.JPG.cfcada9cf1c1b502df3f5f2f2ca3ff36.JPG)

SteveJ
Community Member
-
Joined
-
Last visited
Everything posted by SteveJ
-
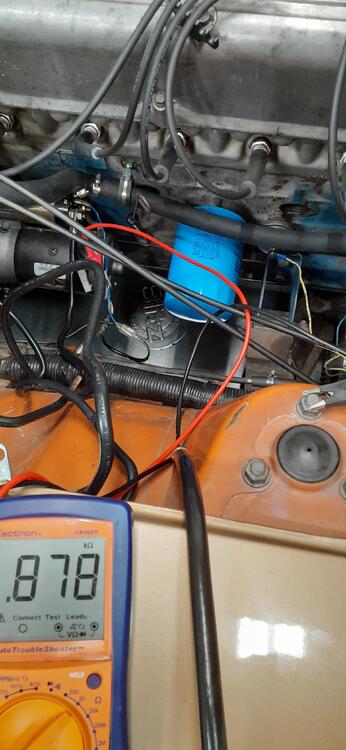
He did say in the first post that it's a 78. I've missed the year being posted in other threads, too. We're just getting old, @Zed Head. That aside, @mayolives, here is one way to test: Disconnect your battery at the positive and negative terminals. Disconnect the alternator wires. Make sure you pay attention about which wire went where. Remove all 4 fusible links. Make sure you pay attention about which link went where. Use an ohmmeter to measure resistance from the connector at the fusible link block to ground. Put the probe on the connector that goes to the white/red wire on the underside of the block. Record your readings. Do that for all 4 positions. Report your readings. Use the post by @Captain Obvious to indicate which reading was at which fusible link position. Repeat the above steps but with the alternator connected. If you see a low resistance reading, that would indicate a short. Here is what it looked like when I was measuring at the connector for the fusible link in my 73 to ground. (878 Ohms)

-
It's amazing how I spent several summers in the south driving around in cars without AC. I was just happy to have cars that ran decent, and I didn't have to pay for them. I still drive around in the heat without AC in the Z cars, but now it's by choice.
-
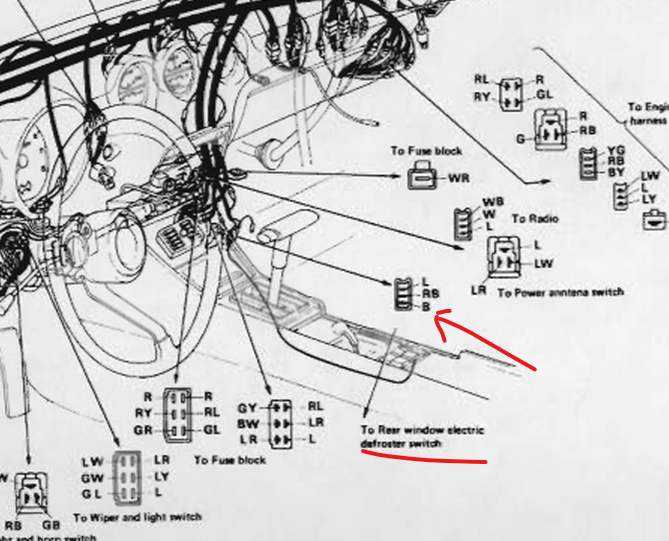
The wire colors tell you a lot of what you need to know. Make sure you download the service manuals. That's where I get a lot of my info from. That page came from the 71 supplement that is posted on this site. If you notice, the connector shapes match up well.
-
I may have not given you a clear methodology for testing. I went out to my car to verify. For the resistance test, measure from the fusible link connector in the engine bay wiring harness to ground. See the photo. I tested my car, placing the other test lead on ground. It was about 880 Ohm. That would mean a potential draw of around 13mA. Can you measure the resistance at the same points?

-
Photos and the correct year in the signature help a lot! It's the wiring for the defrost switch.
-
And, from what I heard, Austin 2017.
-
Dang it. I was hoping for nice weather. Oh well, they have to snag Barber when it's available. 😞
-
He said the car won't start without the ammeter. That says it is not one that relies upon a shunt.
-
Clean up the wires and verify the colors. Also post the year of your car. Different years have different wiring. (Hint: Click on your user name in the top right corner. Then Click on Account Settings. That should give you a new screen. Click on signature and add your car information in your signature.) That is definitely NOT for your horn relay unless someone just randomly re-wired some things. (Yes, I know that can happen.) Green/red - Usually the left turn signal wiring. Red - Usually right headlight power/high beam indicator on the speedometer. (I can't tell from your photo if there is a stripe on the wire.) Black - Ground. That is obviously not a stock connector on that ground wire.
-
I was also looking at a 93 Honda Civic wiper motor on RockAuto.com. It looks the same as what ZCarDepot has.
-
This is what he used: https://zcardepot.com/products/wiper-motor-honda-upgrade-240z-260z-280z?_pos=2&_sid=01d6bdf24&_ss=r @Zs-ondabrainused the 91 Honda Civic motor for the 240Z.
-
You have to be careful bench testing the fuel gauge. From the positive wire going through the gauge, there are two paths. One goes to ground, and the other goes through the fuel gauge sending unit and then to ground. Some people don't ground the first path and ruin the gauge. Power for most of your circuits goes from the battery to the ammeter and then down to the various circuits. (The brake light circuit is a notable exception.) If the wires at the ammeter are not going through the ammeter or not connected to each other, you're not going anywhere. As @zKars warned, if not using an ammeter, you have to insulate the connection between the two wires well, or you may end up with a smoking pile of rubble.
-
Nice first post.
-
Now THIS is the way to frame a request for help. If you are worried about having a short that will fry the fusible link, there are several ways to assess the risk. Remove the fusible link and use a voltmeter and measure from the wire coming off the solenoid (for the fusible link) to the positive battery cable. If there is not a short, that should read 0V Measure resistance between the wire coming off the solenoid (for the fusible link) to ground. If it reads less than 10 ohms, you have a significant load or short. If you have less than 1000 ohms, you will have a pretty good battery drain. Use a 12VDC test light between the wire coming off the solenoid (for the fusible link) to the positive battery cable. If it lights up, you have a short. (Be sure to test the test light across the battery terminals to make sure you have a good bulb.) I would post photos with examples, but I have a gas tank sitting in the way on the garage floor right now.
-
The first and most important thing to do in order to get help tracking down a possible short is to tell us the year of your car! With that, we can tell you specific things to try. Did you get a new fusible link to replace the damaged one?
-
It does not have the original stock profile camshaft.
-
You can get a new connector for the flasher: https://vintageconnections.com/Products/Connectors Specifically https://vintageconnections.com/Products/Detail/141
-
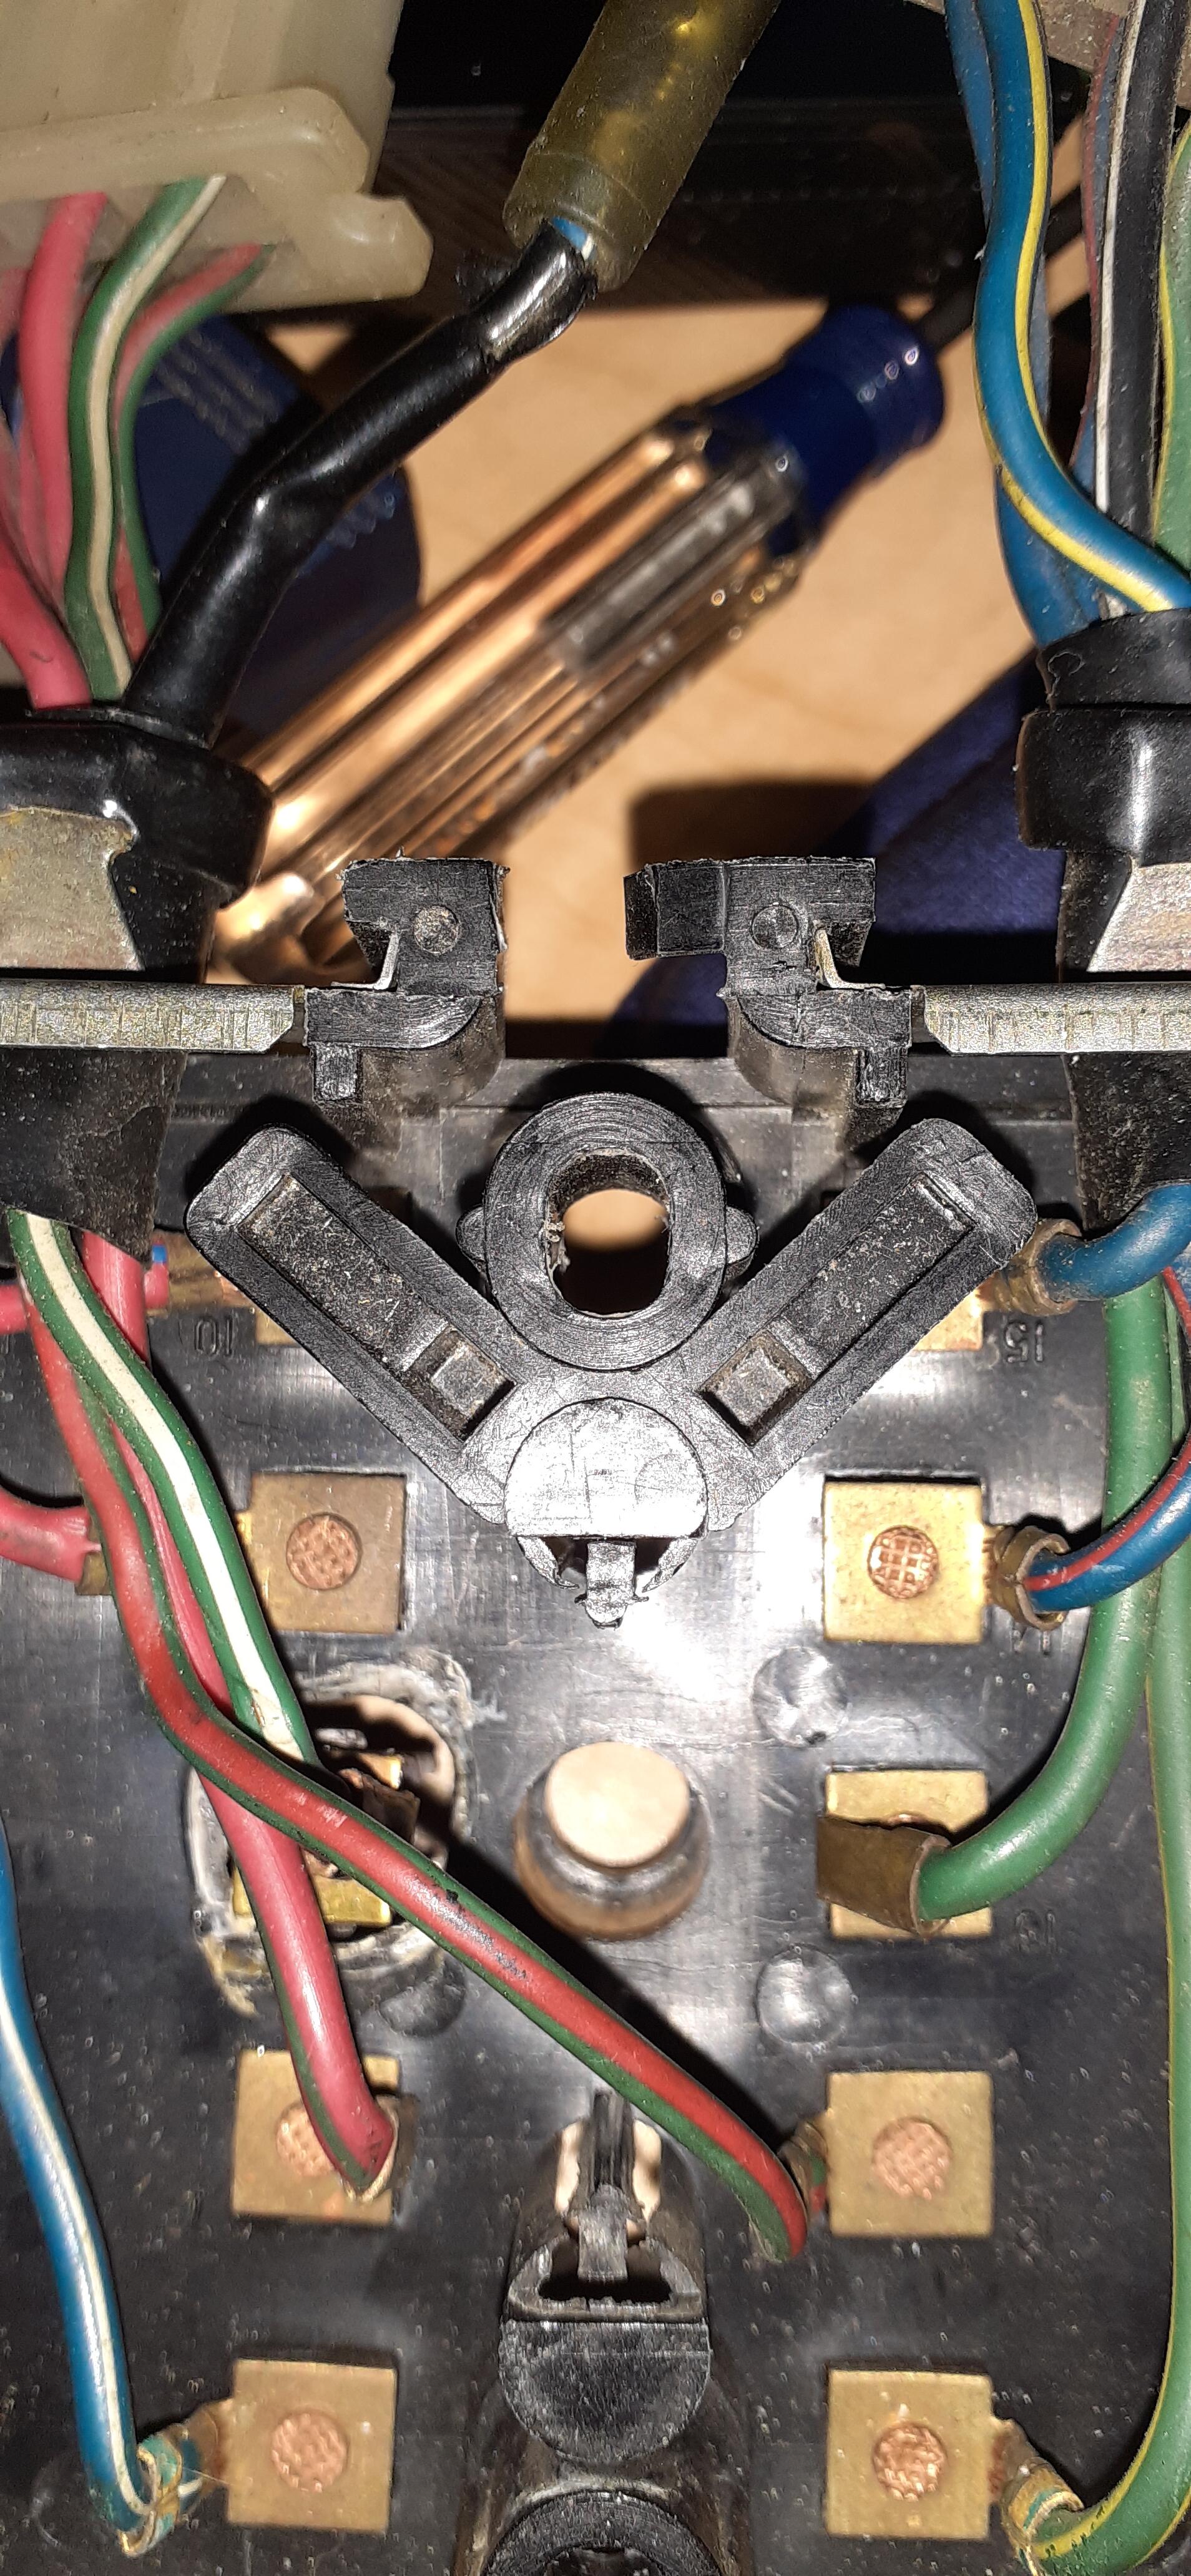
That's what I was referring to in post #4. Now here's what I suggest. Get some round wire brushes like this: https://www.amazon.com/Bottle-Stainless-Bristle-PMD-Products/dp/B007S91ND4 or this: https://www.harborfreight.com/tube-brush-set-6-pc-61923.html Disconnect the negative cable from the battery. Remove the fuses from the fusebox. Note what rating fuse goes where Run the wire brushes on the insides of the fuse holders. Use some canned air to blow out any dust. Replace the fuses. Replace the negative cable. Test. Corrosion in your fusebox can limit the available current in a circuit.
-
Here's an ebay listing for one: https://www.ebay.com/itm/192368847767?chn=ps&mkevt=1&mkcid=28 And a company in the US: https://conceptzperformance.com/nismo-high-flow-volume-fuel-pumpgeneral-purpose-13lmin-17010-a7601-universal_p_24080.php?quantity=1
-
-
I don't know if they are in full production, yet. https://s30.world/
-
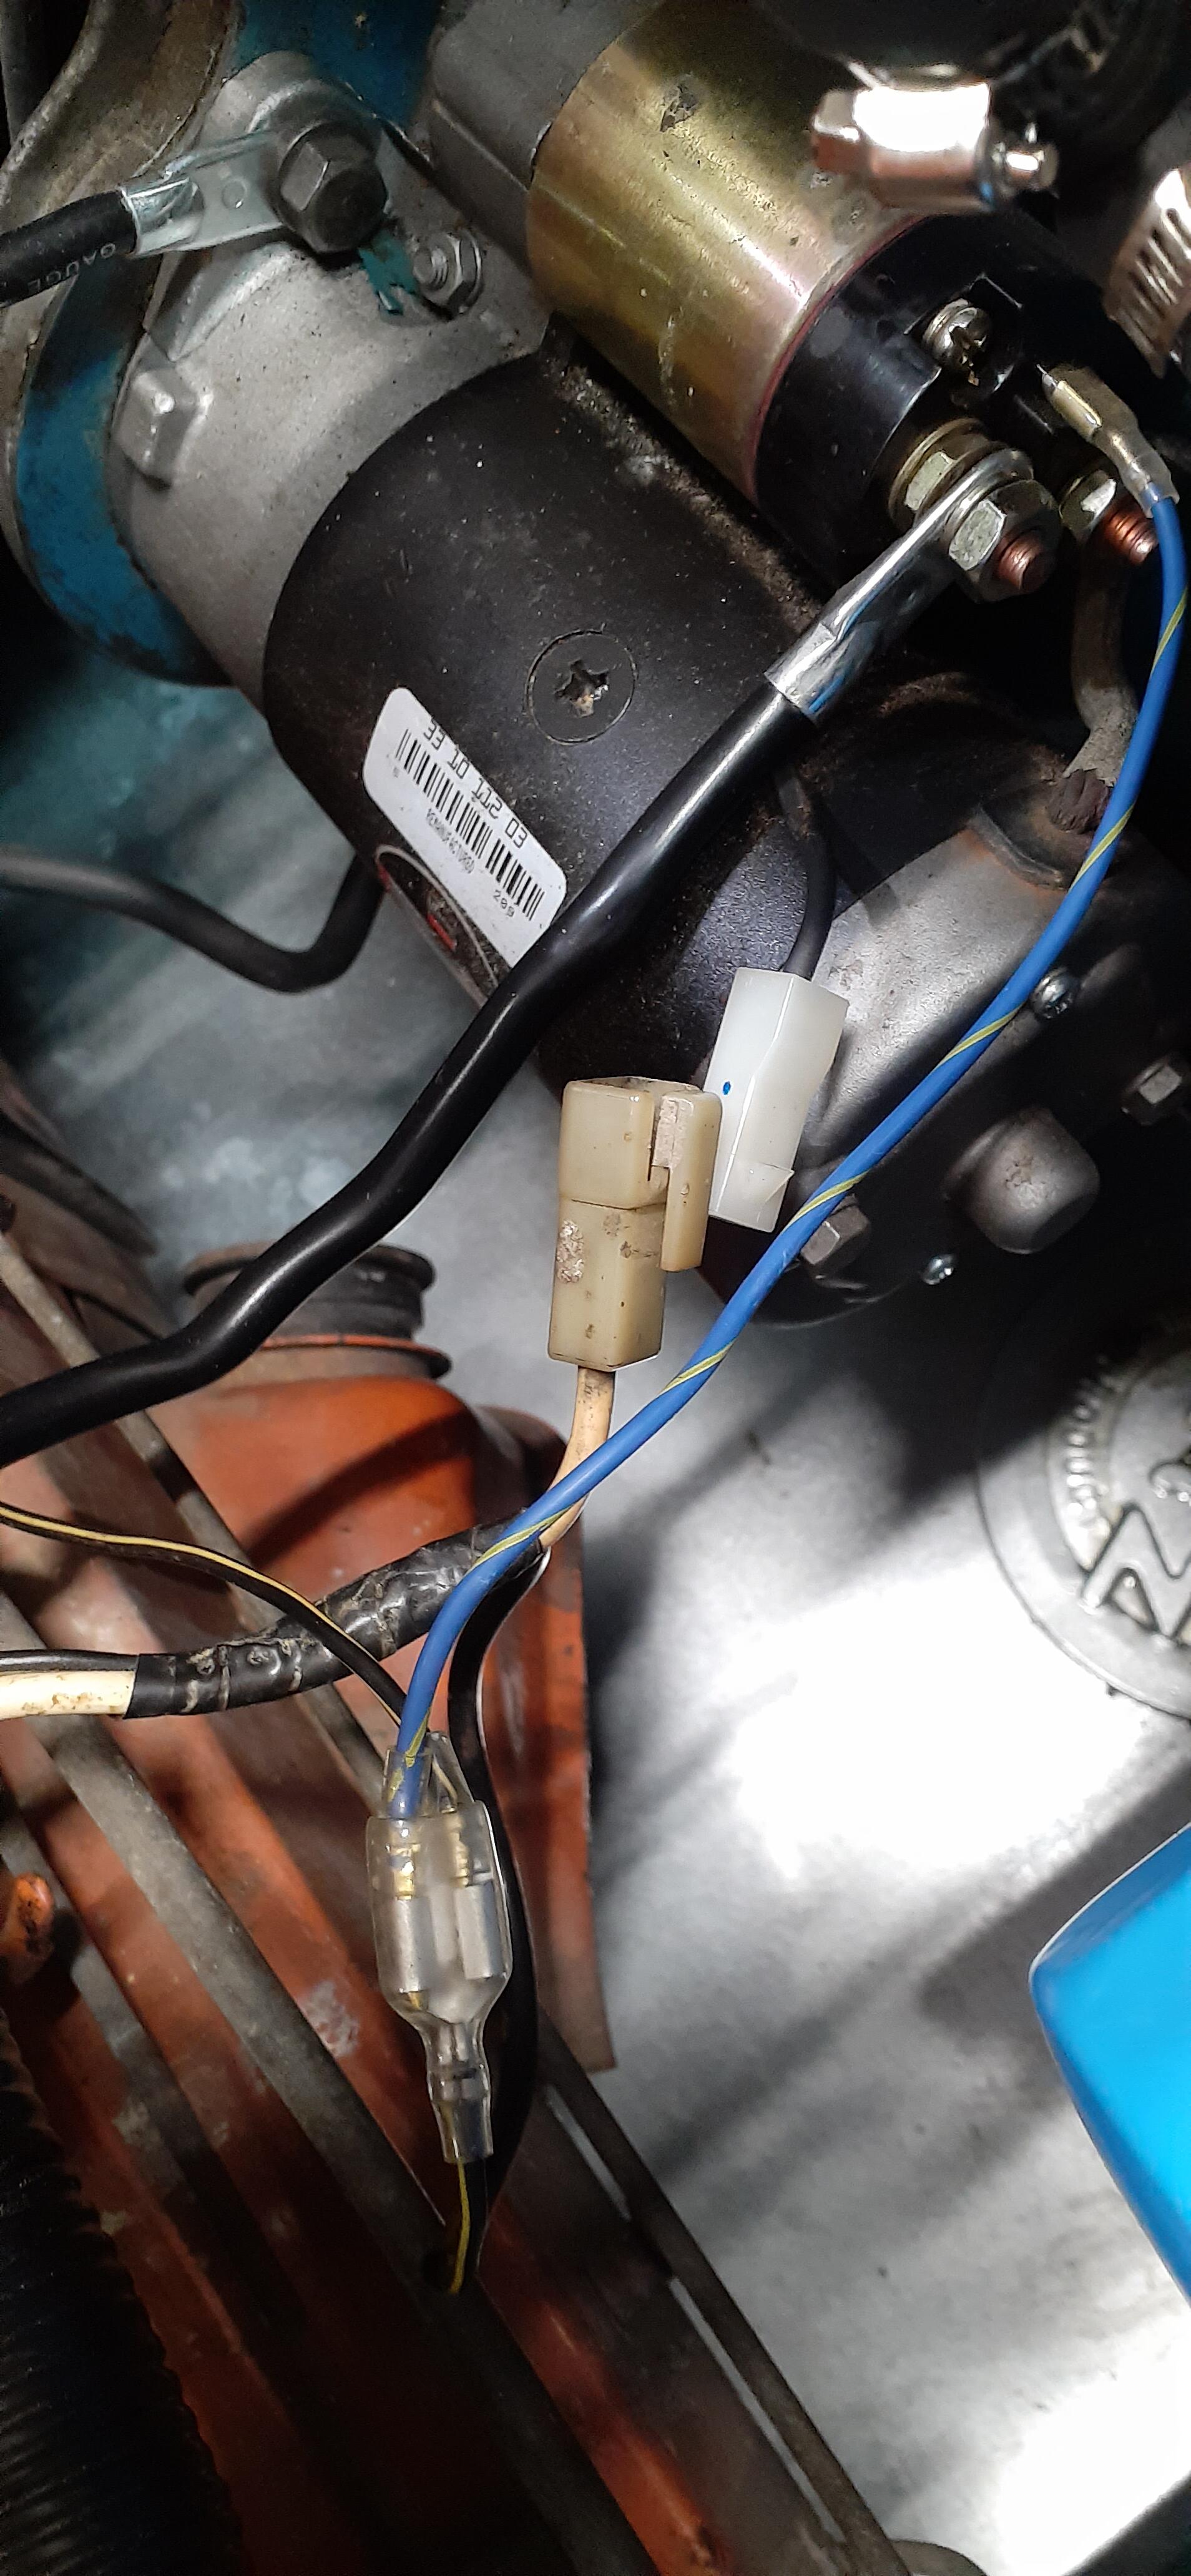
Photos of the connections you have at the alternator would be nice. @Wally posted photos, and it didn't take more than a second to see where he went wrong. While you're at it, post photos of the battery with cables.
-
No, it doesn't come with pads. I'll have to fabricate those.
-
Yes it is.
-
If the test light blinks when you are touching it to the 5 pin connector, it should blink at the white wire (upstream). With the blinking at the 5 pin connector, it suggests that you should test further down the line. The connectors at the lights are good if the hazards flash. That just about leaves the 5 pin connector in the steering column as the last unique connection in the circuit. Unless I'm physically testing your car with a meter, I'm not sure I have any more good suggestions for you.