Leaderboard
-

bluez
Free Member7Points165Posts -

Captain Obvious
Free Member6Points9,927Posts -

Jeff G 78
Free Member4Points3,007Posts -


Racer X
Free Member4Points1,877Posts
Popular Content
Showing content with the highest reputation on 09/14/2021 in all areas
-
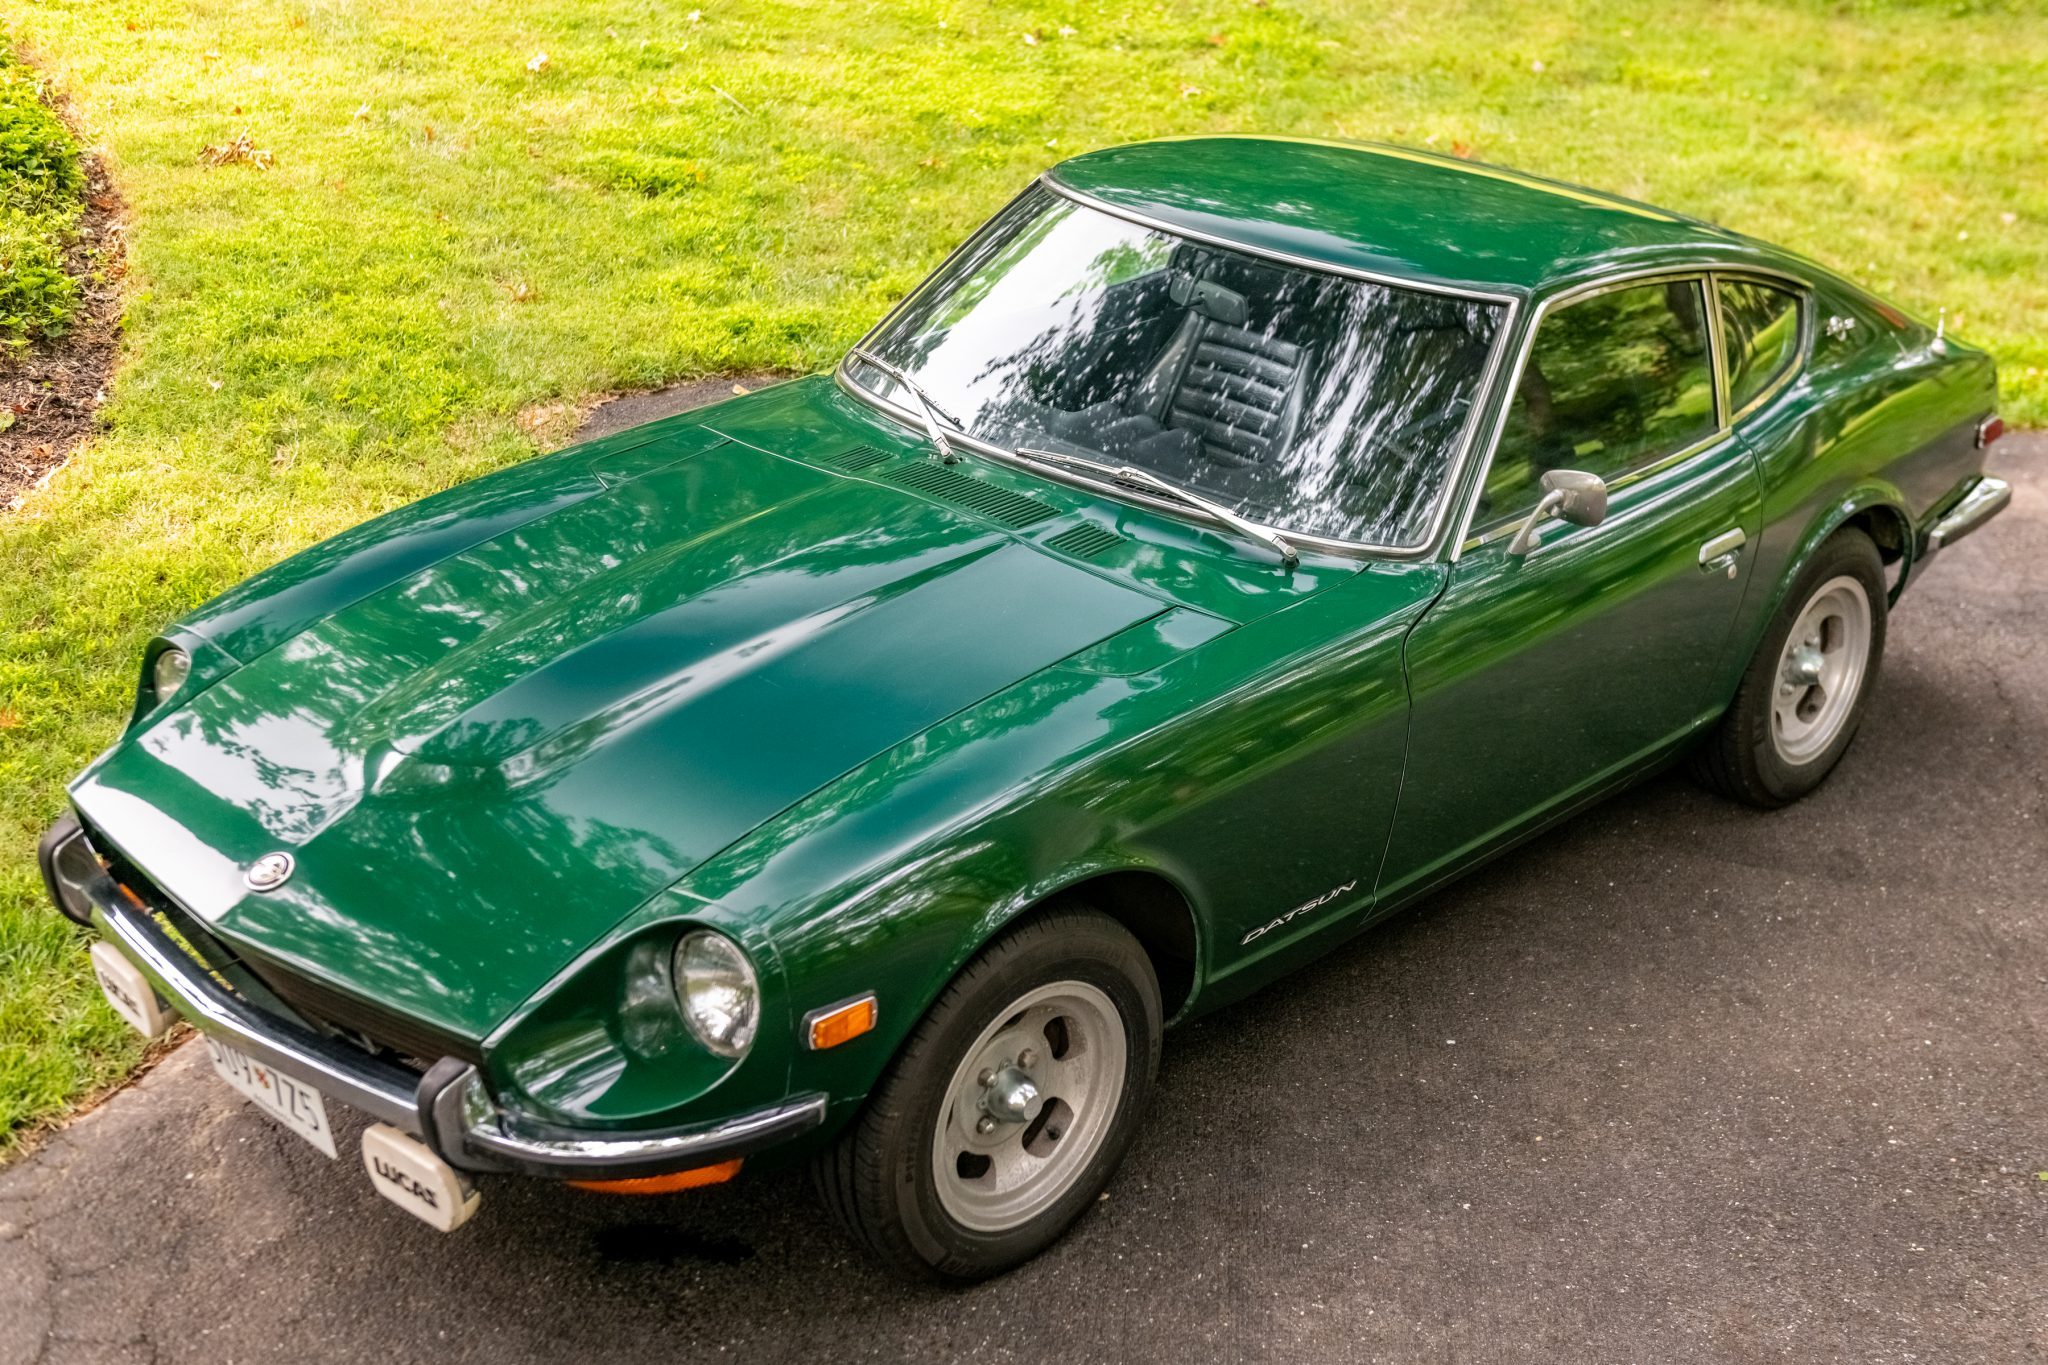
7 pointsGreetings all, new member joining. Just picked up a green 71 Z. Seems to be all original, (no rust😁) with 69k miles, other then a repaint about 25 yrs ago. Planning to fix all the seemingly minor issues. Car has been sitting for many years, about 3k miles over the 34 years. Car actually runs pretty good considering it’s been parked for so long. Sitting in it seems like a throw back in time. Previously owned a 74, 78, and a 82 many yrs ago. Can’t wait to bring it back to life.
 7 points
 -
Set them cold and check them hot to verify. If anything is a tad off, I can adjust one or two while it's still hot.3 points
-
 RacerX, this is how these valve lash adjustment threads always end up. The guys that have done many and have practiced (that's the real key to speed - practice), and have calloused burnt finger tips, say it's easy and everyone should do them hot. "It's easy, don't be a weeny!". They have forgotten that their first time probably took a couple of hours. Logically, setting cold and checking hot has no flaws, except time spent. In the big scheme of things, for a guy with an engine that's new to him, the time spent looking at the engine parts with no reason to hurry might be more valuable than actually adjusting the lash. Plus, mistakes in lash settings can cost a lot of money. One hanging valve and the head might have to come off.2 points
 -
Knowing the job, having the correct tools, and planning are the keys to a quick, hot valve check and adjustment. As for running them a bit tighter to get that little extra bit of lift and duration, one mustn’t get them too tight, or the valves won’t close fully with the engine at full operating temperature.2 points
-
2 pointsAnd about your strut boot fitment... I believe the strut boot is intended to snap onto a bump stop plug. The bump stop goes up under the hat and the boot can be attached to the bump stop either with the boot simply snapping into a groove in the bump stop. or a zip tie if necessary. In other words, the aftermarket boot may not be designed to snap around the flange on the hat like the original, but may snap around the bump stop instead. Like this pic from a generic boot on amazon:2 points
-
2 points
-
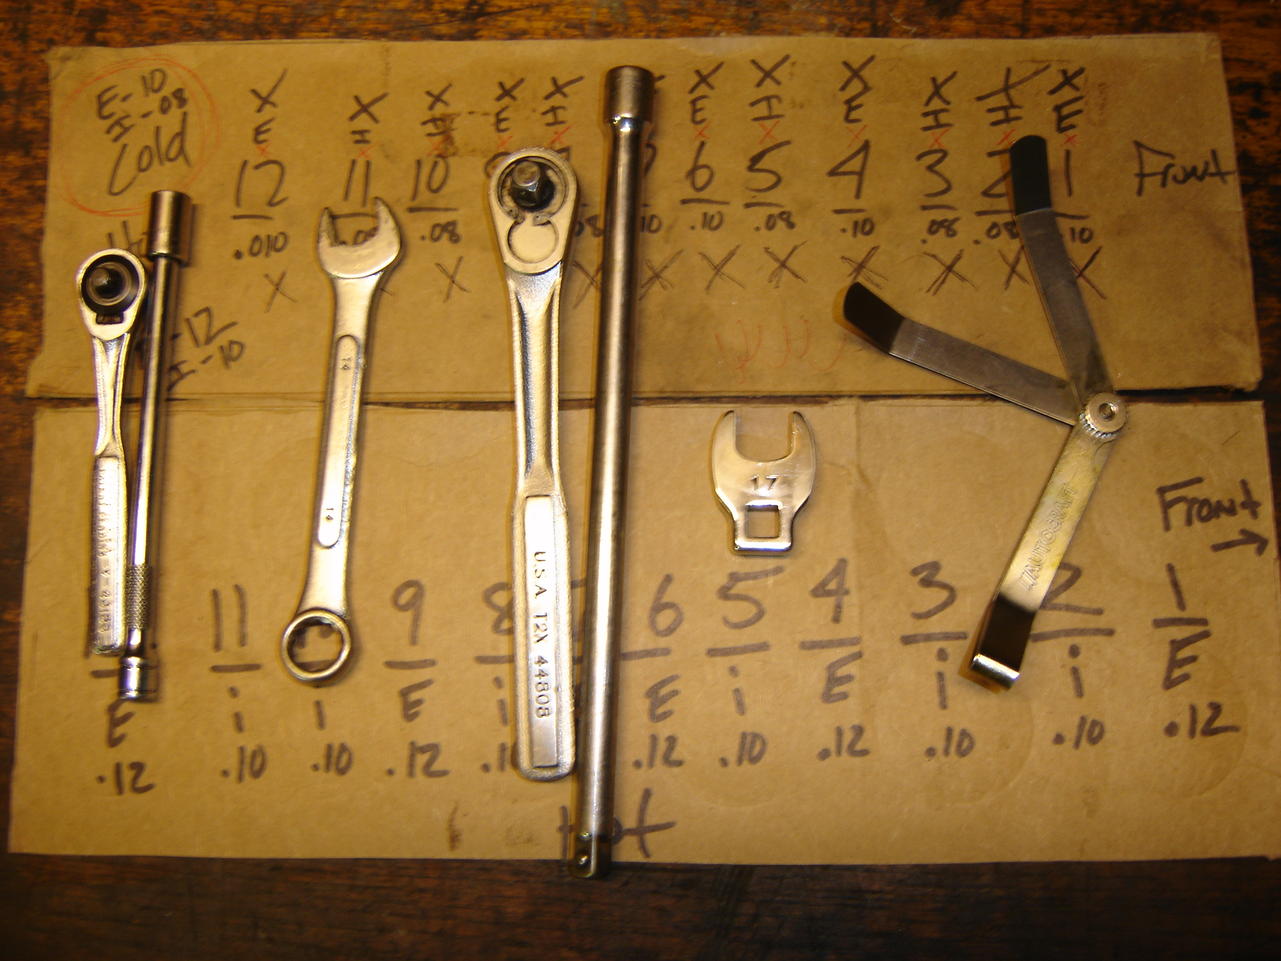
 Here's a good read... And my setup with the tools and the "crossing them off" board I put under the passenger's wiper blade.
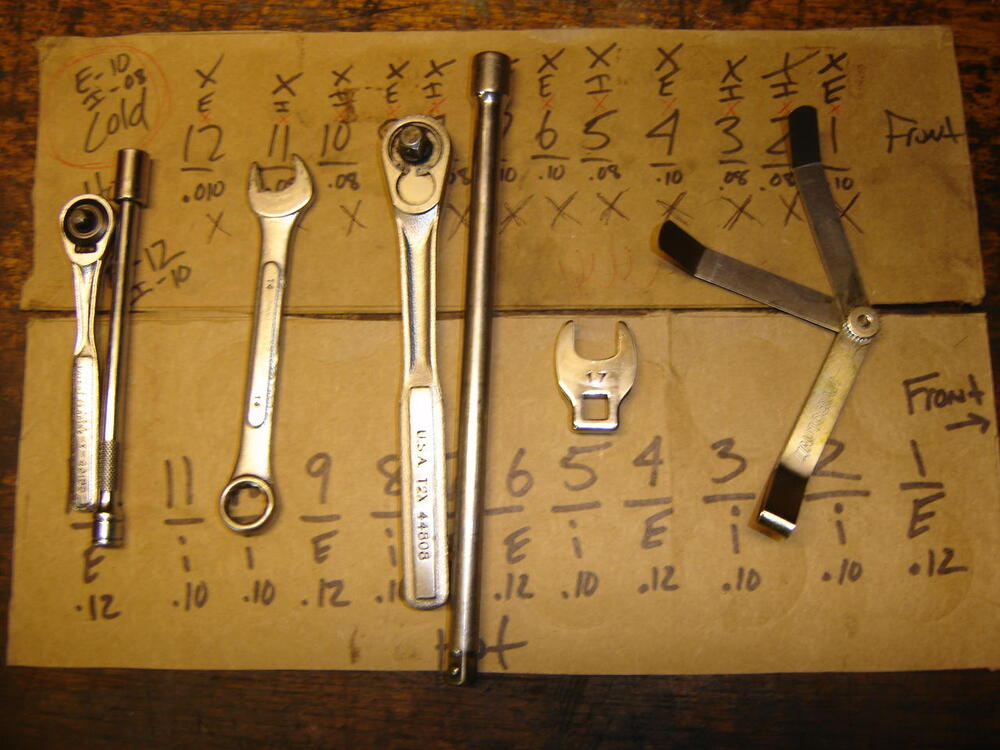 1 point
 -
1 pointIt's a great ID. I love the blues! I always wanted to open a bar, yes a drunkard with his own bar, but I realized as I grew older how stupid I am. My bar would be named "Elbert Bellew's". Great looking car mr bluez. Welcome to our forum, you'll like it here. The members are super smart mostly and very friendly. We like to help! Pictures, pictures pictures... Cliff1 point
-
 1 pointI didn't say silicone 😉 I can't stand the stuff, it's good enough for bathtub caulking but I don't use the stuff on cars.1 point
 -
 1 point
 -
 1 point
 -
1 pointUhhh... bluez, You know your car isn't blue, right? Seriously though, welcome aboard! 😃1 point
-
1 pointThe spacer is required when the 1984 Z31 rotor is used with the Toyota V6 4x4 caliper. There are two spacers - one the is thicker for the 240Z hub and one that is thinner for the 260/280 hubs. The hubs are scalloped on the 240 and round on the 260/280. The Techno Toy Tuning spacers like mine have a pilot for the rotor to keep them centered. Many of the cheaper spacers do not. Here in the US, getting Peugeot parts isn't an option.1 point
-
 1 pointInteresting to see you have a spacer in there - what car do you have? On my ‘77 UK 260z which I think equates to a 280z set up in this regard, I use the vented Peugeot 505 discs which fit perfectly without a spacer but do need to have the centre hole machined out a little to fit the hub centre. One way or another there is faffing about involved :p EBC part number D117 https://www.ebay.co.uk/itm/EBC-Replacement-Front-Vented-Brake-Discs-for-Peugeot-505-2-2-Turbo-79-92-/1229332859261 point
 -
 1 pointI don't recall any talk of adjusting the float levels (the primary mixture adjustment). The easy way to check them is remove the domes and pistons, raise the mixture screws to the top, then lower them 9 1/2 - 10 turns down from the uppermost position. The fuel level should be close to the jet height at 9 1/2 - 10 turns down. Then raise the jets back up to 2 1/2 - 3 turns down from the top. How many turns down are your mixture screws now?1 point
 -
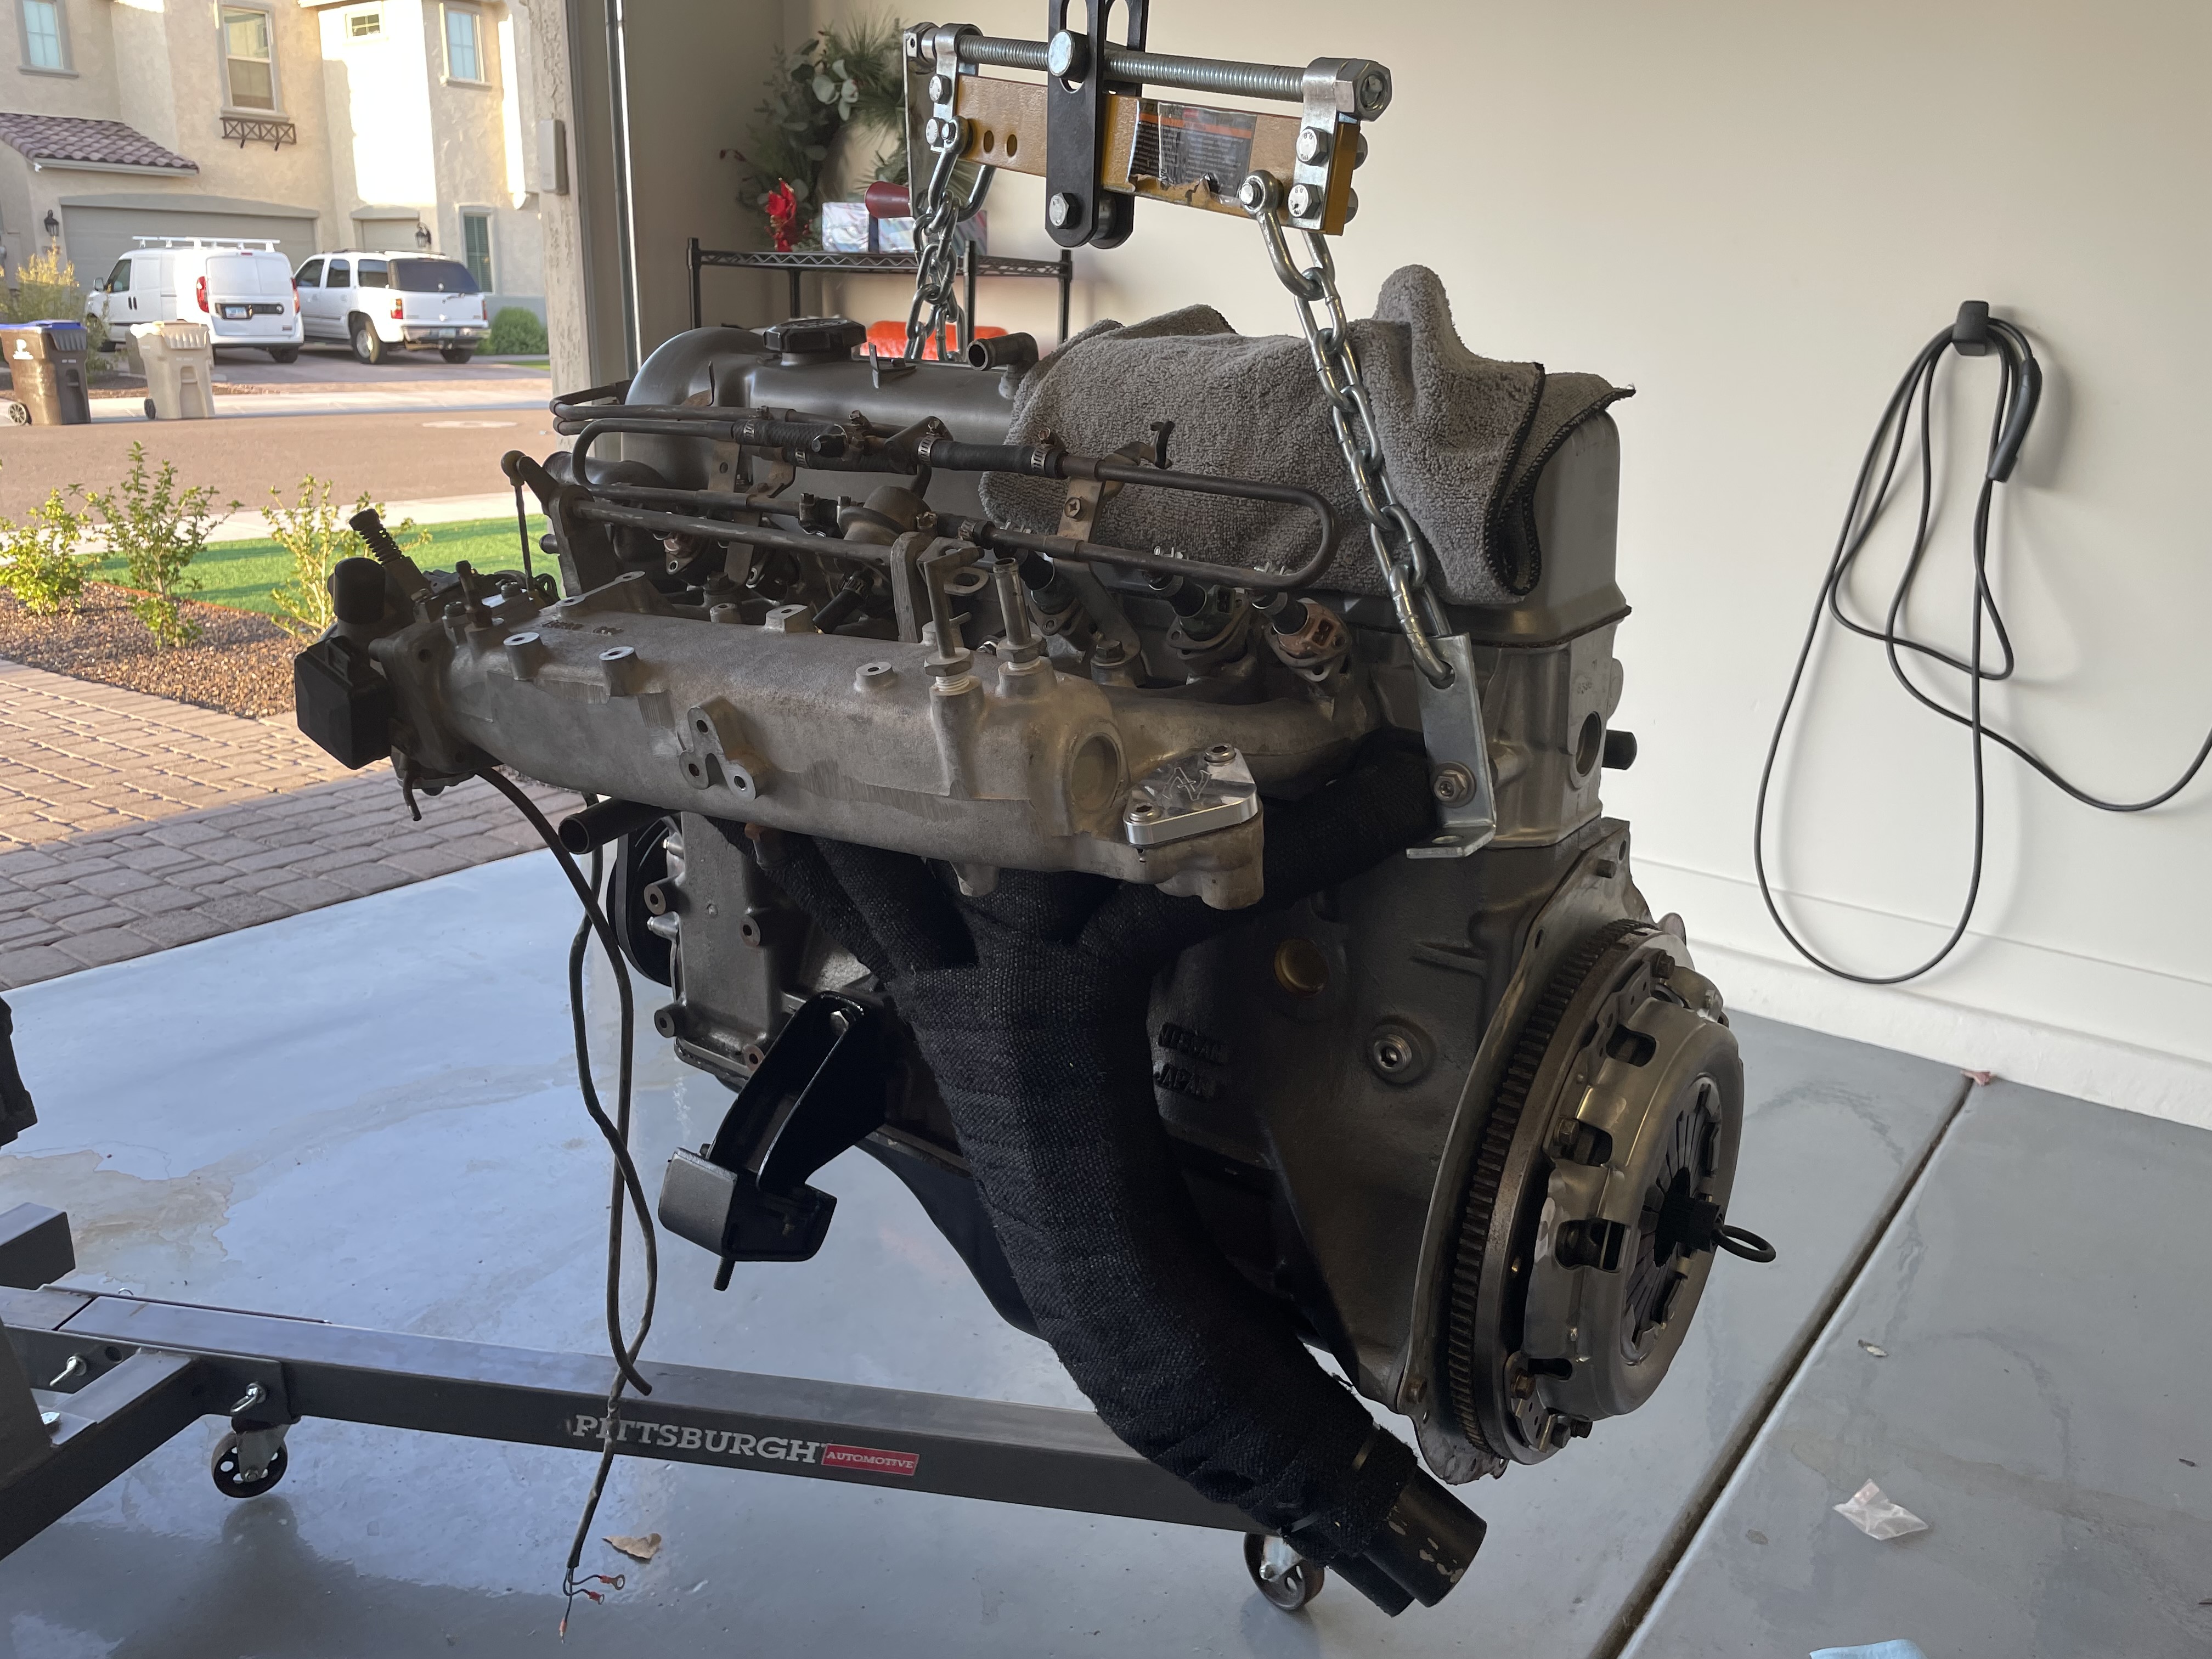
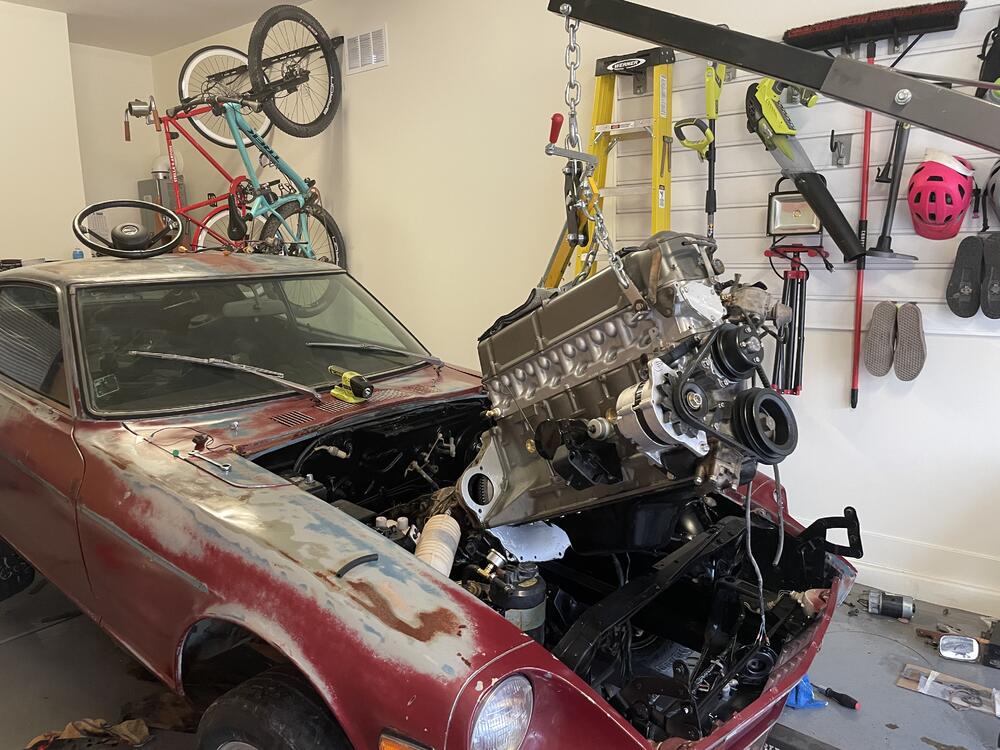
 1 pointGreat work! You won't have much trouble installing the starter after the engine is in place.1 point
 -
 If you know what you're doing, it's 15-20min to adjust valves? Ok i wasn't sure if being a little tighter would be bad Sent from my Pixel 2 XL using Tapatalk1 point
 -
 1 pointMight ad.. do the rivnut install in wet paint and check if the surrounds is covered in paint.. (bit of paint on the outside of the rivnut and) then it will not rust.1 point
 -
1 pointSilicone sealer has acetic acid in it (that vinegar smell when it is curing). Acetic acid is corrosive. I would caution against using it on bare metal as the resulting corrosion it causes would be just as bad as not using it. Before installing a rivnut I paint the bare metal. After installing the rivnut I go over it again to seal the area.1 point
-
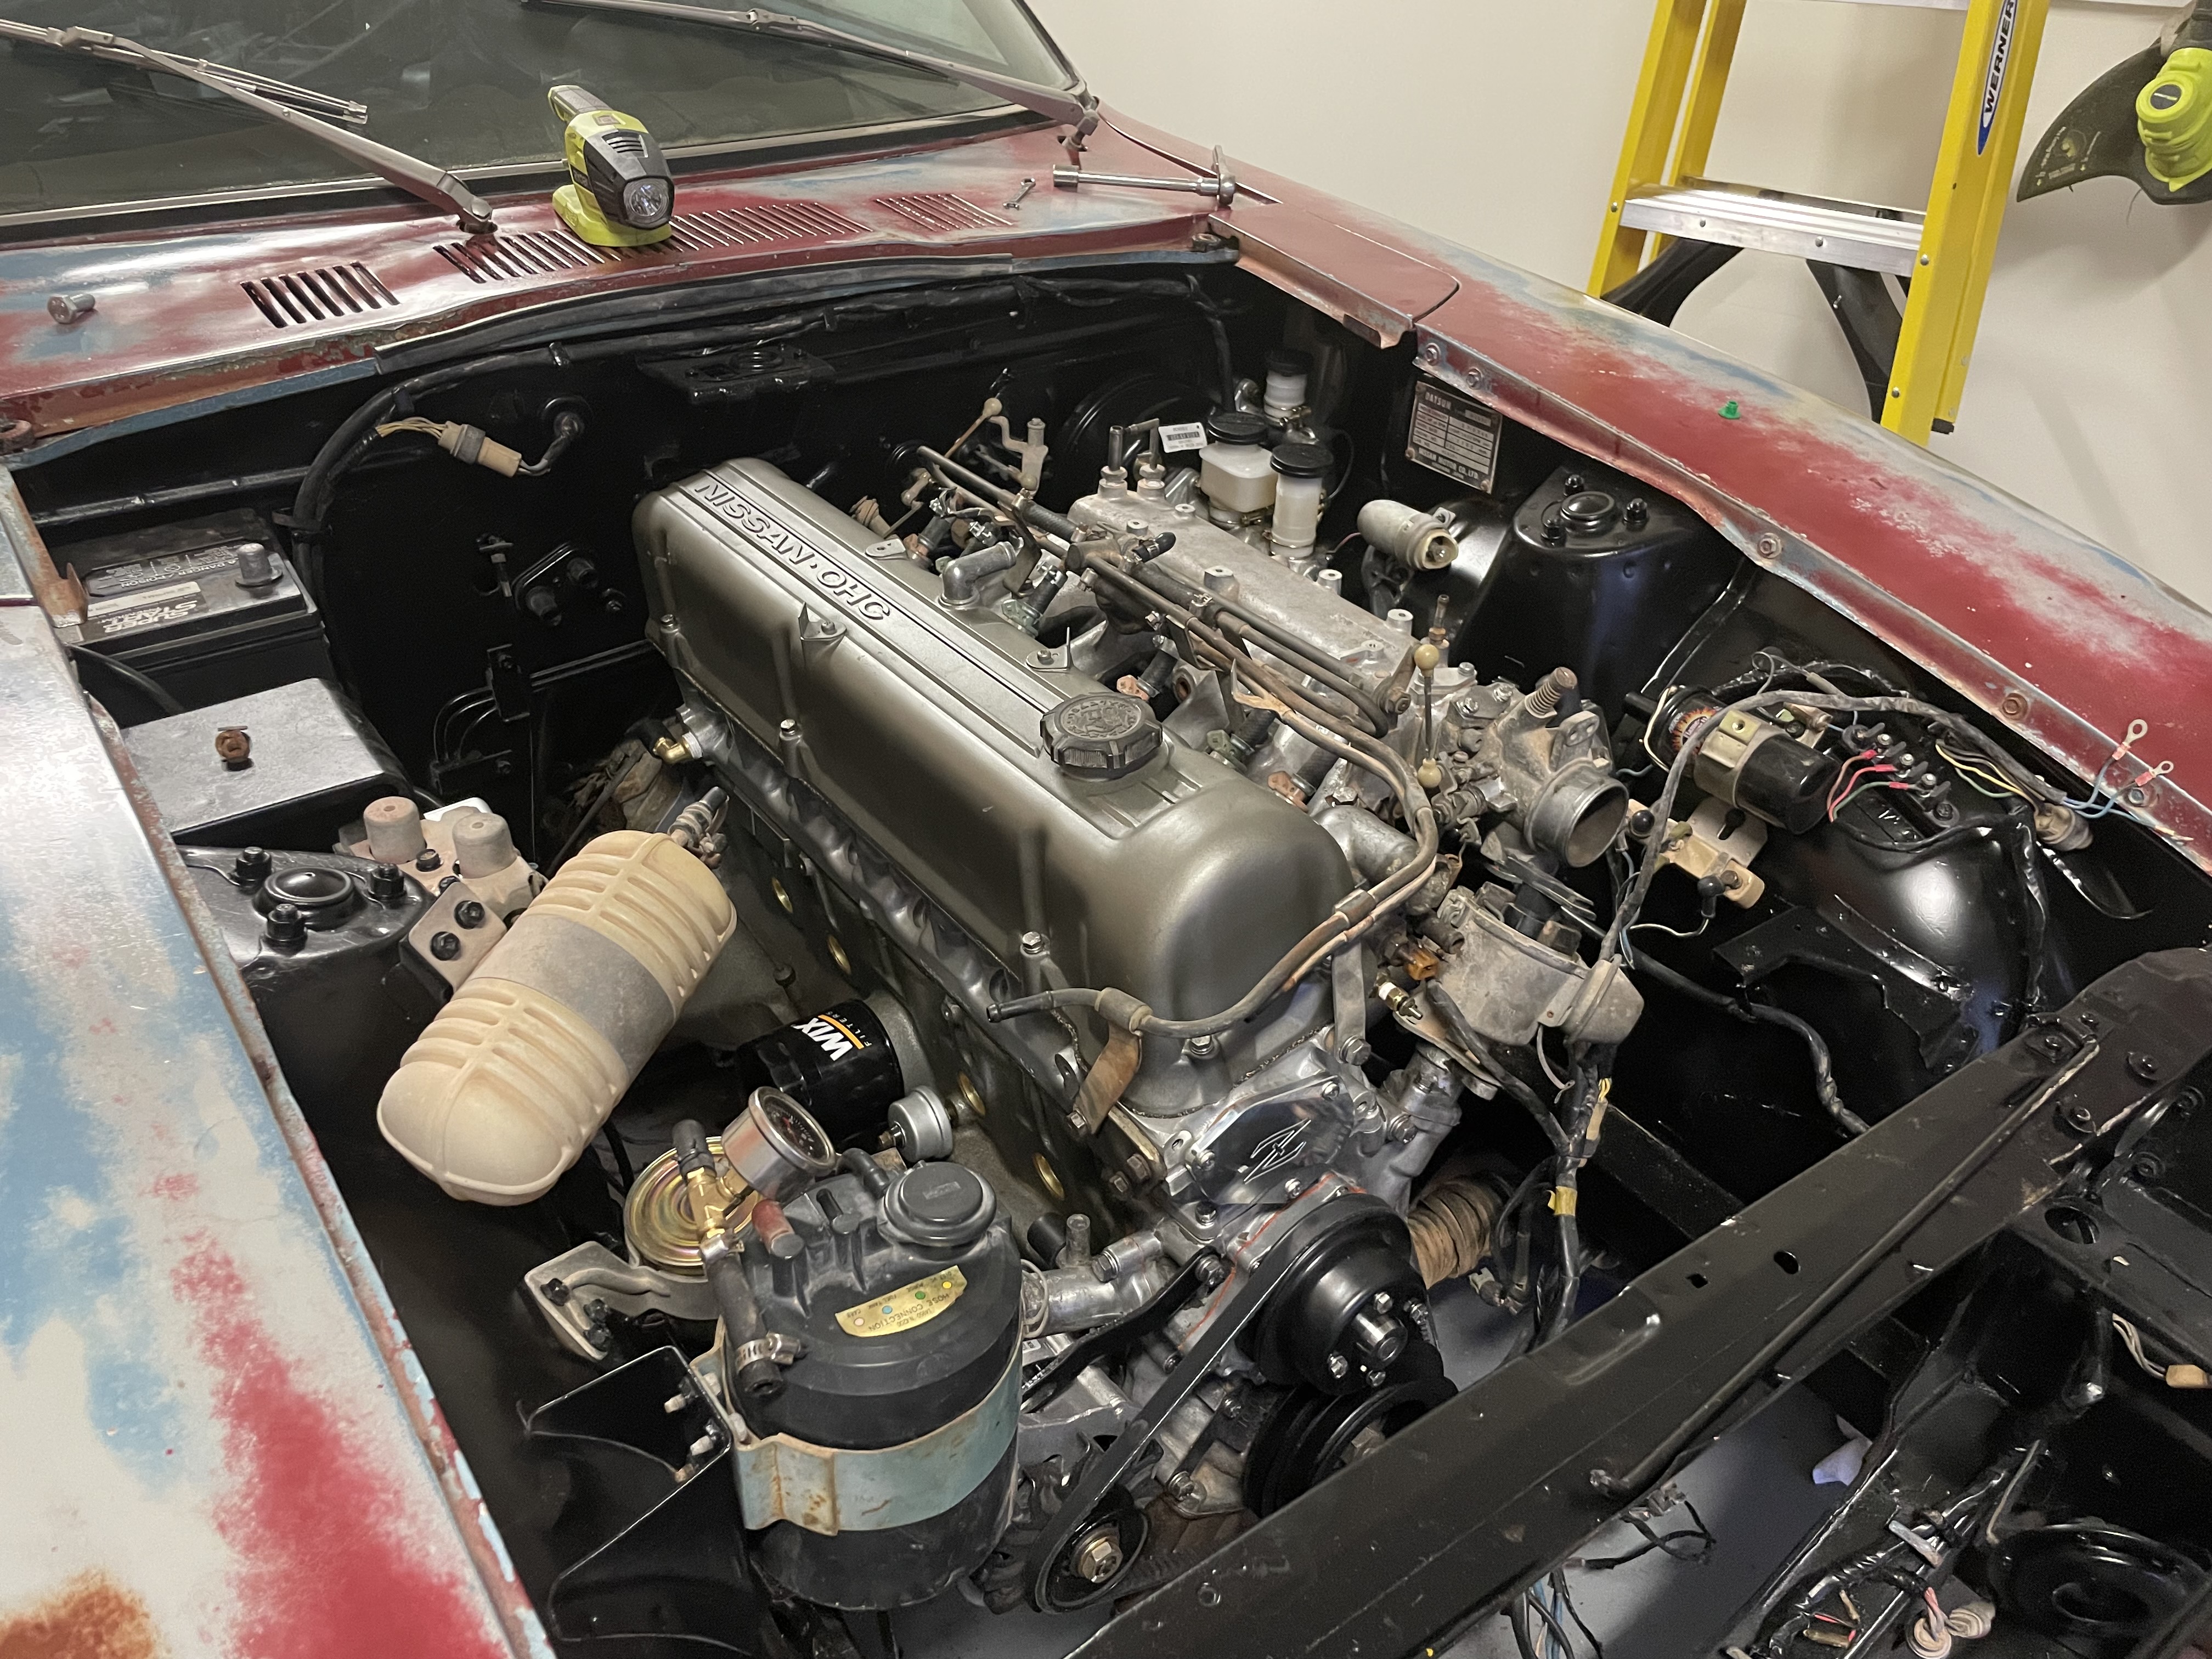
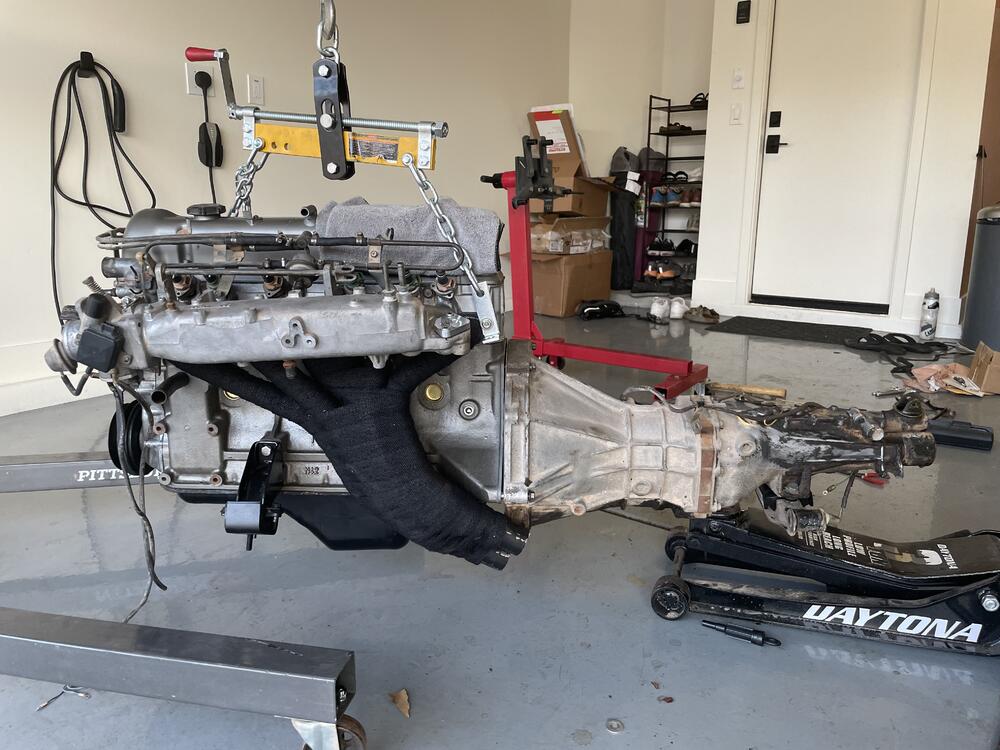
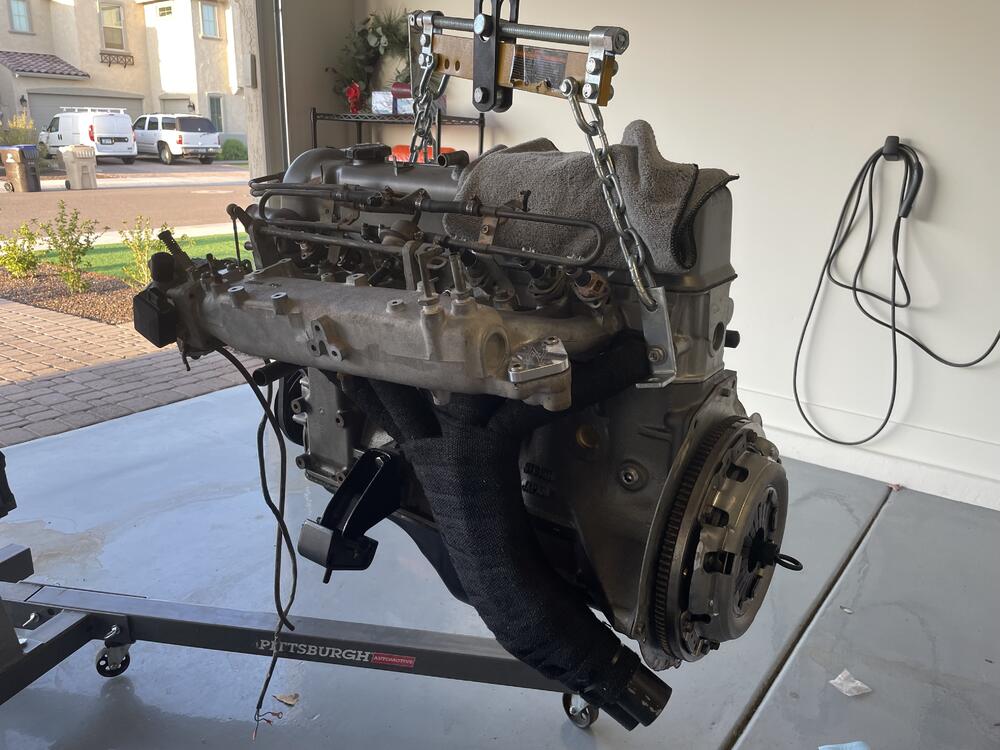
 1 pointI went with no RTV. I inspected the original gasket fairly closely and did not see any signs of RTV. Fingers crossed theres no leaks! I started by getting the engine off the stand so I can work on the rear. I was able to torque the flywheel bolts fairly easy with the use of a pry bar on the dowel and flywheel teeth. Unfortuneatly I realized that I forgot to install the back plate! 😤 Well, off with the flywheel again! I think this was actually a blessing in disguise as I noticed I didnt swap the manual transmission specific pilot bushing. I made quick work of the old one with a hammer and chisel. The new one went in nice and smooth. Flywheel goes back and followed by the new clutch and pressure plate. Things are looking good!! I tossed the transmission up on my floor jack for easy alignment. Took probably 4-5 times of fiddling until the shaft lined up nicely. From there it was all excitement! Doing this solo wasnt as hard as I was anticipating. Alot of back and forth to make sure nothing was binding or jammed. Lower an inch, walk around, tilt a few degrees, walk around, etc. Now that I'm looking at this picture...why didnt I put my starter on while it was so easy to access?! I left all the mounts loose and was able to get the driver side in nice and quick. The shape of the mounts is a bit wide spread so trying to finagle the passenger side was a bit of a headache. I ended up removing the mount from the block, placing it in the frame mount, then lining back up to the block. This worked so much better. And with that...shes finally home again! I can't wait to get back out there and hook up the remaining lines, wires, and driveshaft.
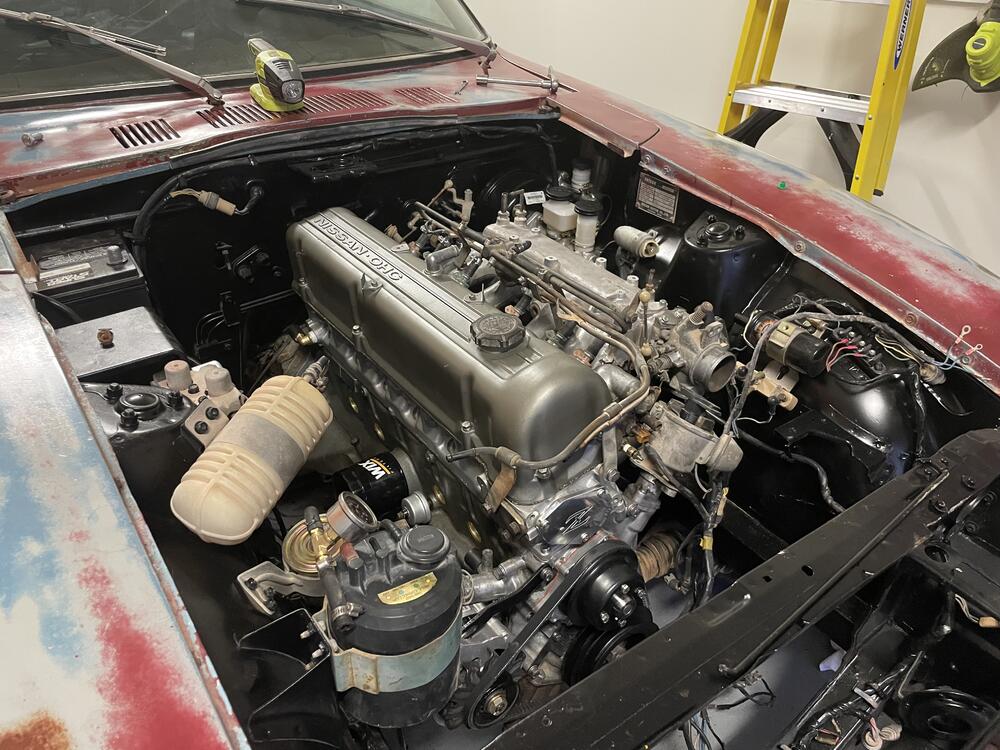
 1 point
 -
1 pointMy post was basically a regurgitation of things I picked up from various other posts on the forum. Odds are almost certain that you're correct. My main point was that you can't really "tune" or adjust anything between the inputs and the outputs. It's all hardwired/soldered in. I did take the opportunity to dig up a neat article about the history of A/D conversion. I think I've mentioned in the past that most of my electronics experience is just dendrites of knowledge taking me just far enough to solve a problem. Many gaps. Like a piece of Swiss cheese, it will support some weight but it's definitely not solid. Kind of squishy. https://www.analog.com/media/en/training-seminars/design-handbooks/Data-Conversion-Handbook/Chapter1.pdf1 point
-
You said the problem started shortly after you replaced the alternator. So as Captain Obvious, it is my duty to suggest you start your investigation there. I suggest you disconnect your new alternator and see what happens. Also, as a side note,,, For a 76, that front outboard link should be black, not brown. And it should be the largest link you have. That link powers a whooooooole bunch of stuff. Hopefully the issue is in the alternator and you can end the search with that.1 point
-
1 pointYou can put a smoog of sealant on both sides of the sheet metal before inserting the the rivnut, then crimp it down.1 point
-
1 pointThere is no Z35. The chassis designation is still Z34. The Nissan Z is slated to be a 2023 model, not 2022. The rules in the US allow Nissan to call it a 2023 model year car. As an example, I purchased a 2012 Ford Mustang in June 2011. I don't think there is any grist to mill here. Nissan has already announced that the base model will be the Sport, and the higher level trim is the Performance. And there will be 240 of the Proto Spec in yellow. If you want something to speculate about, I think we won't see much on any road tests of the new Z until it's close to the launch date, especially if they are making any late tweaks to compete with the Supra.1 point
-
I've set them cold and hot. Both methods worked for me.1 point
-
1 point
-
1 pointIf that is the question... There is a metal stack, welded to cowl substructure that keeps water from flowing into the fresh air intake. There is a flat piece of metal welded above it to prevent water from dropping into the stack1 point
-
 1 pointI’m happy to report that after an afternoon and a half, my carbs are tuned! Thanks to everyone for the help! I had a blast figuring it out; definitely a lot easier than expected.1 point
 -
1 pointAre those calipers for solid rotors, or vented rotors? I think there are two versions, aren’t there? It doesn’t look like you have the brake pads in there.1 point
-
 0 pointsHad a run in with a heavy hammer a a few months ago driving in a stake with my son. Lost an index finger nail two years ago removing the PCV from under the intake of the Z after the wrench slipped. Sent from my iPhone using Tapatalk0 points