Leaderboard
-
.JPG.cfcada9cf1c1b502df3f5f2f2ca3ff36.JPG)
SteveJ
Free Member7Points9,646Posts -
conedodger
Free Member6Points12,513Posts -

Av8ferg
Free Member6Points1,538Posts -

Zed Head
Free Member6Points19,236Posts


Popular Content
Showing content with the highest reputation on 02/05/2024 in all areas
-
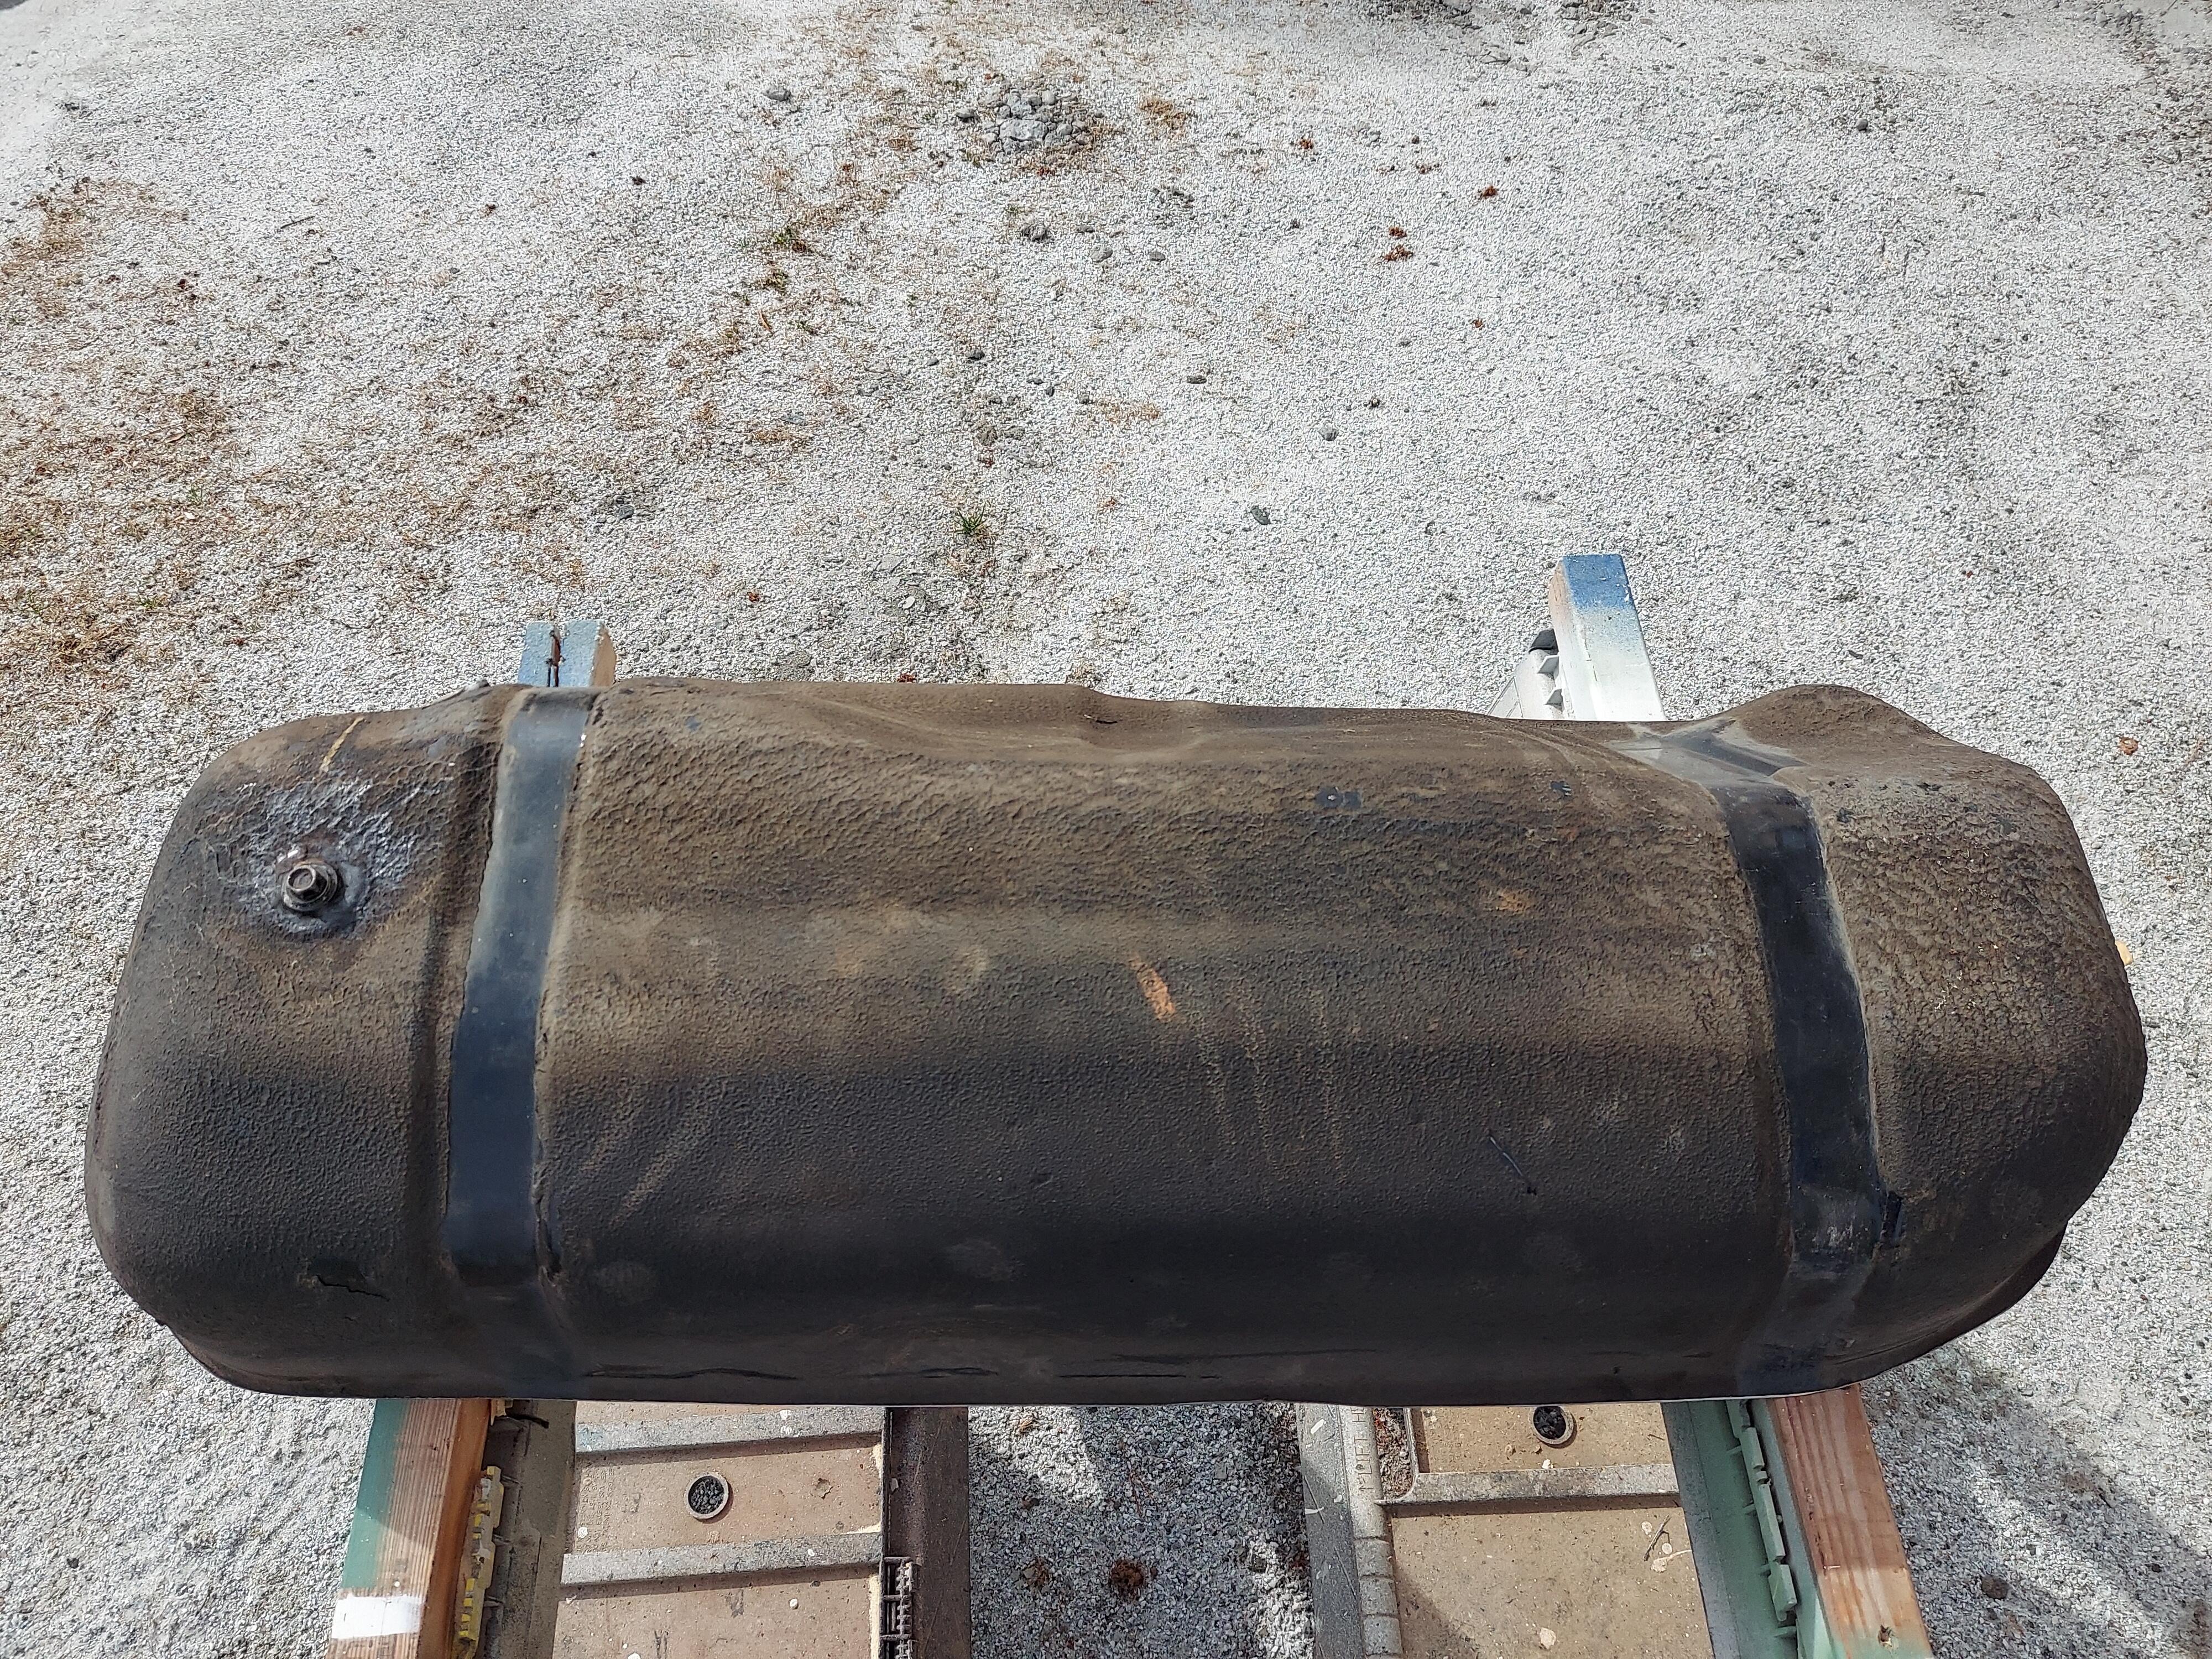
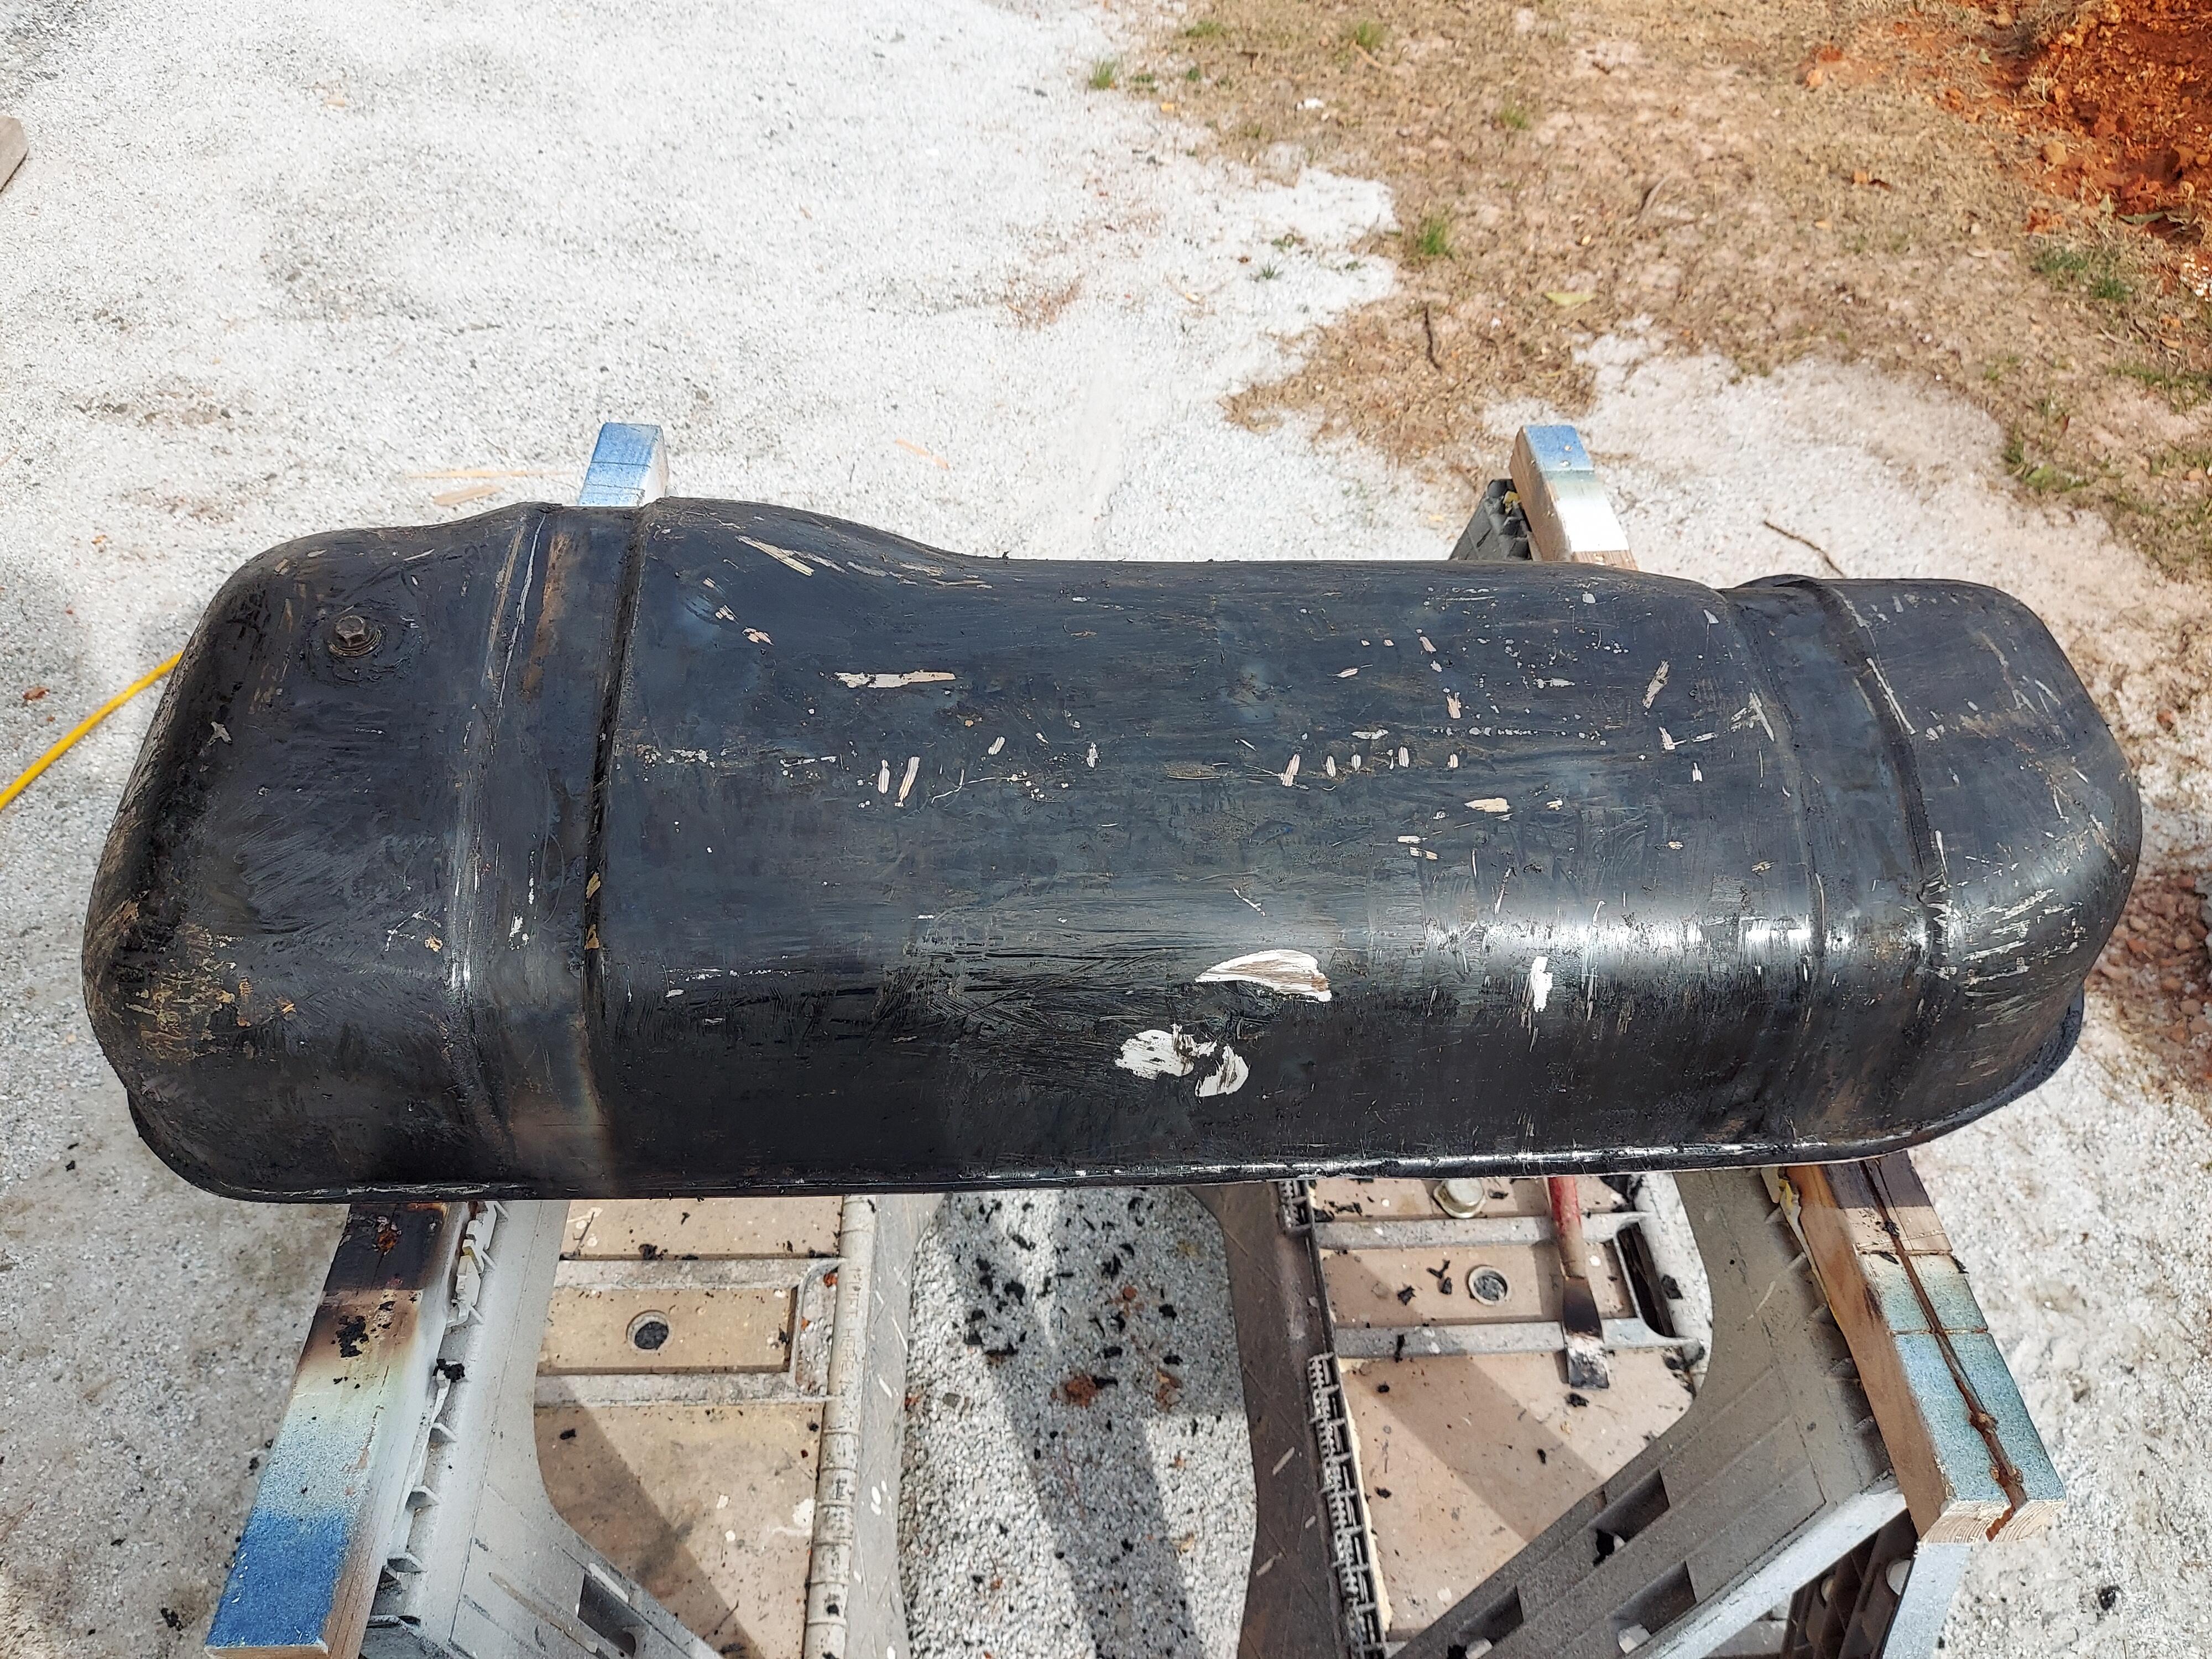
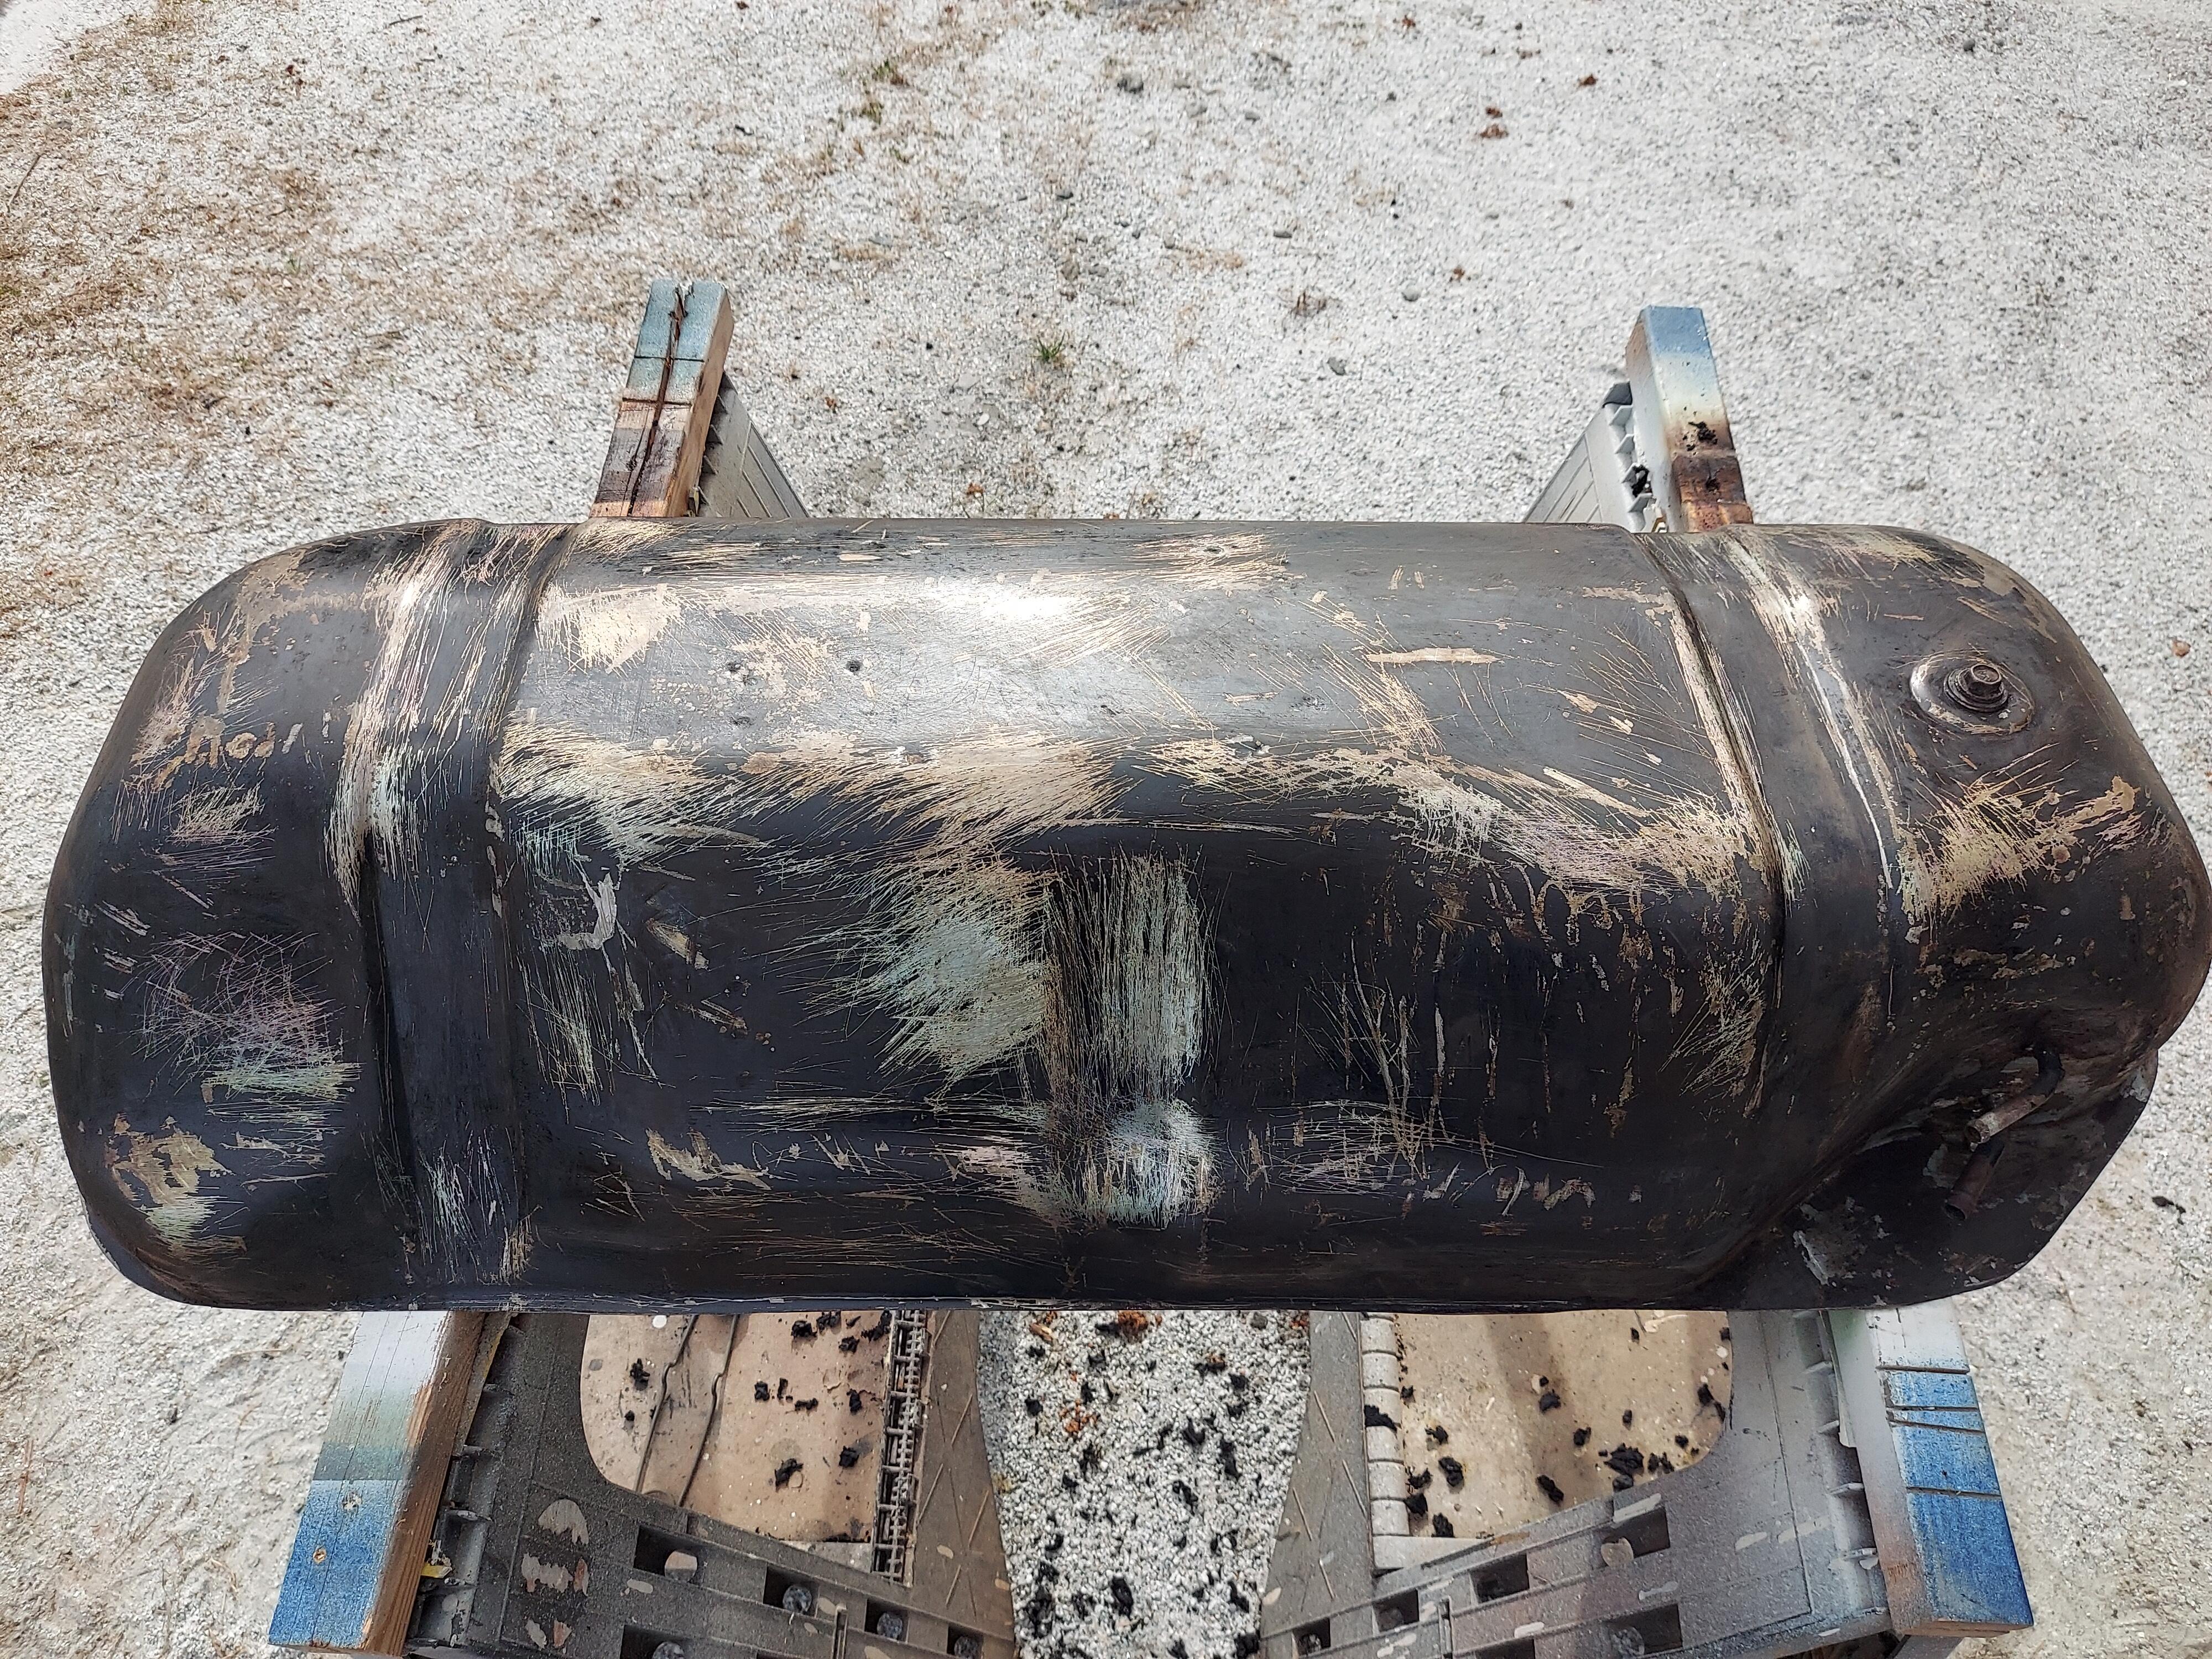
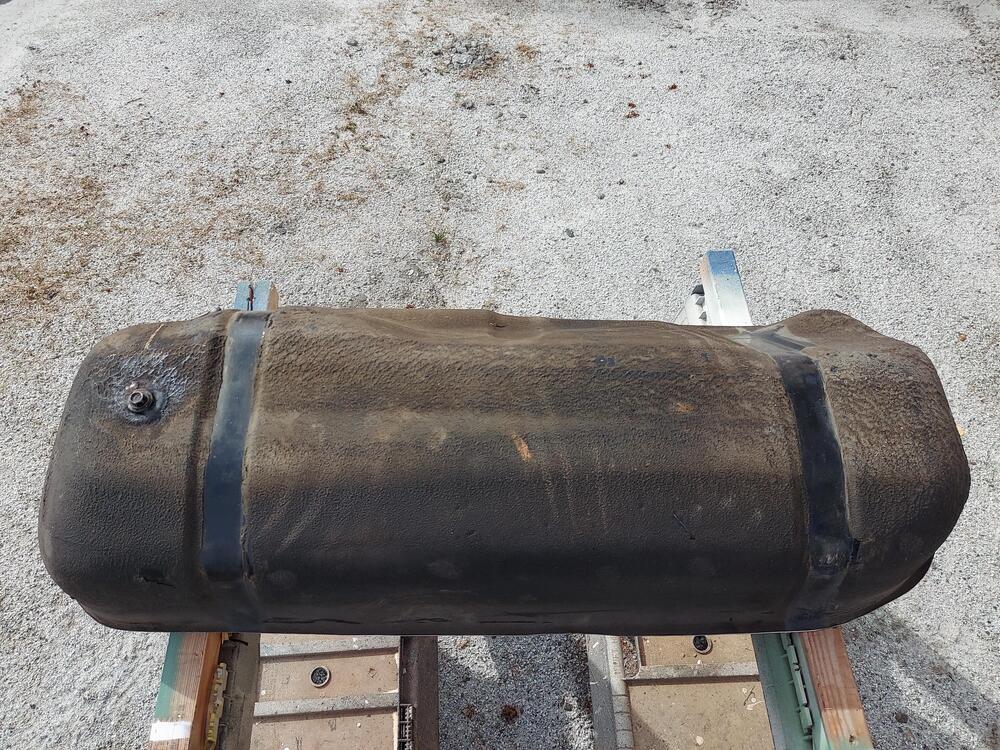
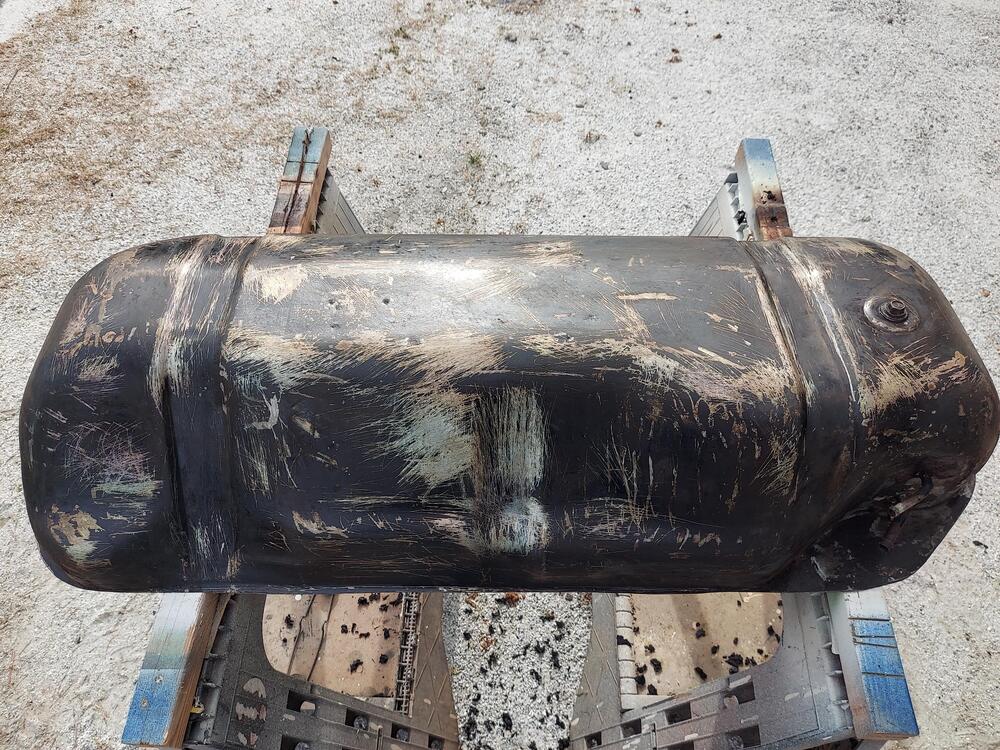
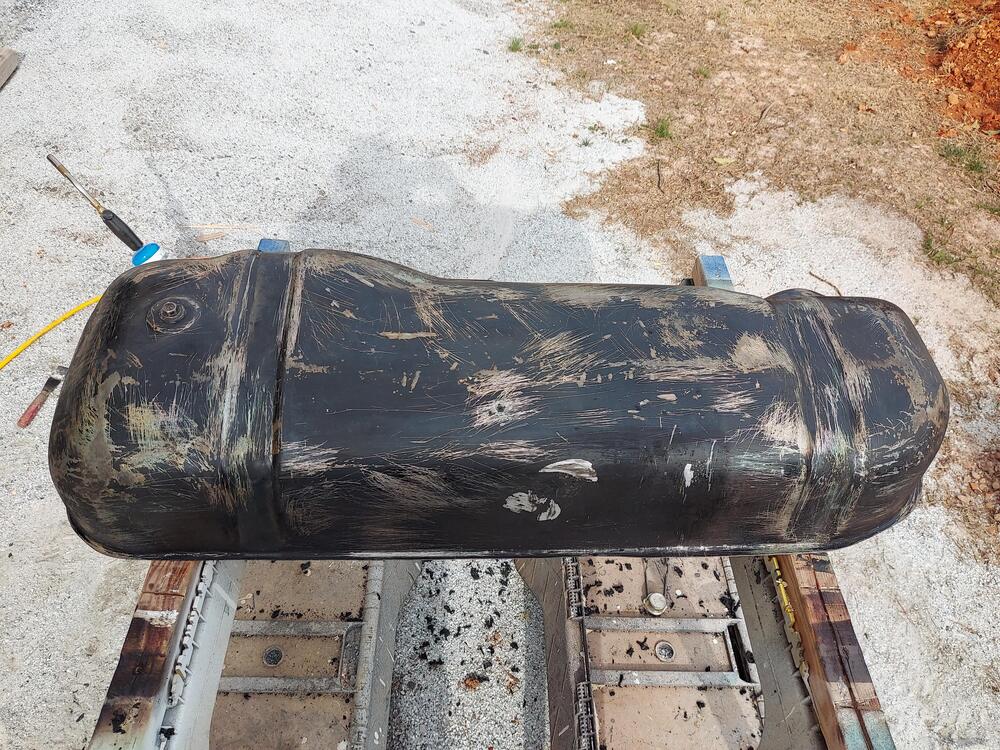
5 pointsI haven't updated in a while. But I've been researching chelating chemistry for de-rusting the tank instead of more destructive methods like acid or bead blasting. When Evap-O-Rust was $12/gallon, I wouldn't have balked at the cost. But now it's $30/gallon. I found some info on using EDTA mixed with citric acid to form a DIY, pH neutral chelating agent. Here's one guy who made an instructional video: He claims $0.75/gallon, but the cost of EDTA has skyrocketed in the last few years, driving the cost of a DIY chemical to about $15/gallon. Then I found something called Rust911, which is a concentrated chelating chemical you just add to water. One $75 gallon makes 16 gallons. That's what I'm using. With that sorted, I needed to strip off the rubberized undercoating on the bottom half of the tank. I ended up using a propane torch to soften it so I could scrape it off with a narrow spatula. It was tricky, because too little heat and it wouldn't budge, but too much and it would smear around. And if I let too much collect into a glob, it would catch fire. It became a balancing act to move the flame around with one hand while scraping with the other. Here's what I started with: After scraping off what I could: There was still a lot of coating in the concave areas, so i followed up with more heat and a wire brush: It took some paint off, too. But I plan to strip and repaint most of the outside anyway. I ran out of propane at this point. Overall, while it was a nasty process, it worked pretty well. I only burned one of my fingers. And what's left on the tank should come off with stripper, or if I use the bead blaster. I pity the person who tackles removing this undercoating from the body. I have no plans to do it. Next, I'll set up for de-rusting the inside. Stay tuned.

 5 points
 -
4 points
-
4 pointsThanks Cliff, I've missed flying and I head back soon to do a short refresher course before I start flying a regular line. If I stay at home any more my wife is going to kill me. Funny thing, I forgot what the max start temperature is on the Pratt and Whitney Engines but I know that the UPC code for bananas at the grocery store is 4011. This means I've been out too long and getting overly domesticated.4 points
-
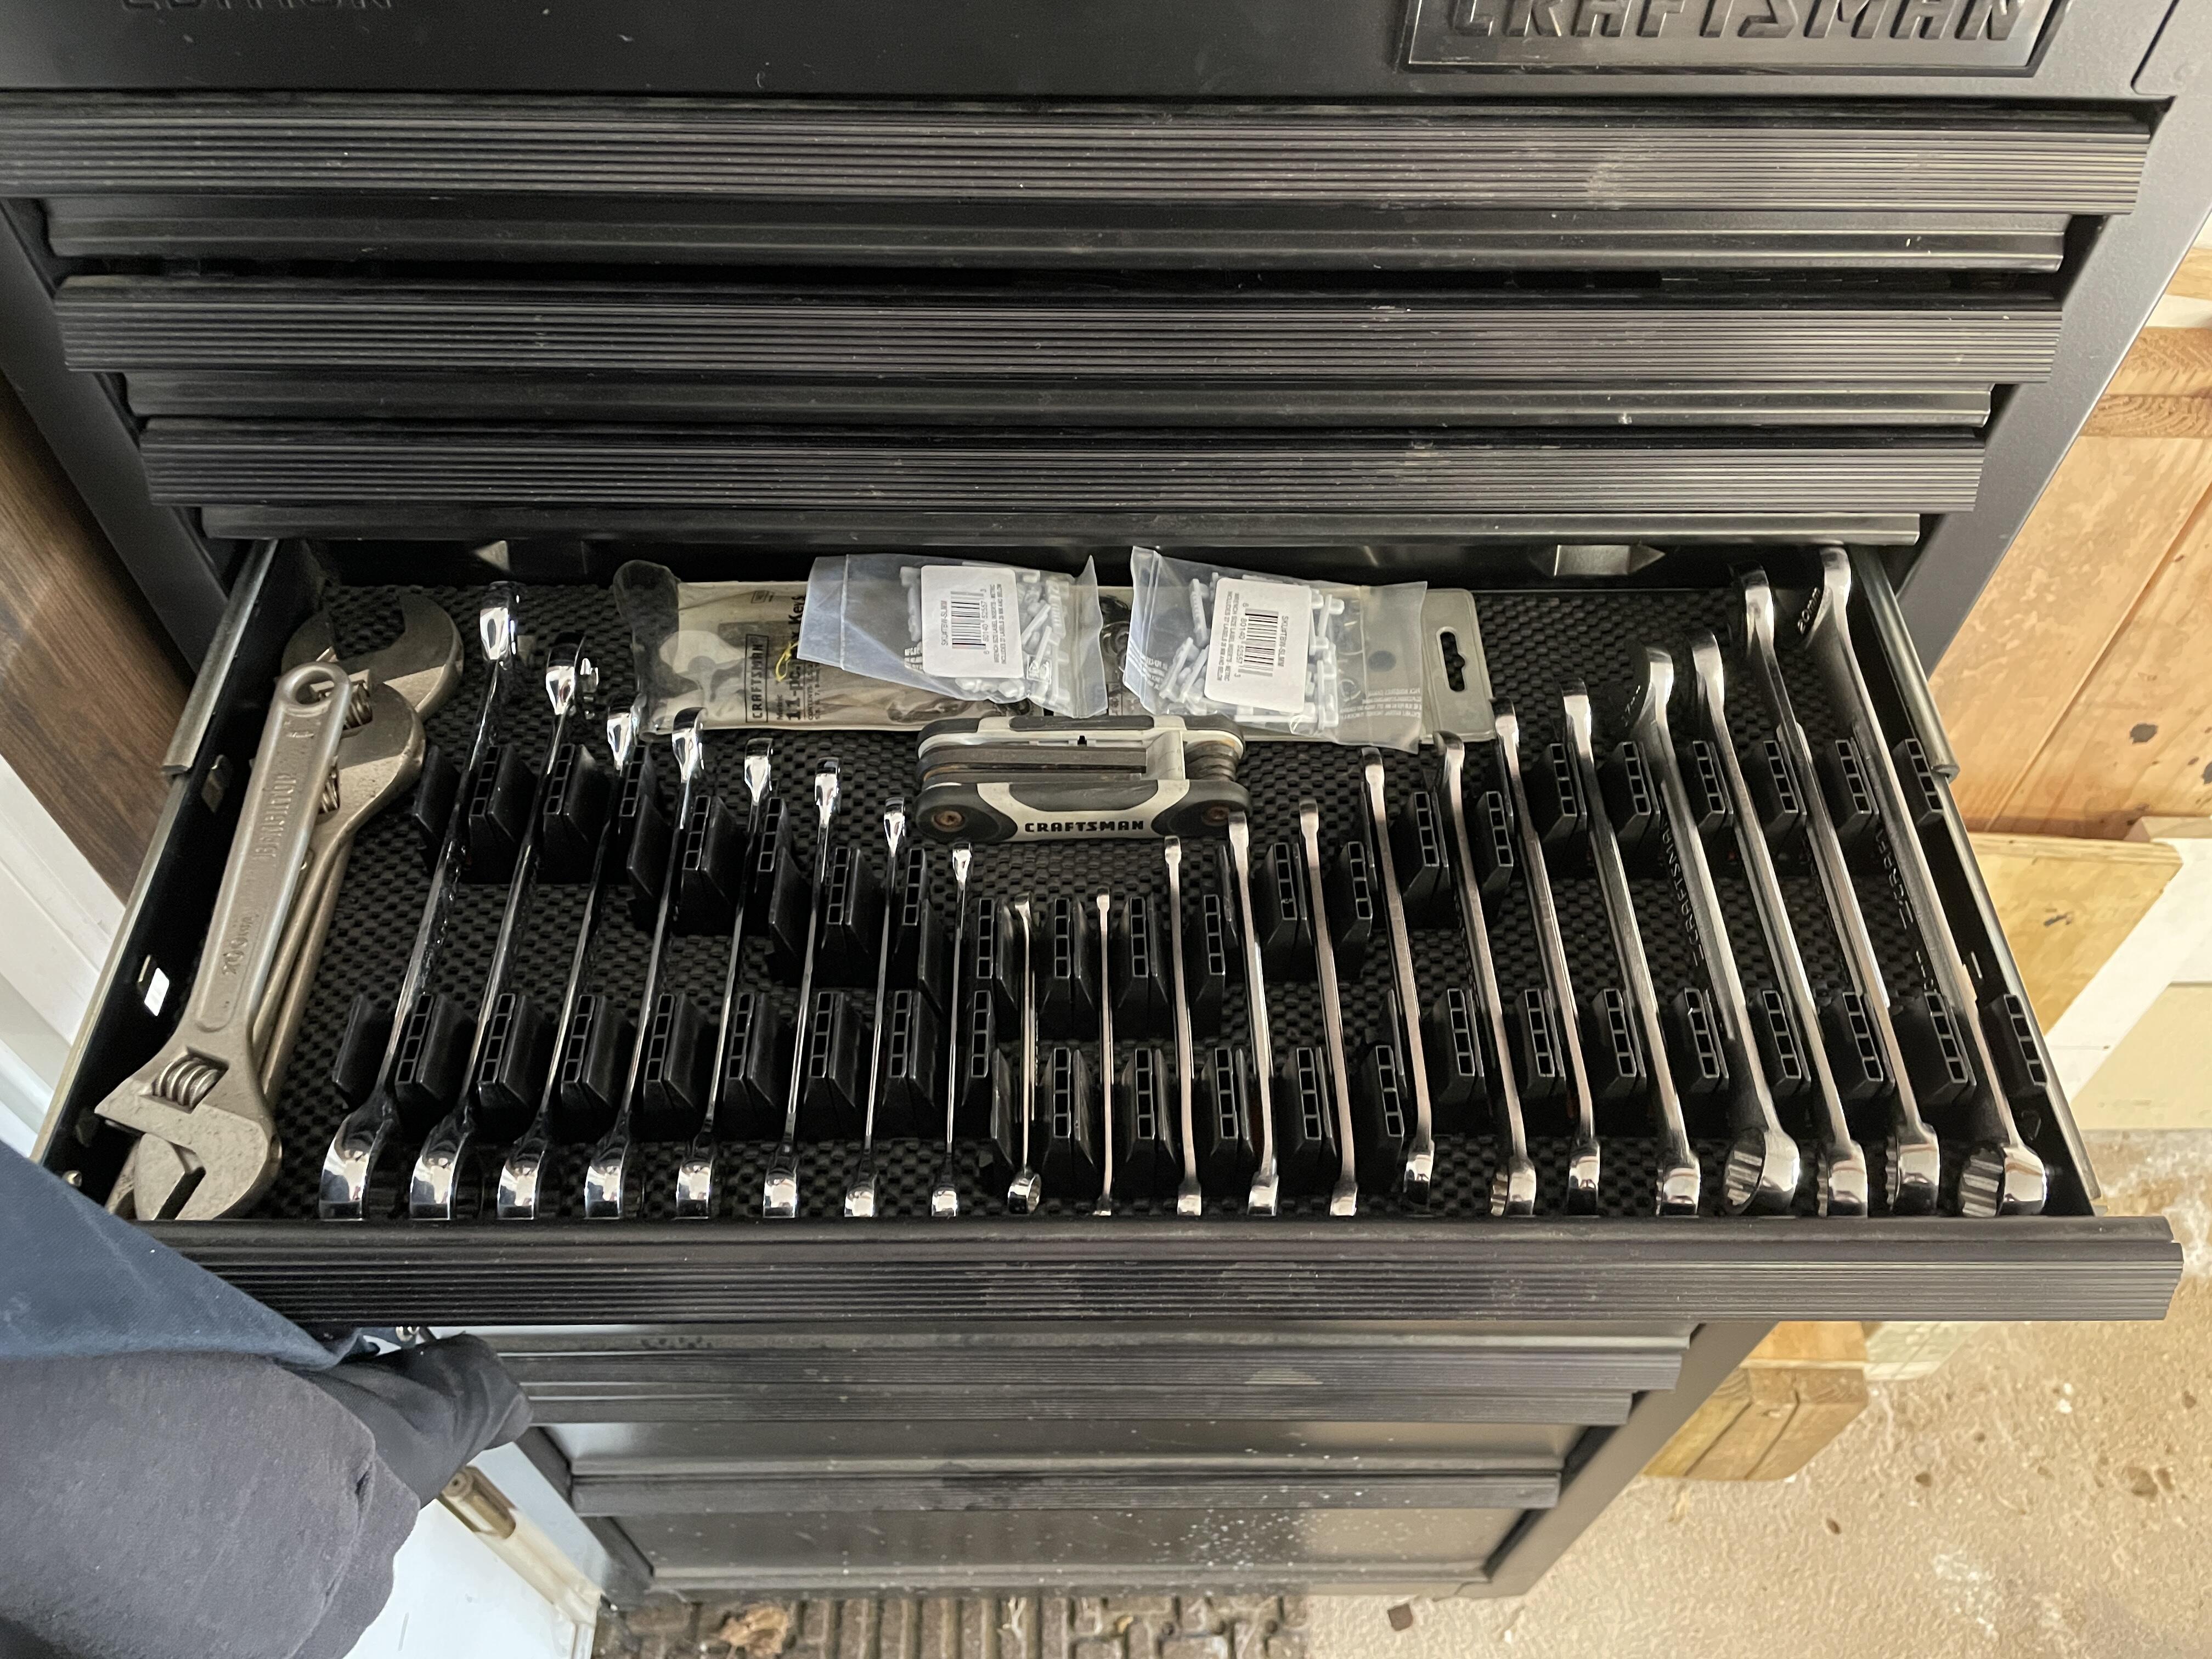
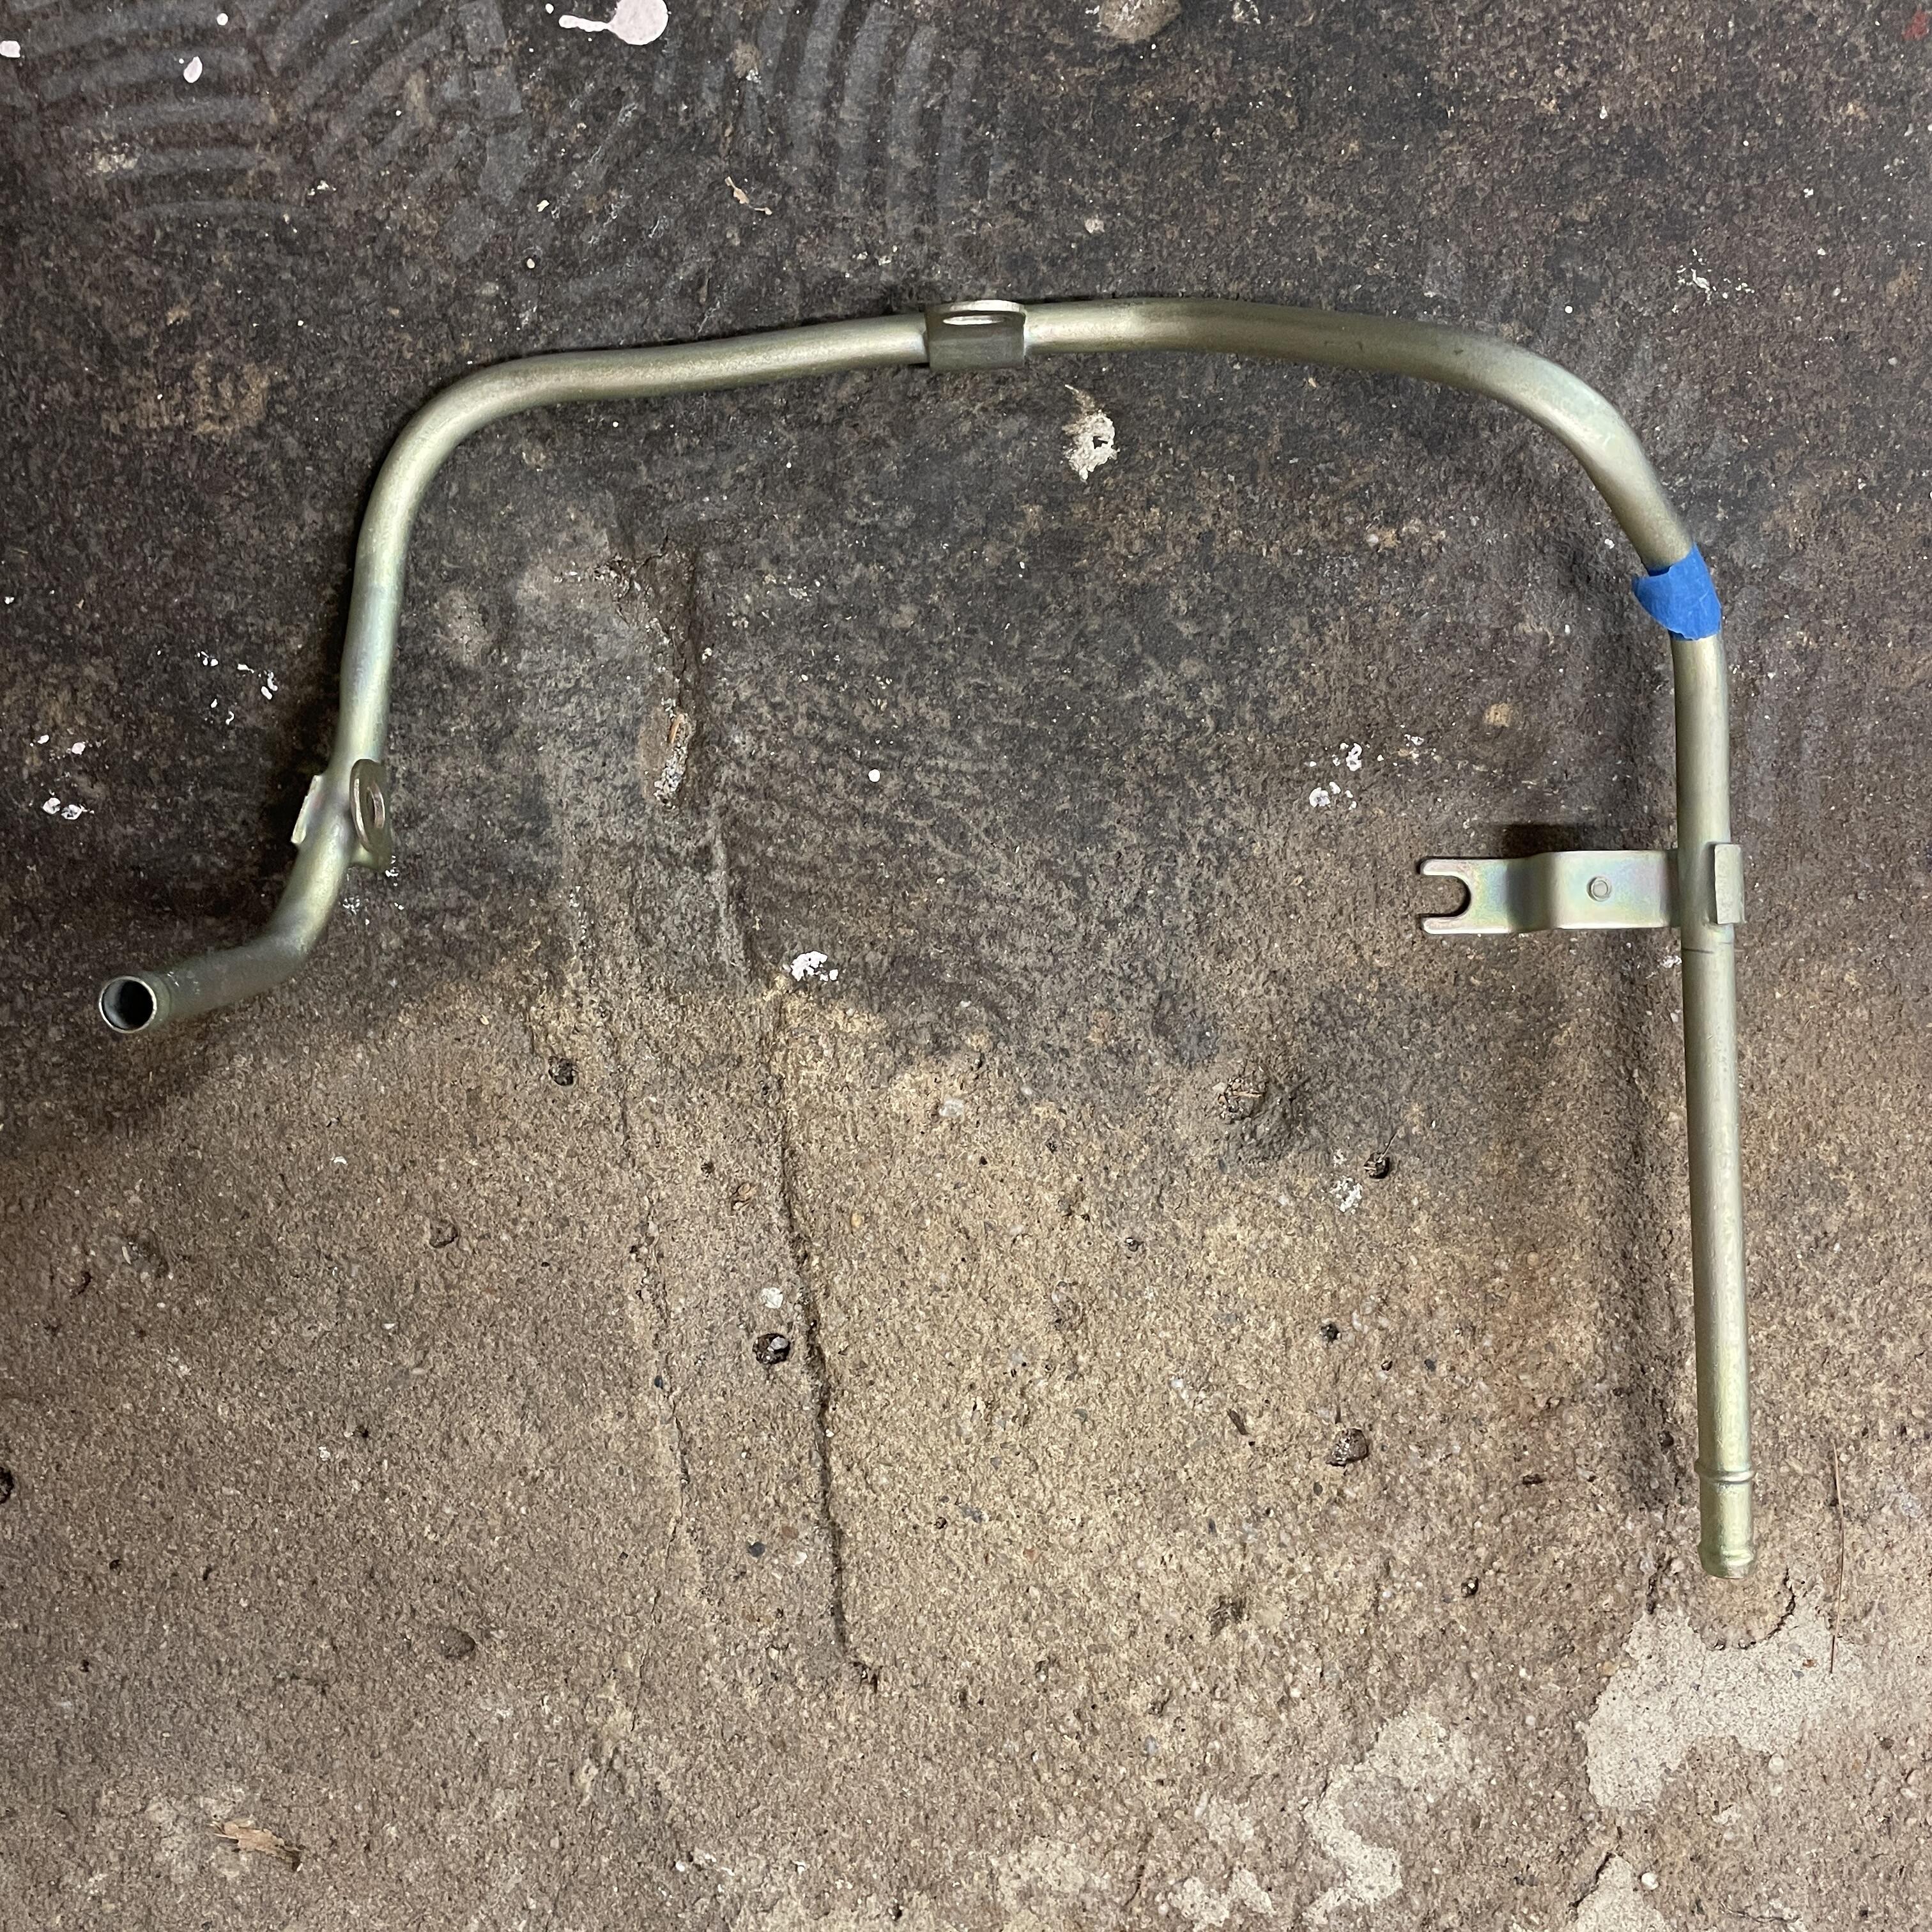
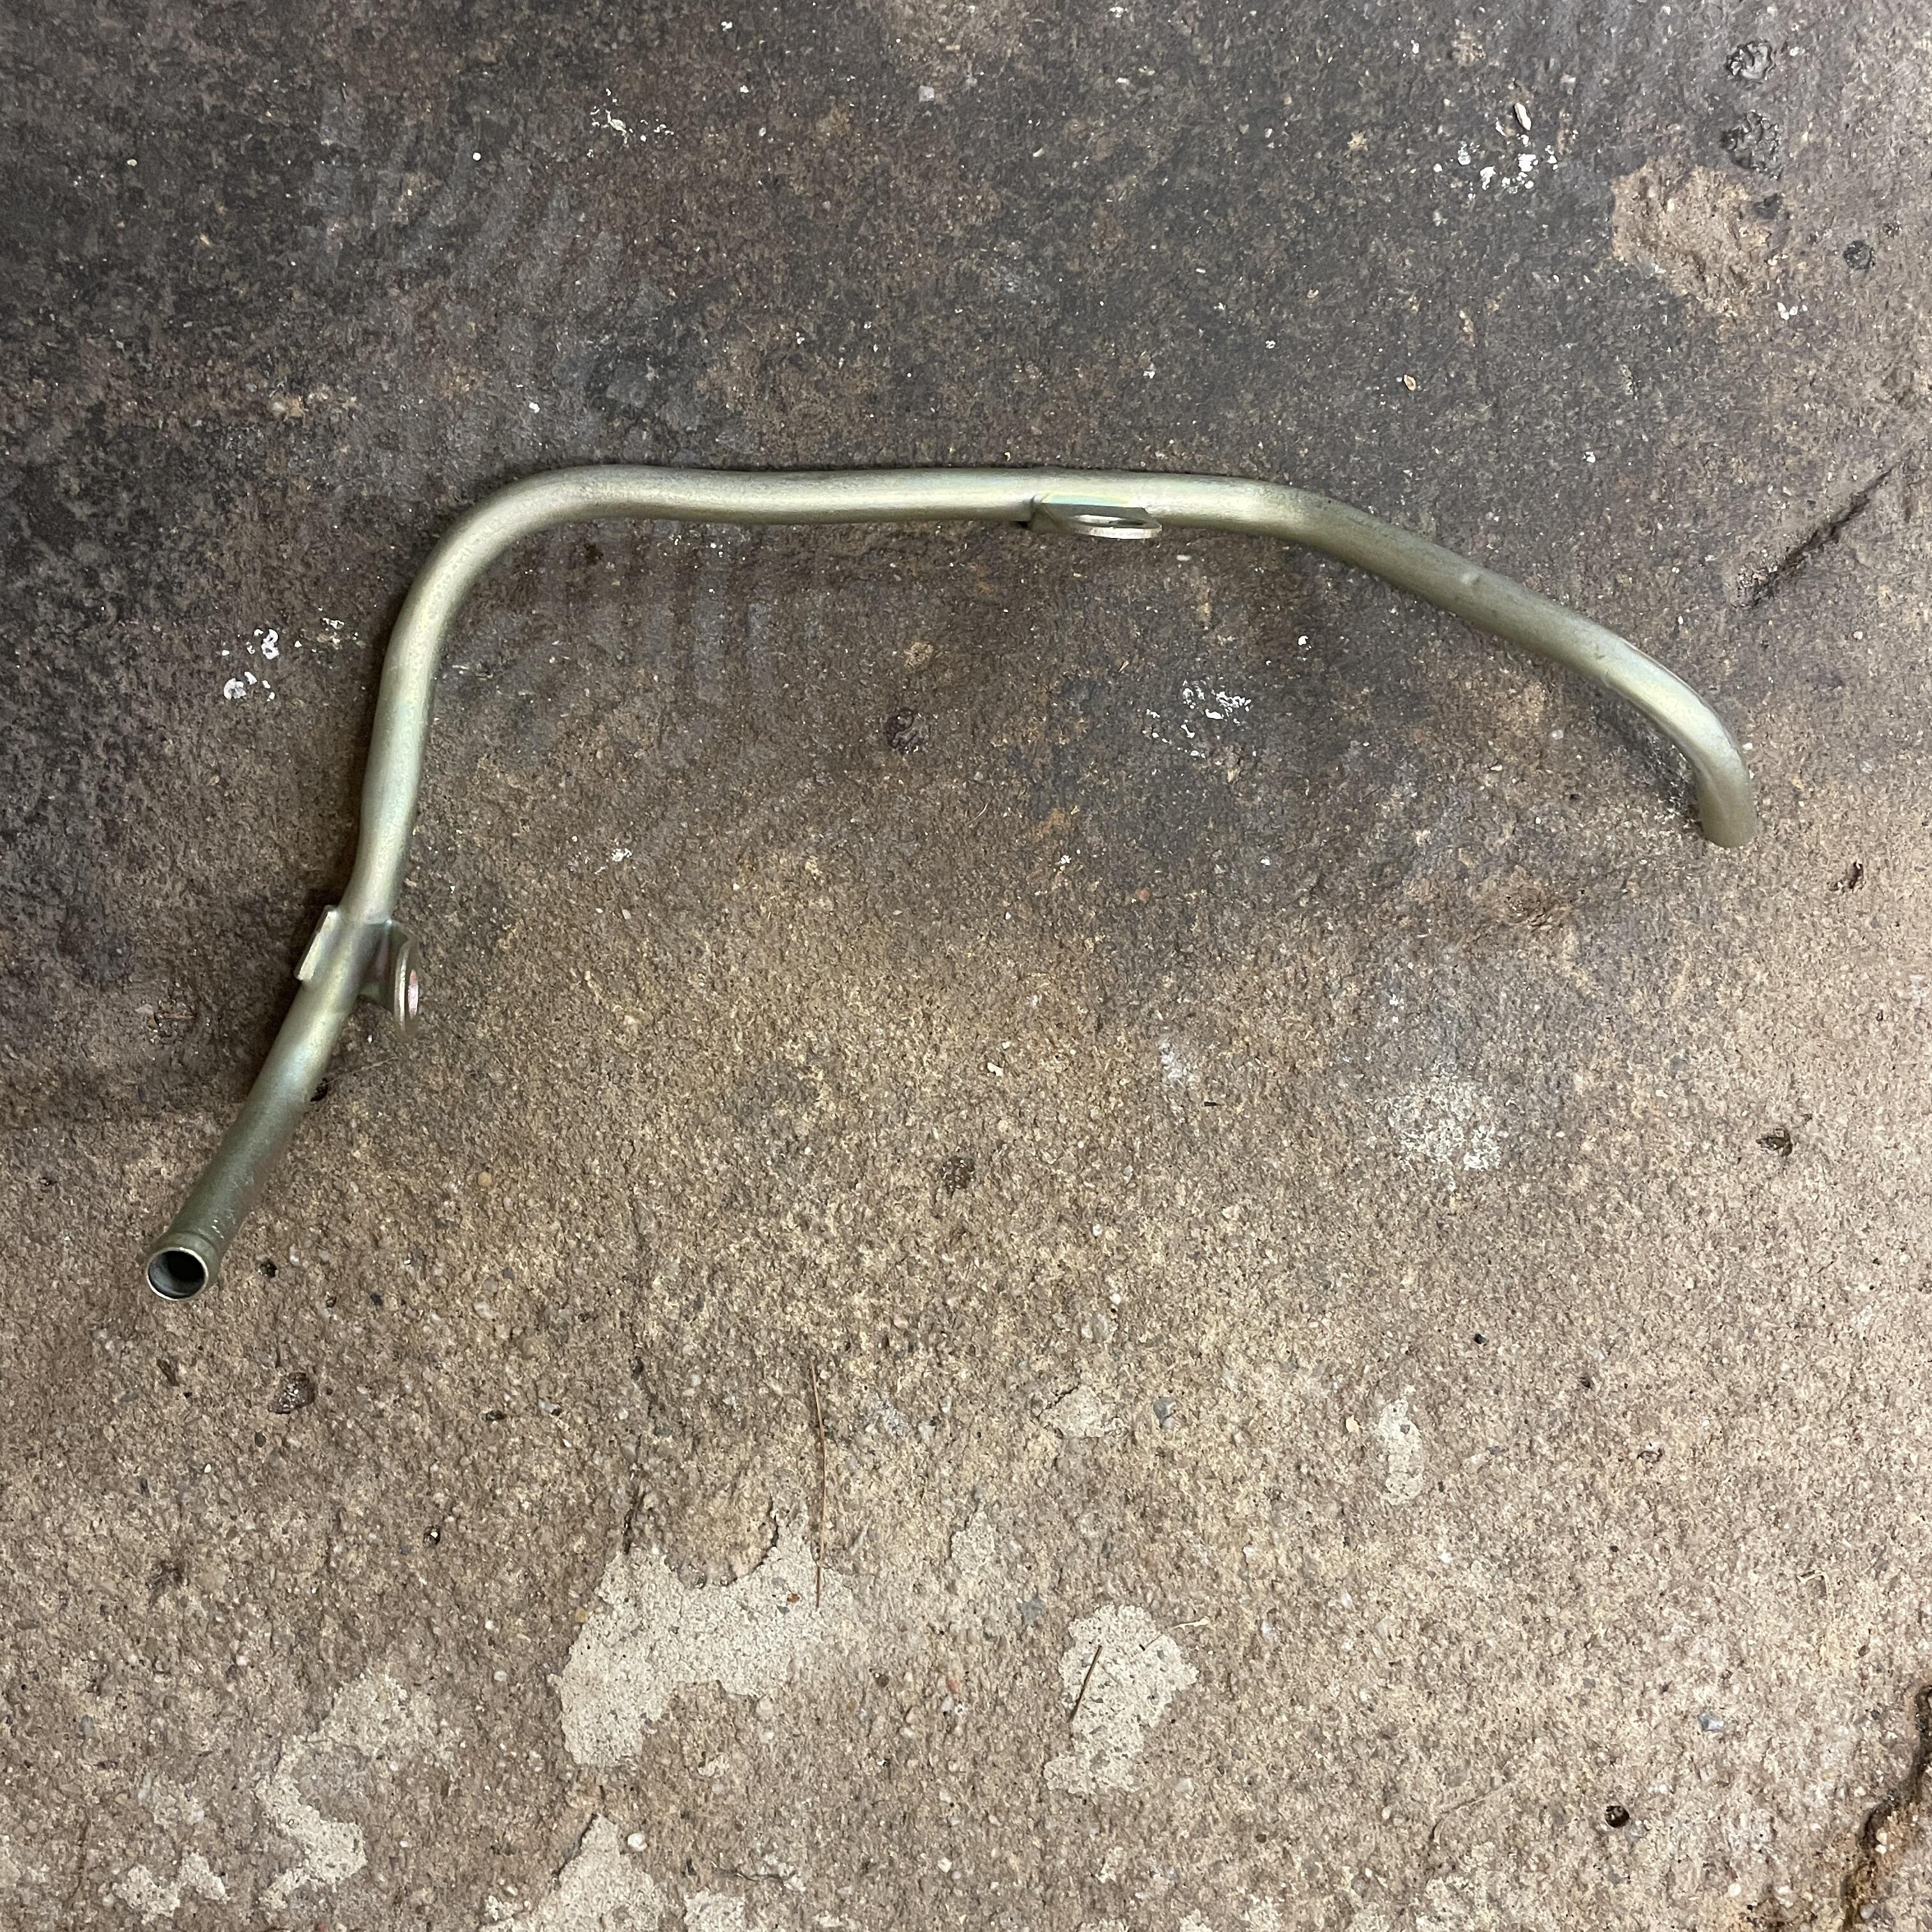
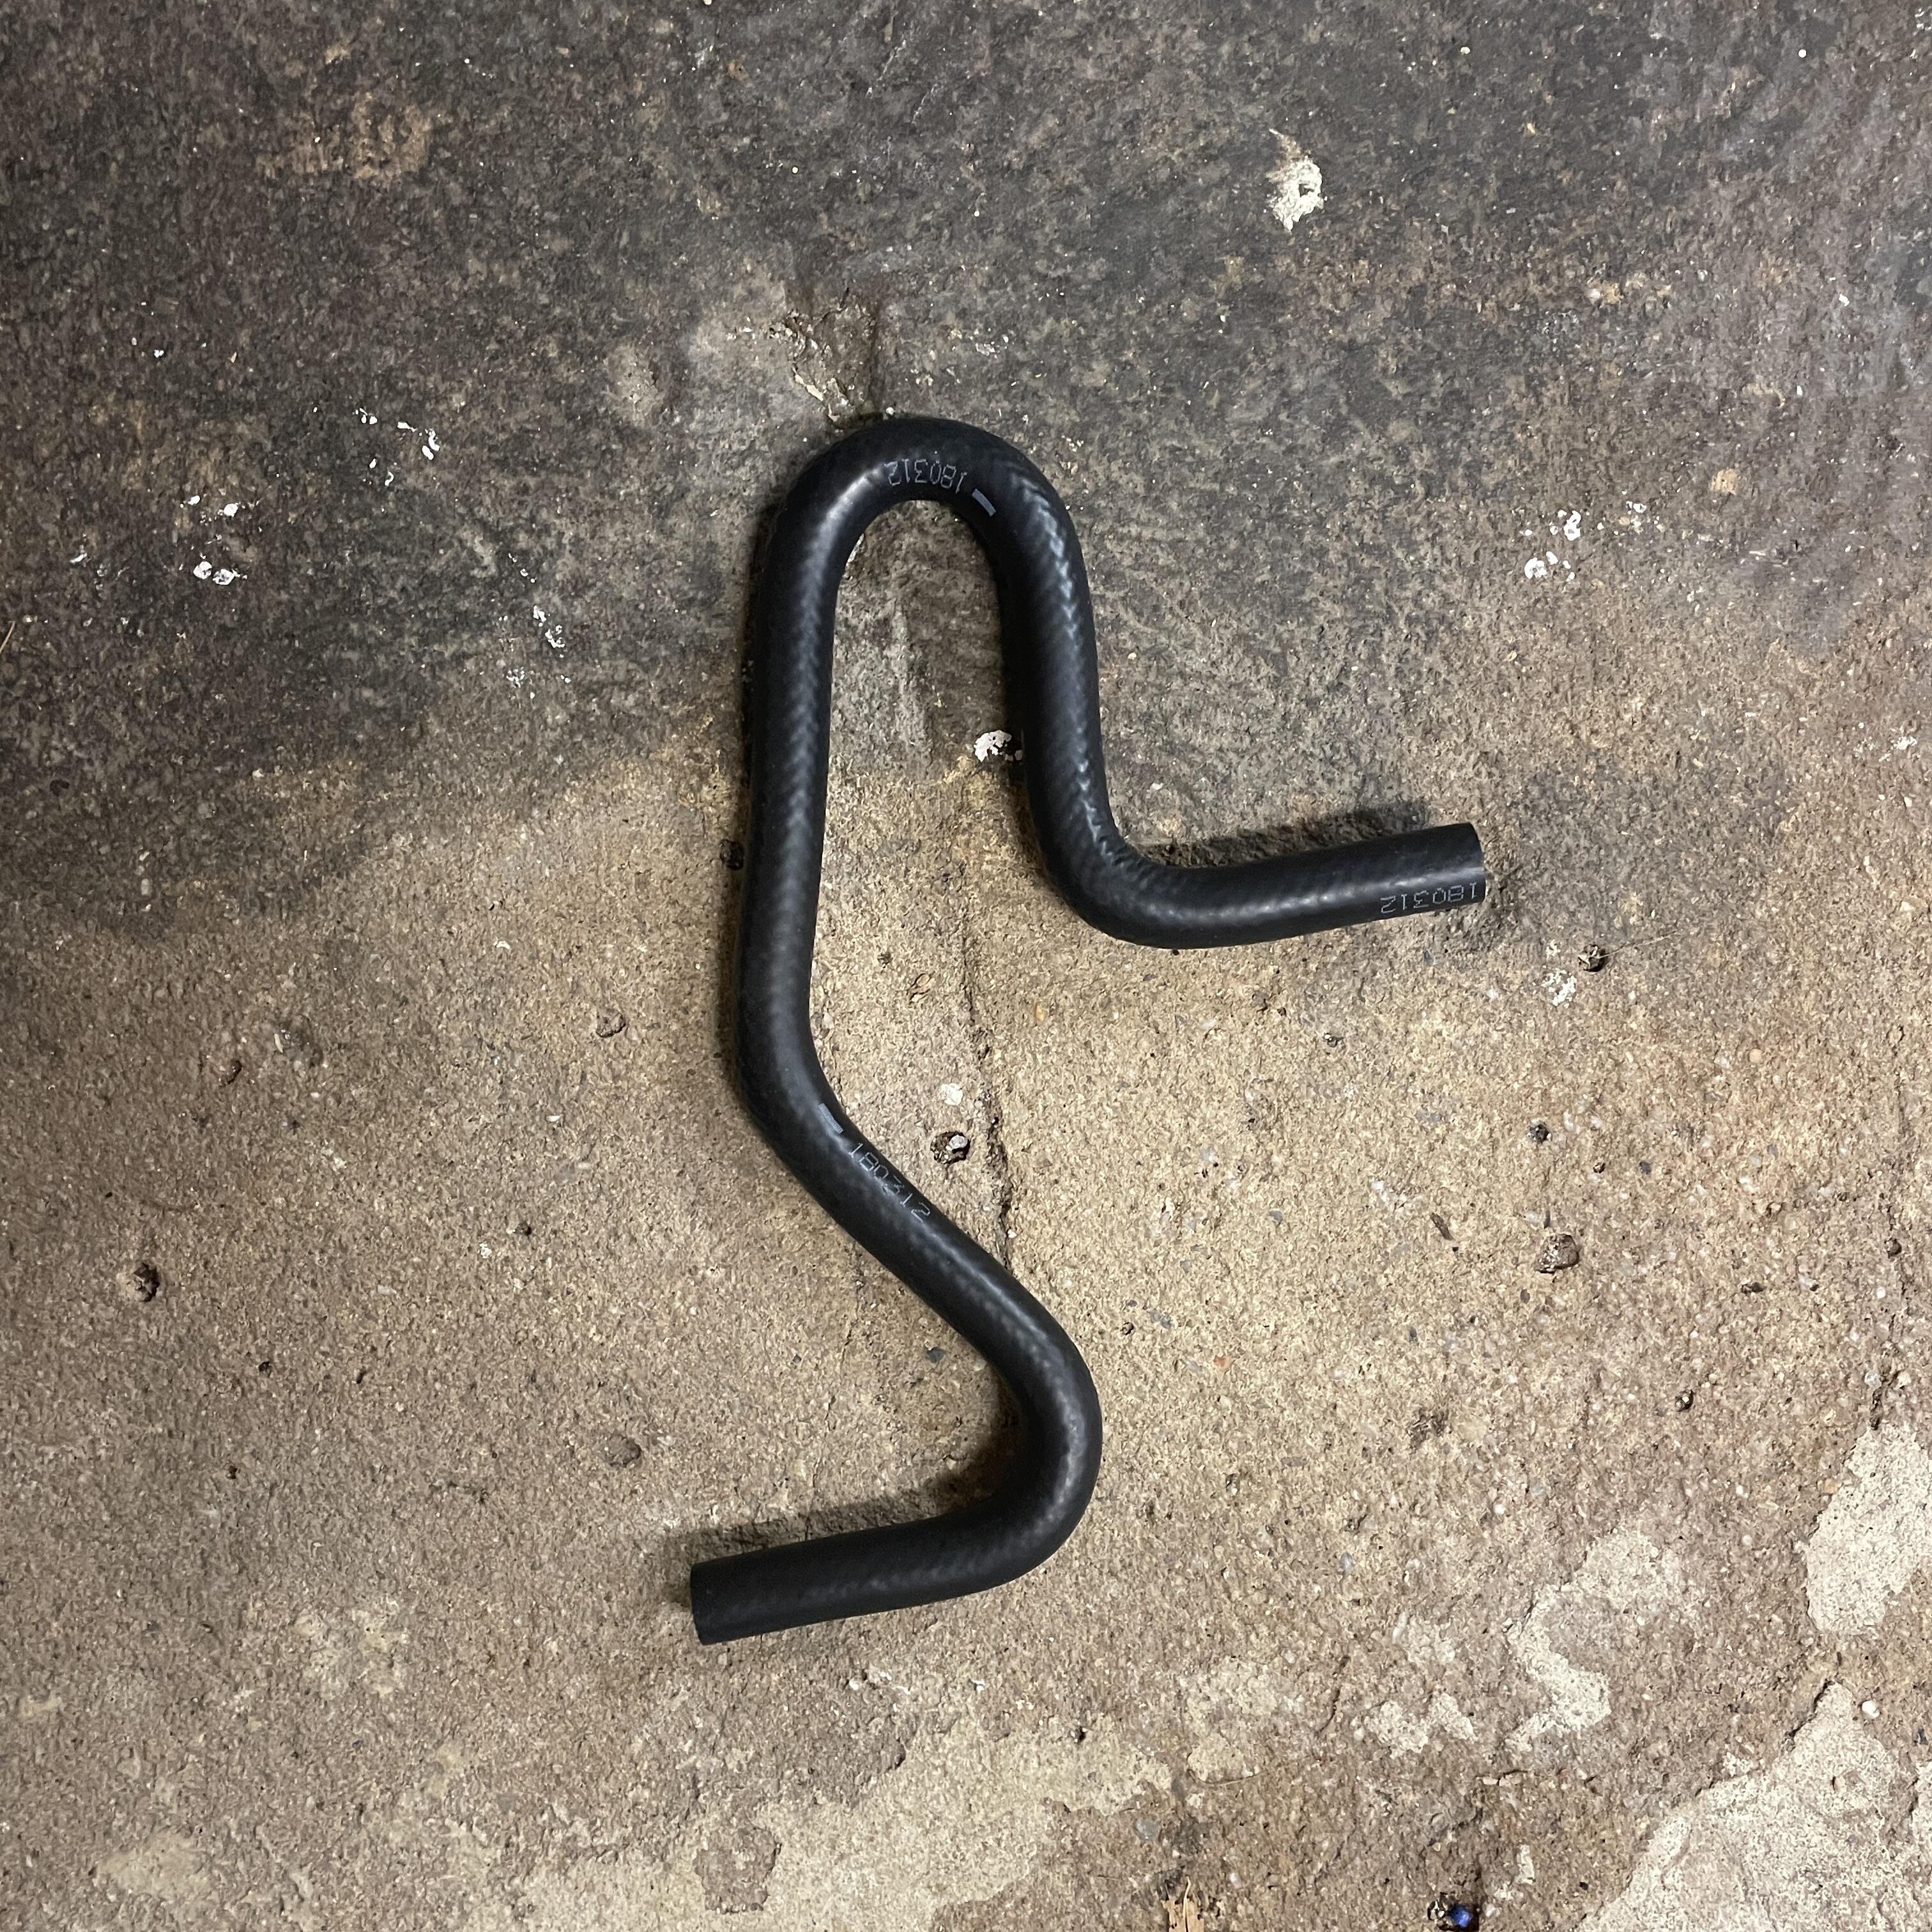
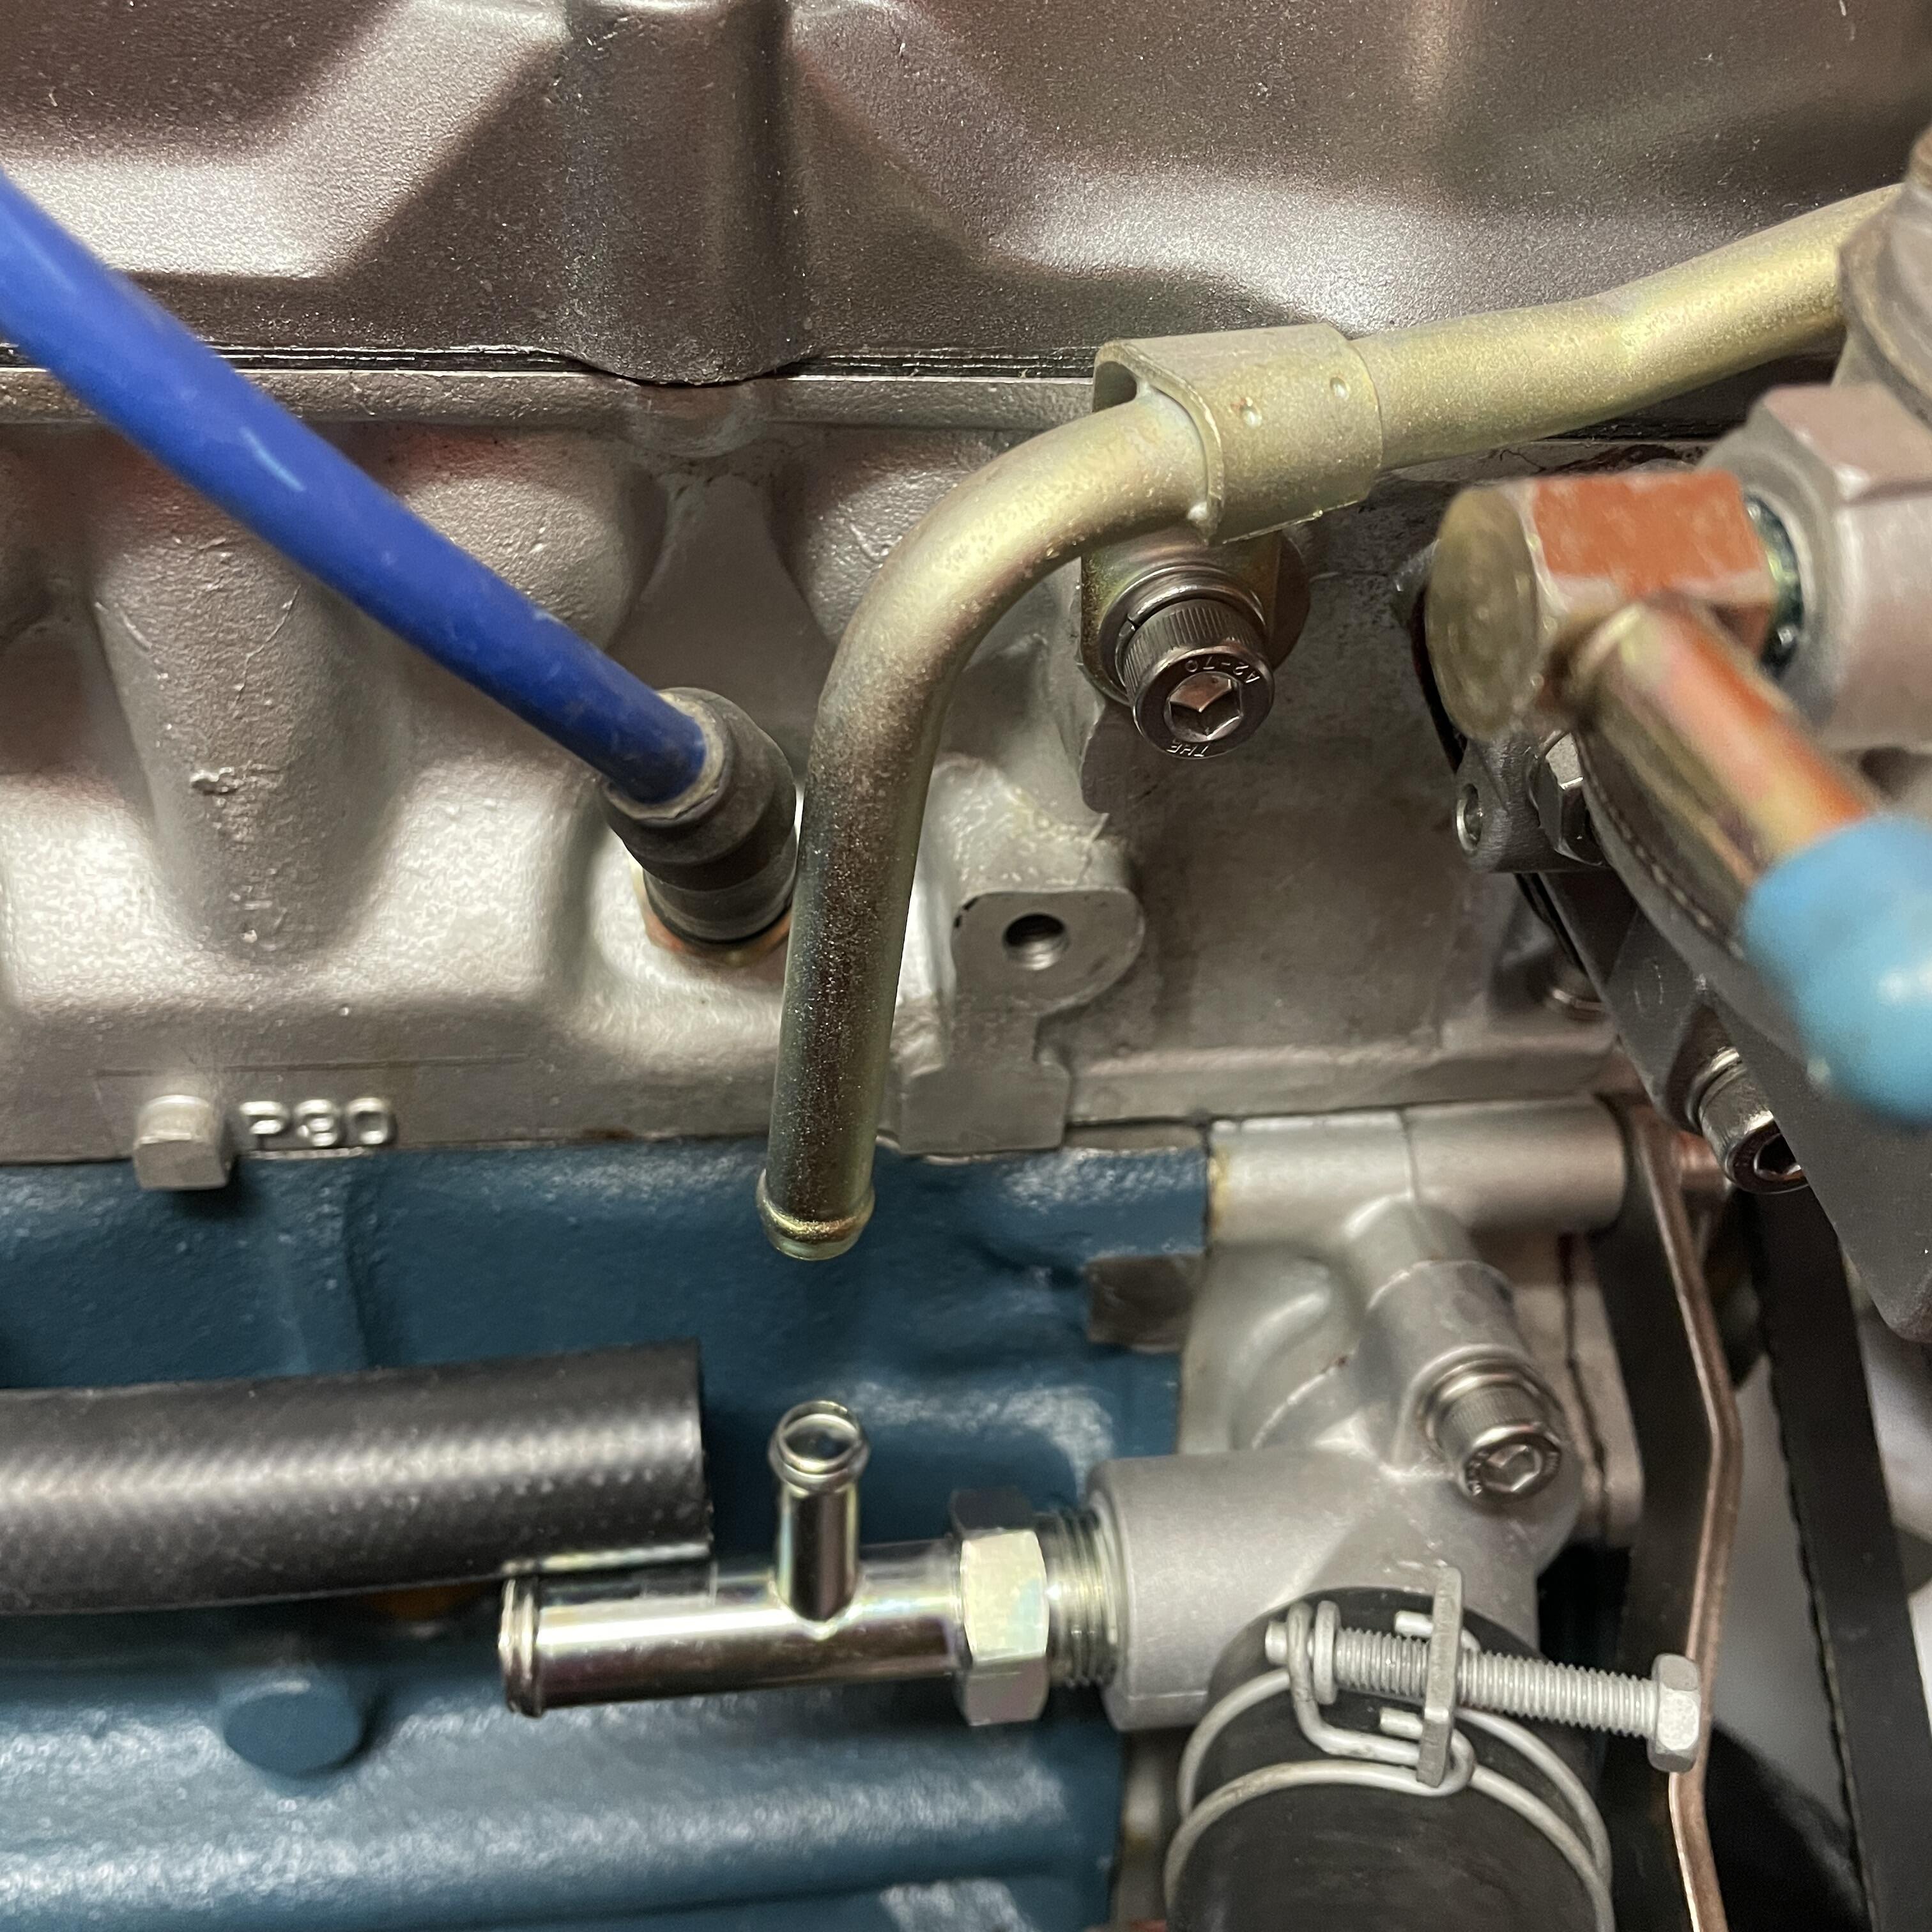
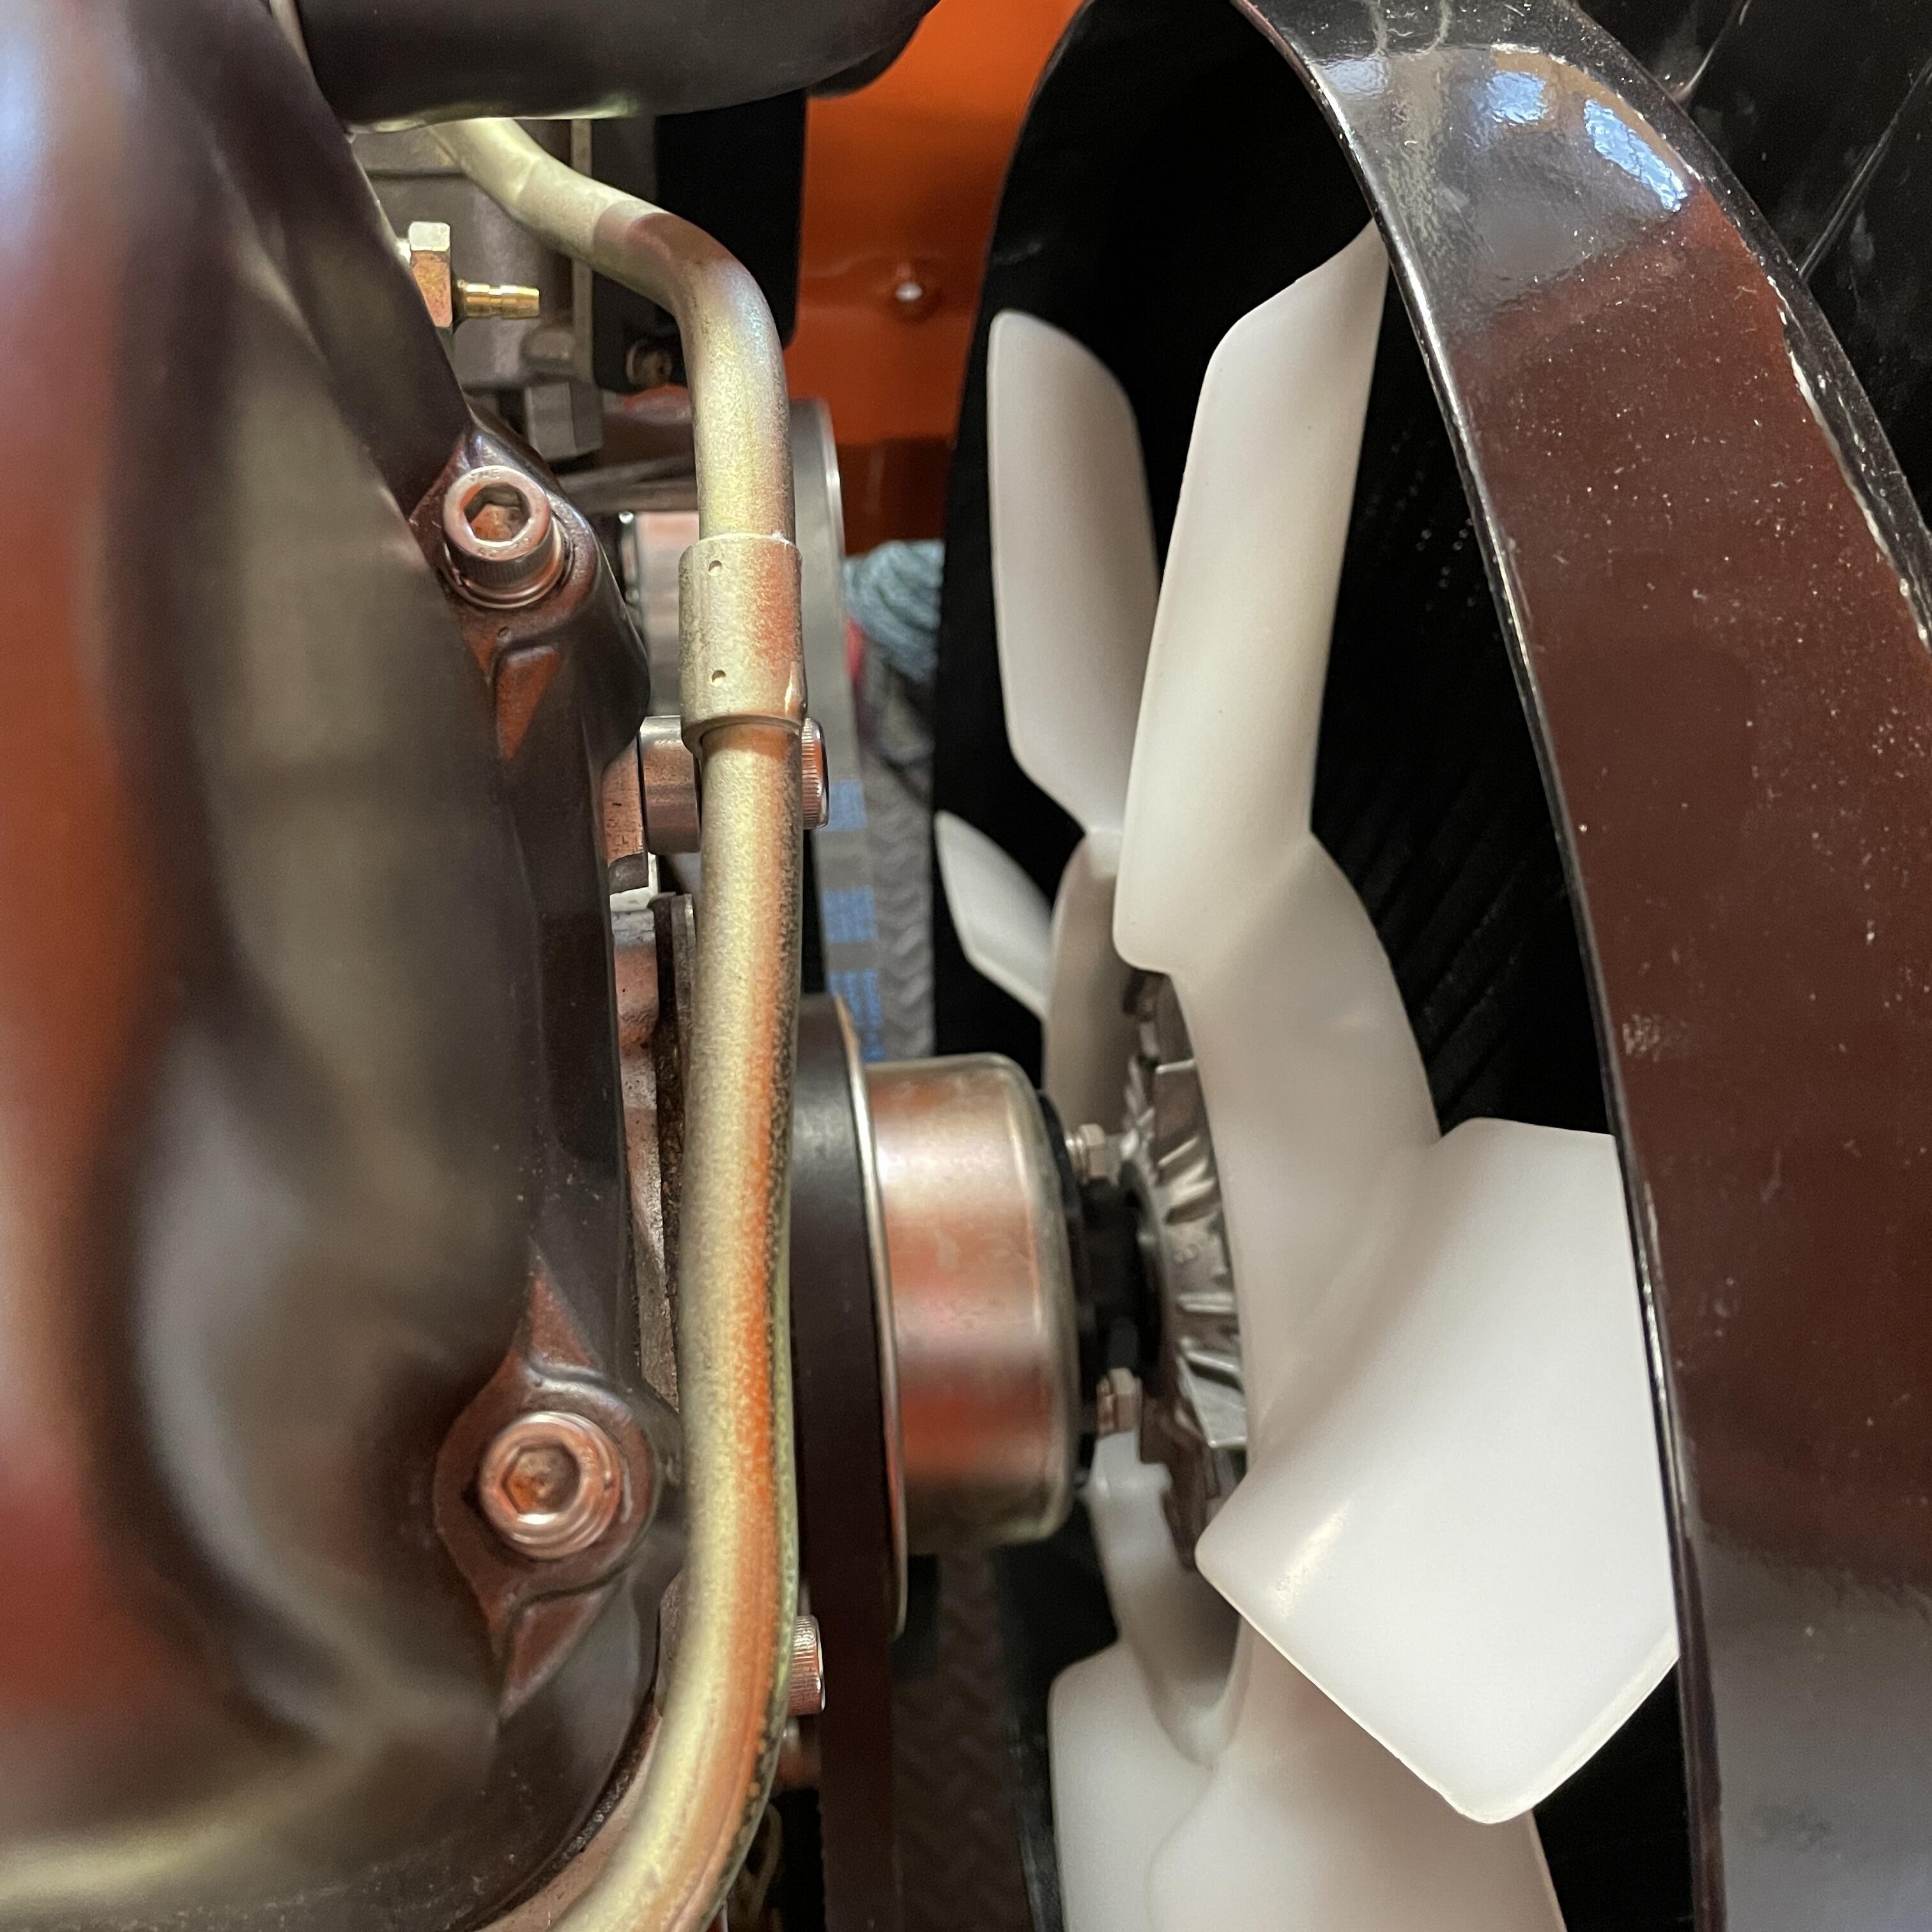
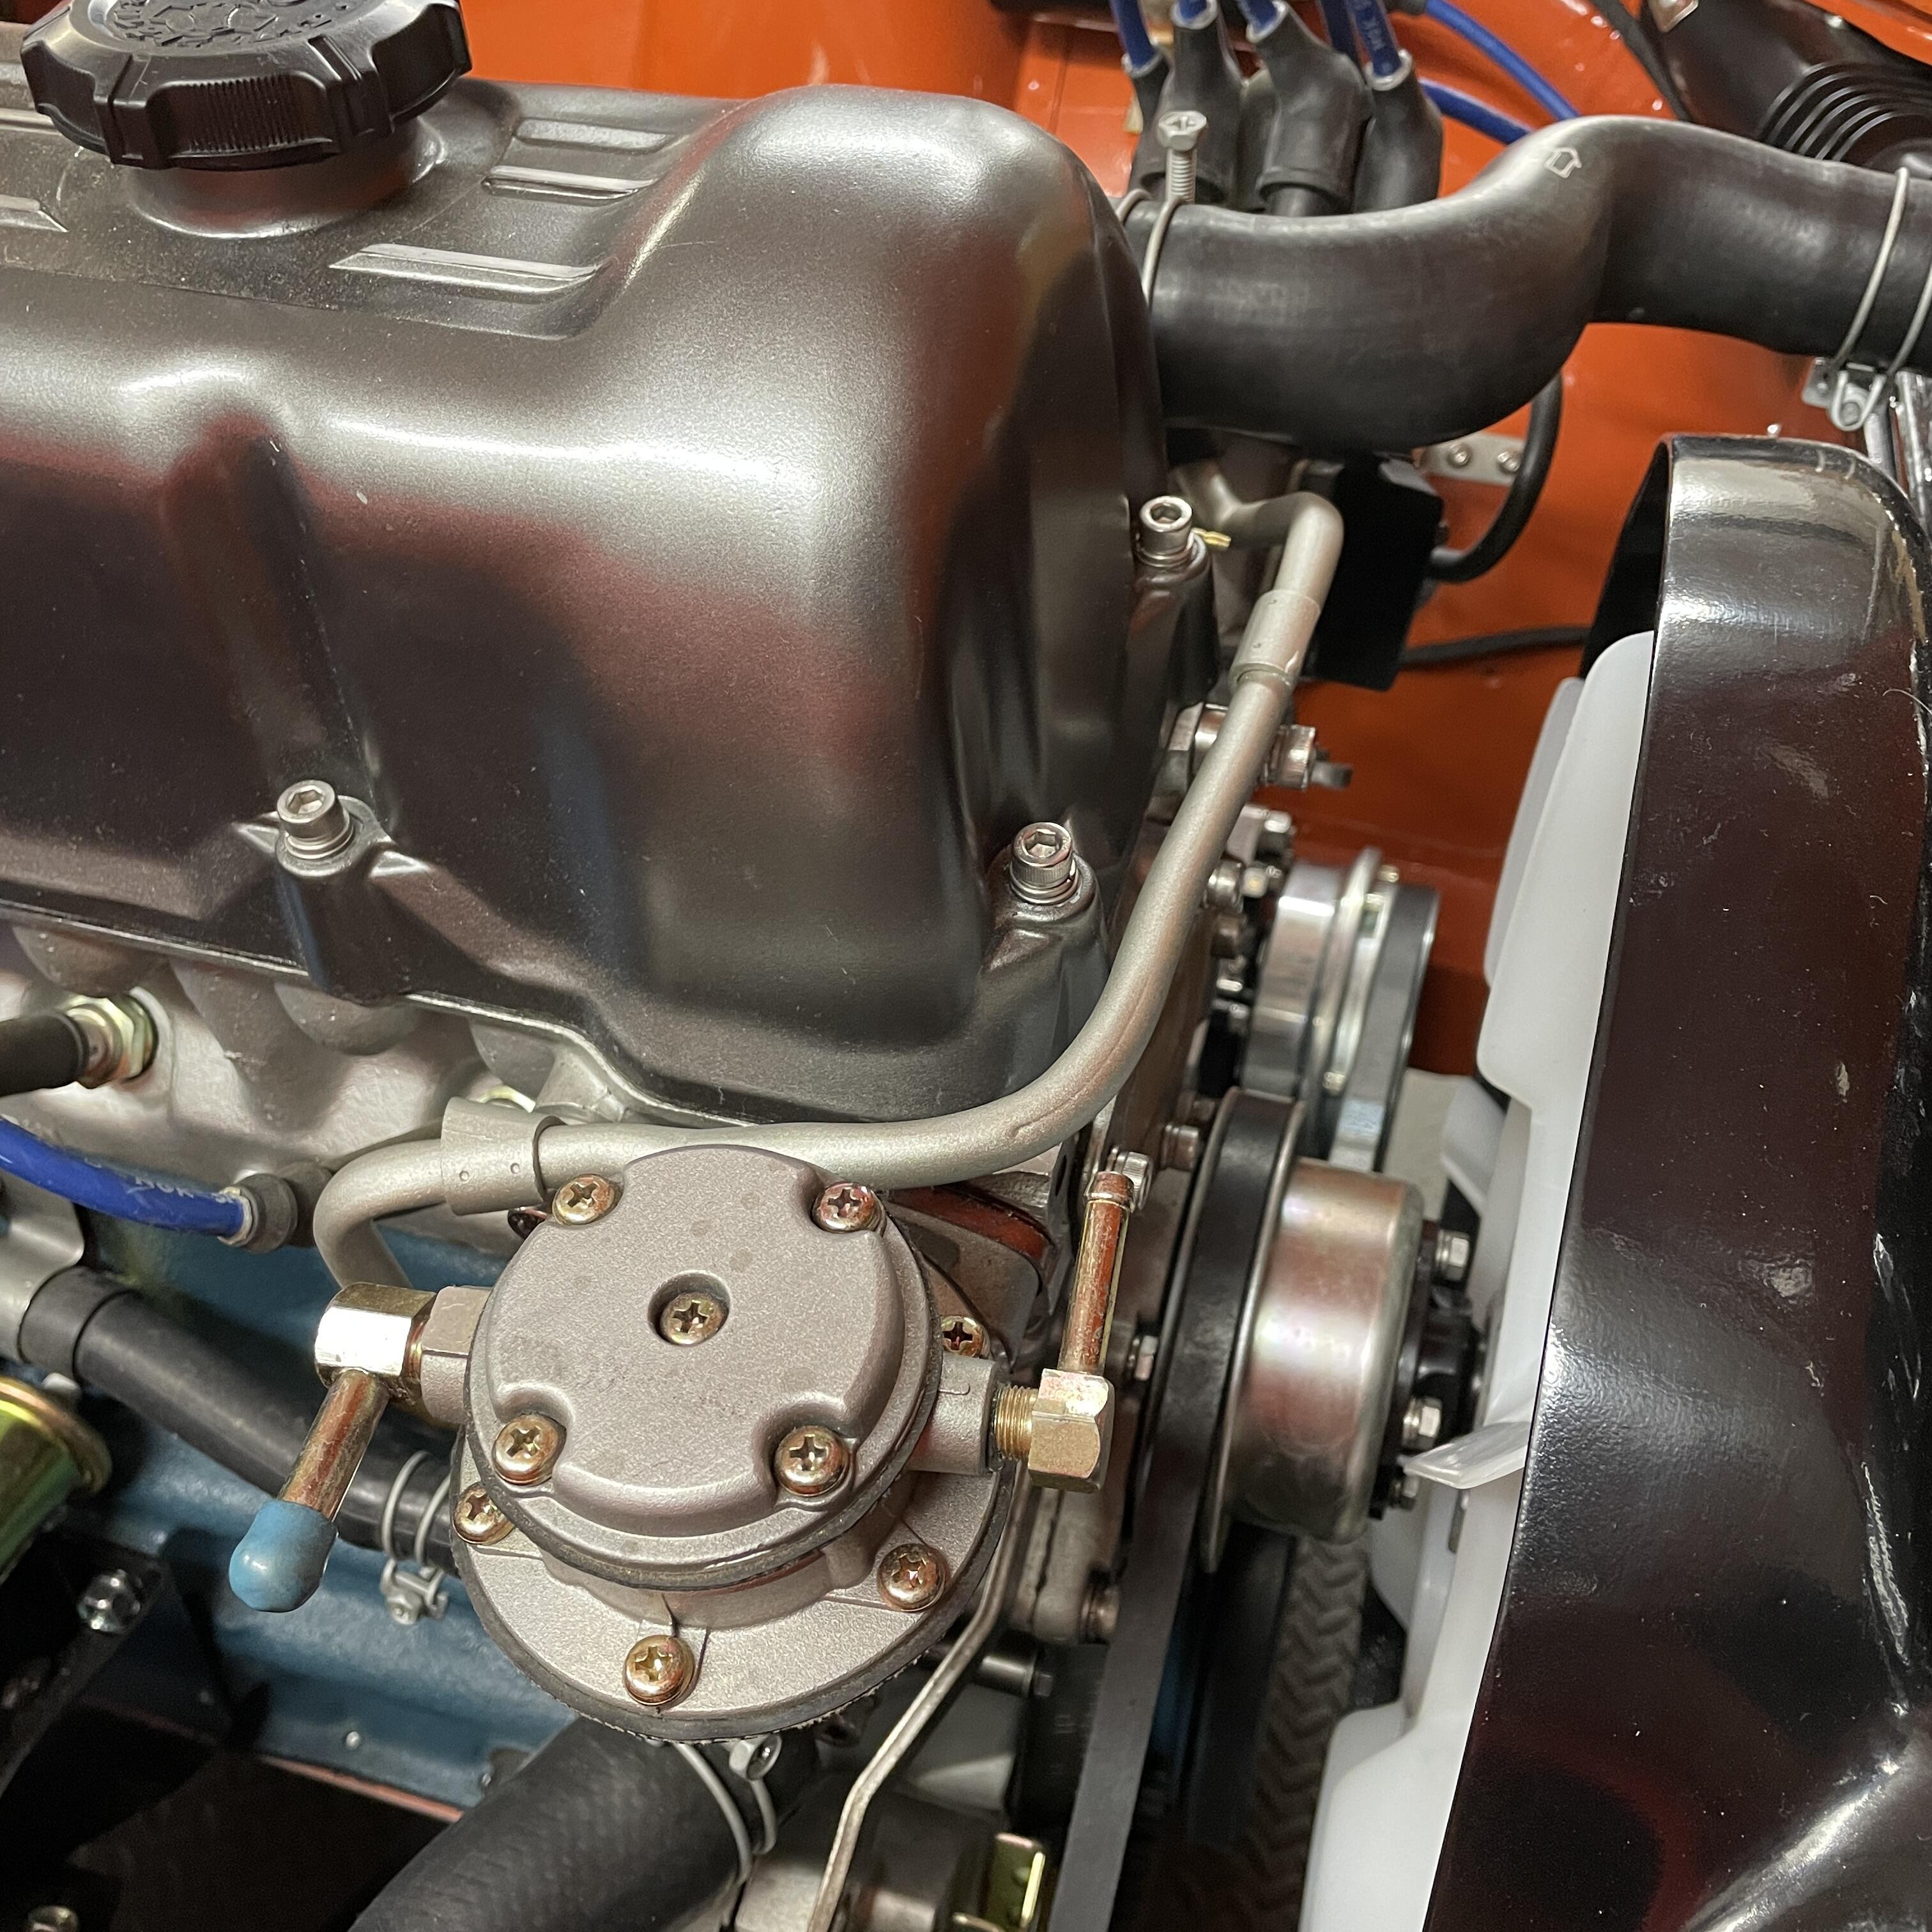
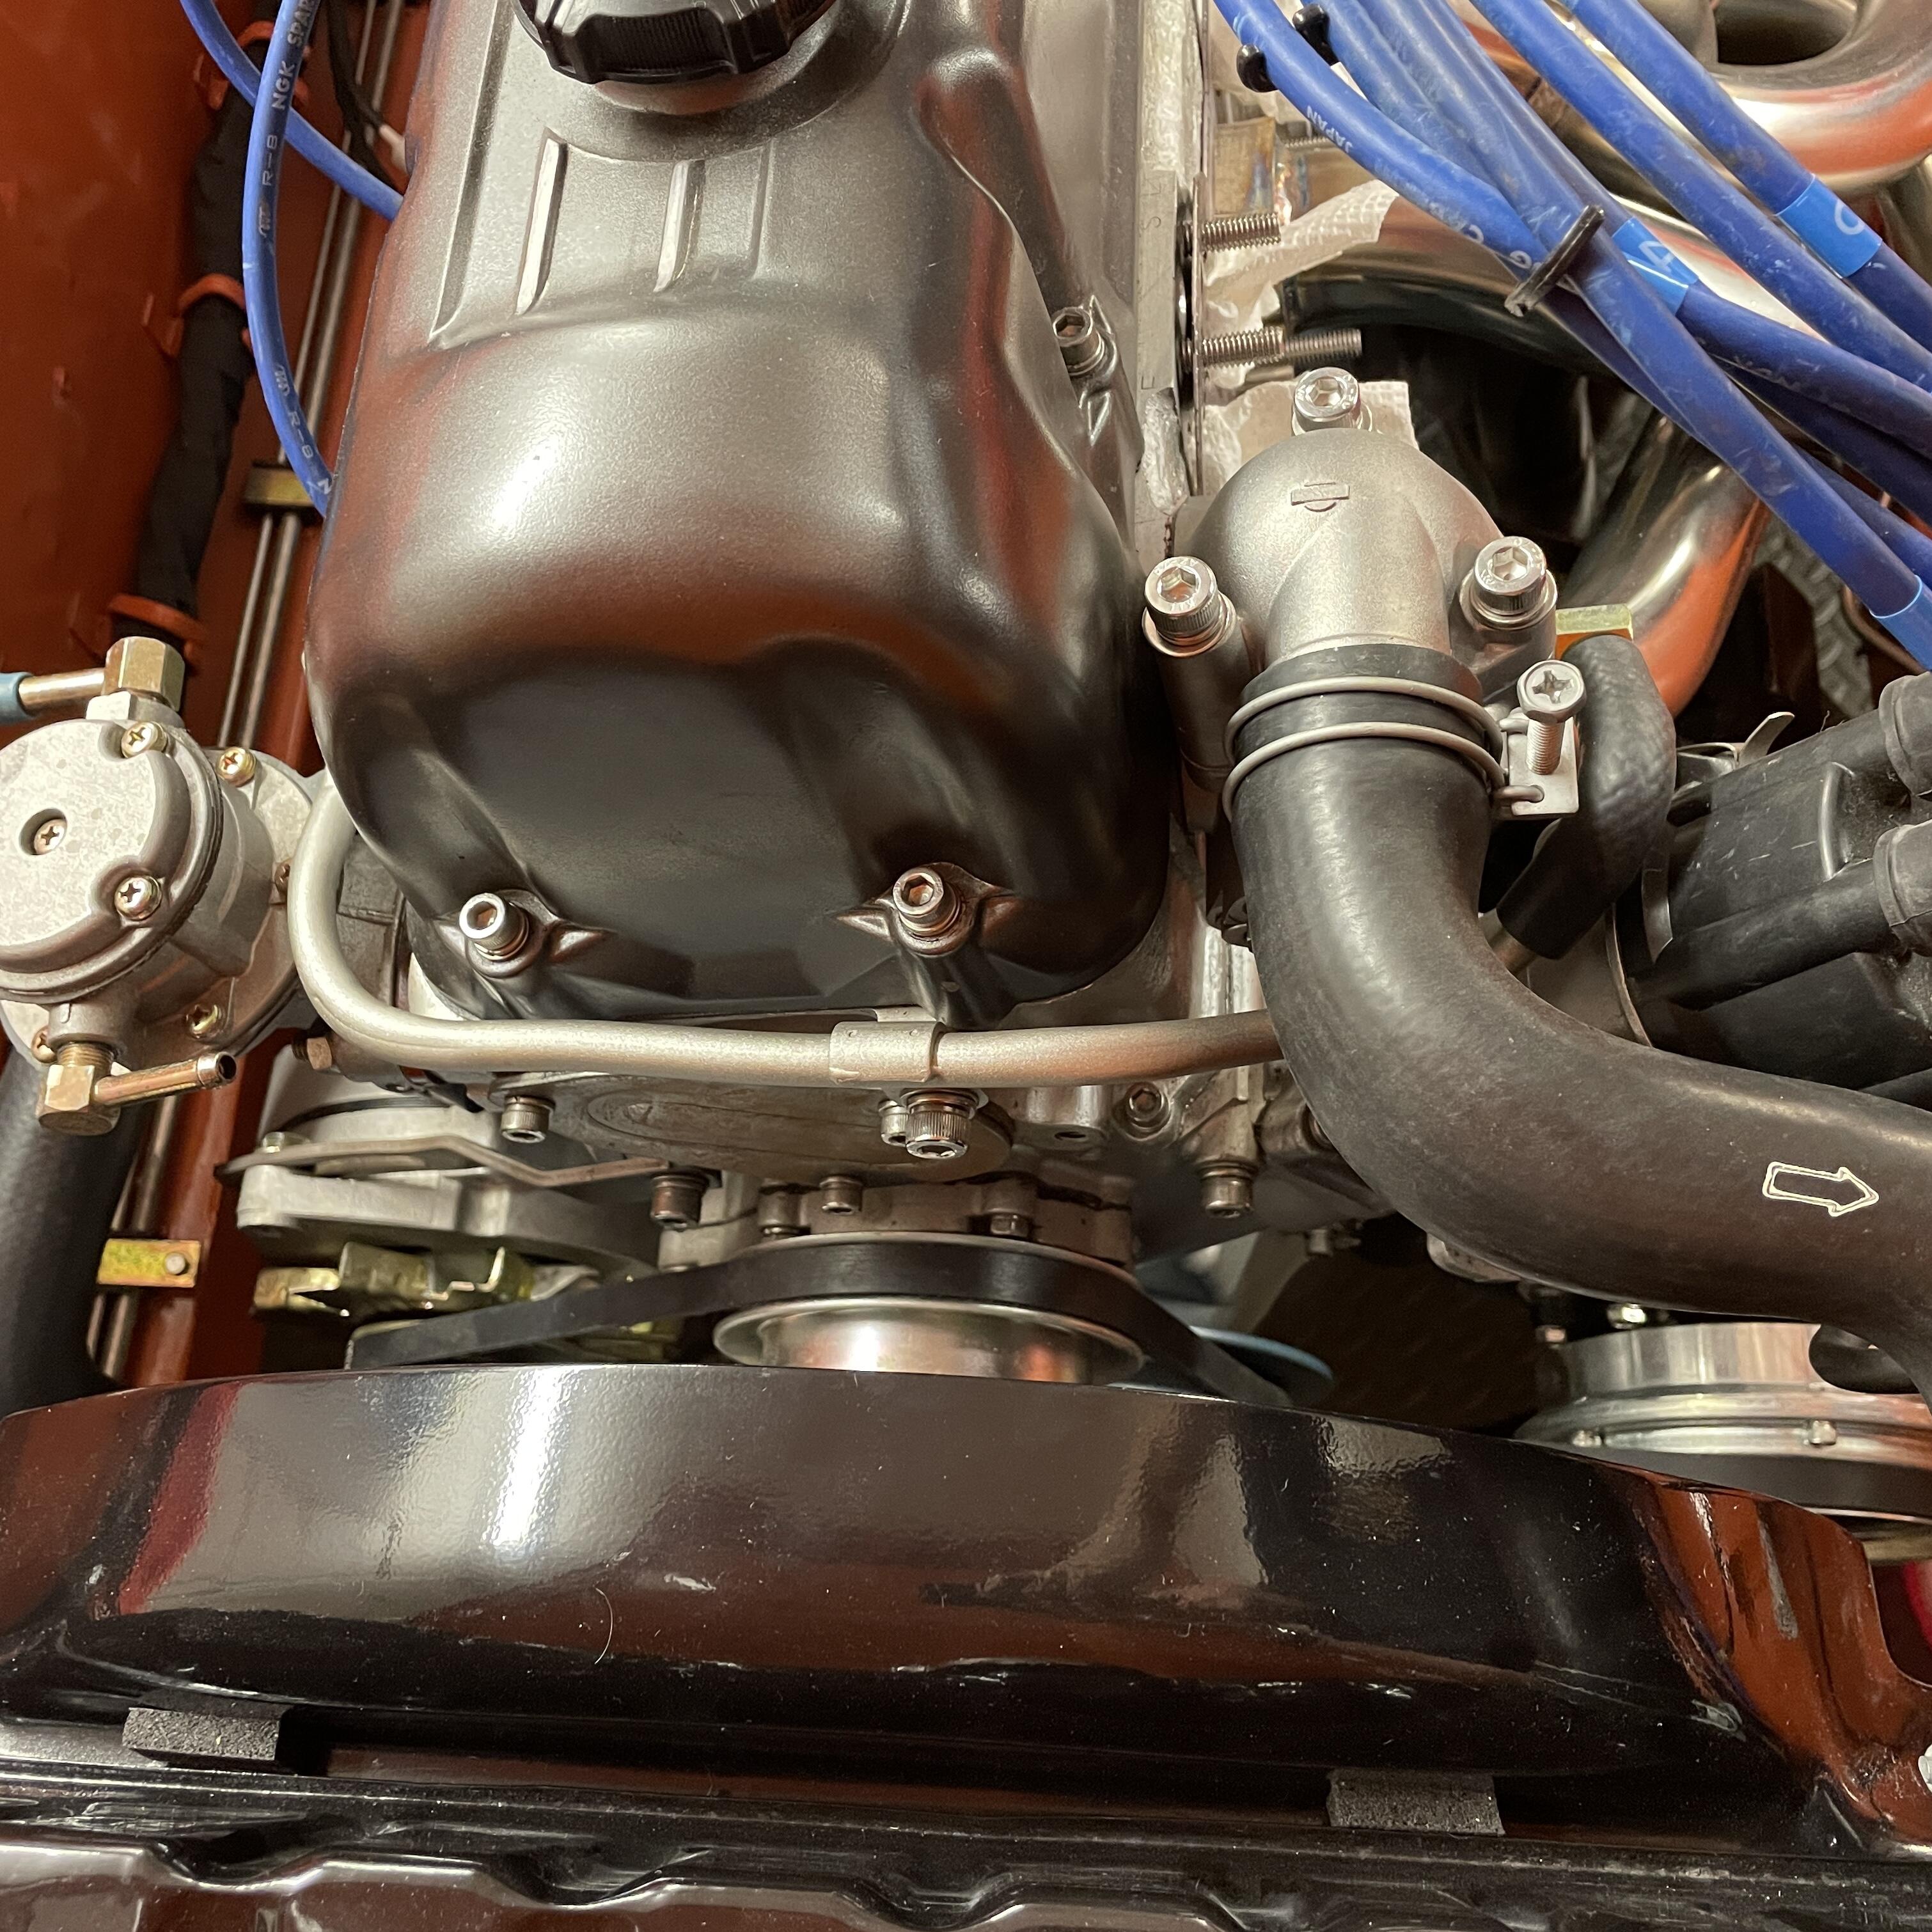
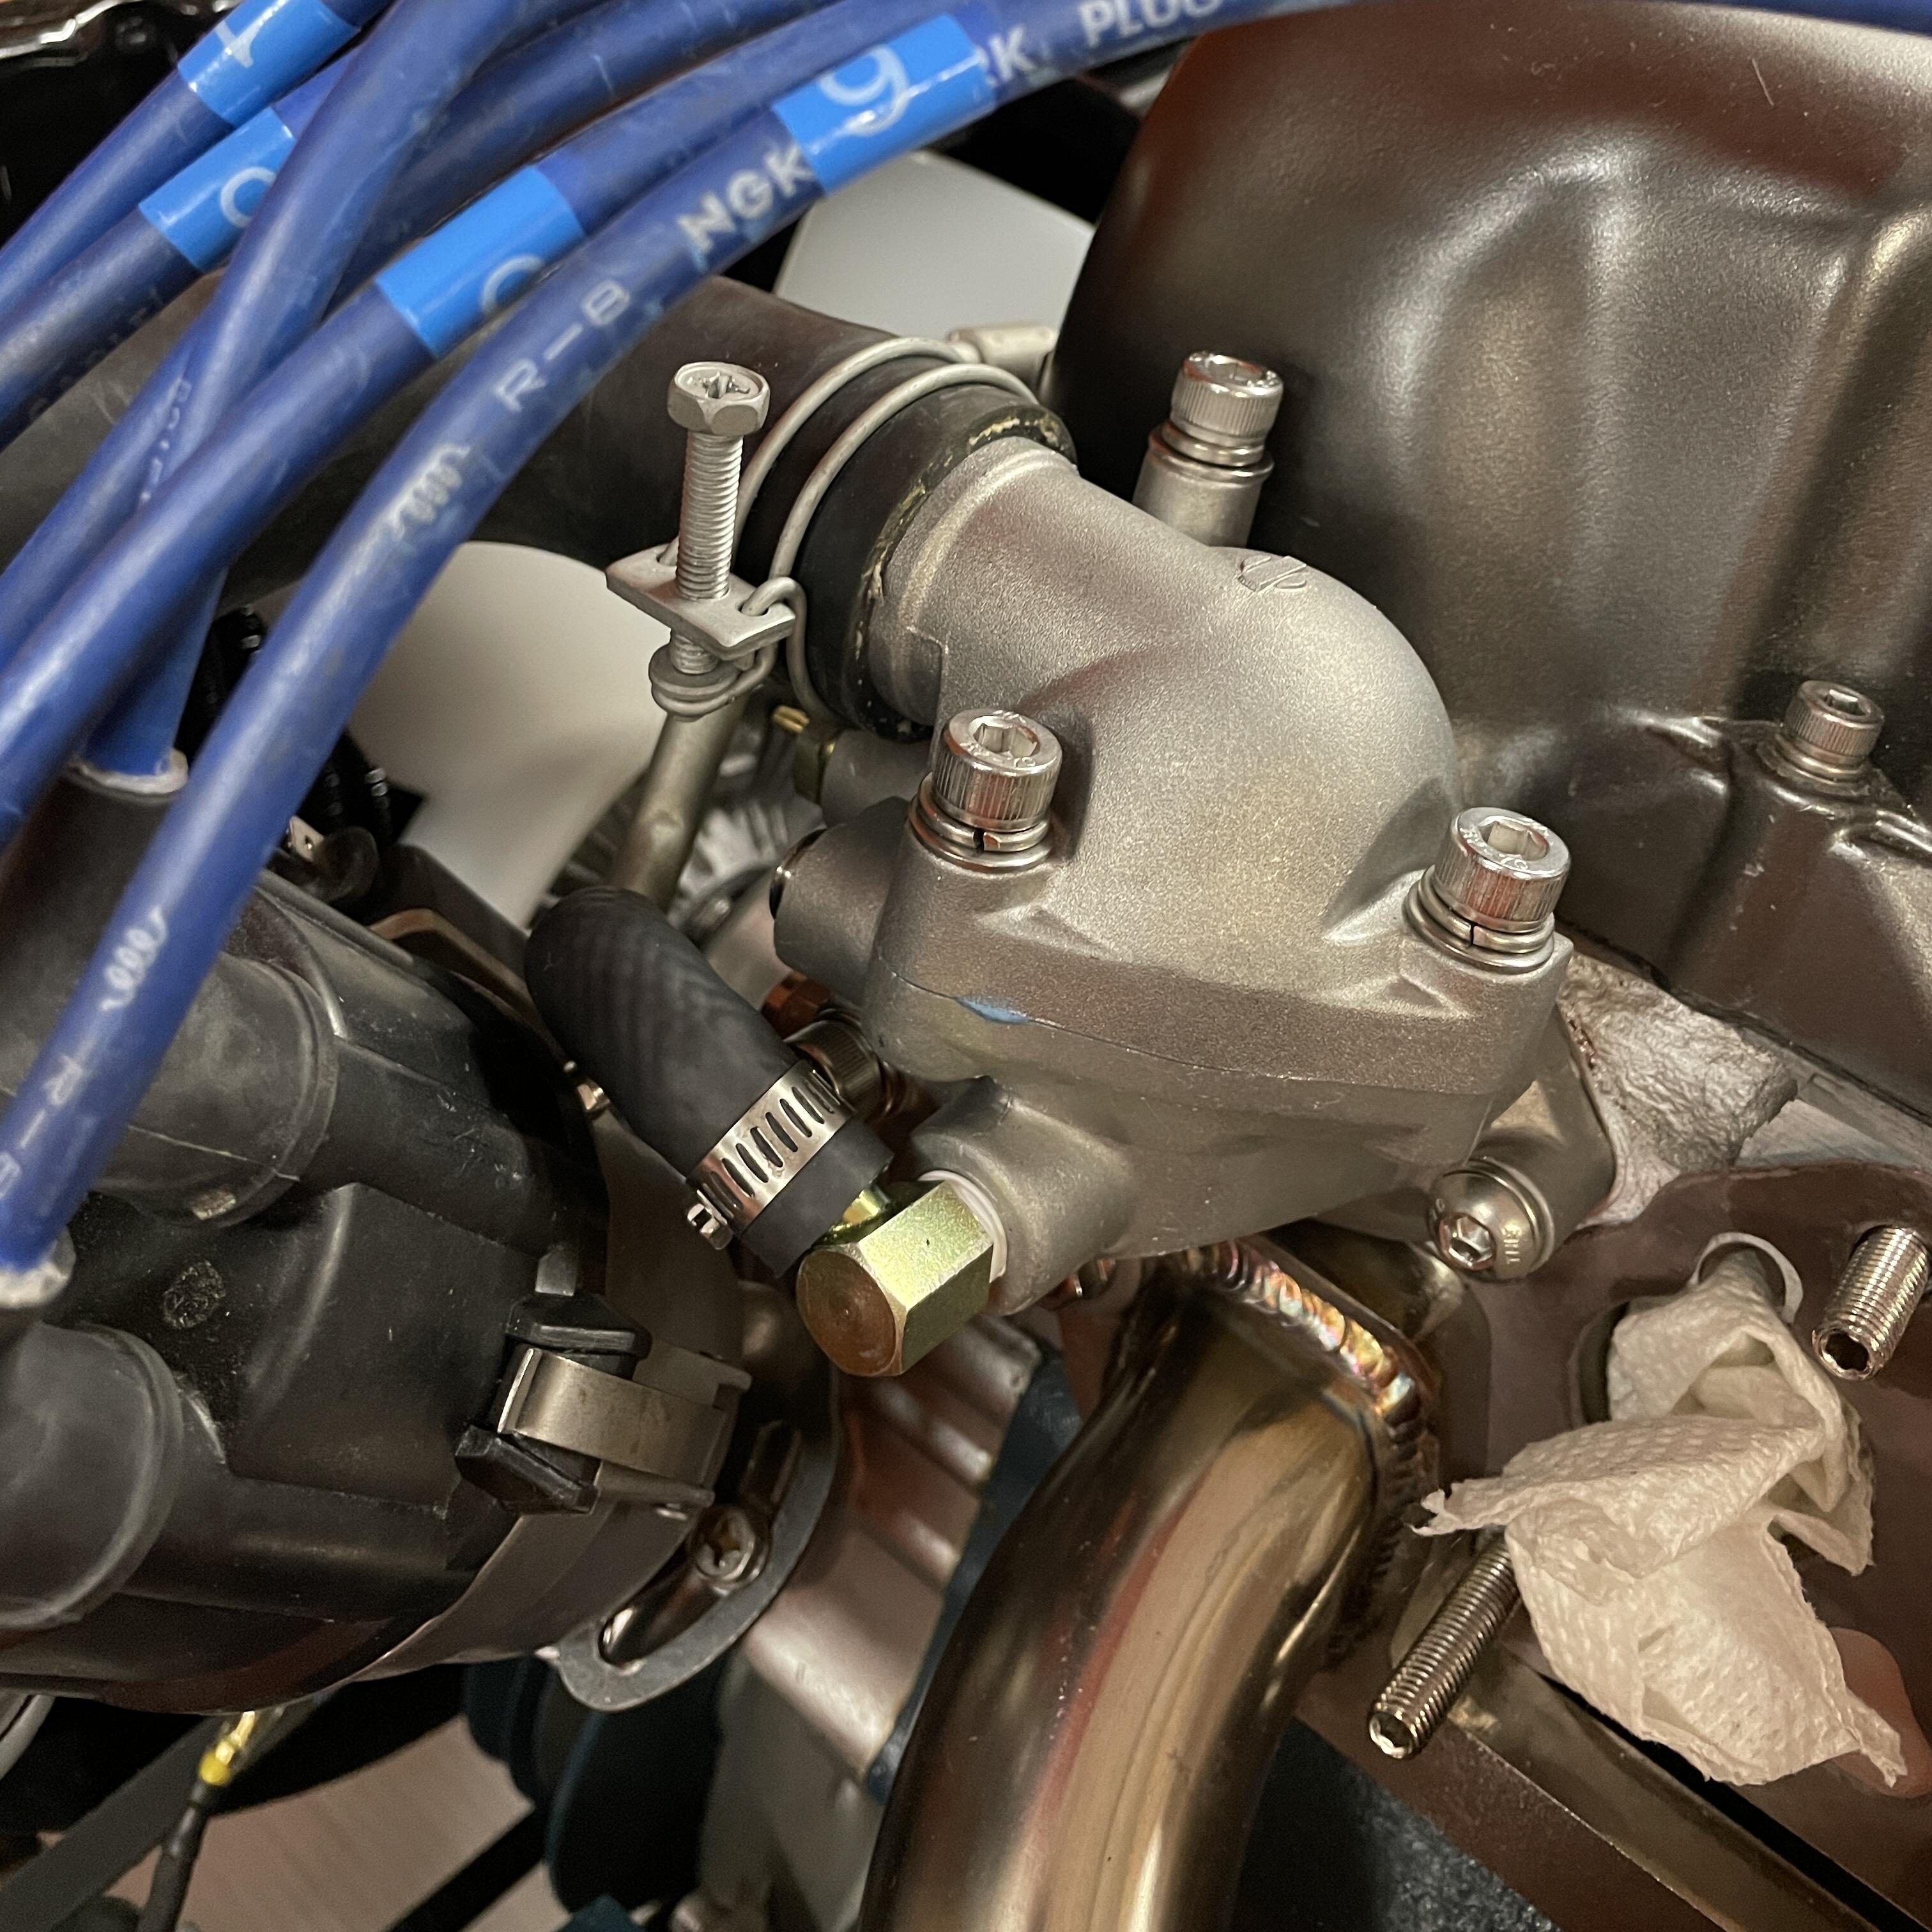
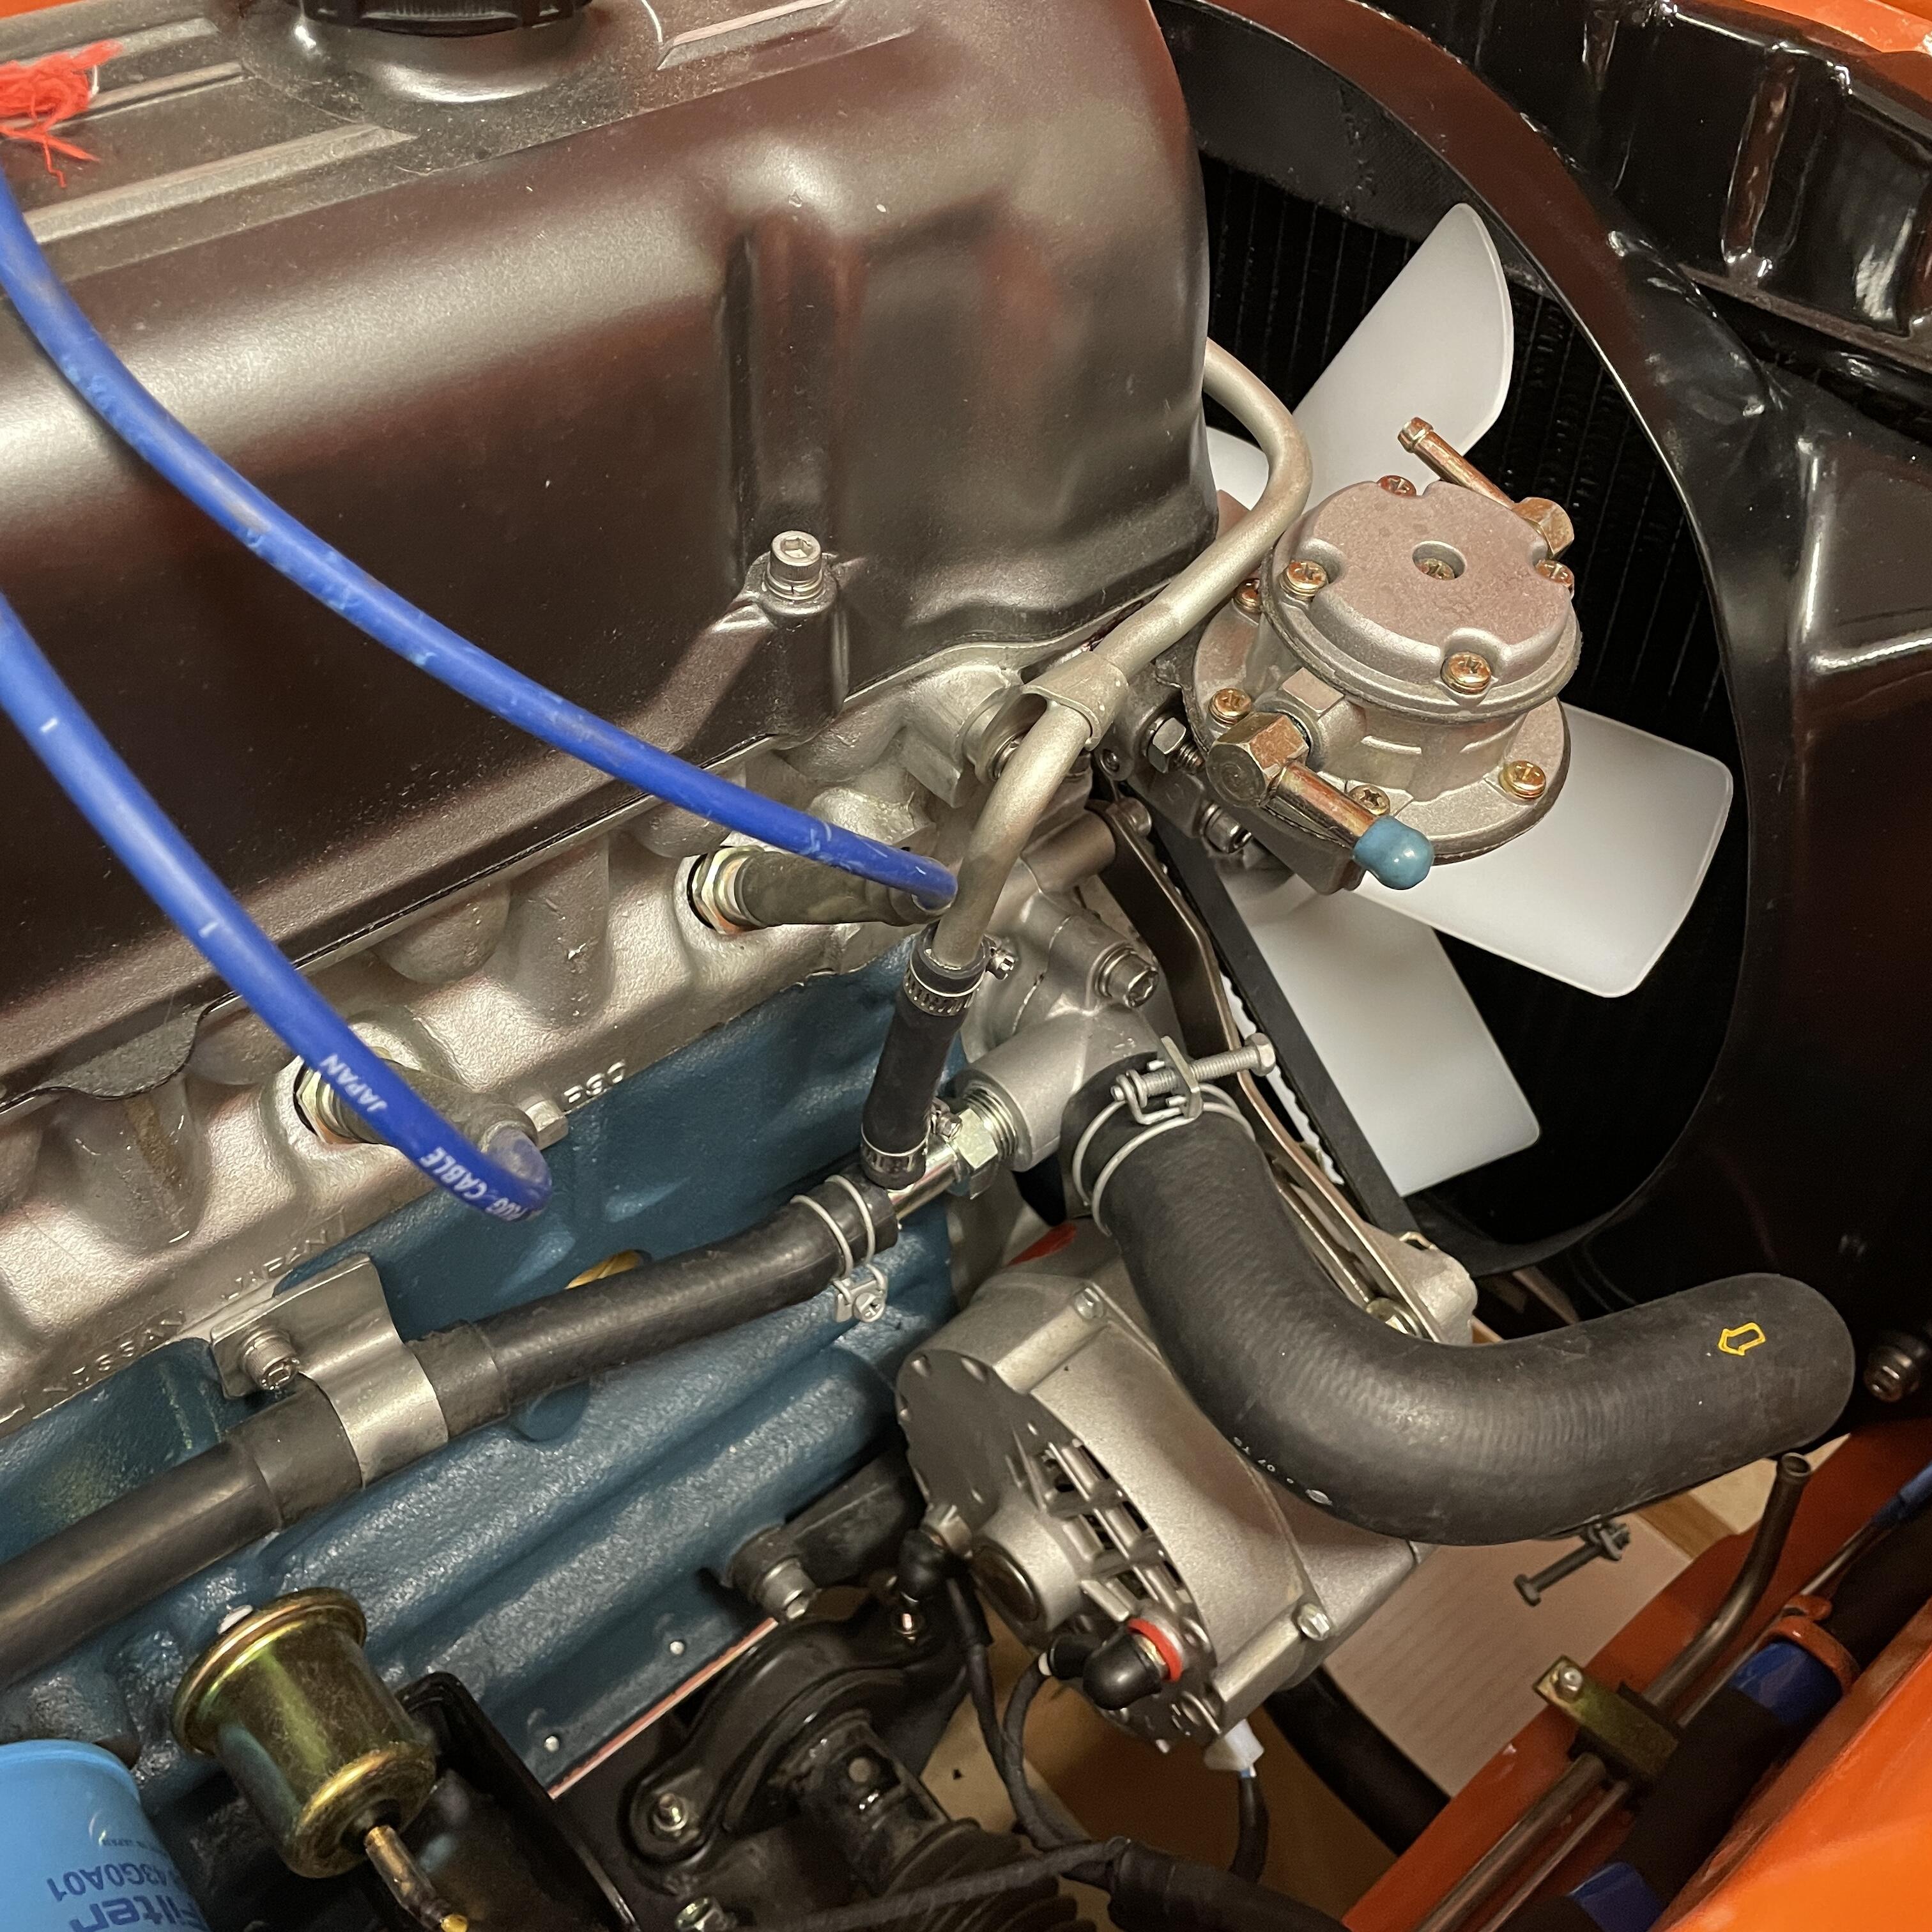
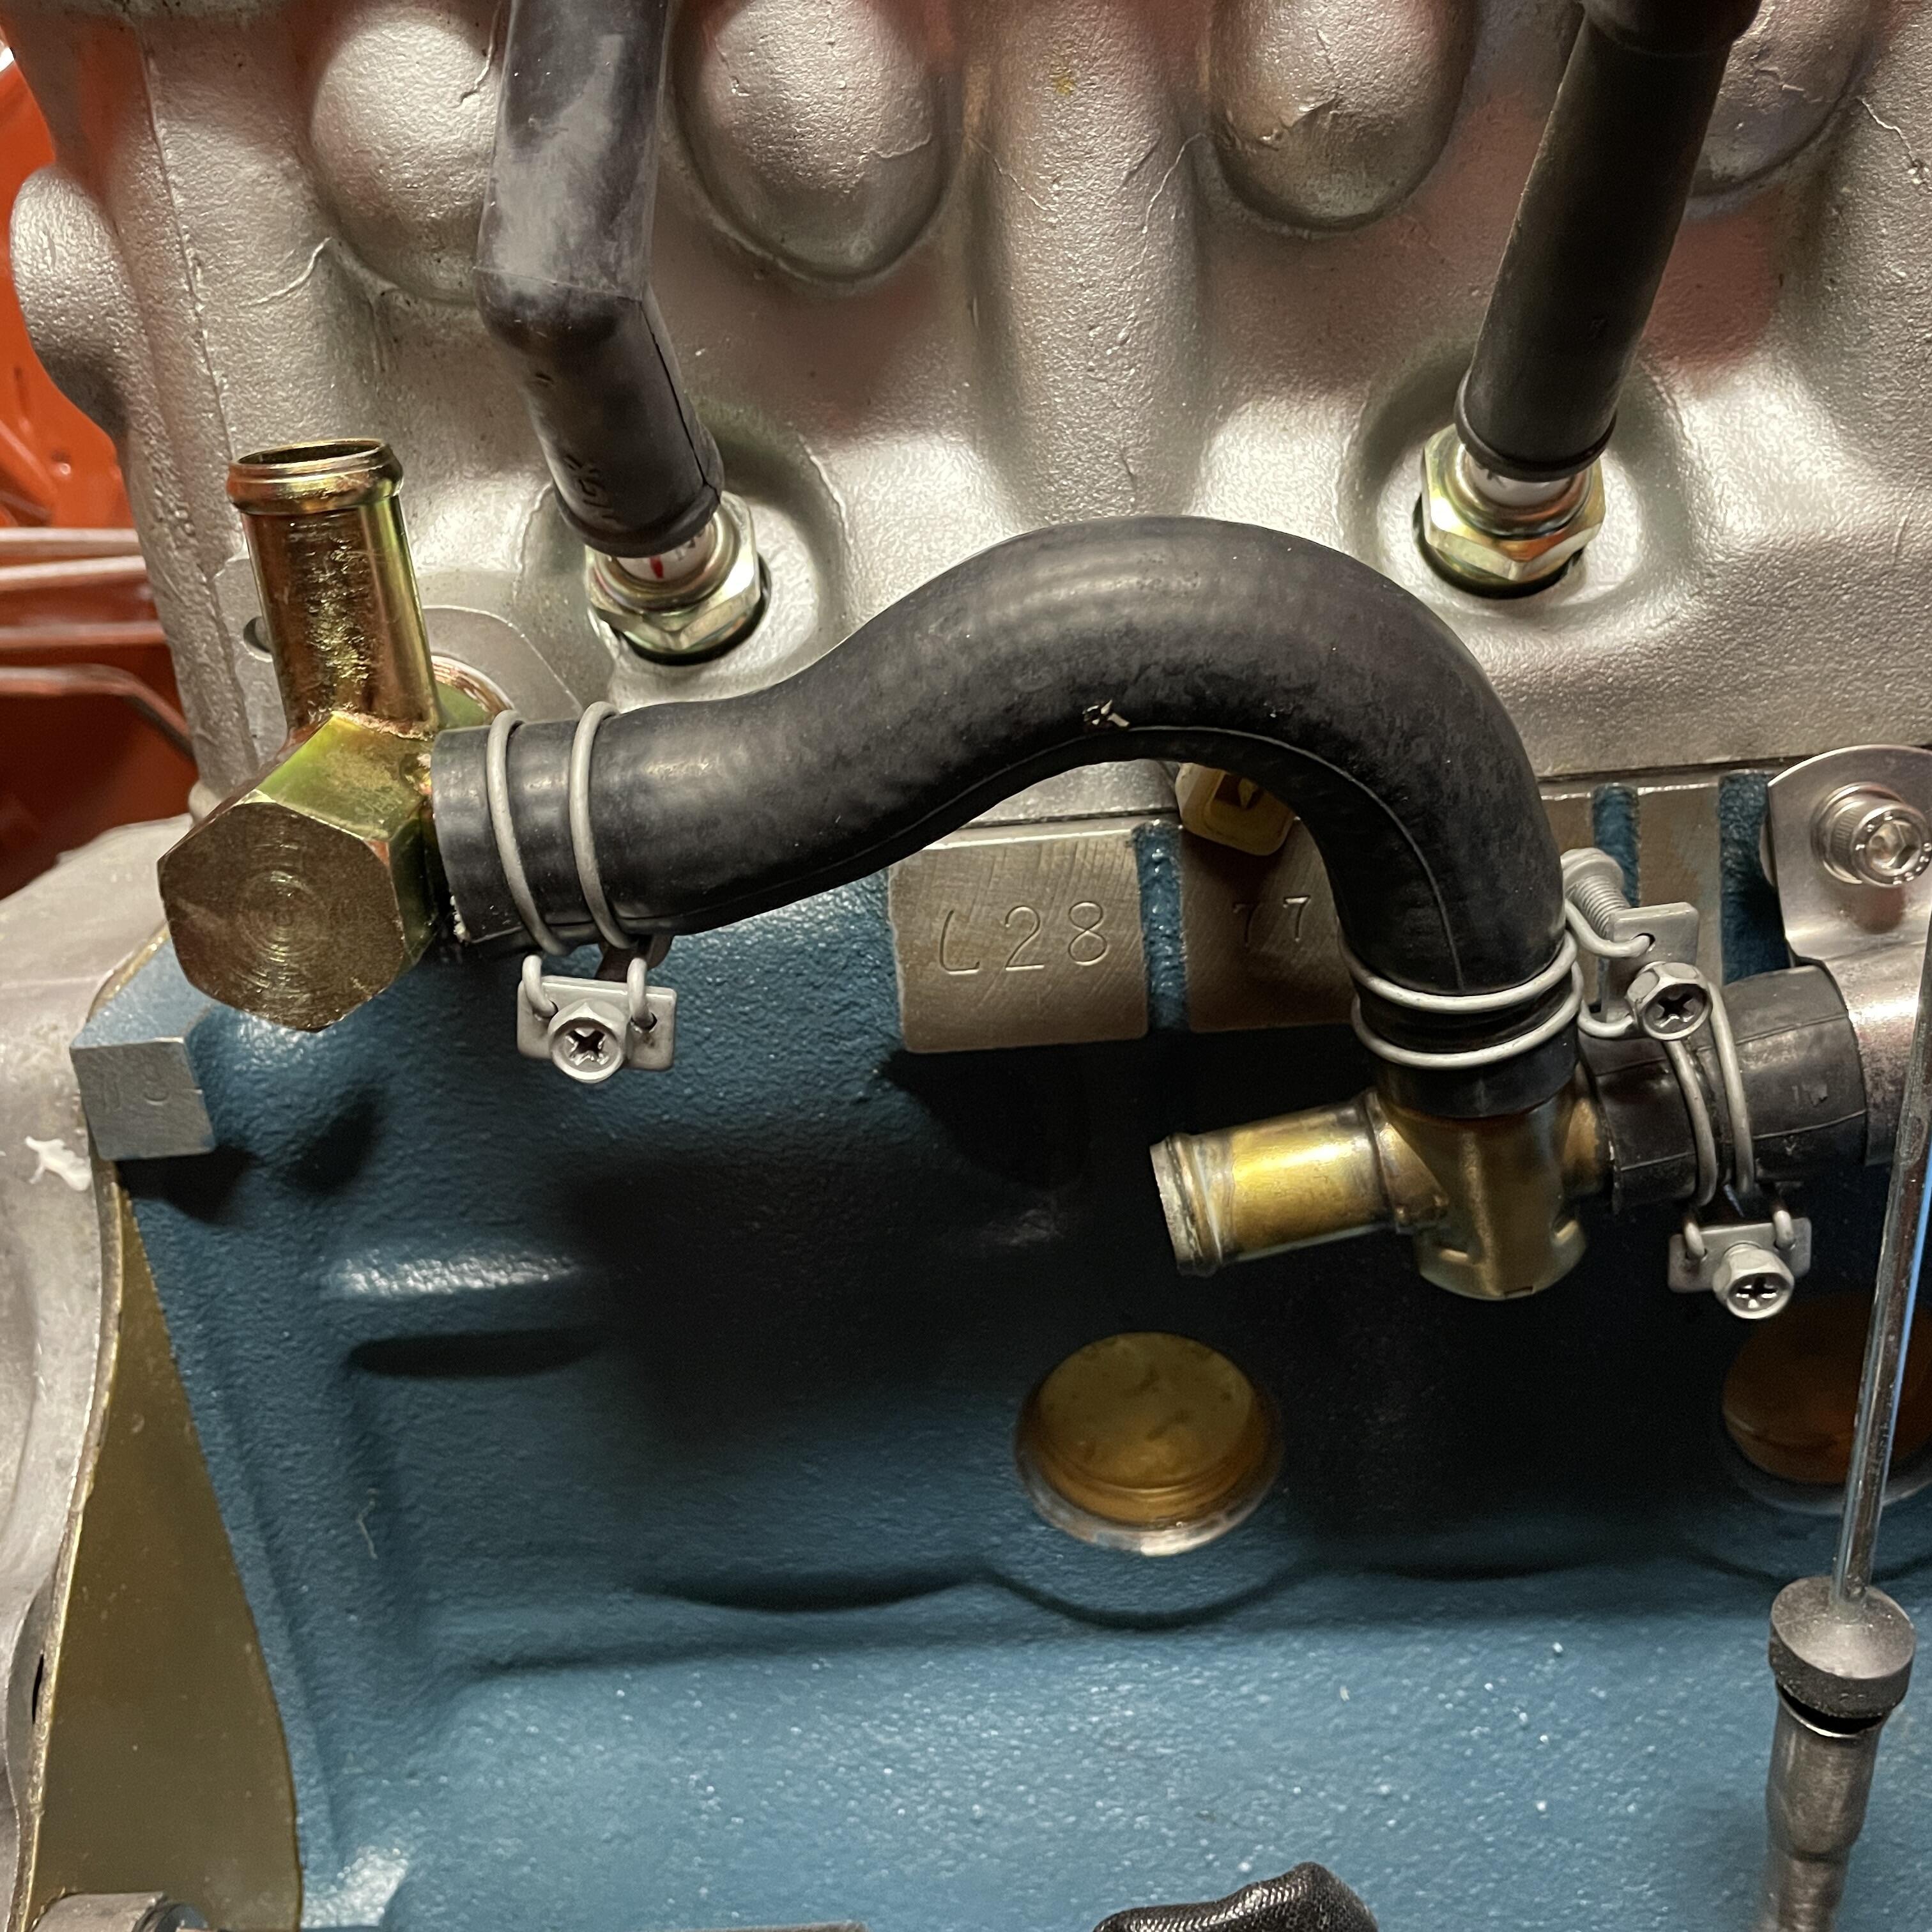
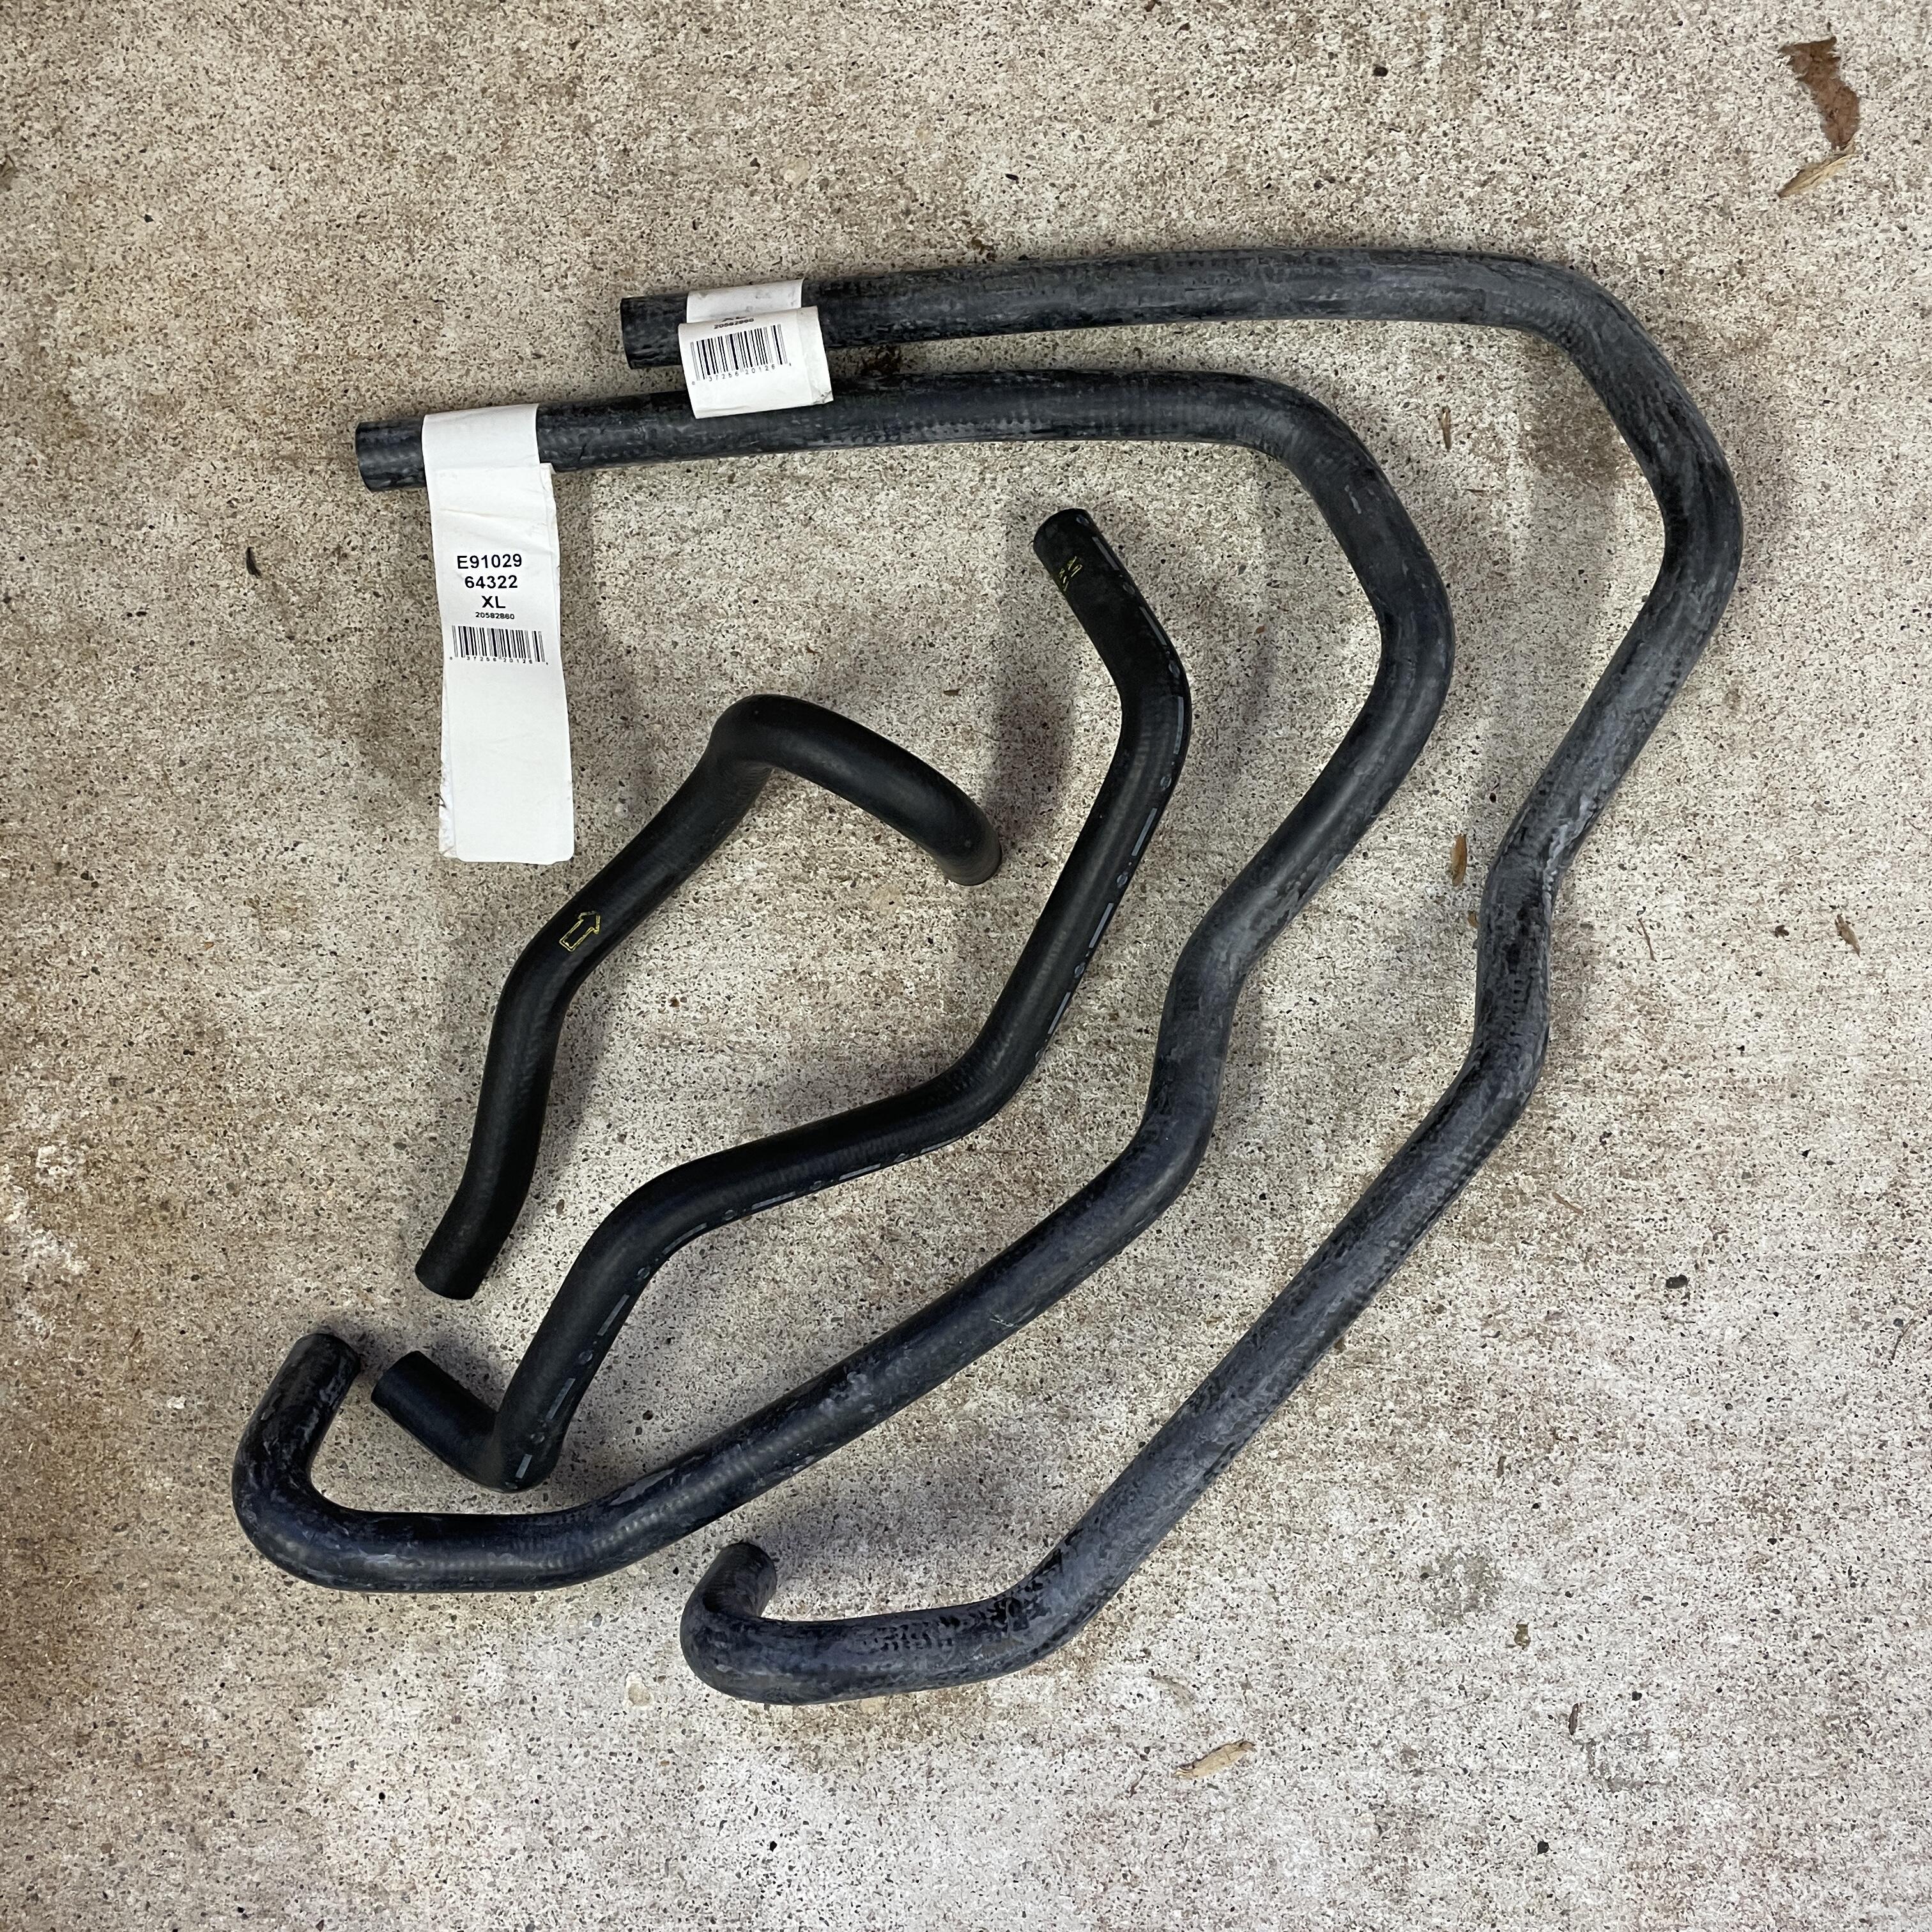
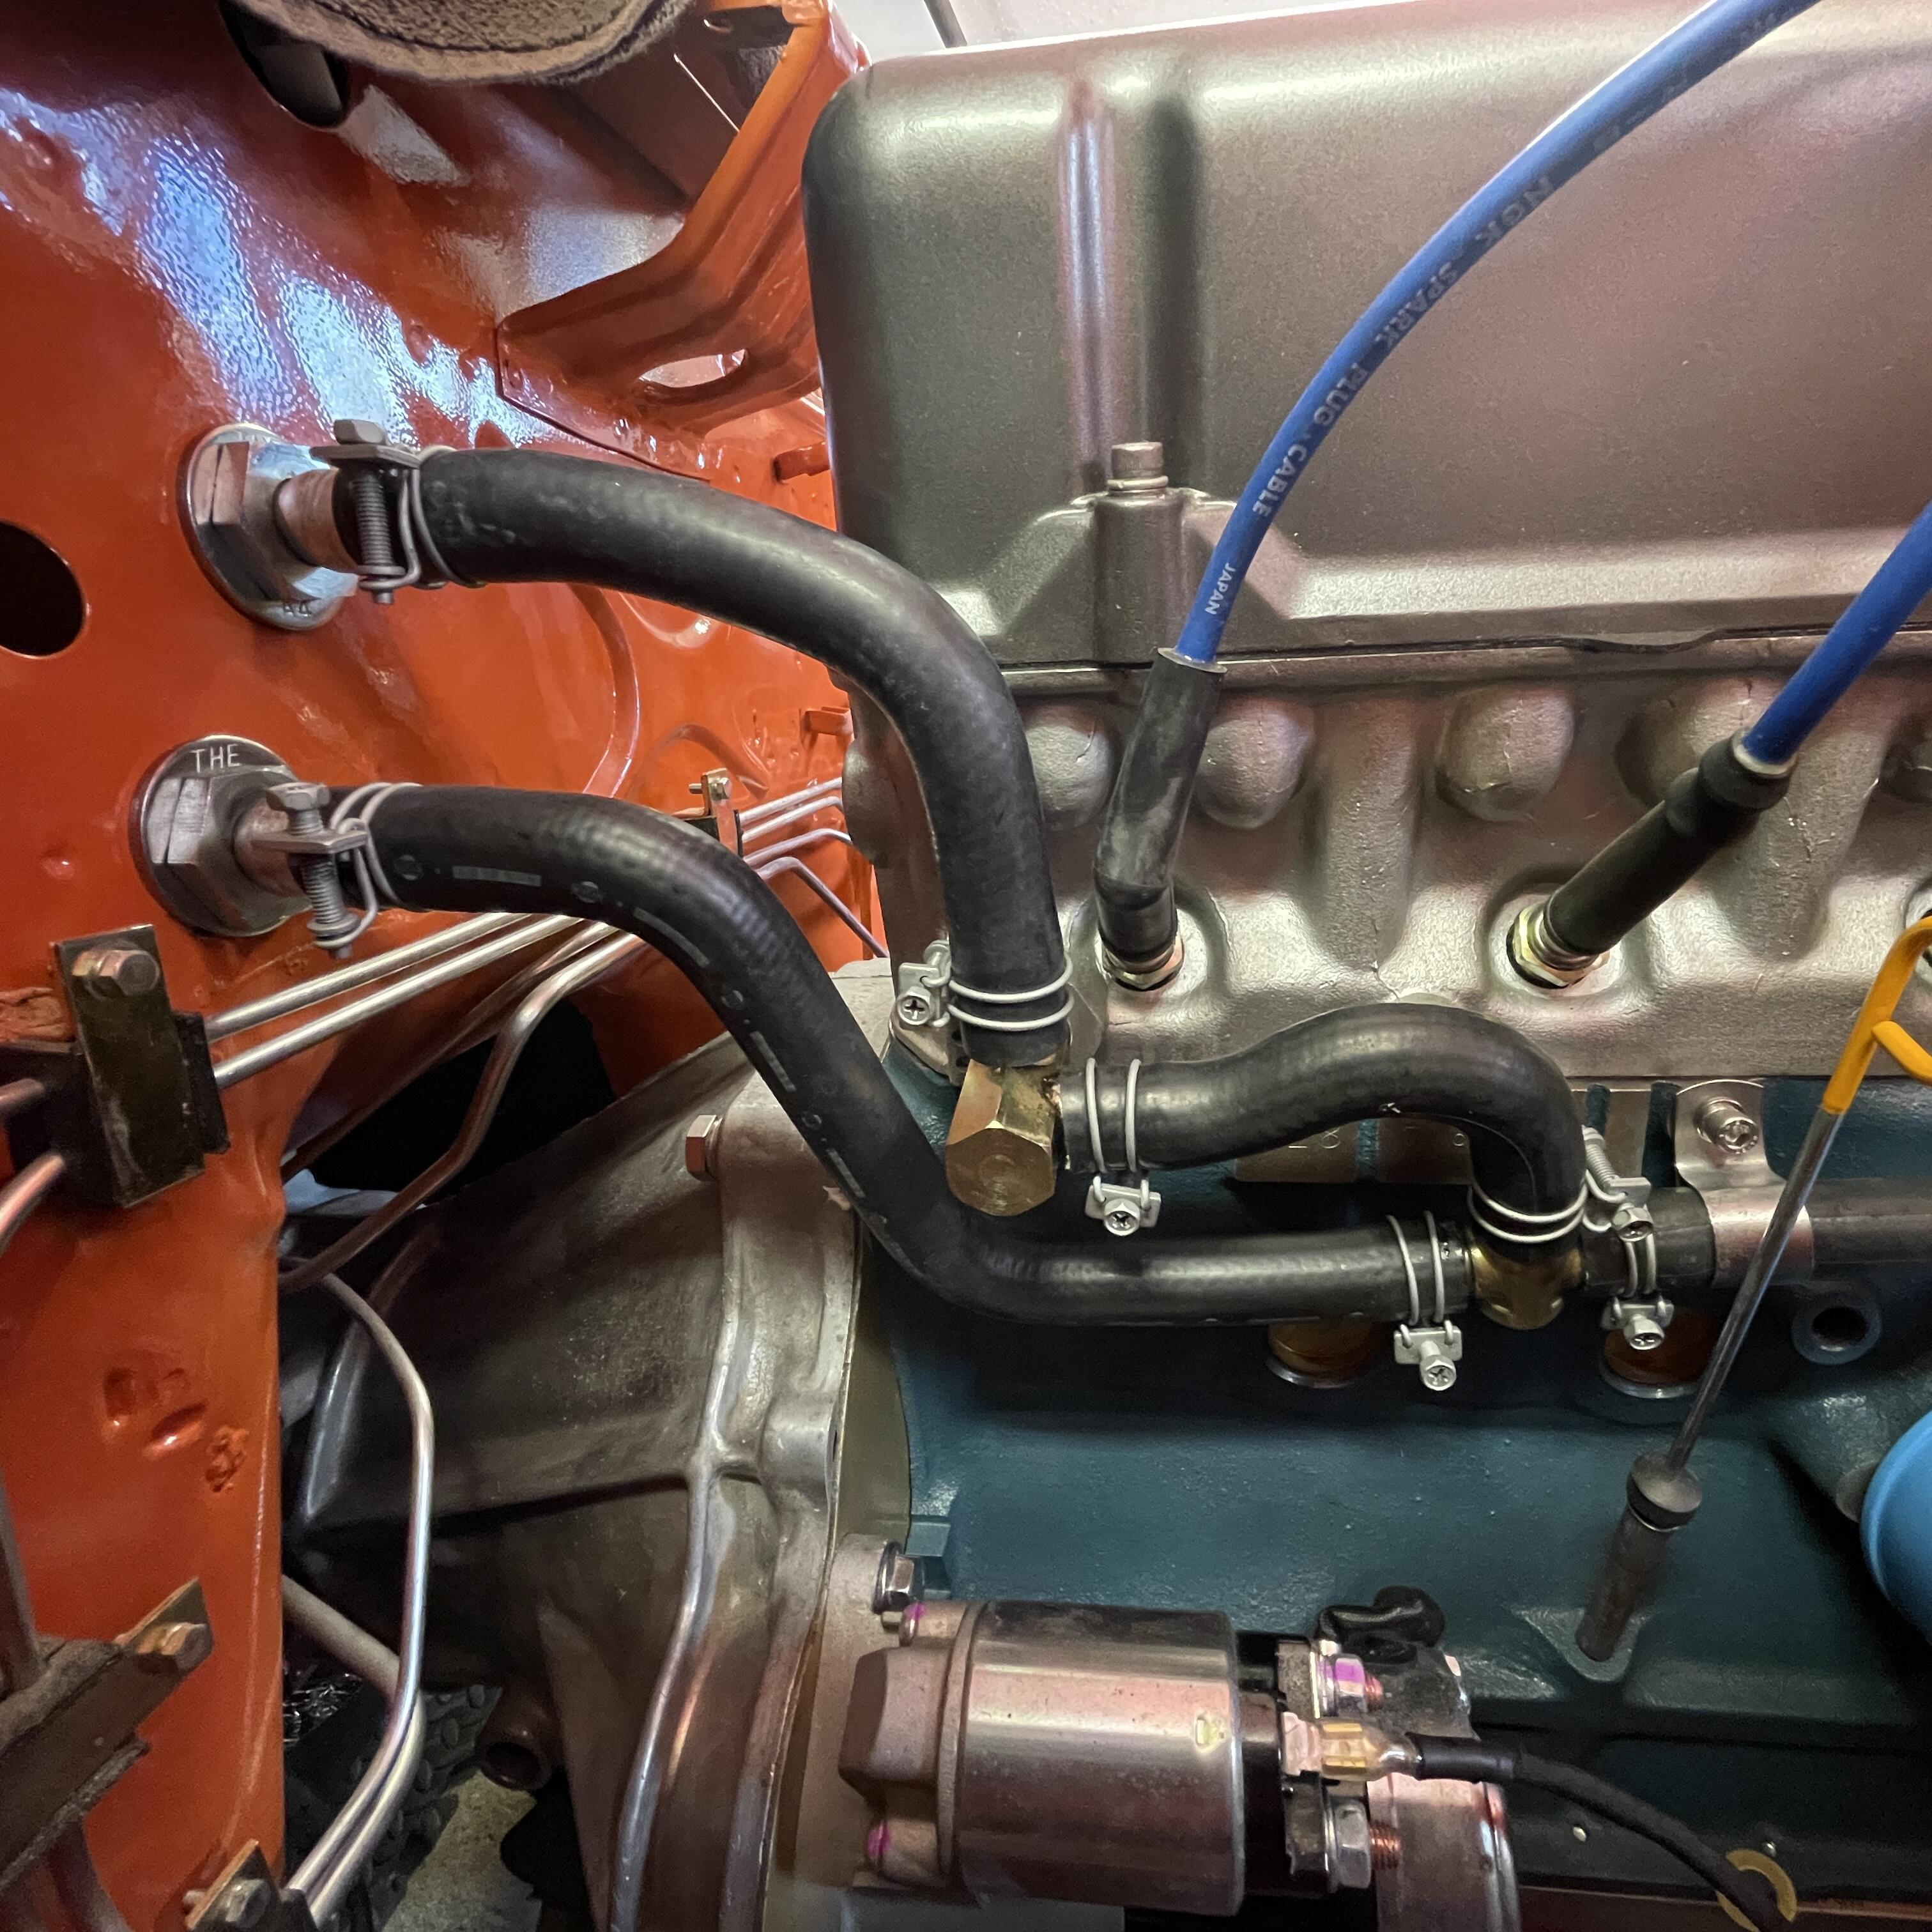
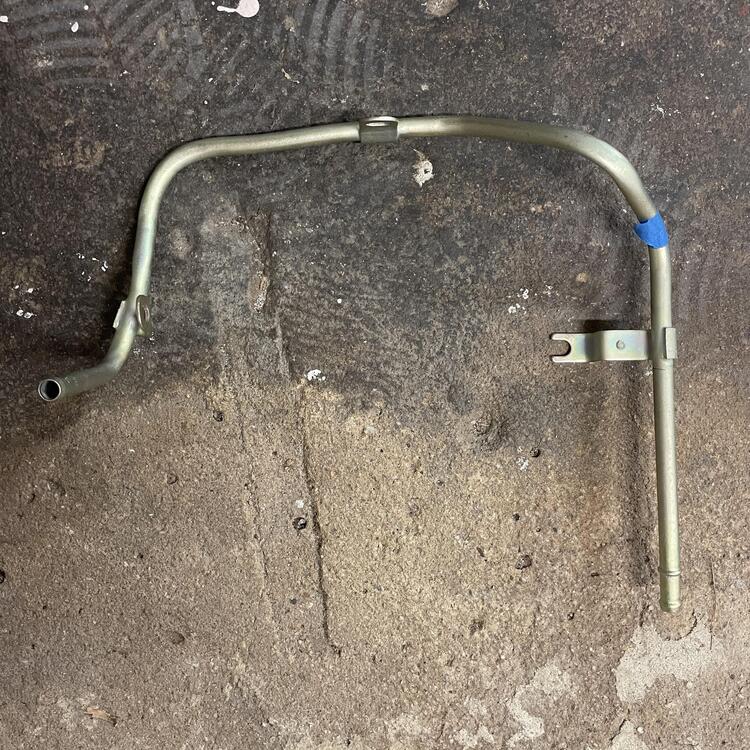
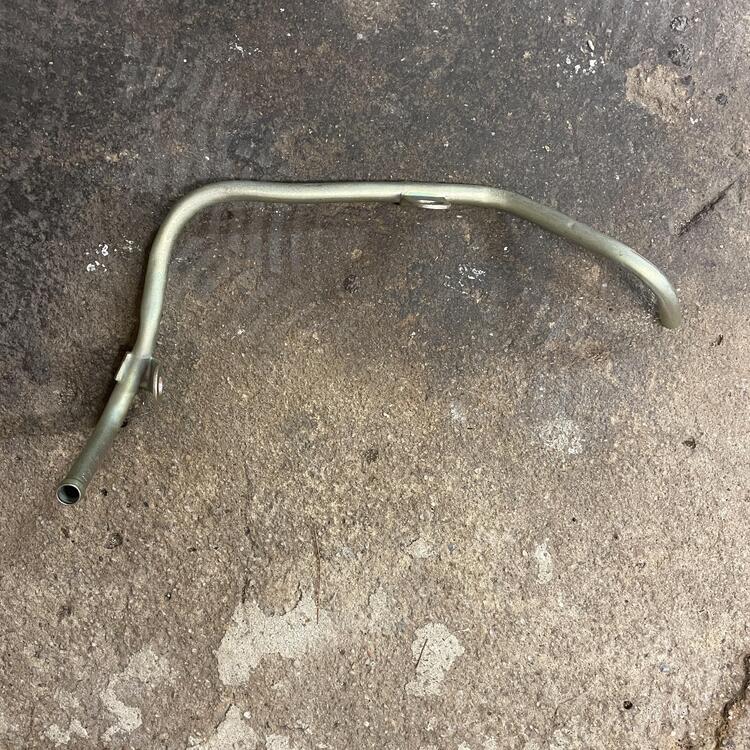
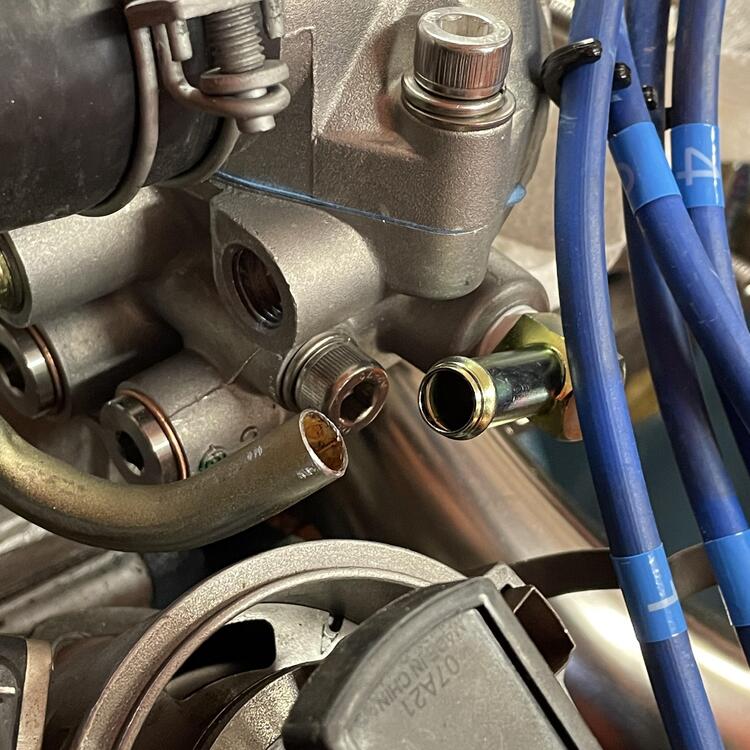
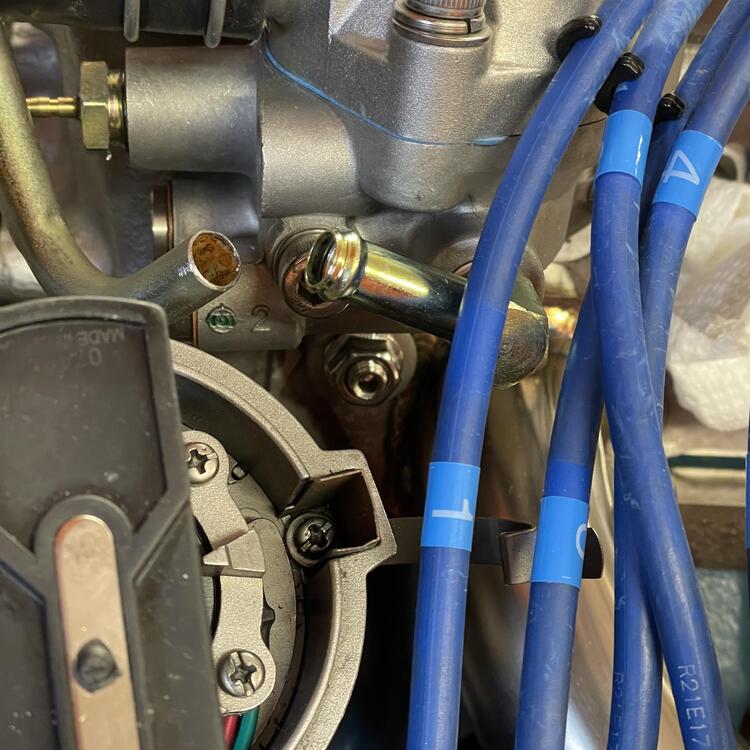
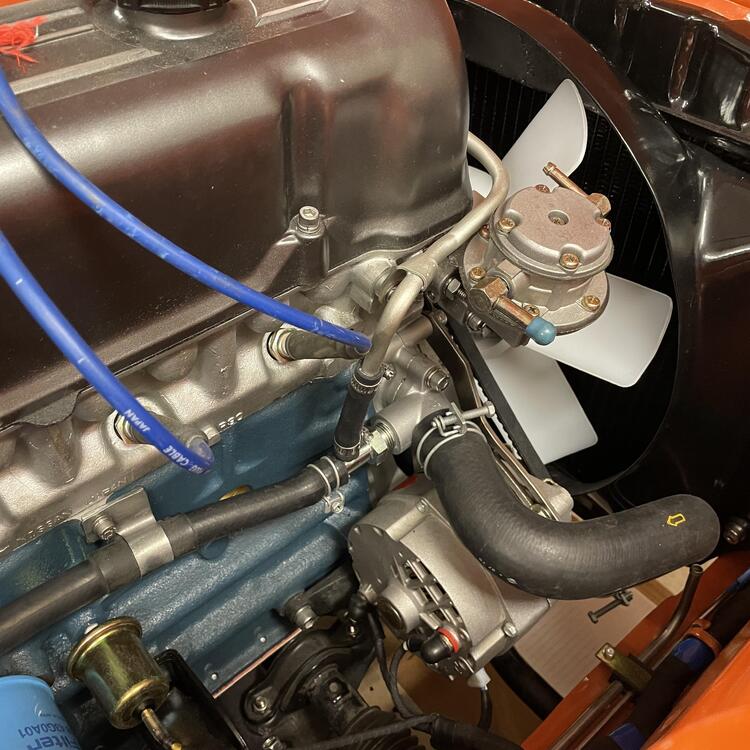
3 pointsI took a break from the car to do some self care and get my mind in order by getting my tools in order. I bought myself a few packs of Toolbox Widget organizers, and so far they are doing the job. The box doesn’t hold quite as much now, but I also don’t have wrenches and sockets sliding around all over the place and piled up on top of each other. Putting a layer of anti-slip foam on the bottom first really helps it feel slick. Not sure how I’m going to keep the dust out, though. … So you may remember that I was having a hard time adapting the 240z coolant routing to having Mikuni triples because that eliminates the carburetor warming channel that connects the bypass tube to the thermostat housing. I had experimented with just running a stainless steel tube in place of that system, but it fouled the manifold and front carburetor. After much back and forth with various thermostat housings I found that the early ZX housing is the one I wanted. It has many extra ports, but these can be plugged with various fittings. The hardest one to find is the 1/4” BSPT, but McMastercarr had them. Next I tried a few different Nissan fittings that are 1/4” BSPT male to a 3/8” hose barb. I found the 105° angled one to work best for clearing the distributor. Then I found a 280zx bypass tube, which more or less mounts right up, but because it is meant for the fuel injection system I had to remove approx. 9” from the side that wraps around the thermostat and put a new bead at the point where I cut it. It also needed some spacers to change the geometry and allow it to clear the temperature sensor and point the tube at the 3/8” fitting mentioned above. After that I needed a ZX water inlet with the 3/8” tube coming off the threaded adapter that connects to everything already discussed. That has a 5/8” tube pointing back to the heater hoses, so I had to replace all of my 3/4” hose. It also meant going full ZX with all of the fittings and getting rid of the 240z y-pipe. I had to find a coolant regulator/check valve, which is nearly a unicorn part. I know seller with some that are NOS in the box, and normally I wouldn’t go with used parts on a fresh engine build, but I’m not paying $175 plus shipping for something I can get for $30 in good used condition and is essentially just a 3/8” tee with a check valve. The coolant system is now closed. After much trial and error and purchasing too much hose, I have the whole system plumbed and clamped. I only used one of the OEM 240z hoses, and I cut it down significantly. They wouldn’t have worked at all with the Vintage Air system I have, so I put a pair of their bulkhead barb to threaded fittings coupled to their 90° barb fittings. I bought a pair of Continental hoses with a bunch of turns from Summit Racing, which allowed me to keep everything under the dash pretty snug. I was worried I would need to make a bracket for the heater control valve, but it’s floating pretty far from everything so it should touch anything even with a huge amount of vibration. So now I just need to check all my fasteners and get a radiator overflow tank. Next is decide whether to move on to the fuel system or put the AC lines in.


 3 points
 -
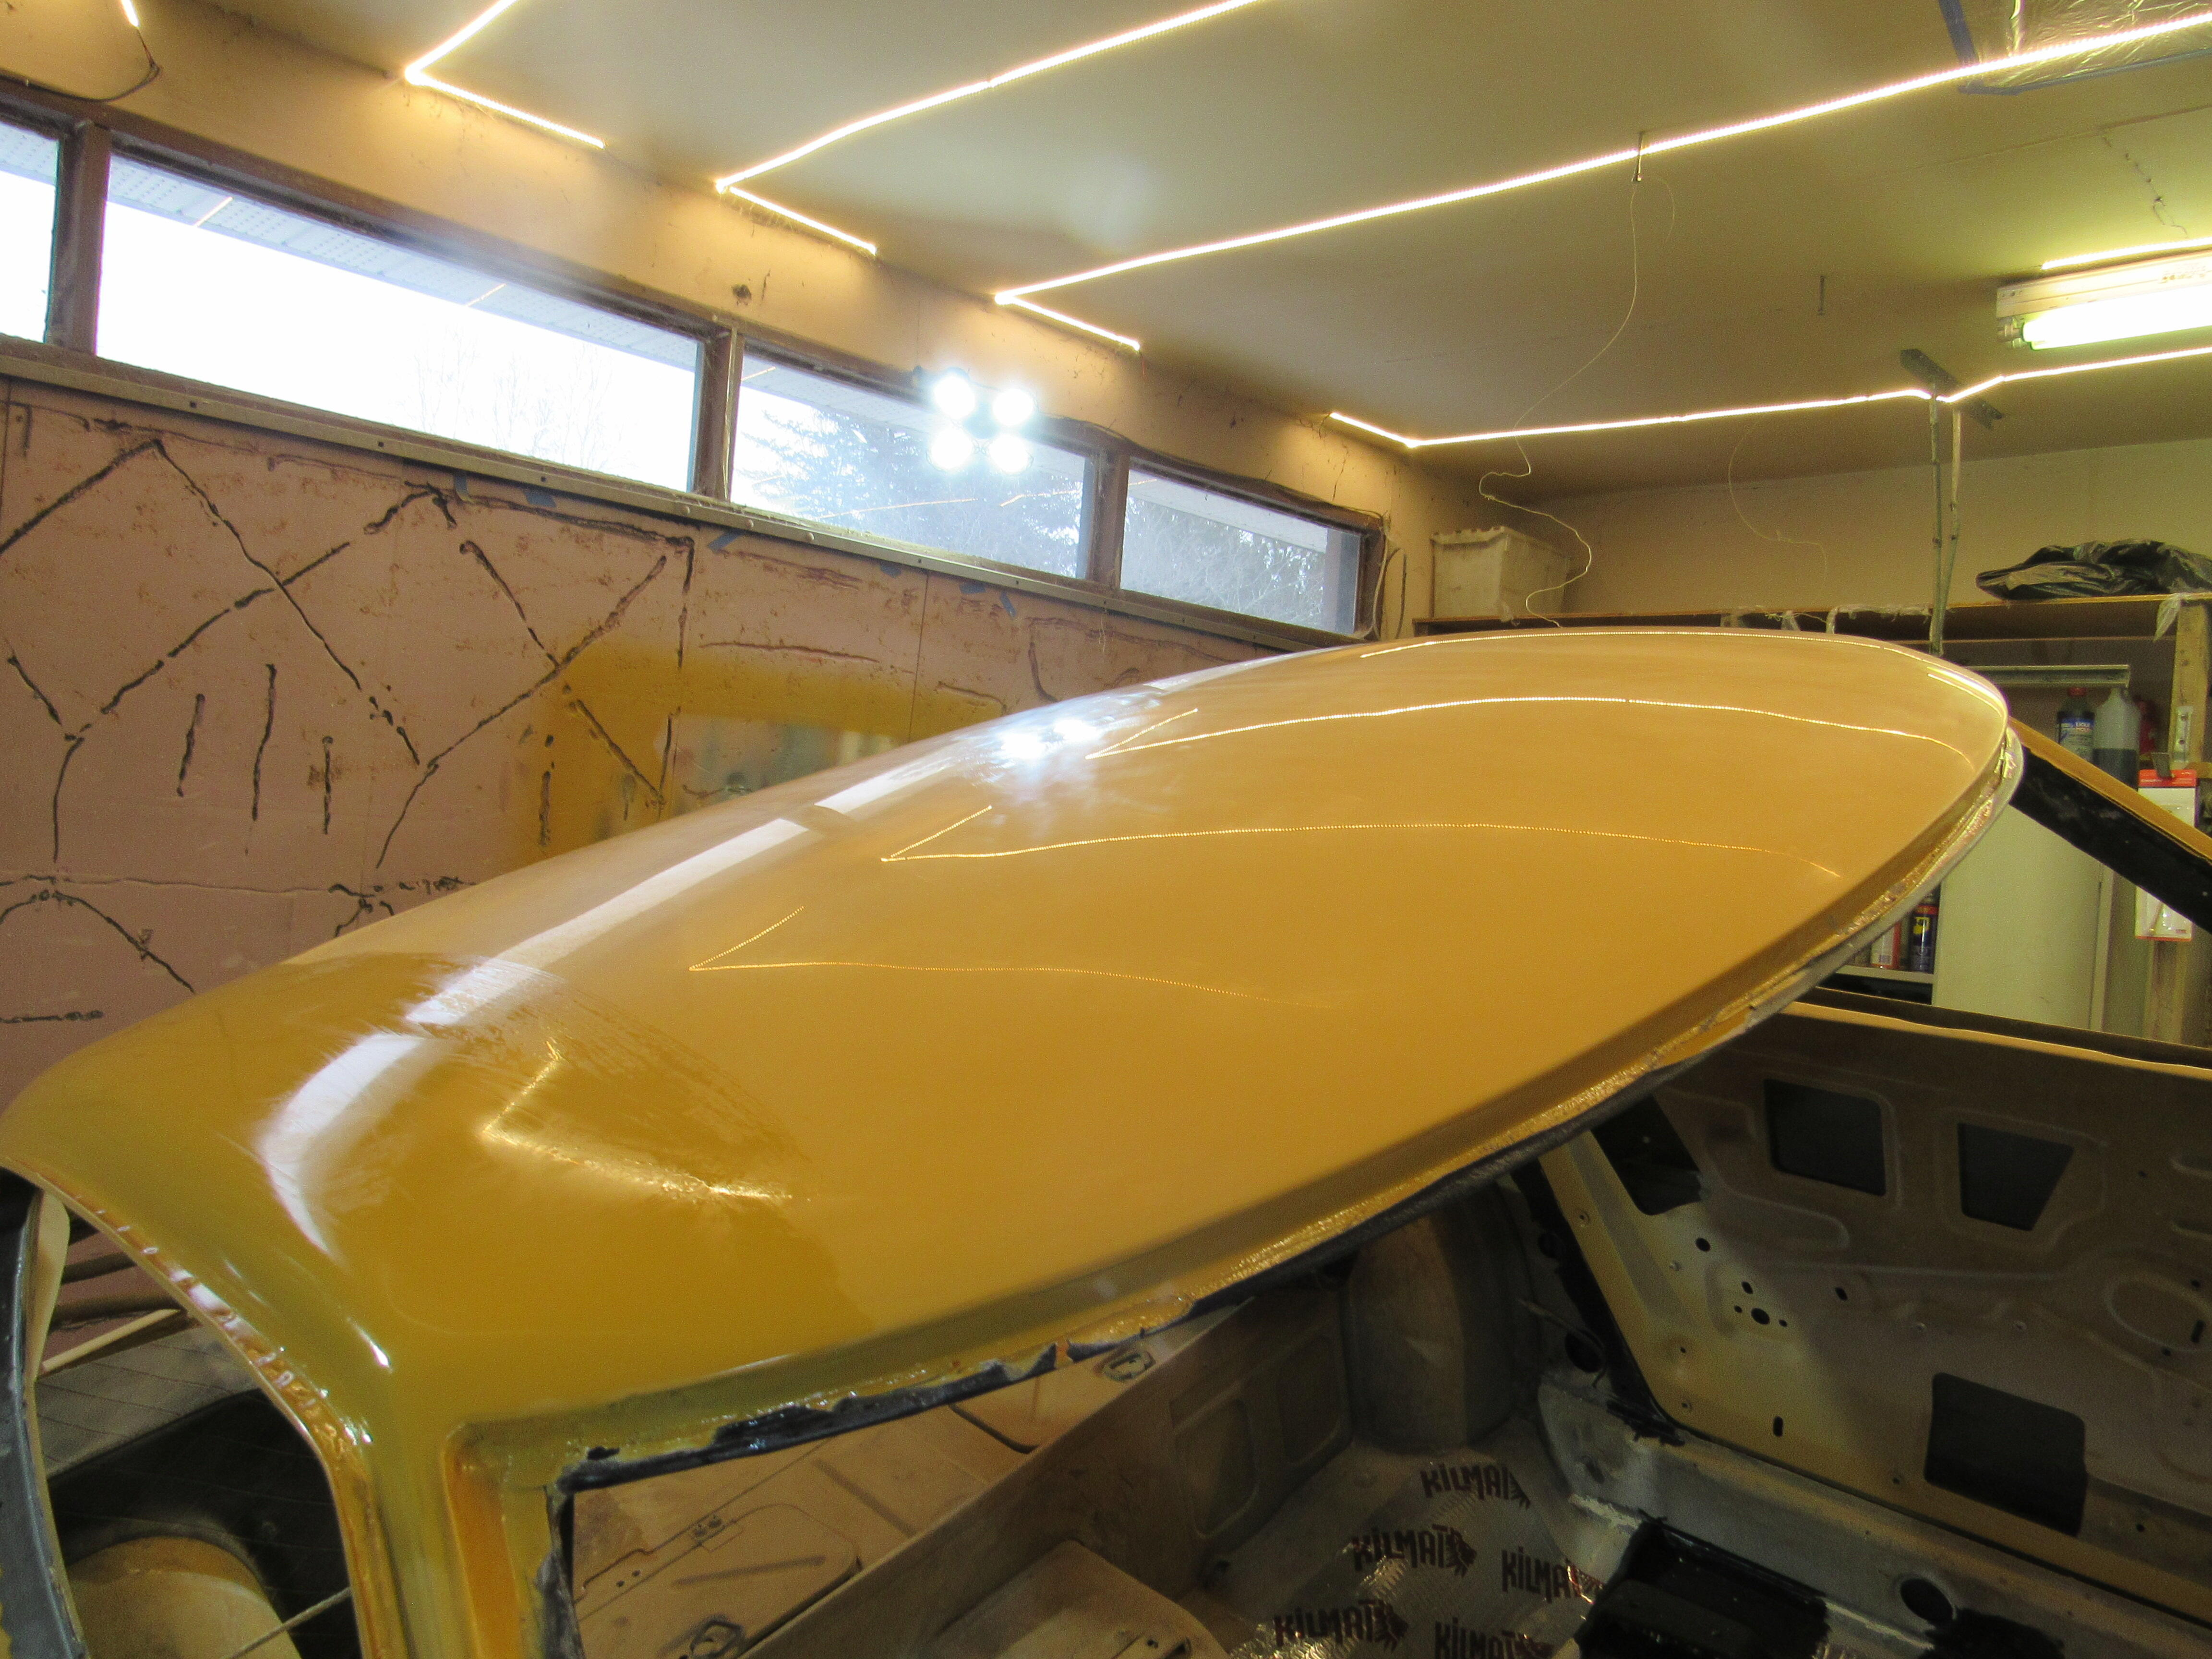
2 pointsCompleted 1500 grit yesterday, finished 2000 today and I'm all set up to start the final 2500 grit tomorrow morning, do a super clean up and with any luck I'll be buffing by Wednesday. These are pits that should have been sanded out with 1200 but some how got past me, I didn't notice them until I was into 1500. This is 2000, the shine is getting there. Even with guide coat it looks pretty good.


 2 points
 -
2 points
-
2 pointsThat’s funny and It’s true Bruce….except for laundry. There is no amount of training that will enable me to meet my wife’s laundry standards. It’s like quantum physics people claim they understand it but nobody really does.2 points
-
2 pointsA few more pictures. My lap belts dont have the clip for the shoulder belt and were on the car when I got it. They appear factory and have the factory seatbelt light plugs. I cant remember if the shoulder belts were on the car when I got it or if I had them as parts. Same with the luggage straps. One is longer than the other one. I had them in storage so who knows where they are from. Did early models without the storage bins have longer luggage straps?? I need to research belts and straps.


 2 points
 -
2 points
-
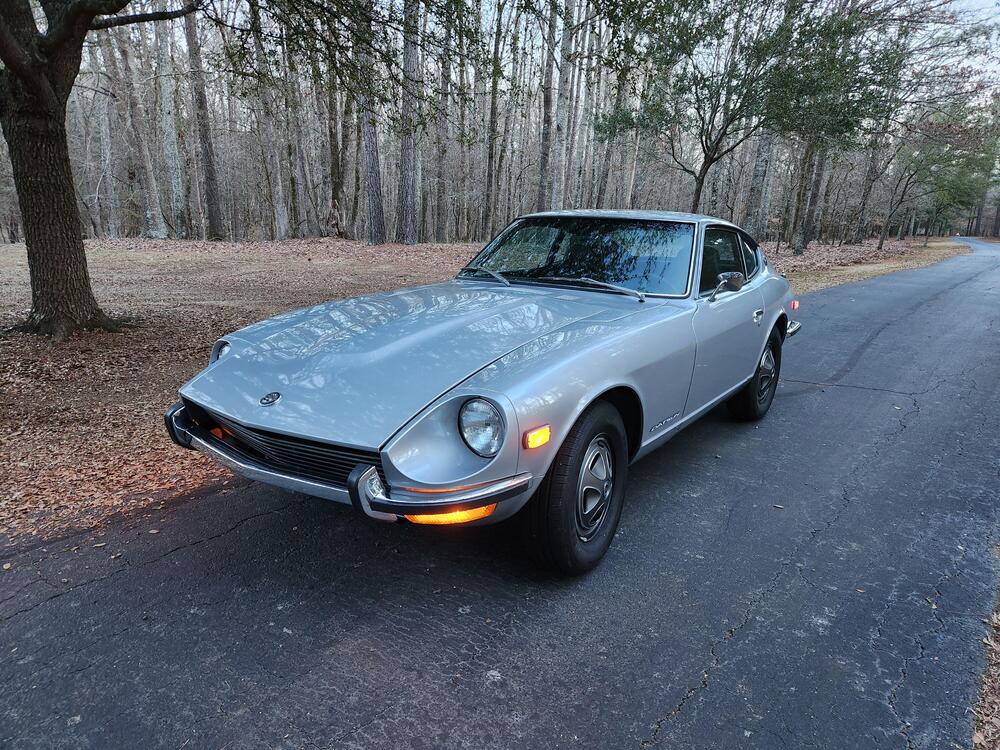
2 pointsFinally to the finish line. Just waiting on some plastic rivets to finish the interior. I took it for an extended drive today. Really runs nice. The transmission shifts fantastic. The guy I took it to did an awesome job. I need to aim the headlights and a few other minor things, but I am calling it done (for now).
 2 points
 -
1 pointI don't see yours on their site but there are examples of others. https://allclutchsystem.com/shop/ols/categories/nissan?page=1&sortOption=ascend_by_price1 point
-
1 pointThat's a performance clutch disc. Puck-style, probably ceramic, not Nissan. Typically they have high pedal pressure and a narrow engagement range. Grabby. The pressure plate has hot spots on it too, not good for smooth engagement either. Also, sometimes a sign that it was grabby. More slippage required to get going. You cam measure the diameter of the friction surface to see if you have an 8 3/4" or 9 1/2" (225mm or 240mm) flywheel. The flywheel has turning marks on it, so it might be fine. Clean it up a little and see hwo it looks. It has rust but that's not a big deal. I think that part number is internal to the clutch company and might not show that it's a 240SX clutch. Best to measure. You're at the gambling stage now. Odds are it will work but might not be fun to drive. Anyway, somebody has definitely been there, with performance plans. Who knows if they got things right. Good luck.1 point
-
1 pointI would just pop that pressure plate off and check out the flywheel surface, the disc, and the pilot bearing. If they look new, use them. If theyre worn, replace. Nothing worse than a chattery clutch.1 point
-
1 pointThat part number is for the clutch disc, not the pressure plate. Any difference would be in size and spline count. I'd still take those measurements. The fork wear could be from before or it could be a sign of a bad angle. The measurments will tell you if the package of parts will work right with the transmission. The pivot fork on the transmission is the same distance relative to the engine, across all engine sizes and transmissions, except the very early 240Z's, I think (the monkey motion 4 speeds might be different.). Only the pressure plate and sleeve sizes will change across the various models of vehicle. If you have the room and time, nothing wrong with trying things out, if you're fine with dropping the transmission again. I've had a transmission in but back out in a few dyas when I found out it had a leak. Kind of a pain but not terrible.1 point
-
1 pointI would definitely take some measurements before buying new parts. Your throwout bearing sleeve is the short one used for the tall 240Z pressure plates. But your pressure plate is definitely not a stock Nissan pressure plate. If you use a short sleeve on a short pressure plate you'll have problems. If you have to buy a new sleeve it might come with a bearing already installed.1 point
-
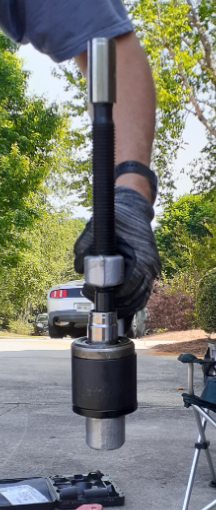
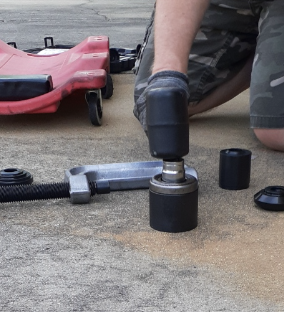
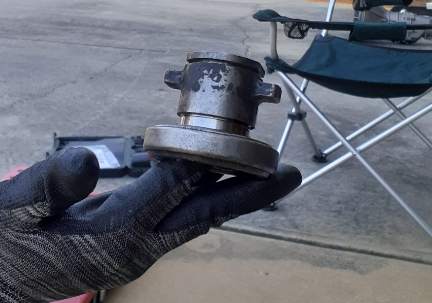
1 pointI used this to remove the throw out bearing: https://www.harborfreight.com/ball-joint-service-kit-for-2wd-and-4wd-vehicles-63610.html Fortunately for me, I bought it with a 20% off coupon. As you may have seen in the video I linked, the guy used a socket and drove out the bearing. I think I may have used a socket at one point, too. Yep, I did use a socket. I drove it out with an impact gun. Then I drove it the rest of the way out with a mallet. Note: you may want to put it on a block of wood when doing that to prevent damage to the collar.
 1 point
 -
1 pointHere's a video of the throw out bearing replacement in a 260Z. Start watching about a minute in. Why do you want to re-use the throw out bearing? Put a new one on.
 1 point
 -
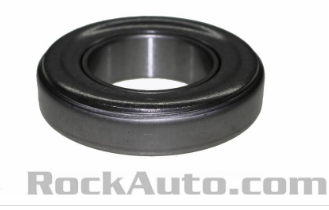
1 pointThat is different but there are many ways to make a bearing. Kind of looks like the clutch kit maker spec'ed their own bearing. Do you know who made the pressure plate? Any markings? Most do not come in red. Looks "performance". Before you put it back together you should take some measurements. Also, the contact points on your clutch fork look kind of shiny. Are they worn? The topic of measuring before installing comes up often. Here's one thread with a link to more. And here's a Rockauto picture of a bearing that looks kind of like years. https://www.rockauto.com/en/moreinfo.php?pk=6085047&cc=1209226&pt=1968
 1 point
 -
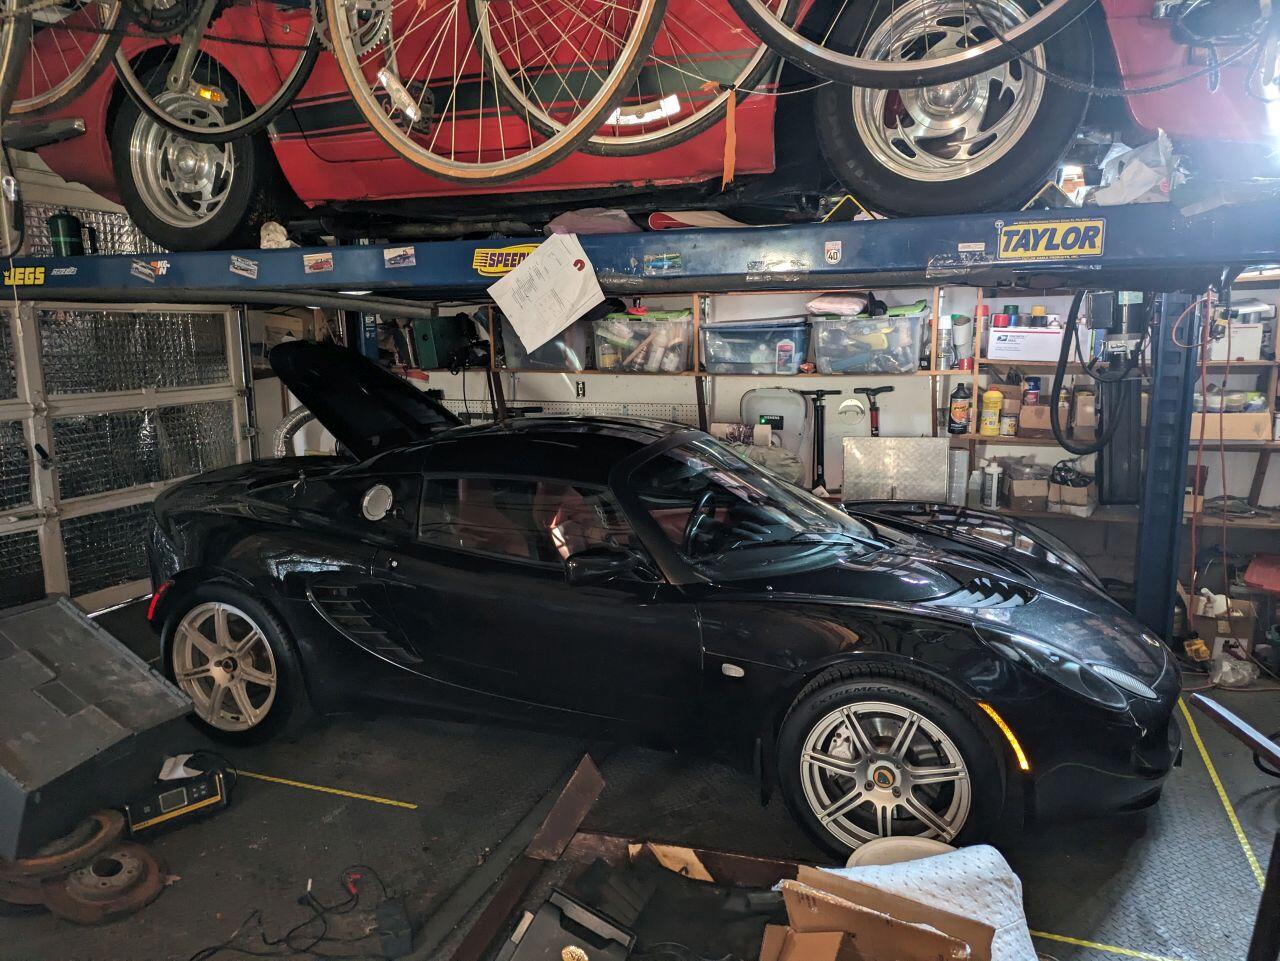
1 pointMy son just purchased a 2005 Lotus Elise. It needs some cosmetic work but is mechanically sound. Its currently stored under my 260Z that is waiting on its differential to be installed. We drove to Chicago from Cleveland to pick it up and had an eventful road trip. On the way there, my son's 2019 Veloster Type N's steering wheel locked while driving at 80 mph on the turnpike. He was able to inch the car to the berm, cycle the ignition off and on and that cleared the lock. We just found out this morning that there is a TSB that covers a slew of Hyundai models that addresses this concern so its sitting at the dealer waiting on a part. Please ignore my junk filled garage in the photo.
 1 point
 -
1 pointAt the time I was too confused to be terrified. I had my seat reclined and I was covered with my winter coat as my son refused to turn up the heat. Then I heard "Dad, Dad... my steering isn't working". Luckily the turnpike was neither curvy or crowded and we still had a couple of degrees in either direction on the steering.1 point
-
1 pointThe (car) world would have been a better place if tar-based rustproofing had never been invented!1 point
-
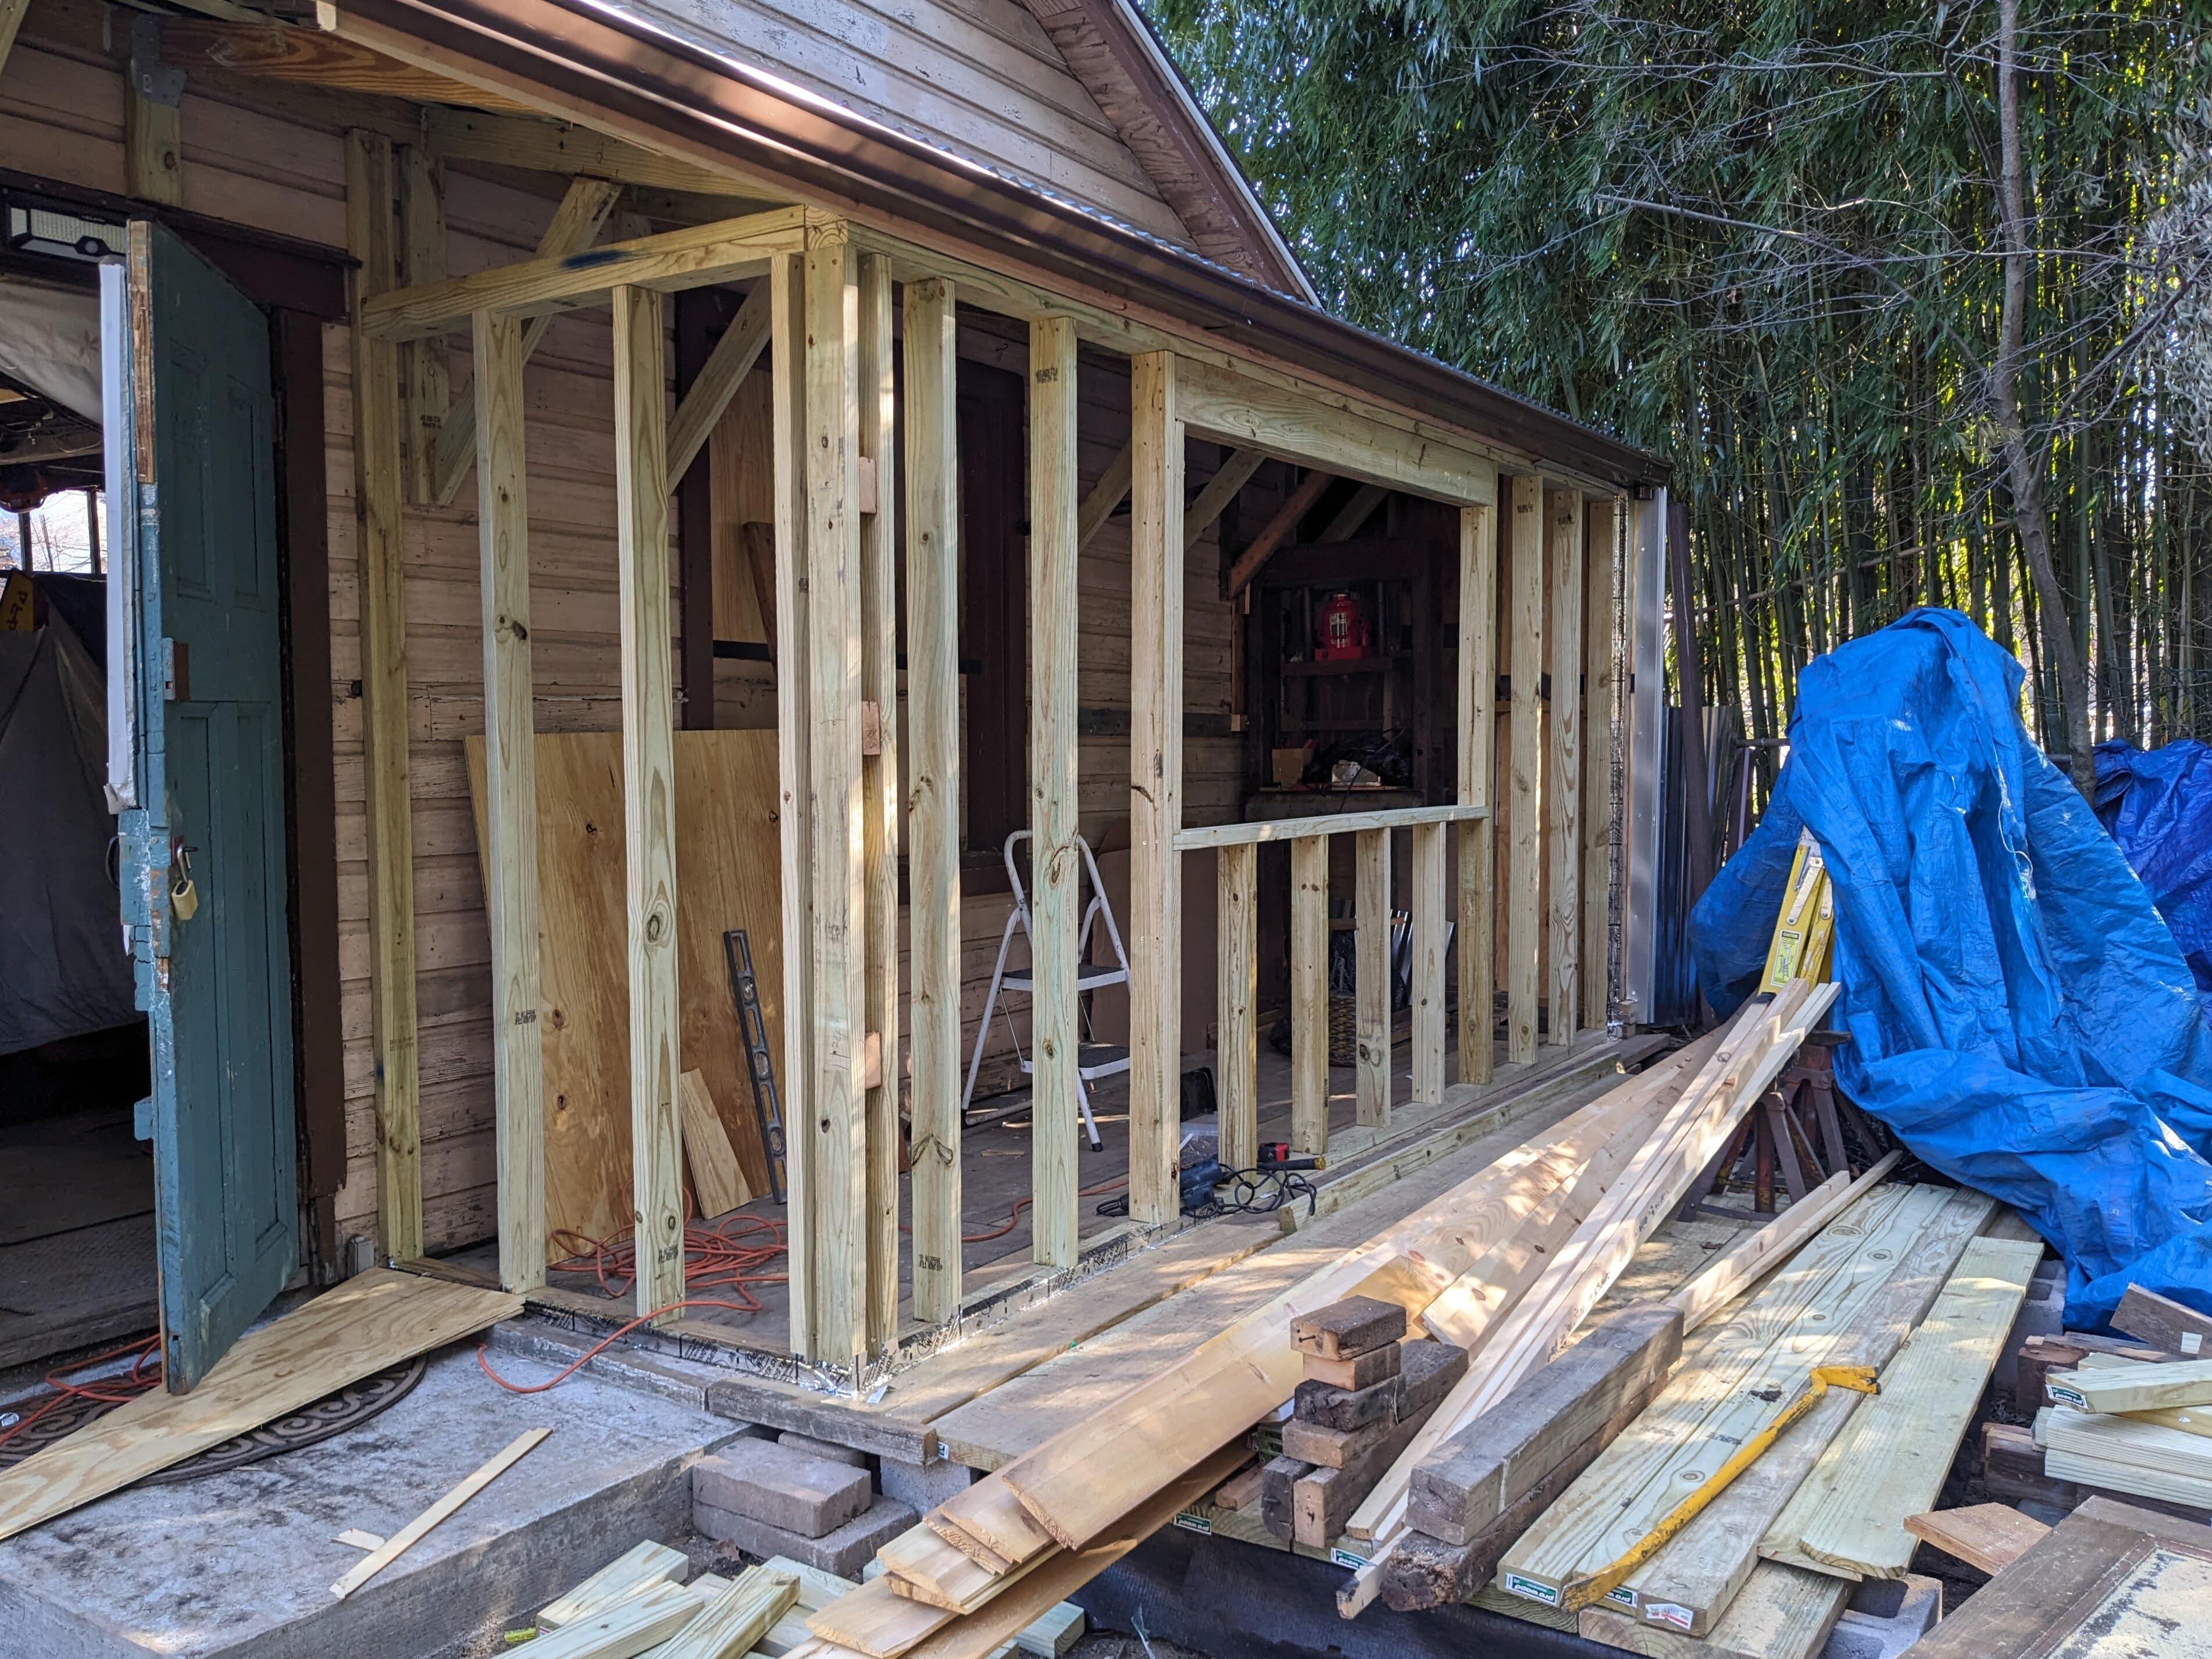
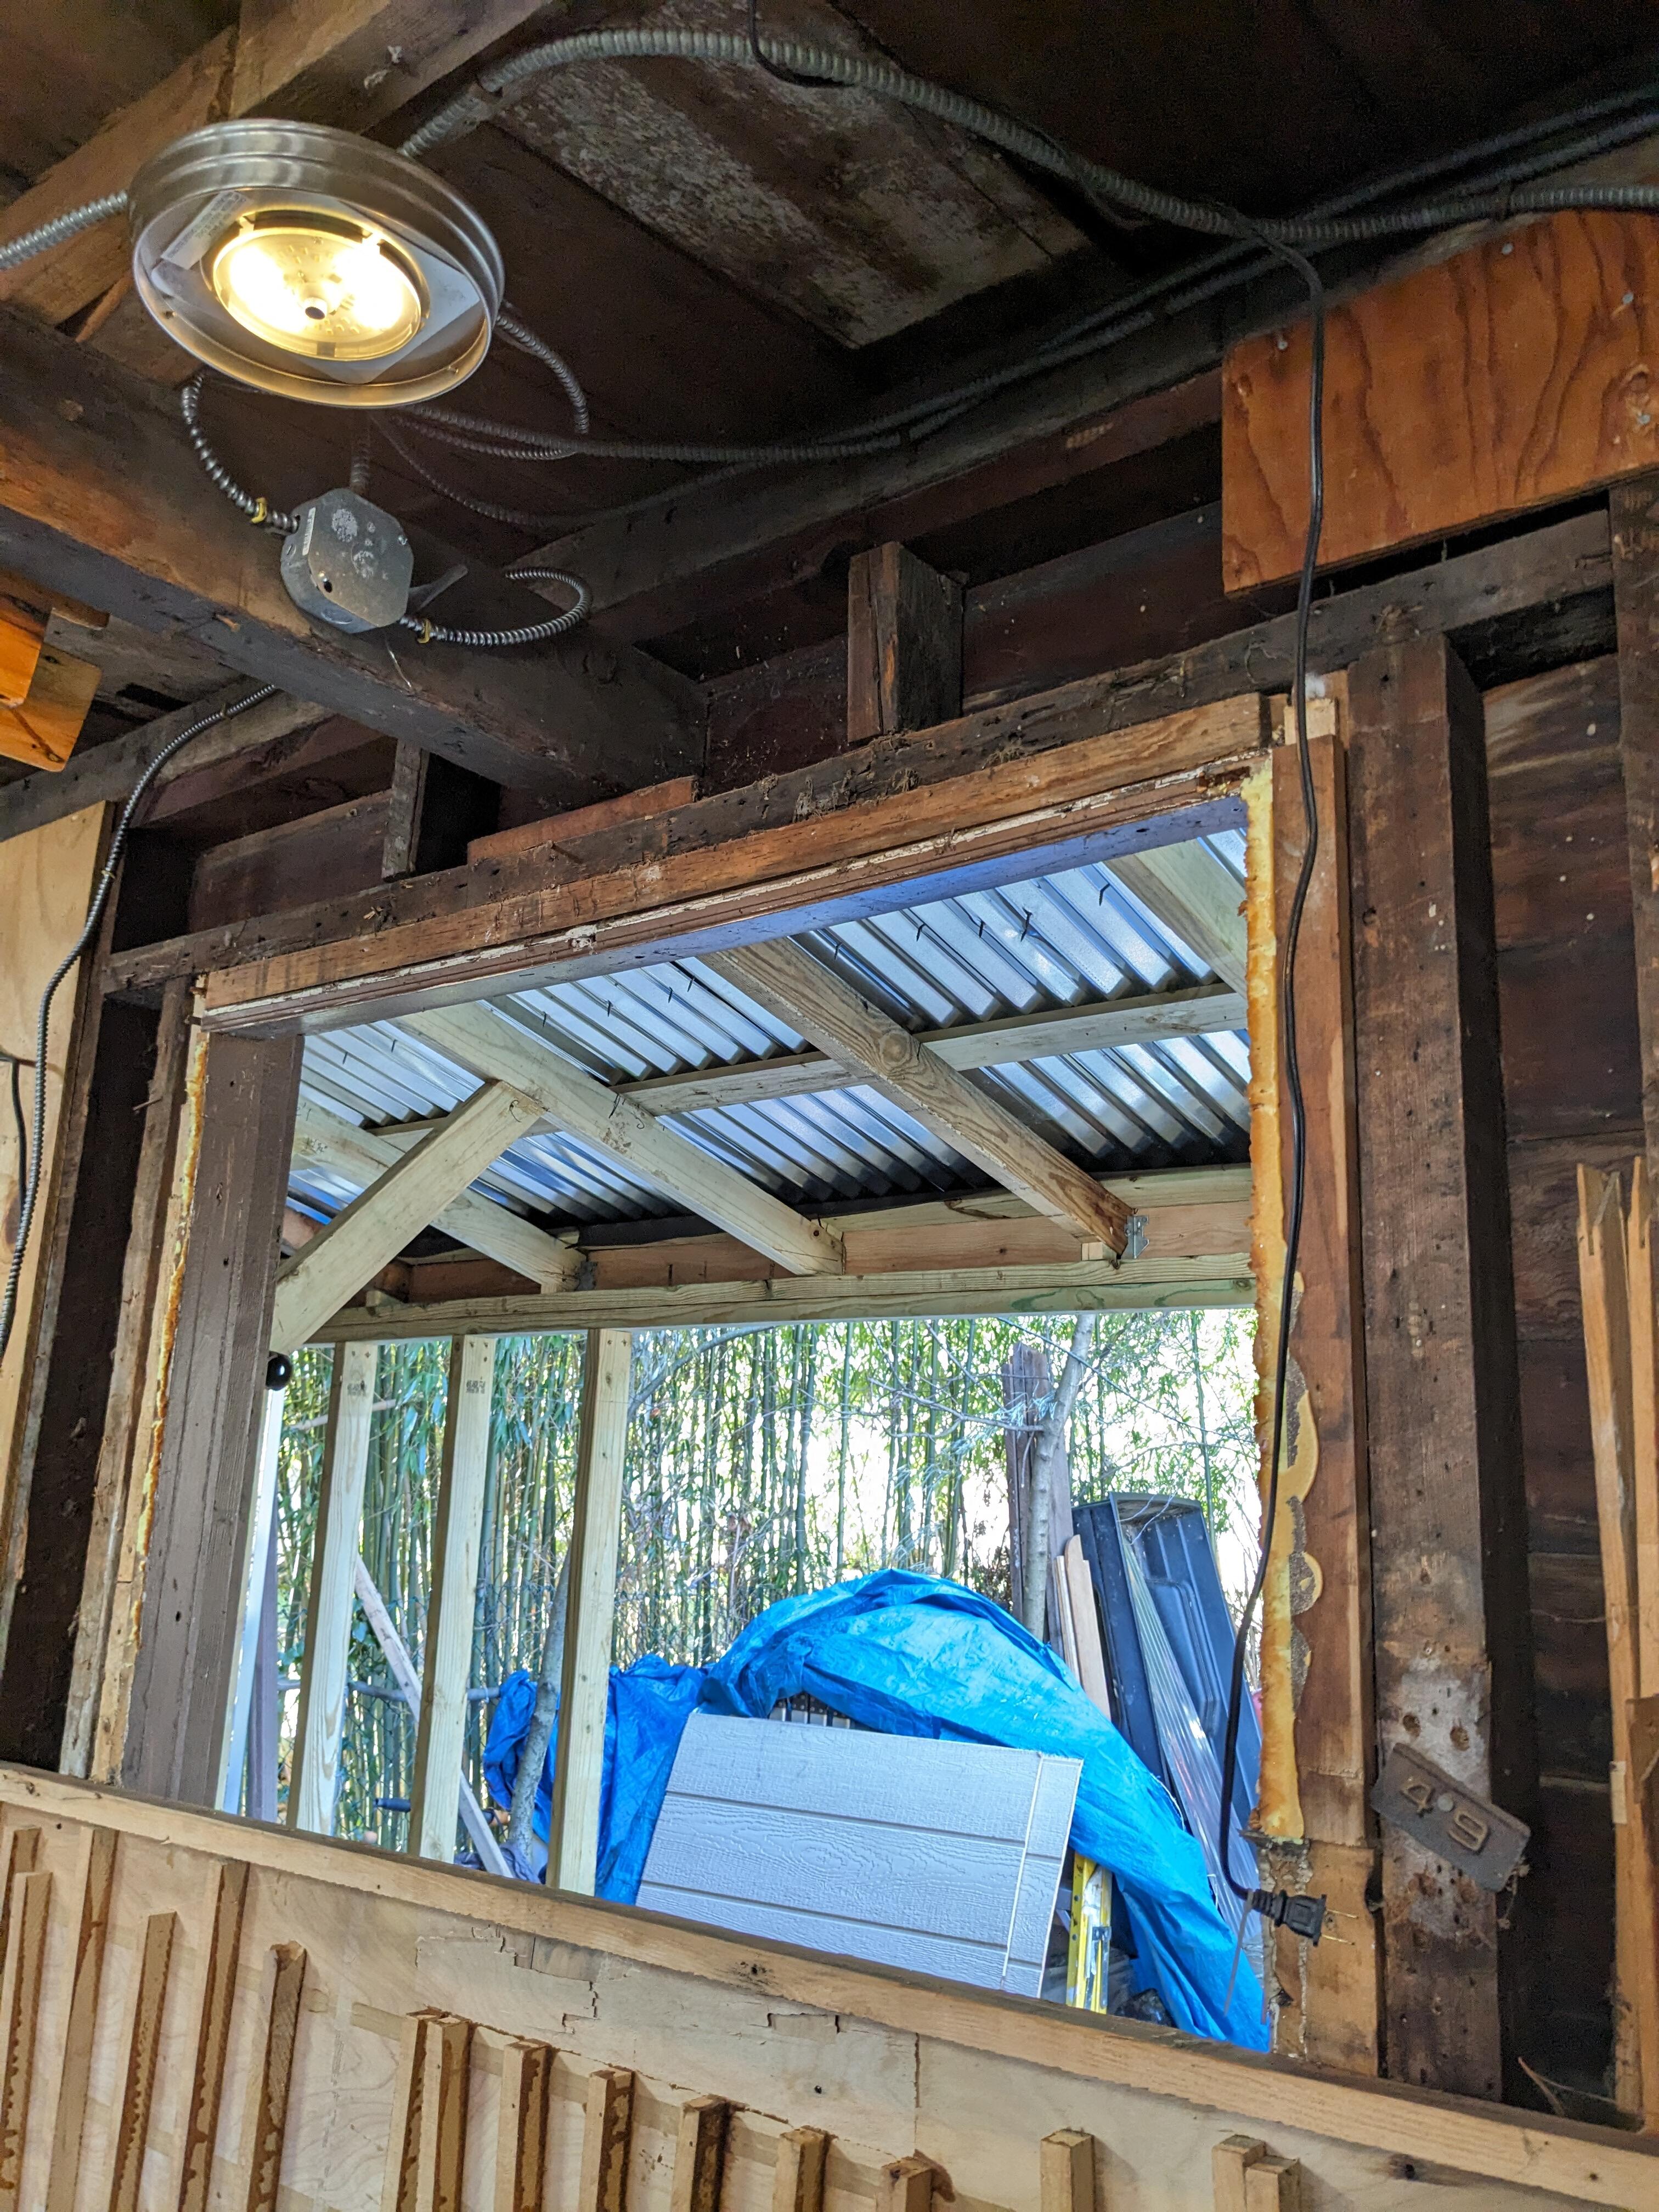
Started framing the platform. This will add 4' to the inside of the garage, which will mean the Datsun will fit once the Fiat is sold. I can't build a real extension on the garage, the town codes make such an addition on a non-conforming structure. I can however have a 'patio" without having to get a permit or be subject to the architectural review board - so I will be pouring a 16x18' or 16x20' slab behind the garage, just has to be staggered 10' in from the property line at the side & back. Cleared the back wall of the garage of the shelving & workbenches. I'll be removing about 13' of the inside wall, so I'll be building a temporary wall to support the beam & upper wall whilst I open it up. The existing header is not exactly healthy construction


 1 point
 -
Tip, so you dont make the same mistake I made. Double and triple check your wipers to make sure they are working correctly before putting on the blades. I hooked up the wiper arm to the motor in the wrong position and it caused them to work almost backwards. Make sure motor is in "park" then hook the arm to the motor. It can go on two different ways. Mine looks like this and works properly now!
 1 point
 -
I took the 260Z for a drive today. When I stopped for gas, I could smell coolant, though I couldn't find a smoking gun. When I got home, I looked closer, and it appears I may not have tightened some hose clamps when I replaced the water pump. I'm letting the car cool down enough so I can work on the lower clamp on the lower radiator hose.1 point
-
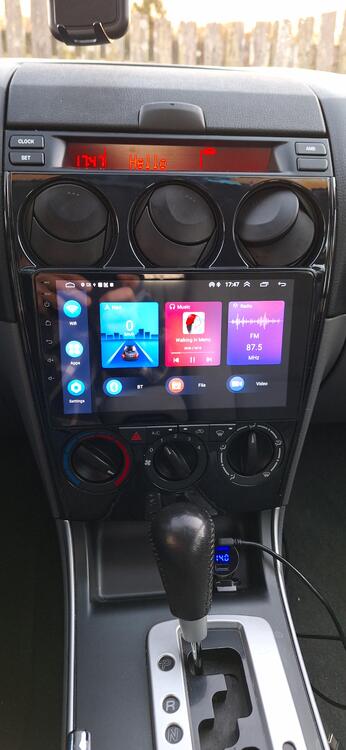
1 pointYep, I decided to start the "Stop Putting It in Your Damn Mouth!" diet about a month ago, and I'm down 20 lbs. Getting rid of sugar can do that for you. Now I just have to exercise more. I haven't been working on my Zs lately, but I did put a new stereo in my wagon. Does that count? Anyway, welcome back to the living, John. I hope you have a long stay.
 1 point
 -
That is not a diode. It is a capacitor referred to as a condenser. That is on internally and externally regulated alternators. It was incorporated to reduce electrical noise for the radio. If you have an older stereo, keep it. If you have a newer stereo, you may not need it.1 point
-
1 point
-
1 point
-
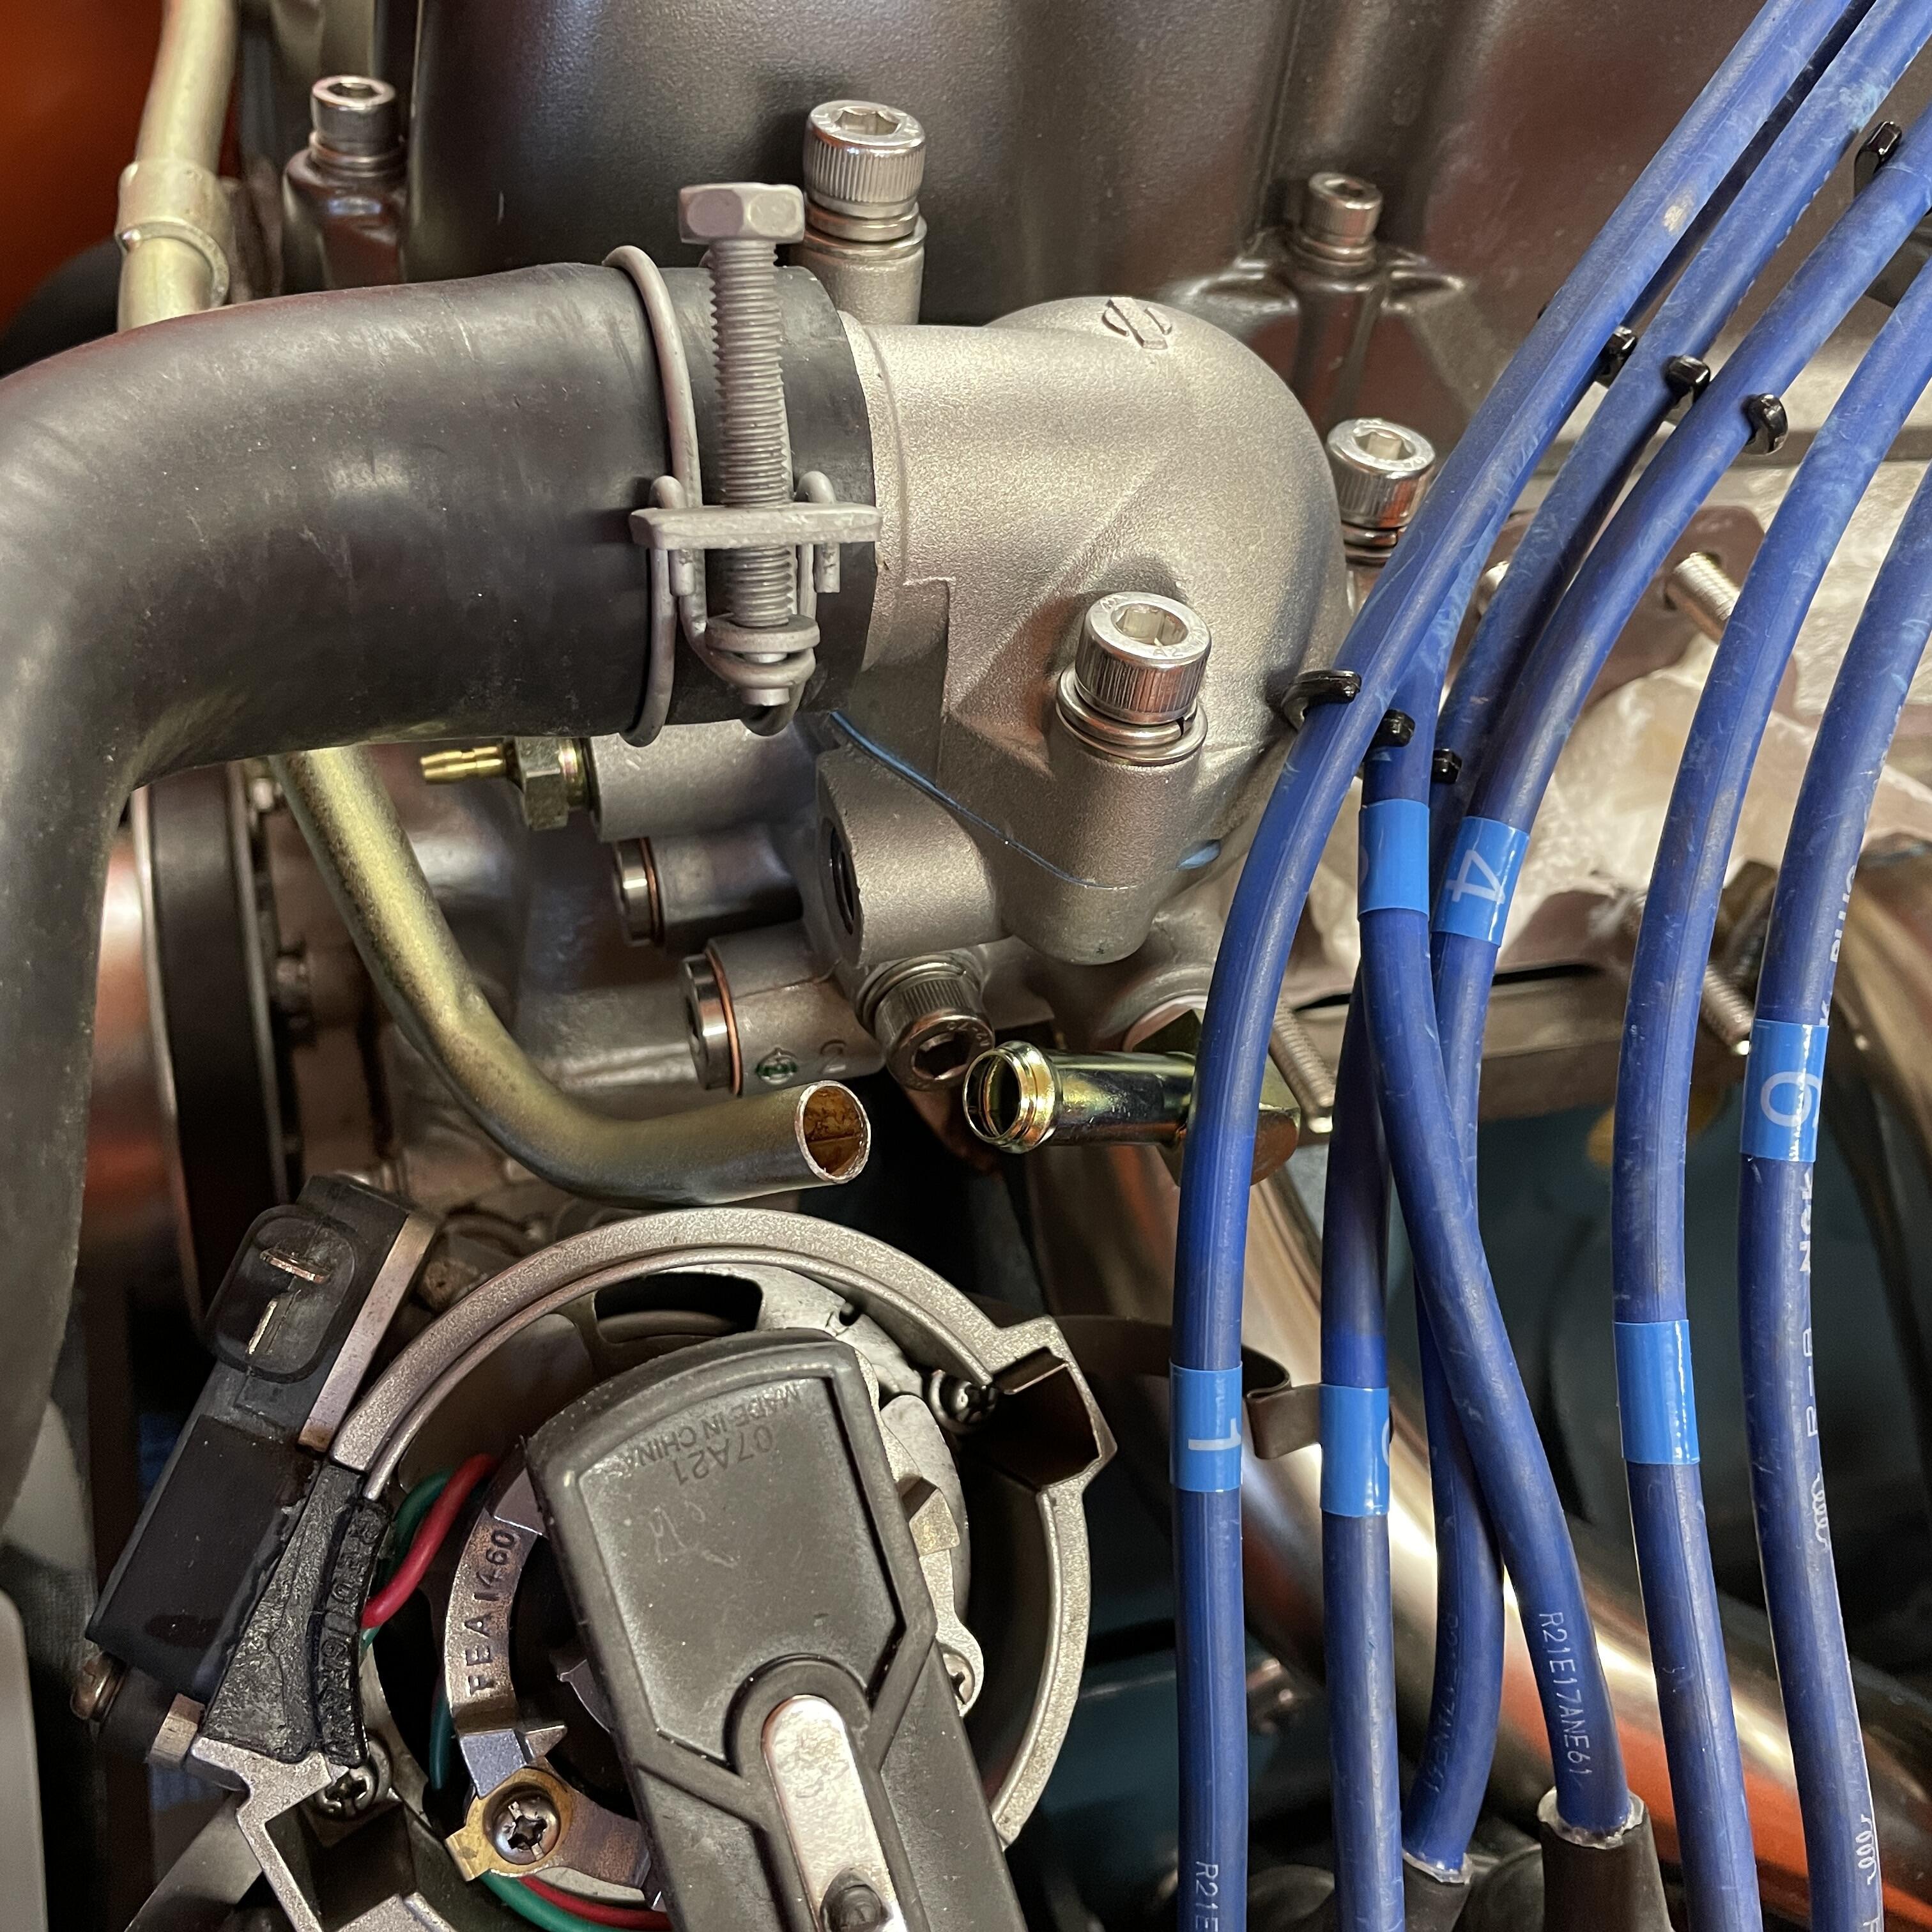
Finally tracked down an original set of 1971 plug leads (had to buy a complete car to get them!), they are different to 1970 in having white lettering and the #6 plug boot with a 45 degree bend. Just have to model that up in Solidworks and print out a test piece. The 1970 wires and boots are all sorted and modelled. Print samples work fine on the test engine.1 point
-
@SpeedRooJust checking in to see how progress is coming along. Thanks!1 point
-
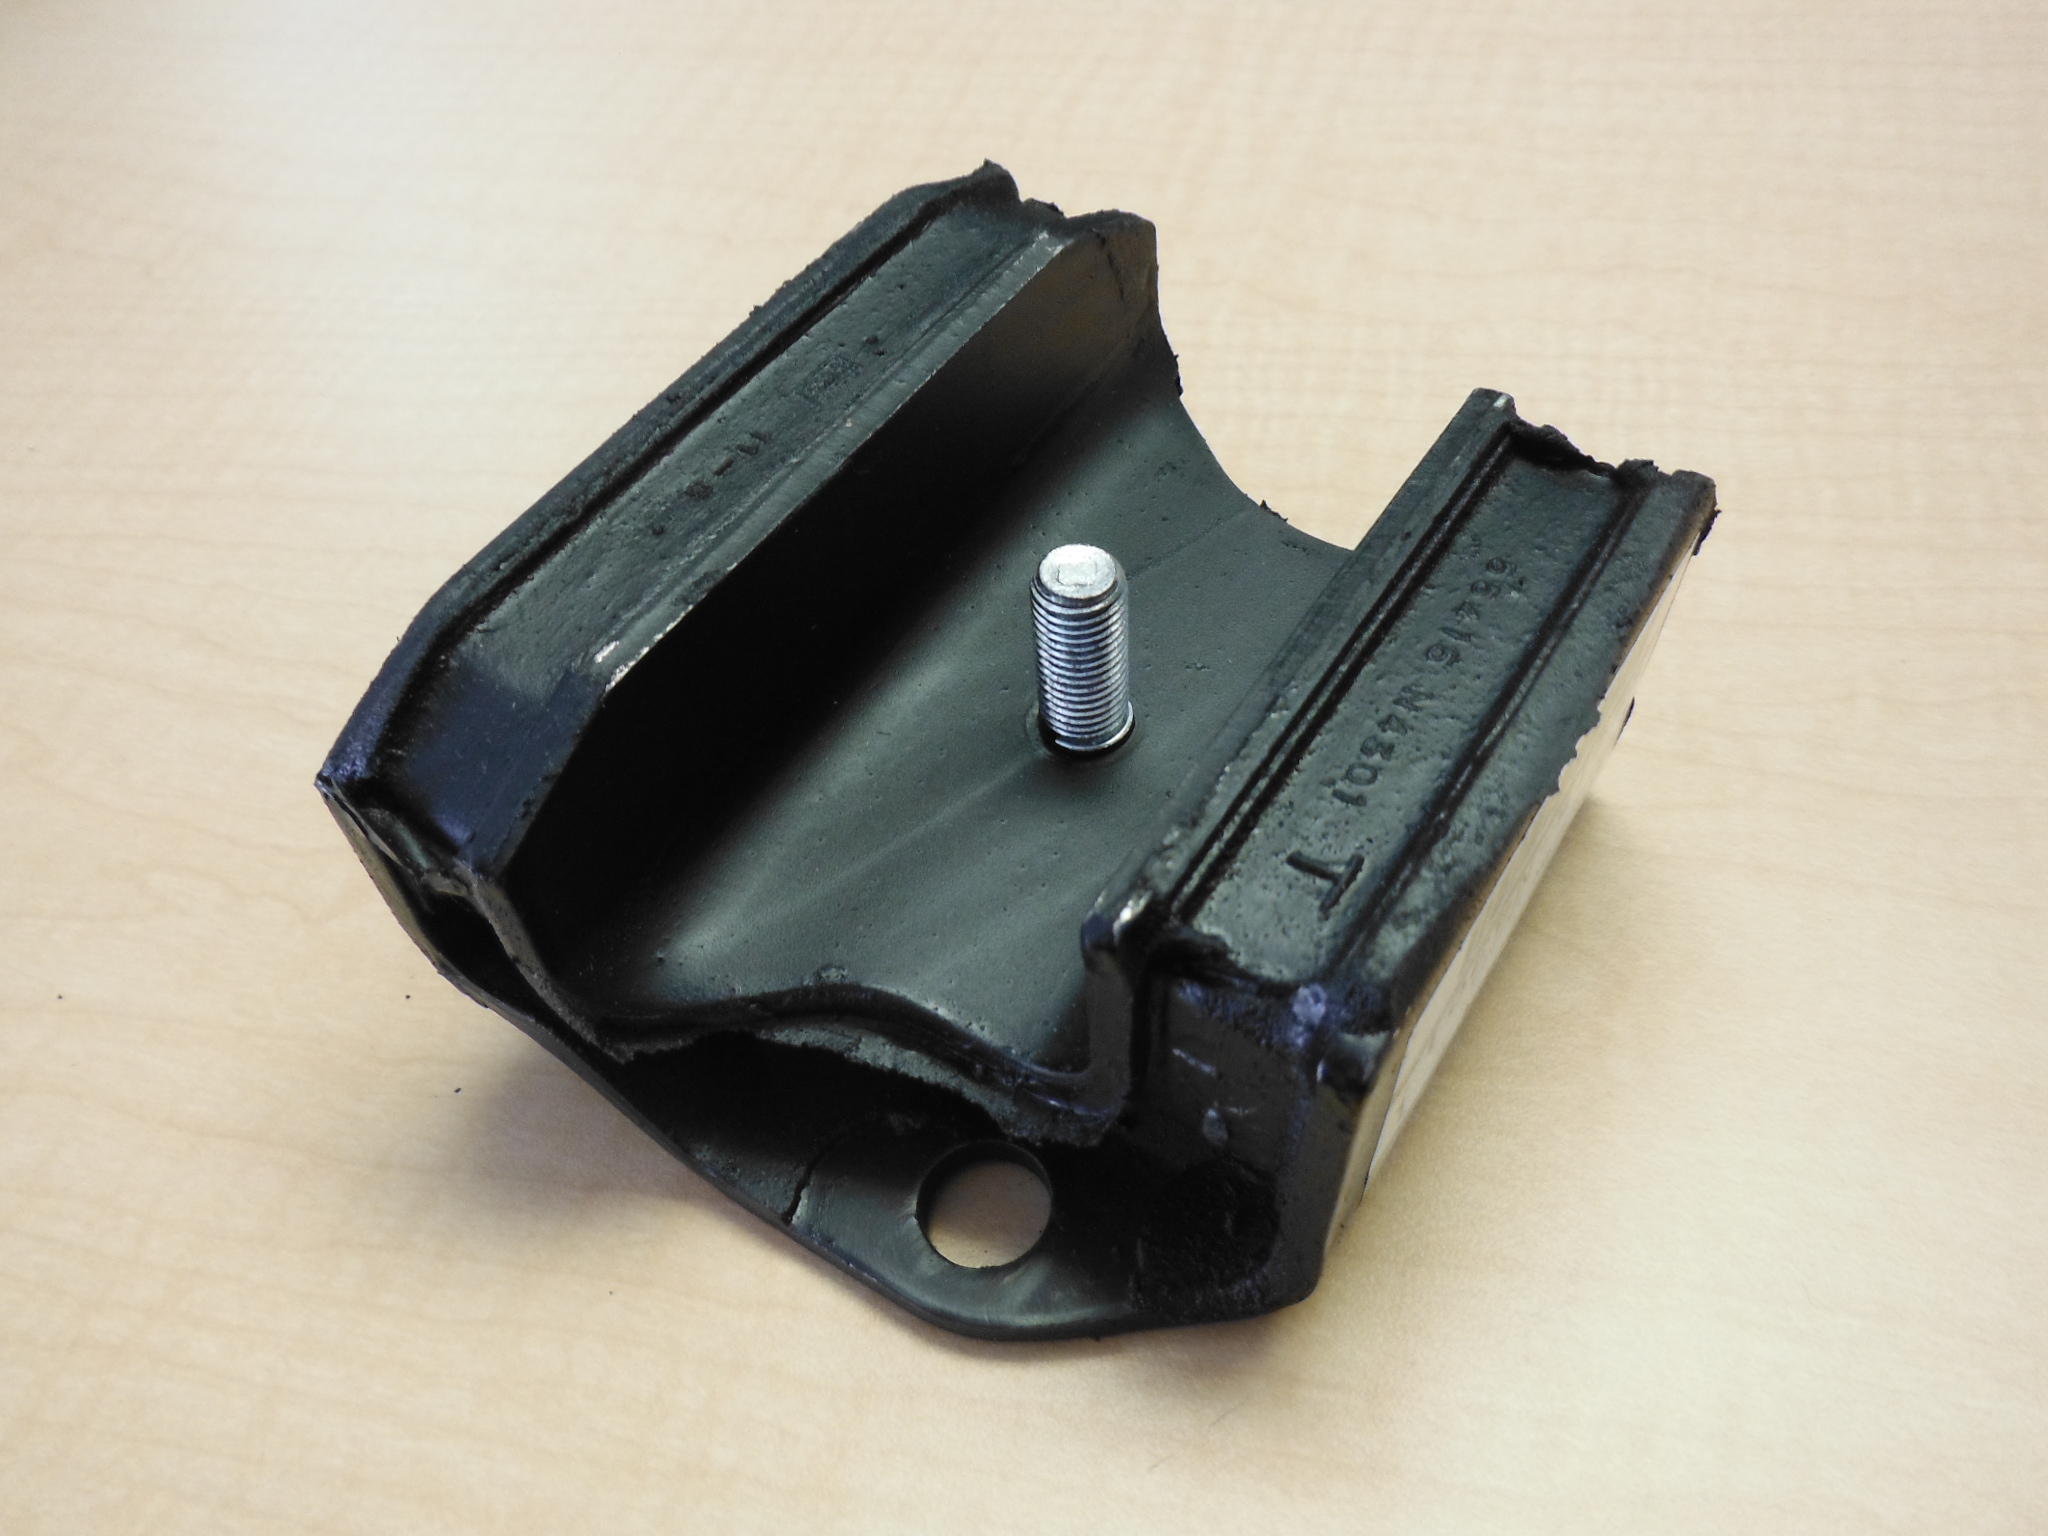
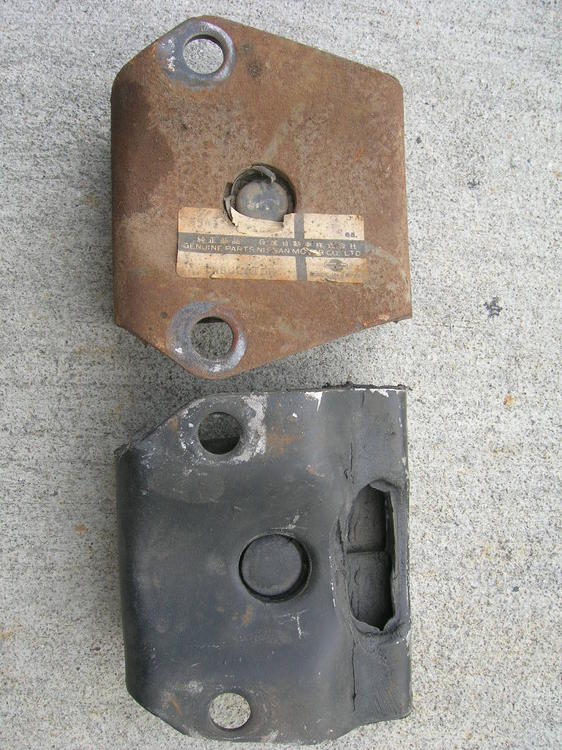
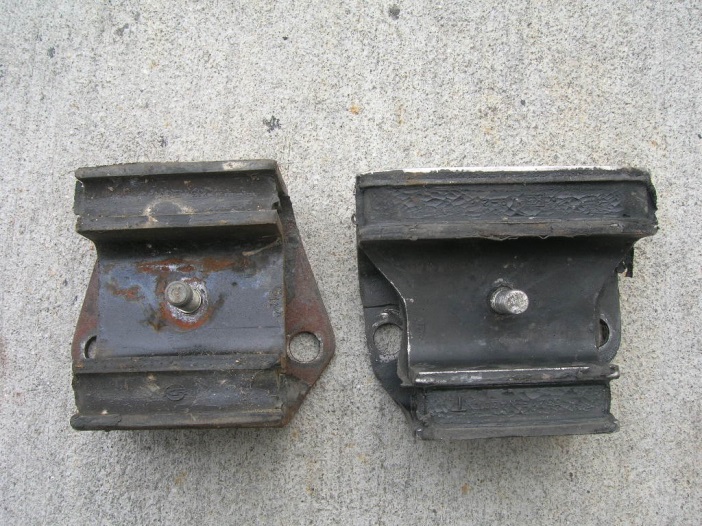
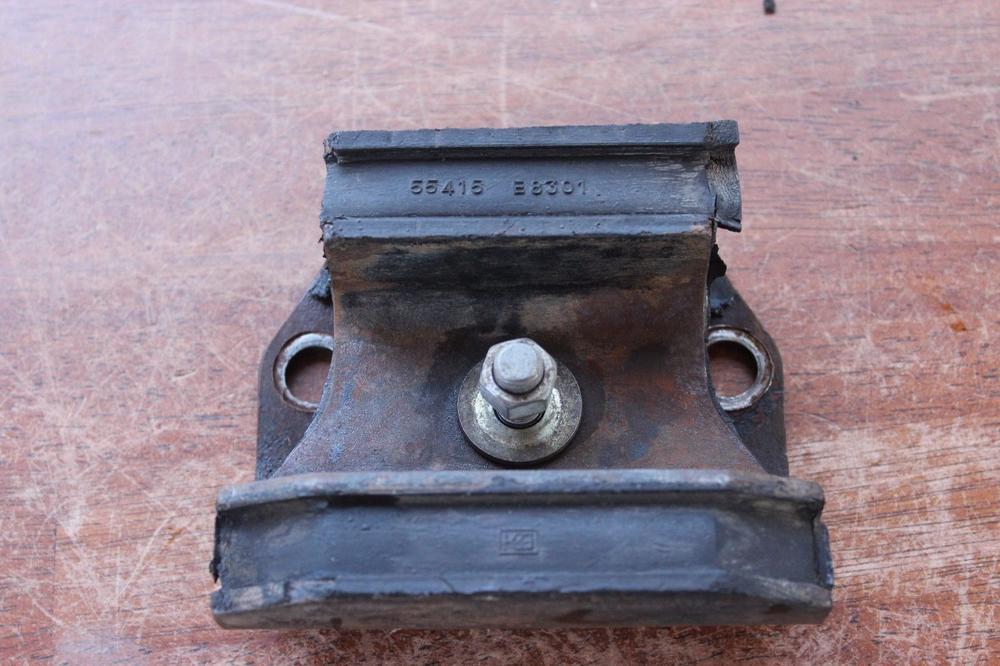
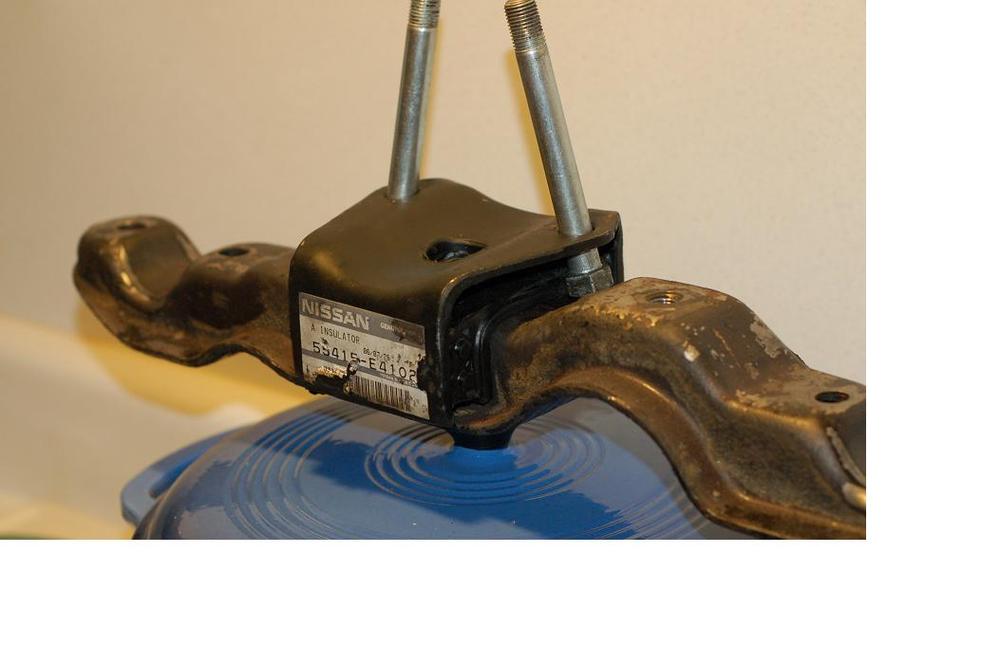
Here are some pix that I've accumulated from this site and others (apologies to the owners -- I didn't record names with photos). Picture #1 shows the top surfaces (front of car points right)... 240Z early type (55415-E4100/4101/4102) on the top, 240Z later type (55415 E8300, introduced in 7106 for the MY1972 240Z) on the bottom... x Picture #2 (below) shows the bottom surfaces (front of car points up)... early type (55415-E4102) on the left, later type (55413 E8301) on the right... x Picture #3 (below) shows a third type (55415-E8301) which -- if I read the parts manual correctly -- was offered between 7308 - 7412 (which would make it specific to the 260Z, I believe) x Picture #4 (below) shows a fourth type (55415-N4300/4301) introduced in 7501 and therefore specific to the 280Z. x Going back to Picture #1 and #2, it looks to be like the 'early' and 'later' 240Z designs, there doesn't appear to be anything different about the hole spacings/positions for the two mount bolts. The location and size of the threaded centre stud looks the same, too. The upper/outer plates have different shapes, but I don't see anything that would prevent re-shaping the contour of the later style plate if that's needed to make it fit into a Series 1. Also, the width of the inner plate's 'jaws' looks similar, early vs late, so it appears that the later style mount would fit down over the early style crossmember. I emphasize the word, 'appears', because I've never read anywhere that this can actually be done. Perhaps someone else has tried this and can comment. For possible reference, Picture #5 (below) shows the early-style insulator sitting in position on top of the matching front crossmember. BTW, I don't think there would be any need to turn the later style insulator back-to-front to make it work in Series 1 application. Again, others who've actually tried this may have a different opinion. In case you're curious, the threaded holes in the crossmember on either side of the insulator are provided to take a bolt that retains an exhaust system hanger piece.

 1 point
 -
Here's something interesting, GTO replica built on a 76 280z, https://bringatrailer.com/listing/vanilla-sky-ferrari-250-gto-replica/0 points