Leaderboard
-
grannyknot
Free Member11Points5,158Posts -

Zed Head
Free Member7Points19,236Posts -
inline6
 Subscriber
 6Points1,282Posts
 -
emccallum
Subscriber3Points428Posts


Popular Content
Showing content with the highest reputation on 02/01/2024 in all areas
-
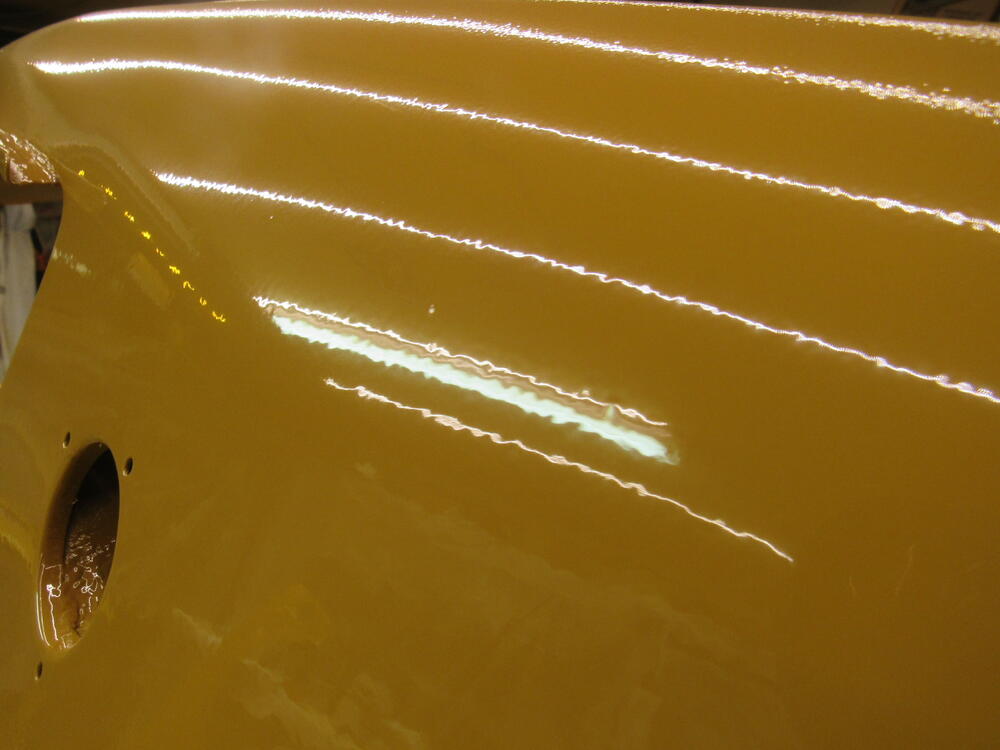
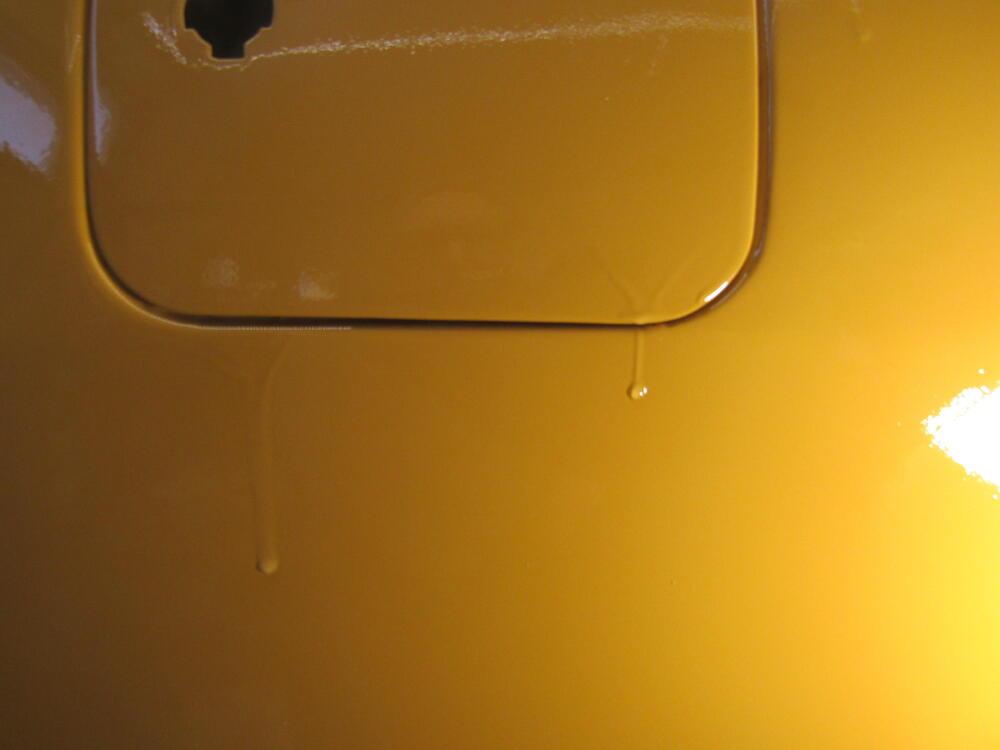
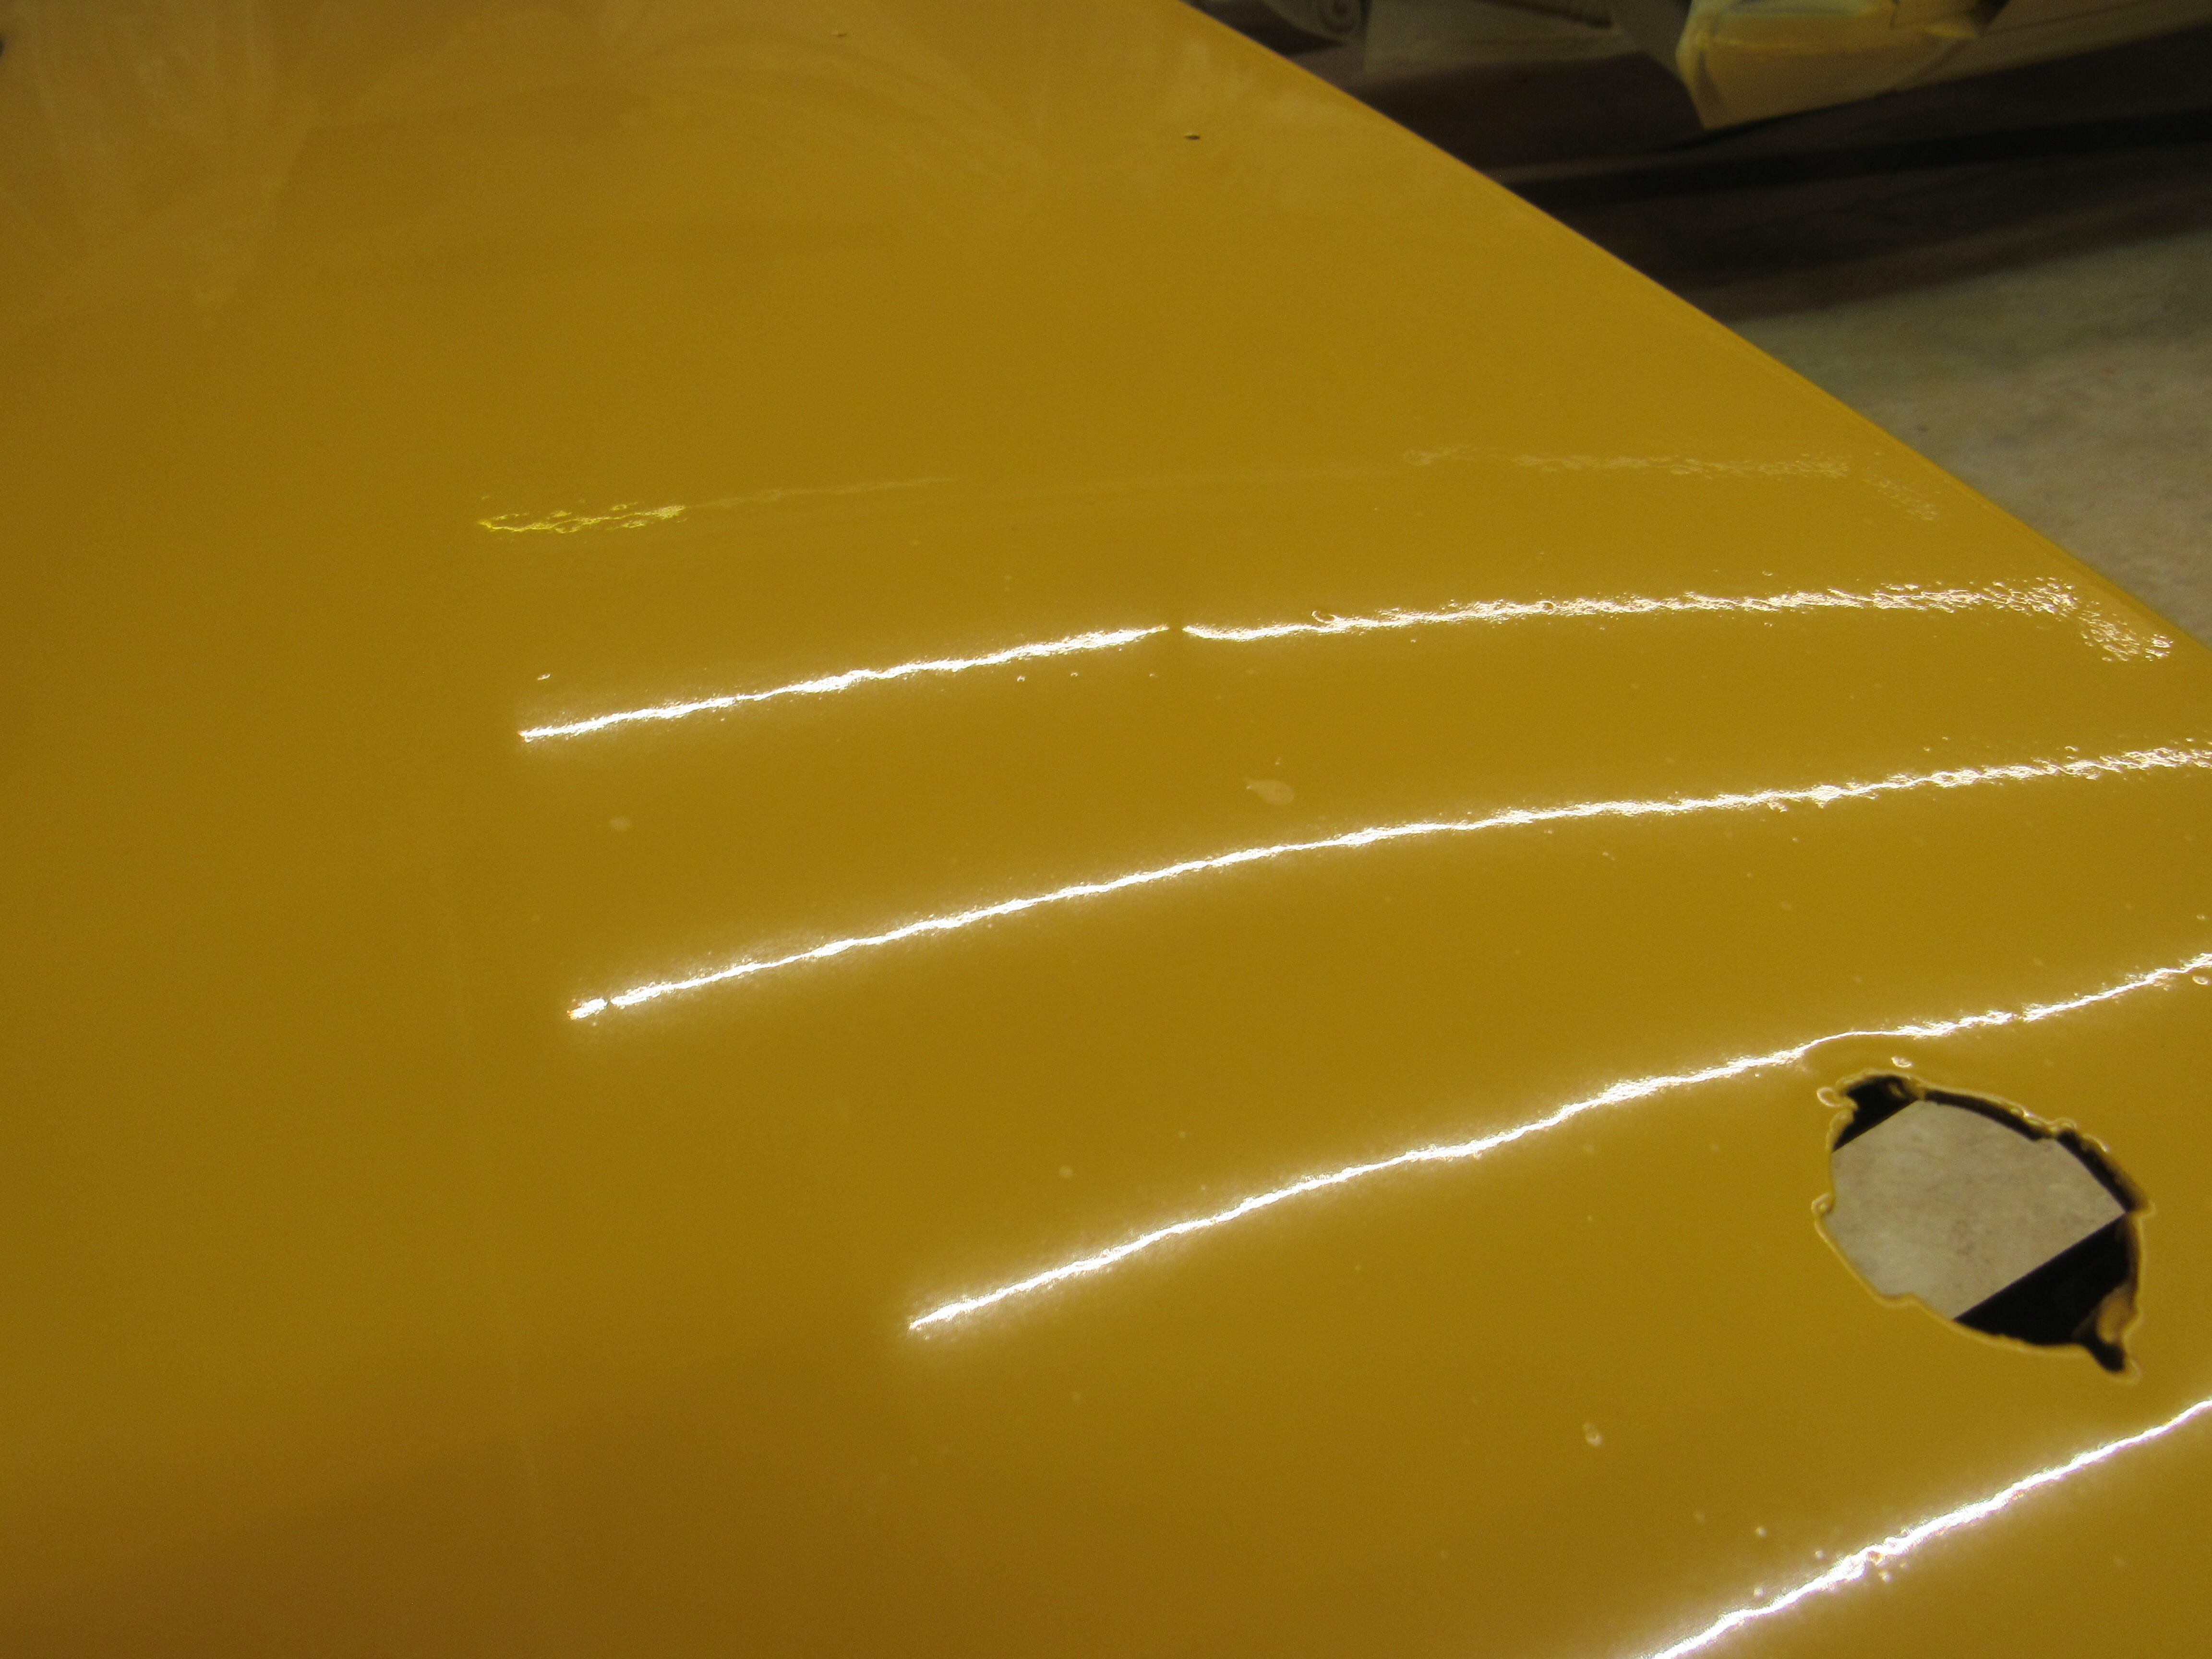
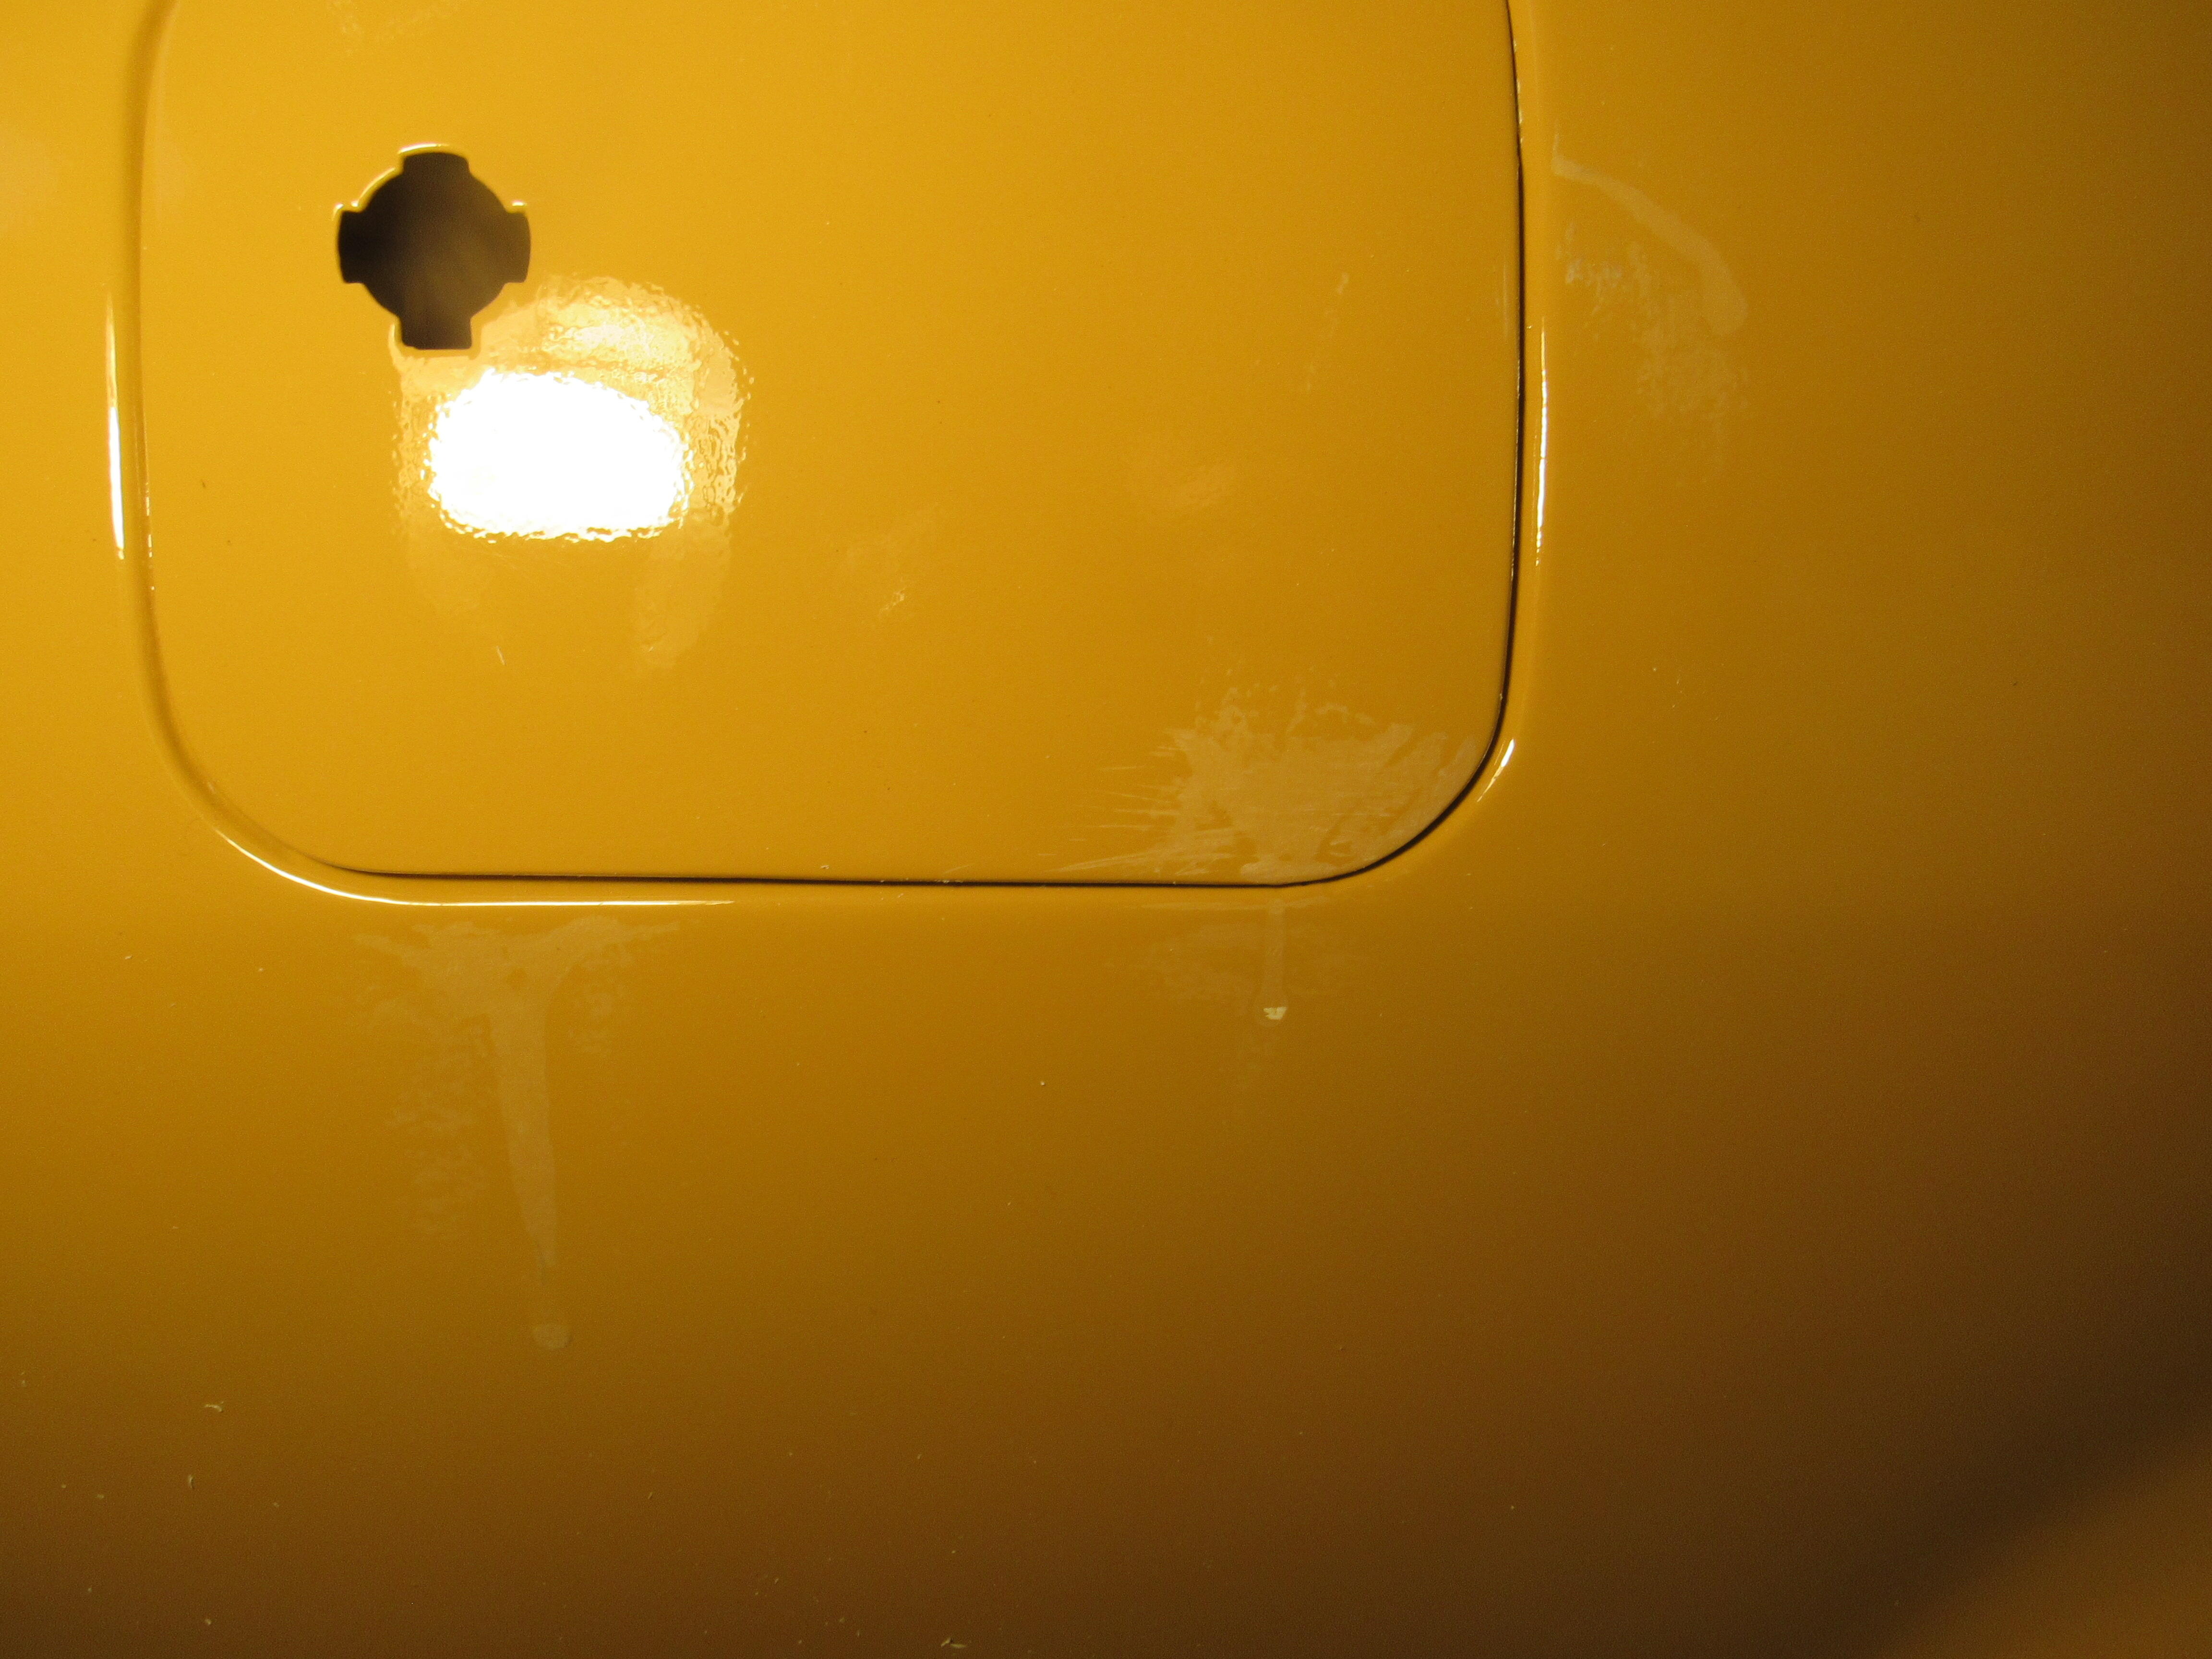
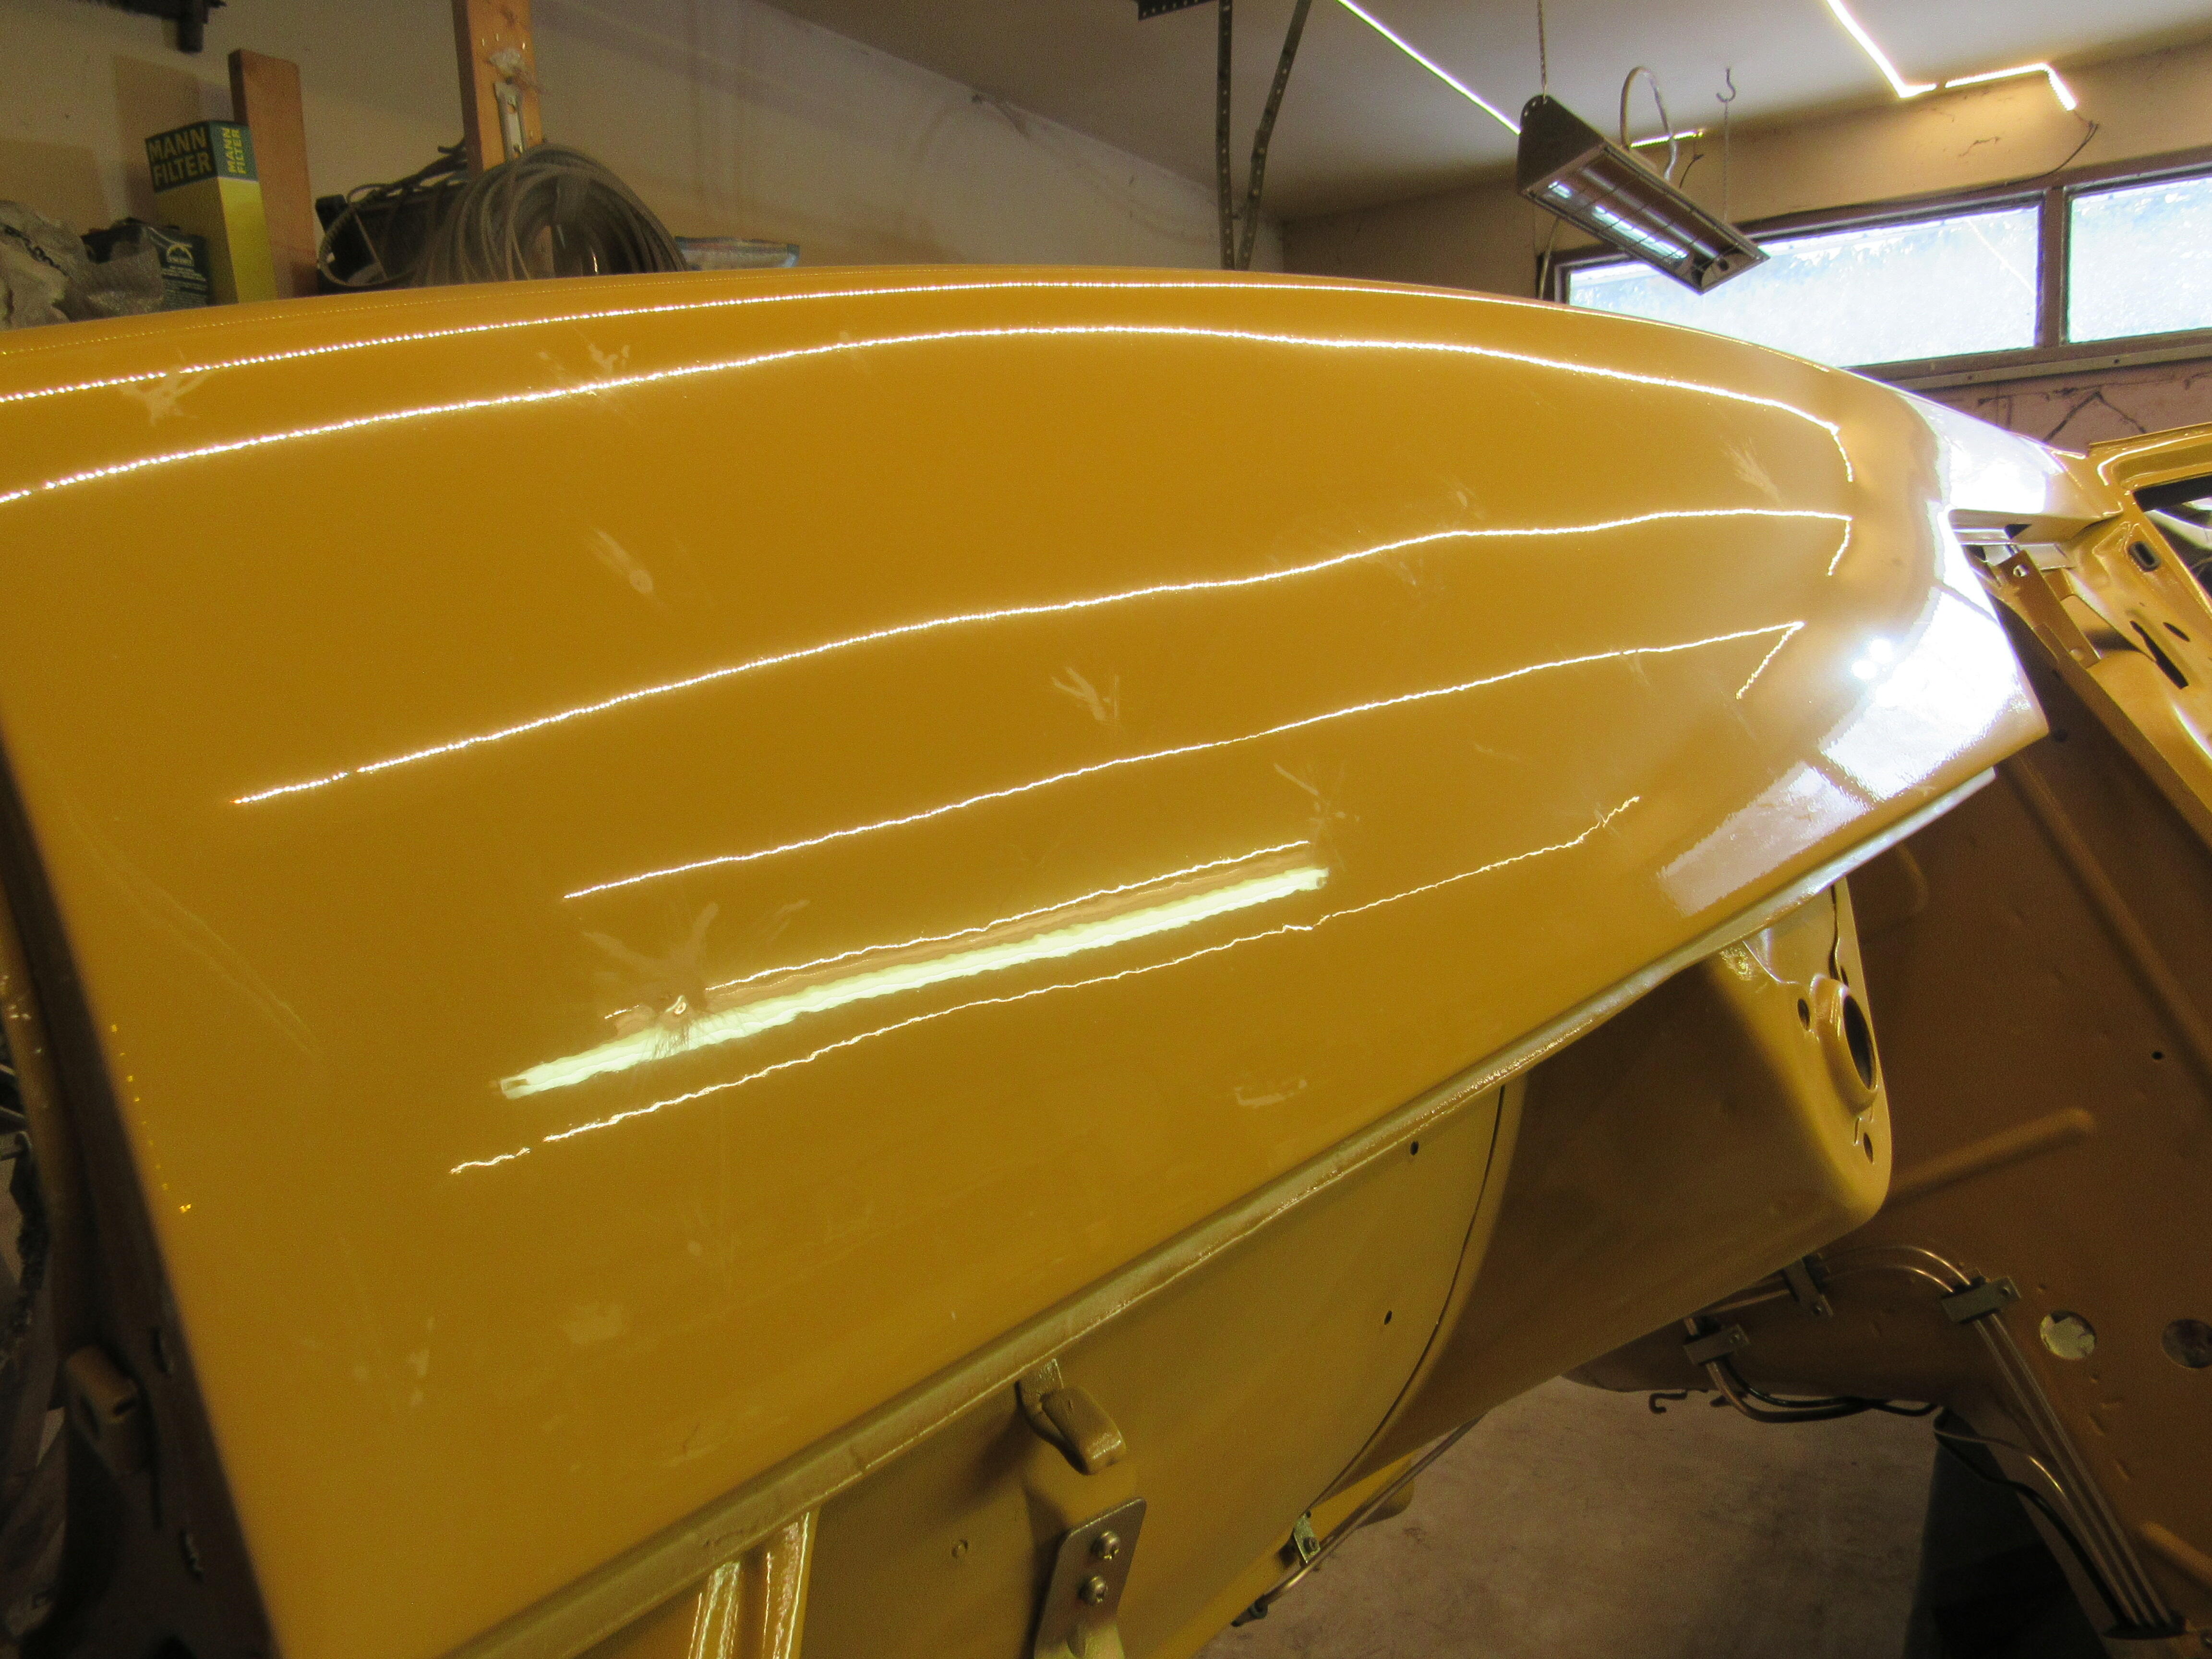
5 pointsThe biggest disadvantage to using your garage as a paint booth is all the trash that ends up on the clear coat, it doesn't matter how clean I blow the shop out, cover up stuff with plastic or soak the floor down. I don't paint often enough to lay down a clear coat like glass like some guys, mine are always covered with orange peel anyway so I guess some trash isn't too bad a price to pay. Like it or not the clear has to be sanded, I tried to start with 1500 grit but could see quickly that I would have to go down to 1200. A nib file is the tool to deal with trash and runs. Here is where I have gone over the worst of trash with the nib file. The tear drop at the bottom of run takes a week or more to fully cure, so if you go away at it with a nib file too soon it can pull the paint off as you get down to the bottom of the drop as I have done here. Now I'll have to apply some colour coat to that white spot with a toothpick then cover it with clear and wait another week before I go back and try to work it again. Recommissioned


 5 points
 -
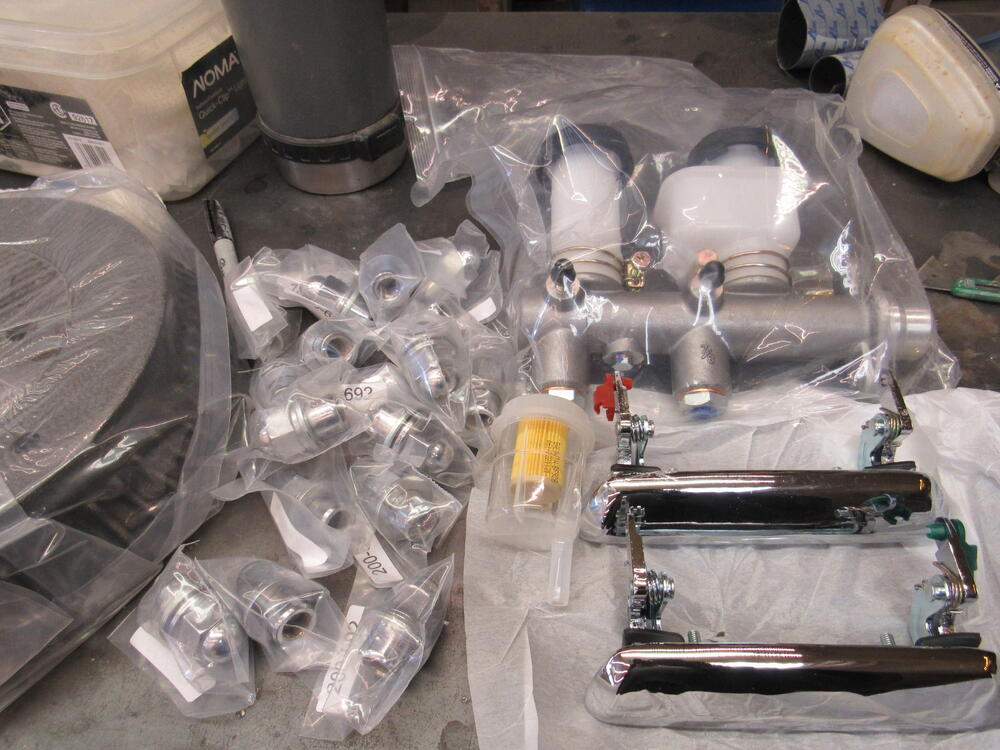
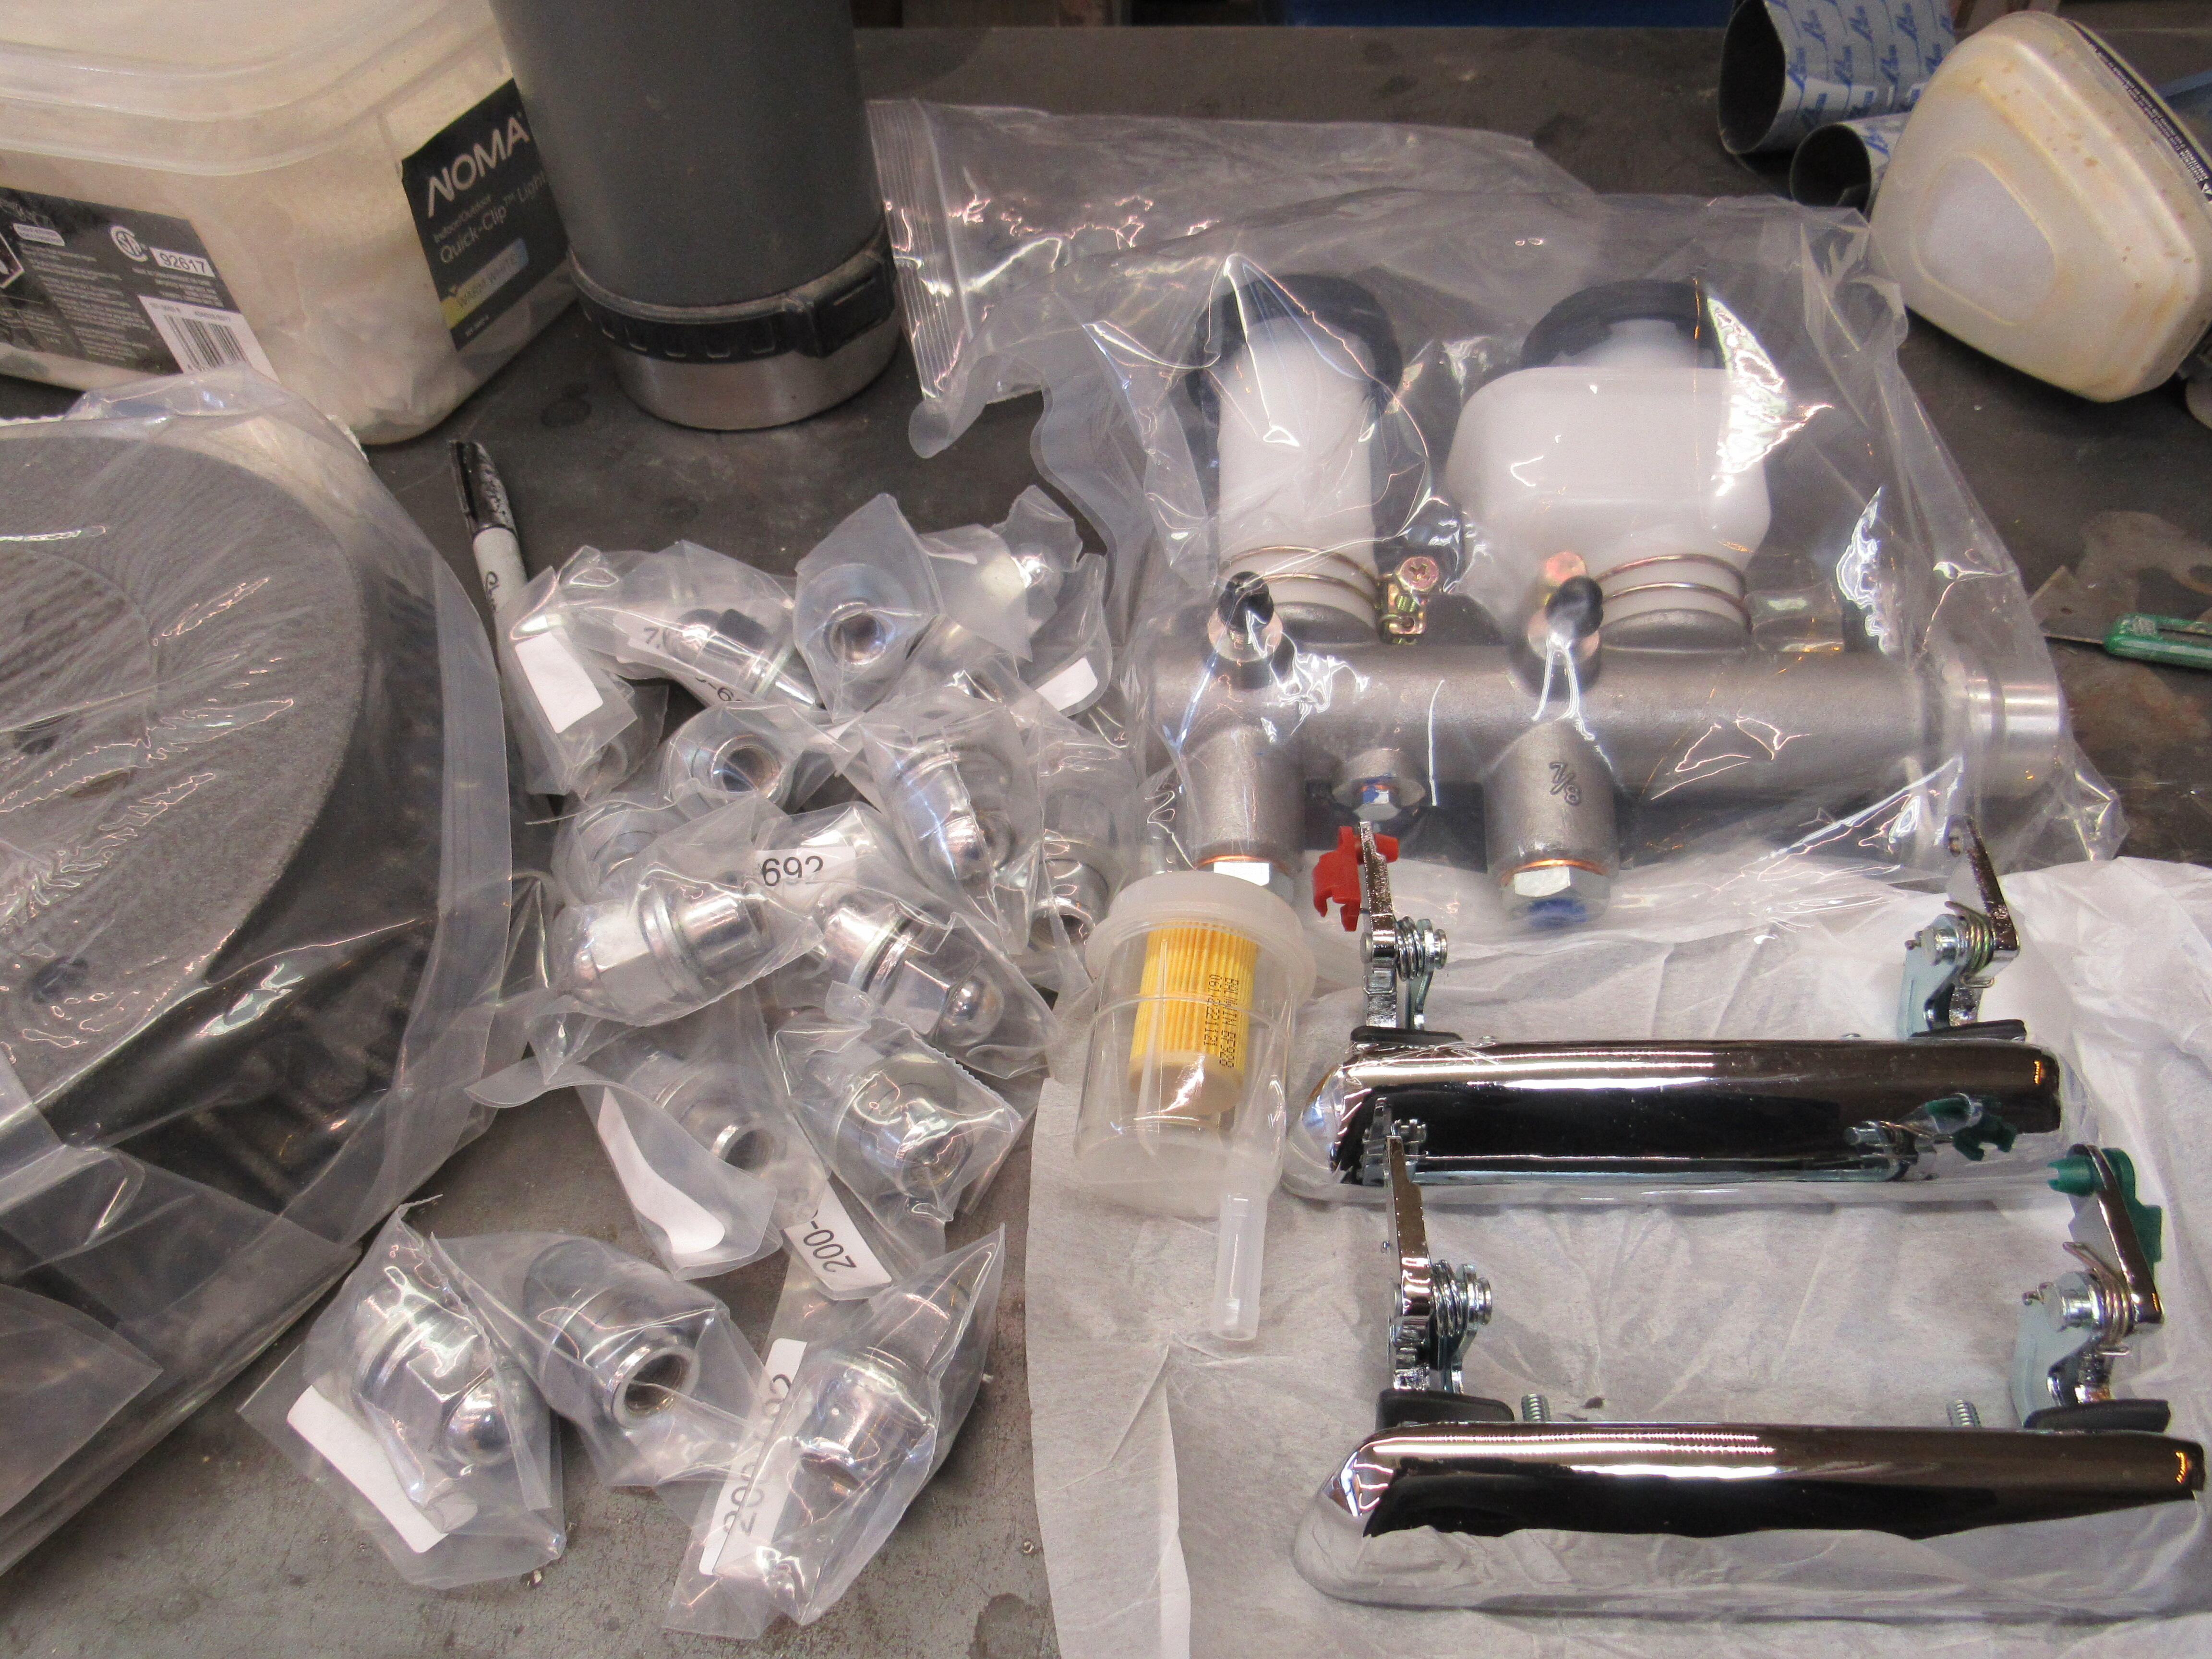
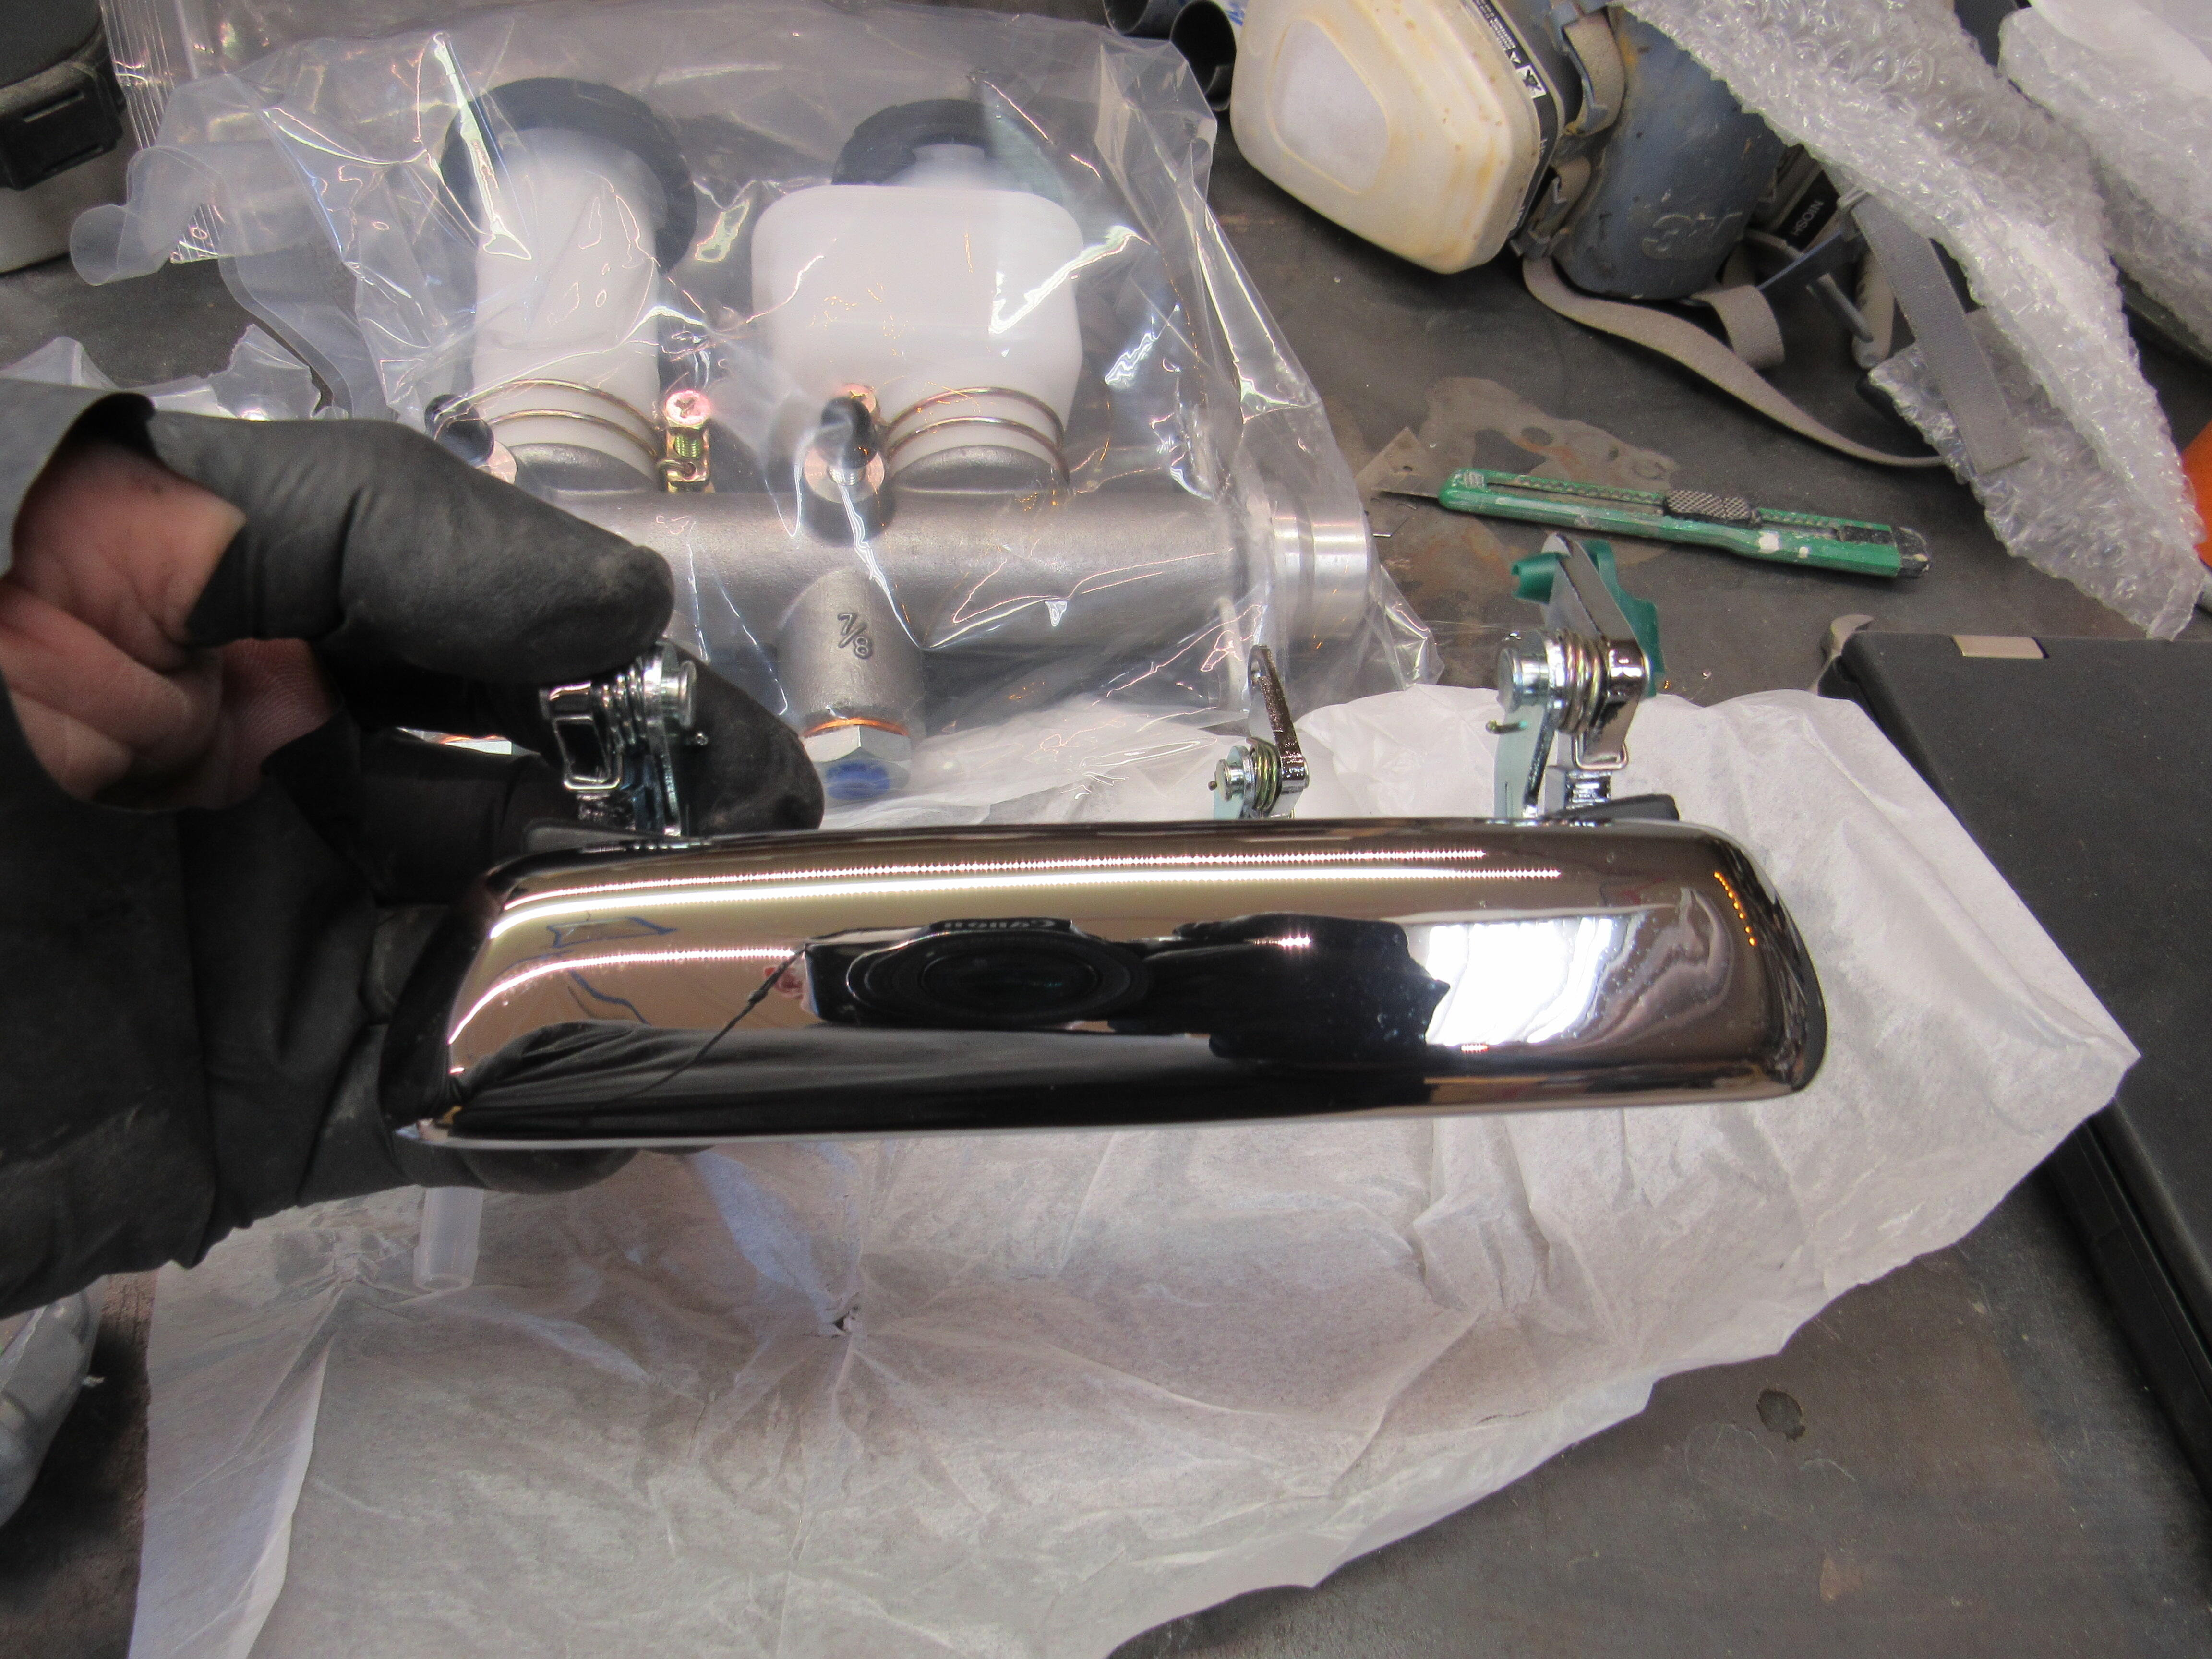
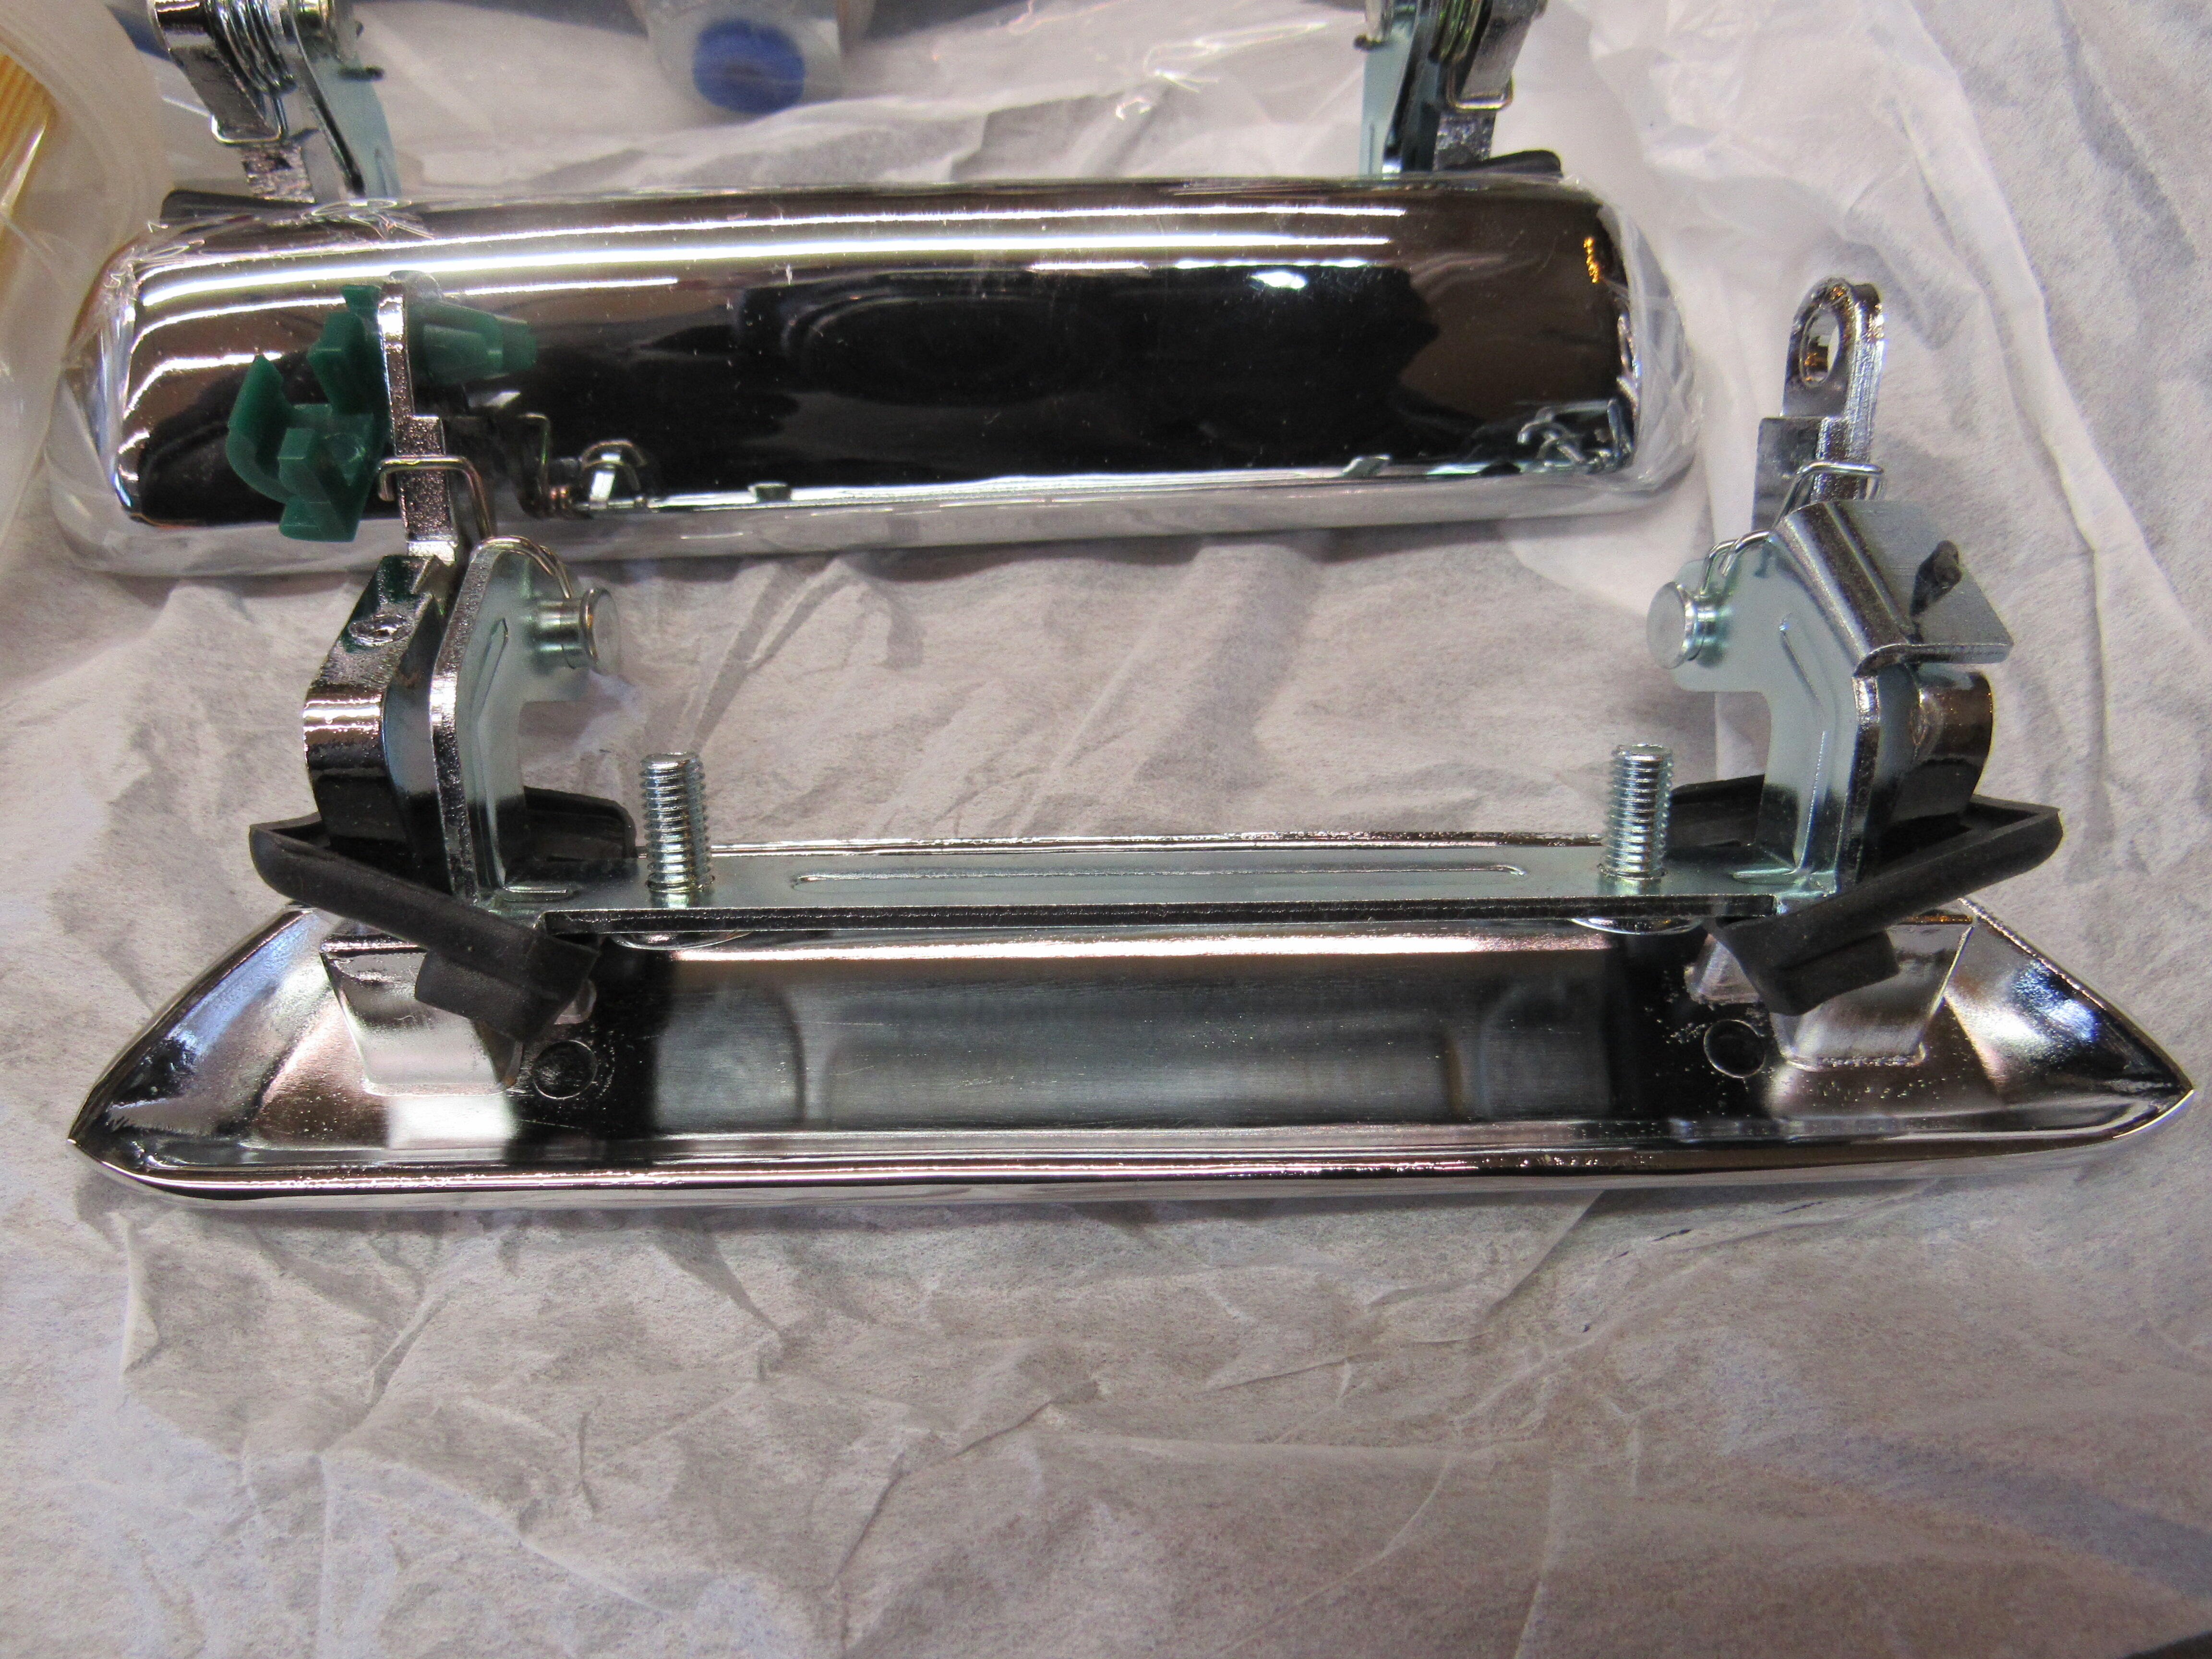
3 pointsDatsun goodies from Rockauto arrived today, these door handles are just as well made as the originals and only $27.00, they even come with rubber finishers.

 3 points
 -
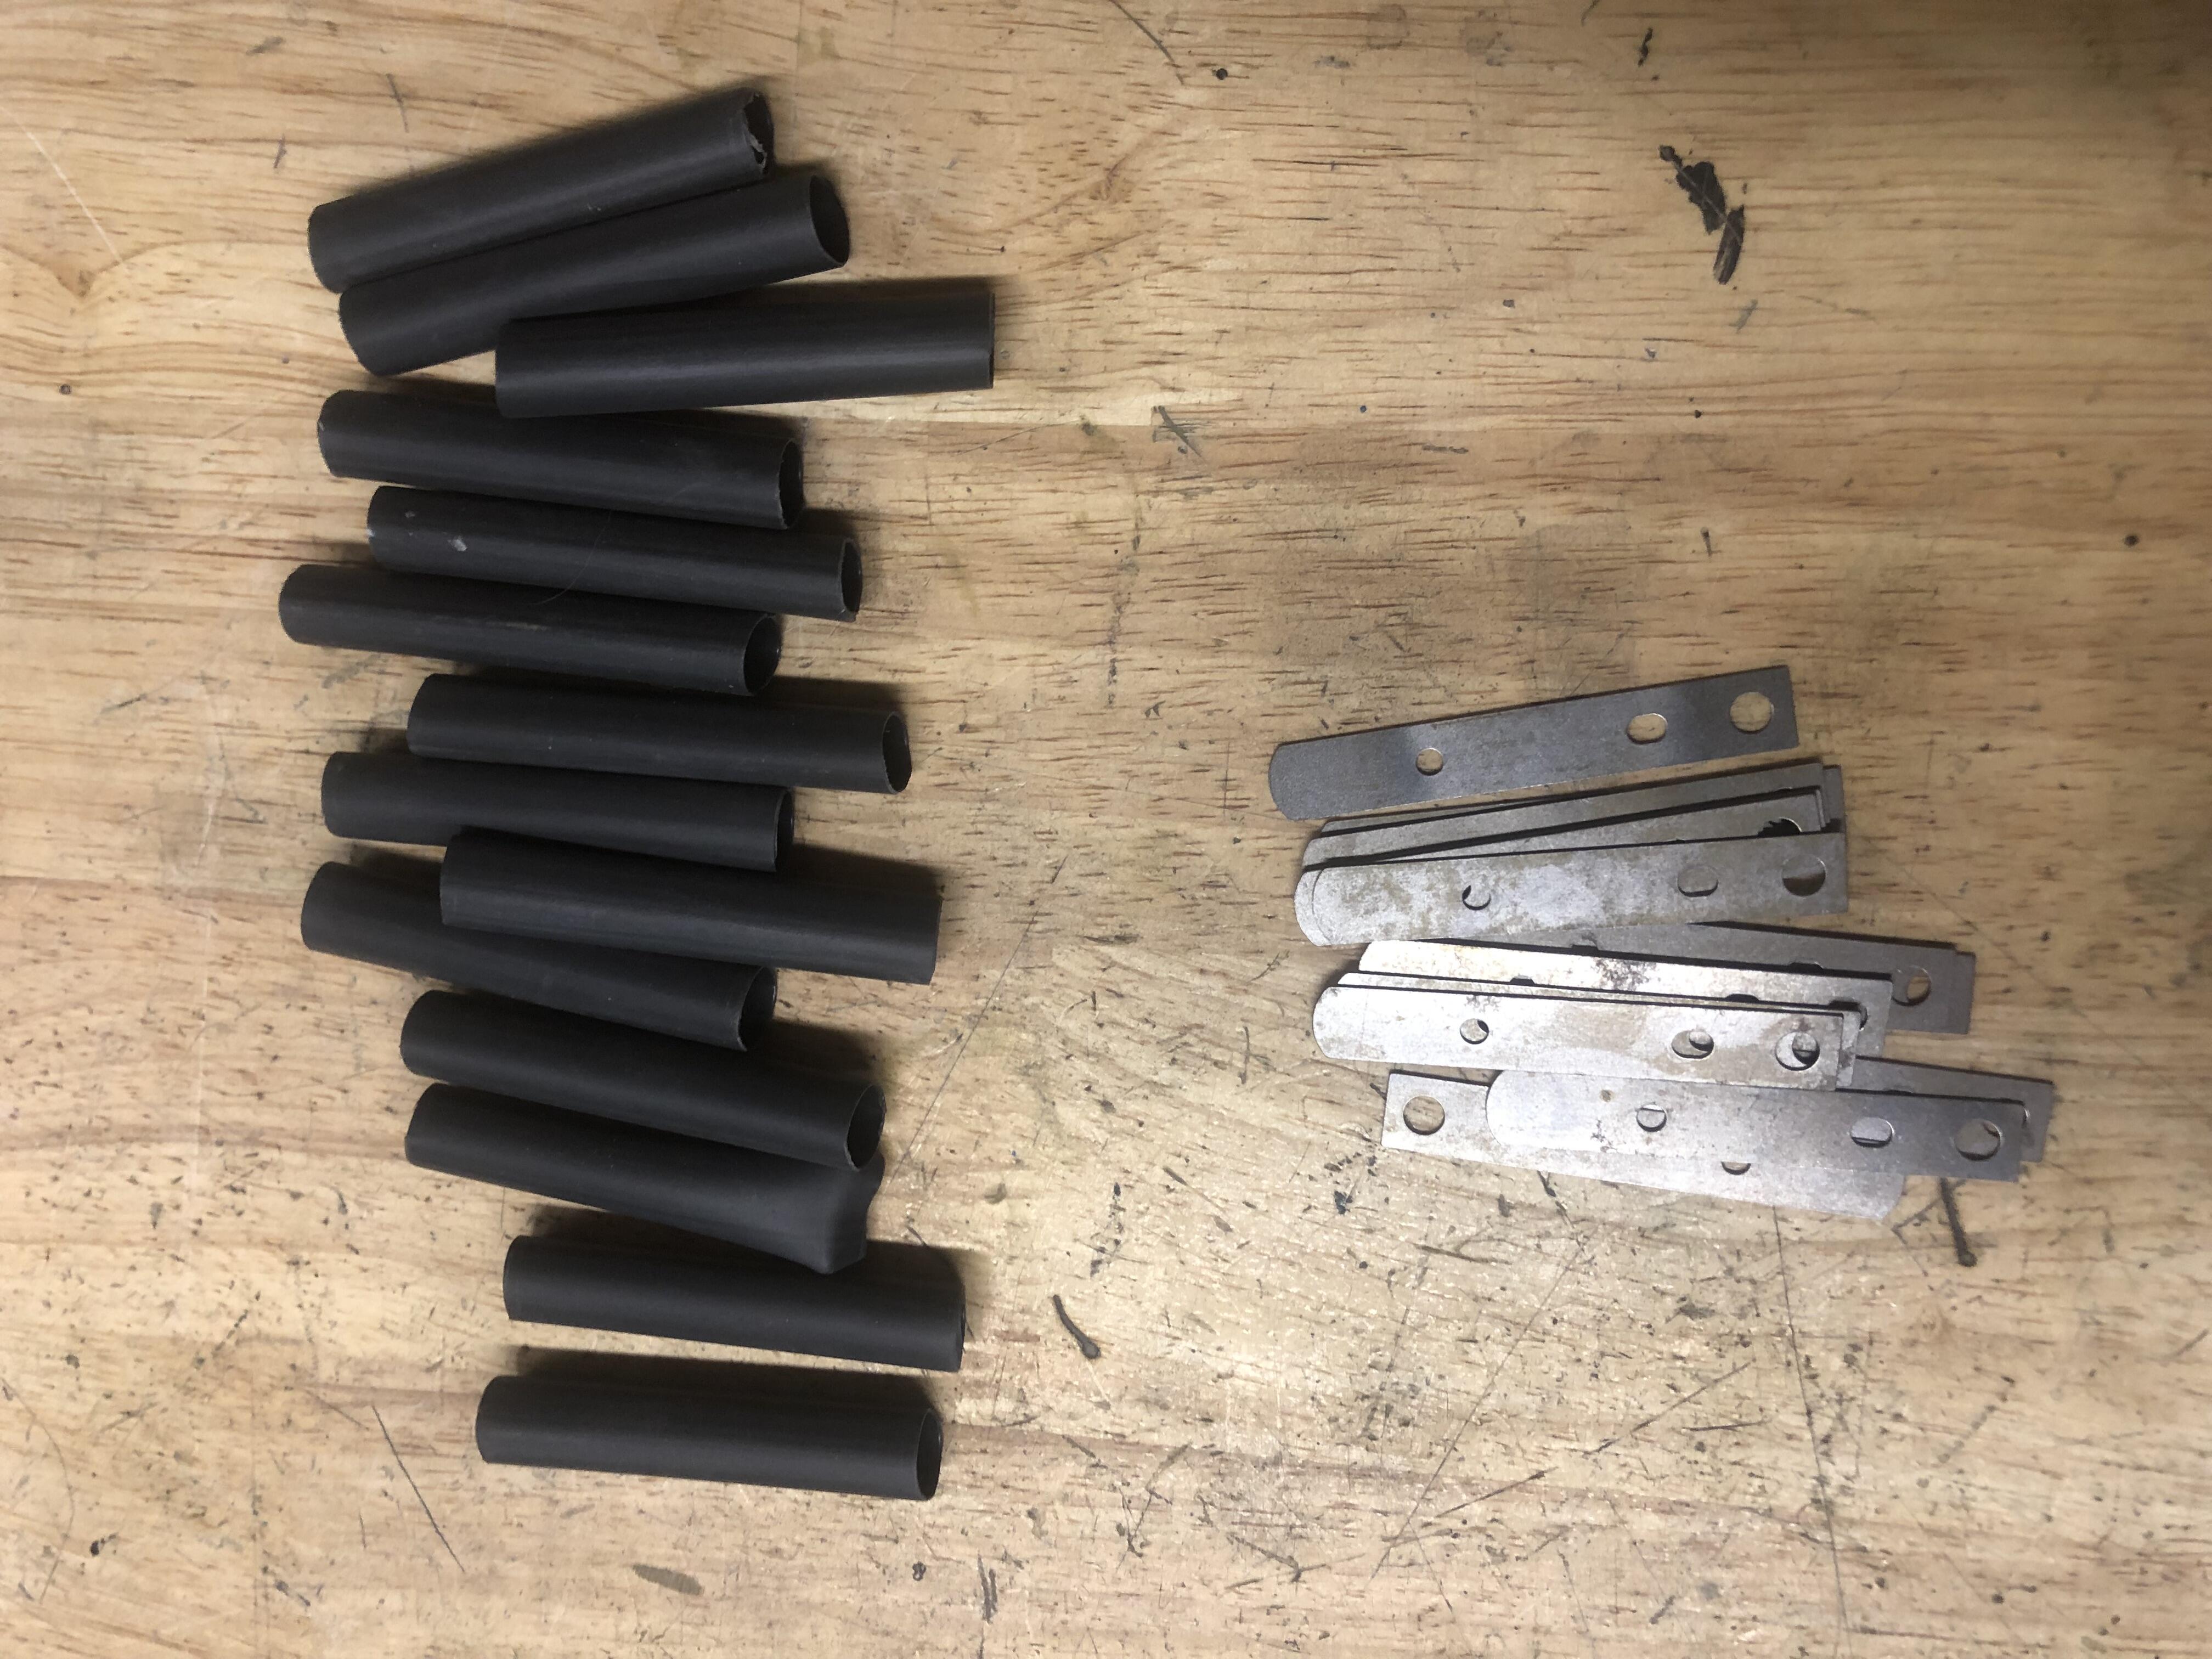
3 pointsOK, I am officially an idiot regarding these harness tabs. Looking back two years ago I inexplicably wrote "a close inspection of mine confirms that they were covered in their rubber casings AFTER the color coat. I read some folks who said the rubber coatings were painted body color, but that clearly was not the case with mine (5/71 240Z)." I cannot for the life of me recall which tab had body color UNDER the rubber. I sliced off all the dried and cracked rubber and every single one was bare metal underneath and the cleaner clearly had factory paint on the outside. I apologize for this knuckle headed error. Anyway... Trying to get my interior metalwork ready for final priming means getting replacement harness tabs installed on my new KFVintage floors. The "short" harness tabs from ZCarDepot are spot-on, and not worth time the work to make my own or salvage from other scrap cutoffs. Thru some trial and error found the perfect covering: 3/8" thick-wall, adhesive lined heat shrink (Molex 0192690023, available from Digikey). Slip the shrink to the middle of the second hole and apply a heat gun for 10-15 seconds. Then quickly press the end closed between two foam body sanding pads. Don't use any textured surface because that will leave an embossed mark on an otherwise smooth surface (don't ask me how I know this). I then I trimmed the end with a razor blade and using my sander rounded the end to match the rounded metal end. Nail clippers would be neater, but mine had too large a radius. Perhaps baby nail clippers would work. Nissan use a dip-method that I need to investigate someday. These heat shrink ones will be under carpet so I can be (slightly) less OCD about them. But clearly they were pre-dipped before they were spot-welded in place. So that is how I am doing it for any new tabs. Then I will apply heat shrink to the surviving tabs scattered around the car. I am not aware of any other non-metal (besides seam sealer) on the car before any coating spraying was started at the factory.

.thumb.jpg.36554a7a8a1052df9098bf8213cde0cb.jpg)
.thumb.jpg.46a469740bf949f53777ae9621f7722d.jpg) 3 points
3 points -
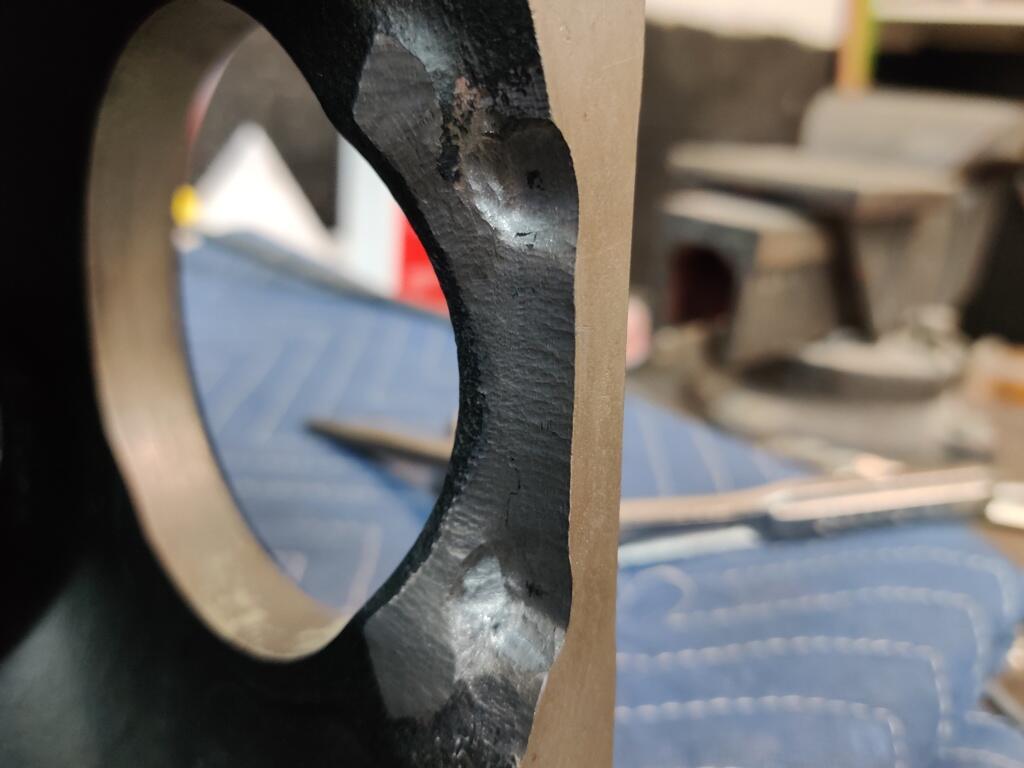
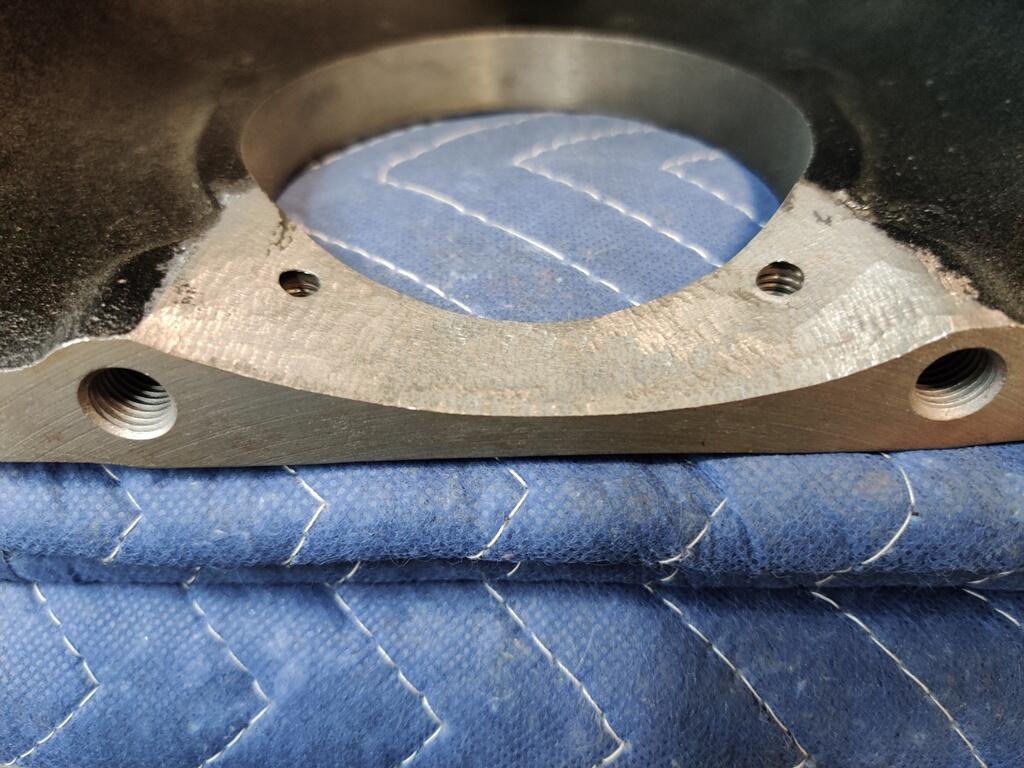
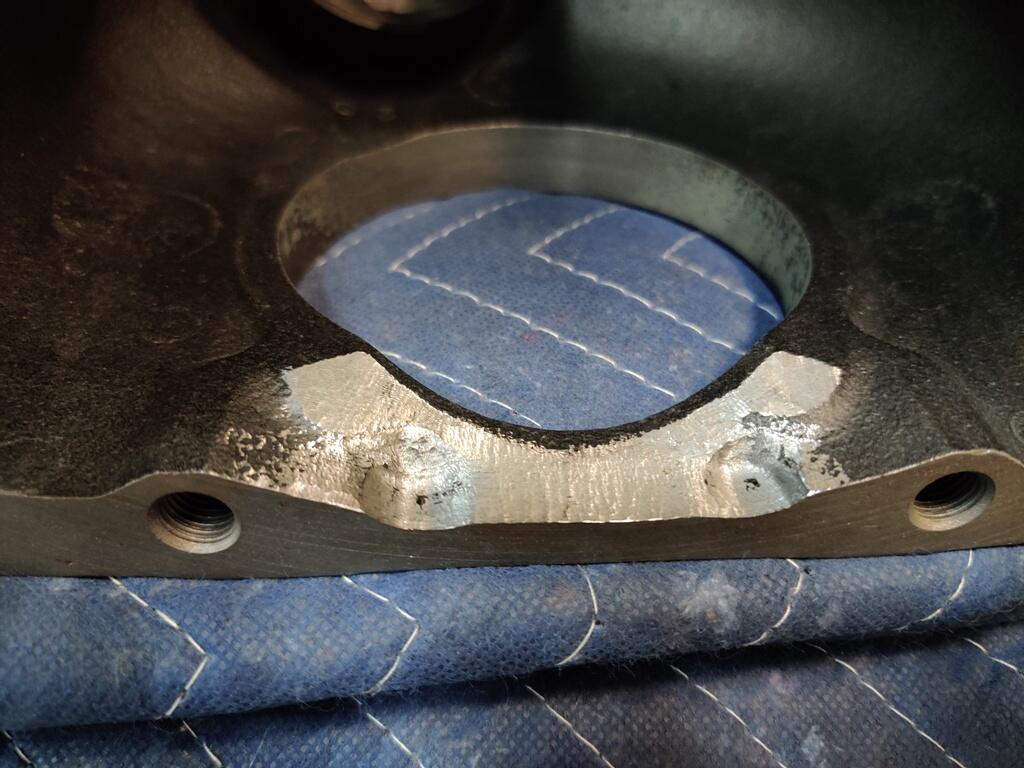
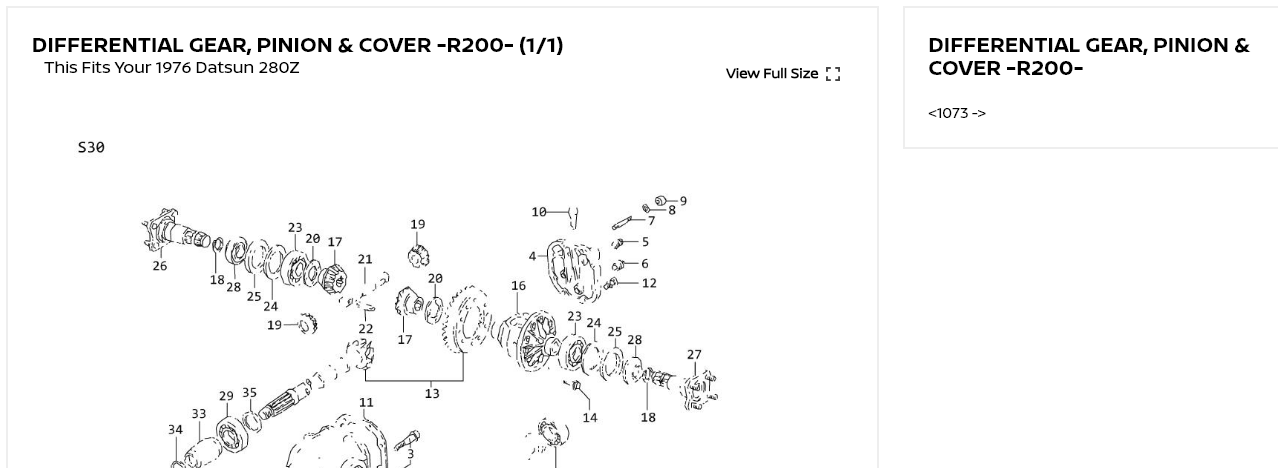
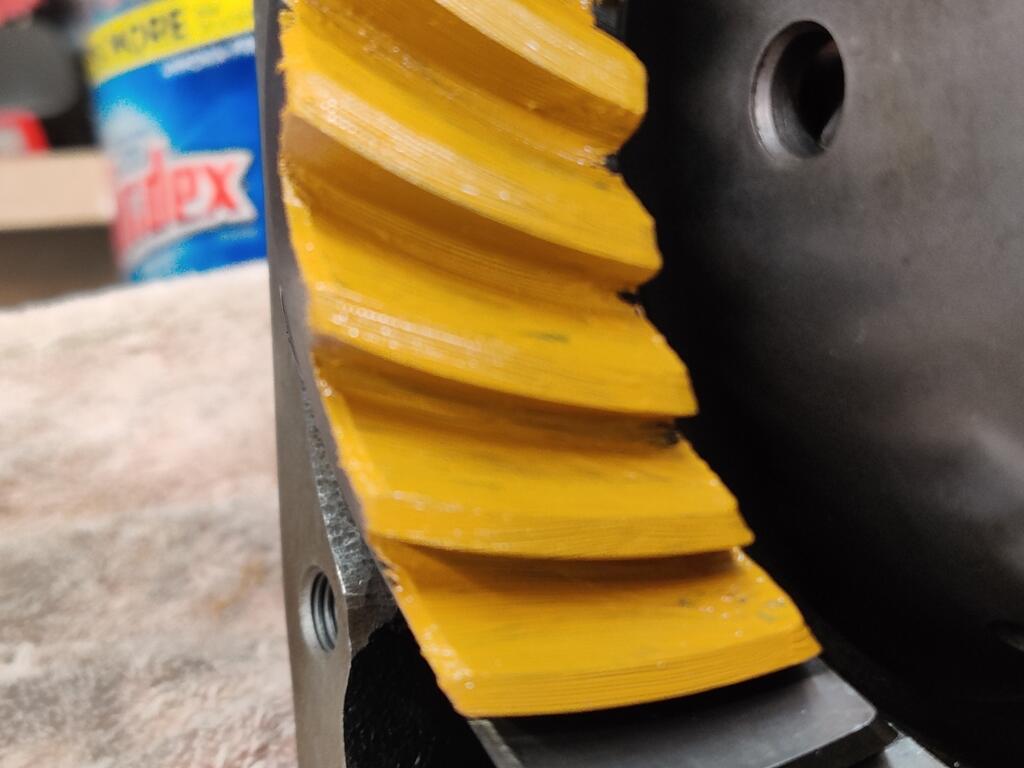
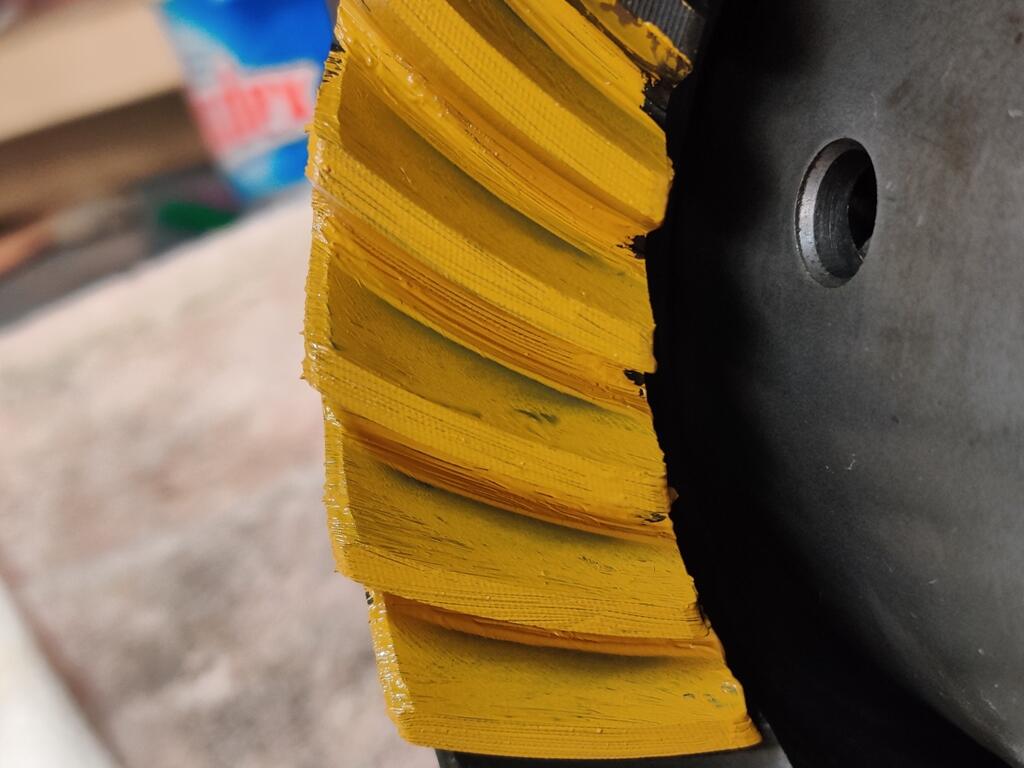
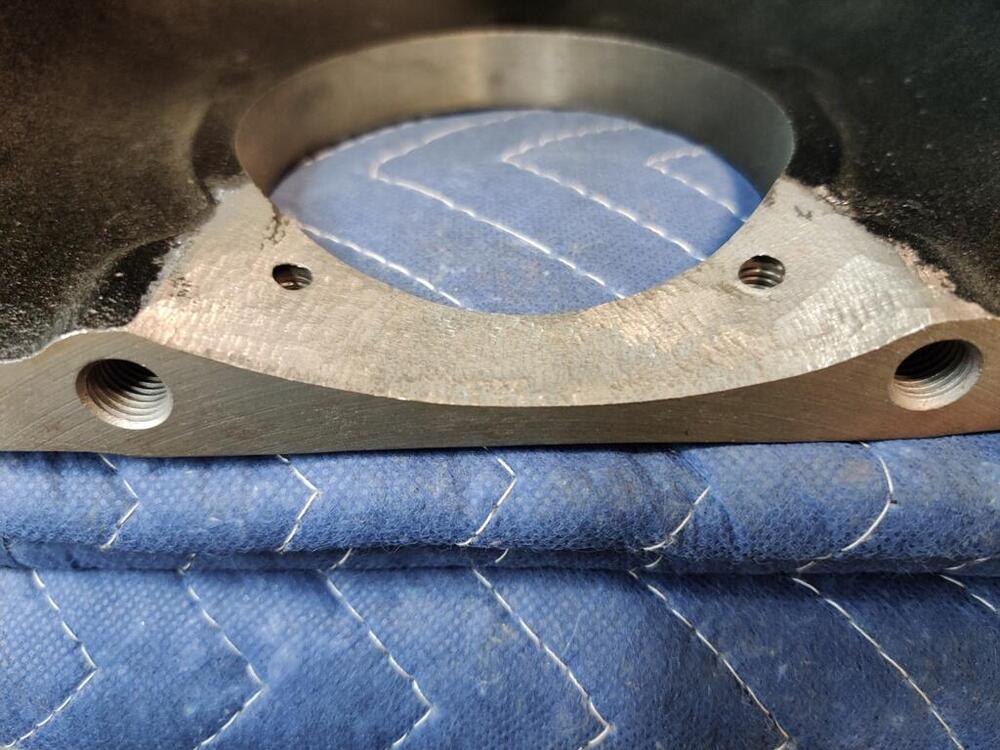
3 pointsHi Jeff, Just glancing at the pictures you provided, it looks to me like this area on the Subaru case is much thinner than on your case: I had to grind extensively to get the Quaife unit to fit. On the right side, I ground a little bit, and then made deep depressions to allow a couple the bolts to fit in "wells": On the left side, I ground more extensively, so much so, that I broke thought to the side retainer bolt holes. I spent hours with a die grinder. I would test fit, and knock lsd into the case lightly to make marks... which I then ground away. Again and again I repeated that process until the carrier went in. I also had to remove one of the ring gear bolts in order to get the carrier to slip in. After I determine the final shim size, I will assemble it one last time. During that final assembly, after the carrier slips into the case, I will need to torque that one last ring gear bolt through the side hole. Then I will be able to install the side retainers and finish assembly. The KAAZ unit may need similar approach.


 3 points
 -
At speed, it would act something like a surfboard. I think there's a skill to driving through deep standing water where you create a sort of 'bow wave' effect which pushes the water out in front of the car at the right speed to stop it coming over the top of the car? Some of the later cars had big rubber flaps attached to the corners of the front bumper to help with this.
 3 points
 -
2 pointsPick N Pull won't sell the whole car unless they list it as a builder. They also only show this one picture of it in the processing yard. They get stripped fast. Funny they list the transmission as unknown, they can't tell a stick from an automatic? It should also have the desirable brake booster on that one as well.2 points
-
Sorry, I wasn't pointing at SimplePart. I don't know how the information gets put in, I thought it would be Courtesy Nissan doing it. Just showing some not-quite-right stuff. The idea is great. It works. Click, click, click, there's what I was looking for. Good luck. Carry on.2 points
-
2 pointsI tried a razor blade once and it is sooo easy for the blade to grab too much material and gouge or tear, I caused so much damage that I went the nib file route after that. For those of us who don't do this work everyday, a file may be slower but it's generally safer.2 points
-
2 pointsThanks for the tip, 240dkw! Replaced the newly replaced condenser (no markings on where it was made, purchased from NAPA) with a Delco condenser (made in Mexico) and she started right up. Still going to install the Pertronix ignition once it's delivered. Will be interesting to see the difference between the two setups.2 points
-
The guys at the original Courtesy said that they were working on an improved site. Looks like they finally got it done. It looks very nice. You can go directly to your vehicle and find parts. It's better than MSA's wb site. Very well done.


 2 points
 -
Agreed. Those look pretty much dead soft. (Annealed.) If you dare, you could hit the edge of your original factory shim with the file the same way and see how it compares? I think you could do that and not affect performance. That could give you something to compare against as far as what hardness you are looking for?2 points
-
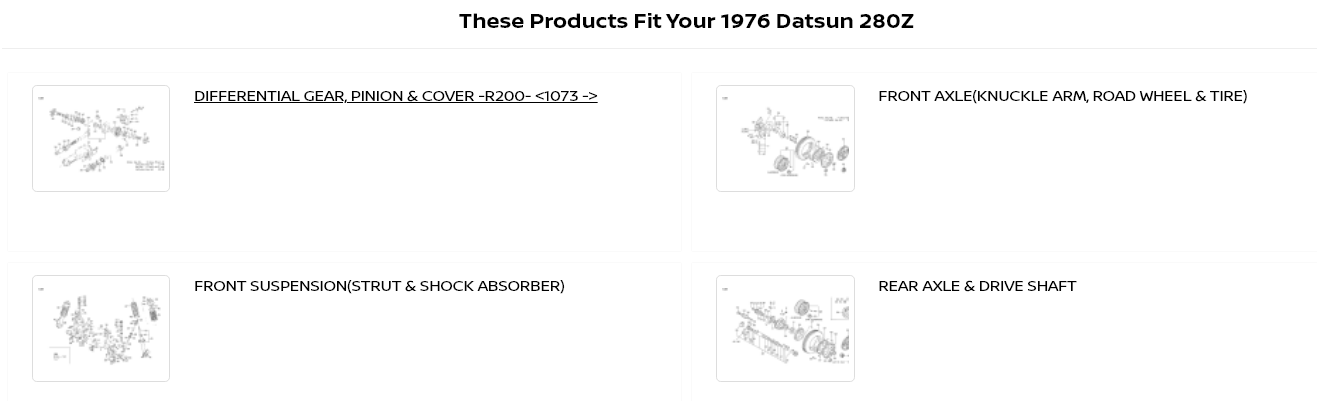
Courtesy Parts Online is alive and well... just moving to a different address. I stopped by this morning to check on our friends, had a nice visit with David House. With a decline in online orders over the past year, the old site managed by a 3rd party was no longer cost effective. It is business as usual at this Nissan-managed site: https://parts.courtesynissan.com/ And... Courtesy is no longer a part of Group 1 Auto, ownership has changed to Clay Cooley.1 point
-
1 pointThis shipment was from Z Car Depot. We have shipments of goodies coming from all over the place at the moment, including Rock Auto. Sent from my SM-S901W using Tapatalk1 point
-
1 pointI just got mine to fit. I didn't need to grind off nearly as much as InLine6 did on the gear side and on the other side, I just needed to grind a little off of two spots on the 1/2 shaft opening so that the LSD carrier could make the turn. Now it easily falls into place. I'm surprised that an LSD designed to fit a specific case will not fit unless you alter the case. Hopefully since I chickened out of replacing the pinion bearings, I won't have a shimming issue. I attached a shop drawing of the KAAZ DAN2020 LSD and I was wondering if it is smaller than the Quaife unit. Jeff1 point
-
1 pointThis popped up this morning. I've noticed that there aren't many Datsuns ending up in the local wrecking yards anymore. This one looks like it might still have the drive train. The whole car might even be saveable! https://row52.com/Vehicle/Index/JN1HZ04S3BX405996
 1 point
 -
1 point
-
I think the description says the door is in the car. Just trying to help 🙂1 point
-
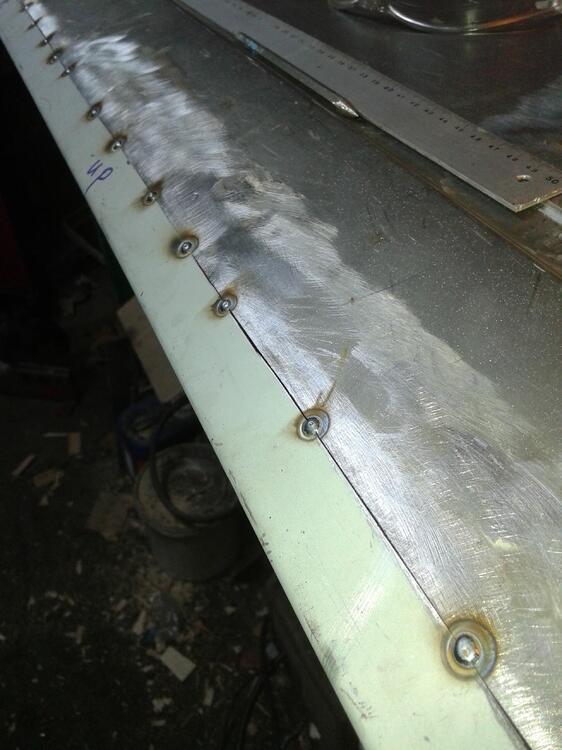
1 pointEh.. first weld the tab and thén put the heat shrink stuff on.. now you will burn that.. So first weld the tab, then spray them in color of the car and then put the heatshrink stuff on.1 point
-
1 pointHi, If you don't have enough penatration you need to go from step 2 to step3 but weld just for 1 second at the time.. lay small welds after each other. Normally when you weld thick steel you can weld for say a minute, but thin steel you have to make small short welds.. Also, welding is putting a current through your cables and the steel your welding.. You have to keep in mind that if you have the earth clamp further from your welding work, that welding current also has to travel further and that extra resistance also reduces the welding current, so the shorter you are on your weld with the earth clamp, the higher the current will be. .. by placing it as far away as possible you create a kind of step 2.5 on your welding machine. Just be sure that your clamp is making good contact to your chassis. Make small welds and as far as possible from each other, especially when doing something like this door i repaired.. one weld left one to the right then one in the middle.. let it cool down, and weld one left one right, let it cool down and lay some weld between.. cooling down can be done with a damp cloth. (Not to wet. but not to dry 😉 ) To be a good welder takes years, it's a matter of trail and error! Once you understand how it works you get better and better in it!
 1 point
 -
1 point
-
Just on the down low... I work for SimplePart - the company that provides the ecommerce platform that Courtesy is now using. 😉1 point
-
1 pointif i recall, your issue was the pivot points for the wiper arms were rusted shut. Once you got them disassembled I'm assuming you either sand blasted or used a grinder to remove rust and get back to bare metal. once you have it at bare metal you should zinc plate the metal pieces to prevent future corrosion which is what caused you rust in the first place. By refinishing I just meant rust removal, metal prep, and proper plating. Then prior to assembly grease the shaft before inserting back into the pivot plate and locking it up with the c ring.1 point
-
1 pointThe painter who painted Cody's goon would use a straight razor blade. Put a small piece of tape on each end wrapped over the blade. That spaces the blade up the thickness of the tape. He would then scrape runs with the razor blade standing straight up off the paint. You could then scrape them down a little, but not all the way. Let them harden up some before coming back to them.1 point
-
This car may have your left door glass if he is willing to part it out for you. https://www.facebook.com/marketplace/item/1588085648594964/?ref=browse_tab&referral_code=marketplace_top_picks&referral_story_type=top_picks1 point
-
1 point
-
1 pointIf there are areas of the cast iron housing that are in the way of the ring gear, it is perfectly acceptable to grind off the areas that are in the way. You can't go crazy on it but a little bit here and there won't hurt the strength of the housing. Stuff a clean rag up into gap around the pinion gear so no fillings get in there then spray it out with brake cleaner before assembly.1 point
-
Another option is a local off-road shop. The ones that support the guys that destroy things every weekend. Or one of the big online shops. https://www.randysworldwide.com/shop/?q=shims&mode=autocomplete1 point
-
Agree with Mr [mention=22019]Patcon[/mention] - the factory location on my 260z (just behind the seats on the sides with tiny speakers) isn’t great for sound. Let alone anything in the luggage area behind strut towers! BUT, this little baby (USW10) under the passenger seat transformed things to an “acceptable” standard. The sub volume controller is hidden under the ashtray and very useful to have for easy tweaking. Shockingly great bass from such a little thing! Incidentally, I refuse to put more holes into my car than the factory did, so I used industrial Velcro to hold it down. A total no no for sub woofer mounting, but it works exceptionally well and didn’t have a detrimental affect. https://amzn.eu/d/4M8AstJ Then having gone through the effort, I found myself just listening to the engine [emoji14] Seriously though, in my experience as a car audio-holic in my younger days, what I’ve found is that with speakers, the “cavity” and its solidity / sealing was everything when it comes to decent bass and some mid range. In a car environment it’s hard to beat a decent (and discrete) pair of 2 way speakers at the front with separate tweeters up high - ideally at dashboard top height but maybe at visor height in a Z to keep things looking clean? Finally, MLV sound deadening is vital on the car panels behind / around the speakers - especially if open cavity. My high end 6x9s on a custom heavy arse shelf sounded amazing in one car. But the same set up transferred into a hot-hatch French car with panels made of Cornflake packets sounded like $10 speakers. The paper thin panels just absorbed everything but treble!
 1 point
 -
Doing great work there - hang tough buddy, you’re making progress. It’s great to see you taking the time and giving it the proper attention it needs. This is why I didn’t take mine to a “specialist”. They would in no way give the time and attention you have to get it absolutely spot on. This will pay dividends down the road - literally! ;) When I was playing with mine, I was using throttle body / carb cleaner to get the paint off, then wiping down with microfibre cloth. I agree, WD40 may be causing you some additional fun. Not sure if this is helpful but the buddy doing my R200 received shims yesterday from the Zcardepot in Nissan packaging. They appear to be very decent quality - albeit a very different size to that which you require. Is it worth tapping them up for your shims to see if they have the size you need and comparing with the ones you have? We spent £43GBP postage - at least you have the luxury of paying a lot less. I felt like holding them in my hand and exclaiming: “my precious”!!!!!1 point
-
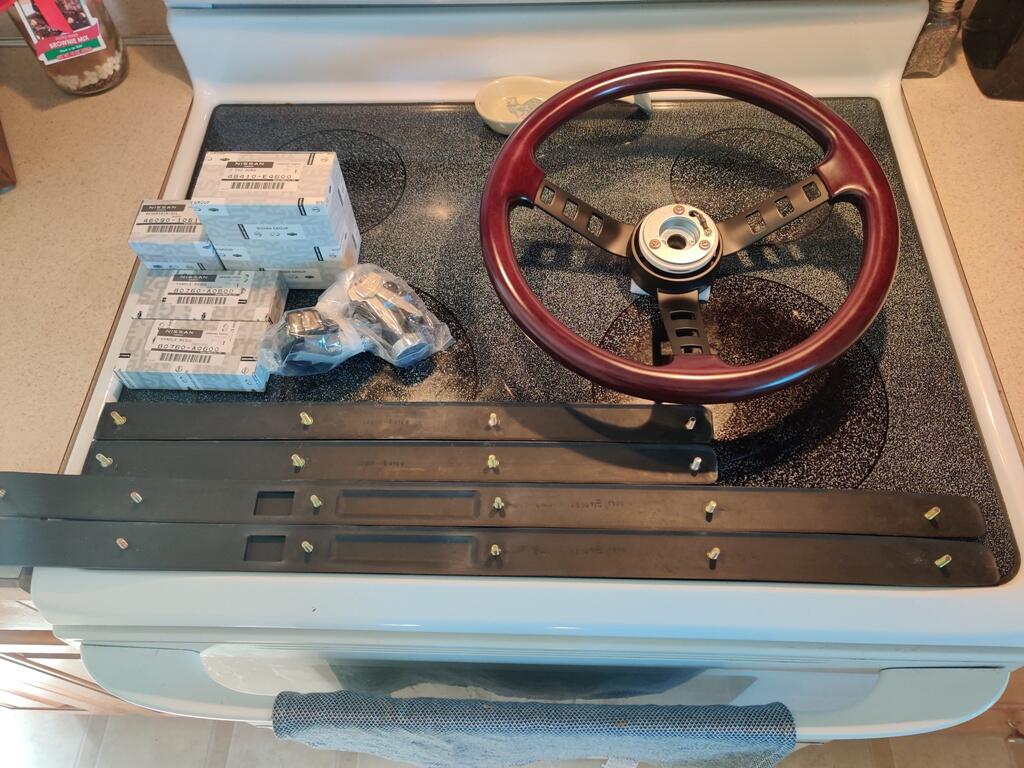
Today, I received some items I won from auctions in Japan. I use a third party, Jauce.com, to assist with the logistics. They handle receiving items... holding them until all are ready to export, and then packaging and sending them to me. There are many fees. There are bank fees when depositing funds. There are auction fees when you win. There are tax fees. There is shipping from the seller to the Jauce warehouse. There is the cost of shipping to the US. With all the fees and shipping, it can be difficult to determine whether what you paid was a good price. I thought it would be interesting to share a bit about my experience with purchasing and importing these items. The steering wheel is a "Nissan competition replica" - this one is wood vs. others available which are vinyl. I also got several genuine Nissan parts including a front set of front bumper rubber strips (the horizontal ones), a set of matching rear bumper strips, an ignition switch, a couple of window cranks, a horn pad for the steering wheel, and a clutch slave cylinder reservoir. Apparently someone made a batch of these replica steering wheels a while back, and you can still find them available in a few places. Generally speaking, without the horn button, you're looking at a minimum of $389 here in the US. Pair of genuine Nissan front bumper rubber strips are discontinued and no longer available - $200.84 with free shipping from eBay Pair of genuine Nissan rear rubber strips (the horizontal ones) $145 and $17 shipping from eBay and $66.51 plus shipping each from NissanPartsDeal.com Original Kanto Seiki ignition switch is available on eBay for $398 plus $19 shipping Set of two genuine Nissan window cranks $46.85 ($93.70 for two) currently, though they go on sale for about 15% off from time to time) plus shipping from NissanPartsDeal.com A genuine Nissan horn pad for a stock steering wheel - $310 on eBay and $269 plus shipping from NissanPartsDeal.com (but not currently available) A genuine Nissan clutch slave cylinder reservoir (old type) which is discontinued and no longer available Adding in all the fees and allocating the final shipping to the US. proportionately per item with the final auction price with fees included, here is what I actually paid: Replica steering wheel - $320.69 Pair of genuine Nissan front bumper rubber strips (NLA) - $96.46 Pair of genuine Nissan rear rubber strips - $109.77 Original Kanto Seiki ignition switch - $145.93 Set of two genuine Nissan window cranks - $63.16 A genuine Nissan horn pad for a stock steering wheel - $193.49 A genuine Nissan clutch slave cylinder reservoir - $21.30 A dollar buys a lot of yen these days, historically speaking, as can be seen from the graph below. The exchange rate is pretty much what it was back in about 1987. Something to consider!

 1 point
 -
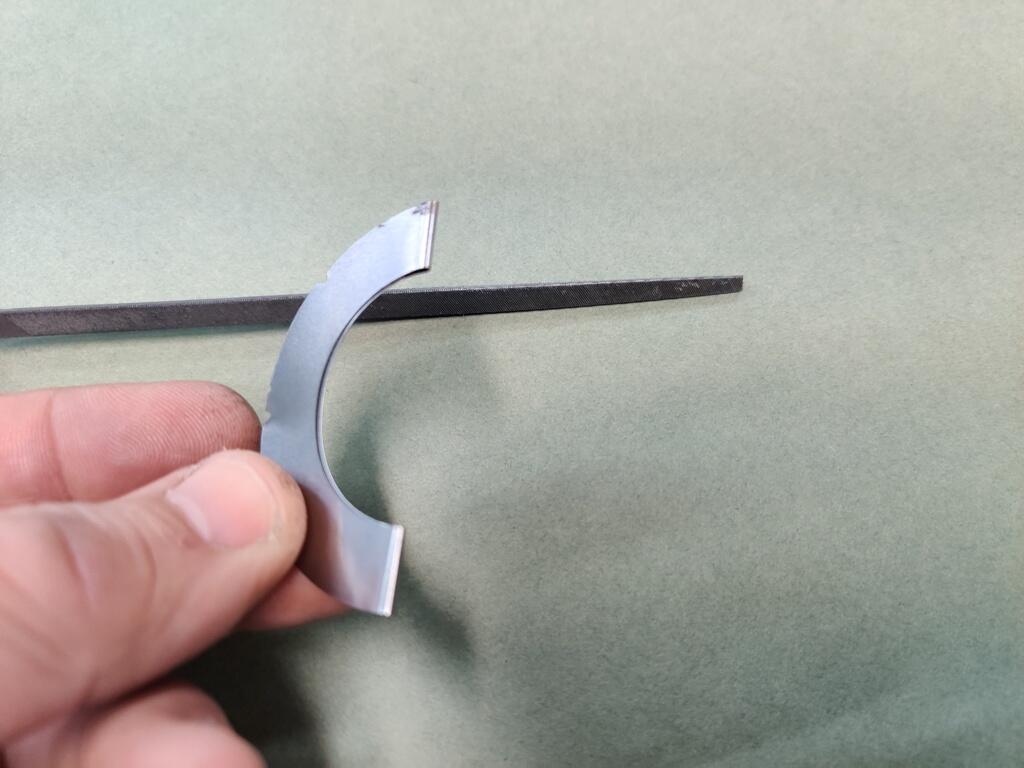
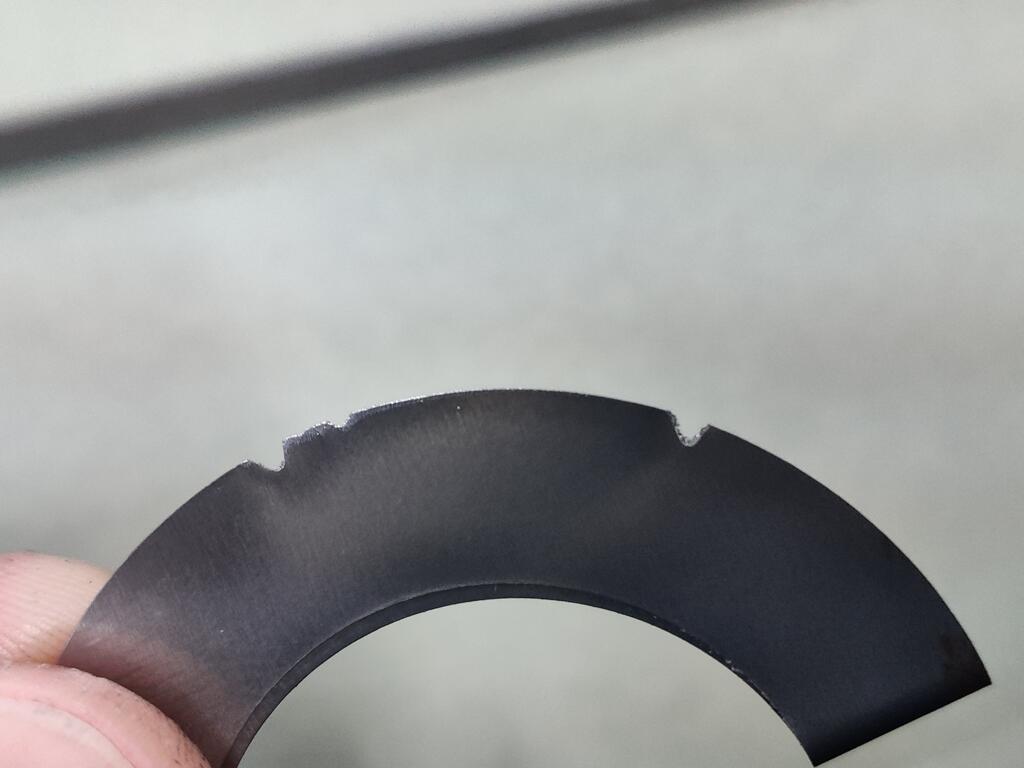
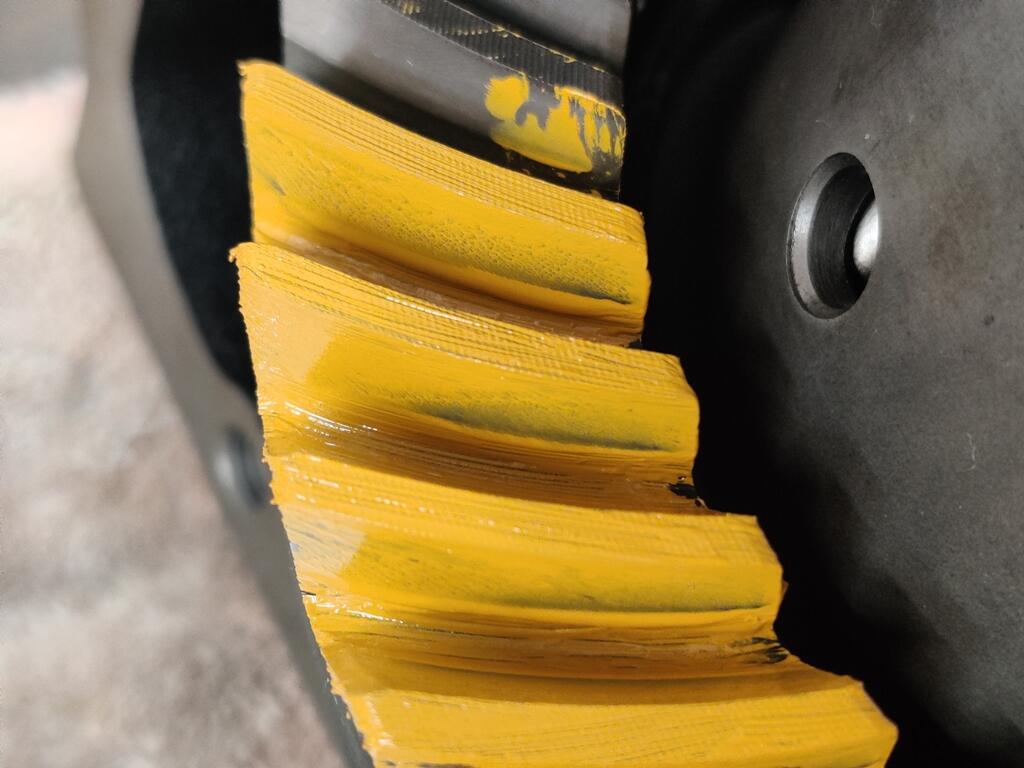
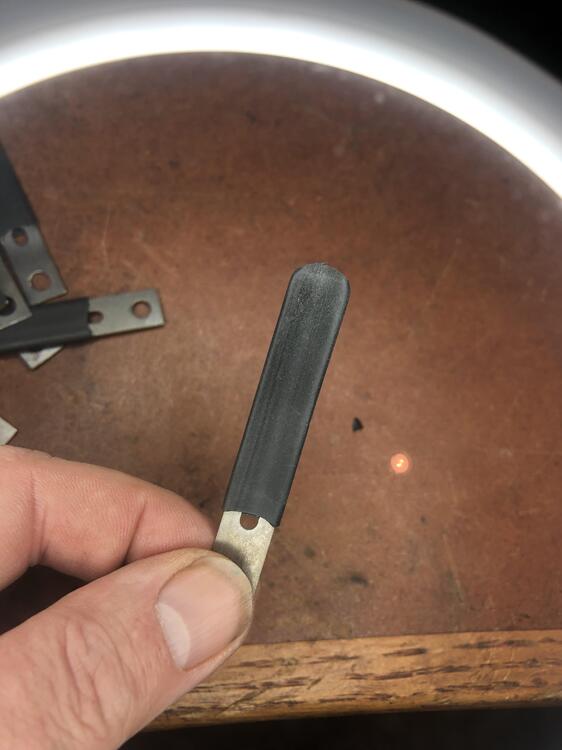
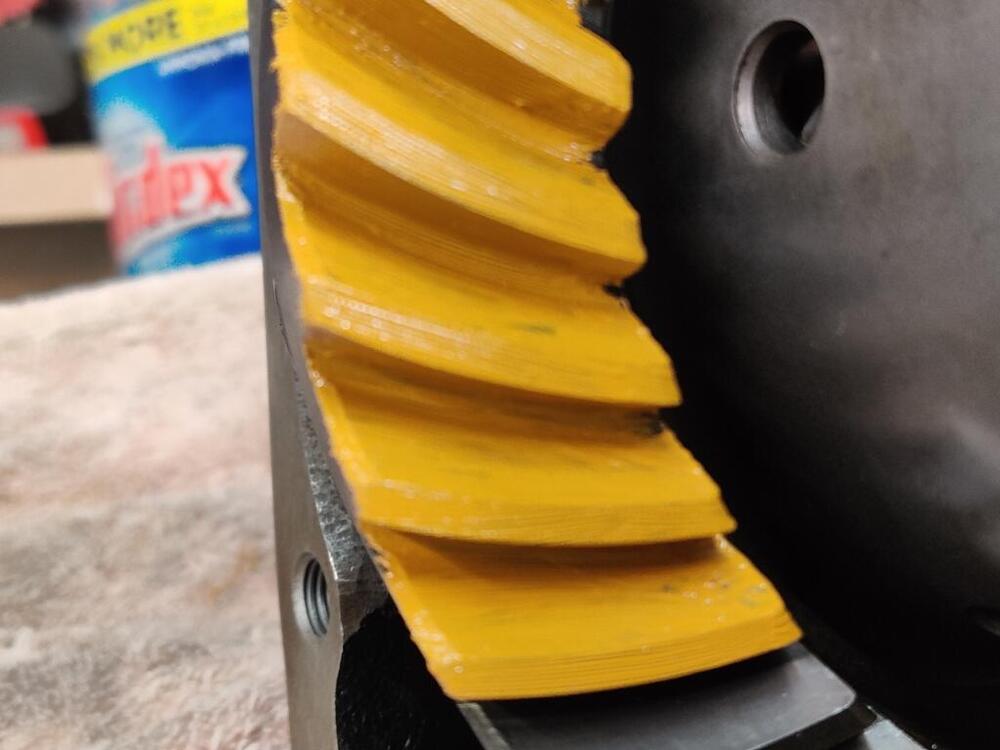
Welp... 😑 I thought maybe I was close to done with the shim issue until tonight. First came some shim testing. Folding one in half... and no spring back whatsoever. Then, I took a small triangular file and made a few strokes with meaning behind them. Even stacked twice as thick .010", four or five strokes was cutting through the shim pretty easily. Subjective... but not great signs based on the guidance. Then, I put the paint on the ring gear to check the wipe pattern. As a reminder, all three side shims are on the right, and backlash is .005". Start: Coast side - contact is at the lower portion of the gear tooth. A closer view and from a different angle of the same: And here is the drive side. Compare with the illustration from the Nissan differential manual: I am beginning to think that moving the pinion shaft toward the ring gear is not equal to moving the ring gear towards the pinion shaft --- as it relates to contact pattern. There is also as possible issue with cleaning the ring gear with WD40 - the paint may not be acting the same way as it was before with the perfectly oil free ring gear. I think my next step will be to remove the pinion gear yet again and take my best guess at additional shim thickness necessary to allow me to get about .004"/.005" backlash with the one left and two right side retainers in their original positions. Also, I am not comfortable with the hardness of these latest shims based on my observations today.


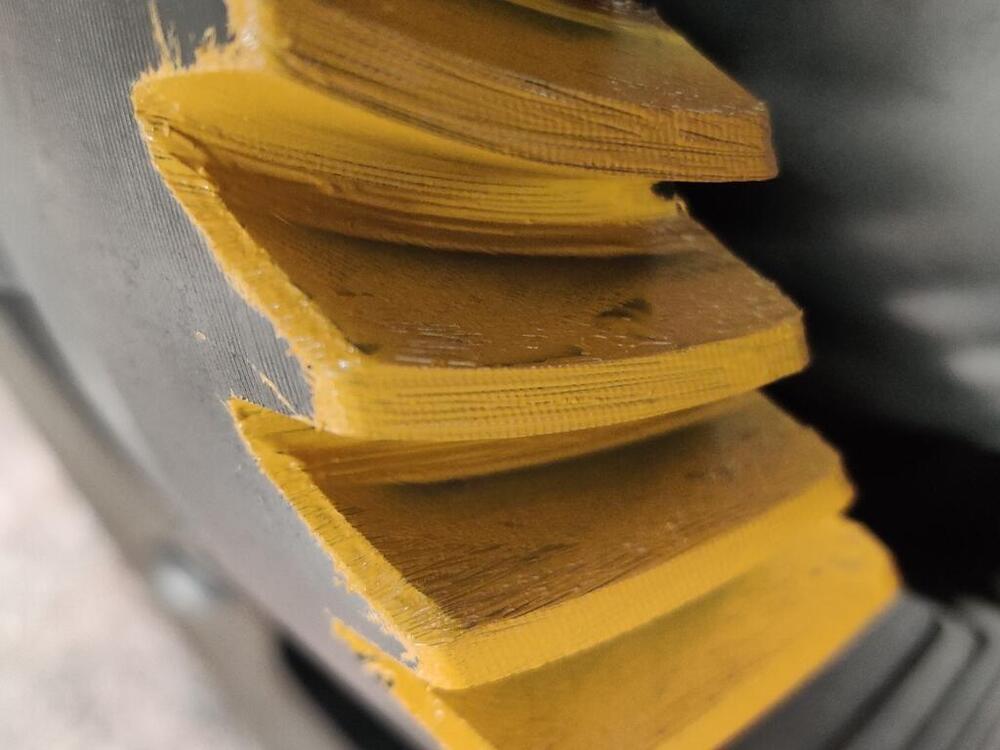

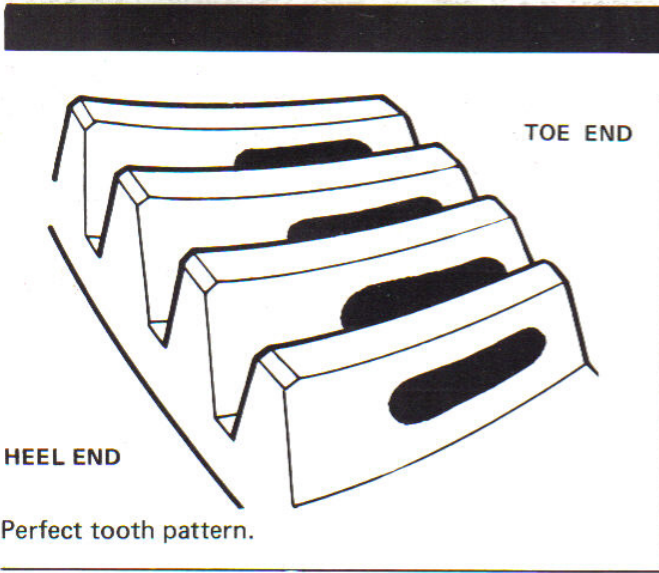 1 point
 -
1 pointWith original parts becoming pricey and scarce, I think the hardest part of rebuilding a z is getting quality parts that will fit. I spent a ton of time (and money) trying to work with garbage aftermarket stuff. We need a sticky that rates aftermarket parts. Dashpot gets zero stars. Belmetric 5 stars.1 point
-
1 pointIs the head thread pitch/thread length identical for all s30 heads? If they are different, then my guess is that would be the cause. Regarding NGK plug part numbers I found the bpr6 to be 7133 and the bpr7 to be 5534. Just putting this in here in case people look for those NGK part numbers in the future.1 point
-
1 pointLiking the grannyknot link and added to favourites! This is the other one I use which also gives the same info on a different way https://tiresize.com/calculator/1 point


.jpg.345184507fc40129e261f2c1124c218d.jpg)

.jpg.20446ea758b198e0724db5161640b702.jpg)