Leaderboard
-
inline6
 Subscriber
 7Points1,282Posts
 -
Patcon
Subscriber7Points11,142Posts -

CanTechZ
Free Member5Points1,311Posts -
Matthew Abate
Free Member4Points1,204Posts


Popular Content
Showing content with the highest reputation on 10/29/2023 in all areas
-
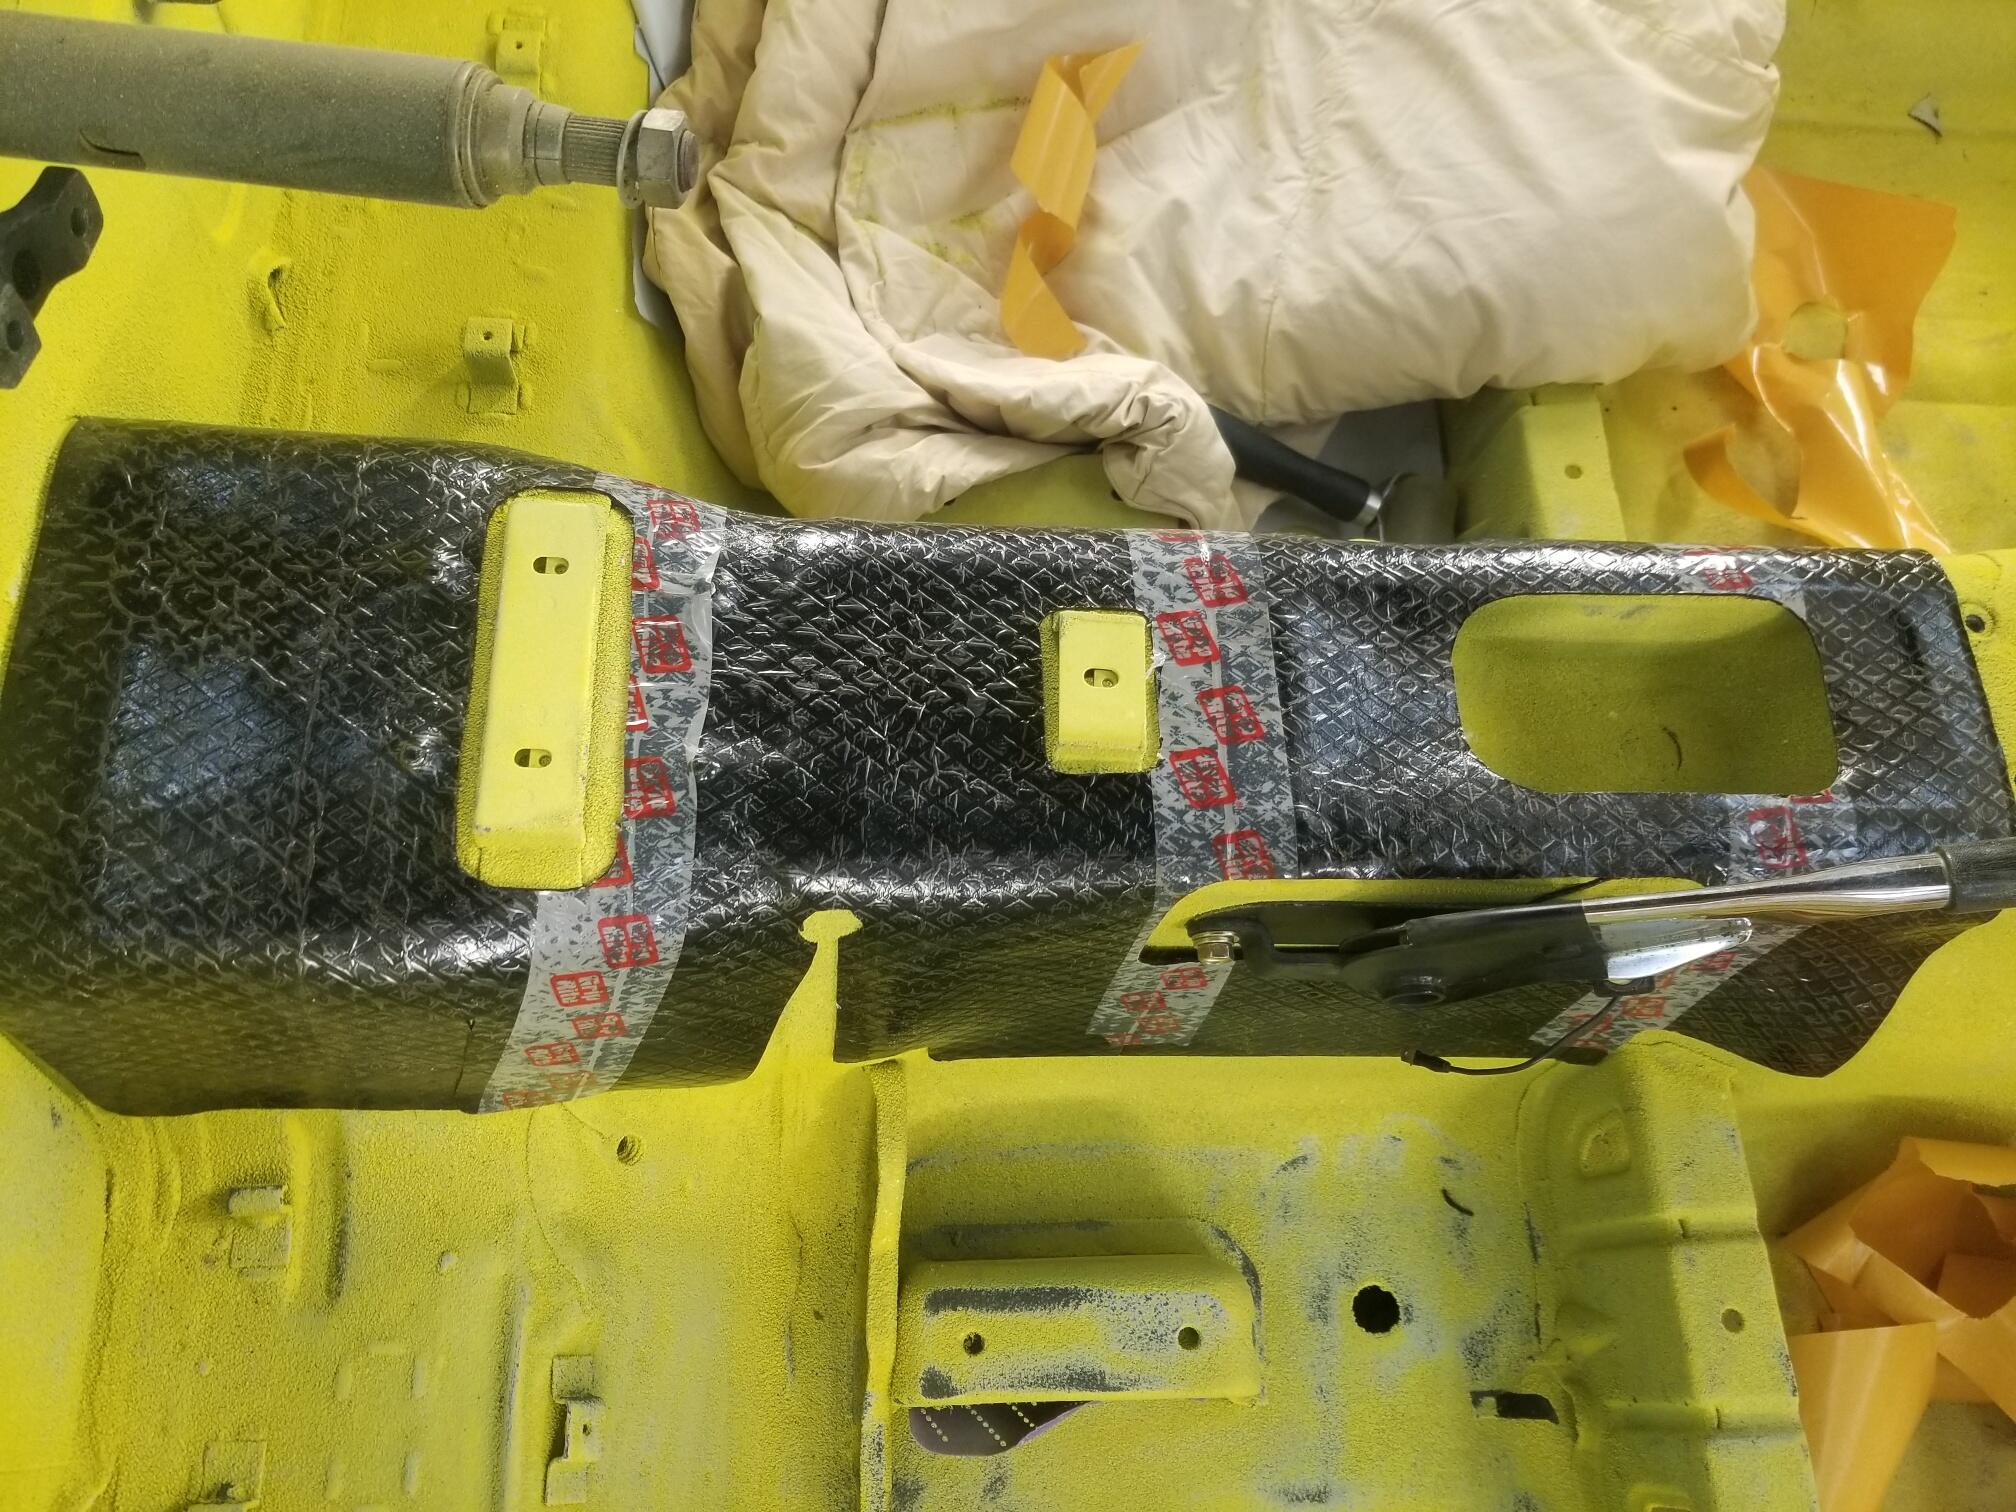
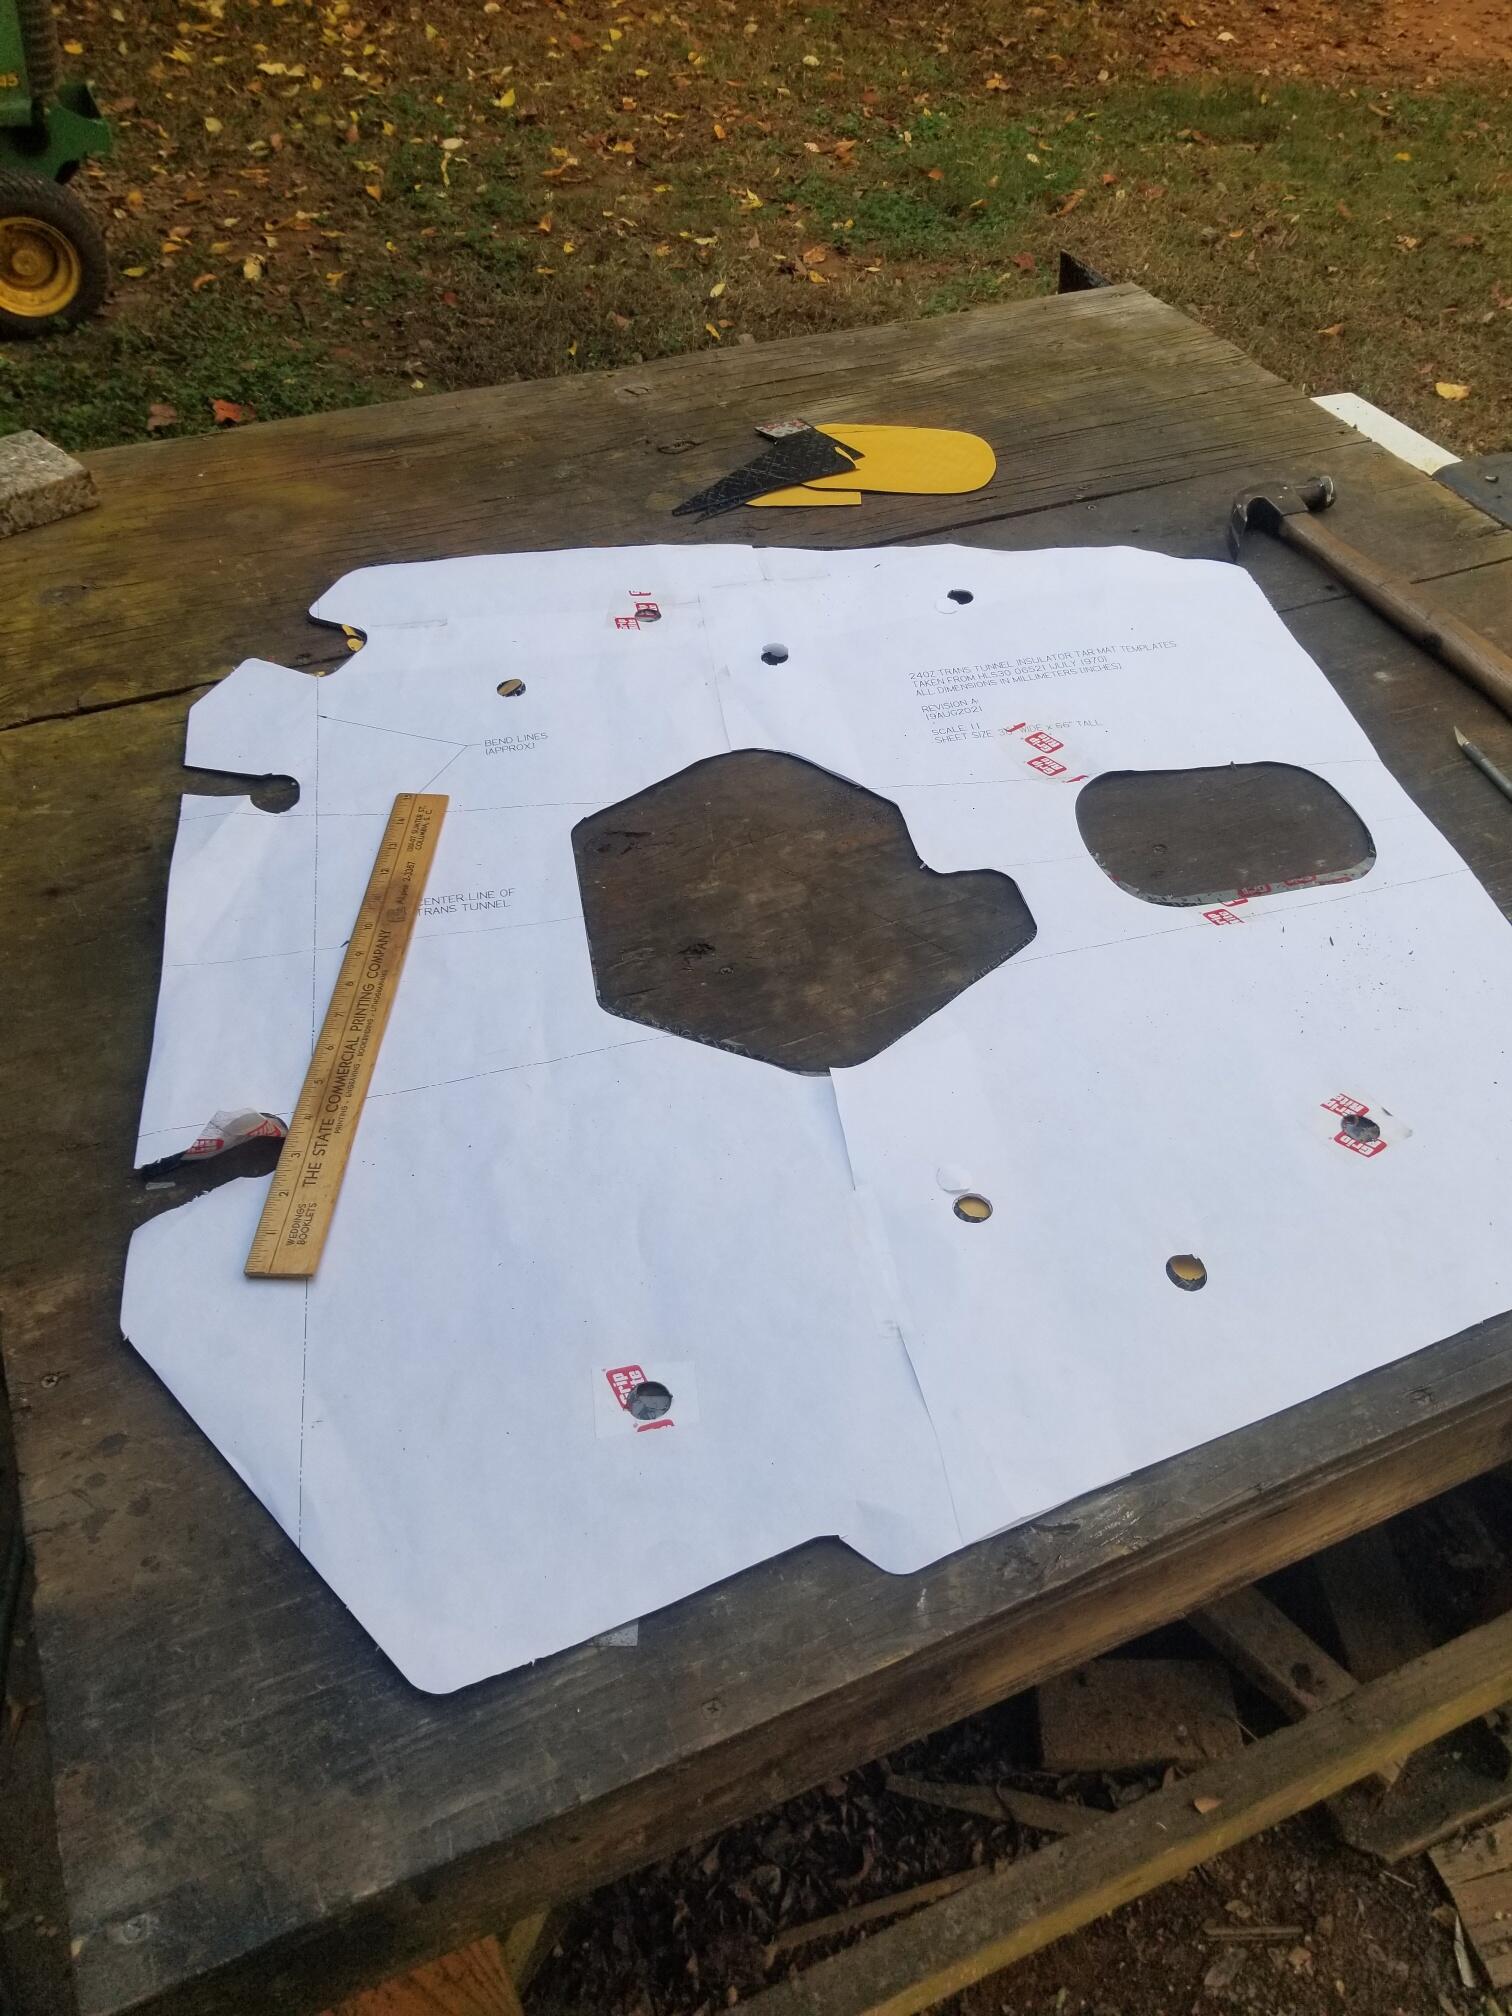
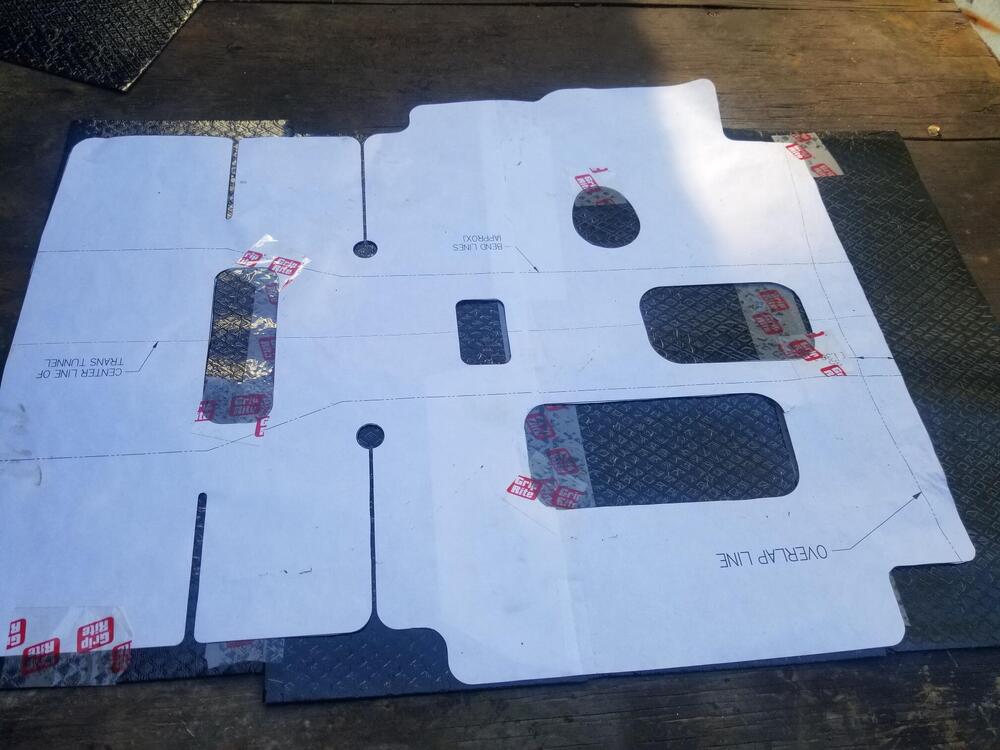
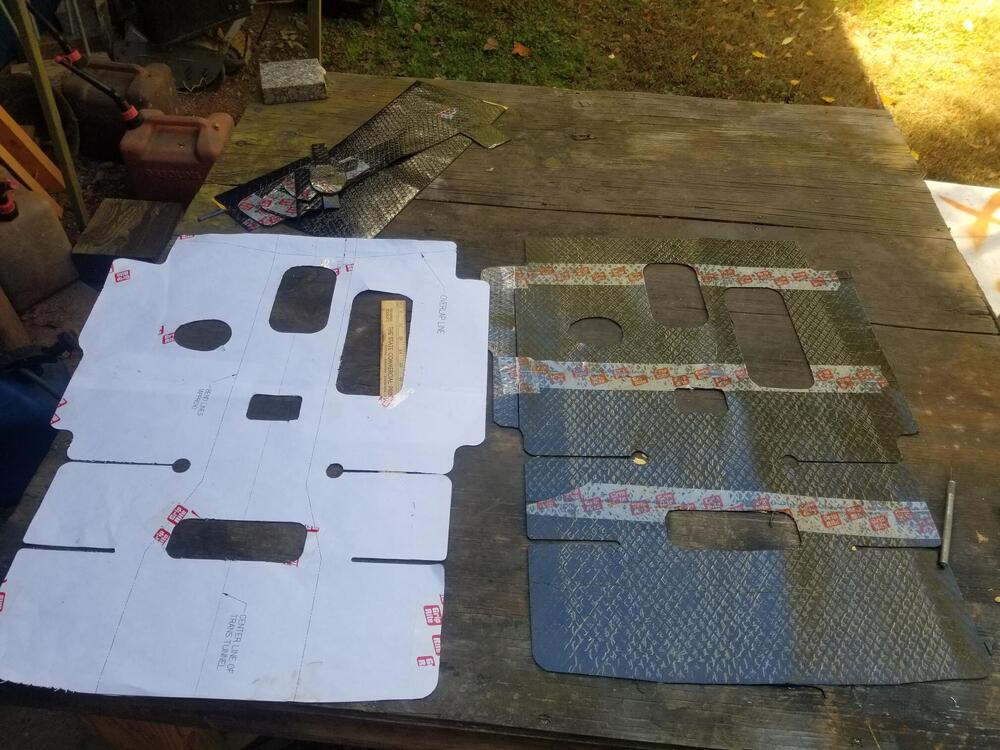
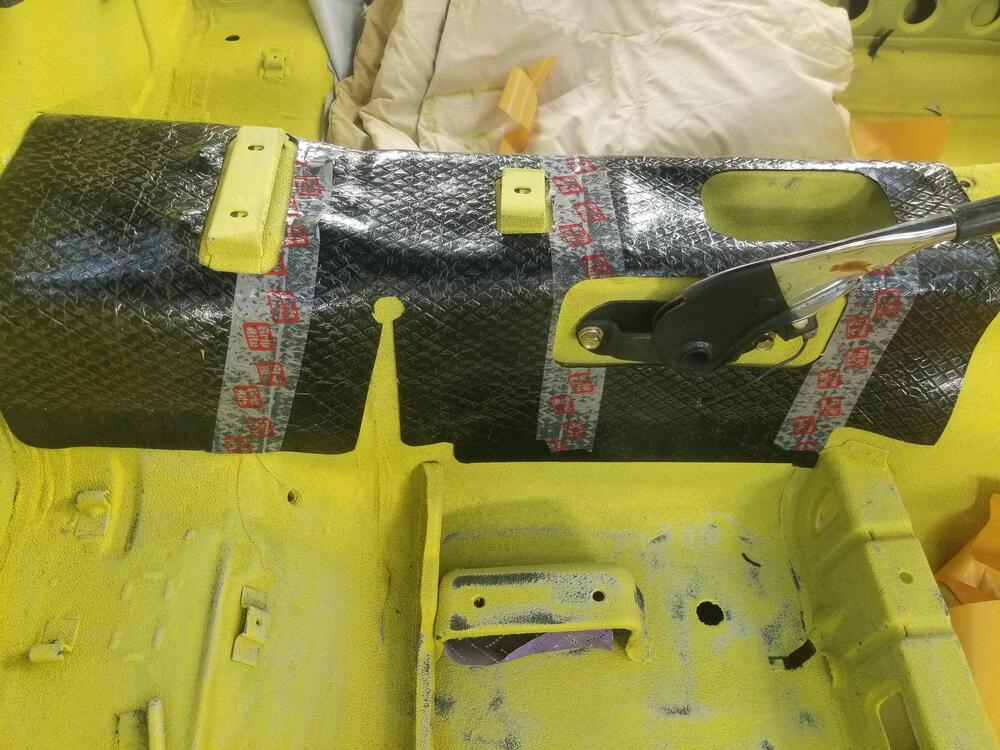
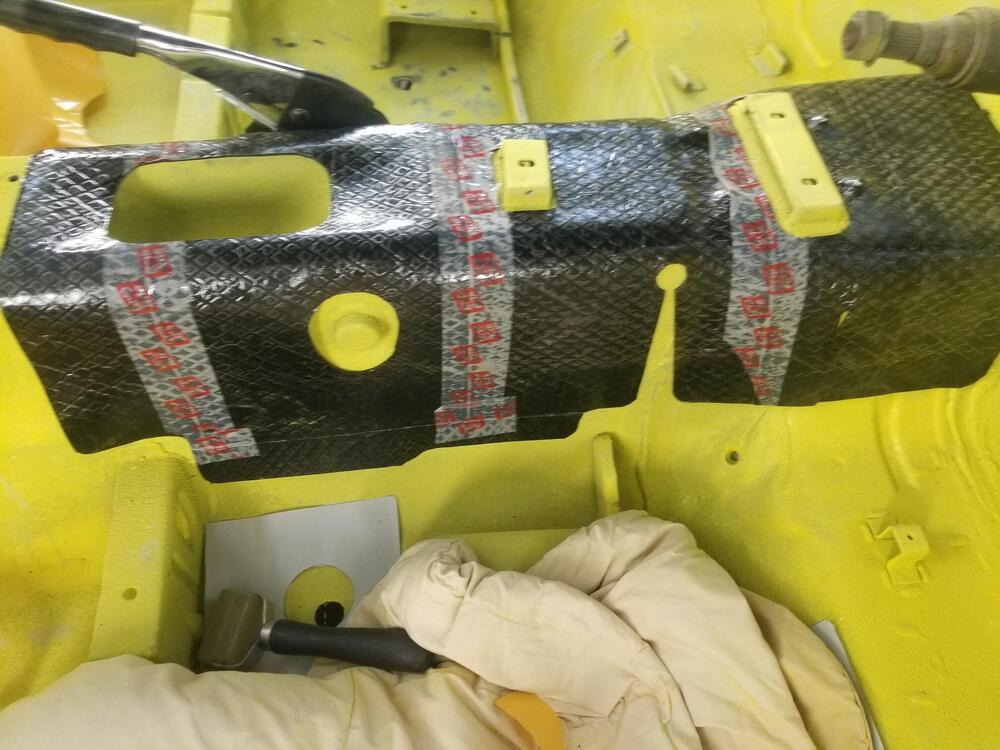
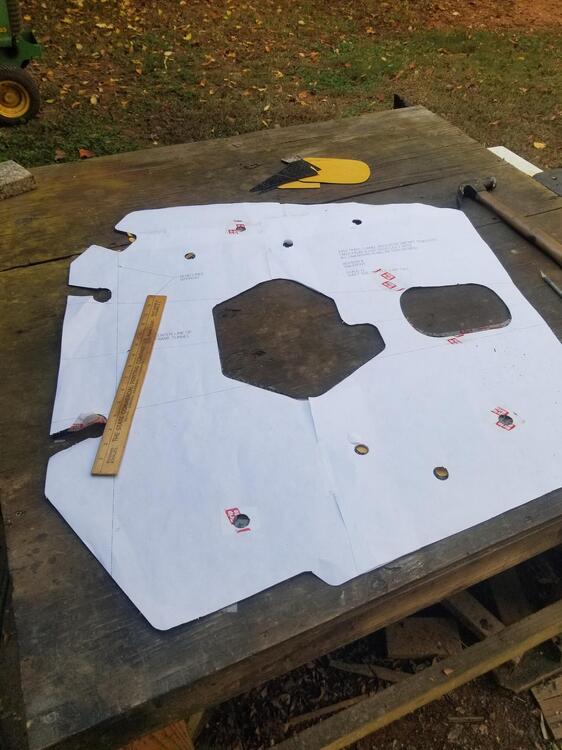
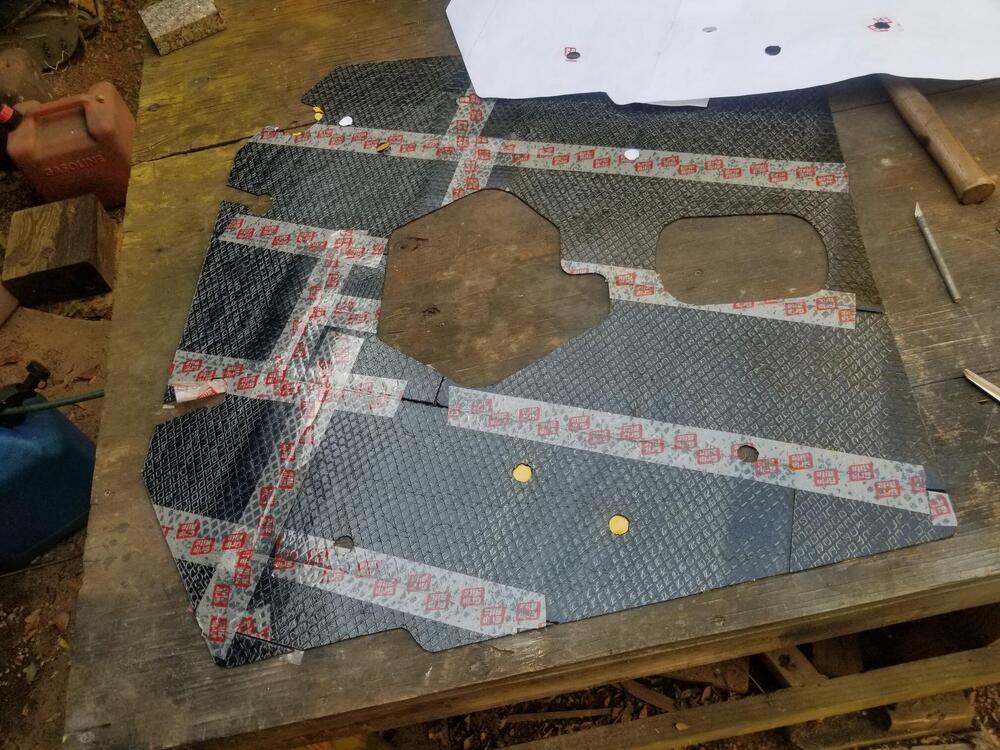
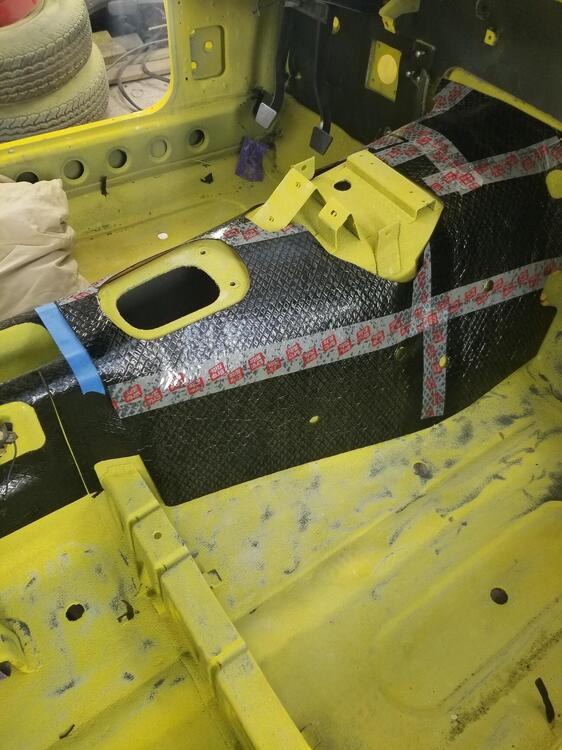
7 pointsSo I worked on tar mat some. I used the Wurth tar mat @Zup recommended in another thread. One box is just enough to do the tunnel. I will have to get some more later for the floor boards and hatch floor. The patterns I used are in the resource area Here is the rear pattern over the mat. I layed the mat out and used some clear tape to seam them together. Then I used a few pieces to tack the pattern down. I used this ruler that has a brass edge to help on the long straight cuts. Everything else was freehanded All cut out This is installed. I have that roller tool to get it stuck down properly. The film on top has been peeled since then. I didn't take any pictures of that This is the larger front piece I had to scrap out some areas on this. If I were going to do this again, I would be more selective on where I used the scrap. My scrapped out section was near the top edge of the tunnel and that made it difficult to hold together on install. I used a blue tape line to mark the overlap point


 7 points
 -
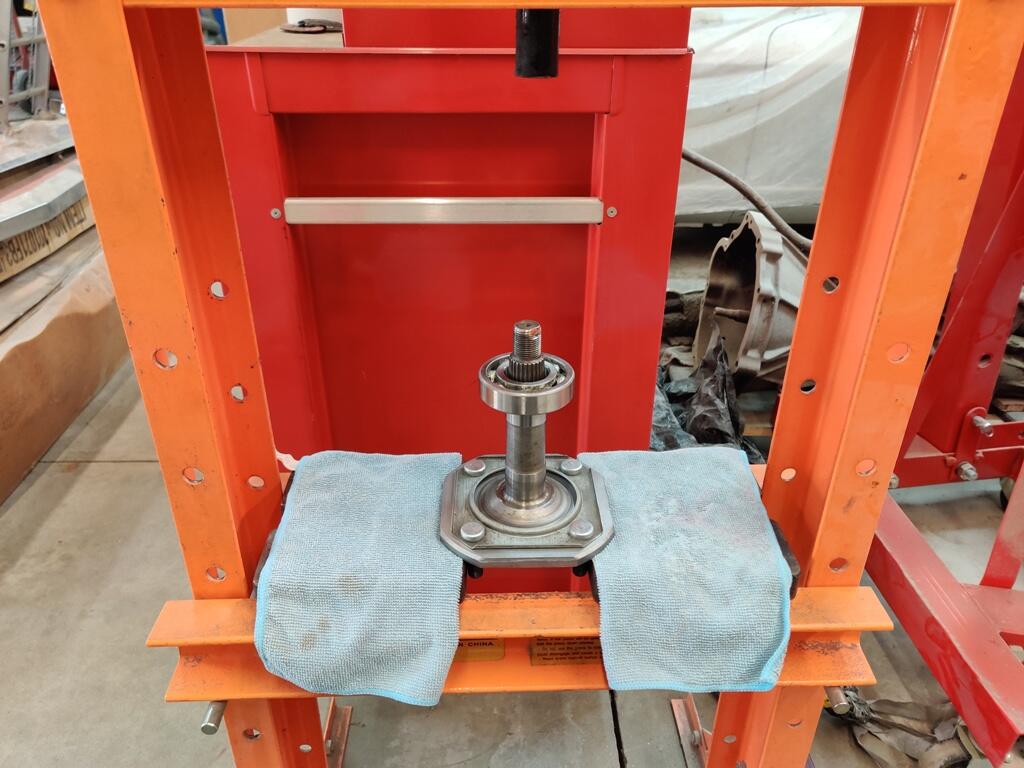
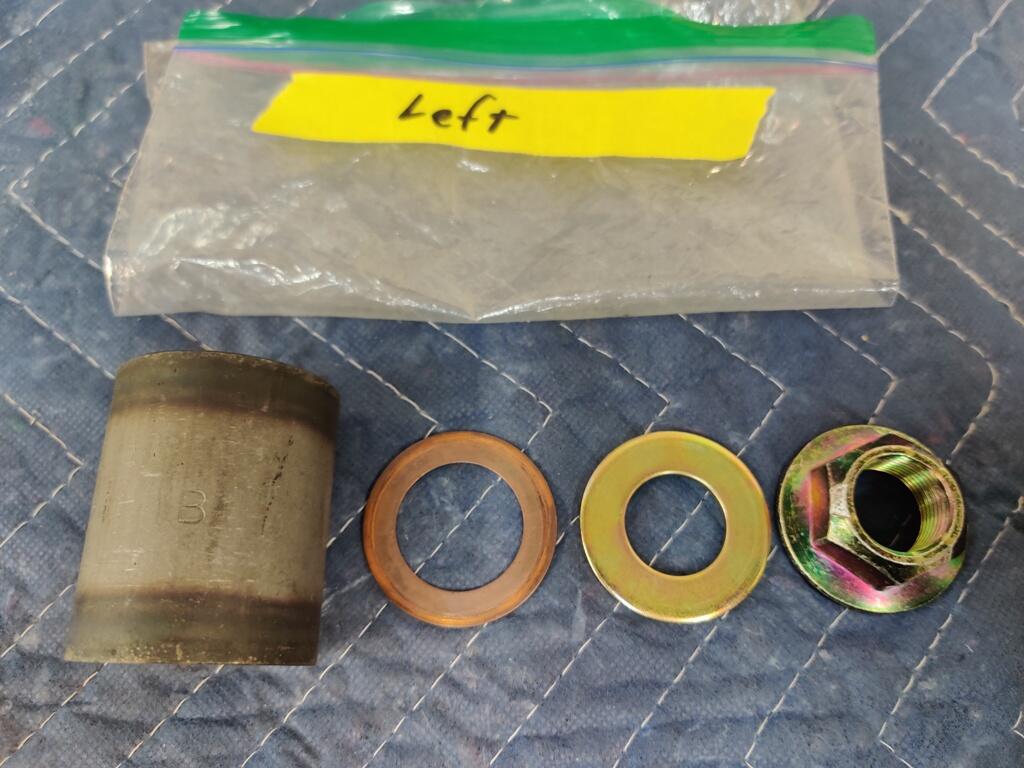
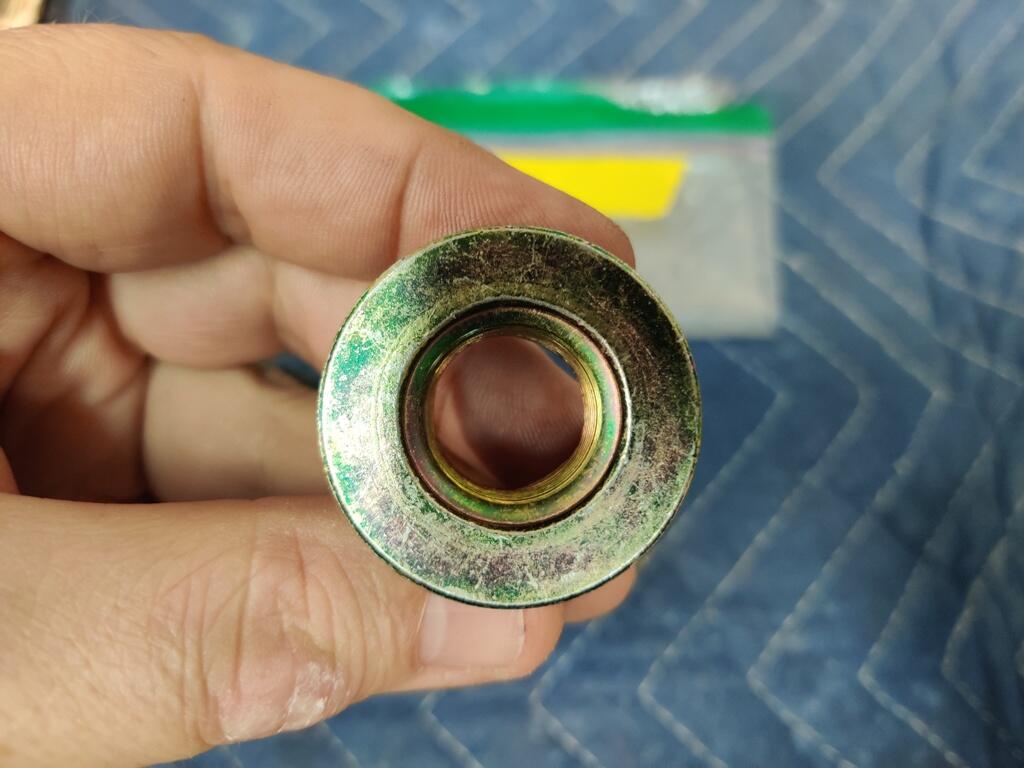
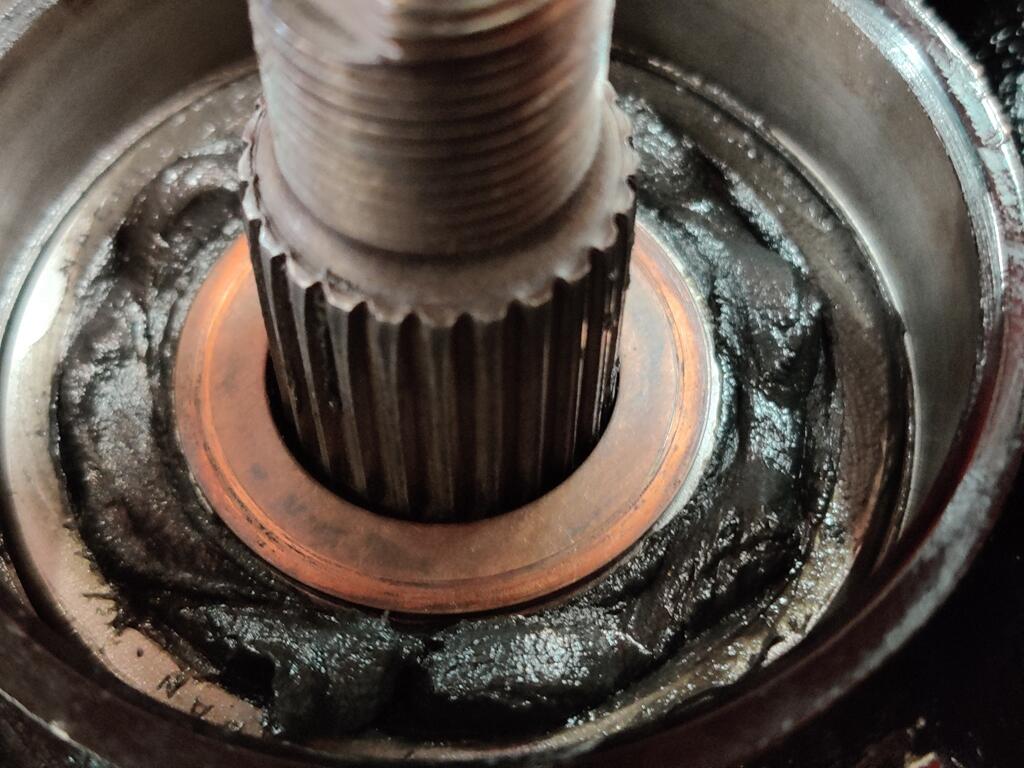
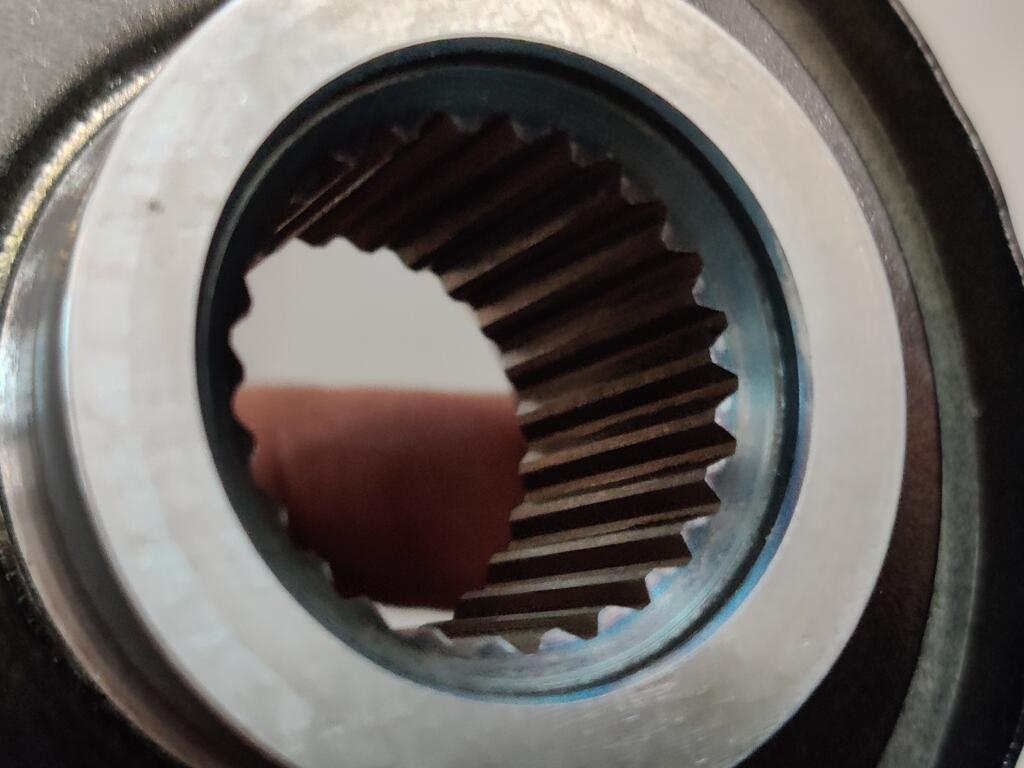
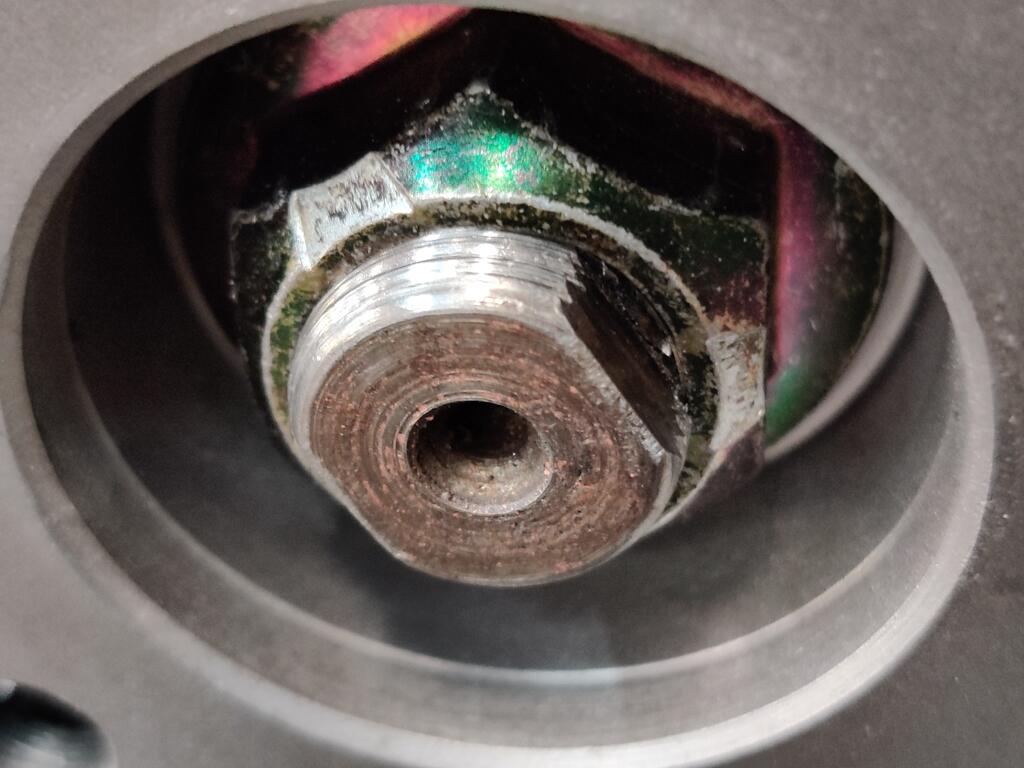
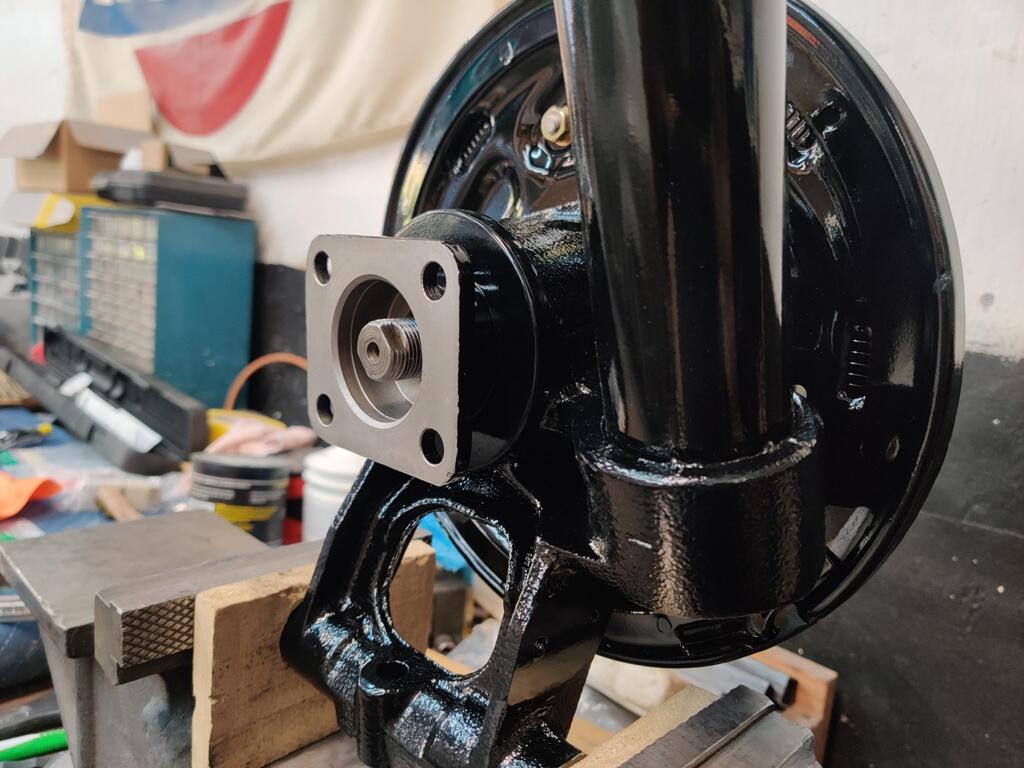
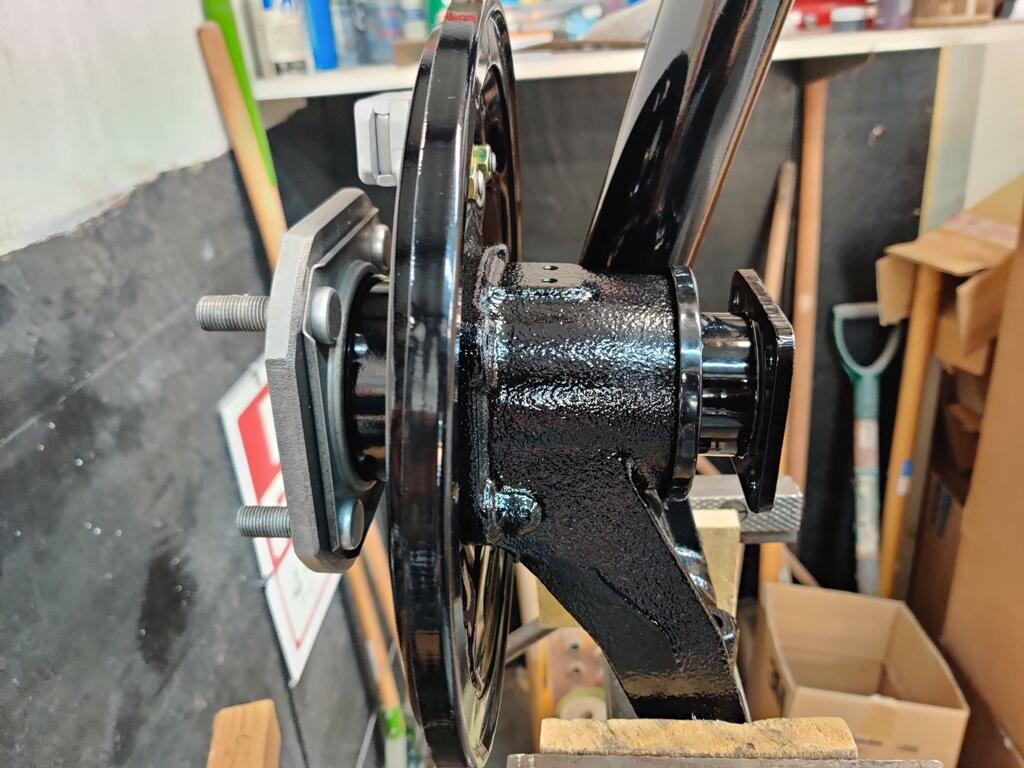
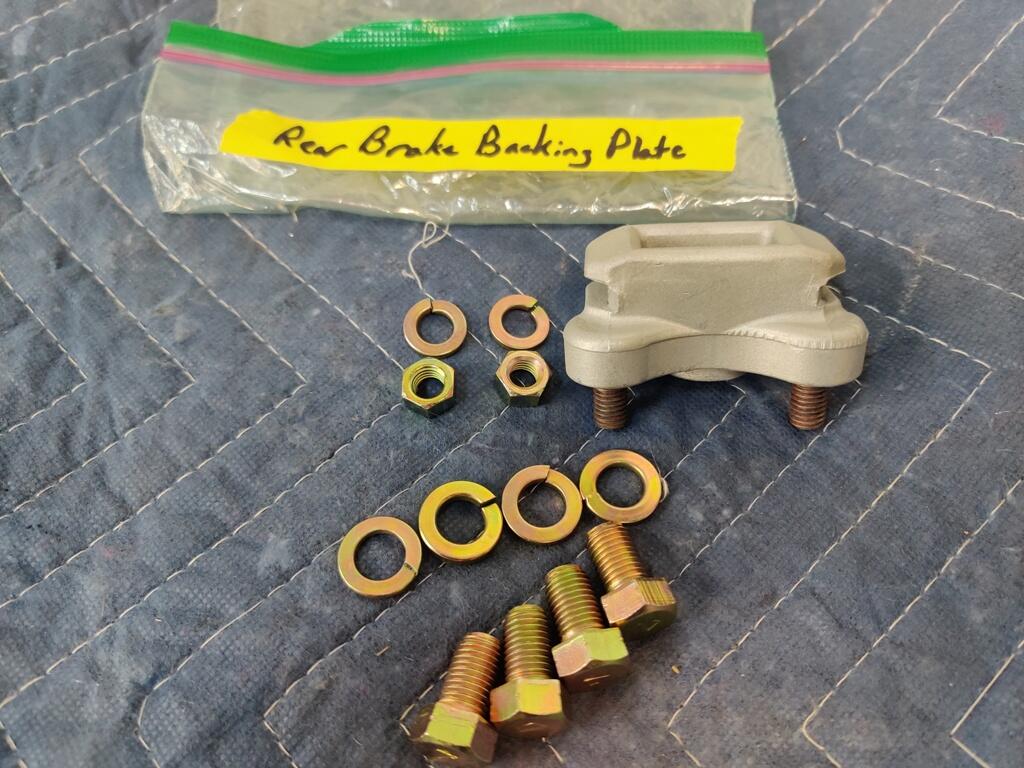
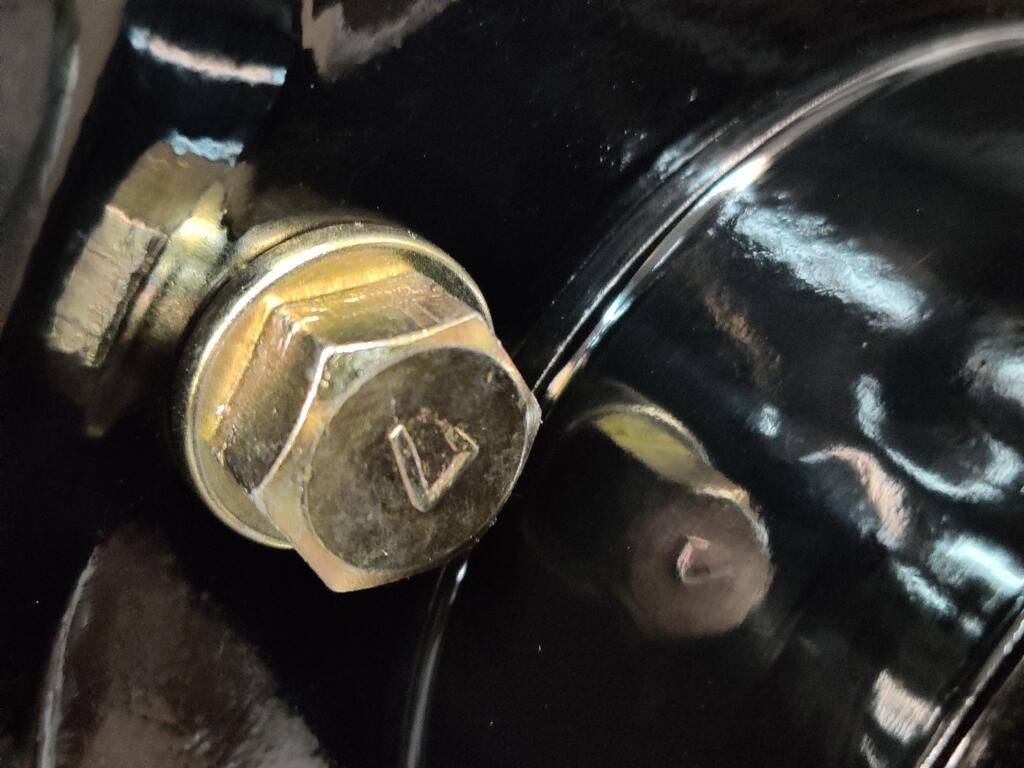
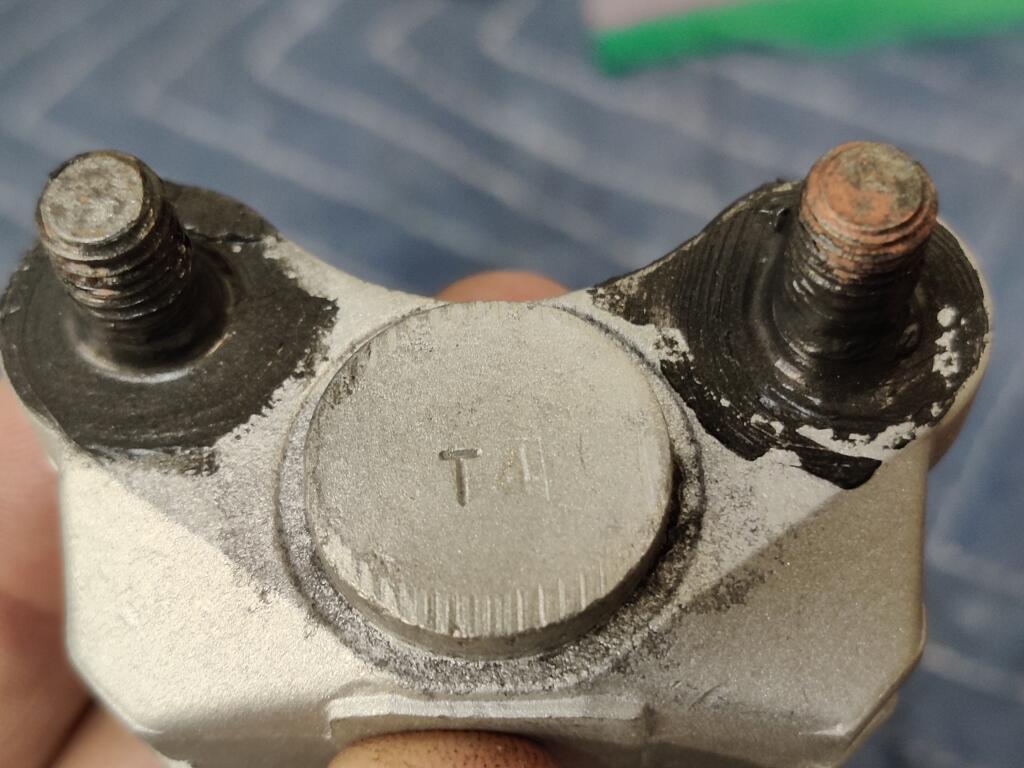
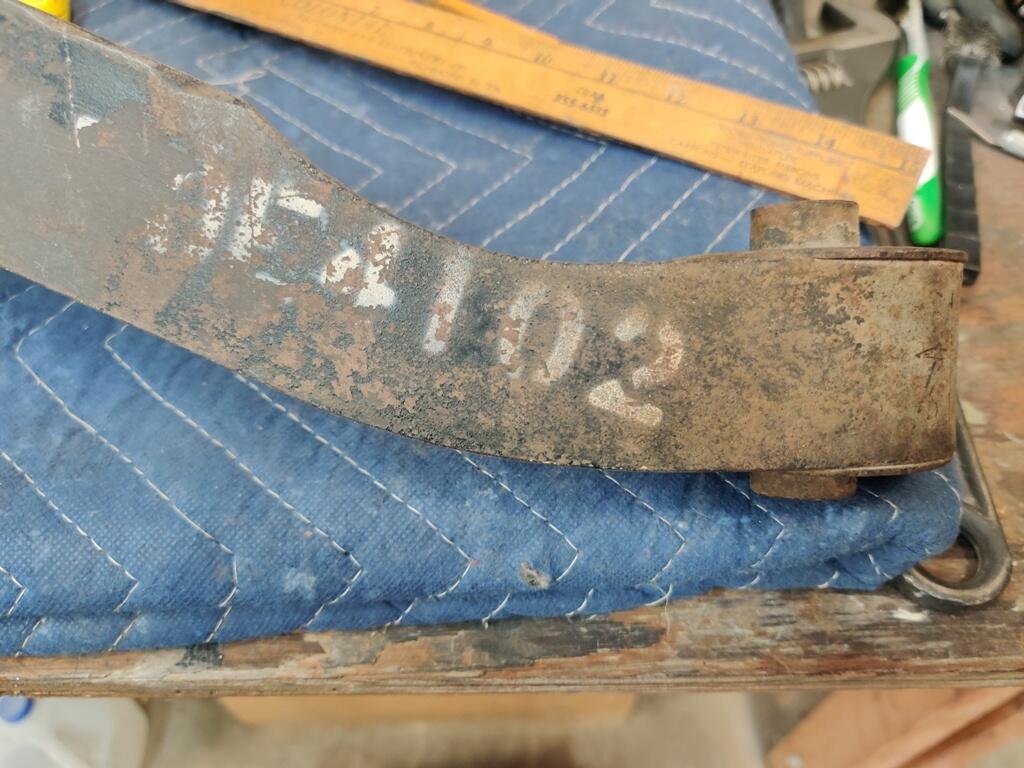
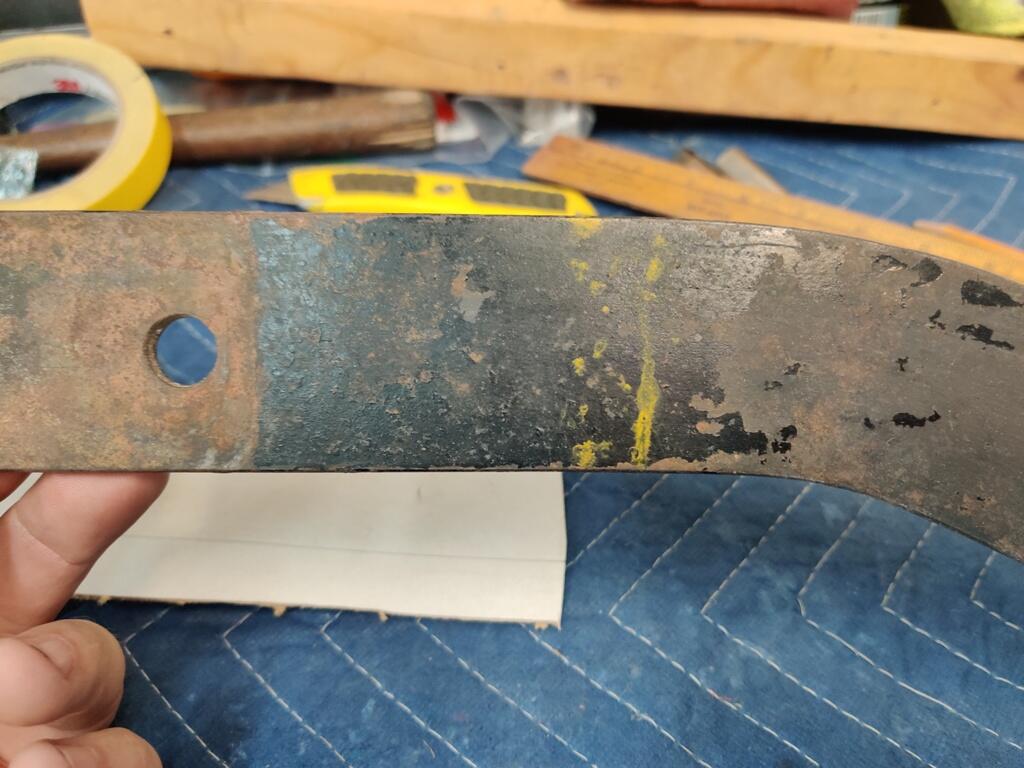
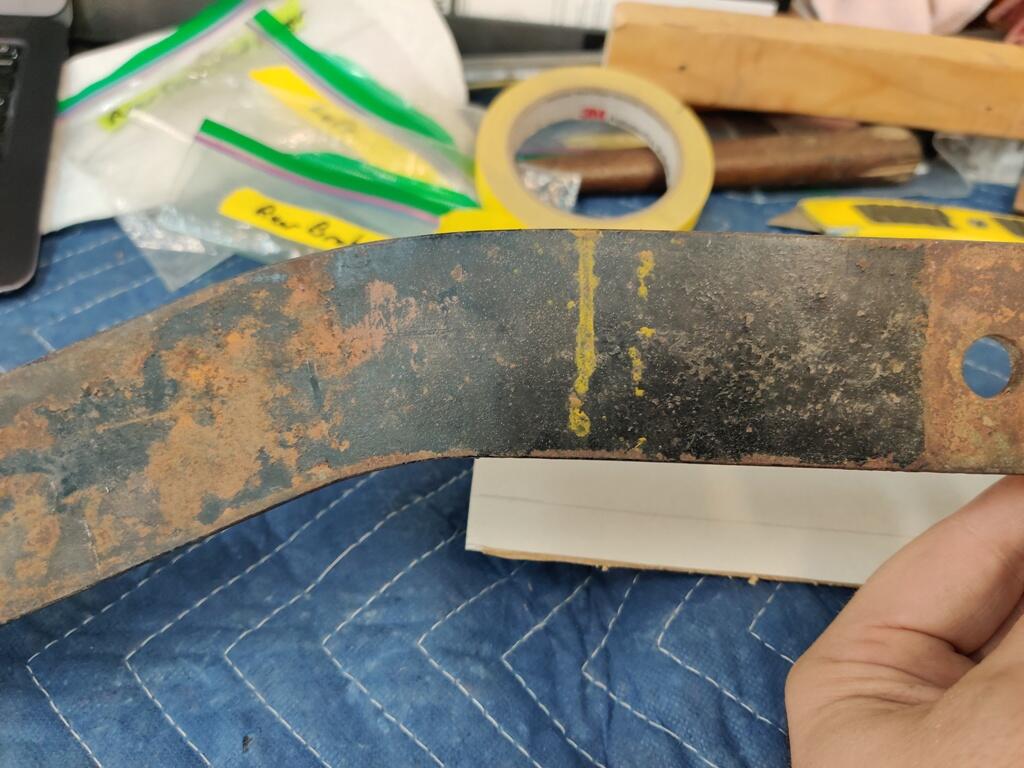
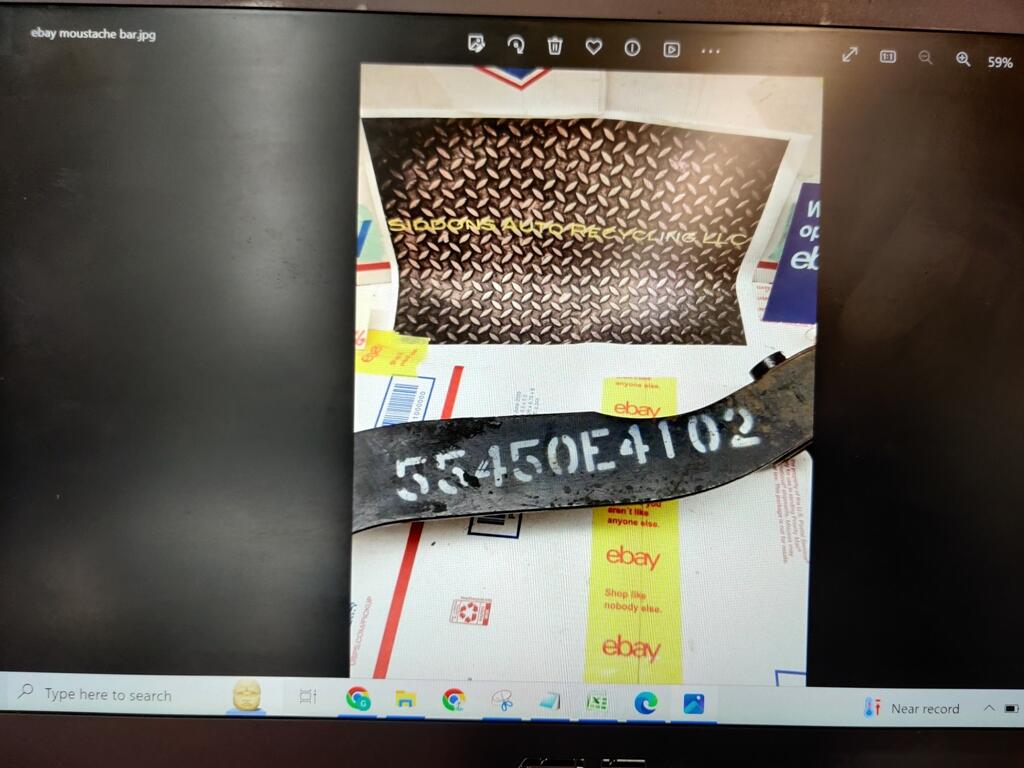
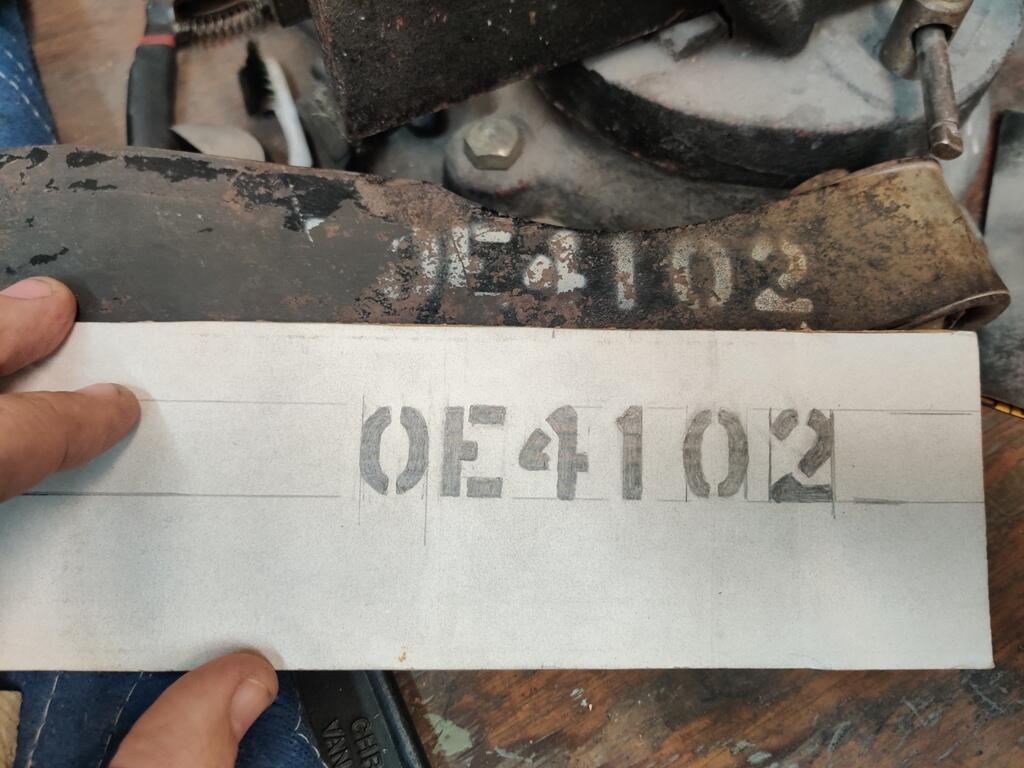
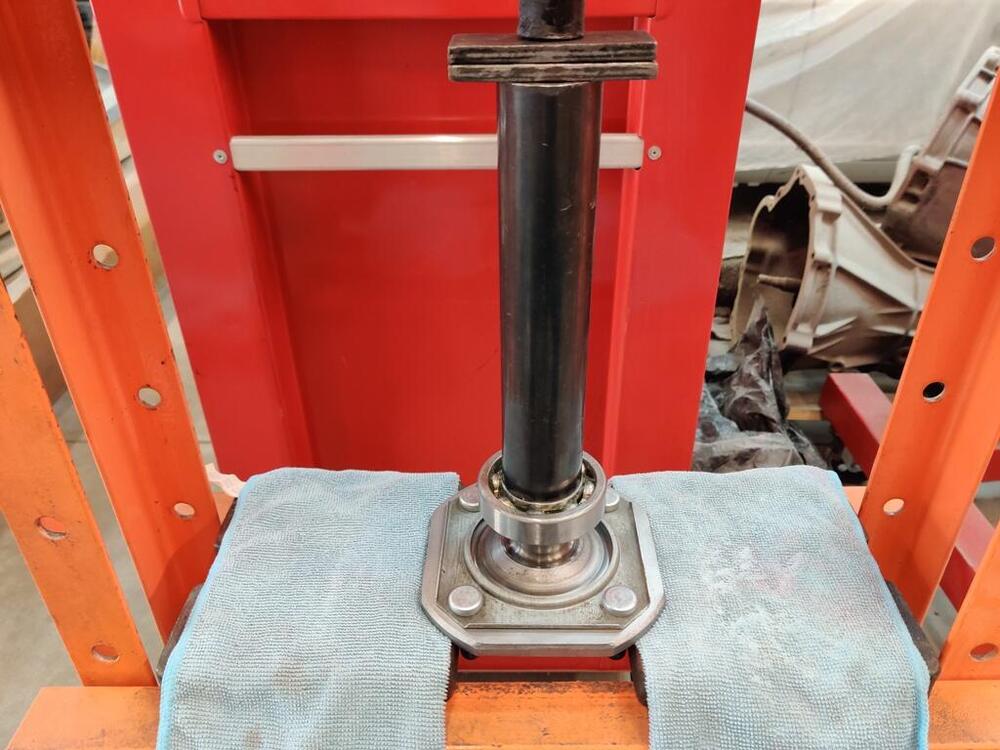
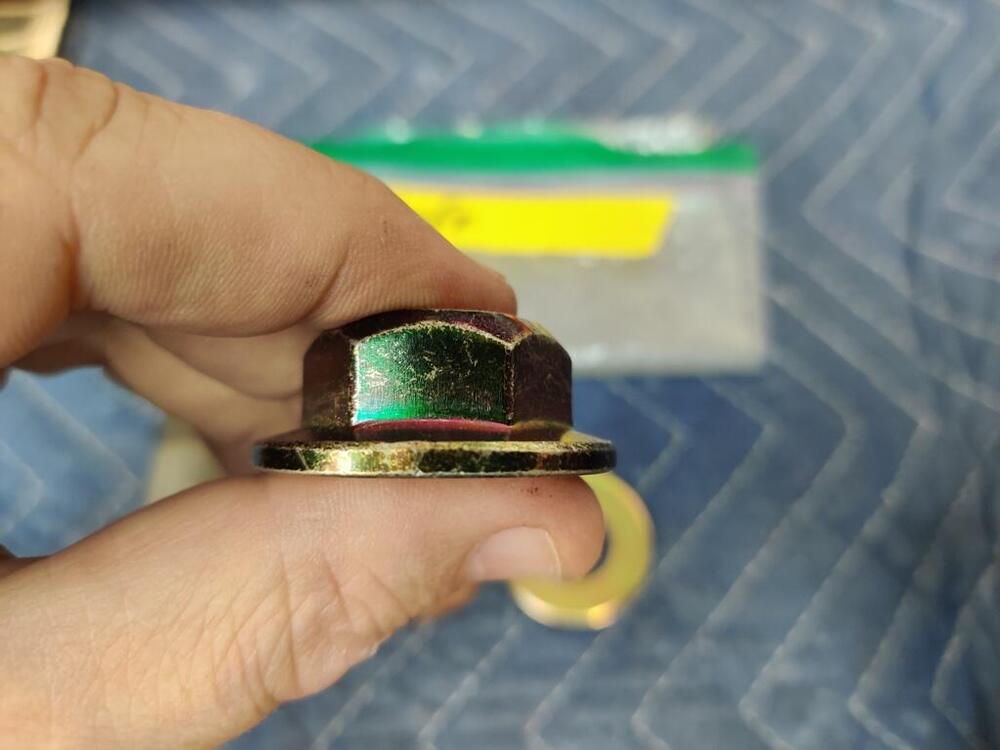
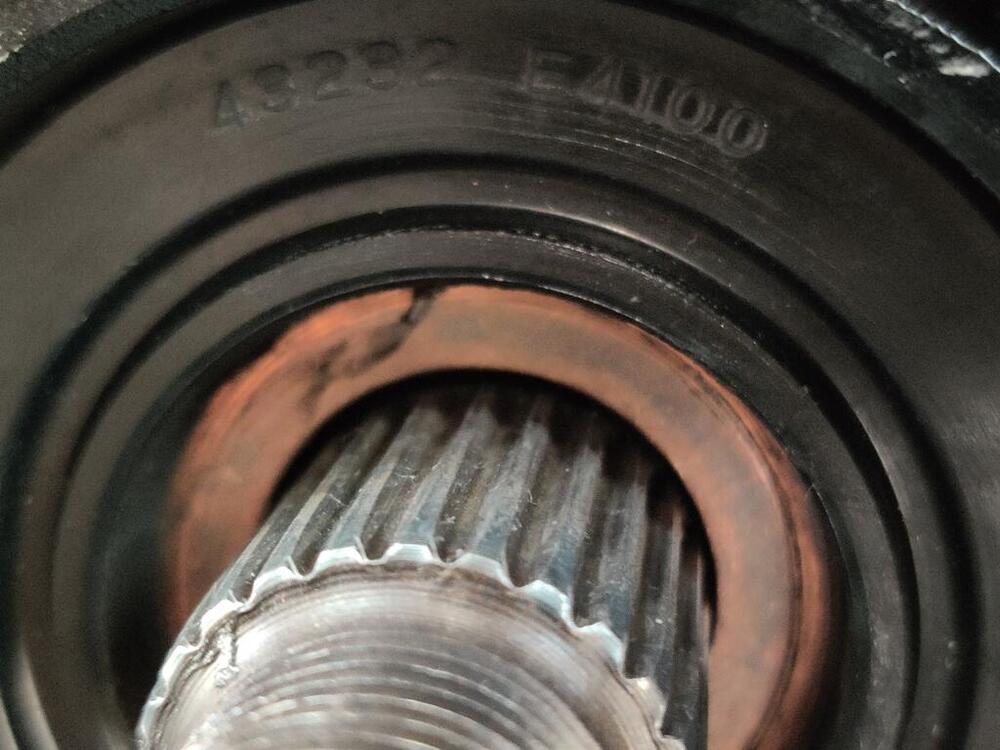
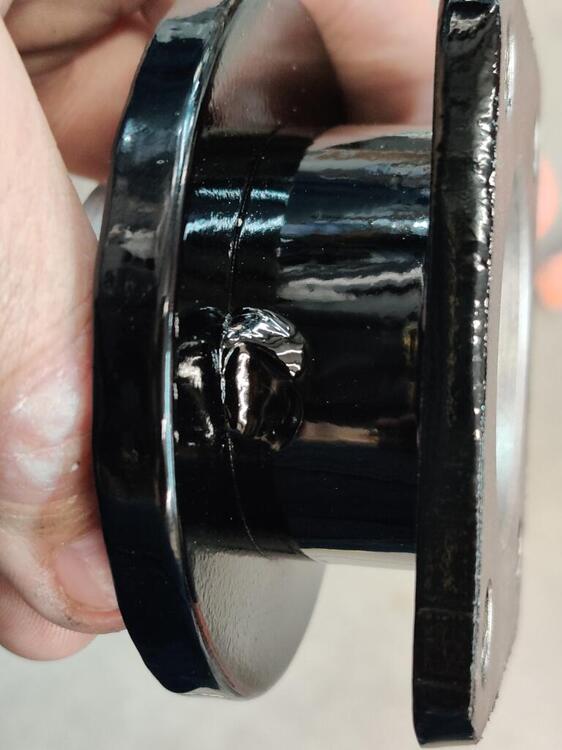
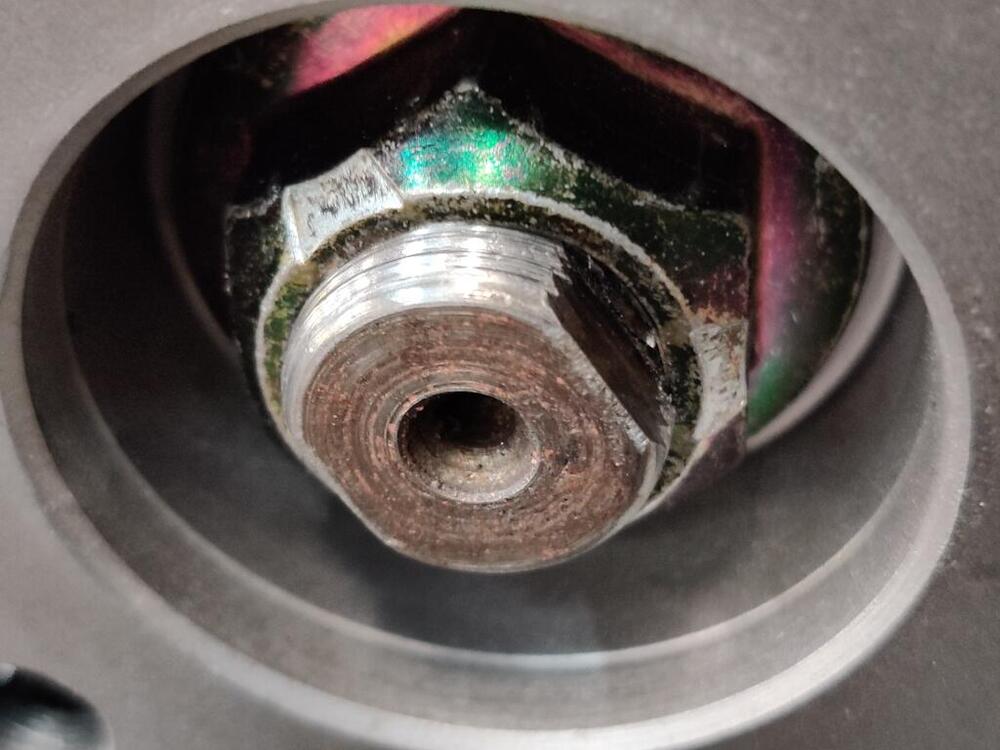
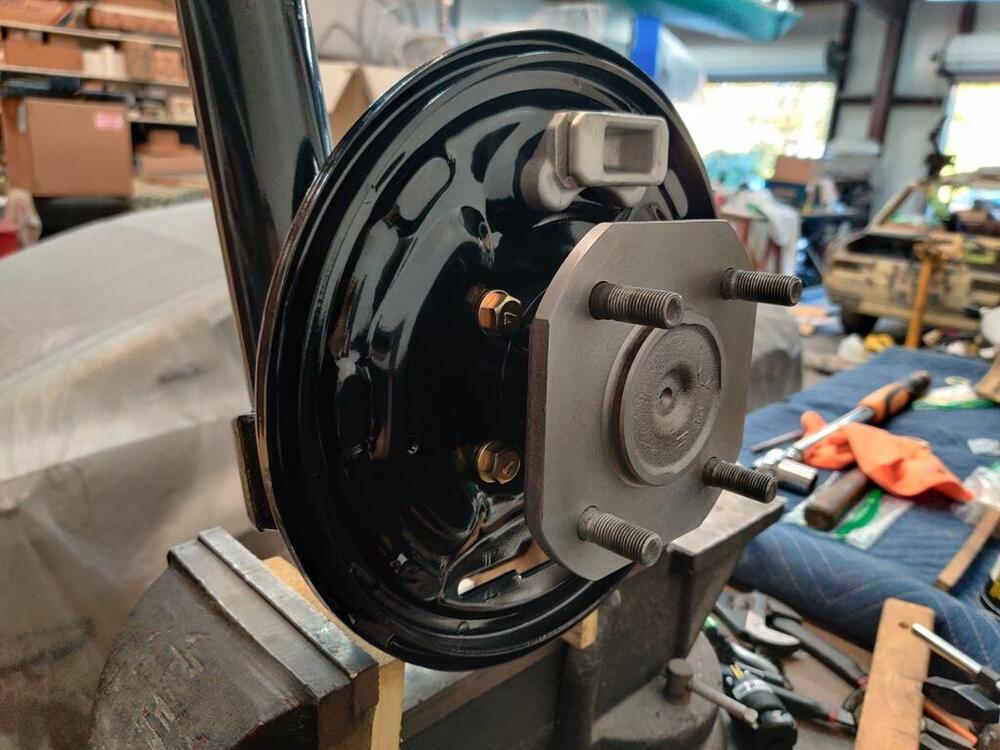
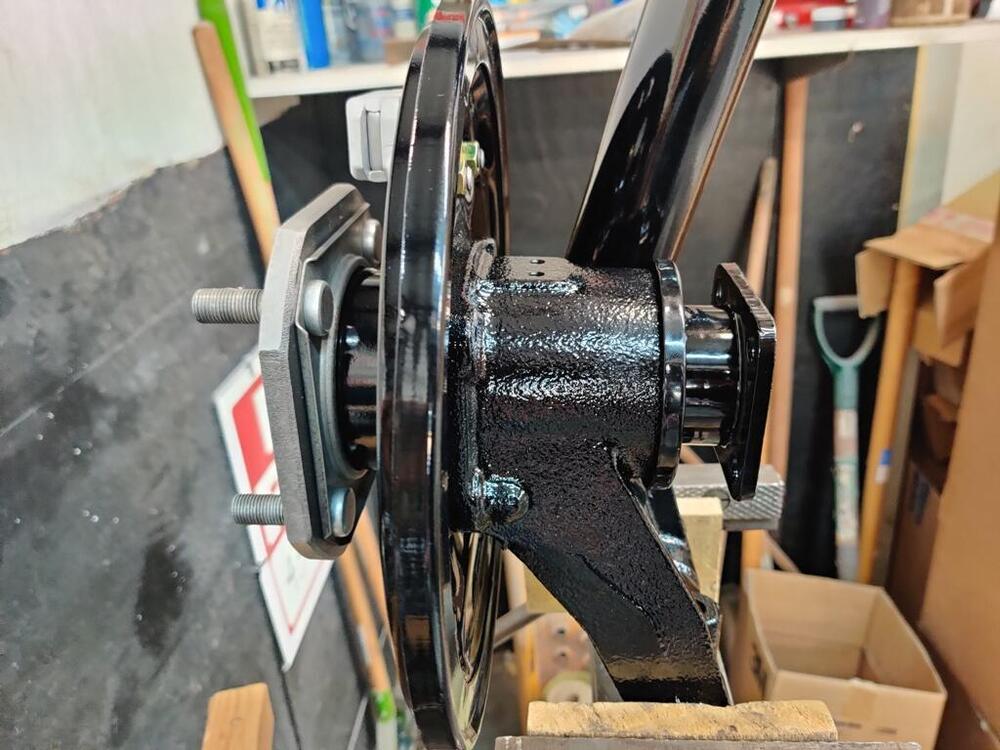
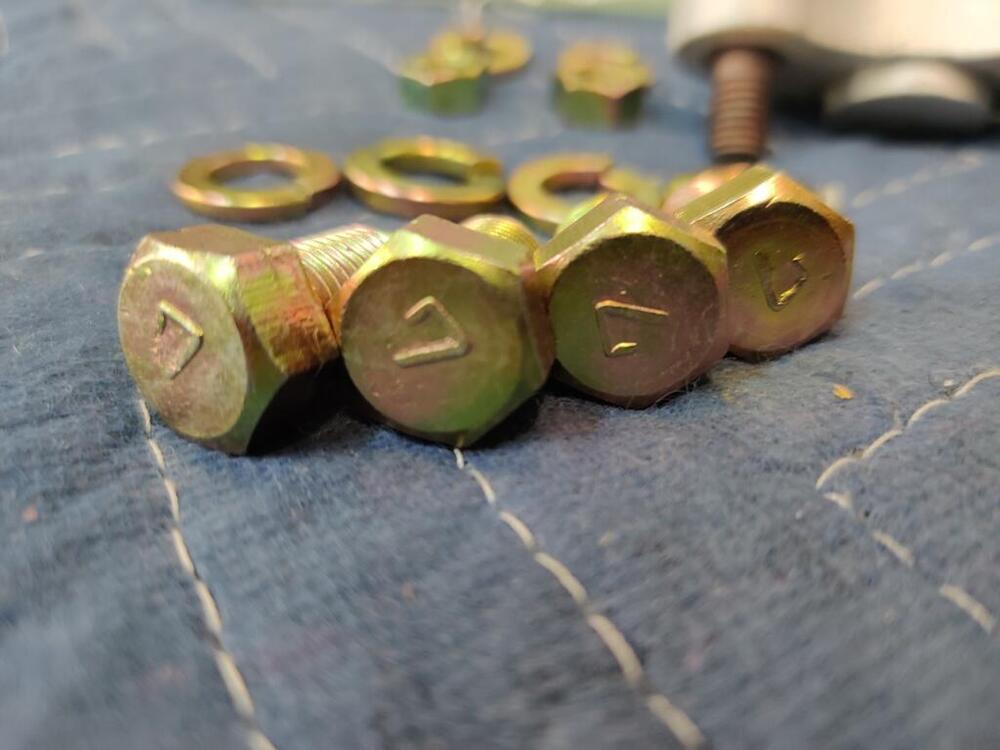
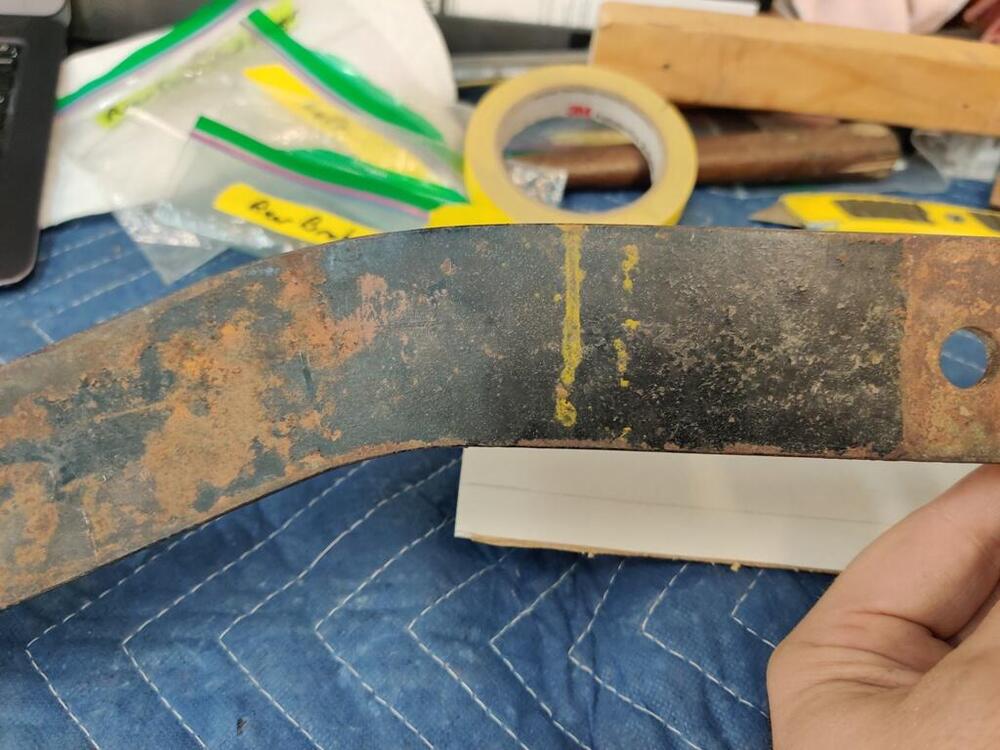
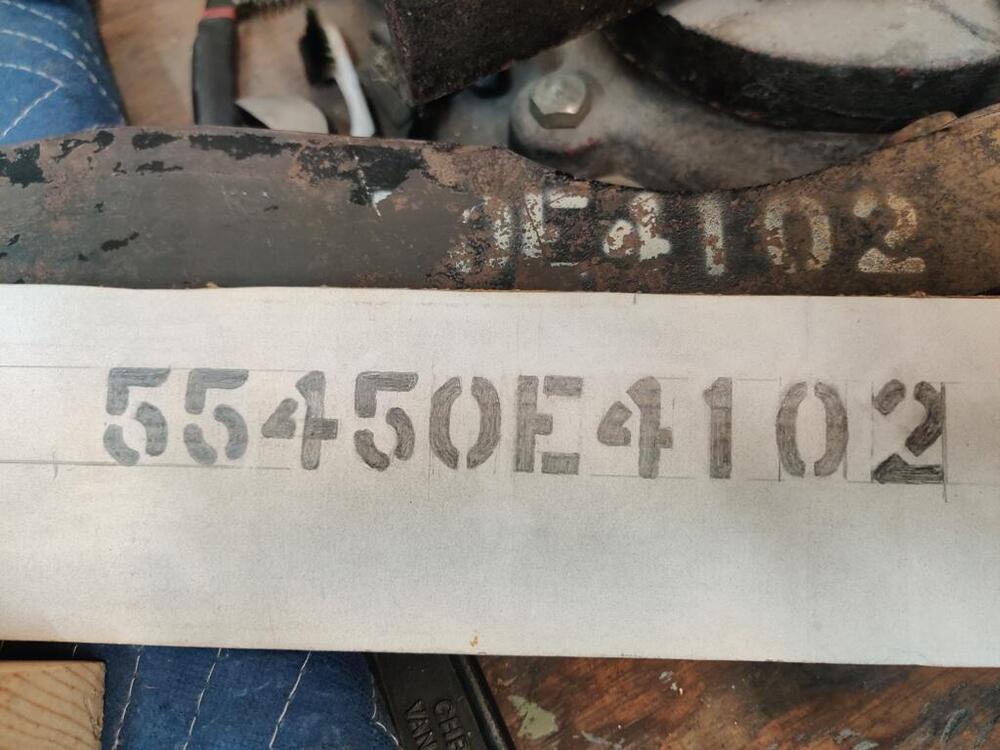
Today, I finished installing the rear axles. Thanks for the info about not using too much grease @Captain Obvious! 12 ton press in use - and a nice close up of the rear back plate going onto the strut I like to use silicone on some parts such as the brake shoe "block" to keep water from entering and to keep rust from occurring on the threads of such parts. Note that I have a new style axle nut (third pic): Axle flange is freshly painted and looking good! Because the axle nut is a newer style, I did not use the large flat washer above. Note axle orientation - axle flange is aligned with hub to minimize weight imbalance. In addition to finishing with greasing the bearings and installing the axles, I worked on a stencil for the part number of the mustache bar. This bar came with the car. Note the vertical streaks - are these yellow paint marks from the factory? Some of the part number did not survive, so I was also looking at an image from an eBay auction I saved a long time ago as a reference image. It's not perfect, but it is closer in size to the original than the picture shows - it is a bit closer to the camera lens that the bar.


 5 points
 -
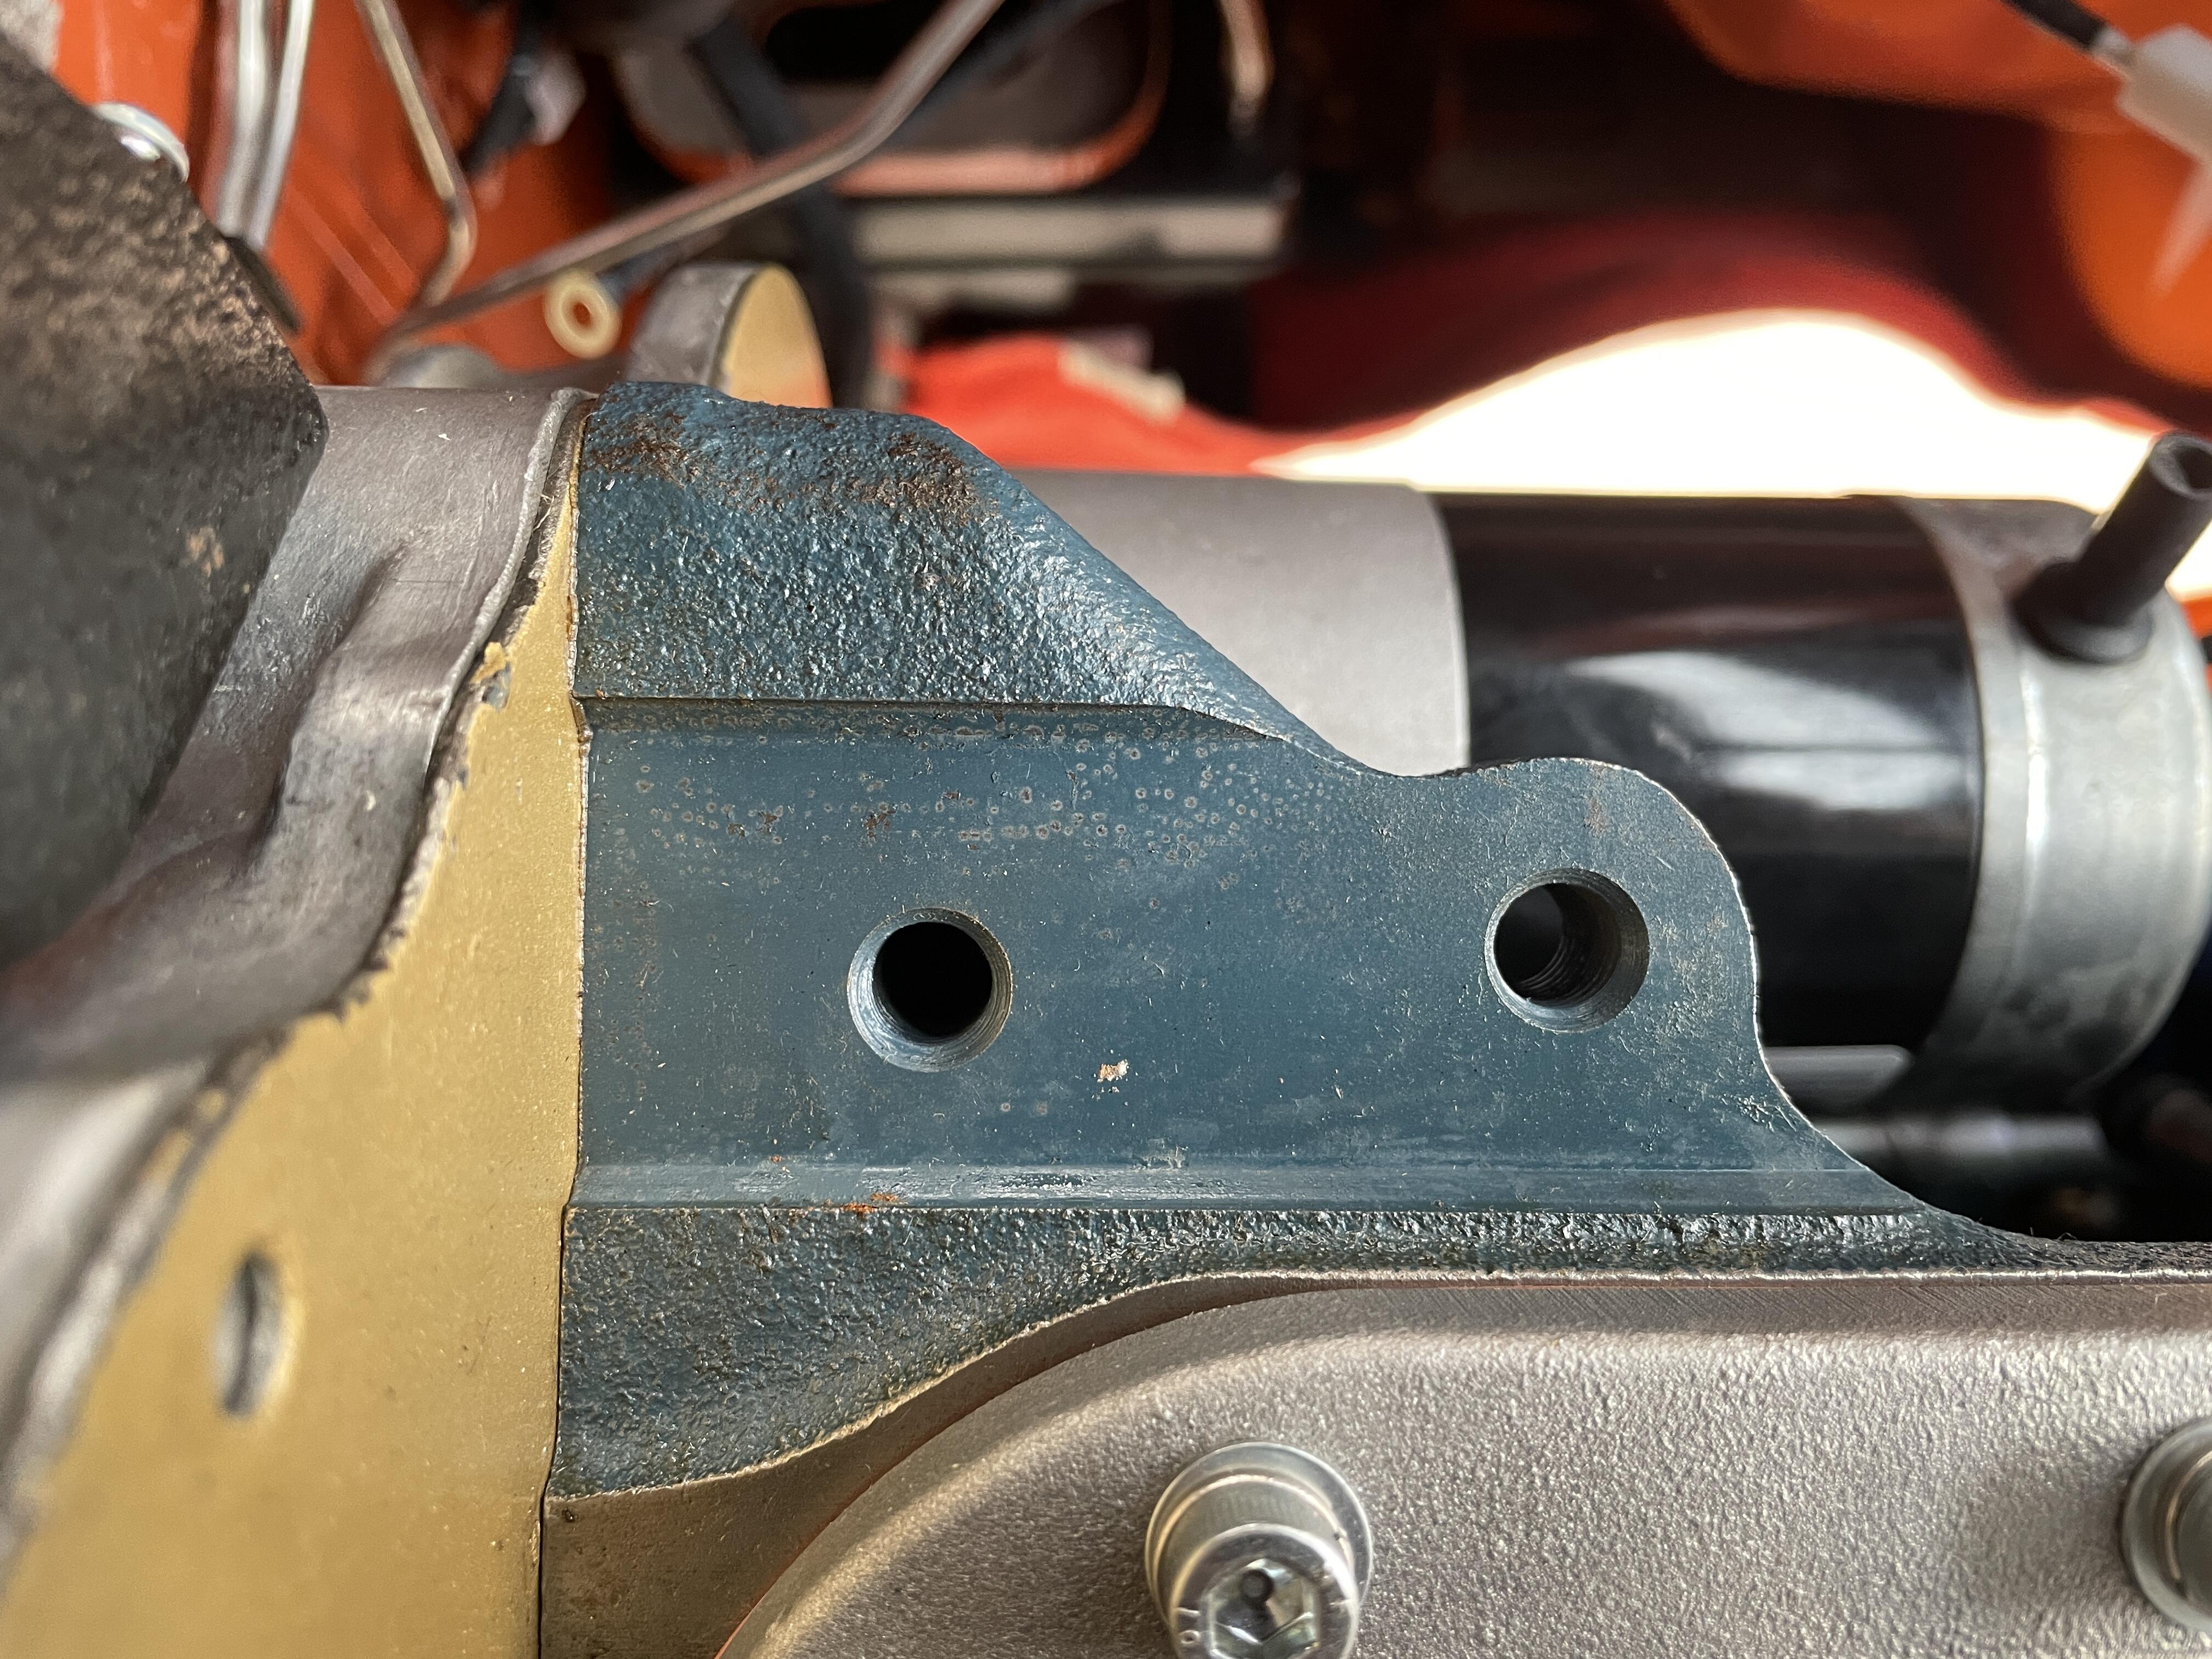
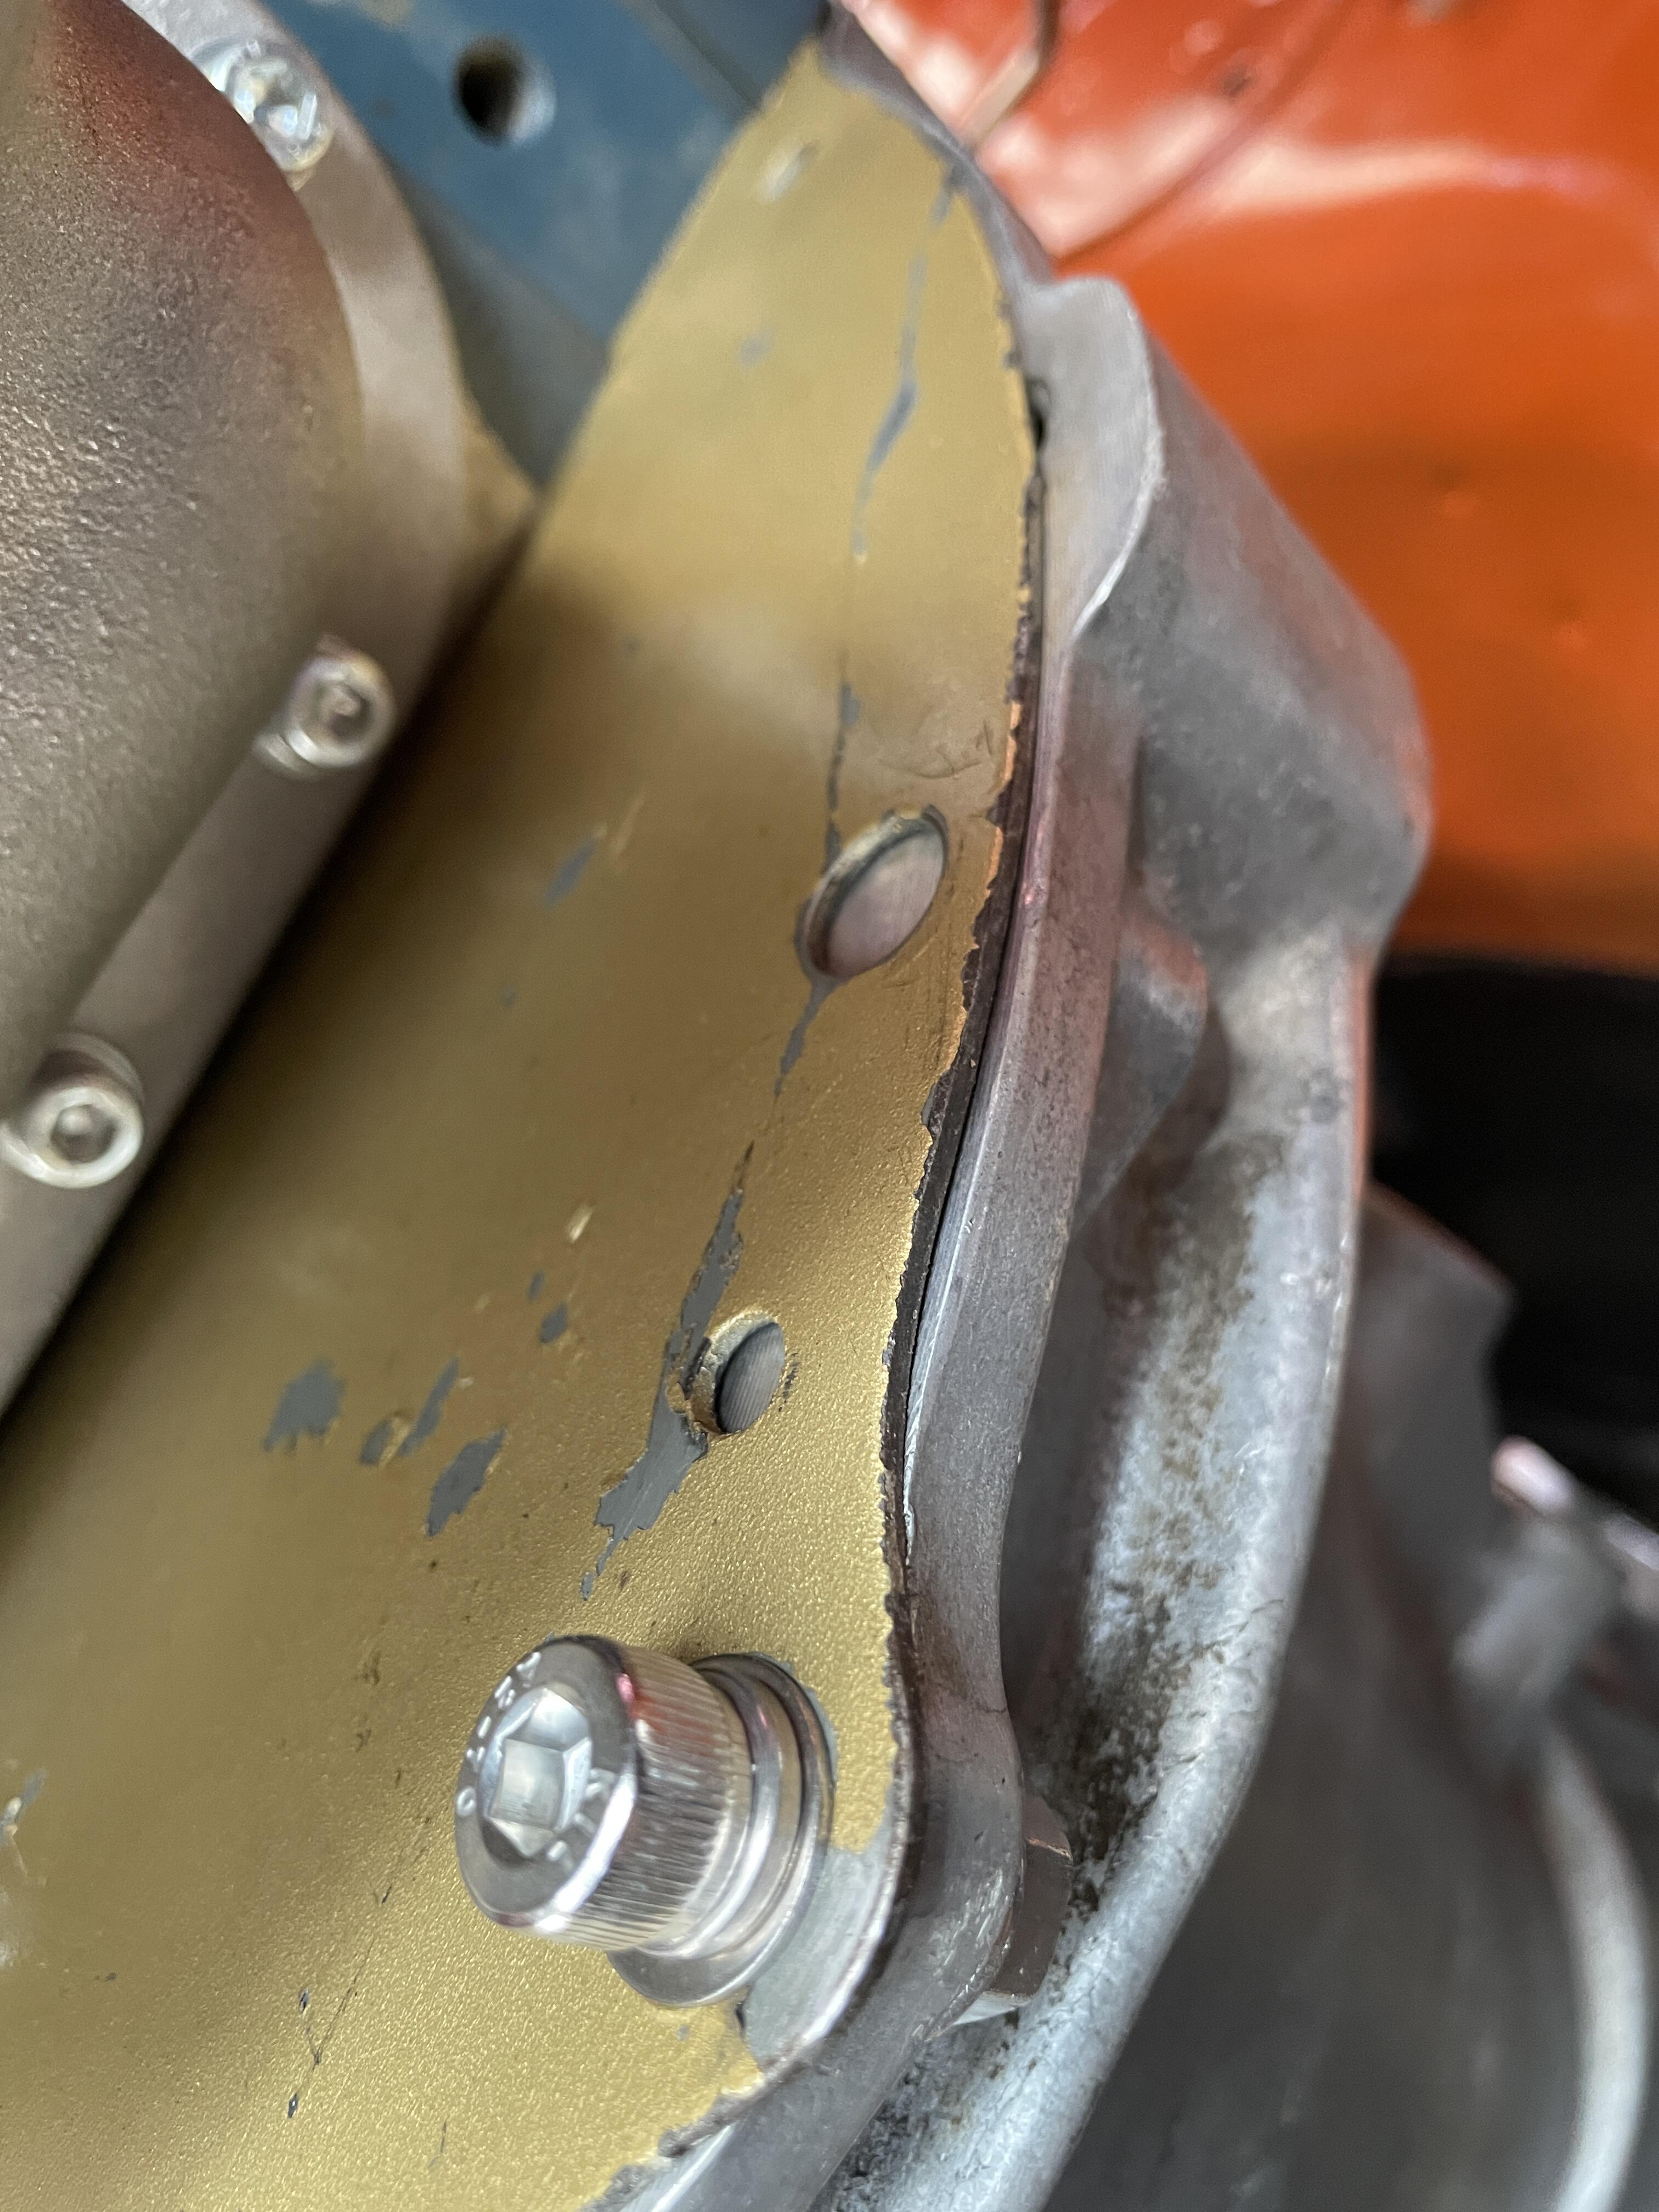
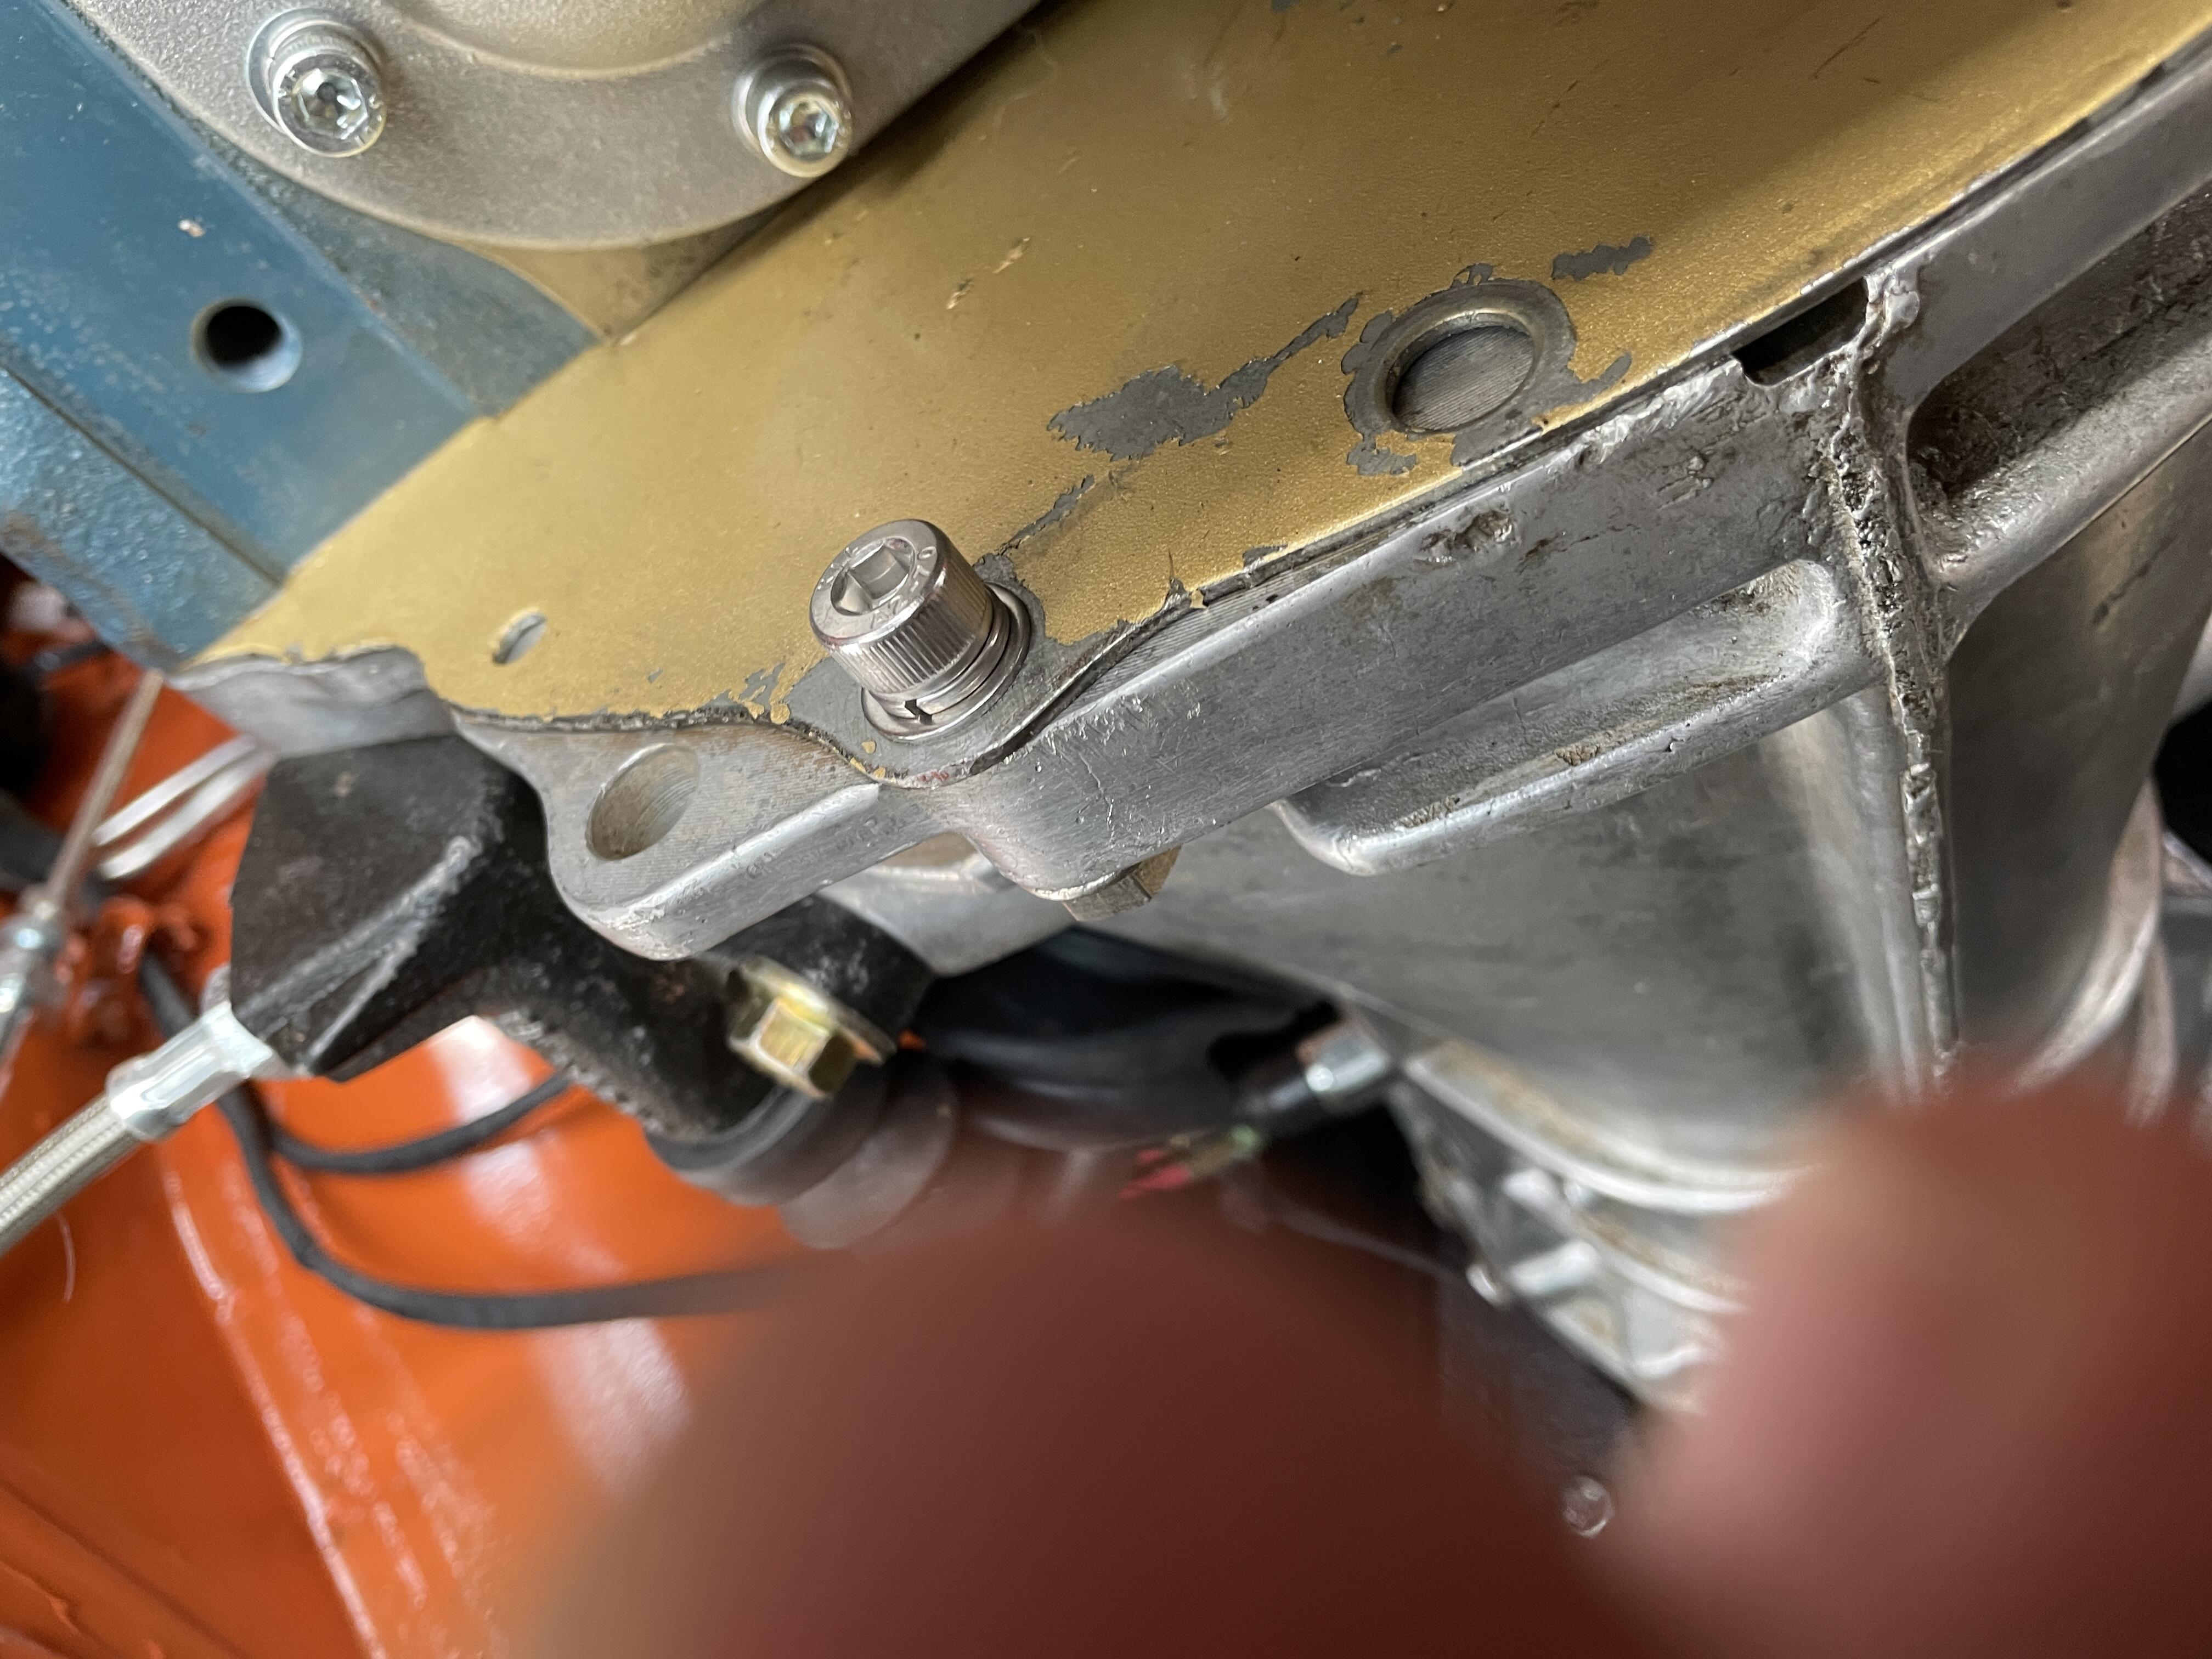
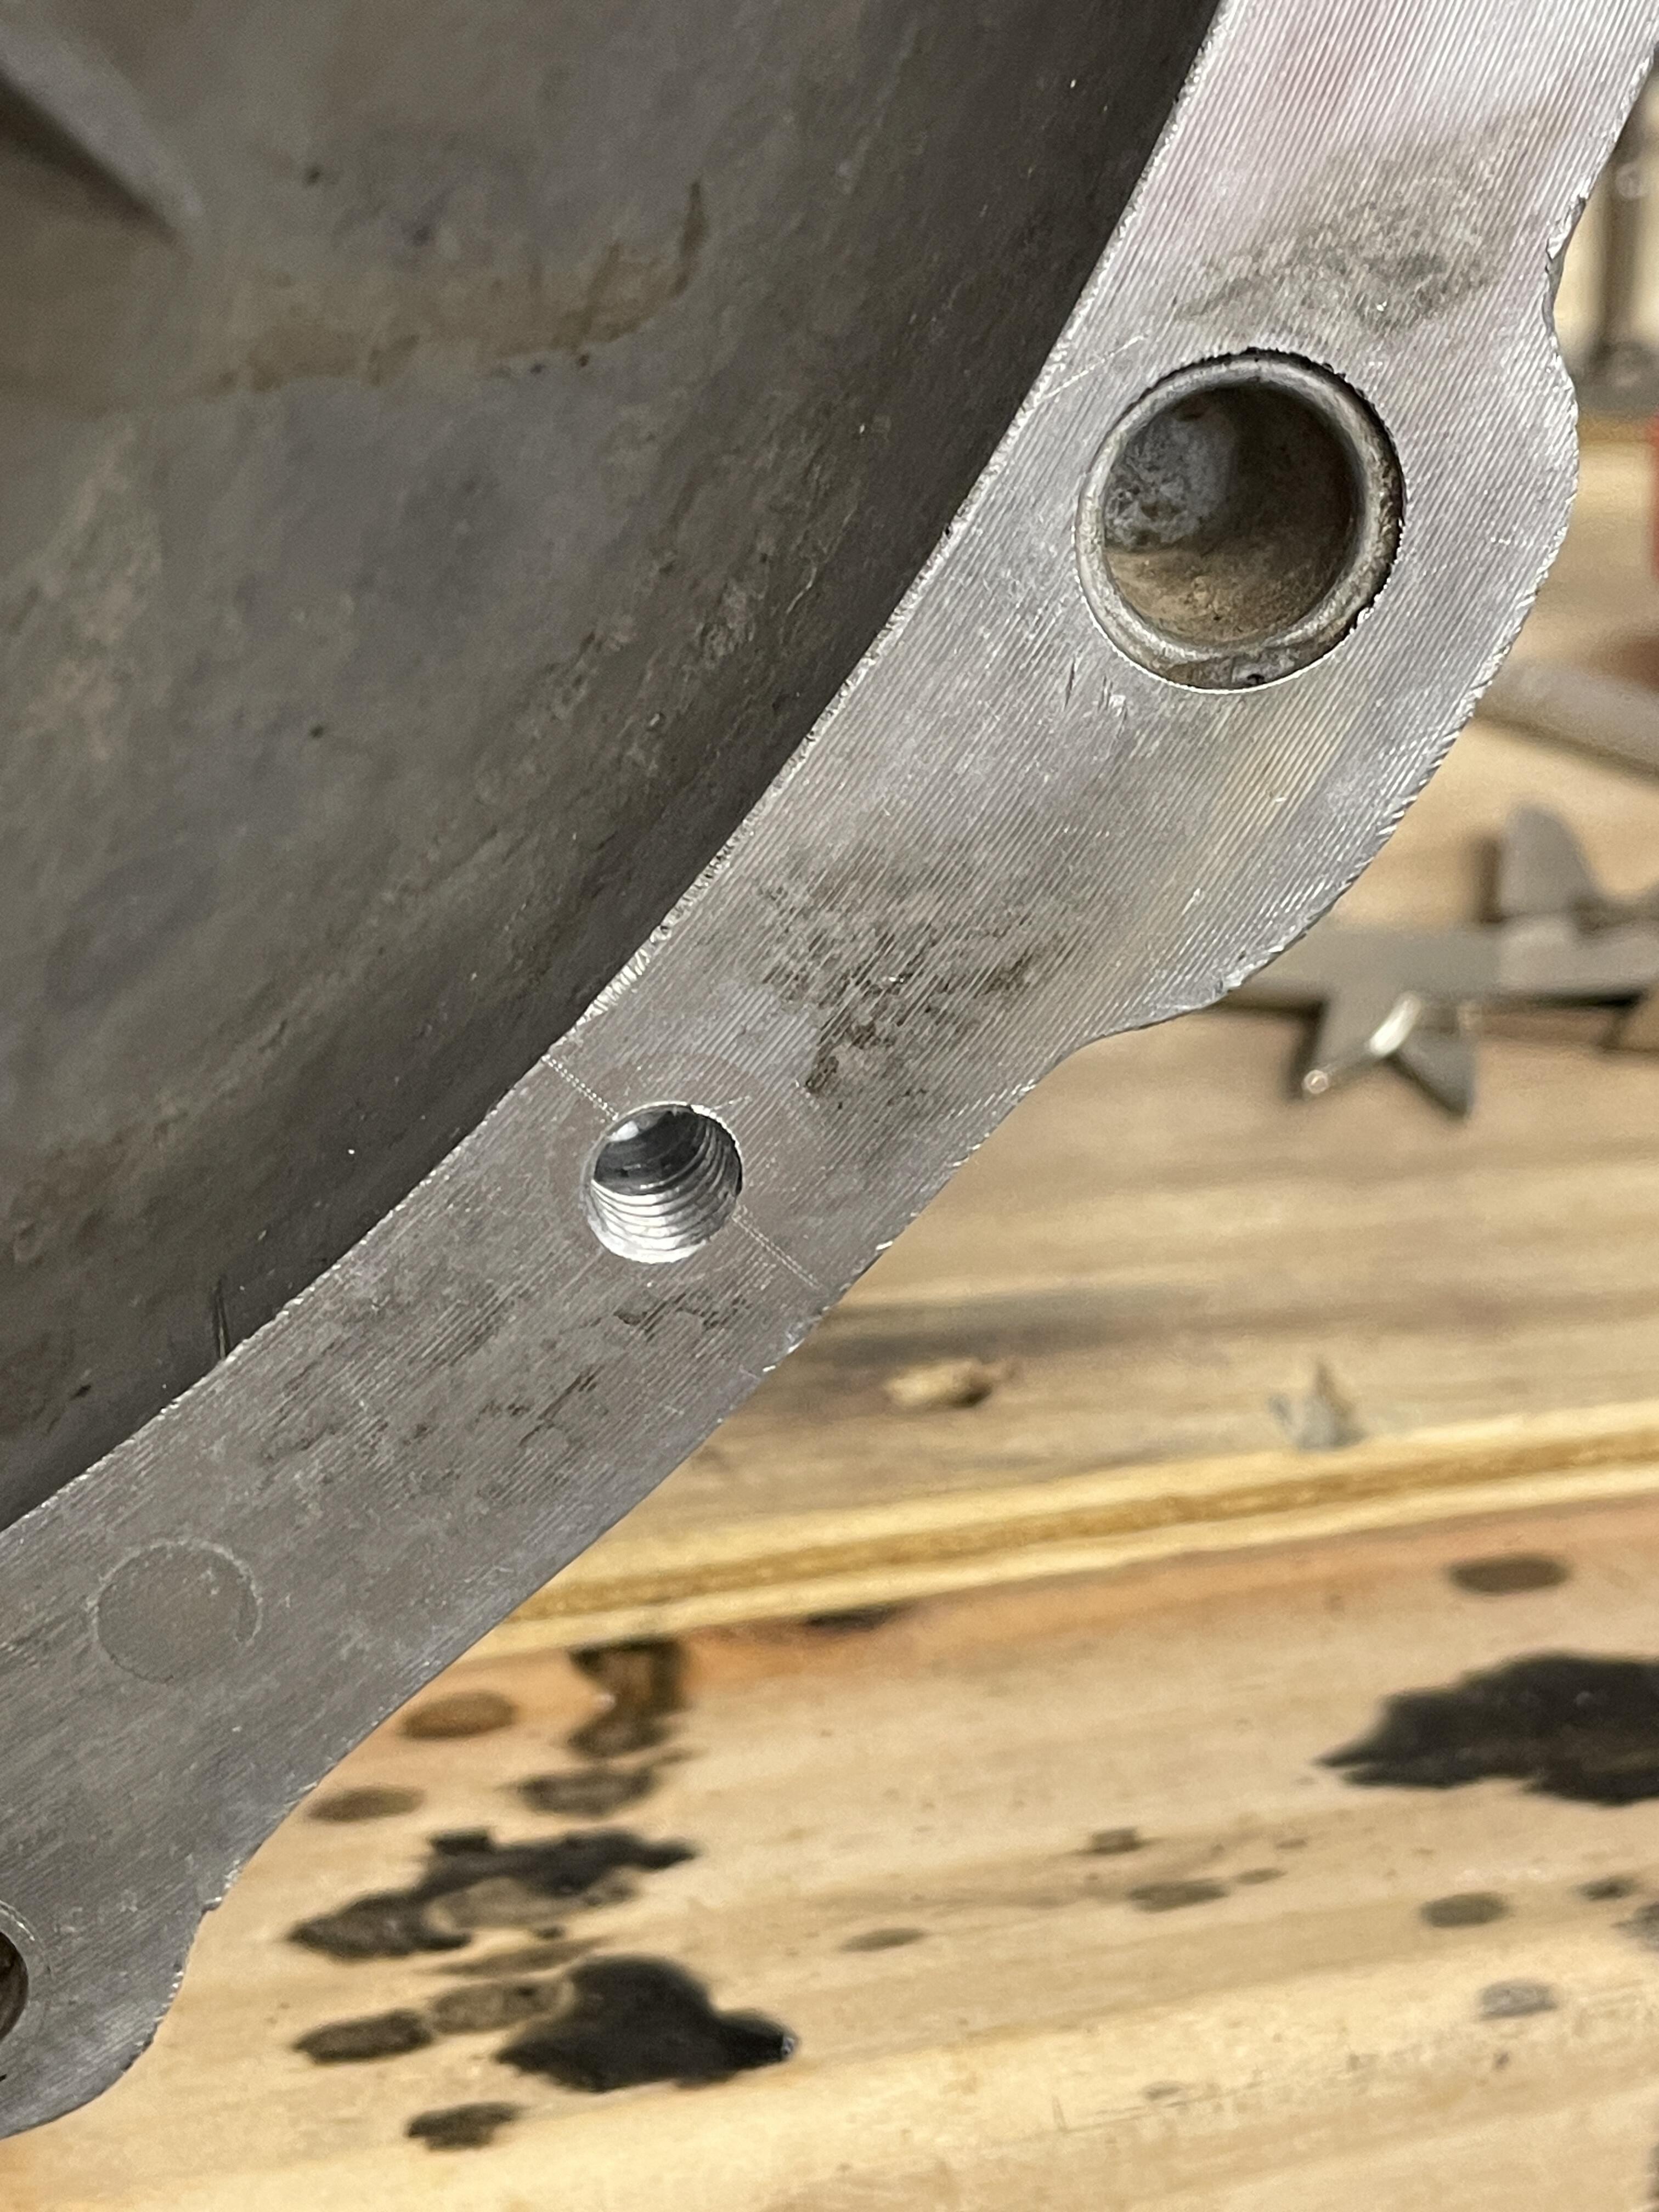
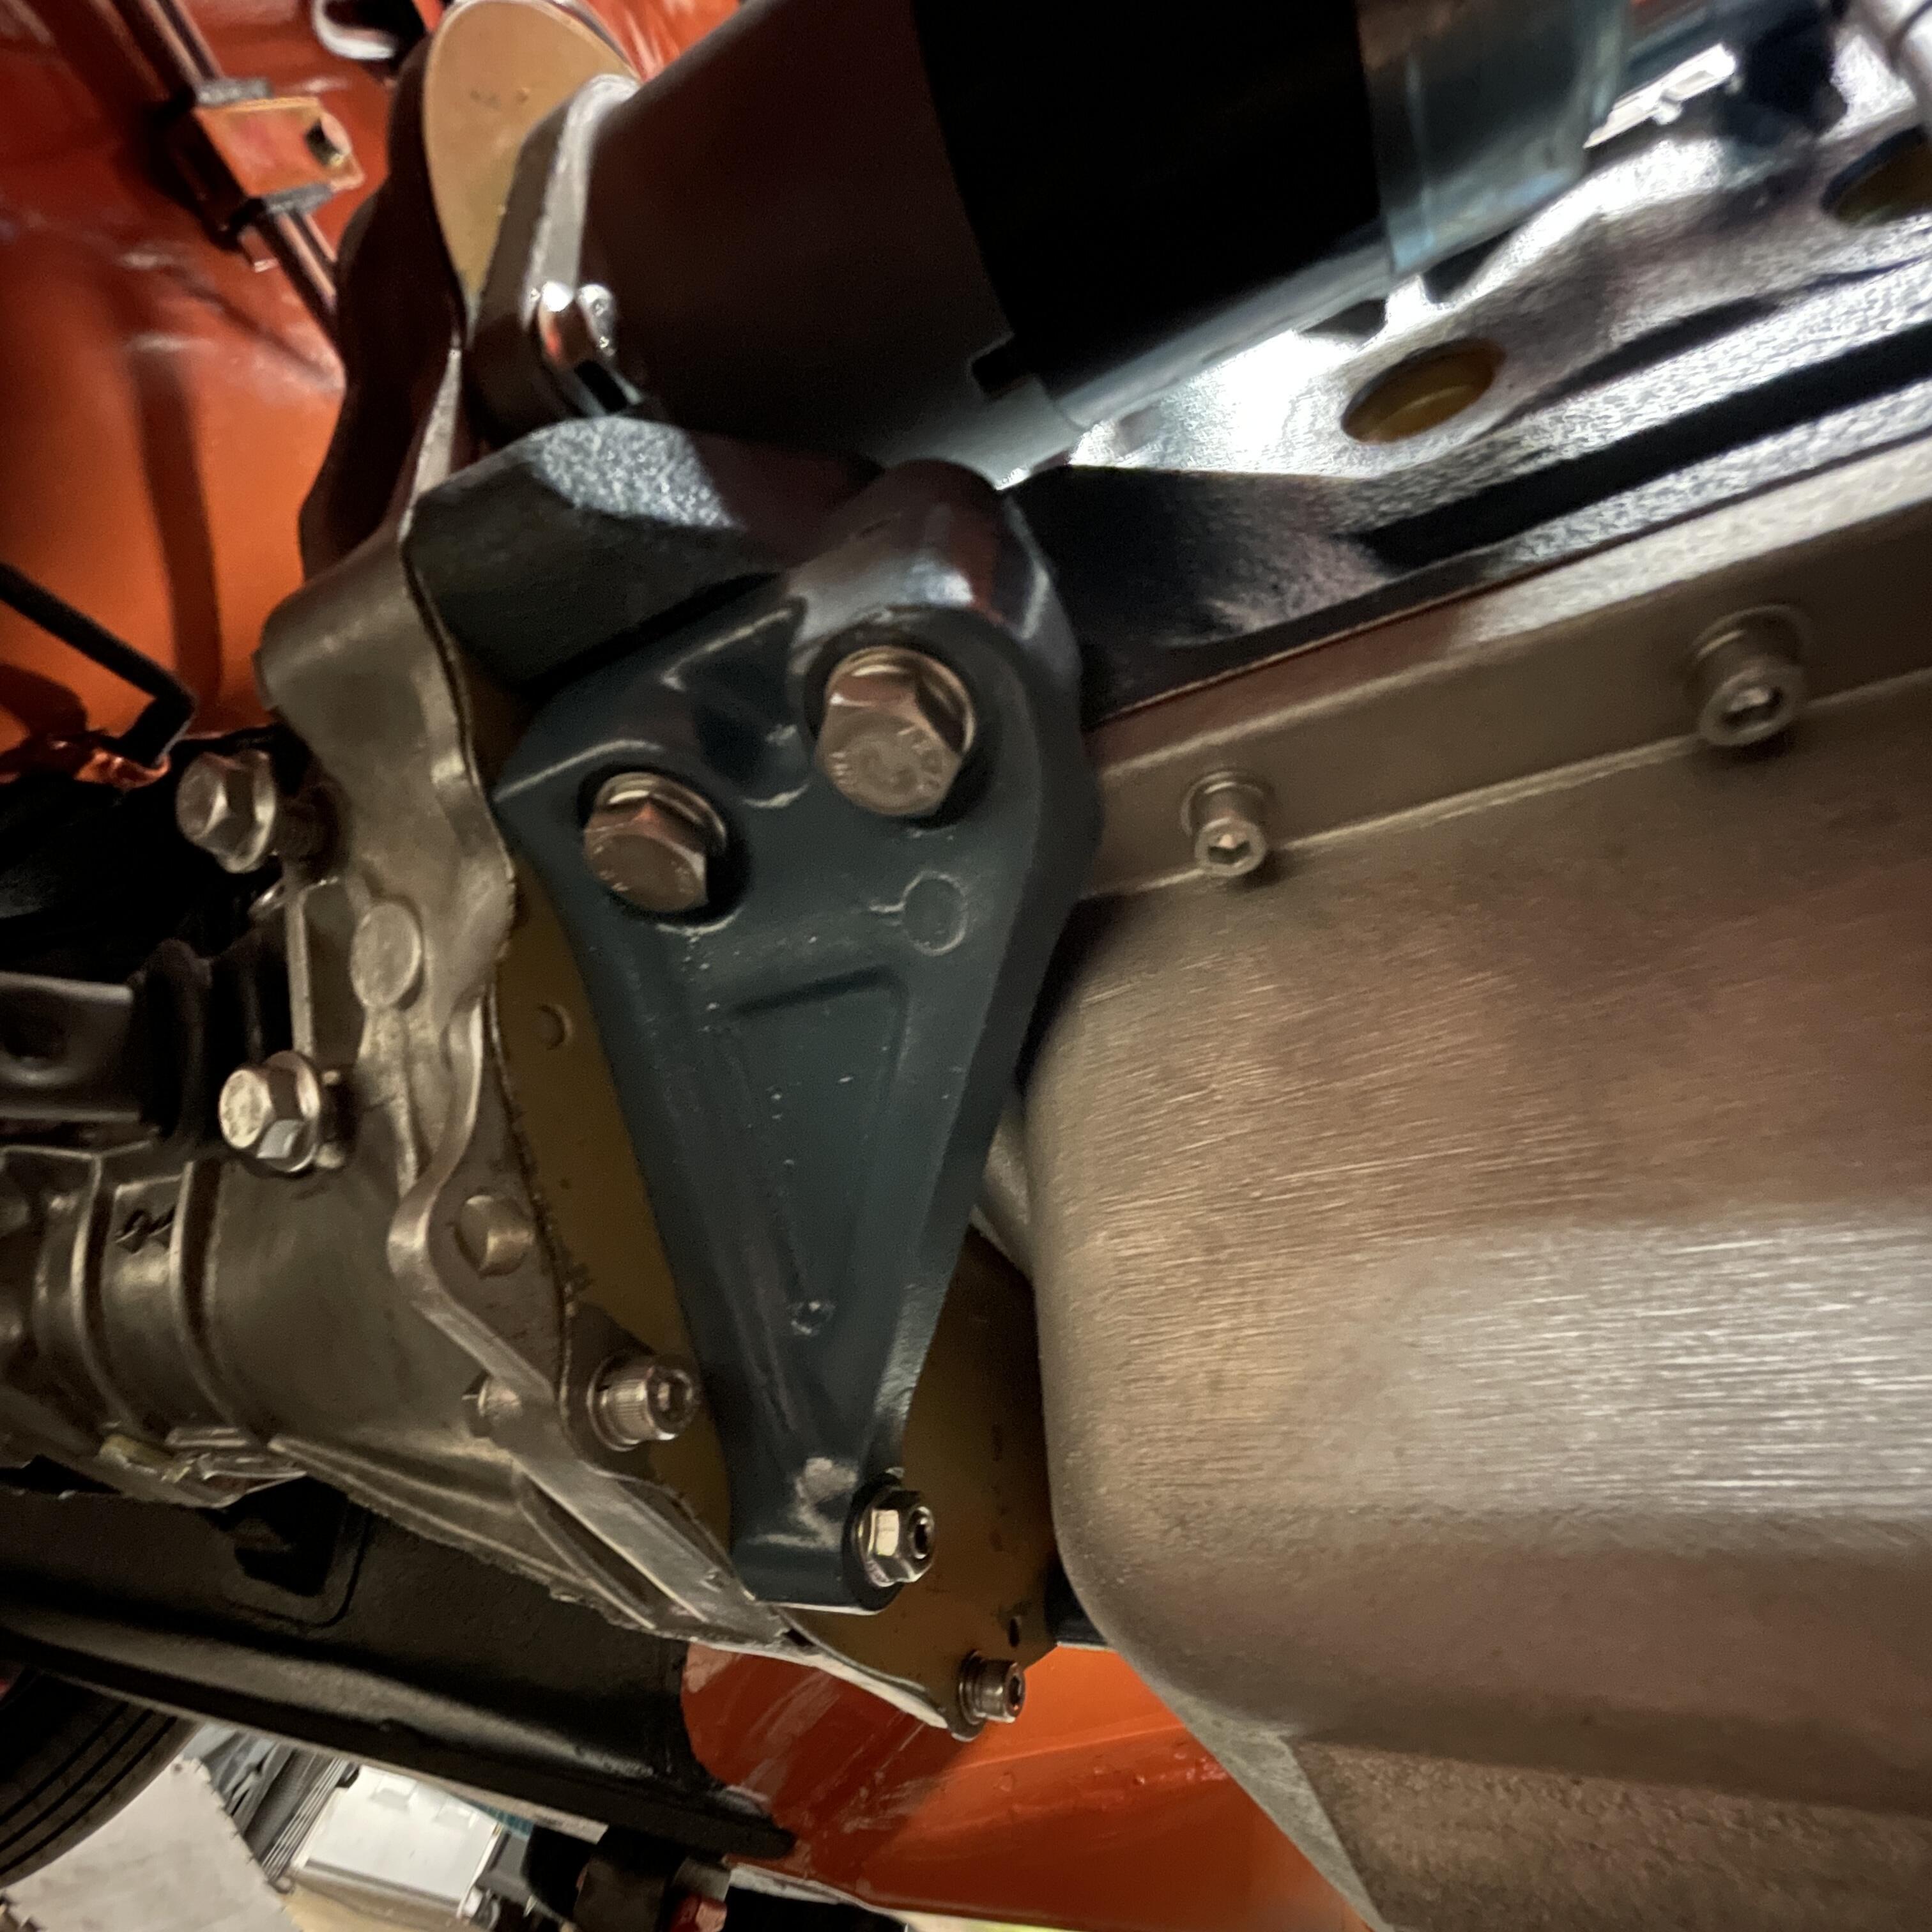
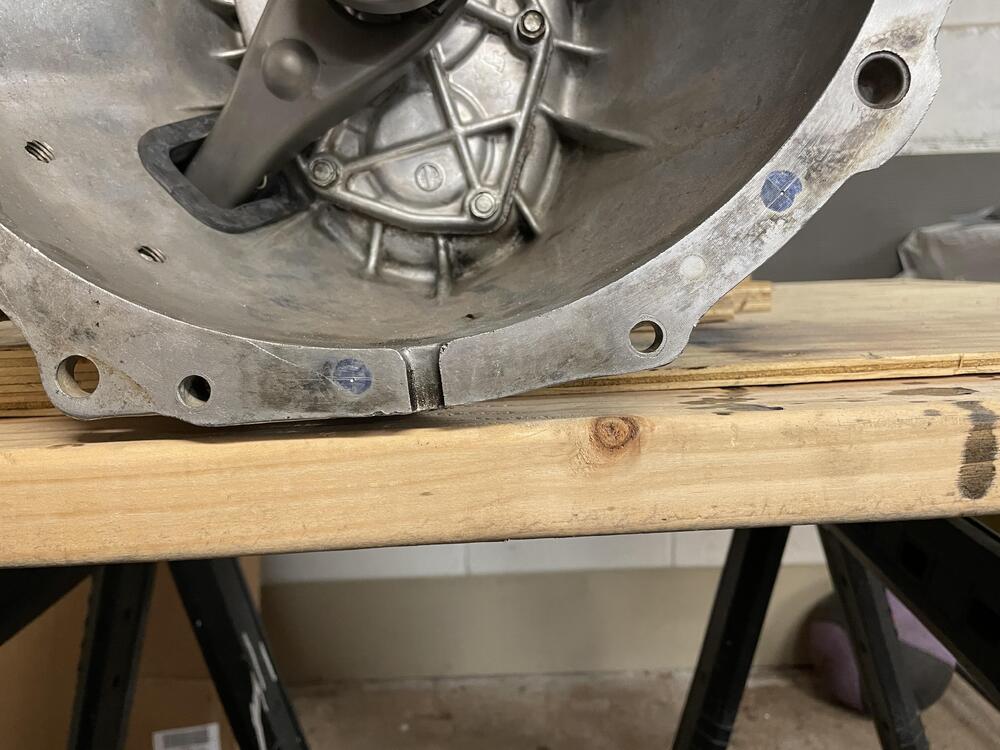
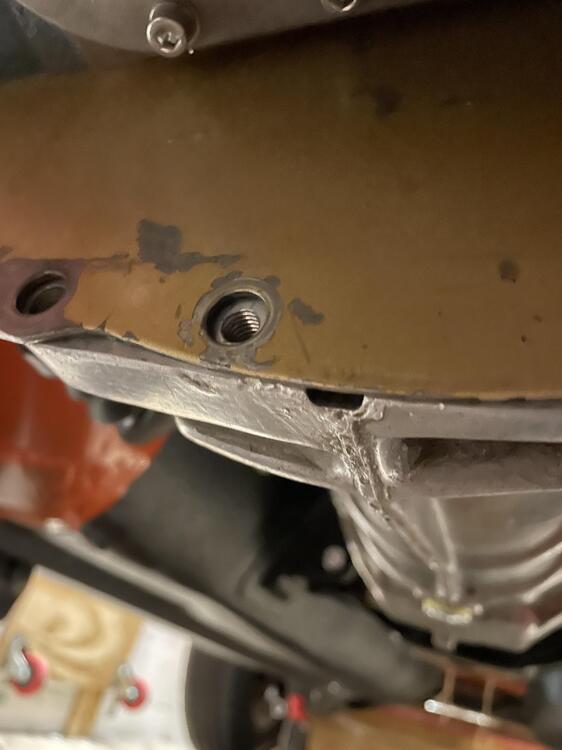
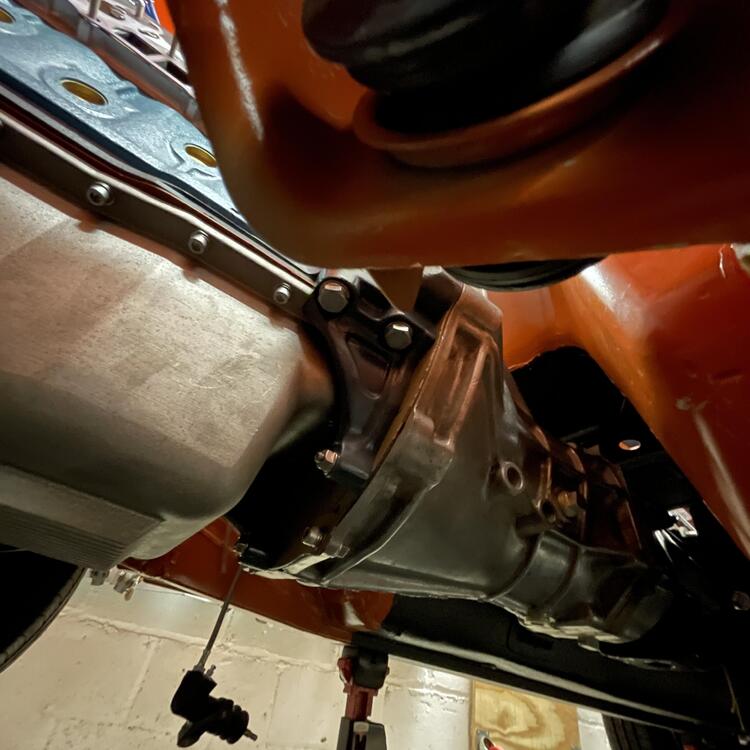
4 pointsDid some stuff… Chopped up and rebuilt my compressor bracket to move it up and toward the block… I rehabilitated my transmission gussets and made them work on this 720 transmission. The gussets needed relief to accommodate the rear left corner of aluminum oil pan and the bolts. You can see where I carved that out in the process shot below where they are hanging on wires. I tapped the bell housing for m8-1.25 manifold studs and finished it off with flange nuts.


 4 points
 -
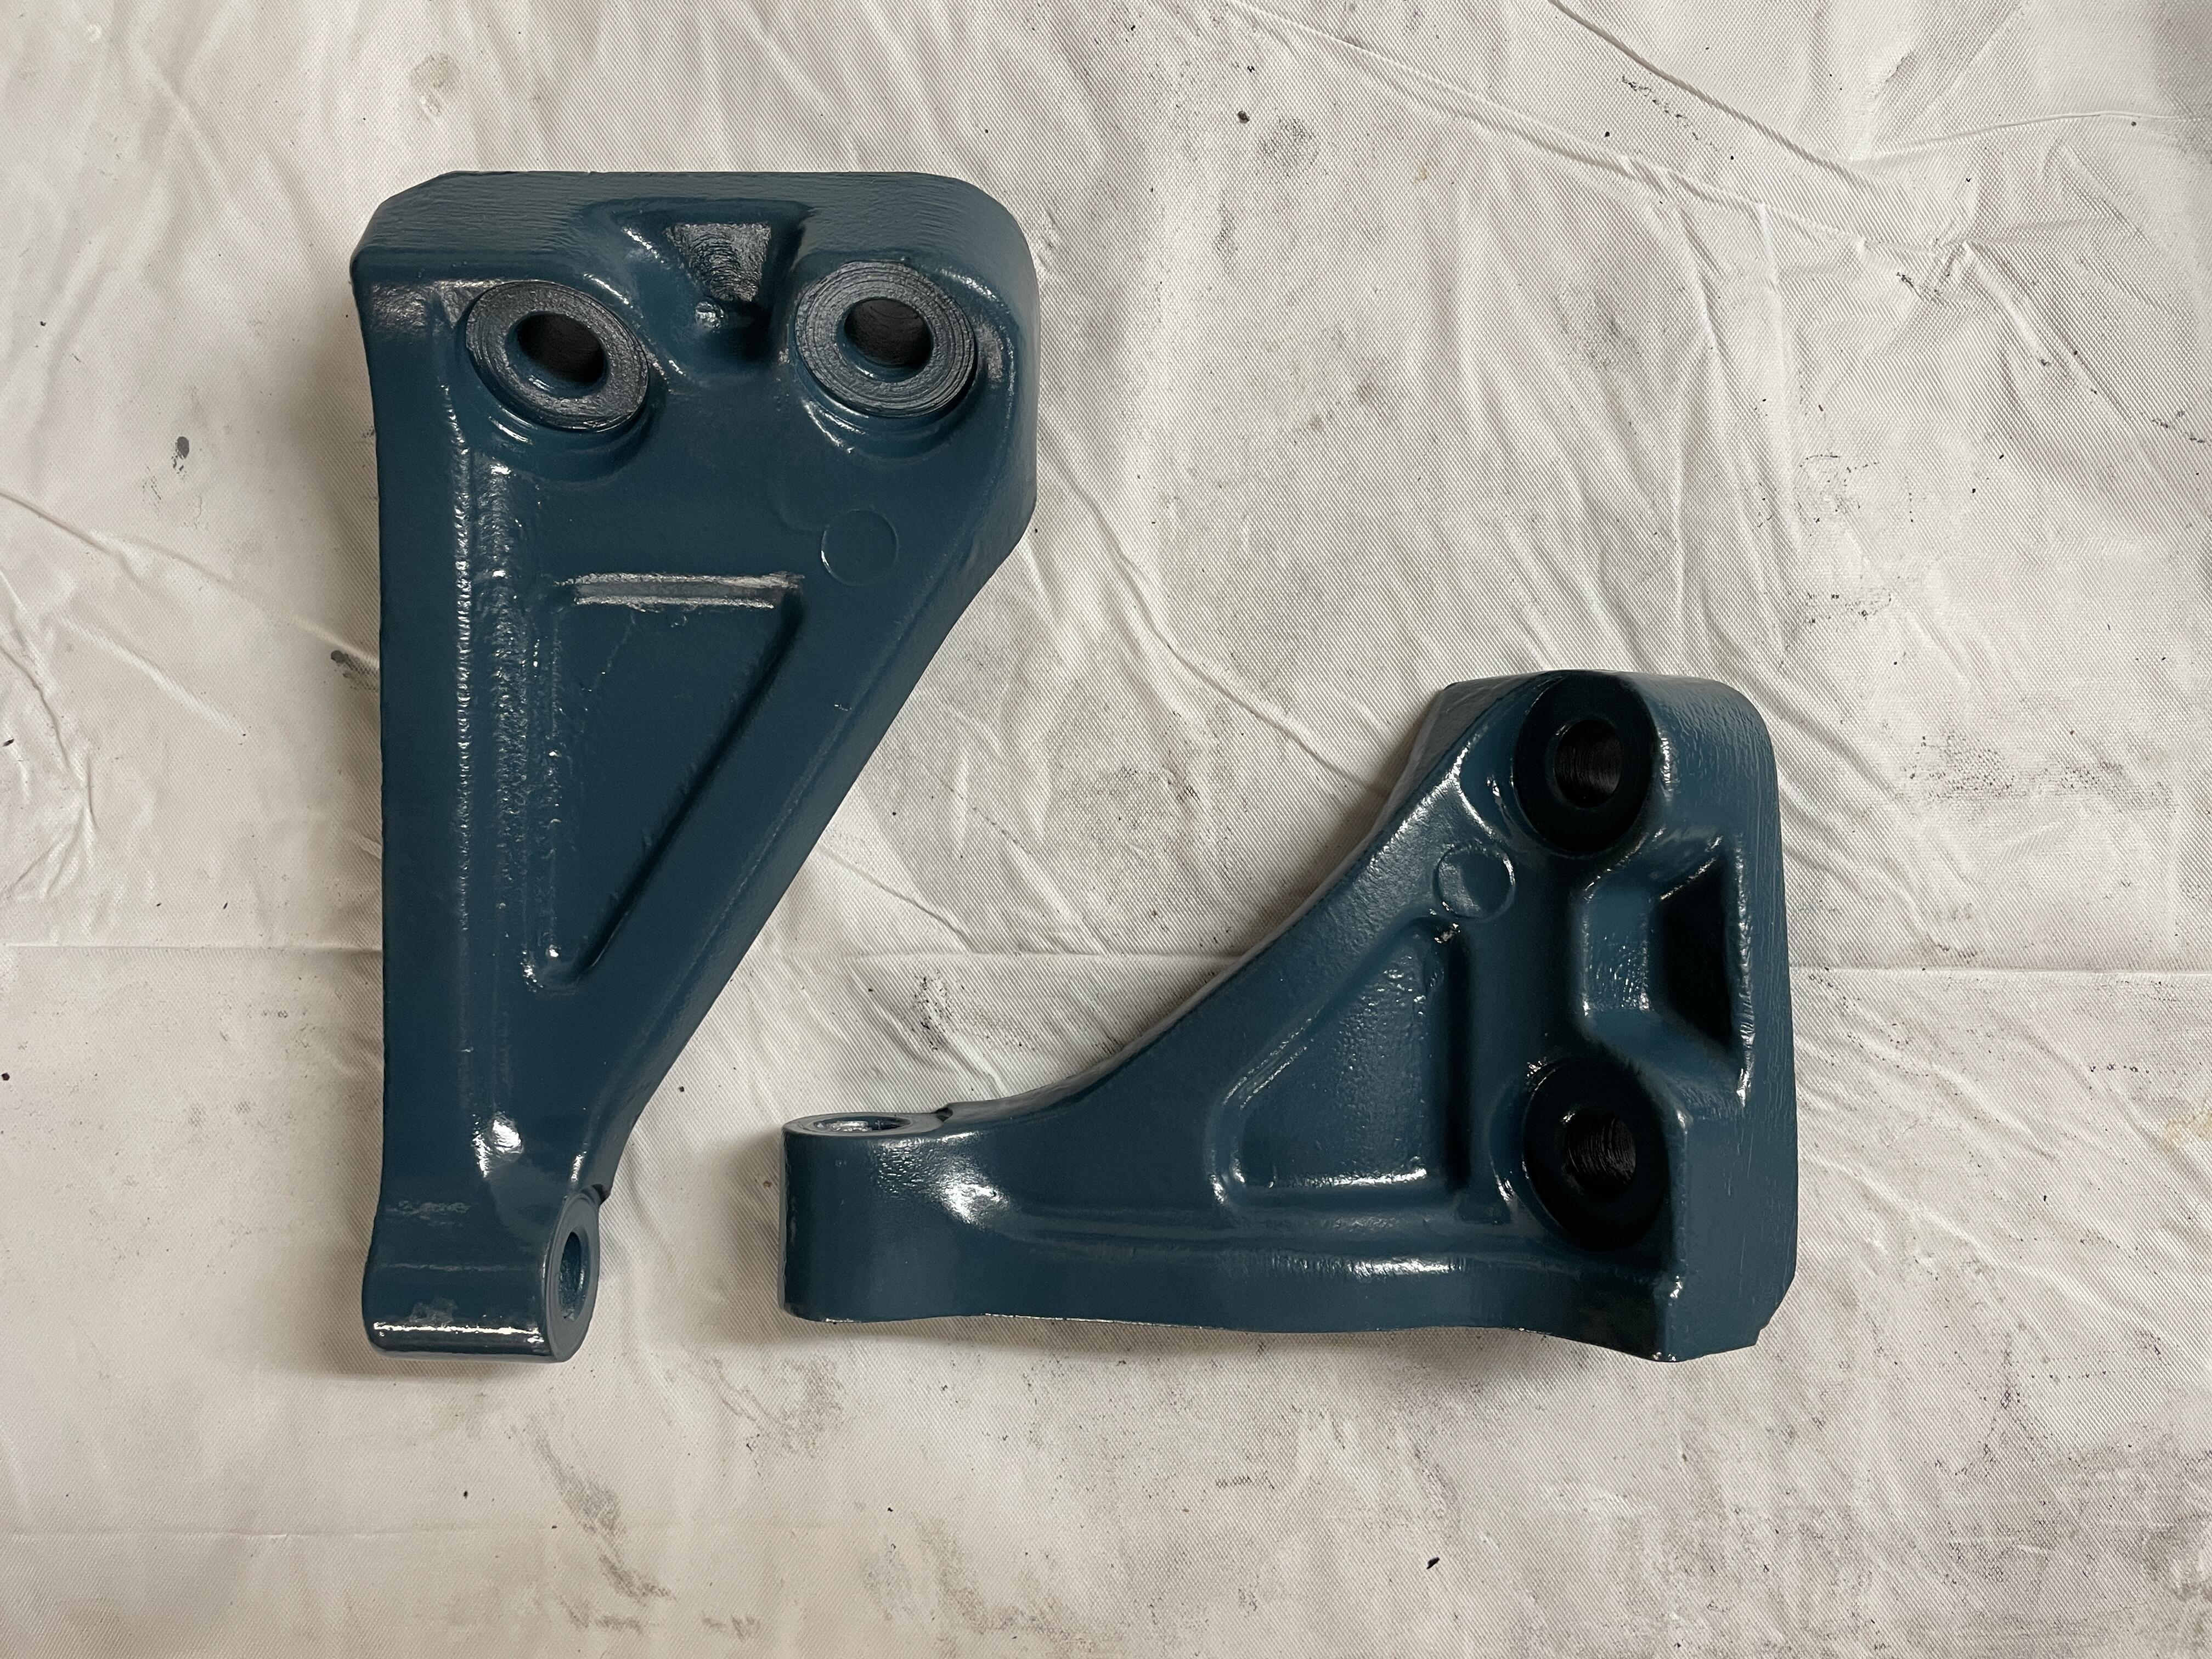
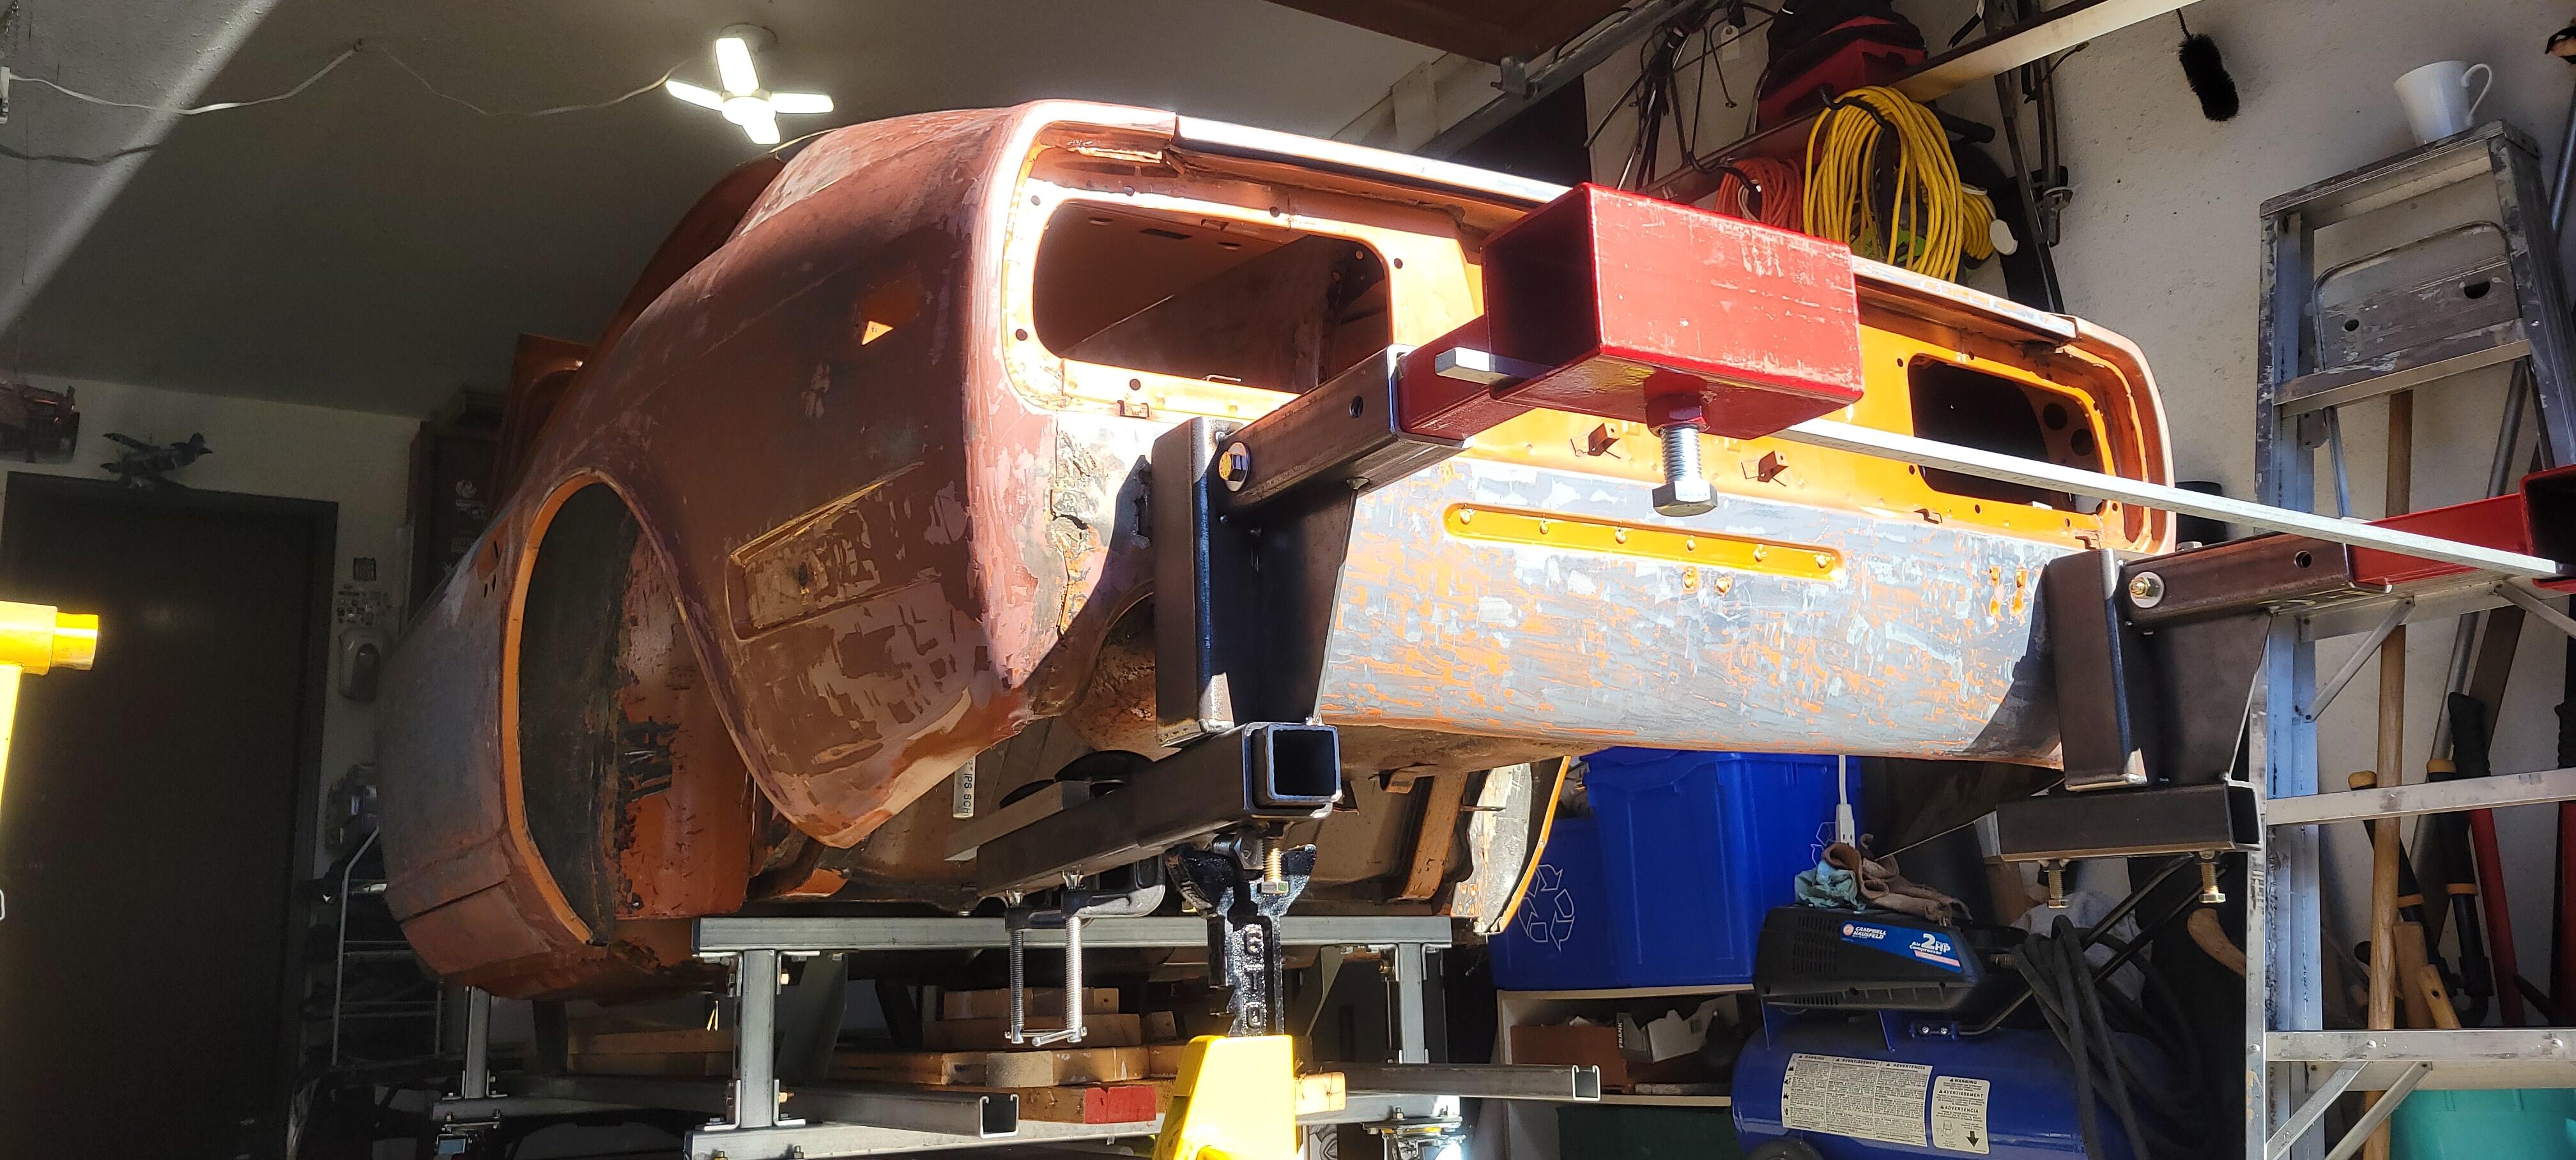
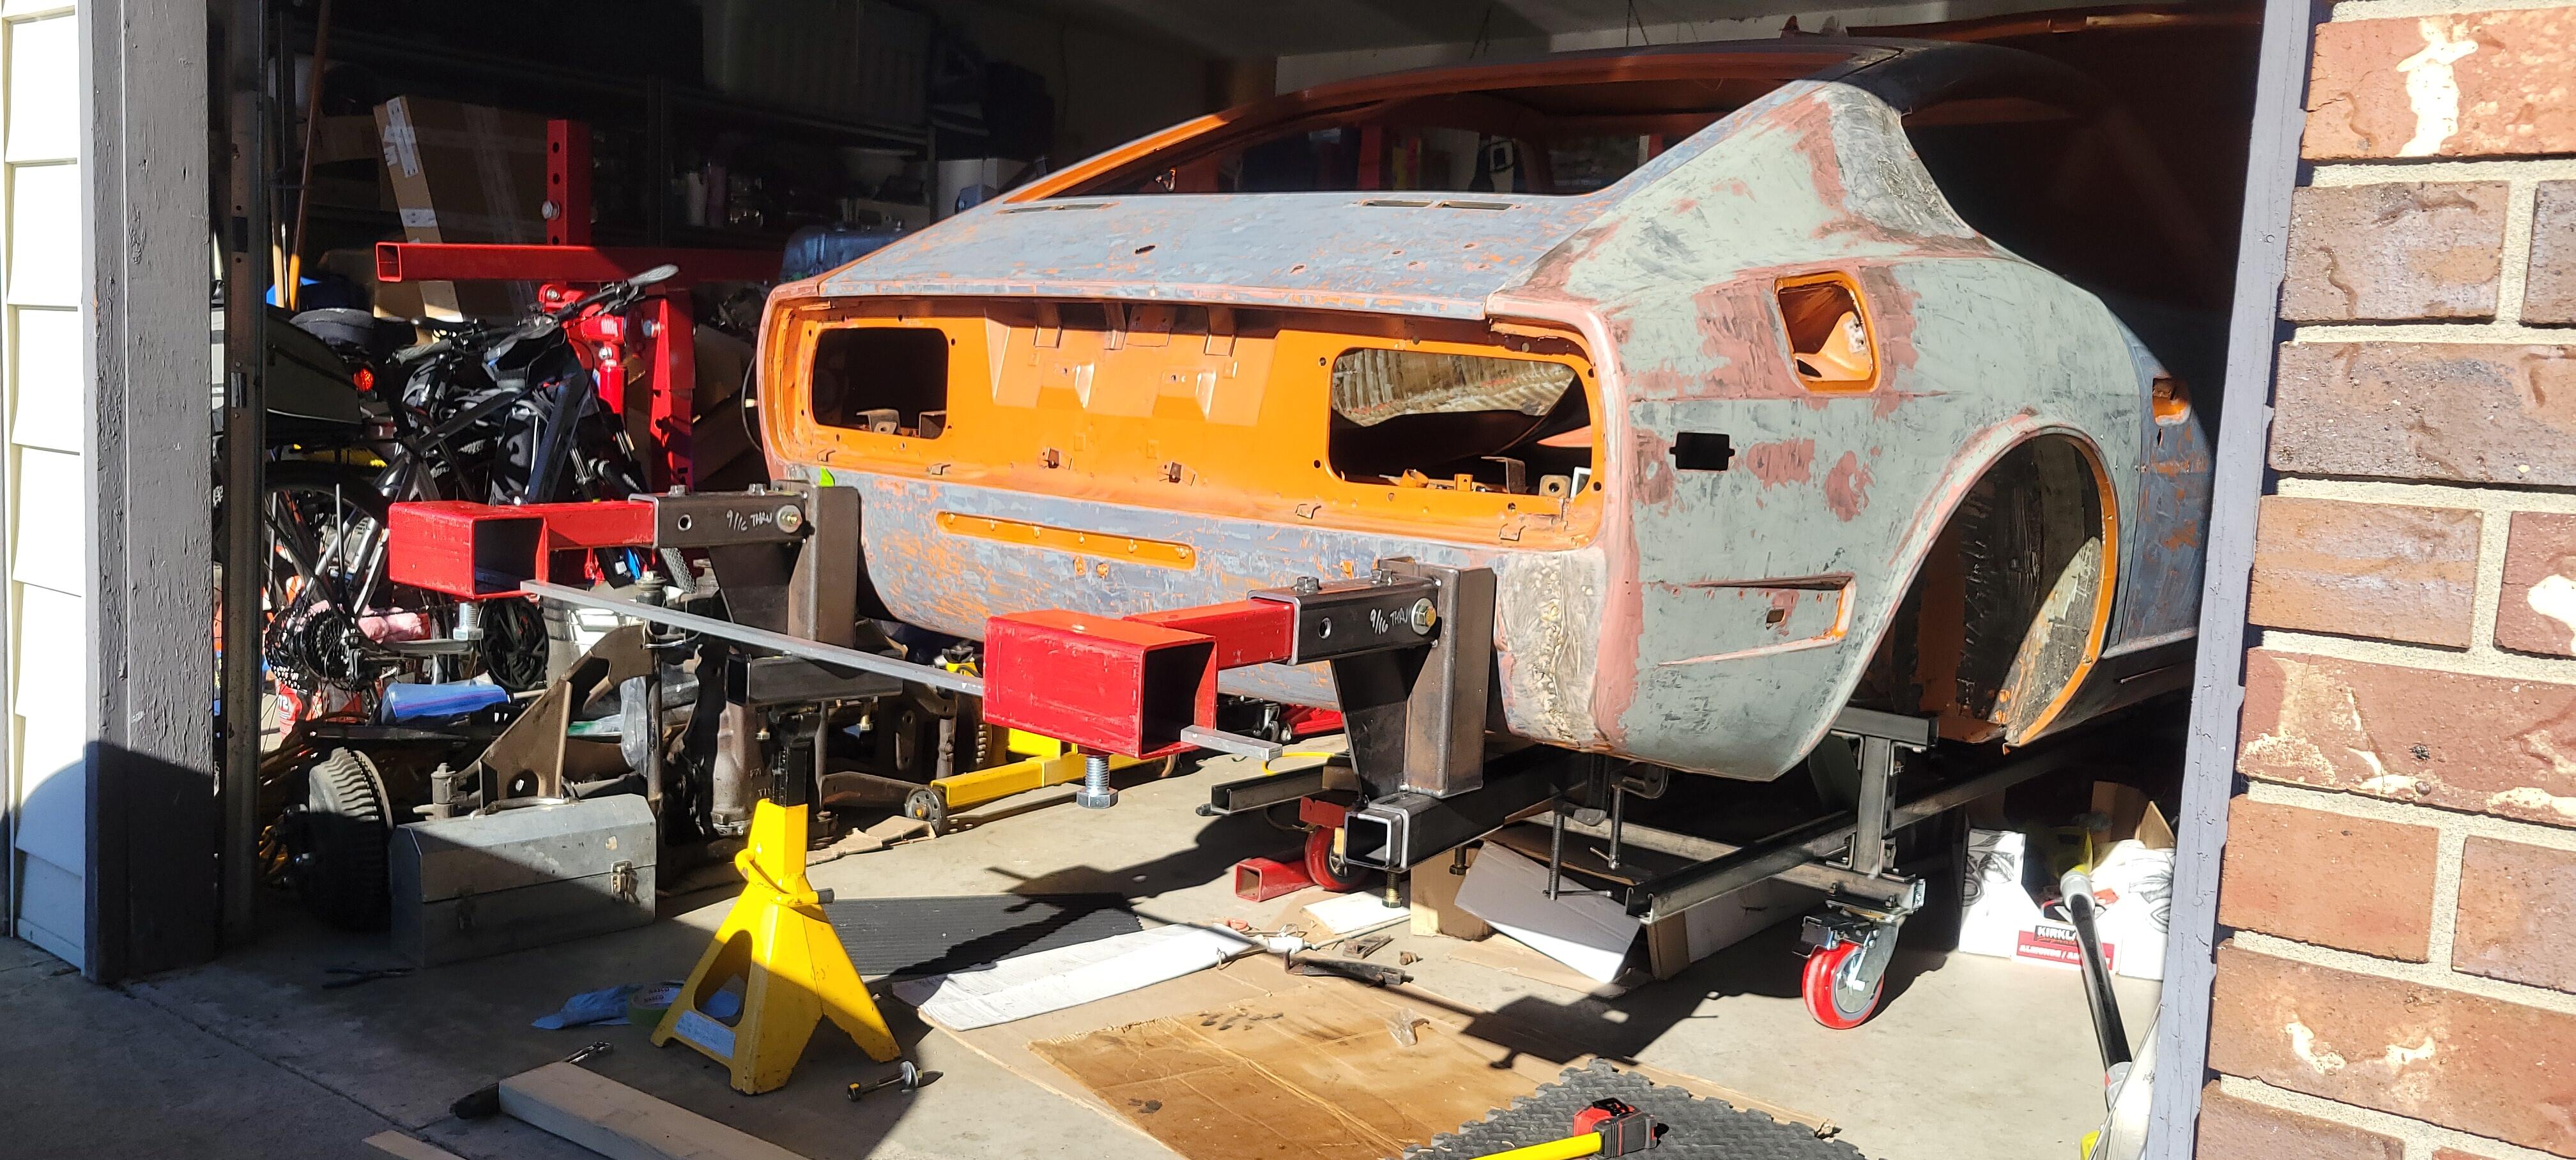
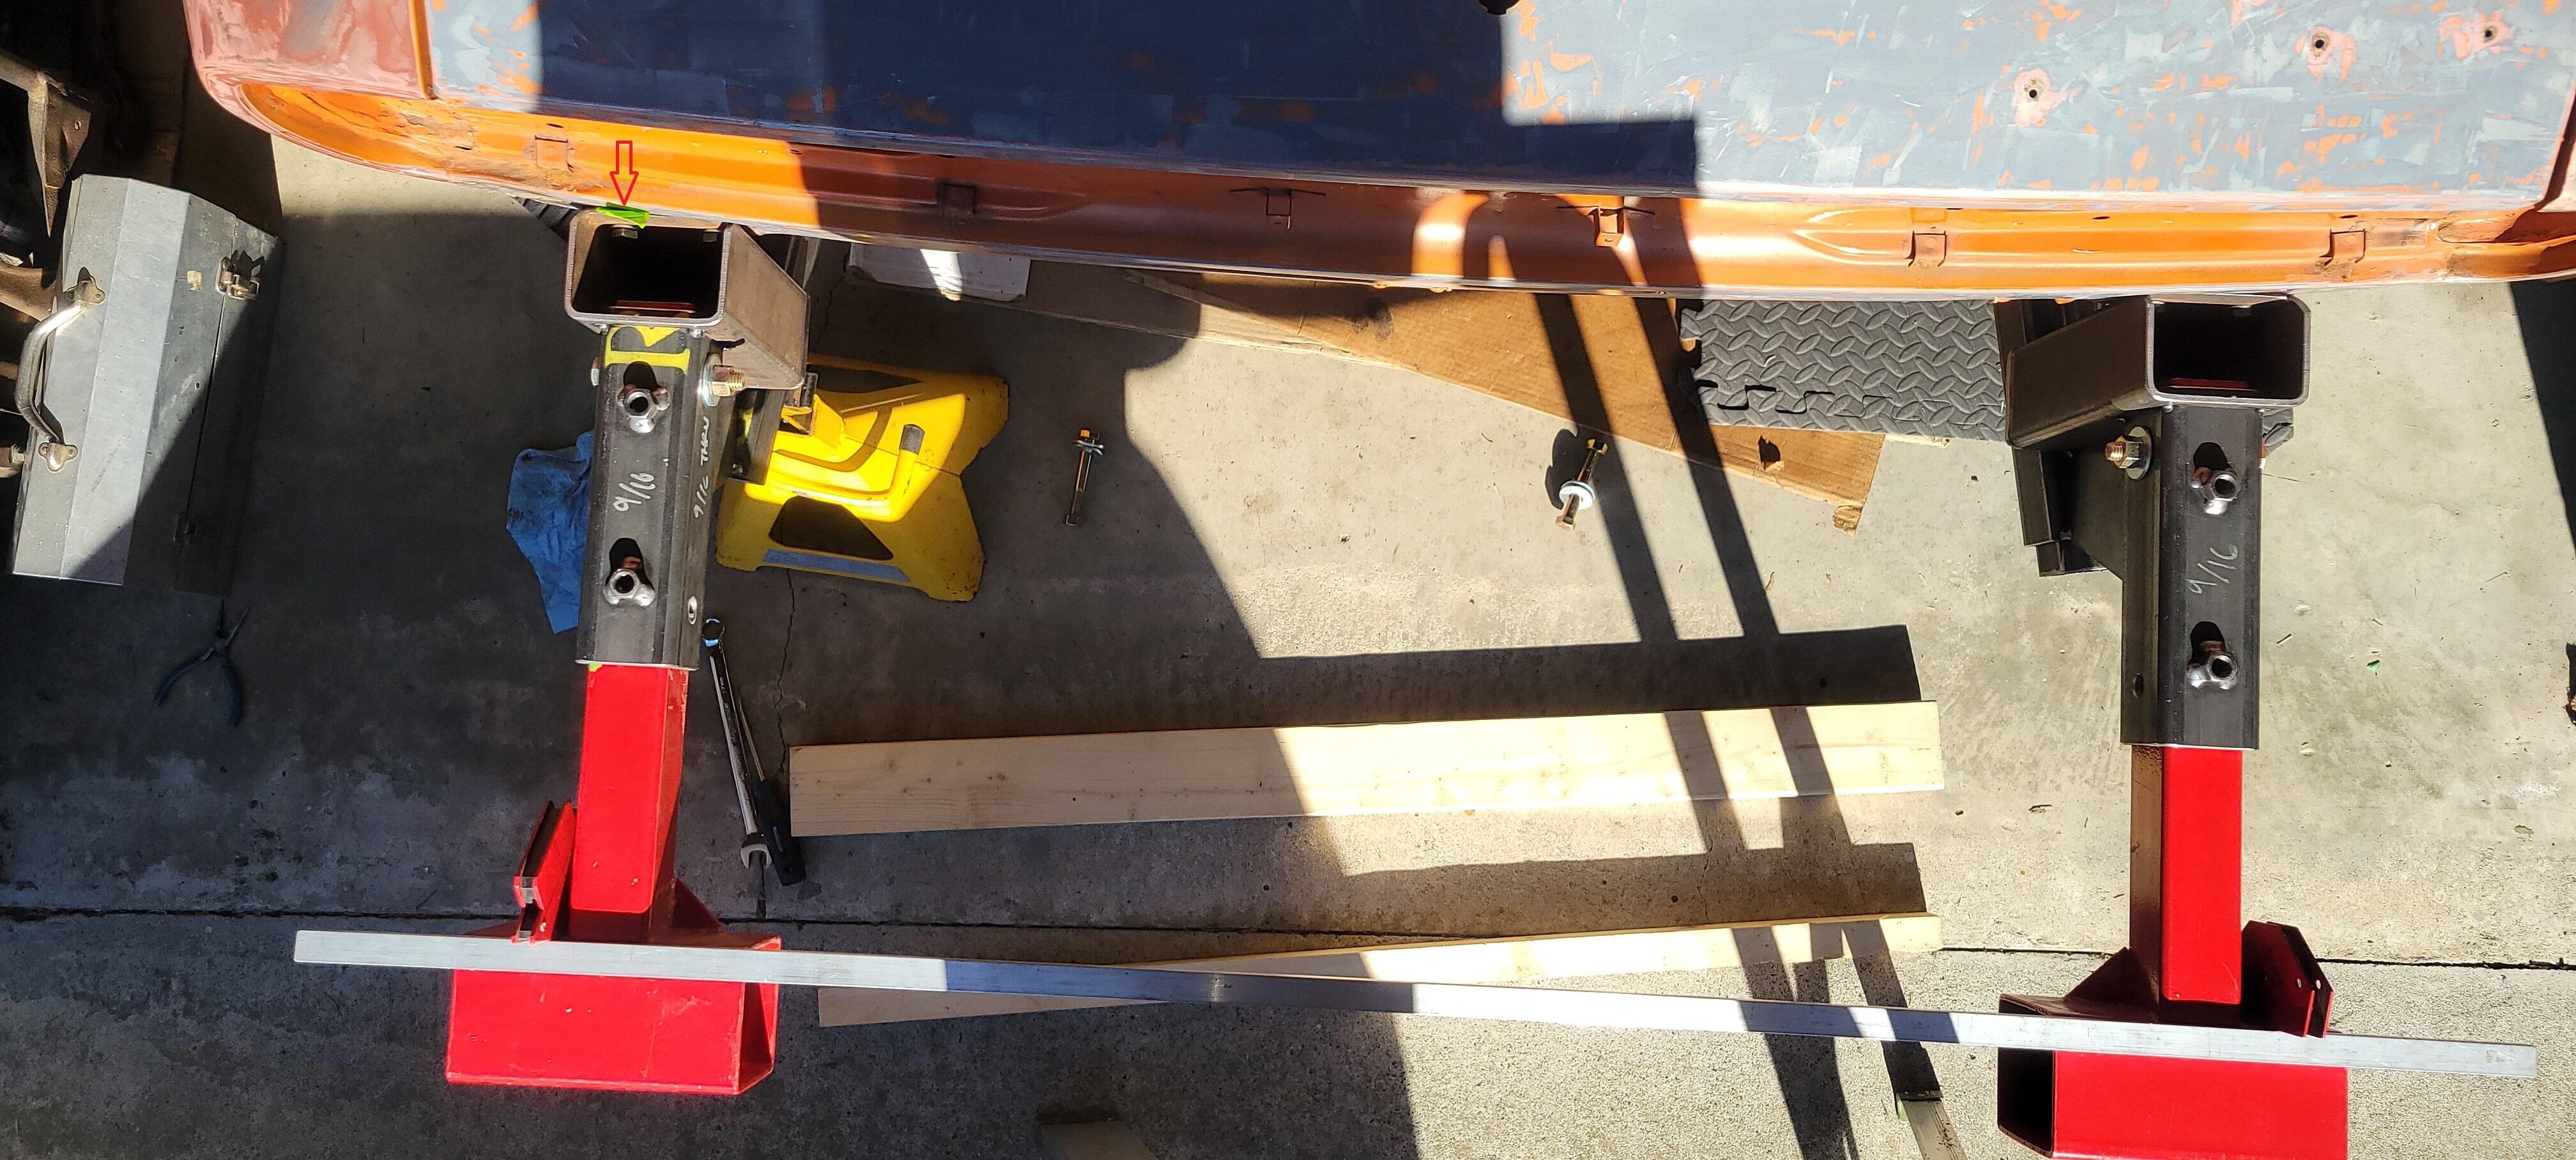
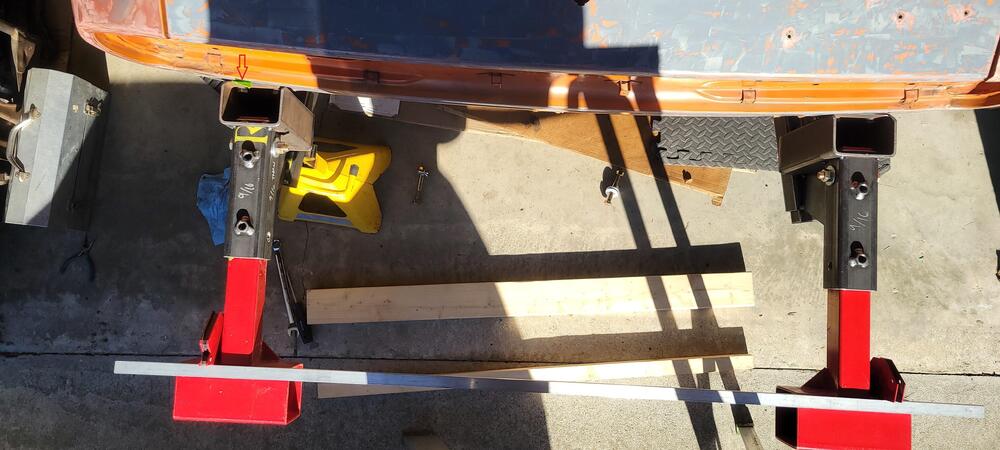
4 pointsYesterday I picked up the rear rotisserie brackets from my fabricator (in the tacked state) and this morning I was able to do a test fit to check the angle for the diff mount extensions. They fit good, so they can now be welded up as is. While they were attached I also did a squareness check and found that the left bumper mount was was note quite parallel with the right. A 1/8 inch shim (2 washers) between the far left bolt and the new bracket took care of the issue, so I will have no problems with alignment when assembling on the main rotisserie end support. Hopefully next weekend I will be able to get the body onto the rotisserie. The red arrow in this next pic shows where I need the 1/8" shim.


 4 points
 -
I made two. One for proof of concept, and a second one since the first turned out so well. Short story... I've got one available for sale if you're interested.3 points
-
On finding one I hope I didn’t imply that it was easy but they are out there. Personally I look for the permanent fix in order to move on to the next project. It all comes down to the end result you are looking for. Everyone has a budget which I fully understand.2 points
-
Thanks Steve! I have a windshield to install... and a hood... and possibly some other things that I will need help with. Appreciate the offer and will ask for help before long.2 points
-
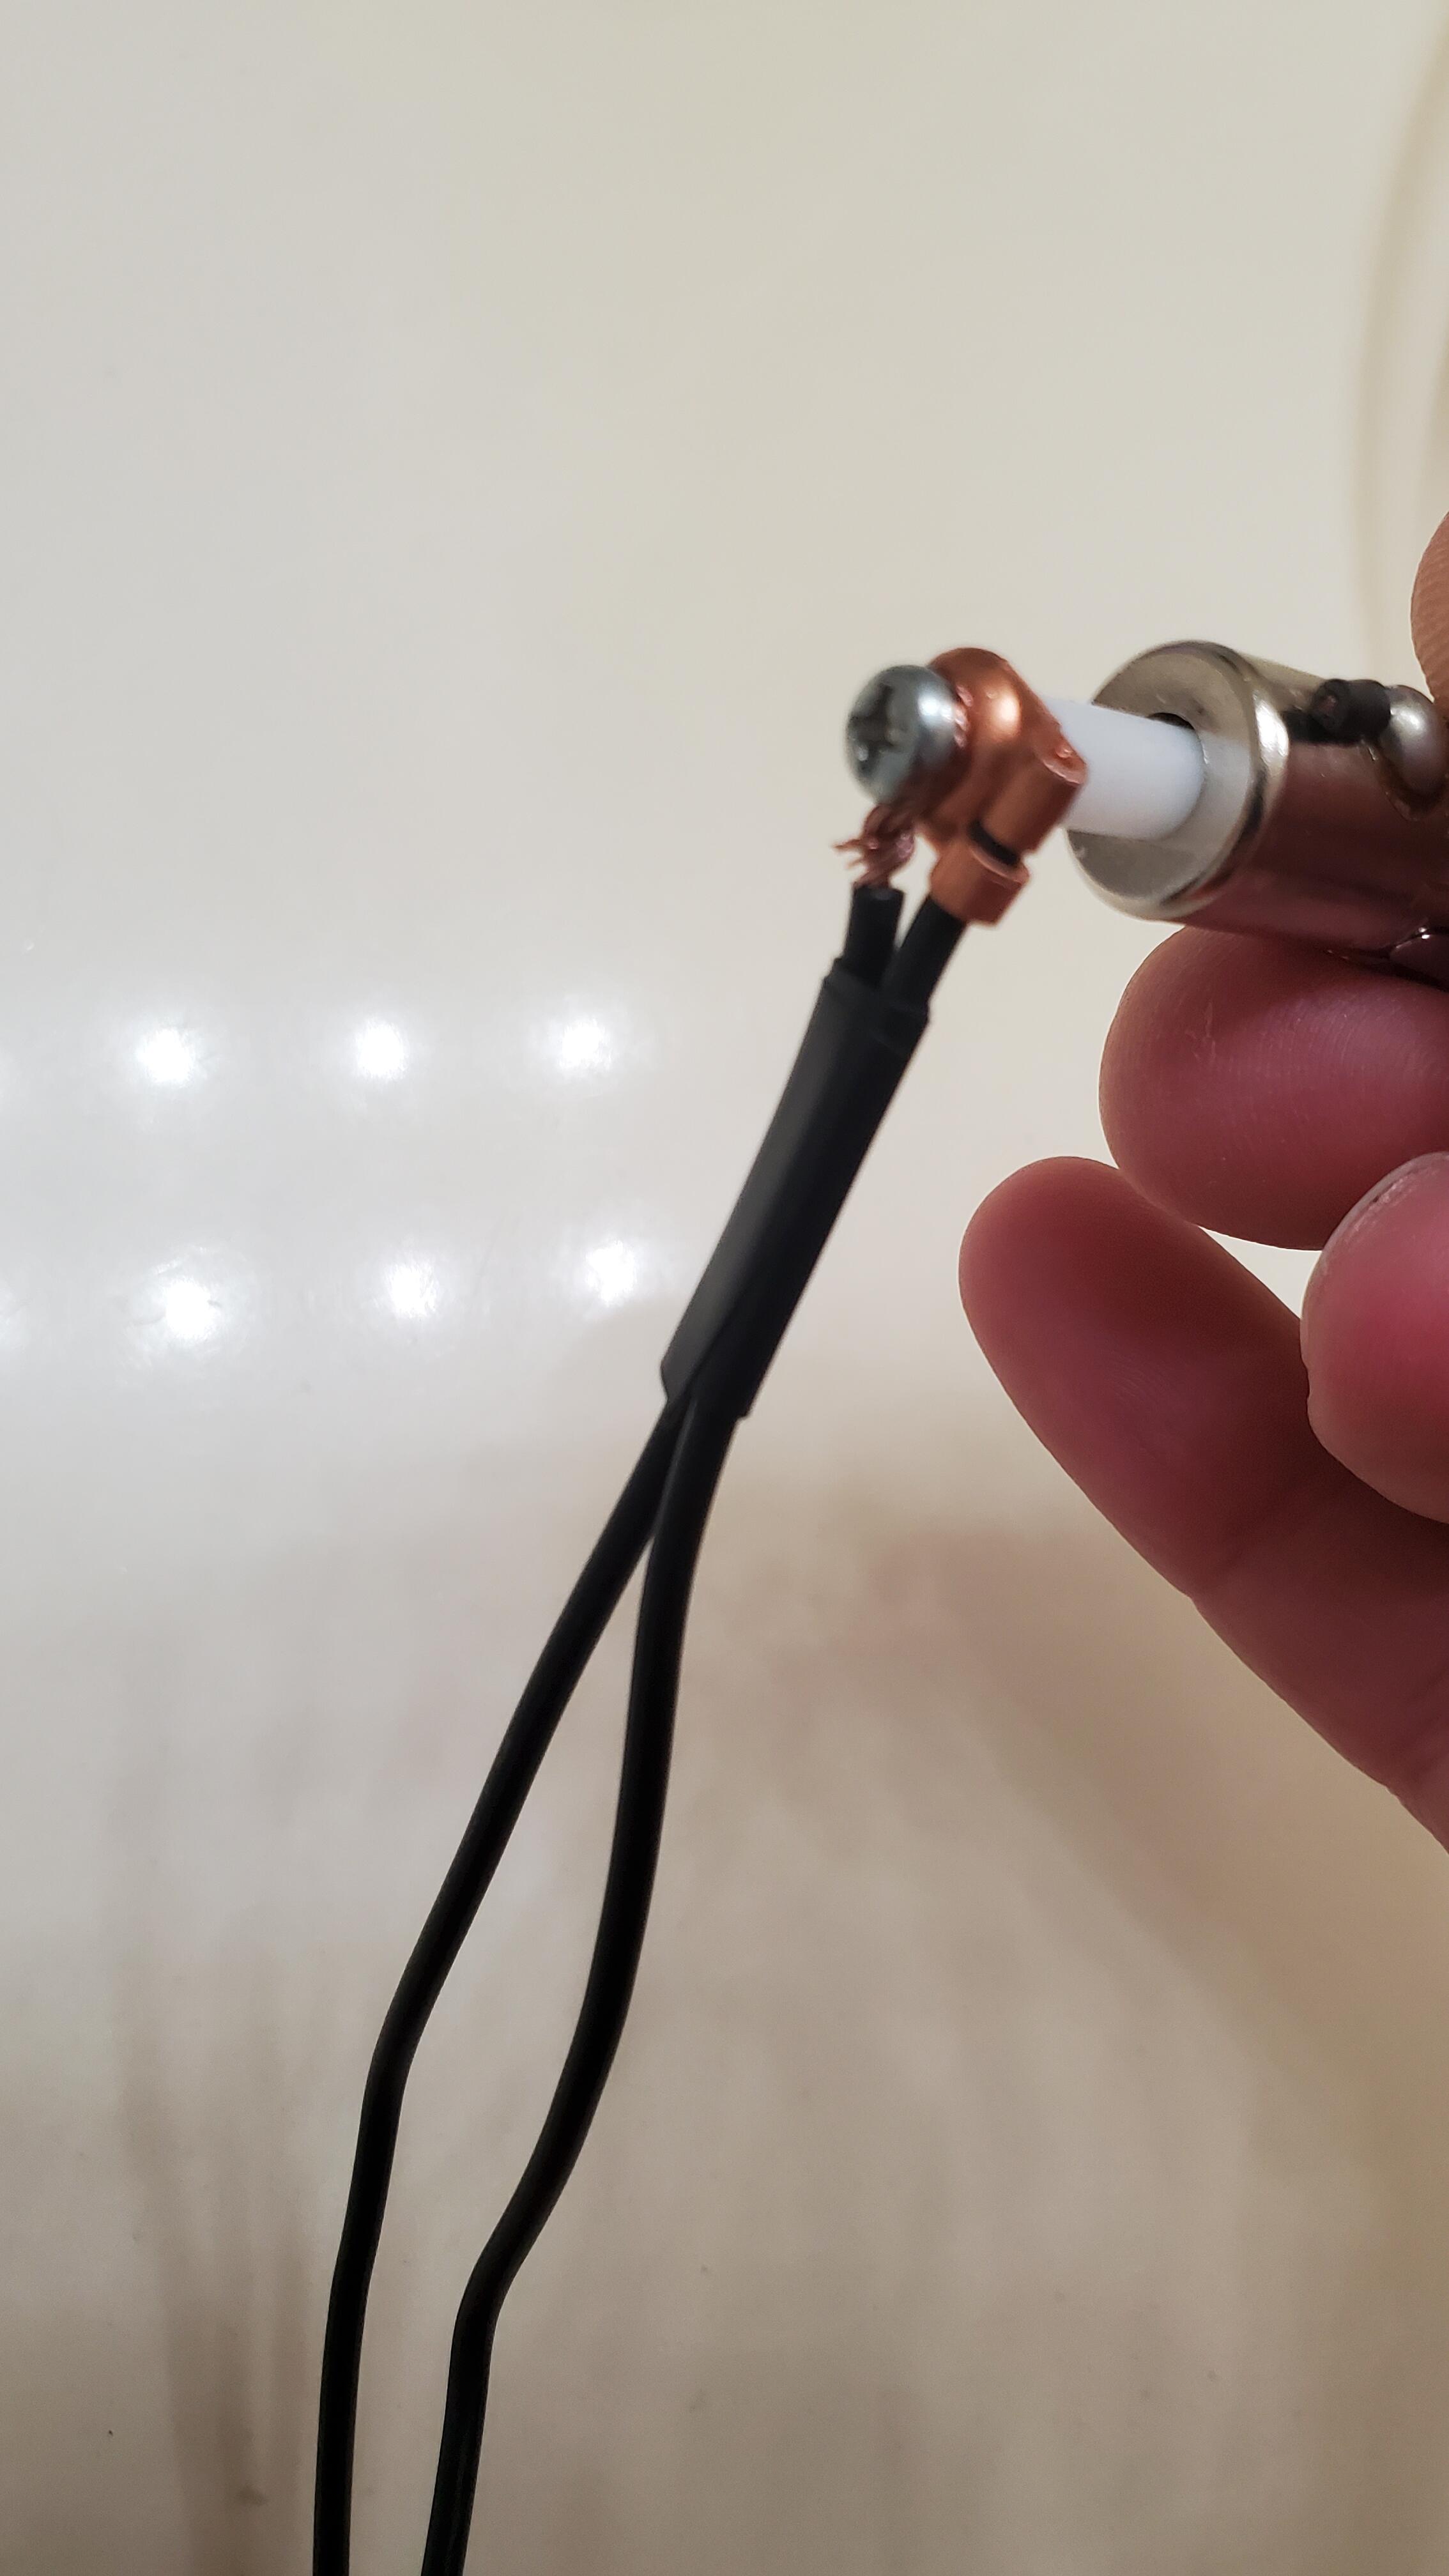
2 pointsI would suggest putting an open barrel ring lug terminal on that wire. It will last longer. https://www.amazon.com/Terminal-Connerctor-Terminals-Connectors-Assortment/dp/B08GFJY4NY Even cheaper: https://www.amazon.com/Copper-Terminals-Connectors-Barrel-Electrical/dp/B0BN6335H72 points
-
2 pointsJust wanted to finish up what I started. My issue was the new door switch the PO put in. To recap, it was a two wire and both wires were connected properly to the ground wires for the dome light and the buzzer circuit. What the issue was, and I can't understand how the PO didn't address this, was that these new door switches have one wire on constant ground. That was the wire he had connected to the buzzer. He had the switched ground luckily enough connected to the dome light. So all I did was change the second wire to switched All is right and the buzzer that is straight from hell works as it should!


 2 points
 -
1 pointI have used the Auxito bulbs for a couple for about 3 years now. I don't believe I've driven more than an hour in the dark, either. As for flicker, I haven't noticed it in either of my cars, and I haven't heard of any complaints, either.1 point
-
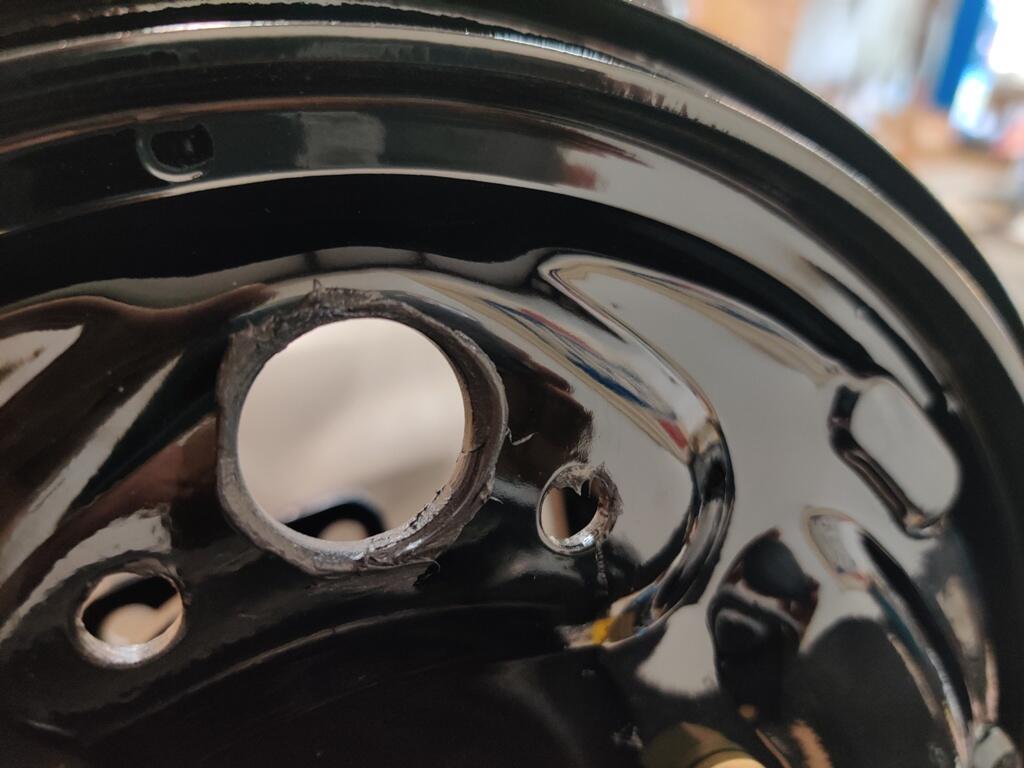
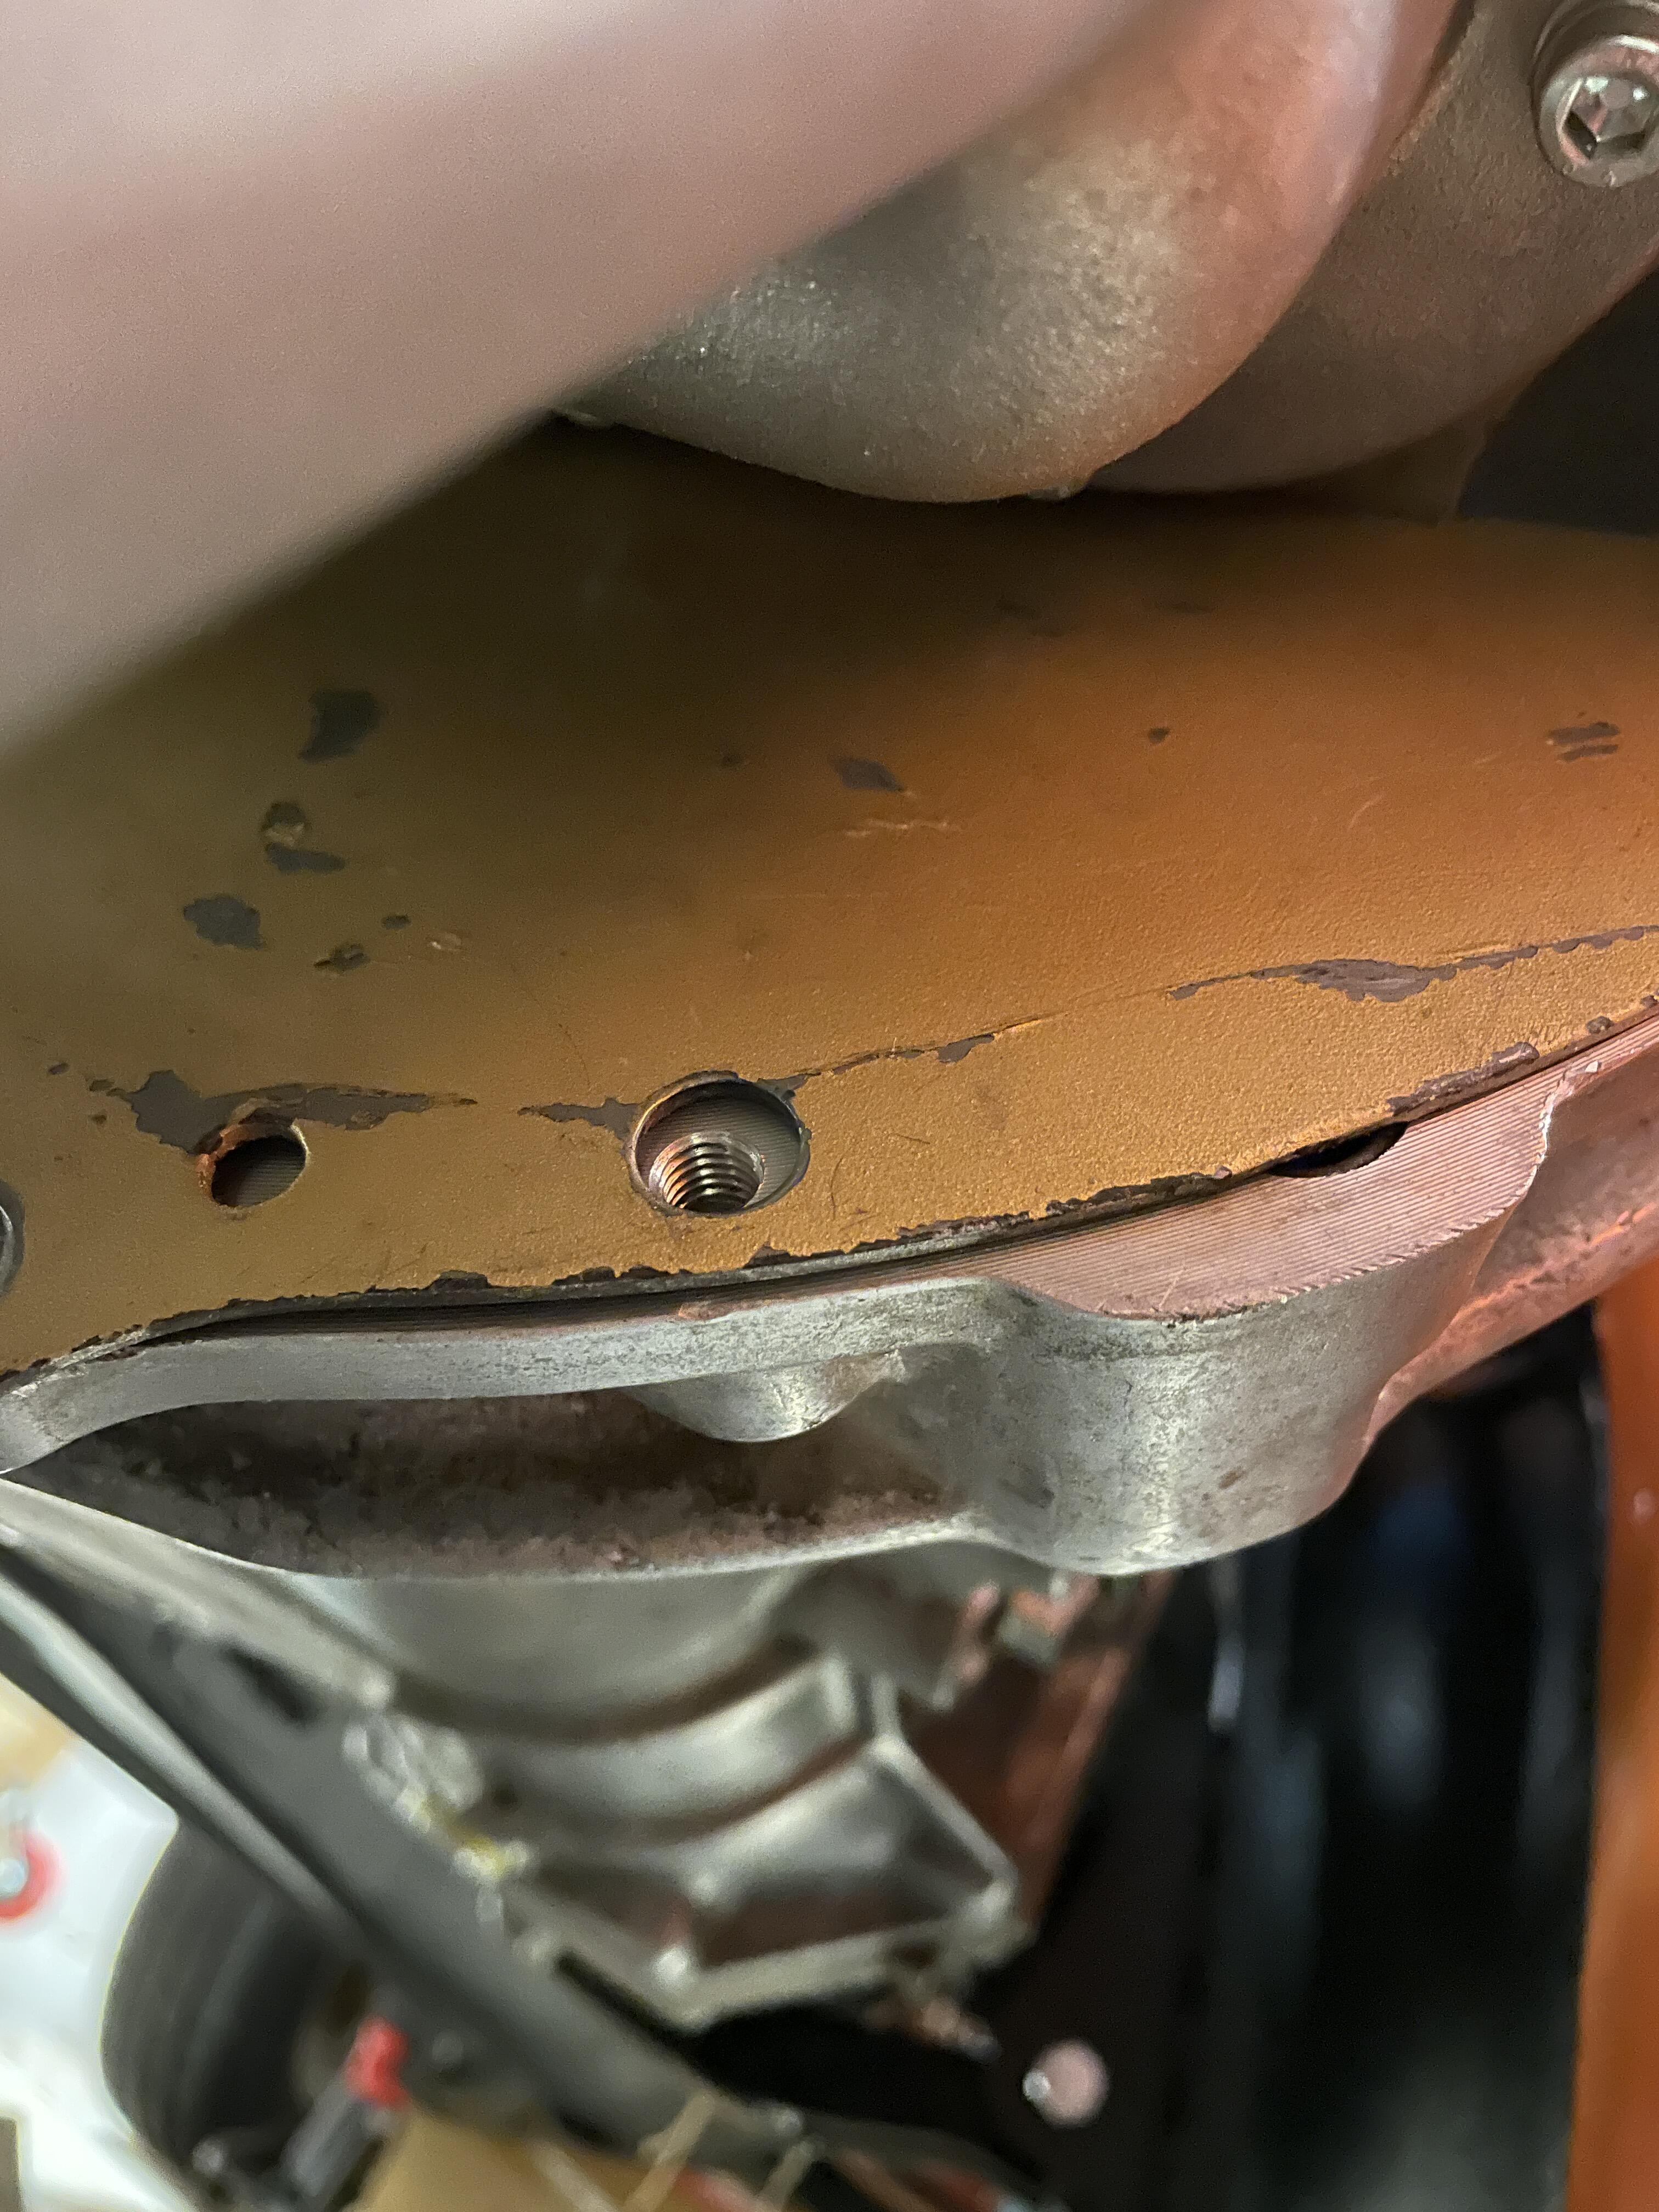
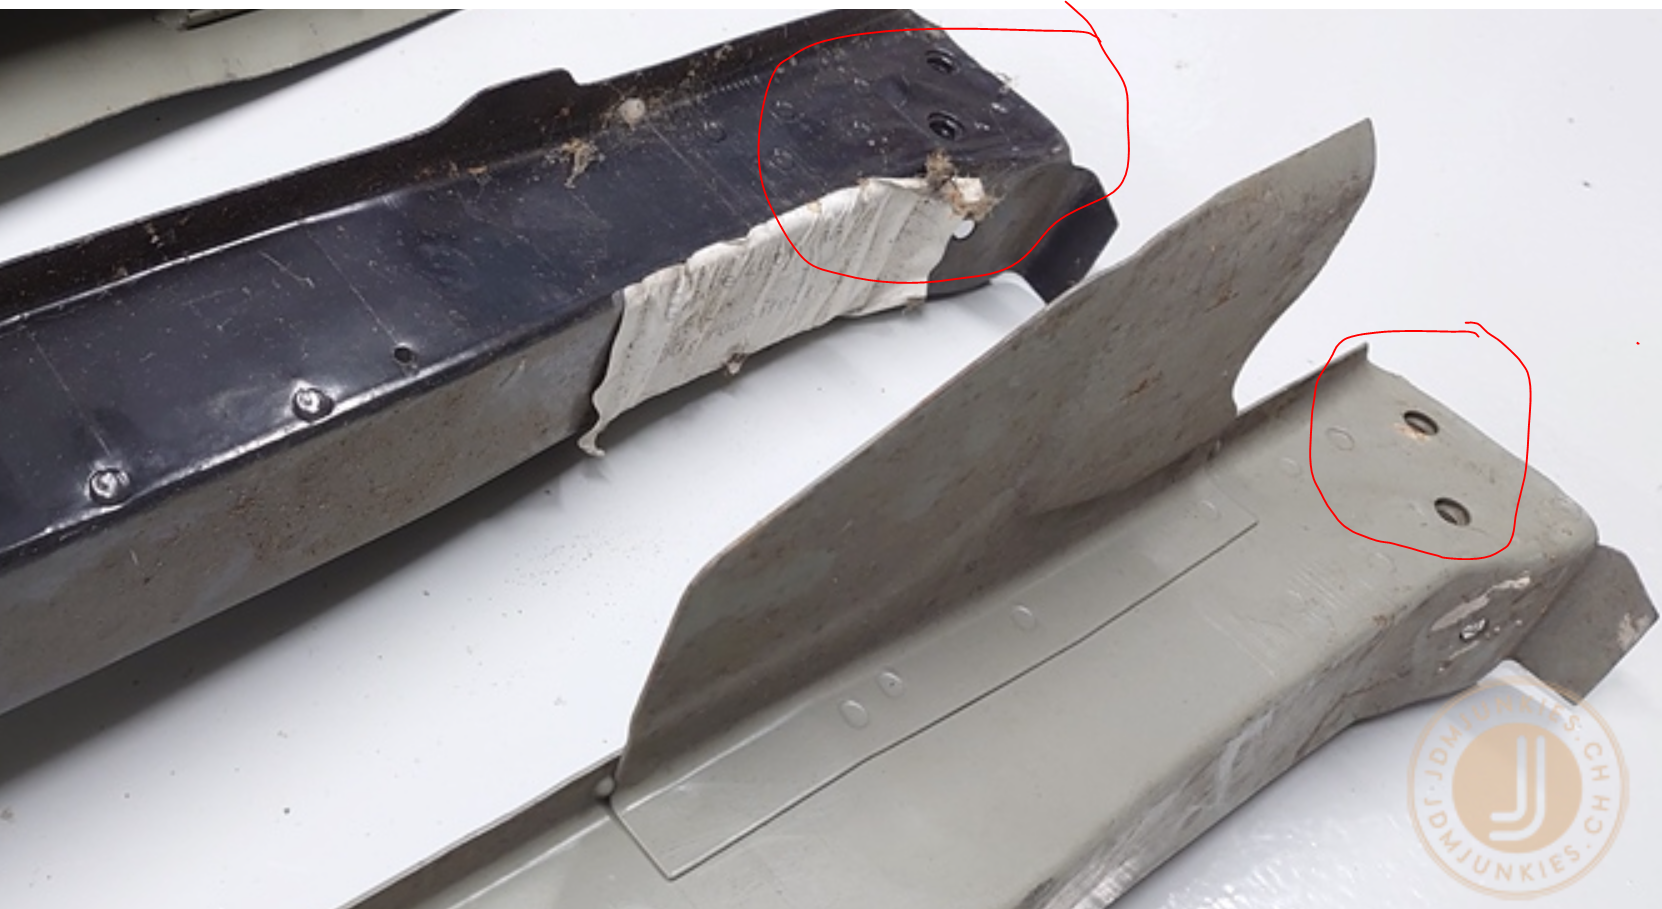
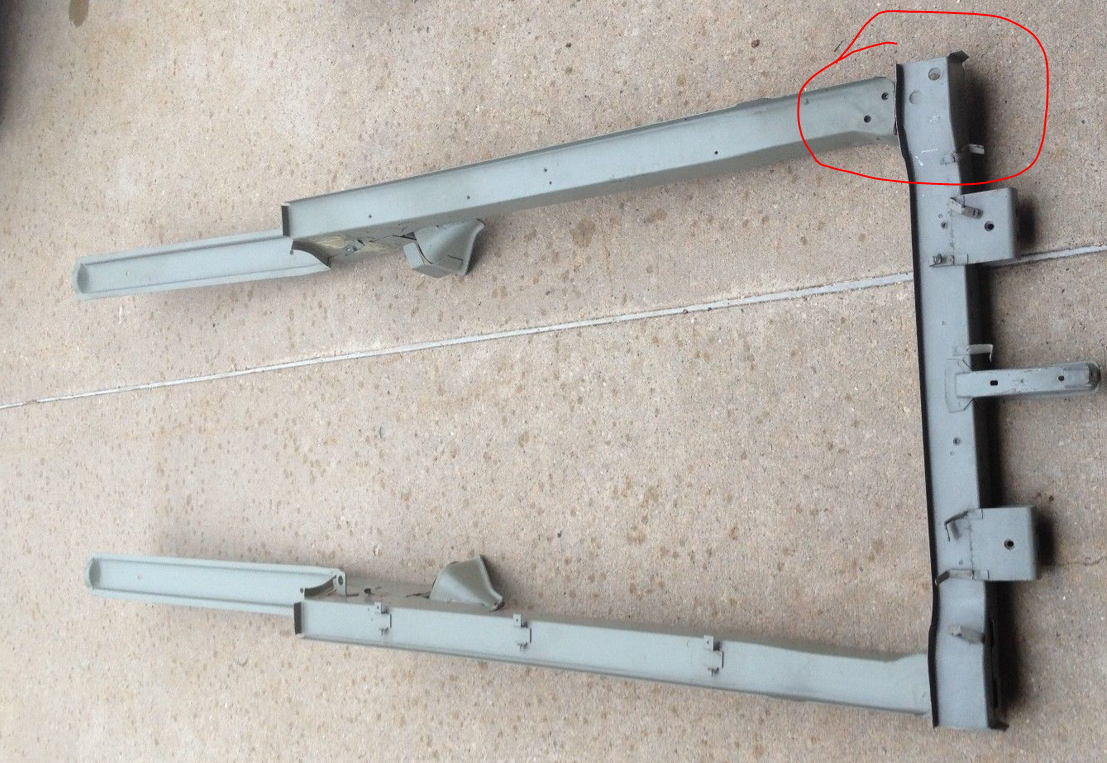
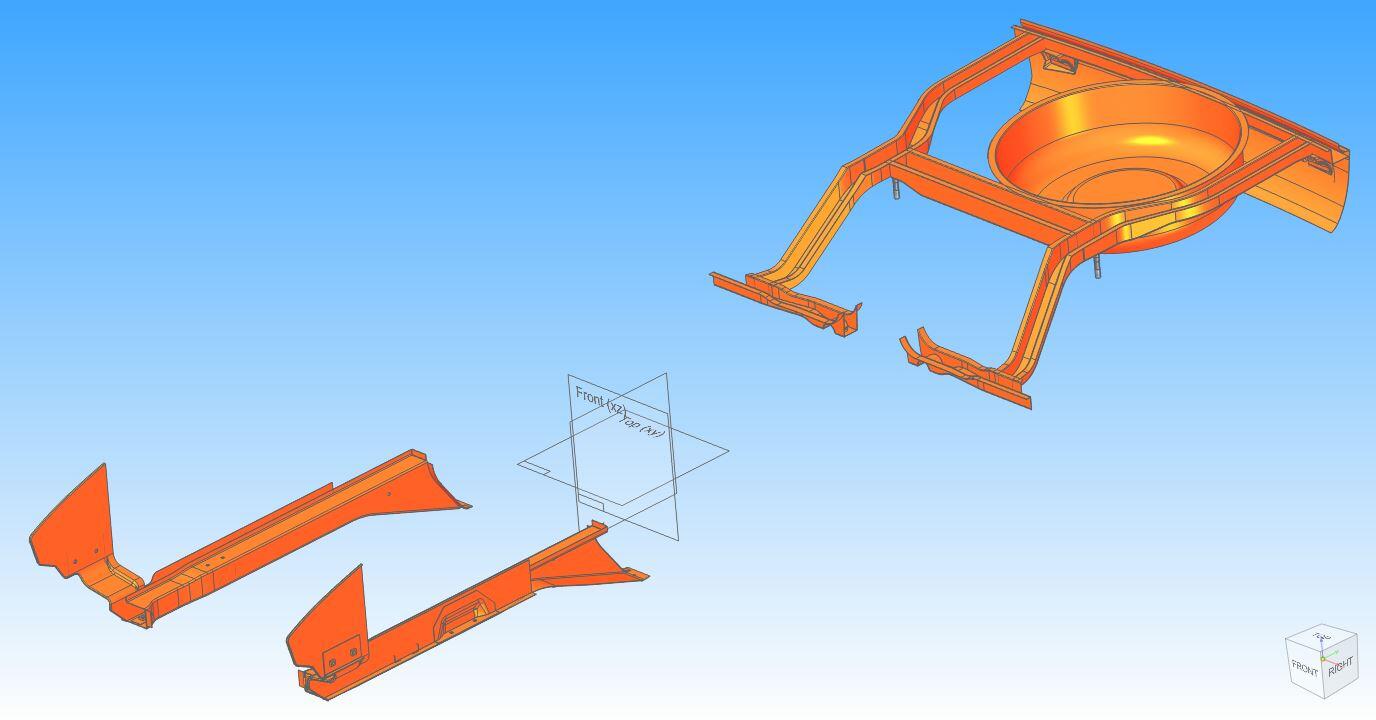
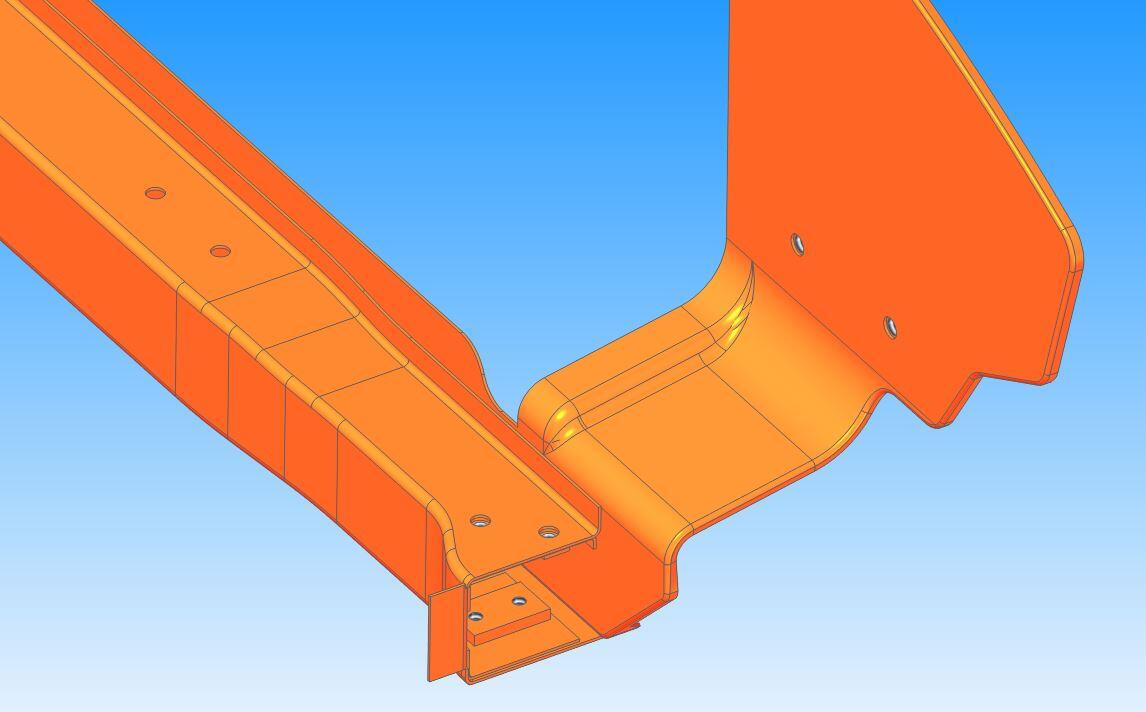
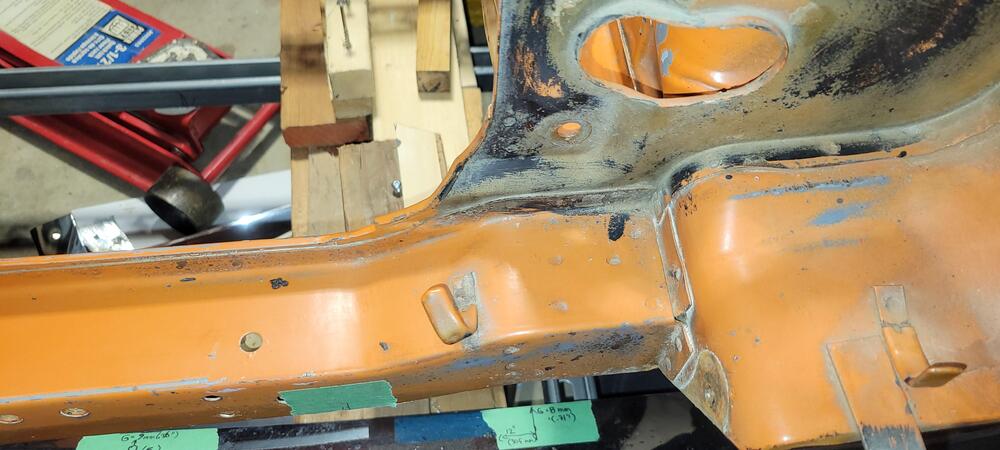
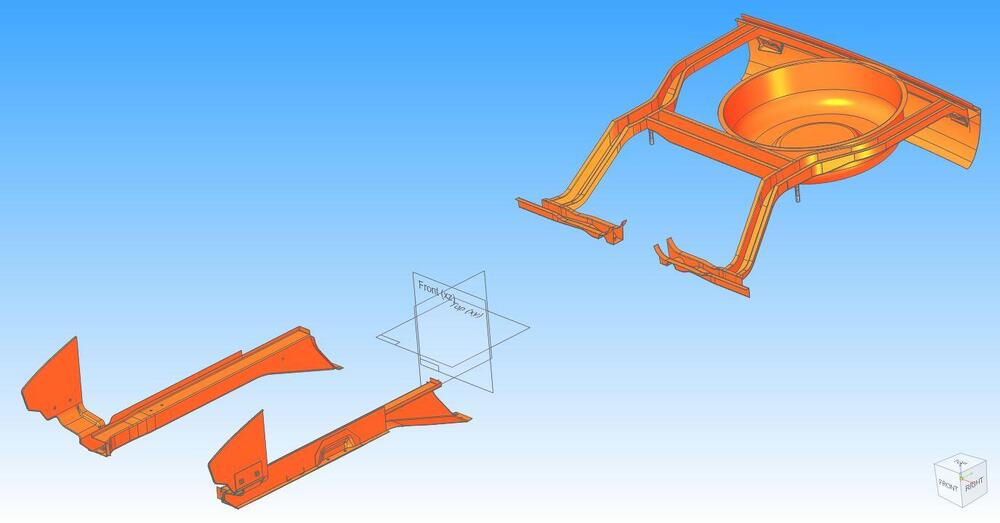
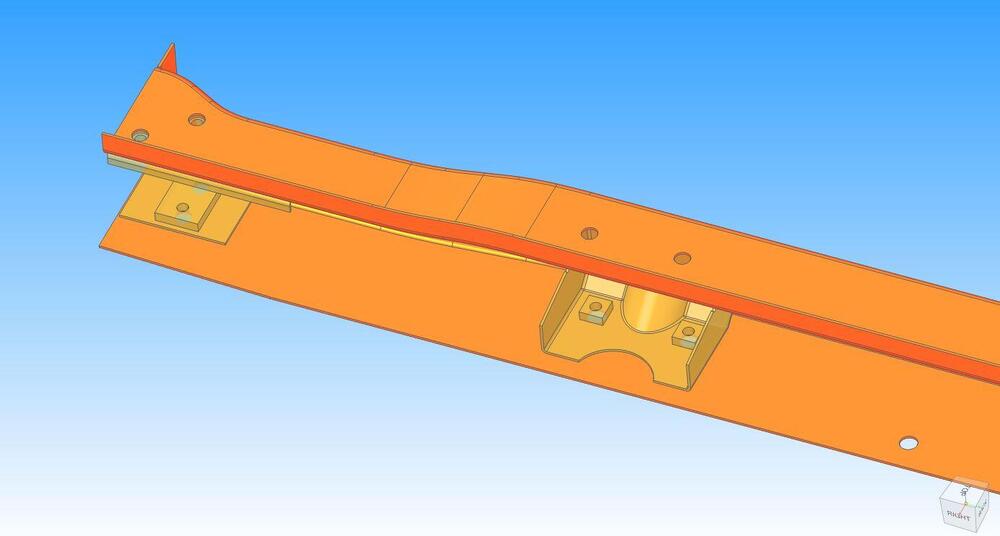
1 pointCan anyone tell me what these two M8x1.25 threaded holes are for? I see them in both the black and gray LH front frame rails above. Here is a pic from an old ebay that has them and corresponding holes in the LH end of the lower rad support x-member. I don't see them on my 7/70 HLS30. These holes are on the replacement LF frame rail I have from KF. In my spare time I have been creating a 3D cad model of my chassis and I have included these holes, I'm just curious about what they for. Here are a few images of my model, it is a work in progress.


 1 point
 -
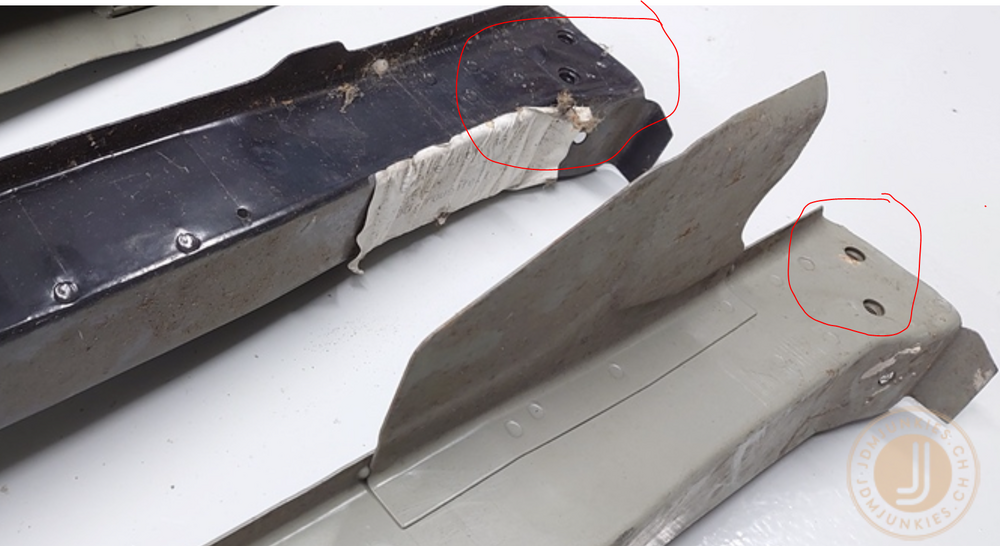
That's fantastic work Sir. I had the sense to saw mine off but the bottom of my tunnel was rotted farther back and too jagged for a plate. I was going to do as Zedhead mentioned, just put a big 'ol wad of JB Weld in there but lucky for me I found an N42 on an old junkyard 280.
 1 point
 -
Ah, that makes sense. The housing of the door switch doesn't need it's own grounding wire as it is grounded on the sheet metal as it is pushed into the hole on the door jam. The dome light, door switch circuit has always baffled me, thanks.1 point
-
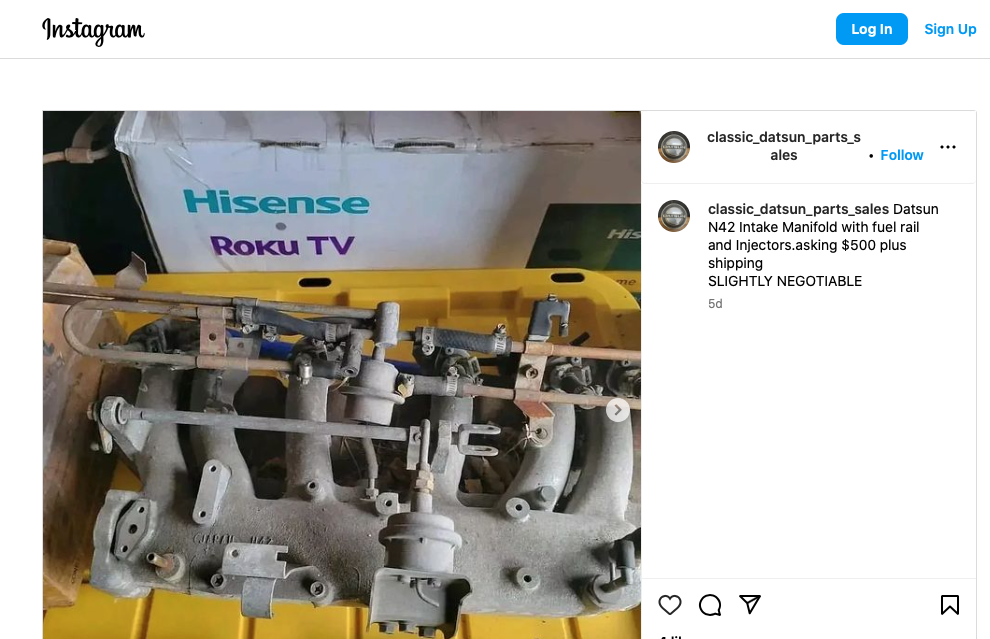
I checked eBay and found no N42 Non EGR's currently for say or sold. I checked some other individual sites and they all said sold out. 2040-parts.com list one for $500 but the site looks shady to me. Another on Instagram, also $500. beware of scammers!!
 1 point
 -
1 point
-
Now that you seem to have good spark, you may want to consider backing up to the basics. Valve adjustment, timing, then mixture/balance. Not sure what fuel you have there, but our current 87 octane is garbage. My car runs way better on premium (non ethanol).1 point
-
Don't ruin the entertainment man. The day is long...1 point
-
1 point
-
I be careful about referring to my wife’s hair as cat hair (or are you married to a cat?), but other than that, fantastic find!1 point
-
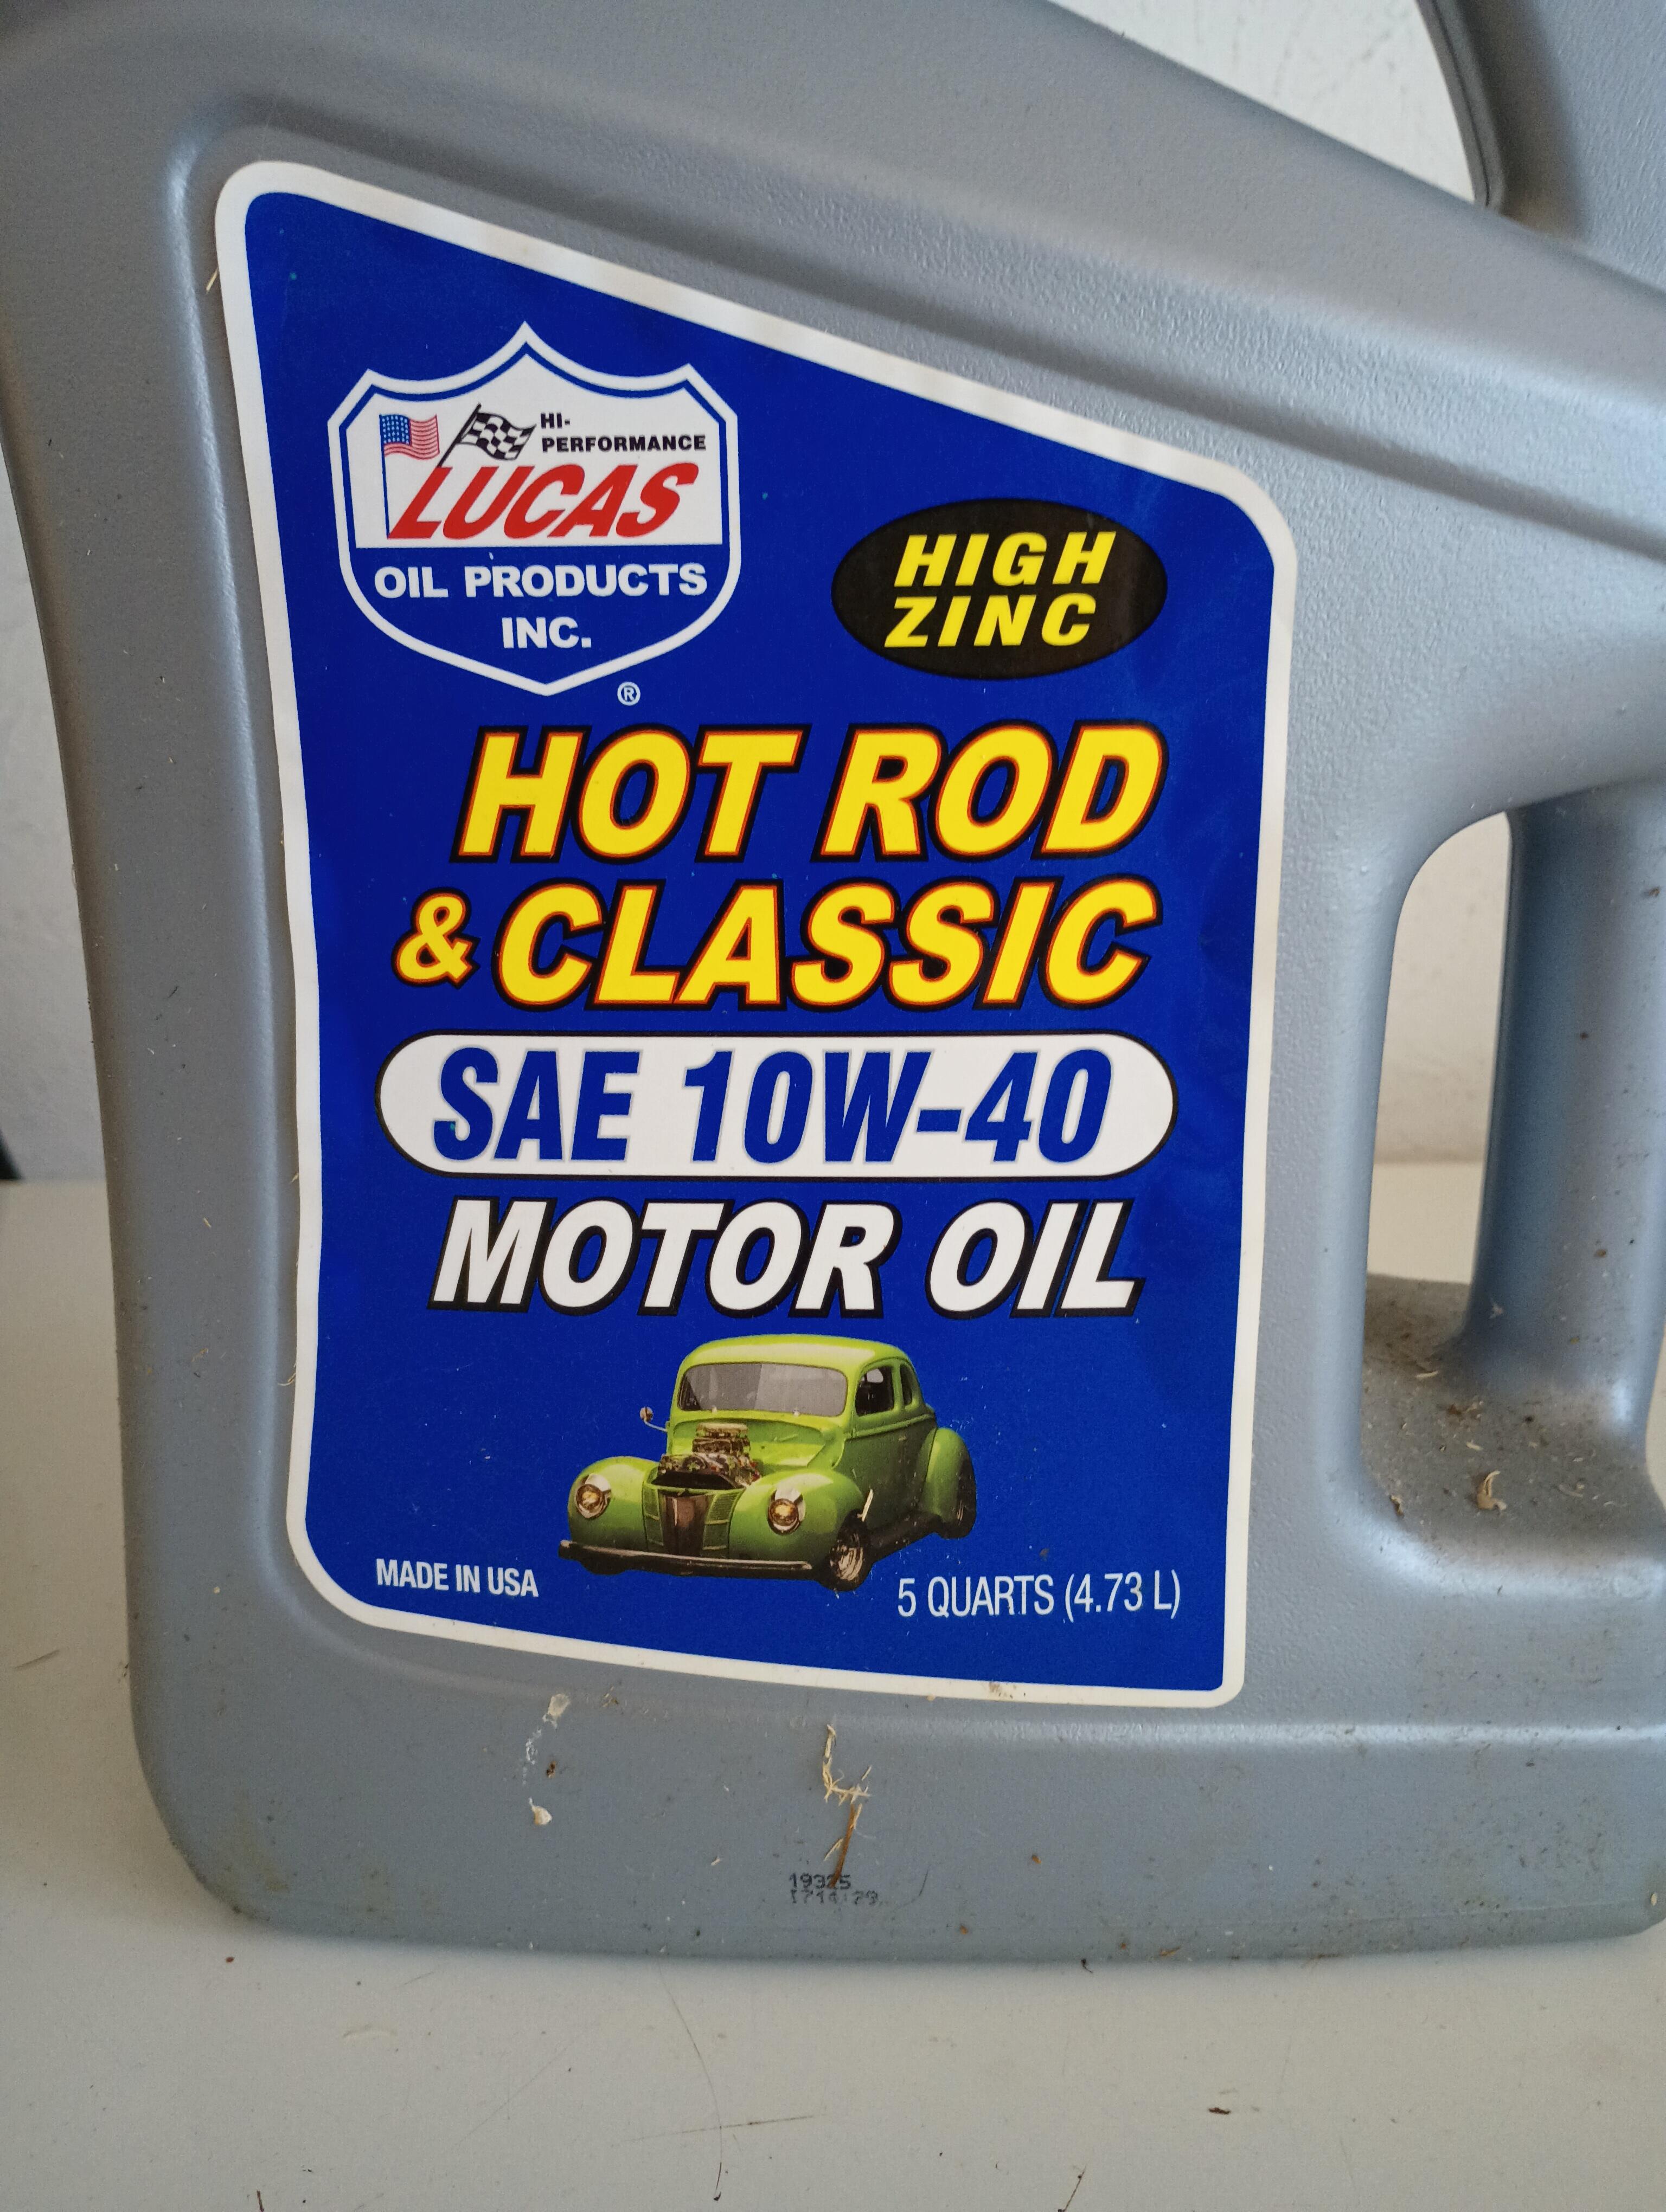
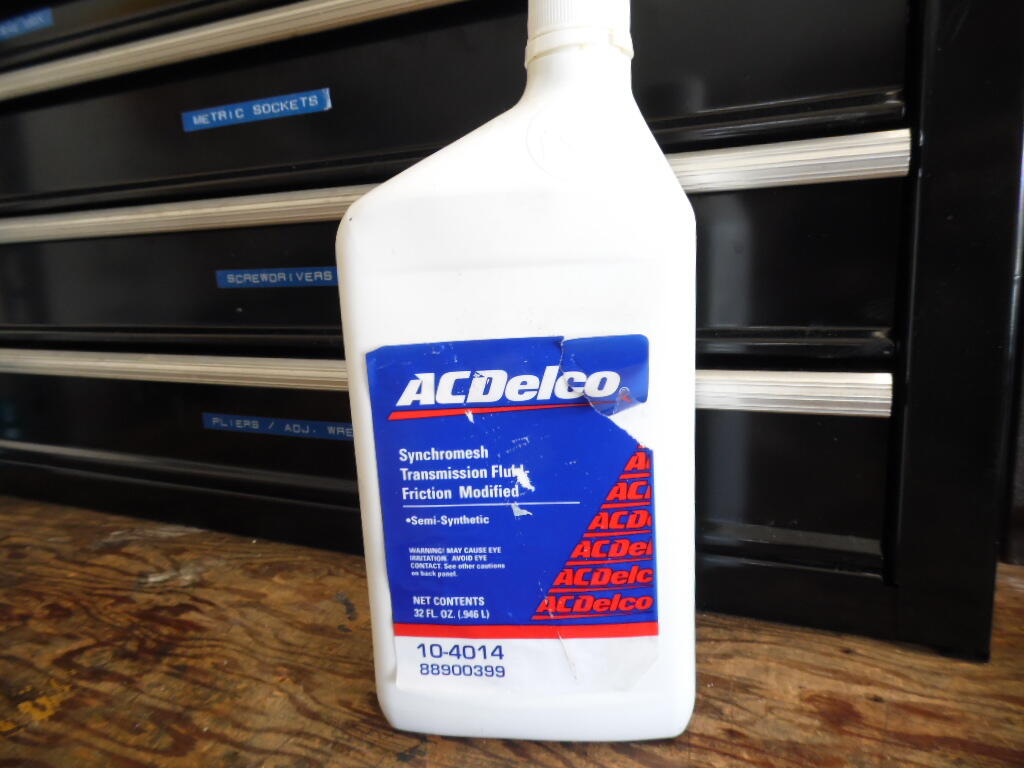
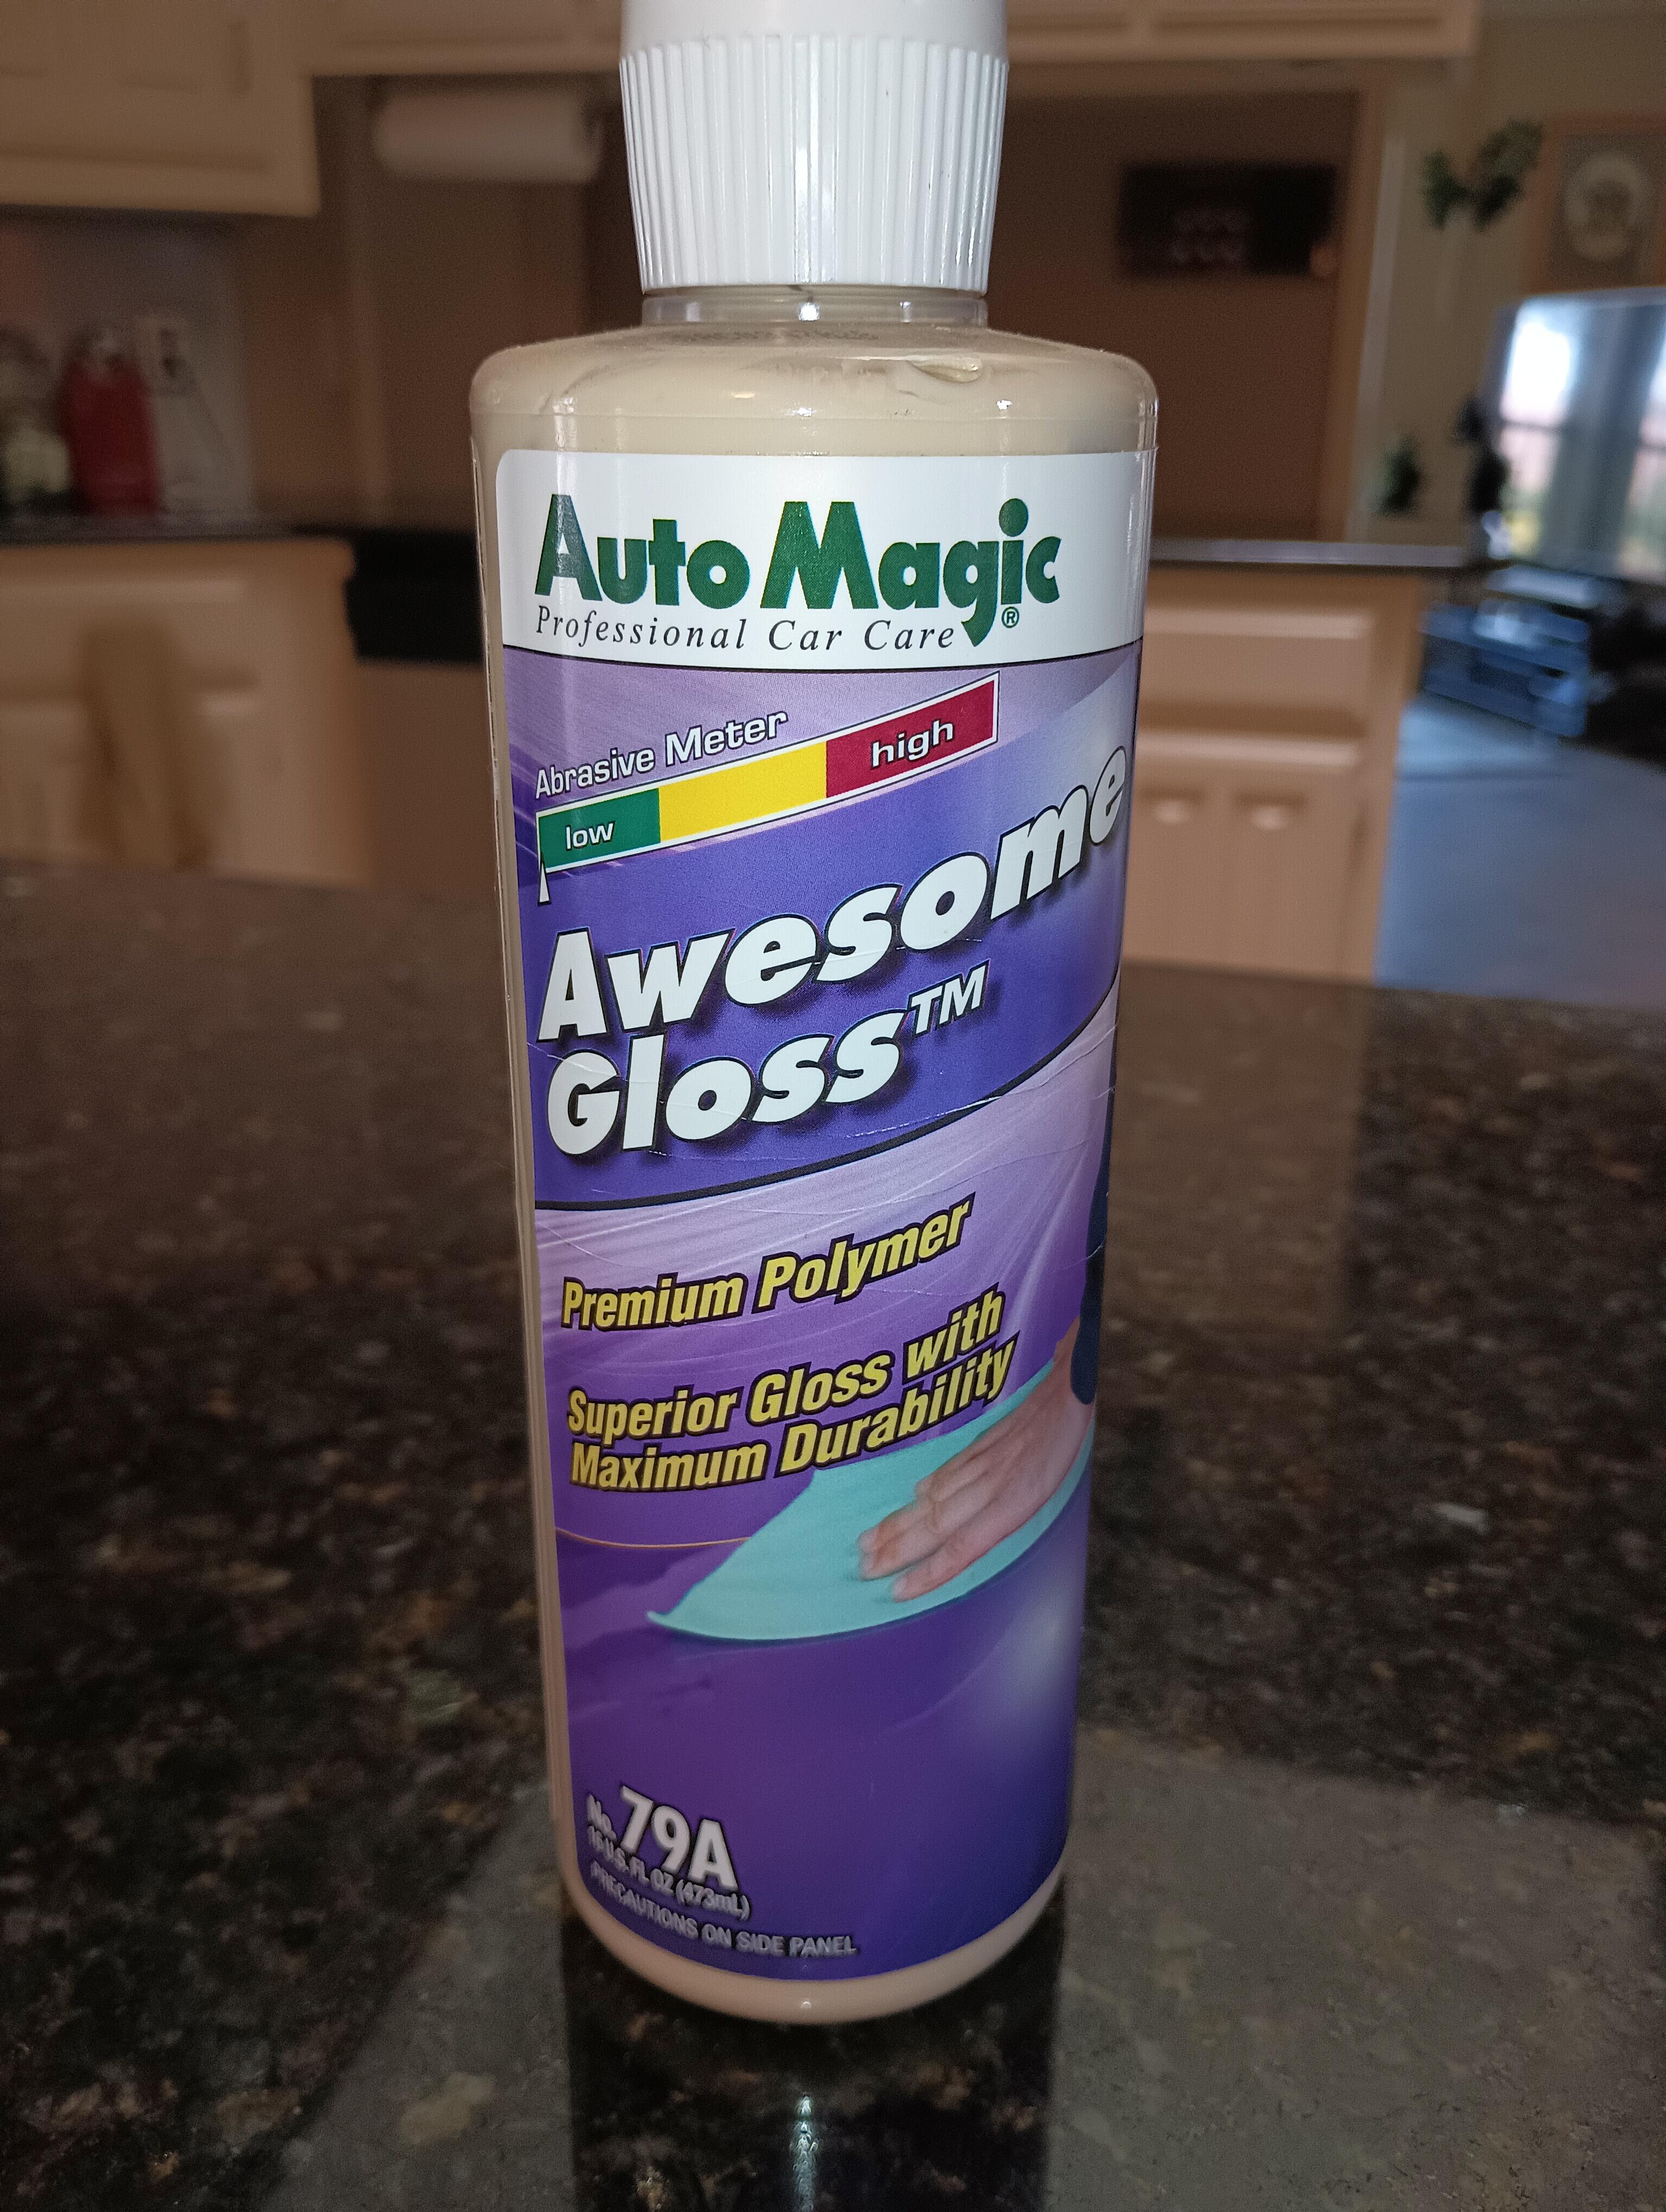
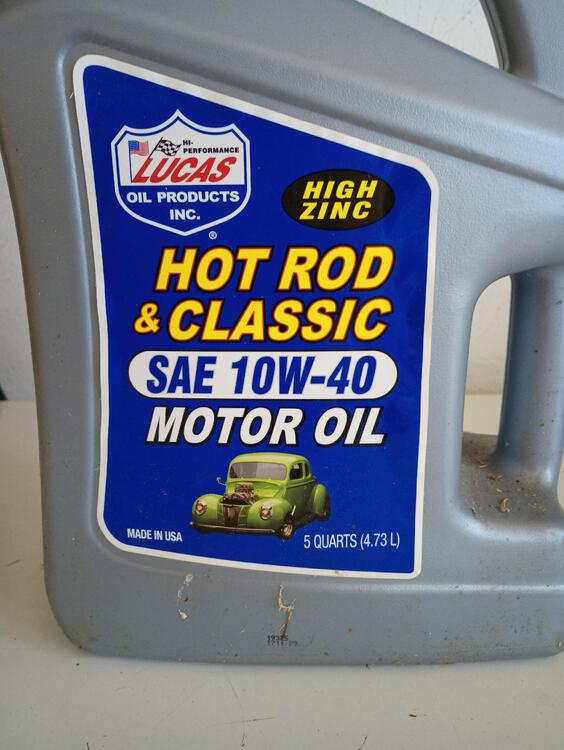
Here are a couple of good products for you - a high zinc oil and great transmission fluid for our old gearboxes. The old paint might benefit from a good clay bar treatment to get rid of old wax, dirt and other buildup, followed by a non-wax polish such as AutoMagic Awesome Gloss, topped off by the ceramic coat or wax of your choice. The clay bar process might leave a few swirl marks so the Awesome Gloss is a way to polish them out.

 1 point
 -
Sold for asking price. The car will most likely be stripped for parts for some early restorations at a Midwest Z shop. Not sure what they do with rusted out shells, my only guess is cut them up and store the good sections. Is anyone interested in a set of five 7/70 4.5 wheels and early D hubcaps that need restoration? There are assorted date sets on ebay right now.
 1 point