


Leaderboard
-

siteunseen
Free Member7Points15,115Posts -
Captain Obvious
Free Member5Points10,081Posts -
conedodger
Free Member5Points12,513Posts -
emccallum
 Subscriber
 3Points428Posts


Popular Content
Showing content with the highest reputation on 04/17/2023 in all areas
-
2 points
-
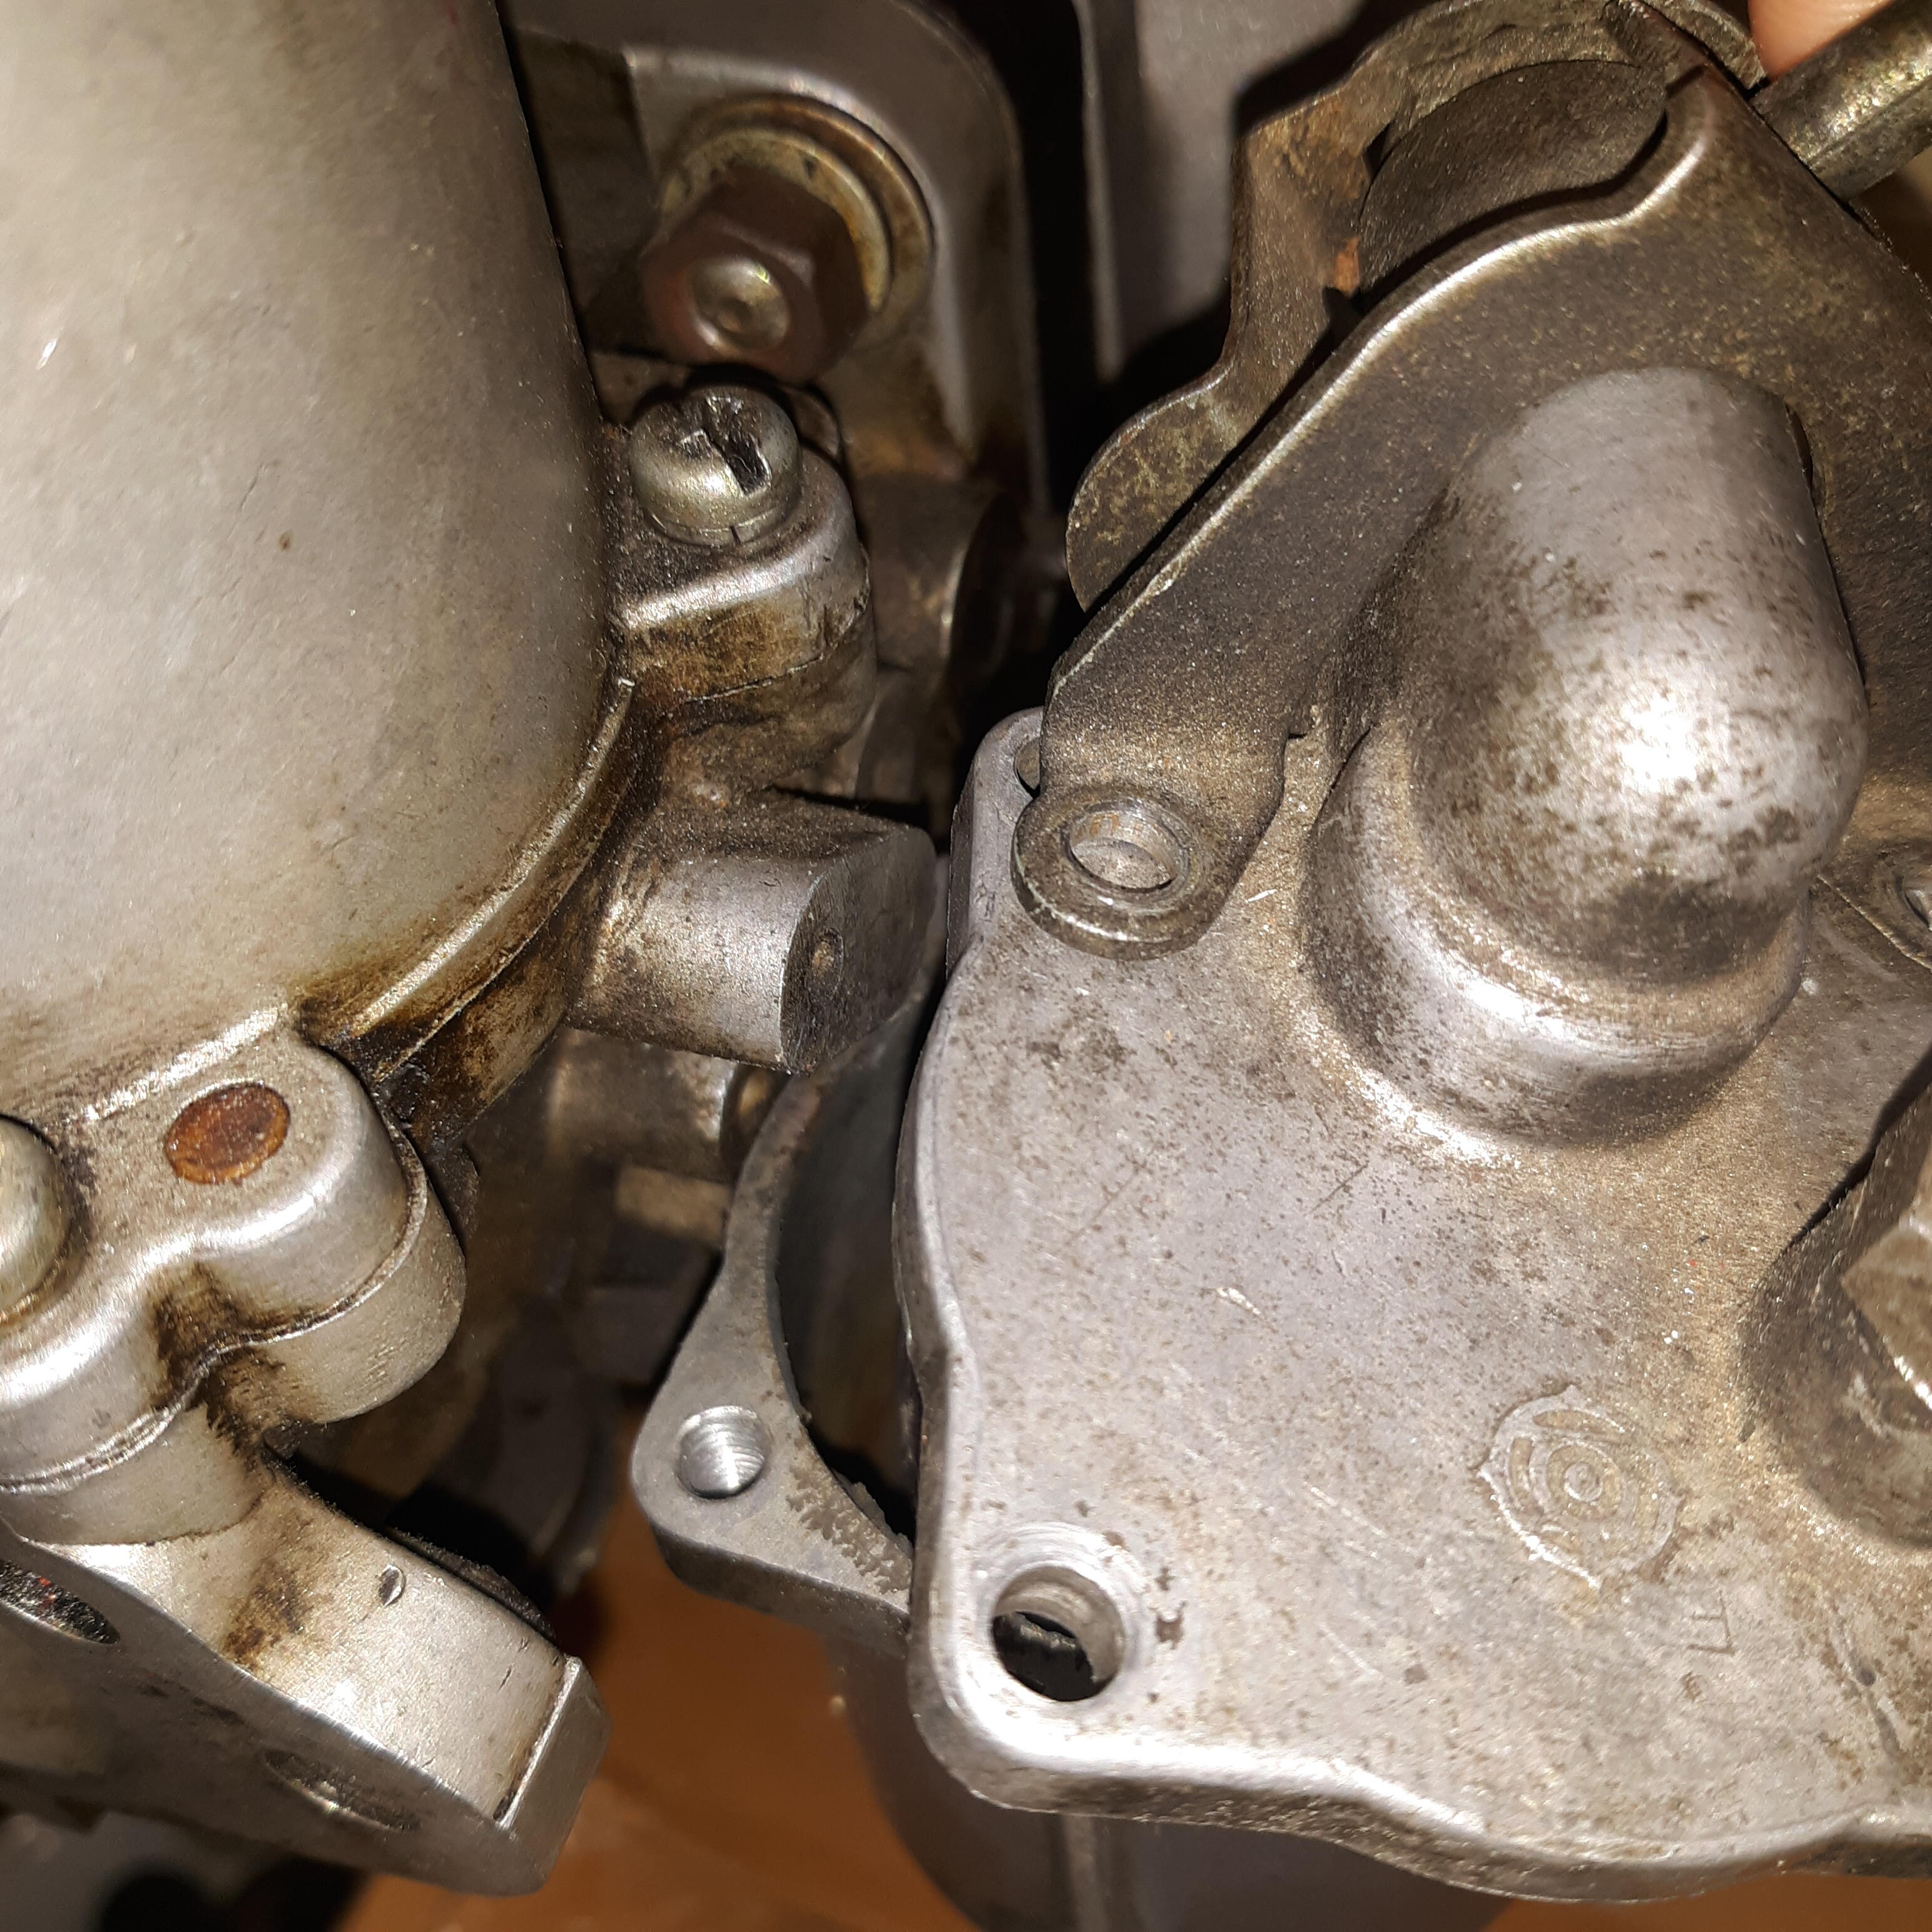
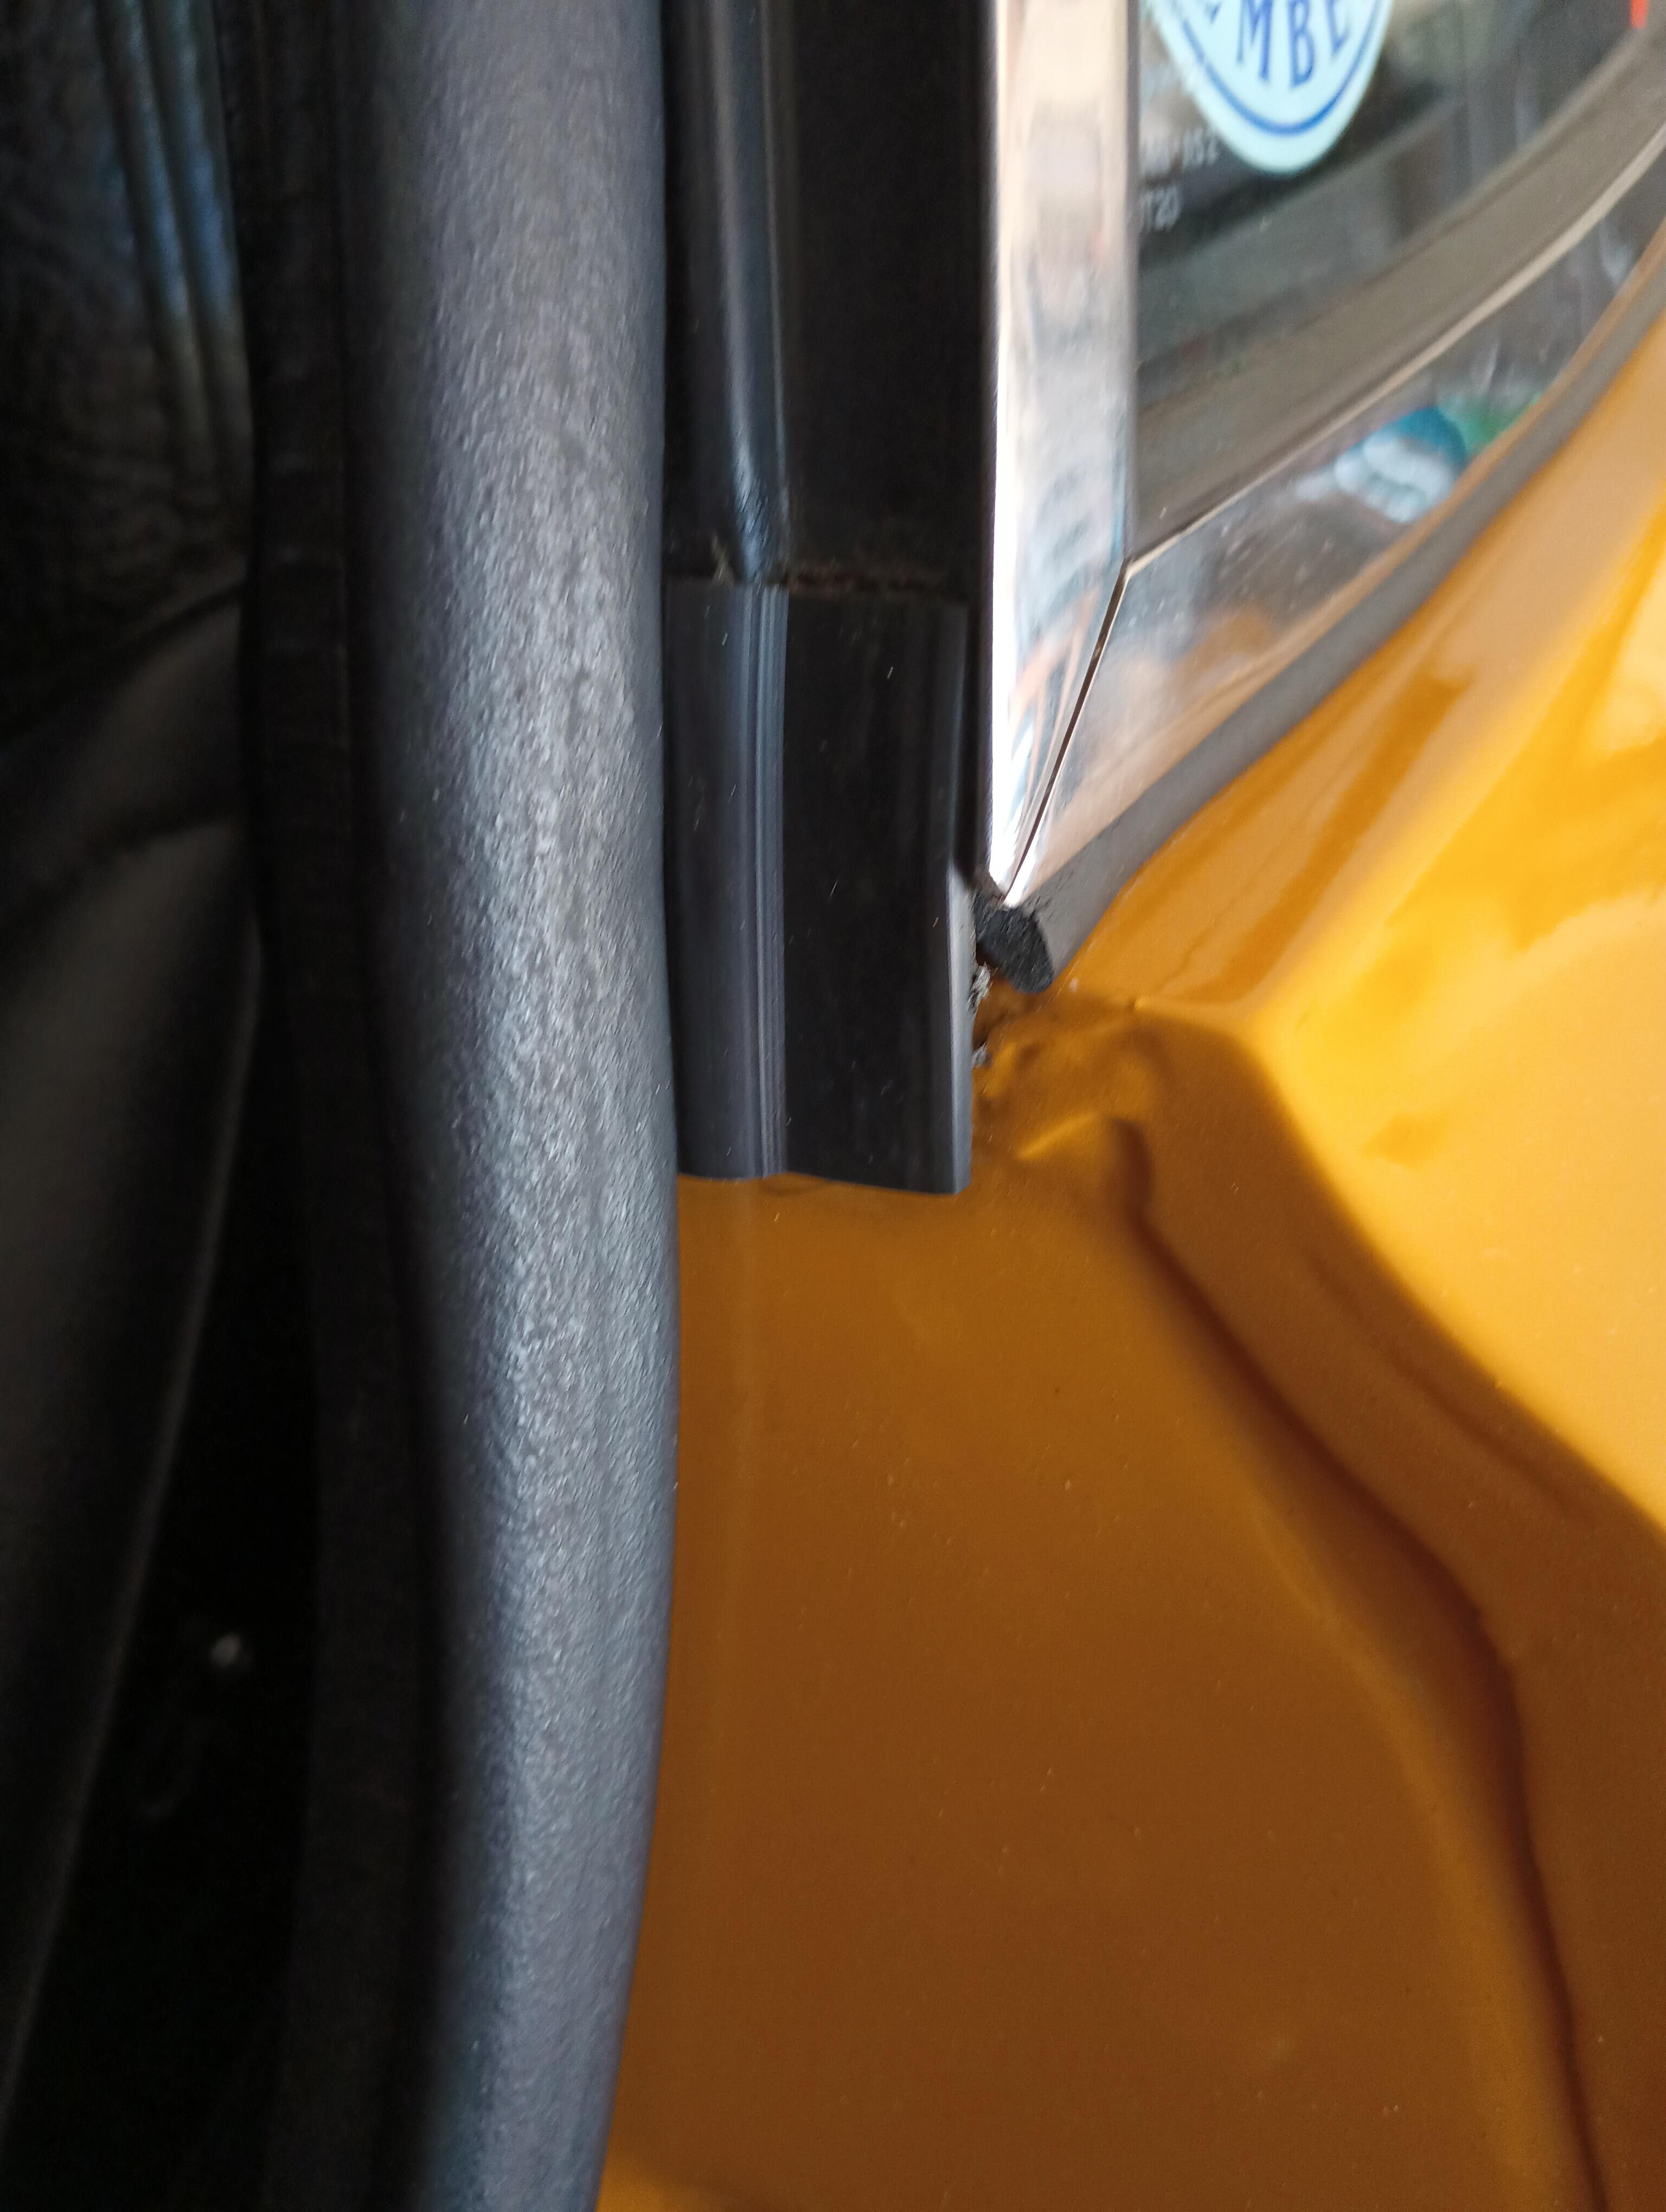
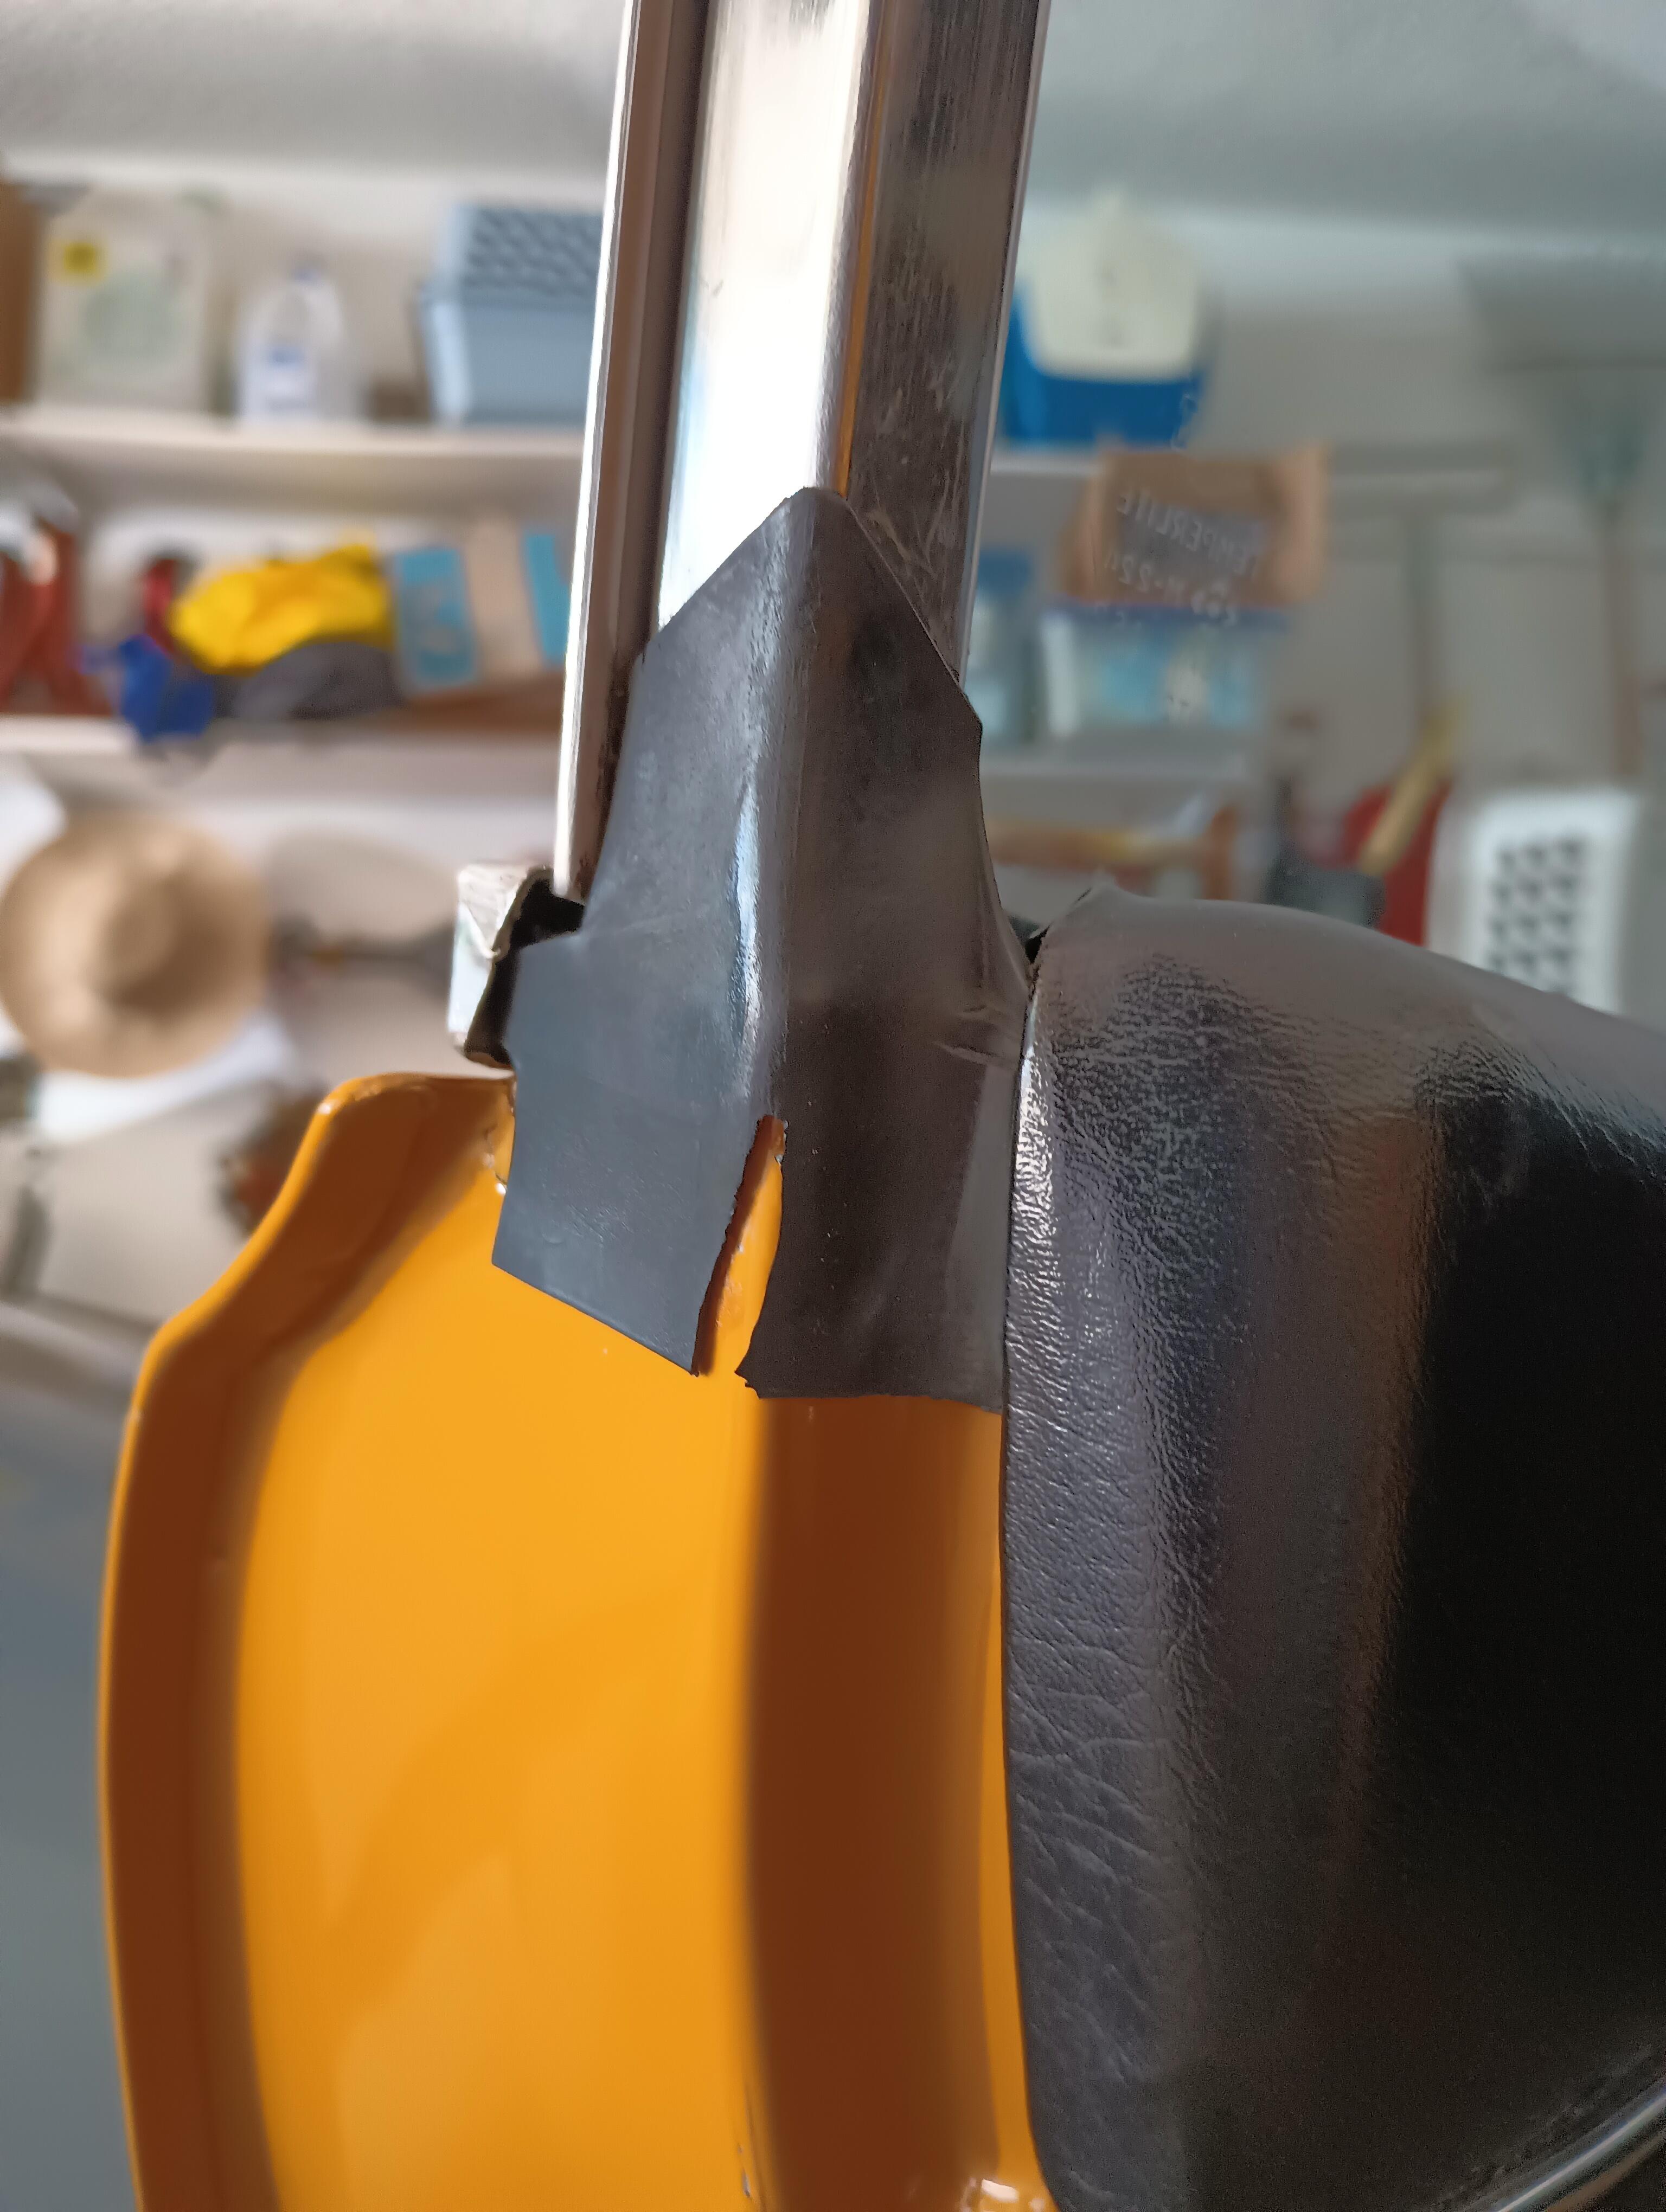
Thanks for the pics. That is just what I needed to know. The pic I posted was just one I got from online and it looks like someone "modified" that one. Mine actually look just like the pictures you posted. I turned it 90 degrees but didnt think try to get it in the notch. Makes sense now. It might be useful to glue the gasket to the lid. Thanks!!2 points
-
2 points
-
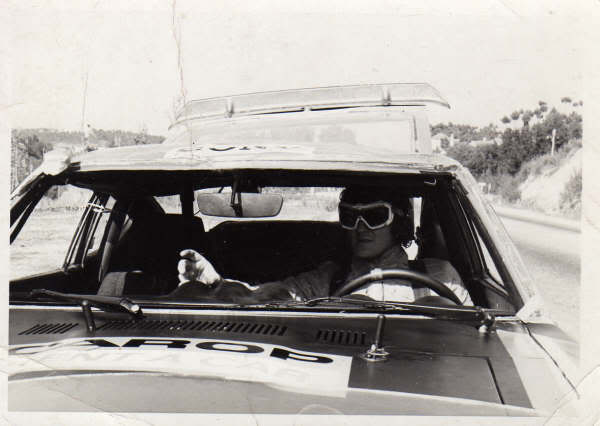
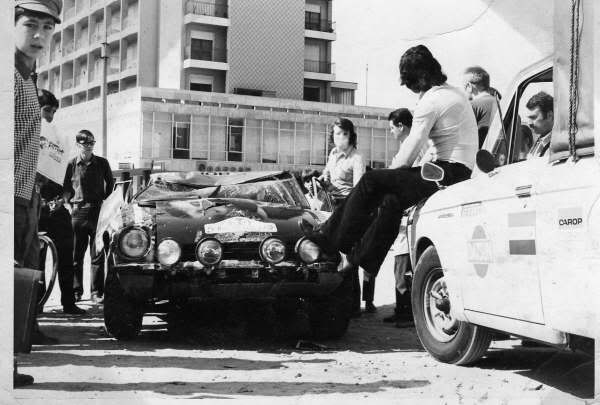
That series of photos was taken by Rob Janssen's friend and navigator Jaap Dik, who carried a camera with him on the events they took part in. For sure a rock star move, but they had little to no option. No private jet home for them whilst others swept up the mess. Heroic privateers on a shoestring budget!2 points
-
2 pointsThere was some discussion about such a maneuver in the past, but I don't know if it ever happened: https://www.classiczcars.com/forums/topic/67674-afm-loose-arm/ @chaseincats And @kickstand80, since he's a big proponent of AFM modifications and adjustment.2 points
-
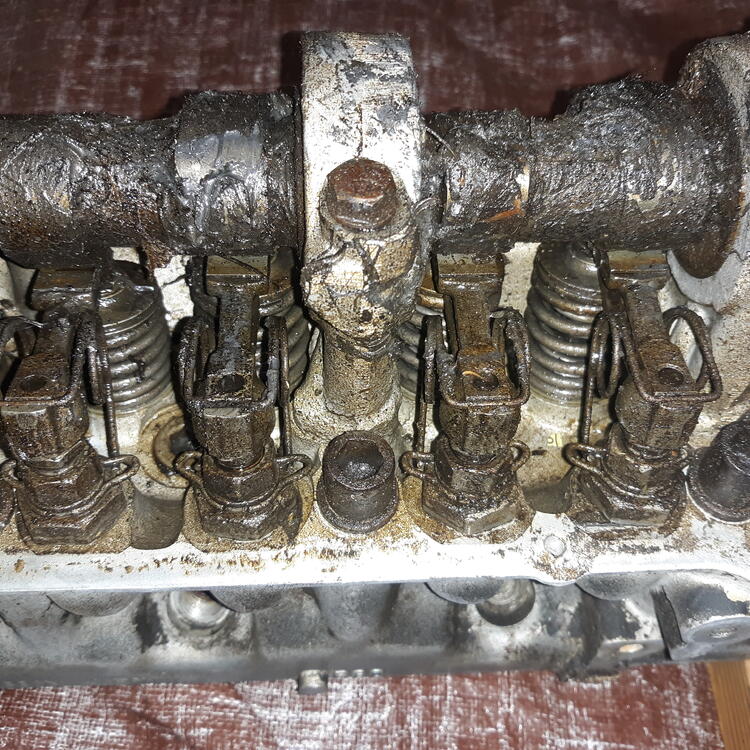
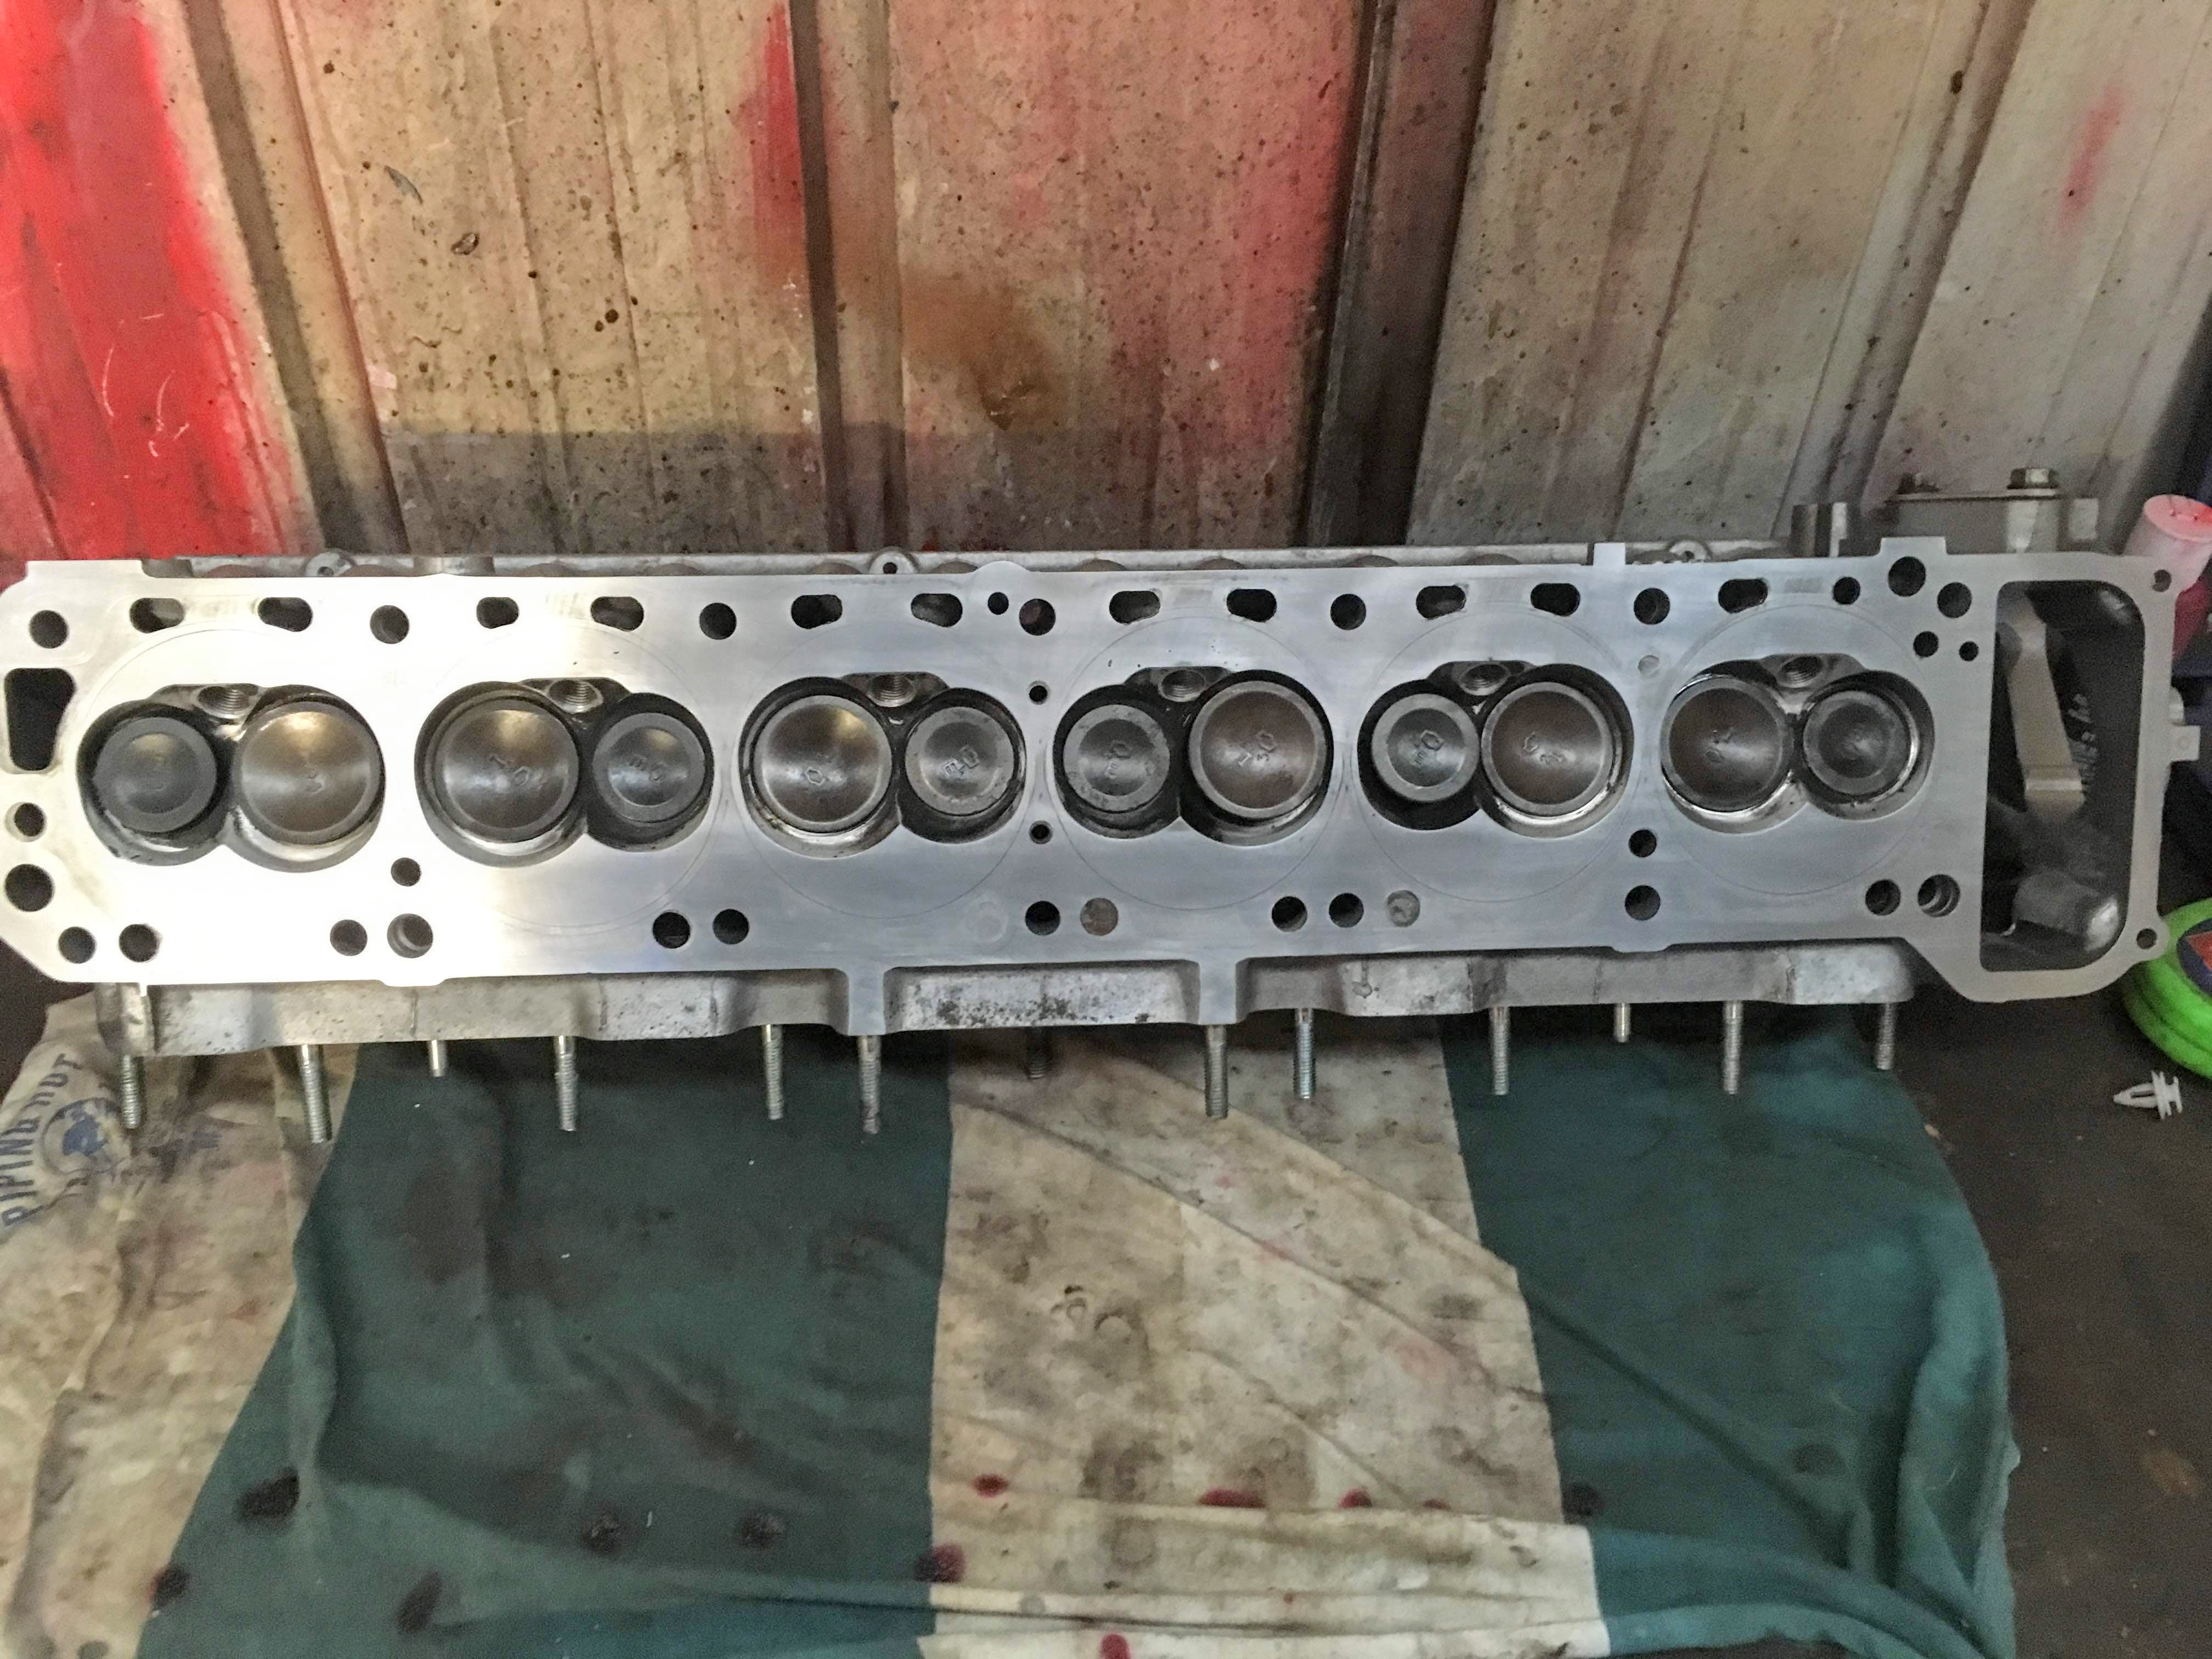
1 pointComplete engine overhaul. Stock build L24/e88. First start this weekend. 10w30 dino oil, engine fired up, held revs 1500-2k for about 30 min shut down and let cool. Noted a small amount of blue smoke. Restarted fine tuned timing, carbs etc. and blue smoke continued and got worse. Called engine guy. He thought the rings weren't seated. Said to run hotter 180-200 for an hour then shutdown, let cool. Lots of smoke. Engine seems to run well and no noises. Just smokes. Coolant is fine, engine runs with gauge right in the middle. Builder came by today checked plugs, compression and valve train. He isnt an SU guy, but really thinks the issue is too much fuel. Wet black plugs. Compression #'s were all 175-180. All immediately jumped to 90 at first rotation. Warm engine, throttle wide open, all plugs removed. Carbs are fresh from ztherapy. SM needles. I just dont see how they could dump that much fuel to cause the amount of smoke I am seeing. I am thinking valve guides. Is there any way the ATF fluid in the carbs could be getting sucked into the intake? I told the engine builder I would check out the carbs. The engine builder did the block and a machine shop did the head. Thinking the head is going to come off. Just wanted to get some input from the forum. Fun, fun. I often wonder what people who dont work on cars do with all their free time and money 🙂1 point
-
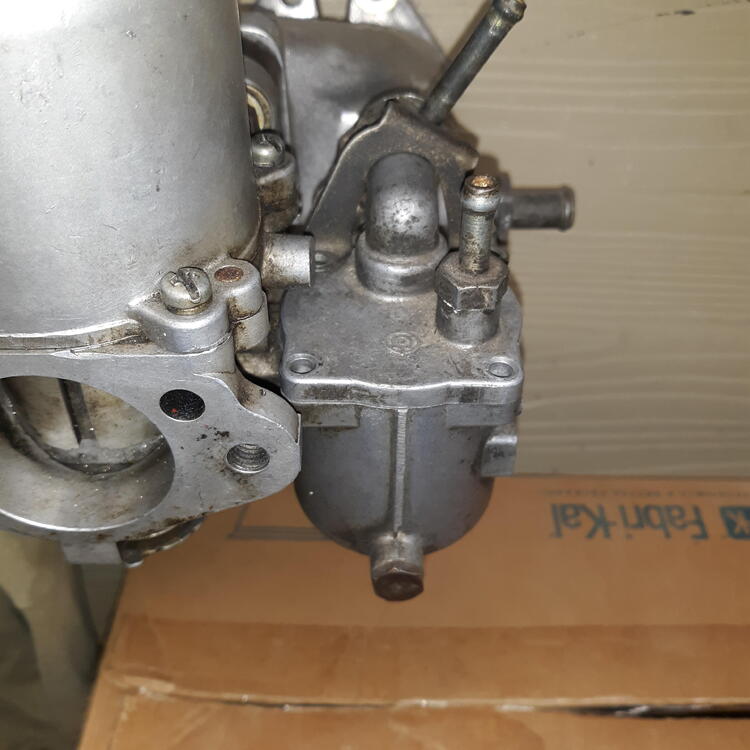
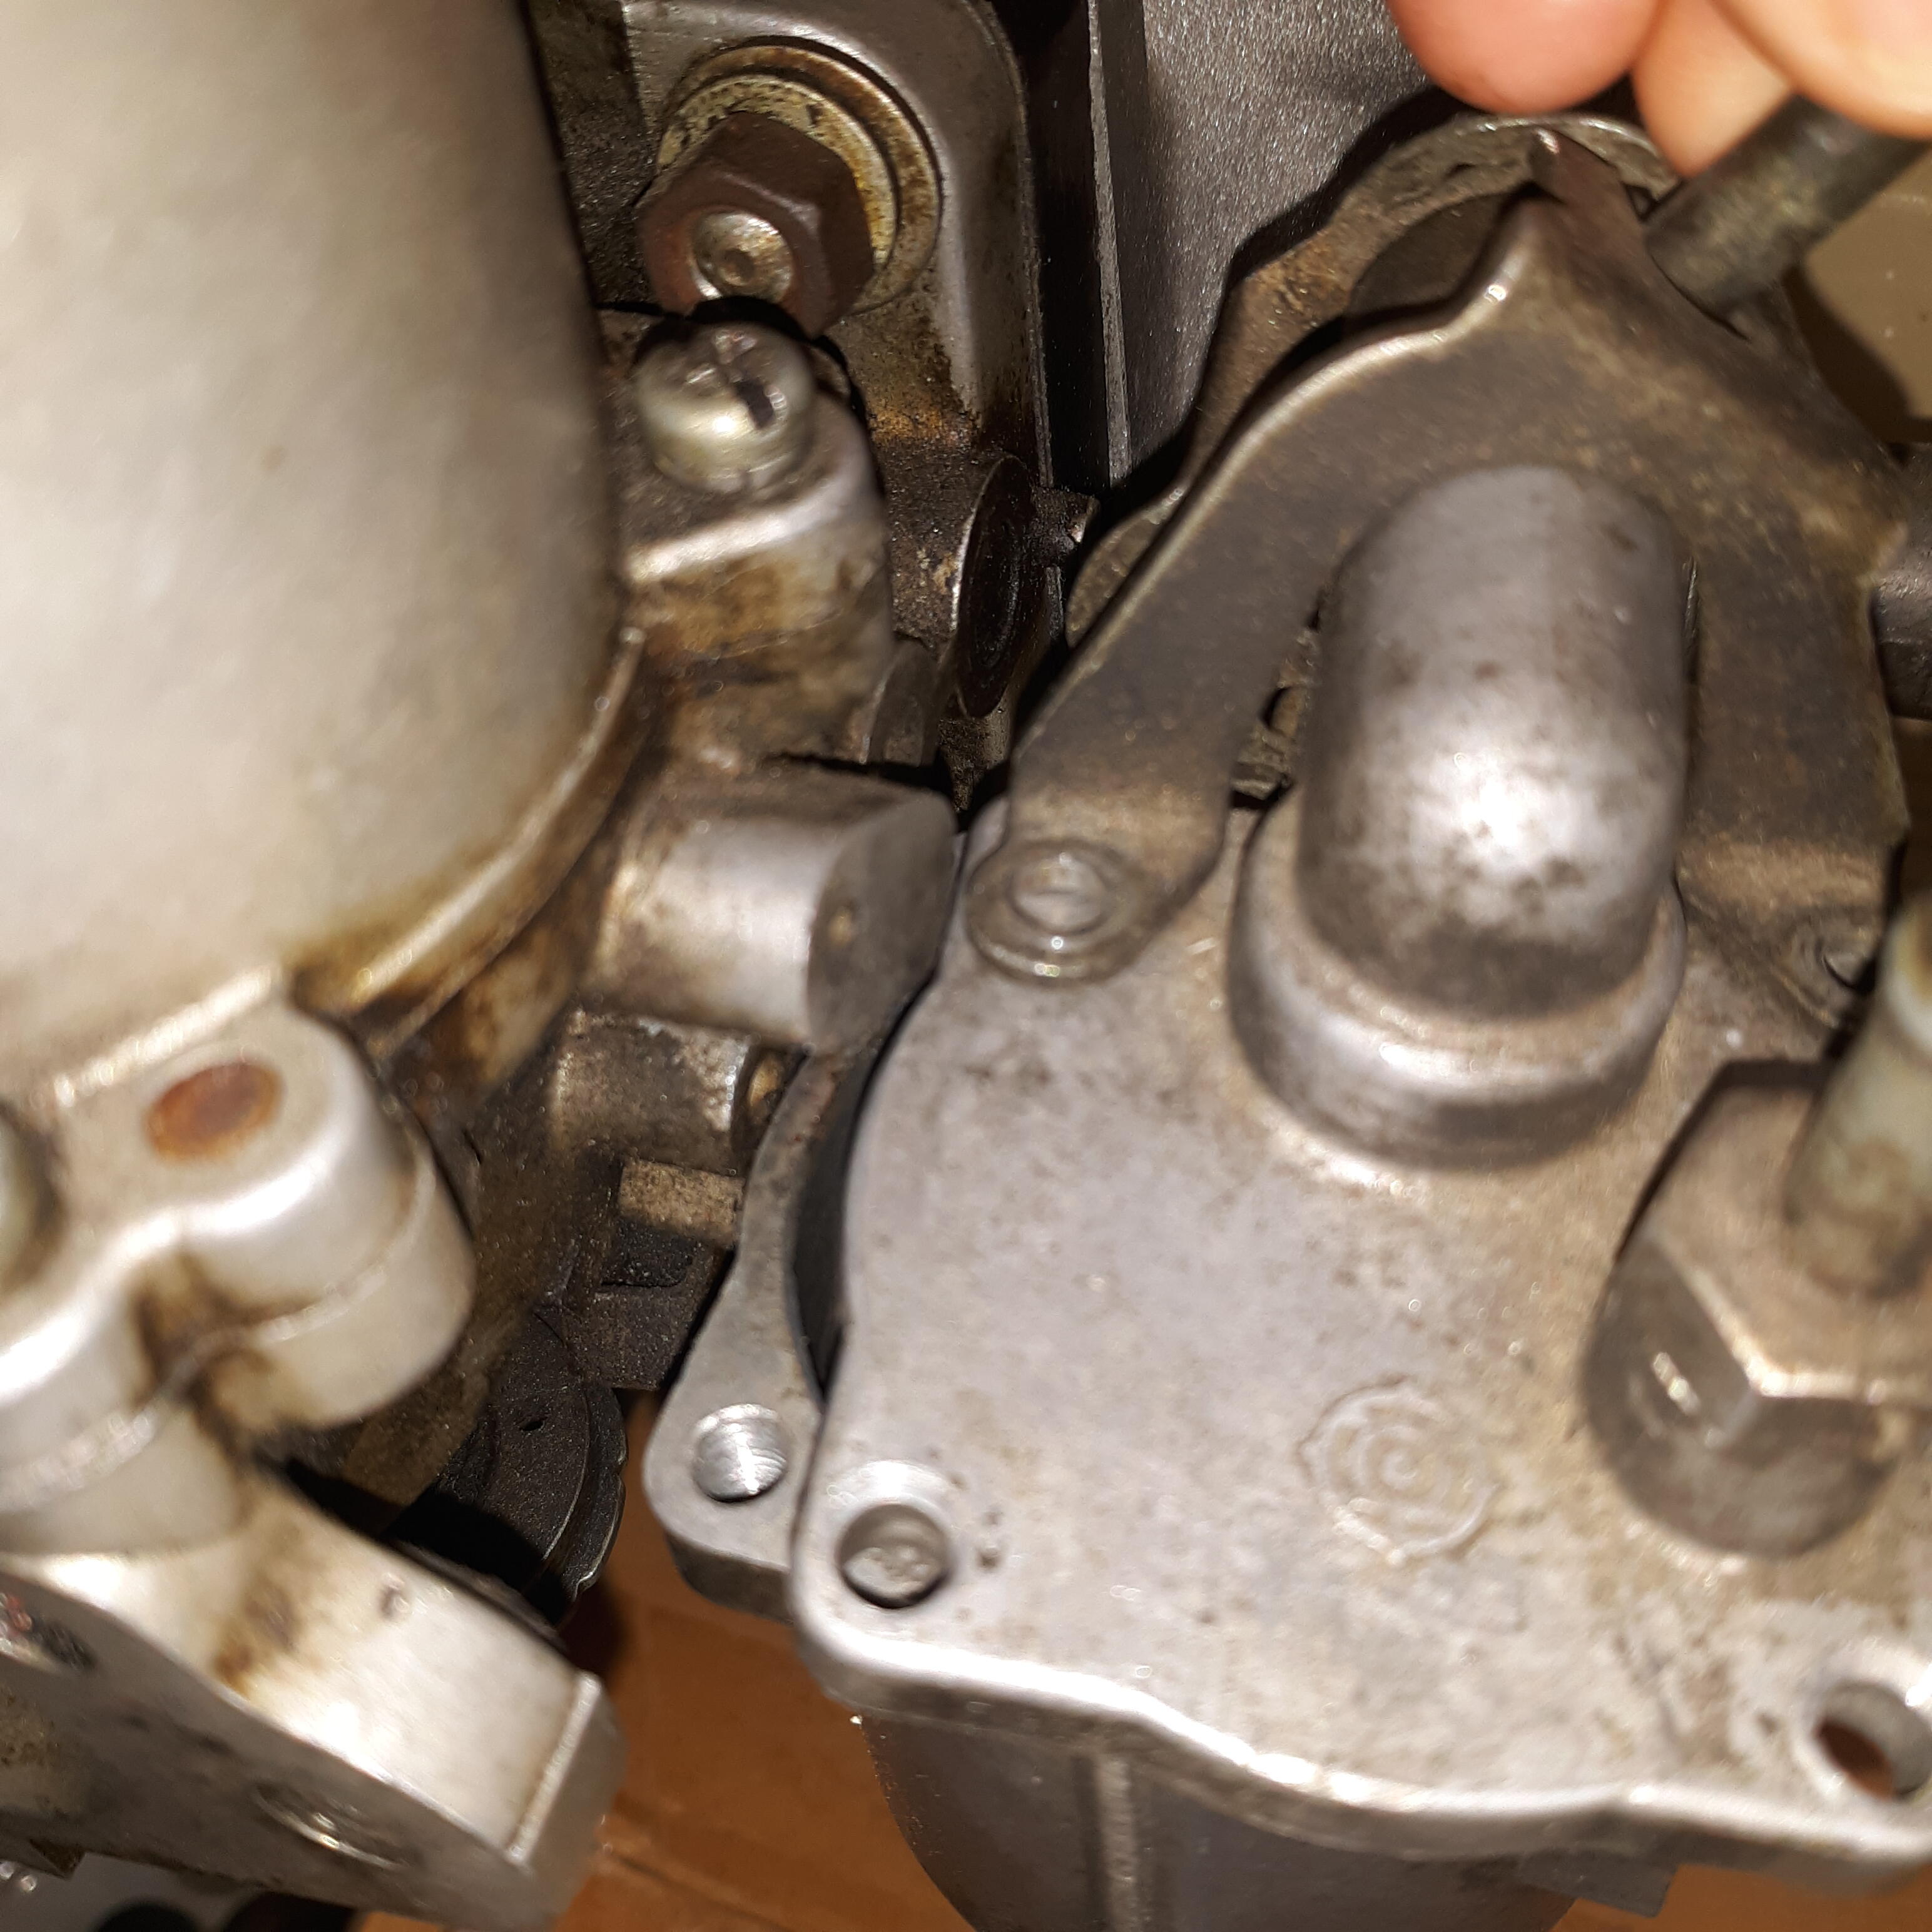
1 pointI have heard stories about sticky AFM's in the past, but I have never held one in my own two hands. Until now. So I've got this AFM here that has a binding sticky spot right in the middle of it's travel. I have looked it over very carefully and cannot see any visible explanation for the sticky spot. I'm thinking maybe the damper section of the vane may be making contact up in the belfry area, or the main shaft may be bent. At this point, I'm toying with the prospect of taking the back cover off. I remember some discussion about doing this in the past, but don't remember if anyone has actually gone through with it. Has anyone taken this back side cover off? Mine has two screws at the bottom and a whole bunch of glue around the entire perimeter: Has anyone gone through the operation, and did the patient survive? I mean... This thing is worthless to me in it's current state, but it would be nice if this was more than just an autopsy.
 1 point
 -
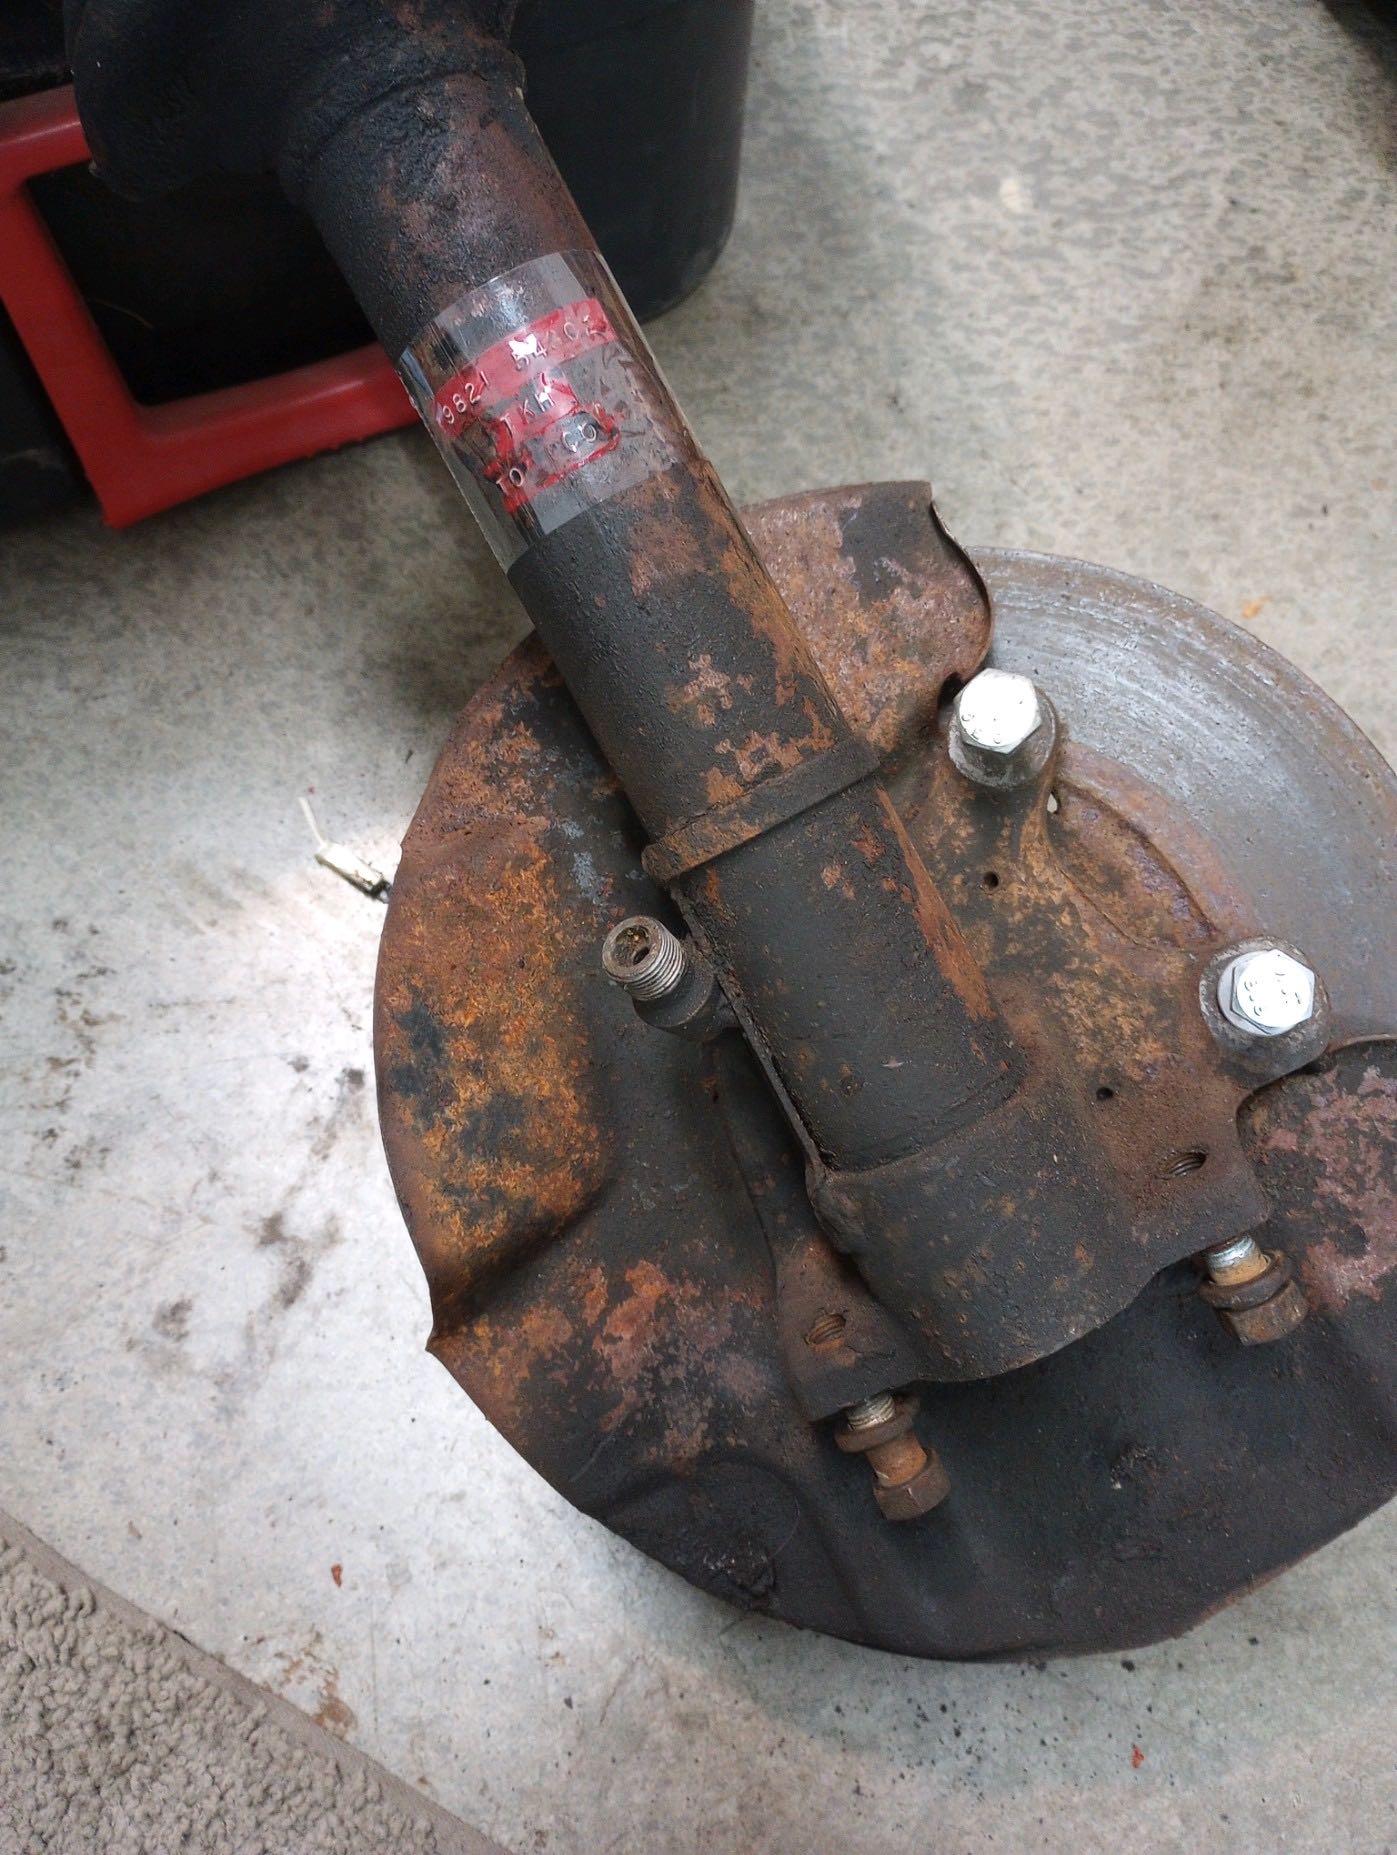
1 pointI'm going to try and take pictures of this paper weight as I make it lighter. Bought it from a guy that works at a scrapyard. $20 dollar scrap price but an old friend that works there knew what a Datsun 280ZX was and gave him $25. Called me and now it's my toy for the next month or so. With you guys asking about it I'll get it done. Pictures so far.
 1 point
 -
I think that’s 3m 8001. We used to call that “Yellow Death” at the machine shop. A nightmare to remove!!1 point
-
1 point
-
1 point
-
1 pointOil smoke has a distinctive smell, and so does gasoline vapor. Might be worthwhile to run through the cloud and see what it smells like, if your nose works. And water vapor dissipates pretty quickly. You could put a smooth cold surface at the exhaust pipe, a mirror or a piece of chromed metal, and see what condenses. If it's as bad as you describe you should get something.1 point
-
1 pointDetails might show something. "Did" is not enough. Valve seals can get damaged during installation. You might even see something just by removing the valve cover and taking a look. Is there blowby? Smoke from the oil filler cap? Wrong/poor rings and ring sealing should show up there also.1 point
-
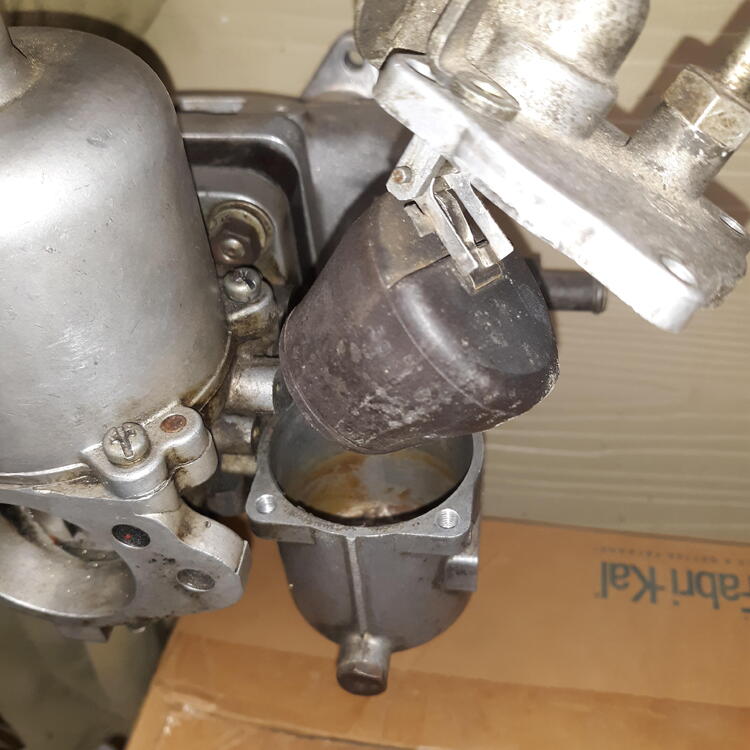
1 pointWell????? Pics or it didn't happen!! You're saying that taking that back cover off did not provide access to the sweep vane?1 point
-
1 point
-
Take the screws completely out then with the lid still flat on the chamber turn it 90 degrees in the opposite direction of the vent bung. Then turn it just enough to get that indention before the screw hole under the nub under the dome. Once you figure it out it's easy. An "ah ha!" moment. Turned Indention lined up lift up when you can whala


 1 point
 -
Something we have discussed before, but is it not a possibility that OWSS simply supplied and fitted a set of the taller RAC type springs to use on the same Monte struts originally fitted to the car? I would think, what with Works parts being in short supply in-field (I am in possession of much period correspondence where OWSS, Datsun UK and various privateers were all trying to get hold of Works-specific spares in order to use Works cars that they had care of) that could have been a possibility. Have you got any intact part number alloy tags or painted numbers on the springs? Any legible Dymo tags on the rear strut tubes?1 point
-
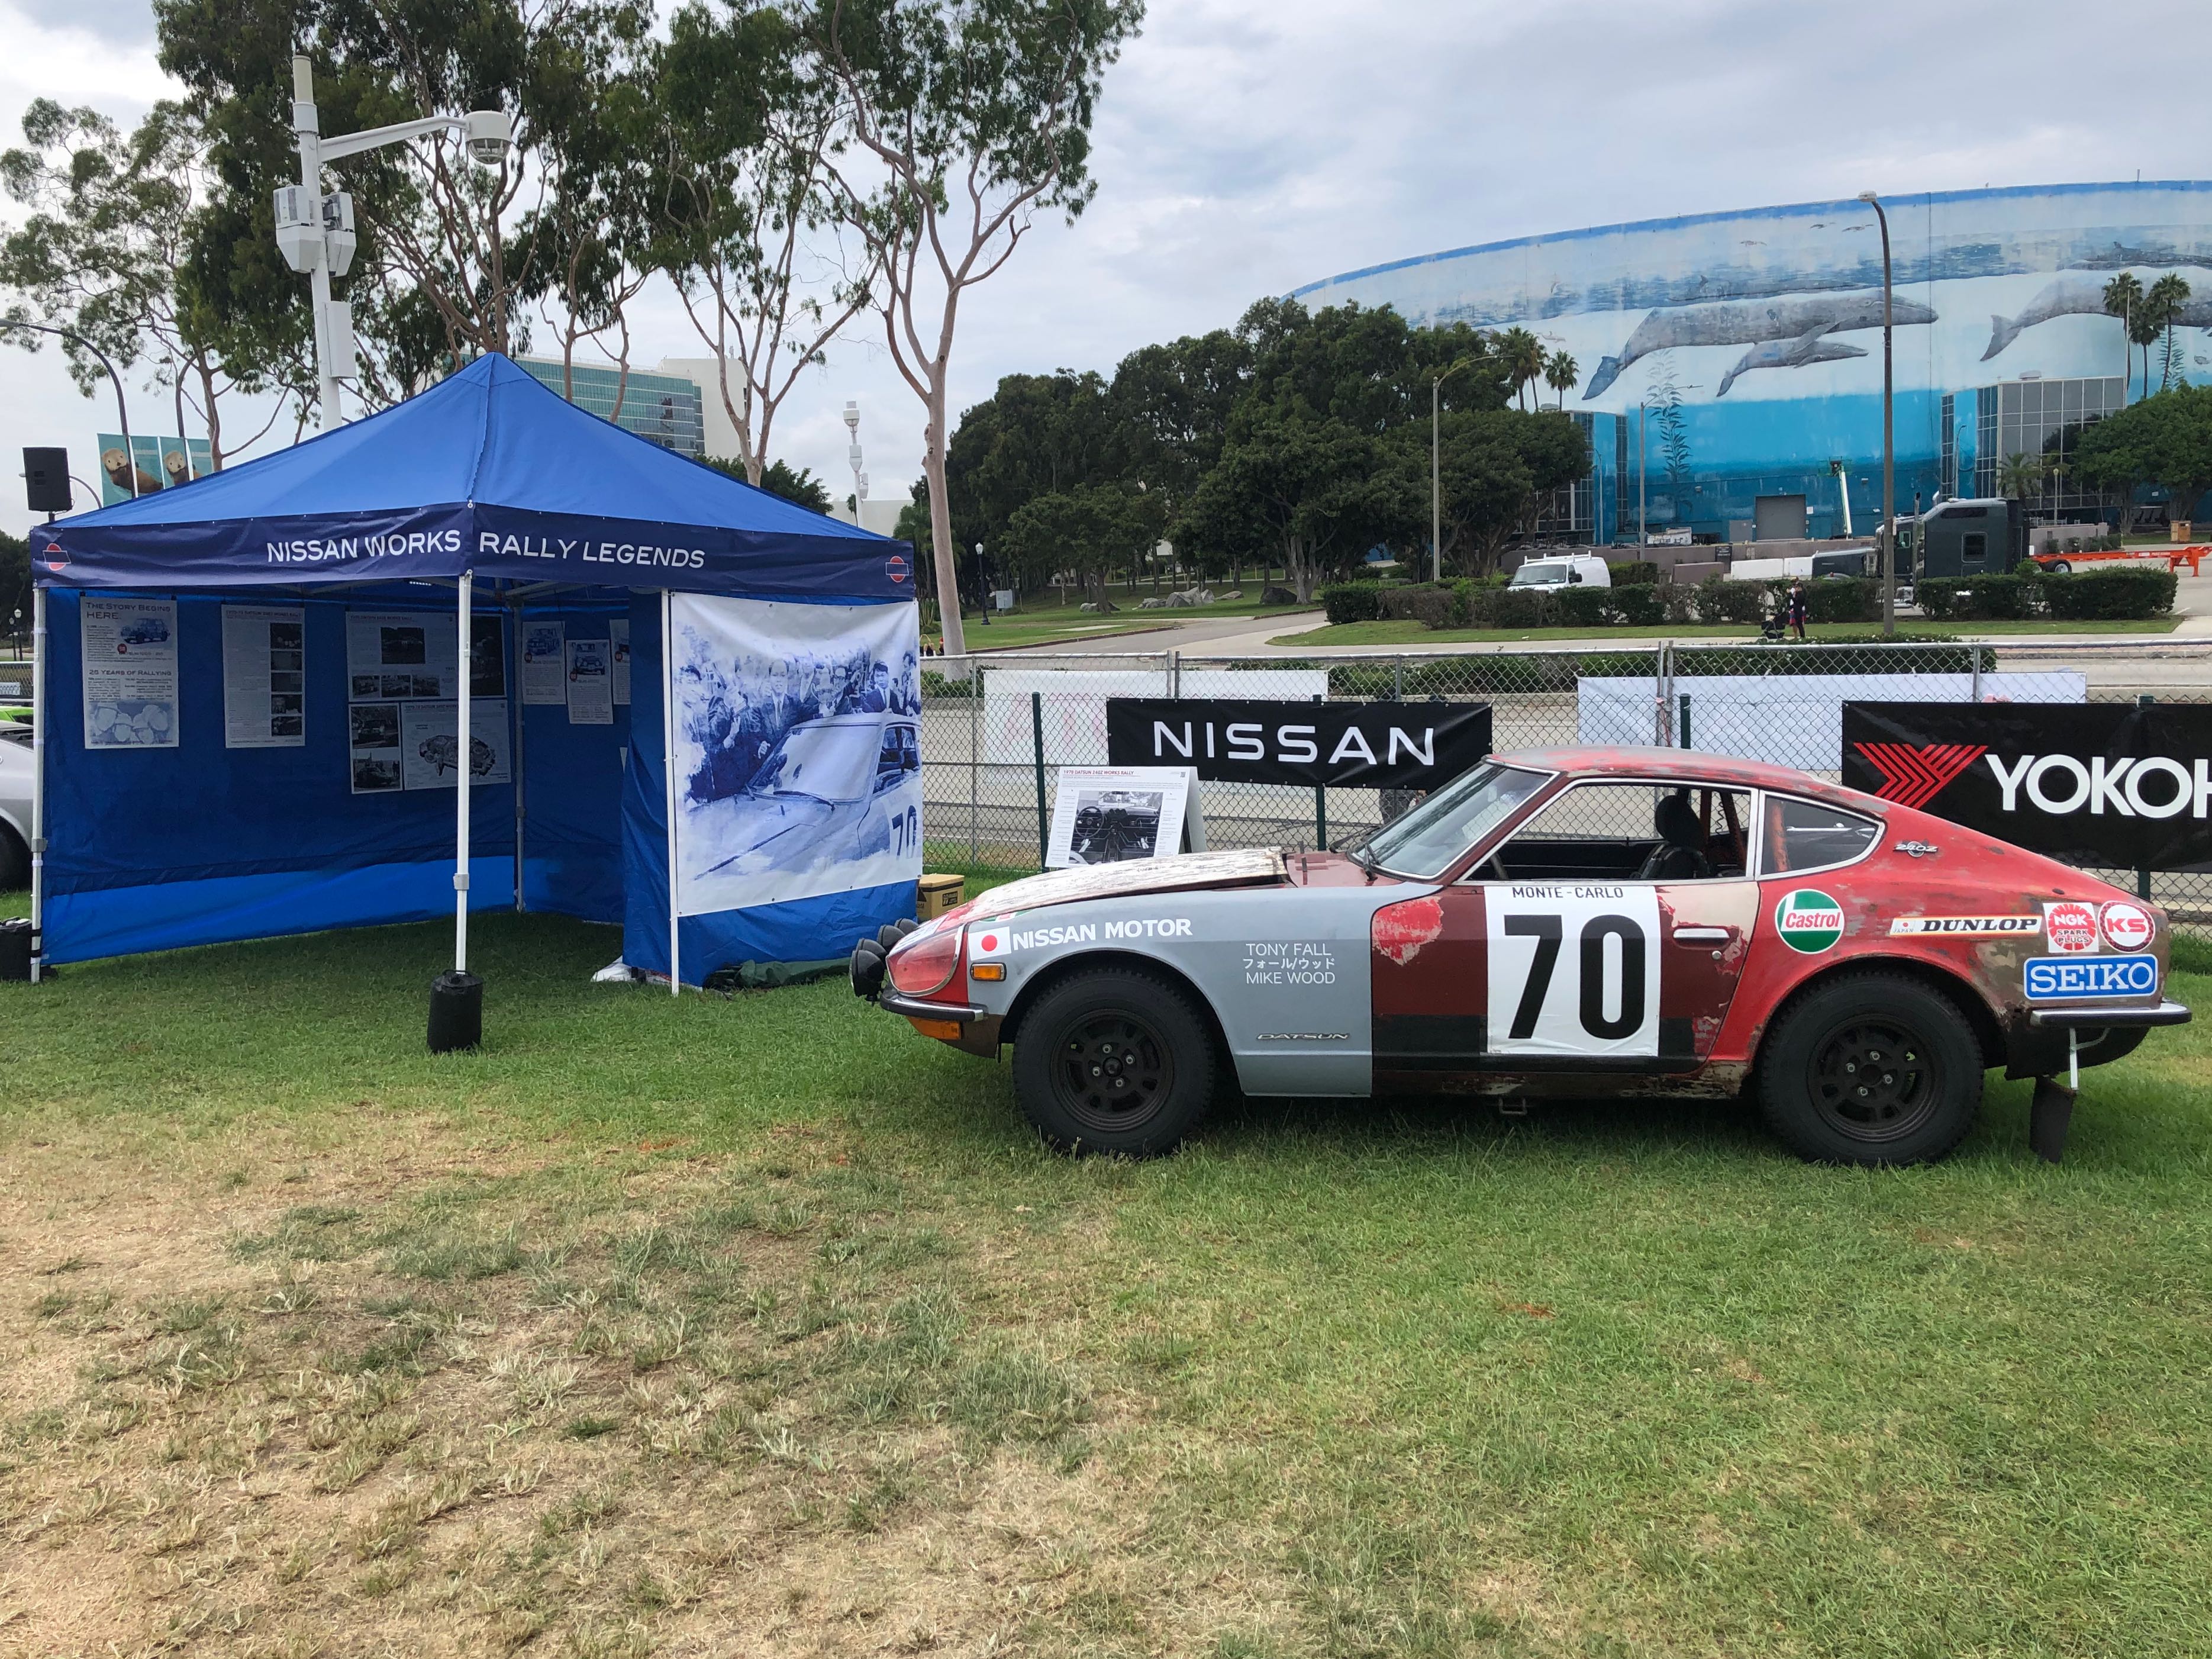
They banged out the roof, chucked the windshield, and he drove it home, apparently (don't know about the navigator). I can't tell whether this photo was staged, but if the story is at all true, then that is a rock star move. (photo credit unknown)
 1 point
 -
1 pointI actually did on the one with the wobbly arm just for the hell of it since it was useless in its current state. Taking the back plate off surprisingly does nothing except give you access to the idle air mixture bypass passage to clean it if memory serves. I remember opening it and being really confused how the sweeper arm is actually removed since I was sure that's how the rebuilders do it but no dice.1 point
-
1 pointVery cool find Cliff! Remember that you don't have to do all that valve swapping and tower shimming. You can go one of two ways and keep the ZX valves. Either shave a bit less (0.060") and take up the difference by slightly modifying the stock chain guides, or go the full 0.080" shave and buy the Kameari chain tensioner. I've heard they are rather loud, but it's a cool loud. With either solution, you don't shim the towers and you dial in the timing with an adjustable cam gear. This can be done cheap as well. I started with a high quality timing chain set and then drilled one of the dowel pin holes for a Chevy V8 eccentric bushing setup. For less than $10, I got a set of eccentric bushings and I was able to dial in my timing. An adjustable gear is easier, but both accomplish the same thing. This engine was in my race car and ran great.1 point
-
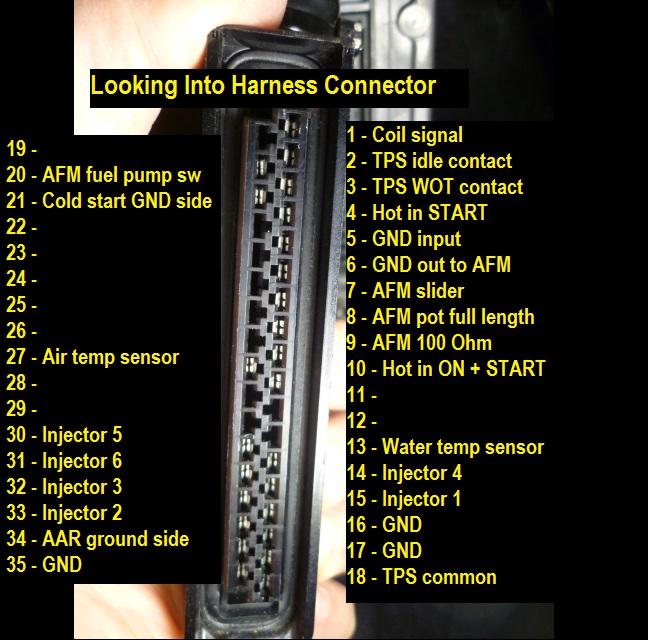
My first guess would also be the temp sensor unit. Pull the big connector off the ECU and measure resistance between (harness side) terminals 13 and 16. That should be temp sensor and ground. Looks like this: Compare the resistance measurement result to this.

 1 point
 -
1 pointThe compression numbers look good. I have heard of people running ATF in their SU's. I don't think the ATF is the issue. It will draw it out if the pistons are overfilled. It will stop once it's pulled down some. I wouldn't mess with the needles yet as they're fresh back from Ztherapy. I might also make it a little leaner with the knobs. I would expect the floats to be right after the refresh too. You could check them but I wouldn't go adjusting them right away. If you restart it, does it smoke a lot and then get better. Typically valve seals and guides will drip onto the backs of the valve stems and smoke heavily when first started. Also wet looking plugs are typically oil unless you have a lot of extra fuel! The smoke would be obviously black at those levels too.1 point
-
1 pointThe only time I experienced ATF being burned off by the carbs is when I overfilled it. Eventually the excess gets burned off. I would try running the carbs a bit leaner or maybe popping off the tops and re-seating the needles and see if anything changes.1 point
-
1 point
-
1 pointBTW...The Matthew Abate thread is incredible. I know you had lots of input and I commend you for that. R1 point
-
1 point
-
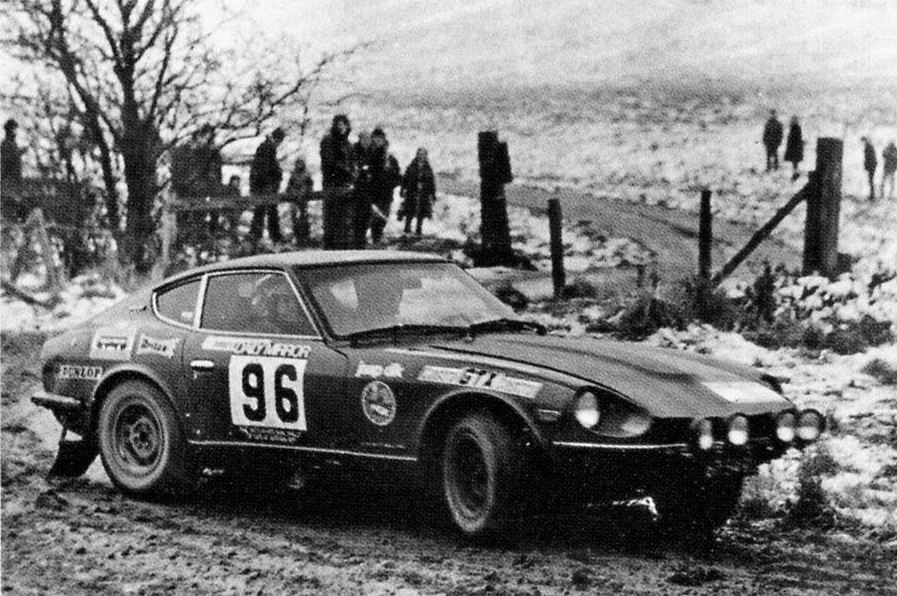
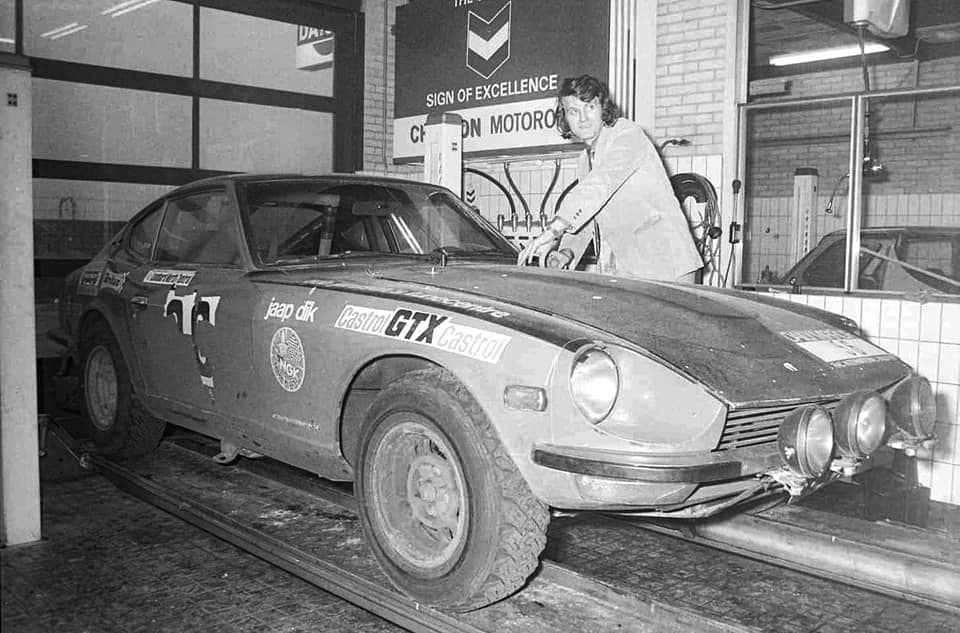
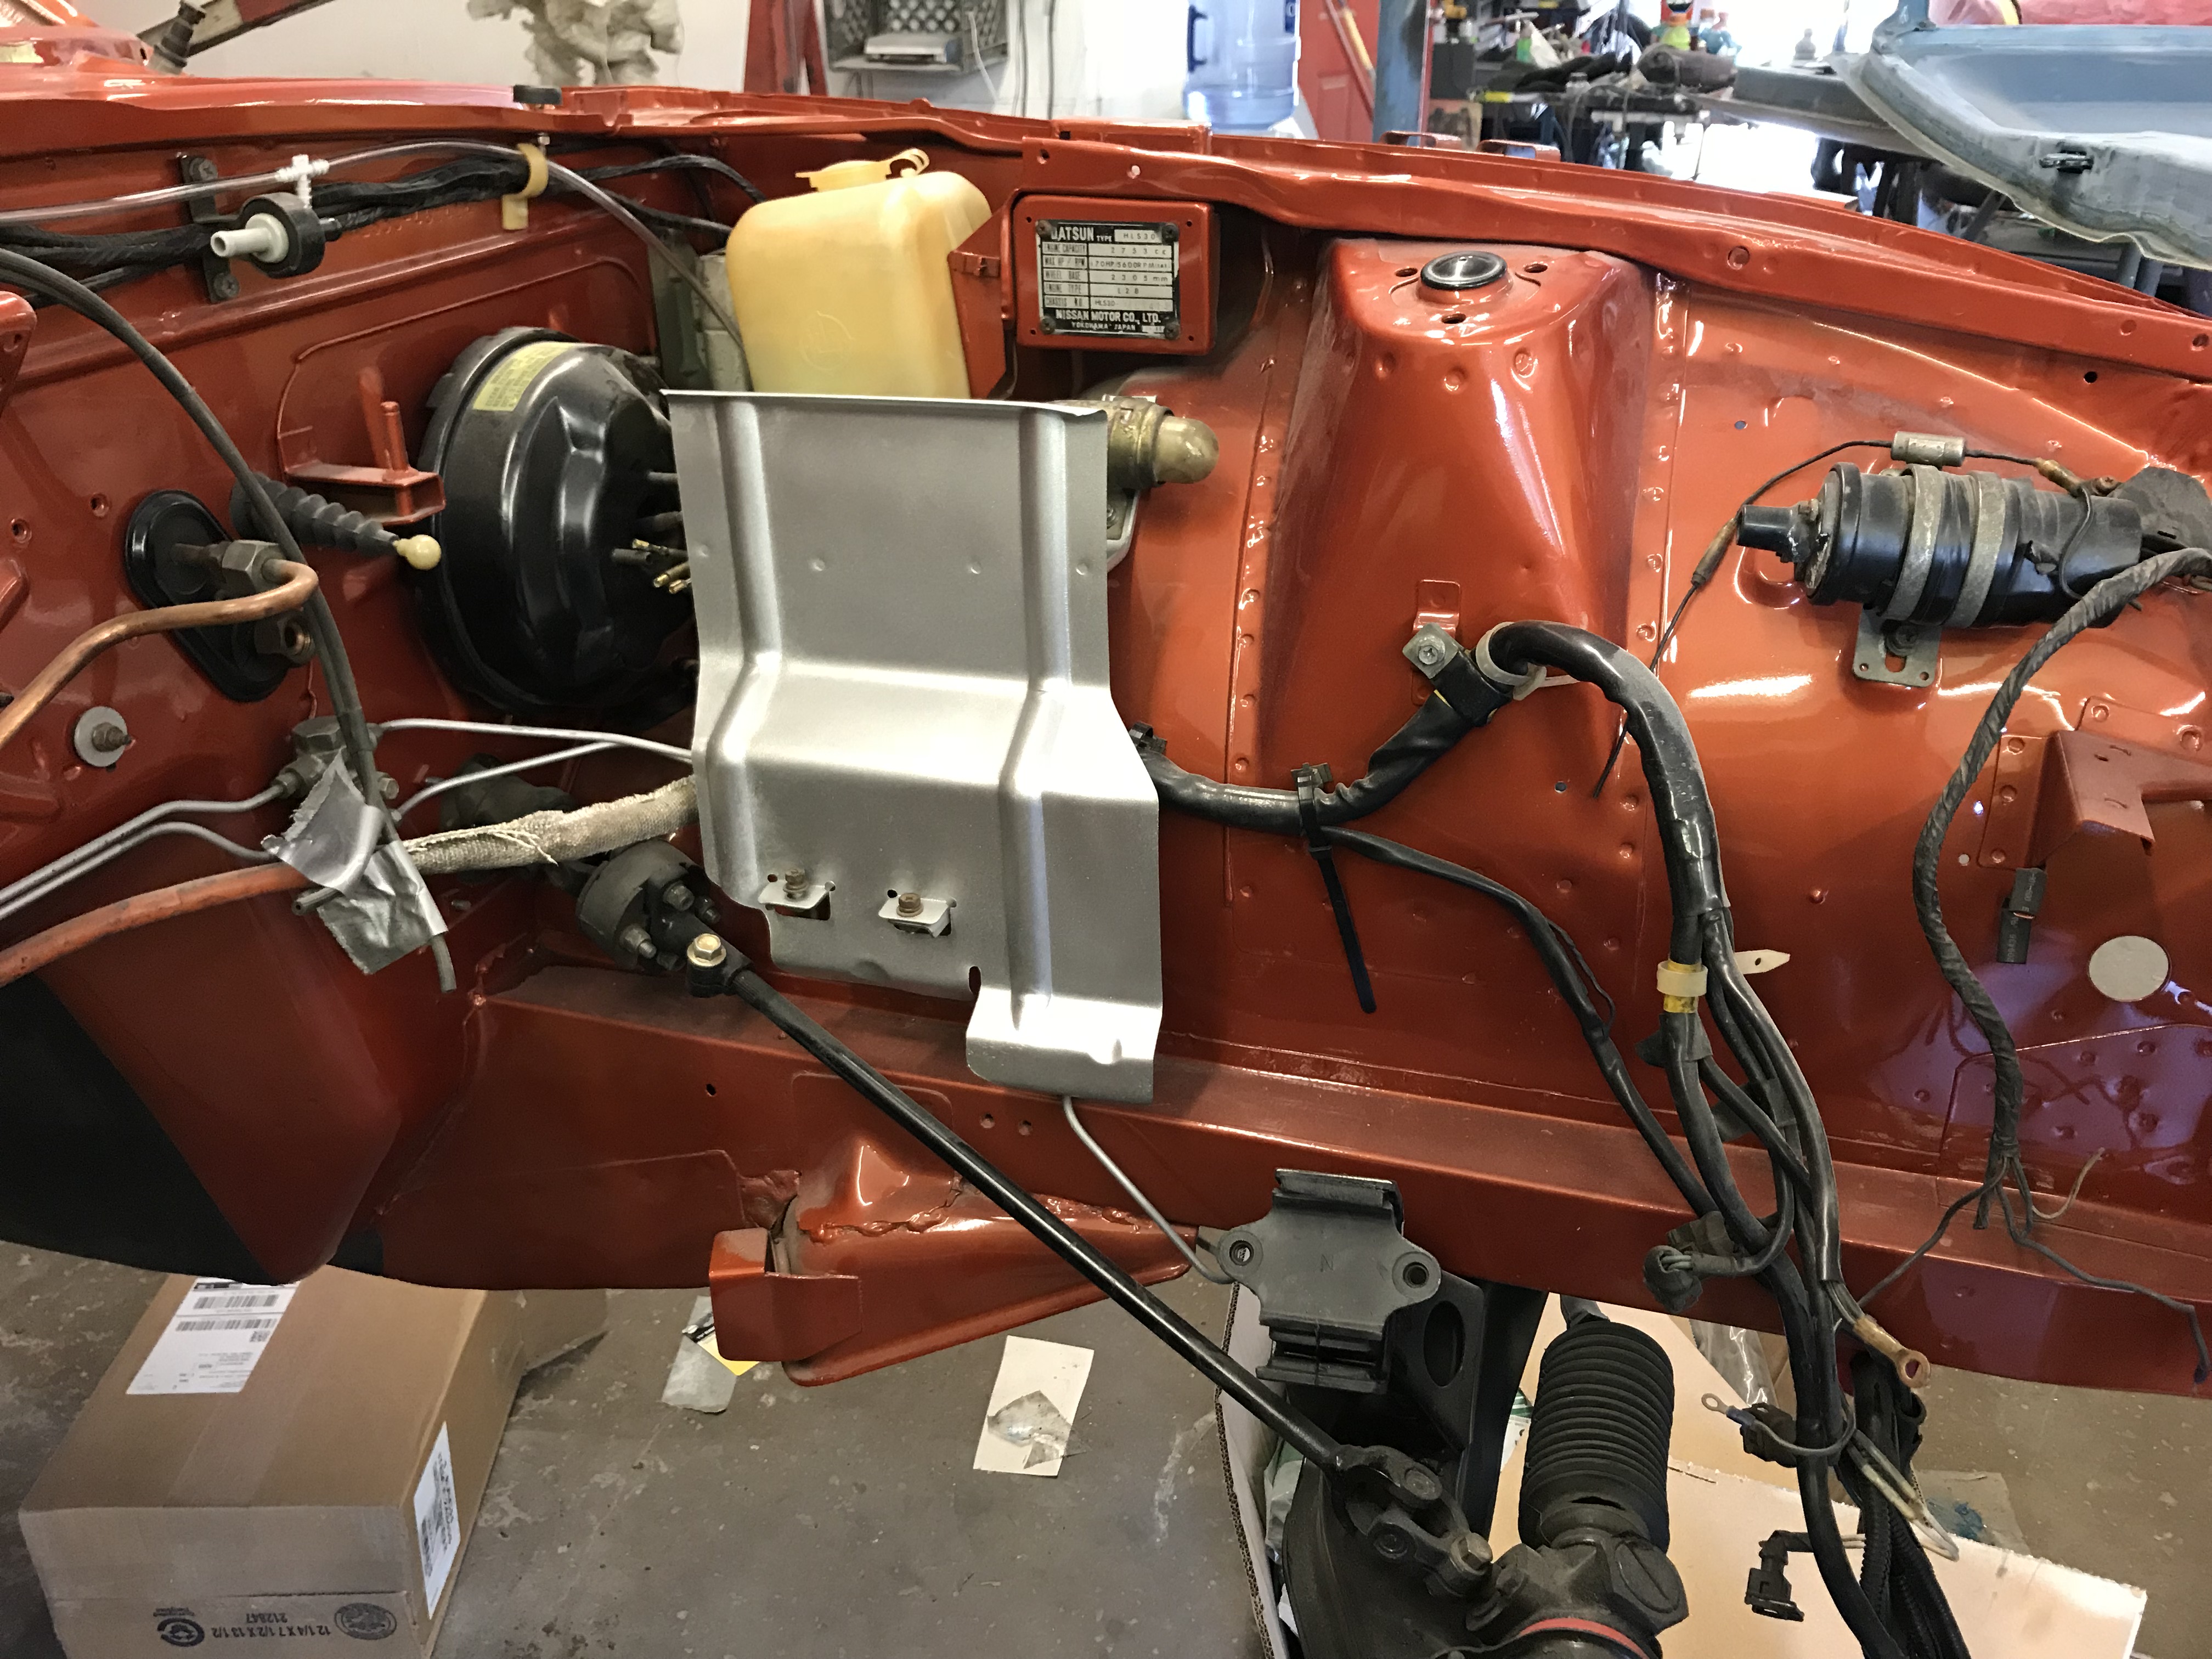
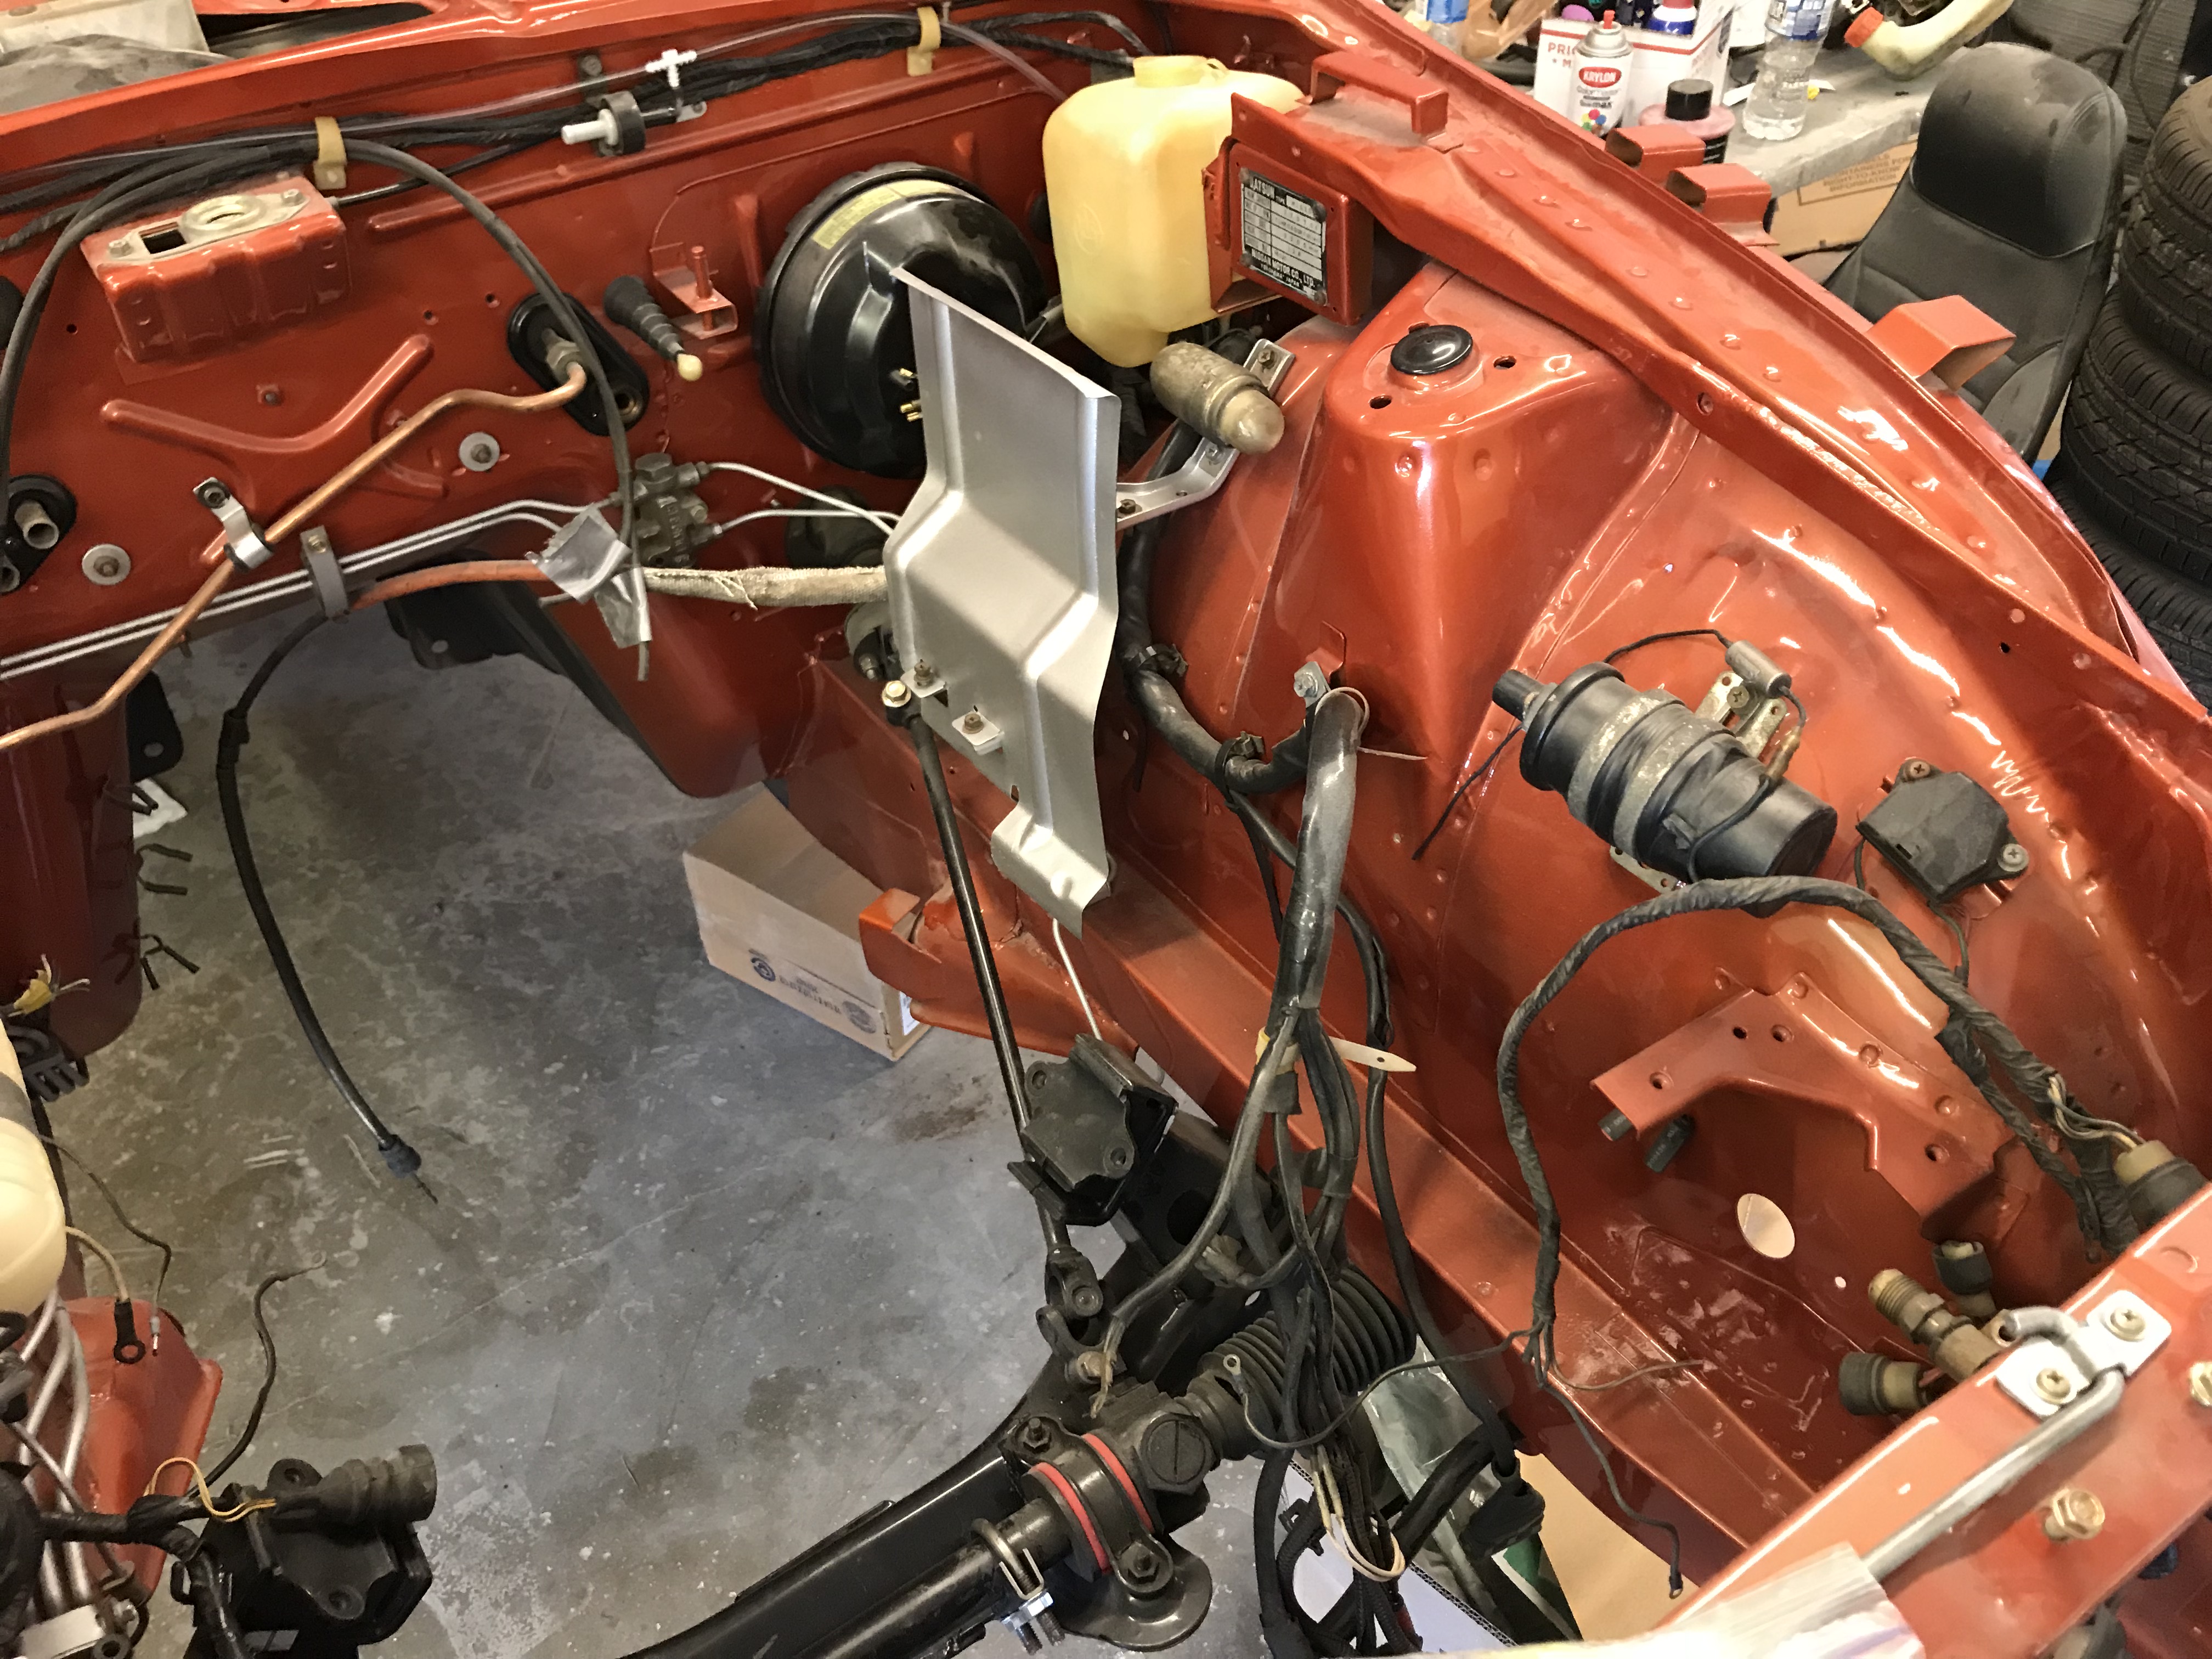
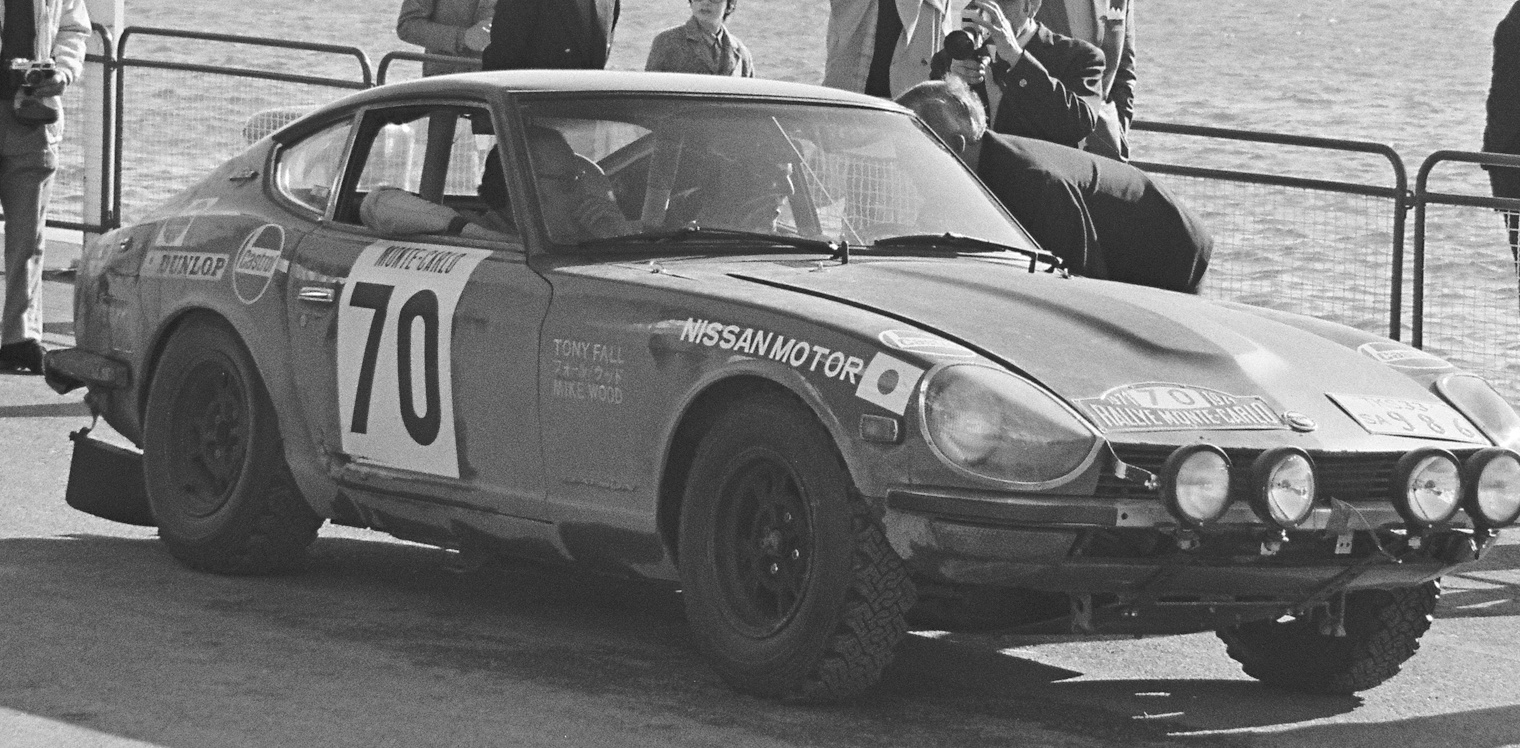
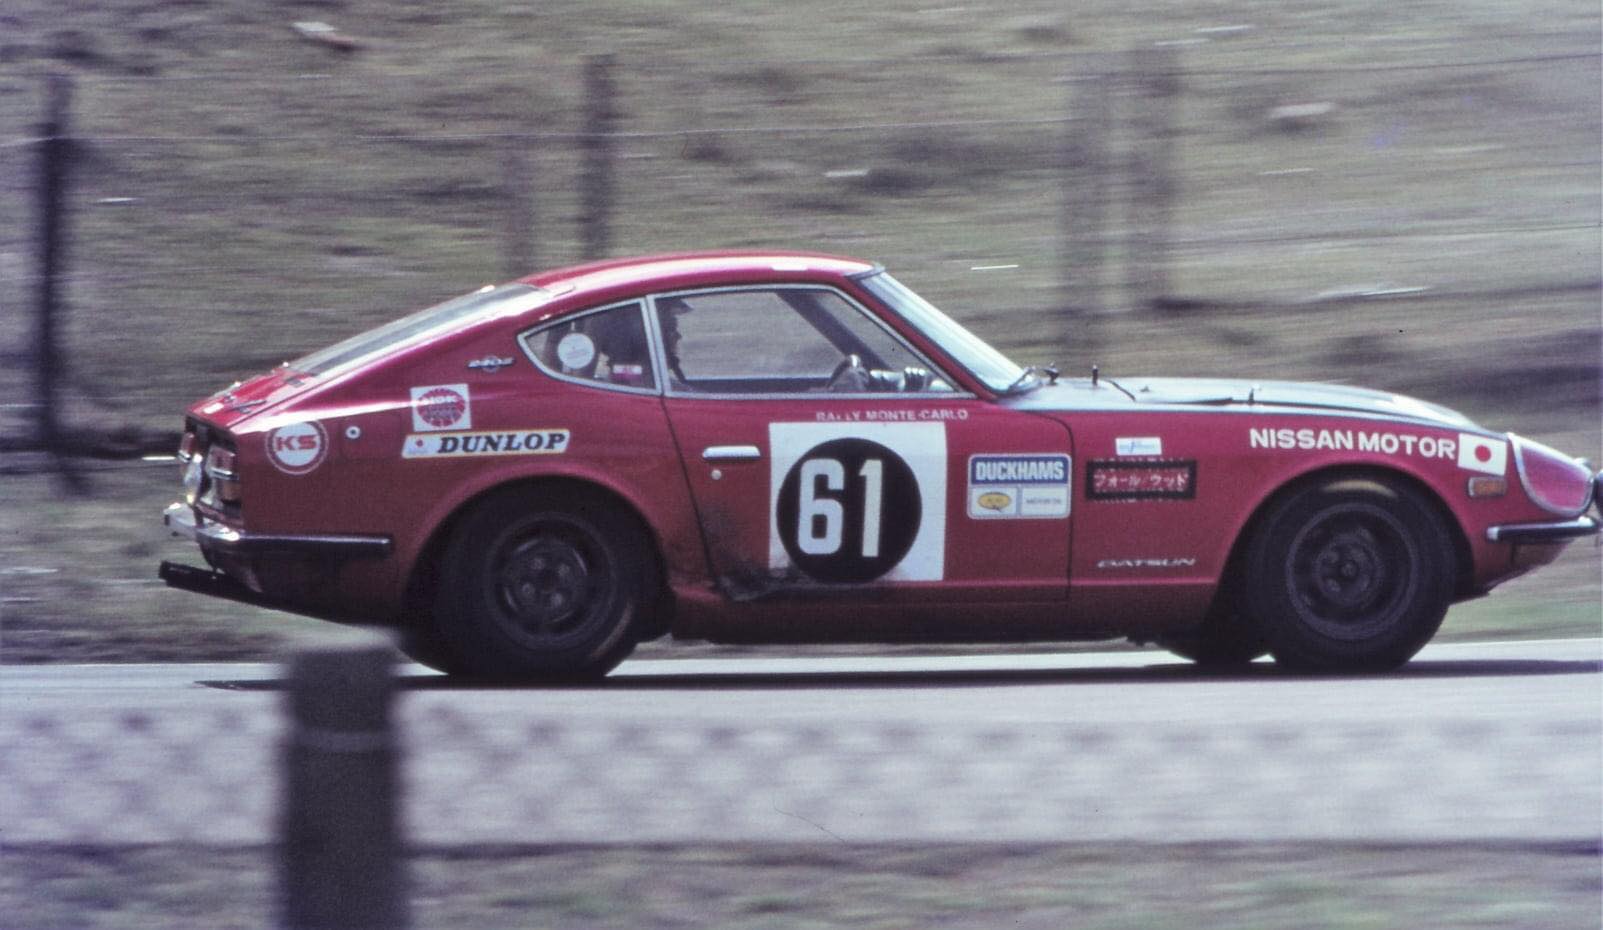
S30 Works Rally Struts - this is a lengthy post because there's so much to unpack here, that I hardly know where to begin. For starters, it's worth noting that the Works team was constantly developing and improving their suspension technology, and what was employed for use on my car was a very early system in comparison to the later adjustable and (likely) more maintainable systems used on later cars. The system on my car was not ride height adjustable in the way later cars were, apart from swapping out entire systems for struts with different components. A preamble before I dive into the actual struts on my car - for the sake of simplicity, I've postulated in the past that there were probably at least three established ride heights for the early rally cars, which I've internally labelled "Tarmac, Forest, and Safari". Please note, this is just a visual way I've used to convey "Low, medium, and High", and are not in any way official designations. I can imagine that it's also possible that there may have been more gradients denoting other characteristics, like firmness, travel, etc., but this is outside my own knowledge-base, and I personally don't possess any evidence to support this line of thinking. Using the same terminology as above, here's a little flash-back to 1971, to gain some color: my car originally ran the 71 Monte Carlo using a Tarmac setup (picture 1, credit Nissan Global Media), thereby lowering the chassis by several inches. After it was sold to Janssen (along with 3 other Works cars), he ran it the 71 Paasraces (picture 2, unknown source) with the what looked to be the same Tarmac setup. What happened after that race is pure speculation by me, based on clues I've loosely pieced together. I can surmise he stripped the car of it's sump guard and a few other off-road parts, presumably with the intent on using it primarily for road use (something he was quoted as planning on doing in a 1971 AutoVisie article). Later in the season, when he rolled his OTHER off-road s30 in the 71 TAP rally (picture 3, unknown source - please note, this is a picture of the crunched SISTER car to my car, inserted here for narrative purposes only), my car was likely pressed back into off-road service for the upcoming 1971 RAC. The off-road rallying parts were re-fitted, along with the sump guard, additional protection for the fuel tank, and Forest struts. He ran an unsuccessful RAC, with a retirement (picture 4, unknown credit). Some time after the RAC (picture 5, unknown credit) he sold the car on to an enthusiast. Back to today, and the struts I have on the car - just about the only thing I can confidently say is that these struts on my car are Works parts - perhaps possibly the Forest struts used in the 71 RAC, given the car's use history - but almost certainly not the correct setup for Monte Carlo, as they make the car to sit too high (picture 6). What I'll need to do in the coming year is to determine if it's possible to easily alter the Forest struts to be used as Tarmac struts, hopefully by just swapping out some of the internals. More on the actual Works strut tower construction (picture 7) in an upcoming post.


 1 point
 -
1 point"Home is where the head is" I'm going to take it to my job and disassemble it when I can. Bag and tag all the parts then bead blast it. In the meantime I can read up on the mod to figure out what to do next. Hopefully I can use this one instead of the 53 year old E31 I was planning on putting that cam kit on. Most likely use up all the parts I've collected to make a higher compression motor then drop it in the 280. I'm not touching that 240 unless I have to, fenders already have elbow dents all over the tops. @Jeff G 78 I found this for less than shipping that P79! $475 less than the ZX motor. Does this sound about right @Diseazd? - shaving the head .080" - installing 1975-78 L28 valves which have .080" longer stems - shimming up the cam towers .080" - shimming up the spring bases by .0801 point
-
1 point1 pointWell judging by this site: https://www.ratwell.com/technical/DoubleRelay.html that @SteveJ posted on another thread, it breaks down that relay and its components and even lists out what is inside that version. Stating that it could be made by hand if someone wanted too. It even talks about L- Jetronic and each pinout1 point


Important Information
By using this site, you agree to our Privacy Policy and Guidelines. We have placed cookies on your device to help make this website better. You can adjust your cookie settings, otherwise we'll assume you're okay to continue.