Leaderboard

 Subscriber


Popular Content
Showing content with the highest reputation on 03/28/2023 in all areas
-
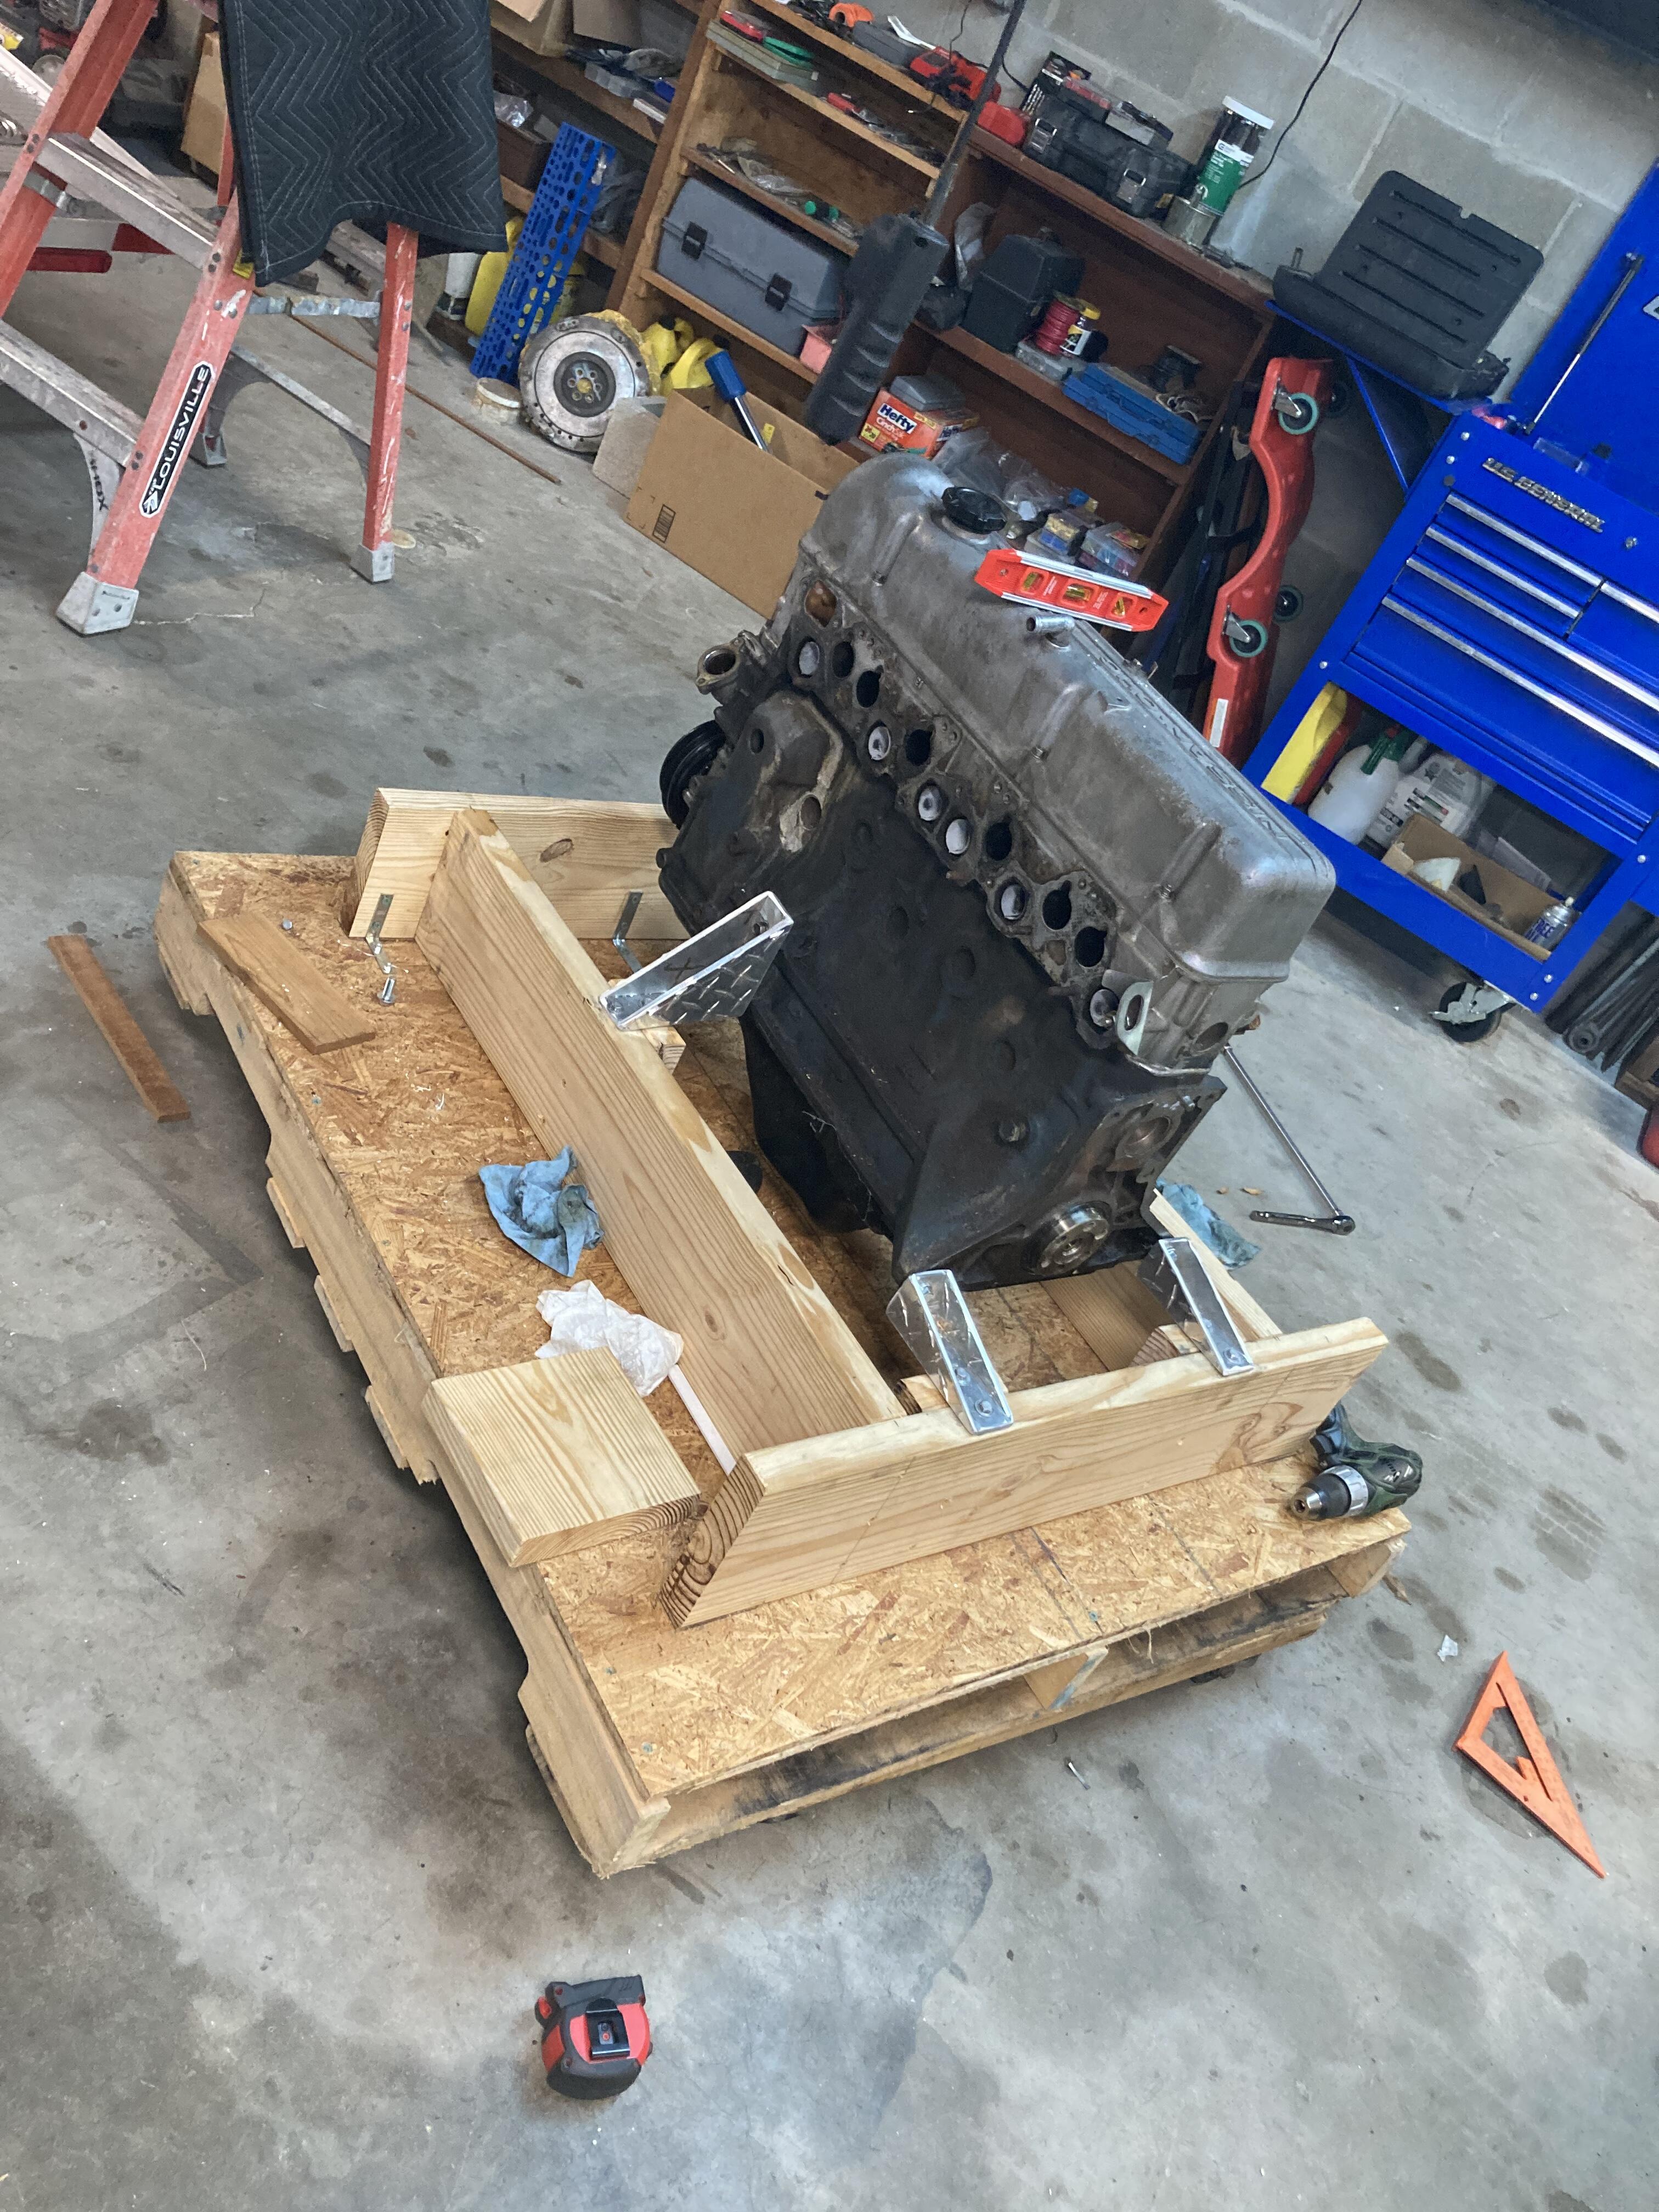
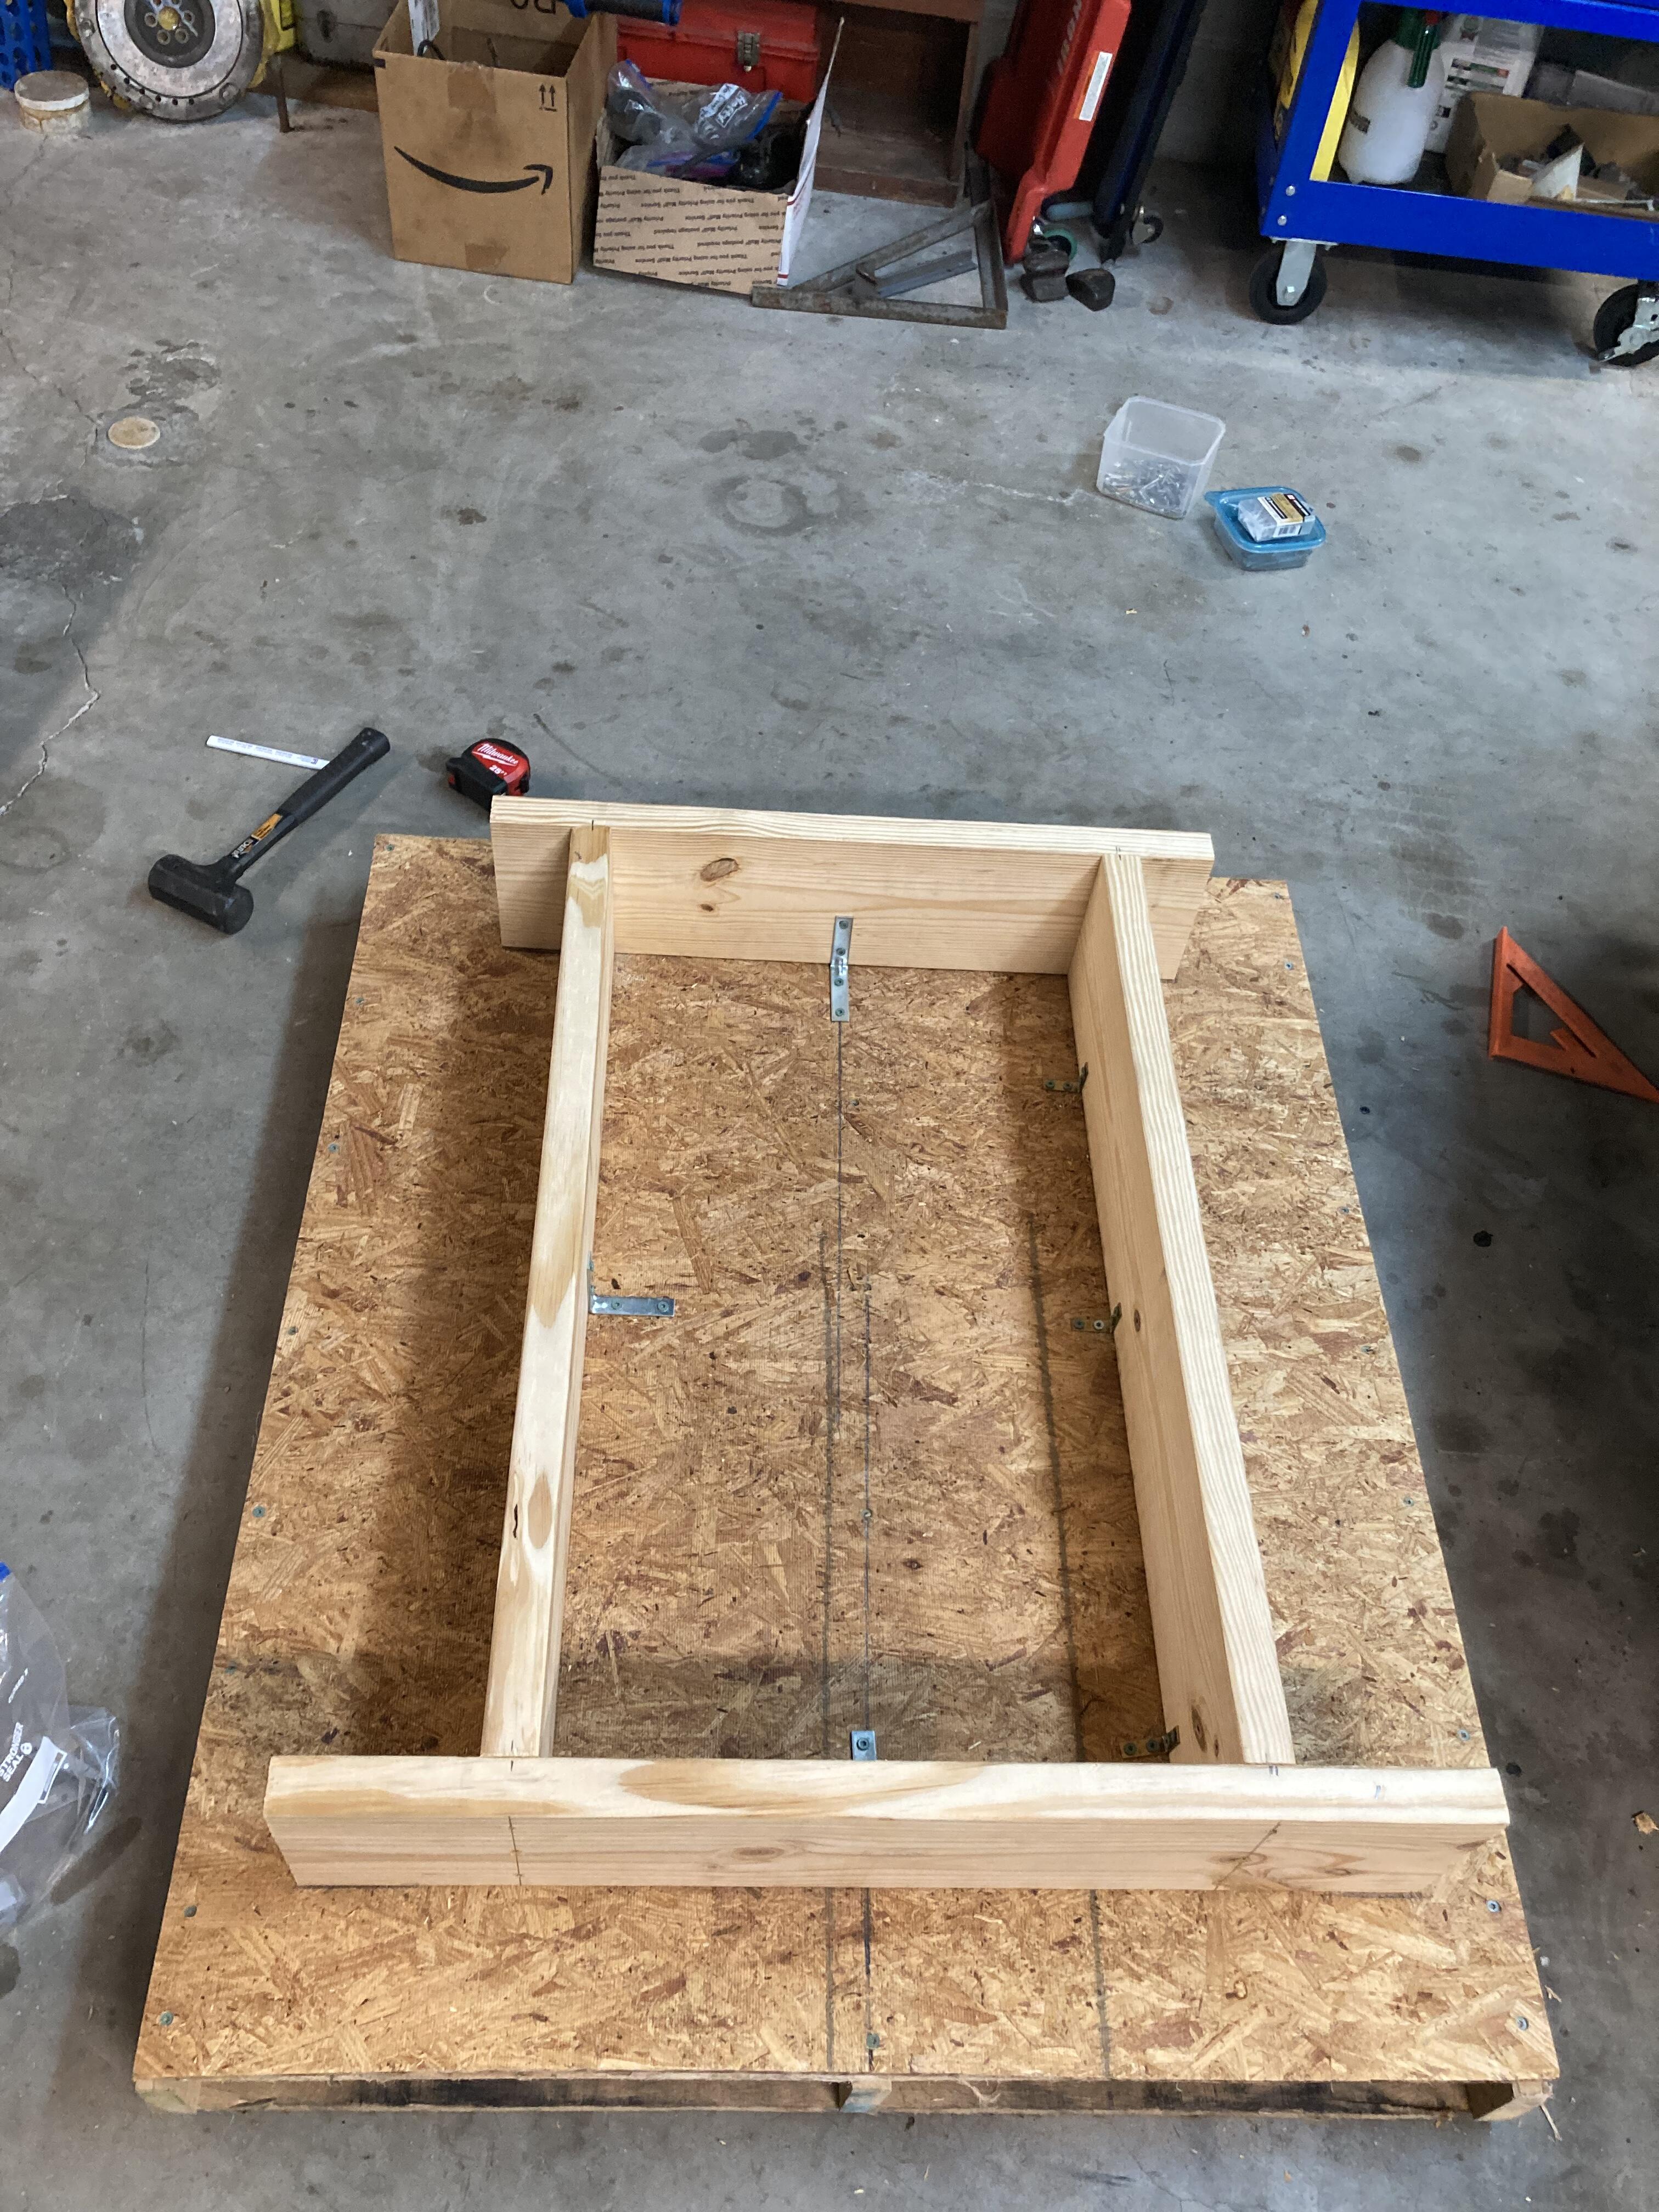
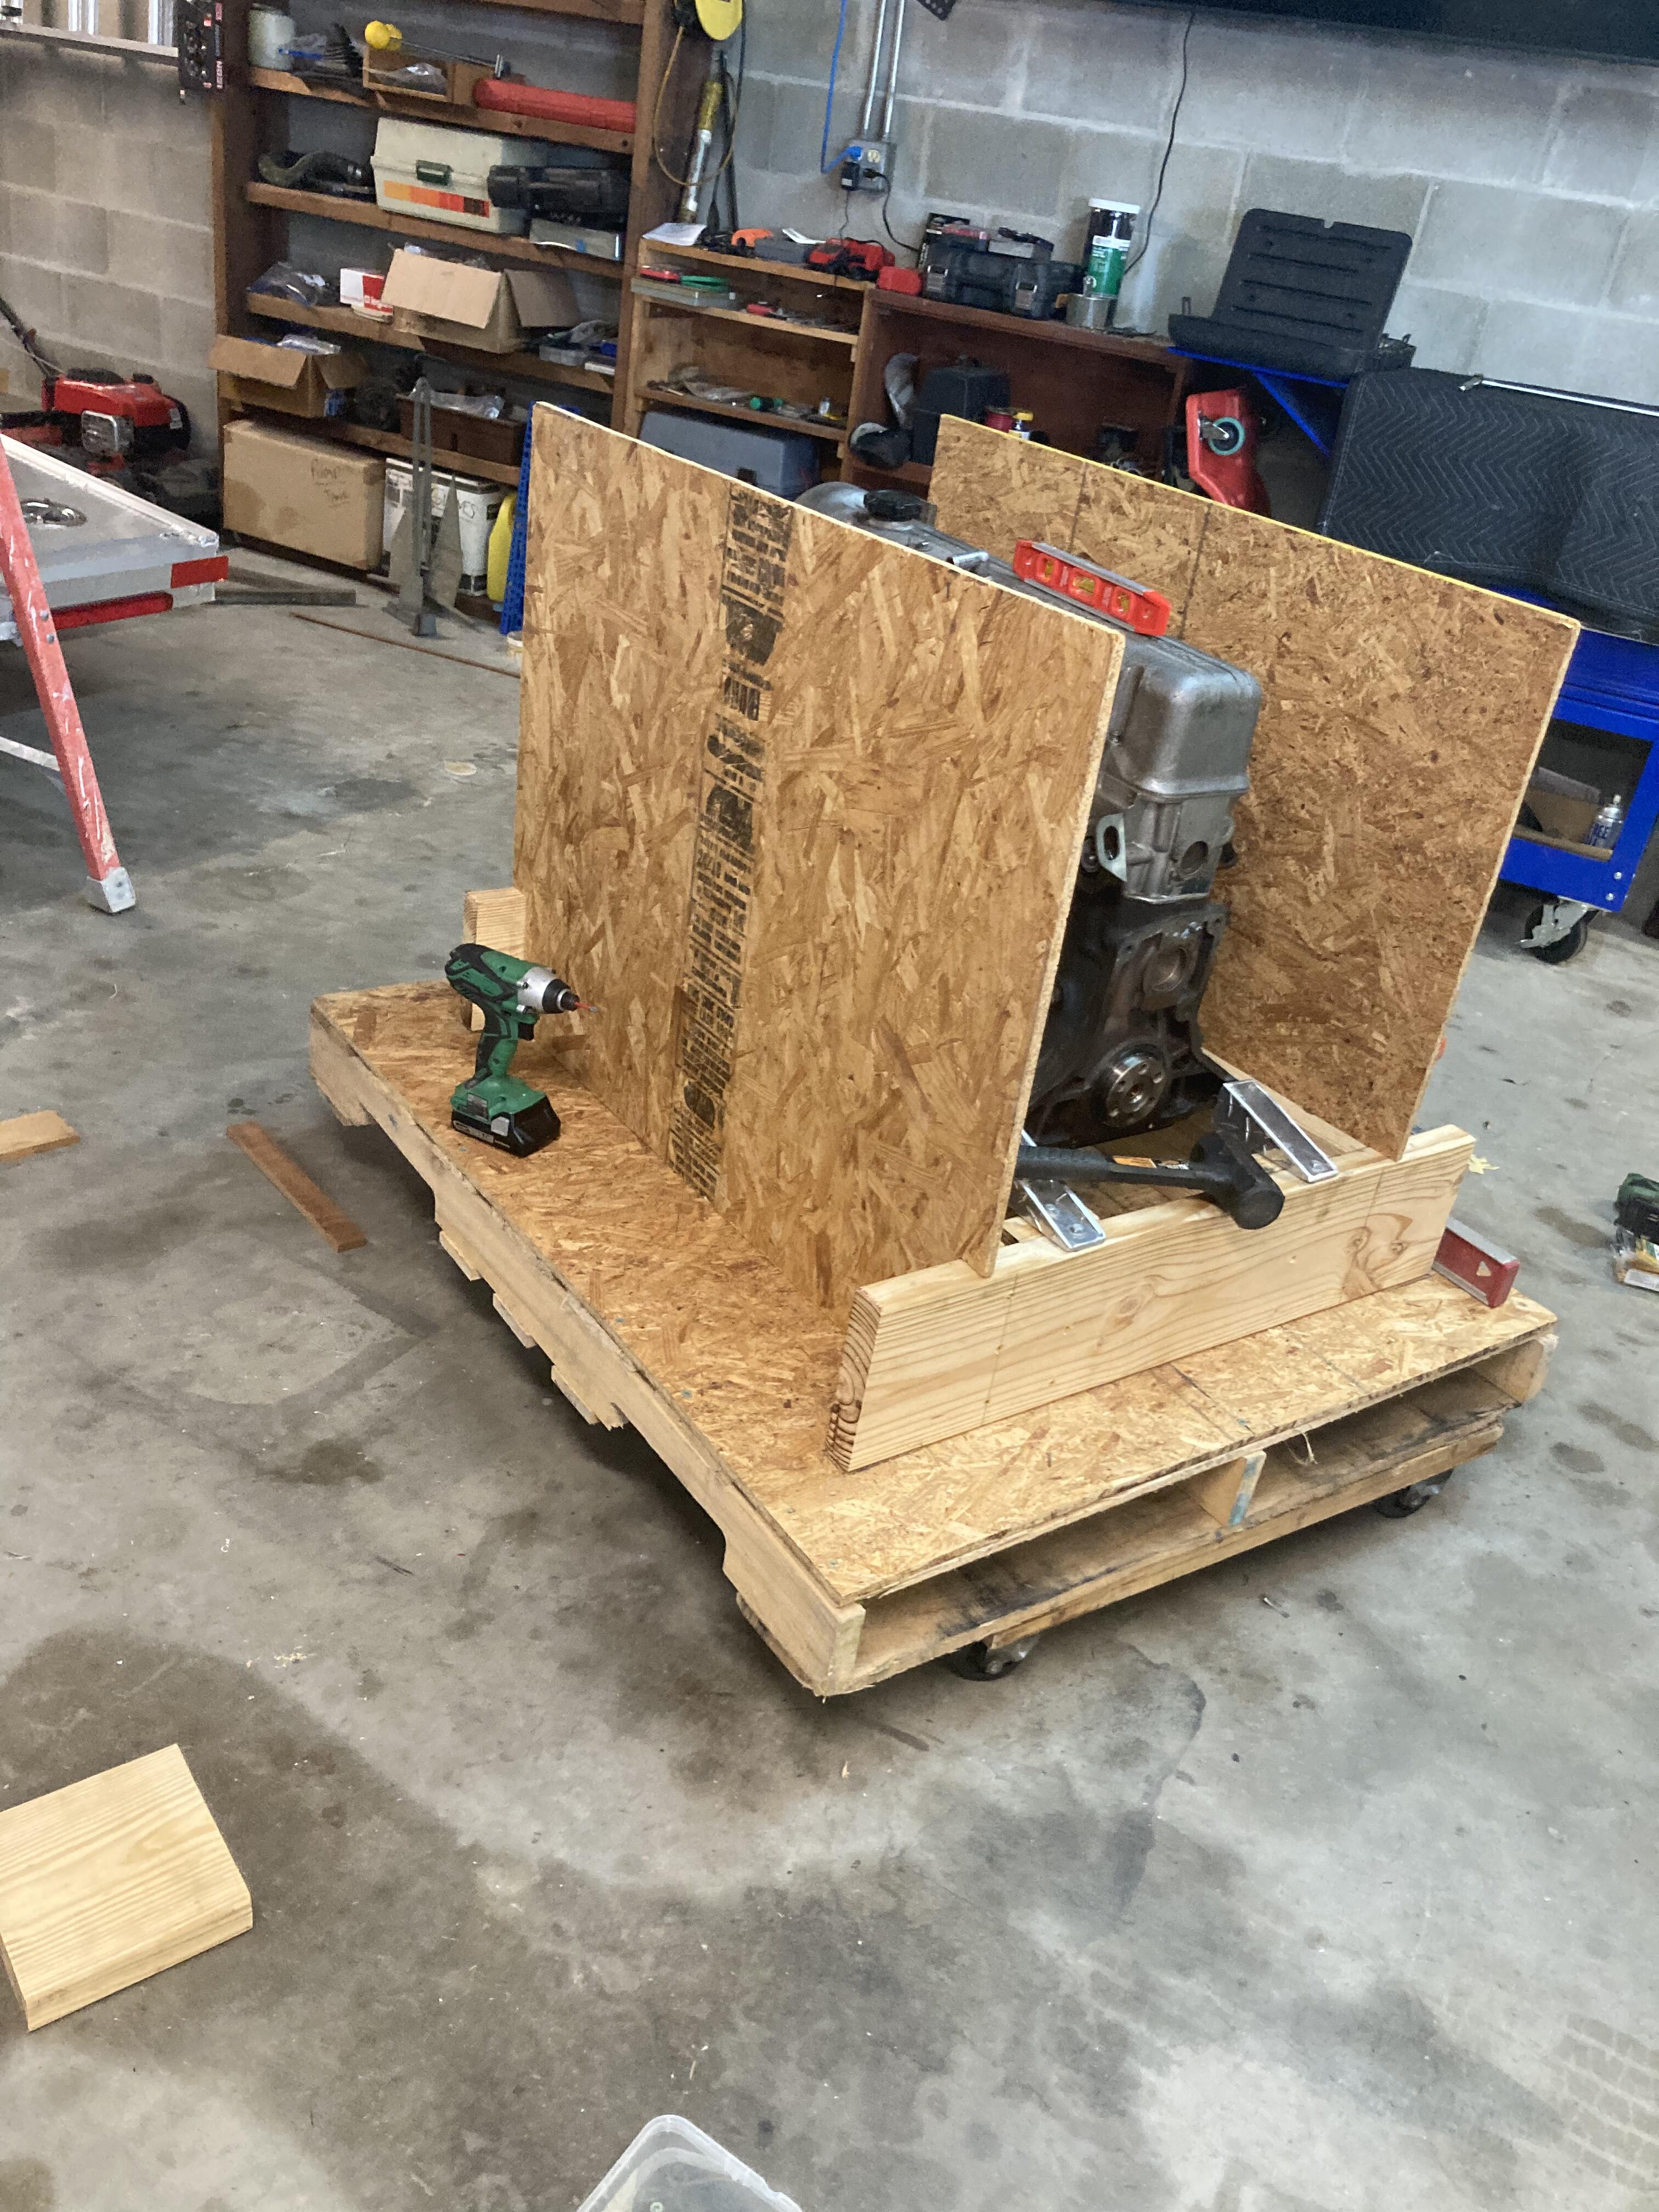
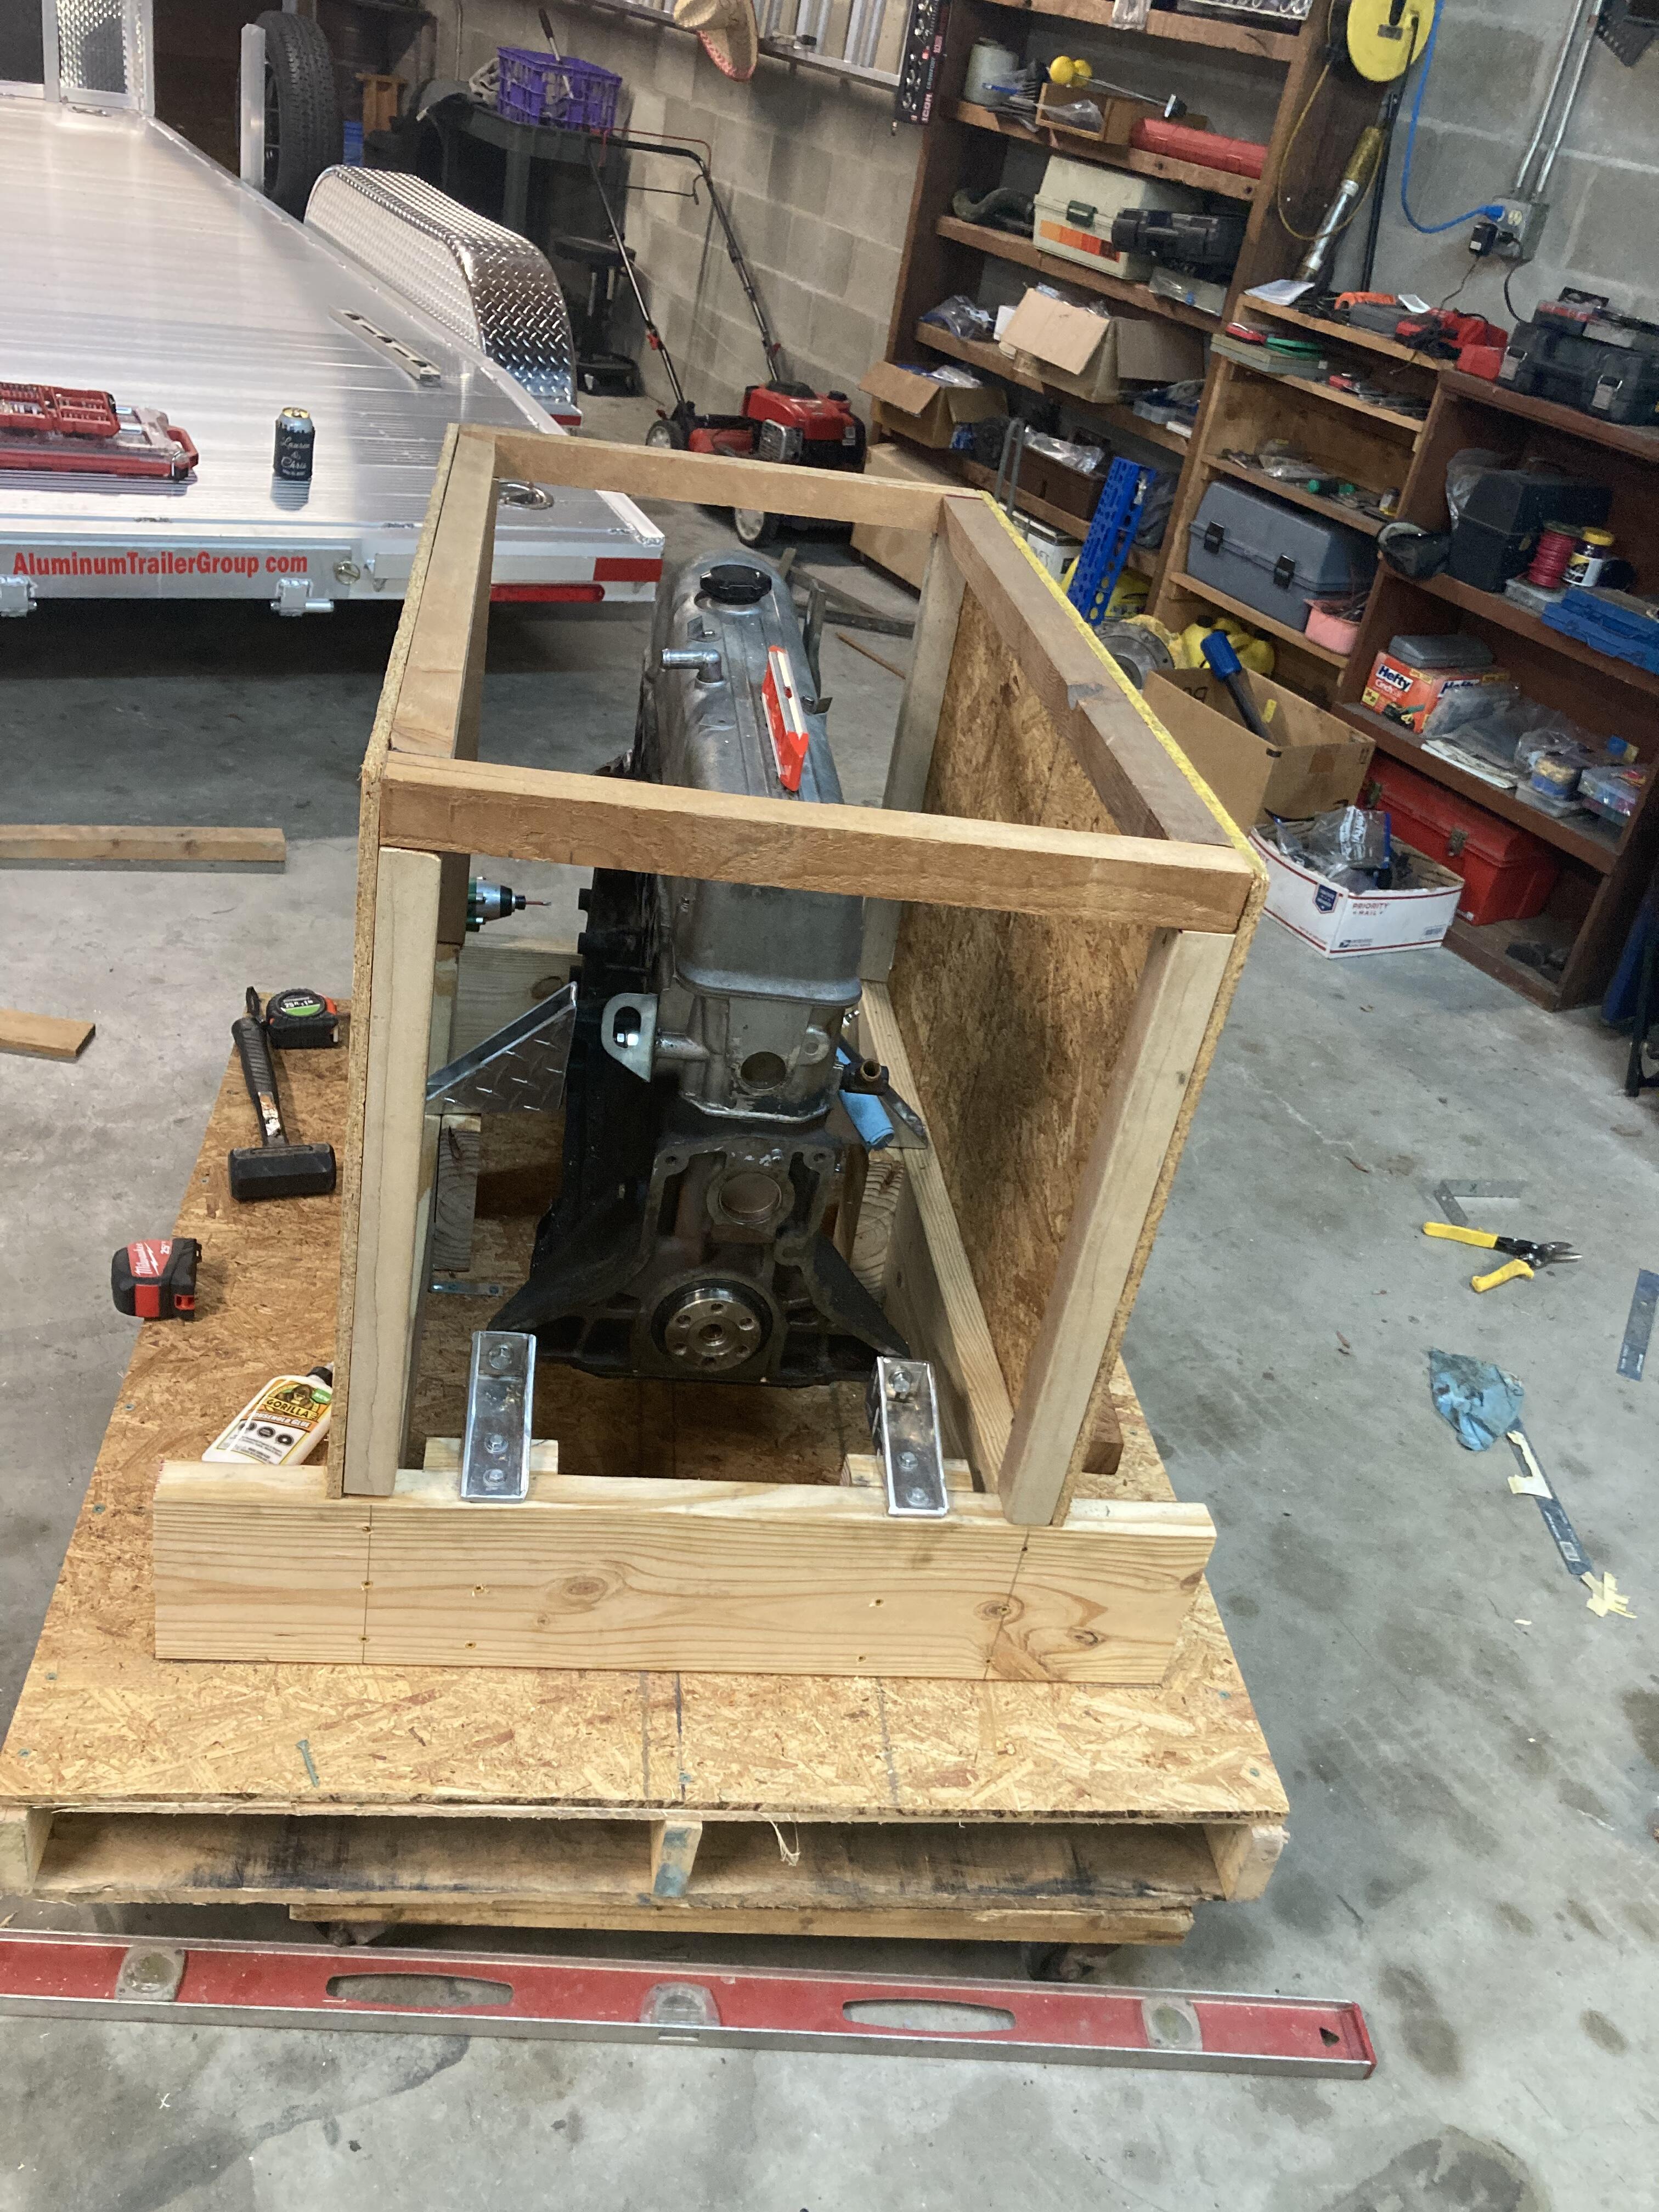
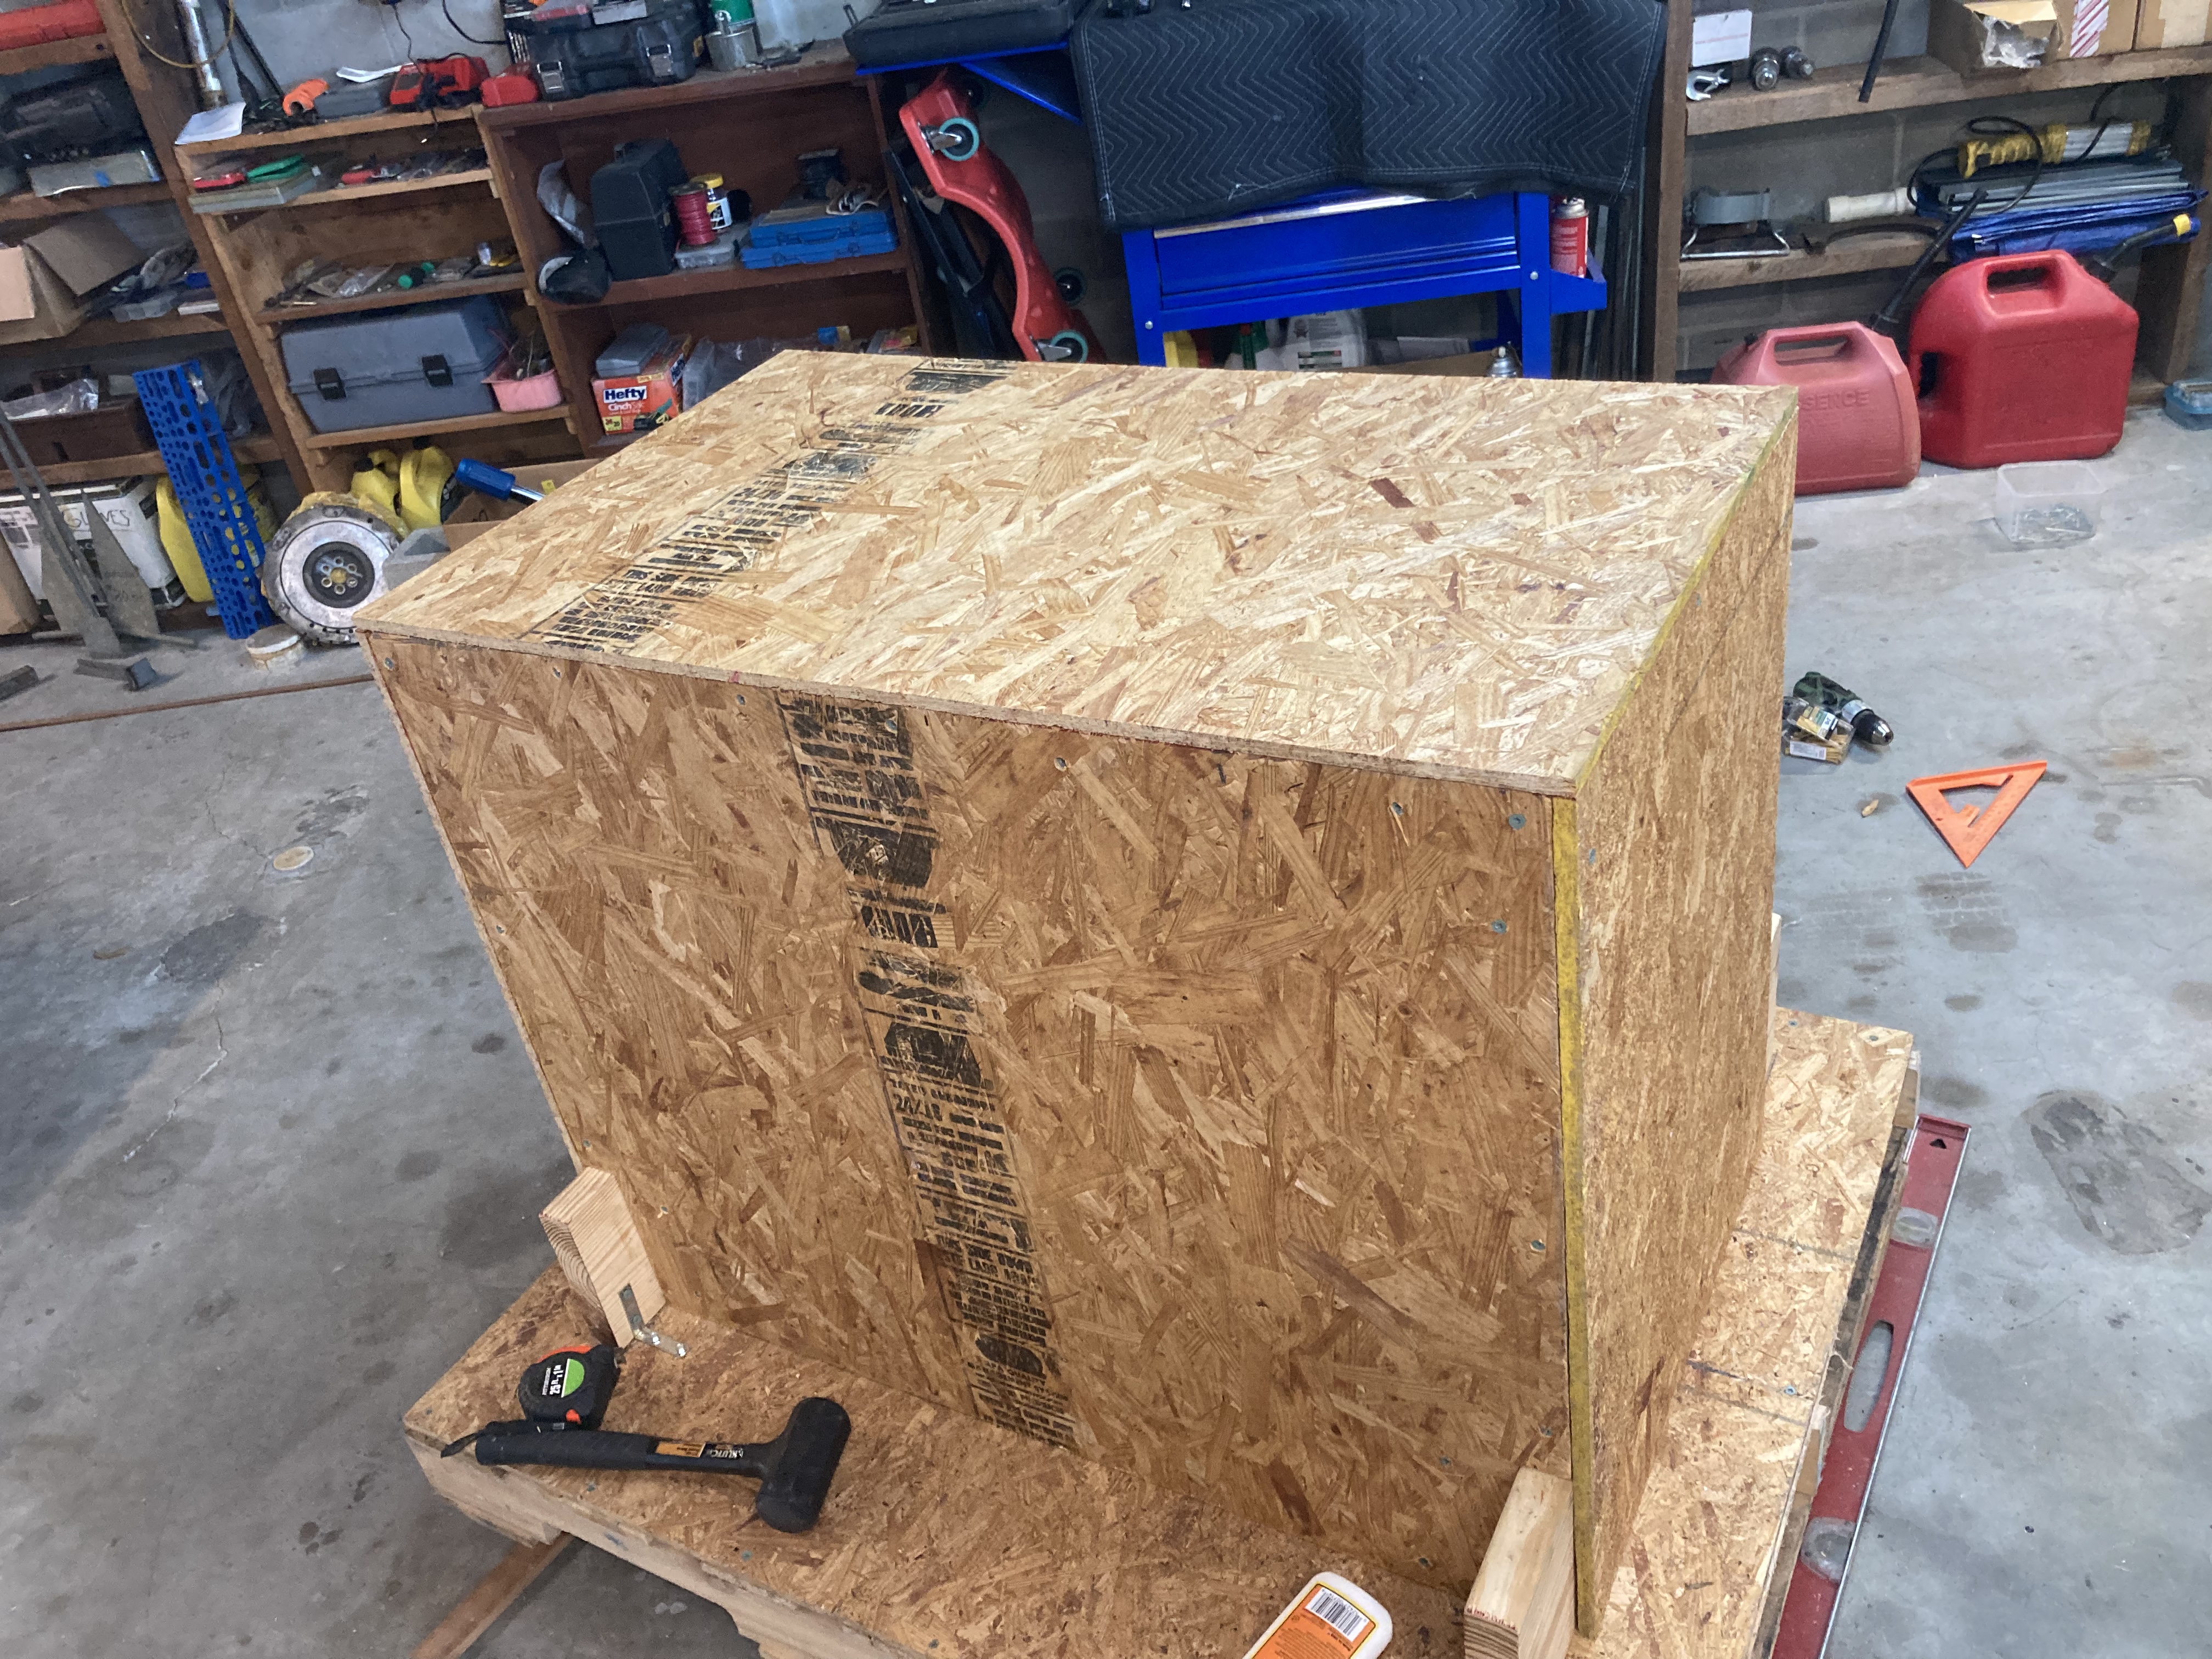
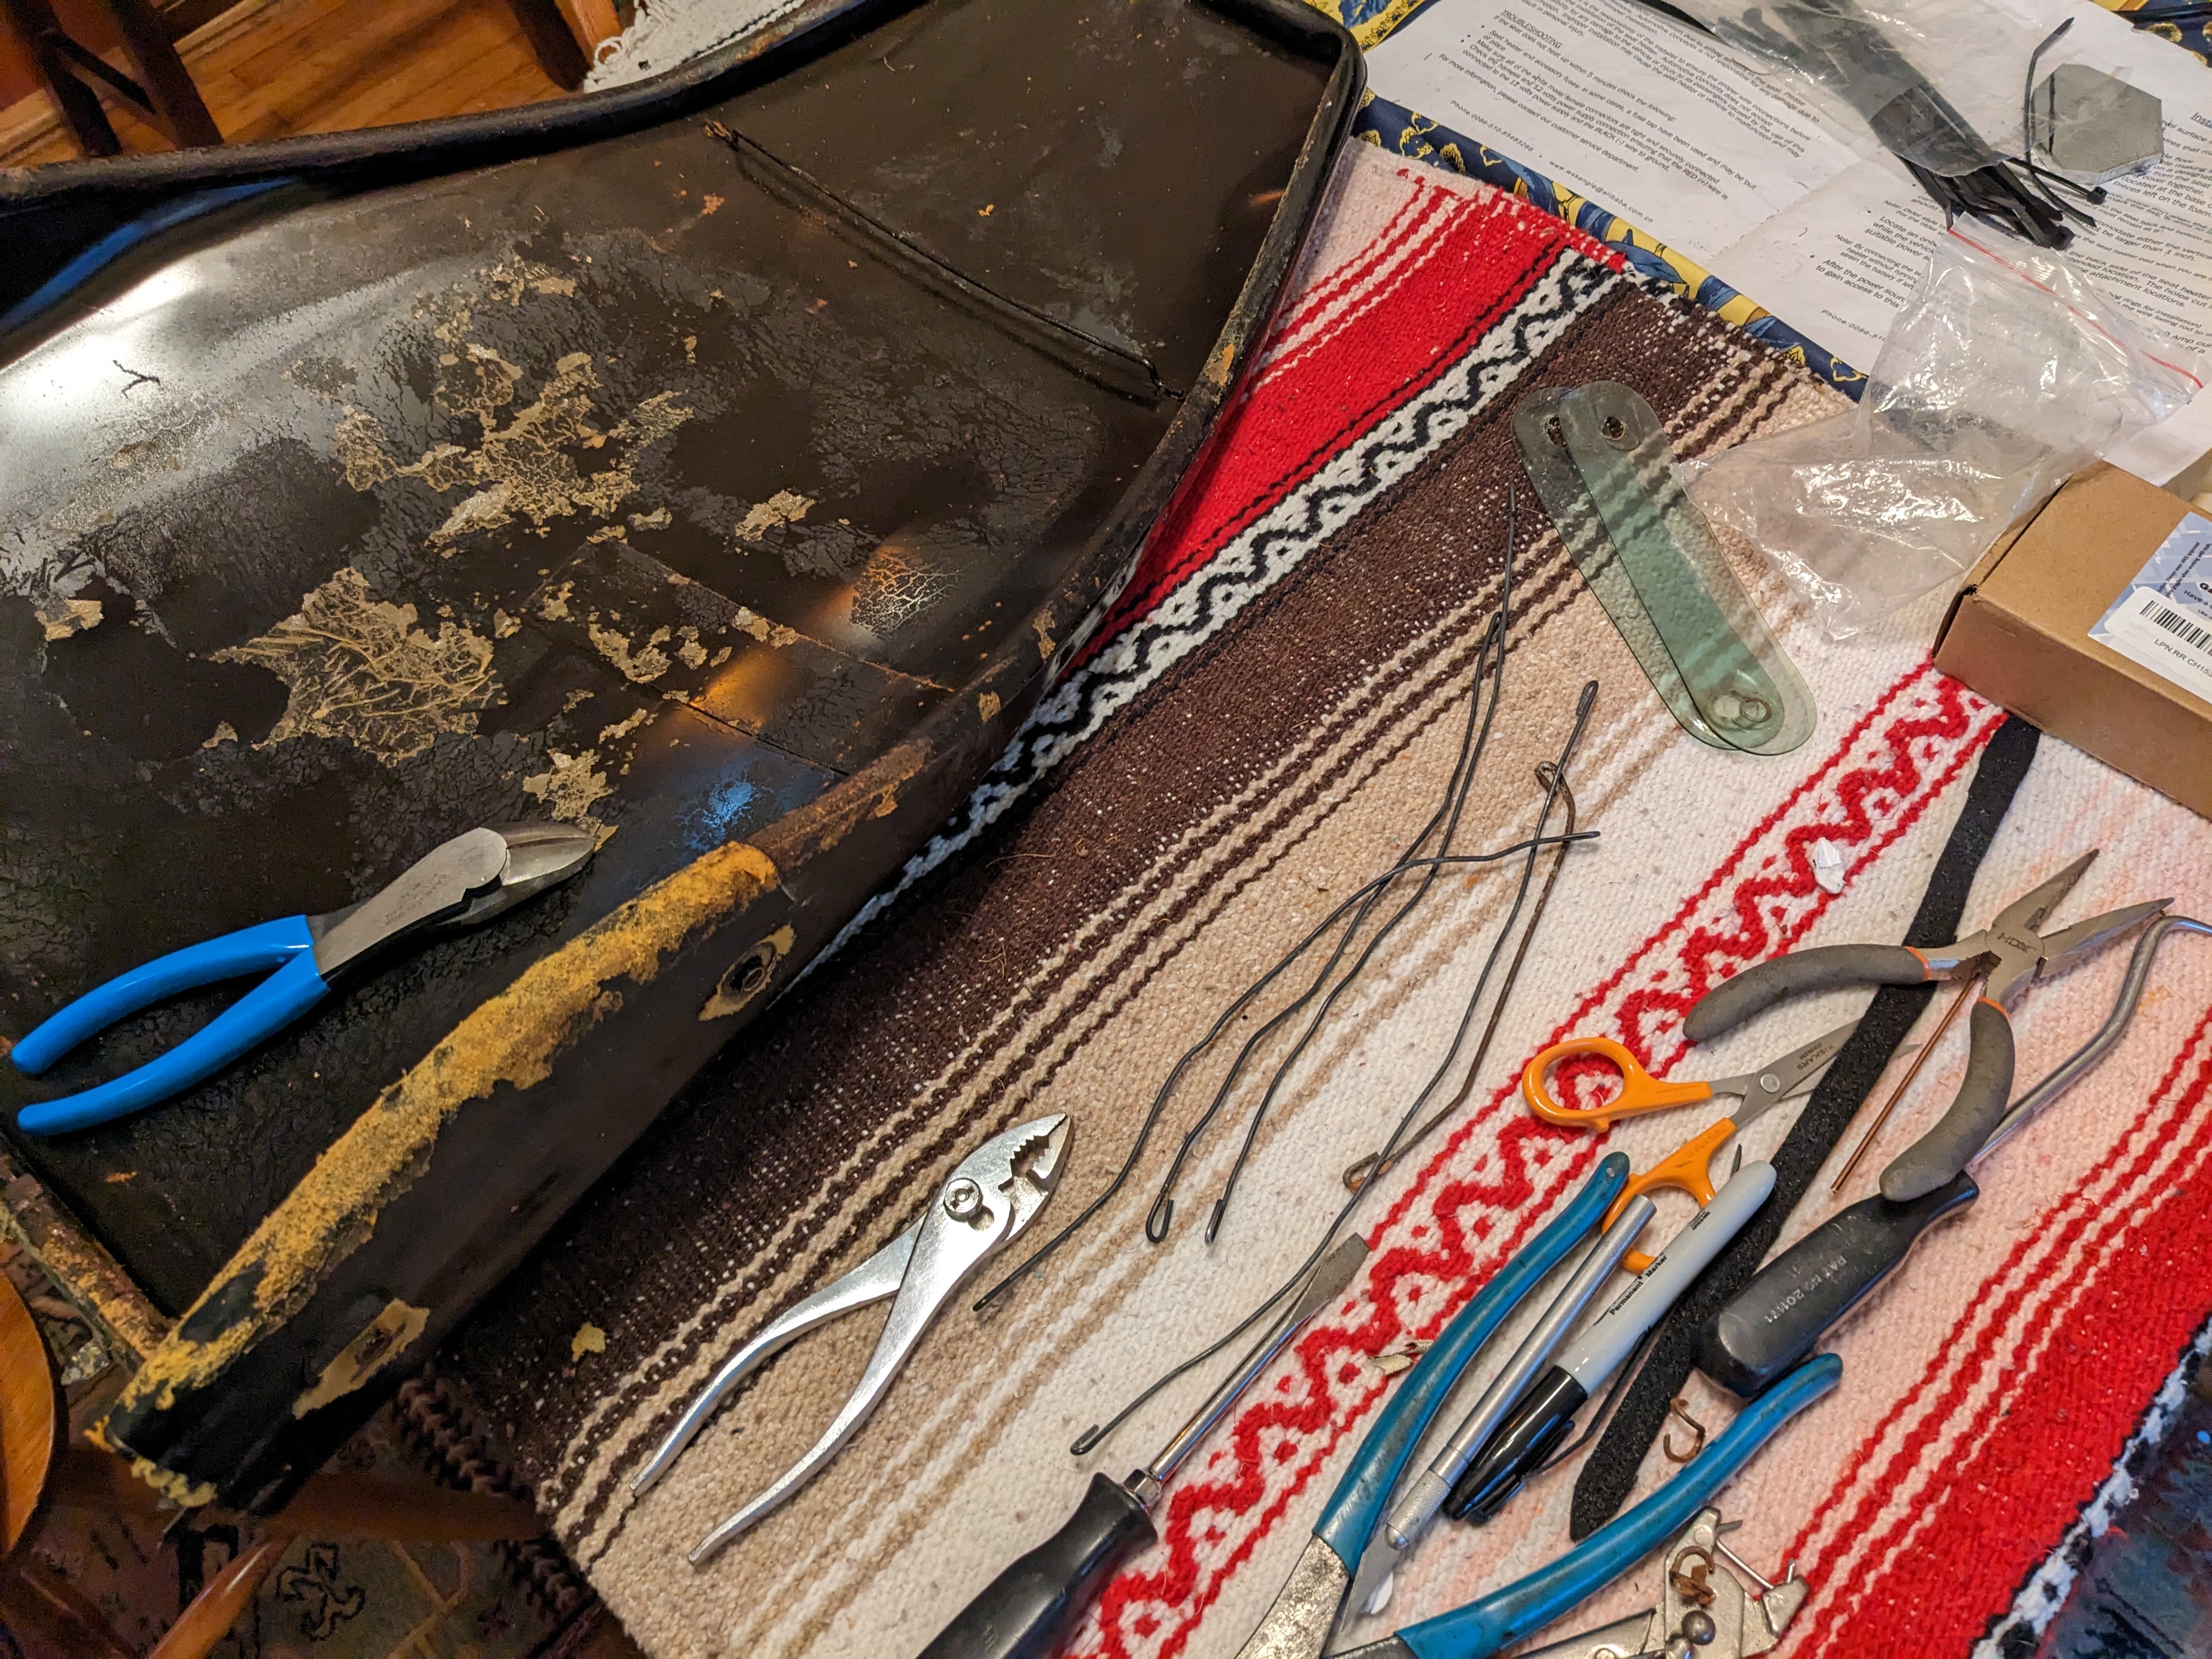
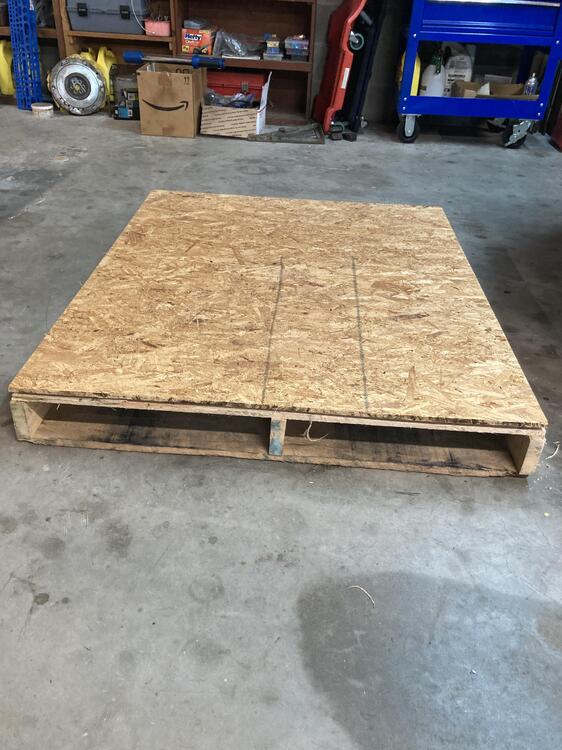
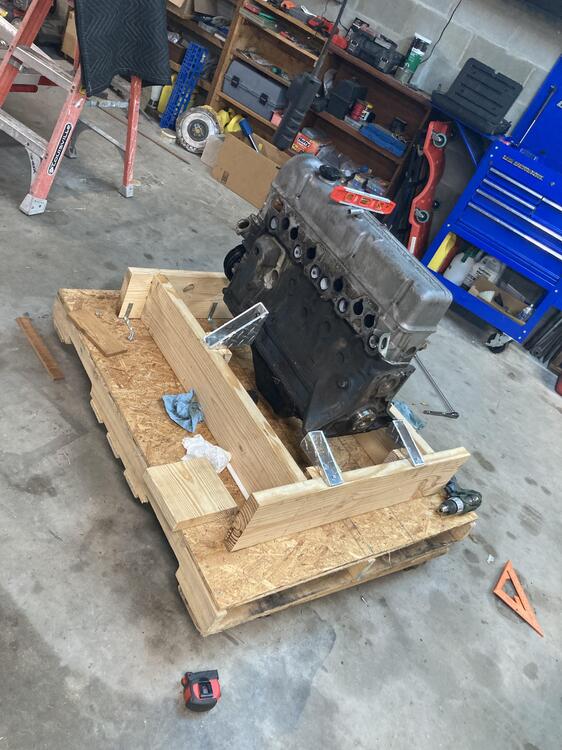
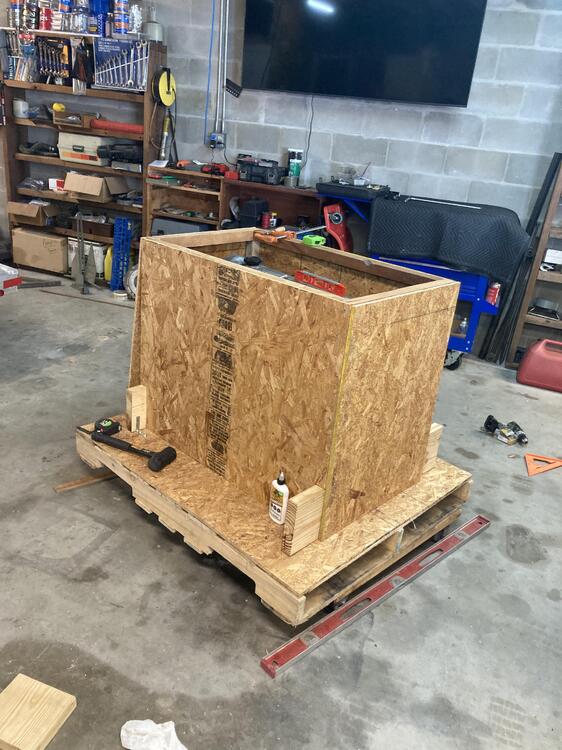
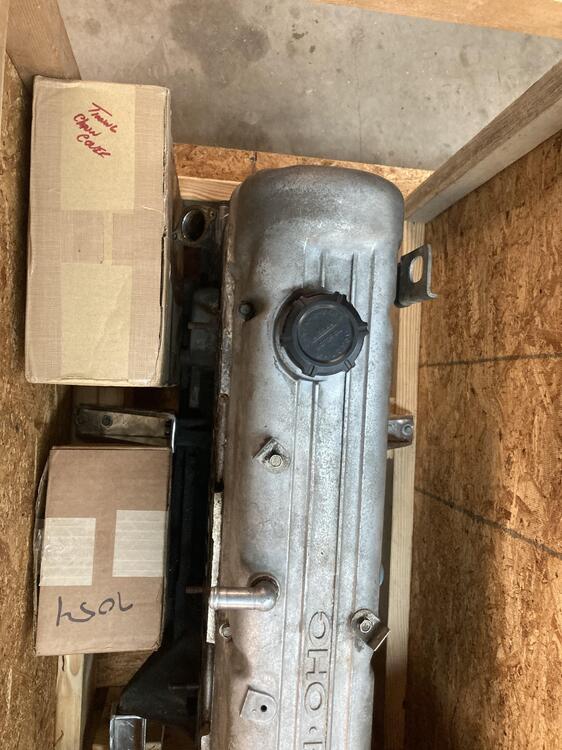
4 pointsFinished building my crate a few weeks ago. The idea was to use the existing mounting points and keep the engine suspended where the No possible damage could be done to the pan or the pump. Here are some pics of how it went together with screws and glue on the non removable sections. I secured a top plate on the new pallet. From there you can see how I constructed it. Upon completion the entire box enclosure can be lifted off by removing the screws around the base. Don’t have a pic of the handles installed on each end for removal. Pretty happy with the way it came out. The crate made it up to Eiji at Datsun Spirit unscathed via R&L carriers.


 4 points
 -
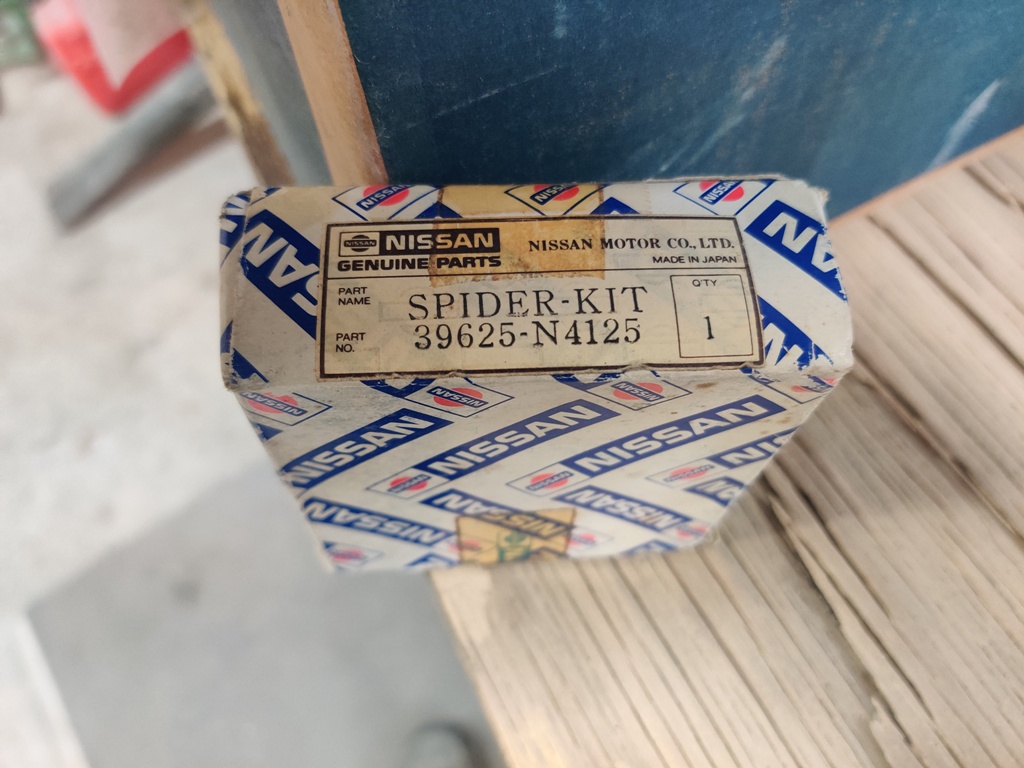
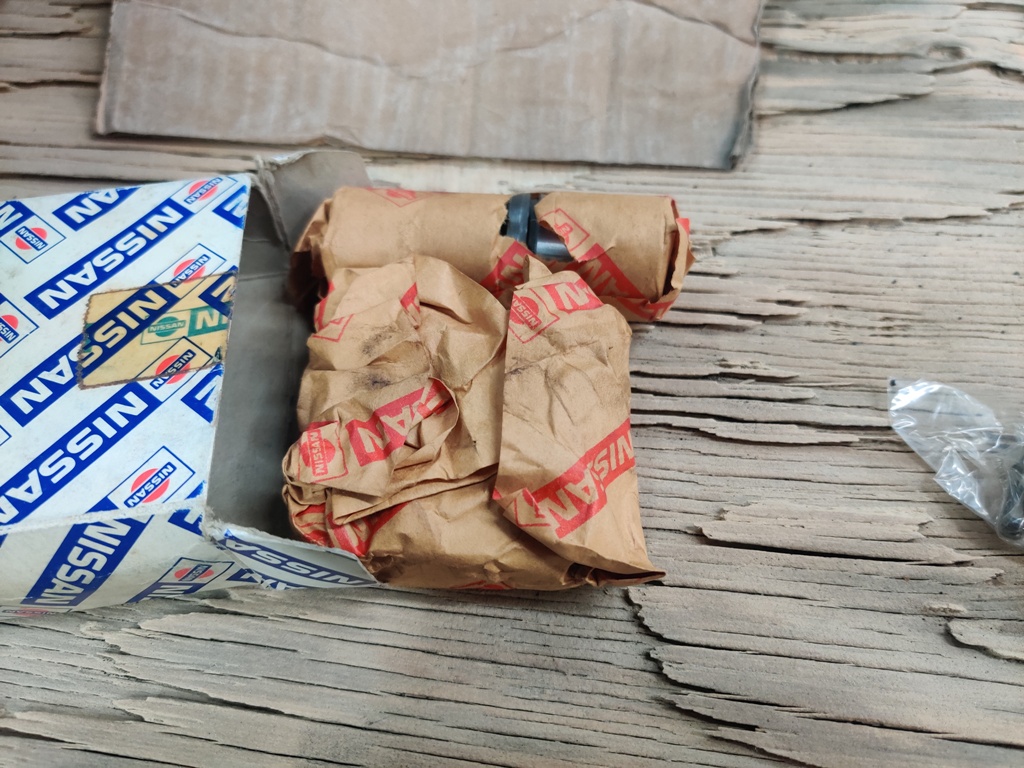
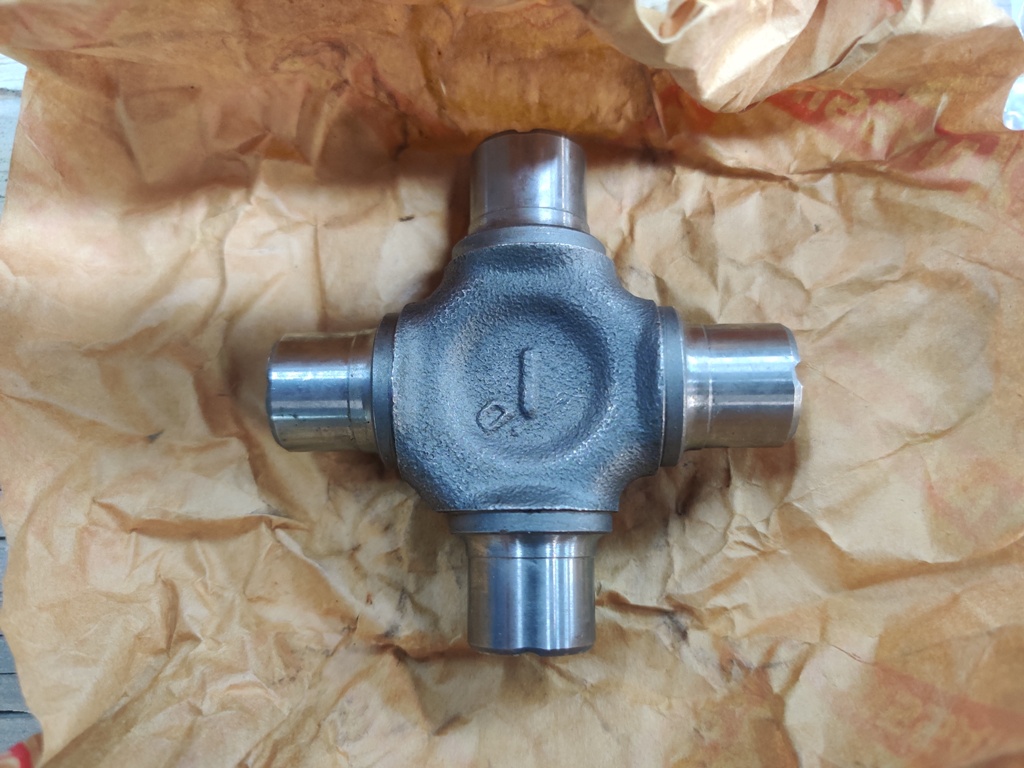
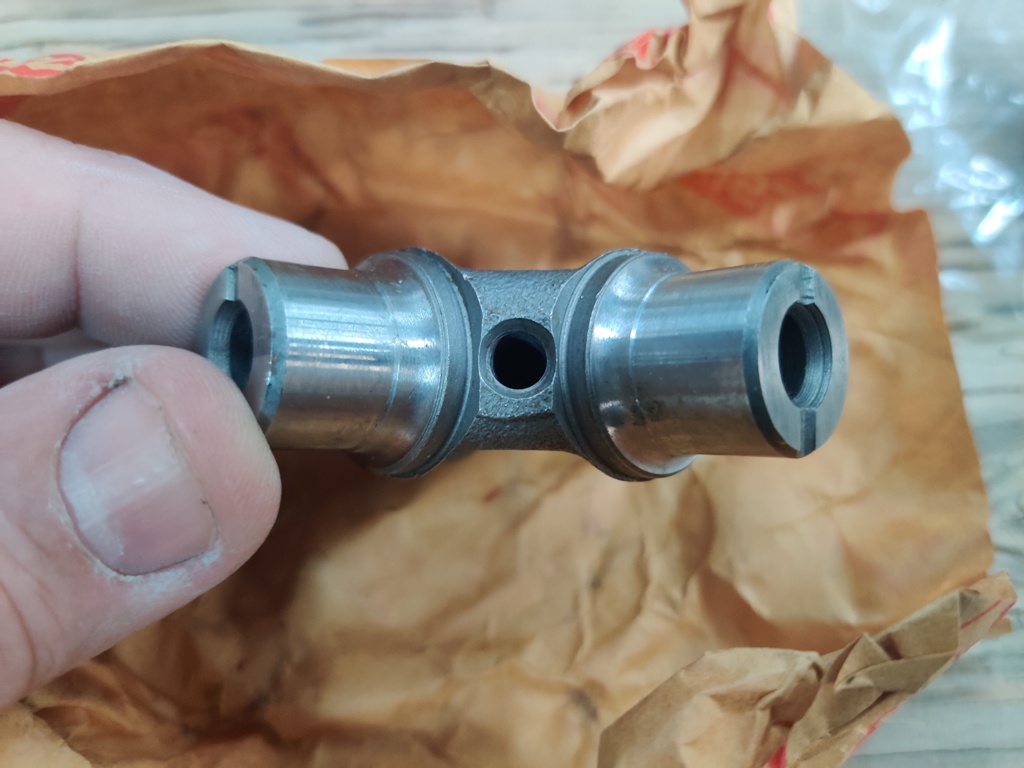
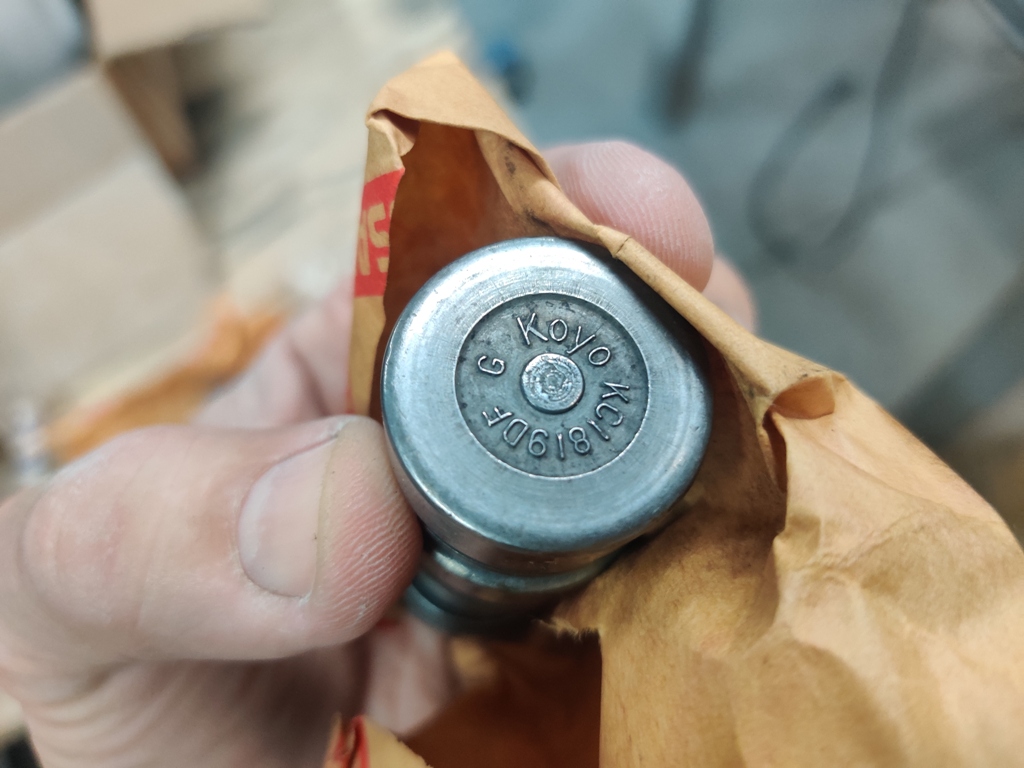
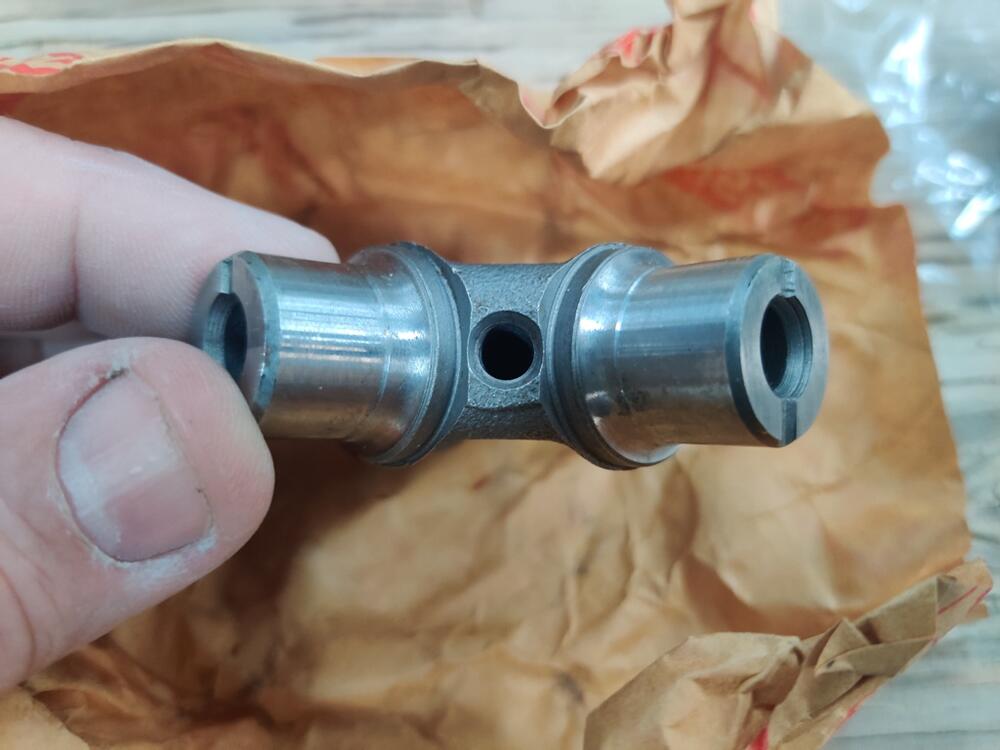
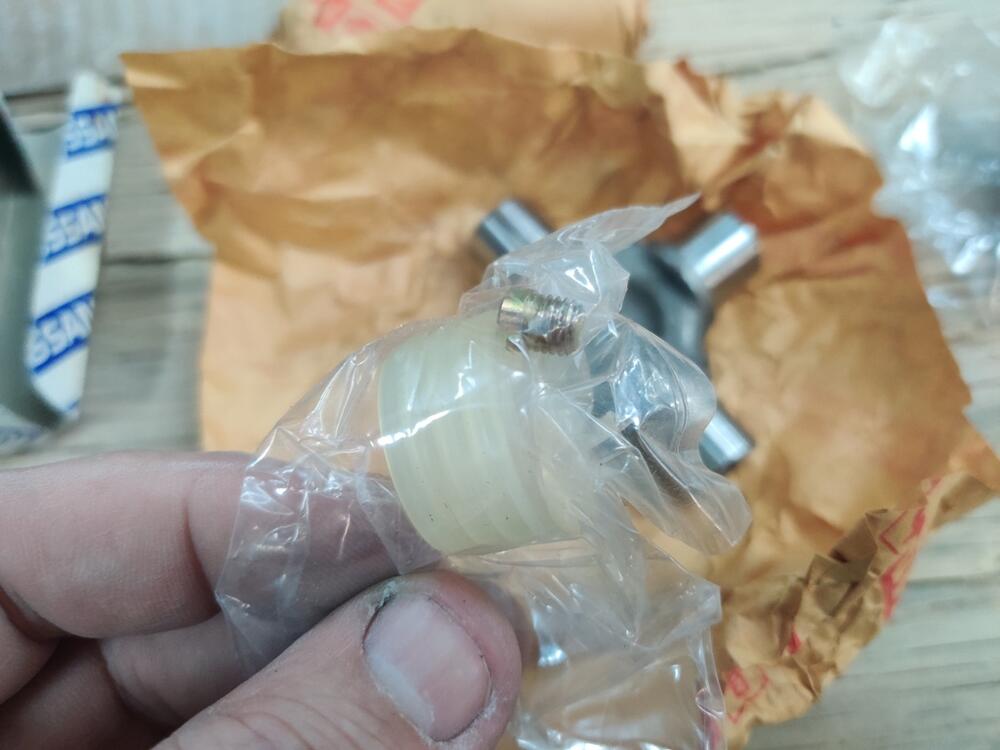
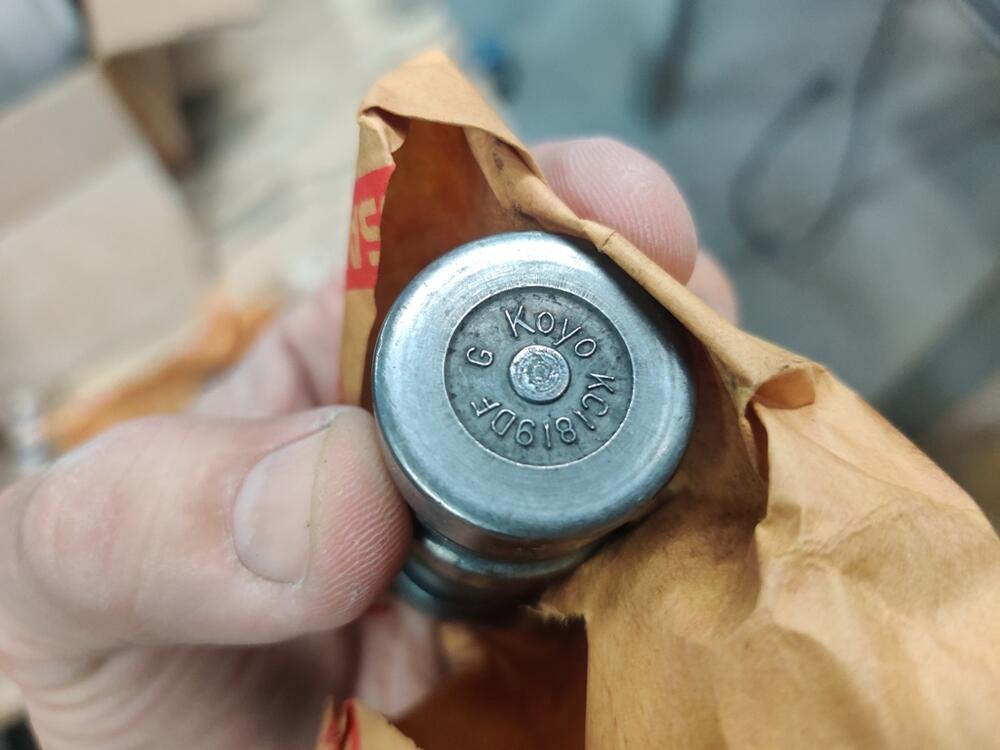
I located a couple of NOS driveshaft u-joints in my "boxes of stuff" tonight. I was curious if they were drilled for grease fittings. I found out that they are. Interestingly, if you look at the corners and markings, you see they are similar to the ones on my shafts. However, instead of an arrow, there is a D on the corner that has a flatter surface than the other corners: Additionally, the brand is Koyo for the two I have in boxes, and not grease fitting was included, but instead a plug was. I still suspect that I could drill and then tap the existing u joints for a grease fitting. I will need to decide how to proceed before I prime and paint the axles. They were painted after assembly at the factory (paint over rubber boots and bands as well), and I am thinking about replicating that. I am leaning toward taking the u-joints out and apart and cleaning them and repacking them with grease. I may attempt to drill and tap and install grease fittings into them.


 3 points
 -
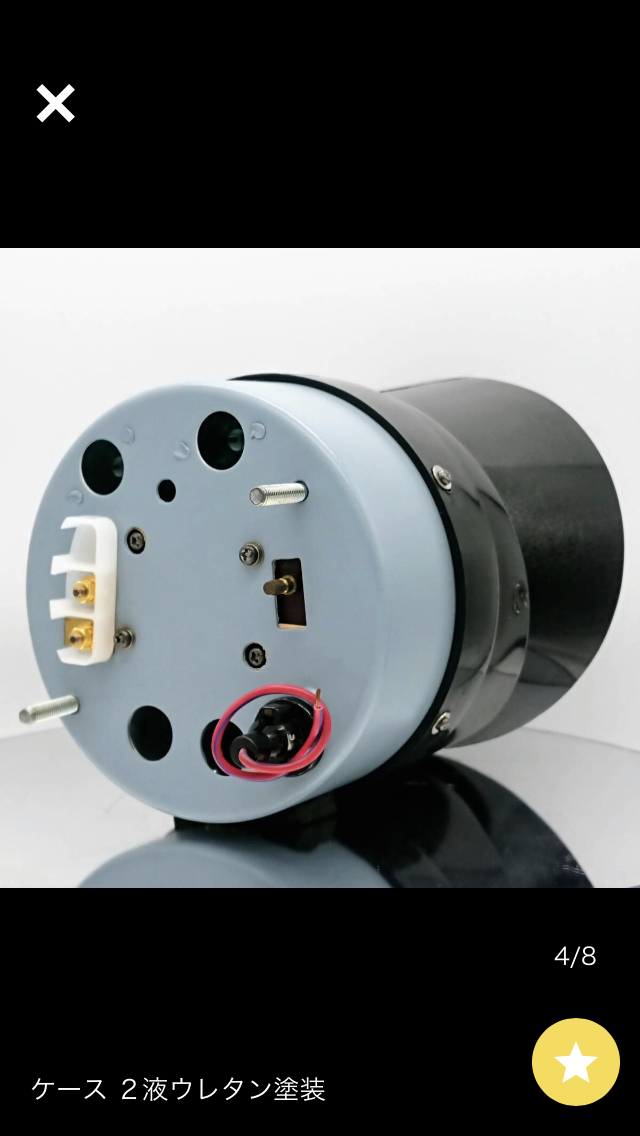
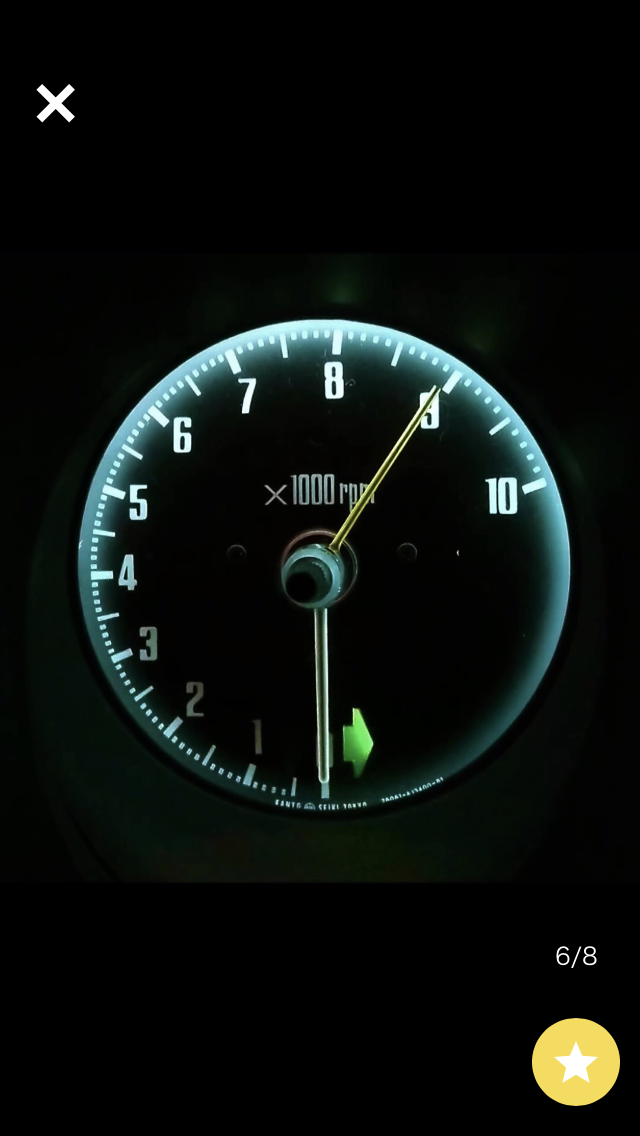
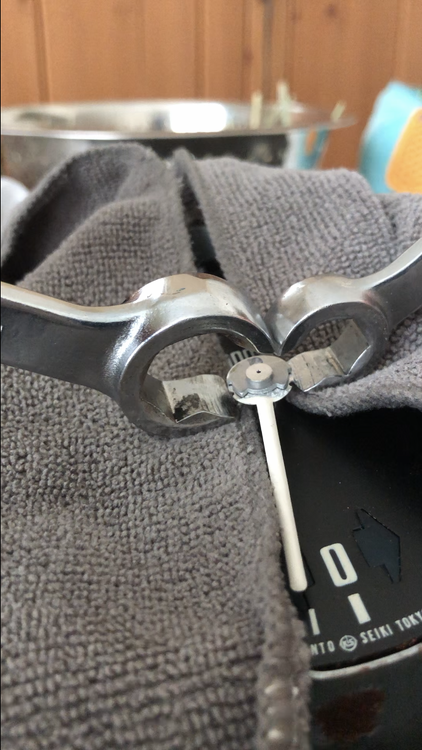
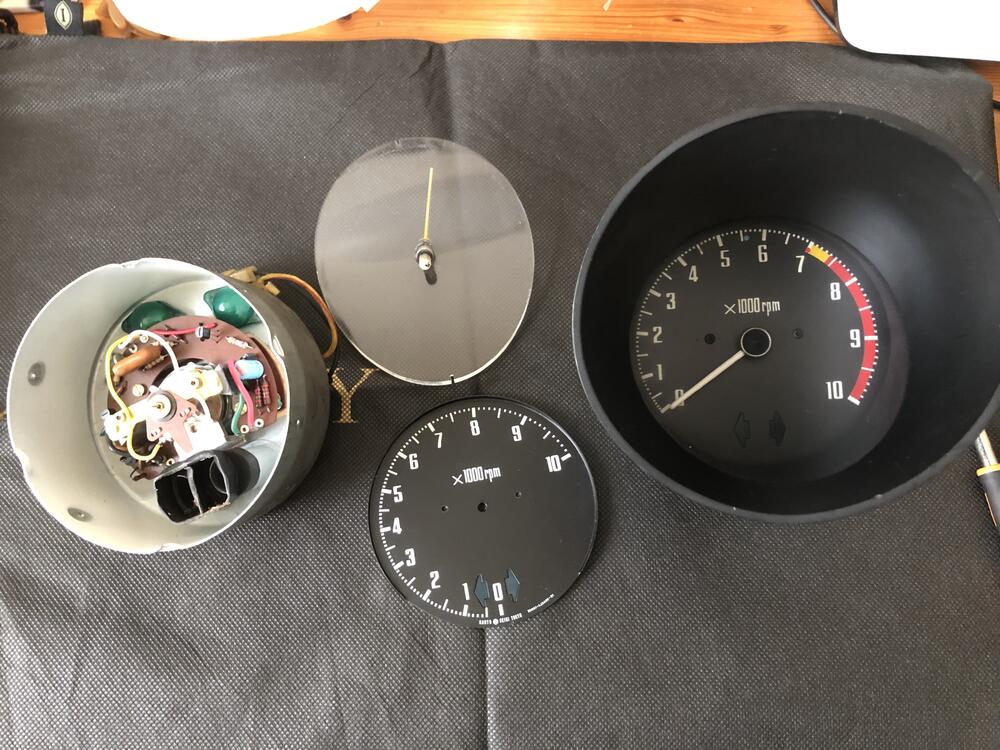
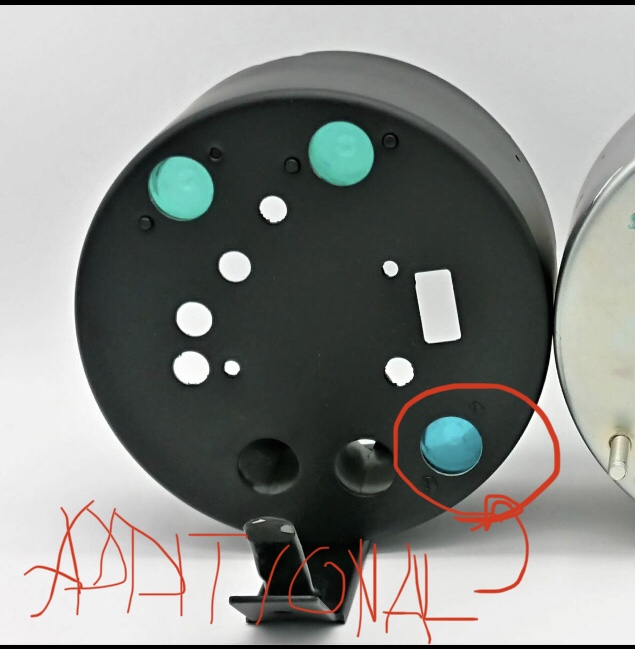
3 pointsI worked for the Z432 tach which I want to make it being works look. The works tach which I have seems not working with a standard Z432 igniter system, so I decided to transfer its glass with a needle and scale Zero at 6 o’clock. It was very easy job but I found I need to make a hole for an additional illumination lamp just next to the left hand turn signal indicator. We don’t have the extra lamp because our cars don’t need it. For the Zero at 6 o’clock scale, it must be. Otherwise I can’t see it well esp IMG_1851.MOV ecially around 0 to 3000 rpm at night. I will do it when I have time. Kats

 3 points
 -
3 pointsMotor/trans installed yesterday. It sure takes a lot of tipping to get it to slide in. I had a good helper and got it in without scraping the hood latch or rad support.
 3 points
 -
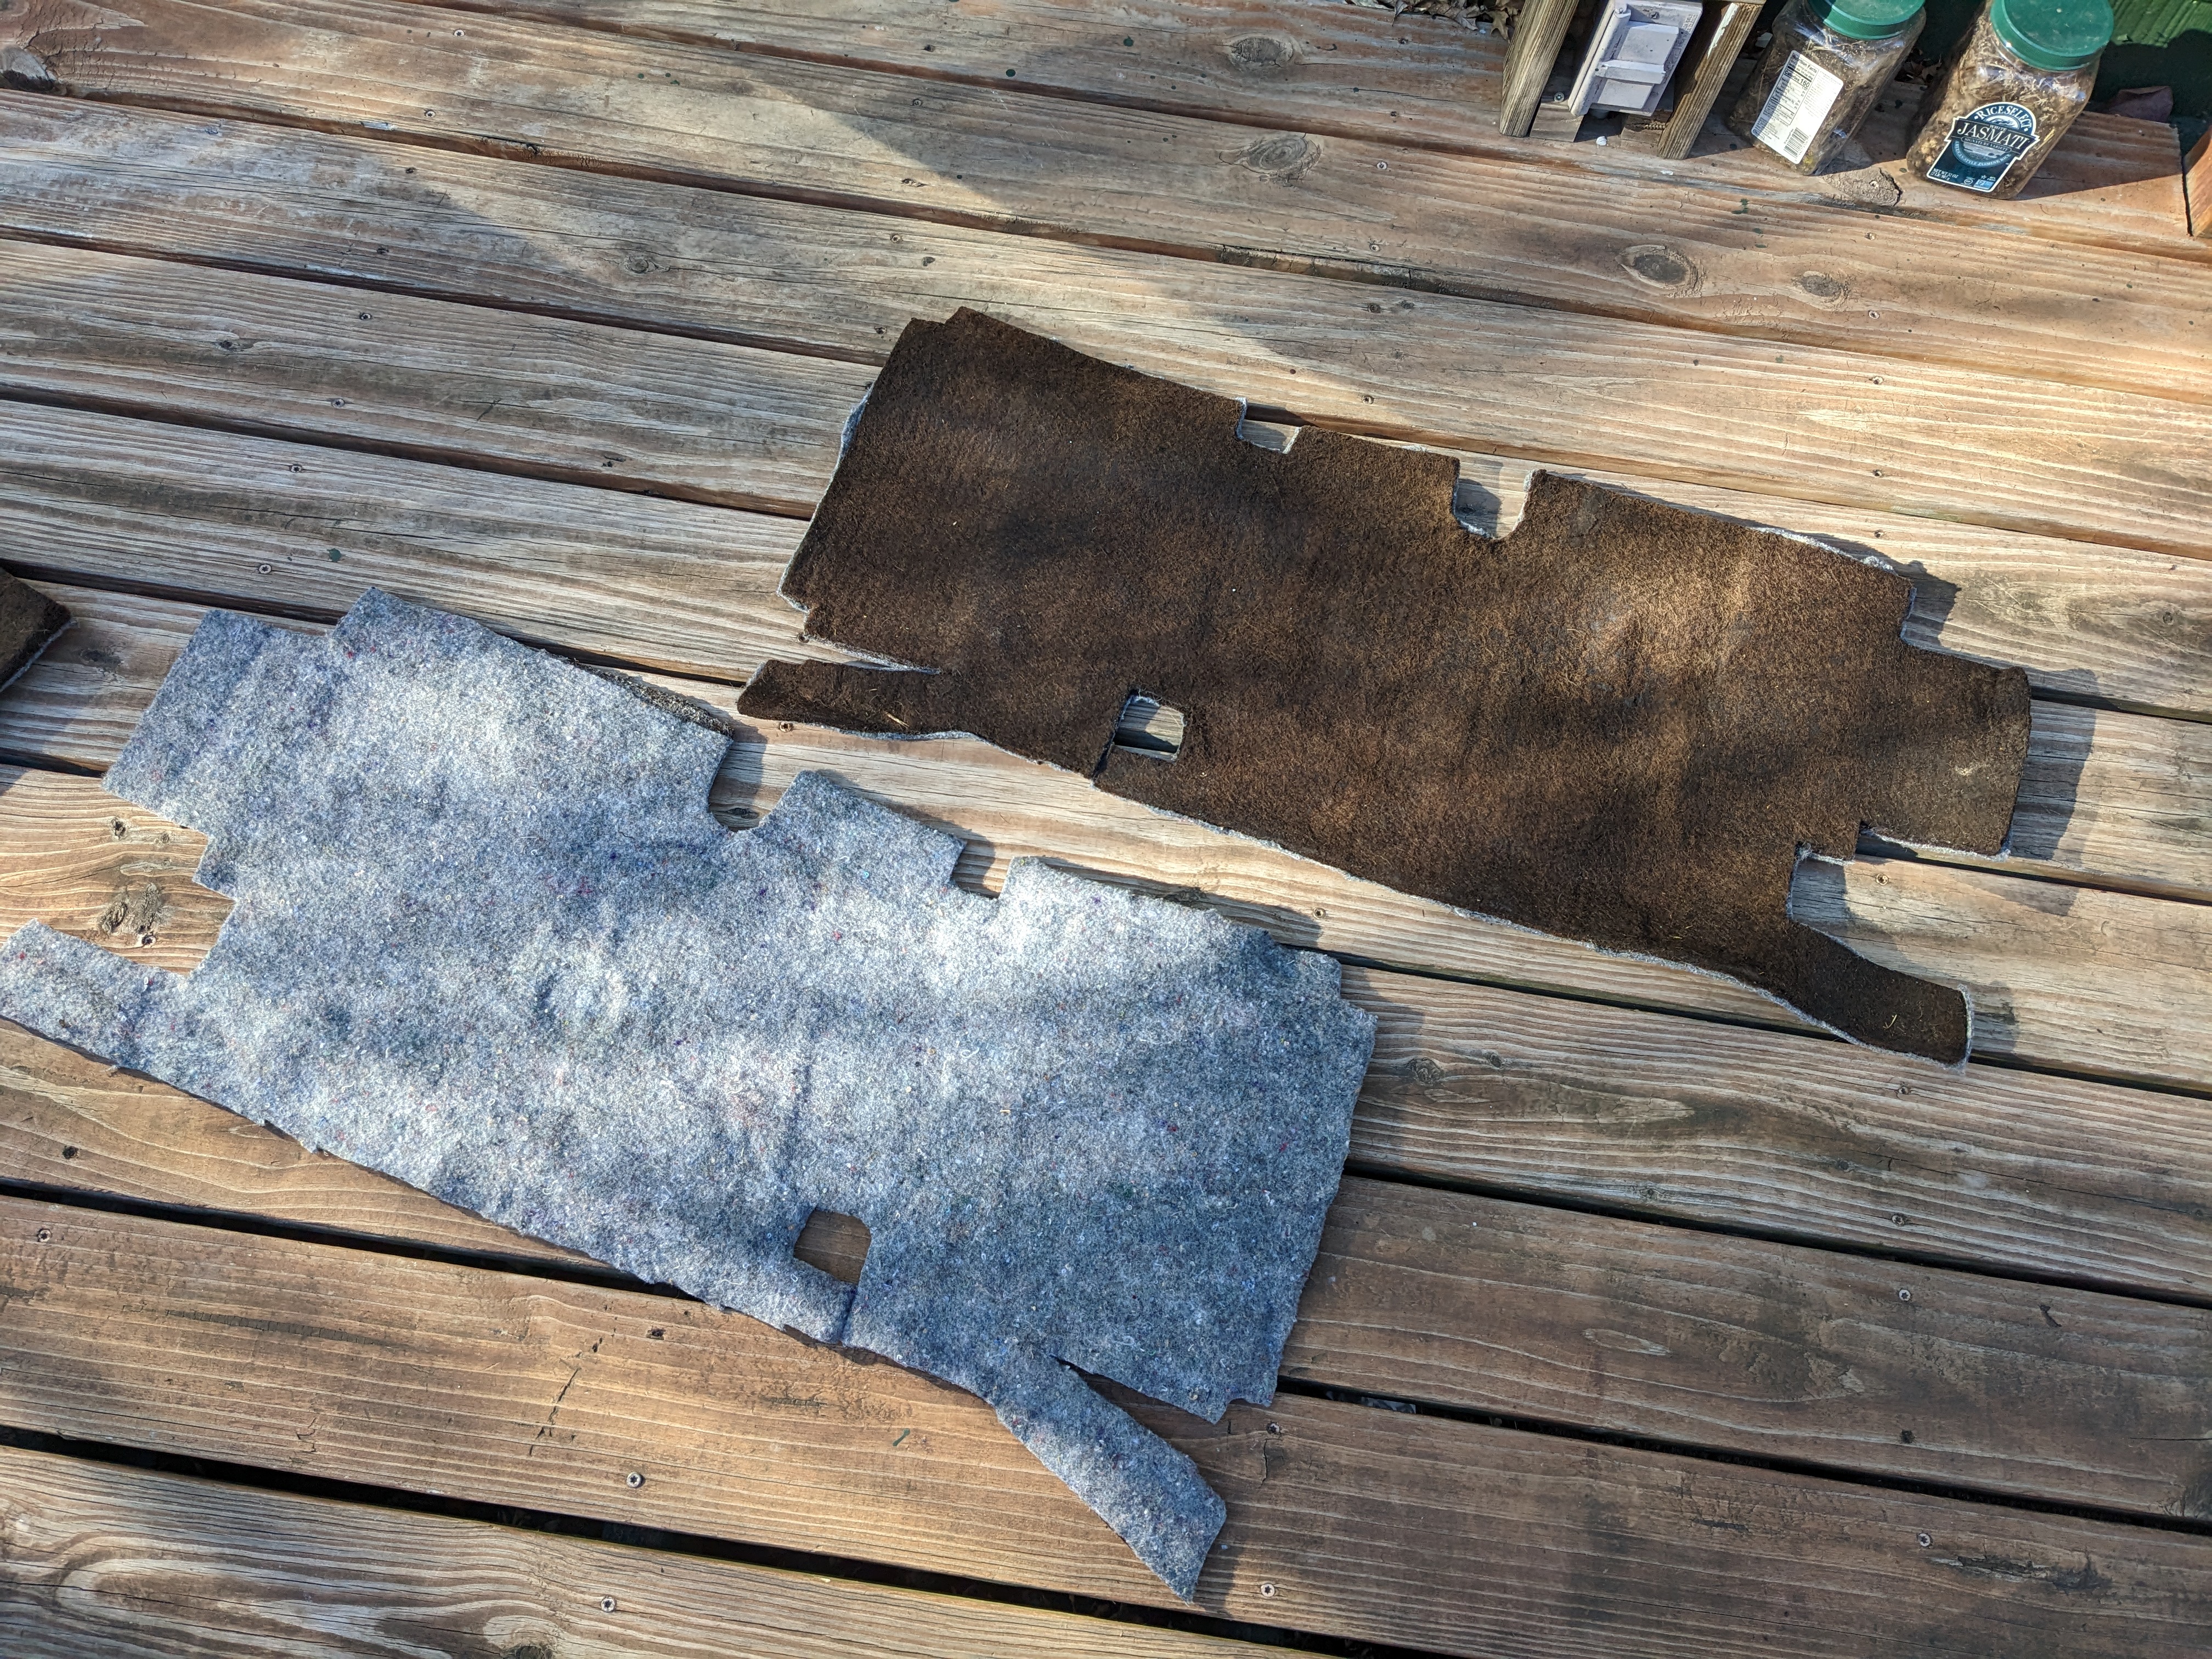
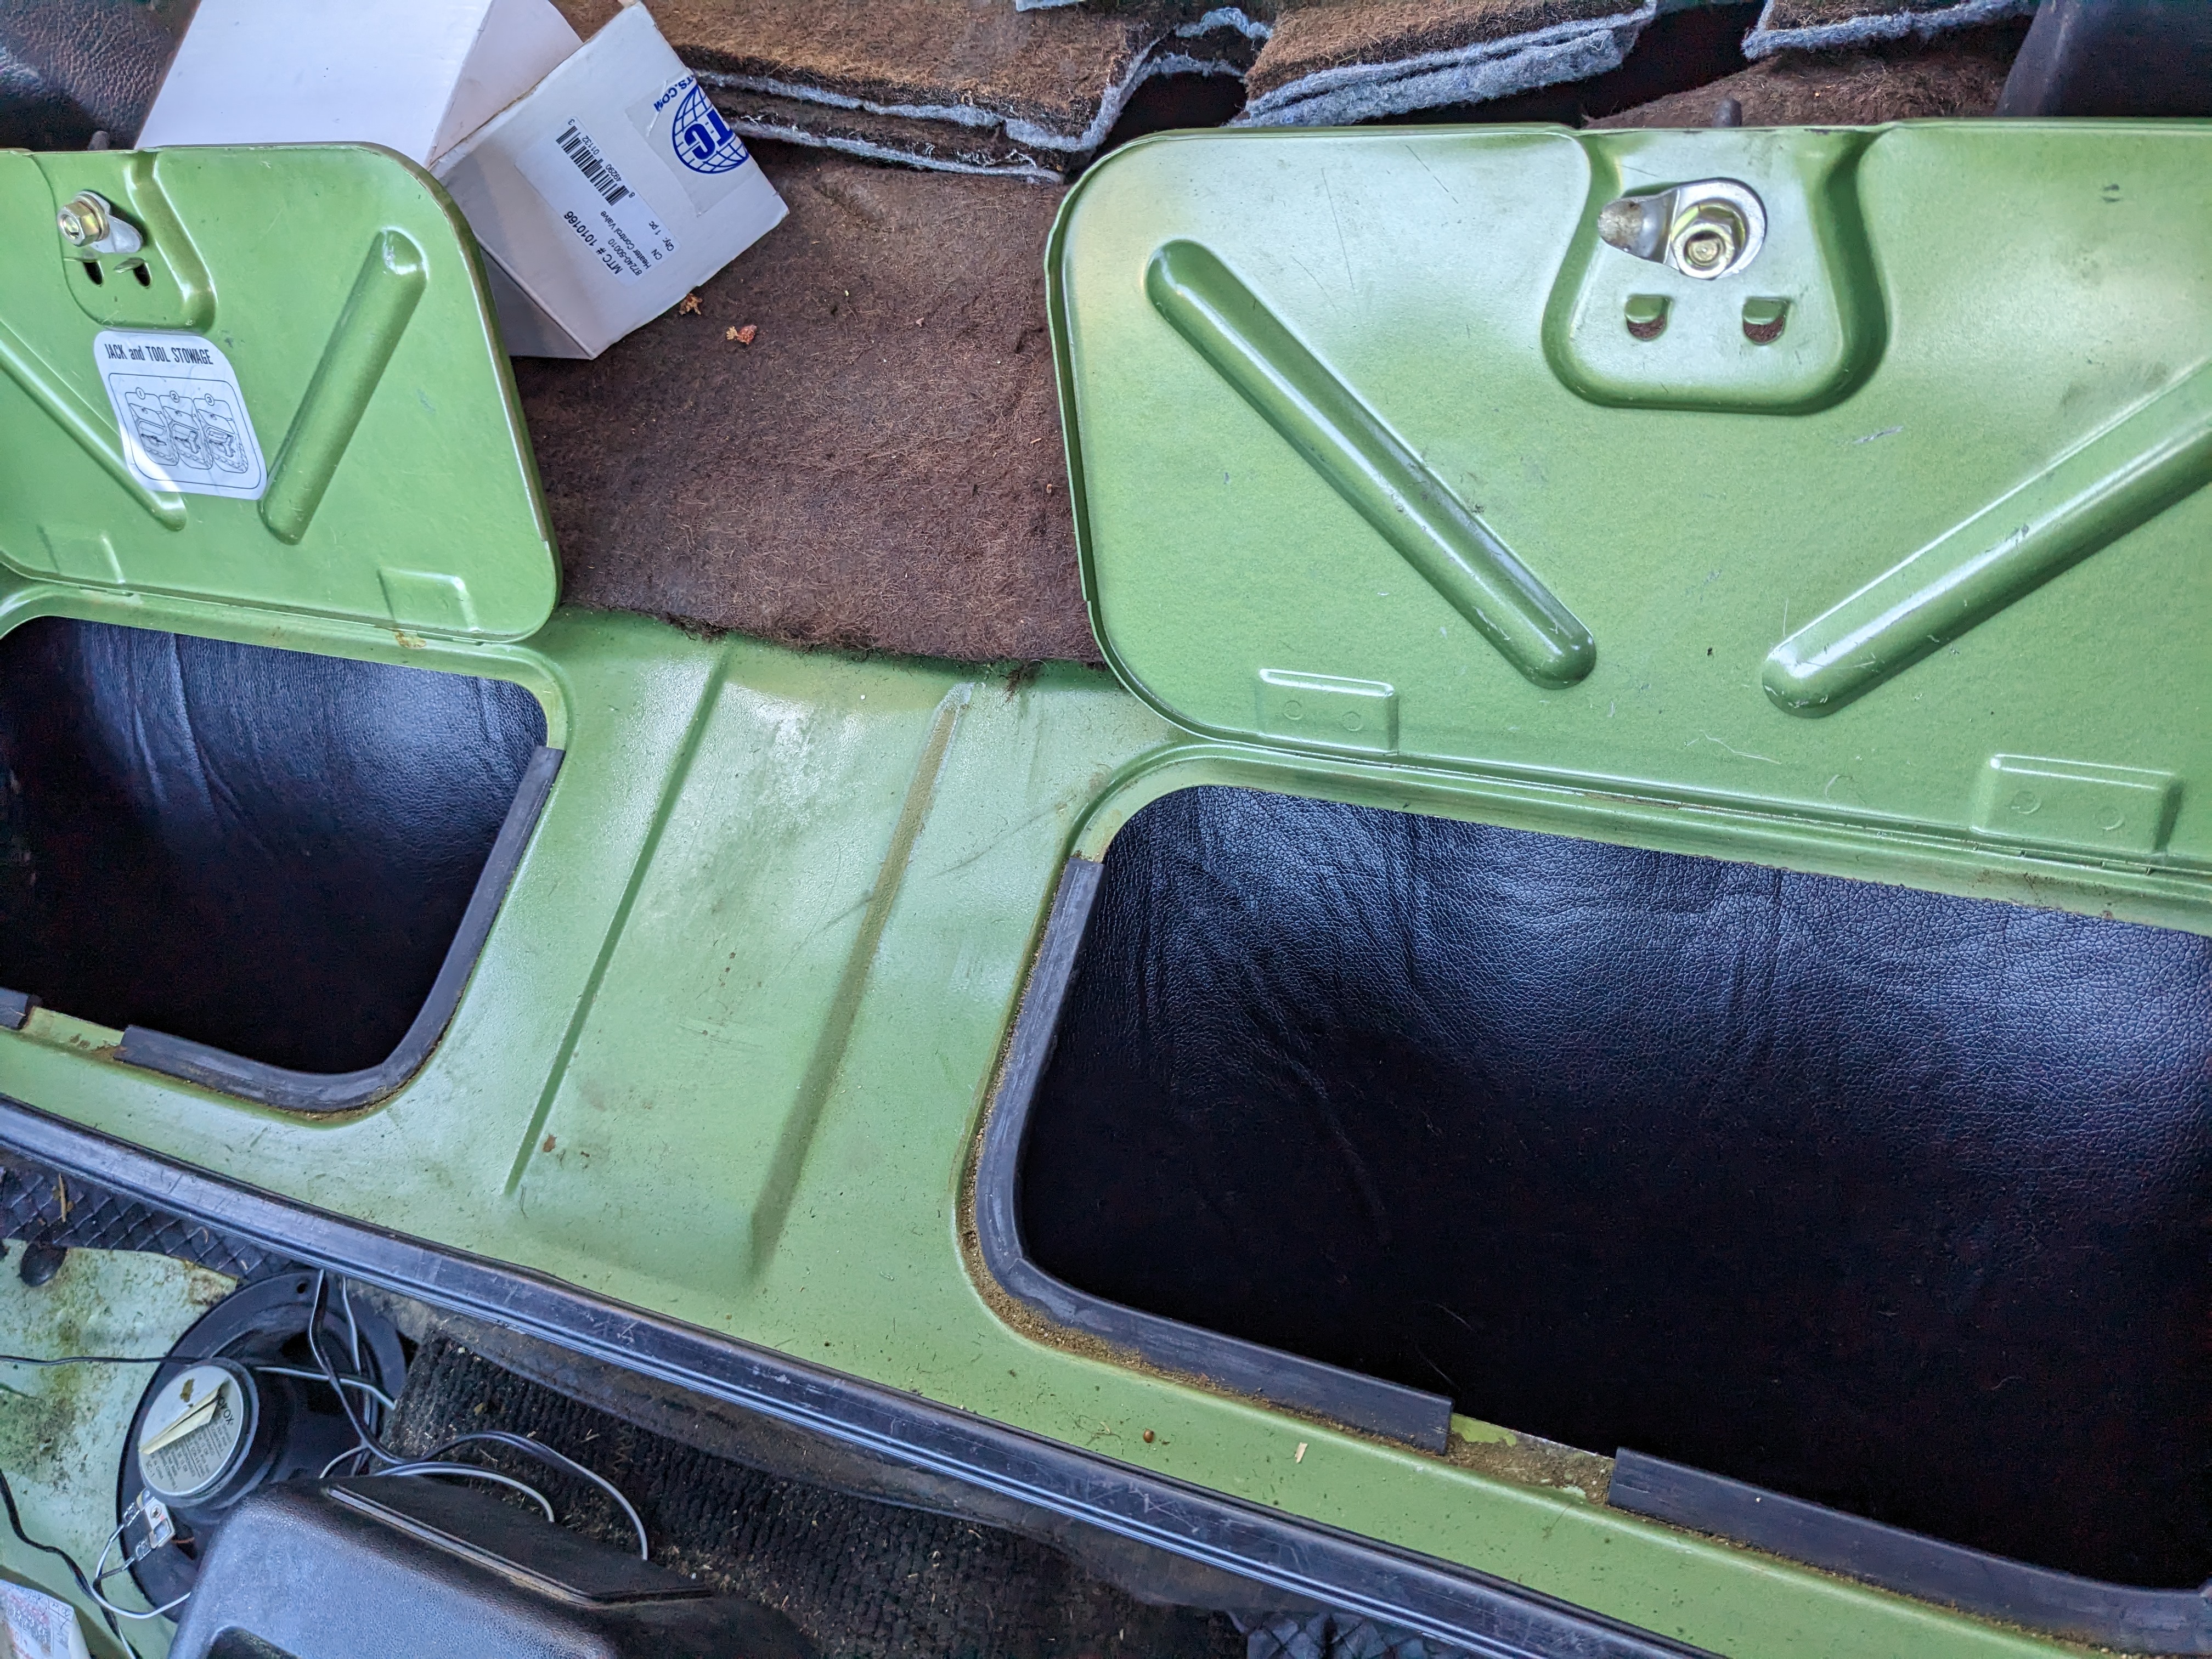
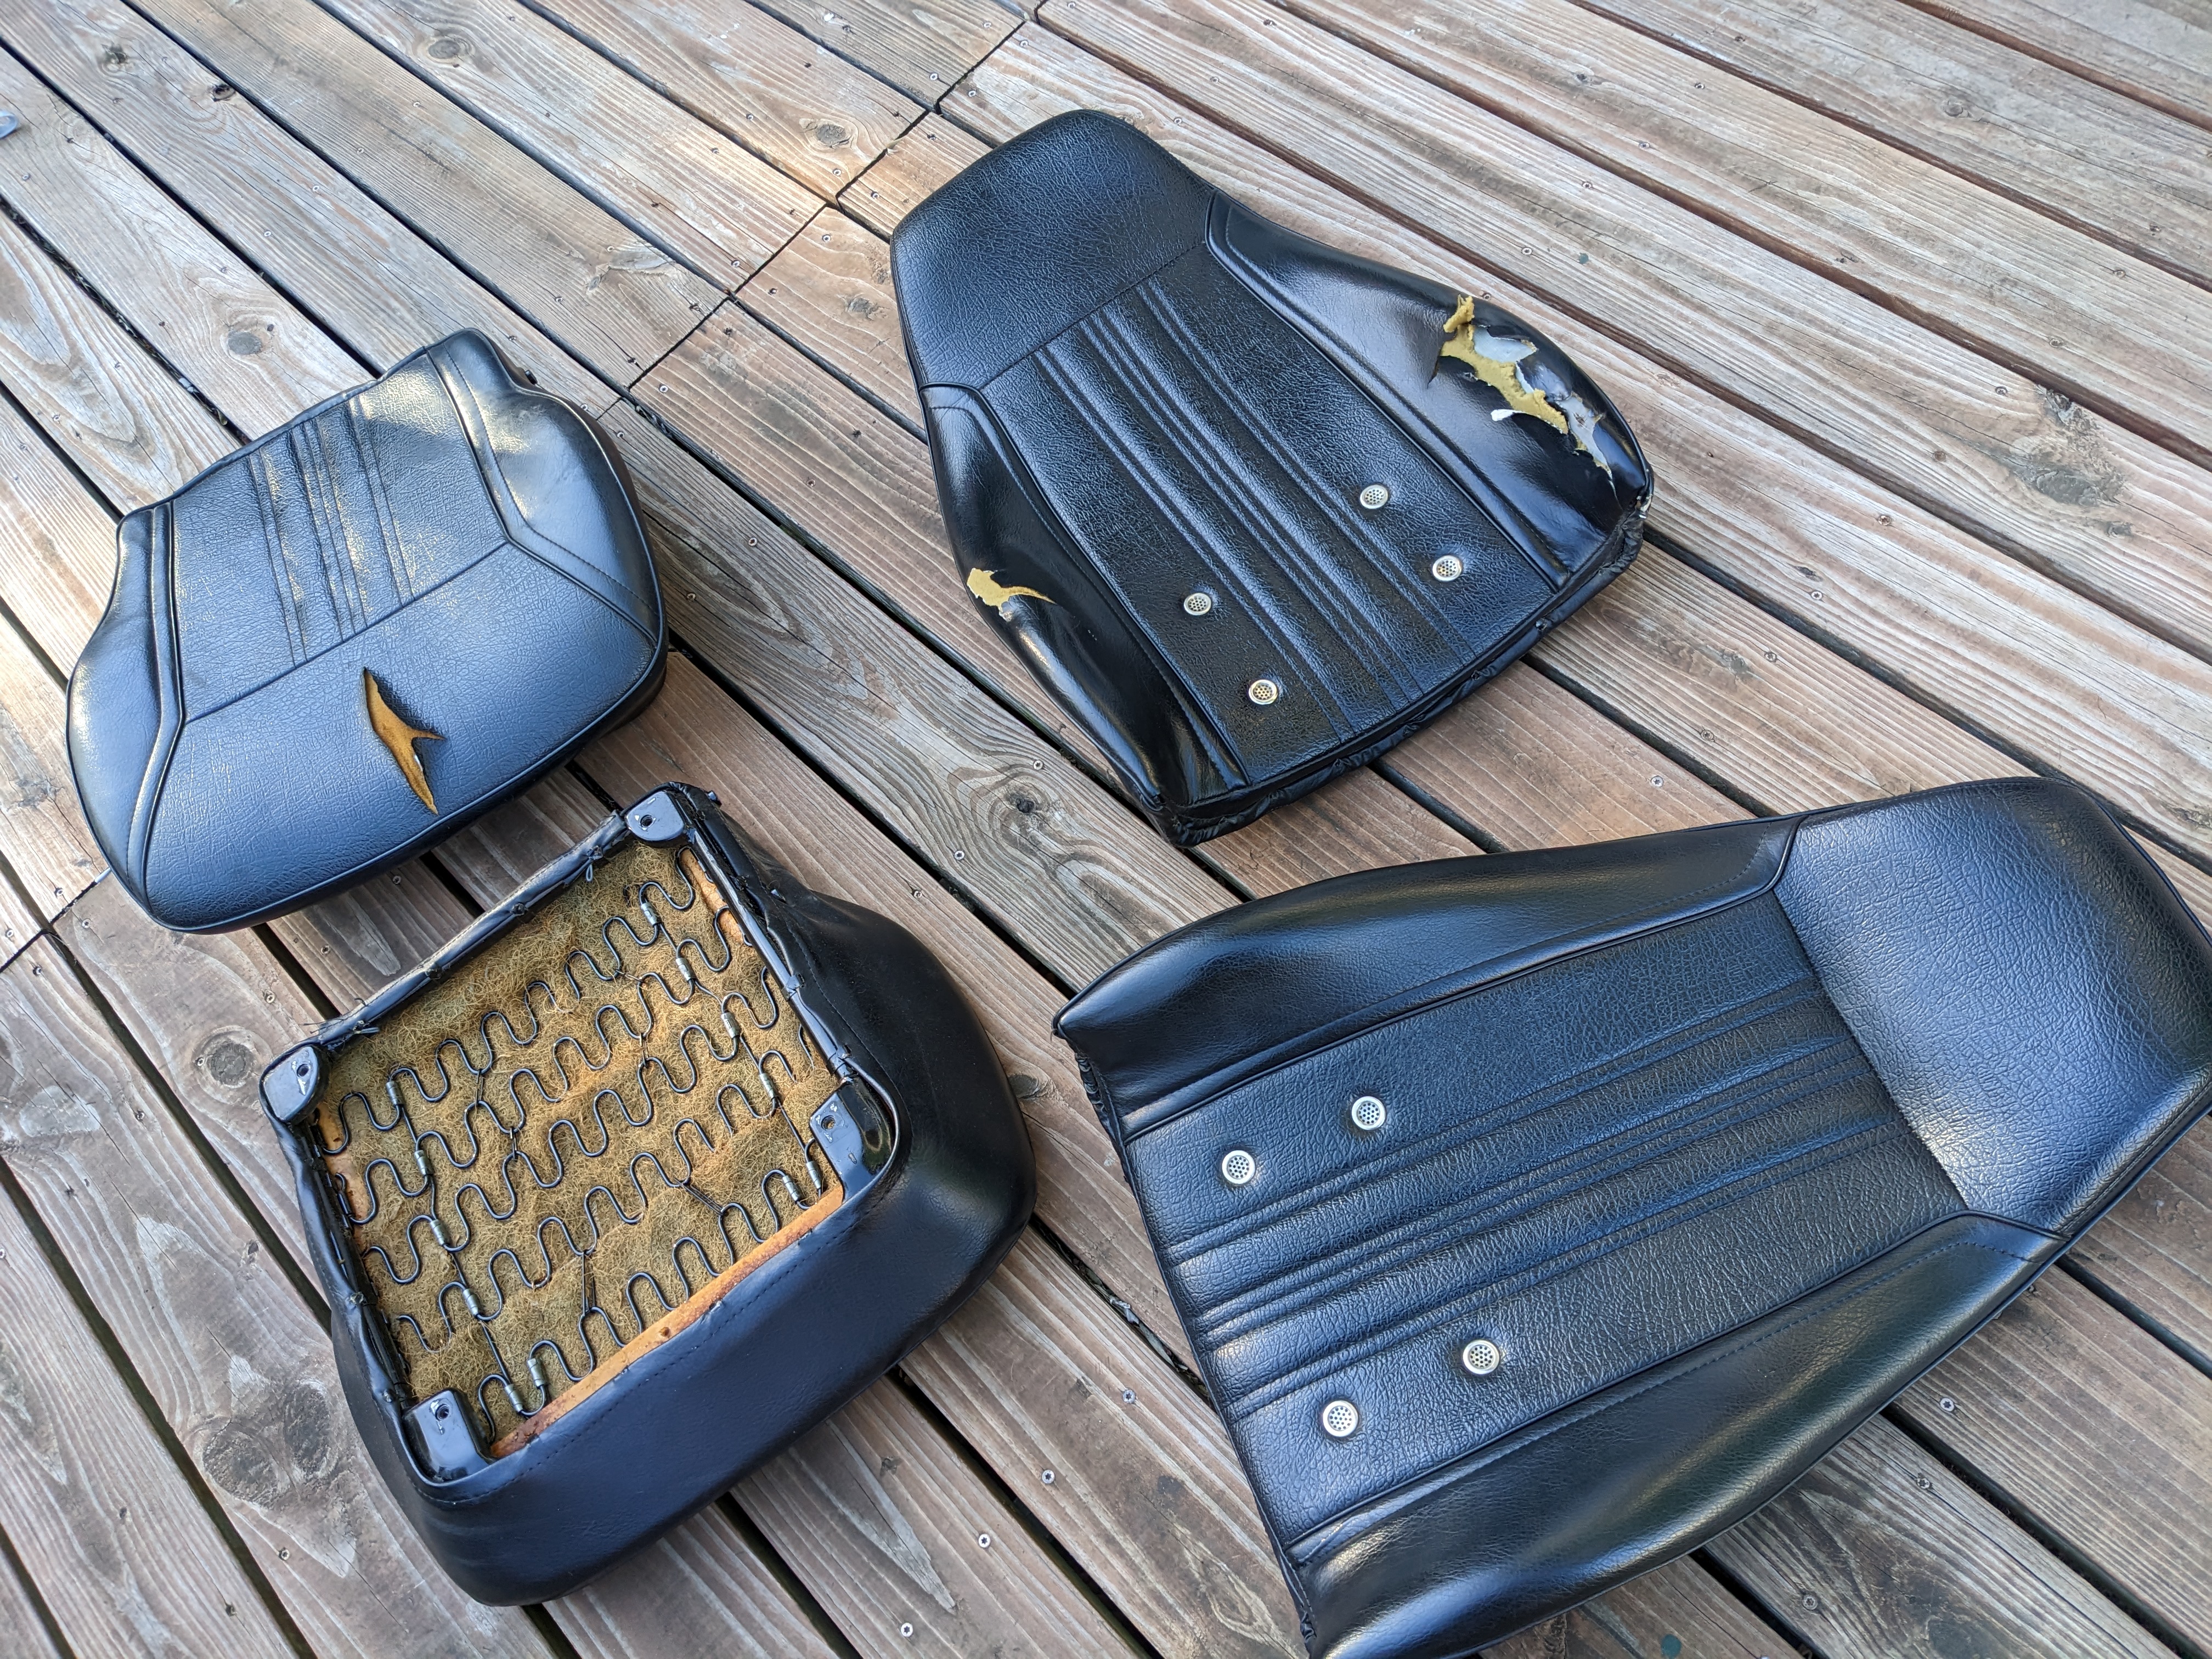
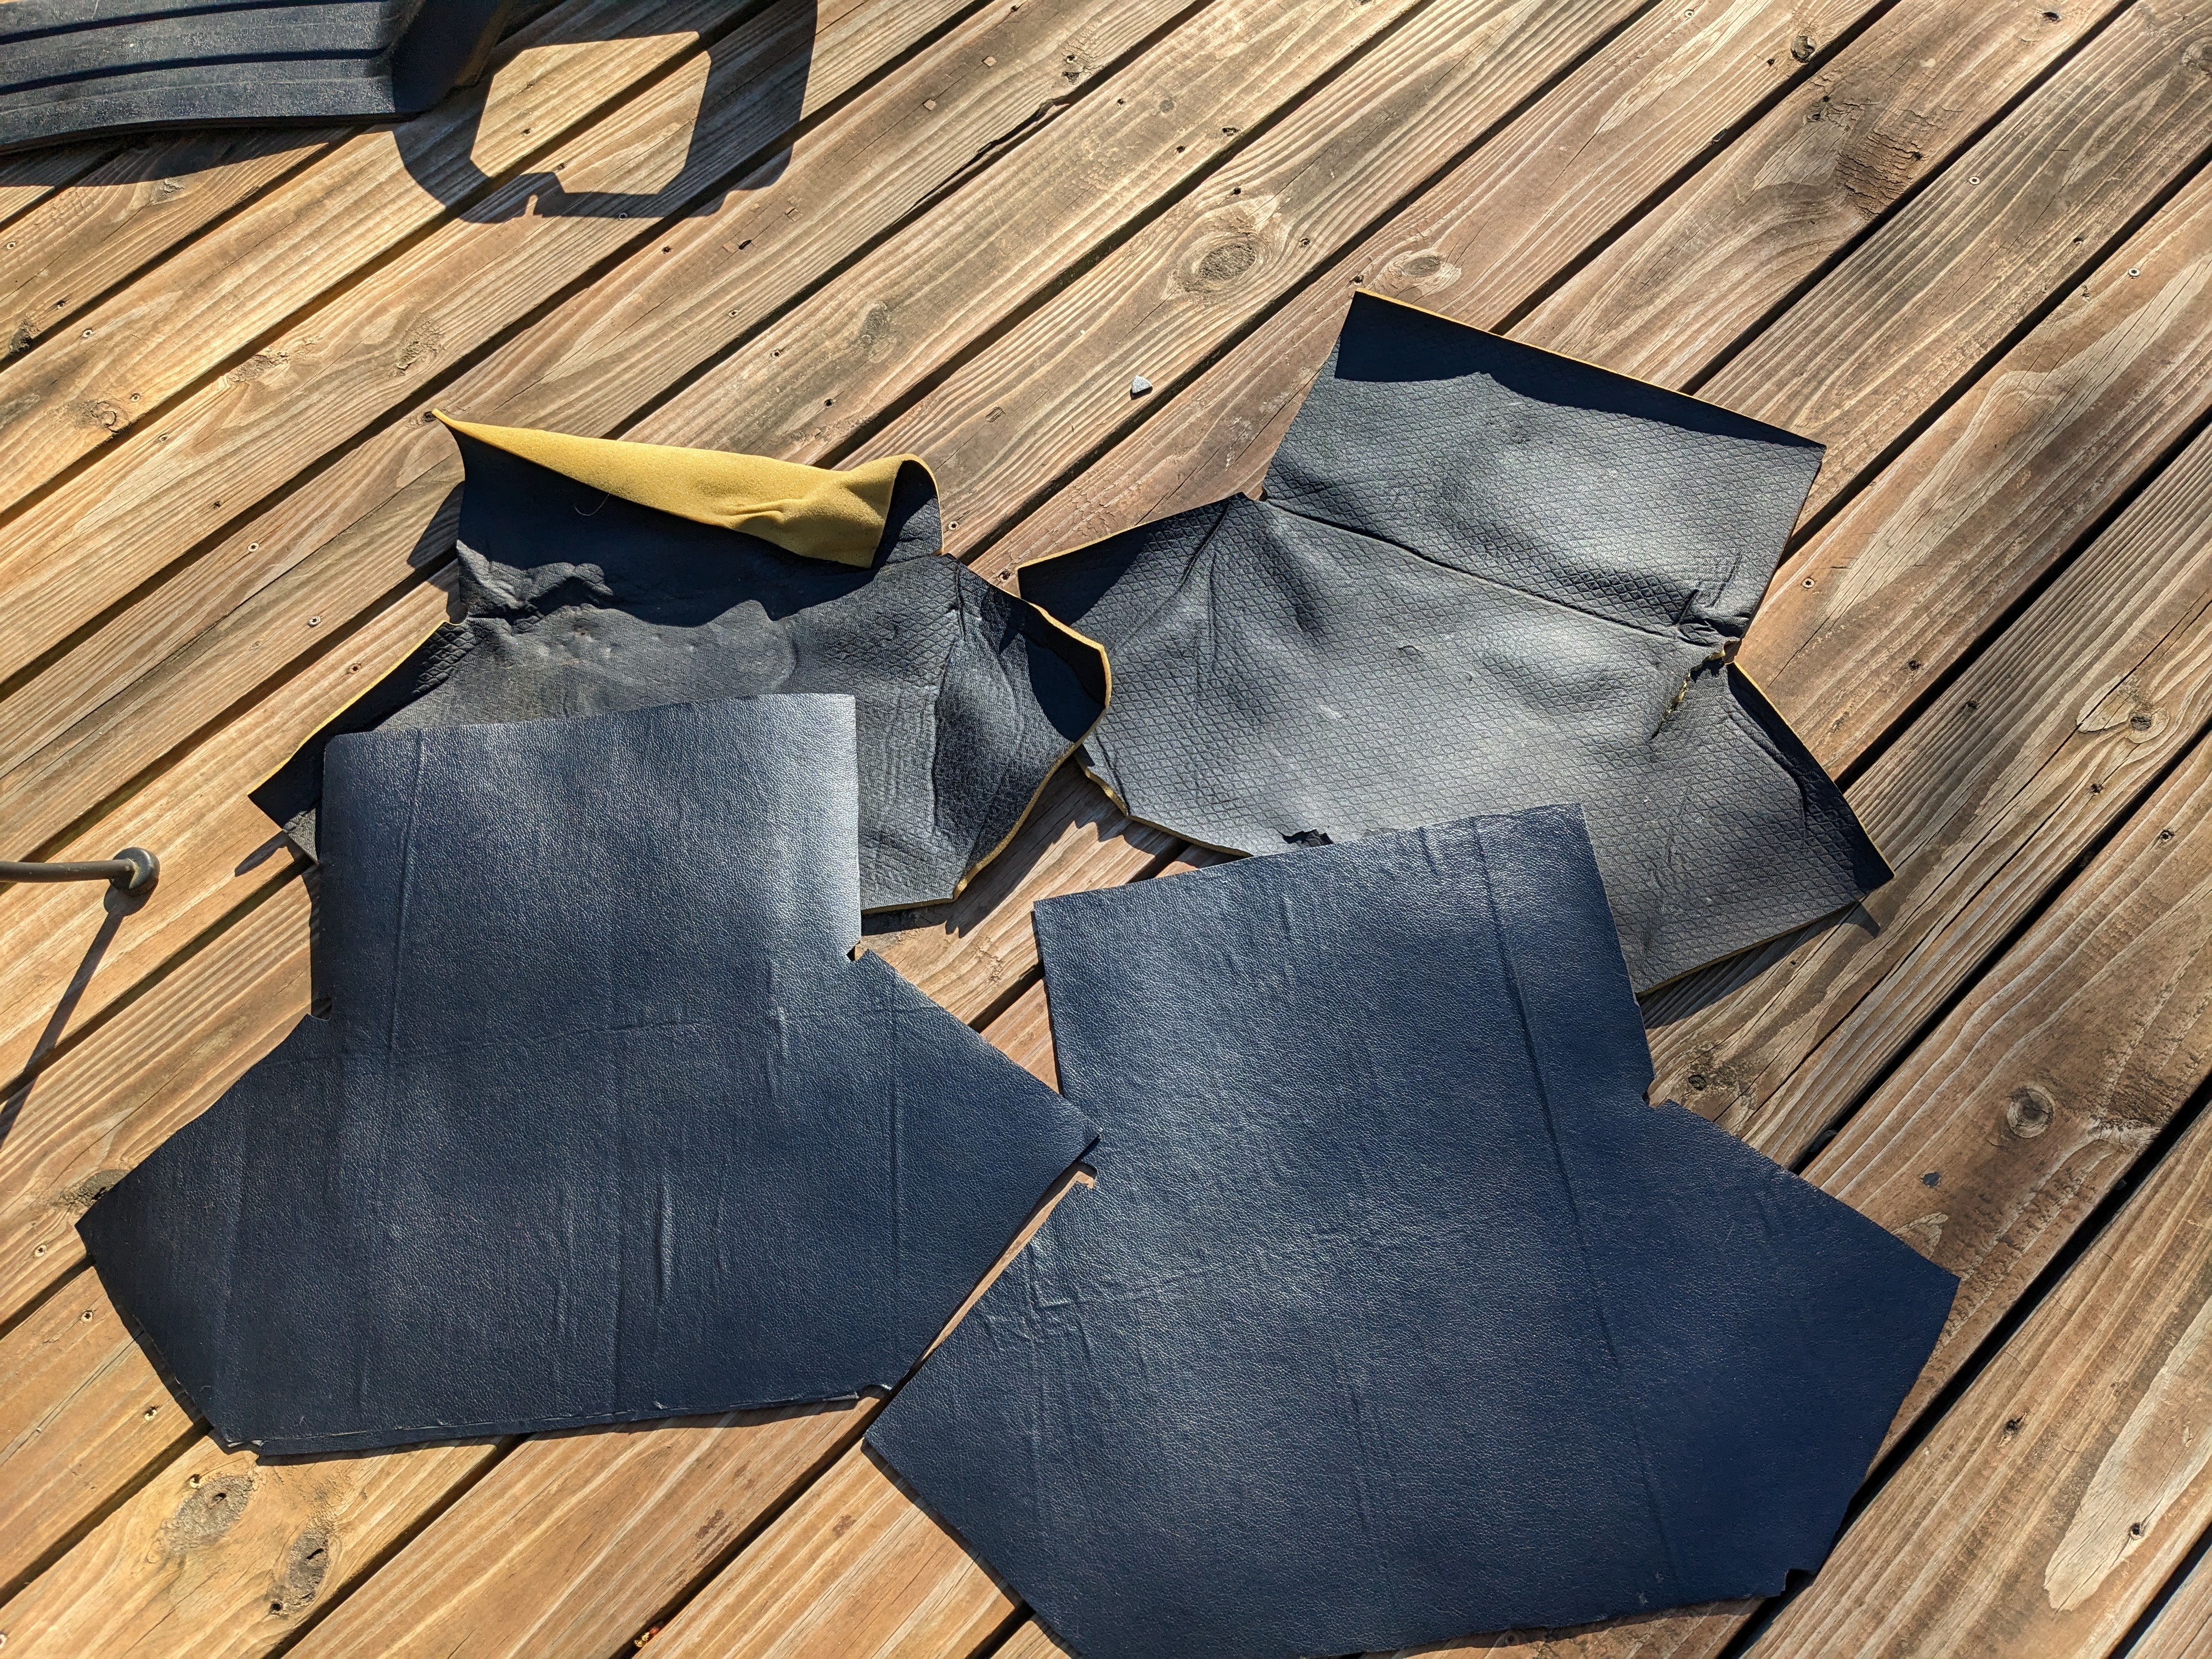
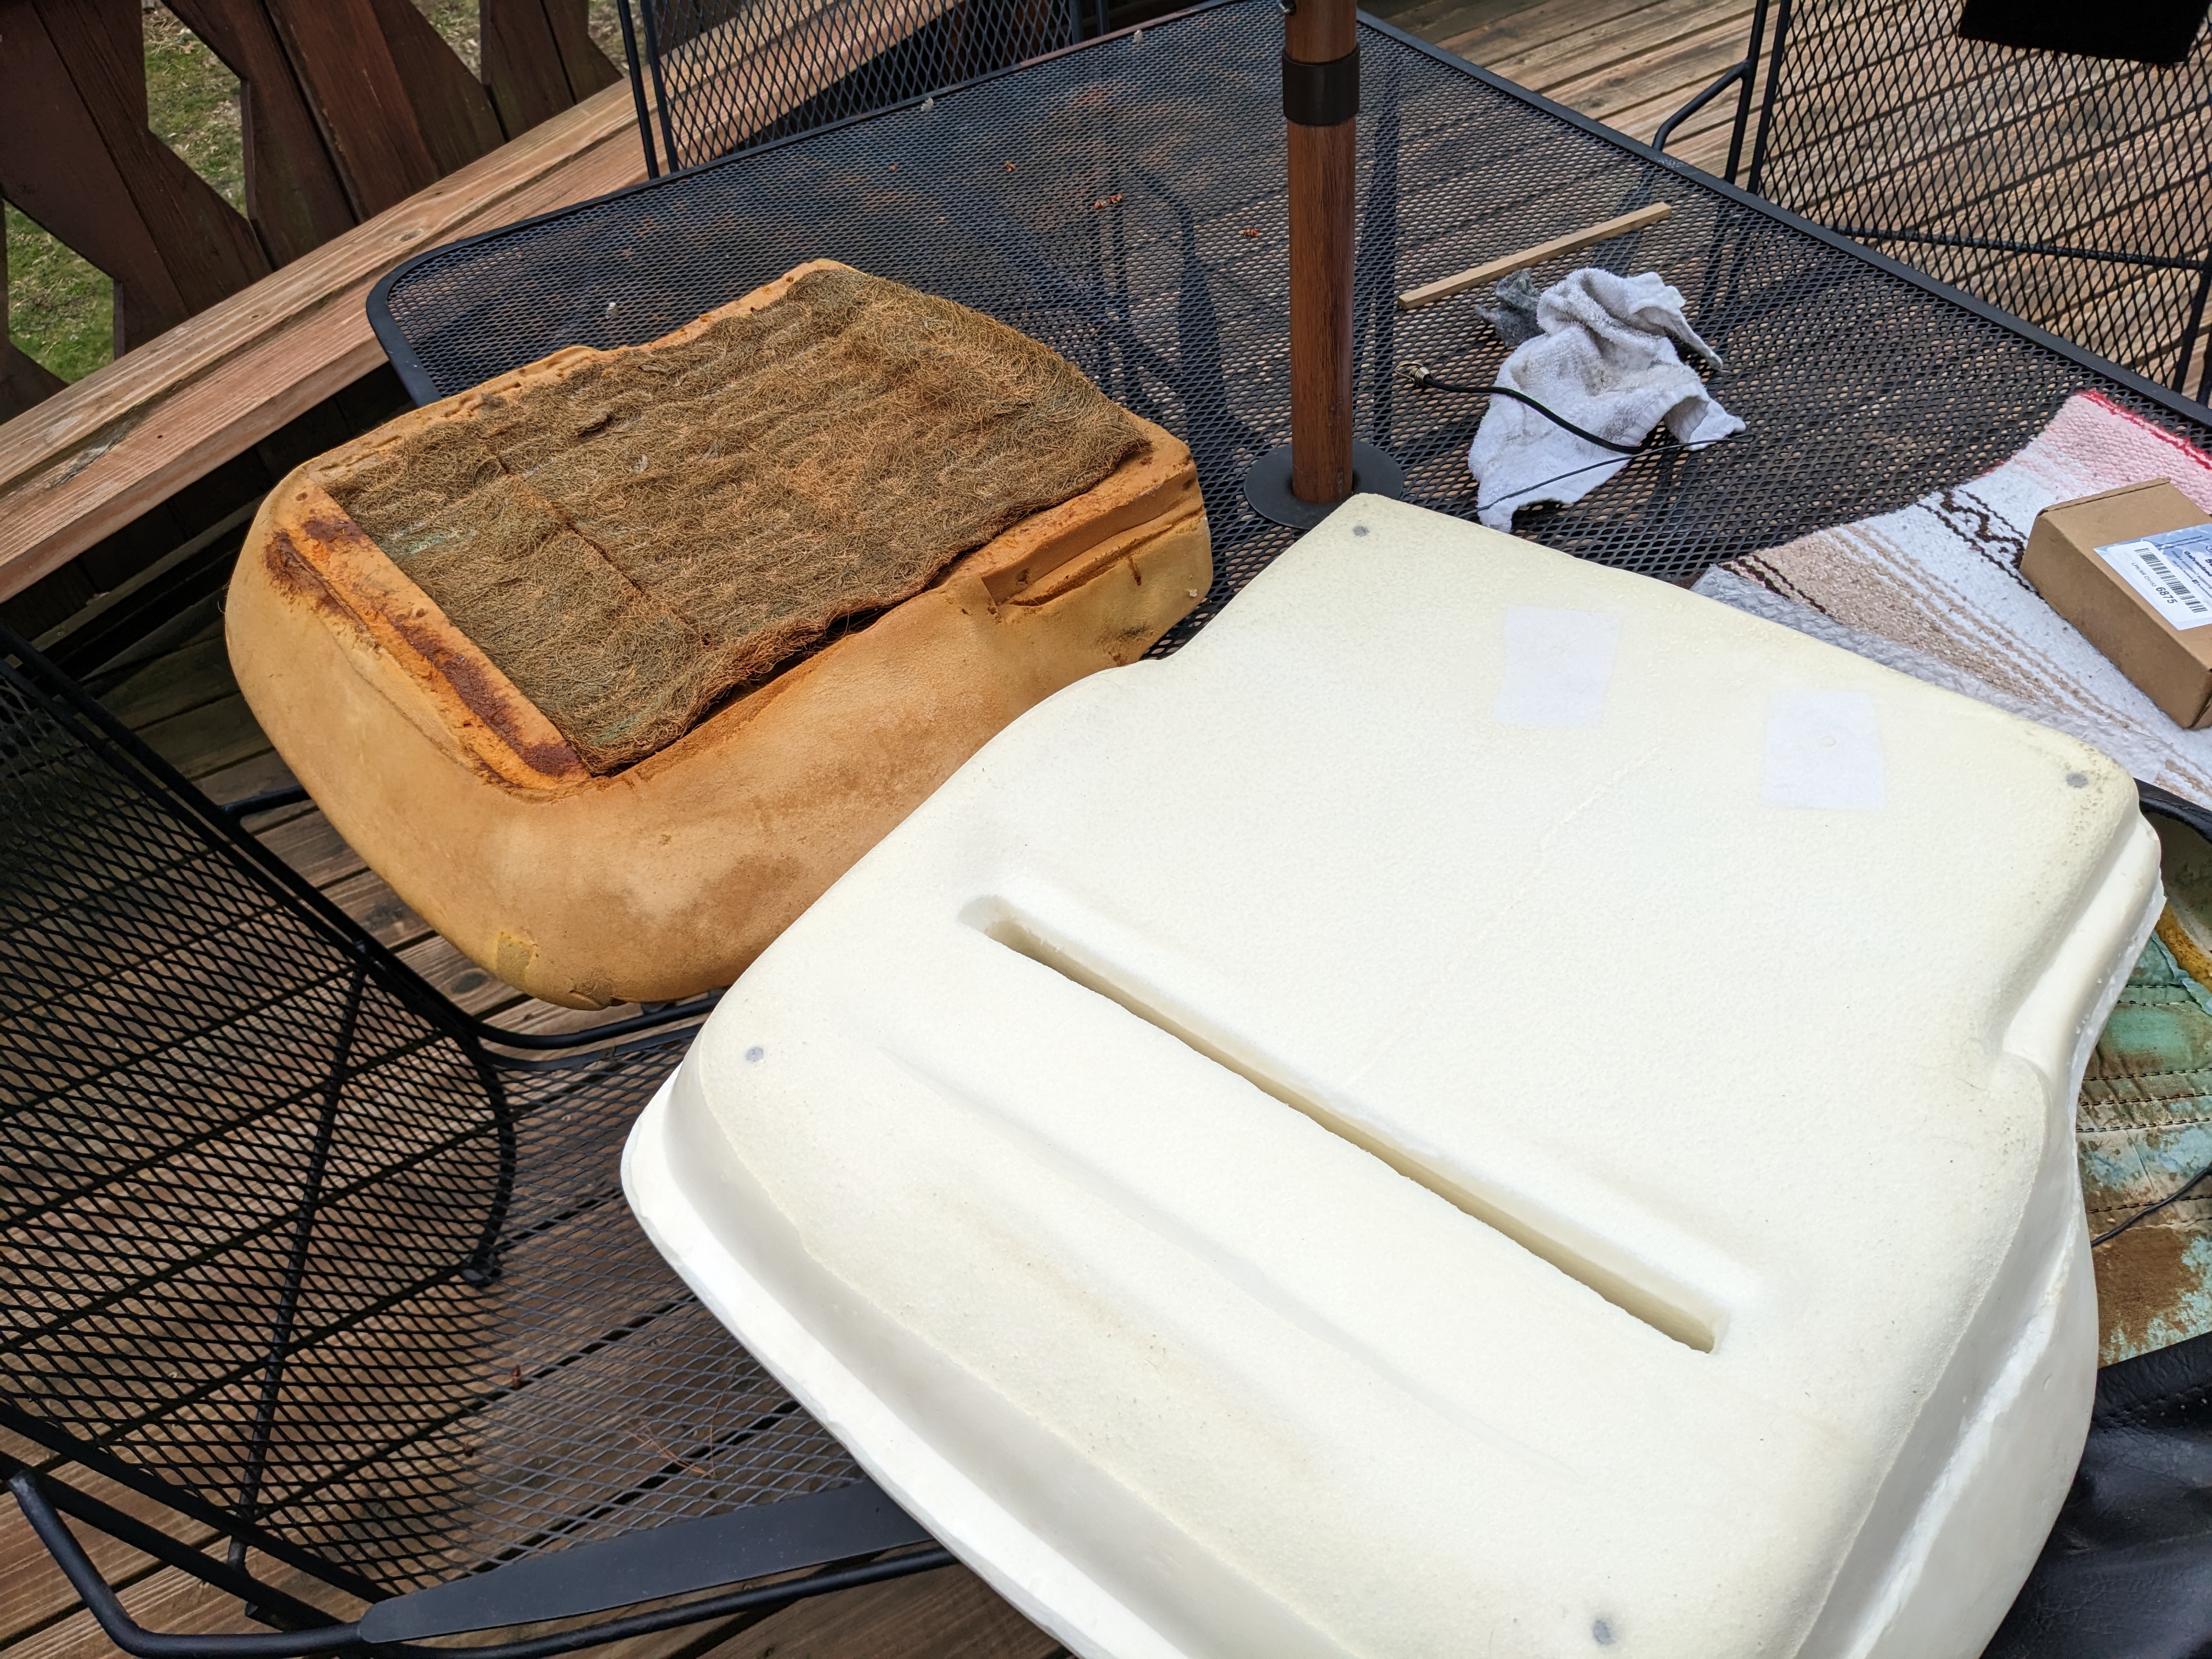
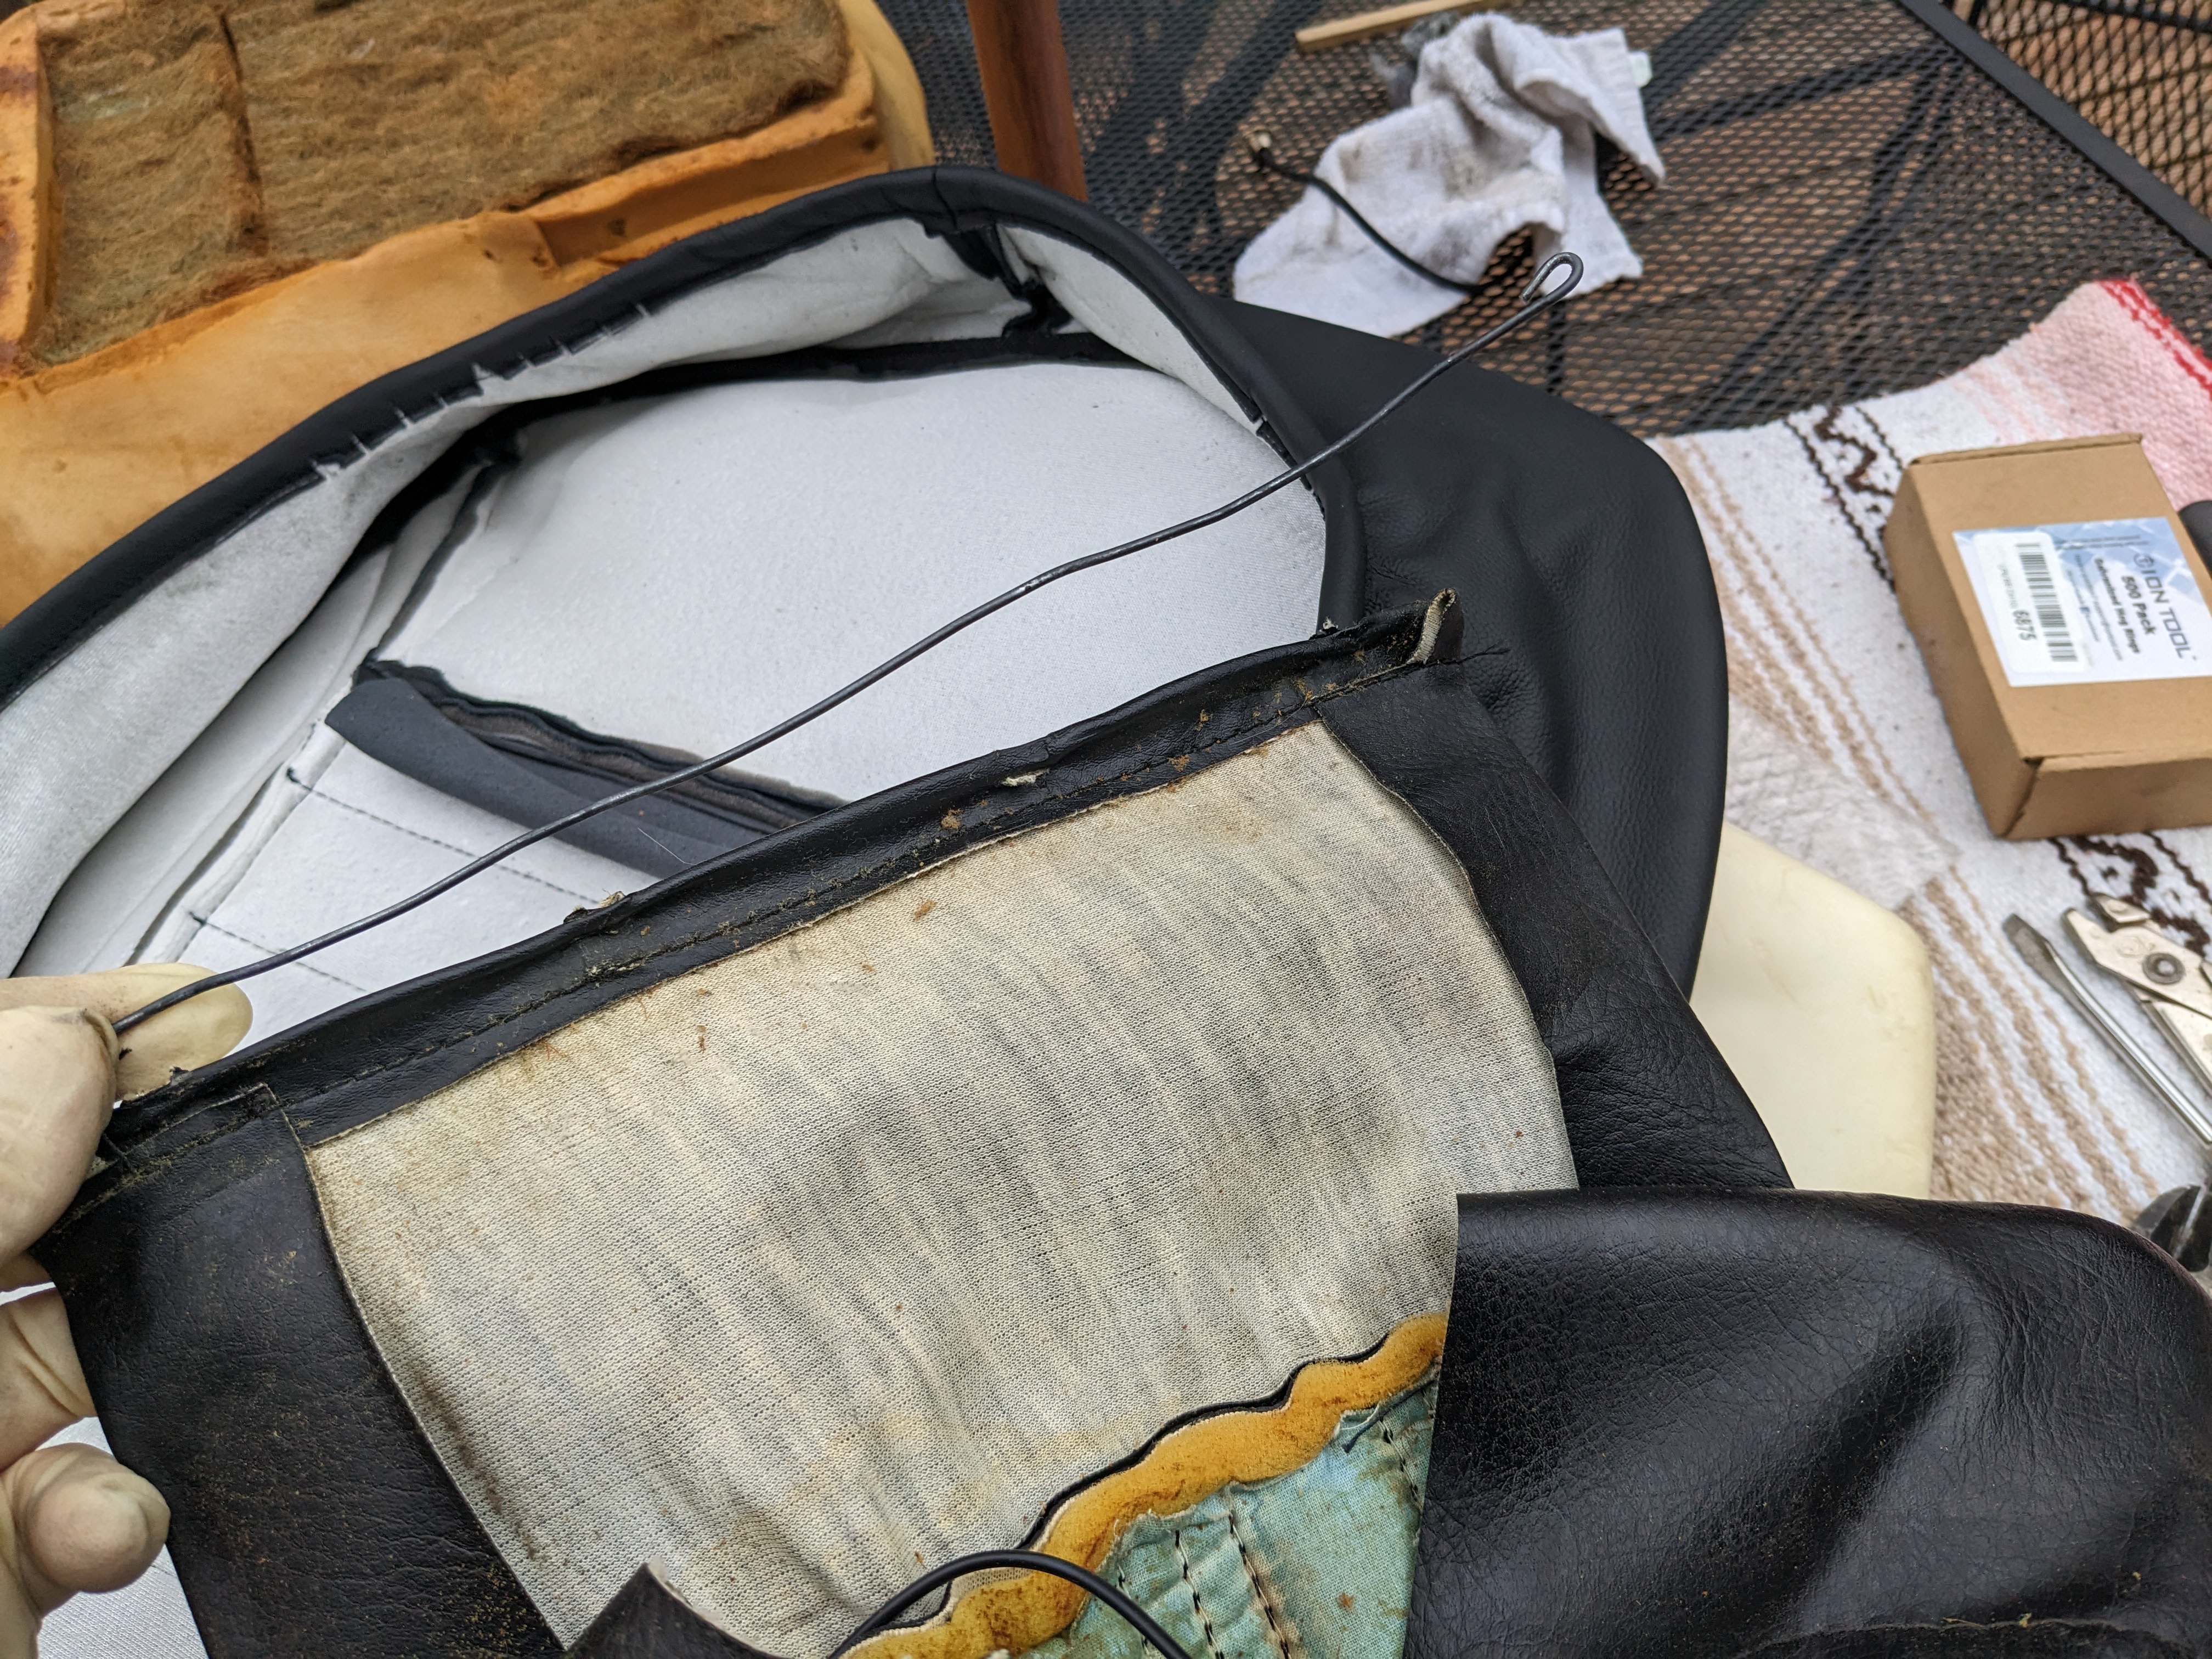
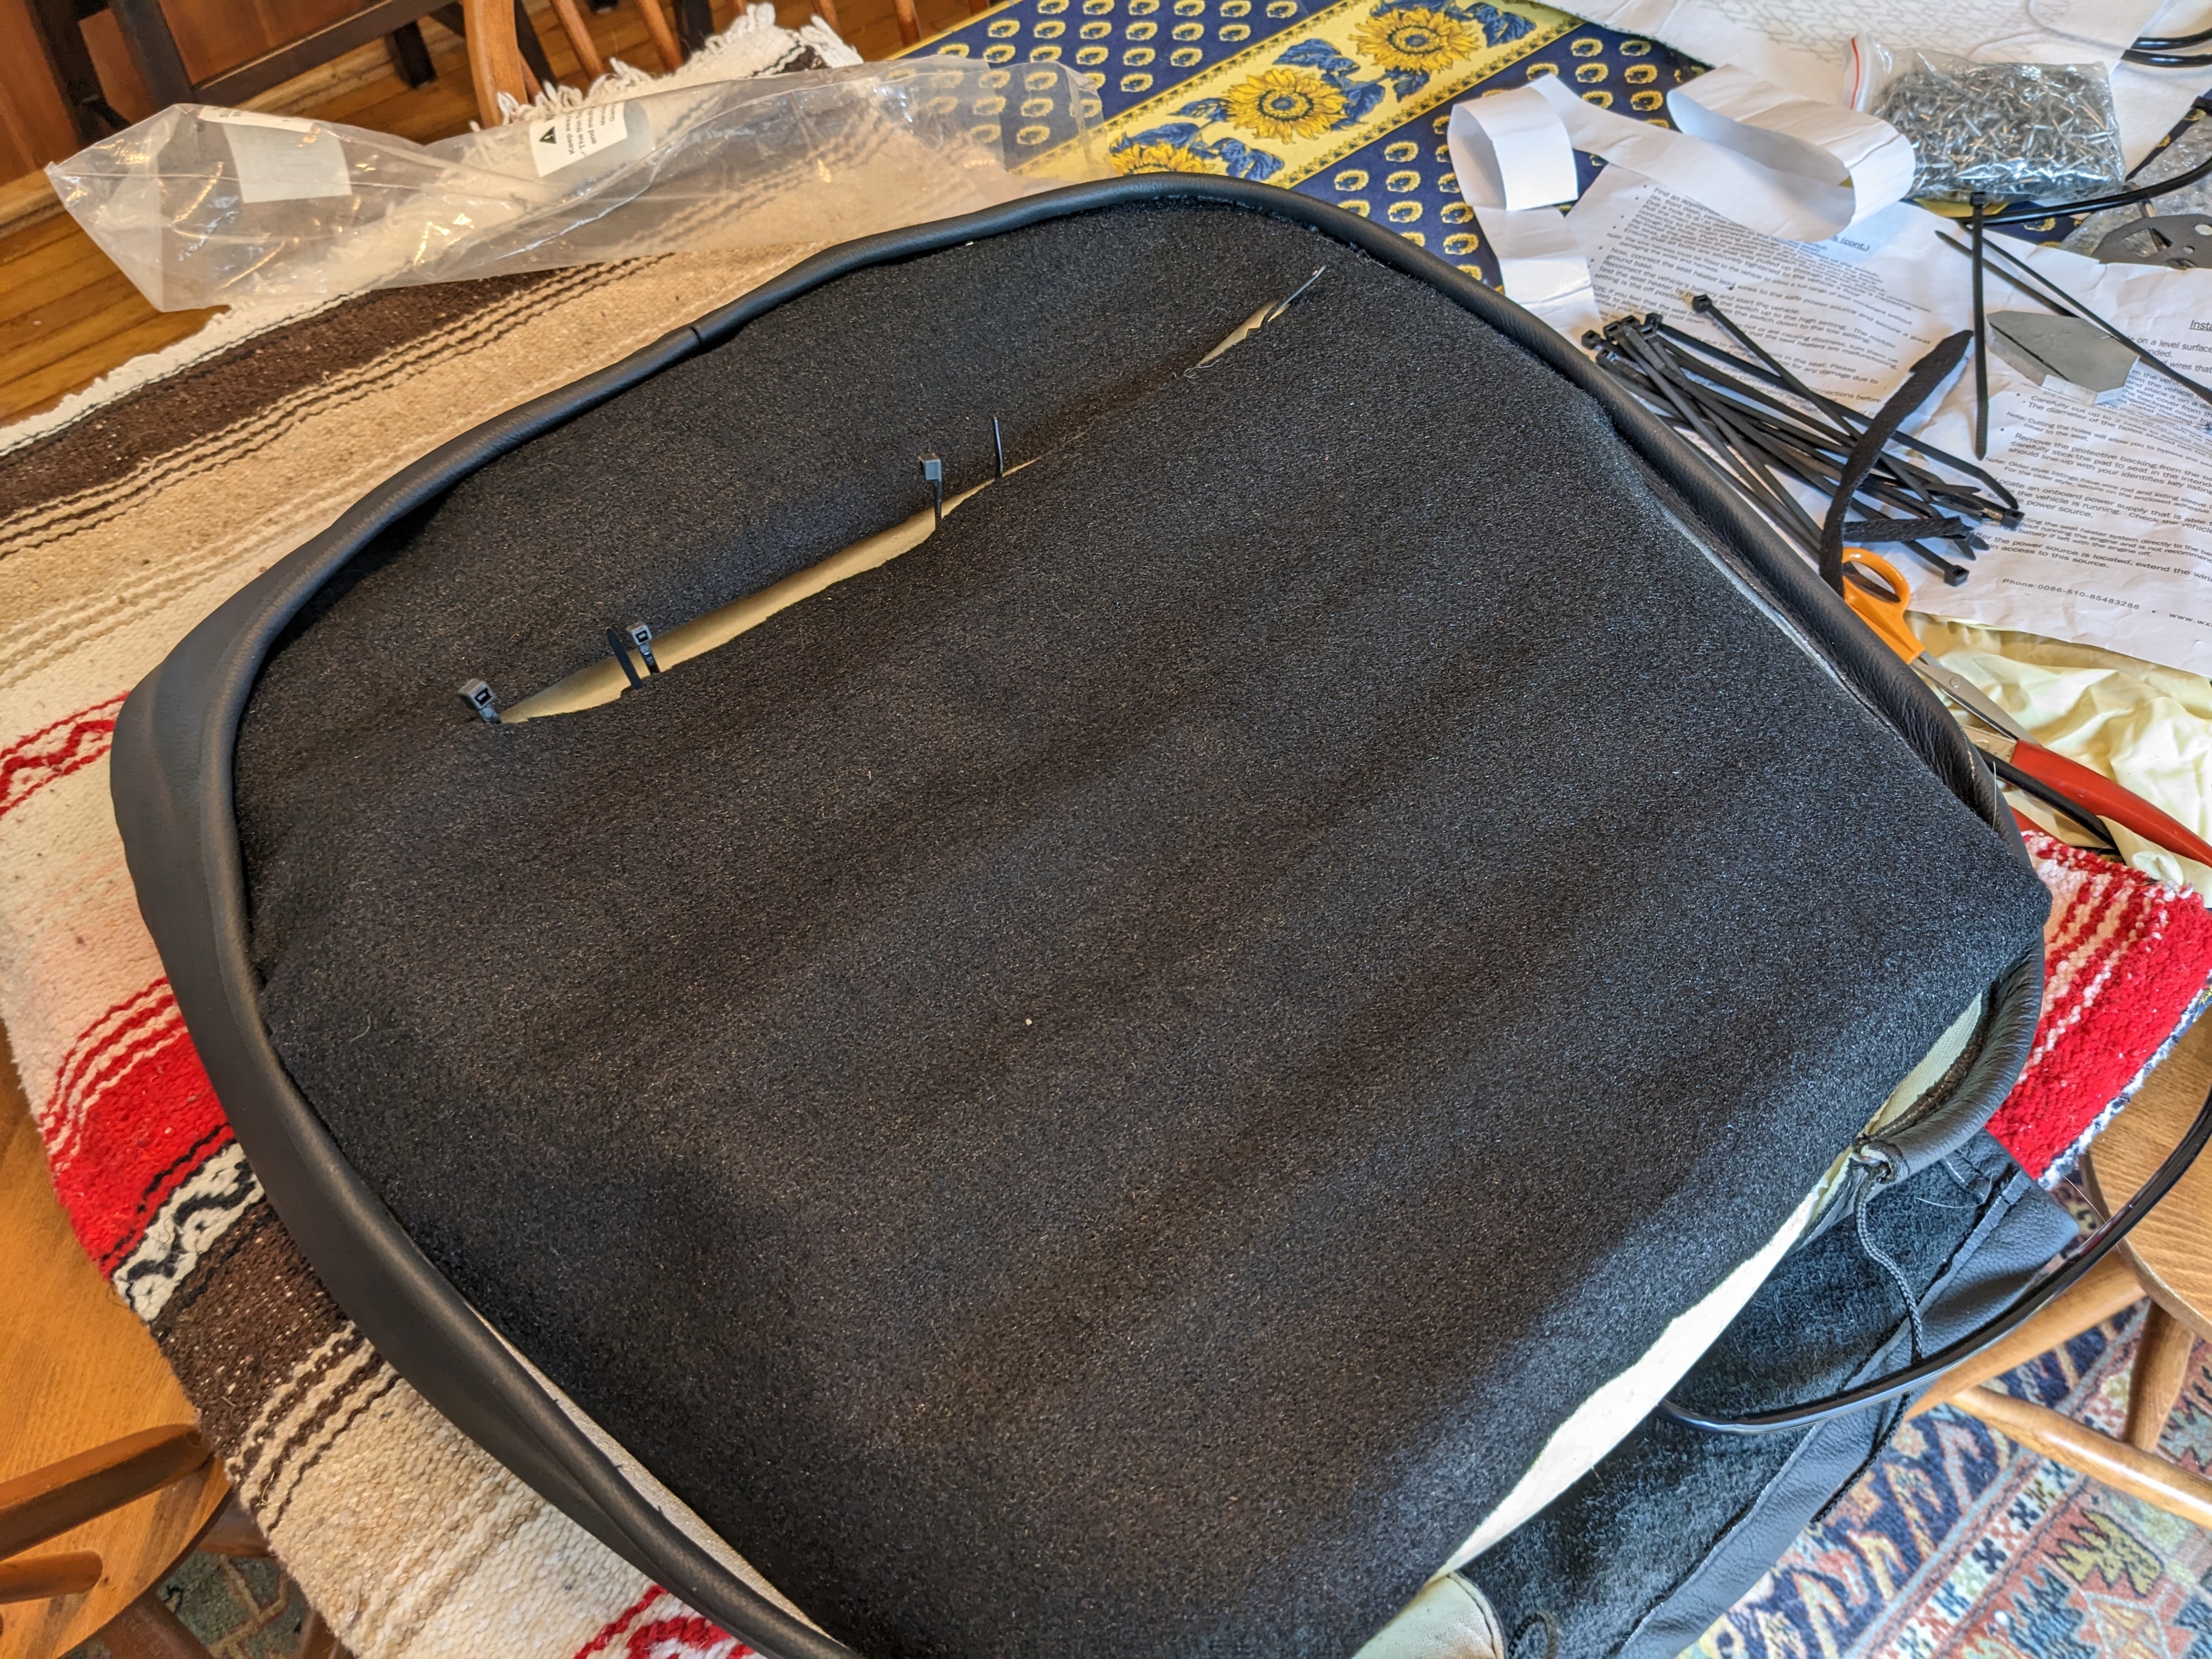
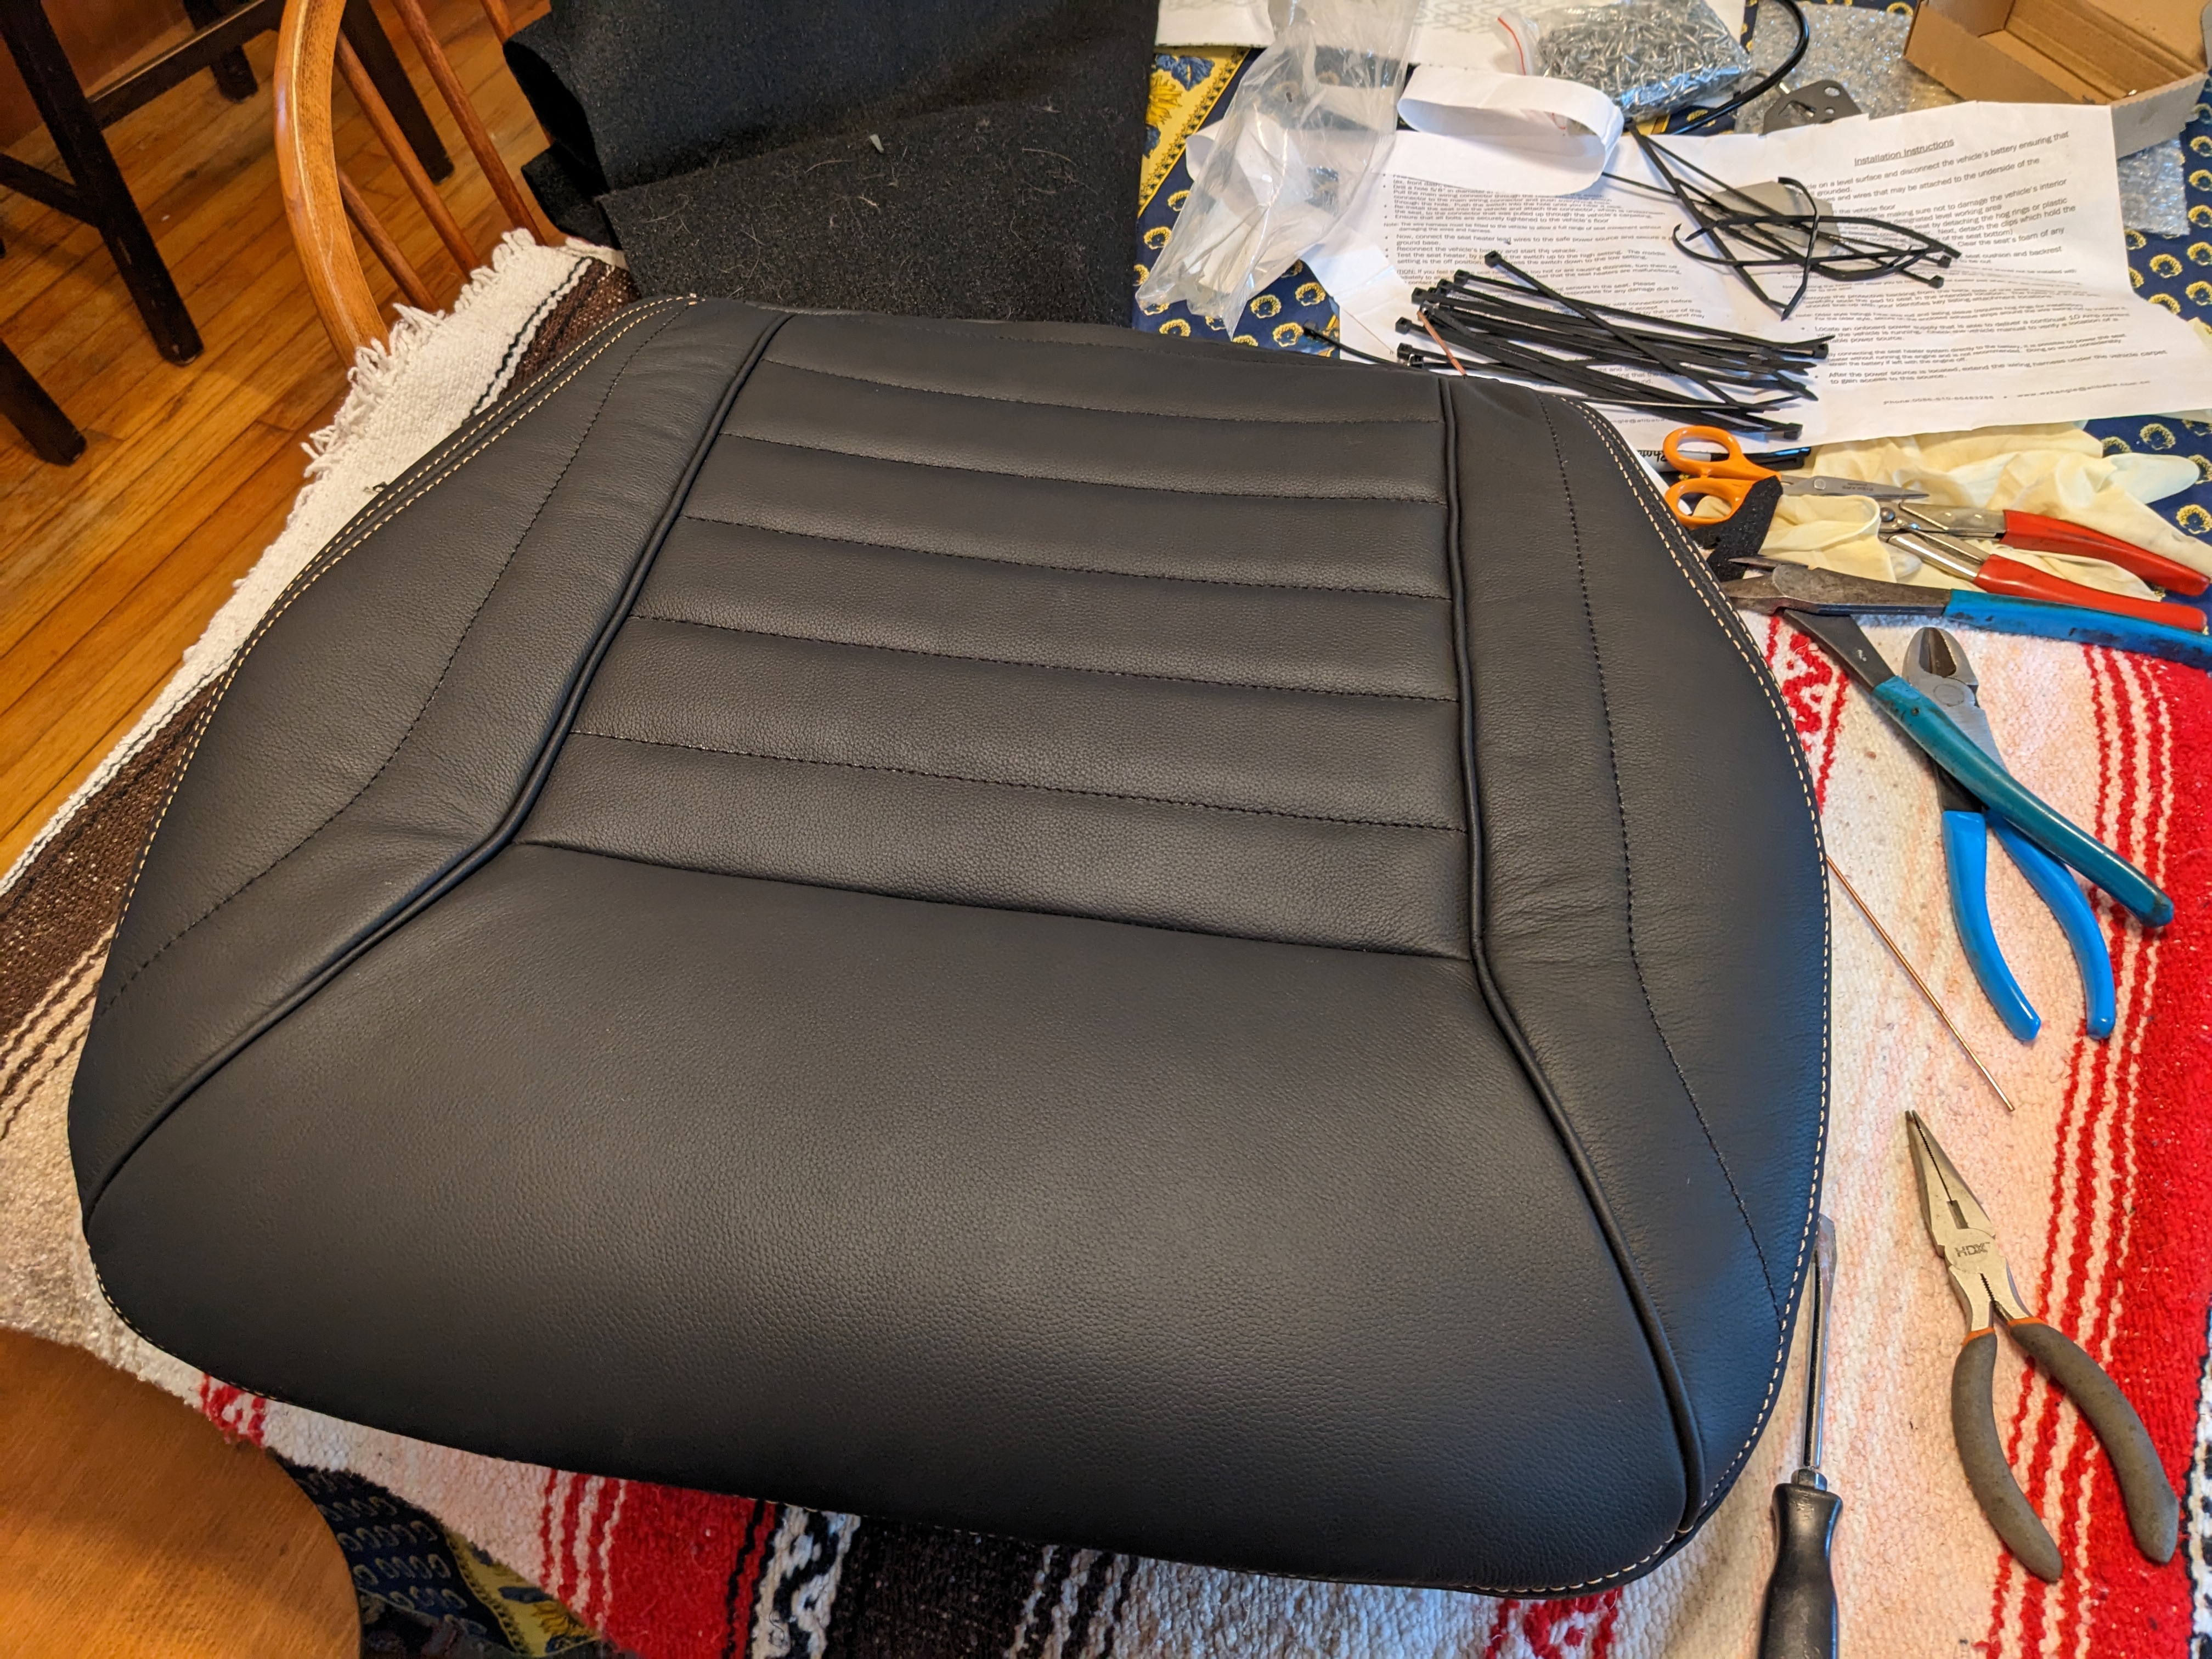
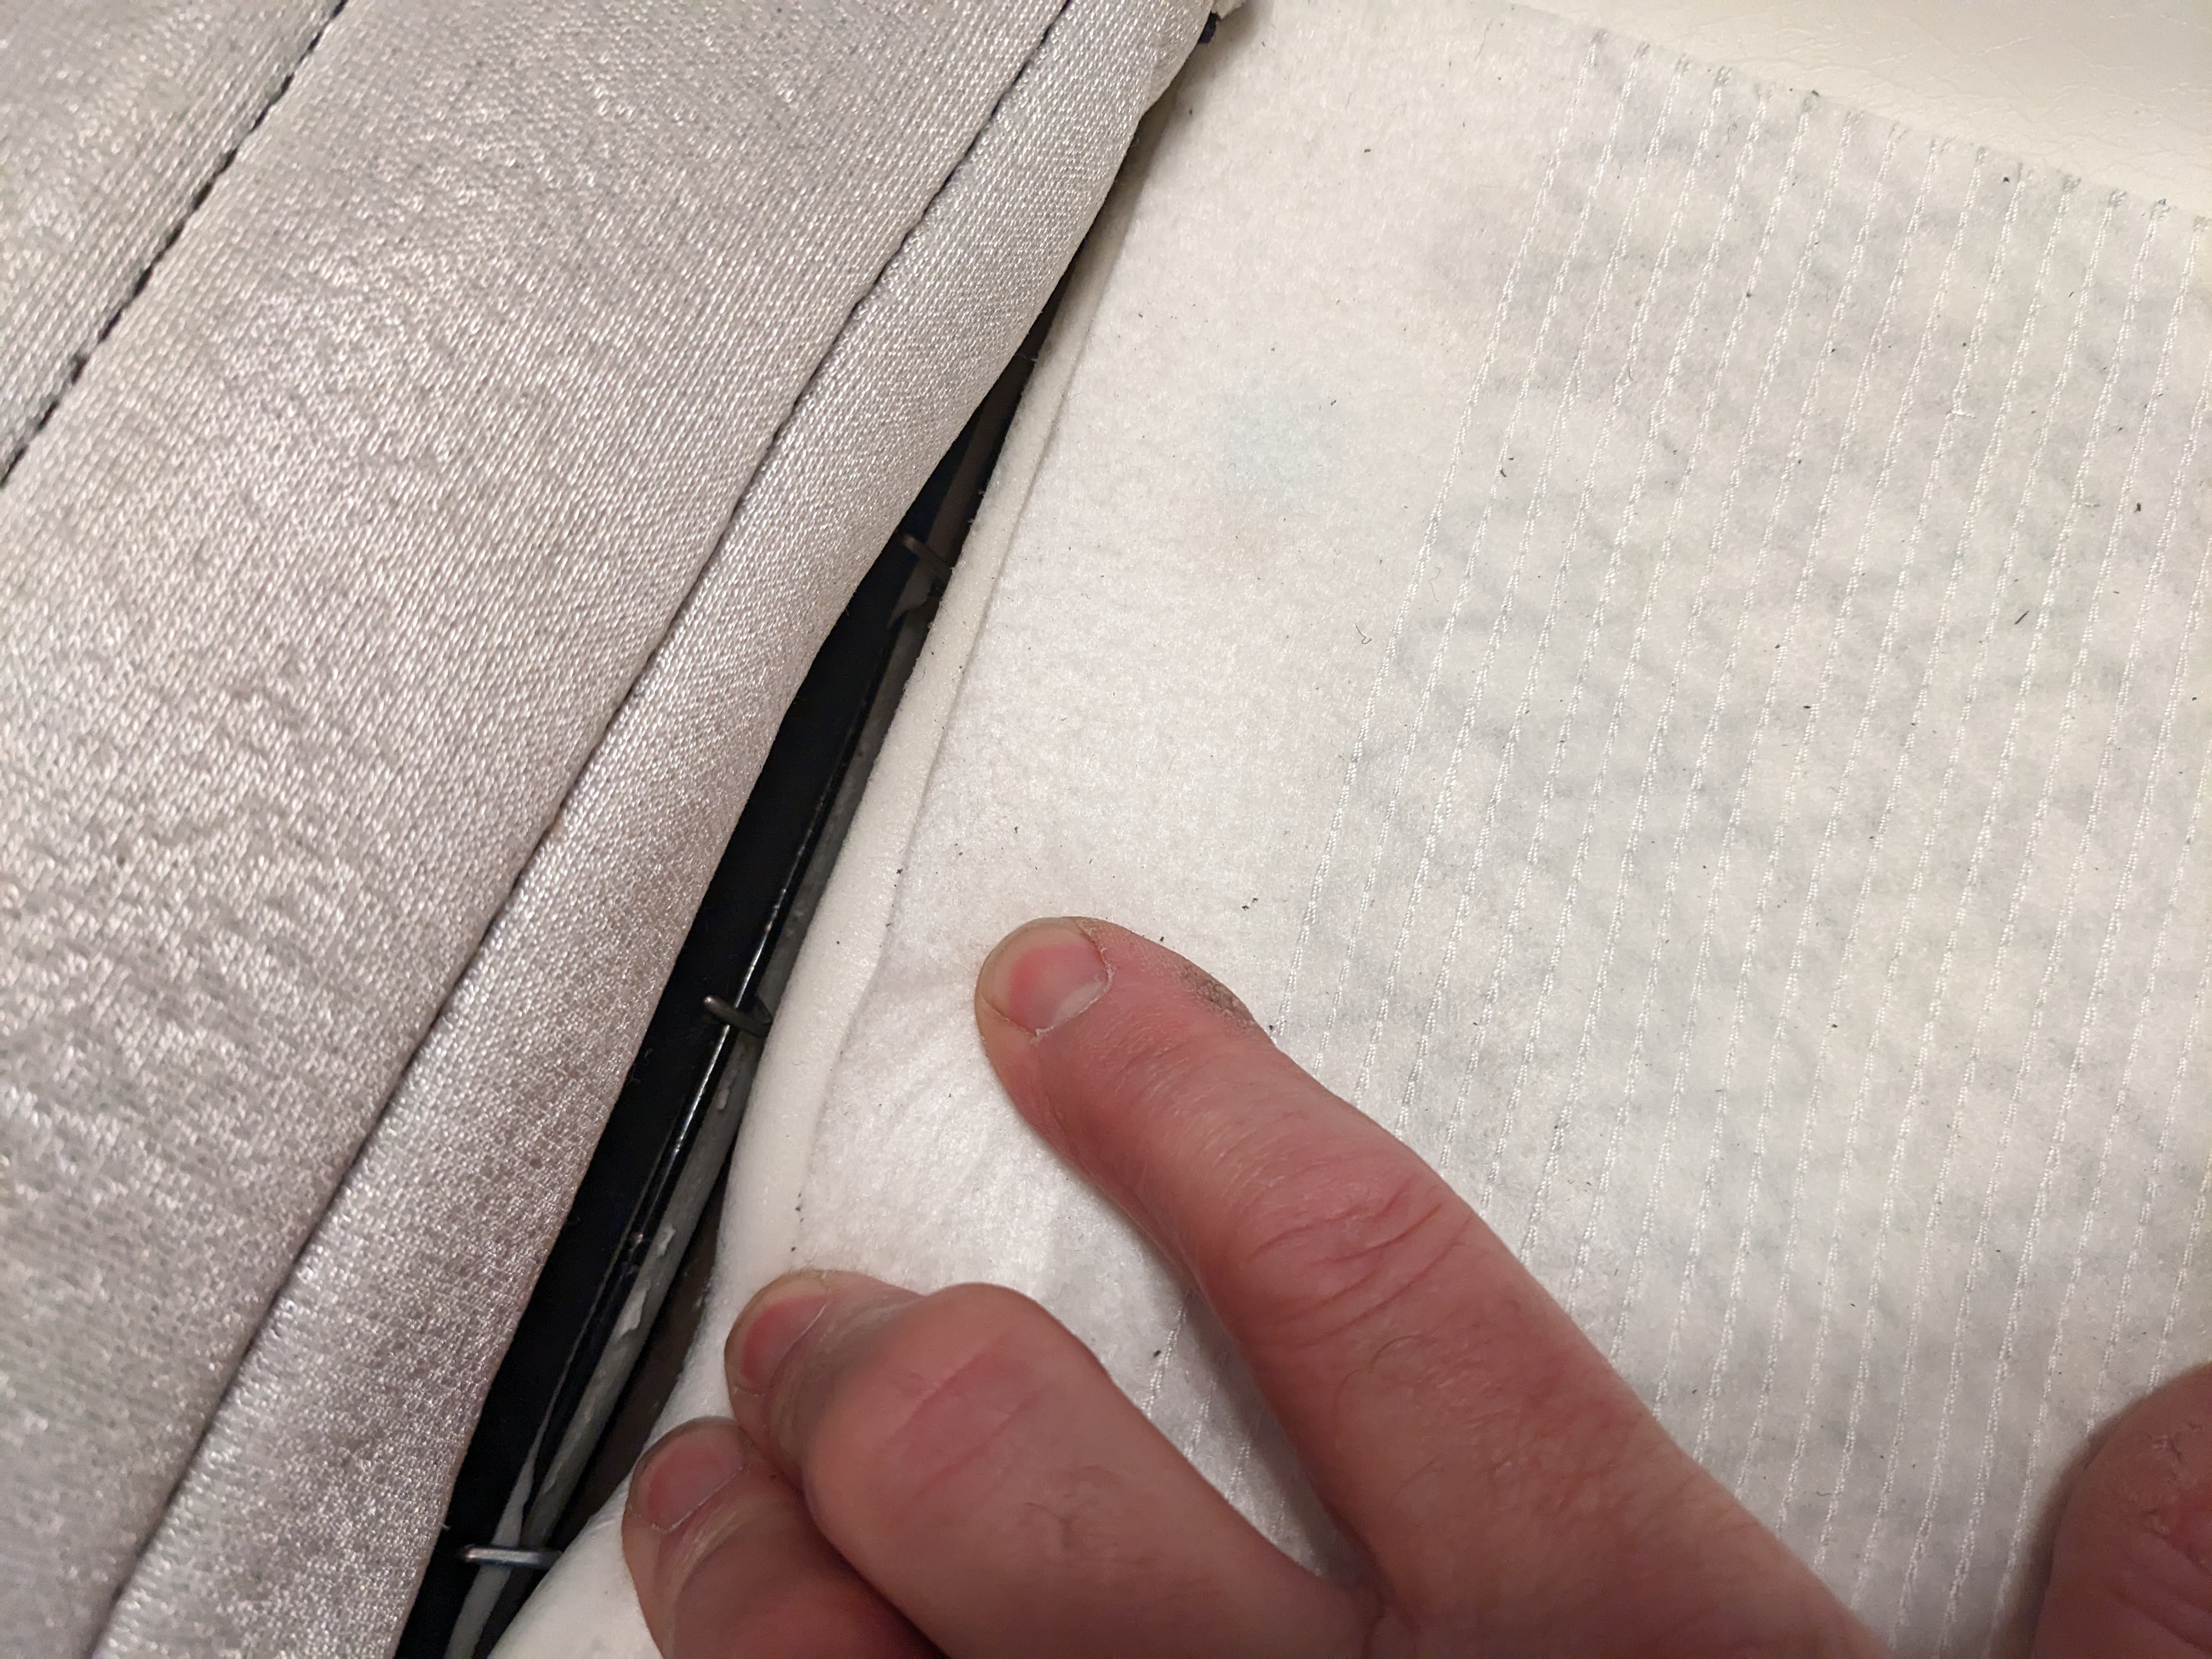
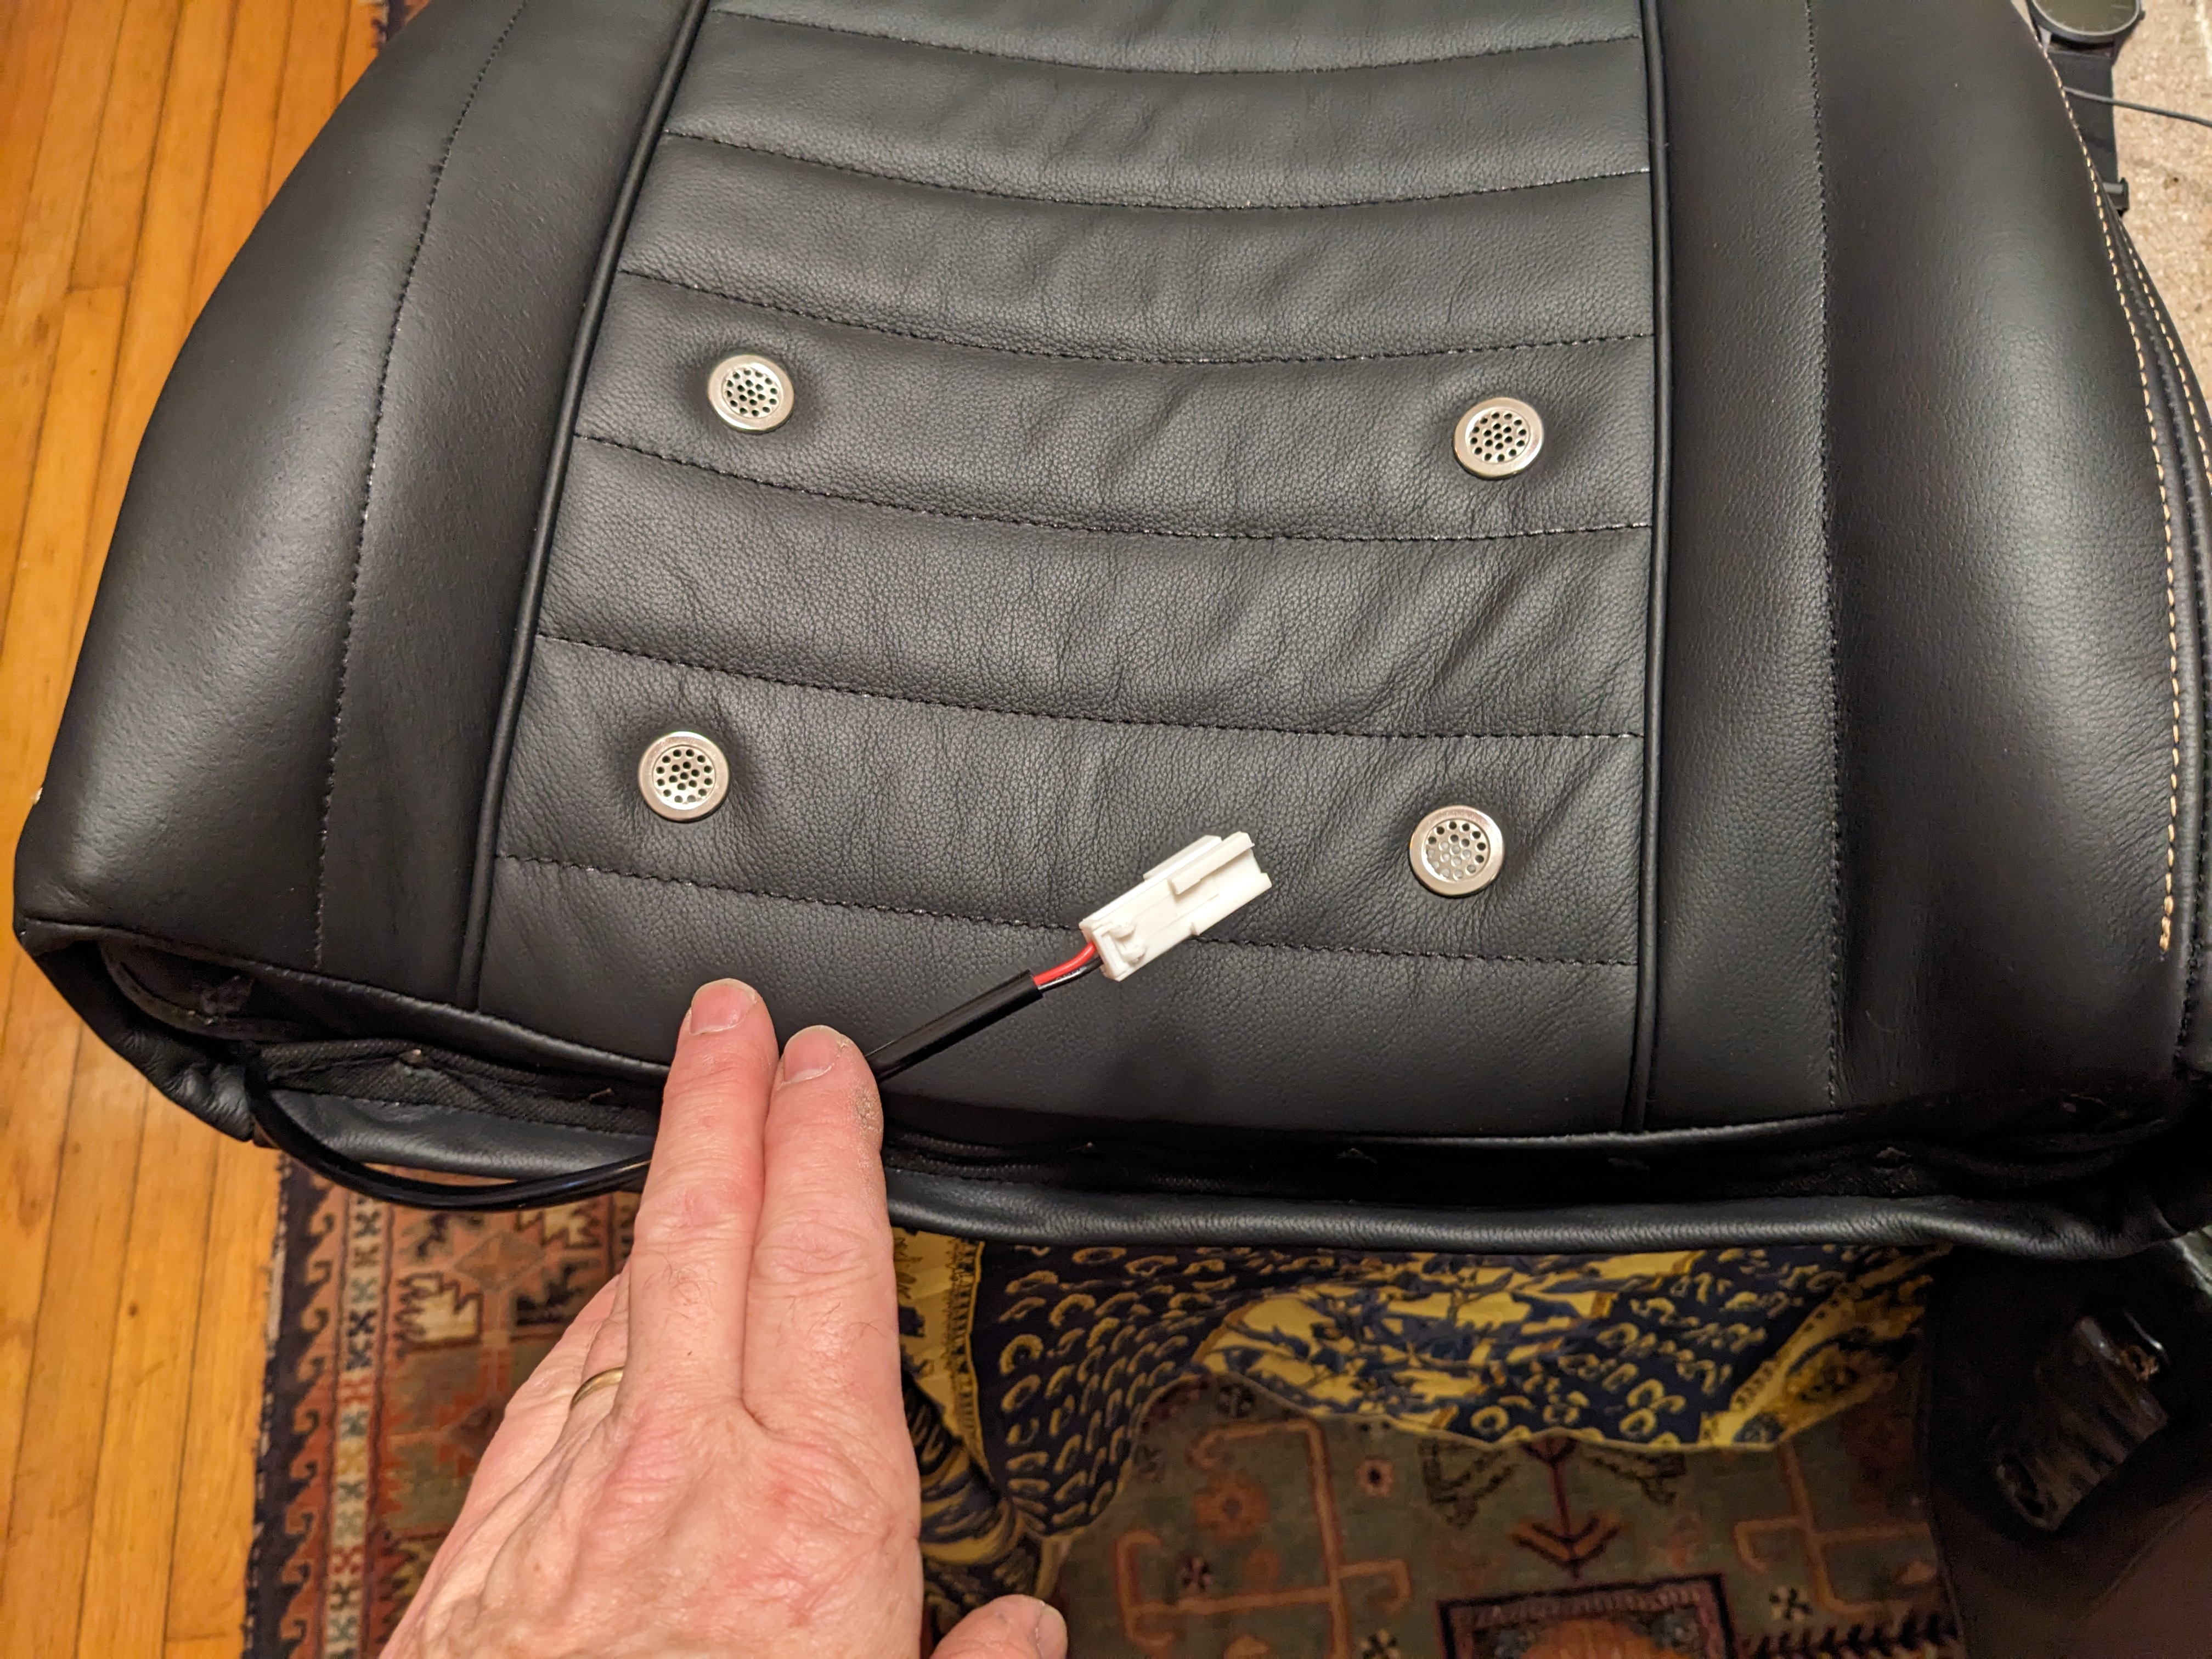
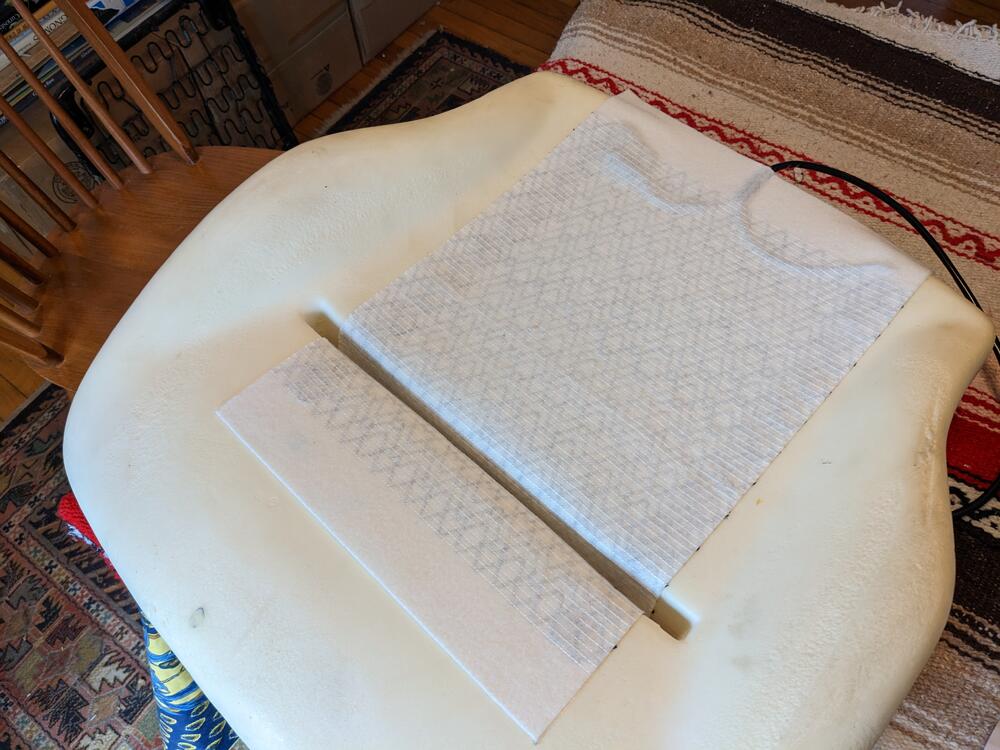
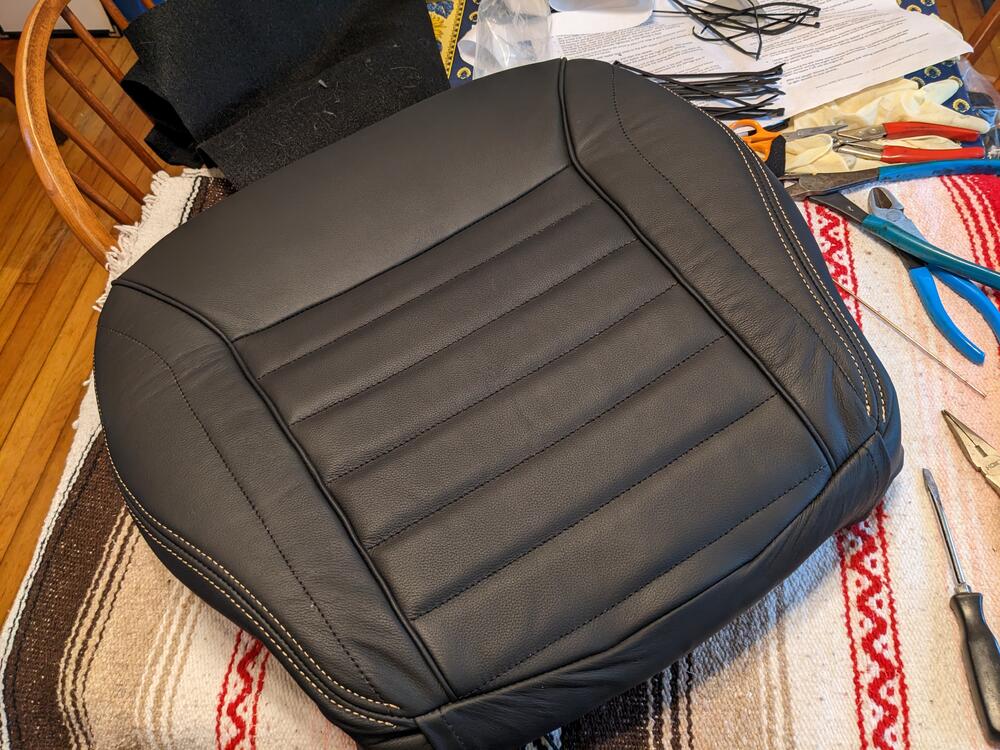
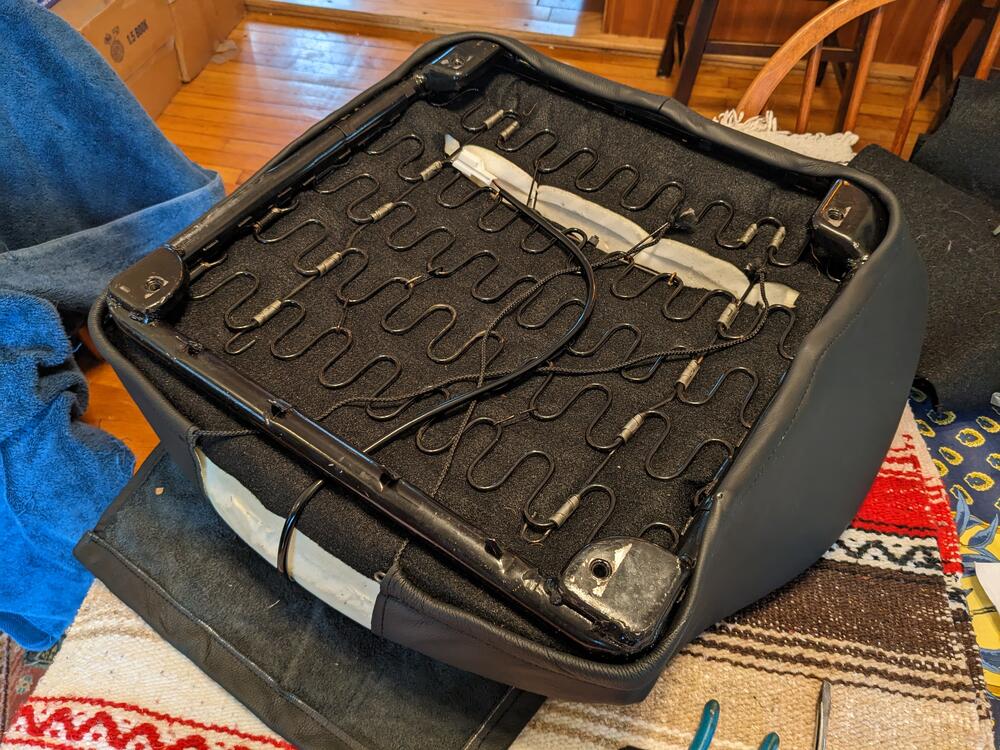
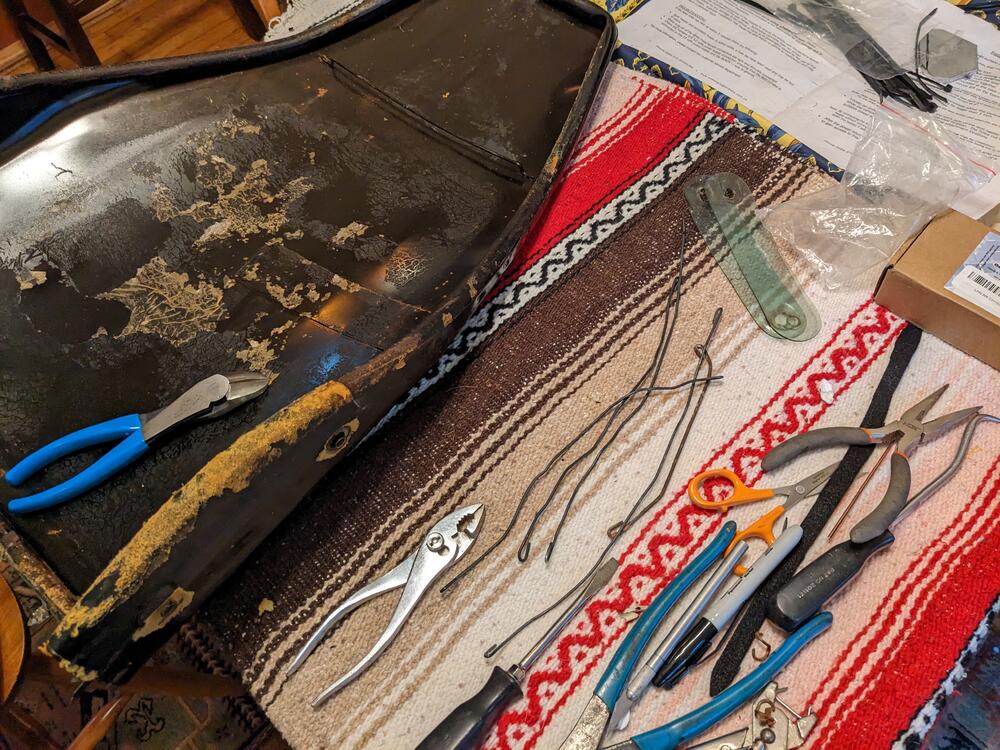
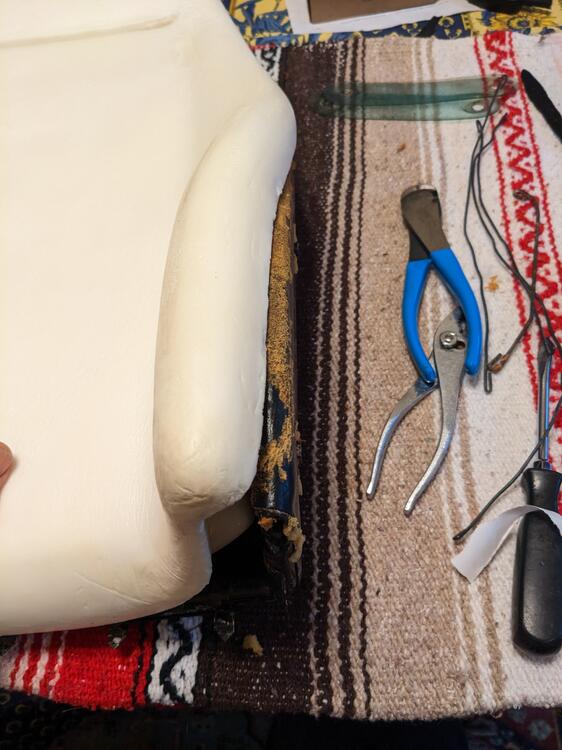
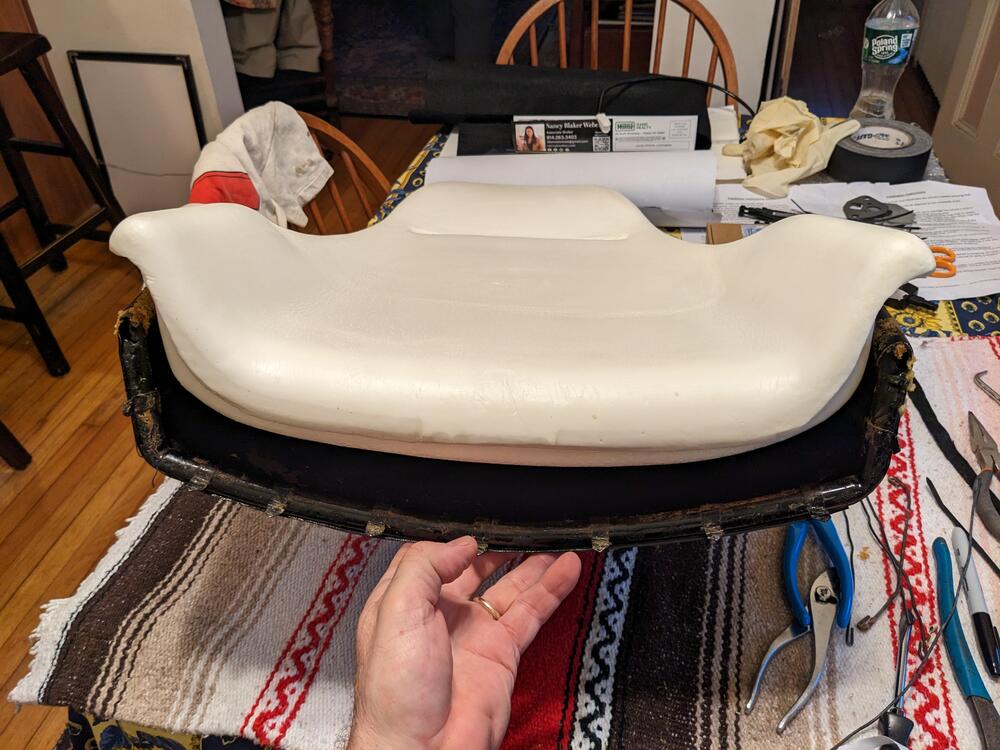
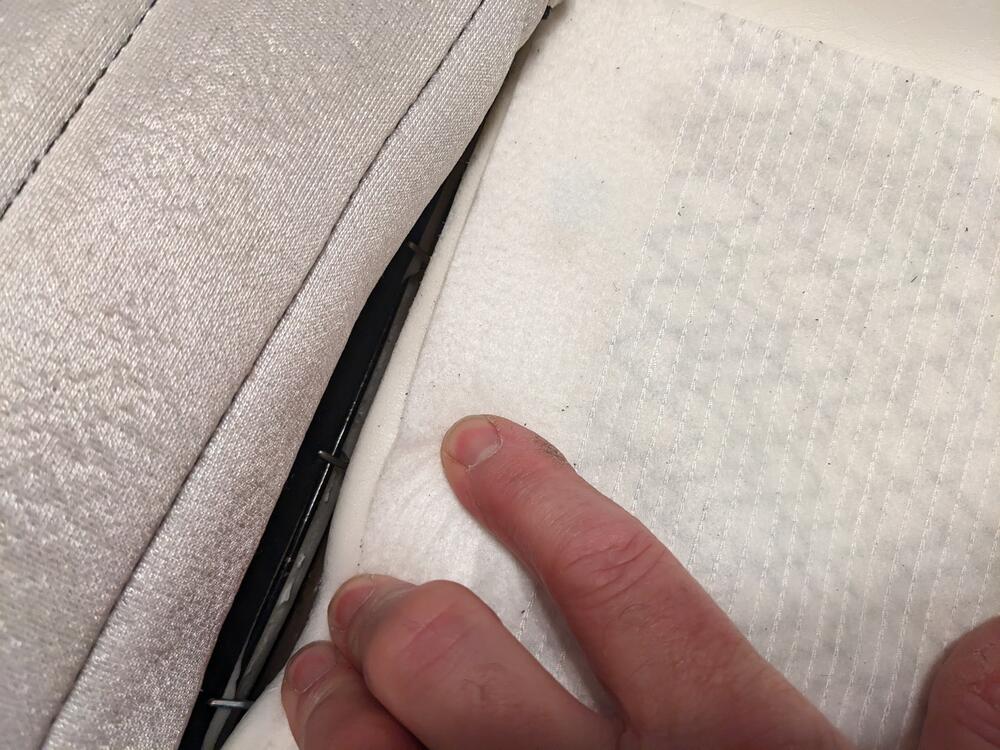
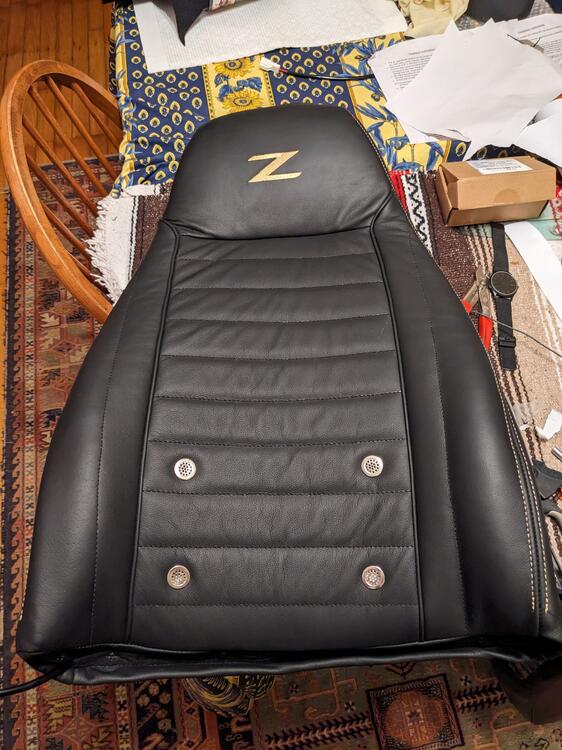
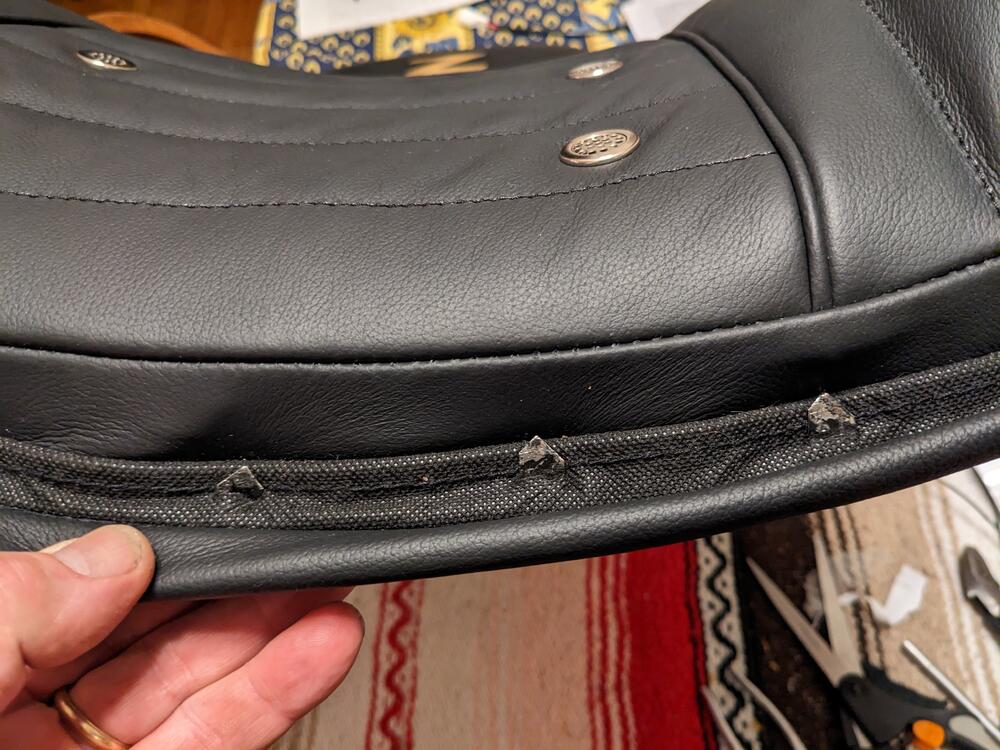
I bought the leather versions of their upholstery (off Amazon, included vents & "Z" embroidery without additional cost), and the new foam to go with. My original seats have 250K miles, so I figured safer to have the foam. There was much hay on the floor. I watched a coupe videos, just to get the gist of the Datsun construction. One guy used dozens of tie wraps(!). I'm familiar with Volvo & Honda (S2000) seats, many hog rings on those, so it was nice to see the way Datsun went about it. Anyway, took the seats out yesterday, and the carpets & under-matting. I have new carpet also, so I need to clean everything up, fix the heater valve coolant leak, then put the new carpeting in, so I can reinstall the seats. Added a reinforcing layer to the under-mats Made new cubby inserts, foam w/ vinyl layer glued removed the seat hinges & rails. Pass seat back upholstery was still good, but I don't want vinyl . Have to clean up the hinges & rails before they go back together. I'm missing the outer hinge covers on both sides. Foam comparsions - new one is thicker, doesn't need the hay layer transfer perimeter wire from originals Started raining, so I moved indoors. Adding seat heaters while I'm at it. Used tie wraps to add in pulling the upholstery flap through to the wire frame Layer of felt to protect the foam Frame wedged in place, upholstery tangs pressed into leather seam, forward flap hog-ringed in place, rear flap not yet attached Fit seems OK Stripped the driver's seat back The upright foam doesn't seem to fit as well, however once the upholstery was on, it seems OK Pulled upholstery over the head rest portion & install 3 hog rings took a couple tries to get the cover reasonably aligned, still a little off center forward cover stretched over tangs, then rear lip seat heater wire brought out near the hinge


 2 points
 -
2 pointsYou will need a decent multimeter to diagnose this problem. Here is what I suggest doing. Put your meter on resistance. Take a reading from the terminal on the sending unit (with the wire unplugged) to ground. I like using a stud on the driver's side strut as the grounding point. Do this with the engine stone cold. Get the car up to temperature. Take another resistance reading on the sending unit. If the resistance hasn't dropped significantly, either you are doing it wrong, or the sender is bad. With the wire to the sending unit still off, turn the key to ON. Put your meter on 1 Amp current. (10 A if 1 A isn't available. Put the negative lead on the sending unit. Put the positive lead on the wire that goes to the sending unit. The current reading should be dancing. (If you look through my videos on YouTube, you'll see a demonstration of this. My channel name is MyZCarLife.) If the current reading isn't dancing, you need to inspect your wiring. Do these steps first and report back. Then I can write up the rest. Please create a signature with the year of your car. That way I can provide instructions specific to the year of your car for the next phase if necessary. (I know it's in the subject line, but sometimes I have a lot of tabs open and can't see the subject.)2 points
-
Nice job! Just finished doing the seats in my '71. New foam and vinyl upholstery. It's the third time I've done it in the 52 years I've owned my Z. And, no, it doesn't get easier with practice. Enjoy your heated seats and leather.2 points
-
1 point
-
1 point
-
1 point
-
1 pointErnest, You're killing me! I feel like I'm sitting still 😉 Looks great!1 point
-
1 point@siteunseenthat is not a bad deal these days. Less than 3 bucks a piece. I’d give it a shot. Still can’t figure out why the lugs from the factory didn’t work. Maybe shipped the incorrect lugs. Gotta be a headache1 point
-
1 pointFriend, I think you dumped oil out of the system. IMO That’s going to be a problem down the road.1 point
-
1 pointI'd be concerned some of the yellow stuff that leaked out would be the oil that's in the system for the compressor1 point
-
Here we are 3 years later, I sure had hoped that the 260/280 rings would make it to fruition.1 point
-
1 pointWanted to chime in here. I’ve ordered a bunch of parts from zcardepot. They’re generally pretty good, with some hiccups. One is they never pick up the phone. Leave a message and they don’t return the call. I think its more a function of the inability to handle the work load. The owner Ryan seems like a good guy from the few interactions I’ve had with him. He’s running parts for Dodge Vipers also. I found this out accidentally. I needed new front and rear inner tie rods for my 2000 Viper and they’re almost impossible to find. I found a set on at a place named Viperpartsdepot. Sent them an email to ensure proper fitment and got a fast response. I ordered the parts and that evening i checked my email and got a PayPal message with a $250 charge to Zcardepot. I hasn’t bought and Datsun parts recently. I emailed Zcardept and he responded he runs both online parts fro both Vipers and Z’s. I think the guy is overwhelmed, but he ships fast and I’ve never been left hanging like Zcarparts. They left me hanging for months and never told parts were backordered. Here’s the screenshot of the email Ryan sent me.
 1 point
 -
1 point
-
1 point
-
1 pointI was getting ready to post that I bought a gasket (a while back) and it fit fine.1 point
-
1 pointI owe Z Car Depot an apology on the gasket issue. Looks like I ordered a 510 gasket instead of a 240Z exhaust gasket. Not sure how I made the mistake, but will need to be more careful next time. Since the 510 gasket works for now I will leave it. Lesson learned here.1 point
-
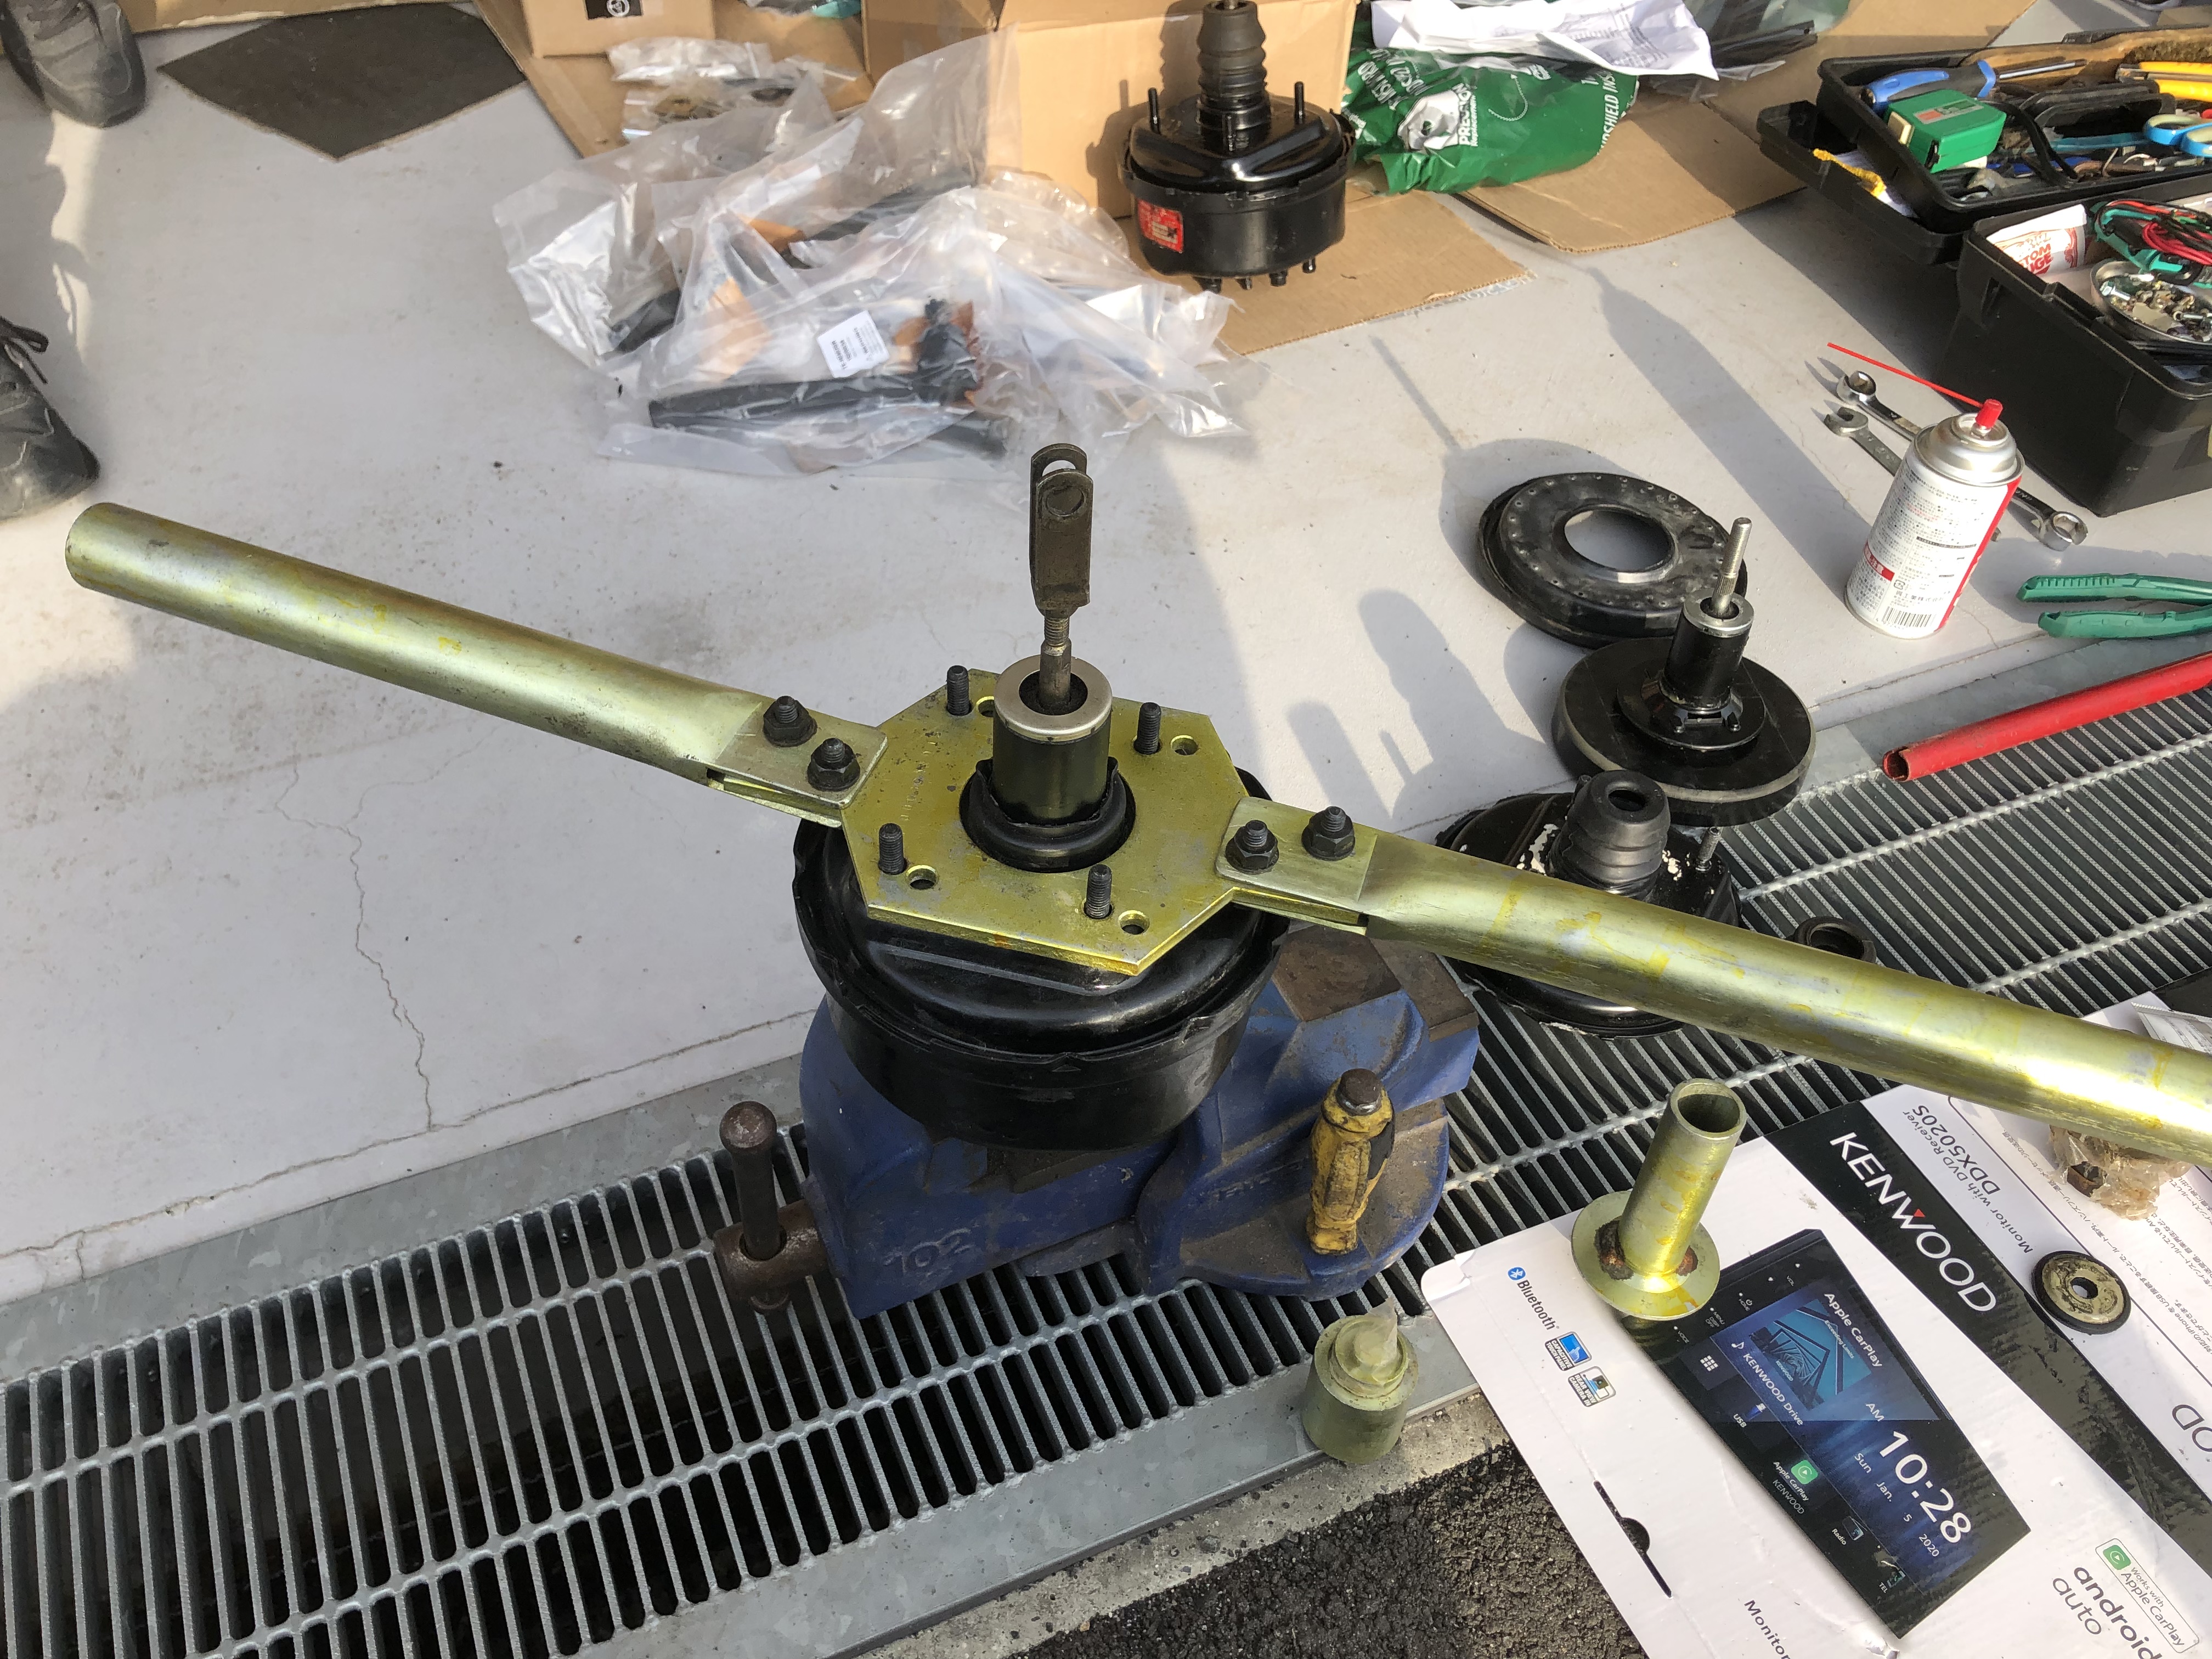
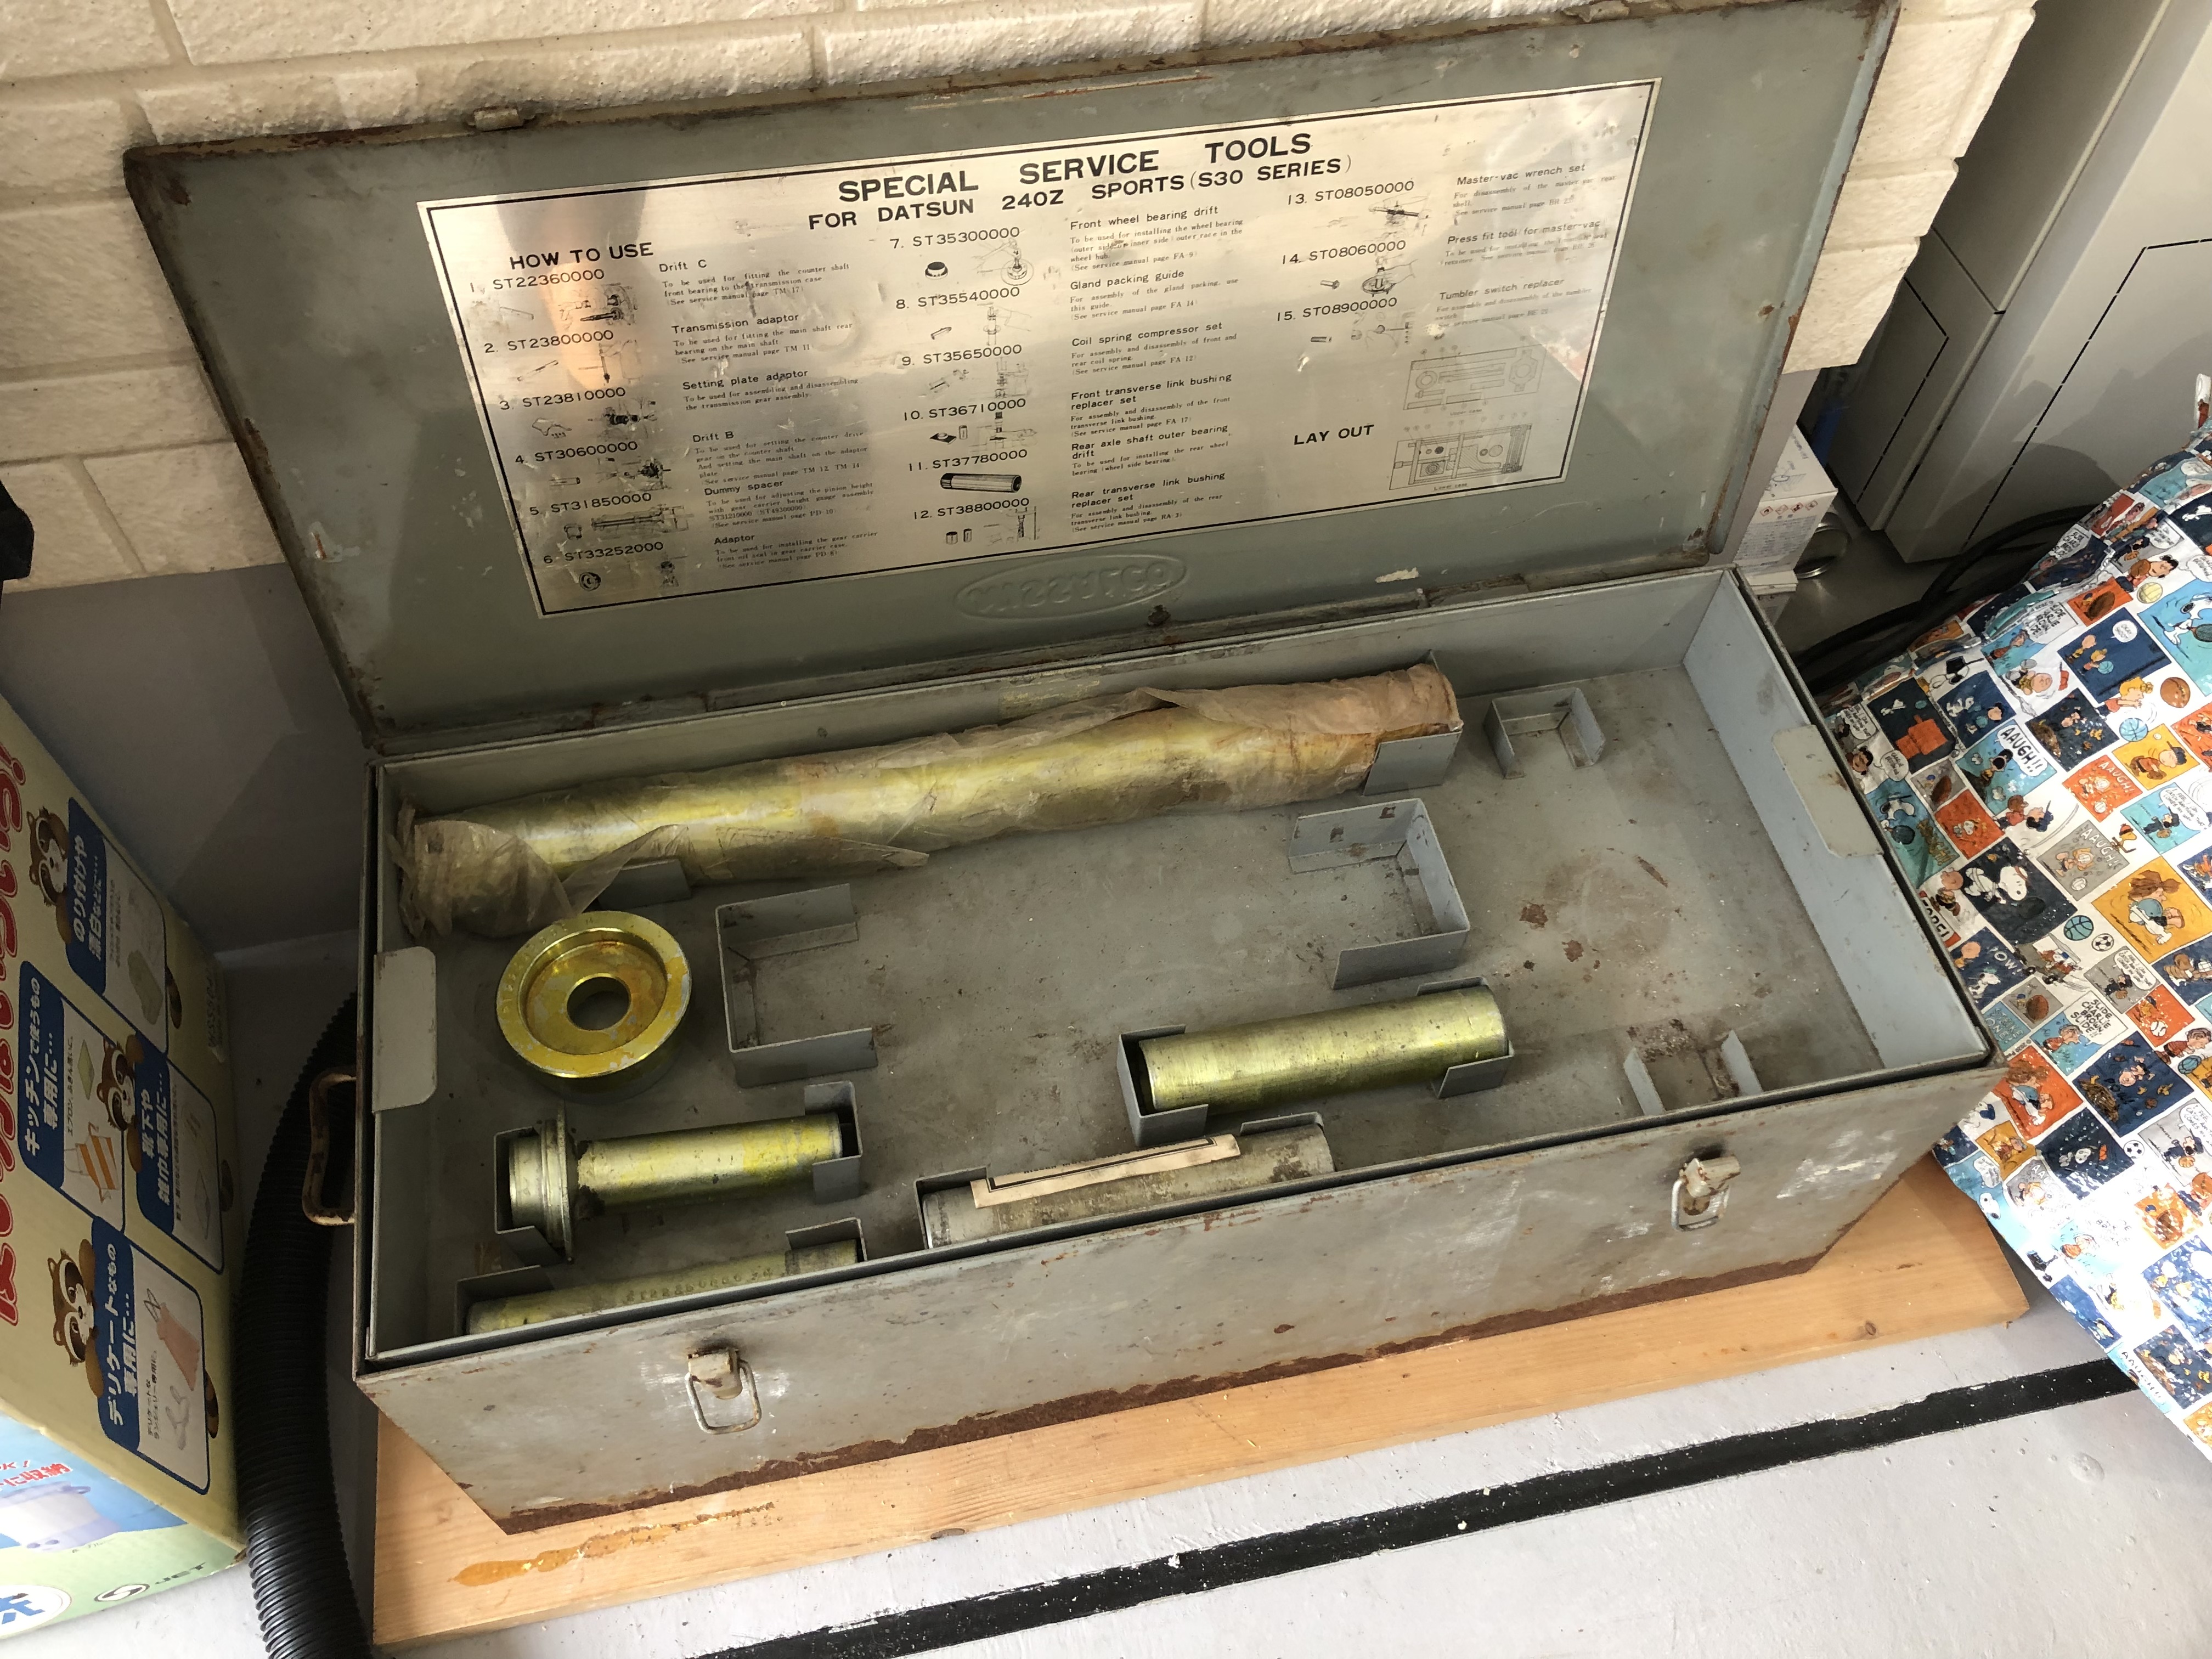
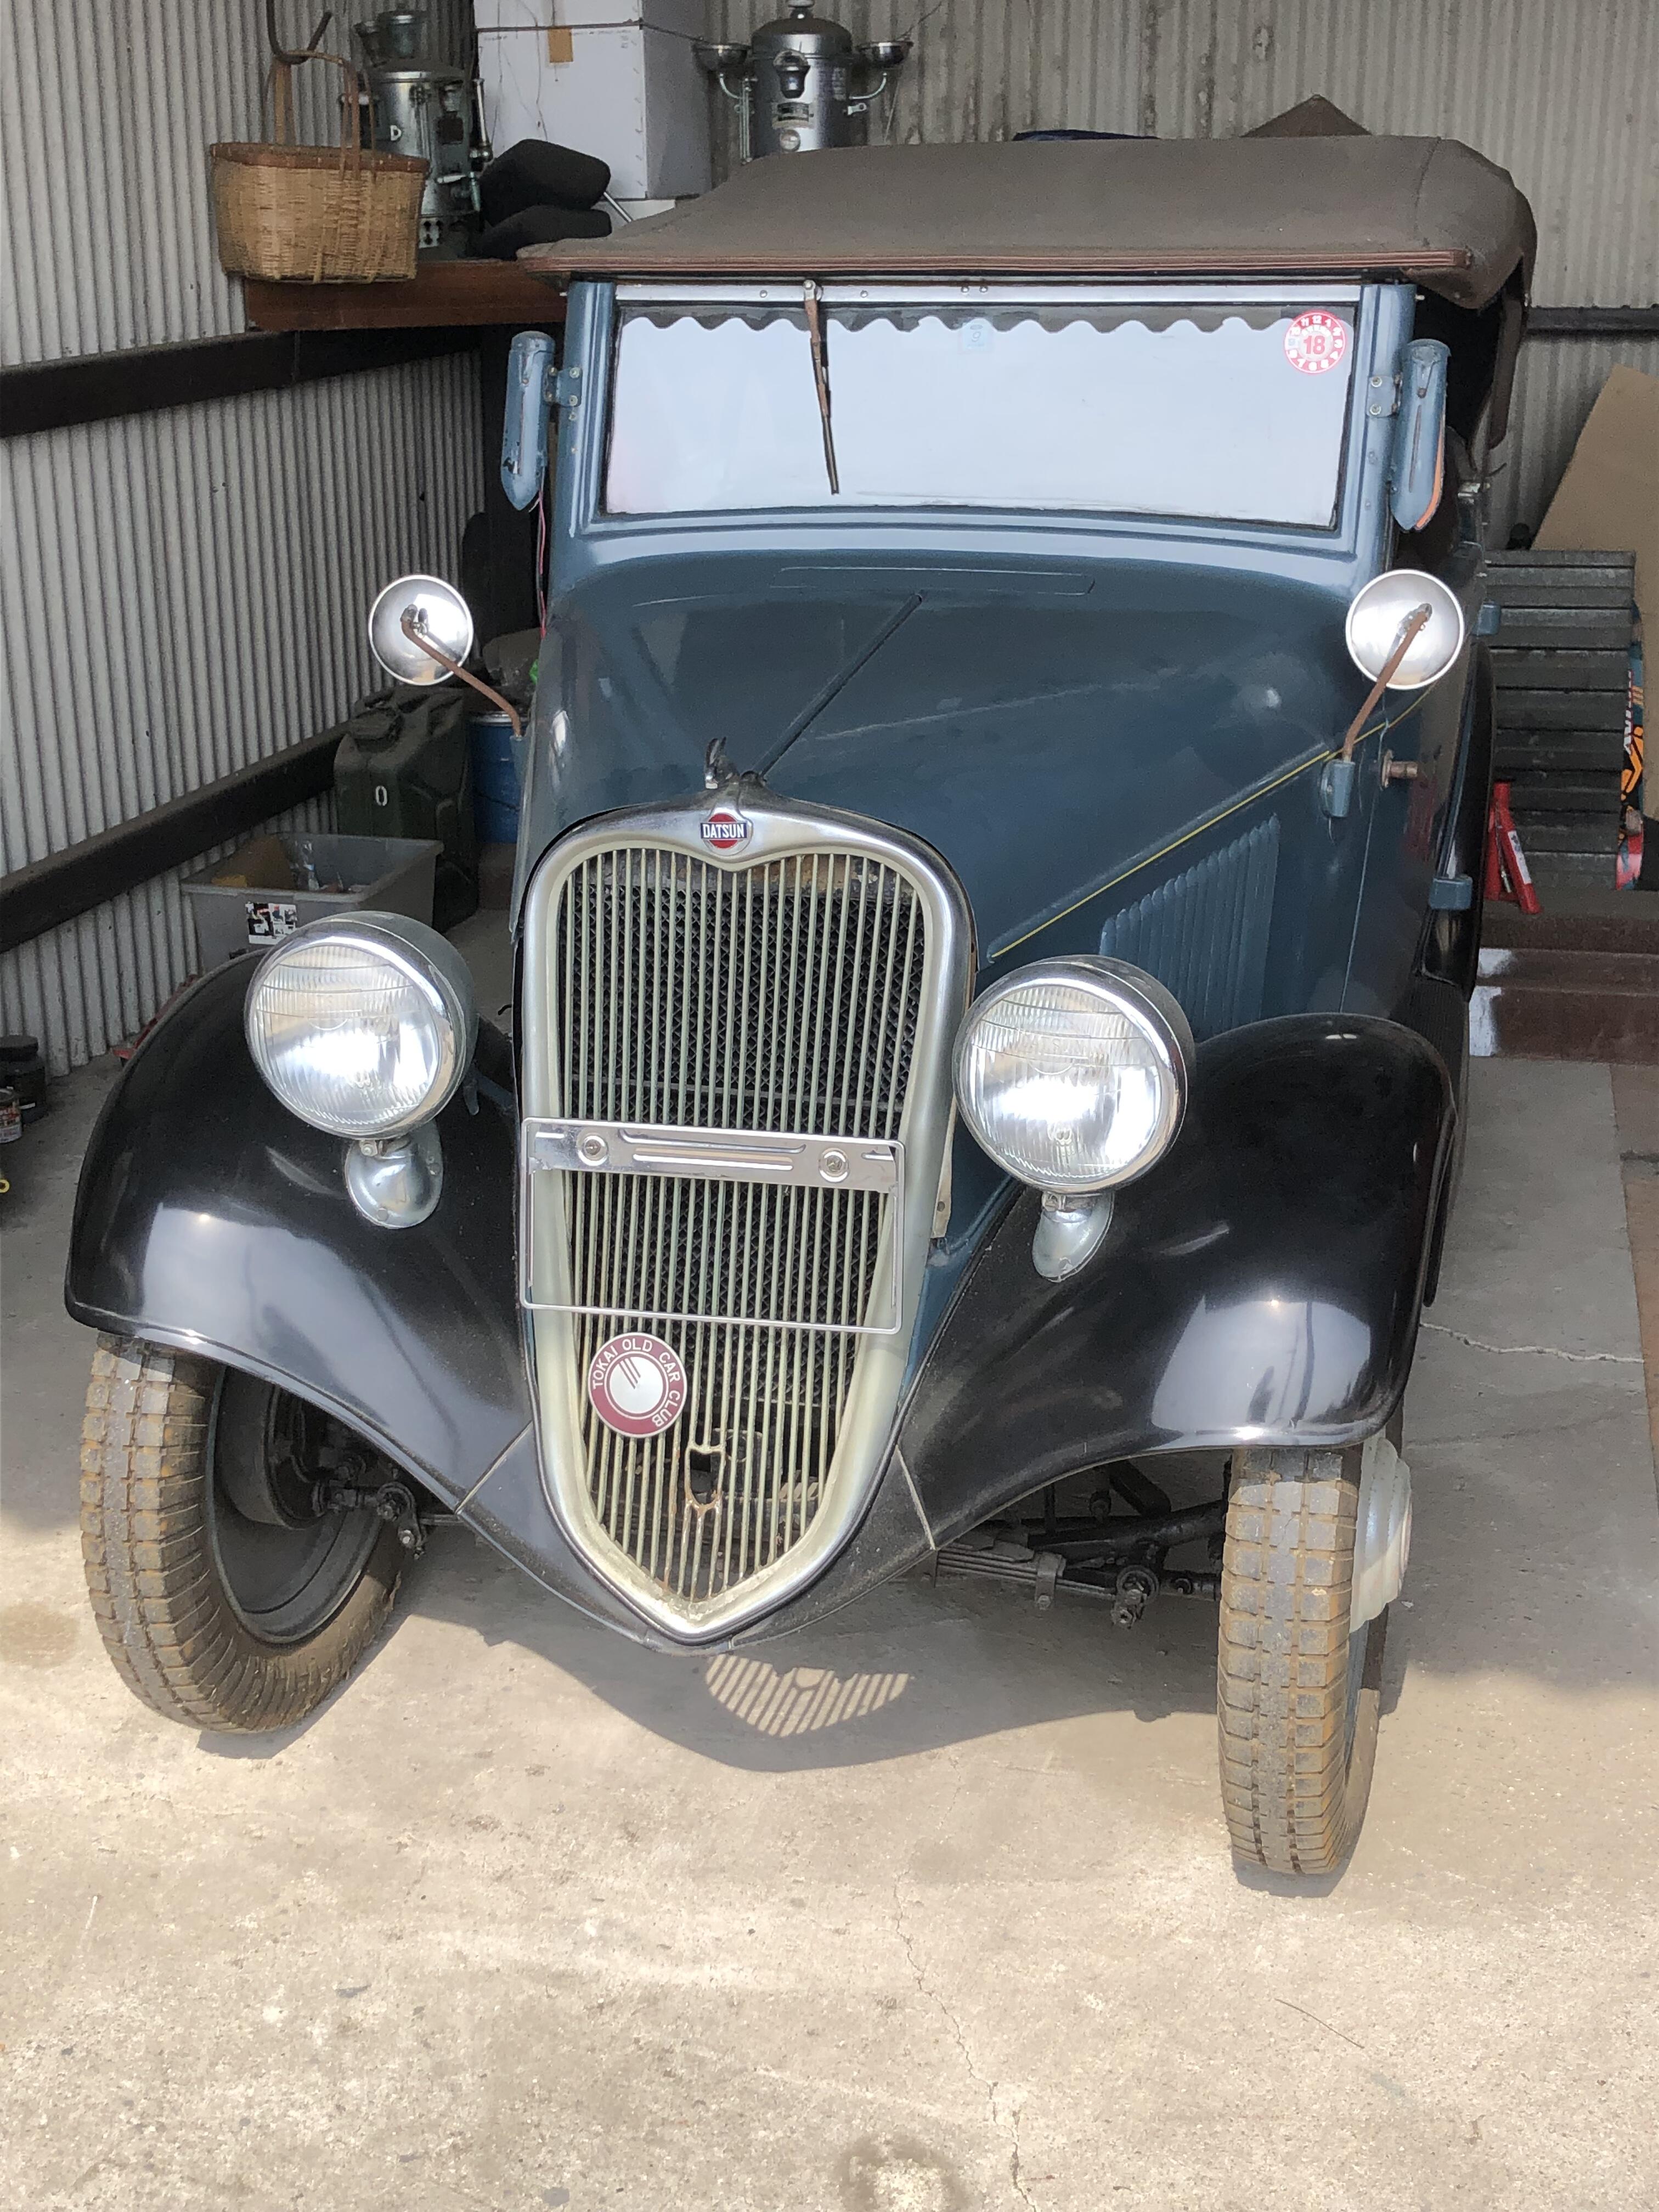
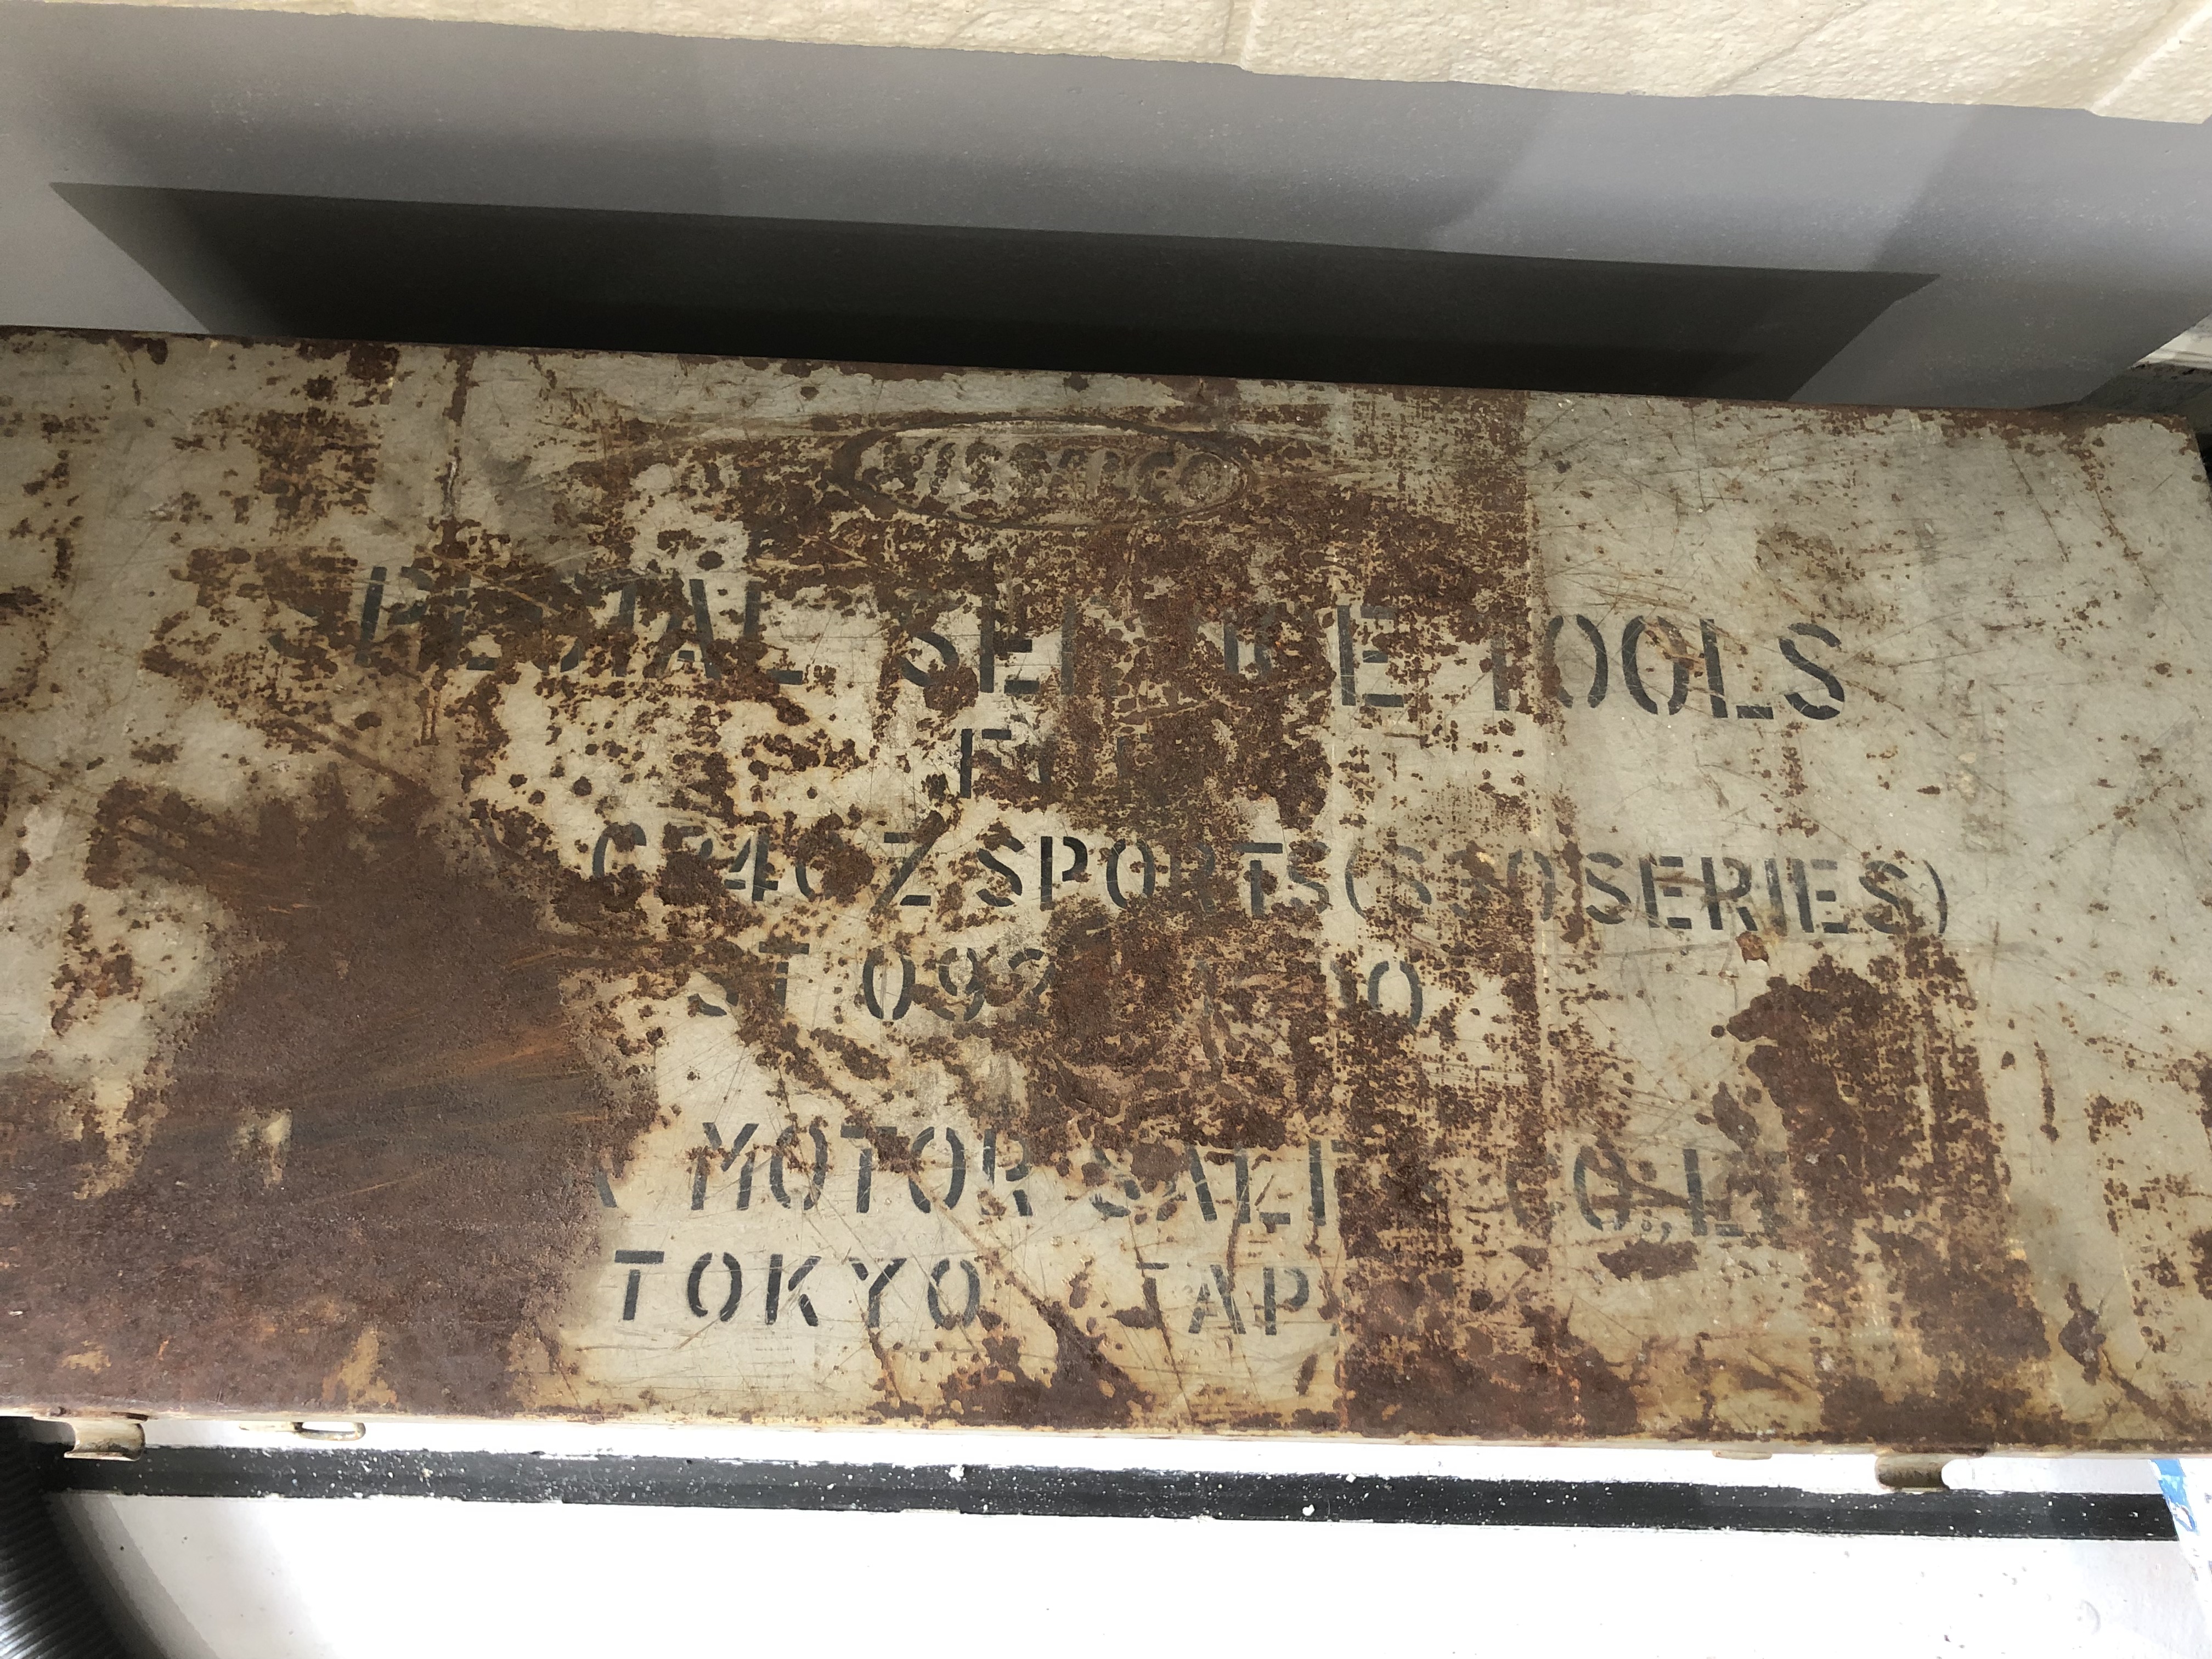
1 pointI did repair job of a master vac for my 240Z with my friend. I almost forgot that I have a special tool box for S30 series. This time I opened the box and pulled a tool which is for twisting the backplate of the master vac. It worked!! 1973 Skyline GTR’s master vac is still available from local Nissan dealership, I used it as a donor for my 240Z. Some of its Internal parts are interchangeable. My friend also needed to do the same thing for his Z cars. By the way he recently bought two Datsun cars, 1935 blue and 1936 orange. They are still good for driving. Amazing cars! Kats


 1 point
 -
280zx L28 TURBO Haltech 550 install - Bing video1 point
-
THANKS, THANKS A LOT! I think that's a good alternative for him.. Thanks man! I'll send him what i find when i google it. Mart(in)1 point
-
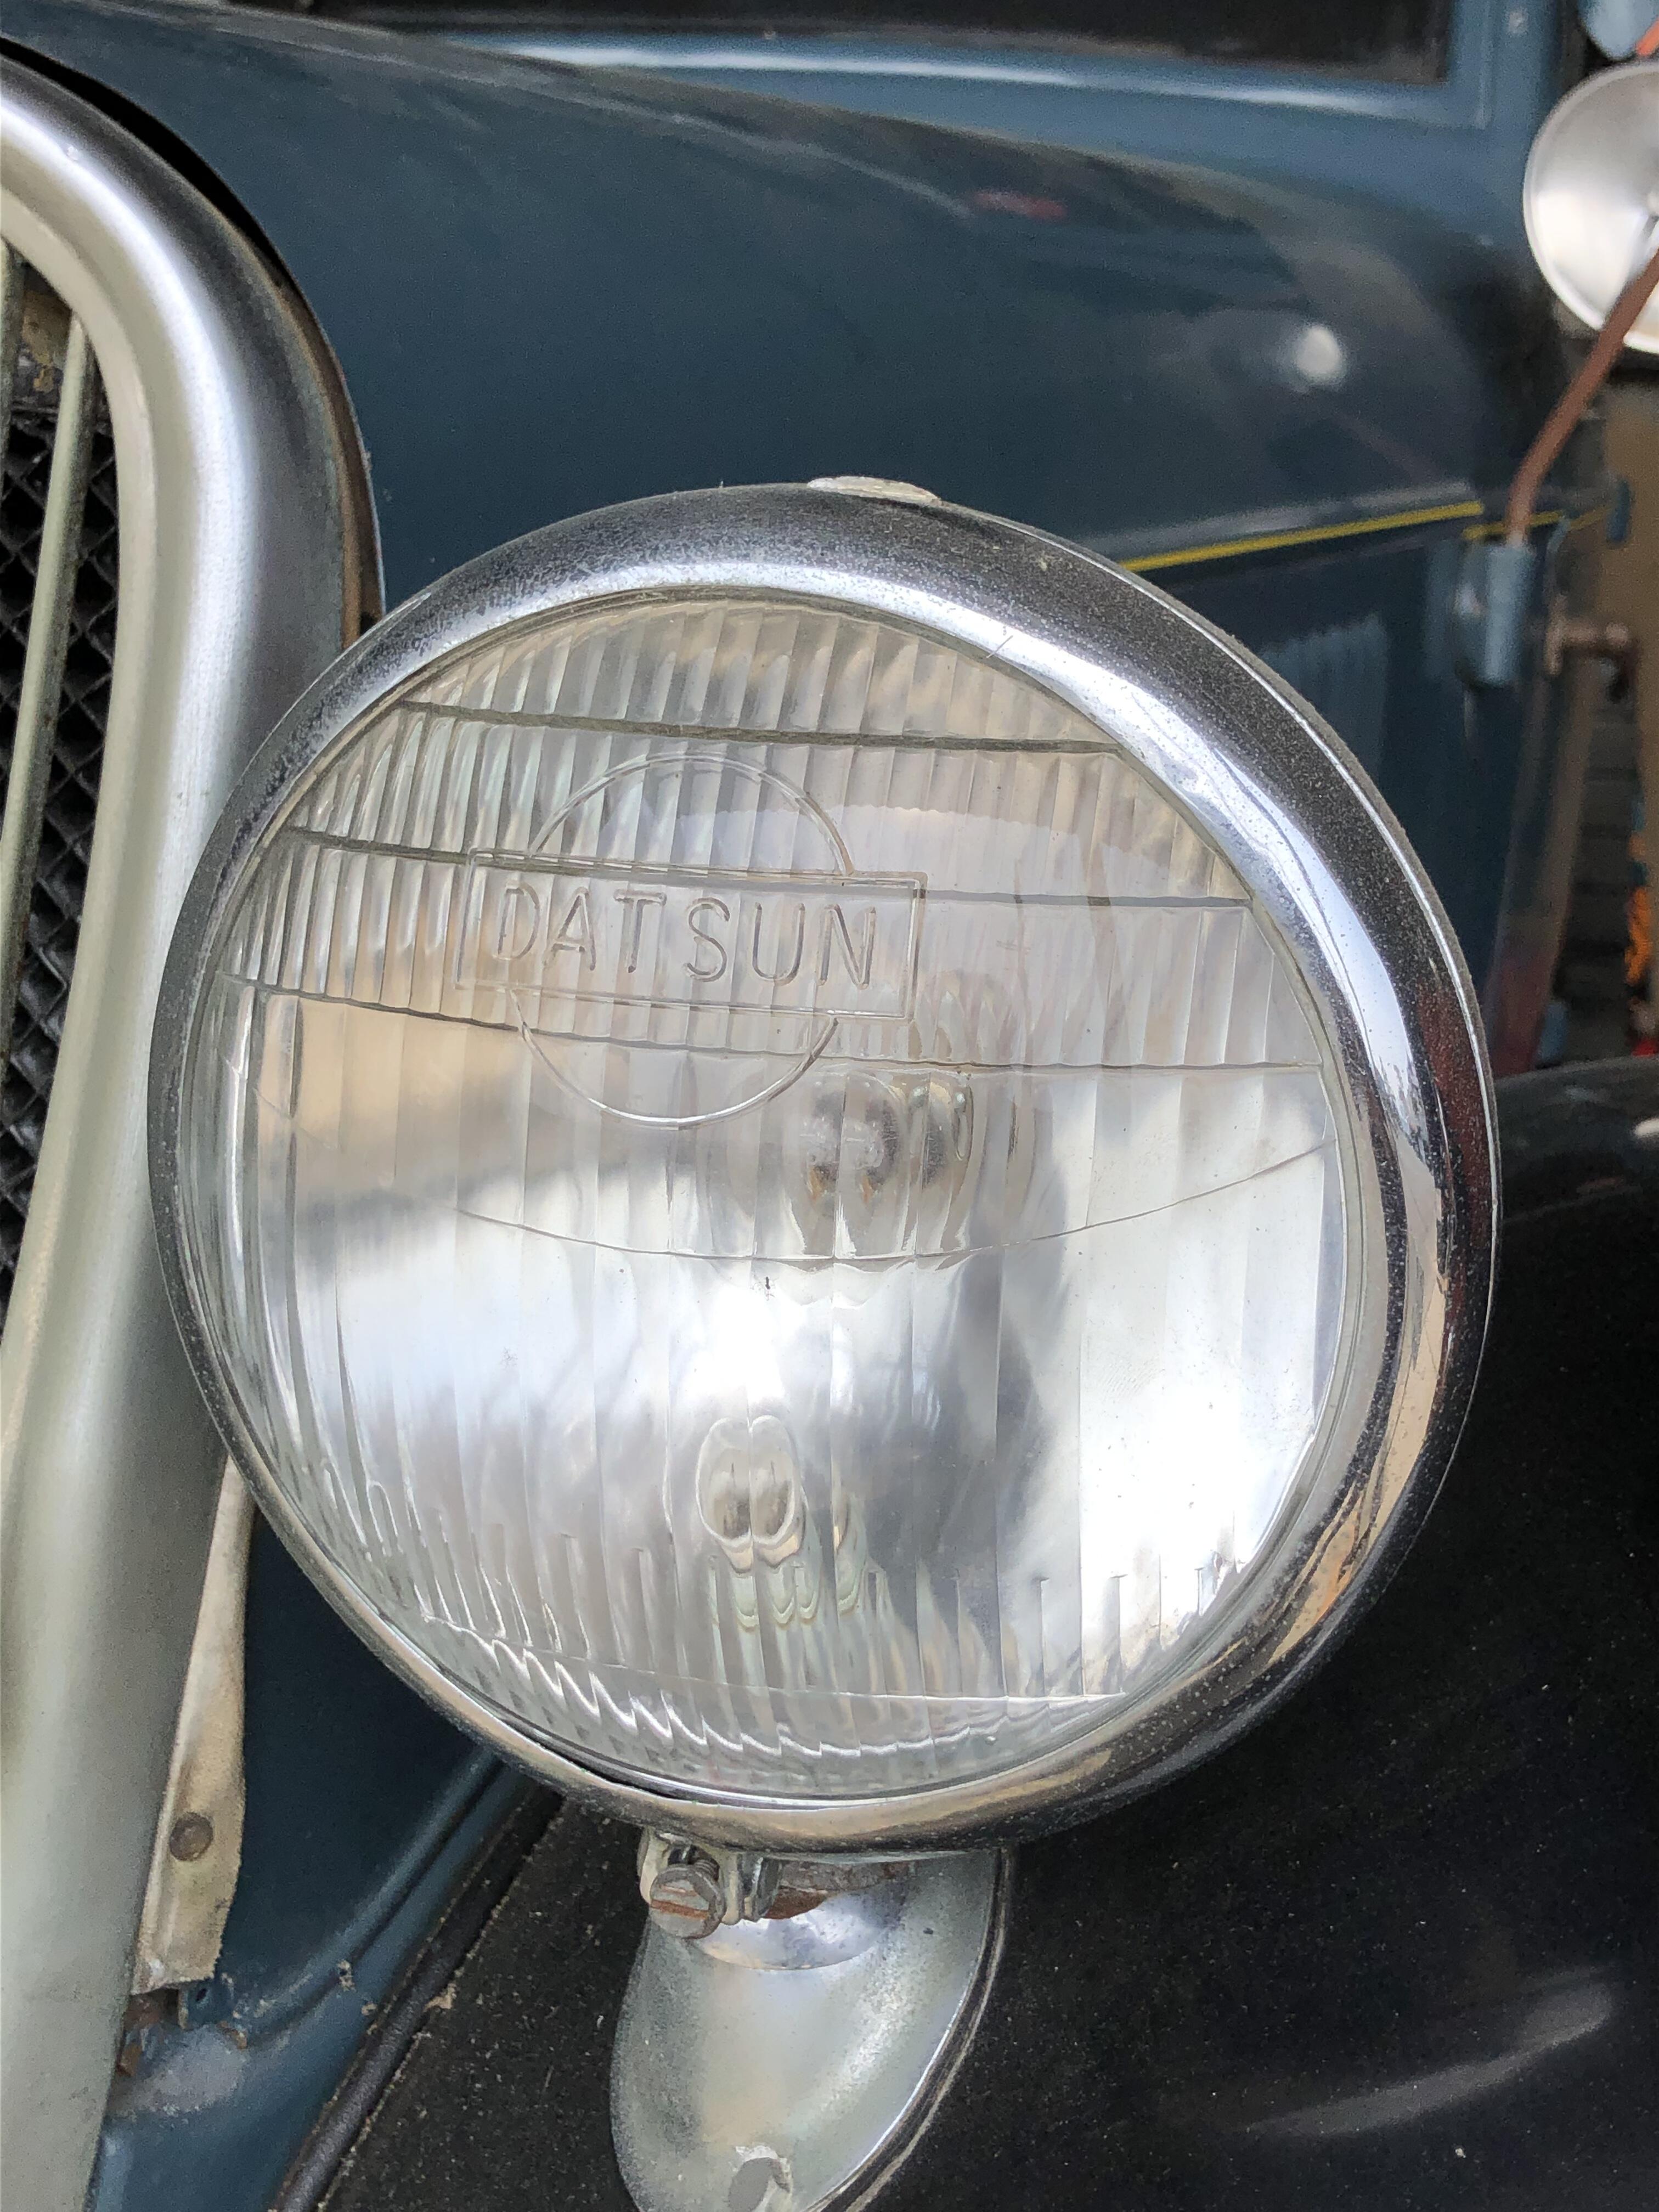
One other tidbit on the 240Z dash. The cigar lighter in the above 240Z is the way it was on my 73 240Z. My current 12/70 car has the cigar lighter under the heater controls on the right side of the fusebox cover plate. The cigar lighter spot is not cut out but the indent is there as a blank spot where I guess you could install like a driving light switch or maybe a beer tap?1 point
-
1 pointIve only seen the acorn "fat bottomed" lugs. If he let you borrow his wheels surely he'll let you borrow the fastners. Not much good when they're not together. My aluminum slots had the self centering acorns with a washer to keep from scarring up the aluminum. My rewinds don't. I buy them off ebay for less than $20. Seven years ago price! They probably $50 now.1 point
-
Yeah you seem like someone who knows the difference between a turbo car and an injector fan haha. It is my understanding that the Haltech 550 series will run the L28ET. There's a 2 part video of it being installed and run on YouTube. My phone seems to be too antiquated to insert a working link for it, but if you search "280zx L28 TURBO Haltech 550 install" you'll find it. If anything it's good to watch with a nice tall Pilsener in your hand.1 point
-
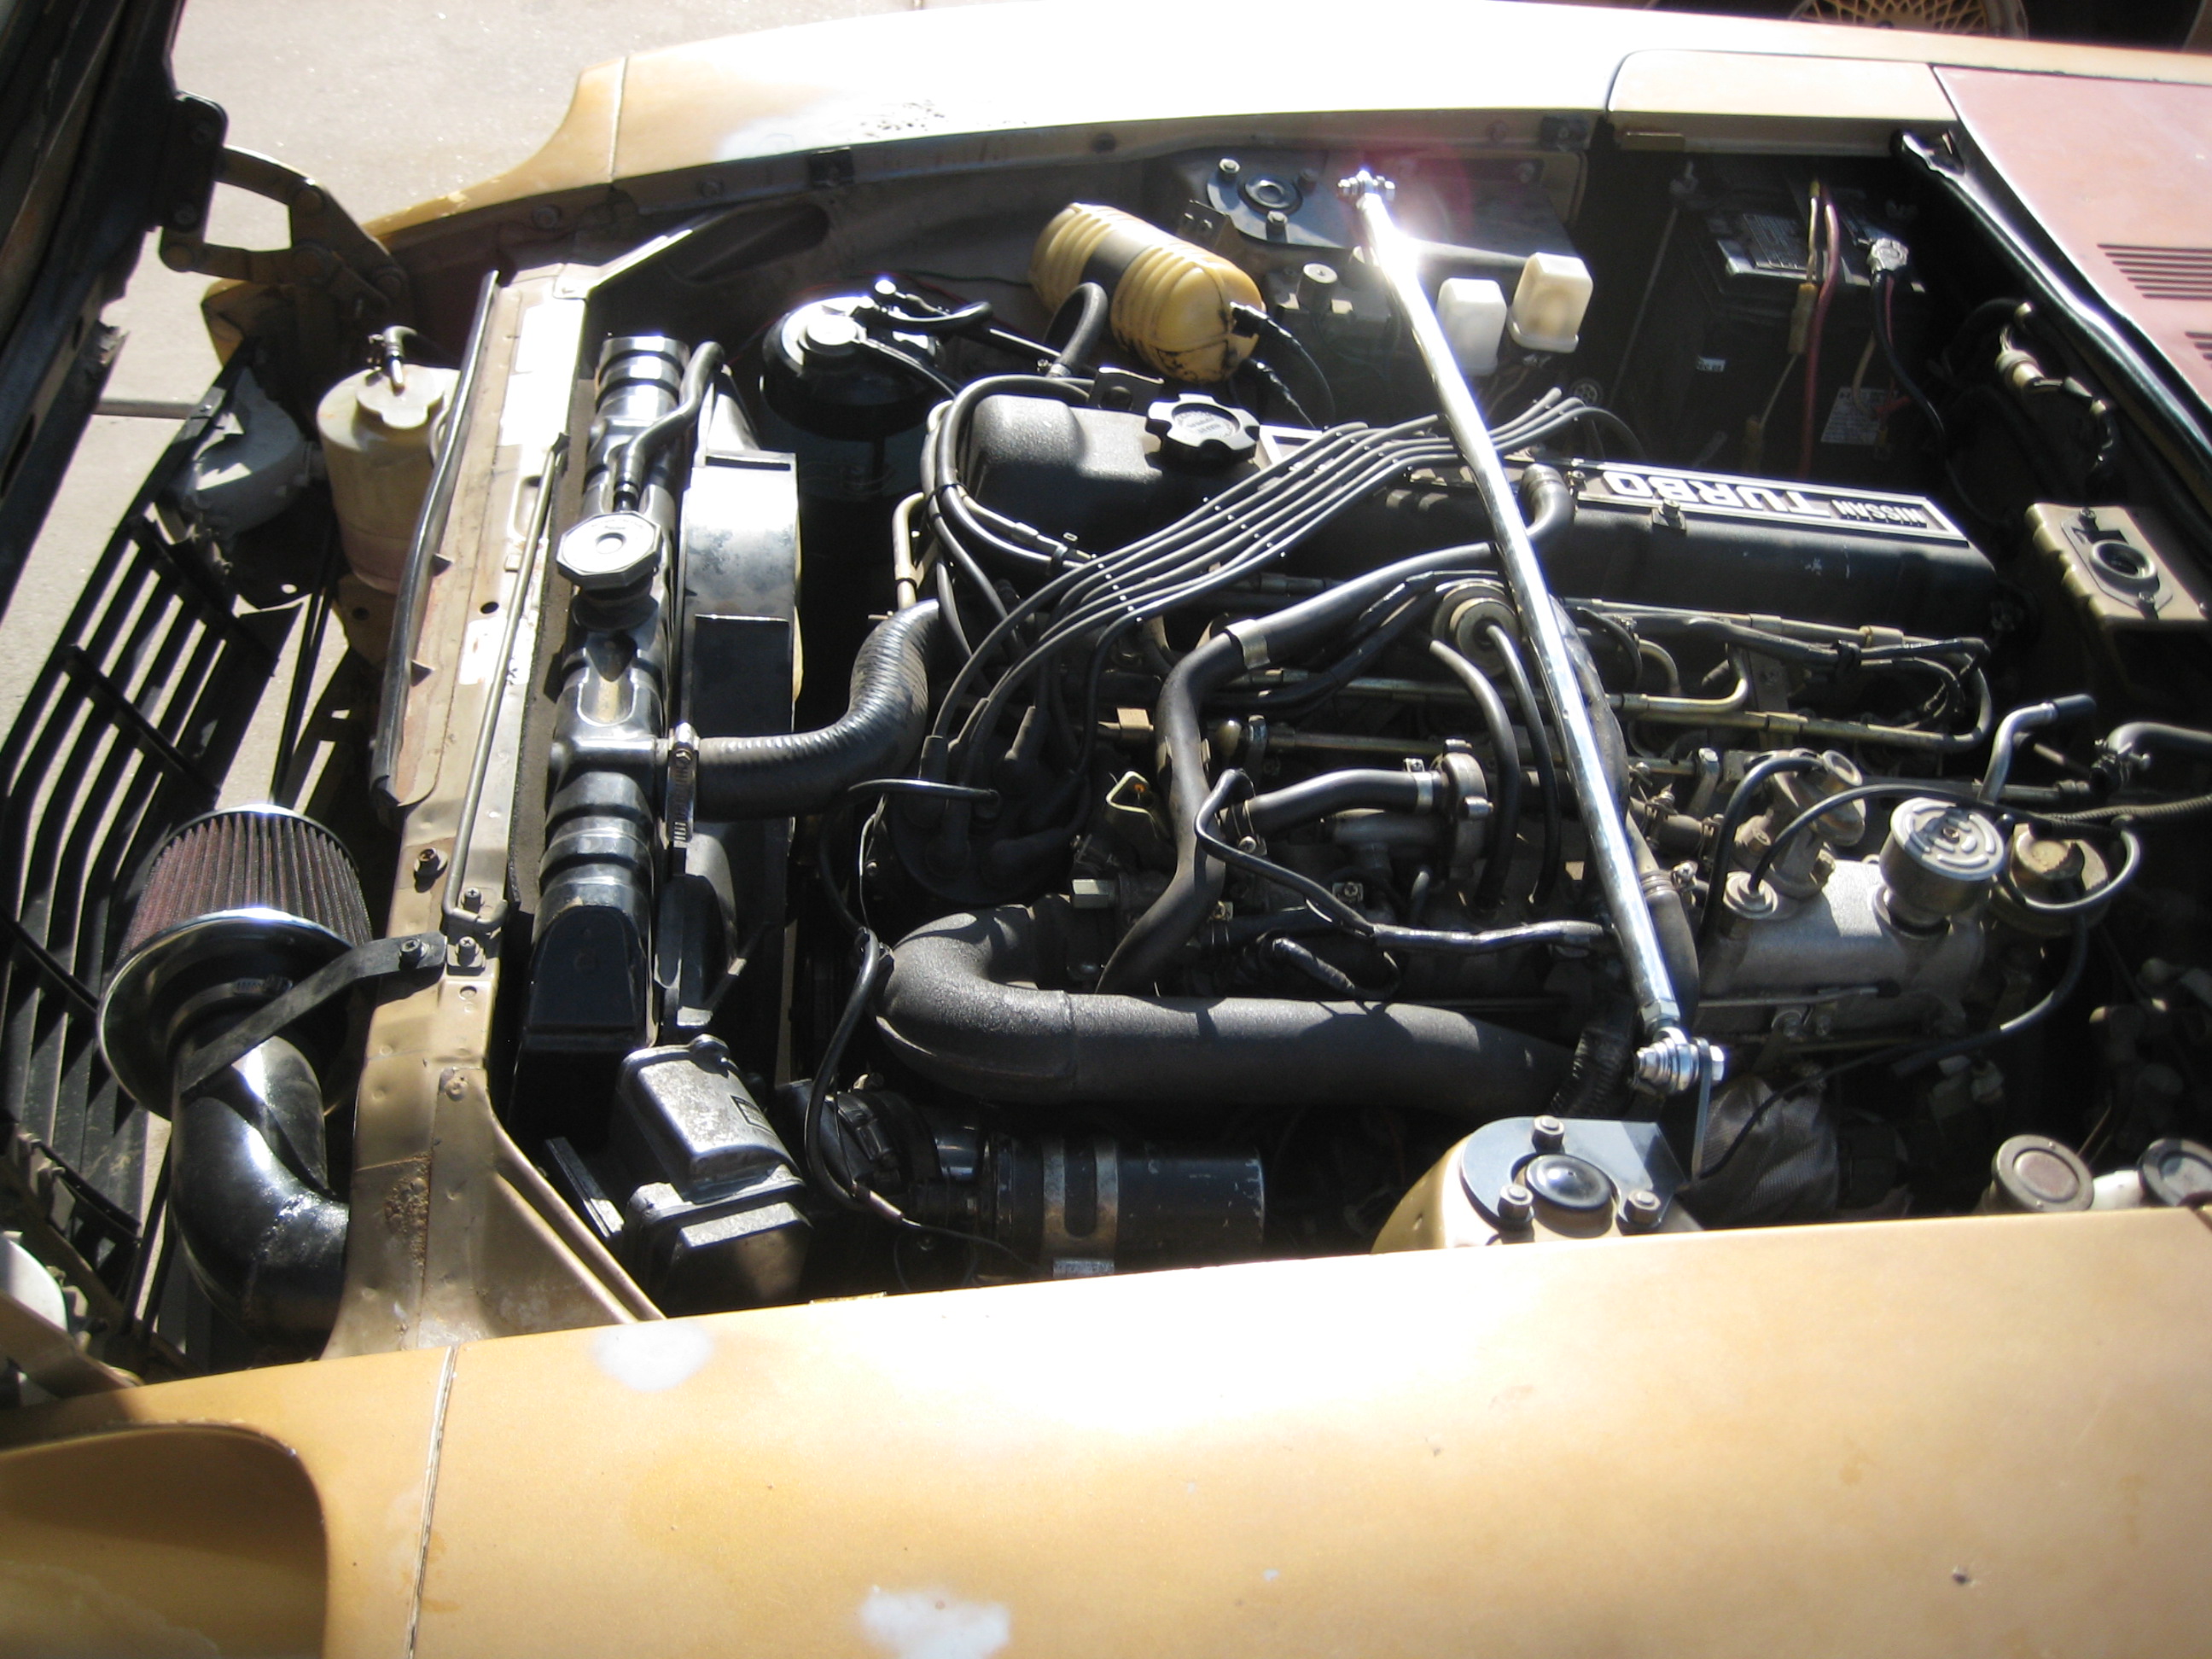
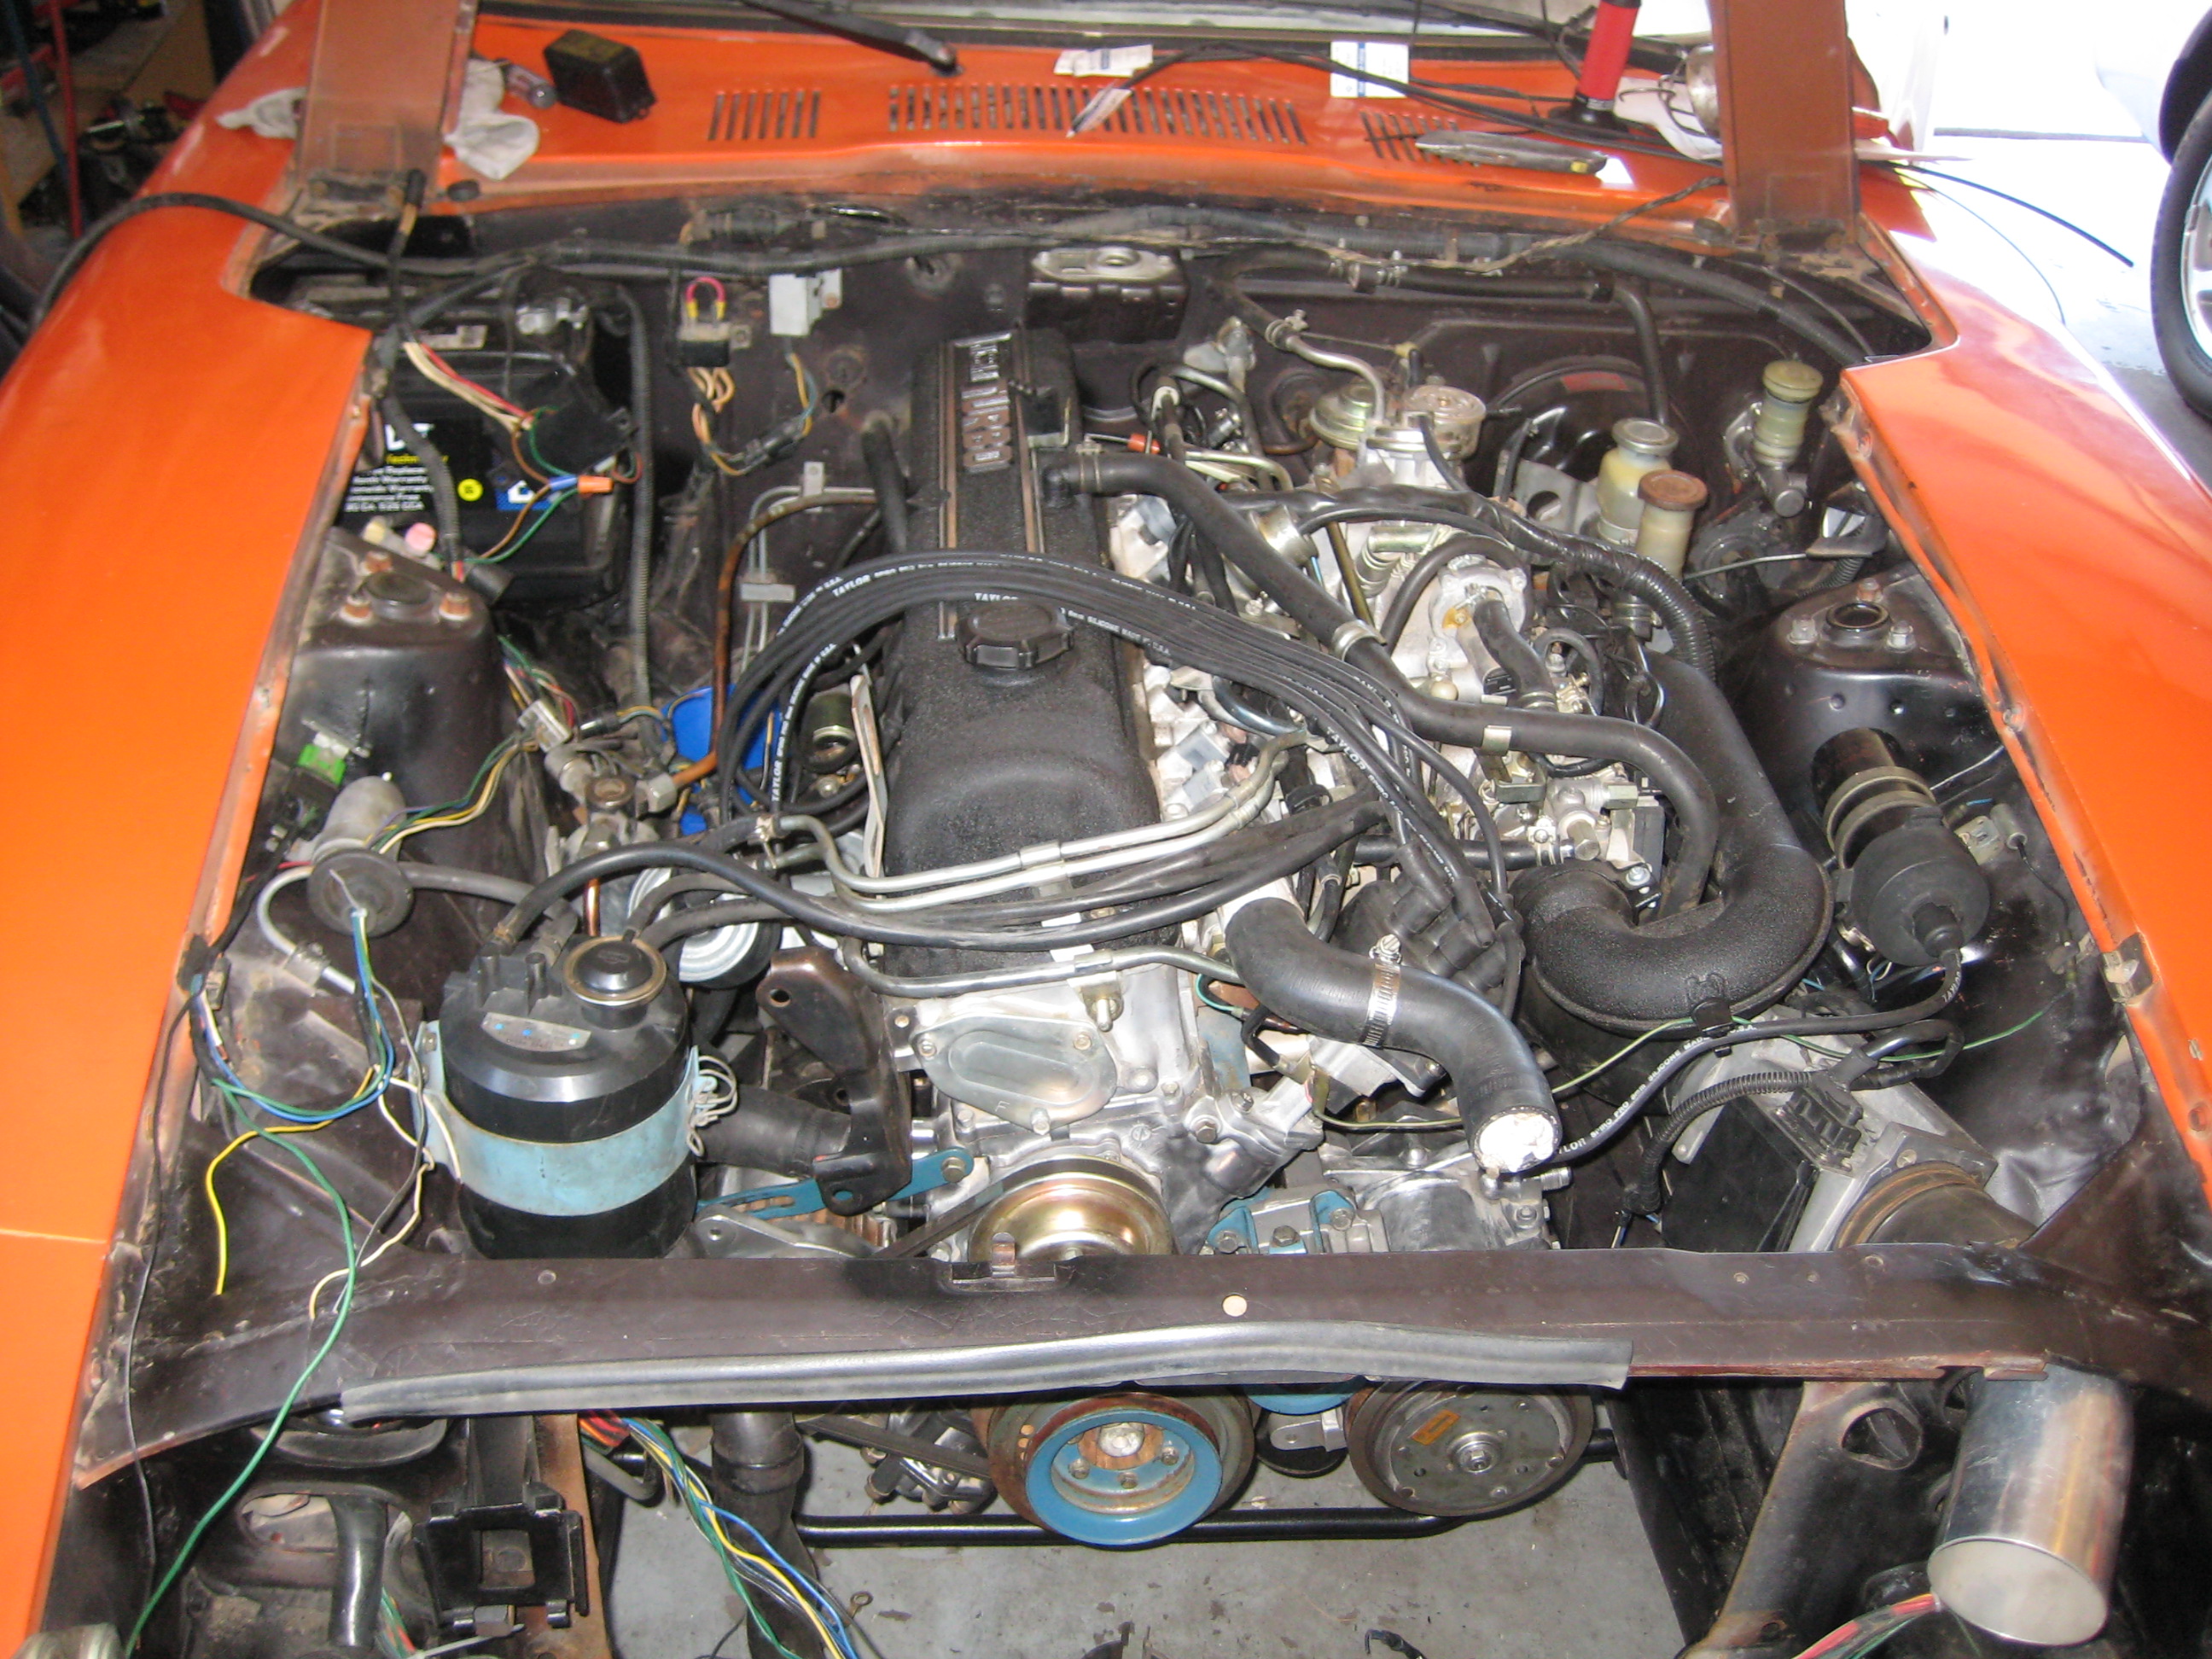
No, this isn't Goldie, it's my son's 280Z. His original color was 304 Gold Metallic. The original color of my 260Z was Brown Metallic which was oversprayed single stage orange... Nick's 280Z had been running with the L28ET for a couple of years when the above pic was taken. I bought the 260 frame in late 2007 and drove it for the first time in March of 2008. Humble beginnings.

 1 point
 -
I would NEVER delete my A/C compressor! 🤪 It's the first thing I had working after my L28ET was running. But, my early 260Z frame had factory A/C so it wasn't a big deal. (My L28ET was a gift from my youngest son who knew once he gave it to me, I'd have to find an S30 to put it in. He was correct.) Our first turbo swap was into my youngest son's '76 280Z. Mine was done a couple years later. We both used the AFM in the beginning - then a MAF. I'll try to find some pics but all were mounted in or near the usual 280Z AFM location - not USING stock AFM mounts however. I think we cut his out and mine didn't have any mounts to begin with. We did custom cold air from the AFM / MAF in front of radiator core support - not the stock air filter. He still uses the F31 (Infiniti M30) ECU (with Nistune) and MAF. I moved on and will be moving on again to an AEM Infinity 506 ECU. I just need to get the engine harness finished.1 point
-
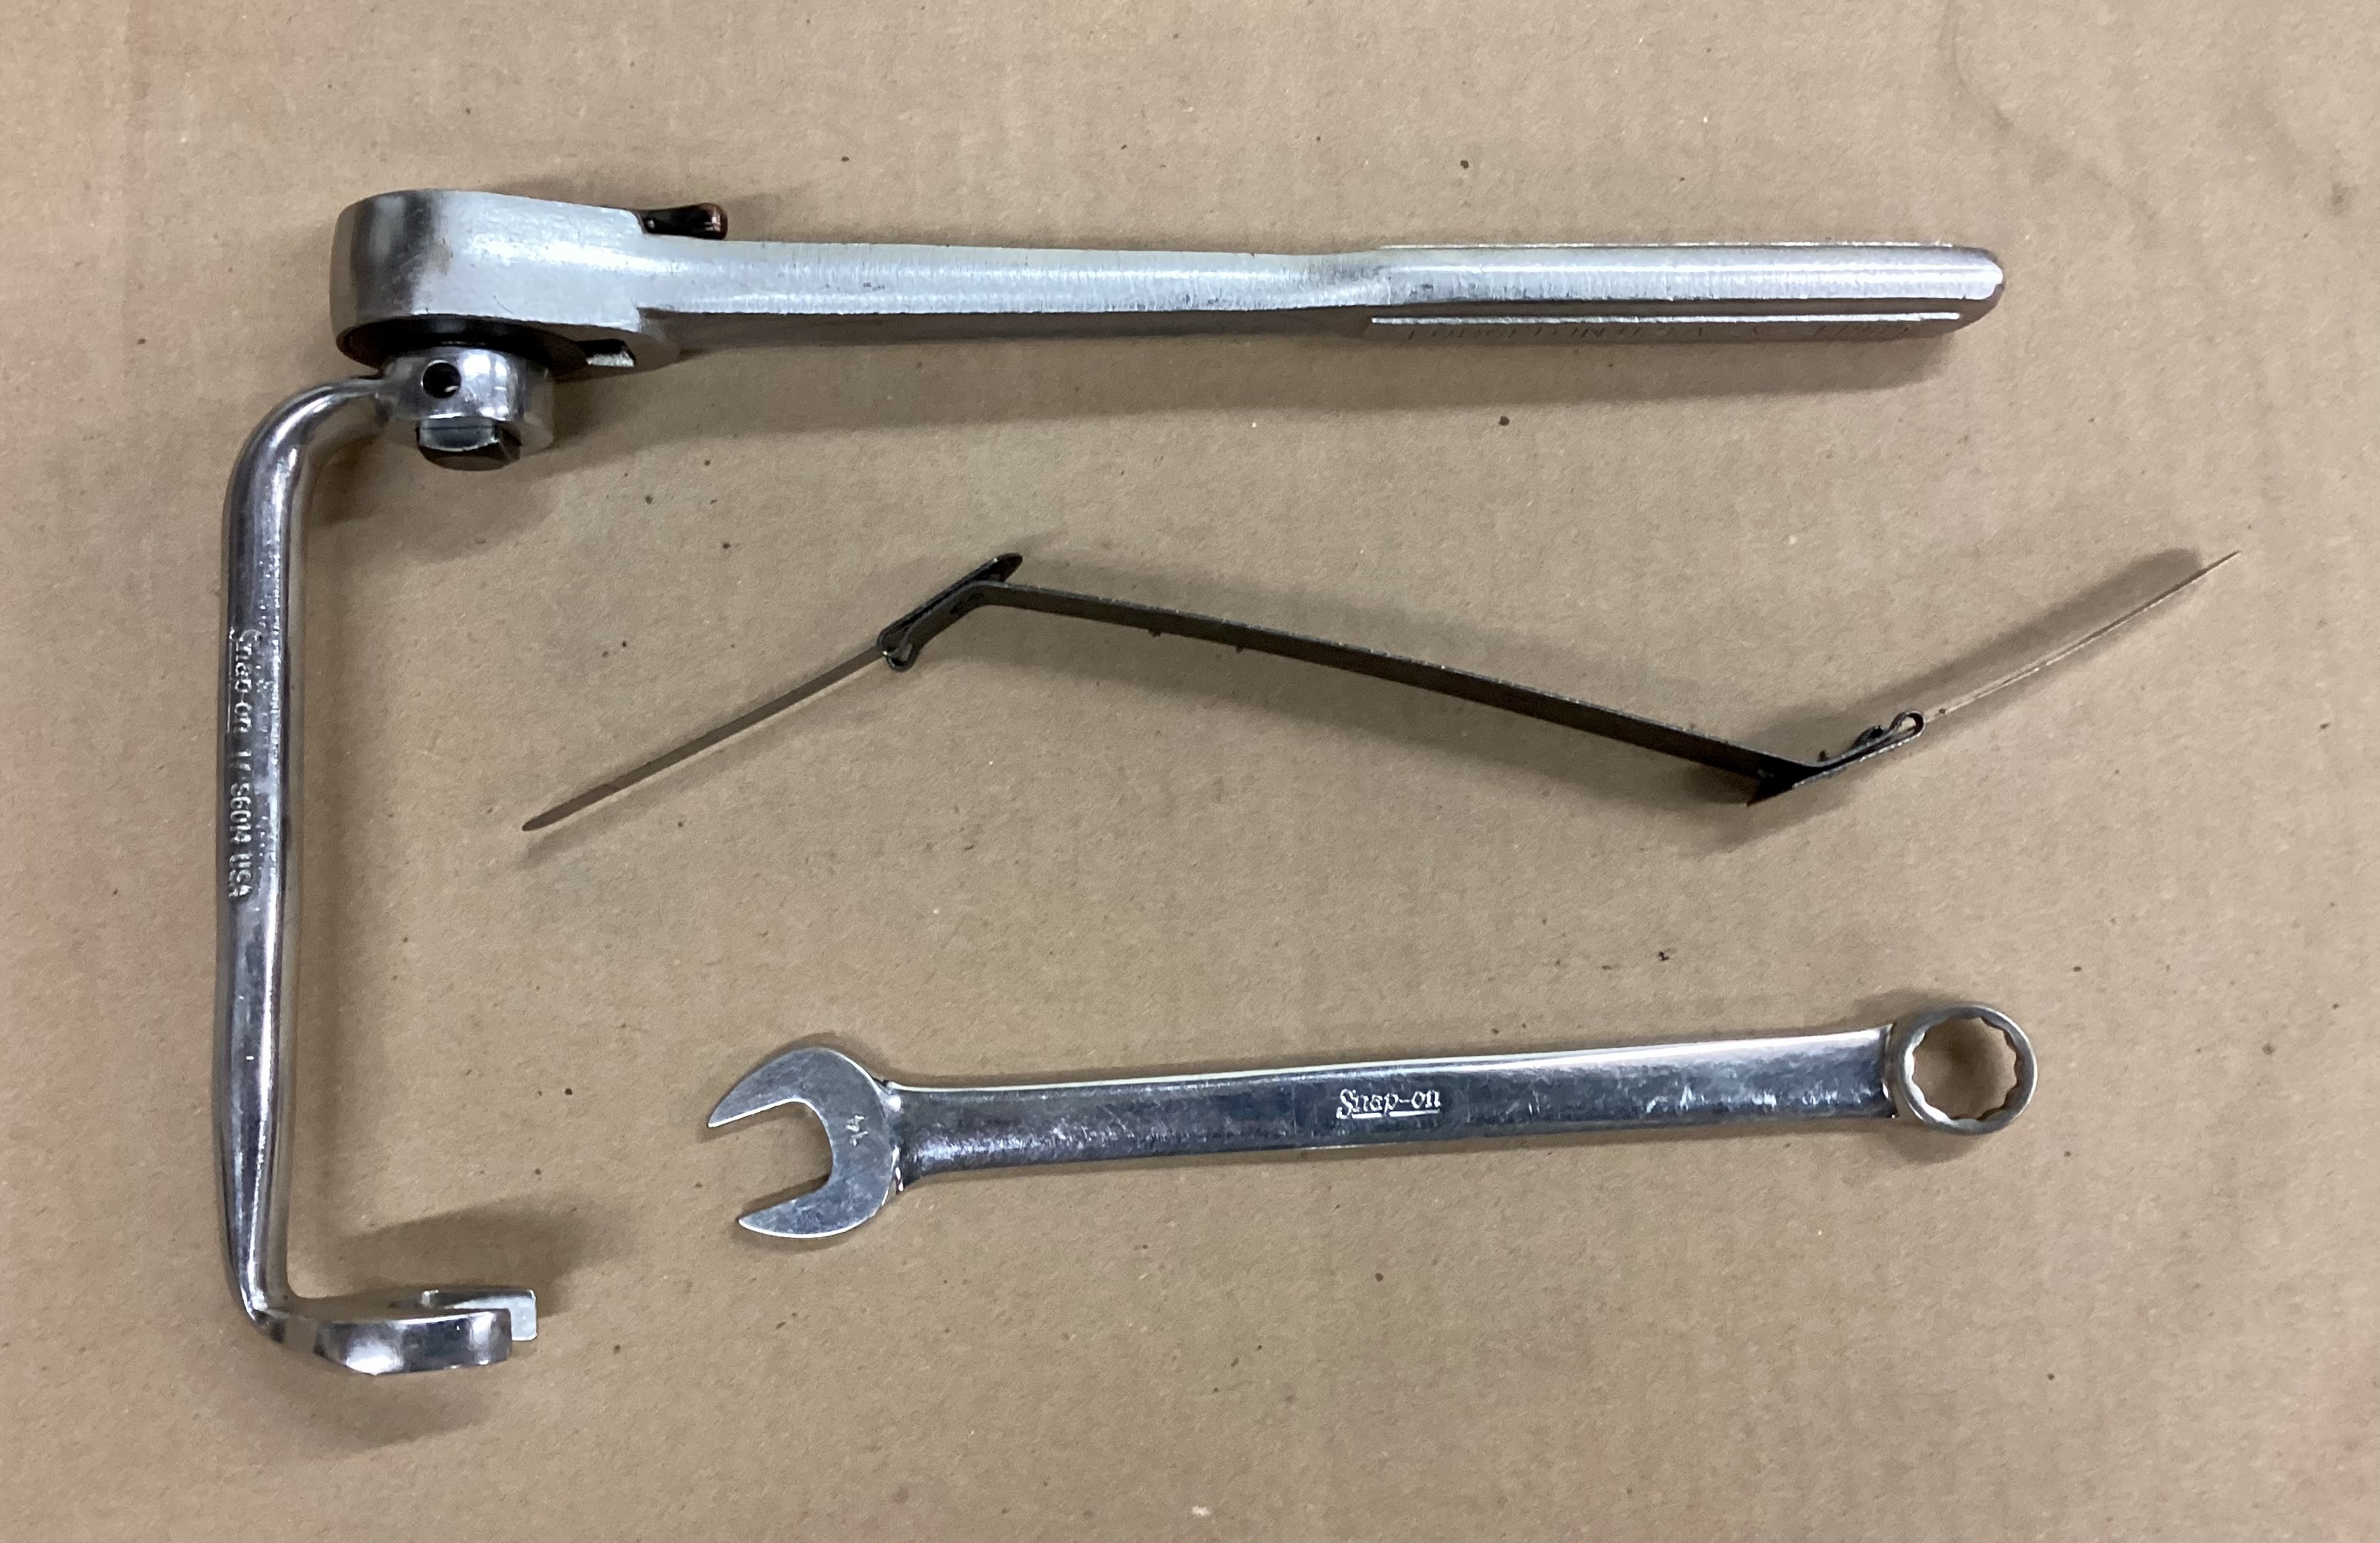
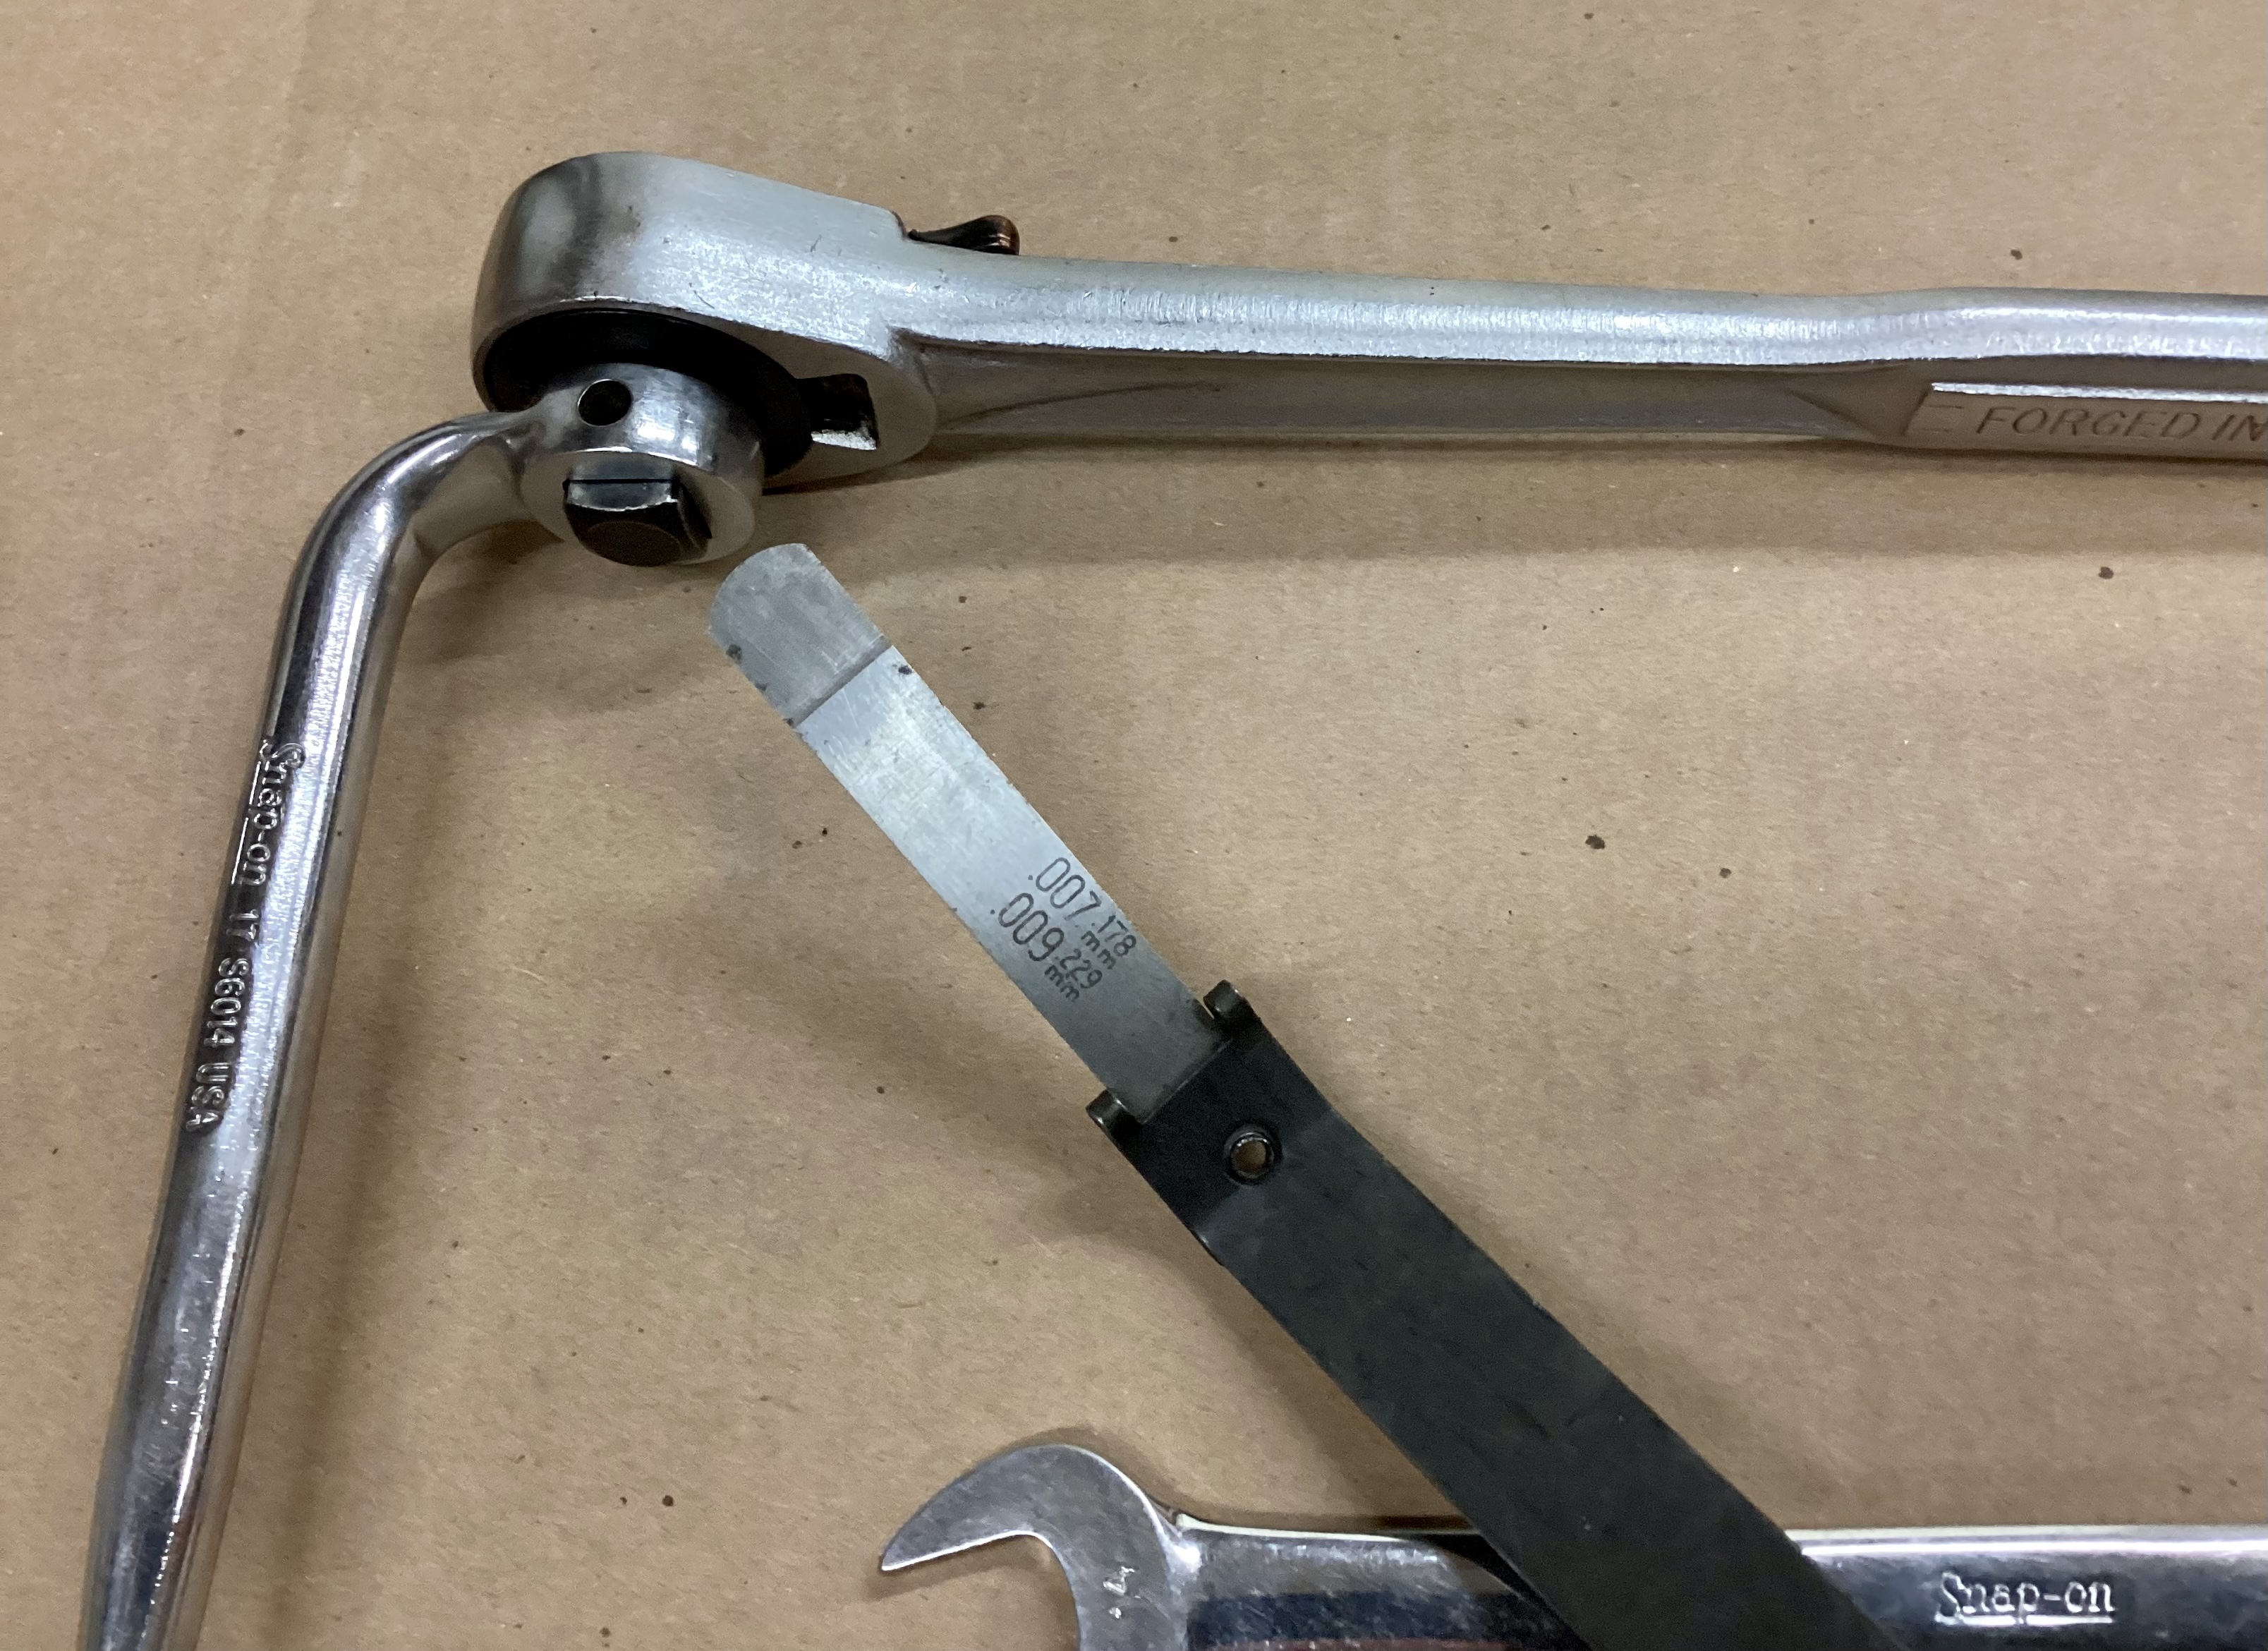
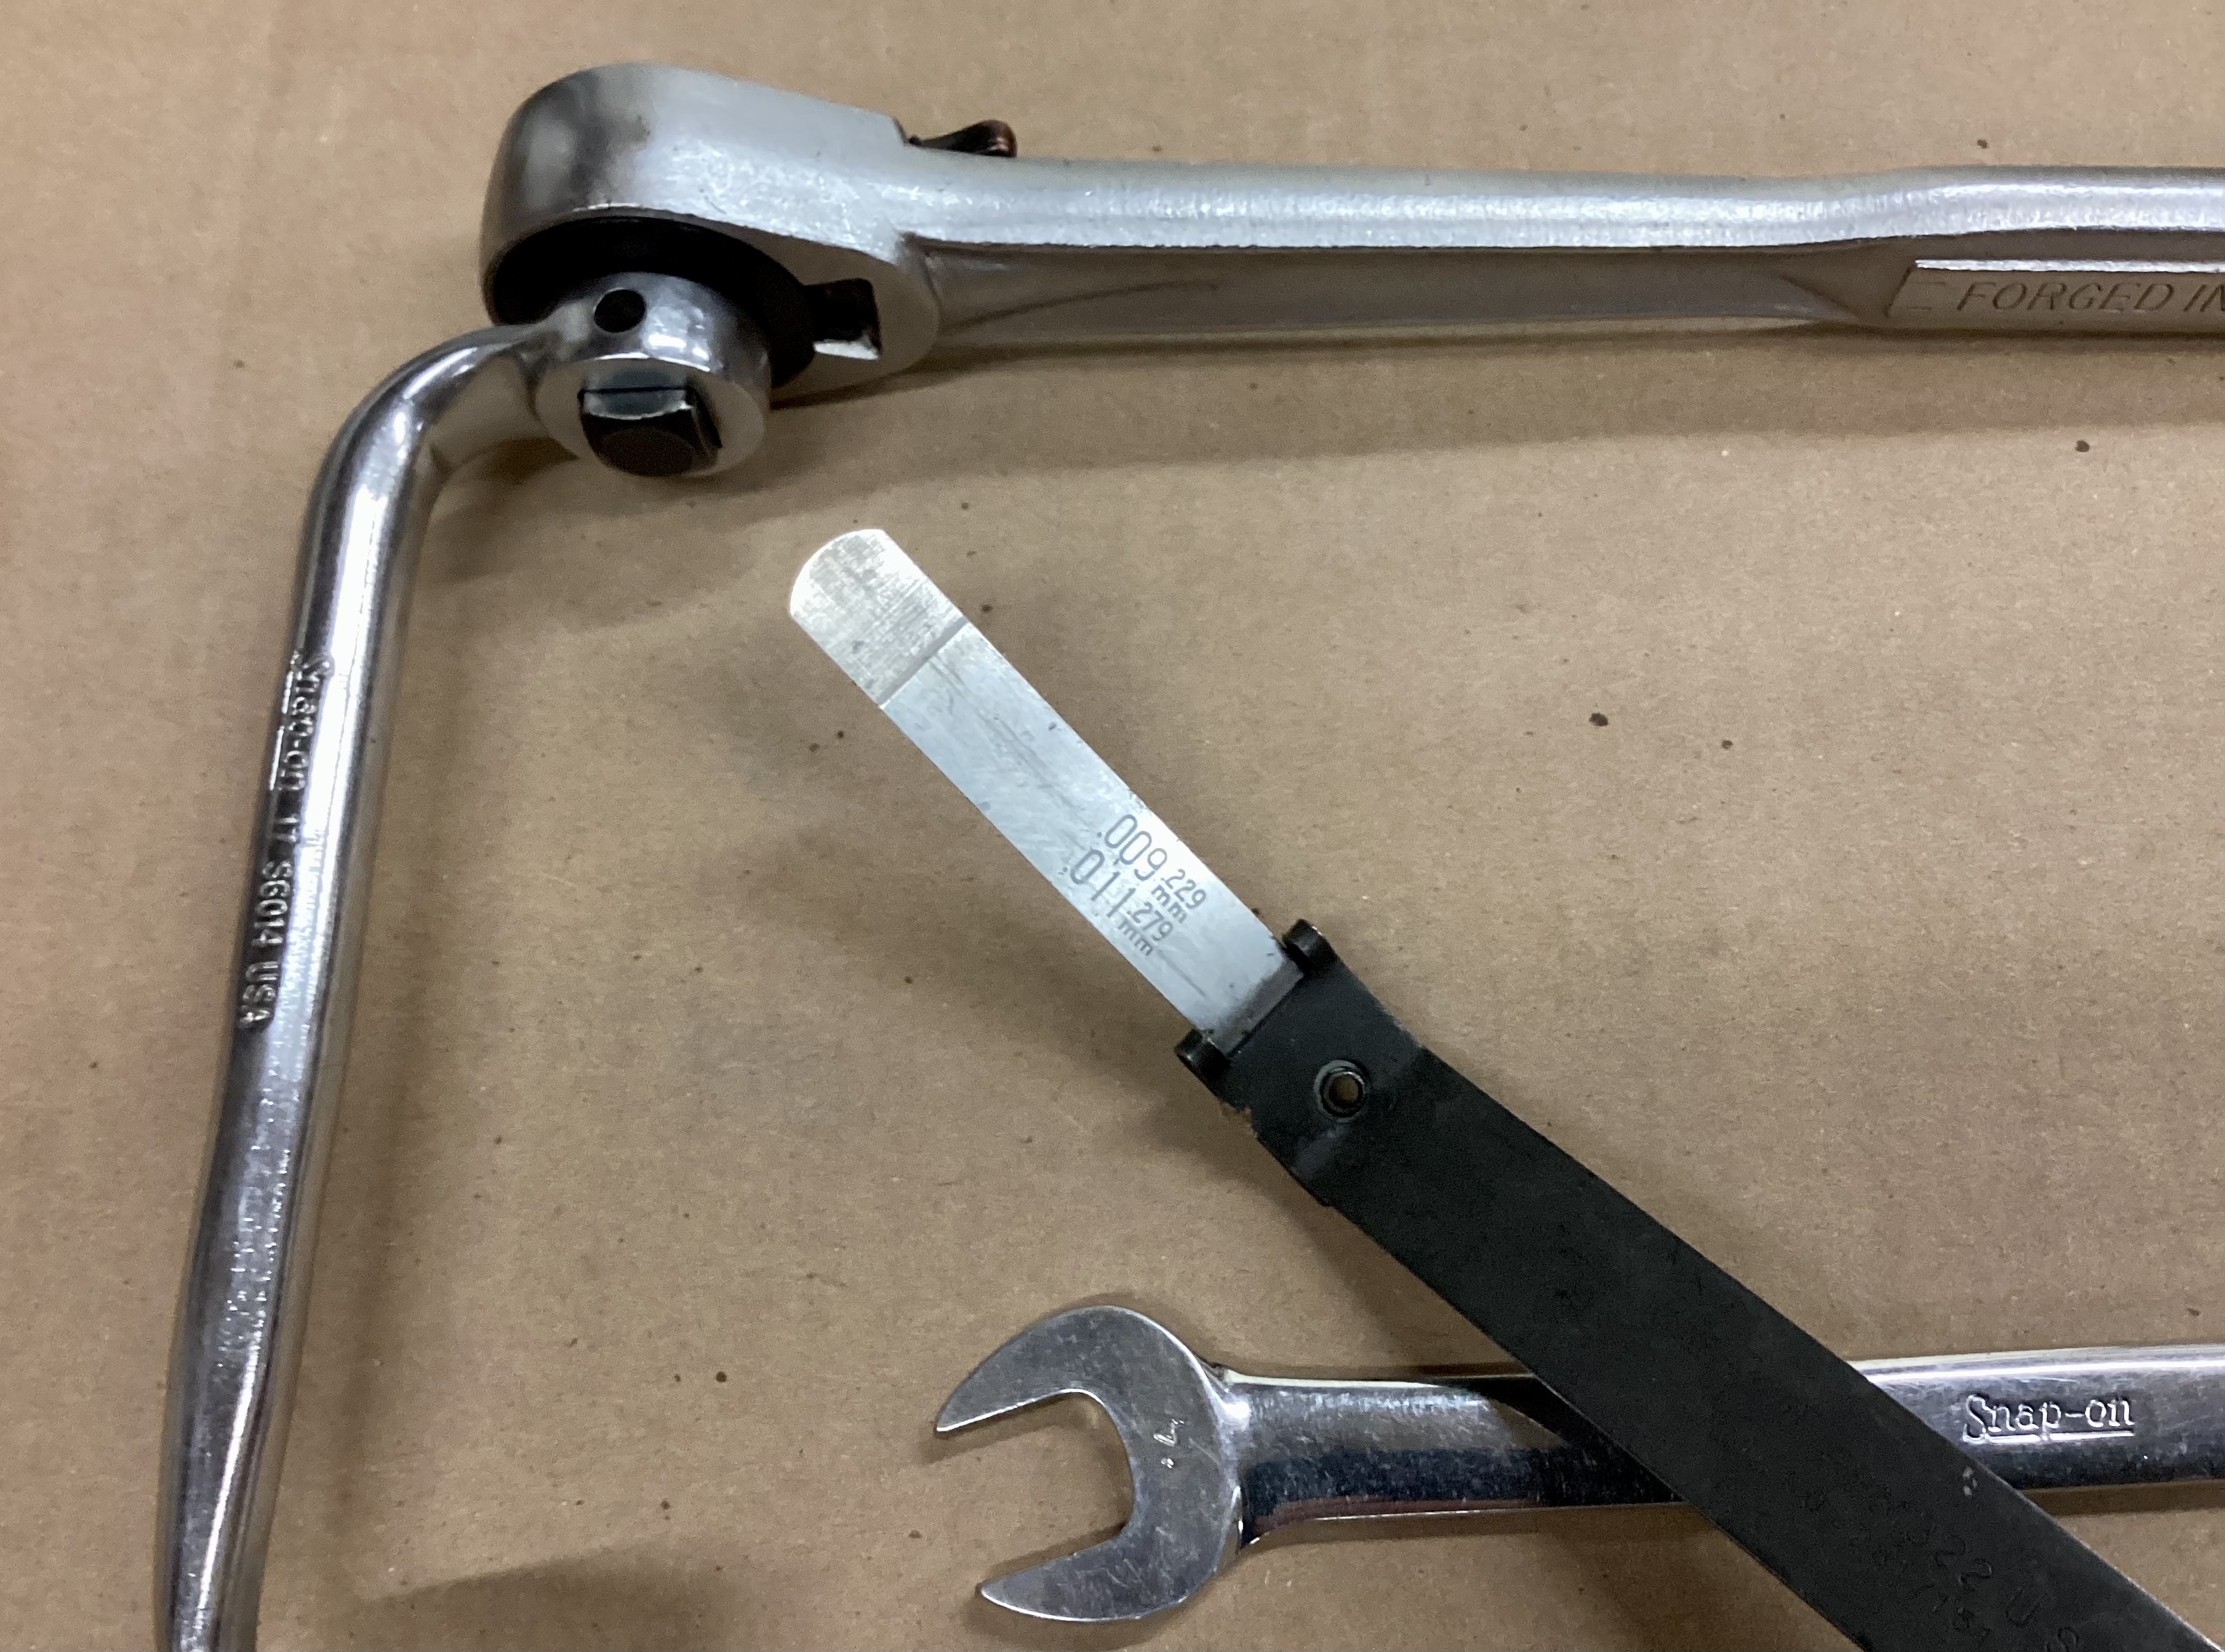
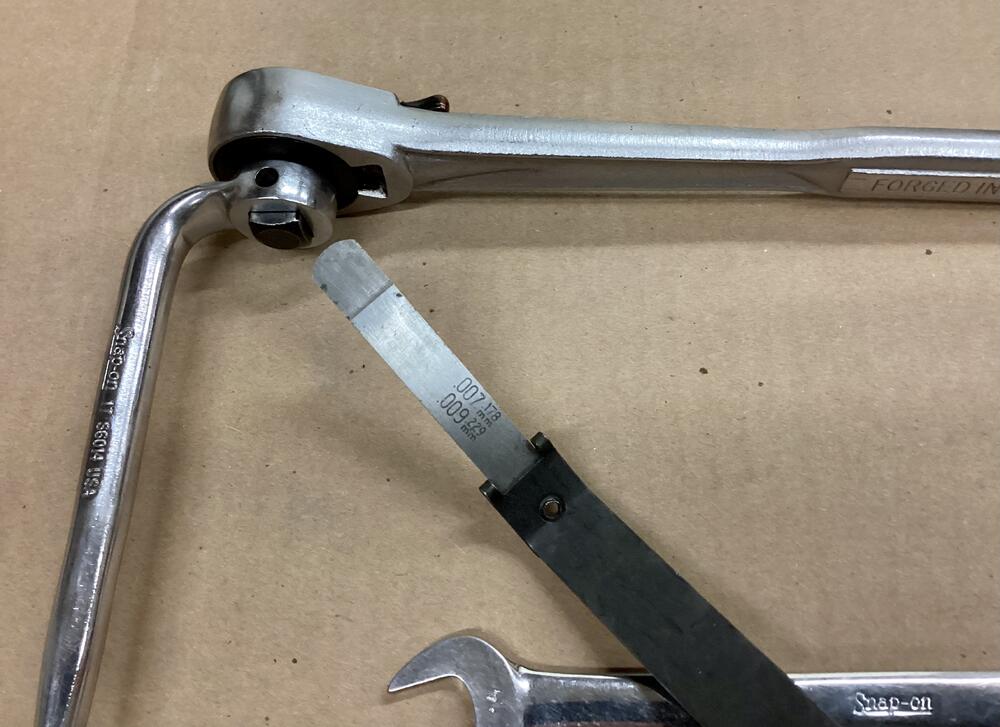
The tools I use for adjusting L series engine valves. Snap On S6014 17mm offset crowfoot adapter, 1/2” drive ratchet, 14mm open end wrench, feeler gage holder with two stepped “go-no go” feeler gages, .007”-.009” (for .008”), and .009-.011” (for .010”). Not shown is the starter button I use for rolling the engine to get the cam in position to set the lash, or the speed wrench I use for removing the cam cover. Also, when number 1 cylinder is at TDC, several other valves can also be set. The base circle of the camshaft lobes is at zero lift for more than 180 degrees of rotation, and as long as the follower is in that area, it can be set. I haven’t run a set of valves for a long time, but it stick in my head that I could get all of them adjusted and only set two or three cylinders at TDC.

 1 point
 -
They rarely go bad just filing the contacts to shine again and making sure there's no spider webs in there. I had to bend the arm on mine when I first bought my '77 after reading this great write up with a lot of good photos. Thanks @240260280 https://www.atlanticz.ca/zclub/techtips/tps/index.html1 point
-
0 pointsNot sure where or when I got this, but I found it in a stash of stuff I was going through that I've had for years. I know it's incorrect to think of him designing the car, but where would this come from? It's a grill badge, and really good quality.
 0 points