Leaderboard
-

Mike
Administrator4Points23,065Posts -

Zed Head
Free Member2Points19,236Posts -
HS30-H
Free Member2Points5,509Posts -
DatsunZGuy
Free Member2Points930Posts


Popular Content
Showing content with the highest reputation on 10/28/2022 in all areas
-
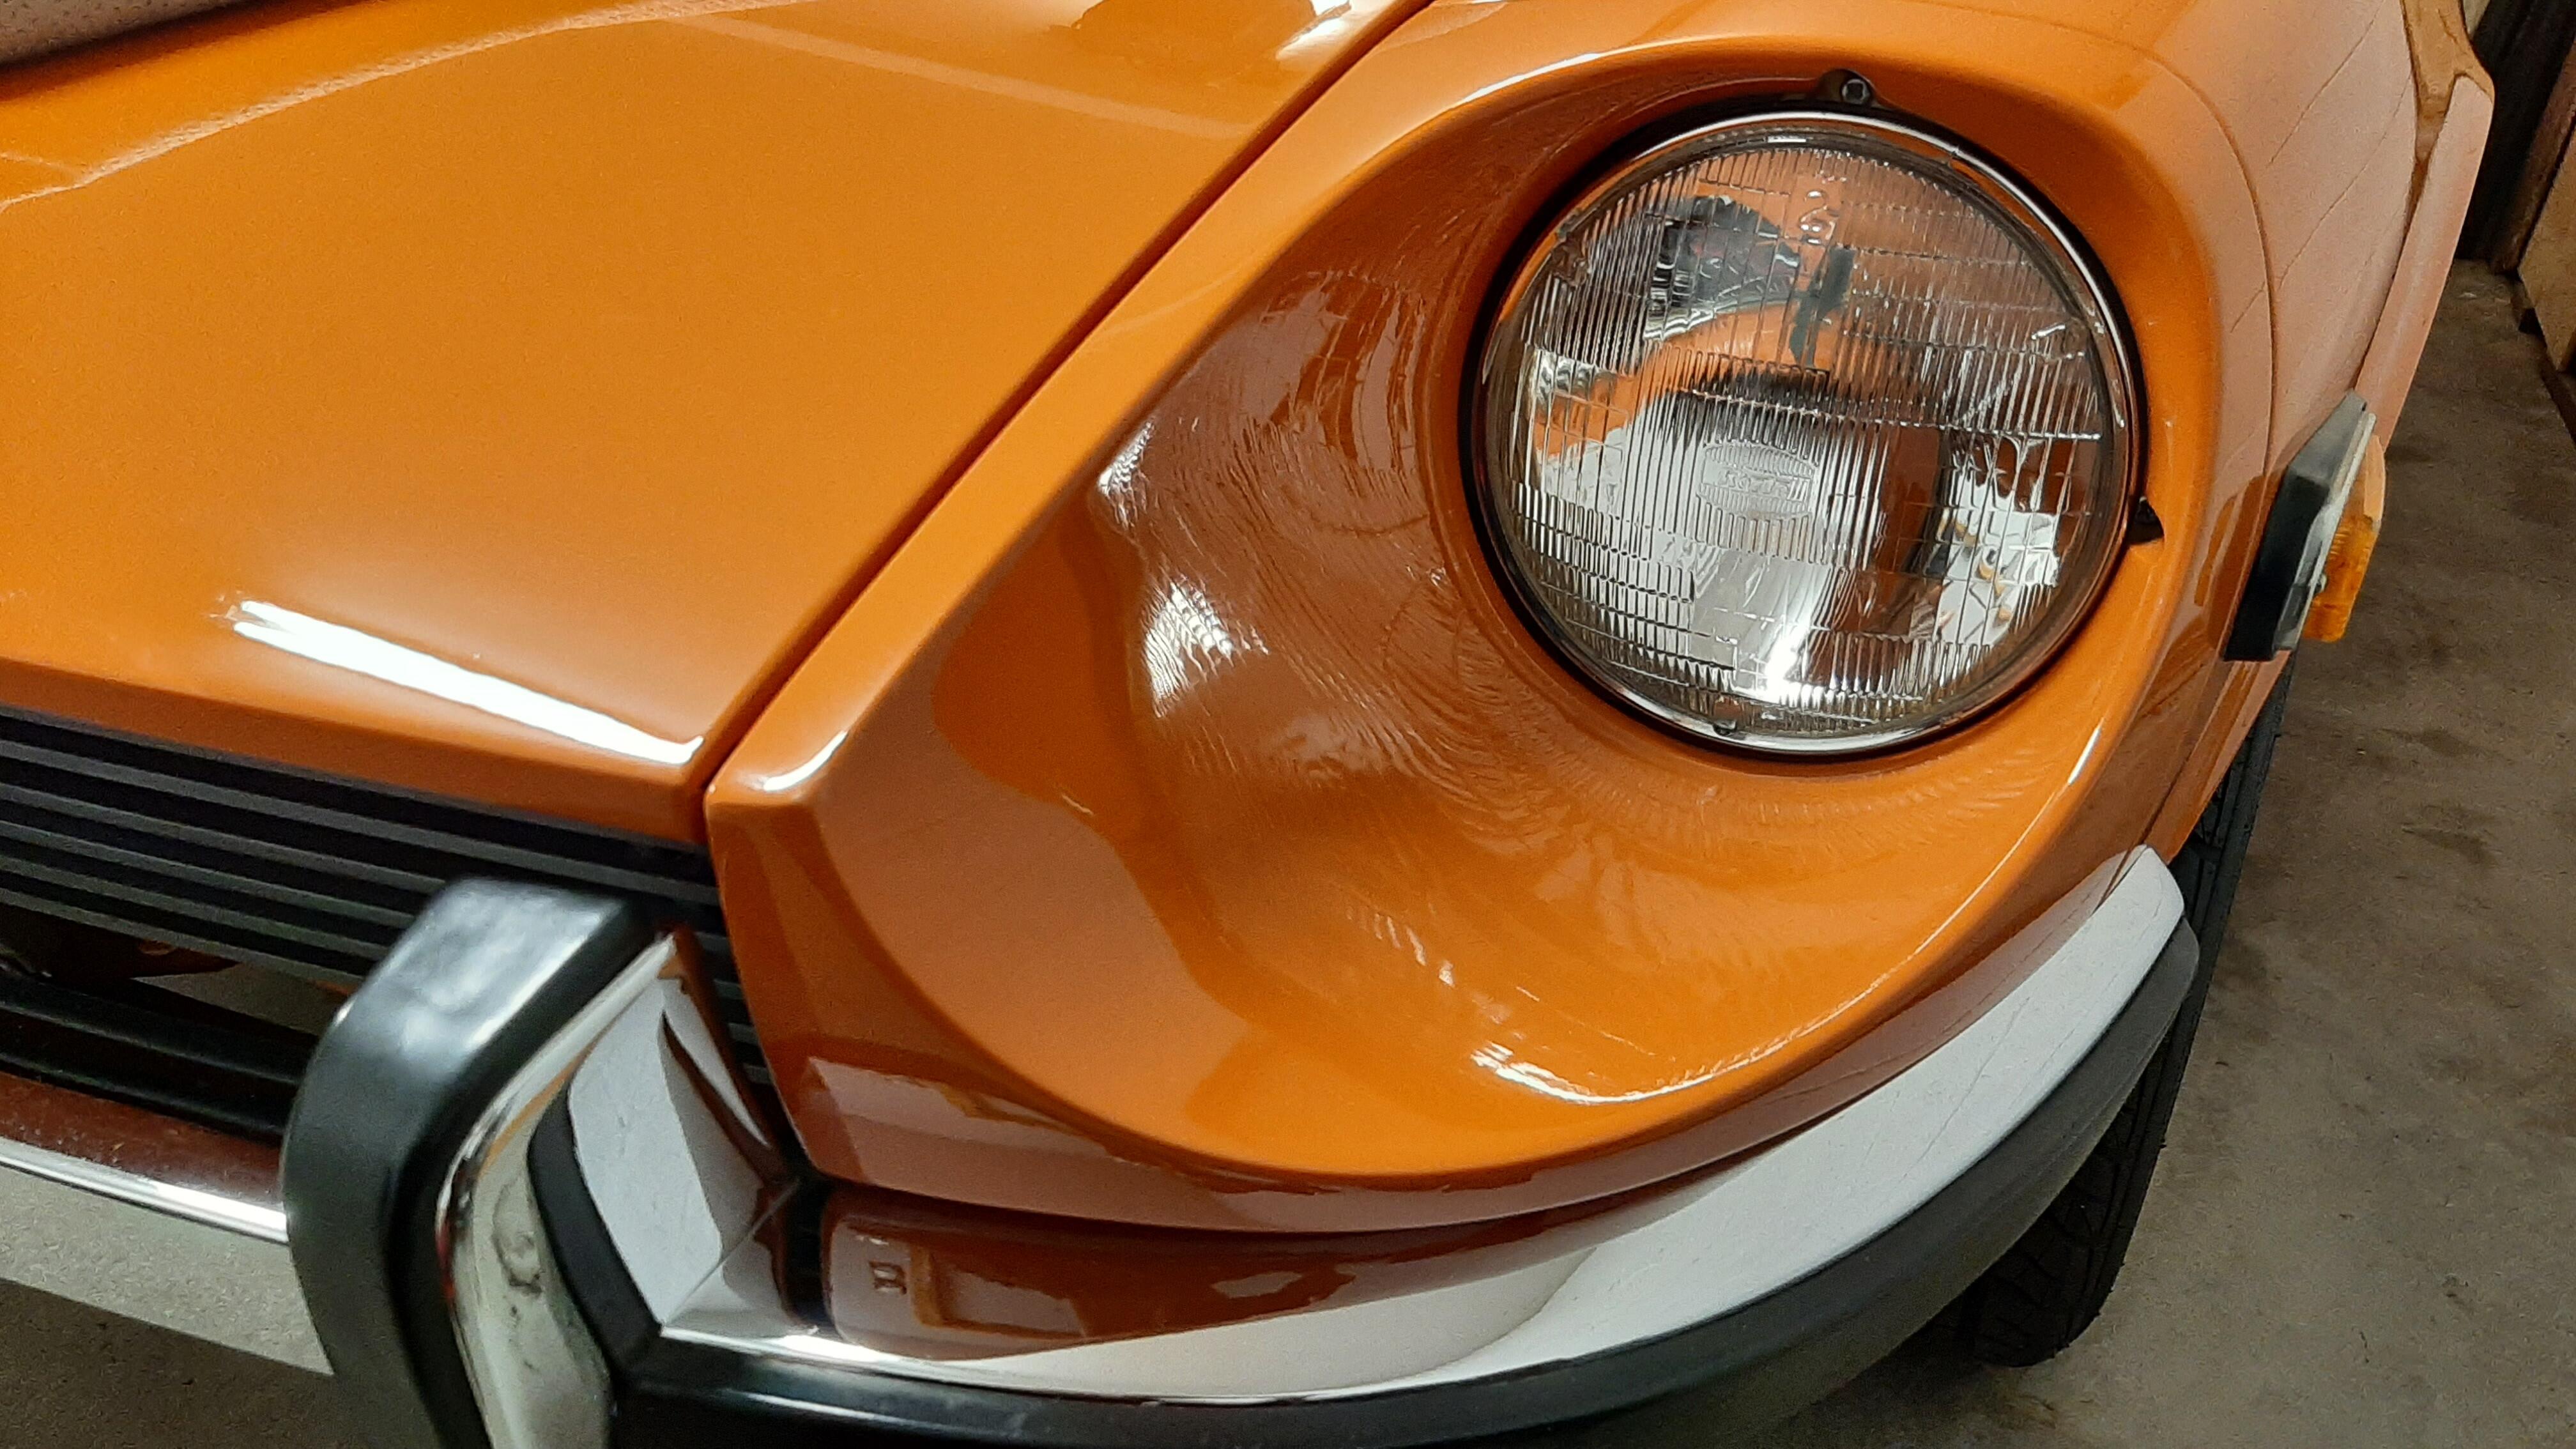
2 pointsWhen all else fails, look at the $310,000 BaT 1971 240Z with 21K on the clock. https://bringatrailer.com/listing/1971-datsun-240z-124/
 2 points
 -
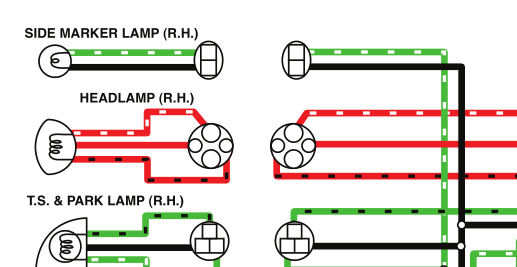
I'm sure it can be figured out. I didn't dig in to the diagram. My brain is stuck on how to interrupt the constant power when the marker lights are on. "Summary ------- This procedure will enable the front side marker lights of any car to blink _with_ the turn signals (if running lights are off) or to _alternate_ with the turn signals (if running lights are on). Normal operation of the marker lights is not affected. The procedure works on any car with parking and turn signal lamps at the front, even if the turn signals are not dual-filament (#1157/1157A/1157NA) bulbs, such as on Japanese cars. Restrictions ------------ The marker lamps must not be single-wire designs which rely on the car body for grounding. If the marker lamp has two wires connected (power & ground), the procedure will work."

 2 points
 -
Recently we purchased some household area rugs from “Ruggable”. Most of their products are designed to be used on smooth hard surfaces, so they have come up with an underlay (they call it the “Pad”) that is rubberized and sticky on the back that prevents slipping on the hard floor, and has what can only be described as hook side “velcro” on the top side that sticks to the underside of their rugs, effectively locking the rug to the floor. It’s very thin, about and 1/8” (3mm). When I started working with it to lay down our new rug, I found it very frustrating to get the large rug to both keep this fancy underlay aligned with the floor AND the rug smoothly stuck down to the velcro like underlay. Smoothing out wrinkles moved the underlay and vise versa. Making it worse, the rug was large and I needed two sheets of the underlay, which had to be tightly aligned to each other. Sometime during this fight, I began thinking, “this stuff is astoundingly good at its job to the point of frustration” but it also struck me that it might be the answer to a problem I have with keeping rugs in place in the Datsun! I don’t think I’m the only one with annoyingly migrating rugs. I’ve tried spray gluing down the underlay, then glueing the rug to the underlay, but it always works loose. It’s clear why the stock top rug had those welded in hooks on the floor under the seat front and slots in the rugs to hold them in place. So I tried using this Ruggable sticky pad stuff and so far, I’m amazed at how well it works. I use it between the foil faced sound deadening I used and the top rug (with or without its sound deadening cushion) . I do spray glue the back of the rubber pad to make it stay in place to the foil, but I’m not sure I have to. The velcro upper faces sticks fantastic to the back of the rug.1 point
-
Yea, I hate to admit, I haven't heard mention of Satch in a very long time. I also miss Brock and Denise.1 point
-
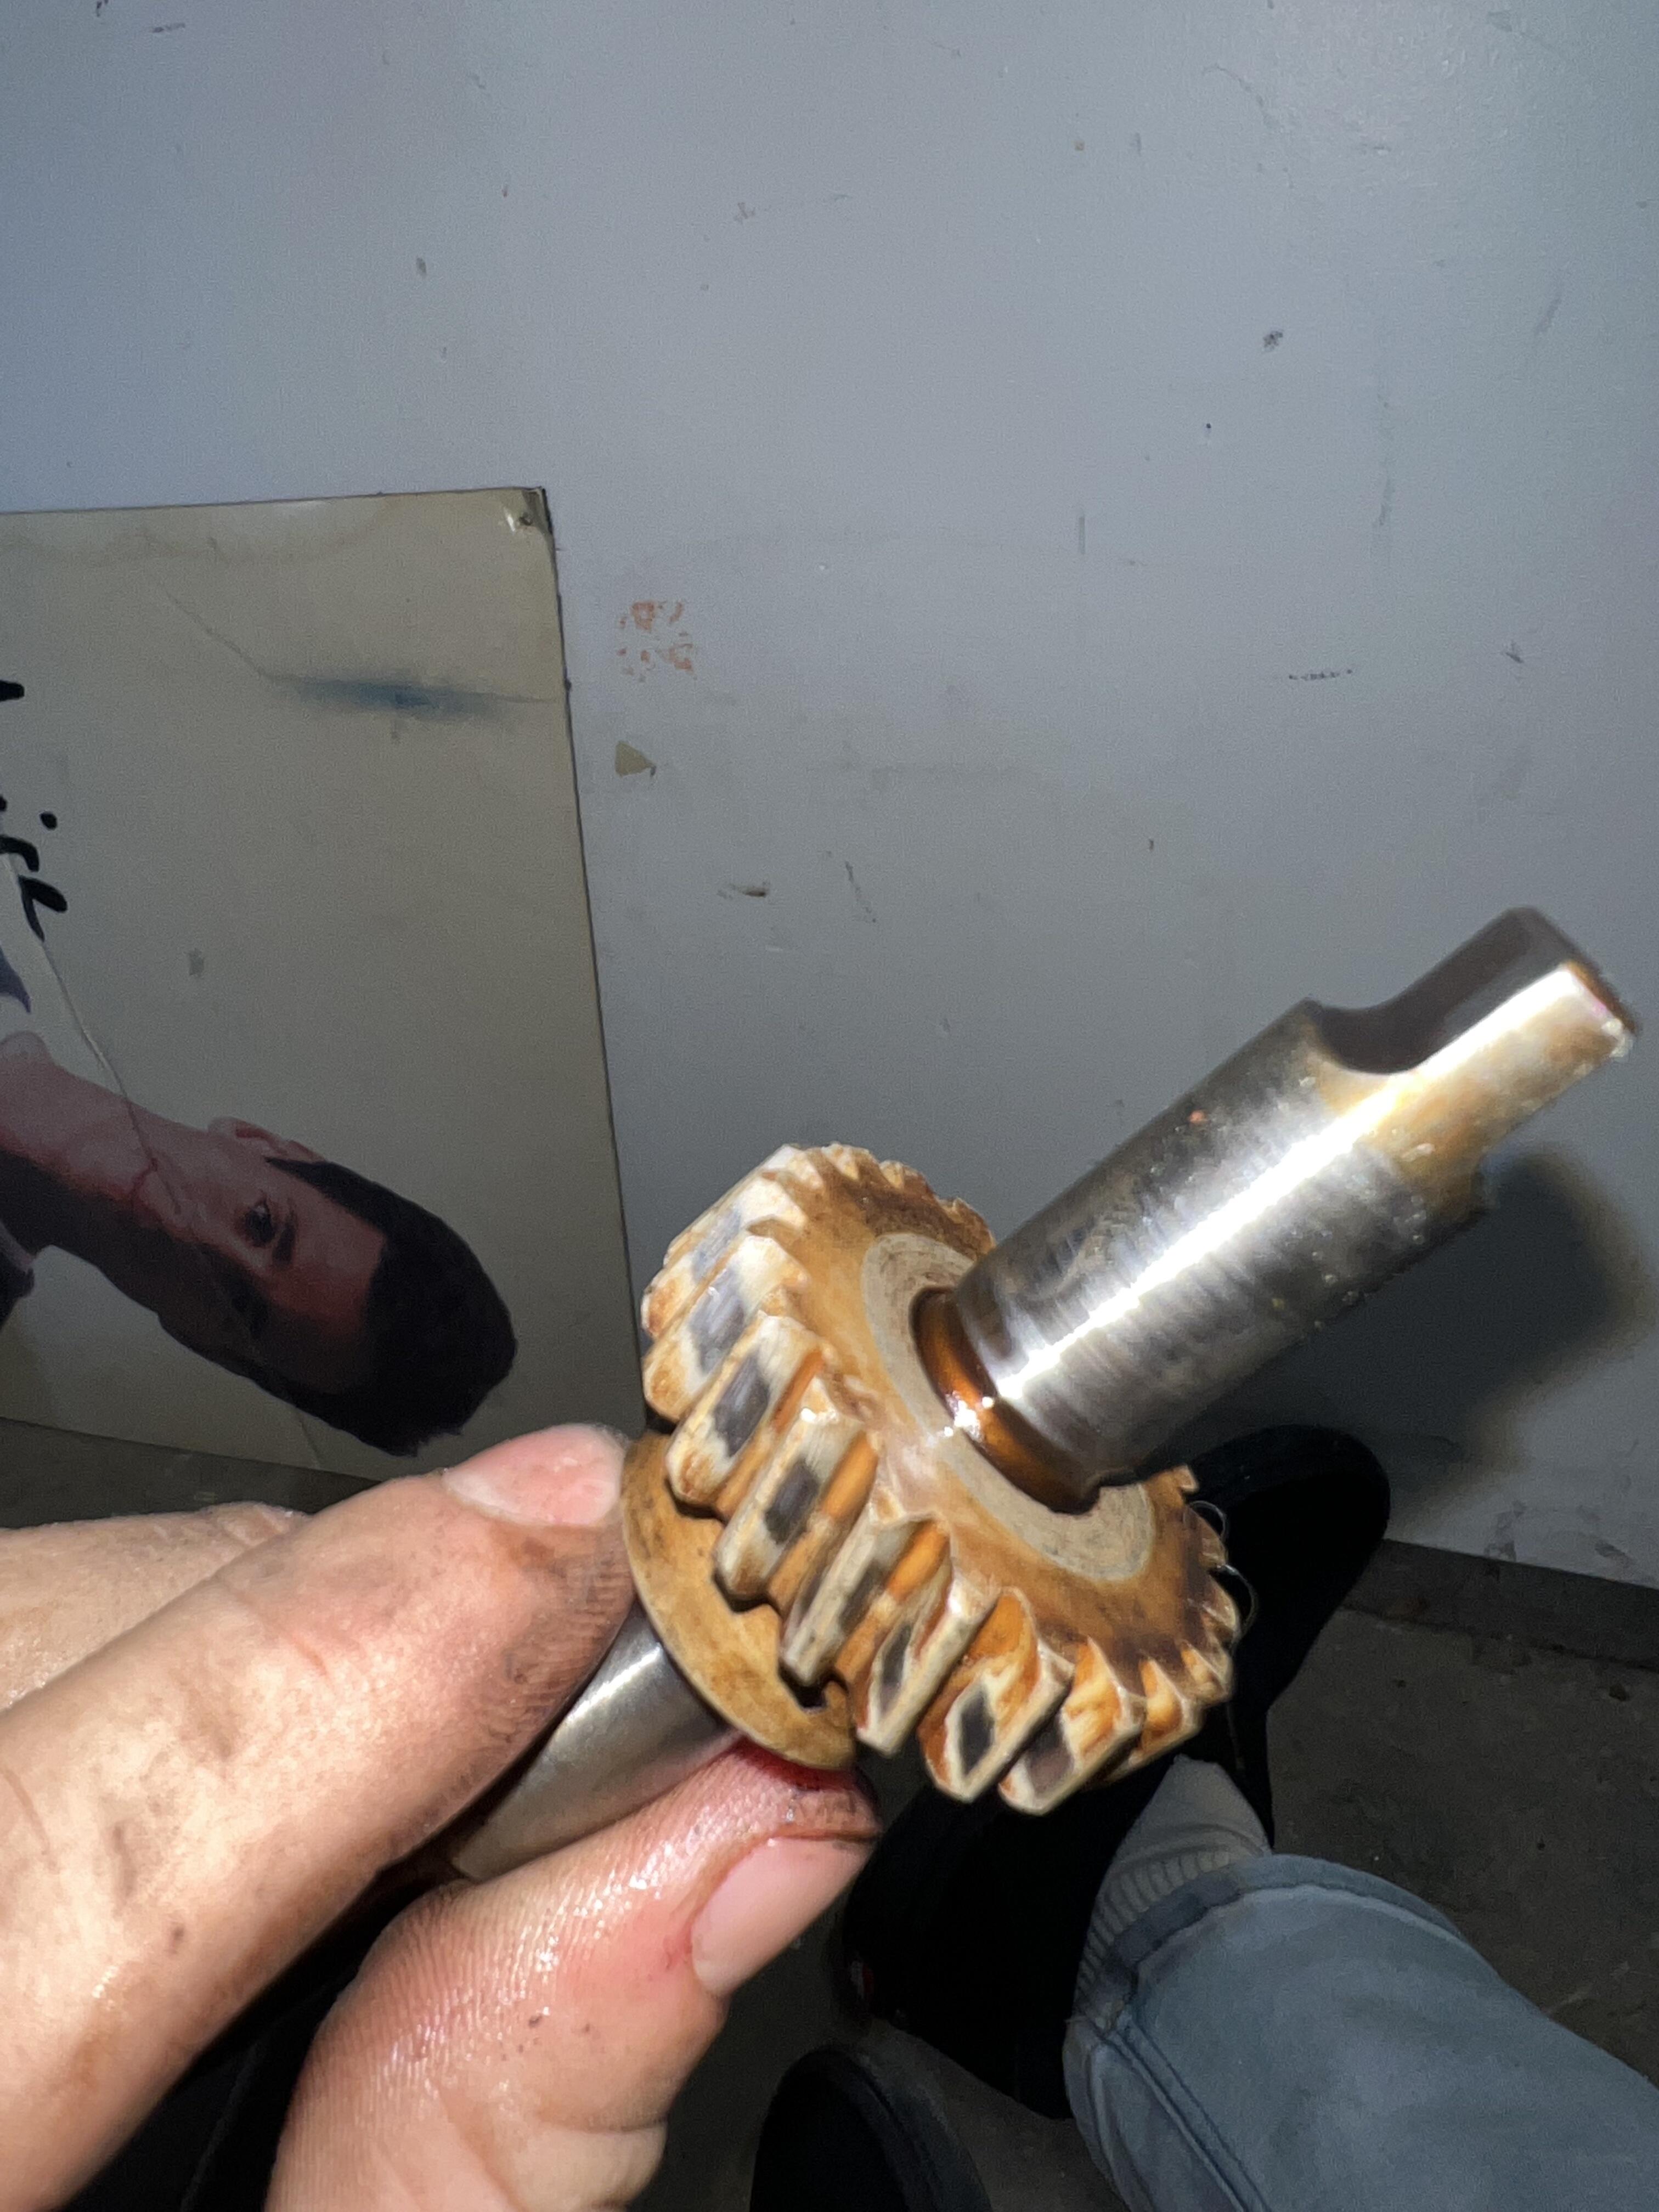
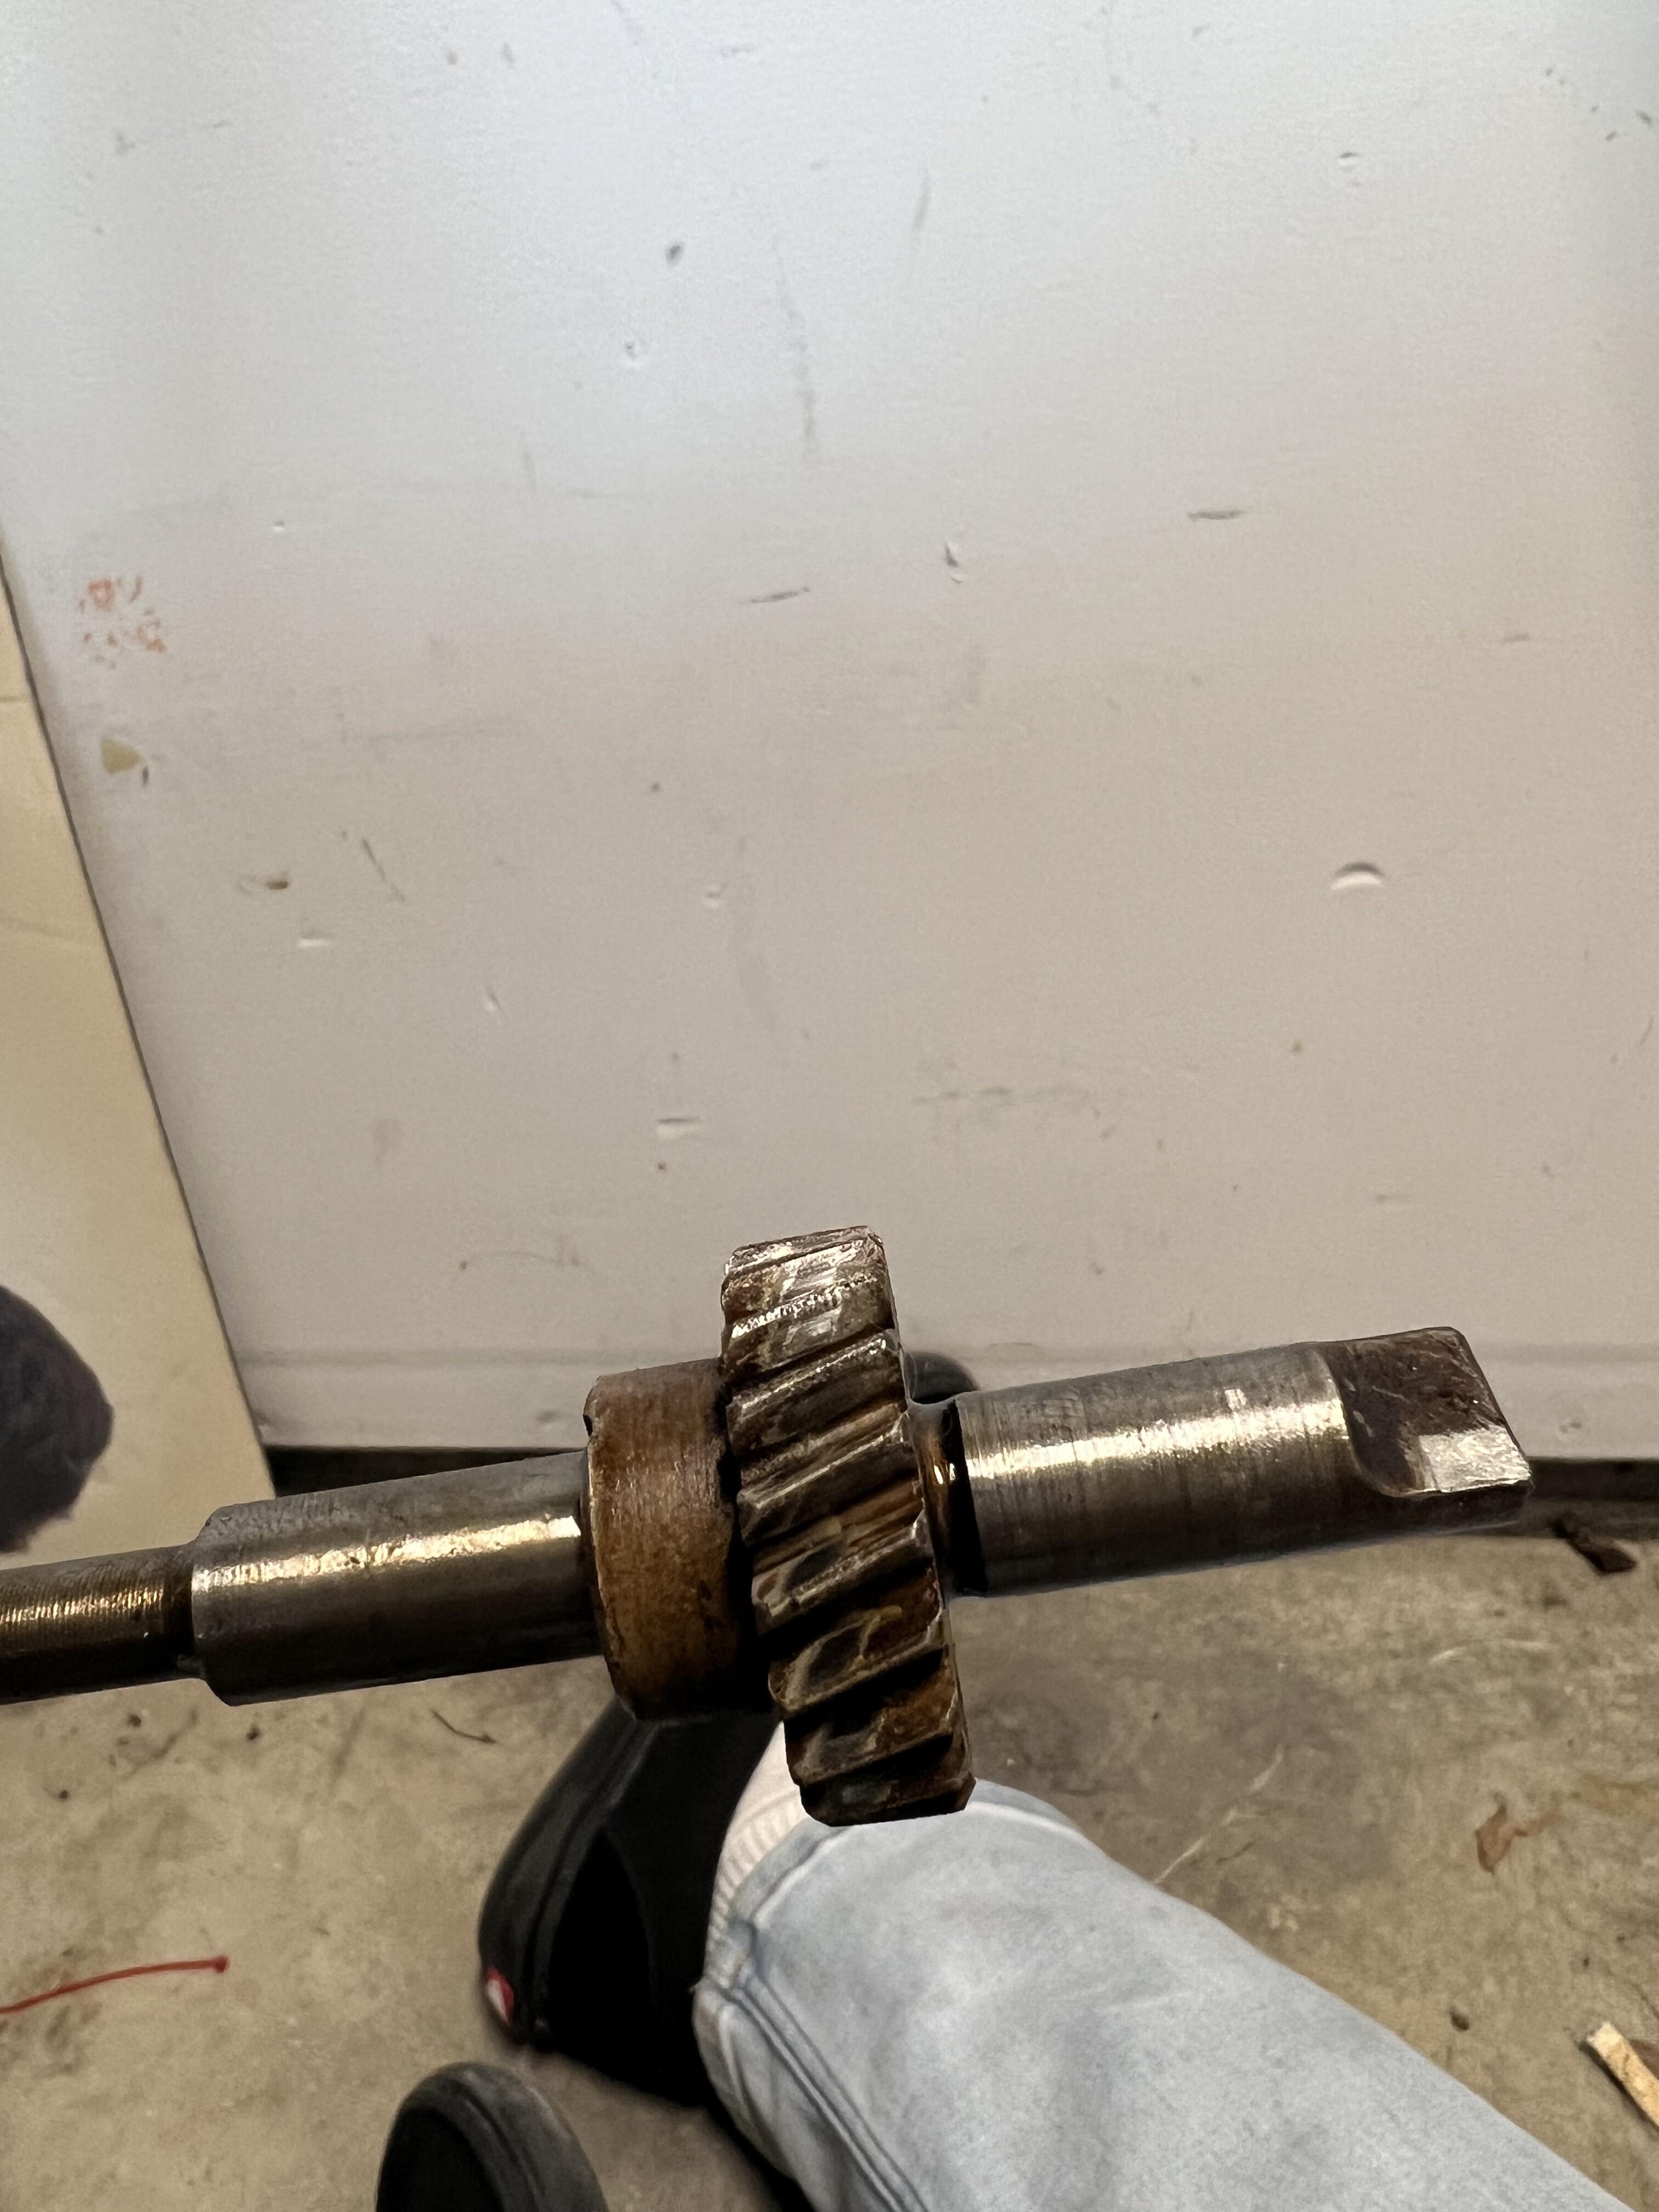
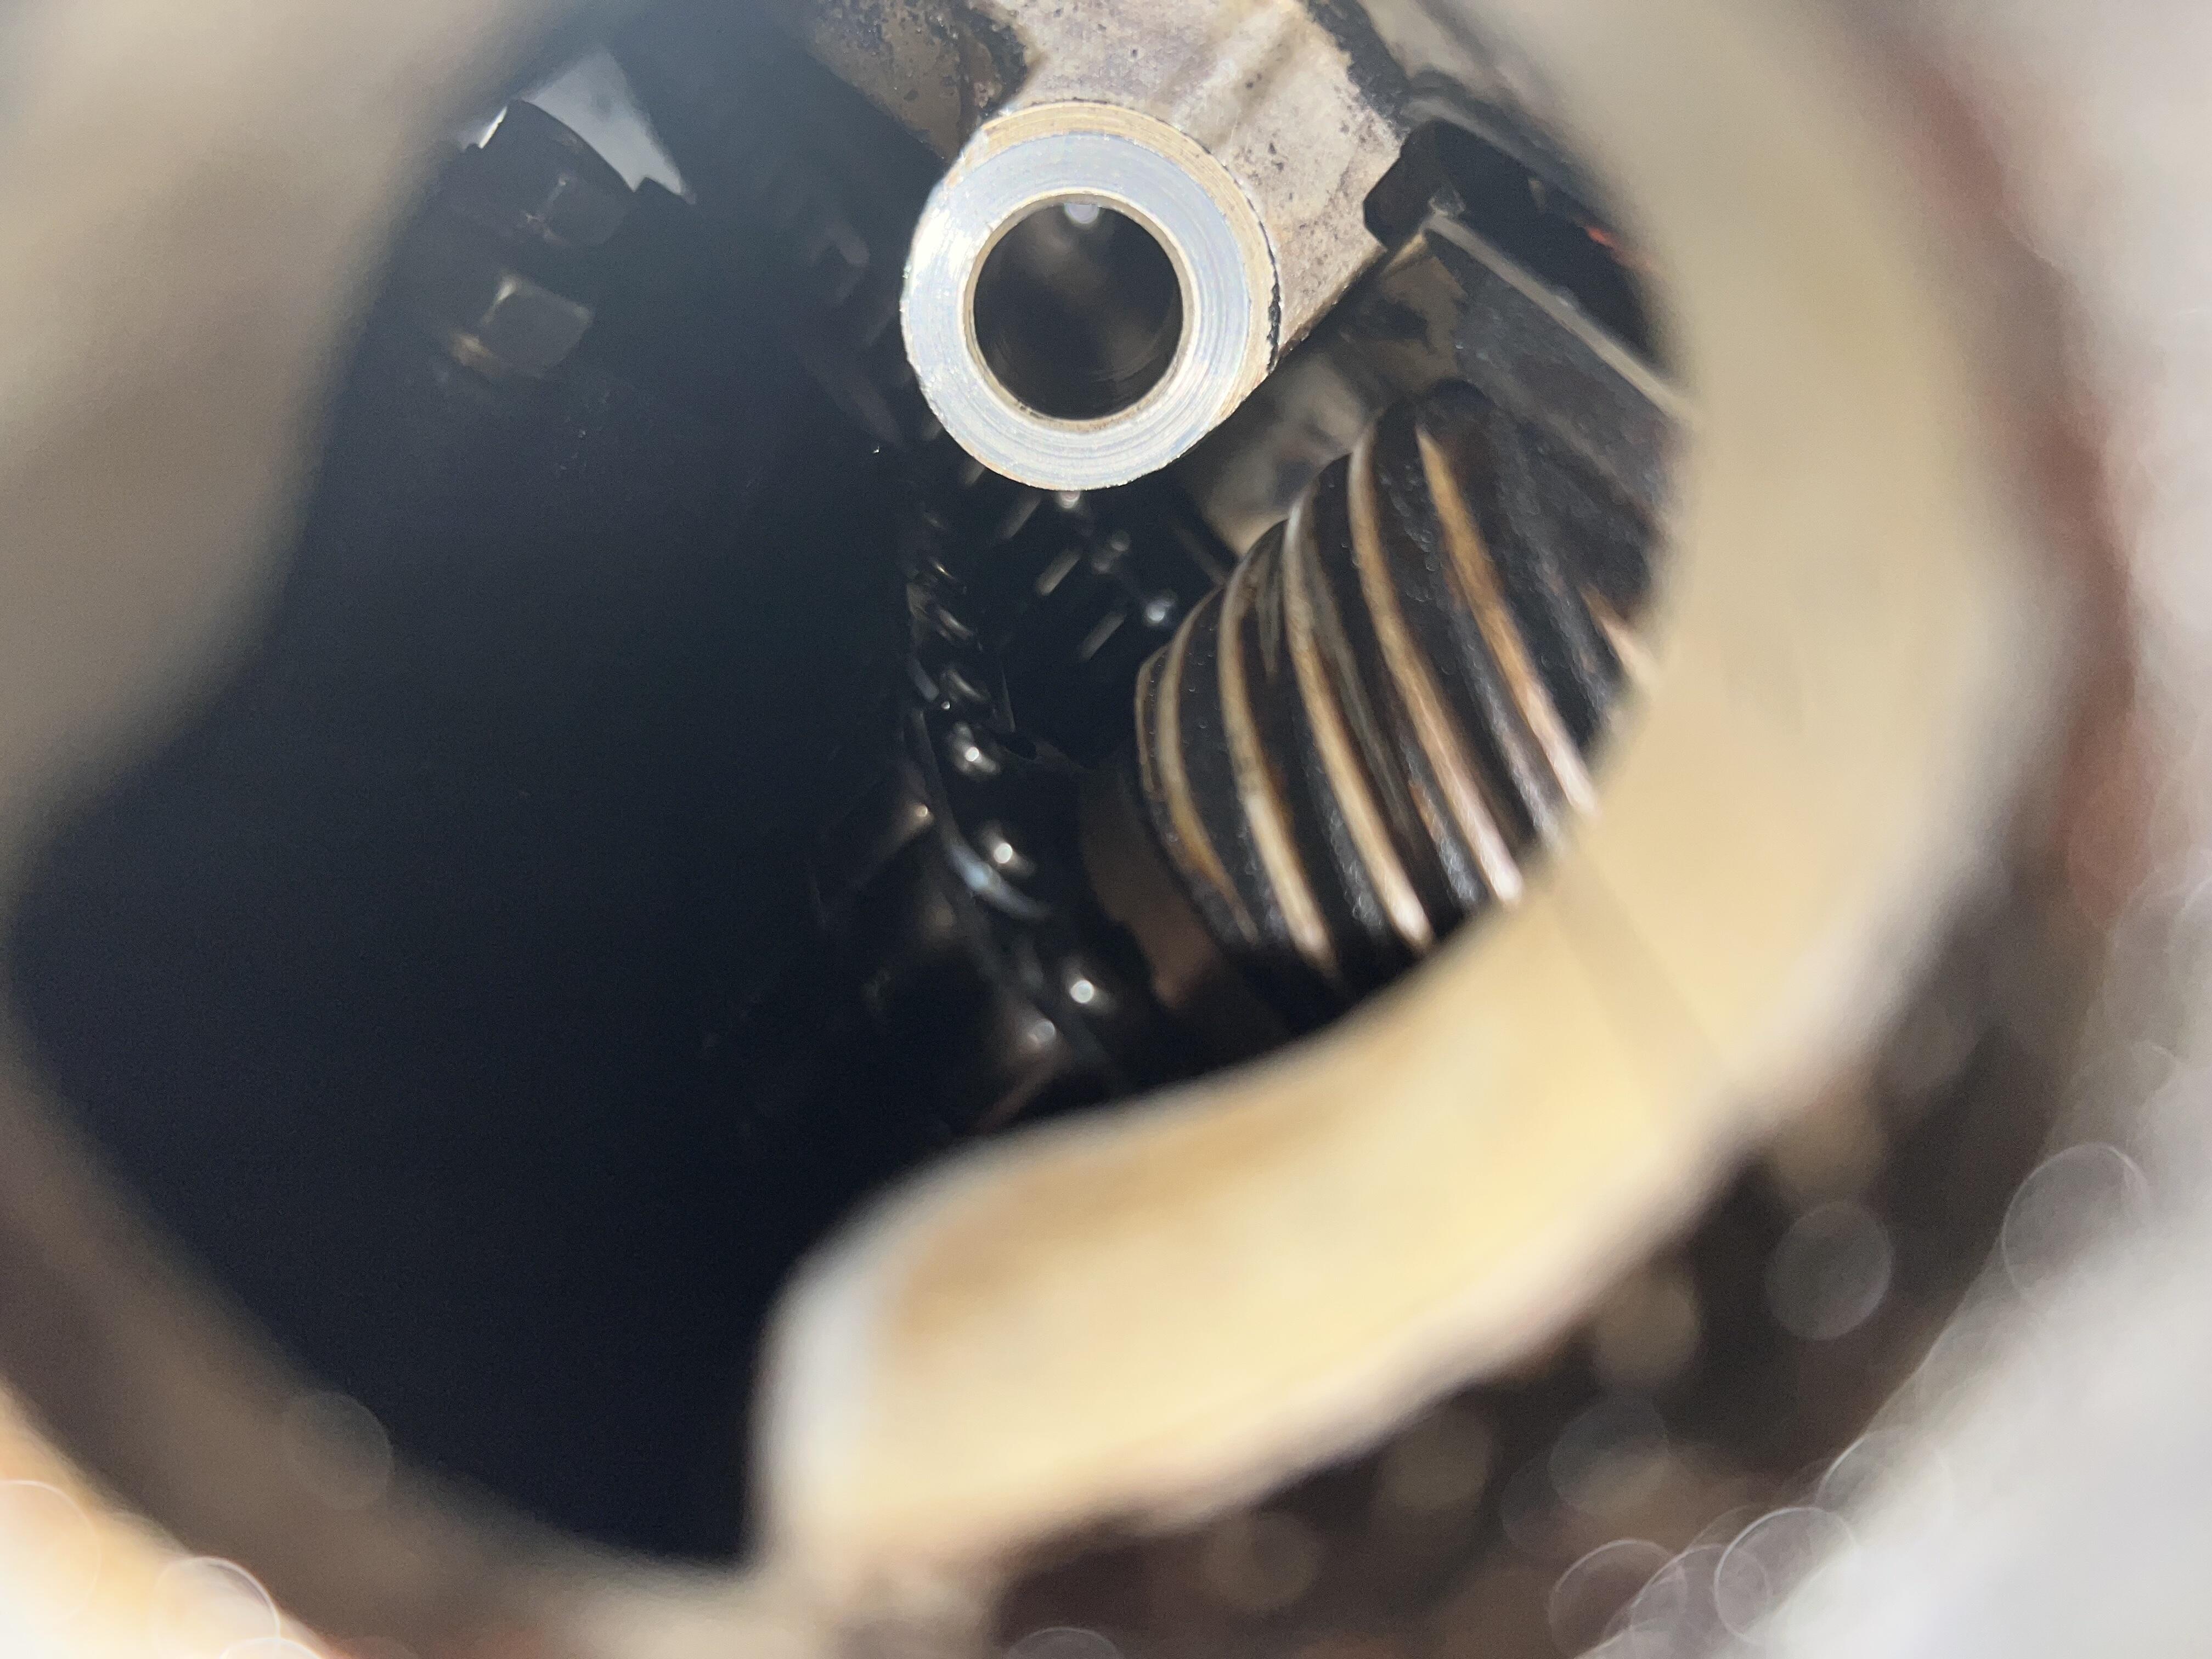
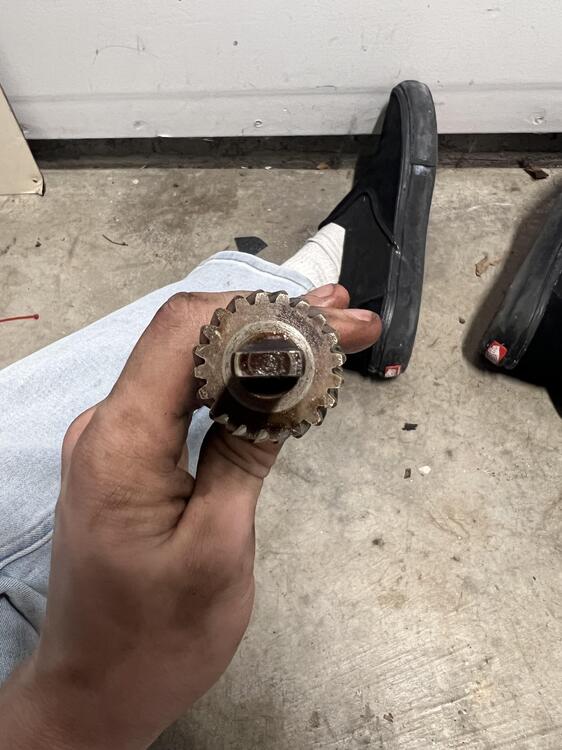
The gear teeth look pretty good, nice wear pattern. Does look like a high mileage engine though, lots of varnish. I had one on a race engine shear the teeth clean off. Happened at Portland, going down the back stretch. Accelerating hard, just shifted into 4th gear at about 110, when it went. Flames shot out around the left and rear edges of the hood, and then nothing. I coasted into the paddock, almost to my pit location. When I pulled the hood off the air filters were blown apart and burned. I suspect the distributor spun a few more rotations and the gear train was turning the crankshaft, out of sync with the distributor, and the spark plugs ignited the incoming air/fuel mixture when the intake valves were opened, resulting in vigorous explosive fire coming out through the intake.1 point
-
1 point
-
1 pointA little something I wrote up a while back. In my and many other's experience, the Precision stuff is not ideal, and evidently, neither is Vintage Rubber. McMaster-Carr makes weatherstripping that's comparatively easy to install, keeps water out well, and allows the door to close properly. Info's in the linked post. Hope this helps.1 point
-
I find that the gloss paints like rustoleam dull down over time to appear more satin like1 point
-
1 pointHi, sorry I haven't updated in a while, I've made good progress on the modeling aspect of it and I'm working on implementing everything, unfortunately I lost my original project files for it but I have the assets and just have to reprogram it all, I'll post some more updates when I can as I'm quite busy with school but I can say that I have nice models of both the s30 and s130 and respective parts for them both.1 point
-
What do you think? looks fine to me personally. I was really hoping it was this to be honest, cause it seemed like an easy fix.


 1 point
 -
I did learn these SU's are H6 from a Triumph T3/T4 set up. Still no info on the manifold, might be a custom set up. They look very well made not something cobbled together.1 point
-
1 pointI've ordered the Precison seal, and will revert back with how it compares to the VR. I like how the door fits now but I could do some adjustments to the window frame in the meantime time. Cheers1 point
-
Here is a link to the product. https://ruggable.com/products/classic-rug-pad?size=4x6 It ain’t cheap, the 4x6 size ($79 USD) is good for the front and behind/under the seats, but you need another one for the hatch area if wanted to use it there to. Anyway, great product that both grabs the floor and the rug at the same time.
 1 point
 -
That seems likely, and logical, to me. I have no idea what these minor differences were, and Nissan doesn't seem to have been too forthcoming with data to explain them either (possibly in line with their 'Do Not Fiddle!' stance?). That difference of '-8' suffix on manual trans '73 L20 and '-9' suffix for the Auto trans version does indeed seem to point to differences being minor. Yes. Pretty much. The top boxes are up to very late '72 whilst the bottom two are the 'Showa 48' (1973) versions. I don't know enough about that to comment, except that it seems - again - likely and logical. I've been sifting through factory parts lists to see if I can see any corresponding (full) part numbers, but no dice so far. I wonder if that too is part of a 'Leave Them Alone!' thing?1 point
-
Satch Carlson is a name that brings back some good memories. He compared the morning commute on our Portland stretch of I 205 in morning traffic to a F1 qualifying session.1 point
-
It may be the setup from a Saab V4 engine. The NW USA was a hotbed for them years ago with Satch Carlson leading the charge.1 point
-
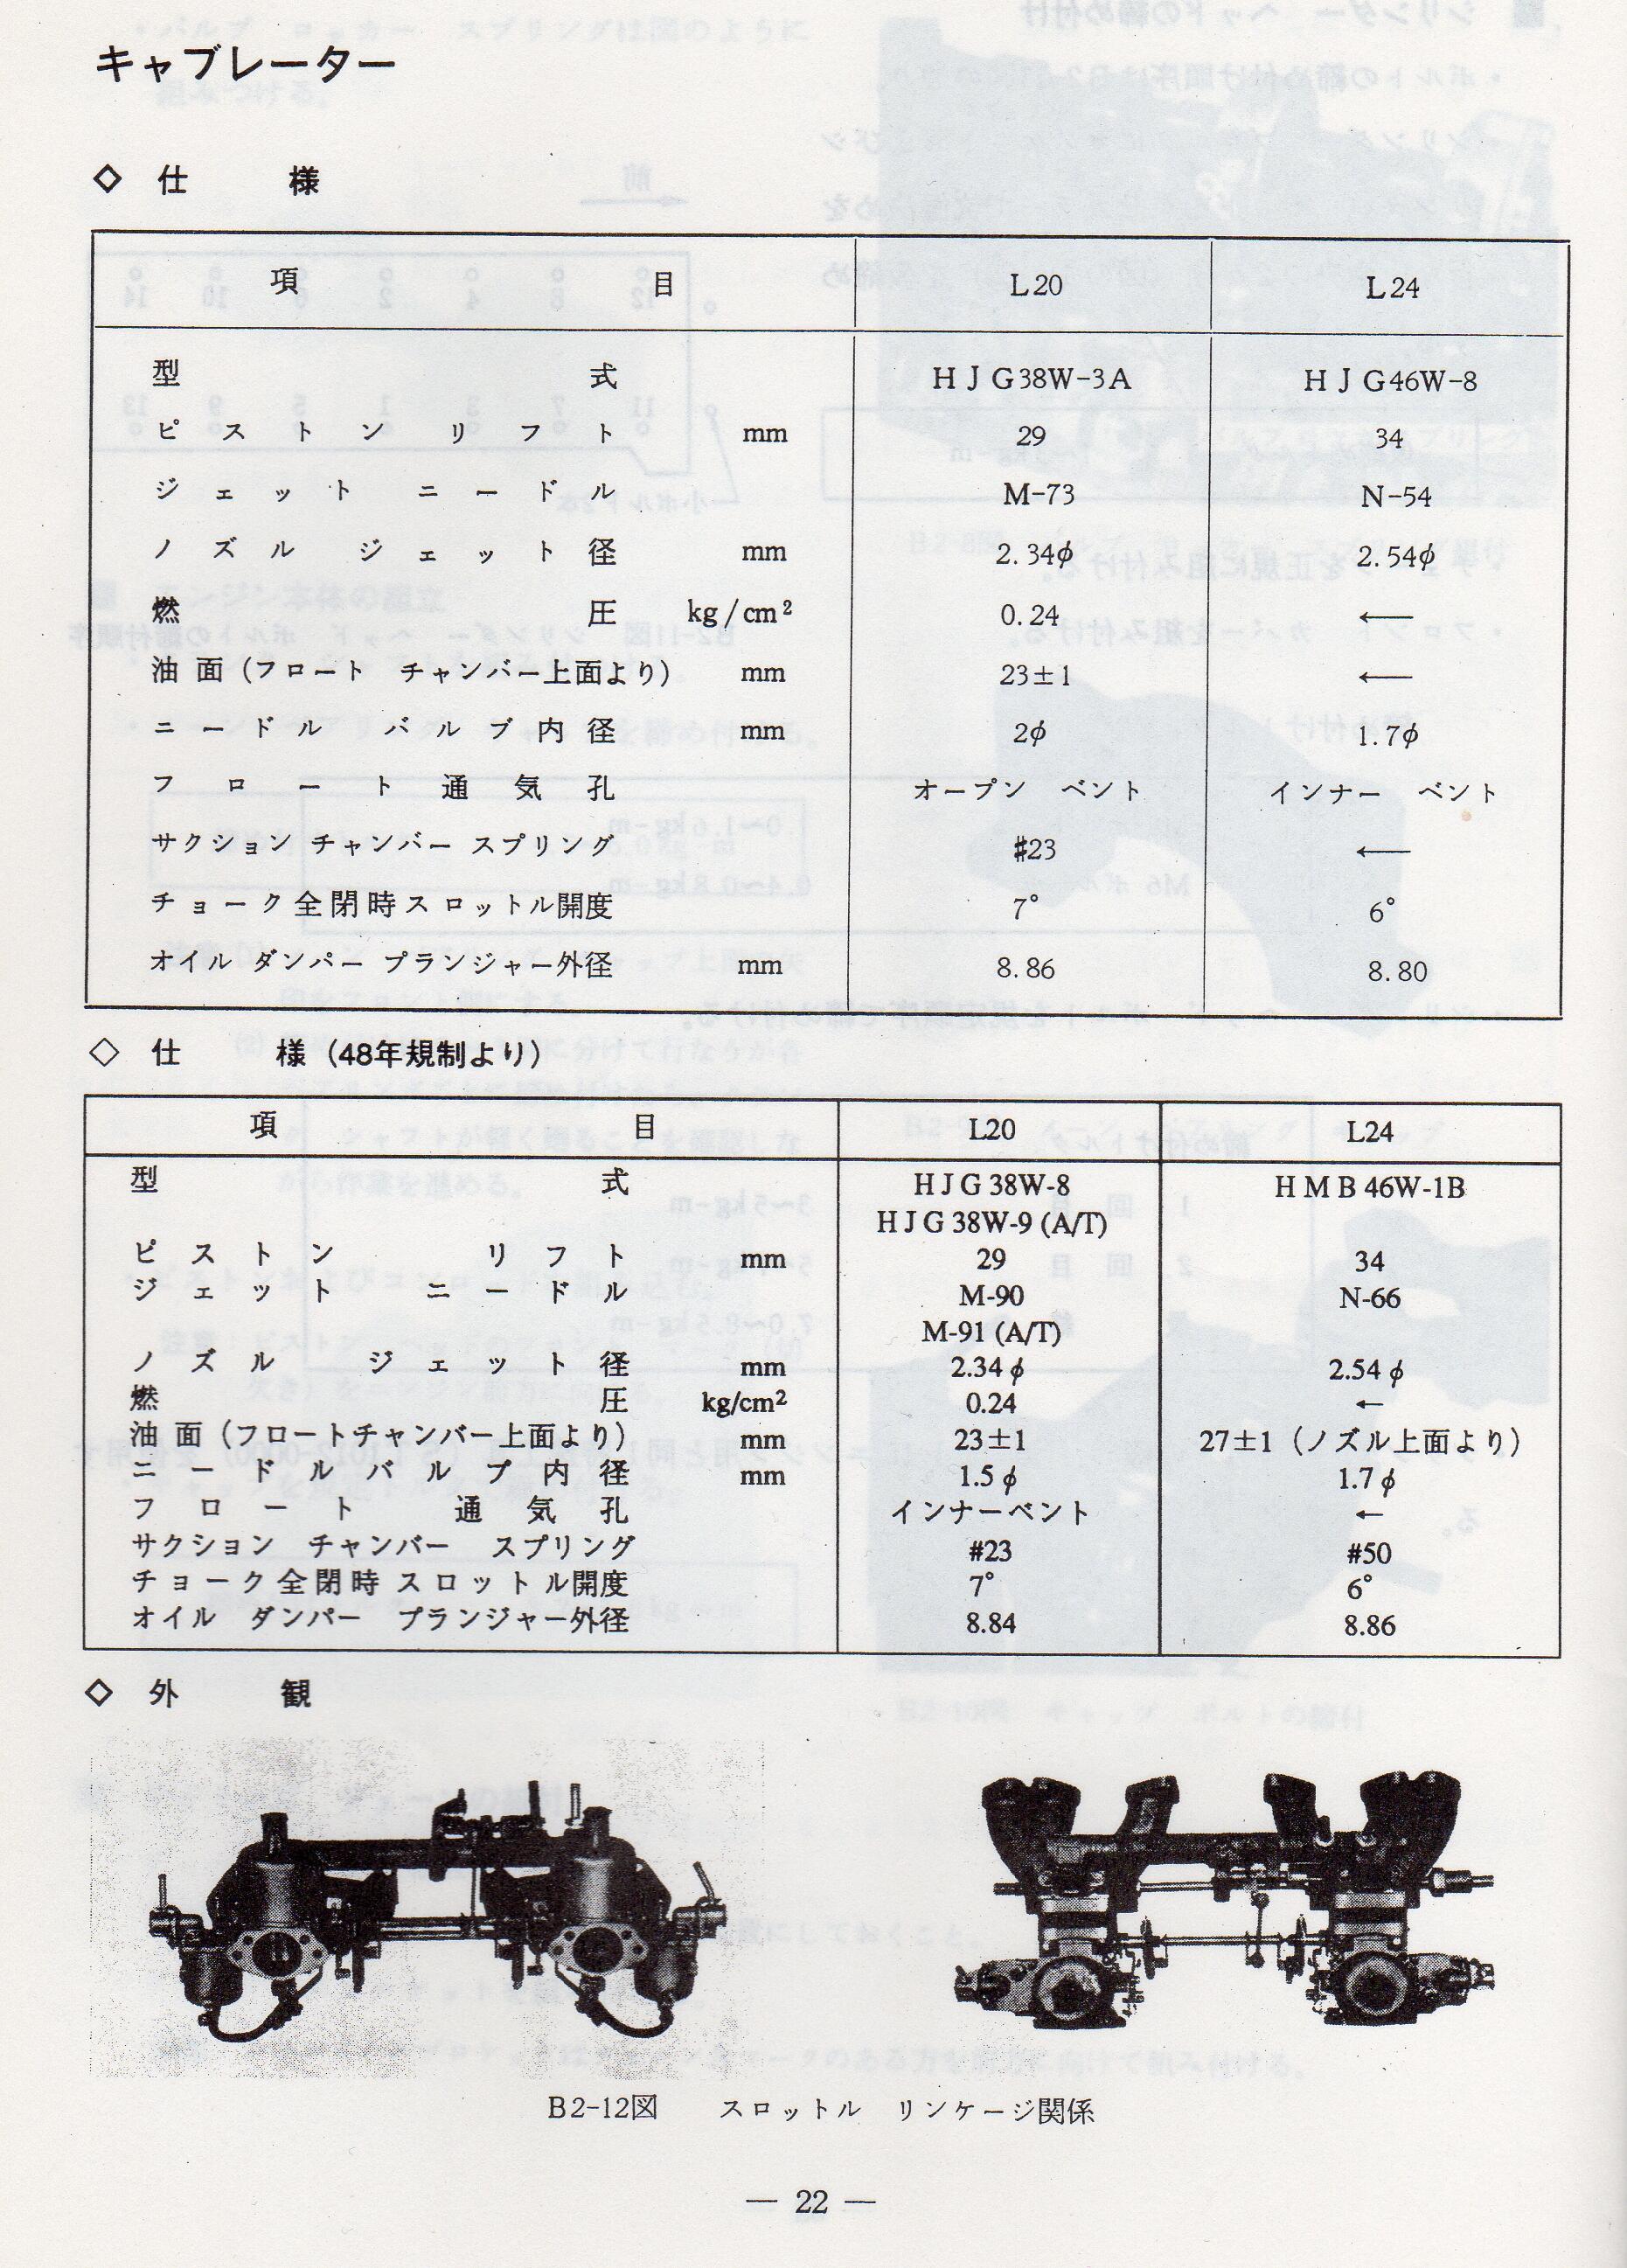
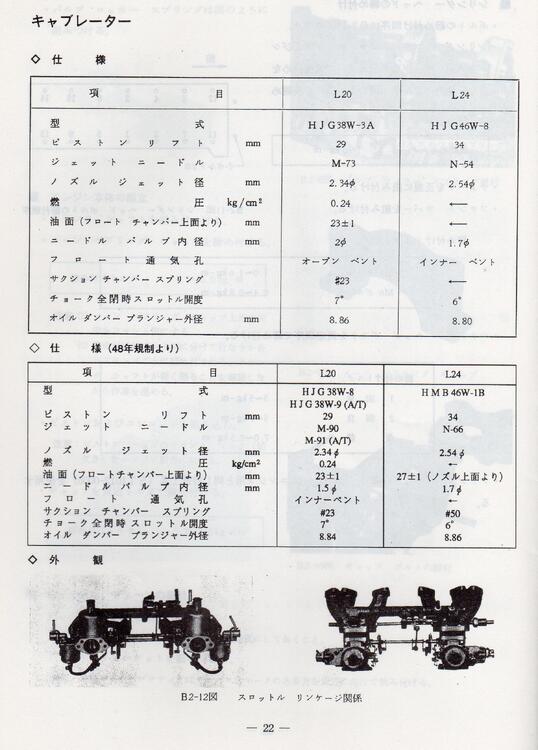
Hi Ian, Very late 1972 and then 1973 year L24-engined Fairlady 240Z, Fairlady 240Z-L and Fairlady 240ZG got the HMB46W-1Bs as part of Nissan's drive towards reducing emissions. Specs here, in bottom right box: ...which says the jet needles were 'N-66'.
 1 point
 -
Sorry for the later reply, busy season with work. I intended to restore an RS30Q, and had the car, but the CSP took its place, and the RS30Q was sold, so I never got to try I found/modfiy/stock set up. It's been a while since I was in Flat top carb world. A quick look/thought. On my parts microfiche, there is only two needles listed, 16354-N3500, N-86A and 16354-N3310 and listed as applied model is L26 Australia. Mentioned above is HMB46W -1 to -10, looking in the 240z/260z fuel system modifications plus booklet, mentions on page 18 "note: HMB46W-5 and -9 carburetors have the improved choke valves (no stamped number)." On the previous page (17) is mentions F1 and R1 as the second type, the third type F2 and R2, where Fand R are front and rear carbs. This corresponds to choke part numbers, 1st type, no part number (and that page is missing from my microfiche), second type 16188-N3300 and third is 16188-N3310. The power valves also correspond to F/R1 and F/R2, (16059-N3314 and 16059-N3313 respectively, with the later having a green blob of paint on the valve, which I have seen. So, what I am trying to say, point to, is I think the -1 to-10 covers small modifications/tweeks, with the HMB46W's as there production progressed. It also on what model the carb was on. I am unsure if any JDM market had the HMB46W fitted (HS30-H?), apart from their recalled Fairlady Z with the 2.6L fitted. It could like the Hitachi HJG38-11, NOS I have, this having an -11 suffix. This carb was I think, ran as singles or twins on various models, the P510, Fairlady Z, B110, N10 Cherry, all these models. I very much doubt ran exactly the same carb, cc would mean that needle valve would differ. The fuel inlet pipe on the NOS one I have differs in orientation than others I have seen, does this warrant a -* number change? The HJ38 has its number etched on the side of the fuel bowl. Which brings me back to needles...I haven't seen anything with 1A to 1C (probably as the 1st page of my copied microfiche is missing), but I think it is lining up with changes to other modifications/tweeks to the carbs. I did send a needle off to be matched with an SU Burlen one, and it was pretty close. I completely stripped a pair of HMB46's years ago to try to get a better understanding of these "boat anchors" work. People can run these carbs successfully, and some can. It's only fuel air and vaccum...! The key I think is they have to set up just so, and are a little less forgiving than the HJG46W. Some of these set up points are in the fuel modification system. What I found on stripping them if I recall is the nozzle kit (16496-N3311) is very easily worn, where the needle cuts a groove/makes the nozzle oval, rather than a centred fit. I found the power valve assembles clogged up with carbon, the valves are made up of 3 or 4 plates, with the centre one has little set brass nozzles set into the aluminium housing. These power valves run off a separate curcuit if I recall, giving an extra shot of fuel at a certain level of throttle, so have to be clean. I think there is a knock on affect if things are just set up just so. The throttle shafts like the HJG46 could do with bearings inserted like Z therapy do. Also, if I remember rightly, the HMB46W's there is only one idle mixture screw that does both carbs, linked to both via hoses. This makes tuning difficult, as there has to a happy medium (or unhappy) to get it to run as best it can. I did come up with a mod that gives you individual adjustment to each carb, which I think would help. Fuel level, very crucial, they eye level glass is a faff to see. The volume of the fuel bowl, which is under the carb is quite small, so getting that fuel float set is crucial,which is linked to fuel pressure. I did think of a large fuel bowl (cut a slice off a spare carb and make it into a spacer) to give you more volume, but I never thought it all the way though and see if it would work. I seem to remember a very small inset fuel filter in the carb body, another thing to keep clean. Also, there are devices on the air filter box that need to be kept in working order too. Right cup of tea time. I hope that helps. Cheers Ian1 point
-
1 pointIf anyone is looking for the stock expansion valve o-rings which are NLA, for the outside sealing ring use a 1-1/2”id x 1-11/16”od x 3/32”cs also known as AS568-128 HNBR. The inside ring is 1-1/2”id x 1-5/8”od x 1/16”cs also known as AS568-029 HNBR. I purchased mine at www.Theoringstore.com . It took a few tries. Hope this helps somebody.1 point
-
Haven’t heard the name Satch Carlson in a very long time. Used to read his column in Autoweek. Also enjoyed his accounts of the AlCan rally. He vanished from the scene rather suddenly. Seems he was accused of sexual impropriety involving a student of his.0 points