Leaderboard
-
Captain Obvious
Free Member9Points10,081Posts -
.JPG.cfcada9cf1c1b502df3f5f2f2ca3ff36.JPG)
SteveJ
Free Member7Points9,646Posts -
madkaw
Free Member5Points4,370Posts -

siteunseen
Free Member4Points15,115Posts


Popular Content
Showing content with the highest reputation on 11/01/2021 in all areas
-
4 pointsNot sure why you are trying to redesign the L motor . Take any other engine of its era and will see it’s a superior design . Properly maintained it’s probably one of the best engineered engines of its time . That bolt would have been fine if the owner had used coolant instead of water . We see it all the time . I challenge you to find a motor of that period that has forged internals for the most part and precise machined surfaces .4 points
-
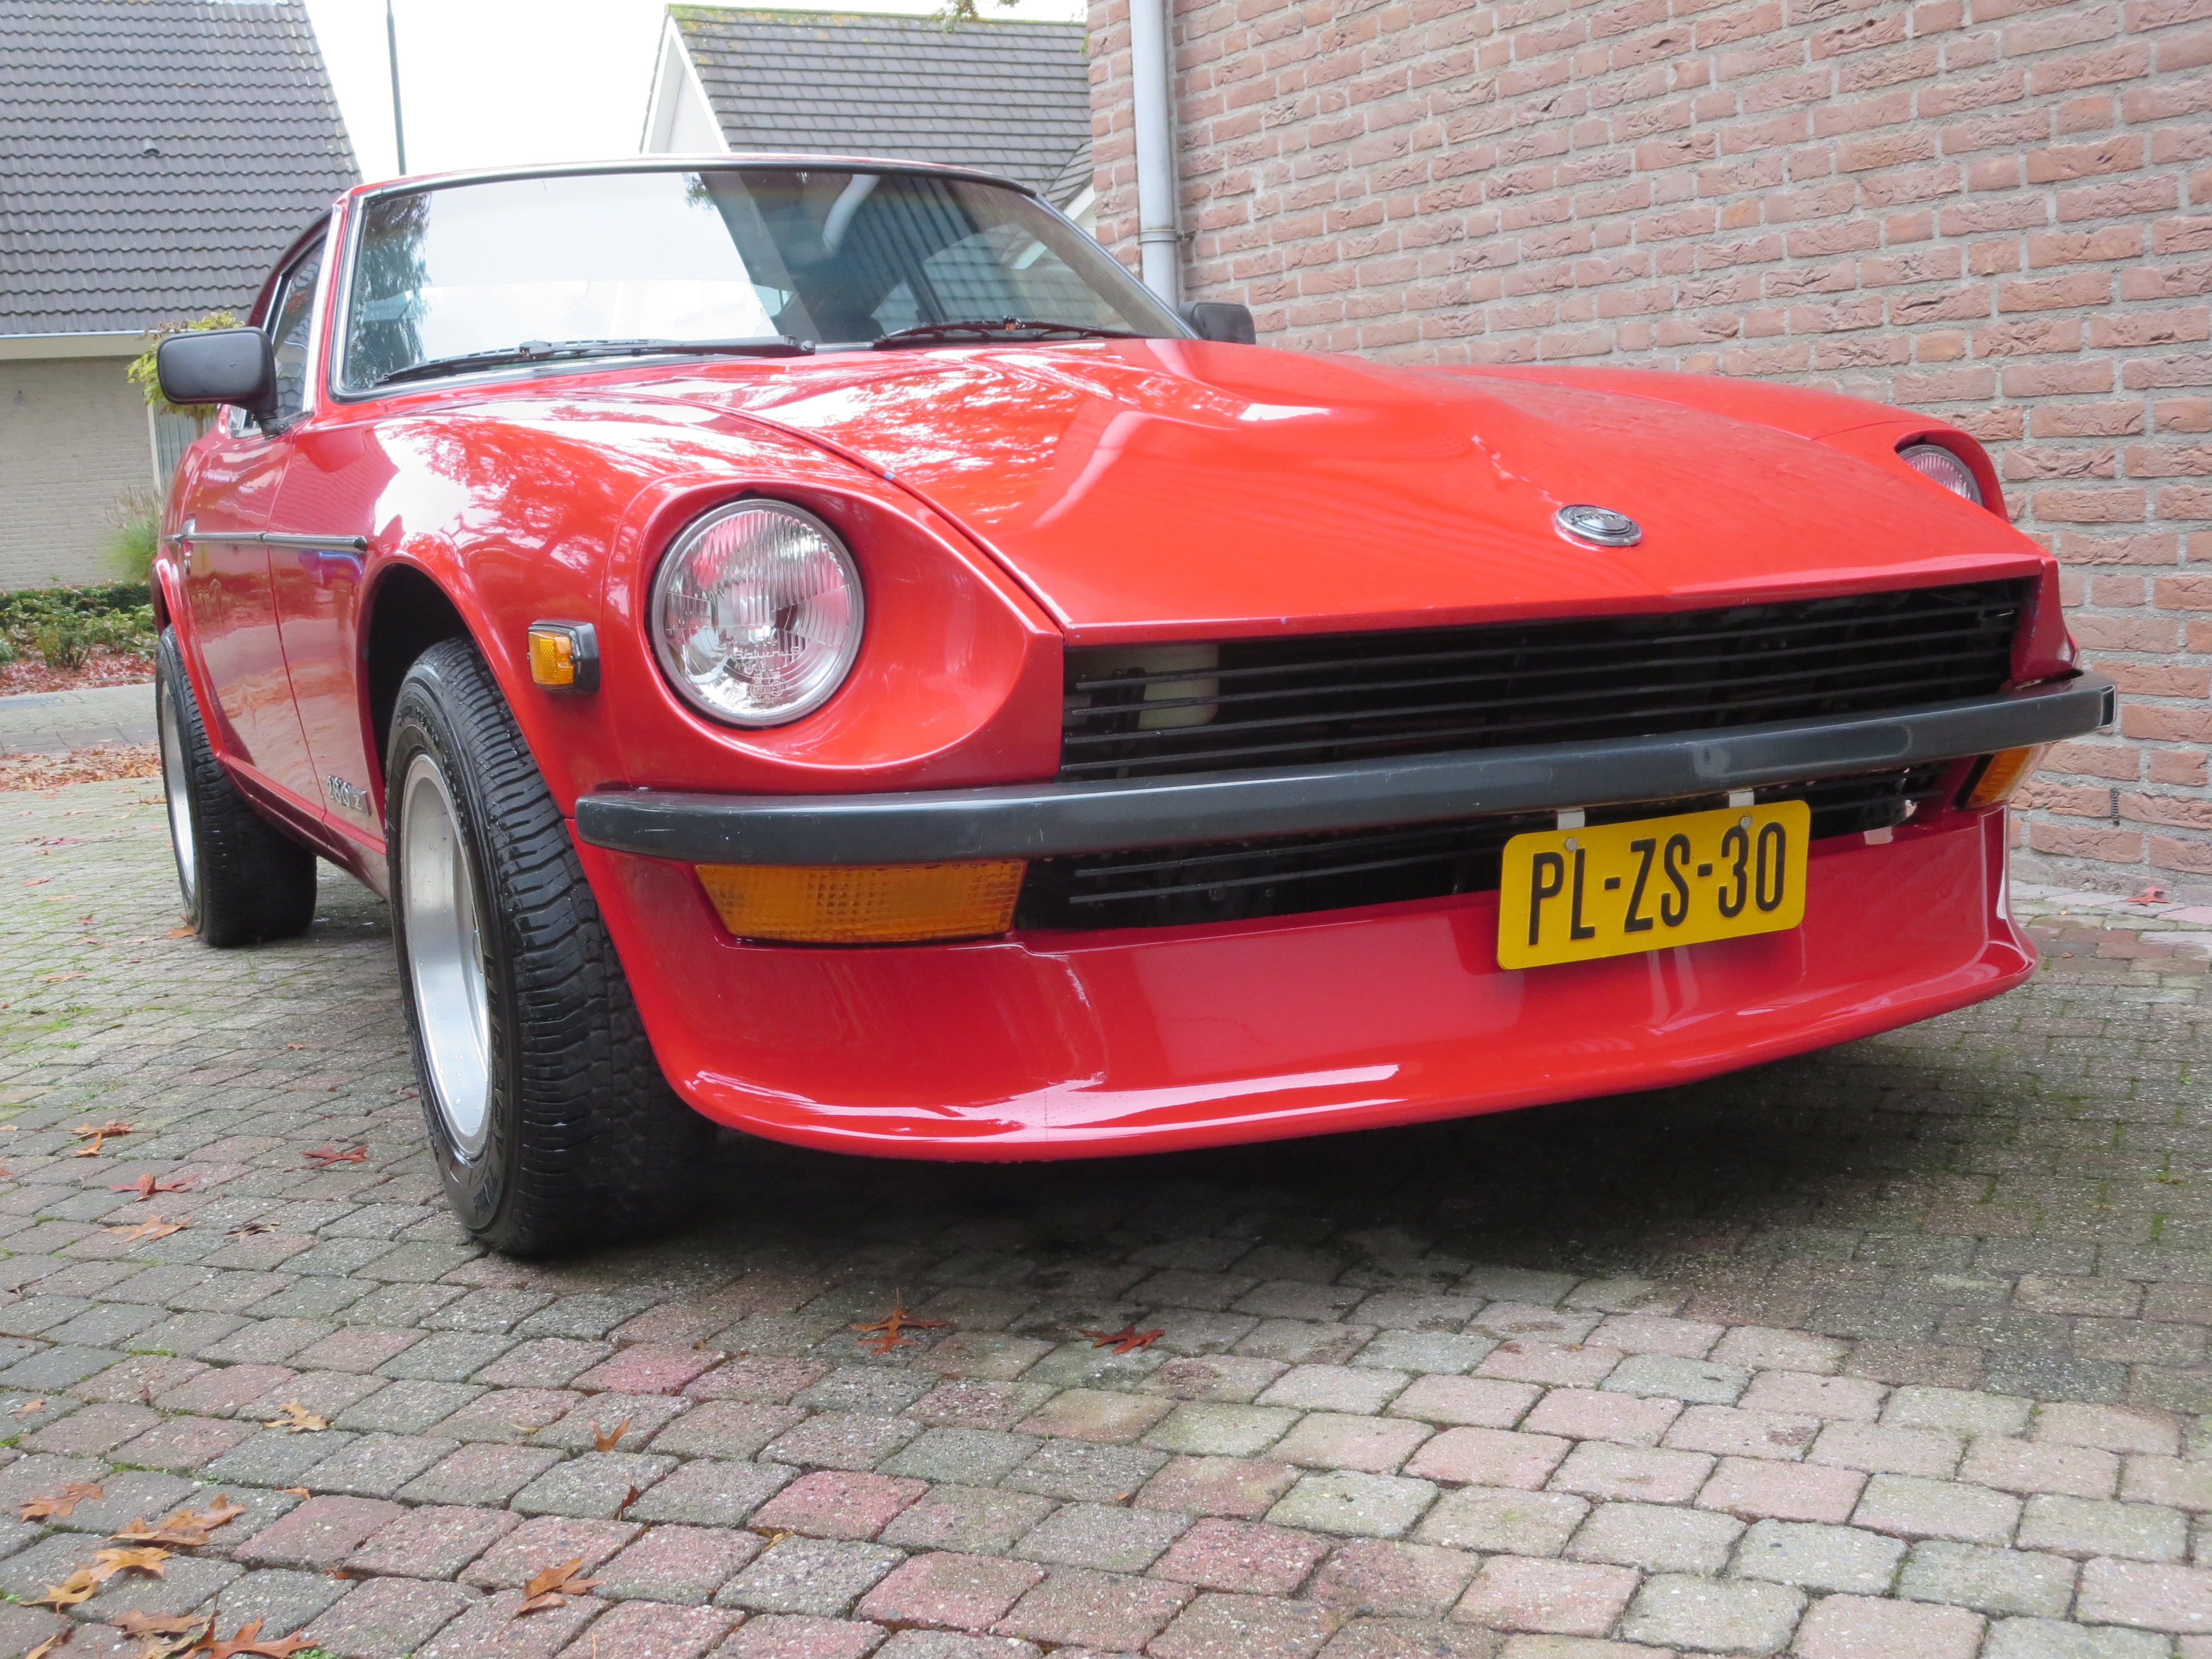
3 pointsThe 260Z will be off to a new home. A well-known Z guy bought it and plans to vintage race it. I'm down to one Z for the first time in decades.3 points
-
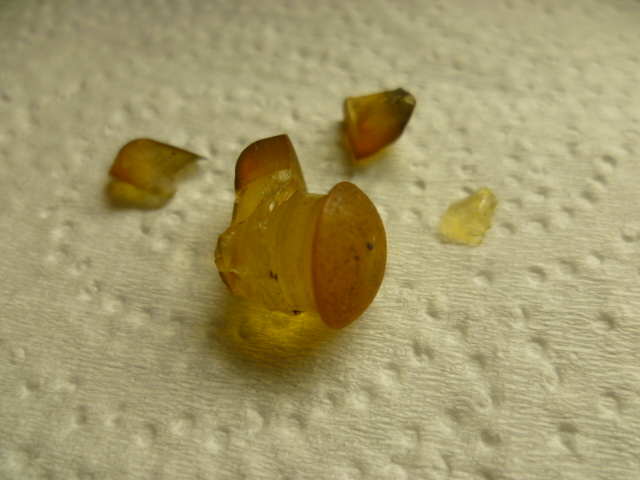
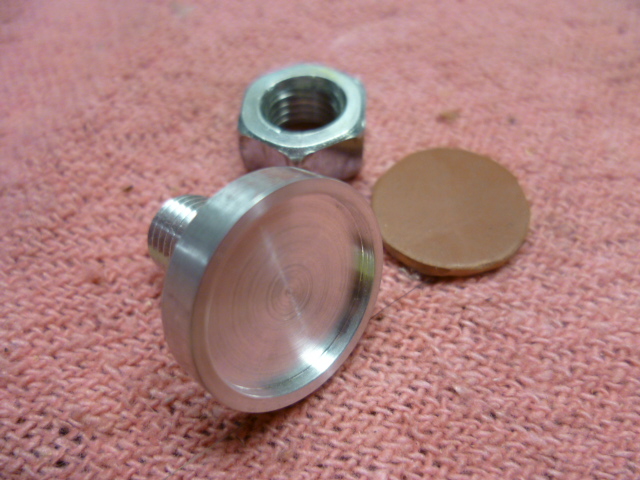
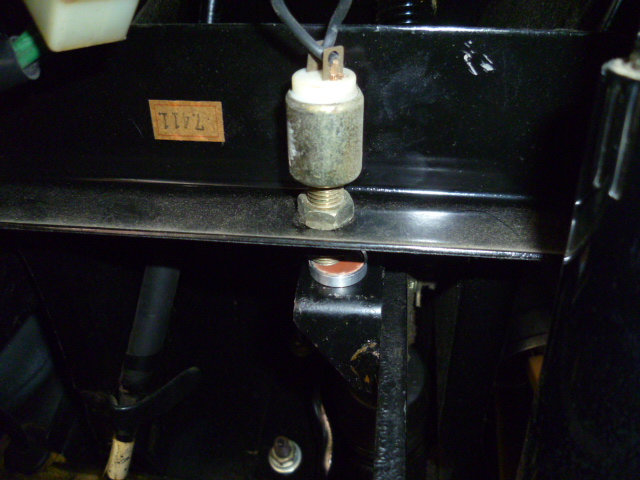
3 pointsMy brake switch bumper turned to dust a couple years ago. Looked like this: So, I chucked up a piece of metal on the lathe and made this: Glued the little rubber pad into the recess and put it up under the dash. A completely unreasonable and unprofitable amount of time later, I have this: Next time, I'll use a quarter. With maybe a couple layers of hockey stick tape over it to prevent any metal-to-metal noises.
 3 points
 -
3 pointsIt's plastic rather than rubber, but machts nichts. As a temporary fix, you can tape a quarter over the hole until you get a replacement plug.3 points
-
Oh yeah, another free and easy way to check the tank is remove the metal filter up front behind the radiator keep the fuel from draining out when you pull it, use your thumb or something on the bottom and sit it in a clear glass jar. Let it drain and see if the gas inside is all funky looking. Then tap it down on a white rag to see what comes out. "Shade tree mechanicus"2 points
-
2 pointsGlad I am not the only one. Thanks for all the good responses guys, these feel way more resilient than my current approach. Plus maybe this will add another quarter to my resale value. 😛 Thanks again everyone for help troubleshooting this.2 points
-
Cool. Things are better when the numbers line up. So it sounds like the needle heater can deal with 240mA on a pulse width modulated basis, but not forever. It's all about heat and average power.2 points
-
That lines up pretty well with what I was reading on the power supply.2 points
-
Well that's what I get for relying on memory... I just took a quick look at a fuel gauge, and I got the heater resistances wrong. The heaters (both regulator and needle movement) resistances are about 50 Ohms each, not the 100 Ohms I mentioned above. The SENDER unit is 90-100 when empty, but the heaters in the gauge are about half that. If the regulator is closed, it will pull about 240mA. And if the fuel sender is at zero (full scale), the needle heater will pull another 240mA. So if you run the gauge without the regulator heater (no ground connected), the needle heater will see a constant 240mA at 100% duty cycle (not the 130 I mentioned above).2 points
-
2 points
-
2 pointsOr you could put a short bolt in there with a fender washer on each side. That would hit the plunger on the switch.2 points
-
2 pointsOn my Nissan D21 pickups I just tape a quarter over the hole.2 points
-
2 pointsI think its just evidence of poor maintenance. m6 bolts are allowed, and rusty short ones break as much as rusty long ones.2 points
-
The issue with clearance is likely the 5mph crash bumper supports, which could simply be trimmed off since they're not really needed if you're not running the impact bumpers, or intending on ever returning to them. I think this is what you're looking for: https://www.thezstore.com/page/TZS/PROD/classic02a01b/50-14021 point
-
1 pointCheck Klassic Fab JDM, I believe they do (and even if you do not see it on their website contact them, I think that their site if not completely up to date with what they have available). https://kfvintagejdm.com/product-category/datsun/1 point
-
The gauge current will actually drop completely to zero when the regulator opens. You're looking at a wildly swinging PWM signal with the digital current meter on your power supply and I didn't see a zero fly by on the gauge, but it does actually cut off completely. And that comes back to the burn out the gauge question... In normal operation, the sender resistance could be zero. So in normal operation, the gauge heater will pass current proportional to it's heater resistance which is about 50 Ohms (which I believe is about 90-100 Ohms). But it doesn't pass that current 100% of the time. It's pulse width modulated and the average power is cut down because of that*. When you operate it without the regulator ground connected, it's running 240mA 130mA at a 100% duty cycle. And it sounds like given enough time, that's enough power to eventually heat up the nichrome wire to the point that it doesn't like it. *I didn't write anything down, but memory says the regulator runs at about 50% duty cycle once it's warmed up.1 point
-
I actually did that once before I tore apart a fuel gauge to look at it. I only connected the green and yellow wires to a 12 volt source (2 lantern batteries in series) without a load. The gauge went to full, and I can't remember how long I had the circuit completed. However, later on the gauge would not register at all. This was 10 years ago before I started studying the wiring diagrams to death. It was interesting to see in the video how much the current dropped after the first heating coil came up to temperature and started operating the voltage regulator. Mind you, that was on the second run of the day after I verified I had a working circuit. I just ran a test. It took about 7 seconds for the VR to come up to temperature with an ambient temperature of 64 degrees F. I don't really want to see what the power supply ammeter reads without the VR just in case I'm right that it could burn up the gauge.1 point
-
Glad to help. That temperature compensator/regulator is really an ingenious little detail. I should really put together that "how the gauges really work" thread I suggested some time ago. In fact, I suspect the OP's issue with his gauge is dirty contacts in the regulator portion of his fuel gauge. (But I haven't officially suggested that yet because it's jumping the gun until you work through the other possibilities.) So, you had previously mentioned (in another thread) the caution about damaging the gauge if you didn't connect the ground. That ground connection is the low side of the regulator heater, so if it's disconnected the PWM will run full bore 100% to the sender unit. But I'm surprised to hear it's enough power to burn out the sender heater. You've seen this happen? It's only about 240mA 130mA.
 1 point
 -
Thank you for the correction. What I wanted to show most in the video was that the voltage regulator should be connected while testing. I have seen in the archives about people testing the fuel gauge out of the car, and it failed when they only connected the green and yellow wires (no wire from black to ground) for testing. The gauge I used was one I purchased about 10 years ago and never tested. Fortunately it is a good gauge. Again, when testing, don't forget to connect the black wire to the negative of your power source.1 point
-
1 pointThose canon plugs were a PITA. the A-10 has one plug that we t to the ADI in the cockpit this ADI also rotated for heading so it rolled in the case like a ball free floating...that instrument had about 60 wires on one plug. Mix one up and the instrument went cuckoo, ask me how I know. At least I had the best tools in the world, I went from Snap-On then to Harbor Freight now. Thanks for the compliment but I won’t feel good until it actually runs Sent from my iPhone using Tapatalk1 point
-
Dutchzcarguy, maybe try FedEx next time, I am a bit biased I must say. I’ve been flying the European cargo for about 4-5 months now so If it late or something gets damaged you can blame me and my bad landings Cliff was talking about. [emoji23]. We expanded our operations over there and since we bought TNT we’re got a lot more market share. DHL is still the big player in Europe right now . I prefer the euro tail lights and will be in the market for a set once I get this car rolling on its own power and transition from mechanical work to appearance stuff. I’ll be looking for a set in a months. Sent from my iPhone using Tapatalk1 point
-
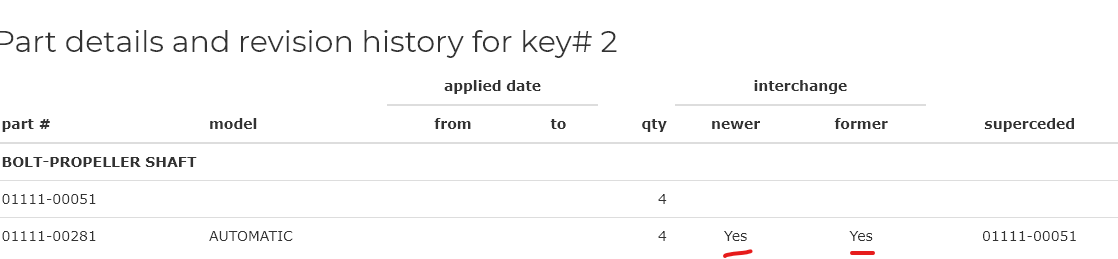
No offense, but this is completely incorrect. The outer shape of the flange changed over the years, there are square and round, but the bolt pattern and size is the same for all of them. It does look like the automatic got a different bolt at some point though. No year is specified. But they do interchange. The same size bolt through the same size hole, through all of the years of the Z. http://www.carpartsmanual.com/datsun/Z-1969-1978/power-train/propeller-shaft/2
 1 point
 -
Thank you, thank you, thank you...one less thing for me to obsess about now.1 point
-
The parts microfiche shows this very clearly with the hex head of the bolts on the propeller shaft flange side. This is how my 1970 is assembled.
 1 point
 -
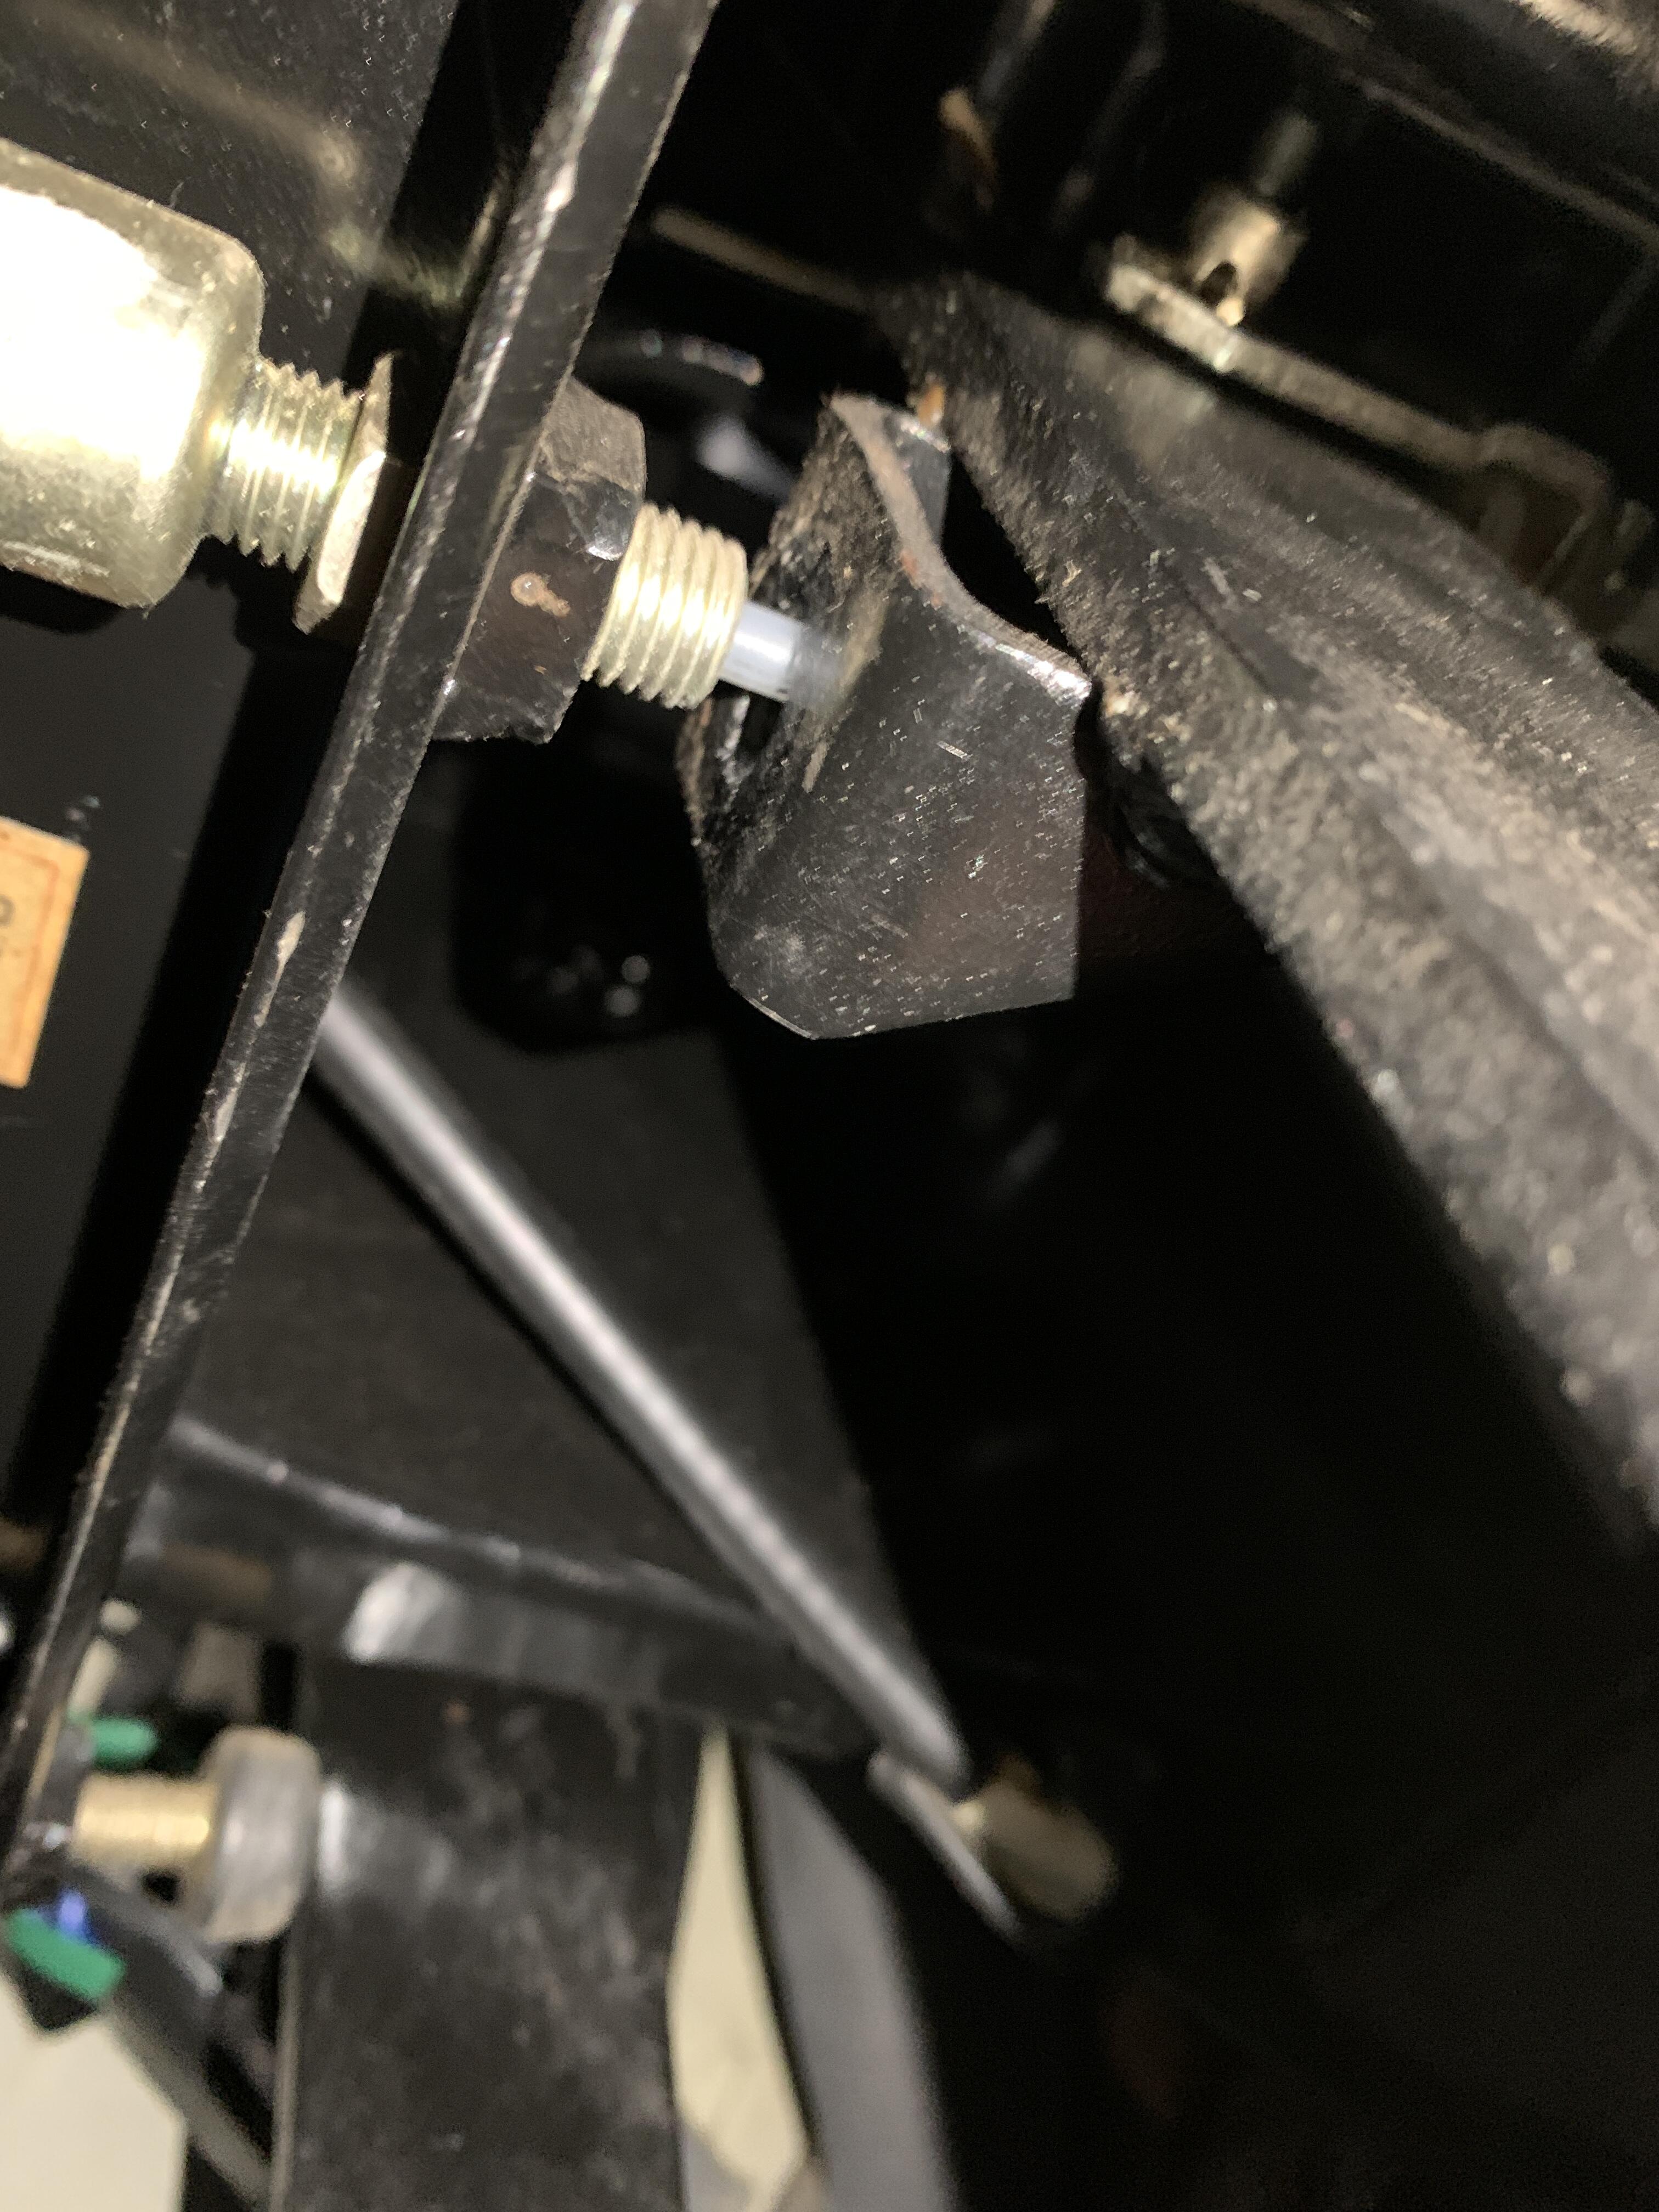
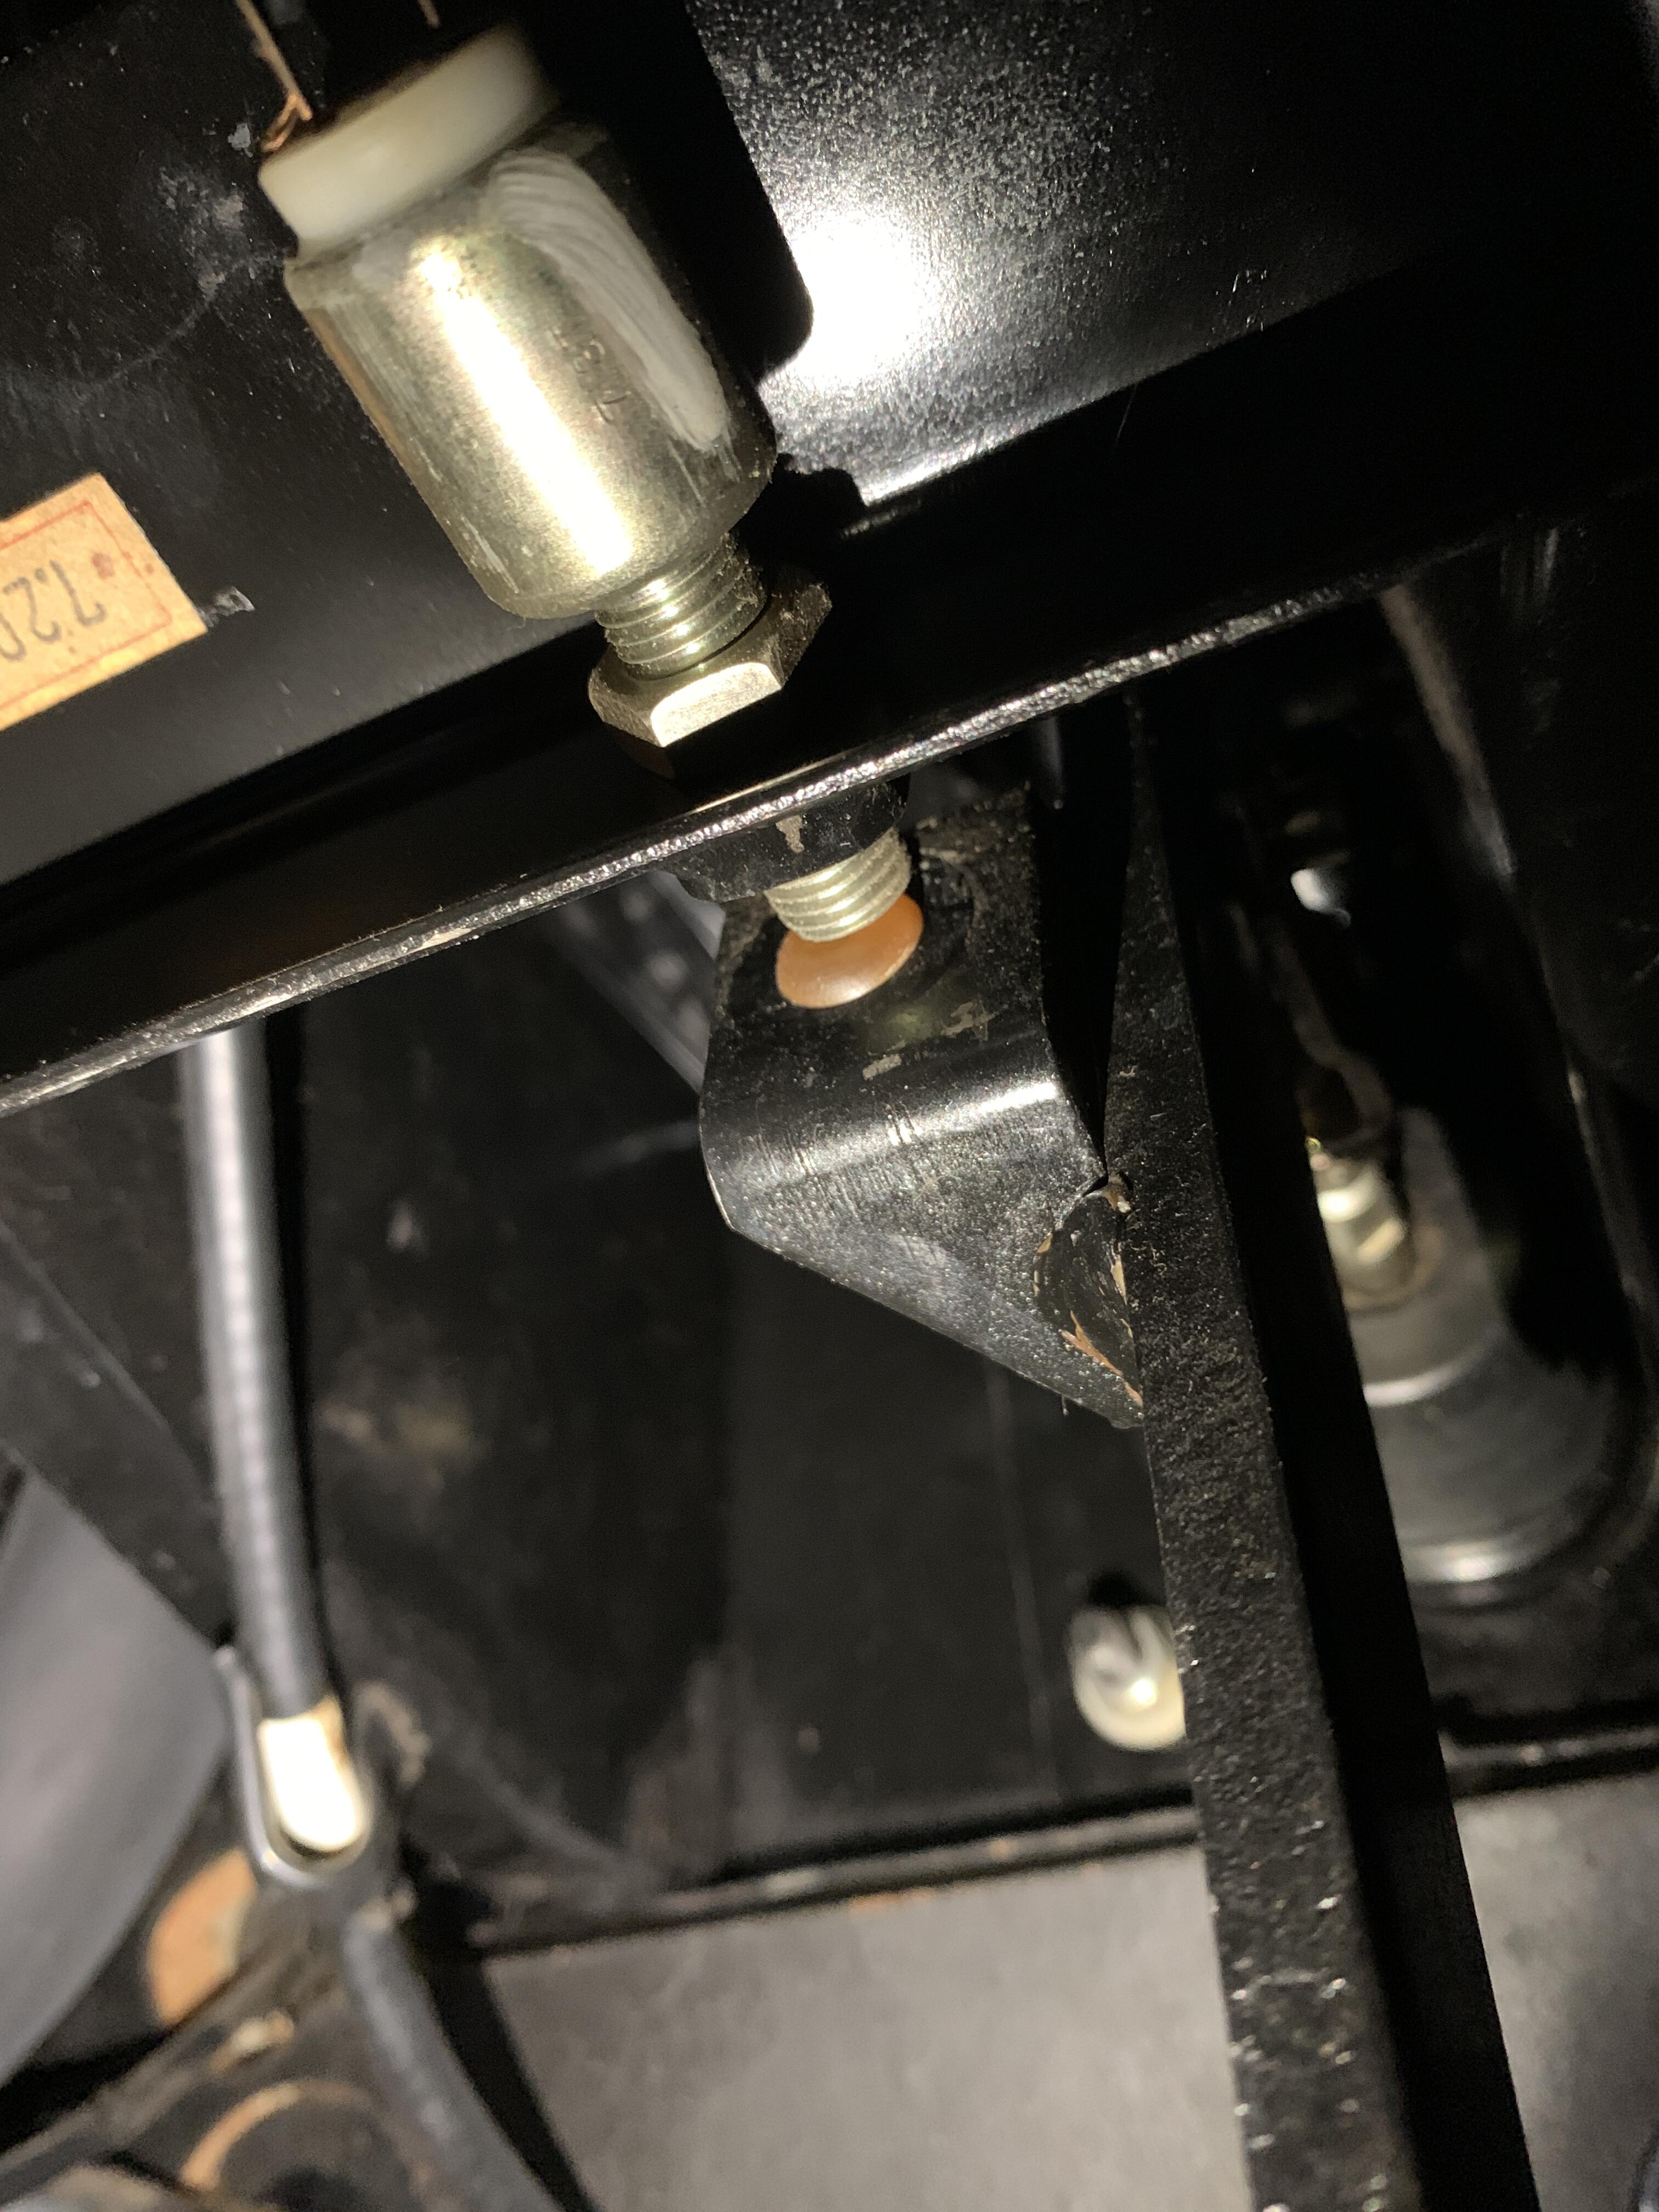
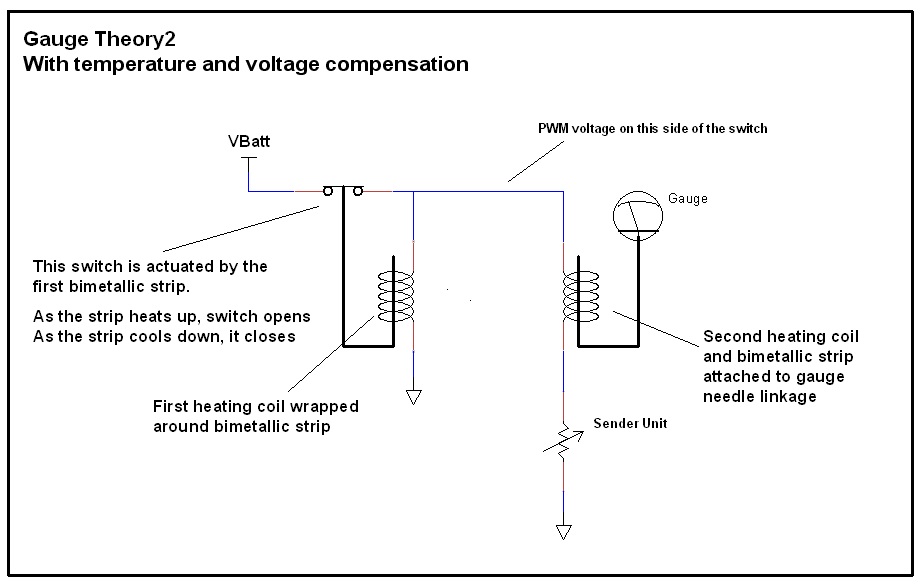
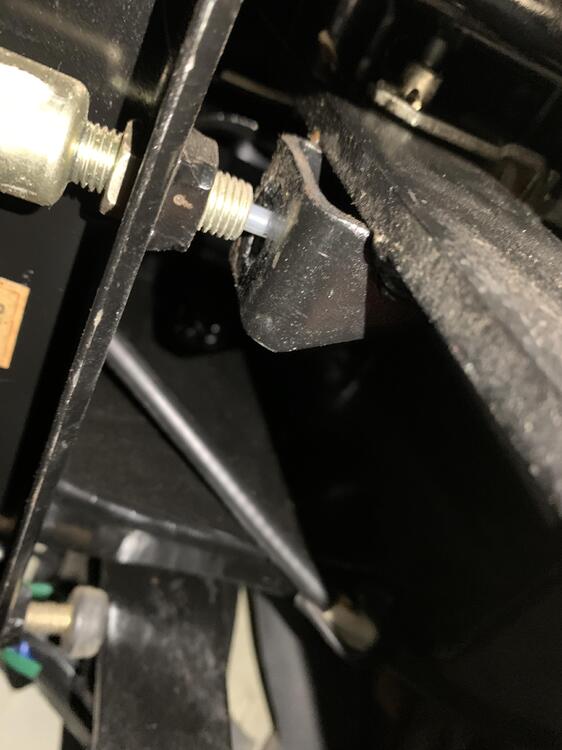
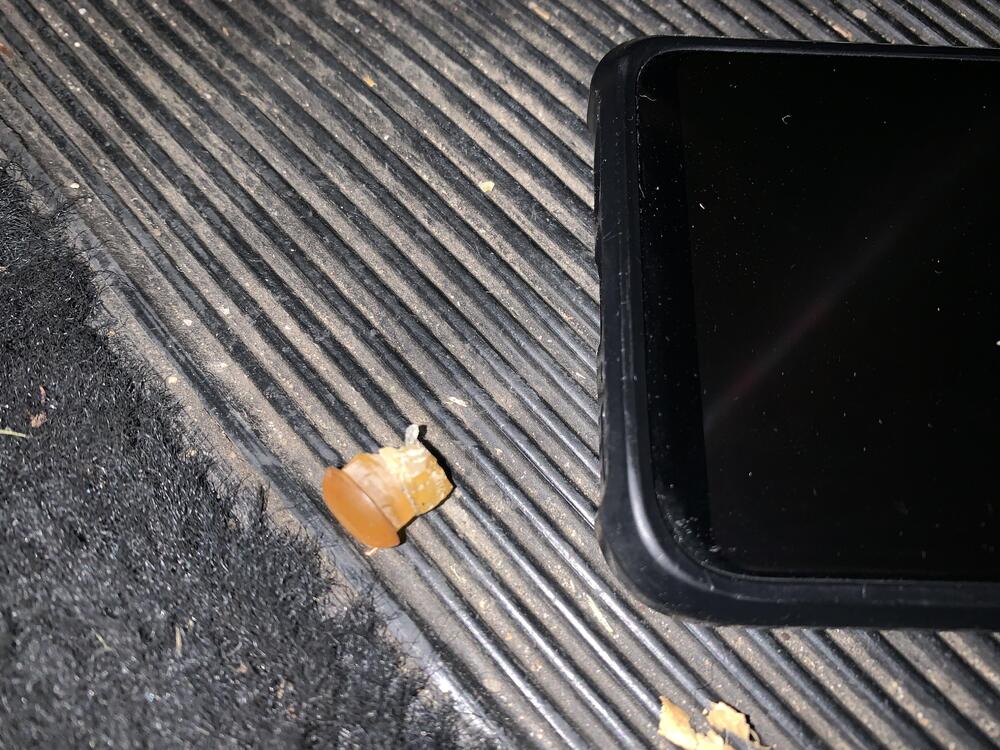
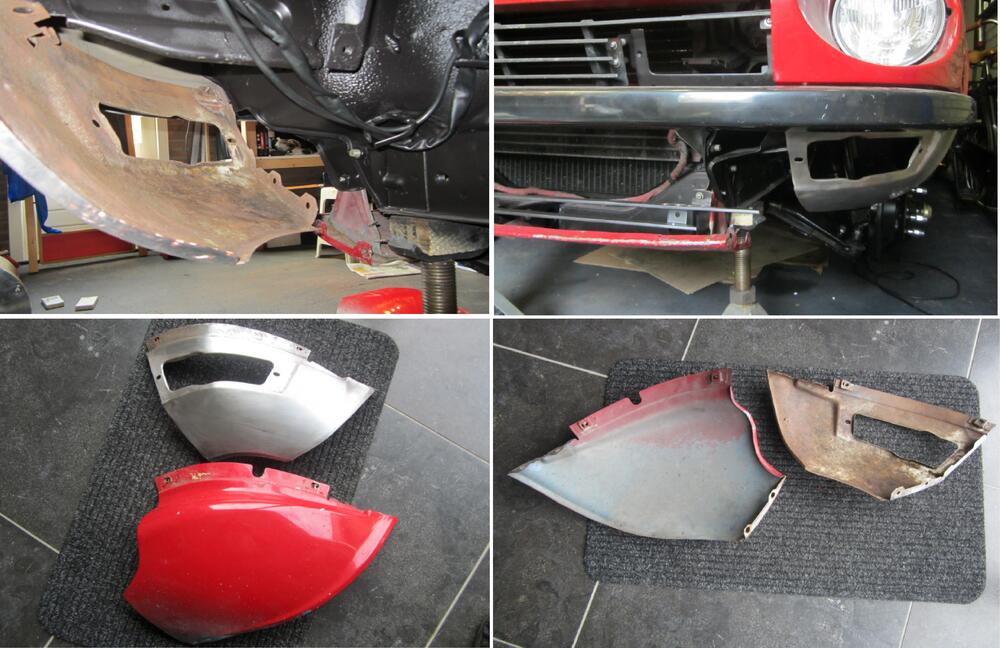
1 pointThe issue is with the little rubber stopper. I don’t see it in your diagram. This is what it looks like with the piece missing This is the rubber piece that popped out, it’s missing a backer piece which holds it in place. This is what it looks like glued in as a temporary fix
 1 point
 -
So I set up the gauge with my power supply and a variable resistor. It's interesting to me to watch the power supply ammeter while I'm doing the demonstration.1 point
-
1 point
-
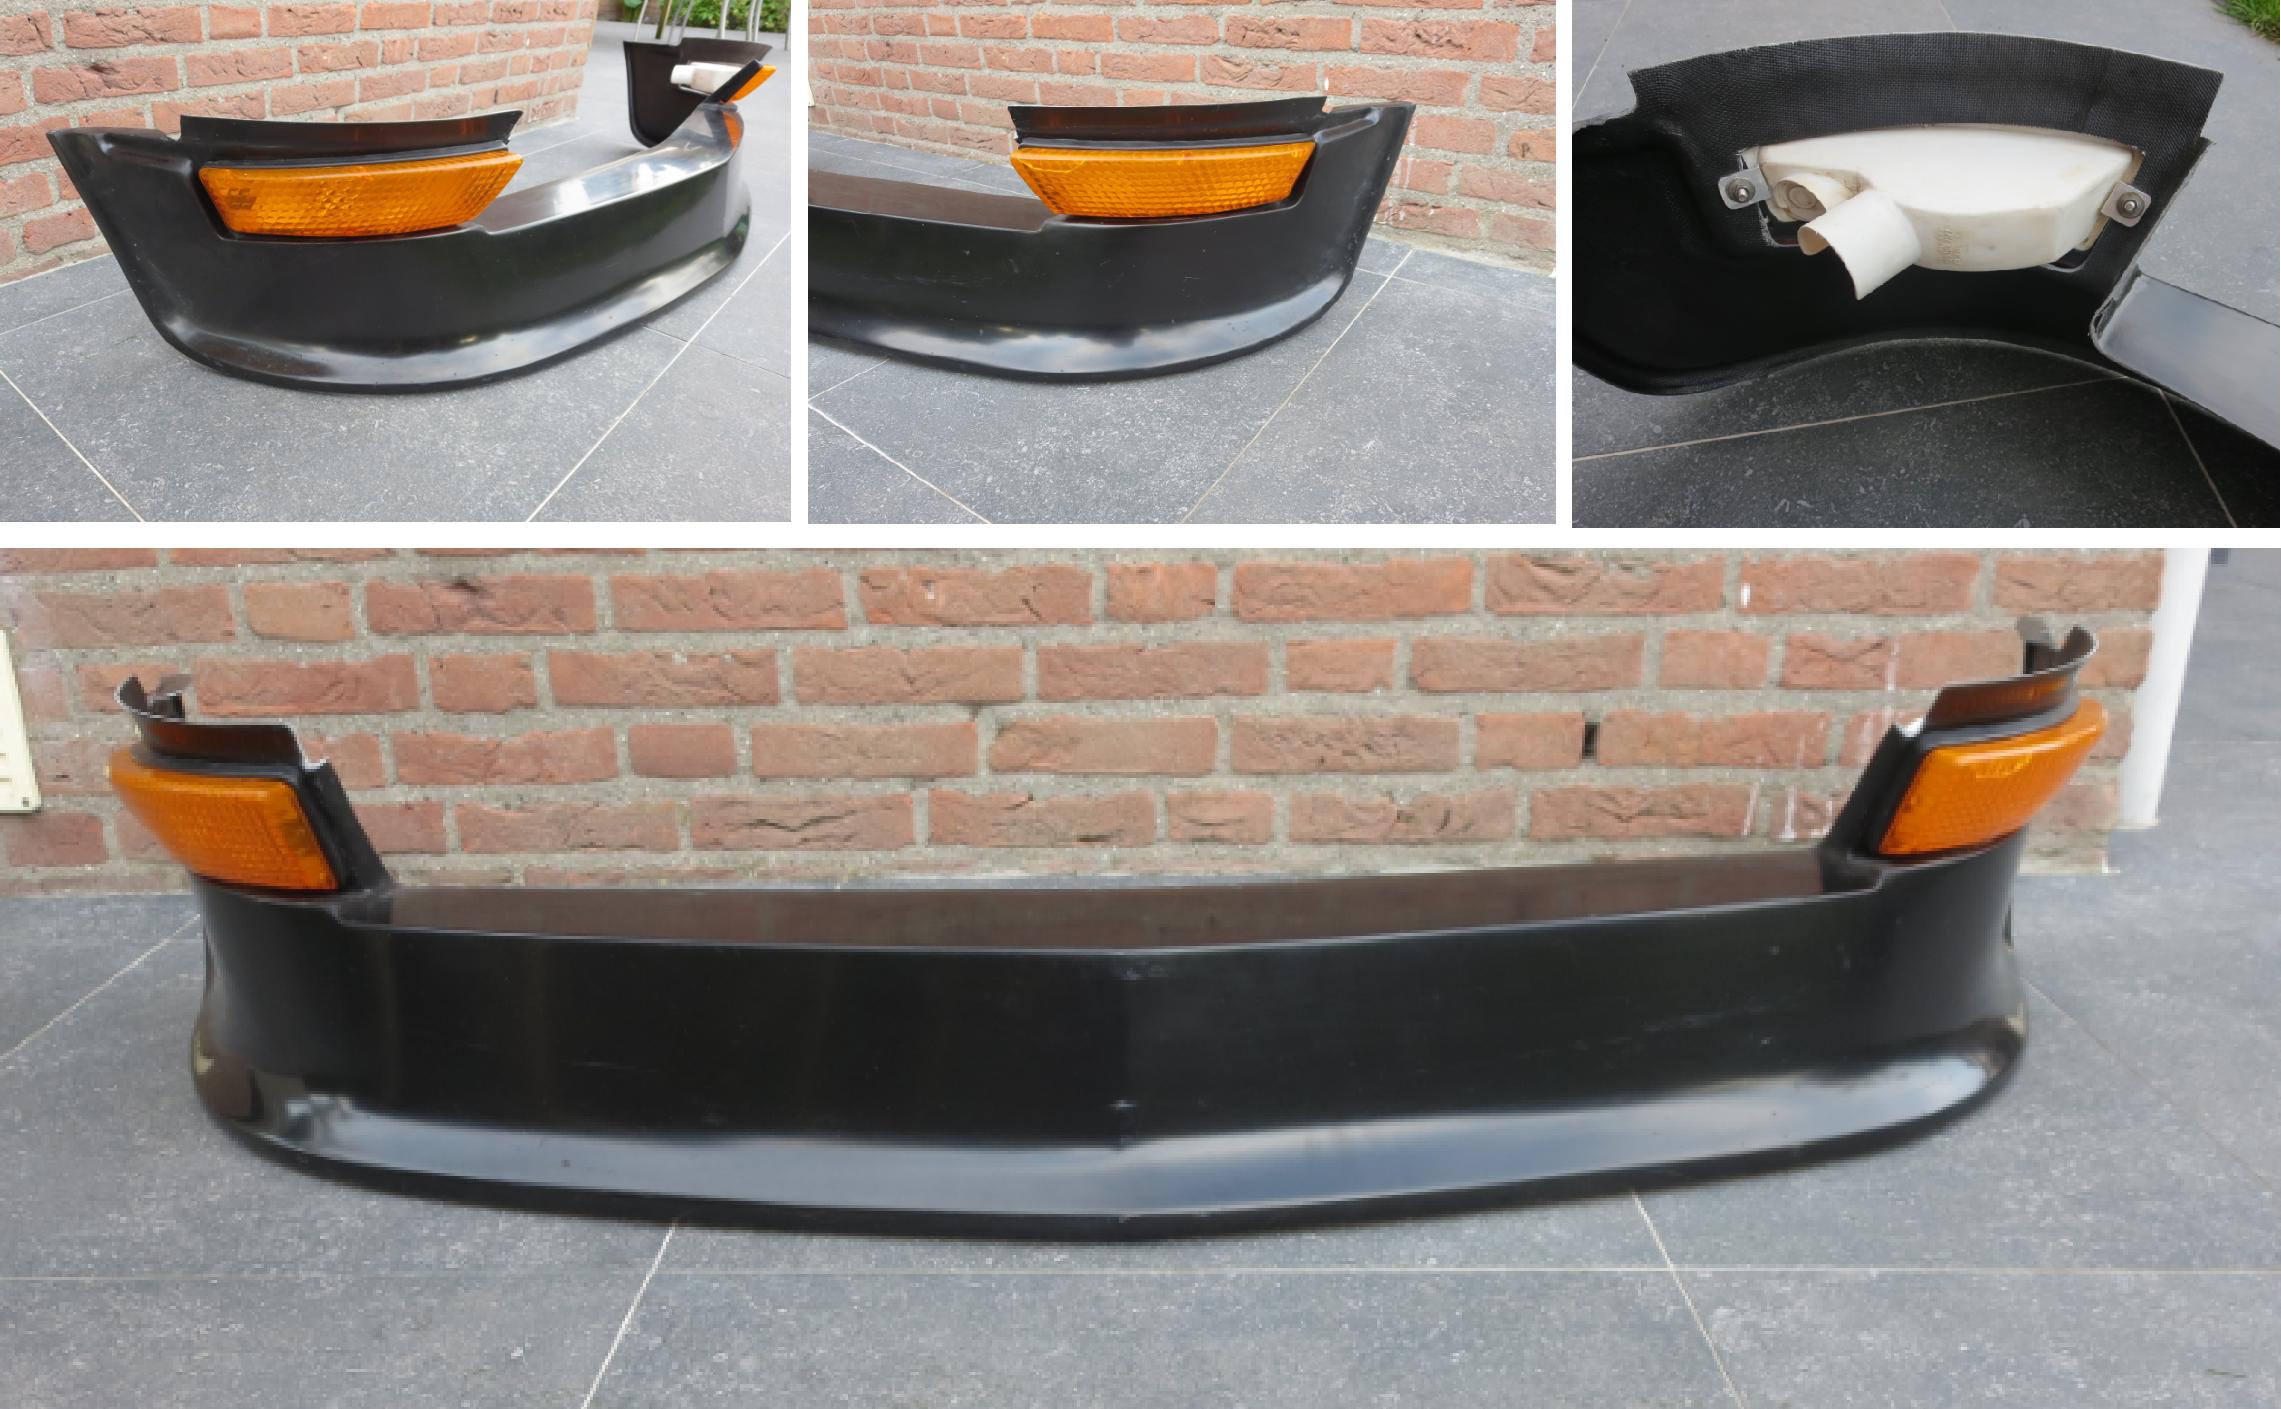
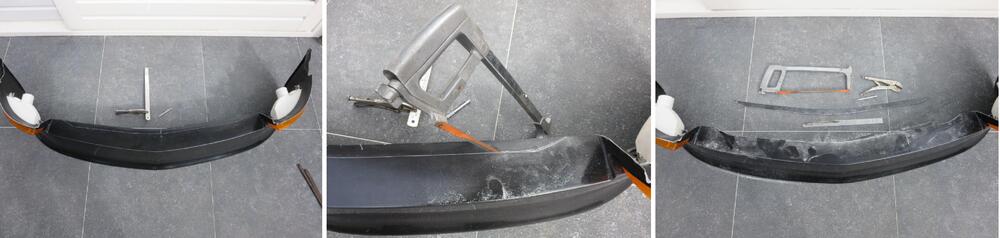
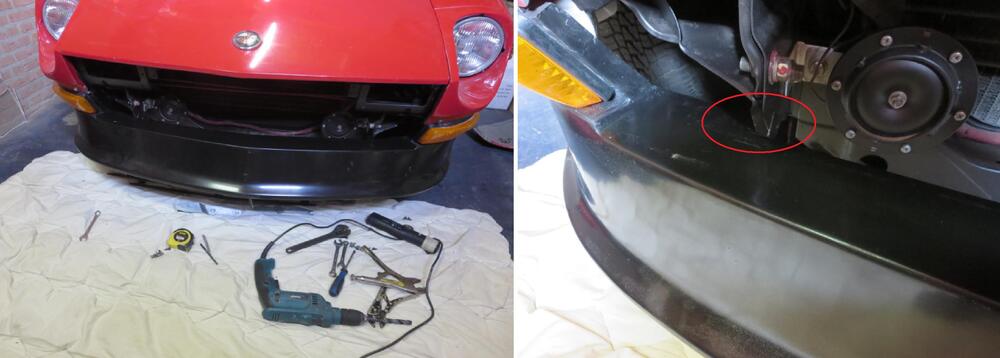
I was all over the place when I started. First tried a 240Z valence, but it is way to high and does not clear the 280Z frame under the larger radiator. Ended up going with the 240Z fibreglas air dam because it is stiffer and self supporting at high speeds. The Xeon PU air dams tend to fold up under the bumper at high wind speeds. You can solve that problem by adding brackets to support the lower edge of the air dam. The 240Z version which will need some trimming to fit the 280Z. No big deal and easy to do at home. See Airdam-2 & 3. The grill is a modified 240Z / 280Z combination with 9 bars instead of the original 240Z 7 bar version.

 1 point
 -
They will. But the first year and a half, about, of 240Z's used a shorter shaft.1 point