Leaderboard


 Subscriber

Popular Content
Showing content with the highest reputation on 01/02/2020 in all areas
-
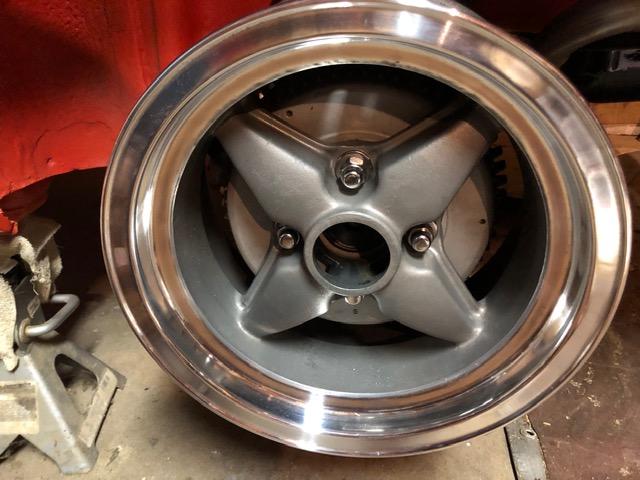
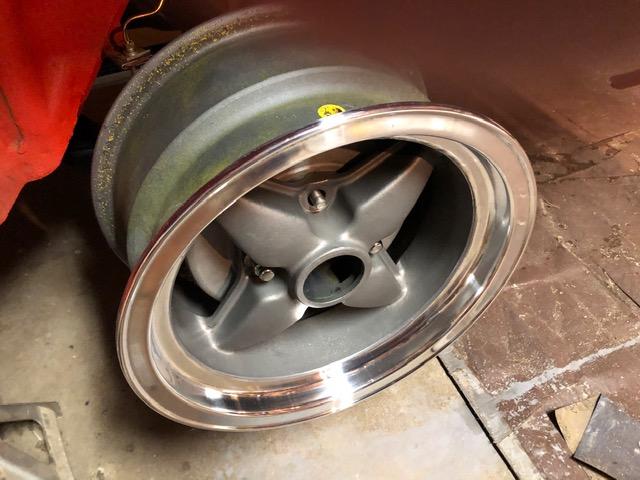
I am in the process of restoration of a set of Logan Blackburn's American Racing LeMans magnesium wheels. This is a set from his championship winning Z. I purposefully left his "trademark" yellow over spray on the inside of the wheels.
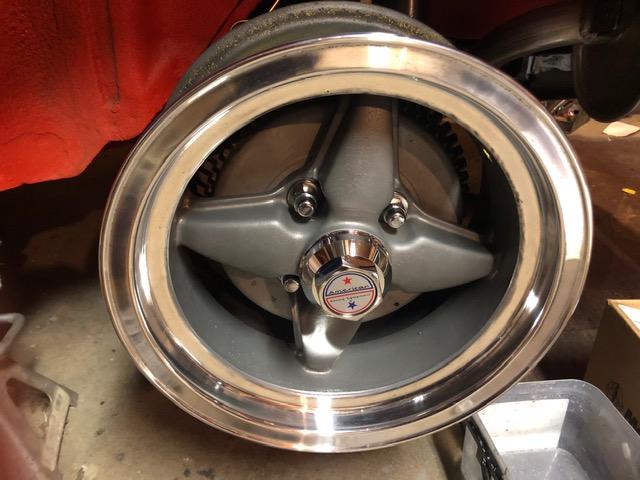 5 points
 -
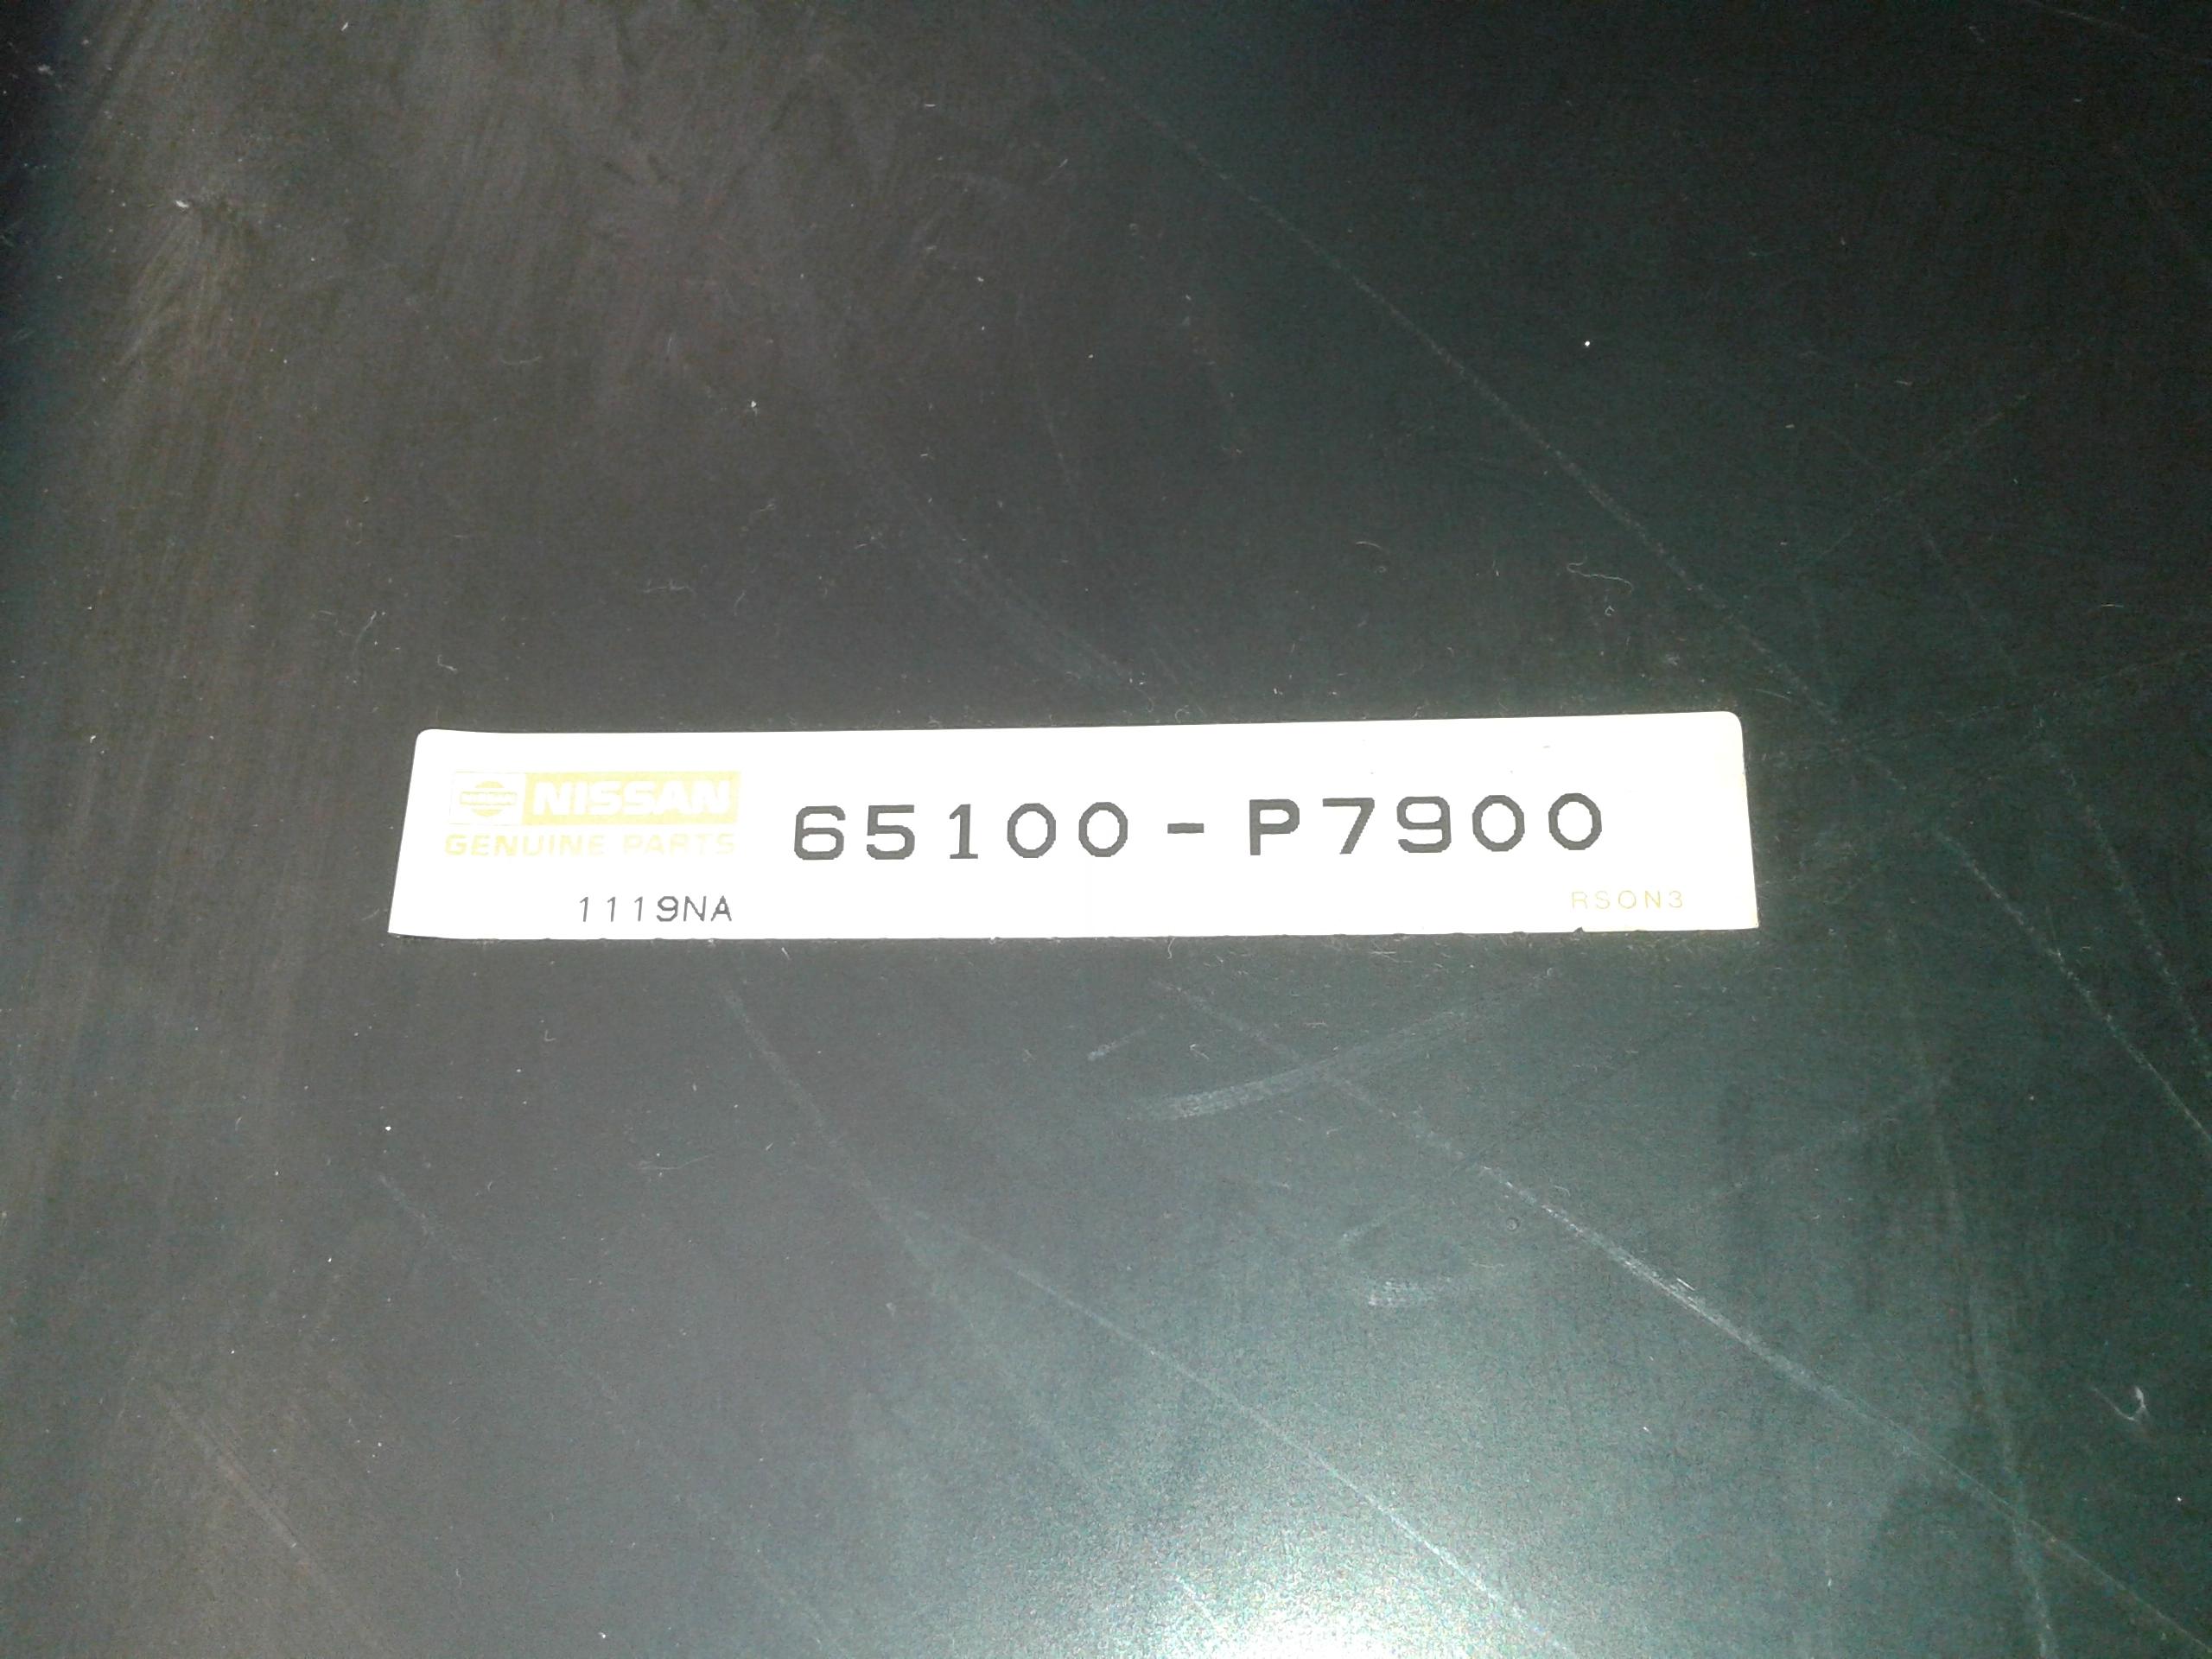
View Advert L-series bronze oil drive A natural upgrade new part for your high-performance L6, L4 and NAPS-Z L4 engines. A must if your engine regularly revs high, designed for competition use, this part is equally at home in street-modified engines. It is fitted to reduce accelerated wear to the drive teeth and therefore gear failure* and is especially efficient at high RPMs. Gear failure will send metal fragments around your engine via the oil and may lead to a complete halt in lubrification and catastrophic engine failure !!! This the essentiel part that you won't find in the Book "How to modify your Nissan and Datsun OHC engine" ! It is basically a small and inexpensive piece of insurance for the longevity of your performance engine - not to be overlooked lightly, its' absence could cost you dearly. Made by Rondeau (France) under my supervision to the original Datsun competiton and USA Nissan Motorsport specification. All the major performance engine specialists, whether they be motorbikes, V8s or our own L-gatas fit bronze oil drives - you'll see them listed in their quotes. An explanatory video : https://www.youtube.com/watch?v=LanQHfNsso8 Applicable to 240Z 260Z 280Z 280ZX Fairlady Z NISMO $155 shipped worldwide. Advertiser Sean Dezart Date 01/02/2020 Price $155.00 Category Parts for Sale2 points
-
2 pointsThis just arrived in the mail.... no guilty party in the shipping documents. It came from Amazon. BIG THANKS to SANTA!
 2 points
 -
2 pointsI have a later copy that lists more 280Z stuff. Haynes is usually one of the better non-OEM books. But on important specs, I always check against the FSM.2 points
-
2 points
-
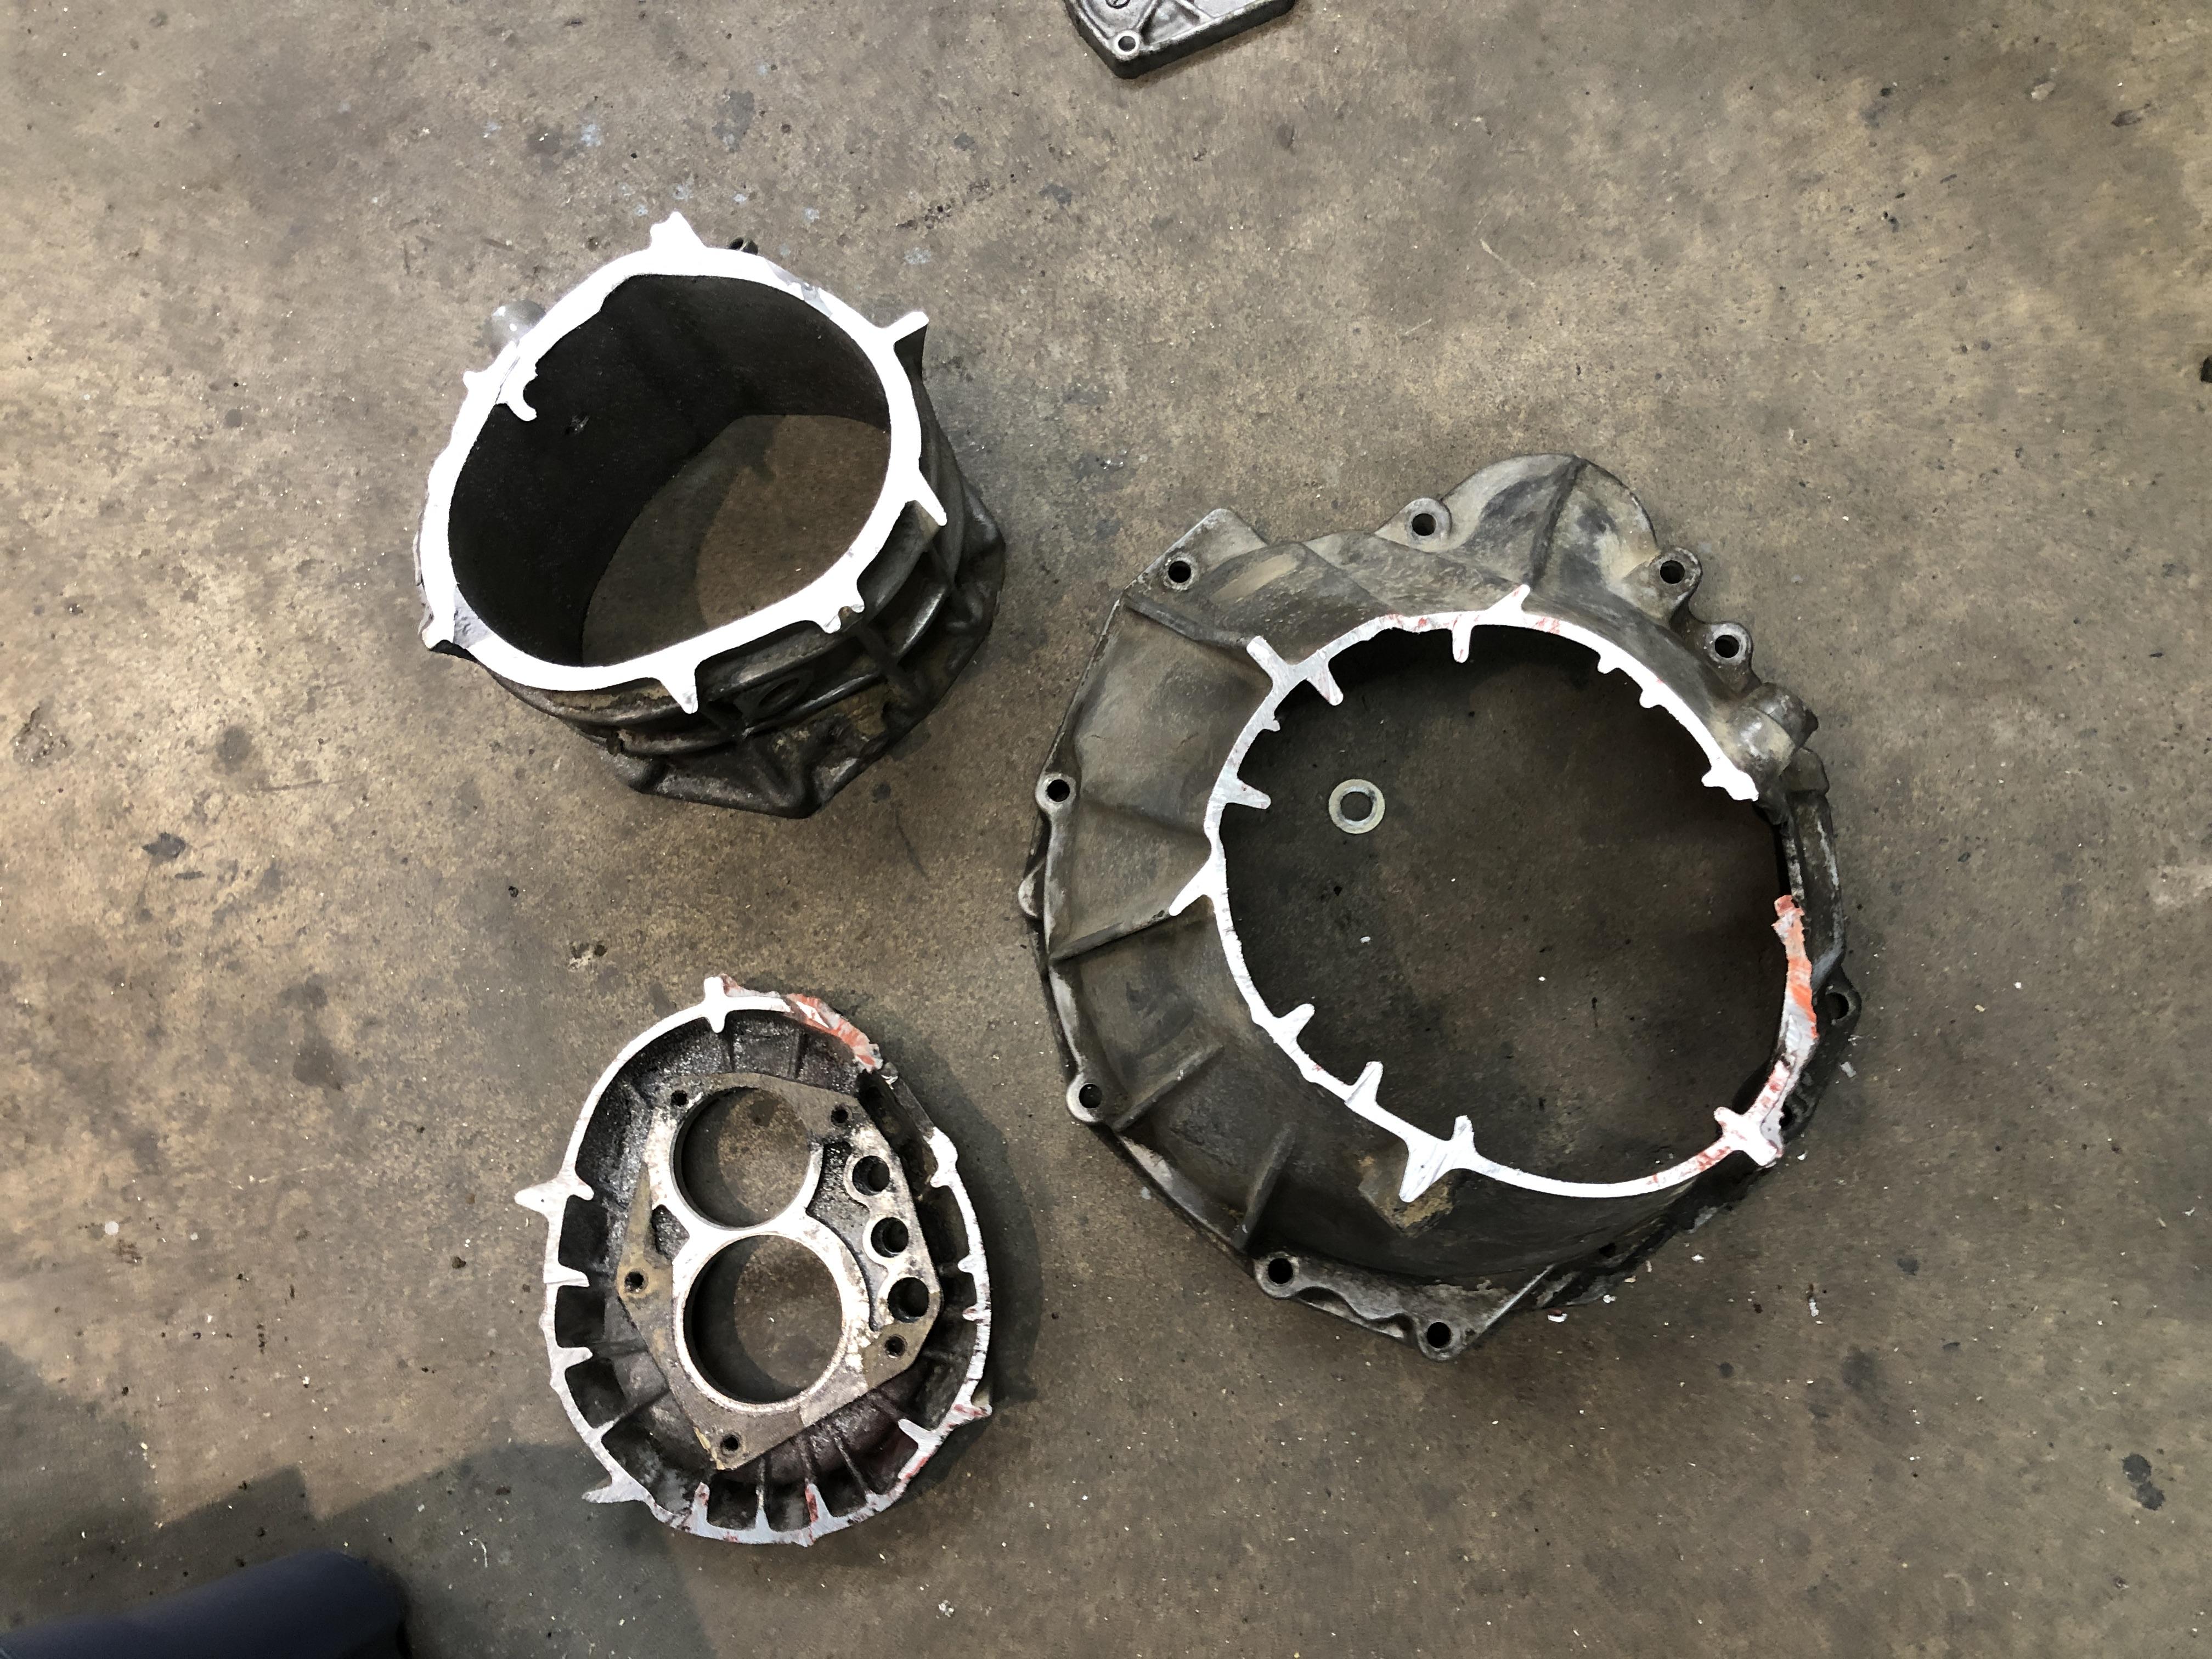
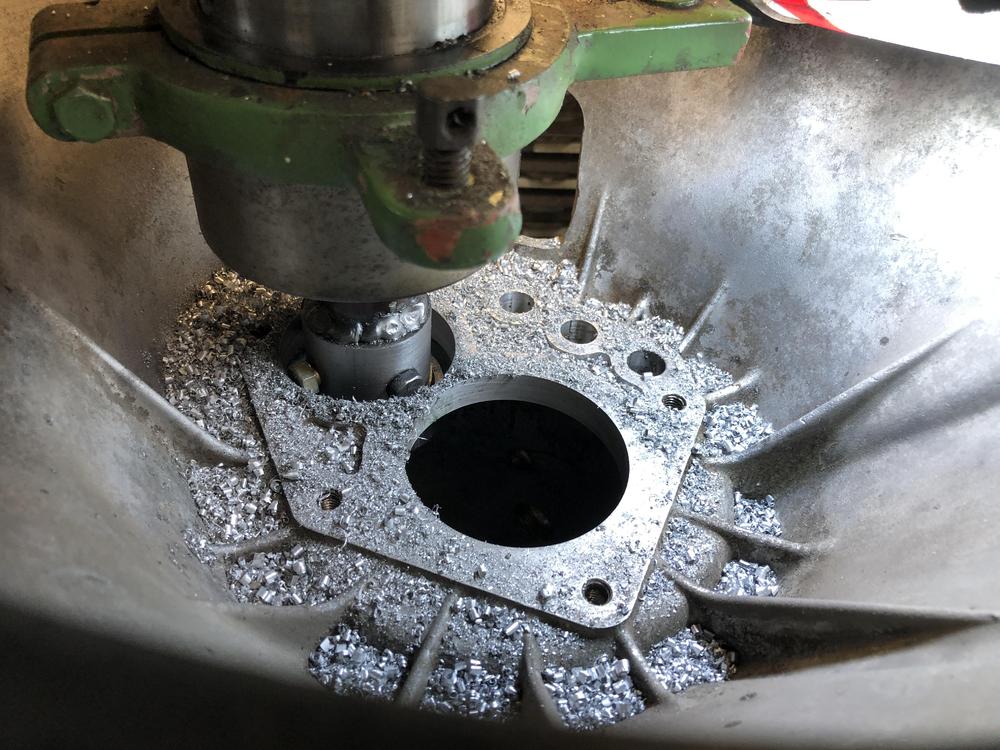
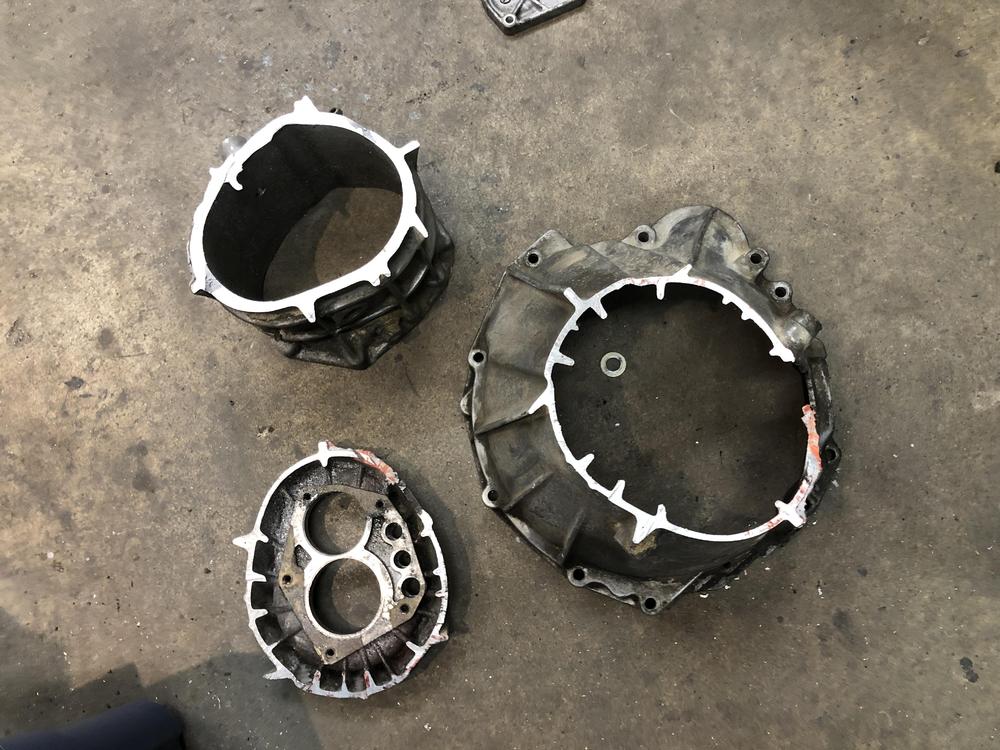
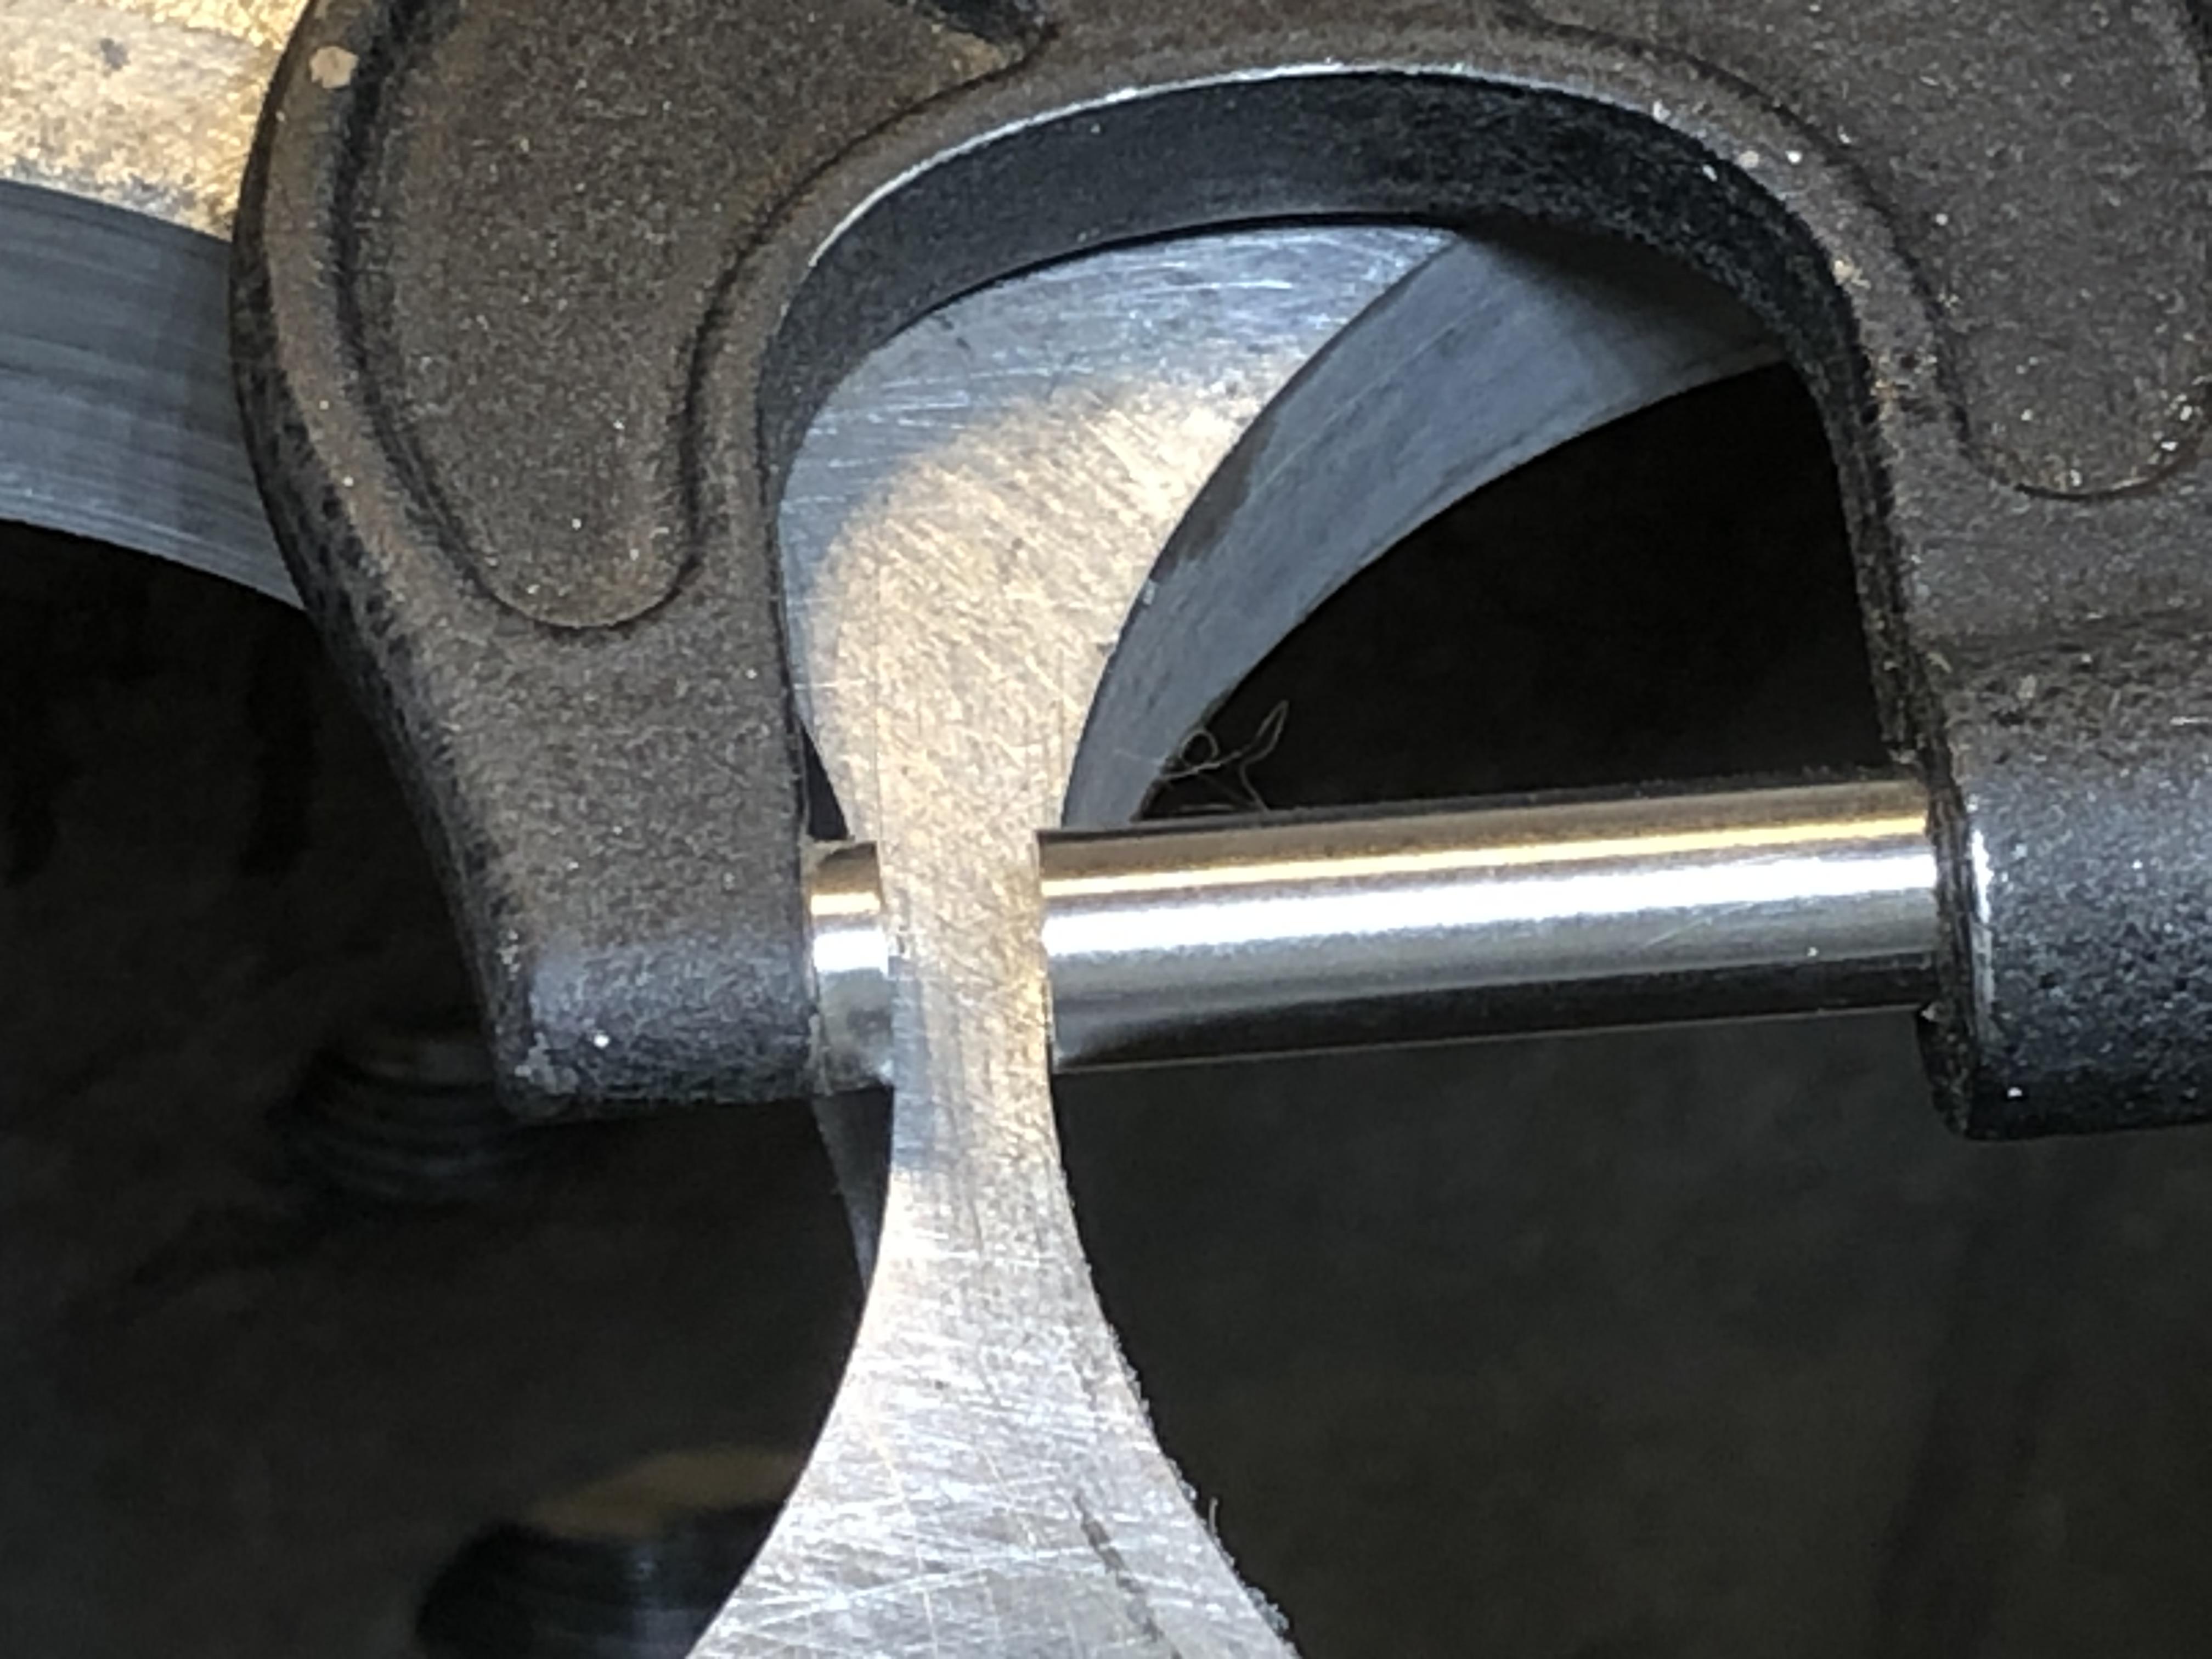
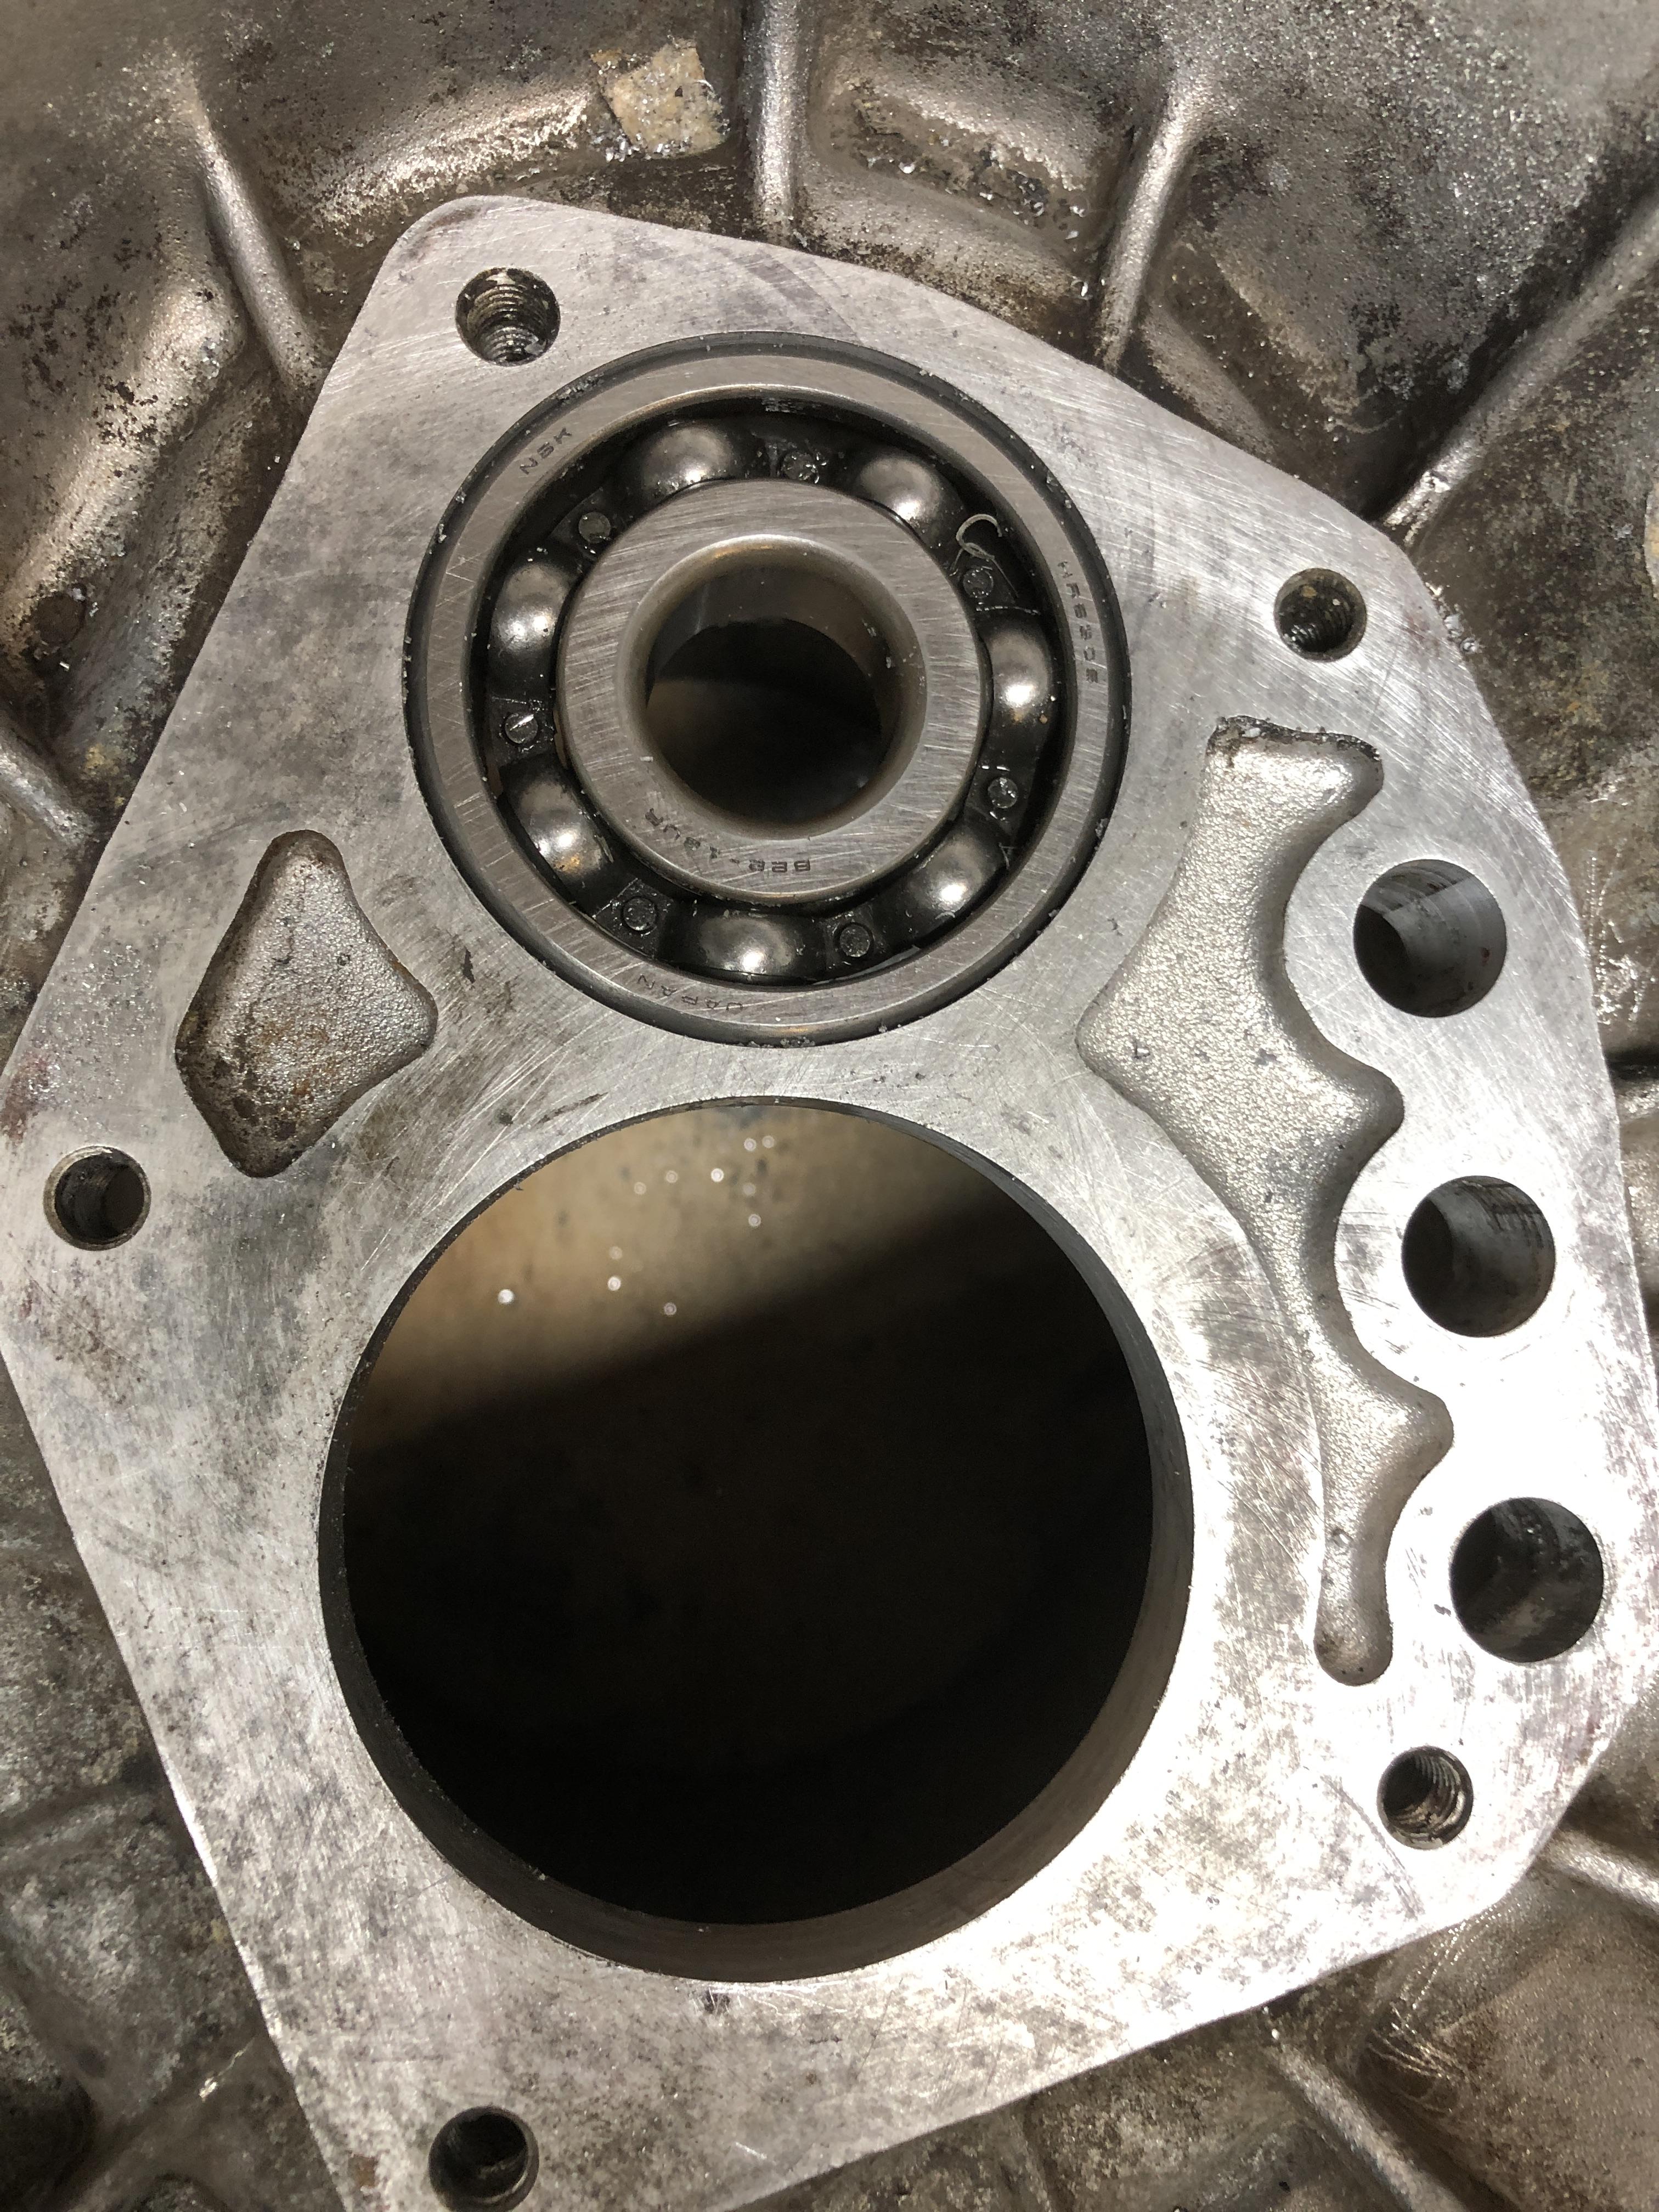
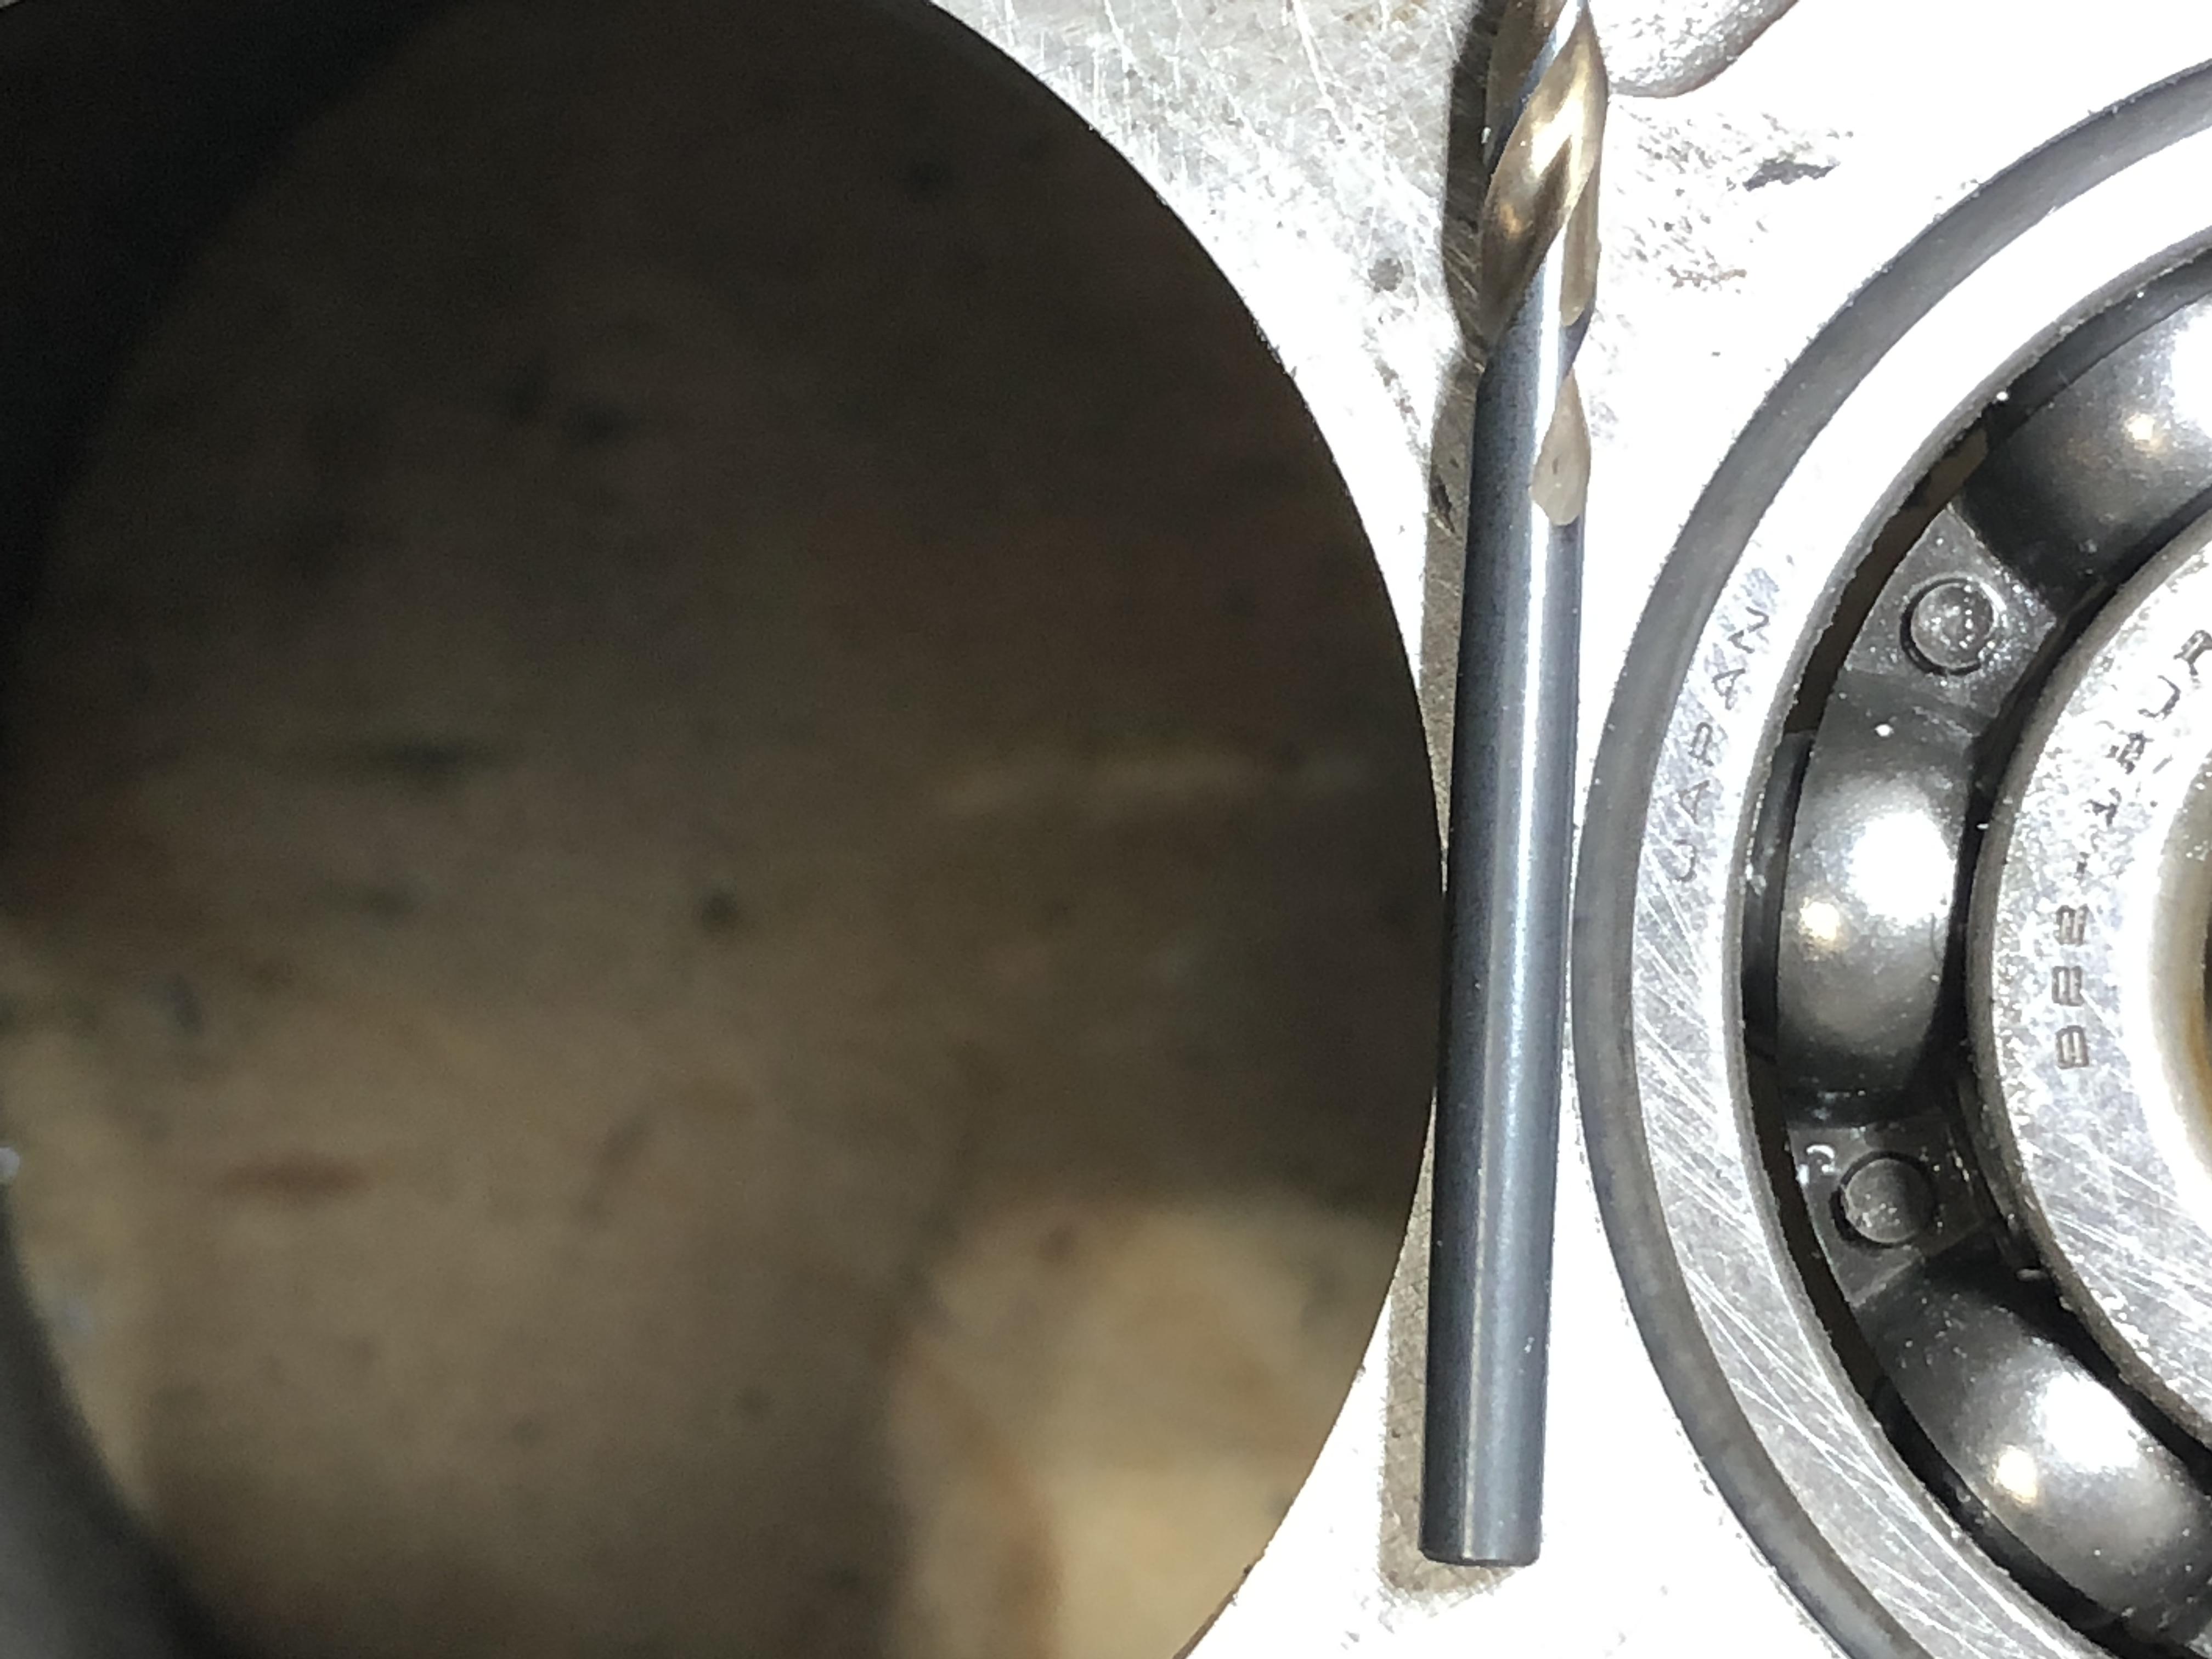
Well, the first real 62mm hole in a real 4 speed housing has been bored. The bearing fit is a nice tap-in, just like the Stock C type hole, and the location is as perfect as close as I can measure. There is exactly 4mm between the two bores. One slight issue that may lead me to use the coax indicator instead of the pilot bearing for centering. Maybe. This time, when you first move the bearing up/down into the 56mm hole with the quill and start moving the table X/Y to get the bearing to slide nice and evenly in the hole, there is quite a bit of X/Y motion possible with the bearing still passing through. You have to listen very carefully to get the least drag noise, and to get the minimum quill effort. This is not slop between the bearing and hole, or bearing on the mandrel, this is the table motion deflecting the casting on its plywood base I suppose. It’s pretty easy to get close. I drilled the hole, it worked out fine, BUT there is a clue that I was not perfectly centered. The bearing stays engaged with the old 56 mm hole until you are about 75% of the way through, then the bearing pops out the bottom, and is no longer supporting the quill location. At that moment, you can see a mark around the circumference of the bore. It’s tiny, I can’t feel it with my fingernail, but I can see it. So the bearing was not dead center to start with. Maybe its just a remnant of the motion induced when the bearing left the bore. Oh so close. Measuring the 4mm space between the two bores is tricky. My caliper is too long. So I set my micrometer to 4mm. You can’t measure that thickness with two curving walls, so it’s resting on top. I need to make a 4mm gap gauge of some type. This is a 4mm drill bit. Parallax is a bitch.... picture is not perfect. This is the 62mm bearing in place.


 2 points
 -
1 point
-
1 pointbtw it will be proudly displayed on a shelf my Zeroids and Major Matt Masons!1 point
-
1 pointService managers normally make six figures plus... So he is still probably not starving but an 18k pay cut would hurt no matter1 point
-
Sorry for the late update, I let the whole thing sit for a day, mostly because I was busy with the holidays, and everything ran smooth and peachy! Thanks everyone for the quick replies1 point
-
1 pointThanks again for all the input. As far as I remember, the hood lined up before it was removed for the body resto. At the very least, it didn't stand out to me that it was misaligned, and I notice that kind of stuff... The grille and bumper have been removed for better hinge bolt access. I'm not going to remove the torsion bars b/c they preload the hinges and will help keep it from clunking around on the road. As mentioned previously, I'd like to keep up momentum with the project, so I'm working on the rest of the stuff forward of the firewall right now and I'll circle back to the hood in a bit. I just don't want to stall out on it for 2-3 days.1 point
-
1 pointHood lined up nice too. Good to know the gas shock hinge mod worked!1 point
-
1 pointWhat he said! Blue, fastwoman and ztrain got me hooked when I first came in. Now every person on here are friends in my mind. This will be a good year. 50 years over here and a bigger demand now. @Mike I think this years ZCON will be one that really shows off. You should bring your son? Happy 2020! I like saying that! 2020, 2020, 2020 ...Judy, Judy, Judy, Judy...1 point
-
1 pointI know I speak for all the users here, @Mike. We really appreciate all of what you and the moderators do to keep this site going. I have learned a lot here and have made several friends because of this forum. Keep up the good work.1 point
-
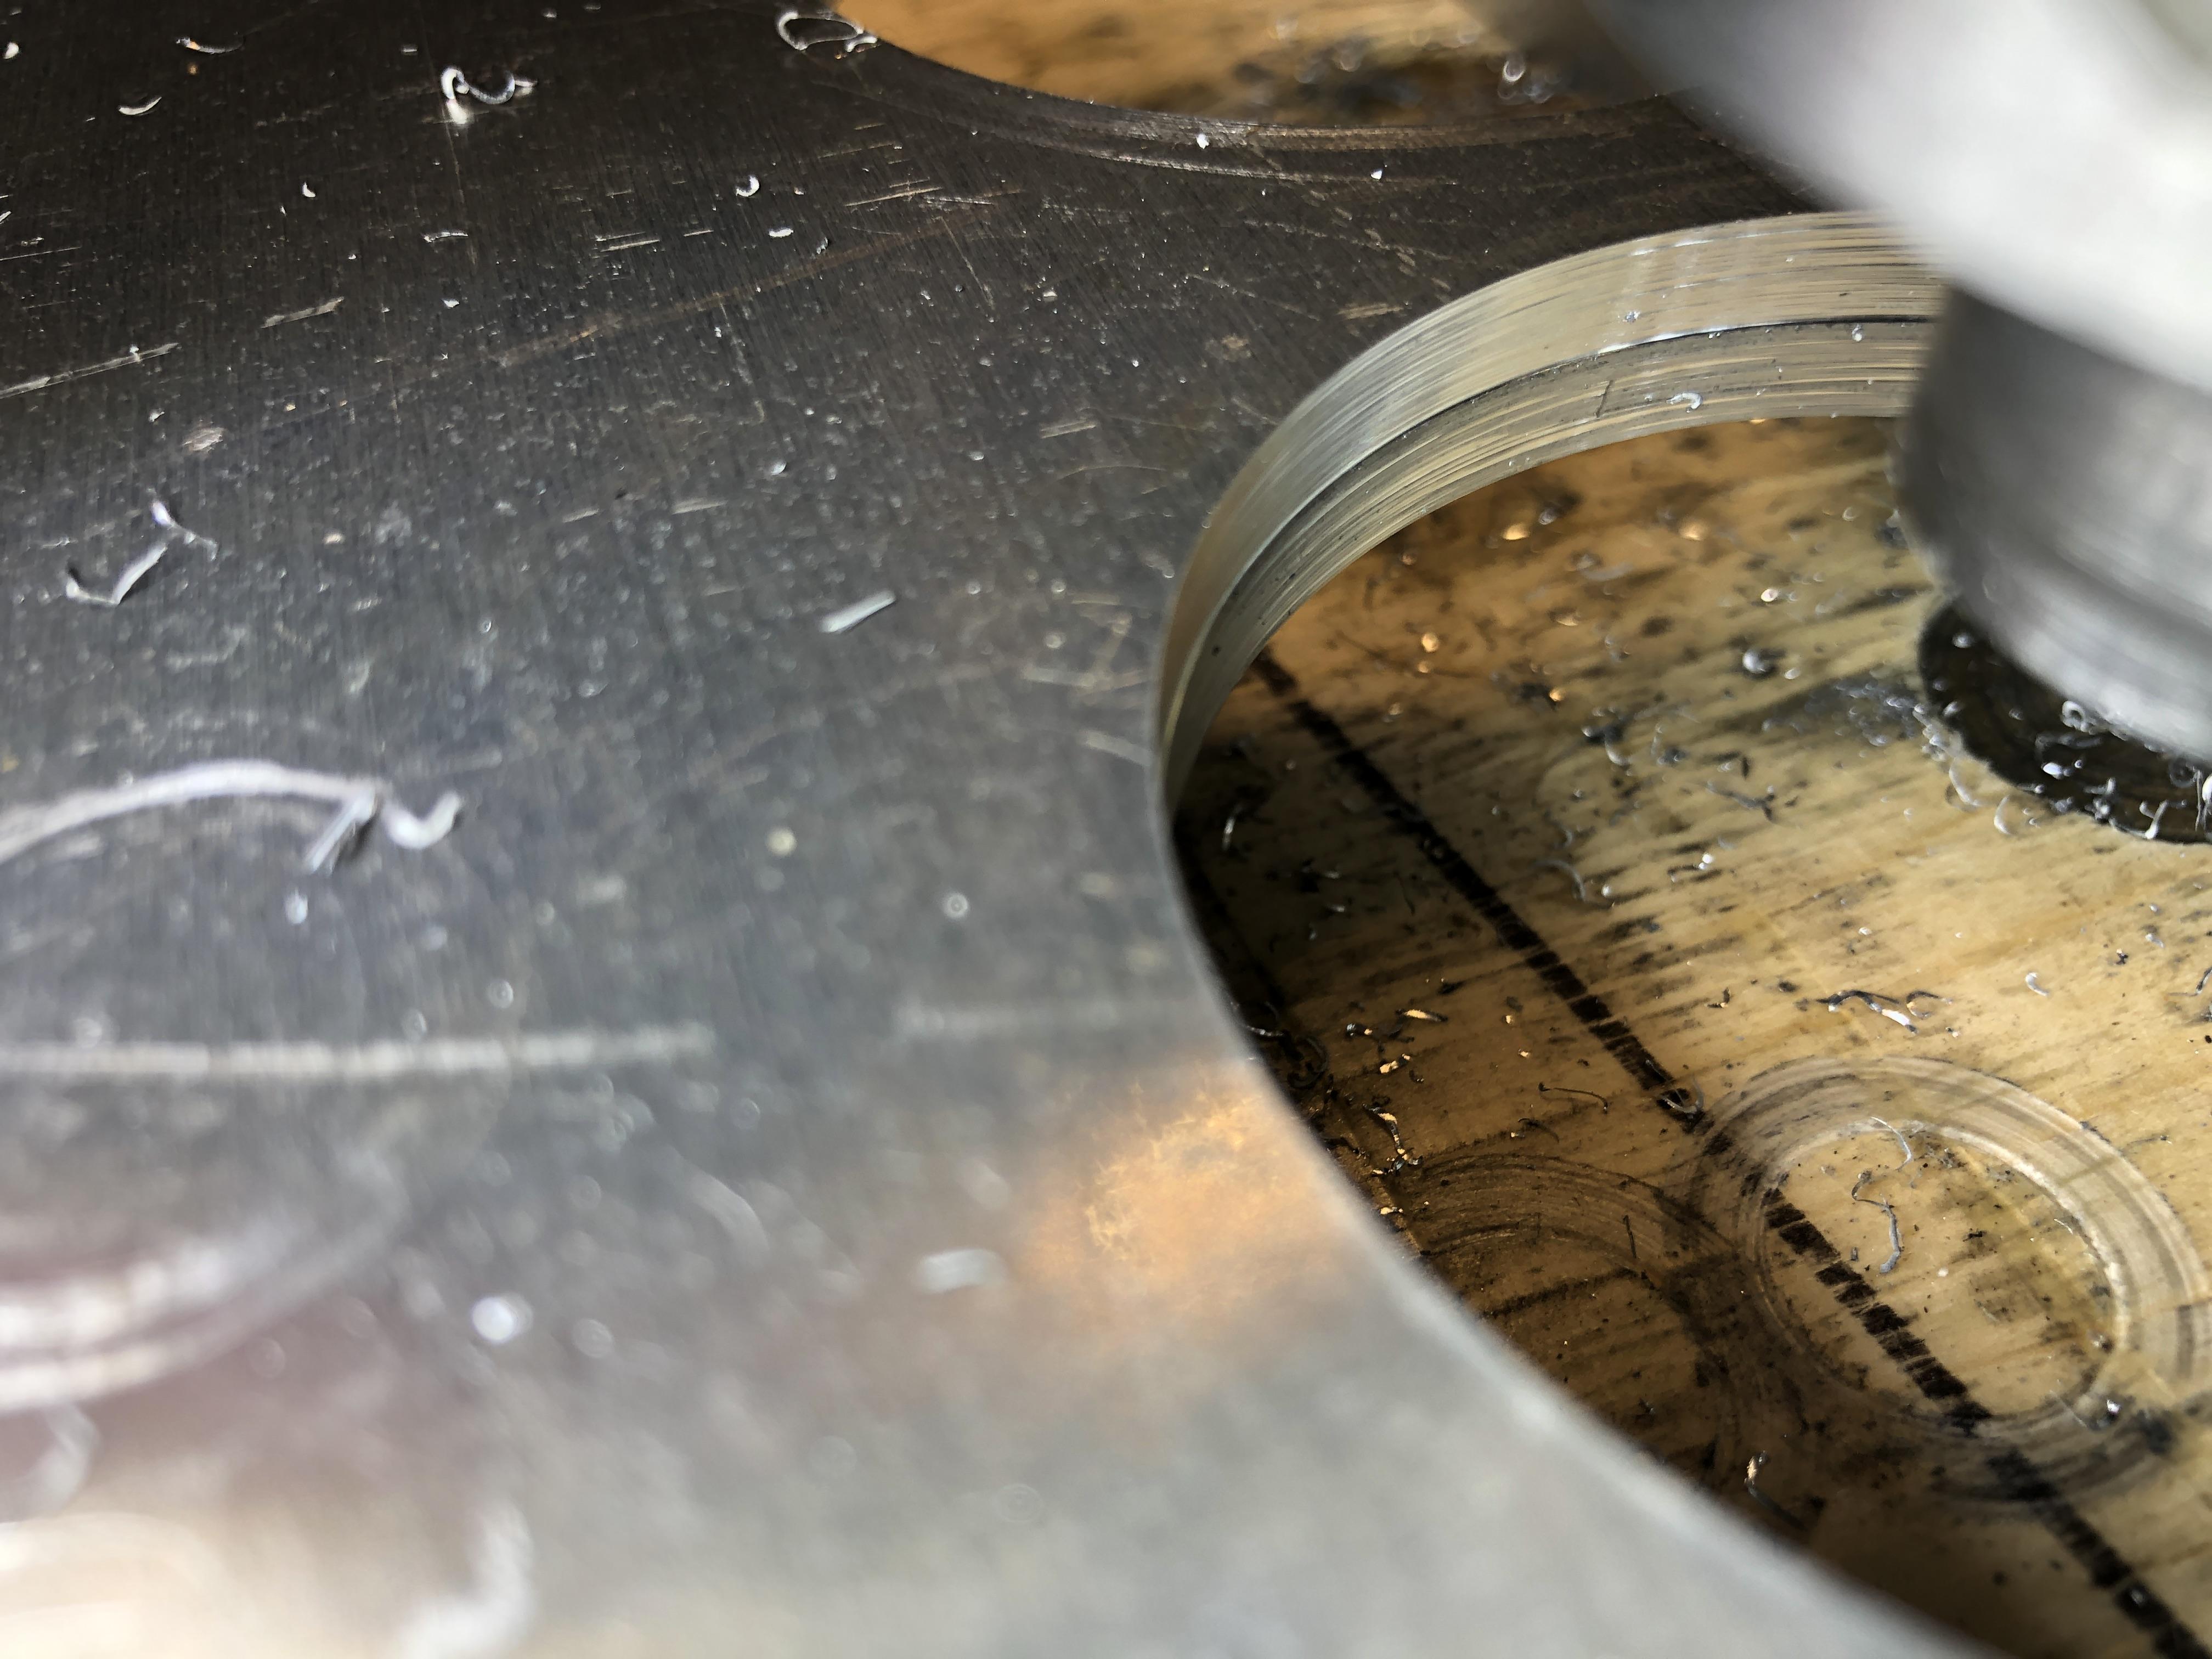
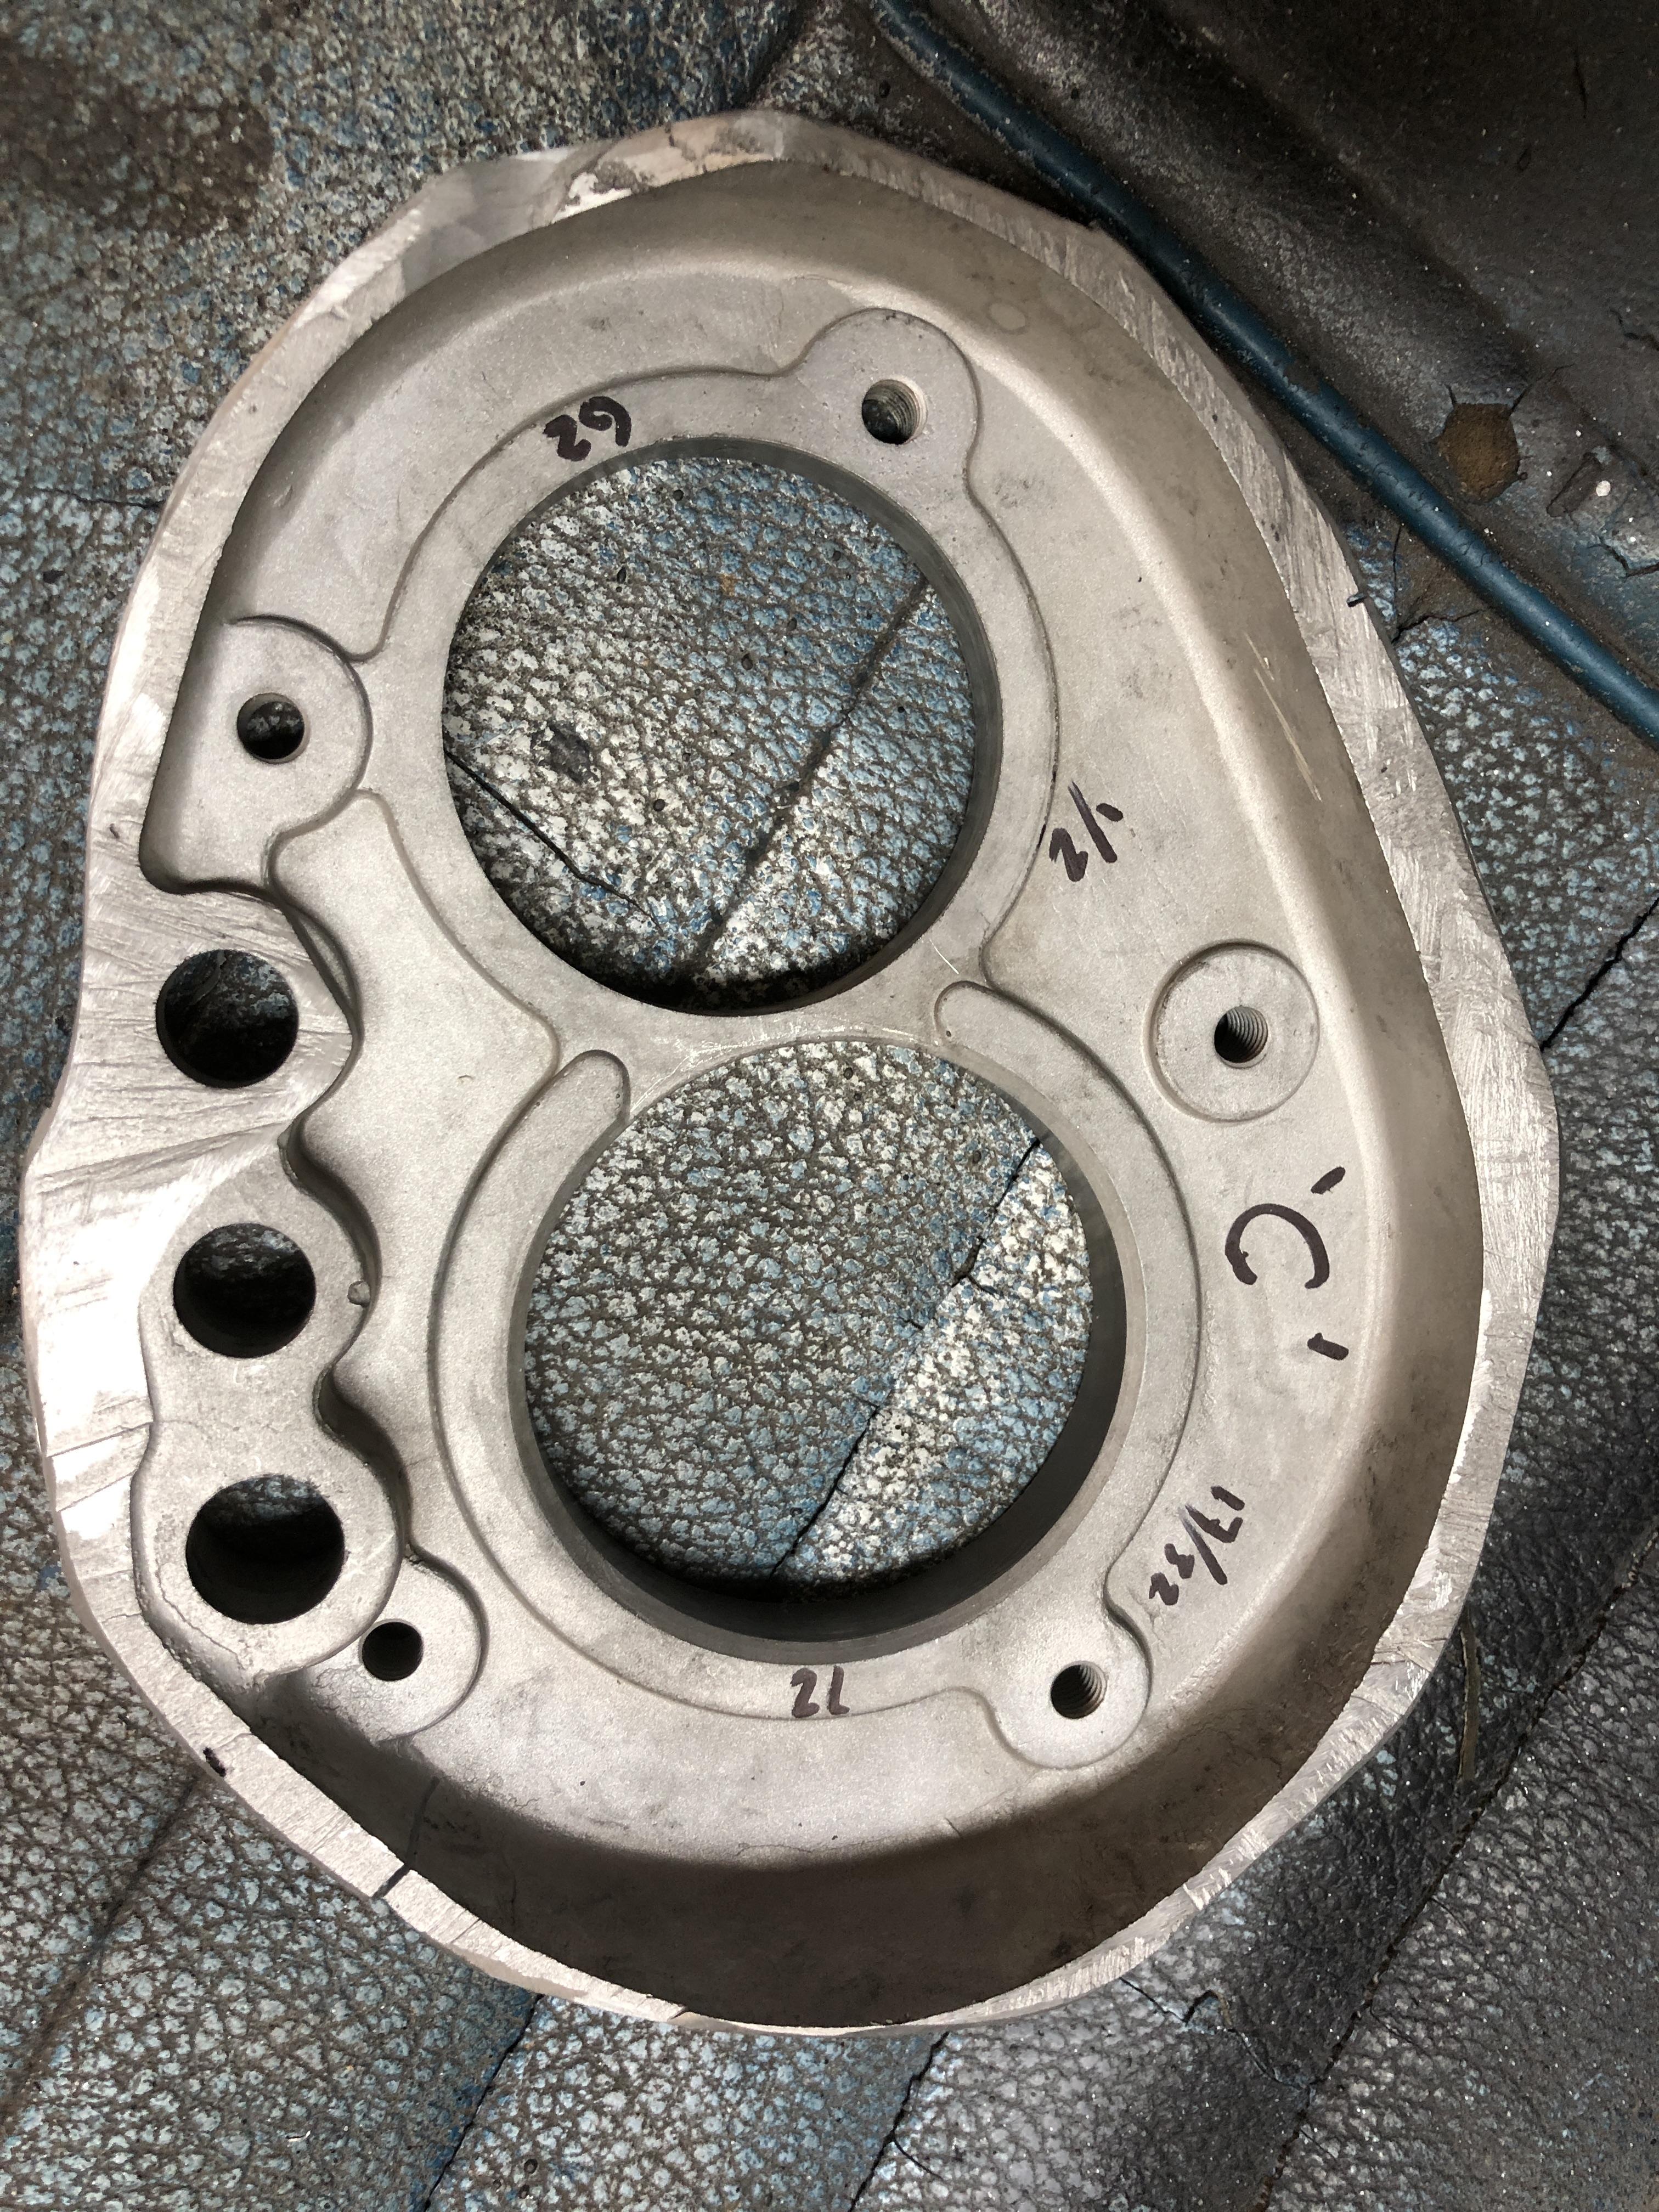
Success! Only took 5 tweaks of the cutter position to achieve hole size Nirvana. It has that nice rough scrapie sound as the bearing easily pushes through the hole with the drill quill. Such as easy test. Drill through, slap the 62mm bearing on the bottom, and push it through the hole to see how it fits. You know immediately if its the right size or not. Since I was starting with a 57ish mm hole drilled with my 2.25" Forstner bit, I couldn't use my 56mm bearing as the pilot. I got a chance to use my fancy new rotating center finder thingy, or Coax if you want to picky.... Dang that worked slick. Got the needle to quiver inside of 1 division on the dial indicator, then swapped to the mandrel, drilled the new 62mm hole. To test how close to center I was, I initially set the boring bar to just a bit larger than the initial hole I had indicated from, and drilled half way down, leaving a step. I then inspected it visually all the way around to see if the step width stayed consistent to test concentrical-y-ness. I can not tell the difference from one side or the other. Seems just fine to me. Next thing up is to actually put a 56mm bearing on the mandrel and drill out a test 4 speed housing and see it the hole ends up in the right place. I also did a thing. To help me check if my holes are the right size, and if the new 62mm hole is in the right place, I figured there was nothing better than using a real C type front bearing housing for comparison. Turns out the C type I took apart has a busted bell housing that was previously patched with epoxy and fiberglass cloth, so there was no way I would ever use it again, so..... There you go. Now I have a nice easy to handle and measure, C bearing / shift rod plate. Easy to measure the thickness variations, size of the 16mm shift hole (a 5/8 bit is going to be SO close. 0.630 vs 0.625. The rod is very close to 16mm, so a 5/8 hole will need just a tad of honing to make it work. Steve talks about this same problem here http://zhome.com/ZCMnL/tech/240SX5spd/Transmission2.htm "but later had to ream the hole slightly larger myself with an adjustable reamer because it was too tight" Dollars to donuts the machinist used a 5/8 bit.... I could pony up and learn about reaming now.... 62mm_TestFit.mp4 coax.mp4

 1 point
 -
1 point
-
1 pointIts a pretty simple setup, everything under the hood is easy to get to. Try to stay with R12. Mine only needed the new condenser, I was lucky found a NOS OE one. That and a new drier is all it took to get it back to working great, and its been at least 2 yrs with no noticeable loss of Freon. It still has the original compressor, which is pretty amazing, its a big heavy brute of a compressor, but clearly well made.1 point
-
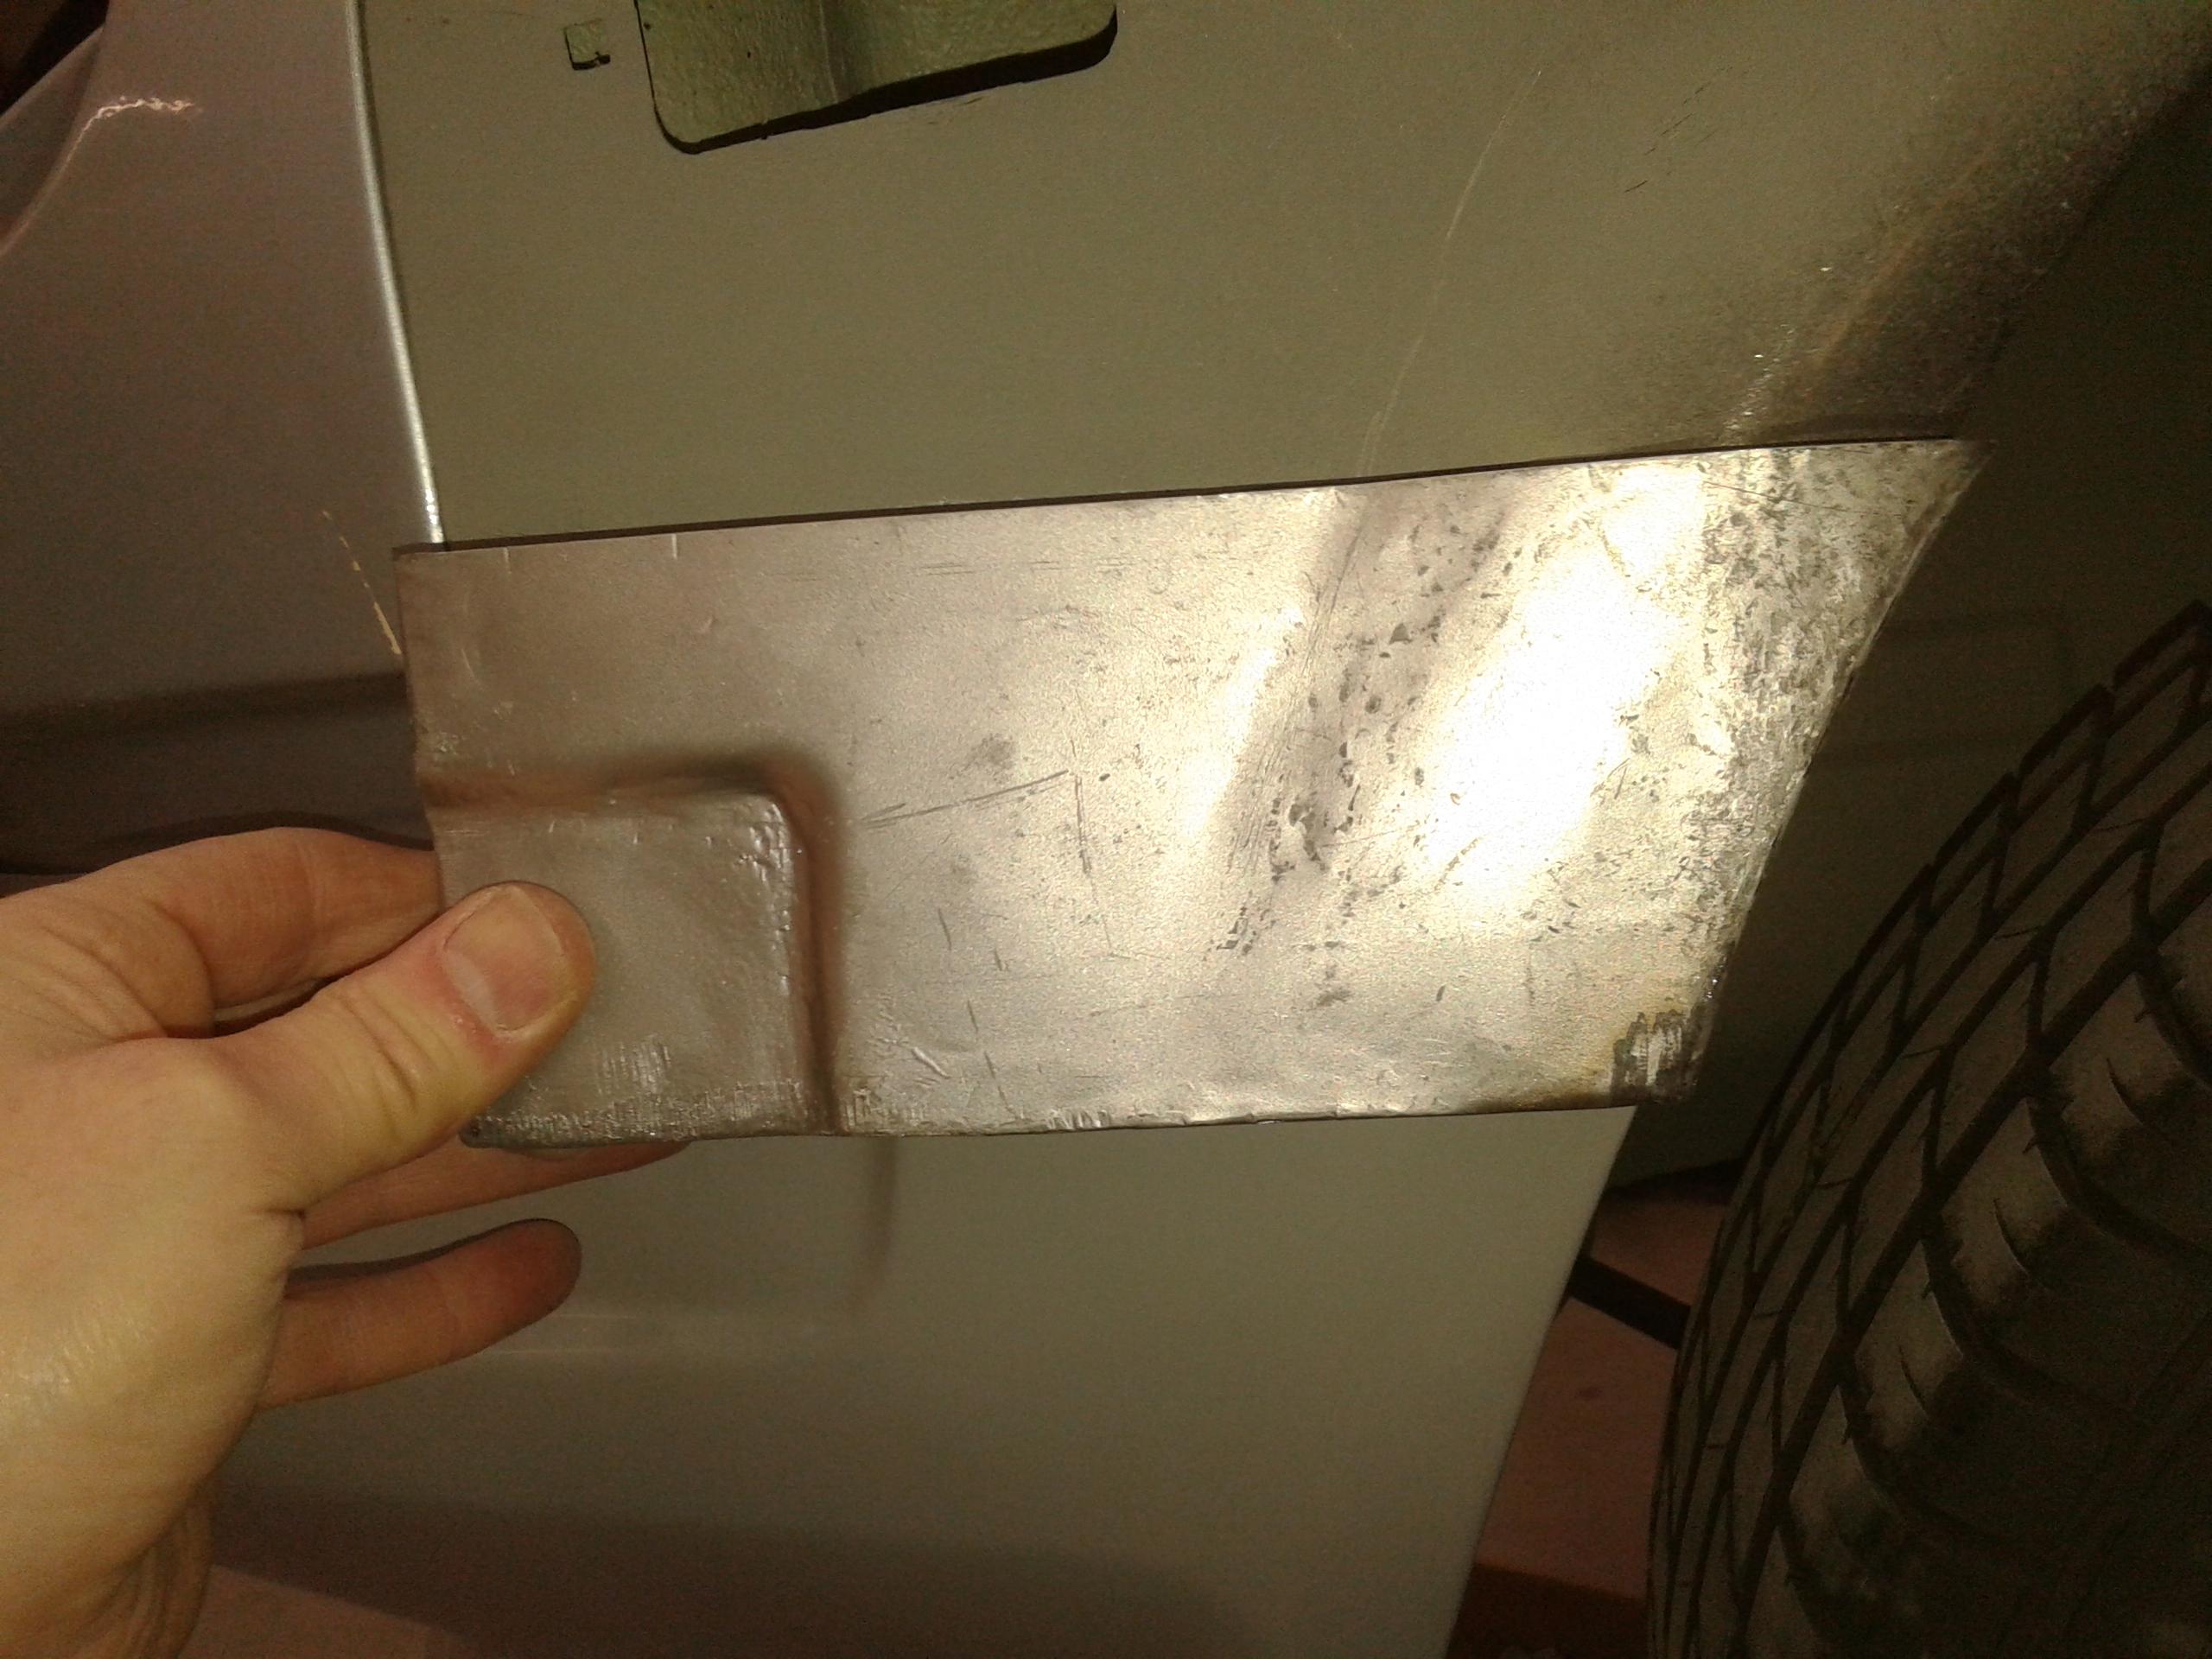
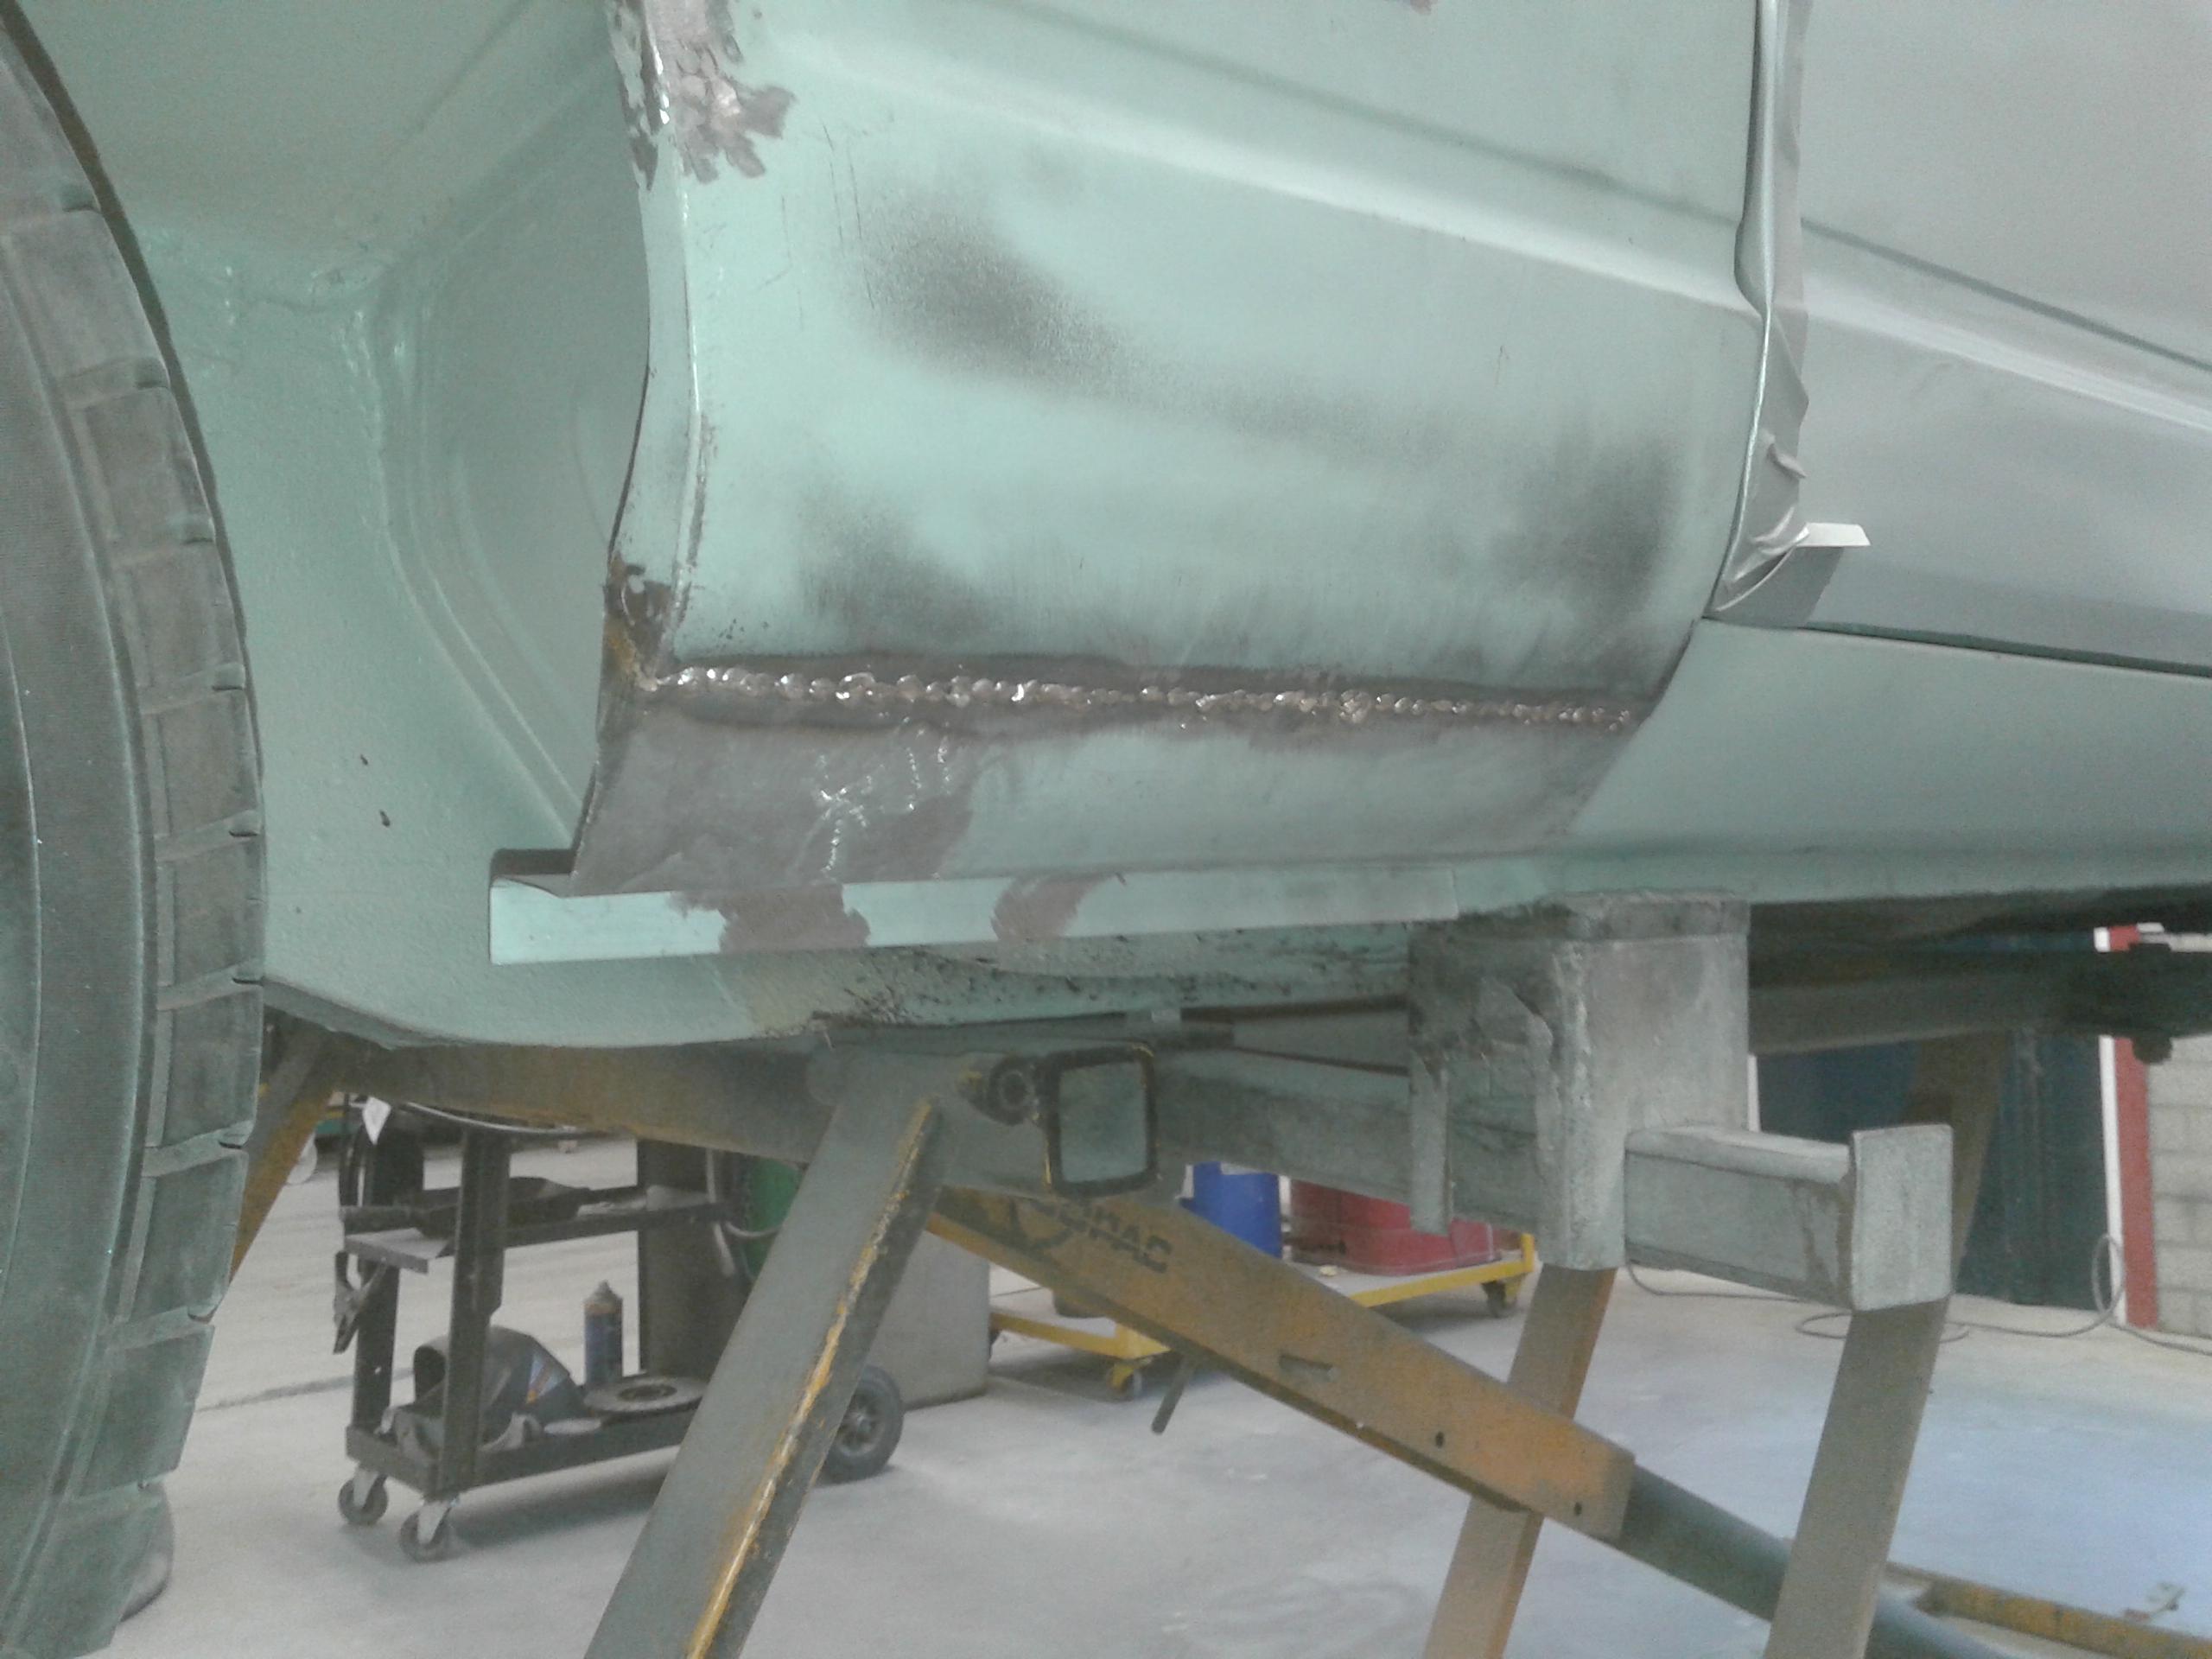
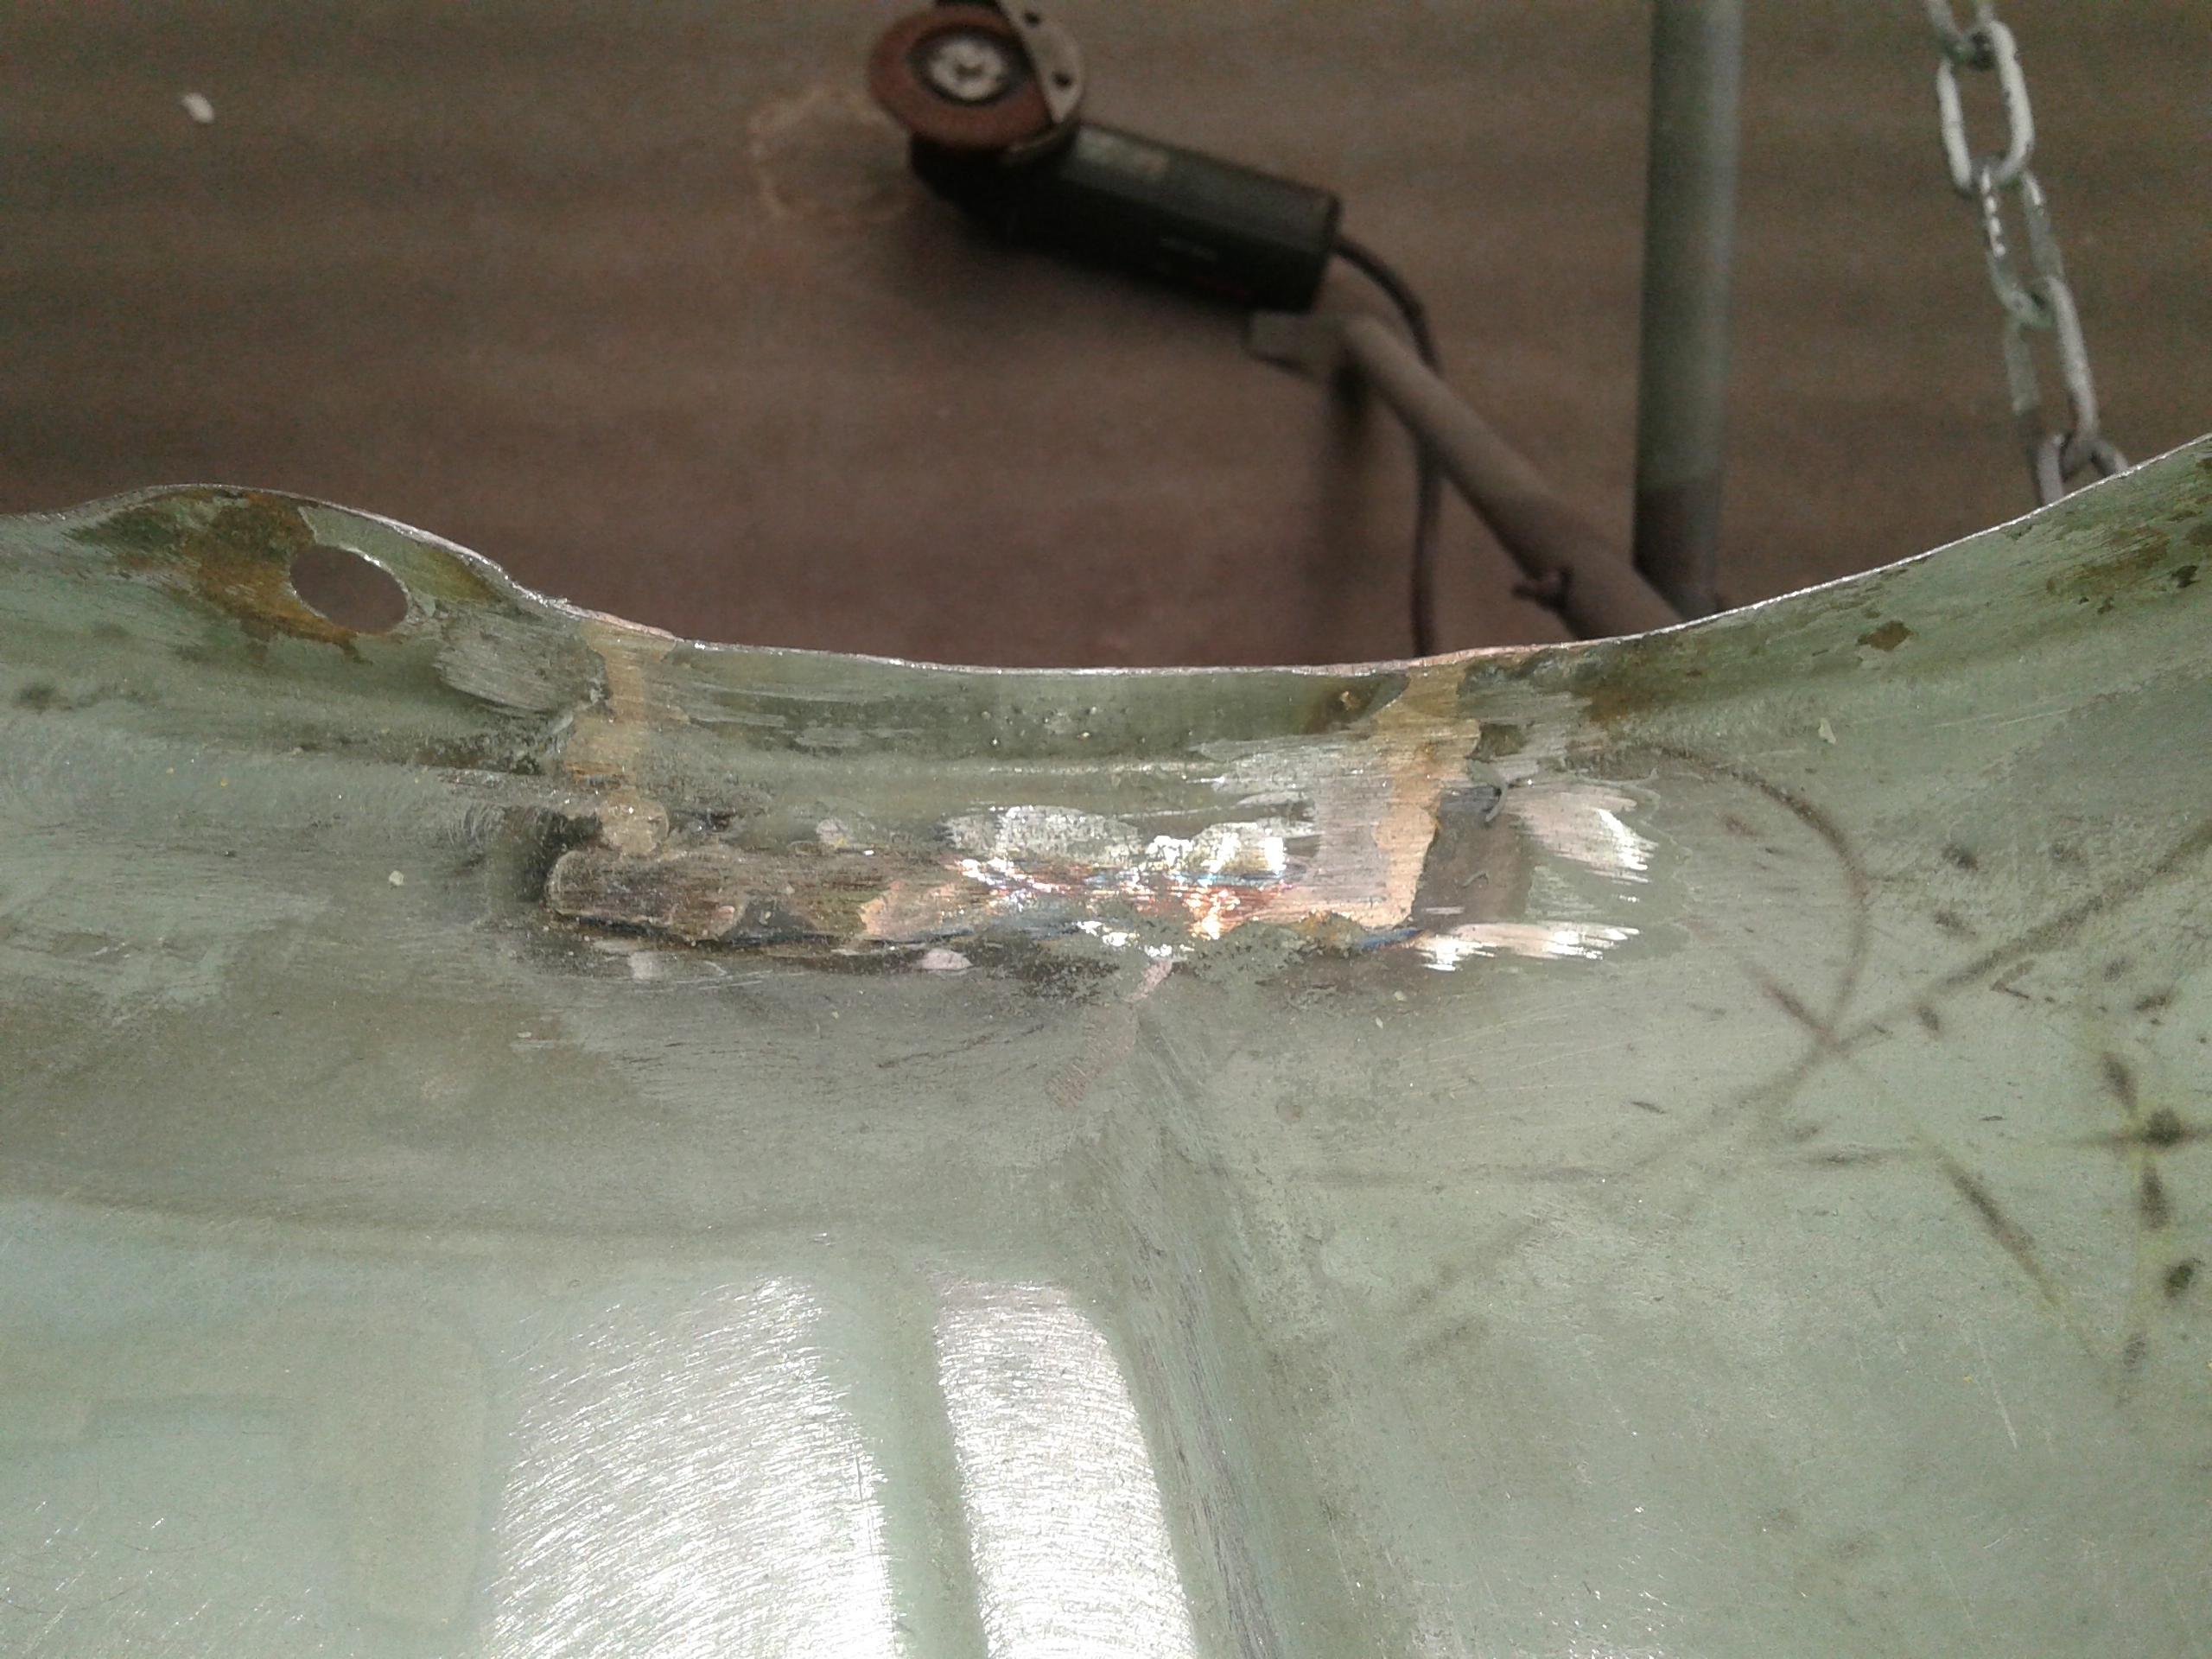
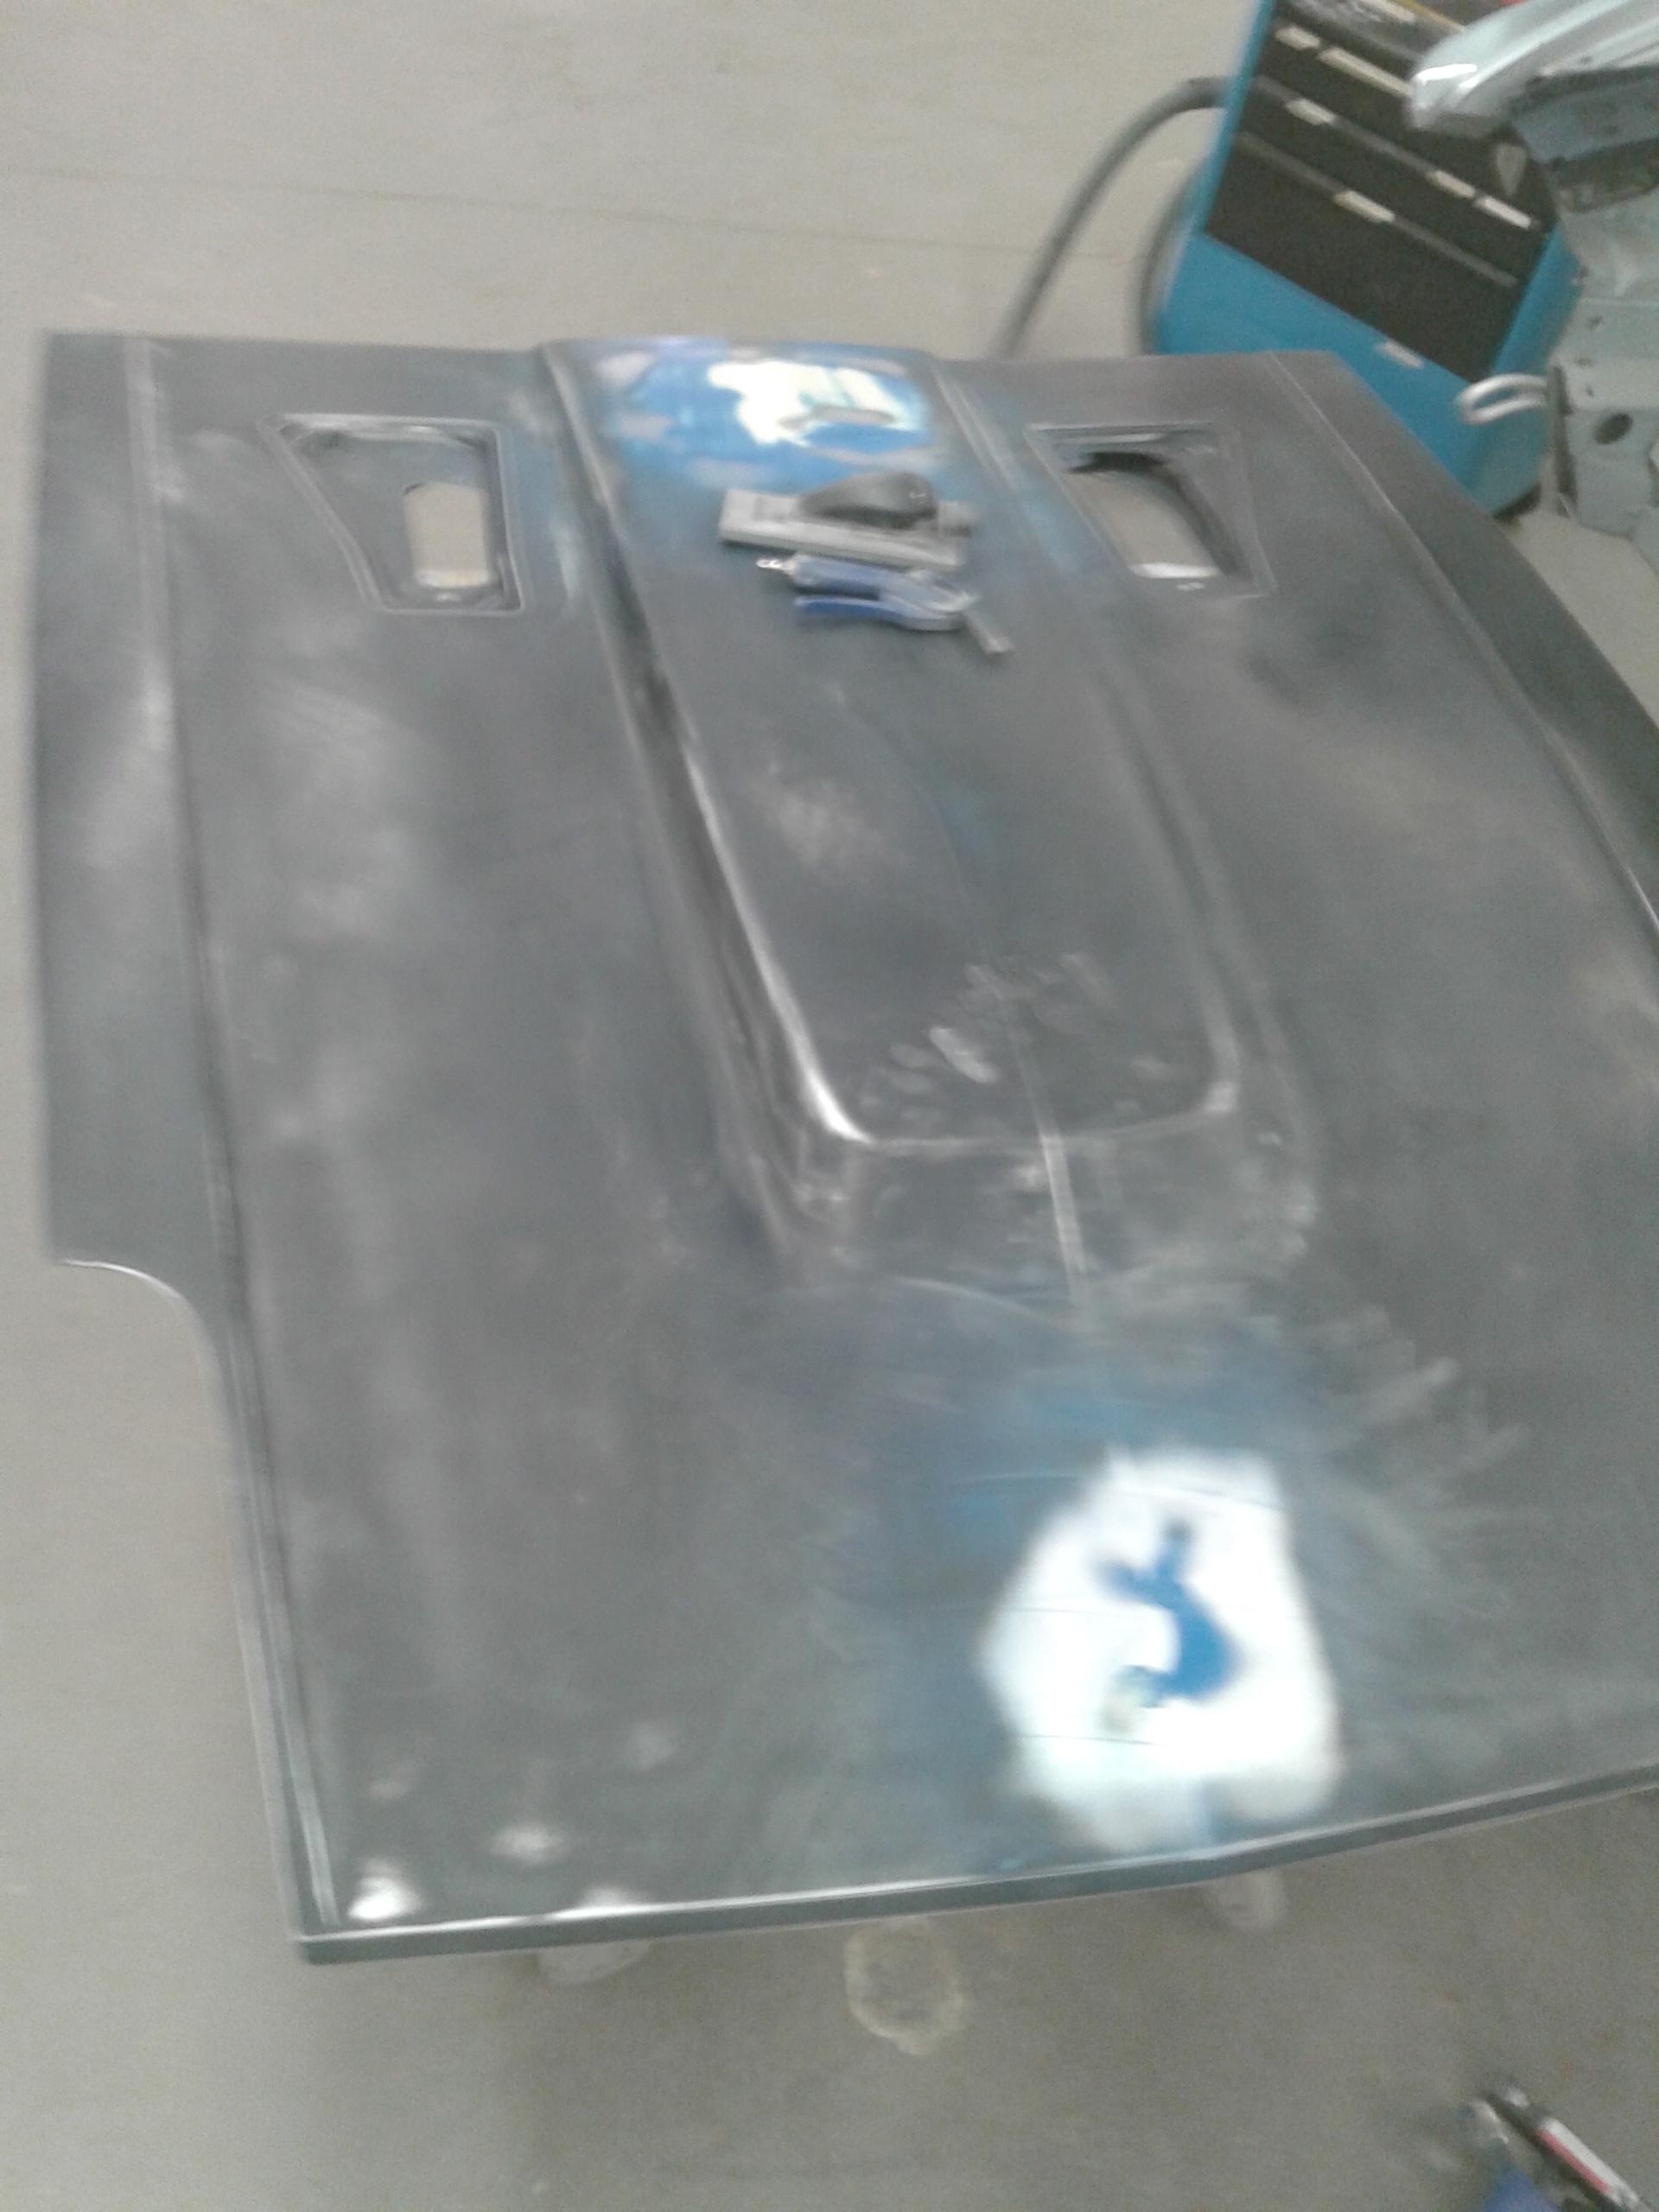
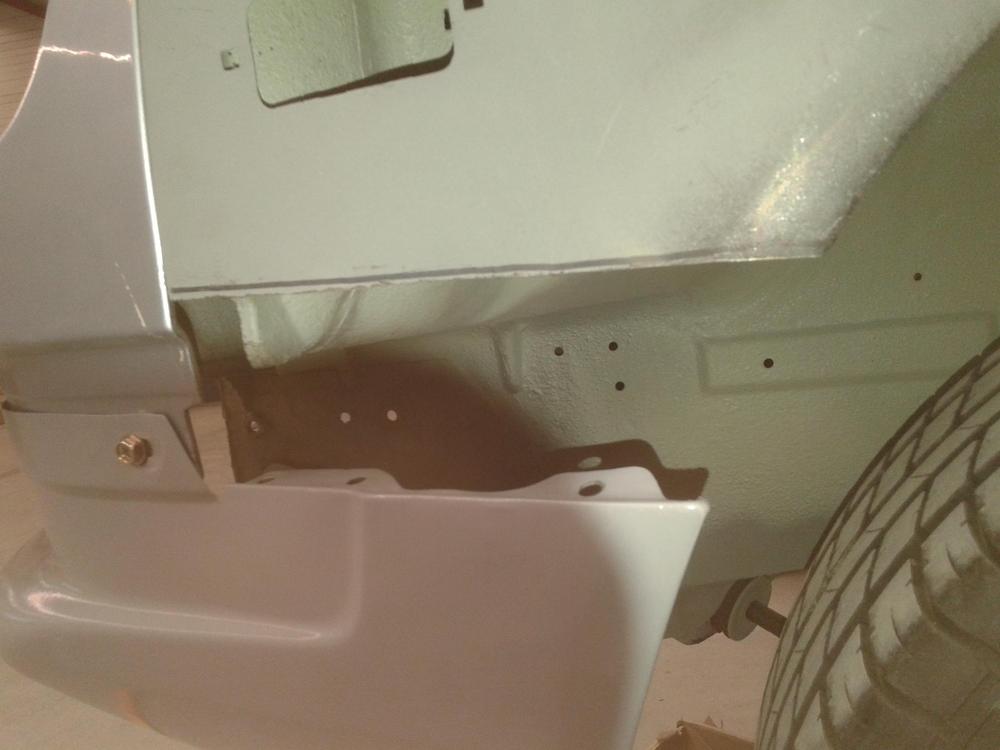
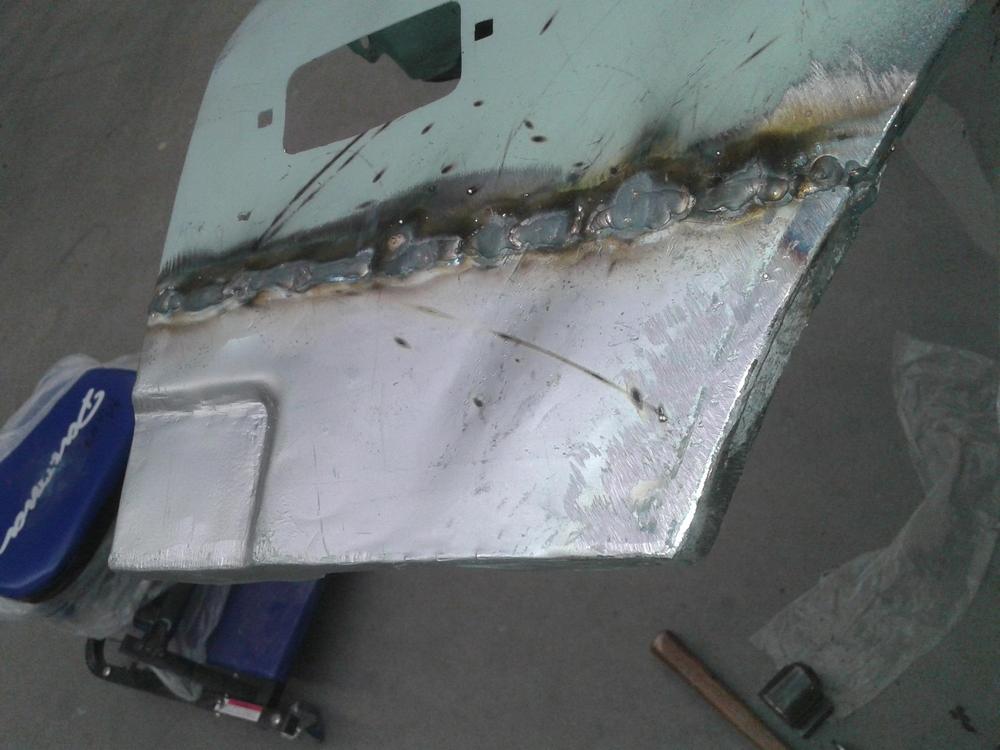
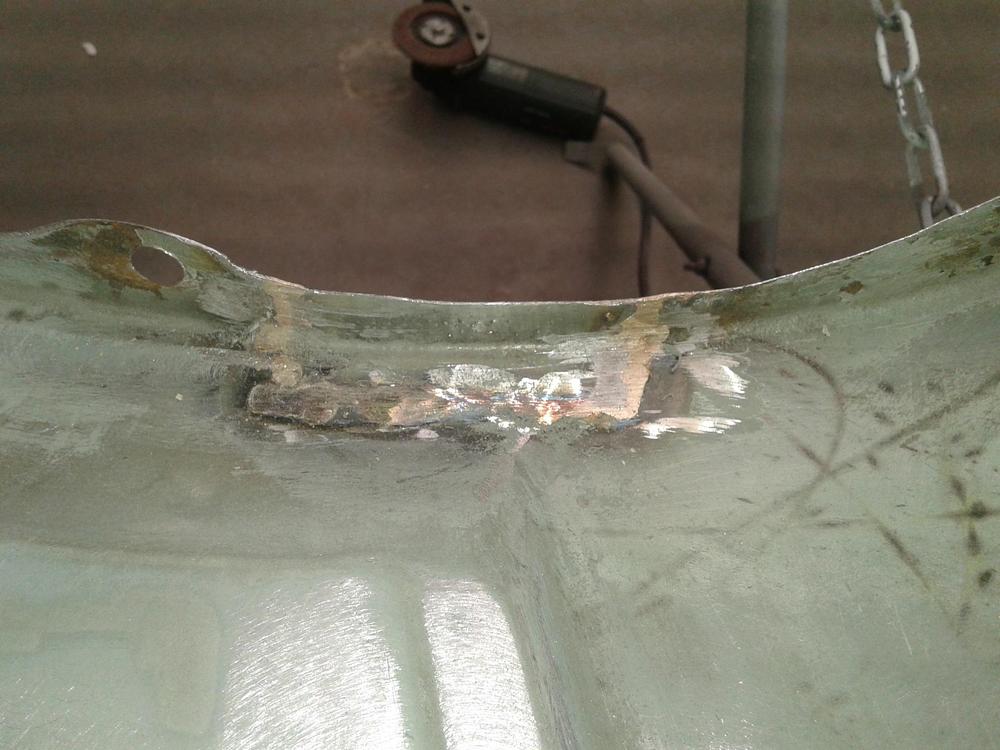
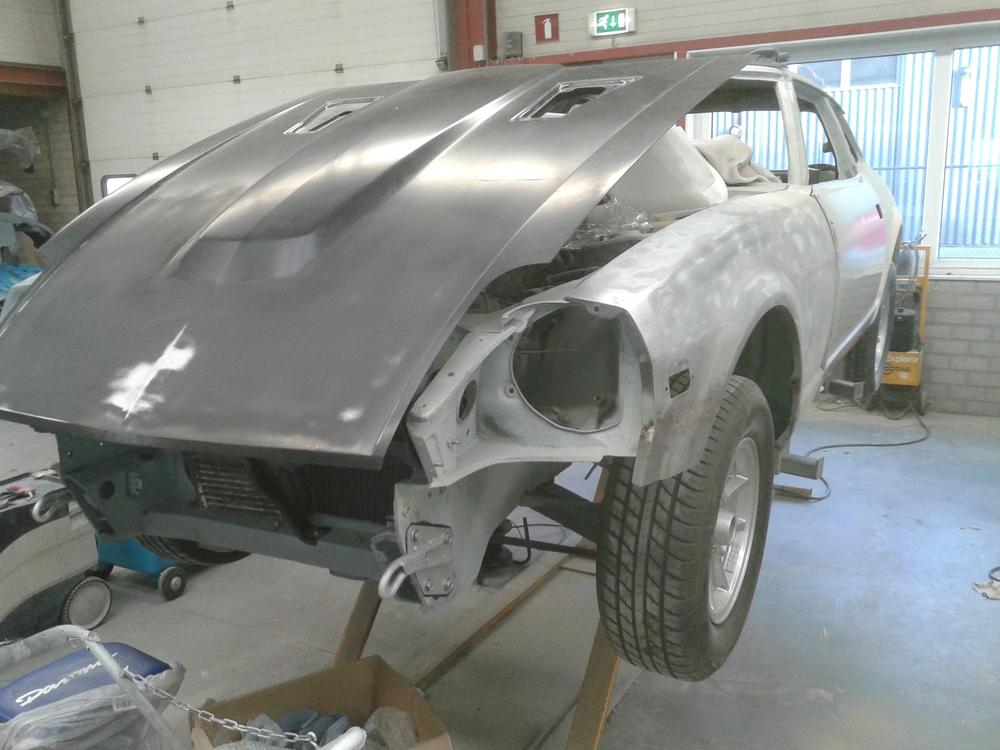
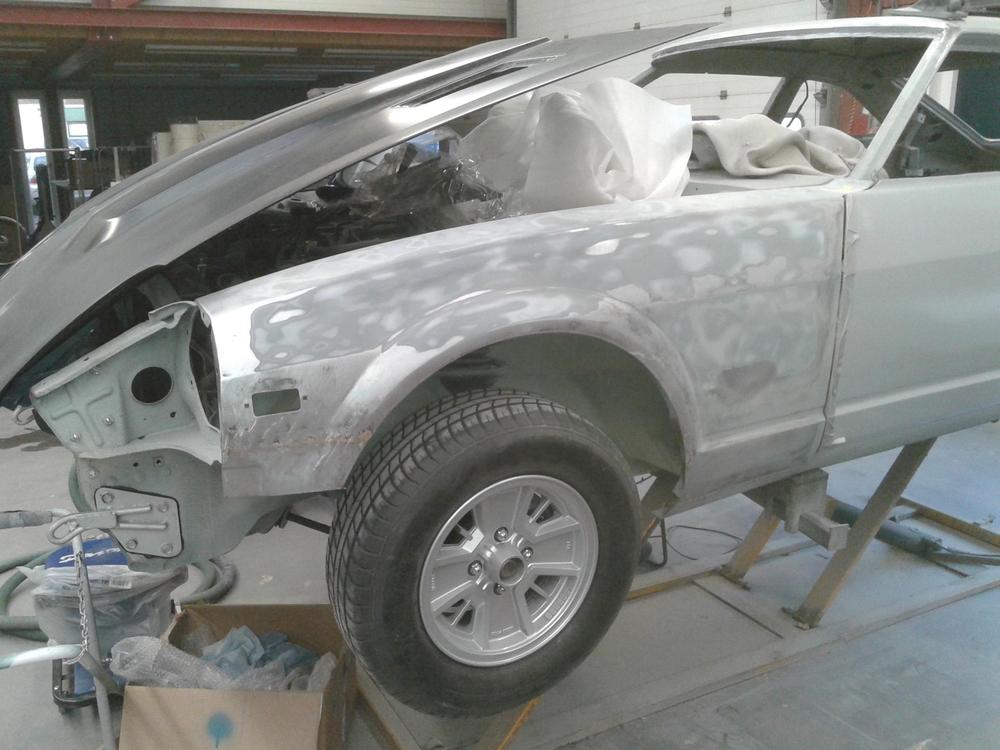
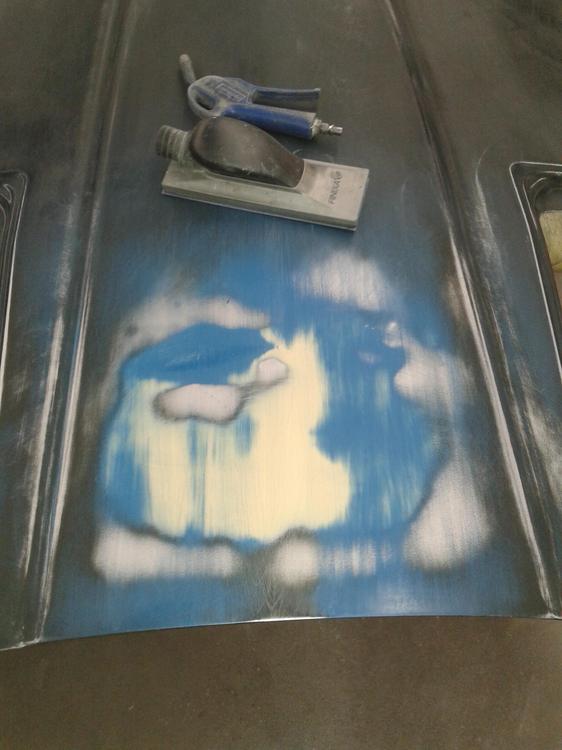
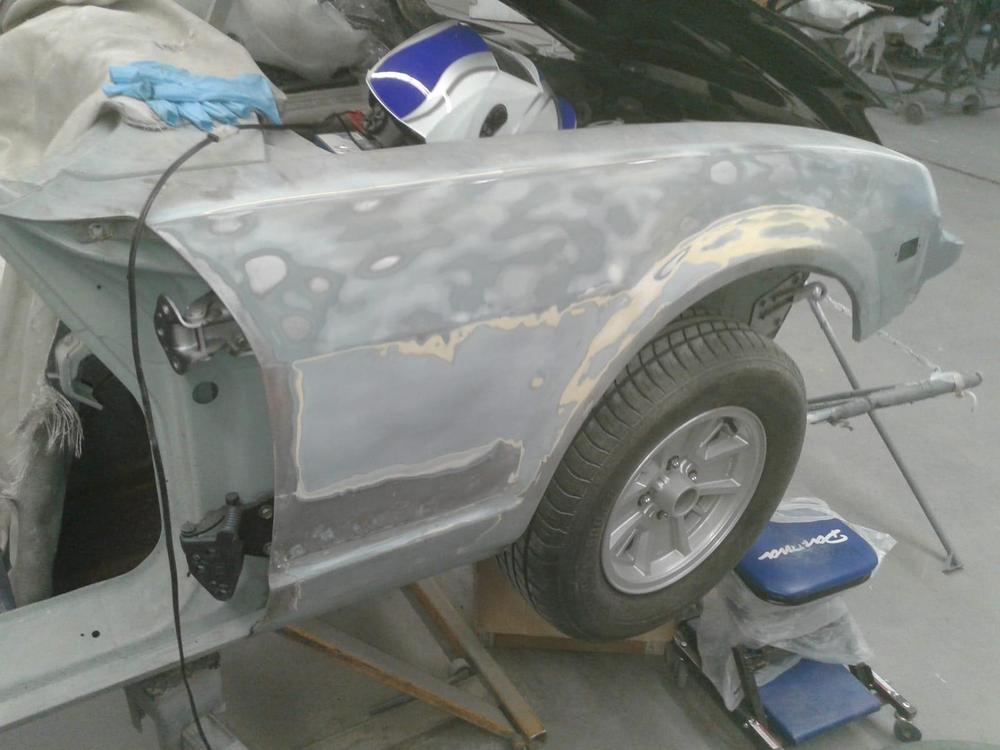
Yes Bart, it is going well, i try to work on it every working day and i get a lot of support of the guys who work at the bodyshop. Also from the owner of the shop. Because i count all the hours i work at it (or someone else, like the pro painter or bodywork guy) last week we went past the 500 hours ! working on the car and i think it's going to be another 250 to complete the restauration.. ? At least... These days i'm working on the fenders, left in particular and the hood (or bonnet!) whole lot of.. you guest it... sanding! ? Even a brand new bonnet needs work, a Original NISSAN hood… where do i find them haha...! Restoring the left fender.. left lower part of left front fender.. I had a problem with heat, despite the copper/silicium welding i now did.. but about 20 little blows with a special hammer made it strait.. learned again something! Then i discovered that i welded it to straight down, had to correct that.. now the lower front part deviates inward as it should! (see last pic in this part.) lower front left fender. Putting in a little piece in the wheelarch. If you want to do this… i told the owner of the shop you have to have a diploma to weld newspaper paper.. ? Sanding left and right fender.. (still busy..) Sanding (with some rattlecan paint to sort out the imperfections). Making the fenders and hood ready for epoxy coating. (later on the blue paint is sanded off completely before epoxy.) Front left corner, welded in part fender, deviates inward.


 1 point
 -
1 pointBut, now, he's got Dog The Bounty Hunter to deal with. Should make a good episode - especially if his compound is guarded by Hezbollah militia. Dennis1 point
-
1 pointI've not seen one for the 260. What tool would you be using to create the diagram? There's a great one for the 77 done in AutoCAD. Would it save you work to start from that and modify it for the 260, or would it be just as easy to start from scratch?1 point
-
0 pointsThe Infiniti branch of Nissan is feeling the hit, too. The last time we took ours in for servicing, the deanship was like a ghost town. The service manager who has worked with us for 10 years at the dealership mentioned having to take a $1,500 per month cut in pay recently to keep the job. Dennis0 points


.thumb.jpg.e9c1401d1fce1ad1a819e5ad8d6a1809.jpg)