Leaderboard


 Subscriber


Popular Content
Showing content with the highest reputation on 04/12/2019 in all areas
-
3 pointsJust got buzzed by an air jockey in a CF18 Hornet, 30 feet over my tank park. I should be pissed, but it was kinda cool...!3 points
-
3 points
-
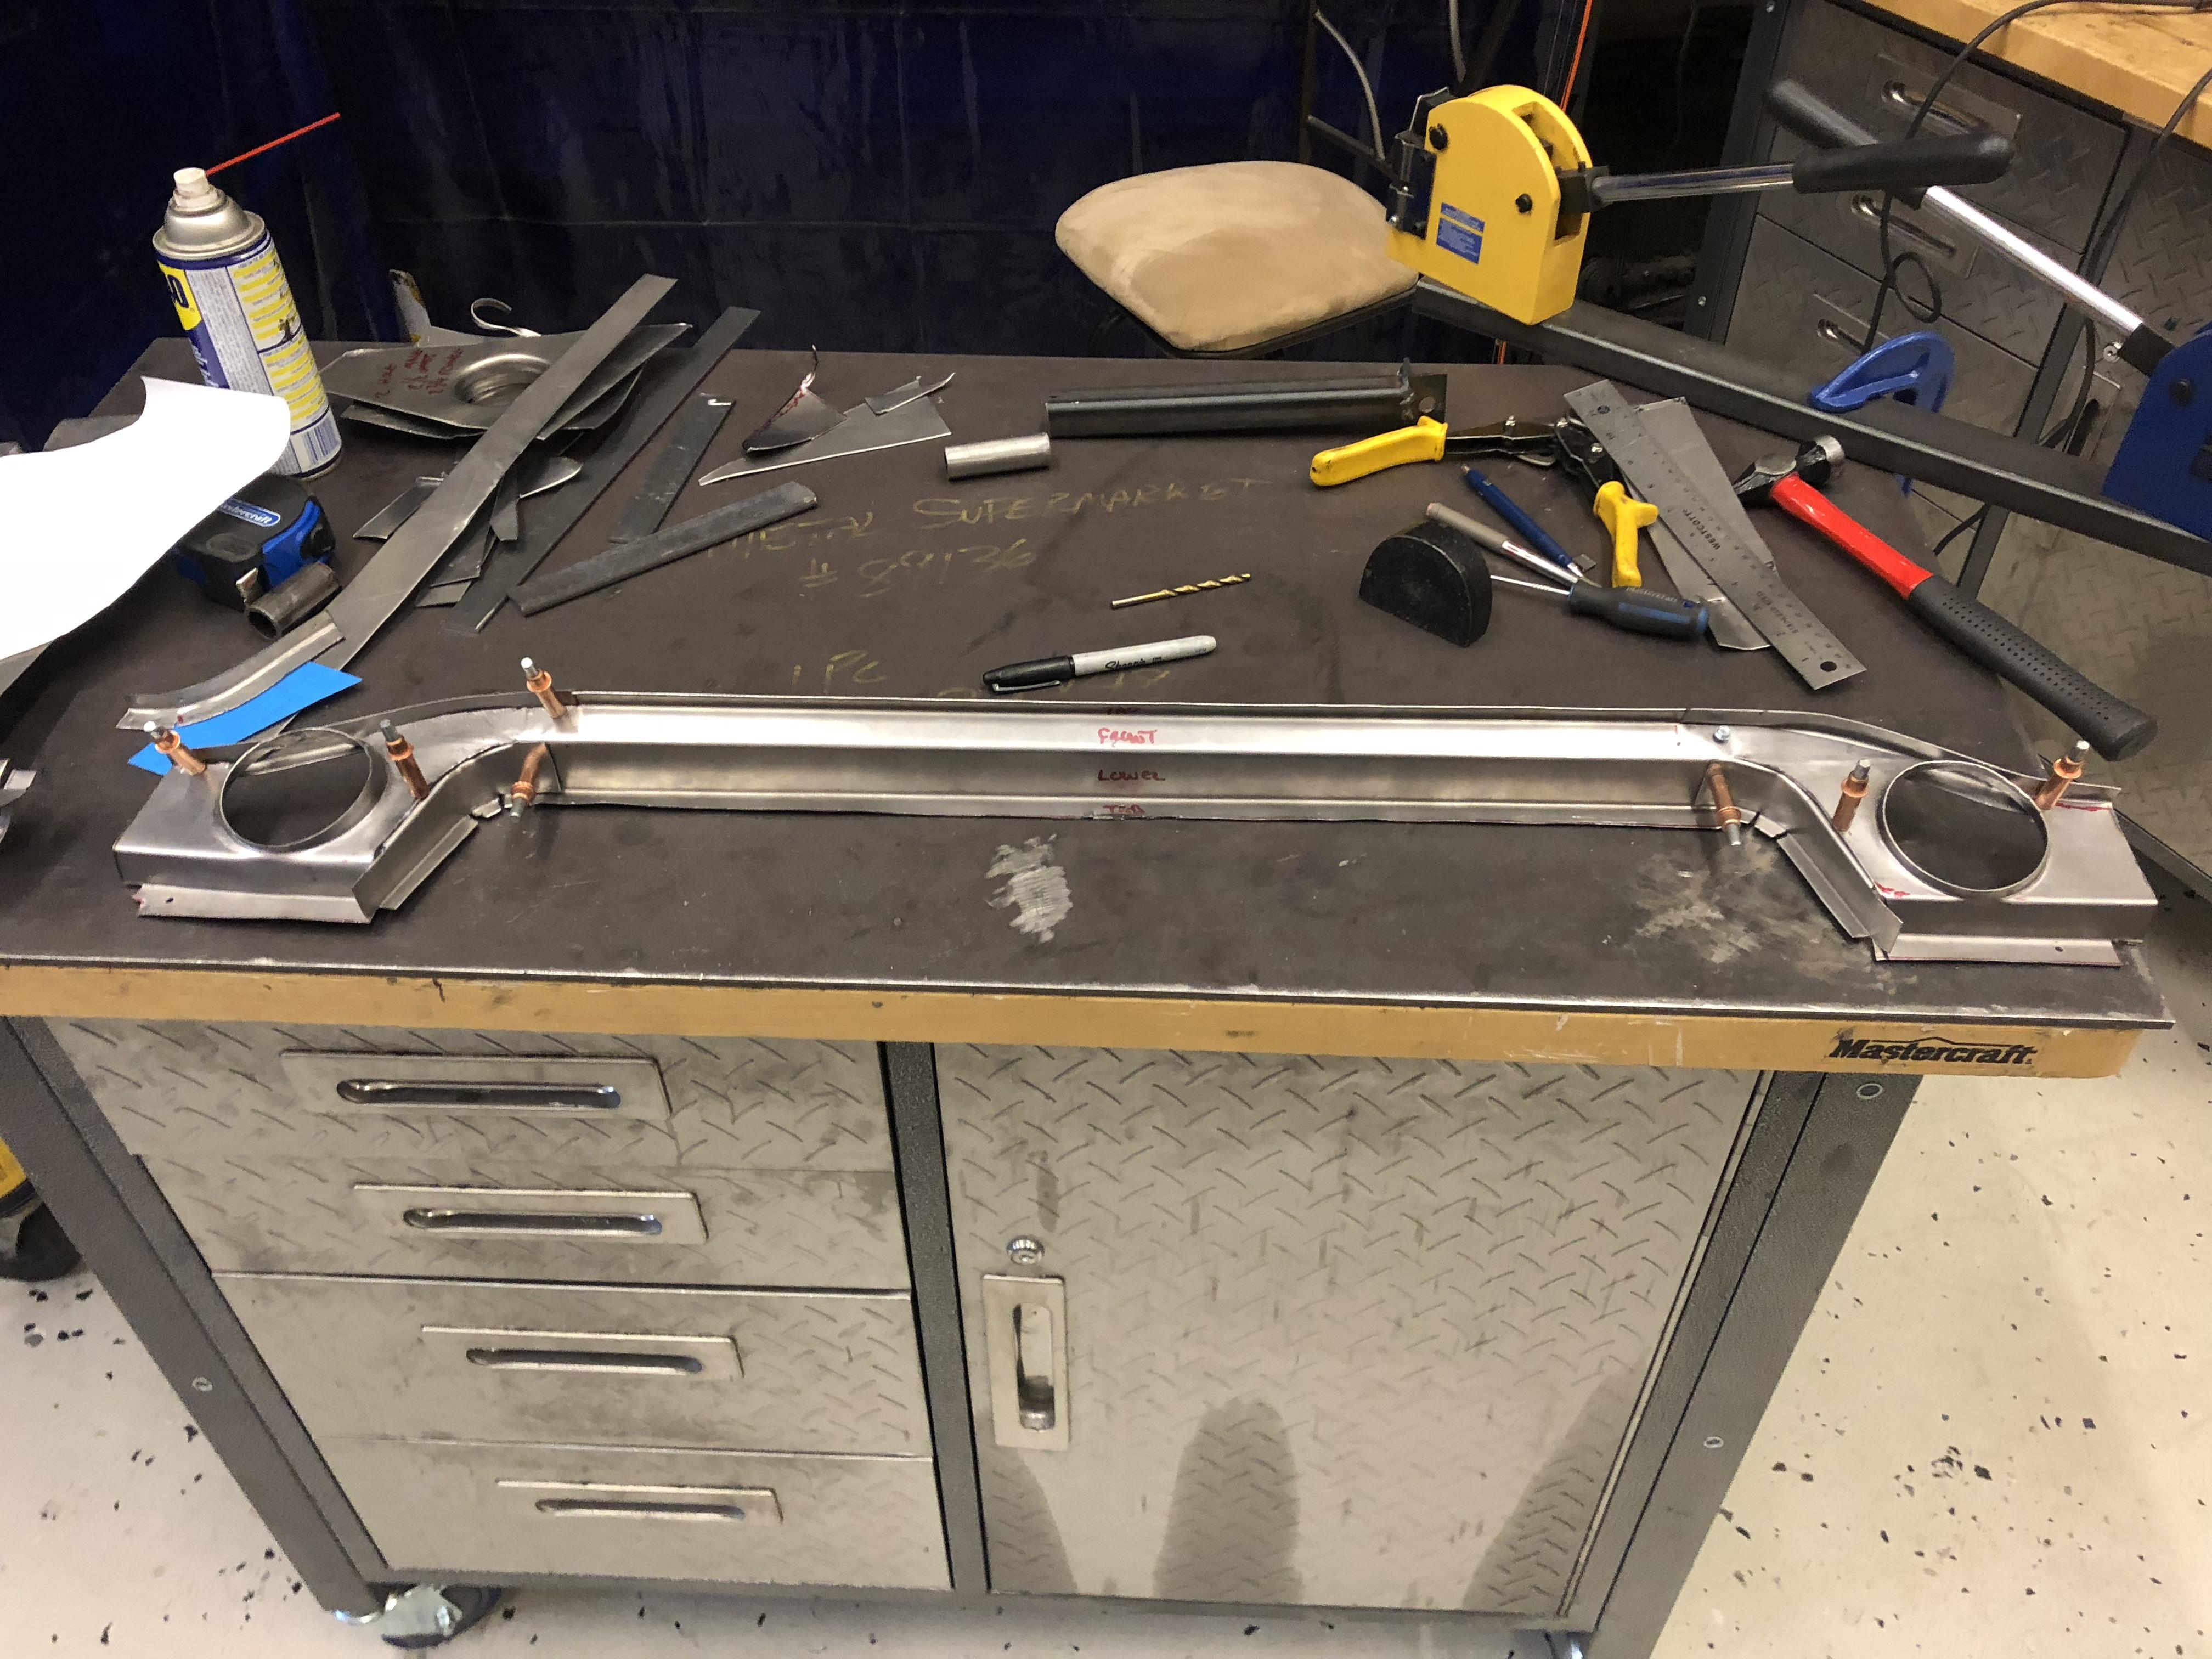
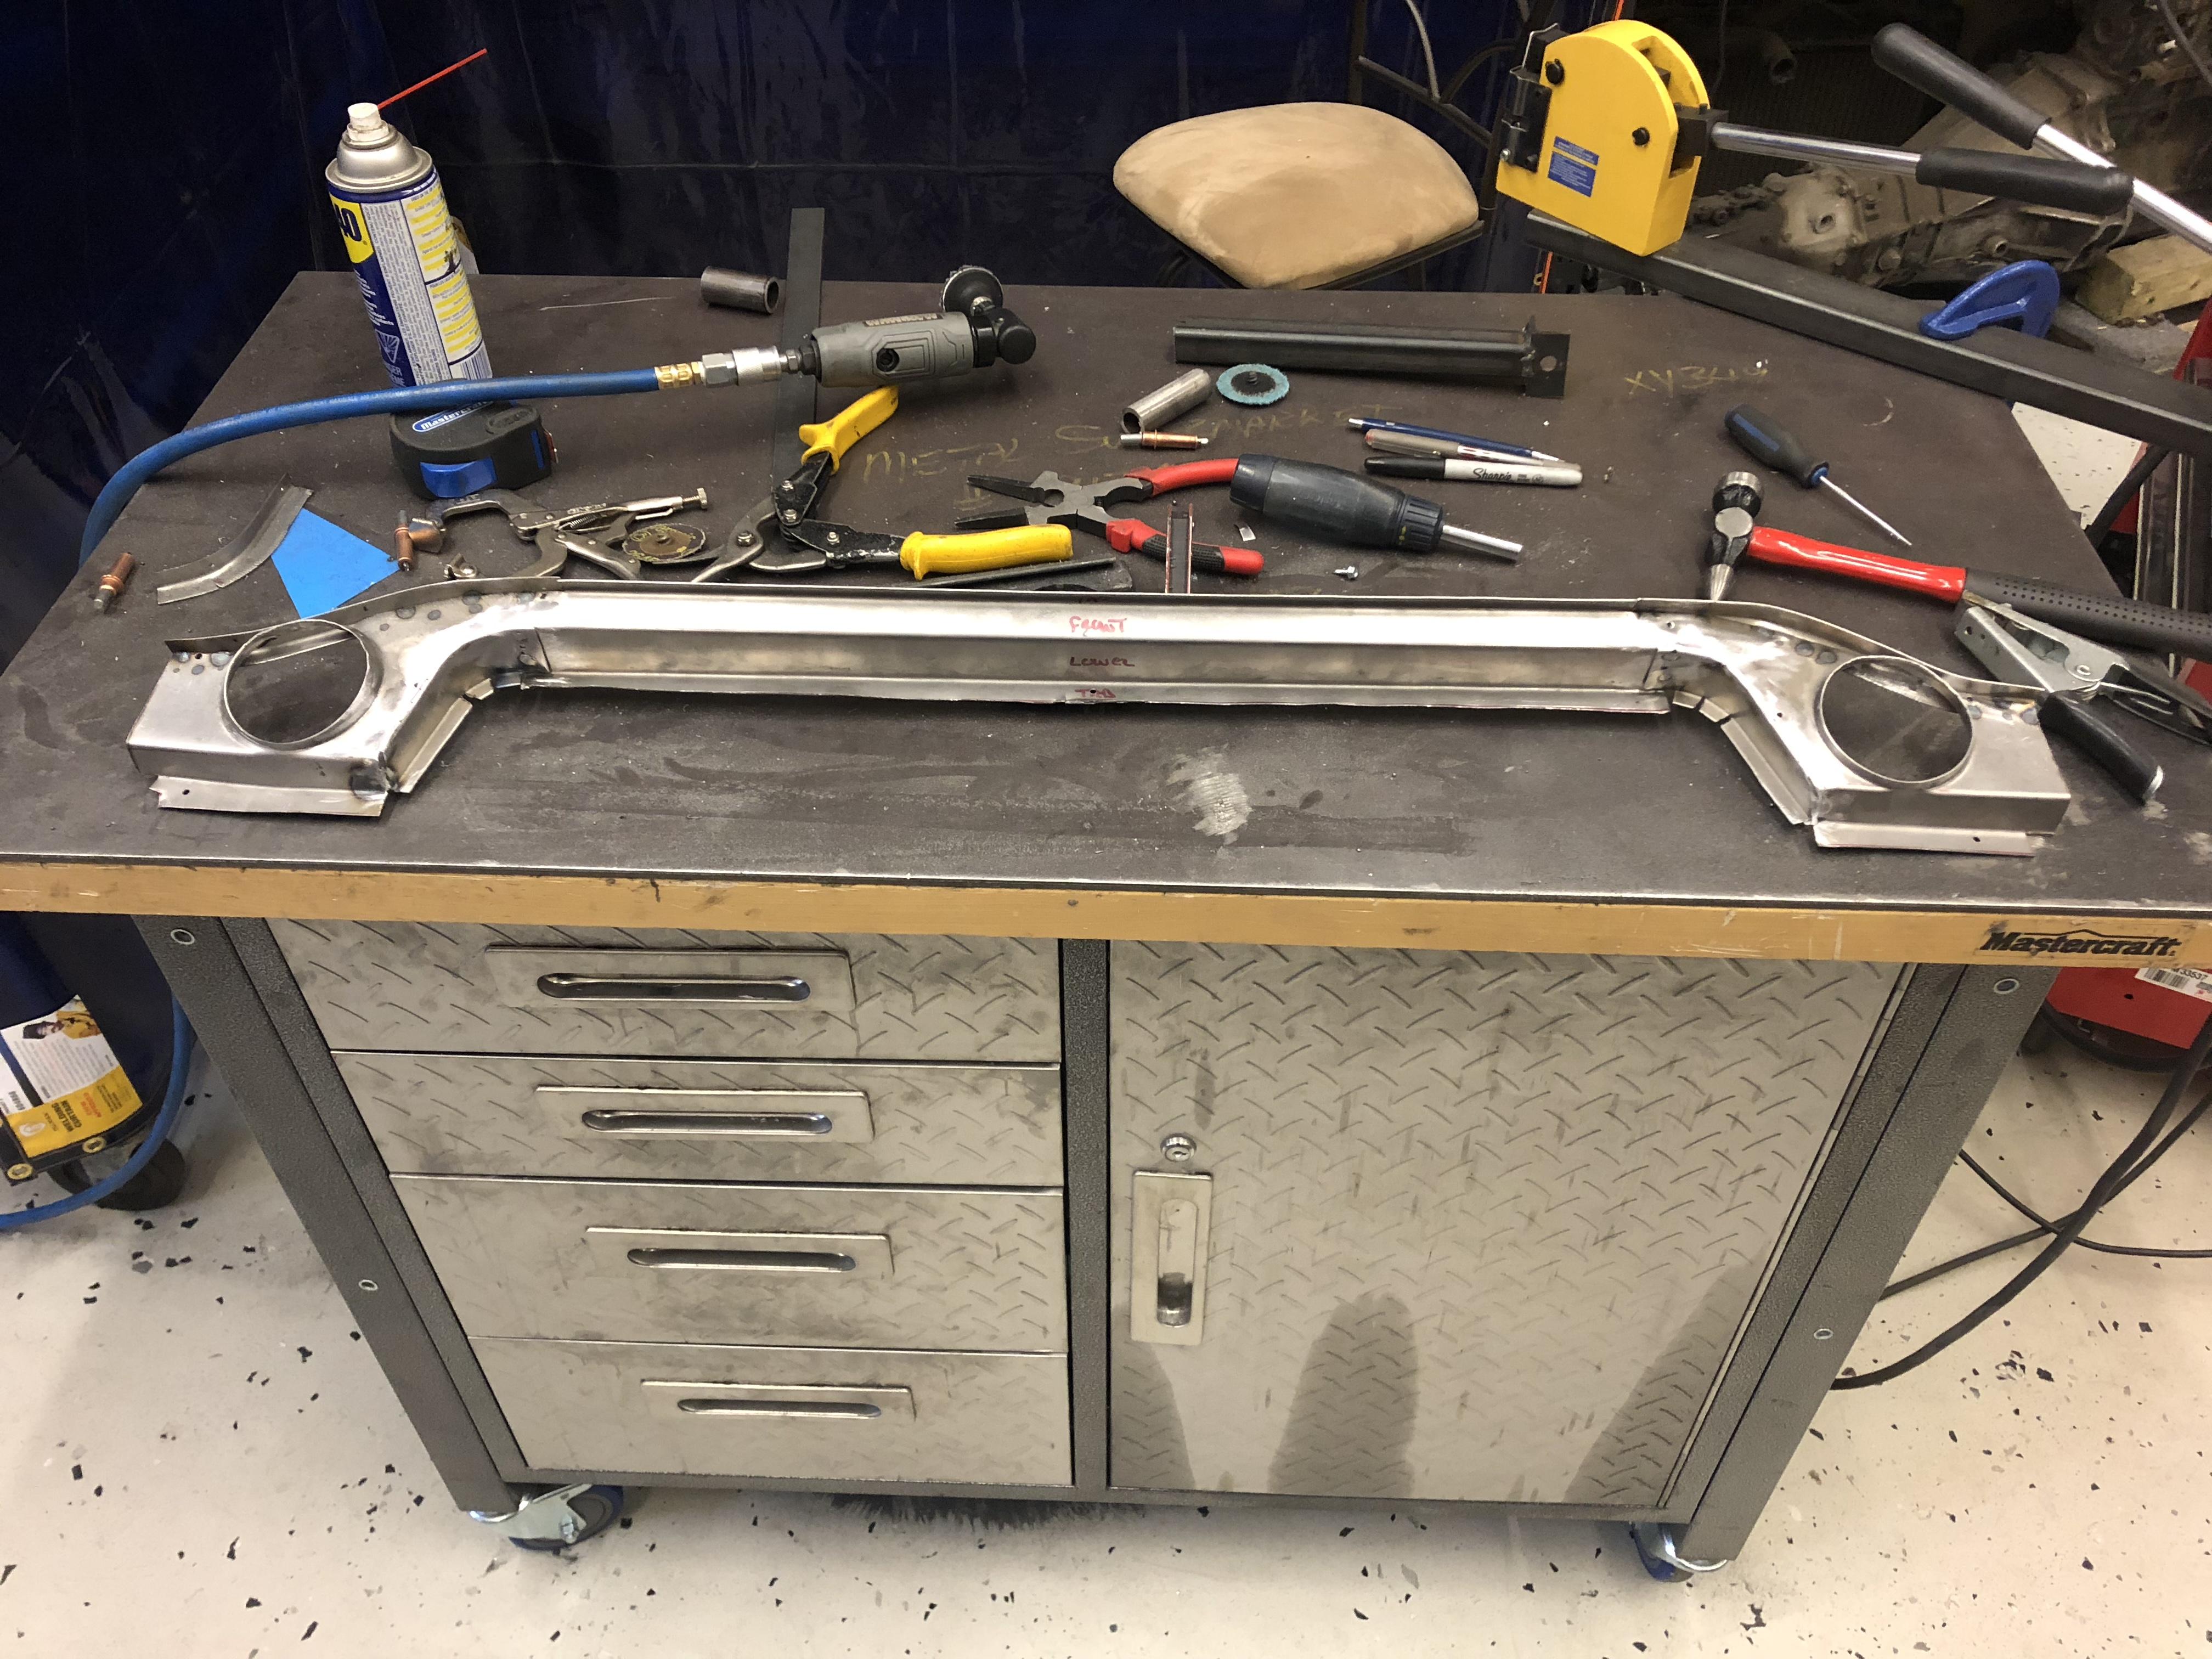
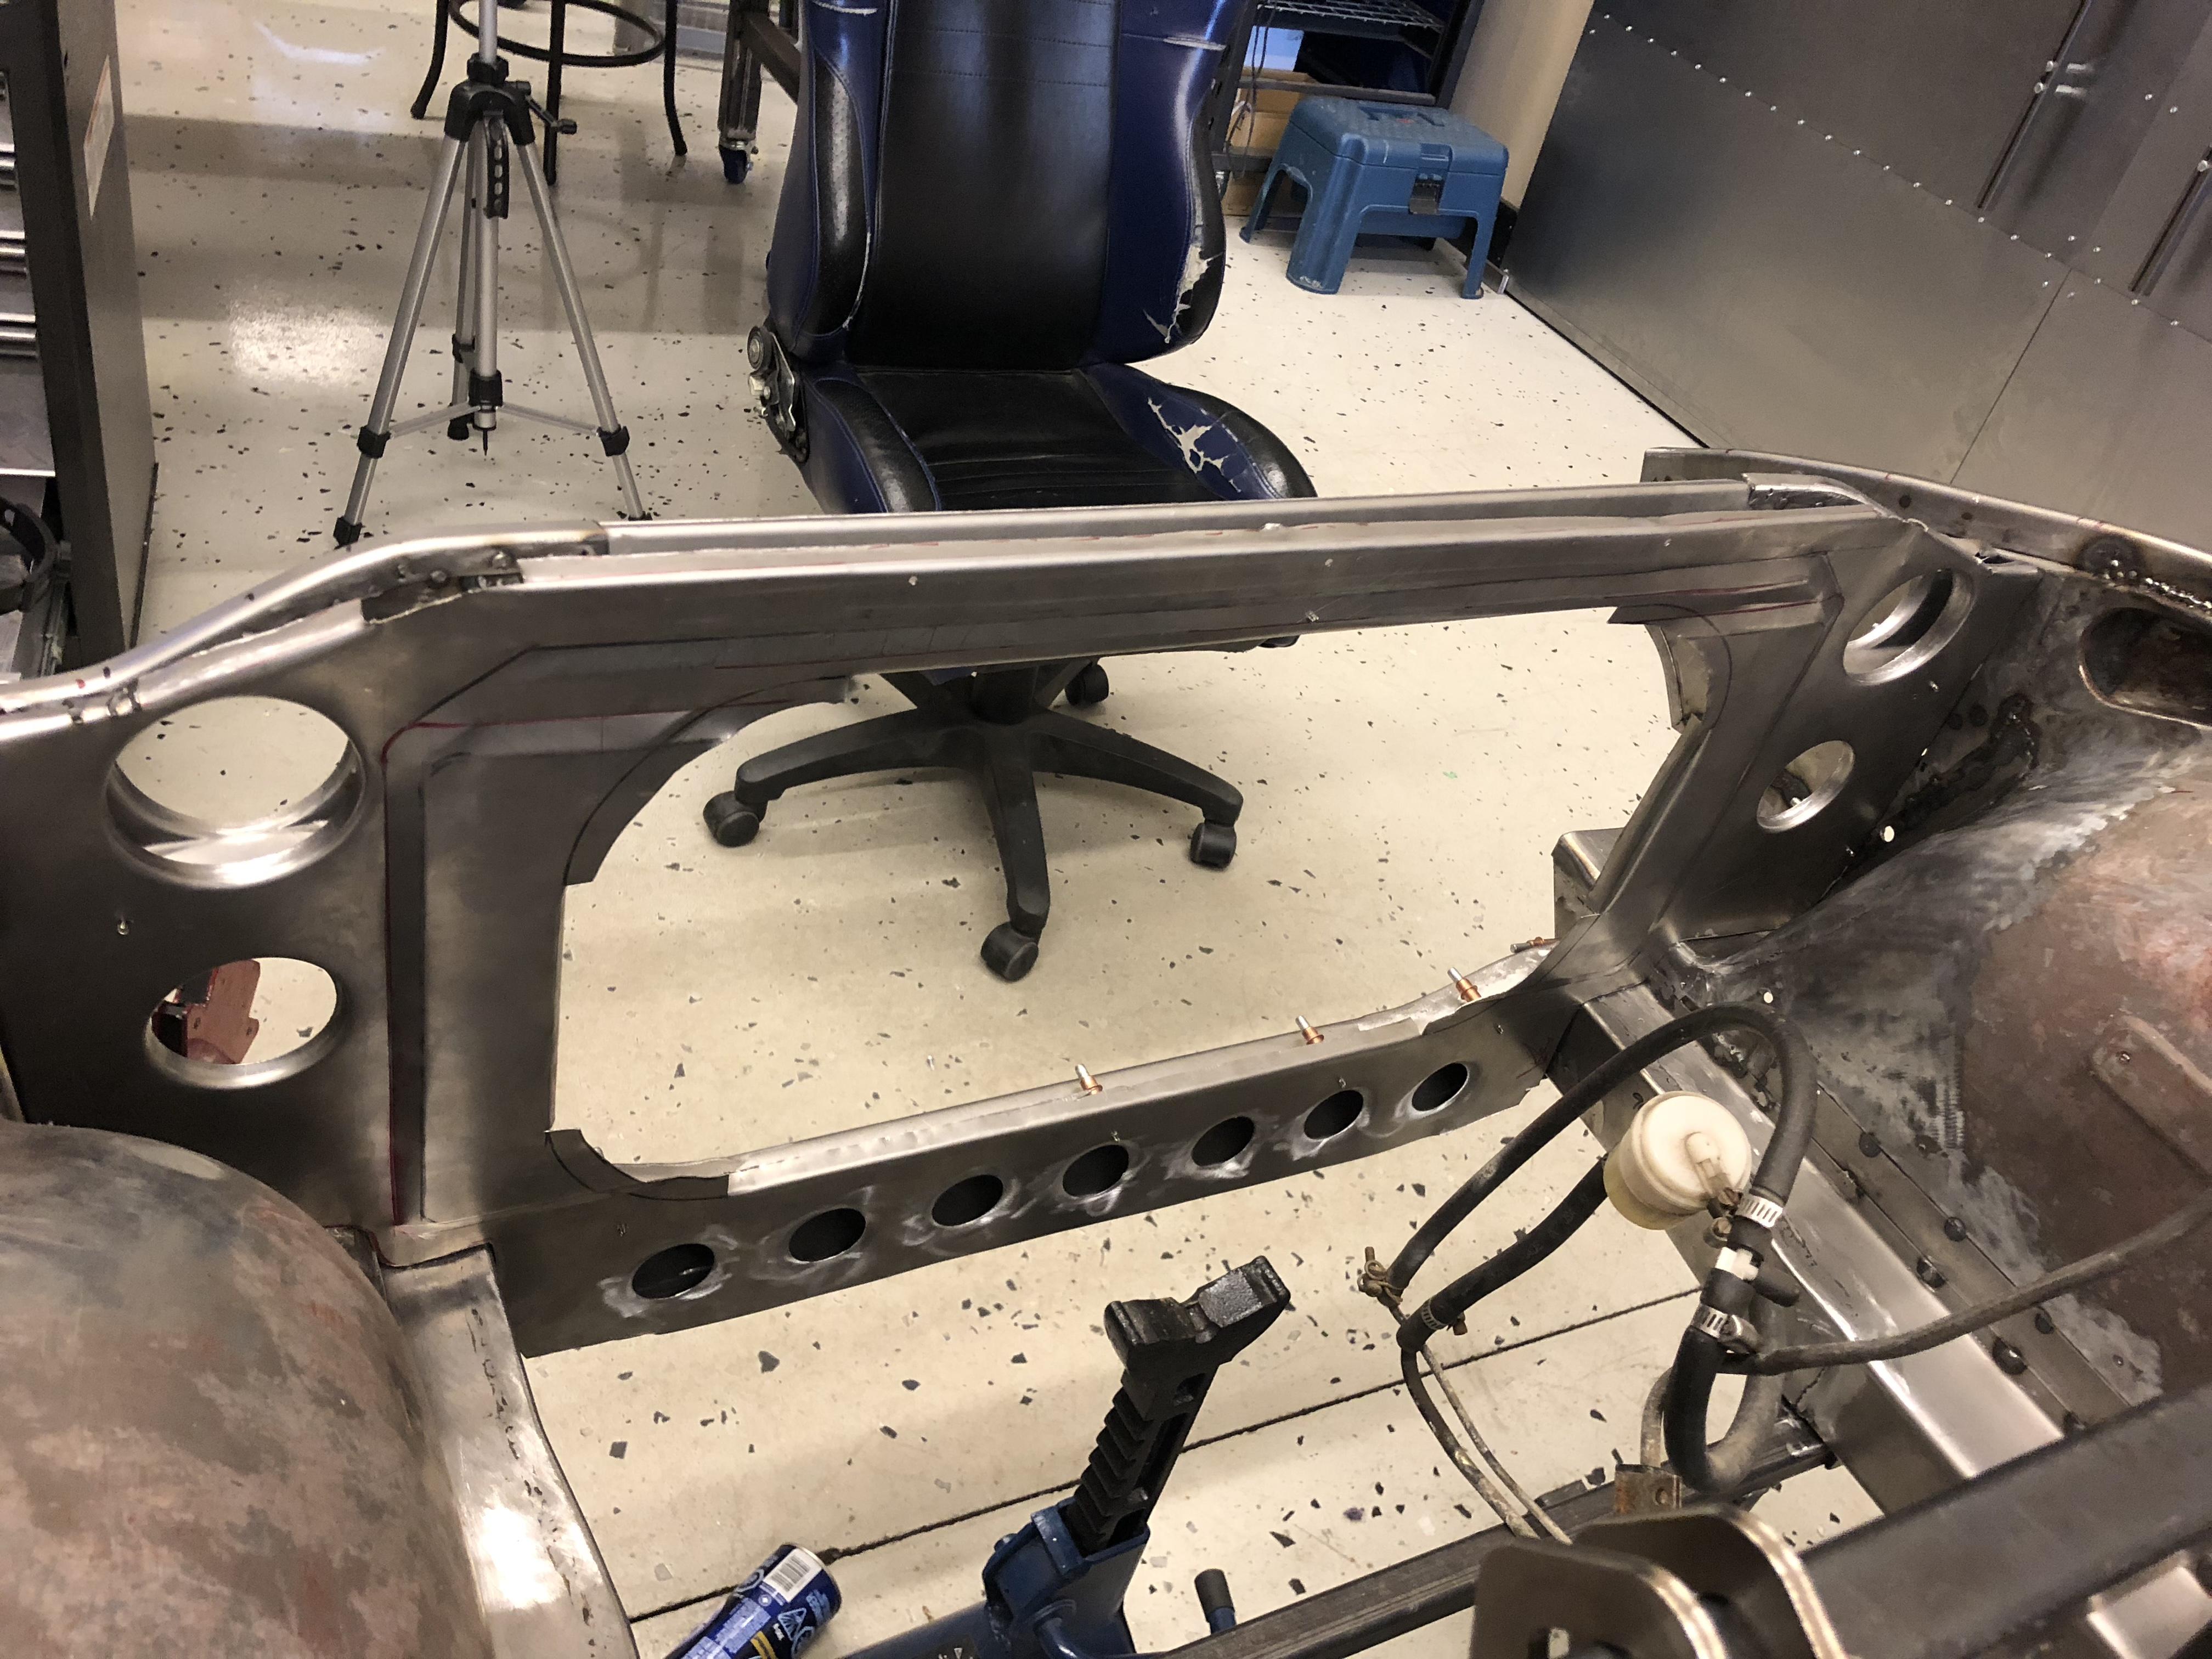
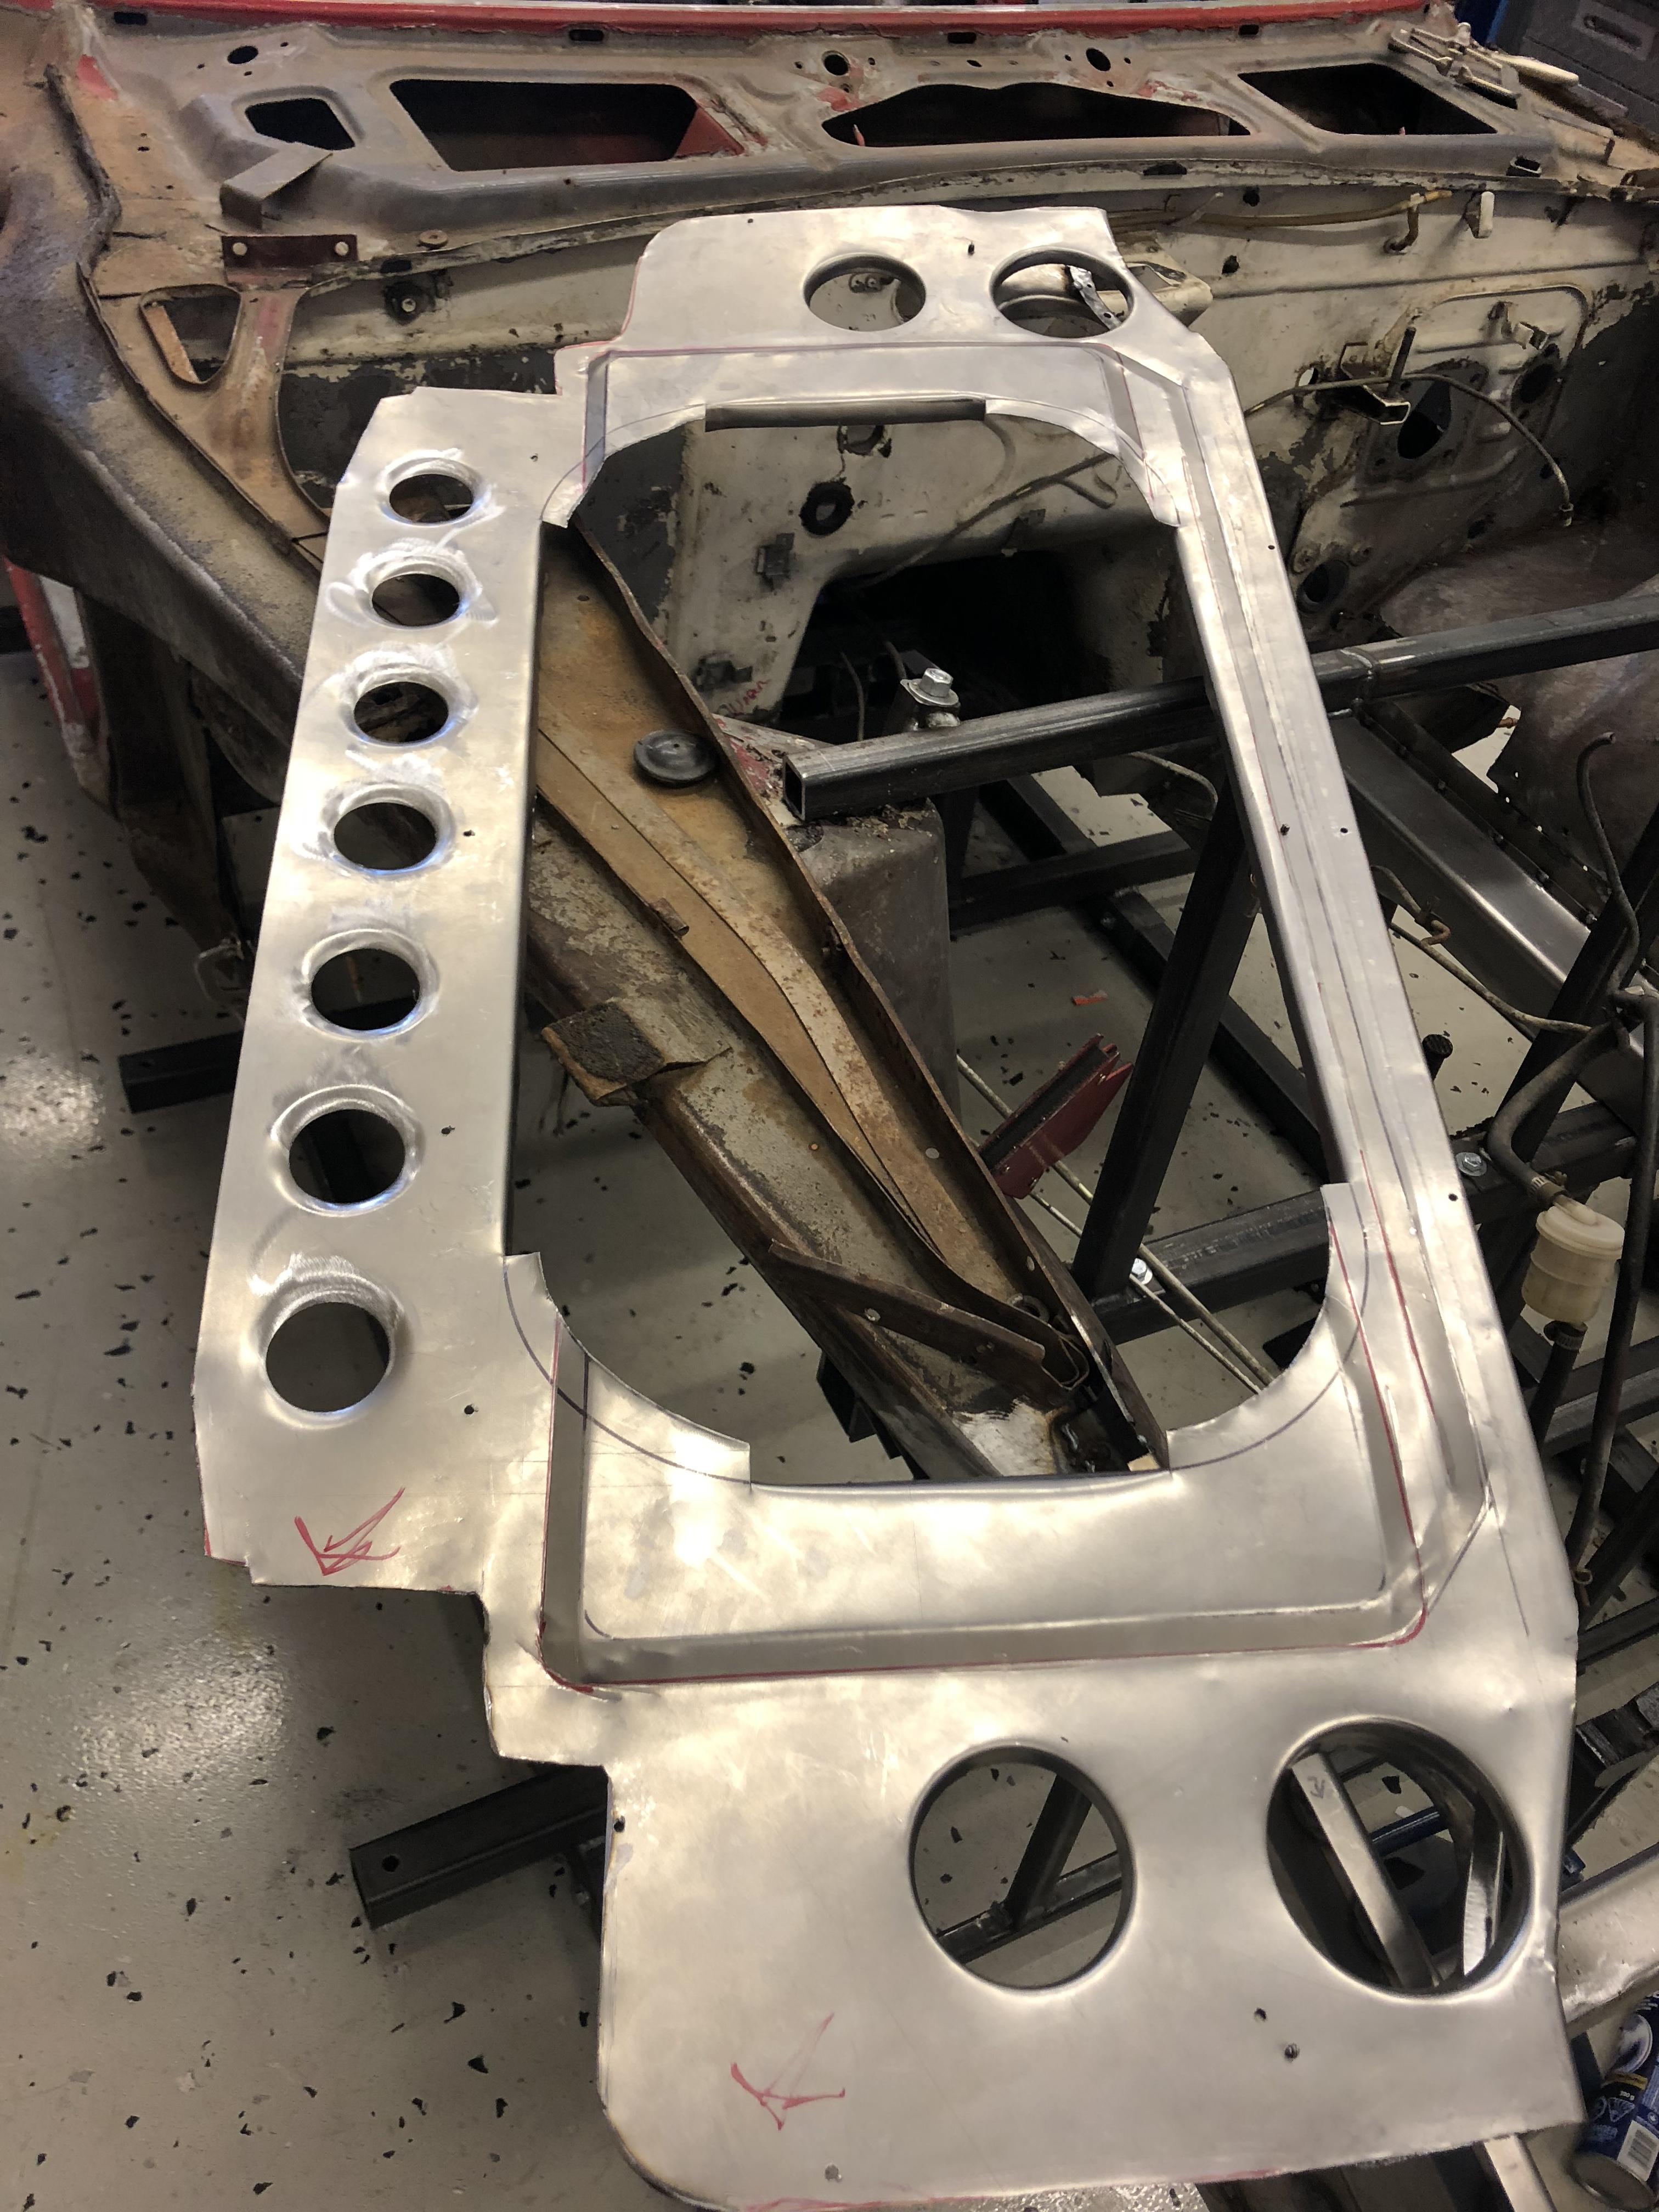
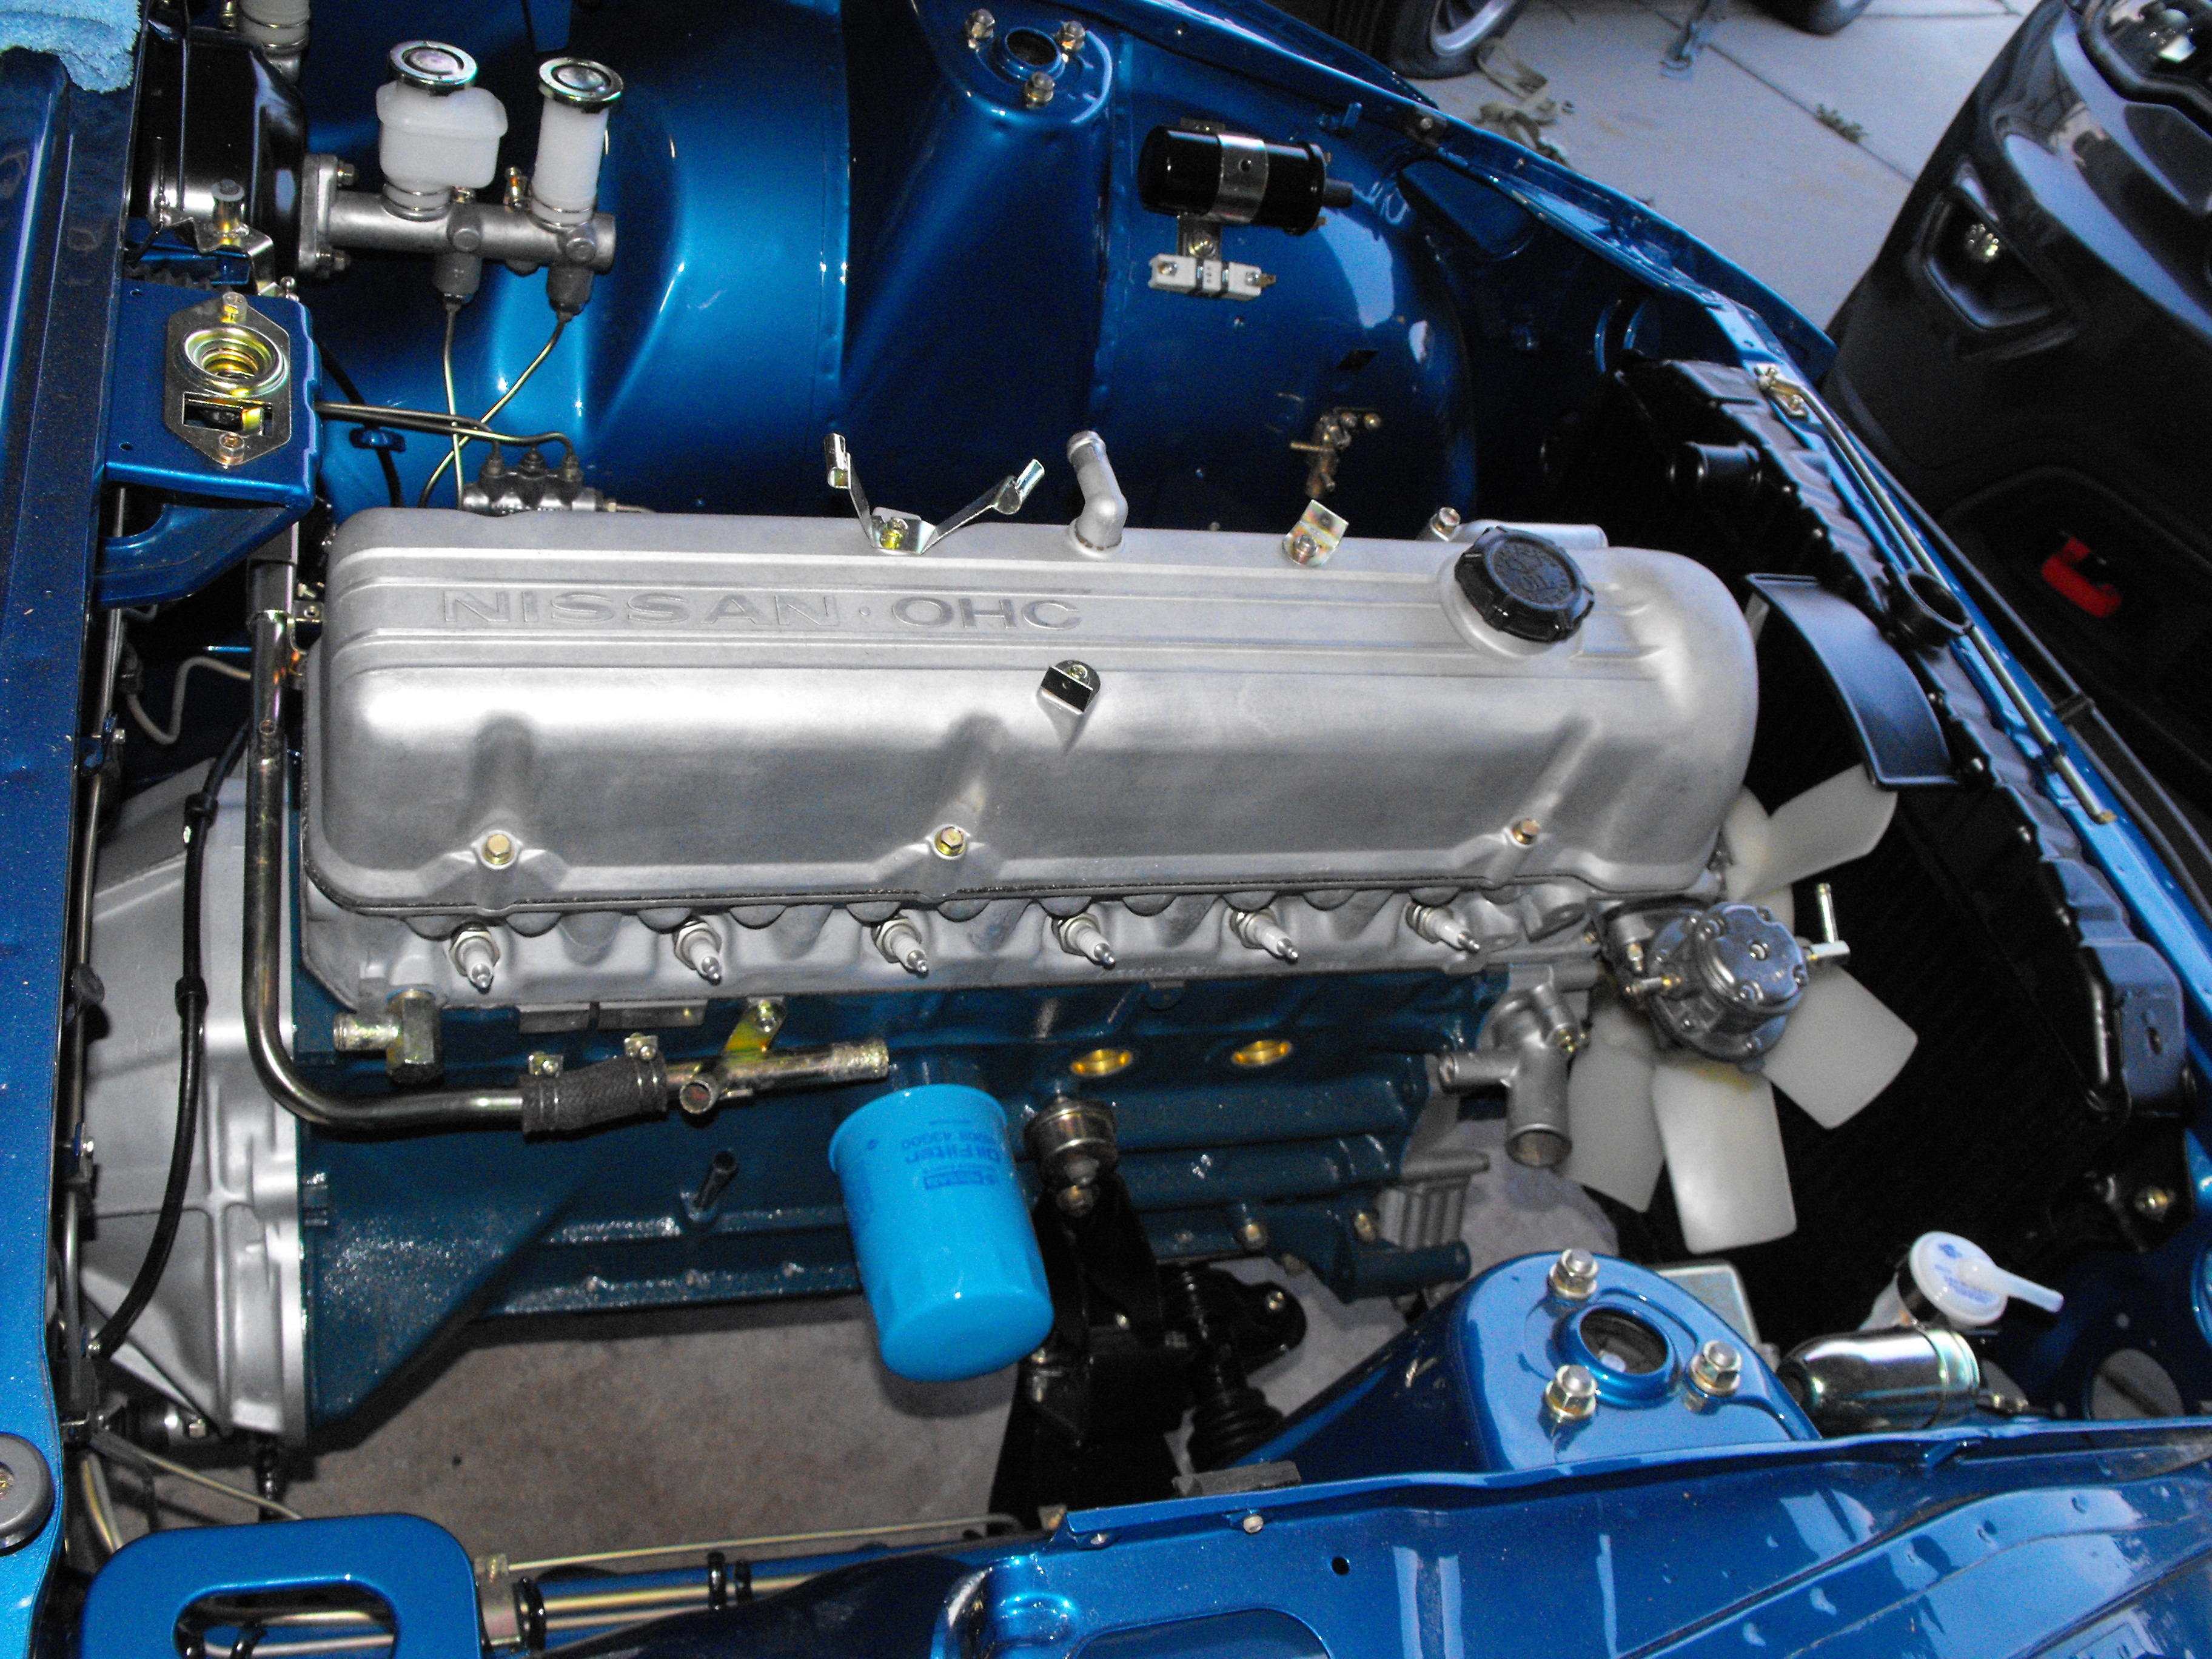
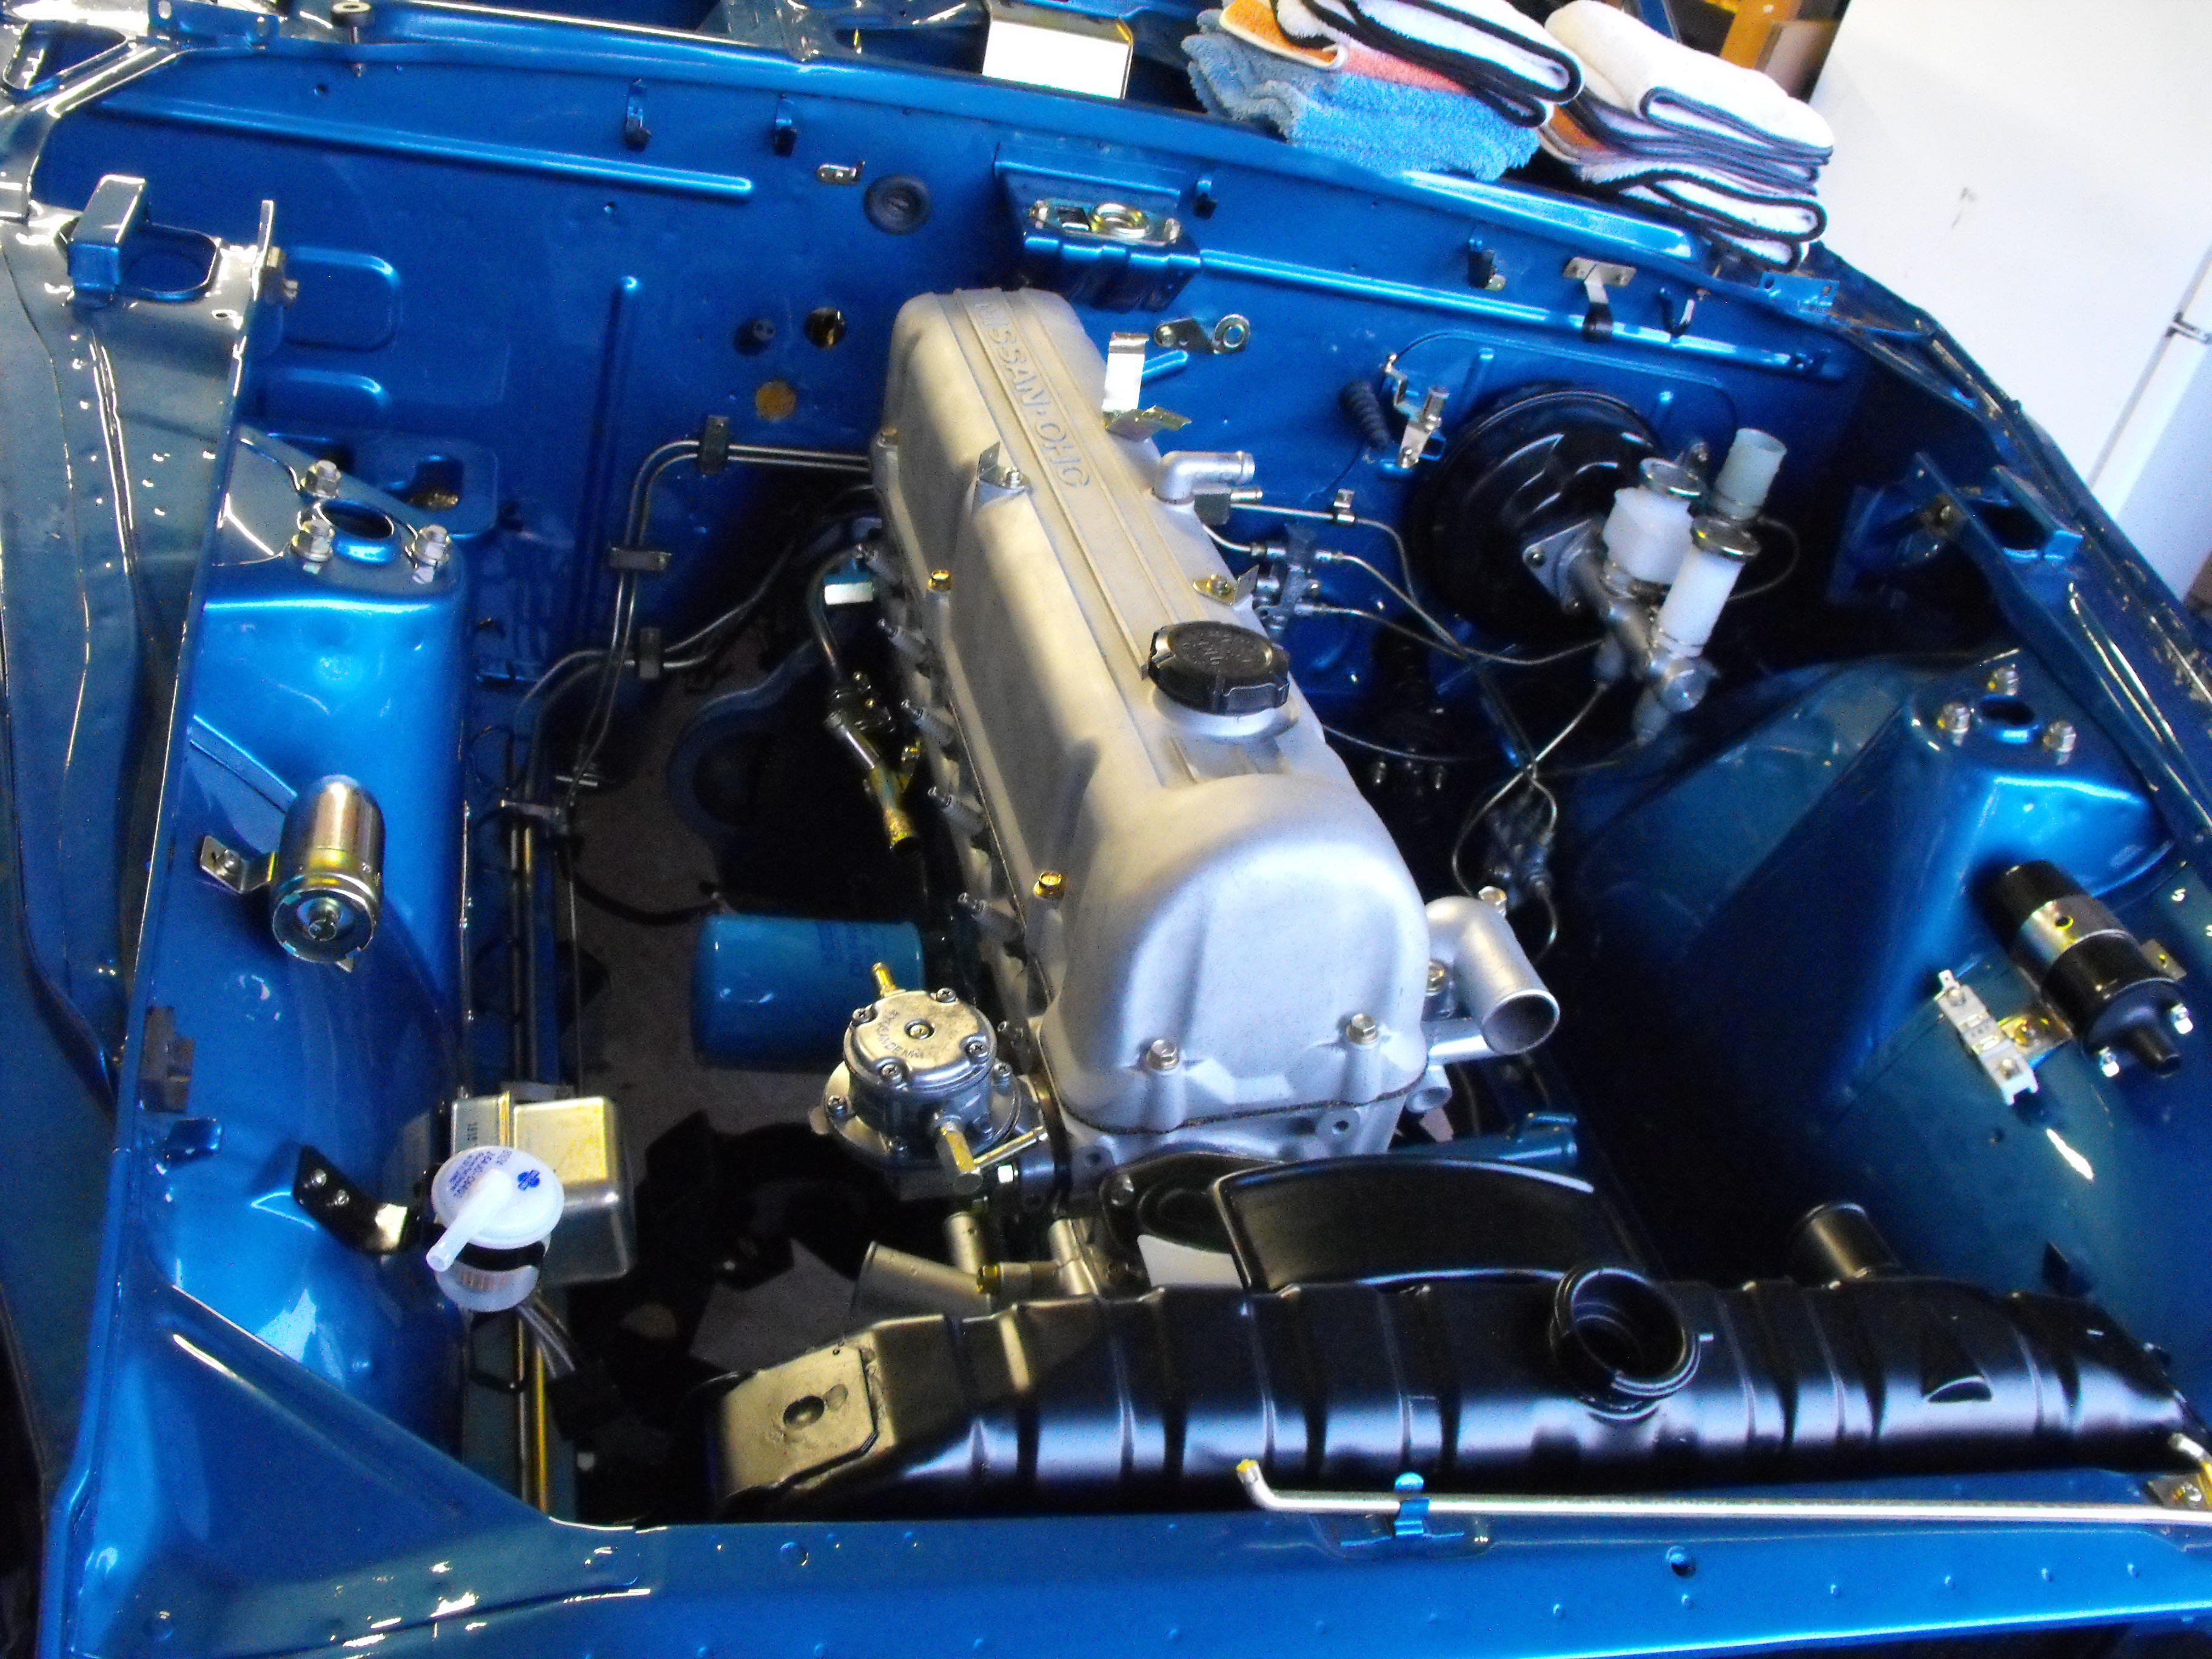
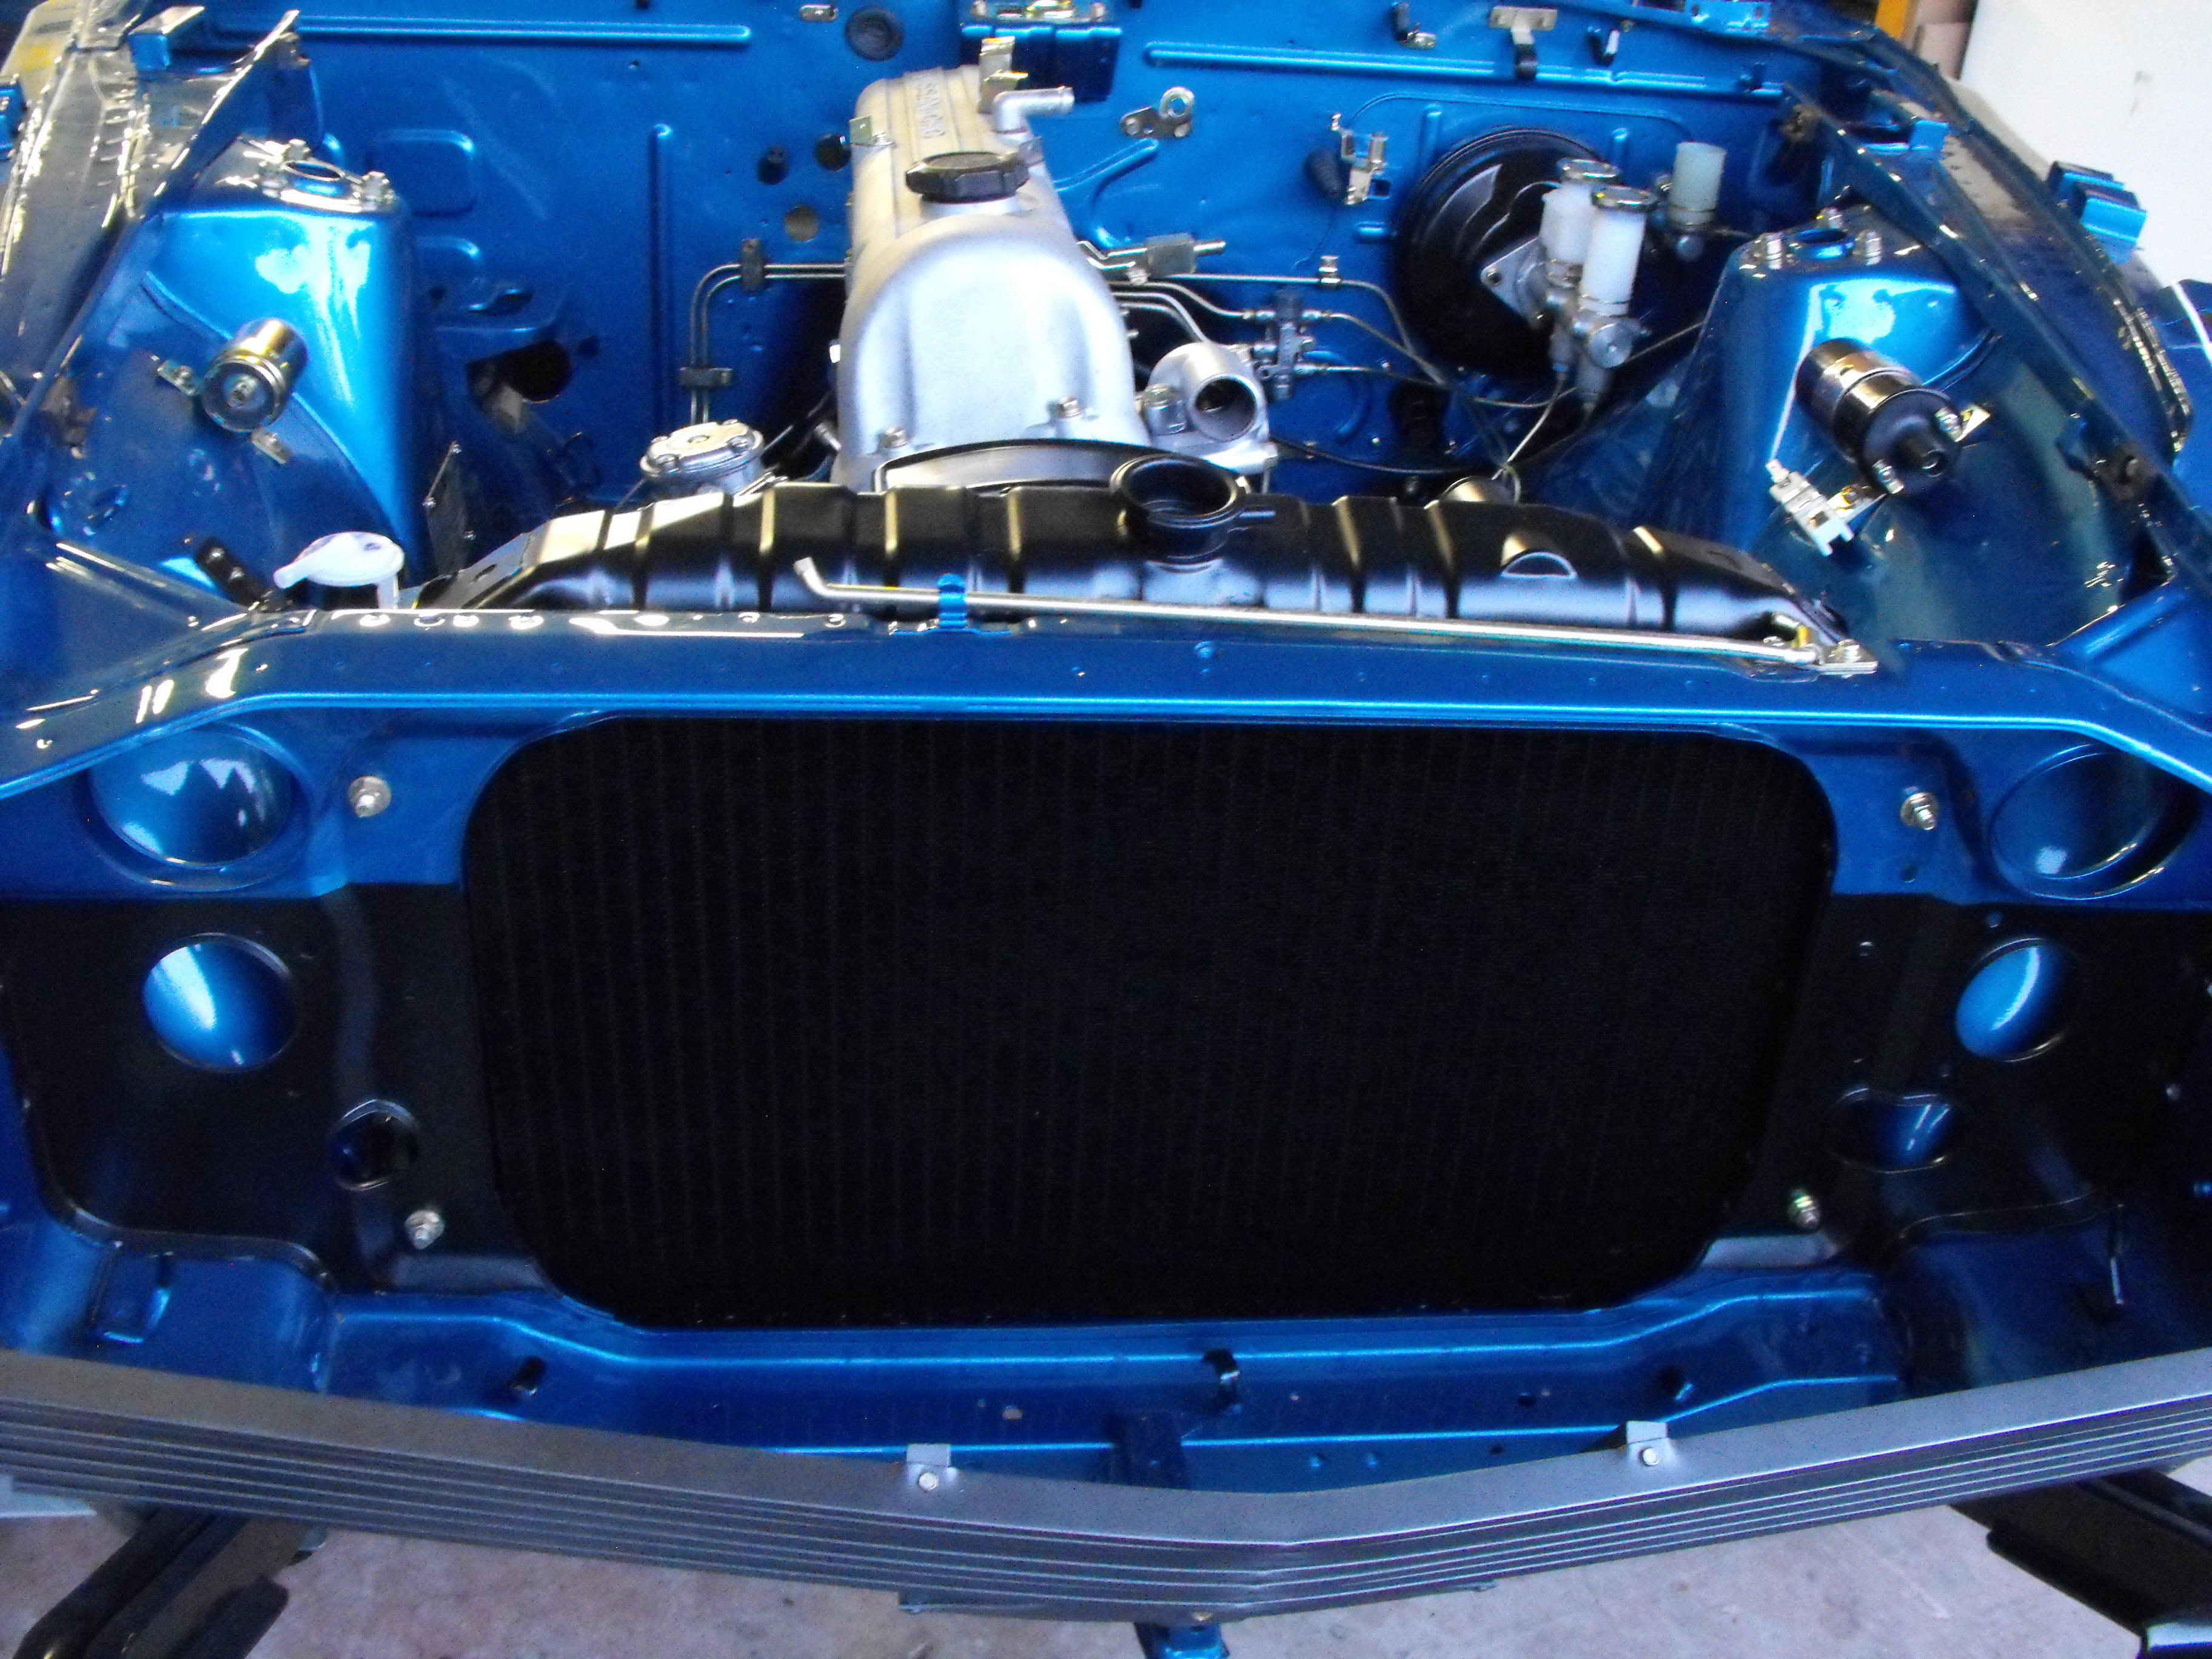
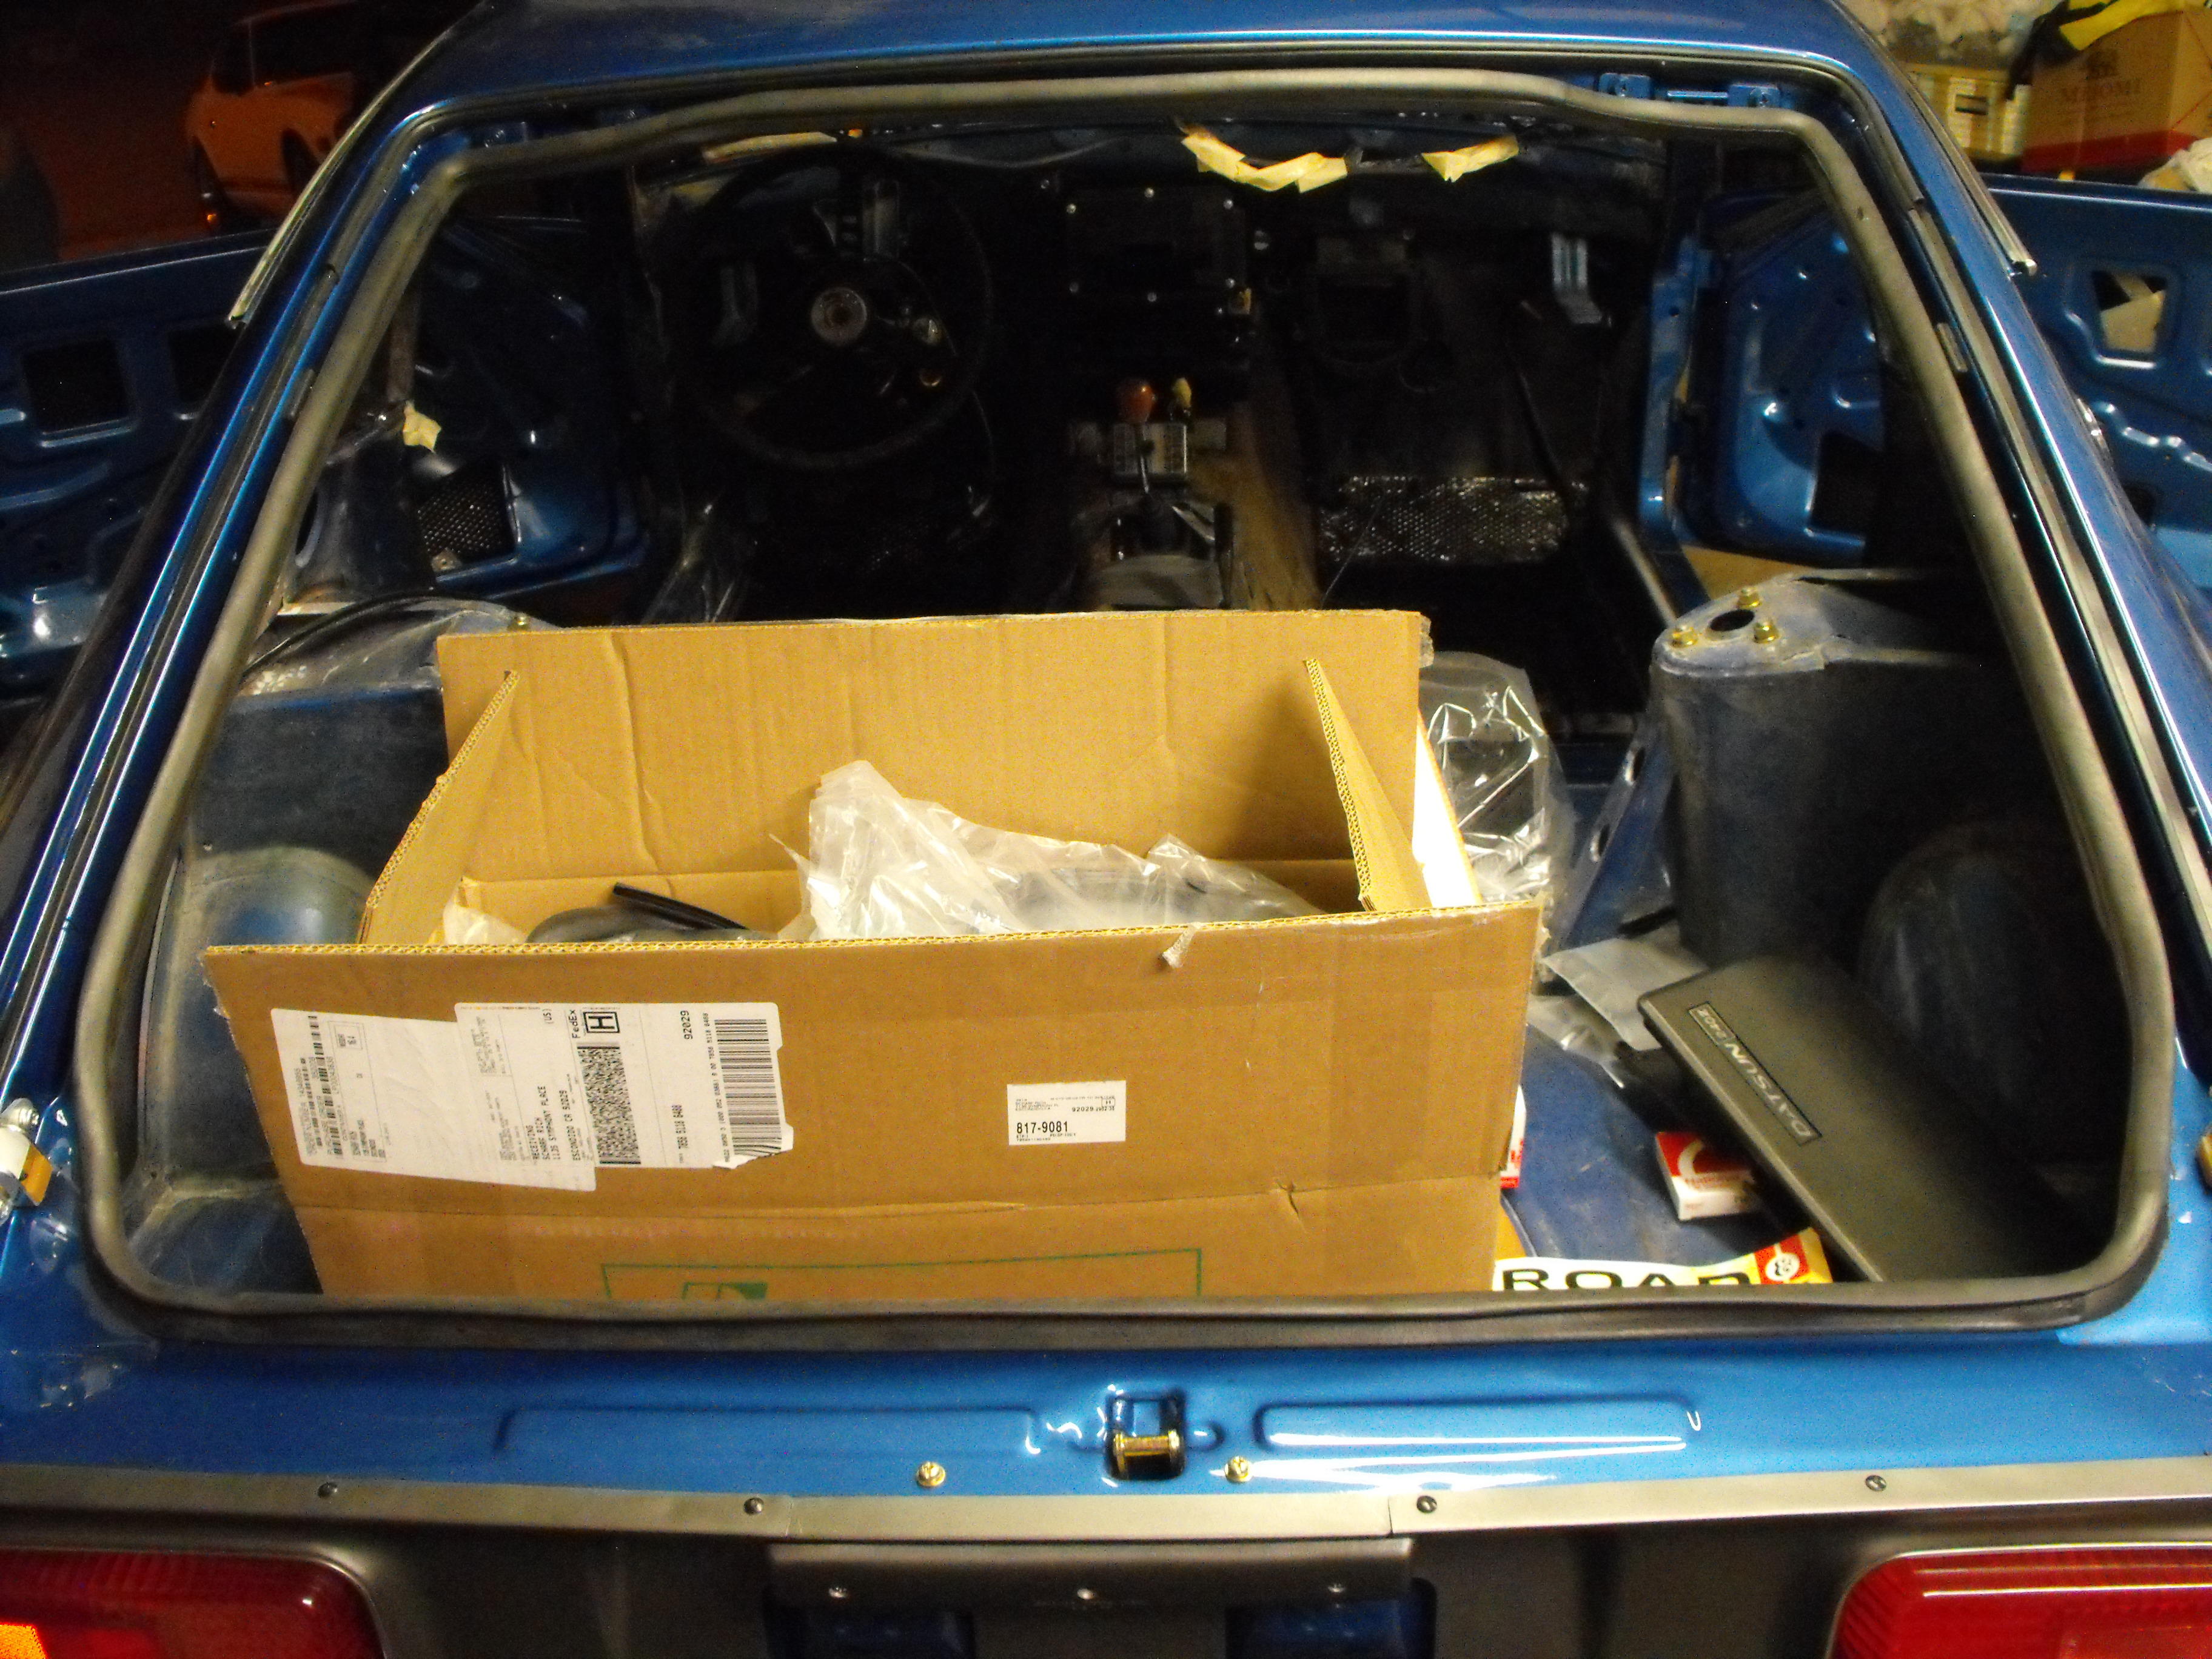
2 pointsGot the radiator re-cored with a heavy duty 3-row core. Installed radiator, fan clutch and fan. Also cleaned up fuel pump and installed that. I am picking up the hatch tomorrow, so figured I would put in the hatch weather stripping. My favorite part of dointg the weather stripping is peeling the glue off of my fingers afterwards....very entertaining. Ordered the engine compartment braided hoses from Jay at jdm-car-parts.com. Those should arrive in the next day or two. Also cleaned up the electrical harness. Will install that once I get the new harness firewall boot.


 2 points
 -
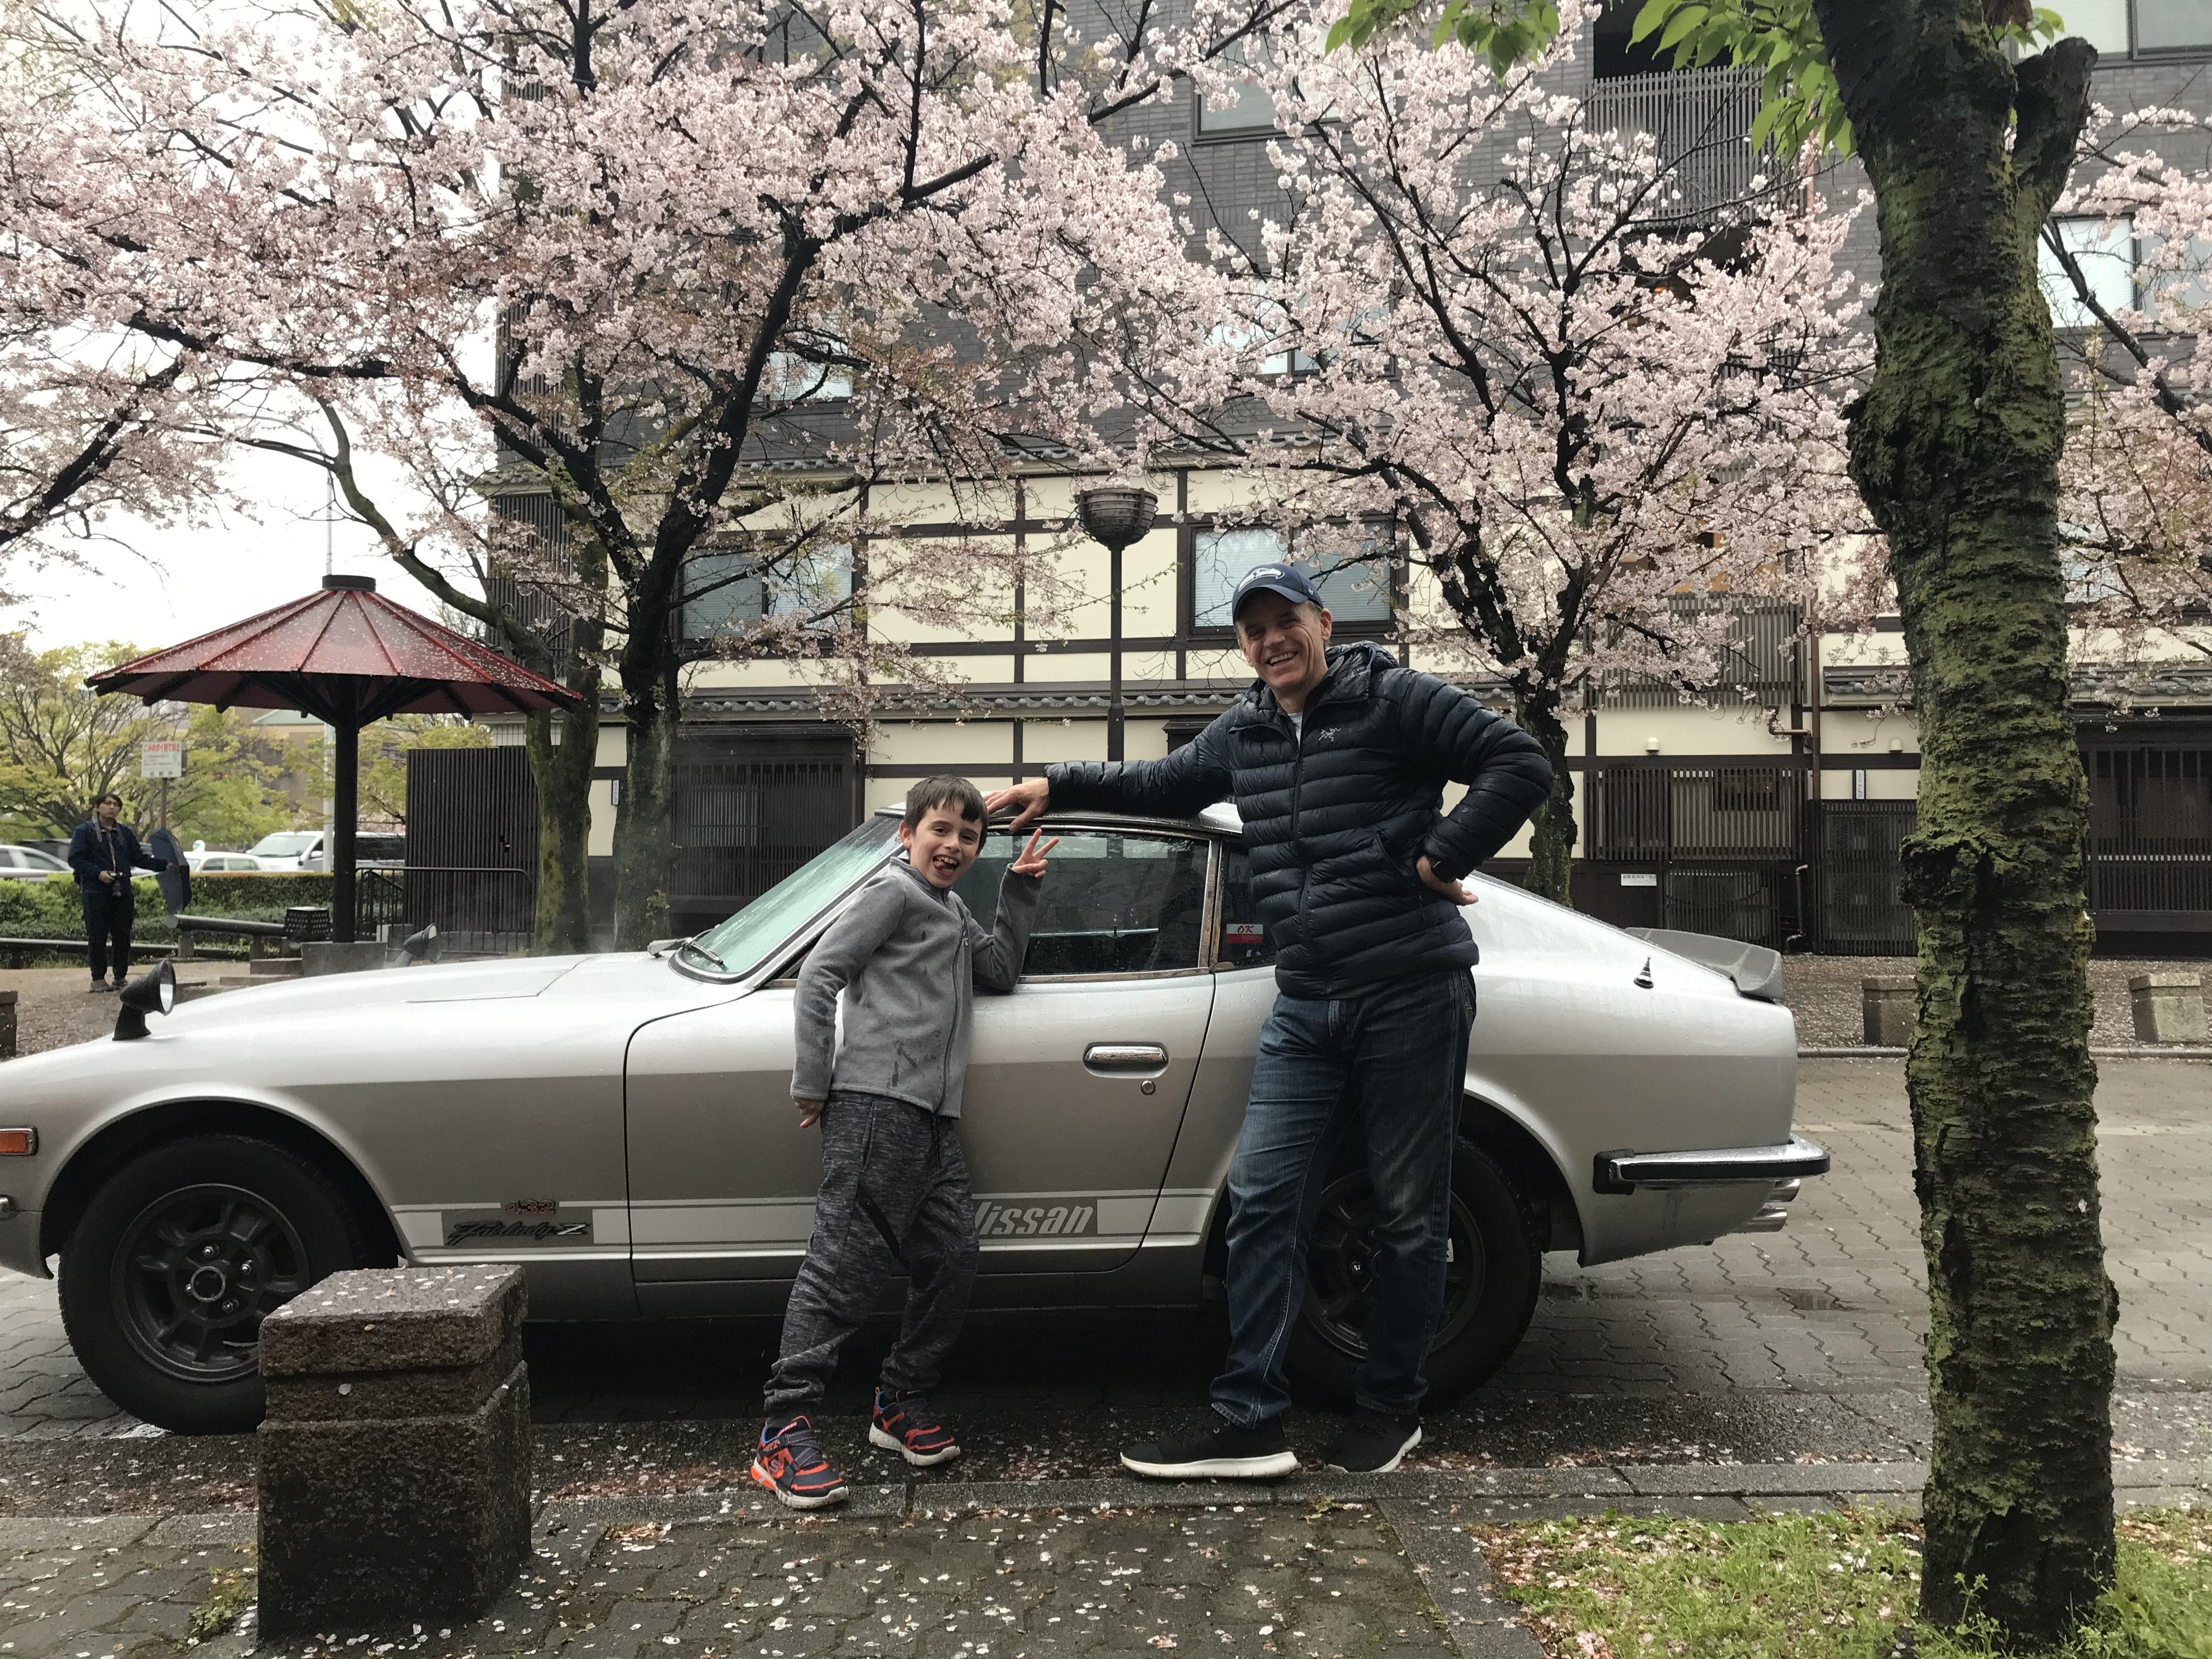
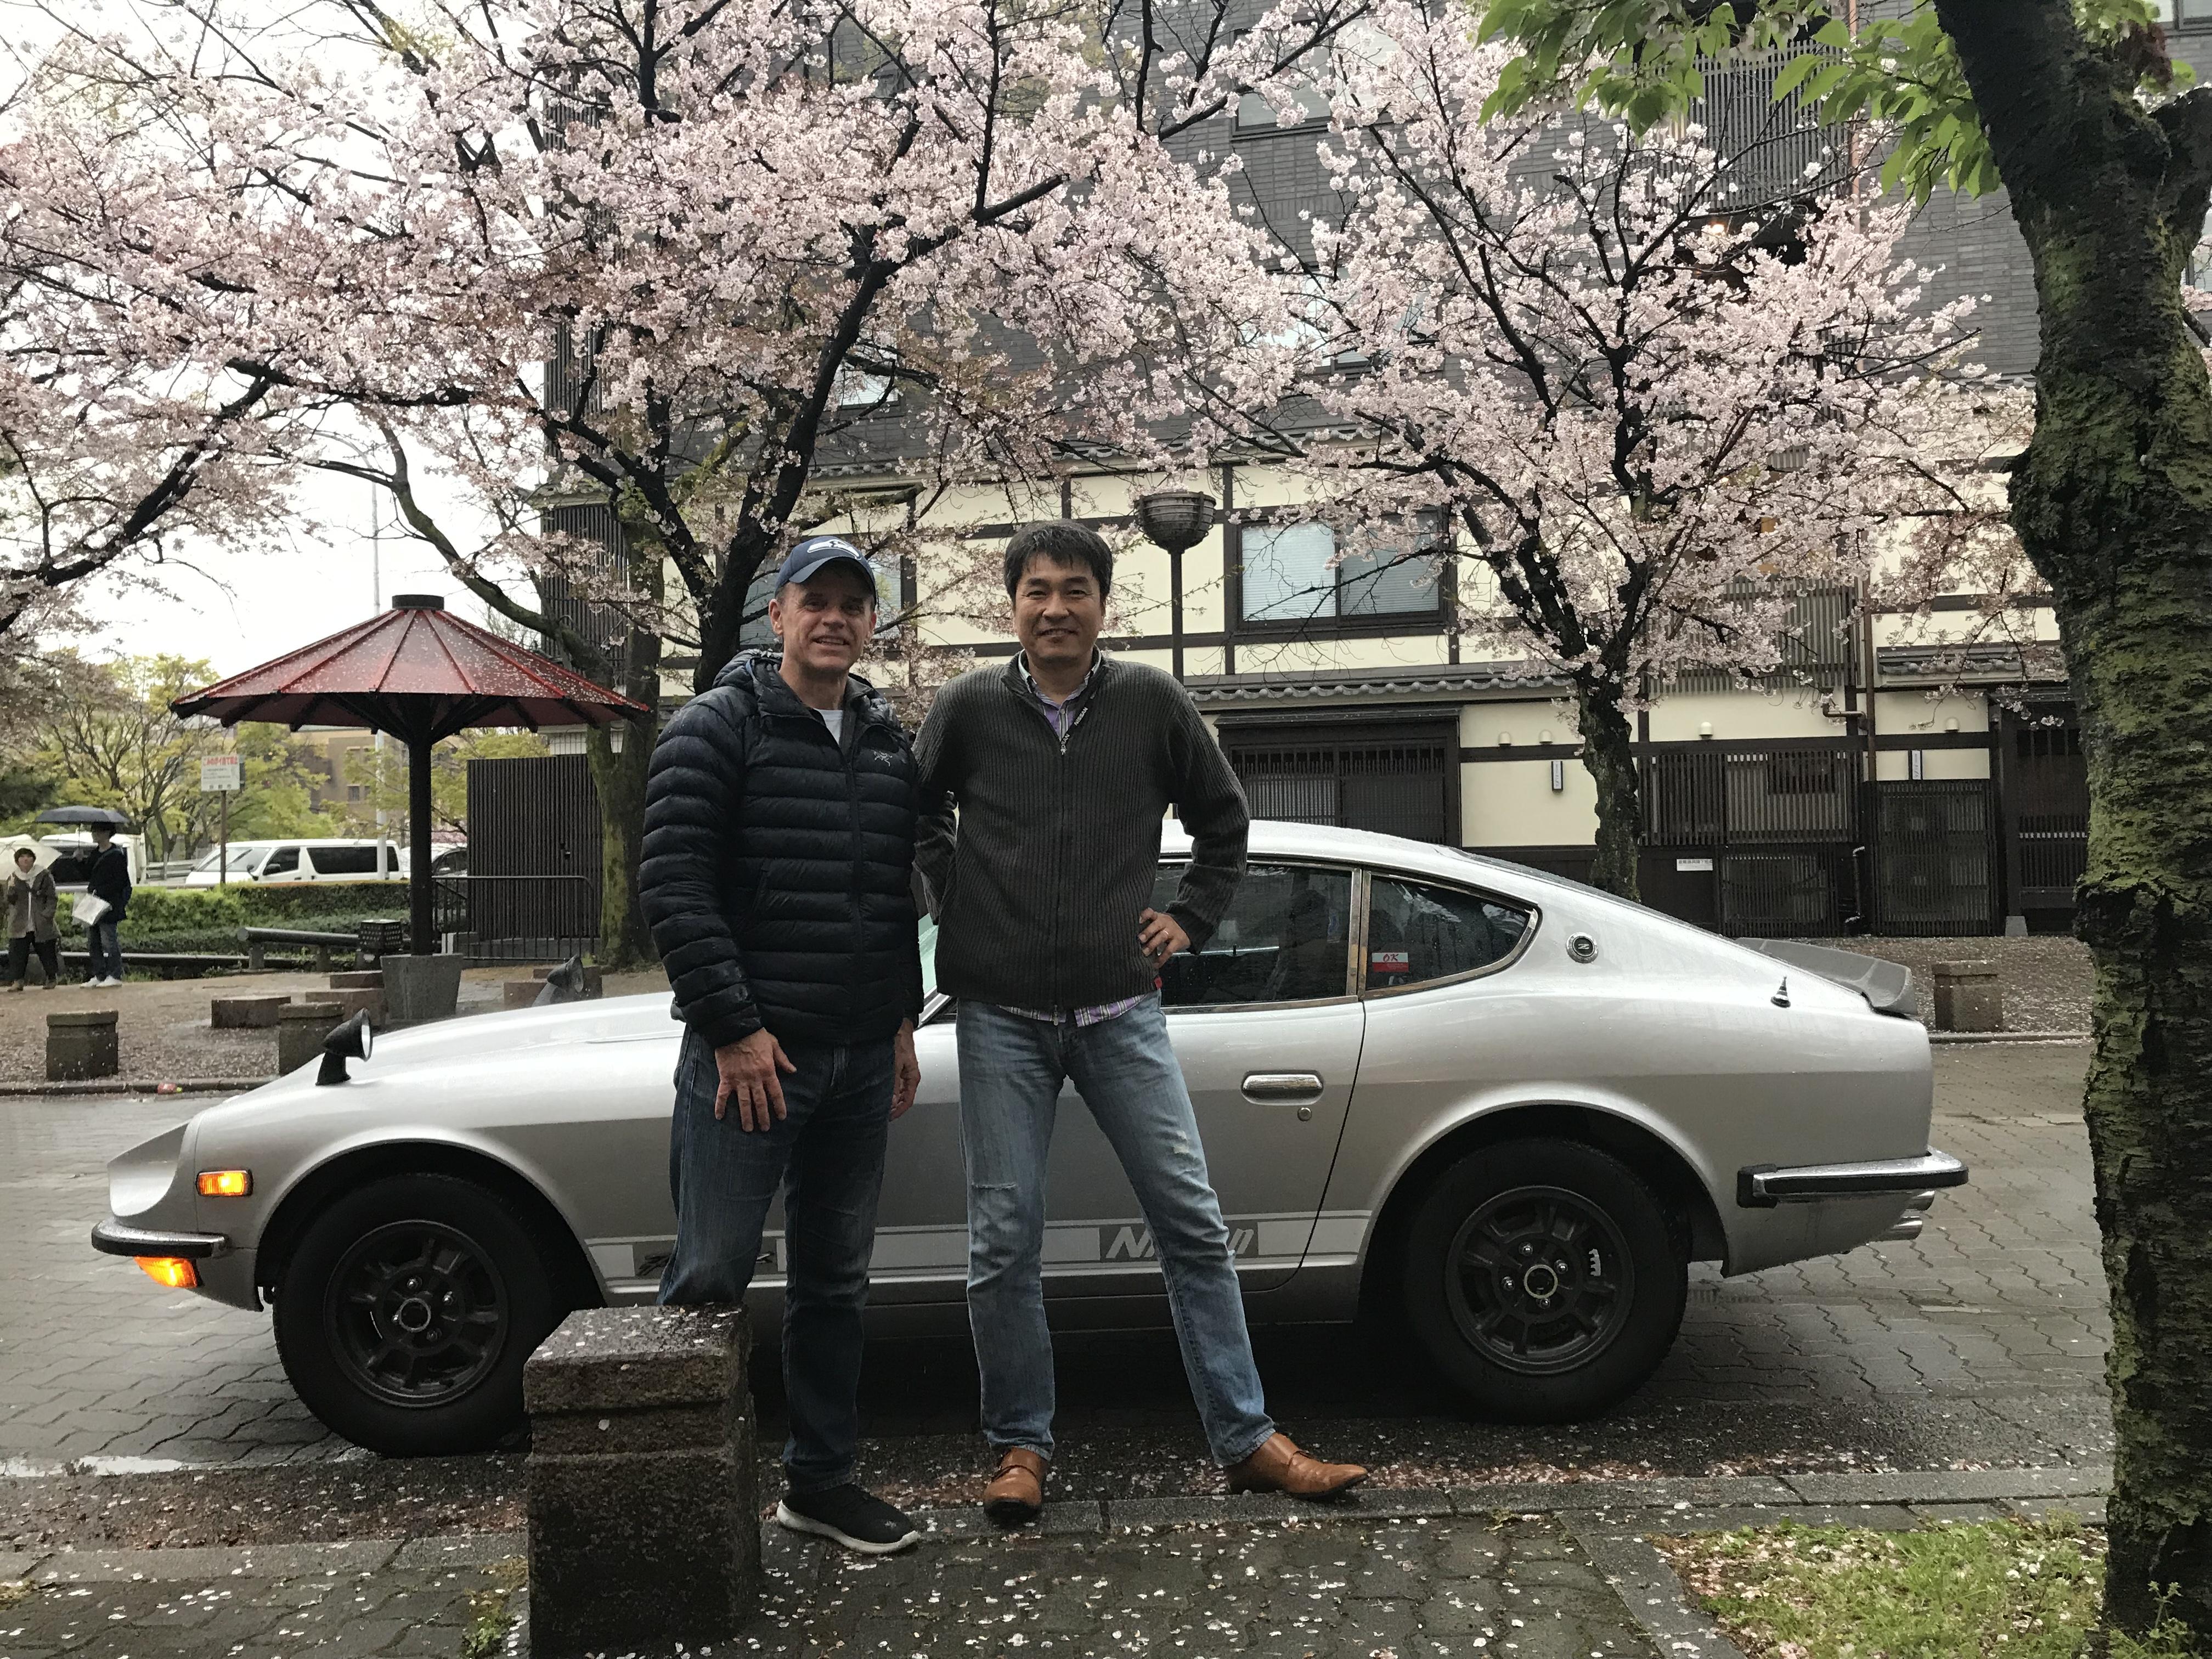
1 pointHi all, just wanted to post some status of my trip to Japan. I was able to meet @kats and we took a drive in his Fairlady Z432. Man what a great car! It’s in great shape and Kats knows how to take car of his cars. We met in Kyoto as I arrived, with my family, to our hotel. Kats lives about 30 minutes away from Kyoto and drove the car up just to visit with me. He has 4 Z’s and asked me which one I wanted to see (and drive). Since I’ve never seen a Z432, it was an obvious choice. We spent about 20-30 minutes ogling the car before he let me drive it around the block. I don’t have an international drivers license, so he took the controls and we went for an extended drive around the city. I’ll post more about my observations when I am able to sit down at a computer, but I wanted to share a few pics. What a great time, and I wanted to personally thank Kats for taking time out of his busy schedule to meet with me. As you can see, it’s springtime in japan and the cherry blossoms are in full effect!

 1 point
 -
1 pointhttps://www.khaleejtimes.com/international/europe/motorist-fined-for-driving-shiny-gold-porsche1 point
-
Yeah I could see that with a LSX swap, but a standard 350 and auto? The rest is just the creators “opinion”. I guess he did ok from an auction perspective. ?1 point
-
Plenty of unique details in an Estonian S30. http://www.speedhunters.com/2019/04/devil-z-estonian-way/
 1 point
 -
Thank you guys. I ended up fixing this issue by replacing the wheel cylinder. next up is changing out the differential fluid. I bought Mobil 1 75w-90. I didn’t find much info about this on the internet for our diffs, but should this work fine or should I return it and go with Redline?1 point
-
1 point
-
1 pointFeeling good about 1970, green, and buying those quarters if this holds up ....1 point
-
any way you go about it, its always tough, like ZH said a little lube goes a long way, I think part of the problem is getting correct sized fuel injector hose. But yea taking the entire thing off is easy getting it all back on, not so much. One thing to watch for is fuel leaks, anytime you mess with it just make real sure there are no leaks. I generally will pop the hood every time I take it for a drive at the end of the day and while idling do a quick visual inspection.1 point
-
If you've already done the other hoses and have already installed new injector seals and don't have any leaks, just do it while it's on the engine. The key to making it easy is to get the hose lengths right, not too long, then get the rail ends lubed up (gasoline actually works well) before sliding the hoses on. Slide one short hose length way down as far as it will go, then stick the FPR end in, squeeze the other hose in between the rail and the FPR, then slide everything to the right spots for clamping. Don't forget to put the hose clamps on at the appropriate times. It's a pain to get everything right and realize there's no clamps on the hoses.1 point
-
Yeah, I was going to play along. I suspected you were too low.1 point
-
1 pointI was one of the earliest users of the 123 ignition in a Z car and so have quite a bit of experience with it over the years that I have used it. I can also tell you that I had a similar advance problem at idle with my initial install. If I remember correctly, and according to the install instructions, everything needs to be at TDC on the engine. You install the 123 distributor, apply power, and turn it until an LED turns on and that's where you are supposed to lock the distributor in place. However, after some trial and error, I figured out that at idle I was at about 30 degrees advanced, and this was with a flat 0 degree advance programmed into the 123 distributor. I ultimately concluded that the distributor was not rotated to the proper point for a 0 degree advance, despite the fact that it had been installed properly (with the LED) as per the instructions. So what I ended up doing was unlocking the distributor, ensuring it was programmed for a 0 degree advance (up to about 1500 RPM's), and rotated the distributor until I was at 0 degrees as measured with a timing light. I then programmed in some additional advance at idle (I believe about 12 degrees) and double checked it with a timing light to ensure it agreed with the programmed values. So for some reason the LED install instructions did not work in my application, but by setting the initial timing of the 123 like you would a normal distributor, I was able to get it to work as expected. And the ease of changing timing curves is awesome. In any case, hope that helps. If you have any other questions on this just let me know. Mike.1 point
-
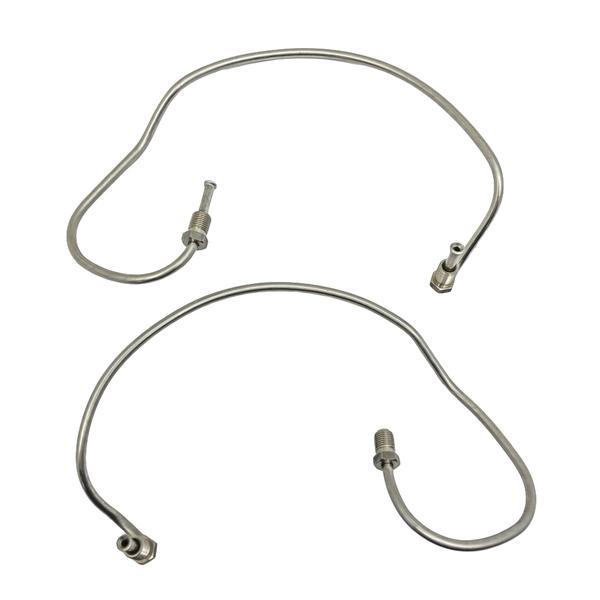
There is also this option, in stainless .... Available from ZcarDepot & MSA I believe. For late 280z, a slight bend is needed to line up with the different wheel cylinder angle of the port for the fitting. Somewhere on here is a thread I did a while back, replaced both the bridge lines due to one flex hose damaged & could not release it for the bridge line.
 1 point
 -
I had a rear brake line rust out on my daily driver S10 last fall. I had to buy a tubing bender (just the cheap $10 one), a tubing cutting (around $5), and the double flare tool (about $25). Now you can make any brake line you want. You'll need the right size line and nut. PRACTICE making your double flares on scrap lines first... don't ask how I know... ALSO, in case you read about it, compression fittings ARE NOT for brake lines, even though parts stores sell them as such1 point
-
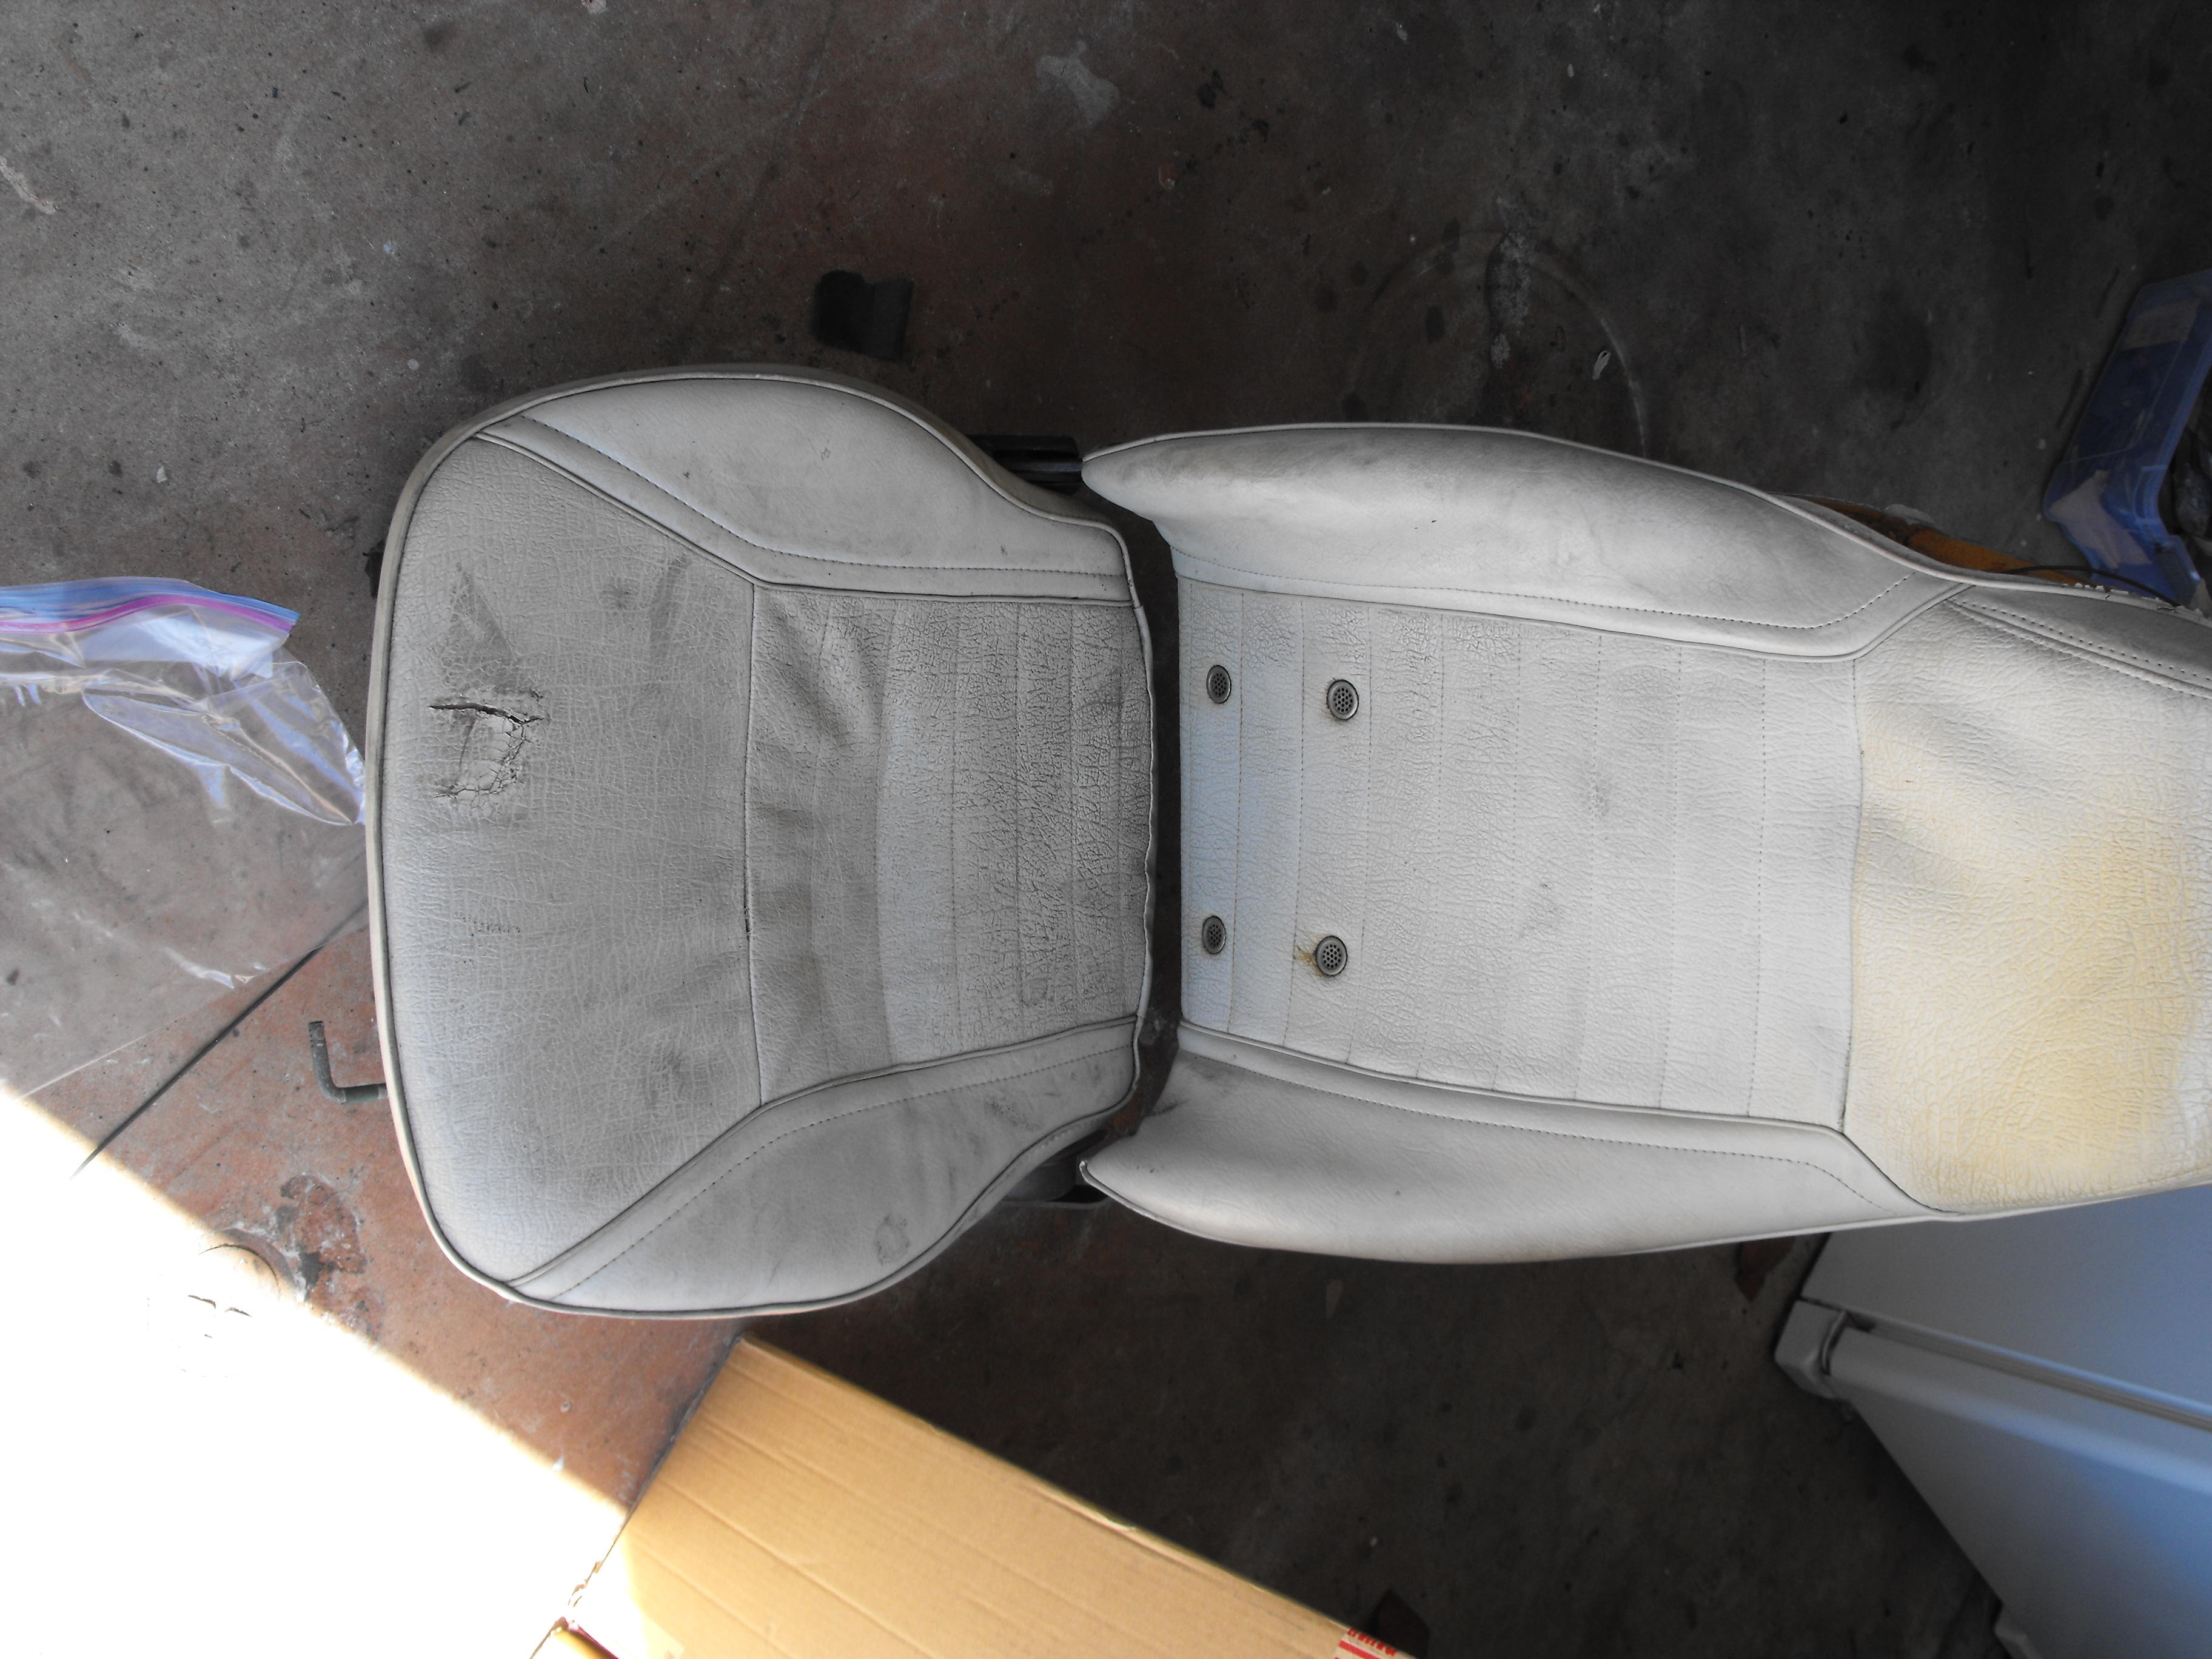
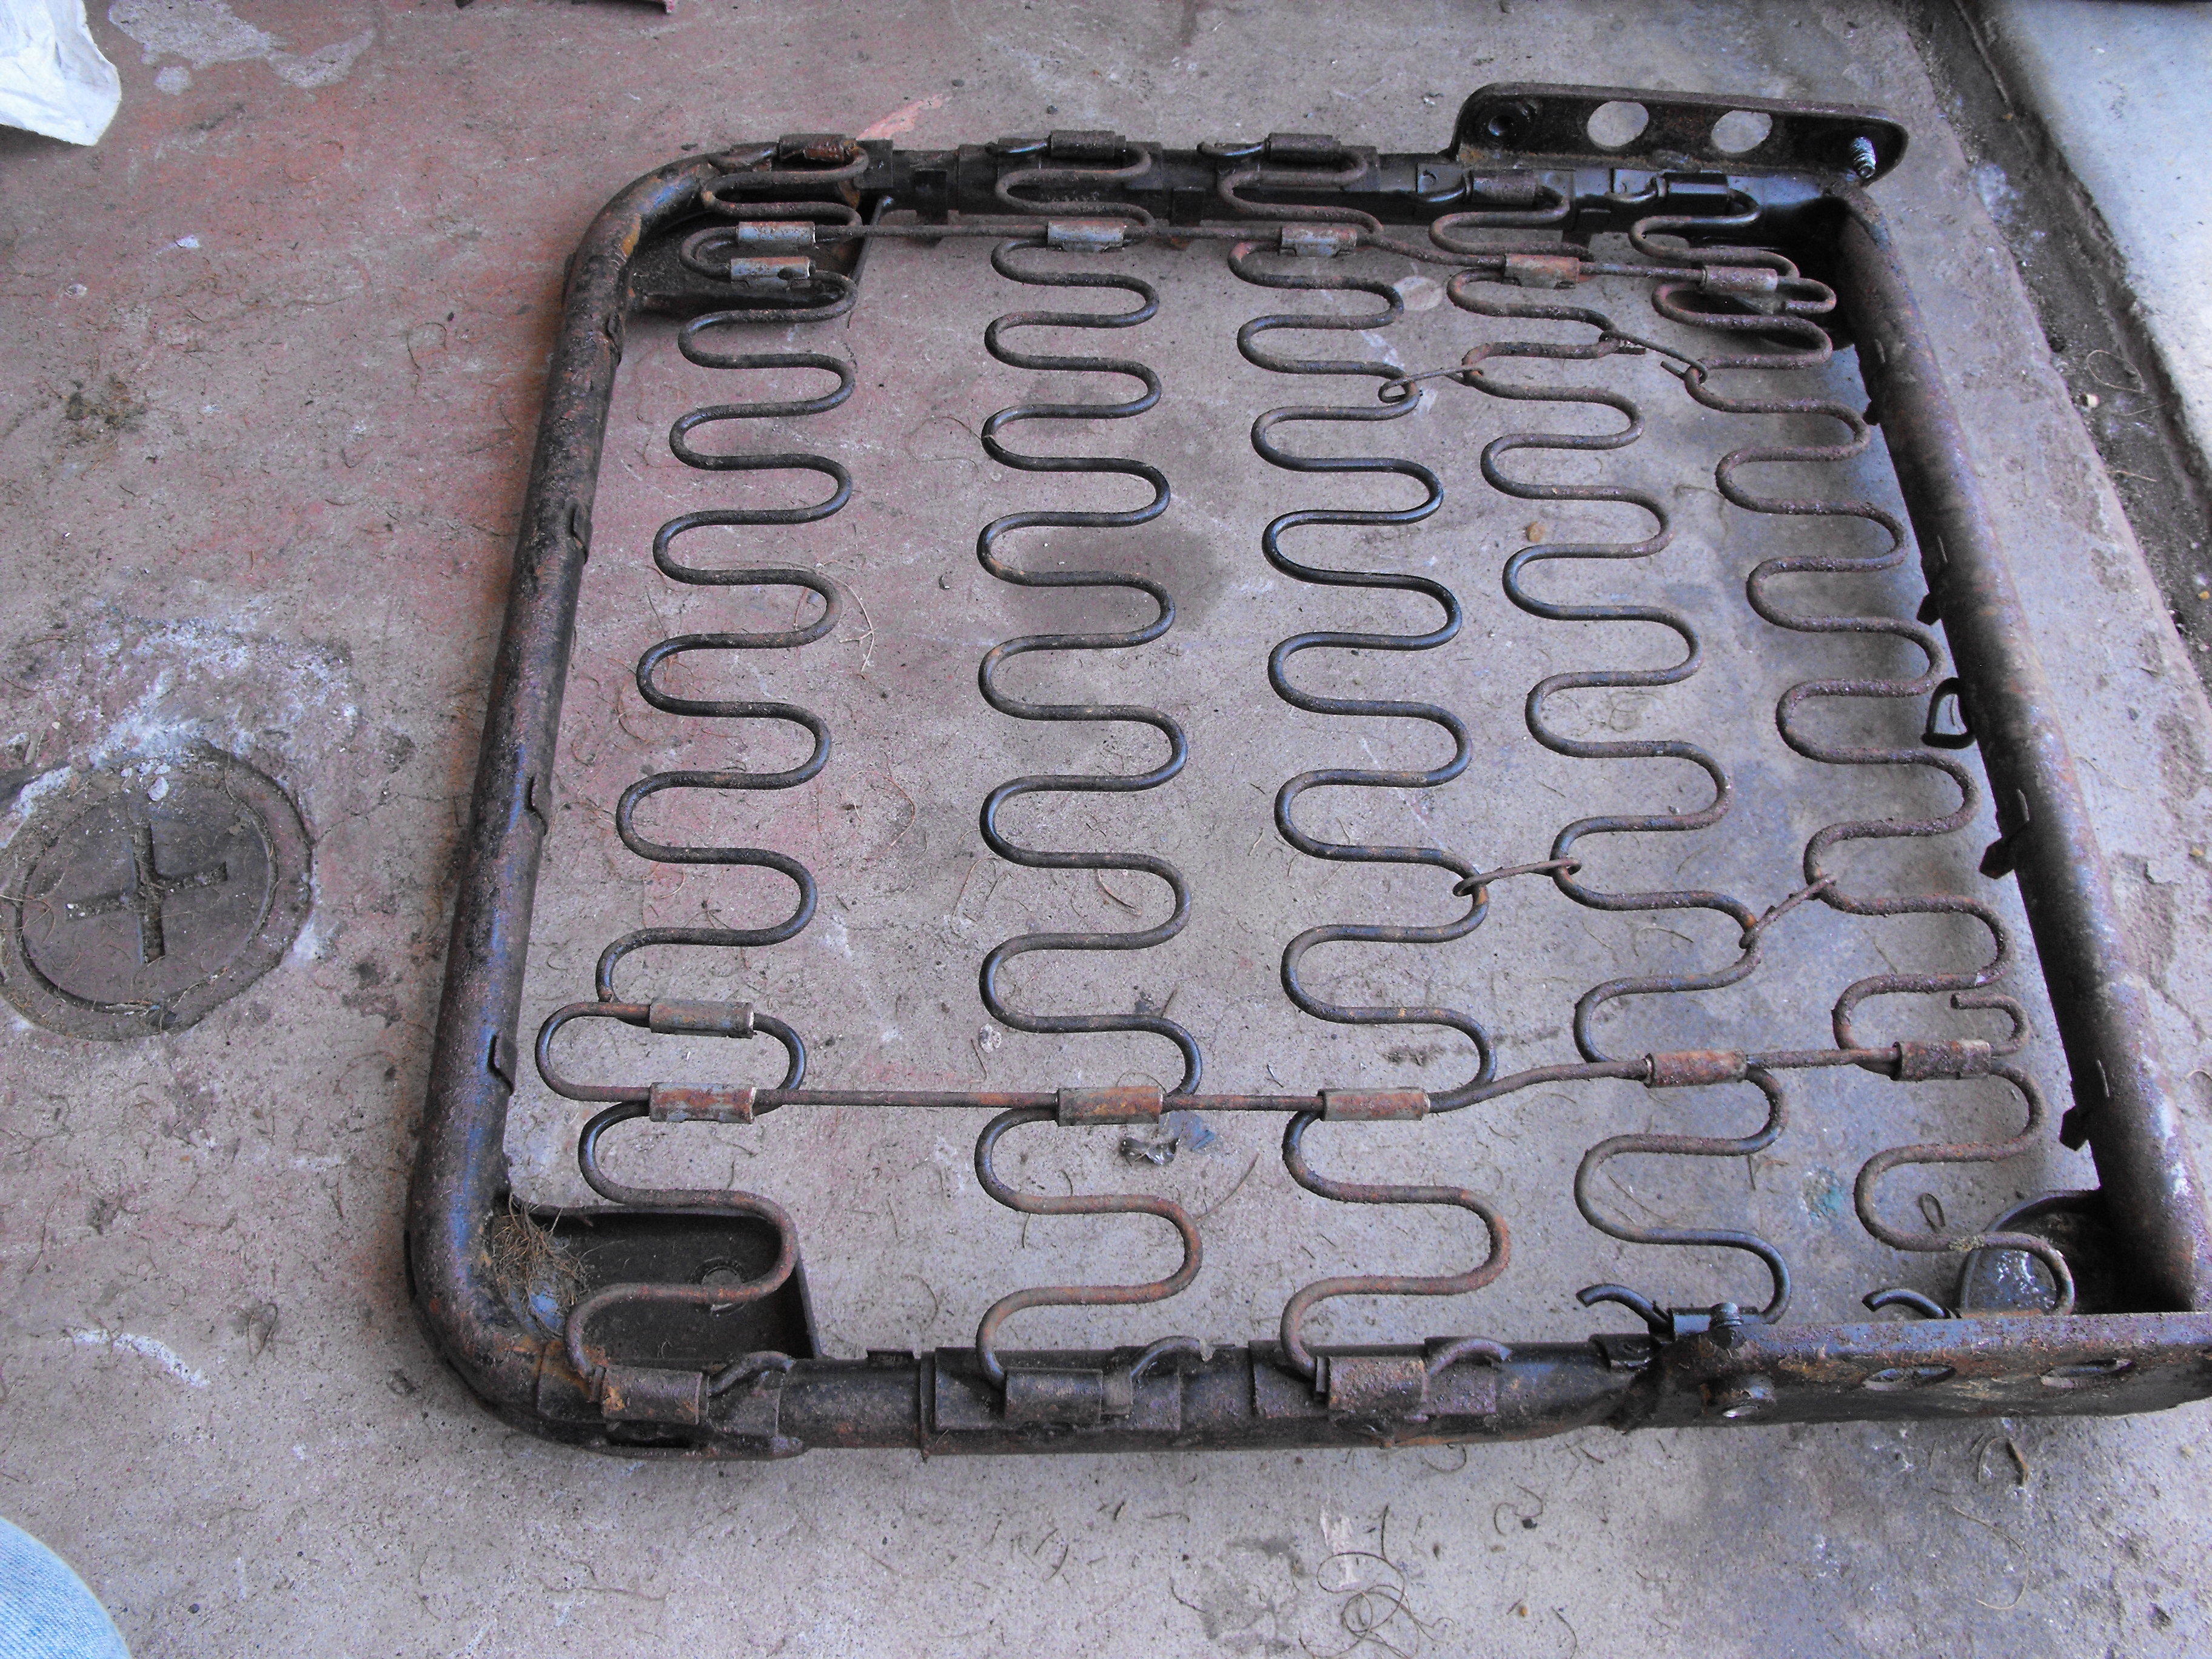
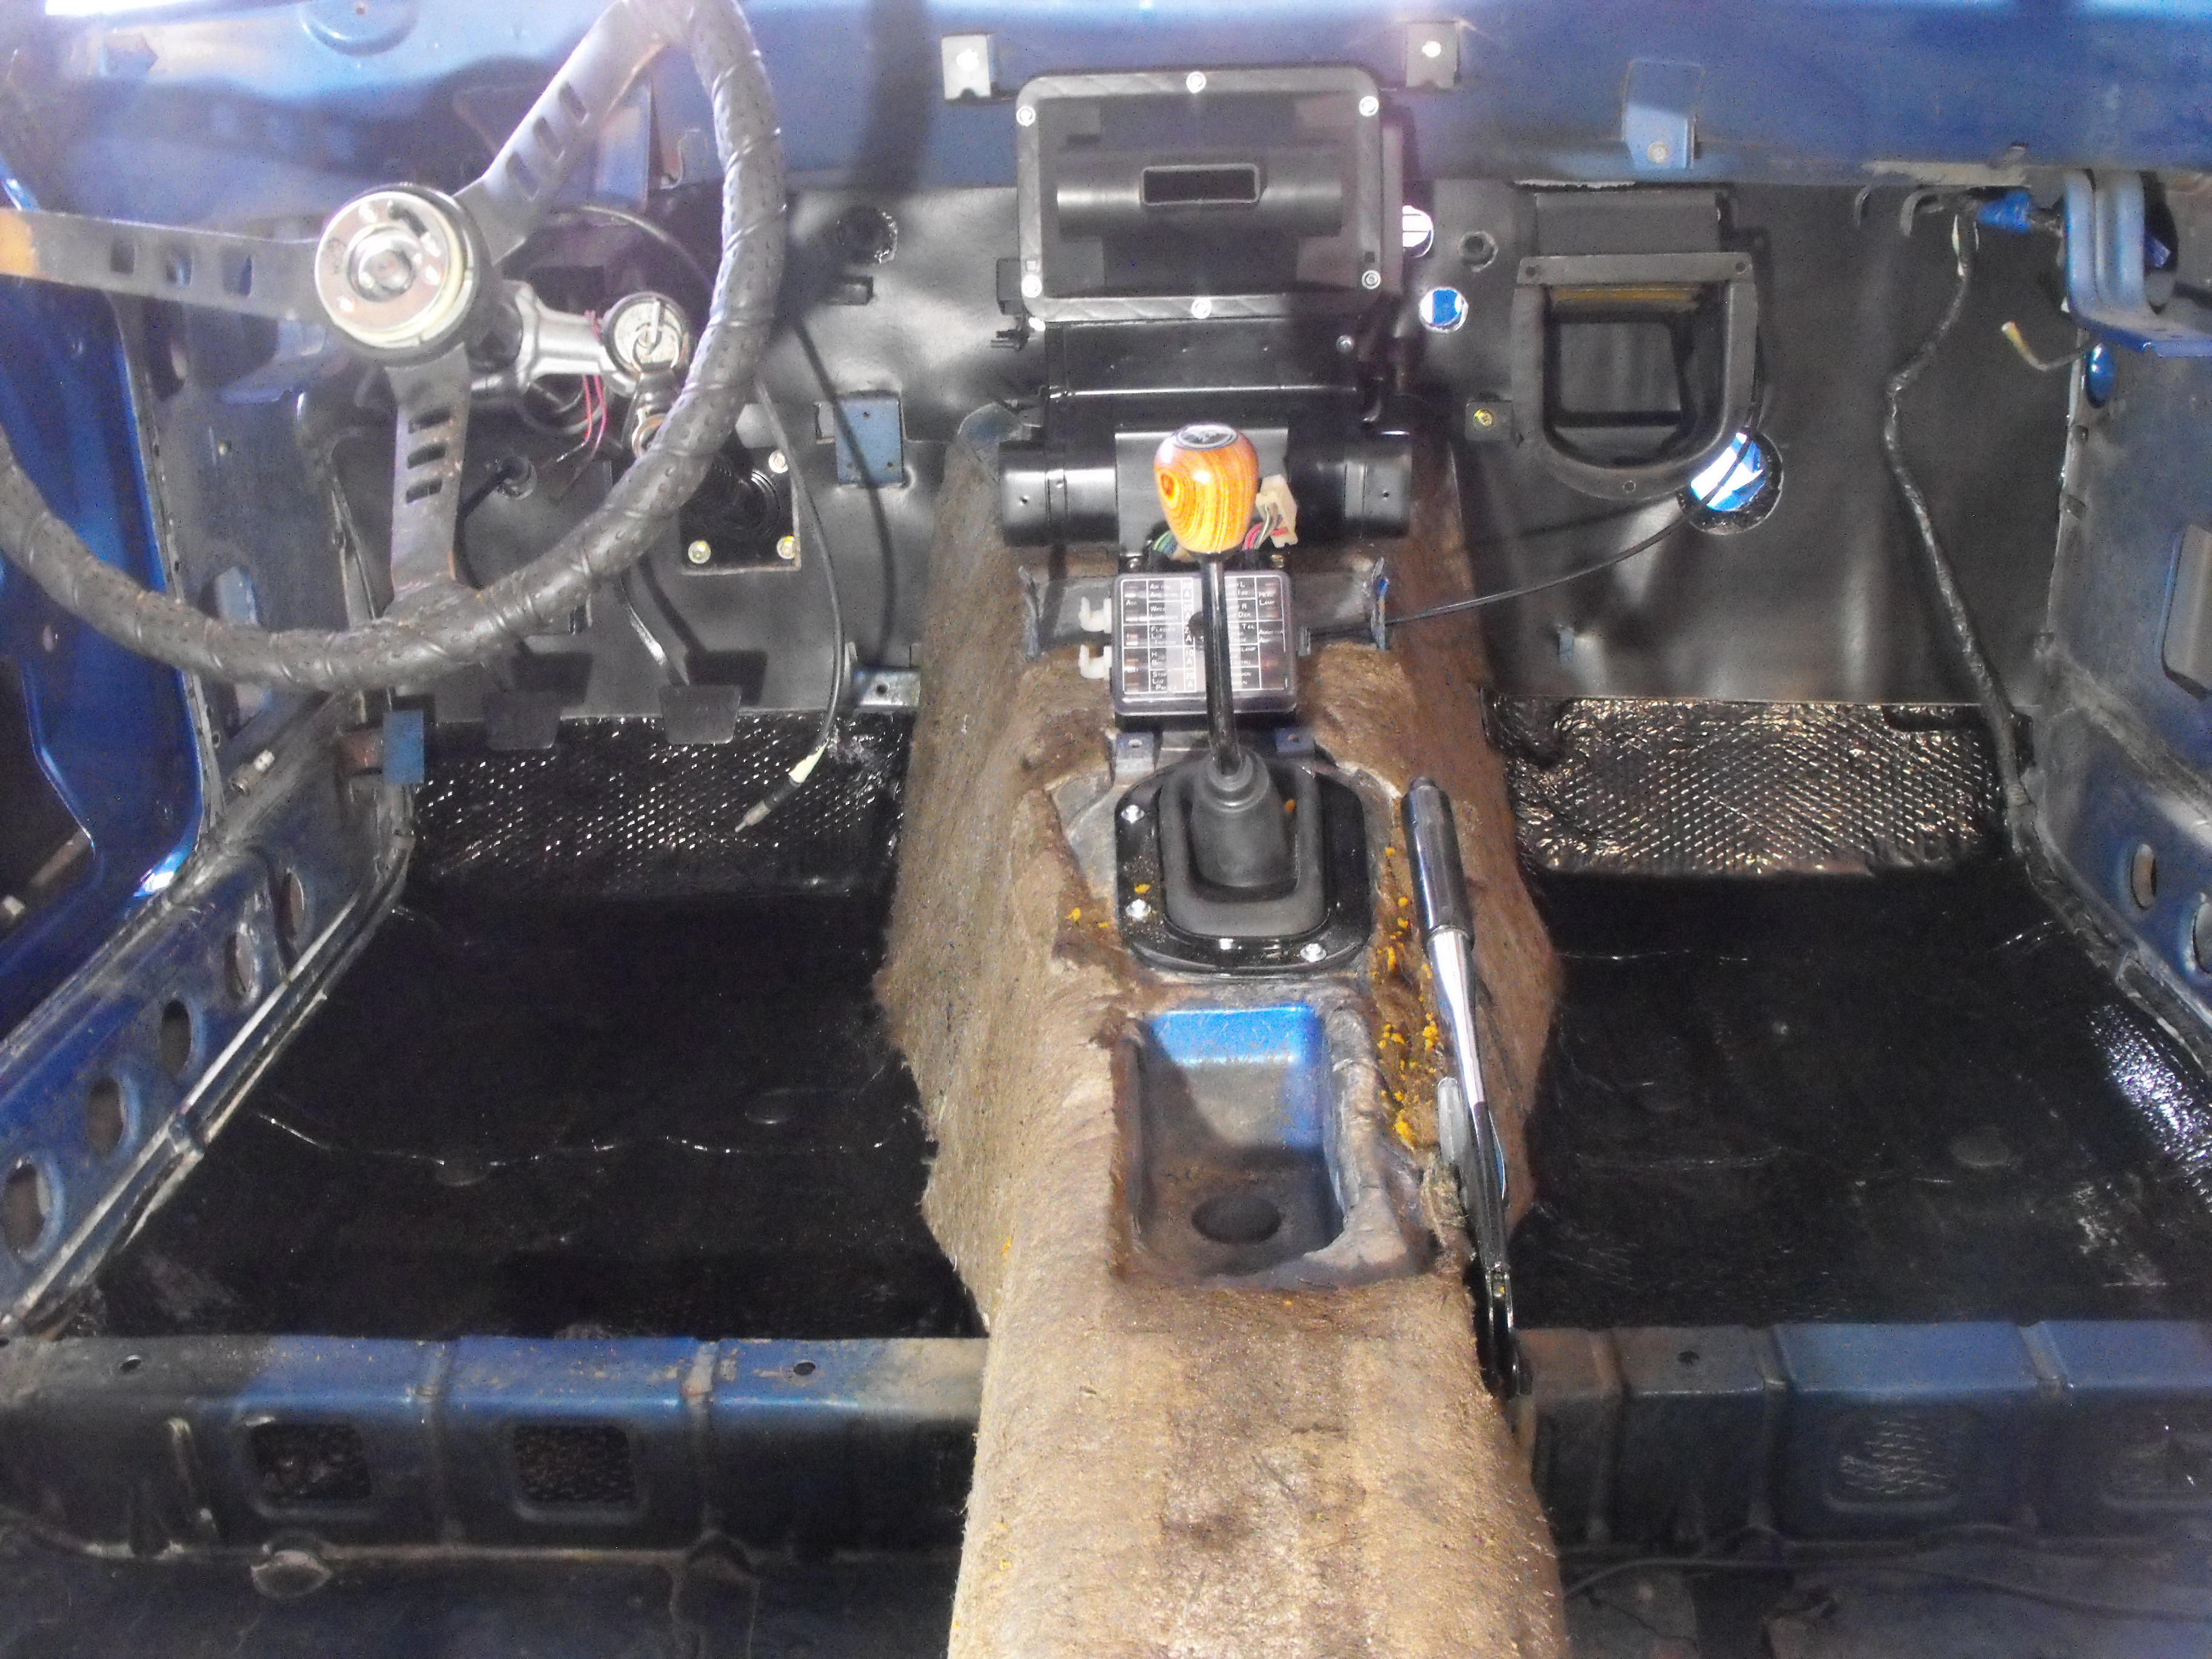
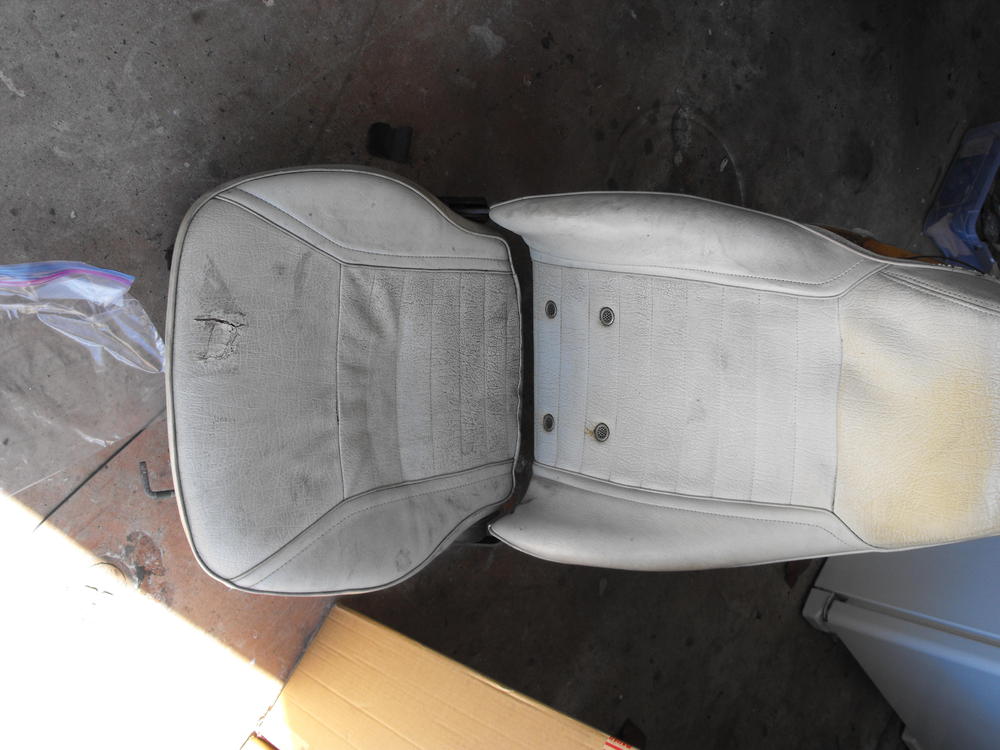
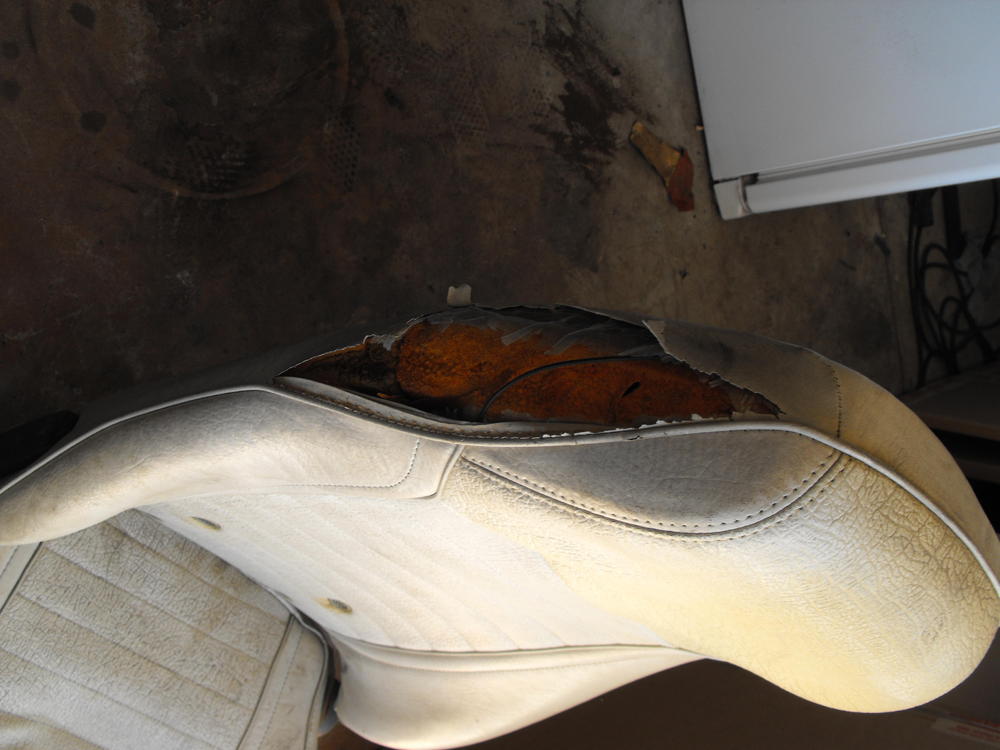
Made some more progress this week. Got the soundproofing in on the doors, firewall and the front floors. I used the Noico mat because I like the weight and flex of the material. It makes a huge difference in the interior sound level when the car is running. I also like the feel and sound of the doors when they close with the Noico mat. Without the mat, the doors have that tinny 'tink' sound when you open and close them (drives me up the wall). With the Noico mat installed, the sound is like a modern car. You get the solid, deep 'thunk' when you close the door. On my yellow Z, I have the mat in the drivers door and nothing in the passenger door just for demo purposes. People are pretty amazed at the the difference in sound. Started the heater and fan install, got the shifter installed along with a new rubber boot. Also got the handbrake installed. Cleaned and installed the speedo cable and then disassembled the seats. That was a task. The lower bolts were rusted in pretty good and I had to drill the head off of three of them. After that, used the vise grips to thread the 'headless' flat head' screw out the far side of the fitting. The rear frame of the seat was pretty corroded, so I will drop that off at the powder coater tomorrow along with the stock rims that I picked up last week. I removed the old interior vinyl around the door pillars and roof headliner. All the new vinyl is in along with the seat foam and vinyl. I was tempted to install the headliner today, but will wait till I am a little bit farther along. The snow white interior will probably pick up marks pretty easy so I will definitely be careful with it. Here are a few pics..


 1 point
 -
Take the old one to the store and match it up. They'll have precut, flared, and nutted lengths on the shelf. You'll have to bend it yourself. I used wood screws in a board to get the curves right and avoid kinking the line. It's not hard if you have the old one right there for comparison.1 point
-
1 pointis it idling OK now? Going back to the beginning, it seems to me that this was the sequence, right: 1. car was all working fine, 2. you took carbs off to fit new exhaust 3. You fitted the exhaust and put the carbs back on 4. The car ran poorly 5. You fiddled with float levels, mixture screws and more 5. Eventually discovered that the carb linkage was not set right and front carb wasn't opening at all below 2k I personally think it's unlikely that you simultaneously developed problems with fuel supply or ignition. Fwiw that 2 psi fuel pressure is fine. I think all you've got to do is really balance the carbs properly (you don't need Ztherapy for this) and make sure those float levels and mixture settings are right. Colourtune is a great tool to help with the mixture. Eventually you will need a decent heat shield between that zstory manifold and the carbs. Without it the fuel in the float chambers will boil.1 point
-
1 point
-
https://www.ebay.com/itm/Choro-Q-TAKARA-TOMY-NISSAN-FAIRLADY-Z-Limited-15-Set-HS130-HLS30-240Z-F-S/303036340889?epid=1977125165&hash=item468e5f9a99:g:nNUAAOSwqoxcFwfH:rk:1:pf:01 point
-
1 pointWe had a 1975 280Z "Museum Car" in the shop for a few weeks a few years ago (4500 original miles, then kept in an auto museum in PA - shipped from the museum to our shop...). The color was actually much lighter than I thought the original color would be (it shows a tad darker in these pics than IRL- the top of the license plate light actually shows the color best - that's not merely "light flare"). Here are some crappy pics I took of it:
 1 point
 -
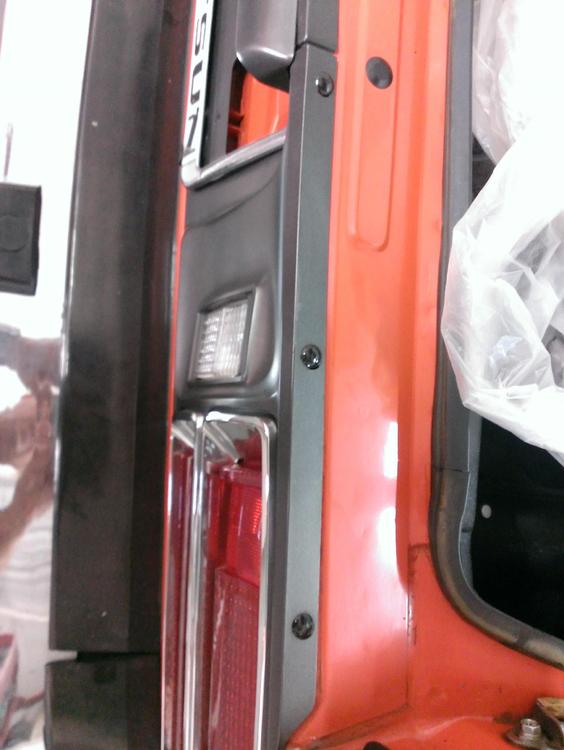
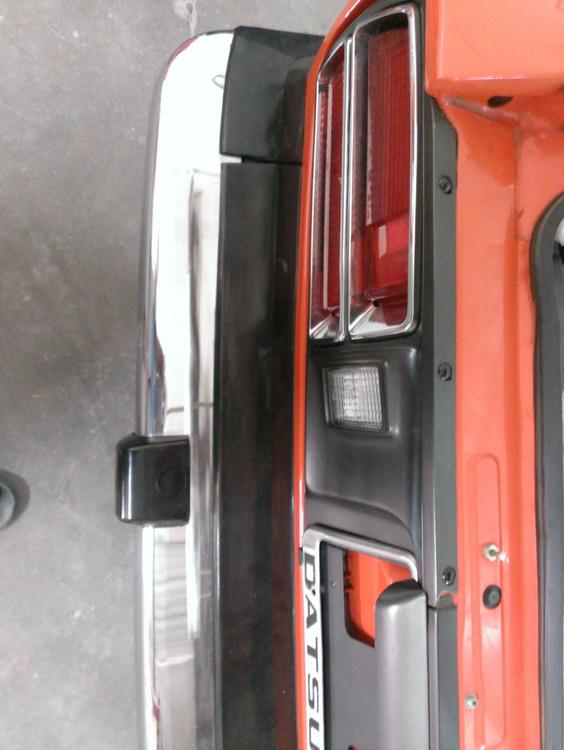
1 pointYes, one of the Z car questions for the ages!! First, There isn't just ONE color. What the hell? After almost 50 years of Z cars I've discovered that there is often some variation in the 240 rear panel, hub cap and grille color, yes, and tag light assy, between cars. Light charcoal right up to a fairly dark charcoal. Datsun wasn't at all strict about keeping the color exactly the same throughout the entire 69-73 range of 240s. Why should they? There was a long line of customers with cash burning a hole in their pockets and, more importantly, cars just weren't manufactured to the kind of standards that apply today. I'll give you another example of what I'm talking about. I've seen a lot of 240 air filter housings through the years and I've seen more than a few - from the factory - that didn't have the full compliment of decals. On Tue they ran out of the air filter element replacement schedule decals, what to do!!! Ship em what we got, more decals coming in Thur. No big deal. Back to that hub cap, tail panel and grille color (and TEXTURE) and an example. I have 5 virgin, unused, original wrapping, etc, etc D hubcaps and they are 3 different colors! My point, just don't sweat it too much. As long as the color of your grille, hub caps and tail panels matches and isn't too far from the color of your tag light assy you're good. Now on to the TEXTURE issue. Yes, it should be a bit scratchy/sand papery. How to get that feel. A skilled painter using the right air pressure and distance between gun and object will achieve the right feel. Slightly different story for 74-78. Some other time. Now if I can just find that thread about tie down hooks/brackets. I've done some research in the ancient Datsun files and found some interesting info on the subject.1 point