Leaderboard
-
Captain Obvious
Free Member9Points10,081Posts -
conedodger
Free Member5Points12,513Posts -
motorman7
 Subscriber
 3Points2,228Posts
 -
Patcon
Subscriber3Points11,142Posts


Popular Content
Showing content with the highest reputation on 08/06/2018 in all areas
-
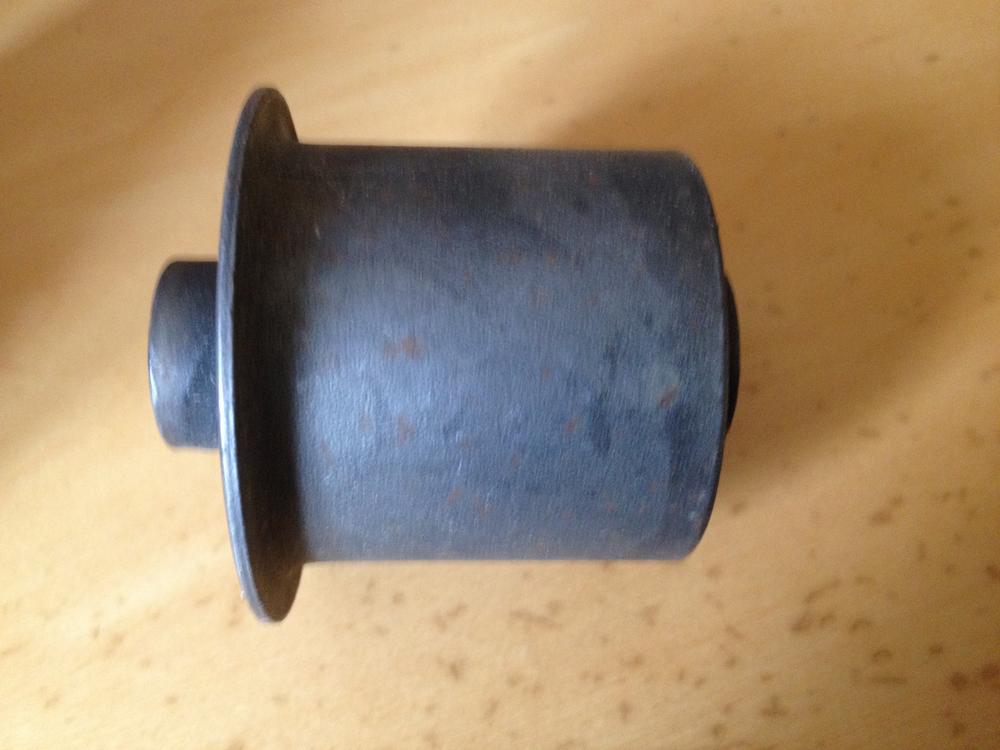
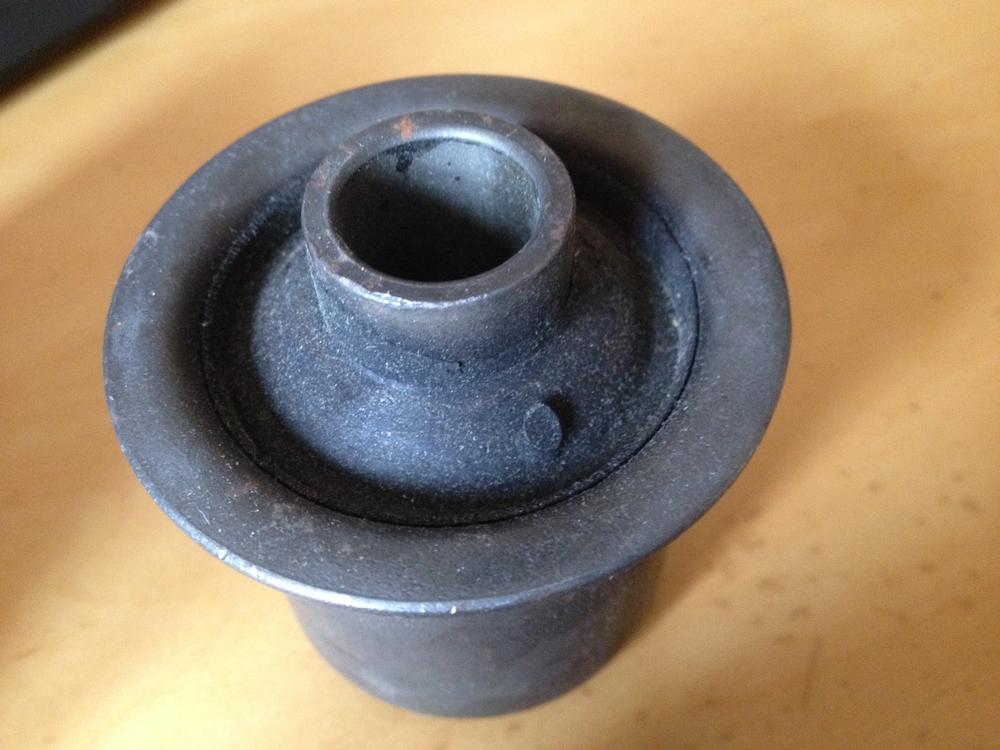
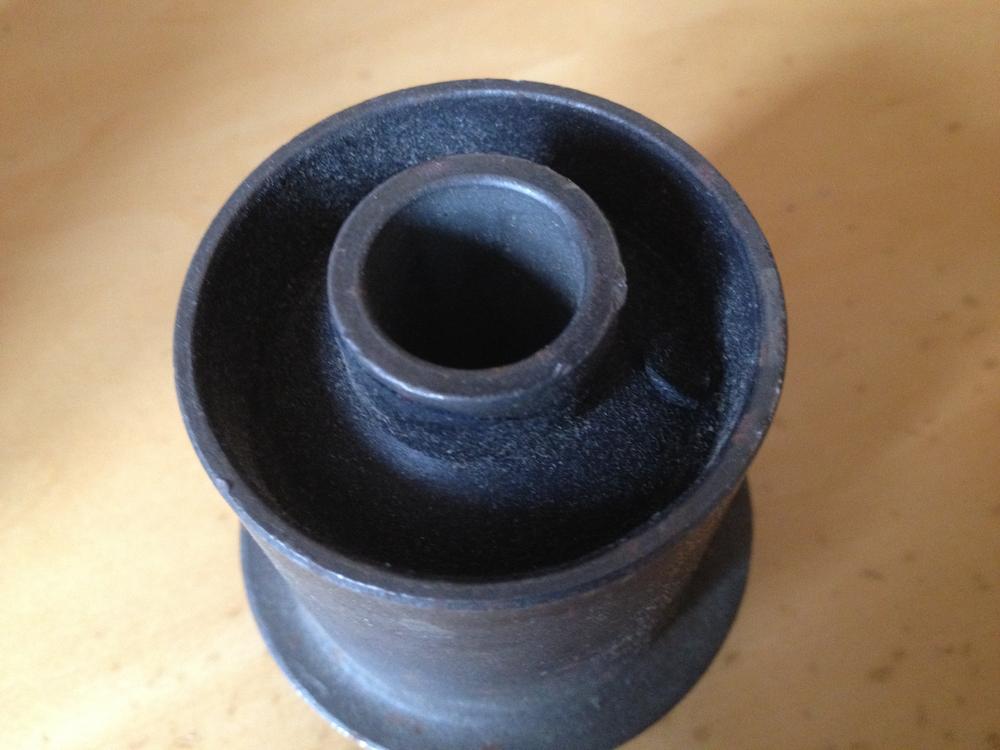
4 pointsThe old single flange design would be a lot easier to replace (because you just press the old one out and press the new one in. The later two flanged design is a little more involved. This is what I did. First, I cut a bunch of slots in one of the flange ends with a thin cutting disk: Then, using a couple punches and a hammer, I peeled up the "petals" of the flanged lip. Worked my way around the bushing: Once those petals were peeled up, you can push the old bushing out of the bar and press the new bushing into place. No pics should be required for those two steps. In order to form the second retaining flange on the new bushing, I made a pair of press forming dies for the hydraulic press. Here's a pic of a new bushing and the dies I made. I made two dies to form the flange in two steps. First flaring step is a simple taper (on the left), and second step flattens the lip after the taper die has bottomed out: Here's another view of the dies. Preliminary taper form on the left, final form on the right.: Once the new bushing is pressed in place, I used the preliminary form to flare the metal outward: And then once the flare was formed, I switched to the final form die: And finished the flare flat into the retaining flange:4 points
-
Yeah, Madkaw, I'm hoping everything goes great with your neck as well. No more boxing or drag racing for you. Safe travels to everyone, and hopefully I'll be able to check in while I'm away. Depends on the internet access availability. That and how much beer is between me and my keyboard.2 points
-
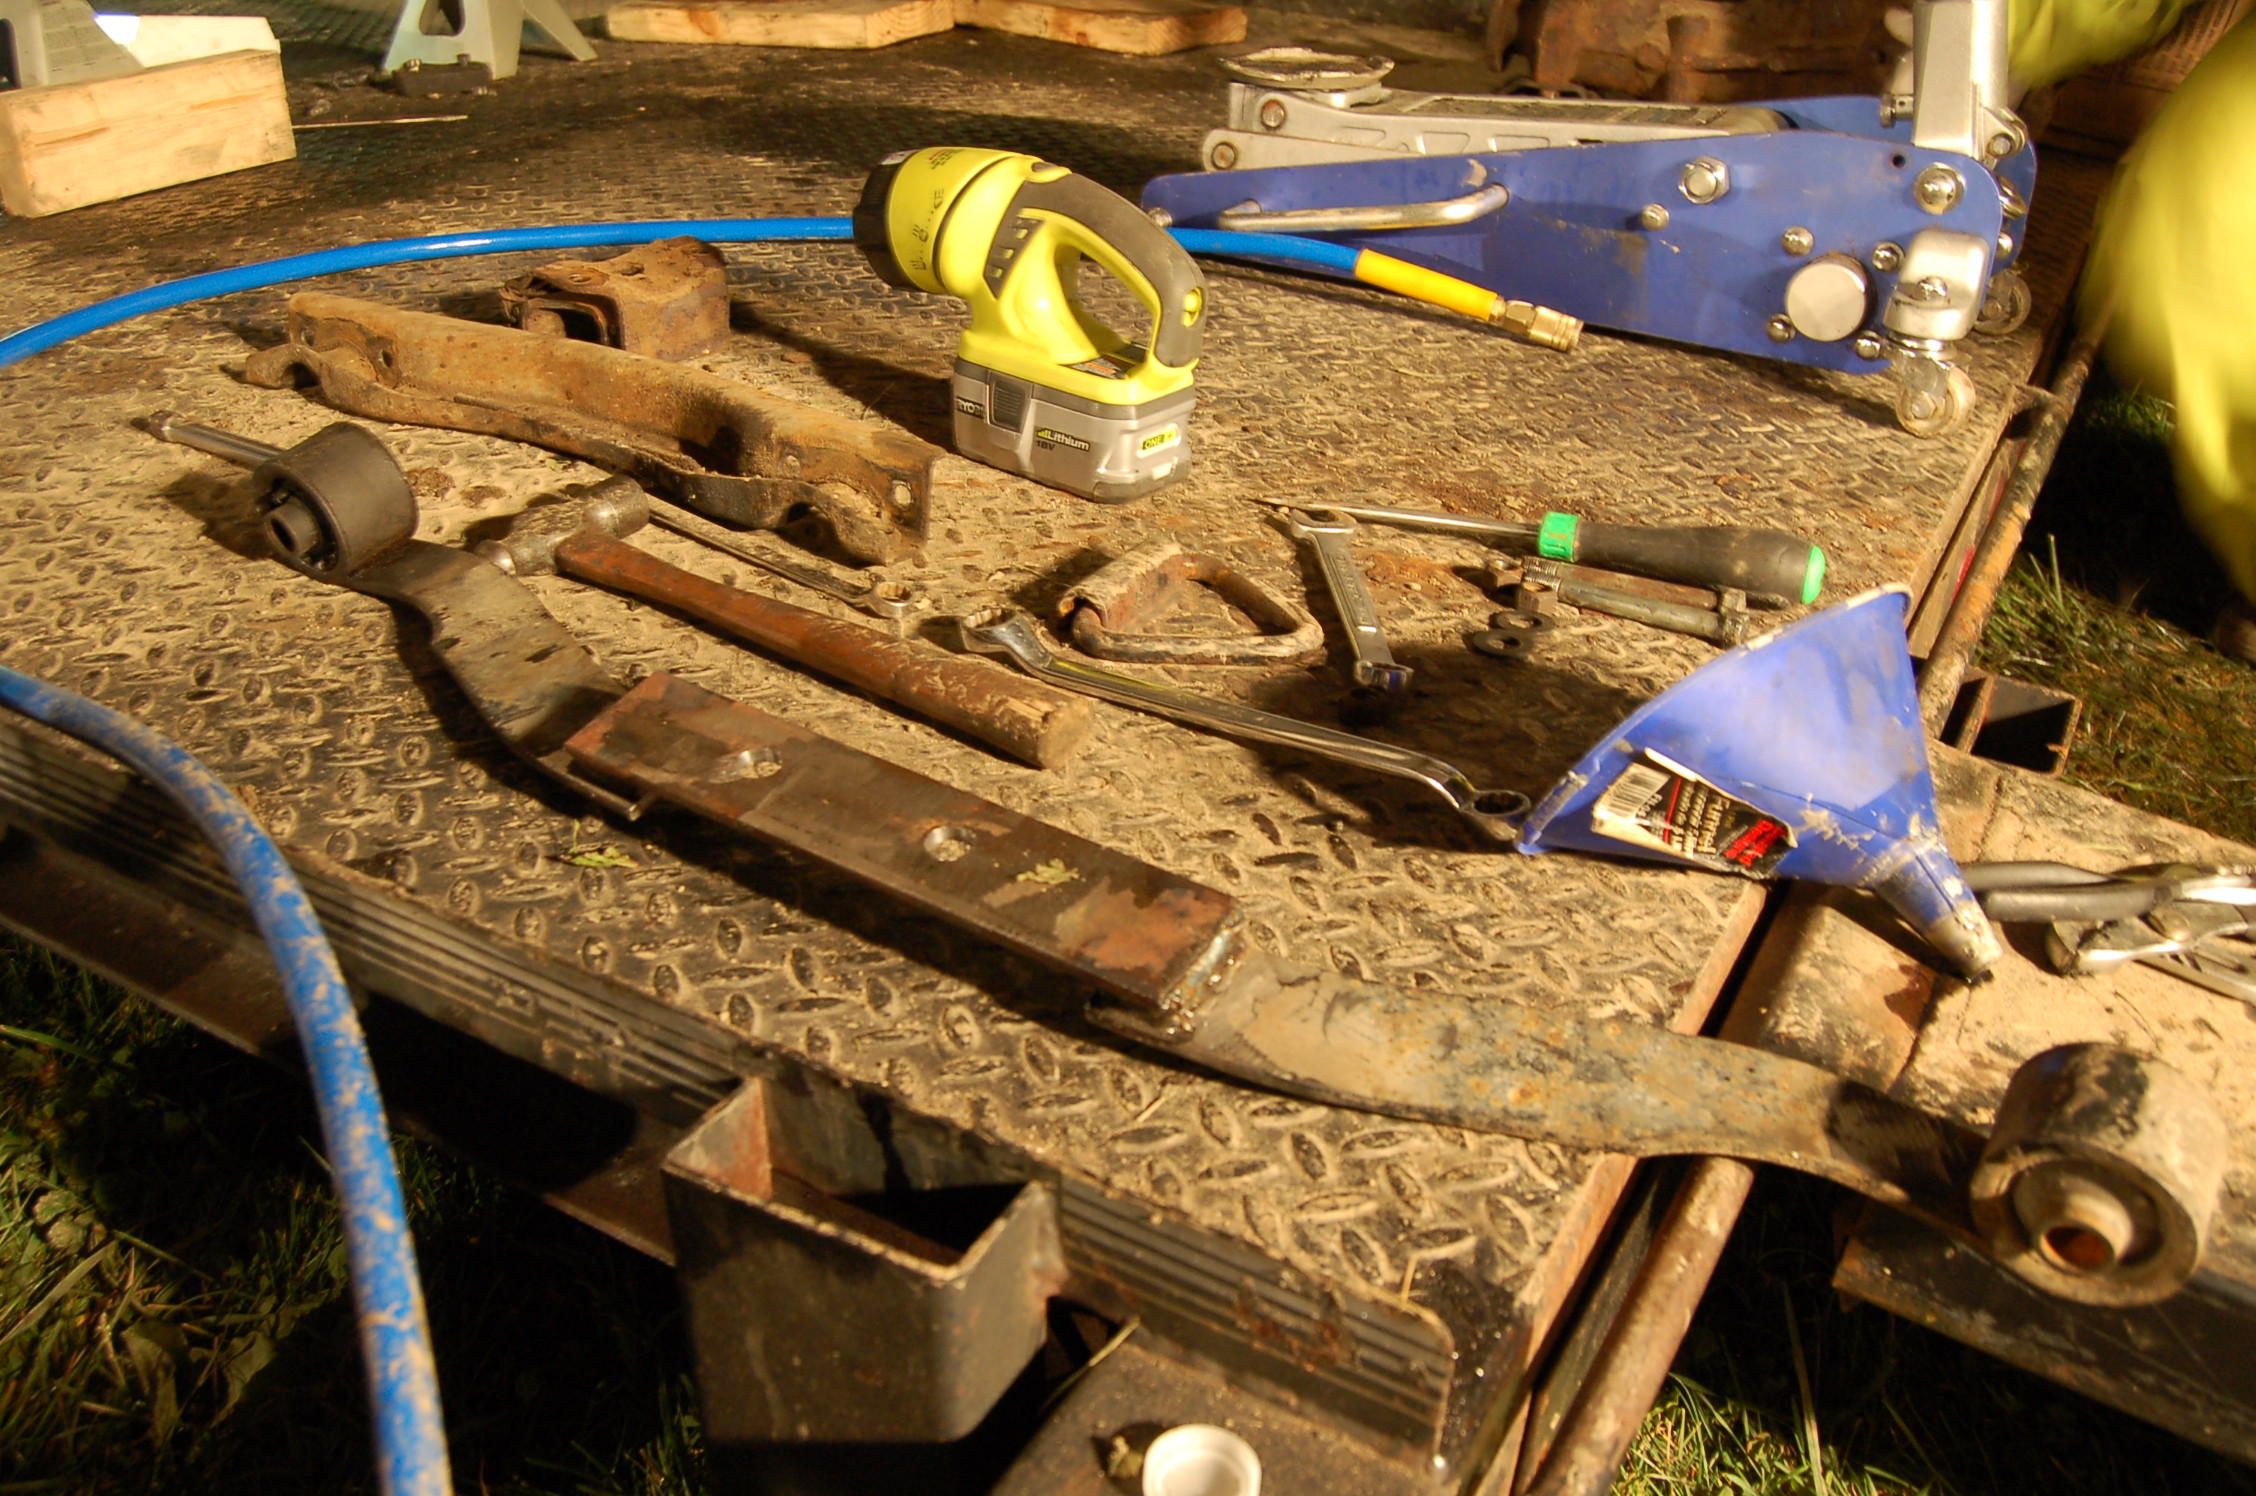
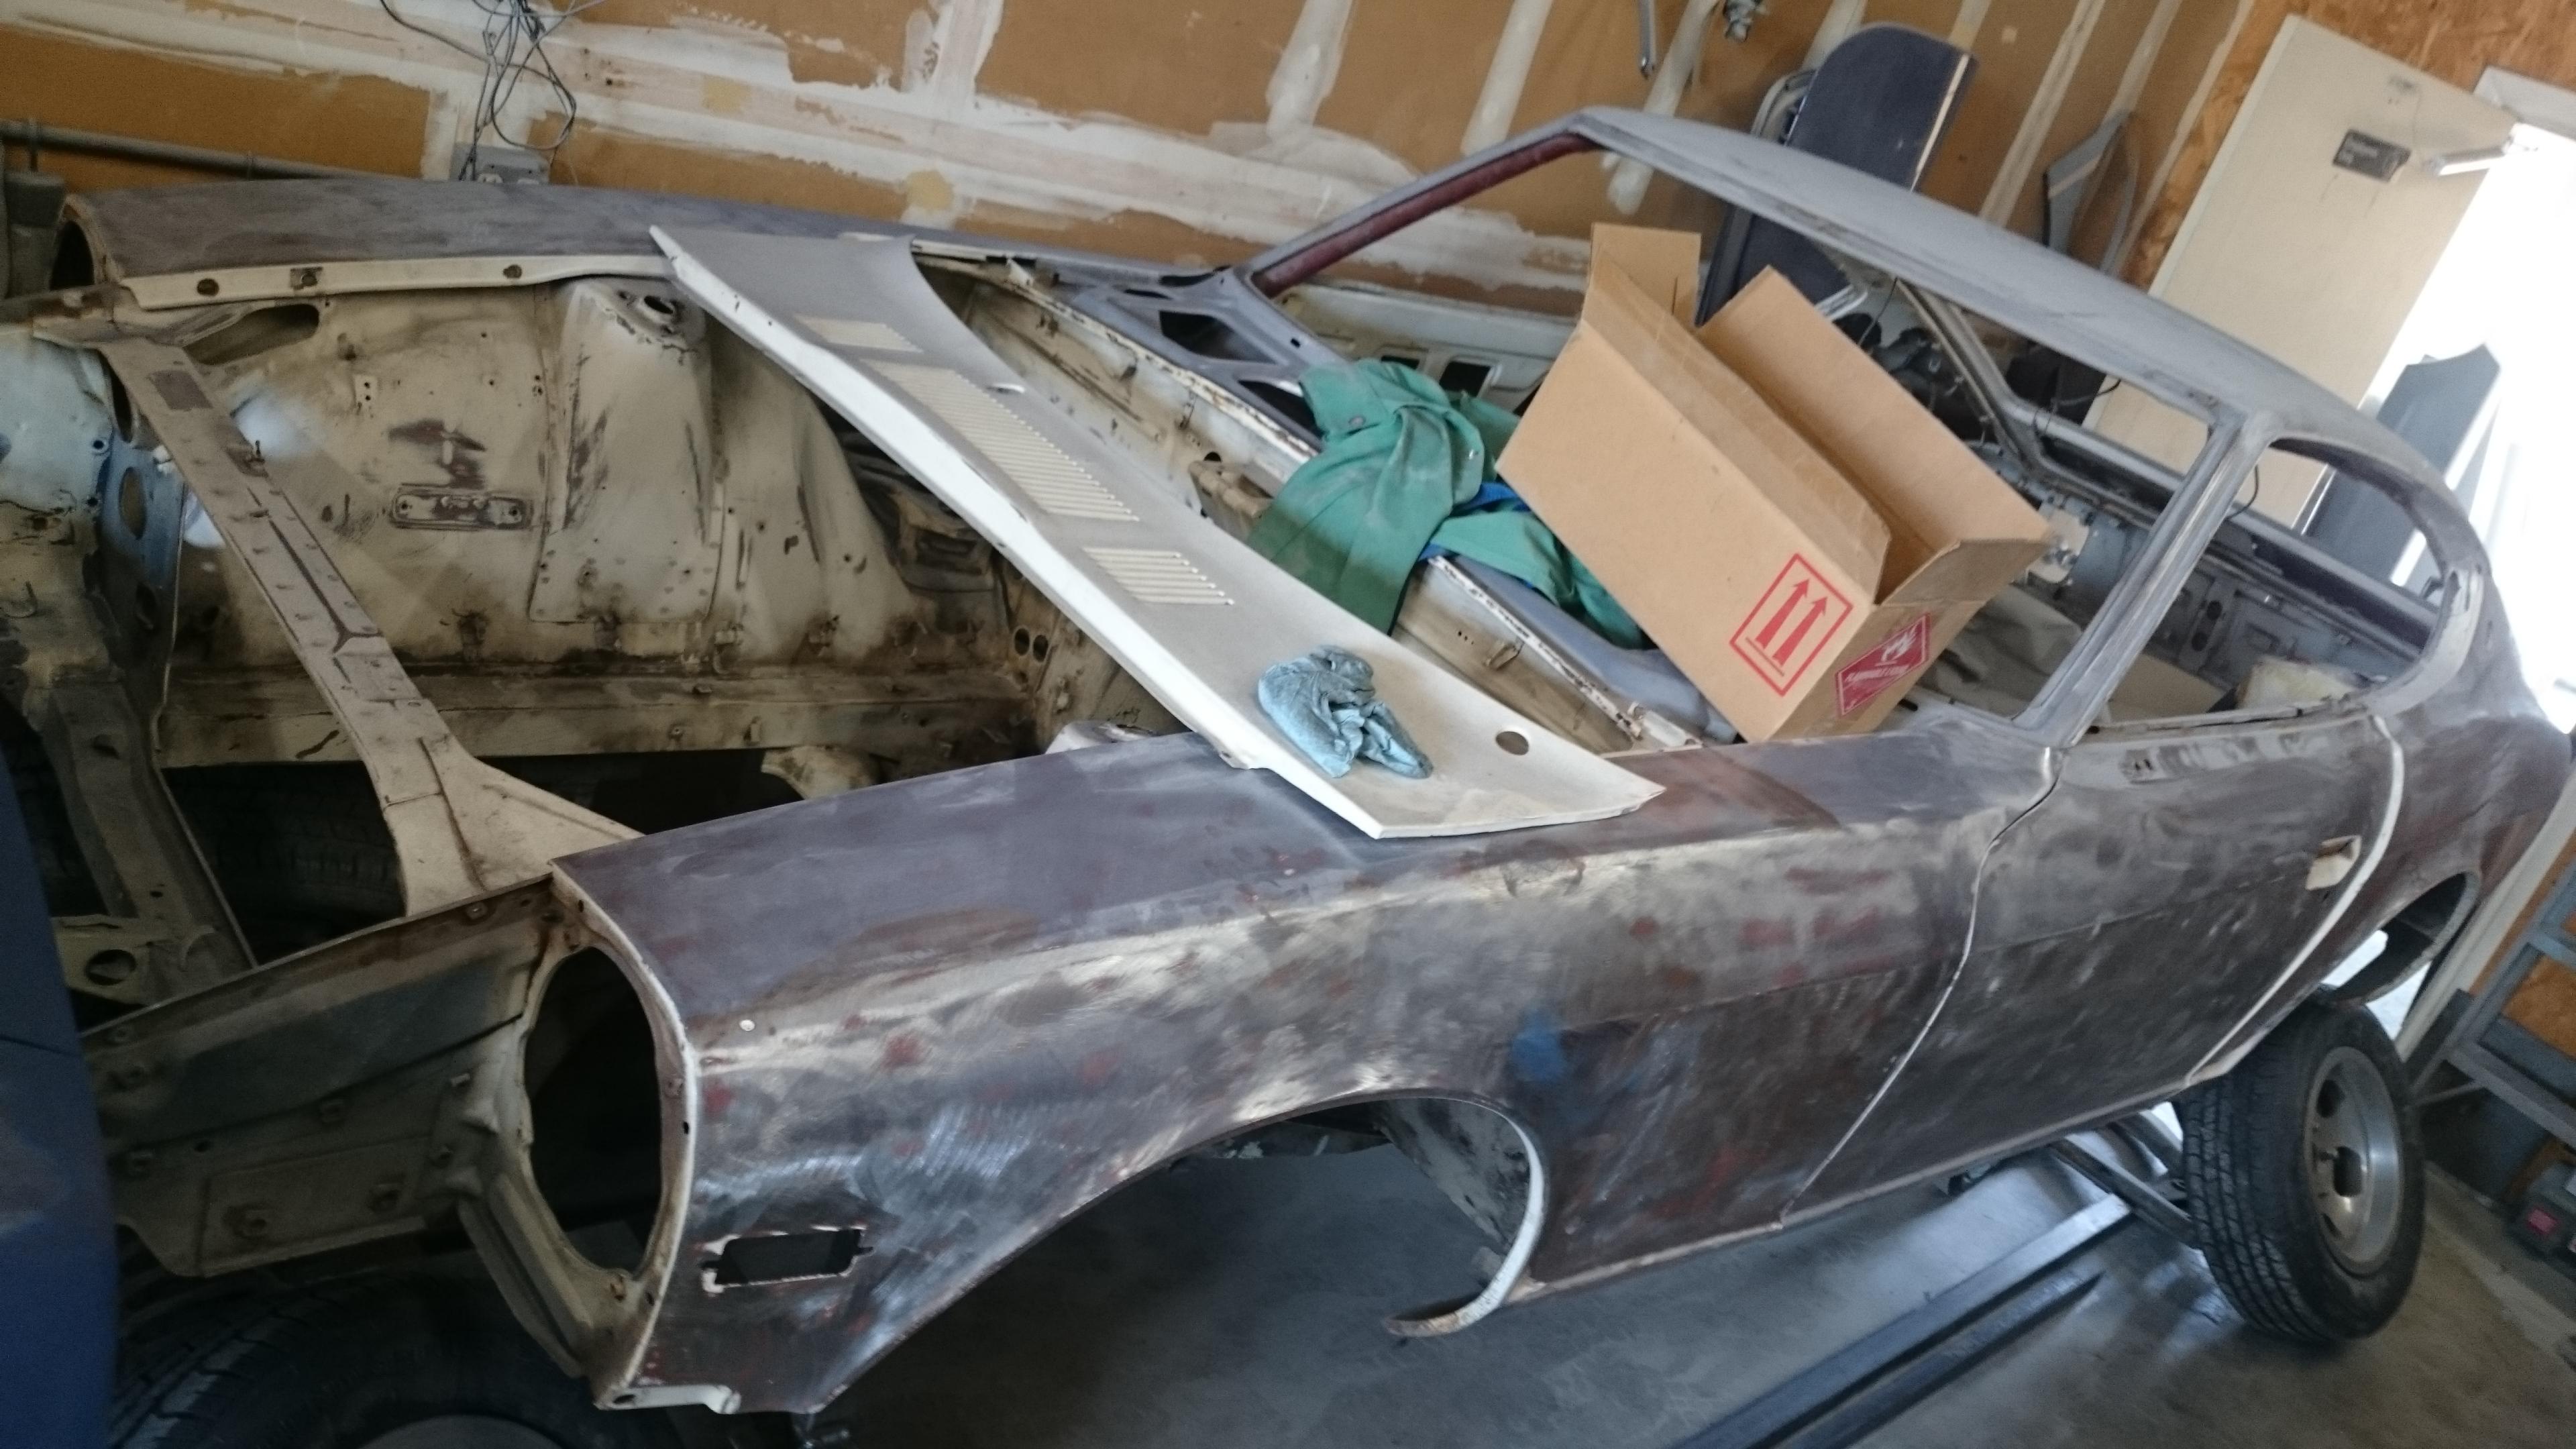
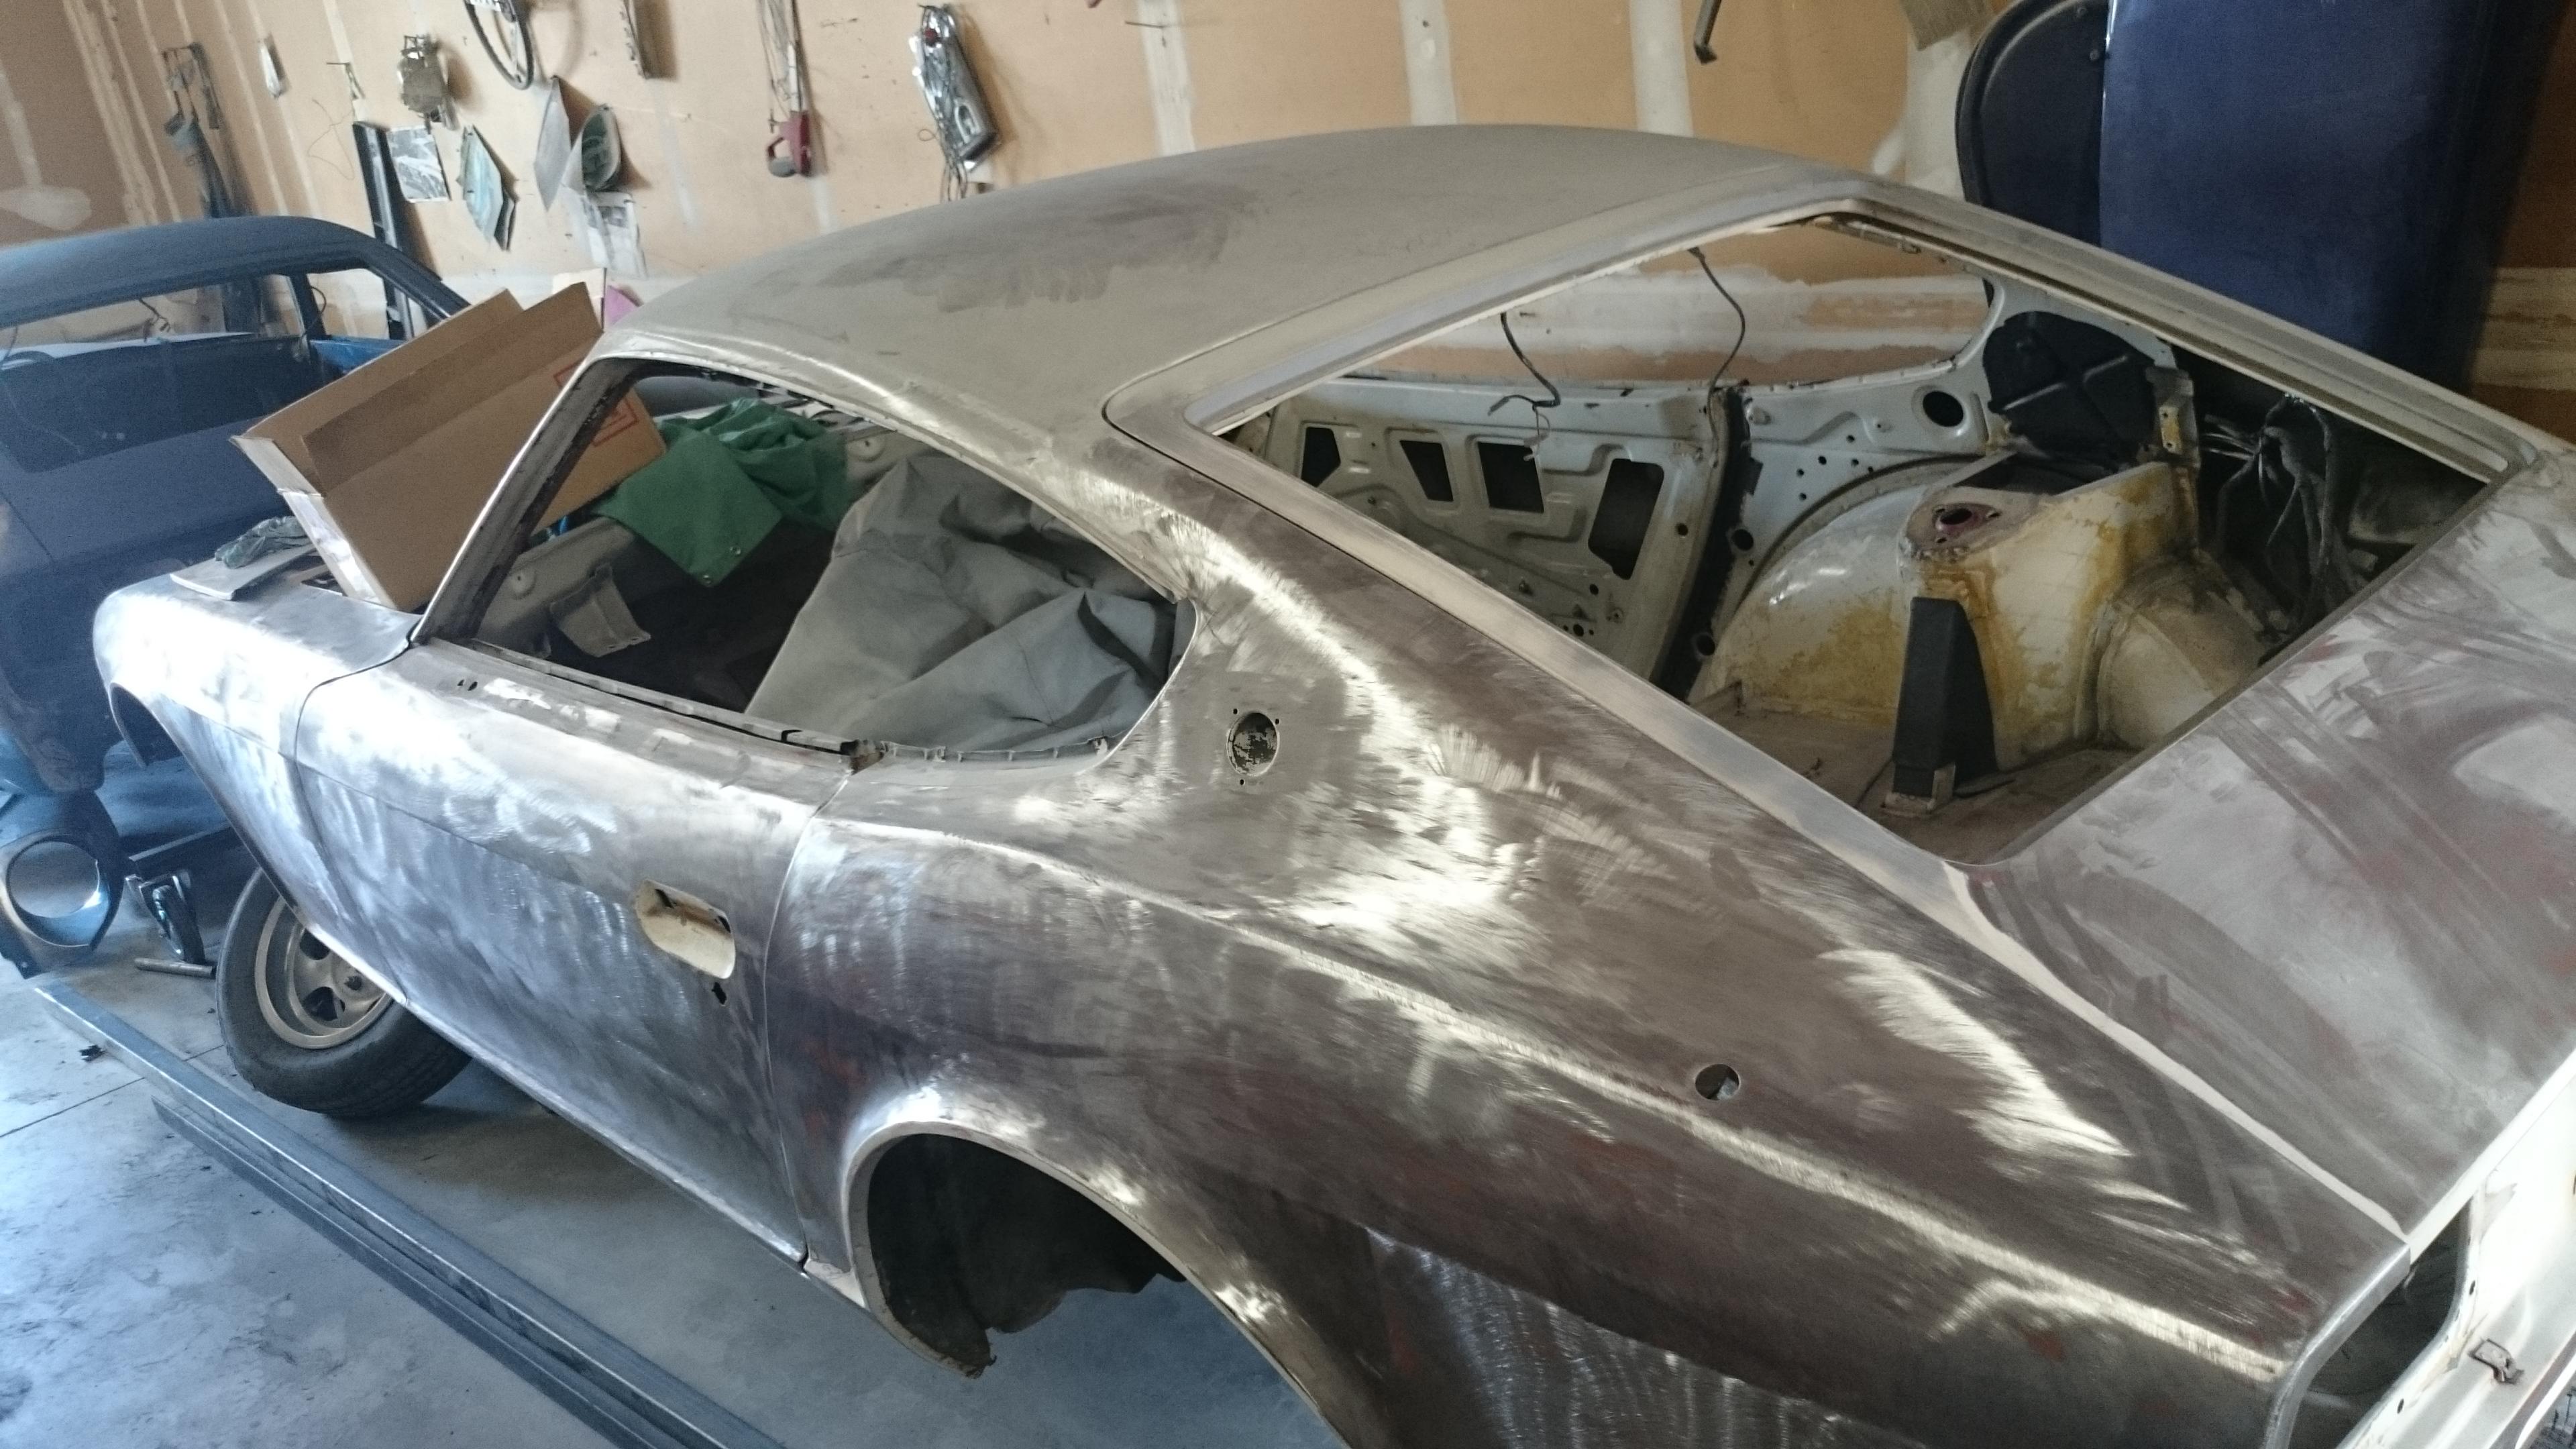
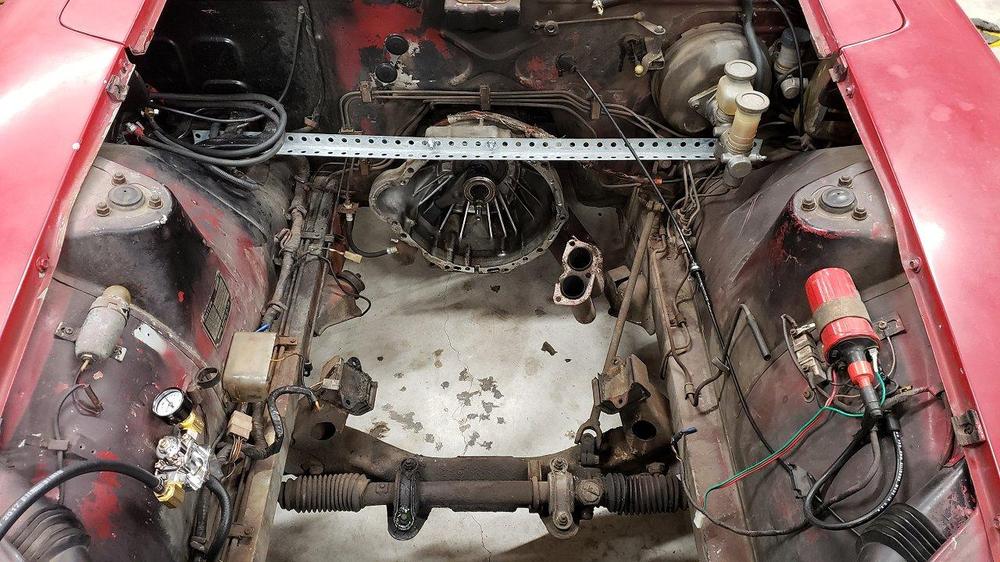
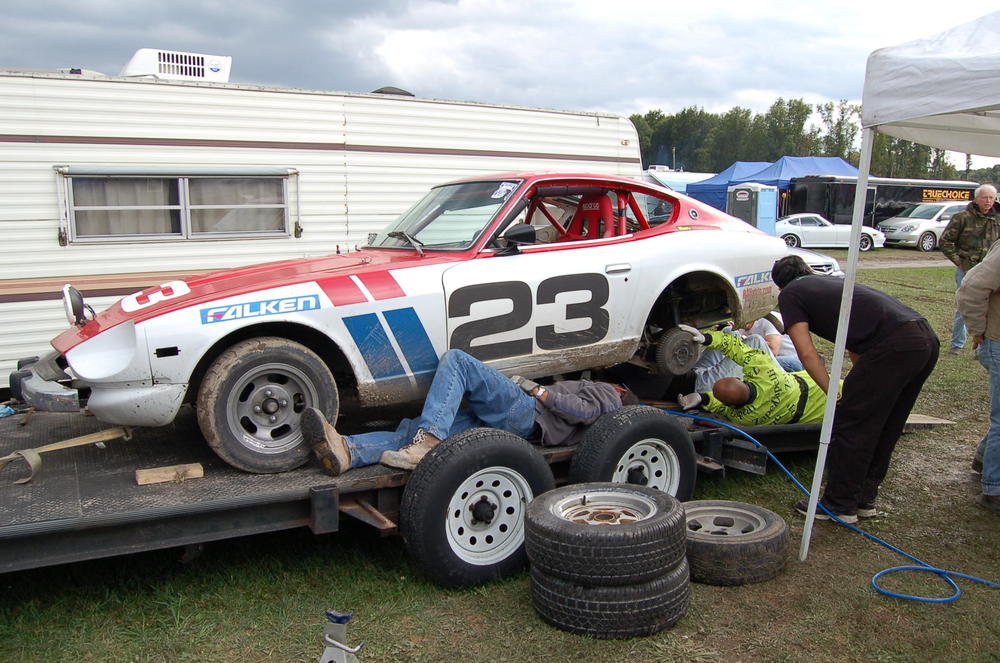
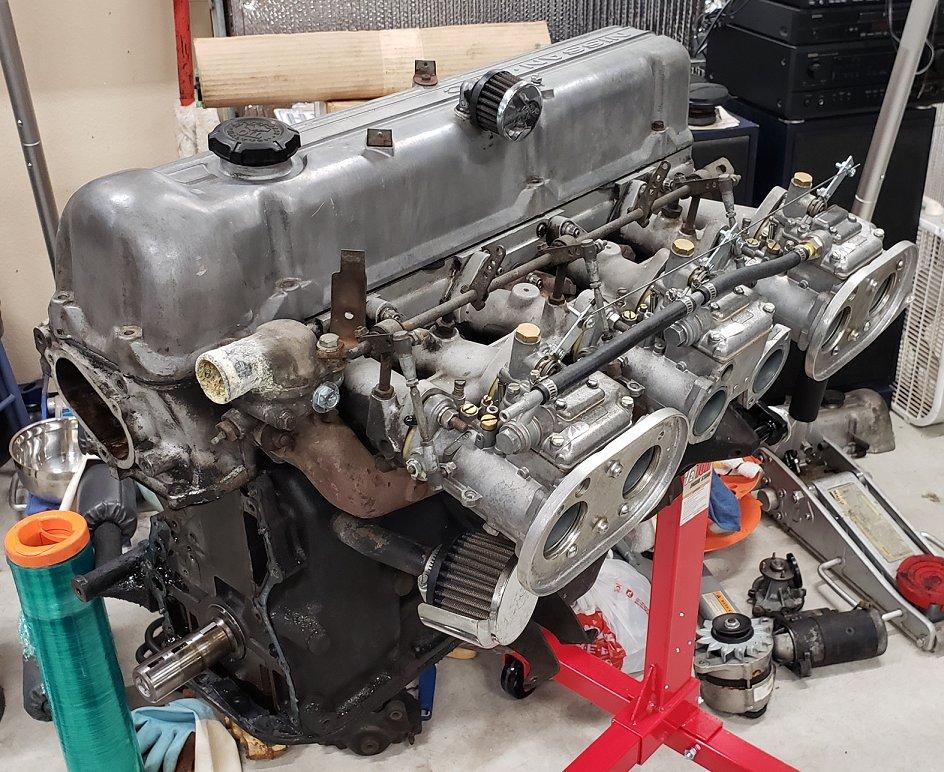
A quick update. I got the engine out yesterday with the help of my friend's 13 year old son. He is in to all kinds of car and jumped at the chance to work on something old and interesting. It took us a few hours but it came out with little drama. Next up is to remove the carbs, intake, exhaust manifold, and anything else that Kevin at the Z Clinic does not need. Once it is down to just the the block and head I am going to clean it up really good so it is not so nasty to transport. I am going to have him get the timing chain and cam geometry corrected as well as install an Isky Stage-2 cam that I purchased from a good friend now that he has gone to a Stage-3. With the engine out I plan to do a lot of clean up, replace the steering rack bushings, and decide just how much I want to remove to paint the engine bay. Still need to pick a color too. Seeing that the paint on the body is a 4 at best I may just satin black it for now. The original color of the car is silver which one day it may return to that but even in its sad state the red looks really sporty.
 2 points
 -
I have located a bumper for Cody's car just outside Eugene but the seller doesn't want to ship. If anyone could help me out and get the bumper and ship it to me, I would cover the shipping and try to compensate for the time it takes. I am pulling stuff together for his 18th birthday presents later this month. Thanks, Charles1 point
-
1 pointI had a tool made by a fabrication / machine shop in Atlanta. I had several of them made actually. Attached are two photos of the tool. Below, also find a link to a video they made using the tool to fold the bushing shell into the swage shape. If someone wants to use the tool and ship it back to me or on to the next person wanting to use, I am happy to help accommodate. You should know though that I have never actually used the tool...which is why I have never mentioned it on the forum. I plan to use it in my refresh of my orange 72 and my dad's pearl black 78. Mustache bar bushing tool video
.thumb.jpg.16ecc7caece57094c8f0cef5c29693bf.jpg)
.thumb.jpg.2c7e175be6aa5d54fd6716965da4c230.jpg) 1 point
1 point -
I actually tried a couple different setups beyond that last one posted over the weekend. I took a log of one that was too lean up top and then tried a different setup that I didn’t get a log of but it looked really good just watching the readout. I’ll try to get a log of it later this week if we get a dry day here.1 point
-
There was a very good reason the R180 failed. Bought the car after it had been in a barn for 20 years and in 12 weeks, turned it into a caged race car. We had about 100 items on the to-do list and the only item that never got crossed off was changing the diff fluid. My teammates couldn't get the plugs out of the diff. Once we ran out of time, a decision was made to not change the diff fluid. There was no signs of leakage via dirt or stains. 4 hours into the race, the diff broke. Upon teardown, we found no more than a few ounces of oil. I was shocked it made it 4 hours! I had to drive an hour to get a R200 diff and then engineer the mustache bar to fit and make the mods. It was a long repair, but it got back on the track and ran the final 4 hours to take the checkered flag. The mustache bar worked so well, that I left it in for another 14 hour race even though I had a R200 bar ready to swap in. I didn't press my luck any further and the fabbed mount is now wall art.1 point
-
I broke an R180 during a 24 hour endurance race. I converted it to an R200 and finished the race. I even fabricated the R180 mustache bar to make it fit. ☺️

 1 point
 -
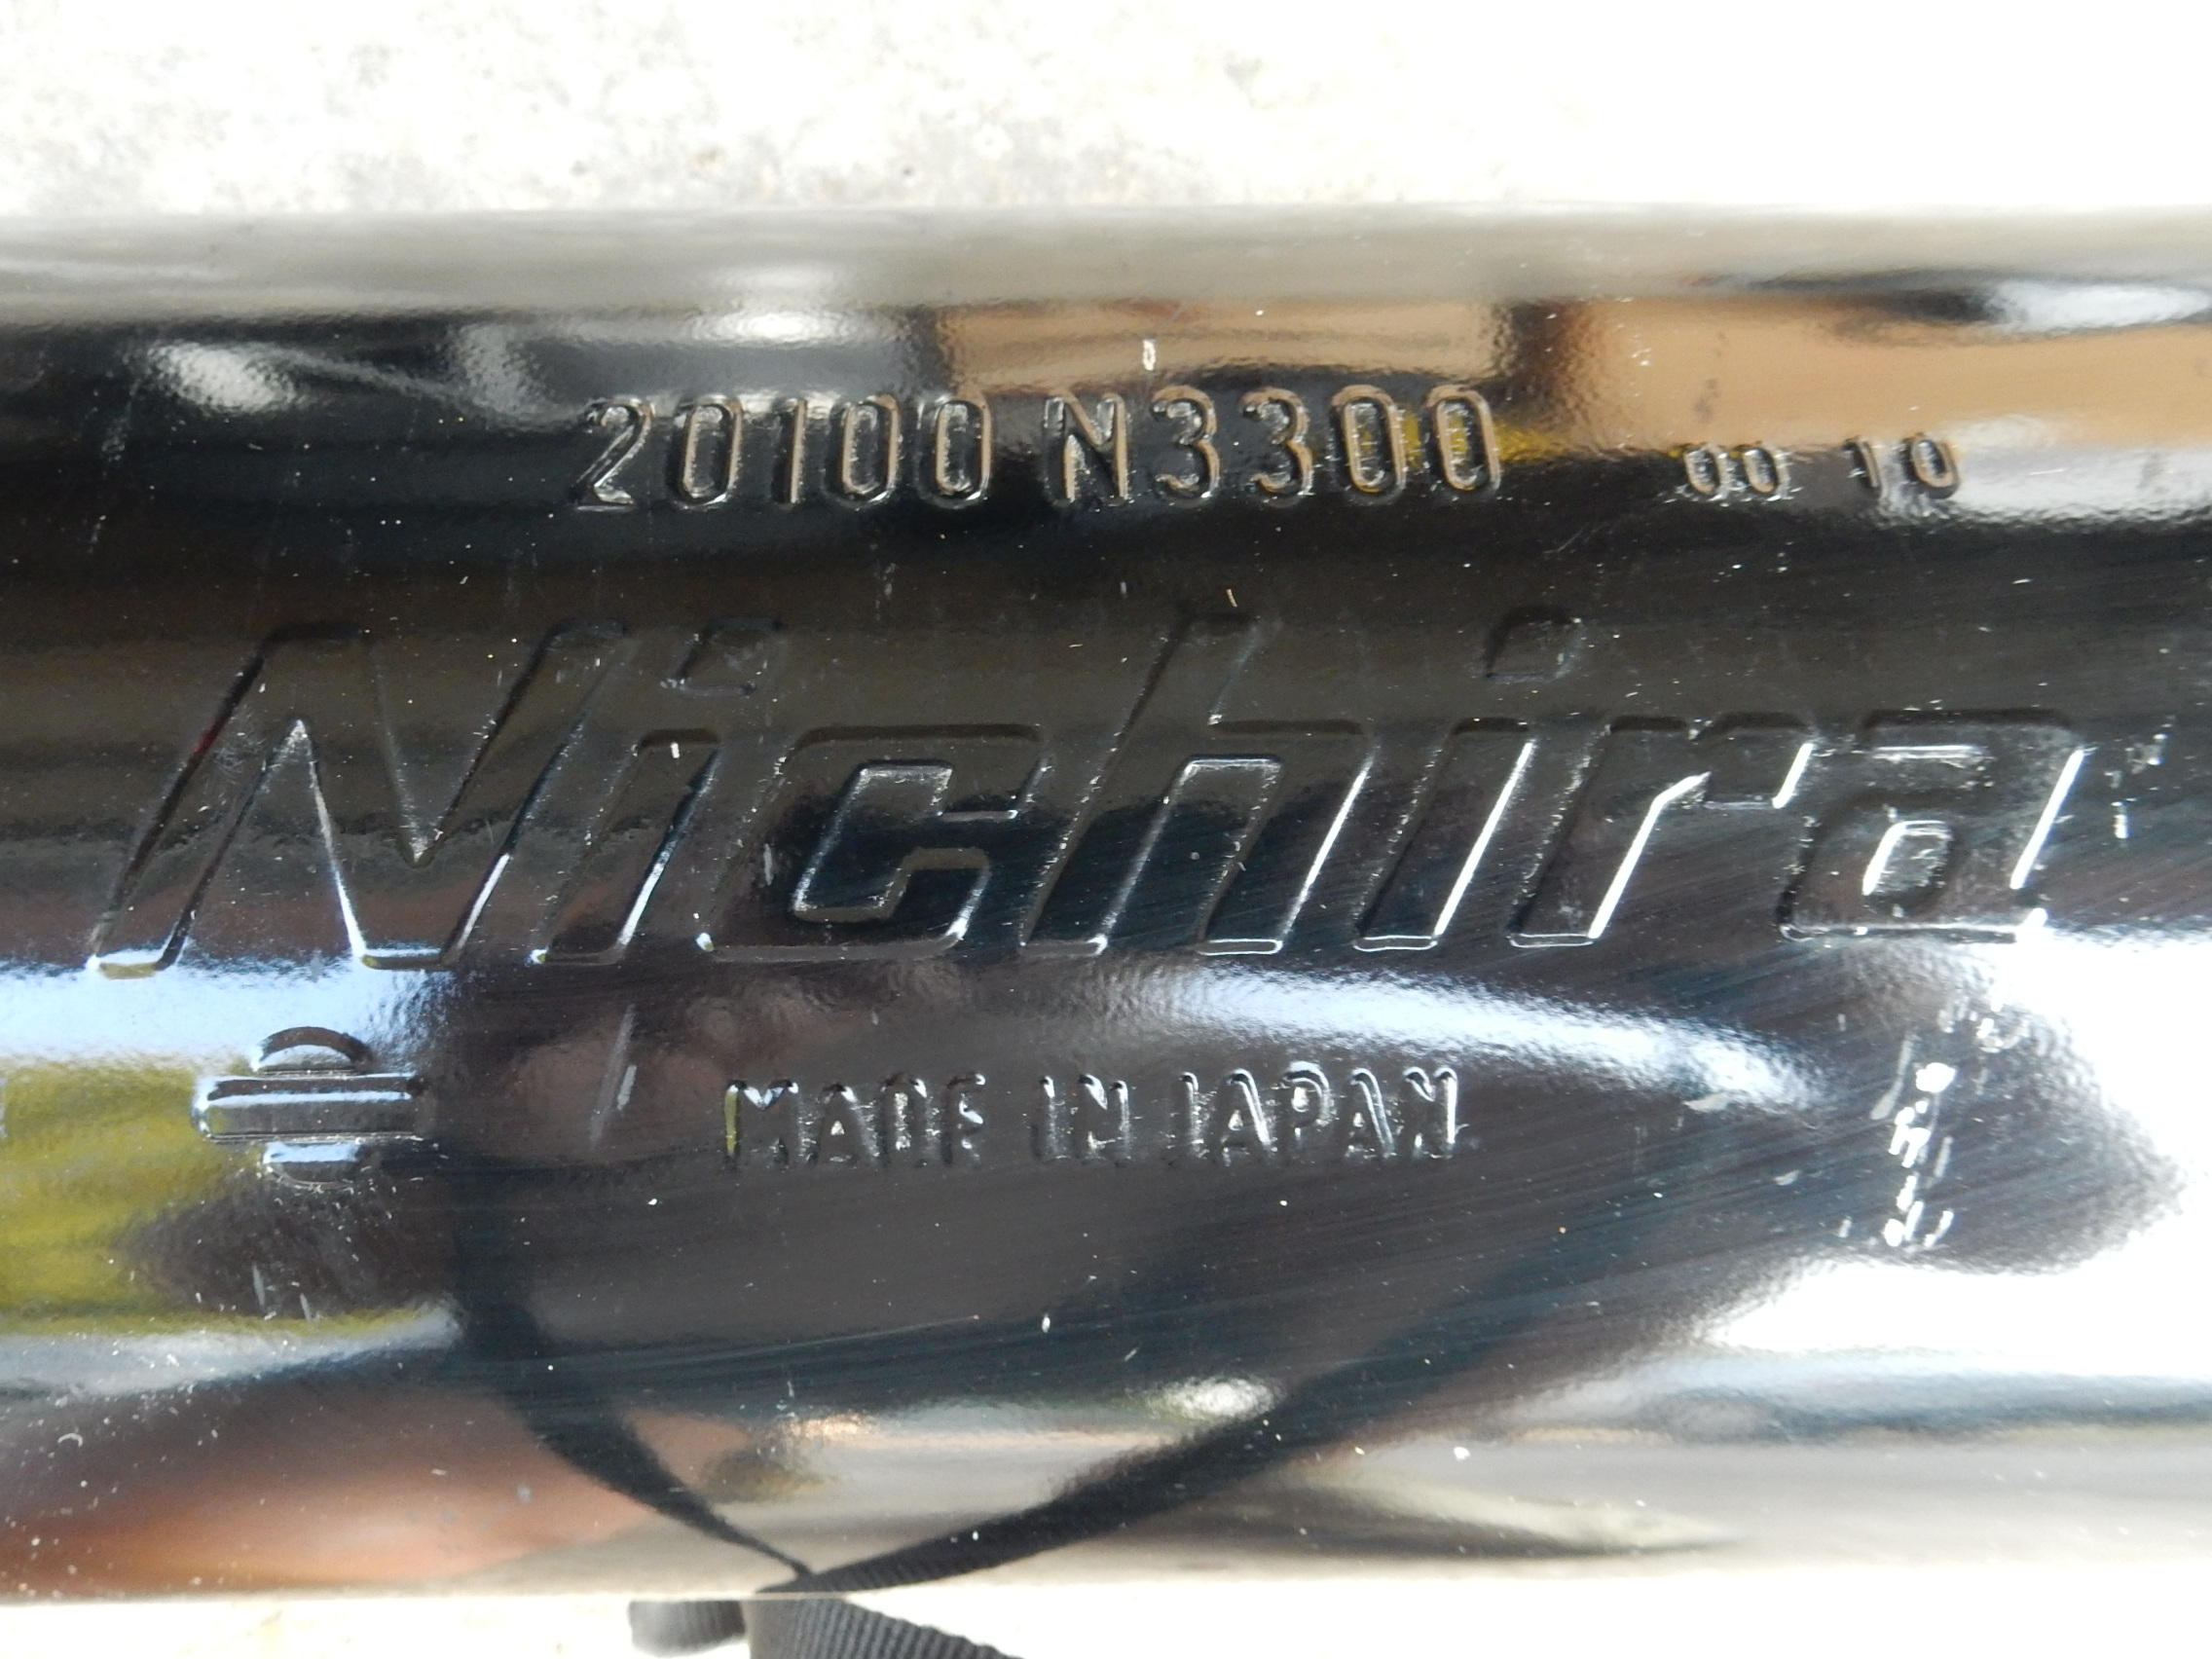
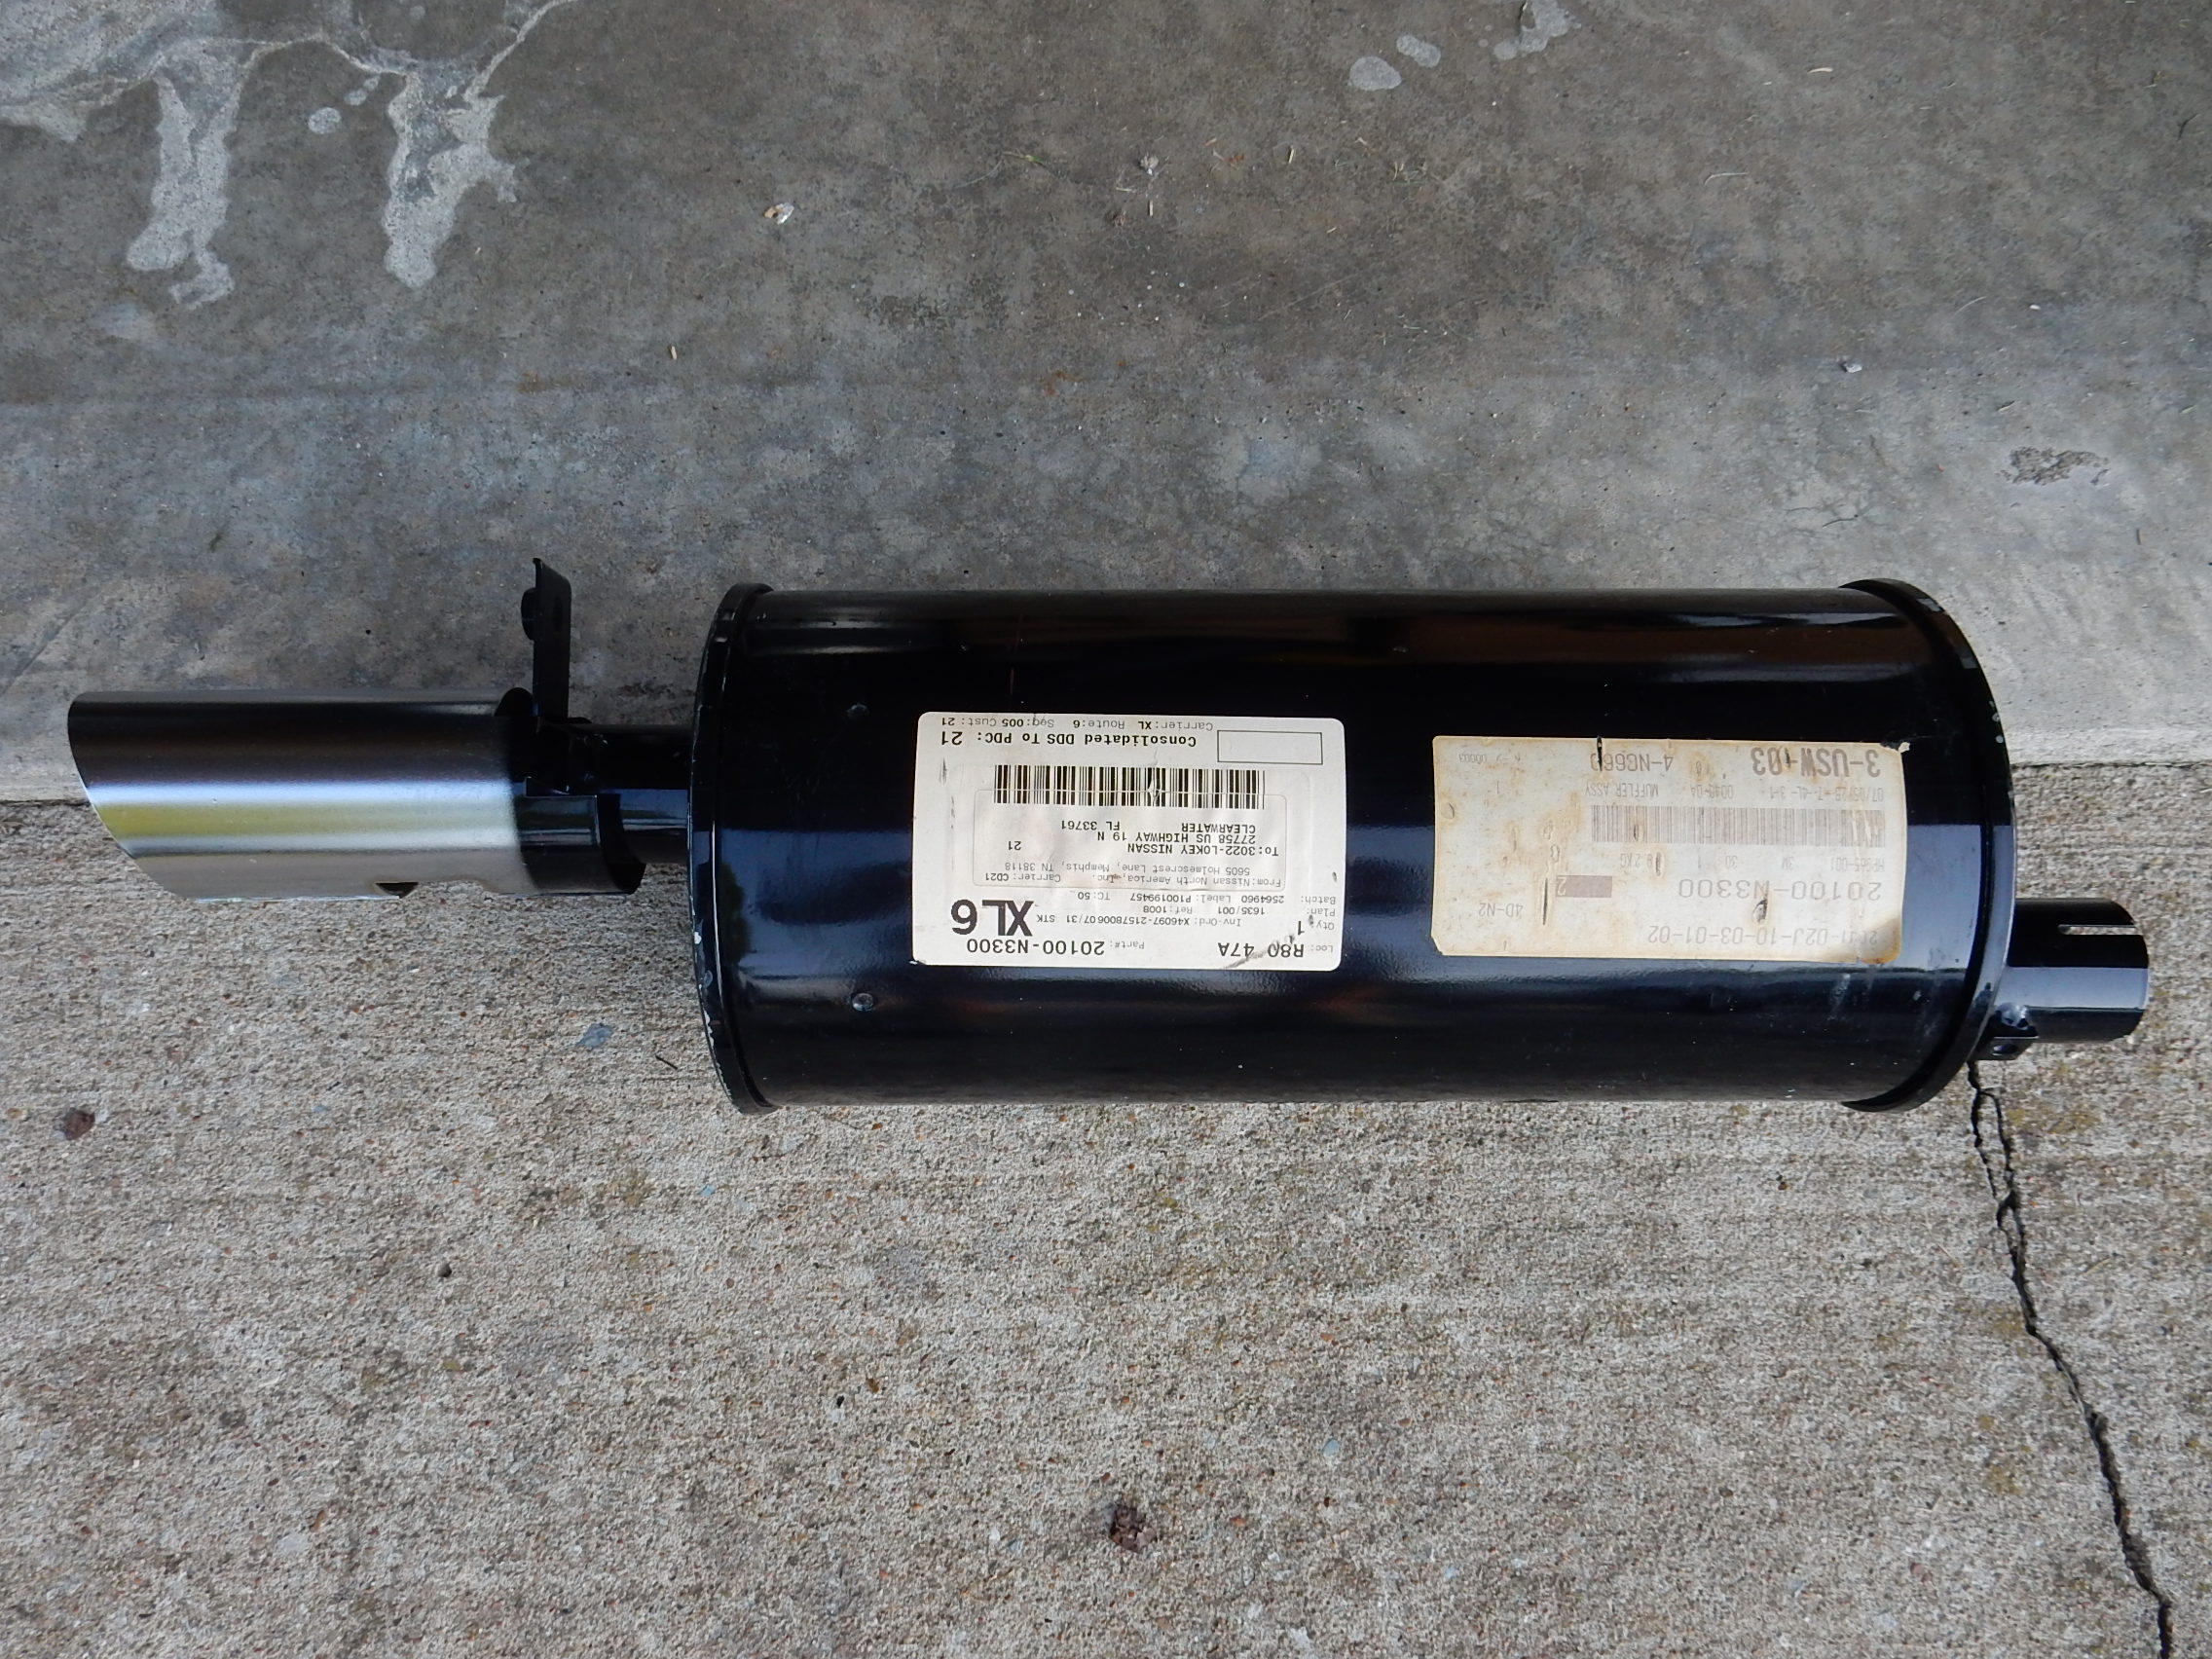
My Zilver is hankerin' to get spruced up for ZCON 2018 in Atlanta. 1st on my list of many: NOS Nichira muffler waiting to take its first deep breath--no more deductions for a "rusty tailpipe" or "can dirt". In storage for years. Time to go to work.


 1 point
 -
1 pointI do the same. Les Cannady at Classic Datsun Motorsports recommended this to me during my first Z engine rebuild. I am sure he has prepped more Z engines than the average bear, so I take the advice as gospel. Never had a problem.1 point
-
I’m near Eugene in Springfield, let me know if I can help1 point
-
1 pointHi Kats, Thank you so much. I'm humbled and honored and I'm just trying to help out where I can.1 point
-
1 pointWell I wasn't there at the factory when they were swaging those bushing, but I suspect they did it in just one step. Keep in mind, however, that they have access to machines and processes that I don't. I'm also sure they heat treated their dies, and I did not. I started with a mid-hard heat treatable steel that I could heat treat to a very suitable hardness, but I figured I'm only going to be doing this a couple times, and even without the heat treat, my dies should outlast me. So IMHO the bottom line is that I think it's possible to do it in just one operation, but I wouldn't recommend it unless you really know what you're doing (and I do not). However... After going through this, I believe that I can simplify the die design. You see... The first flaring die did such a fantastic job of tapering the material outward that the curved section of the second did never even made contact with the bushing wall until the flange was pressed completely flat. In other words... The complicated portion of the second die (the carefully radiused and polished center section) is pretty much unnecessary and that second die could look just like a donut with a hole in the middle. That raised portion isn't even necessary. In fact, I believe I could have simply flipped my tapered first die over and used the flat side to press the flange to it's final position. I think that if designed properly, you could get two forming operations from two different sides of the same die. So, if you're looking to minimize the cost of having dies made, I would try that. Here's a pic at the very start of the first tapering operation: And here's how it looks fully tapered with just the first die. You can see that the material is "rolled outward" so far already that it never even contacts the curved portion of the second die: If I had known that a the beginning, I may not have even made two dies. I may have made one "reversible" die instead and saved myself that polishing time.1 point
-
1 pointHi Captain !! You are the best engineer for helping others , I wish I can do it for my cars like that . Kats1 point
-
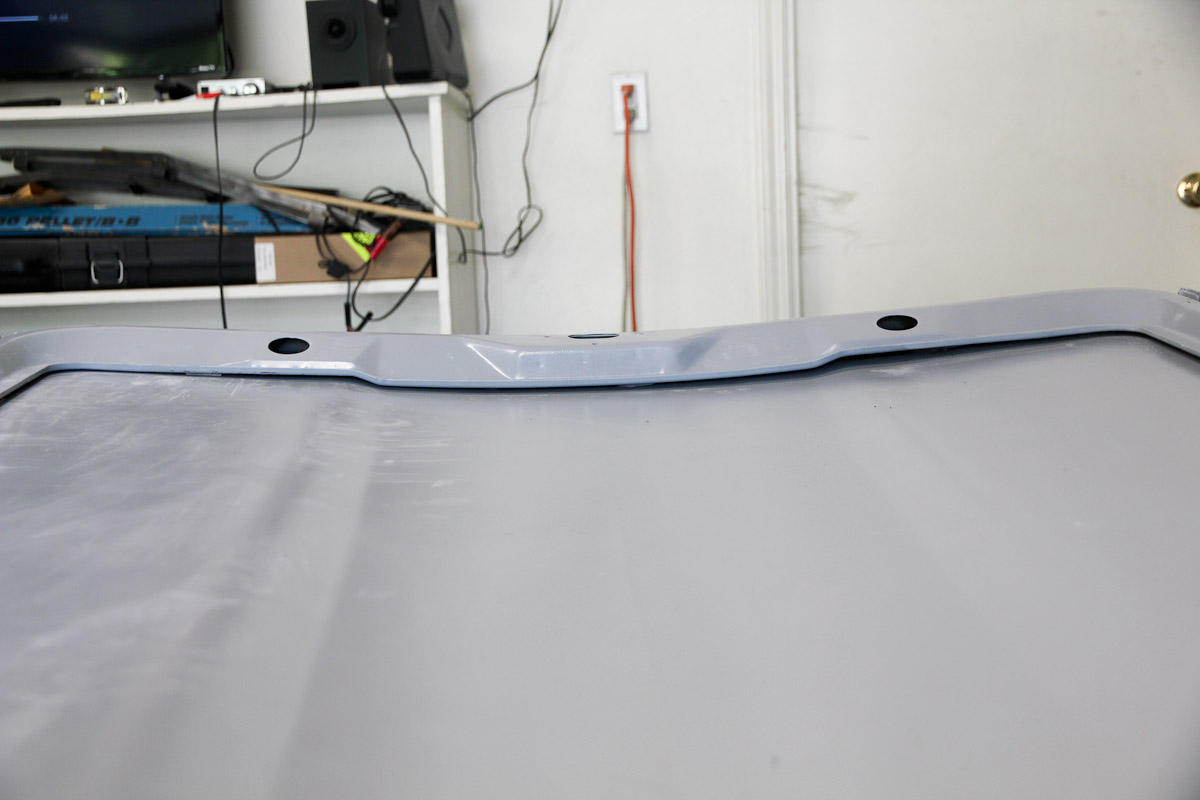
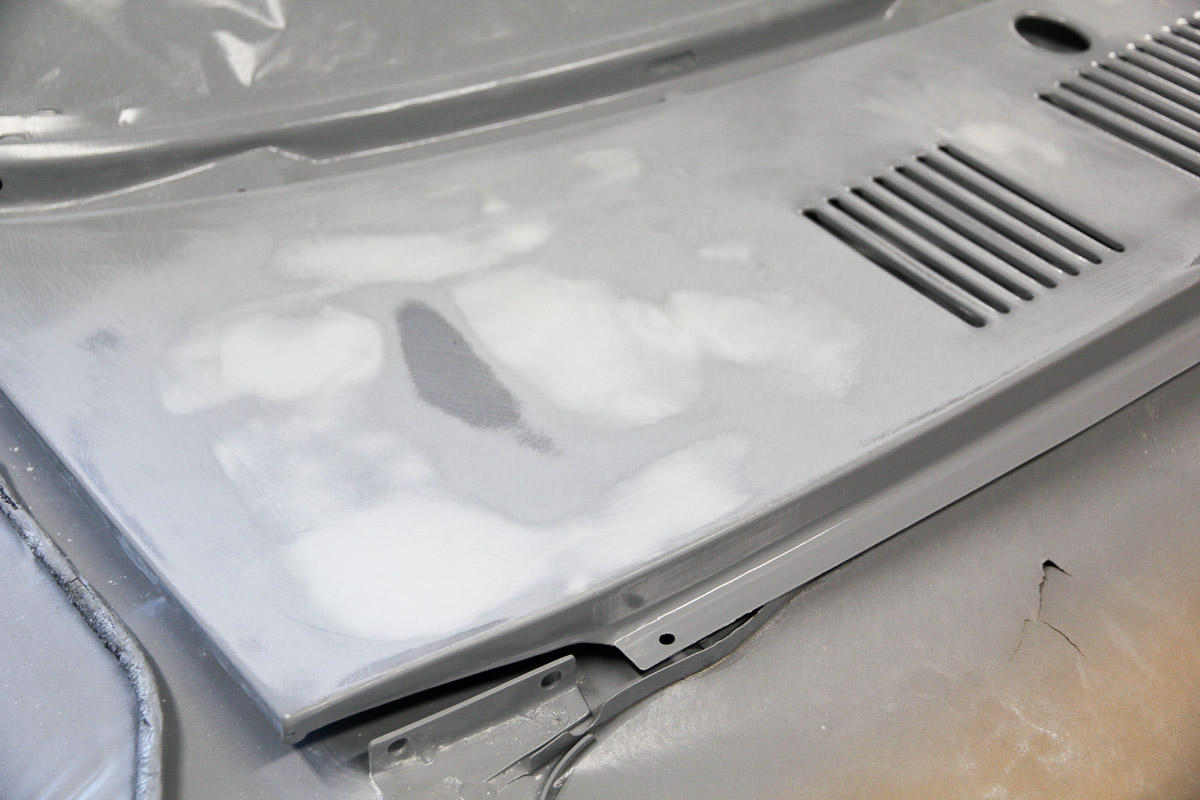
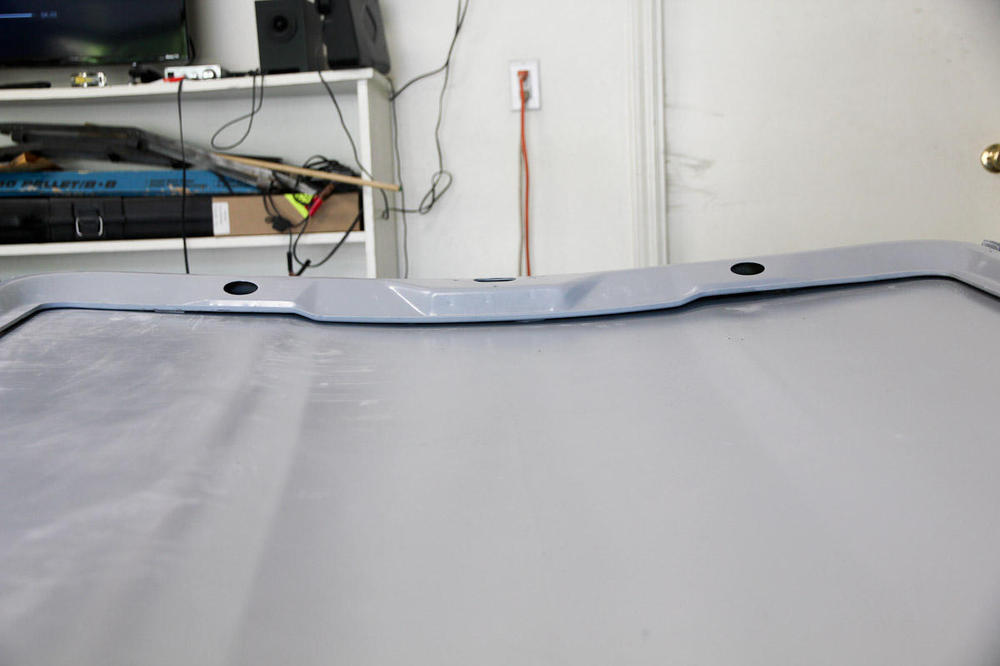
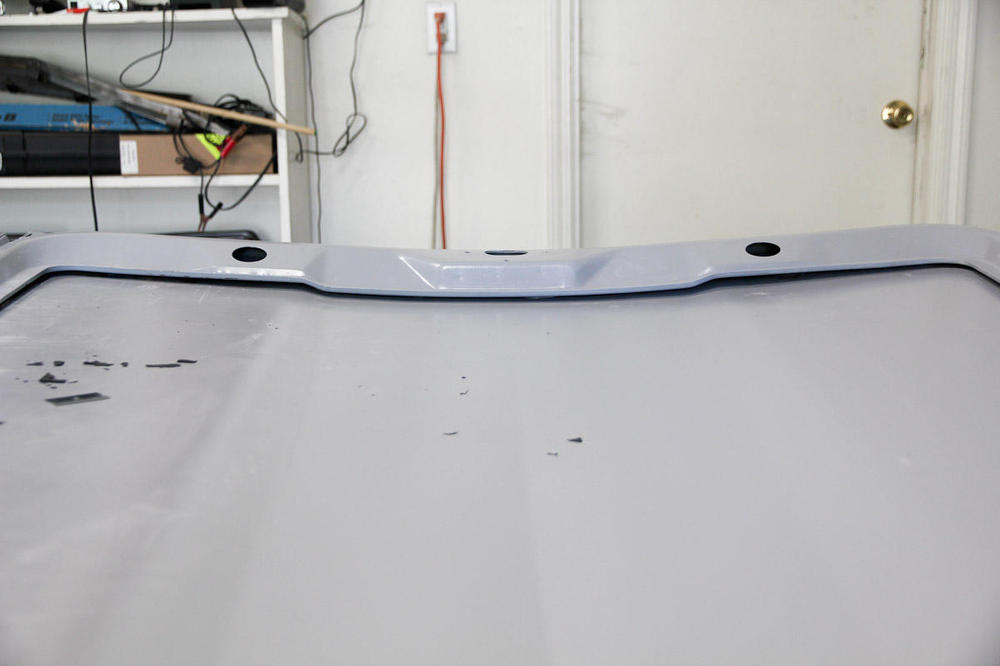
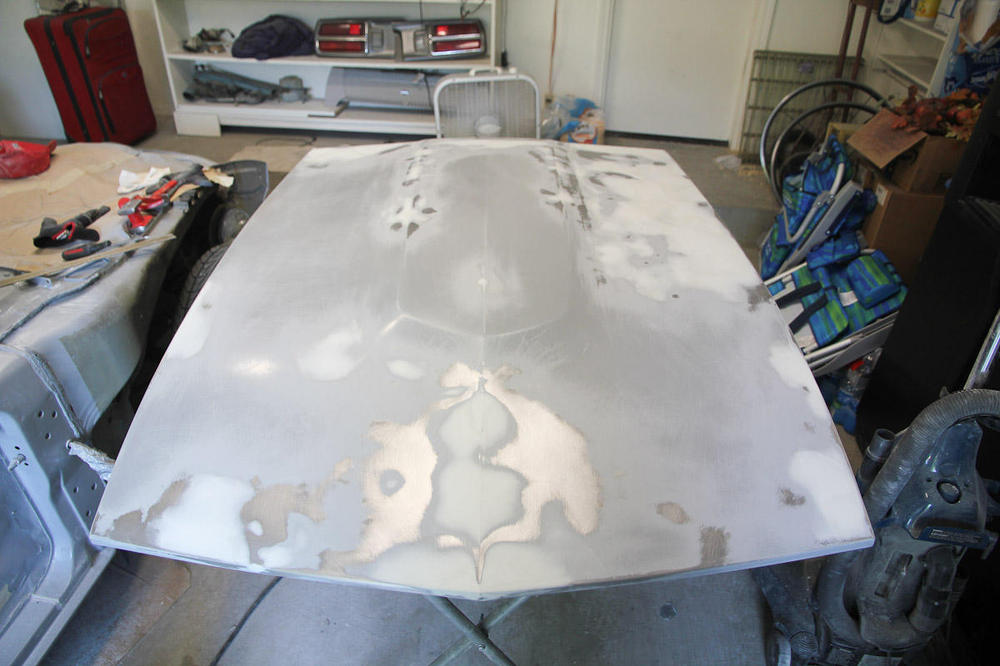
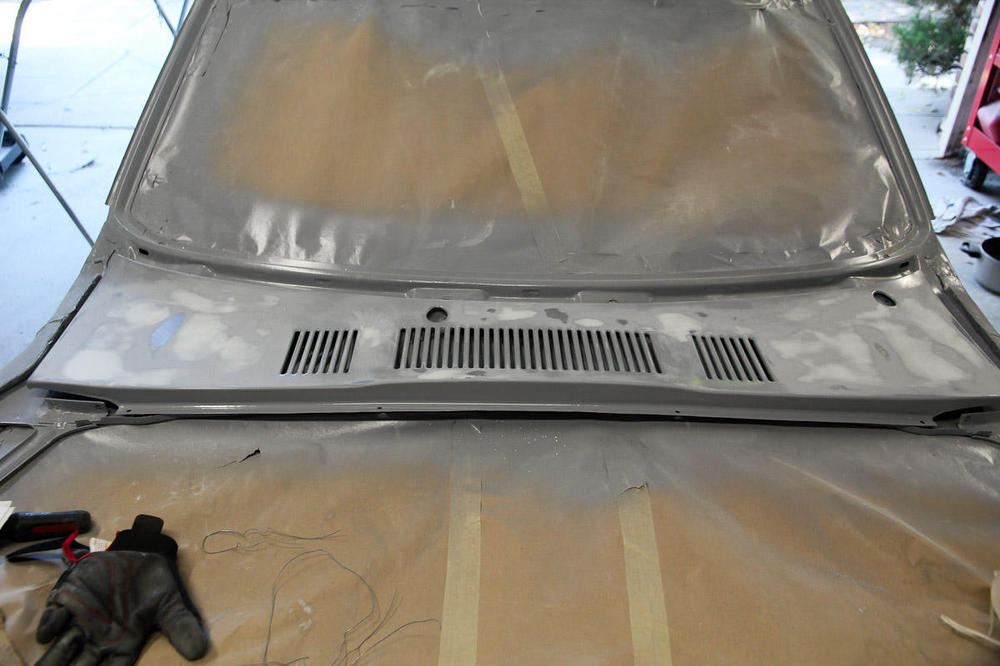
In all the time working on the hood trying to get the metal on the left side straight, I somehow overlooked that it was out of shape. Instead of having a slight crown, I had a slight dip. Someone probably leaned on it or used it as a table or something at one point. I do not have the patience or ability to try to coax that panel back into shape, so I forced it instead by cutting up a few pieces of ~3/16" steel bar and hammering them between the top of the hood and the bracing underneath. Seemed to work. But, while I had the hood turned over, I also noticed that the two sides still didn't match. There's are (supposed to be) some rubber pads sandwiched in there, and the driver side ones in mine are missing. I cut some replacements out of a rubber sheet and stuck them in there. Everything's even and back in shape. Then just more filling and sanding, and the hood is done. So is the cowl; at least that was easy. Was hoping to get all the panels finished before going on vacation, but didn't quite make it. Only have the one rear quarter and some final work on the rear panel left.


 1 point
 -
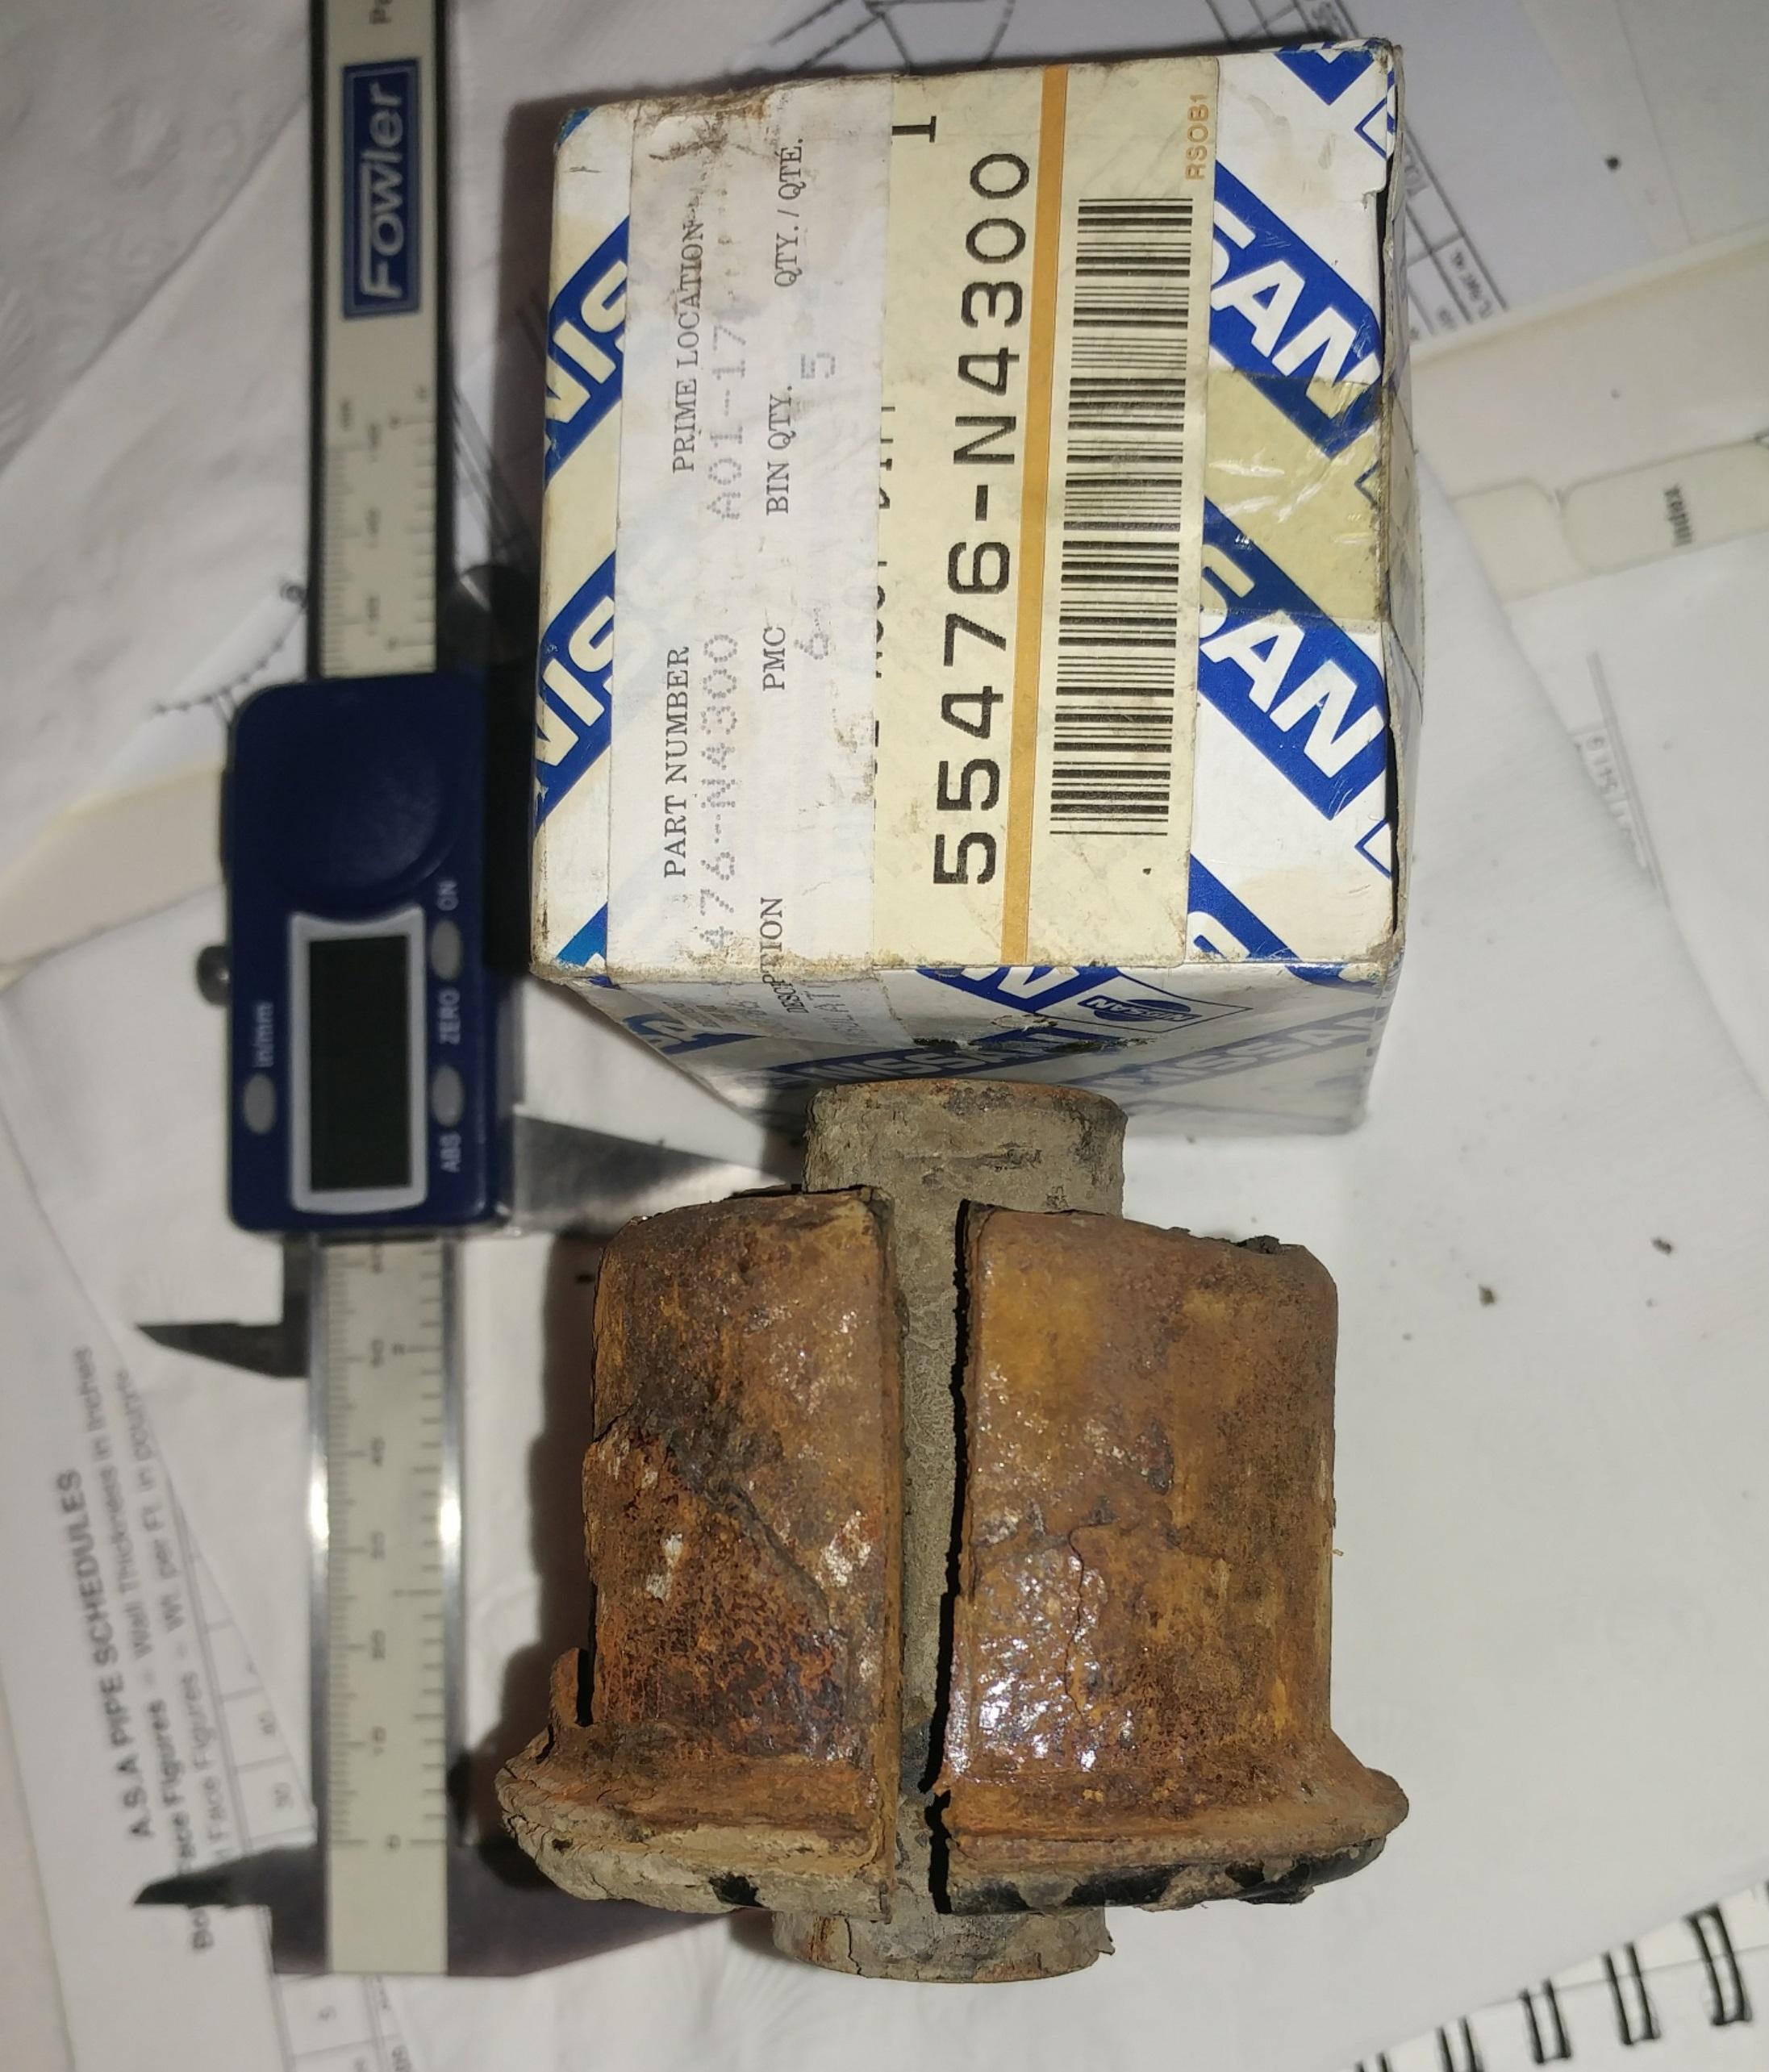
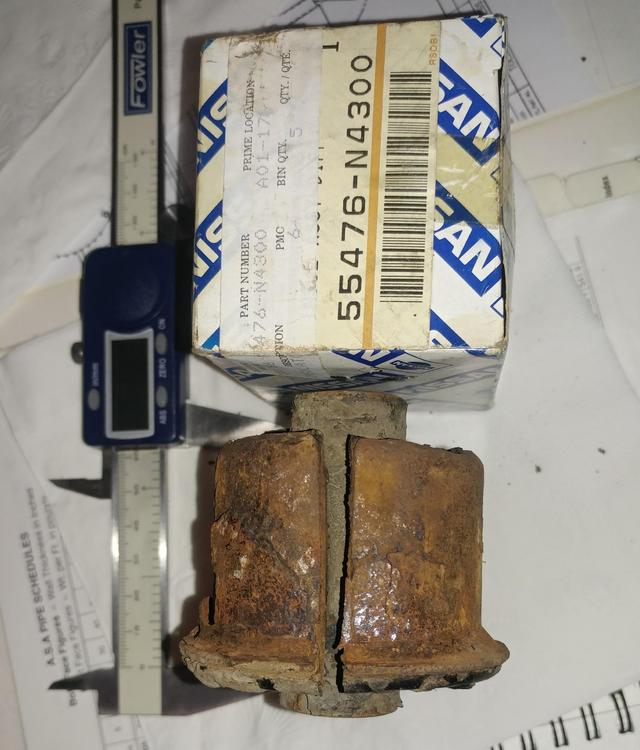
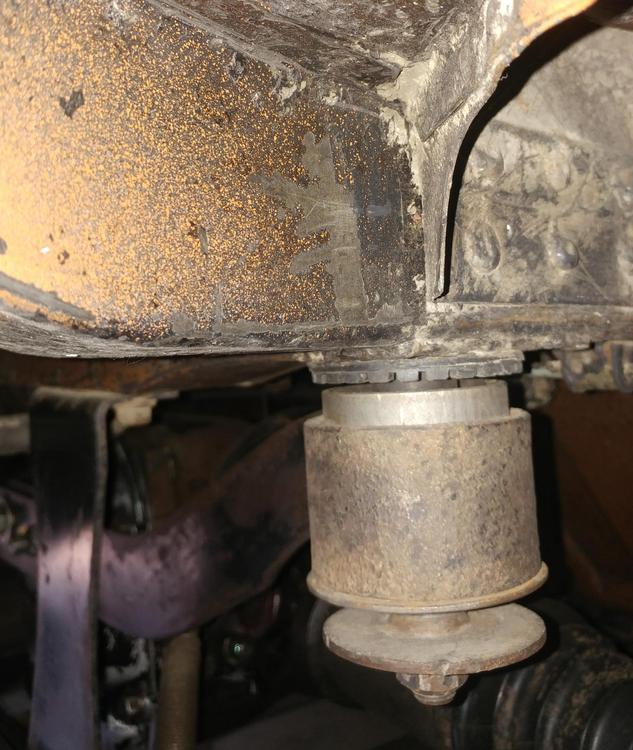
1 pointThis would have been a good thread for me to have read back in 2005 when I replaced the isolators in the mustache bar on my 7'70, Here is a picture of the old isolator, early style, beside the box from the new, later style, replacement that I was able to get at the time. The picture of the newer style one installed shows the extension that should have been formed into a flange, oops. The picture also shows the gap 'B' is very evident.
 1 point
 -
1 pointI found one of the old threads/articles about that custom tool. Click the arrows to go back and forth, it's a pictorial. Search the name and you might find more. Somebody was loaning one out for a while.1 point
-
1 pointThat's exactly what I thought you were describing. So to me, it looks like someone has removed (burned, grounded or something) the rubber portion of the bushing and left the outer metal shell installed. In other words... That looks like the two flange bushing style that someone has eviscerated, presumably in preparation for installation of poly bushings. I believe the process would be to cut (or peel up straight like a banana) one of those flanges off and then press the bushing remnants out of the bar. Once you do that, you should be able to press the new ones in.1 point
-
1 pointIs this correct? I haven't heard of this. Your existing bushing looks like a bushing that has had the rubber core removed and cleaned up. Most of the time these have poly bushings installed in them. If you want to use the new bushing you will need to remove the old bushing shell from the bar. Press the new bushing in and flare the edges. I know someone that has flaring dies but I am not sure they are available for use internationally. You would need a hydraulic press to flare the ends. You might be able to get some dimensions for how to make the dies and have some made locally for the same amount of money for the shipping and import duties. On flipping the bar, I don't know1 point
-
1 pointSorry I made that clear as mud! Pics my bar. its got a factory pressed bush in as standard, you can see either side of the 'lip' factory bushings... diameter current size of the hole pressed in bush thickness So, on earlier cars, the bushing was rubber outer that pressed into the factory fitted metal flange/bushing. So it seems, I need to cut one end of the curve off, then press out the rest, before fitting the newer design(1971?) in. Can i use my early straight bar, just flip it around to use with the later lower diff mount?(curved one). Is there an actual issue with early ones?1 point
-
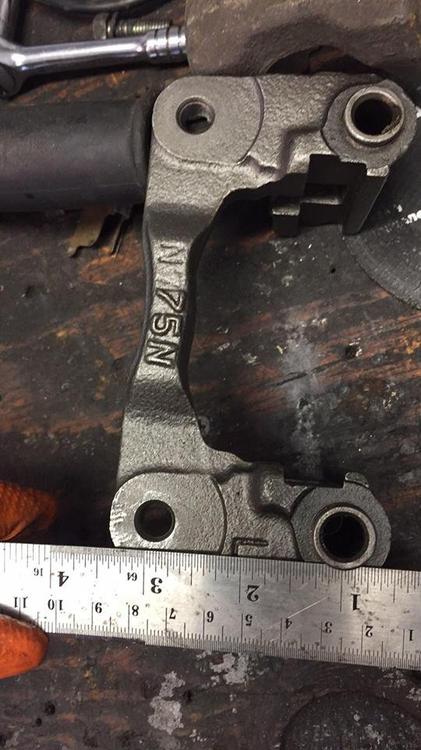
1 pointFound the dimensions of the Large frame Maxima caliper bolt spacing. I knew I'd saved it somewhere: 1.93" Edit: Note there are at least two different Large Frame castings that I know of. Both have the same bolt spacing, but the connecting bridge appears a bit different. This looks like an original Nissan casting with 75N cast in. I have seen other large frame brackets that look " flatter " and have no casting number. Those are probably re-cast Chinea brackets???
 1 point
 -
1 pointI opted for manual cloth 350Z seats in my 78. While searching, leather seemed more popular, but I don't like sliding around on leather/vinyl. The cloth keeps me firmly planted and doesn't get so damn hot in the summer. With no A/C, that's worth considering. My original worn out seats are in the basement for now. I'd like to make a pair of bar stool/chairs for the garage out of them someday.1 point
-
1 point
-
1 pointSomehow I missed Kats's post. There's a lot of new things in it that I've never seen before . Too bad we don't have sticky's on this forum. This could be the mustache bar sticky. Seems to me that Nissan got stuck between the differential whine and the mustache bar clunk/thunk. Under acceleration the diff twists, driving one end of the bar up and the other end down. So you can't have too much free space for the bar ends to gain speed or you get a thud/thunk/clunk noise. But if you have things too close, then you can get diff whine as the rubber compresses. If they had just made a less whiny diff, they probably could have avoided a lot of work on the mustache bar.1 point
-
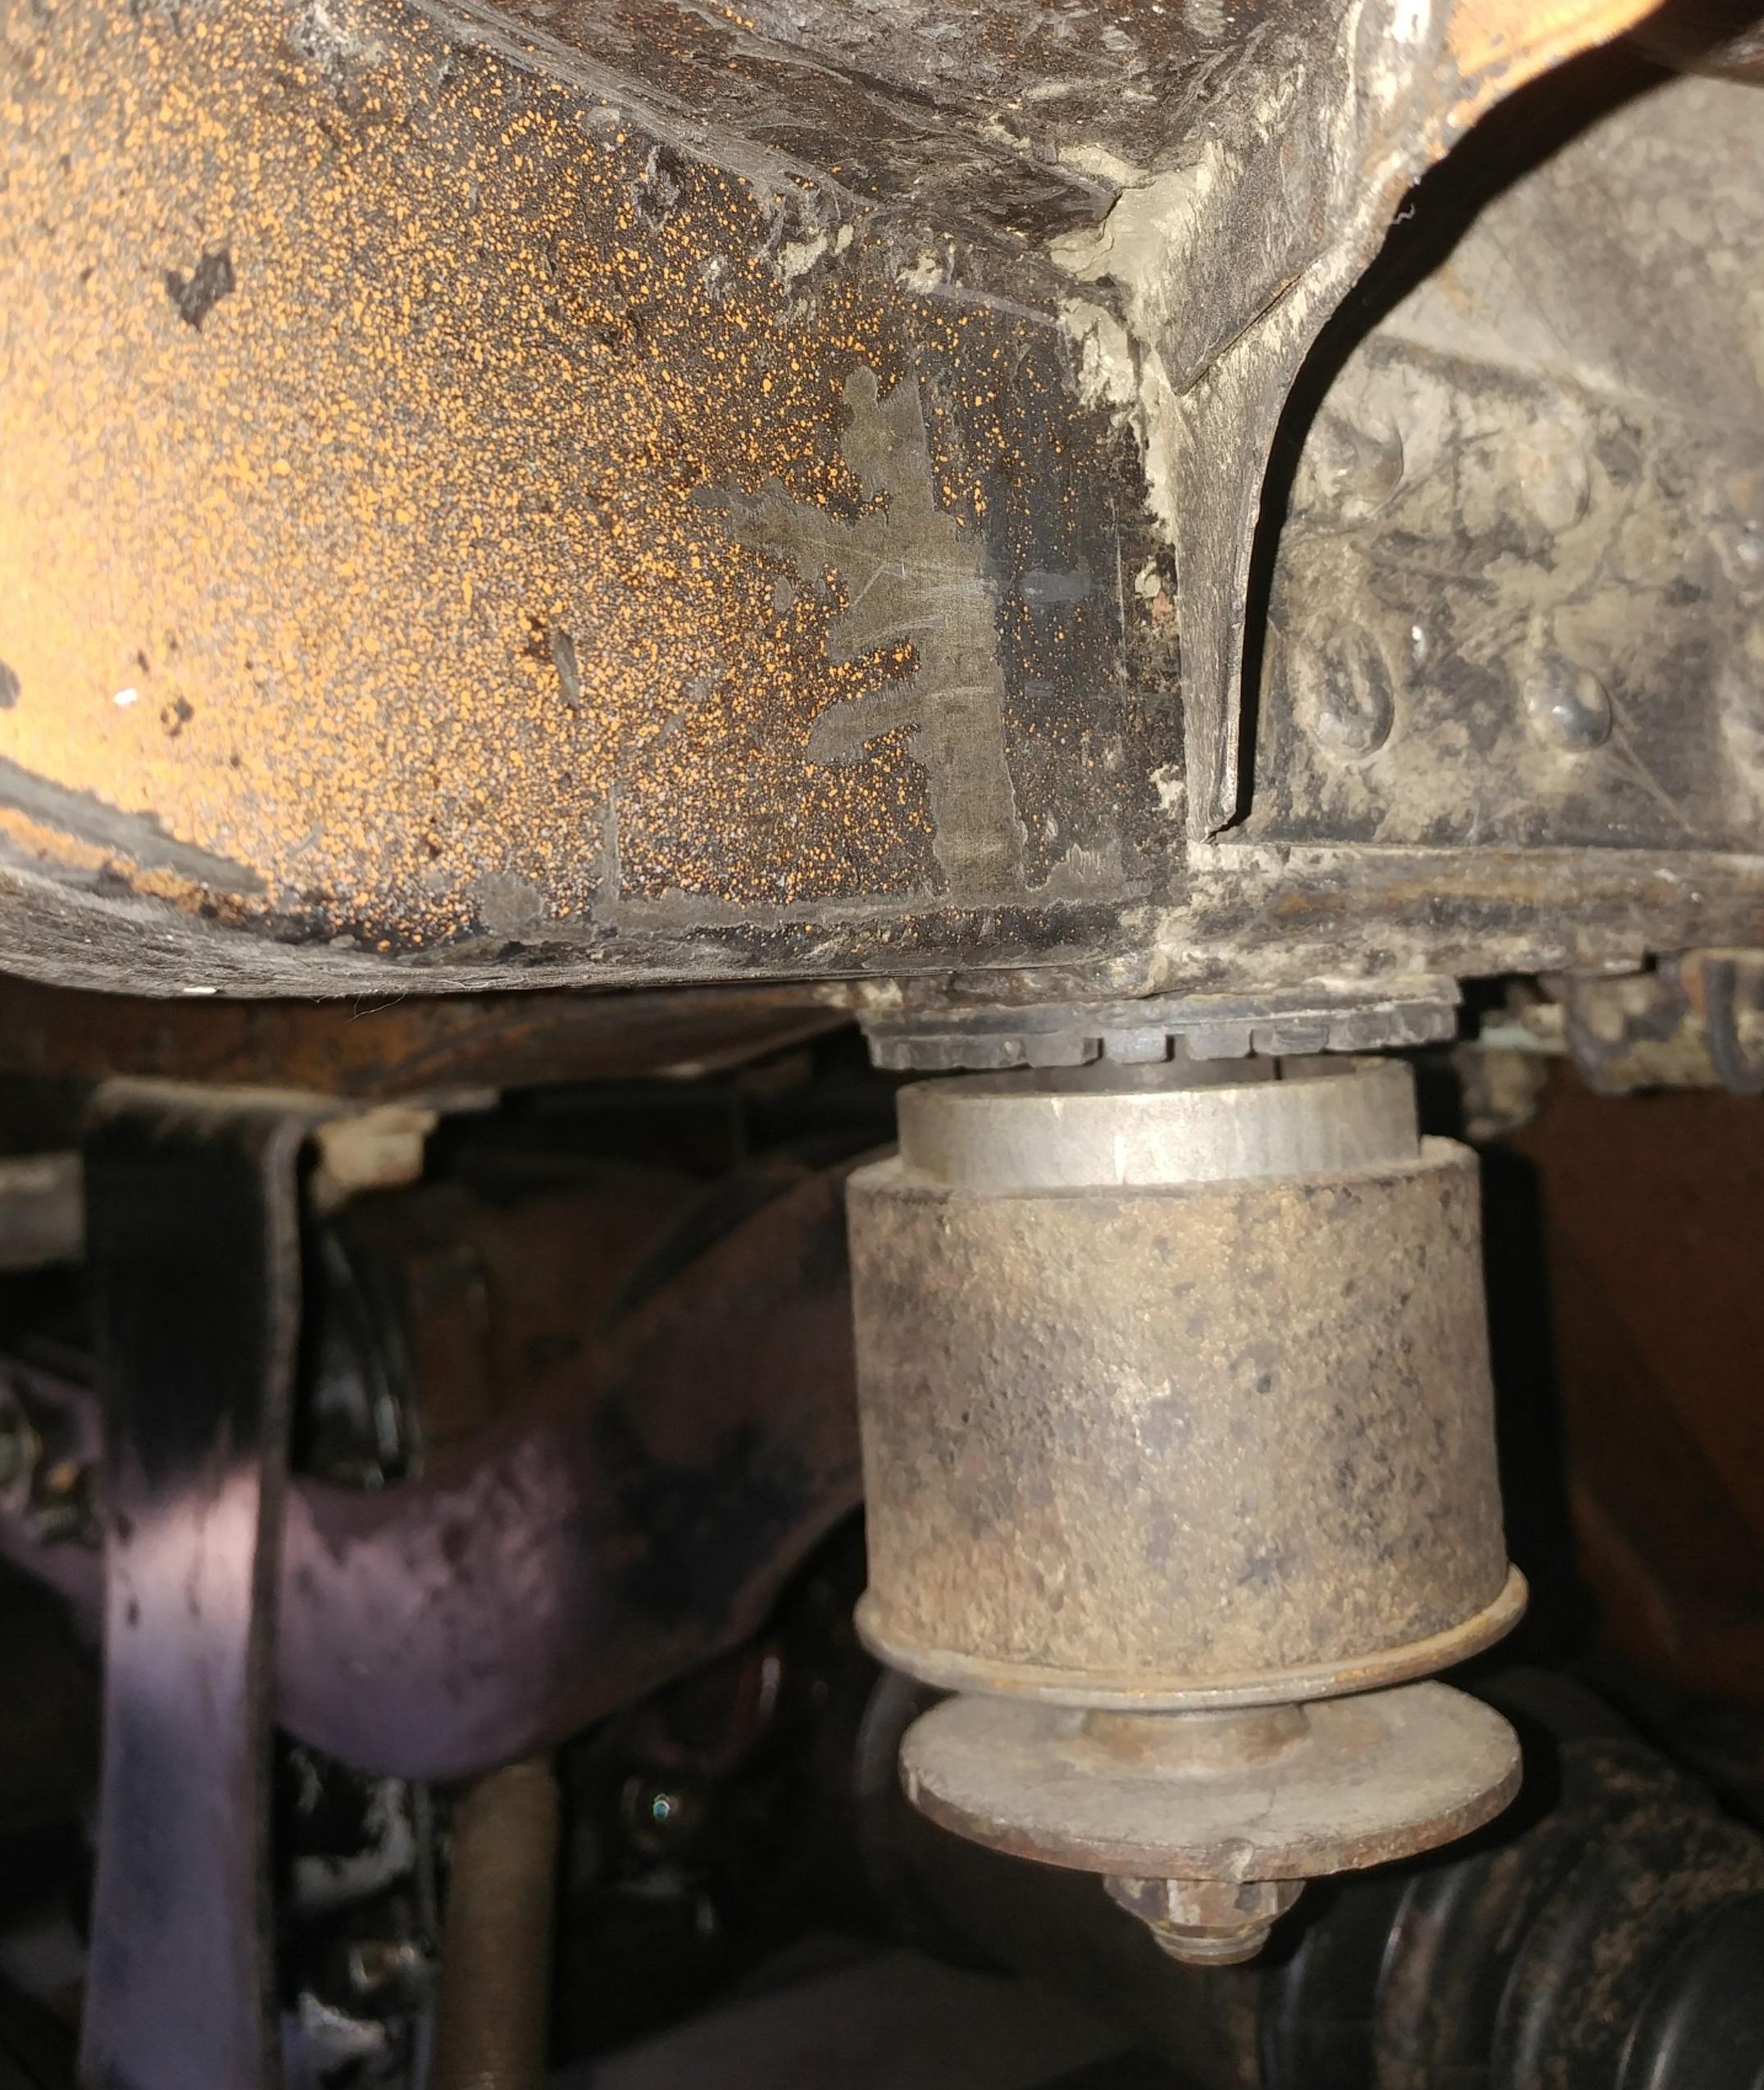
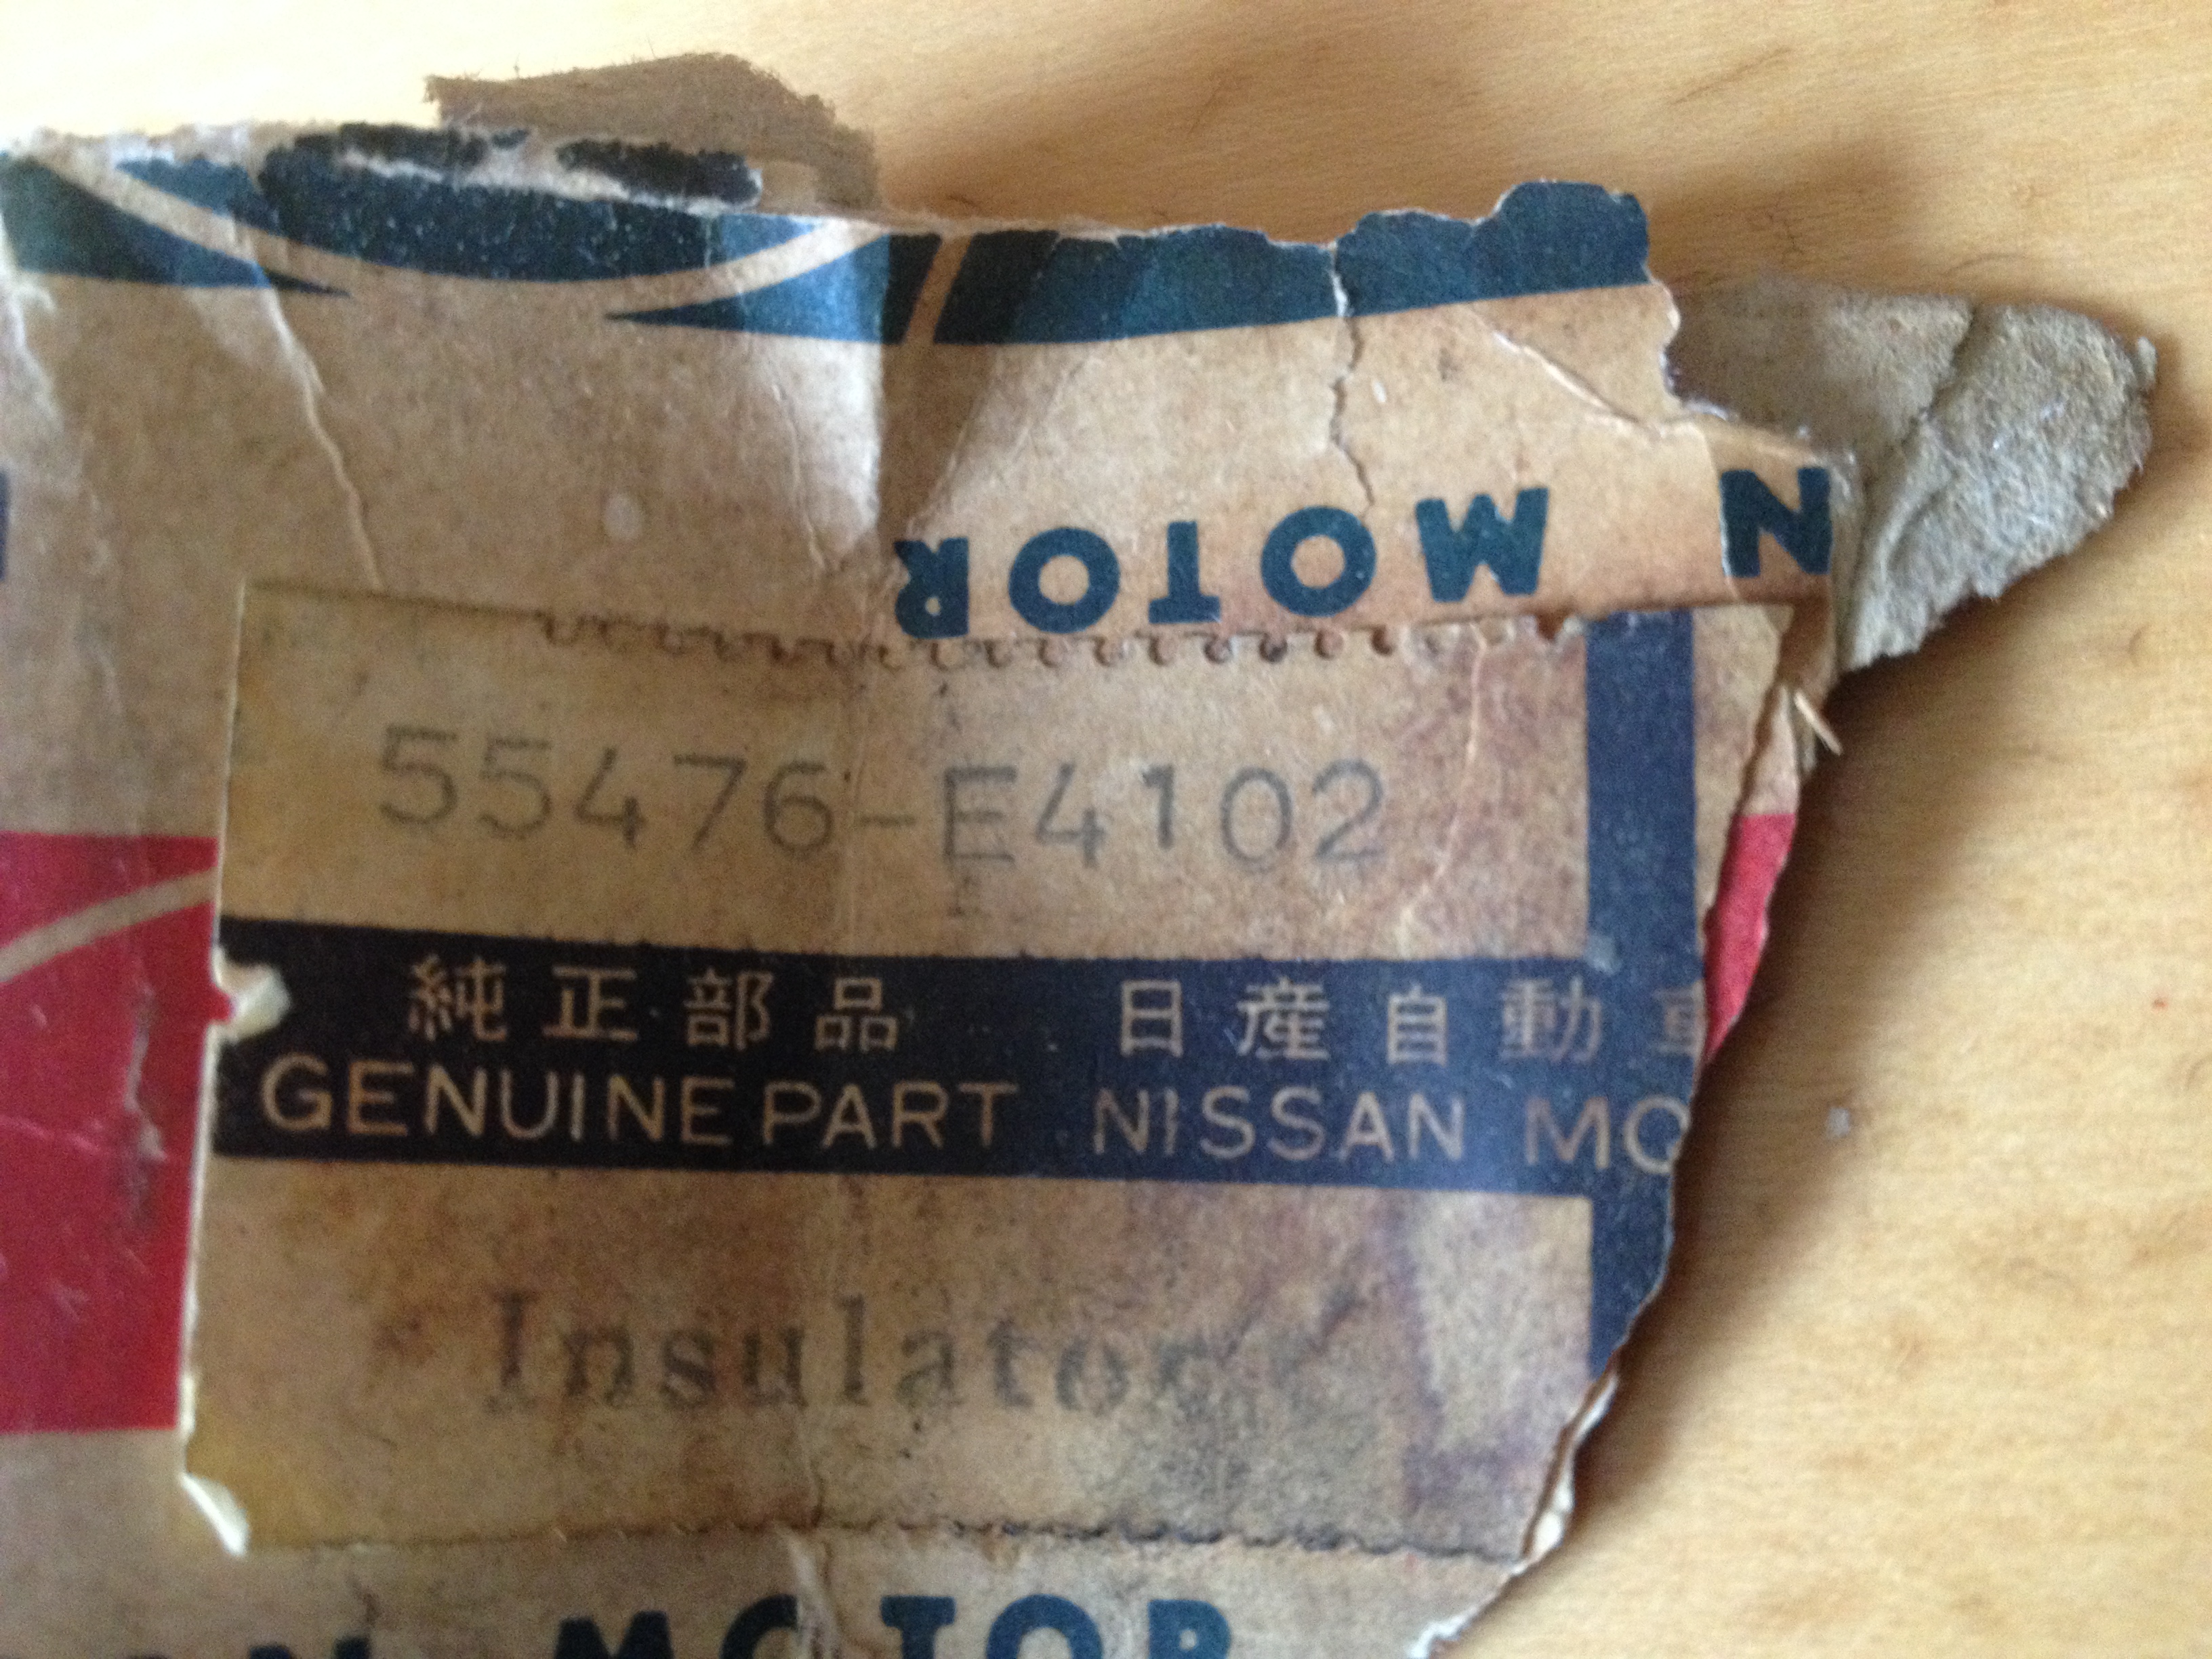
1 pointKudos to Kats for being able to finally produce for us a well-organized set of clear photos and graphics, c/w parts numbers. I still have a few questions, though. The M-bar mounting/isolation scheme for the Early S30's with the angled halfshafts (SoP to until 71-06) appears to use a unique isolator design, in which the rubber core extends out around the lower end of the metal outer shell so as to provide a soft lip for the plain-metal-washer lower 'stopper' to sit on. This apparently didn't work very well (the rubber lip probably sheared off over time). Does any one have a photo of this early-version isolator (PN 55476-E4100 or 55476-E4101). In the section view of the early-version isolator, the clearance gap marked as 'A' is intriguing. In the FSM, it's called 'B' and comes with the following explanation: "Replace differential mounting rear insulator if the dimension 'B' is less than 5mm." I believe that the lower 'stopper' (washer) is supposed to sit on the hard stop created by the square step machined into the bottom of the tapered mounting stud. Then the securing nut gets torqued to 60 lb-ft. The lower stopper doesn't even touch the insolator. So that means that the 'A' (or 'B') gap is intentional and the hanging weight of the Diff would be entirely taken up in shear by the rubber core of the insolator. This would be quite different in principle from the later style arrangement with the rubber-faced lower stopper. In that later design, the hanging weight of the Diff would be taken through the rubber stopper and into the tapered mounting stud. Makes me wonder why they even retained the rubber core for the isolator in the later design. Comments, anyone? As Kats photos demonstrate so nicely, there were at least three different M-bar mounting/isolation schemes used over the life of the 240-260-280 models. The early #1 version (angled-halfshaft 240) and the final #3 version (280Z) are easy to position in the Z's chronology and well-documented in Kats' photos. The 'middle' #2 version, however, is puzzling (it's the one that uses the thick/concave rubber-faced stoppers with no ribbing, top and bottom). Depending on how you read the parts numbers, this version may (or may not) have applied to the entire run of later 240's and the 260 and we should be seeing photo evidence of this style of stopper frequently. But that doesn't seem to be the case. Most of the suspension/drivetrain photos I've seen over the years show the deep-ribbed stoppers that were used on the 280Z. Comments? More specifically, does anyone know the production dates over which this 'middle' version (thick/concave rubber-faced stoppers with no ribbing) was used... 71-05 to 73-07? (i.e. later 240Z only) 73-08 to 74-11? (i.e. 260Z only) 71-05 to 74-11? (i.e. later 240Z and 260Z) To add to my confusion, the FSM for the 260Z continues to show the early-style insulator design (ref. Figure RA-13).1 point
-
1 pointGood info, much easier to fabricate too. @kats That is excellent info and the pictures are outstanding!1 point
-
1 pointJust to add to this thread that European-specification cars, at least from 07/71, were equipped with solid rubber inserts between the concentric metal bush parts, part number 55476-E4102, which probably helped to firm up the suspension.

 1 point


.jpg.4db970378ce0df3f03ca180f12ccbca1.jpg)
.jpg.86e111e4fbecb1046b1d062e253c367f.jpg)