CanTechZ
Free Member
-
Joined
-
Last visited
-
Currently
Viewing Topic: Z's on BAT and other places collection
Everything posted by CanTechZ
-
 I did a hi-res scan of the FSM chassis drawing and then did a raster to vector conversion. For those who are interested, I am attaching the cad file (.dwg format) that most cad software should open, as well the same drawing as a pdf. I scaled the .dwg file as close as I could to 1:1. One thing I noticed was that when I scaled such that the horizontal dimensions were accurate the vertical dimensions were plus about 3%. See the dims in green that I added for reference. Mike 240Z Chassis Dimensions - Source 1972 FSM Dated 10SEP71_Scaled_26MAY2018.pdf 240Z Chassis Dimensions - Source 1972 FSM Dated 10SEP71_Scaled_26MAY2018.dwg
 -
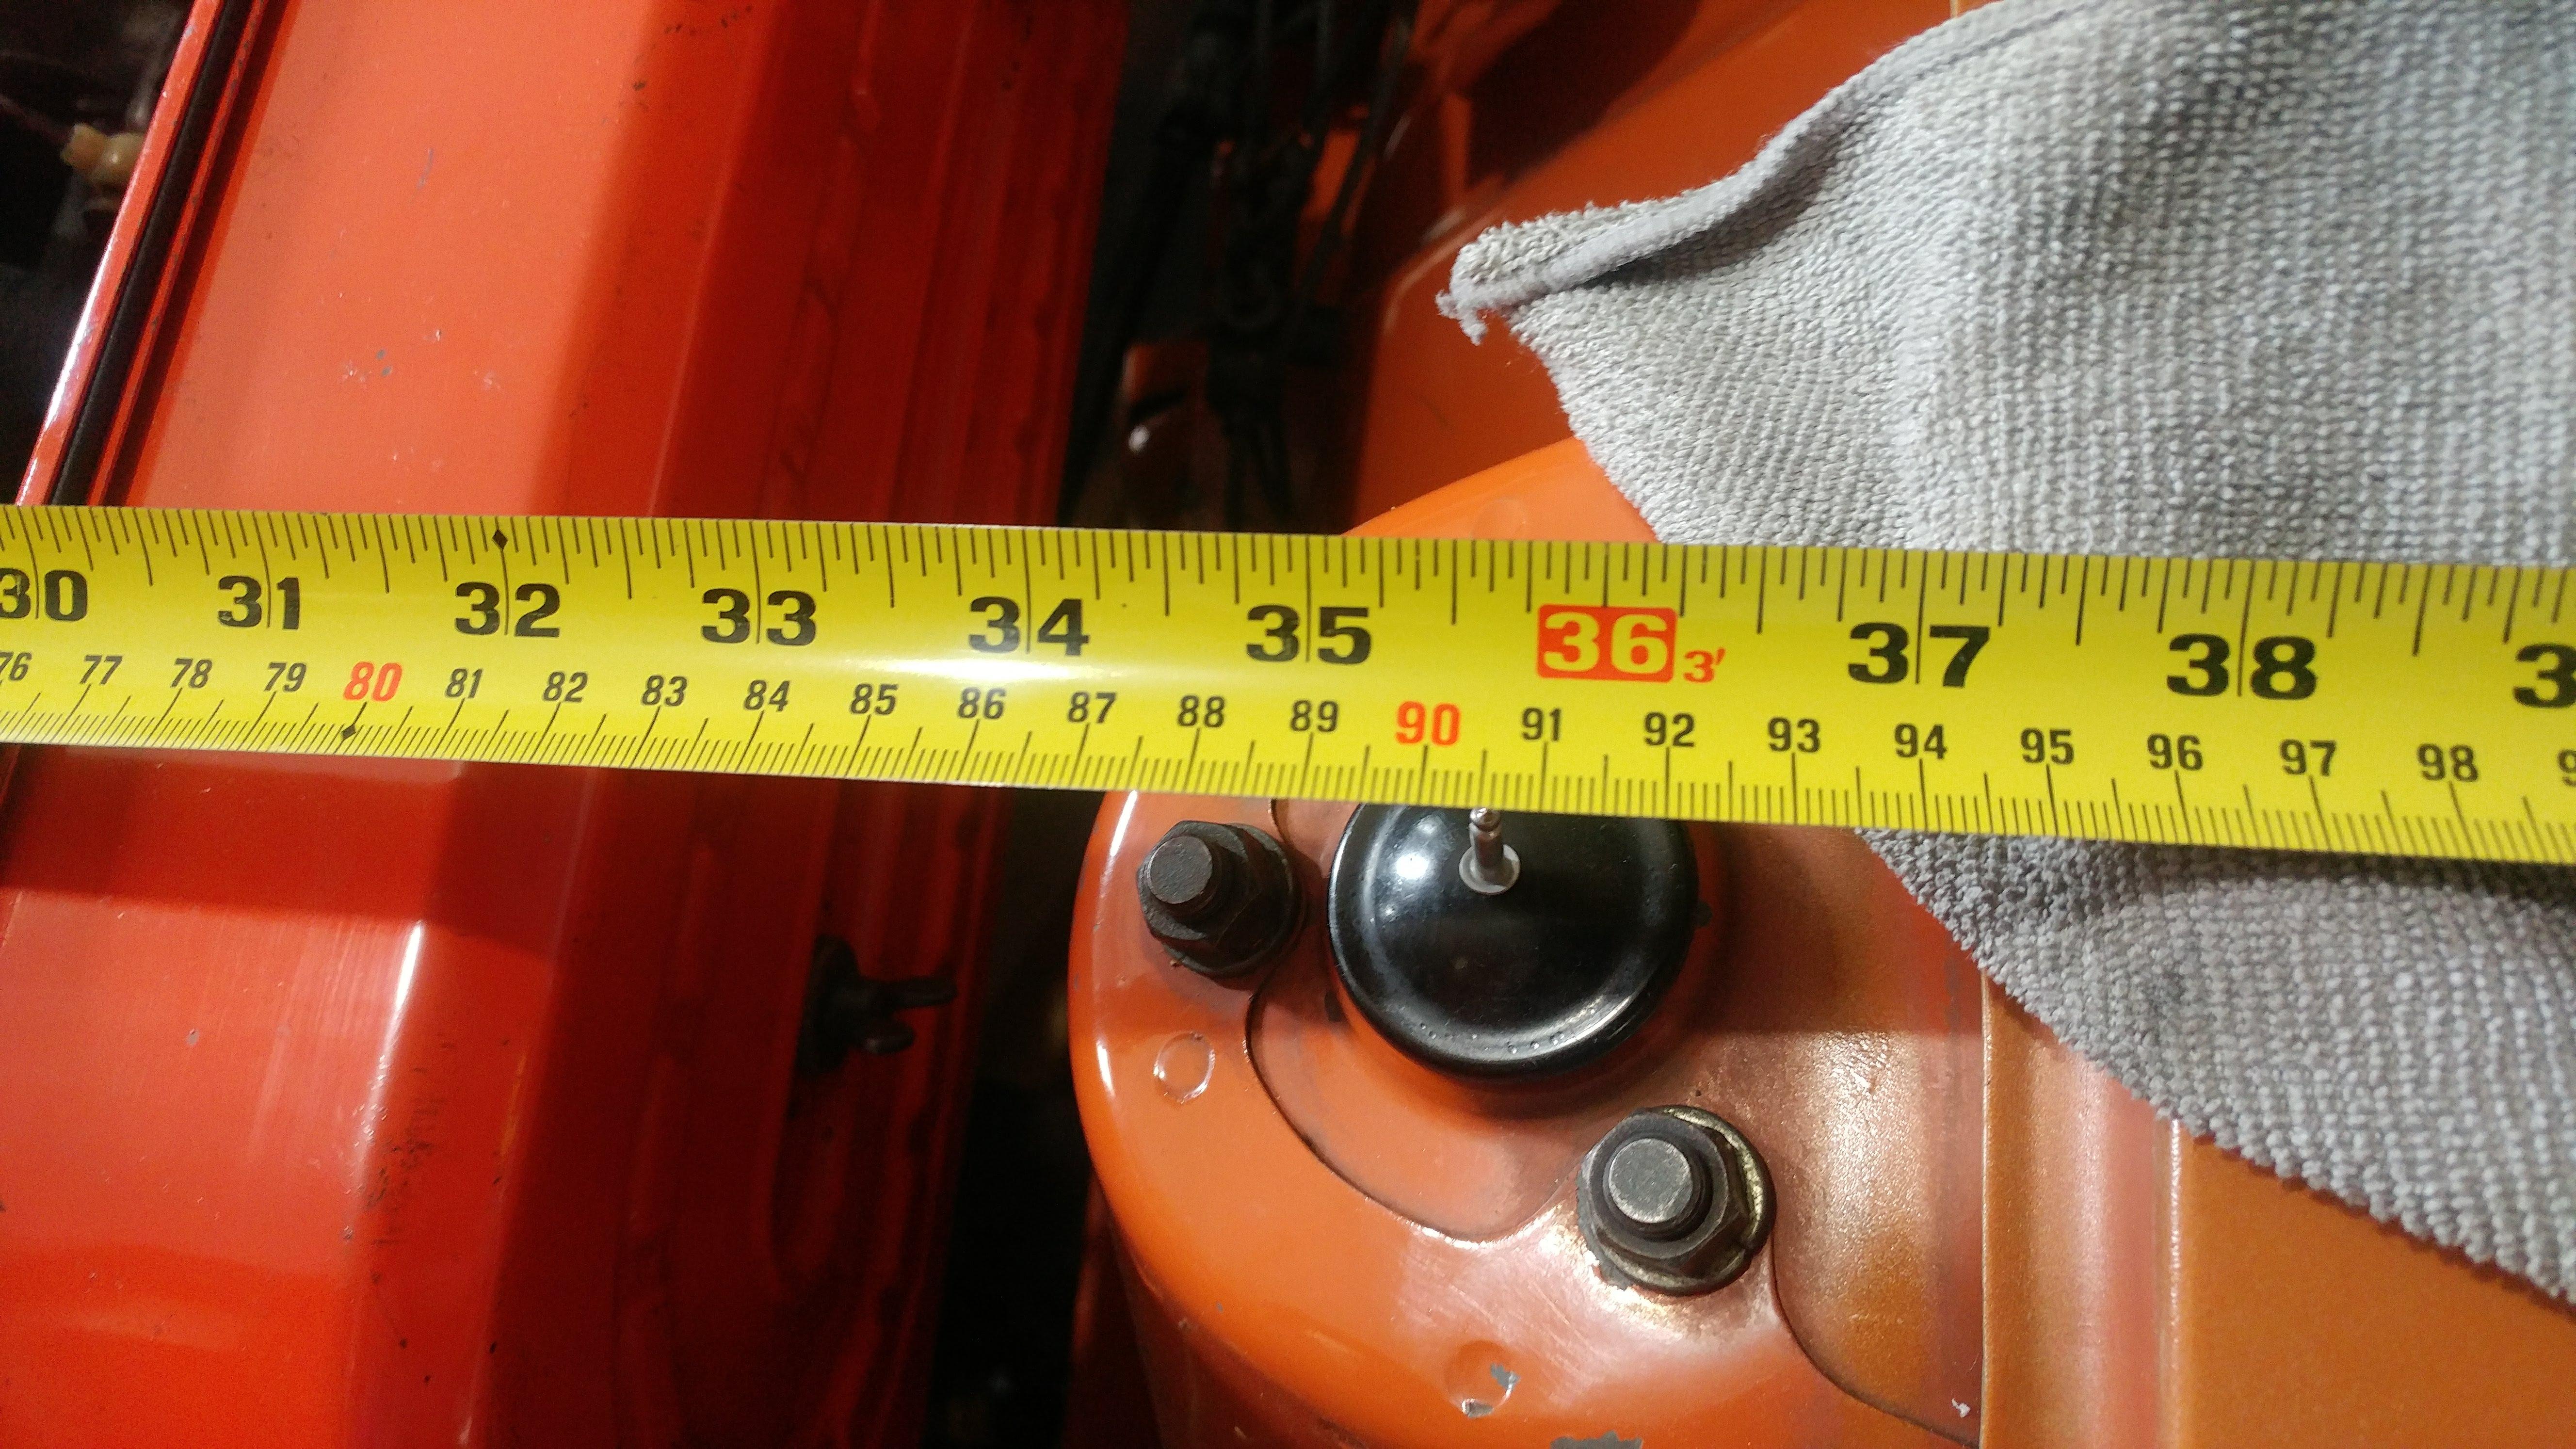
C/C Shock towers on my '70 measured 905mm.


-
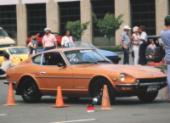
When these cool trucks show up at local shows, I always stop to admire them. A great part of Datsun/Nissan history.
-
Looks like a 320. 1962 to 1965, they had a 1.2L engine. The 520 started in 1965 with a 1.3L
-
My understanding is that the buyer pays bid price plus 10% and the seller recieves bid price less 8%. The bottom line BJ makes a lot of money.
-
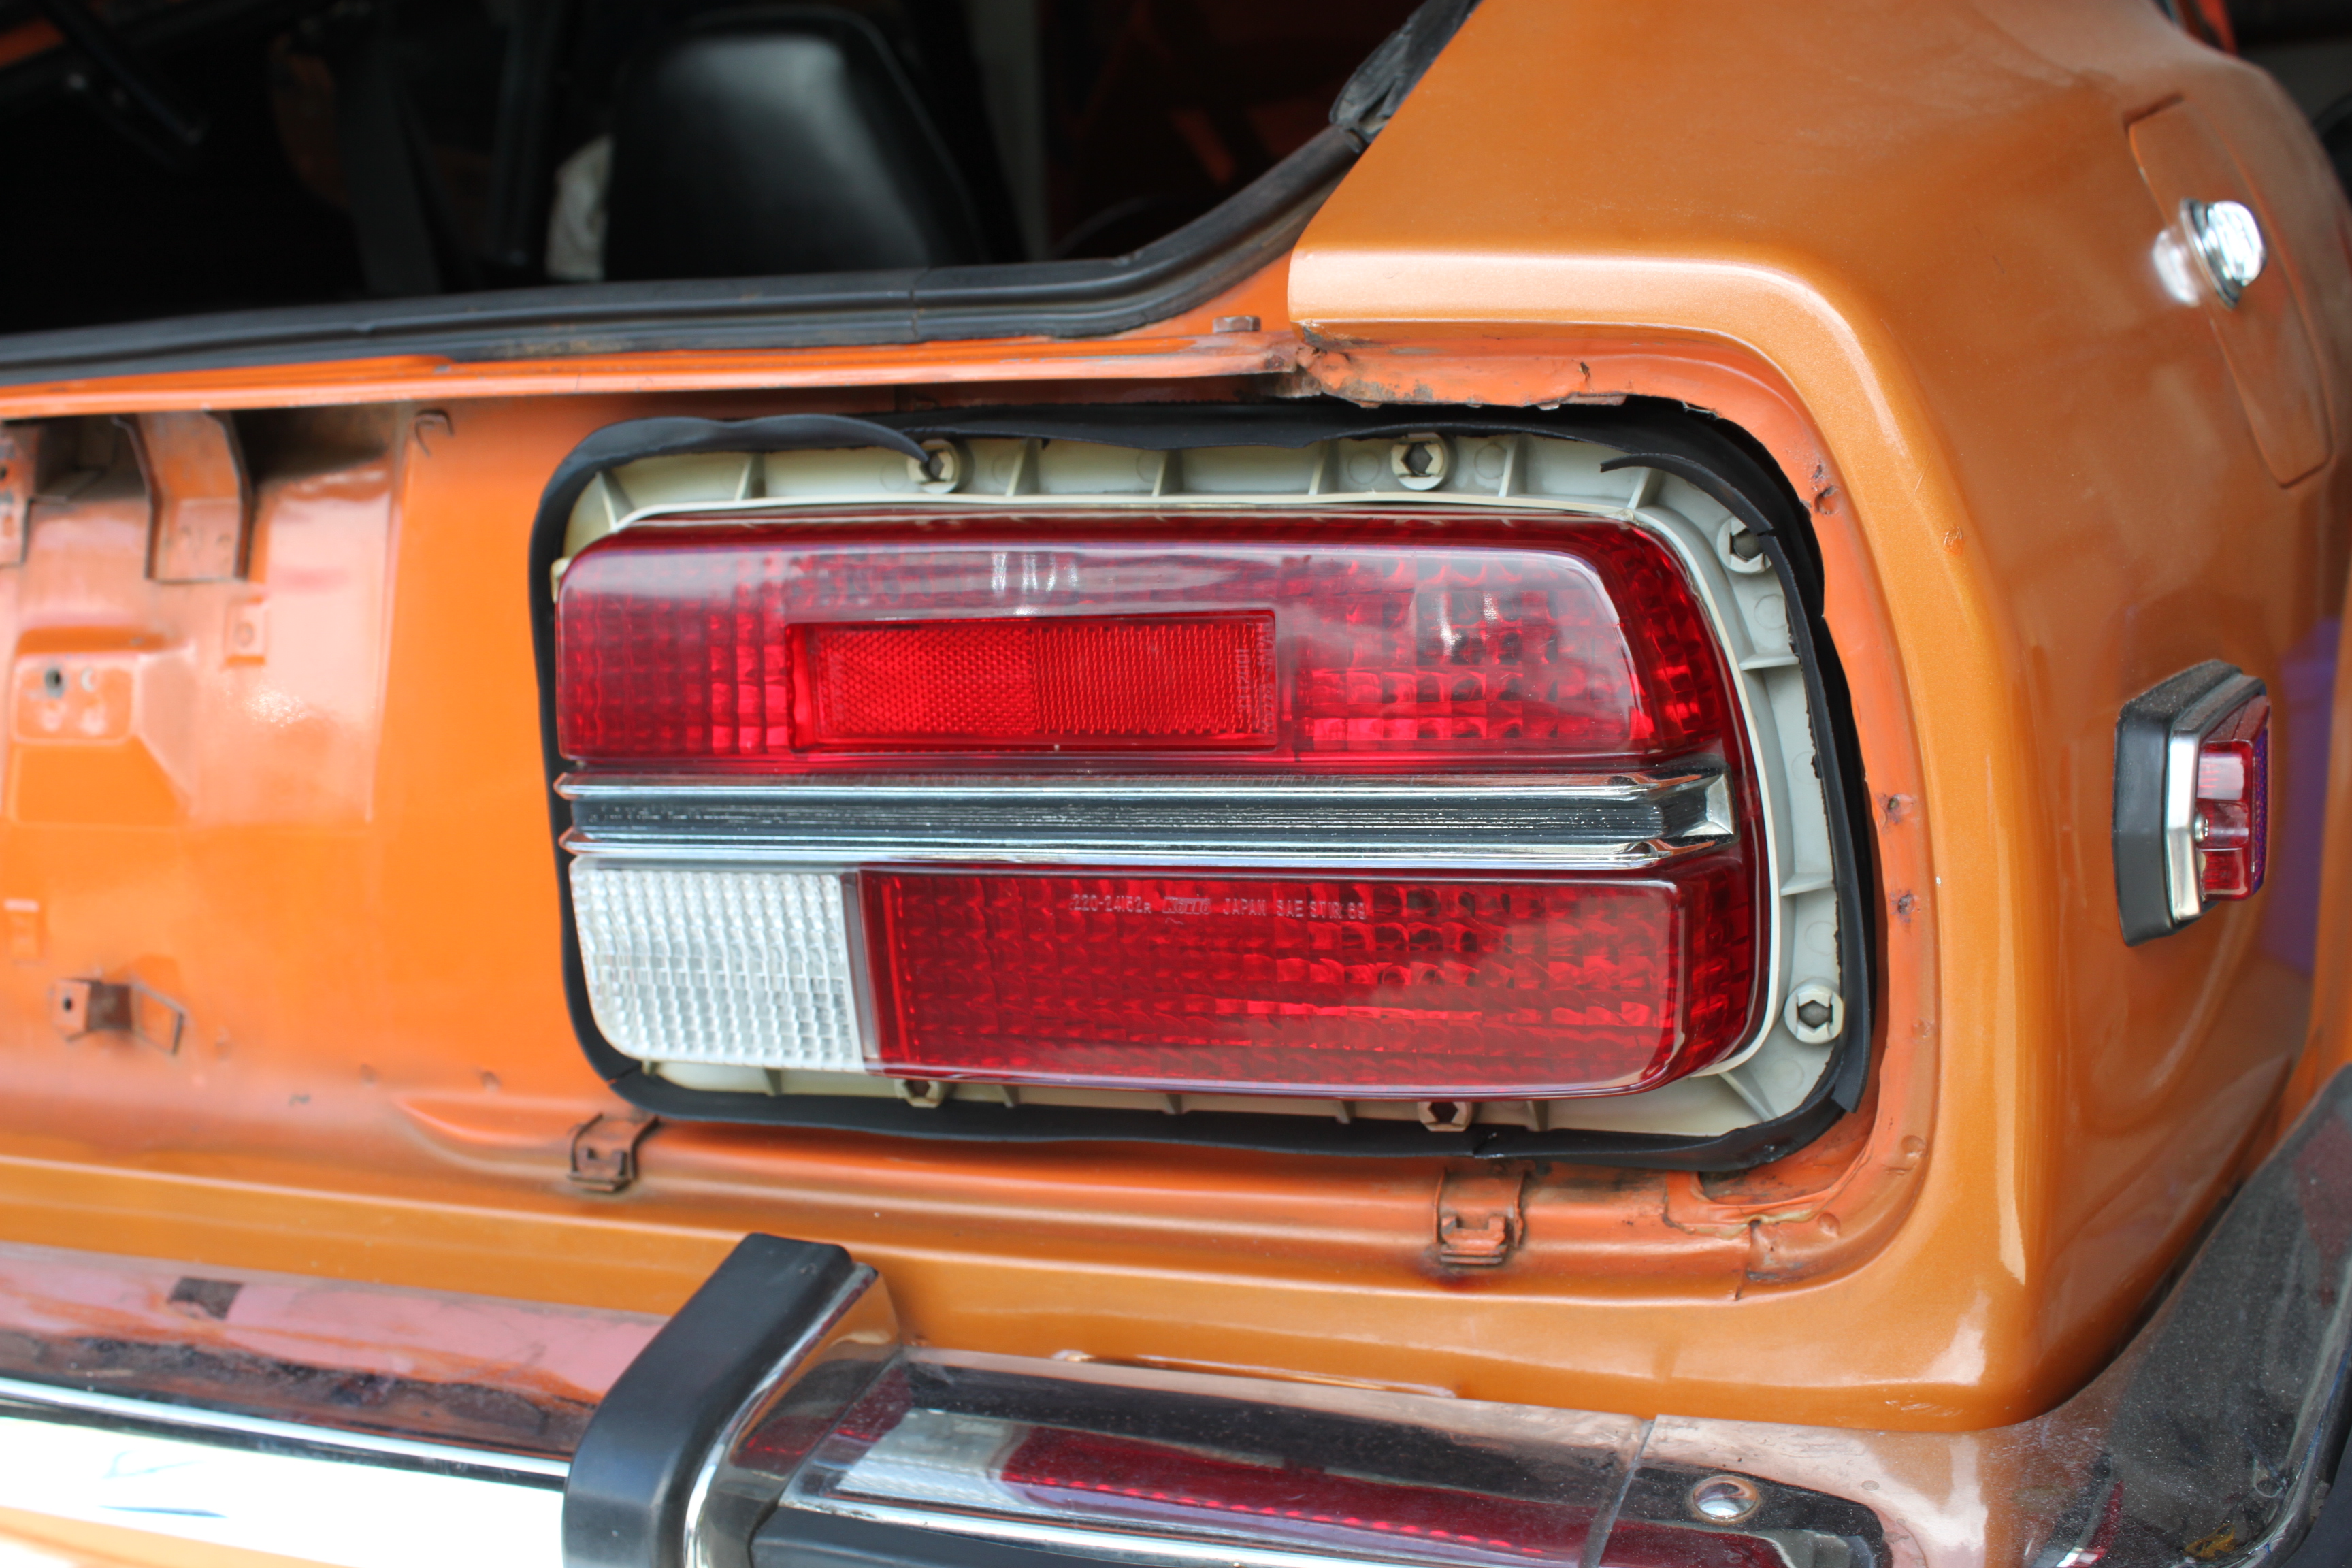
For reference here is a picture that shows the clips and brackets for the tail light finisher/surrounds from when I painted mine. I think the clip (item 8 that @siteunseen mentioned) attaches to the bracket that is spot welded to the body if I remember correctly.

-
Regarding question one, I remember reading about a change to the doors where side impact bars were added to the door structure. I just can't seem to find a reference, this change might have been for later models, ie. 260Z or 280Z.
-
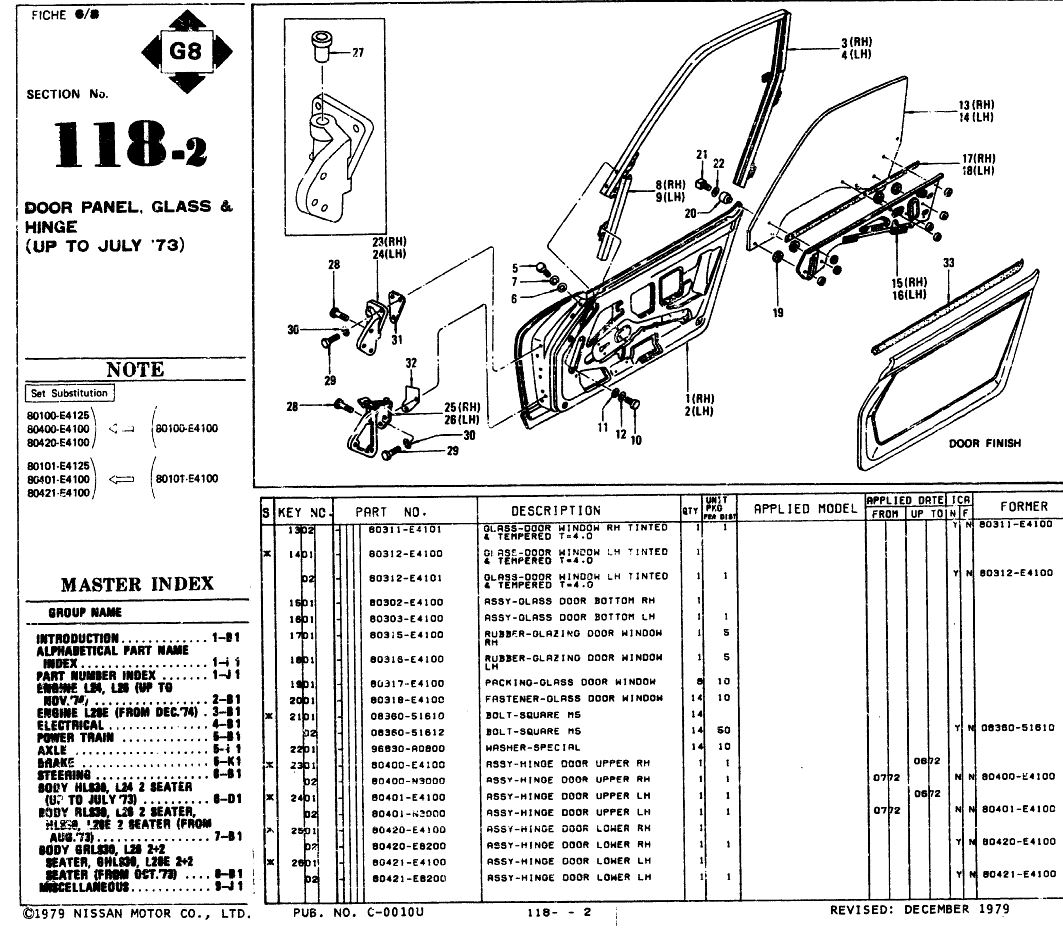
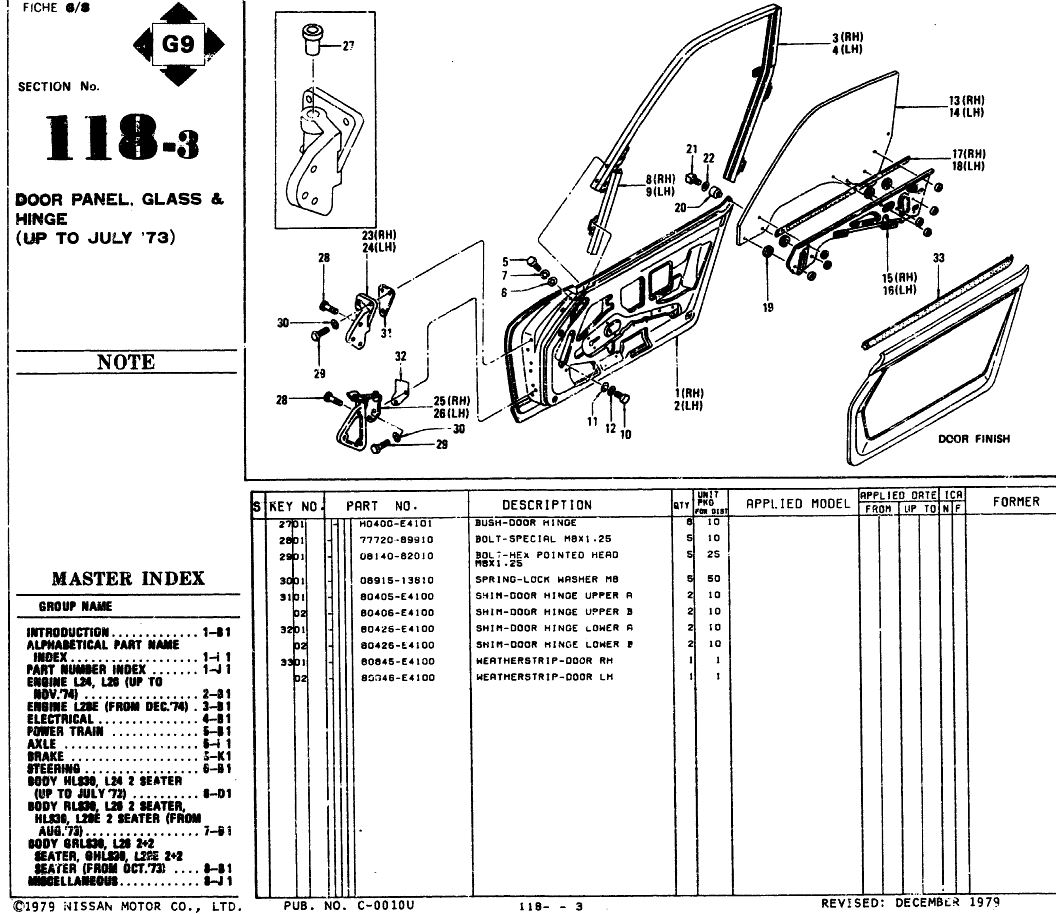
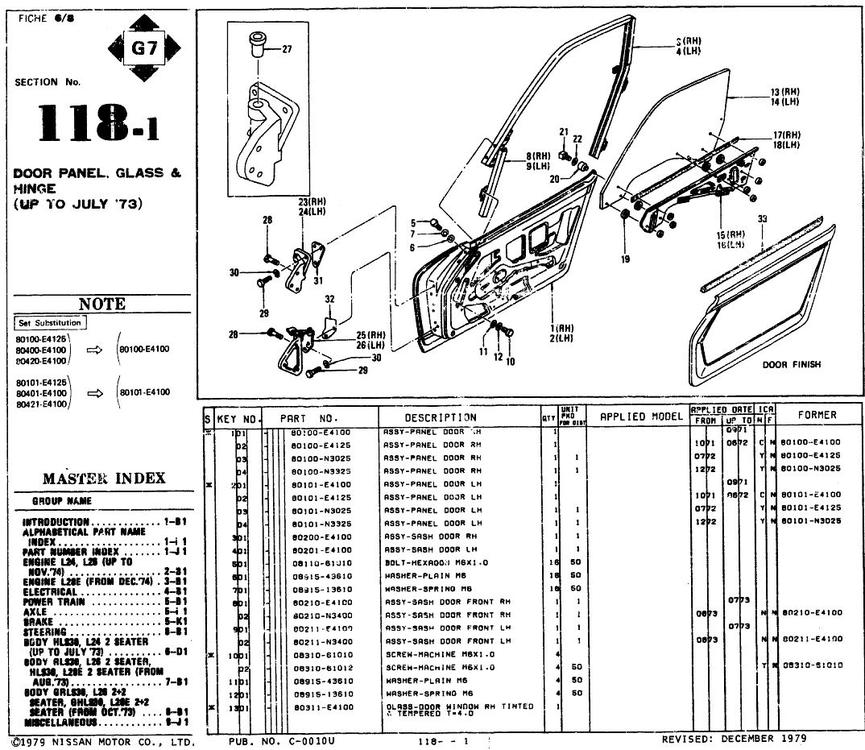
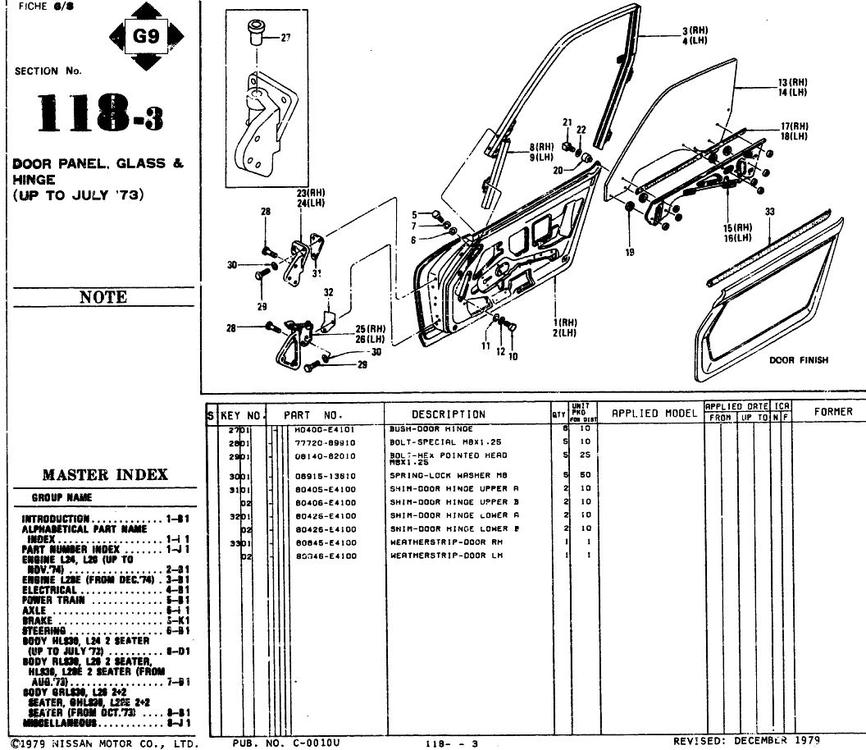
Here are the door related pages from my parts CD, they have more info relating to questions I & 2 than that shown in carpartsmanual.com. Page 6-G-7 shows four p/n's each for RH & LH door panels and page 6-G-8 shows two p/n's each for lower hinges but not an implementation date.

-
Interesting, Thanks @26th-Z
-
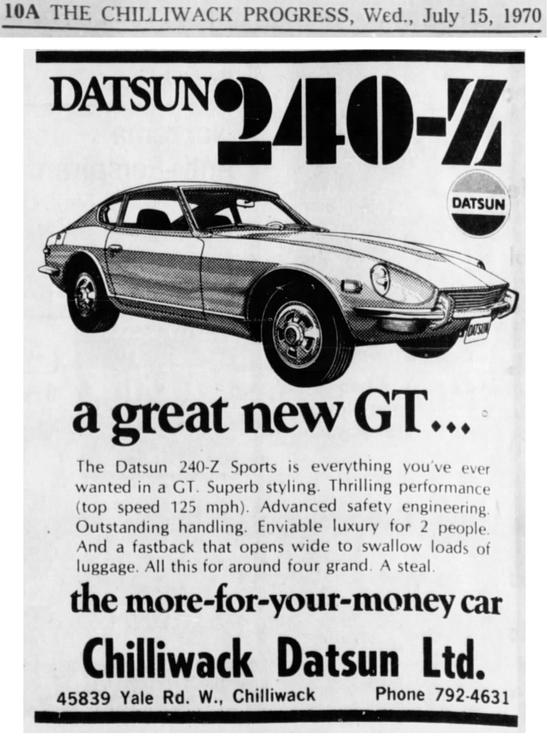
I thought that some early US cars with 1969 production dates were UN spec. Maybe @Carl Beck or @26th-Z will chime in. Here's another 1970 Canadian ad,
-
Ok, you got me. Now I have to come up with an excuse for the collection of parts in the spare bedroom closet.
-
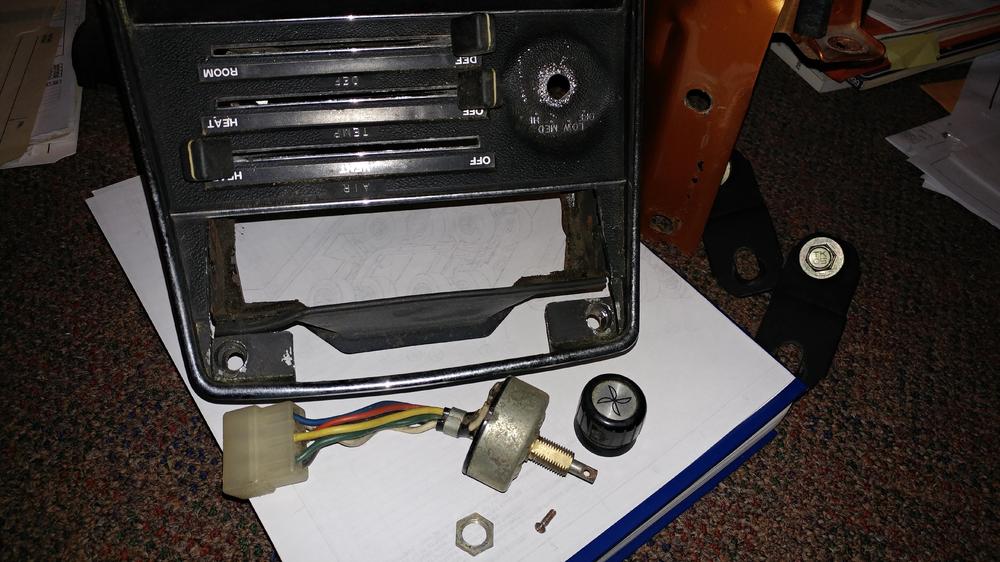
I happen to have these spares in my office right now. As site said there is a nut that goes on the panel, front side. There is also a flat on the thread and in the panel hole for orientation. But it doesn't really stop rotation, the clamping of the nut does that. Here's a pic. HTH Mike
-
Point taken
-
Amazing work on your project, I have this topic bookmarked as a reference in case I ever get to a full resto of my car. Just wondering about the color of the hood hinge torsion bars? I thought they were black as they can be seen though the grill.
-
-
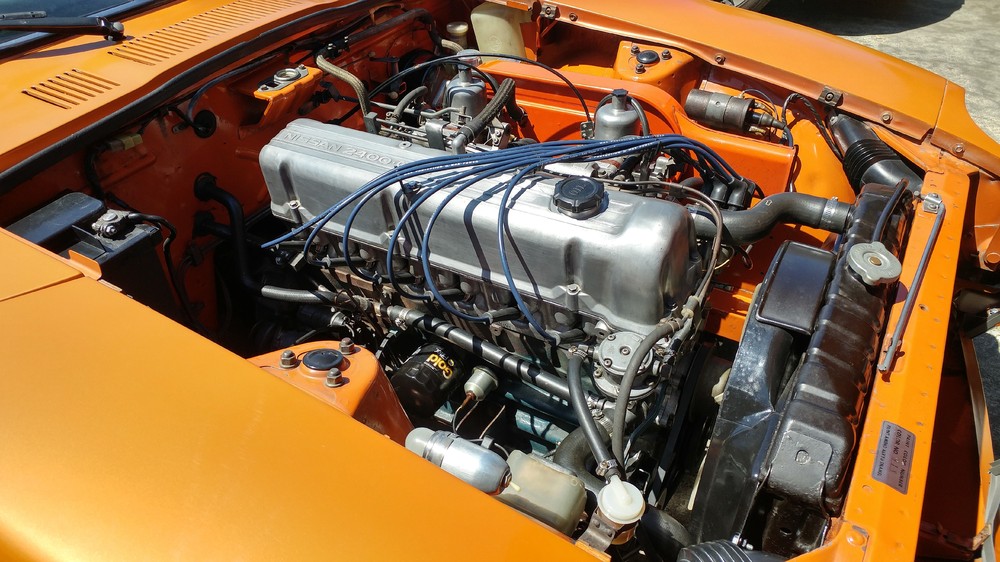
The Nissan parts book shows four part numbers for the PCV hose (item 3) from 1970 to 1973. I'm not sure what the differences are but the first P/N shows for up to 12'70 and the part number starting 1'71 not being backwards compatible. Also here is a picture of my 7'70 car showing the early hose. HTH Mike


-
-
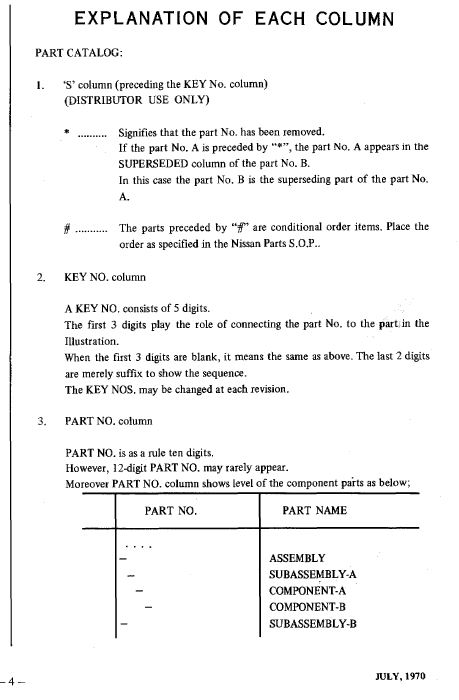
The ICA column refers to parts interchangeability, the attached pages from the 1970 520/521 pickup 1970 parts book show definitions of all the columns. HTH Mike

-
The '72 choke cable is definitely shorter by a few inches. I managed to get the '72 cable to work in my '70, but the cable was quite bent over where it left the choke linkages on the carbs. In fact it resulted in so much effort to pull the choke lever that I thought I would break the knob. Last year I ended up repairing my original cable by using the original sheath and making a new cable from .055 music wire, .055 stainless wire is also available. It works great now, here are a couple of links on the subject.
-
Check with Steve @nix240z, maybe he will make more. His website shows out of stock for now. http://www.240zrubberparts.com/apps/webstore/products/show/4842818 Cheers Mike
-
+1 on the clay bar as the first step, it works good on glass too. I prefer Mothers products. Mike
-
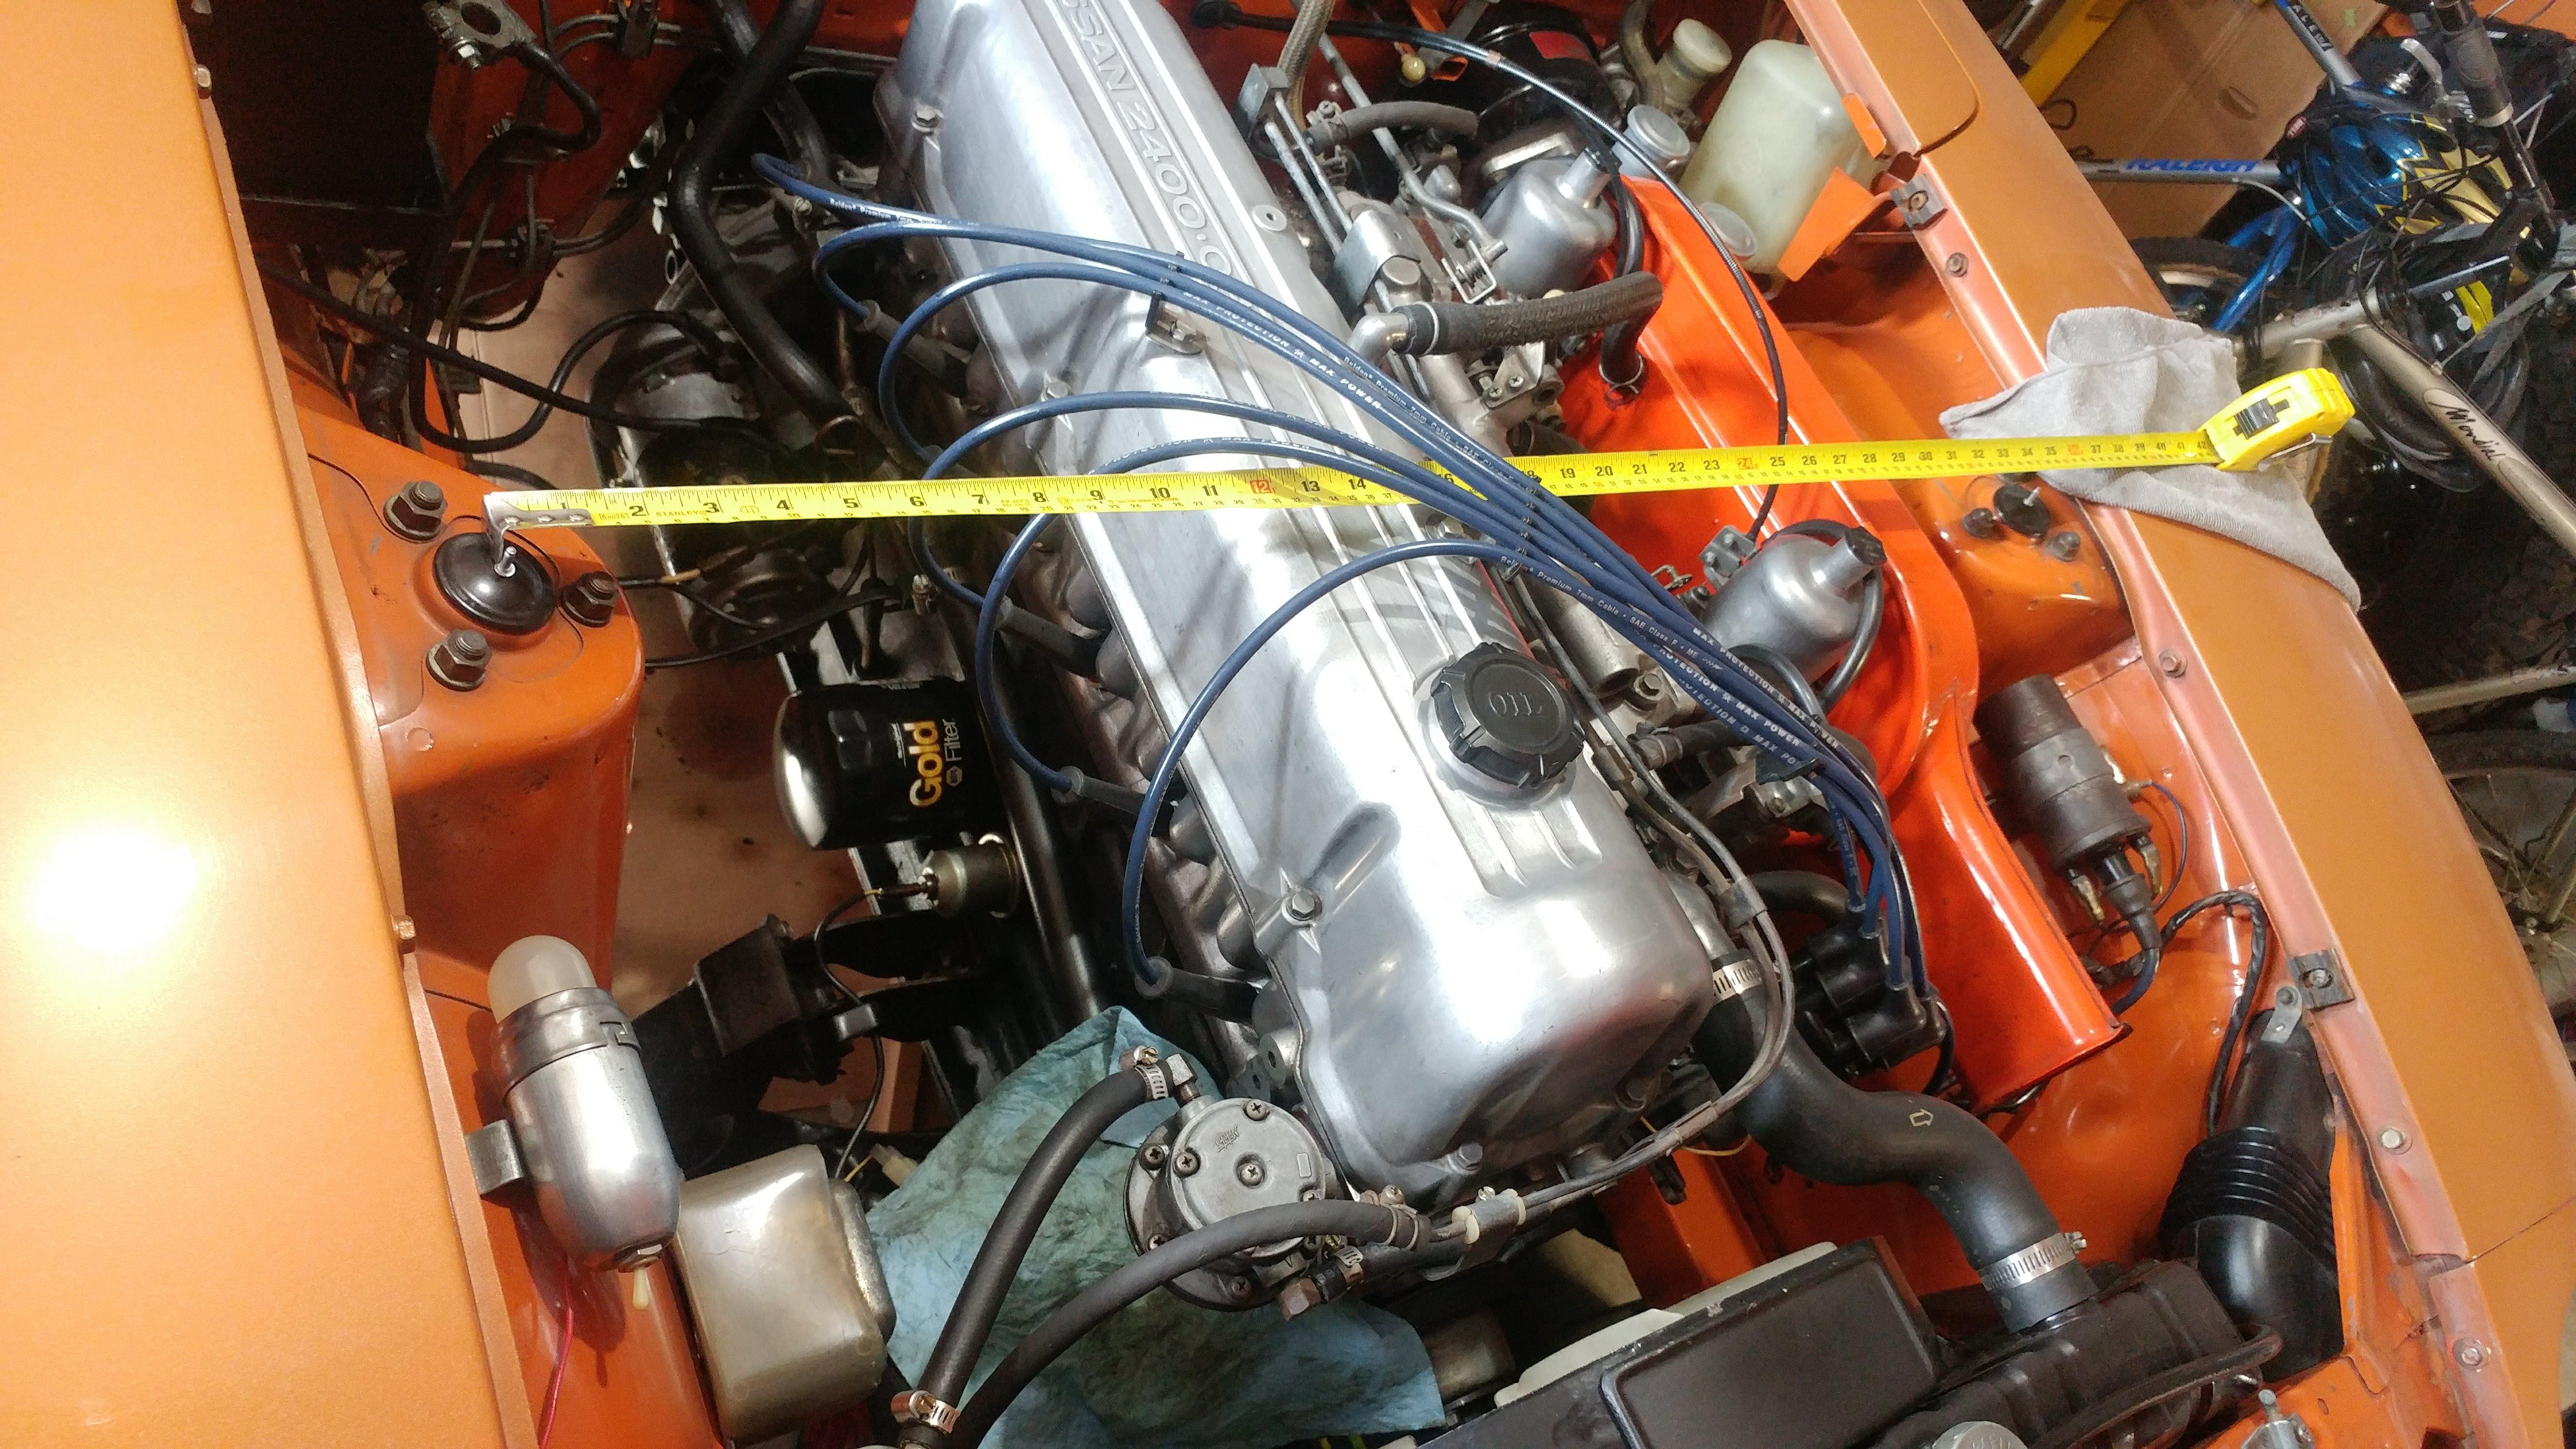
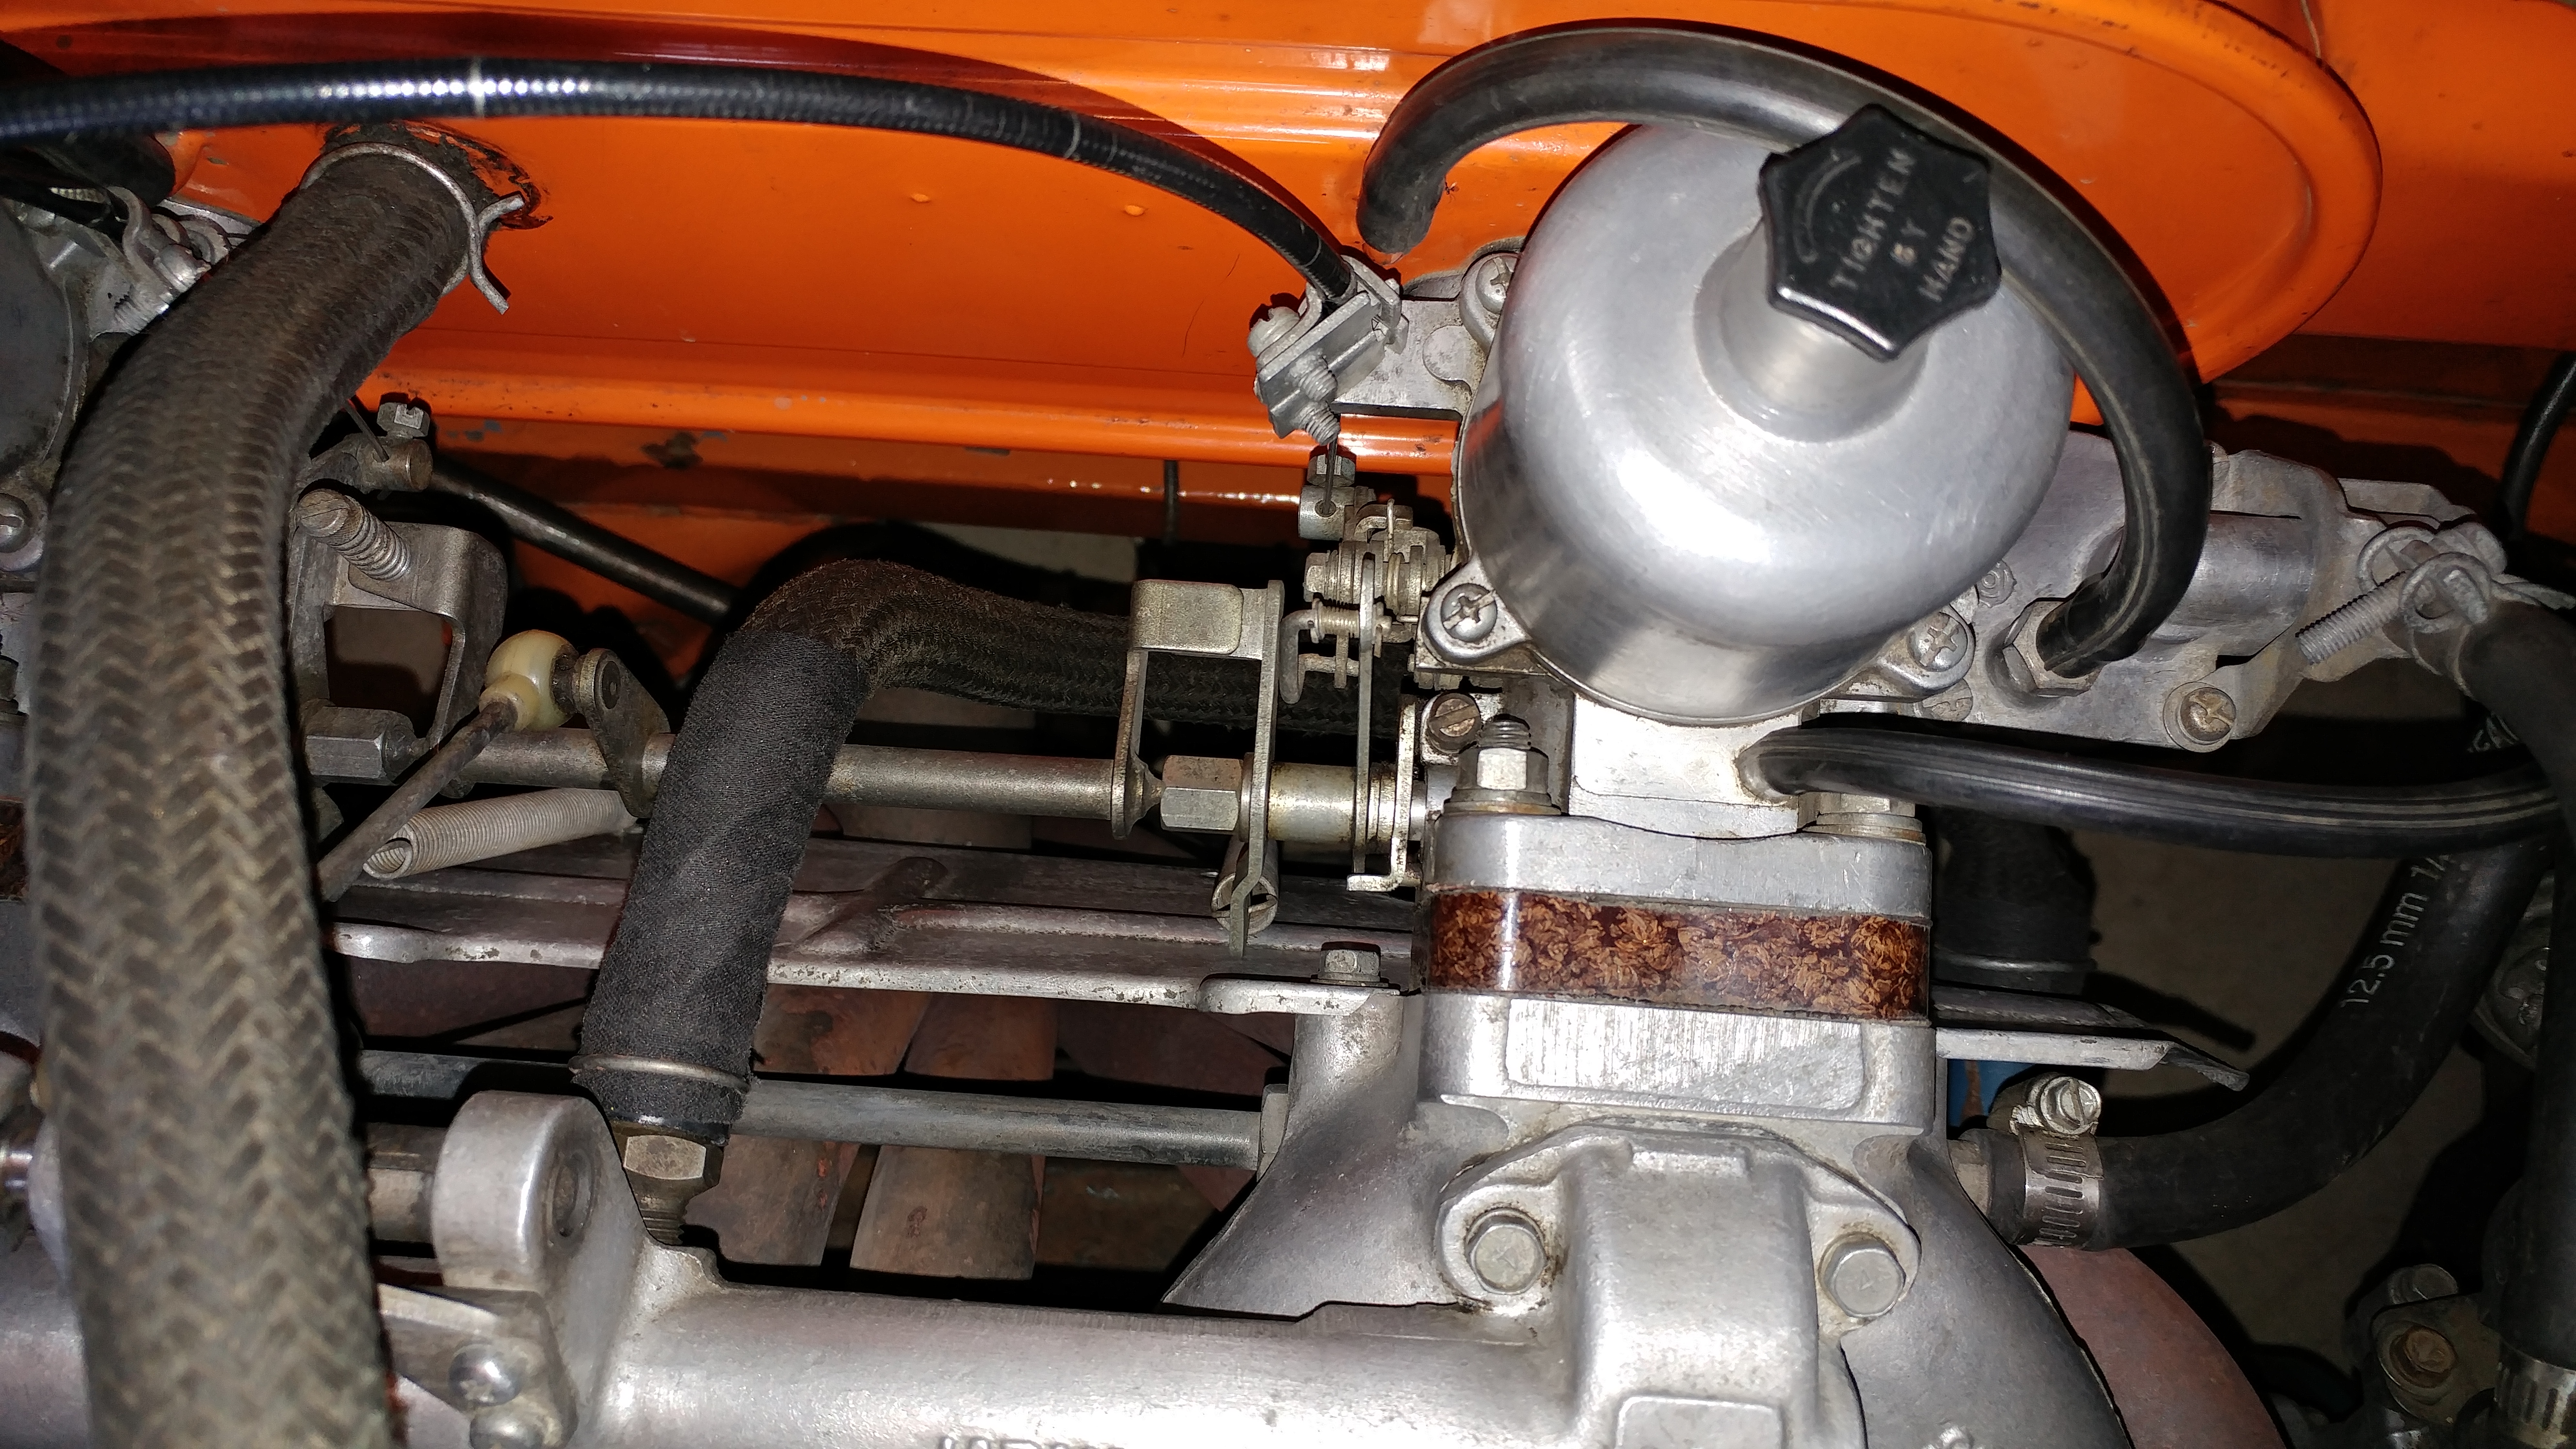
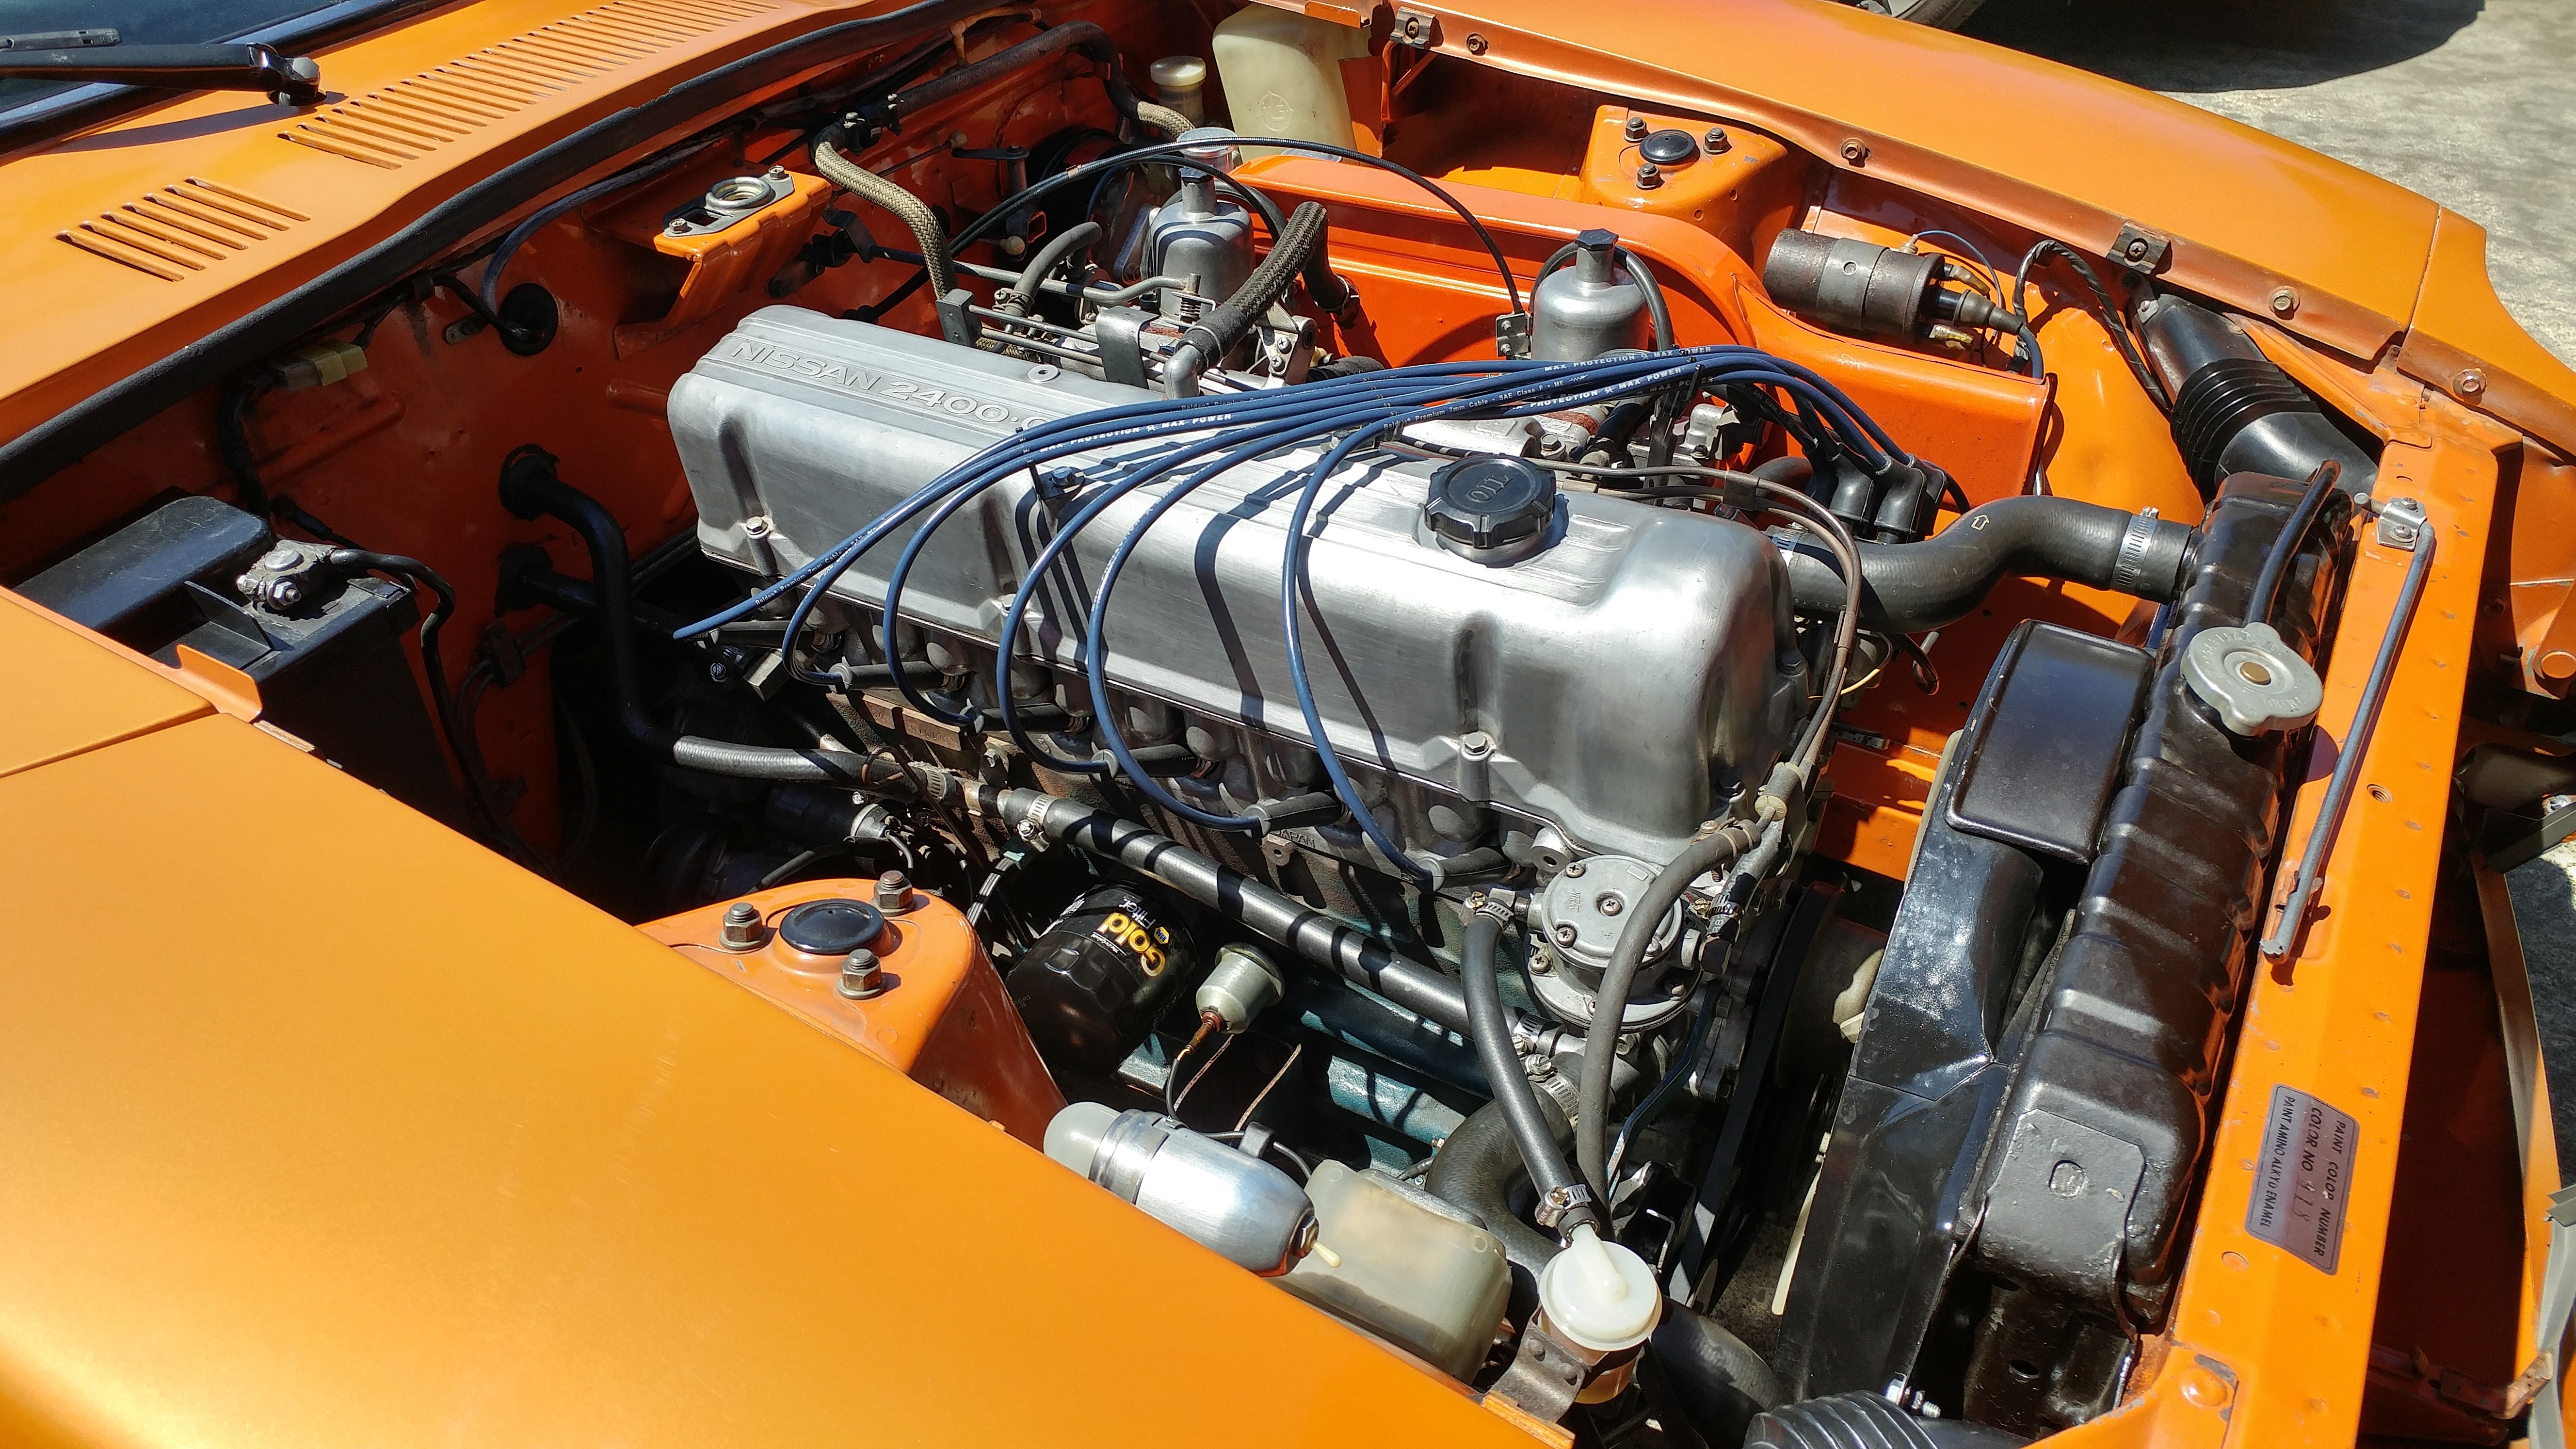
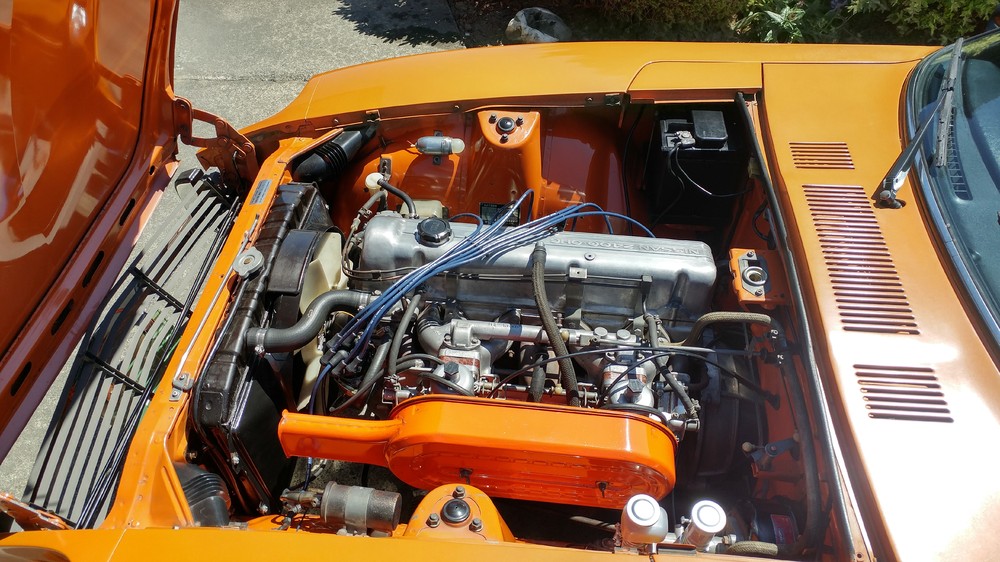
Did some engine & engine bay detailing, I'm thinking it's not looking bad for 146,000 miles and engine never been out of the car.
-
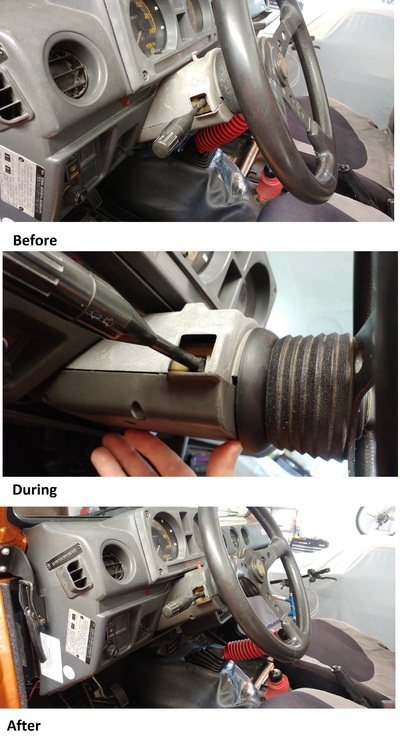
Just tried this today on the steering column surround on my Samurai as a test. It was an eye sore in really sad shape, and now its just sad. I must admit it does look way better from 10' away. The bottom half was removed and worked out better than the top as the dash basically has to come out to remove the top half, so it was done in place. Time will tell if it looks good for the long term.
-
That plate looks like it could be one from the late '70s British Columbia, here is a link to some examples, http://www.worldlicenseplates.com/world/CN_BCOL.html
-
Interesting, my 7/70 car has closed slots on both sides and no 12V 8W stamp. I've owned the car since '78 and as far as I know it is original.