
Zed Head
Community Member
-
Joined
-
Last visited
Everything posted by Zed Head
-
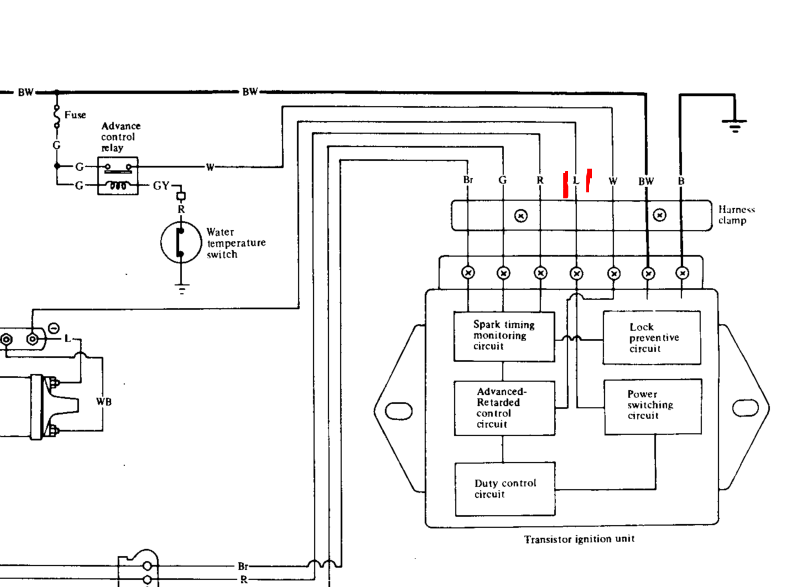
The XR700 is the "low energy" version of their electronic ignition. It keeps the ballast resistor and is basically just a points replacement. The XR3000 has current-limiting technology and is designed to use a lower resistance coil so that you can use a larger plug gap. SteveJ is asking about the ignition module that your 260Z came with. It's the finned aluminum thing by the fuse box. The blue wire needs to be disconnected from it, at least. Might as well disconnect all of them. I've posted this before but sometimes a capacitor/condenser on the negative side can suck up some voltage spikes. I'm not sure how Crane's adapter works, it needs an external power supply. Your tach is the voltage sensing type, not the Smith. http://www.triumphspitfire.com/images/cranemanual.pdf
-
Might be easier to just fix the tach problem. What is it doing? Higher energy spark generally helps for leaner mixtures (emissions), richer mixtures like you might find with a high performance cam at times, turbo engines with high cylinder pressures, stuff like that. It reduces the number of misfires. Once the spark starts a fire, performance is on its way. For general driving around in the car, probably not much difference.
-
Y'all gotta use the power of the @. @wrecked2001 We can see you man! Or your friend.

-
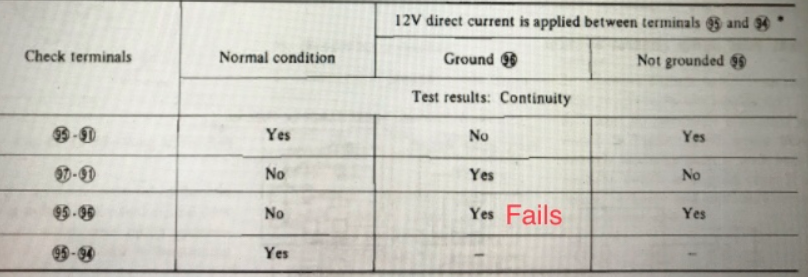
The odd part is that you did get continuity in the "Not grounded" test, but not on the "Grounded" test. Doesn't make sense that the contact would open just by grounding 96. Unless it's a sporadic problem.
-
Sometimes a spec of dirt can get between the contacts in the relay. I would take apart the pump control relay and apply power, then just watch to see if the 95-96 contacts close. If they do close but there's no continuity then there's something in the way. You won't get shocked with just 12 volts. Take it apart, check the contacts, hook up some power.
-
I converted your numbers in to yeses. Everything looks right except for the fail. That must mean that you had an open circuit on 95-96, meaning that the fuel pump relay would not get power. I reread your first post and can't really tell what the problem is that you're trying to fix. You said that you have a weird problem where the "new fuel pump was working". no power 95-91 Yes (yes) No (no) Yes (yes) 97-91 No (no) Yes (yes) No (no) 95-96 No (no) Yes (???) Yes (yes) 95-94 Yes (yes)
-
Not really clear what you're saying here. "my readings were very different between the 2 tests". Are you saying that two different meters gave different results? Or that the same meter gave different results? And when you write "FAIL" you should still give the value of no or yes, or, better, the resistance reading. You have no, FAIL, and resistance readings all blended together.
-
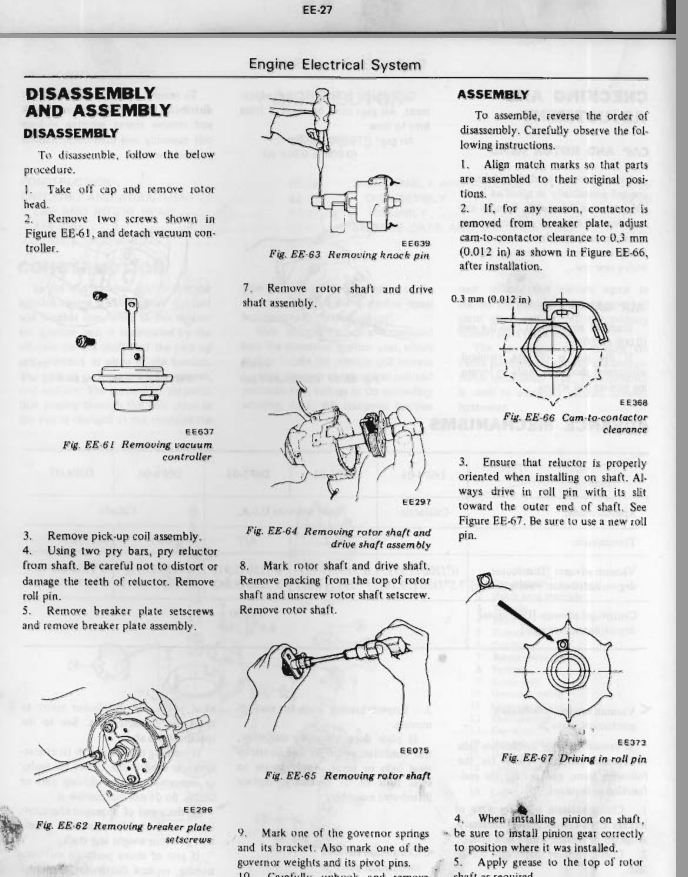
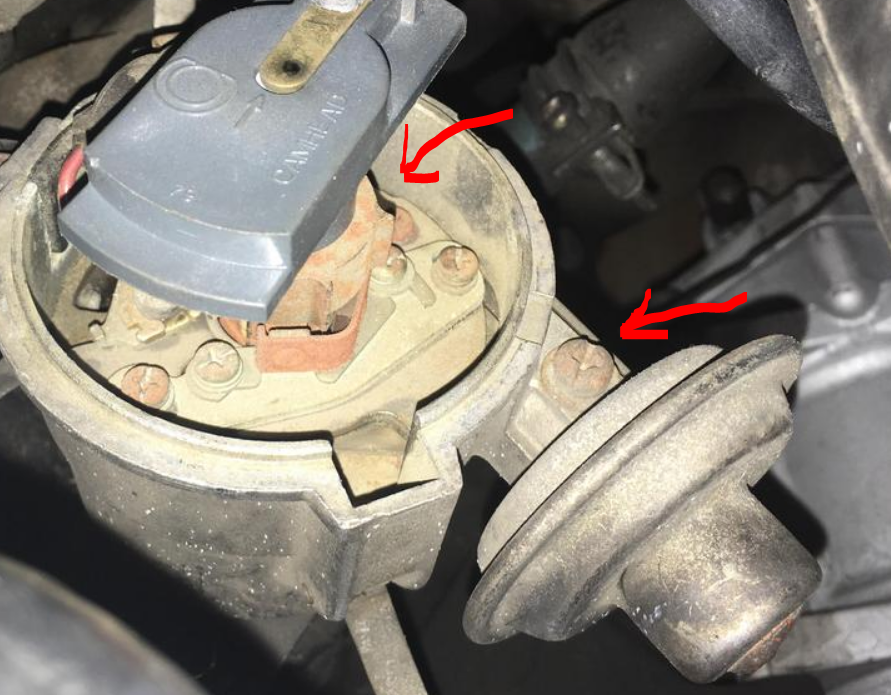
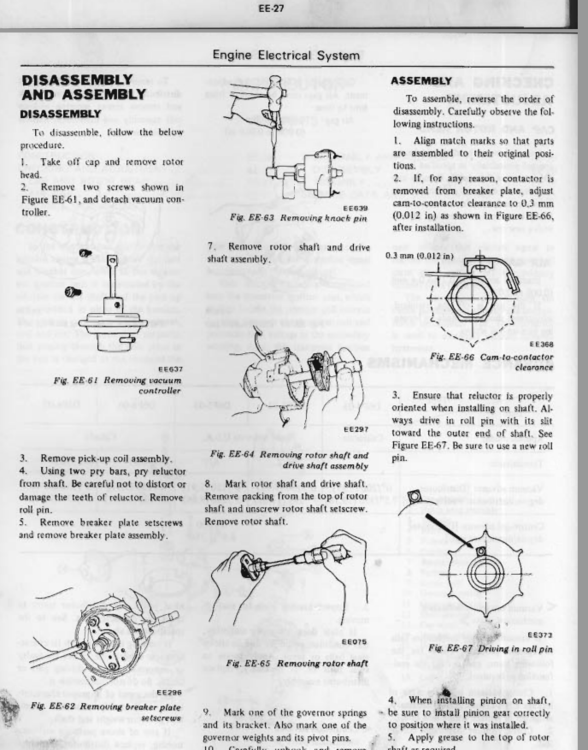
If you remove the big screw you should be able to carefully wiggle the canister free and very carefully pull it out slightly. As you move it the plate with all of the screws in it should rotate. Be very careful, if it doesn't move easily don't force it. The bearings are in a plastic cage that often breaks. OR. You can twist the pate with all of the screws in it in the direction of the vacuum canister. The rod should goin to the canister as the plate moves. OR. You can remove the tiny screw that holds the end of the rod on to the plate, then the big screw that holds the canister, and just remove the whole canister. Then twist the plate by hand. OR. You can do the above, then remove the whole distributor and remove the breaker plate, and look through the sides for rust. Loosen the big screw first, it's usually very tight. Sometimes so tight it takes drastic measures. BUT. There's a lot of rust visible there. I'd be surprised if your bearings aren't already rusty. They might be salvageable. You probably haven't had vacuum advance for a while. If I had that in front of me, I'd loosen the big screw while it's mounted then take the distributor out and go through it. Take the breaker plate out, check the mechanical advance, and the breaker plate bearings. Disassembly is shown in the FSM.
-
I must have been thinking of the 240Z cans. I know I was keeping my eyes open for spares since they're hard to find.
-
My mistake. I might have been thinking of breaker plates. Did you check that the arm attaches to the same spot on the breaker plate?
-
I happen to have my box of distributor parts down. I'll dig around and confirm.
-
The round part that fits in to the distributor is smaller and the arm is a different length. If I recall right. Always worth double checking.
-
Since you're working on yours, check the breaker plate for rotation. If the bearings are rusted up or have fallen out, it might be time to just get a replacement distributor. The vacuum unit moves the breaker plate so if it won't move anyway it's a pointless fix. You should be able to rotate it by hand. The vacuum unit pulls on it.
-
That is a weird paste. Seven links in one. The ZX vacuum cans are different from the 280Z units. Looks like you should keep your eyes open for closeouts though.
-
I took one apart and found that the diaphragm had become brittle and cracked. You might be able to pour some liquid urethane in to the vacuum port as a desperation measure. If it bridges the gap without leaking through it might seal it up. I wonder if one of these other Datsun parts will fit. Still spendy. Might as well get a 1-2-3 distributor. https://www.autozone.com/external-engine/vacuum-advance-distributor/duralast-vacuum-advance-distributor/293187_0_0_1382_5133 https://www.autozone.com/external-engine/vacuum-advance-distributor/duralast-vacuum-advance-distributor/293181_0_0_1382_3498
-
I should have seen that. He starts it at 2:00. Didn't realize that thin piece of metal was strong enough. Good to know. He even put a key on the framework of the engine stand. Should have built a seat with a throttle pedal too.
-
He doesn't show it running. It's from 10 months ago. Hmmmm...
-
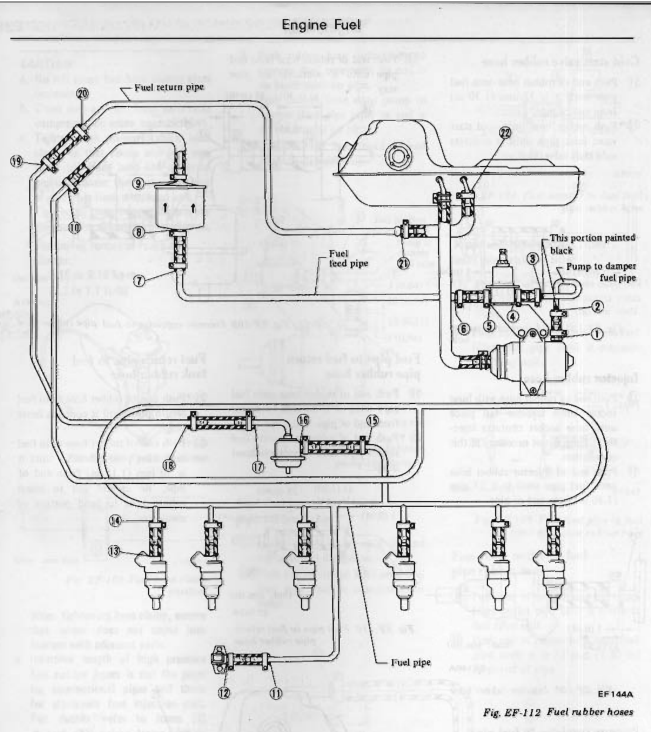
I can shoot some old injectors out to you if you want to make a matched set. I have some BWD auto store brand, some Bosch, and a full set of rusty looking but balanced 1978 Denso (I think, whatever the OEM brand was).
-
I just went out and pressed on the pintle tip of a functionable injector using a small allen wrench. I could feel it opening and closing, tick-tick-tick. Really didn't take much force at all. I didn't feel like it was even close to being damaged. It felt about like what it is, a small spring loaded valve. If you can't get it open using just slight hand force, it's probably toast.
-
Some of the caps are made of rubbery material. You can twist them off, but still reuse them. I have some old injectors I can go poke at. Pretty sure the spring is not that strong.
-
What does it do?
-
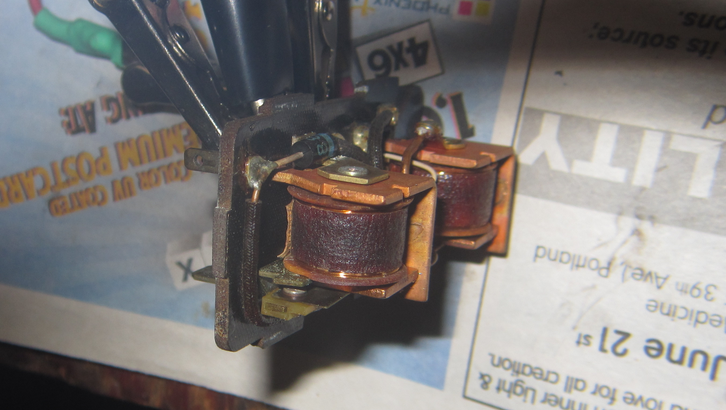
I had a 1976 combined pump and EFI relay that would overheat and have a coil go open circuit. The coils were a little bit burnt. You can peel the little tabs back and remove the cover. After you finish the tests. Good practice on meter operation and test procedure.
-
Don't know about what you're doing, but the TC rod definitely assembles easier with weight on the strut. If the wheel is hanging it's almost impossible to get the bolts in.
-
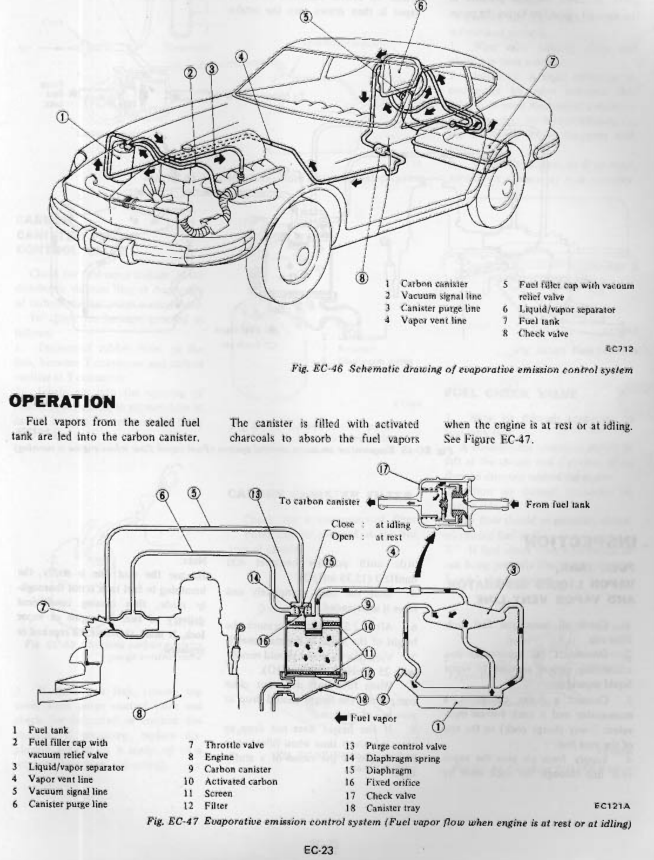
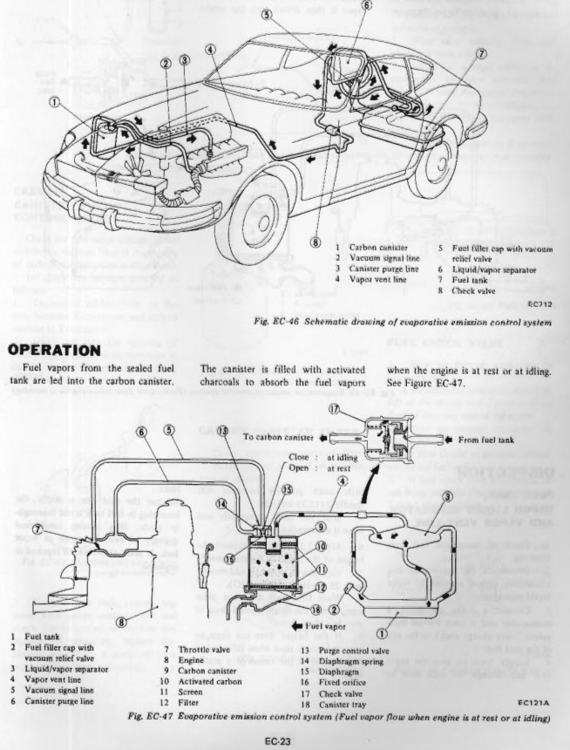
Vapor vent
-
Fuel