zKars
Supporting Member
-
Joined
-
Last visited
Everything posted by zKars
-
Sure sounds like grounding issues. There most certainly WERE ground wires on the stock EFI harness. Obvious open bare ring terminals with black wires attached into the harness. The ones that comes to mind are right on top of the intake manifold, more or less in the center. Another is on from the AFM harness to one of the AFM mounting bolts, or rather from a simple black wire with ring terminal ends jumper that connects the body of the AFM with its mounting bracket on the body. Its mounted in rubber feet, so it needs that. SHould see a dangler somewhere on that EFI harness. Hunt!
-
There is a welded bracket on the frame across from the starter where the clutch hard line connects to the flex line to the clutch slave. Its the same as any brake line L-bracket at any wheel. If the car has no such bracket, or the bracket it has looks poorly attached, it likely was an auto.
-
George my response was a test of your resolve. Now that we understand shortcuts are not your thing, you have a heck of a job ahead of you. I'll have to take a picture of the back side of a dash so you can at least see how the thing mounts and what you're up against to get its two mounting screws out. Now since the windings are all exposed, you "could" flush it in place with a contact cleaner, some small ID plastic hose to aim the spray, a mirror, a light held in you teeth, goggles to protect from splash, spray and twist the handle back and forth. etc etc etc... DId I mention that alot of contact cleaners are hard on kinds of plastic, don't spray it just anywhere.... Then all you have to do is re-connect it! Simple, eh Zedhead?
-
Option 2. Don't fix it, just disconnect it and re-connect the two dash-side leads to effectively bypass it. This just puts the dash lights at maximum brightness. Unless you have replaced your bulbs with fancy LED's or the like, you won't likely find the dash lights too bright. If anything you may actually be able to see your gauges at night for the first time!
-
Mikuni 40's are a hair under 5"
-
Now we need a source for just the right coil spring. AFM flap spring? old Thermostat bi-metal coil spring, innards from a tape measure? Think man!!
-
Zeddy: Anti-rotation feature = spot weld. John, don't confuse us with simplicity and reason at this point. We are on a design adventure here!
-
Numerically lower or higher ratio? I noticed MSA via Kameri has a listing for a ring/pinion sets in 3.154, 4.875 and 5.143 Motorsport! Kameari R200 Differential Gear Set, 4.875 Ratio, 70-89 Z/ZX - The Z Store! Nissan-Datsun 240Z-260Z-280Z-280ZX-300ZX(Z31/Z32)-350Z-370Z Parts
-
and a torsional style spring tension can be adjusted SO simply by just wrapping it more tightly or loosening it. No more hunting for just the right return spring! Brilliant!
-
Well, couple of options for you. 1. Weld up that out of line hole and re-drill it in the right spot. Yes it means taking the manifold off and having at least the welding done. But its the "right" way. You could also JB and drill/tap the hole back in the right spot too. I just don't like the permanance of the JB'ing the rod end into the hole. Makes taking the linkage apart a real bugger. 2. Or how about this. Get a long 1" x 0.5" aluminum bar to go across the three manifold holes and mount the three rod ends in this new bar. This has two advantages. First it allows you remove the entire linkage for alignment and service anytime you want VERY EASILY, and you get to place the rod ends where you want to best support it based on where you have your carb arms and throttle cable attachment point etc. I have this arrangement and like it very much. I especially like the ability to have the entire linkage on the bench when aligning the three arms to each other and to the bar. In fact I have a little connector/sync linkage between the front two carbs and only run two rod ends and two carb arms/push rods from a much shorter (and hence stiffer) 3/8 bar. I wish I had a picture handy. Maybe a comprimise would be to drill the existing hole large enough to accept a threaded bushing, so you glue in the bushing after its centered, but leave the rod end free to thread into the bushing. Could just grind off the sides of 5/16 18 nut to make the bushing. Many options, more will be suggested I'm sure
-
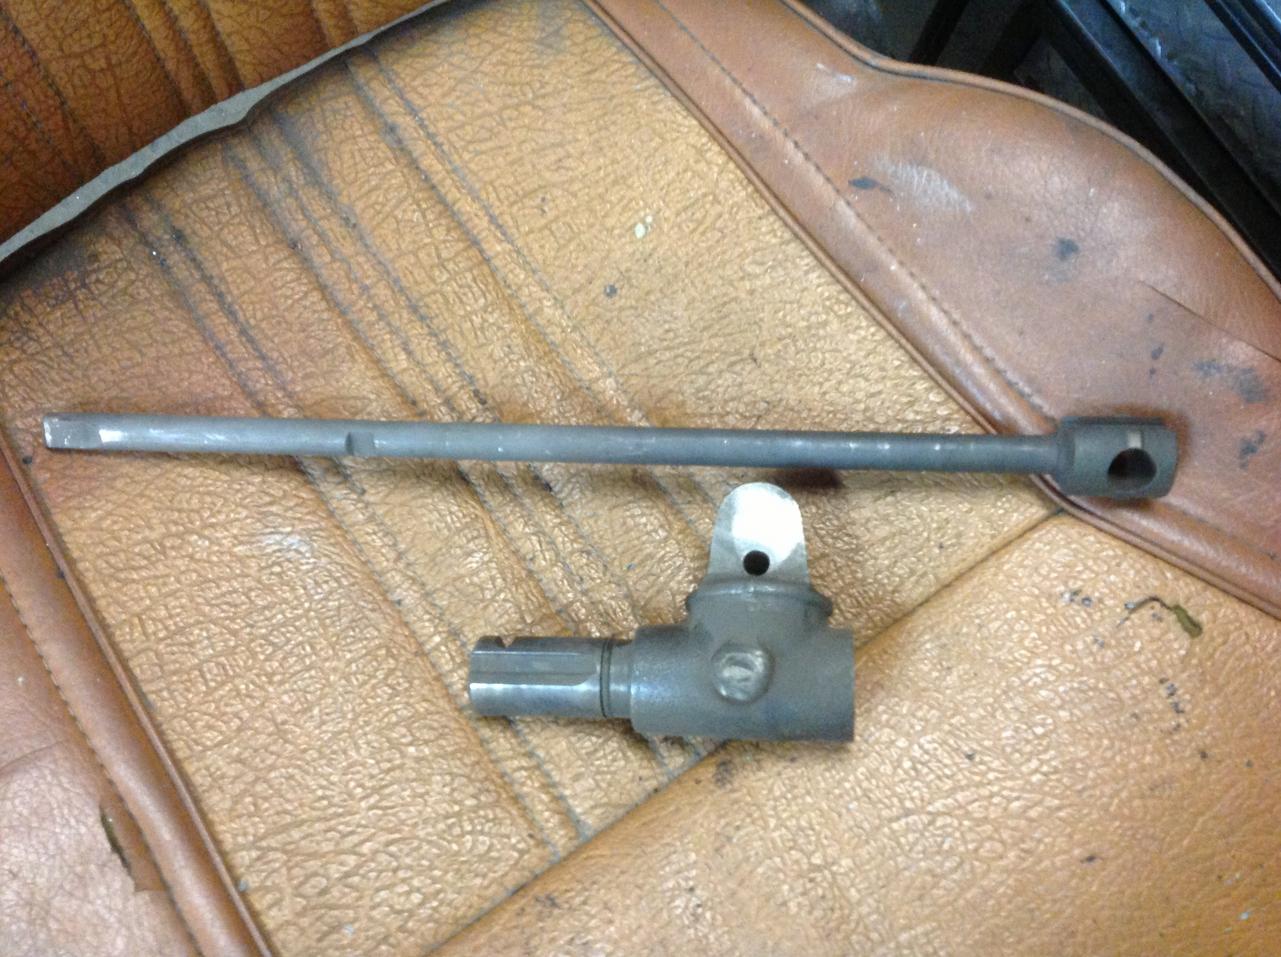
This is the remains of a scrapping of a dead late 5speed about 2 years ago. I salvaged the shifter ears to design/test short shifters, so had to take that nasty pin out to get the shaft out. Since this thread got posted I've thinking "dang I know I kept the ears part, but I must of tossed that shaft, didn't I??" I finally went to look, and guess what I found!!! That and I have more Z bits laying around than I know what to do with....
-
I think this is what you want, yes? pm me or send a note to z240@shaw.ca and we'll set ya up!
-
This is a common failure point. Seen it on lots of Z doors. There is another crack spot at the rear in the same relative location.
-
-
I can pop one in the mail for you tonight from Calgary. Drop me a note to z240@shaw.ca with an address.
-
yellow wire is likely water temp sender wire. Bullet connector on the front of the upper rad hose housing.
-
Heat. Lots. Burn the sucker off.
-
This should get us on the same page. "Technology for Tuners"Newsletter #3 :: Exhaust Clamp, XD-1, How Wideband Sensors Work, and more! Modern, affordable accurate wide band AFR is available to masses without having to build our own circuits. One of the better known systems: Innovate Motorsports LC-1 and LM-2 WBo2 WideBand o2 Systems Megasquirt Kits / Assembled Engine Management Systems, Wideband o2 Sensor Systems and tuning products - DIYAutoTune.com
-
Pretty tricky to fix permanently. Old flexible plastic parts don't mend easily. Duct tape just doesn't seem right. Someone will chime in with some ideas, but if one or more pleats are ripped now, then more will happen soon. I have some spares if you get stuck.
-
Please tell me you removed the center locking pin from the strut that locks the spindle pin from turning.....
-
Canada =USA in this one case... Now we need detailed pictures of the trans to look for clues to see if its a 280zx or 280z 5 speed, or a roadster transplate or a true non-NorthAm 5 speed.
-
Dear D&D: Yes they are separate. I've pryed a set off once just to see if I could, as I was painting the panels gray, and didn't want to mask off those tiny strips. they are just a 'U'. Careful replacement was nessessary, and the tips had to be re-crimped to grab again. Go play?
-
Yes the early ones had that one-screw switch body which is different from the later ones. Buying the entirely new assembly as found by ZCurves will fix the problem. Electrically they are the same. It will mean a new key for you. I think Captain Obvious has a thread recently about taking the switch apart and cleaning the contacts. I have an old 1-screw switch in my collection (I check it) if worst comes to worst. Let me know z240@shaw.ca if you need it.
-
speedo yes for sure, only thing about the tach, if its a three wire, (12v , ground and a single connector from coil -) pretty sure all 260's had switched by then. The connector may differ, but easy to switch the harness from one to the other. Maybe one factor not to like is the lettering font on 77 gauges is different, so they won't match exactly. Both have 280 style dashes so the mounting is identical.
-
You're in luck, Canuck! I saved a couple from a recent demo, just have to find 'em! Drop me a note to z240@shaw.ca and I'll stick 'em in an envelope.