Leaderboard
-

dutchzcarguy
Free Member5Points2,677Posts -
Captain Obvious
Free Member5Points10,081Posts -
Mark Maras
Free Member4Points3,719Posts -

CanTechZ
Free Member2Points1,311Posts


Popular Content
Showing content with the highest reputation on 10/21/2023 in all areas
-
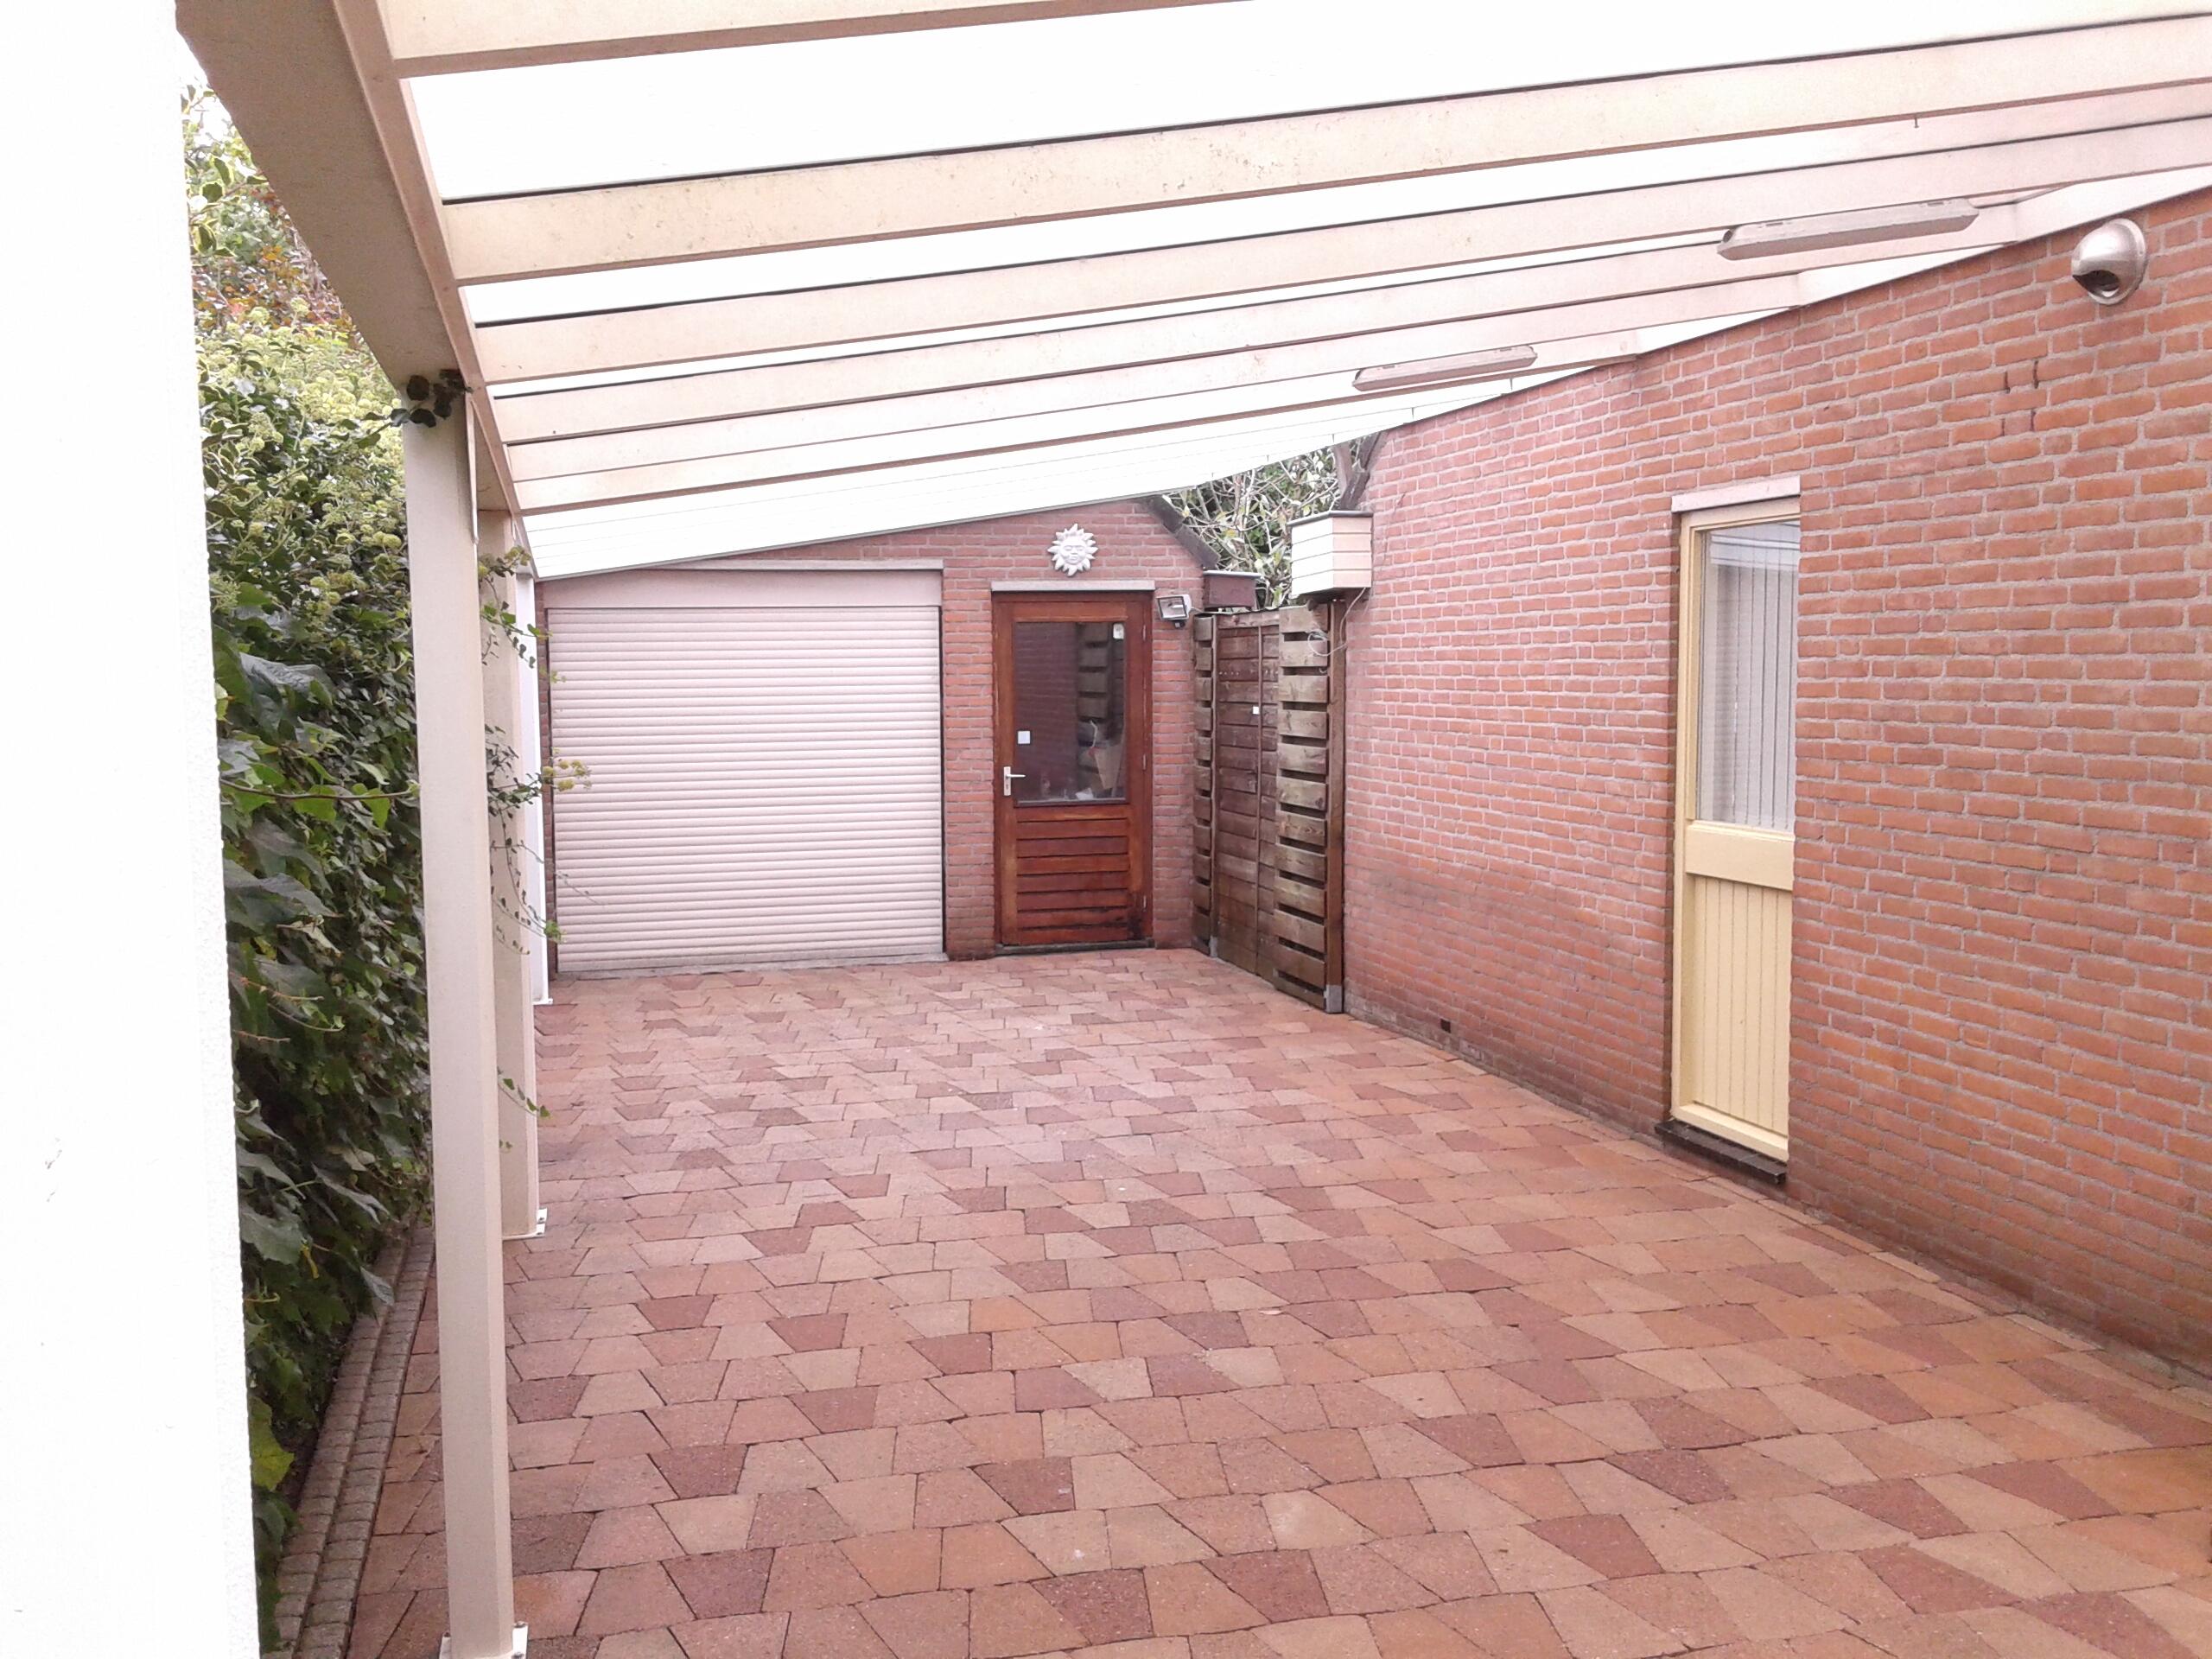
Hi Guys, some news.. I installed in a few month's my extension on the carport and also installed my heatpump for the house and partial the heatpump for the garage! Did it all myself with a lot of patience but i'm happy to let you see this next picture! A giant carport of 4x 11,5 mtrs or 13 x 37,7 feet! Almost 500 square feet! 👍 I've got now place for 4 cars.... wait a minute? I only have 3? I can buy myself another one!! 🤣 I need to put in some lighting in the new part but no hurry. First i have to install the garage heatpump.. that's half a days work i would say... but when? i don't know.. before this winter i hope. When that's done i can concentrate on the 280zx again as the engineroom is still a mess.. oh well we get there, some day.. 🤠
 5 points
 -
2 pointsSomewhere out there, either in the FSM or the Owners Manual there is direction by Nissan that the pump might need to be primed if you run out of fuel. I took a look at what I have but couldn't find it, but I'm sure that I've seen it. I remember worrying about it when I ran out of gas on my 78 parts car. But it had an aftermarket pump and fired right up after I put a couple of gallons in. I assumed at the time that that the OEM pumps must be different.2 points
-
2 pointsI've had problems with the stock pump priming sometimes. Usually will prime, but sometimes won't. And if you think about the way it works, it's not surprising. I'm thinking that the insides of the pump and the impeller bits are not a gas tight fit. It pumps the fuel because of the relative incompressability of the liquid and the fact that even though there would be some losses between the parts, the majority of the fuel will be moved from one spot to another. Not necessarily the same thing will happen with a gas.
 2 points
 -
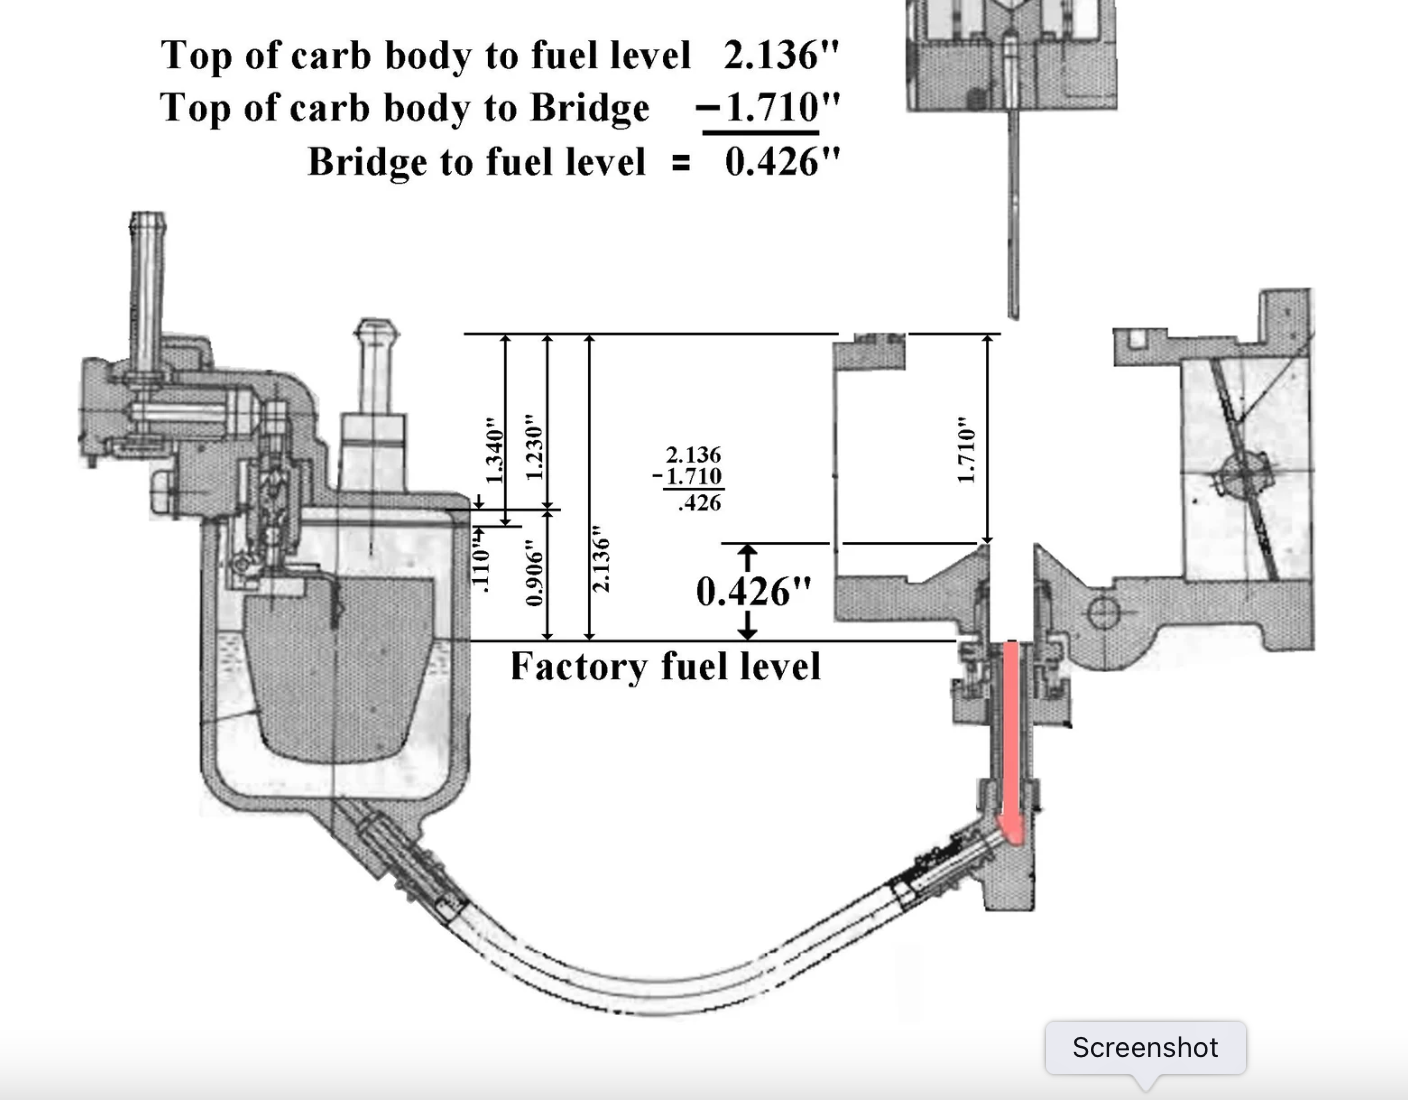
This diagram illustrates the importance of float level adjustment. The float level determines the level of the fuel in the jet and thats really important in tuning. If SU would have given us a sight glass on the carb bowl we would have a lot less to argue about online 🤣
 2 points
 -
Yeah, I remember they were ZTherapy carbs. What I was wondering was how many times have they been adjusted (specifically balance and float level) and if they were adjusted properly. Last year we were dealing with #4 fouling and I thought (at least in my mind) that the problem was somewhere in the cap, rotor, wire, wire connection, and plug, all of which were replaced with quality parts. So, I was left thinking it was a bad sparkplug wire connection. Now we've got five plugs fouling. What happened between then and now? Any thoughts or explanations?2 points
-
Might just search the forum and see if anyone has one that’s complete. Went through the same thing with mine and the pressure just won’t hold. @jfa.series1is the forum expert.1 point
-
After a few trouble-free weeks of driving, my headlights started acting up. Sometimes, they won't come on, but after a few tries with the switch, they work. In addition now, the RH light isn't working at all. A test light shows power at the connector by the fender, so I cleaned the contacts with no change. I then removed the lamp and I also have power at the bulb socket, so I put 12V directly to the lamp and it works fine. With everything back together, the light is still dead. Time to dig deeper. With the high beams switched on, the LH light is dim and the RH is still dead. Clearly I have issues, so I need to go through the whole system. The morning drive to work is dark enough to need the lights on for other traffic, but not for me. In the coming weeks, I will need them to see.1 point
-
Then we still need a photo of your ignition wiring as recently I posted. Coil and resistor (if used) and which Pertronix you purchased. A couple different ones.1 point
-
Interesting, they are down on my 7/70. Pic from before I pulled my interior.
 1 point
 -
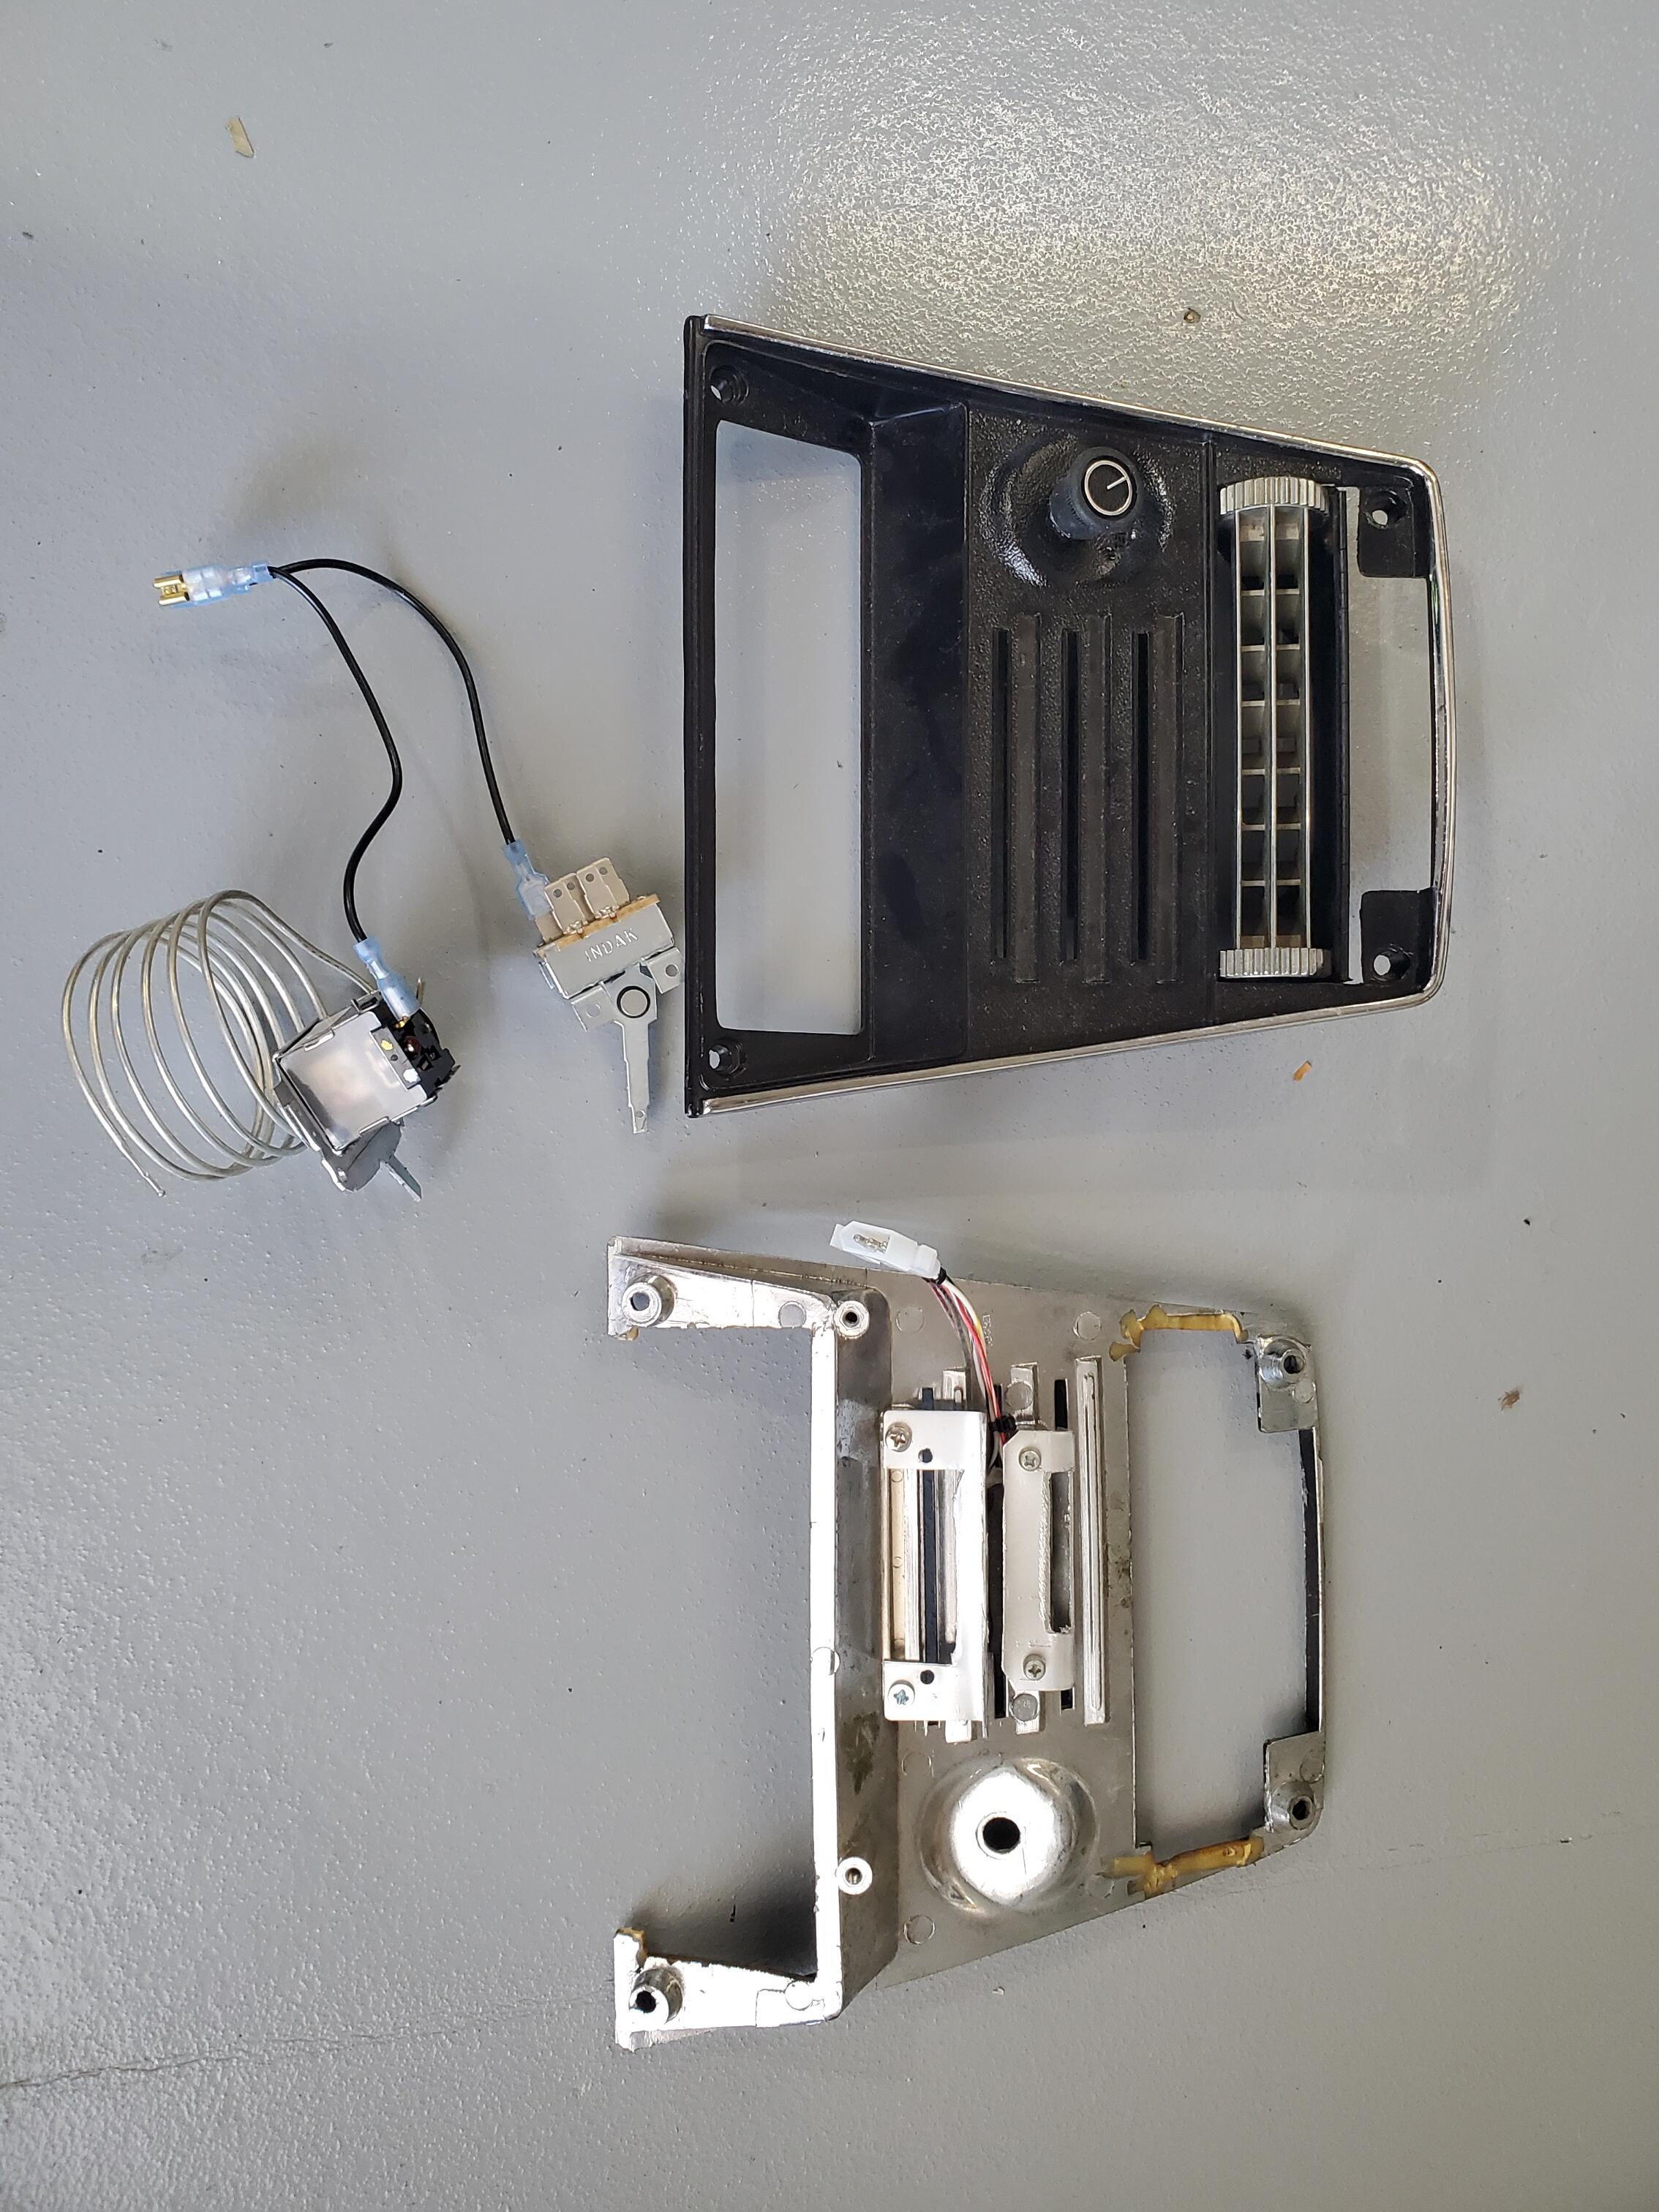
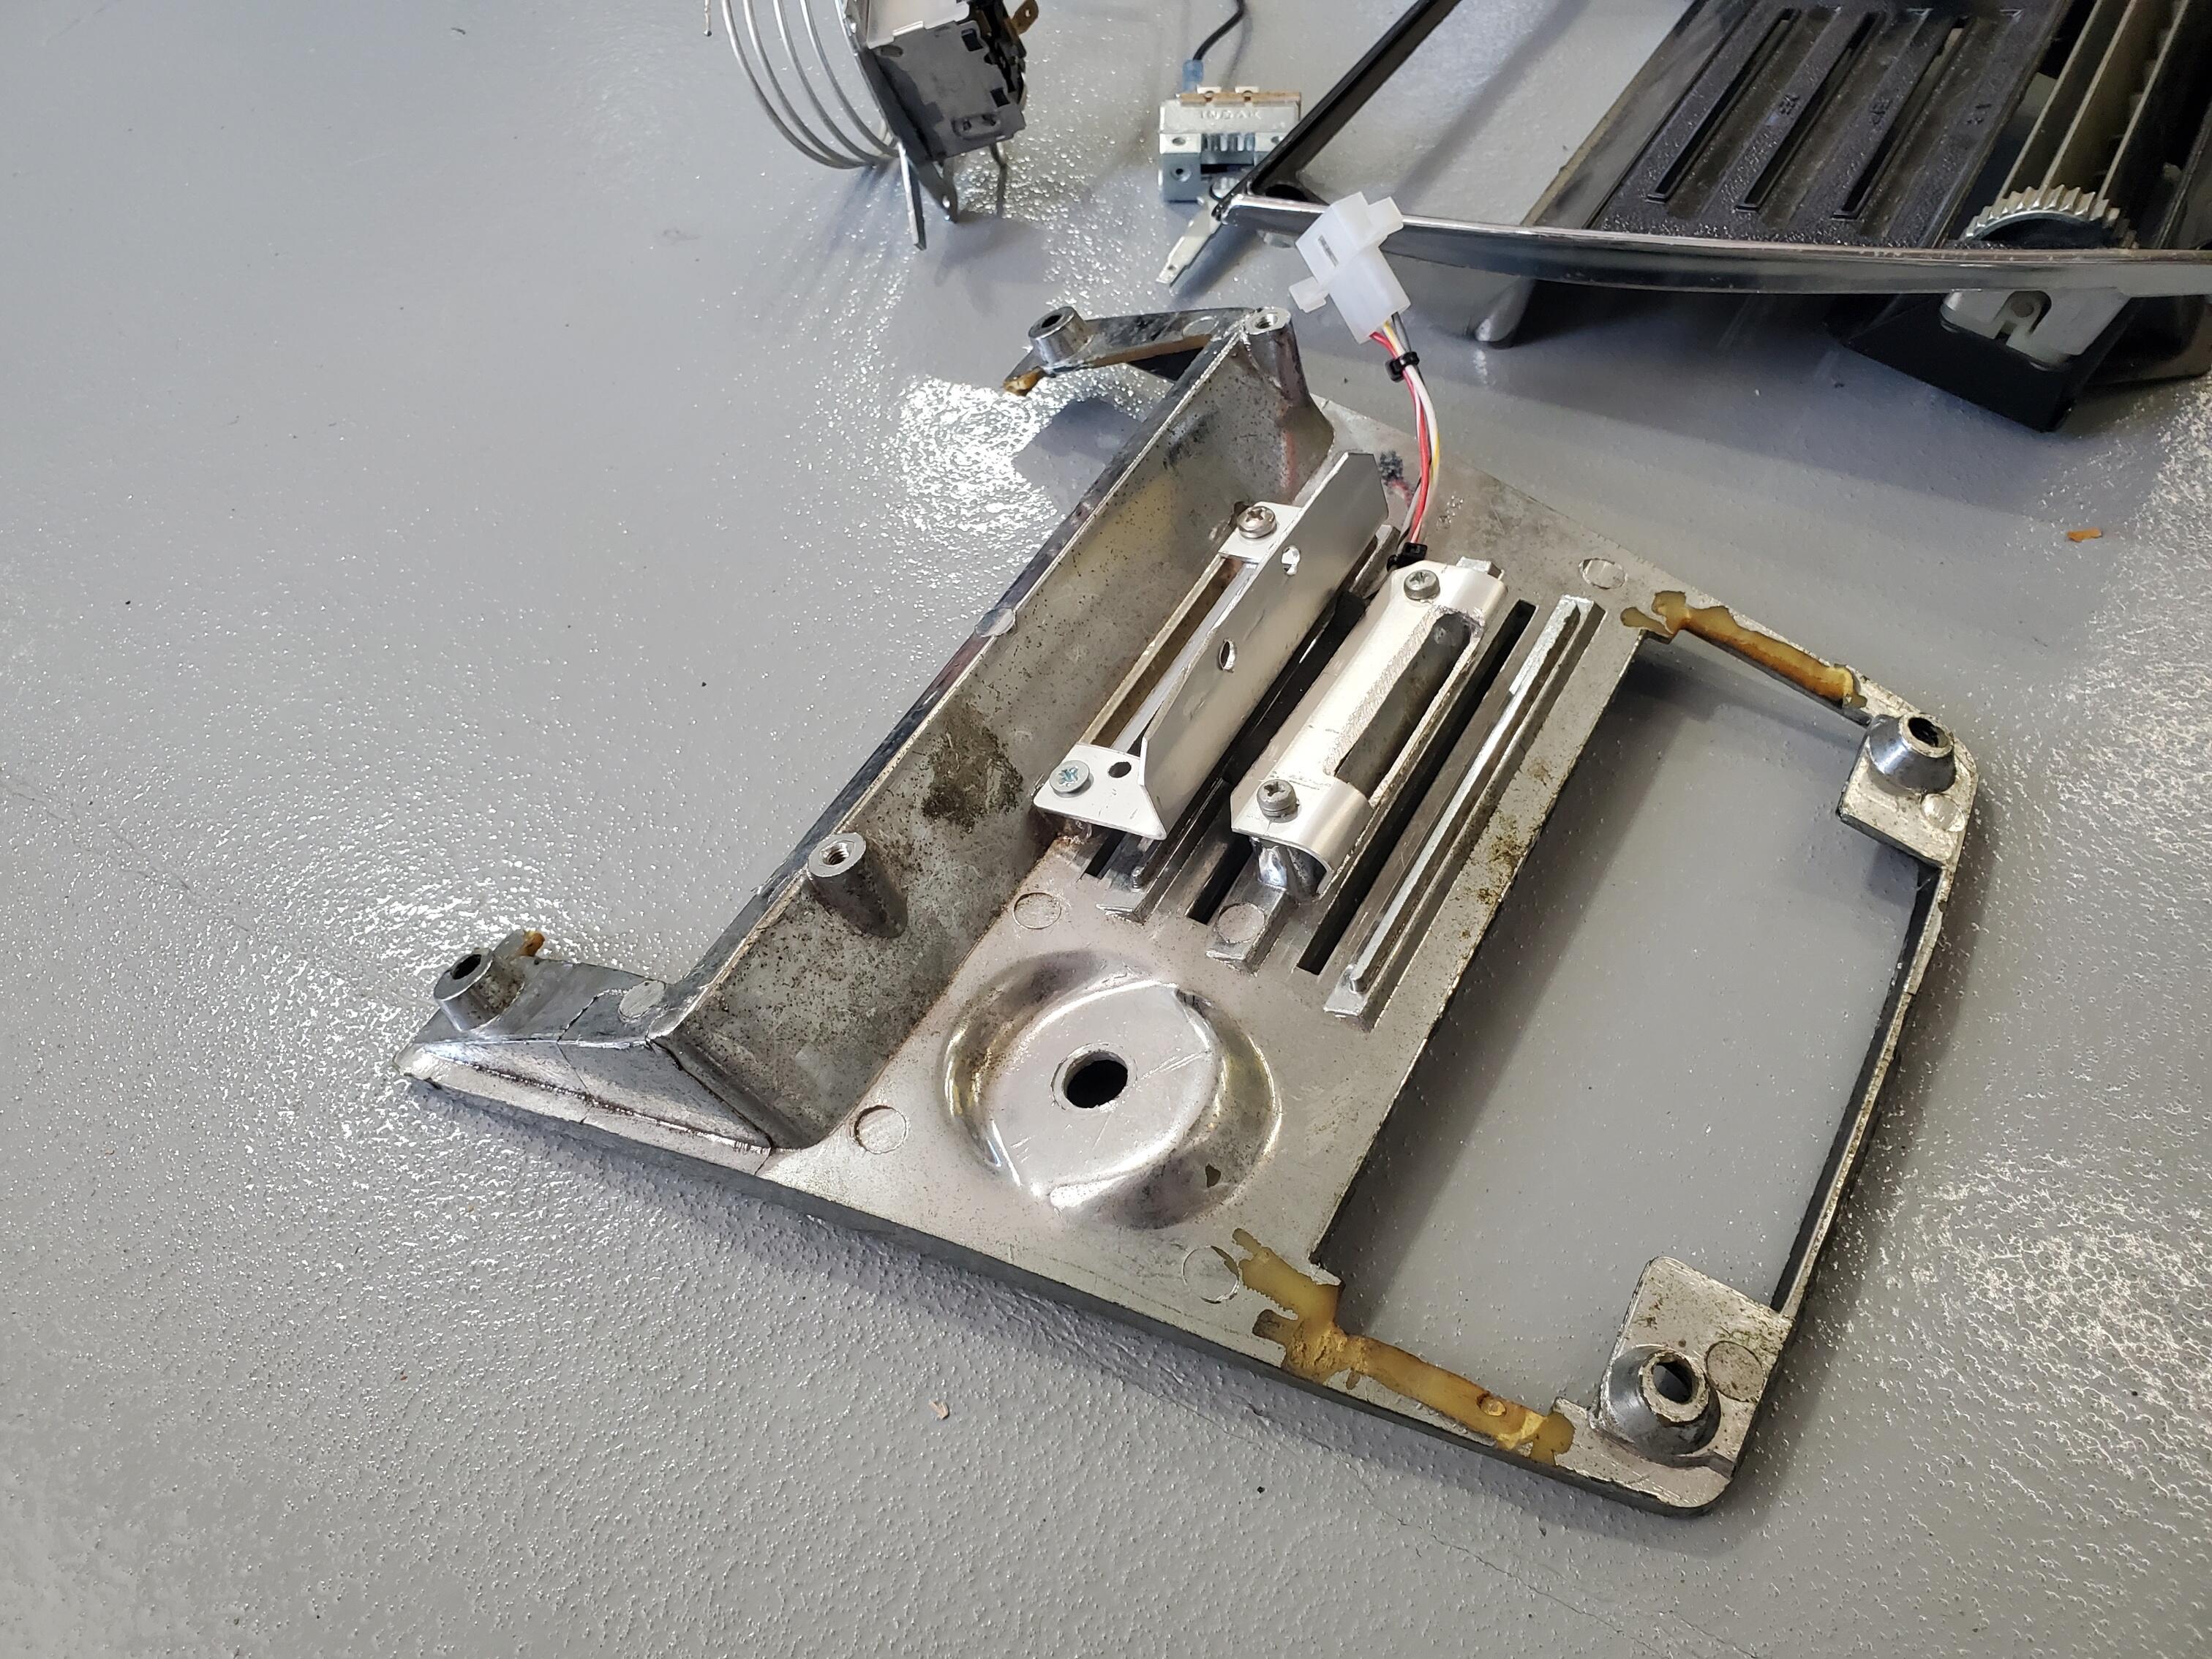
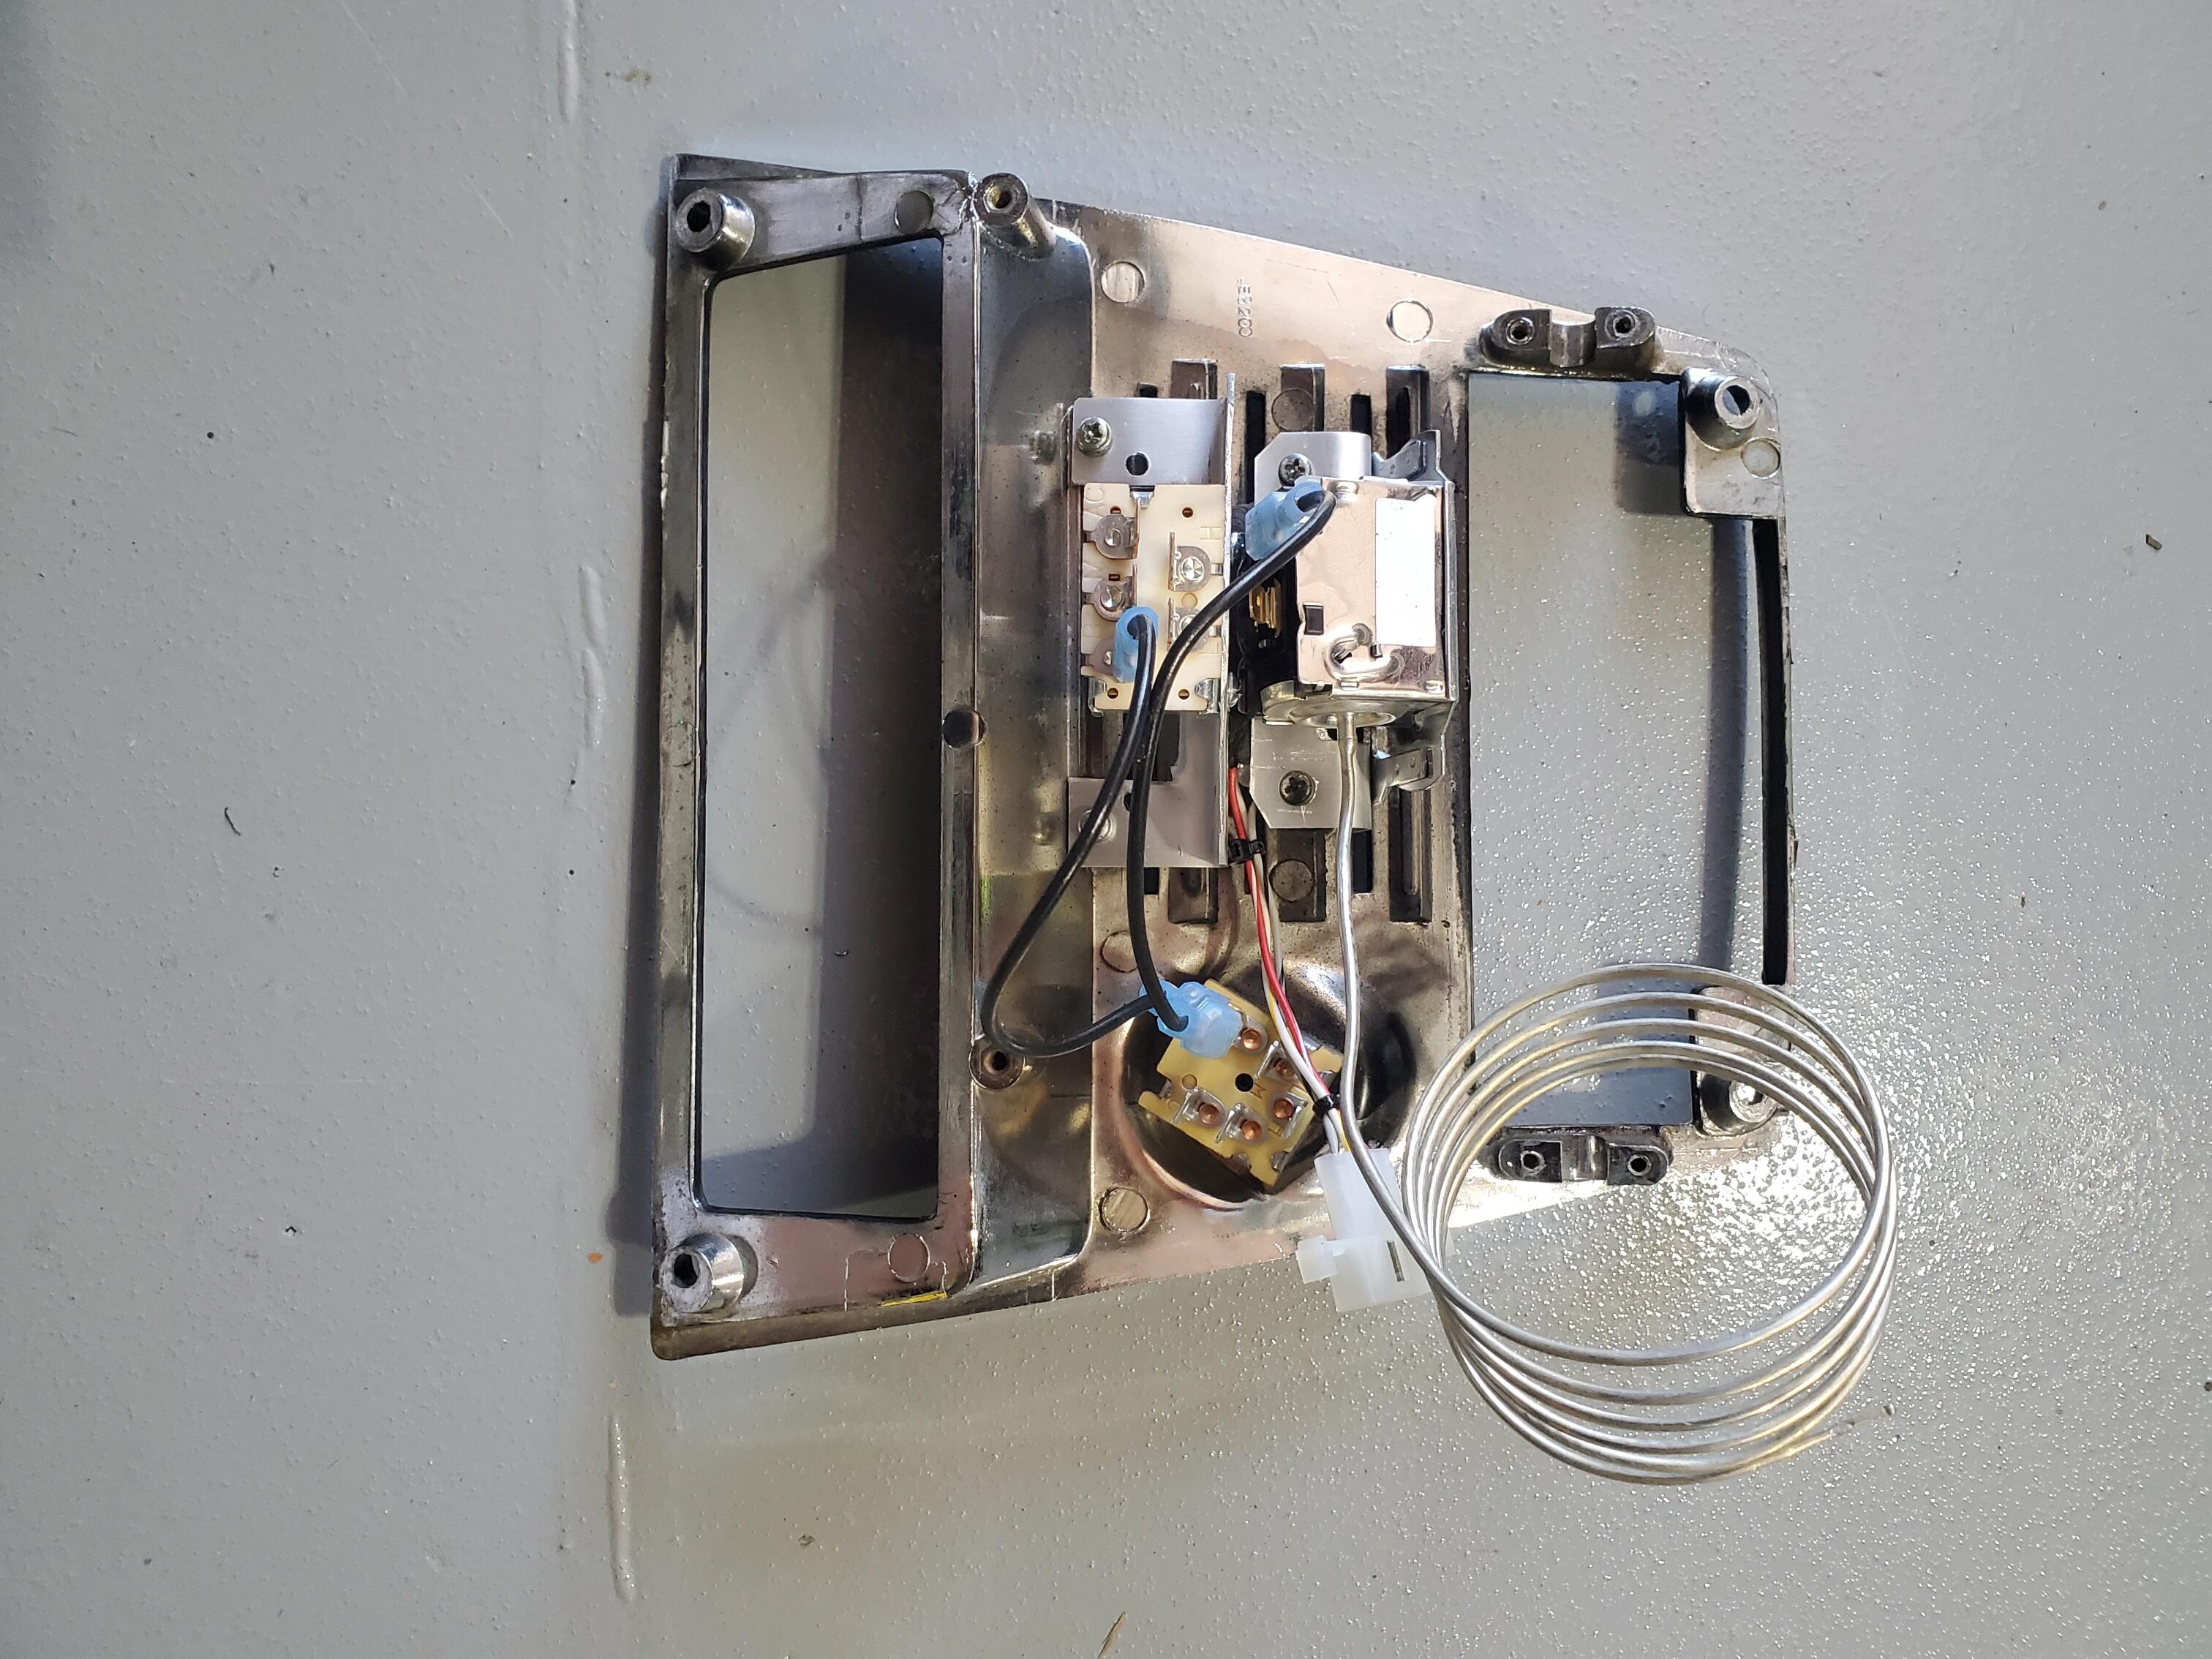
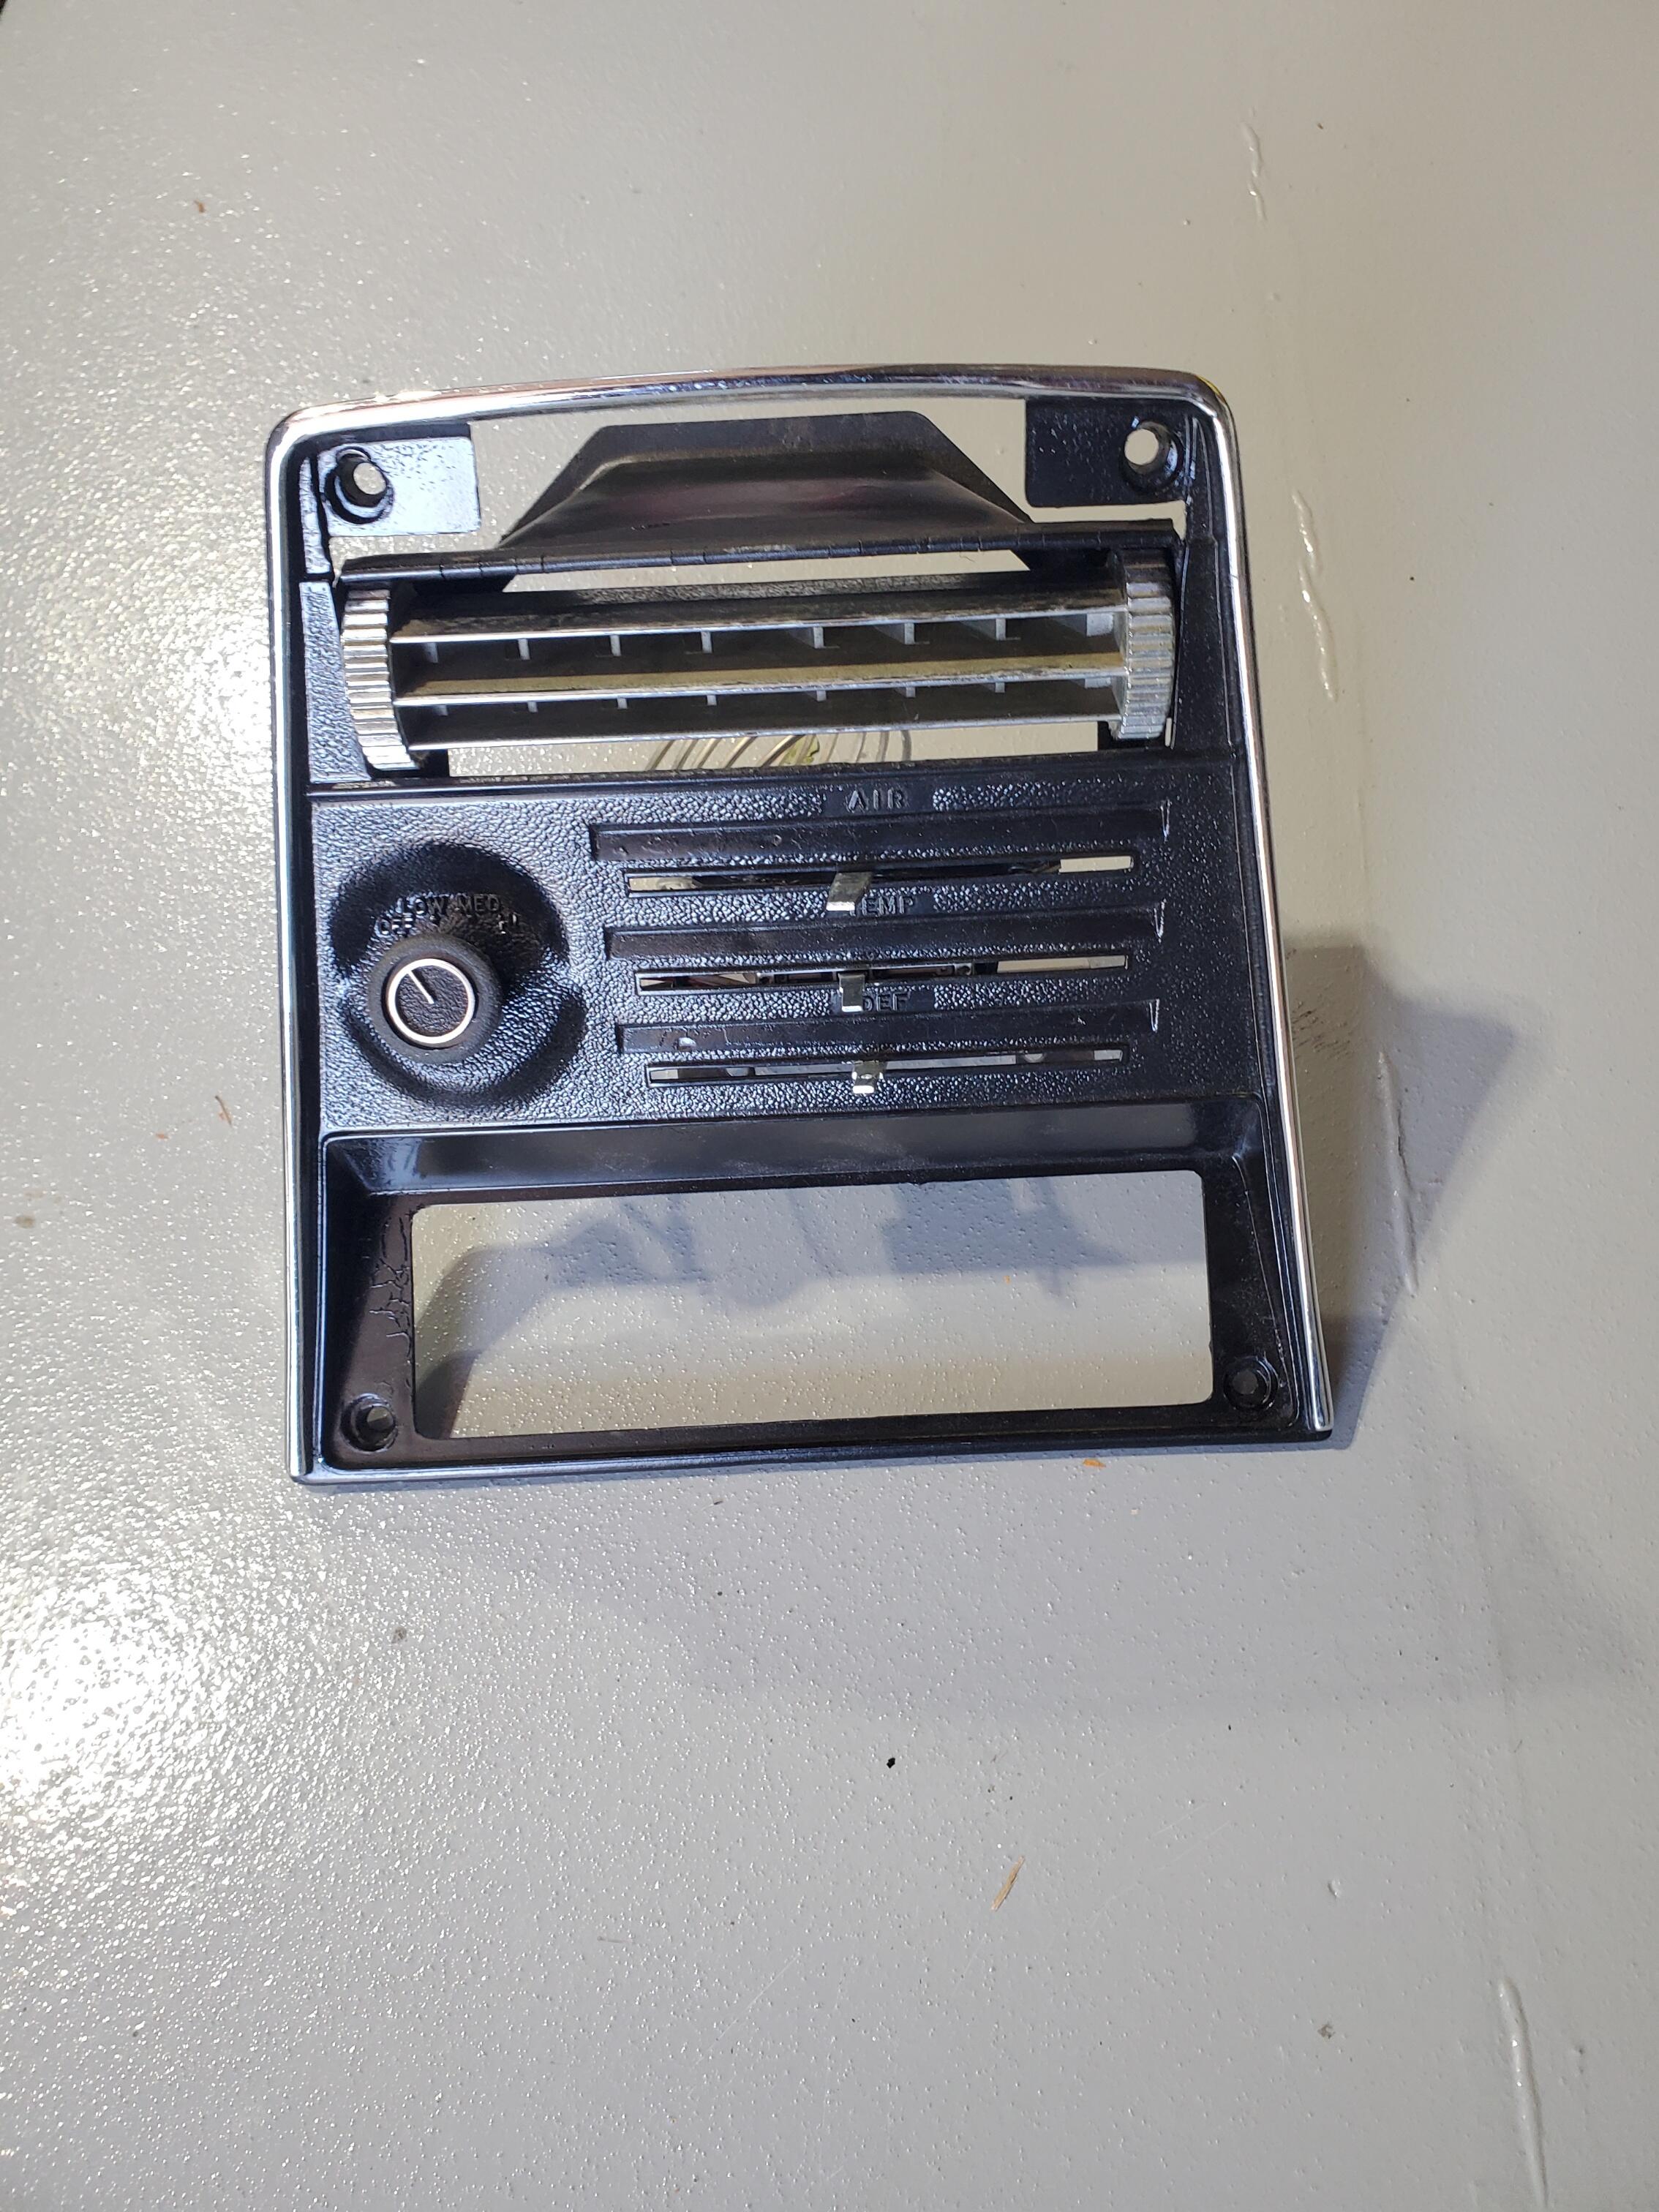
1 pointOne more item. I wanted to see if I could use the stock rotary fan speed switch instead of the VintageAir rotary switch, so I rung each switch out with a meter and found that the Vintage air has a tab that gets power whenever the fan is switched to Low, Medium or High. The stock Z switch does not have this function. The Vintage air tab that powers up when turned on routes to cooling control switch and area selector switch. Also, the resitance through each switch is different. The VintageAir resistance to each Low, Medium and High is about 20 Ohms while the Z fan speed switch is around 100 Ohms. So, I had to go with the VintageAir switch.1 point
-
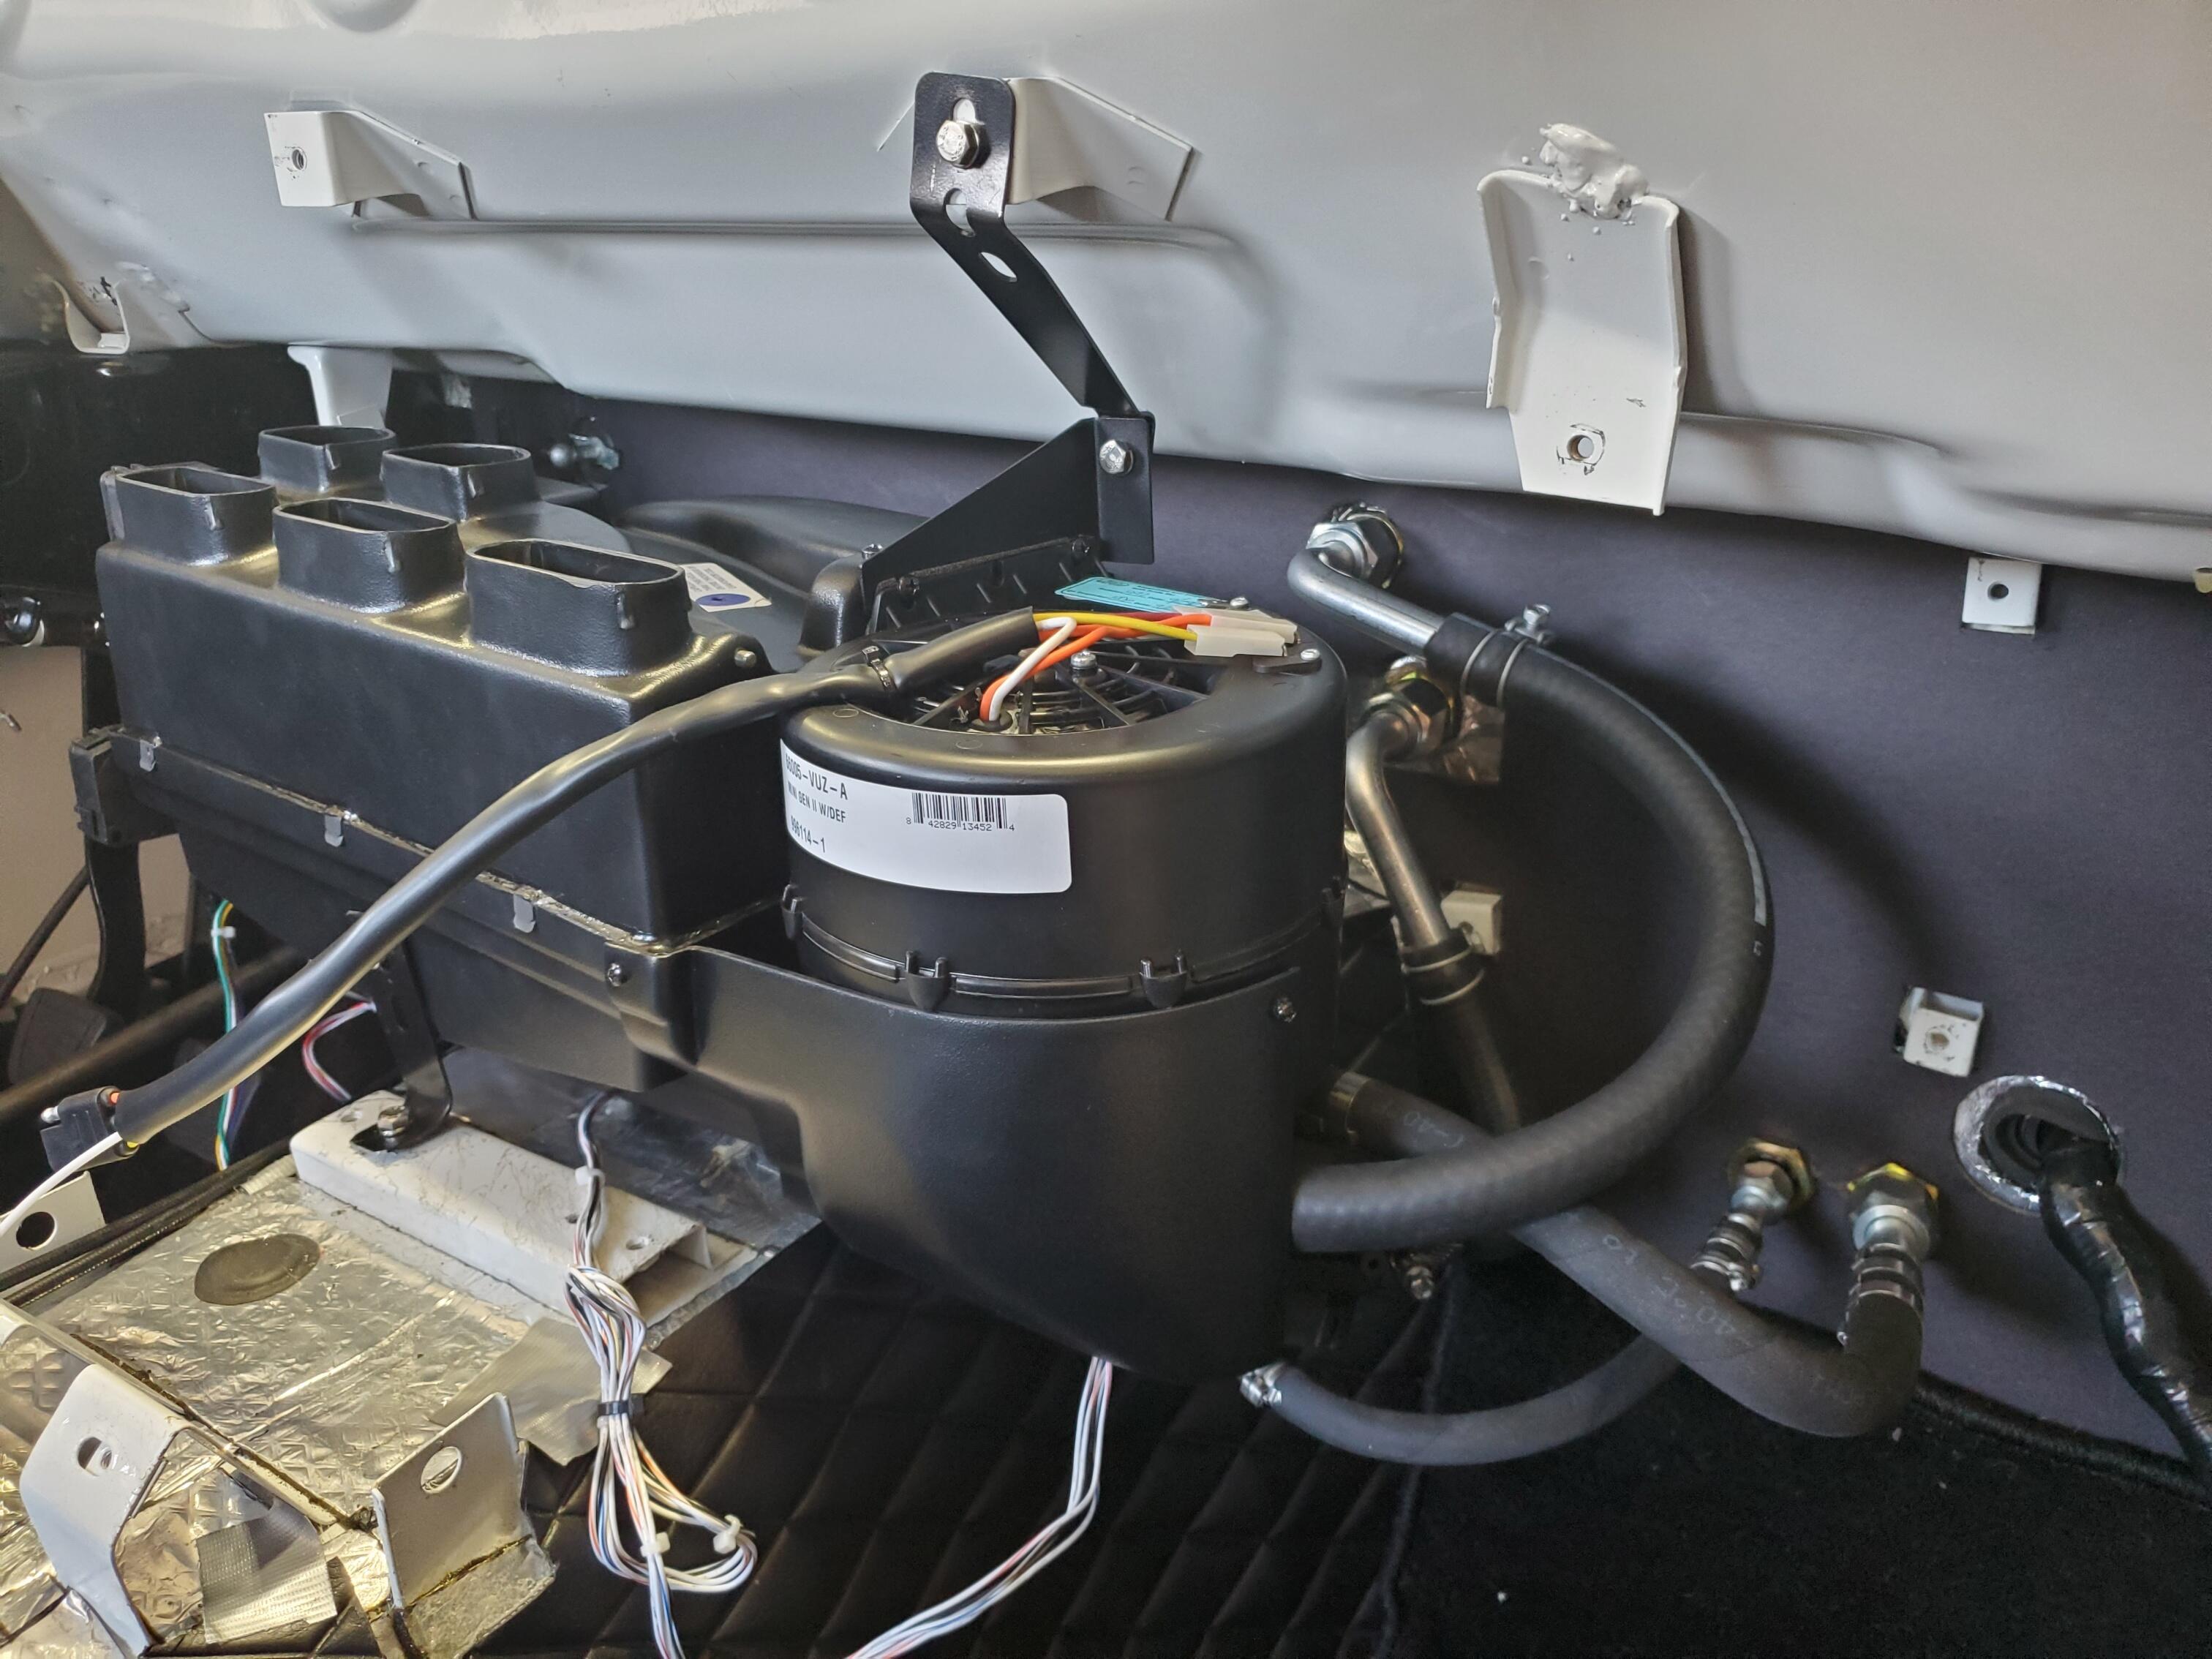
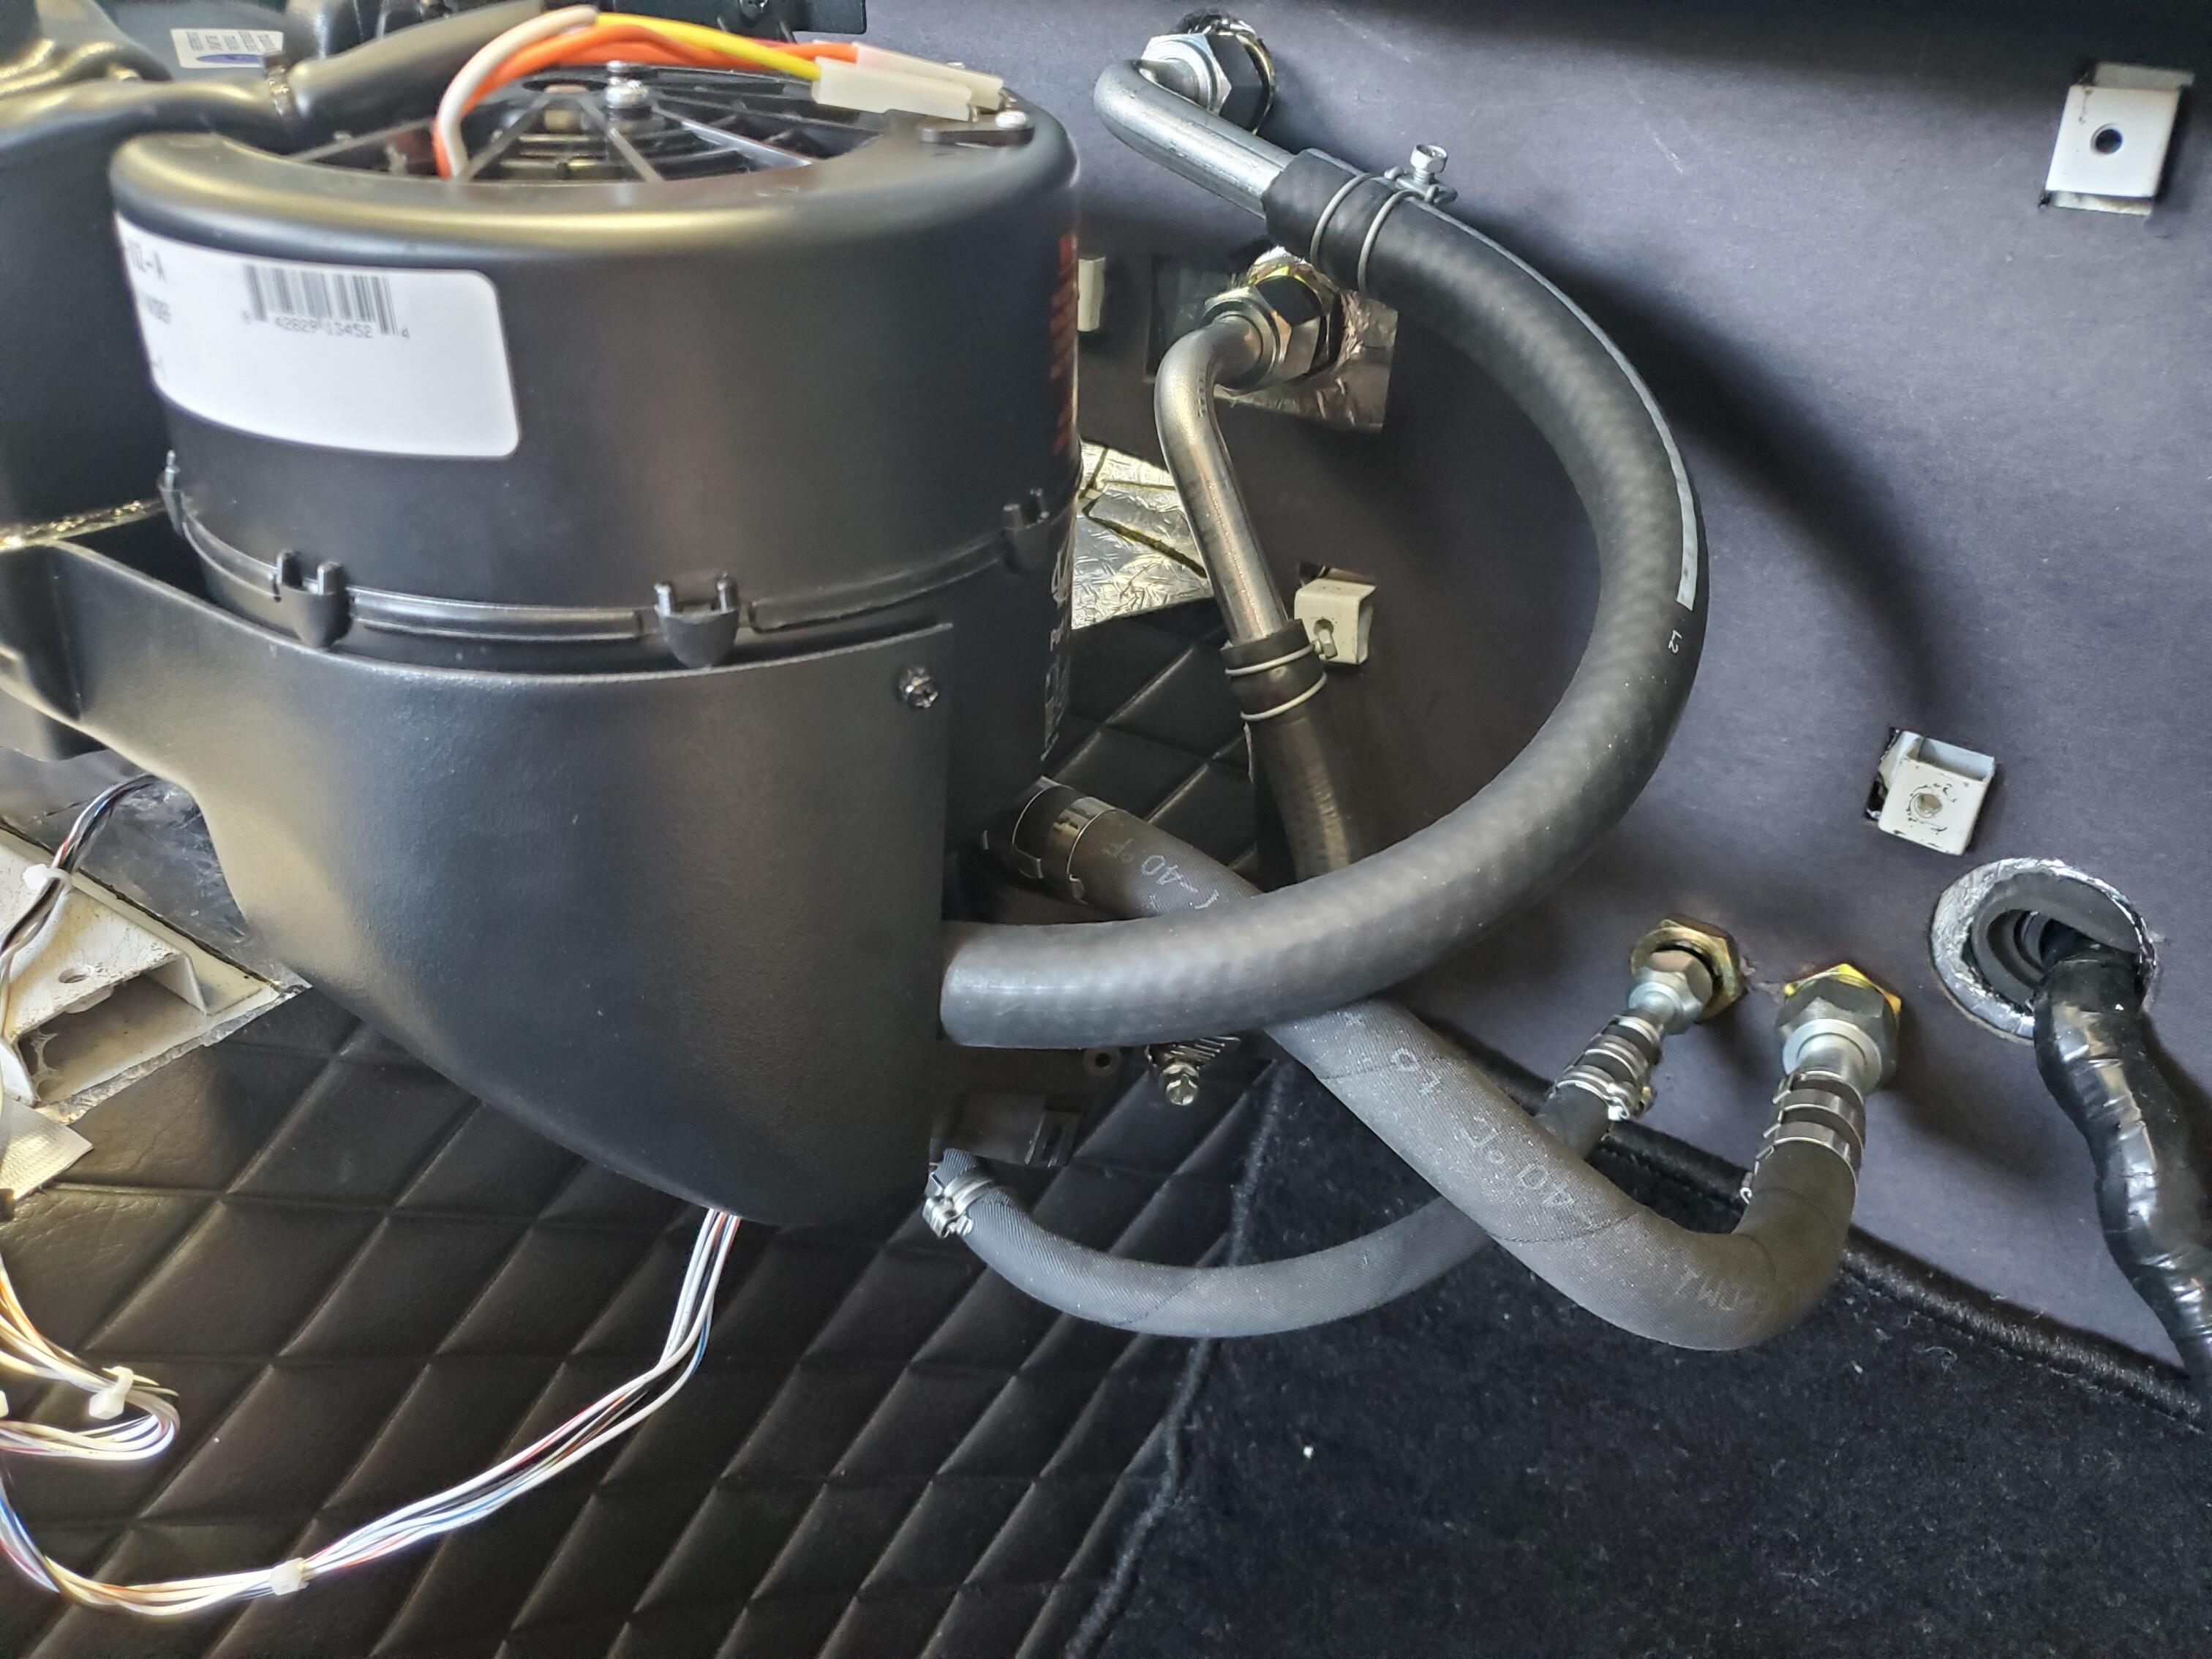
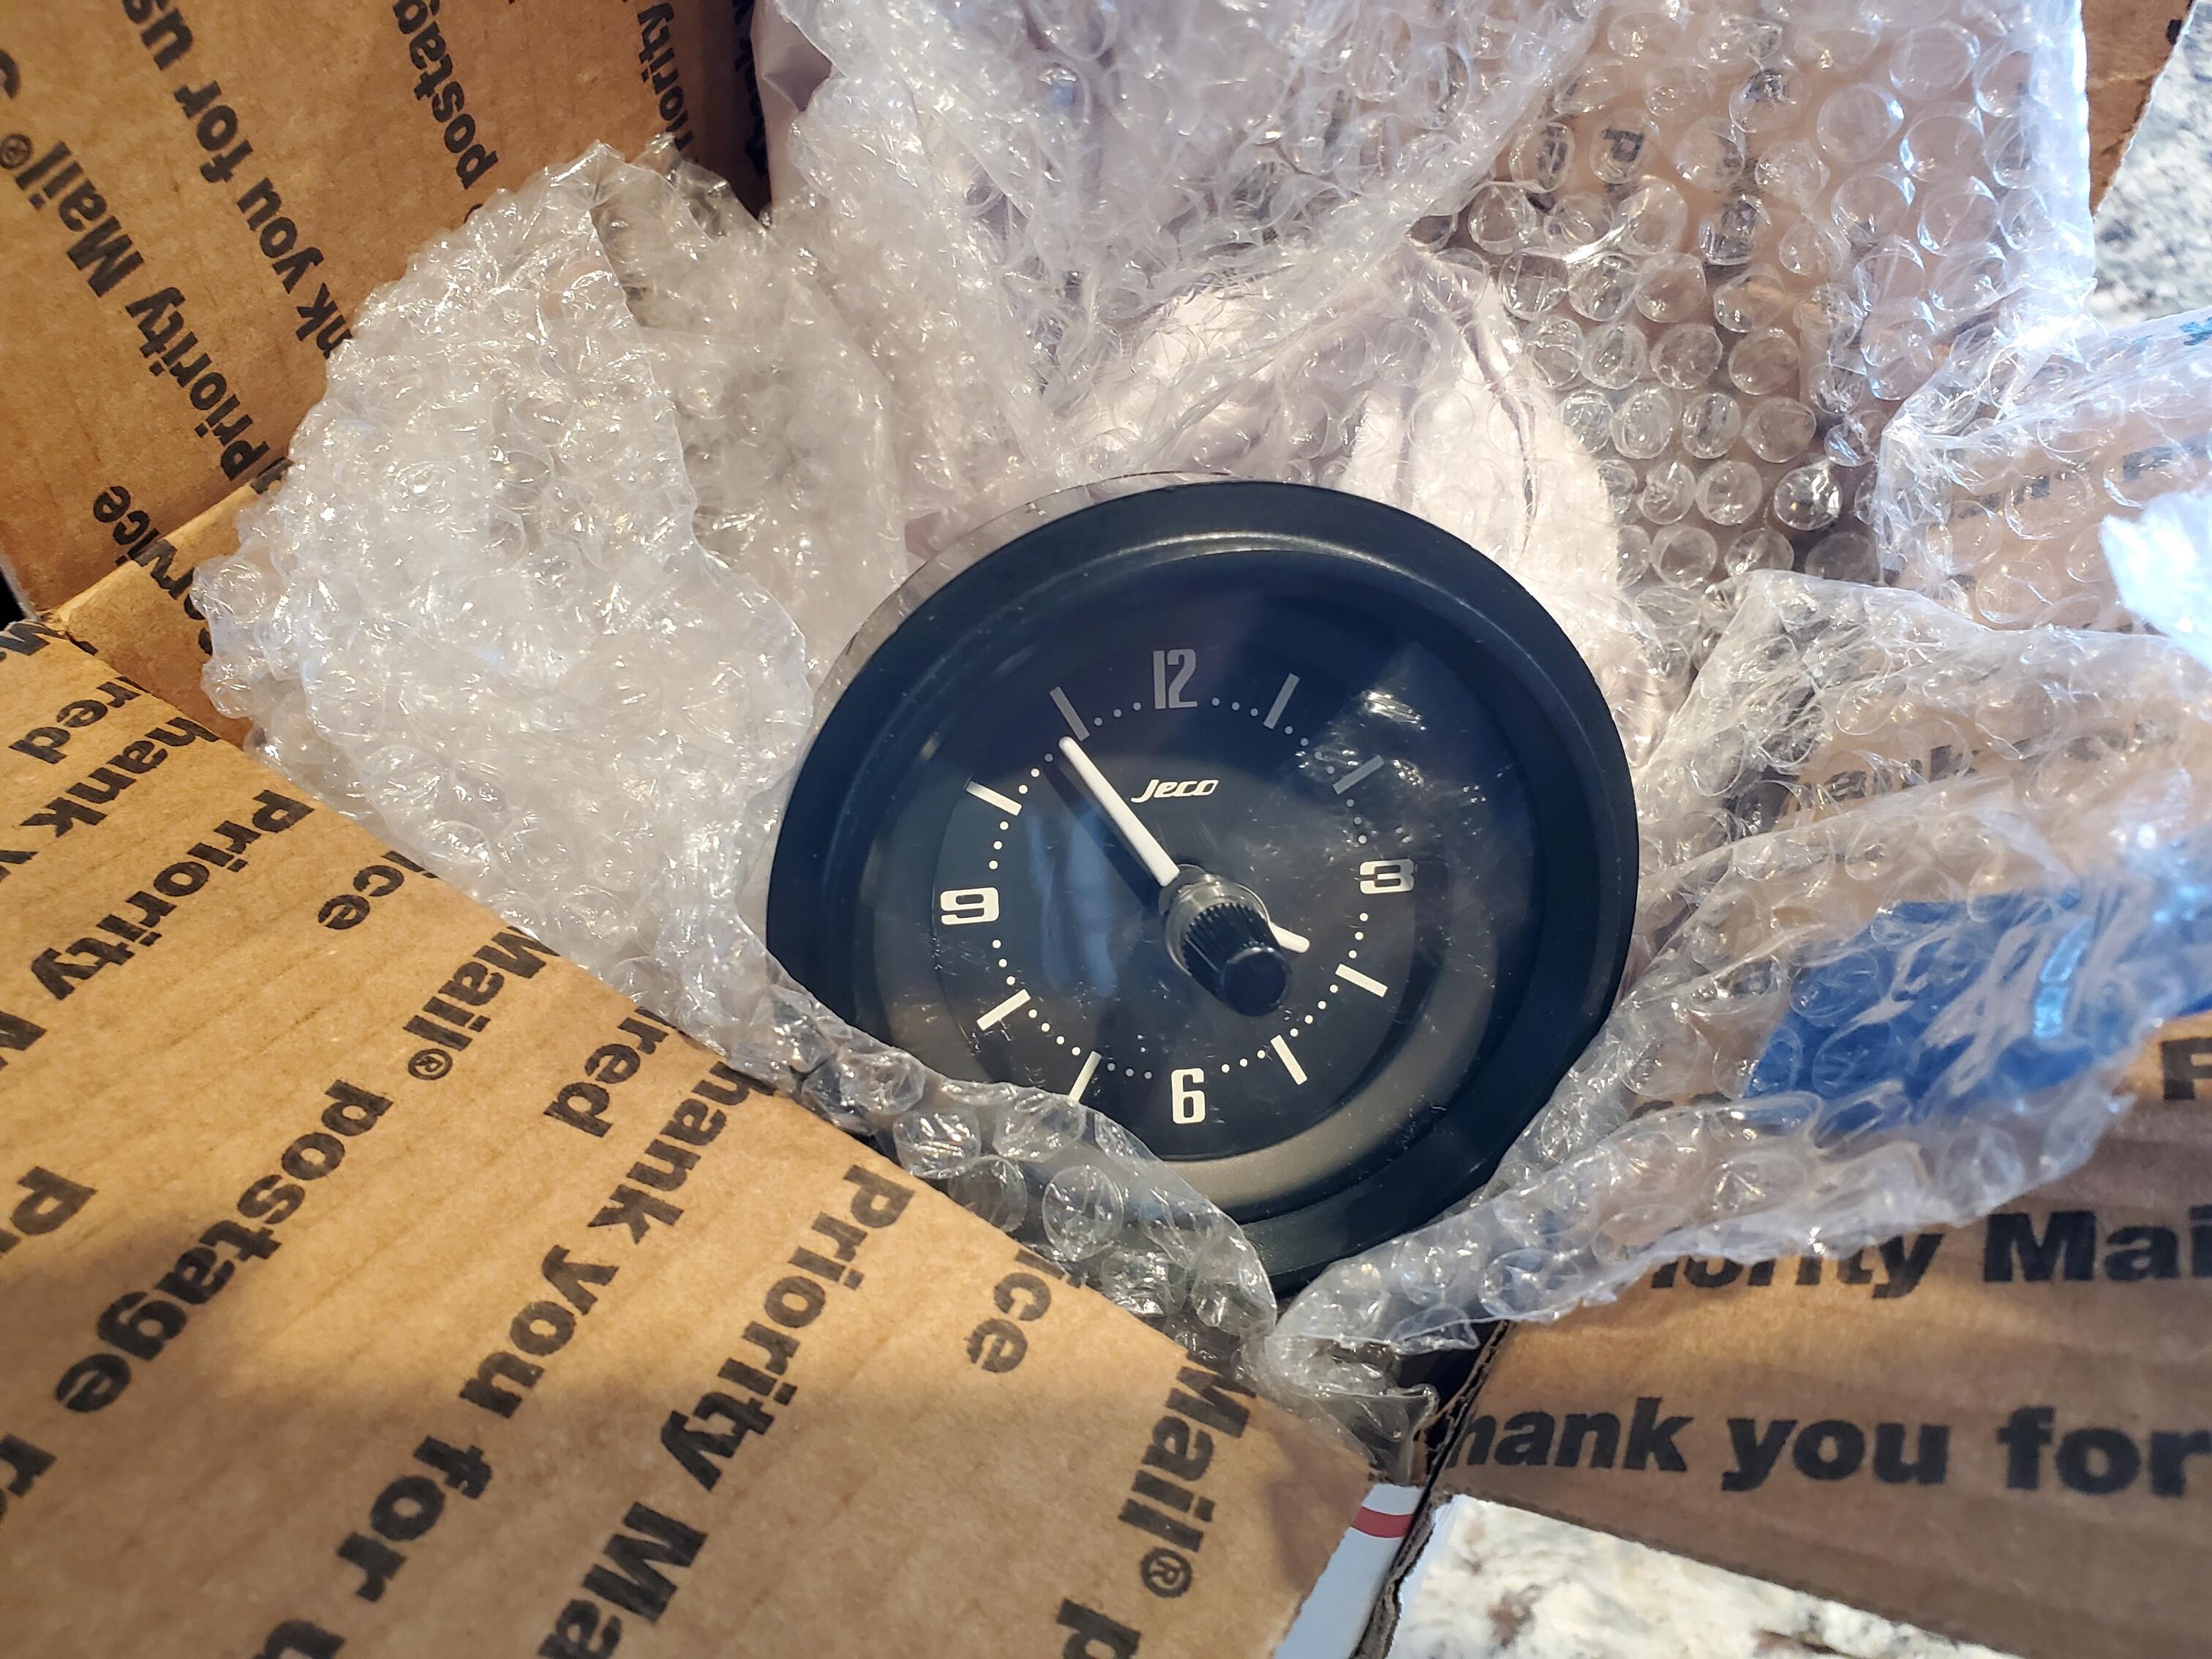
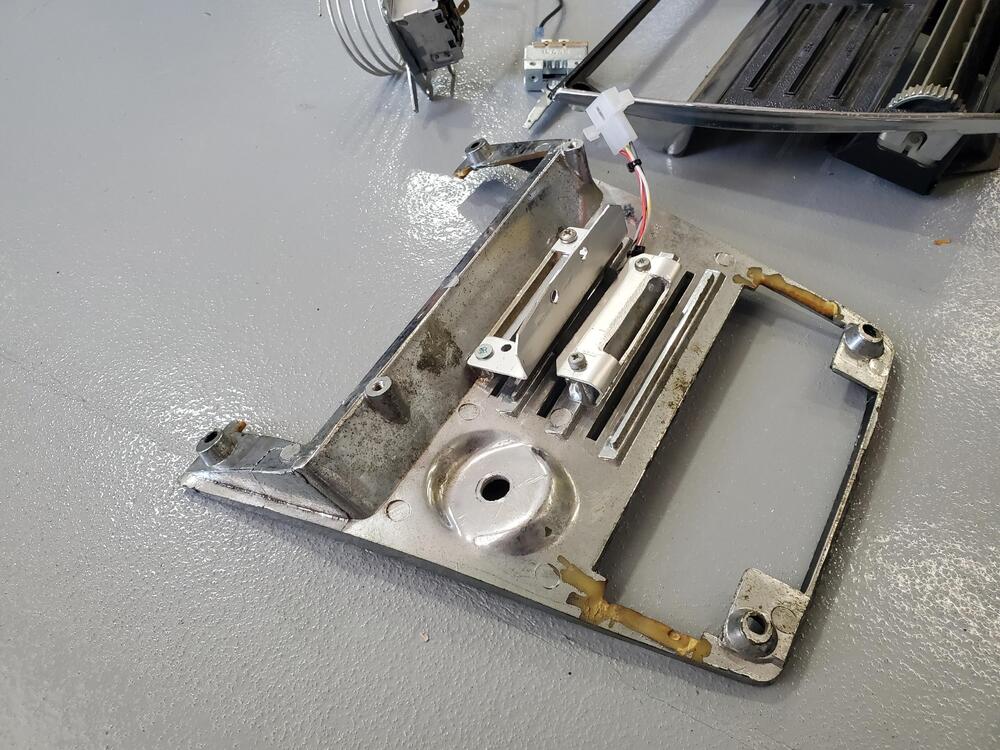
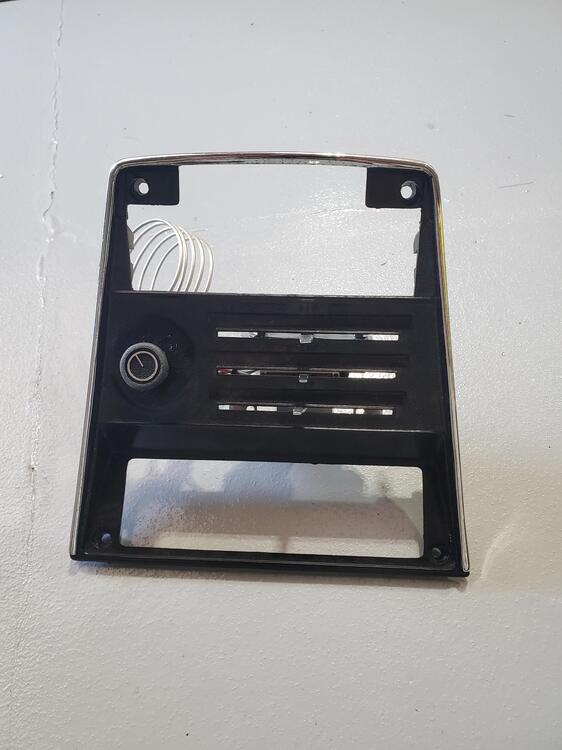
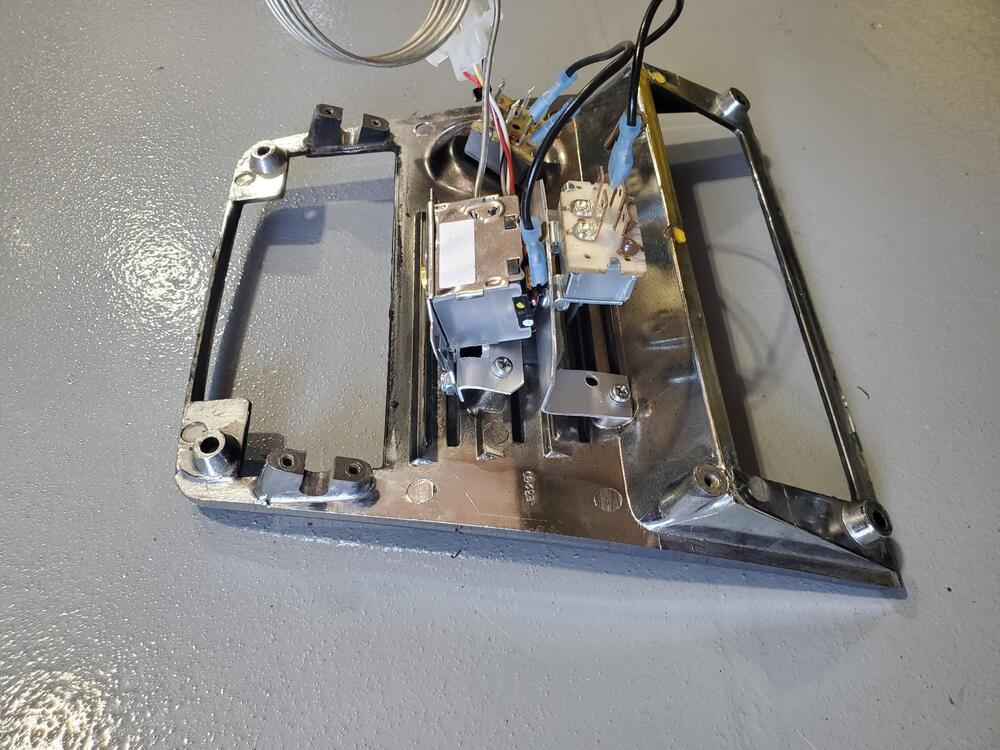
1 pointMore progress this weekend. I got the final parts for the AC from VintageAir on Thursday and completed the mechanical installation of the AC system. All hoses were fitted with thier respective o-rings, lubed, and then given the final torque. Installation of the complete system was much simpler than I had expected. I like the final routing to the Evaporator box. It's a little different than the other AC thread installation, but looks very clean. I adapted the AC switches and slides to the stock Z Temp control panel. I first tried making a single bracket to support two of the switches and ended up making a single bracket for each switch. It was a bit easier this way as the mounting features on the panel are not in the same plane (there is about a .10" offset). The heater slide is secured with the cooling switch bracket as it does not have any mounting features. The Cooling switch and control switch are both secured to their respective brackets with #6 screw and nuts. Pics are below. I test mounted everything to a spare panel before finally transfereing over to the final panel. I will finish up the panel with the knobs, decals and silver touch up pen a little later. While the dash was out, we got the clock re-furbed with a quartz mechanism at Zclocks.com. I have used these on several of my restorations and have one in my White Z. These keep incredibly accurate time. Much better than the stock units, also more reliable. Pics are below Next steps will be to finish the AC electrical connections (looks fairly straight forward as most connections are poke-a-yoke) and then put the dash back in.


 1 point
 -
Correct, it is a toggle. There is a cam of sorts on the roller pin that flips from one side to the other. This in turn flips the contact rocker from one side to the other. I doubt that changing out the spring is going to have the desired effect since the phenolic board for the wiring is broken and moves every time the cam is flipped..1 point
-
They look great, plus no one will even notice….just you! 😆1 point
-
Just wanted to thank everyone who contributed to this thread. I finished up my firewall snaps and carpet snaps, and am satisfied with the results. Not perfect, but those snaps weren't on my firewall when I got the car, and they seem to be unobtanium. I guess I could make a 3D printed model, and maybe get some online place to print it in metal. might work.

 1 point
 -
Rainy days. I made a bracket for the right AC under dash vent. Not sure why the factory one has an angle bend, I made mine flat & long enough to put the vent somewhat centered under the glovebox. Used relatively heavy gauge SS sheet metal, that way I don't have to paint it folded one edge for rigidity, like the factory bracket Hopefully the rain gives over later today to I can install it, and then get the glovebox modded to clear the AC ducting, and installed. When I put the DS duct elbow in, I dislodged one of the tach illumination bulb holders, so that has to come back out so I can access the bulb holder, or I can pull the tach out. Problem with that is the lower ridge of the tach body is scraping the vinyl of the dash opening 😞
 1 point
 -
Well if you are not blowing blue smoke out the tail pipe, cannot smell oil and never need to add oil then it is carbon fouled it would seem.1 point
-
1 point
-
1 pointI made a pilot bushing remover tool many moons ago (many). Probably made it for my Z at the time. Man, have I gotten a lot better at making things since then. I probably still have it and if I can find it, I'll post a pic.1 point
-
I've toyed with this idea in the past and if I come up with a simple and elegant solution, I'll let you know. And I'm sure you'll do the same. I've messed around with one of these little timer modules, and while it's overkill, it would work. Under ten bucks off ebay. One shot or continuous output. Programmable on time or off time. On pulse, or off pulse. Moore's Law. Throw transistors at it. Example ebay availability: https://www.ebay.com/itm/334738777145?hash=item4deffc6439:g:WuoAAOSwc4FdeKyz&amdata=enc%3AAQAIAAAA4G9hgNdMy2ONBPE71Z3gGq3qzRvQaK%2BWxXTNH9UcLyqdQOnalj%2FTC7kXod2gRdFTsLiWo6%2Bw1CPybhOzekN701%2F%2BflwUhMM%2FPFwIW2dw8osWQx9N5Y%2Bzkpow7cdoPTmHLYpoPfIk%2FRFNVEEBRJsPYuXmY4ugTqfGWpl7Ec4CWDHRZSS741ZOWEezeh8wGXqgvZyp08MiOeeLydivakdTYNtrBhLn%2F0TIsZKVjDUwYSL53goggea6rIRywsYDHcrtu5vM73hwhkBkbaBkKp%2FbkO65VxtF9cypNMy2%2BfSyOCw%2B|tkp%3ABFBMrtrs_Oli1 point
-
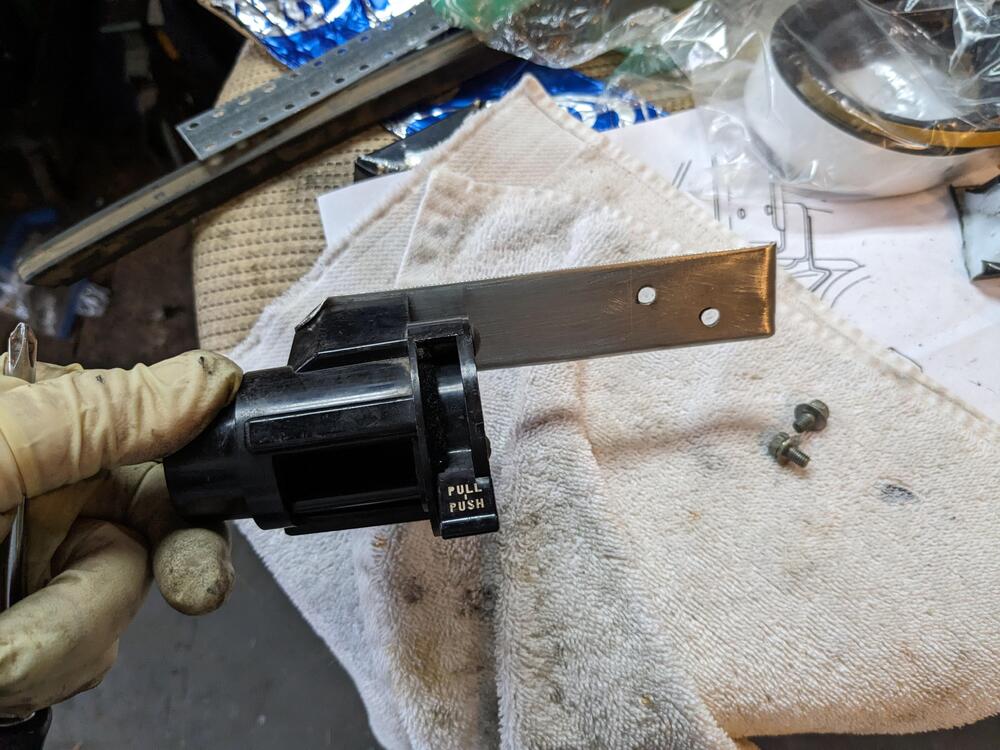
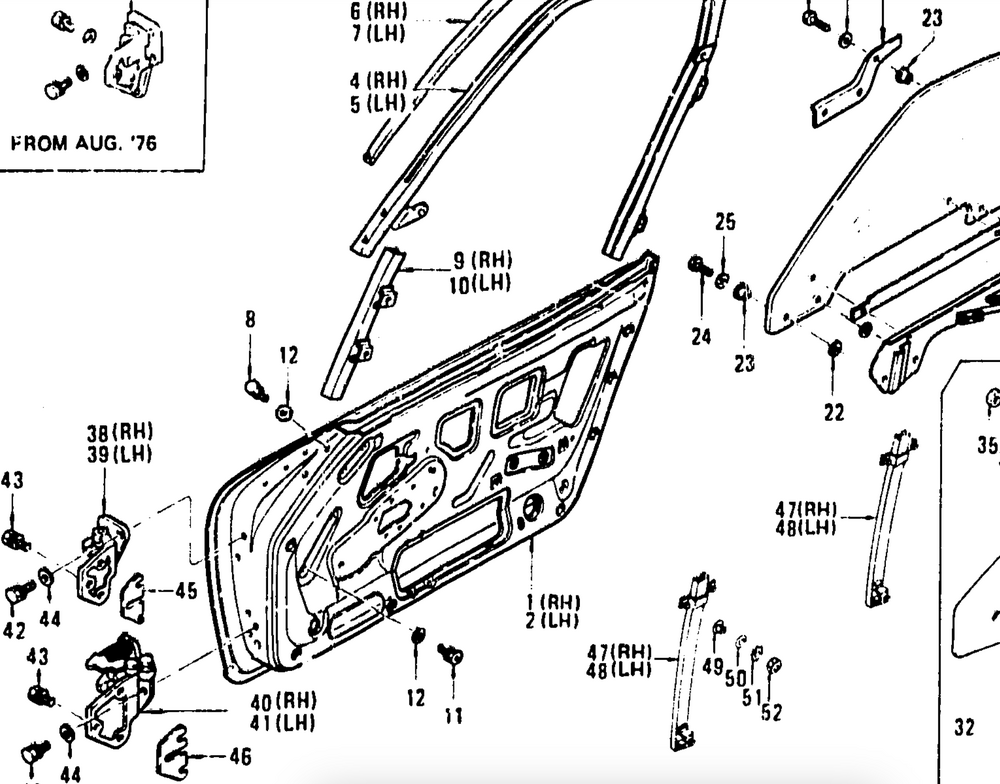
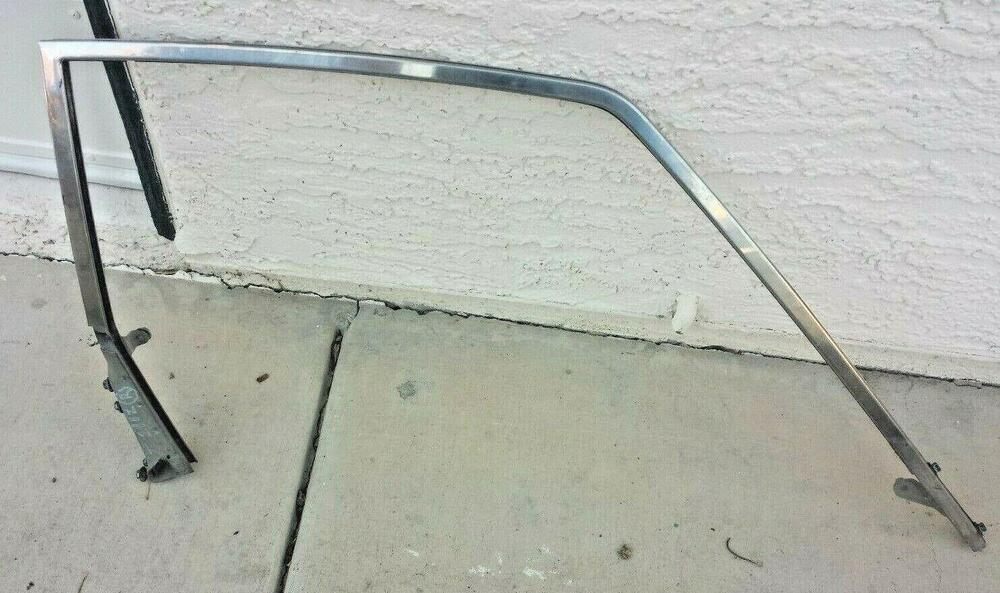
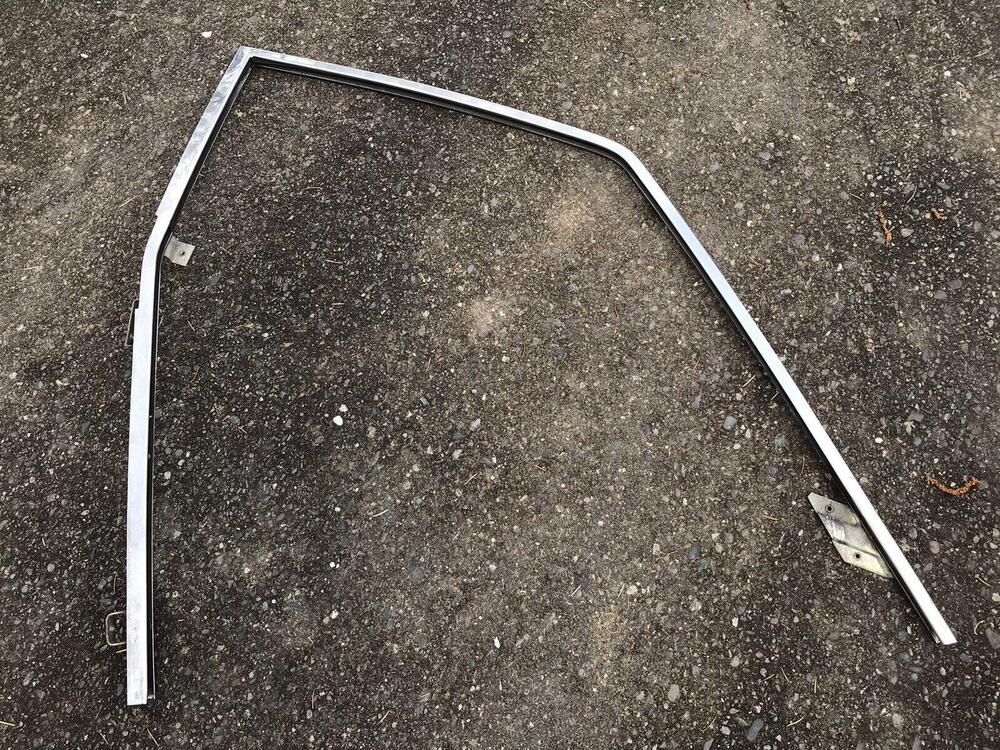
Your response got here just before mine, but the summary of my post is that the car parts manual lists three different sash part numbers*. 80200-N3400 up to 7506 80200-N4500 from 7507 to 7607 And it supersedes 80200-N3400 80200-N4400 from 7608 to the end of the run. And it supersedes 80200-N4500 Based on that, and your pics, it's not a straightforward swap. * For the 260-280 cars. The 240 used a different part number.1 point
-
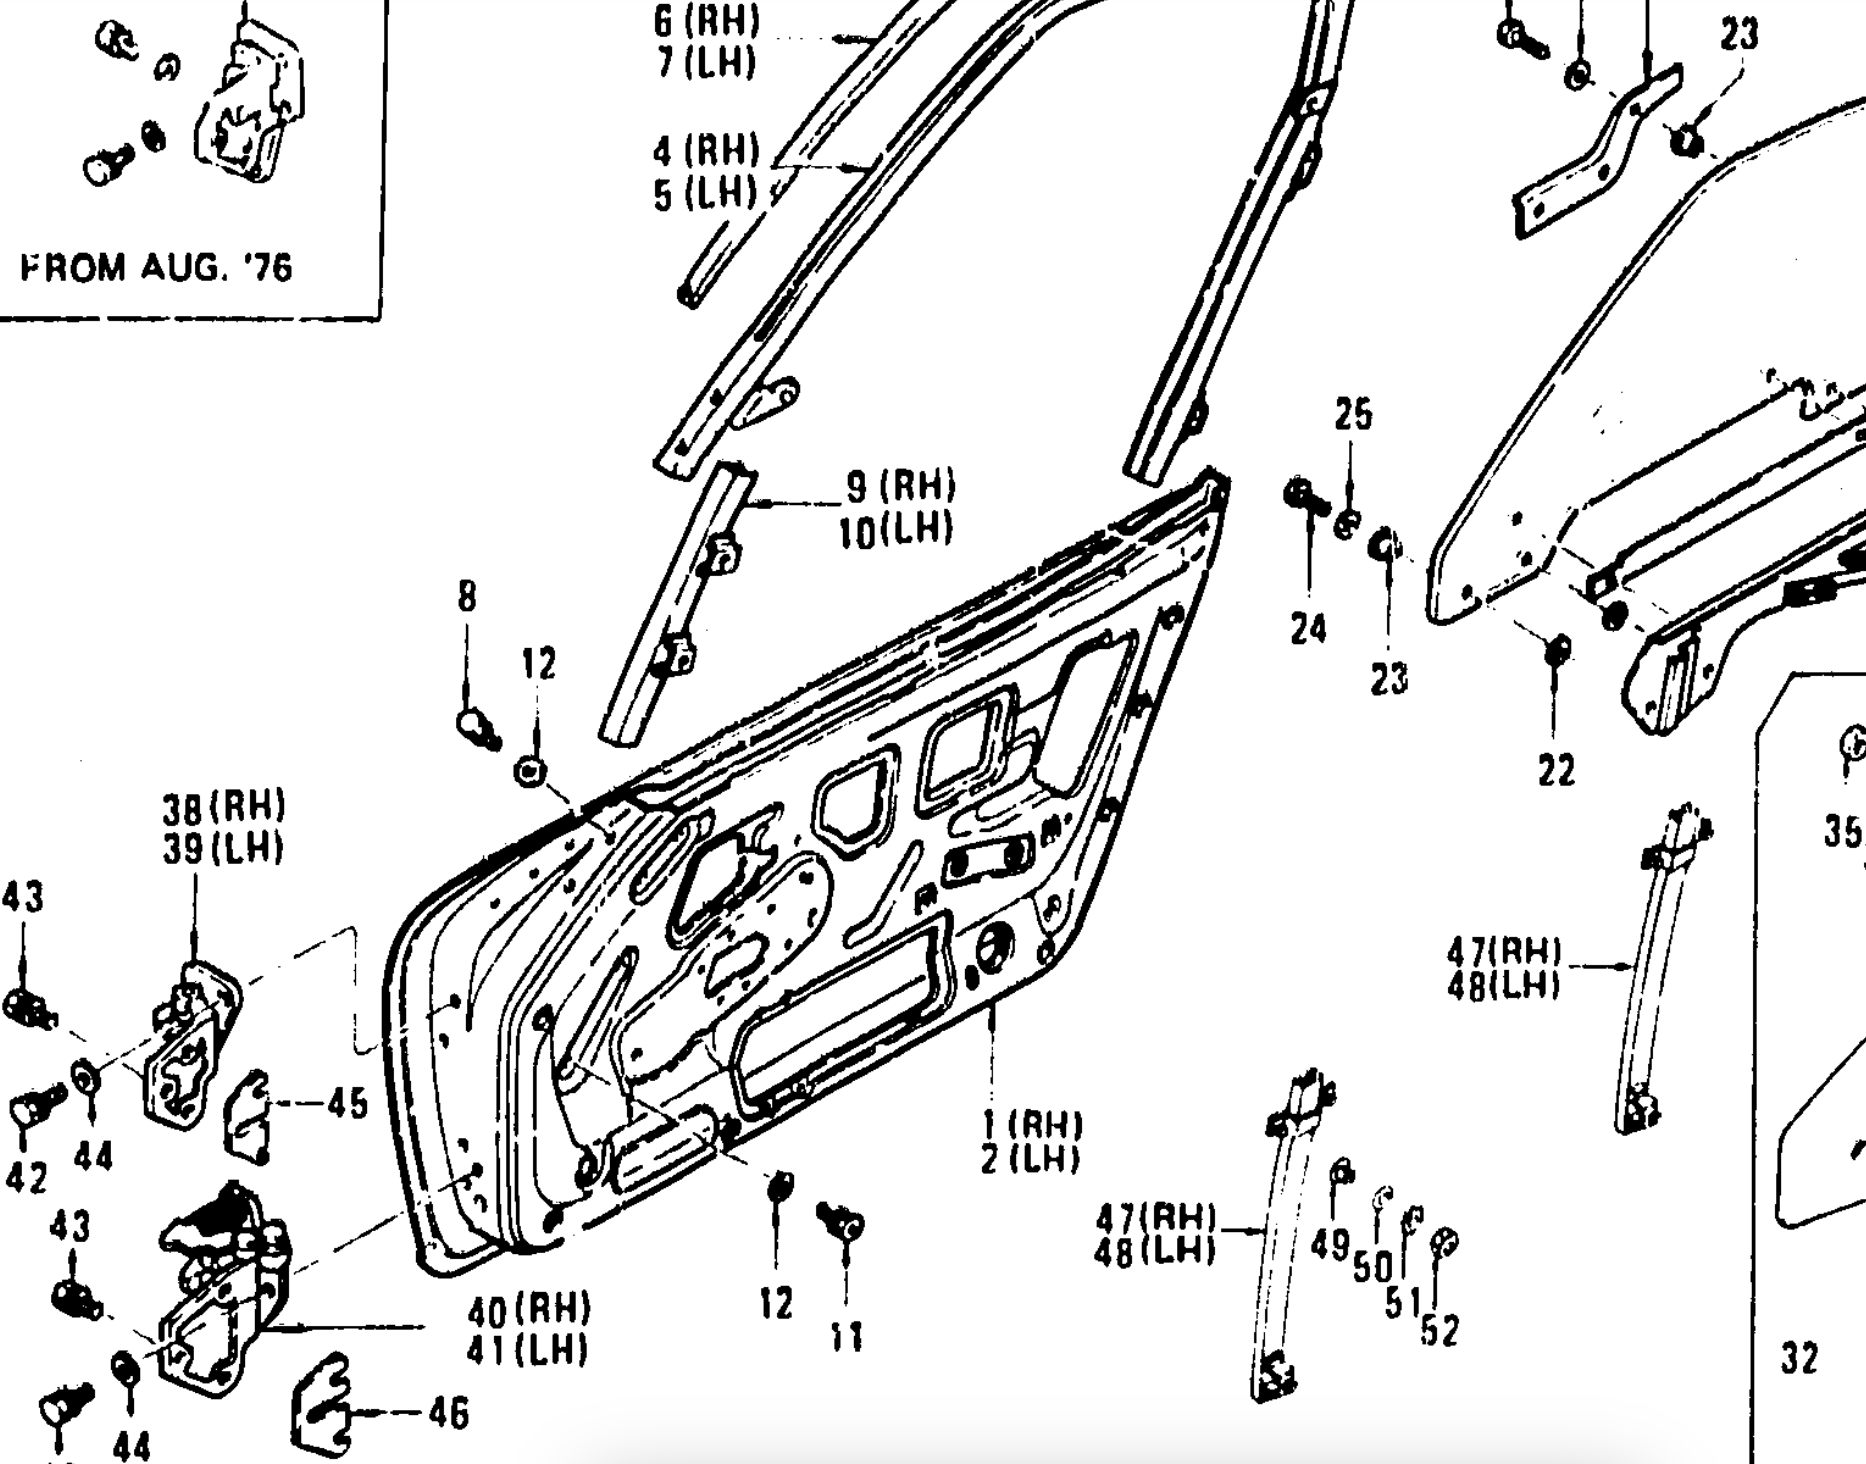
OK - looking at pics of a 77-78 frame and the earlier frame - the later frame has a separate lower section #47 & #48 in the catalog Only one bolt at the front inner instead of two on the earlier style. Rear ends a few inches below the 2 vertical mounts that likely align with the 2 on mine, and has two additional horizontal bolt points. If I can get the later lower guide channels maybe I can make it work
 1 point
 -
1 point
-
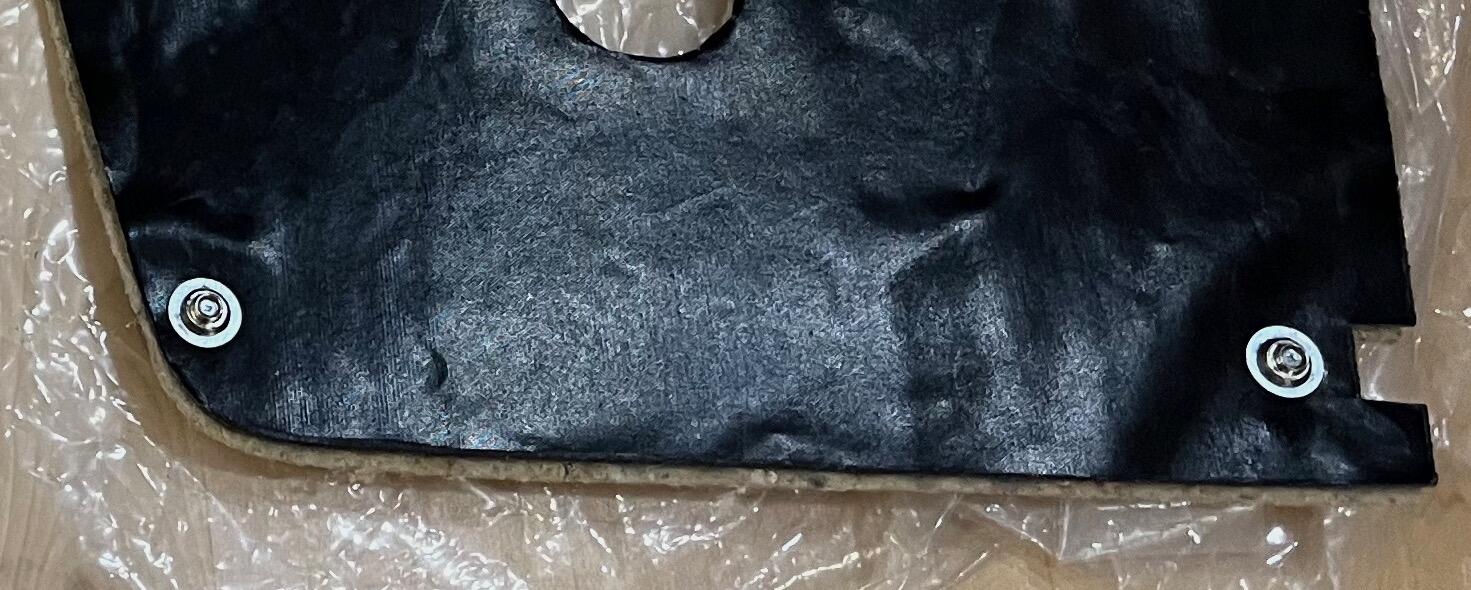
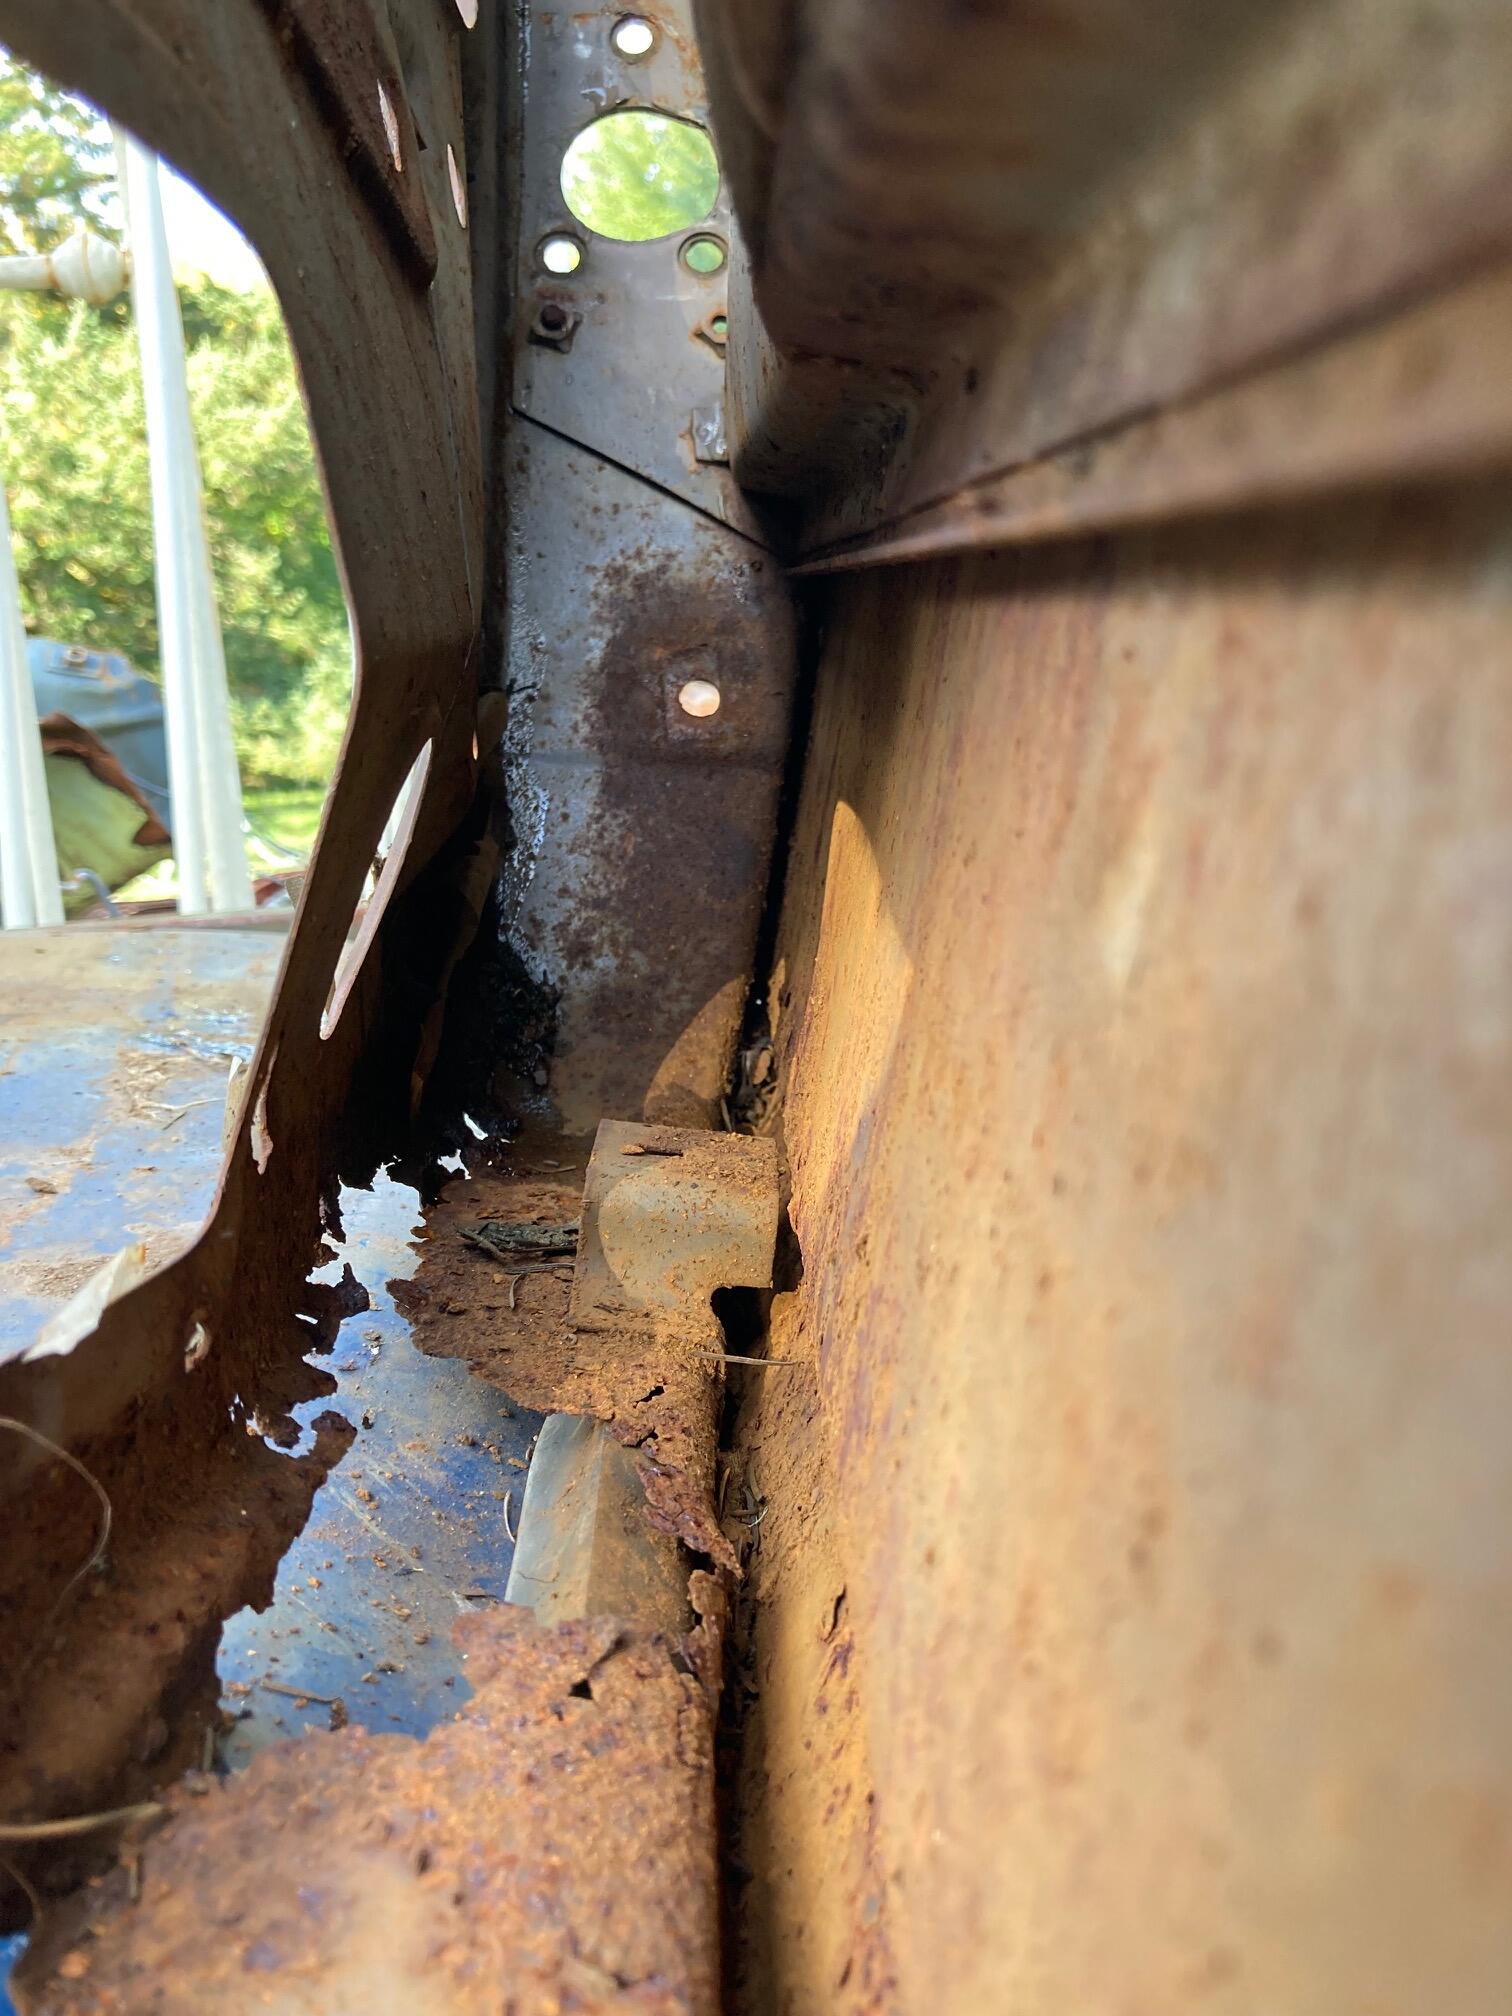
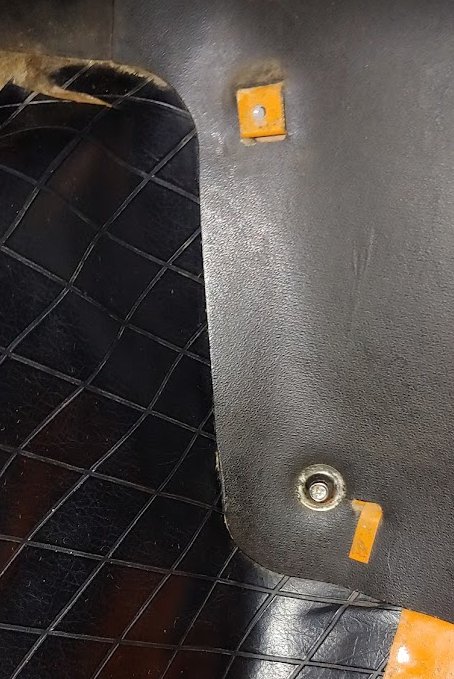
1 pointMy mistake before. The pad sits in the rear portion of the door. Slightly forward of where the the lock cut out is. There is a raised bracket that has a rectangle hole in it for the spring clip. I hope these pic's help. Pardon the rust.
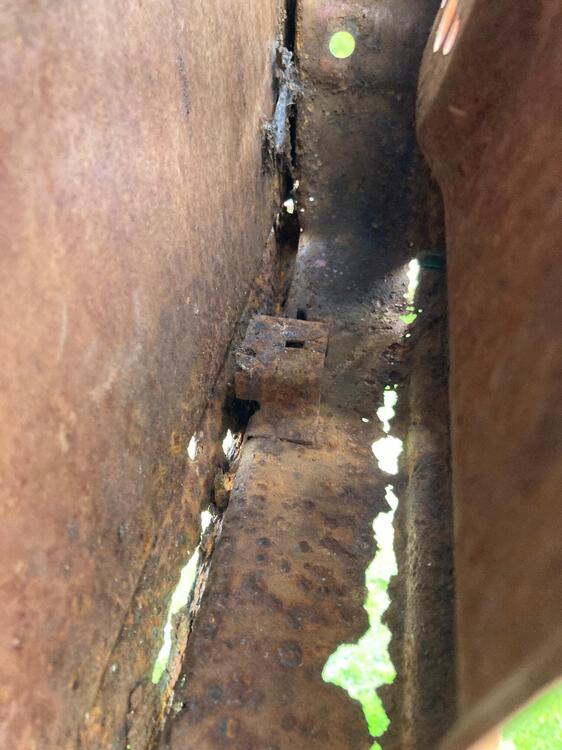
 1 point
 -
1 pointI used the bread method on a RX7 a few years back. I'll never use anything else in the future.1 point
-
@jalexquijano If you'd like someone in Panama City to check out your carbs there's a JDM shop there. Also, look into any British or Volvo repair shop that has an older mechanic. Volvos used Hitachi SUs (I think) and any older British mechanic should know SUs inside and out..1 point
-
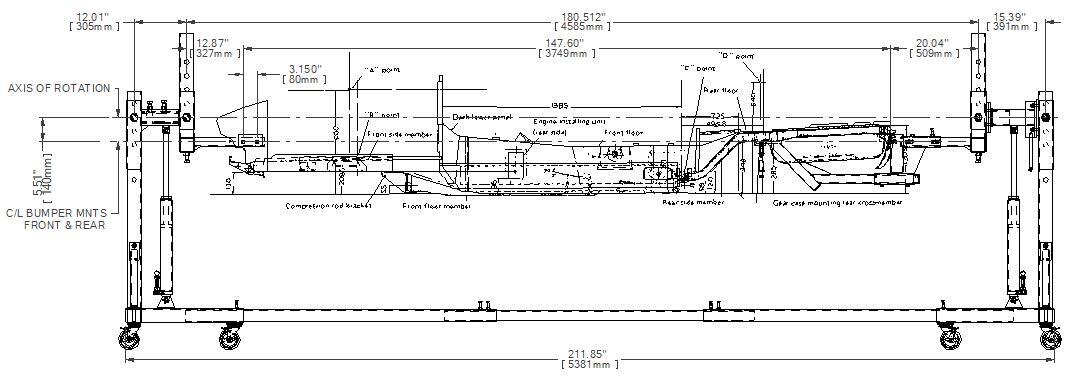
1 pointHere is a drawing showing the difference in height from the mounting points to the axis of rotation. Assuming my measurements are good. Lol Thanks to Nissan for the chassis drawing in the 1970 FSM.
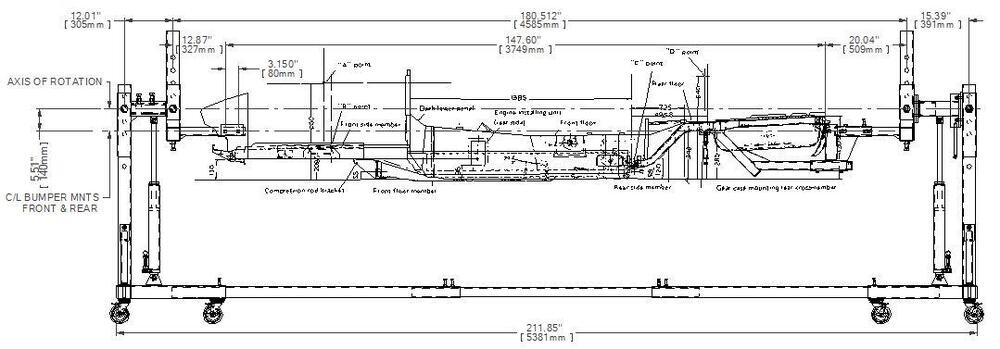 1 point
 -
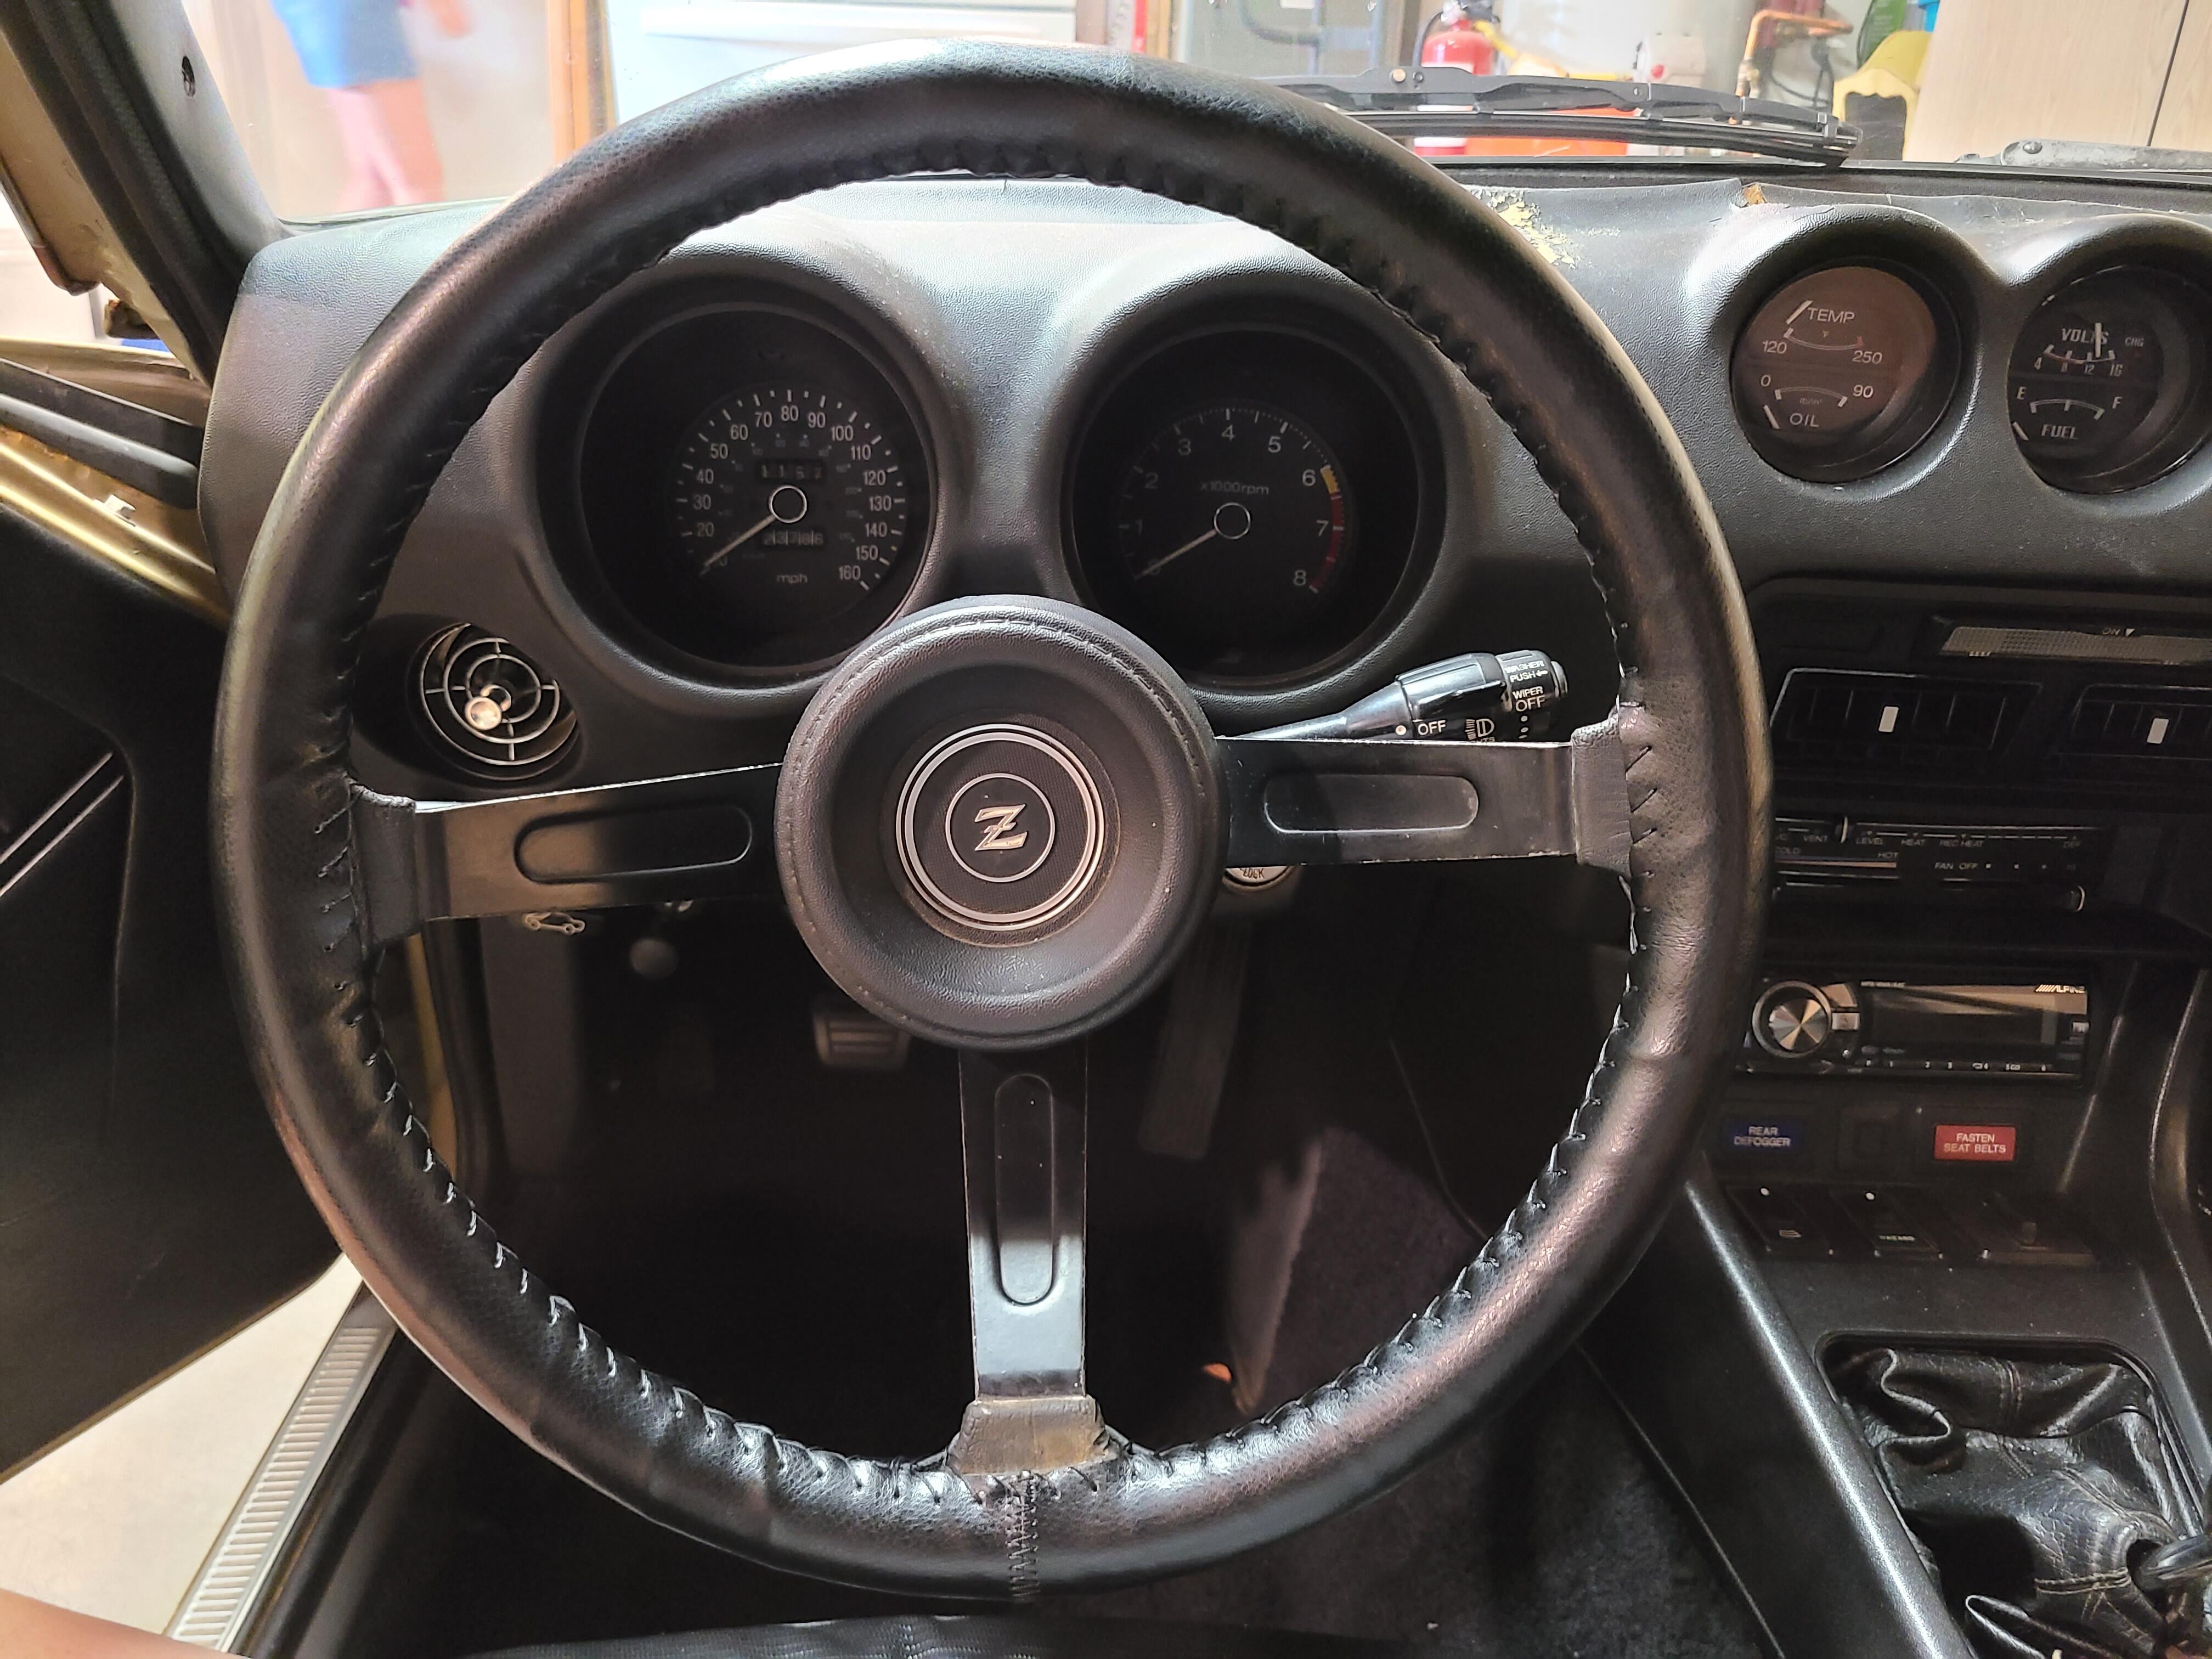
I installed a leather steering wheel cover today. It was $15.99 on Amazon and it looks great. My Z had one of those terrible 1970's foam/vinyl wheel wraps. I left it in place to add a bit of thickness and put the leather cover over top. Ideally, I would have removed the old wrap and added foam padding to get the thickness I wanted, but then it would have been much harder to get the correct leather size. I removed the wheel and used a baseball stitch. It took a few hours to stitch it on and I'm happy with the results. The old wrap prints through a bit in the photo, but it's barely visible in person and it actually gives the wheel a bit more grip in the hands. https://www.amazon.com/dp/B0989MRSDV?psc=1&ref=ppx_yo2ov_dt_b_product_details I bought a M3 size and it was perfect with the foam wrap under the leather. I'd guess the M2 would fit a stock 280Z wheel.
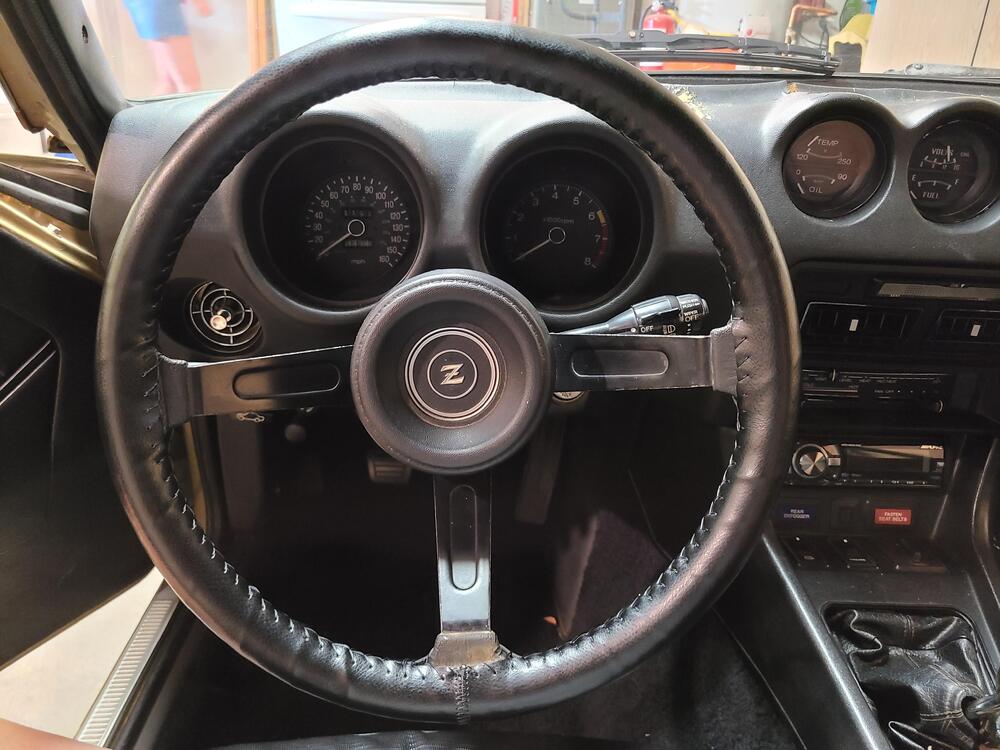 1 point
 -
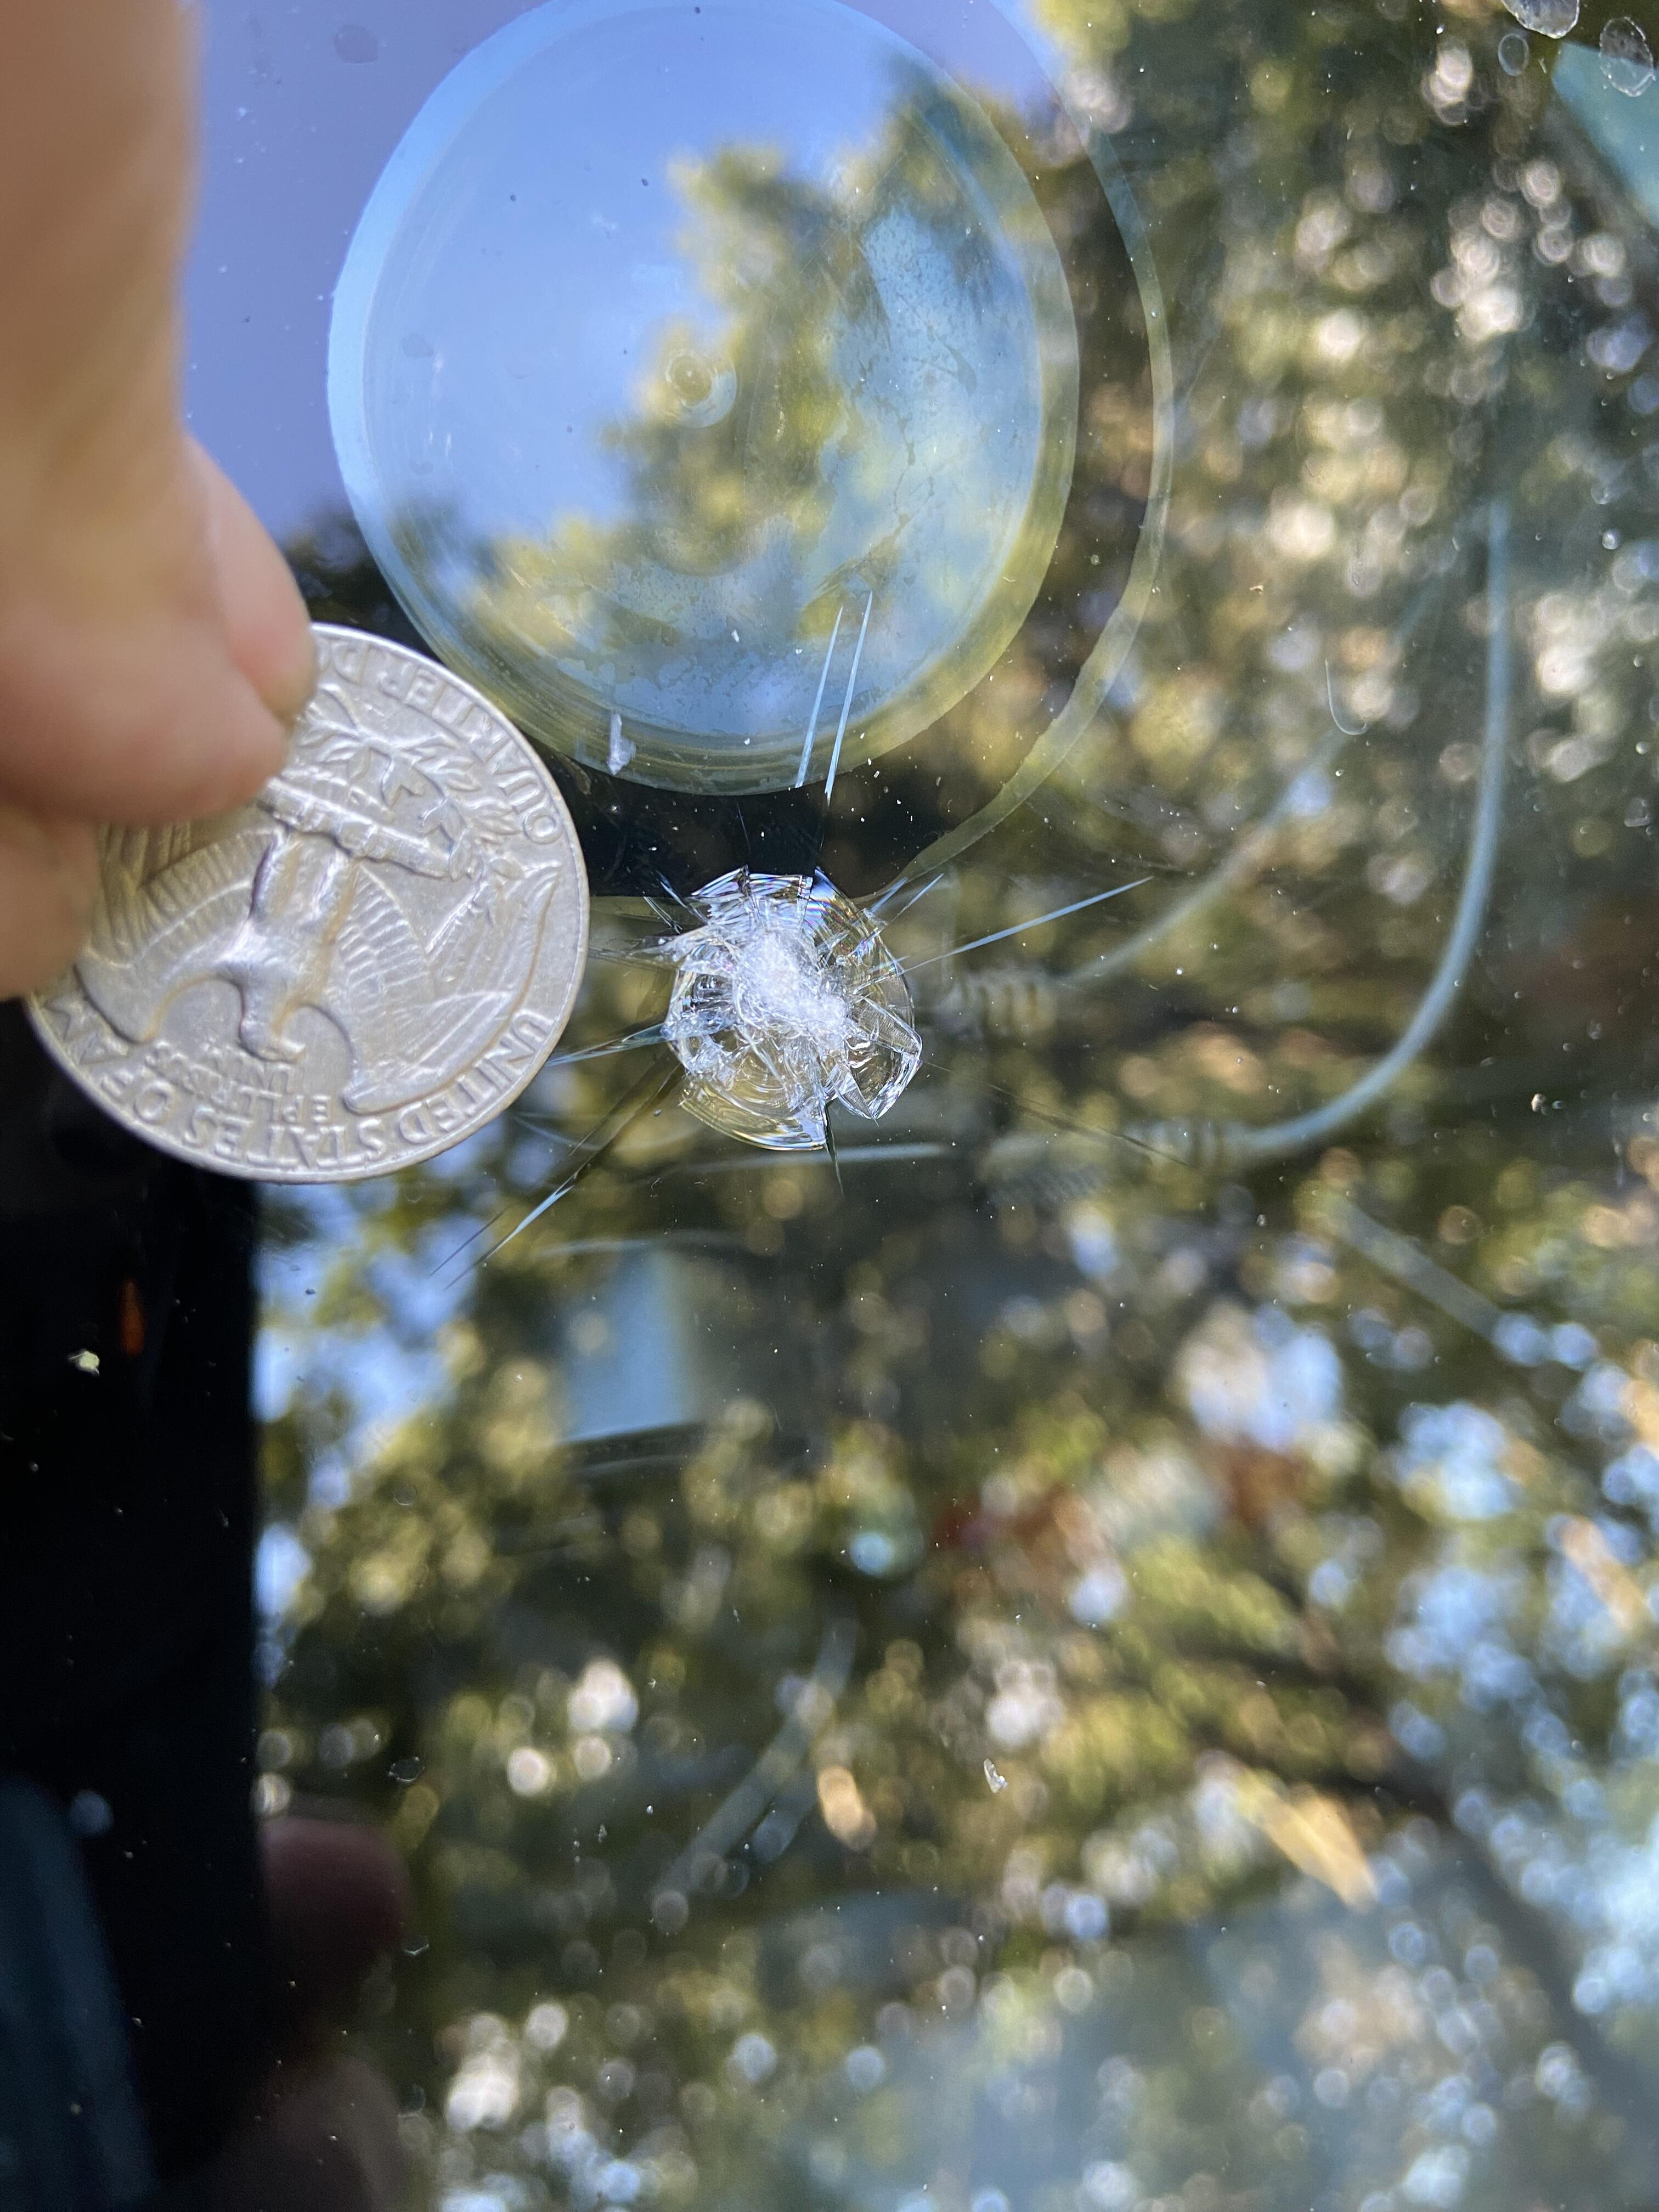
I've been very busy with work and have been quiet on this forum for while now, but I still read the posts and still glean important knowledge and laughs from all of you. To my pleasure my Z has run great over the past year without any issues, and as of late, been driving it about 3 to four days a week. It's turned out to be a good solid car. Today, while driving home, I caught nice rock on the windshield from oncoming traffic. I saw it coming and could do nothing.🥴 I'm hoping it's repairable so I'm taking it to a windshield repair place ASAP so it won't spread.
 1 point