


Leaderboard
-

kats
Free Member12Points2,215Posts -
HS30-H
Free Member6Points5,509Posts -
duffymahoney
Free Member5Points961Posts -
grannyknot
Free Member5Points5,158Posts


Popular Content
Showing content with the highest reputation on 08/09/2023 in all areas
-
4 pointsWhat a complete pain to fix. When I opened the email, I went straight to the picture without reading your findings. My first thought was "wait, what? How is that even possible?" It was only after reading the post that I saw that the backing plates were on the wrong sides as well as upside down. After removing everything from mine to do new bearings and a disc brake swap, I know how much work it was for you to put it all back the right way. I probably would have had many choice words before I calmed down enough to tear it apart. After your other discoveries, I would have serious trust issues with every single component on the car. Hopefully they didn't open up the transmission or differential.4 points
-
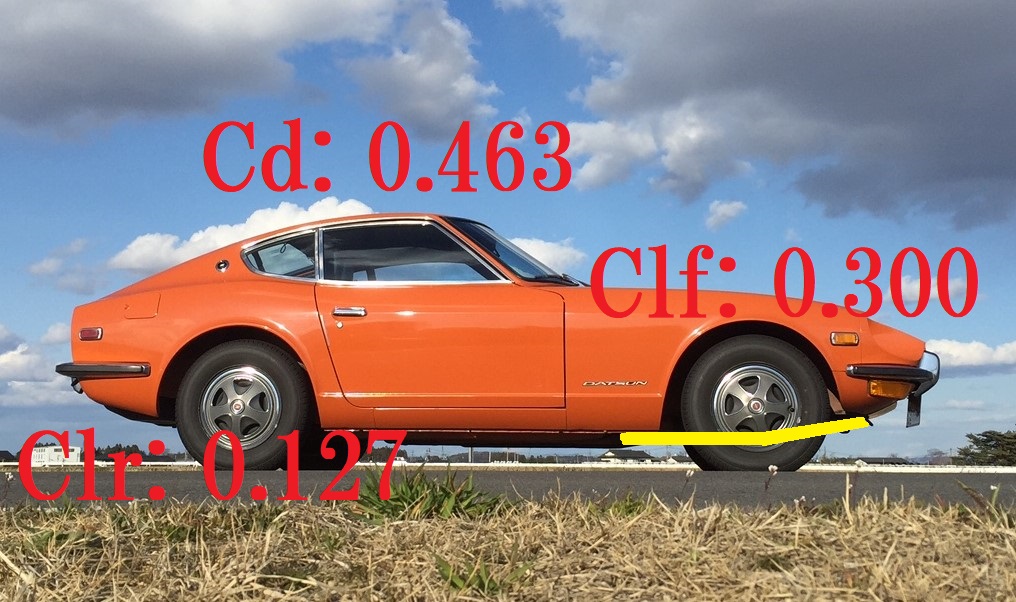
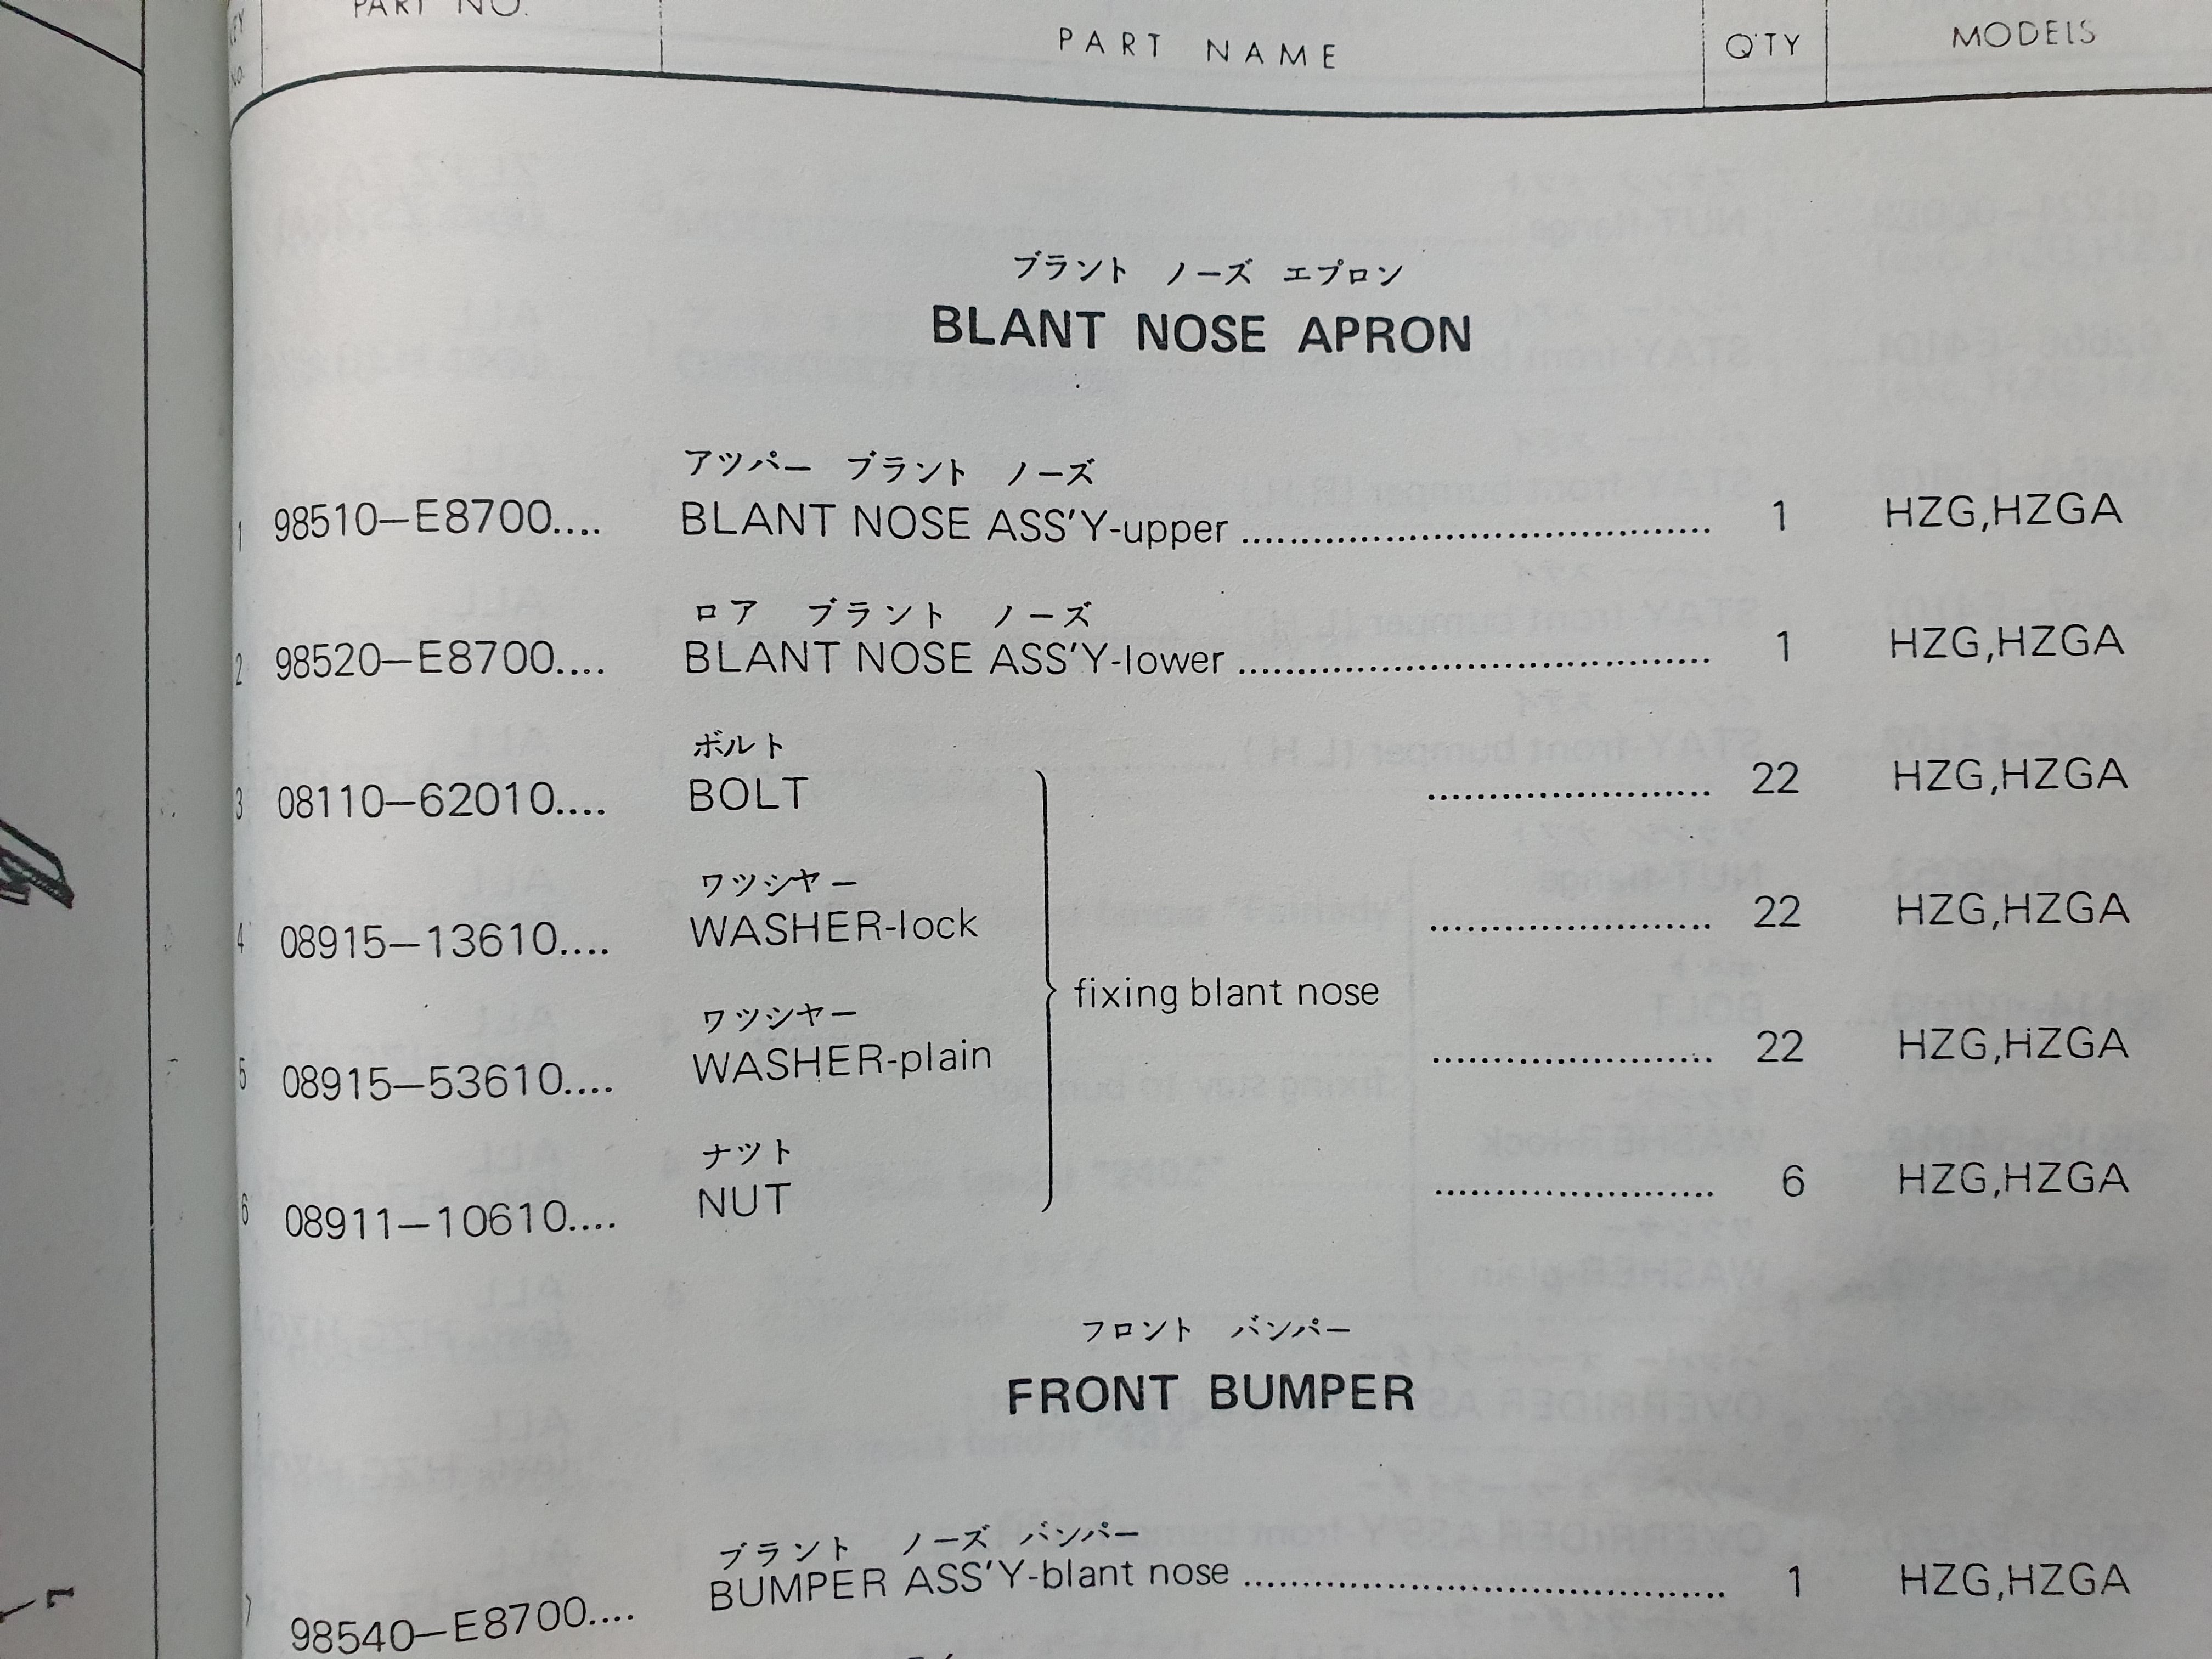
4 pointsHi, For someone who is interested in aerodynamics of our S30 cars, here is a thesis made by Nissan engineers in May 21st 1971. Aerodynamic Study on Passenger Car Body Configurations / Michio TAKEI, Hikota SAKAMOTO, Kazuhiko YOSHIYUKI. The effects of G-nose and spoilers are quite noticeable, 7 pages of this thesis is worth to read. I'm not an engineer so some of the numerical formulas are unable to understand but the figures and illustrates work easy for me. So, I tried to show one of their data. Those numbers in pictures are excerption from the thesis. The only thing which I am not for sure is the data of Clr for the rear spoiler only configuration. It shows 0.007, it is too small isn't it? By the way, Mr. Uemura told the story of naming our G-nose in his book. "Blunt-Nose", Mr. Yoshiyuki and Mr. Uemura felt it was a cool name of NASA's Blunt-Nose cone which was attached on top of the satellite. They named their nose extension kit after the NASA's Blunt -Nose but the Sales department worried about that people would not understand what it would be. Finally "Grand- Nose" was used. Kats
.png.d121fc160689249989db5ca4931b8bc8.png)
.thumb.png.85d511bcb37ab15fdaabd7c886e8d1a2.png) 3 pointsHi Roo, Me neither, and also engineers were shocked when they saw the results of Cd and Cl at that time. I will upload the remaining pages. Before that I will try to explain that Mr. Miyazaki told me about how bad the opening front end of S30 was. Just like you proposed, it was the issue of S30 which engineers had to deal with. I will draw a picture by hand, Mr. Miyazaki said S30 front end is so wide that it leads too much air coming through the radiator. Then the air can't go through under the engine because the air was blocked by the air stream which is flowing underneath of the car. At the end, the pressure of inside of the engine bay becomes positive, it pushes the front end. The higher front end gets more Cd worse. This story I think it relates the story of 15mm lower front end of Europe model (except Portugal model). And Mr. Miyazaki even told me there was a test car which had a factory air conditioning coupled with Z432!! (Z432 was not able to make a choice of air conditioning from the factory). During the test of aerodynamics, one day he was wondering why one car had a better value than other cars. The better one had an air conditioner condenser in front of the radiator. Less air gave less lift. That was a Z432. Kats3 pointsGreat data Kats. Thank you for posting. About the 'Blunt Nose' vs 'Grande Nose' story: I think there was always a little bit of confusion mixed up with the 'Blunt' nose naming, possibly not helped by Japanese vs English language meanings. 'Blunt' vs 'sharp'. What's the opposite of 'Blunt'? 'Sharp', right? In aero terms, we might easily think that something 'Blunt' does not cut through the air very well. That's how I think of the stock Z front end. It has a big open mouth which resists passing through the air. On the other hand, the 240ZG's front end reduced that big open mouth and channeled air over, under and around it. It cuts through the air more efficiently. So is the 240ZG's nose sharp, or blunt? Confusing, isn't it?! In the end I think it was a good decision not to use the term 'Blunt Nose', even if I can understand the NASA_derived thinking. But still, the term DID make it into some of Nissan's factory documentation:
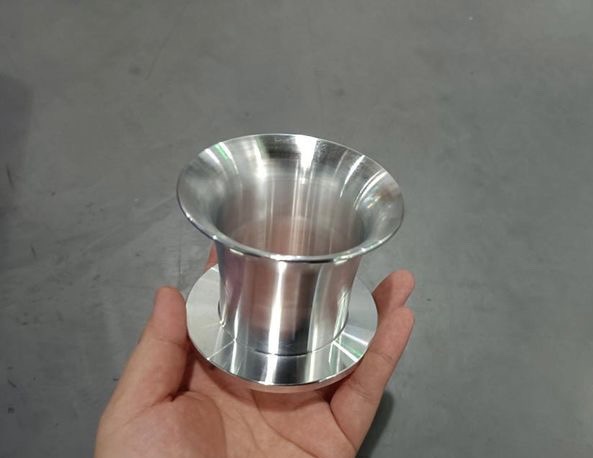
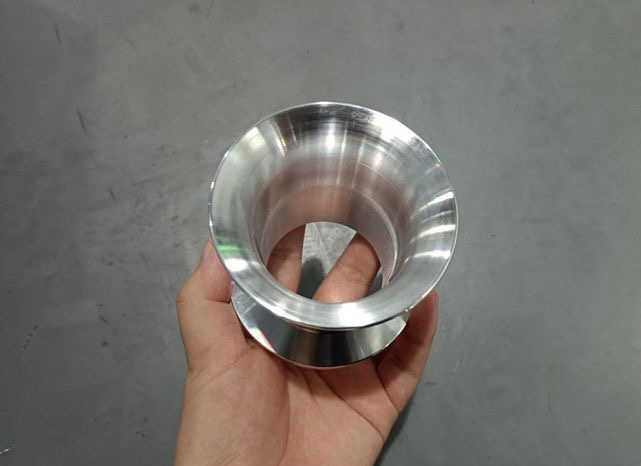
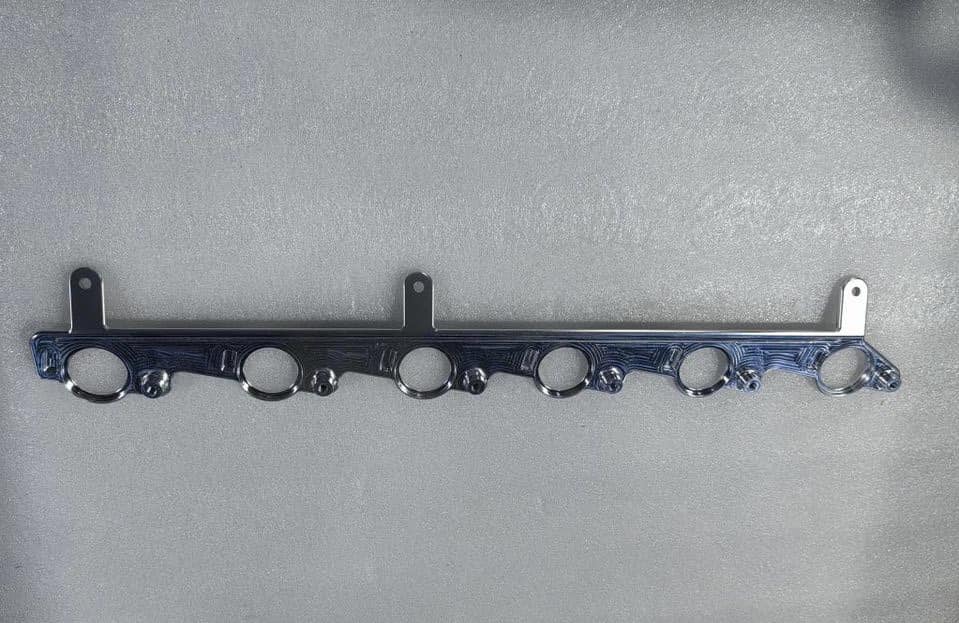
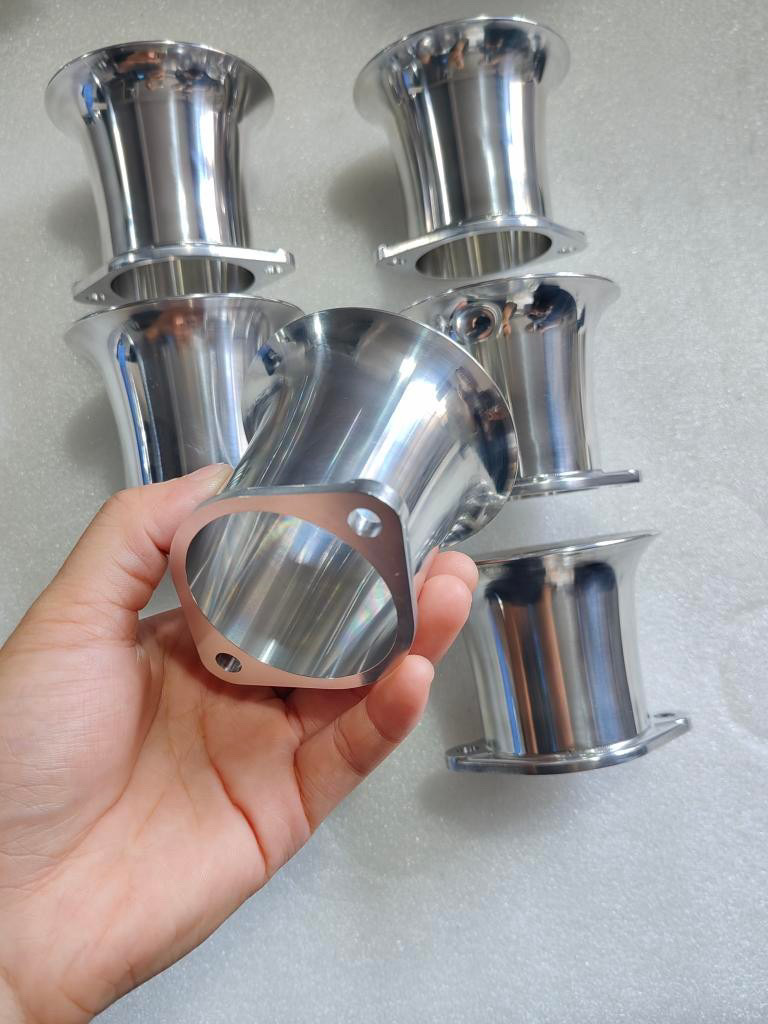
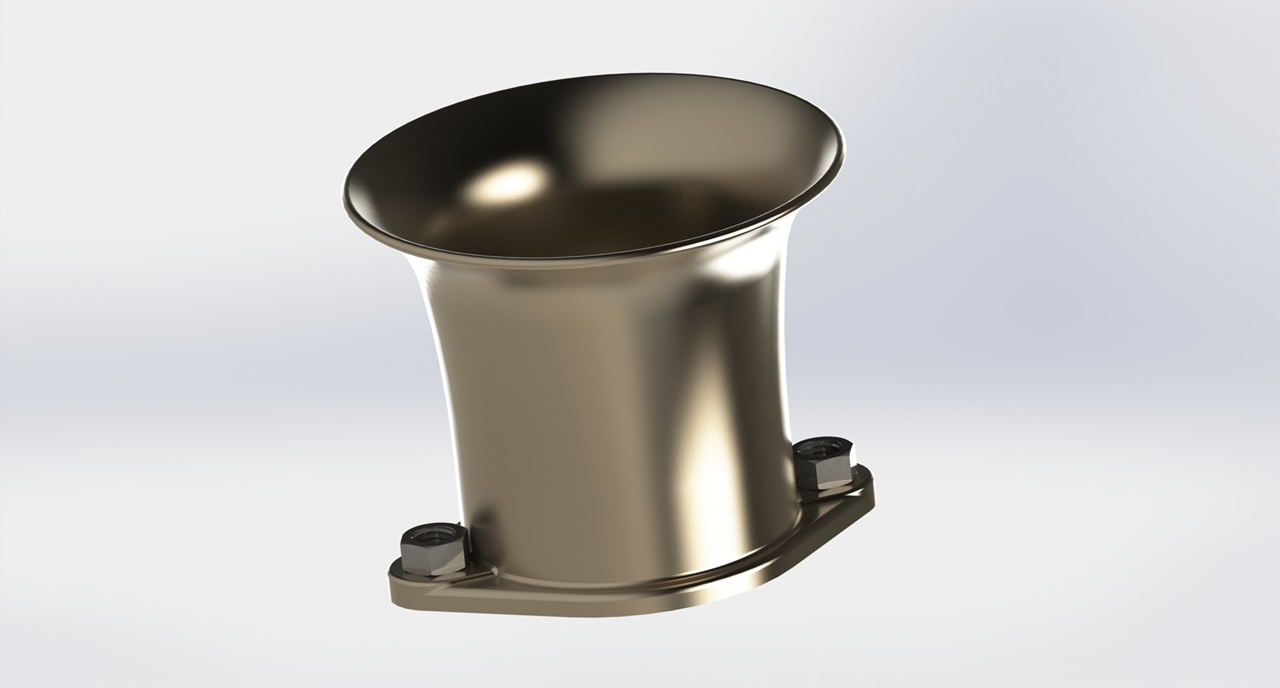
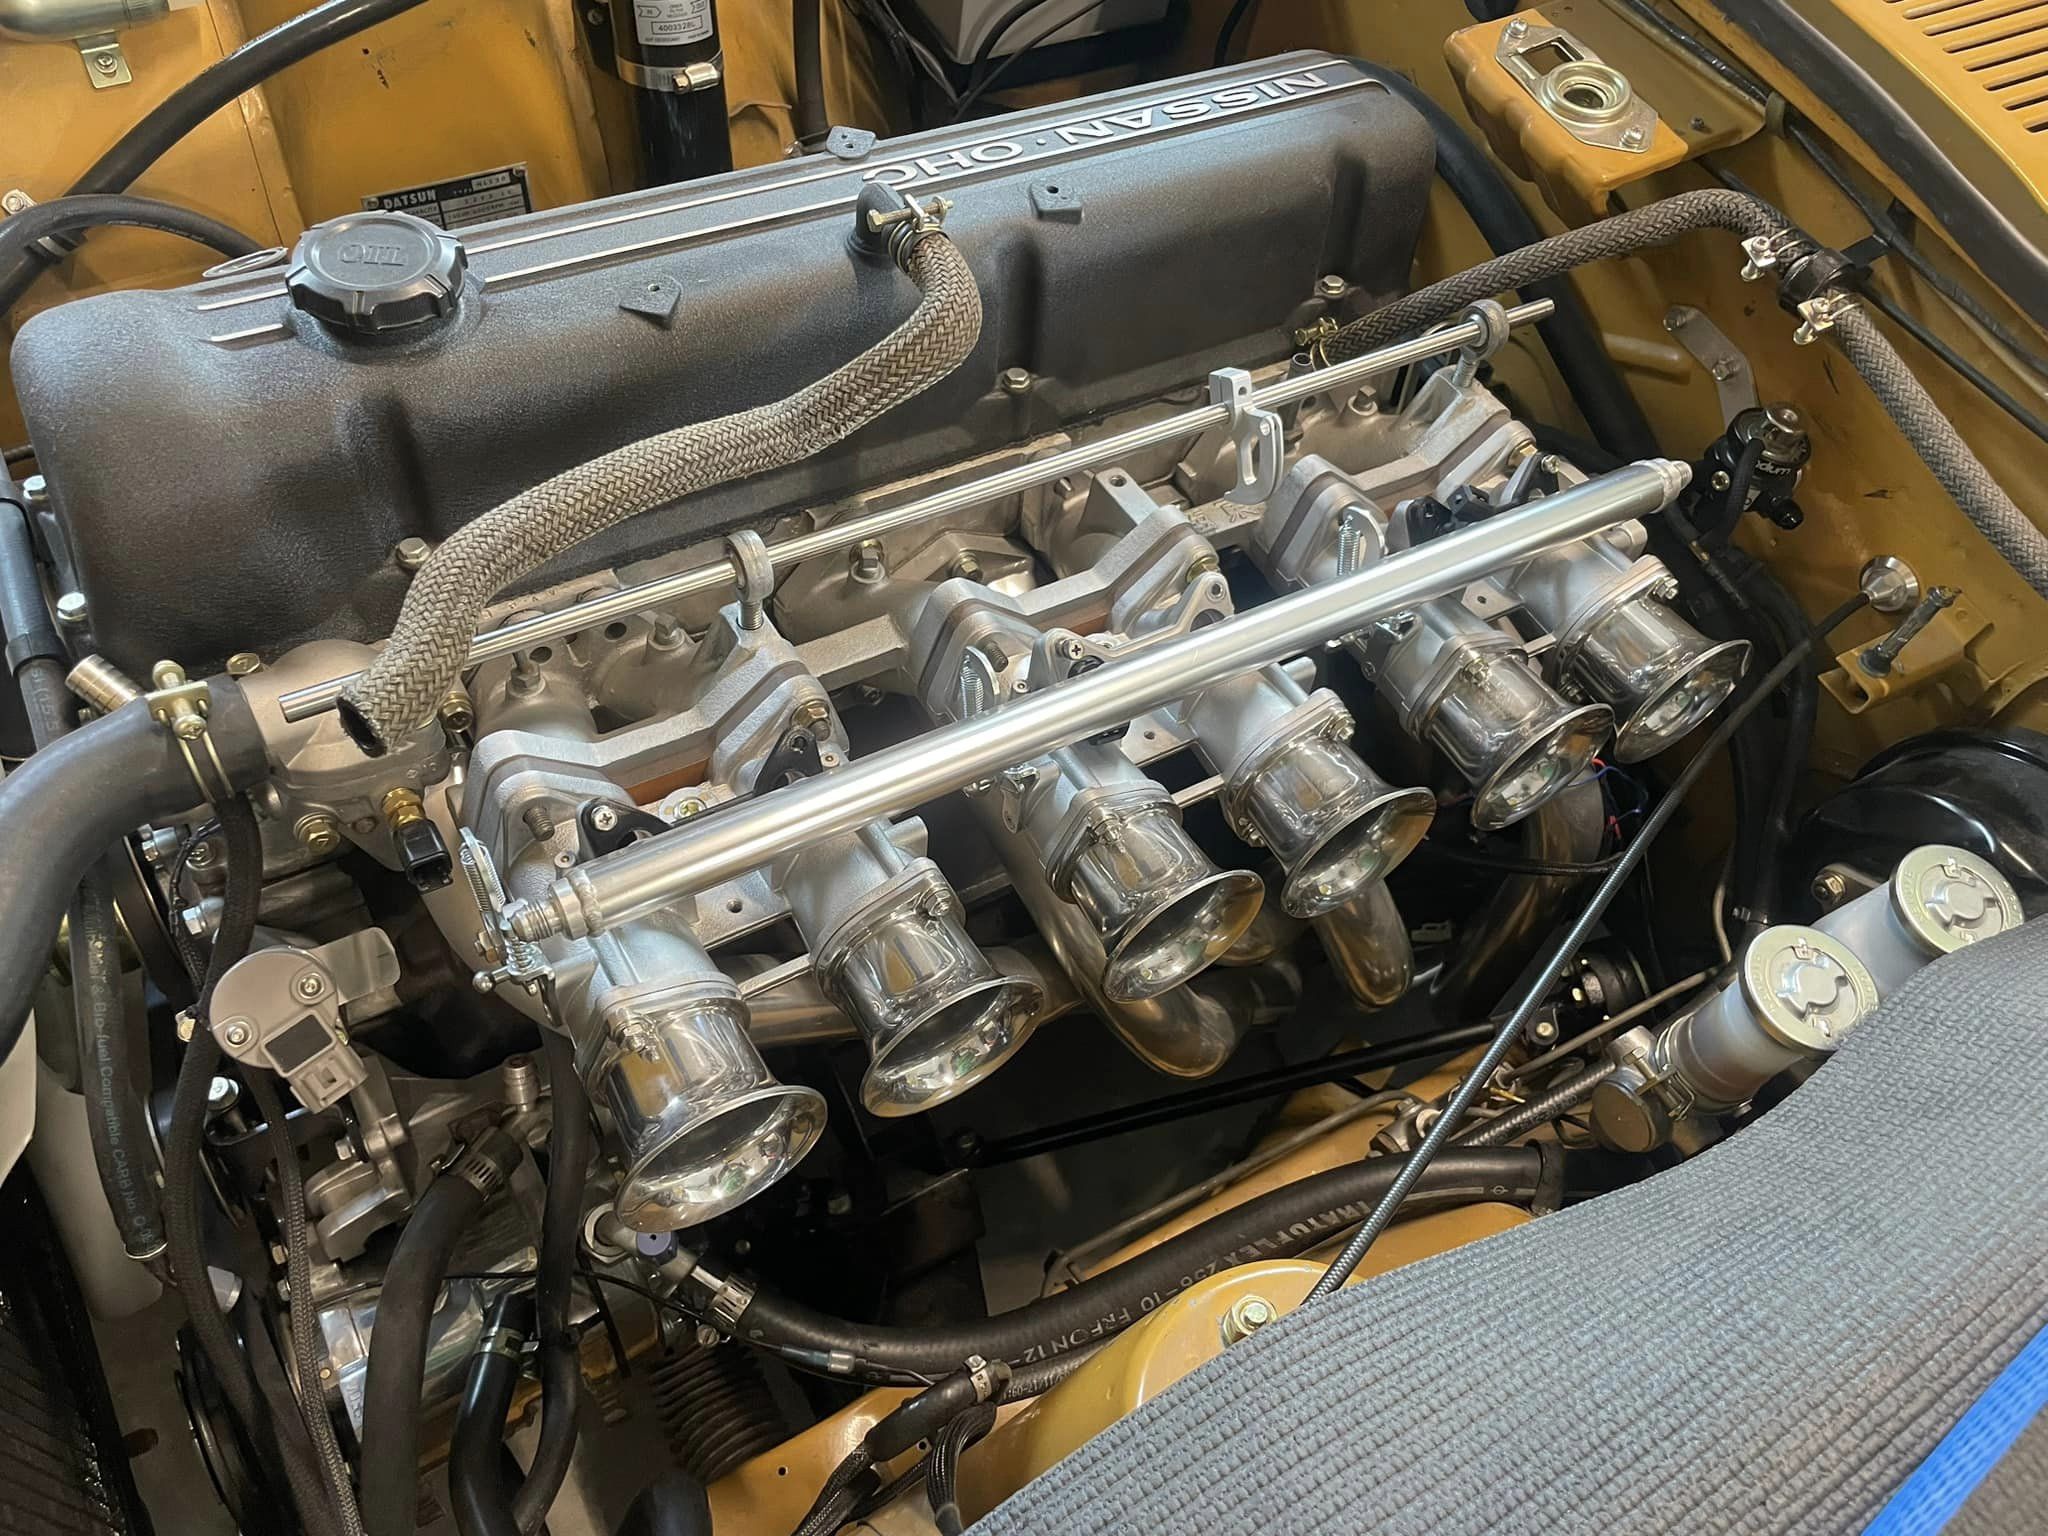
3 pointsHi Roo, Me neither, and also engineers were shocked when they saw the results of Cd and Cl at that time. I will upload the remaining pages. Before that I will try to explain that Mr. Miyazaki told me about how bad the opening front end of S30 was. Just like you proposed, it was the issue of S30 which engineers had to deal with. I will draw a picture by hand, Mr. Miyazaki said S30 front end is so wide that it leads too much air coming through the radiator. Then the air can't go through under the engine because the air was blocked by the air stream which is flowing underneath of the car. At the end, the pressure of inside of the engine bay becomes positive, it pushes the front end. The higher front end gets more Cd worse. This story I think it relates the story of 15mm lower front end of Europe model (except Portugal model). And Mr. Miyazaki even told me there was a test car which had a factory air conditioning coupled with Z432!! (Z432 was not able to make a choice of air conditioning from the factory). During the test of aerodynamics, one day he was wondering why one car had a better value than other cars. The better one had an air conditioner condenser in front of the radiator. Less air gave less lift. That was a Z432. Kats3 pointsGreat data Kats. Thank you for posting. About the 'Blunt Nose' vs 'Grande Nose' story: I think there was always a little bit of confusion mixed up with the 'Blunt' nose naming, possibly not helped by Japanese vs English language meanings. 'Blunt' vs 'sharp'. What's the opposite of 'Blunt'? 'Sharp', right? In aero terms, we might easily think that something 'Blunt' does not cut through the air very well. That's how I think of the stock Z front end. It has a big open mouth which resists passing through the air. On the other hand, the 240ZG's front end reduced that big open mouth and channeled air over, under and around it. It cuts through the air more efficiently. So is the 240ZG's nose sharp, or blunt? Confusing, isn't it?! In the end I think it was a good decision not to use the term 'Blunt Nose', even if I can understand the NASA_derived thinking. But still, the term DID make it into some of Nissan's factory documentation: 3 points3 pointsWhy didn't you just switch the struts to the other side? Wow. Pistons? Really? I'm assuming that was not done by the current owner, right? You're not outing him here on the forum are you?3 points2 pointsSince my throttles are taper bore. There isn't a velocity stack that looks classic and is the correct size, so I had these drawn up and cnc cut. Sadly I screwed up a measurement, so they have to get cut again. These are 65mm length stacks, which I think make them look better with the shorter throttle bodies. Thoughts? 865c1107babc421bb8381e64ca3a31b8.MOV

.thumb.jpg.469c50bed6f22a620aff6b59b4e7f1f3.jpg)
.thumb.jpg.4e5128e74f53f318c140ac705733efe7.jpg)
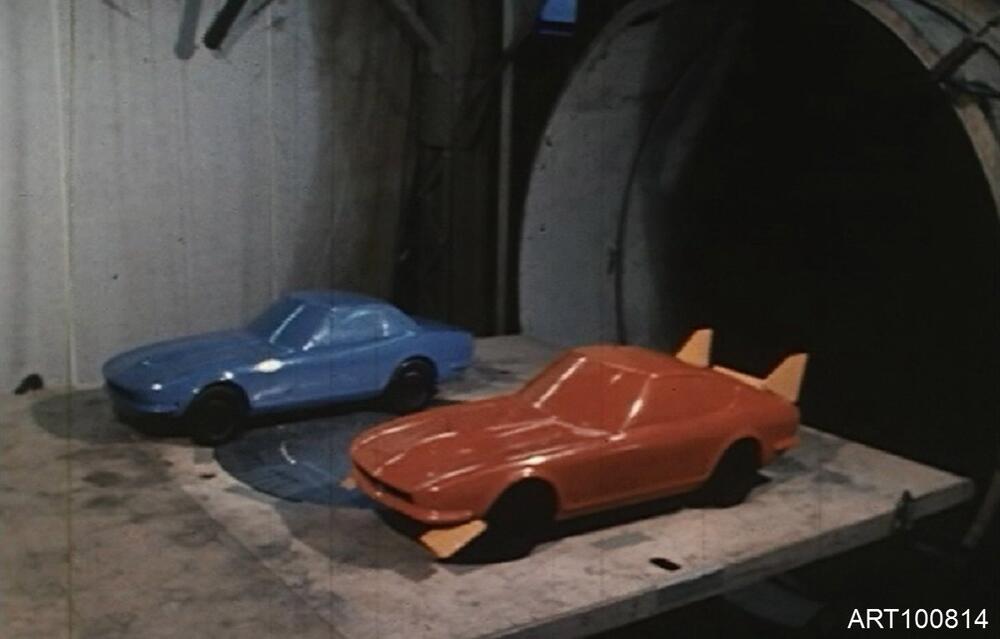
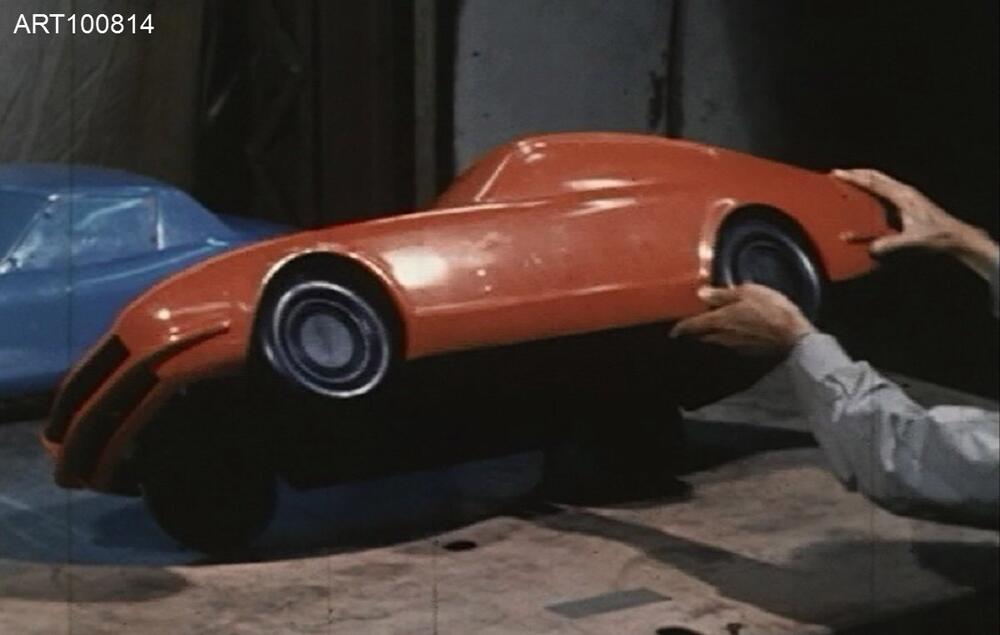
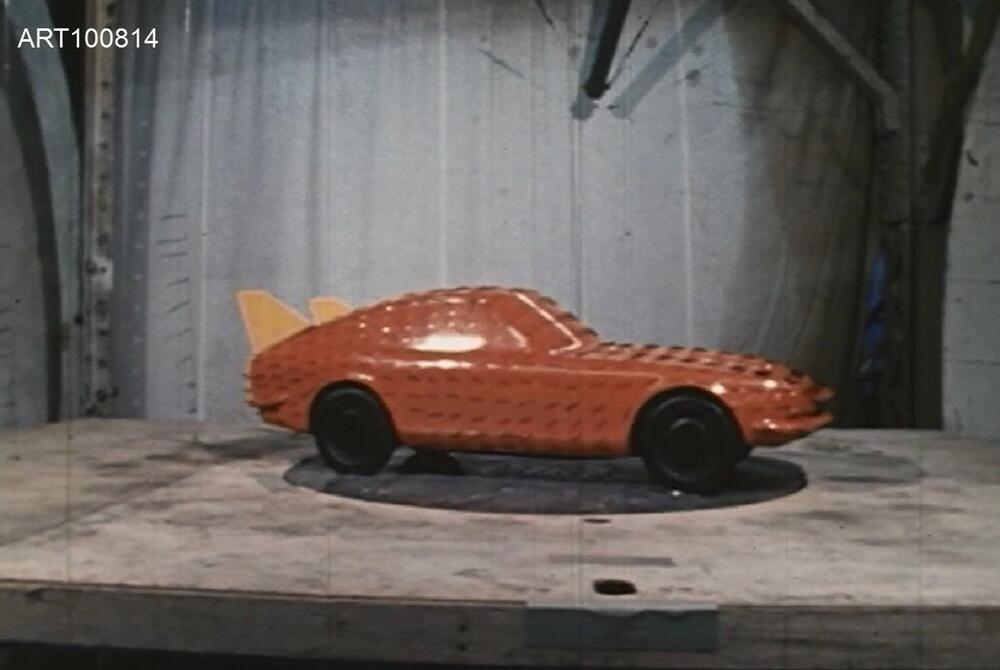
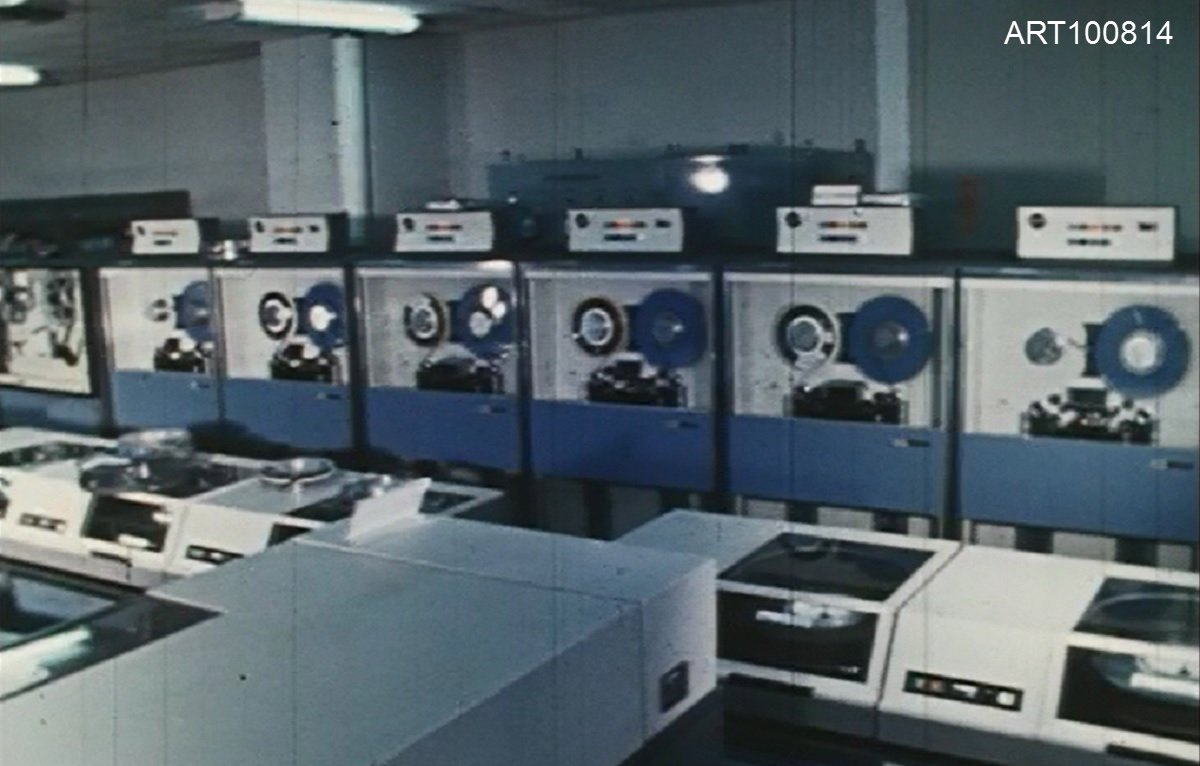
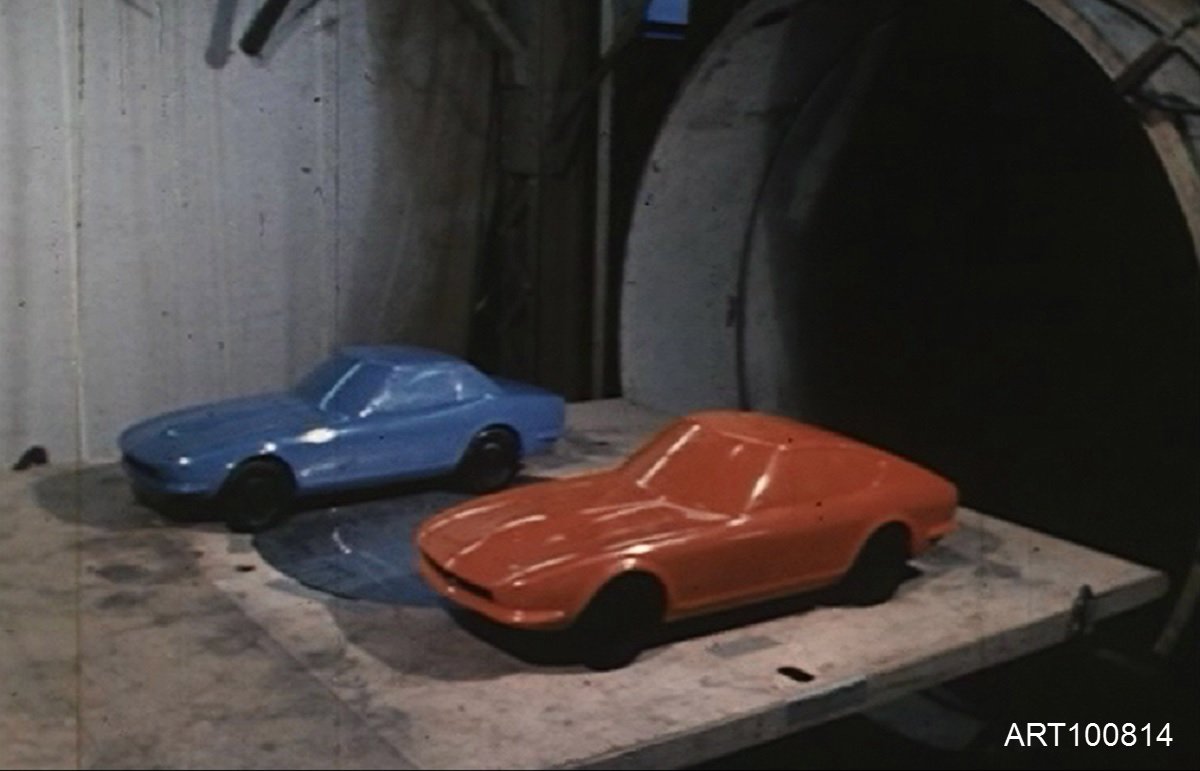
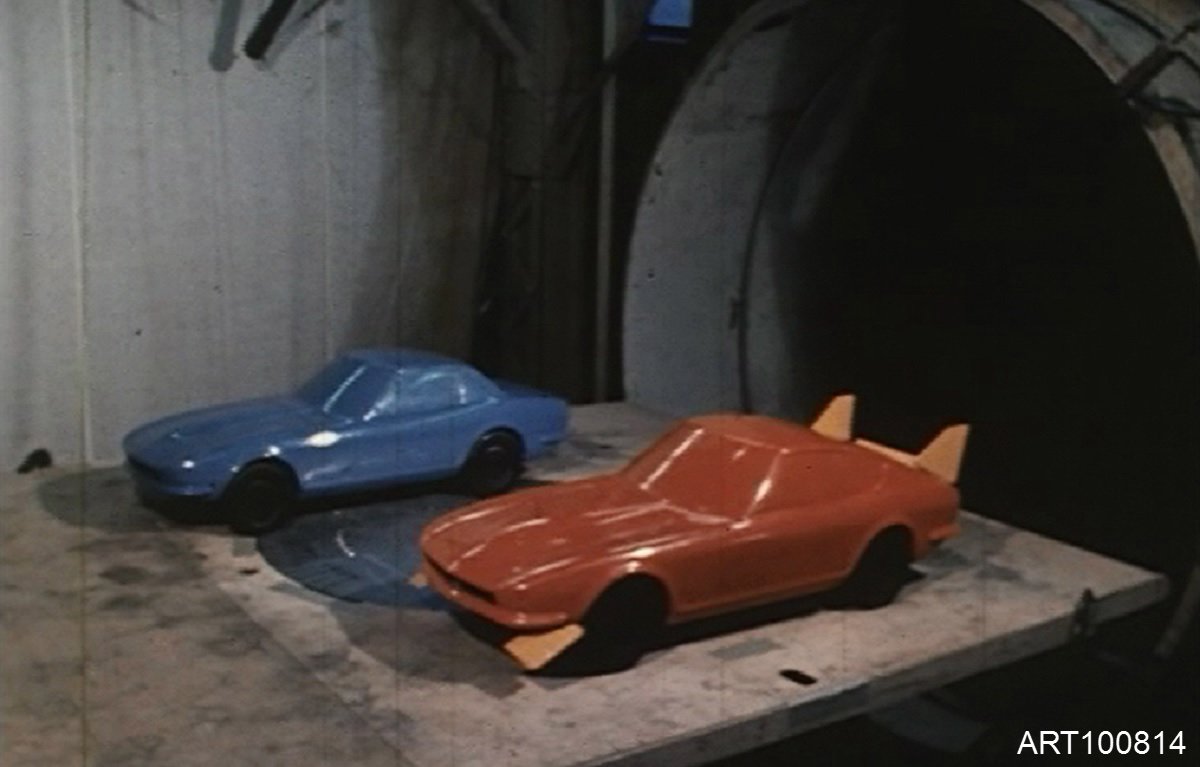
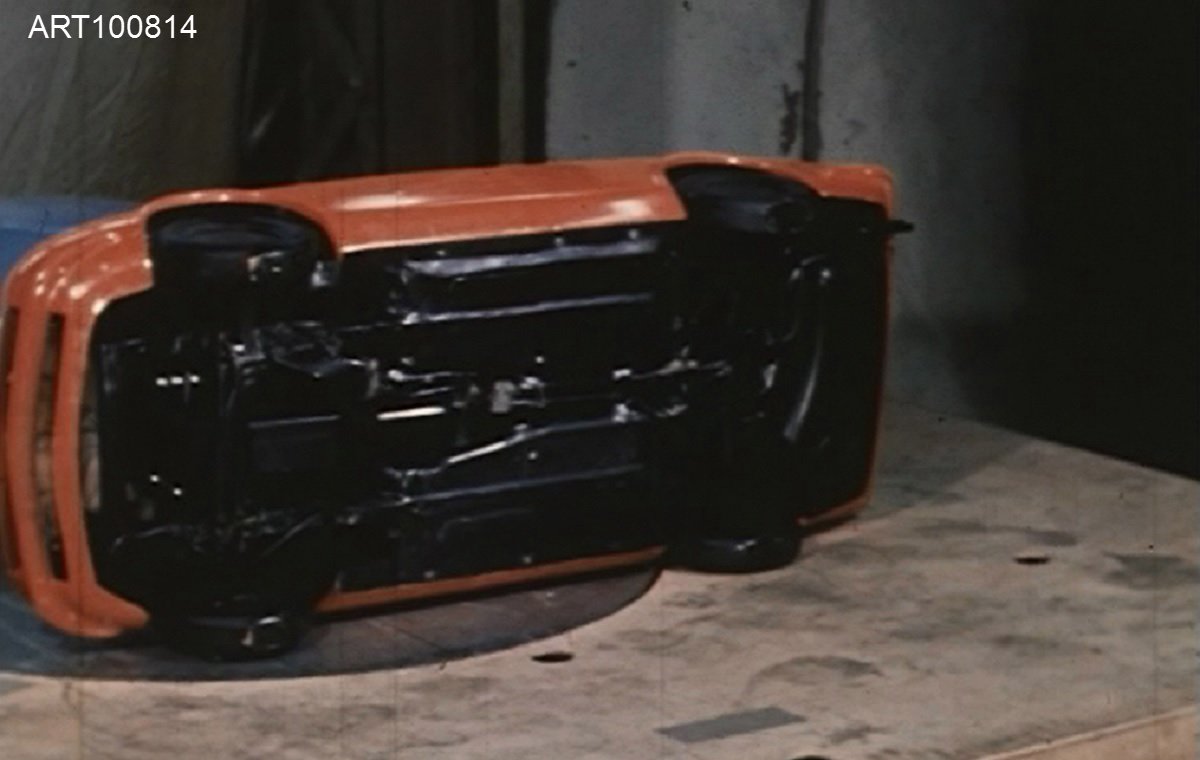
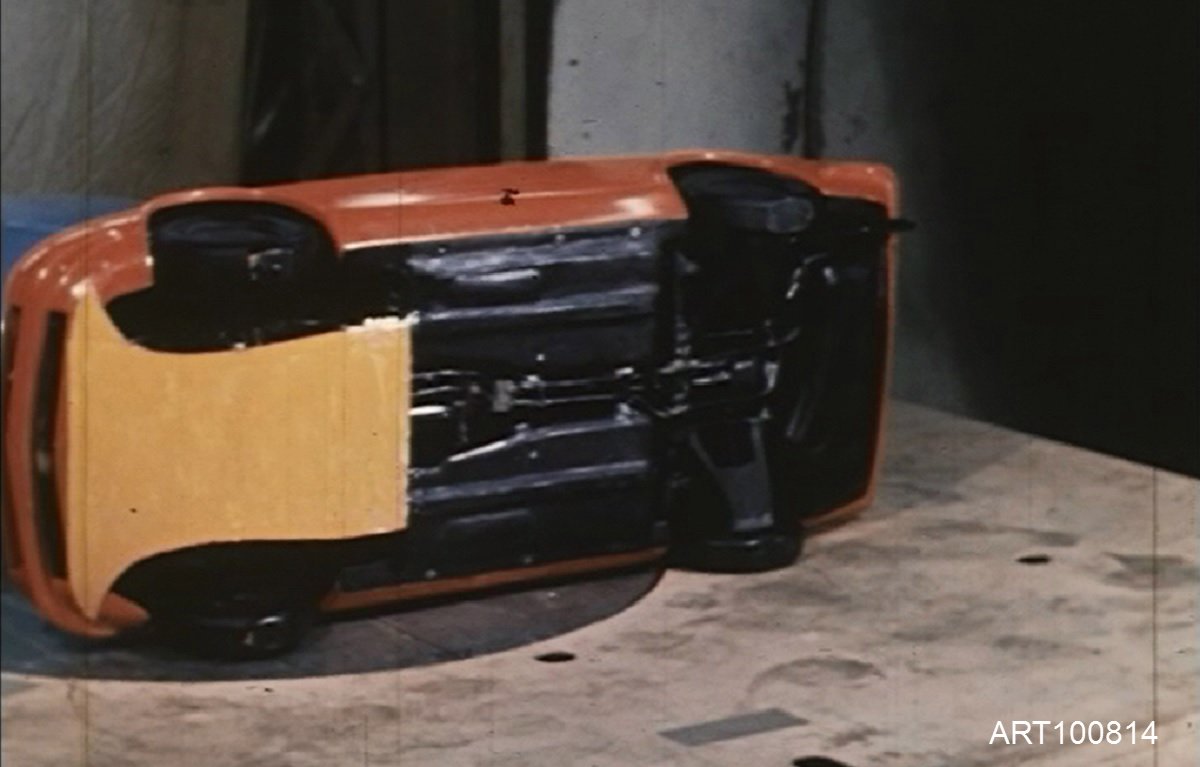
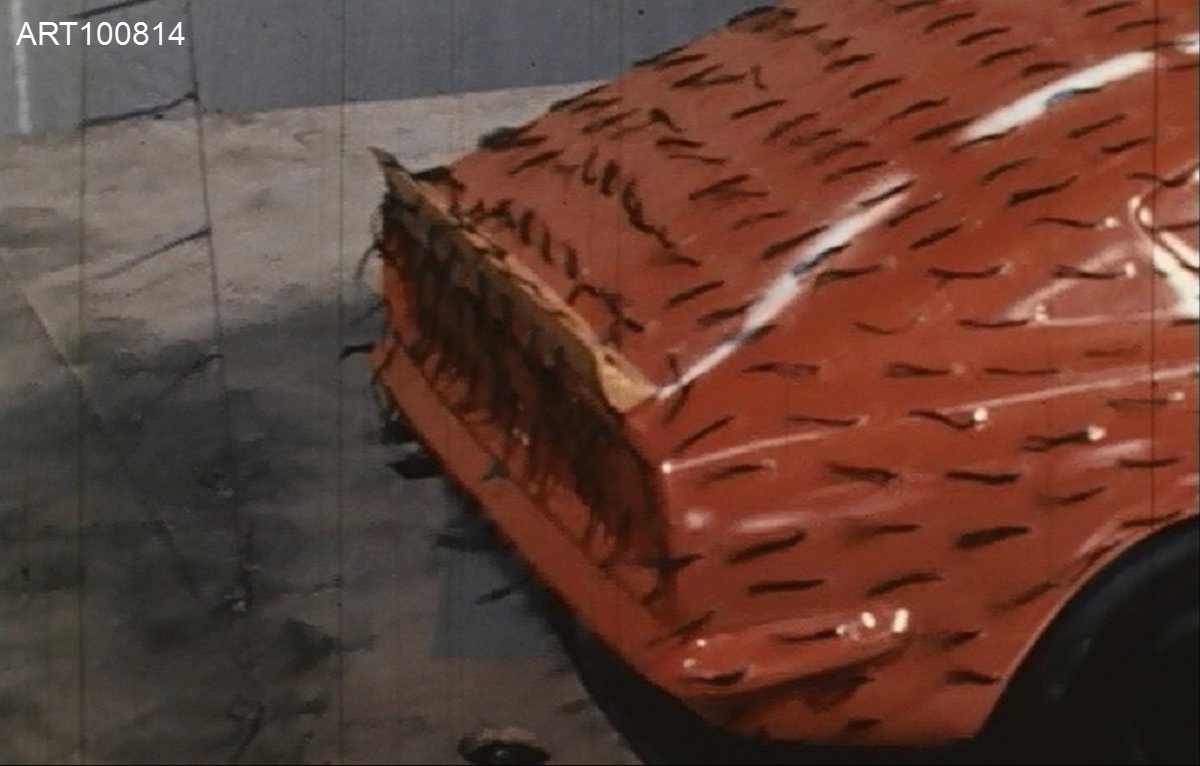
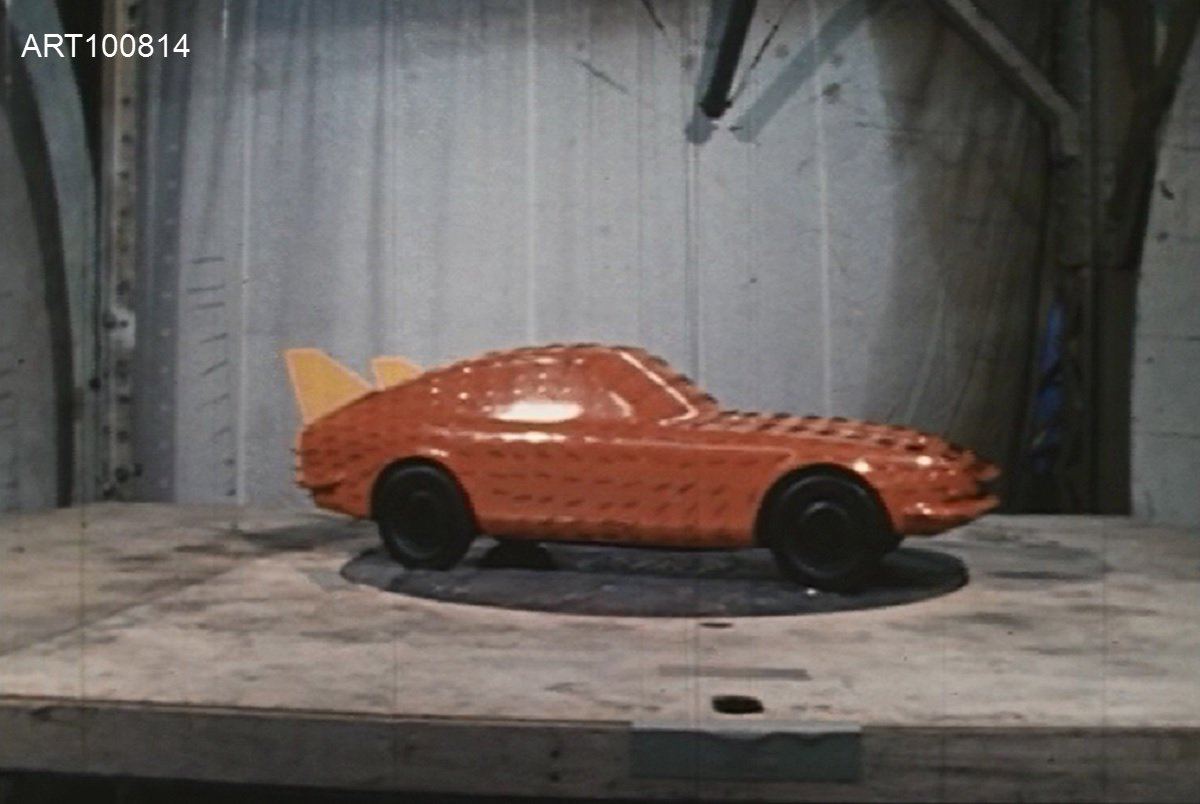
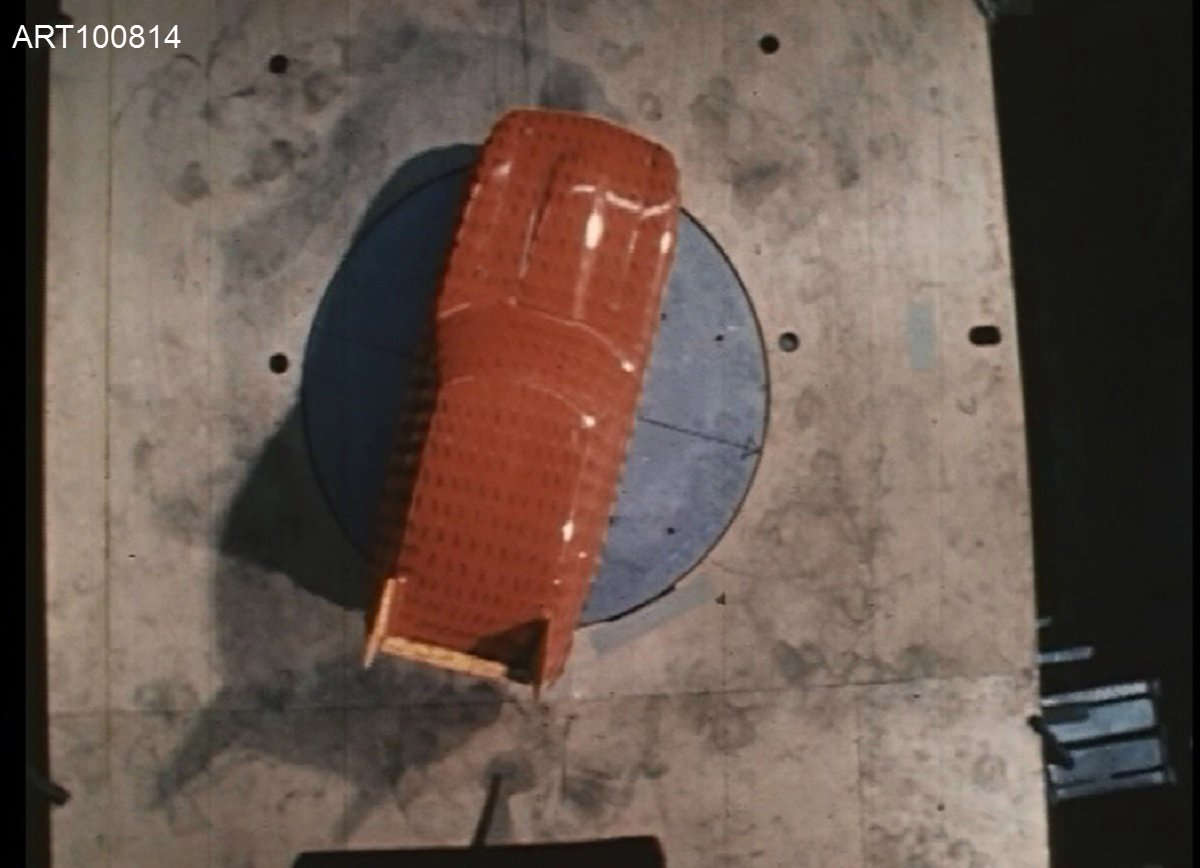
.thumb.jpg.5e73c09a314161a1847cb6b200952980.jpg) 2 pointsI believe that, after their merger, Nissan had use of the ex-Prince research facilities at Ogikubo, which was linked to Tokyo Daigaku's Aerospace department? I also remember reading that Prince, and subsequently Nissan, had sponsored students in Tōdai's Aerospace department around that period via a bursary scheme. Nissan took over Prince's satellite-launching rocket program, I think? Here are a few stills from one section of the Maru Z Keikaku Suishin Iinkai films. I had believed that this impressive array of research equipment was either part of the full-size Nissan wind tunnel that came on stream in 1969, or was part of the facilities at Ogikubo. We can see both full-size (silver pre-production car?) and scale model research taking place. Maybe the filming even took place at both locations?
2 pointsI believe that, after their merger, Nissan had use of the ex-Prince research facilities at Ogikubo, which was linked to Tokyo Daigaku's Aerospace department? I also remember reading that Prince, and subsequently Nissan, had sponsored students in Tōdai's Aerospace department around that period via a bursary scheme. Nissan took over Prince's satellite-launching rocket program, I think? Here are a few stills from one section of the Maru Z Keikaku Suishin Iinkai films. I had believed that this impressive array of research equipment was either part of the full-size Nissan wind tunnel that came on stream in 1969, or was part of the facilities at Ogikubo. We can see both full-size (silver pre-production car?) and scale model research taking place. Maybe the filming even took place at both locations?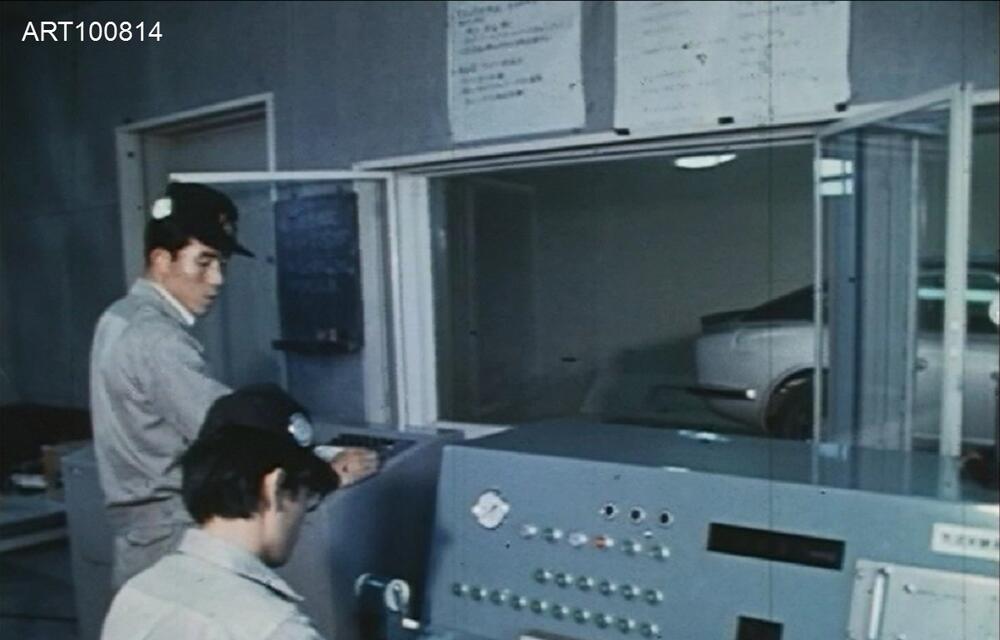


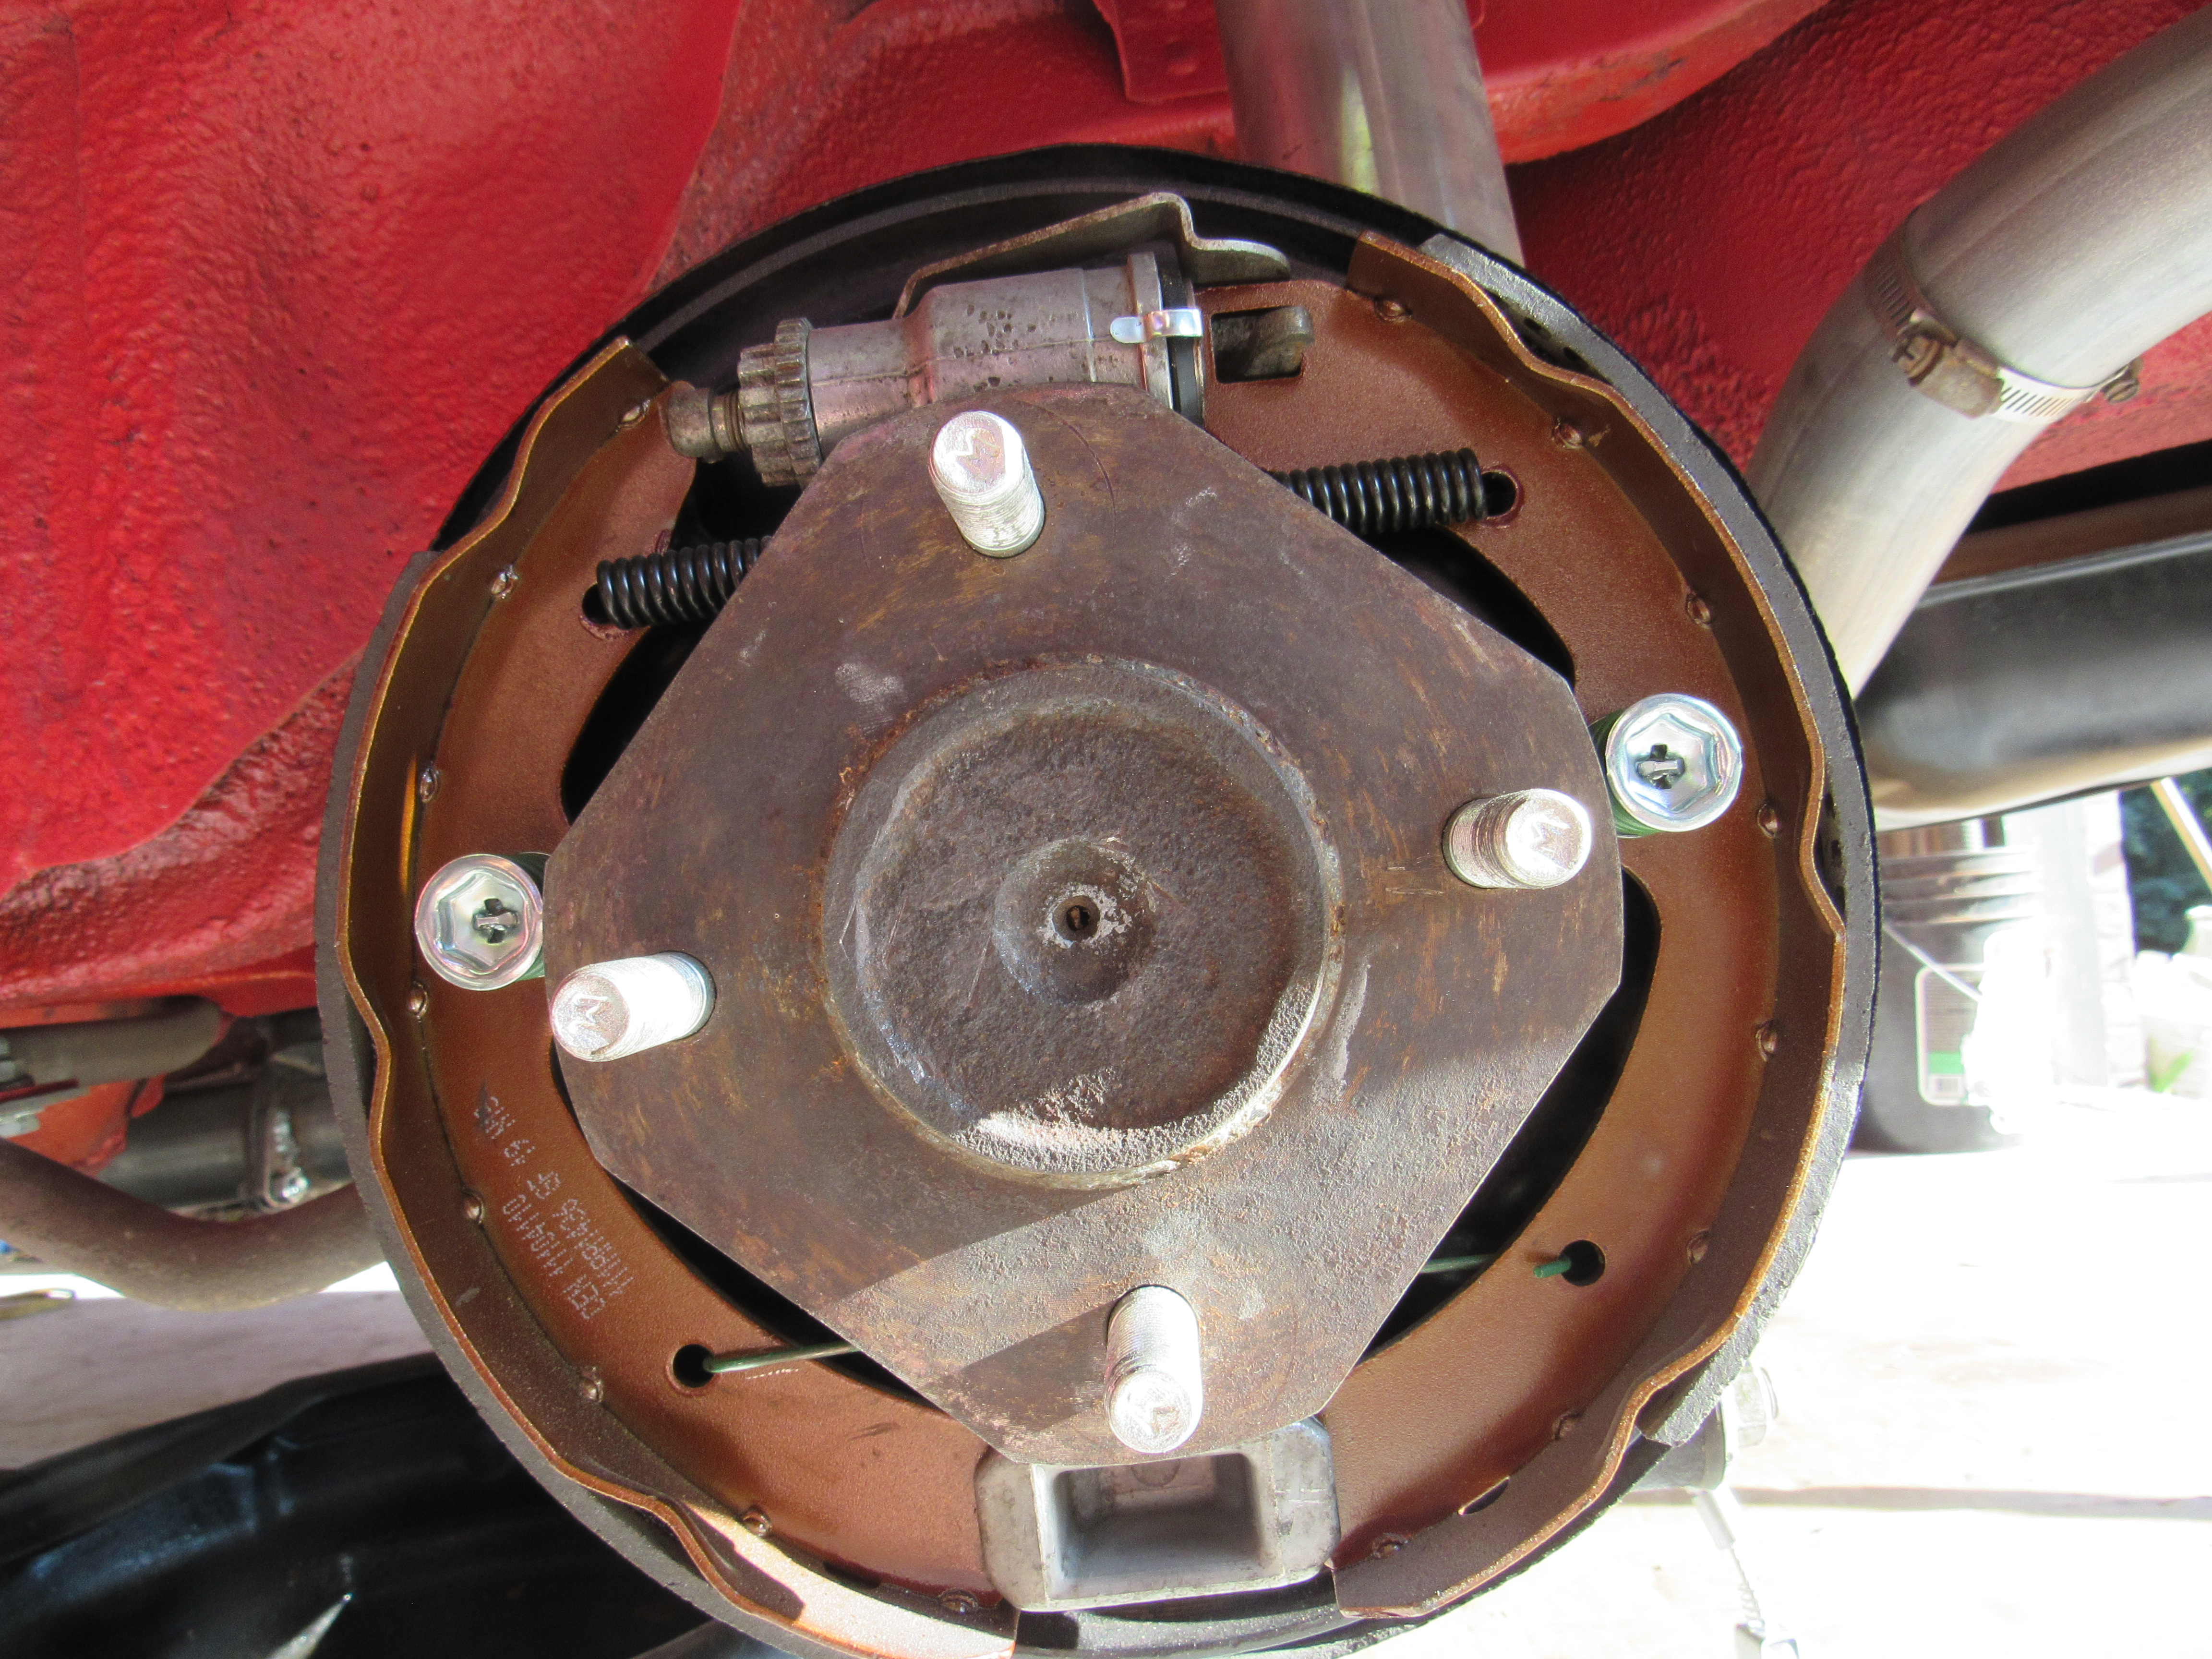
 1 point1 point1 pointOne of the jobs to be done on this car is get the parking hand brake working, I got under the car but something didn't look right, took off the drum and it all became clear. Not only was everything upside down, everything was switched side to side. In order to fix it both struts had to come out, press out the axle hub (new nuts required) and switch the backing plates.
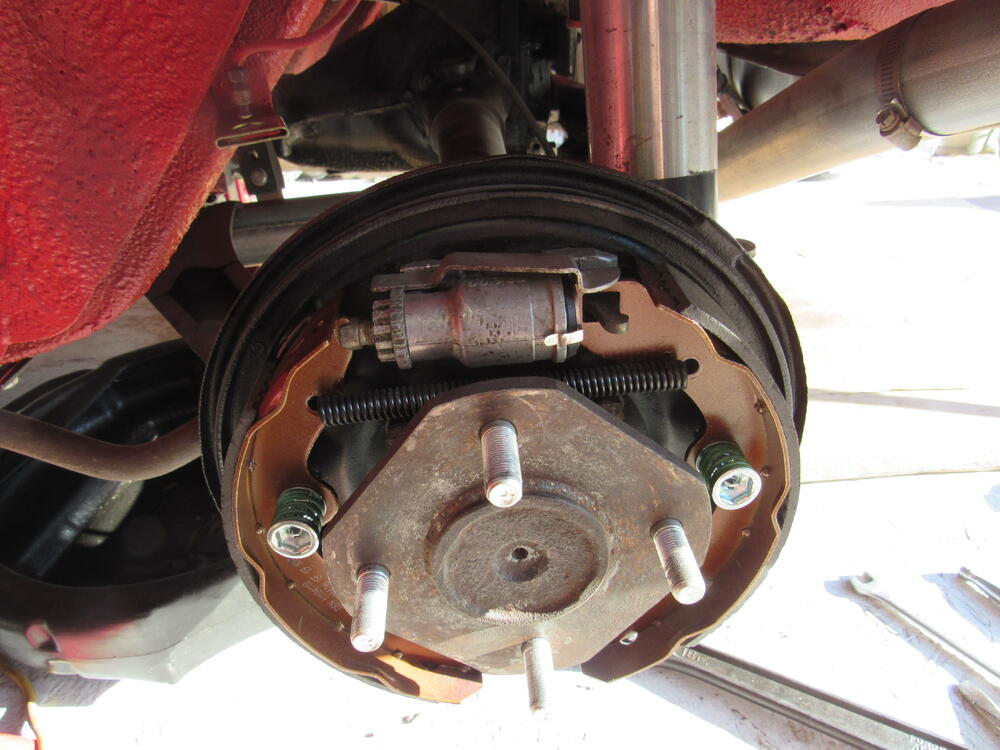
 1 point1 pointI hear you. What is amazing is that the rear brakes actually work like that, the parking brake doesn't but the rest does. I haven't got to the electrical system yet🥴 I can't wait.1 pointI totally get why they would have been going with the 'Blunt' nose name for the more aero-efficient 240ZG front end, following on from NASA's use of the term and their pioneering research which they would have been referencing (yes, I think 'Blant' is just a typical Katakana-linked mistake) but I think it is counter-intuitive. I'm kind of glad that they went with 'Grand' (I have often seen it spelled as 'Grande' in period Nissan documentation) as I think it is an apt descriptor.1 pointTo give you an example of blunt nose aero, this car has a Cd of 0.326, CLf of 0.92 and CLr of 0.60. It also has a much larger frontal area with a width of 6 foot. The blanking plate to reduce the opening was key in reducing the drag.
 1 point1 pointI am working on the stalks now, 3D printing and test fitting how the stock springs will work. The goal is cheaper and rigid like the stalk coils, I plan to make and sell a few of the brackets.
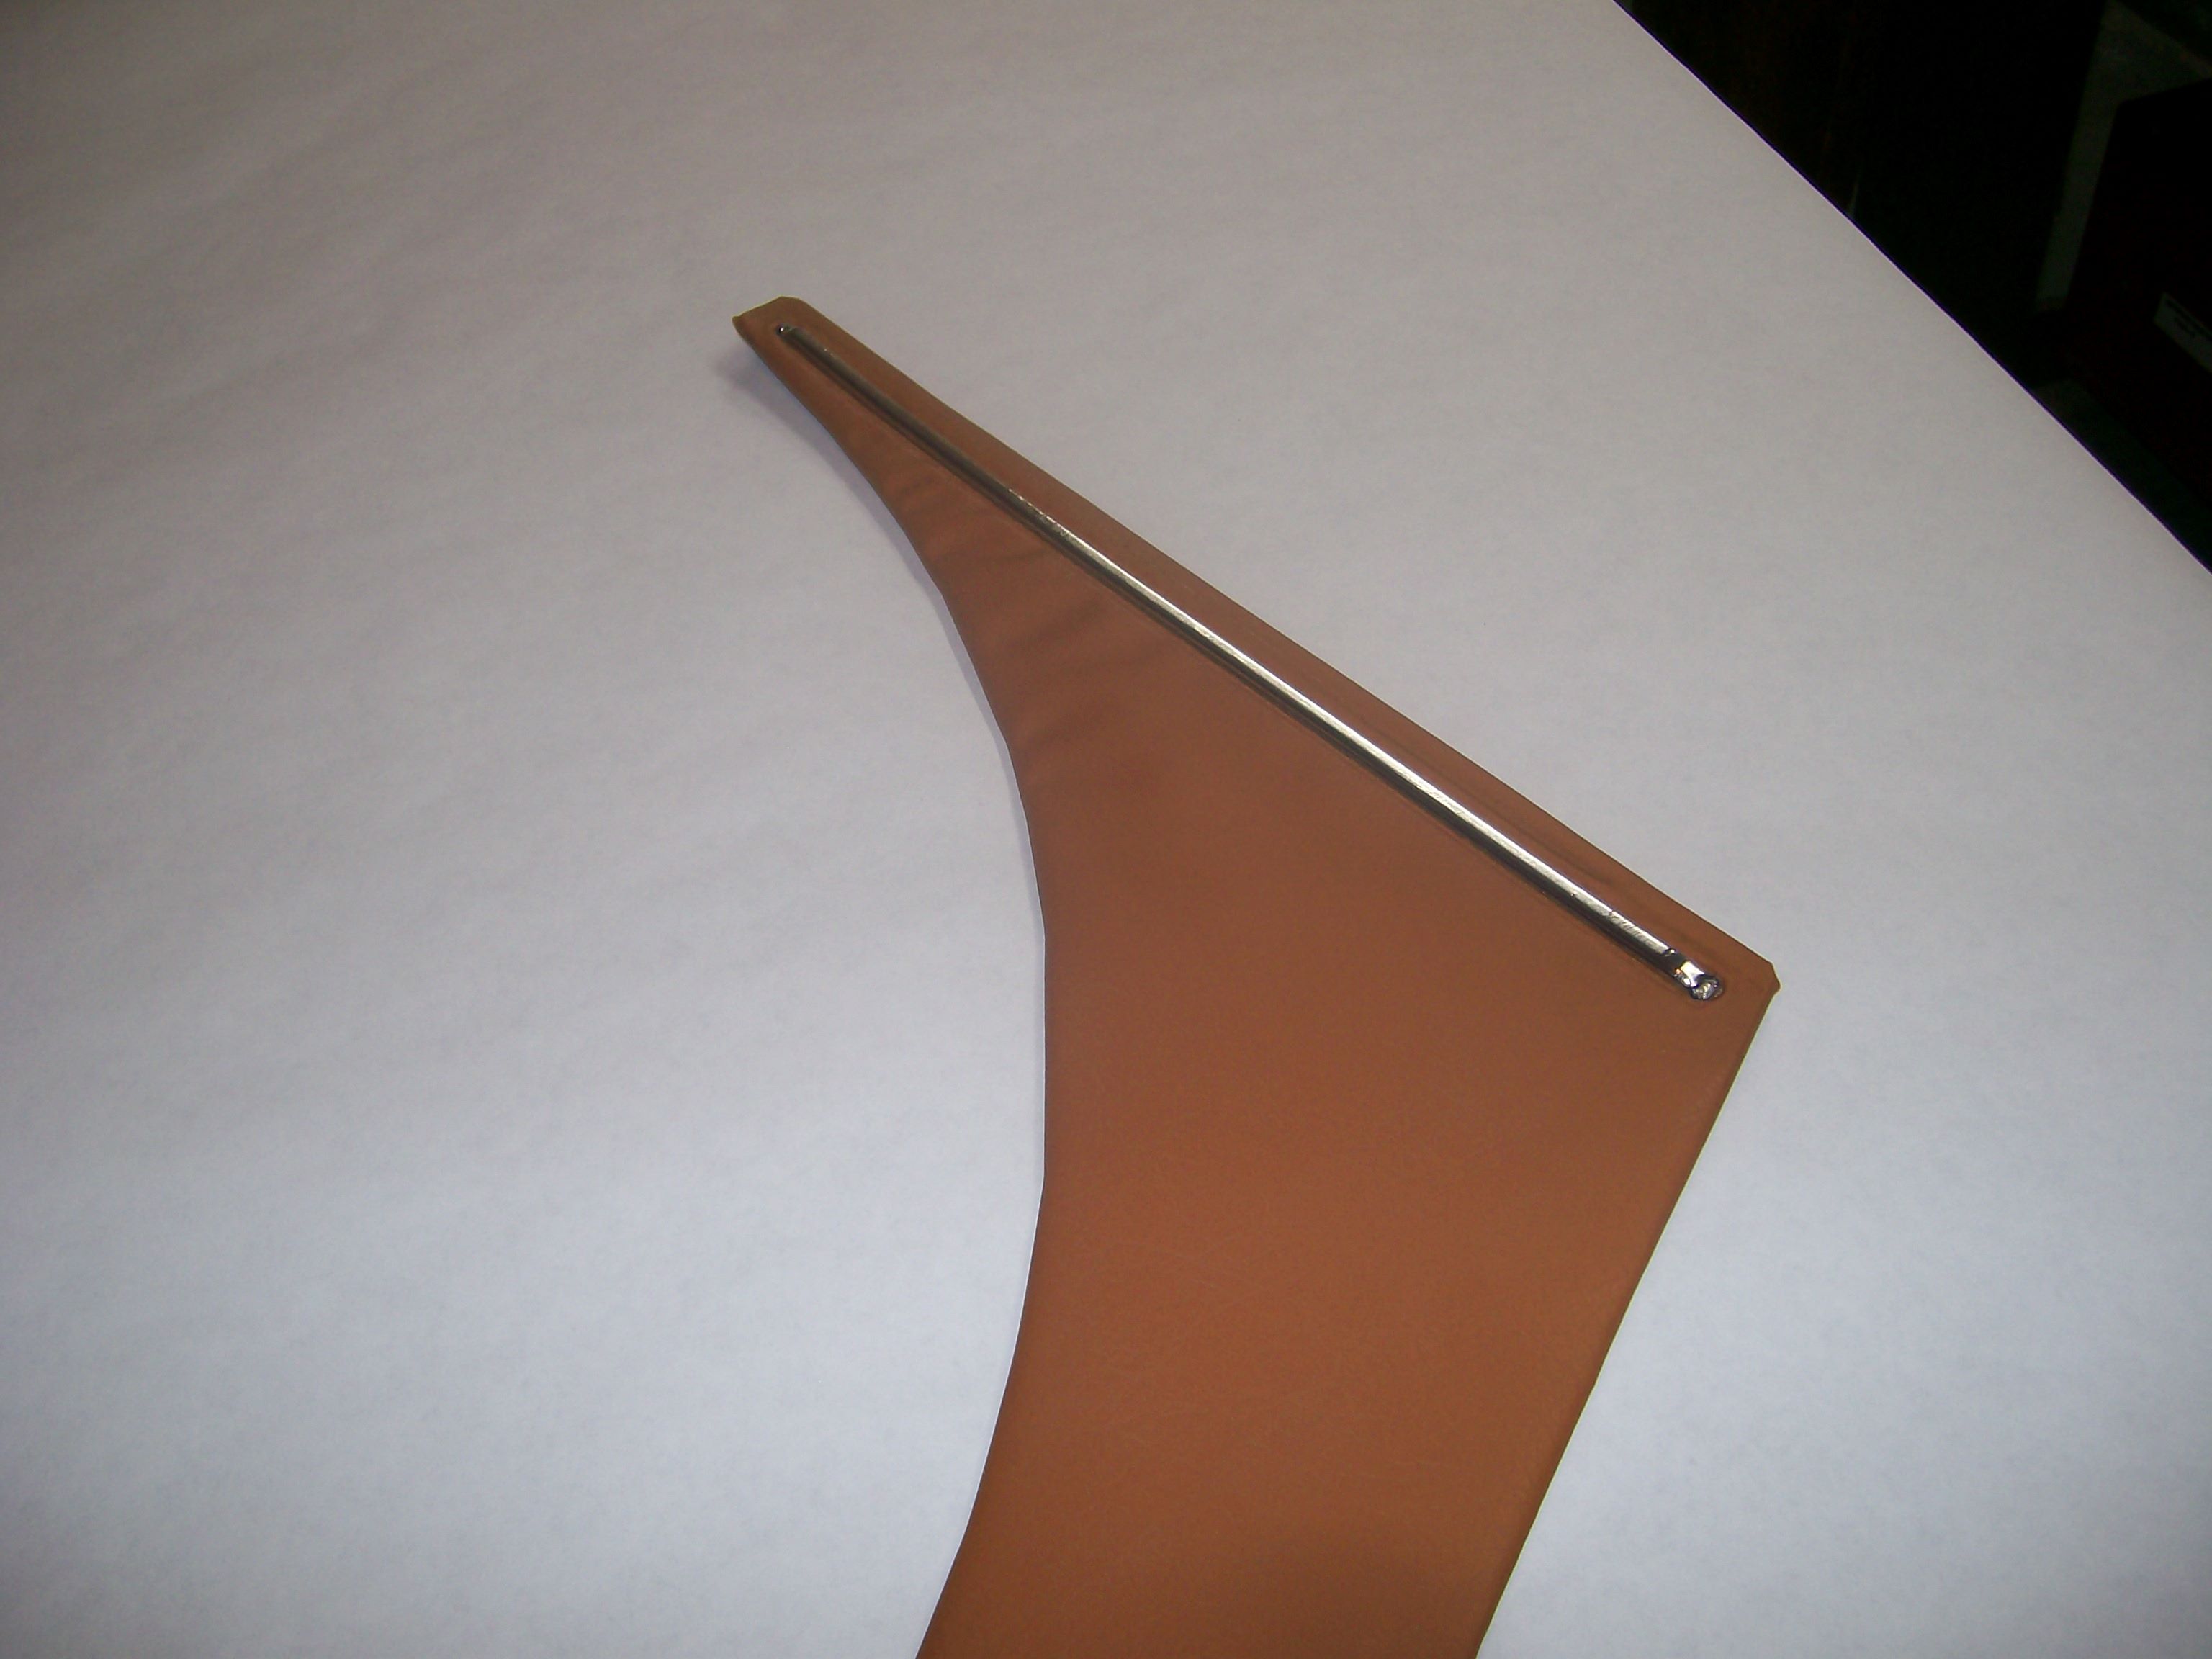
.thumb.jpg.1d1008bac09cecf822df04fe8ab66b70.jpg)
.thumb.jpg.0abbb3fb7af0d4e677b38f2dde572c24.jpg)
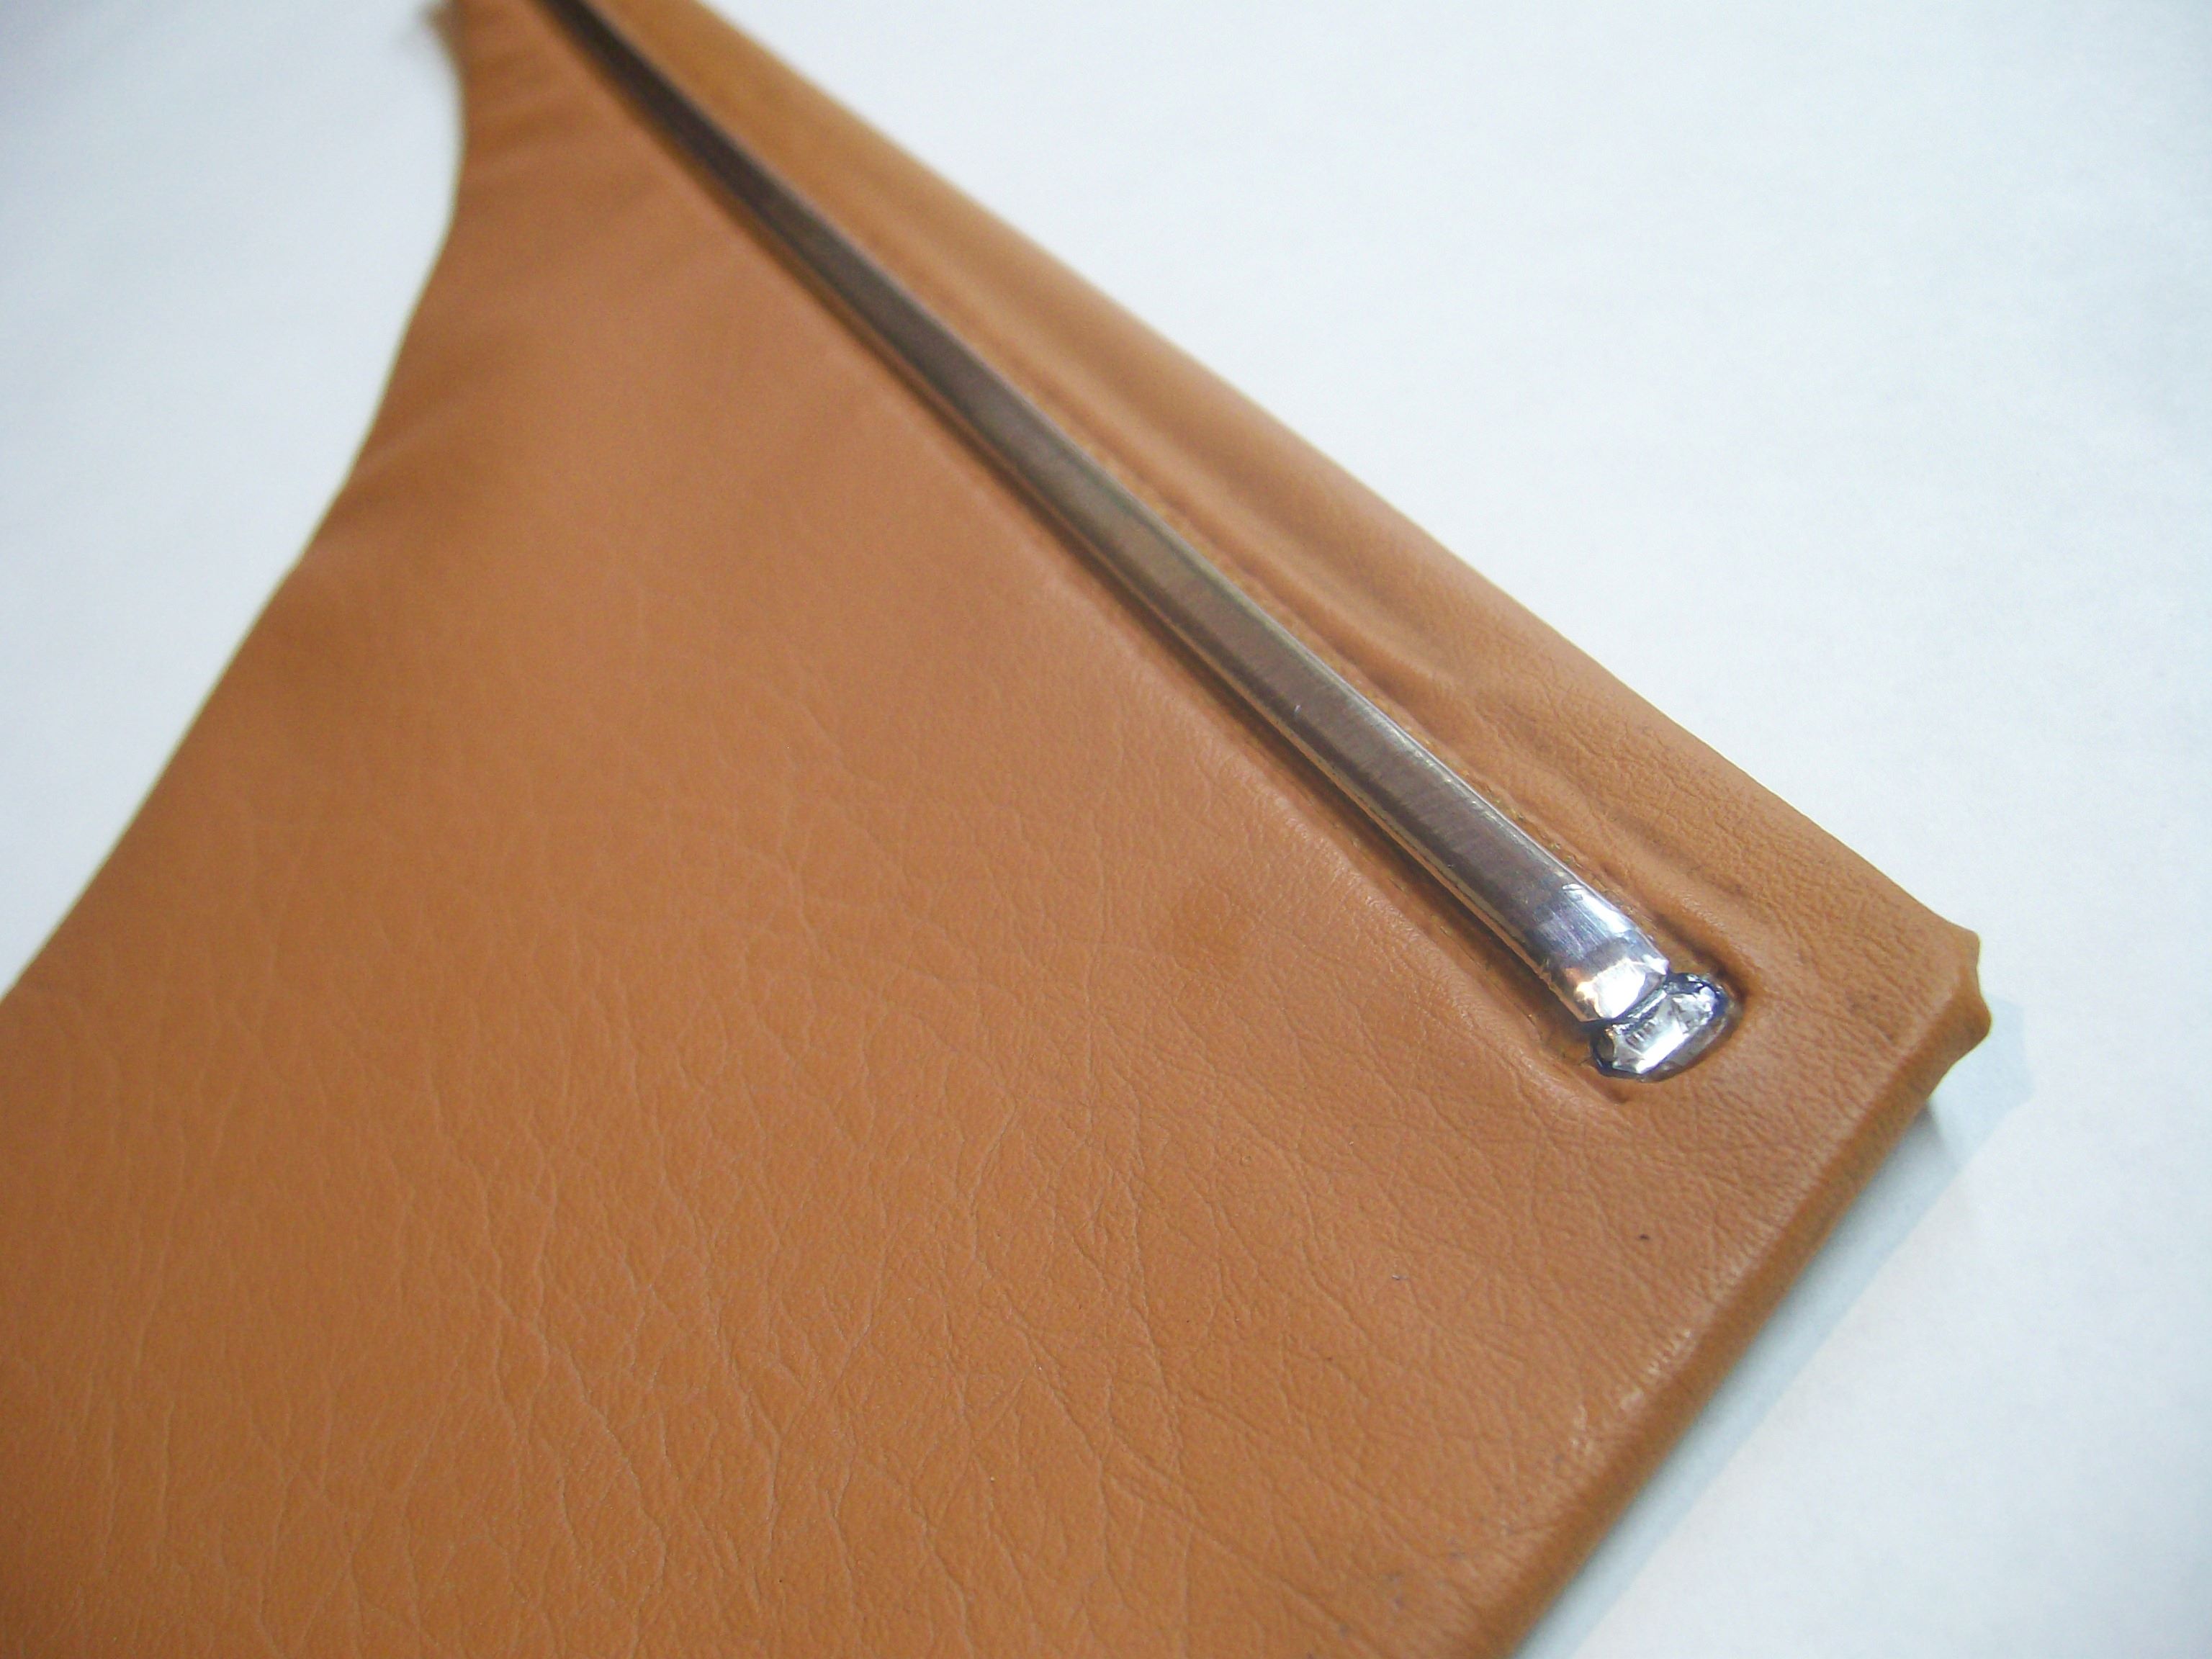
.thumb.jpg.237df098b5cfb8d4d4da978278071cfb.jpg) 1 point1 pointAlso working on a new coil bracket, this one has a built in angle for the boots not to be bent so much. It was cut on a 5axis cnc.
1 point1 pointAlso working on a new coil bracket, this one has a built in angle for the boots not to be bent so much. It was cut on a 5axis cnc.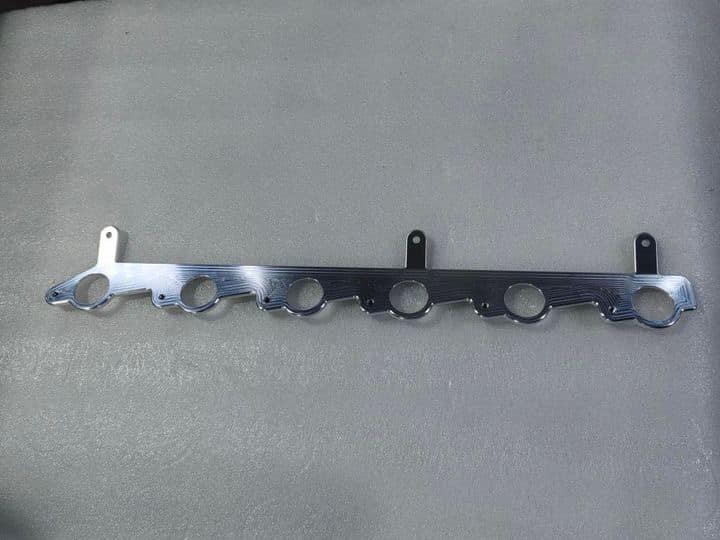
 1 pointI didn't realise the 240Z was such a draggy shape in both standard and modified forms. For such a small front area it creates a lot of drag. Blunt noses can actually be very aerodynamic, the problem is the openings at the front, whether blunt or sharp, they have the biggest influence of the drag and lift figures. Would be interesting to see if they tested the car with the radiator intakes closed off and the effect.
 1 point1 pointWell I ended up selling my SKs. I am going EFI hardware pro throttles and a vintage FET V1 intake. The FET has about a perfect injector angle and should spray fuel directly down the middle of the runners. The only real issue is they have huge ports at the head, so I will be welding them up and matching to my head.
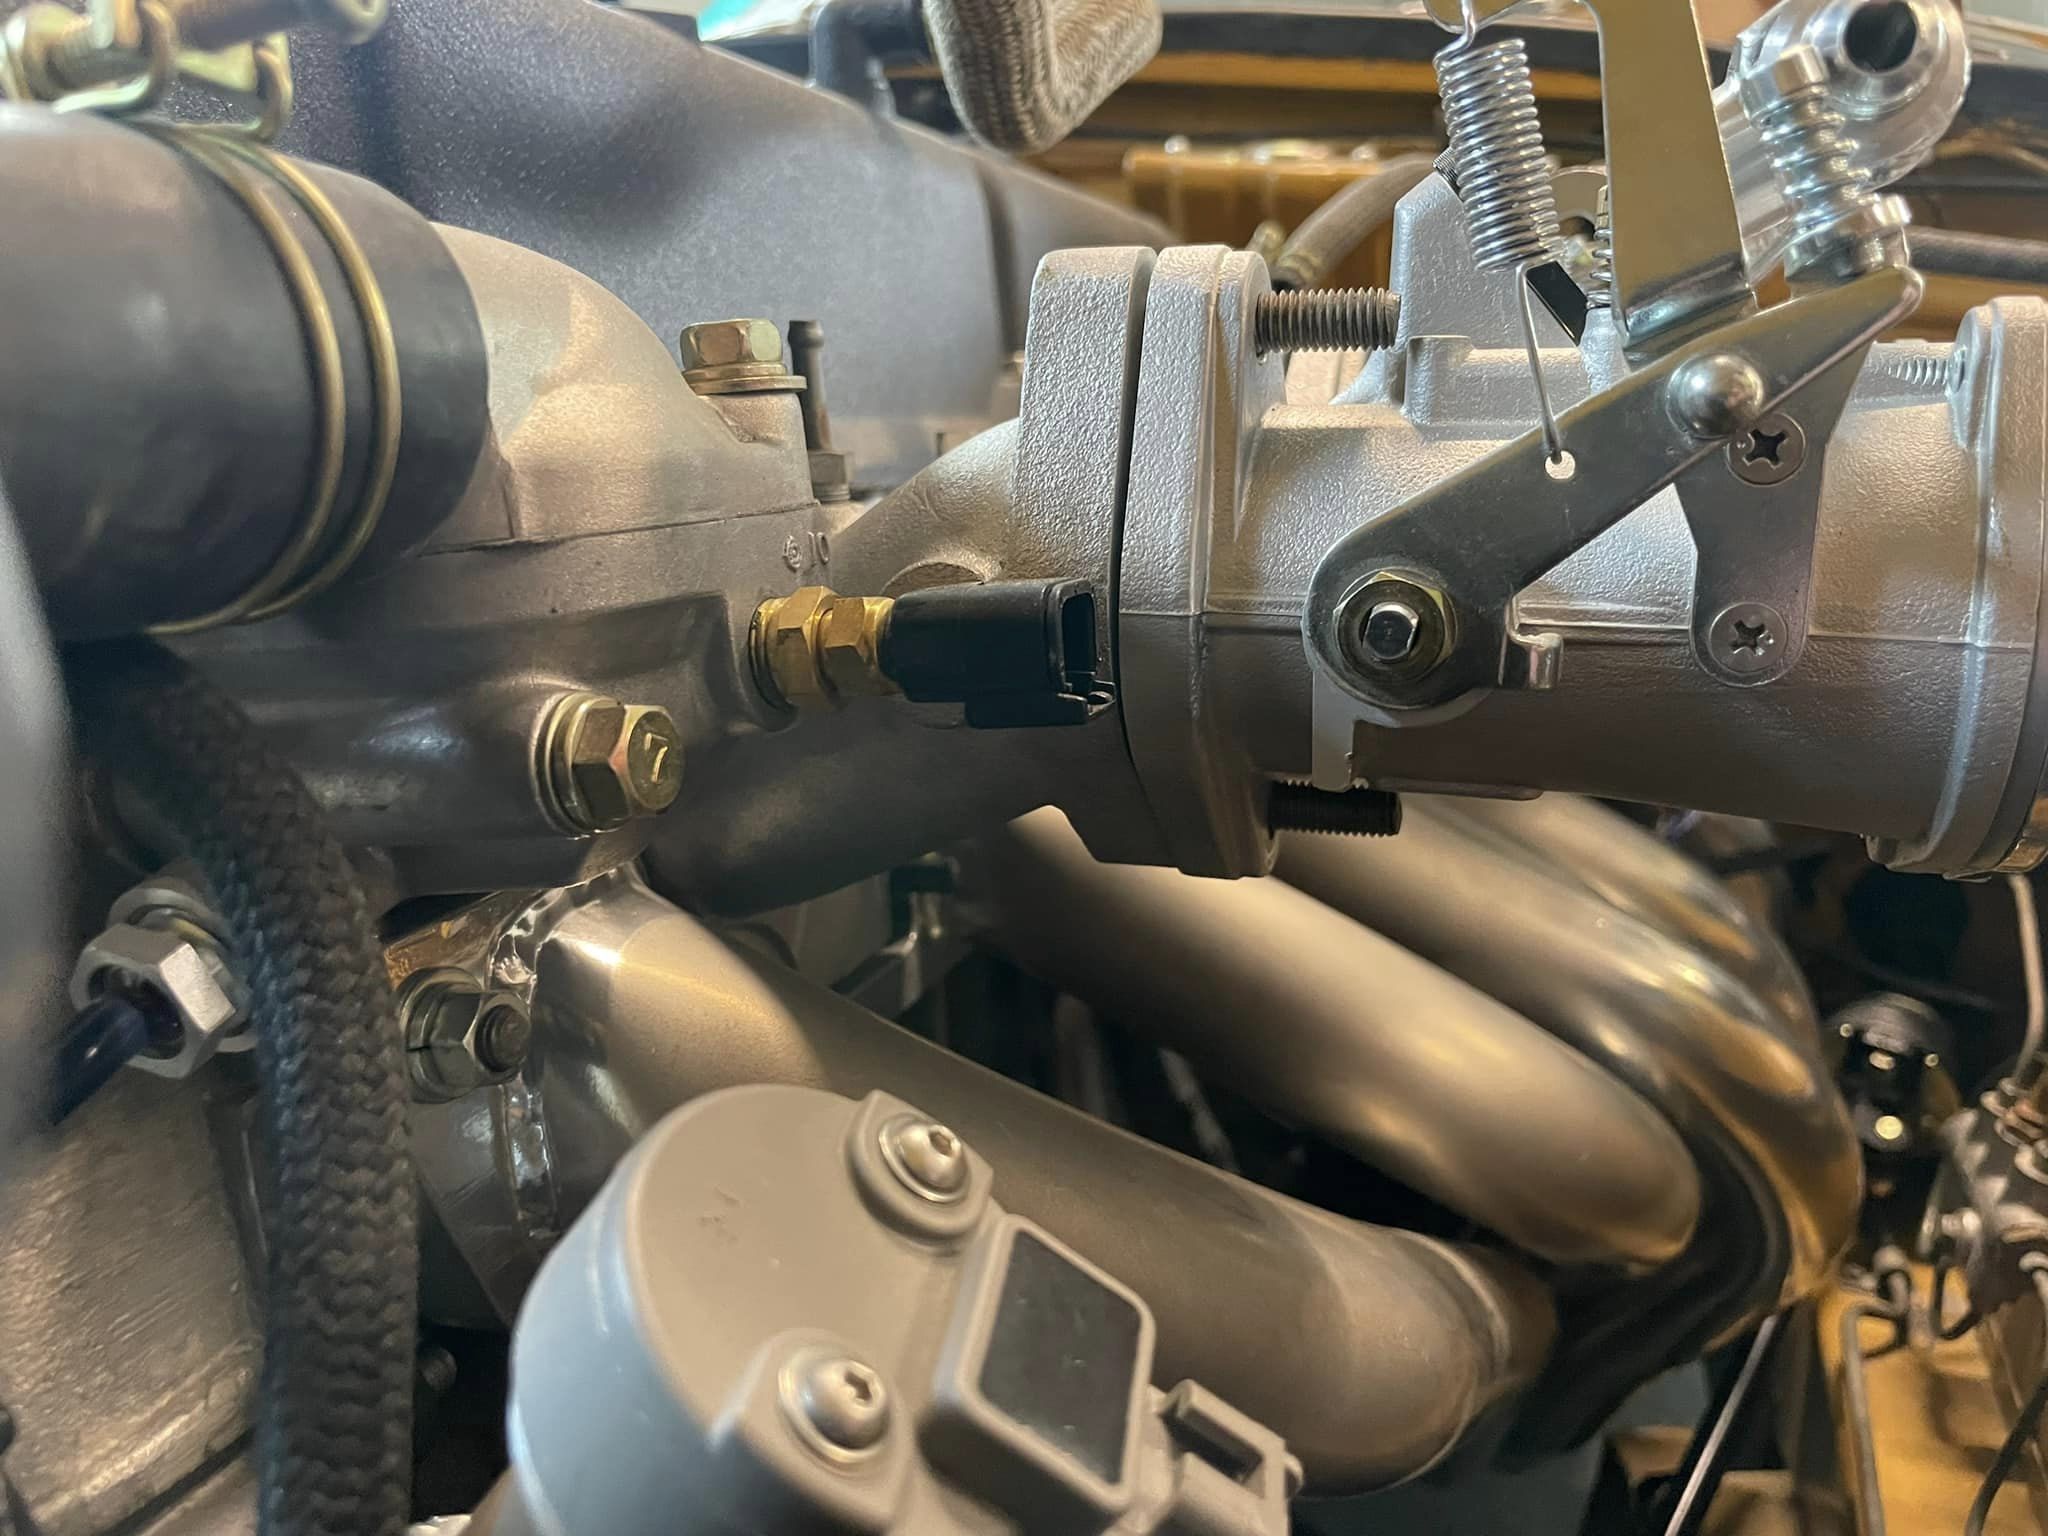
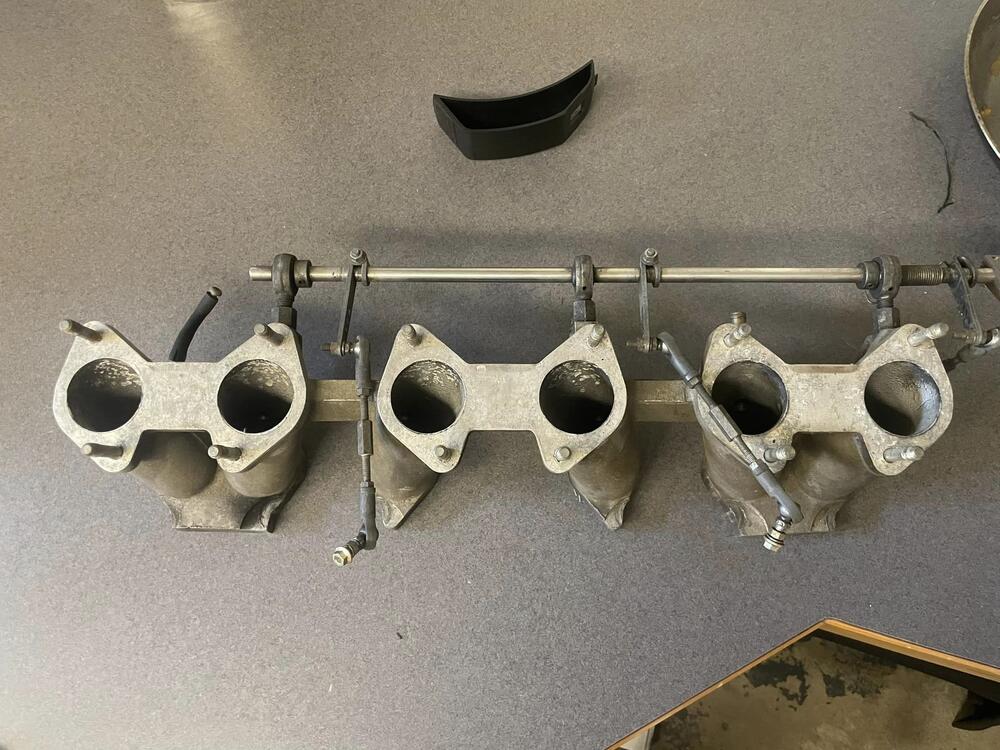

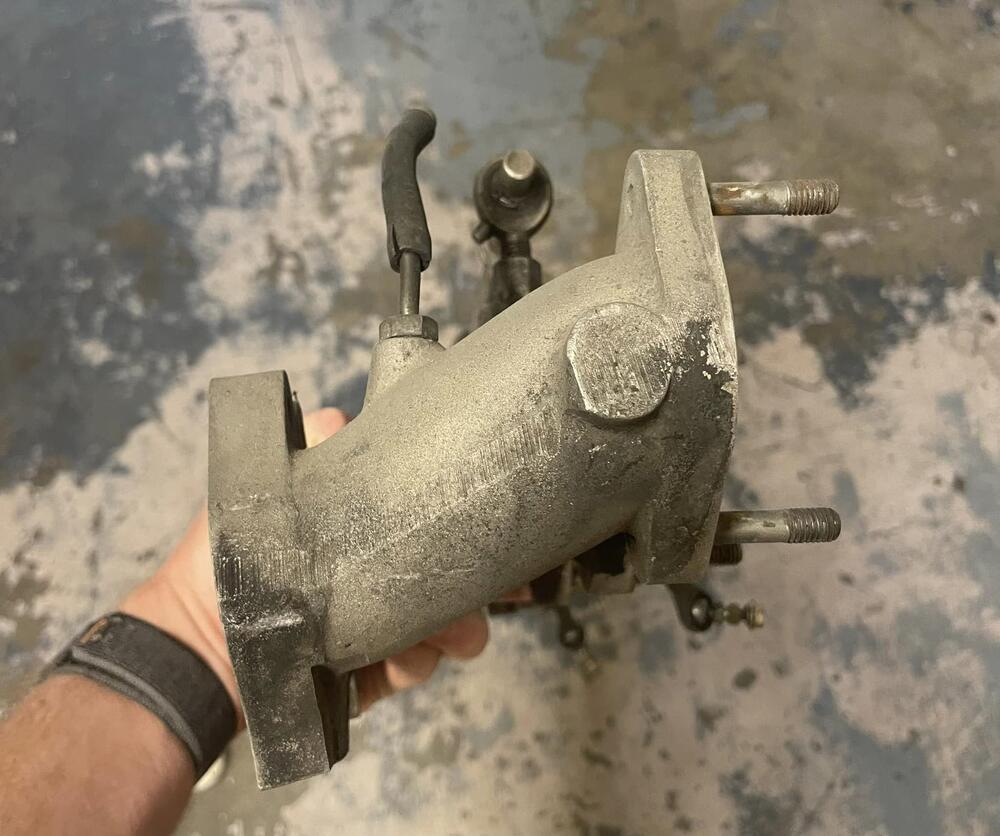

 1 pointIs the whole report available to view @kats Should make interesting reading. Does it make any reference to aero imbalance due to the large differences between front and rear lift coefficients?1 pointAlan, Your explanations made me realize the real meaning of Blunt. Yes the change to "Grand-Nose" is better, even people in the sales department were not fully educated why "Blunt" is literally not suitable for the image of the extension pieces. I think of course Mr. Yoshiyuki and Mr. Uemura knew how NASA's Blunt nose looked like and meaning of "Blunt", they might just wanted to barrow the image of detachable nose piece, not barrowing the meaning of "Blunt". By the way, "Blant" is just a spelling mistake? Kats1 pointHi Alan, I reviewed it once again to see how it was connected to the University of Tokyo's department of Aerodynamics and Aeronautics. I don't see it as we expected at the moment. I believe before 1969, the University of Tokyo was the only place where had a wind tunnel, but it was for 1/4 models not for full size scale car. So early days of styling development and aerodynamics study, engineers brought their 1/4 scale models to the wind tunnel at the University of Tokyo. In 1969 Nissan built a full size scale wind tunnel at Nissan Oppama. This thesis was made by using the wind tunnel at Nissan Oppama. Some of the engineers graduated the University of Tokyo's department of Aerodynamics and Aeronautics, so we can say the thesis was connected to it, though. Kats1 point1 pointThis is one of those cars that has been through many different jobbers, rust guy, body/paint guy, mechanical guy over the course of 5-10 yrs and in each case the owner paid for and thought good work was being done. That's the problem with a long term project like this, there was no project manager to oversee all jobs and keep track of quality control and continuity. The owner is a busy guy, All I'm doing is going through every system to make sure at a minimum, it is safe and reliable.1 pointQuick question, Kats. Was the thesis connected to the University of Tokyo's department of Aerodynamics and Aeronautics?1 point1 pointIt's a bearing. It can be pressed on two ways. How does it become a rabbit hole? Actually, I can't say for sure that Patcon's is backward just based on the pictures. But, it's 50-50. Either way the measurement should be taken with the stack stacked.
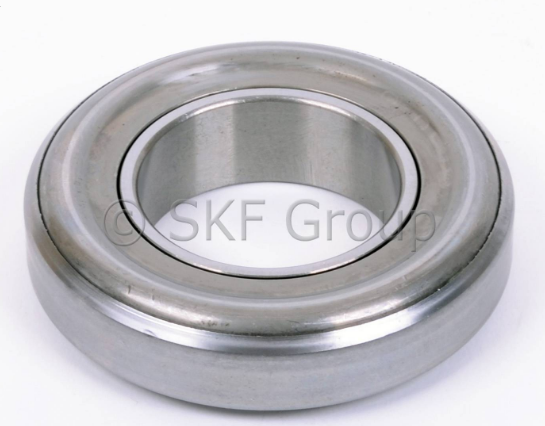
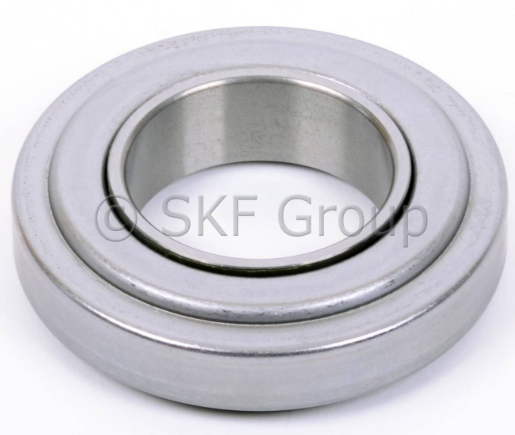
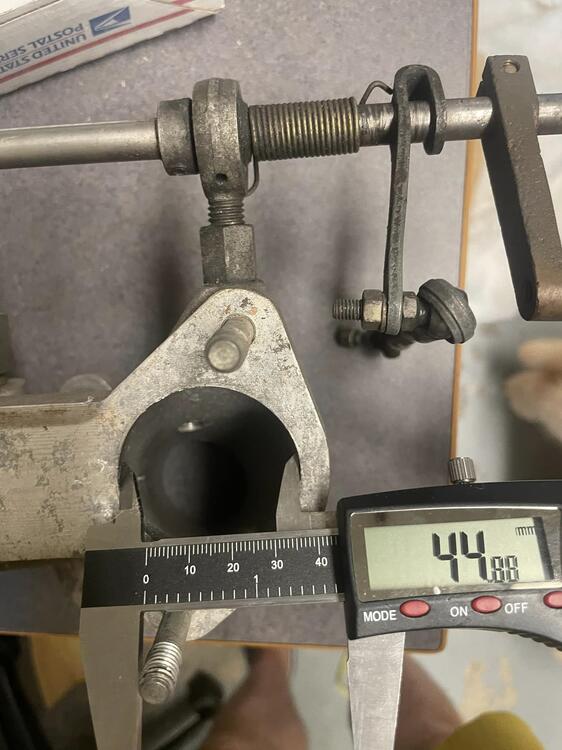
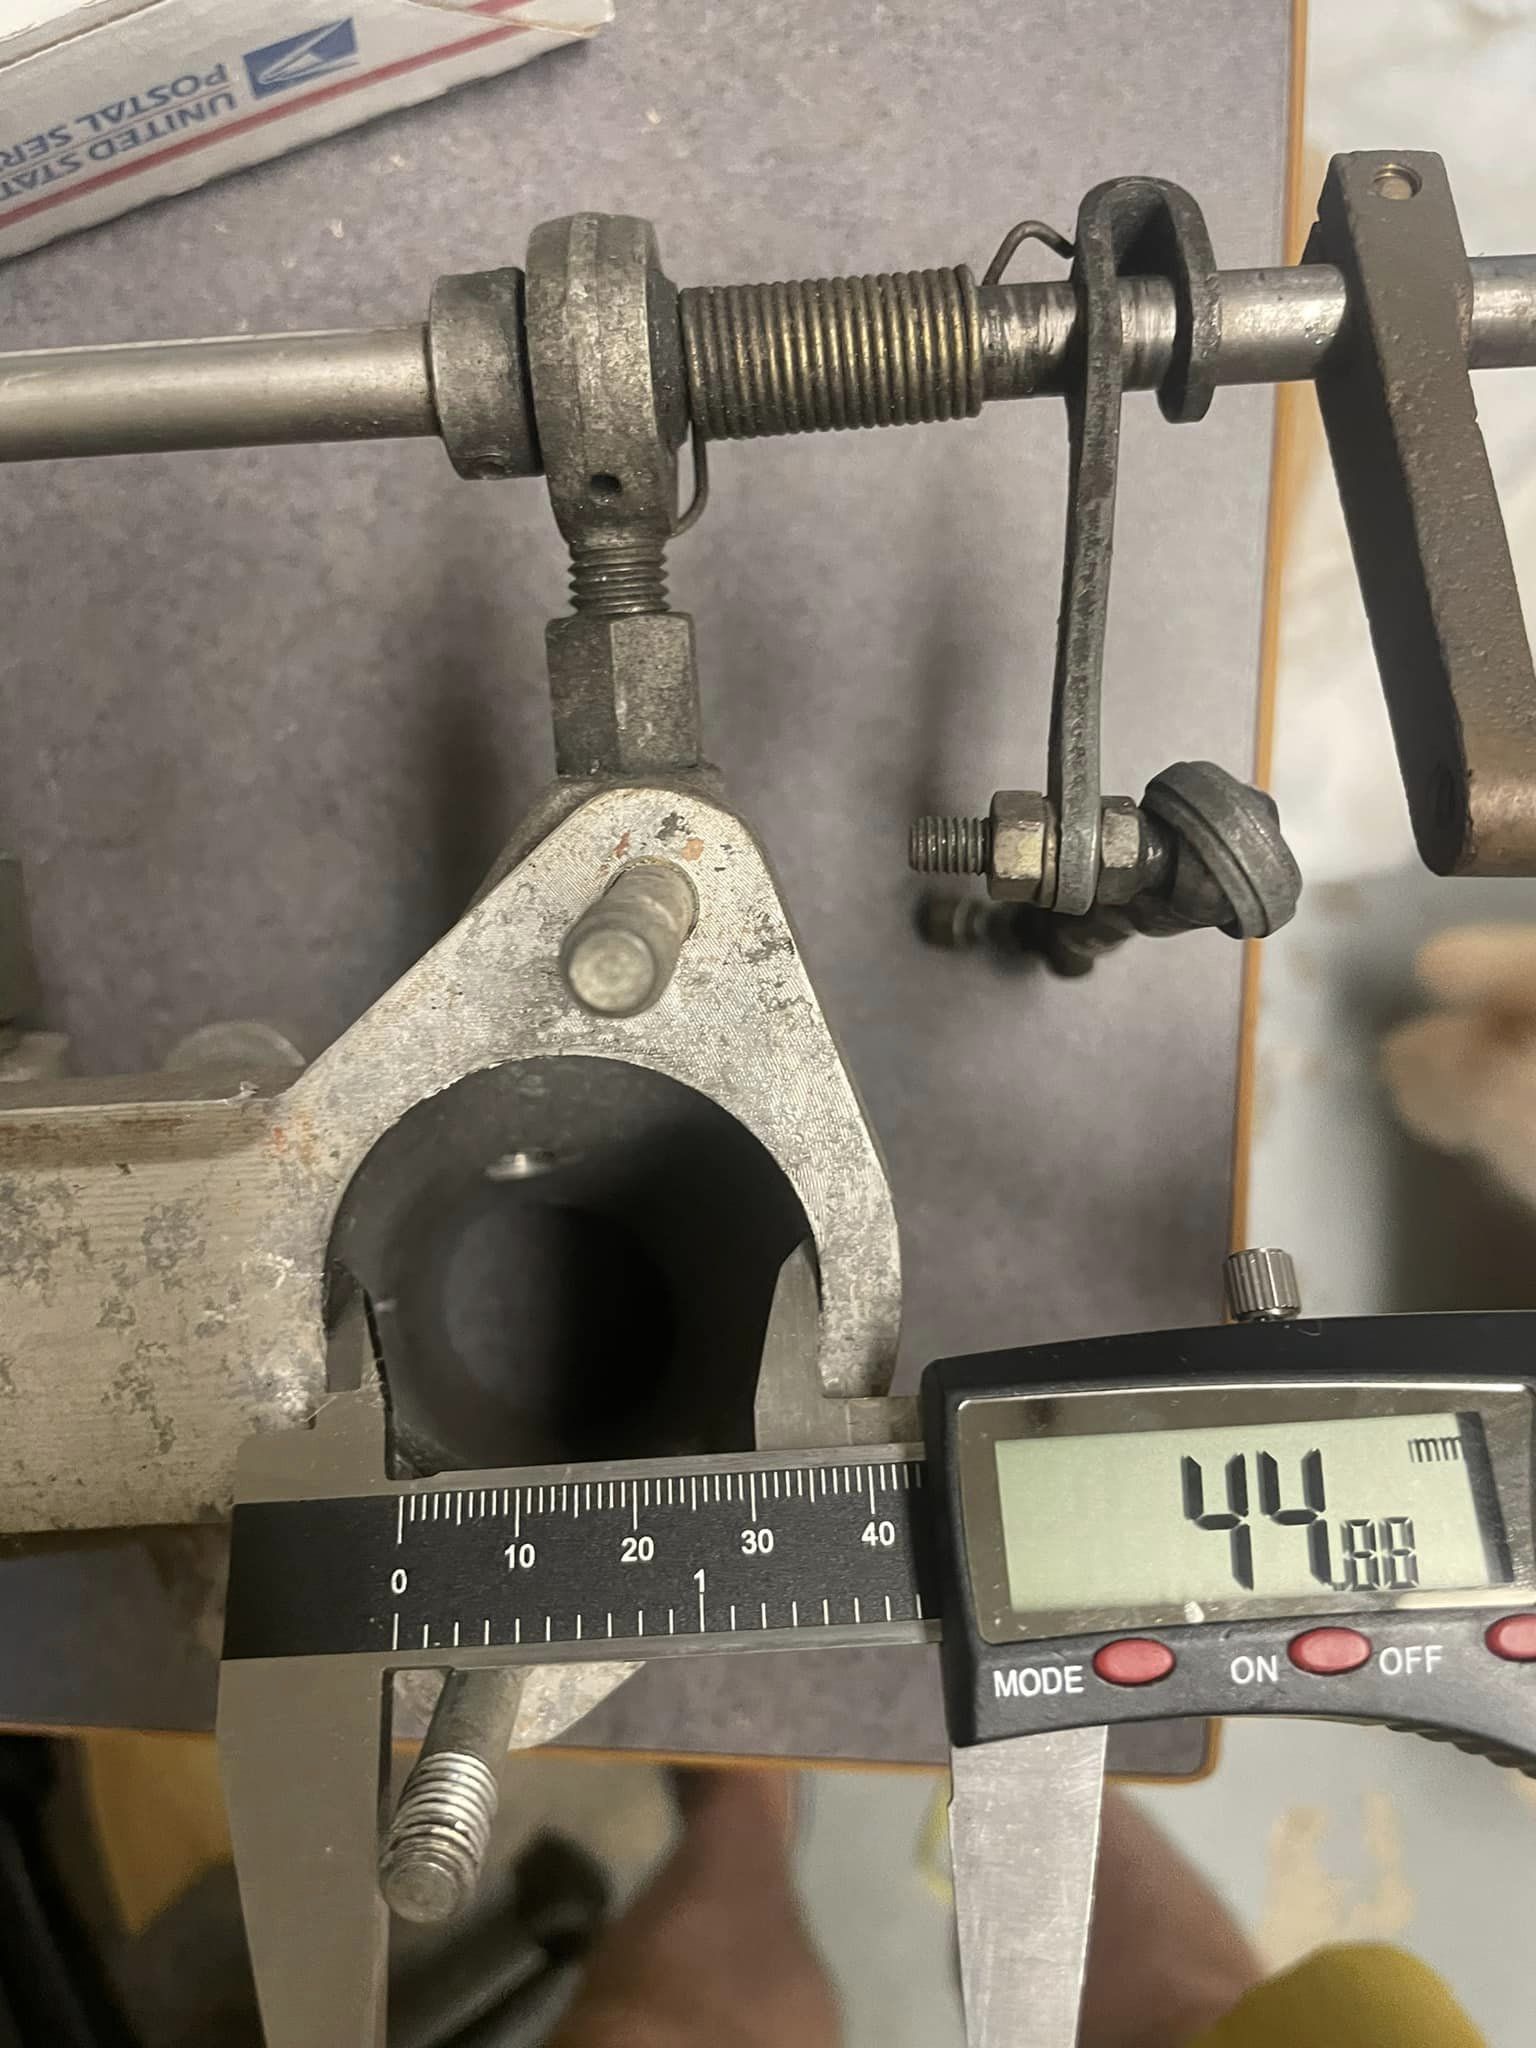
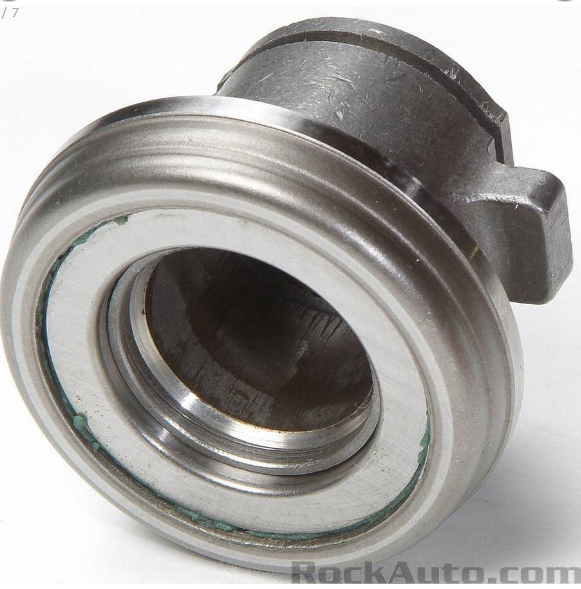 1 pointDid the best you could with what you had to work with!! Kudos my friend1 point1 pointI see. You're only showing the TOB and bearing. You have to add the height of the clutch pressure plate, from the fingers. Set the TOB and bearing on top of the pressure plate and measure down to the surface it's sitting on. You're only showing half of the stack. Edit - maybe that second measuremnet is from the fingers? It's in the ball park of your first picture couldn't tell if you were just showing the smae measurement. But, your bearing is on backwards. I see 1.70" and 1.75 from your measurements. 43 + about 44.5 = 87.5 mm. You might get there with the right bearing orientation, sitting on the finger tips.
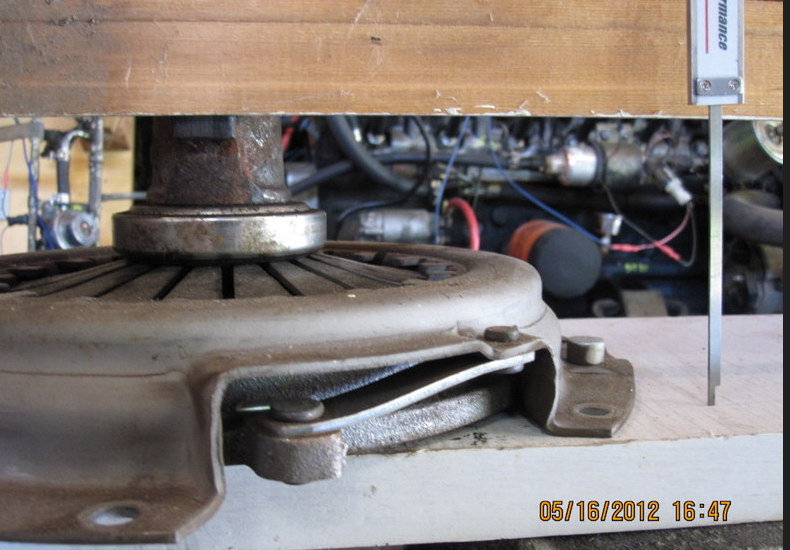 1 point1 pointThese brake backing plates are the 3rd major item I have found backward on this car, the other 2 being the seat mounts welded on opposite of where they should be and 2 of the pistons were facing the wrong direction. If I find a 4th one, I'll stop counting.
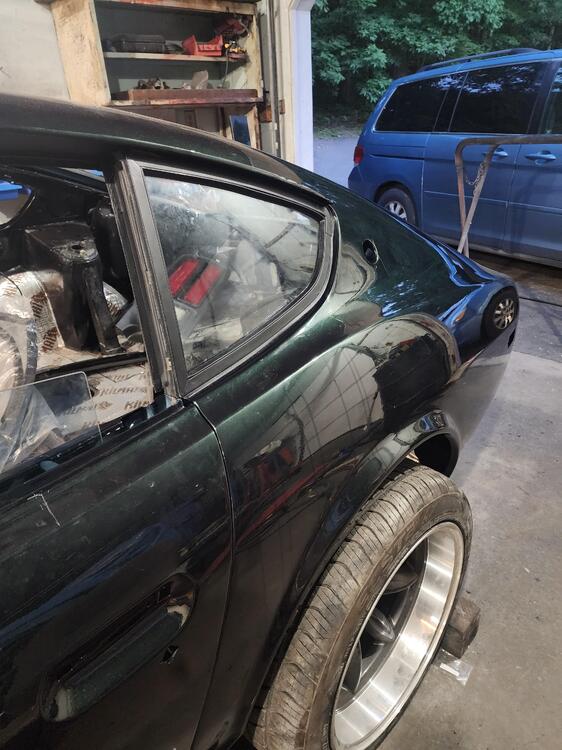
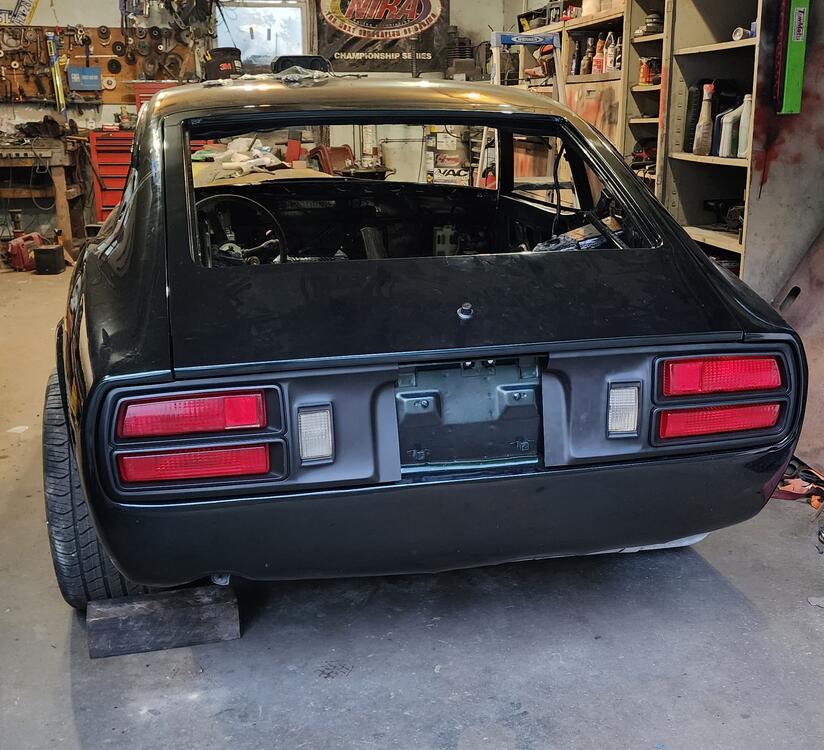
 1 point1 point1 pointHaven't updated much but good progress on the car. Took a new job a couple months back so that's been hindering the progress. But at least body work is done and I can focus on assembly.
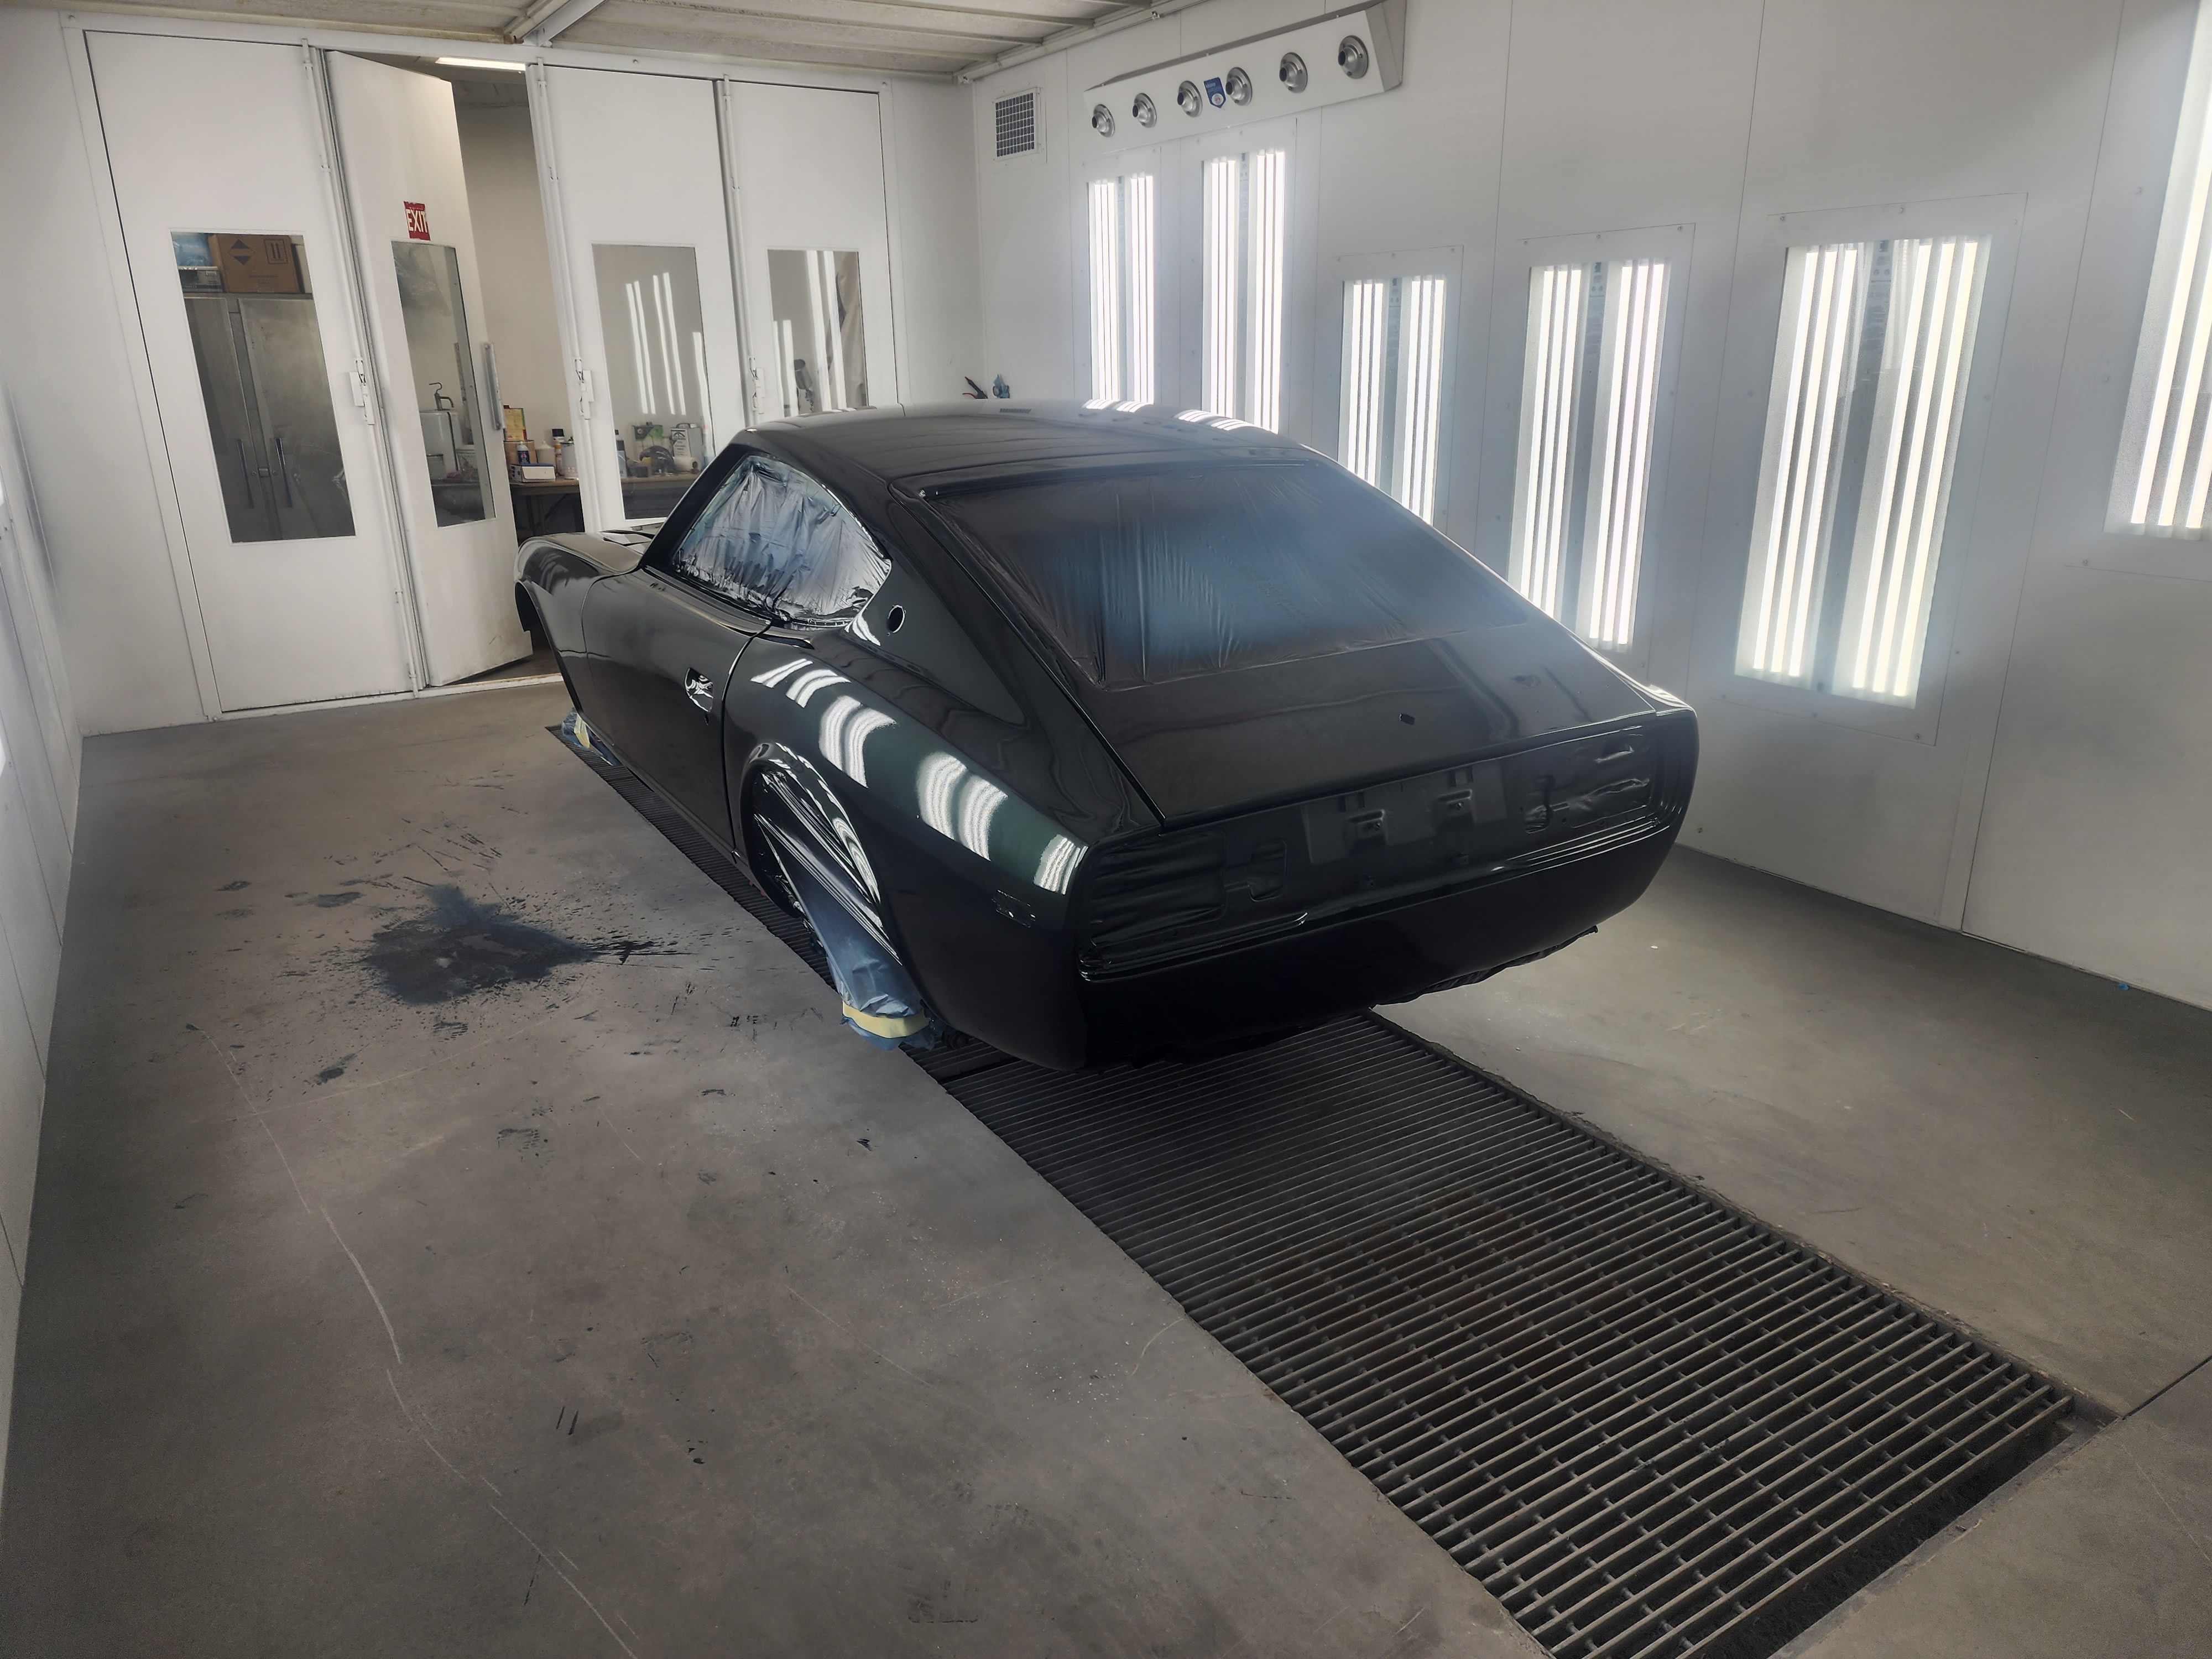
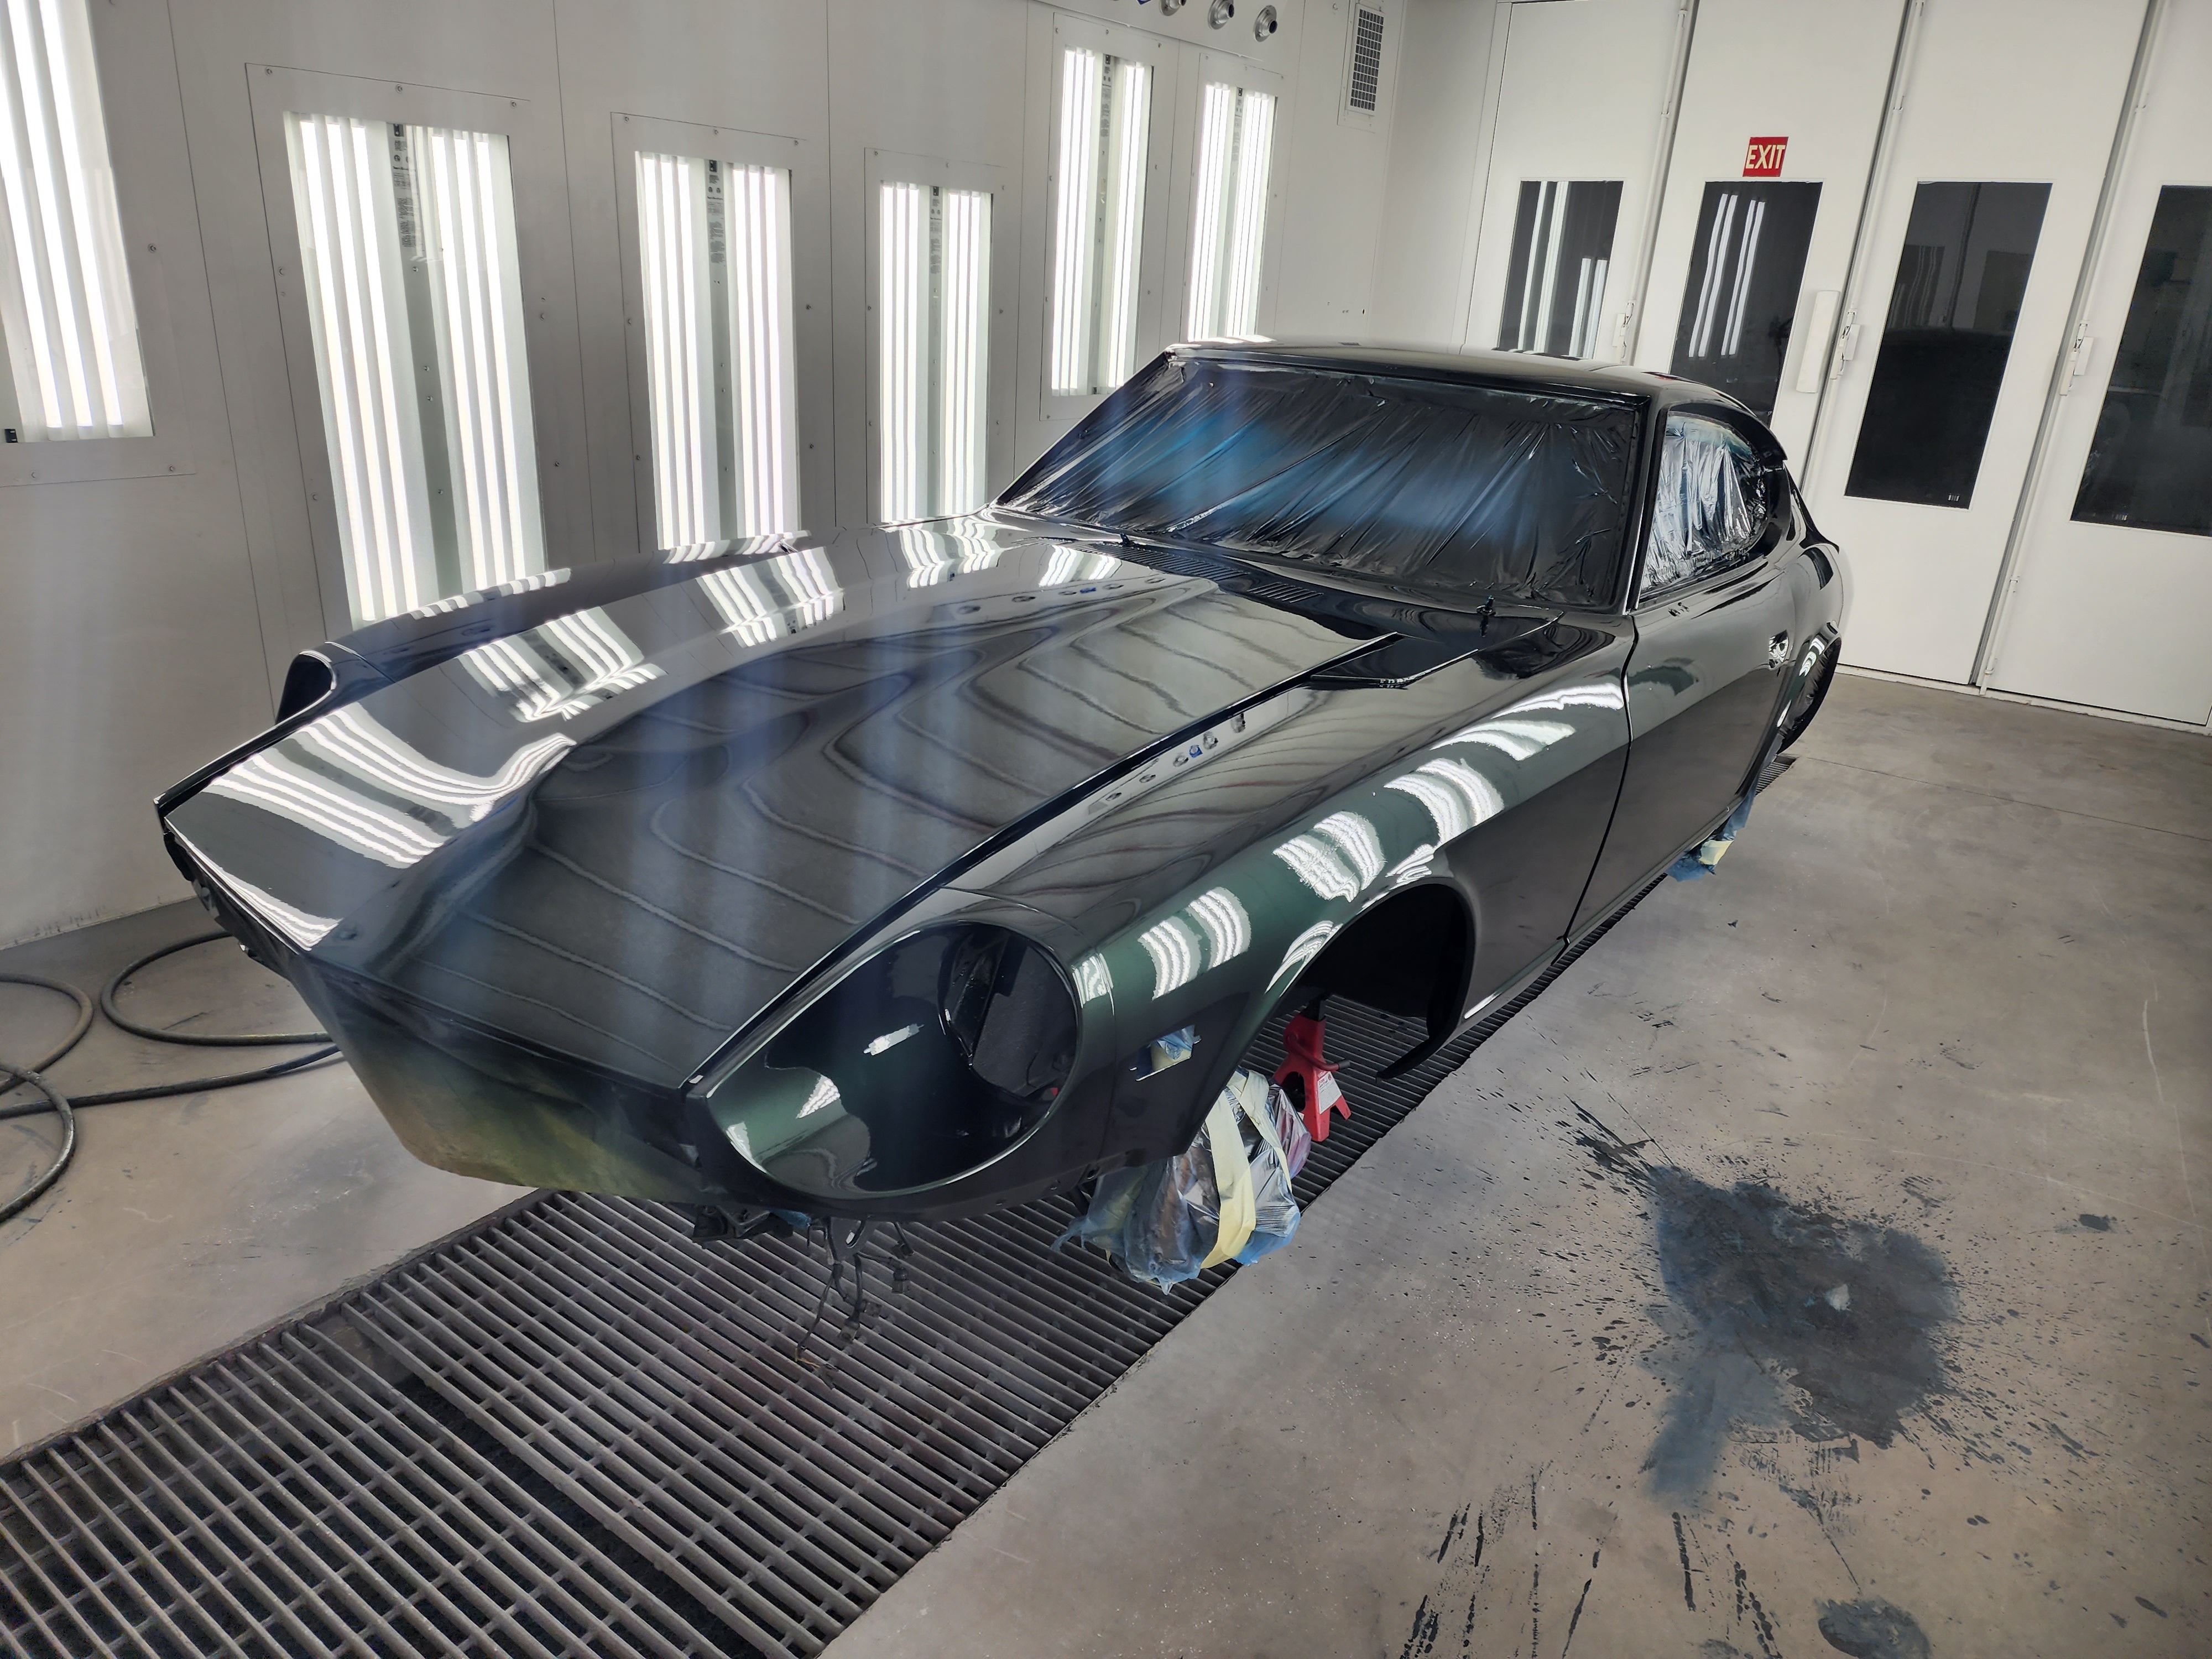
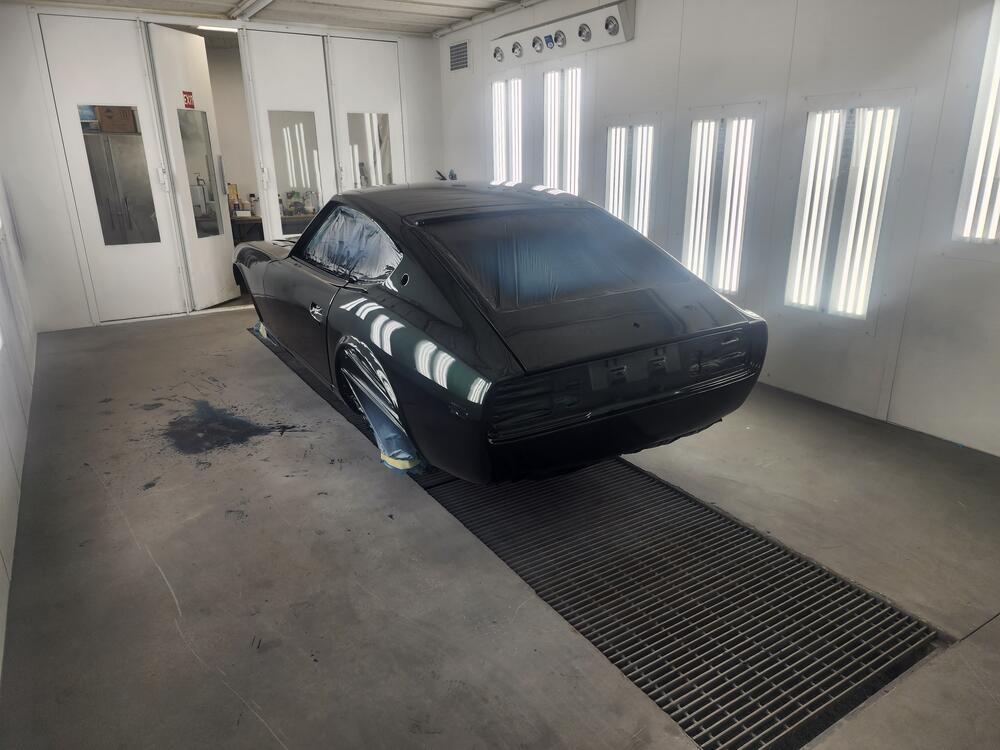

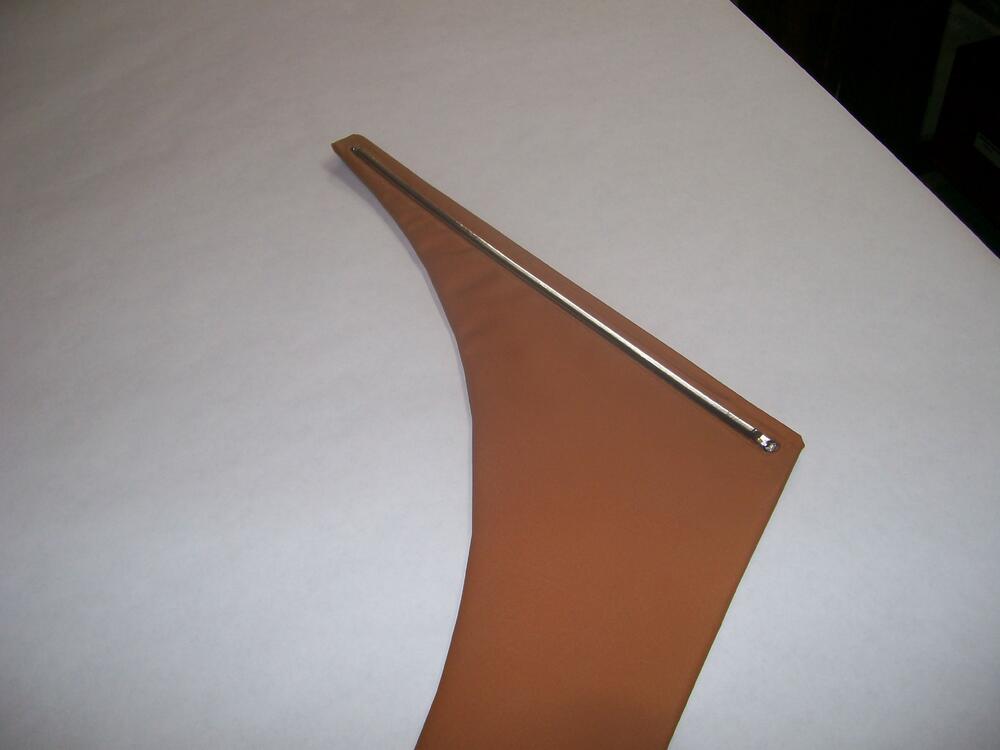
 1 point1 point1 pointA few photos to go with my write-up. I didn't take any photos of the work that I did with my door trim panels. These pix show the same technique used for the rear kick panels...
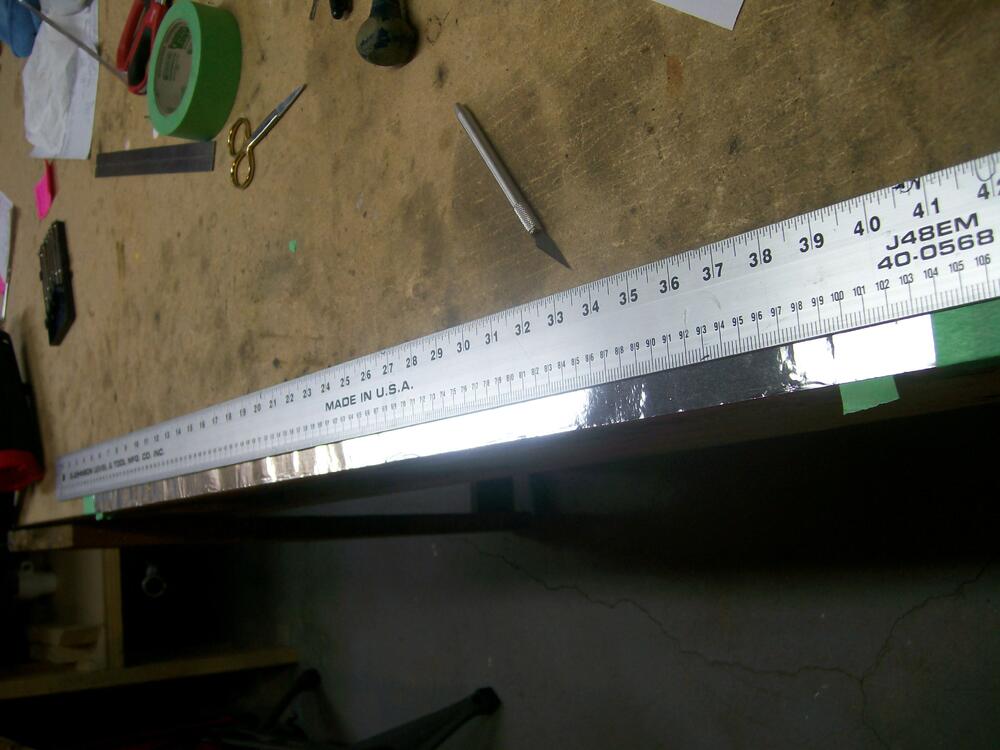

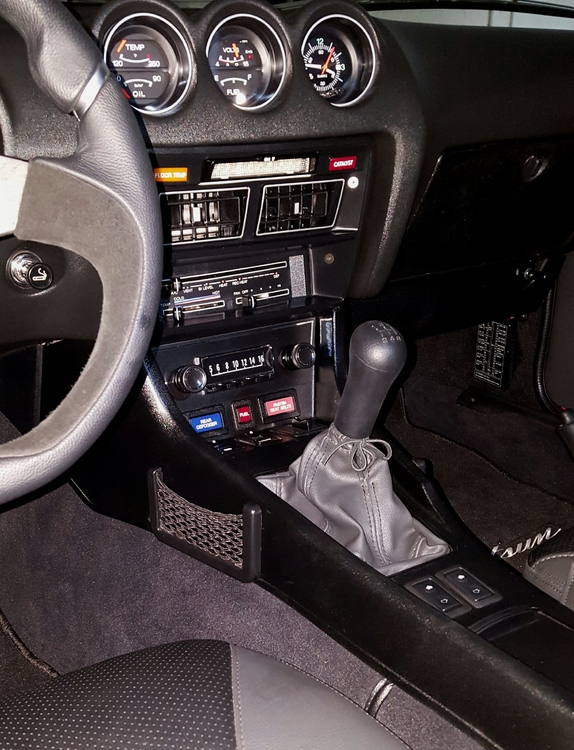
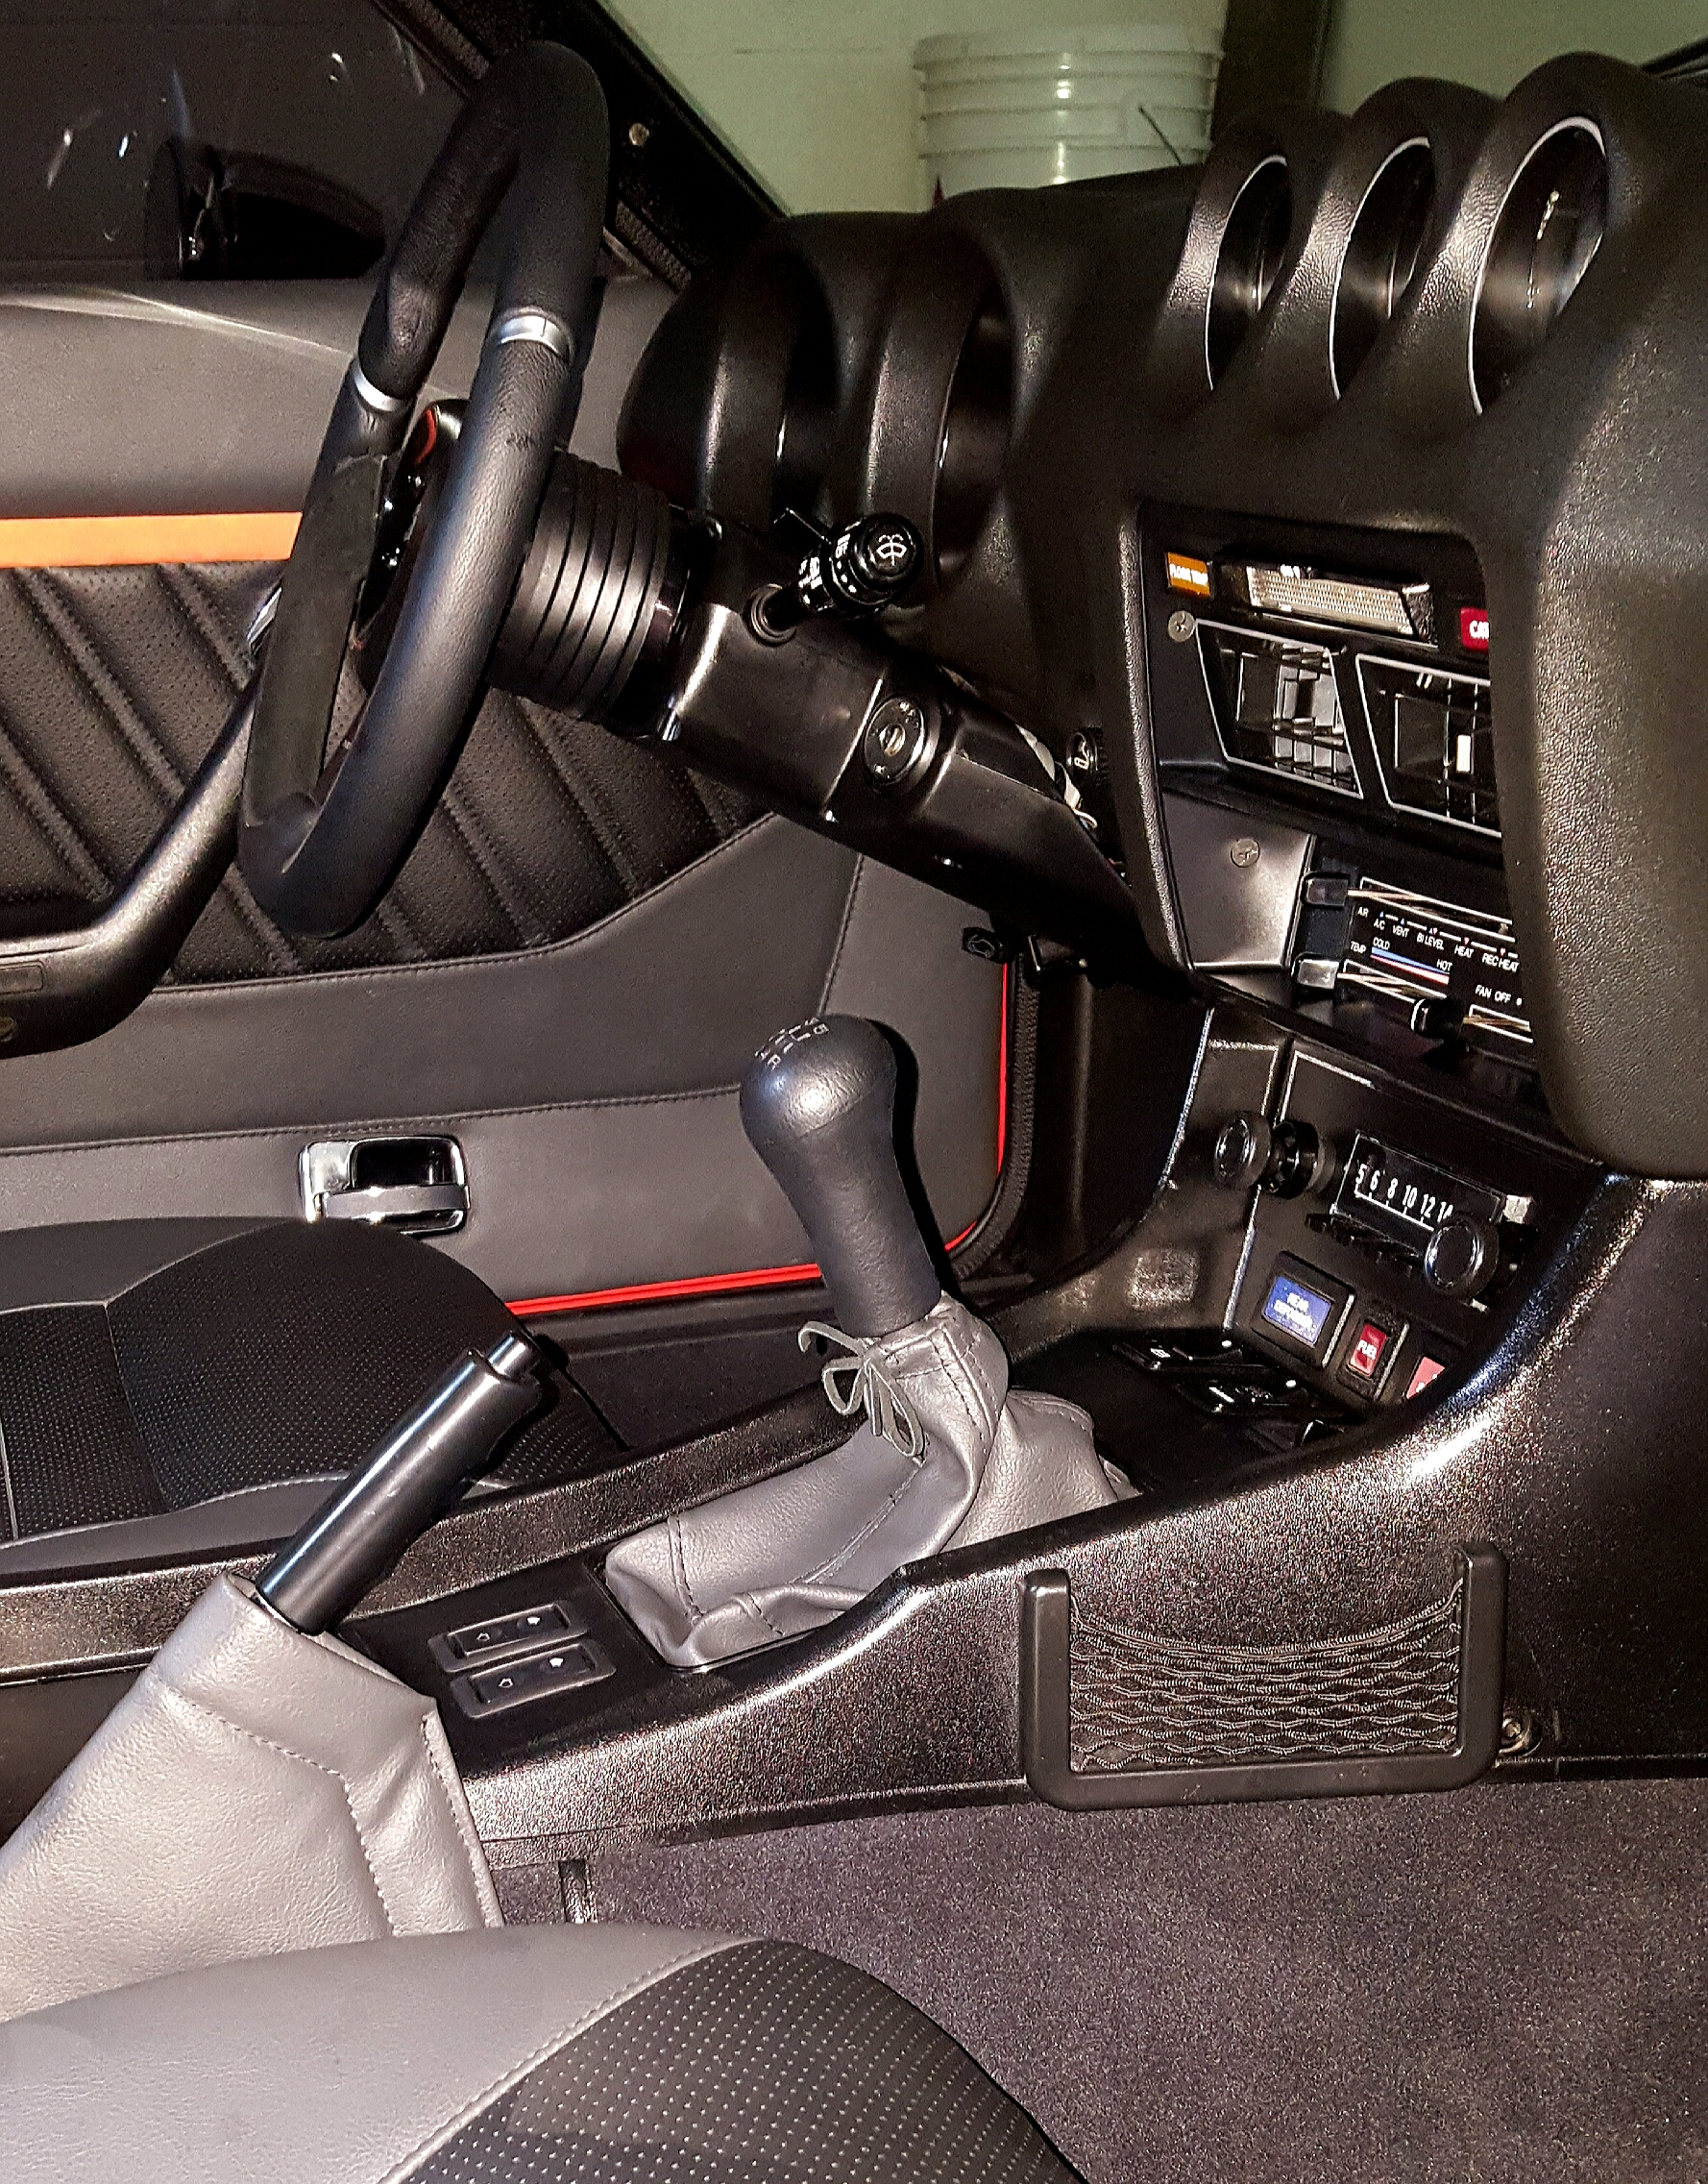
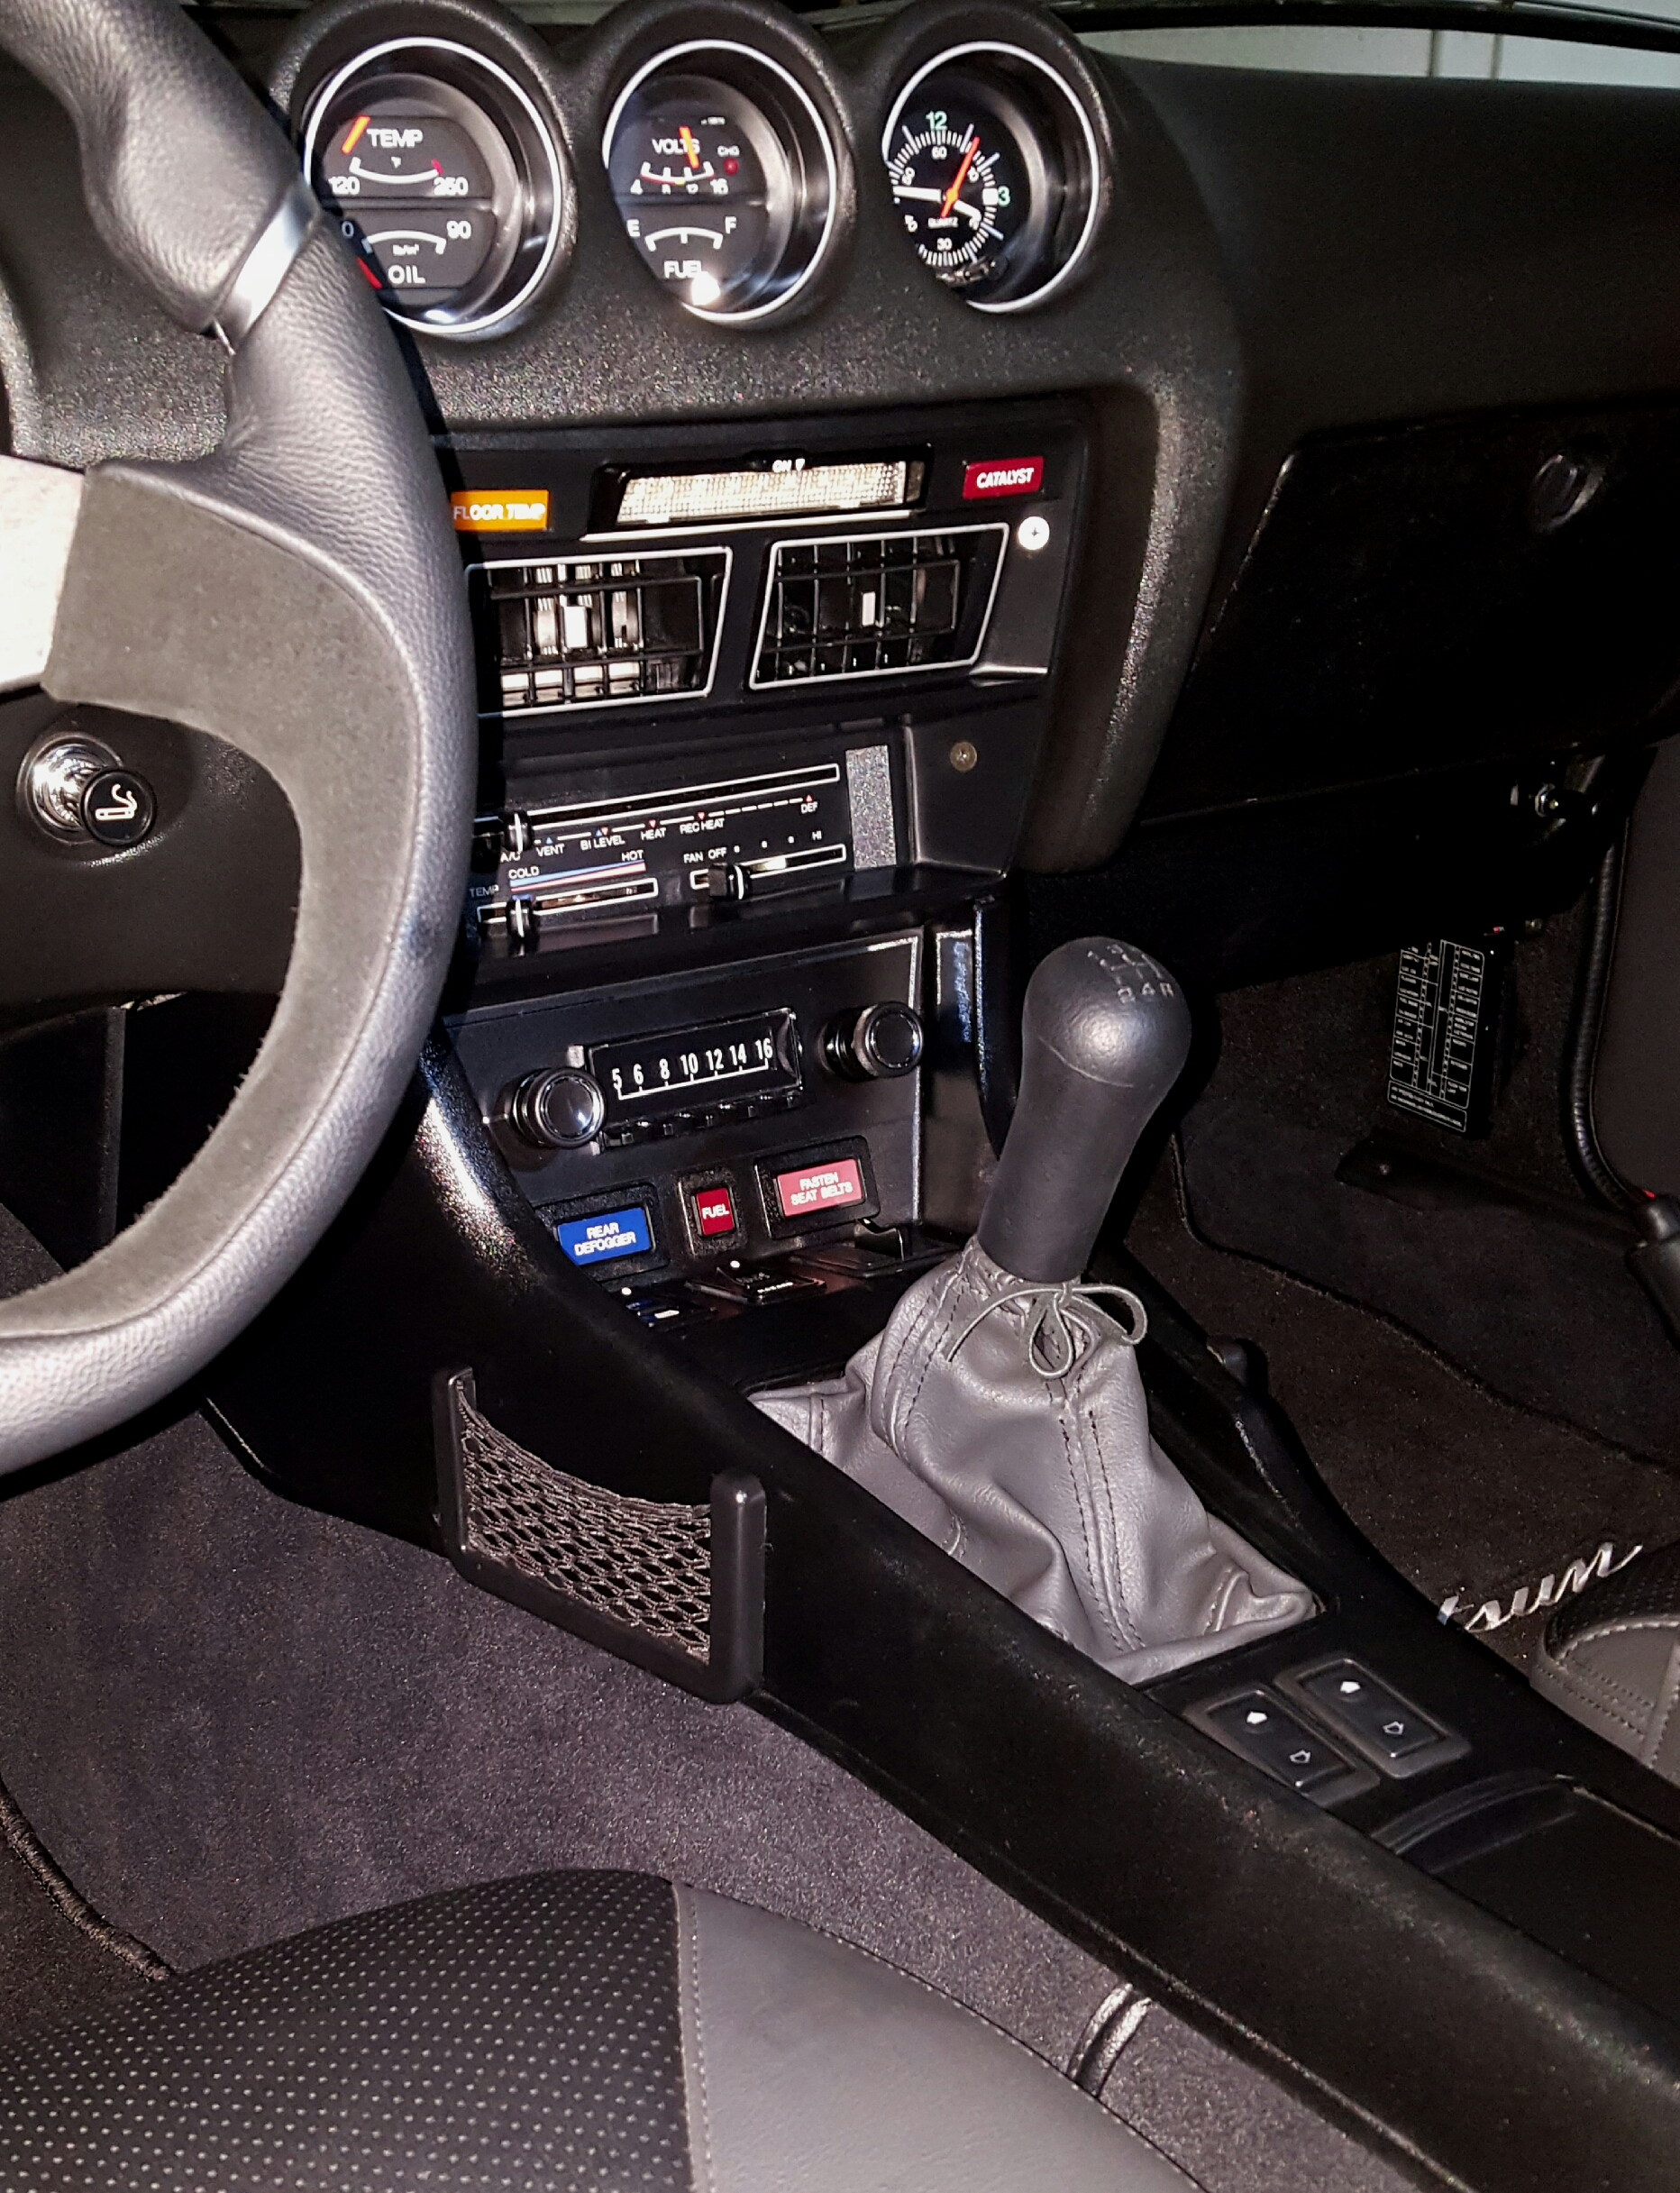
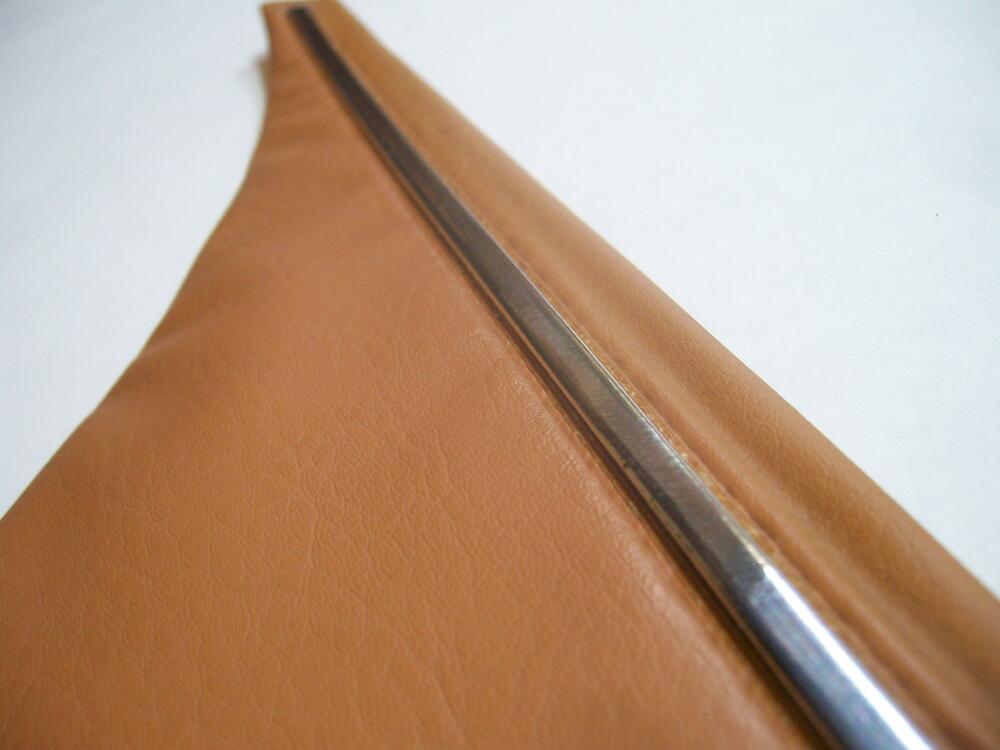 1 point1 pointFor your consideration: HVAC duct-sealing foil tape (adhesive backing) can, with care and patience, be used to replace the chrome film. The result has a finish that's almost indistinguishable from the original. I used this foil to restore my door cards and rear kick panels. Five years later, the tape remains securely in place. Steps: Leave the trim strip in place, but peel off the 'chrome' layer. It comes off as a thin film and you should be able to remove 100% of it without needing to use chemicals. Left behind will be the blue-coloured plastic strip. It has a 'D' cross-section. Measure the perimeter of that cross-section by shaping a piece of aluminum foil over the surface and marking the base of the 'D' on each side with an awl or straight pin. Flatten out the foil and take your measurement. I measured it at 9mm for the rear kick panel. I'm not sure whether it was the same for the door card accent strip. Cut a length of HVAC duct-sealing foil that's about 6" slightly longer than the door trim strip. Secure it to a flat surface, shiny side up, using regular 'duct tape' at each end. Mark off several strips, using the 'D' perimeter measurement to define the width of each strip. Using a long straight edge and a utility knife (with a fresh blade), cut at least full-length 6 strips (you eventually only need two, but you'll probably ruin at least two at the start as you practice stripping off the backing sheet and then applying to the door strip). For each lengthwise cut, work from the inboard edge of the widthwise duct tape at one end to the similar point at the other end. Then, after making your six lengthwise cuts, use a shorter straight edge to cut widthwise at each end. Tip: It helps if you clamp the long straight edge to the table/bench top, so that it can't move while you're making each long cut. Clean the surface of the blue plastic trim strip thoroughly. I used denatured alcohol. It's particularly important to get the top and bottom parts of the 'D' clean (where the strip meets the door trim vinyl). As noted, it takes a bit of practice to figure out how to pull the backing strip off the aluminum foil strip without putting a kink in the foil and/or having the foil accidentally bond to some unintended surface before you have a chance to start laying it down on the intended target (i.e. door card's blue plastic strip). It also takes a steady hand to keep the tape properly centered on the blue plastic strip as you lay it into place along the length of the plastic strip. The application technique is to lightly lay the foil onto the crown of the D. Press it into place at the front end of the plastic strip, then align while gradually lowering the full length of the foil down into place. It may take a few tries to get this right. Unfortunately, every failed attempt will ruin the foil, so you'll need to use a new strip for your next attempt. Once you get a good result, the next step is to cut the excess off at the front and rear ends of the foil. You'll need to judge the position of these end trim cuts so that, once pressed down, the cut end of the foil will align with the end of the blue plastic strip. Getting an acceptable result here requires a little additional work because the end of the blue plastic strip is rounded. The foil will not stretch to meet this contour. The only way to avoid a crinkled surface is to make two short lengthwise cuts so that the foil is now divided into three short segments. Eventually (but not now), you'll be able to press the center part down first, and then press the top and bottom segments into place. There'll be a slight overlap. Returning to the main job, your foil strip at this point is lying flat along the length of the blue plastic strip, touching only the crown of the 'D'. You now start working the foil down over the 'D' contour. Use a soft cloth rub lengthwise, gradually working the tape down over the 'D' contour. To avoid 'bunching', work from the center out to each end, rather than from front to rear. Work from the crown of the 'D' outwards, alternating from the upper half to the lower half. I think you'll be very pleased with the final result. My only caveat for this technique is that I haven't tested the effectiveness of the foil adhesive under extreme temperatures (e.g. car parked outdoors in the summer with the windows up). If you're concerned about this and think you know of a better adhesive, you could always try gluing chrome mylar film over the blue plastic trim strip. Personally, I like the foil because it's metal and actually bends to into shape over the 'D' contour, meaning that there's very little residual force trying to lift the edges. At extreme temps, the adhesive may temporarily get a bit gooey (technical term), but I don't think the foil will lift unless it's disturbed by the side of your arm. I take some consolation from the fact that this foil is designed to be reliable for use on air distribution ducts that carry both cooled and heated air.1 point1 pointYou're welcome. I had nothing to lose cutting up that old door panel and I found it quite interesting to look into the methods of manufacture used 50+ years ago.1 point1 pointThanks for those leads, AZ-240z. I shall definitely take a hard look at that option. And, CanTechZ, what can I say other than "WOW!" You went to a LOT of trouble to do that exploratory work and I truly appreciate it.1 point1 pointFinished it off today and took it for a drive. What a difference! The shift knob is now within easy reach to engage all gears. It was a PITA so it would be nice if MSA took notice and included a properly shaped rod in their short shift kit (specfically for the 280Z). The pics show the car in neutral with the knob 2.5" rearward and 0.5" left from the initial position, much like the stock shifter location. Even though the following before pics aren't exactly taken in the same angle, the difference is noticeable.
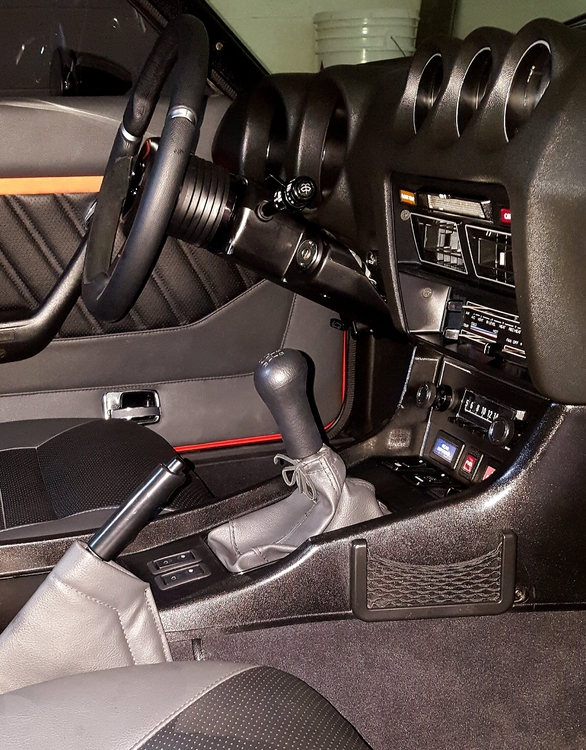
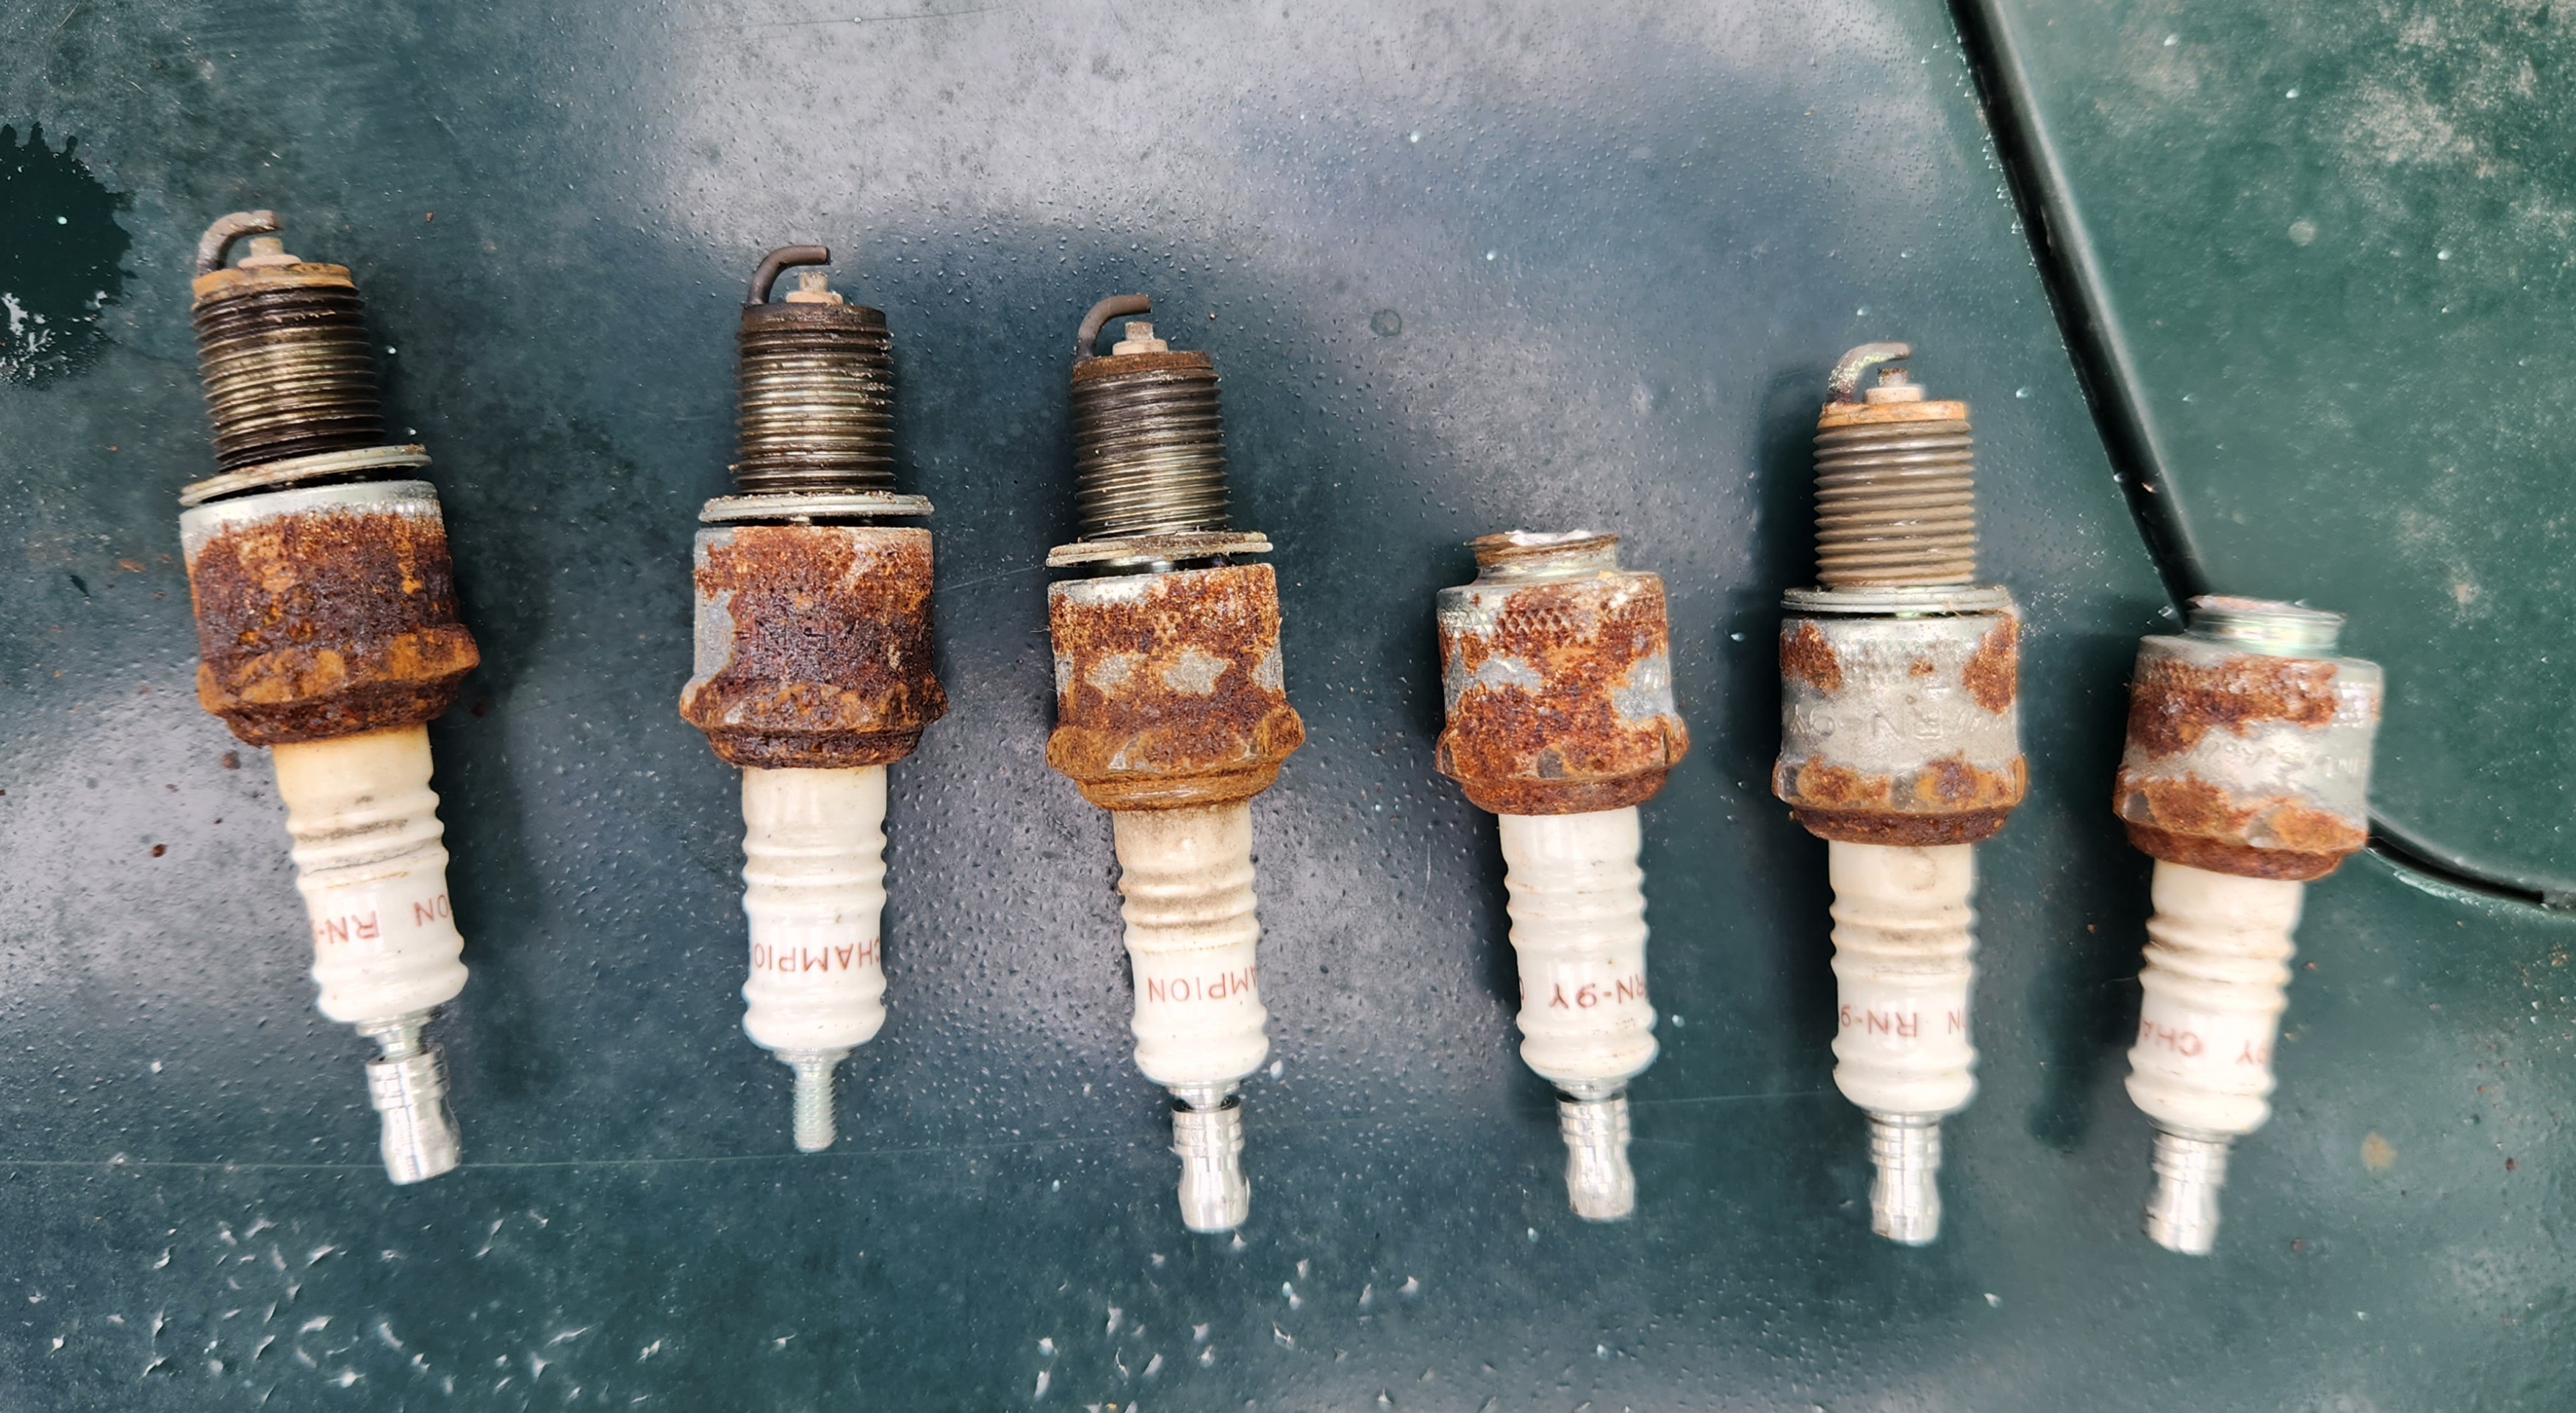
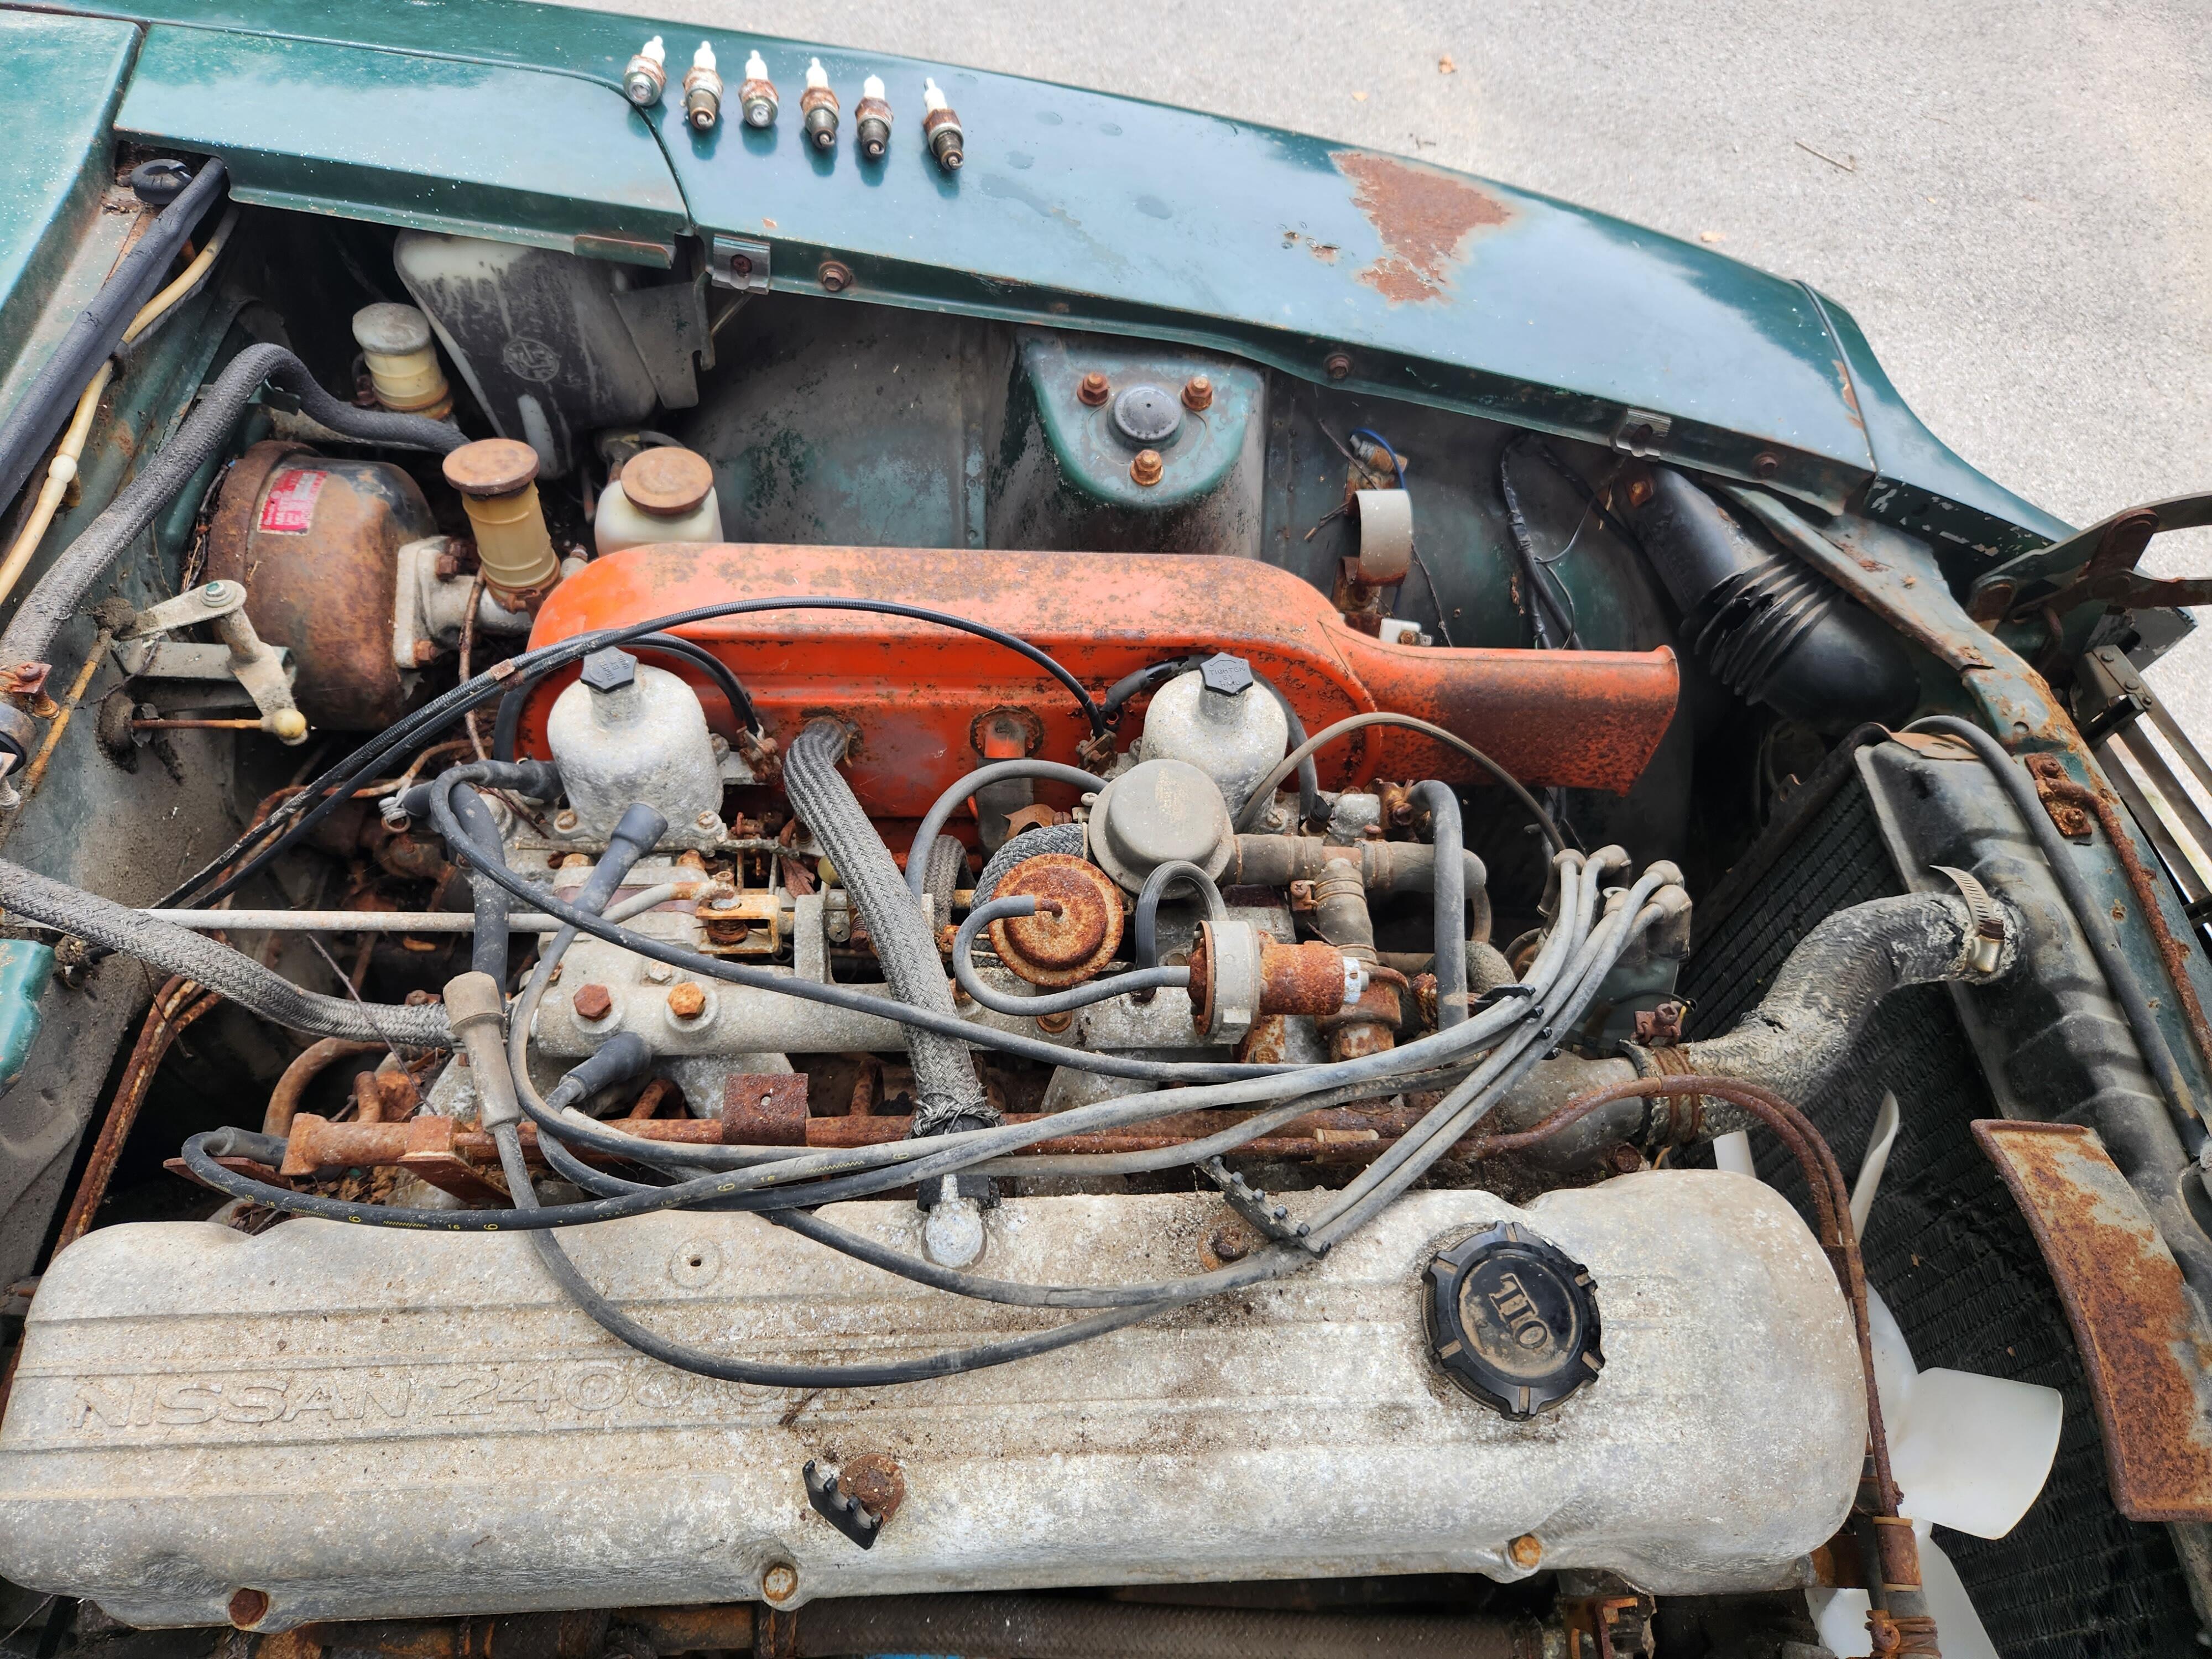
 1 point1 pointHere's a primer on how to adjust the doors on your Z so that they fit properly and seal well. ADJUSTING THE Z DOORS: Unless the car has been in an accident and the door opening or door itself have been tweaked out of shape, most problems with the doors are due to misaligned latches, hinges, or worn components. Presuming that it is adjustment or bad parts and not bent items check the following. First perform a visual check of the door. Check to make sure that the door is aligned properly within the door opening. Check the spacing along the top part of the window frame, the spacing between the window frame and the quarter window, also the spacing between the door skin and the rear quarter panel. I also check the spacing on the front of the door, above the hinges and the front fender. All of these should be even, and consistent in width. The gap should not appear to be excessive one edge with it's opposite component, i.e. front of door to back of door; top edge by windshield cowl and lower edge, etc. If all these appear in order then you have an adjustment problem with the latch mechanism. If however, there is a problem with the alignment, before you go and loosen the hinge bolts behind the kick panels, first do the following: 1. Check if there is any vertical play to the door, that is, with the door open lift the door gently. If there is a noticeable movement up and down, then you may have a worn pin or pins that are causing the alignment problem. Check to make sure that the hinges are solidly affixed and if so, then you definitely have a worn hinge. Although it is difficult to find new hinges, you might need to replace one or both. On Chevy's it is a known problem and parts stores sell new hinge pin inserts to fix this. This is an often overlooked problem, so check this first before you dismount the door or start adjusting the latch etc. 2. If the hinges are in good condition and there is no vertical play, check your weatherstripping. I know of a case where a guy filled the cavity in his weatherstripping with silicone in order to get a "tight" seal. Unfortunately, it also increased the thickness of the gasket and made it almost impossible to close the door without a hydraulic ram. He finally replace the weatherstrip. Check to make sure that the weatherstripping is mounted properly on the lip of the door opening, also the rubber splash guard on the front part of the door just above the hinges. Check the lower weatherstrip on the under lip of the door. Any one of these could cause the door to shut hard. 3. If both the above are ok, check to see where the latch is striking the striker plate. The striker plate is on the door frame and the latch is on the door. Both must line up in order to catch. The latch on the door has countersunk screws and hence is fixed in position. The striker plate on the door is the major adjustment item. It can be positioned along the 4 axis on each of the screws. Close the door, if the door exterior is not flush with the rear quarter panel skin, then you need to move the striker plate in (towards the seat for a protruding door edge) and out (for a sunken door skin). If the door is difficult to close AND the handle is hard to operate, check the bottom of the striker plate to make sure that it isn't inclined too far inward in relation to the top of the plate. That is, the door latches, and the skin lines up, but it feels as you are forcing the door to close and forcing the handle to open, then the bottom part of the latch is stressing the latch, Loosen the screws, and WITHOUT moving the top part of the plate, adjust the lower portion of the plate outwards. Align and retry. If the door latches but springs back when slammed the bottom of the striker plate is probably out too far. This appears to be a half-way latch, and only the safety position has been achieved. If when closing the door, there is a noticeable thunk, and when opening the door the door seems to "DROP", then the striker plate is set too high. The reverse occurs when the plate is too low, although in this instance the door usually will not latch. If you find that you have to move the door within it's opening, then it gets a little more complicated. In a nutshell; you need to remove the electrical components attached to the kick panels, remove the kick panels, and preferably with a jack supporting the door, or a friend, loosen the hinge bolts located behind the kick panels and adjust the door to fit. It makes it easier to remove the striker plate mechanism in order to ensure a good fit. DO NOT remove the hinges from the door, or loosen these bolts unless there is a problem with the hinge. The hinge pins must be PARALLEL and IN LINE to work properly, and it is too easy to get these out of line and introduce serious stress to the door. Sorry for the length, but hope it covered your question and options. Enrique Scanlon This post has been promoted to an article1 pointA little news. The L24 is seized. I pulled the Champion plugs in order to spray the cylinders with Marvel Mystery Oil. At first the plugs looked pretty good, but #4 and #6 snapped in half unfortunately. Now I need some advice. I'm sure some spark plug particles fell in the cylinders. And if I try to remove what's stuck in the threads, more pieces will fall inside. I suppose the only next step would just be complete engine disassembly/inspection, but obviously I will leave that to the next owner and most likely sell it with seized, matching numbers L24. Any more advice would be appreciated.
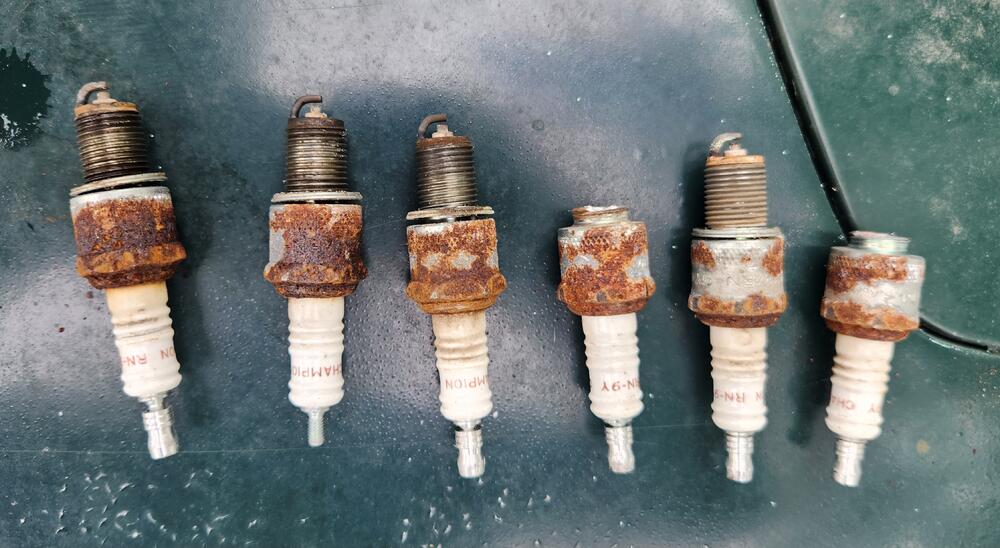
 0 points


.png.797eac93b286f498ca22f66c4c082f24.png)

.jpg.e054fde70f22bdf030fb610899495d2b.jpg)
.jpg.c66cbb0d0a647a1e06288f4ed97a5de6.jpg)
.jpg.26cab8403e814c4e3c180e75e52e3ca7.jpg)


.jpg.a33ca12ae3d40b5af54af8570c33b859.jpg)
.jpg.0eb13220dc2de5a542a653f84c815d31.jpg)
.jpg.f2a0cd1f8645a182d1245d40b91c5bfc.jpg)


Important Information
By using this site, you agree to our Privacy Policy and Guidelines. We have placed cookies on your device to help make this website better. You can adjust your cookie settings, otherwise we'll assume you're okay to continue.