Leaderboard
-
Captain Obvious
Free Member8Points10,081Posts -

siteunseen
Free Member5Points15,115Posts -

Terrapin Z
 Subscriber
 4Points1,333Posts
 -
conedodger
Free Member4Points12,513Posts


Popular Content
Showing content with the highest reputation on 04/18/2023 in all areas
-
Your pic's helped me Greg, At least I know what I am looking for in the bottoms of bins. lol It had been bagged with the brake line clips and clamps.


 4 points
 -
3 pointsI know it's hard to believe, but this is a separate piece: "Are you sure about that five minutes??"
 3 points
 -
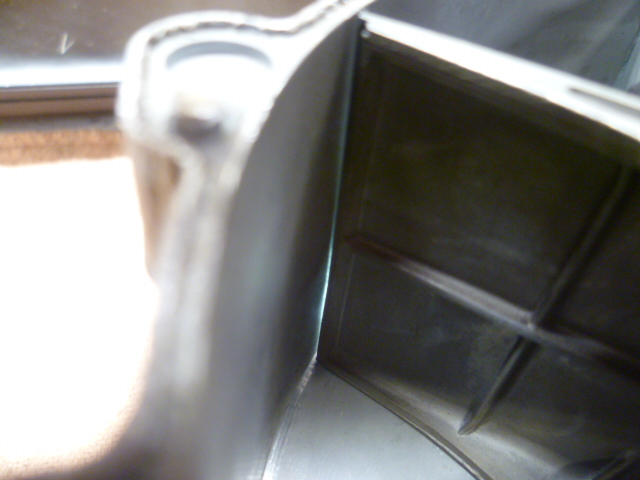
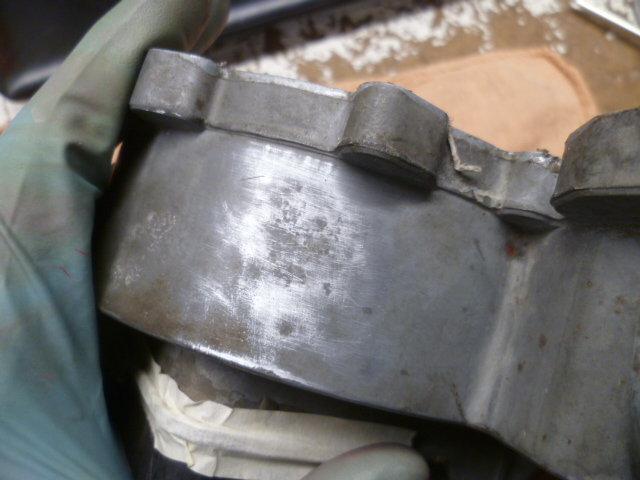
3 pointsAnd once the cover was off, the problem was obvious. Here's a pic of the damper vane. I'm back lighting the gap between the movable vane and the case / body of the AFM. This is a pic when there is very little air throughput and the vane in the "mostly closed" position: And here's a pic of the damper vane at about mid-scale. Note how the vane is rubbing against the inside of the case: And then here is the damper vane "beyond" the sticky spot. Note that there is a gap again: So mystery solved.... The case is bent. Pushed in at that spot. Like someone dropped it or hit it with something big enough to dent the case. Note that I looked it over thoroughly from the outside and did not detect the dent. I did find an anomaly on the outside of the case, but it's quite subtle. Here's a pic of the outside of the case after some "block sanding" in an attempt to highlight the problem area. The clean spots were wiped by the sanding, but the darker spots (still dirty) did not: So, mystery solved!!! I'm going to try to fix it, but ran out of time today. I'm thinking that a few well aimed taps with a ball peen hammer might push the dent back out enough for the damper vane to clear the case.


 3 points
 -
2 pointsJust to check if there was any correlation between which AFM’s have rivets or screws holding the cover on, I found that all of the 5 pin connector AFM’s that I have used screws, where as all the 7 pin connector-ed AFM’s had rivets. So 75-77 with internal fuel pump contacts were rivets, then all the later ones had screws. I also have two turbo AFM’s and one has rivets and one has screws. Humph. Just when you think you have a correlation…. Might just be a “where were they made” kinda thing. I am tempted to add, “Anyone want a slightly used AFM cheap?” I’m collecting them why?2 points
-
1 pointI'm going to try and take pictures of this paper weight as I make it lighter. Bought it from a guy that works at a scrapyard. $20 dollar scrap price but an old friend that works there knew what a Datsun 280ZX was and gave him $25. Called me and now it's my toy for the next month or so. With you guys asking about it I'll get it done. Pictures so far.
 1 point
 -
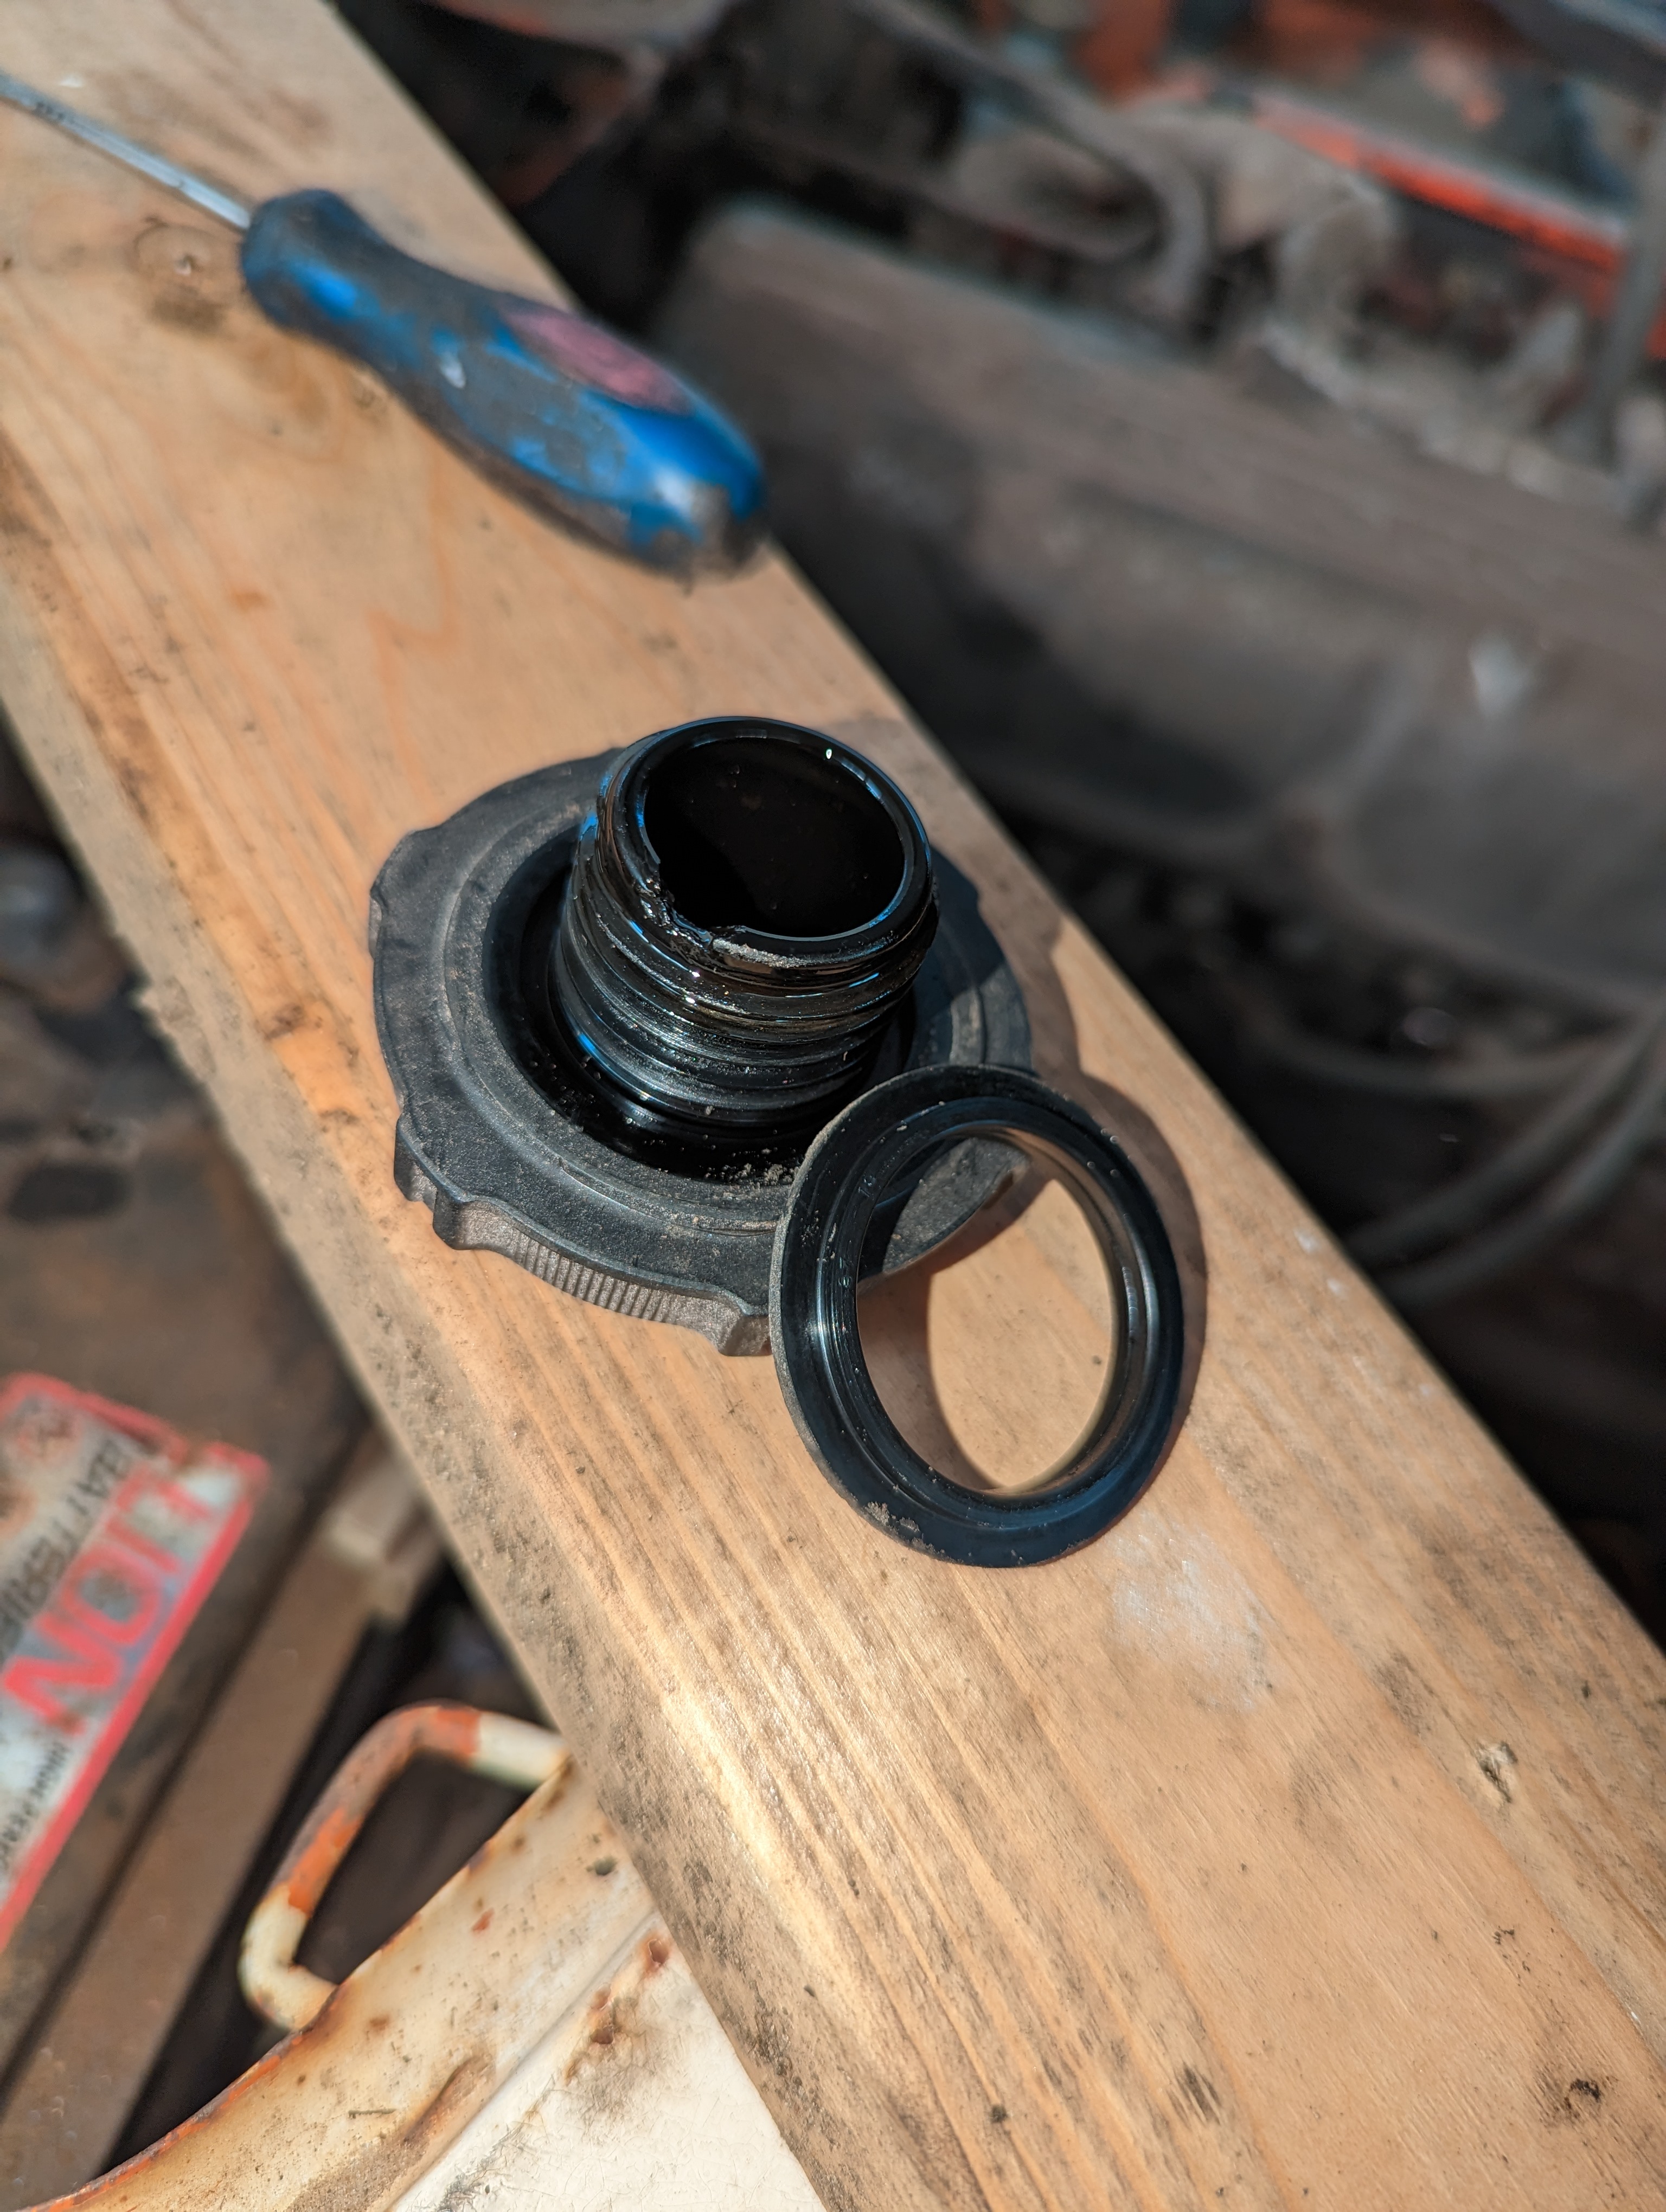
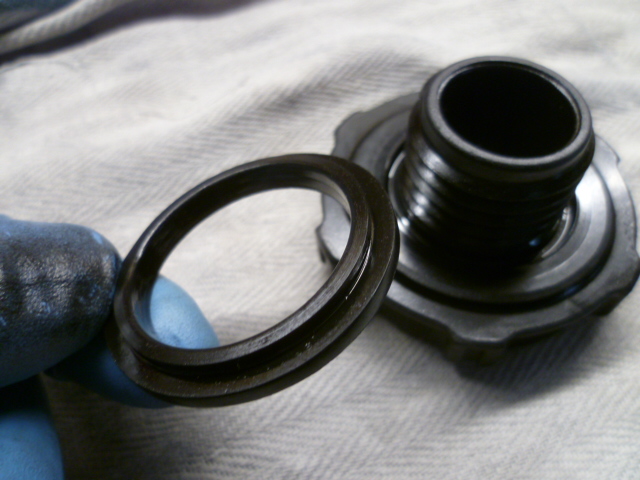
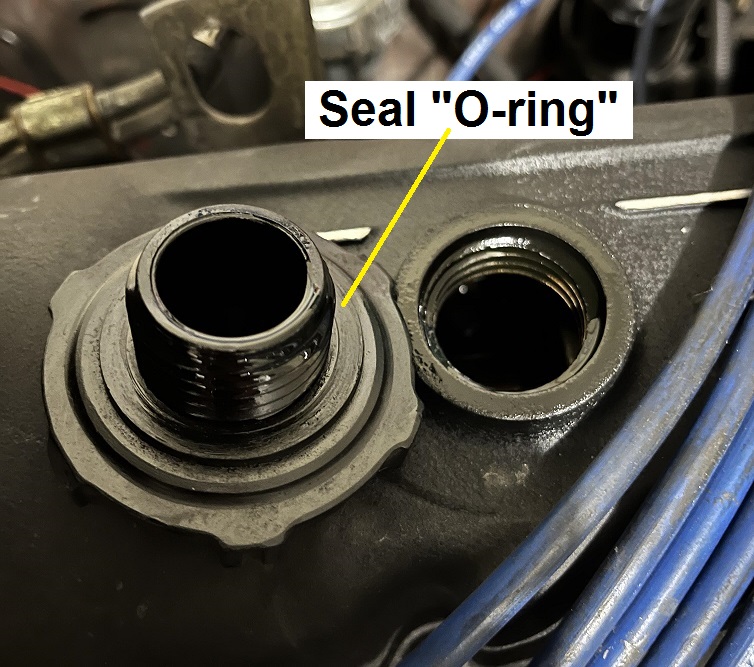
1 pointHaha!!! Mostly just lucky. And yes... The term "O-ring" typically evokes a picture of a soft pliable contraption with a circular cross section. The seal on the filler cap is neither soft, pliable, or circular in cross section. It may have been soft and pliable at one time, but it's not now.1 point
-
Zed, thanks for the FSM ref. I put all the sensors in a pan of hot water with a thermometer in the water and heated the water to various temps on my stove (wife was at work [emoji6]). I will say the sensors react very rapidly to cooling. I wanted to get a baseline of the sensors before I put them in the car. I think I’m going to order a couple additional ZX sensors and see what I find.1 point
-
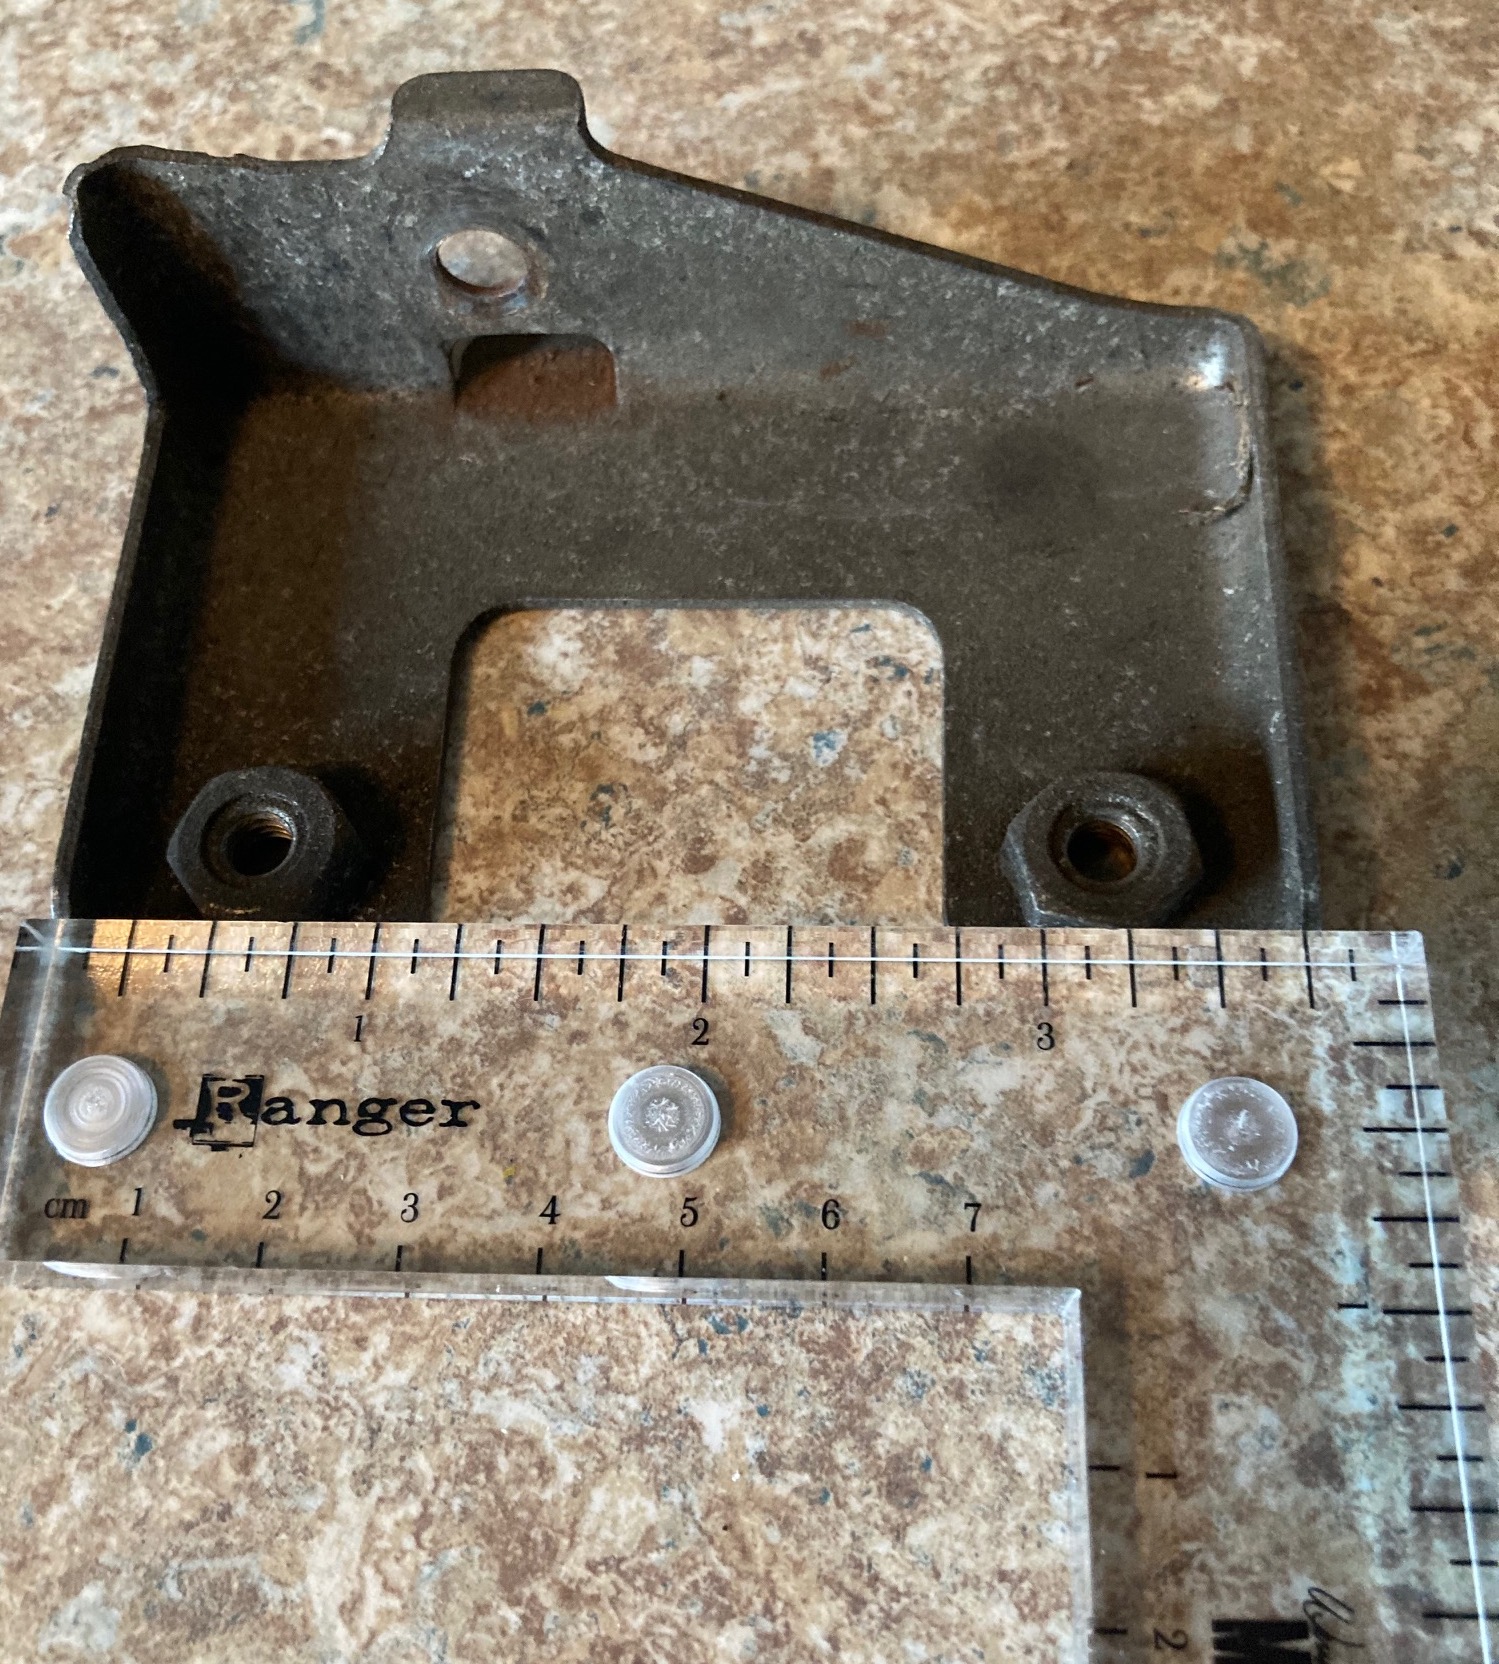
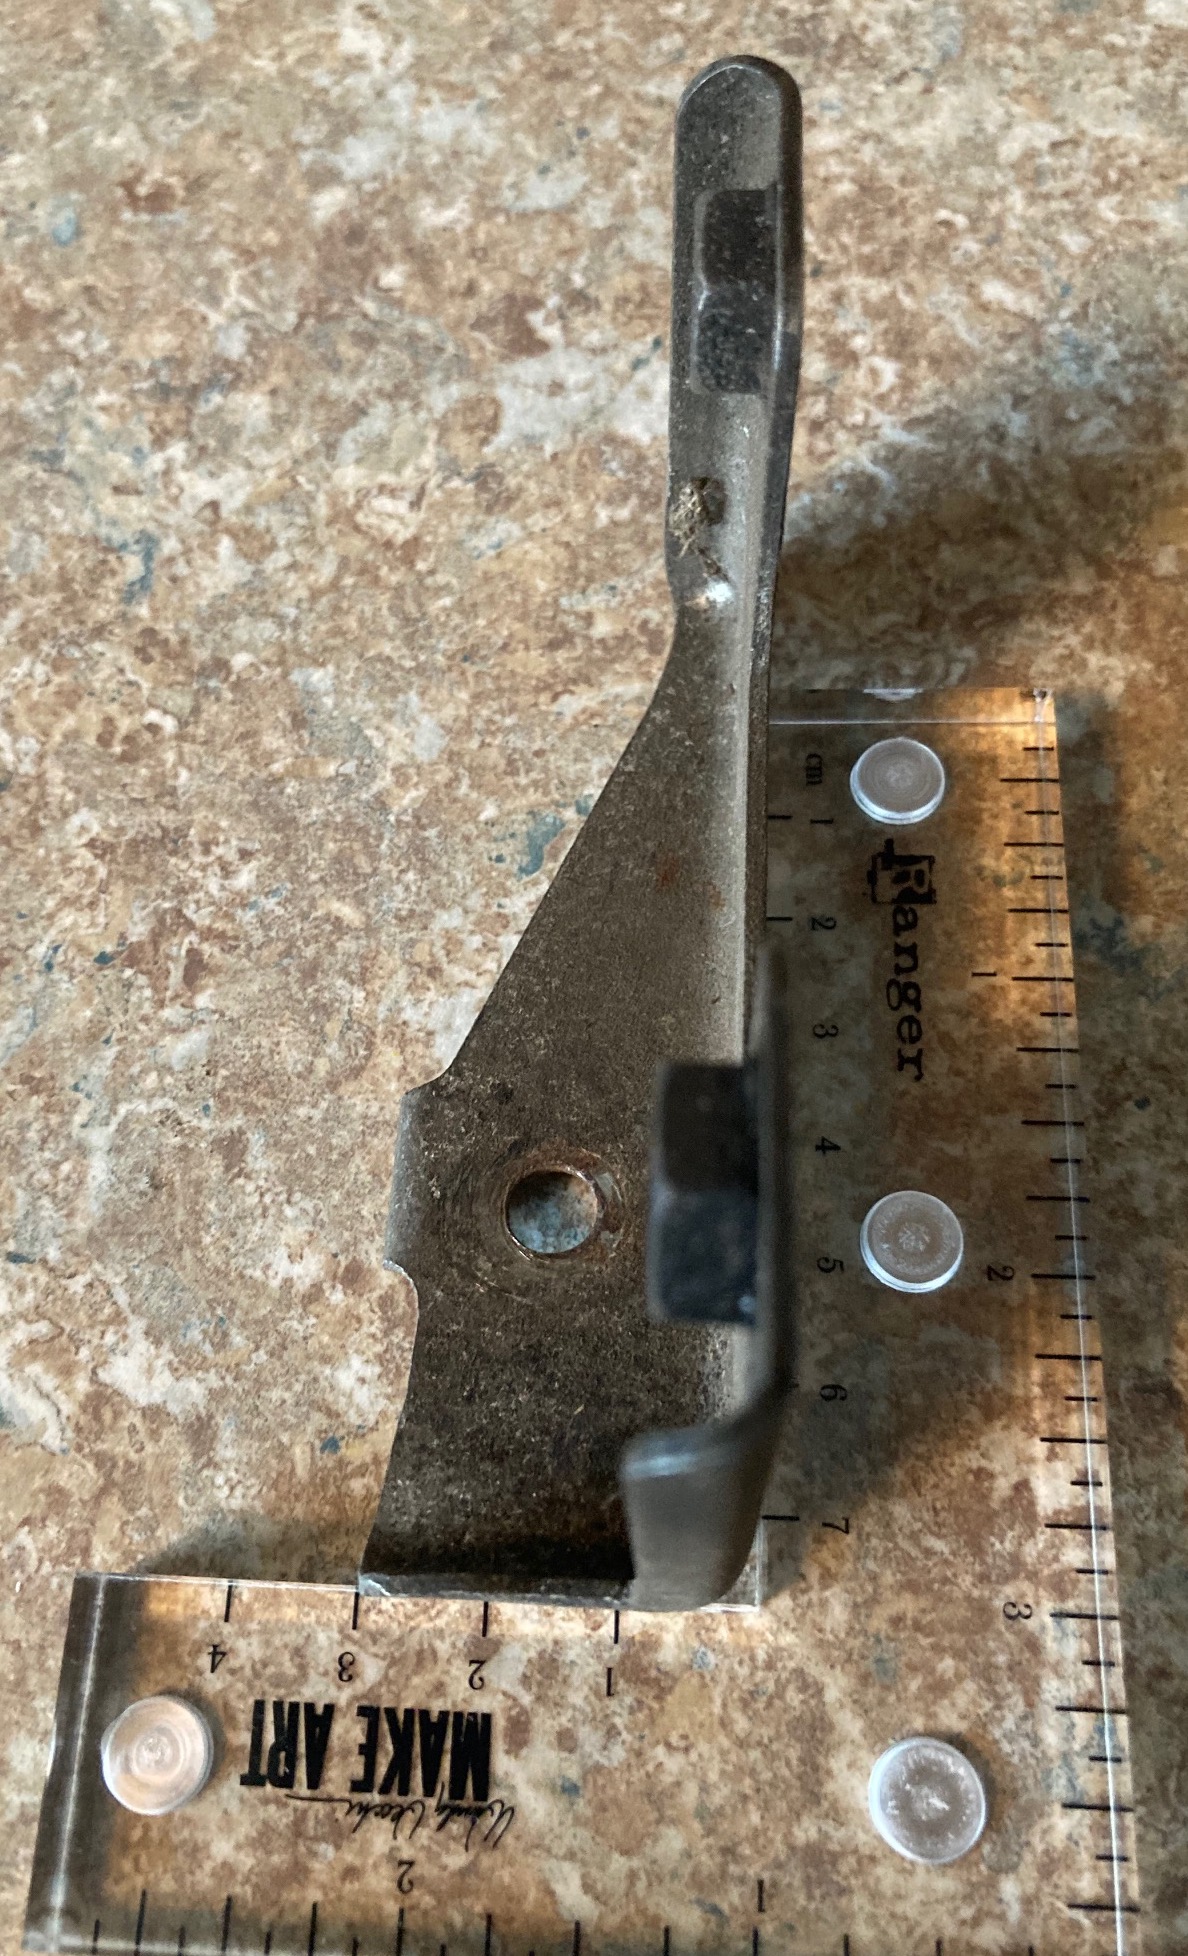
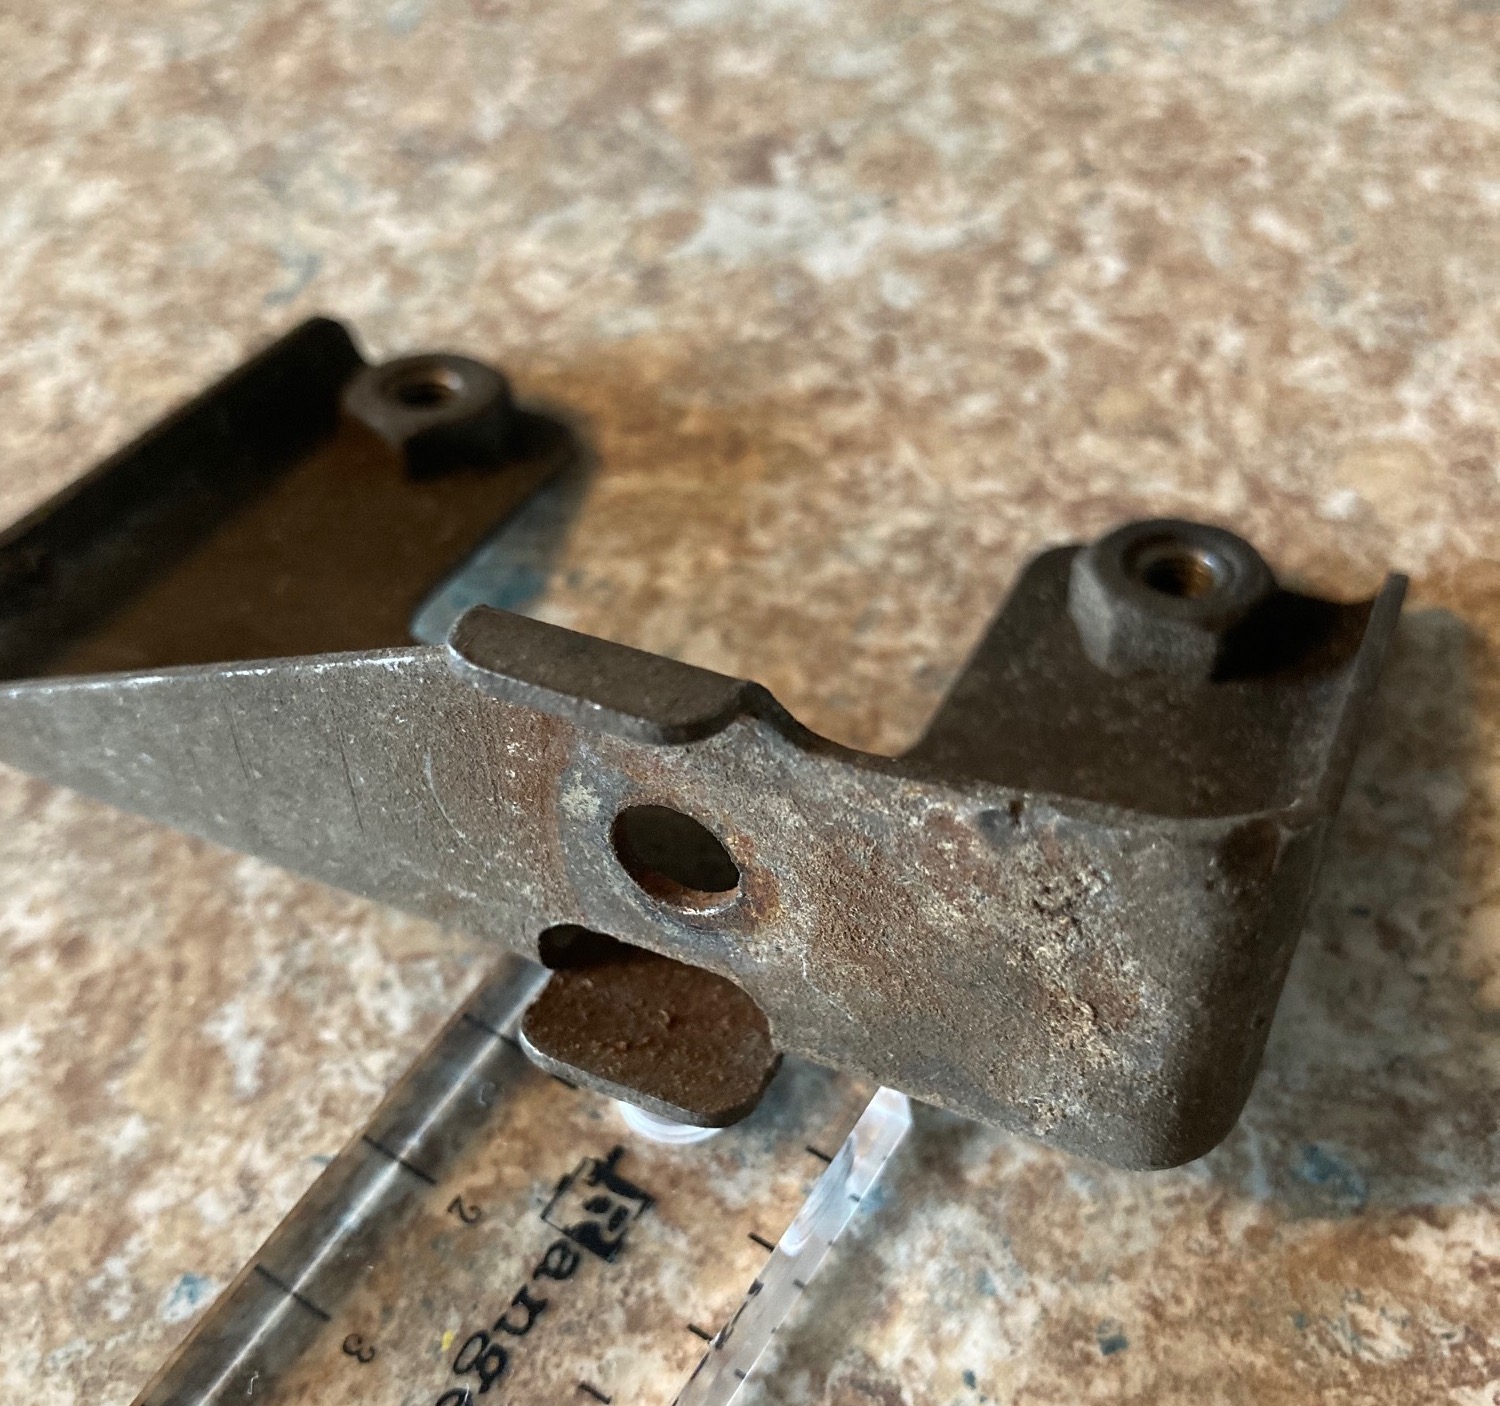
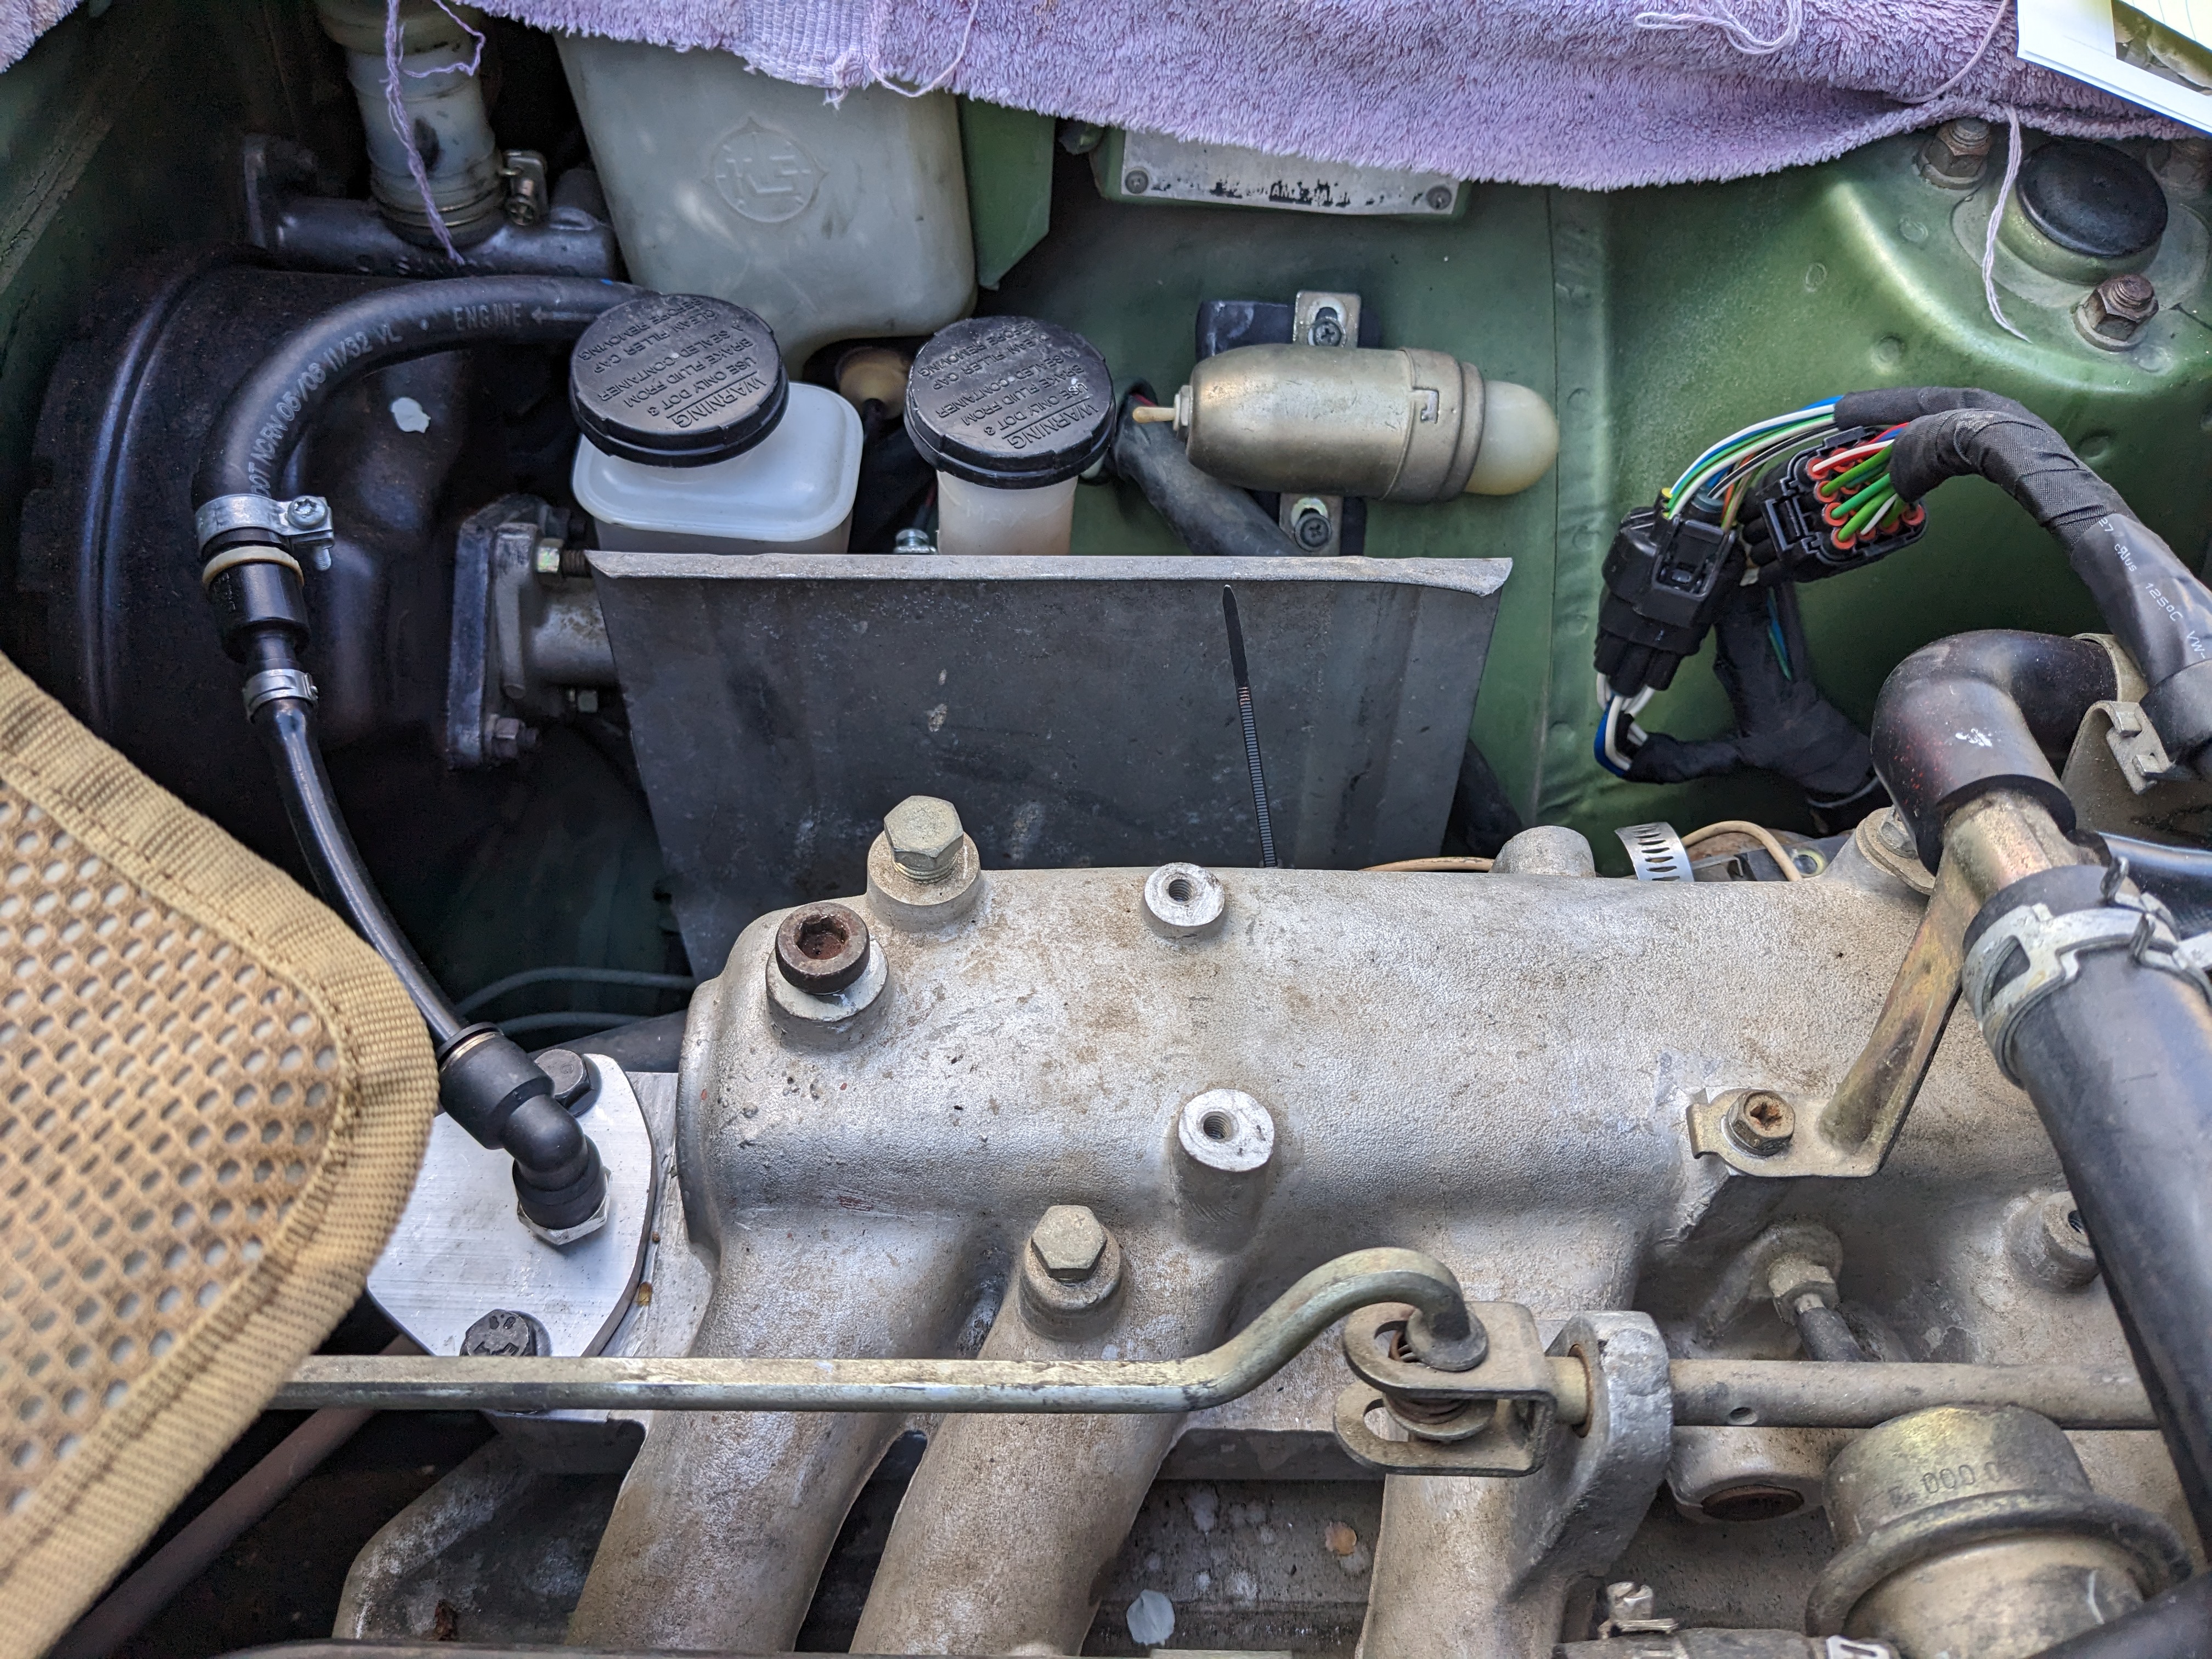
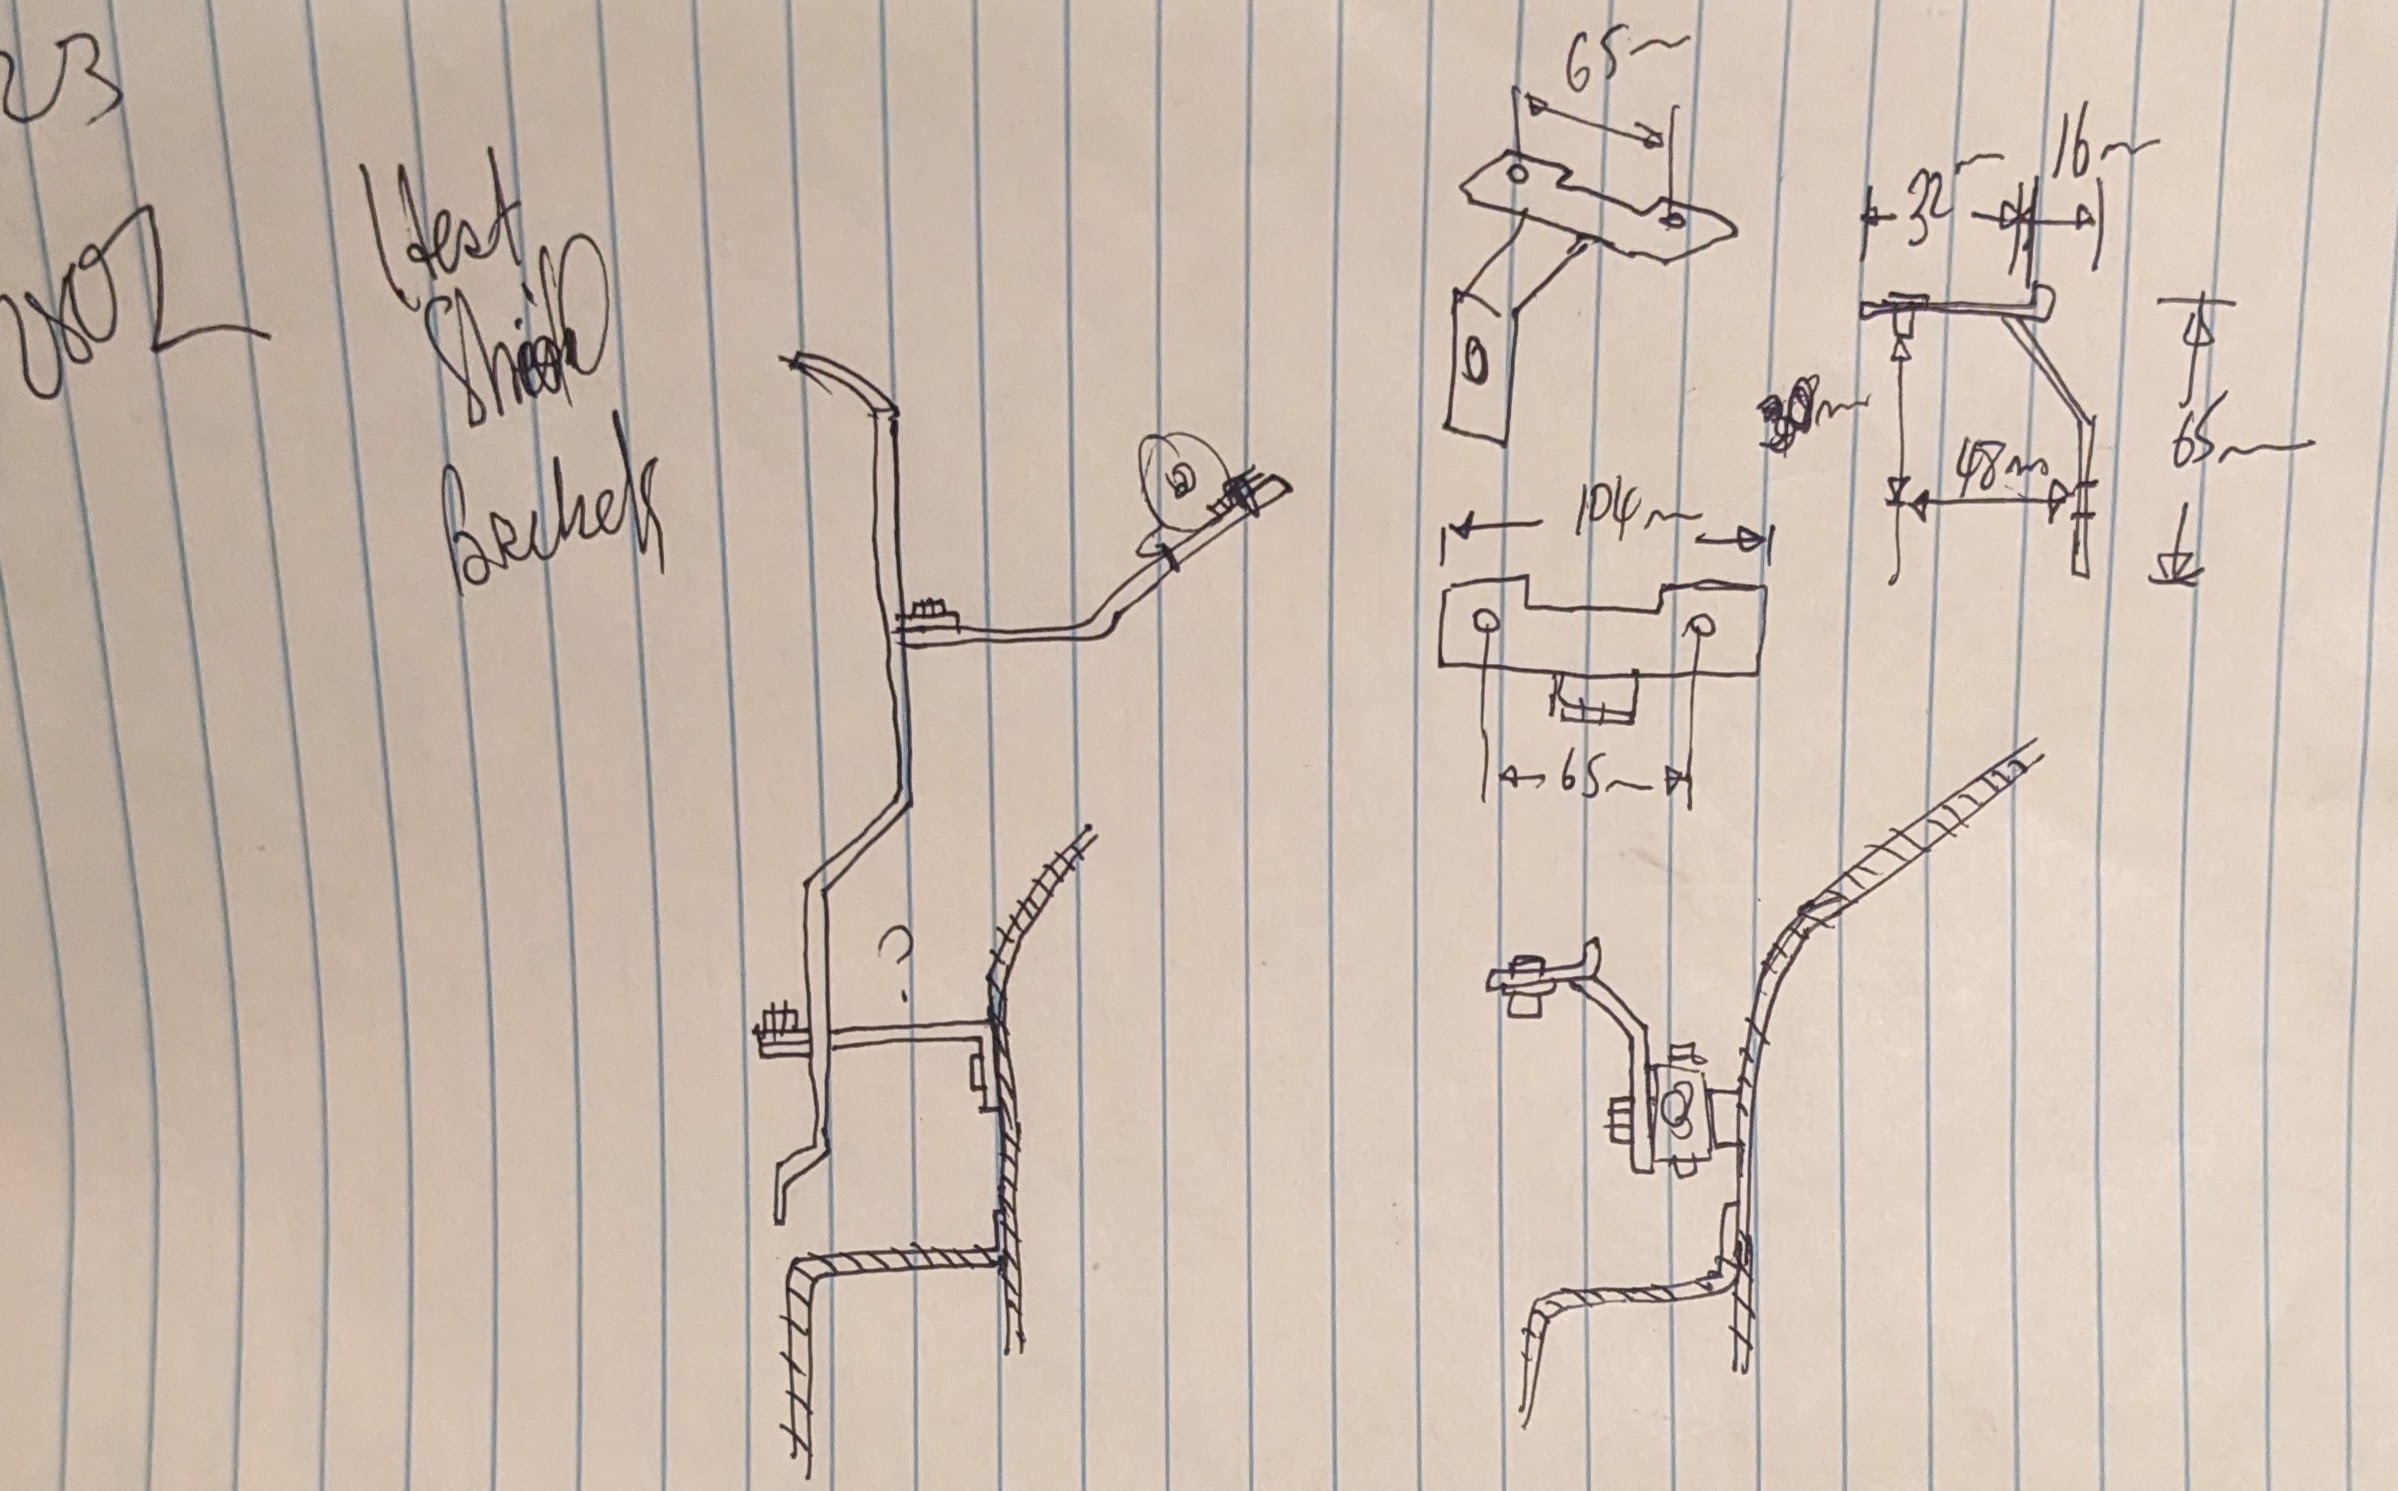
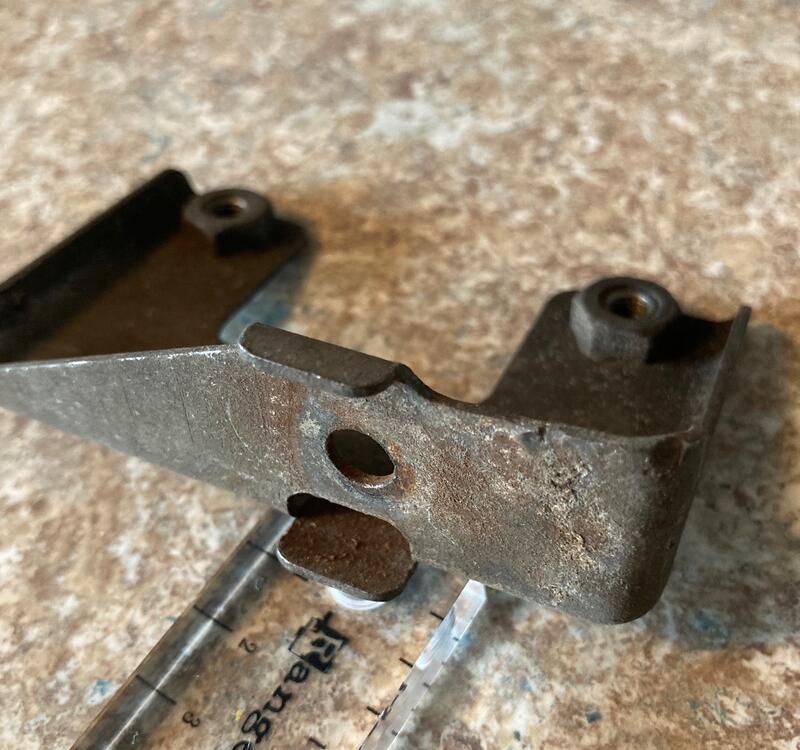
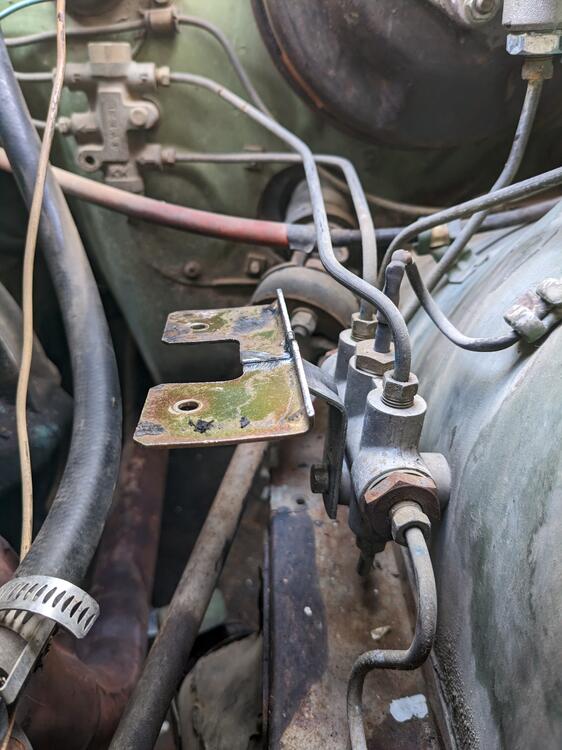
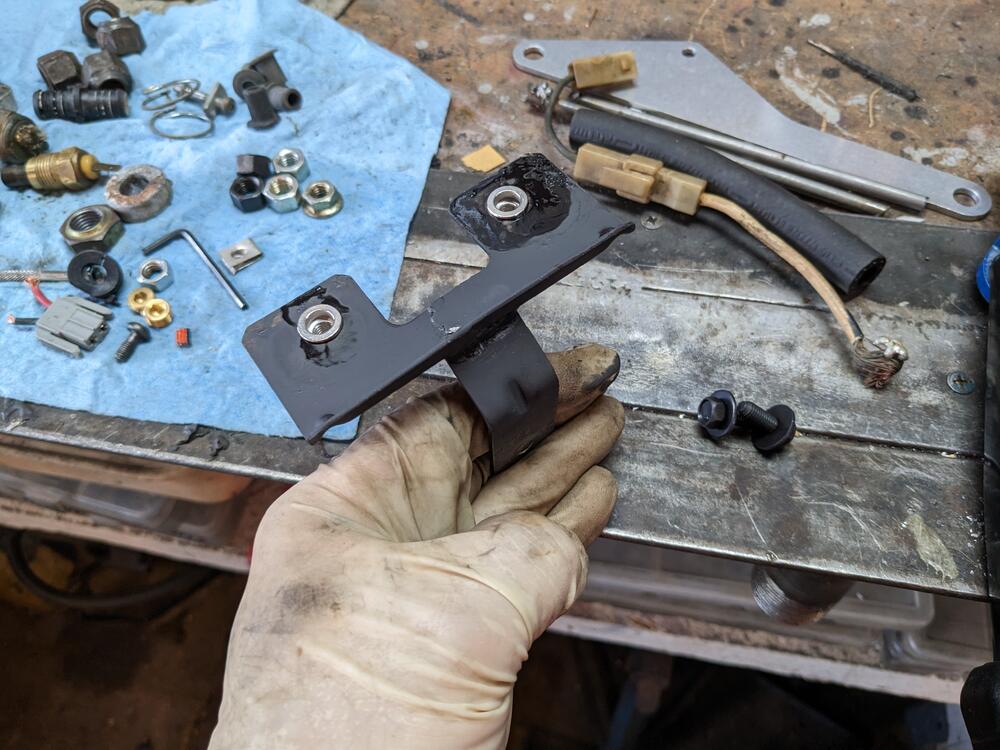
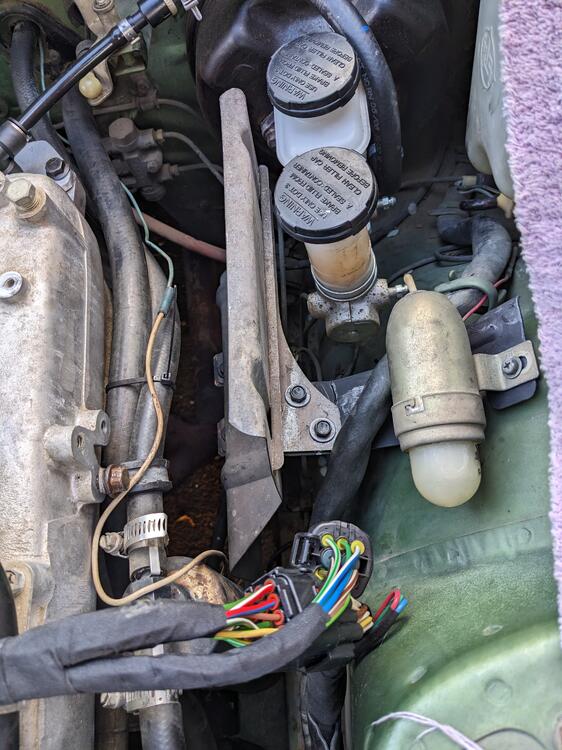
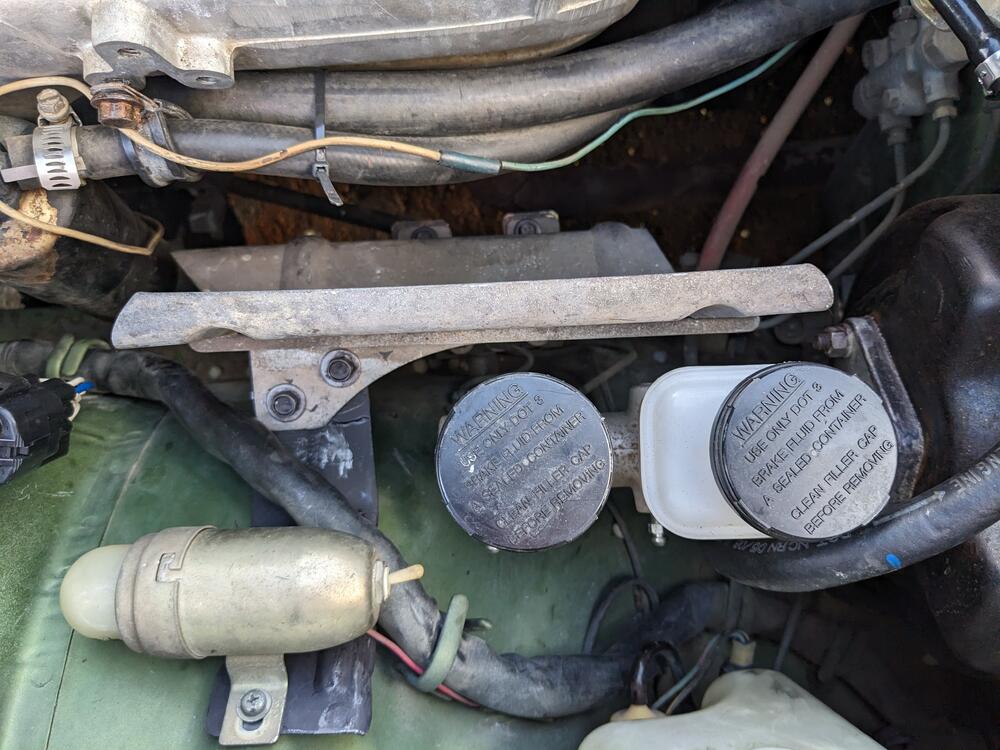
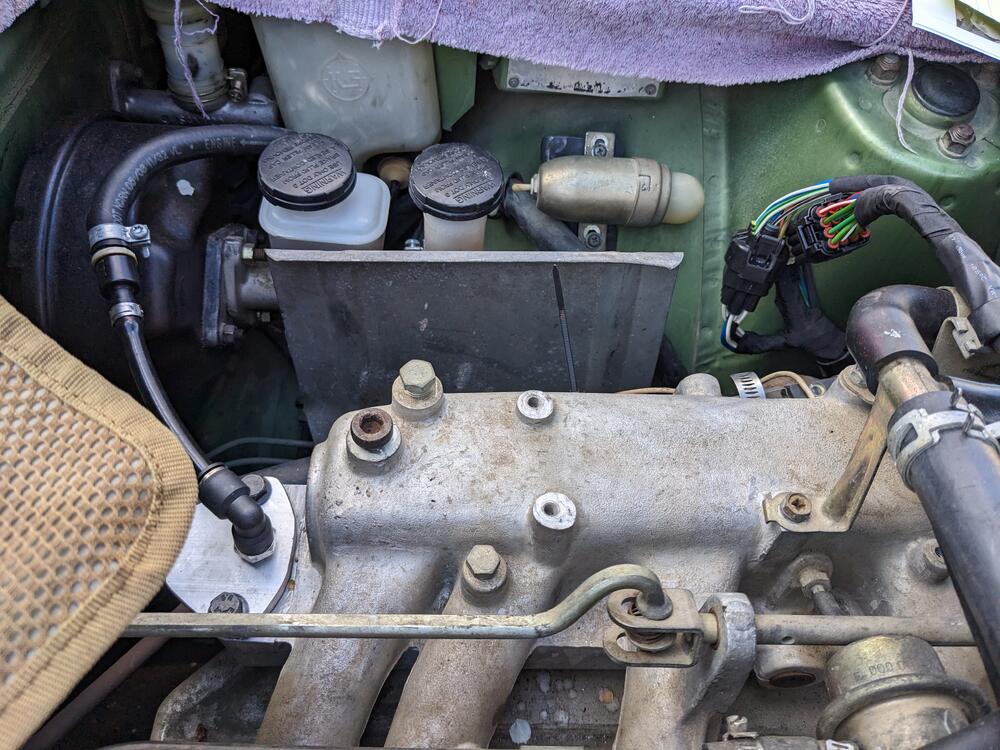
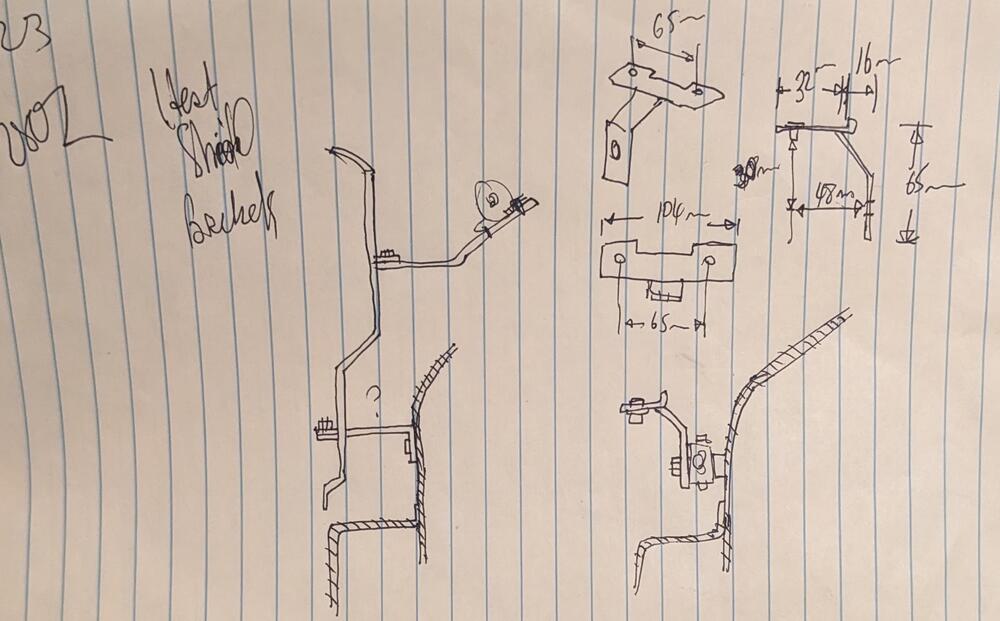
I made a bracket when I got home - I saw that the brake valve was in the location that made sense to mount to - confirmed by Gwri8's pics. I wish I had checked back here first & seen his & your pics above, that would have simplified things a little 😬 In any event, this is what I made tack welded a few pieces of cut up bracketry to test I only have a finger width between the back lower edge & the steering shaft, so I didn't want to move it any further rearward . Made the upper support bracket to have 2 mounts at the shield, and holes to allow the stock bay light bracket to stay where it belongs. Engine harness lays nicely over the bracket. I curved the left side to both make it more rigid, and to make sure there is no harsh edge for the harness to chafe on.


 1 point
 -
1 pointI feels soft and squishy like assembly lube. I'm thinking the p.o had the good sense to coat it real good before storage.1 point
-
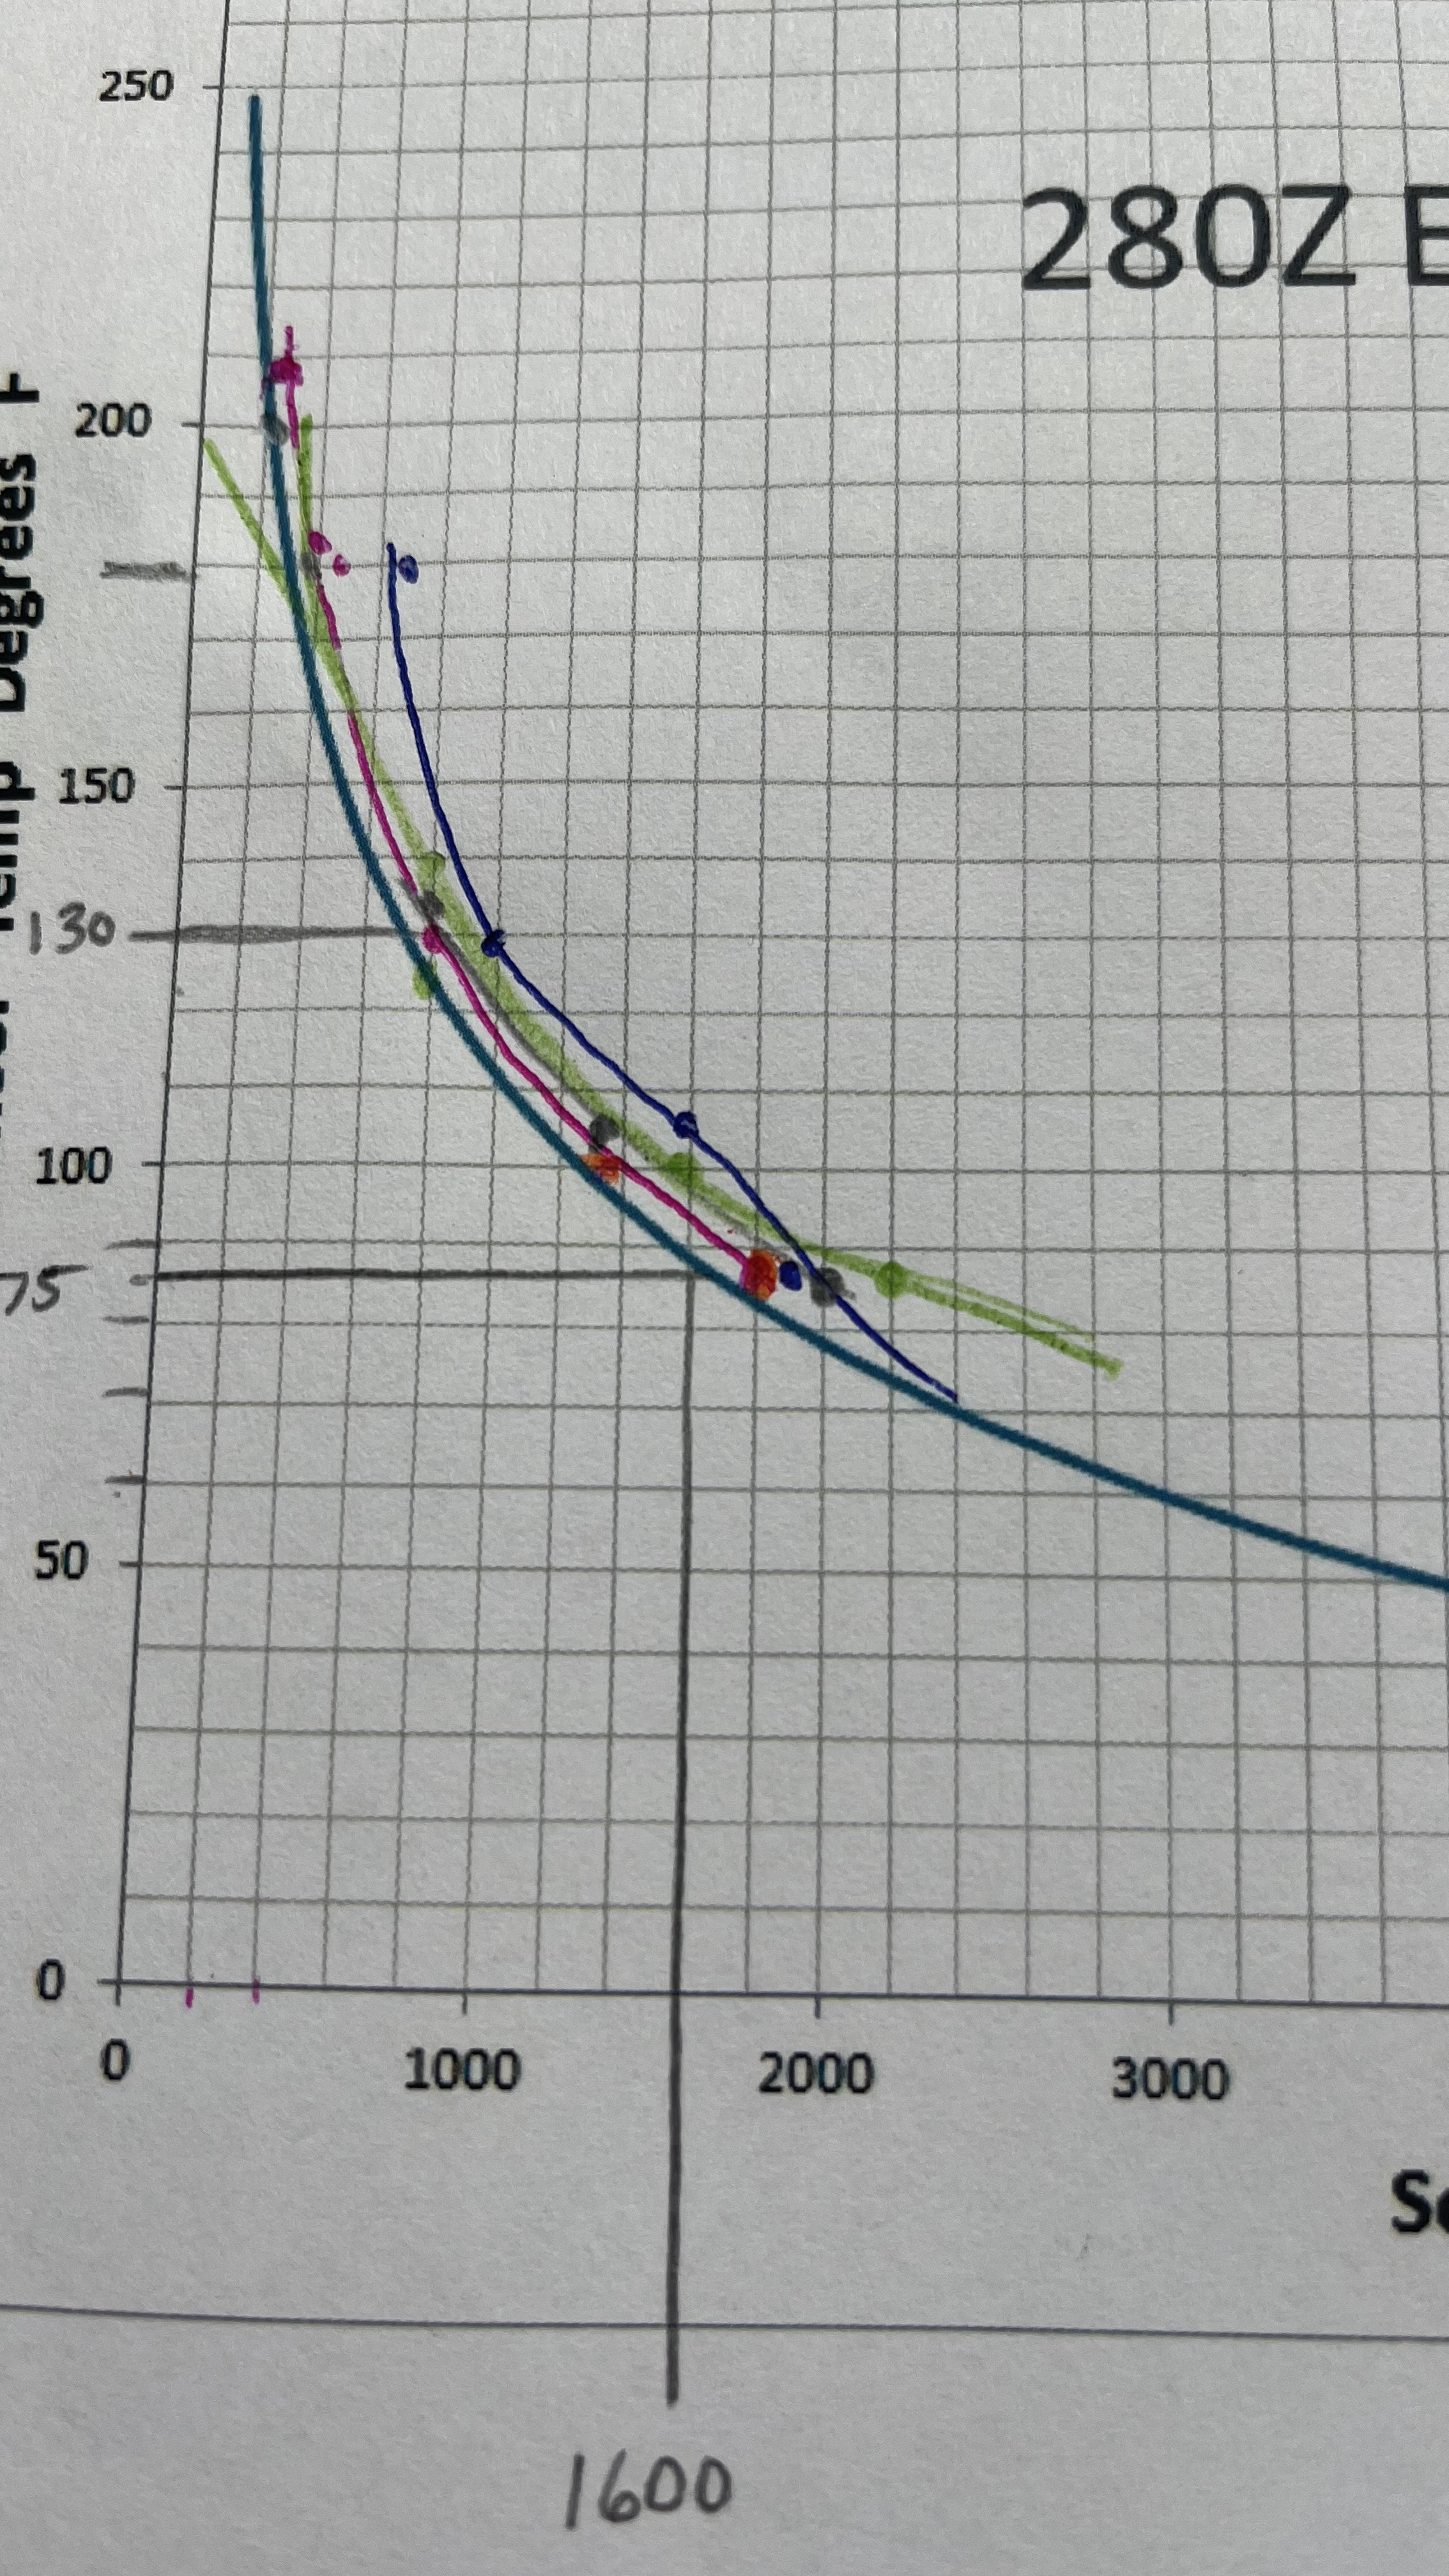
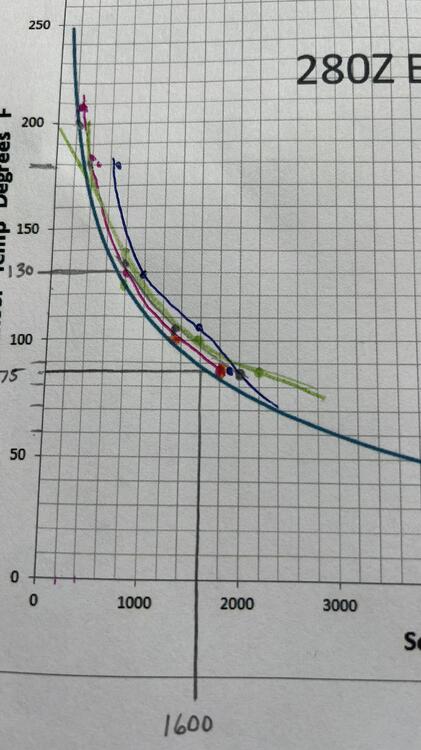
Thanks for the chart Bruce. I printed it out and plotted the 4 sensors I had including the one I pulled from the head. The one that came off the car had the worst/richest curve of all of them. So I decided to install one of the other 280z ones into the thermostat housing. That was a small disaster. First none of my extras fit im that housing. This is something that Nissan did that ticks me off. All the different lower thermostat housings and a myriad of odd and non consistent openings across the years thread size/type and opening sizes…..unbelievable! Well once I found out non of the holes worked and about a quart of radiator fluid on the garage floor I cracked one of the openings by over tightening it. Dummy! so I had to remove it and make more of a mess and roll into one of my back-up housings in the box of parts. Have two other and they both have different opening and threat types. Are you serious! I finally got a combo together and filled the extra holes with needless sensors. Got it all re-installed and put it all back together. Then cleaned the garage floor before my dogs drank the anti freeze. Job is not complete and ran out of time. Here is the temp sensors graph I made putting them in hot water on the stove. Blue was the one installed on the car.
 1 point
 -
I think that’s 3m 8001. We used to call that “Yellow Death” at the machine shop. A nightmare to remove!!1 point
-
1 point
-
I don't have a clear shot of the lower bracket but these should give you the idea.
 1 point
 -
1 point
-
Looks like a good plan. I did something similar, but used a 14"x18" condenser and a Sanden copy compressor on the driver's side. You sure like to use Volvo parts!1 point
-
1 point
-
1 pointsmells of oil to me. I just need to find out where its coming from....bottom or top. Hoping the top.1 point
-
1 pointYep, and it is getting harder and harder to find people with integrity. I have restored several cars over the years, and the last couple of years has been the hardest ever to get work and parts. I am thinking this is my last restoration.........until this pain is forgotten and another project drops into my lap!! 🤣🤣 I looked at the valve train and didnt see anything but it may be worthy to look again more closely. Felpro valve cover gaskets suck. I am running it with nothing on the valve cover breather port and no smoke is coming from there. I did remove the oil cap while it was running to make sure I could seeing oil spalshing around and didnt note any smoke. Could it possibly be water from the manifold heater getting into the intake? I bought new carb insulators to make sure everything had fresh gaskets. I assume the new OEM insulators have gaskets on them?? They appeared to have a gasket, and it isnt leaking water. The carbs are the style that have water jackets in them.1 point
-
1 pointBe careful when you doubt the Captain. I looked at all 3 I had lying around and found no gaskets, but once I opened the parts manual website... But not surprisingly...


 1 point
 -
1 point
-
1 point
-
1 pointThe only time I experienced ATF being burned off by the carbs is when I overfilled it. Eventually the excess gets burned off. I would try running the carbs a bit leaner or maybe popping off the tops and re-seating the needles and see if anything changes.1 point
-
Hopefully I will be OK with the seal depth change. That is SOP on Volvos, which can easily see way past 250K miles in service.1 point
-
1 pointEiji will have everything you need to build the perfect head. If you need any help, feel free to PM me. We had him over this weekend for number 50.

 1 point
 -
1 point"Home is where the head is" I'm going to take it to my job and disassemble it when I can. Bag and tag all the parts then bead blast it. In the meantime I can read up on the mod to figure out what to do next. Hopefully I can use this one instead of the 53 year old E31 I was planning on putting that cam kit on. Most likely use up all the parts I've collected to make a higher compression motor then drop it in the 280. I'm not touching that 240 unless I have to, fenders already have elbow dents all over the tops. @Jeff G 78 I found this for less than shipping that P79! $475 less than the ZX motor. Does this sound about right @Diseazd? - shaving the head .080" - installing 1975-78 L28 valves which have .080" longer stems - shimming up the cam towers .080" - shimming up the spring bases by .0801 point