Leaderboard


.JPG.cfcada9cf1c1b502df3f5f2f2ca3ff36.JPG)


Popular Content
Showing content with the highest reputation on 07/10/2022 in all areas
-
Thanks for all the replies. Even though I lubricated this piece I had to remove it as it will still the cause. Fully cleaned and lubricated and everything is working great now
 3 points
 -
Don't run EFI. Get yourself a set of SU's. The EFI will make for a very slow race car and will not like any engine mods. Since you are in GA, contact a friend of mine that lives near Atlanta. He has endurance raced Datsuns and has a huge stash of parts. He has since given up on Datsuns and switched to BMW's since they simply are no longer competitive in ChampCar or WRL. LeMons is possible with a Z, but you will still be slow. PM me for his contact info. My biggest issue with running a Z is that you will have more money in it than most other cars and if it gets wrecked, you will not find a cheap shell to rebuild it. I built mine when they were cheap, but after a decade or so, the Z prices had gone through the roof and it was very risky to race it. If you start with a car you already own, plan on spending at least $8k to get it on the track. I had way more than that in mine and I had 30 years worth of Datsun hoarding before I started my build. My car was done as cheap as possible!3 points
-
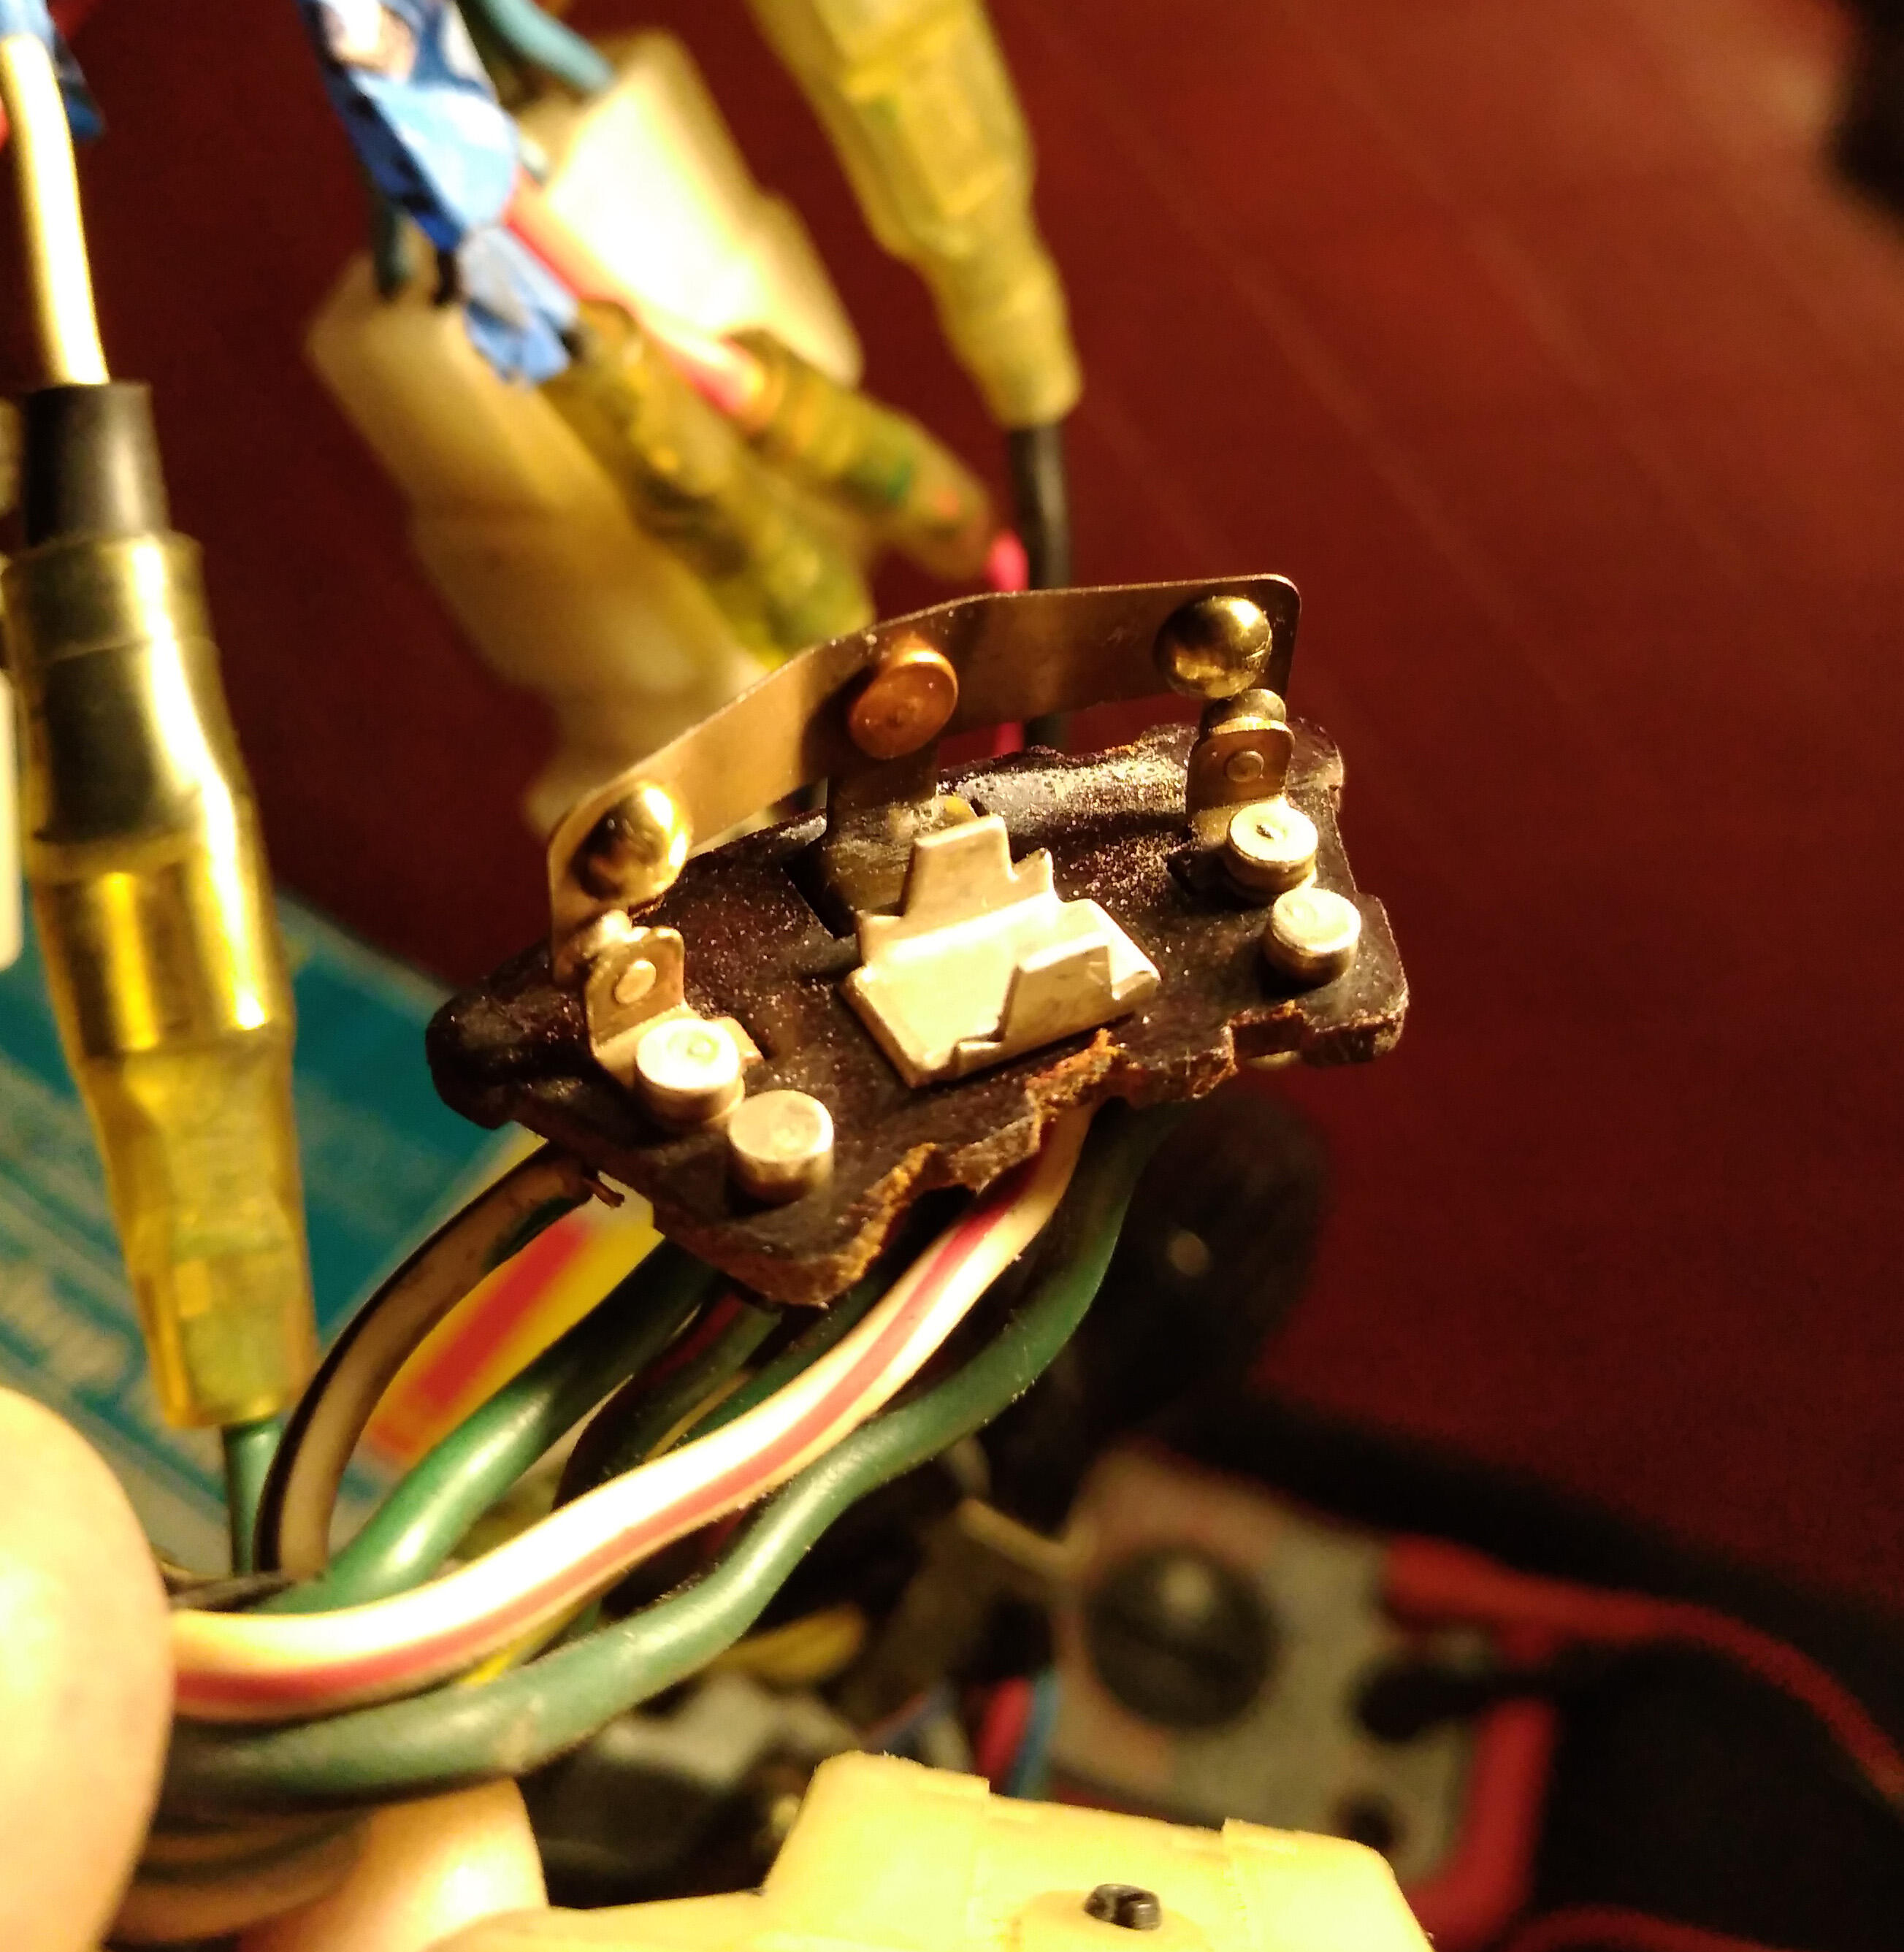
Not surprised about the rocker. I even mentioned having to bend it in my description of tearing down and reassembling the switch: https://fiddlingwithzcars.wordpress.com/2012/12/04/turn-signal-repair/. It's toward the end of the post. Now you have a great understanding of how the switch works. Wait until you need to dig into the headlight switch. 🙂2 points
-
2 pointsIf the engine has sat for 20 years it's possible that the cylinders have dried out. I had that happen on an old 1963 Bonneville. We cranked and cranked and even tried towing it to jump start it (automatic, you have to hit at least 40 mph, apparently, to get the engine to turn. It was fun.) but it wouldn't start until a farmer drive by on his tractor and said "squirt some oil in the cylinders". Fired right up. Squirt some oil in to each cylinder to help the rings seal, to generate enough compression to get it to fire. I'd probably do that anyway just to be sure that the cylinders have good lubrication prior to the first start in a long time. Might save some rings and cylinder wear.2 points
-
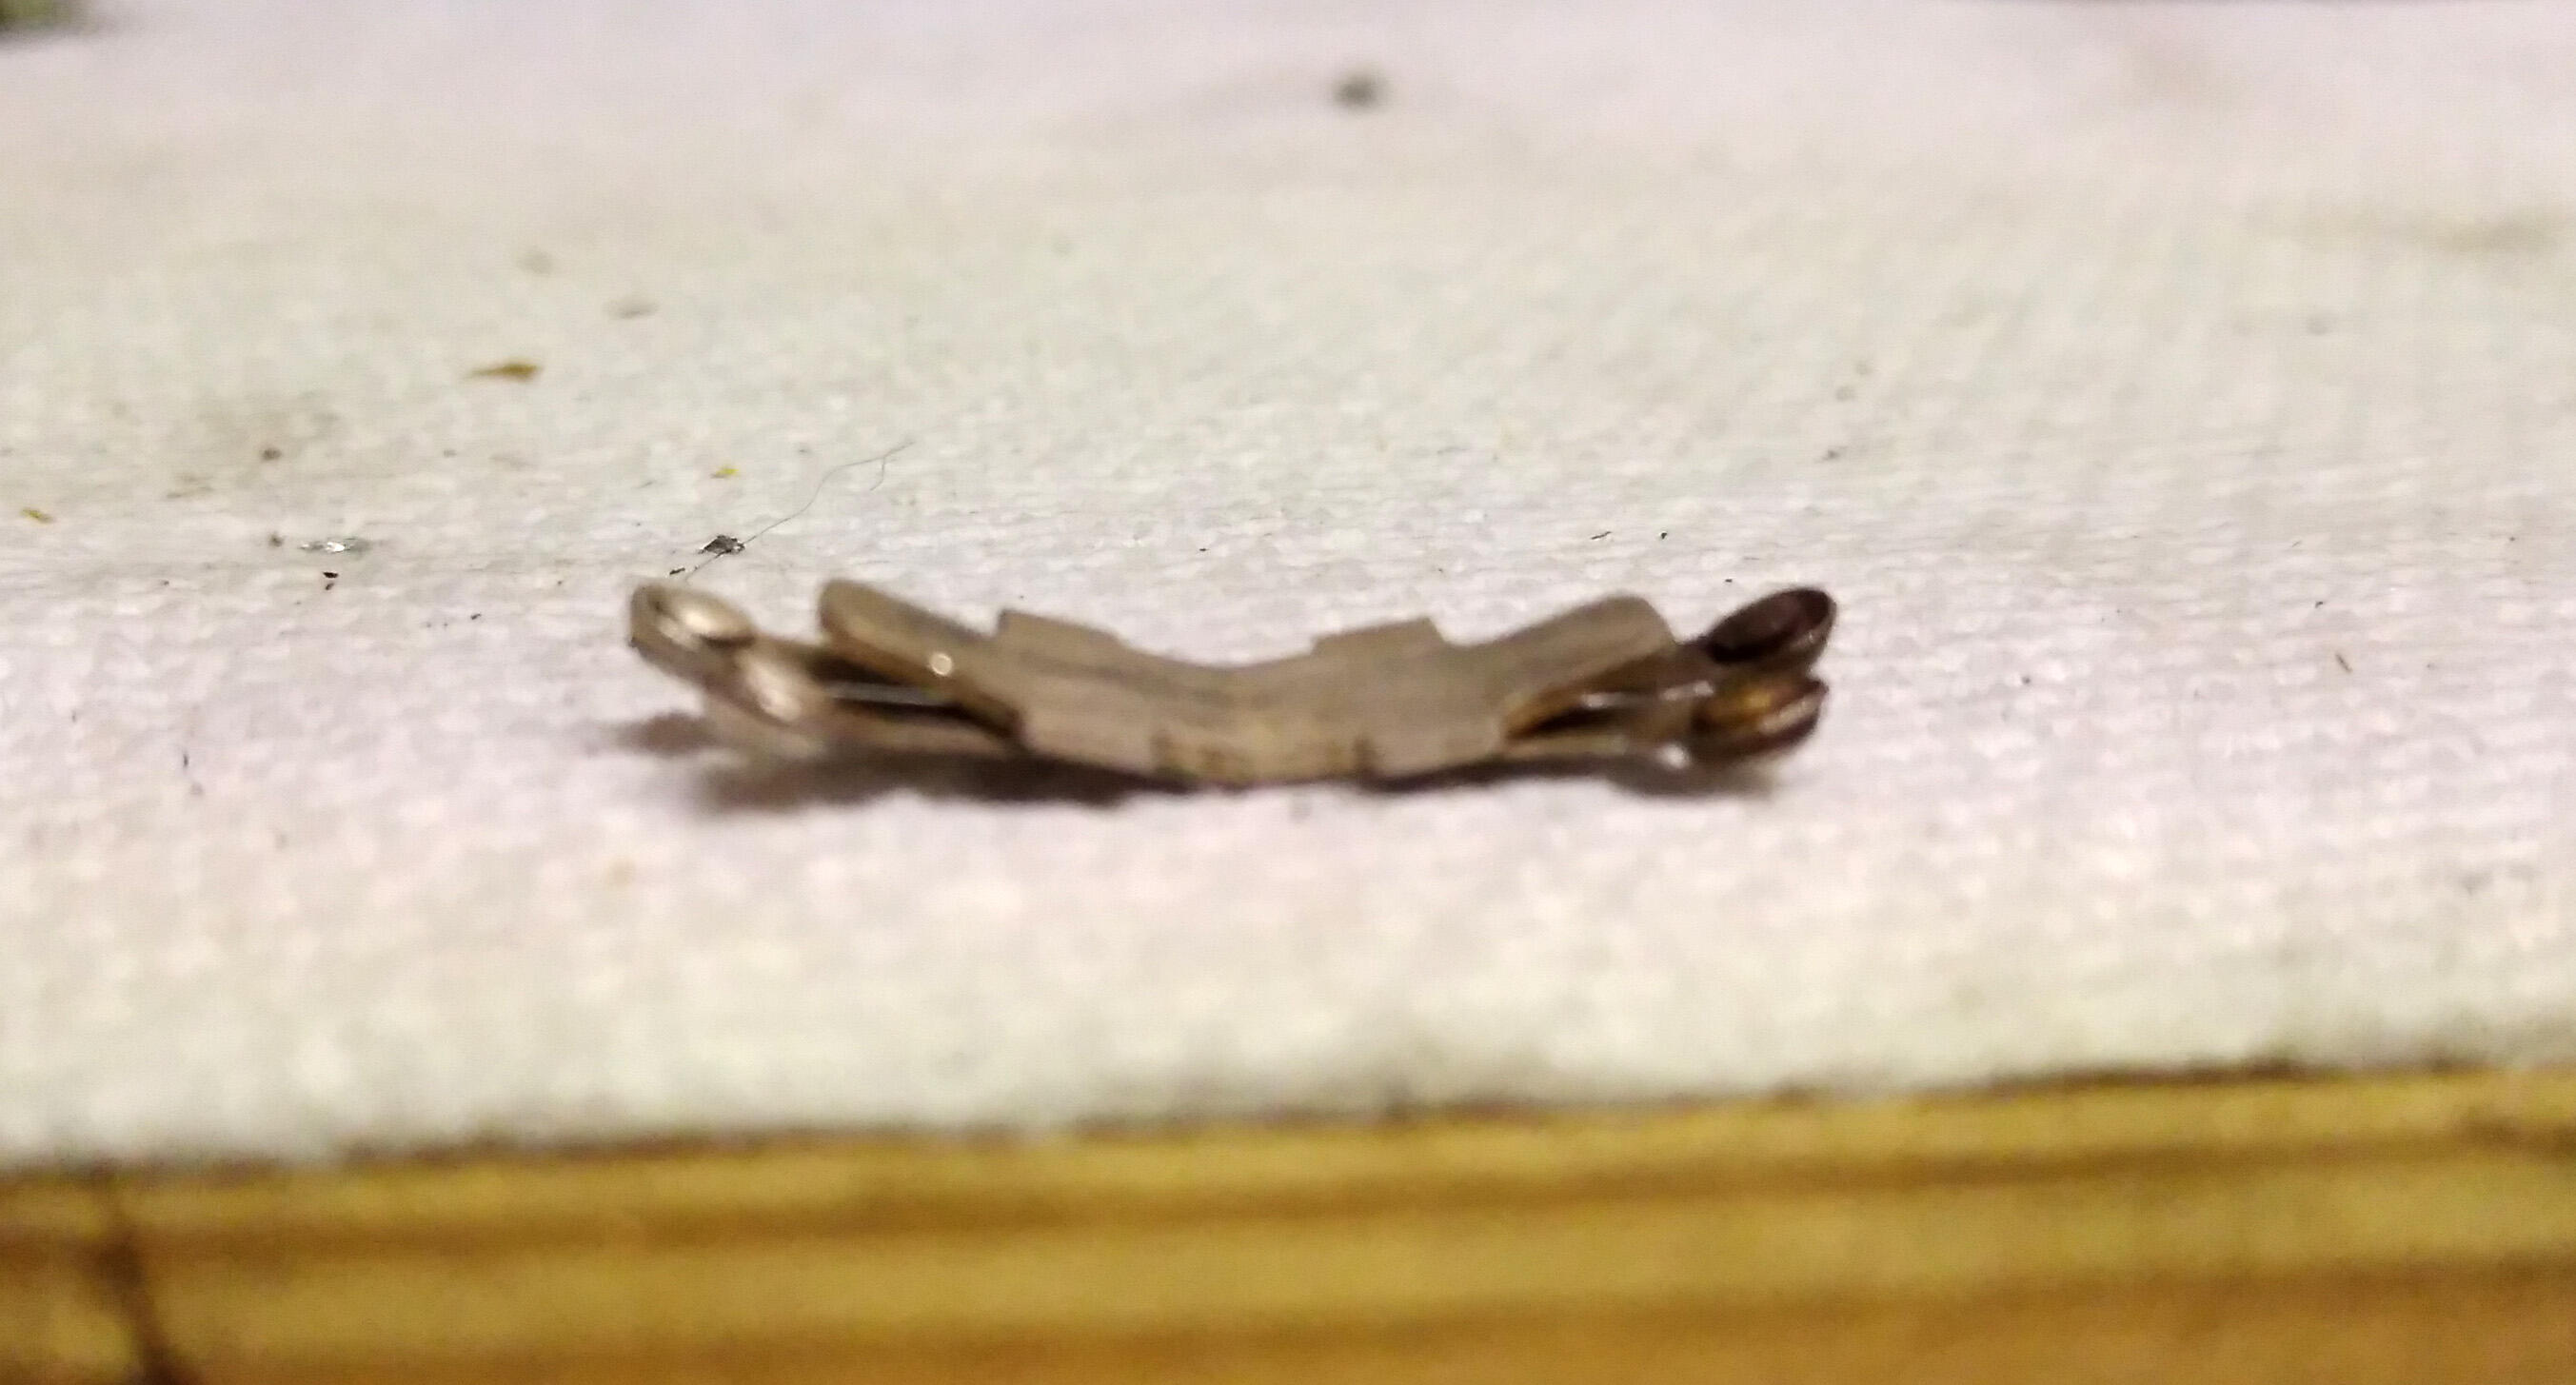
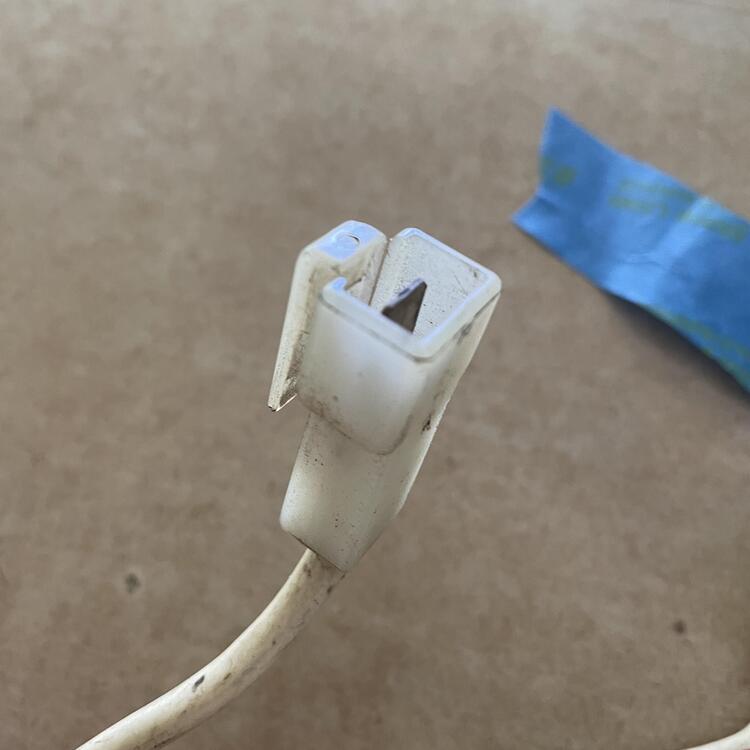
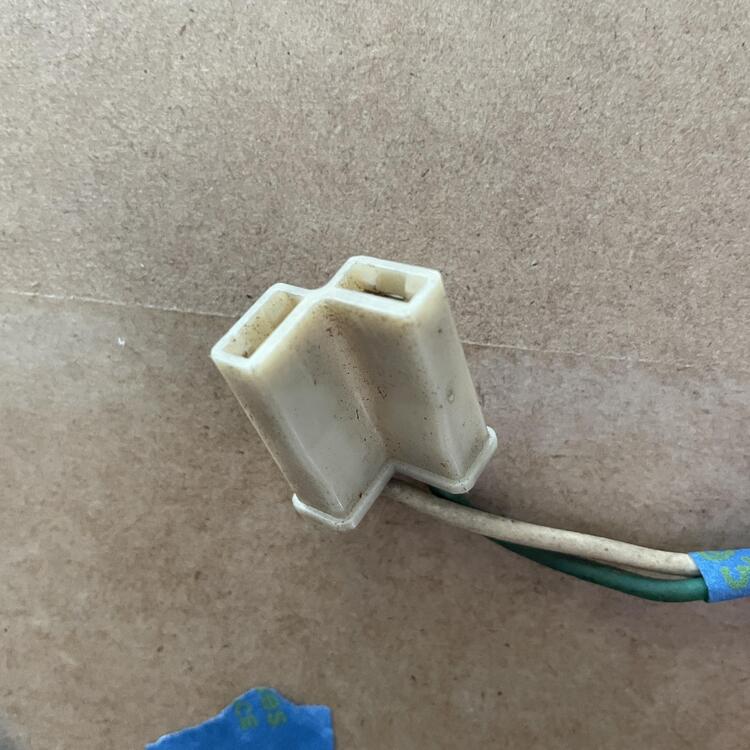
FIXED! Finally. After several months and many hours, everything works. Headlights, parking lights, hazards, brake lights and turn signals. The last two to be resolved were the brake lights and turn signals. To diagnose, I took the switch completely apart (for about the 10th time), but this time, I plugged the raw switch elements into the harness, like this: (that poor circuit board) With the rocker absent, the brake lights came on perfectly. I played around with the angle of the rocker tabs and moved it back and forth with my thumb until everything worked. Conclusion: The rocker tabs were FAR too "flat." They need to be bent upward at a fairly decent angle, like so: Reassembled everything, and it all works. Thanks to all for your help and good advice. Special shout out to Steve for his wiring diagram and input. * * * * * * To summarize, here were my issues and here how they were resolved: Uncertain about steering column wire connections: Referenced pics on the internet and consulted wiring diagrams. No parking lights, and 20A fuse was popping every time I tried to turn them on: Front left parking light wired backward. No brake lights or turn signals: A combination of cleaning out the TS and hazard switch contacts, re-soldering loose wires and bending the rocker tabs at the correct angles. Thanks again. On to the next issue, lol.

 2 points
 -
1 pointI’ll have a mechanic friend take a look this upcoming weekend. we will be putting together the engine, trans, and clutch and installing on the 16th. what radiators do y’all recommend?
 1 point
 -
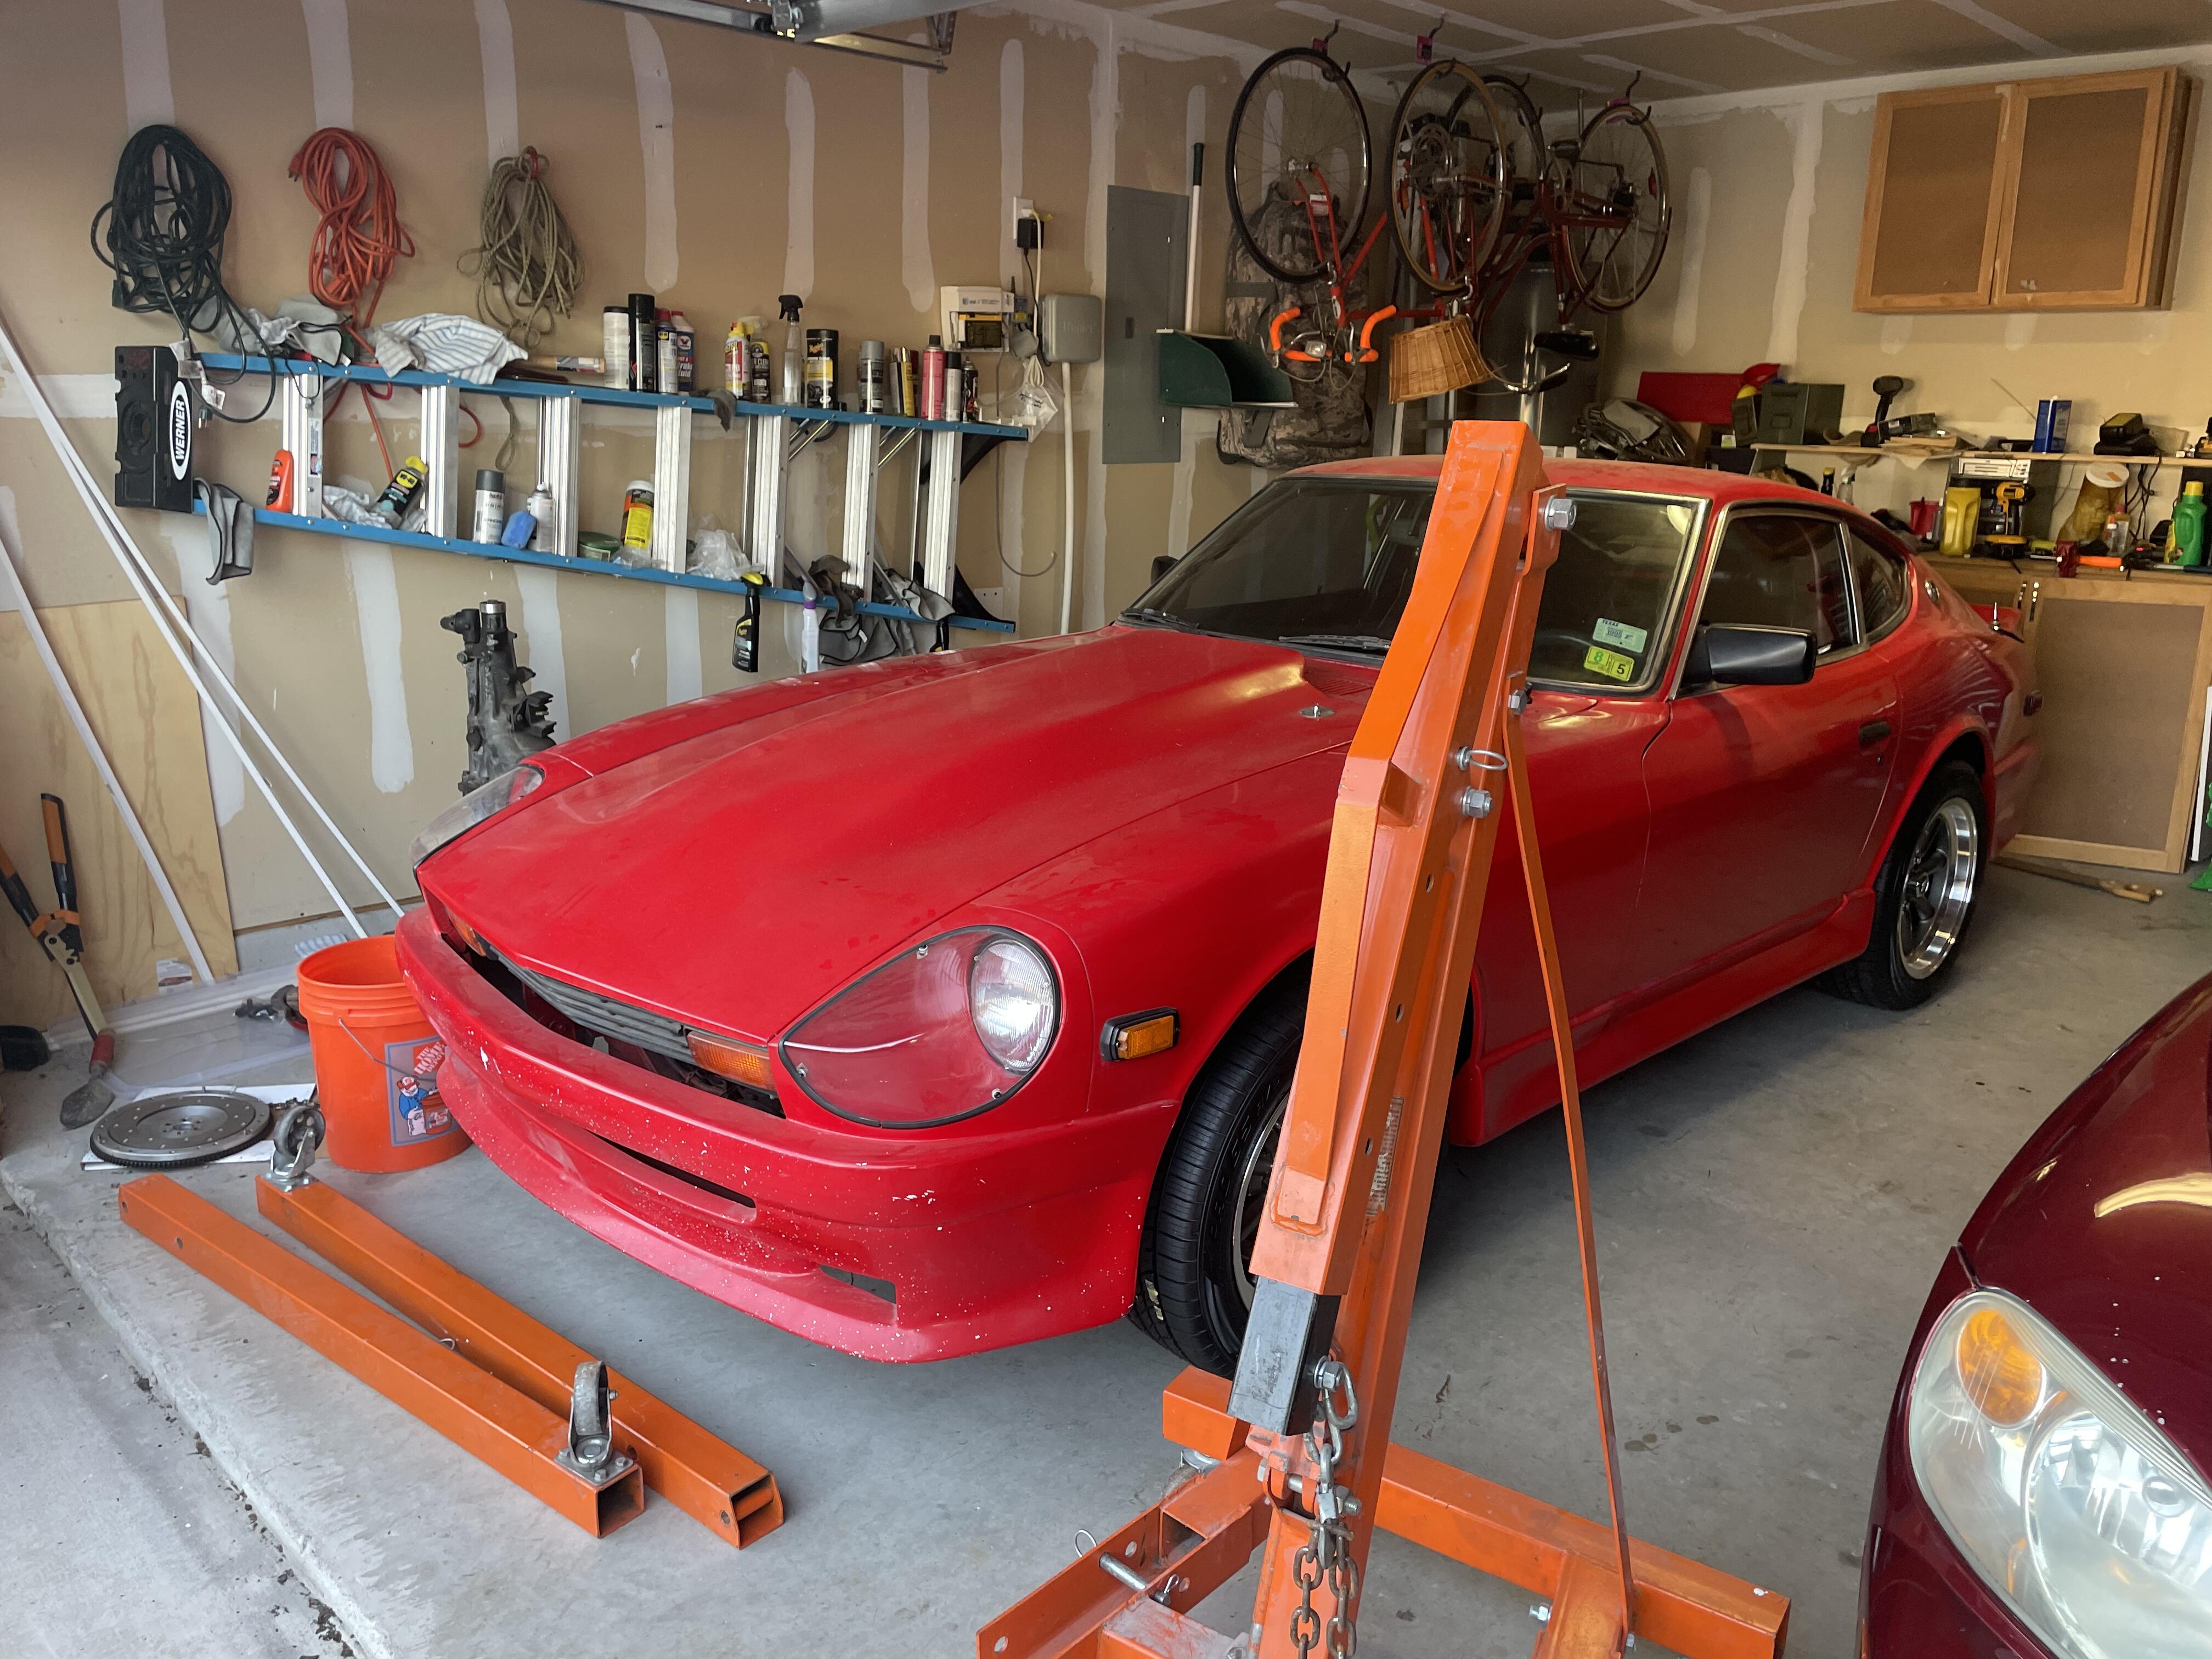
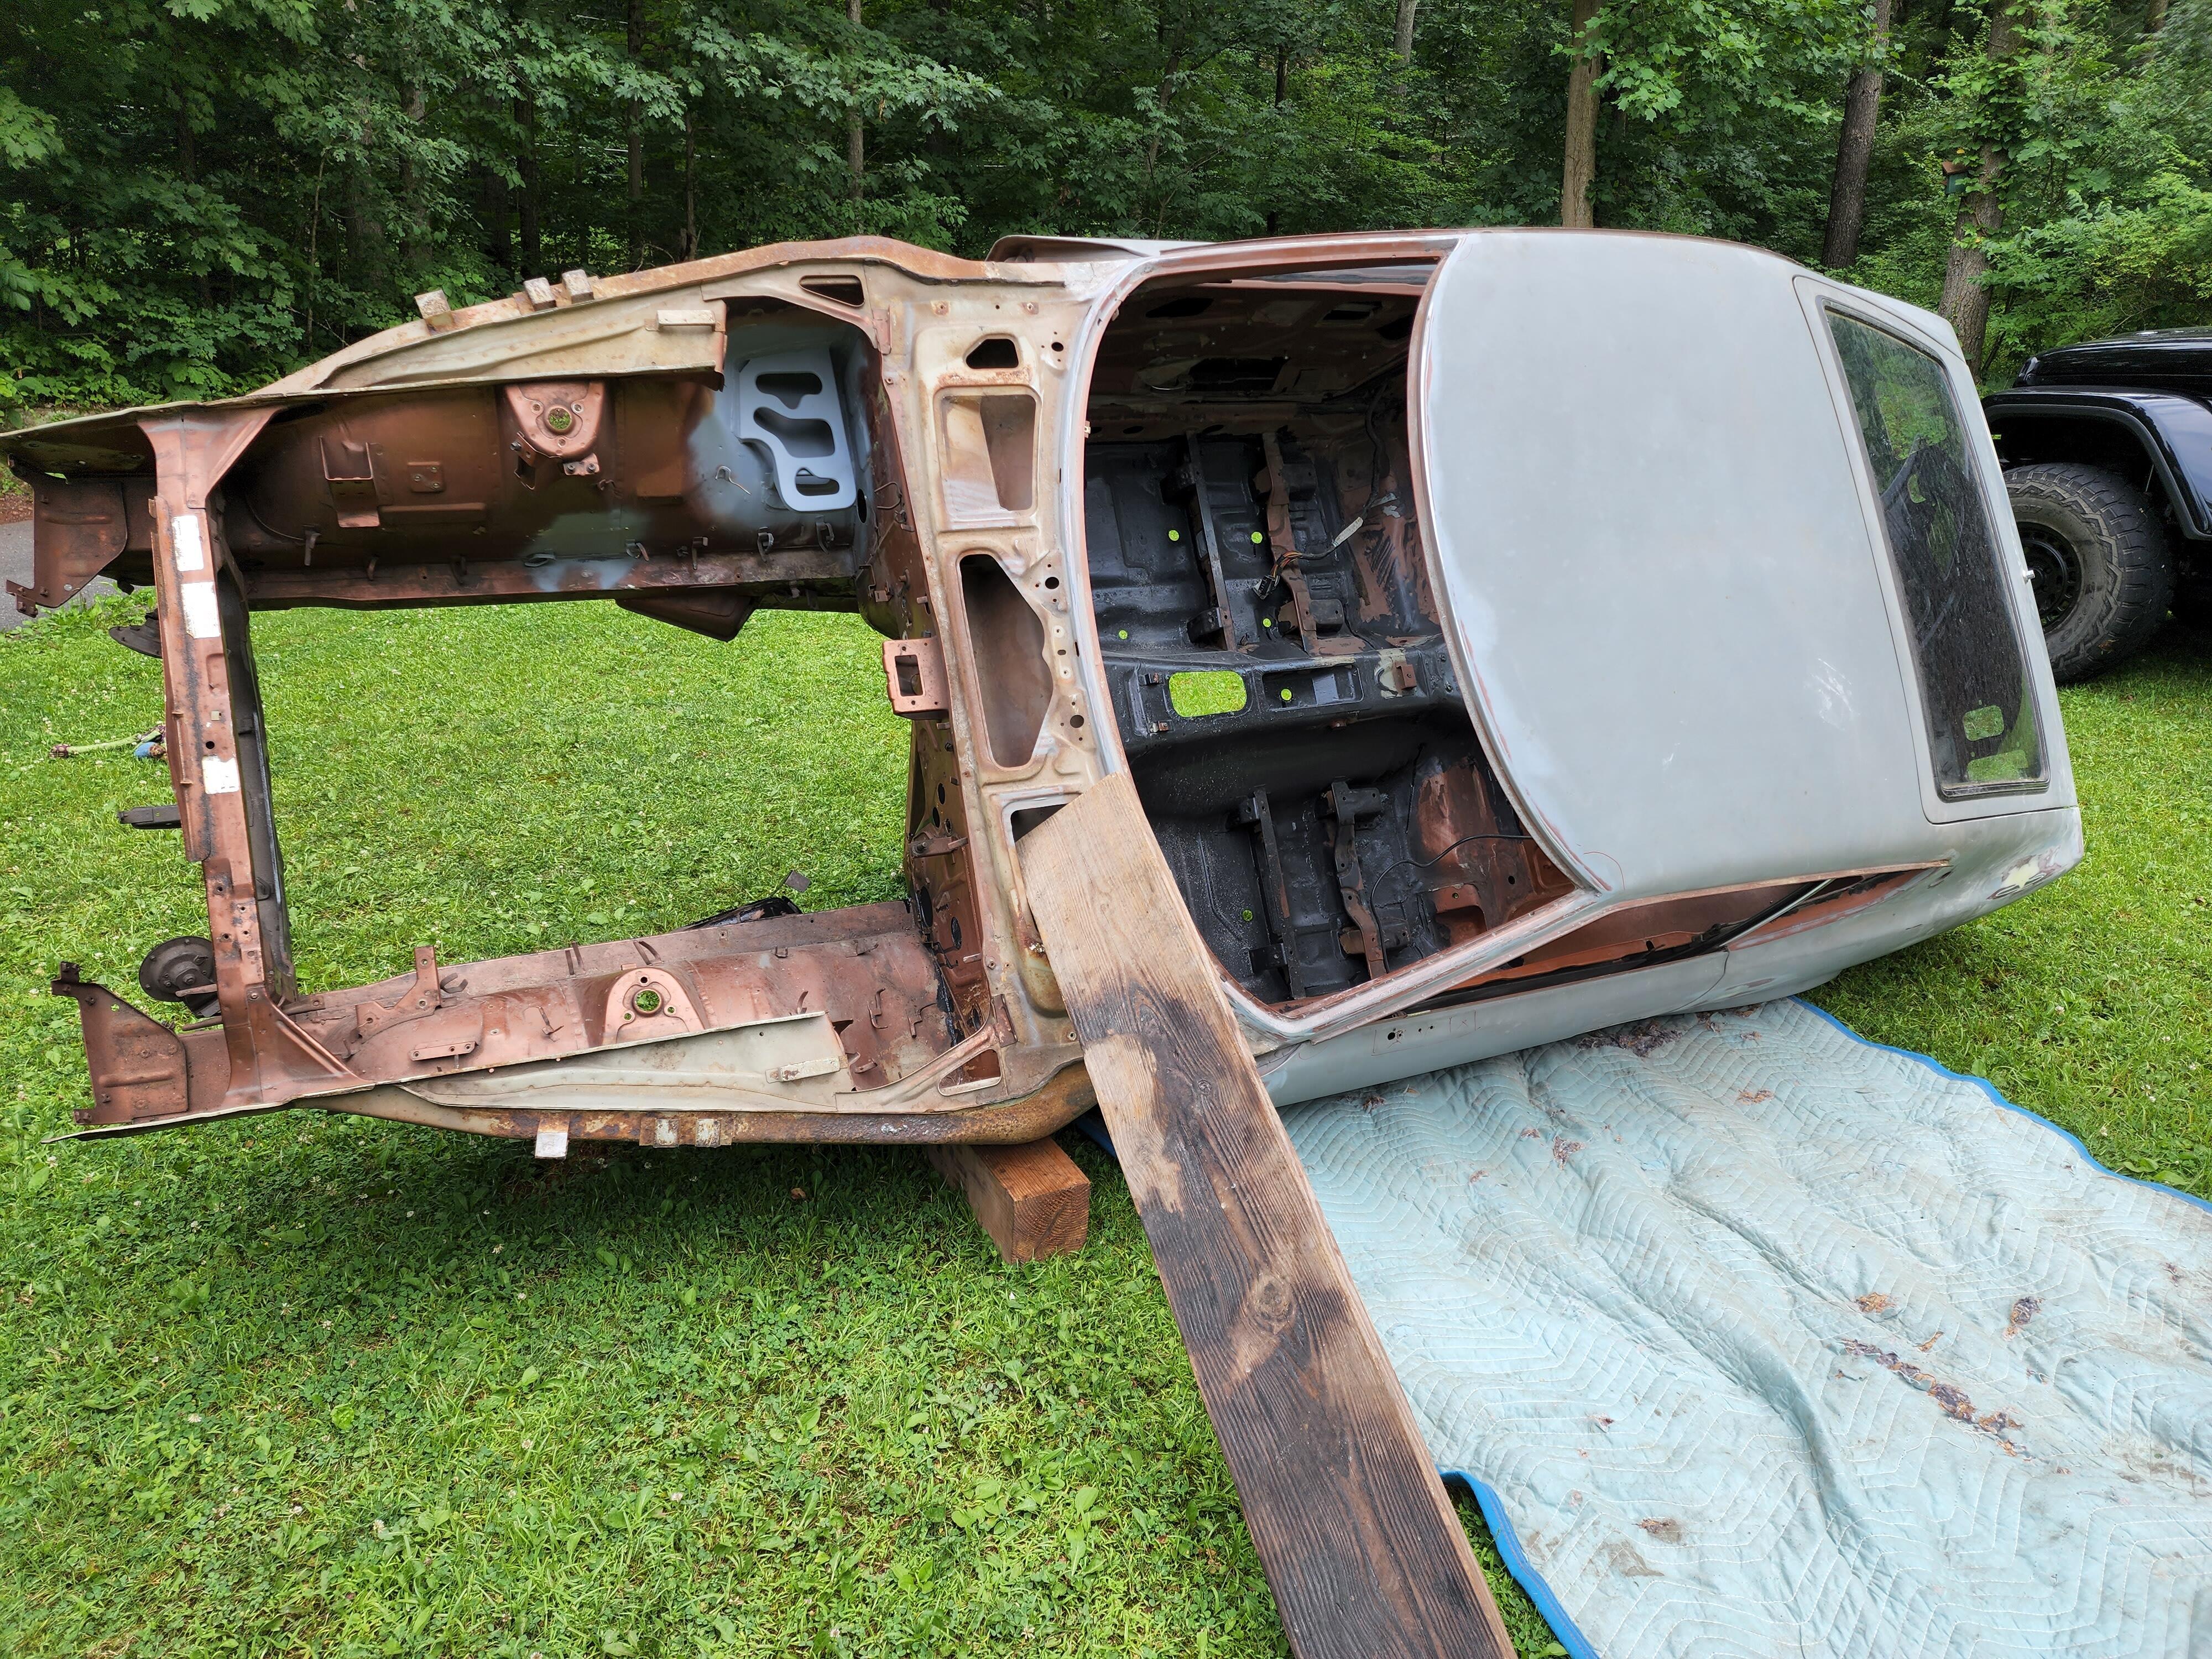
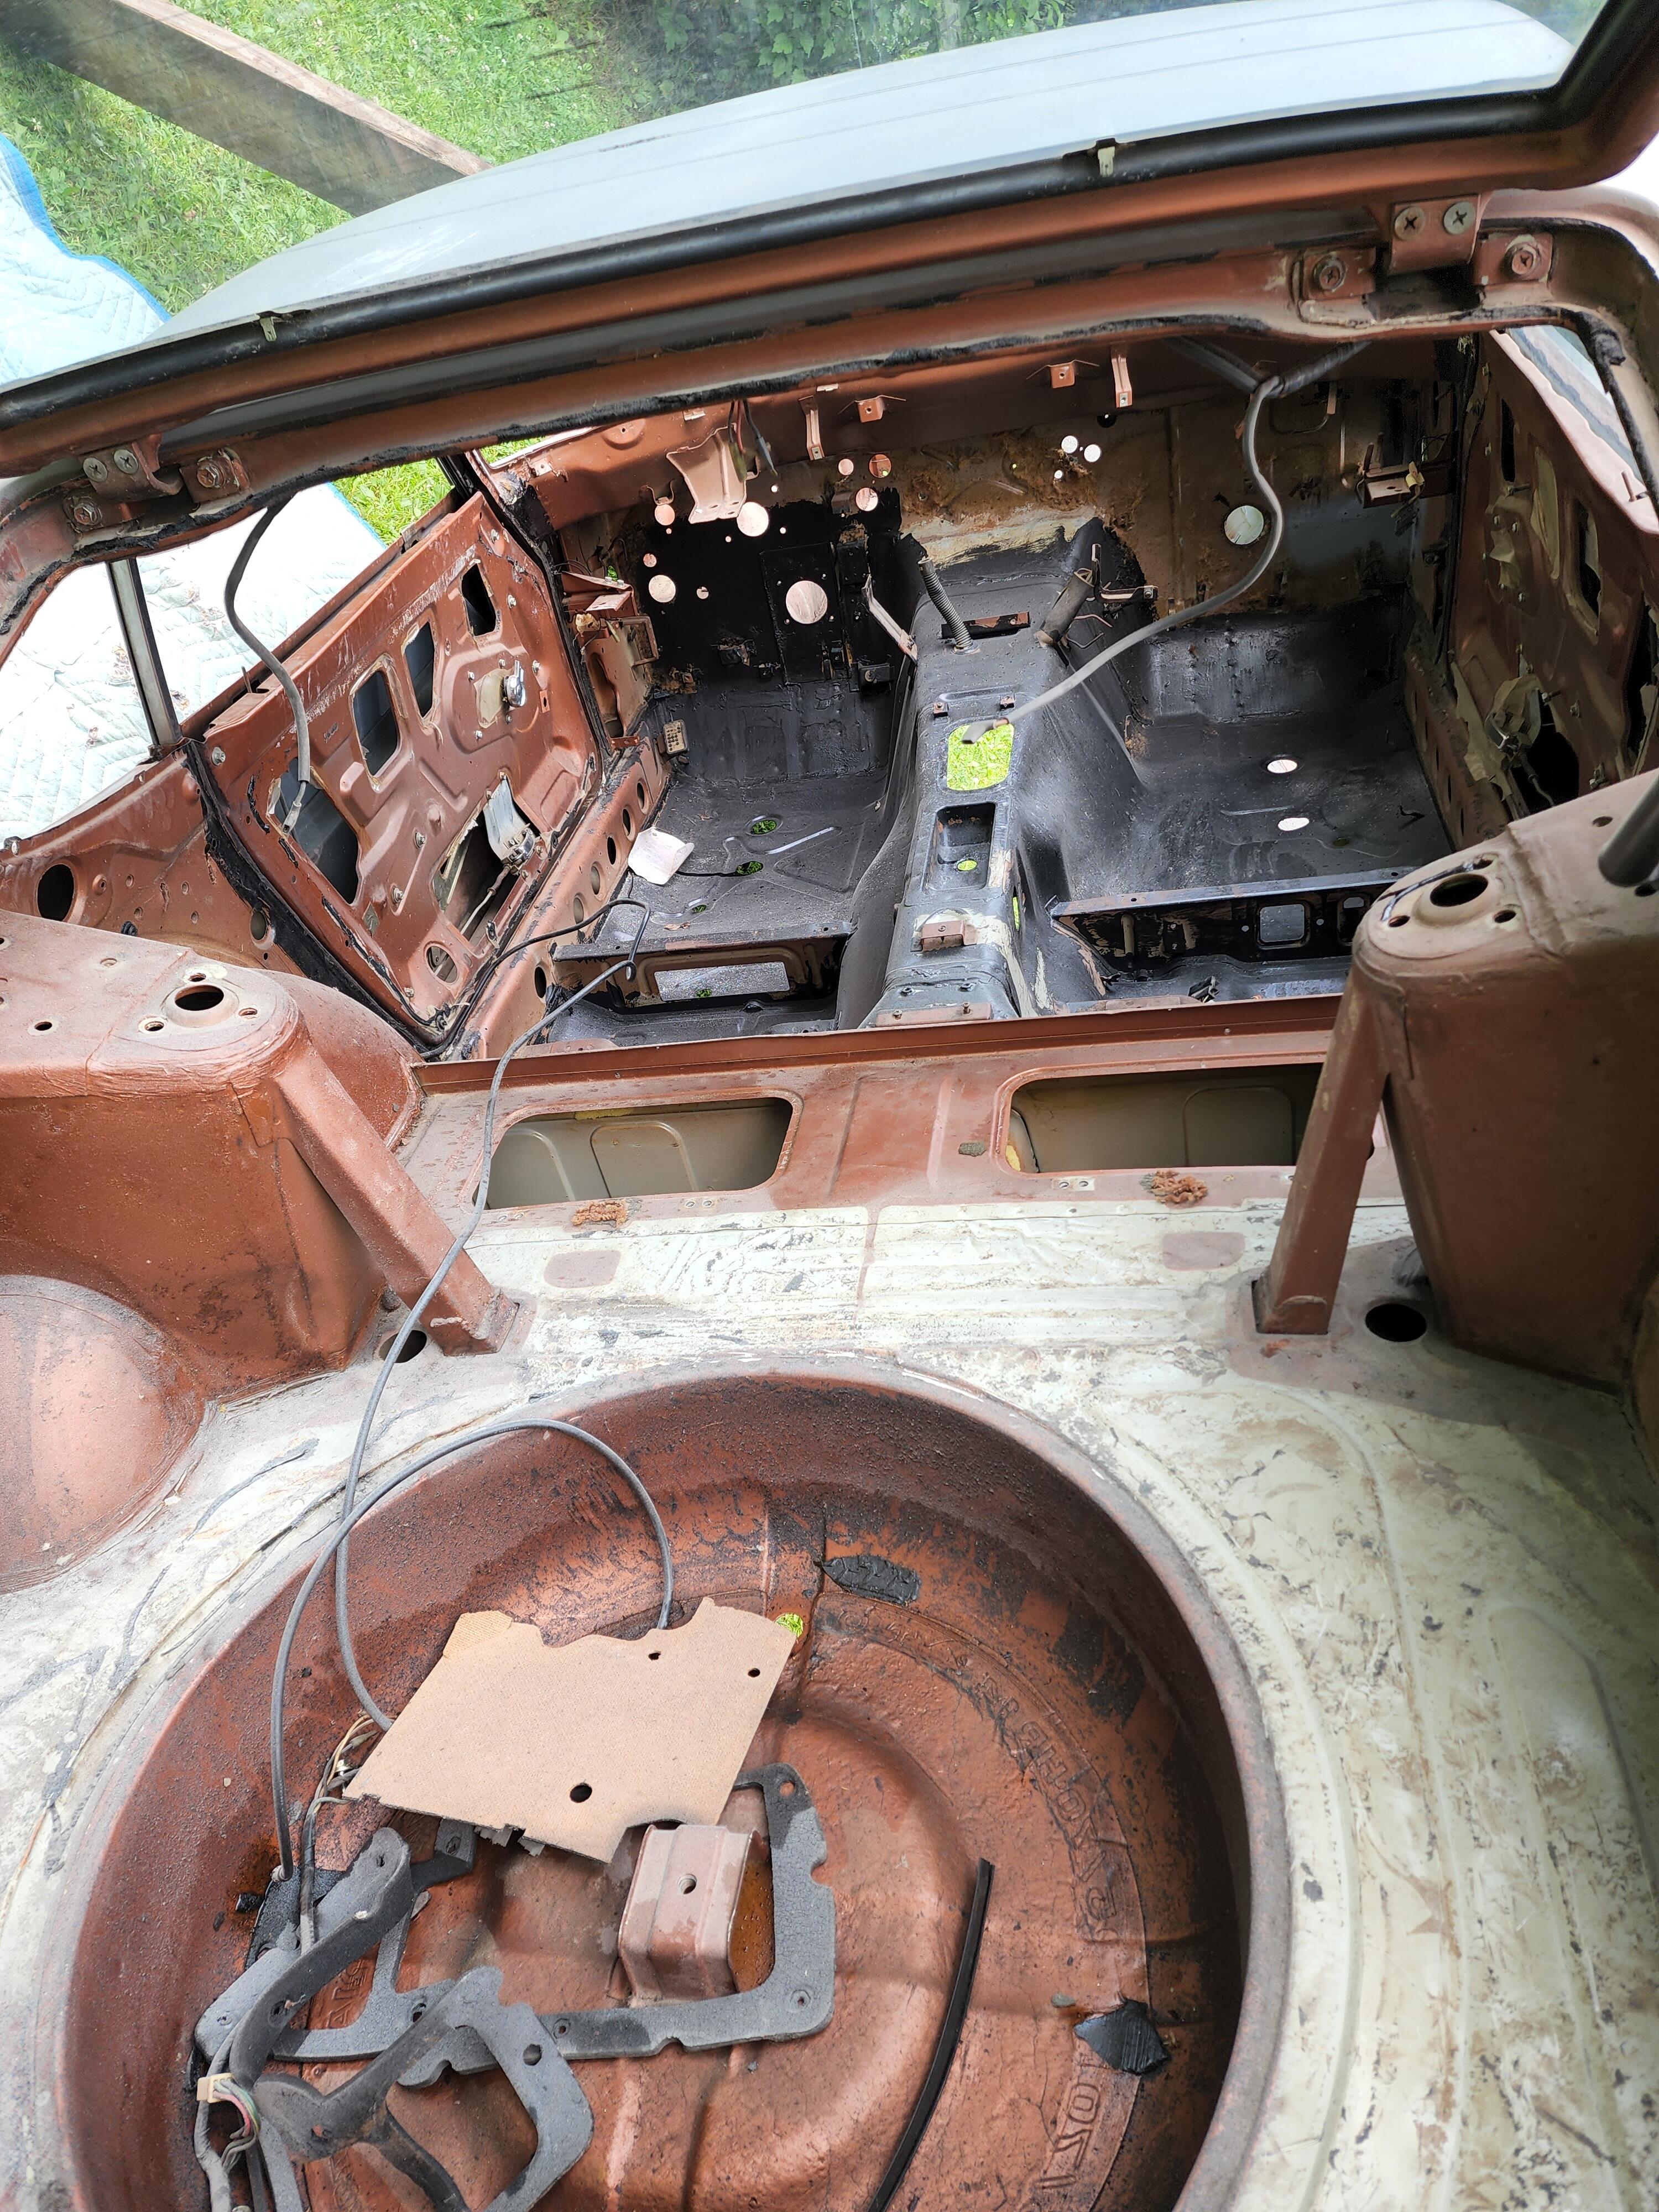
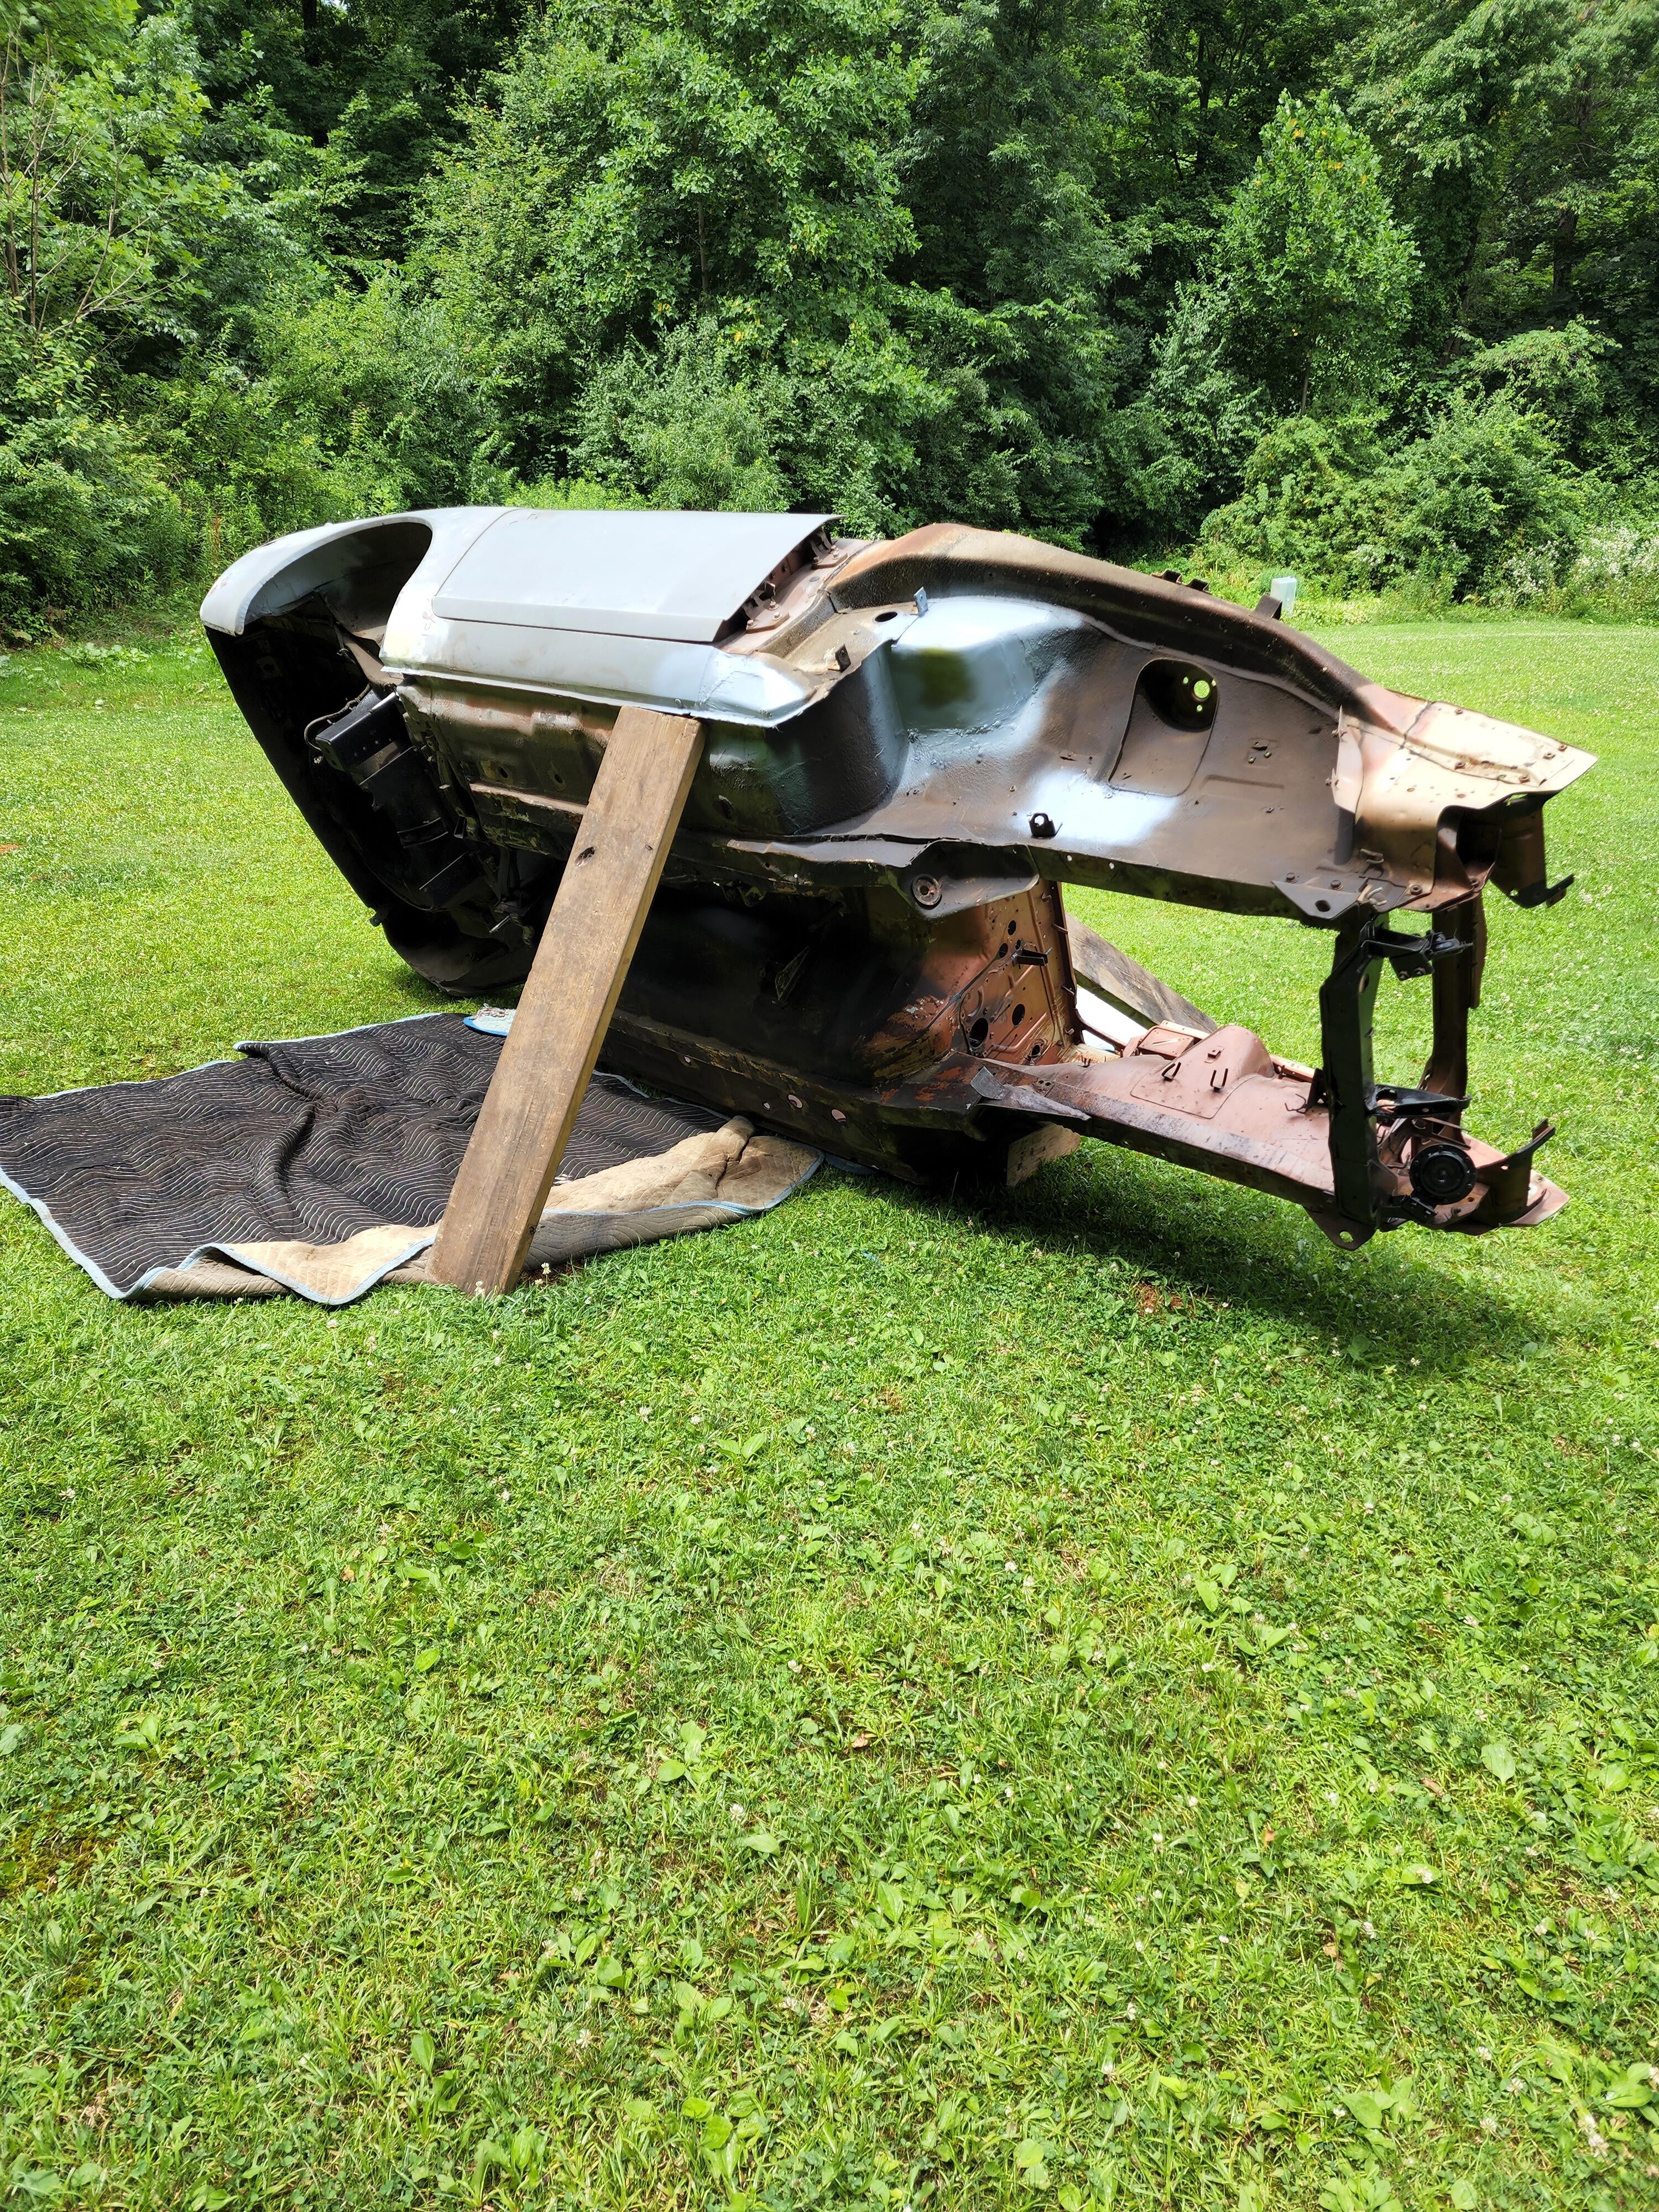
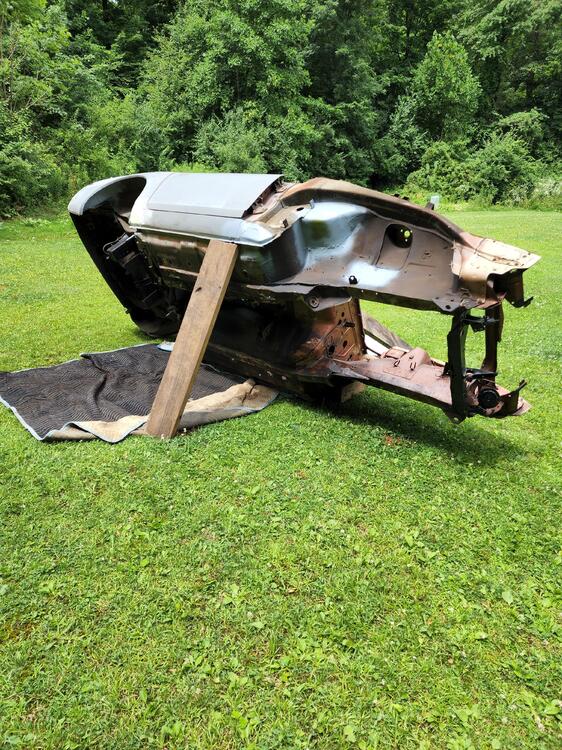
1 pointBeen a while since I updated this post but nothing fun has been happening and with work so busy with a lot of travel, I haven’t had much time to work on the z. I finished repairing and areas with rot and welded all new patches in. Applied POR15 where required. I’m now focusing on the underside to get it ready for undercoating. Should be finishing that up in the next two weeks. I’ll then be able to throw the suspension back on and have a roller… and yes, that is some fine engineering since I don’t have a rotisserie.


 1 point
 -
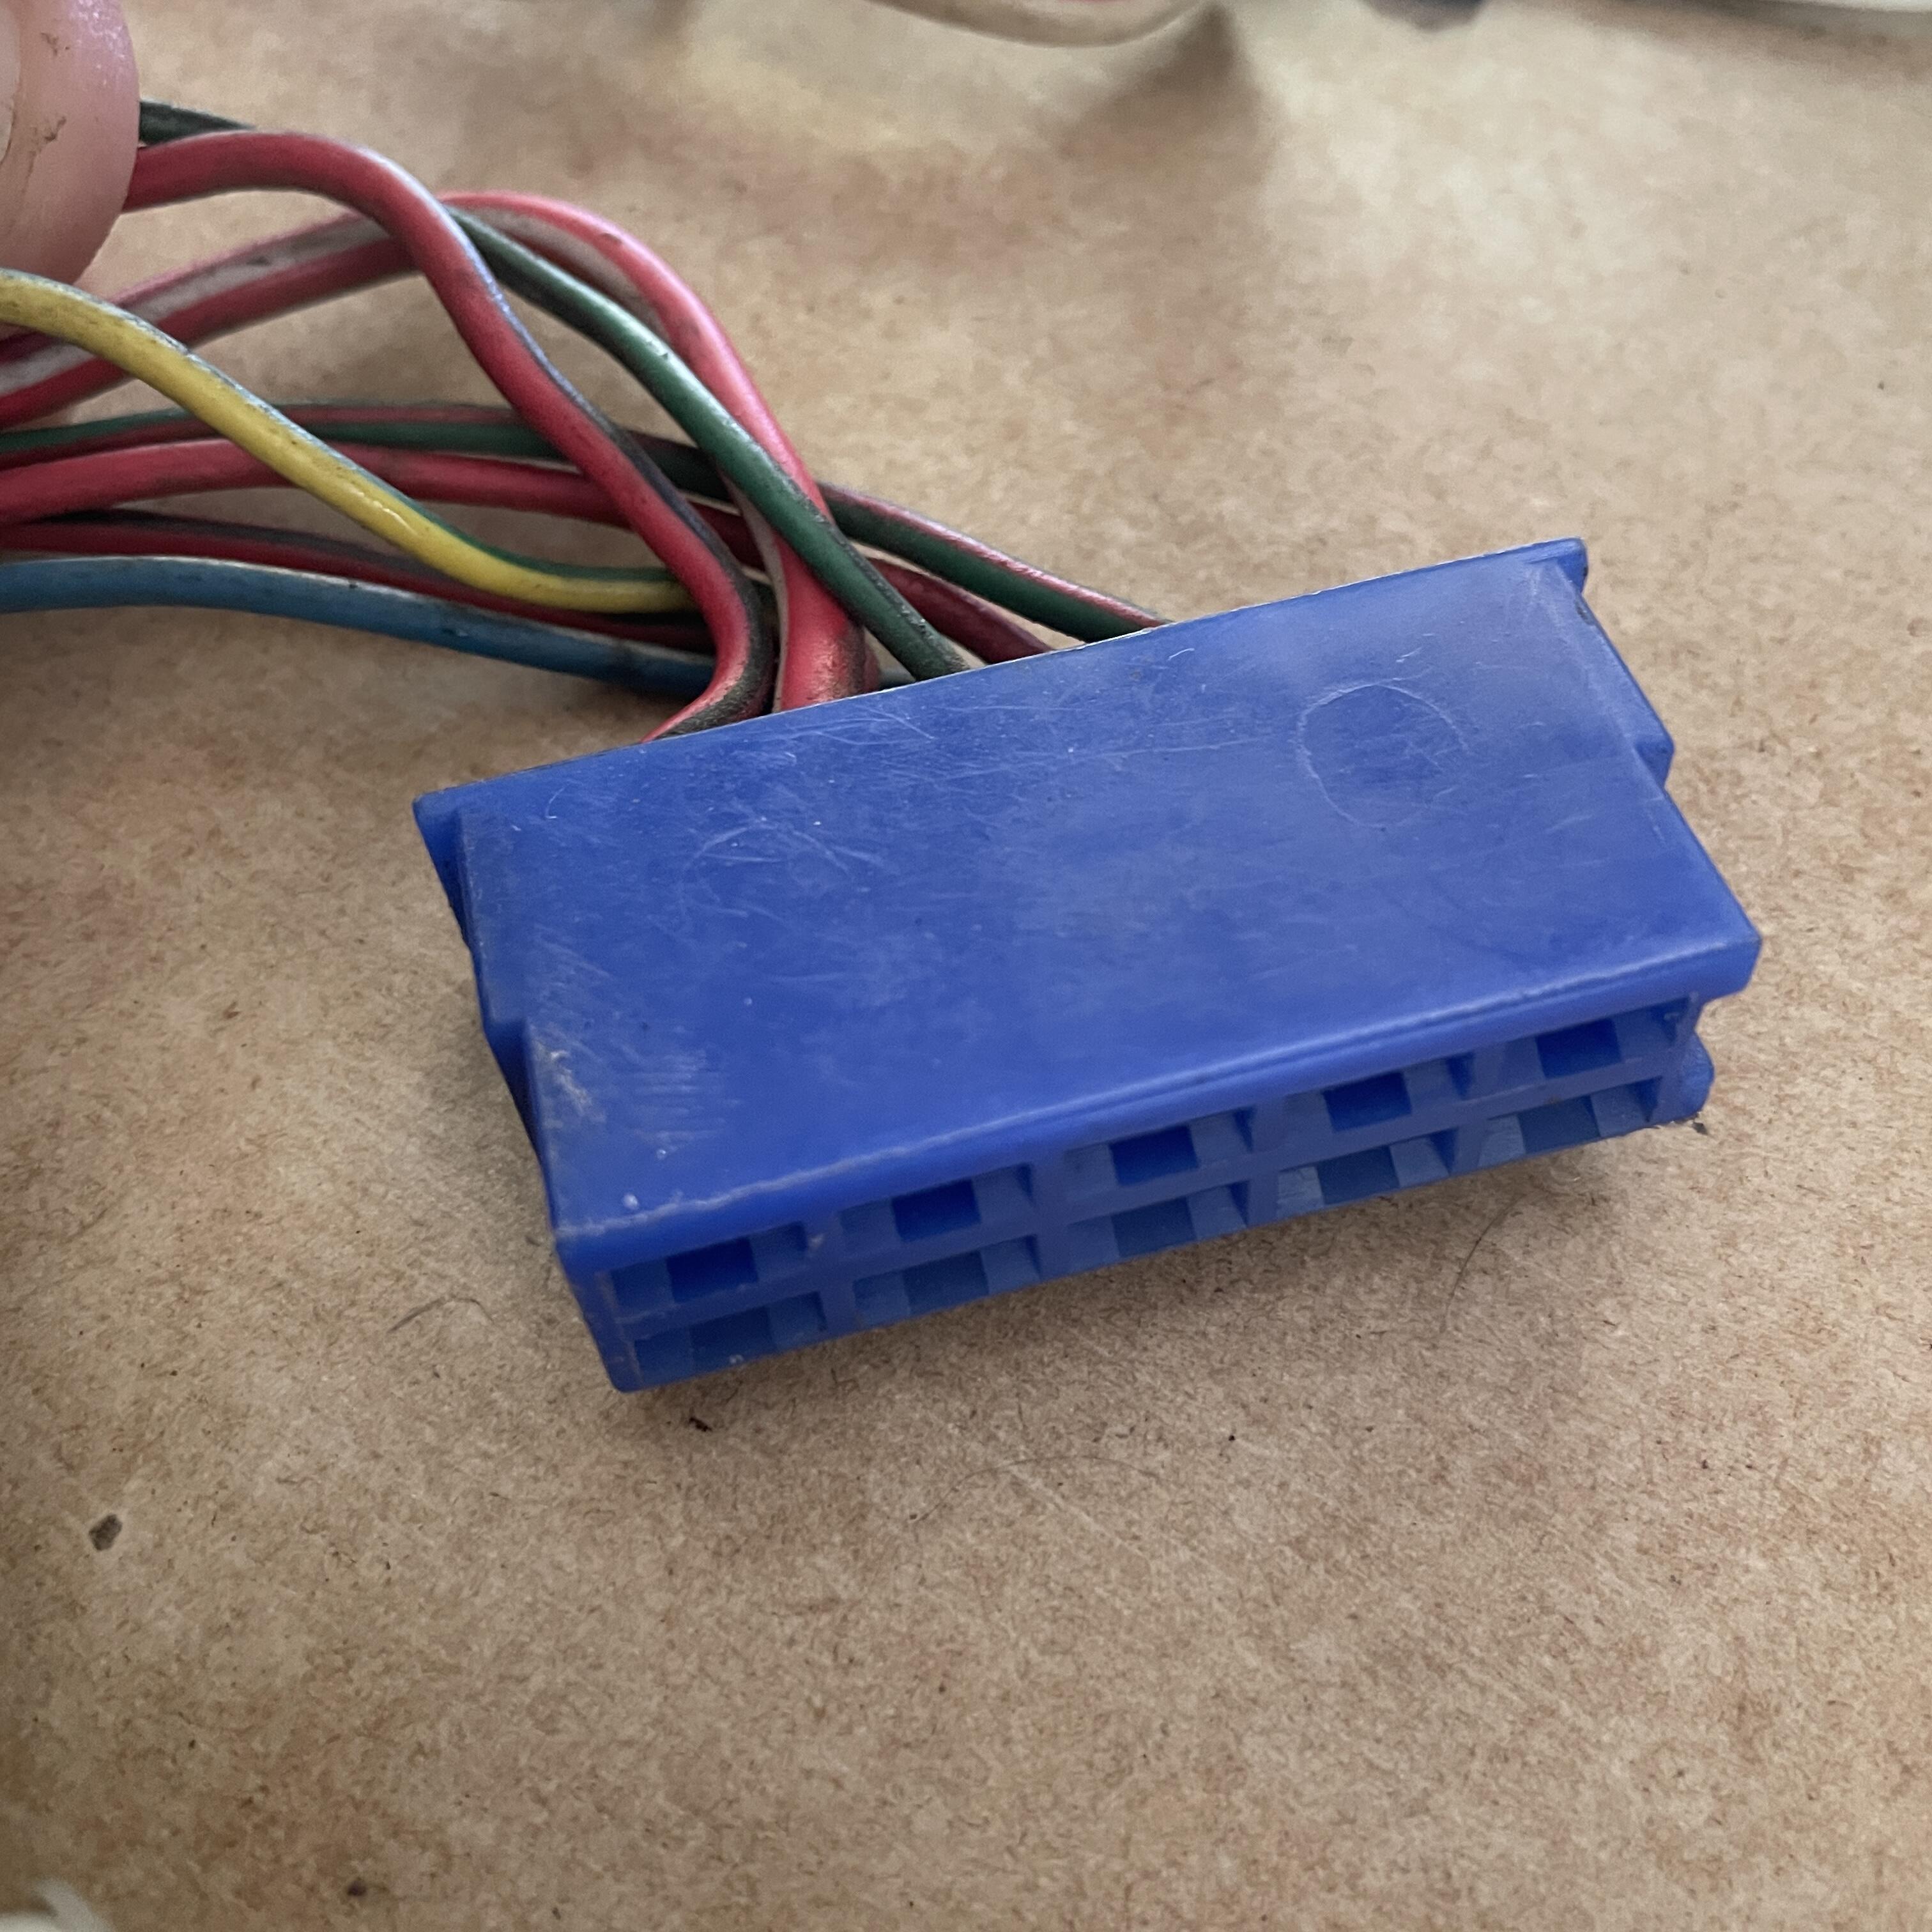
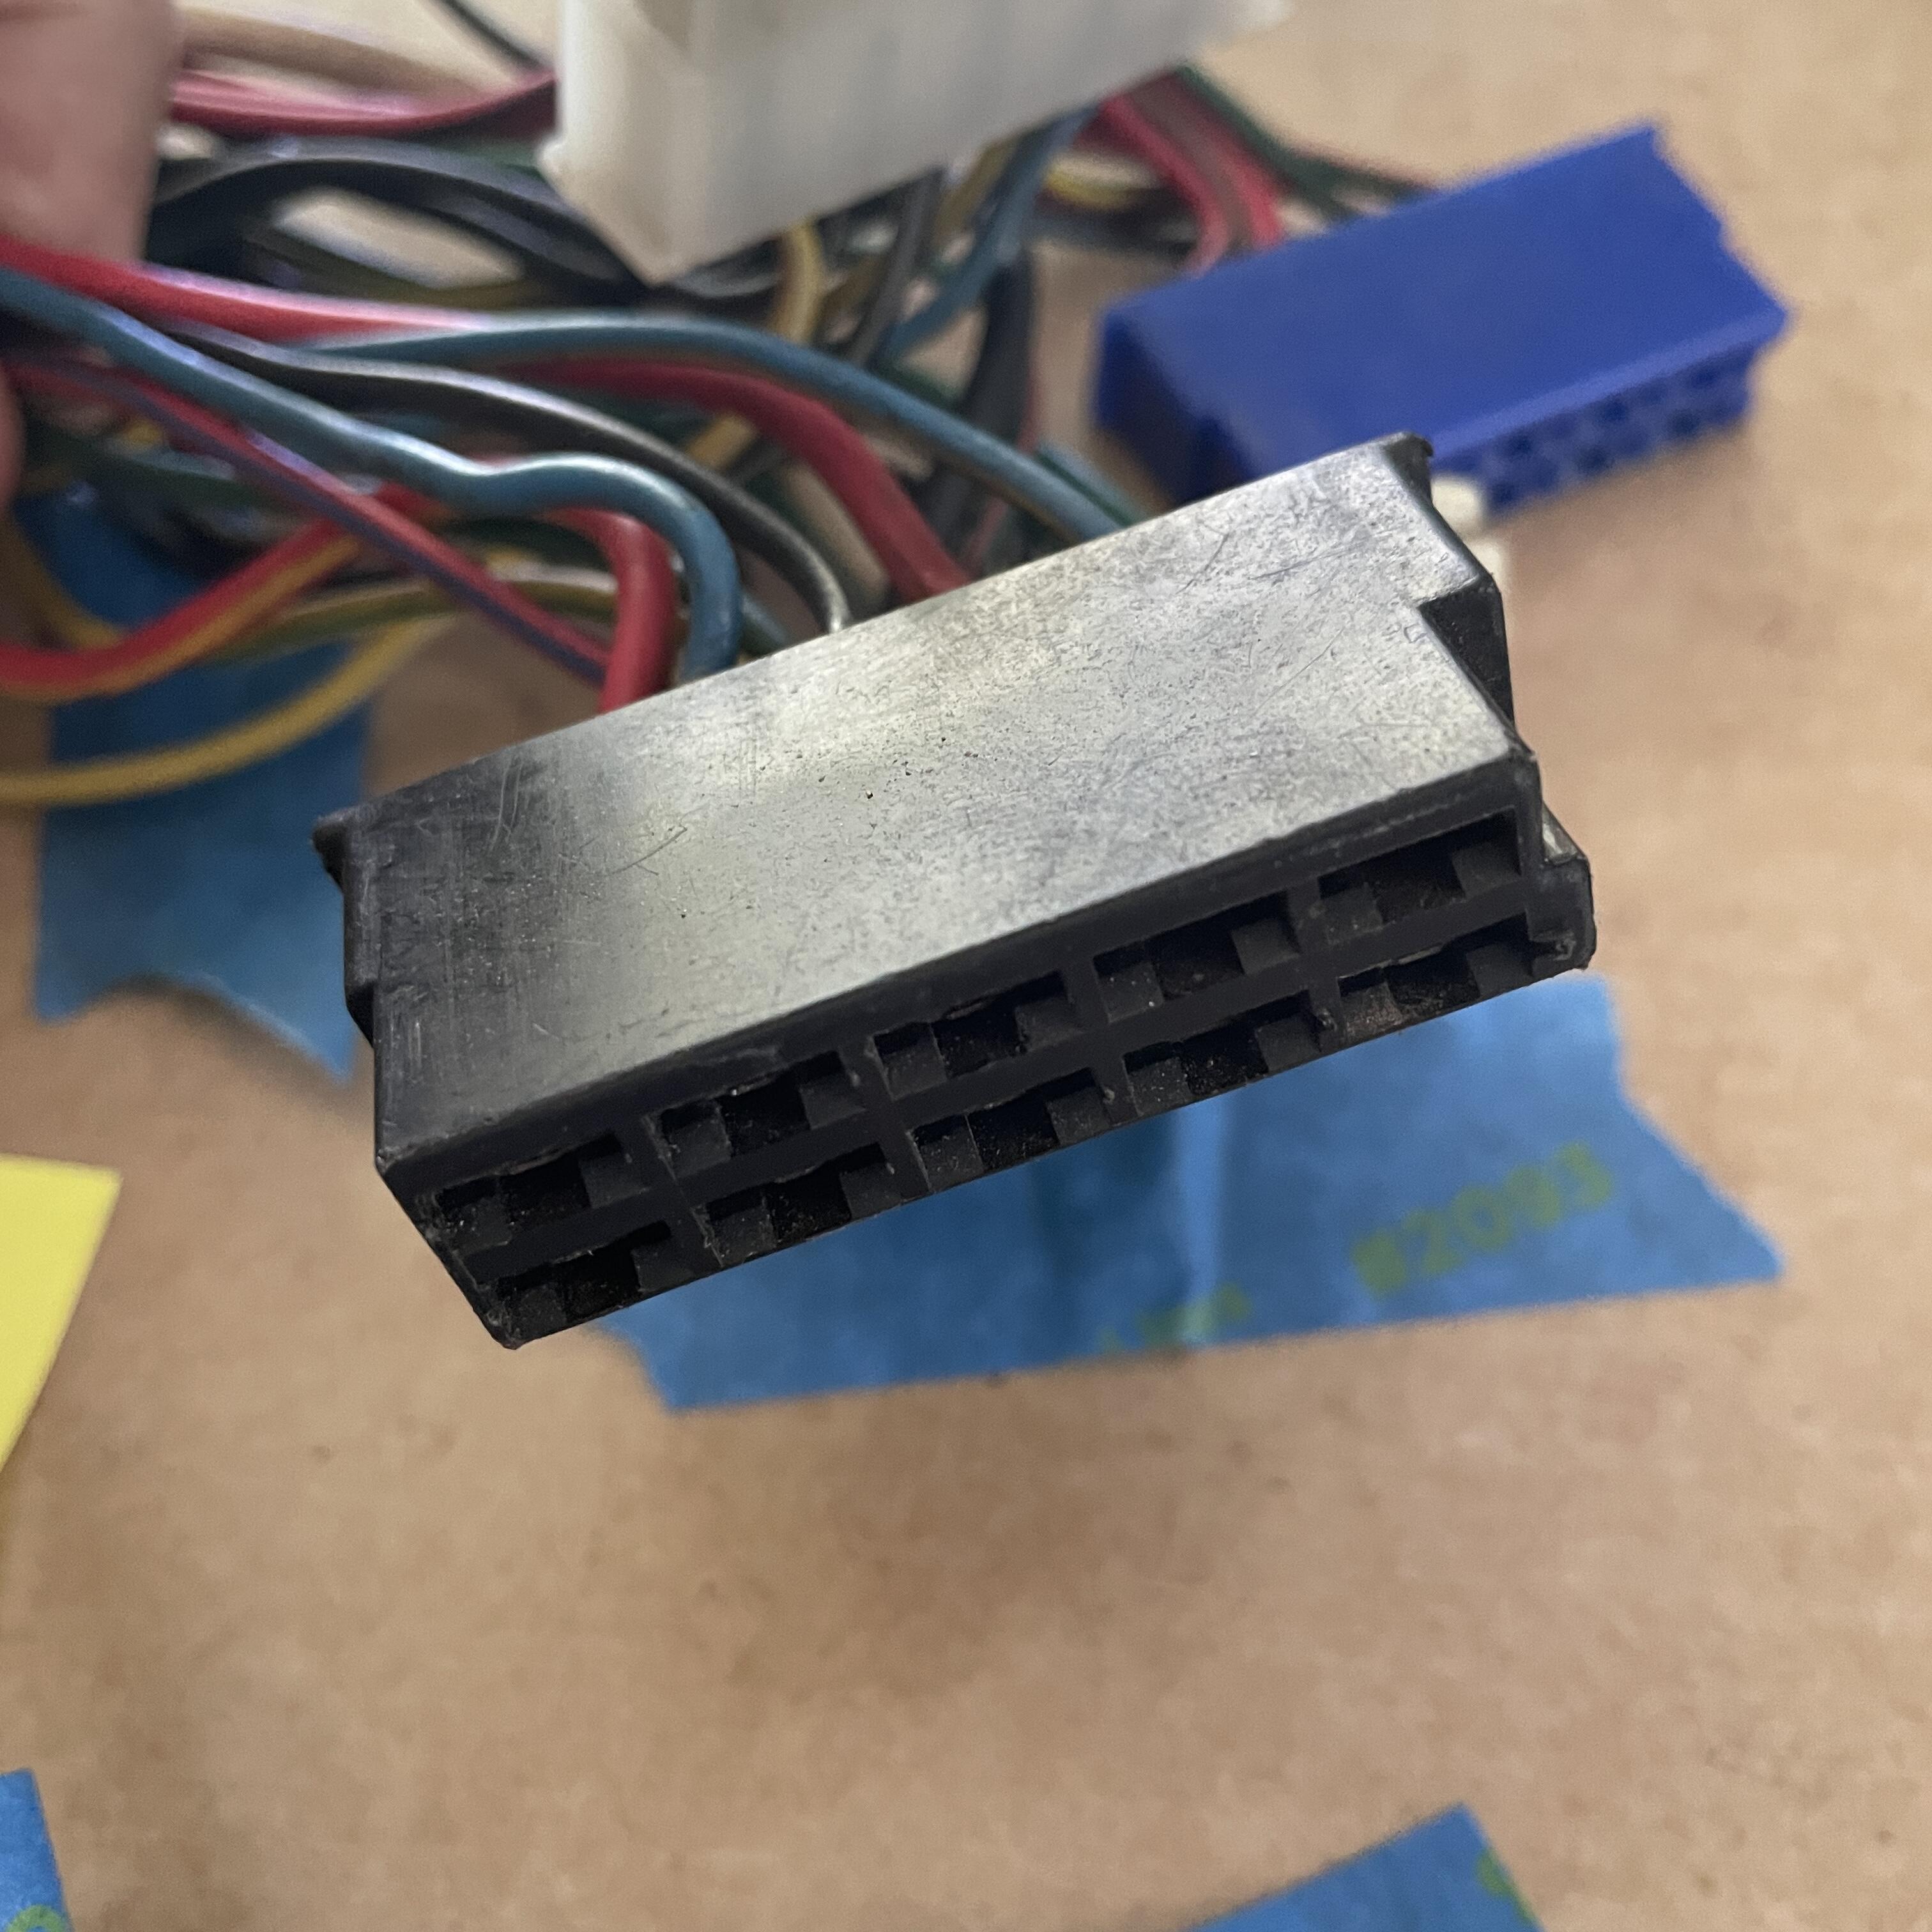
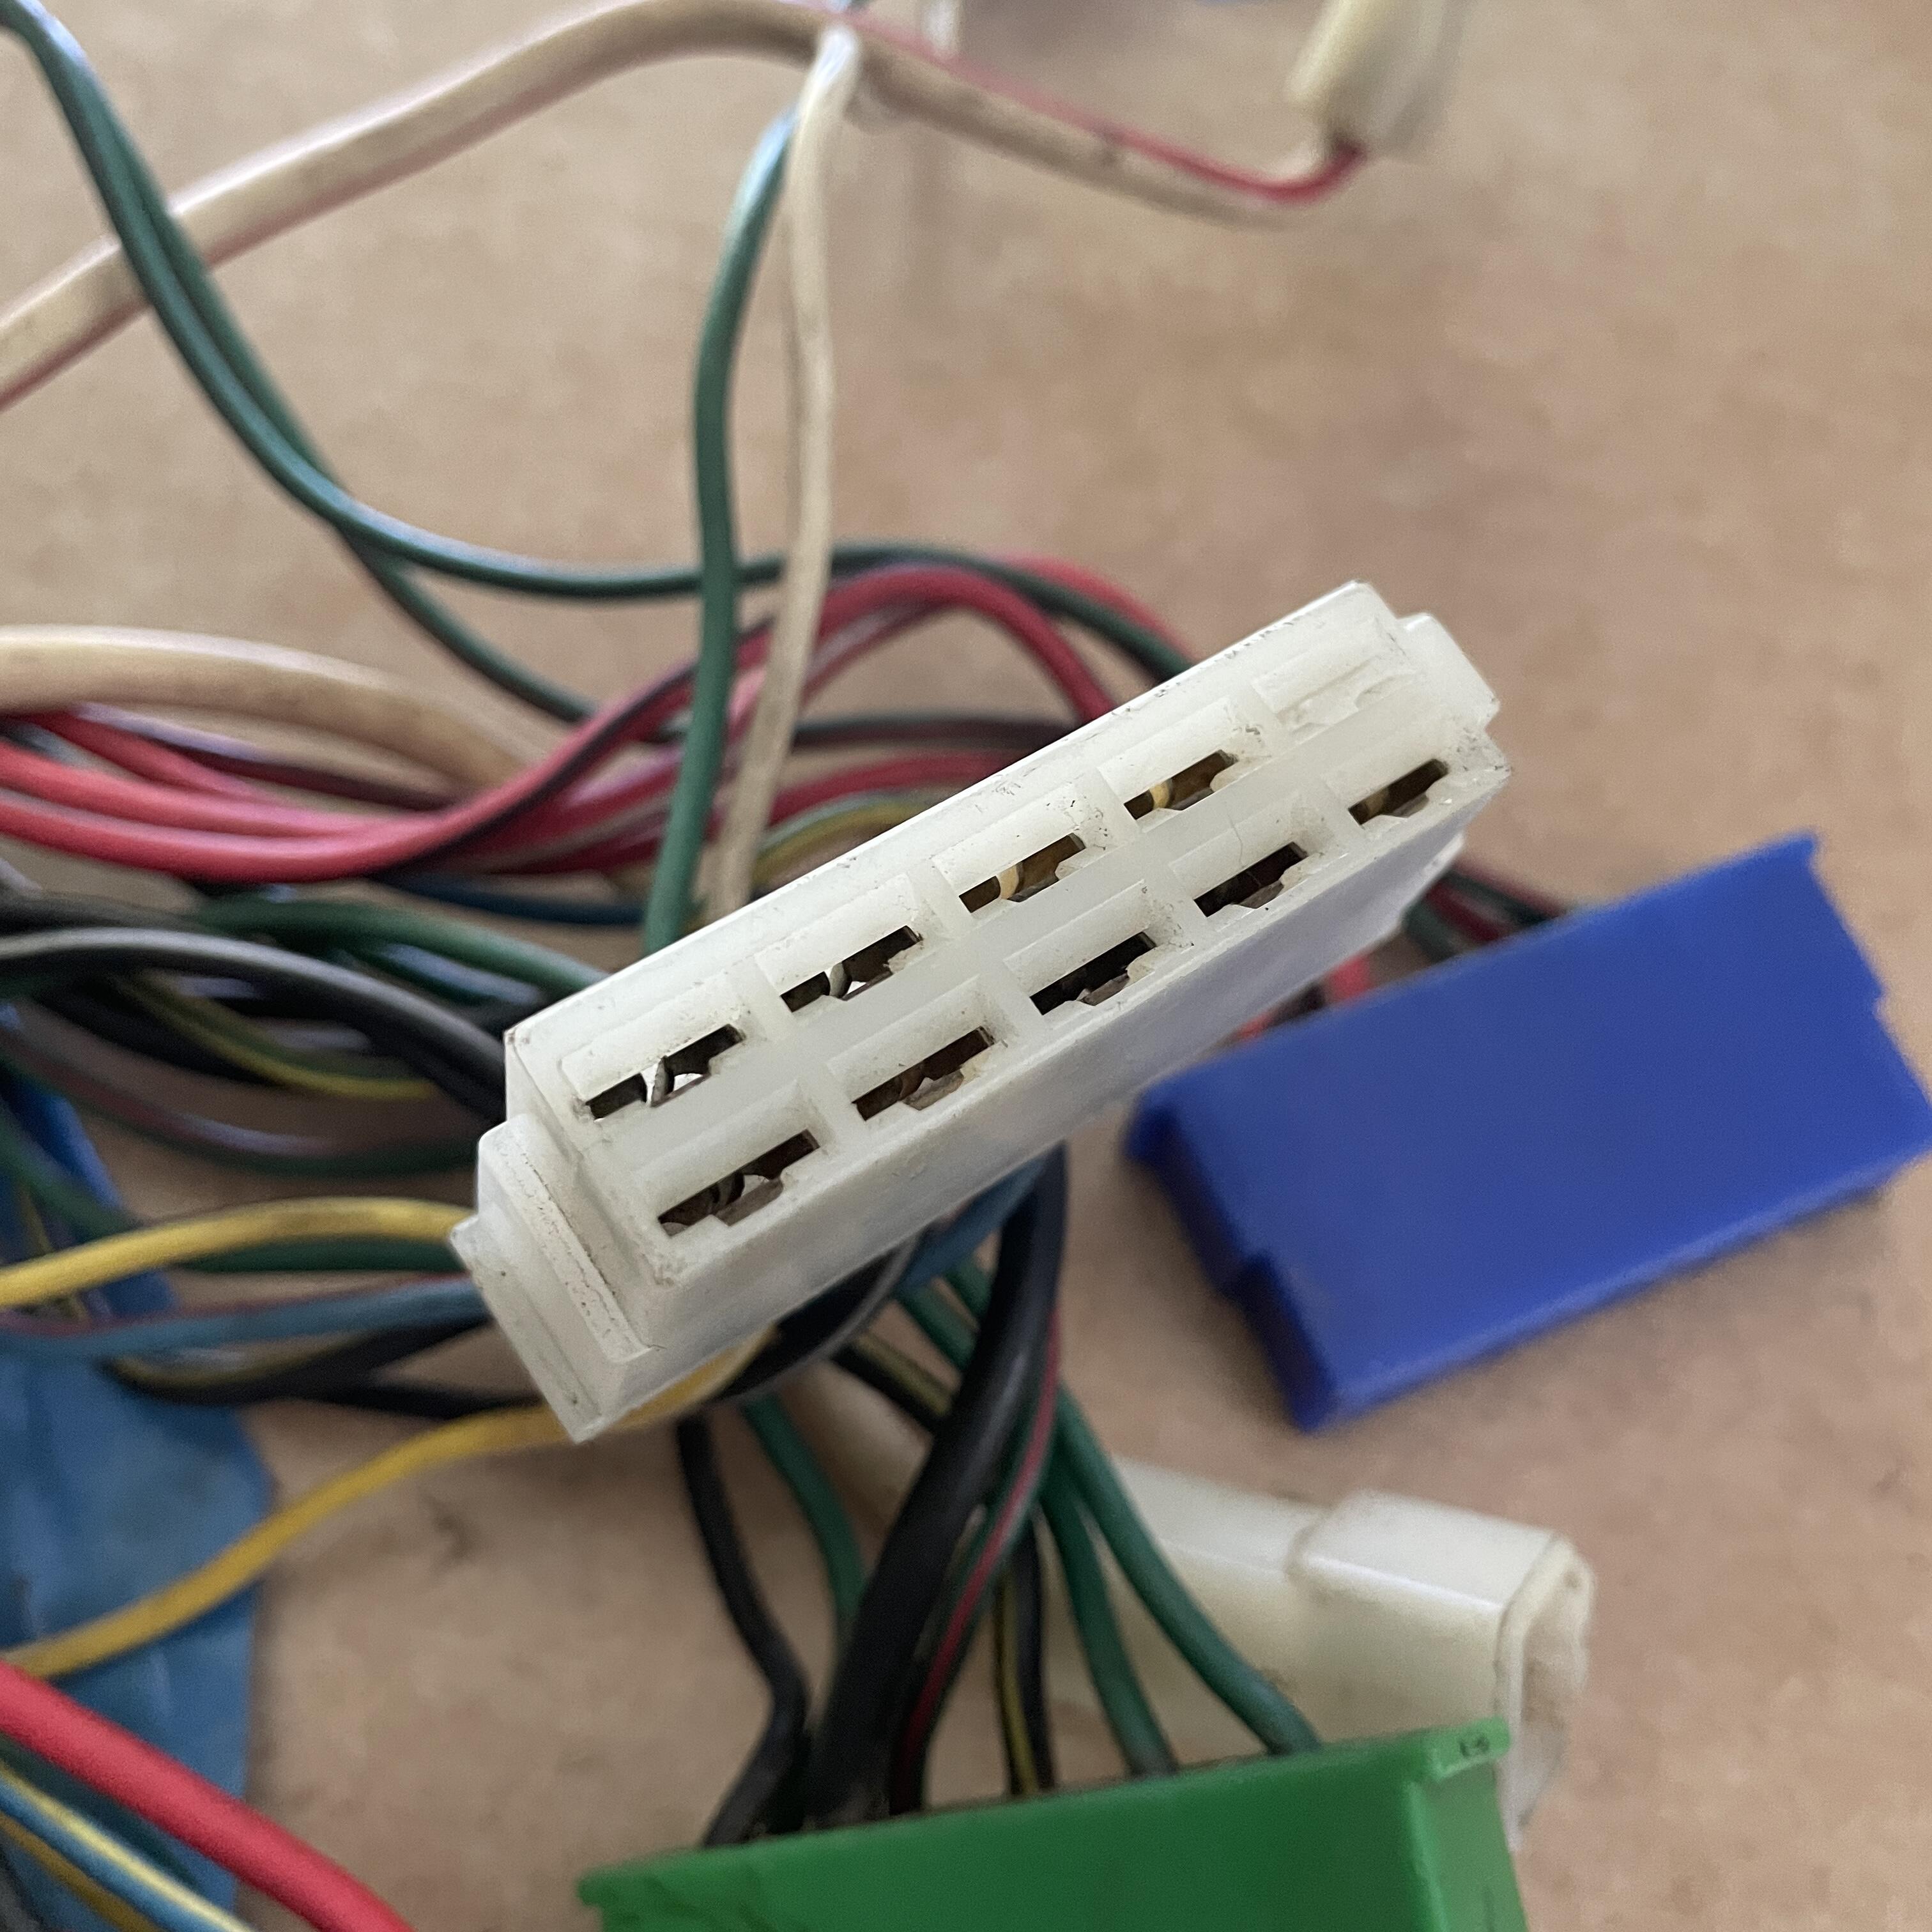
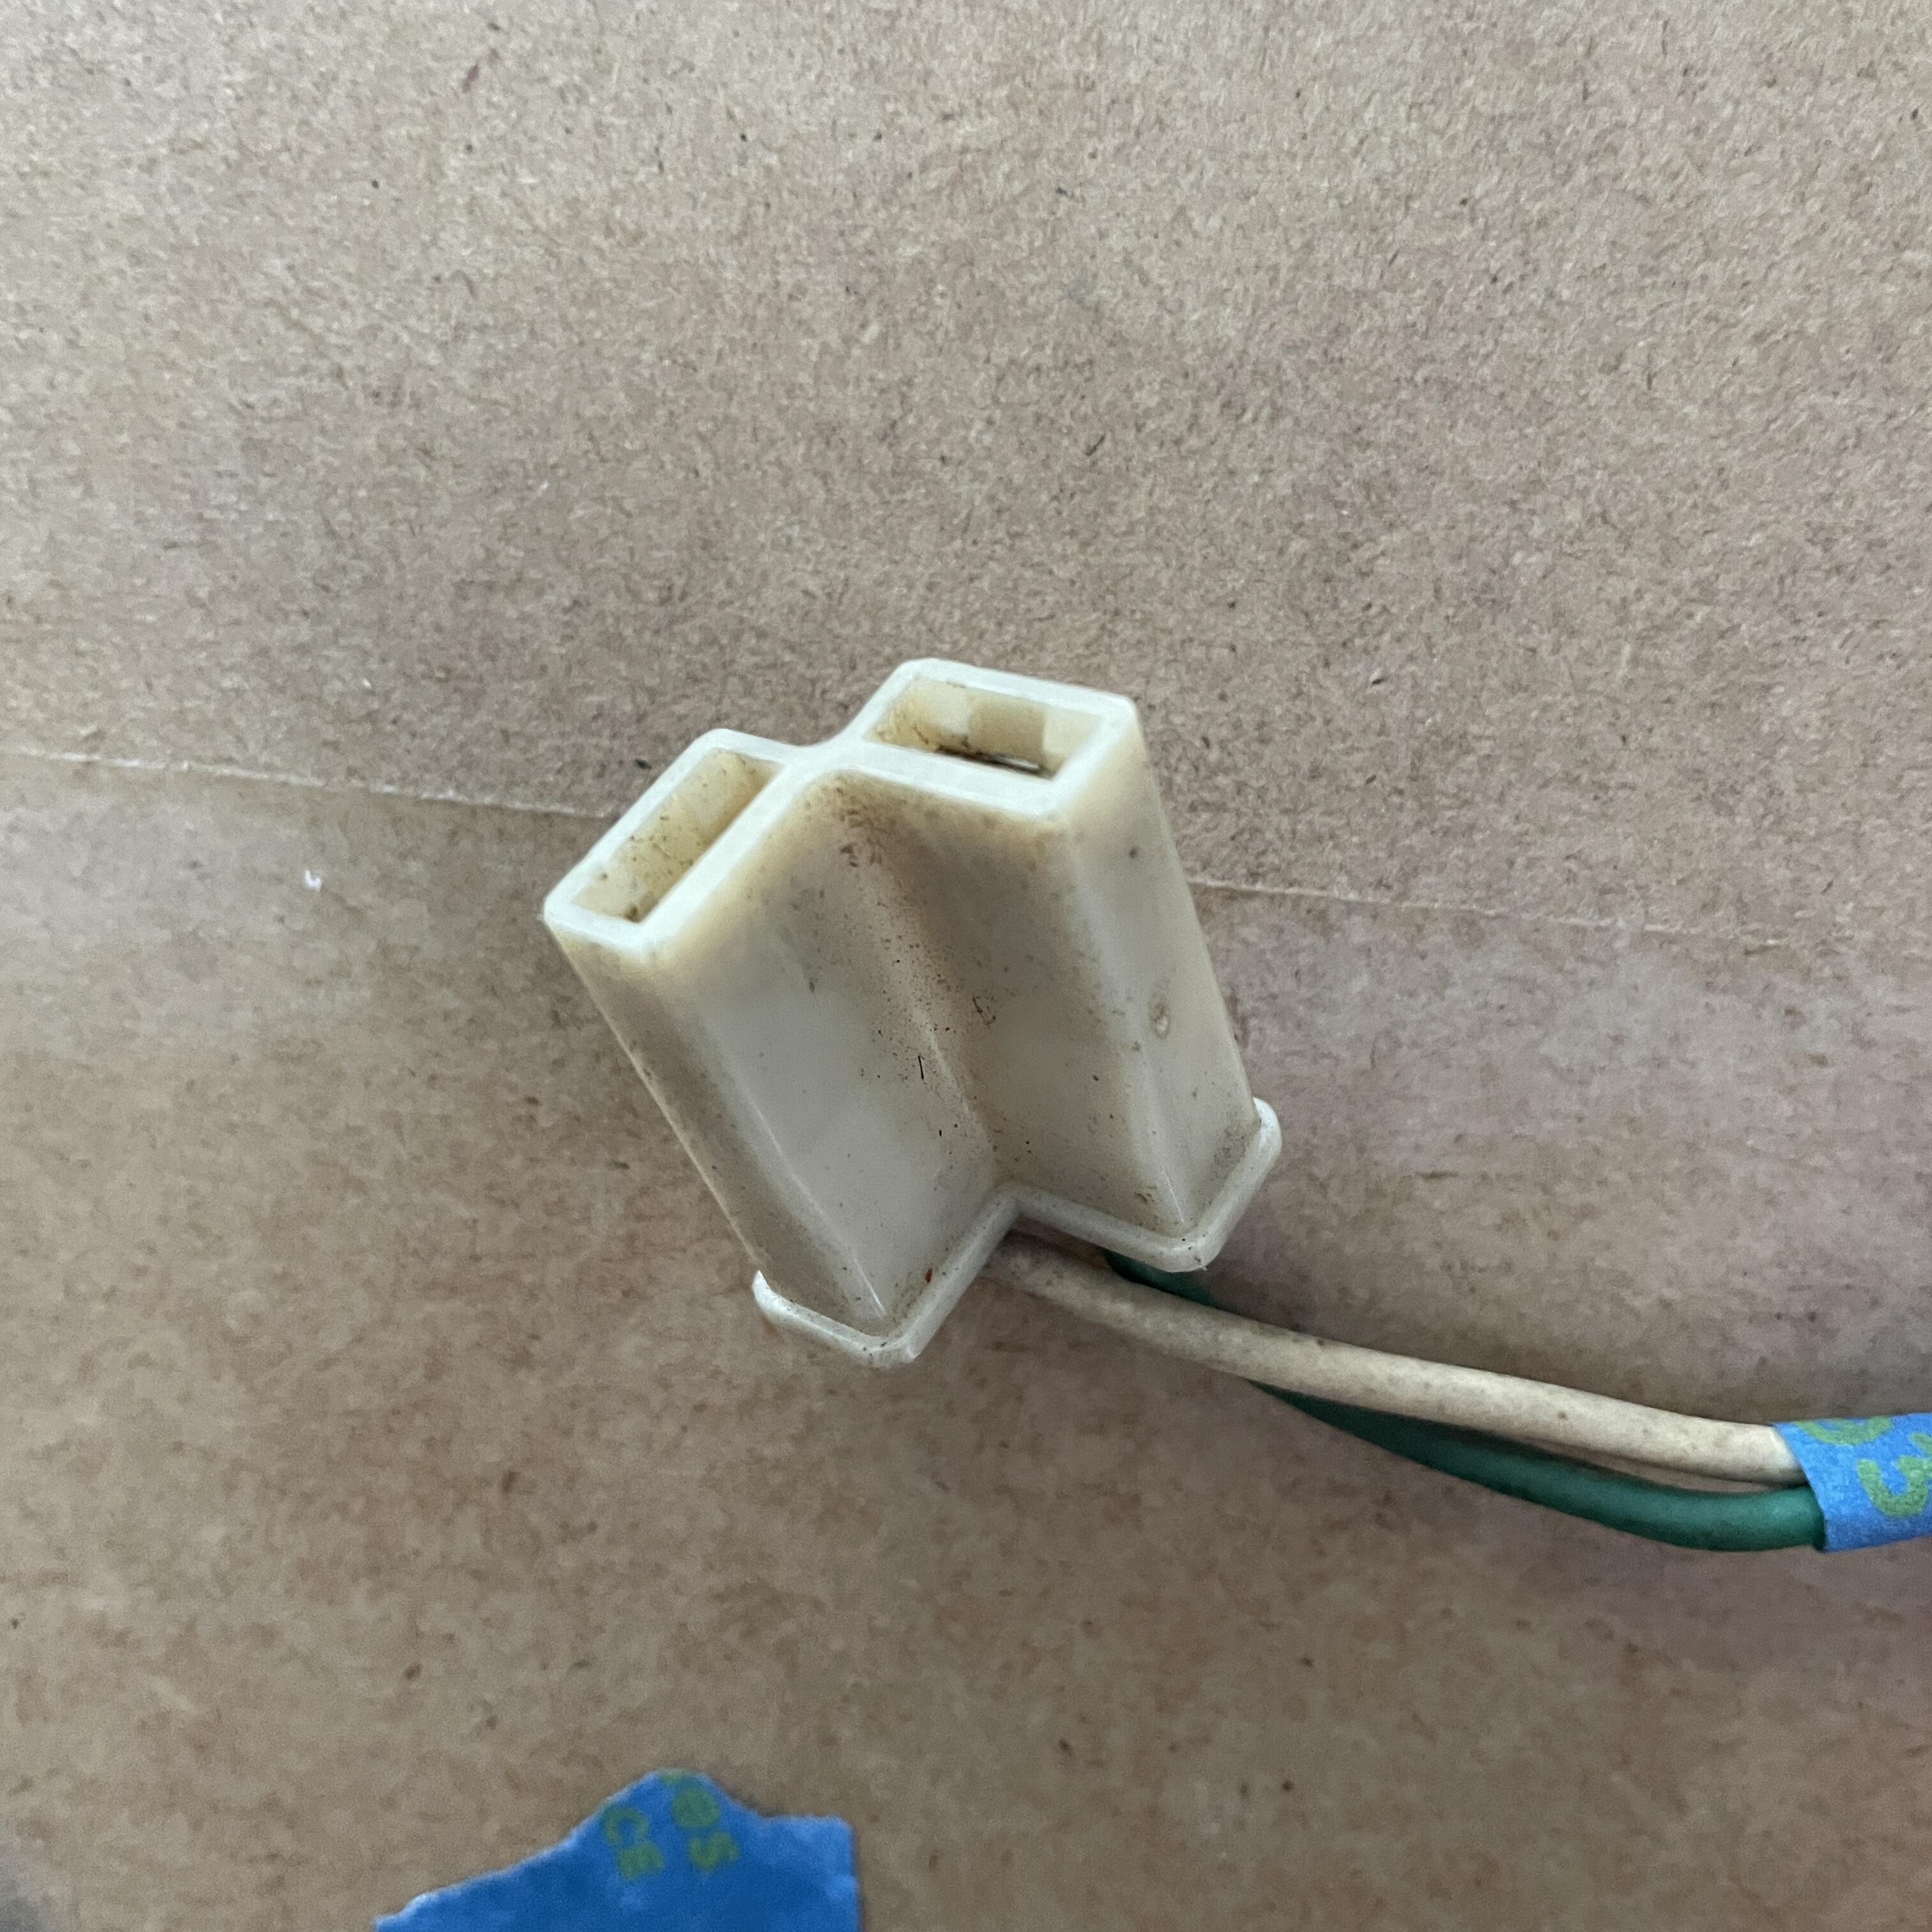
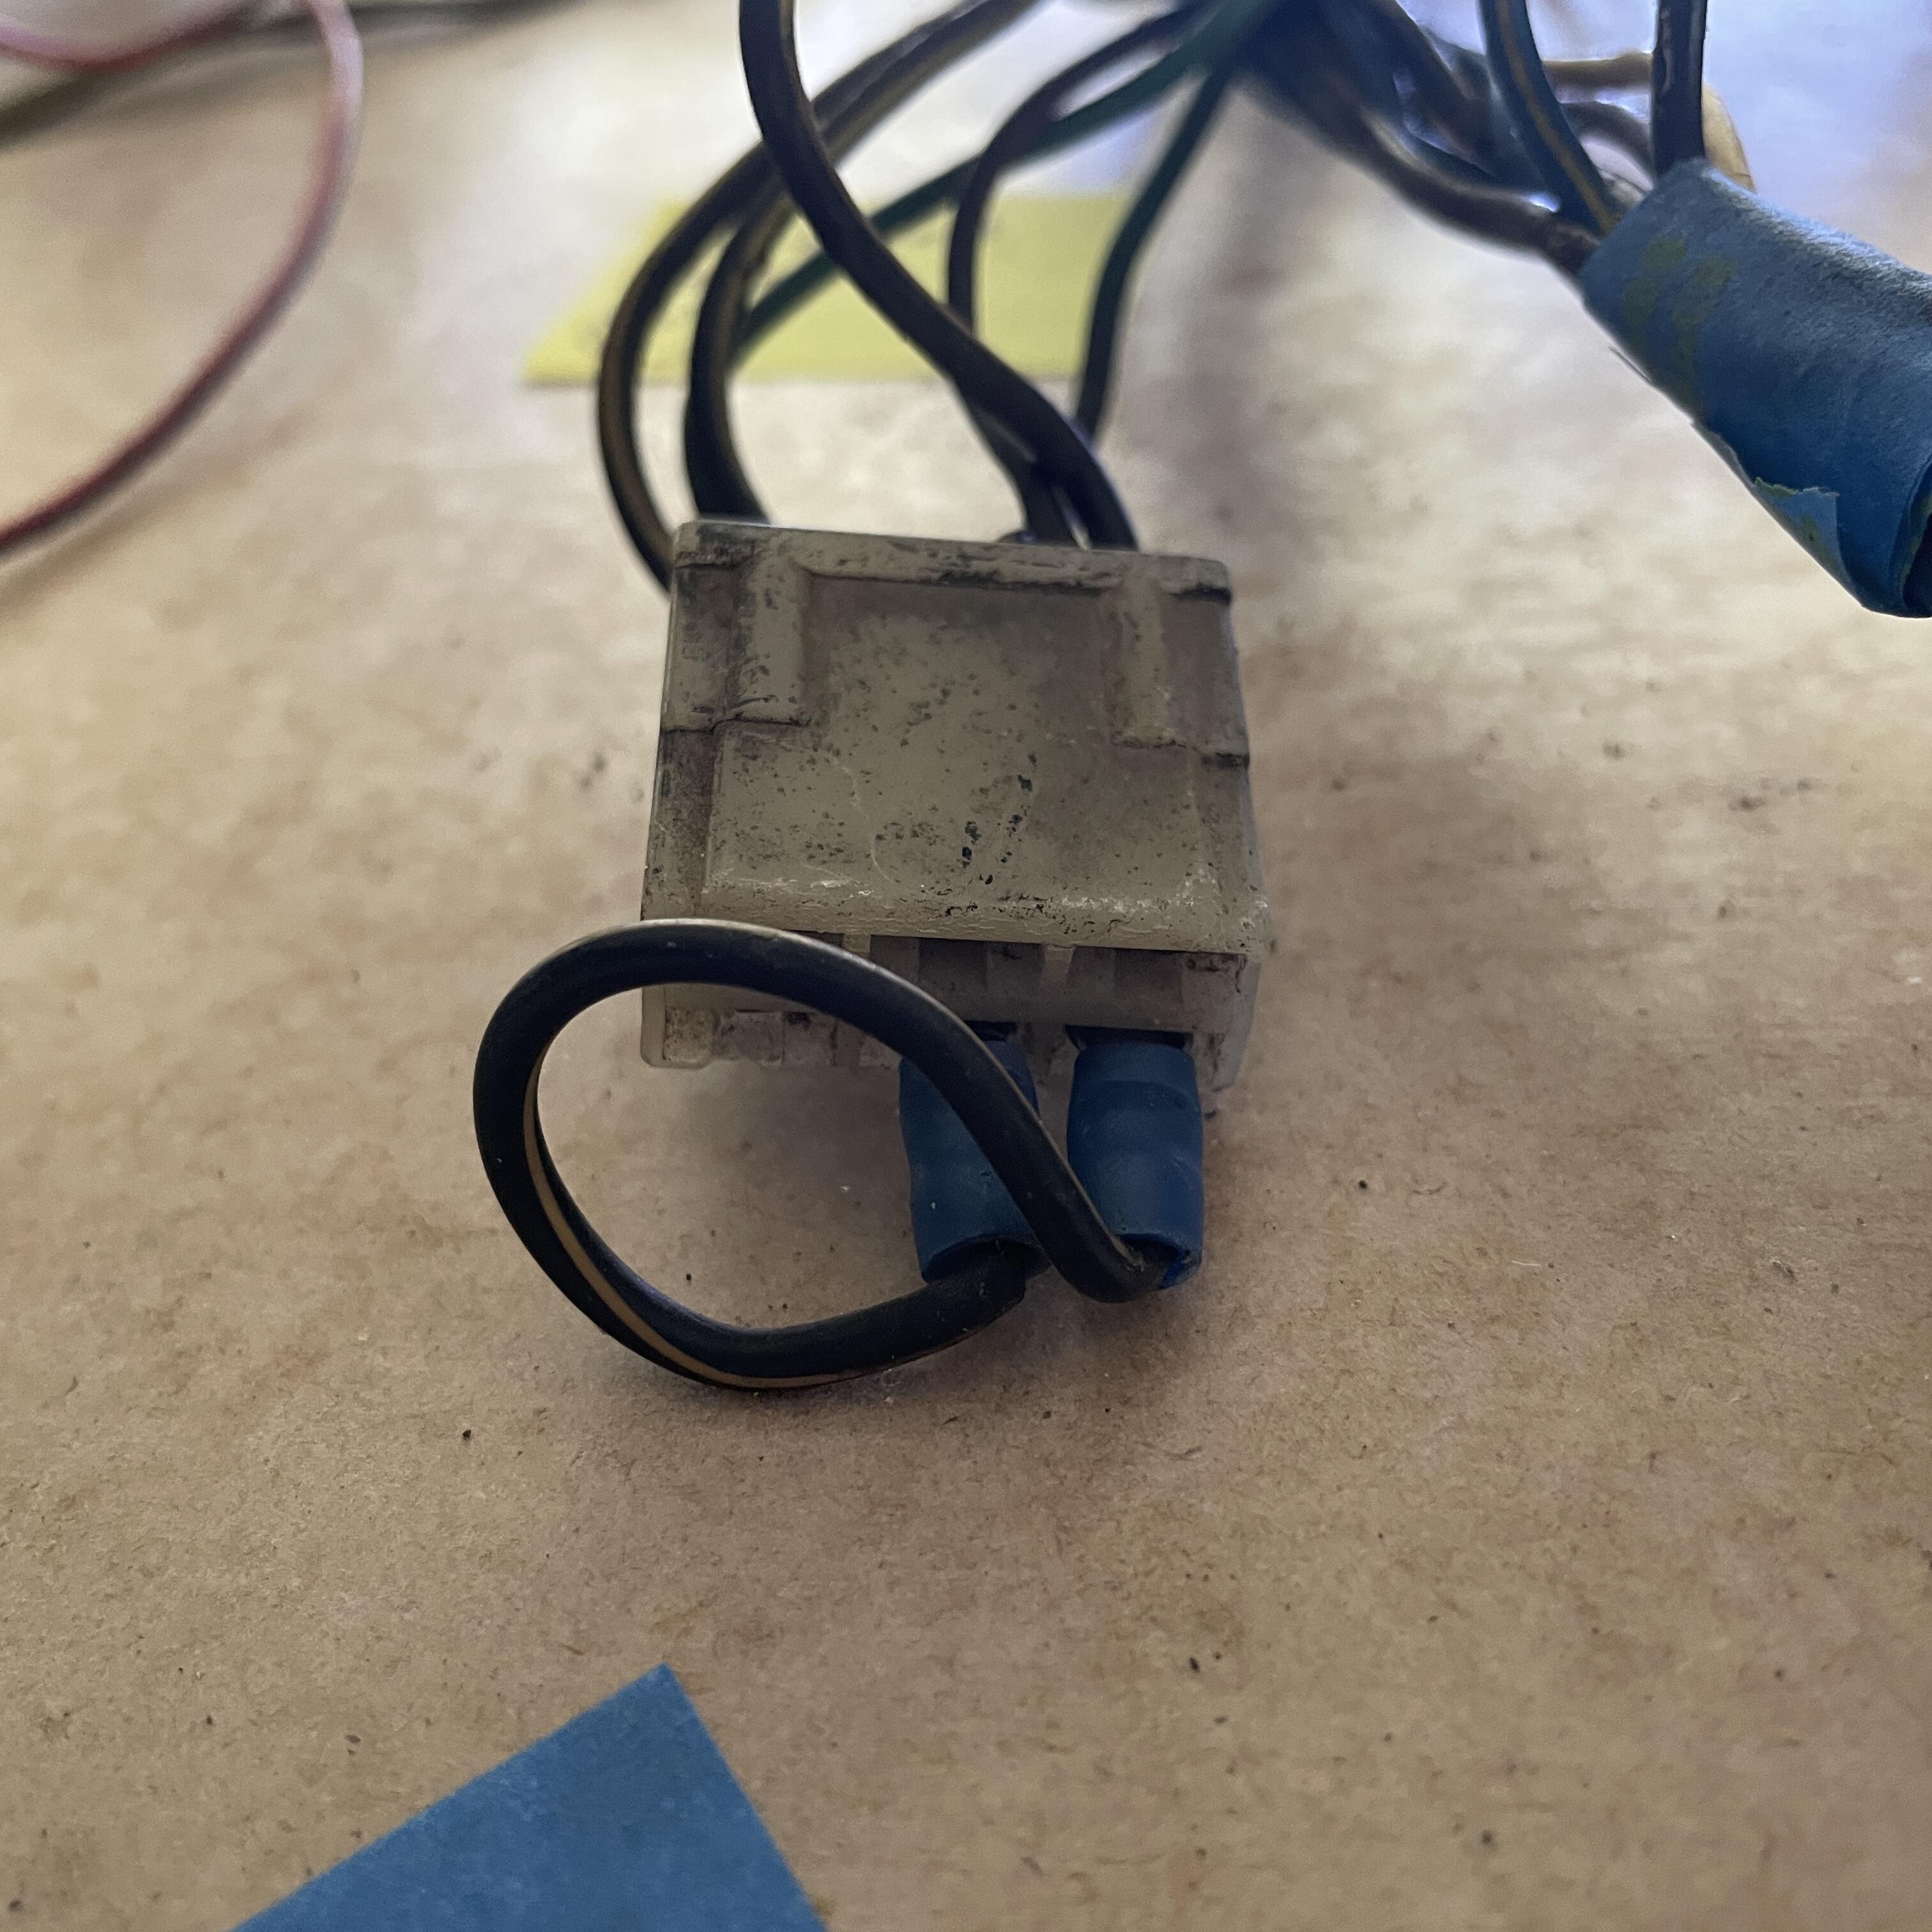
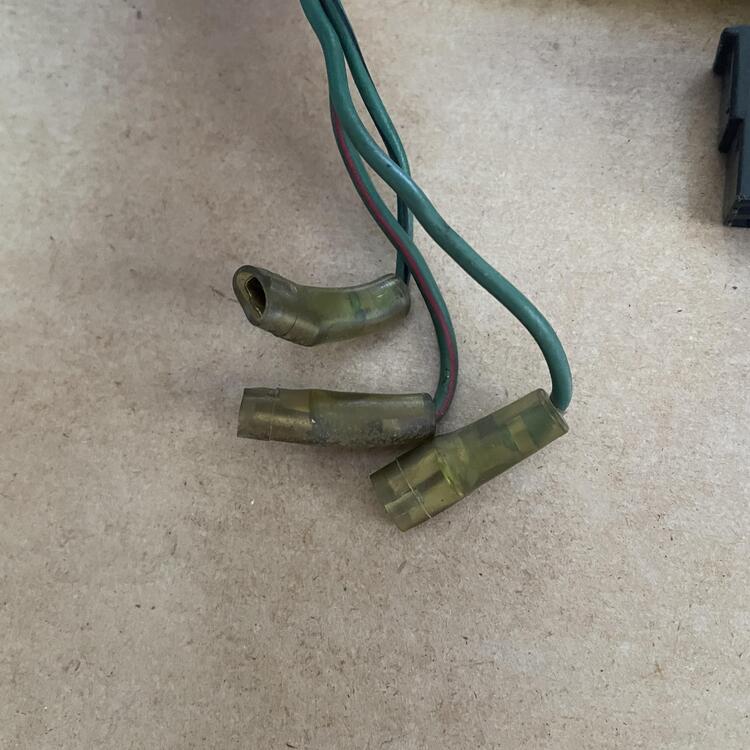
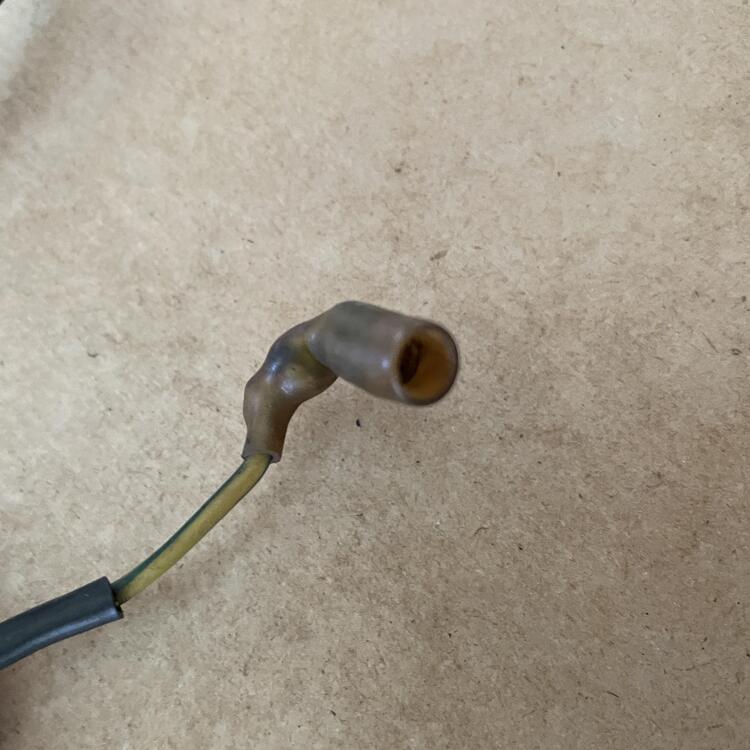
Thanks! I am hopeful that I didn't make any errors. If I did it would most likely be with the measurements of the wire lengths, since I was super tired of working on this harness by the time I got to that step. I checked them a couple of times, so they should be right, but there are a lot more splices in this harness than there were in the body harness and they are mostly blue or yellow, so difficult to keep straight. I'm also bothered by the fact that someone cut 4 of the wires and I can't tell you how long they should be or what the connector should be. :/ ––– Also, I was wondering if anyone knows what gauges the OEM wires are. It looks like there are 3, maybe 4 sizes, which I have tried to indicate with (heavy) and (thick) next to the wire colors in the table.1 point
-
I love this table! I would love to see a hardware table like this for the 240z with pictures of the fasteners beside the descriptions1 point
-
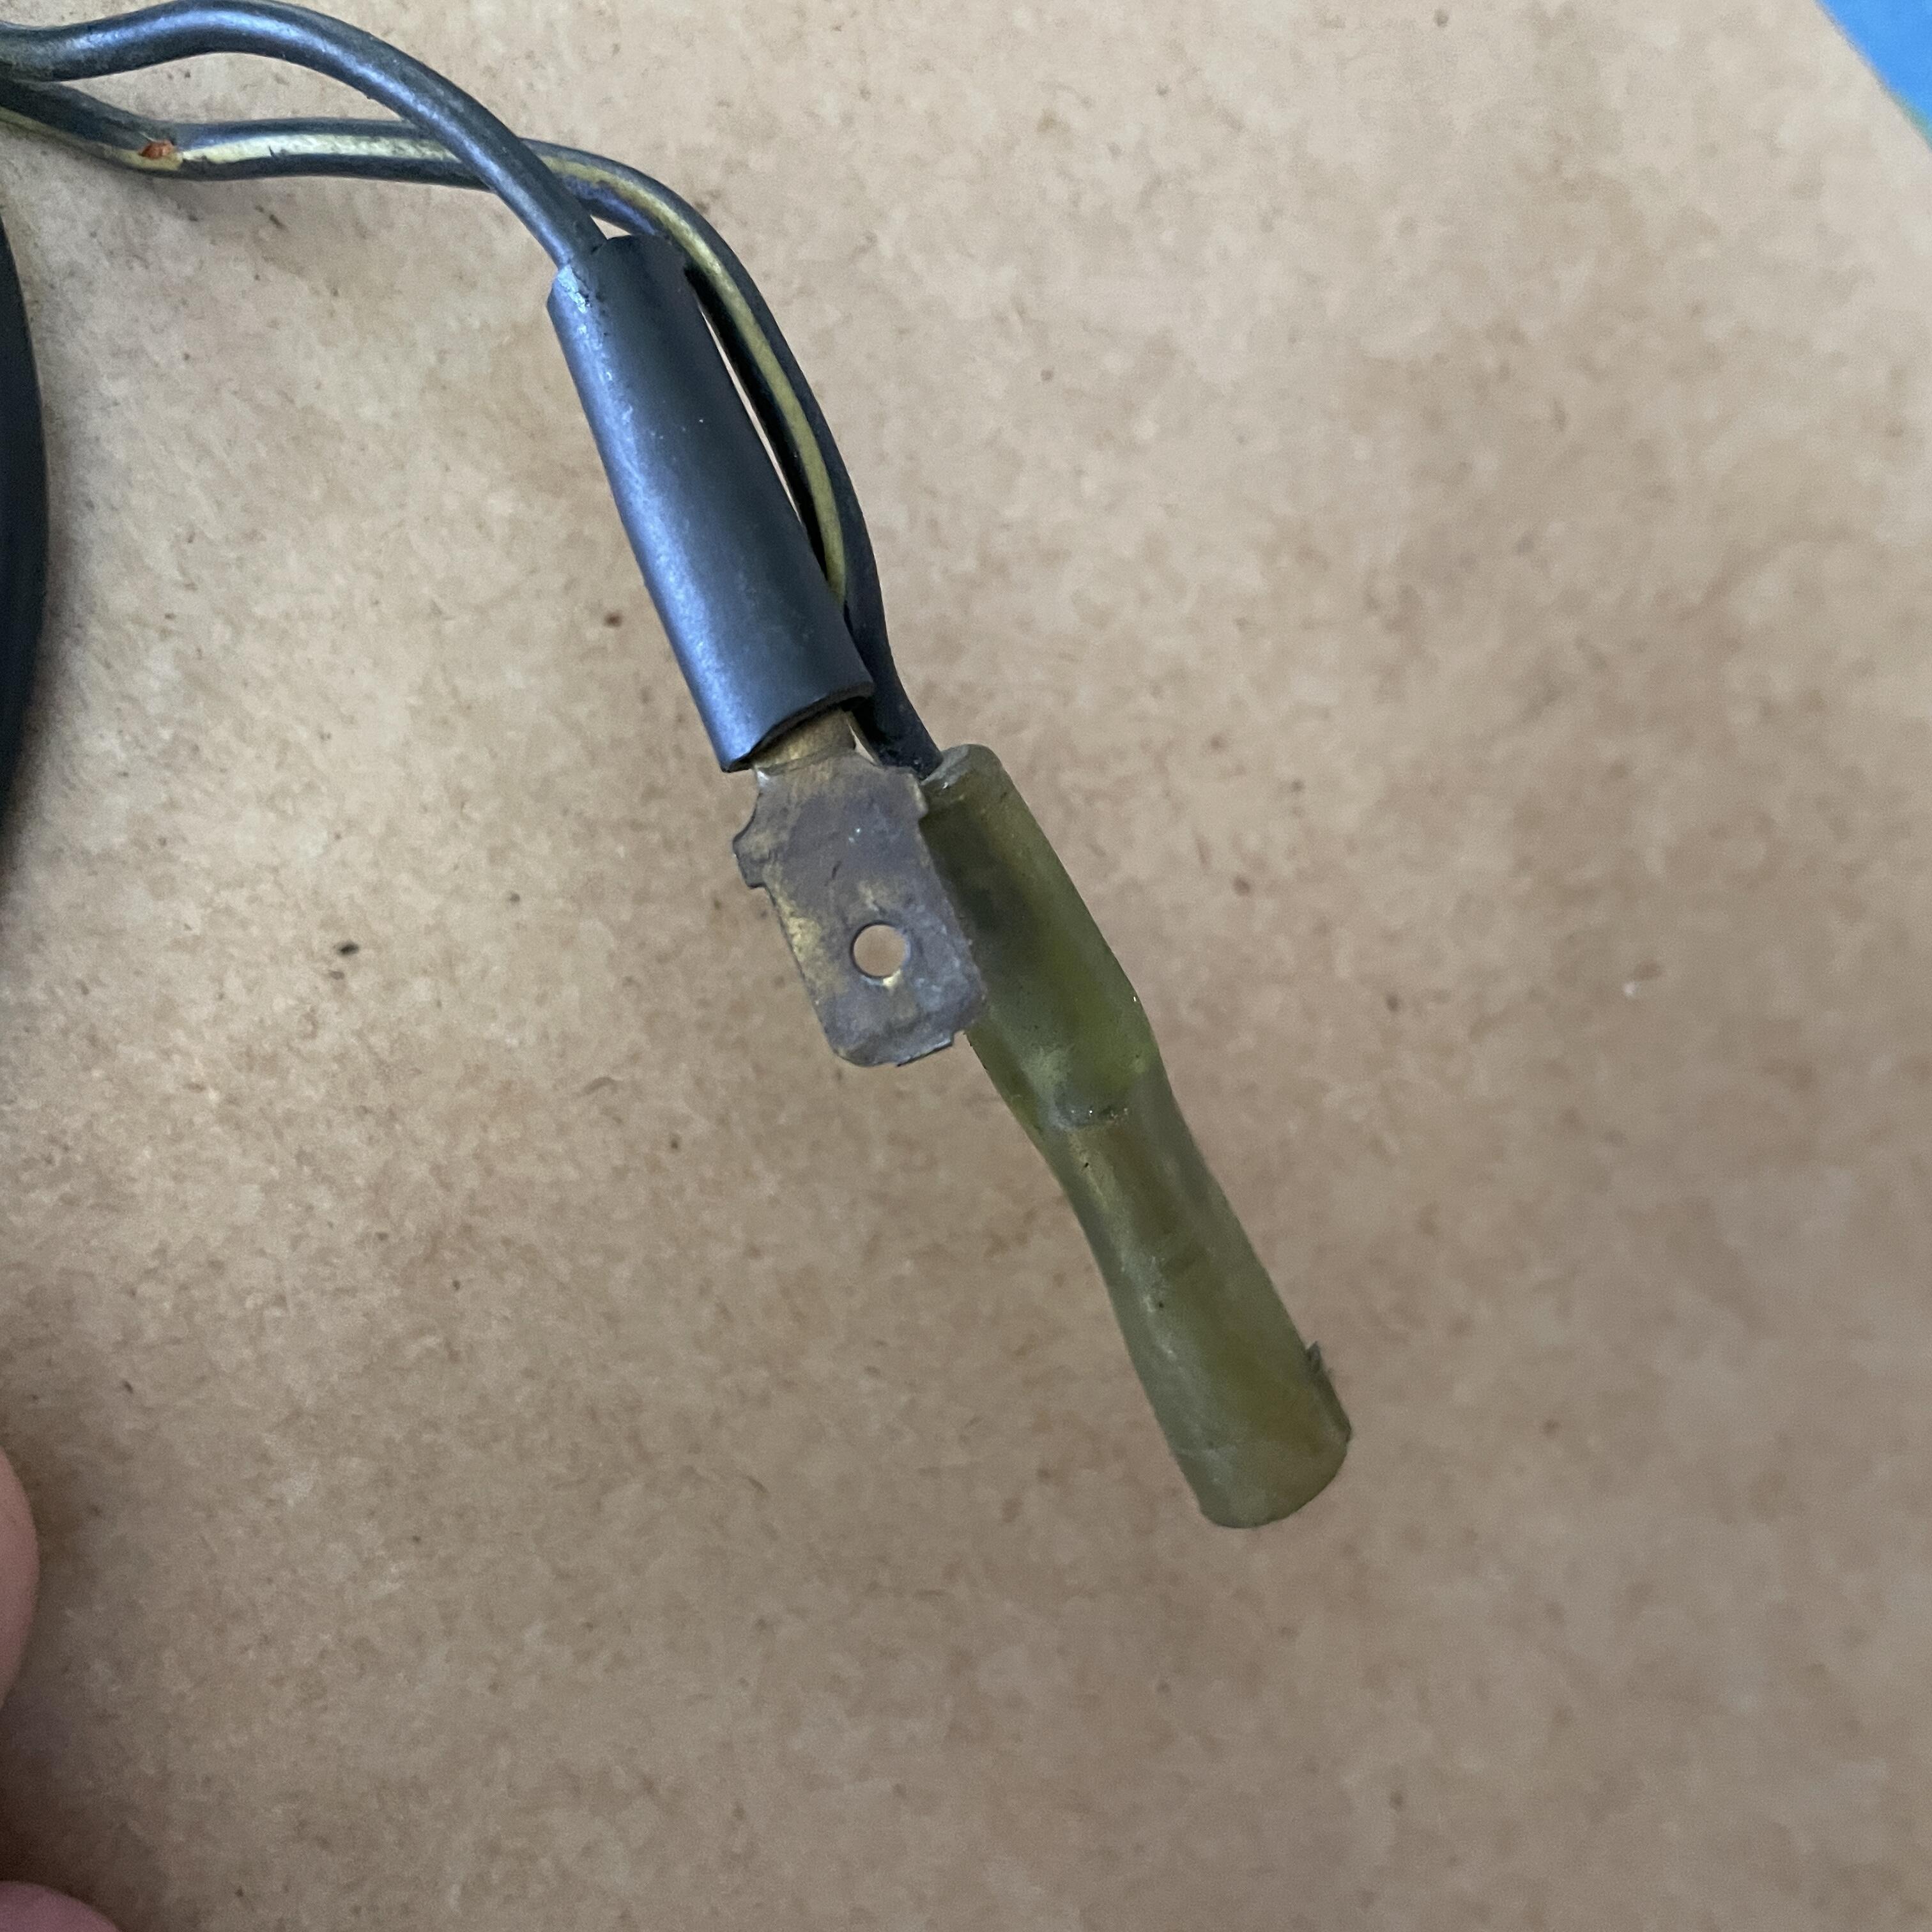
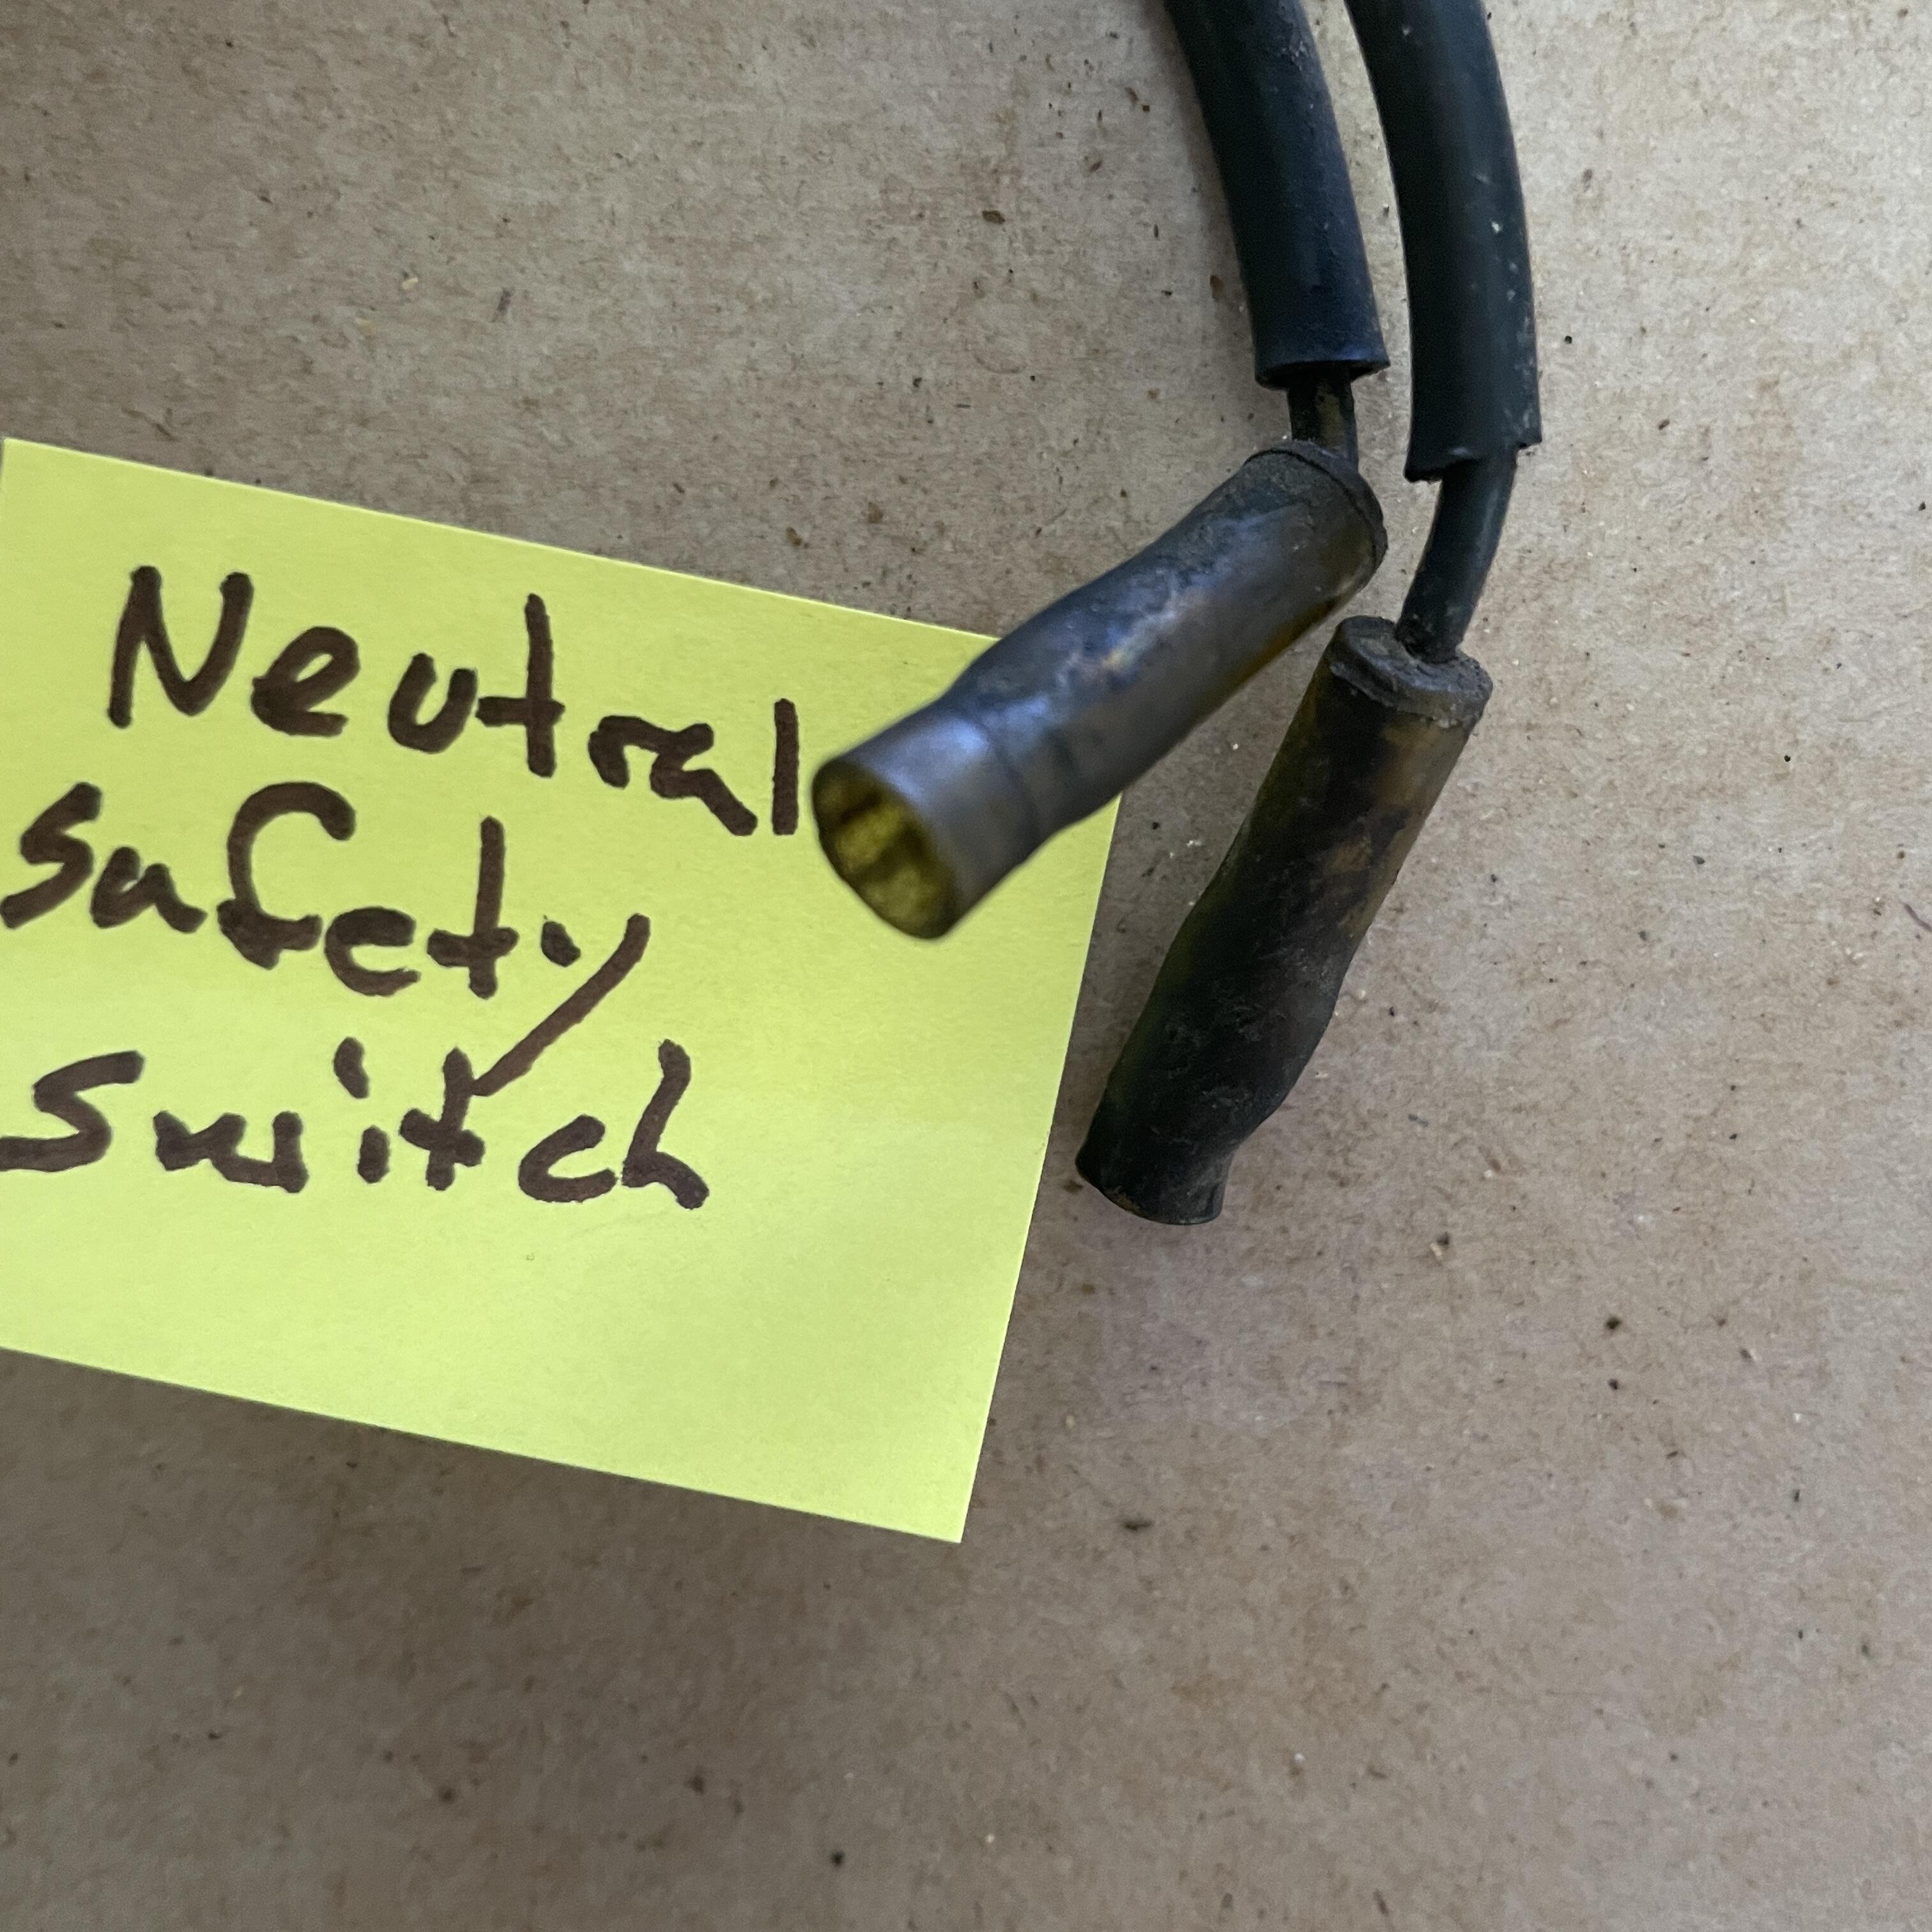
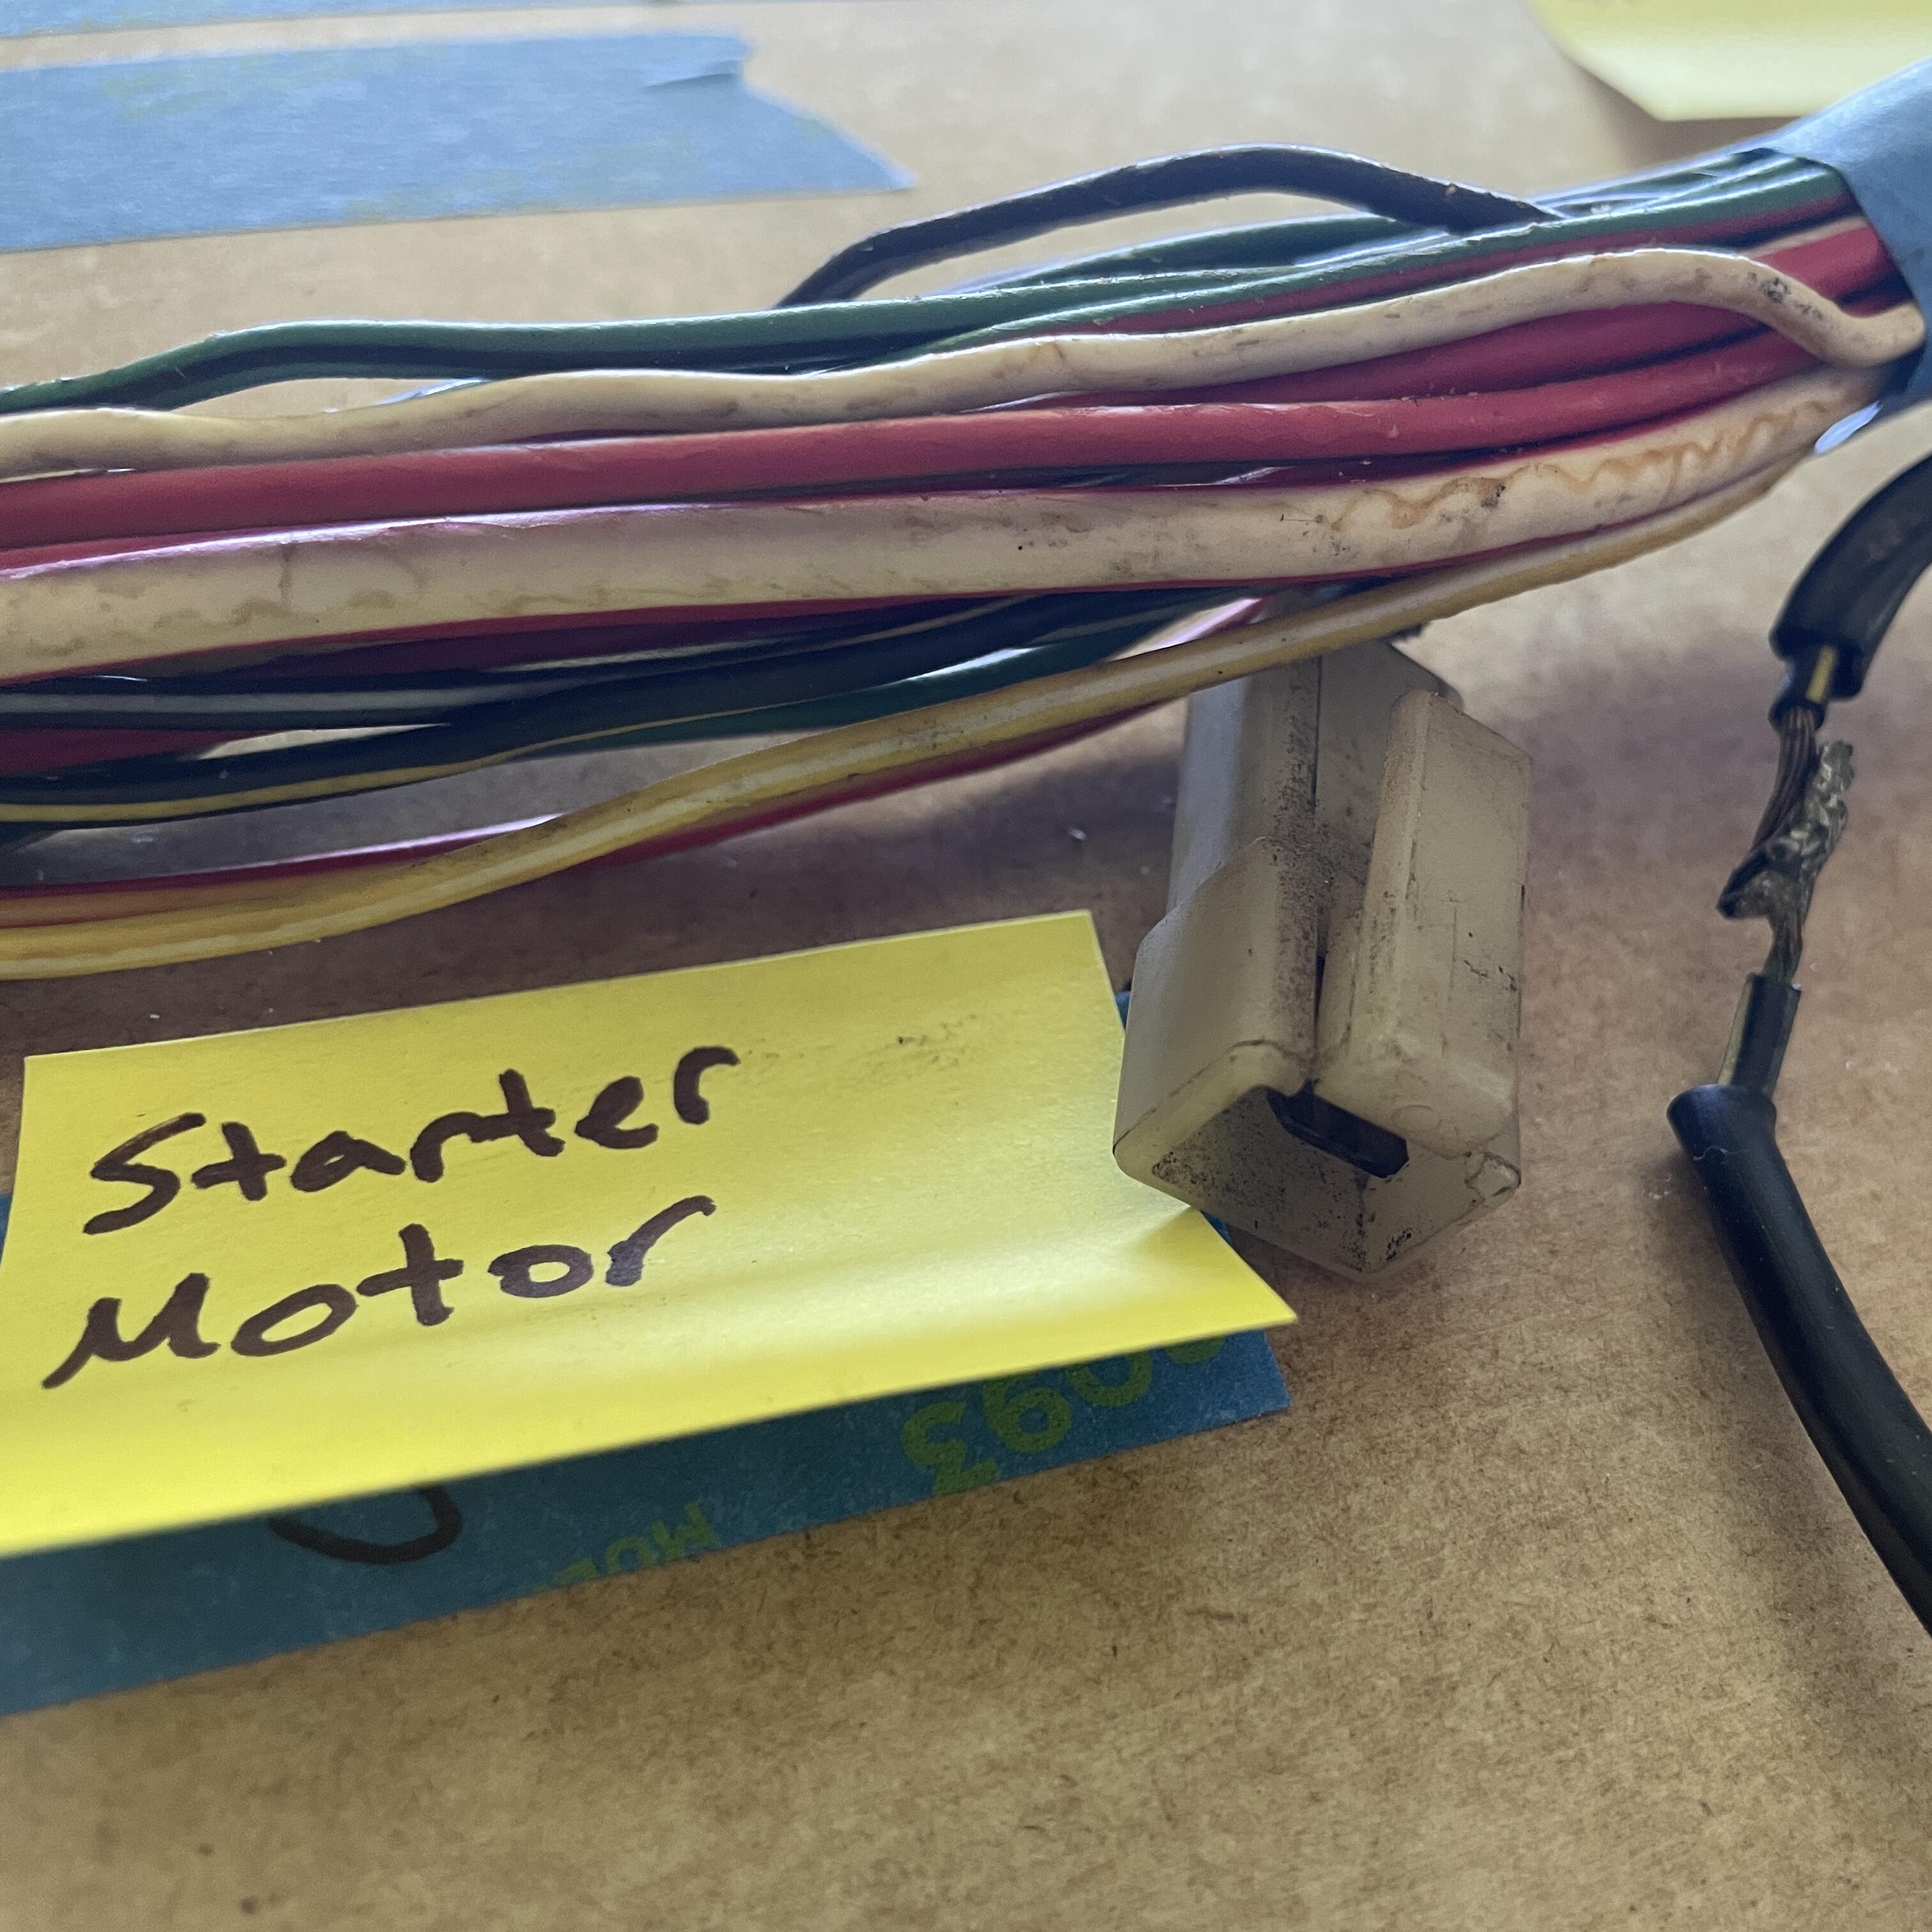
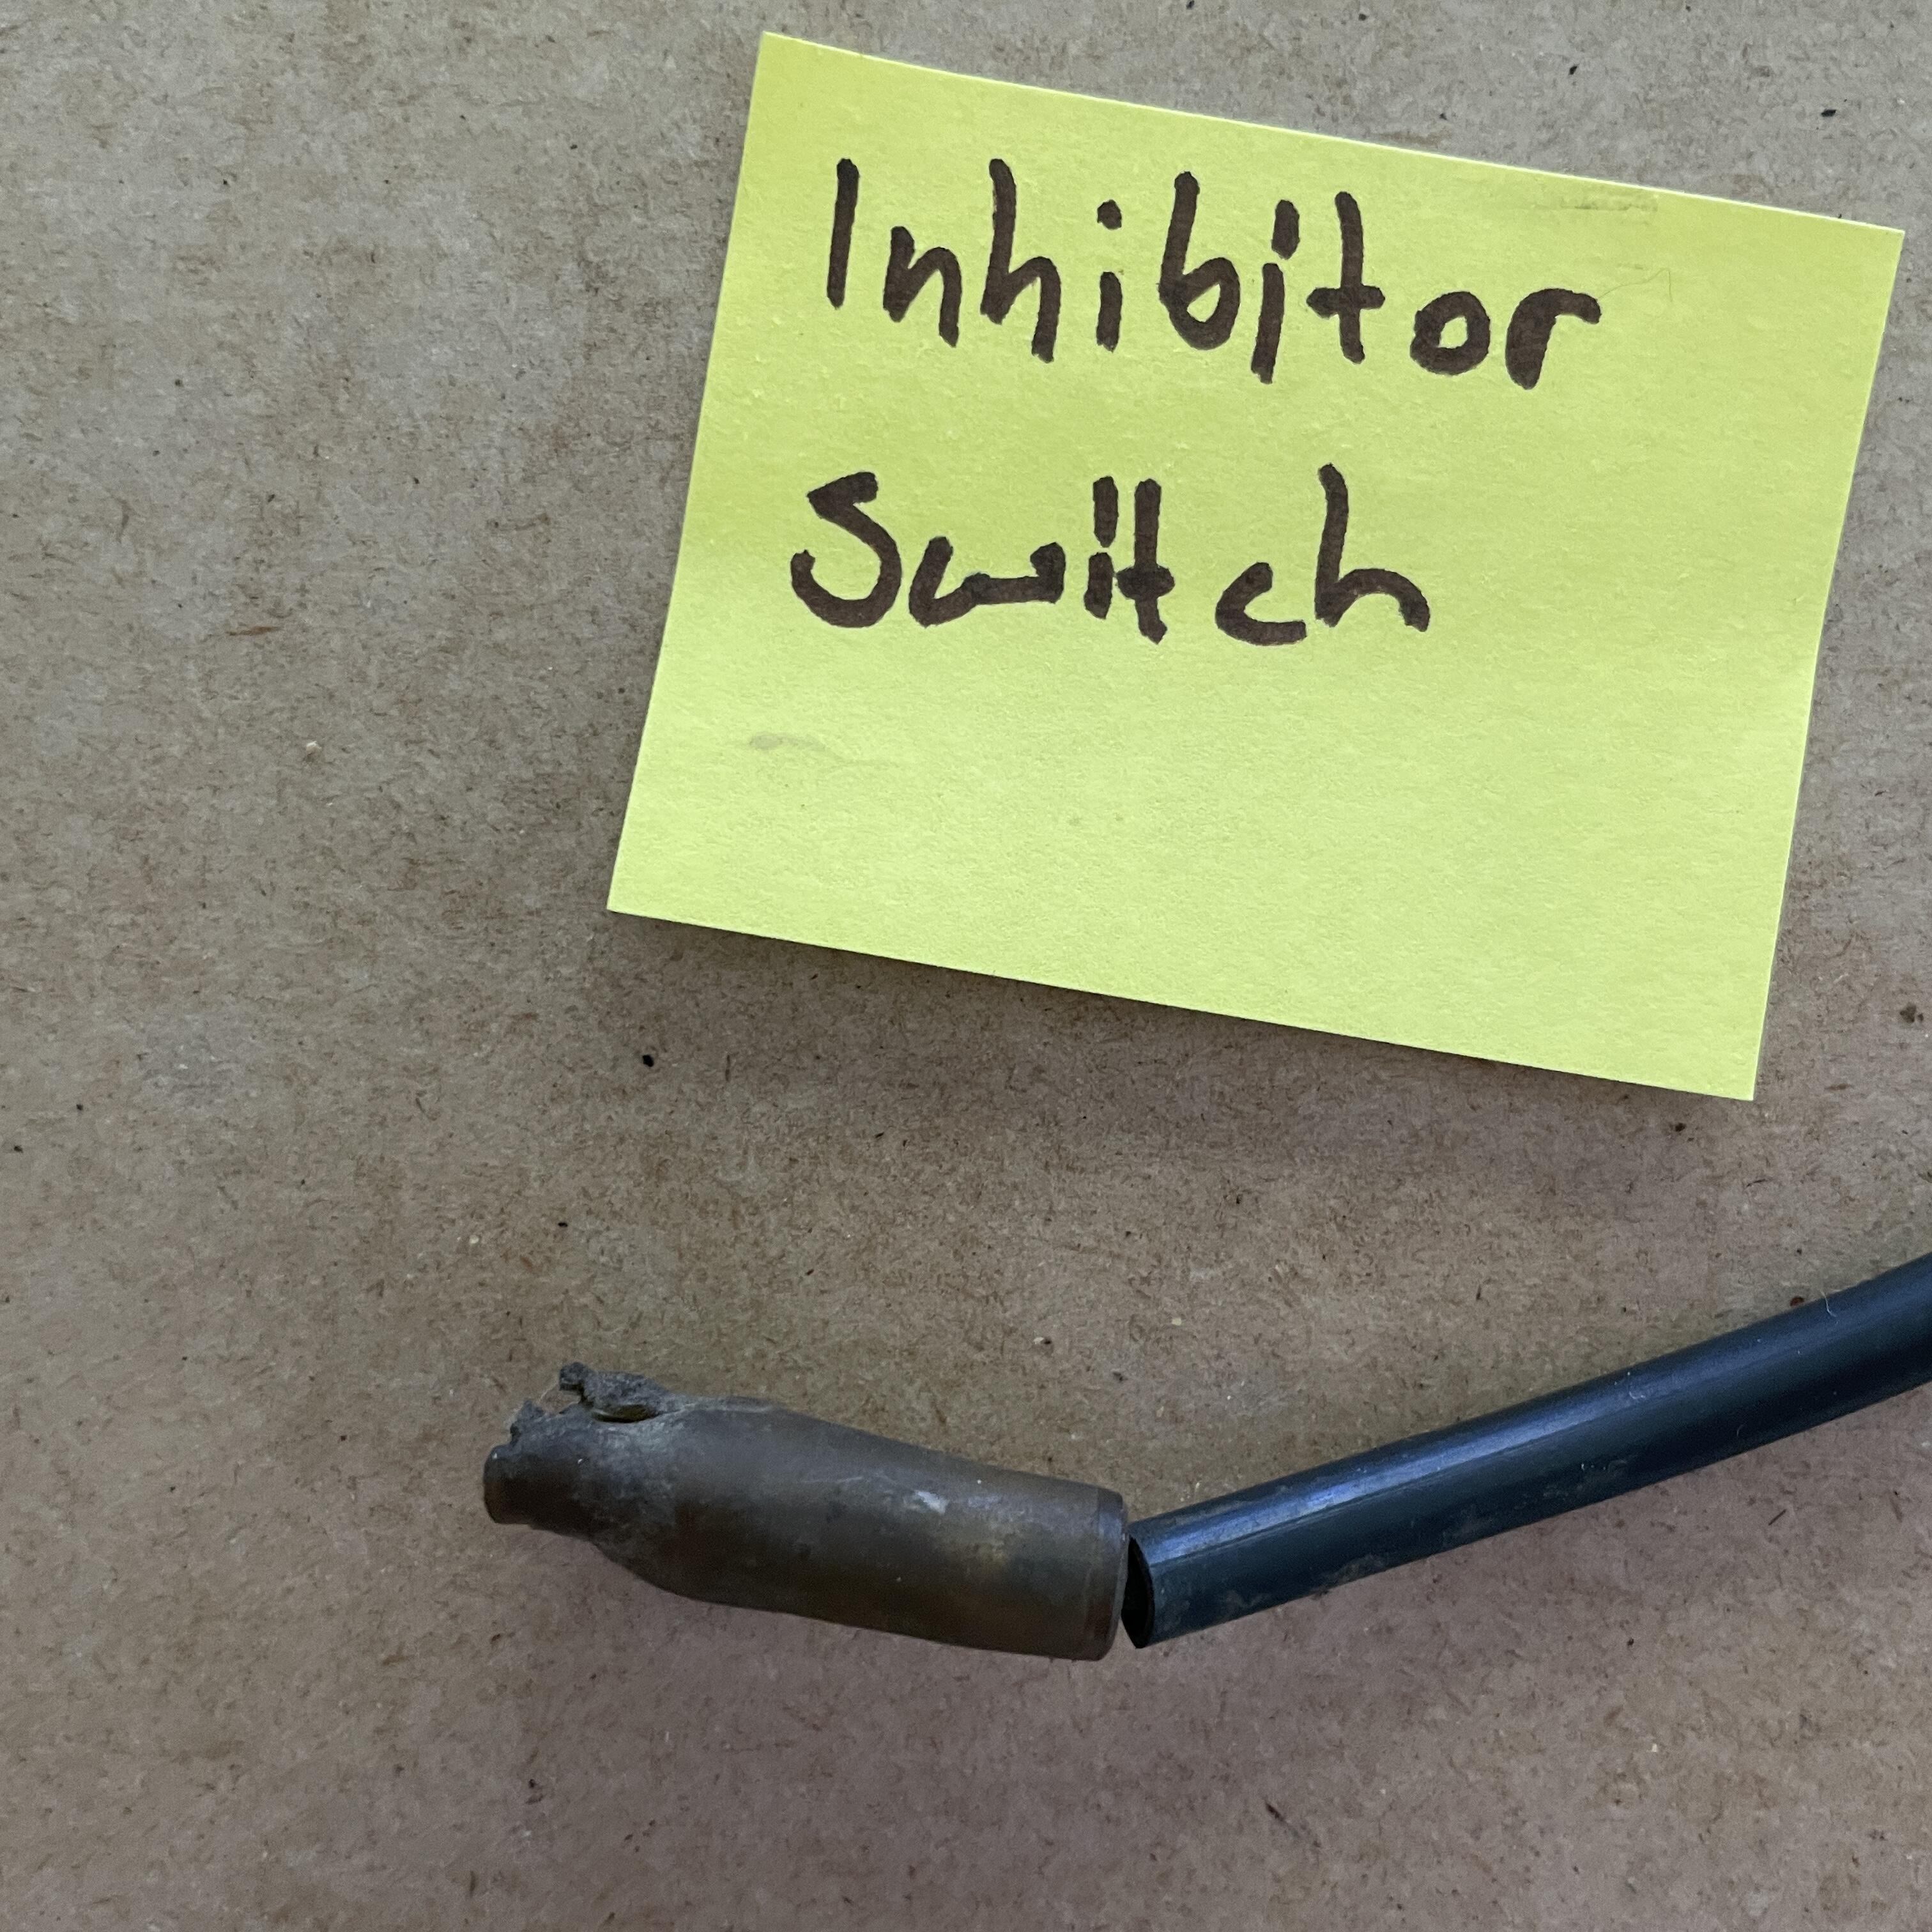
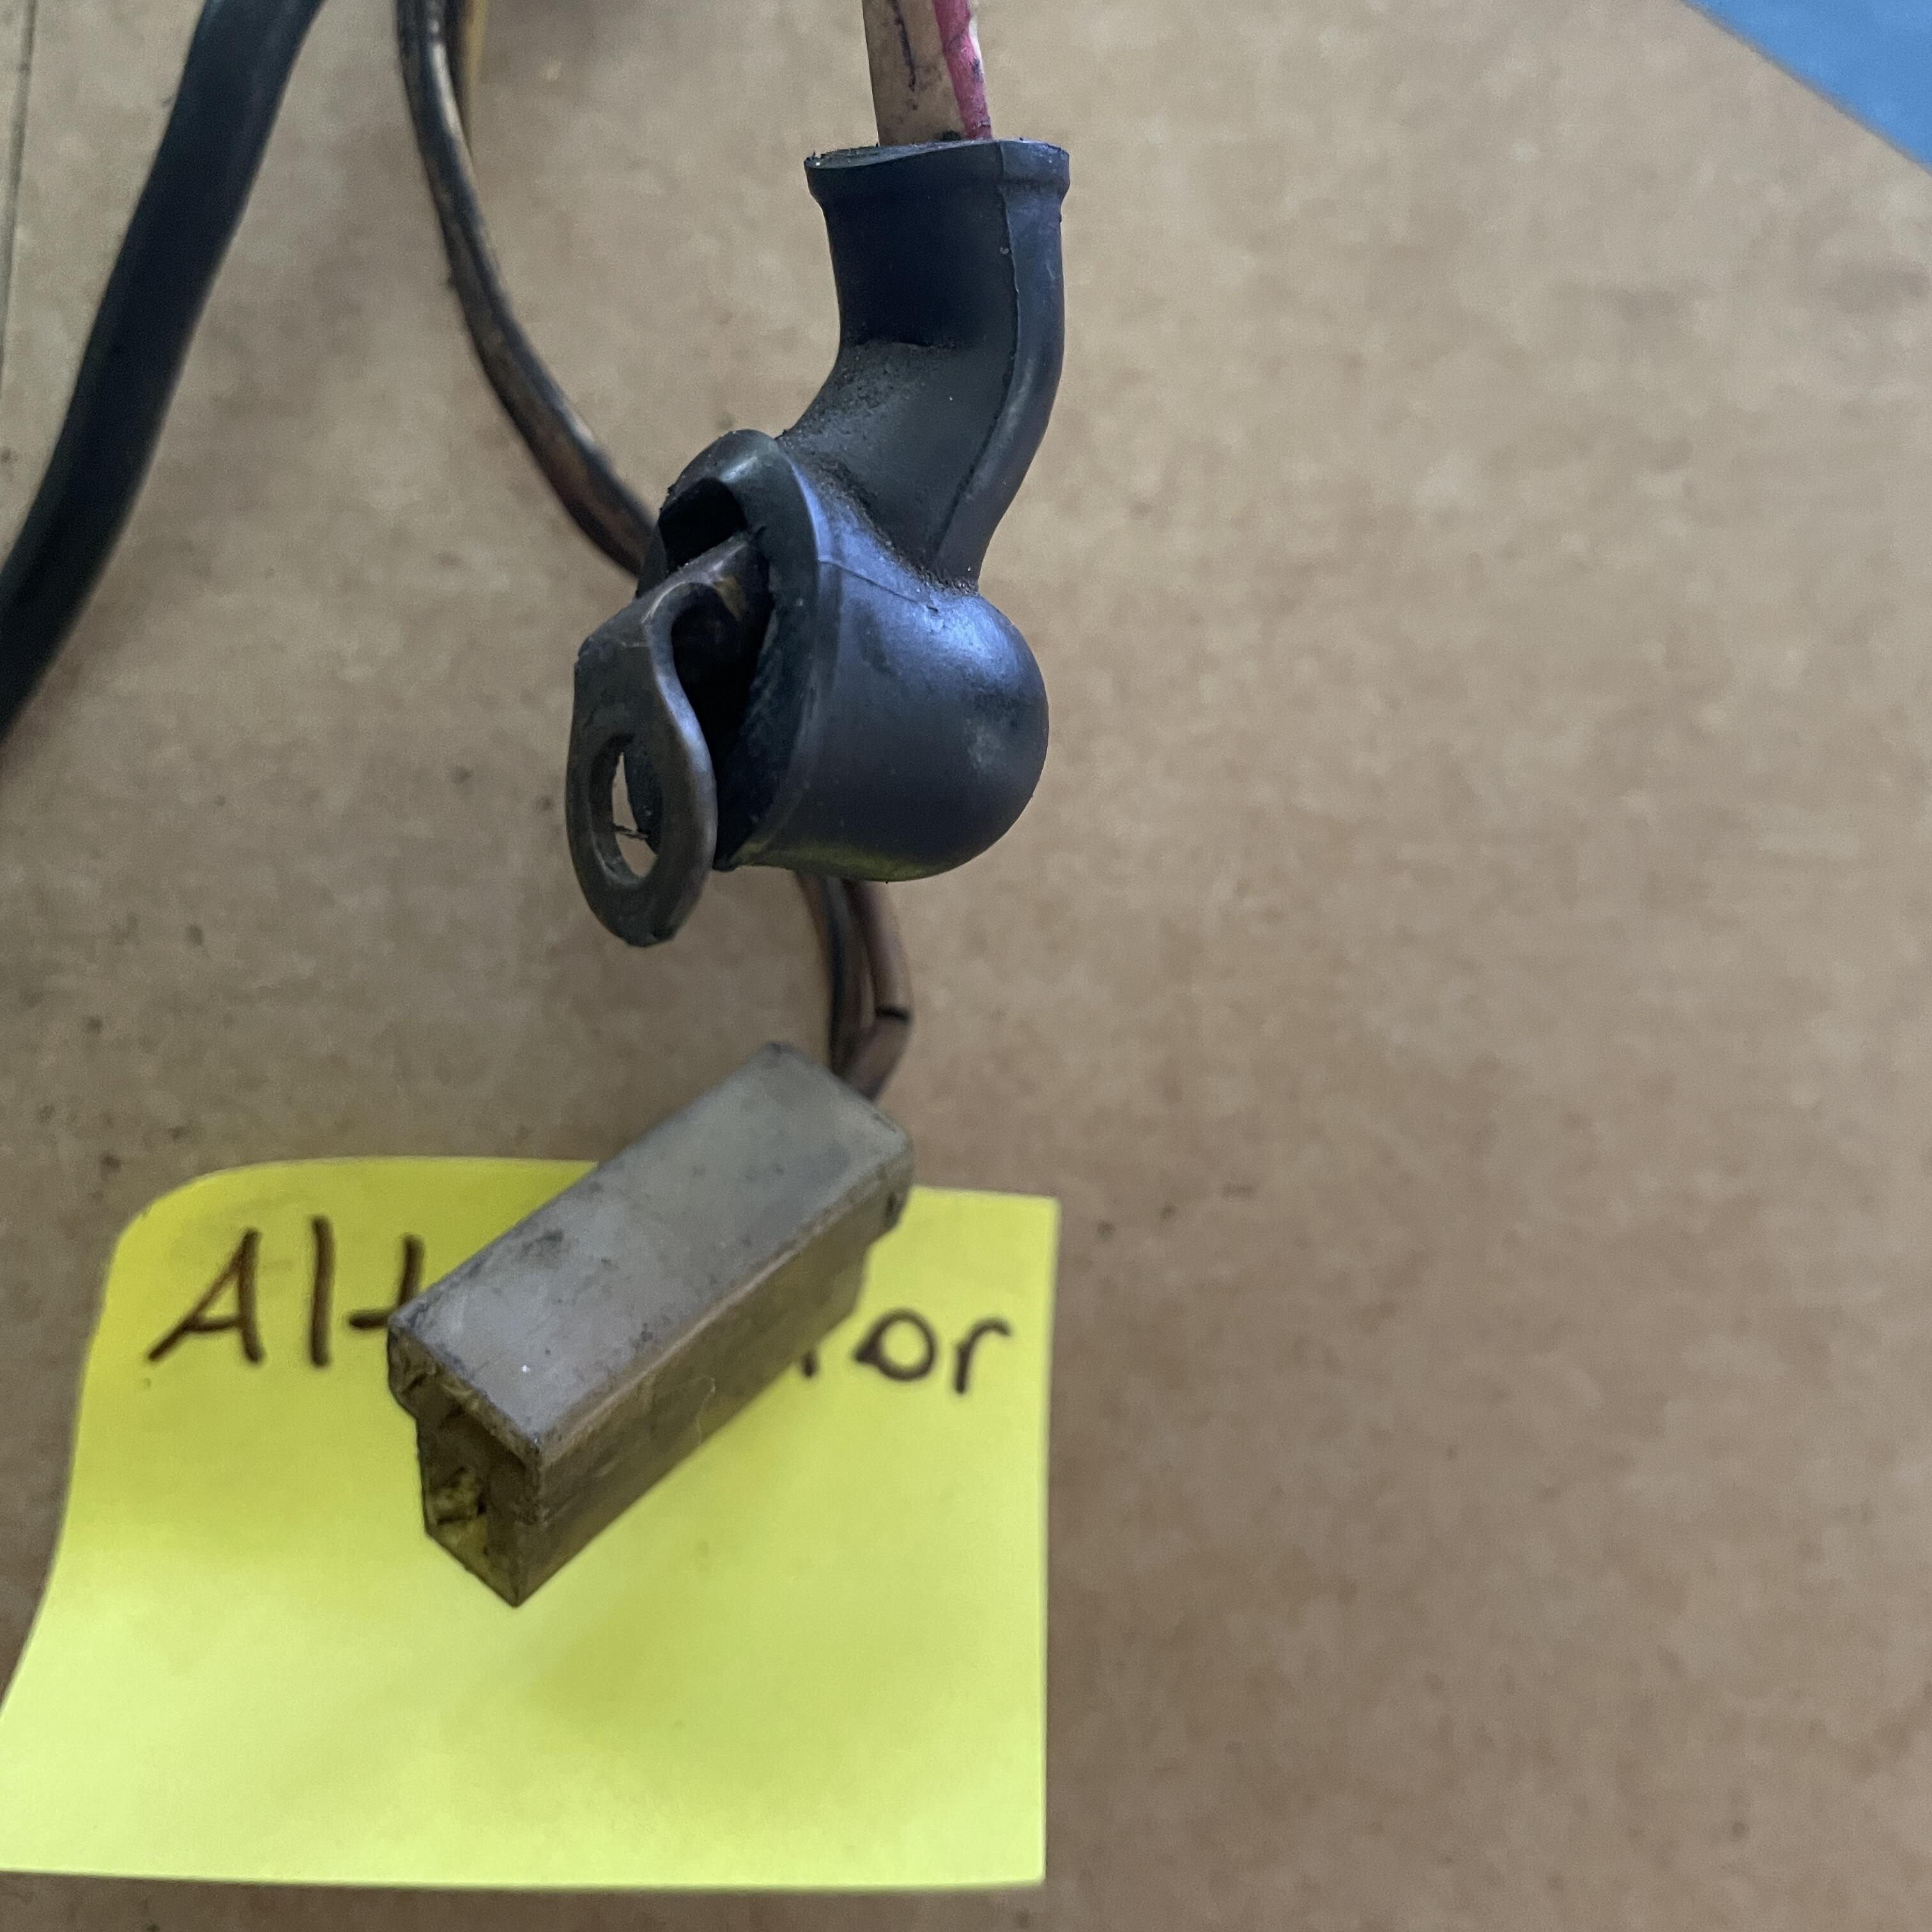
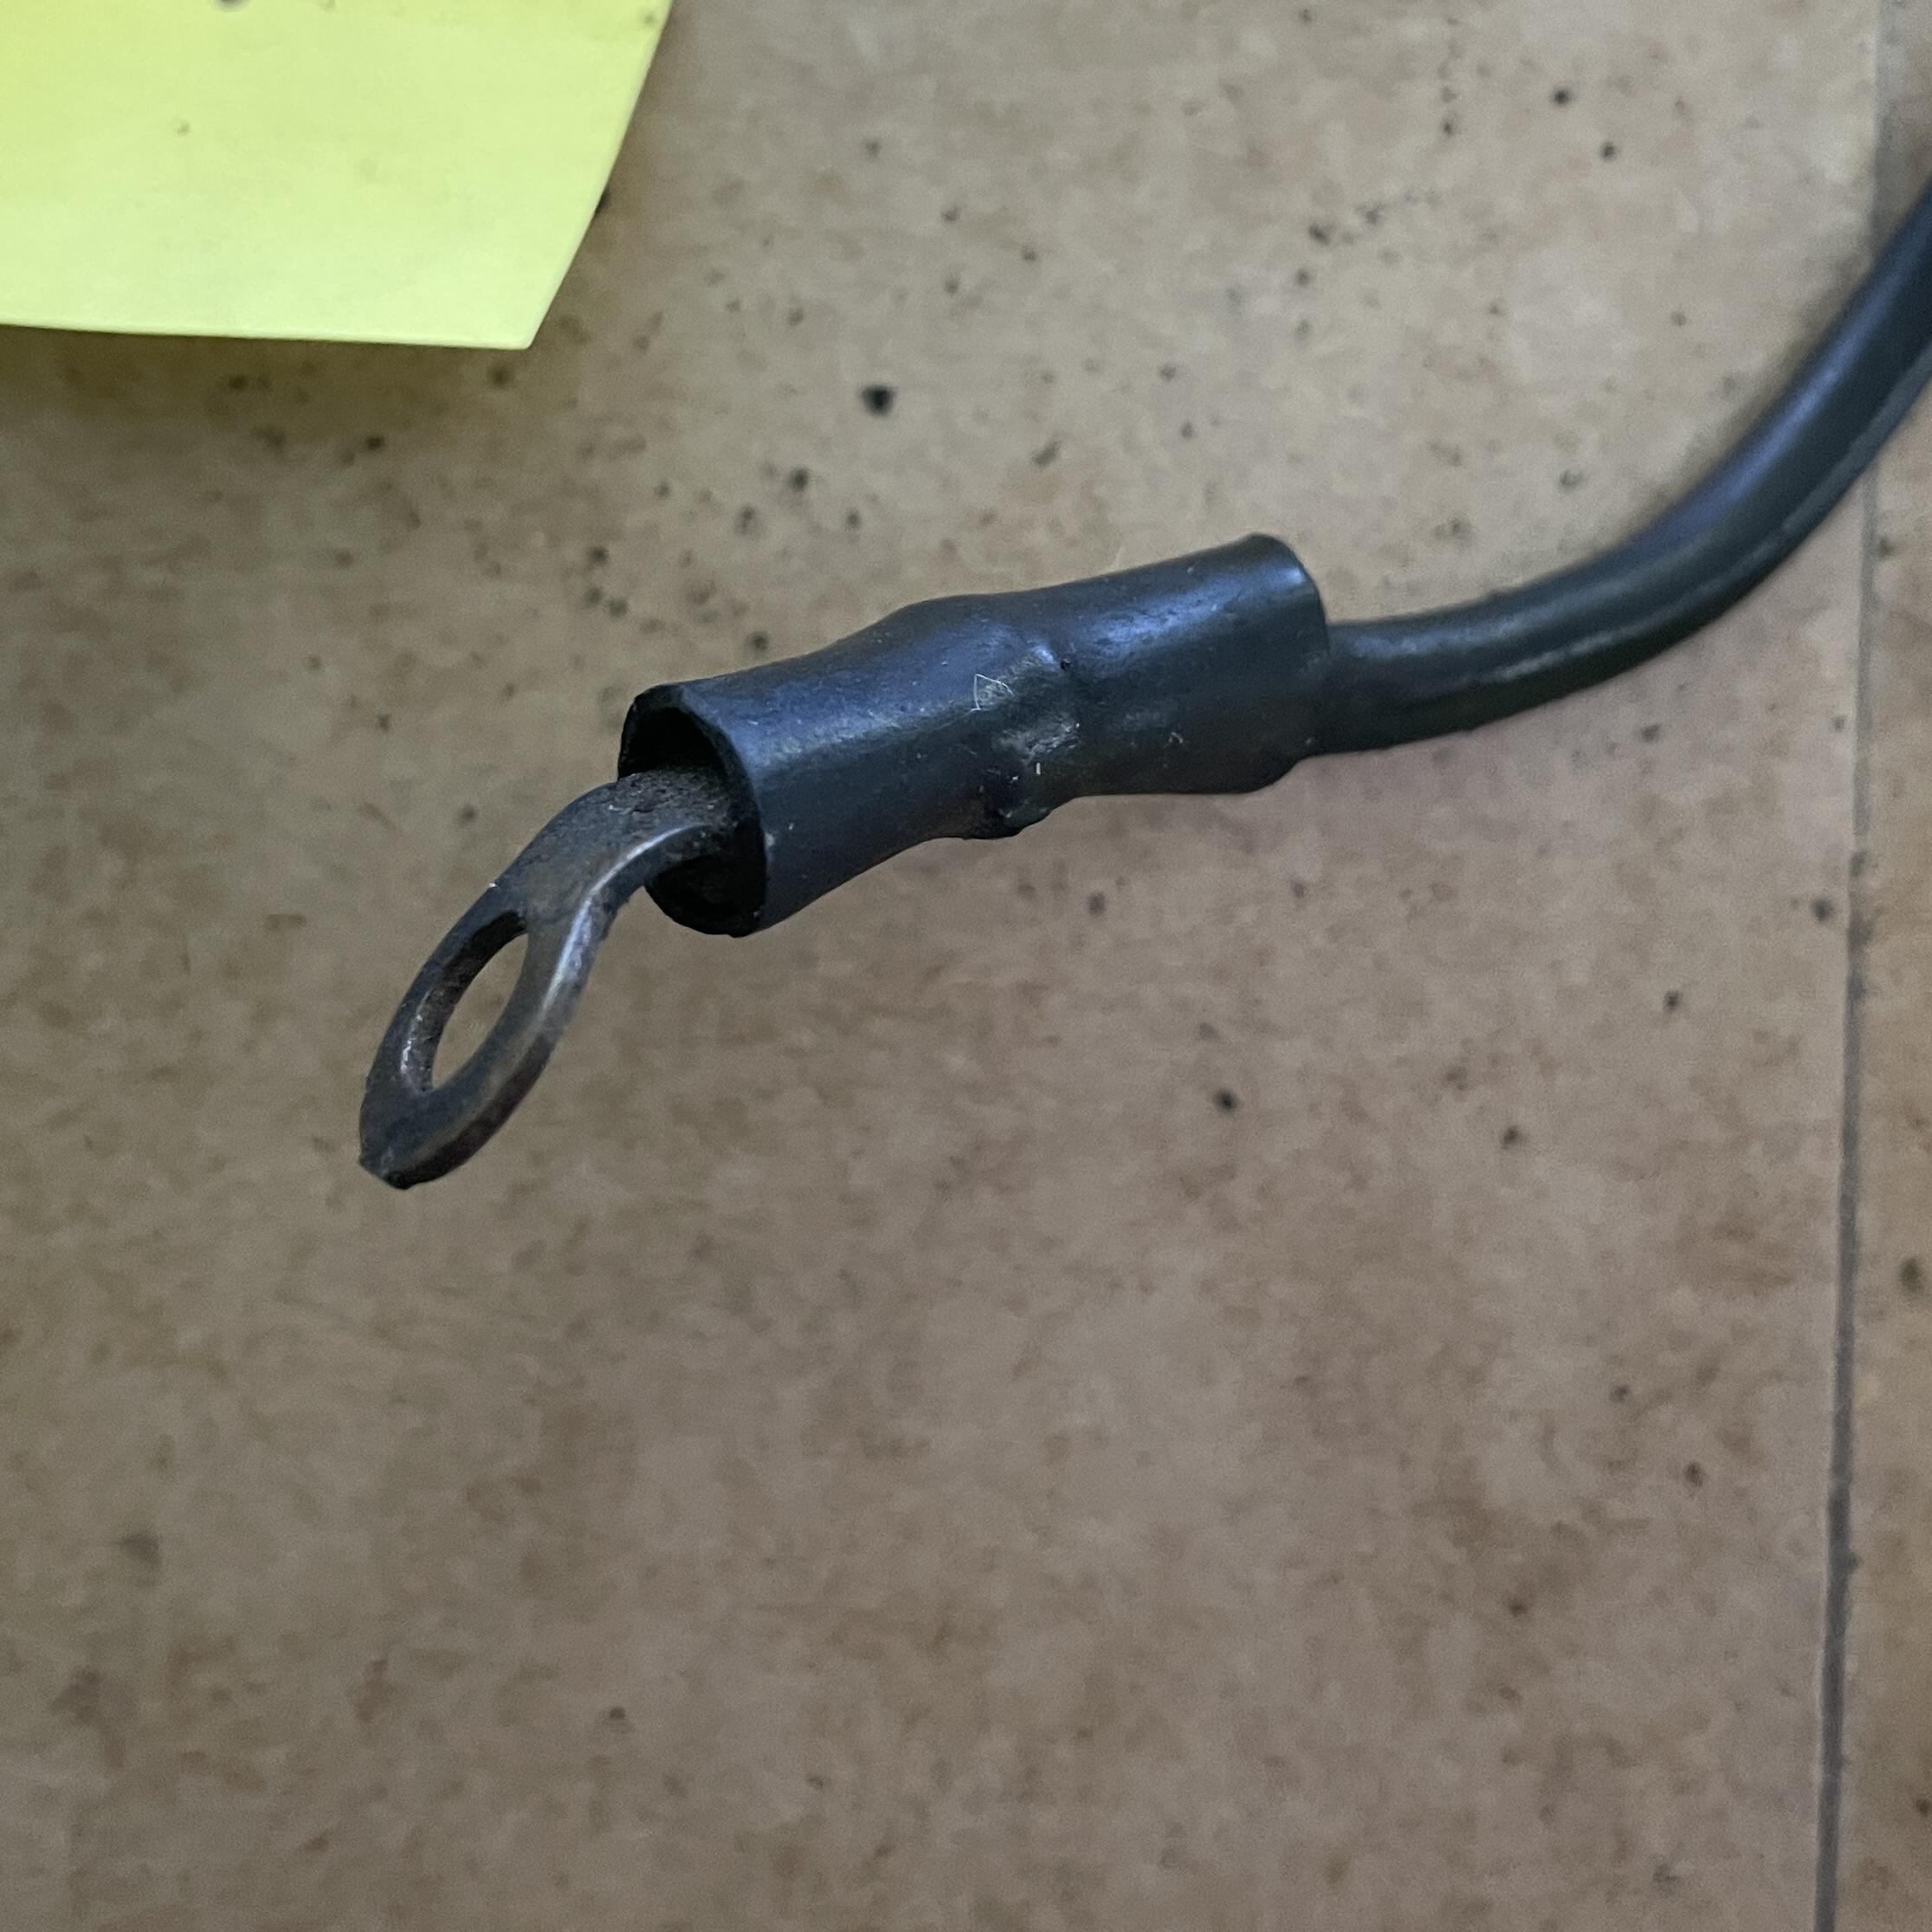
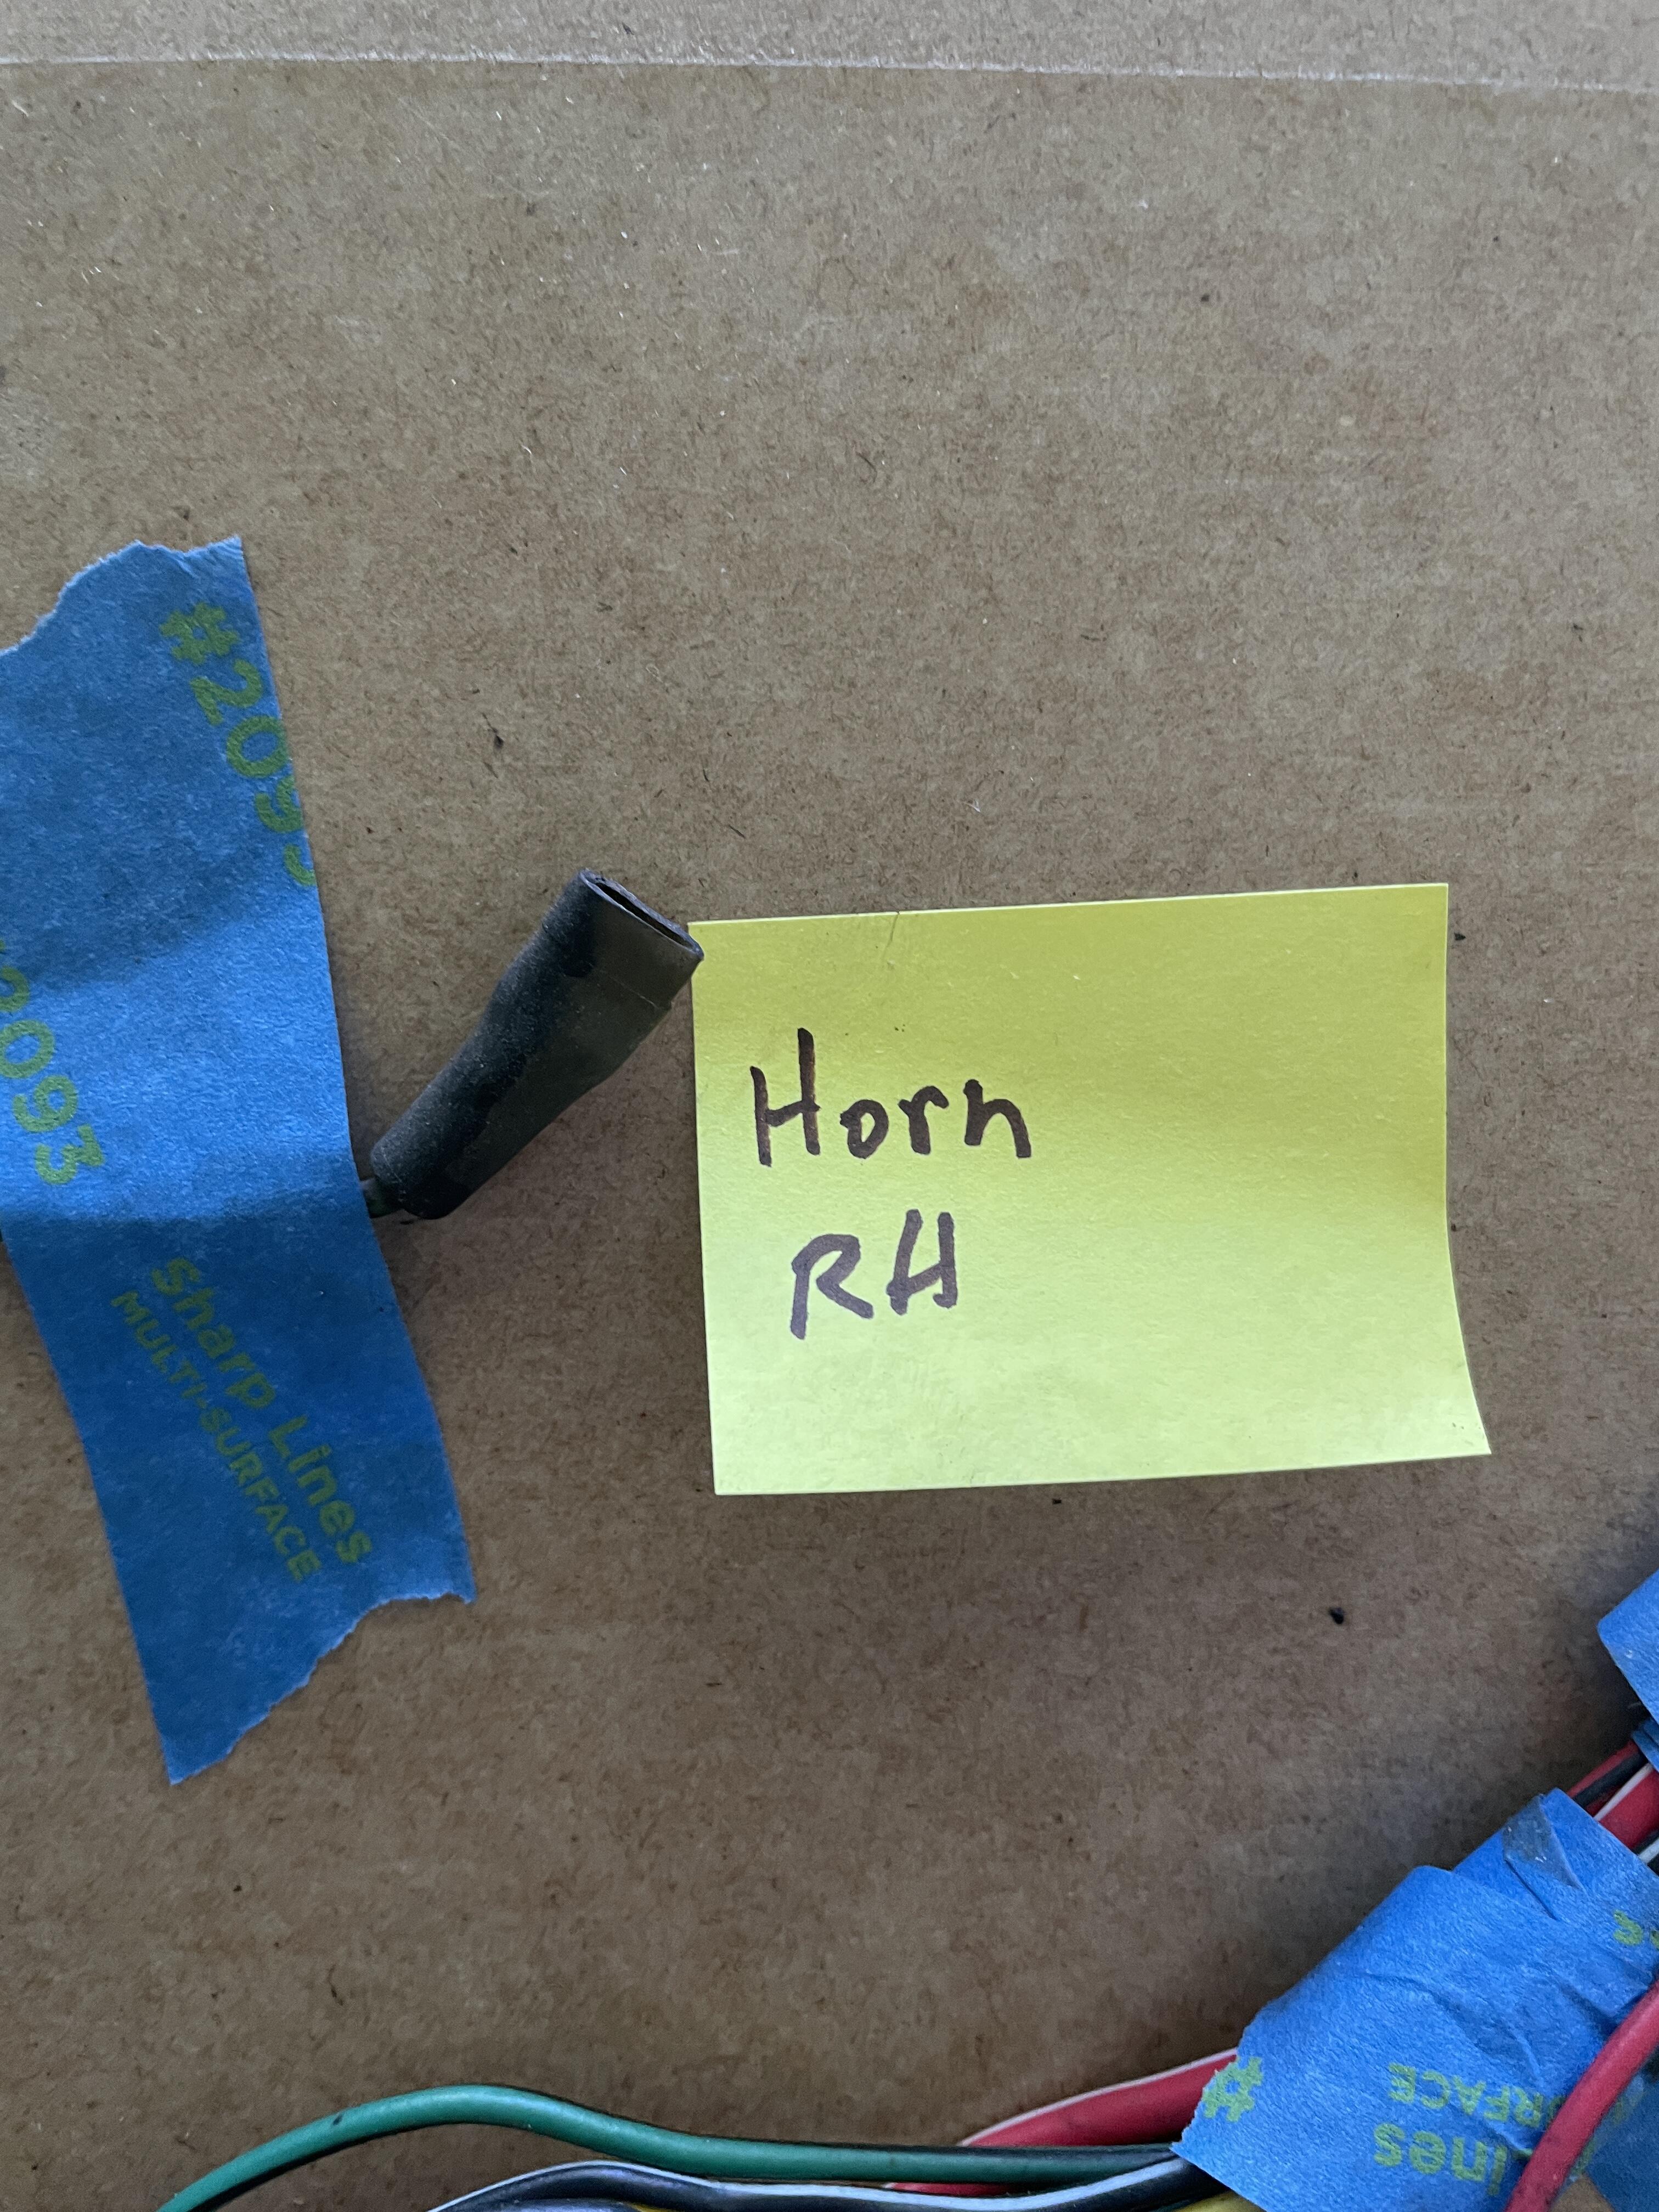
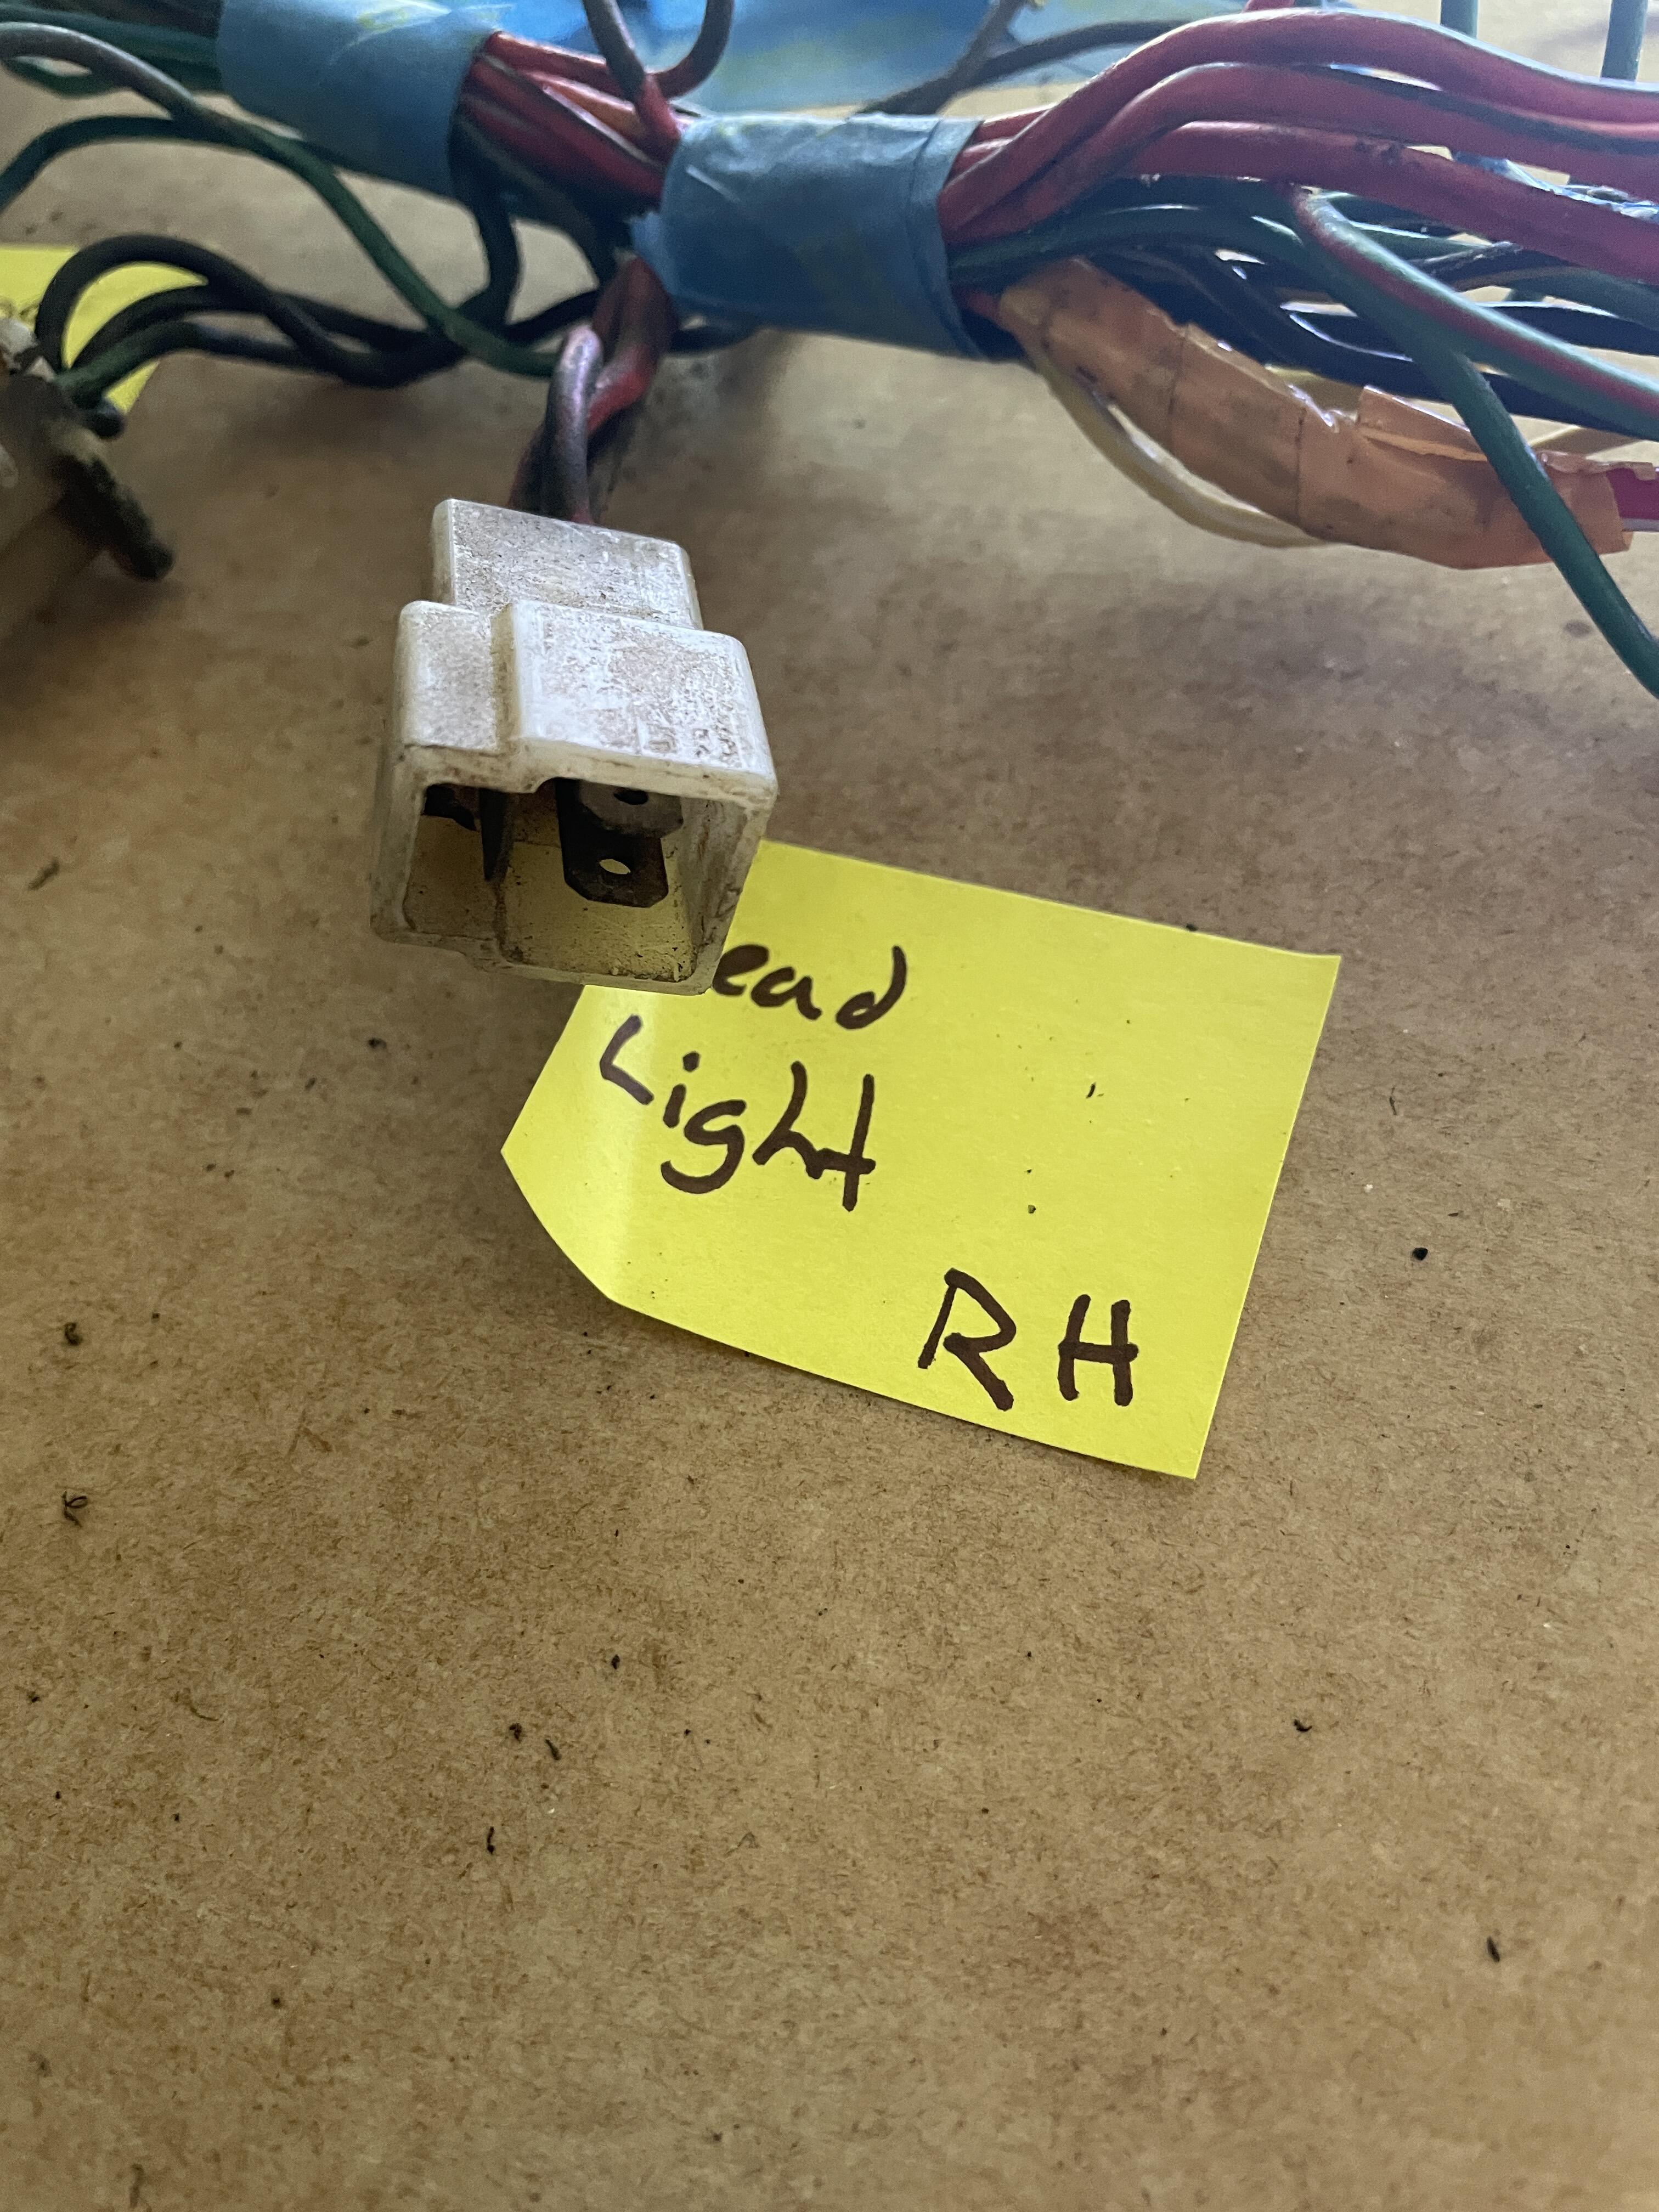
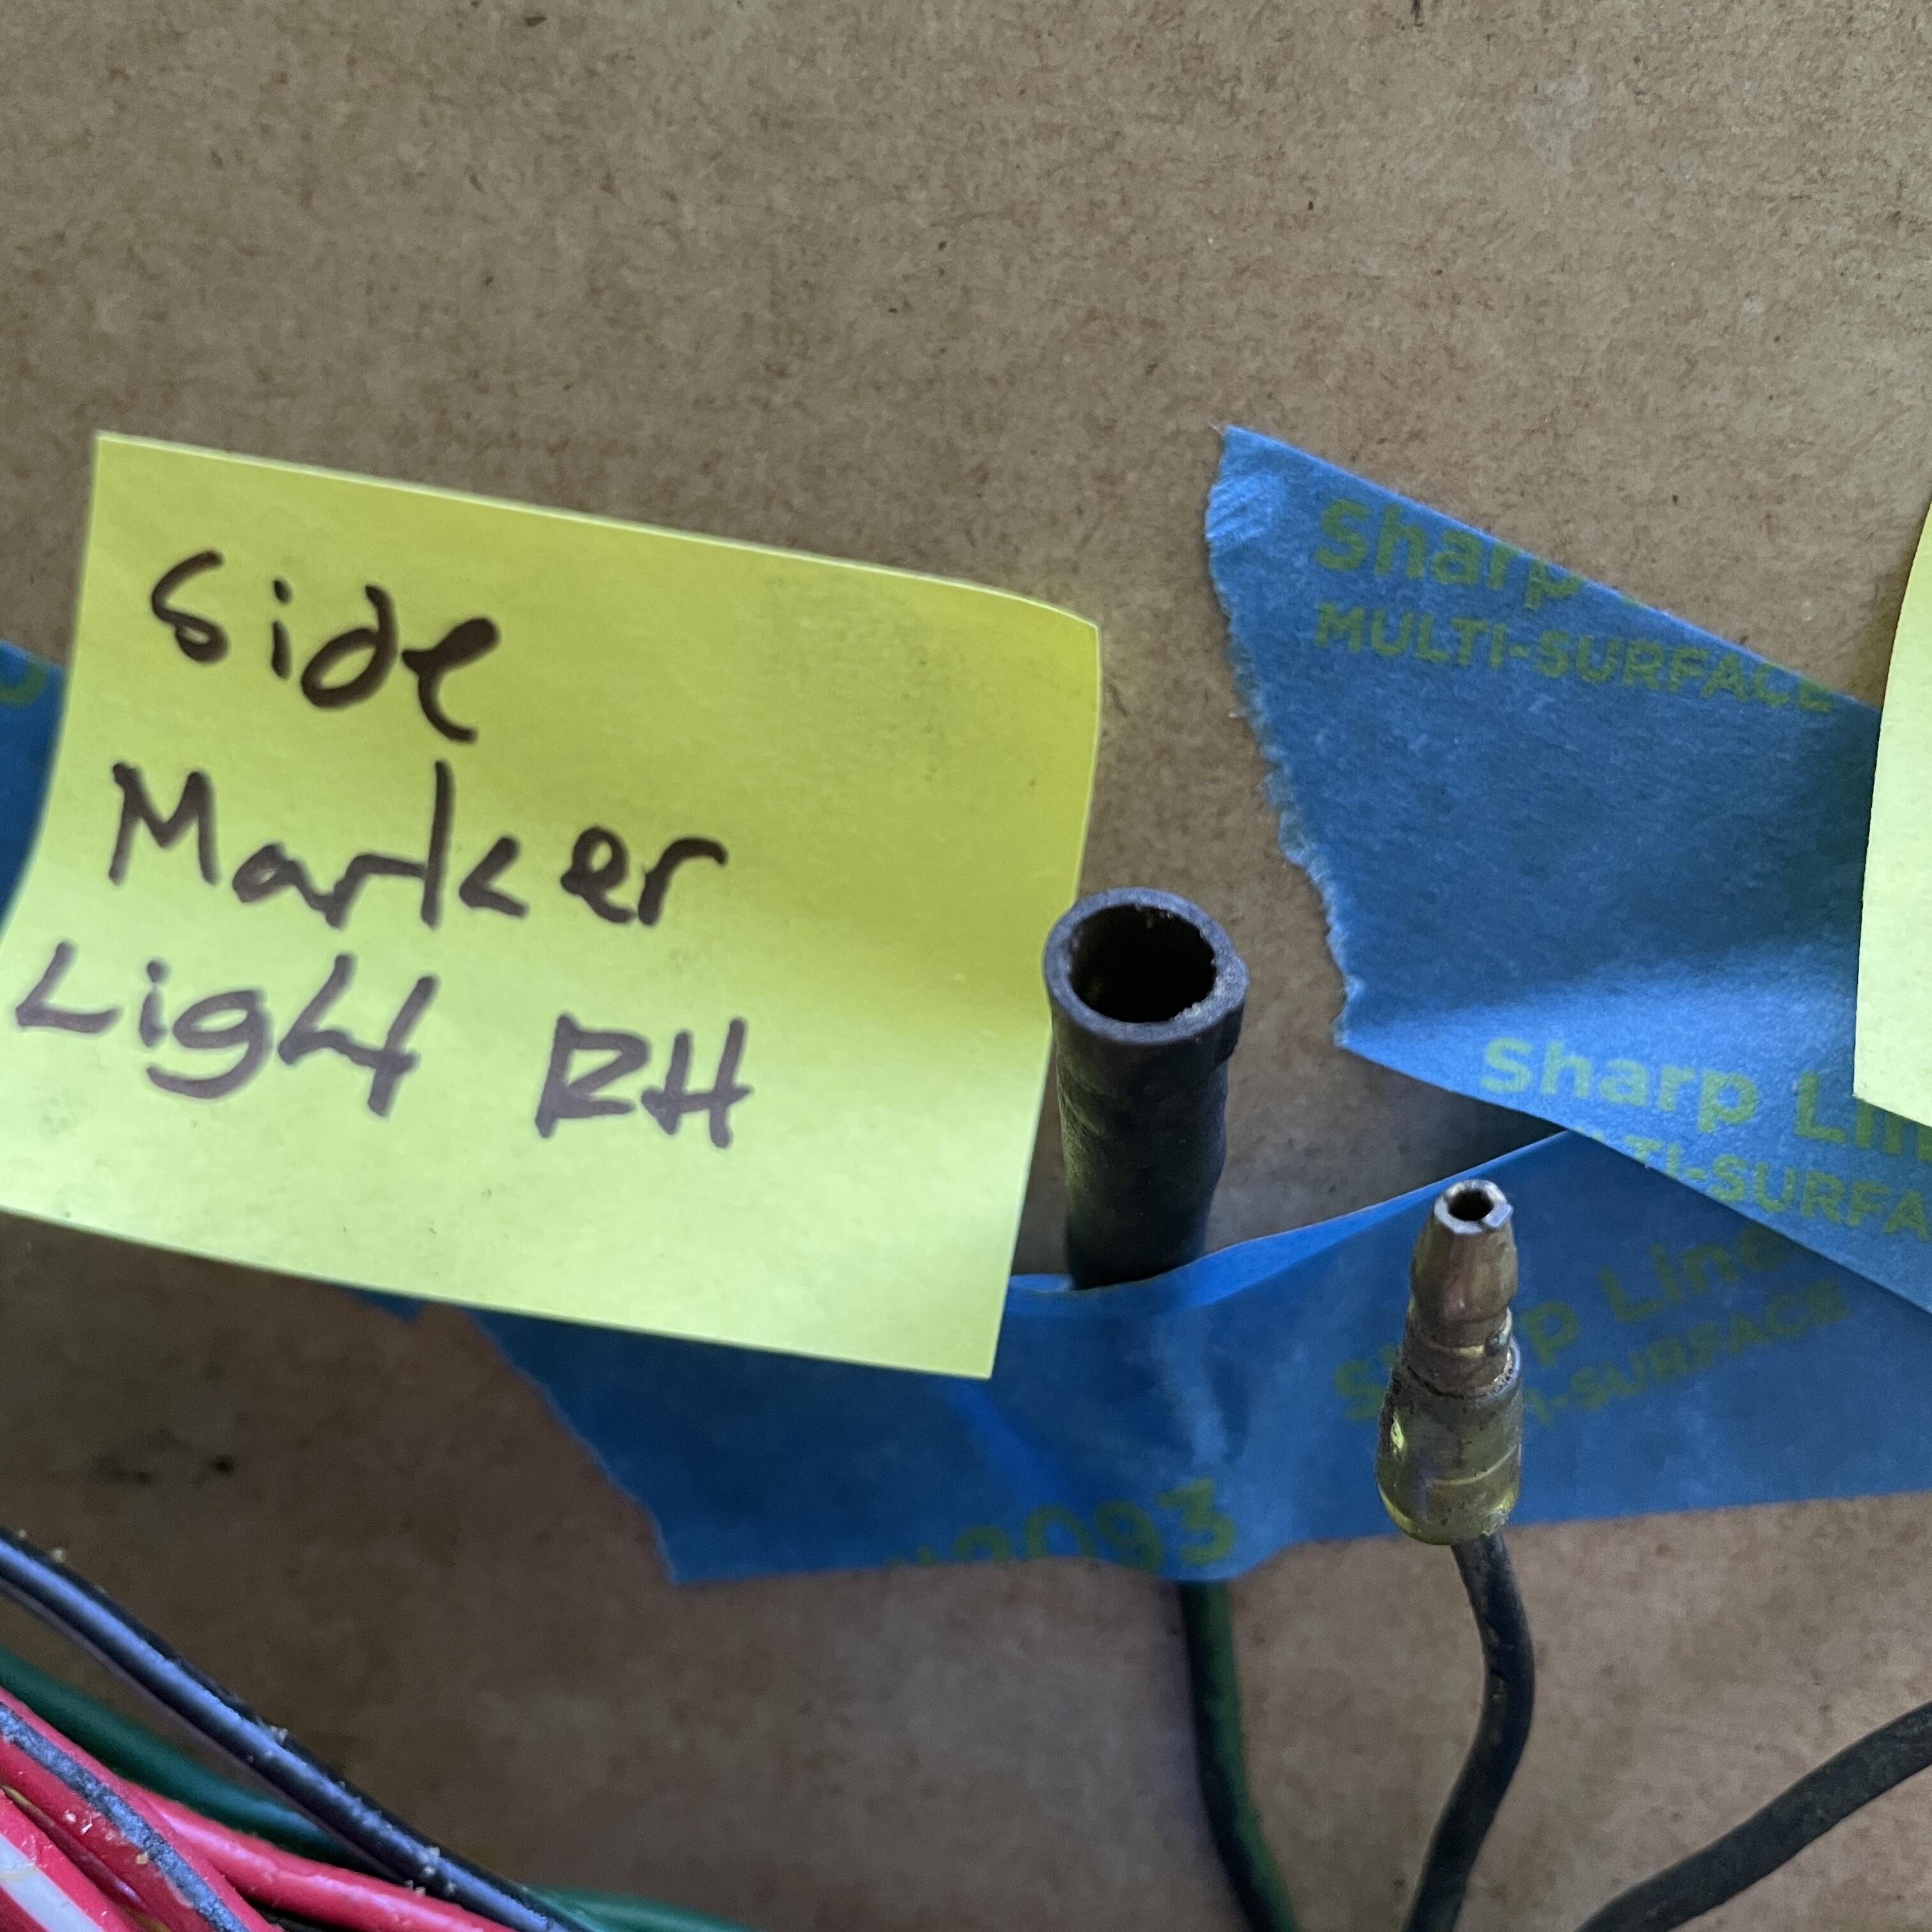
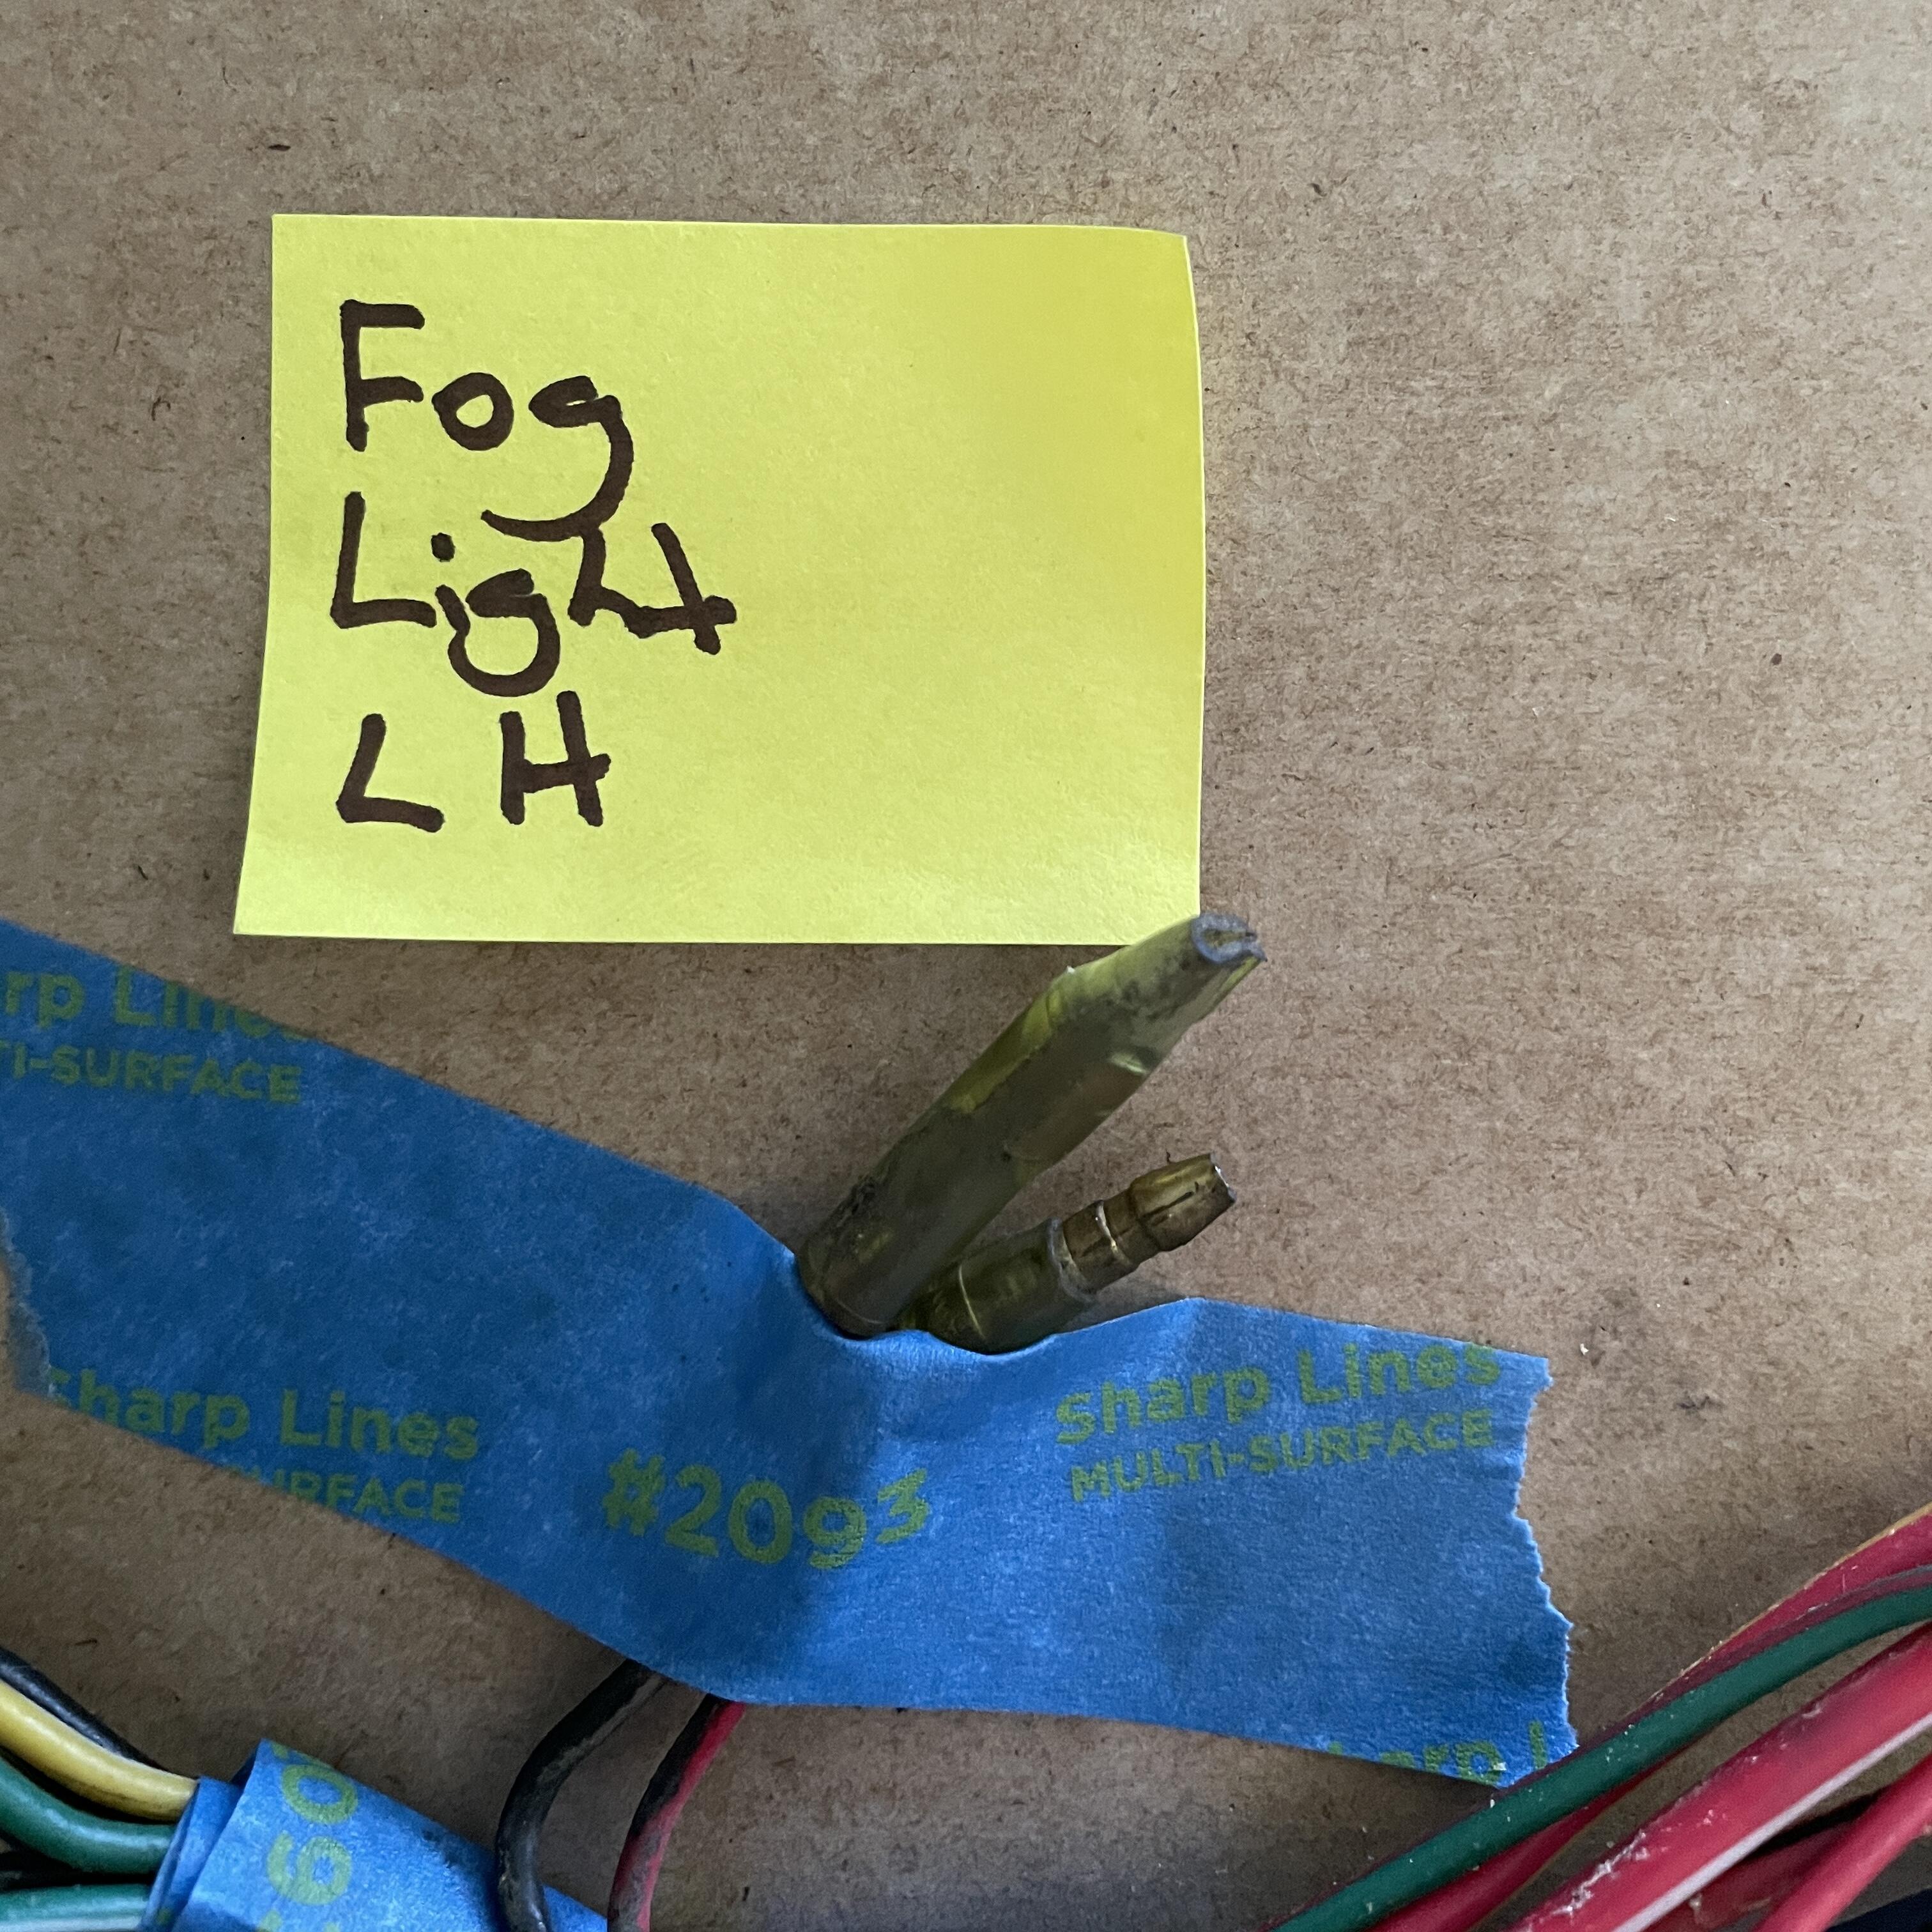
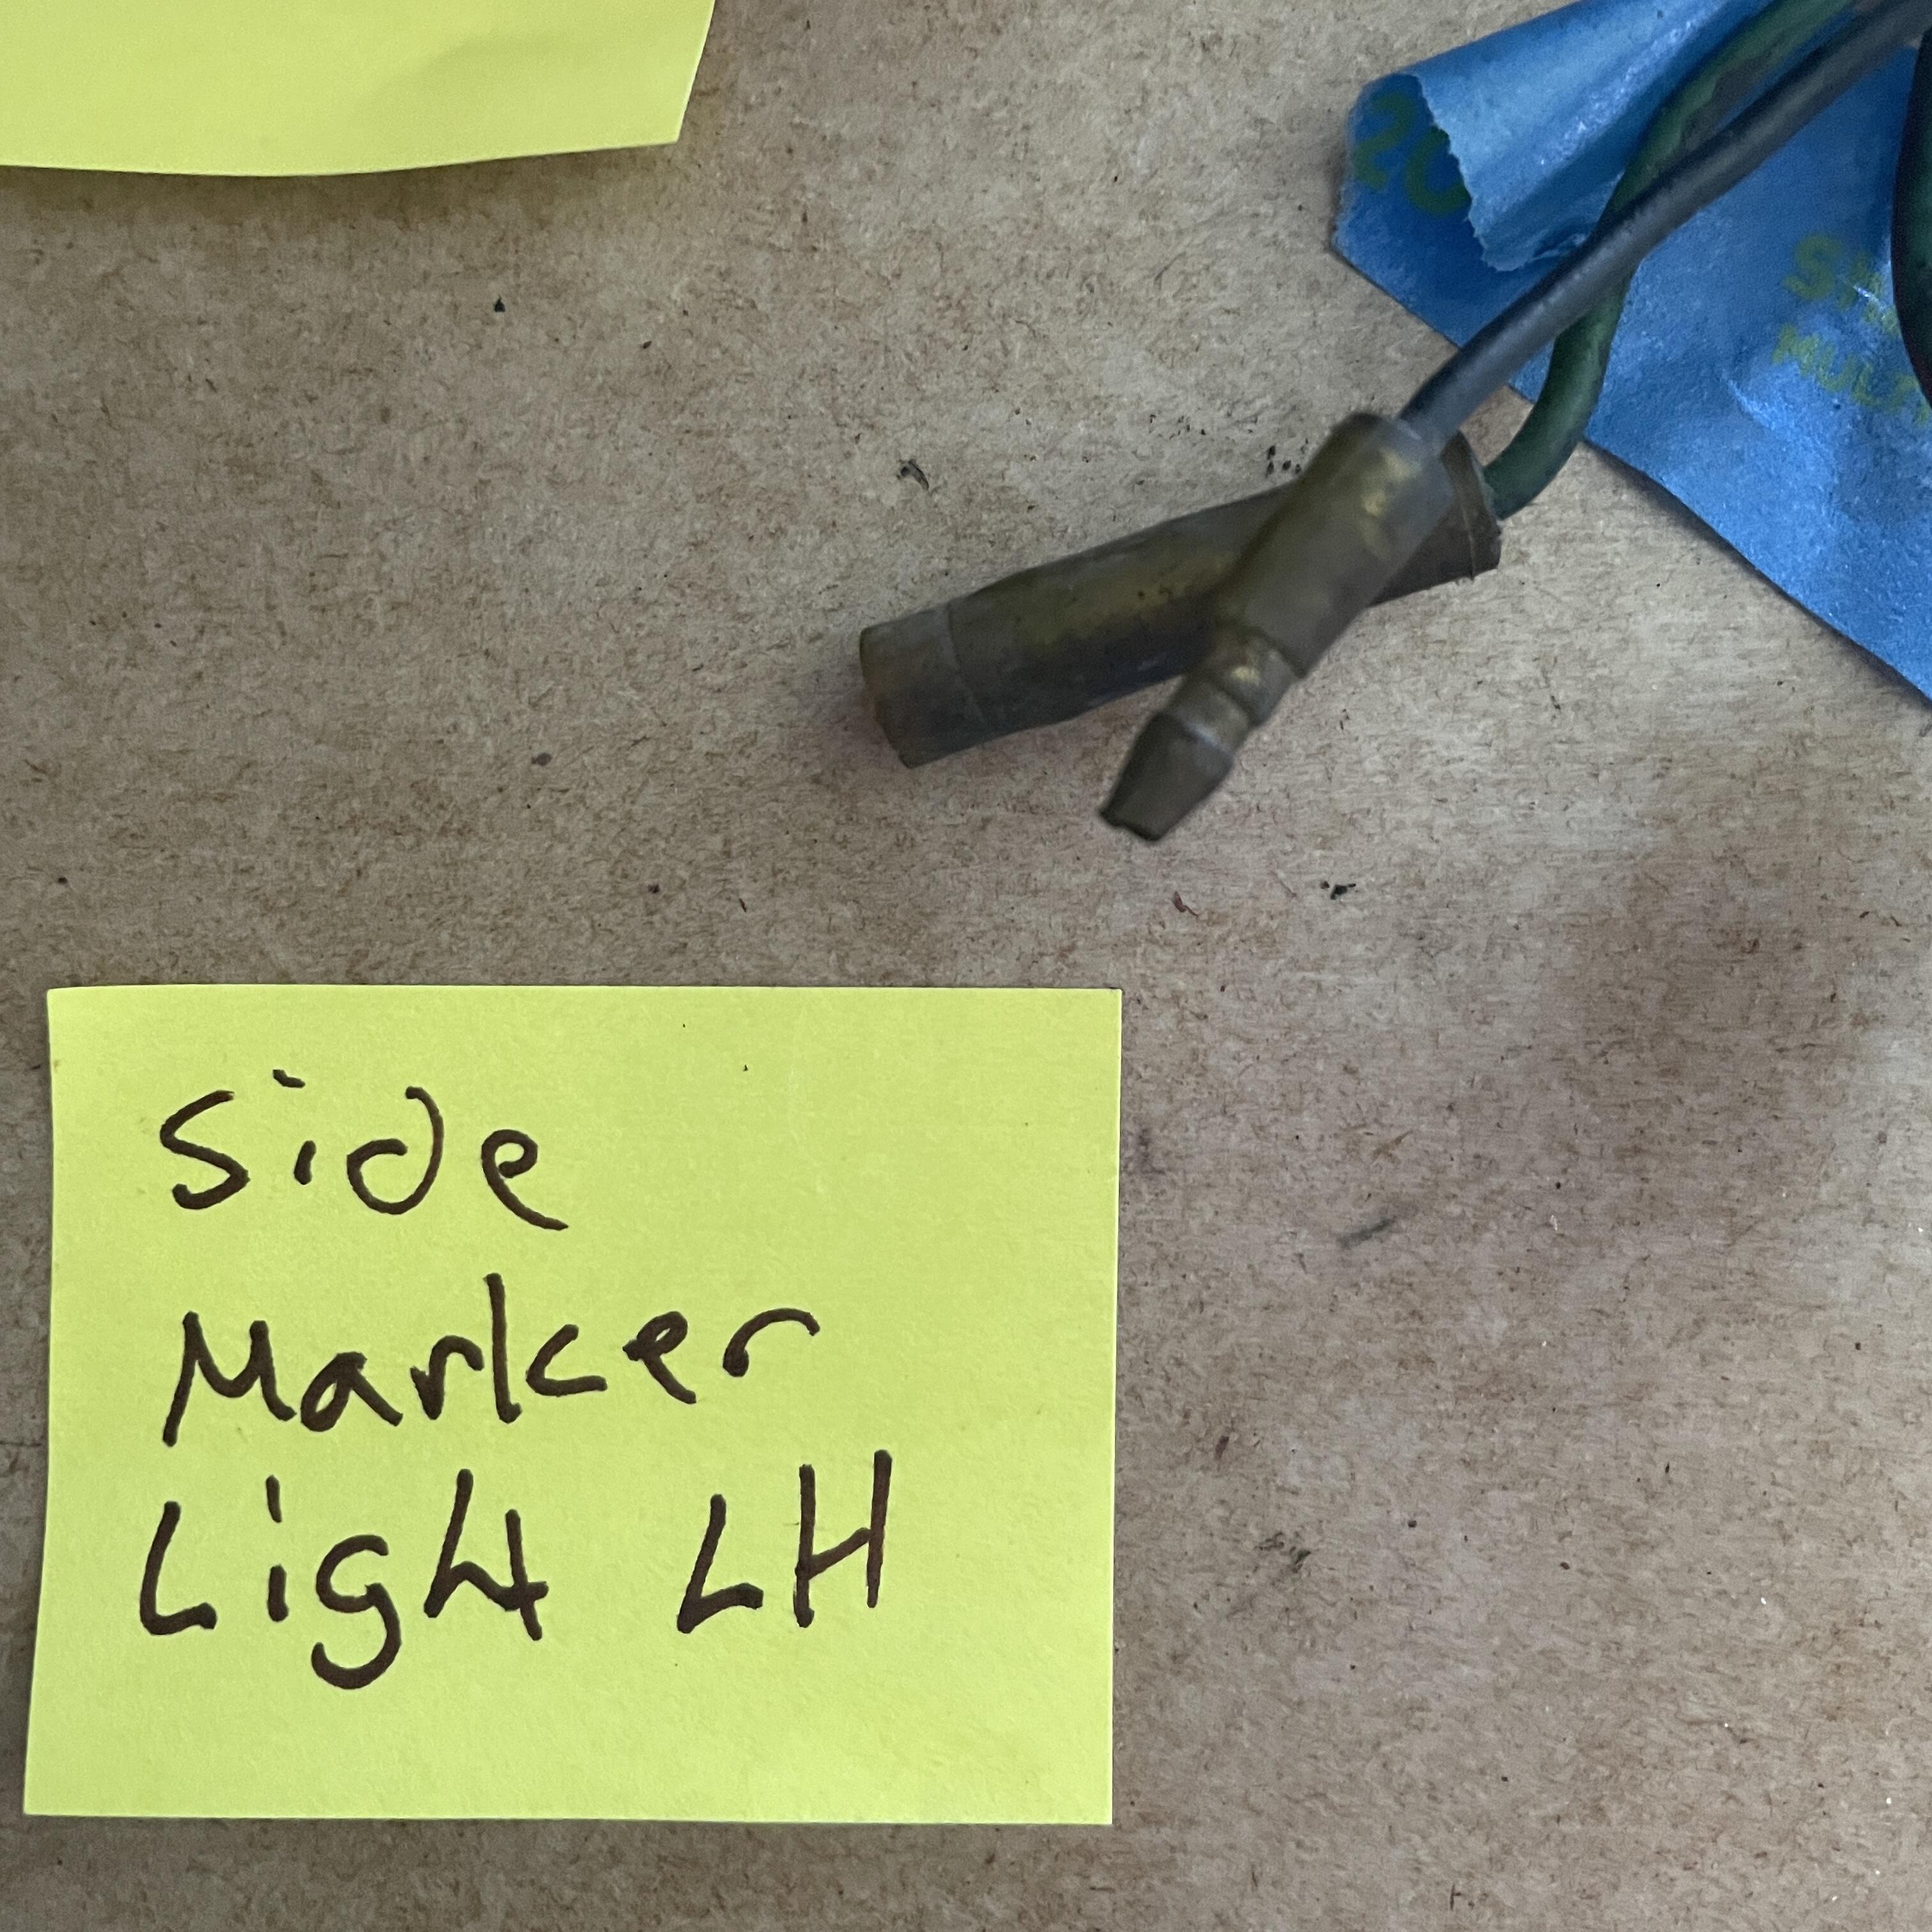
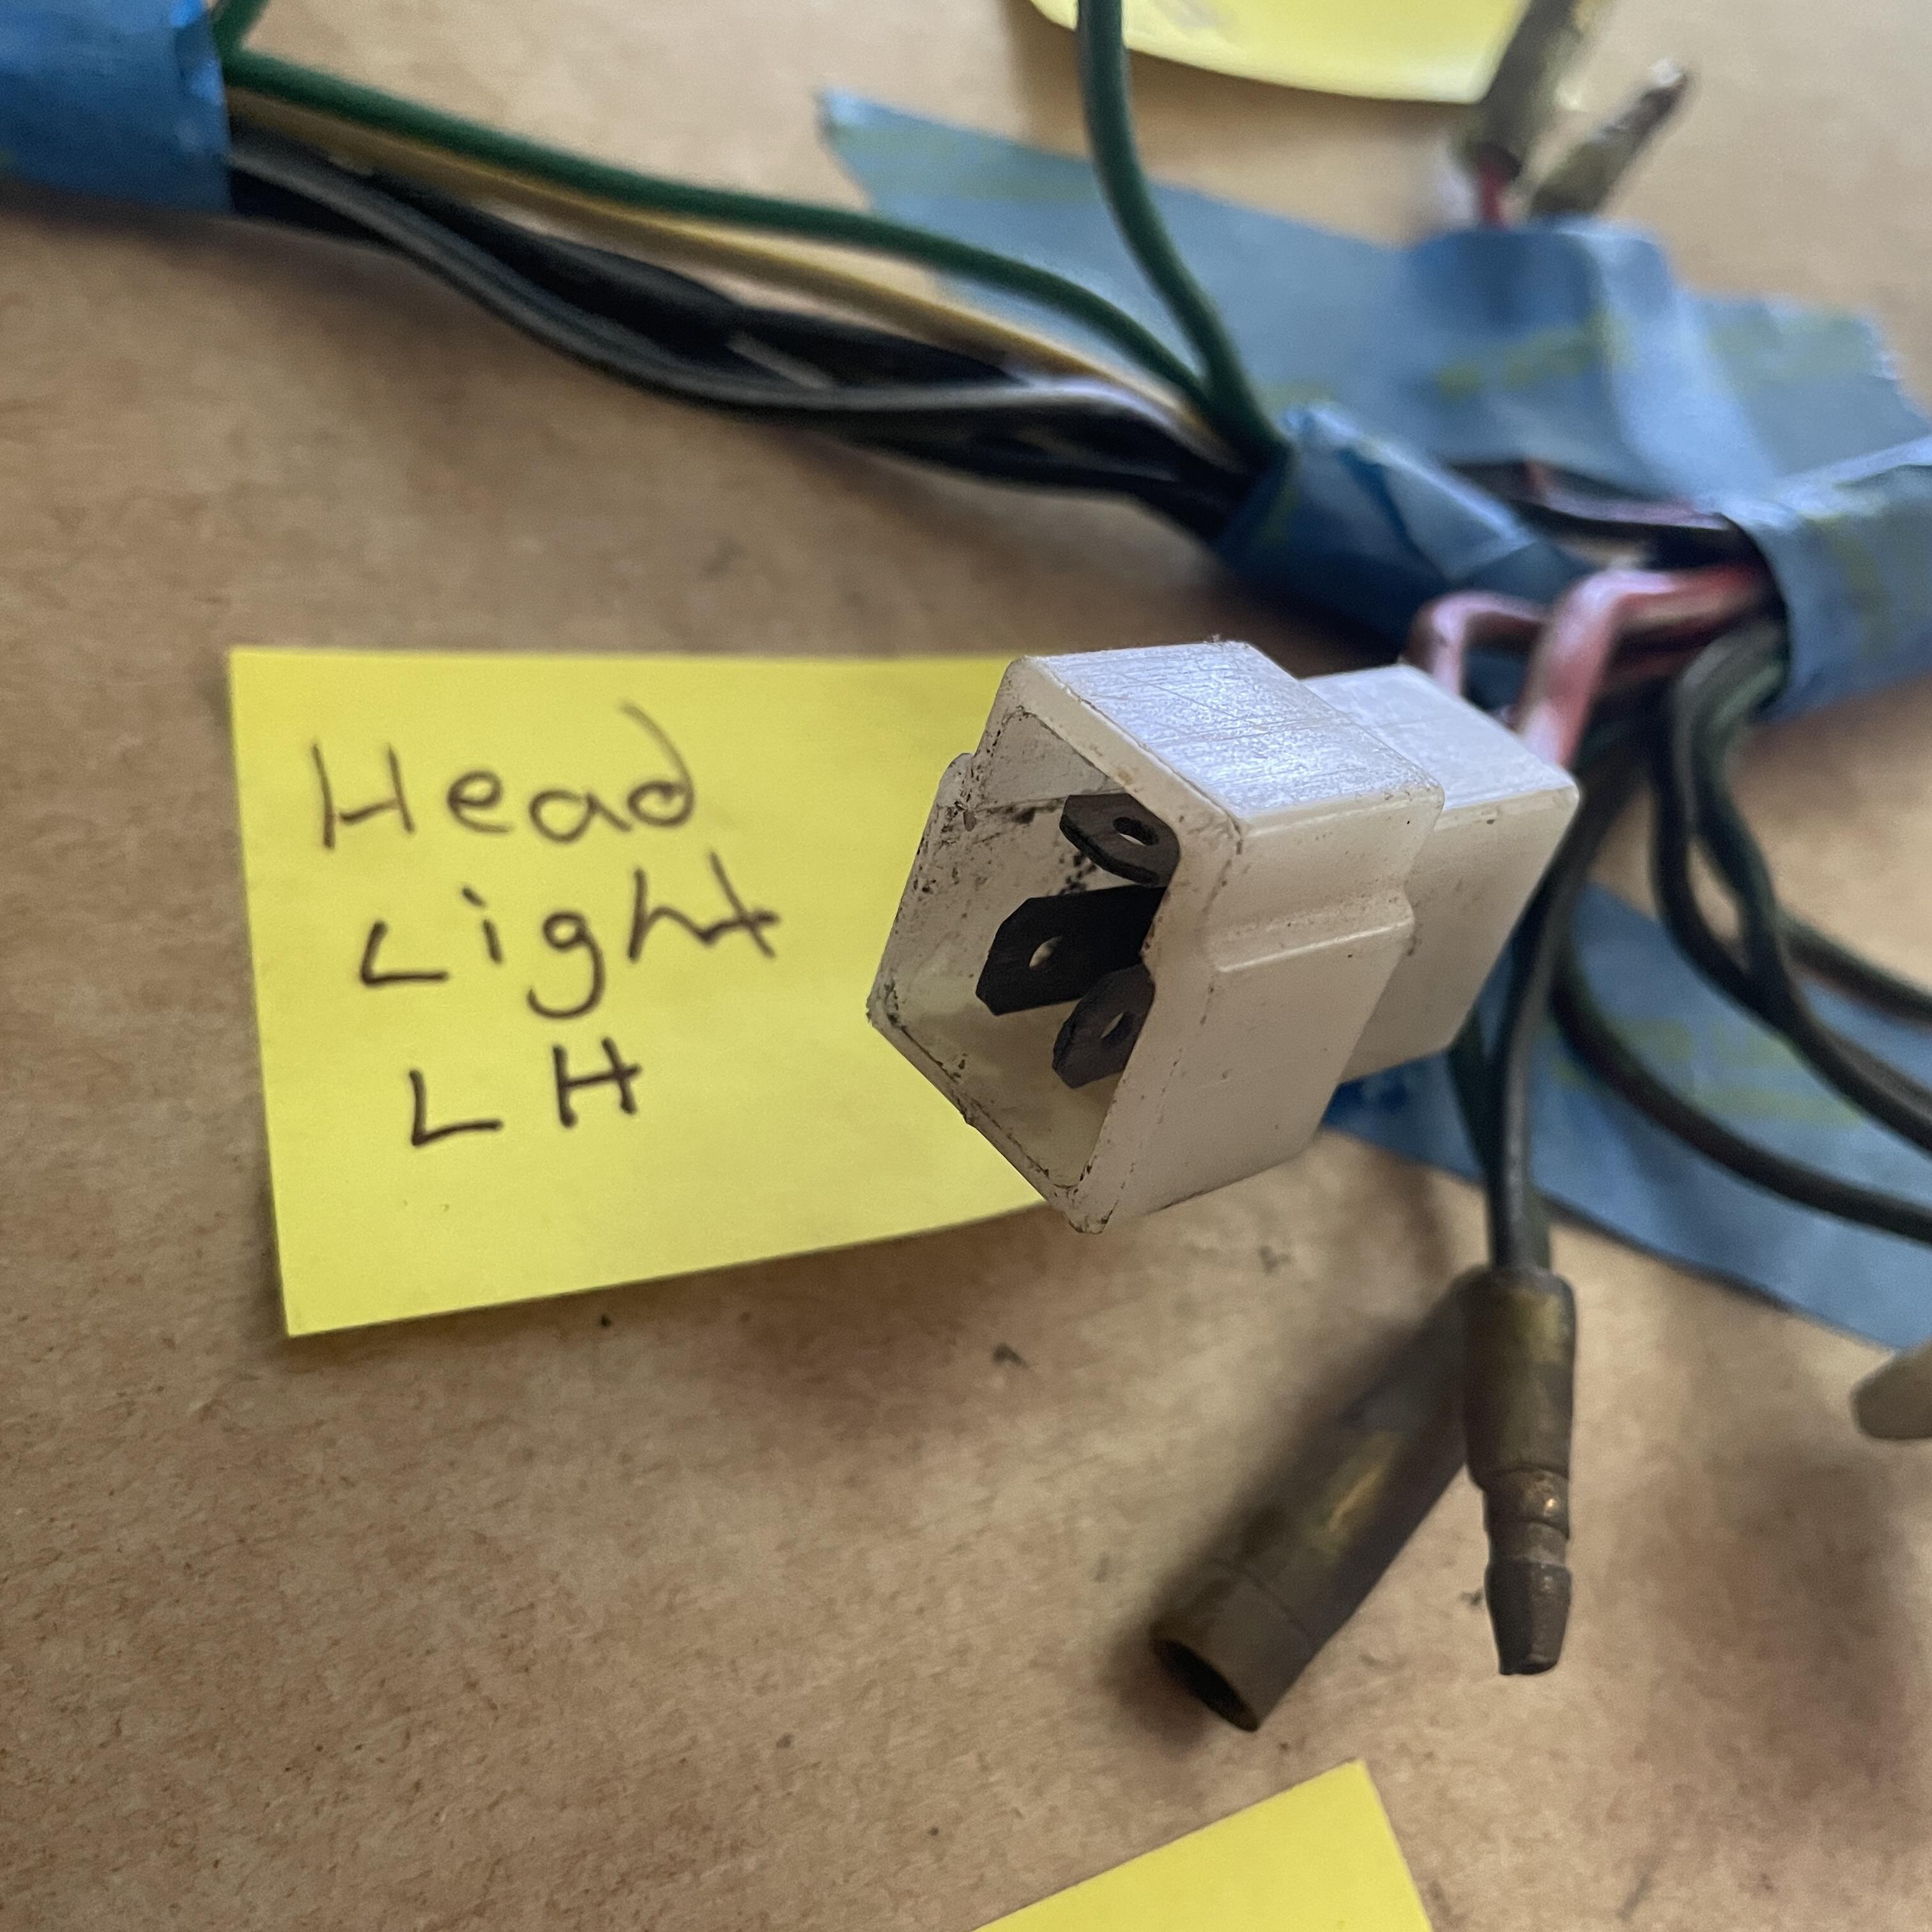
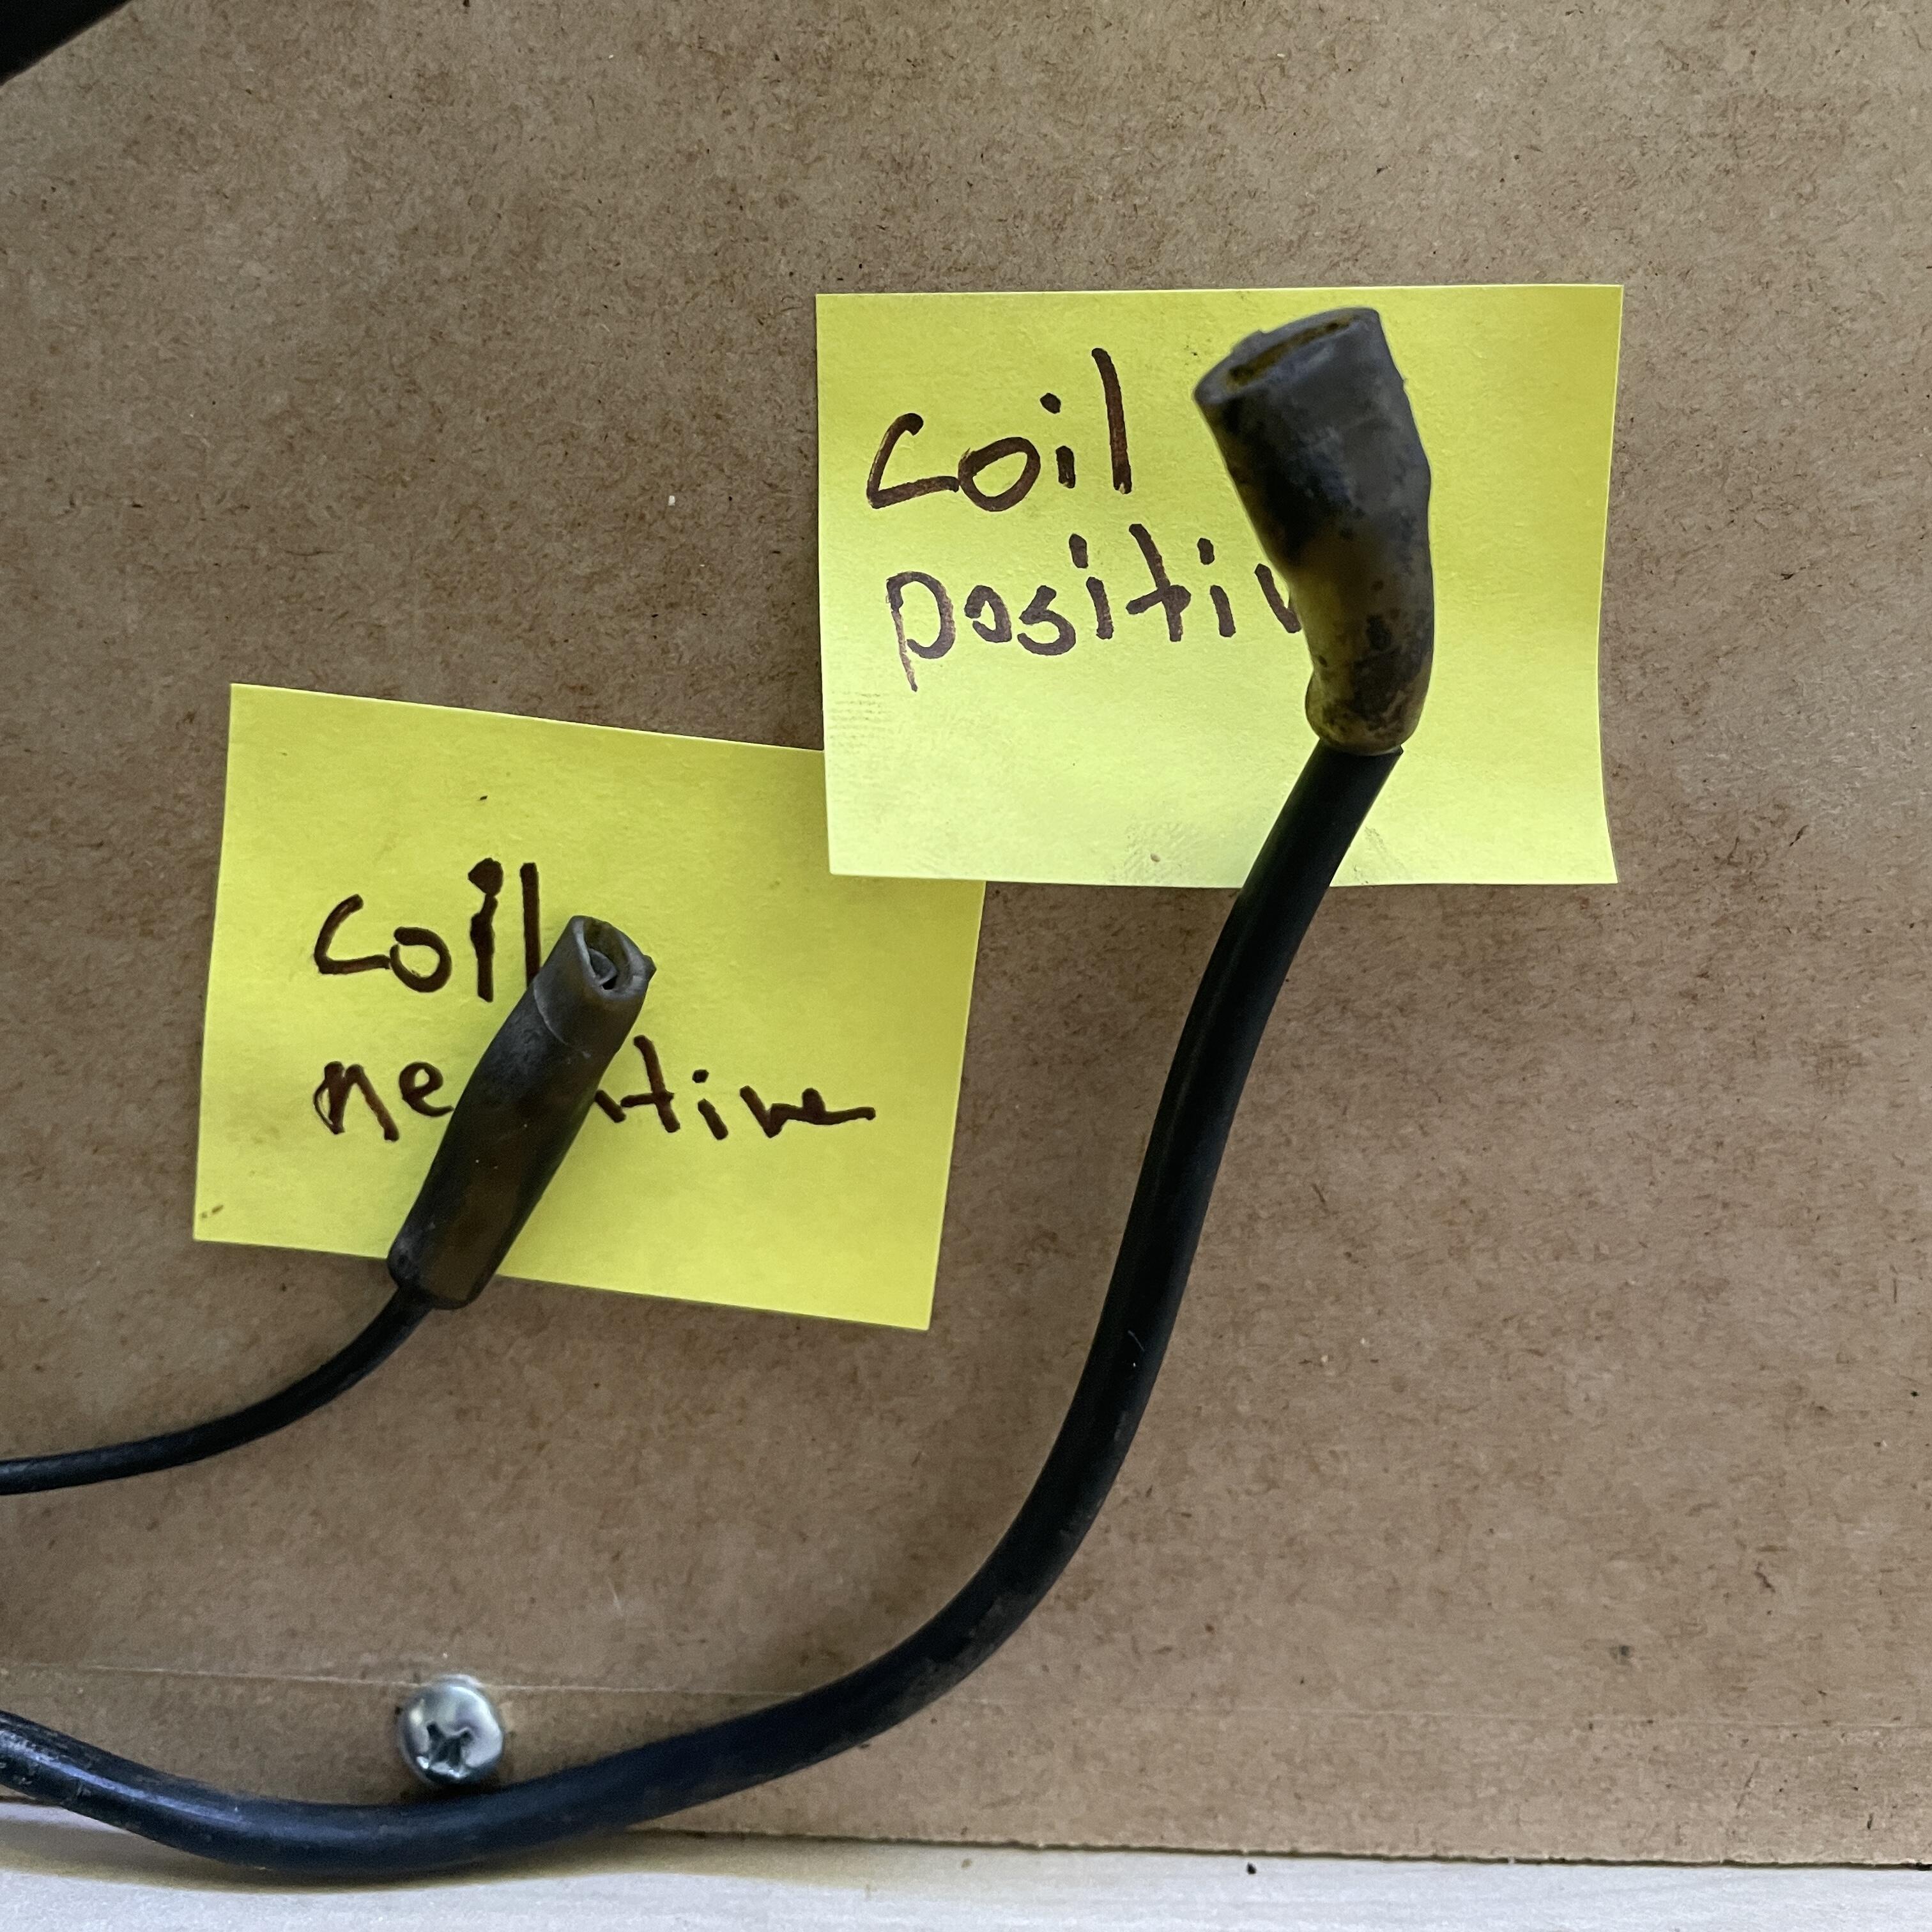
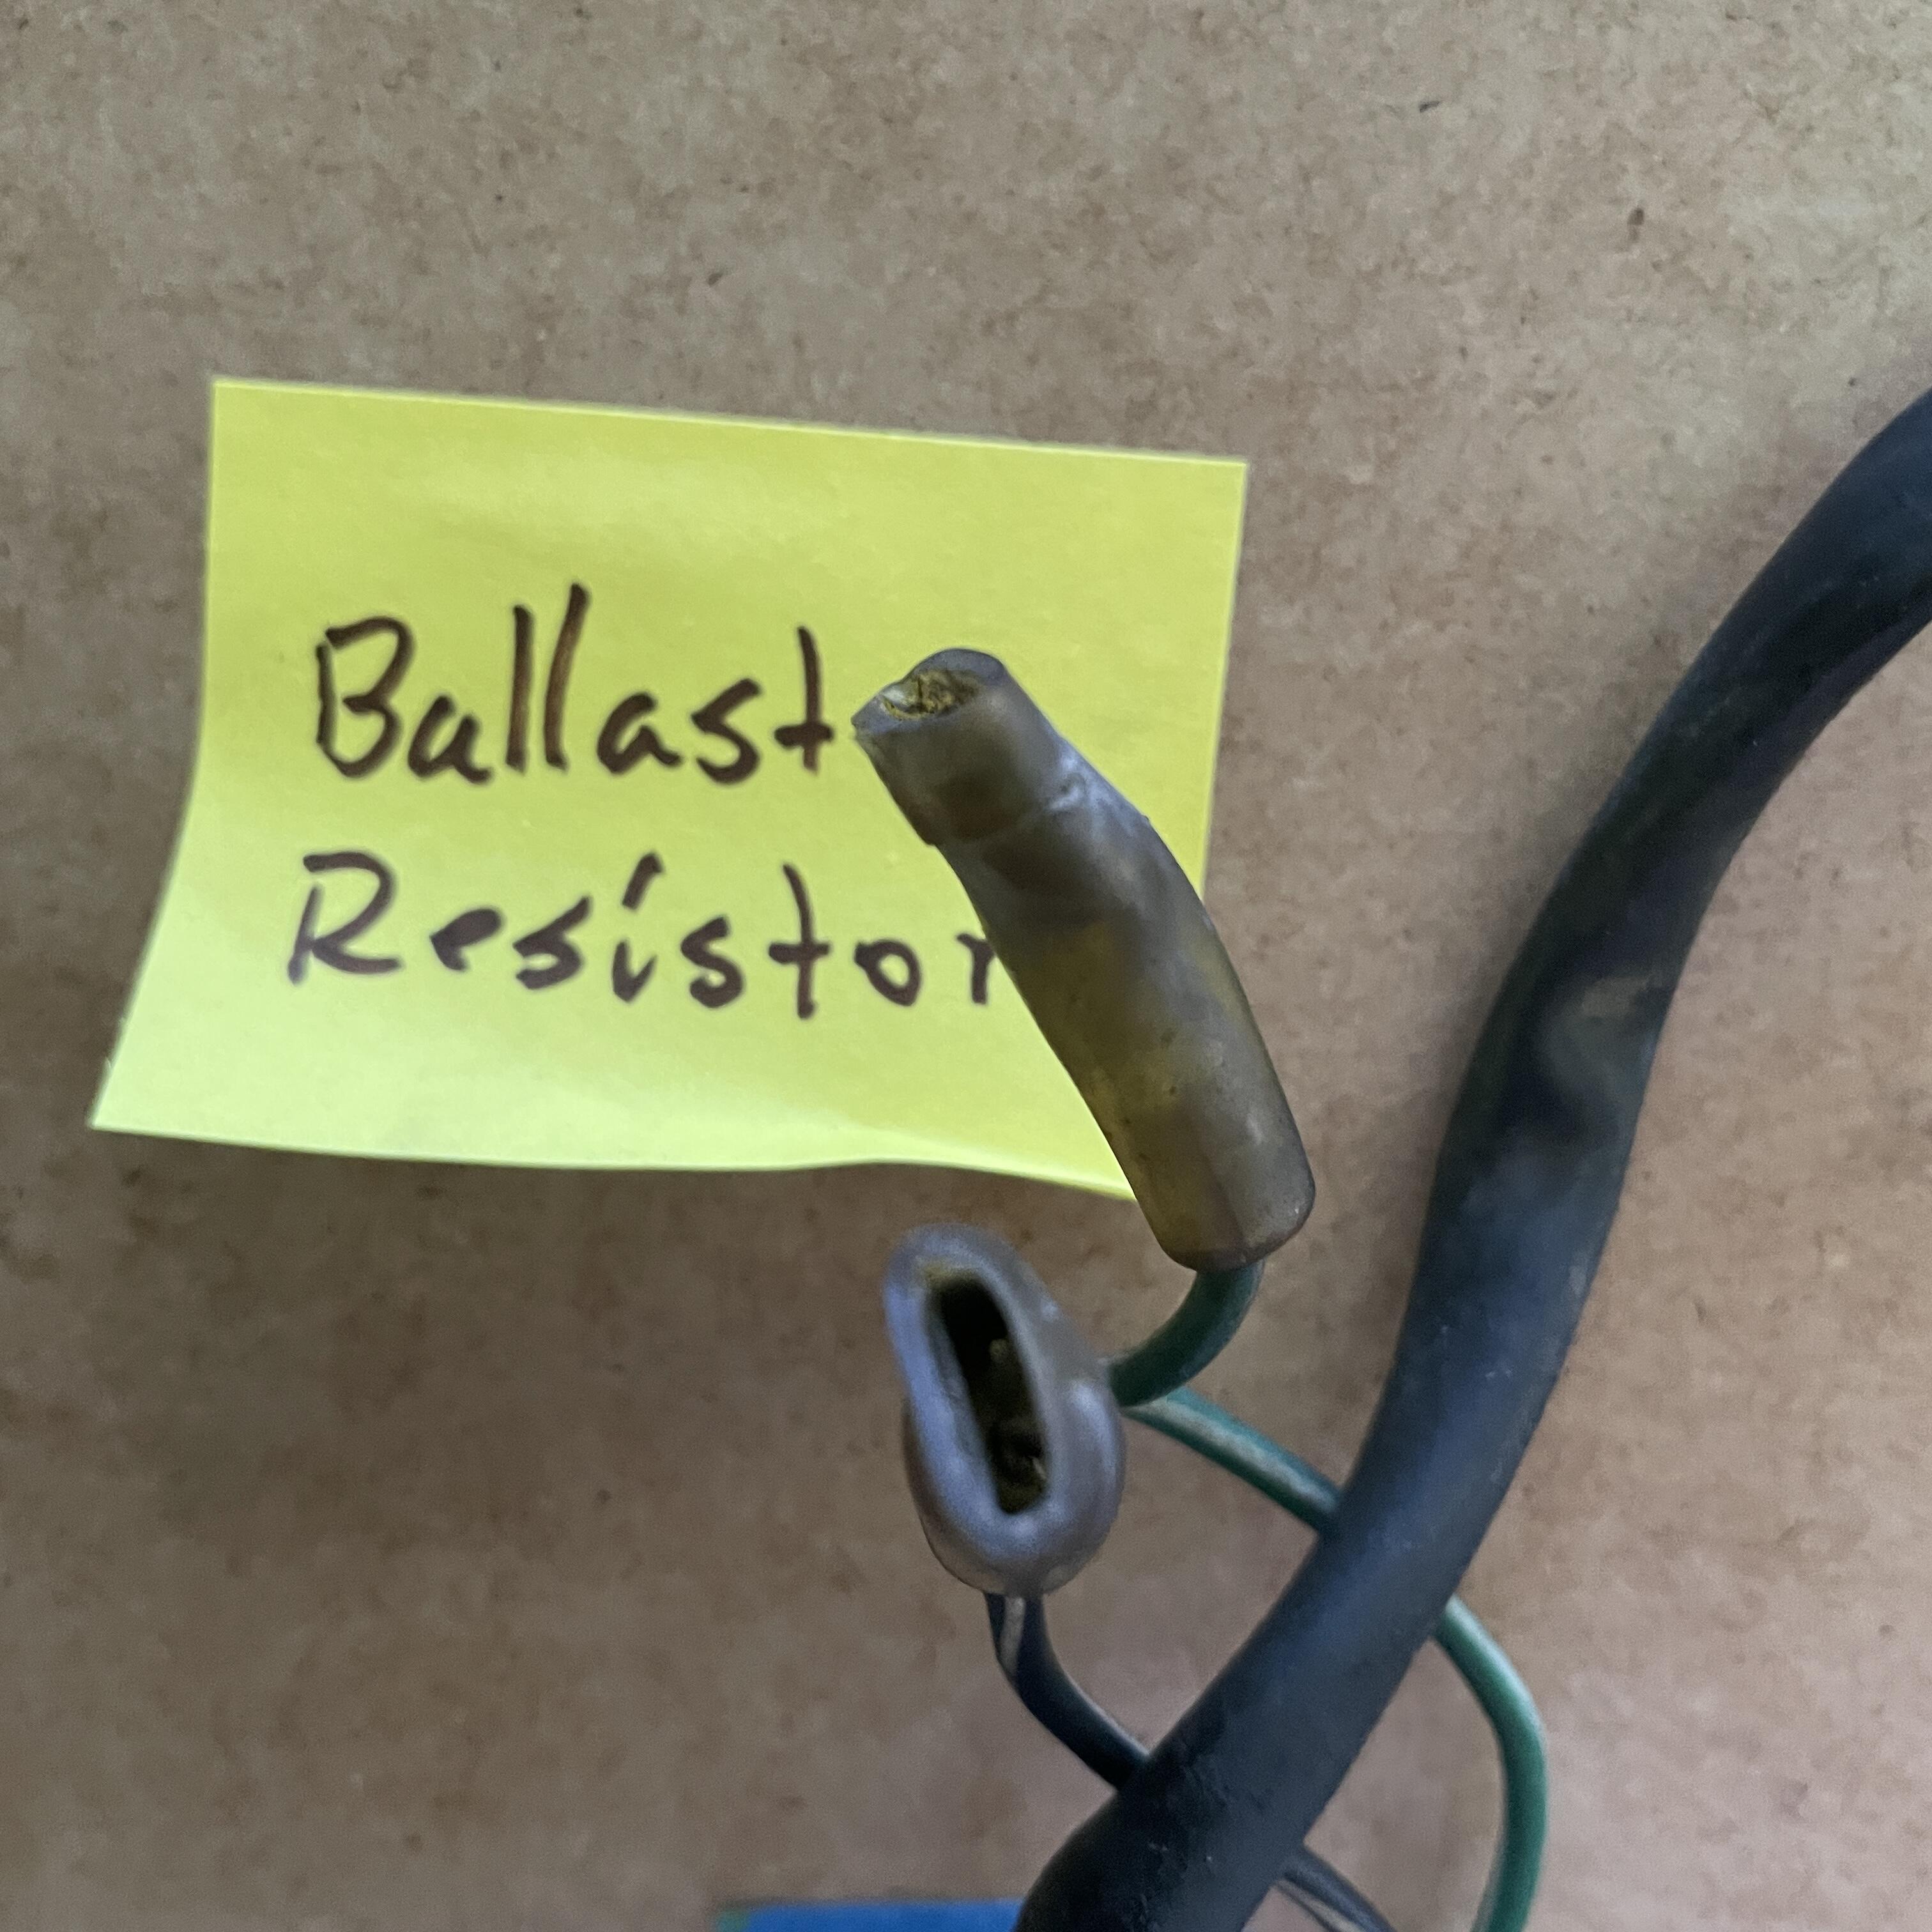
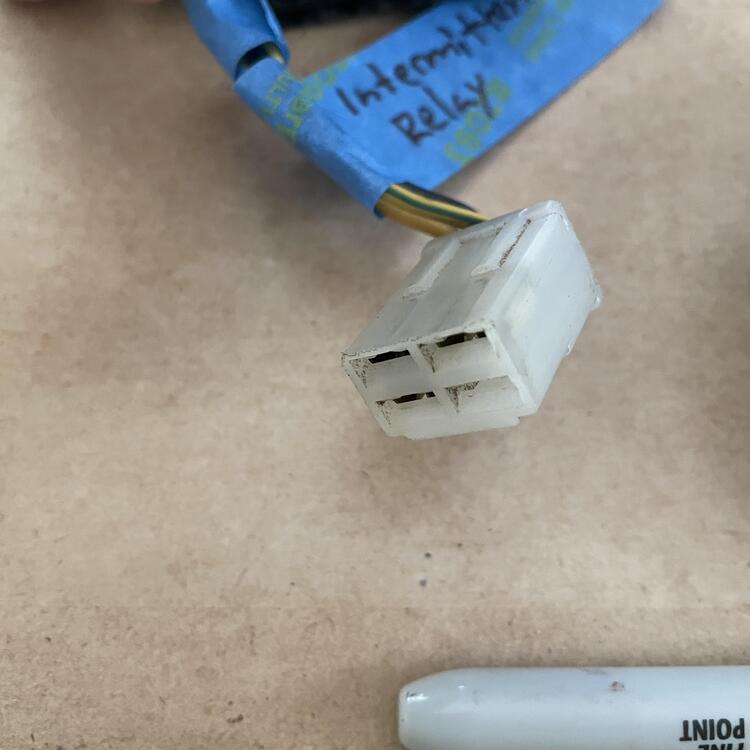
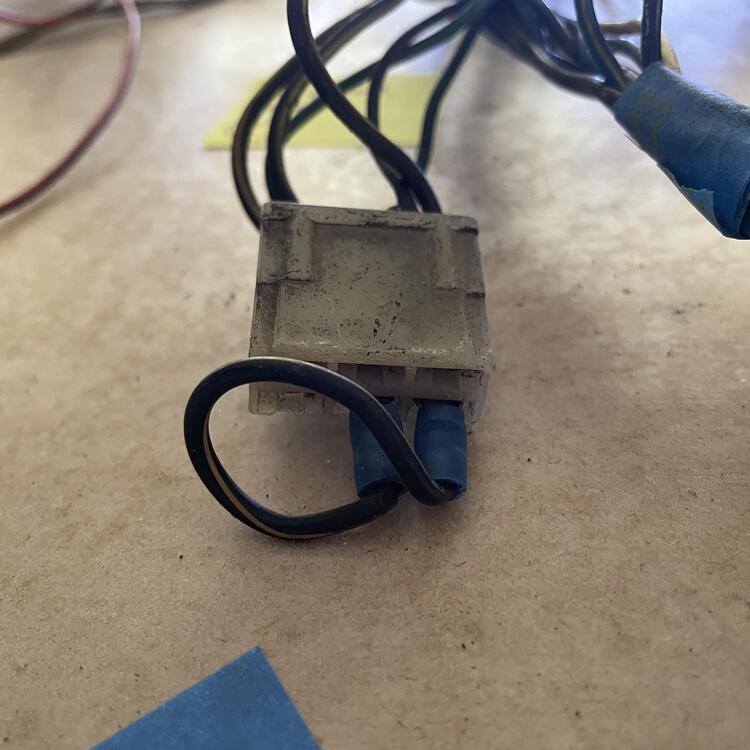
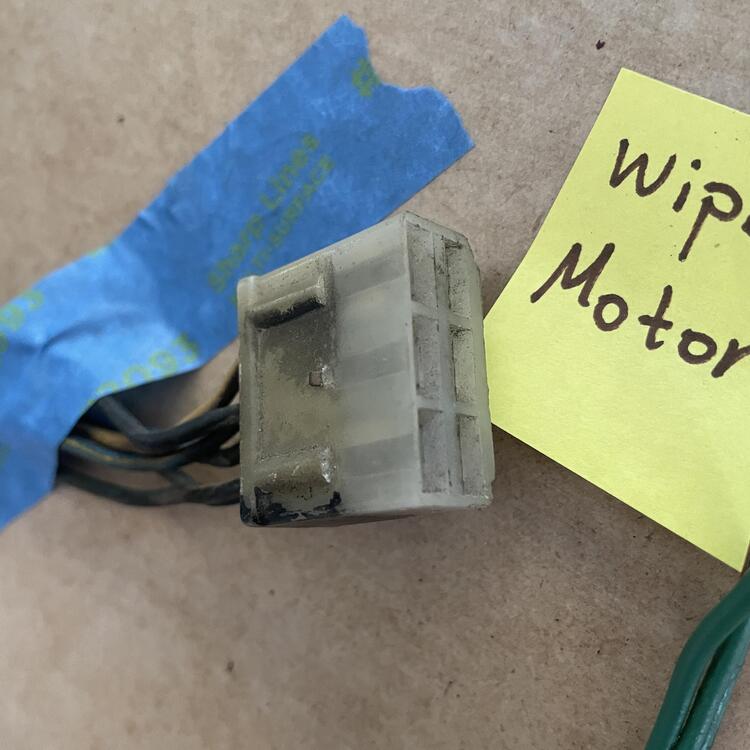
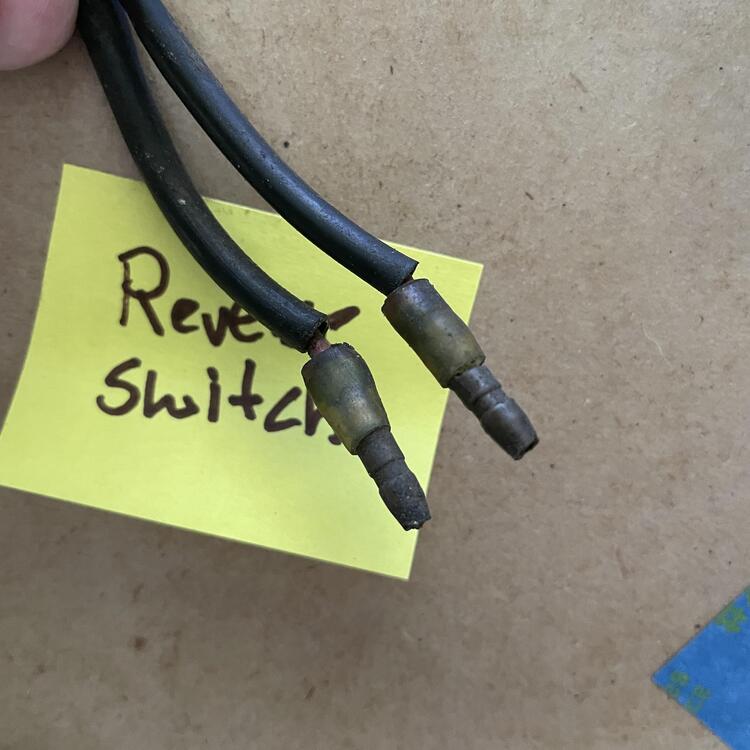
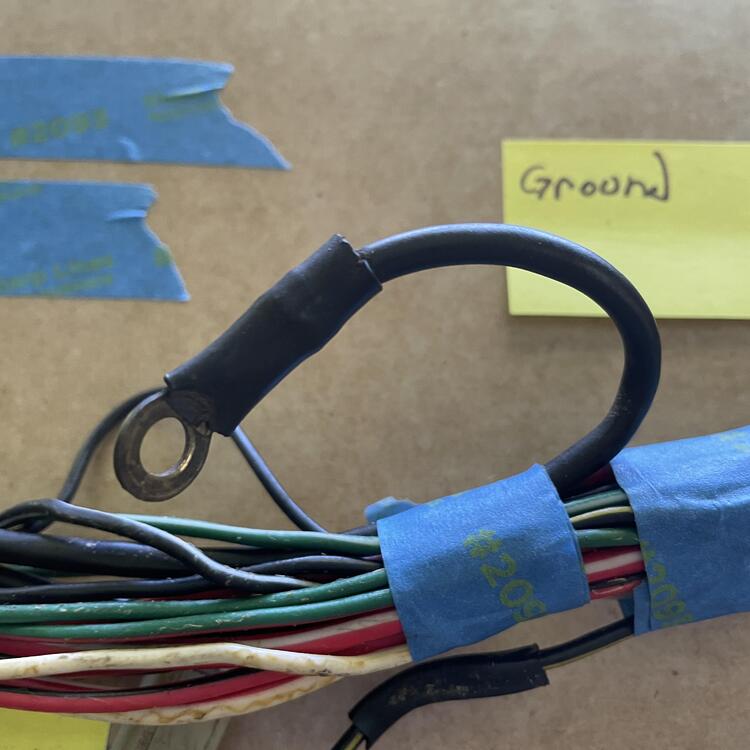
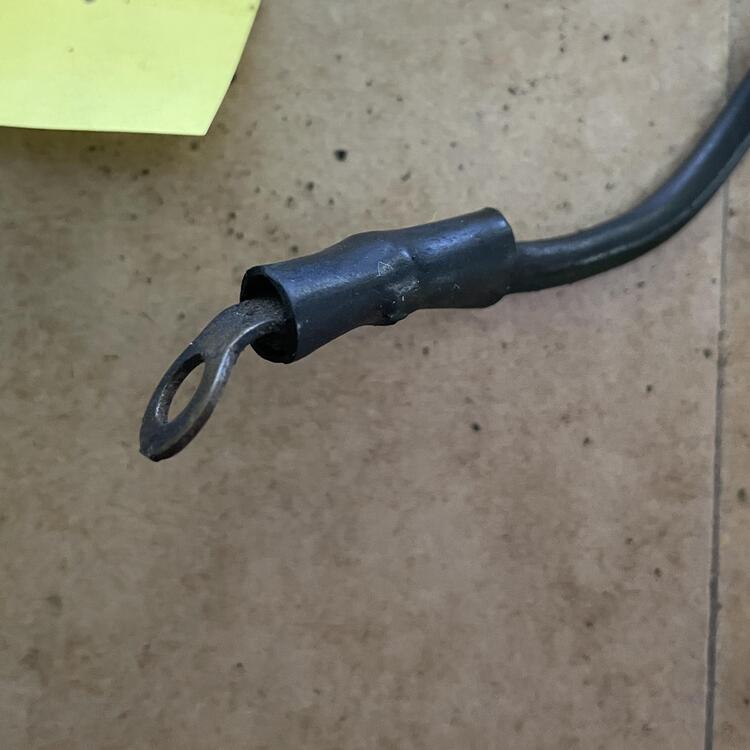
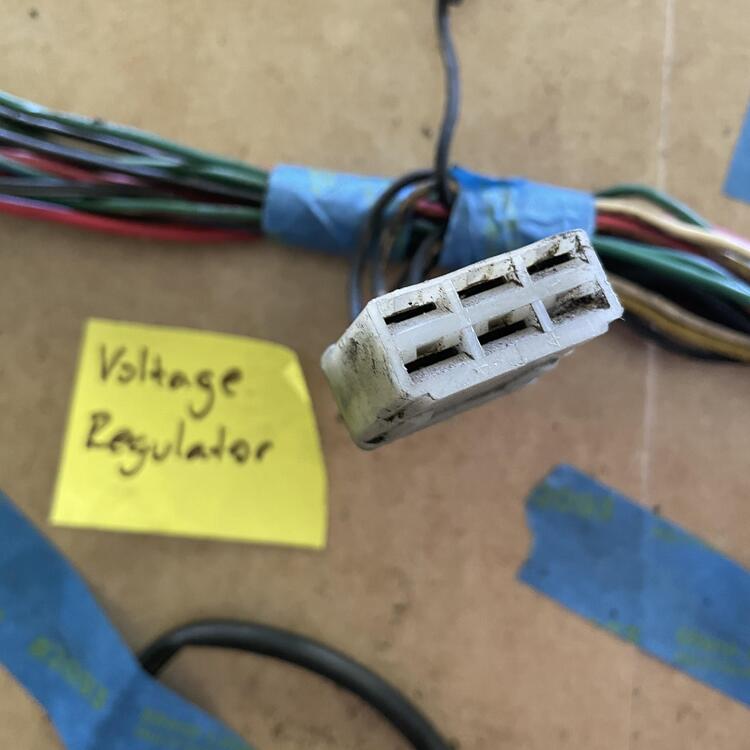
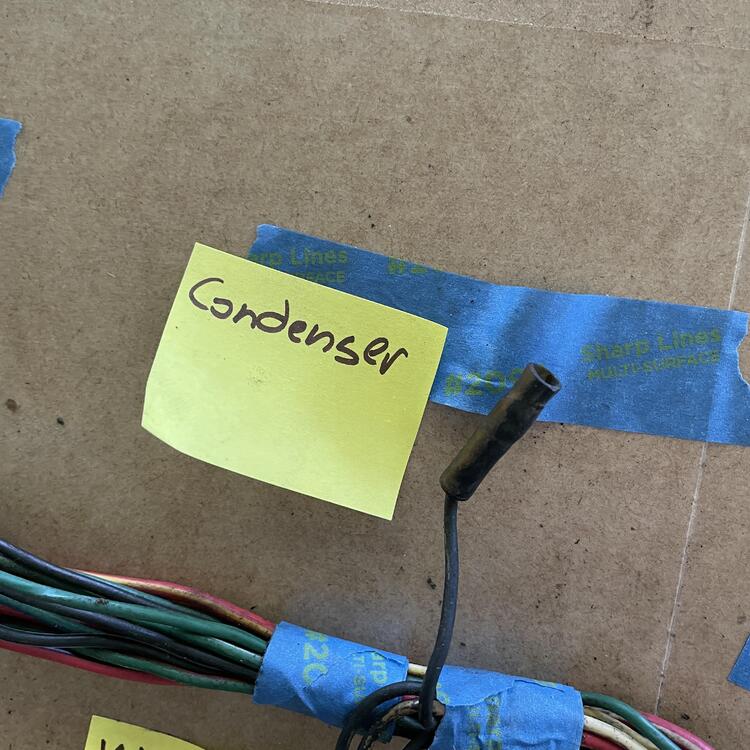
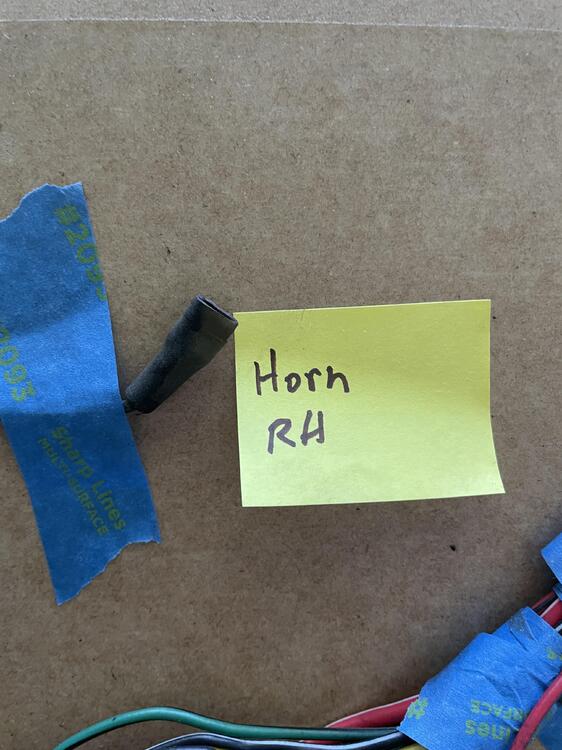
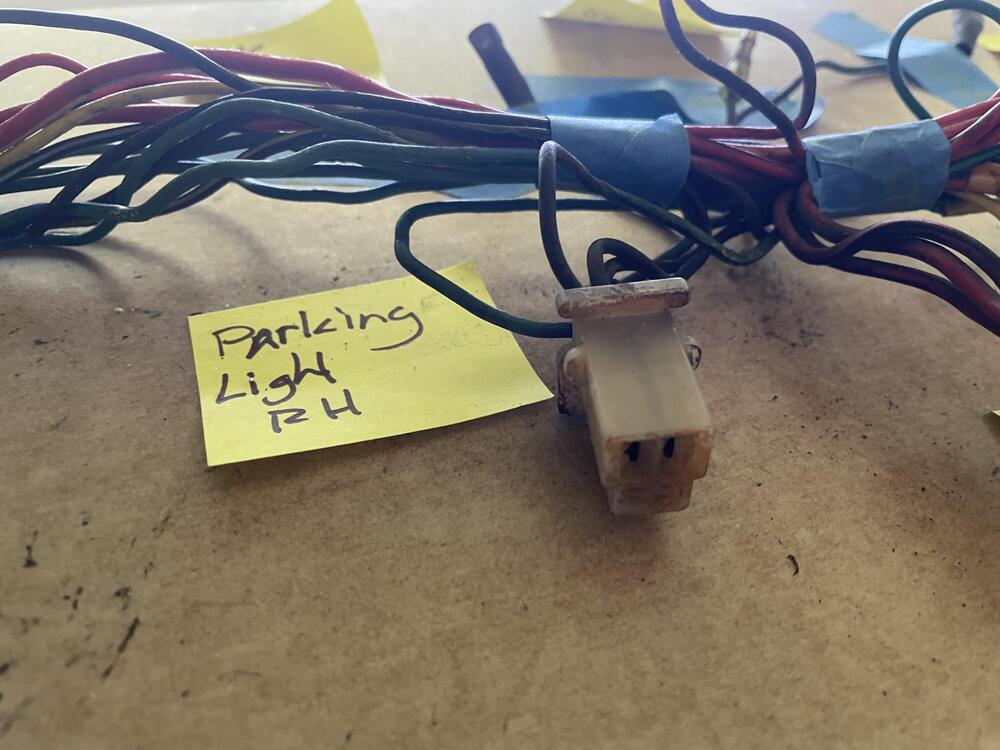
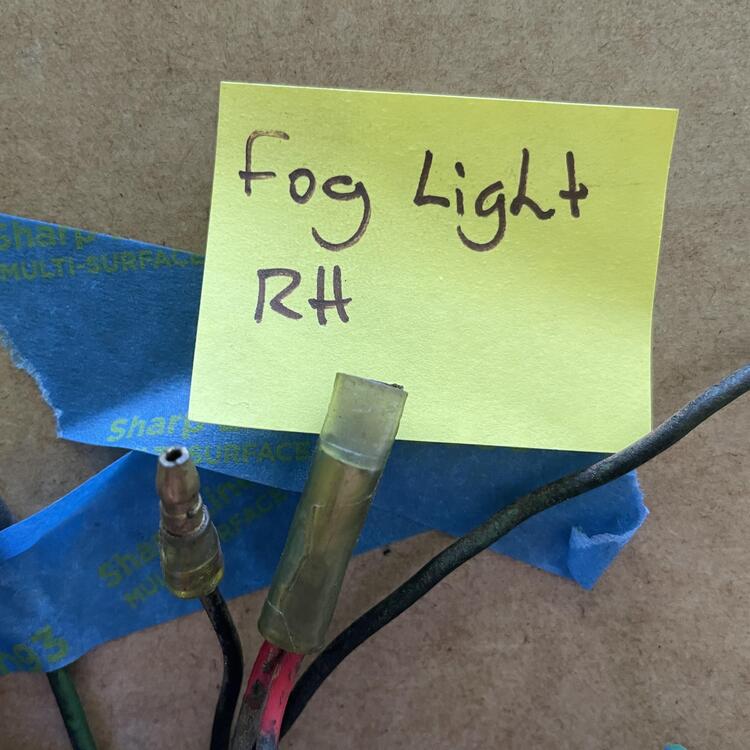
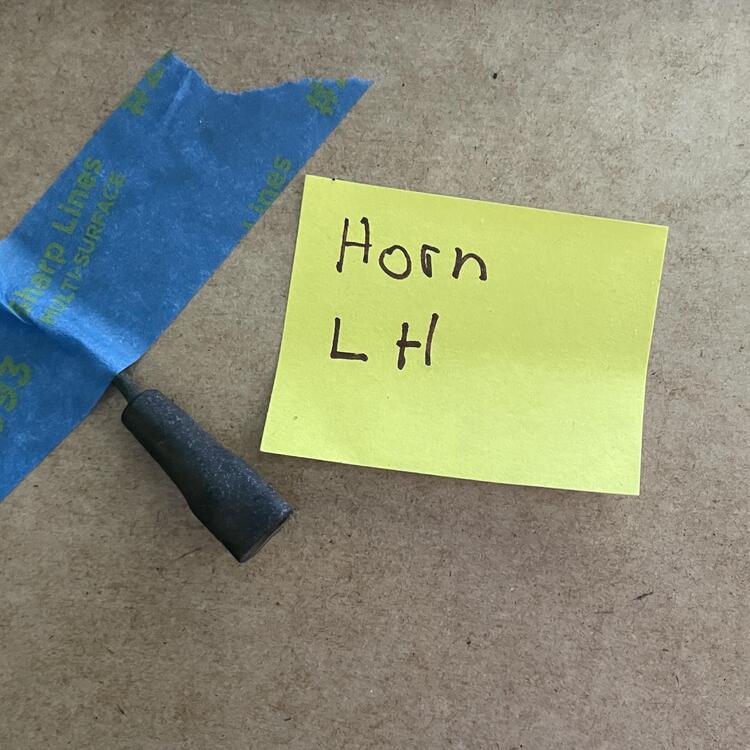
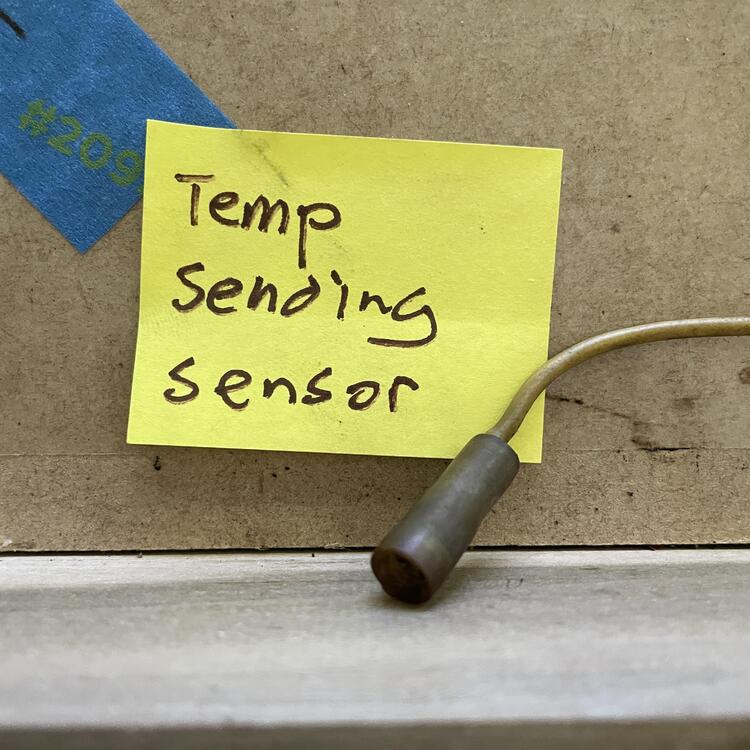
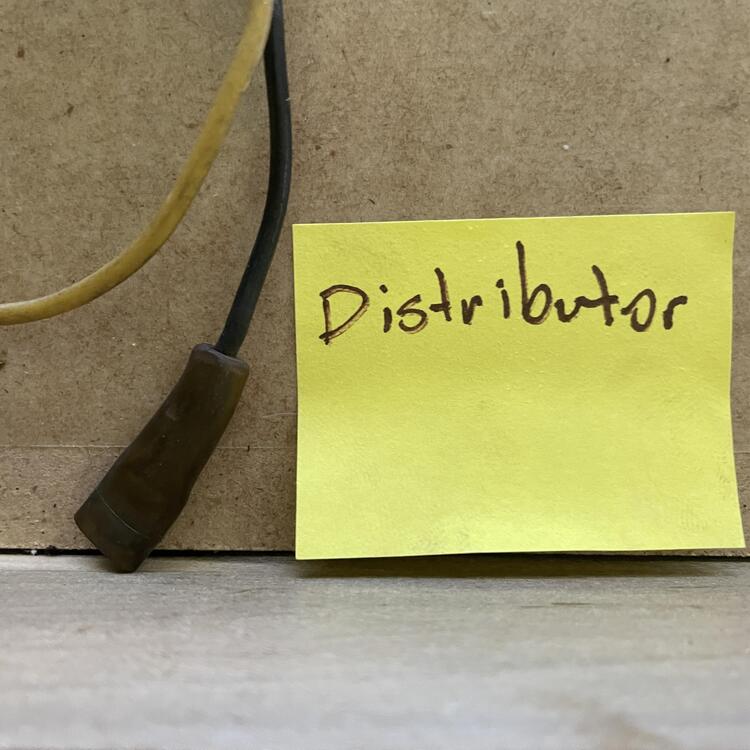
I have another table for you, this time for the engine harness in automatic cars. For manual cars, you would not have the Seatbelt Relay, the Inhibitor Switch, the Thermo Relay, or the Thermo Switch. In a 1973 car with a manual transmission, you WOULD have the Throttle Opener Vacuum Relay for the flat top carburetors (not included in the table). Note that there are a few things I was unsure of in here, so they are marked with a pink background in the table cell. The wires that were cut have indeterminant lengths, so I measured how long they were to the point where they were cut. Where the harness I have differs from the FSM and wiring diagrams, I have marked the change in red. The things I am most curious / worried about are the missing black w/ yellow wire that should be coming out of the blue 10-pin connector and the missing green w/ black wire that should be coming out of the green 10-pin connector. 1973 240z Engine Harness (Automatic Transmission) Inventory Position Component Connector Color Connector Style Connector Image Direction # of Pins # of Wires Diagram Wire Color Sample Wire Color Min. Feet of Wire Needed 1 Instrument Harness A Blue 10-Prong F 10 9 Red w/ Black Red w/ Black 6 (to Yellow Splice C) Red w/ White Red w/ White (Heavy) [See Headlight LH] Green w/ Black Green w/ Black [See Horn Relay] Green w/ Red Green w/ Red [See Horn Relay] – – – Yellow w/ Green Yellow w/ Green [See Low Brake Fluid/Pressure Sensor] Red w/ Black Red w/ Black [See Reverse Light Switch on Trans] Black w/ Yellow – ? Red Red [See Fog Light RH] Blue w/ Yellow Blue w/ White [See Wiper Motor] Instrument Harness B Green 10-Prong F 10 8 Black Black [See Ground - ?] Black Black (Heavy) 2 (to Blue Splice A) Green w/ Black – ? – – – – – – Green w/ Black Green w/ Black [See Parking & T/S & Side Front RH] Green w/ Red Green w/ Red [See Parking & T/S & Side Front LH] Blue Black w/ Yellow [See Seat Belt Relay] Green Green [See Seat Belt Relay] Green Green [See Seat Belt Relay] Instrument Harness C White Black 10-Prong F 10 8 Blue w/ Yellow Blue w/ Yellow [See Wiper Motor] Red Red (Thick) [See Headlight RH] Green w/ Blue Green w/ Blue 5 (to Blue Splice F) Red w/ Blue Red w/ Blue [See Inspection Light] Red w/ Yellow Red w/ Yellow (Thick) [See Headlight LH] – – – – – – Black Black [See Water Tank] Blue Blue [See Wiper Motor] Yellow w/ Green Yellow w/ Green [See Intermittent Relay] Instrument Harness D Black White 10-Prong F 10 9 Blue w/ Red Blue w/ Red 2 (to Yellow Splice A) Yellow w/ Black Yellow w/ Black [See Oil Pressure Switch] Black w/ White Black w/ White 2 (to Orange Splice A) Black w/ White Black w/ White 4 (to Blue Splice C) Yellow w/ White Yellow w/ White [See Temperature Sending Sensor] – – – Green Green [See Hazard] White White [See Hazard] Black w/ White Black [See Ballast Resistor] Green w/ White Green w/ White [See Ballast Resistor] Instrument Harness E White 1 1 White w/ Red White w/ Red (Heavy) [See Alternator] Instrument Harness F White 1 1 White White (Heavy) 3 (to Green Splice A) Horn Relay Clear Spade F 1 1 Green w/ Black Green w/ Black 2 Clear Spade F 1 1 Green Green 7 (to Yellow Splice D) Clear Spade F 1 1 Green w/ Red Green w/ Red 2 Intermittent Relay White 4-Prong F 4 3 Yellow Yellow [See Wiper Motor] Green Black 4 (to Blue Splice B) Yellow w/ Green Yellow w/ Green 2 Hazard White 2-Prong (90 Degree) F 2 2 White White 2 Green Green 2 Yellow Splice A N/A N/A N/A N/A 2 2 Blue w/ Red N/A Red w/ Black 2 Seatbelt Relay (A/T) White 4-Prong F 6 6 Black w/ Yellow Black w/ Yellow [See Neutral Safety Switch] Black w/ Yellow Black w/ Yellow 6 (to Yellow Splice C) Black w/ Yellow Black w/ Yellow [See Inhibitor Switch] Black Black 1 (to Blue Splice A) Green Green 3 Green Green 3 Wiper Motor White 6-Prong F 6 5 Blue w/ White Blue w/ White 4 Blue Blue 4 Blue w/ Yellow Blue w/ Yellow 4 Yellow Yellow 4 Black Black 2 (to Blue Splice A) Blue w/ Red Blue w/ Red 2 (from Yellow Splice A) Ground - ? Missing 1 1 Black 4+ (from Blue Splice A) Water Tank Clear Spade F 1 1 Black w/ Yellow Black w/ Yellow 8 Black Spade M 1 1 Black Black 8 Low Brake Fluid/Pressure Sensor Clear Bullet (Large) F 1 1 Yellow w/ Green Yellow w/ Green 9 Yellow Splice B N/A N/A N/A N/A 2 2 Black w/ Yellow N/A Black w/ Yellow Orange Splice A N/A N/A N/A N/A 2 2 Black w/ White N/A Black w/ Yellow Blue Splice A N/A N/A N/A N/A 3 3 Black N/A Black Black (Heavy) 2 (to Blue Splice B) 3 Reverse Light Switch on Trans Clear Bullet M 1 1 Red w/ Black Red w/ Black 4 Clear Bullet M 1 1 Red Red w/ Black 3 (from Yellow Splice A) Neutral Safety Switch (for solenoid power) Clear Bullet F 1 1 Black w/ Yellow Black w/ Yellow 5 Clear Bullet F 1 1 Black w/ Yellow Black w/ Yellow 5 Blue Splice B N/A N/A N/A N/A 3 3 Black N/A Black (Heavy) Black (Heavy) 2 (to Blue Splice C) Blue Splice C N/A N/A N/A N/A 3 3 Black w/ White N/A Black w/ White Green Green Splice A N/A N/A N/A N/A 2 2 White (Heavy) N/A White 4 Starter Motor White 1-Prong M 1 1 White White (Heavy) 1 (from Green Splice A) Starter Ground Black Ring N/A 1 1 Black Black (Heavy) 2 (from Blue Splice B) Inhibitor Switch (A/T) Clear Spade F 1 1 Black w/ Yellow Black w/ Yellow 4 Blue Splice D N/A N/A N/A N/A 3 3 Black N/A Black (Heavy) Black (Heavy) 6 Oil Pressure Switch 1 Yellow w/ Black Yellow w/ Black 6 Alternator White 2-Prong F 2 2 White w/ Black White w/ Black 5 Yellow Yellow [See Voltage Regulator] Black Ring w/ Cap N/A 1 1 White w/ Red White w/ Red (Heavy) 5 Alternator Ground Black Ring N/A 1 1 Black Black (Heavy) 2 (from Blue Splice B) 7 Voltage Regulator White 6-Prong F 6 5 Yellow Yellow 2 White White 5 Black Black 5 White w/ Black White w/ Black 5 Black w/ White Black w/ White 5 Distributor Condenser Clear Bullet F 1 1 Black w/ White Black w/ White 5 5 Inspection Light Clear Bullet F 1 1 Red w/ Blue Red w/ Blue 7 Blue Splice E N/A N/A N/A N/A 2 2 Black N/A Black 2 (from Blue Splice D) Yellow Splice C N/A N/A N/A N/A 2 2 Red w/ Black N/A Red w/ Black Blue Splice F N/A N/A N/A N/A 2 2 Green w/ Blue N/A Green w/ Blue Yellow Splice D N/A N/A N/A N/A 2 2 Green N/A Green Orange Splice B N/A N/A N/A N/A 2 2 Red w/ White (Heavy N/A Red w/ Black (Thick) 8 Side Marker Lamp RH Clear Bullet F 1 1 Green w/ Blue Green w/ Blue 2 (from Blue Splice F) Clear Bullet M 1 1 Black Black 2 (from Blue Splice E) Parking & T/S & Side Front RH White 3-Prong F 3 5 Black Black 6 Black 6 Green w/ Blue Green w/ Blue 2 (from Blue Splice F) Green w/ Blue 2 (to Blue Splice G) Green w/ Black Green w/ Black 6 Head Light RH White 3-Prong M 3 3 Red Red (Thick) 6 Red w/ Black Red w/ Black 6 Red w/ White Red w/ Black 1 (from Yellow Splice C) Fog Light RH Clear Bullet M 1 1 Black Black 6 Clear Bullet F 1 2 Red Red [See Fog Light LH] 6 Horn RH Clear Spade F 1 1 Green Green 6 Blue Splice G N/A N/A N/A N/A 2 2 Green w/ Blue N/A Green w/ Blue Blue Splice H N/A N/A N/A N/A 2 2 Black N/A Black 9 Horn LH Clear Spade F 1 1 Green Green 8 Fog Light LH Clear Bullet M 1 1 Black Black 8 Clear Bullet F 1 1 Red Red 8 Parking & T/S & Side Front LH White 3-Prong F 3 3 Black Black 8 Green w/ Red Green w/ Red 8 Green w/ Blue Green w/ Blue 1 (from Blue Splice G) Head Light LH White 3-Prong M 3 3 Red w/ Yellow Red w/ Yellow 8 Red w/ White Red w/ White (Heavy) 8 Red w/ Black Red w/ Black 3 (to Yellow Splice C) Side Marker Lamp LH Clear Bullet F 1 1 Black Black 8 Clear Bullet M 1 1 Green w/ Blue Green w/ Blue 1 (from Blue Splice G) 10 Thermo Switch (A/T) - ? Missing 1 Black w/ Yellow 7+ (from Yellow Splice B) Thermo Relay (A/T) Missing 1 Black Black 9+ Missing 1 Green Green 9+ 11 Temperature Sending Sensor Clear Bullet F 1 1 Yellow w/ White Yellow w/ White 13 Distributor Clear Spade F 1 1 Black Black [See Coil] Coil Positive Clear Spade F 1 1 Black w/ White (w/ Shroud) Black w/ White (w/ Shroud) 12 (from Orange Splice A) Coil Negative Clear Spade F 1 1 Black Black 2 Balast Resistor Clear Spade F 1 1 Green w/ White Green w/ White 12 Clear Spade F 1 1 Black w/ White Black w/ White 12


 1 point
 -
1 pointPer @Patcon's suggestion, here is a video showing how to check the spark: When you add oil to the cylinders, make sure you don't add too much take out all of the spark plugs turn the engine over by hand if you can. Also, considering the time it sat, I hope you did drain the gas tank of the old fuel.1 point
-
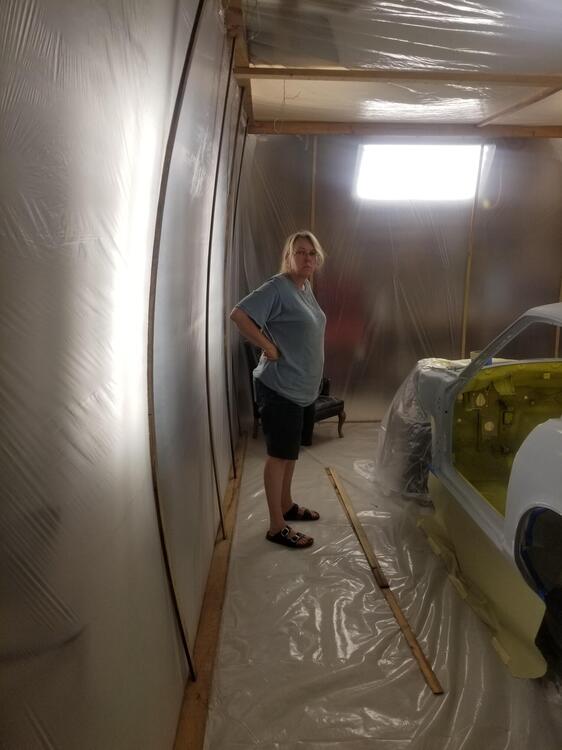
1 pointDang, sorry to hear of your injury. Great work on the booth, especially with a helpful and understanding spouse. Looking forward to seeing Lilly back in color.1 point
-
1 point
-
1 pointSo your thumb got screwed? (Sorry but had to make this joke..) i wish your thumb get well fast !! Maybe you can make a (metall strip) bow or 2-3 inside the filter then you have a bigger filter were the air go's through much faster? just a tip.. the filter itself you use is big enough for that. Take your time for paintwork, get to know your (new) paintgun.1 point
-
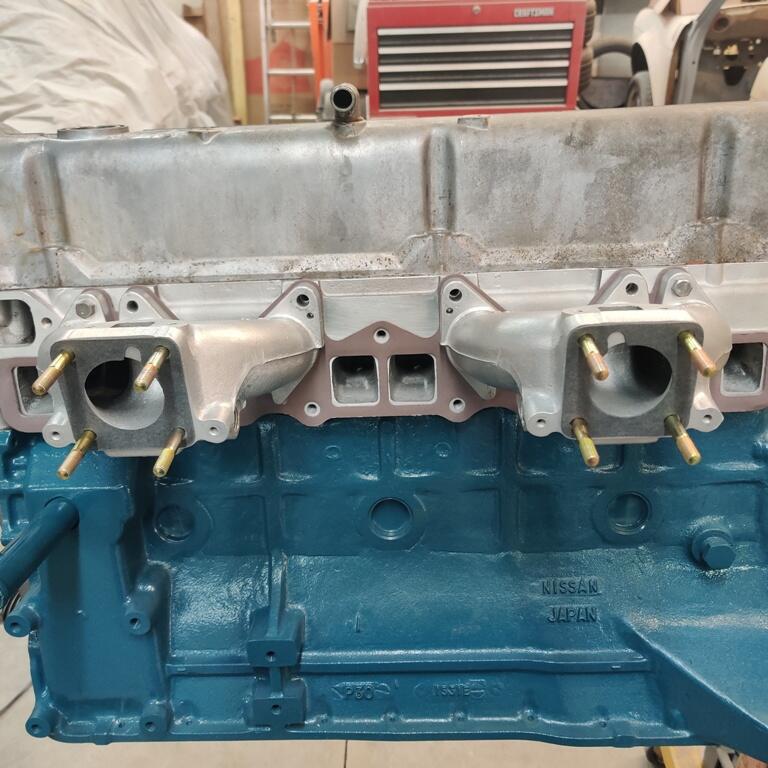
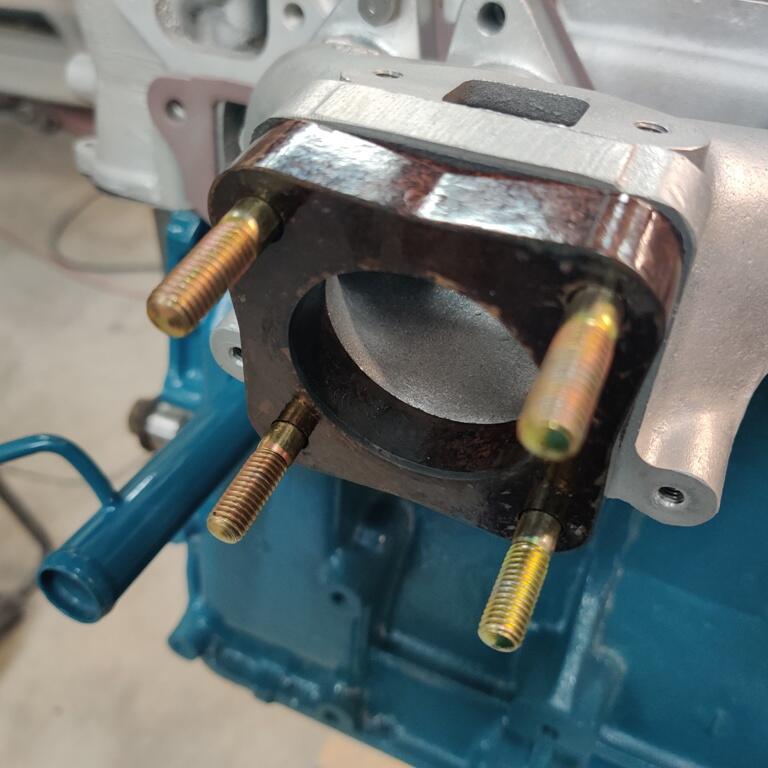
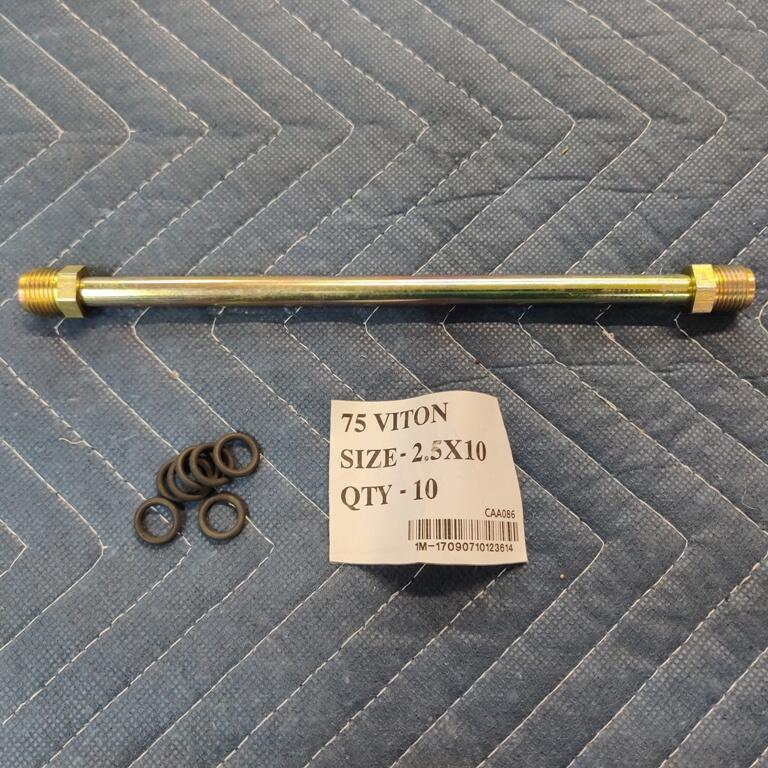
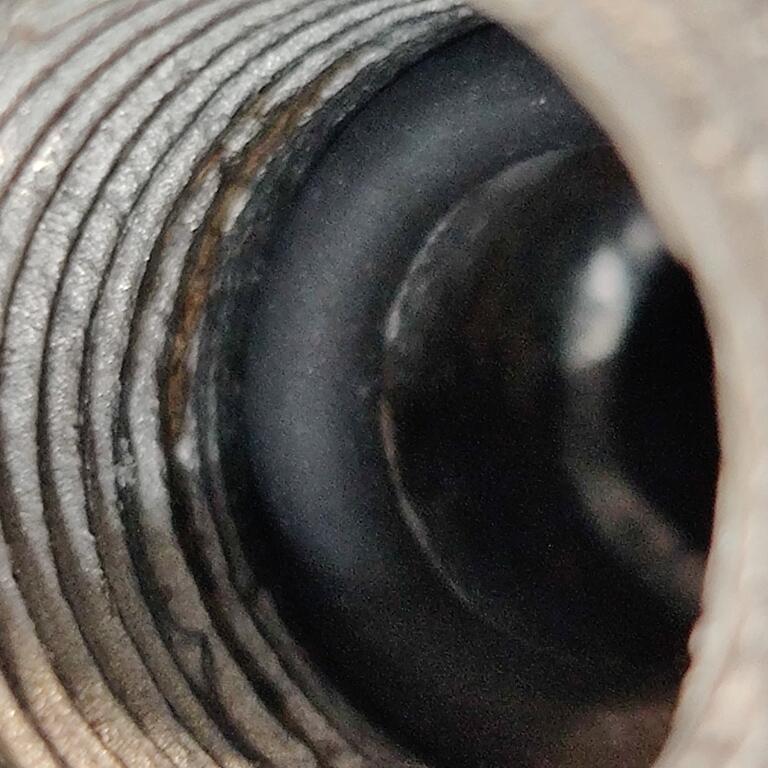
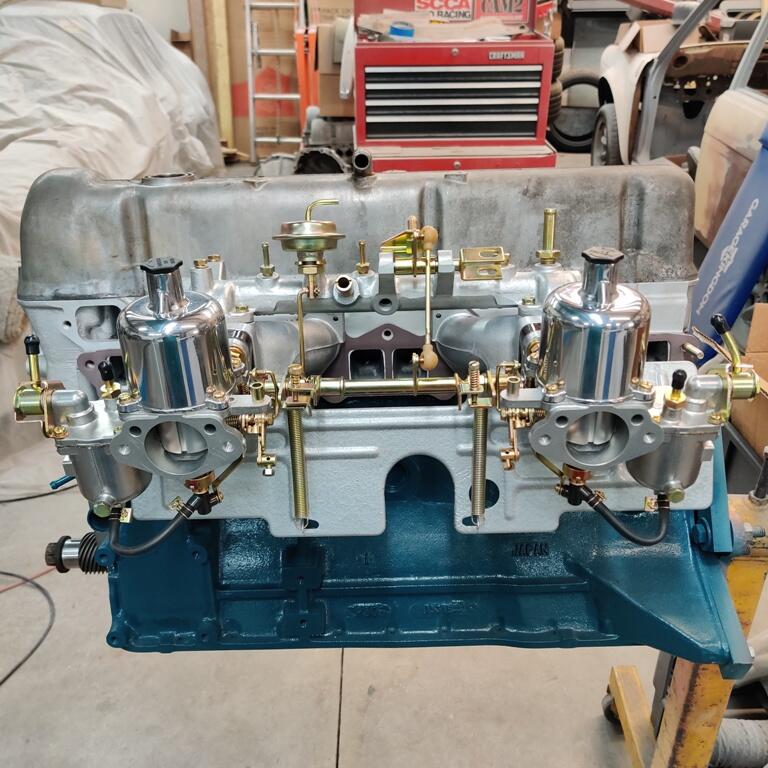
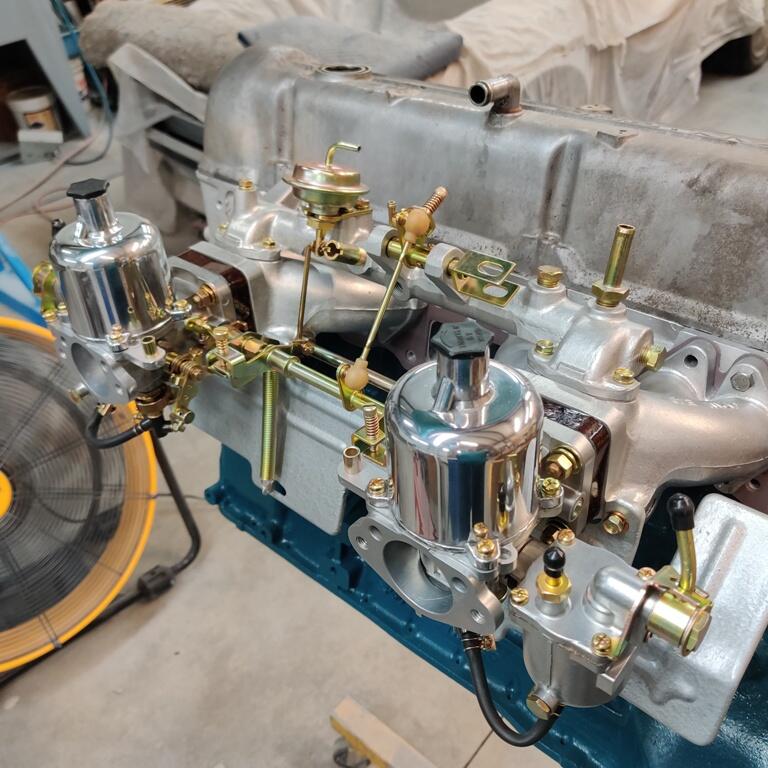
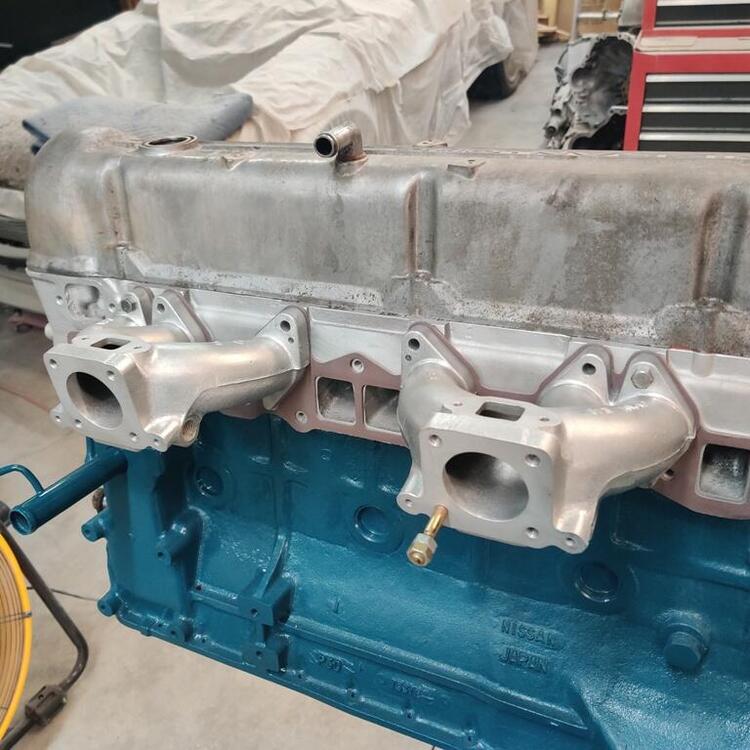
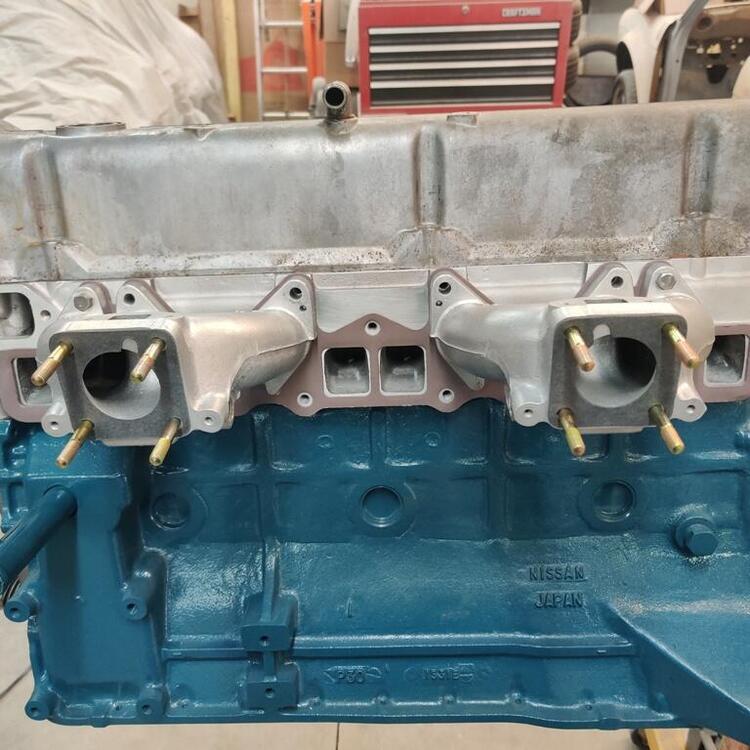
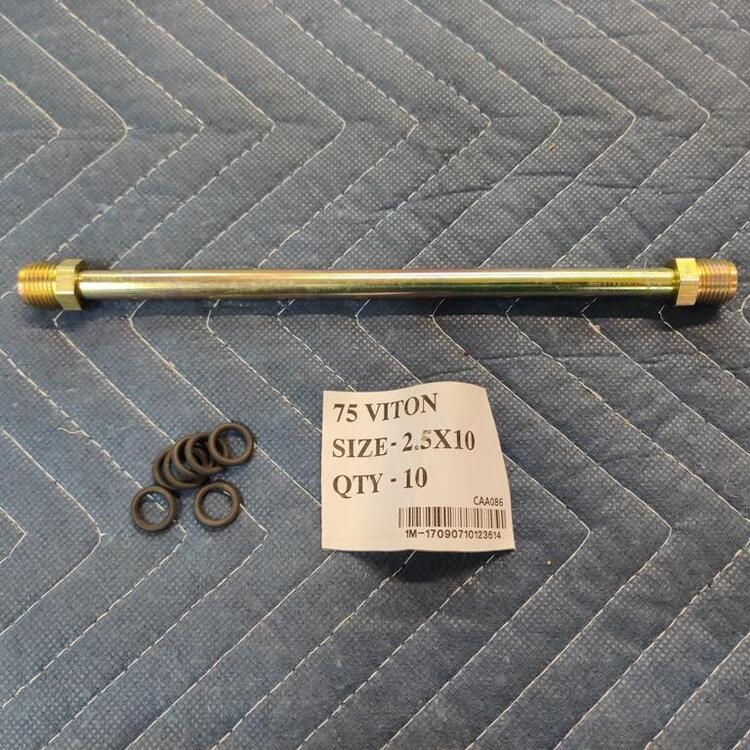
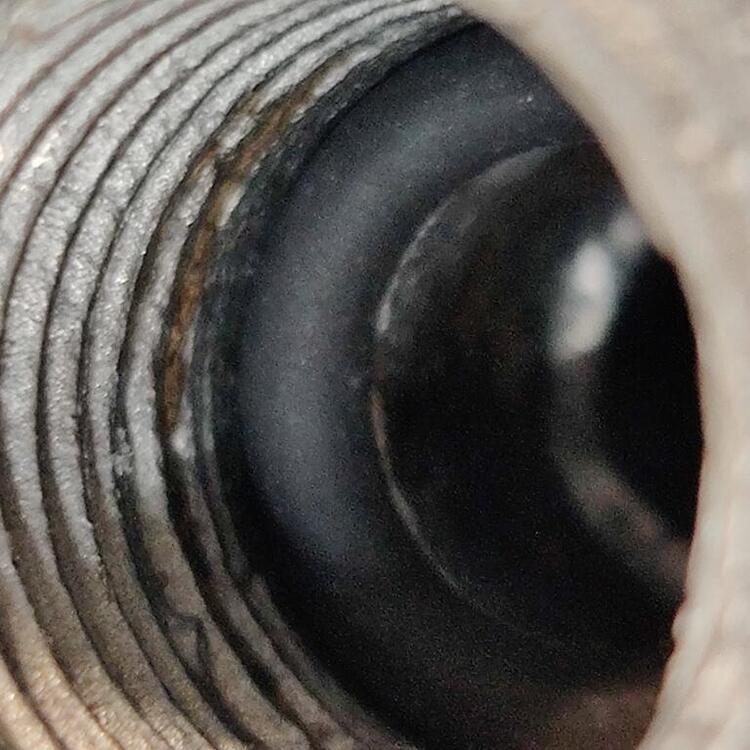
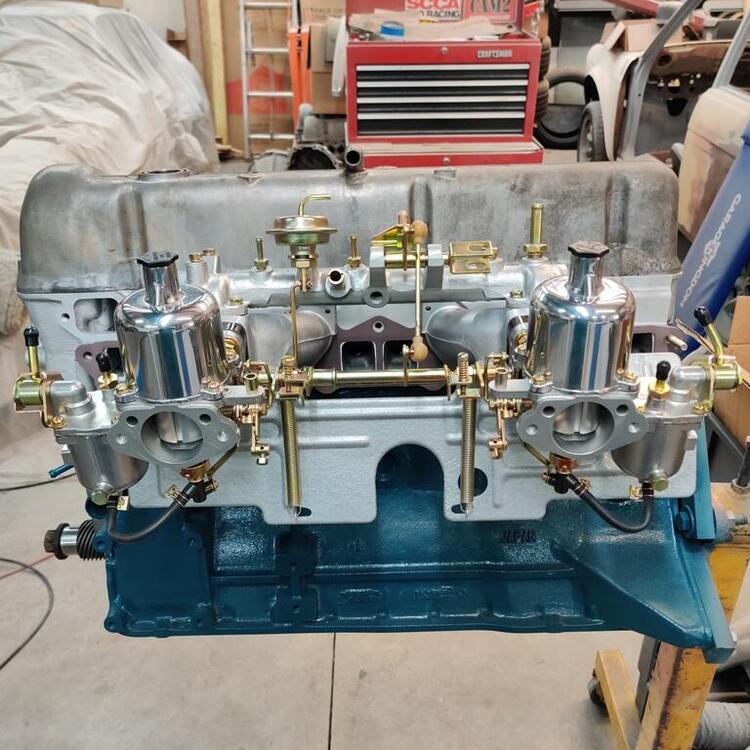
In addition to working on the doors and front fenders, making progress towards addressing the minor imperfections again today, I had some downtime waiting for 3M platinum finishing glaze (fine filler) to dry. So, I decided to pull the cover off of the engine - Ah ha! That (center pic, first row of pics, holding the manifold to the engine) is where my two intake bolts that were missing went! Unfortunately, they didn't make the trip to the plater. I am thinking there will have to be one more shipment to them for a few parts that I accidently left out. Assembly of the intake manifold. For those that do not know, studs can be installed using two nuts on the end of the stud tightened up against each other. Locked together, they won't spin and the outer one can be acted on with a wrench to wind the stud into position: Four studs in each intake manifold, gaskets and the heat insulator blocks installed. I rarely see people remove the coolant tube from the manifolds during restorations. It was a pain. I destroyed the old tube, and mangled the original fittings. But, the tube is basic, and a replacement is easily sourced. The outer diameter is 10 mm. The fittings at each end are very odd. I remember spending a lot of time searching the internet, trying to get info on them. Eventually, I figured it out. They are "Male Inverted Flair - Tube Nut - M16 Threads x 10mm Tube" The factory ones have a 19 mm size on the hex, but I couldn't find ones like that. The replacements are 16 mm hex. Additionally, what makes a water tight seal at each end of the pipe is an o-ring. Originals were hard as rocks, and crumbled. I was able to source some Viton O-rings that I am confident will work (see third pic in the row of pics below). There is an angled (chamfered) shelf that the o-ring seats against. The nut compresses against the o-ring. The chamfer forces the o-ring to push against the outer diameter of the shaft to create the water tight seal. First pic is 5.9X magnification of the o-ring in place. Second and third pics show the intake assembly. Unfortunately, the rubber fuel tubes got kinked a bit during storage. Will have to see if that resolves itself now that they are installed. I sanded the 3M glaze and applied 3 more coats of high build primer which I will sand tomorrow. Fingers crossed that I can finish the doors and fenders tomorrow.


 1 point
 -
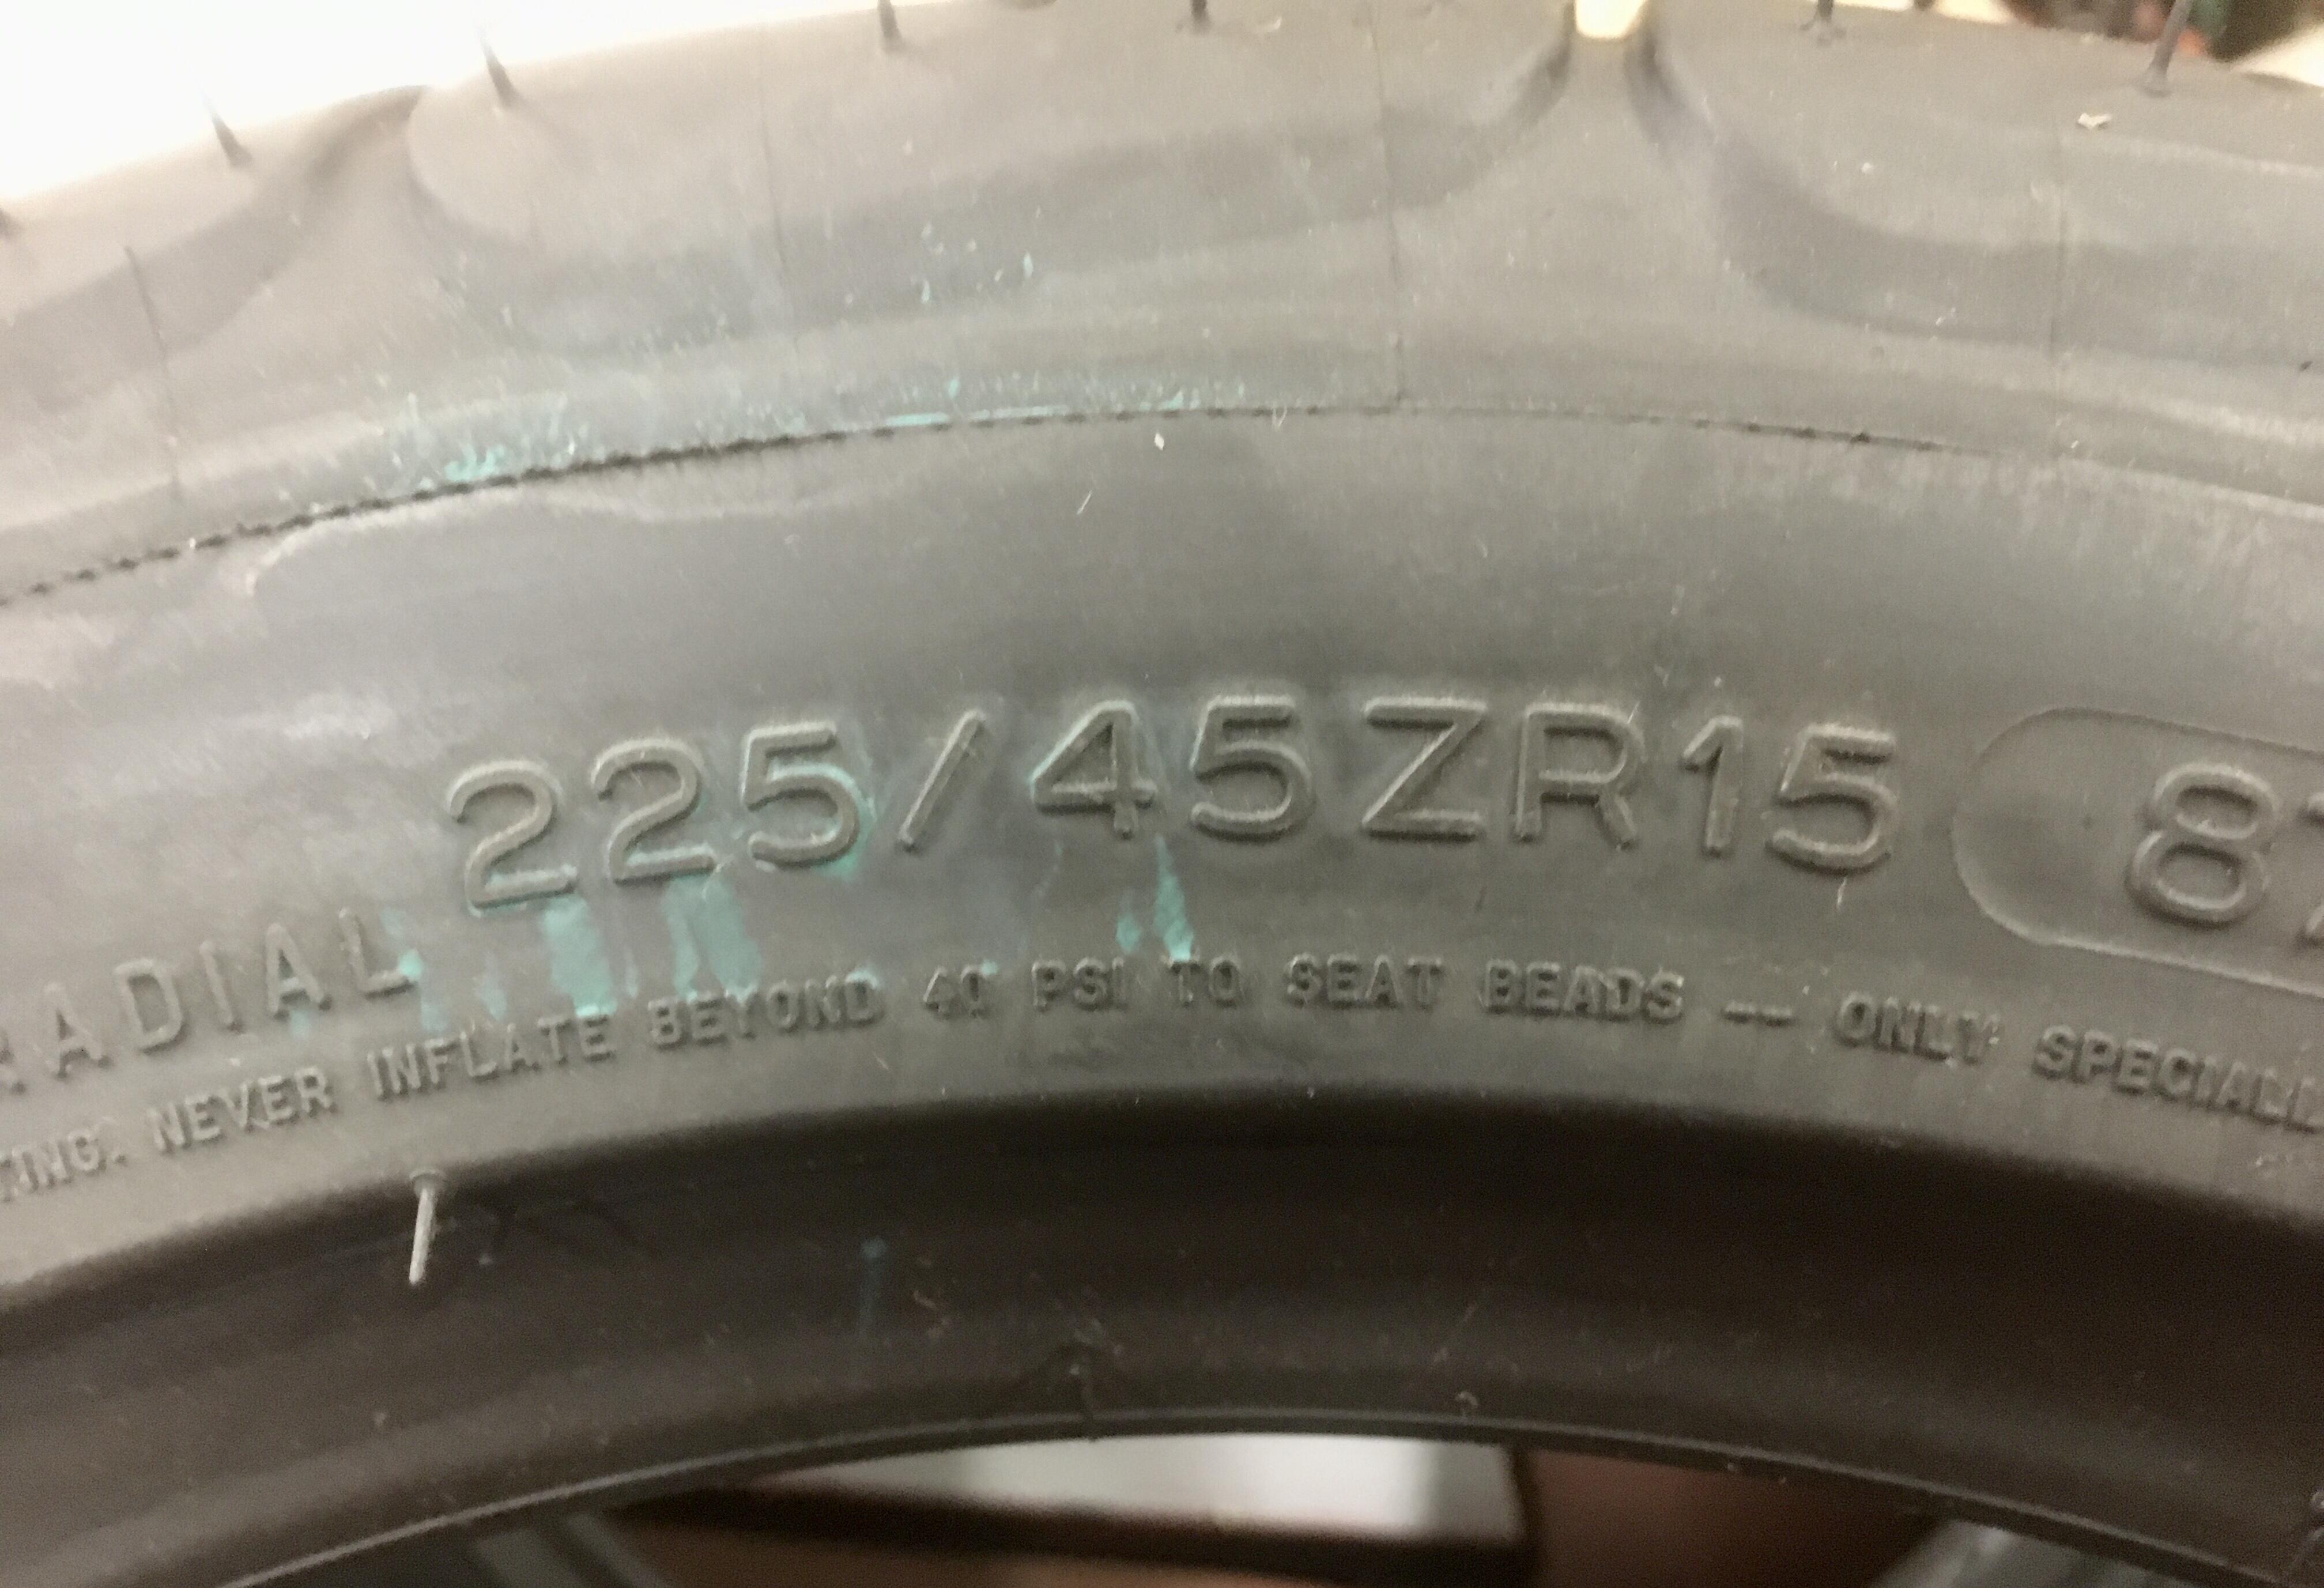
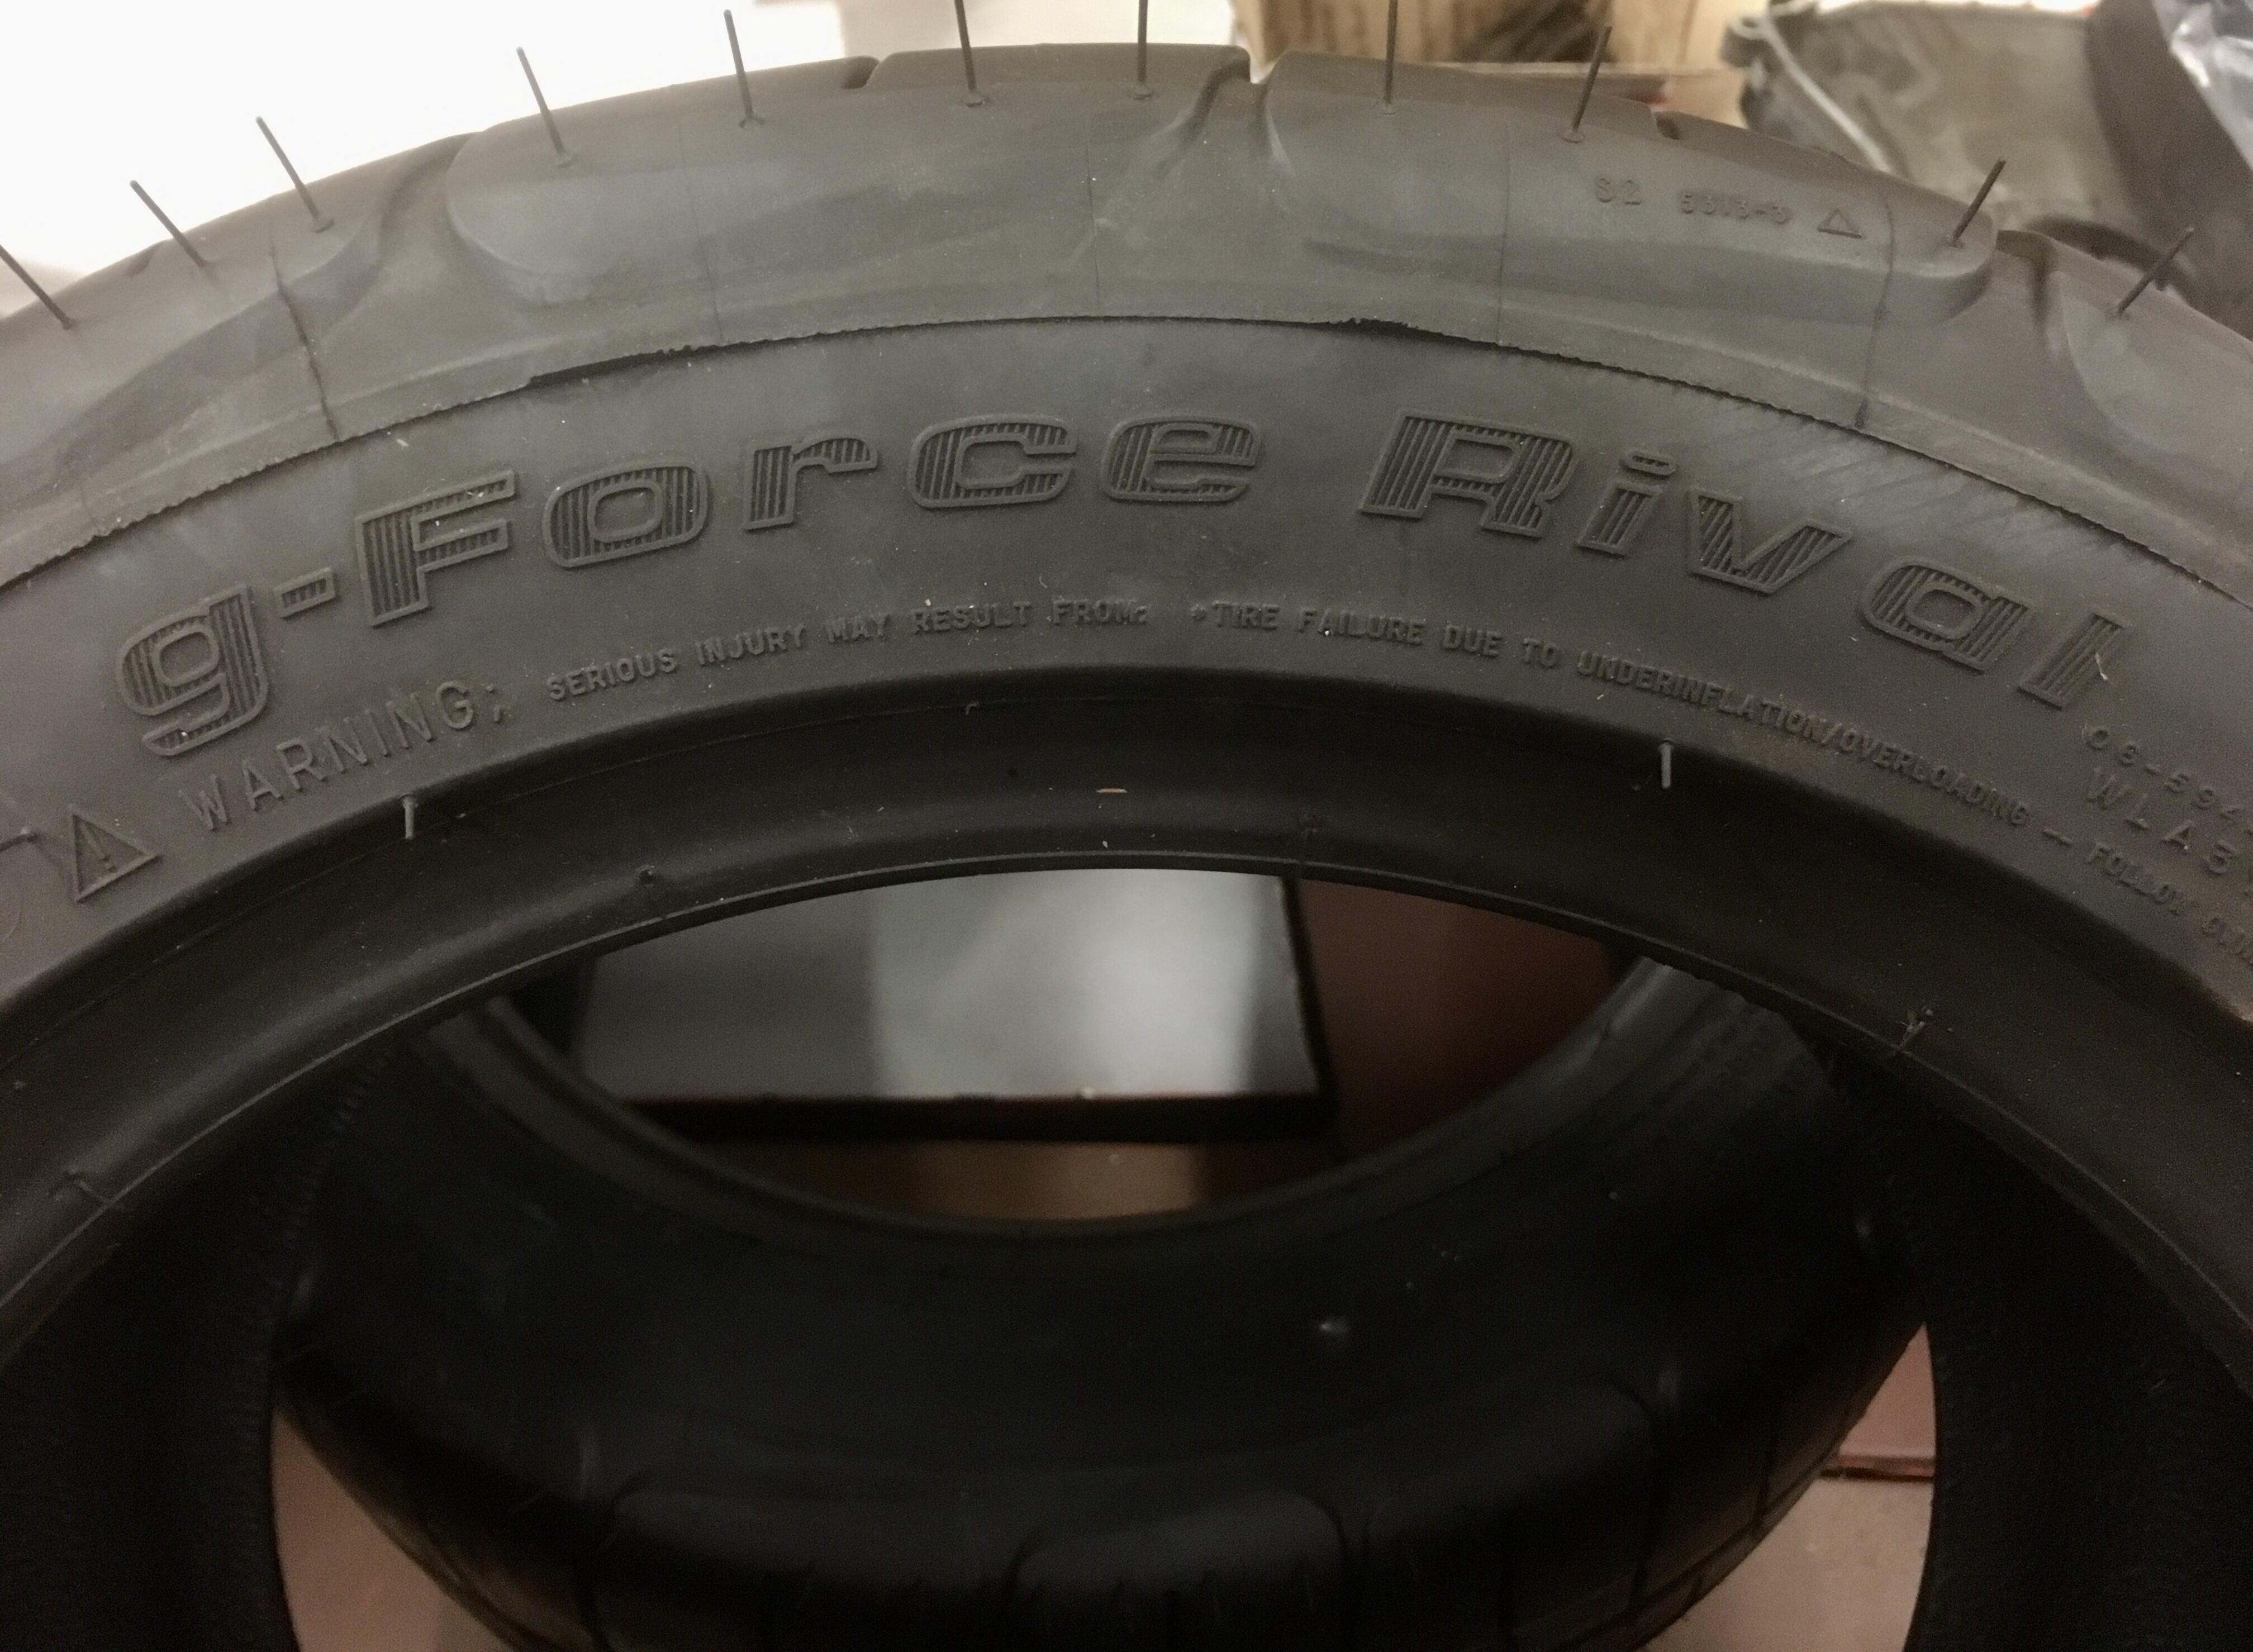
225/45ZR15. They are close to the same overall diameter as the Hoosier tires I run on the race Z, and about the same width.


 1 point
 -
1 point
-
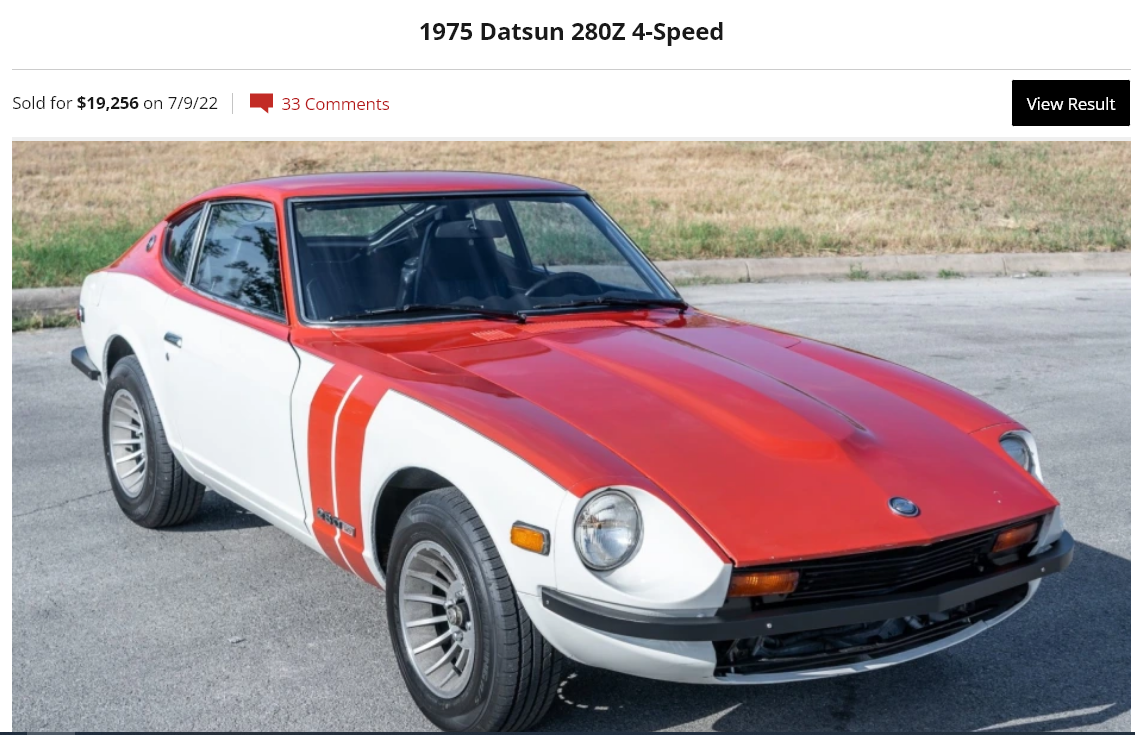
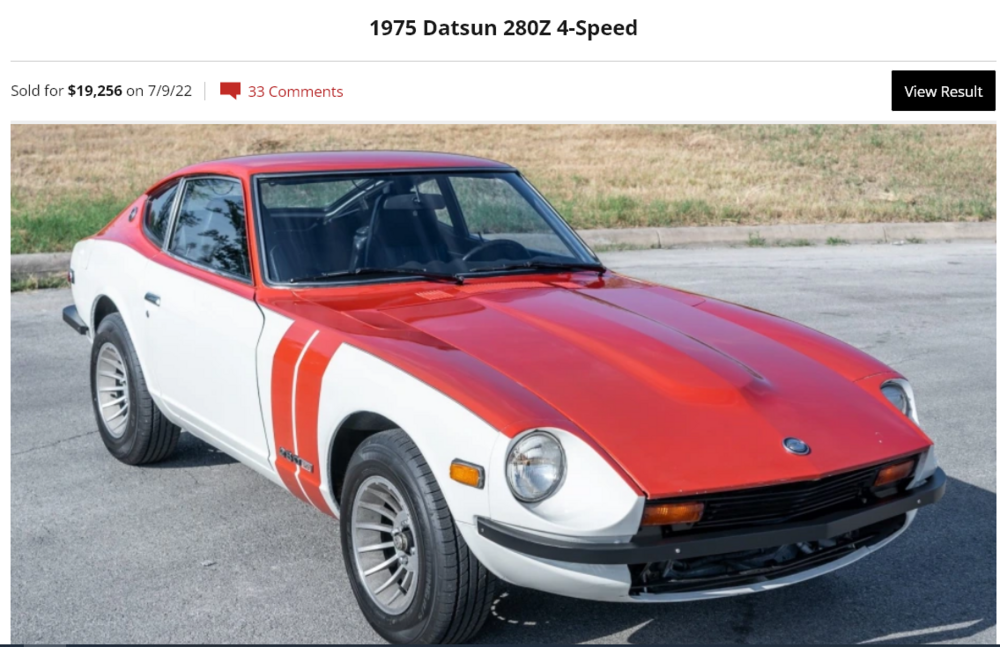
$19,256 for a crusty old de-bumpered 1975 with an odd paint job and a rebuilt engine. Impressive. https://bringatrailer.com/listing/1975-datsun-280z-36/
 1 point
 -
In my opinion, very good. Probably an 8 out of 10, given the size and my car setup. Obviously I would use something better for track or auto crossing, but for everyday use and sometimes aggressive corning, I think they're great. I went on a ~100 mile drive yesterday with the Z club in the foothills, highway 49 (which sometimes makes Car & Drivers favorite road list), and my favorite, 193 coming down into Placerville. Pleased with their performance when we had no traffic in front of us.
 1 point
 -
TO: Terrapin, 26th-Z, CanTech Z, Dave Thank you ever so much fellows! Your input will be of great help. Happy Motoring, Richard1 point
-
1 pointAdding a rear anti-sway bar reduces body roll and oversteer. Brings the 240Z closer to neutral handling. On the downside - you lose some of the warnings as you approach the limits of tire adhesion. Body roll and tire squealing are warnings that you are approaching the limit….. so with no warning spin-outs happen suddenly and unexpectedly if you are not experienced and right on top of your game. I think that is where the old saying “you don’t know your limits until you spin out” comes from. You also lose the ability to use trailing throttle oversteer to set the rear of the car out where you want it attacking fast corners. For that reason about 8 or 9 out of 10 240Z’s are road raced without a rear anti-sway bar. A better solution is a slightly larger diameter front anti-sway bar. It reduces body roll but maintains throttle control for faster corners. FWIW, Carl B.1 point
-
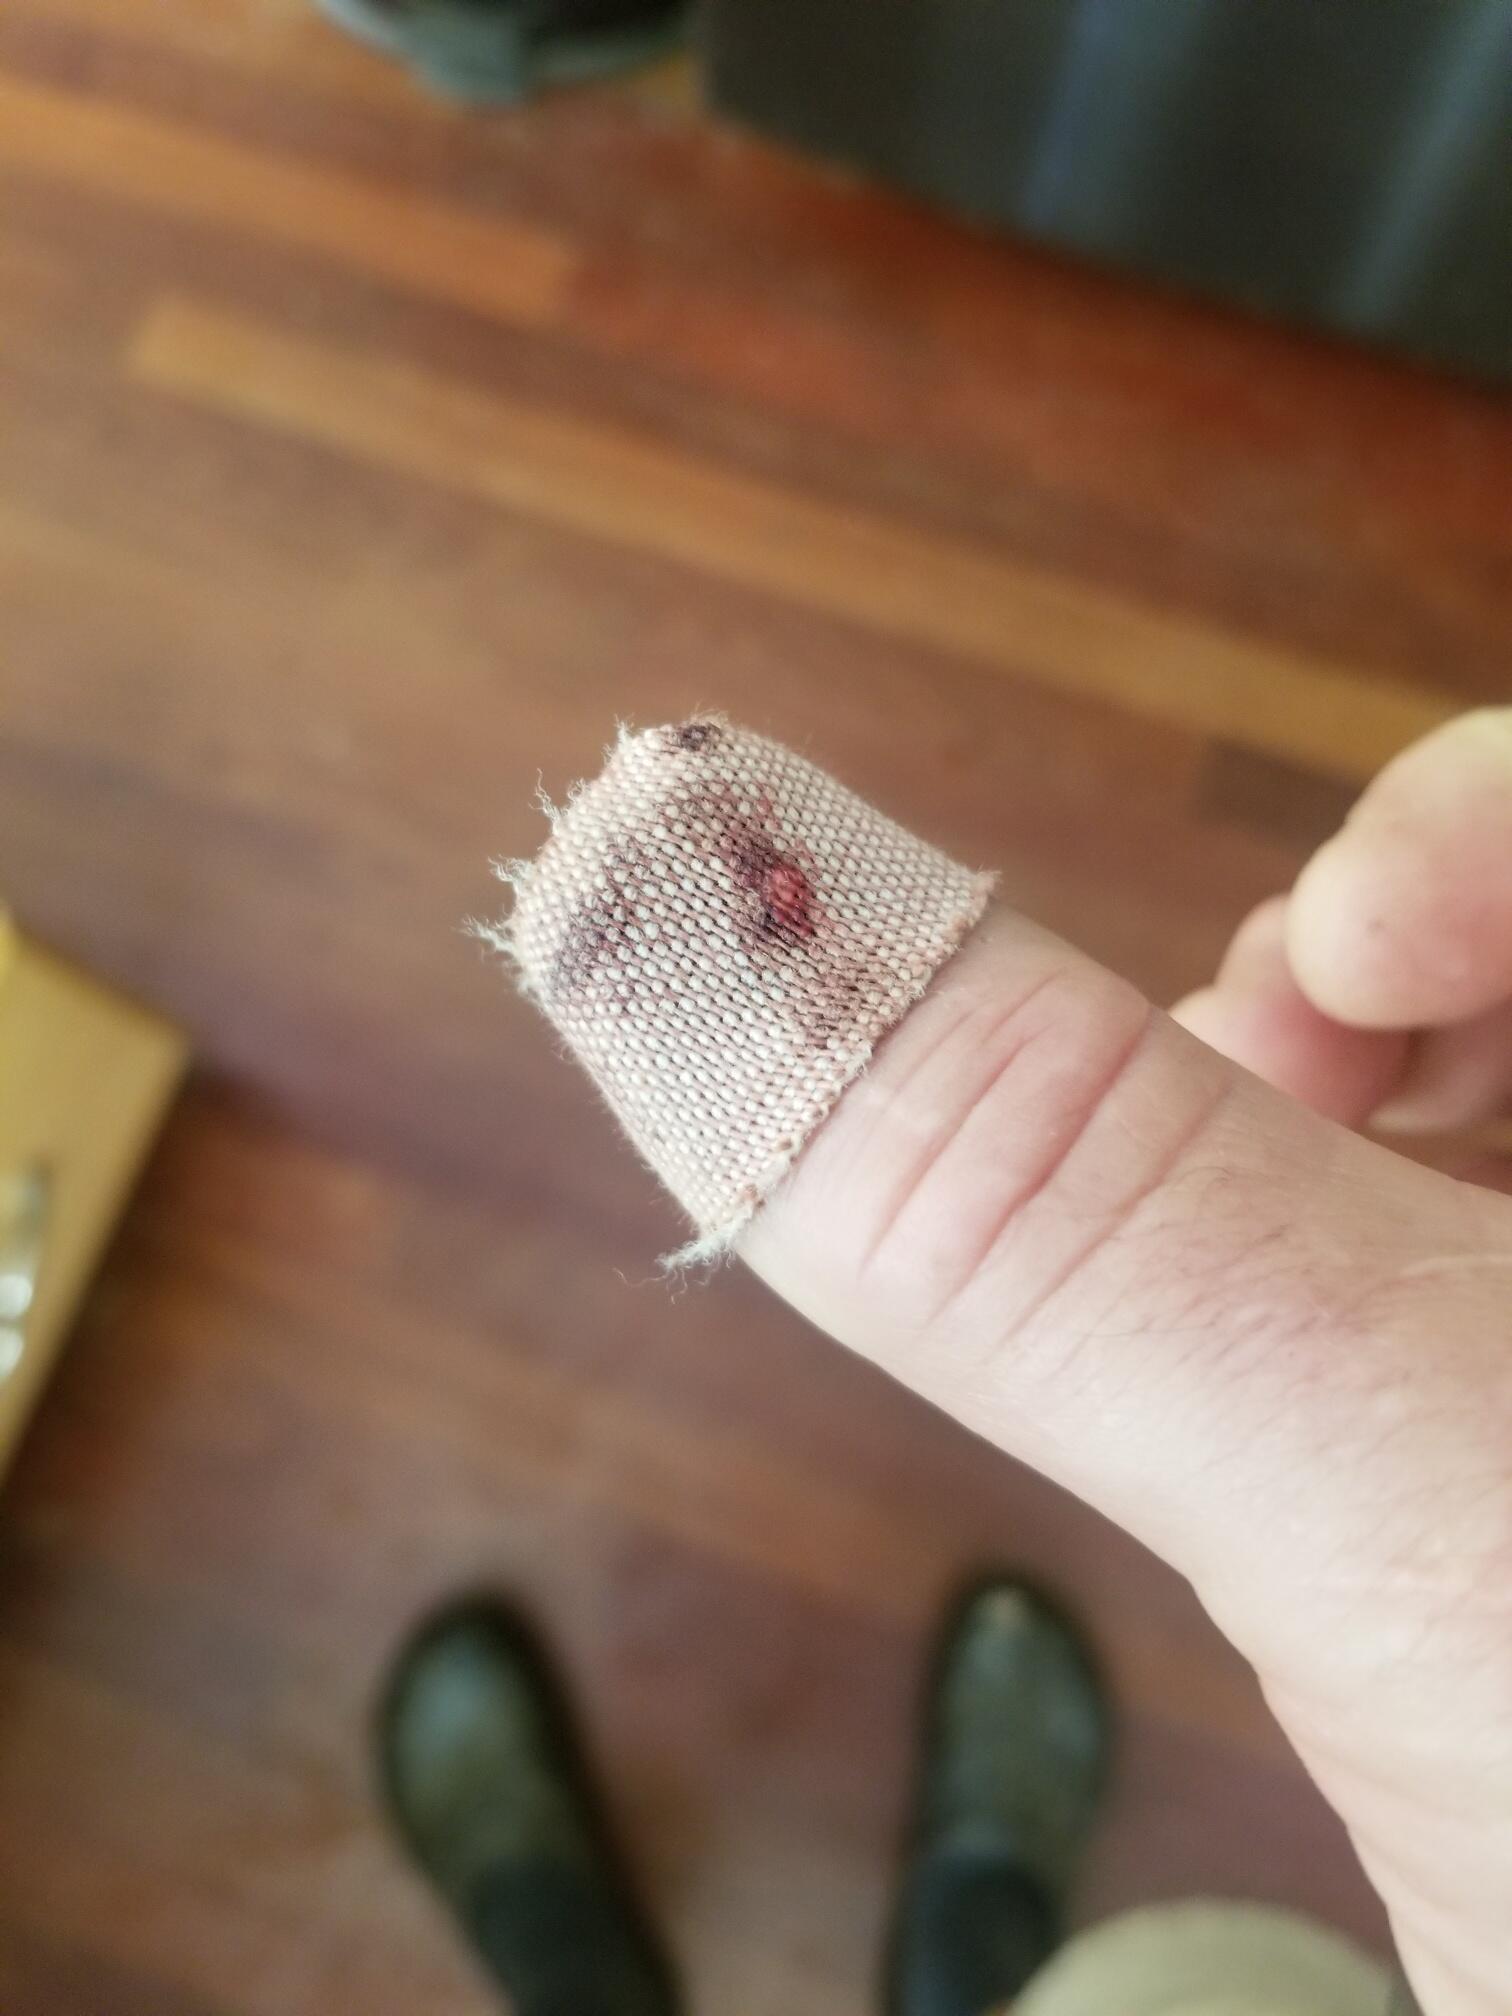
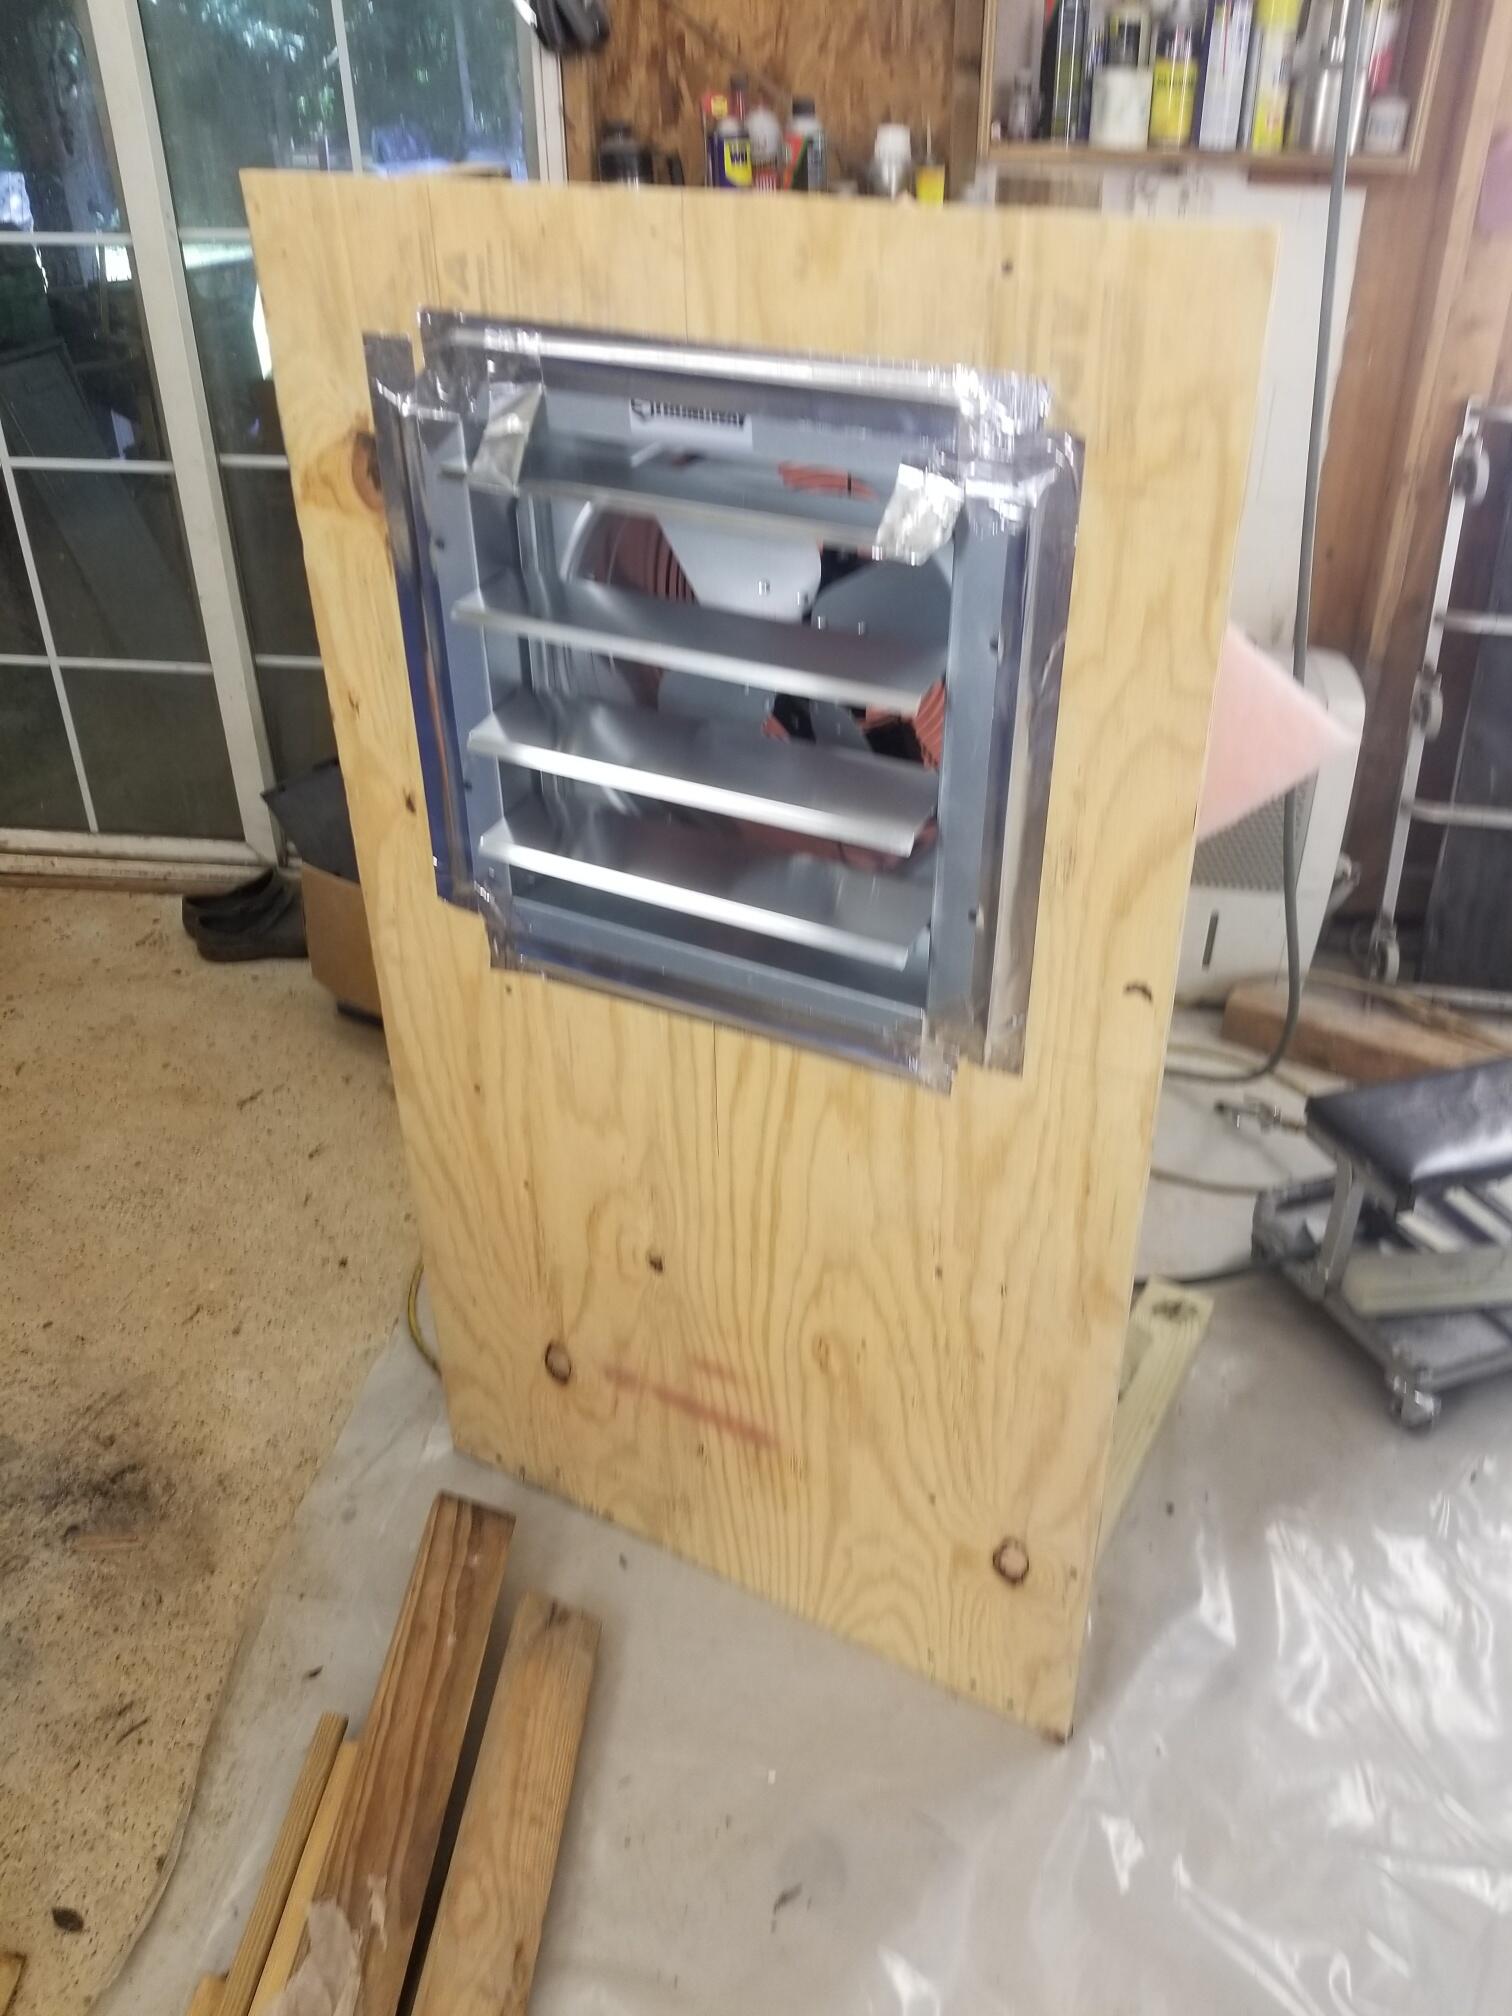
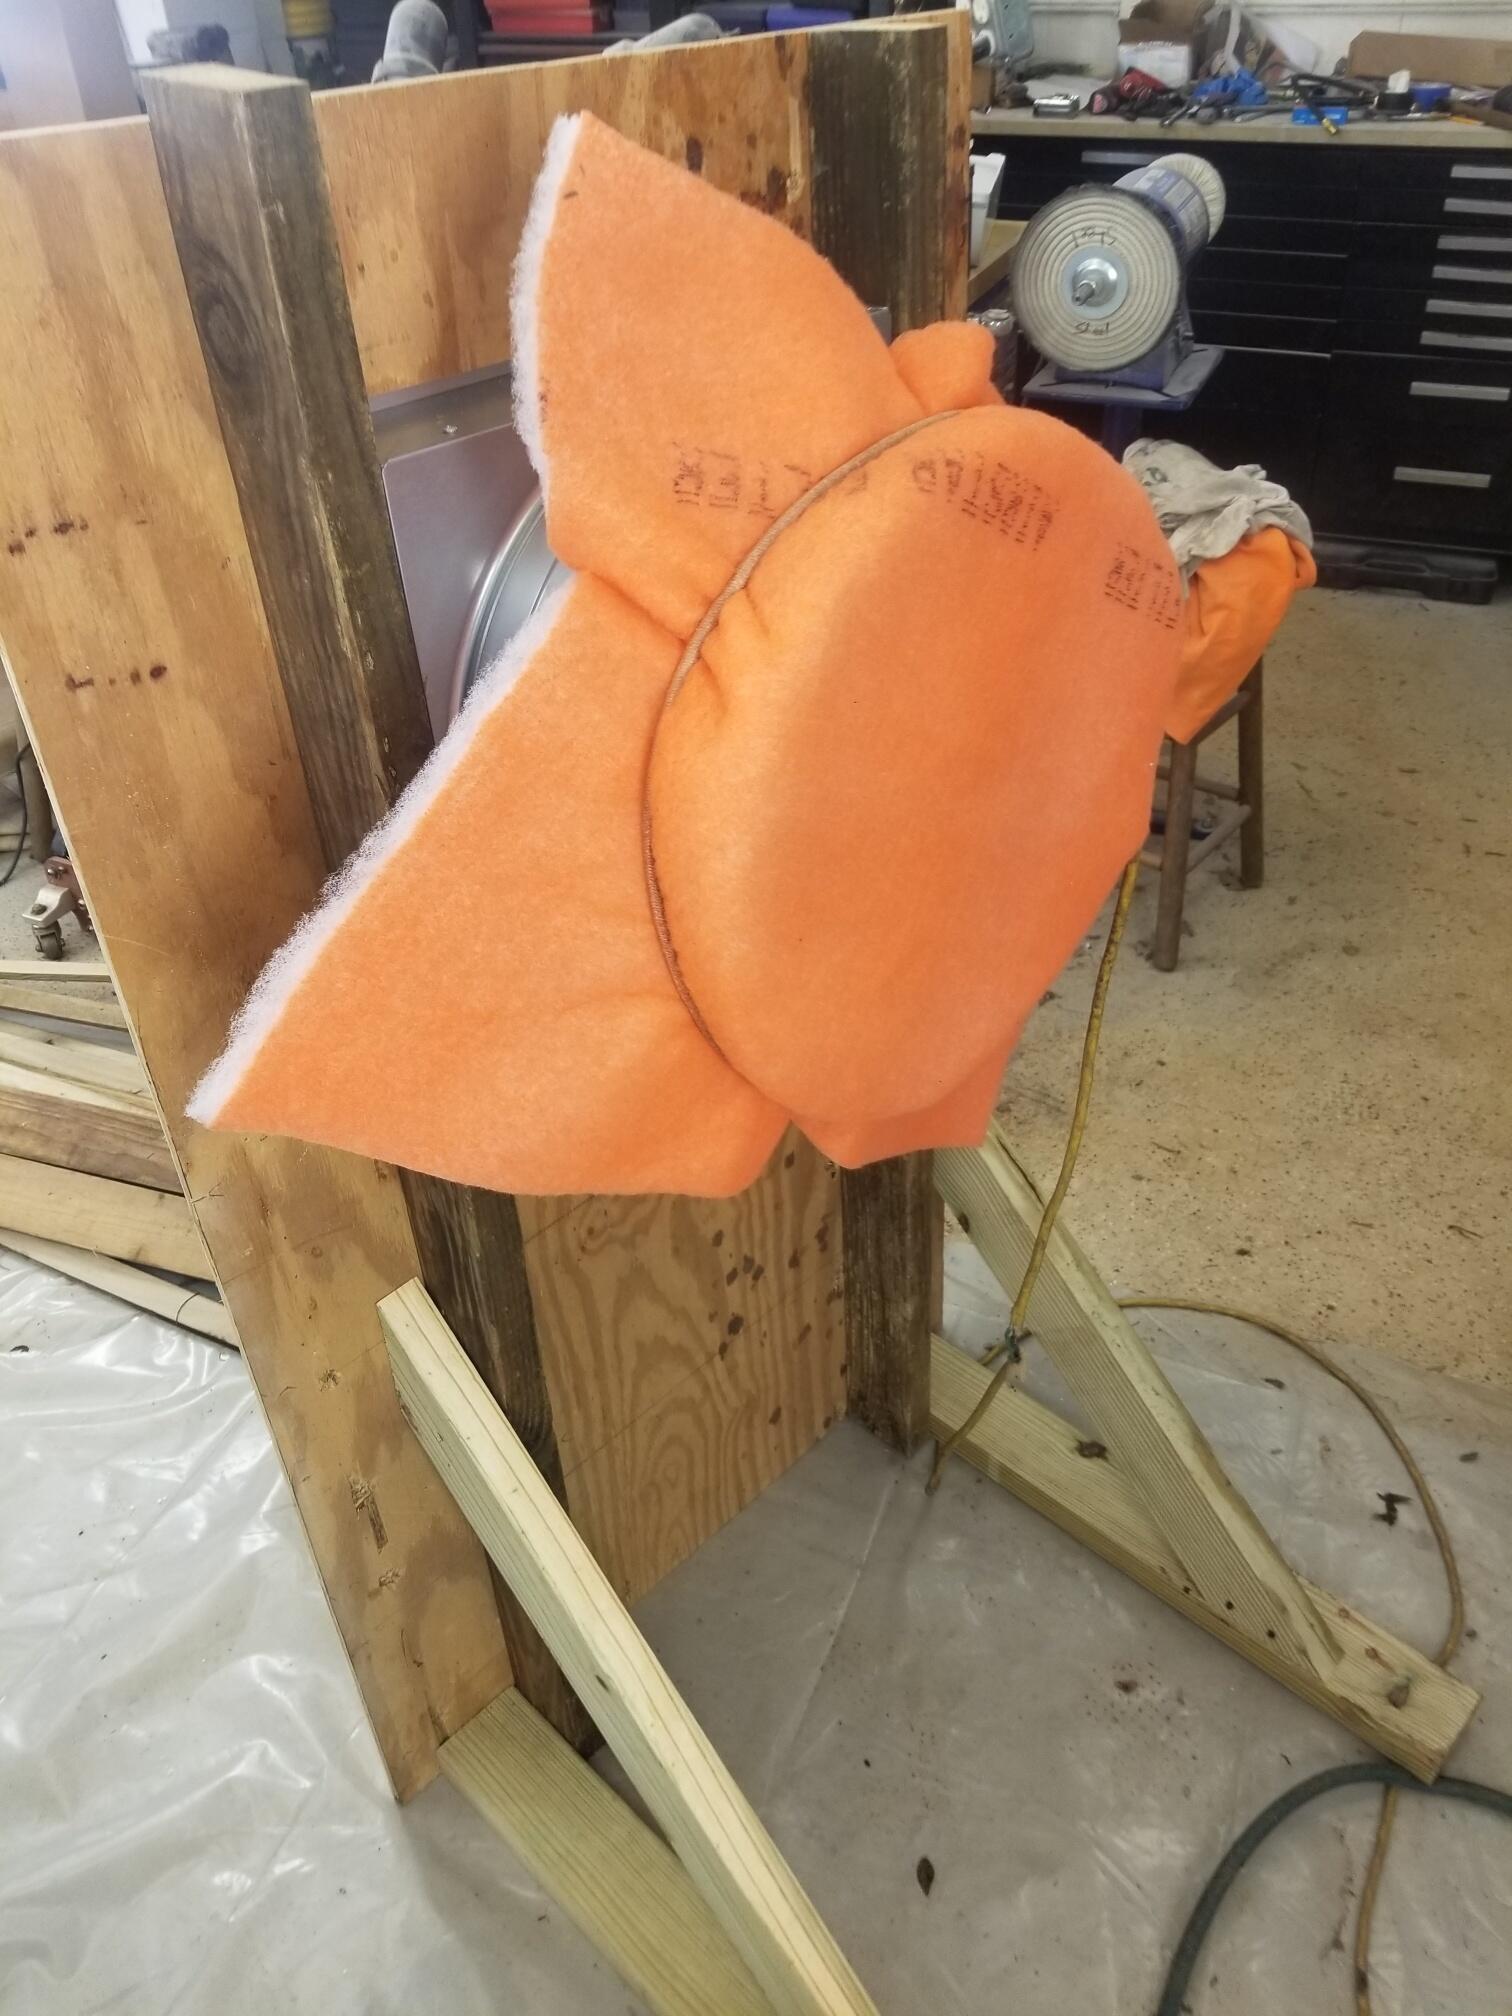
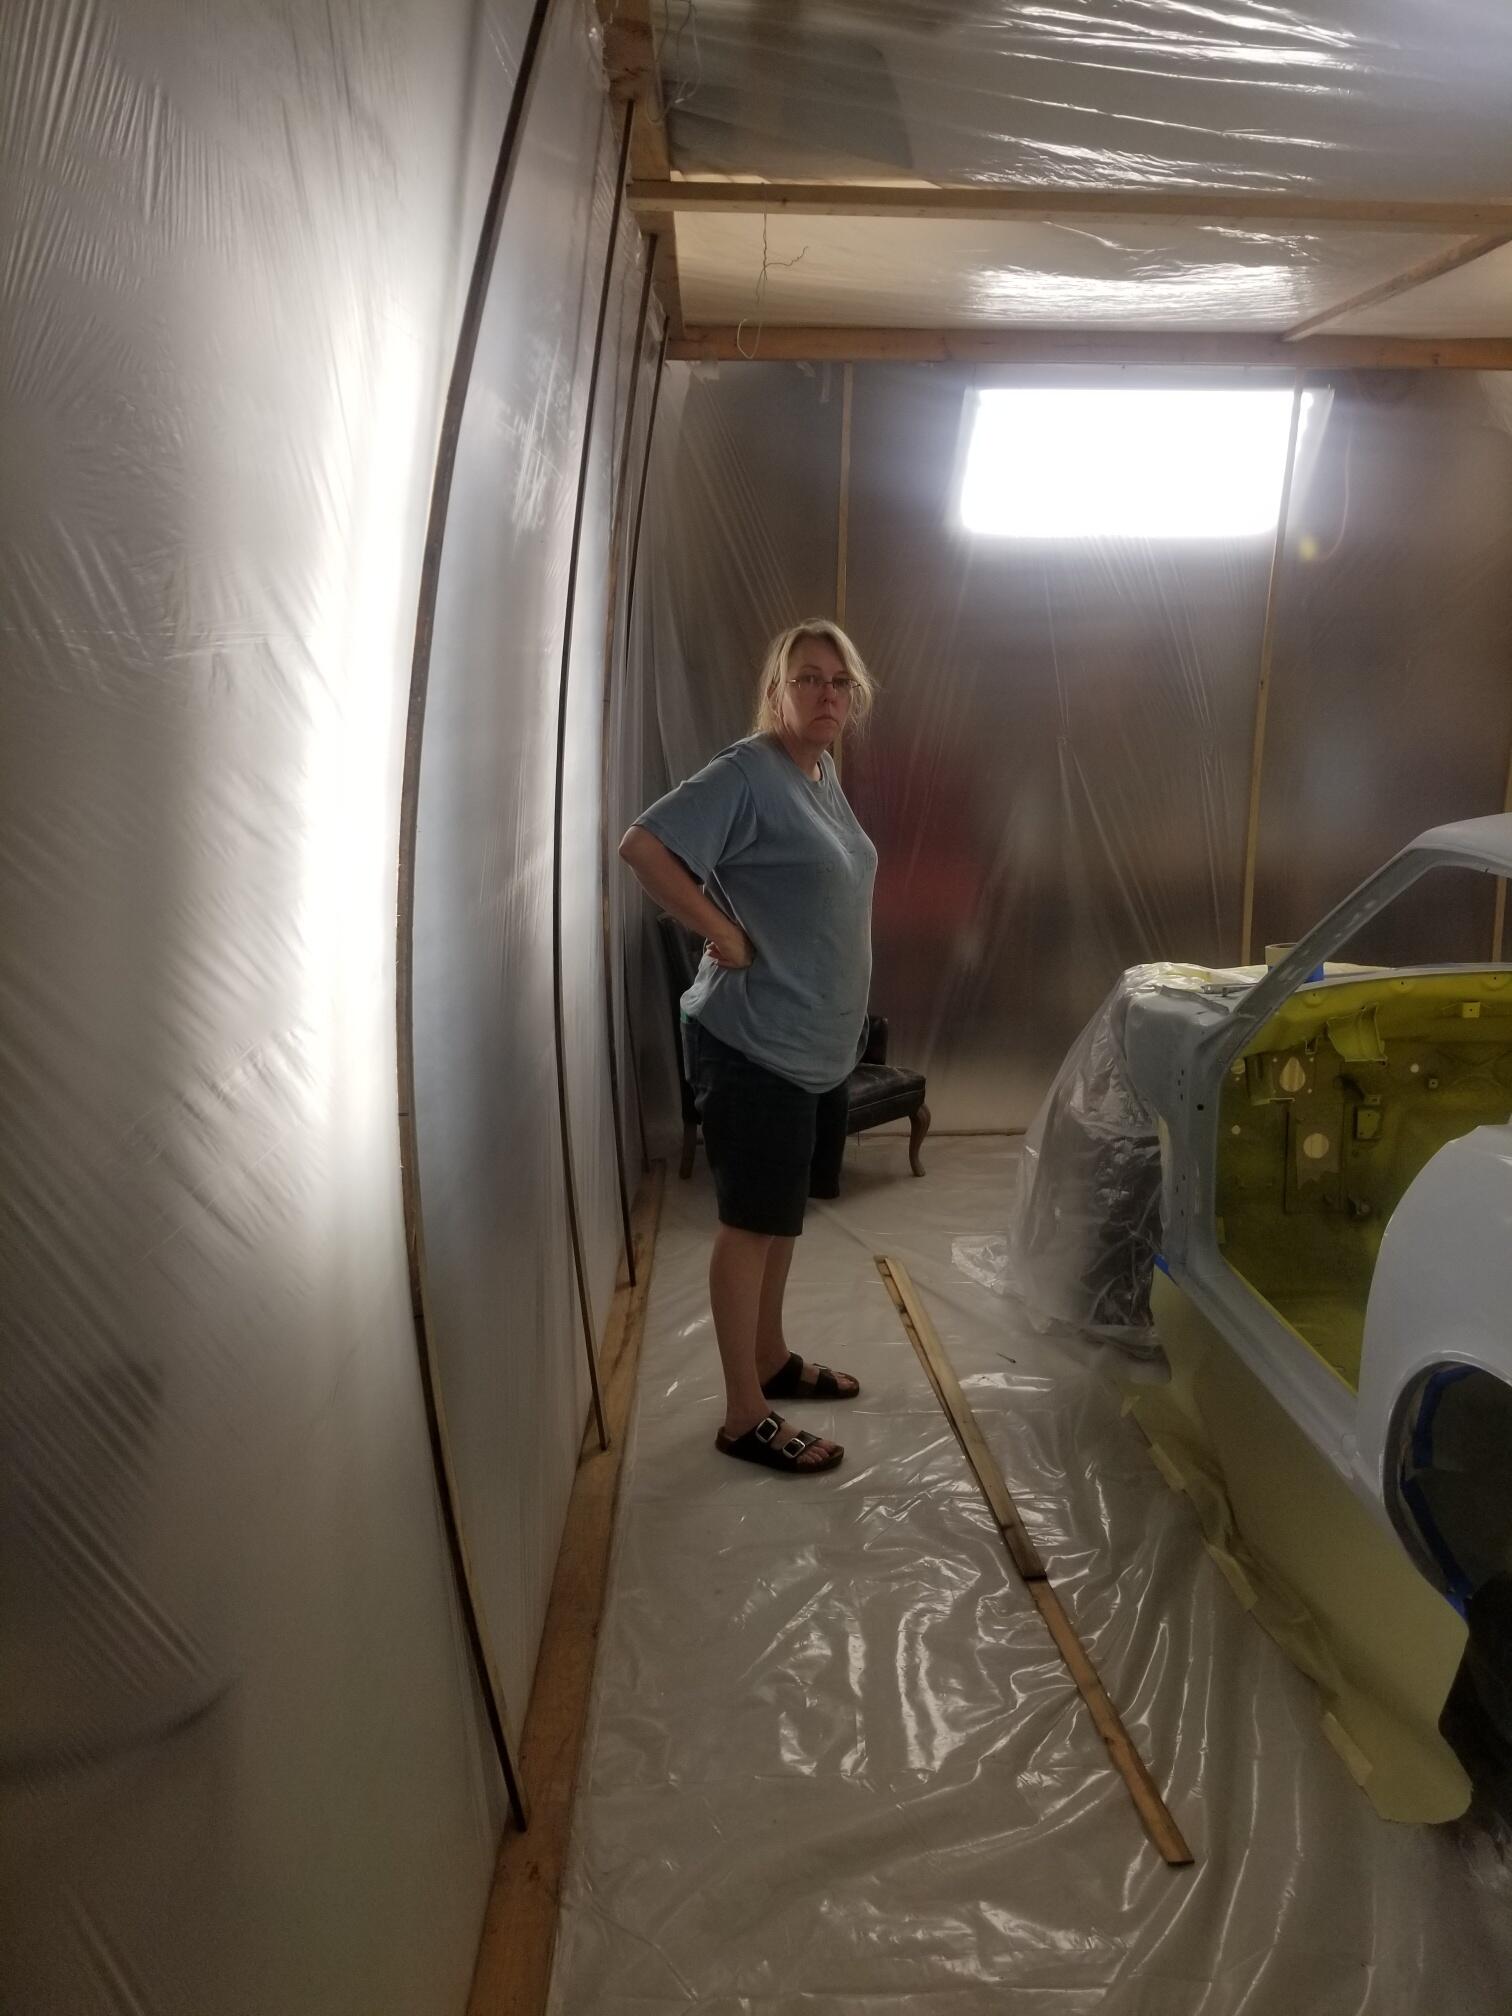
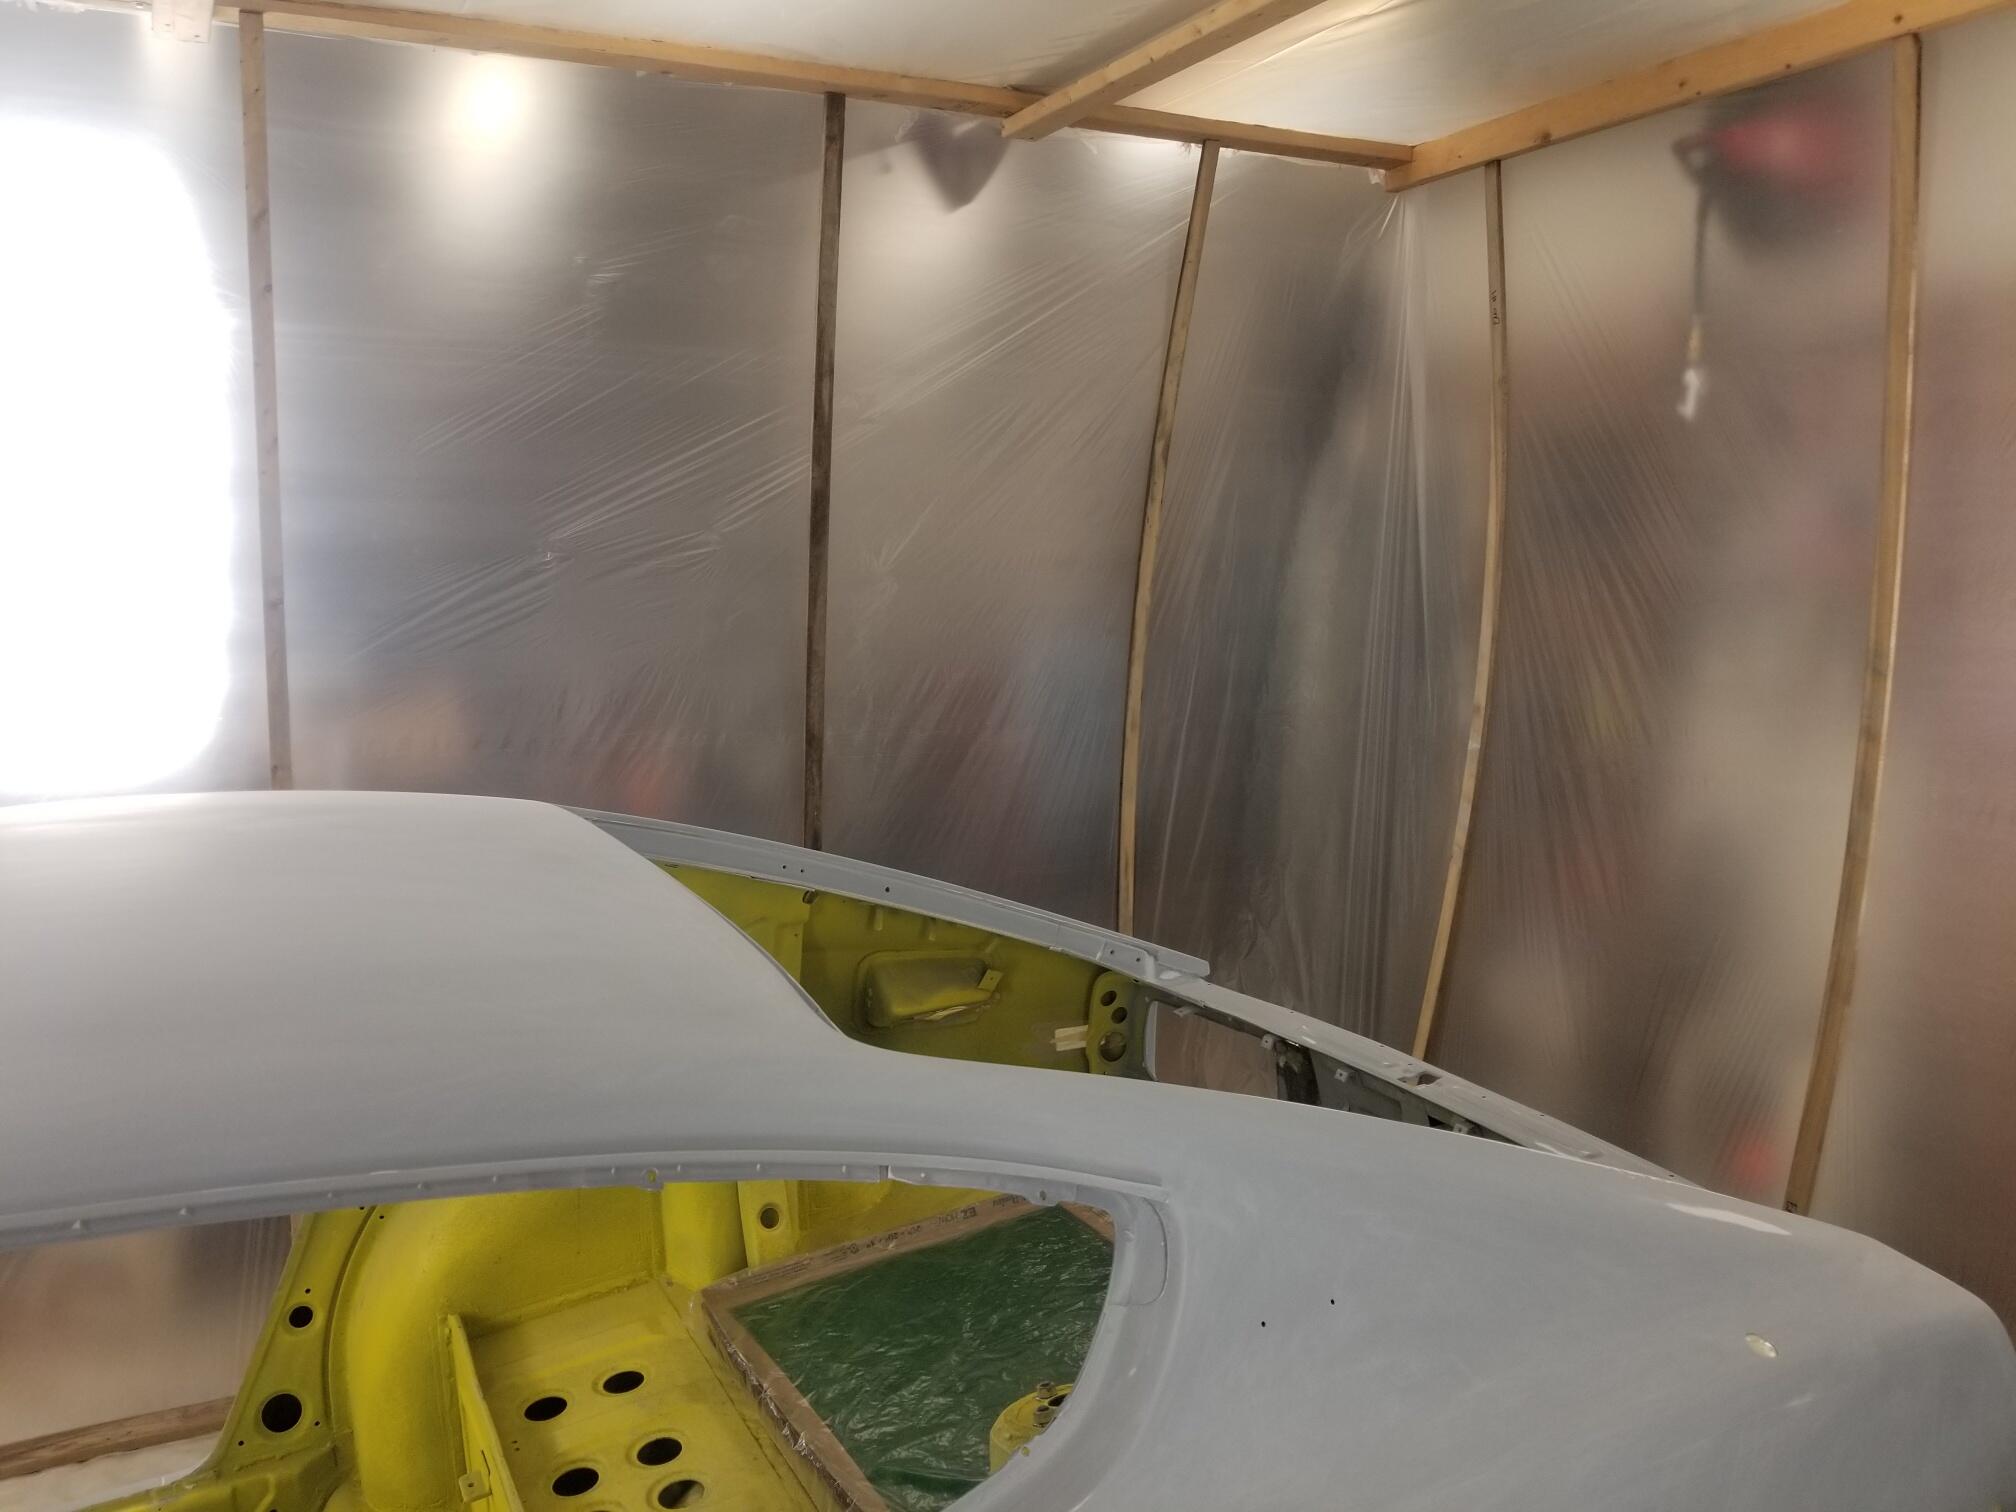
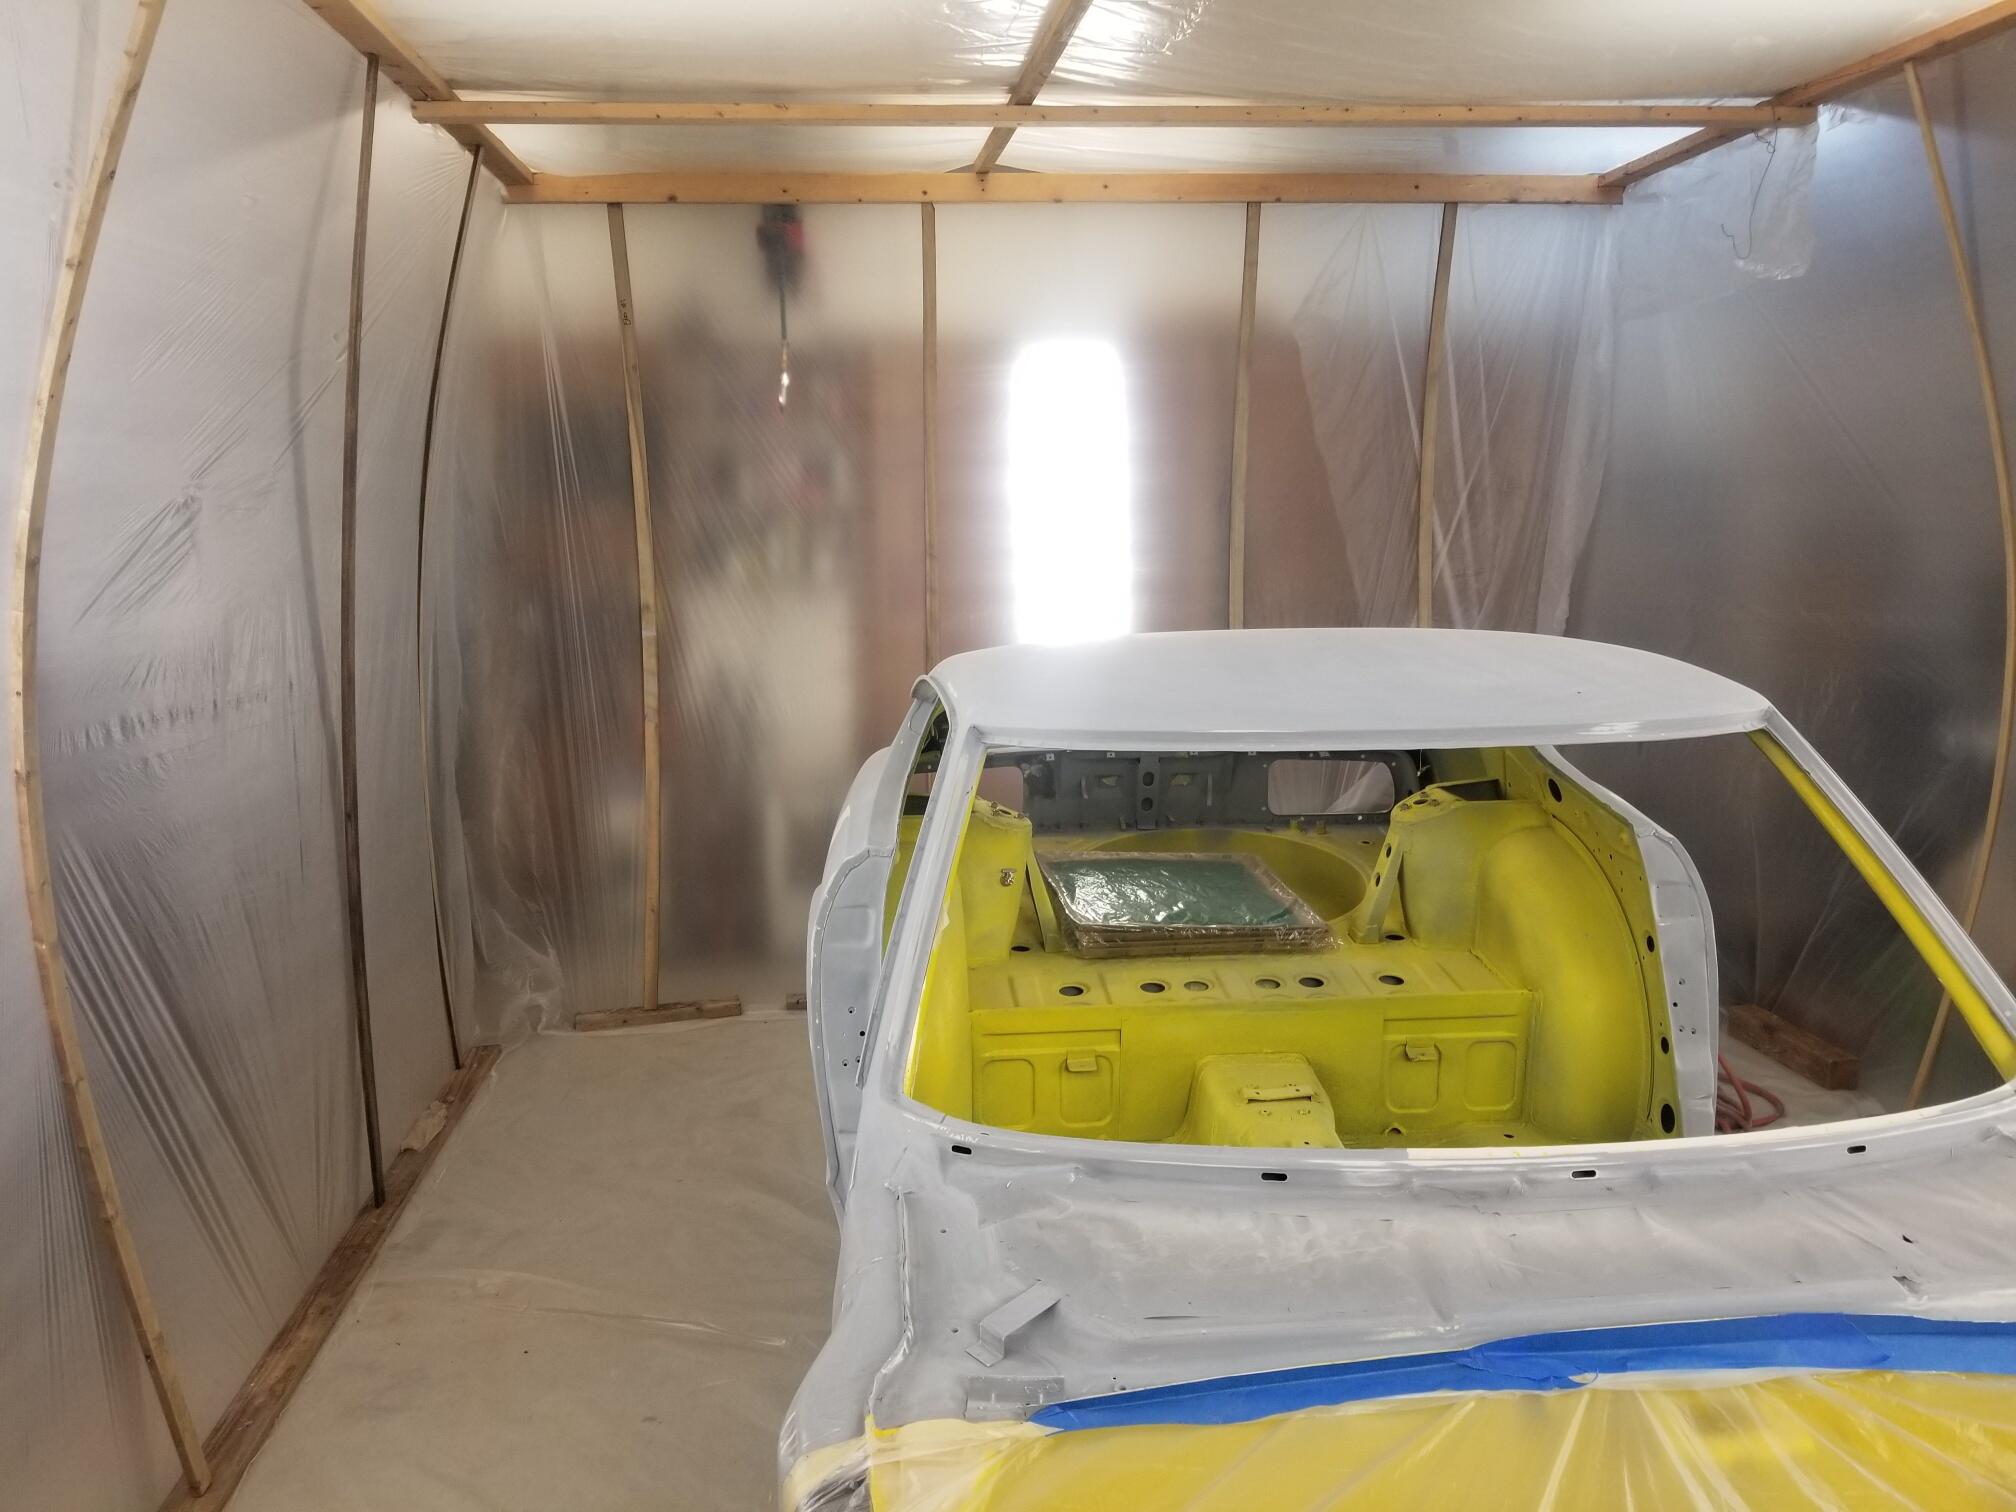
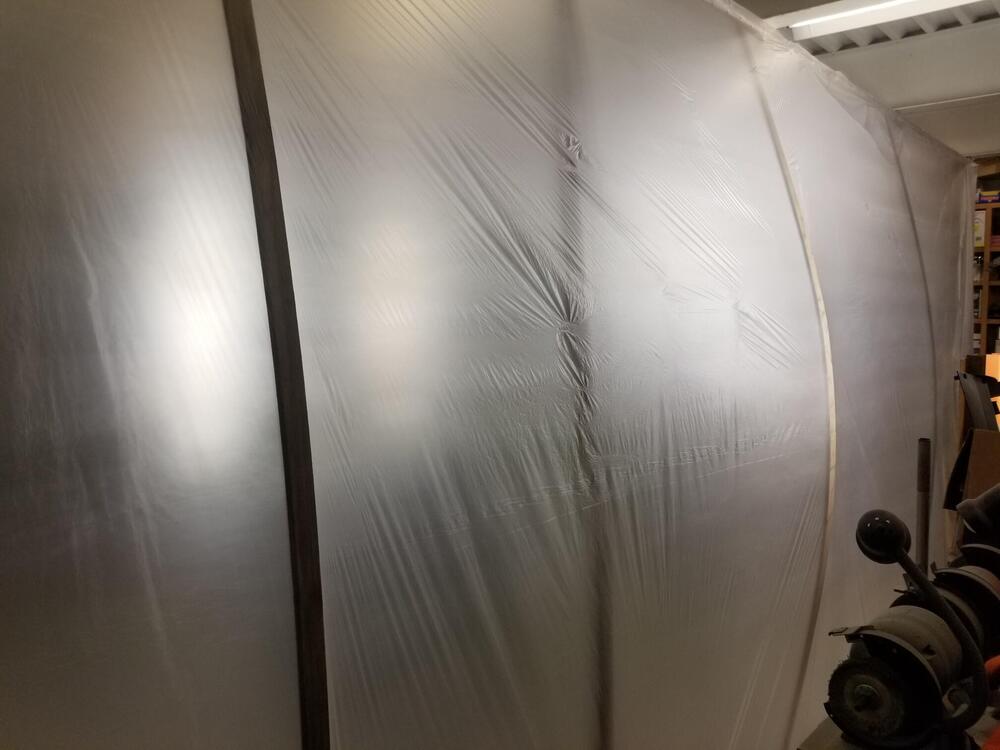
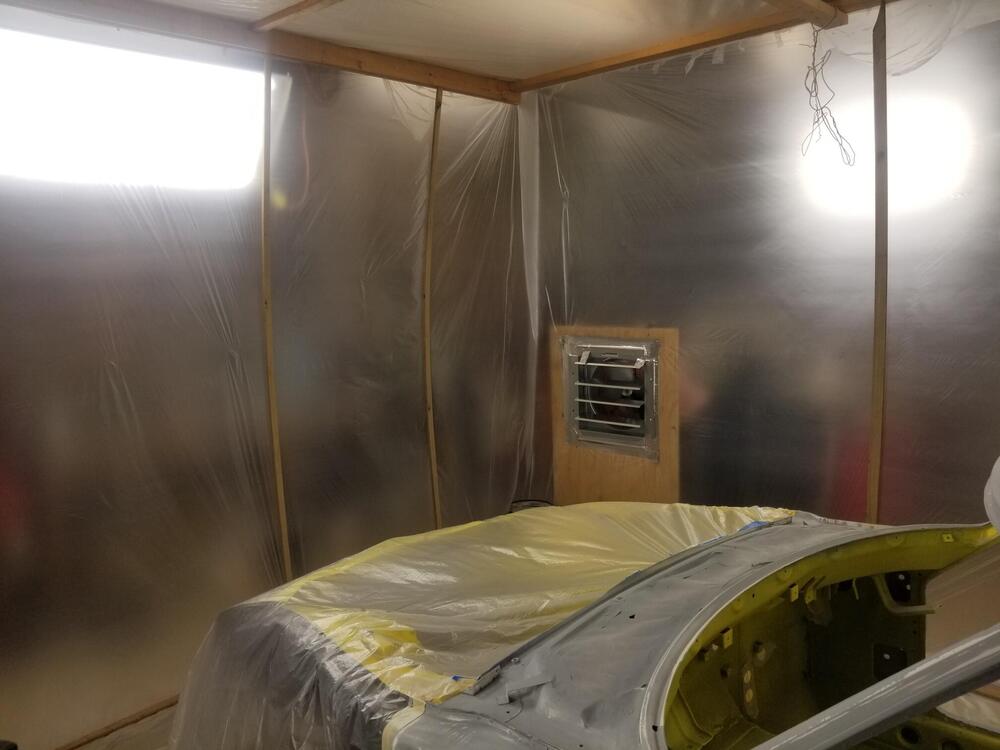
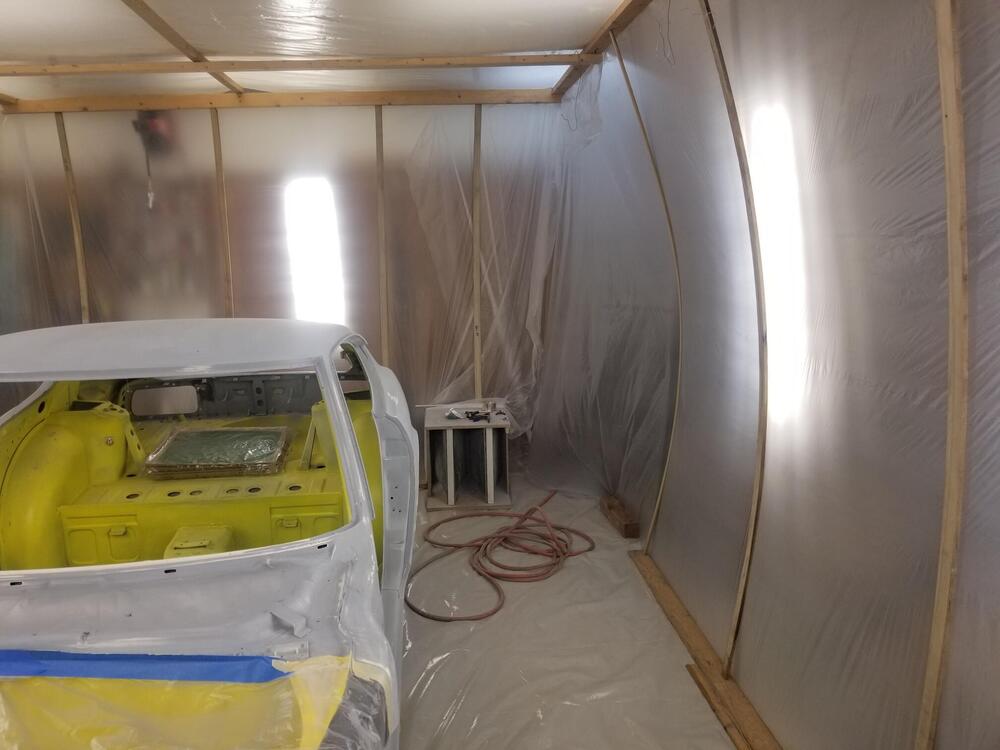
0 pointsSo I was gonna try and spray color this weekend but that's not gonna happen. I reset the booth and added an inflow fan like Homebuilt by Jeff had. The problem came about when building the fan. I stabbed my thumb nail with a philips bit in an impact and tore about half the nail loose! 🤬 Shelley helped me get the booth all back set The weather this weekend is also pretty rainy and humid. So I will try again next weekend. May try a test panel with the new spray gun tomorrow.


 0 points