Leaderboard
-
qz16
Free Member6Points147Posts -
grannyknot
Free Member6Points5,158Posts -
Patcon
 Subscriber
 6Points11,142Posts
 -

Zed Head
Free Member4Points19,238Posts


Popular Content
Showing content with the highest reputation on 09/20/2021 in all areas
-
4 pointsI think you will find it is just the opposite, sounds like you have already reached the limits of the Flux core capabilities, with a gas Mig you can weld a much wider range of metal thicknesses and gas Mig it is very predictable. If you get one just spend 10-15 min. playing around with welds on sheet metal and I think you'll be surprised at how easy it is to run a good bead or spot weld.4 points
-
3 pointsESAB are very good welders yes ! But there are many good brands. An American one is Miller3 points
-
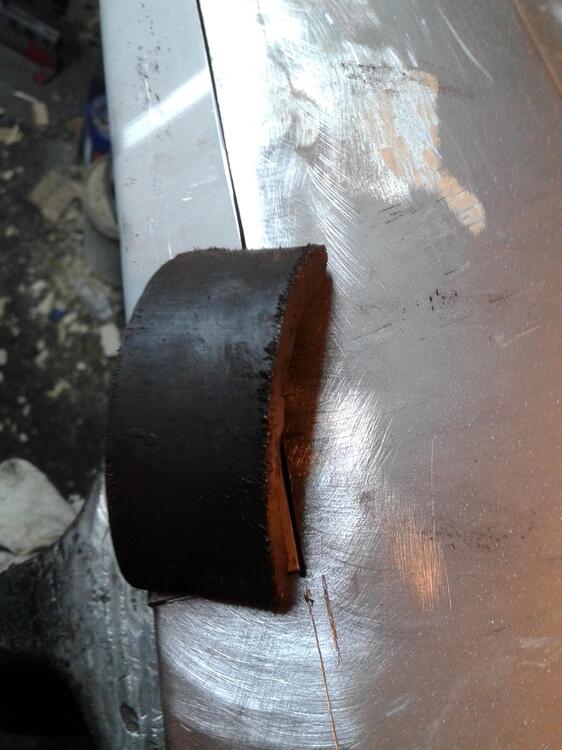
3 pointsI have the smallest ESAB welder mig.. (with co2 10ltr./200bar.) (swedish company?) does it wonderfull! hav'nt read the whole thing but one thing i want to say is: clean the spot that you want to weld very good.. i see a lot of people not cleaning well their welding spot.. place ( whatever..) When i was welding a door edge.. and the use of a magnet to keep the sheet metal aligned.. Old speaker magnet comes in handy with weld work.
.thumb.jpg.3bc75555d42714913da3f0923b8d0c79.jpg)
 3 points
 -
3 pointsThe problem I've experienced with flux core and repeated small welds is the flux left on the finished weld. When it cools it prevents instant conductivity to start the arc when doing small welds. If it doesn't arc instantly you're left with a longer wire which will act like you've turned down your welder. You'll have success if you clean each weld before attaching another weld to it. I usually try for very small gaps and I run it a bit hotter (instant arc) than I would for a continuous weld. I would also suggest the smallest wire you can find and an auto darkening hood (for precision).3 points
-
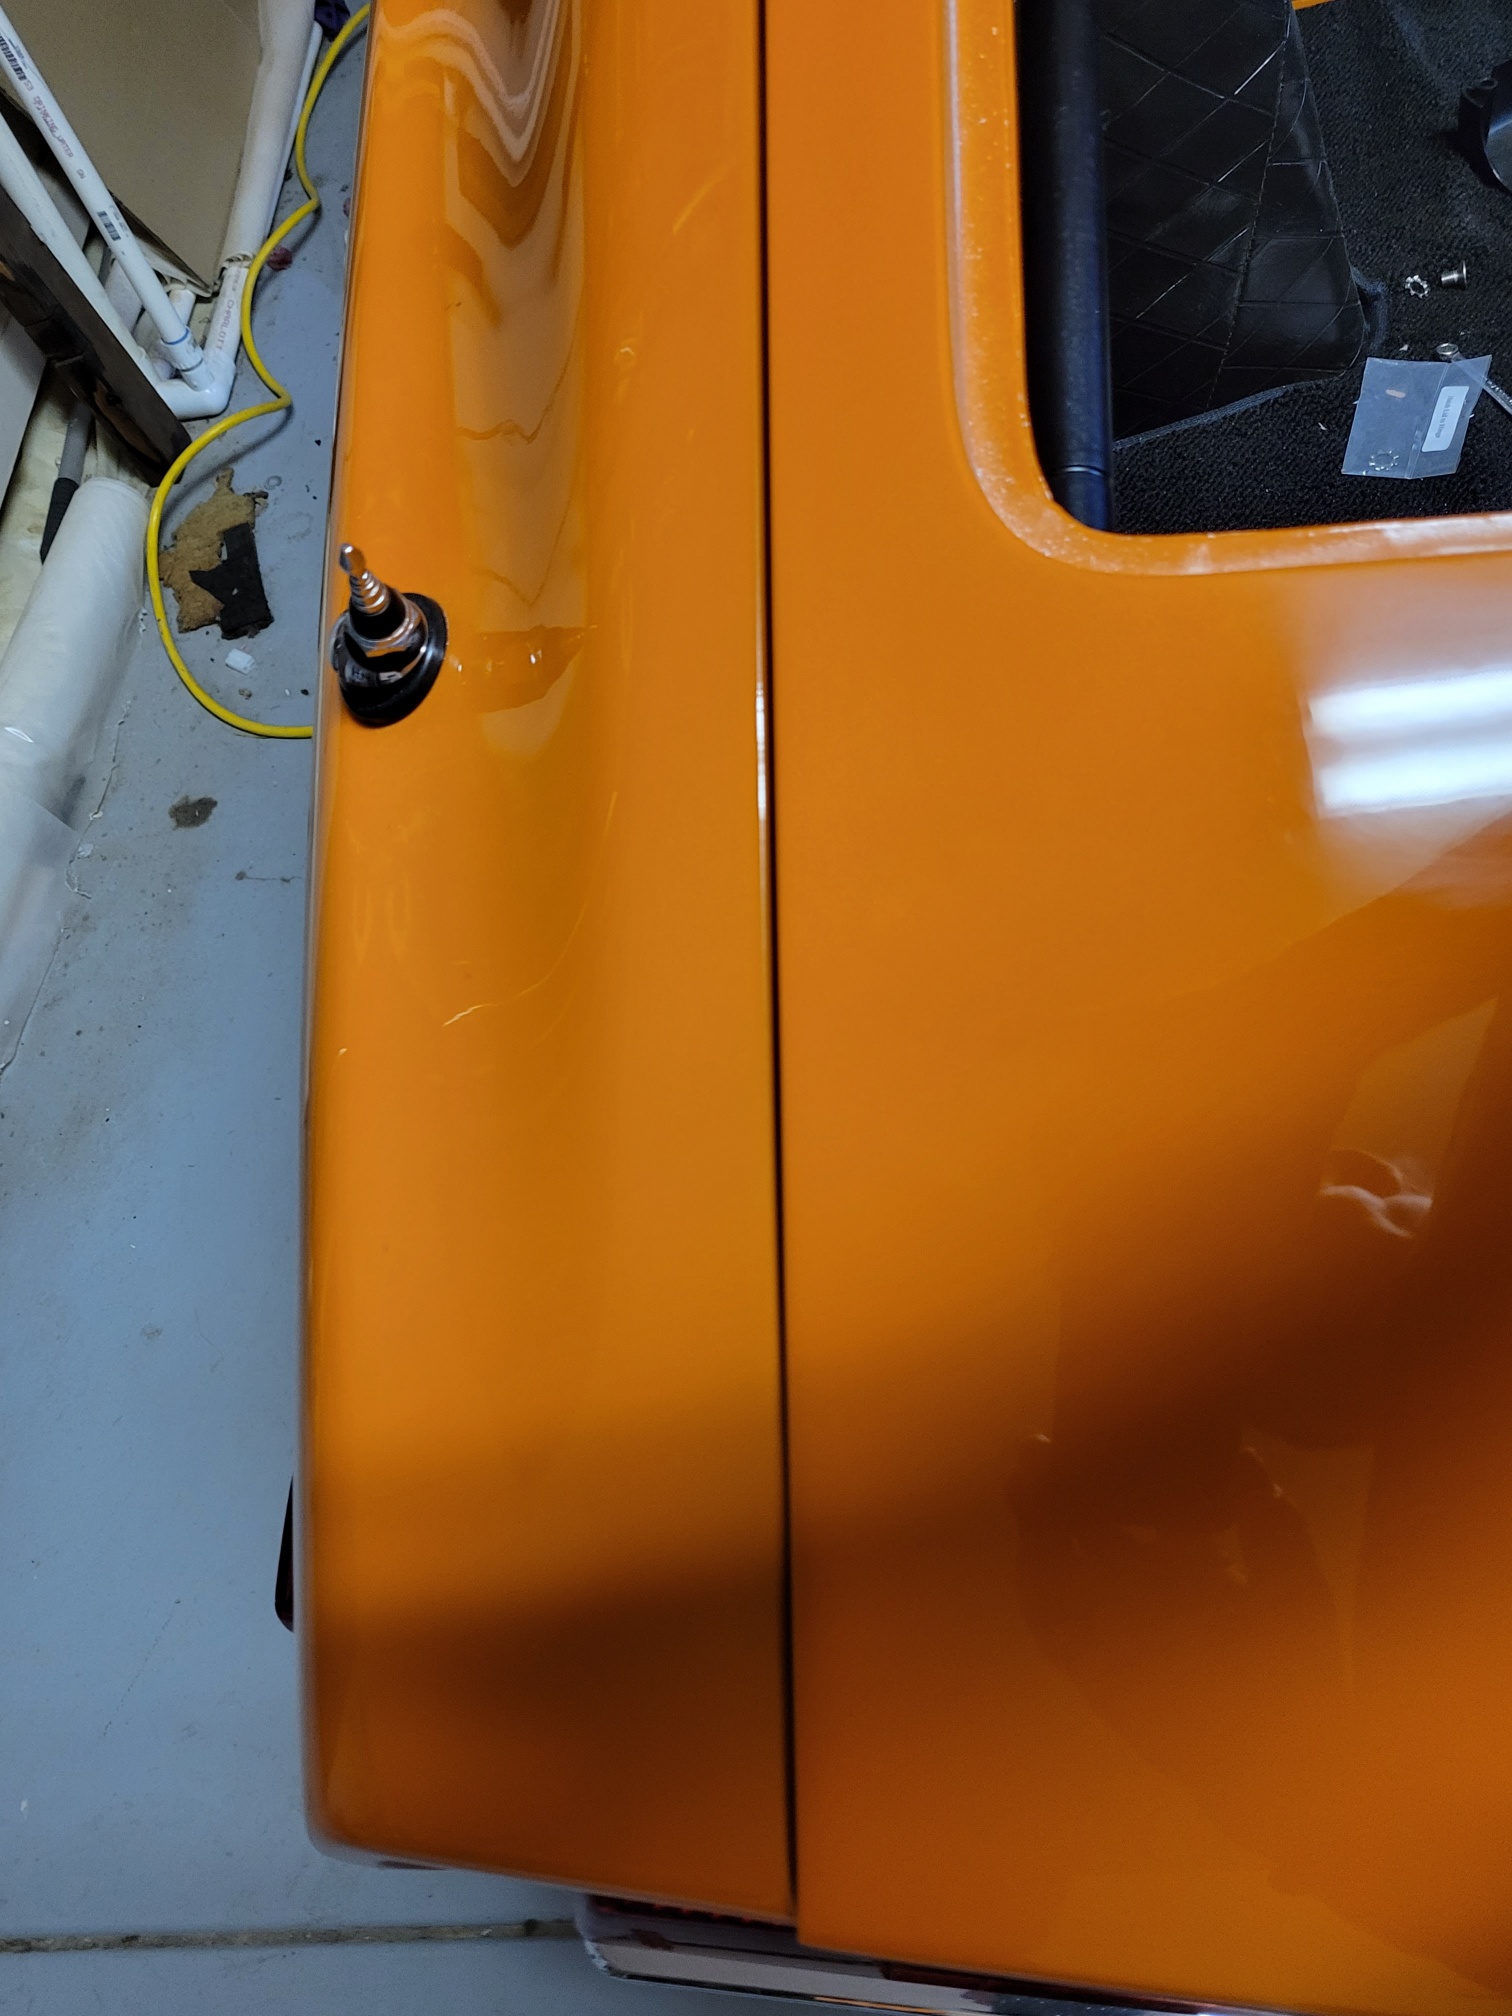
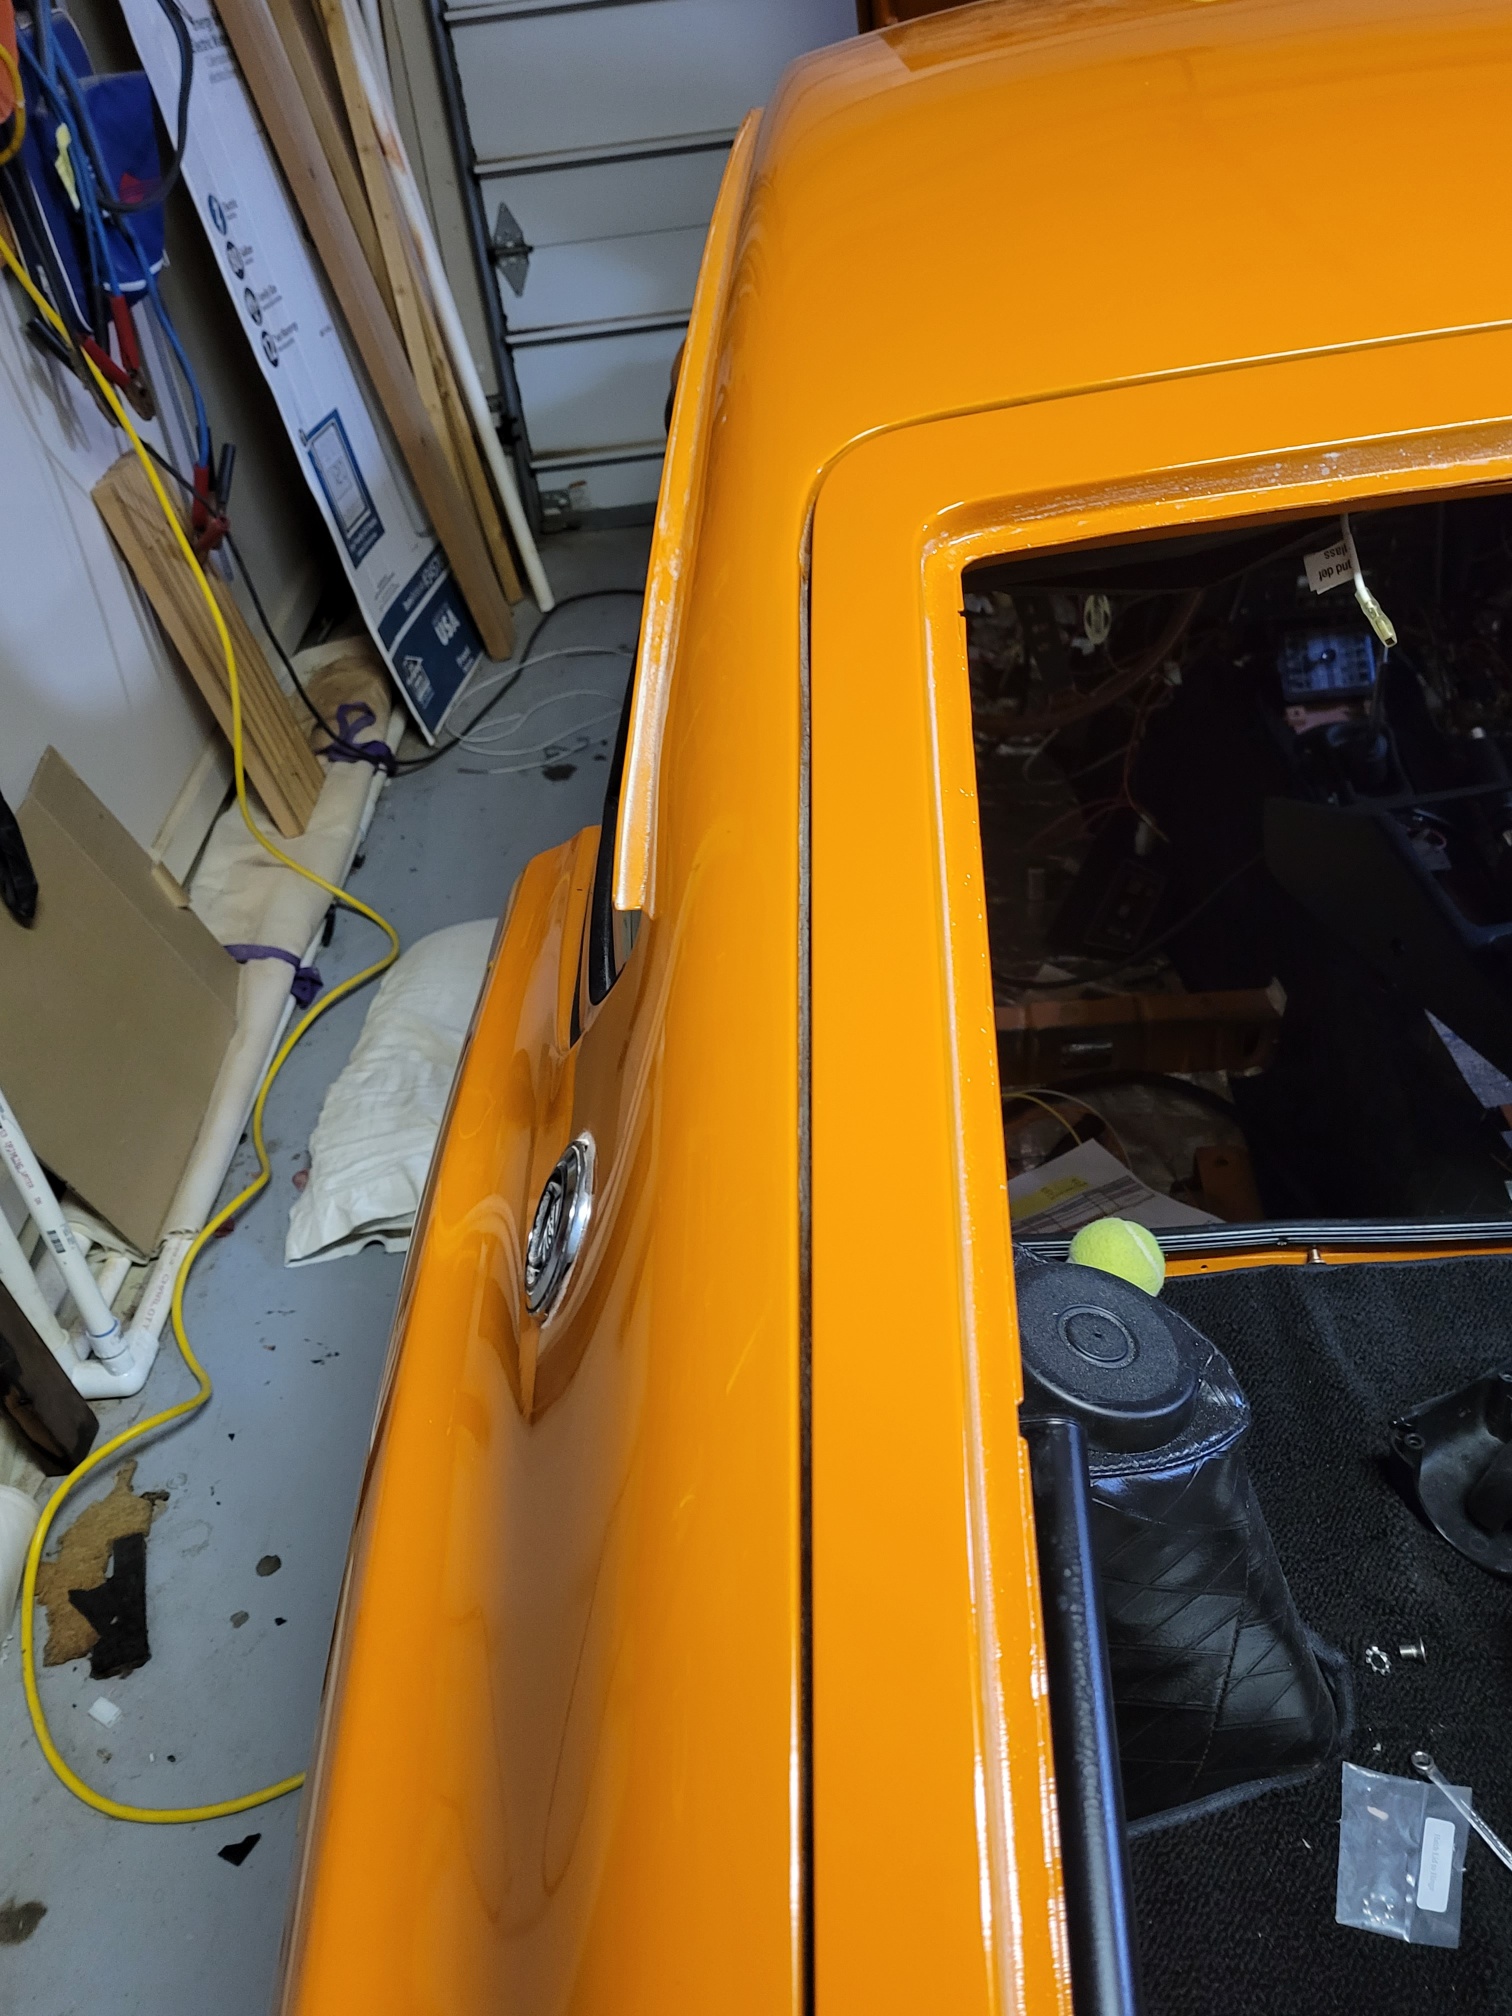
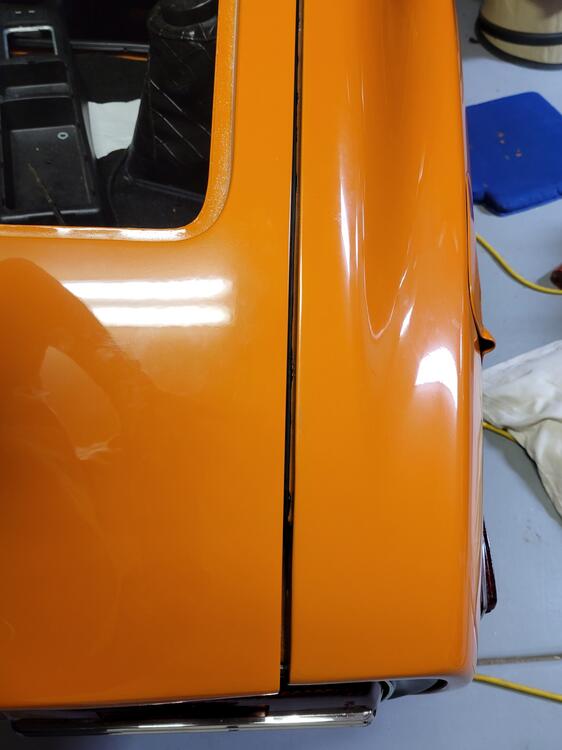
3 pointsYes, the hatch just nicks the roof where the tape is. I don't need a lot of clearance at this point but you can see from the other pics of the closed hatch that I need to bring the hatch more toward the front of the car which will likely cause more of a clearance issue. I would like to get the gaps to look good but I am not a perfectionist. And Yes I plead guilty on the paint. It still needs a final buffing. Thanks for the compliment. I love to paint. This is the 2nd car that I have done. My first was a 1974 MGB, that I still have.3 points
-
2 pointsPictures can be deceiving. It's helpful to know how they were taken, and what the corresponding adjustments were when they were taken. For example it is easy to jump to the conclusion that the hatch extends far beyond the fender. In one of my posts I said: “I do not have the latch hardware installed so the hatch is not shown fully closed.” Because the hatch is not fully closed and because of the angle that the picture was taken the rear edge of the hatch looks far worse than it is in reality. Will it be perfect when I am done – I doubt it. But the hatch rear edge will be close enough to matching the rear fender edge to satisfy most folks, at least in my house. zedhead - Don’t worry about being brutal. I will take positive advice from anyone whenever it is offered. I am just trying to give the “bucket” my best effort, sometimes it is an iterative process. This forum has been a tremendous help to me. I have tried to post items that might help the next guy avoid a few problems or solve a problem faster than he/she might otherwise. For example I was unaware that the hatch lift strut actually raises the hatch vertically, when in the open position. I think this might help the next guy. Anyway, I have the parts coming that I need for a right side hatch strut. This will allow me to prove/disprove that my issue can be resolved with a very slight vertical movement in the hatch open position. Once I can close the hatch without worrying about the paint I can do the trial and error adjustments for the gaps. I will post pictures, bad or good. Some can trash the effort, and I am sure that some will help me figure out how to improve it. Once I get the hatch right with the additional strut I can decide whether I want to get the vertical movement with the strut or by opening up the adjustment holes for the hinge. I put this off because I dread making those holes larger, and because I still think introducing the 2nd strut with the 260z was an upgrade, certainly not just for aesthetics. On the other hand, part of me thinks that the 240z had one strut and the bucket is a 240z so it should have one strut. Roberts280z – You have a little more extensive work on your project than was needed on mine. The bottom of my hatch had the typical rust issues and I had some welding, patching and metal filling to do on it. The left side of the bucket was fairly clean, the right side had a lot of work in the dogleg area and some in the lower quarter. I could not find much help via the forums to align the hatch, but I am hopeful that this thread will ultimately turn into a procedure/process that helps others do it faster and better. I look forward to your comments – thanks. Let me know if you need a measurement. Patcon & Grannyknot– As always, I appreciate your assistance – thanks. Thanks to all for your help.2 points
-
2 points
-
Thank you for reply and explanation. I like your reasoning and I think it gives me some direction on mine. I’m certainly not doing concours type build and should just go with makes me happy and keep them protected. Shiny Cad parts make me happy. That splash shield almost looks to cool to paint, but I do understand the want to protect if it’s going to be driven. Sent from my iPhone using Tapatalk2 points
-
Hi All, Thanks for your ideas. I used the Socket Extention and was able to get it off. Guy2 points
-
2 pointsI started with a 100 amp flux core. Then, I did a gas bottle on it. Now I have a Hobart 230, that is about the right size. The only real complaint I have is the 12 current settings versus infinite adjustment. I run .023" wire with gas and normally weld on setting 1 or 2. .030 or .035 wire requires more current to puddle and that can make blow through holes. 20 ga really isn't that bad to weld but there are some super thin areas of the that are. I have also found that unlike good golf clubs, a good welding machine make a welder much better. Unlike my golf game... If you can afford it, get the better machine now and learn it versus learning how to make the wrong machine get by. I also agree, if there are gas services in your area that will fill privately owned bottles, go that route. I have a 99 year lease on my bottle so I exchange it at my local welders supply for a new bottle when its empty but no rental charges2 points
-
2 pointsI pulled a few things out, out of order. Fuel pressure should never get down to 20 psi. But you can check that without the engine running. That will tell you if the pump is running and if there's fuel in the pump. Just disconnect the small wire at the starter solenoid and turn the key to Start. But maybe that's what were doing with the AFM flap. If you have to wait quite a while for pressure to build that's not right. A good pump and clean filters and pressure will jump to 36+ in seconds. Might be that you have a blockage or a bad pump. There are stories about pumps that overheat and quite producing pressure and I've had one myself. This was me just testing a pump off the car. Started out just fine but after a minute or two of running it started making noise and pressure dropped. The bouncing resistance I'd guess was just bubbles passing by the sensor. I assume you tested with the engine off, so no flow other than convection through tiny holes in the thermostat. Not sure why it doesn't start. But once it does use a timing light to see where your timing is.2 points
-
2 pointsMaybe your future son-in-law has a gas welder you can use for this... I wonder if changing the thickness for the flux core wire would allow you to reduce the heat going into the metal. Another thing you can try to do is make a heat sink of out of copper, I beat a copper pipe into a flat section that i clamp to the back of the metal, this allows some of the heat to be absorbed into the copper. How much more welding do you have left? I assume the rest of the car? Might be worth while to pickup a gas-compatible welder. Checkout the panels after i ground them down, I used a finger sander from harbor freight, great for the tight spots. Also imma just say it now, **** Airgas, go to a Praxair, or even better a mom and pop shop. My local Airgas has a bunch of shady sales people, overcharging for gas. This 80 CFM tank should get you around 4 hours of trigger time, https://store.cyberweld.com/shielgascyl8.html the refill for me is ~60-70 bucks at Praxair, I bought the tank locally because I dont want praxair to go out of business and ill be stuck with airgas.... That cyberweld tank with the fill is probably the cheapest thing you'll find, but call local and see... if you do go down that route.2 points
-
1 pointI was out of gas….what kind of timing is that! folks just because your fuel pressure gauge shows pressure doesn’t always mean you have enough fuel to run 😉1 point
-
1 pointI have found it very difficult to get this right. I found that my hatch seemed too long also. I just got it back into the shop. So I will try to make some pictures this weekend1 point
-
1 pointI just saw this thread, and will be anxiously watching it. I'm just slightly behind you with my 280z. I had to fab a lot of patches on the liftgate itself, and to the rear of the right quarter, and to the lip across the top and right side. I'm just now carefully attaching the new weatherstrip (which caused much of the rusting in the first place). I'll try to help as soon as I get the last of the weatherstrip on and try to mount the liftgate.1 point
-
Browse these listings and see how yours stacks up. Yours is kind of up in weekend race car zone, with the 12:1 CR. Without pictures, really it's just a list of parts. Good luck. Put it up on Hybridz. https://bringatrailer.com/datsun/280z/?q=280z https://bringatrailer.com/datsun/240z/?q=240z1 point
-
1 pointJust saw this and read through it. The first question that comes to mind is, why didn’t you check and adjust the panels, doors and hatch before you painted the car? Panel and door fitment should be done during the bodywork phase of a restoration. Now you have what looks like some serious mismatches. The hatch looks longer than the opening, hanging off the back of the car by a considerable margin. Did the quarter panels get replaced?1 point
-
1 point
-
1 point
-
@ArcticFoxCJ When I was taking art classes in college the professor said to get medium quality tools vs the cheap stuff... Being that there is more space to grow in your ability with the medium grade stuff.... (Not to say the flux core is cheap)I think you can learn much more when you are not fighting the blow through, or worried about how much heat is in the effected zone, this will enable you to feel more comfortable at a quicker pace if that makes sense. I currently use a Lincoln 3200 HD, but I had my eyes on a Tig welder from Everlast for even finer detail stuff. Everlast might have something that fits your application. It was @grannyknot here is the thread, some nice info about welding in that thread. That copper magnet looks good to use, does it apply pressure between the panels? I use these ones too https://www.harborfreight.com/welding/welding-supplies/welding-lugs-clamps/butt-welding-clamps-8-pc-60545.html1 point
-
1 pointIf you continue searching this forum you will see it has been covered before . You can search this forum using google also. It’s ok just be nice and you will get more help. You are new here and you have been getting into it with people but just chill out By the way, I got my gasket at Z Car Depot. https://zcardepot.com/products/power-brake-booster-gasket-240z-70-73?_pos=1&_sid=a87c129e3&_ss=r And it worked great on my new 8.5" booster for my 240Z with this adapter (the one I mentioned above). https://zcardepot.com/products/power-brake-booster-7-240z-70-73-new?variant=29688152359025¤cy=USD&utm_source=google&utm_medium=cpc&utm_campaign=google+shopping&gclid=Cj0KCQiA0MD_BRCTARIsADXoopa0Kt5nGMc-Hi_GfRzjOkysLppxy9-0NLqie2PblZqFrMIS1kUwYOgaAr3dEALw_wcB1 point
-
1 pointProbably fine for a short time running but you might check your oil for gasoline. Gas-thinned oil is probably bad for new bearings. And cylinder walls/rings.1 point
-
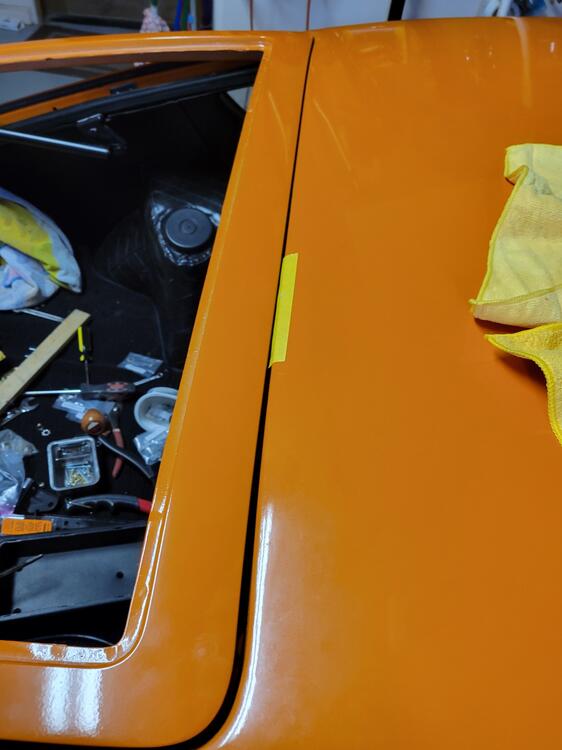
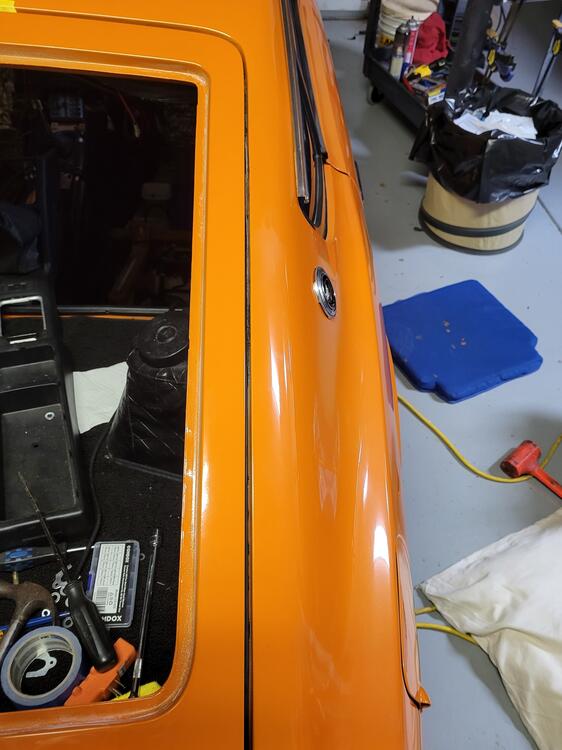
1 pointSo in this pic, is the tape you have on the rear roof edge getting marred or scuffed up by the hatch as it passes over it? It is one of the tightest clearances on the body and as much as we all like to have perfect gaps on every panel the guys on the Datsun assembly line weren't so particular. Great looking paint, did you do that yourself?
 1 point
 -
1 pointAll I'm saying is you can't think of any part of the body as an individual piece, because it isn't. In your case with the fire wall rusted out the stresses have to take other routes which isn't good. There are lots of little things you can do to a 240-280z body to improve stiffness but most of them aren't practical unless the body is stripped and on a rotisserie.1 point
-
1 pointI am going to have to move the hatch toward the front of the car. More on the right then the left, this i fear will only make the clearance issue worse. I also hope that adding the weight of the glass will not impact the lift of the piston. By inspecting the tabs I gather you mean remove the hatch completely or can i just take the screws out and get one hinge out of the way? I guess I really need to look at both sides of the hatch tab. Thats going to take a bit of time as I will probably need a second set of hands to remove and install the hatch. I will post images of the tabs when I have them. Thanks again. edit: Okay so I just took a look at the tabs and they are painted, which means they got a good look over when I sanded them before I primed and and sprayed color. I am fairly certain that they are in good shape. I probably would not have noticed if they were slightly bent, but a bad weld would not have escaped me.


 1 point
 -
Flux core is not the way to make this repair in my opinion. You need gas and mig with a decent duty cycle. If you're burning holes, then your current is too high or the metal is too thin. A welder with too low a duty cycle can also do this when overworked1 point
-
I don’t use a spot welder (although I’m open to buying one) rather I drill holes in the plate then use shielded mig welding to “spot” weld it into place. What kind of welder do you have? Does it support adding shielding gas? Your welds will come out cleaner. Someone on this site convinced me to switchwhen I was working on my floor pans, and I never went back to flux. I think it was Grannyknot. watch how this guy works, he has some Japanese cars he’s working on. https://youtube.com/channel/UC6JPmJ_aicru8XPWr3EvJnw1 point
-
It looks like I've convinced the Z Store to correct their installation instructions regarding retaining the outer sleeve. It no longer says to retain the original outer sleeve. Installation Note: When the factory rubber-in-sleeve bushing is removed for use with this kit, the inside mating surface of the Mount Bar MUST be cleaned, deburred, and smoothed, so there are no protrusions that may damage the urethane bushings.1 point
-
Awesome thread Dutch! I’ve got a 79 I’m working on and have been slowly prepping things for platting so I hope you don’t mind questions. Looking at the pictures on my phone I can’t tell if everything was Yellow/Gold Zinc Cad platted or if some were also left clear zinc. Did the heat and under shields come zinc plated from factory? I was thinking the manifold shield and the booster shield were galvanized but was not positive. Same for the under shield but I have not really looked at it yet or done any prep work to it. And I was wondering if you knew what finish was on the radiator over flow bottle bracket? Every one that I have seen out of the car is pretty rusty like mine and you can’t see it when looking at engine bay pics of cars. Sent from my iPhone using Tapatalk1 point


.jpg.cca756c0a13b24e5bcf48eadda5d3dfa.jpg)