Leaderboard
-
Captain Obvious
Free Member7Points10,081Posts -
.jpg.017c2fbd9ed4c548138d9c6f6c49e029.jpg)
astrohog
 Subscriber
 5Points157Posts
 -

siteunseen
Free Member4Points15,115Posts -

CanTechZ
Free Member3Points1,311Posts


Popular Content
Showing content with the highest reputation on 04/01/2021 in Posts
-
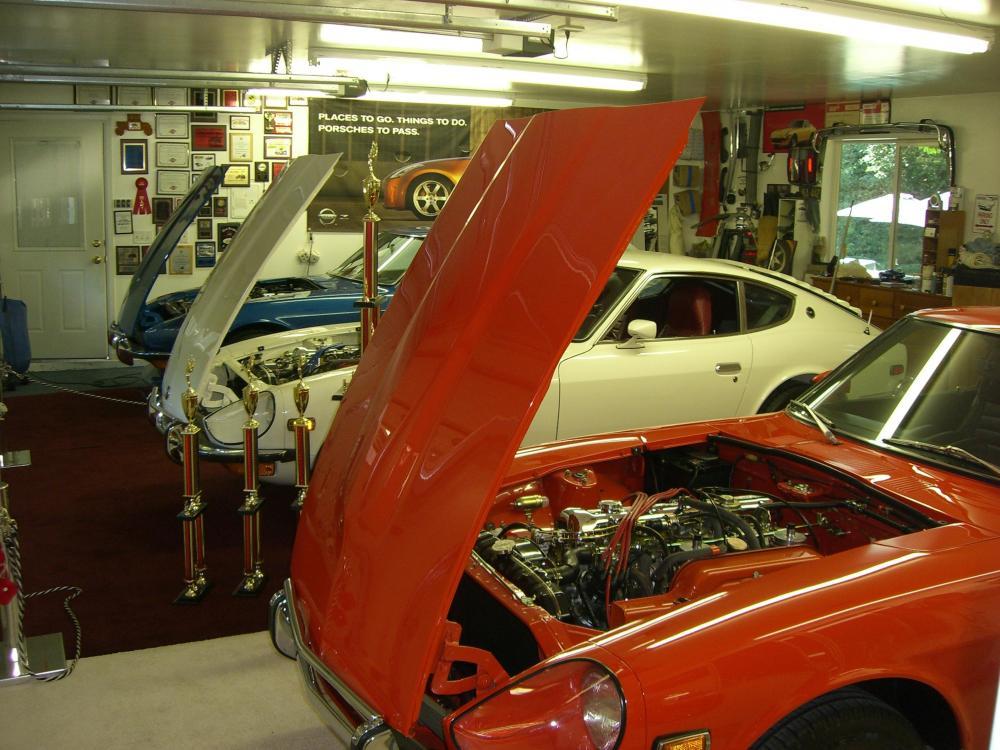
5 pointsCheck out the poster on the wall in the background. Someone needs to do one of these with a series 1 car!
 5 points
 -
3 pointsUnrelated to the harmonic balancer key, but I got a question. Your timing chain tensioner is really sticking out pretty far... Is the head off, or is everything up top still in place? Timing chain wrapped around the cam gear and everything? if the answer is "yes, everything is installed and engaged", then I think it's time for a new timing chain and guides.3 points
-
2 pointsVery good step by step instructions in Tom Monroe's Book that I mentioned above2 points
-
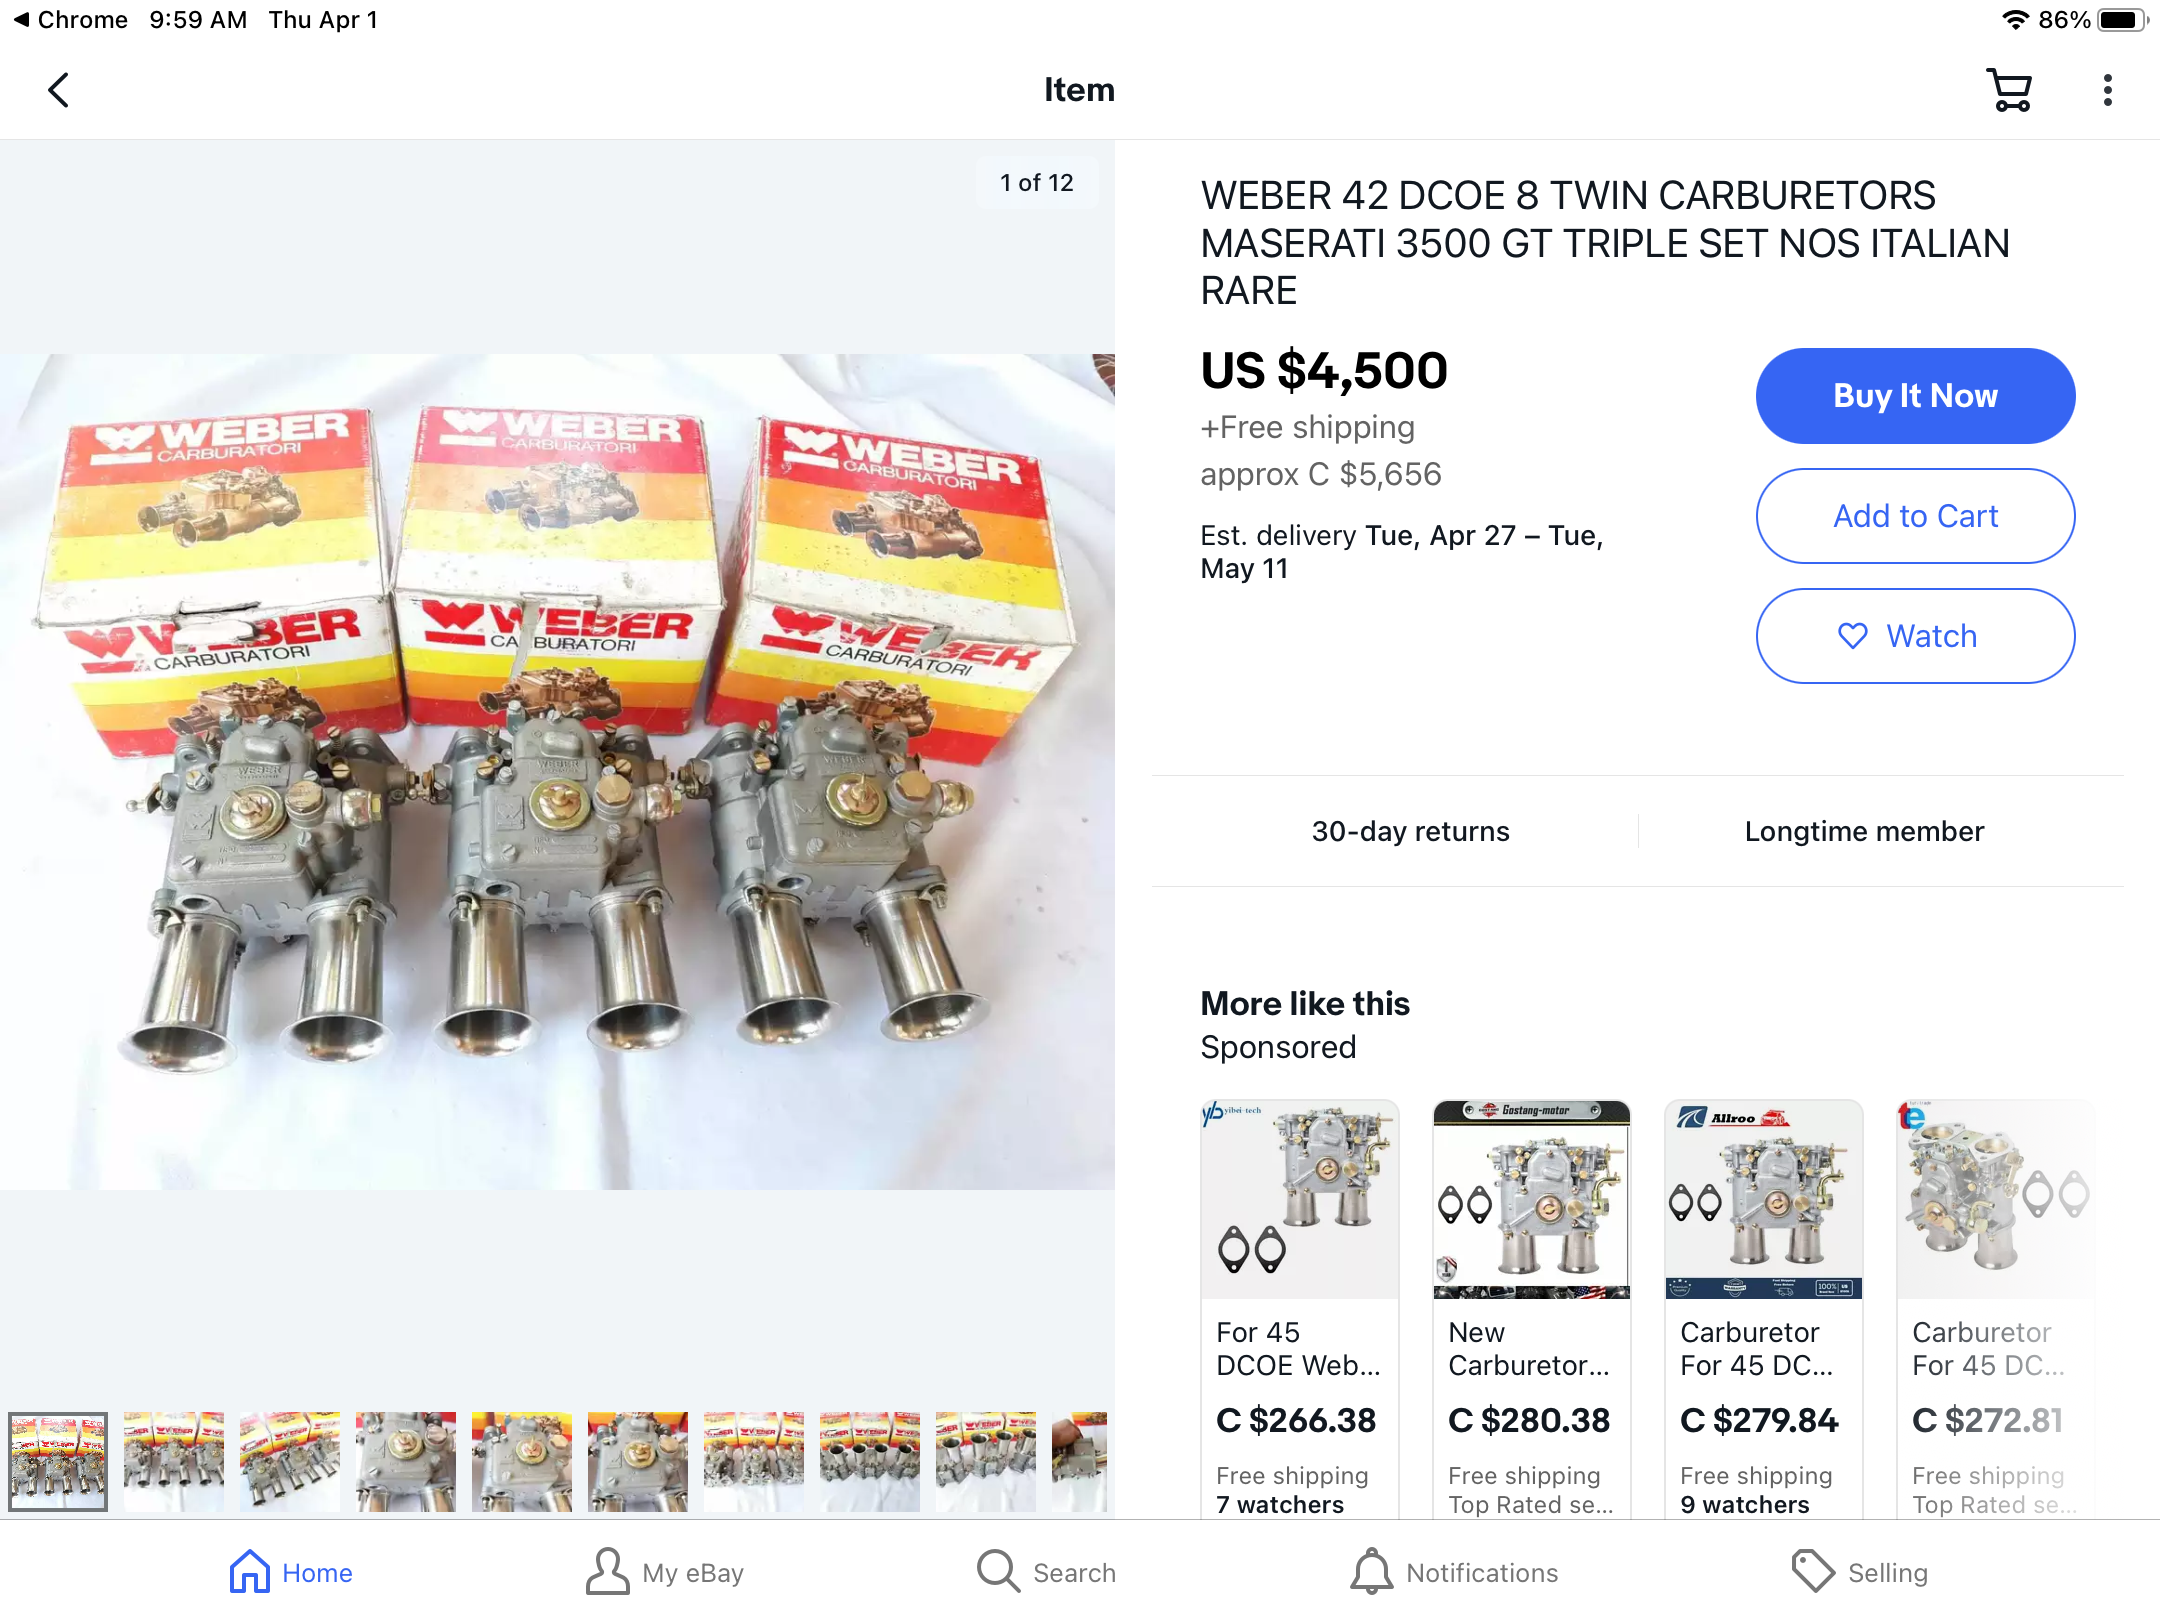
2 pointsWhen you google them, they are associated and spec’ed to ridiculously expensive exotics Ferarri, Mazeratti etc. Hence their crazy value. Quite rare and quite valuable. $1800 would be a steal. Ebay has a new set at the going value, no intake etc.
 2 points
 -
2 pointsI agree with Captain Obvious. That chain tensioner looks extended too far. You might have some serious chain stretch going on. Another possibility is when you rotate the engine (clockwise -looking at chain) and then back it off going CCW you might see some chain slack build up on the left but it still looks like you have too much. Here a pic of my tensioner and chain following my rebuild. Sent from my iPhone using Tapatalk2 points
-
1 pointThis thread might not be a good idea but I came across this video that I need to share. There seems to be quite a bit more foreign content on the old youtube site recently. Maybe I haven't been paying attention though. Jaws from the Bond film wins a motorcycle race.
 1 point
 -
1 pointI bought the straight chrome from futofab and really like them. Cheaper shipping from him on the East coast side. They still look like the day I unboxed them. I was worried they may rust on the unseen insides but haven't. Rubber's for tires not bumpers.1 point
-
1 pointI don't think that head's been cut. It can be measured from the bottom to the top edge to be certain. Does it have bronze valve seats? A spray oiling bar? If you find an older machinist they can make that one like new for pretty cheap. They're good heads with square exhaust ports. You need an oiling cam but that'd be easy to find, probably from someone on here? I may have one in storage on an n47? Can't remember if I used it as a core to the cam guys? I can look though.1 point
-
1 point
-
1 pointI have these on my car and pretty happy with them! BUT ... if I did it again, I would buy them without the rubbers. The rubber corners perished within 4 years, and my car is garaged for 98% of its life! https://groupharrington.com/product/datsun-240z-and-260z-bumpers/1 point
-
2 reasons: 1. Because that's how the JDM cars came and 2. Because I prefer how it looks without the rears.1 point
-
1 pointyou should make sure you have a VERY clean head surface, then use a good quality straight edge, go from one end of the head to the other with feeler gage. you should go diagonal as well. IF you need to get head work I would suggest you ask around, you want some one that has worked on L type heads. there is a lot to take into consideration. I looked into it some, there is not only surfacing the mating surface, but also you have to make sure the cam tower surface is not bowed. If so you end up having cam issues. I have read the correct thing to do is surface both sides and then shim the cam towers to keep the geometry correct and the chain length correct. You may want to contact someone like Datsun Sprit in VA, they seem to have a pretty good rep.1 point
-
1 pointI removed the egr and thermal switch plus the warming plate on my '77. I think the bcdd and tps, cold start valve would be best left on the motor. They serve a good purpose in my reading and I've read so much now I forget. Too much too soon before my rebuild of the efi motor.1 point
-
1 pointThank the LORD my wife is home and semi functional from the spinal fusion surgery. I was able to wander out to the shop and got the front staked in u joint removed. Used the Dremel tool to grind off the stakes the best I could followed with some heat and some pretty aggressive pounding with a proper sized socket. I was not able to remove either cap but got one side as far out as possible and then carefully cut the exposed cross with the die grinder. Followed the same cutting procedure to remove the cross from the slip yoke. The caps easily pressed inward with minimal pressure. Touched up the stake points with the Dremel and polished the yoke surfaces with sanding barrel. I may run the brake cylinder hone through them later. I will be ordering the joints from Rockford Drive Lines very soon. Thanks, John-Lugoff, SC.1 point
-
1 pointAbout the spring compression tool... You won't be able to use the "hooks on the cam" version if the cam is removed. (Duh.) Here's some pics of my latest valve spring took contraption. A little faster to use than my previous contraption since there's less wrench turning:
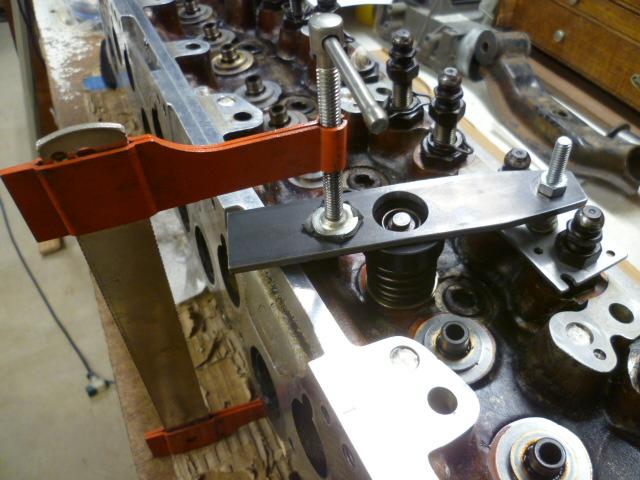
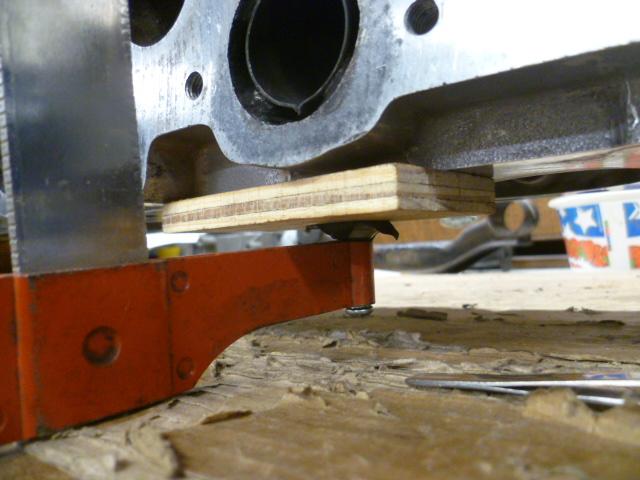
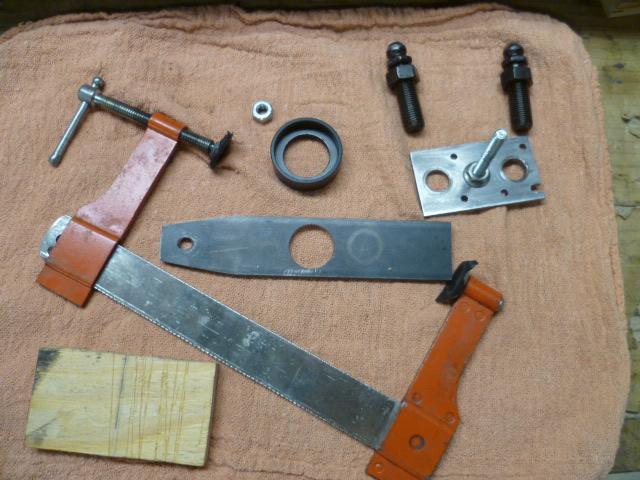 1 point
 -
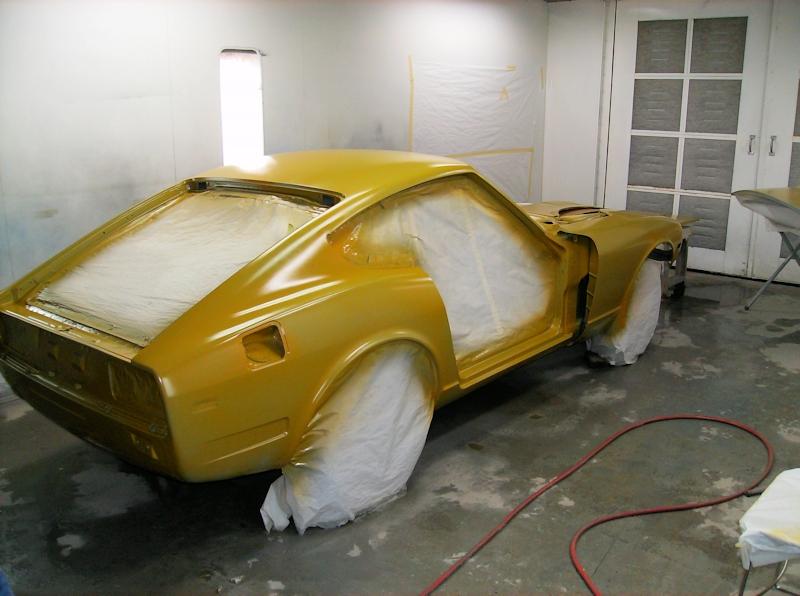
There's no need to remove those items if the cabin is properly sealed off. My car had the headliner, header vinyl, and some of the diamond cloth in place while the car was being painted, all well protected by the paint shop.
 1 point
 -
My wife read these comments and has decided she is the little warrior in Mulan... oh, and I’d did have to take her patient to the damned dentist!1 point
-
LOL. I think he woke up not just thinking about one, but in fact, he work up WITH a Disney princess. I think you get significant bonus points for that!1 point
-
1 pointWell you've got two obviously bent valves, and marks on other pistons as well. That makes the whole top end suspect to me. The point is, the compression numbers may be more related to issues in the top end than the rings. However... You're this far in and it would suck to do a bunch of work on the top end and put it back together with a tired lower end. Who would ever do such a thing.1 point
-
Wow That is way too cool Mr X! no wonder you’re smarter than the average bear 🐻... that’s crazy the variation in length considering the tolerance of the build, is that due to differences in temperatures, metal expanding etc I would think the hangar where you build would be temperature controlled to mitigate that?1 point
-
1 point@AK260 thank you! It seems like exedy is incrementing the part numbers slowly, some people refer to the 240mm clutch as a 06029 a few years ago, I wonder if its just an internal change, and the specification for the clutch is the same. Got the part order in today, hopefully can get parts in by early next week. I went with the 240mm 06030 from rockauto.1 point
-
1 pointTuners fight constantly about using TPS over map. It's a very polar opinion.1 point
-
1 point
-
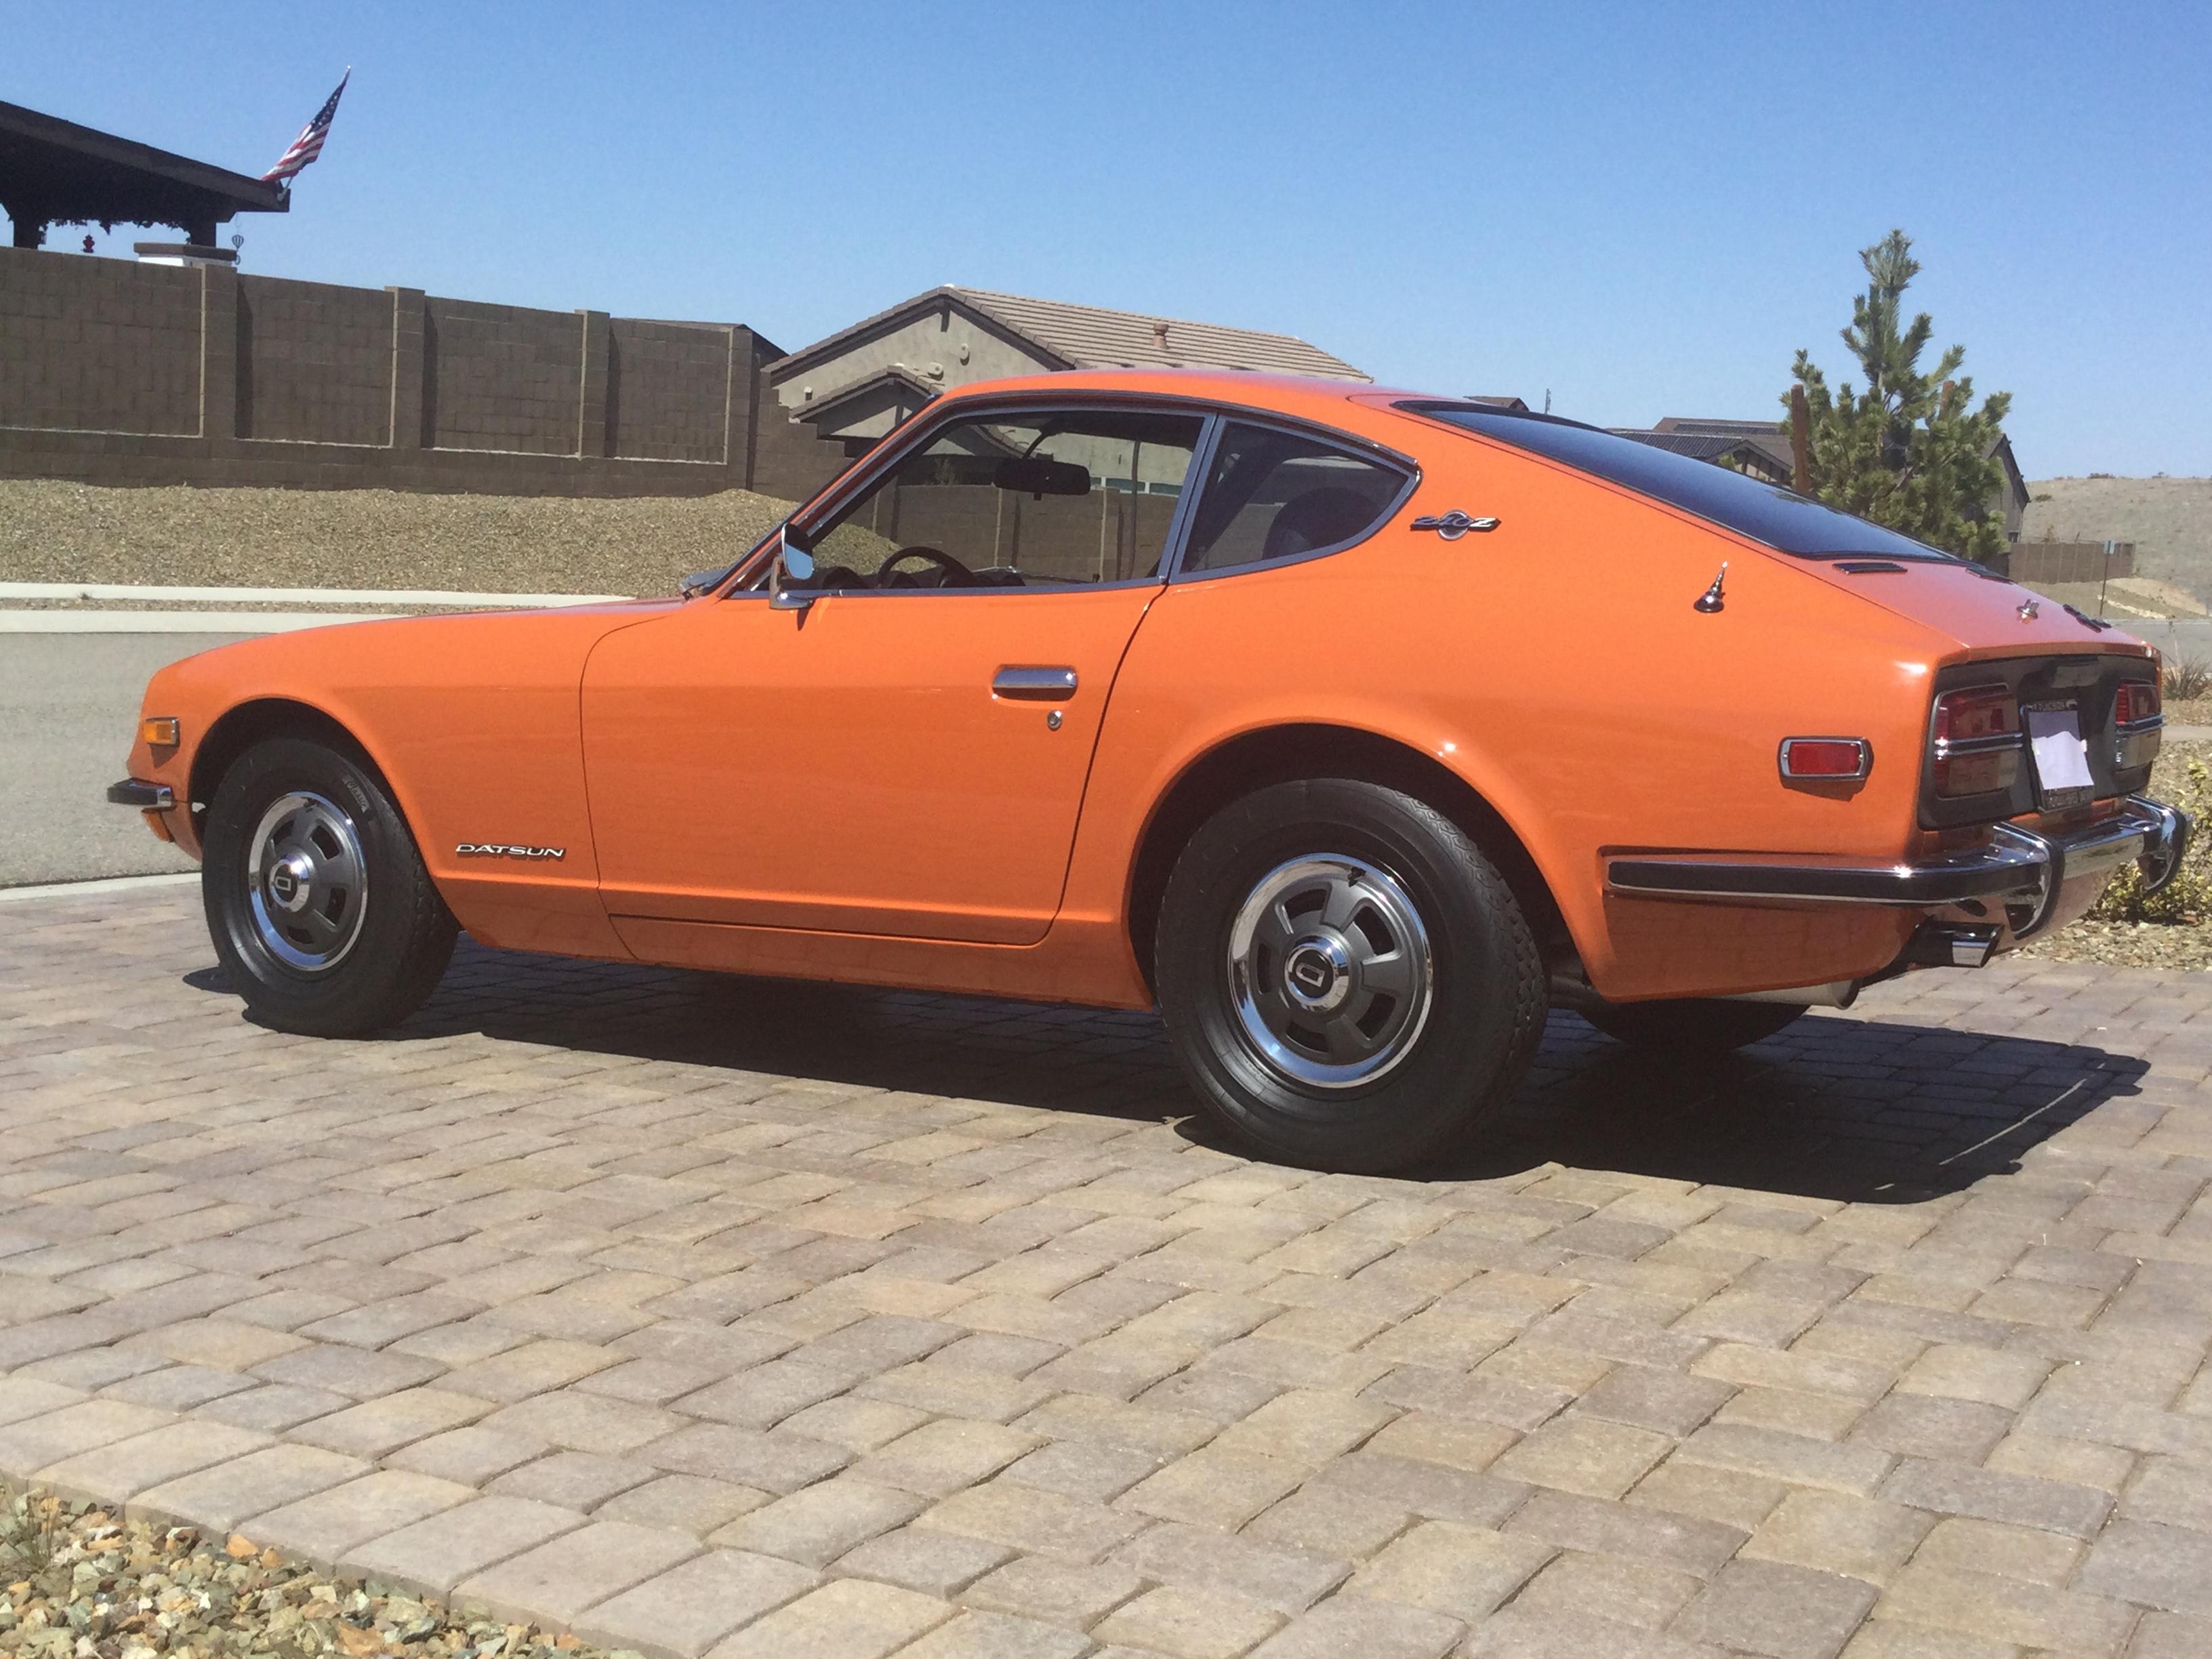
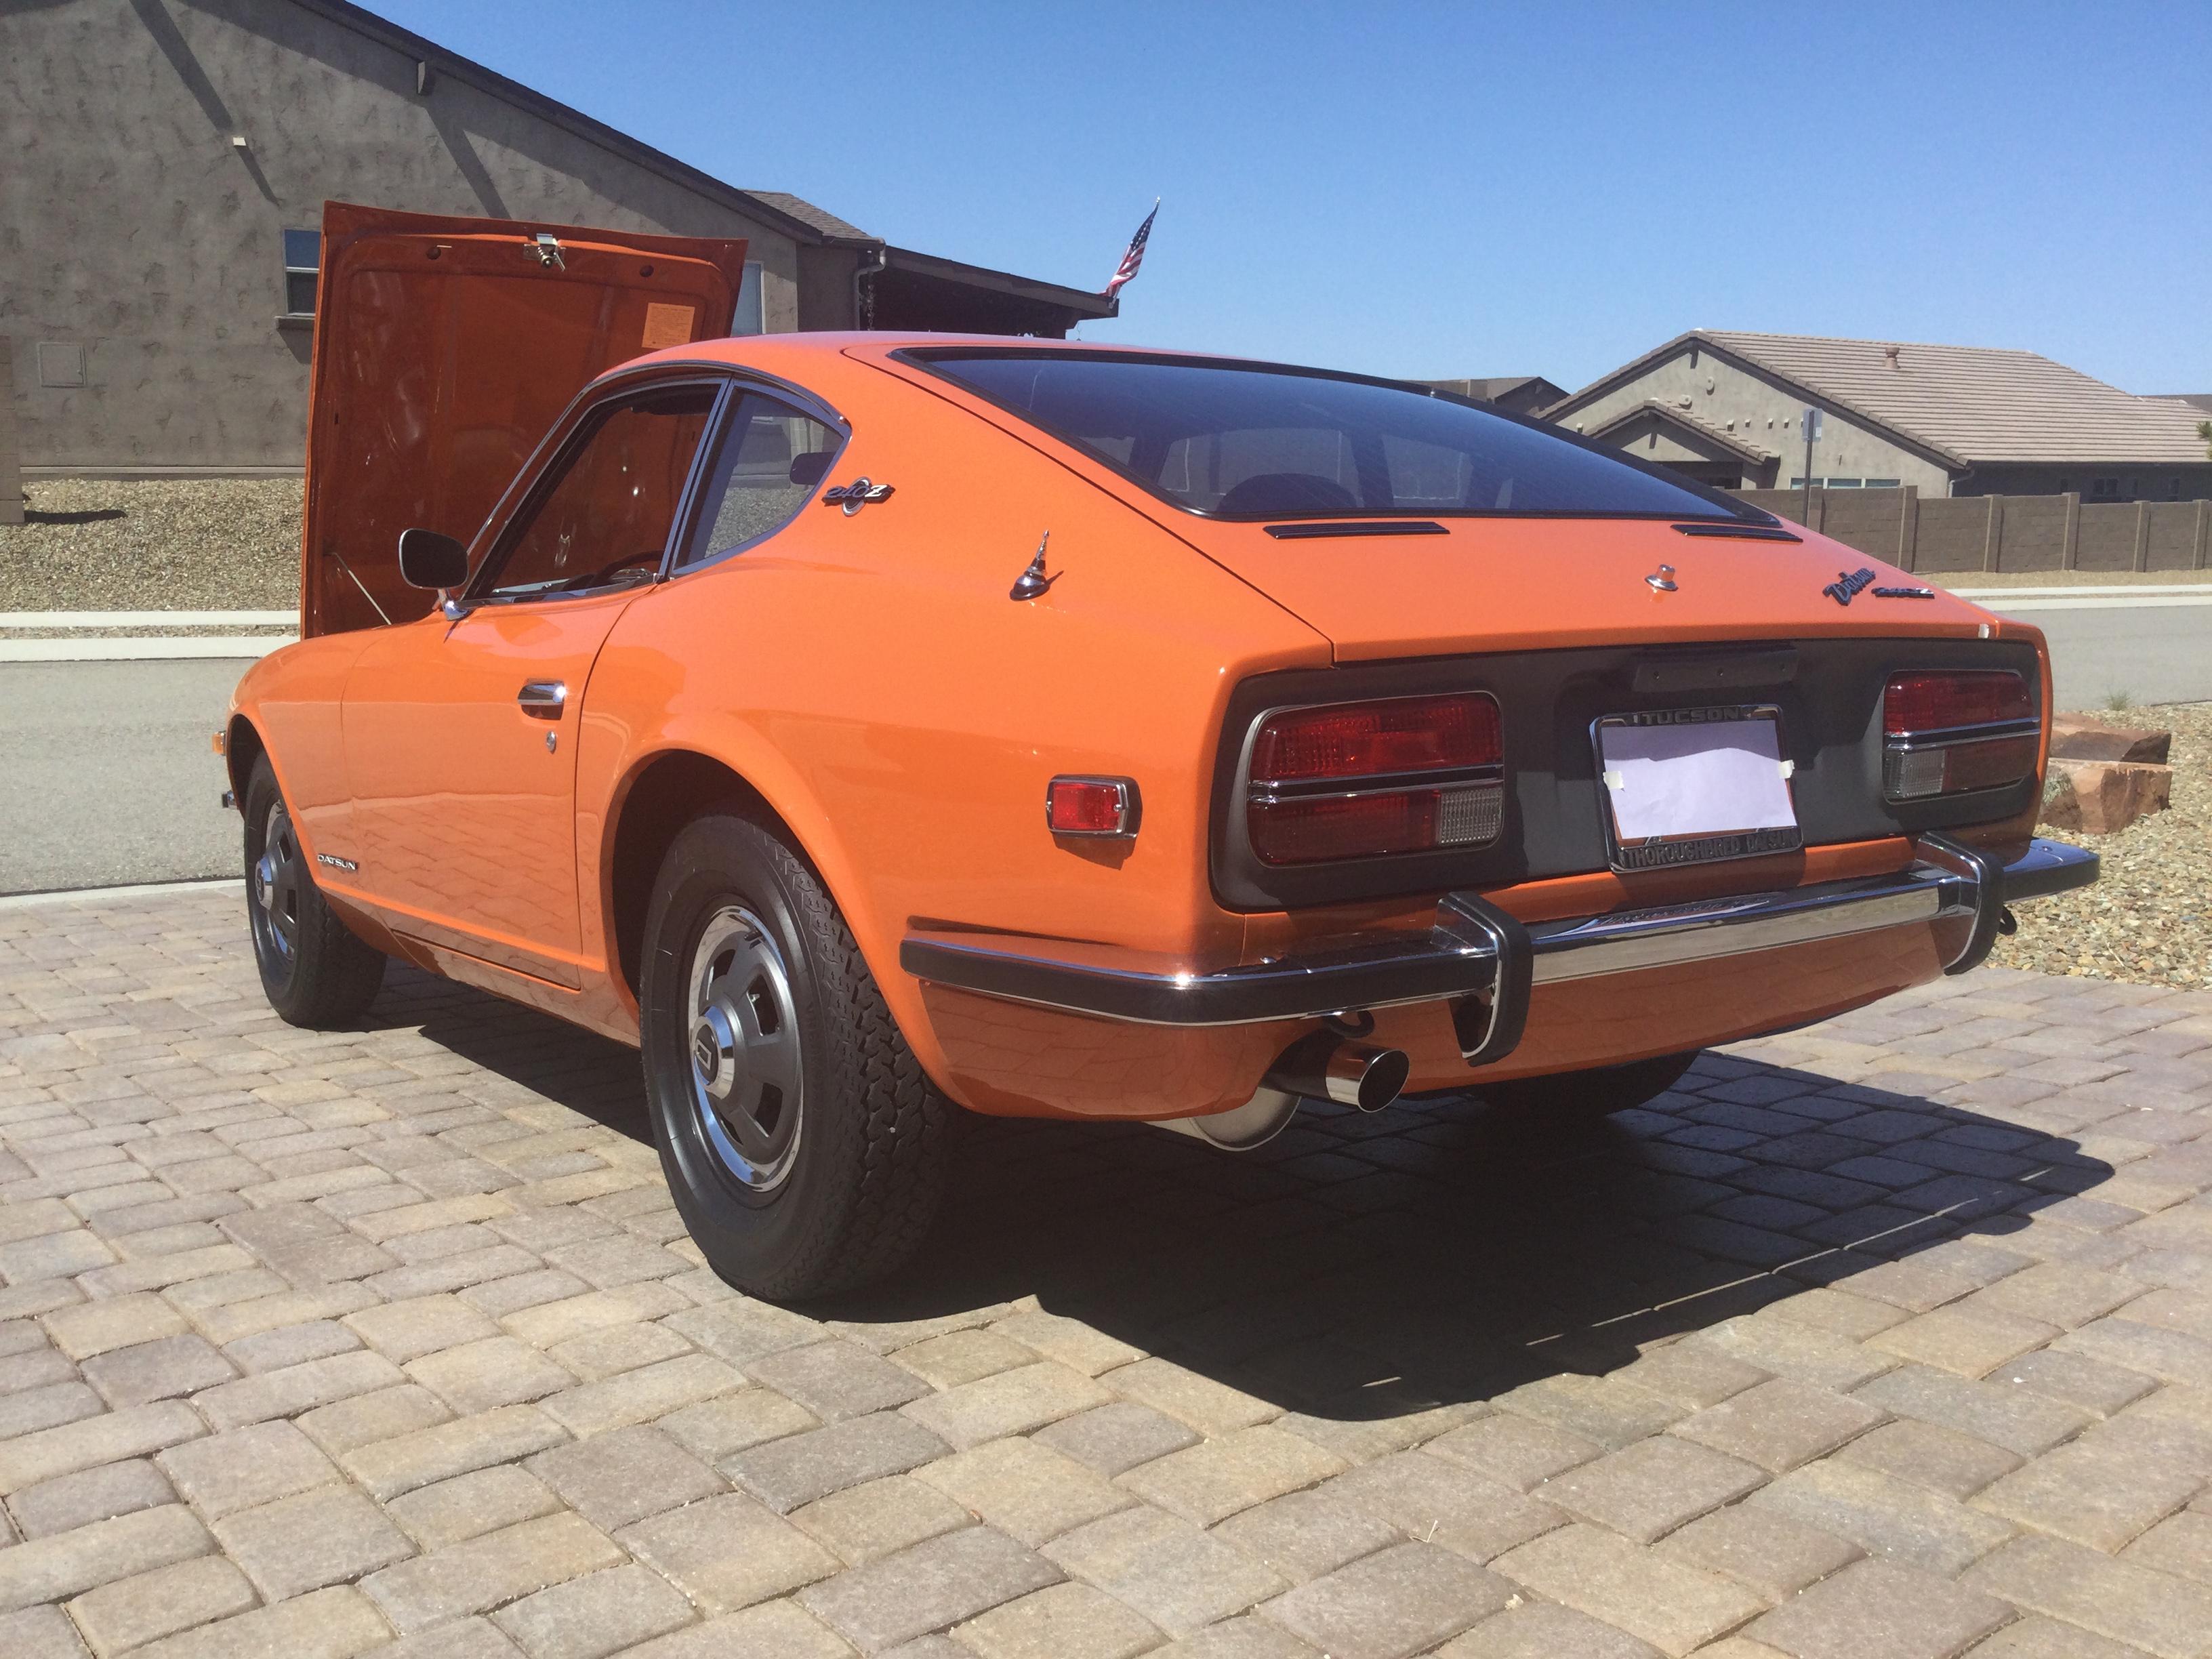
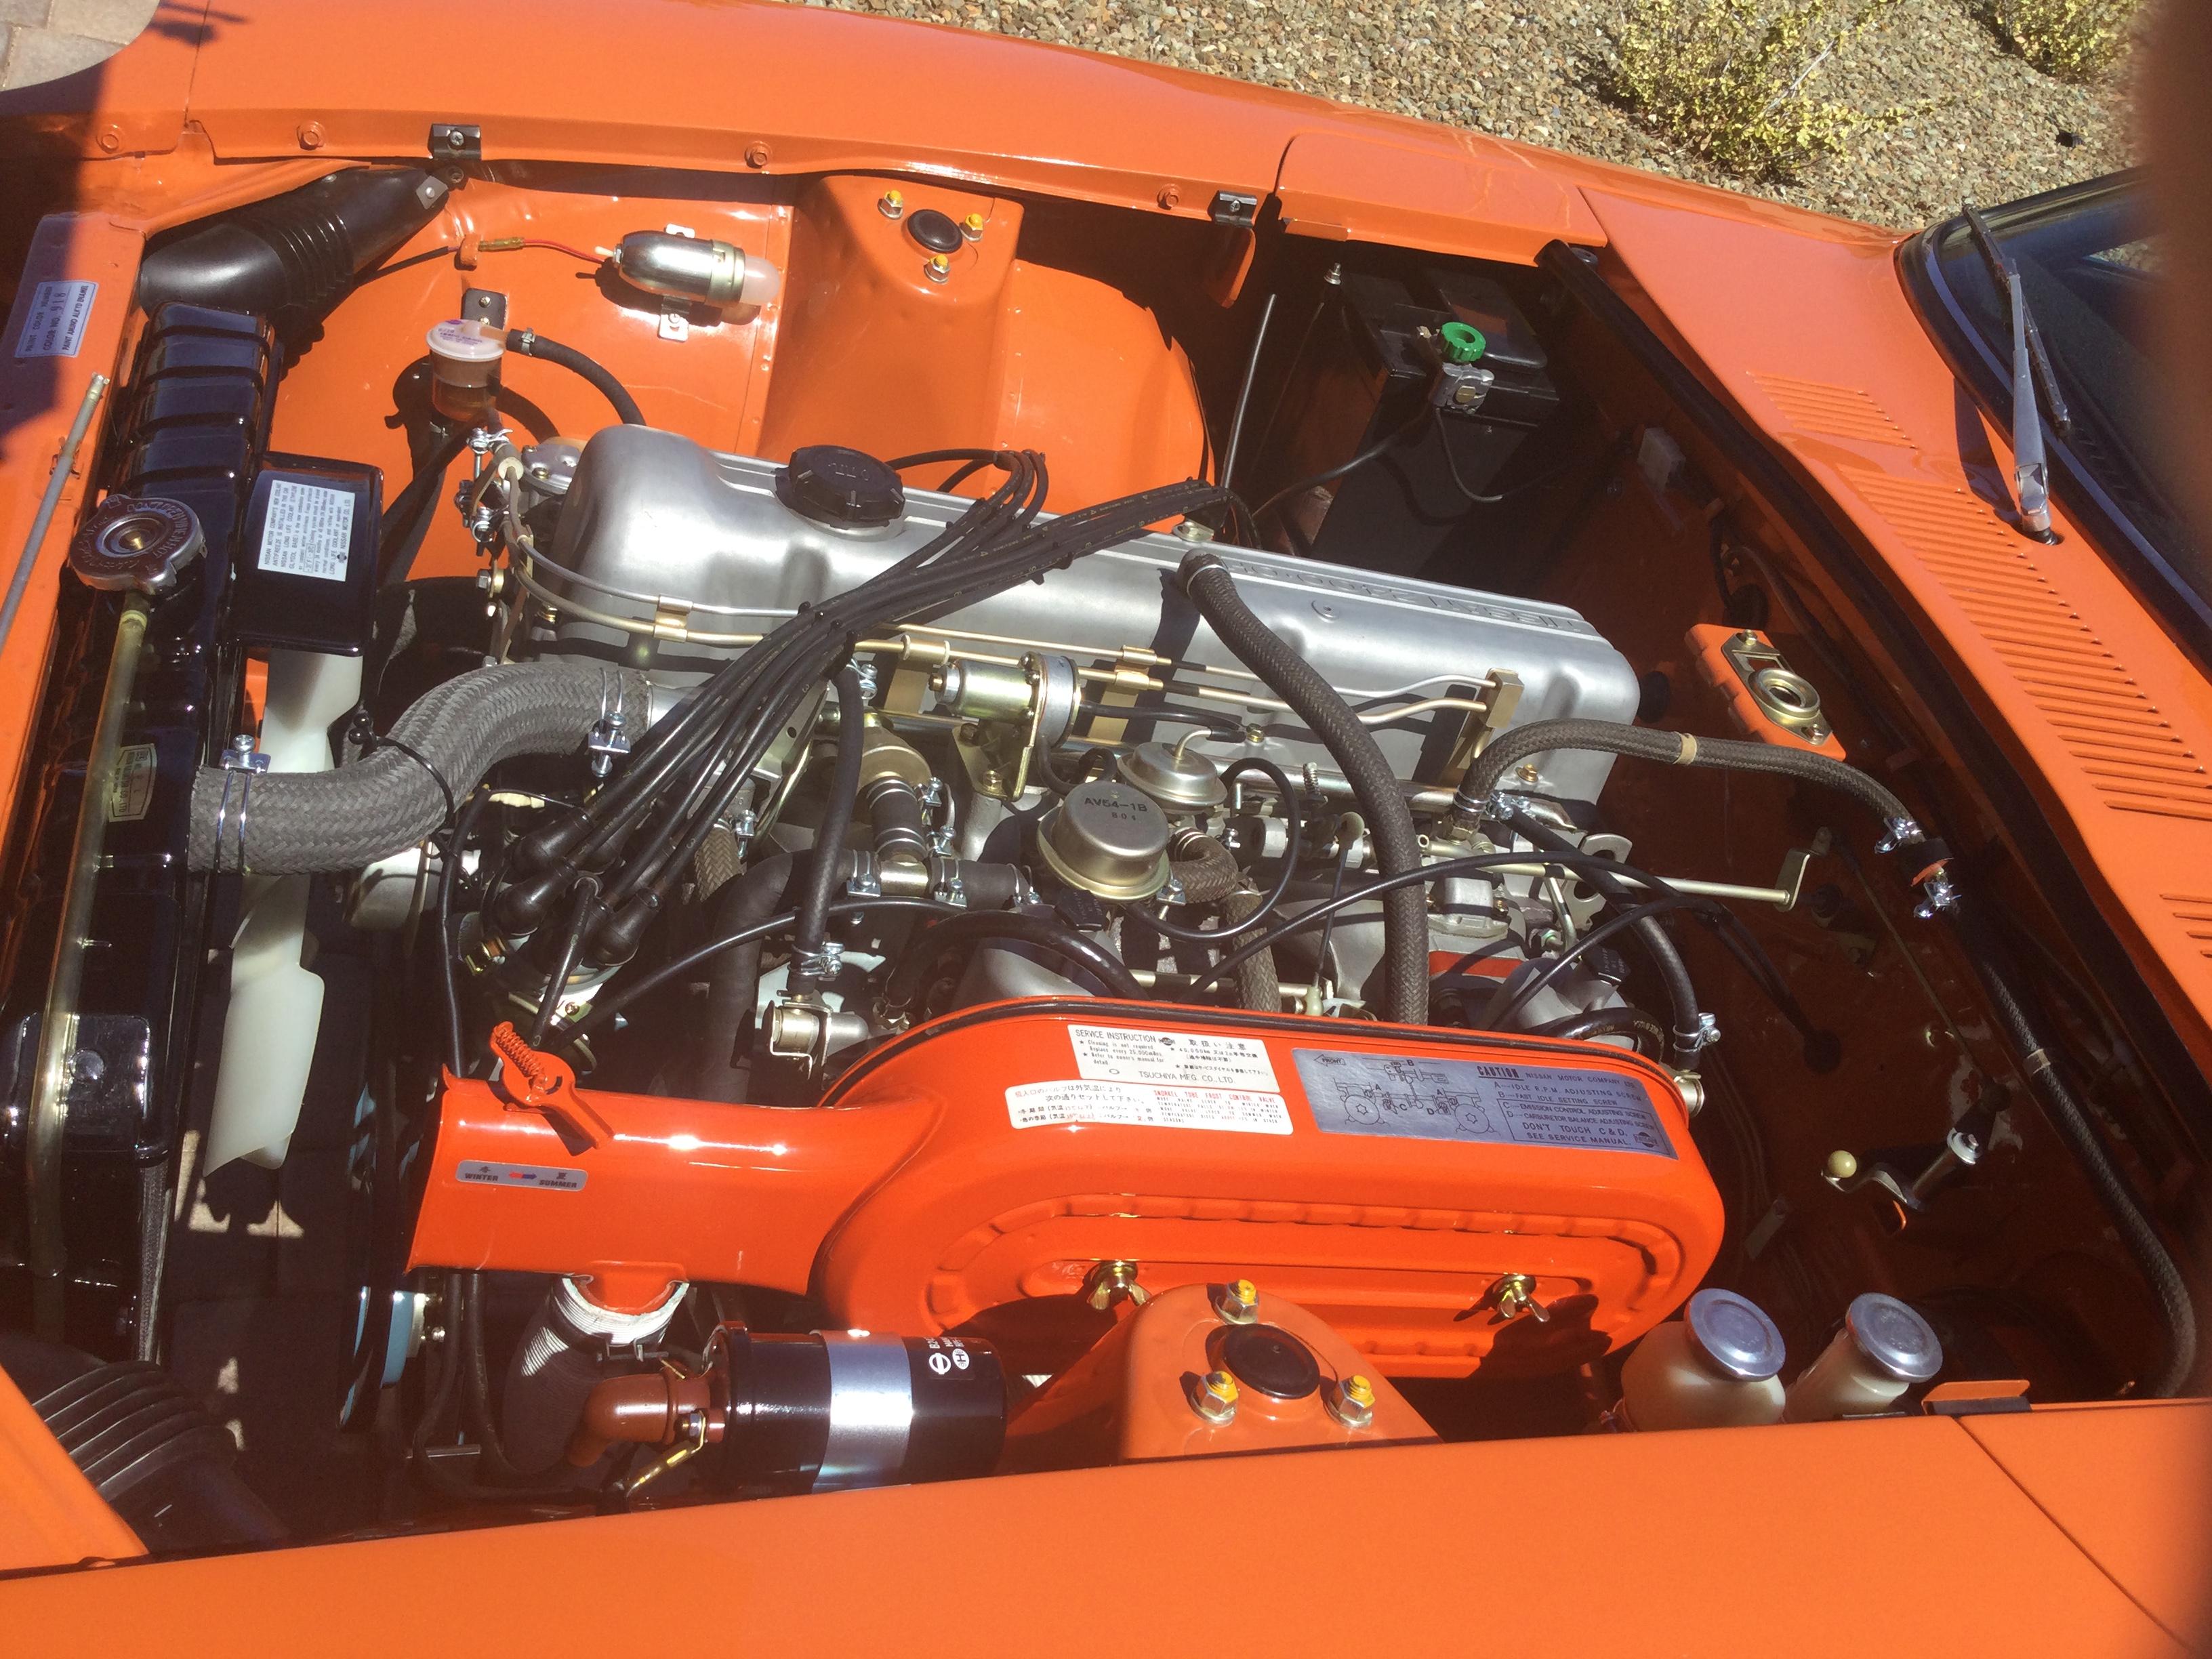
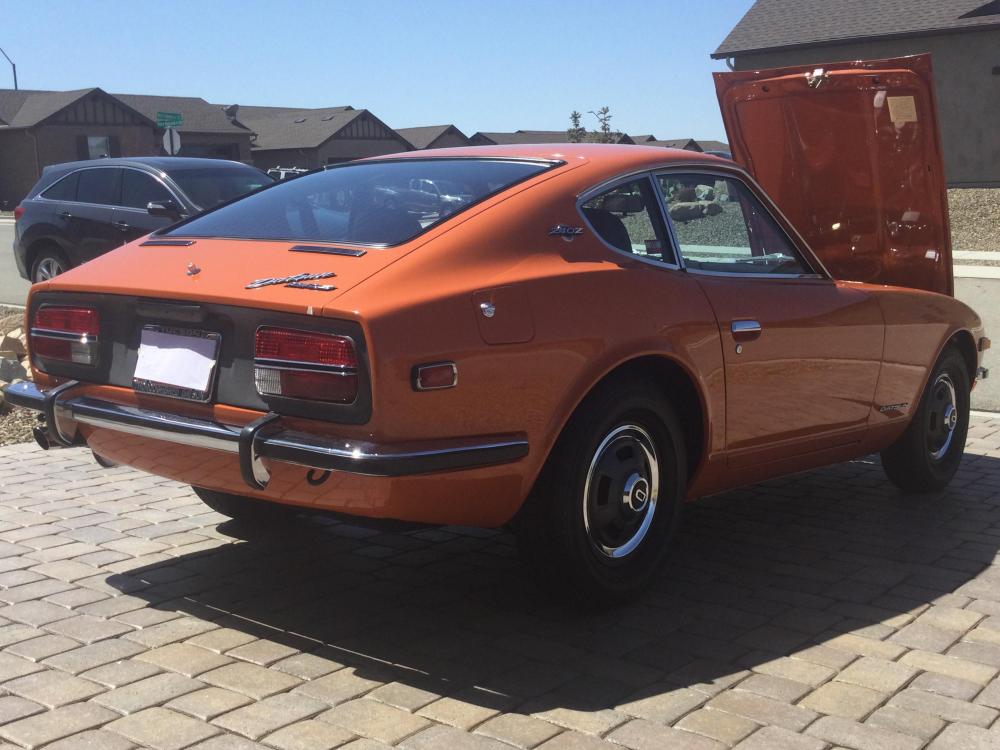
1 pointMuch appreciated, @siteunseen . @Wally , I got the car out into a clear Arizona morning for a few pictures of the 918 finish taken with my iPad.. I included an under-hood picture for color contrast to validate the orange hue.


 1 point
 -
1 pointI think there are downsides to joining the TBs, and limitations to using MAP for load. on my engine, I've only got the brake booster on #6 vacuum tap. I'l use TPS for load and my regulator is a constant 46psi. dunno about AC tho!1 point
-
1 pointHere is a scan of my sketch, if you print on 8.5" x 11" paper and select "actual size" it will print to scale. 1970 240Z HATCH EMBLEM HOLES.pdf1 point
-
Nice work Ryan! Way to stick with it! So i would cut out all the rust on the jig, fix the floor and rockers and then go to the rotisserie personally. The jig holds everything straight. I did each rocker and the front rails separately, but I am certain I could have cut more away at once. The floors basically attach to the trans tunnel and the inner rocker. I had patched my inner rockers but once I got it on the jig I actually cut it all the way out and replaced it. The frame didn't budge. Same thing when I did the front rails. Have fun!!!!1 point
-
I am a structures mechanic. Anything that is part of the airframe is what I (we) work on. As aerospace machinists our job is to fit and assemble commercial jet airliners, freighters and tankers (for the military). So far I have been part of the manufacture of the Boeing 777 (wings and fuselage), 777X (fuselage), and the 767 freighter and its derivative the KC-46 tanker (fuselage). The airplanes are assembled in huge jigs, we call them “the tool”. The 777 wing assembly jig is huge, 4 stories tall, with a footprint larger than an American football field. 4 pairs of wings are assembled simultaneously. So the machinists are working “in the tool”. The wing spars are also assembled in a tool, about 60 feet wide and 120 feet long. The 767, 747 body sections are assembled into larger sub assemblies in large 4 story high tools, similar to the wing assembly tools. The legacy 777 (metal wings) was assembled in a similar tool, which was removed and replaced by crawlers for a “moving” assembly line to also build the 777X. After the wings and fuselage sections are complete they get joined at wing/body join, then final body join. At each step the various pieces are loaded into the tooling, positioned using indexes and checked with lasers to the nearest 0.001”. Still, when an airplane is complete, due to manufacturing tolerances, each one is different in length. I’ve read that a 747 can vary in length by as much as 18”. So I suppose that none of them are perfectly straight, but all modern airplanes have provisions to trim, or adjust the airplane for straight and level flight. The engines are manufactured elsewhere, and installed on the airplane by engine technicians who specialize in the hookup and installation of the engines.1 point
-
1 pointWhat’s wrong with a purple Z.. my car Sent from my iPhone using Tapatalk1 point
-
Of course I can't tell without actually seeing it with my own two beady eyes, but I don't think that's a crack. It just looks like a casting flaw. See if you can catch a fingernail on it... Does it go in (like a crack), or does it actually protrude out?1 point