


Leaderboard
-

siteunseen
Free Member5Points15,115Posts -
Captain Obvious
Free Member4Points10,081Posts -

Av8ferg
Free Member2Points1,538Posts -
lonetreesteve
Free Member2Points1,700Posts


Popular Content
Showing content with the highest reputation on 03/09/2020 in all areas
-
3 pointsAre you stuck on a cruise boat? Call me if you are. I can entertain for a good hour.3 points
-
2 pointsMy was cracked too. Will try and find a replacement. I fly the 757 but would have no concerns flying the Max. It’s a concern if you don’t know how to fly like many 3 world carriers. They rely on automation too much and can’t handle the machine without it when things go wrong. I flew for 25 years without an autopilot it’s no big deal. Rule #1 push down....houses get bigger, pull up....houses get smaller. Sent from my iPhone using Tapatalk2 points
-
2 pointsOh, and BTW, I wouldn't do it that way. I would press (or pin or silver solder or glue or loctite sleeve retainer or something) a 25mm long (or so) cylindrical piece of tubing onto the shaft up where the original bushing wore. Then I would machine that pressed on piece concentric to the shaft leaving it a little larger than the original diameter of the shaft. Then I would ream the upper bushing to fit the larger diameter. Looks like there's plenty of meat in the oilite bushing to make the hole a little larger than stock. That way I wouldn't have to cut the whole shaft down, just the top portion. So what if the holes in the two bushings aren't the same size. Shouldn't matter, right? Of course, never having done it... It's all speculation that plan would work. That shaft goes in from the top, right? Haha!!2 points
-
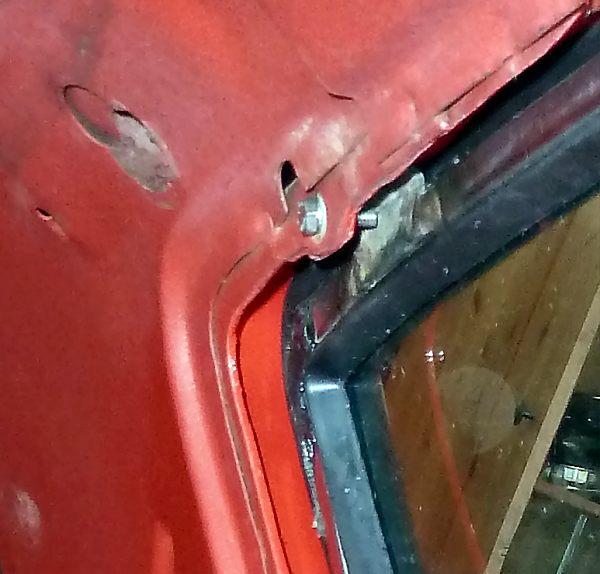
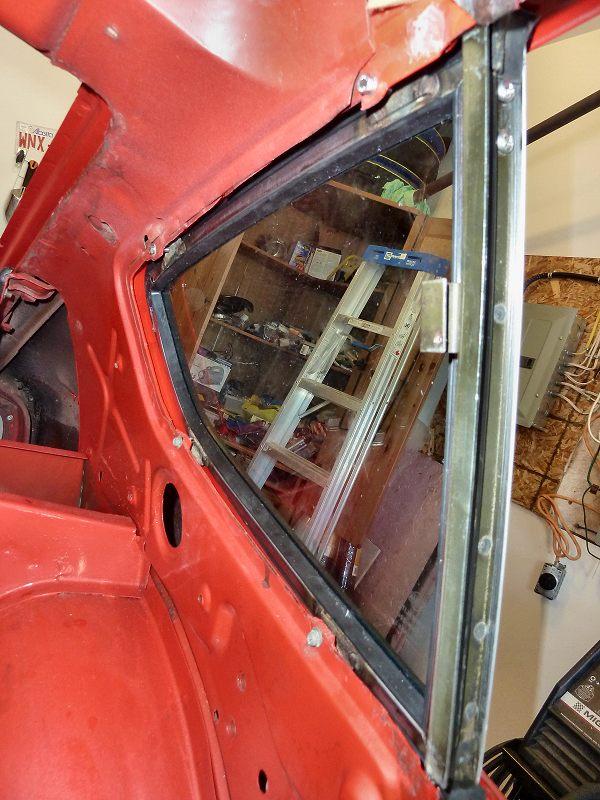
I went thru this frustrating exercise years ago. With no one around to assist I found it impossible to both get the assembly pushed back into the body and get the screws in place to lock it down. My solution was to create "extra hands" with a ratcheting tie-down strap. I installed a large hook in the base plate of the garage wall and positioned the car with the rear towards the hook. A length of stout rope was attached to the hook. One end of the strap was attached to the rope, the strap passed into the car via the open hatch, around the front of the quarter window and back to the rope for a second attachment. The rope allowed for a shallow angle for the strap. Gentle ratcheting pulled the window into position and held it in place to get the screws installed. Loosen the strap, re-position the car, and repeat for the second window. Thankfully, no pictures exist of this particular McGyver moment. ?2 points
-
Took the skyline over to my dad's (Diseazd) for a family photo. Missing from the photo is my Z31, his Z32 300zx and his NSX. Was definitely too bright out but it was the only time we had.1 point
-
JSM.....They all are a joy to drive....the silver and green cars have Stroker 3.1 Motors.....hard not to climb into one of those when I need a little lift!1 point
-
1 pointProbably. It probably works now, those parts will make it better. I'm not an expert, I make my stuff work right, but can't say that it's "rebuilt". The guy with the parts in hand has the best feel for what's needed. Look through 246's writeup and see if you're missing anything. @240260280 http://atlanticz.ca/zclub/techtips/distributorrebuild/index.html1 point
-
Looks like the car was sold. Someone got a great deal!1 point
-
1 pointHere's what I bought: https://www.ebay.com/itm/25-M8-1-25-Flange-Exhaust-LockNut-Copper-Plated-12mm-Hex/400360273199?hash=item5d3754f52f:g:HJQAAOSwLwBafPRS Copper plated, distorted thread, and they have a force spreading flange on them so you don't need a washer (just like stock). I bought a bag of 25 because I needed them for the broken cam motor and I should have enough left over for my F54/P79 project.1 point
-
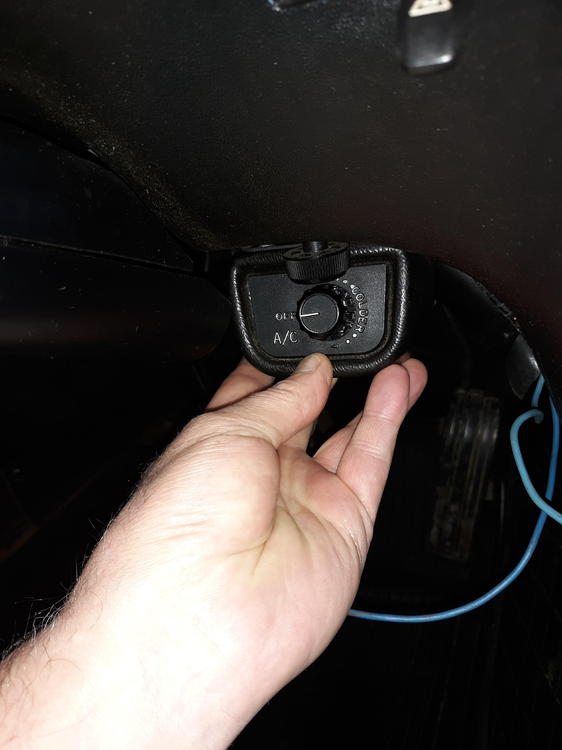
1 pointYup. Something just like that. And the plastic part on the bottom should be pretty easy as well. (Says me who's never messed with it!) Haha!!1 point
-
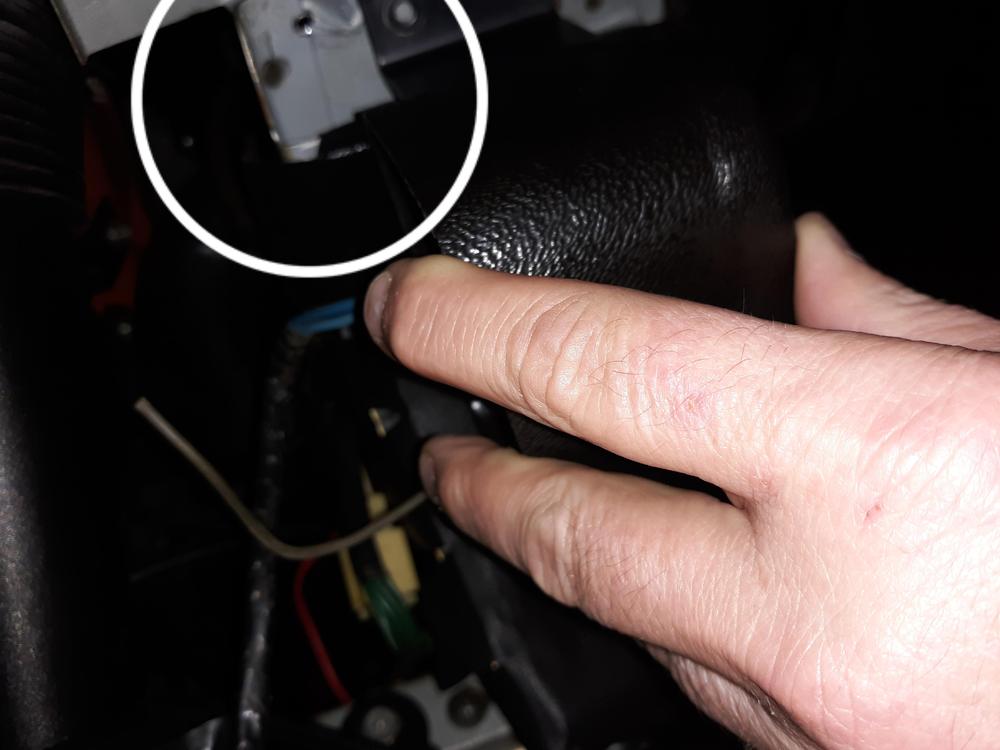
Good point! Two thoughts: - I am going to retrofit (slightly) longer bolts with an actual hex head. Way too much pressure on the tiny phillips screws and they strip out too easily. - Wick Humble says the later Z actually went to longer screws b/c (his theory) the factory assembly line workers were having the same issue we are...1 point
-
Nope, Nope, Nope, and Nope The trick it to buy longer screws or bolts and bring the window in a little at a time until you can replace each long screw one-at-a time with a shorter screw. E-Z P-Z
 1 point
 -
I can't take it any longer… i'll take a few days off.. away from this site..1 point
-
I posted this on the UK Z-Club forum and it seems on this side of the pond, I’m very late to the party! But for those who haven’t seen it .... This is by far the most entertaining and awe-inspiring bit of engineering I have EVER seen. I’m totally hooked and been binge watching while doing other stuff. The dry humour and unbelievable fabrication skills keep you coming back and make you wonder why we moan about a little rust or fabricating things on our Zs!! It really picks up after the first couple of episodes .... I do wonder what that thing will weigh at the end of the project though! [emoji848]1 point
-
That front bumper looks like a good place to sit when parked at scenic overlooks. Dennis1 point
-
1 point1 pointI will say that I saw that coming. Wasn't sure from who because there's so many possibilities! ?1 point1 point1 pointHere's the best I could do how it's parked. Luckily I'm lazy and haven't boxed it up yet. I'm mailing it tomorrow. Anyhow...
 1 pointLooking at the condition of battery tray and the floor section, I really don't understand how this isn't already gone. And someone asked him to cut the roof and tail section off.
 1 pointI just checked and the car is still available for only $1,000.00. https://tucson.craigslist.org/pts/d/tucson-datsun-parts-car/7083772784.html "Can’t put it back together or use it to replace parts off a rusted out Z. Already been asked a few times for the roof and tail section, I will not sell car in pieces if you want it buy it and cut it up yourself." Heaven forbid that someone would cut this solid 240Z into pieces!1 point


Important Information
By using this site, you agree to our Privacy Policy and Guidelines. We have placed cookies on your device to help make this website better. You can adjust your cookie settings, otherwise we'll assume you're okay to continue.