


Leaderboard
-

Zed Head
Free Member2Points19,236Posts -
Captain Obvious
Free Member2Points10,081Posts -

Dave WM
Free Member2Points3,591Posts -
grannyknot
Free Member2Points5,158Posts


Popular Content
Showing content with the highest reputation on 02/19/2020 in all areas
-
2 pointsGotcha. Shows what I know! LOL. So all you need for a proof of concept test is a citric acid based thixotropic paste. I suspect the finer the sawdust, the better, and (again, for proof of concept), don't know if you need to spring for xanthan gum. That stuff is a lot more expensive than corn starch (which you already have). Cooked corn starch slurry (cooked to activate the corn starch), with citric acid added. Only thing I'm not sure about is the reaction between the starch and the acid. I spend a fair amount of time in the kitchen, but I'm a little rusty* on which thickening agent to use in which application and I'm not sure if there will be compatibility issues. I do remember there are some restrictions on which starch to use when preparing a citrus fruit based dessert, so I'm assuming those restrictions would apply here. Could maybe use plain ol' gelatin as a thickener if corn starch isn't compatible? Maybe put in a little propylene or ethylene glycol to slow down evaporation? *See what I did there?2 points
-
1 pointBad news, good news on the tube plating. Turns out that the local plating shop was not able to accommodate the tubes in their 5 foot long tanks due to the 'Anode configuration'. So, I went back and picked up all the tubes and figured I would send them to Sav-On plating. They are the ones that do my batch plating for the smaller parts. They do a great job with very nice results. So, after chasing down a large box here at work, I shipped the tubes off to the plater. The good news here is that in spite of the added shipping charges, $75 each way, the cost to do all of the tubes using their rack plating set-up is just $165. I was paying double that for my local plater on the long tubes and I did not care for their work as much. So, turns out, I should get nicely plated tubes for just a little less than what i was paying my not so good local plater.1 point
-
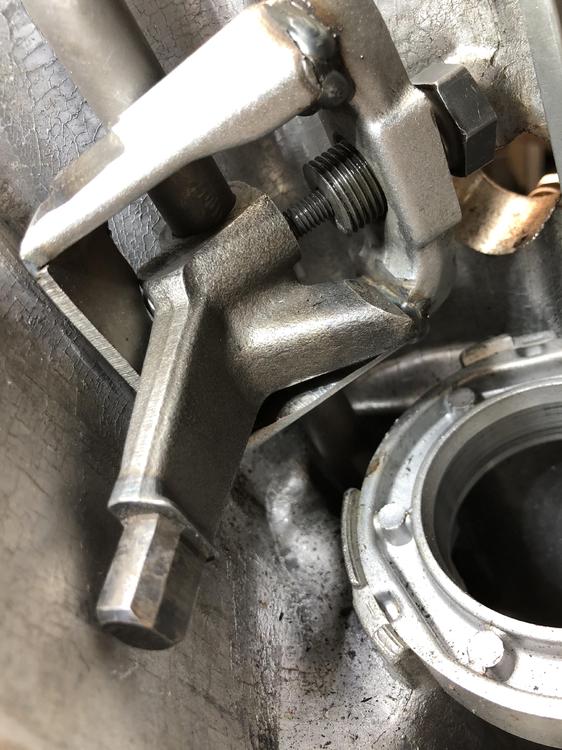
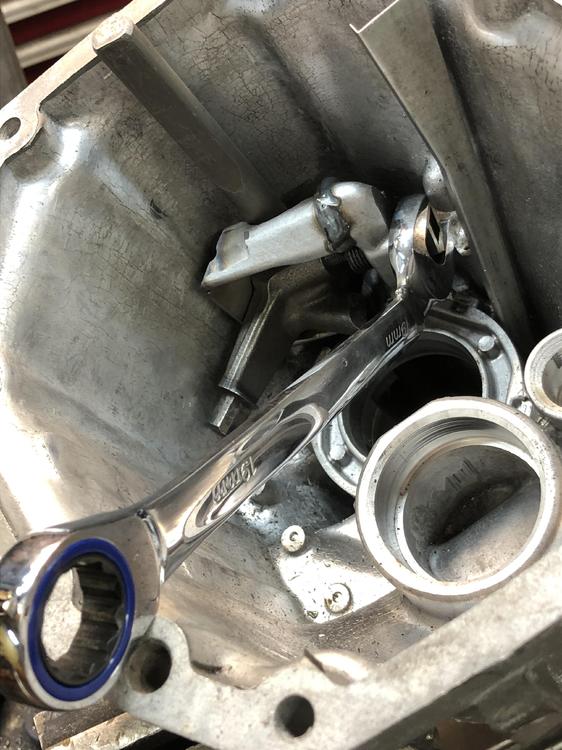
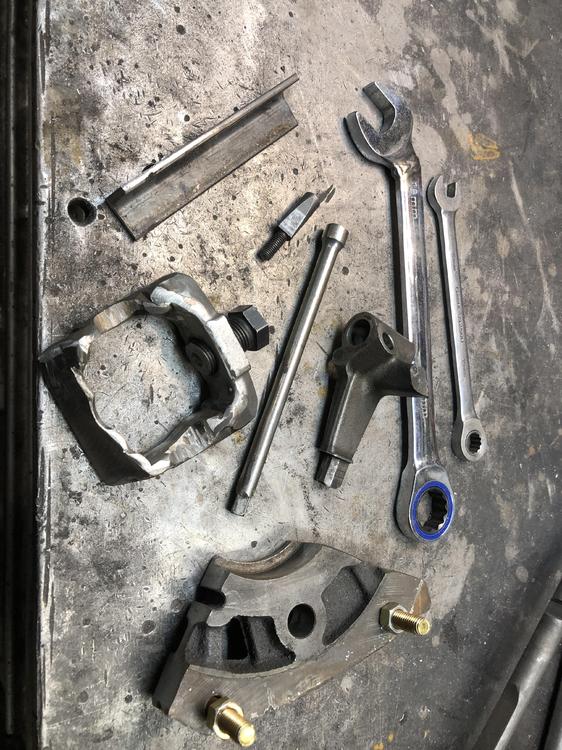
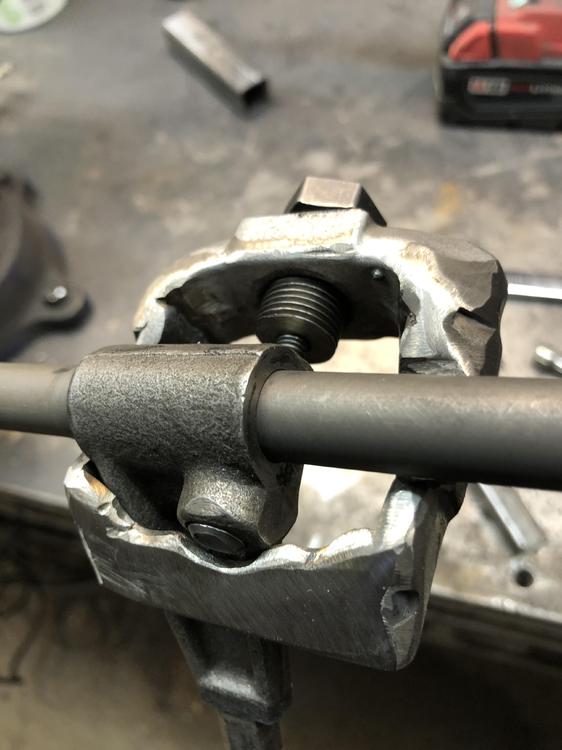
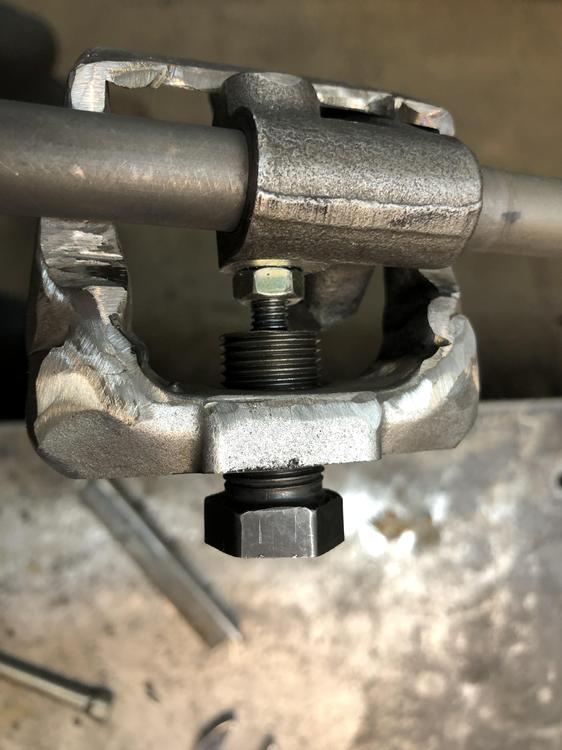
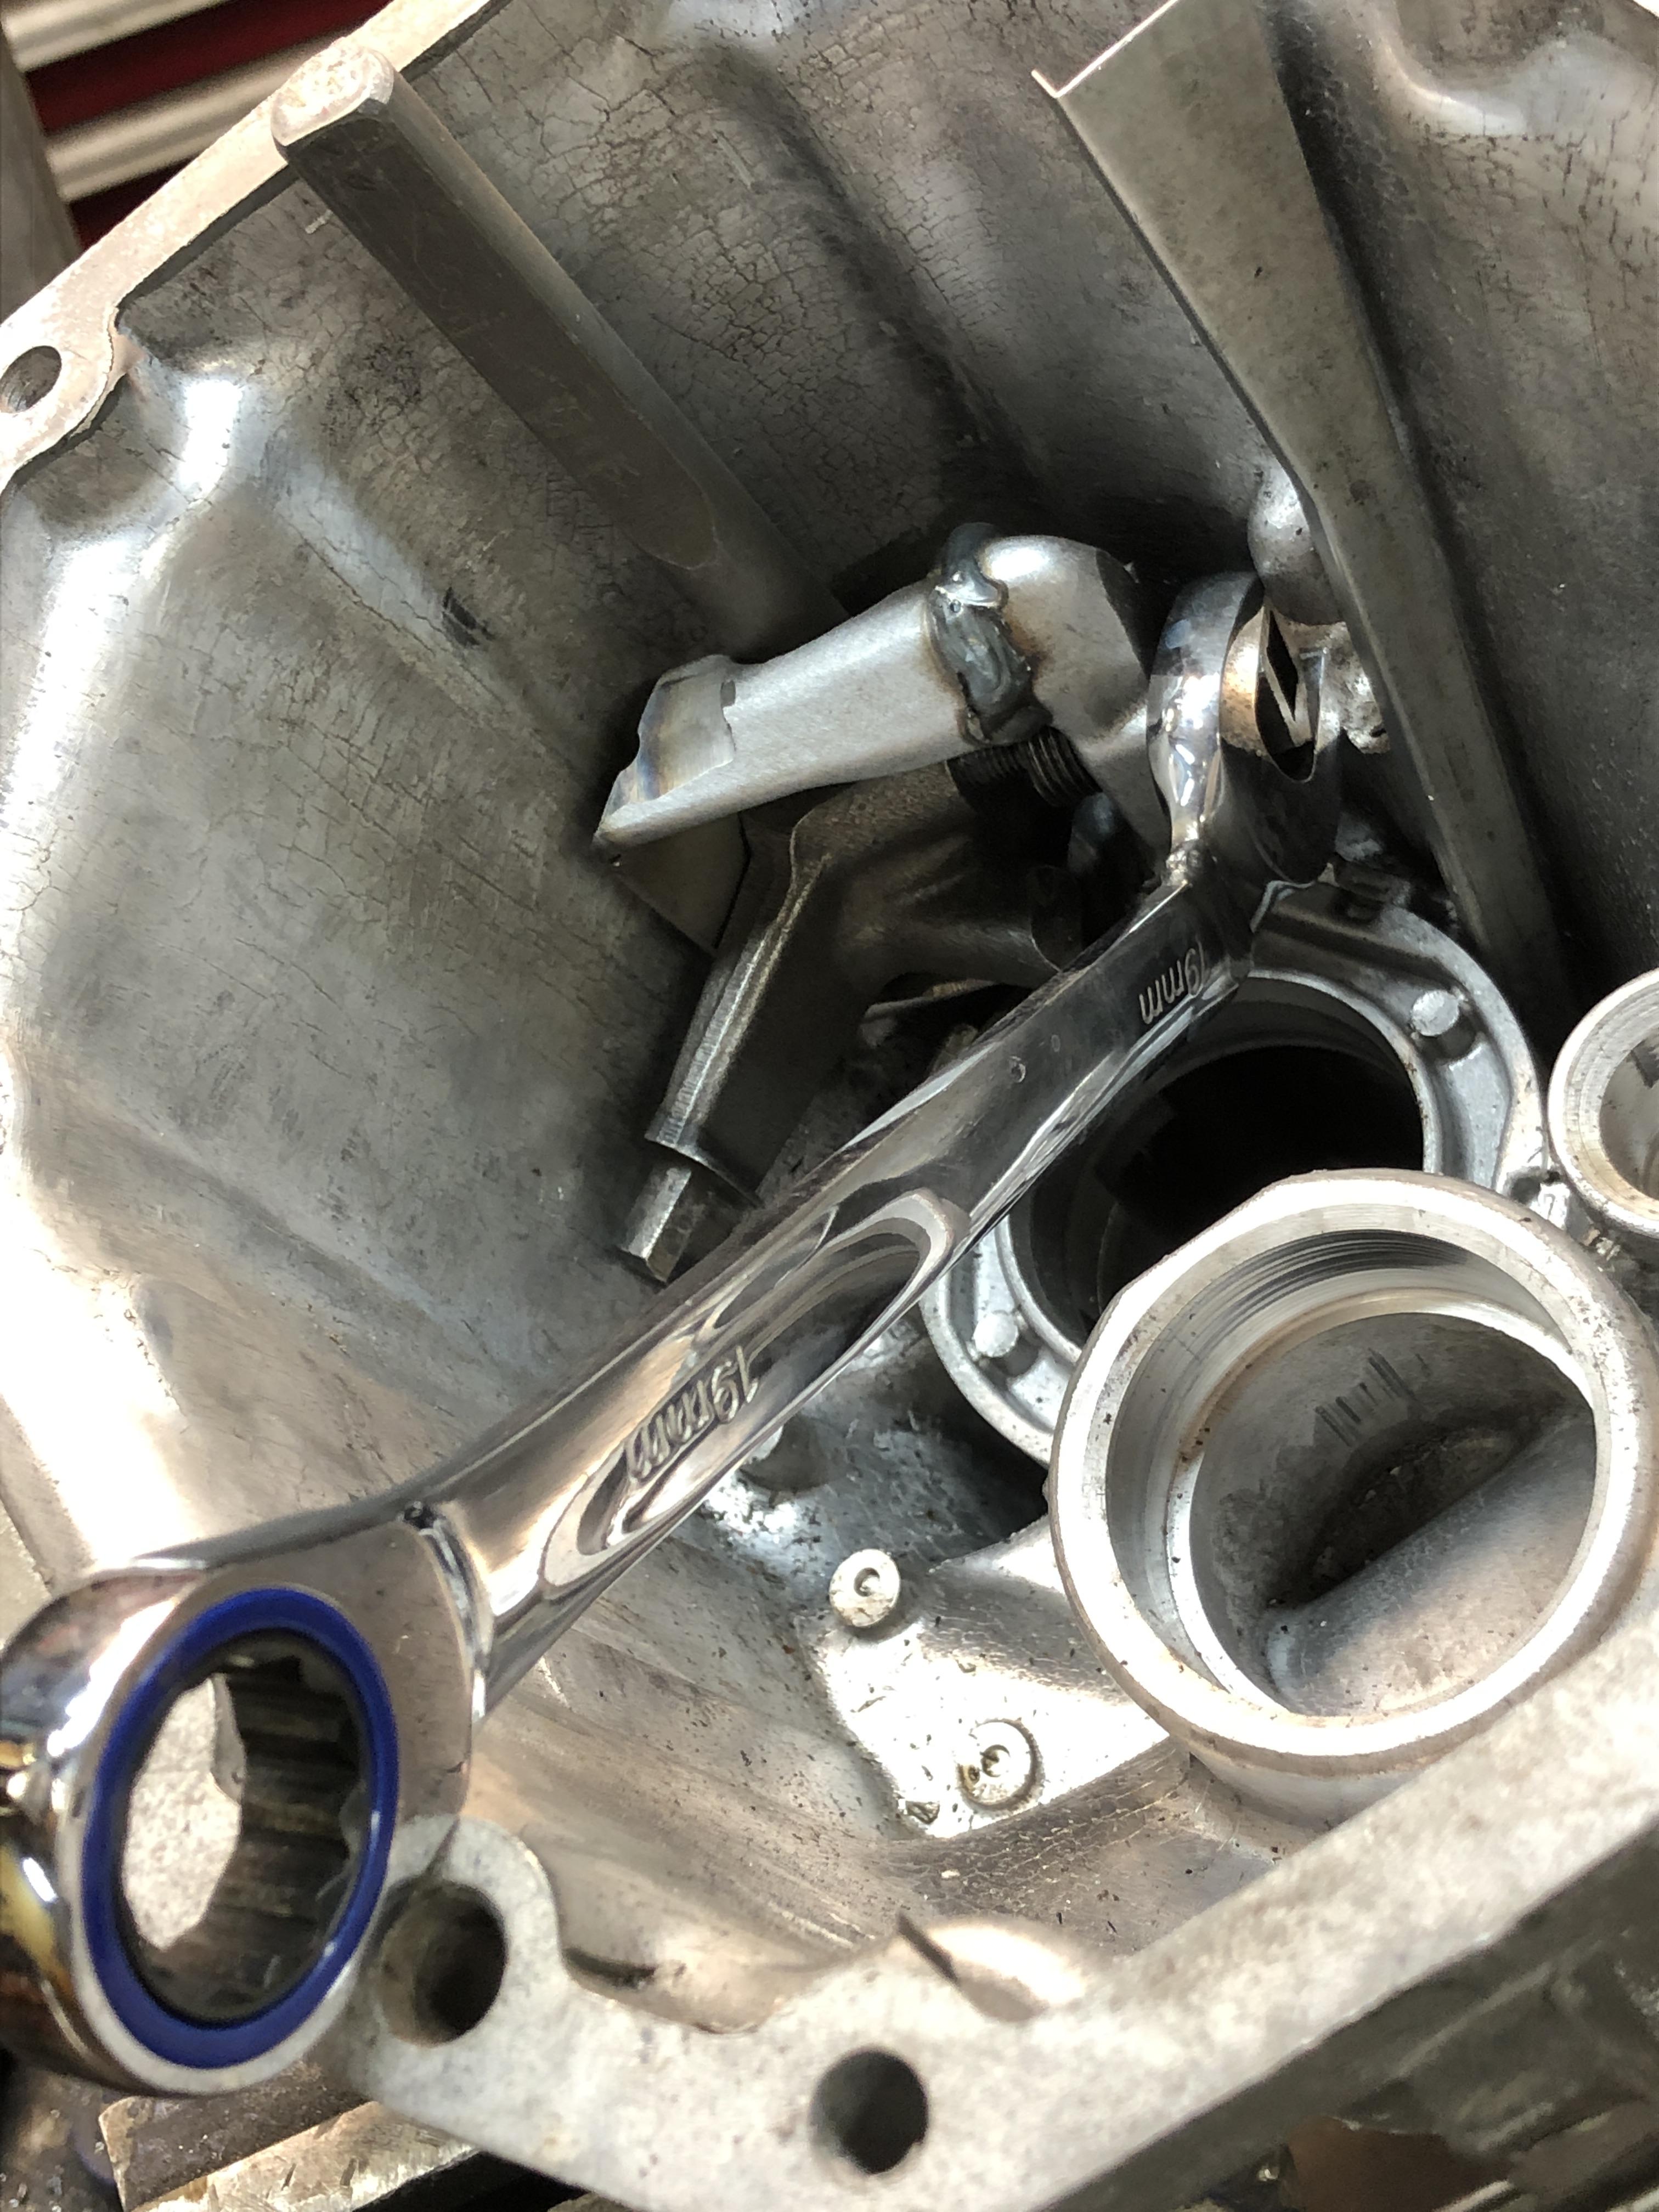
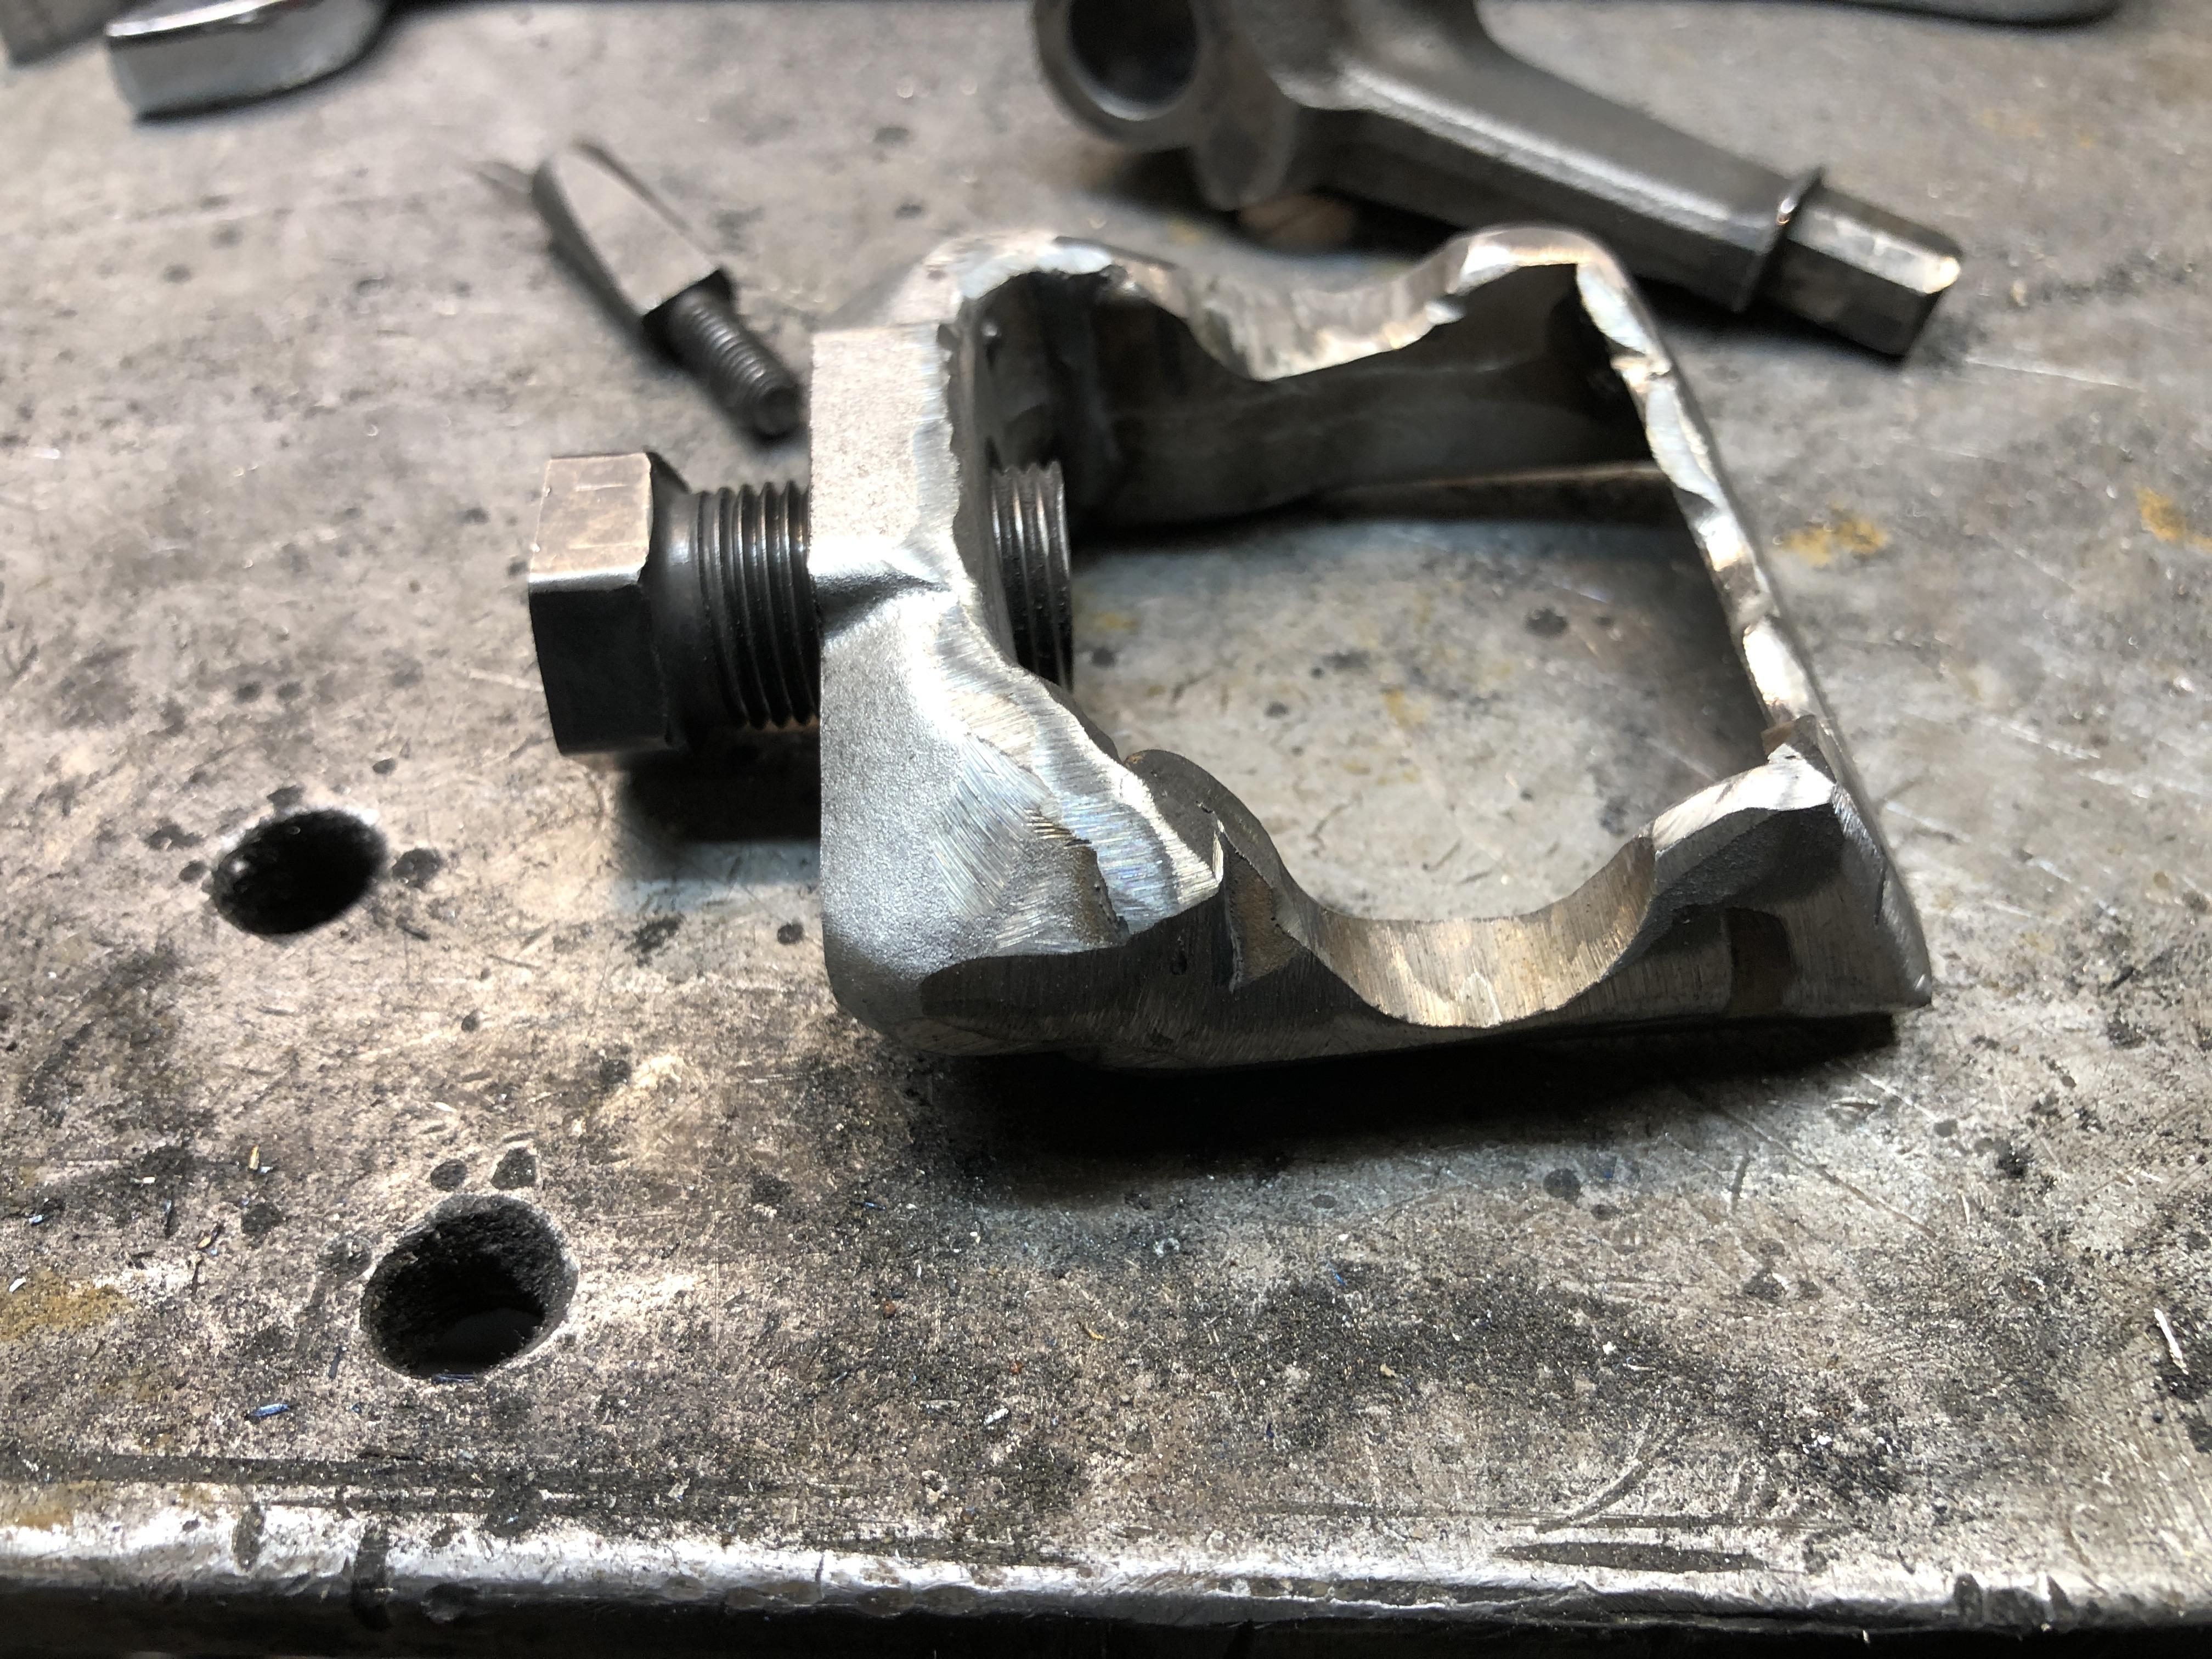
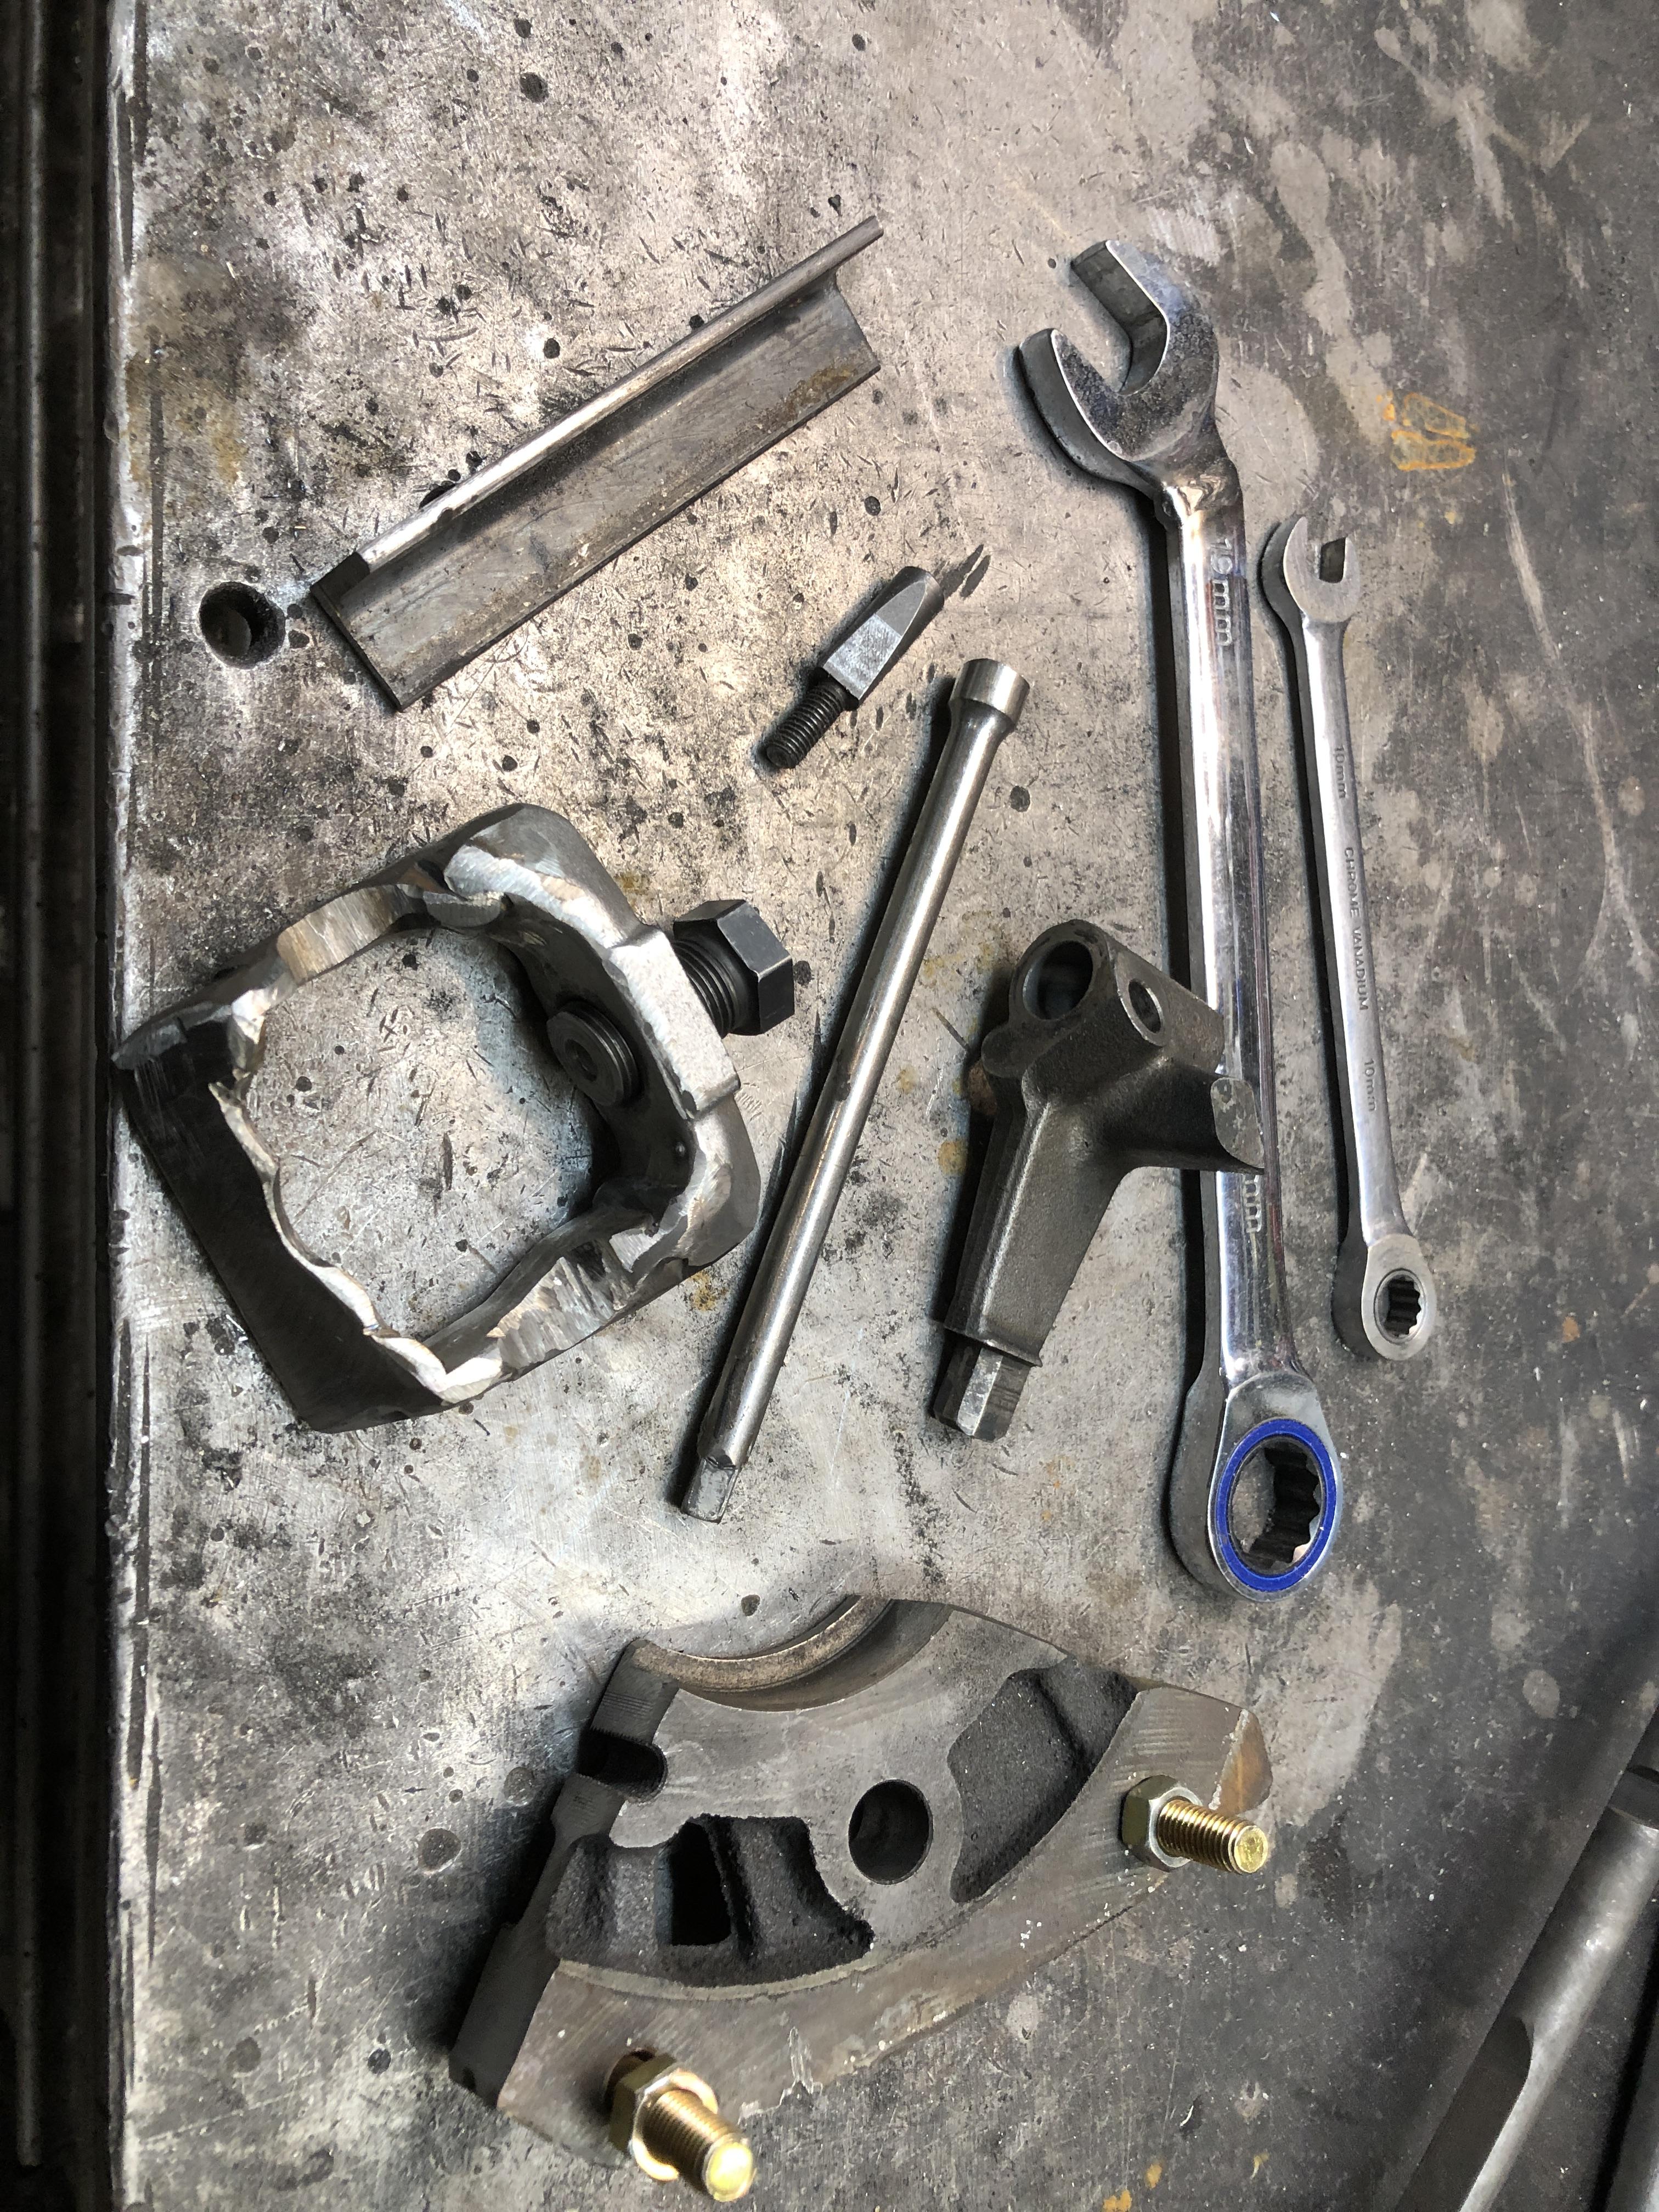
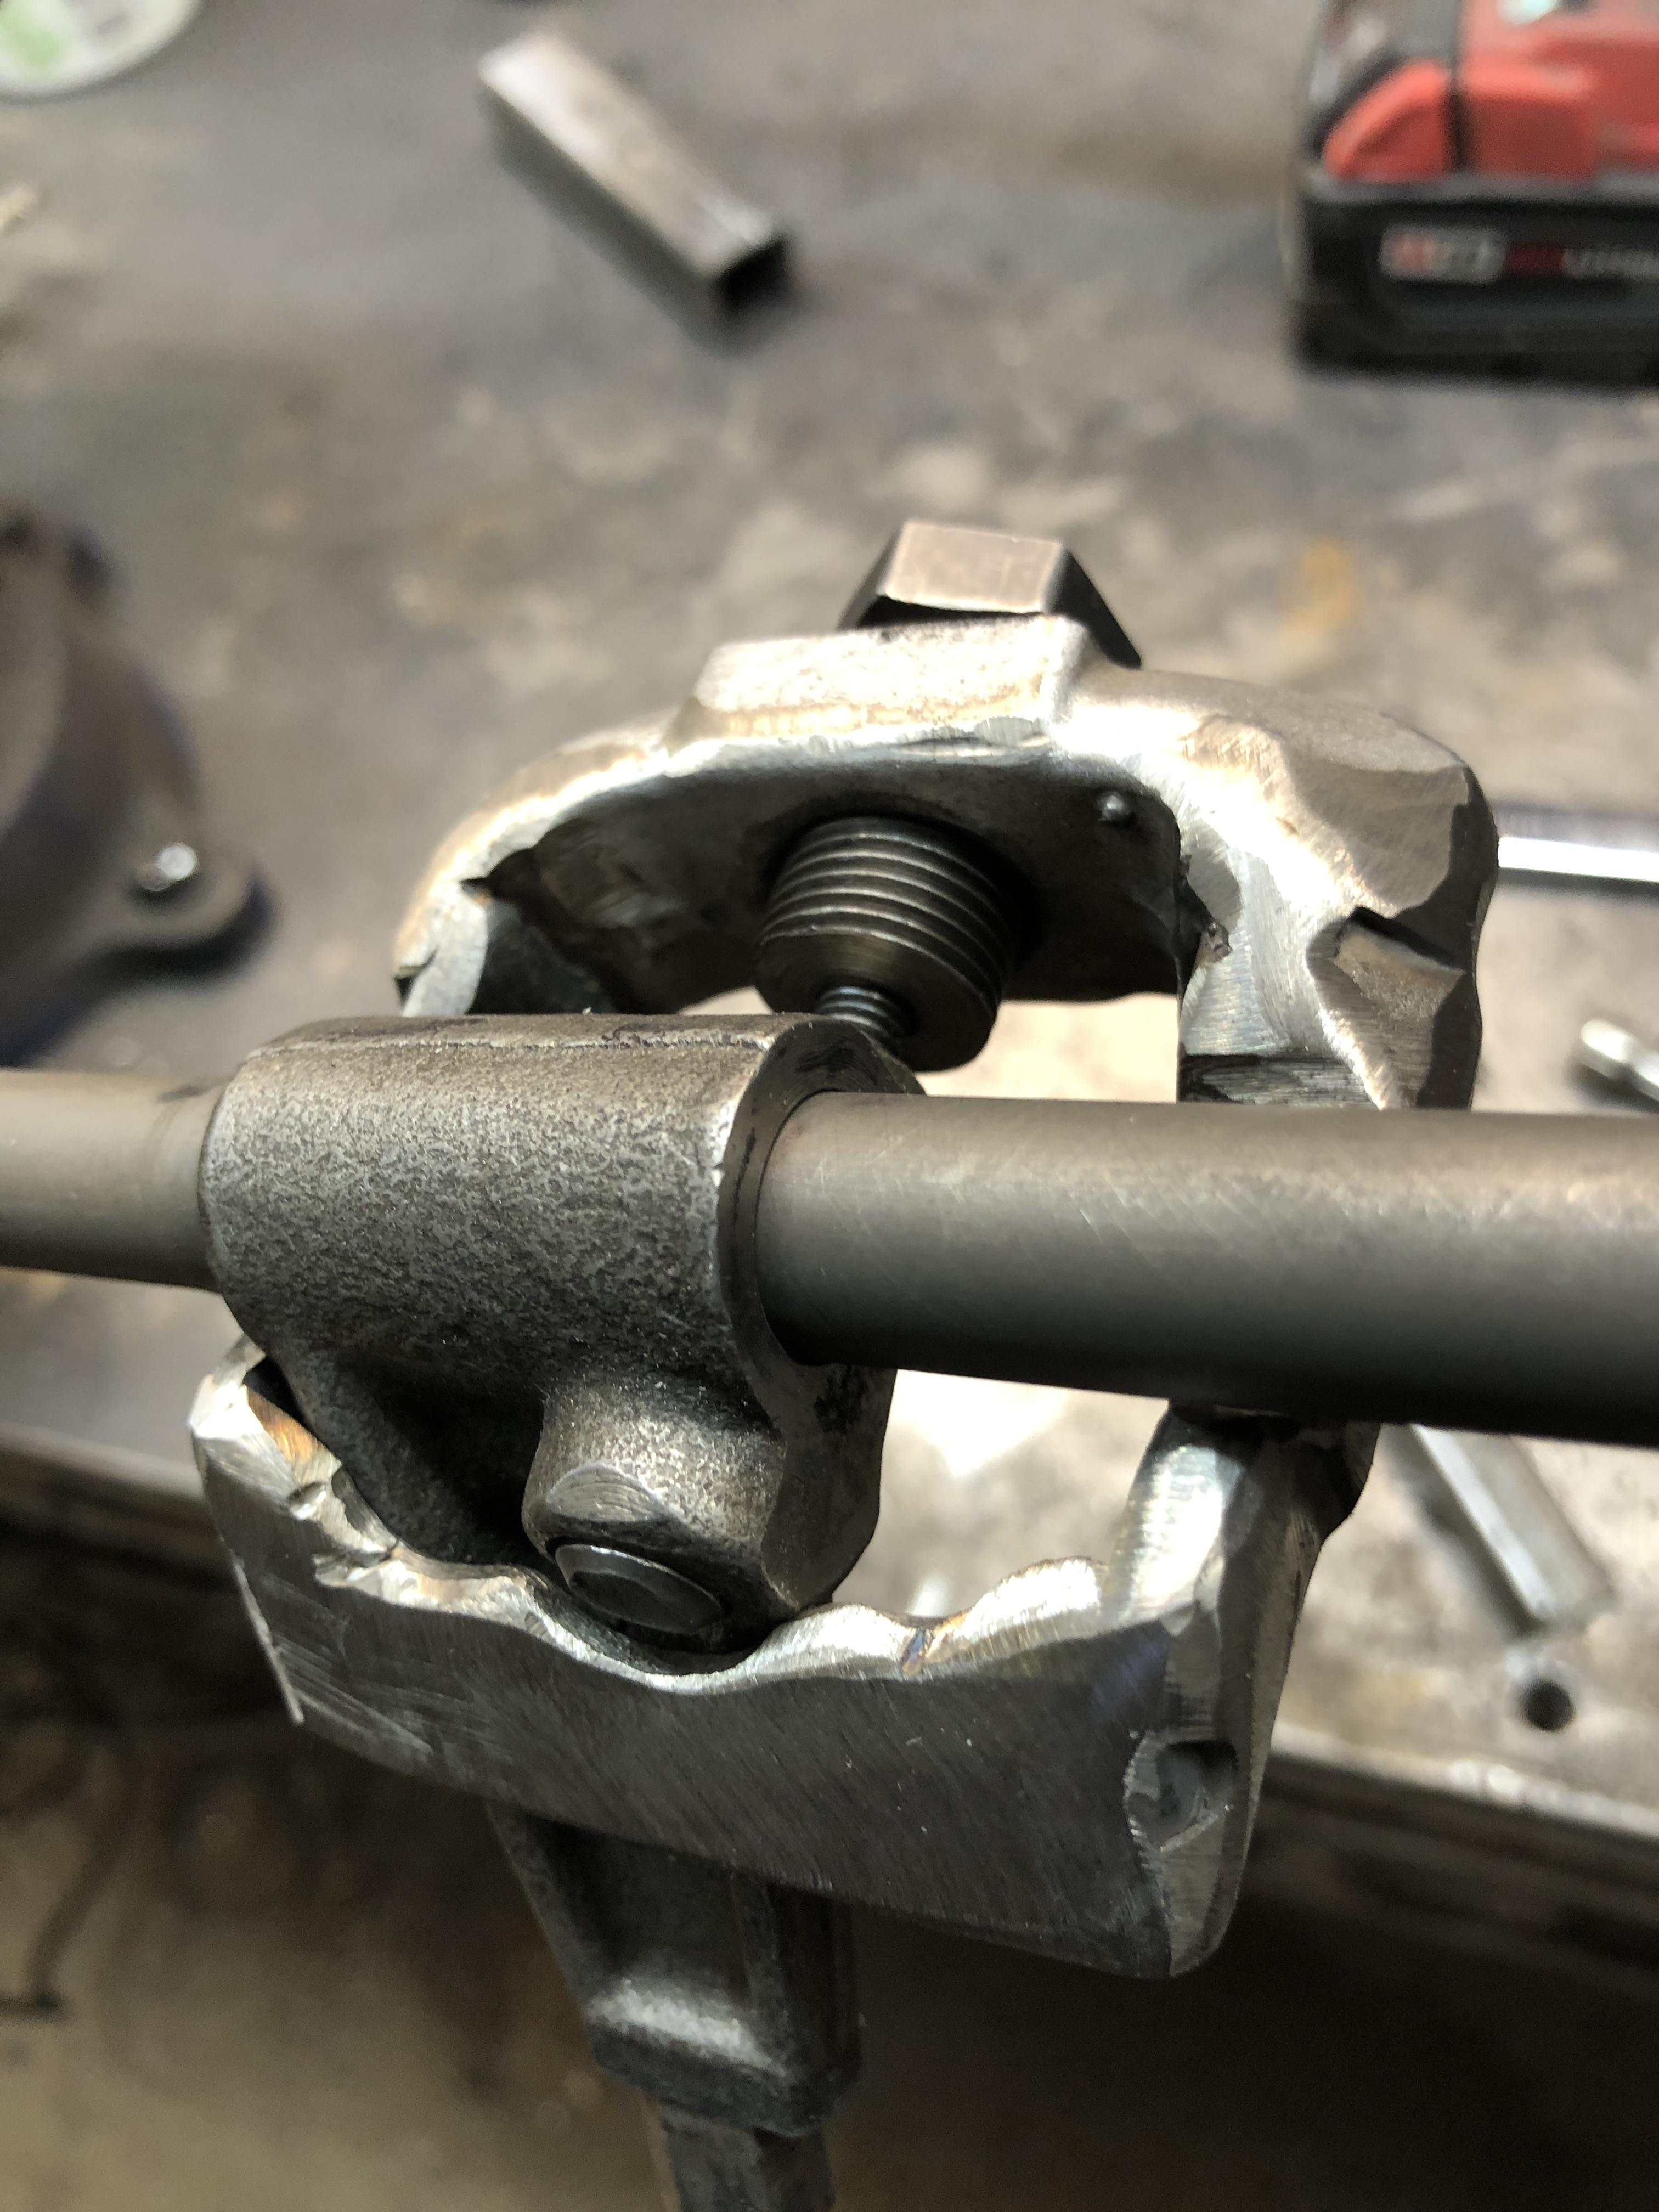
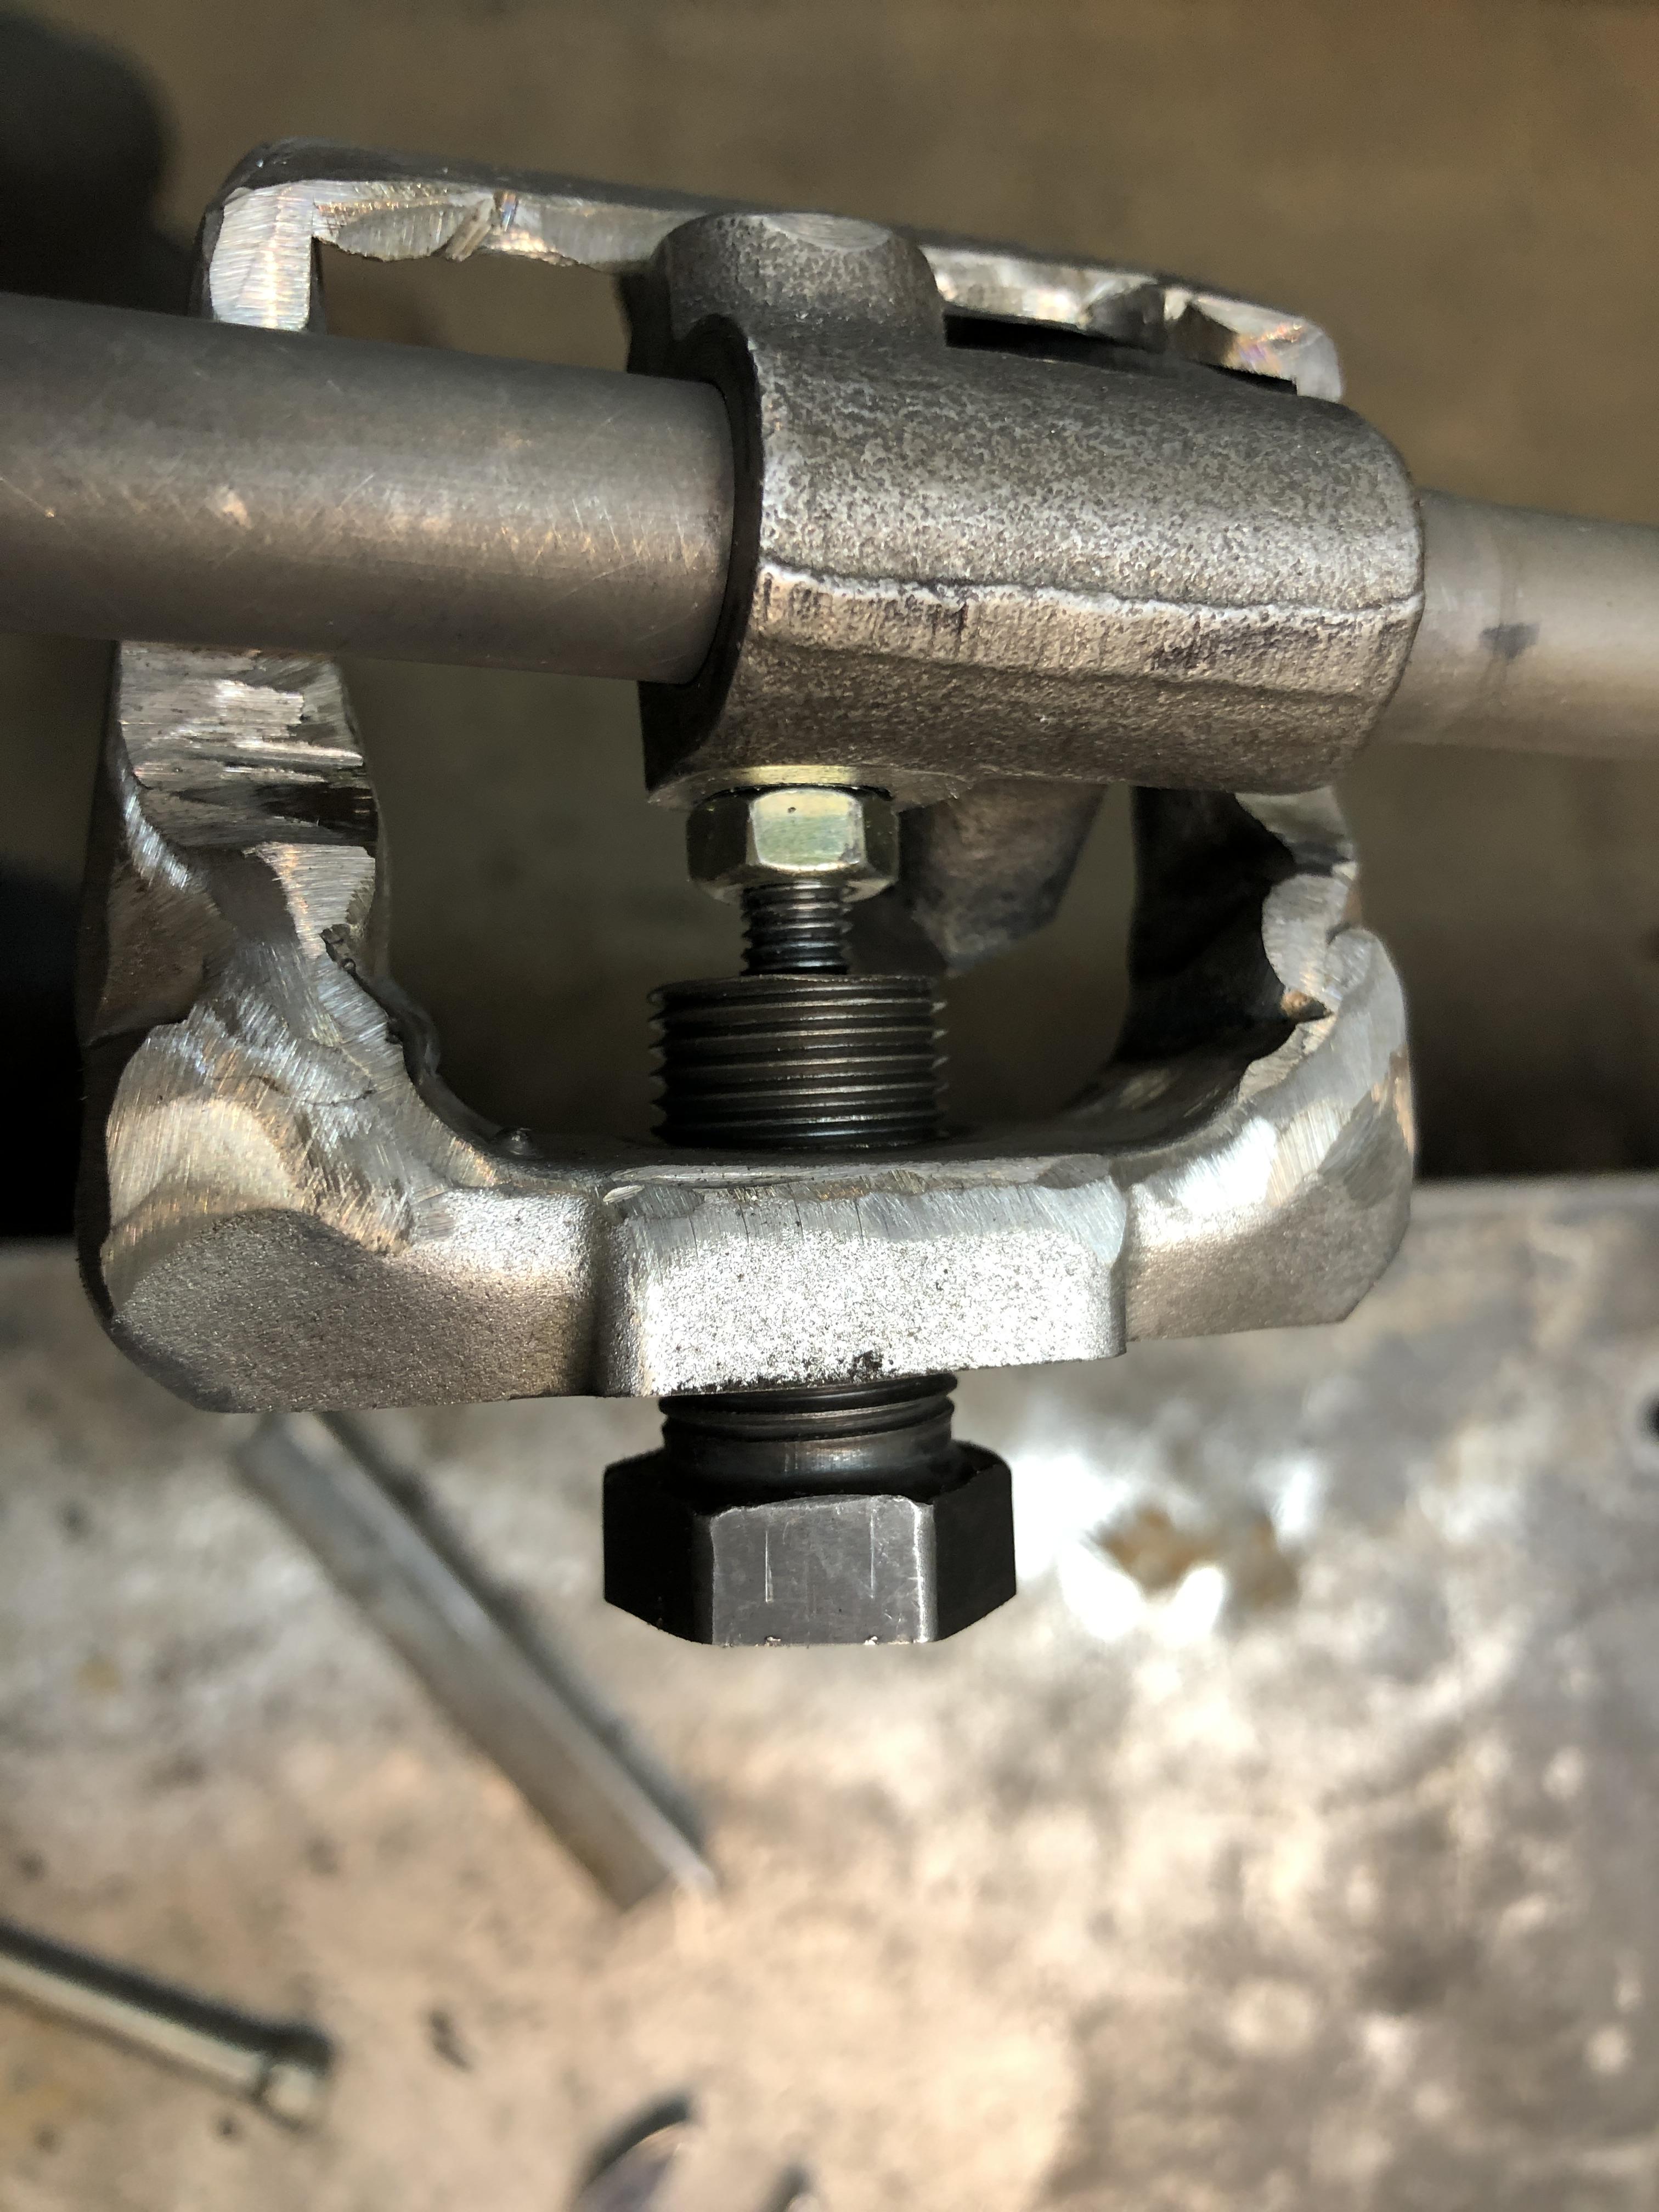
1 pointwww.zhome.com - click "Z Car Registers" in the column menu, then "The Classic 240 Z Owners Register". This will bring up a long list of owners / chassis numbers / and engine numbers. Find the chassis number closest to yours and compare the engine numbers with yours. If the engine number range is close to your car, your engine is original. If it's way off, then your's has been replaced. You can buy blank ID plates from a number of places including https://www.zzxdatsun.com/1 pointAha! Push the tip of the wedge bolt using the case opposite as the base. If you can get it to seat nice and tight against the case where it can’t slip, this could work. There is lots of rotation so you could find the spot where the case surface is orthogonal to the turnbuckle axis, or a ridge to catch against. Would need to find a good quality turnbuckle with fine threads. Naw, just make one. Drilling holes and making threads is basic work. And yes, the backside would need to be well supported just like the “whacking it out with a pin punch“ case. I think I have a better solution for that too than a chuck of angle iron crudely propped behind it. Something that slips over the shaft and has a threaded bolt in it that you unthread until the bolt head touches the case. Probably still easier to drill the hole, whack it, then plug the hole. But not as much fun!1 pointAfter being on display in my office for umpteen years the colors, yes colors, were a bit faded. One of my customers very generously agreed to have it professionally reproduced and enhanced. Should bring the colors back. When it returns, soon I hope, I'll post the results.1 pointNever really understood why people overprice their cars, then say that they'll entertain offers (obviously going to be lower than asking), but then say "don't go too low or I'll get angry". Just set a reasonable price and make the sale. He has 900 + 1350 + 1200 in parts included in the asking price. Subtract that from $11,000 and you're at $7,550. He can't get mad at that since those are his numbers.1 point1 pointOk, here is the beast. Bit rough, it has been through many changes on the way to a working model. Here is how it fits and sits on and around the rod and lever arm. And here is it in action inside the tail housing/ The nut on the threaded pusher is 19mm, so had to make a custom bend on this 19mm open end wrench to allow access and at least 1/6 turn. The nut is very close to the raised casting area around the reverse lockout assembly hole in the case. Had to get the length of this pusher bolt just right to allow you to put it on the wedge bolt tip and still get you enough room to push it off. The tail housing without this reverse lockout thingy would have much more room. You might even get a box end wrench on it. Here is the SFT’s for the project The bottom chunk is the part of an intermediate plate from a junked 4 speed. It has the hole for the end of the shift rod. Helps to keep the shift rod supported if you using the 1/4 socket extension whacking method to remove the wedge pin. I still needed a firm support behind the wedge pin area to the case to prevent the rod from just flexing when you hit with the sledge. That is what the 3/4” wide 1/8 thick angle iron piece does. Sits in there real nice. Design wise, the biggest change I had to make to the original tie rod end puller was to cut the legs off close to the threaded end and shift the whole body down about 3/16” then re-weld. This is due to the fact that the wedge pin sit below the centerline of the shift rod by about that much. Your threaded pusher bolt has to be in-line with wedge bolt or you risk bending, well actually, snapping it off. You will be applying considerable compression on that little M6 threaded pin.The 1/4 hole in the end of the pusher bolt makes sure the pin end stays straight and engaged. Now the real test is to try it on fresh untouched pin in another housing. This test pin was never re-inserted with the same pressure as it had from the factory. At least there was zero, and I mean zero signs of rust or pitting, or roughness on the pin. Being bathed in oil its whole lift kept this one clean. If you have a wet rusty one, you’re in for a fight. Heat, penetrating oil, time, the usual.... I still think the “best” approach is to use the pin punch (1/4” socket extension) from outside the case through a hole. Easy on a trans with the reverse lockout, but you’d have to make a hole in the same spot for the earlier ones. I don’t think this such a big deal. We have the exact location from any trans with the reverse lockout, and making NPT threads and plugging it is pretty benign. 1/4 or 3/8 NPT is a plenty big hole. Or you spend a day or two making a custom puller. Your choice.

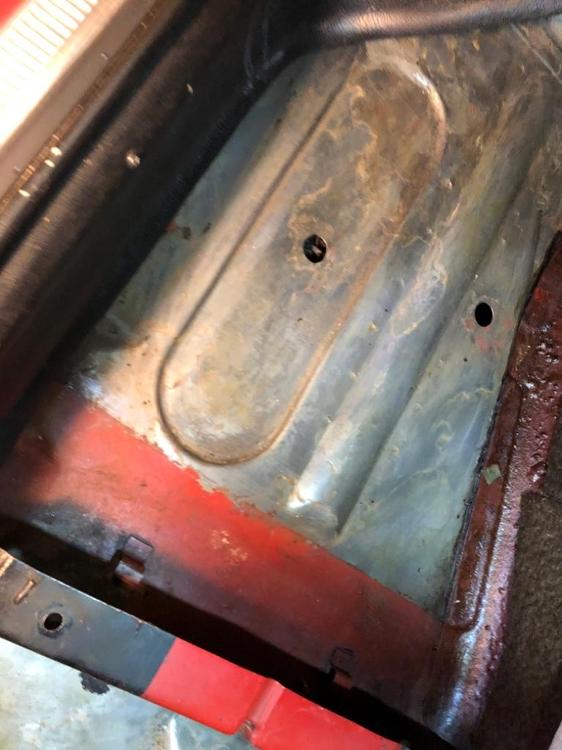
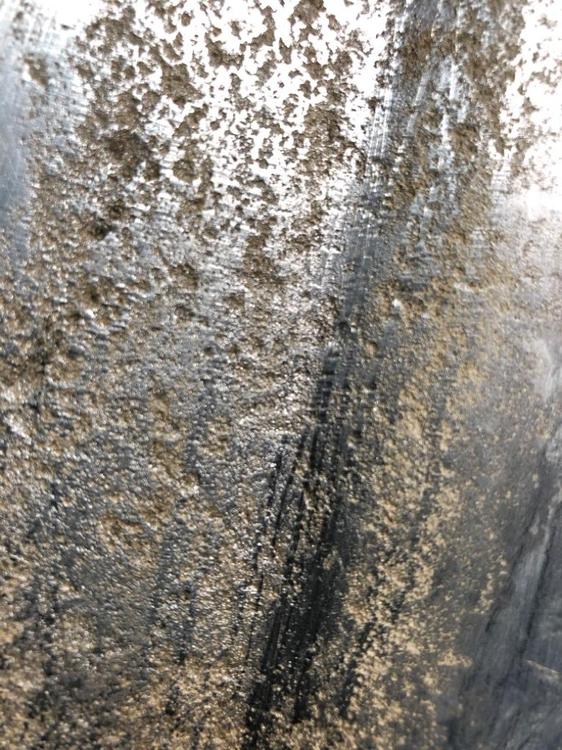
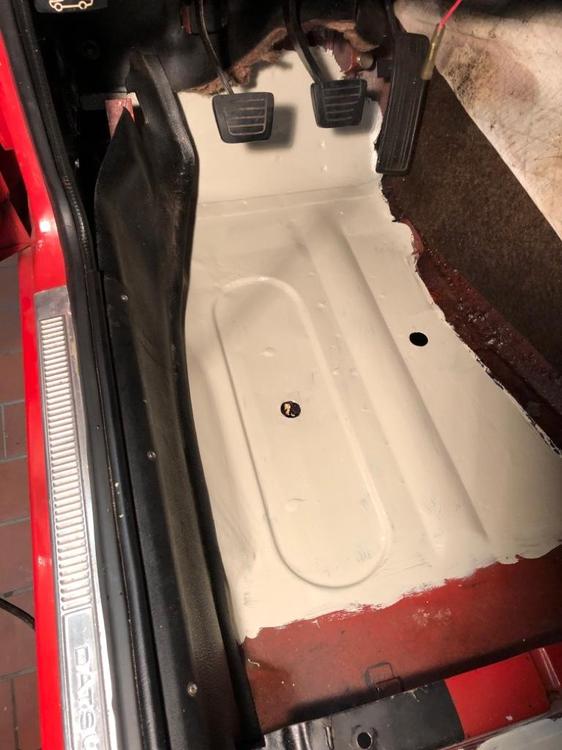
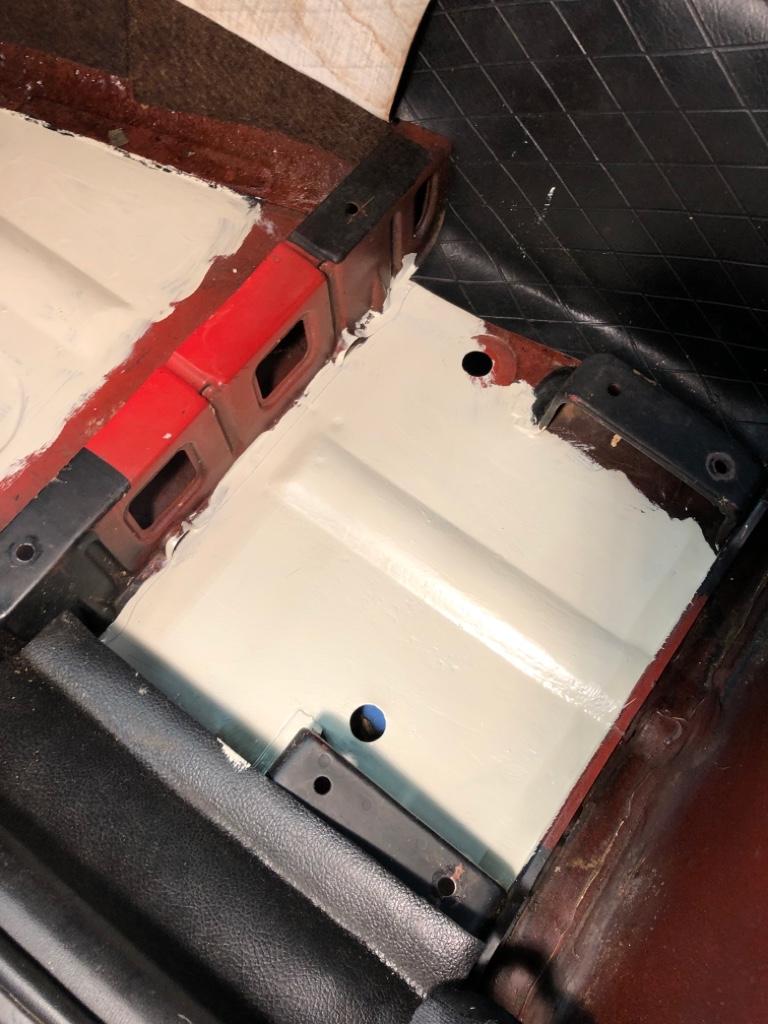
 1 point1 pointI have used phosphoric acid based rust removers and metal preps a lot and although for the most part they do the job well it's the iron phosphate they leave behind that always causes problems for me. Even when I have washed off the product while it was it wet then washed with detergent, I've even tried to neutralizes it with a baking soda paste and scrubbed into the metal I still end up with white powder bleeding through the paint. In fact the only success story I can claim with using phosphoric acid is by sanding the metal down until all of the iron phosphate is removed before painting, that works. So I have done a lot of reading today on citric acid and it seems that after de-rusting with citric acid and washing, the metal is ready for primer immediately. One less step and cheaper? Considering agricultural grade citric acid is about $2 per pound it's certainly worth a bit of experimenting with xanthan gum and sawdust to see if I can come up with a quick and easy way to deal with rust on vertical surfaces or hard to reach corners. I'll give it a try and see what happens.1 point1 pointthe scootershop is in Germany ...... ?, my results with rostdelete are better than every other possebility to rmove the rost without dird everywhere in the car ... look at my foors

 1 point1 pointWhat's the history of the motor? A lot of miles or pretty fresh rebuild? Does it smoke on start-up? You like driving it or working on it? It may be time to freshen it up but that's what I always do, get it roadworthy, dependable. I'd rather work on mine anyway. I guess it's time to buy another one instead of talking other people into working on theirs.1 point1 pointdon't pull the head off unless its a problem. If you suspect a issue with the head gasket, start with checking for exhaust gases/oil in the radiator, and oil in the pan. If those are ok then leave the head alone. Typically I would expect an exhaust leak to present as a noise, and intake would be hard to notice unless it was pretty bad. You can smoke out intake leaks with a cigar and a hose after blocking the TB with a cup. IF there is a manifold leak its likely the exhaust on the back of the head. That is were one of the bolts typically breaks off, leaving #6 with just one bolt holding the manifold up tight to the head. After a while the hot exhaust will eat up the gasket and you will get a loud "tick" sound. You can find it easy with a 1/2" rubber hose hold one end to your ear, move the other end around the exhaust and listen for the tick. White smoke can be just something burning off, have you sprayed any chemicals around the engine? Here are a few things I like to do just to base line an engine, after its warmed up take a vacuum reading note the vacuum numbers as well as any erratic movement of the needle, do a compression test write the numbers down for future reference. Put in new plugs, drive it 10 miles pull them and take pictures for future reference.1 point1 pointCheck chain slack. You may move the sprocket to the next hole or replace all that while you're at it. New head bolts too. Hopefully you won't snap one of the old ones. A lot more to say but I'm on a quick break now. Others will chime in. I'd get the tom monroe how to rebuild L motors book from Amazon. Best $20 you'll spend.1 pointAll of your testing (except for my other comments below) indicates that the #6 injector is not opening at idle. It might just be too sticky to open quickly enough for the very low idle pulse duration. There's not much to an injector, a spring to close it and a solenoid to open it. Carb cleaner can't fix rust or corrosion or baked on deposits. The injectors get really hot after the engine is shut off. You could swap injectors and see if the problem follows the injector. Probably should have done that the first time. On the other hand, doing a lot of work to try to fix a diagnostic test doesn't make much sense, if the goal is to drive the car. Most EFI cars have a "missy" kind of idle due to the way they open, in batch mode. I'd be happy with a smooth idle and well-running engine. Is the #6 plug the same color as the others? If it's not opening the plug will be whiter. And, on the other other hand - I think that the idle get smoother on the EFI engines when they are running rich. There might be enough residual fuel floating around that disconnecting an injector doesn't have an effect. At idle there's a lot of backflow in the manifold. Might be that the real problem is running rich at idle. Not #6.1 pointI'd go colourtune too. I'd guess you have an air leak at #6.1 pointalso a good time for one of those see thru color tune plugs.1 pointDid you notice the those side louvers are from the hood of a 280z? Keeping it all Nissan.1 point1 pointHi Guys: I've seen quite a few of these in new cars. When the Dealerships received the cars, the hubcaps, carpet, tool kit, outside rear view mirror, inside rear view mirror, booklets etc were in the rear deck area. Nissan had an extensive "Pre-Delivery Inspection" process during which the car was mechanically and physically checked over. In addition to preparing it for delivery to the Customer - or actually to be turned over from the Service Dept. to the Sales Dept. {then the Sales Dept sold and delivered the car} The Owners Manuals and Warranty Booklets along with other Paperwork such as the MSO went to the Title Clerk {of Office Manager} in the Dealerships. They in turn processed the MSO for State Title, filled out the Factory Warranty info to be sent to Nissan USA, and stamped the owners warranty info on the warranty cards. If they were really on top of things - they also recorded the VIN, Engine Serial Number and Key Codes for the new owner in the Warranty Booklet.. but sometimes that didn't get done before the customer that had been waiting for his/her Z wanted to take it... During PDI - all extraneous "trash"... boxes from the hub caps, the paper they were wrapped in, the vinyl sheets covering the door panels, wrappers from the seatbelts - - - and yes - - -these funny little inspection notes written in Japanese - and considered of no value - - went into the trash. The mechanics had to fill out a PDI Report - and one copy of that was supposed to go to the Customer, while other copies went to Nissan. Nissan paid the dealers for PDI services... I still have the Inspection sheet that came in my Blue 72 Z - but only because I took the car right off the truck - and did everything to it myself. Who would have ever thought back then that anyone would want to see any of that junk - - 98% of the Datsun 240Z's left their hub caps and stock wheels at the Dealership, and the Customers never saw them. For years we had large stacks of both stock wheels and hubcaps sitting around - and after a time we just threw most of them in the dumpster. There just wasn't enough room to keep them all. If you bought your Snow Tires from the Dealer instead of a Tire Shop - we'd throw in a set of stock wheels to mount them on ;-) The Parts Dept sold a few over the counter for customers that wanted them for snow tires as well - - usually $5.00 each, $10.00 if you wanted both stock wheels and hub caps. For years and years and years no one wanted "D" hubcaps, they were ugly, and stock 72/73 hub caps were just passable... Moon Dishes were the only way to go if you didn't have "MAG's".. On the Inspection sheet - after all these years one can just barely read what is left of the ink from the "carbon copy"... it wasn't too bright to begin with. FWIW, Carl B.
 1 point


Important Information
By using this site, you agree to our Privacy Policy and Guidelines. We have placed cookies on your device to help make this website better. You can adjust your cookie settings, otherwise we'll assume you're okay to continue.