Leaderboard
-

240260280
Free Member7Points4,442Posts -
grannyknot
Free Member6Points5,158Posts -

Dave WM
Free Member5Points3,591Posts -
Jeff G 78
Free Member5Points3,007Posts


Popular Content
Showing content with the highest reputation on 09/22/2019 in all areas
-
6 pointsI haven't seen that one before, in the last photo, who's that old man driving it, looks like my Dad.6 points
-
4 pointsYep......all car nuts. This car will be my favorite yet of many, many great builds!


 4 points
 -
3 pointsSo I fired this thing up and got a good test drive in our fine Washington rain today. All in all I'm pretty happy with it. The .080 head mod makes a pretty noticable difference. I must say however, that my original engine was pretty worn out, so any improvement must seem major to me. I'm running the same transmission and differential that came out of the '82 that the engine came from. I had removed the dash weeks ago to replace the heater hoses through the firewall, and in replacing the dash, I must've gone and knocked my temp gauge in just the right way to make it peg all the way to the top indicating total meltdown in the dash. But the meat thermometer in the radiator indicates 180deg after a 20 min drive. It feels normal if you touch the valve cover and I can see circulation too so I feel pretty good about it. The gauge read high ever since I've owned the car. The only leak is a small drip from the heater hose coupler that runs along the passenger side of the engine. Easy fix. I ended up running the stock flywheel, and MSA's headers and 2 1/2" exhaust. Drives and sounds good. So I guess this mod works well for anyone looking to do it. Now I can tear down the original motor haha. Edit: I didn't notice any pre ignition detonation. I'll be keeping an ear out as my drives get longer. With 3k RPM cruising and 4k rpm shits I hope I don't get any. I have a tank of premium fuel in right now.3 points
-
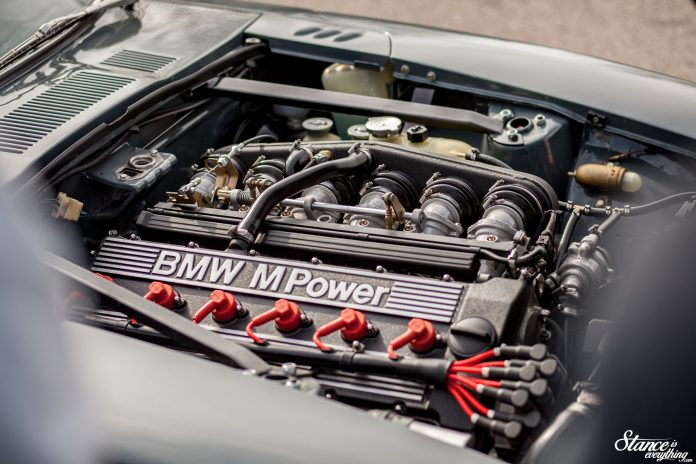
3 points@grannyknot https://www.stanceiseverything.com/2018/05/motor-monday-m6-power-in-a-datsun/
 3 points
 -
3 pointsWhen is that? I tried to google search. There is still a lot of work to go. I have this vision for the car and every component has to be just right so no matter how long it takes.. Ideally, by SEMA in November 2021. The body is coming along very well and he has bonded that trim strip to the bumper so he can shave it down to the exact profile of the car. That strip, the extended rear bumper and the side trim are what always bothered me on these cars and they really look so much better without. The car will be how Nissan could have hit a home run on the Z31. The long block is now assembled and it's spectacular. This is 2 years in the making and the end result is exactly as I would have hoped. Almost a shame to cover this stuff up. They do make clear cam gear covers though.. This engine should make around 400hp at the flywheel with a 10-11k redline. The build was done so it would have a really usable torque curve. With ITB's, no air filters and a custom built exhaust, it should sound intoxicating more like an exotic or F1 type note. Last picture is the best though with 3 generations of Miller boys going to see the engine together.3 points
-
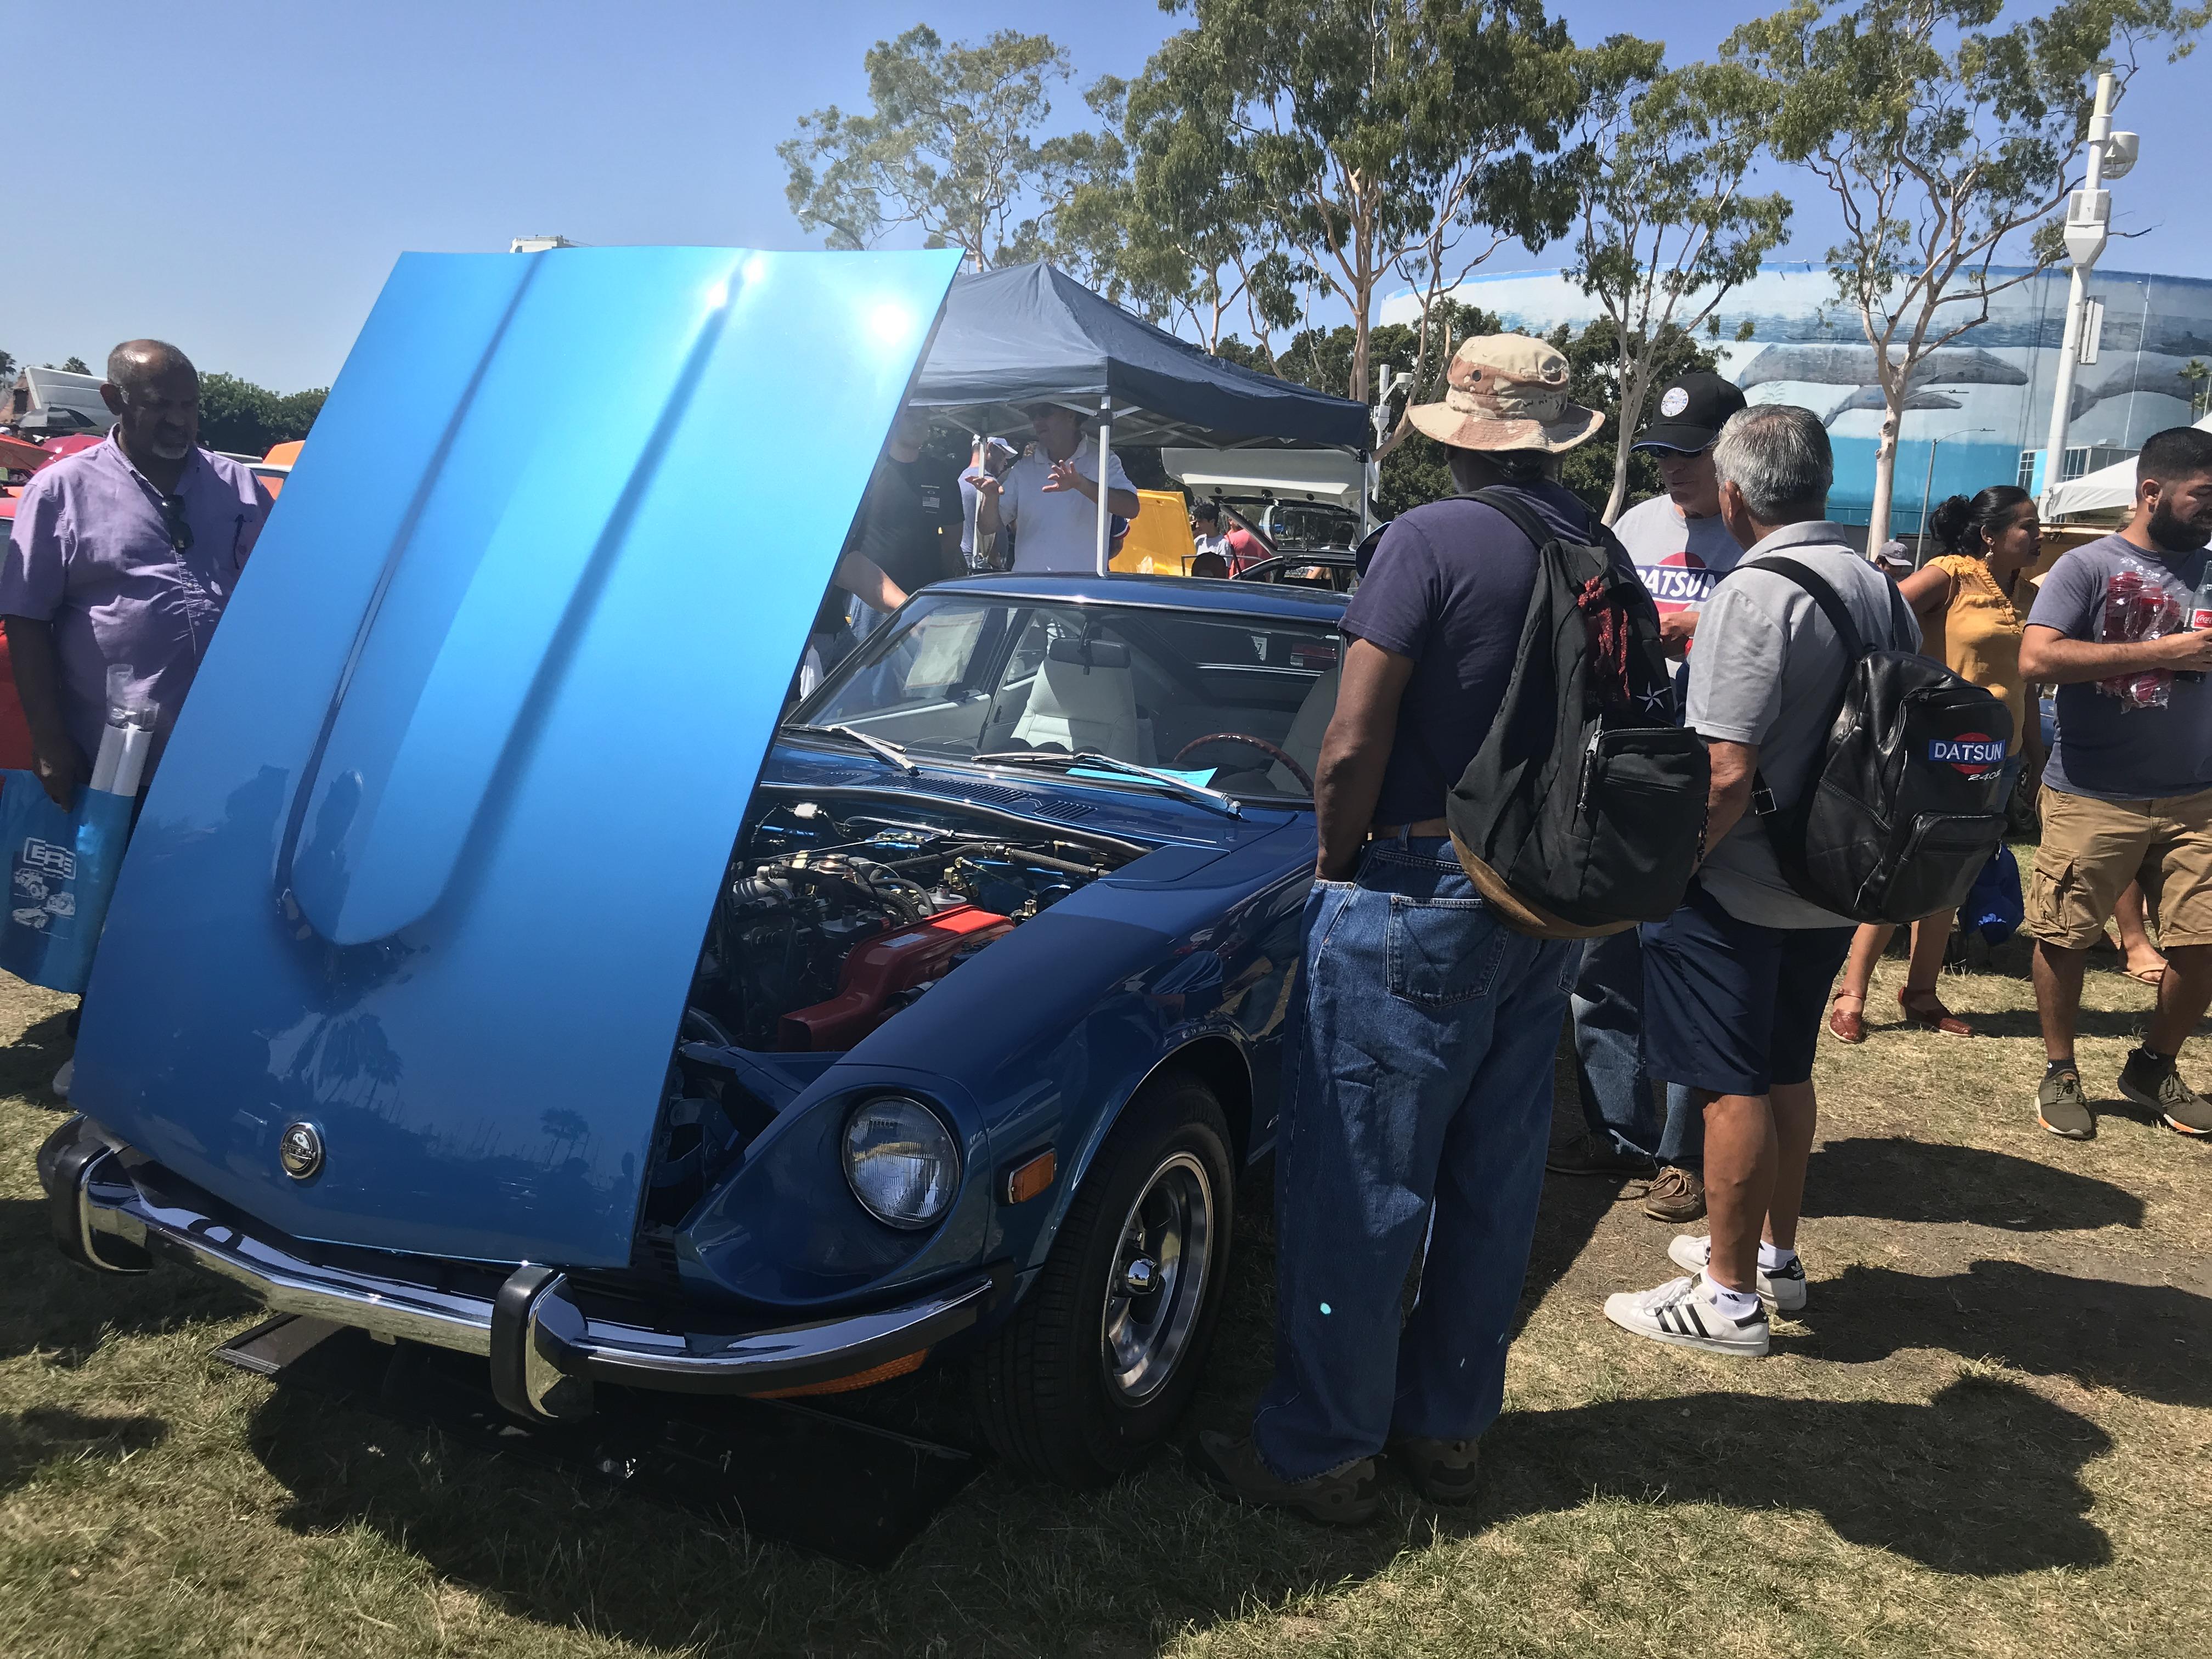
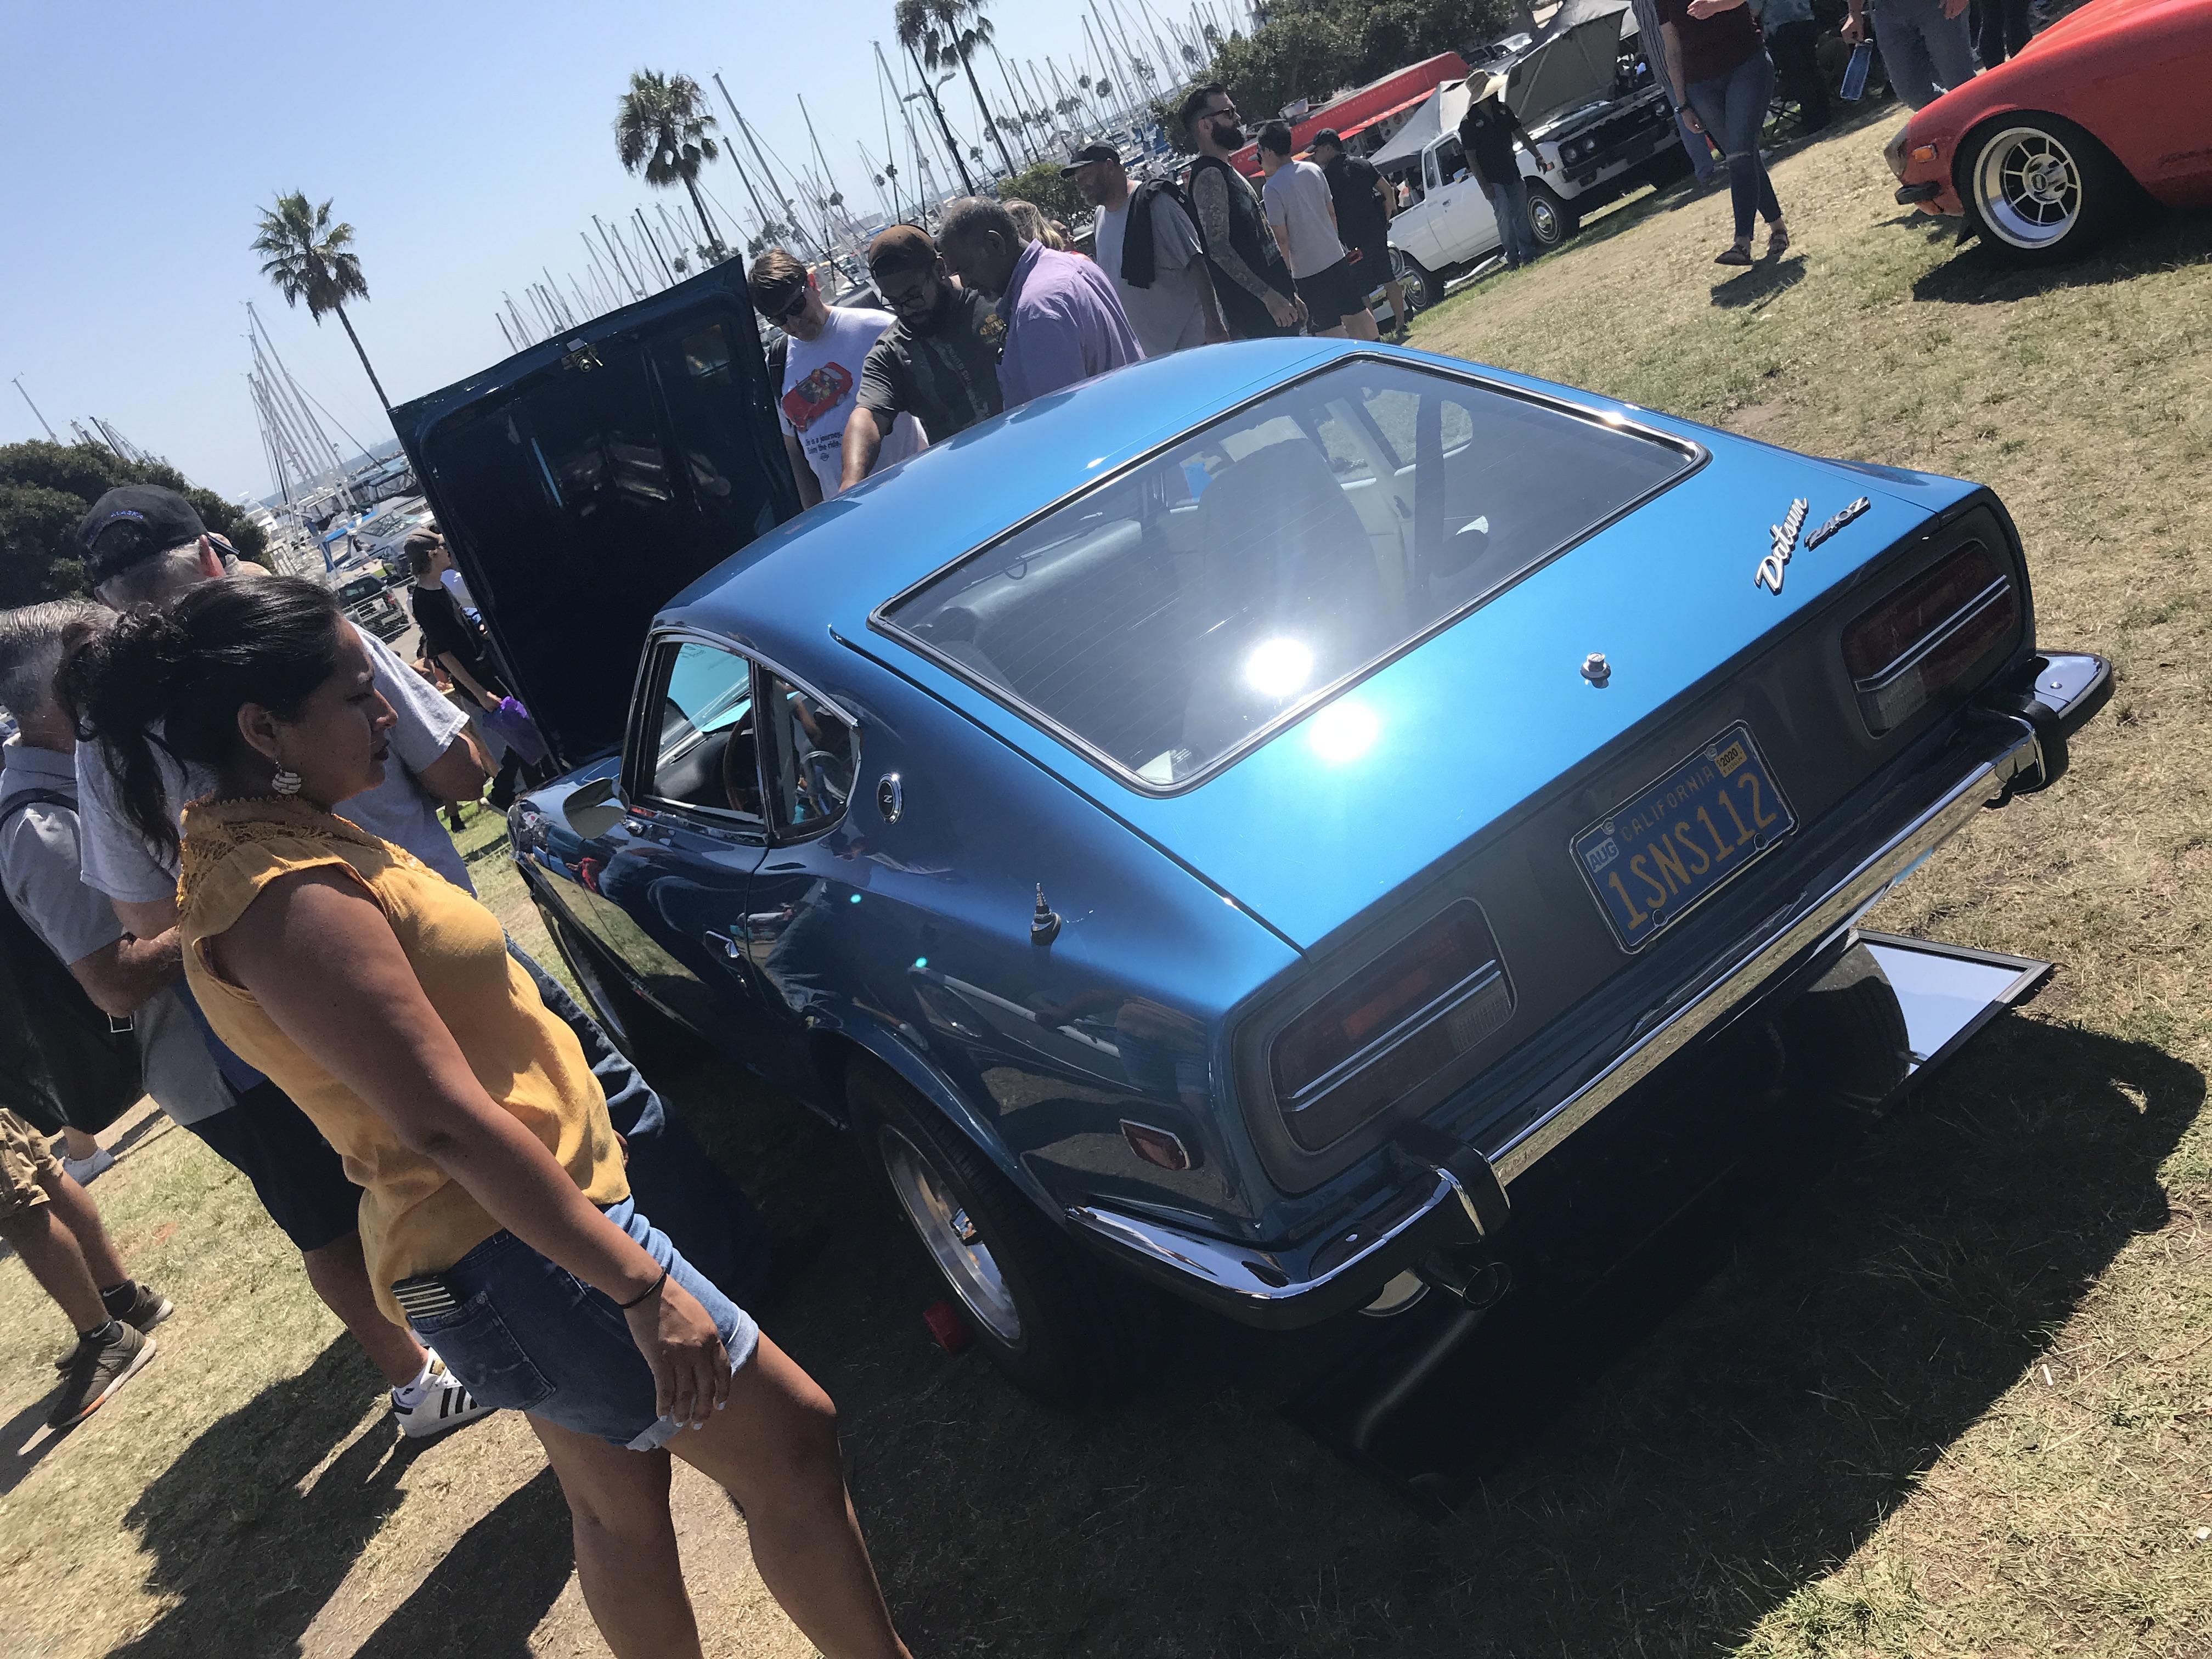
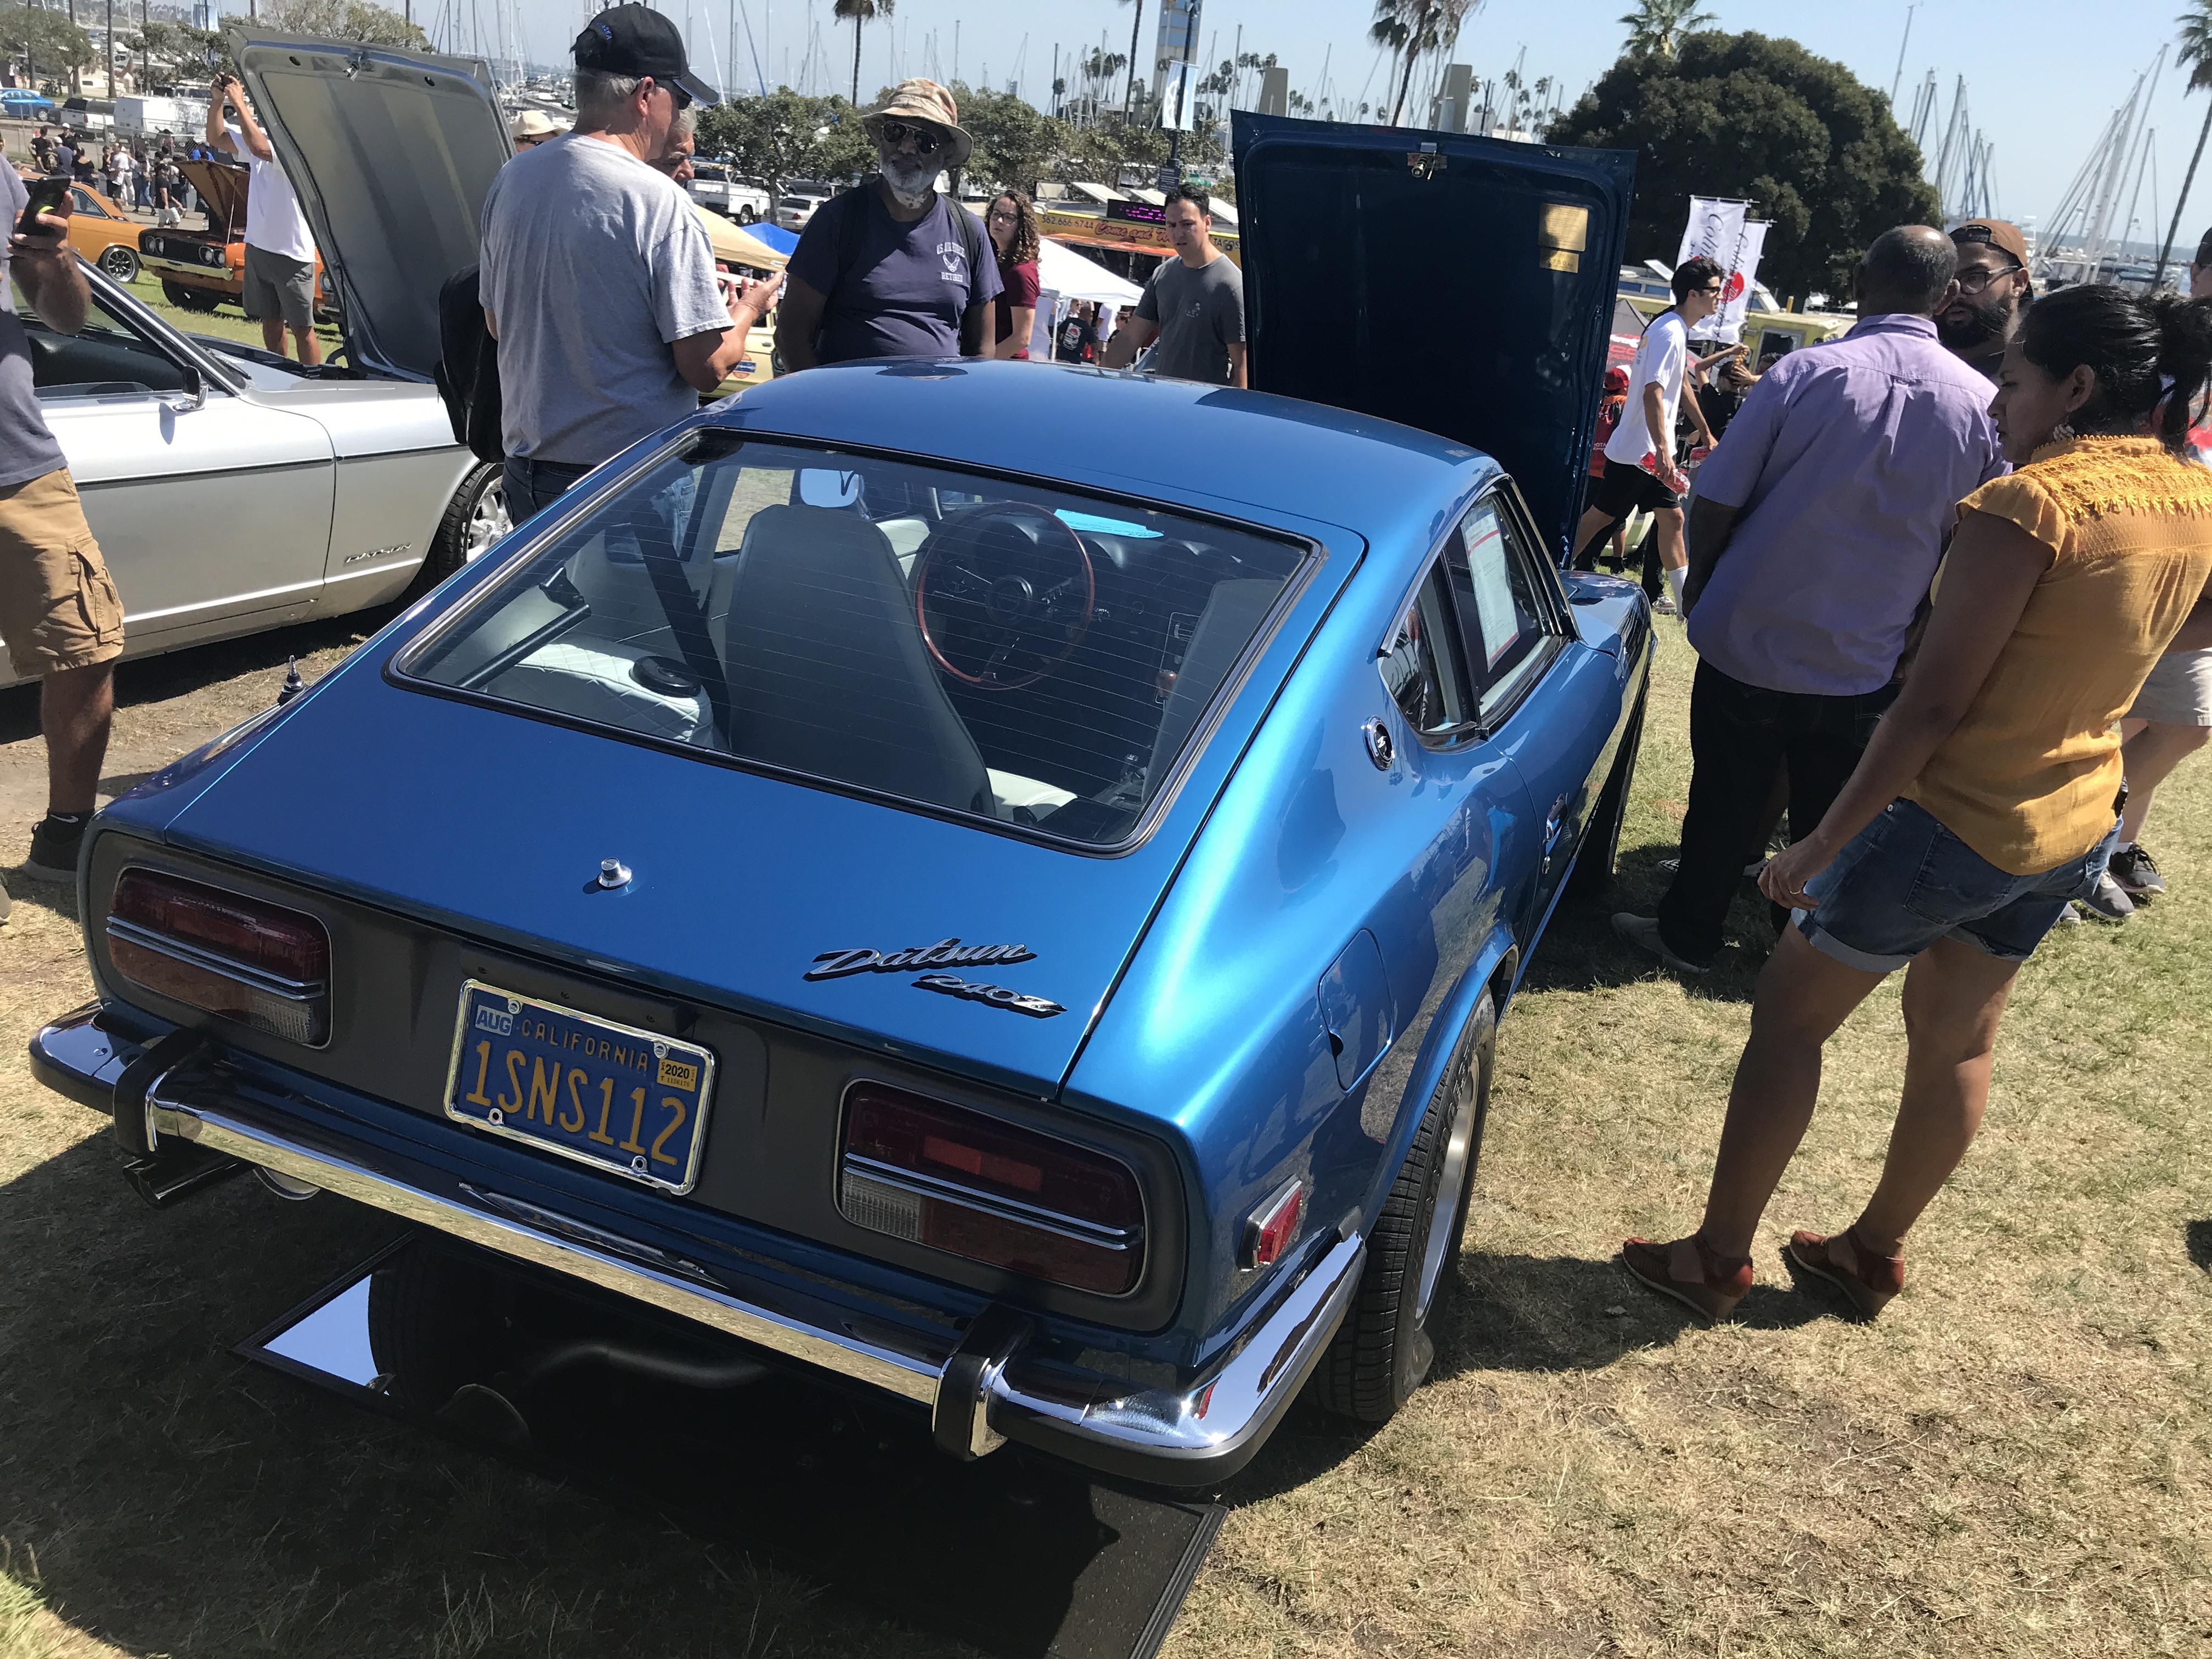
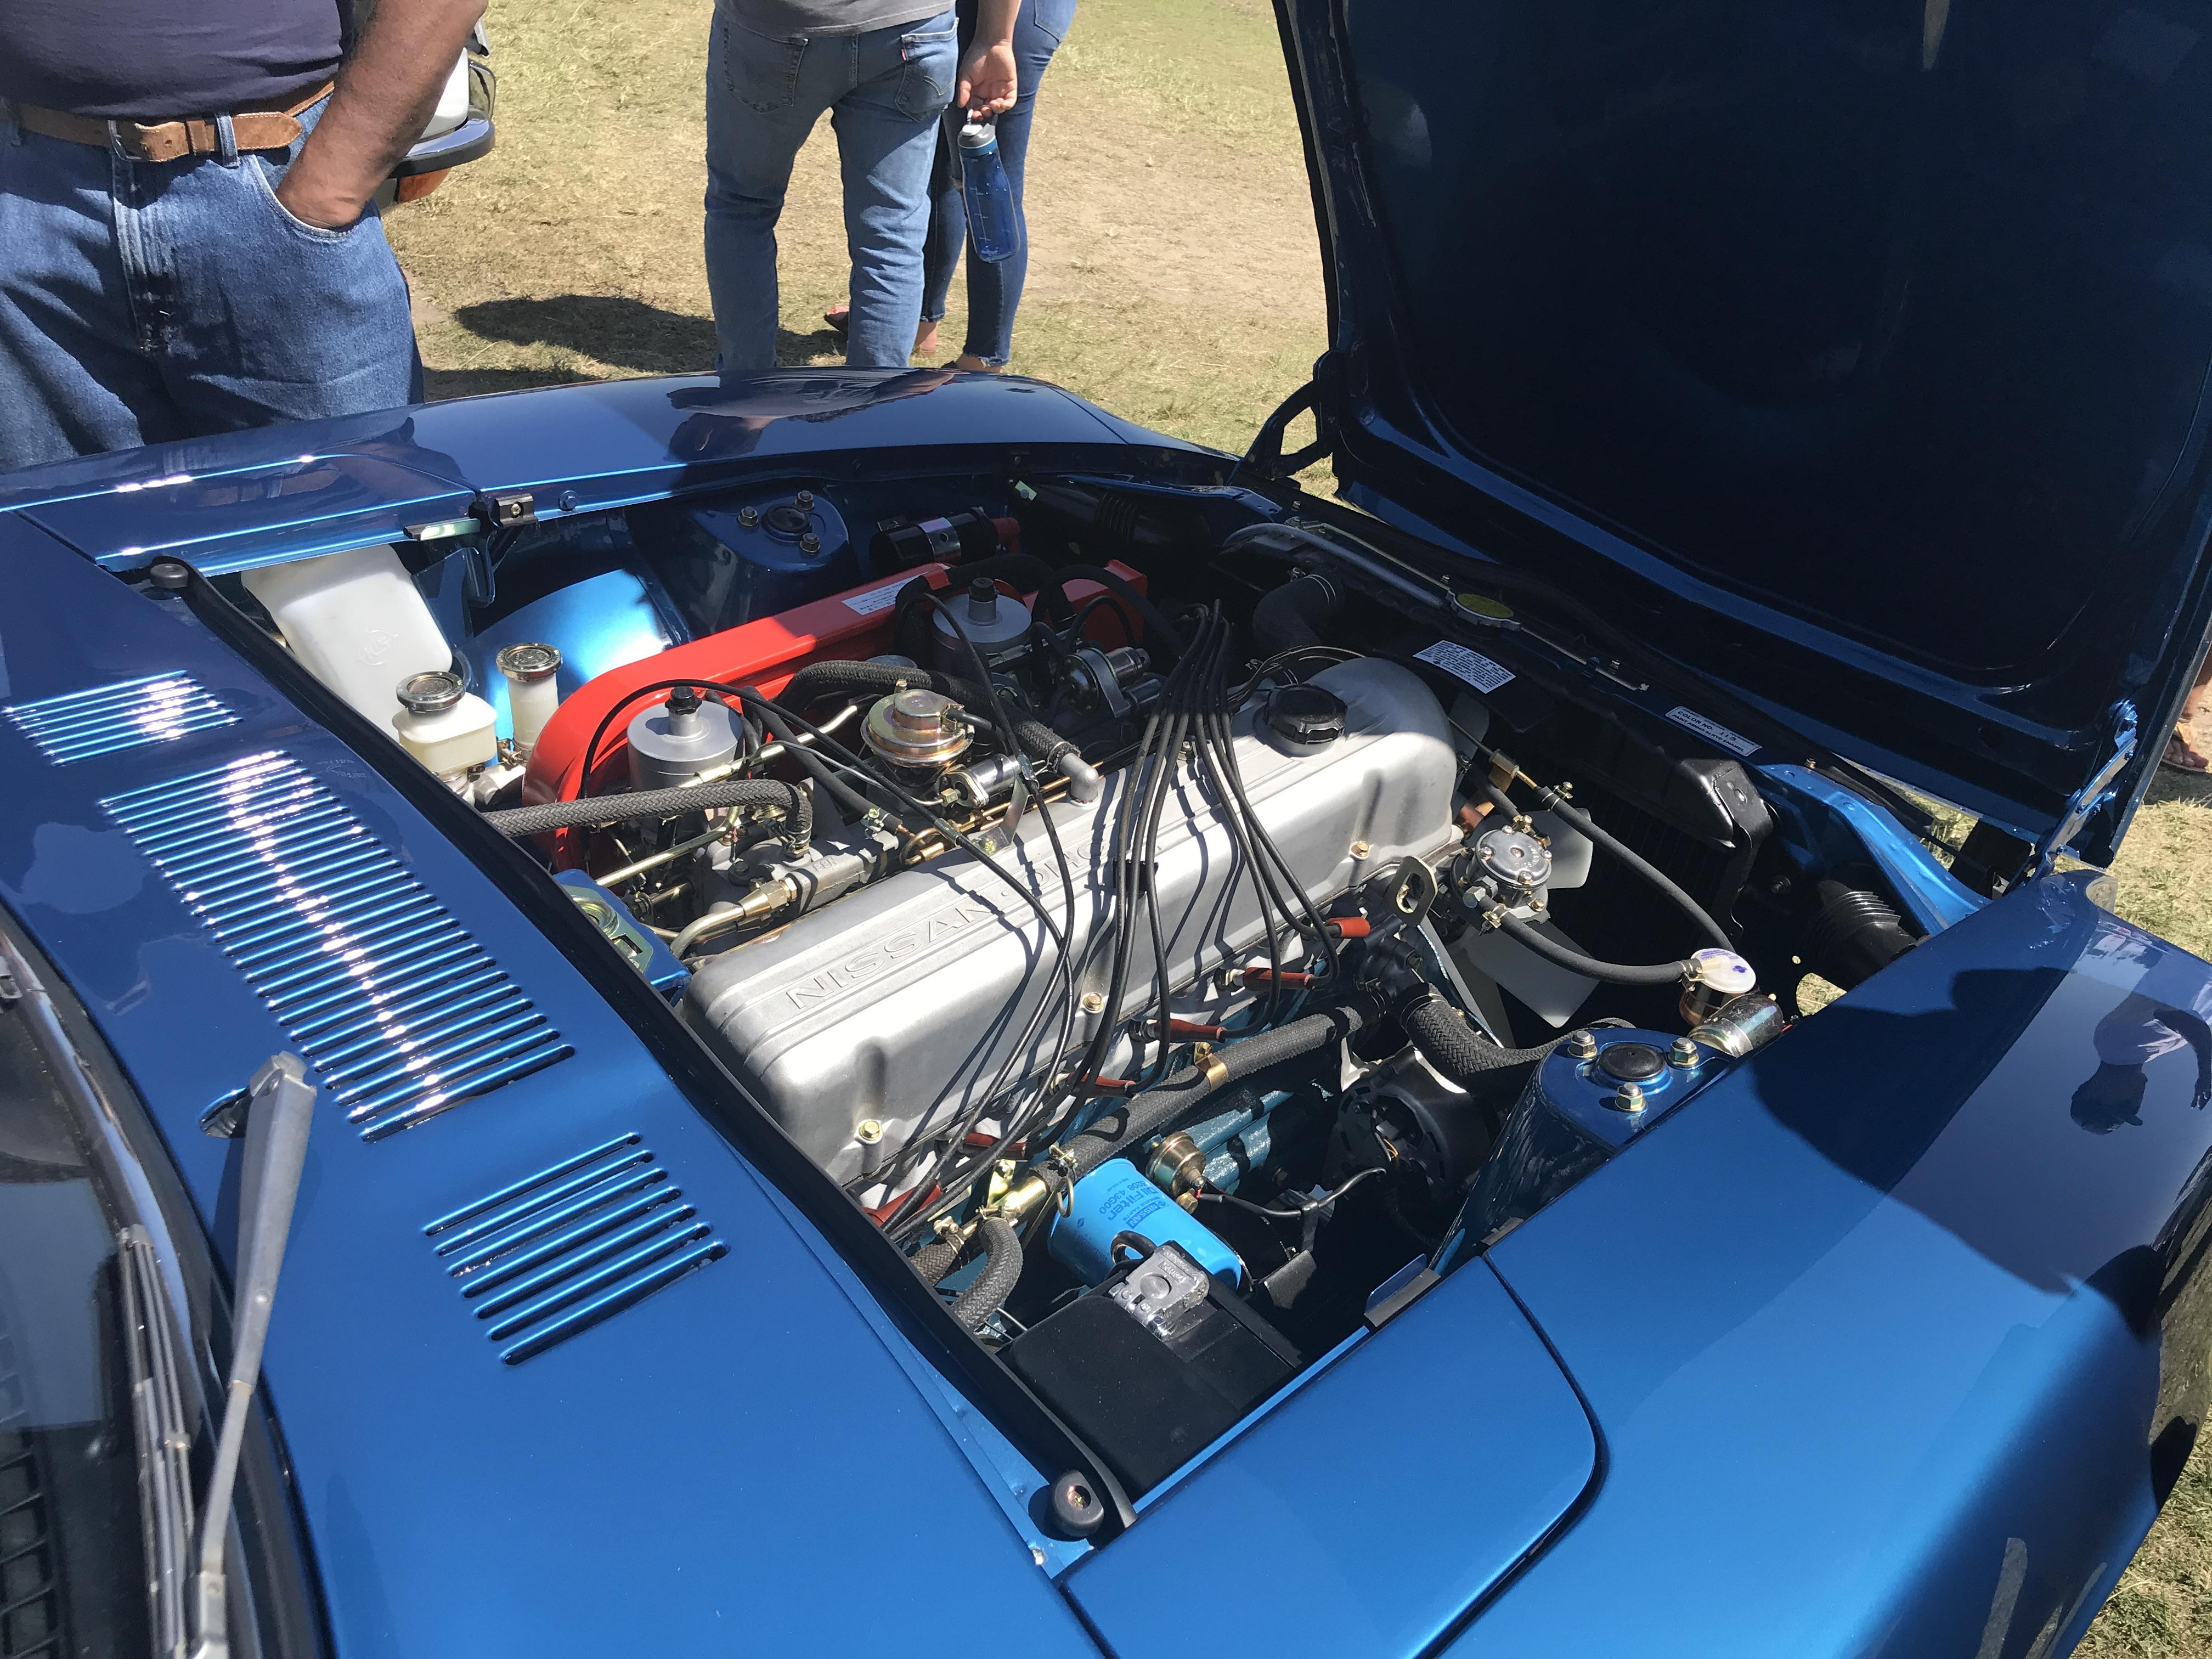
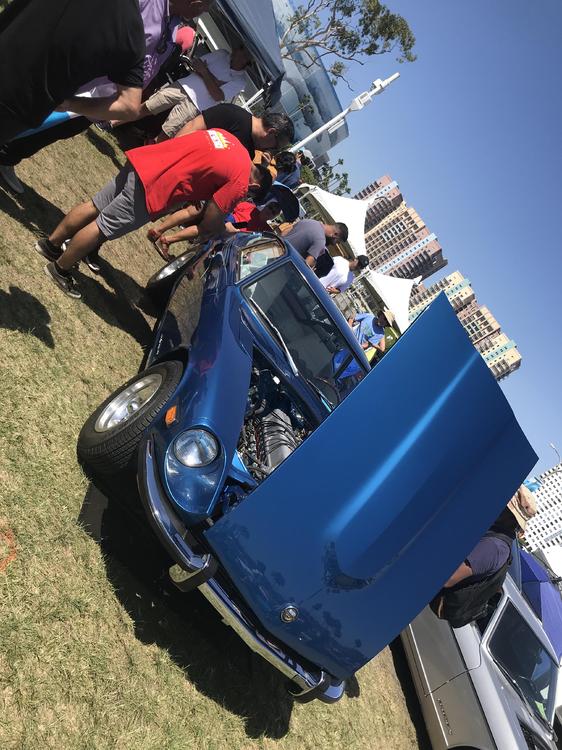
3 pointsHad the pleasure of meeting jayhawk today at the JCCS and saw the finished Z car.... motorman7 did an incredible job restoring this vehicle. This car was hands down the best OE restoration vehicle at the entire show. Every detail was nailed spot on! Here's a few pics that don't even come close to doing justice to this incredible restoration. If any forum members get a chance to see this car in person you are in for a real treat. This is a museum quality vehicle. Kudos to you both and to your body/paint guy.... amazing work!


 3 points
 -
3 pointsThat is right about where the engine gave out. was tough making that multi point turn to get down. I would have liked to try it again with the filter off, but by then my nerves were shot. The trip was great, sleep in car, drive if not sleeping. Stopped at Walmart/McD for food and drink and clean up. Had a great shot of a Cricket pumping crude, next to a cow, next to a solar panel, next to a giant electric turbine wind mill. So you get your greenhouse gas (cow fart), carbon fossil fuels, off set by carbon credits for wind and solar. all in one little square of land. I cant imagine trying to do his taxes. The windmills in Kansas were a hoot. I drove thru some little hipster town just outside of the pikes peak park. Best part was just being on the road. No phones, no emails, no work issues, just me the z and the road. felt like Kowalaski, just needed Super soul to keep me company.3 points
-
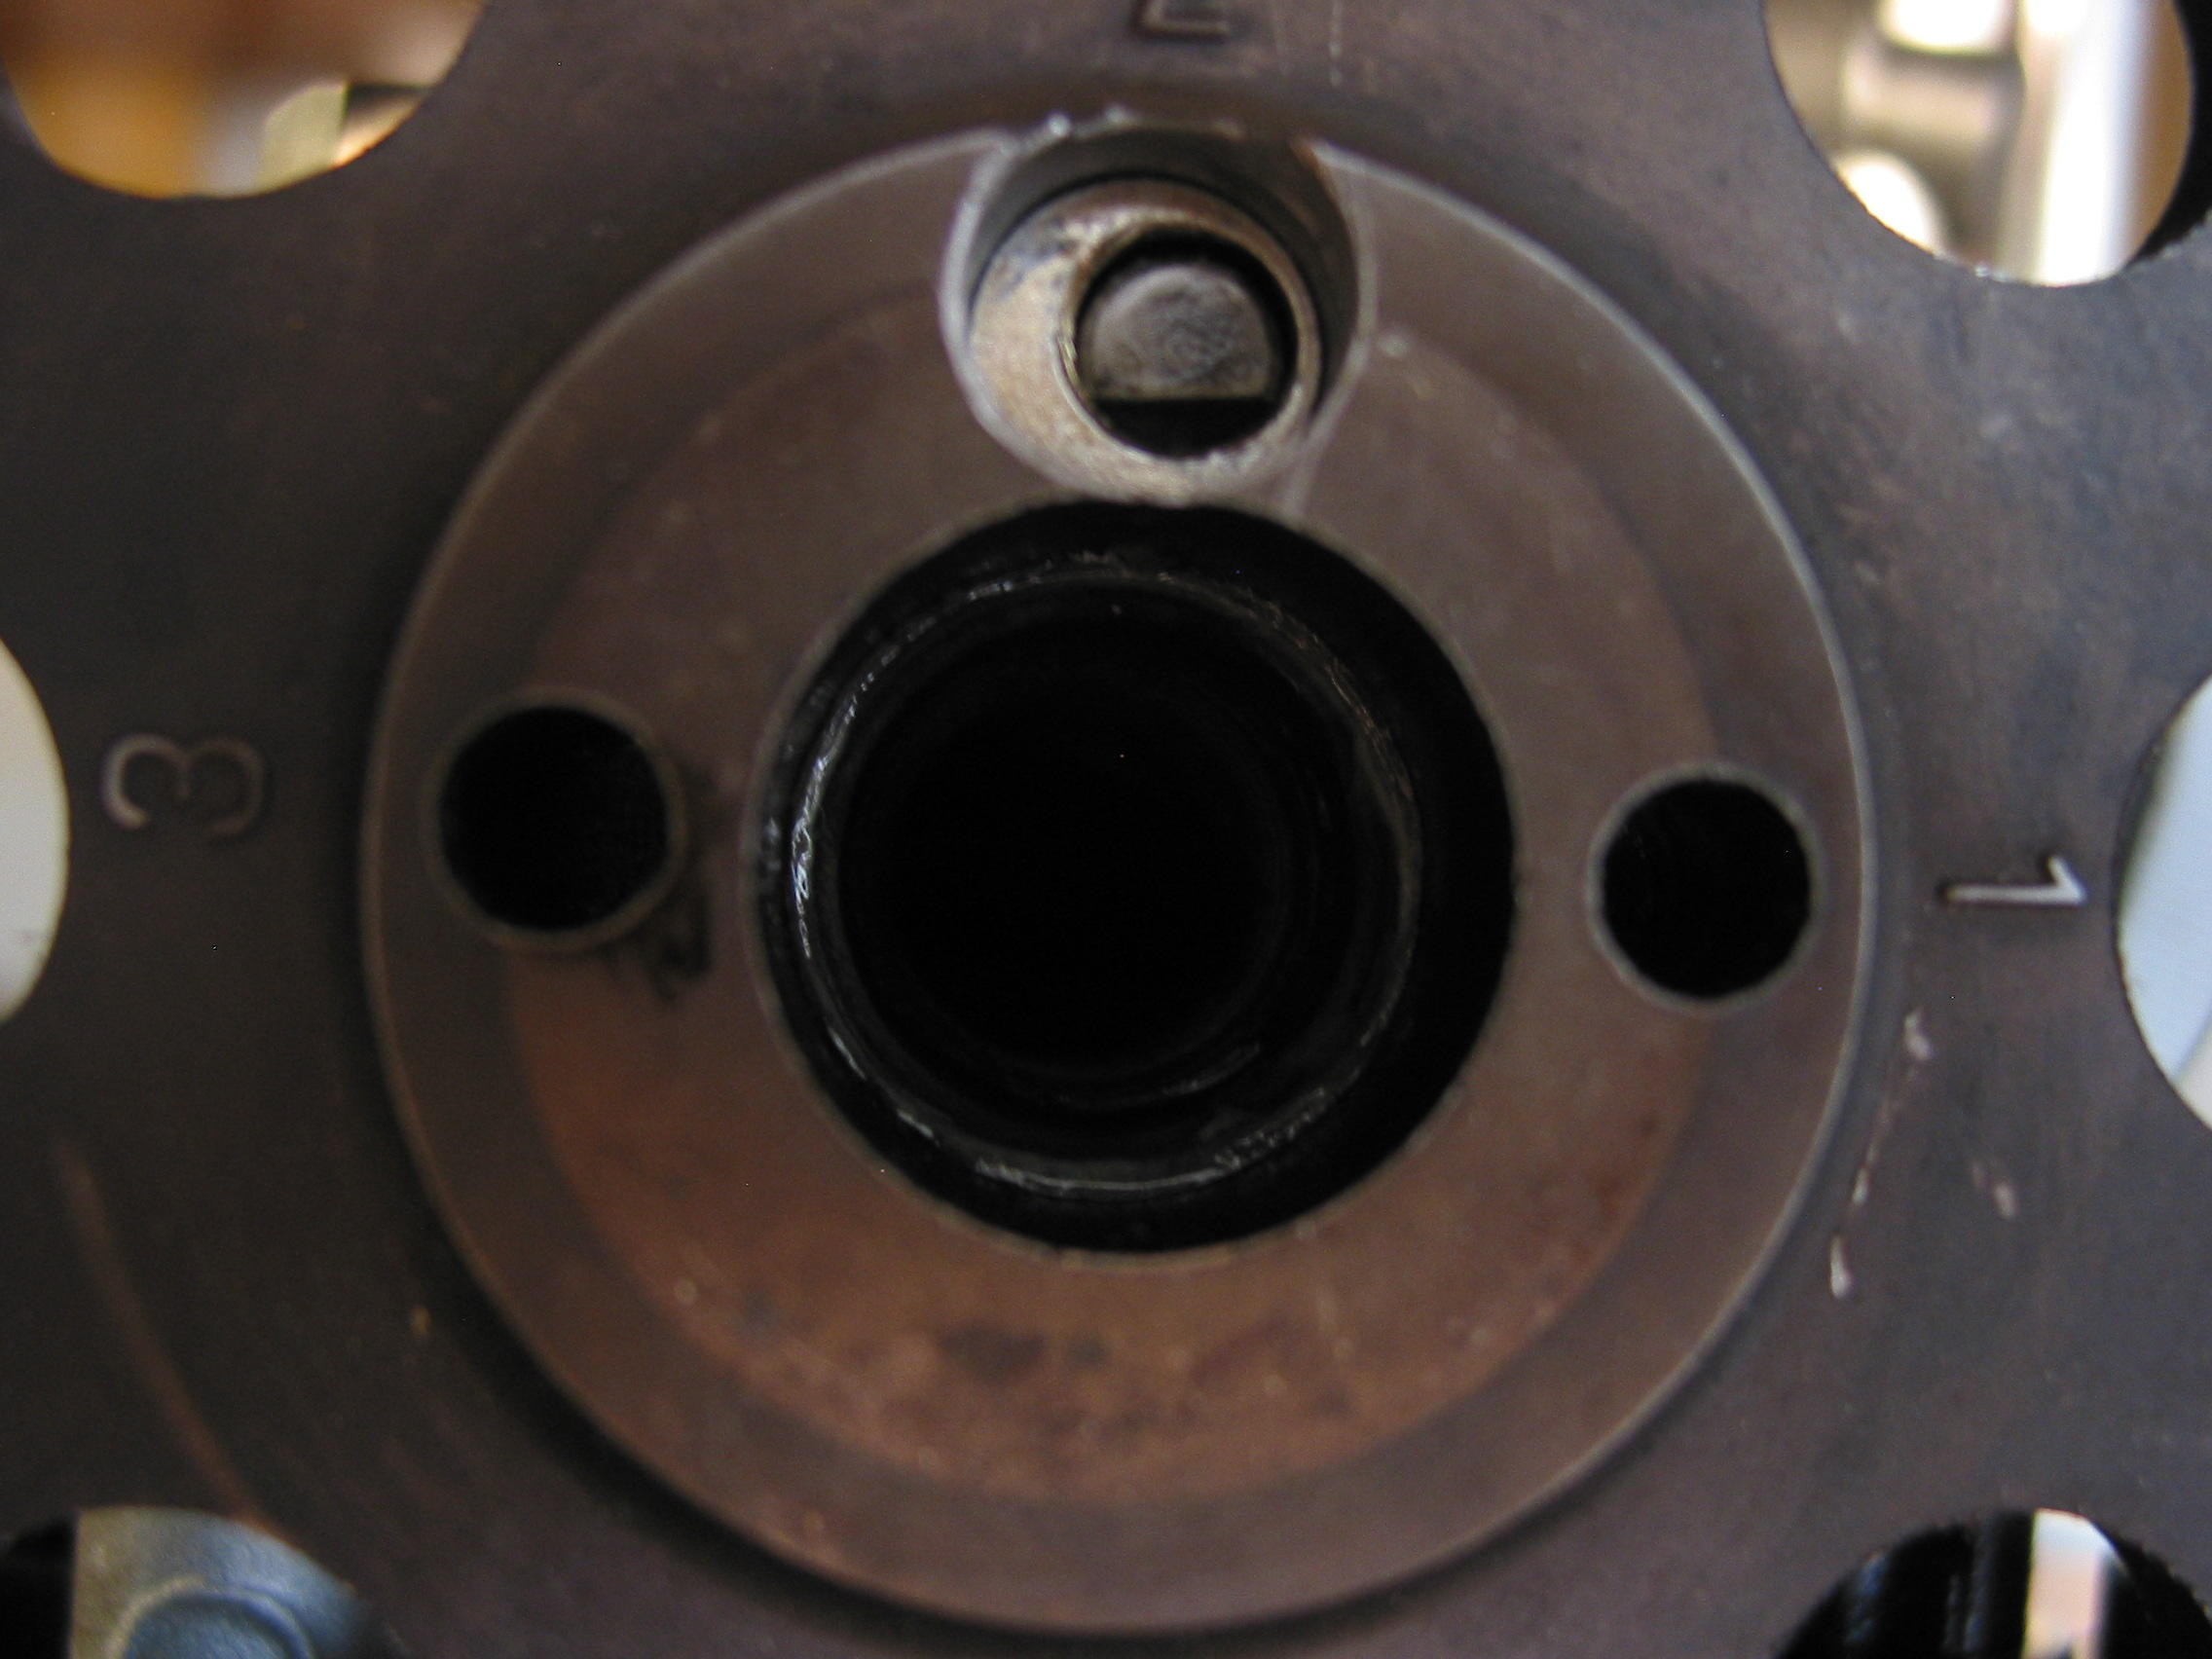
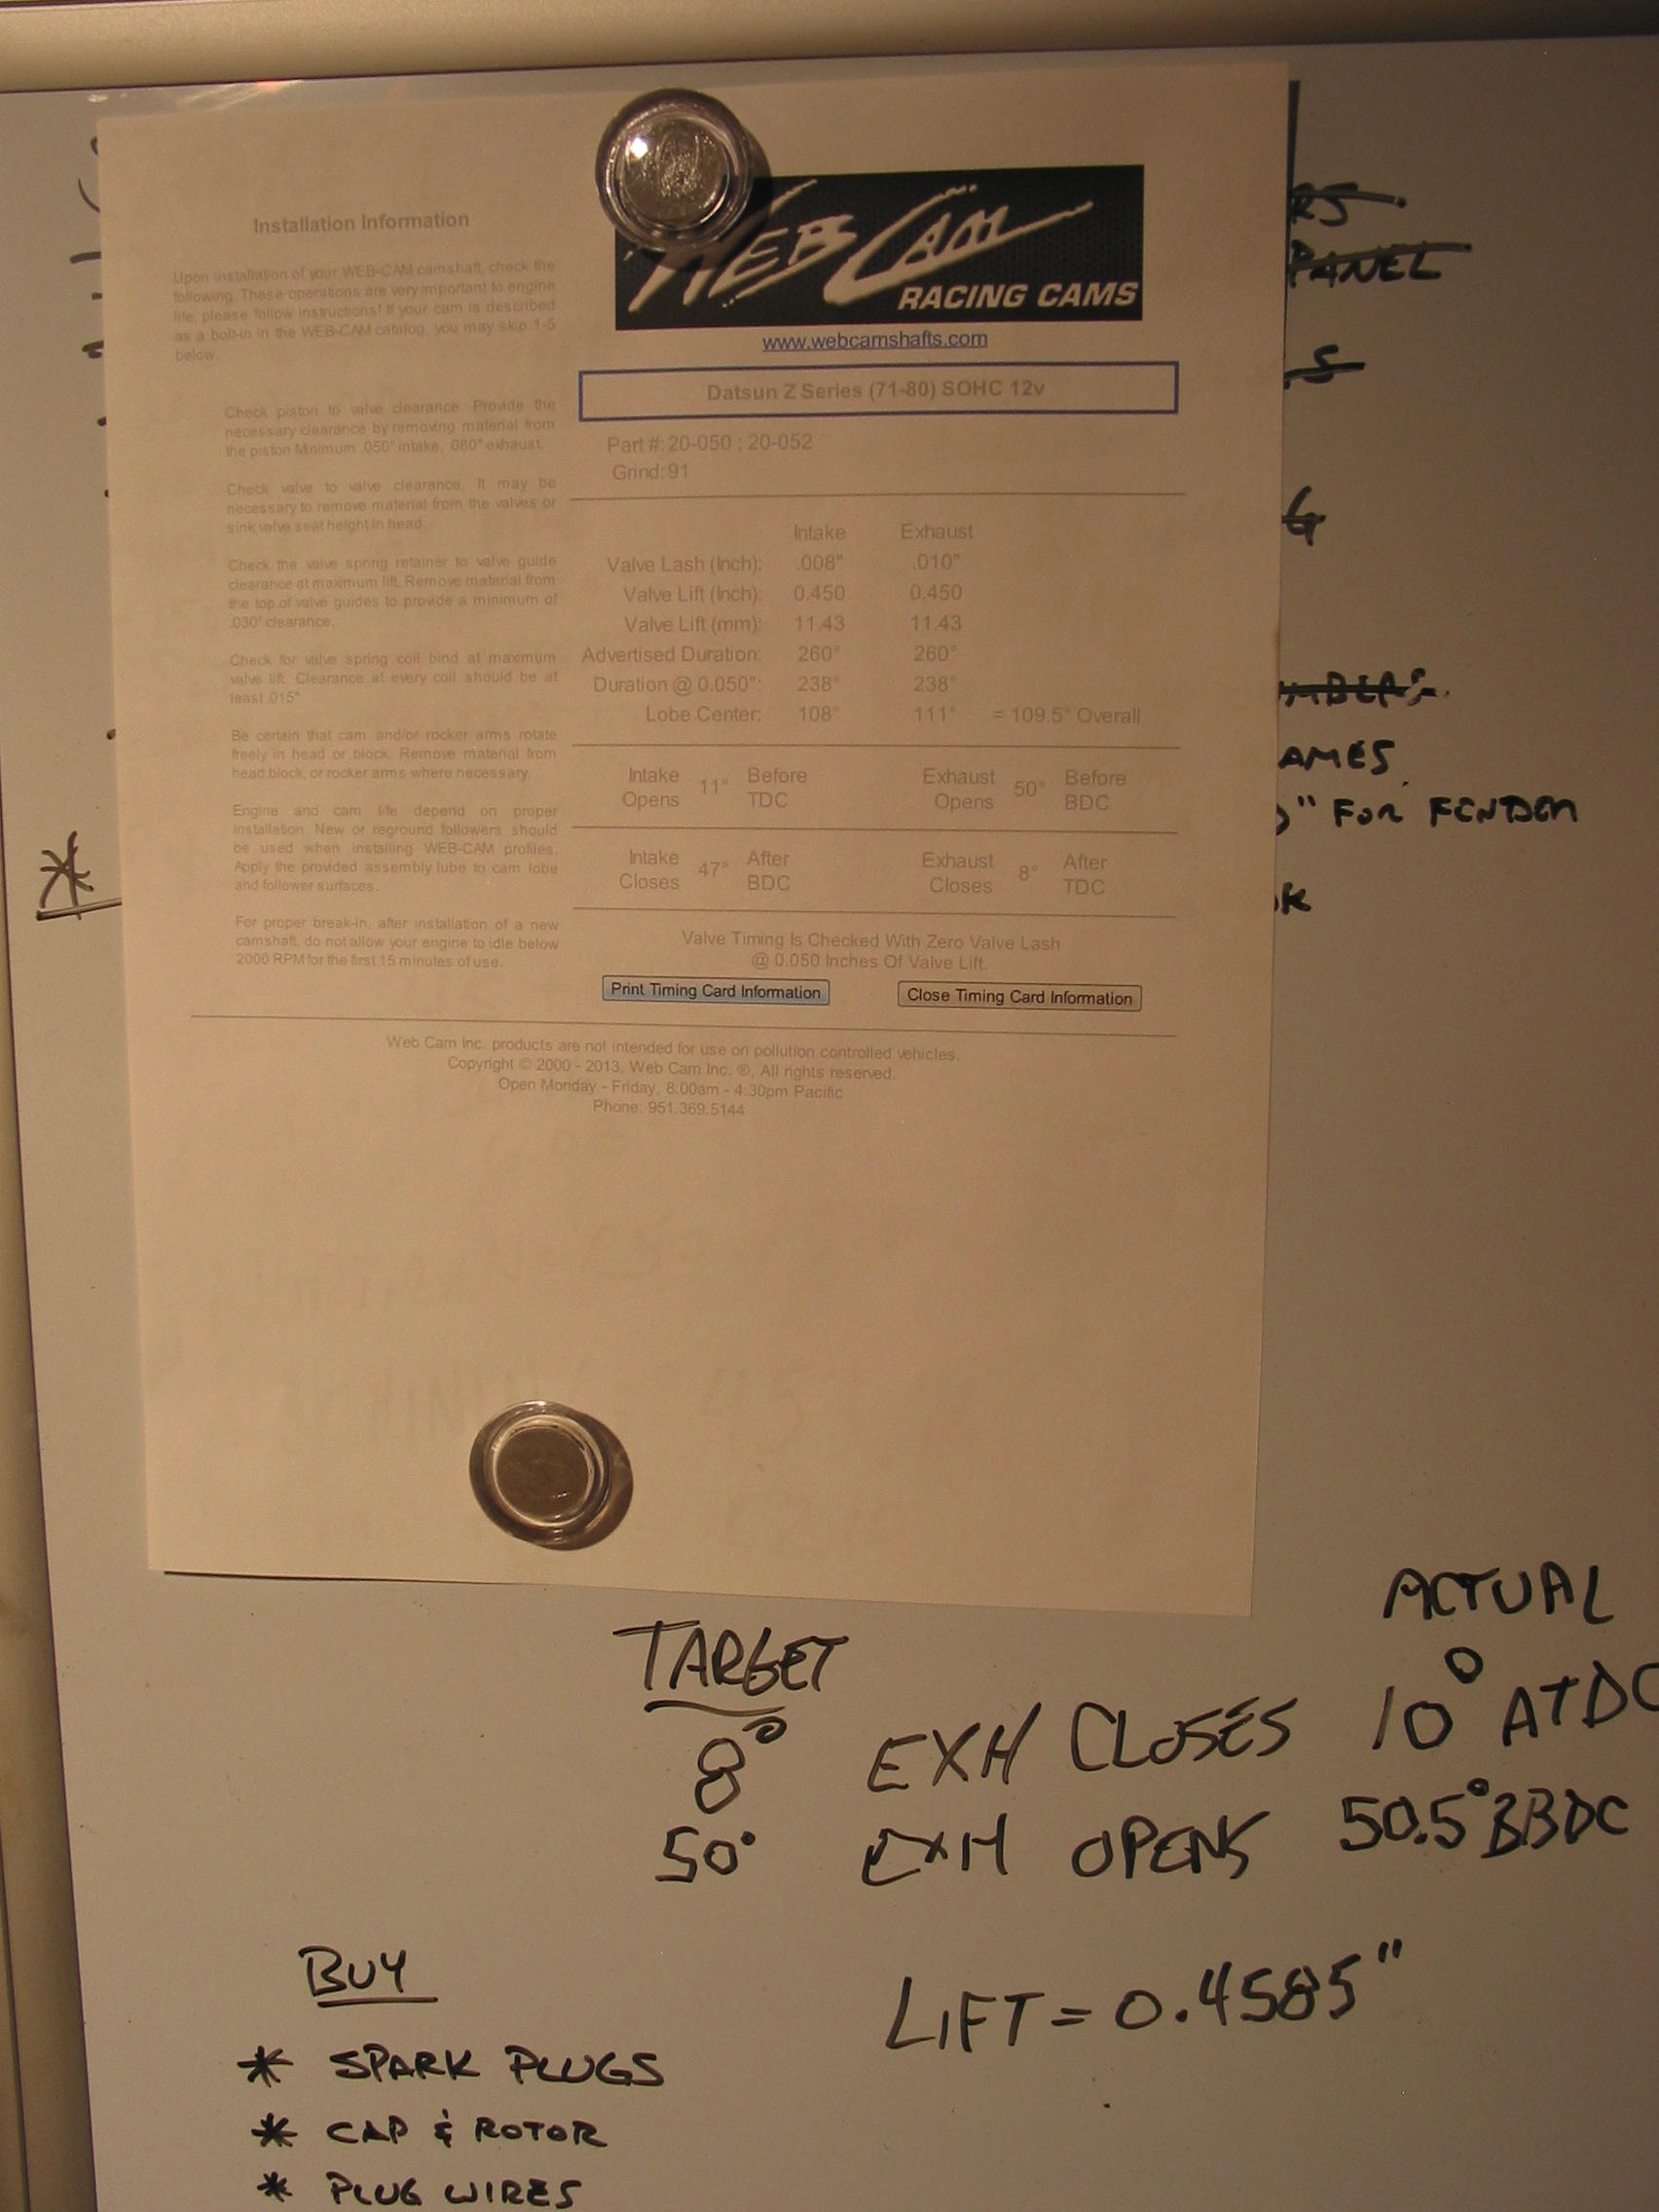
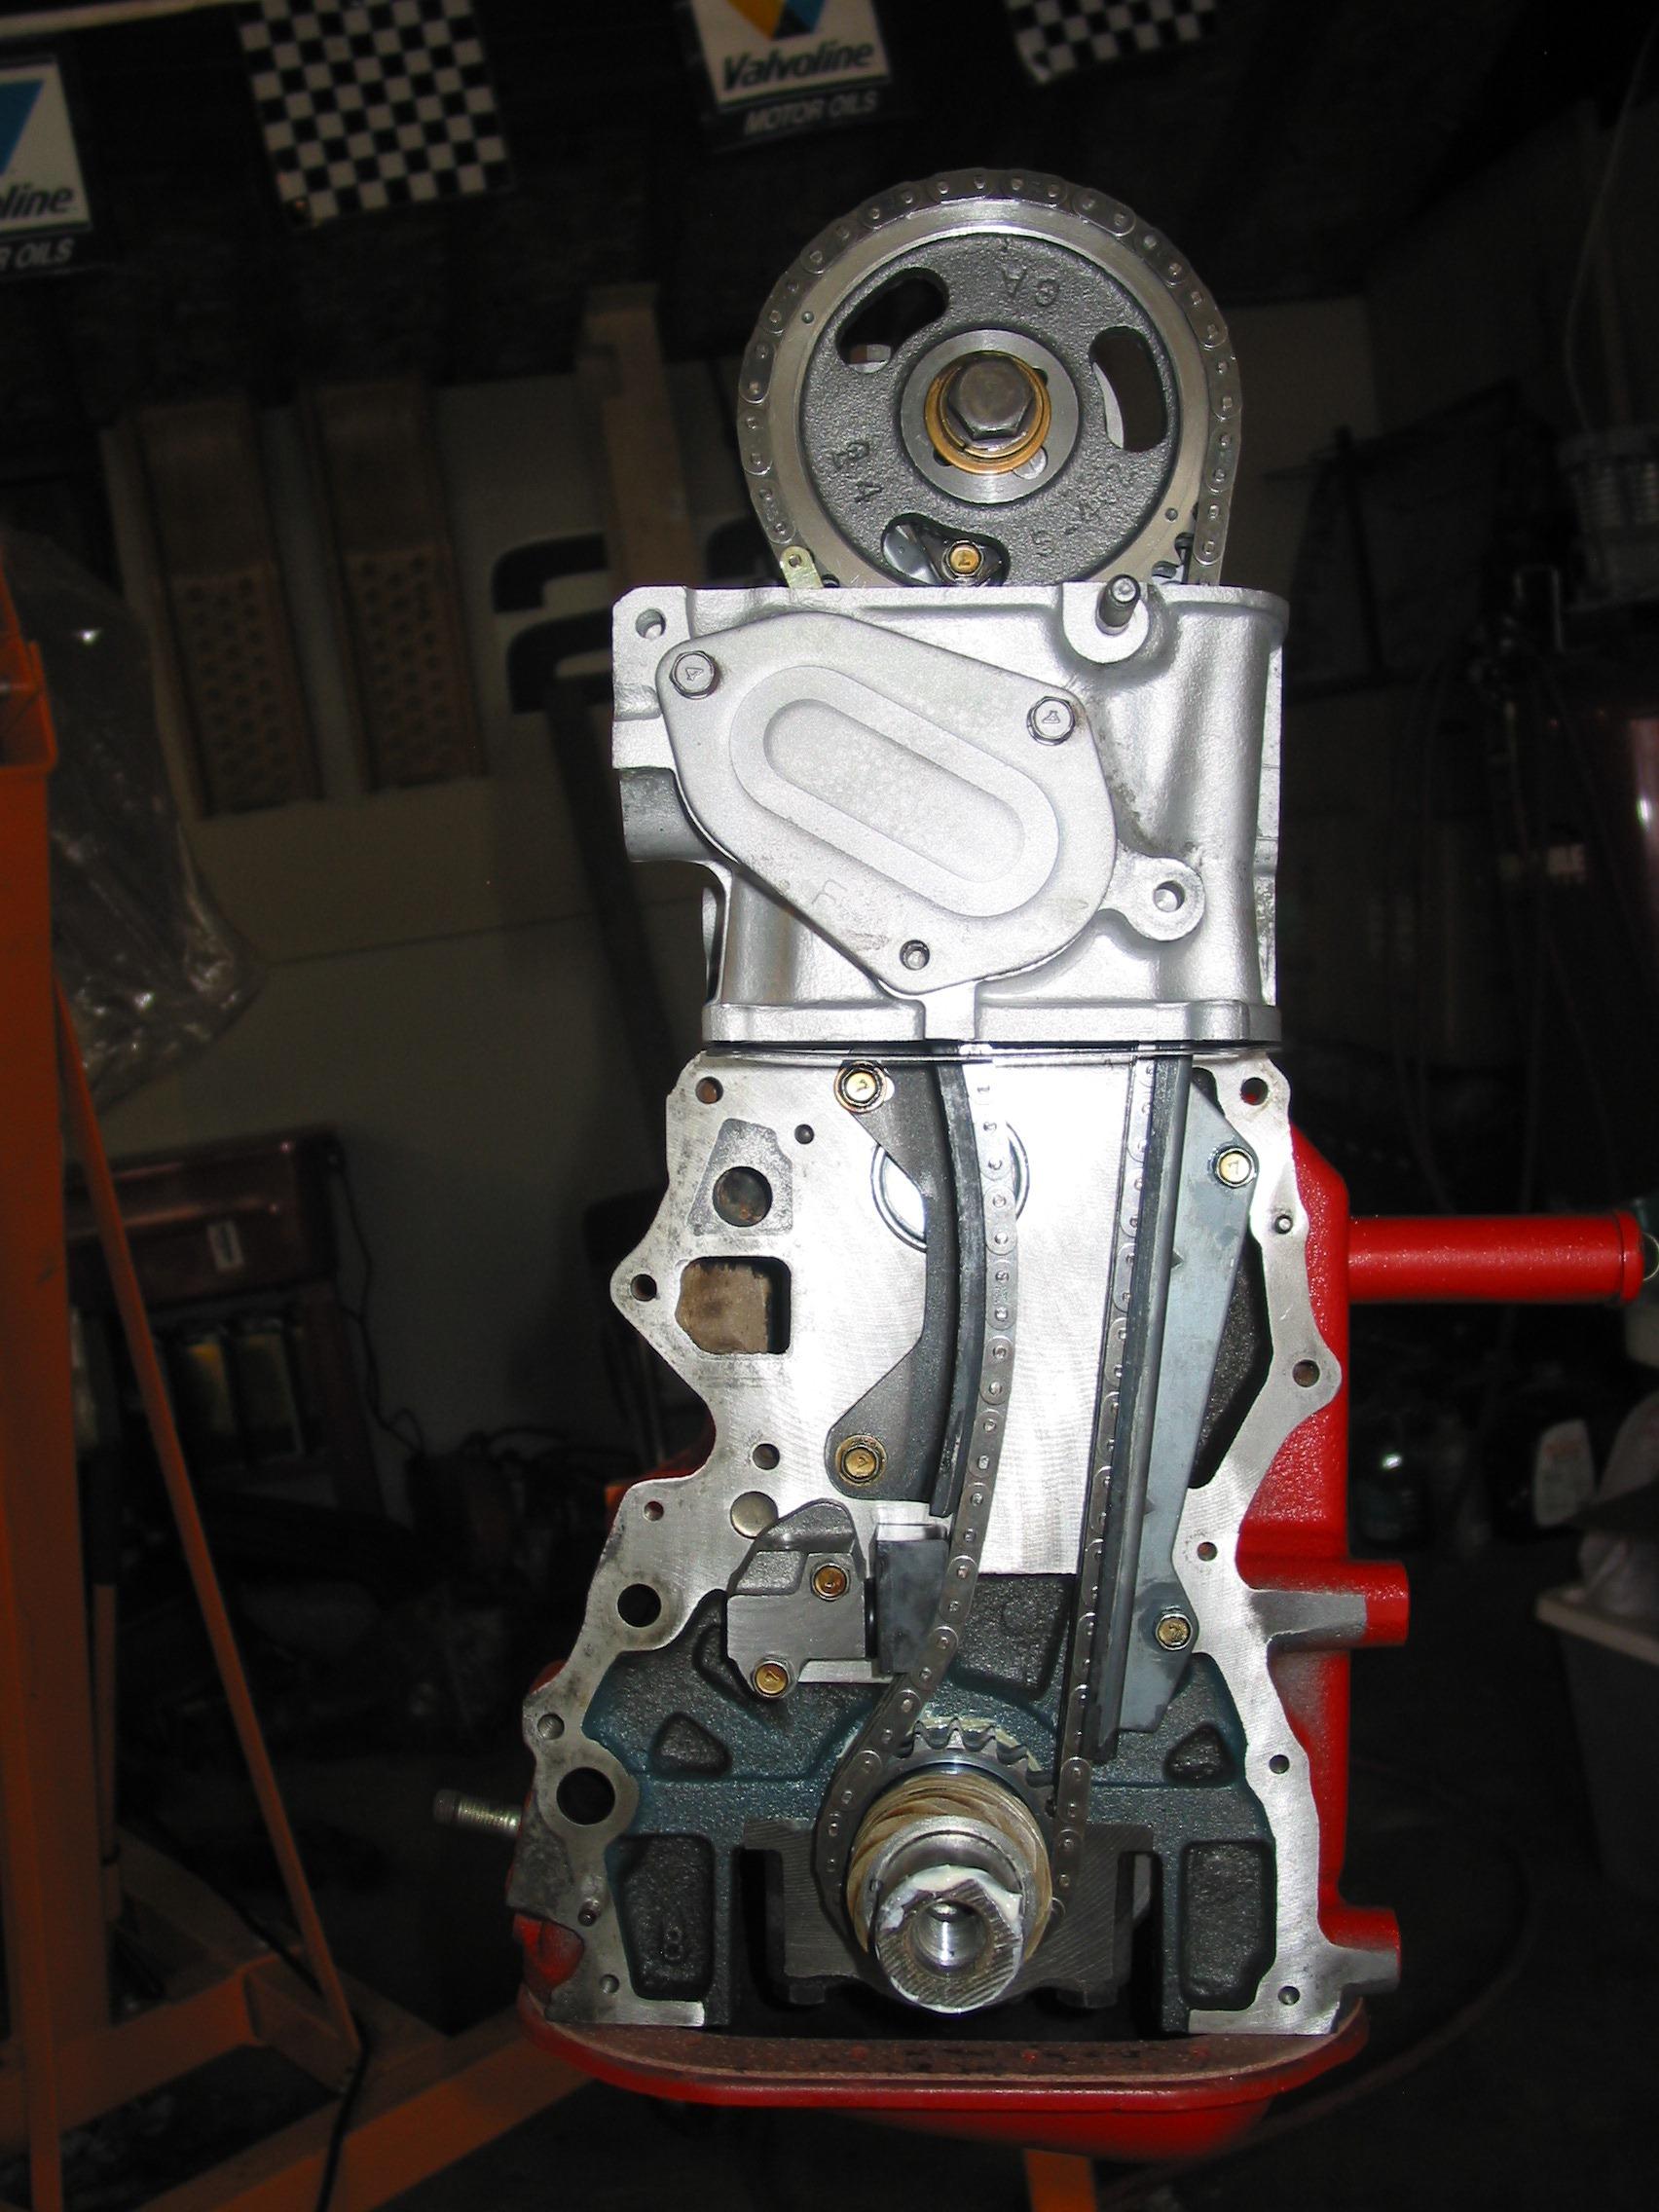
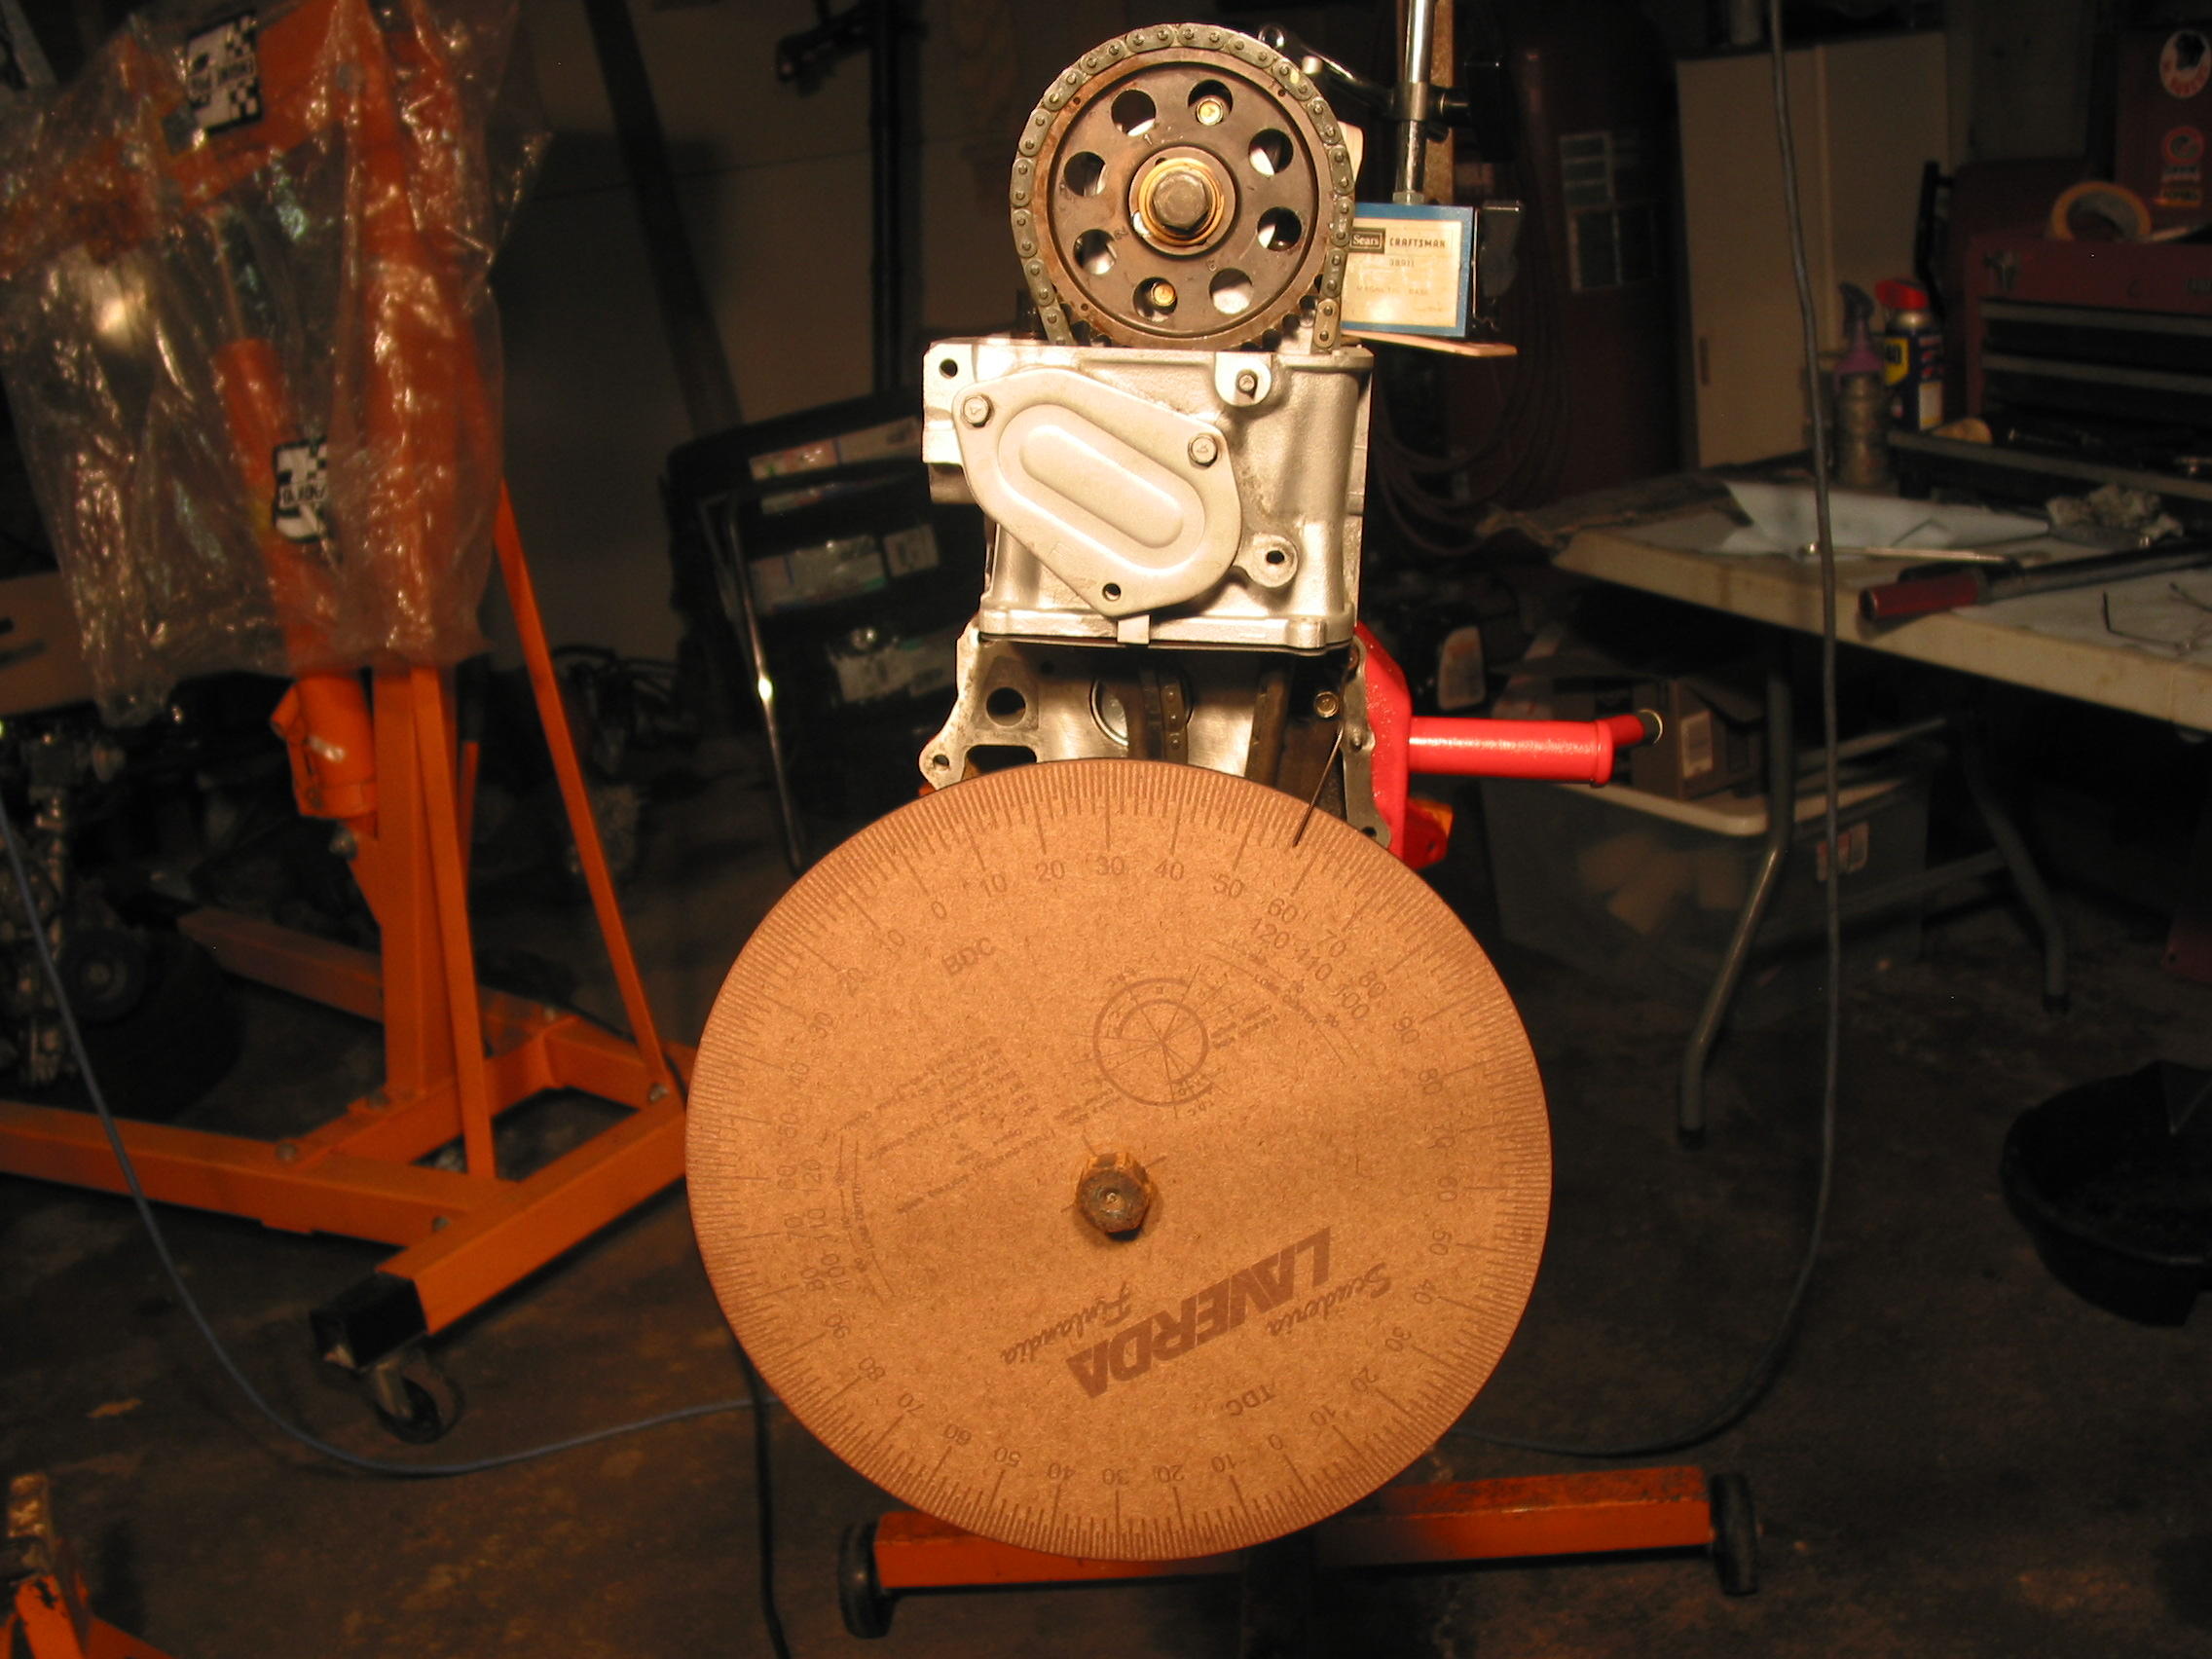
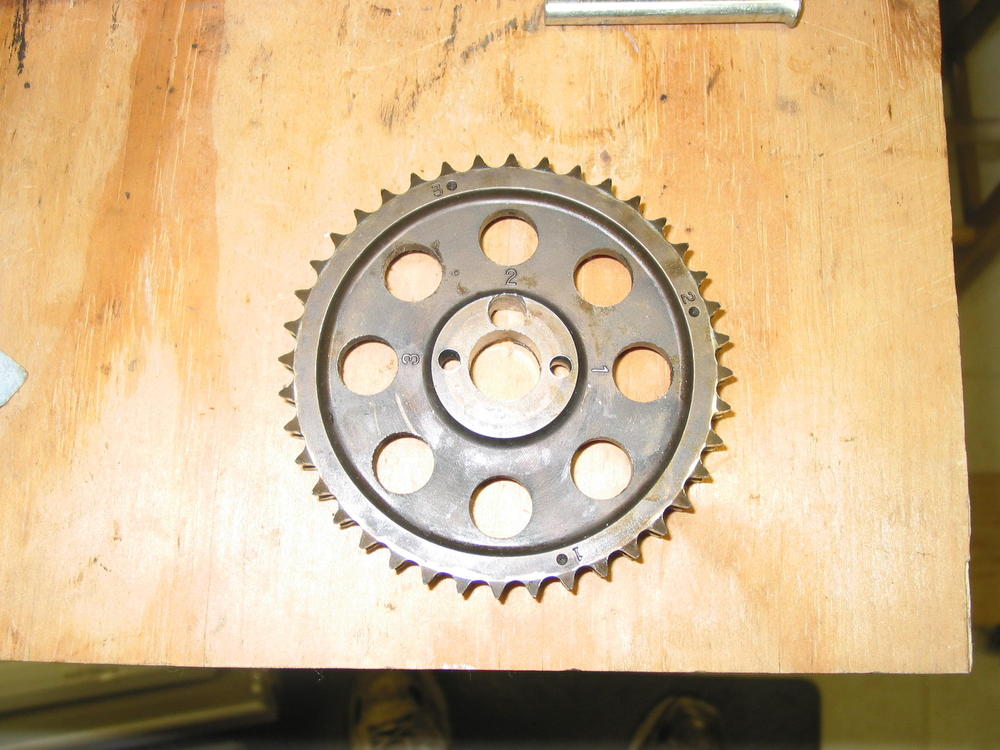
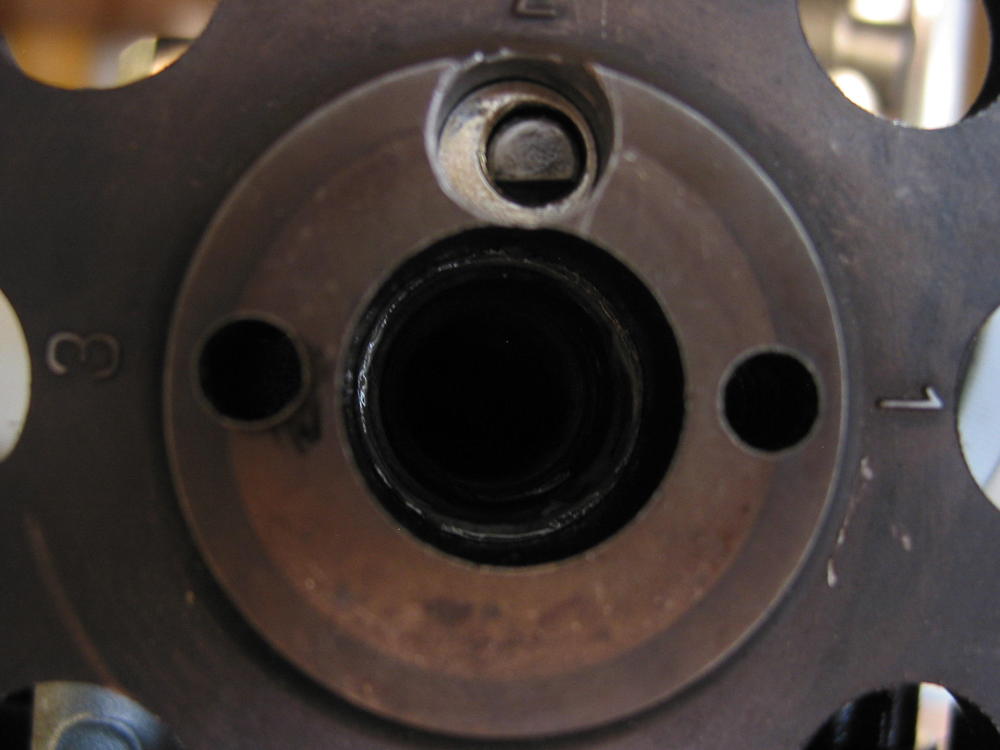
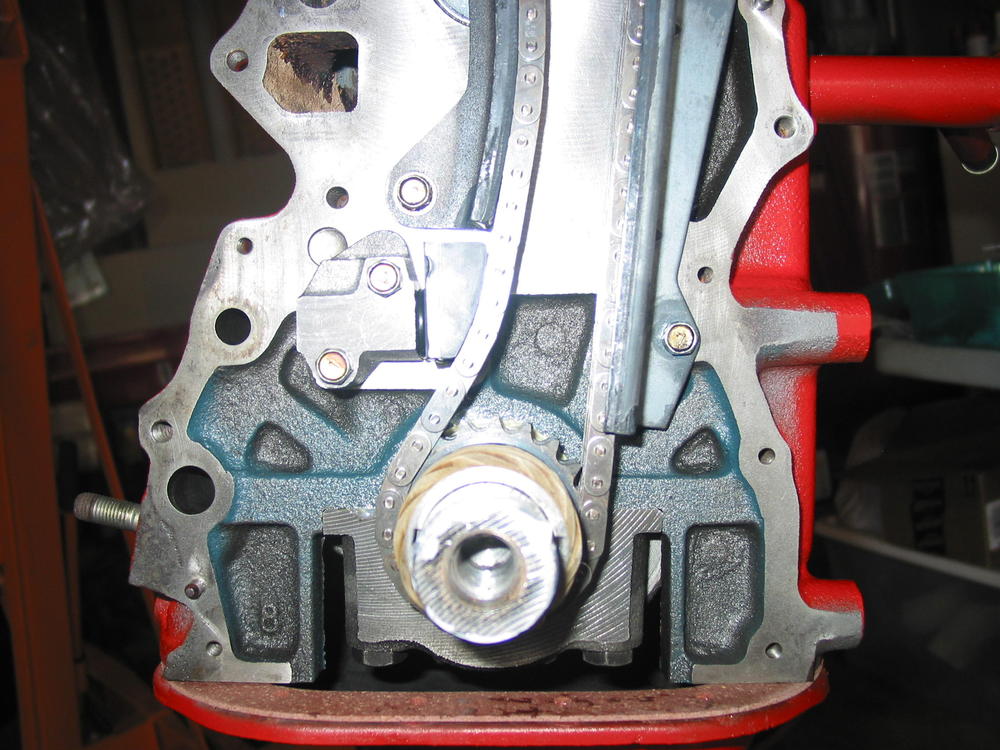
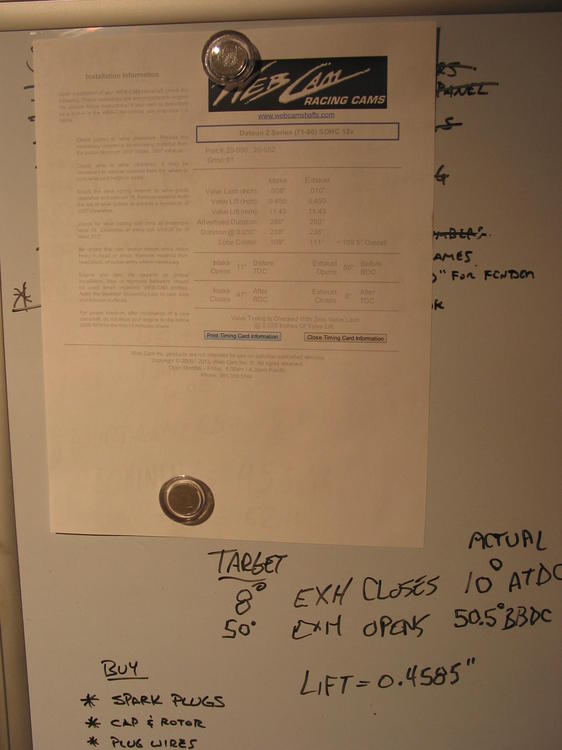
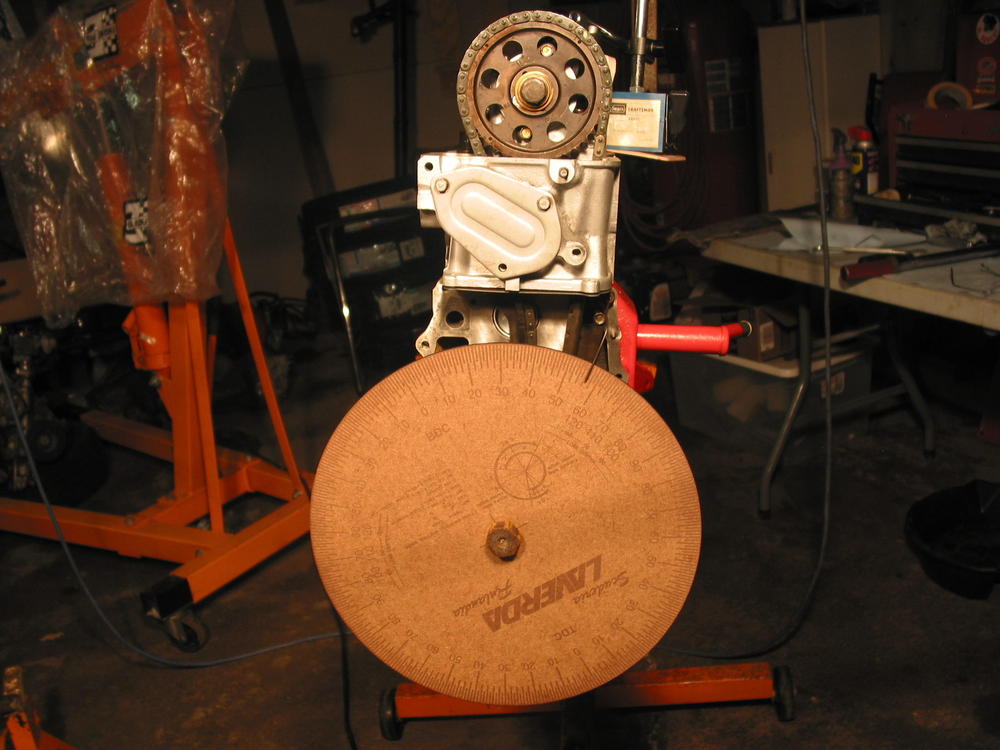
3 pointsOkay, I'll admit that I didn't read every word, but it sounds like you have a very good grasp of the tension, timing, and chain position as it glides over the guides and tensioner block. I slotted the slack side guide holes much more than stock so that I could move them closer to the chain and get the slack right. I loctited the chain guide bolts in, but others who have done the mod drilled them bigger to use a larger bolt. I chose not to do that as I could get more movement with the smaller bolt. I'm not sure I could get the guide in the right location had I shaved more than 0.050" off the head. If I were to do it today, I would get the Kameari tensioner kit and a real adjustable gear to make everything easier. Here are a few pics of my build from about six years ago. I had the engine apart recently and dialed the timing back in using a different eccentric washer after the chain had about 20 race hours on it. As you can see from one of my pics, I had to straddle the actual timing compared to the spec sheet that comes with the cam.

 3 points
 -
2 points
-
2 pointsSo I believe the TPS does not rotate in the proper direction for the Z. I had my suspicions, and the data confirmed it. I was trying to figure out whether to order a clockwise or counterclockwise TPS, and I finally noticed the tiny letters on my current TPS: CW. I have a CCW TPS on order now.2 points
-
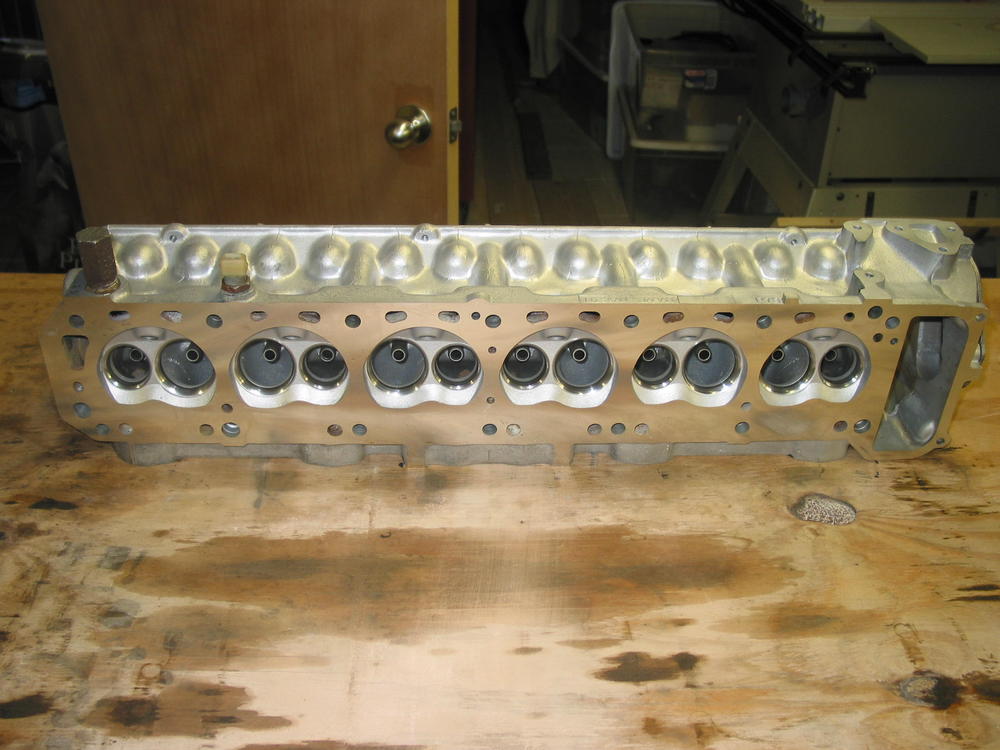
2 pointsHey guys, sorry I missed the tag until now. I've been super busy lately and haven't been on here. Give me some time to read the six pages to figure out what the discussion is about and I'll chime in. ? I do see that it's about the F54/P79 and yes, that's what I run. I run the stock valves and did not shim the towers after shaving 0.050" off the head. I modified the slack side chain guide a bit and use the stock cam gear modified per the "How to Modify..." book to use a Chevy V8 eccentric washer kit to dial in the timing. It runs great and makes good power with a mild cam, header and SU's. Now let me go back and read for a bit to get caught up...2 points
-
1 pointI made is, Orlando FL to Pikes Peak Co in my 75 280z. Left Thursday noon, drove to Phenix City Alabama (about 400 miles). Have family there so stayed the night. Left early about 2am Friday, thru Bham, on hiway 22 to NW AL, then thru a little bit of MS, and then AR. Took a north turn up thru the Ozark mountains toward MO. from Joplin the garmin took me to Wichita KS via rt 400 (2 lane, 180 miles dead of night, yikes). North from Wichita to I-70, then across to CO. Arrived at Pikes Peak about 1PM Saturday. in AR I lost my brakes (replaced a drum slave cylinder a few weeks ago, did not tighten a line fitting, so I did a McD parking lot fix with help from a passer by to bleed the brakes. The only other casualty was I lost my radio somewhere in KS (not a fuse checked the both). Not a big deal as I prefer to listen to the engine :) Other than that Dat Boi handled the trip great, but I did find the operational ceiling of the Bosch L jet tronic system. On the way up past the 13 mile shuttle stop (about 11,400 ft) I suddenly lost power and the engine stopped and could not be restarted and run for more than a few seconds. I was on a fairly steep incline, on a section with no guard rails, a steep drop off on one side and a steep wall with a bit of a ditch on the other for shoulders. After a bit of panic (am I going to have to back down this thing) I managed to get the engine to run long enough to make a multipoint turn around on the narrow road. Got the nose down and got back to the shuttle launch area. I took the shuttle to the top. With hind sight I prob should have removed the air filter before the final accent, maybe that would have helped. My guess is with the thin air, the AFM flap just presents too much of a restriction for the engine to overcome, but that is just a guess. I seem to recall some discussion about a altitude compensation device for the L jet tronic. Getting down was uneventful since engine braking meant I did not hardly have to use the brakes at all. I have a lot of video (including the fail, should be interesting to watch. Will post up later and link.1 point
-
1 pointI didn't think you were ever going to resort to the laptop!!!! ?1 point
-
1 pointThought I would resurrect this thread to add some info that I learned yesterday working on my own speedometer problem. My speedometer on my early 72 suddenly stopped working Friday. My first thought was speedometer cable. I removed and verified that it was just fine. Next thing I tested was the gauge. I was really hoping it wasn't the gauge because I see no practical way to pull the gauge without pulling the dash. Seems like some people have done this successfully but I don't think I could. The way I tested the gauge is I attached the cable to the gauge and disconnected from the transmission. I pulled the transmission side of the cable from under the car so I could hold the transmission end while watching the gauge. As Zed Head mentions above, if you pull the cable out a bit and turn while pushing, you can feel the cable seat into the gauge securely. Once seated I simply turned the transmission end of the cable counter clockwise (by hand, no drill needed) and was able to see the speedometer needle move. So, gauge was fine. Next, I removed the speedometer spindle / housing at the transmission. If yours has been in there a long time it can be a little challenging to remove. Tap on it a lot (without damaging threads). Remove the 10mm bolt and metal piece that slides into the spindle housing slot. I used a flat head screwdriver and the housing slot to kind of pry the spindle housing out. Be prepared for transmission fluid to pour out a bit. What I found is that the plastic speedometer gear was damaged badly: the teeth were worn away on one side. I installed a new spare I had on hand and my speedometer works as it should again. Remember to line up the slot square relative to the bolt hole. When you reinstall the spindle and housing, it will feel like there is a lot of resistance. Oil everything up, especially the o-ring (use a new one). Press firmly and it should pop in. Don't hammer (see below). While you are at it, think about whether it is time to replace transmission oil. At a minimum, top off your oil if any leaked out. Finally, connect the speedometer cable at the transmission. Follow what Zed Head wrote.Rotate the cable pulling and pushing until you feel it seat in the gauge. Then, hold it in position and slide the cable into the transmission spindle slot so that the cable will be driven turned as the car moves. Tighten up the bolt by hand. I am not totally sure why this happened. I refreshed the transmission last summer and I remember having a difficult time re-installing the spindle / housing. Could be that I got too aggressive forcing it back in. Hope this helps someone dealing with speedometer issues....and especially eliminate every other possible problem before heading down the path of removing the gauge or worse the dash.1 point
-
1 pointOkay, so new plugs and ignition module...Not much changed. Got home - plugs looked perfect. So when all else fails, plug in the computer. (I'm liking that aspect of this swap.) Once I got the USB configured properly (and remembering how to configure things in Windows 7), I tried to start the car...Nothing. Oh yeah, reconnect the plug wires. Start the car and watch the data come in...Oops, configured for the wrong ECU. Set the program for the right ECU and watch the data. Coolant temperature seems spot-on. O2? I'm not sure, yet. TPS...Hmm, it seems way too high. Yep, there's the code. So, I'm going to check my TPS settings against the Patton Machine website and test some more.1 point
-
You guys are absolutely correct! I have been pretty nervous about this whole head swap and I completely over looked the obvious. We will try to tap it forward this morning with a rubber mallet! Project is back on the move! Thanks again! Camaro-guy1 point
-
1 point
-
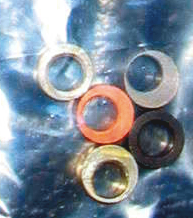
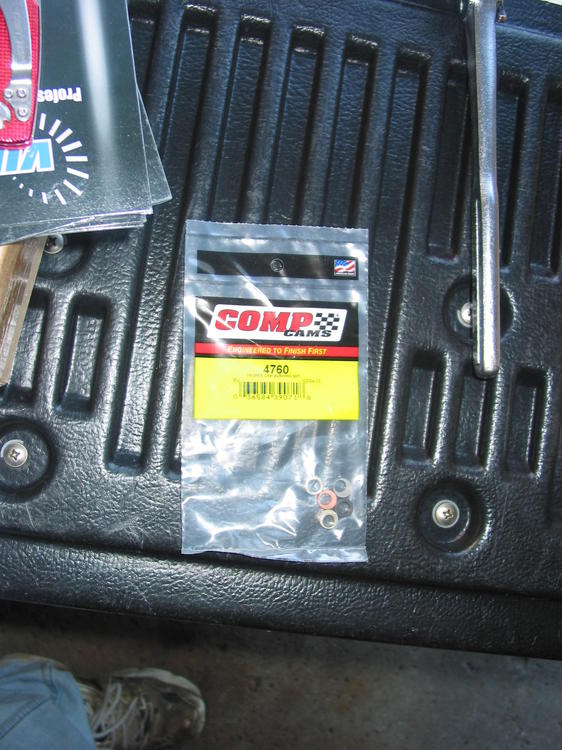
Well, the new ones seem to be identical to the old ones. Pic shows new synchros installed. The old ones are below (in pic).
 1 point
 -
1 pointAJapanese Army Air Force Nakajima Ki-44 Shoki "Tojo" interceptor found by U.S. forces at Oppama airfield in Japan in the immediate aftermath of the war. This one was apparently test flown by the U.S., hence the American markings on it.
 1 point
 -
1 pointThe mad scramble to obtain axis technology. Supposedly these J2M's are being flown by former Japanese Imperial Army pilots. Sent from my Coolpad 3310A using Tapatalk1 point
-
1 point
-
1 point
-
1 pointYes, they seem a bit carbon-coated. Could it be the ignition going out as a coincidence and causing you to think it is fuel? The tach may tell a story when the problem occurs.1 point
-
site unseen, Yes, I wasn't going to use their name, but yeah camaro-guy1 point
-
1 pointI would like to hear from others that have been to the top to know if they made it no problem. Other than that the car was perfect for the whole trip (about 4,000 miles in just a few days).1 point
-
1 pointDon't get me wrong, I also do the phone thing for my orders and you are right on about them being "nice as can be" over the phone. Just wish the website would actually reflect what's really available.1 point
-
1 pointToo bad. MSA needs to do a better job of putting the "Availability" note on items not in stock! @Joseph@TheZStore - This isn't the only item that doesn't show as not available!1 point
-
We share the same transmission code - F4W71A (also known as the "Monkey Motion" shifter). To the best of my knowledge, the rebuild kits for these Type A units are NLA. That's why I have a type B unit from a parts car stashed in my garage in case my unit ever goes out. A very, very long shot might be to identify each of the synchros by P/N and contact your local Nissan dealer to see if they might locate them somewhere. The folks at Courtesy Parts (David and Butch) are good at running down scarce parts if they can be found. Good luck!1 point