Leaderboard
-

240260280
Free Member5Points4,442Posts -
duffymahoney
Free Member4Points961Posts -
NVZEE2
 Subscriber
 3Points3Posts
 -
Mark Maras
Free Member3Points3,719Posts


Popular Content
Showing content with the highest reputation on 06/04/2019 in all areas
-
2 pointsNot far from me is a town named "Devon". Back when Devo first gained popularity, one can imagine what may have happened to some of the (easier to reach) signs along the roads back then. I may or may not know anyone who participated...2 points
-
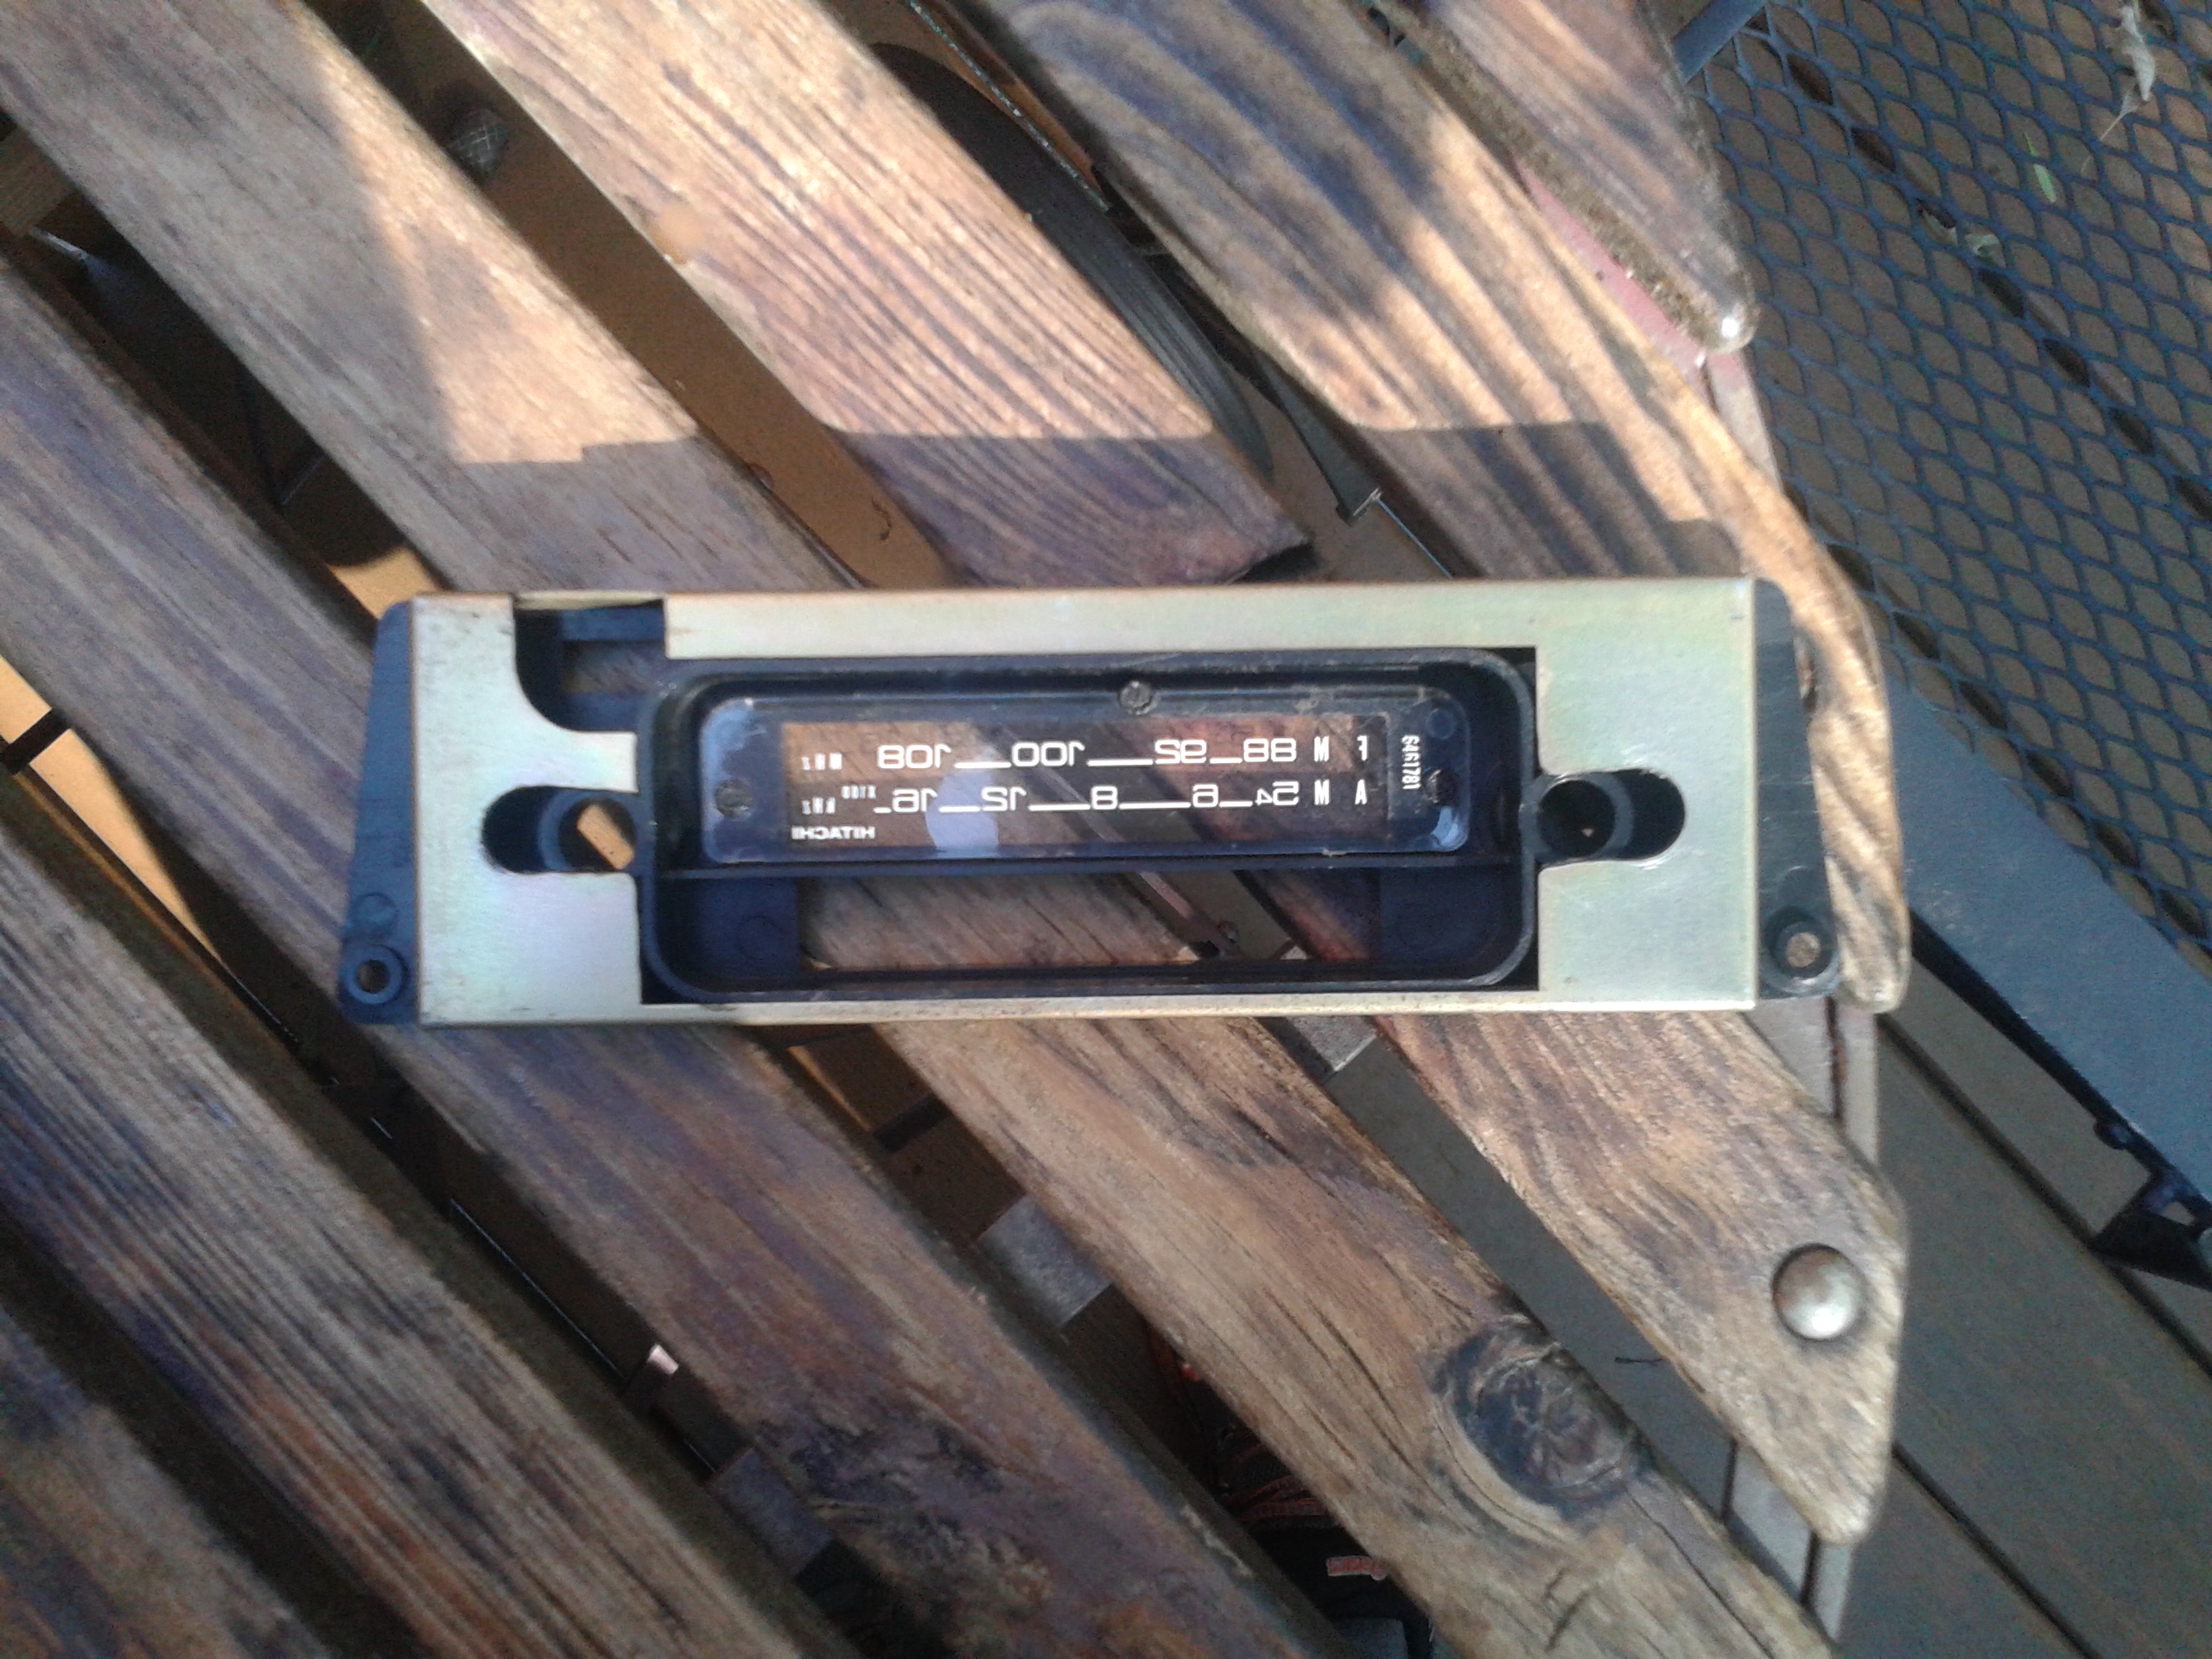
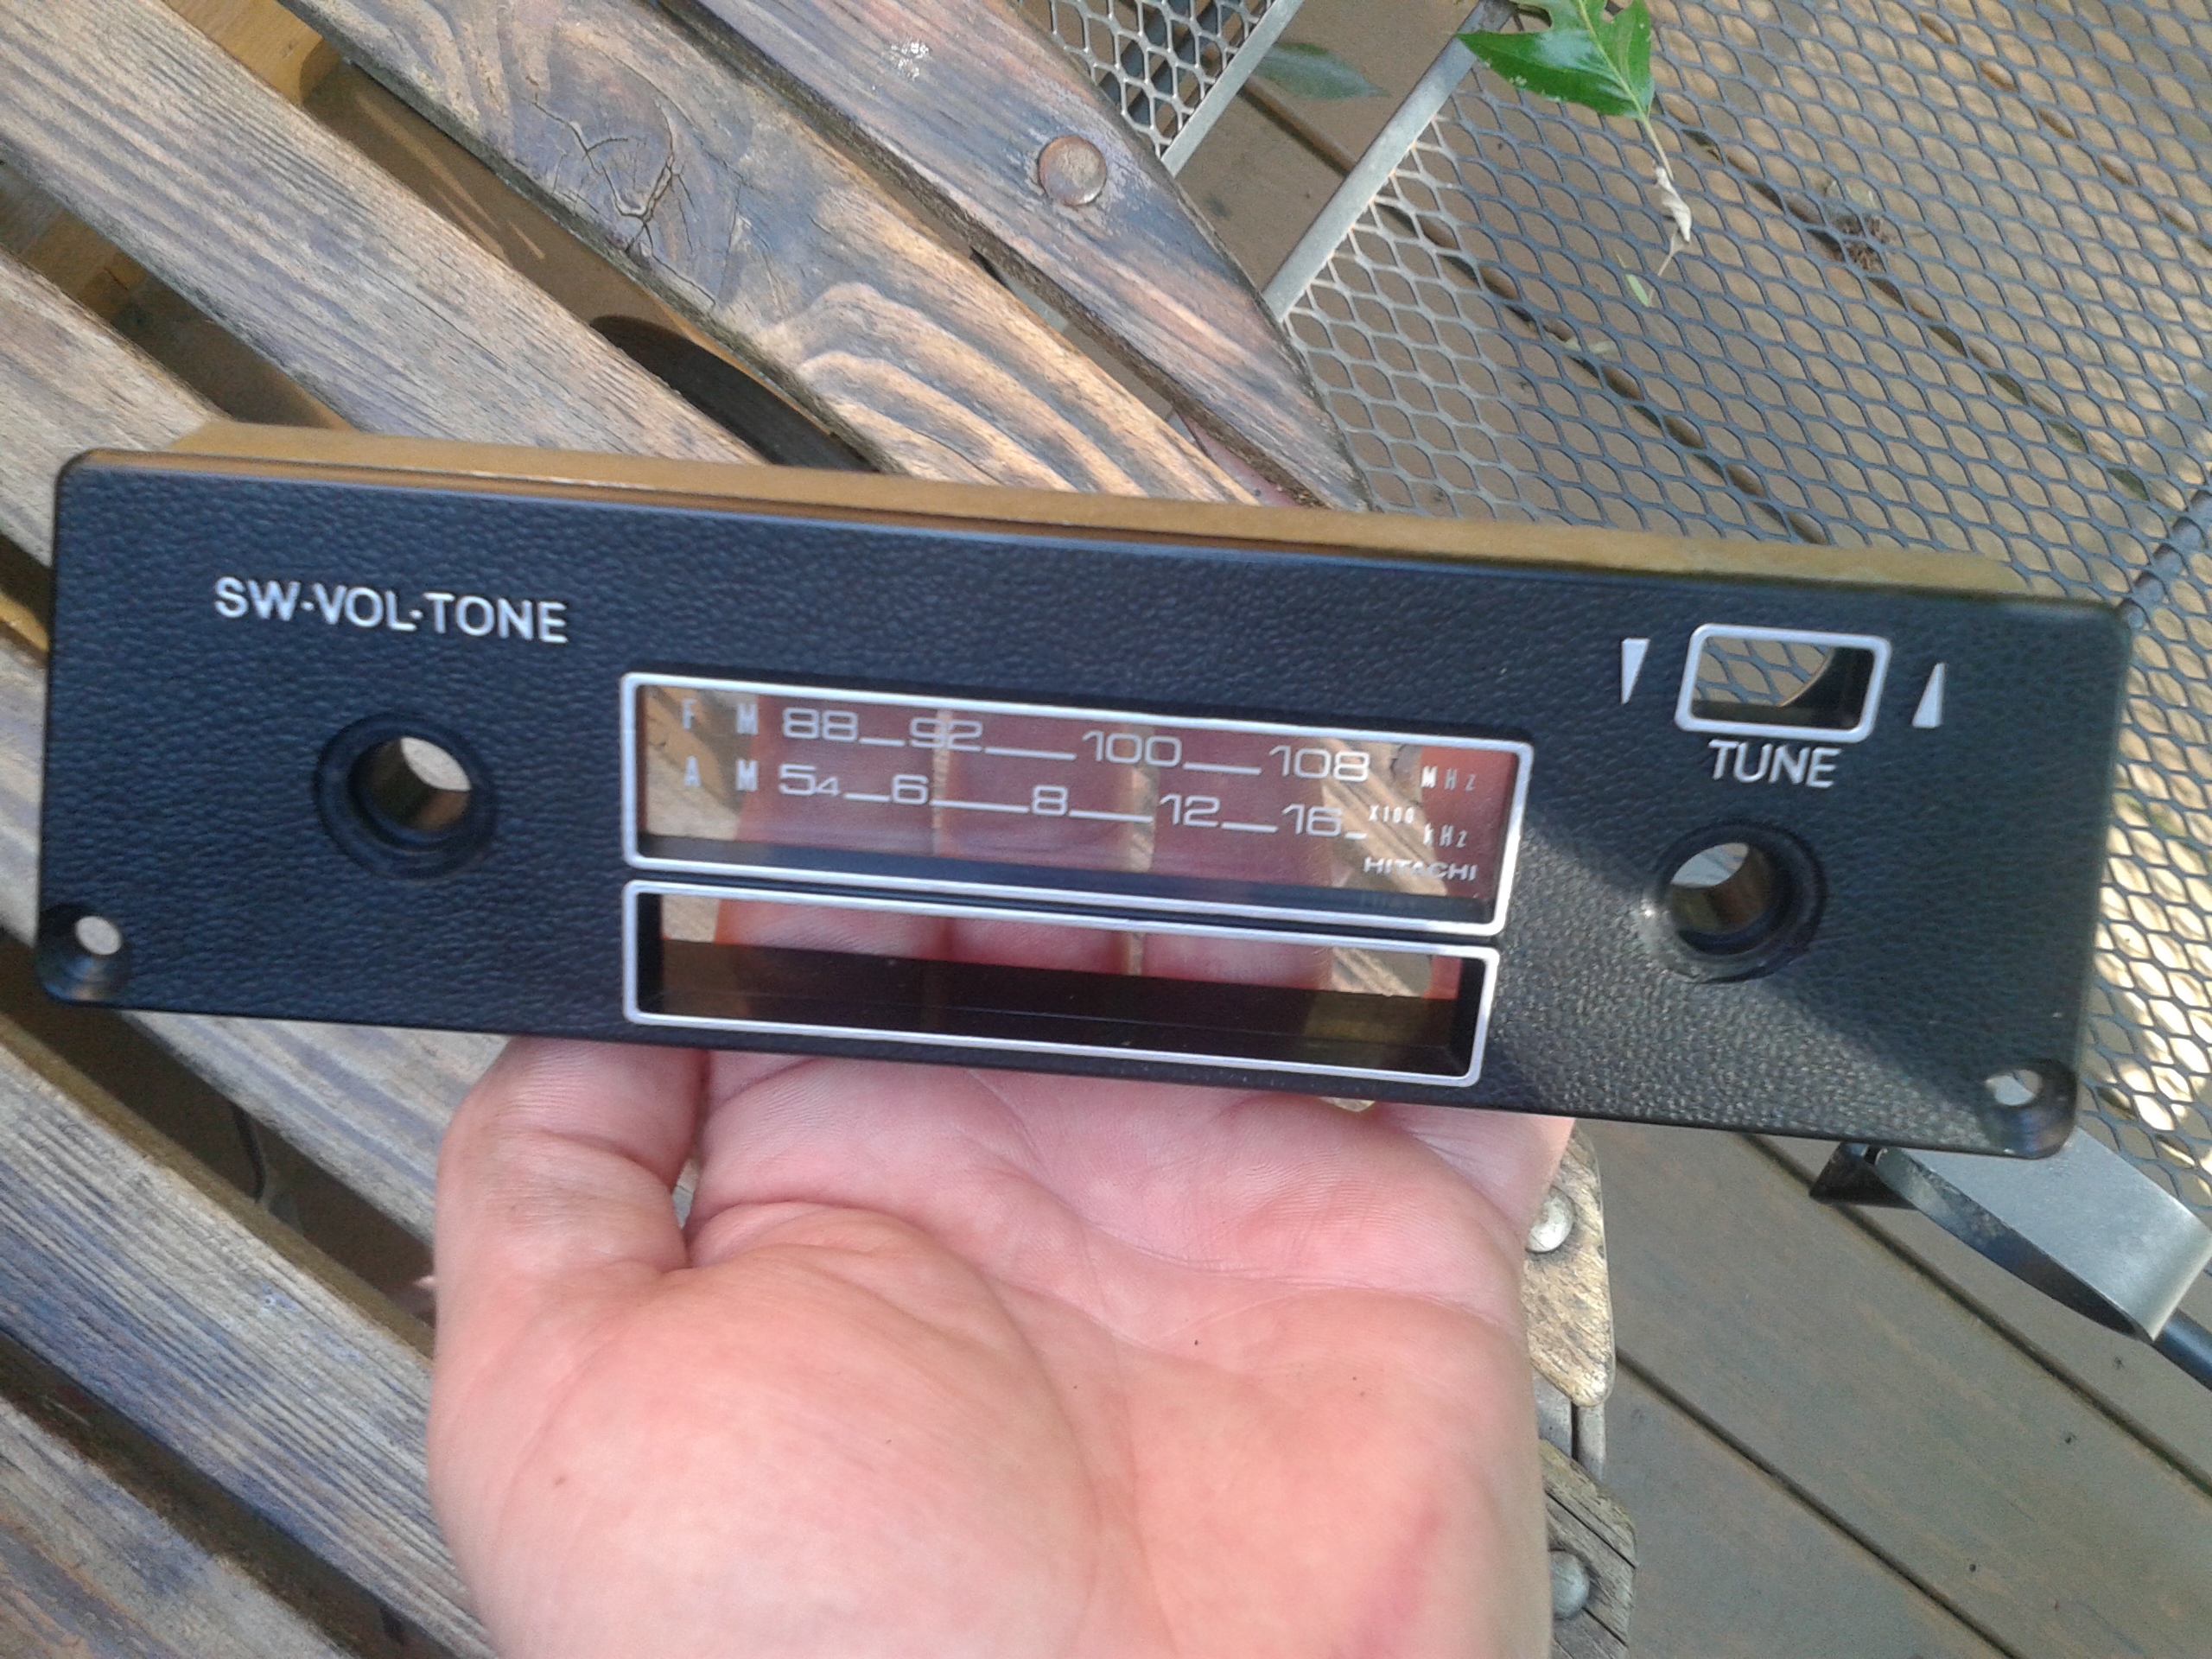
2 pointsI have a box full of Hitachi radios (both MW and MW/FM) liberated from UK market HS30Us. If you look at the factory R-Drive Export parts manuals you can see that all the Hitachi audio equipment (including the stereo receivers and the 8-tracks) were available as optional equipment. European sales brochures and spec lists show the Hitachi AM radio as standard equipment.2 points
-
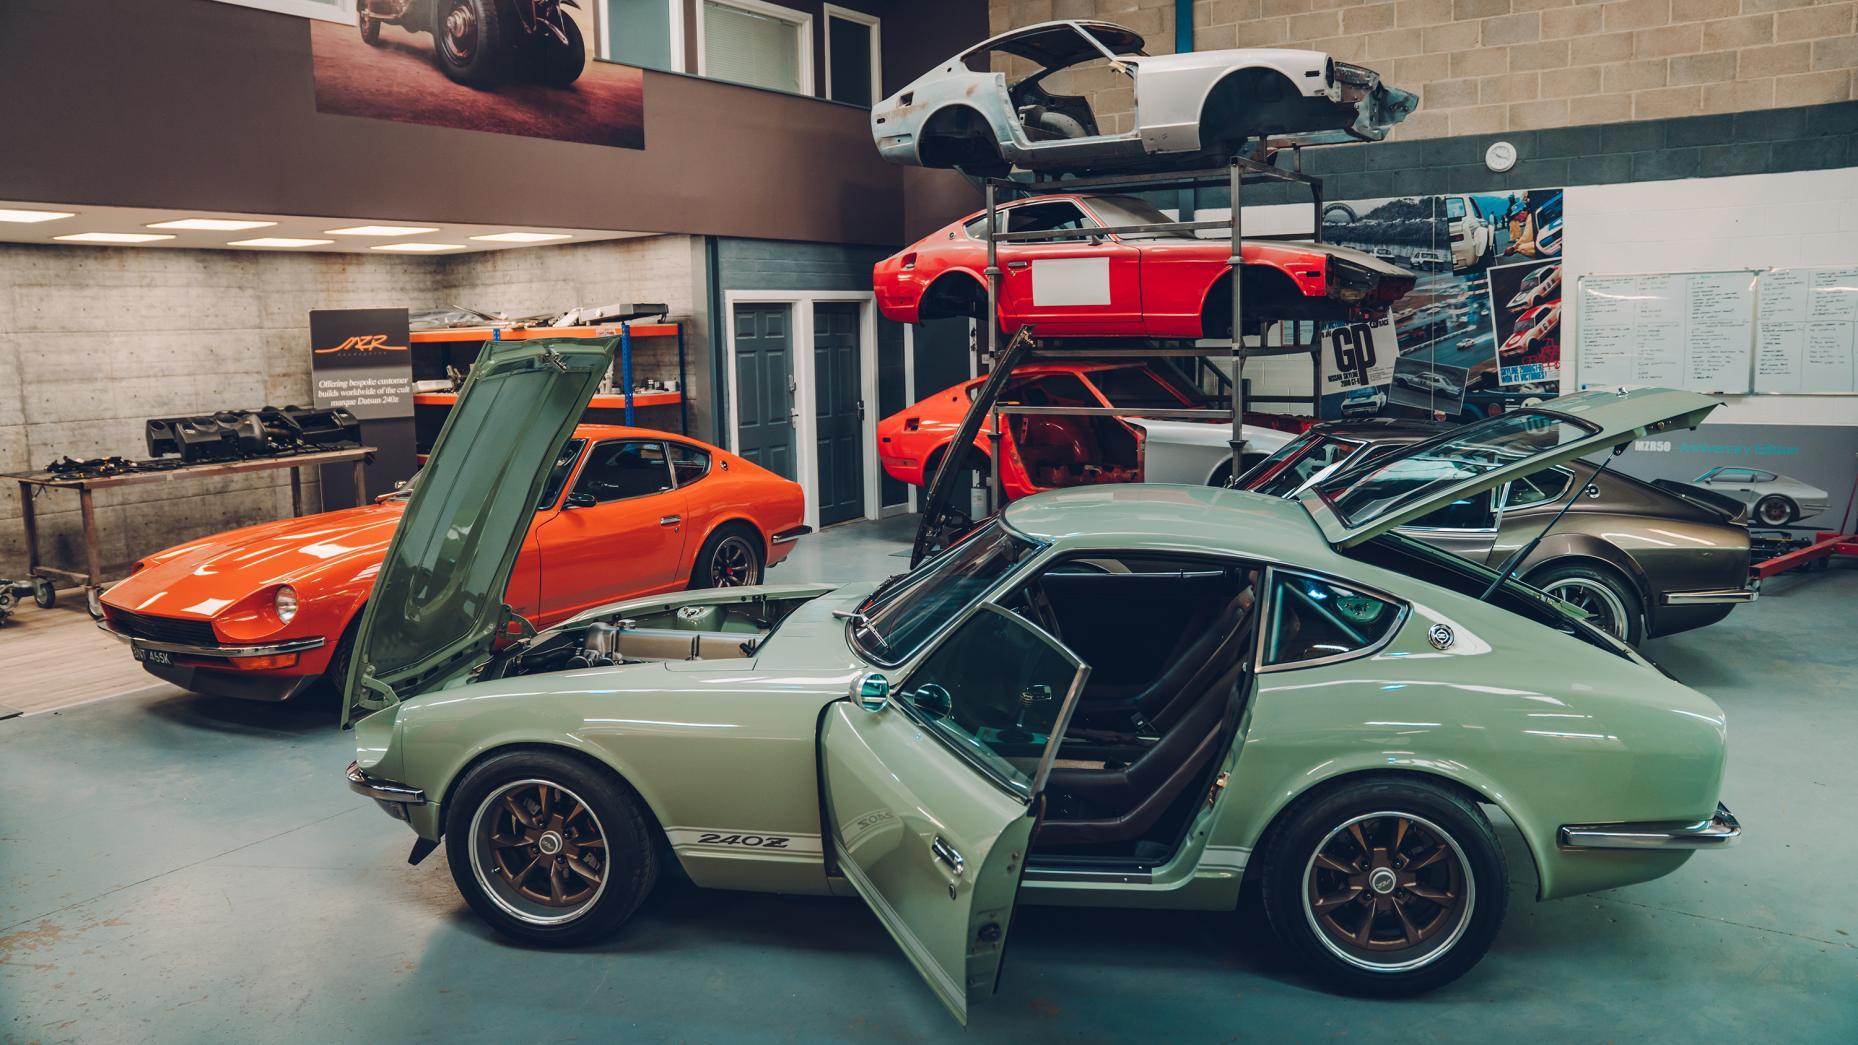
 One more chapter - beautiful photography ? http://www.speedhunters.com/2019/06/metal-perfection-mzrs-widebody-240z
 2 points
 -
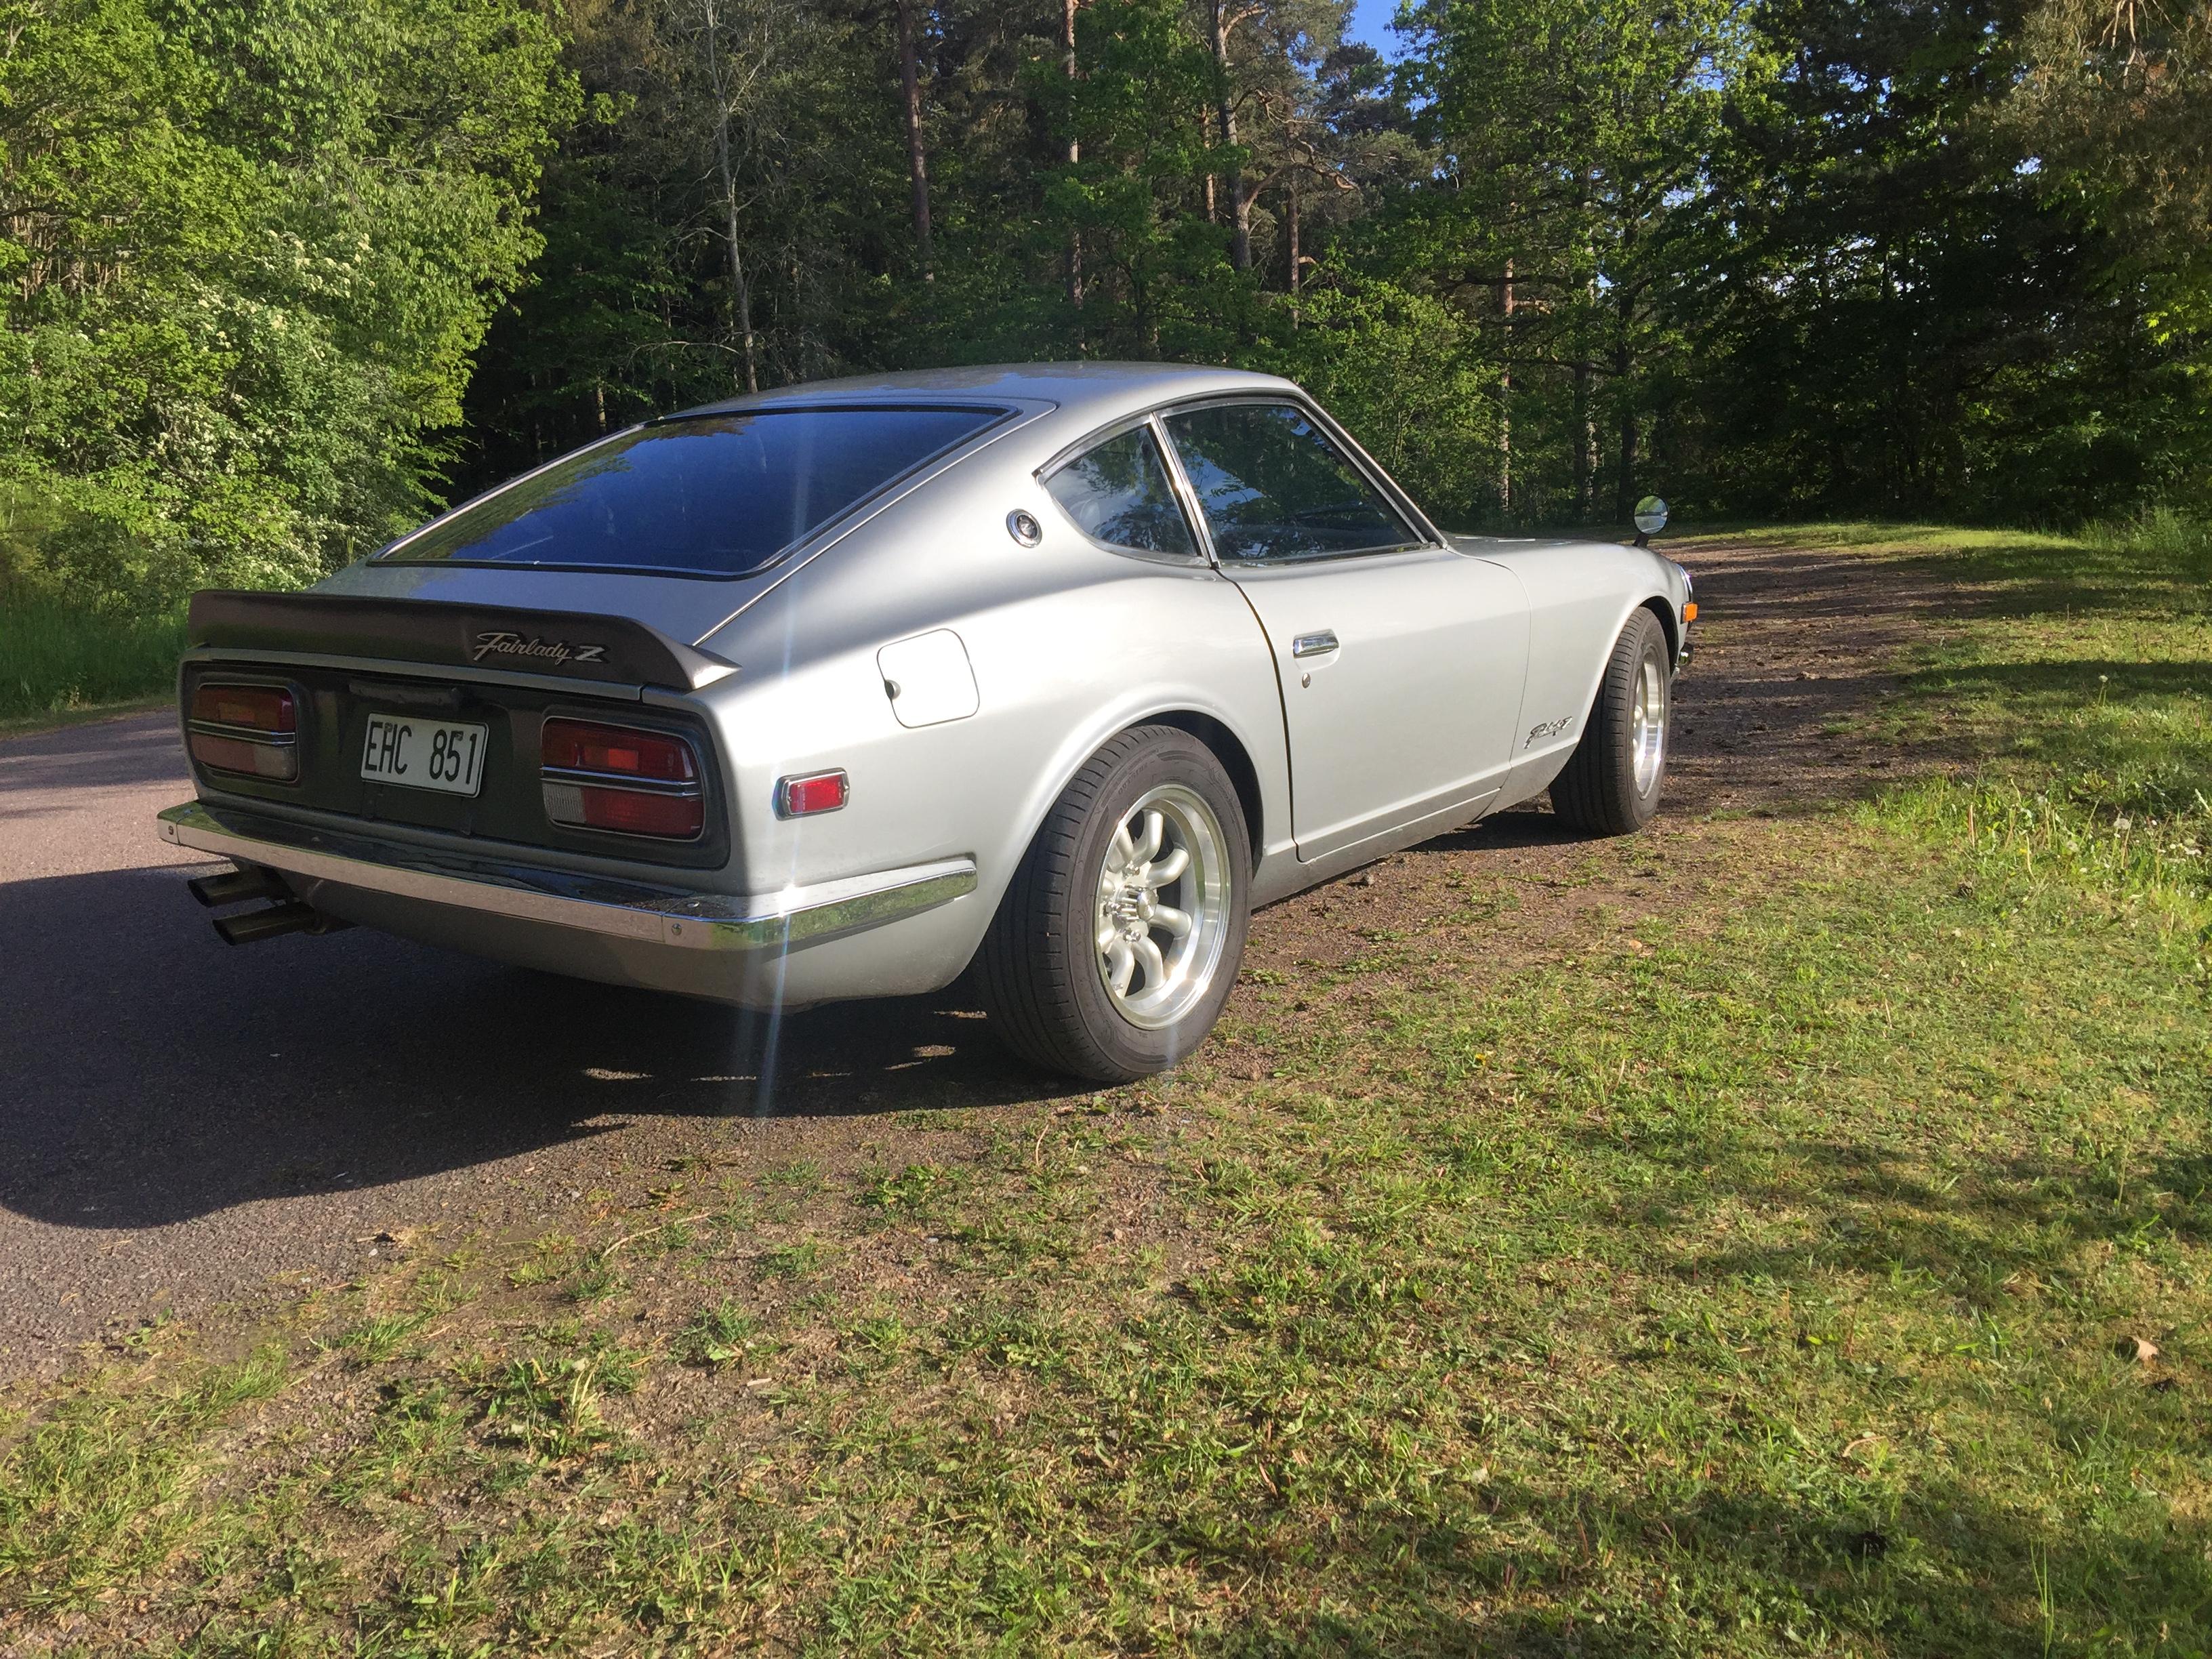
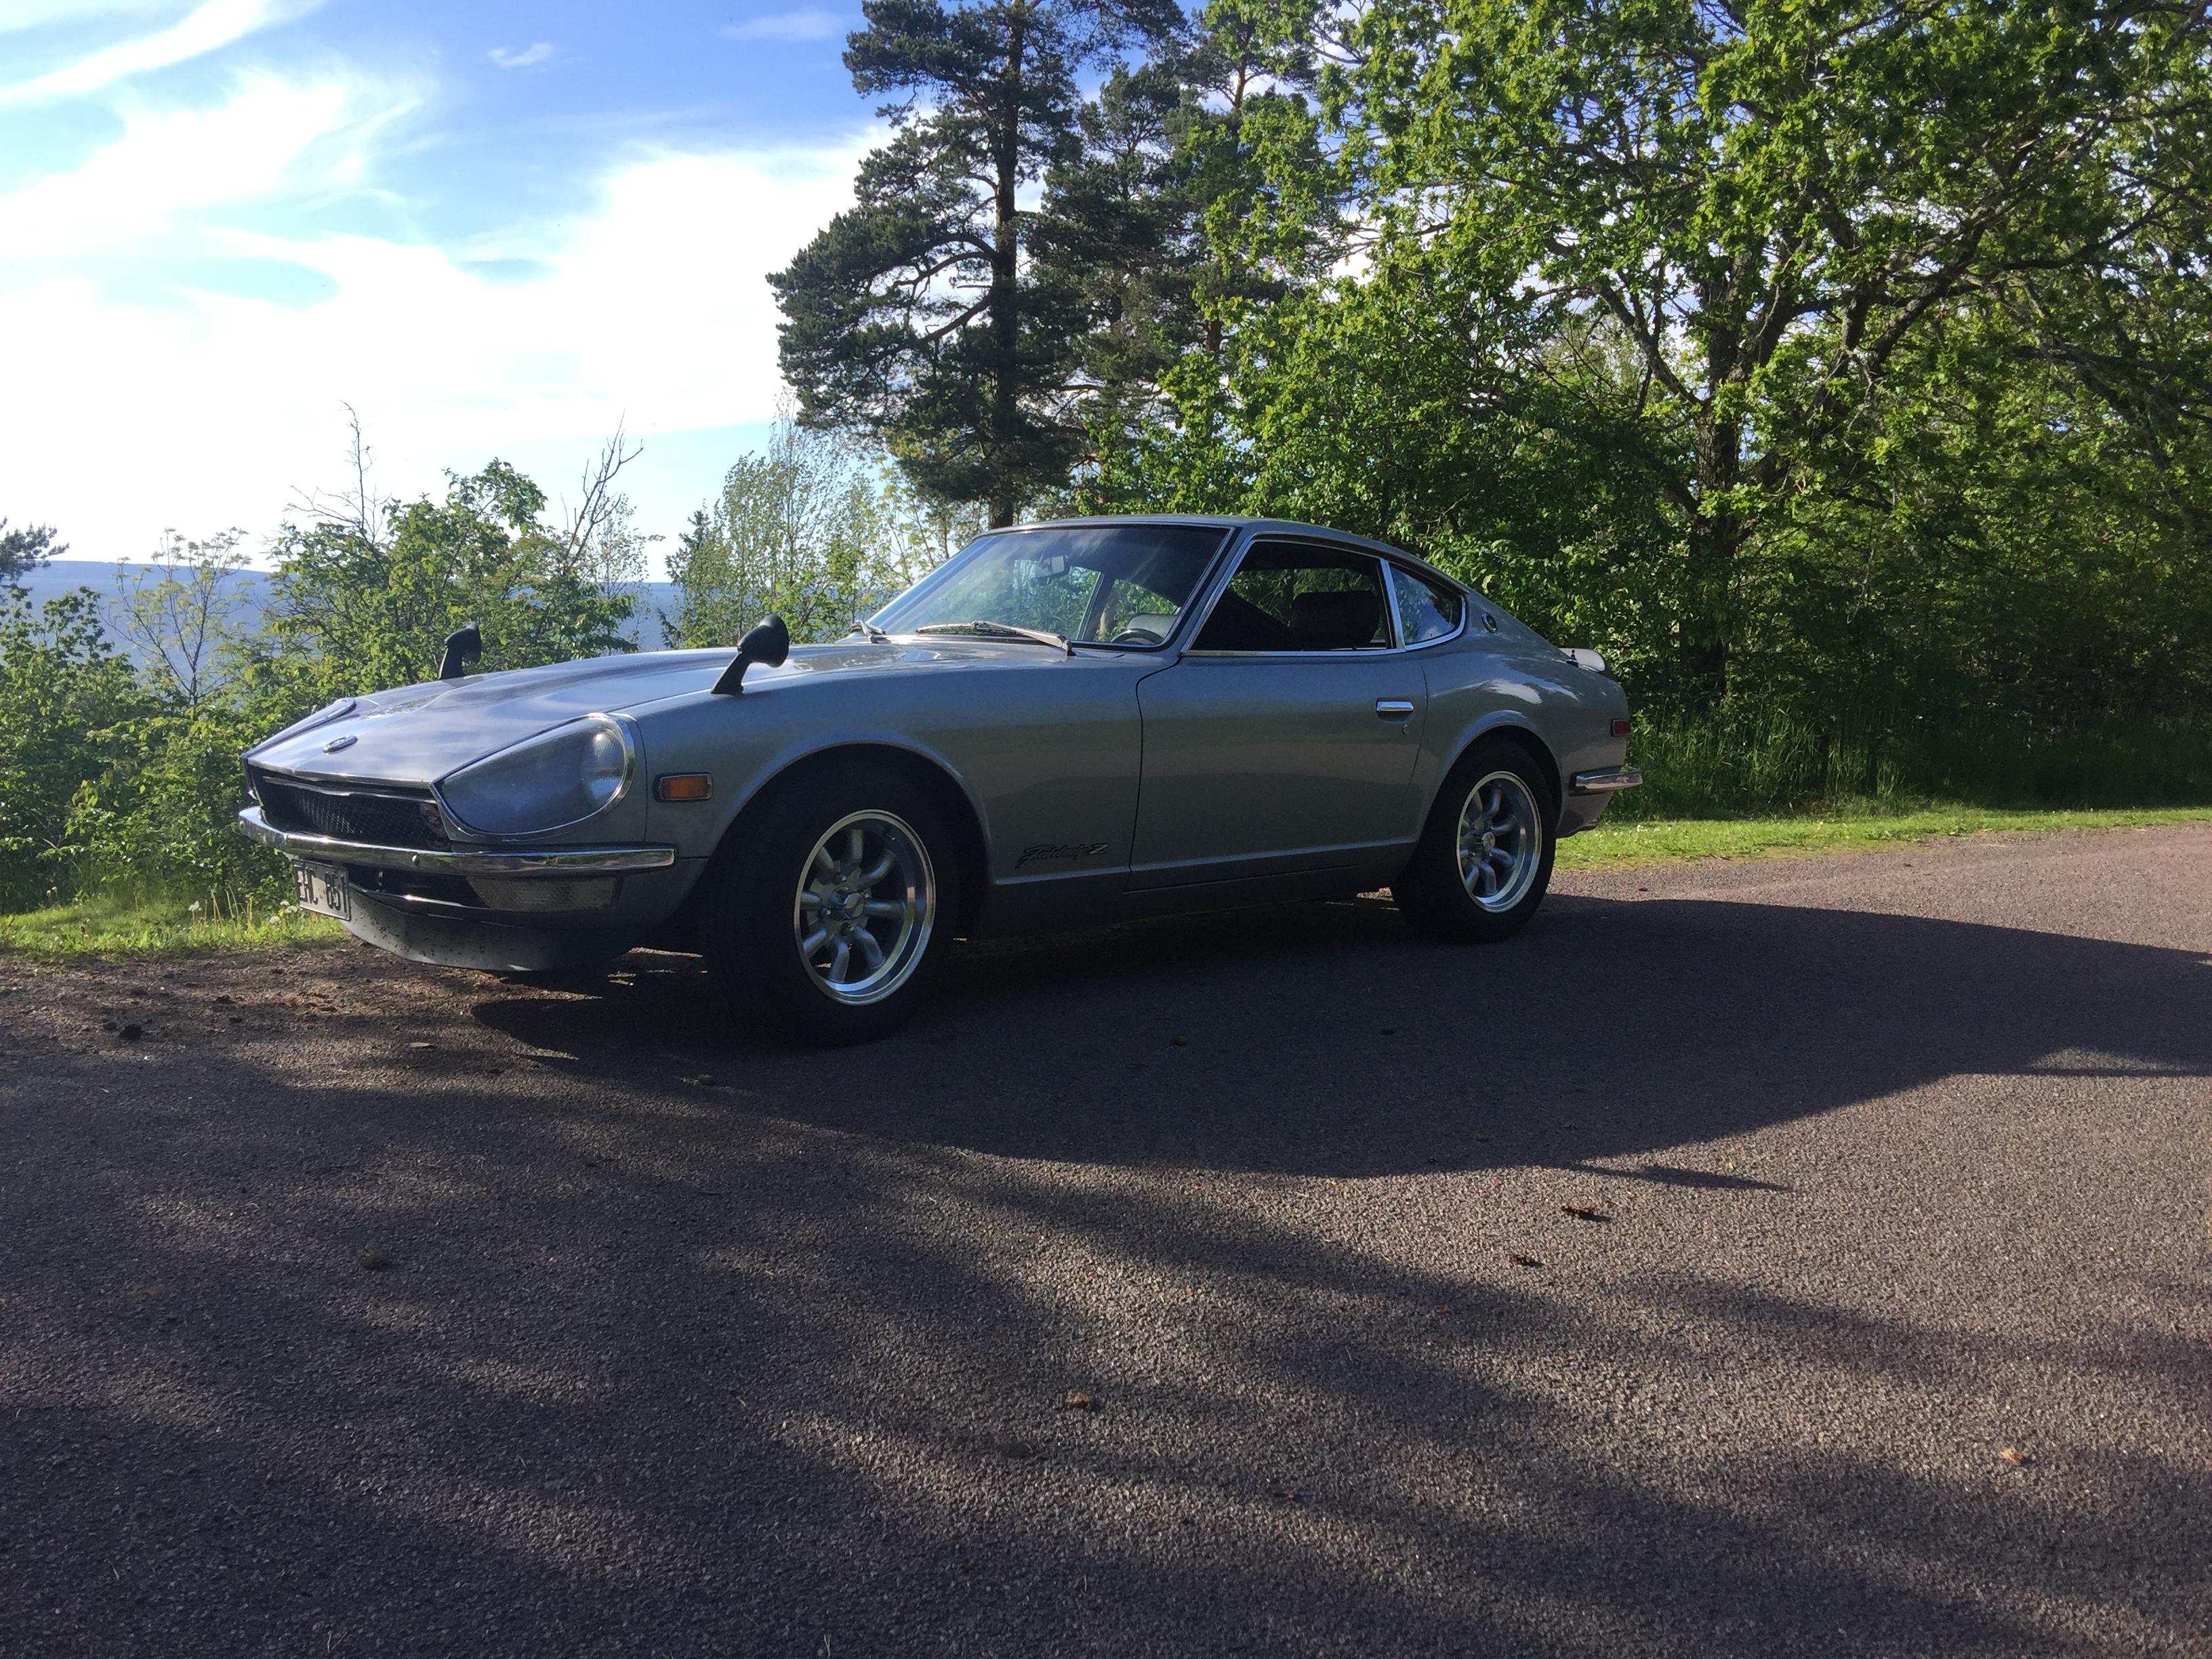
Out drivning and enjoying that there are no oil leaks ; )

 2 points
 -
Ah, The Chevelle. It came with the Muncy (rock crusher) 4 speed. There were many things I liked about that car but in 1973 the gas crunch dropped the value of low mileage cars. I sold it in 74 for $800.00. Saw an identical one sell for $67,000 on Barrett-Jackson a few years ago. That said, after buying the Z, I was done with the Chevelle. I fell in love with sports cars at an early age. Thanks to the book "The Red Car", my insatiable mechanical curiosity, my sister's 58 MGA (which I used to hotwire and drive at the age of 15), it was only a matter of time before I ended up with a sports car.2 points
-
2 pointsFortunately, I haven't fallen prey to the Timesponge Facebook, so the link above is like the tree that falls in the forest when no one is there. Dennis2 points
-
I love this video, especially the first minute ....???2 points
-
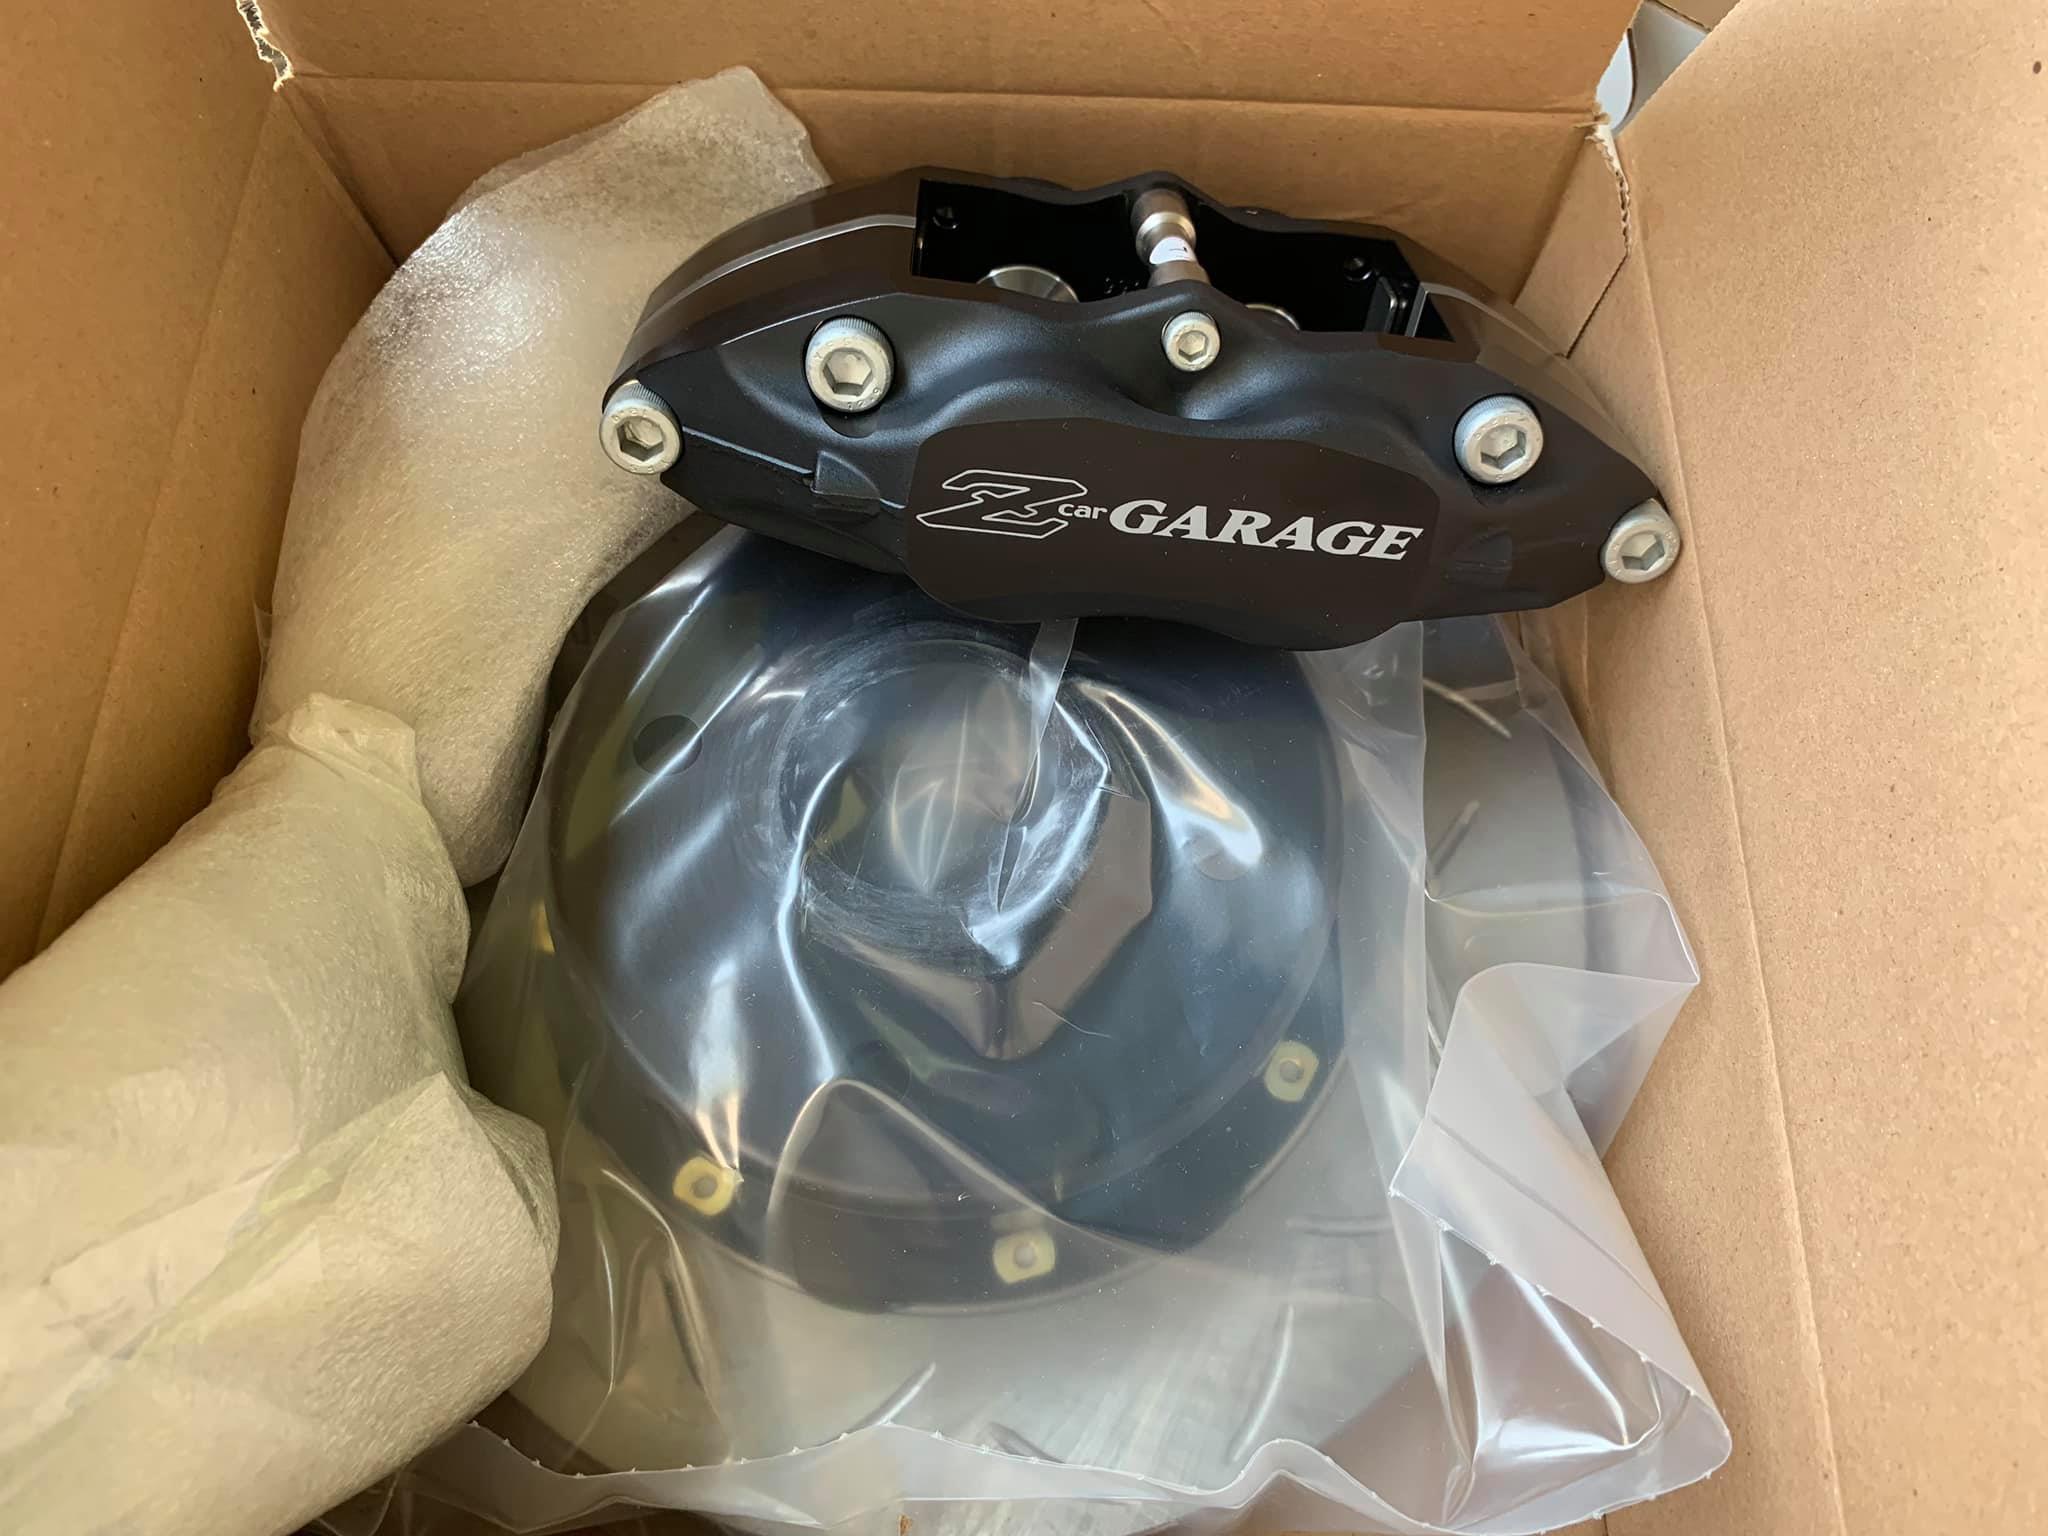
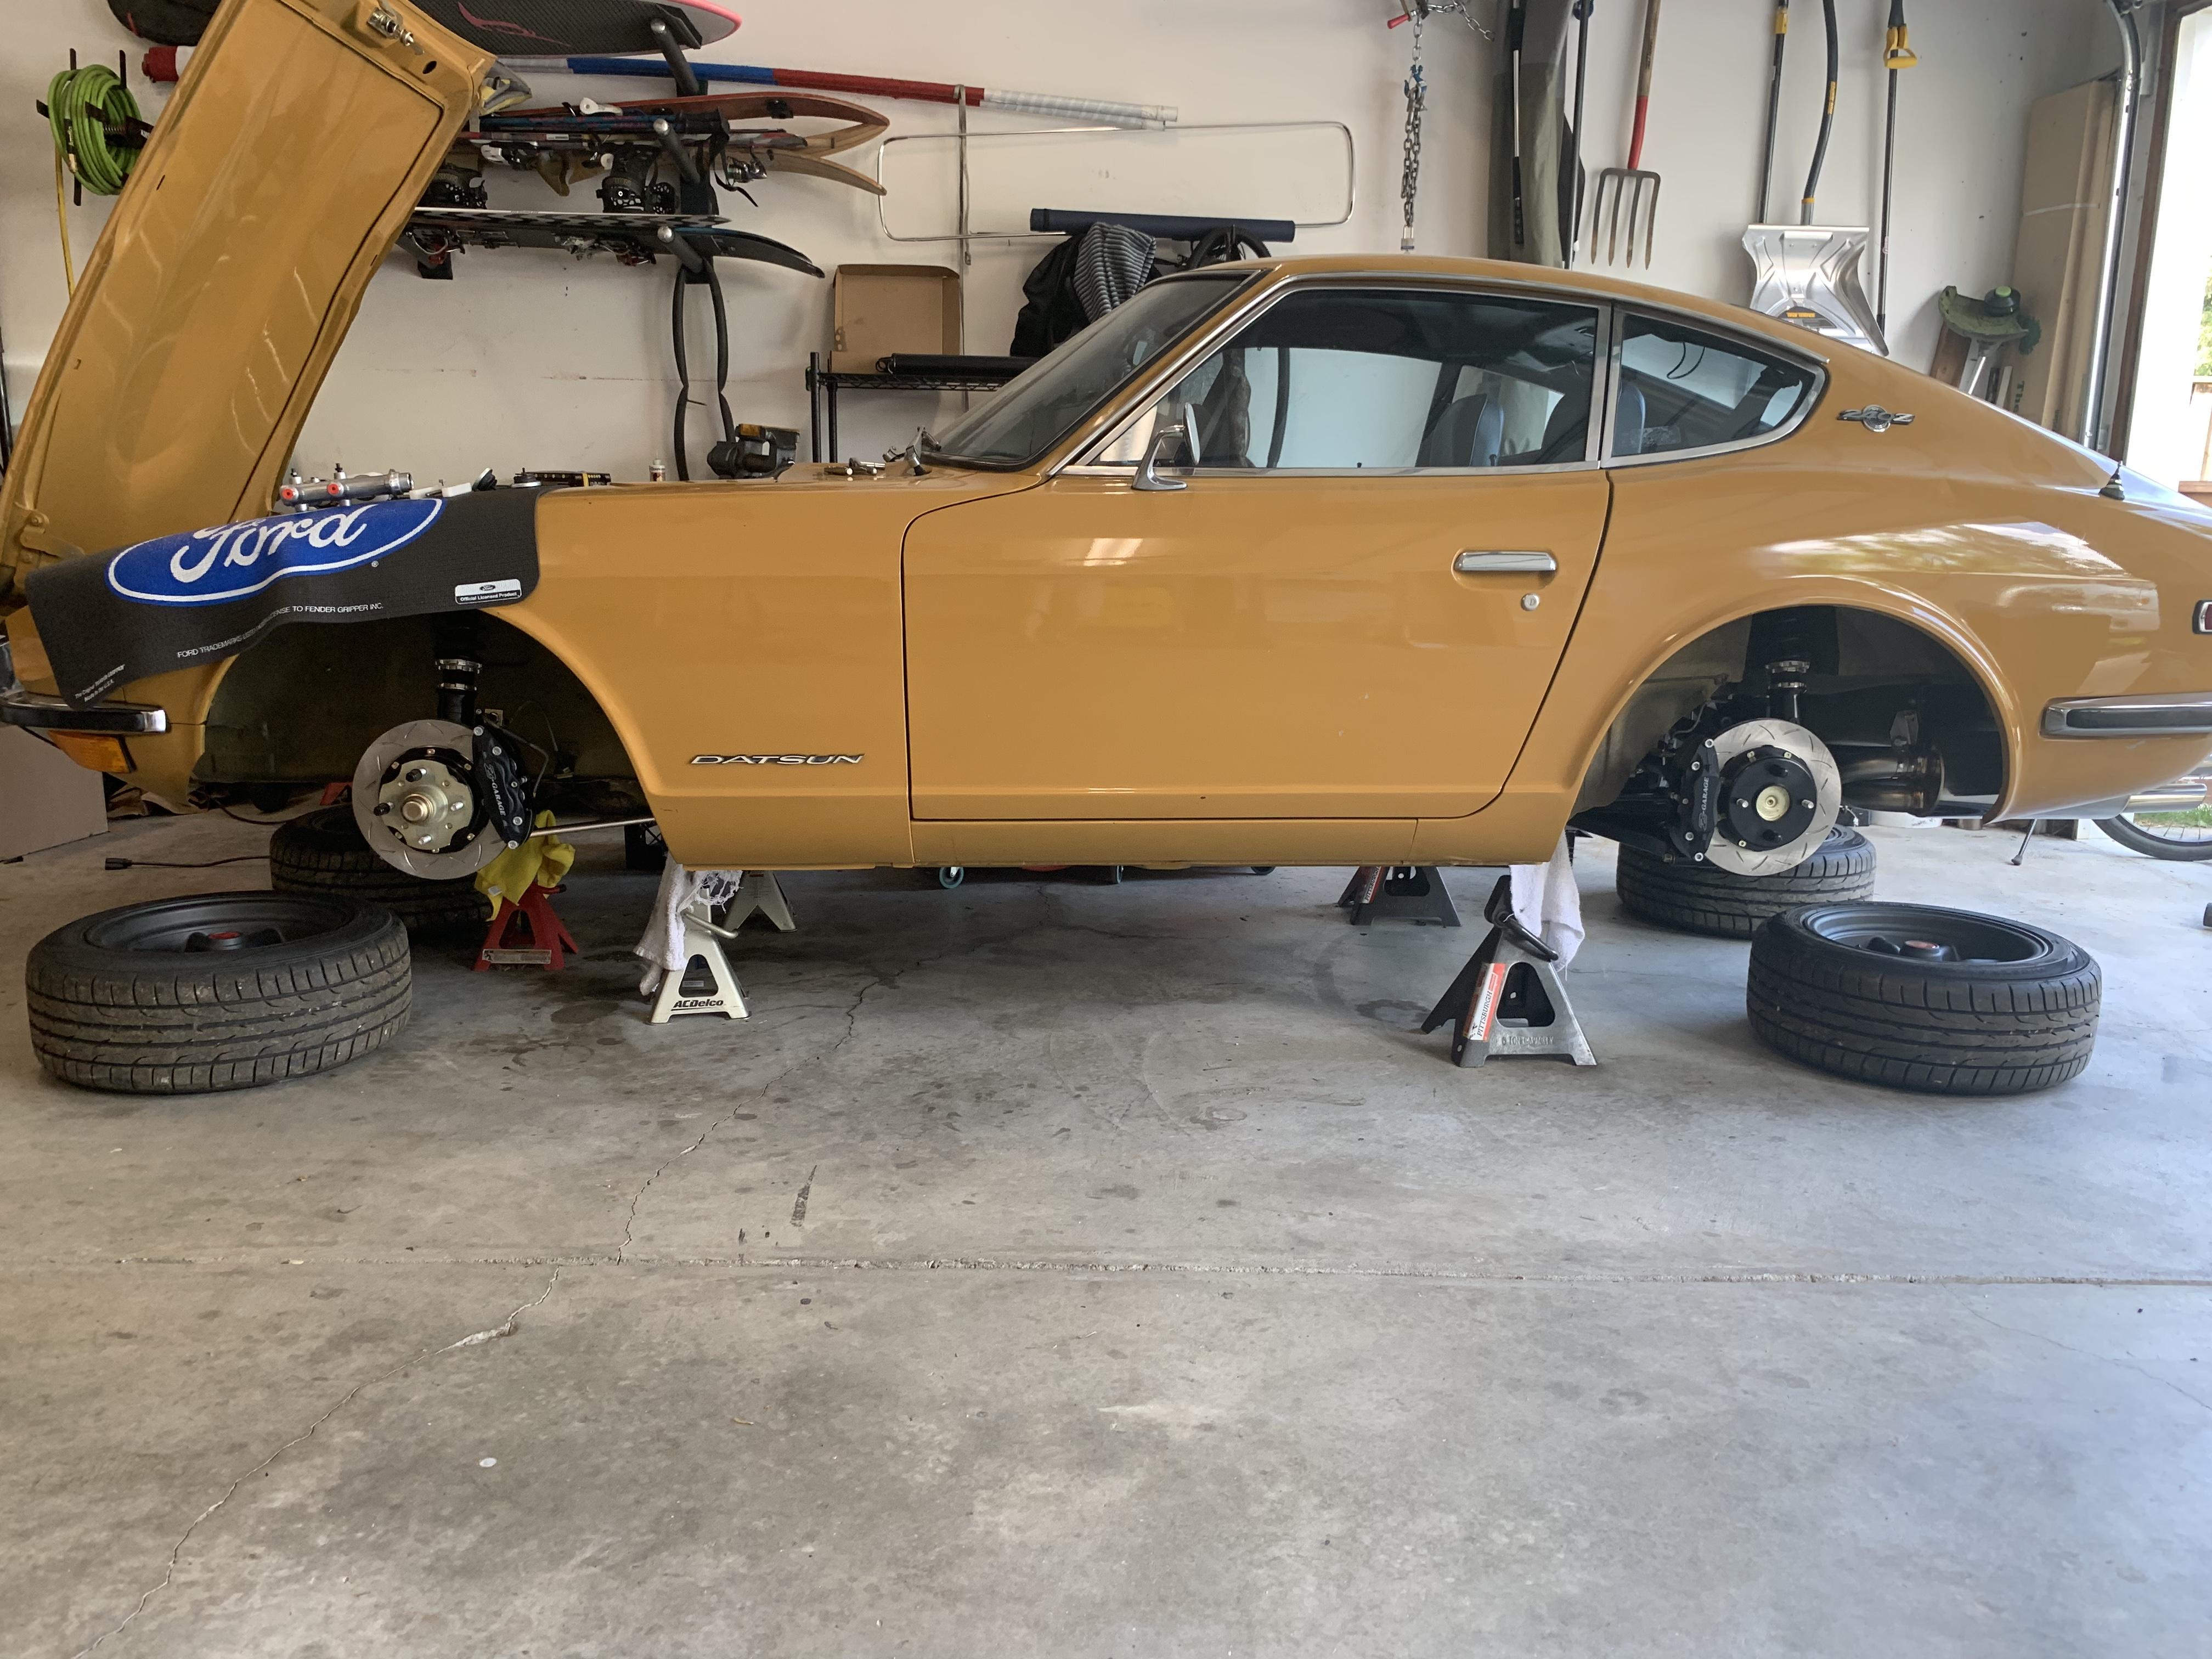
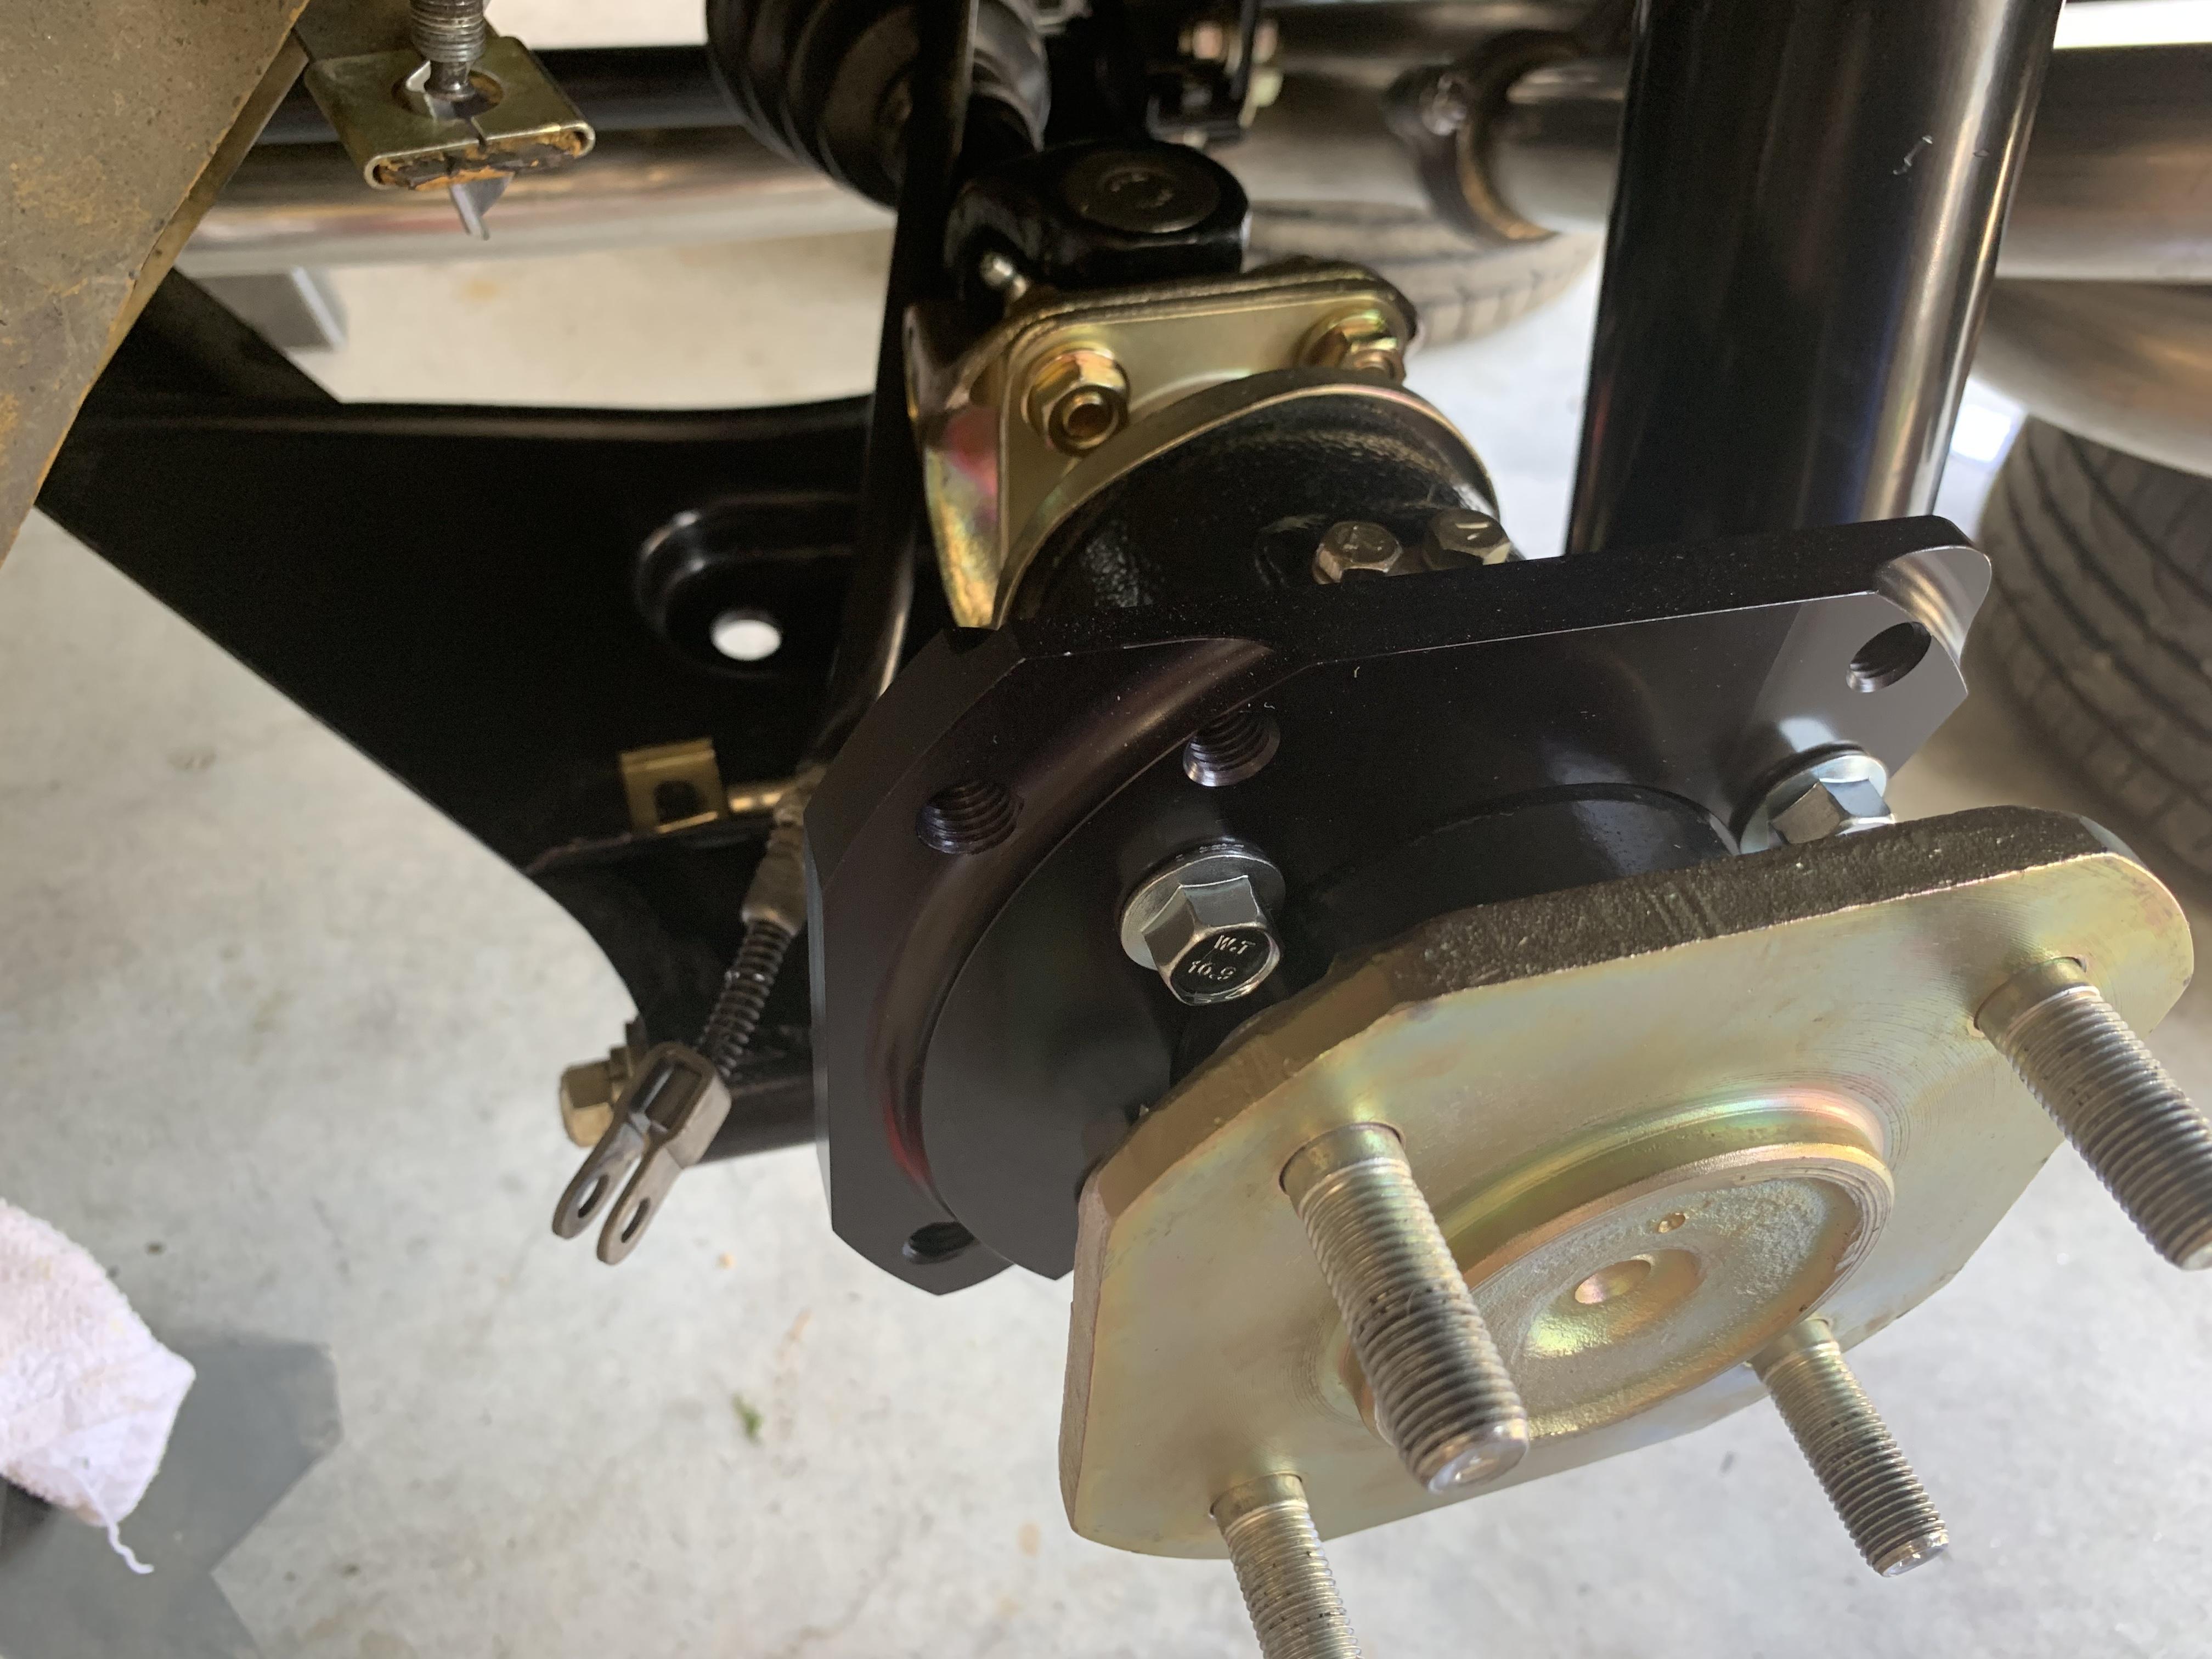
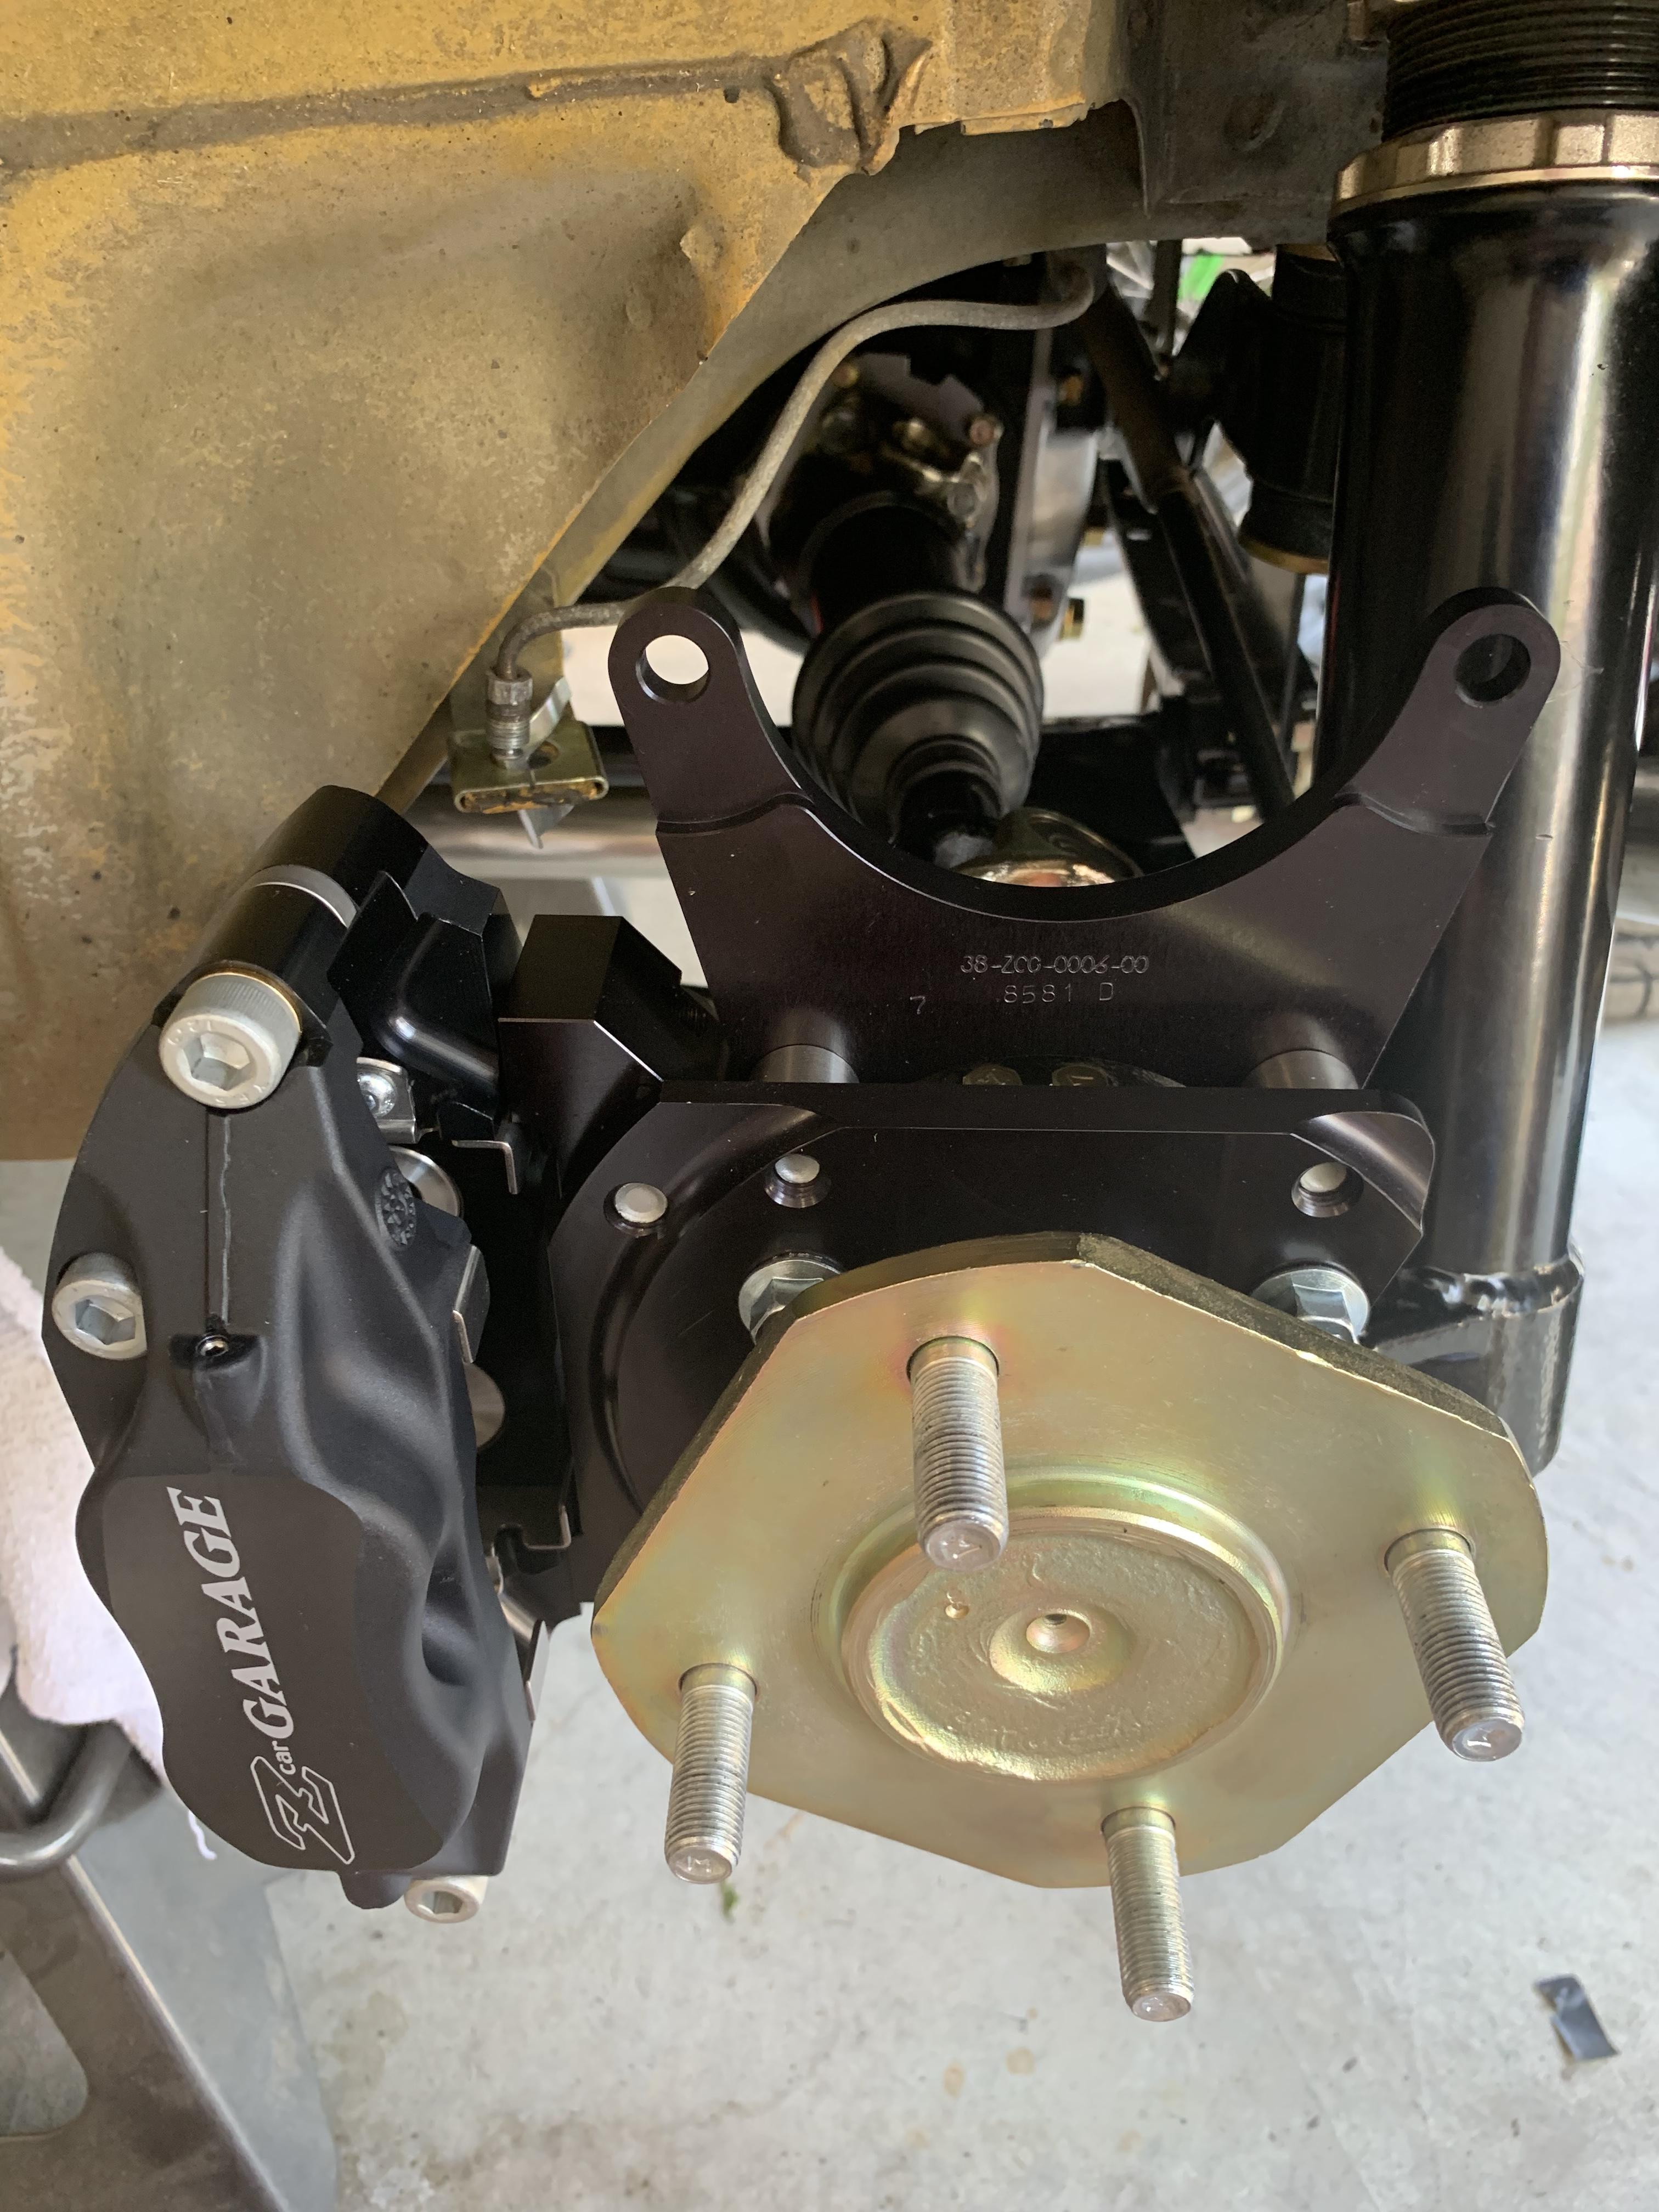
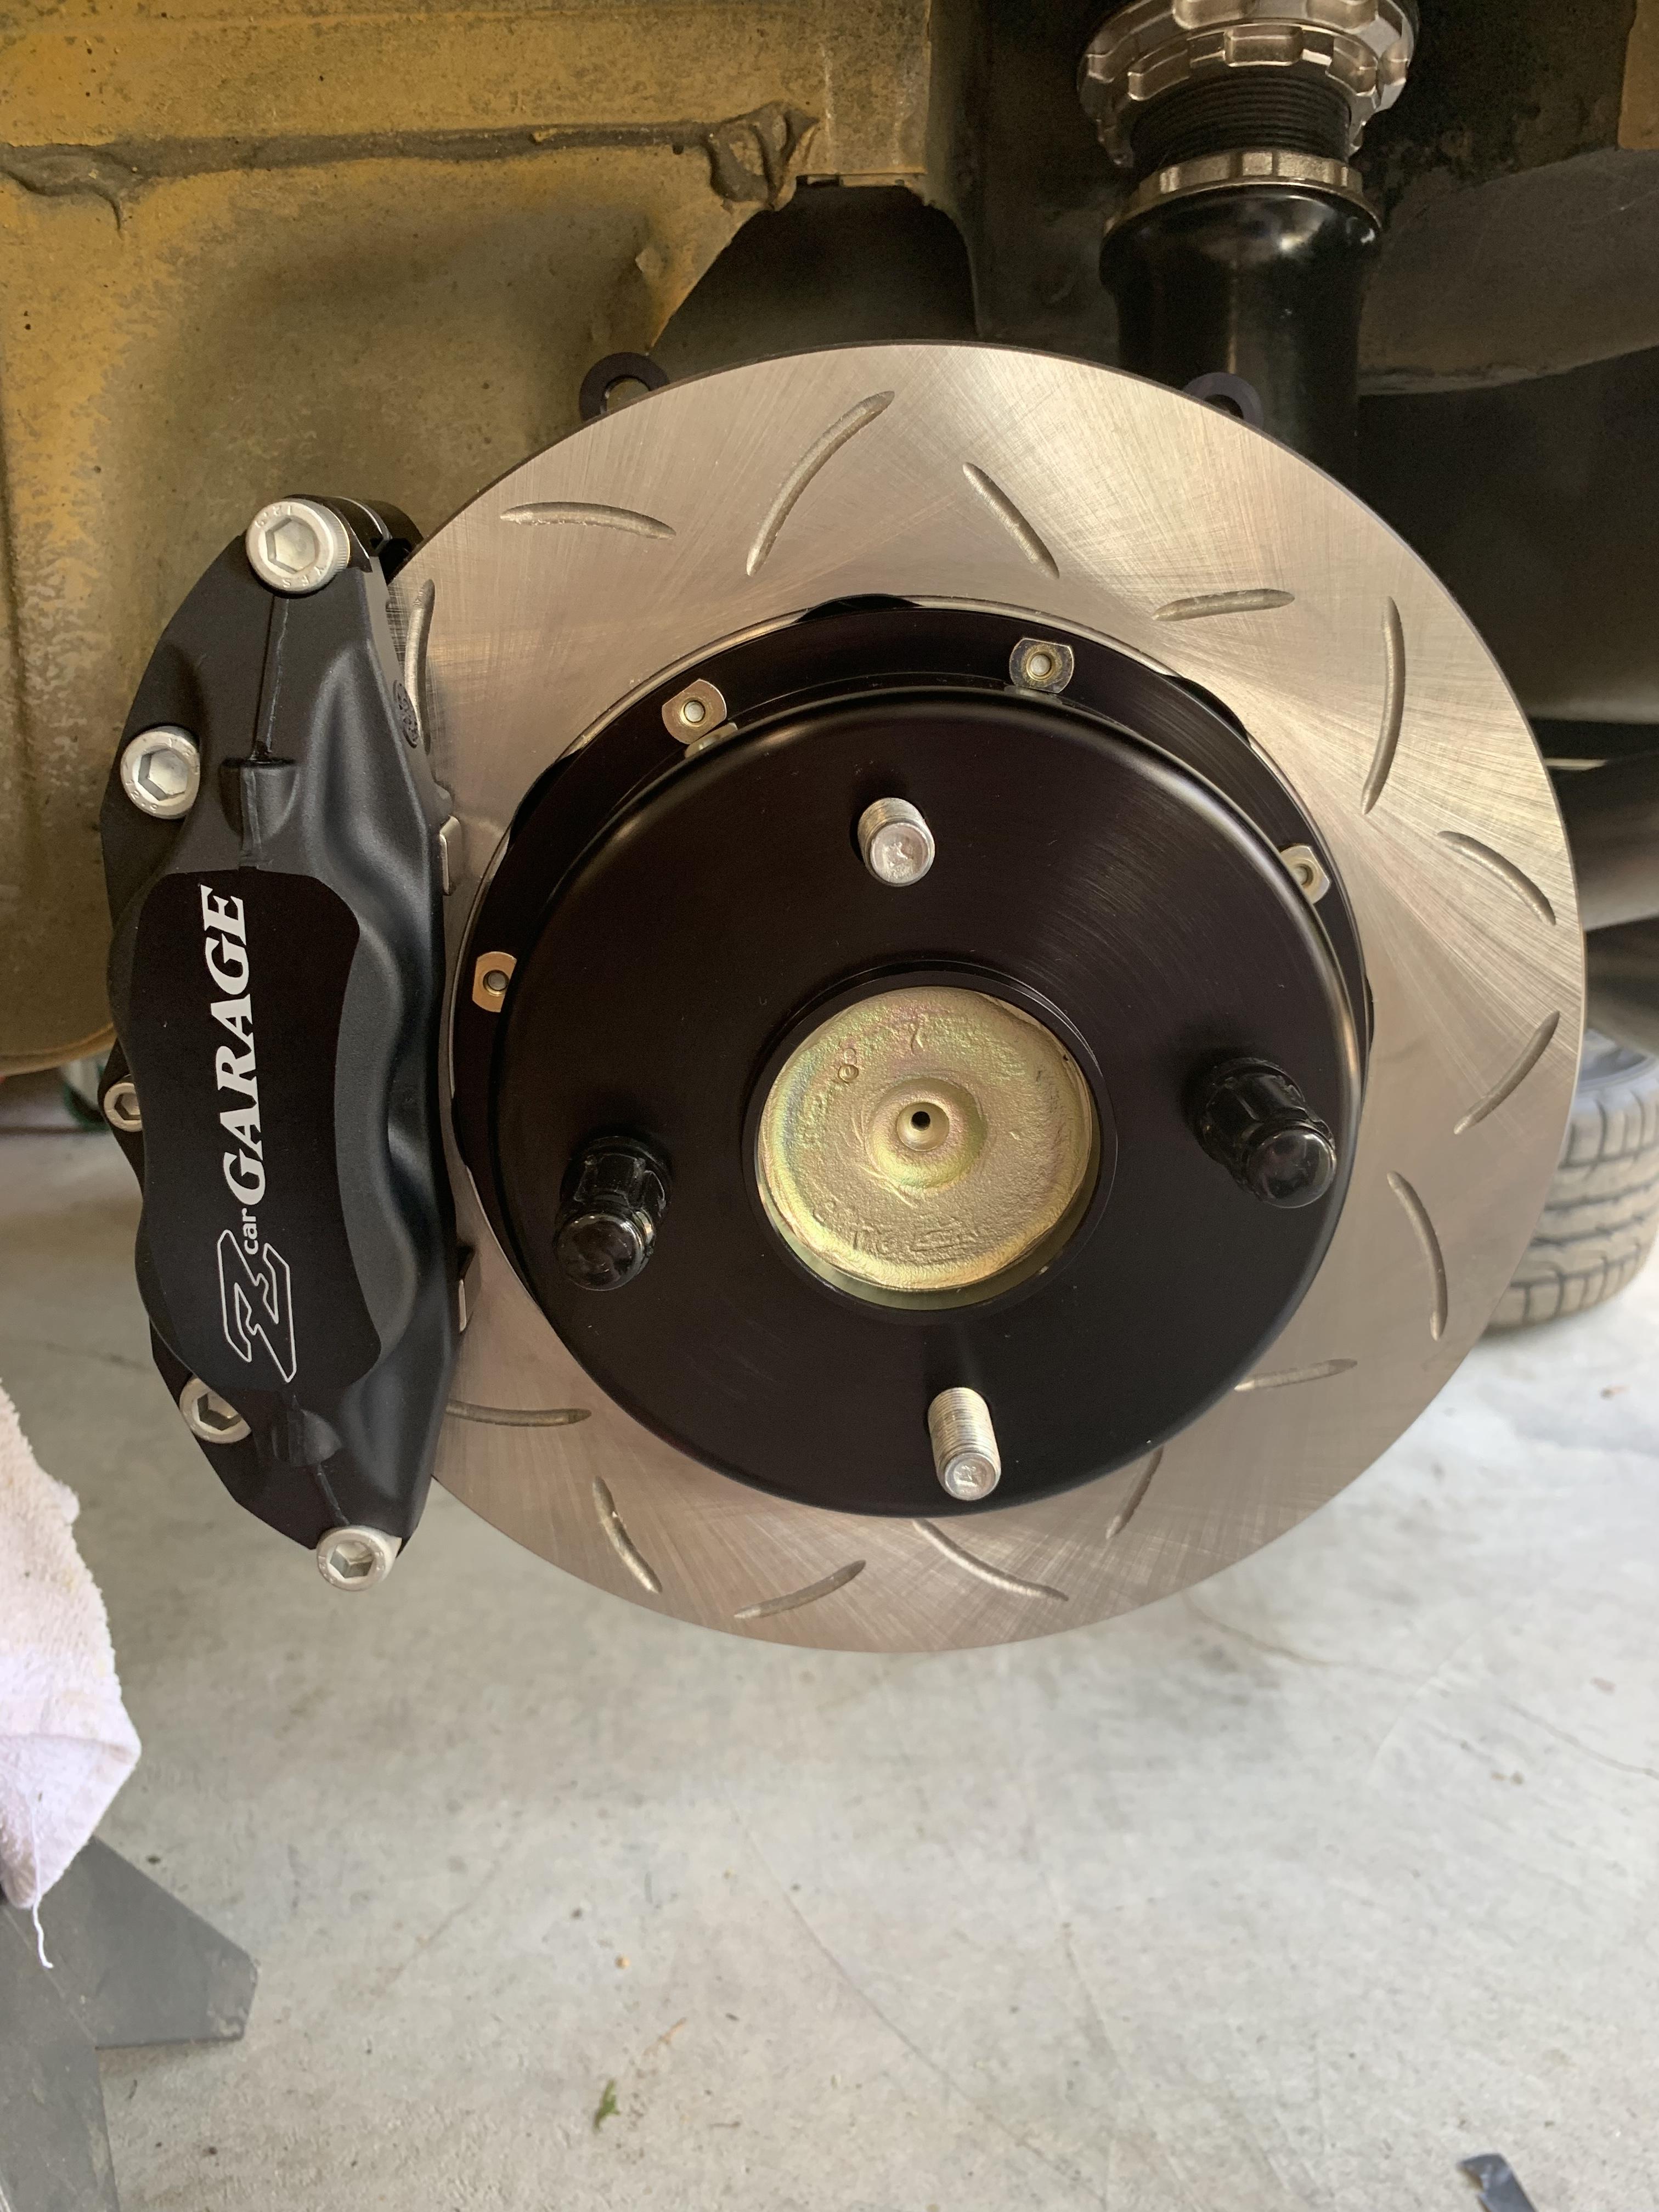
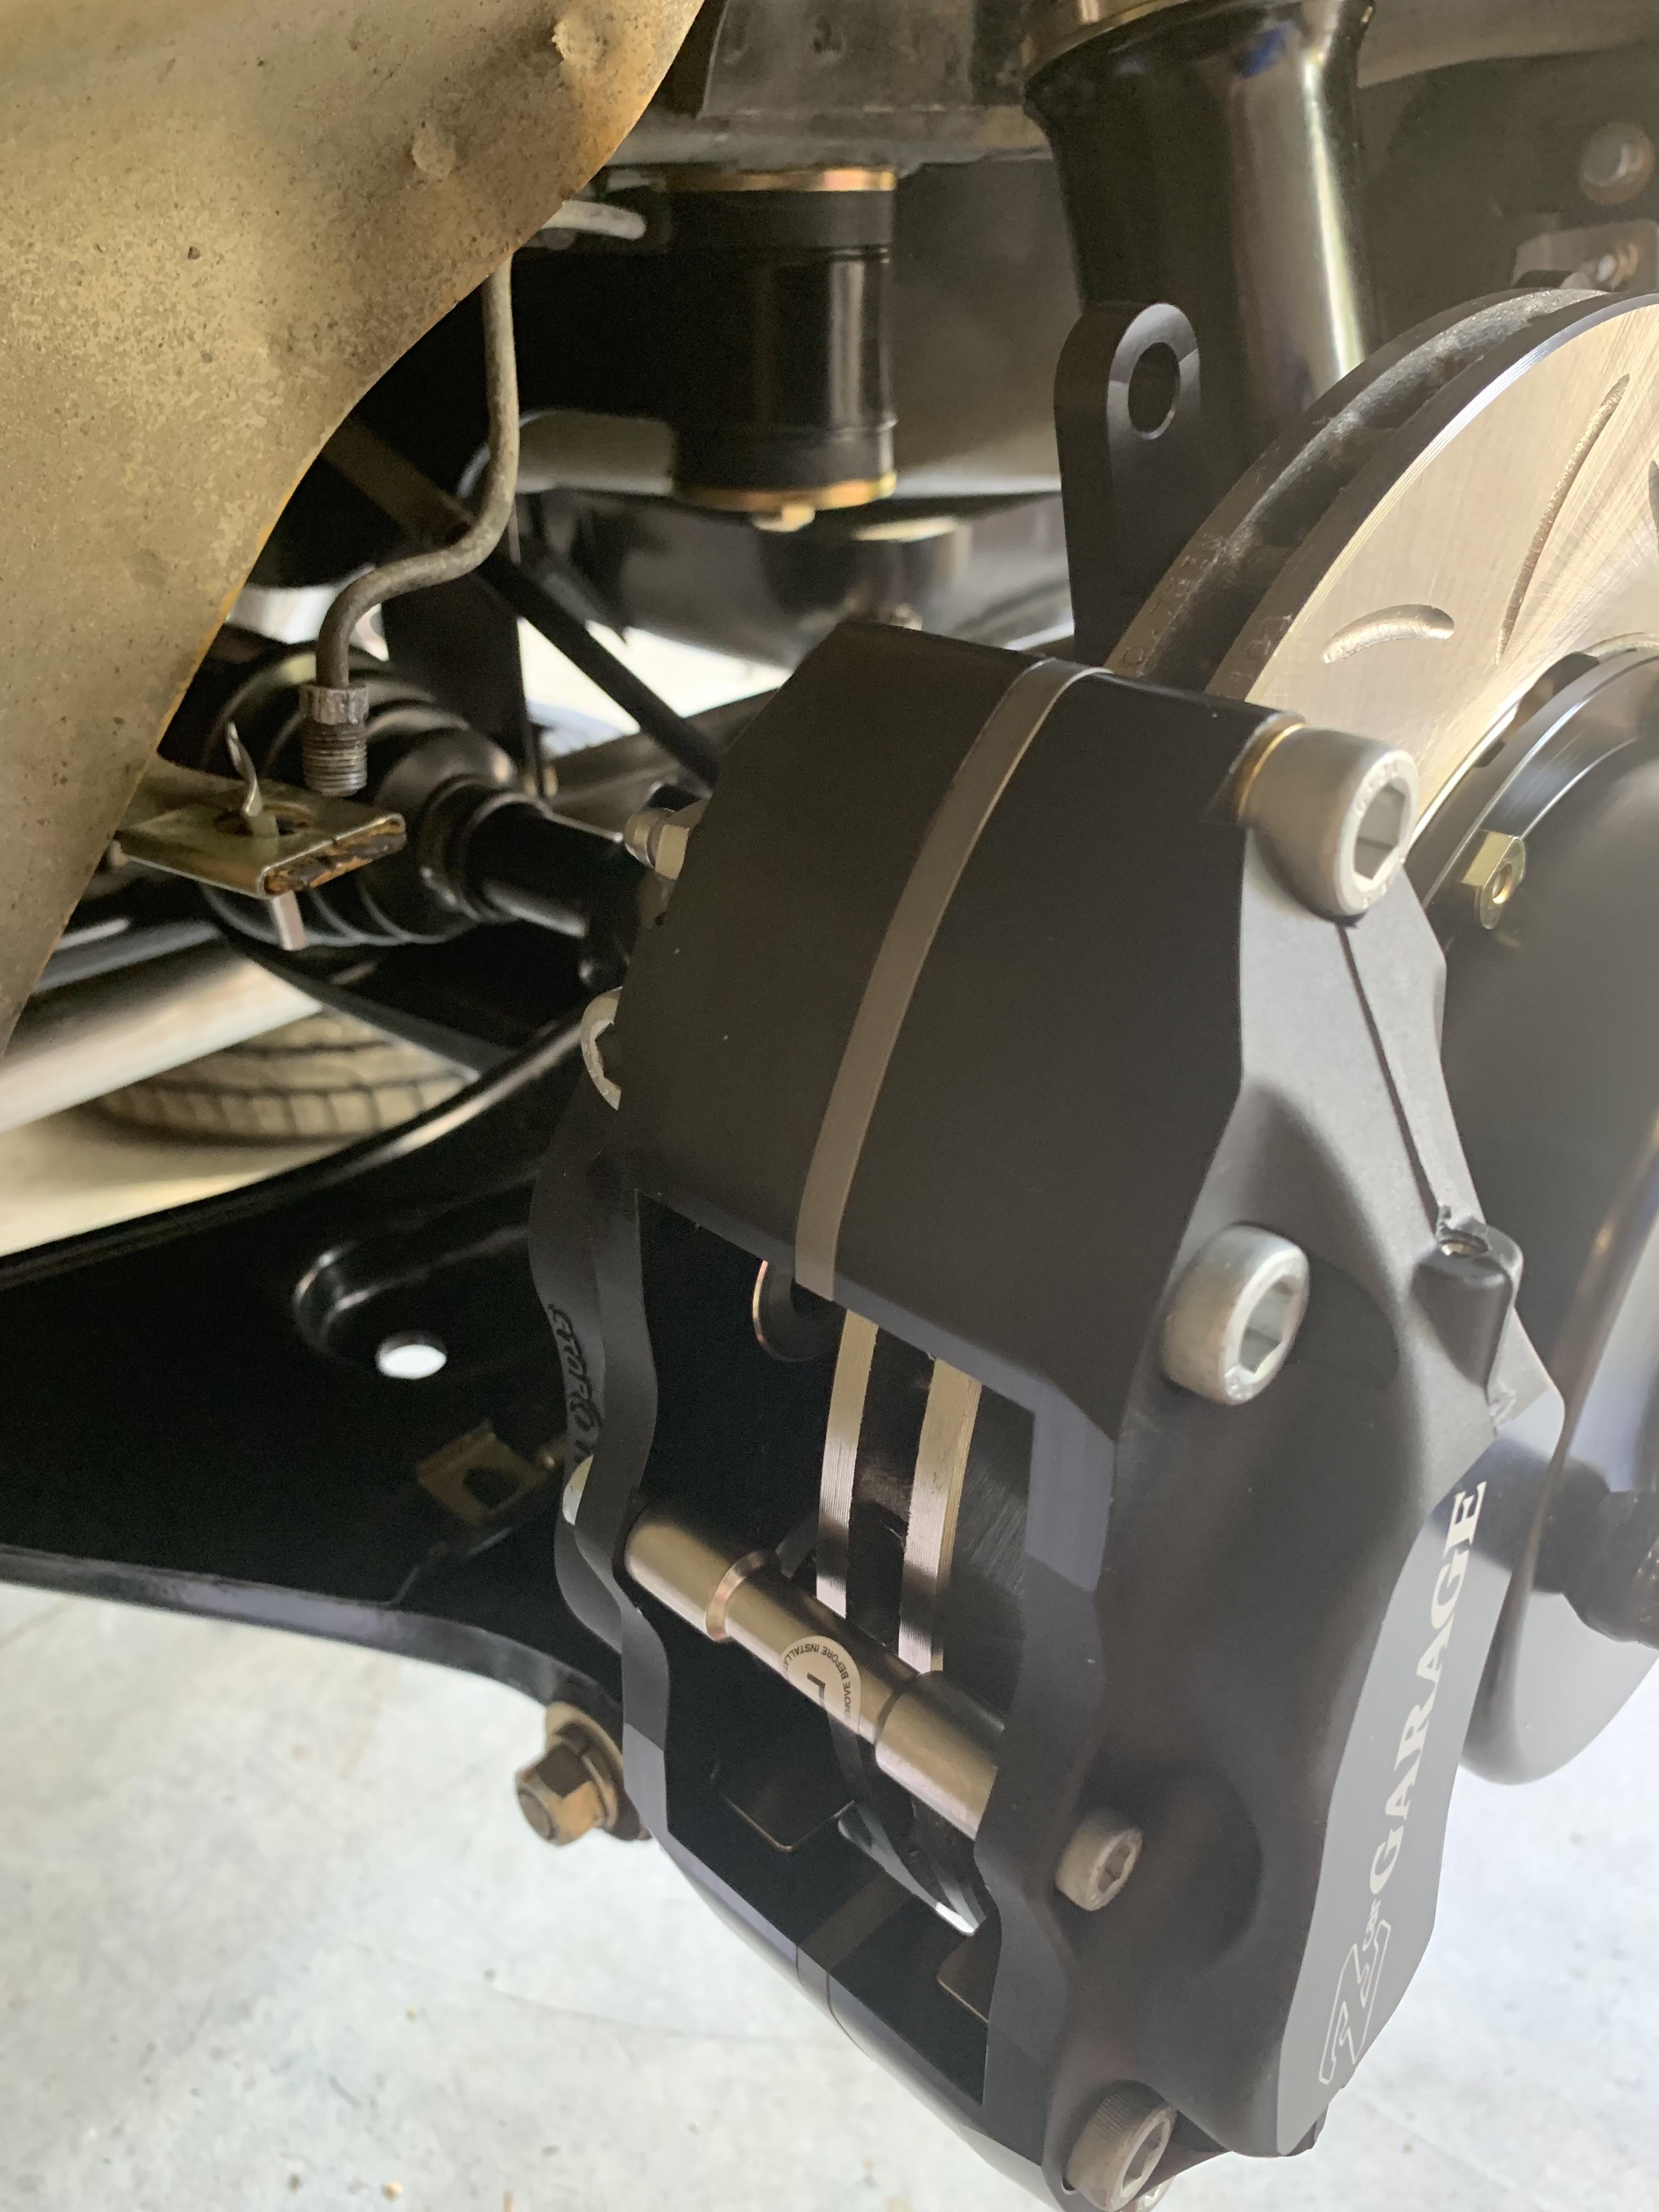
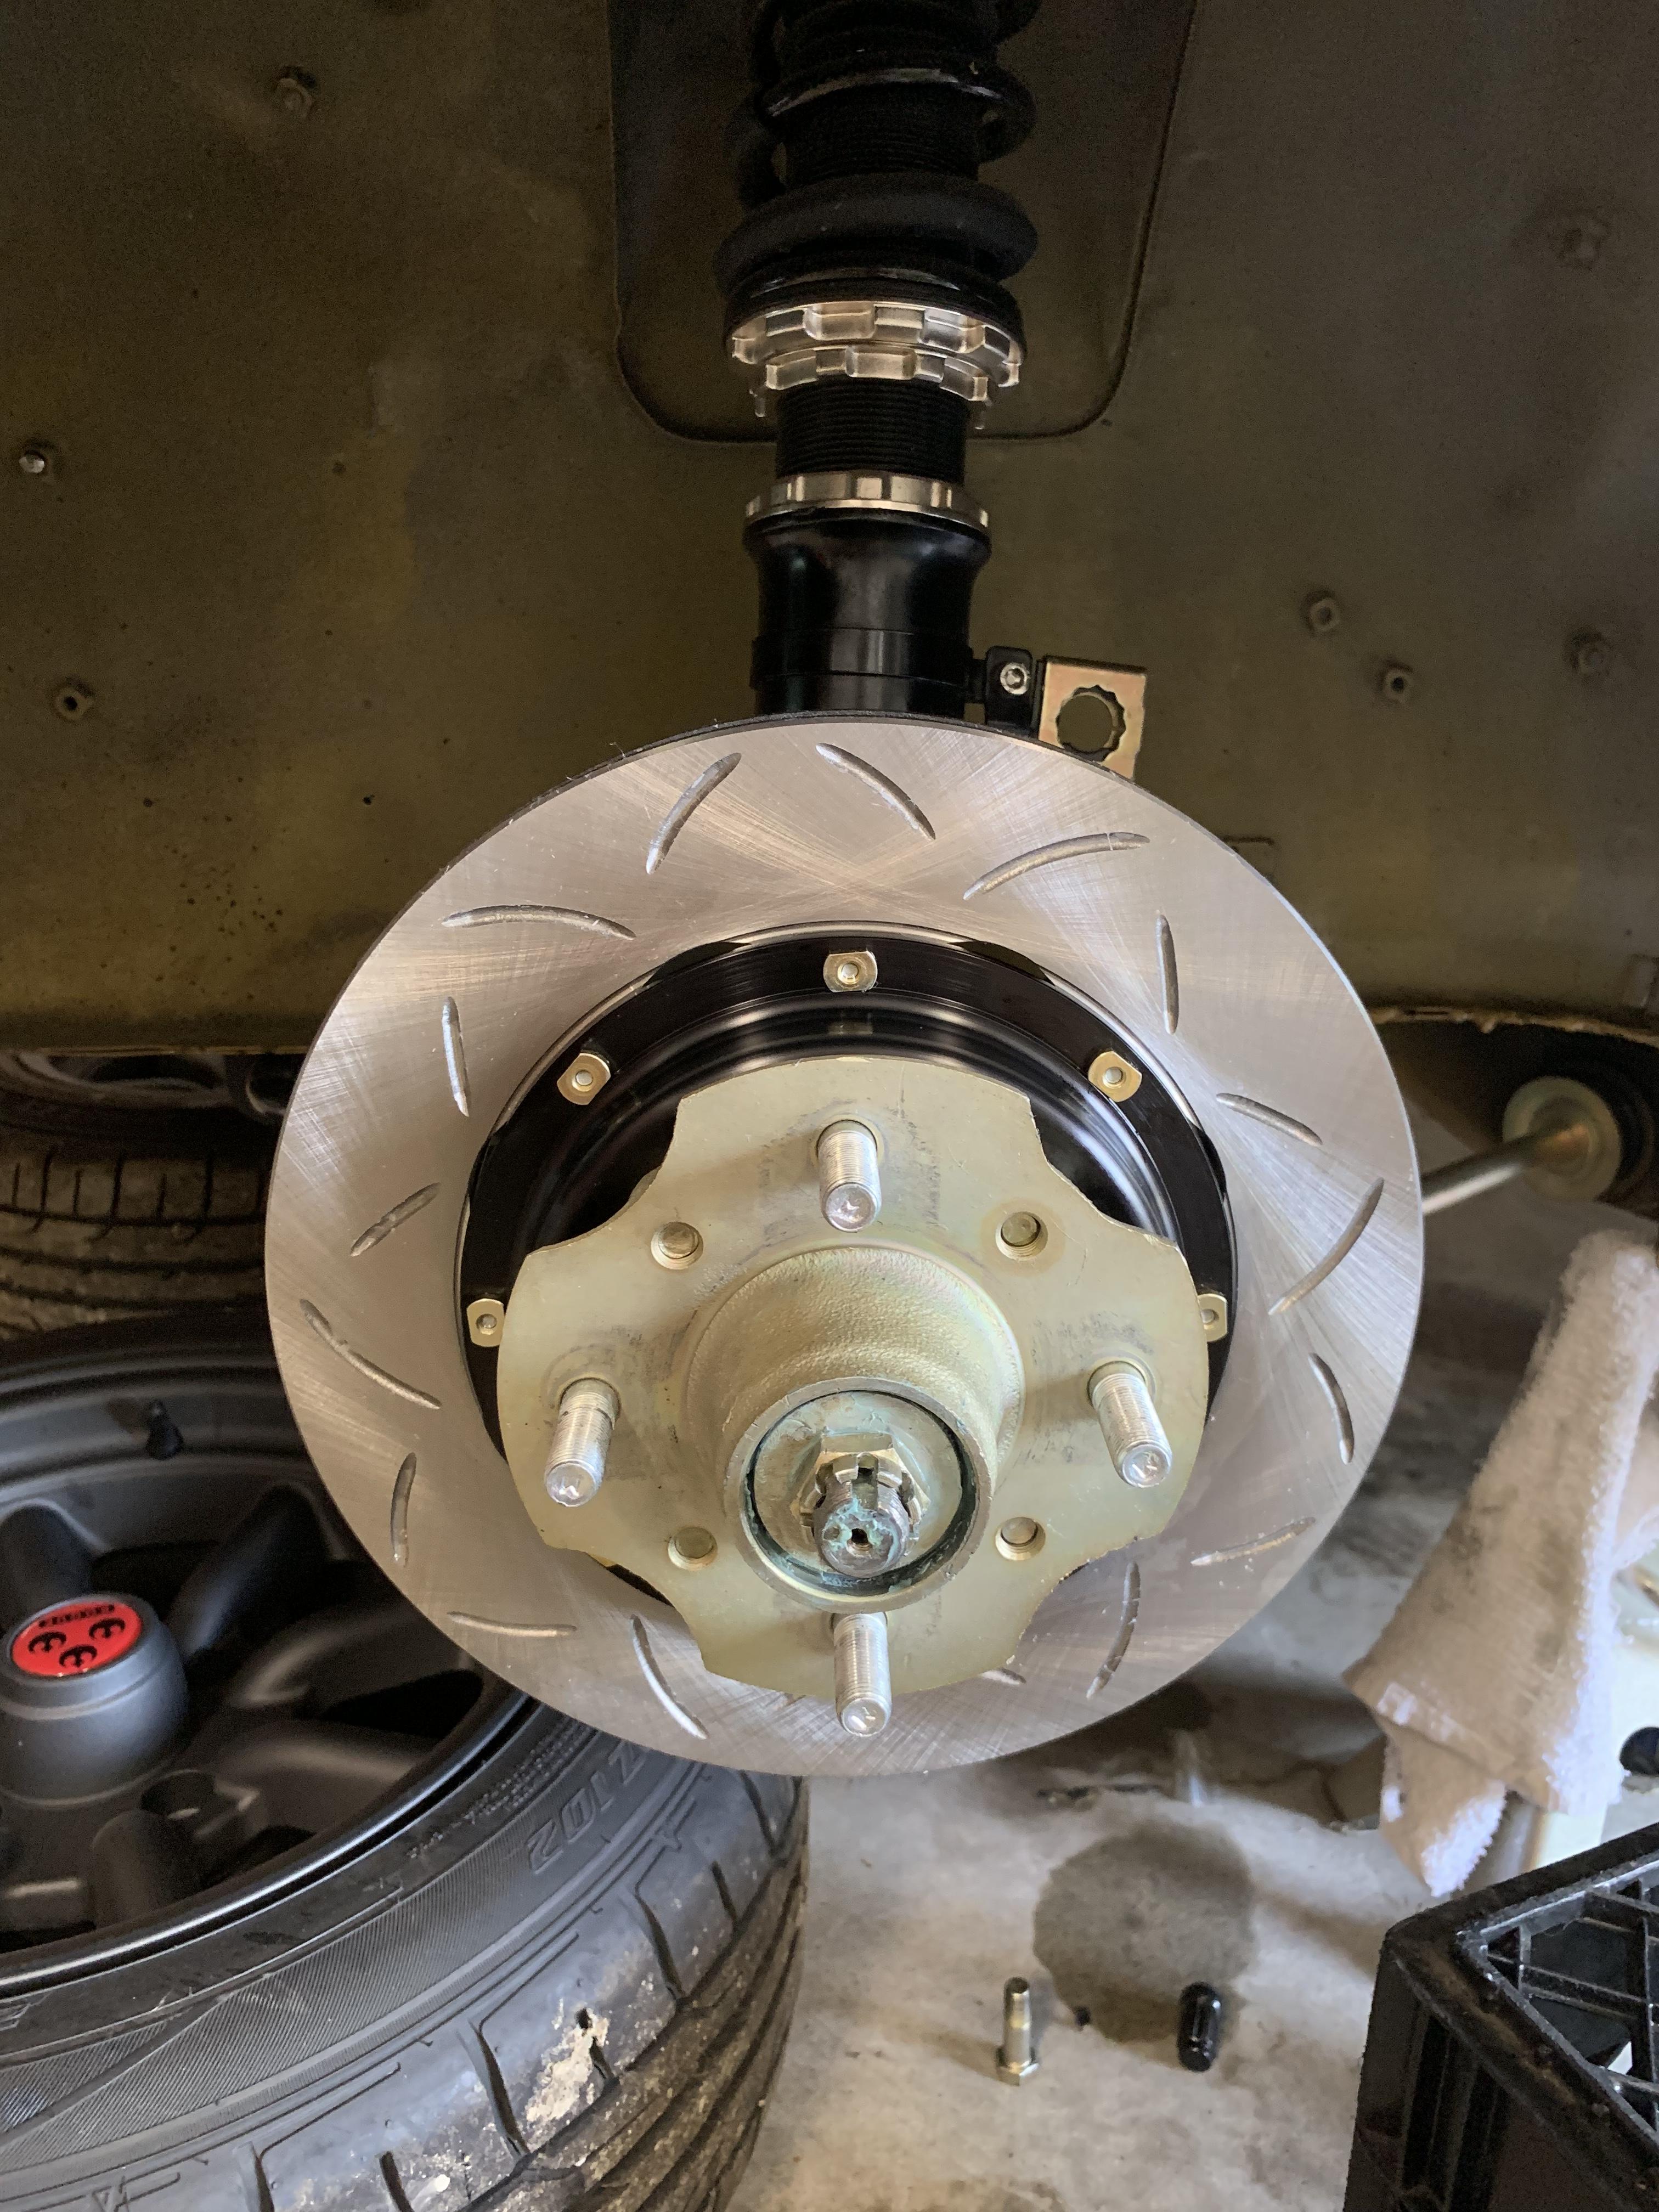
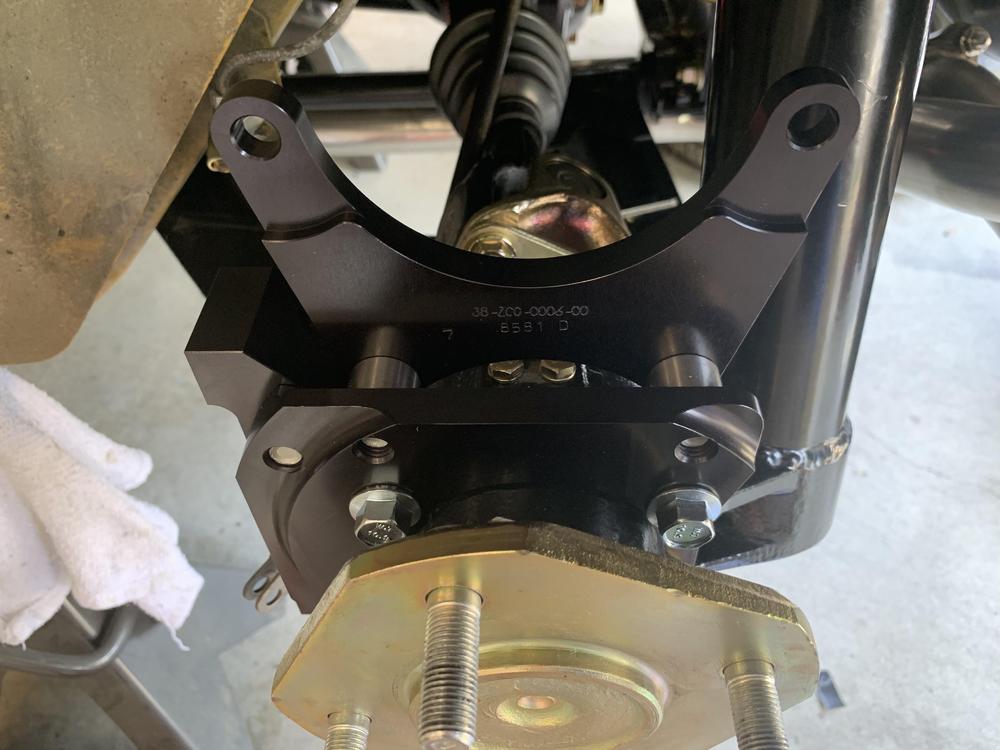
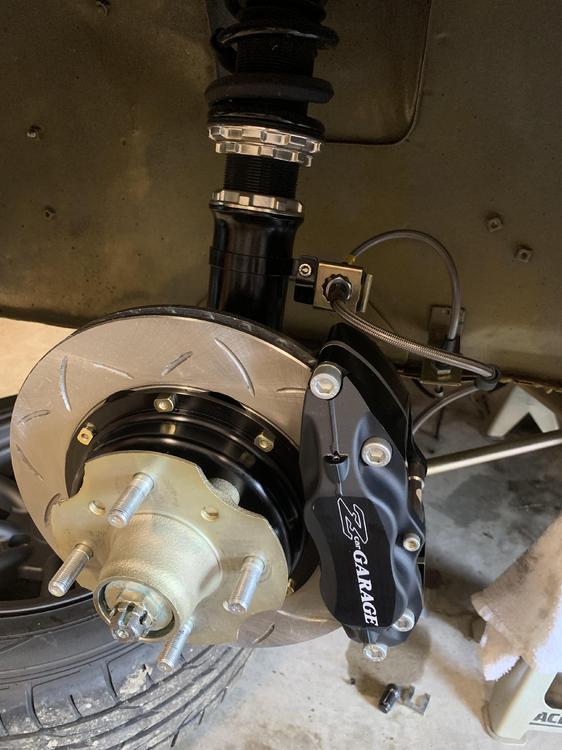
1 pointI am blown away by the quality and engineering that went into this Zcargarage BBK (big brake kit) The kit was designed by stoptech engineers and Zcargarage from the ground up for the Z. I am sort of a guinea pig to see if consumers can install this kit. They have amazing detailed 40 page instructions. Which in the car world is rare. I’m stoked to get them installed. Kit comes with everything needed to install and retains stock parking brake and MC. Fits 15x8 wheels as well! So light!

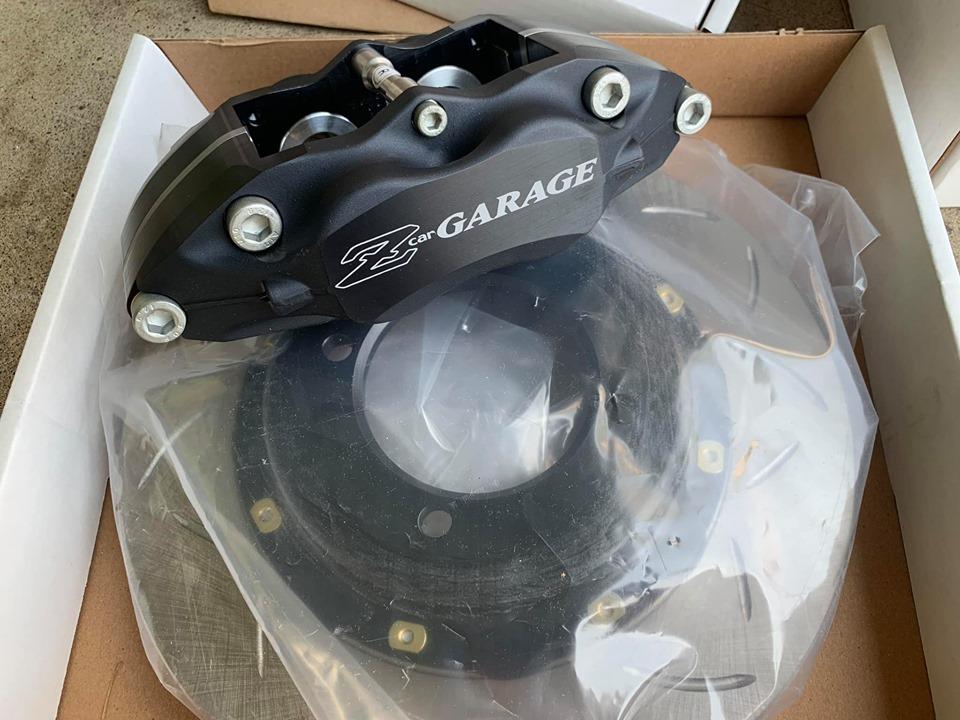 1 point
 -
1 pointNo it has one tiny crack he says. Seller comment: “Complete dash out of a 240z. Comes with everything shown in pictures. One small crack and one small indention on the top. See pictures. “ Sent from my iPhone using Tapatalk1 point
-
1 point
-
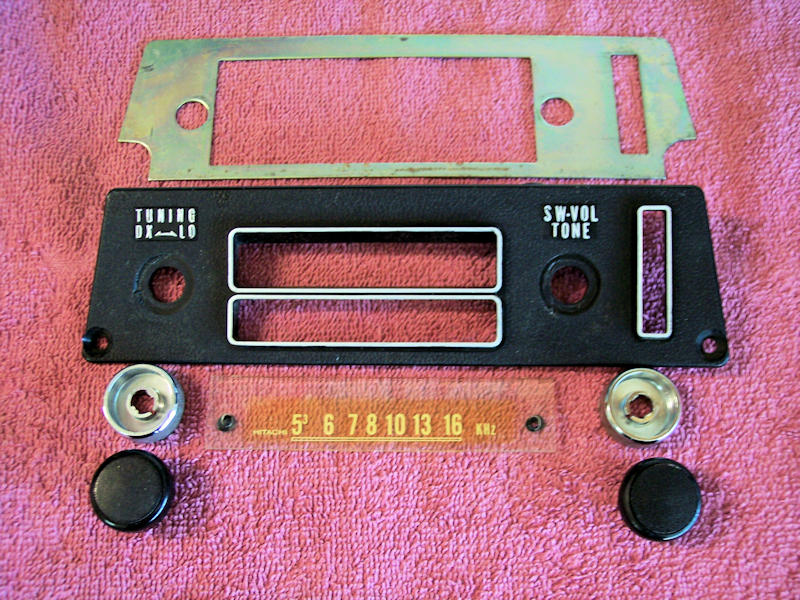
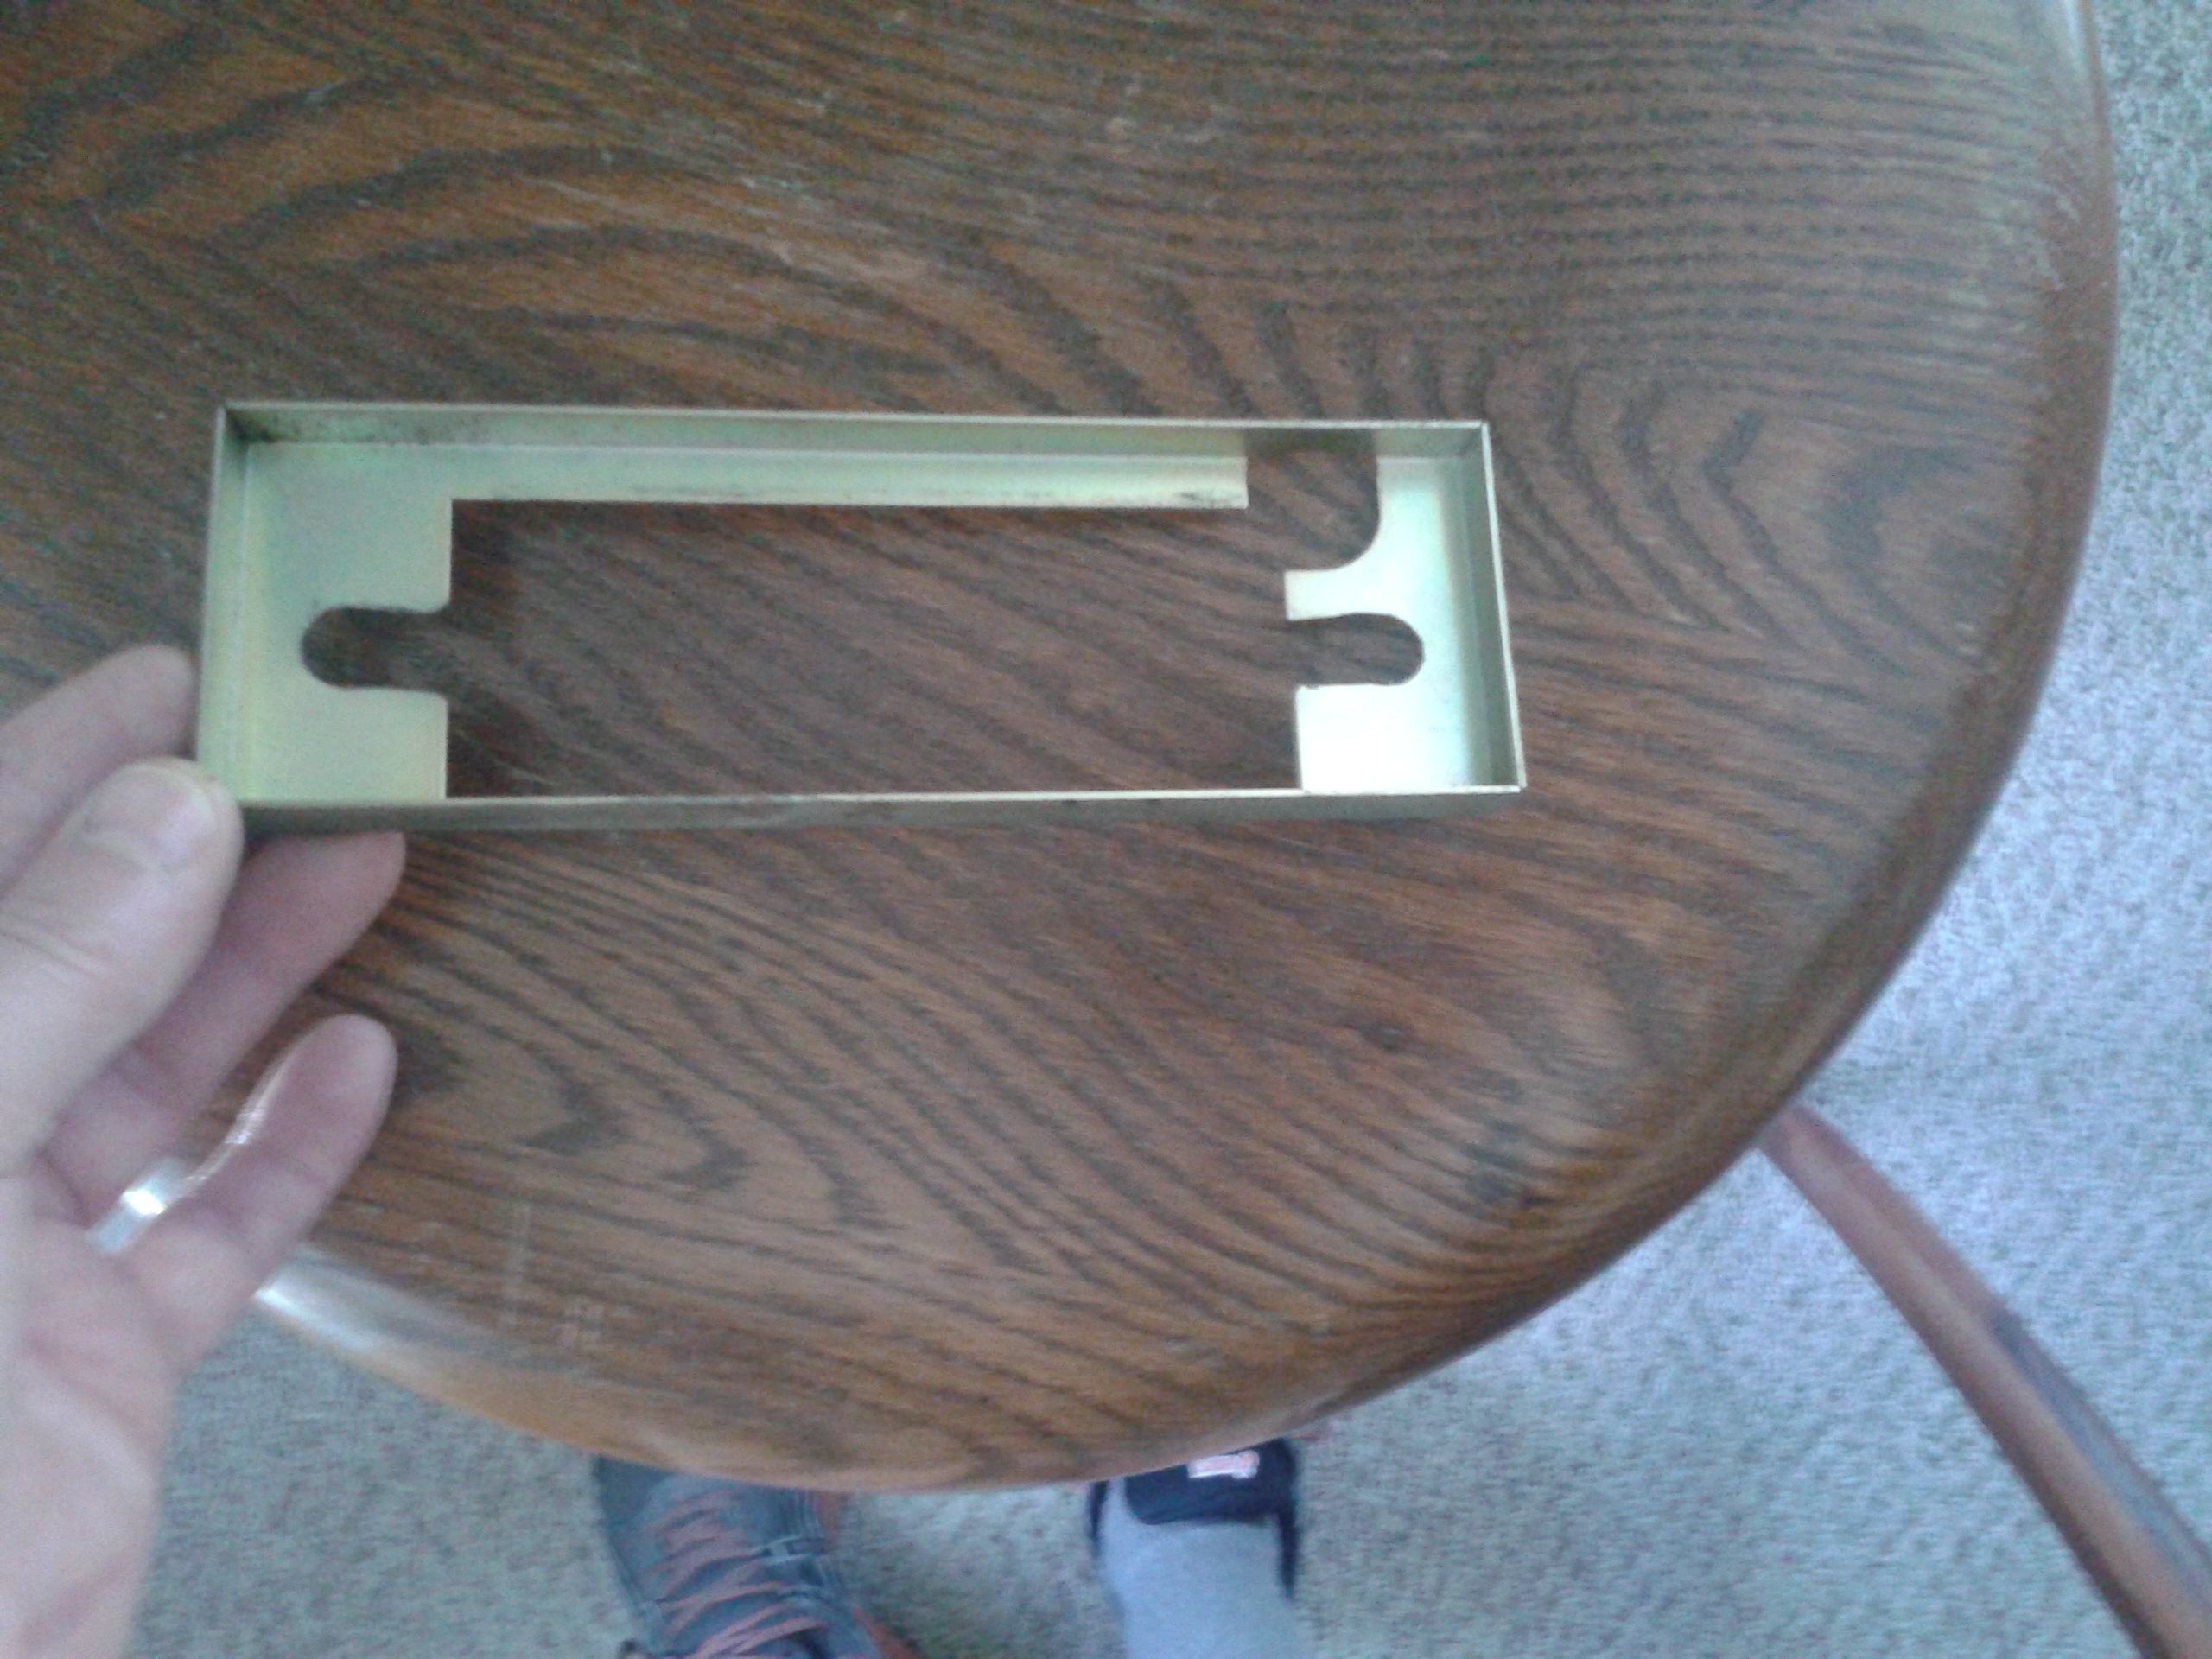
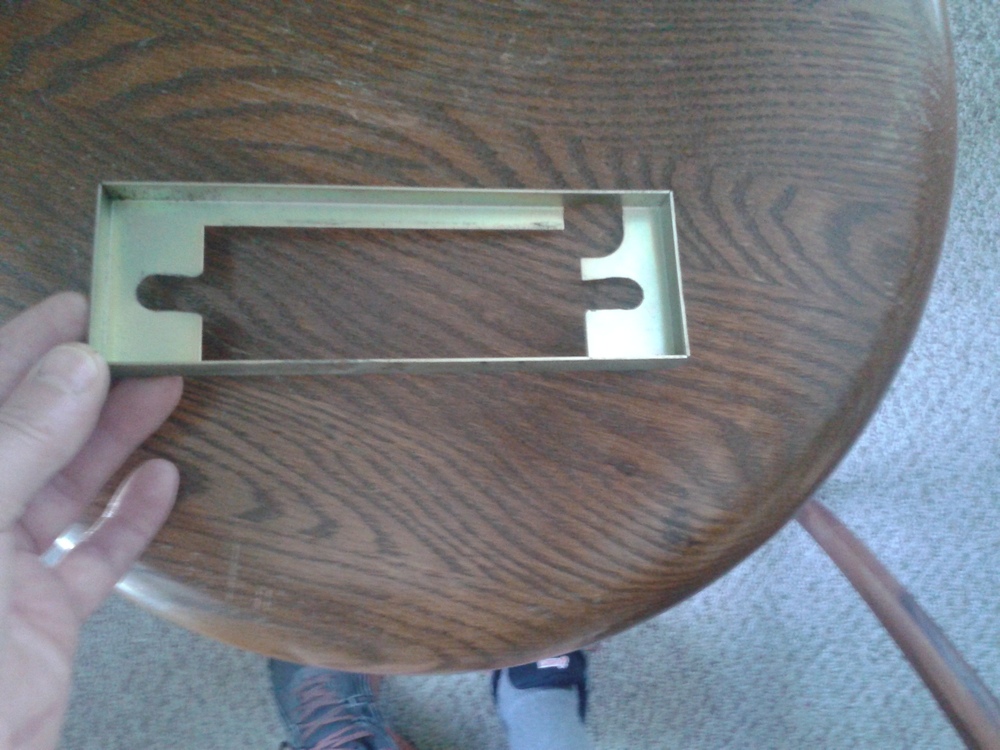
1 pointHere's a picture of my faceplate for my OE radio in my '72. You're going to need the metal back too. EDIT: It does look rectangular in the 3rd photo.

 1 point
 -
1 point
-
Solved a couple of nagging issues with a new ignition switch and re-torqued the not so tight exhaust manifold. Starts fine and no more backfire between shifts.1 point
-
1 point
-
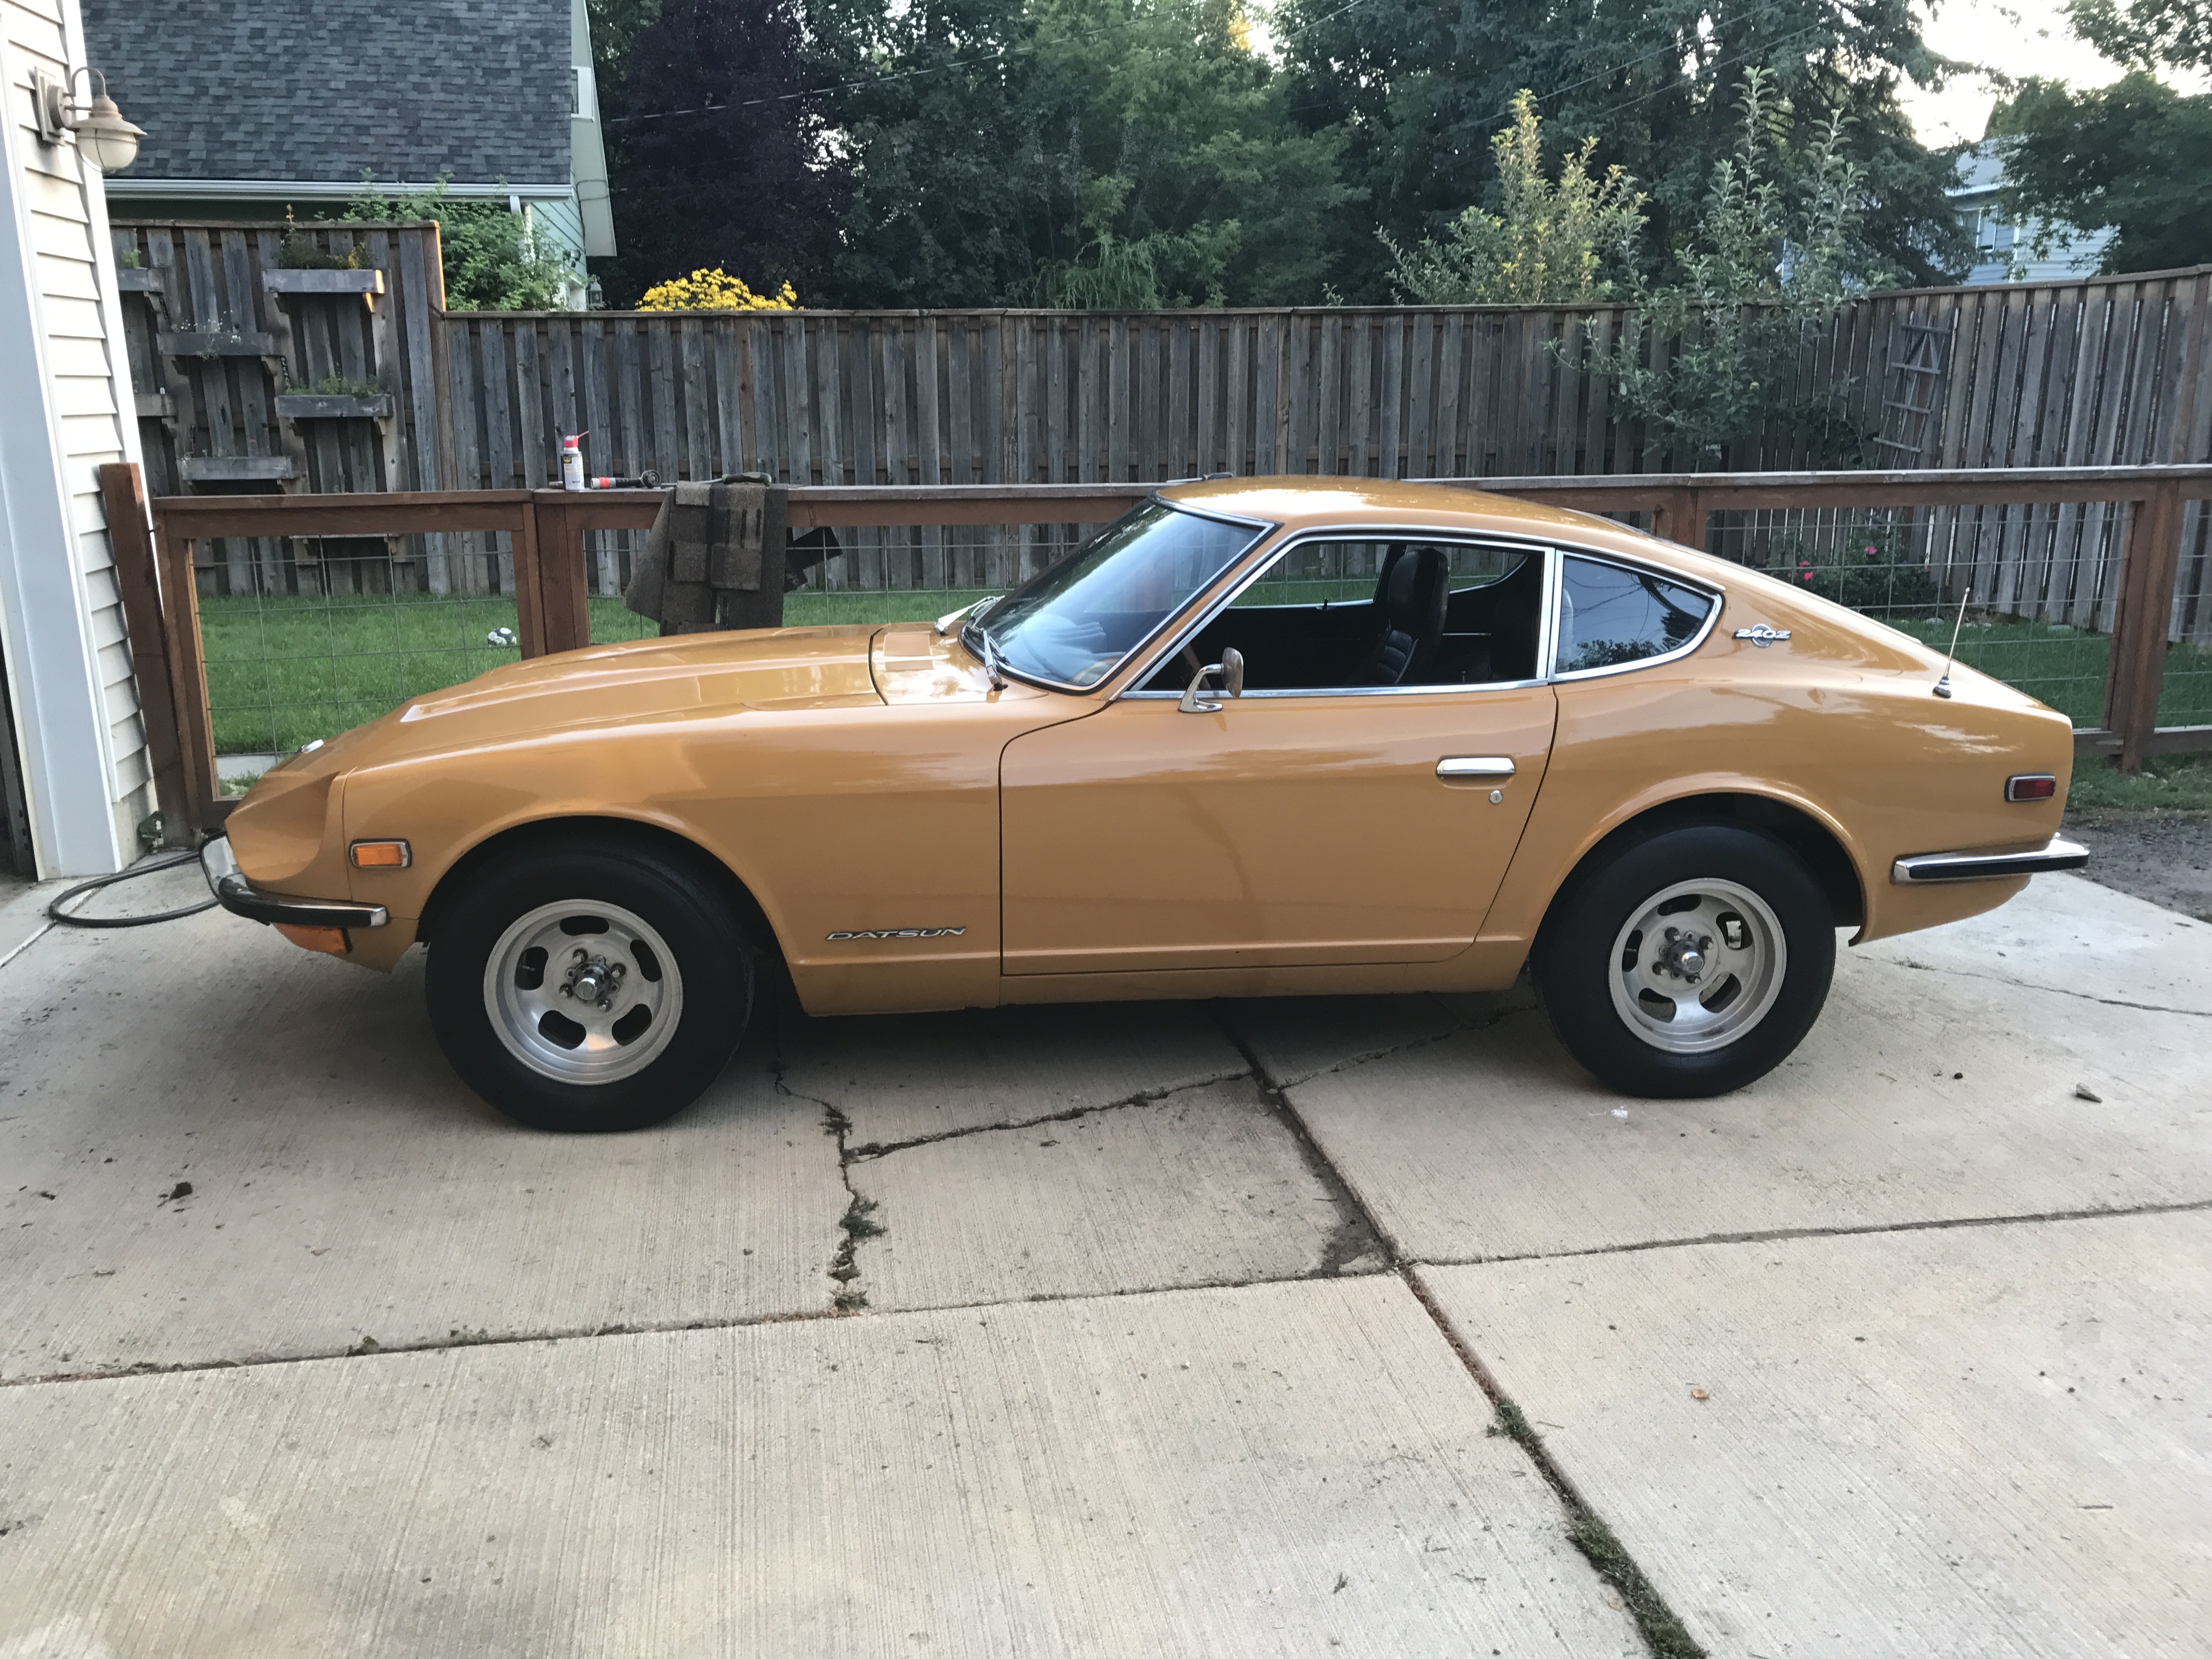
If my memory is still working, that's the month. Definitely a Series 1. Dug out some old paperwork on "Hiro". April 1st, 1972. (I forgot it was April fools day.) I do remember driving by Gran Prix Motors in my 69 SS 396 Chevelle and seeing my soon to be stunning yellow Z. It was a spur of the moment decision. A short drive later and I deposited $15.00 with Joe Black to hold it until I got back from the bank with the sum of $3695.00.1 point
-
1 point
-
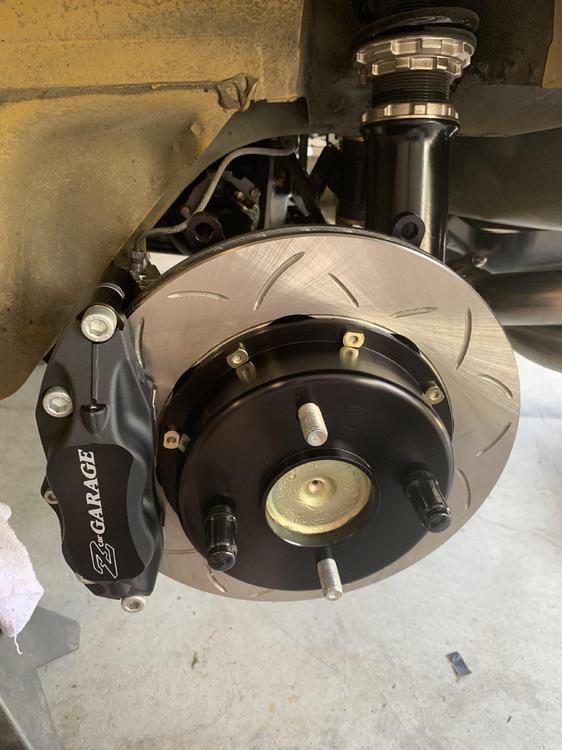
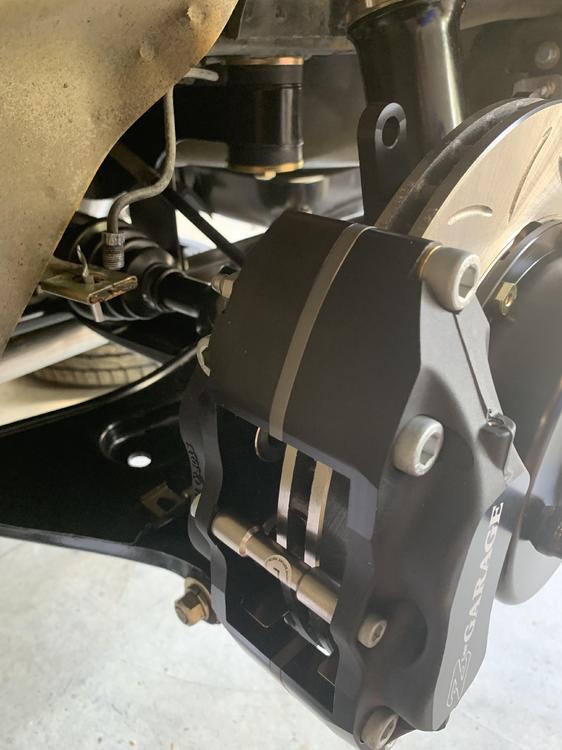
1 pointI’m blown away by the level of fit and finish and engineering that went into the kit.


 1 point
 -
1 point
-
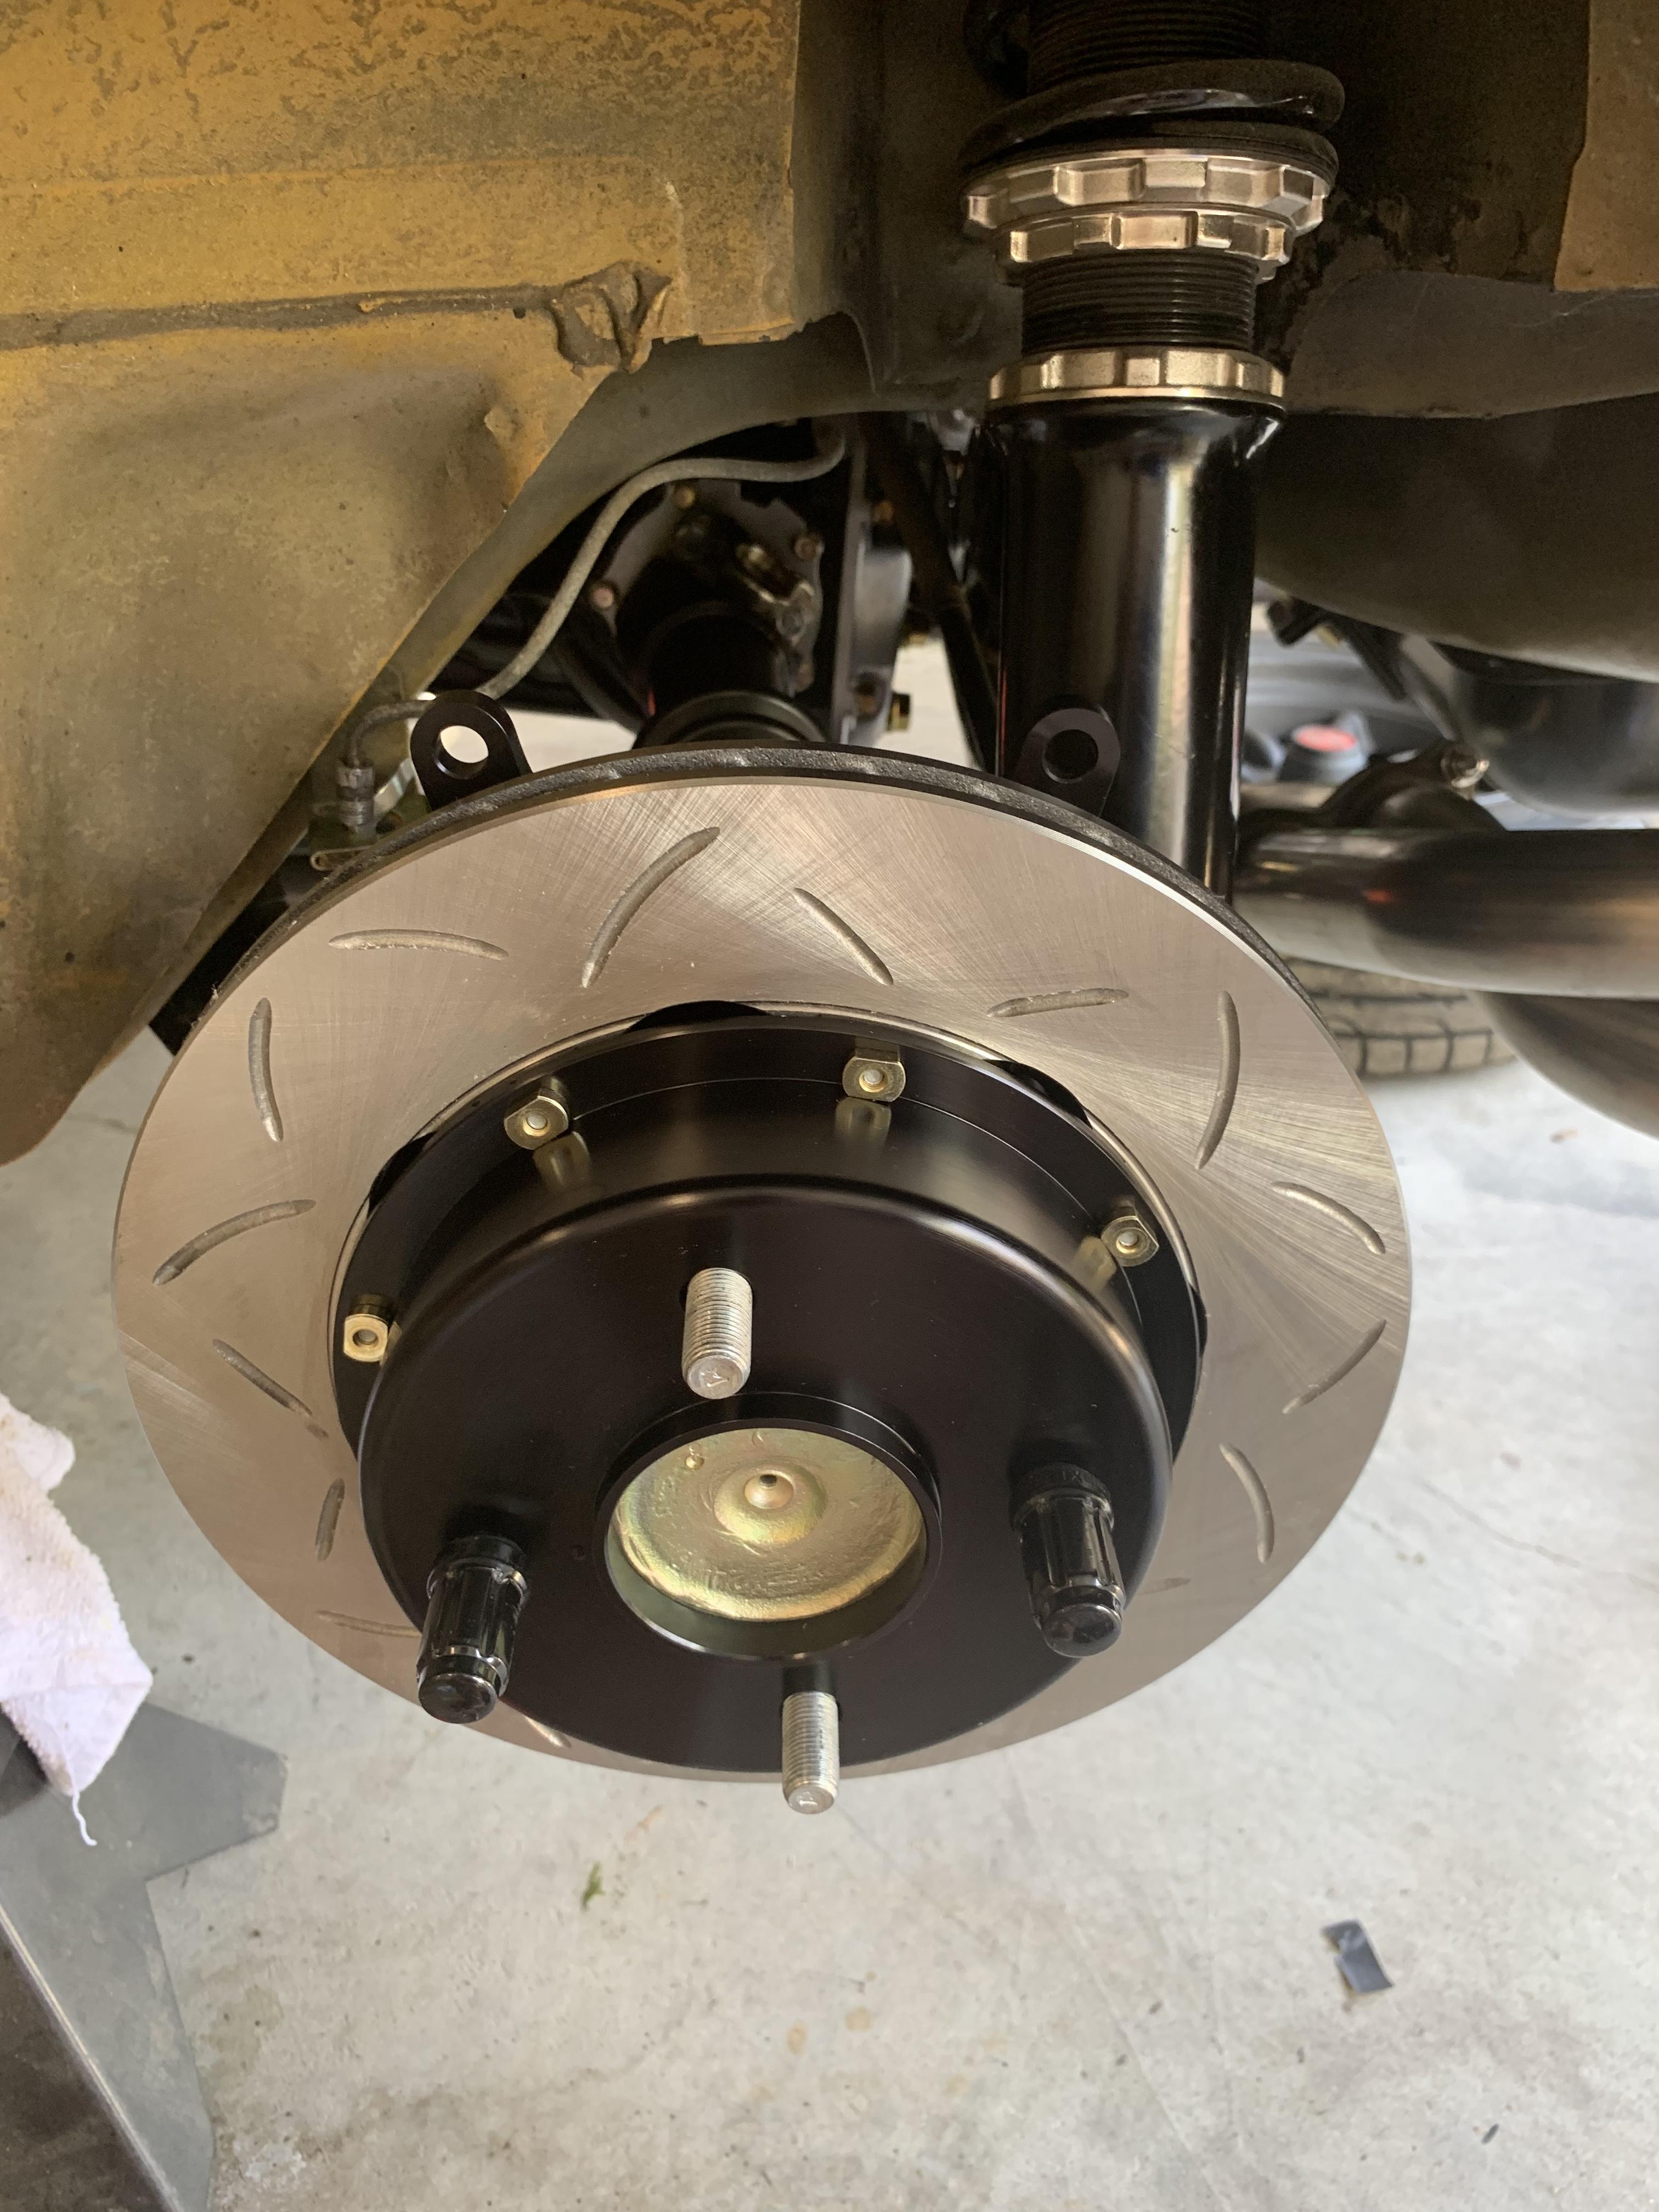
1 pointwhats the disc size and thickness? Also total all up weight of the components? I've been working on something similar1 point
-
1 point
-
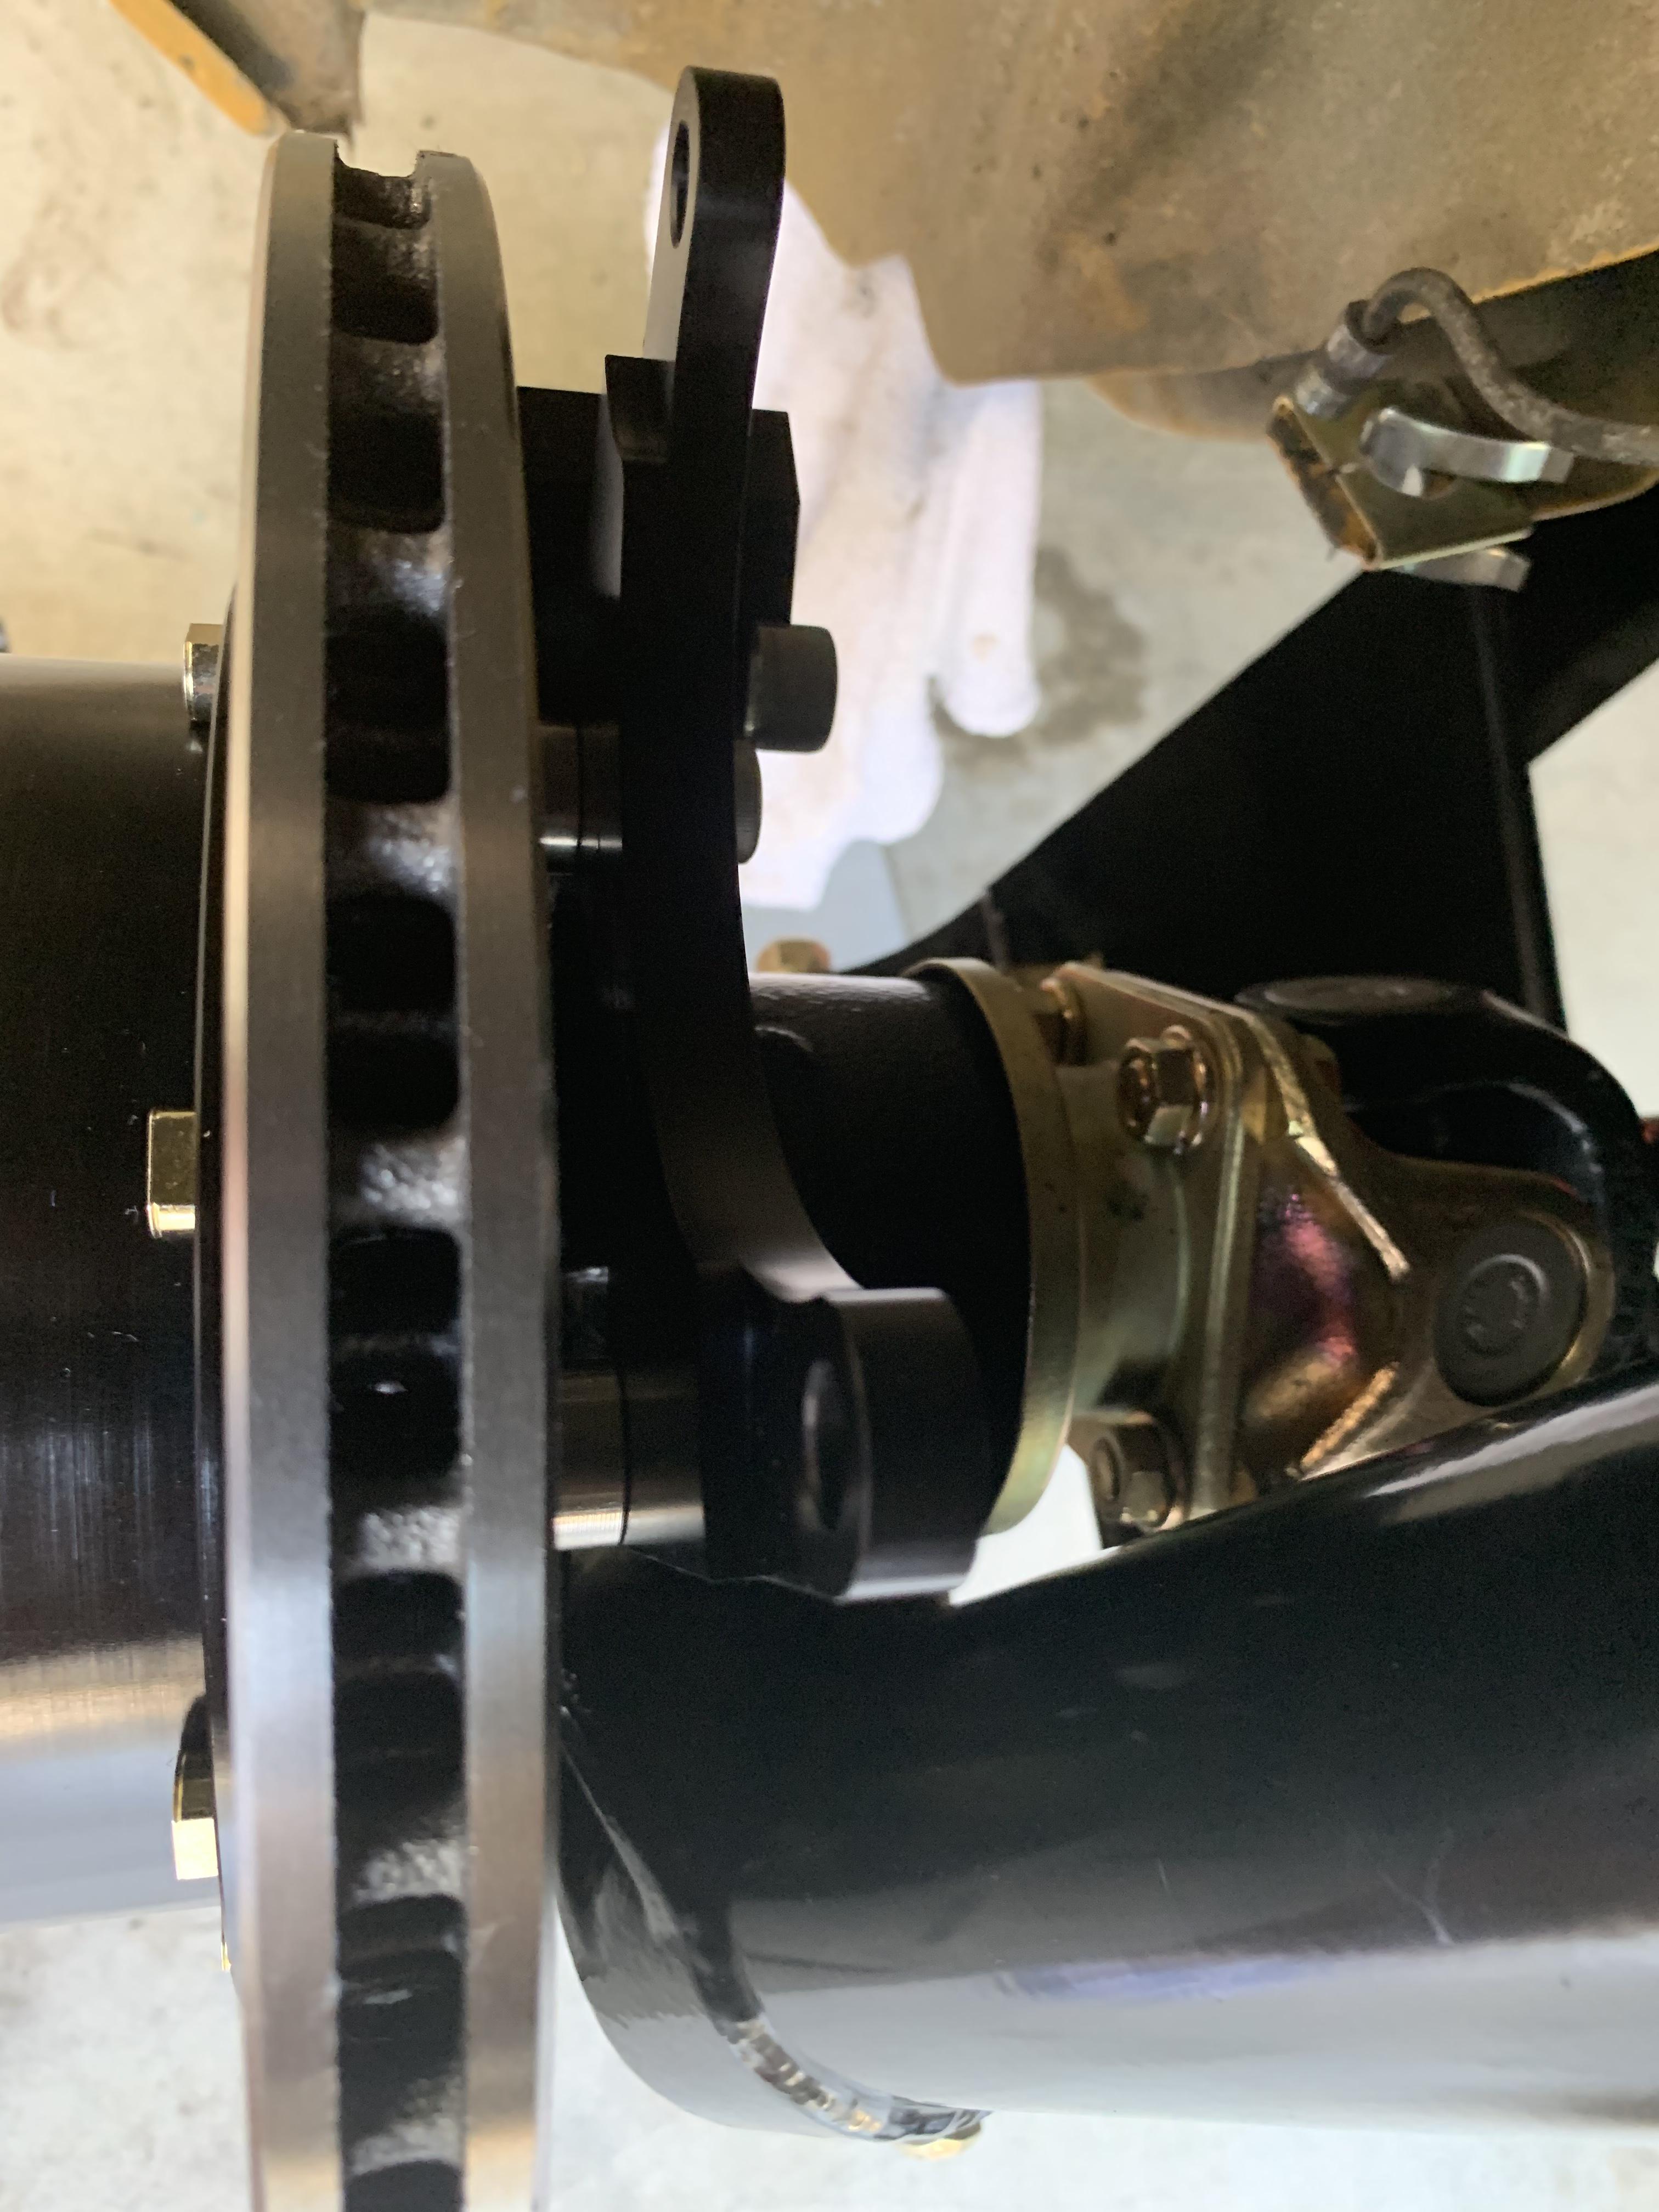
1 pointInstall and instructions are a breeze. Rota 15x8-0 clear with ease. (Wats are on order)


 1 point
 -
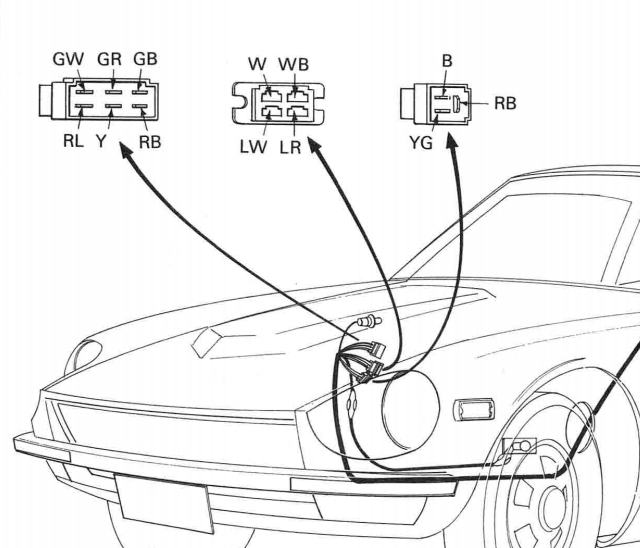
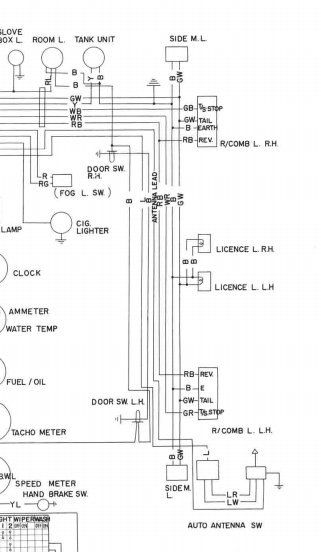
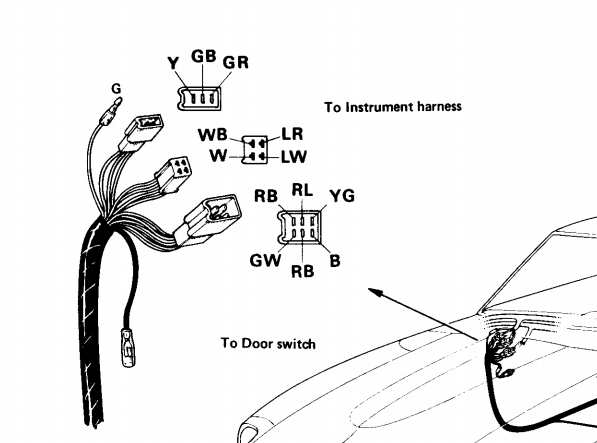
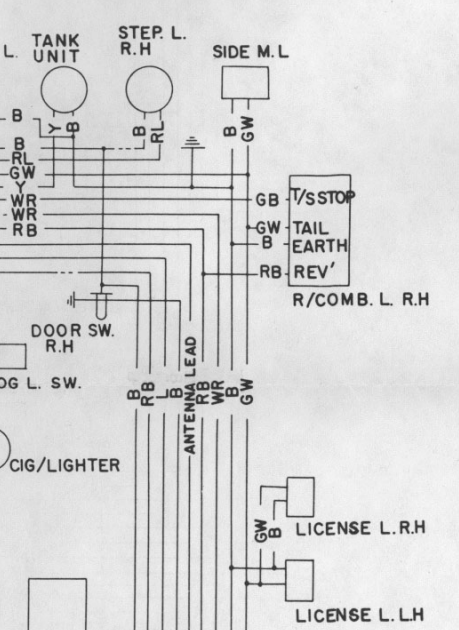
1 pointHere is 1970 FSM. Connectors are different: Yellow Sender is in 6pin connector from dash: Here is rear body harness: Schematic:
 1 point
 -
1 pointHey thanks for sharing such a detailed procedure! This is all great advice / steps to follow. I particularly like the paper clip idea - why oh why did I not think of that! What I do slightly differently to you is to use a digital calliper micrometer's bottom to check the jet heights. I personally find counting flats tedious but also lose count ;). My Z Therapy carbs wound all the way up have the adjustment nut tabs about two flats different between the carbs Every full turn is 1mm down; each flat is 0.167 mm. So in the photo above you will see mine are set at 2 turns and 1 flat down (I run very modified SM needles - my jet height settings should not be reused with stock needles). The only thing I would add to your list would be to check the springs are pushing equally. I just used some books and kitchen scales to measure at a compressed height of 65mm. If different between carbs, the piston heights at WOT conditions will be at different heights. Here's a table of HS6 alternative springs / ratings.1 point
-
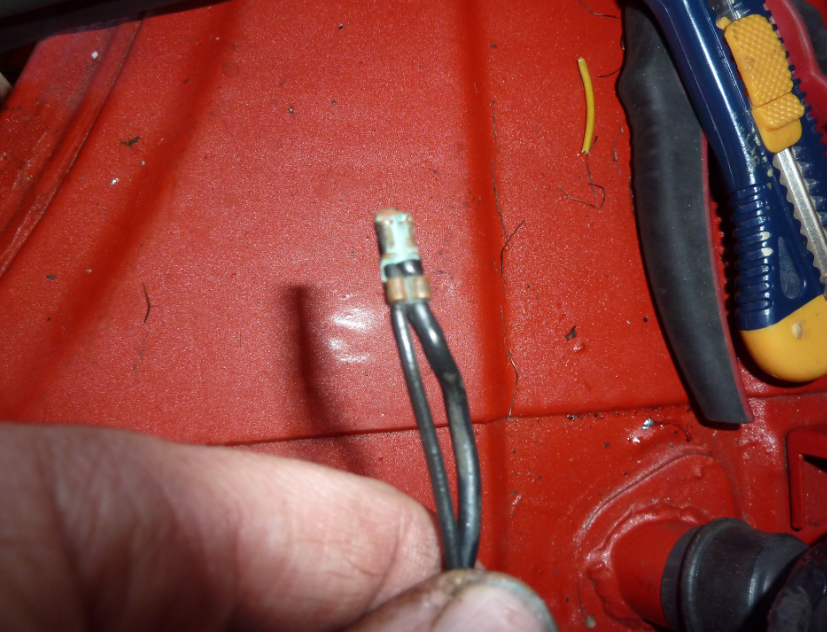
1 pointFound another in the passenger foot panel where the yellow sender wire starts into the rear body harness:
 1 point
 -
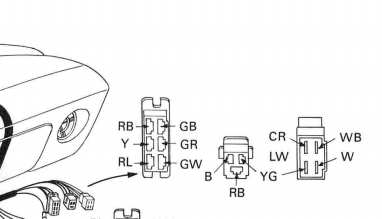
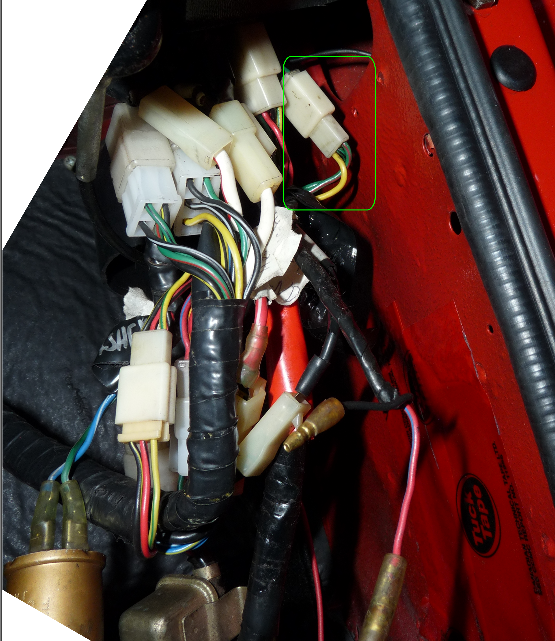
1 pointIt looks like someone pulled those wires out of the harness. Here is where the "rear body harness" to the rear starts on a Jan 71: (Sorry, this is only photo I have of Rear Body Harness Connections) Here is where the rear body harness connects to the dash harness: (Yellow sender (Y) is in right most molex connector in photo below. It also has green with black stripe (GB) and green with red stripe (GR)) Here is the schematic portion with the above cables: (
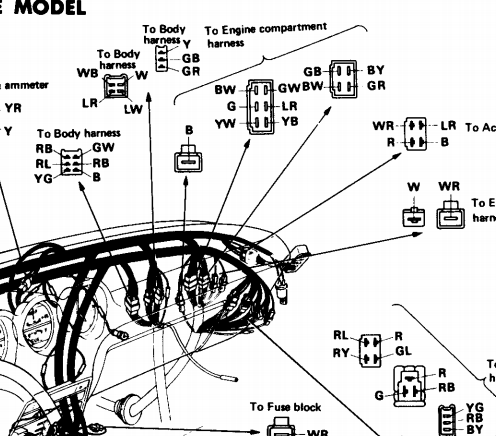

 1 point
 -
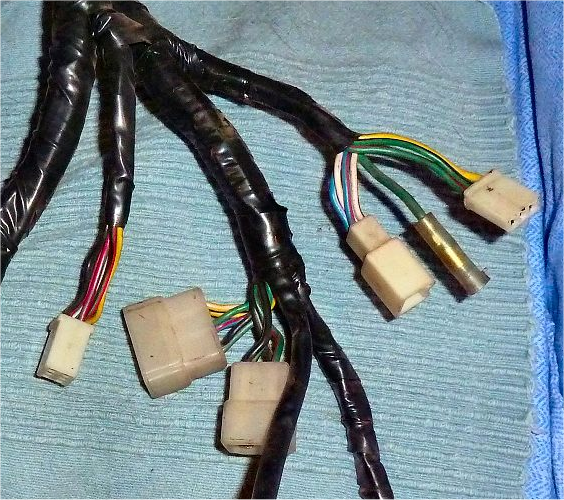
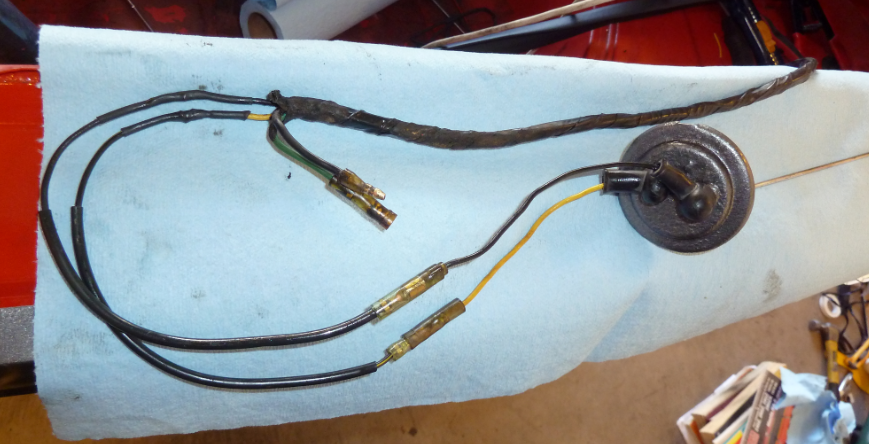
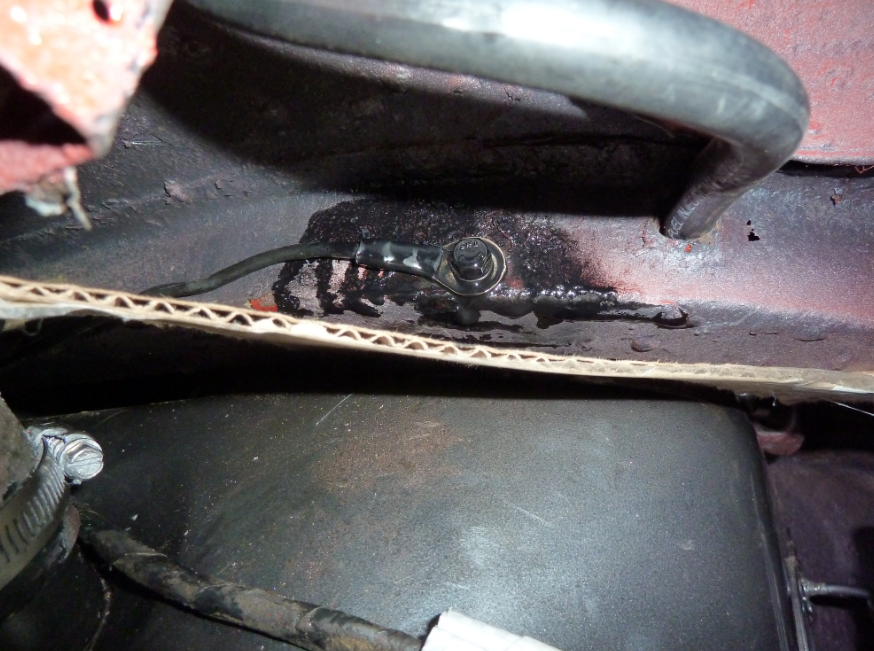
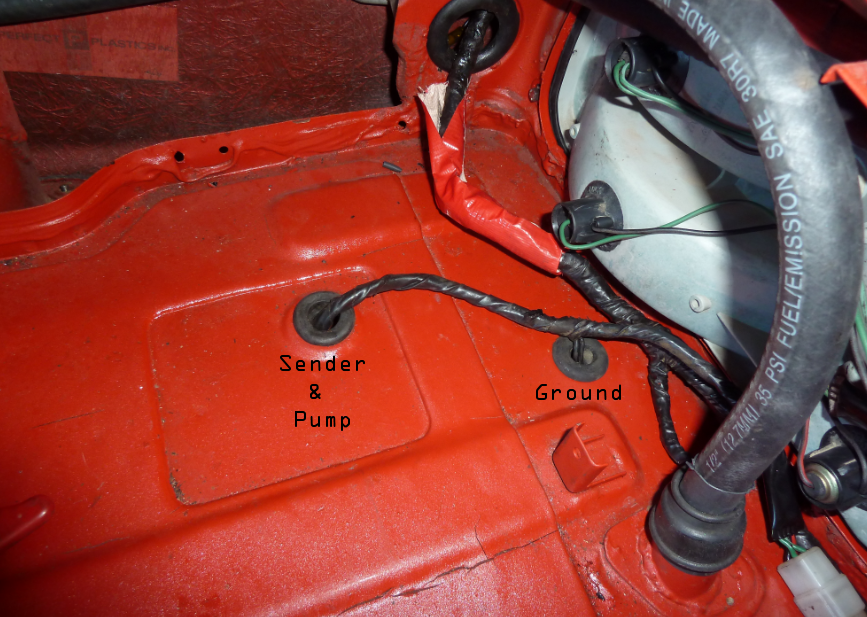
1 pointJan 1971 Two sections of the rear harness pass through the floor near the rear right tail light 1. Front pass through contains fuel sender wires (blk & Yel along with fuel pump blk & Grn) 2. Rear pass through contains rear ground wires (two black wires from harness crimped to one connector) Here is the front pass through with fuel sender and optional fuel pump wires. Here is the ground wire connection (2 wires crimped to O ring connector) Here is refreshed ground connector extended from the broken part above. It is connected to frame near fuel tank. (The black is sprayed corrosion protection.) Here is sender and fuel pump connectors routing:

 1 point
 -
1 pointGoing forward for anyone recovering the seats on an early car, here's a tip on locating the hole for the hanger: After the old seat cover is removed, install a small round-head screw in the hole, install the new seat back cover, locate the round head screw, make a small "X" cut on top of the screw, remove the screw, install the seat belt hanger.1 point
-
MZR’s getting plenty of attention these days, this one from the Top Gear site with brief driving impressions. The Z’s 50th anniversary probably helps their marketing: https://www.topgear.com/car-news/tgs-guide-japan/driving-wonderful-mzr-roadsports-datsun-240z#1
 1 point