Leaderboard
-
zKars
 Subscriber
 5Points3,770Posts
 -
Patcon
Subscriber3Points11,142Posts -

Zed Head
Free Member2Points19,236Posts -
Captain Obvious
Free Member2Points10,081Posts


Popular Content
Showing content with the highest reputation on 08/16/2018 in all areas
-
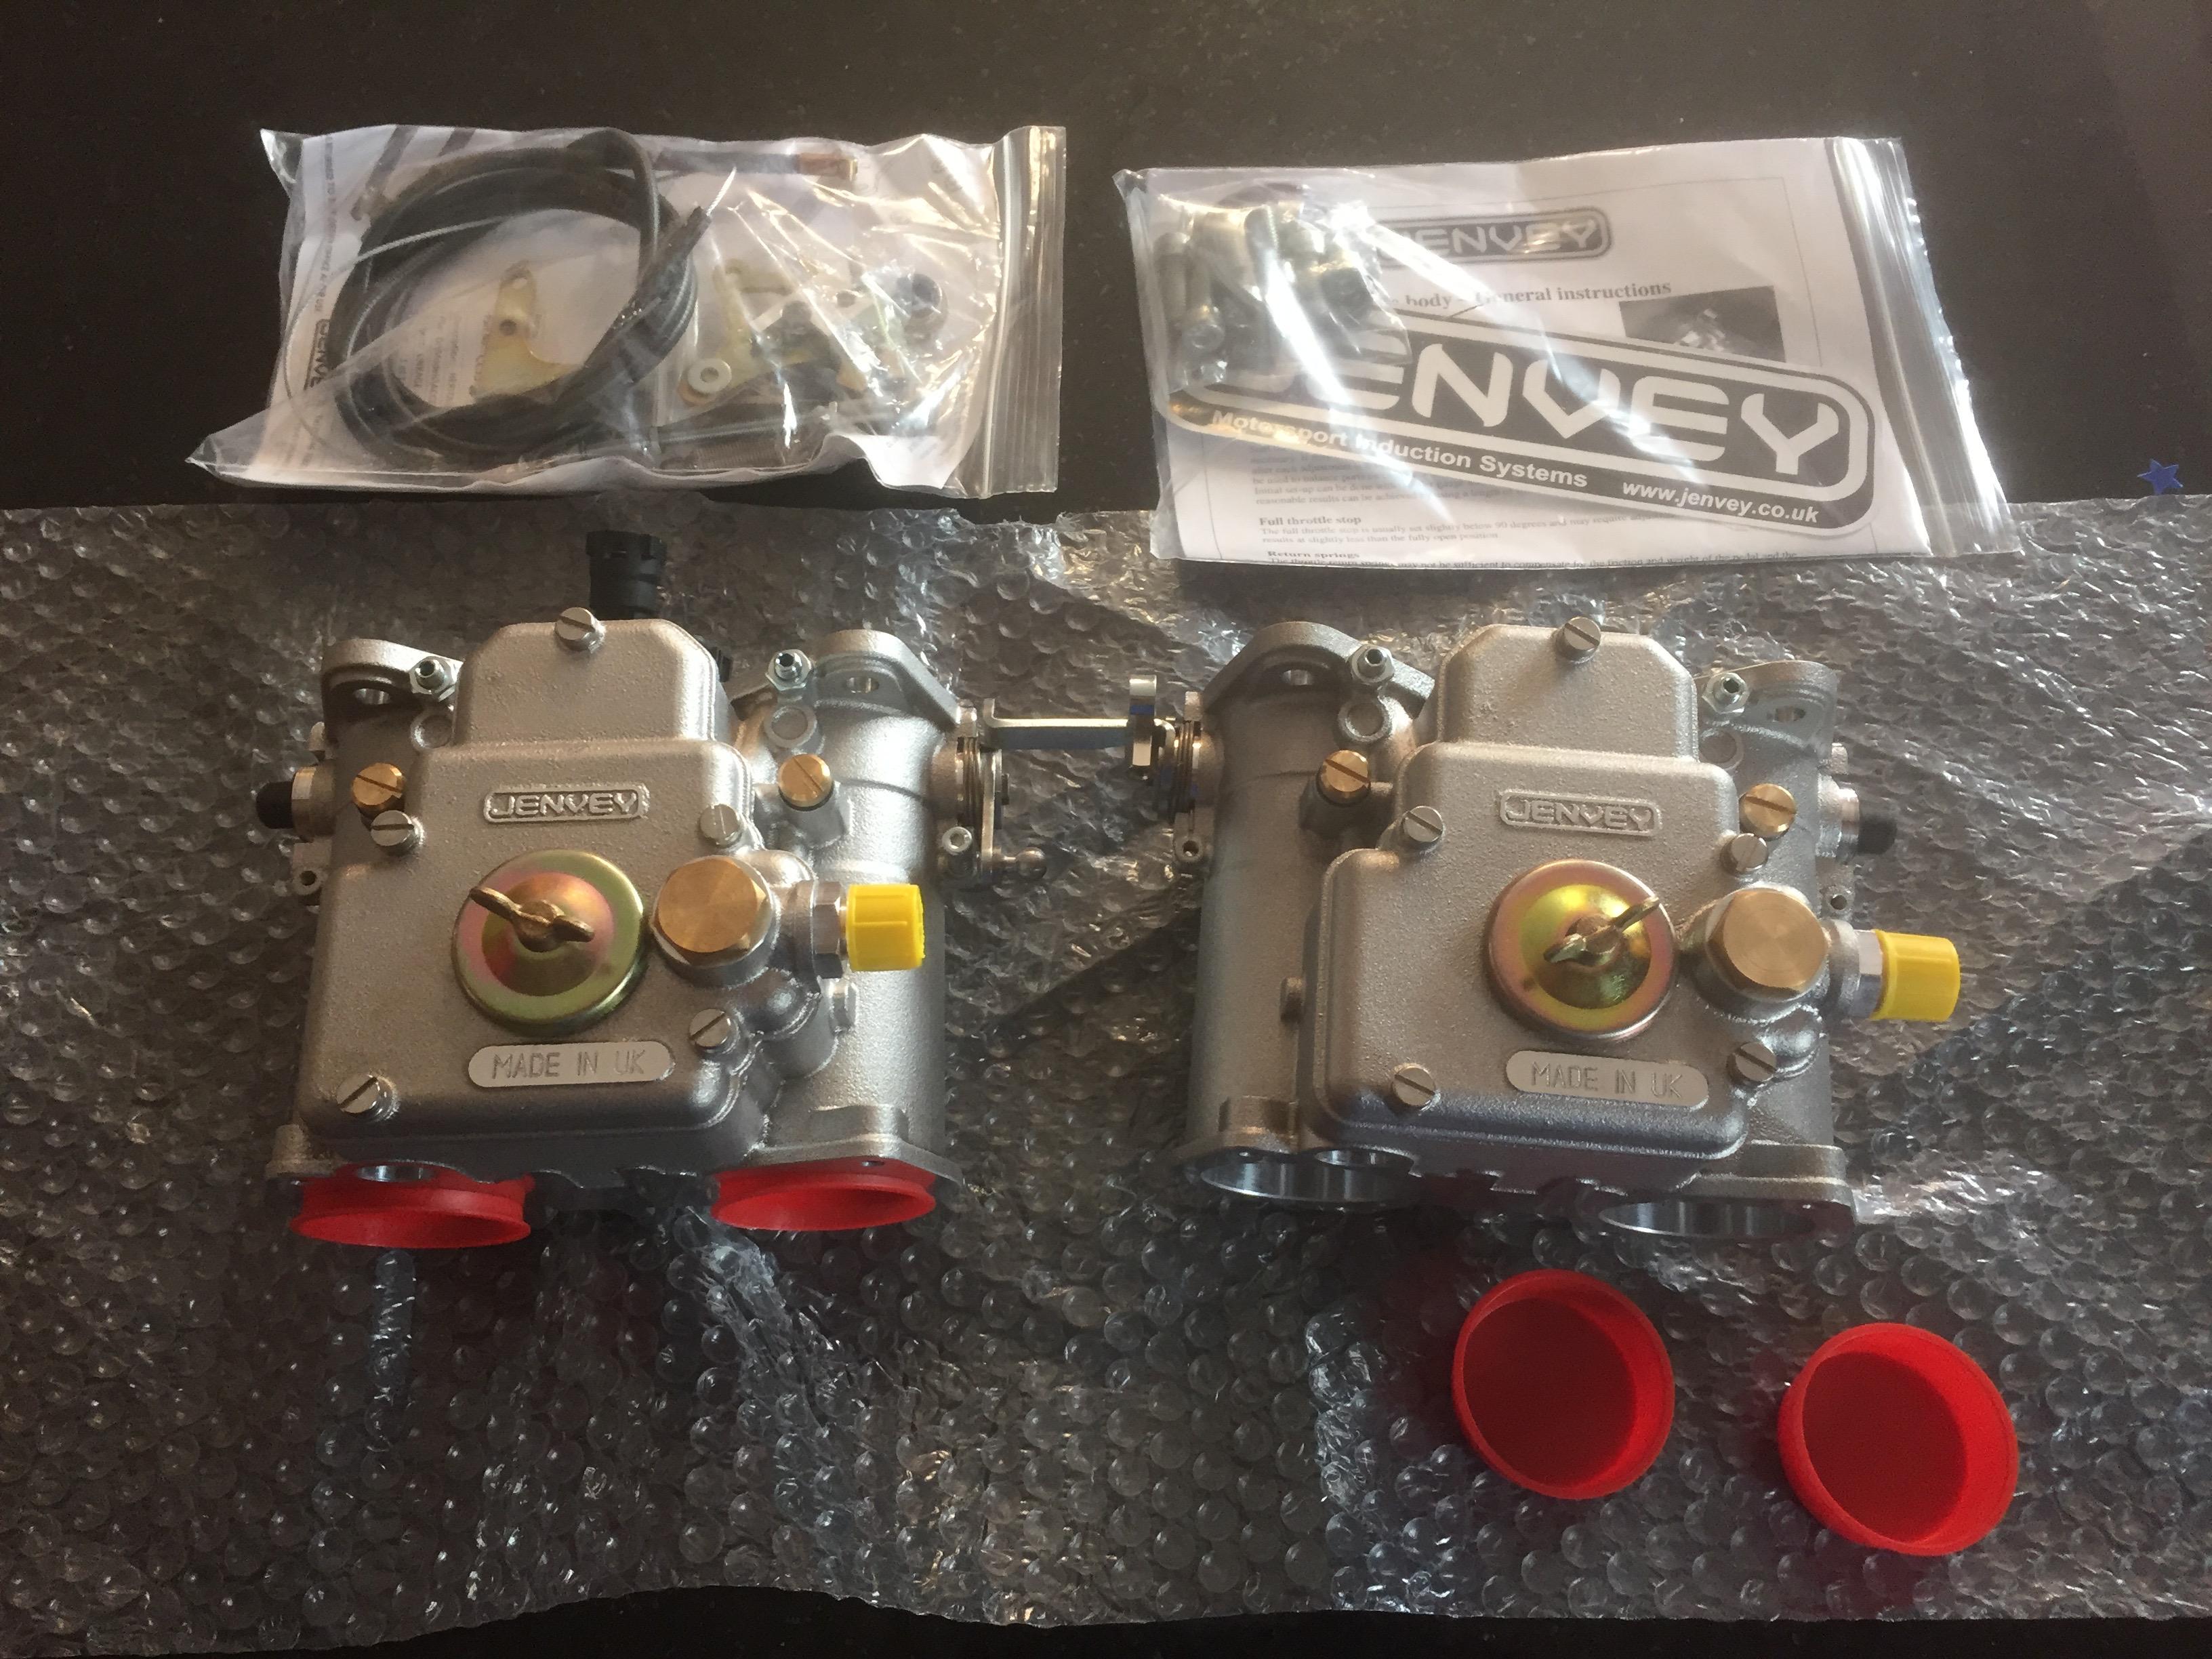
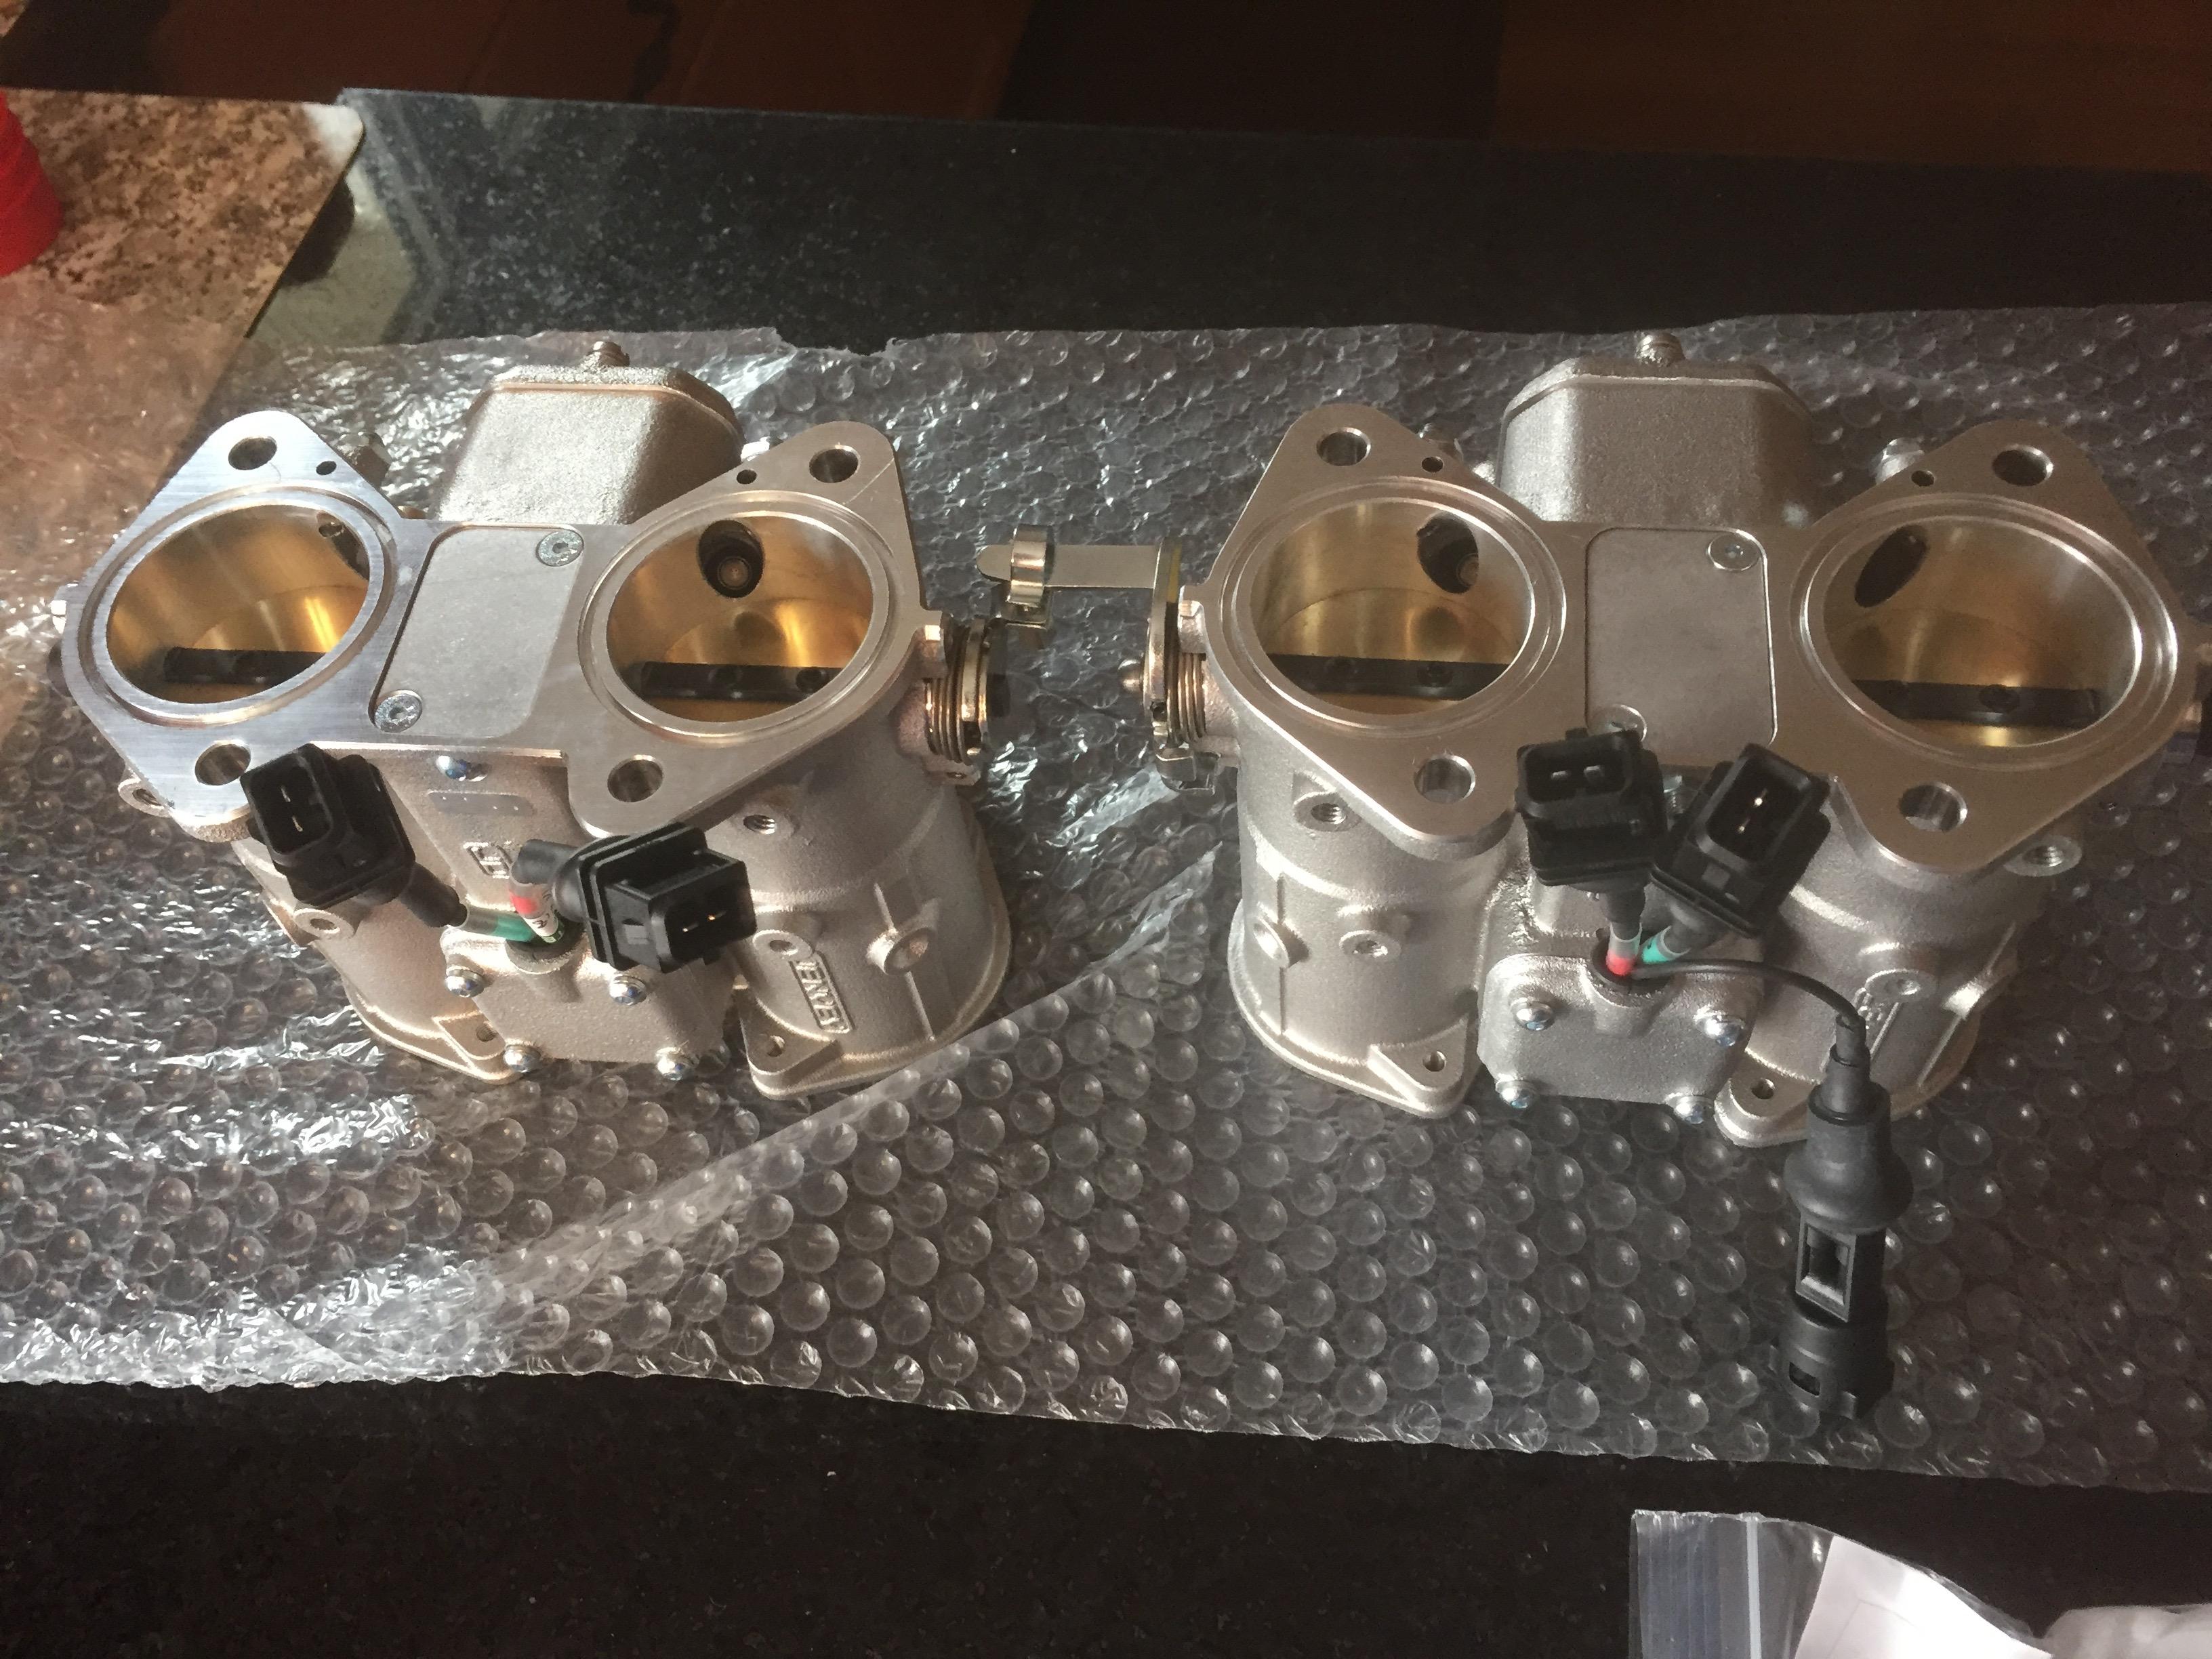
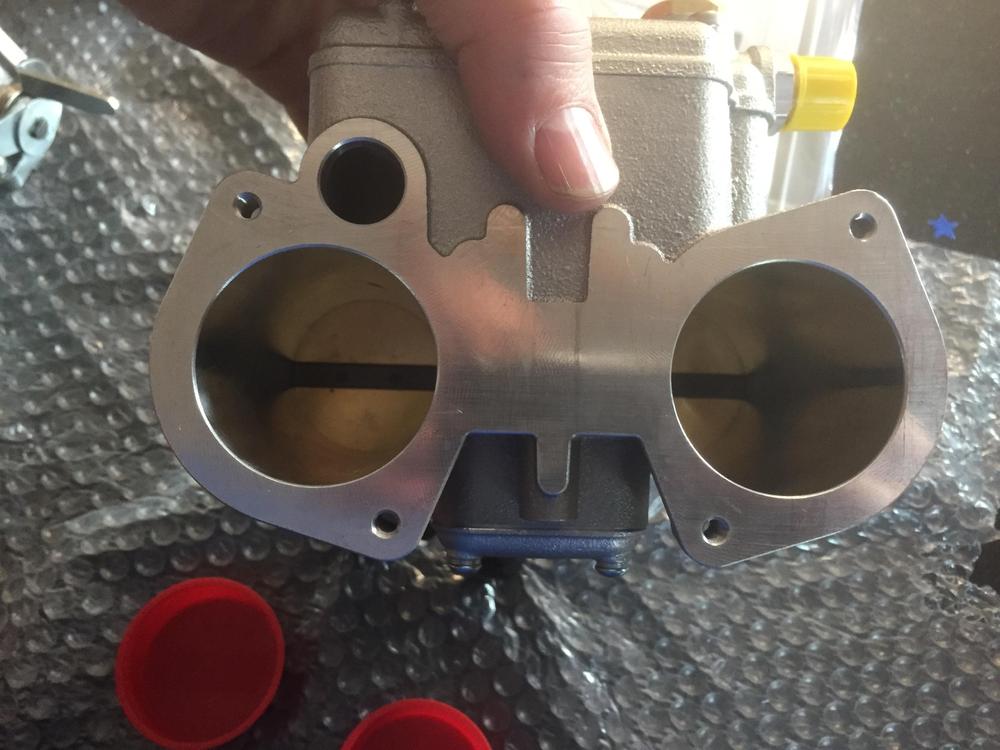
3 pointsWell I decided to jump into the EFI game with both feet. Here is what changed this "old school" boy's mind. Weber look-a-like throttle bodies with built in injectors and TPS. Jenvey Heritage Throttle bodies is what they go by. I get the old look I can't seem to do without, with all the modern advantages of EFI. You may notice that there are only two, and this is a Z forum, but as most of you know there is 510 lady in my life that I'm currently enfatuated with. I can always buy another one if I ever come to my senses. These are 45mm with 350cc/hr injectors. Should do. https://www.onesixindustries.com/products

 3 points
 -
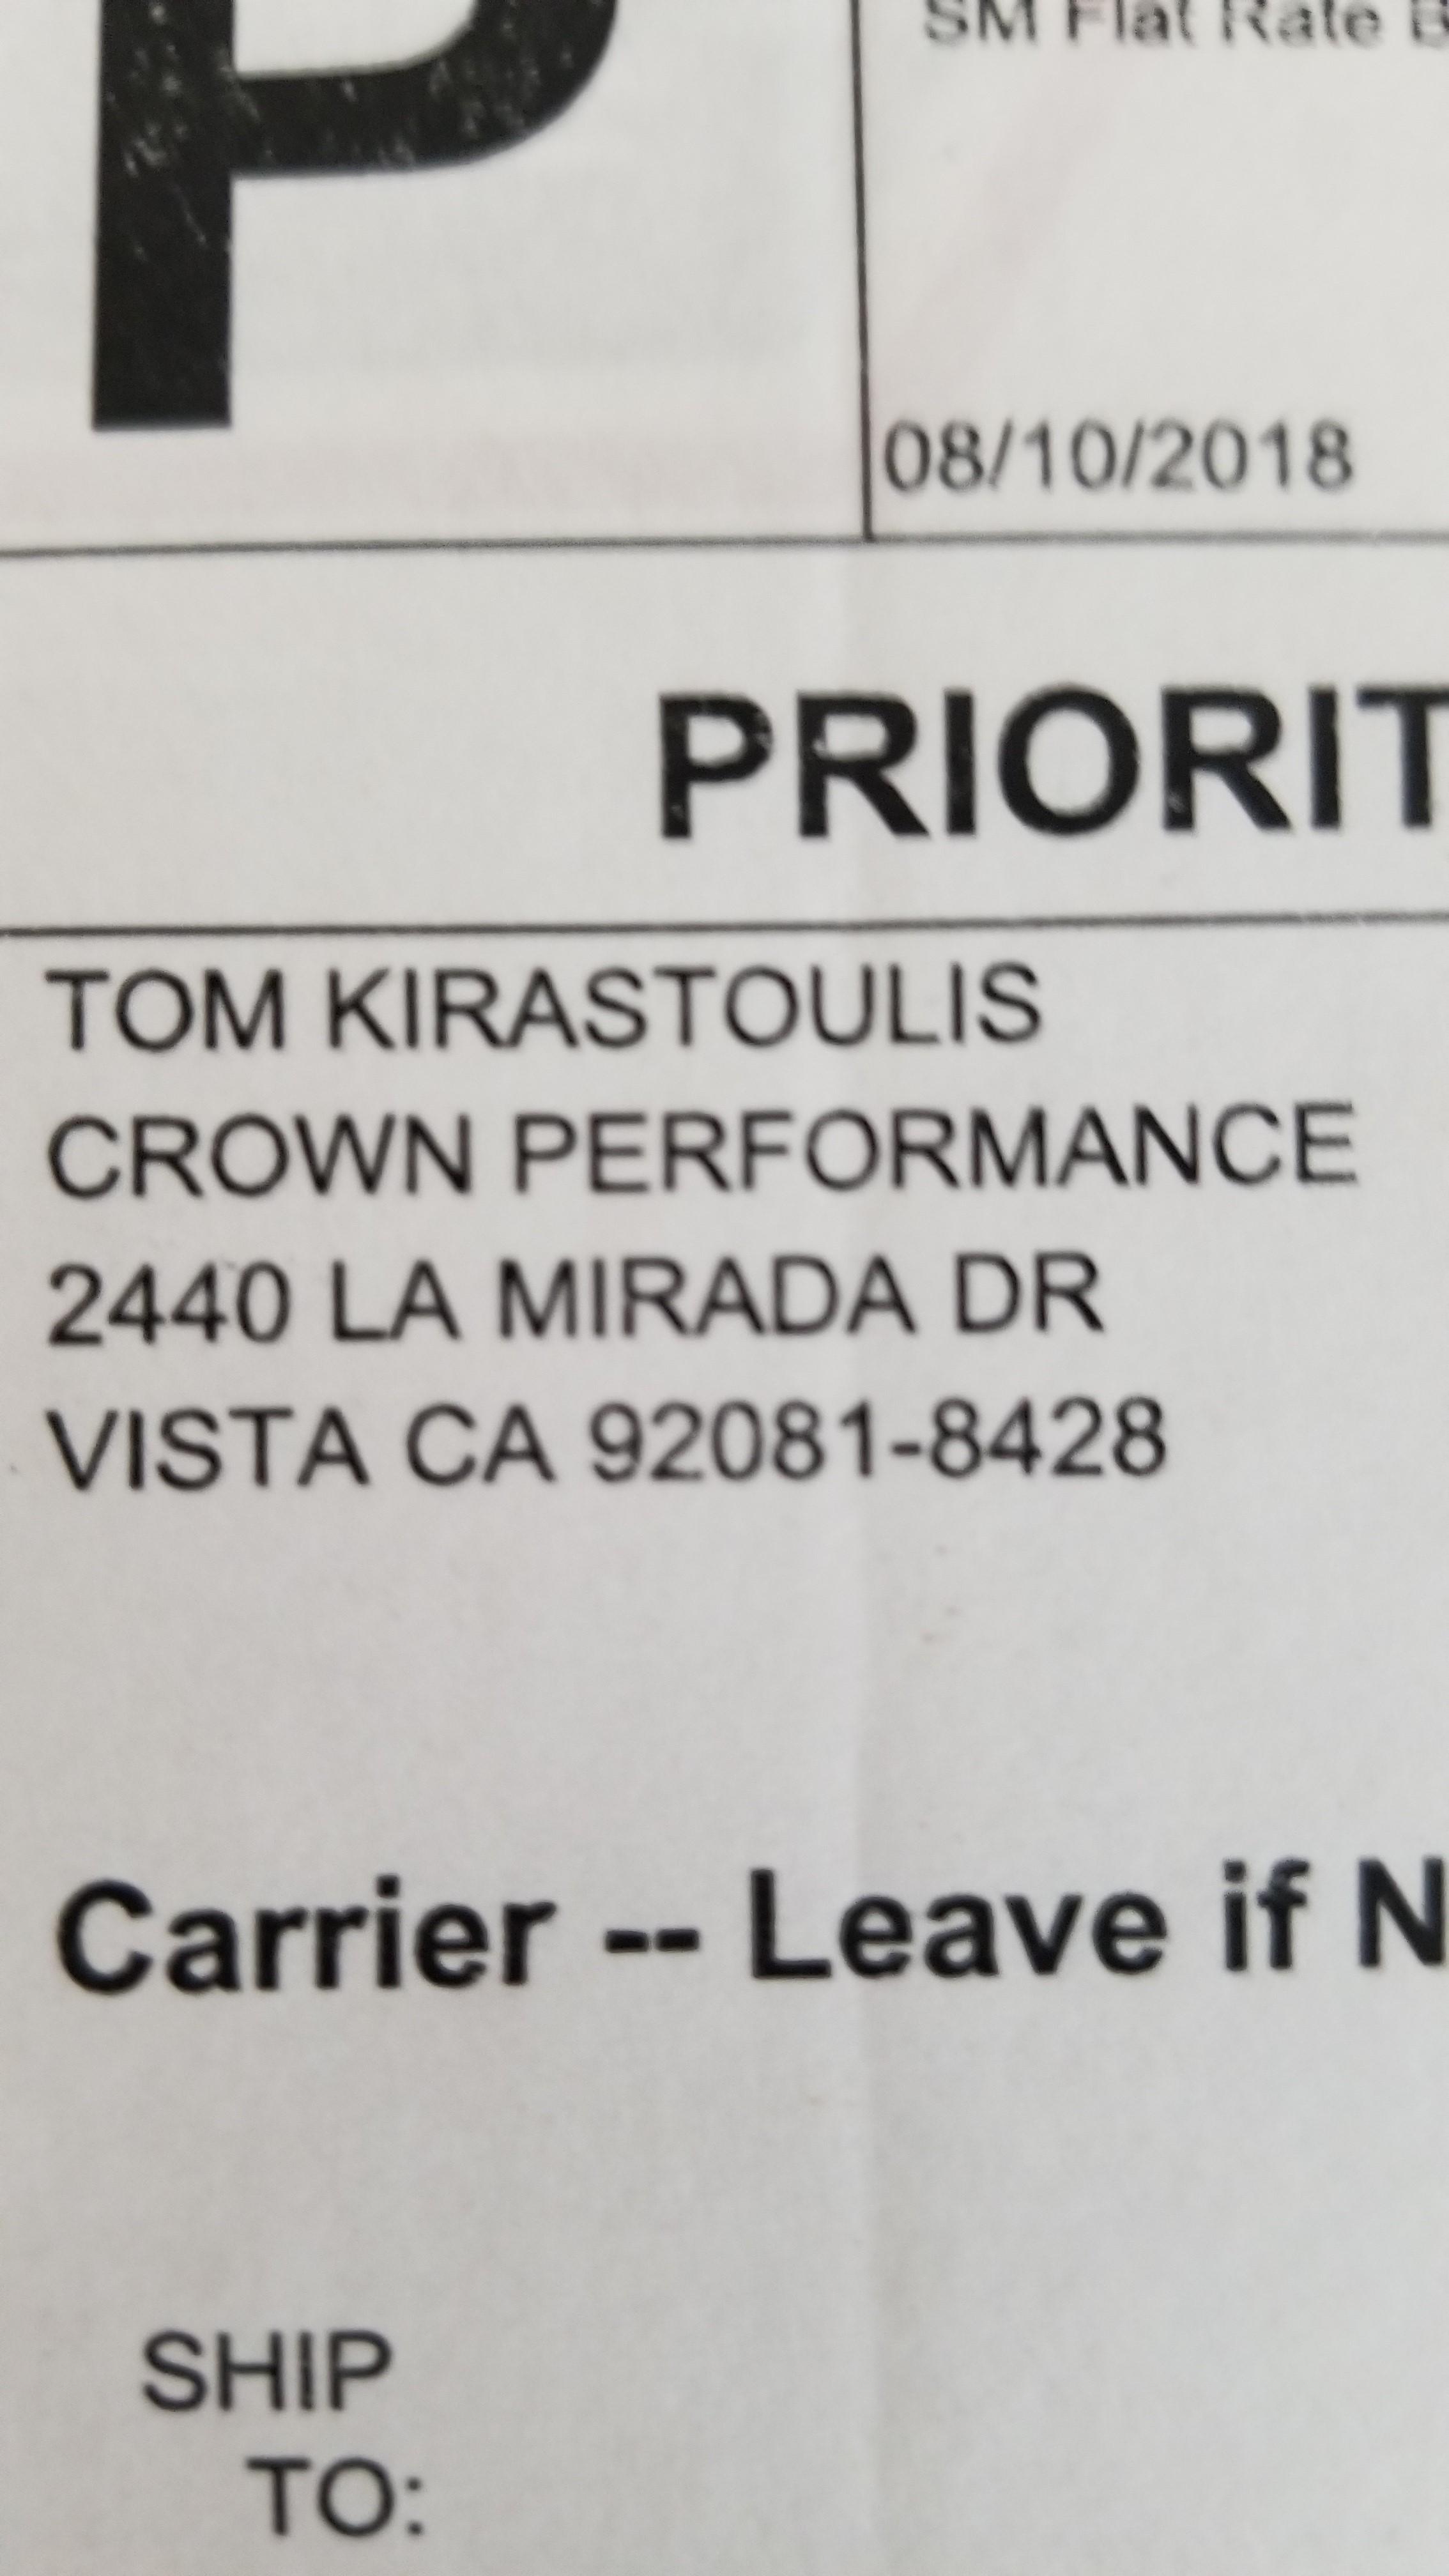
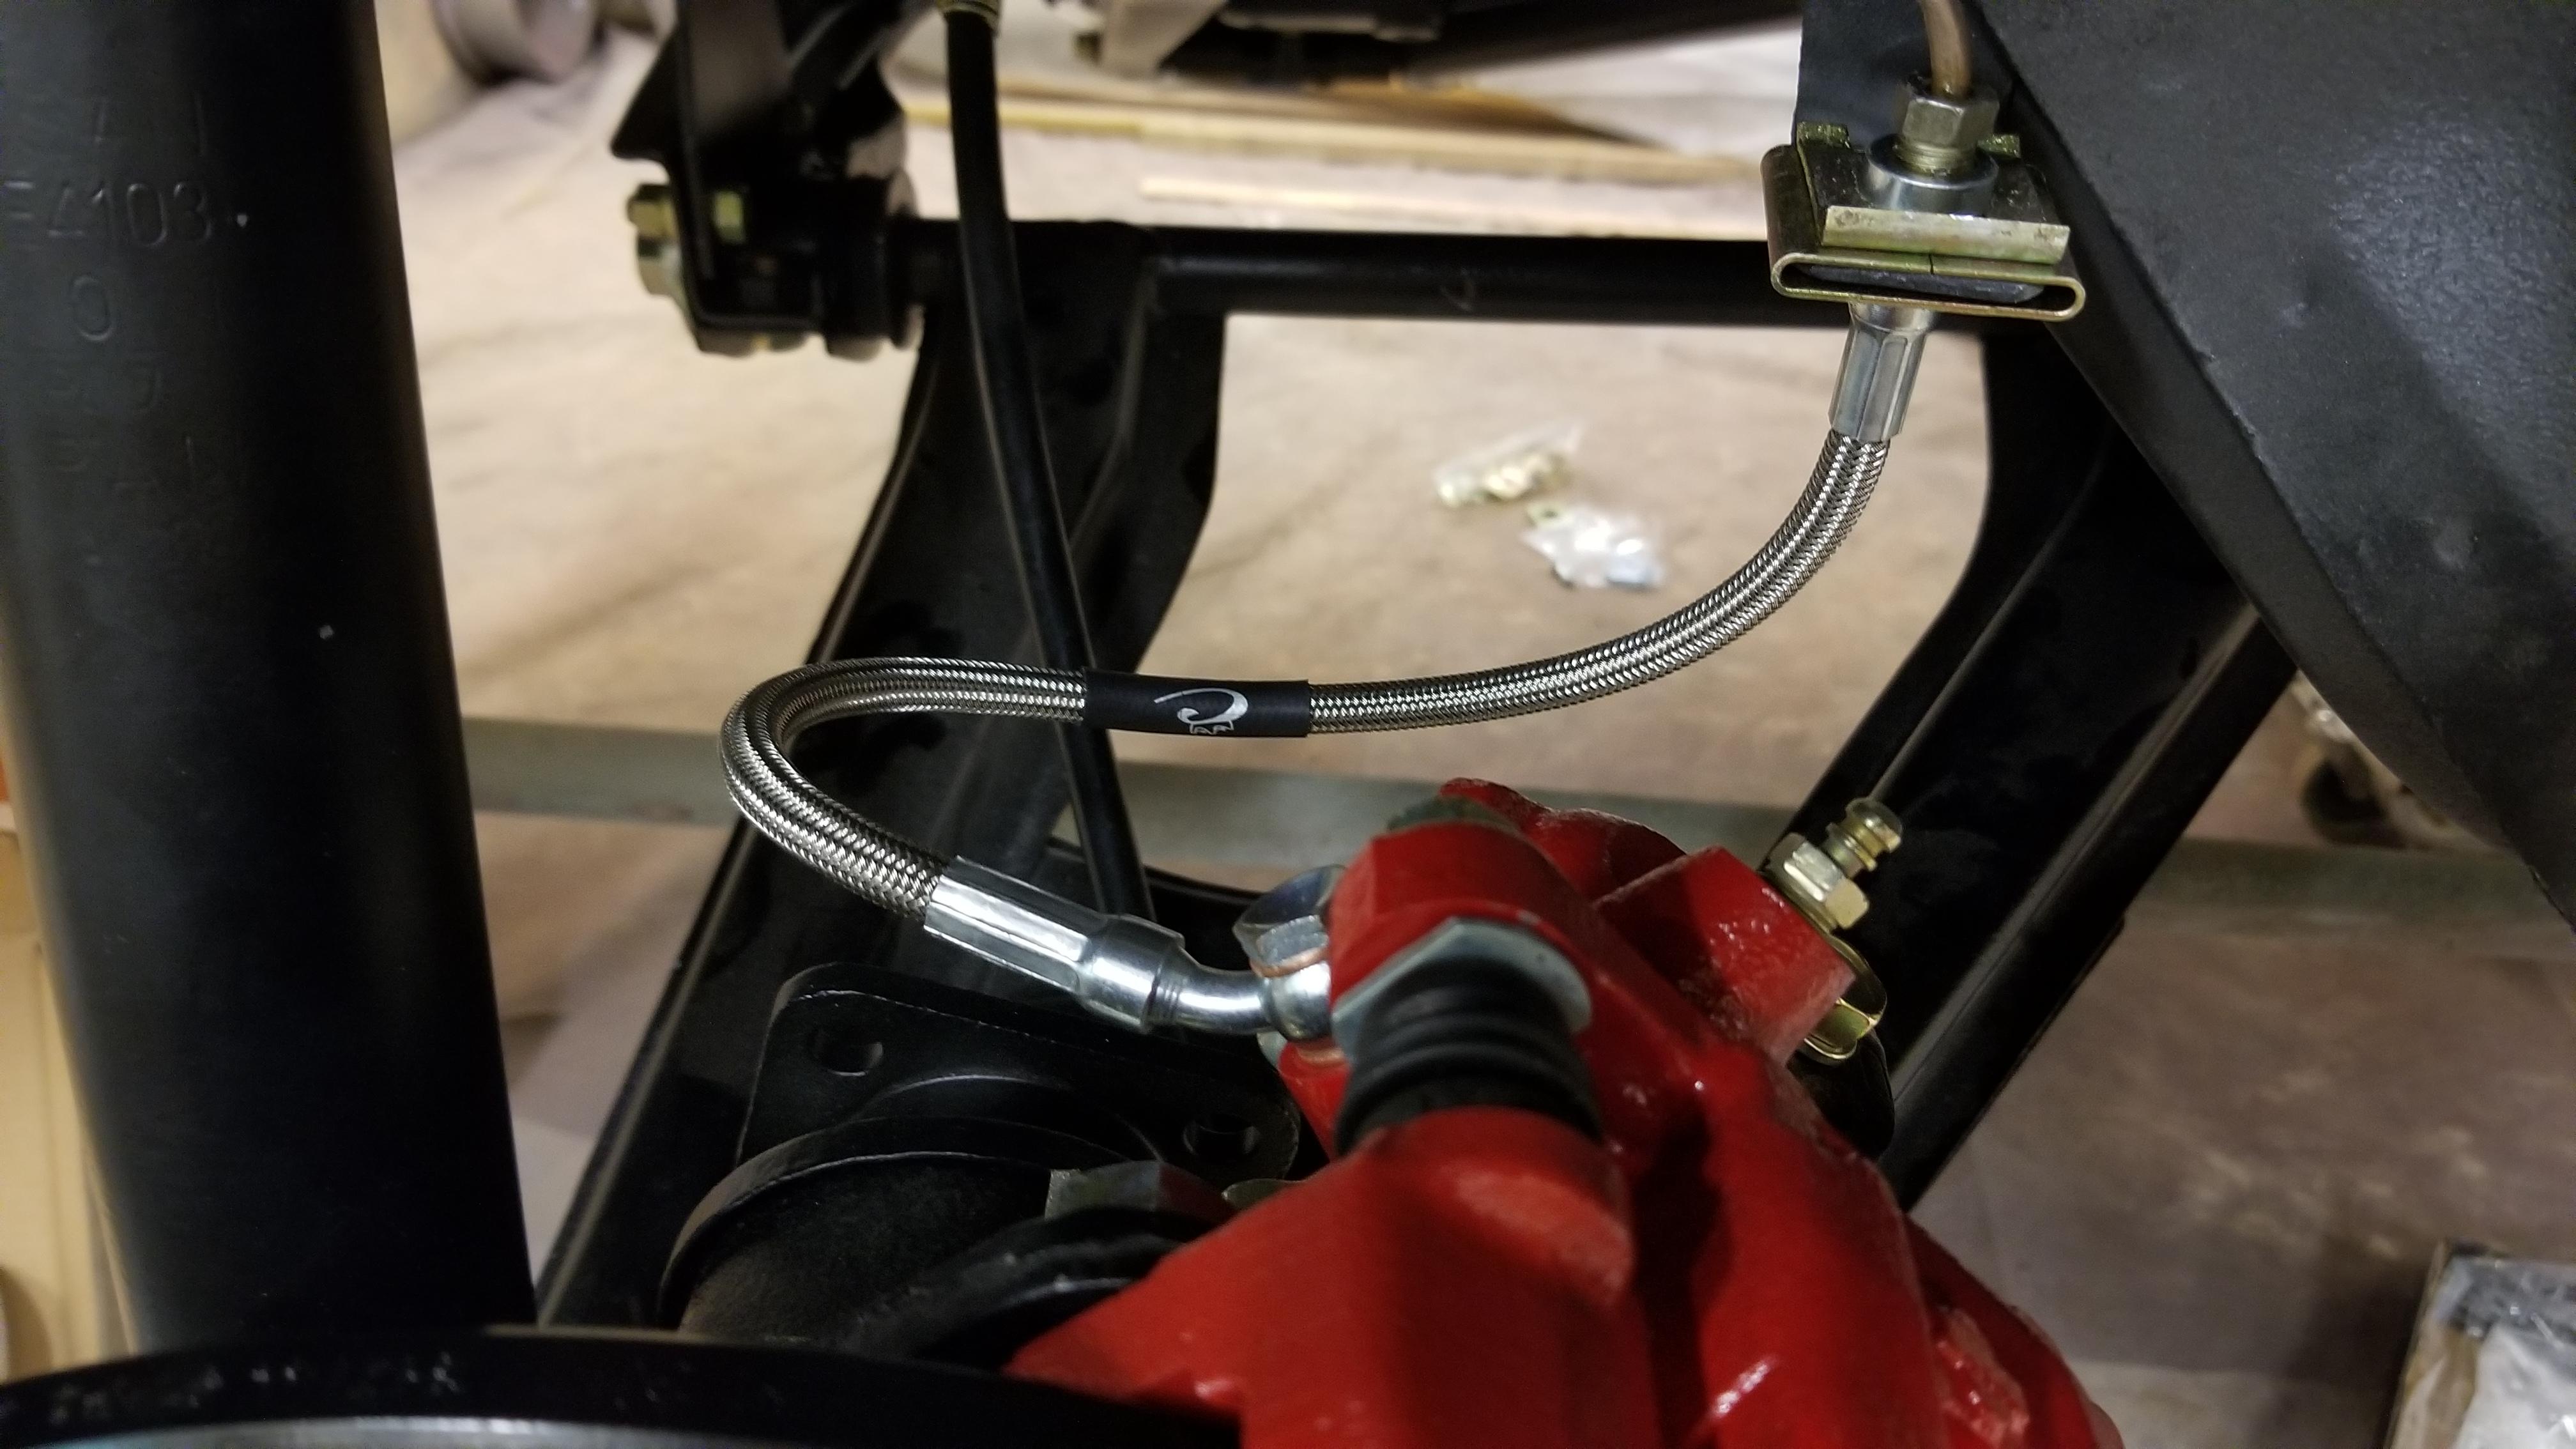
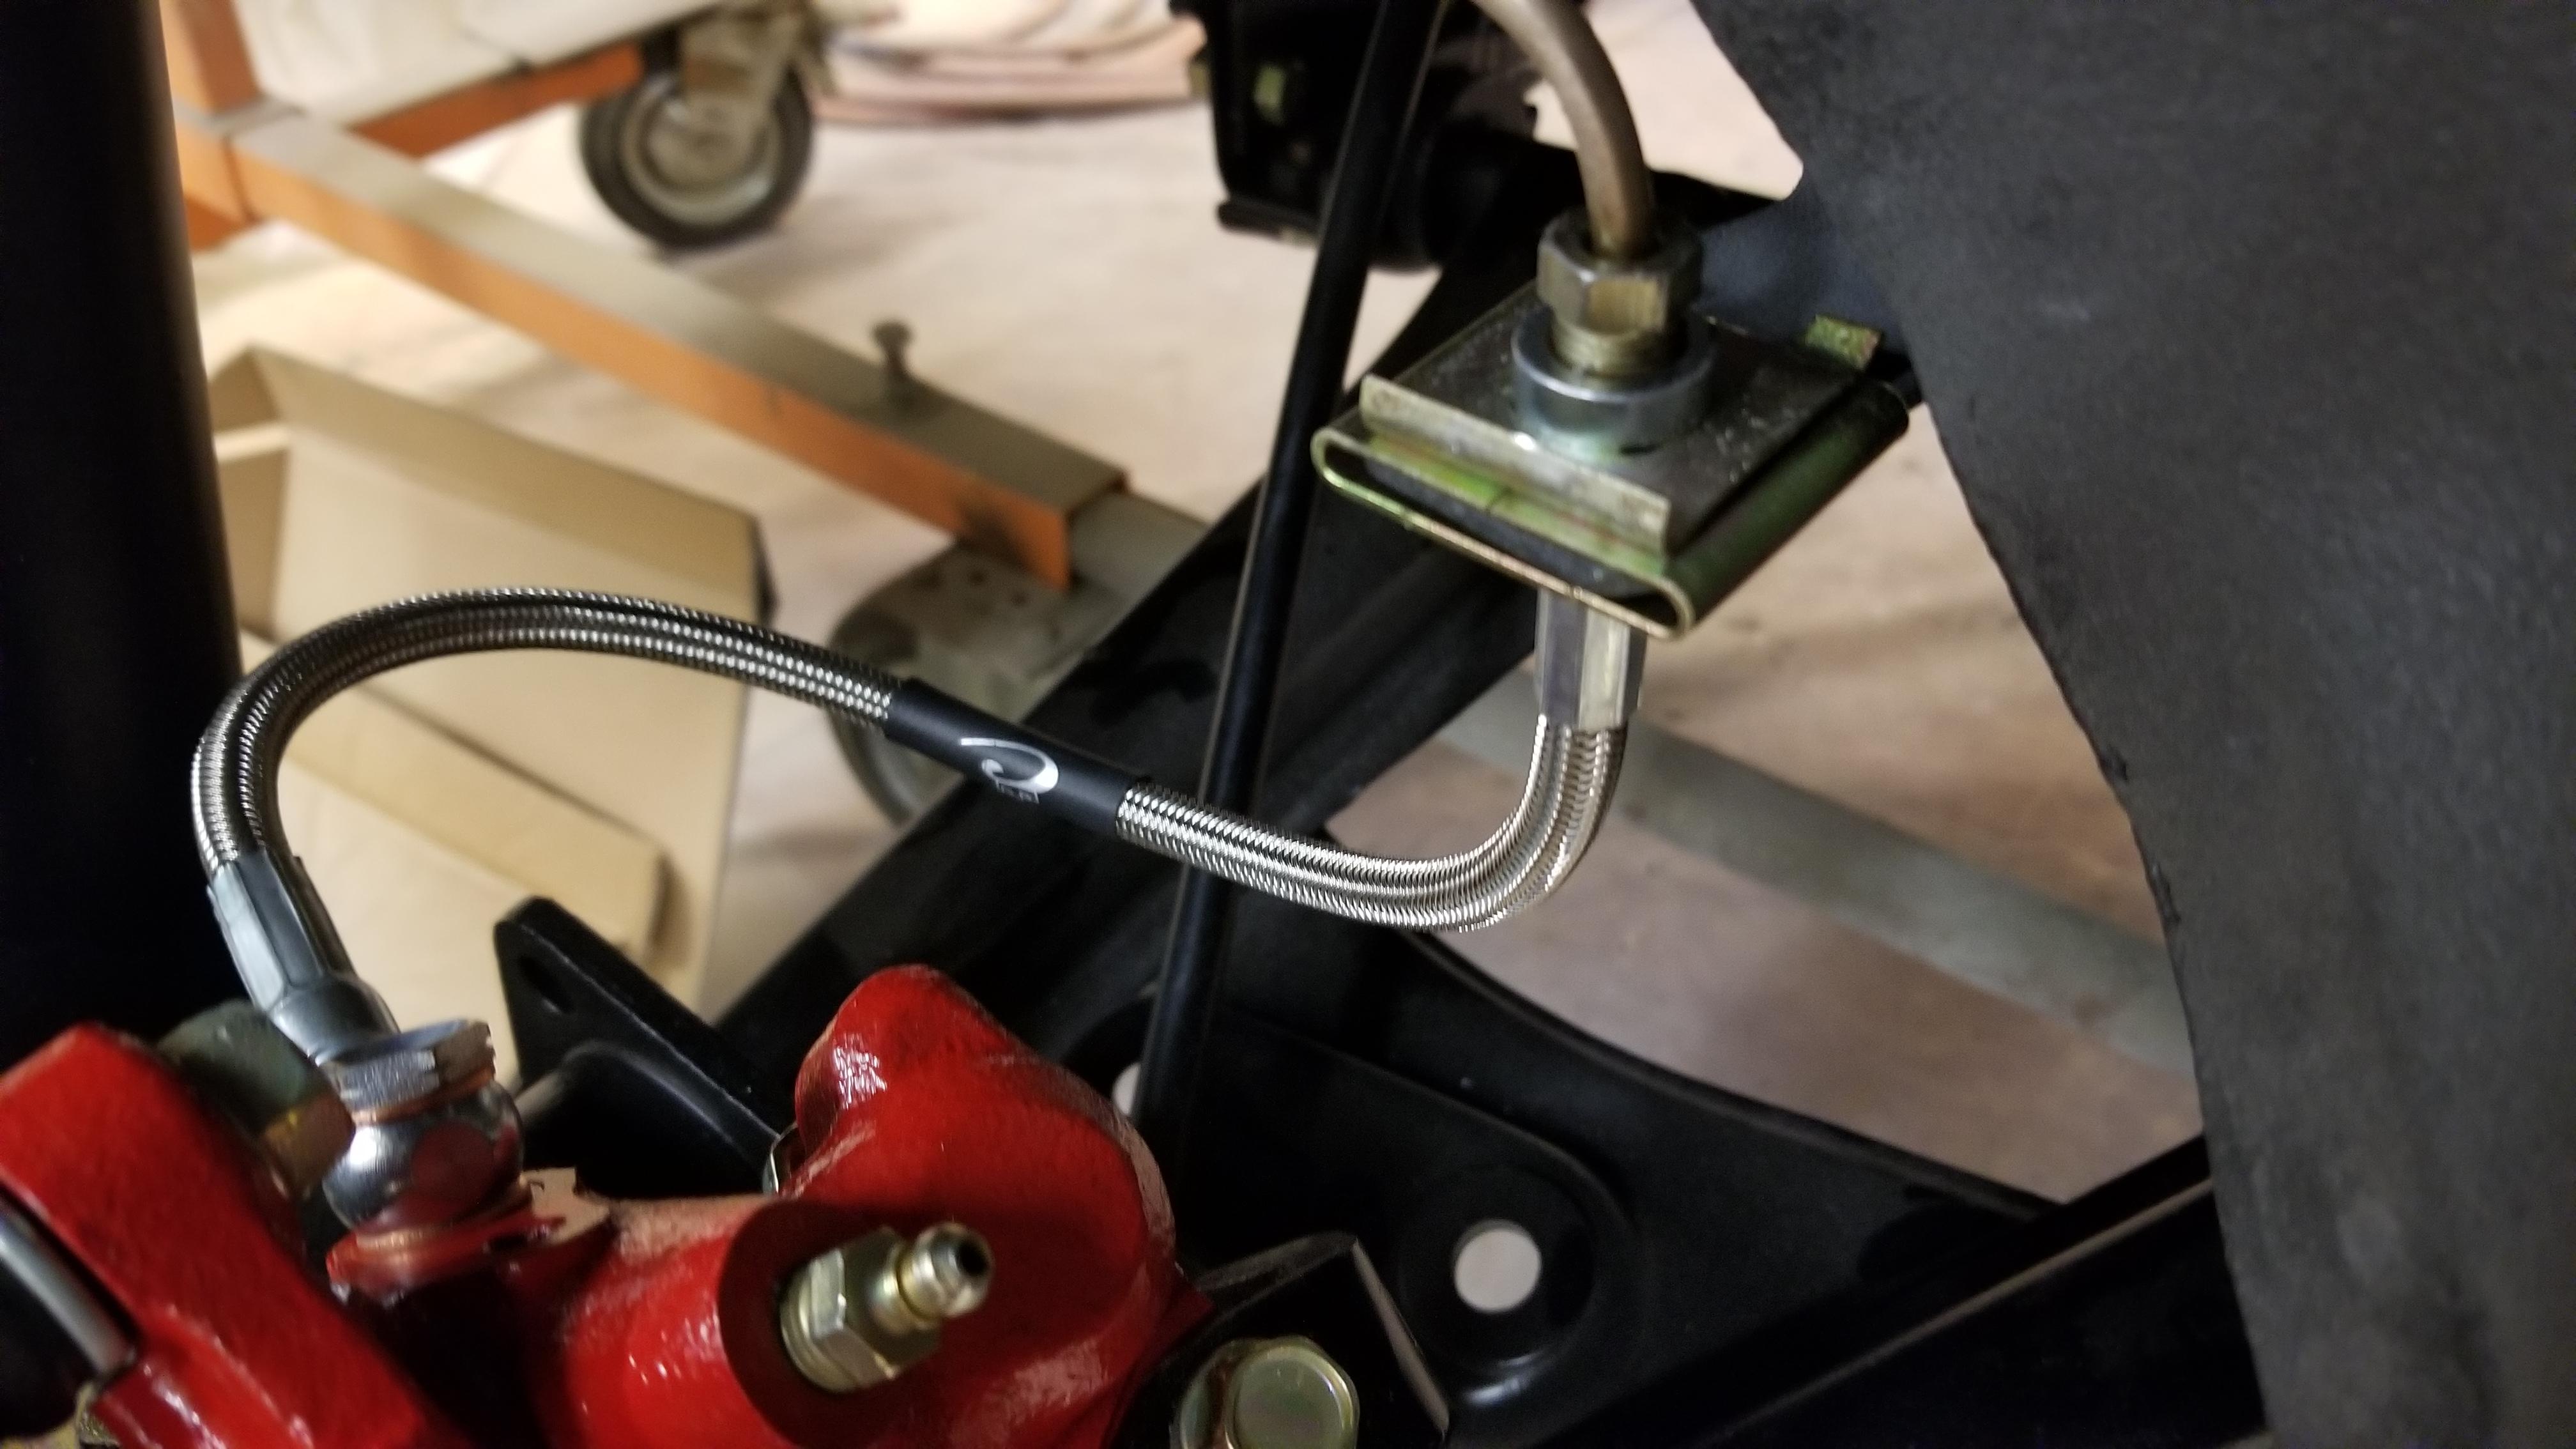
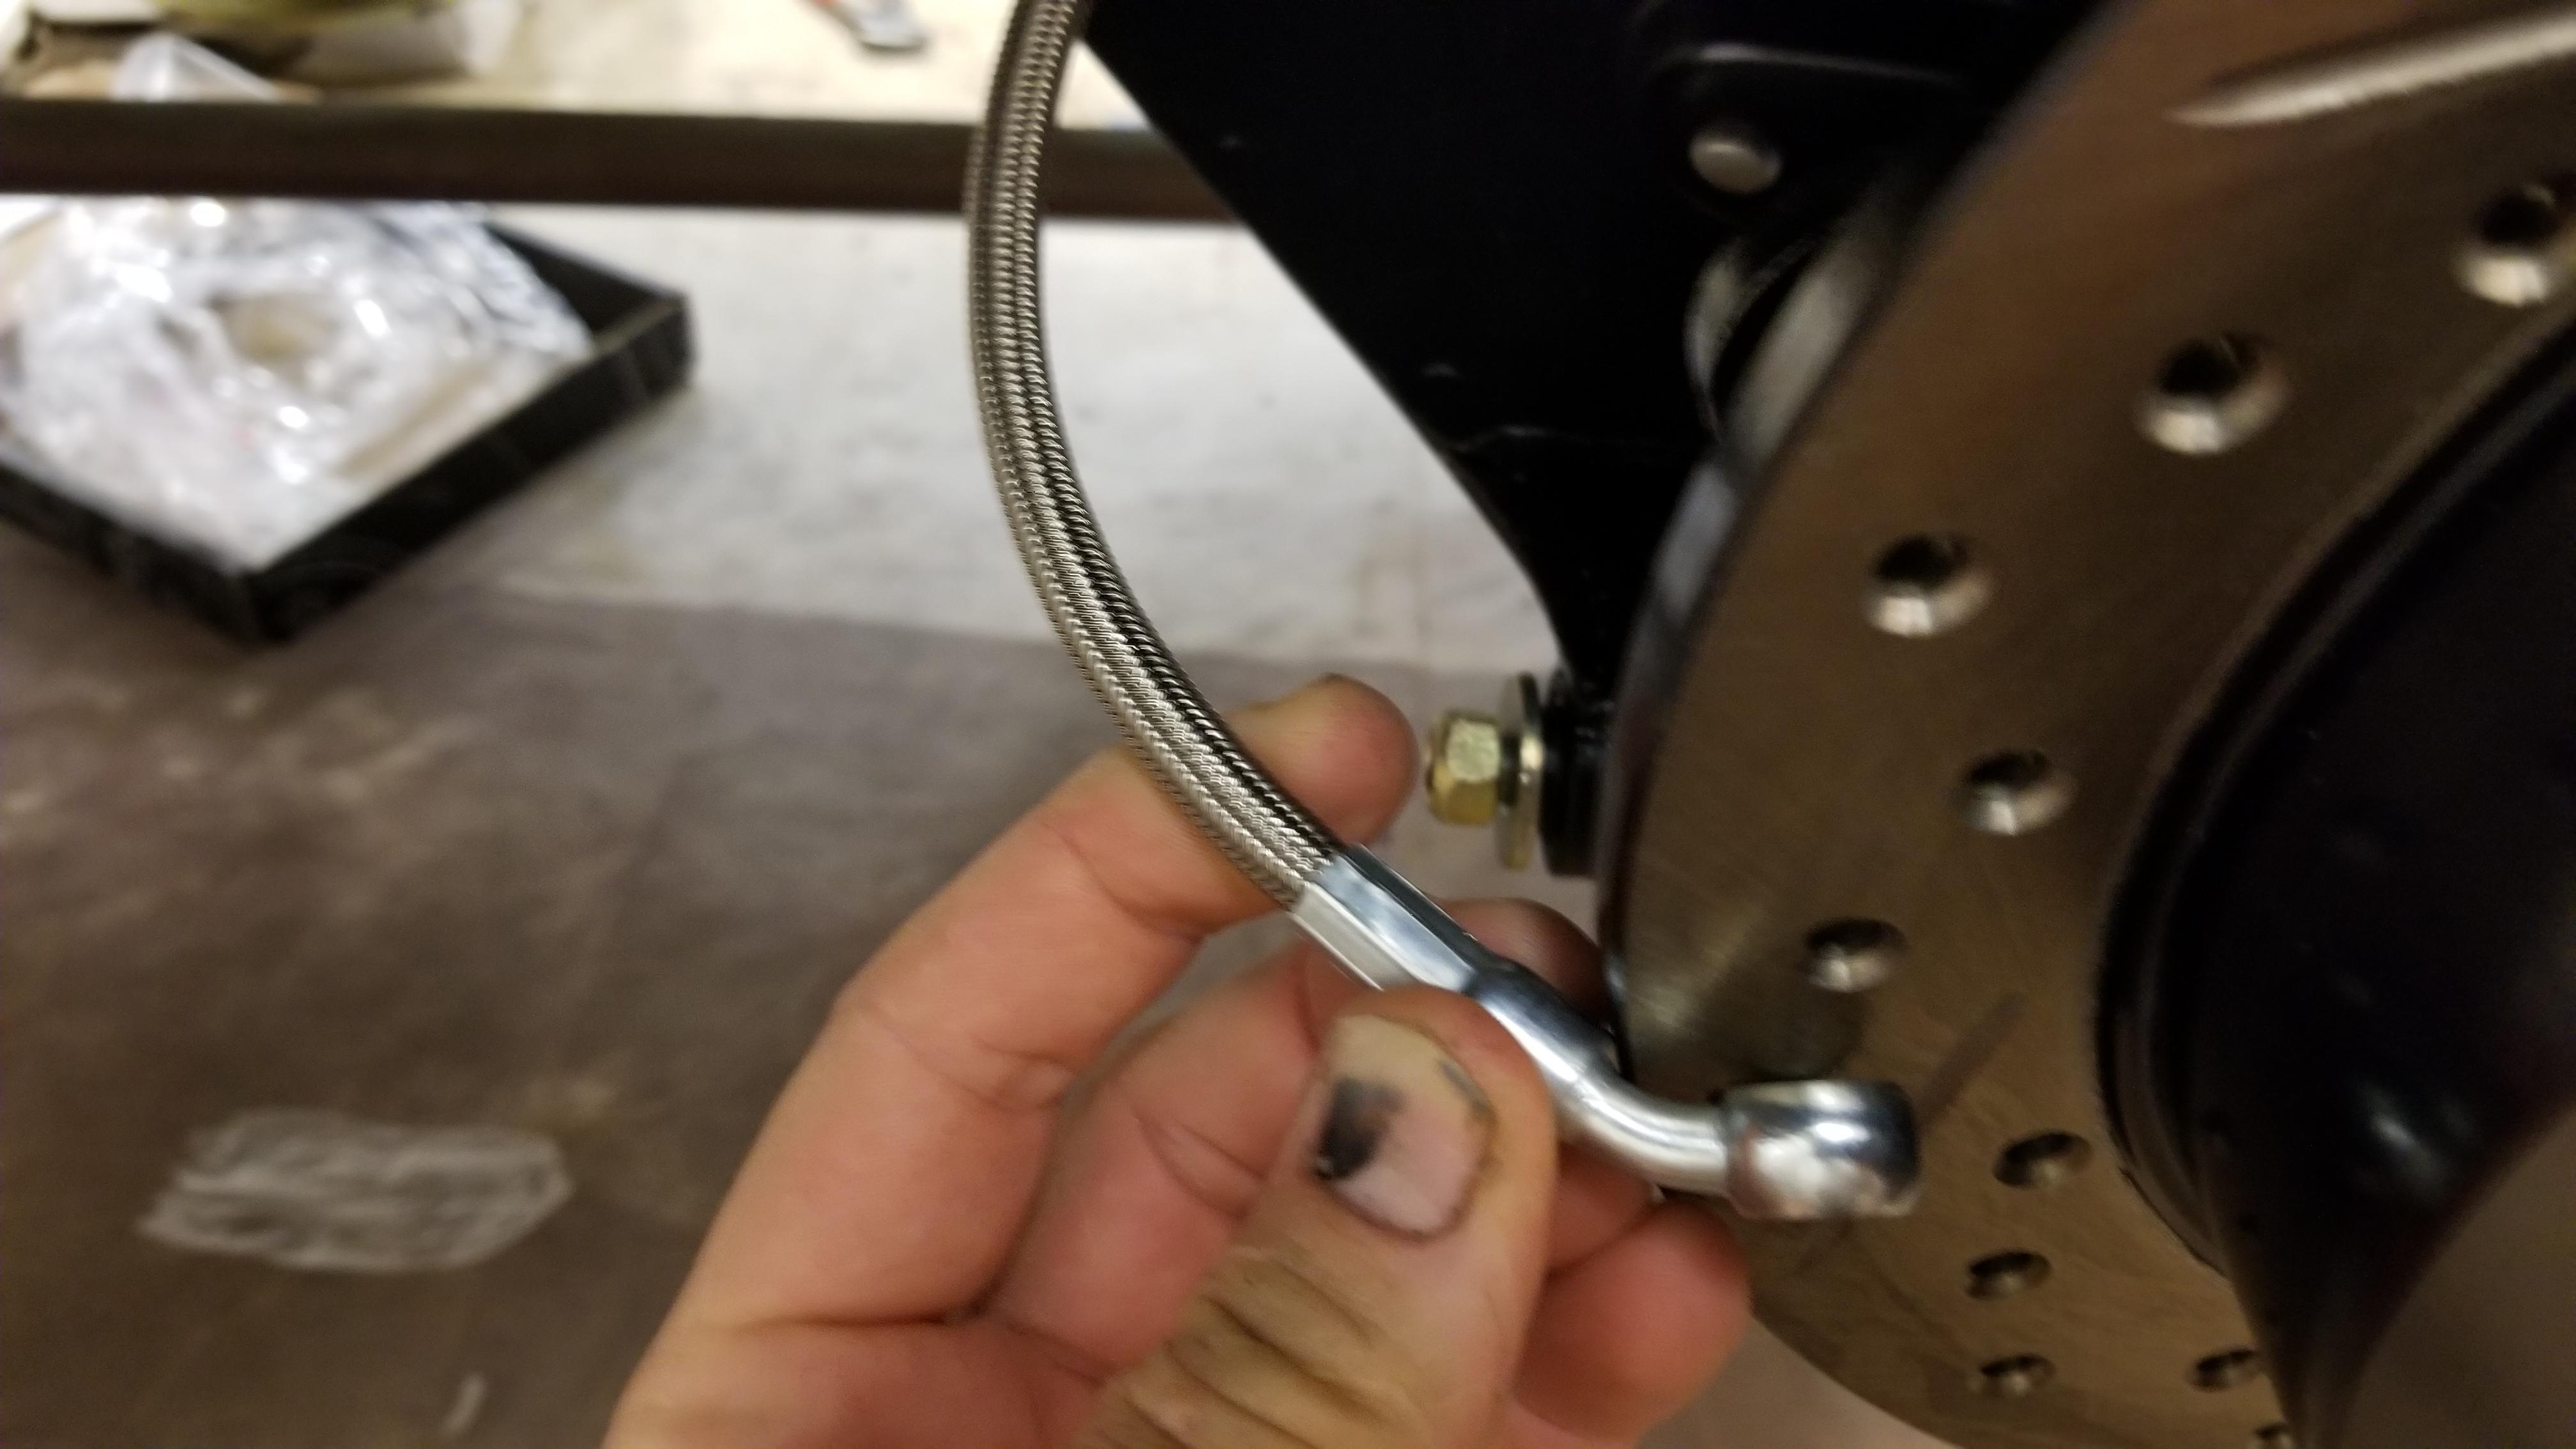
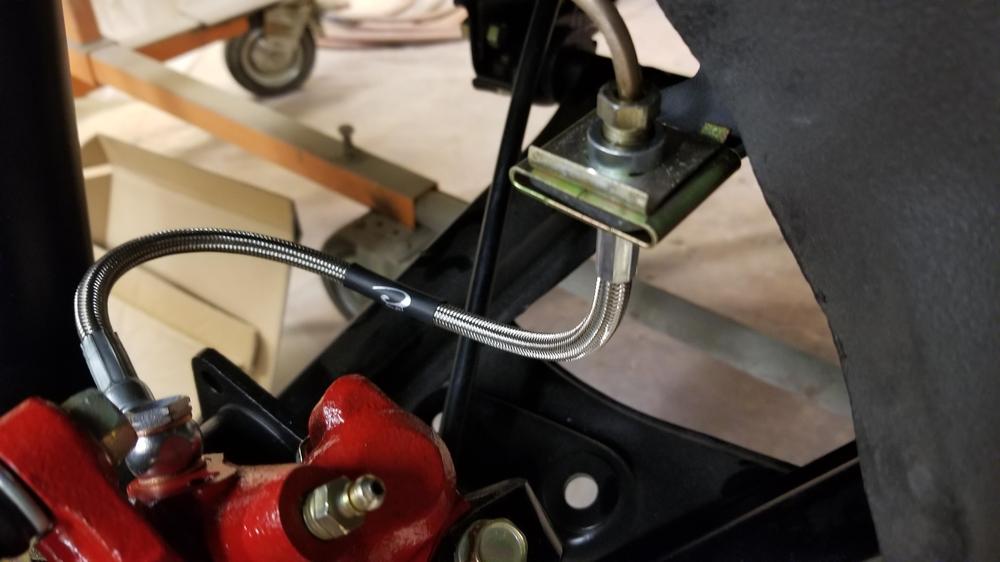
2 pointsSo I contacted Fedhill about a thread size question and he supplied me with a name of a company that makes custom lines Crown Peformance 760 599 0090 I got two custom lines made for the rear maxima calipers for like $60 I told them the length I wanted and the ends. Had them in like 3 or 4 days. Great service! I got a 45 degree banjo fitting on the caliper end to make them fit a little better. I also got the banjo bolts and washers from them for a very reasonable price

 2 points
 -
1 point
-
Looks like a good deal for someone Sent from my iPhone using Classic Zcar Club mobile1 point
-
Pretty much nailed it Zed Head. I prefer the P90/P79 head shaved down and shimmed up to get 10 to 1 CR minimum. A high duration, high lift cam (I run 17 degrees static advance on all 5) with performance valve springs to handle the rpm. Swirl valves help the engine breathe....I run SU’s and love their simplicity (can’t seem to step up to trips)....they work amazingly well for all my engines, through full rpm (up to 7500) with no sign of not being able to adequately feed them. The only thing I think would really bump them all up is CR. If I could run 13 to 14 to 1 CR on pump gas, I would. All 3 of the different engine set ups that I’ve built are a blast. Like kids, it would be hard to say which one I love most!1 point
-
1 pointWell, you are in the correct general geographic area. But, probably not rural enough to get full credit. You may need to move outside the city limits, drive an old Ford pick up, and have a slobbering hound in the truck bed. to become "Fully Qualified".. https://en.wikipedia.org/wiki/Redneck Dennis1 point
-
1 pointI was able to find staples the same width as the original hole spacing. The were rectangular instead of round so I opened up the diameter of the holes slightly. You can then carefully push the staple through the original holes. Then I used long nose pliers to bend the legs over on each staple. Time consuming but it looks good.1 point
-
1 pointThat's a cheap gauge, with no damping. The needle bounce is amplified. Probably not a big deal to the carbs. Hard to tell what real pressure is, but it looks about 4.5 to 5 psi. An oil-filled gauge will give a smoother reading.1 point
-
I believe the 4mm total is the amount of distance that the tensioner has the ability to accommodate. I don't know that you could take all 4mm off the bottom of the head1 point
-
1 pointI’ve also heard of people using thin stainless steel wire instead of the staples.1 point
-
1 point
-
1 pointThis will be a discovery trip for all of us. I'll keep the thread populated as best I can. EFI fuel supply is the next topic. Many options are available, but there are two main competitors. 1. External swirl pot with internal EFI pressure pump, fed by exisiting low pressure carb pump. Two pumps, lots of connections, extra can to mount and hide, not ideal. Something like this. http://www.burtonpower.com/efi-fuel-pump-and-swirl-pot-assembly-wfp600.html 2. Install an Internal hi pressure EFI pump. Quiet, cool running, just one pump, but need to add some baffling or swirl pot and of course cut up a good tank. Definitely the cheapest solution but requires the tank be modified. Have lots of tanks to hack up. Will also install modern fuel level sender at the same time. TanksInc.com has a good option. http://www.tanksinc.com/index.cfm/page/ptype=product/product_id=84/mode=prod/prd84.htm Holley just came out with a fuel tank "mat' (HydraMat) that covers the bottom of the tank and soaks up fuel like a sponge. Any fuel in the tank is soaked up and available to the pump. The ultimate in anti-slosh, anti-starvation device. Not cheap, but an excellent solution for putting efi pumps in non-or minimally baffled tanks. https://www.holley.com/products/fuel_systems/hydramat/hydramats/1 point
-
1 pointJoe - I presume you're talking about the fuzzy strips on the top of the door panel. A few folks have been successful at reusing the OE staples but this is a pretty tough process. Glue is not a good option for this install - probably why the factory did not go this route. I went with a set of 8 small pop rivets and it worked out well. A key trick is to get the rivet head well seated into the fuzzy material by using something small and pointed to pull the fuzzy hairs out from under the rivet head before squeezing the rivet down to finish. This will ensure the rivet head is not sticking out with the potential to contact the glass. Hope this helps. Jim1 point
-
The fancy named modules, like Accel and Pertronix, just pass more current and create more heat. Better spark at 7000 RPM, but if you're not going to be there it's a waste. I like the decent name brands from the parts stores. I have a BWD from OReilly Auto right now. Get on Rockauto and pick a Standard or BWD. You'll save some money and get a part that will work fine with a 0.7 primary circuit coil.1 point
-
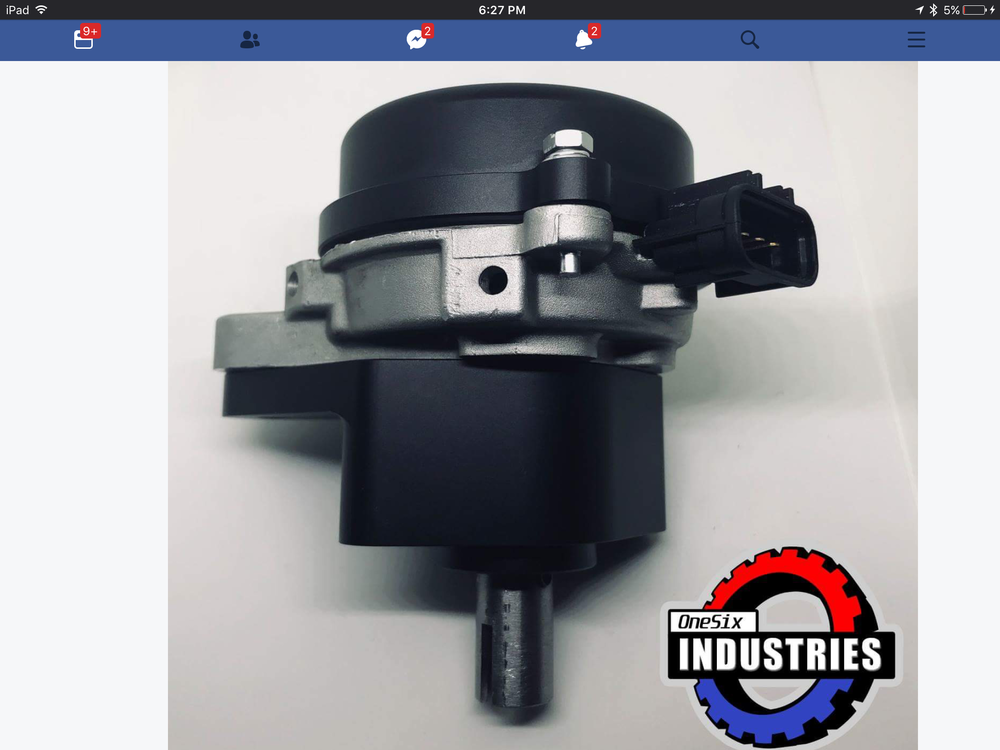
1 pointOn the other side of the motor I plan to tuck a set of LS Coil-on-plug coils and time it all with a OneSix Industries new distributor replacement 'Crank Angle Sensor ' that has a pair of trigger wheels for full sequential injection. No holes barred, this thing is going modern. I may have to glue a dizzy cap on it to keep the old look going. Bad enough to do COP on the plug side. https://www.onesixindustries.com/products One might this a bit pricey, but once again the Canadian - Aussie connection wins as it is $400 AUD, which is actually just under par with CAD, so I win! Any of you yanks can cash in even better with your 35% advantage.
 1 point
 -
1 point
-
Both engines are tuned quite good. What I meant was that I thought my engine would be much slower because the 260 E88 head I have, based on what I’ve been reading about that head.1 point
-
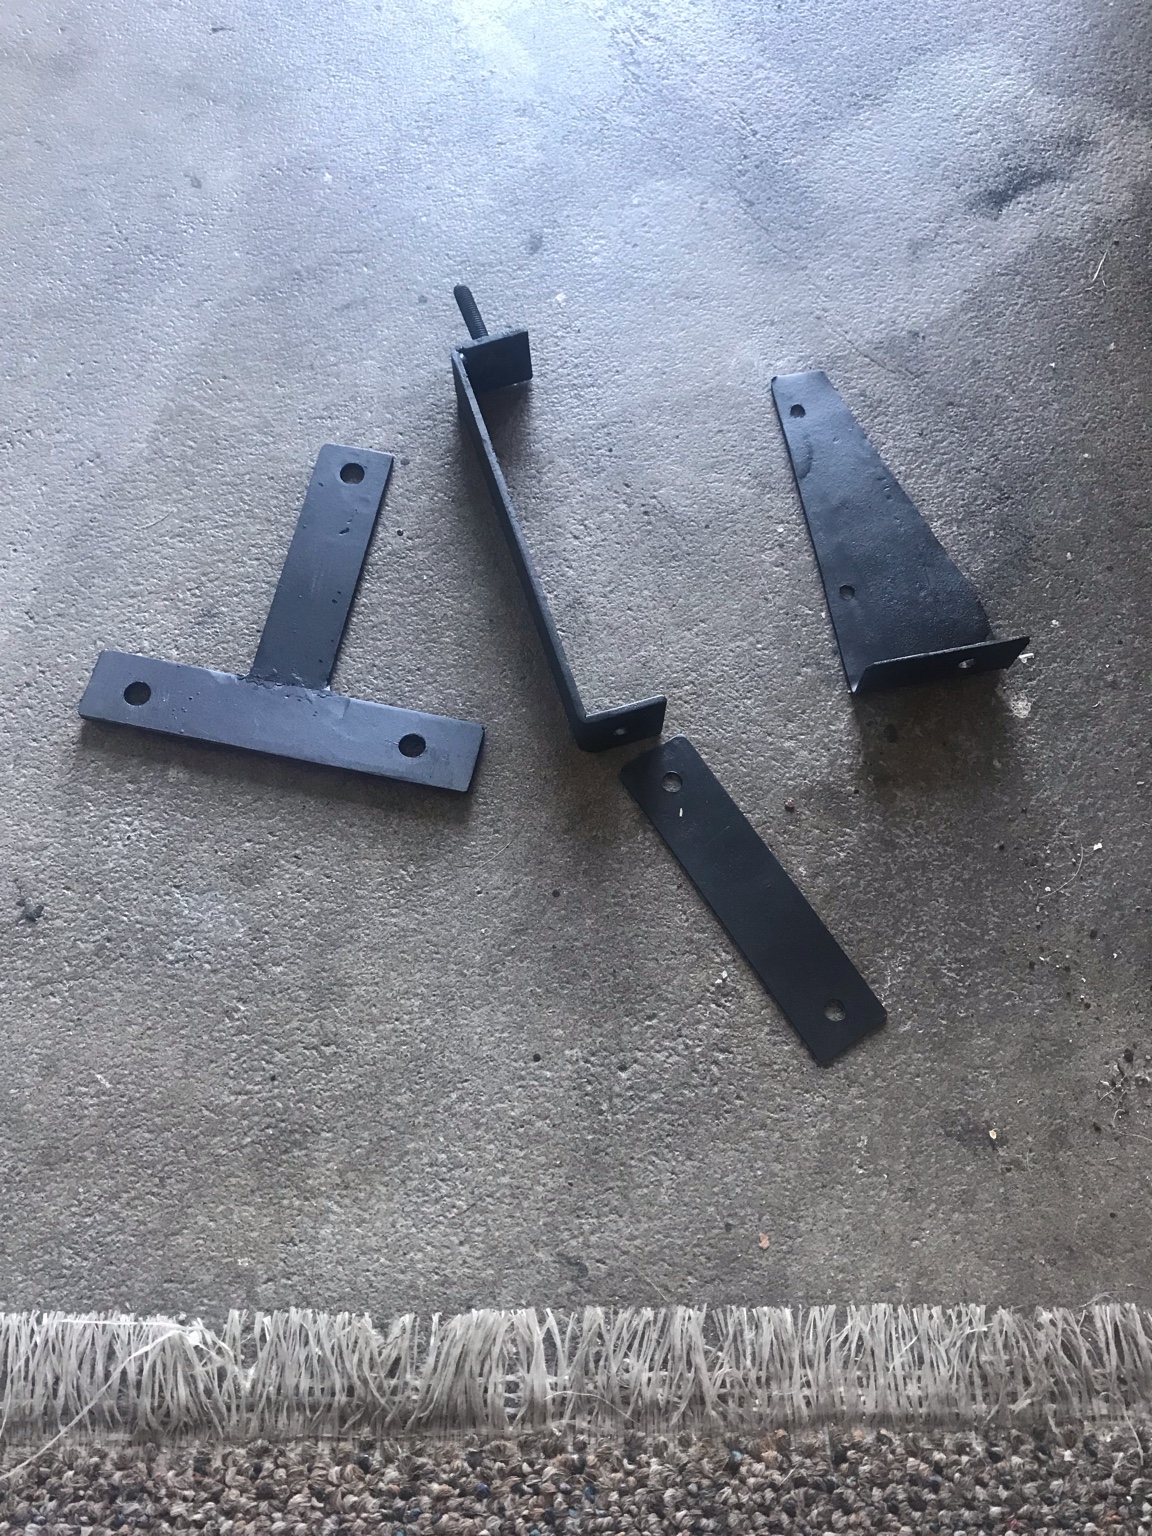
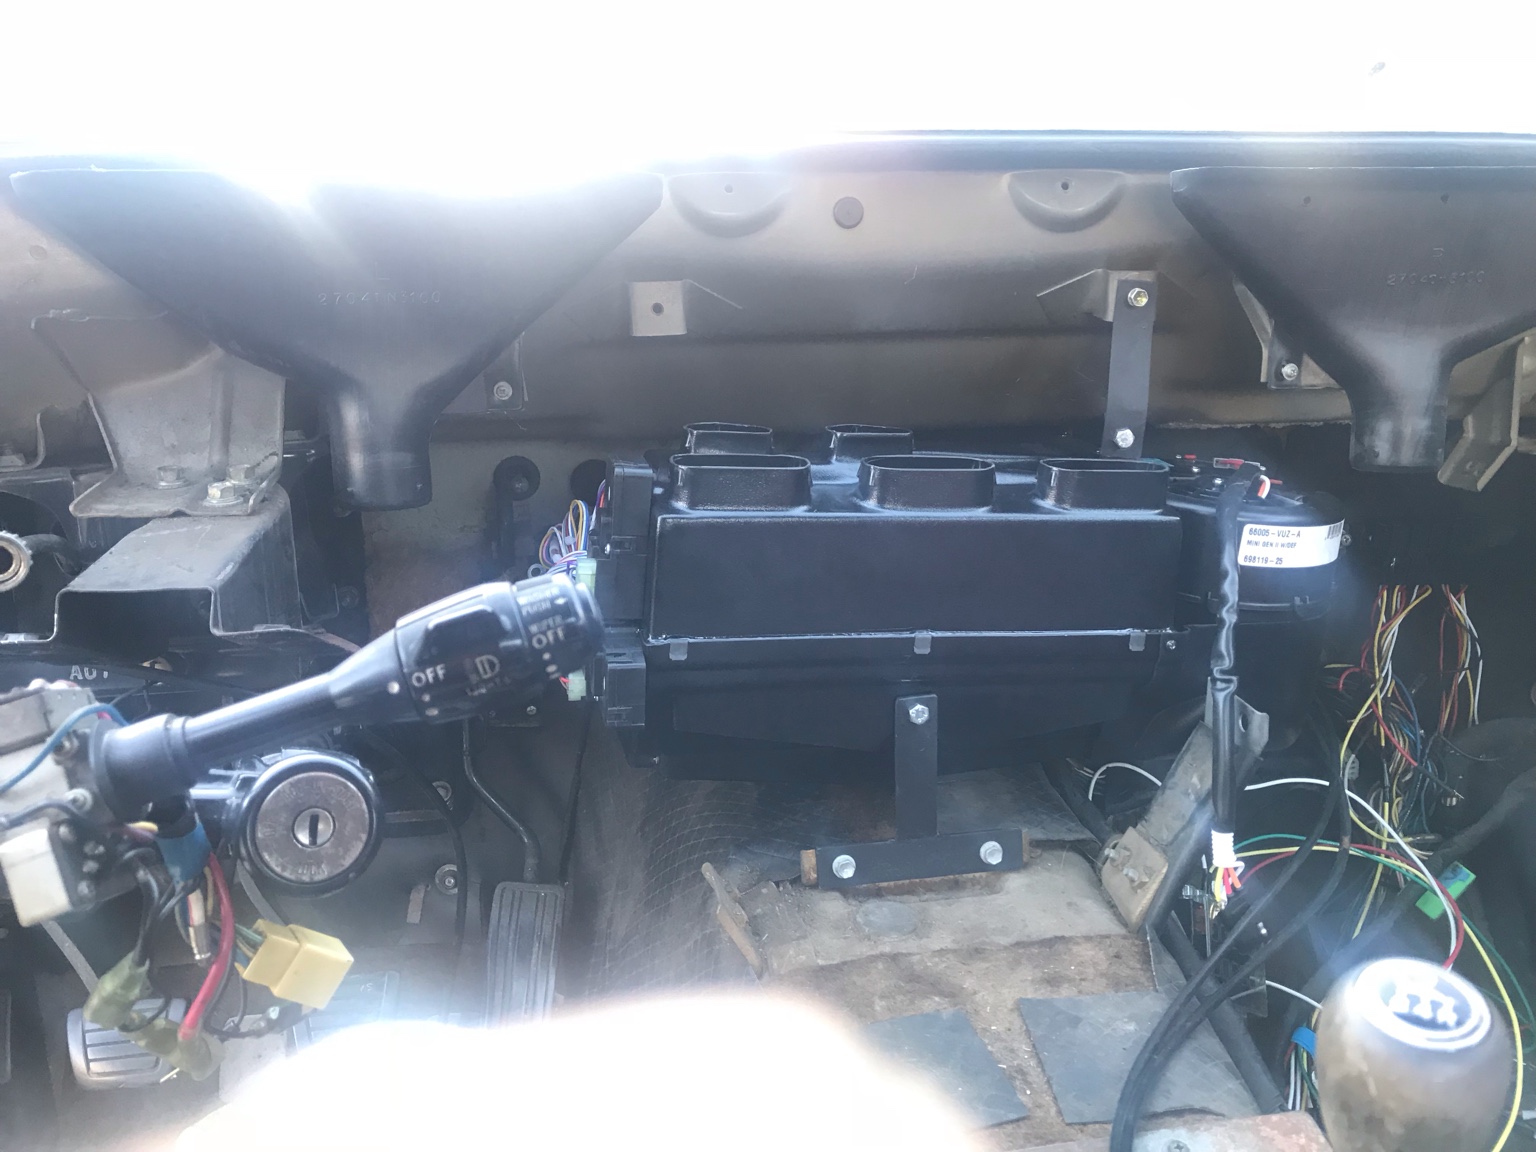
There are 3 mounting points, with 4 pieces. Here they are painted after a test fit Them placed into the car, I’m running a 260Z the front mount might be a little different from pictures I’ve seen. I have to test and see if the dash fits, it should, just have to double check [emoji85]

 1 point
 -
1 point
-
1 pointHere's a pic of what happens when you try to press a bearing in at an angle. You can see the semi-circular mark on the far side where they gouged the cylinder wall that is supposed to locate the bearing. That raised bump was pushing the bearing to one side and not letting it seat square. I used a hand file to dress the high spots back level. This pic is about halfway done. I considered using a dremel with a small grinding wheel, but last thing I wanted to do was slip. It took way longer doing it by hand, but I wanted the control that I could not achieve with a power tool:
 1 point
 -
1 pointMy pleasure. Glad to help. So did you see the pic of the aftermath of the party? https://www.classiczcars.com/forums/topic/60026-friends-over-for-a-party-in-the-shop-yesterday/ So to provide a little more info about Matthew's bearings... The shop that had previously worked on the car really screwed things up. They had forced the spindle pin tapered retainer pins into place without having the spindle pin located properly. This not only ruined the taper pin, but raised a huge burr on the (brand new) spindle pin and we had to use the hydraulic press just to get the spindle pin out. And the problem that Matthew originally noticed when he got the parts back from the shop was that the stub axle didn't spin freely, and had significant tight and loose spots when it spun. We traced this issue to a huge burr kicked up inside the strut housing on the bearing surface from them pressing the bearing in cockked at an angle. In other words... It wasn't straight, wouldn't go in, and they just kept applying more force instead of stopping to figure out what the problem was. We dressed the upset material (high spots) off the inside of the strut housing and cleaned and inspected everything to make sure there weren't any other surprises. Once the burrs were removed, the new bearings went in fine and everything spun perfect. We dressed the burrs off the spindle pins, and after that, they went back into the housings OK as well. And if that's not enough... They had ground down one of his distance pieces on a belt sander. Not only was it not square on one end, but it was also now almost .100 too short. When you tightened the stub axle nut, it would pull the inner races together so tight that you couldn't turn the axle. And they're professionals!! I chucked up the distance piece in the lathe today and squared up the end. Won't ever be able to be reused for a distance piece, but it sure makes a handy drift for doing future wheel bearings. Into the box of misc stuff that lives next to the hydraulic press! It was a good day in the shop.1 point