Leaderboard
-
Patcon
 Subscriber
 4Points11,142Posts
 -

Zed Head
Free Member4Points19,235Posts -
psdenno
Free Member3Points2,632Posts -
jfa.series1
Subscriber2Points2,733Posts


Popular Content
Showing content with the highest reputation on 07/17/2018 in all areas
-
3 pointsYou're right. Pictures of children should not be posted on this forum unless their identities are obscured.. Dennis3 points
-
2 pointsYes. What does this have to do with mirrors? Mark and Patcon you are not helping things.2 points
-
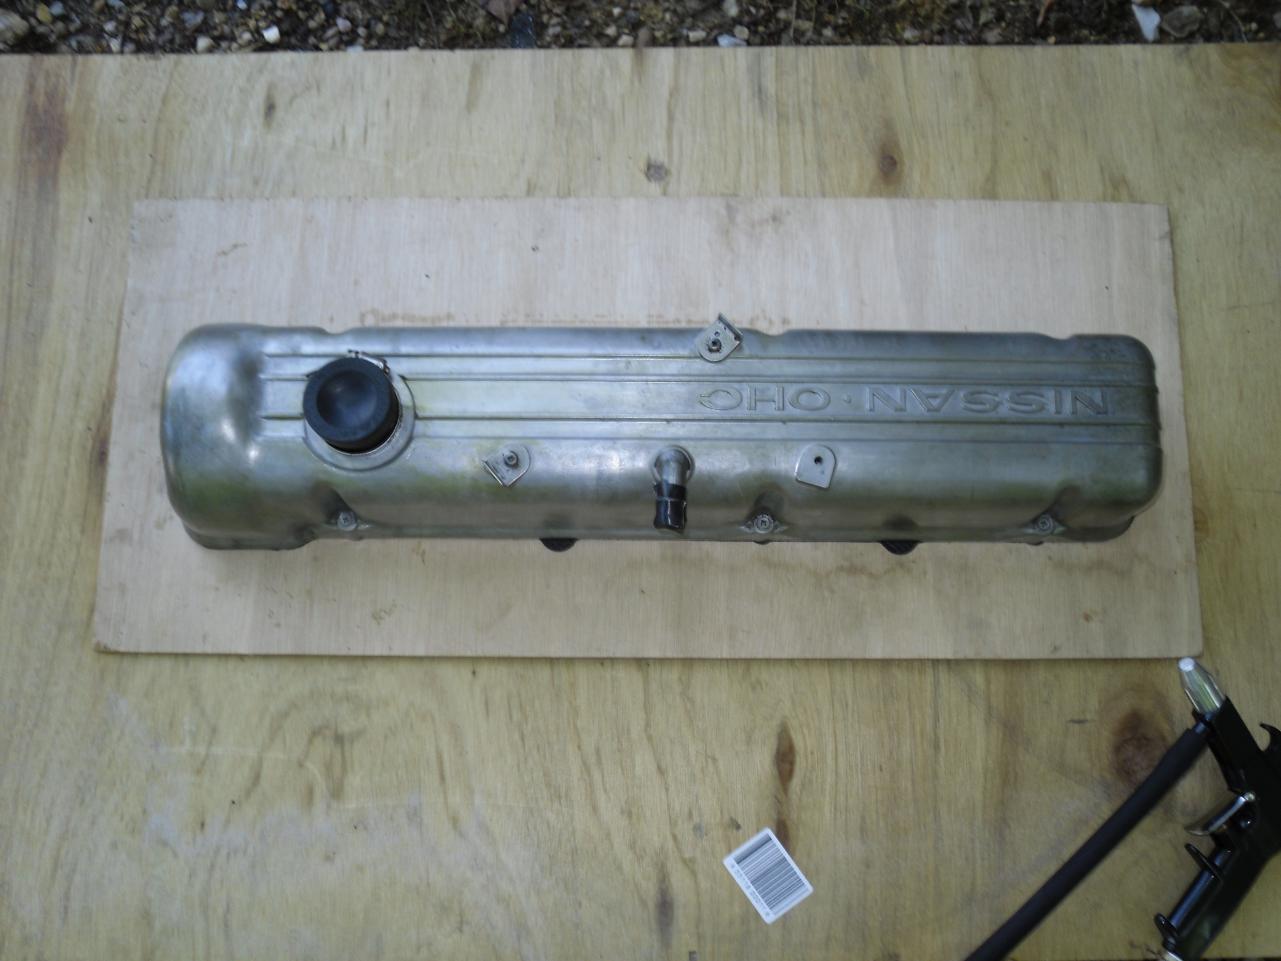
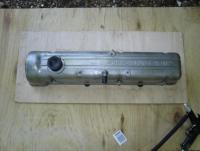
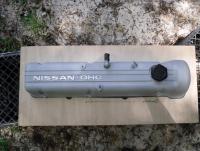
2 pointsI sand blasted this one then sprayed it with clear satin high heat metal protector from Eastwood. Turned out good, to me.
 2 points
 -
2 pointsDid you use new foams for the seats? You were correct to use wire inside the seam where the cord runs. Since I have completed 2 sets of the same leather seat covers, I am interested to know if you also ran into a problem with the material being too short to close the rear of the bottoms & the seat back. If you did not use new foams, I can see it being easy. Yes, more pics... Hope you put the seat heaters in while they were apart, it gets cold in Layton Utah....?2 points
-
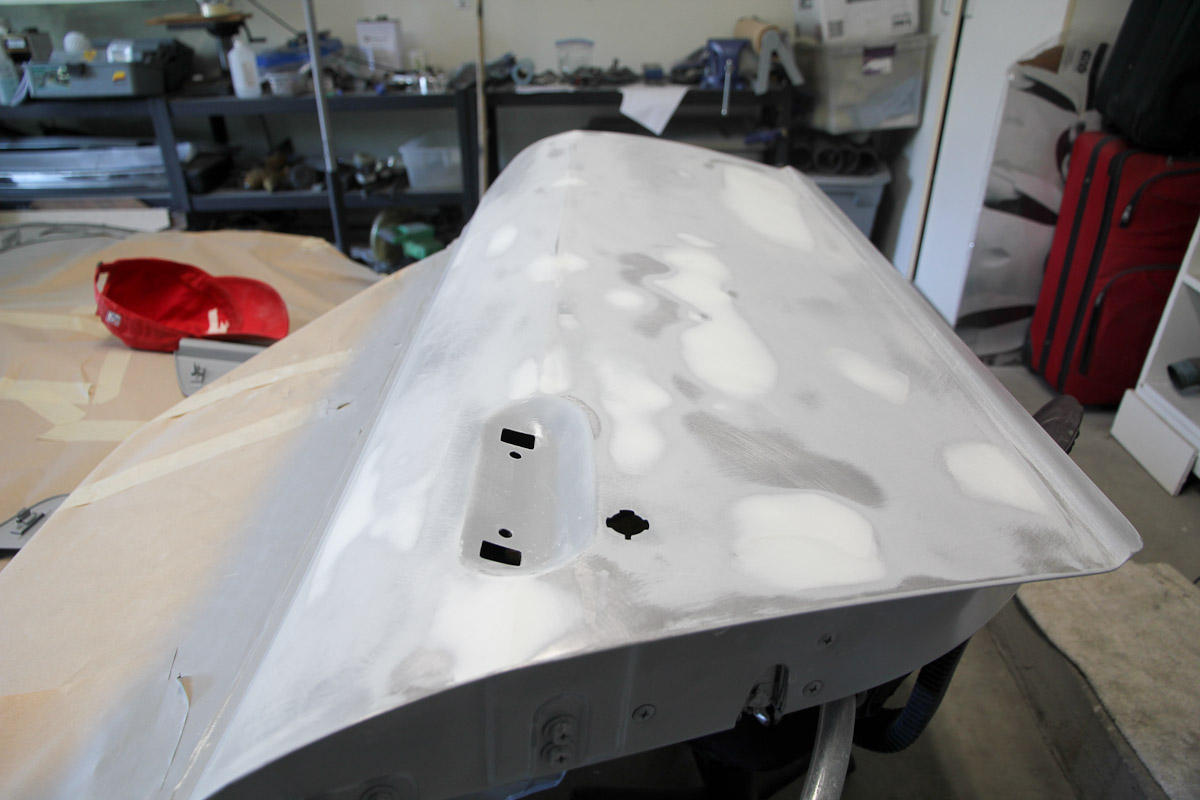
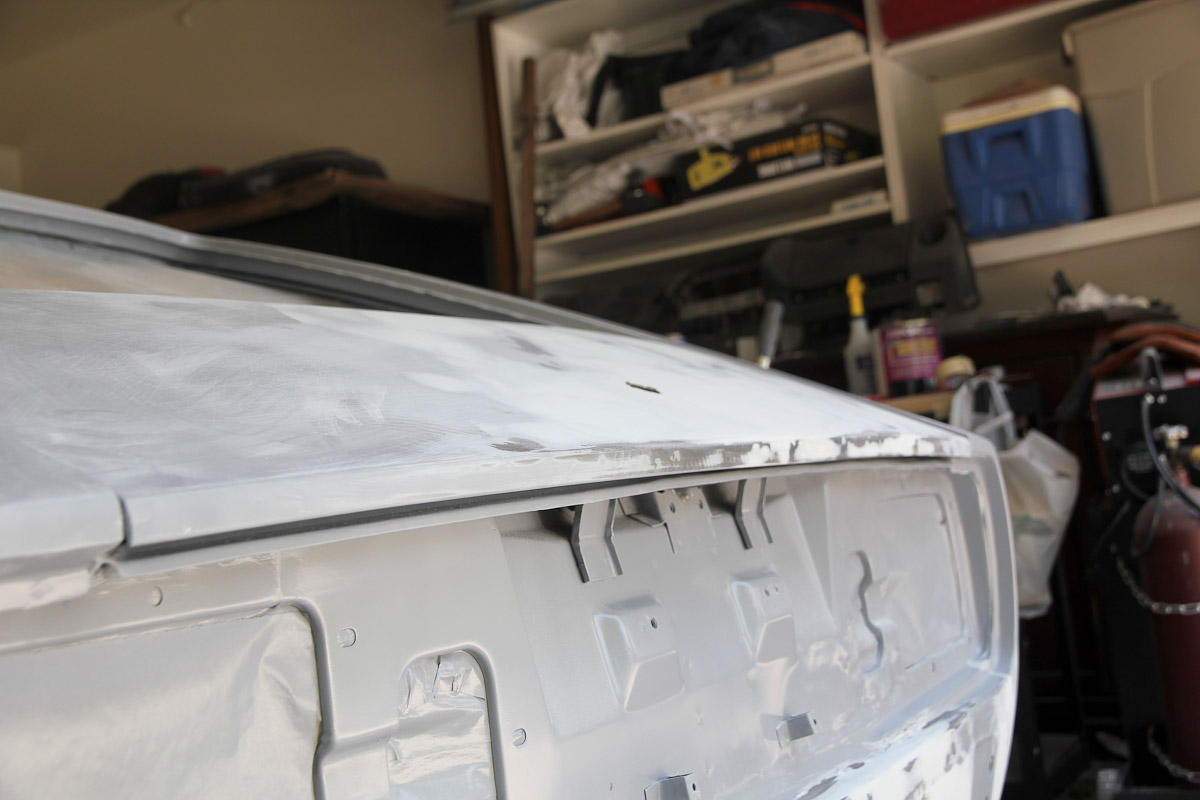
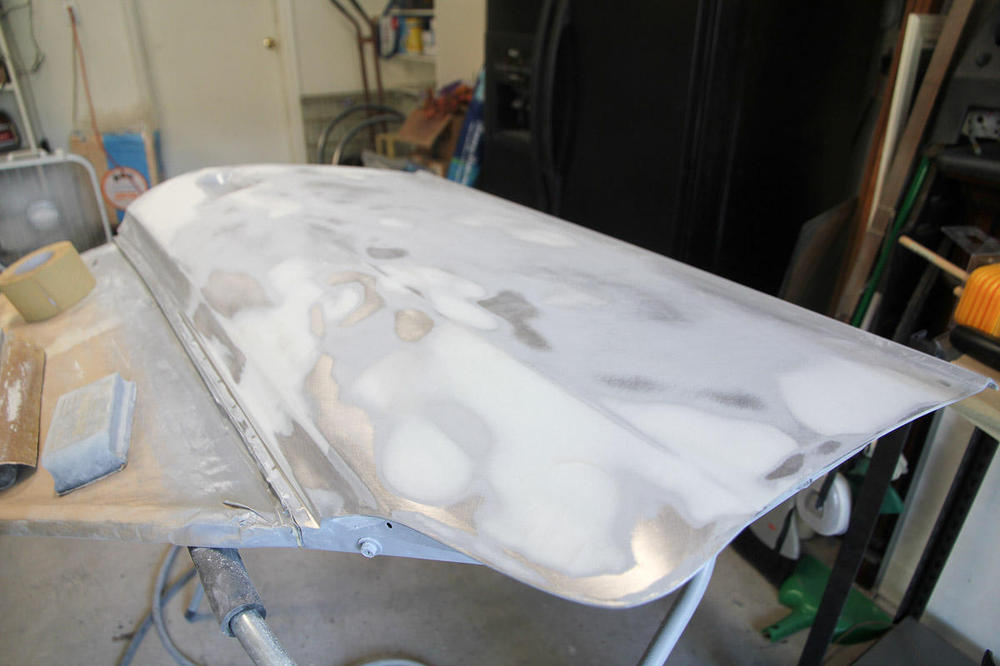
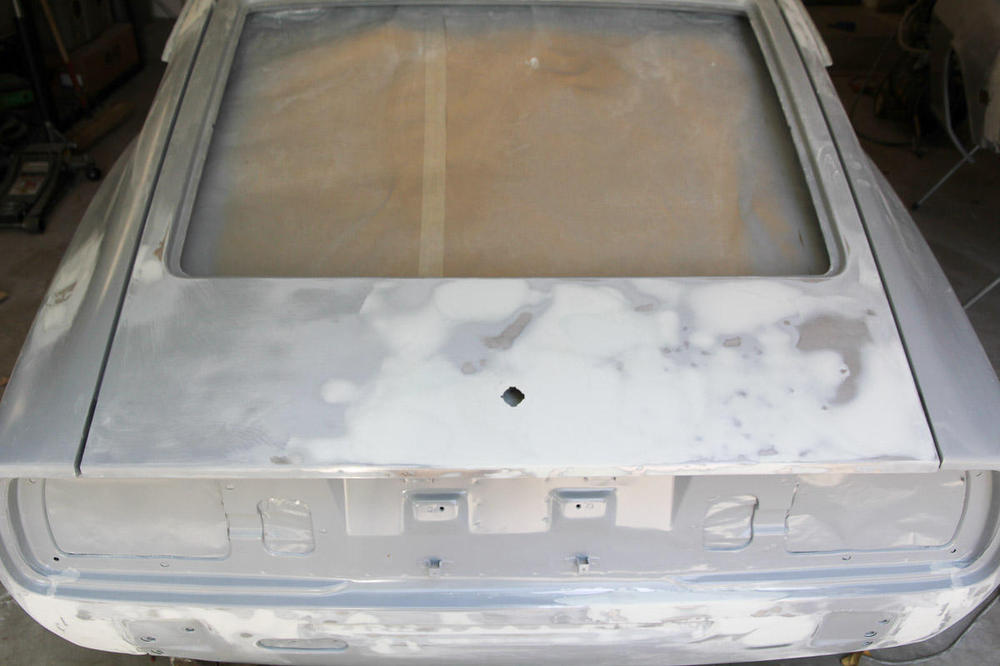
That's good progress! 75% on the floor sounds about right, at least for me. I am not sure the pros do a lot better at that. It's just what it takes To help crisp'n the lines on the rear quarter and other panels , like down the center of the hood. Run a piece of 2" blue tape along the crease line with one edge of the tape nice and straight right on the line. Sand right up to the tape, maybe a hair over it. Cross hatching from both directions. Then move the tape or run a new piece along the other side of the line and repeat. It will help you define a nice sharp line. Many times mine become too sharp and I knock them down with a quick swipe of 320 by hand. When you start running primer, buy some good powder guide coat. You will be surprised how much it will show you. When you sand you want your transitions to be very smooth. No defined area from filler to primer to metal. You will find that if the line is very defined when you prime you will be able to see a map of your filler work. I like the edges of my filler or primer to sand out really far and get translucent where they feather off. Guide coat will help you find these areas before you color and high build should be able to deal with most of those issues. I probably put almost as much primer on the floor as I do filler. So buy an easy sanding primer and good paper!!!2 points
-
1 pointI was searching for a recent thread and came across this instead. Doesn't seem right.
 1 point
 -
1 pointBingo, I can't see any other way that it could work. The seal on the bottom of the plunger must have been longer because there really is only about 3/16" travel on the plunger. OK, so off to the wreckers to look for a 2000 TL Acura heater valve. Now that I truly know that the valve is buggered I'll open it up and post some pics, part of my ongoing mission to show the world the inner workings of the Z... or just cut stuff up to see what's inside.1 point
-
1 pointThat seems to be what mine are. So with a front case swap it should work. You shouldn't have to do any extra work either, bearing swaps or grinding, since the bearings and clearances should be the same. But the ratios are more like a 280Z, not a 280ZX, apparently. The Haynes manual that I have says the ratios are 3.321, 2.077, 1.308, 1, and 0.833. So a 3.54 diff ratio would be about right.1 point
-
1 point
-
1 point
-
Reloaded pics: The heater in my 77 always blew hot regardless of where I put the temperature slider and I tracked the problem down to a faulty water cokk valve under the dash. I had the capillary style valve (http://www.classiczcars.com/forums/thread46448.html) and spent a little time looking into a direct replacement, but after spending that kind of "quality time" working under the dash, I decided that I never wanted to go through that again. So I changed over to a ubiquitous newer style water control valve which I relocated up in the engine compartment instead of under the dash. I grabbed a bunch of different valves from the junkyard from various Honda and Toyota products, trying to find one that had the correct flow direction, had the lever on the proper side, and opened when the cable "pushed" instead of "pulled". I kinda lost track of which was which, but I believe the one I finally used was from a 2000 Acura TL. Here's the valve I used. Flow direction is left to right when lever is on the side pictured, and it's CW to open again with lever as pictured. That means I can mount it on the return line from the heater core and it's push to open. Note that I also had to make a new control arm for the valve to get the ratios correct between between the travel distance of the control slider and the travel distance of the new valve: I'm sure there are much simpler ways to mount a valve and connect to it but here's what I did. I made a mounting bracket for the valve which also included the provision for attaching the cable control: Here's the whole thing painted, mounted, and plumbed in the engine compartment. I attached it to the mounting bracket for the brake lines and fed the control cable through an existing hole in the firewall. I believe this hole is where the vacuum line goes for the HVAC system on cars with A/C. The hole location was a little higher than optimum, but since I don't have A/C, this hole was unused which saved me the trouble of drilling a new hole only to find out that the whole project was a mistake: It wasn't a mistake! It works great and will be a breeze to work on in the future if necessary.1 point
-
They are M4x0.7. Long black and flat/oval headed. Maybe 25mm long. Philips drive1 point
-
Here you go: https://zcarsource.com/door-upper-molding-rubber-seal-240z-260z-280z-70-78-new I see you found my 5-year old post on my fuzzy strips install method. I installed the squeegees the same way. Jim1 point
-
1 pointoh, sorry, my bad. I thought it had both mechanical and electrical fuel pumps. I need to read and look more carefully.1 point
-
I bought pair from a vendor called DatsunLandSoCal several years ago. They install with metal clips (from the underside, so not visible) rather than staples and I am very satisfied with the shape and dimensions, the appearance and the installation system. They sold at the time for over $50 for the pair, so not cheap. Unfortunately, the seller seems to no longer be in business. Somewhere out there, there might be a roll of this rubber, waiting to be put to use. Where is it?1 point
-
1 pointIt is probably a gearing issue overall. Depending on which 5 speed you have, your gearing could be a little high, which will make your launch a little slower. If you go to a lower gearing in the rear end then your cruising rpm's at 100mph is going to be much higher. There's no free lunch here. After all, you are only working with 150 or so HP if you're lucky. It's not going to launch like a modern EFI car that makes 200 or more HP and could have as many a 8 tranny gears. For us in the states, law enforcement tends to lower the speed range we build for, so we don't have to worry so much about higher rpm's. We can run lower rear end gearing and not have to worry about high speed rpm so much1 point
-
1 pointI think I will go with the 90 degree shift rod. I will keep you guys updated. Thanks1 point
-
1 pointI agree with you. I suspect that the z432 would run fine without the electric fuel pump running. They just wanted to be sure fuel pressure is adequate.1 point
-
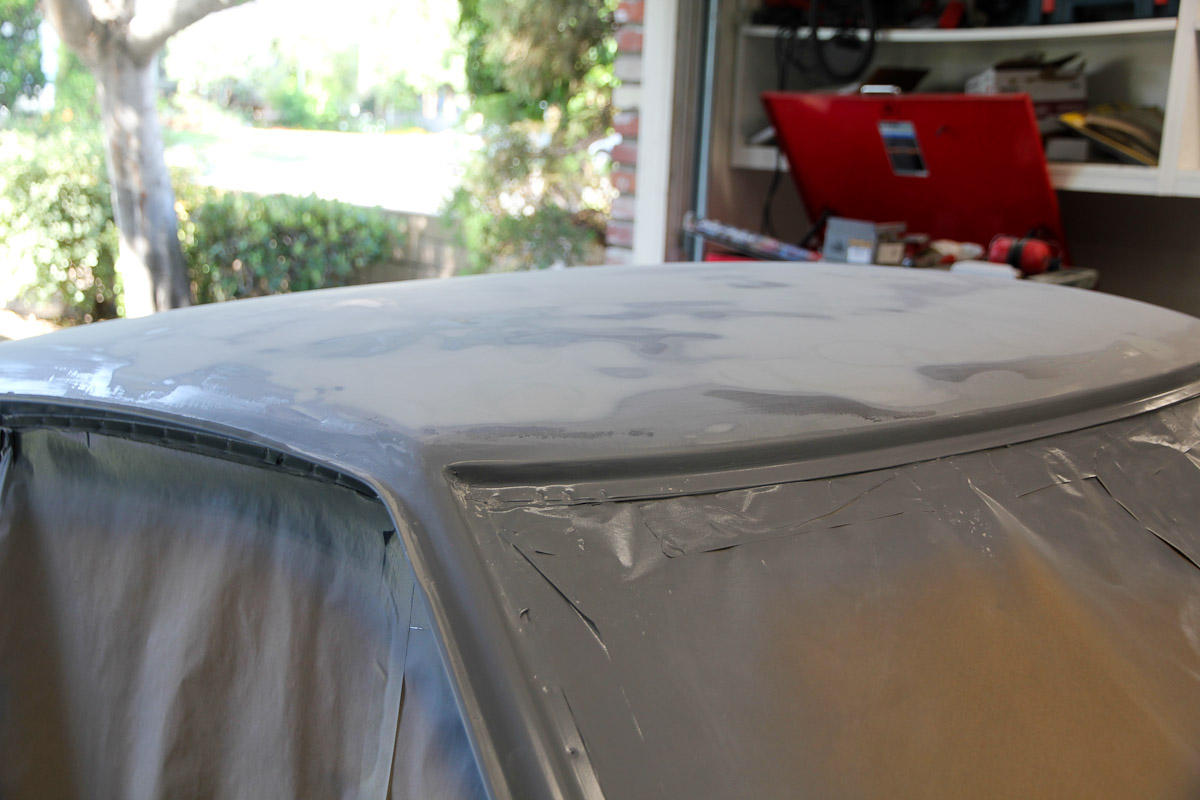
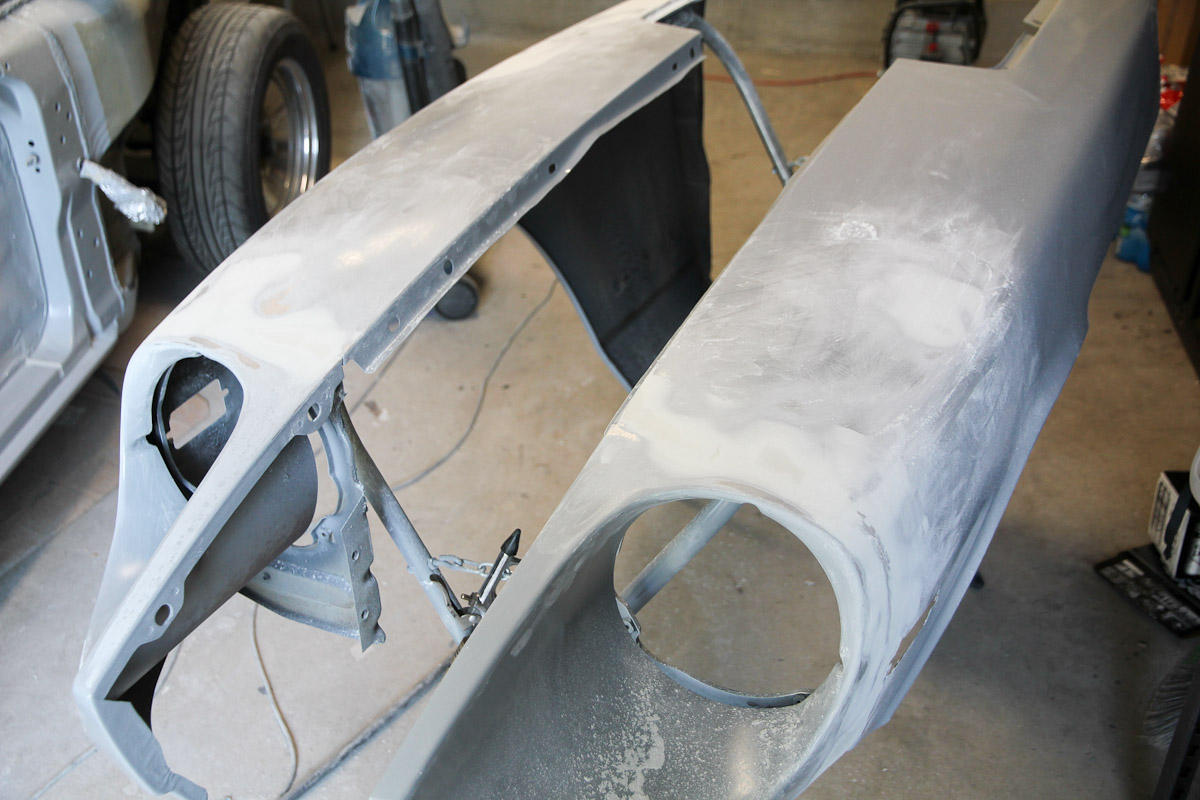
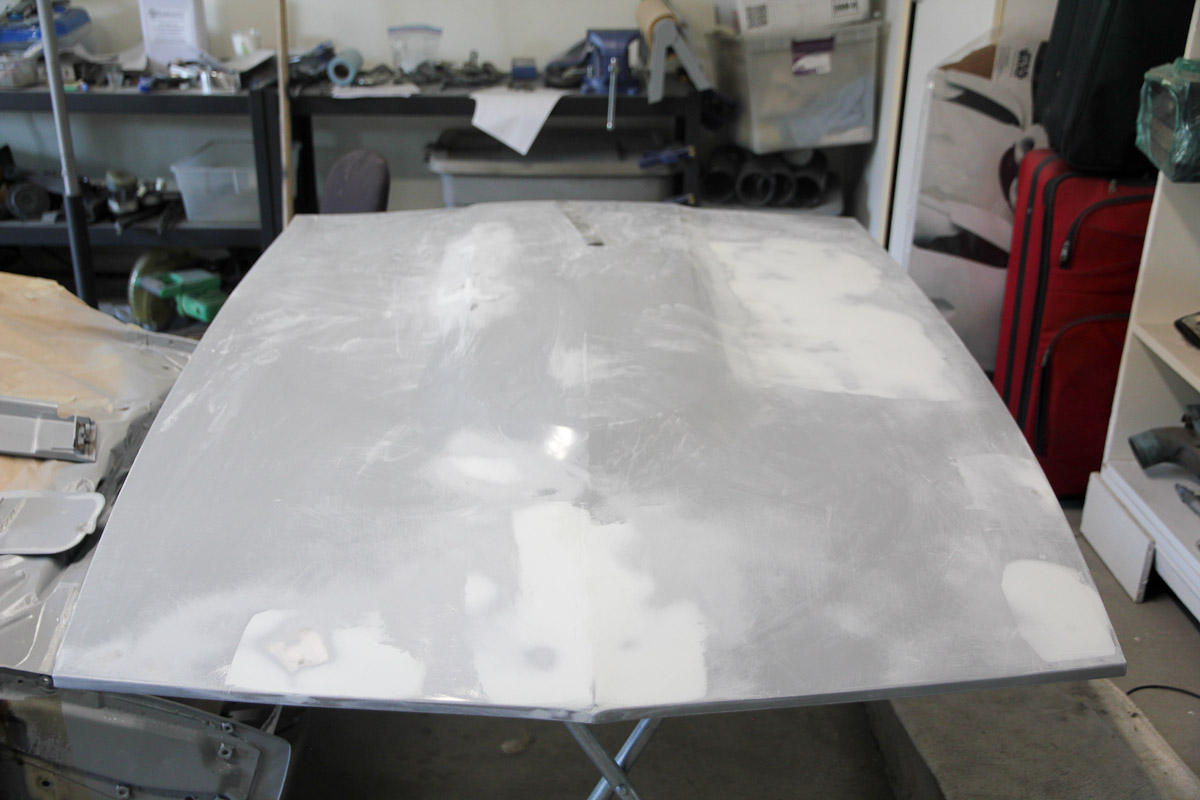
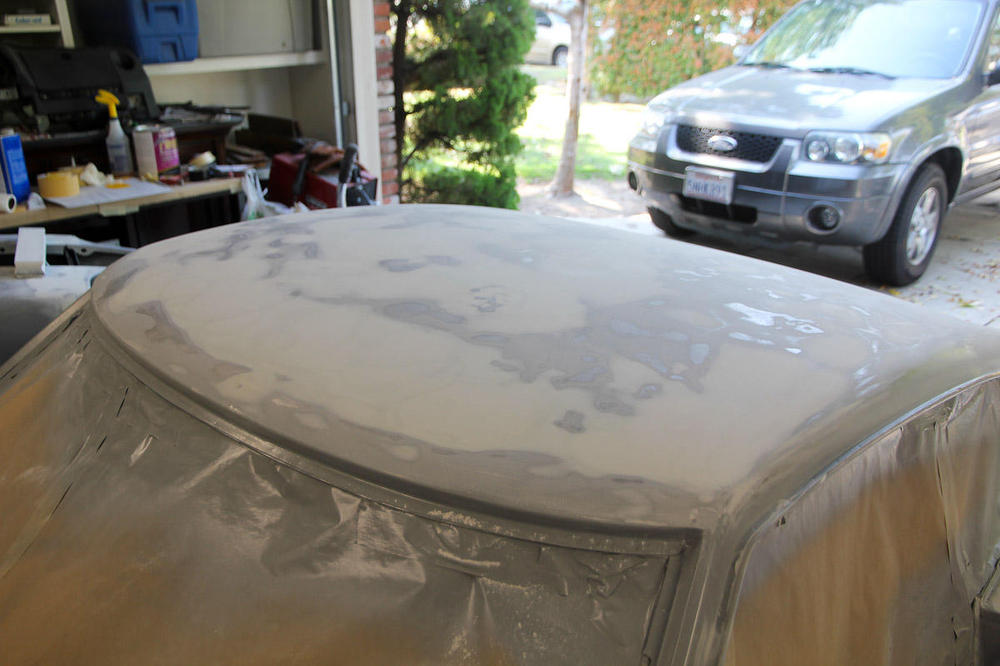
Been chipping away bit by bit as time allows. The doors, hatch, and the roof required a lot of work and are as good as I think I can get them. Had to use more filler than I want, but less than I thought might need. I've gone through about a half gallon so far and probably 3/4 of it ended up as dust...much respect to the pros out there who can do it in one try, quickly, without wasting a ton of materials! The passenger rear quarter and the rear panel are almost finished. The rear quarter on the driver side is going to be a challenge reshaping the wheel arch and that swage line. Saving that for the end. Just started on the hood and fenders...hopefully they go quick.


 1 point
 -
1 pointI would use the rear suspension. Probably one of the lower control arms to try to minimize the impact on the rear valence. I would be careful if you have to pull very hard or you will tear up the body or the fuel tank.1 point
-
1 point4 1/2 year necro post started it all. 4 1/2 months and 26 pages later...it continues. The internet.1 point
-
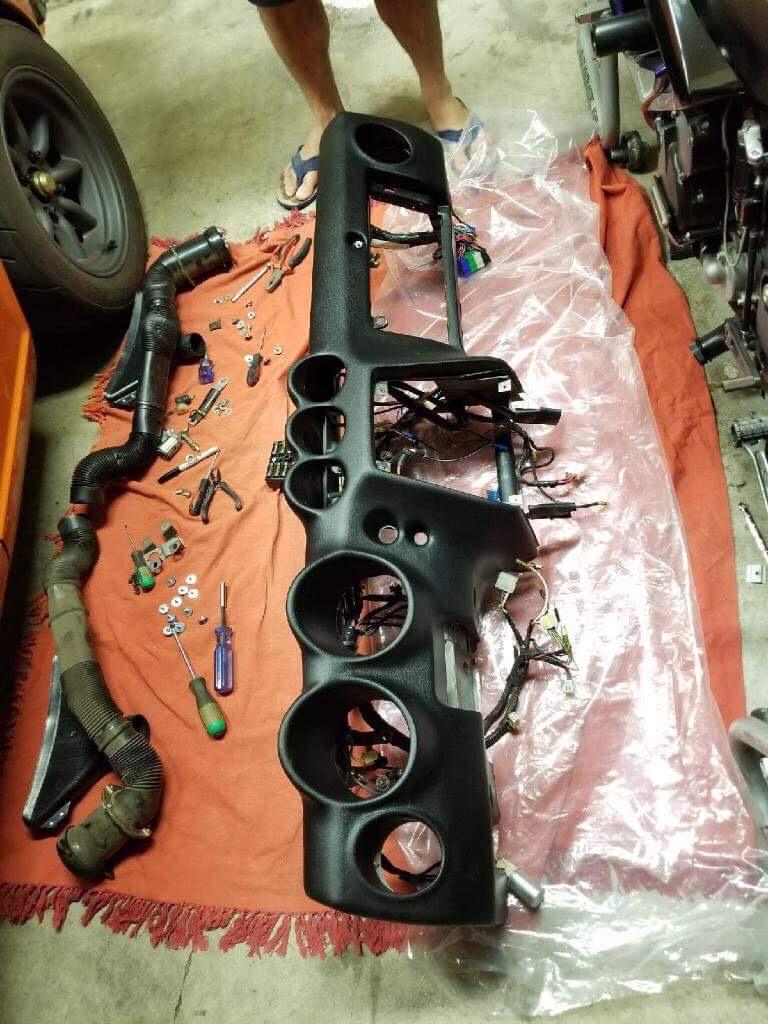
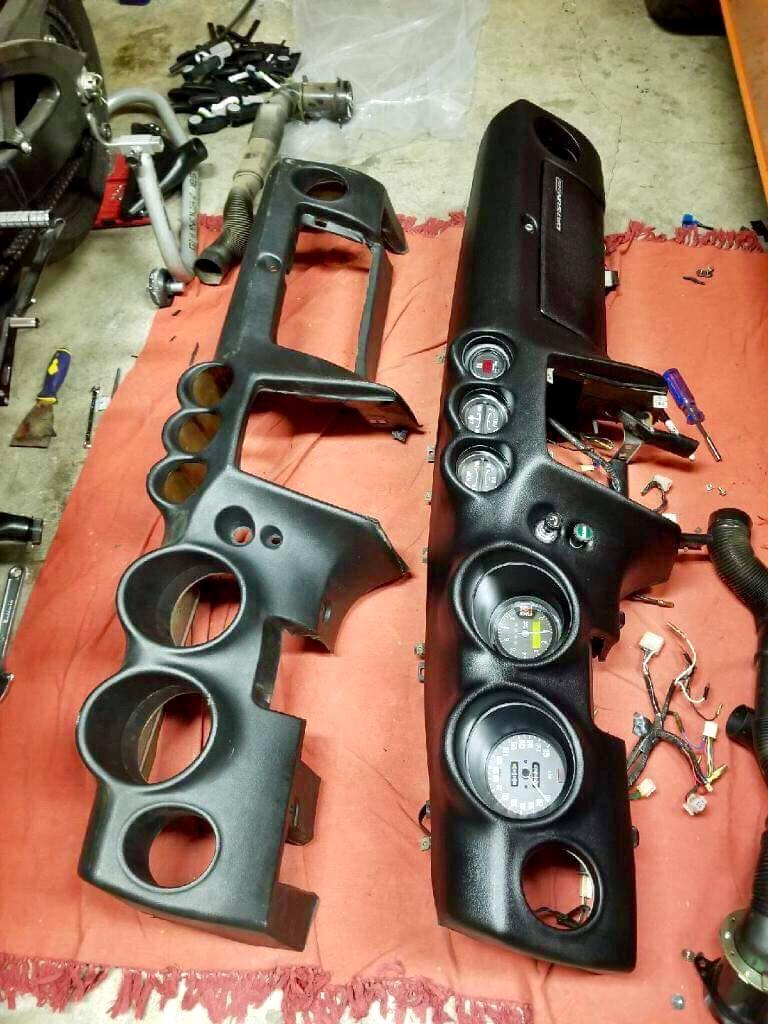
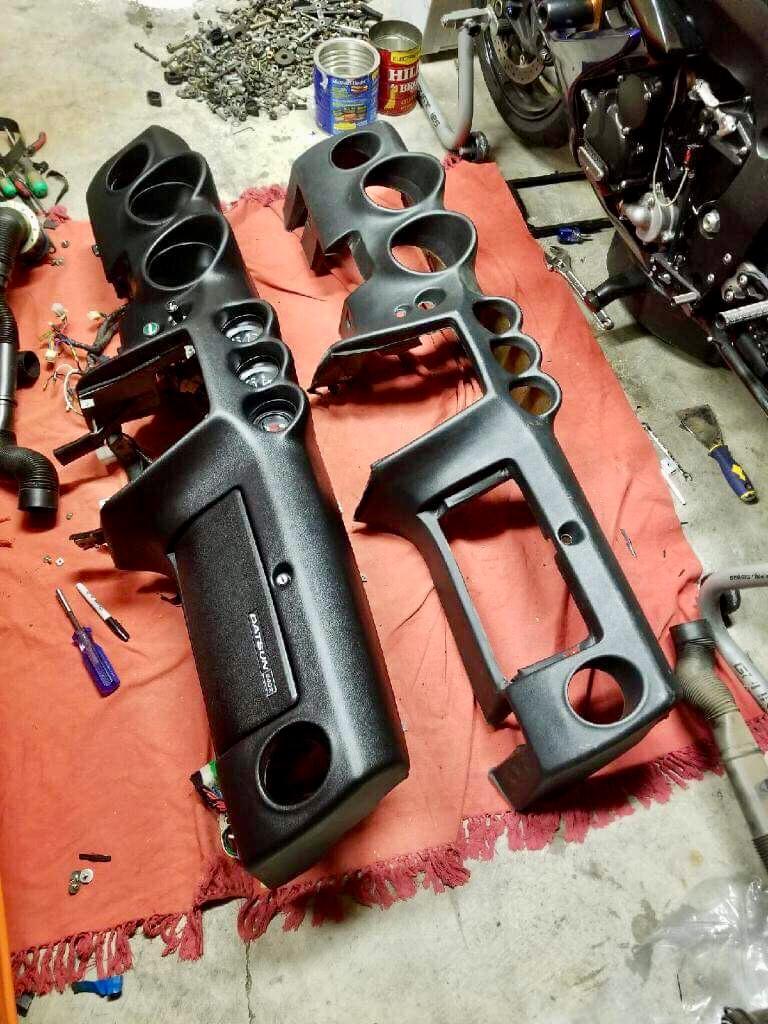
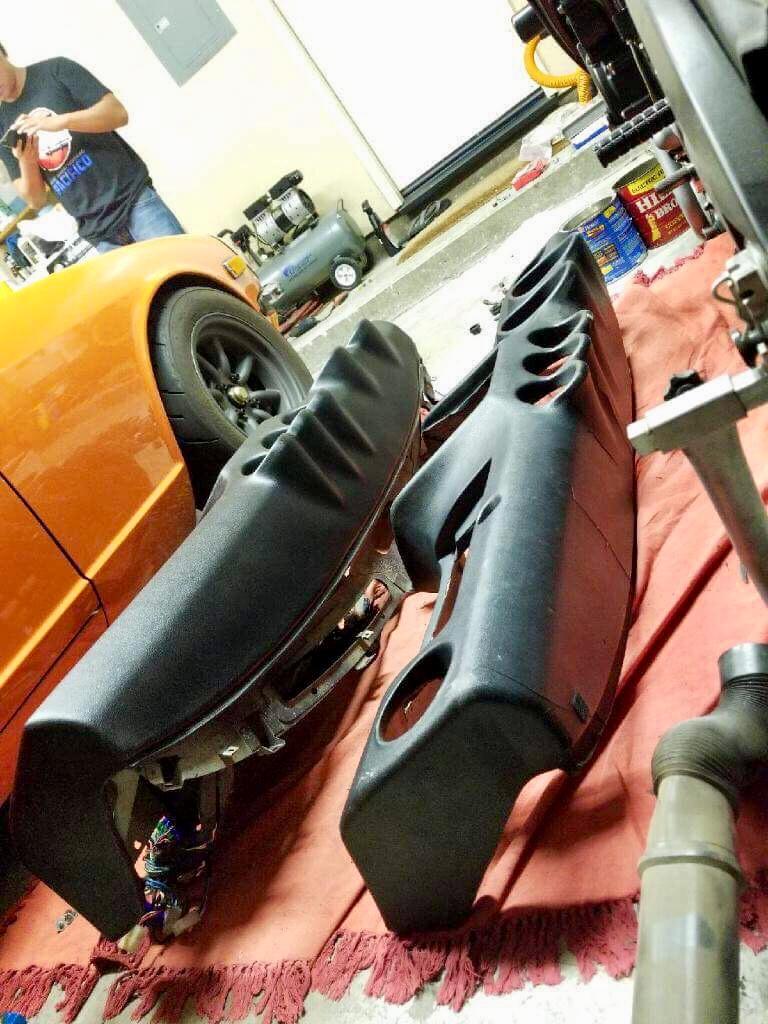
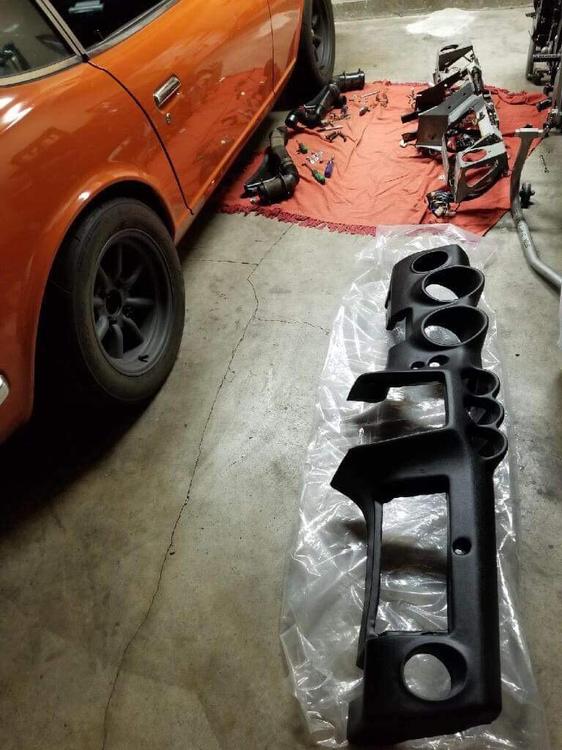
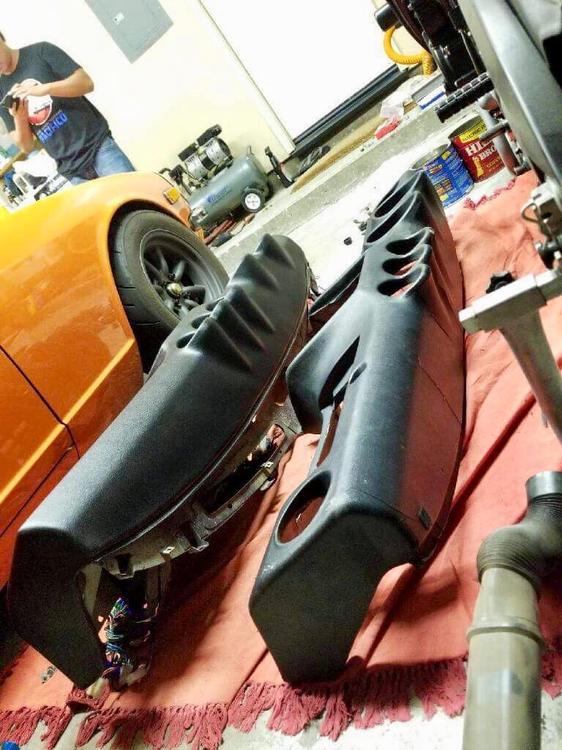
1 pointTwo of my customers were happy to share their reviews on the dash Attaching some pictures of another customer.


 1 point
 -
The link that Blue has provided came in shortly after I wrapped up my car but it turns out to be an exact match for how I did my replacement fuzzy strips (great minds think alike? ). A big caution for anyone going this route: the fuzzy strip is very close to the glass so it is critical that the pop-rivet be very well seated into the fuzzy material. It helps to actually tweezer out a bit of material (i.e. make a small well) after the hole is drilled to ensure the rivet seats as deep as possible. After the rivet is in, check for any burrs or sharp edges that might scratch the glass.1 point
-
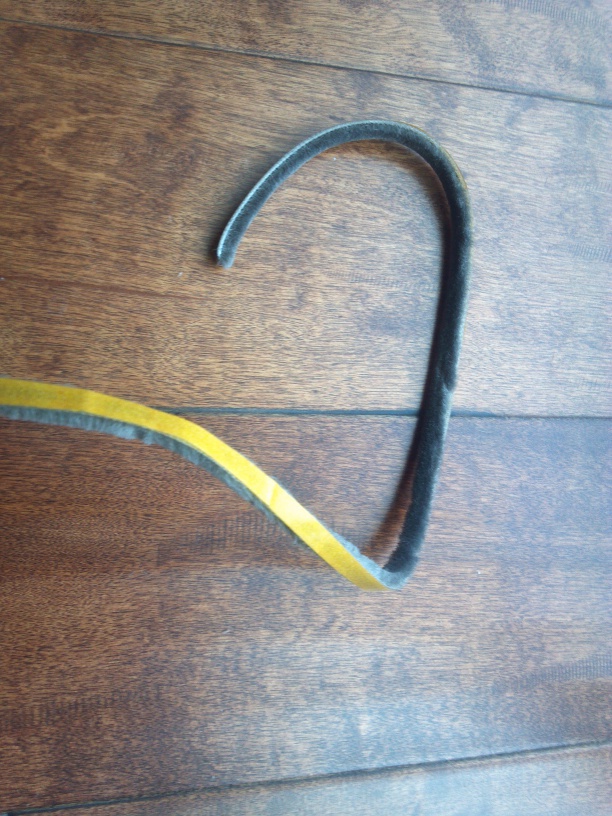
Ace/TruValue Hardware has some fuzzy door weatherstripping that is the same width and it is adhesive backed. I used it on my car 5 years ago and it has not come off yet.
 1 point