Leaderboard
-

siteunseen
Free Member3Points15,115Posts -
Captain Obvious
Free Member3Points10,081Posts -

redzedsled
Free Member3Points108Posts -
abas
Free Member3Points495Posts


Popular Content
Showing content with the highest reputation on 01/19/2018 in all areas
-
2 pointsGetting the right amount of air to all three carbs using an airbox that hasn't been designed to do so could cause performance issues and lead to engine problems due to A/F ratios. If you look at the ITG fiberglass or CF boxes they have a taper to them that speeds the flow up as it moves towards the rear carb. A non-tapered box could end up having you jet each carb differently. Depending on the box you would need to select a shorter velocity stack. A foam full length ITG filter out performs the ITG box (based on dyno runs@Rebello's shop). I have my headers heat resistant powder coated (inside & out) and use an under tray heat shield as well. The street and race cars both have louvered inspection doors and you can feel the heat coming out. Signed, an ITG foam filter guy for 15yrs on street and race car 240Zs2 points
-
2 points
-
2 points
-
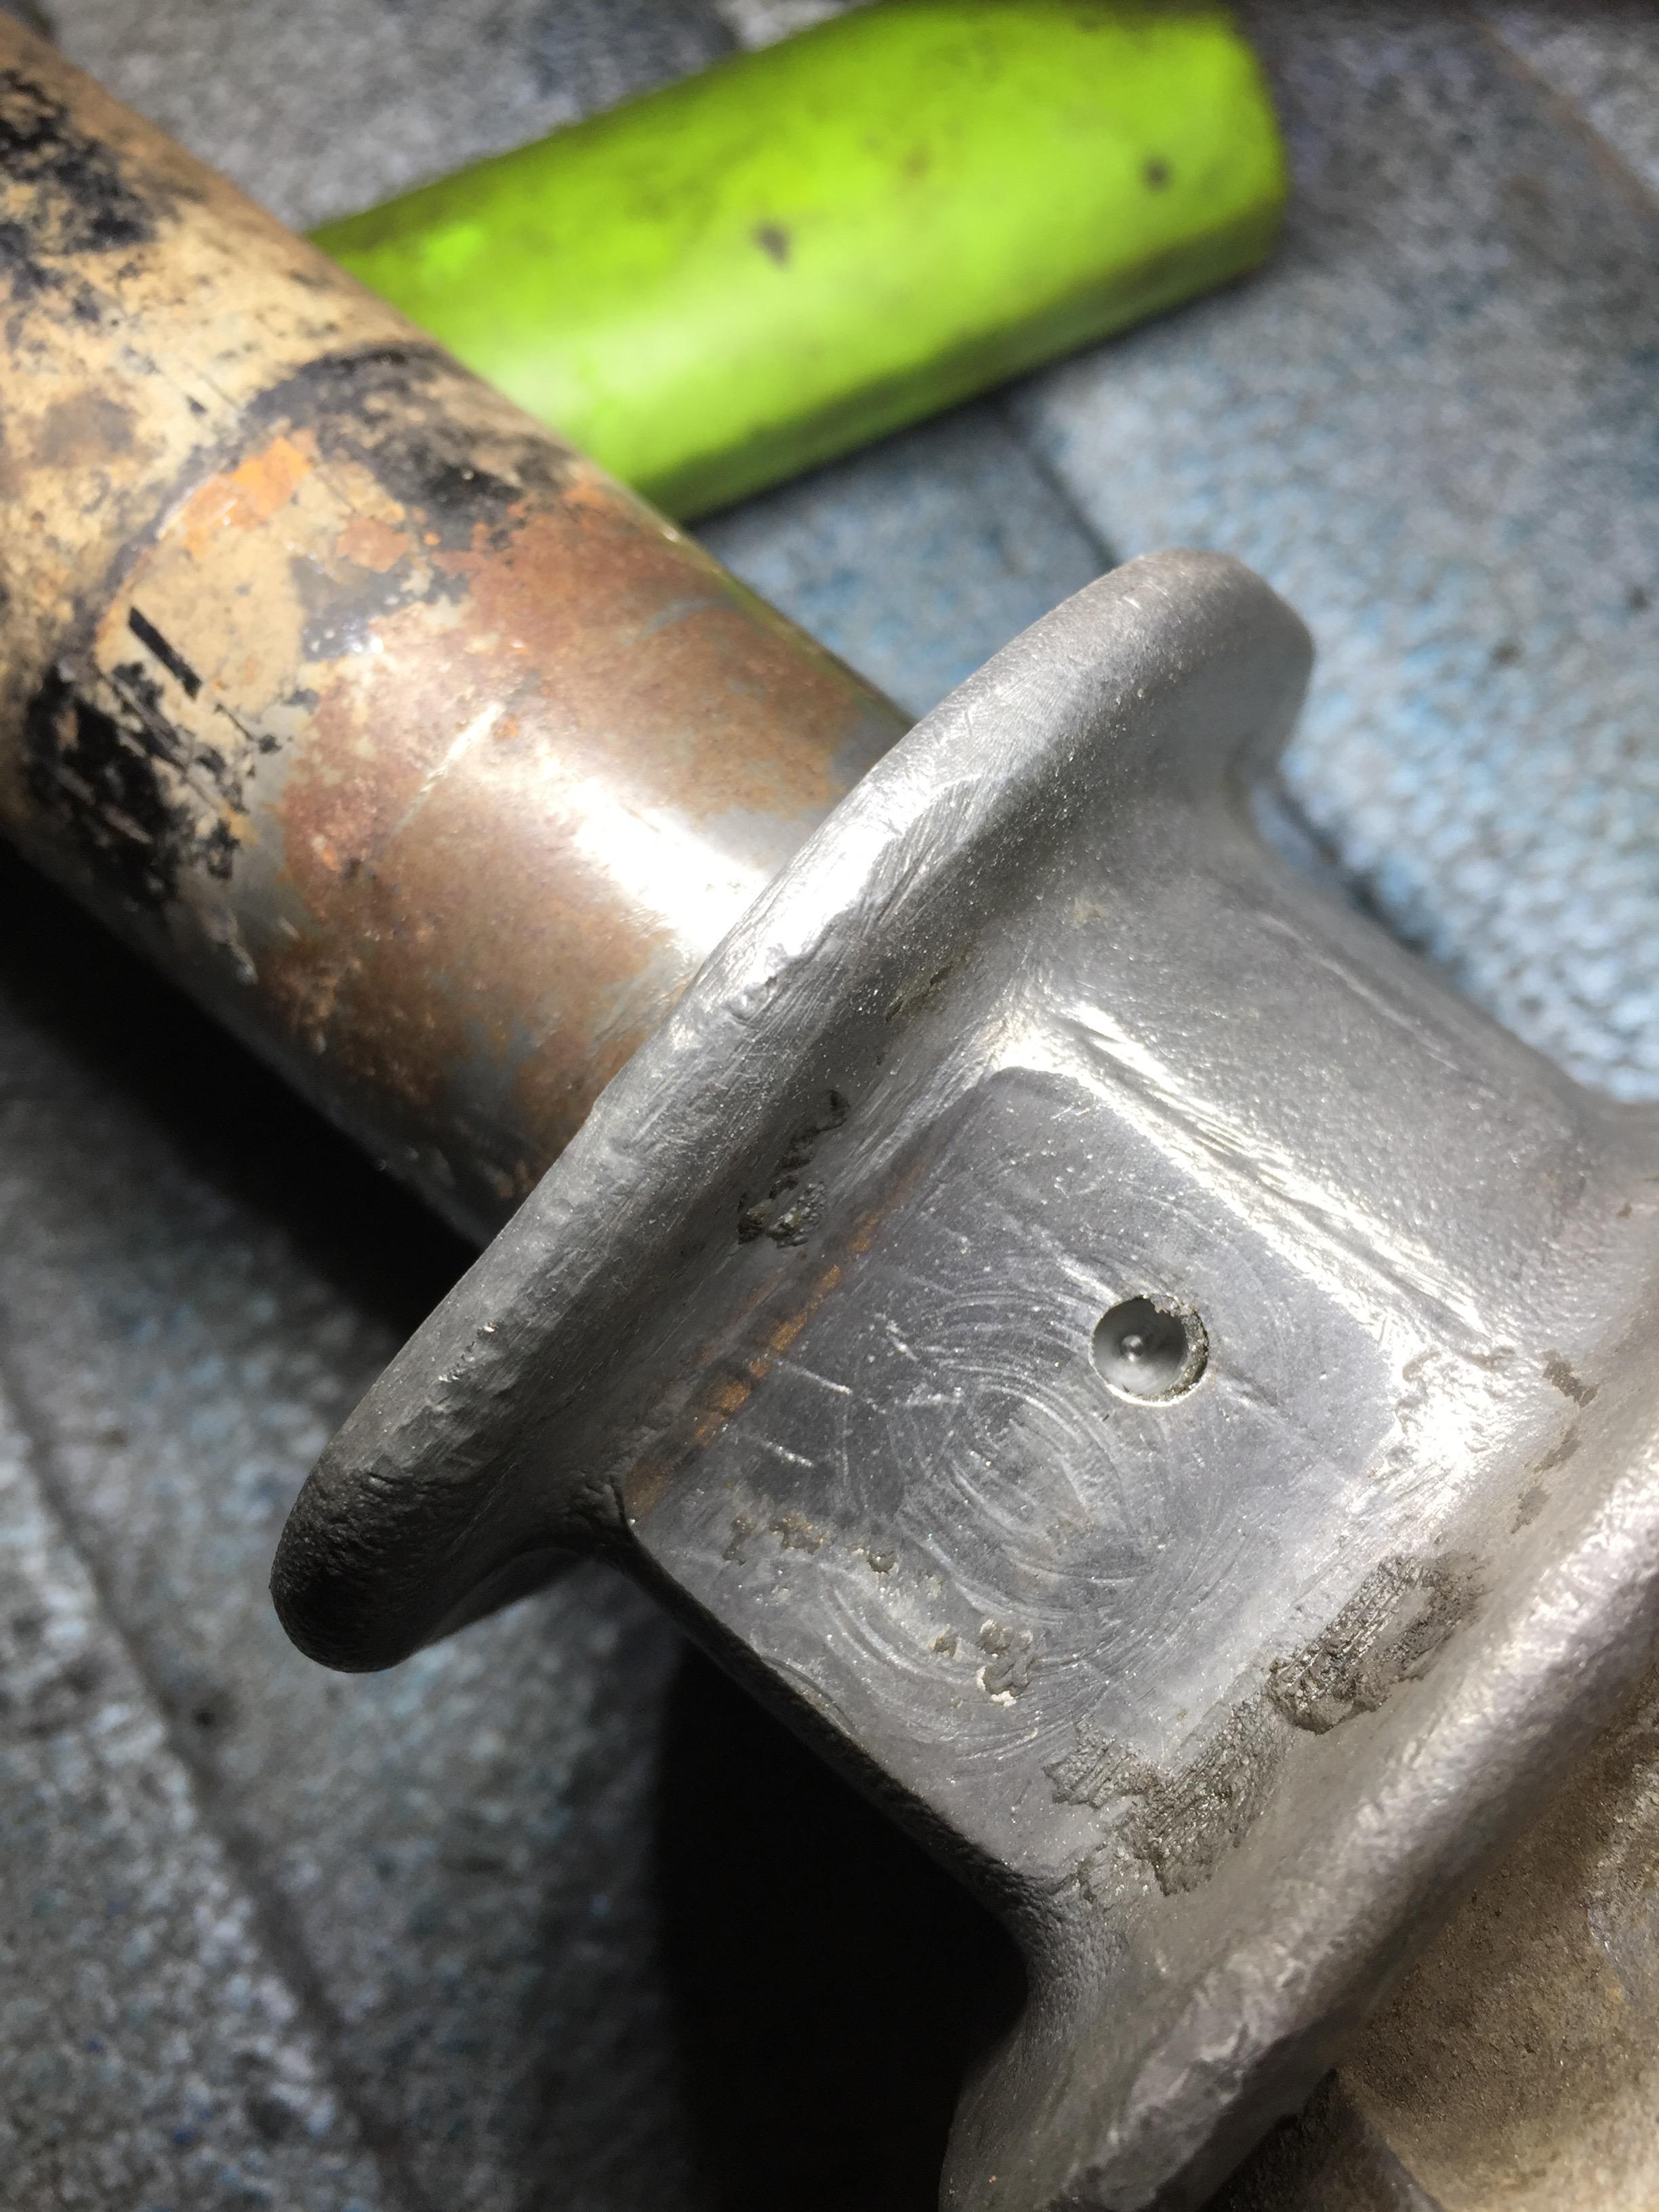
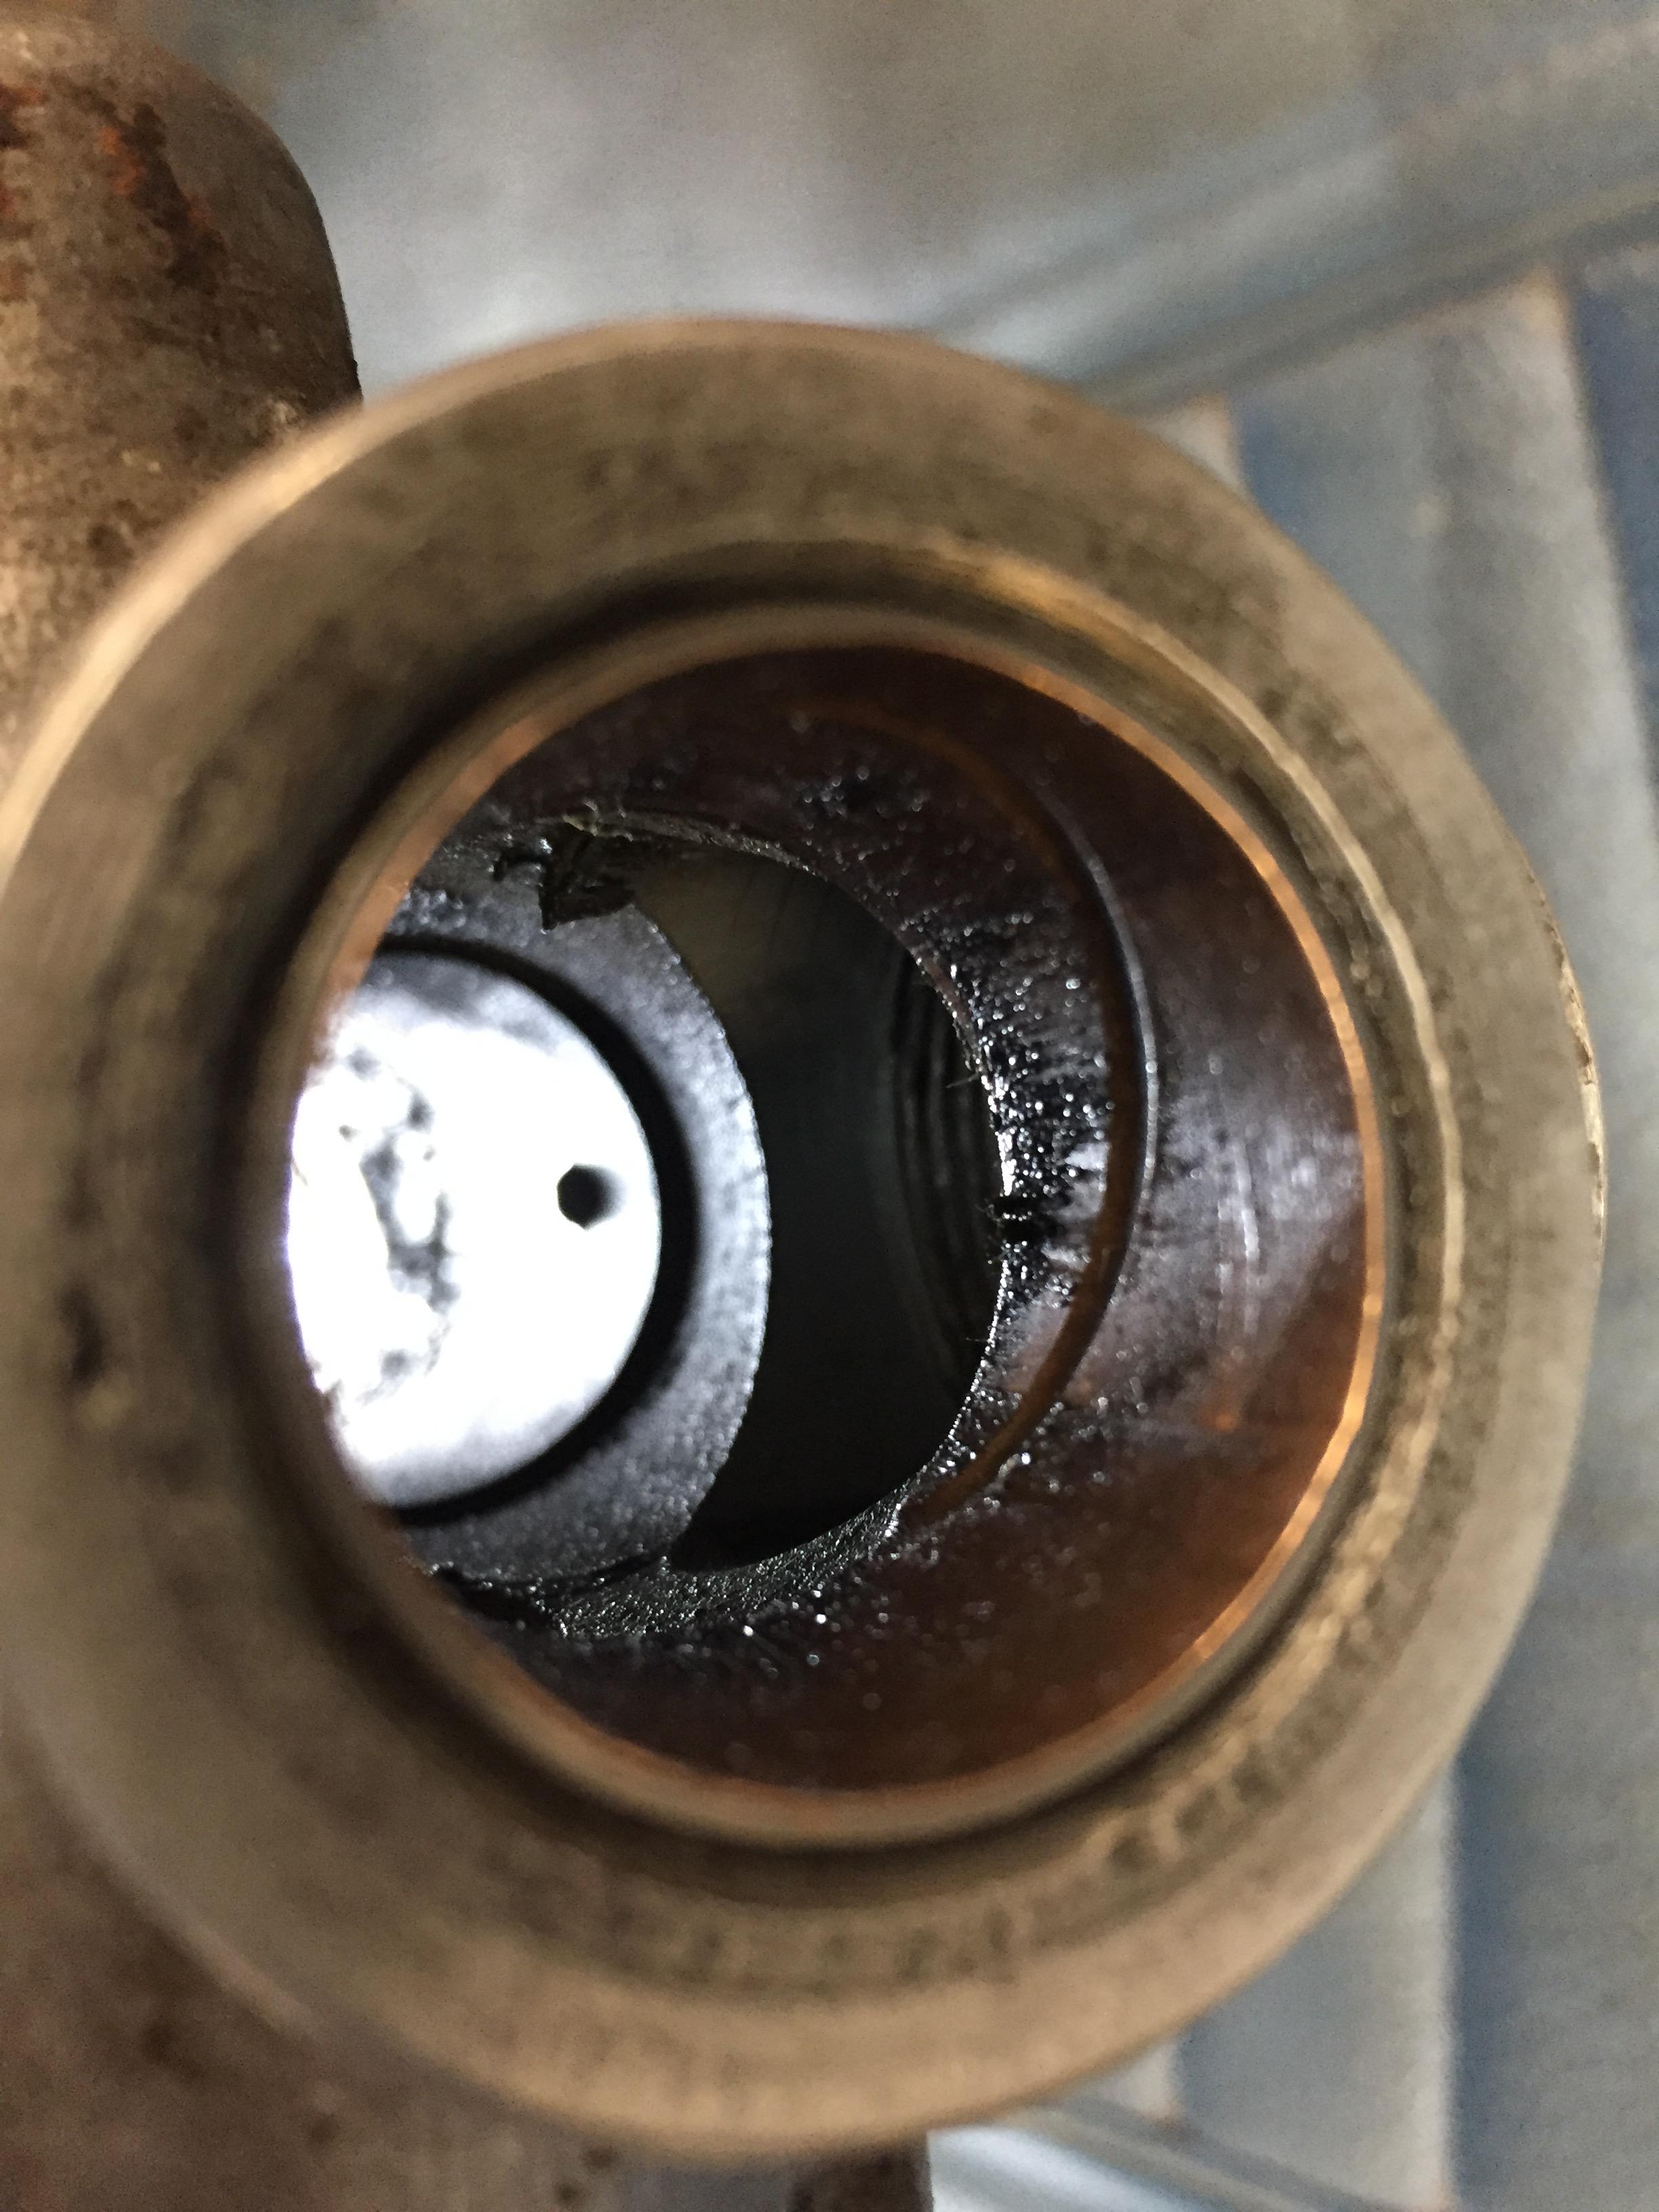
I found a few spare minutes to indulge the OCD in all of us. Mystery solved. I have a single disassembled 240 rack housing. It has the two plastic plugs. I drilled one out, and found that the plastic only goes in about a 1/8". Then I hit metal. Same for the other plug. Well if you look at the construction of the thing, you have the steel round main housing, and the aluminum pinion housing (with drivers side bushing flange) casting that is "Attached" to the steel housing. If you look in from the end, you can see the steel center inside the aluminum part. What do you suppose keeps them together and prevents the two from rotating? Well friction for sure, but those two holes have steel pins in them that lock the two together. The plastic just fills the remaining hole to the surface of the bushing housing. To prove the pin theory, I used an 1/8 punch and whacked one of the holes until something emerged into the ID of the bore. It was not easy to move. I'm not convinced its a pin, but something emerges from the hole into the ID. Here ya go. You may notice a little dimple sticking into the bore at 3:00 o'clock. This is from my punching. It sure as the heck isn't plastic. So I don't really think the kind of plastic is important. Nor is filling the hole at all. Fill if you feel you must. If you drilled right through, I think you might want to put something back in there to keep the two parts from wanting to part ways or rotate. Any ideas on pushing that knubbn back in? Rack ain't going back in with that thing sticking out like that....


 1 point
 -
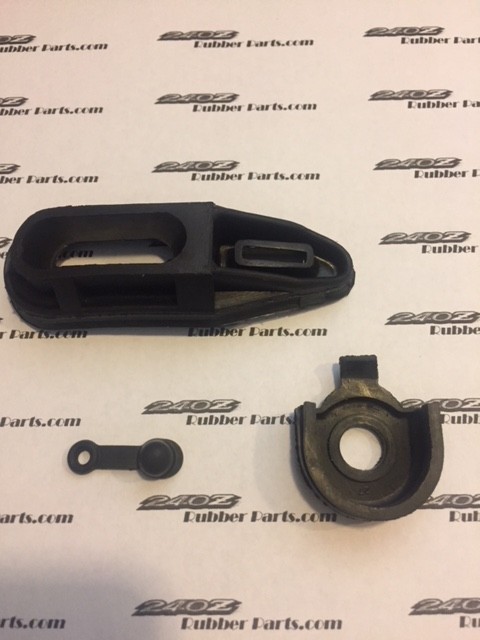
It has been awhile since I added a new item, since I just about have every part made. I now have the 70-71 rear brake cylinder rubber kit completed. You will need to reuse your retaining clip.
 1 point
 -
1 point
-
1 point
-
1 point
-
1 pointThis week I finally finish the roll cage. I also start aligning all of the panels on the Z getting it ready for paint.1 point
-
1 point
-
1 pointAmen to that. My 4 dogs aren't too bad with the snow. But when it comes to rain, they don't want any part of it. They'll hold it as long as they can......which isn't long enough.1 point
-
After seeing both cars in person today at BJ, I agree with you, Lonetreesteve!1 point
-
1 point
-
1 point
-
1 pointMy favorite is Diver down Sent from my iPhone using Classic Zcar Club mobile1 point
-
1 pointIt was, 'Valspar Plastic White'. The project was worthwhile doing as the lenses don't show any regression.1 point
-
1 pointHe's a big ole puzzy cat! Snow on his pads freaked him out. Very spoiled inside dog. I'm gonna have to attach a Ziploc bag on his anus if it gets cold again. Spoiled rotten sleeping, snoring right by me now. I don't think I'm man enough for real kids.1 point
-
1 pointHaha!!! I'm guessing he recently saw snow for the first (and maybe only) time in his life? How'd that go? Make him all rowdy?1 point
-
1 pointGood read Charles, thank you. I'll hold on to my two and wish I'd kept the red 240 I sold too cheap. My family says sale the 280 but it's rust free and I have the room so it's not going anywhere. Also just like the car I drove at 18. Carol Burnett sang "memories, I'm so glad we had this time together" Misses ah wigginz1 point
-
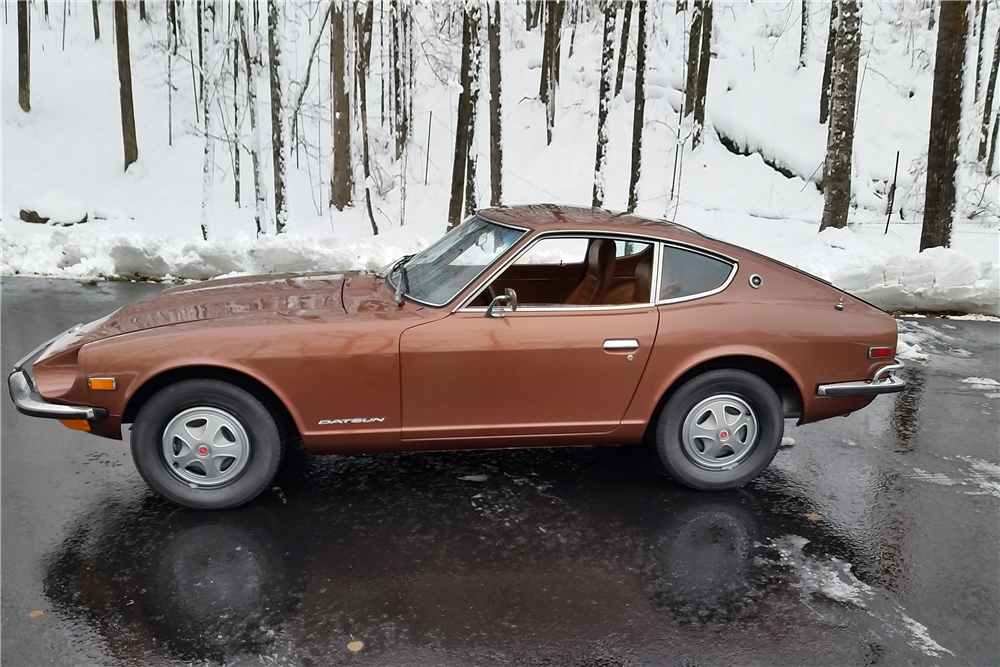
With this in mind, the seller of the '73 240Z that sold yesterday at Barrett-Jackson for $20,900.00 including buyer fees (pictured below) would have probably done better on Bring a Trailer or eBay, especially when you consider the seller fees BJ charges. On the other hand, the seller of the '72 240Z was very fortunate to get the $37K less the fees. There's no way that the '72 Z would sell for $37K on eBay or BaT.
 1 point
 -
concerning Bulldog, if you plan on coating it then taking somewhere else to paint: "...Bulldog is effective up to 24 hours. If the sprayed part is left overnight, the basecoat can be applied with no issue. If the part is left longer than 24 hours it needs to be scuffed and tacked, again. Apply 1 light coat of Bulldog before applying basecoat." http://www.finishmaster.com/prod/assets/GBDS12326_QBDS12327_EBDS12328.pdf1 point
-
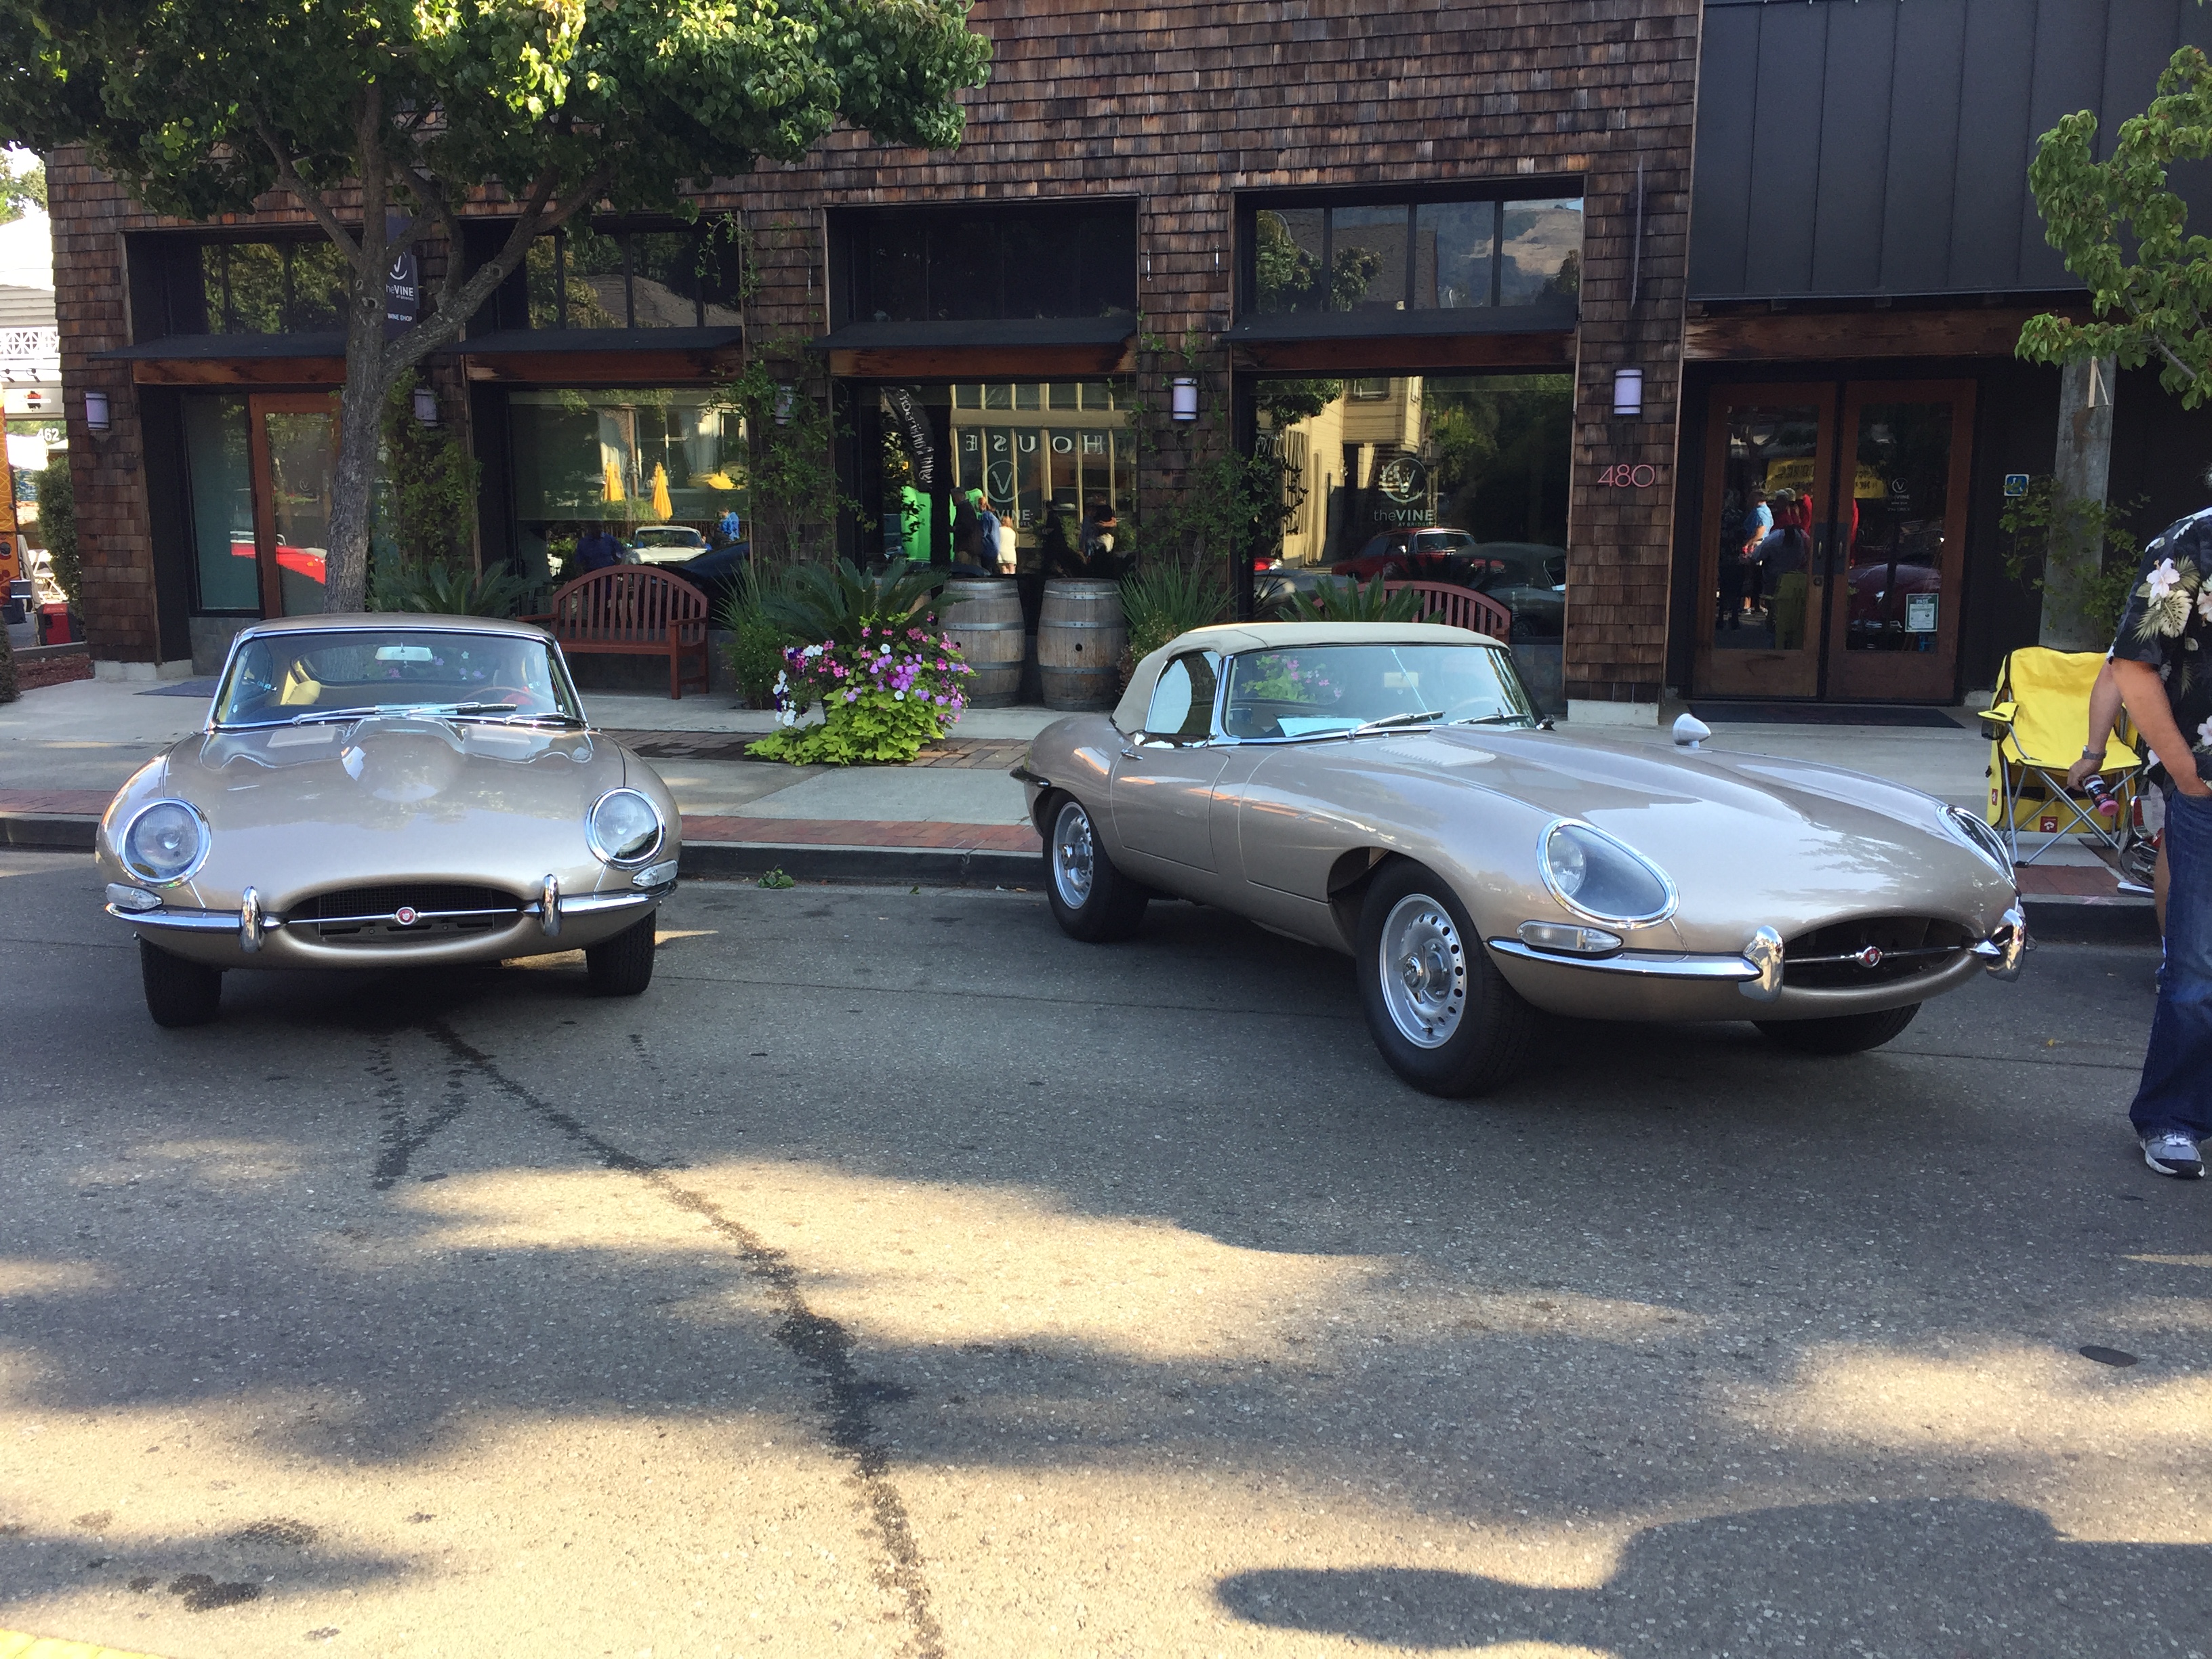
1 pointIf any of you can help advise me on where to order parts for a Datsun 240Z (because I'm new to this car), then I will drive that. However, if not, then I will probably drive my Jaguar E-Type Roadster 1965 (right).
 1 point
 -
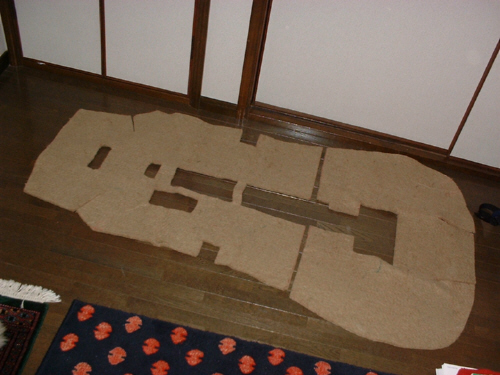
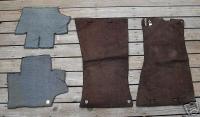
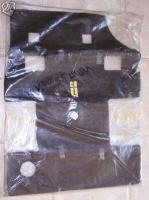
1 pointHello guys and gals... here attached please find a 2-page PDF template of the rear tool box area for a Series I 240Z. Each page contains a left and right pattern. It has been test-fitted and is very accurate. Enjoy... jute mat 70-71 FINAL.pdf1 point
-
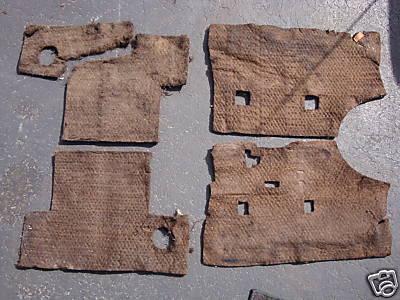
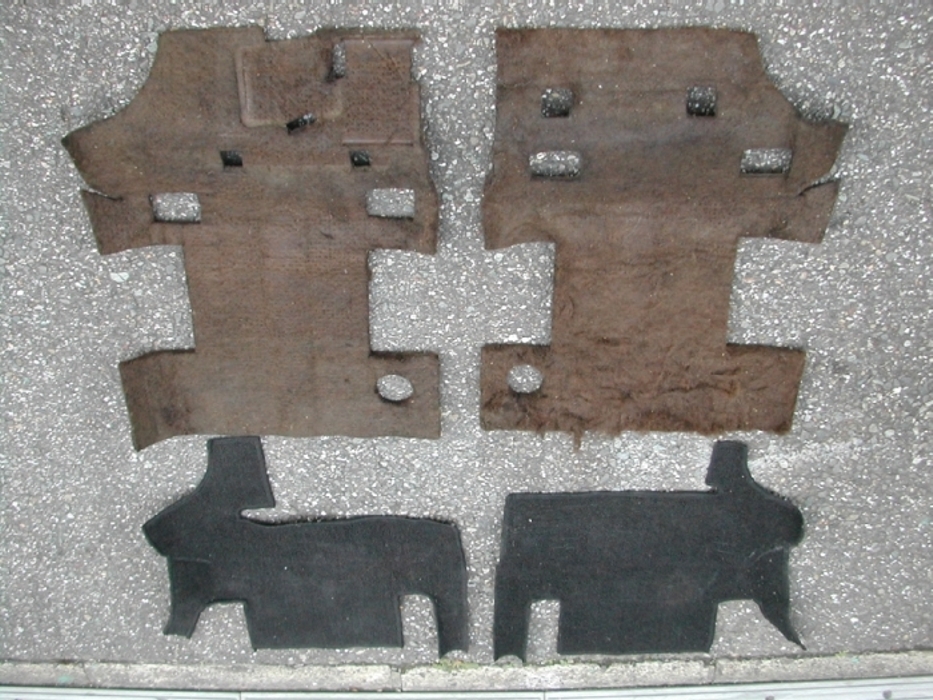
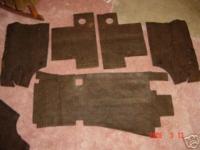
1 pointRefer to Section 113-4 of your fiche. Item No 15, part number 74922-E4100. As far as variance goes, keep in mind that the transmission tunnel changed, the pieces that go behind the seat (70-71) were much different. Also the front carpet jute would have changed over the years whatwith the position of different carpet clamping methods. Also the rear cargo area changed as a result of the tool doors being moved to the hatch area. The jute on a 70-71 goes all the way up to the luggage riser trim, and the later cars are shorter as not to cover the tool doors. I've got both early 71 and 73 patterns and I see a broad variance. See images below... If you would like a PDF pattern file of the proper contour of an early 69-71 for behind the seats, PM me and I will send it to you...

 1 point
 -
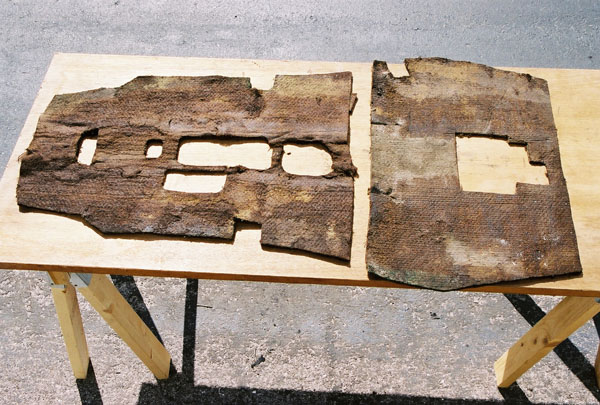
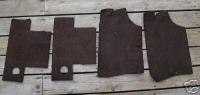
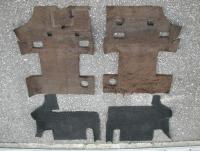
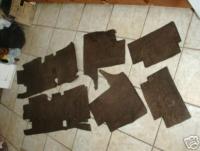
1 pointI think it is very difficult to have patterns made. There were many variances to the patterns from the factory between the early 1970-71 cars and the later 72-73 models. There would be too many patterns to satisfy all owners from all model years. Plus it is very difficult to cut. I bought an old original set from Ebay and reproduced them for my own car and was very happy with the end result. I even made the jute pad for behind the luggage riser trim that you see in the Microfiche, but most likely have never seen in an actual 240Z. The English jute averages at about 3/8" thick, whereas the original jute was at least 1/2" to 9/16" in thickness. See original jute for reference...
 1 point
 -
1 point
-
1 point
-
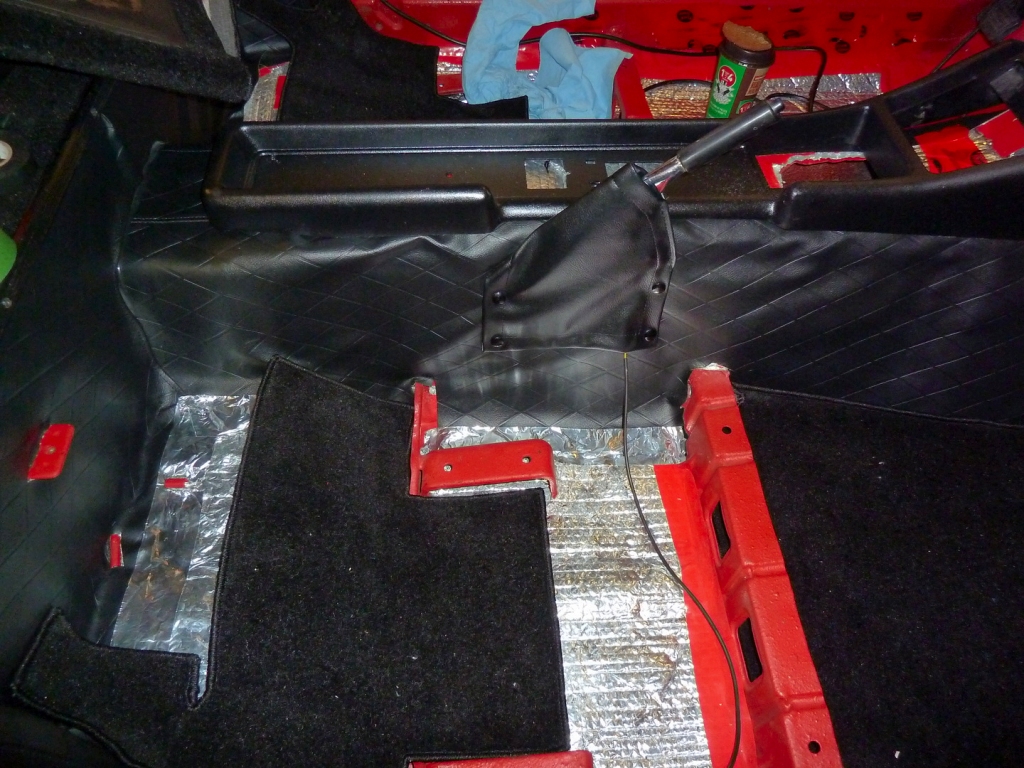
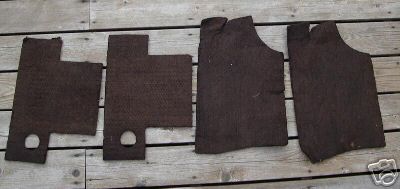
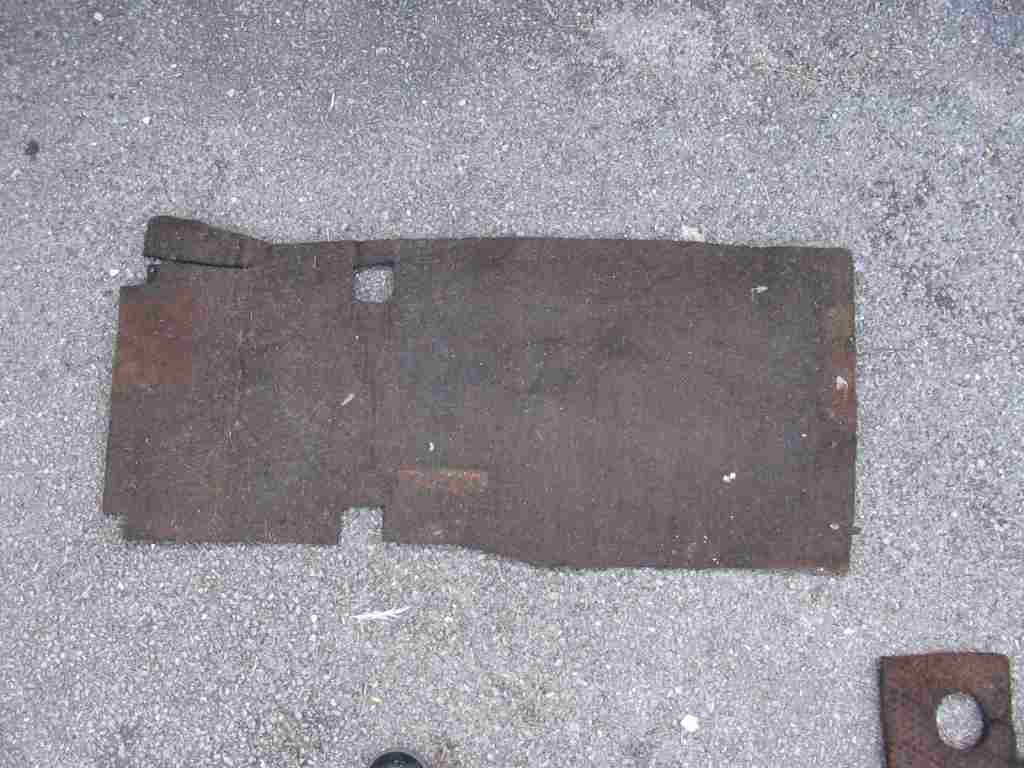
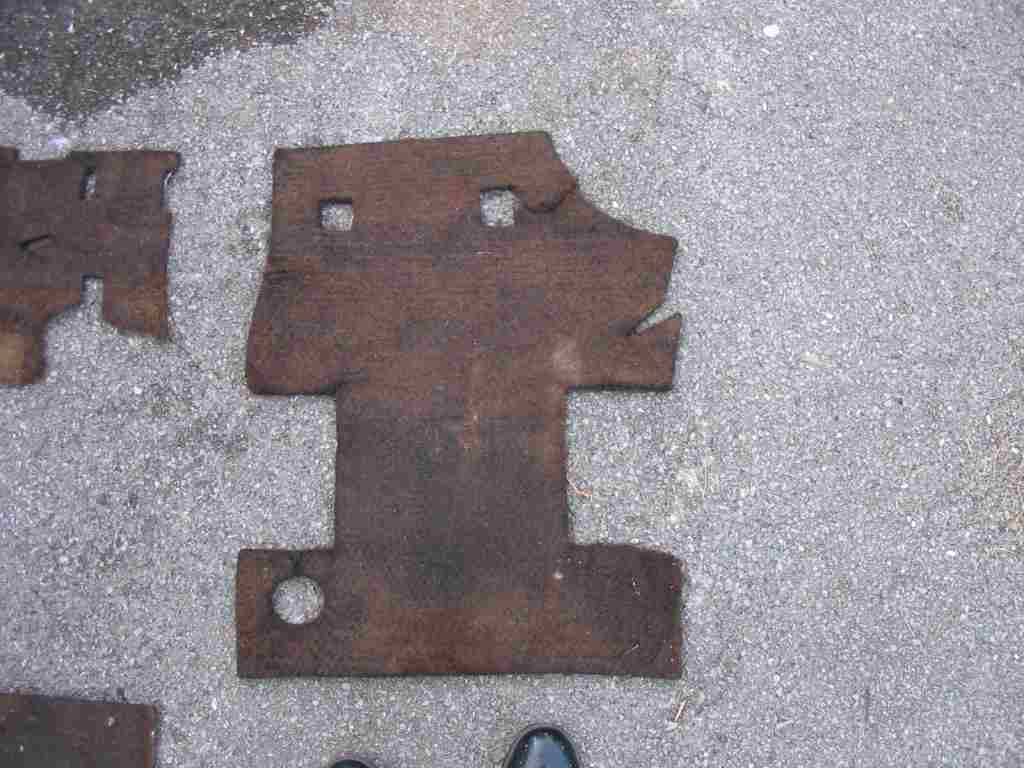
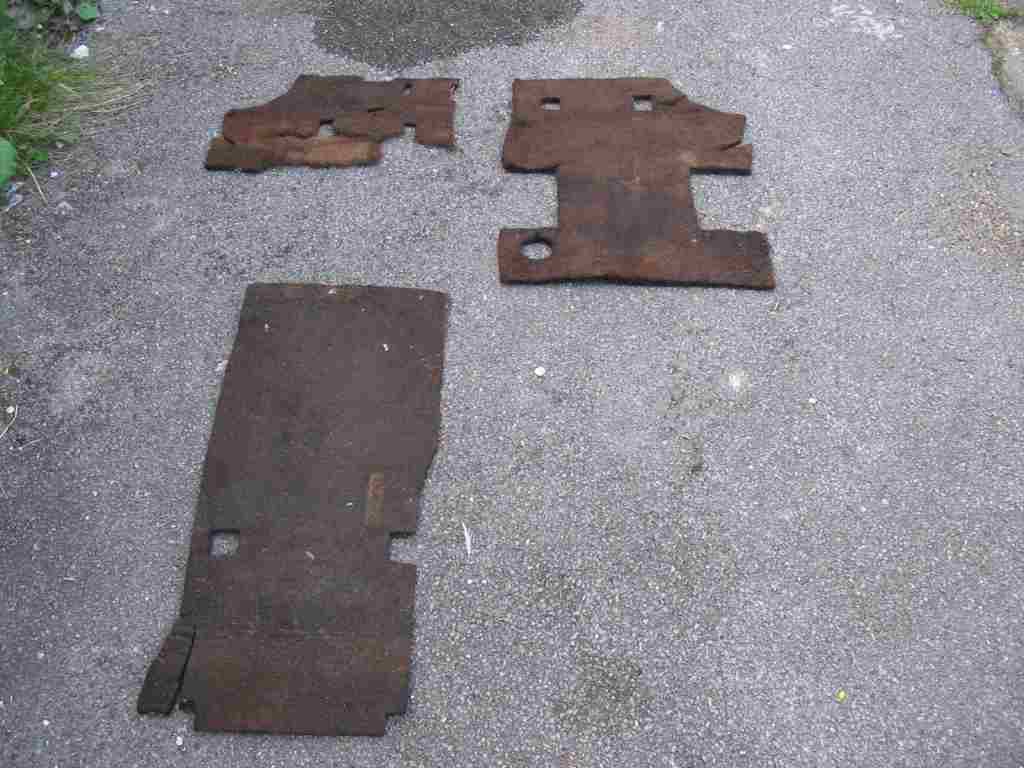
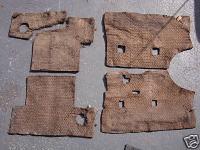
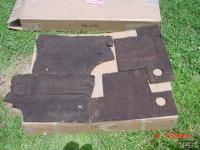
1 pointHaving just got the remaining jute material from my 1970 car out of storage after 10 years, I thought it might be helpful to post some pictures of what is left as a comparison to the patterns that Kats posted previously, which I think were from a Japanese market car? hope this is of help to someone. Andrew picture1 Remaining jute in approximate position when in the car
 1 point
 -
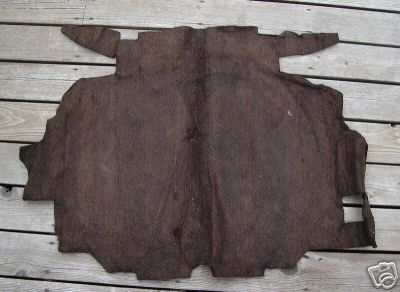
1 pointEvidently, the tar mat was applied before the car was painted. Here is a picture of the tunnel jute over the tunnel tar mat. The interior vinyl was glued directly to the jute. Please, no comments about my floors or the firewall insulation. I'm going to fix all that! The tar mat is already off the floors and they are discolored from a rust treatment solution. Interestingly, the jute has roller compression marks in it. Perhaps from the application of the sticky solution? The contact cement was also applied mechanically. The cement application is patterend on the fire wall, however it does appear to be a hand applied technique from the sloppiness of the work and drip marks. I imagine a paint roller type of tool used to apply the cement. By the way, the cement is yellow, just like the 3M brand of interior and weatherstrip cement.
 1 point
 -
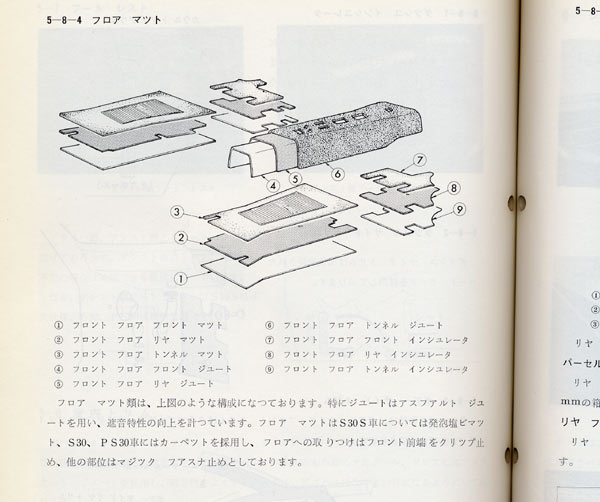
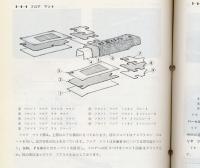
1 pointI thought this might be of interest. Its a scan of a page from Nissan Publication No.184 ( "Z-1" ) dated November 1969, which was for the Japanese market. The translation of the numbered items is as follows: 1 = FRONT MAT 2 = REAR MAT 3 = TUNNEL MAT 4 = FRONT JUTE 5 = REAR JUTE 6 = TUNNEL JUTE 7 = FRONT INSULATOR 8 = REAR INSULATOR 9 = TUNNEL INSULATOR The notes underneath detail the differences between the S30-S ( Fairlady Z basic no-frills model ) and the higher-specs of the S30 ( Fairlady Z-L ) and PS30 ( Fairlady Z432 ). They describe "Asphalt Jute" and "Happo Enbi / Enka Vinyl" ( Chloridated Vinyl mat ) as standard equipment for the S30-S. "Happo" could be translated as 'bubbly' with a little imagination - so this sounds like a description of the cross-section of the rubberised / vinyl mat. Second part of the note states that the S30 and PS30 had carpet as standard equipment.
 1 point
 -
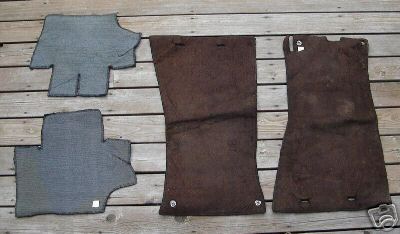
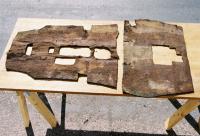
1 pointIt took me a while, kats. Here is a photo of my original jute for the tunnel.
 1 point
 -
1 pointThe answer of a photo which I posted last is,the center tunnel jute pad. This was a bonus from Mr.NISHI,I did not expected he present this for me.Now I do not plan to replace center tunnel jute pad, so just keep this for someday. Many of you made coments about dipping the jute into "something special liquid",I do not want to comence that procedure now.Because like many of you mentioned I do not want the jute to be sticky. Mr.NISHI do not know what the liquid shoud be now,but when he find out about it,I will ask him to dip my jute maybe. Thank you, kats
 1 point