Leaderboard


Popular Content
Showing content with the highest reputation on 04/03/2017 in all areas
-
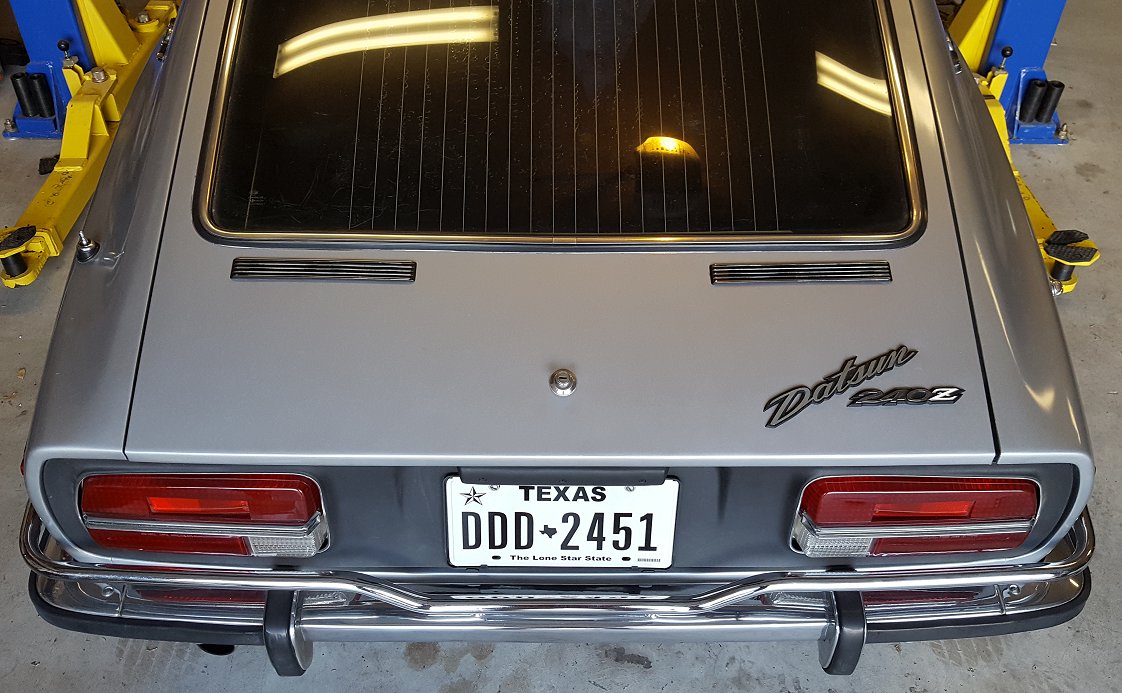
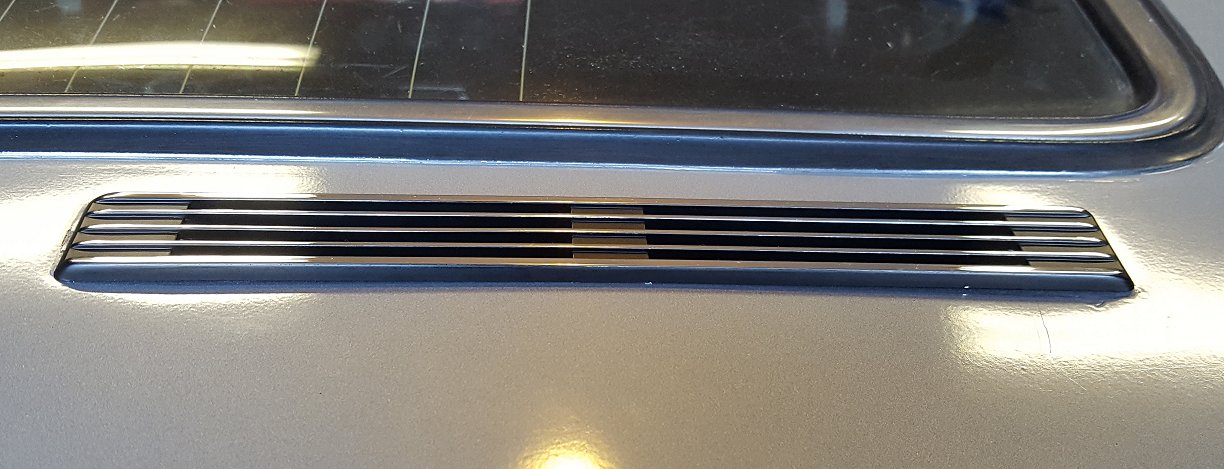
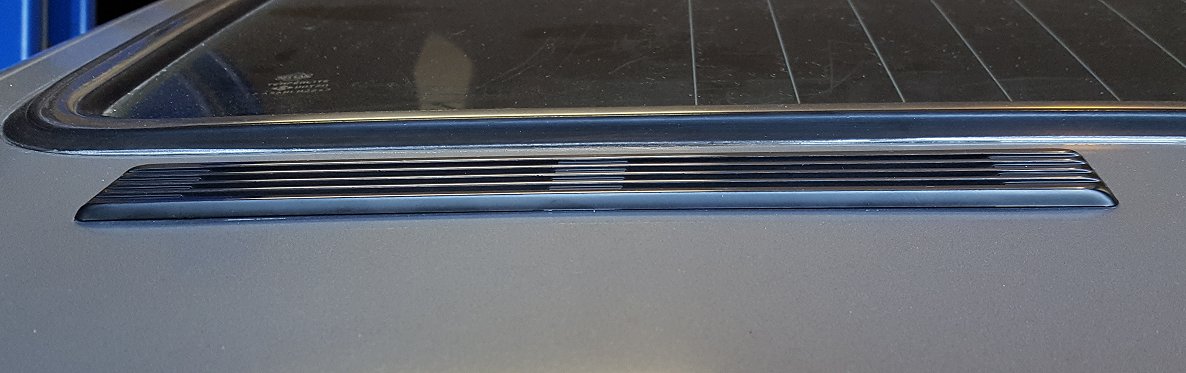
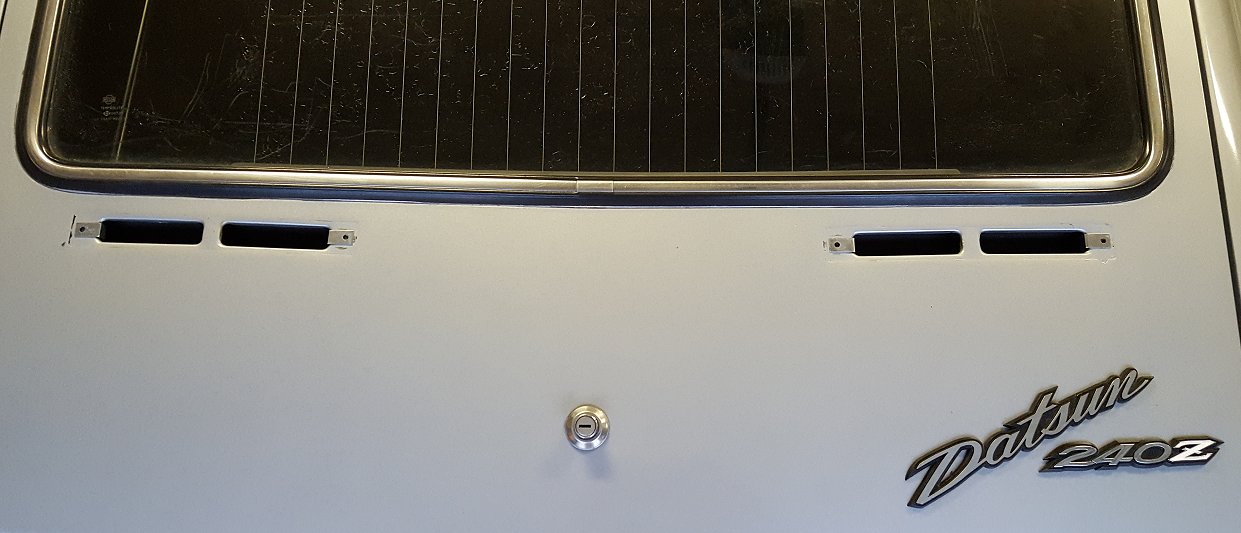
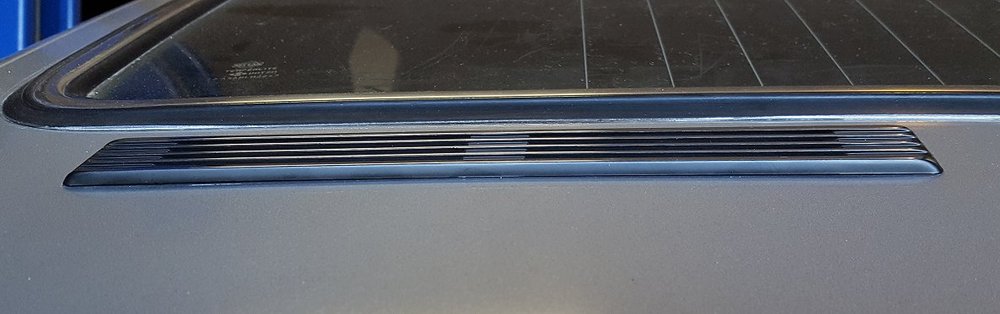
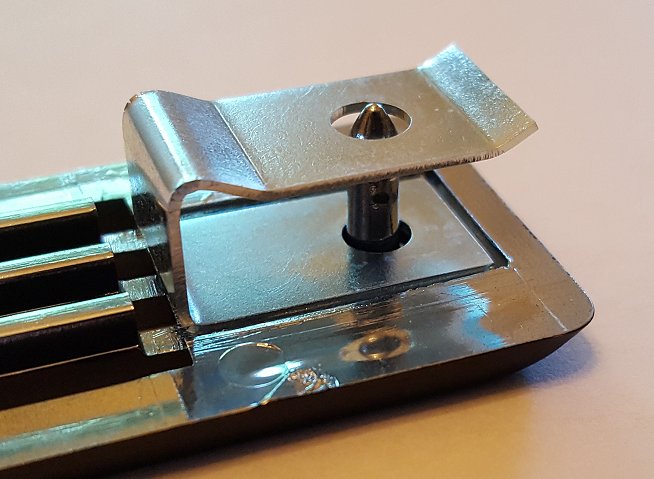
I have responded to your requests Philip and Jim. Thank you for the compliments on the clips. Just glad I could solve one of my own problems and help others at the same time. I was not able to find any barrel clips that were small enough for the holes as everything I had on hand was too big. Knowing I will remove these at some point in the future to paint the car, I did not want to do something so secure that it would break the pins off when I remove them. I ended up using some black RTV gasket maker to essentially glue them in place. Using some blocked of styrofoam and a few bungee cords wrapped around the hatch to apply pressure on each end, the final result looks fantastic. They sit nice and flush against the body. I tried pulling up on them and so far they seem pretty secure. Below are some pictures of the end result. Job done!

 4 points
 -
3 pointsIt's only the clock that eventually stops ticking... so that you can hear the valves better.3 points
-
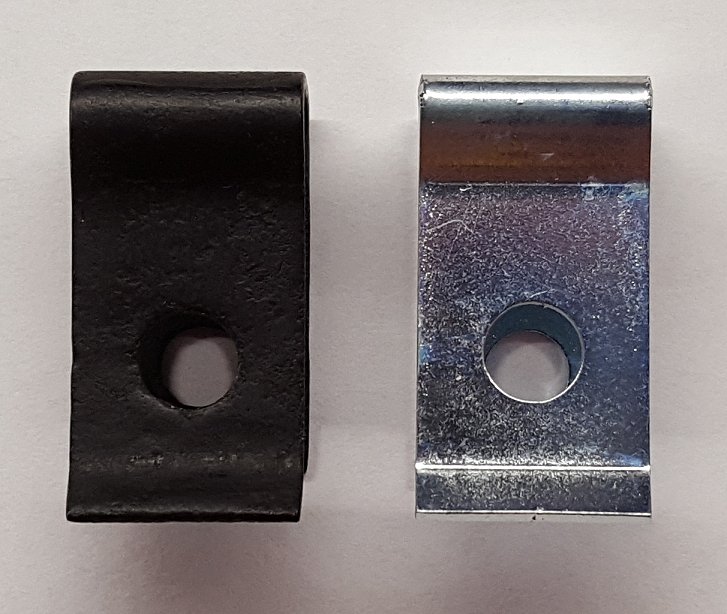
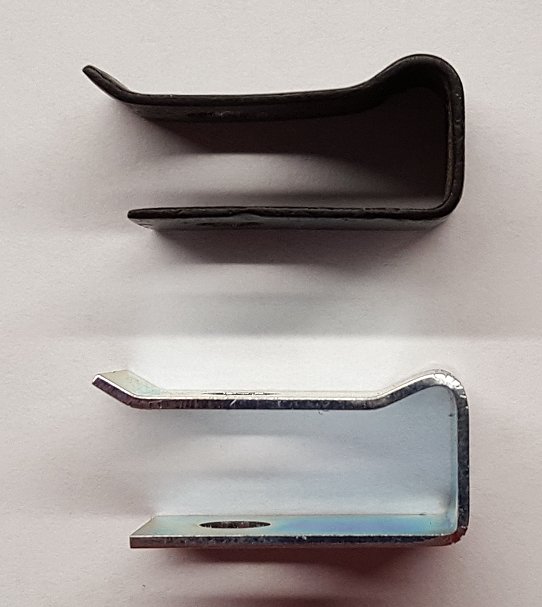
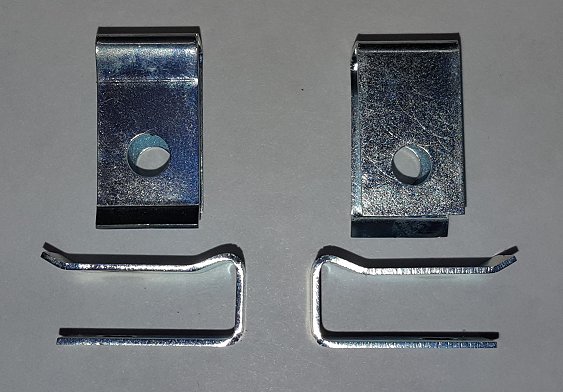
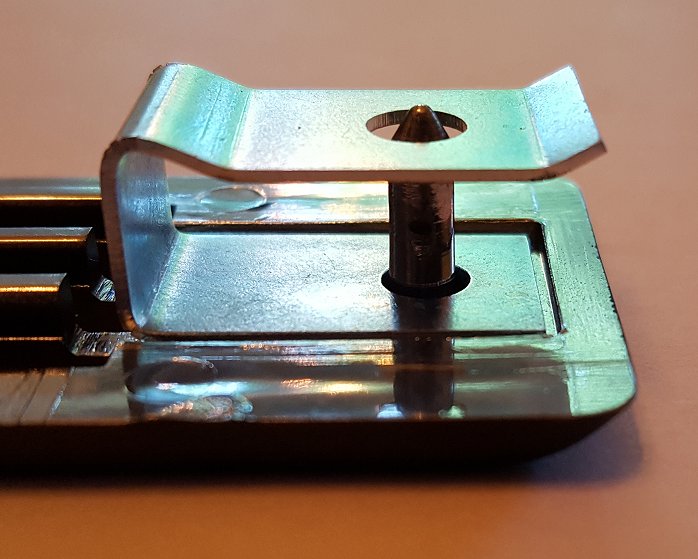
For sale is a set of 4 clips that hold the duct work to the backside of the hatch sheet metal and provide the location for the barrel clip that holds the vent grille on. Also known as a Tailgate Ventilator Clip. Please reference Nissan part# 90829-E4100 and the link below. These have been NLA for years and I discovered a personal need for a set. With the help of others I had a local sheet metal fabrication company produce a run of 100 clips which equals 25 sets. I needed a set myself and I am keeping an extra as a spare thus making 23 sets available. The clips are made of spring steel just like the originals and are clear zinc plated to protect against corrosion. Each set is $50.00 US shipped w/insurance & tracking to anywhere in the continental US. Shipping to Canada should not be too much more but reach out to me for a specific quote. There is a $5.00 discount for each set after the first if you purchase 2 or more sets at one time. Meaning 1 set = $50, 2 sets = $95, 3 sets = $140. Please review all of the pictures below. The clip in black is an original that was used to model the new clips off of. The new clips hold the duct work nice and tight to the under side sheet metal and fit very well in to the recess of the plastic chrome vent grille. Please ask all questions prior to purchasing. Payment accepted via Paypal and I will only ship to the Paypal address. Please DO NOT use the friends and family method. PM me for my Paypal email address or mailing address as check is welcome as well. I will ship out each set within 2 business days of payment being received. Original link - http://www.classiczcars.com/topic/57001-series-1-hatch-vent-duct-clips-restoration-info-needed/


 2 points
 -
2 pointsDon't forget the air filters that are included in Site's carbs. I can't seem to find similar cast filters. At a minimum I would think that adds $150-200 to the deal2 points
-
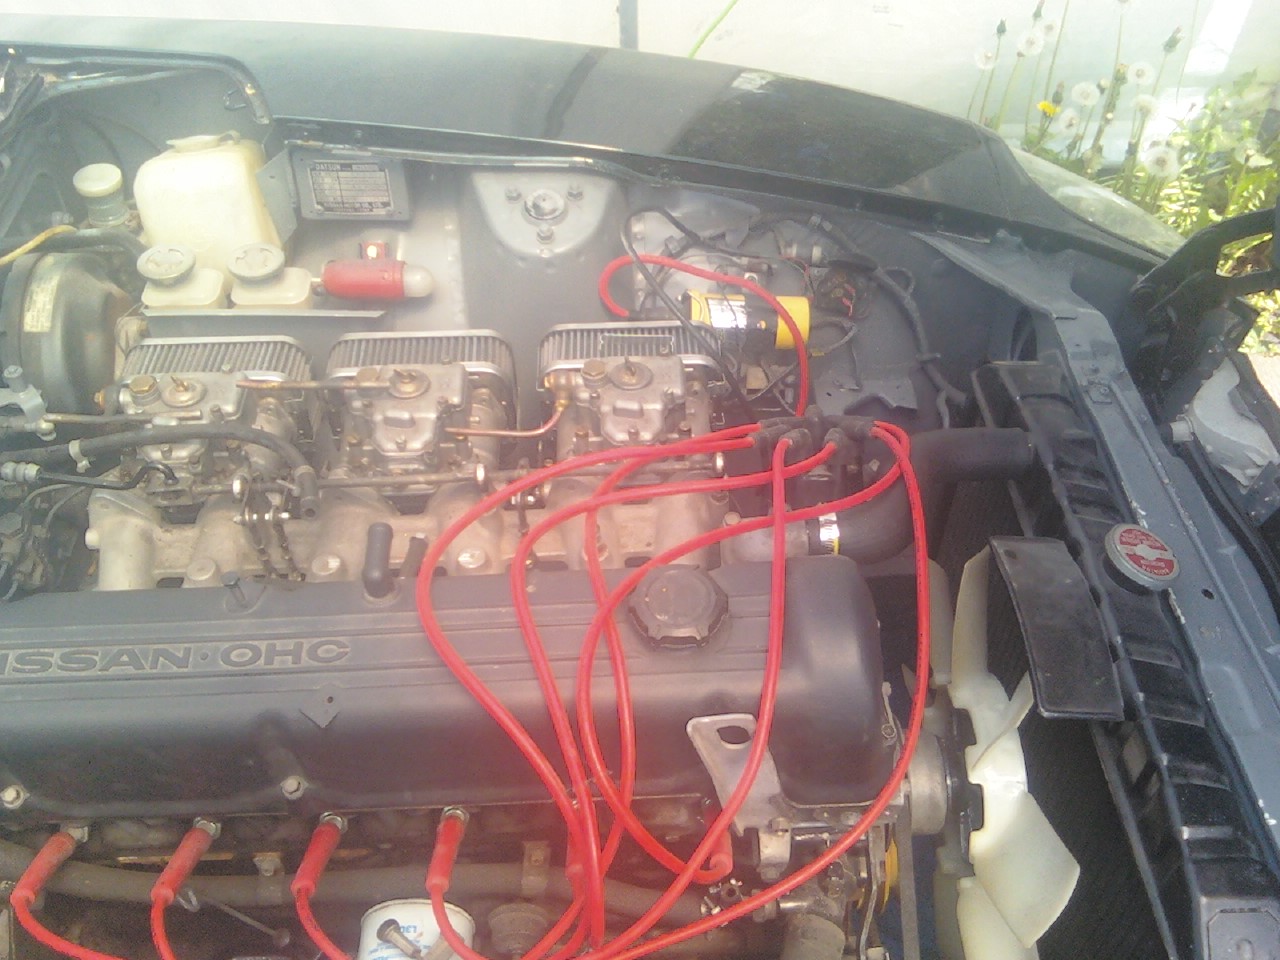
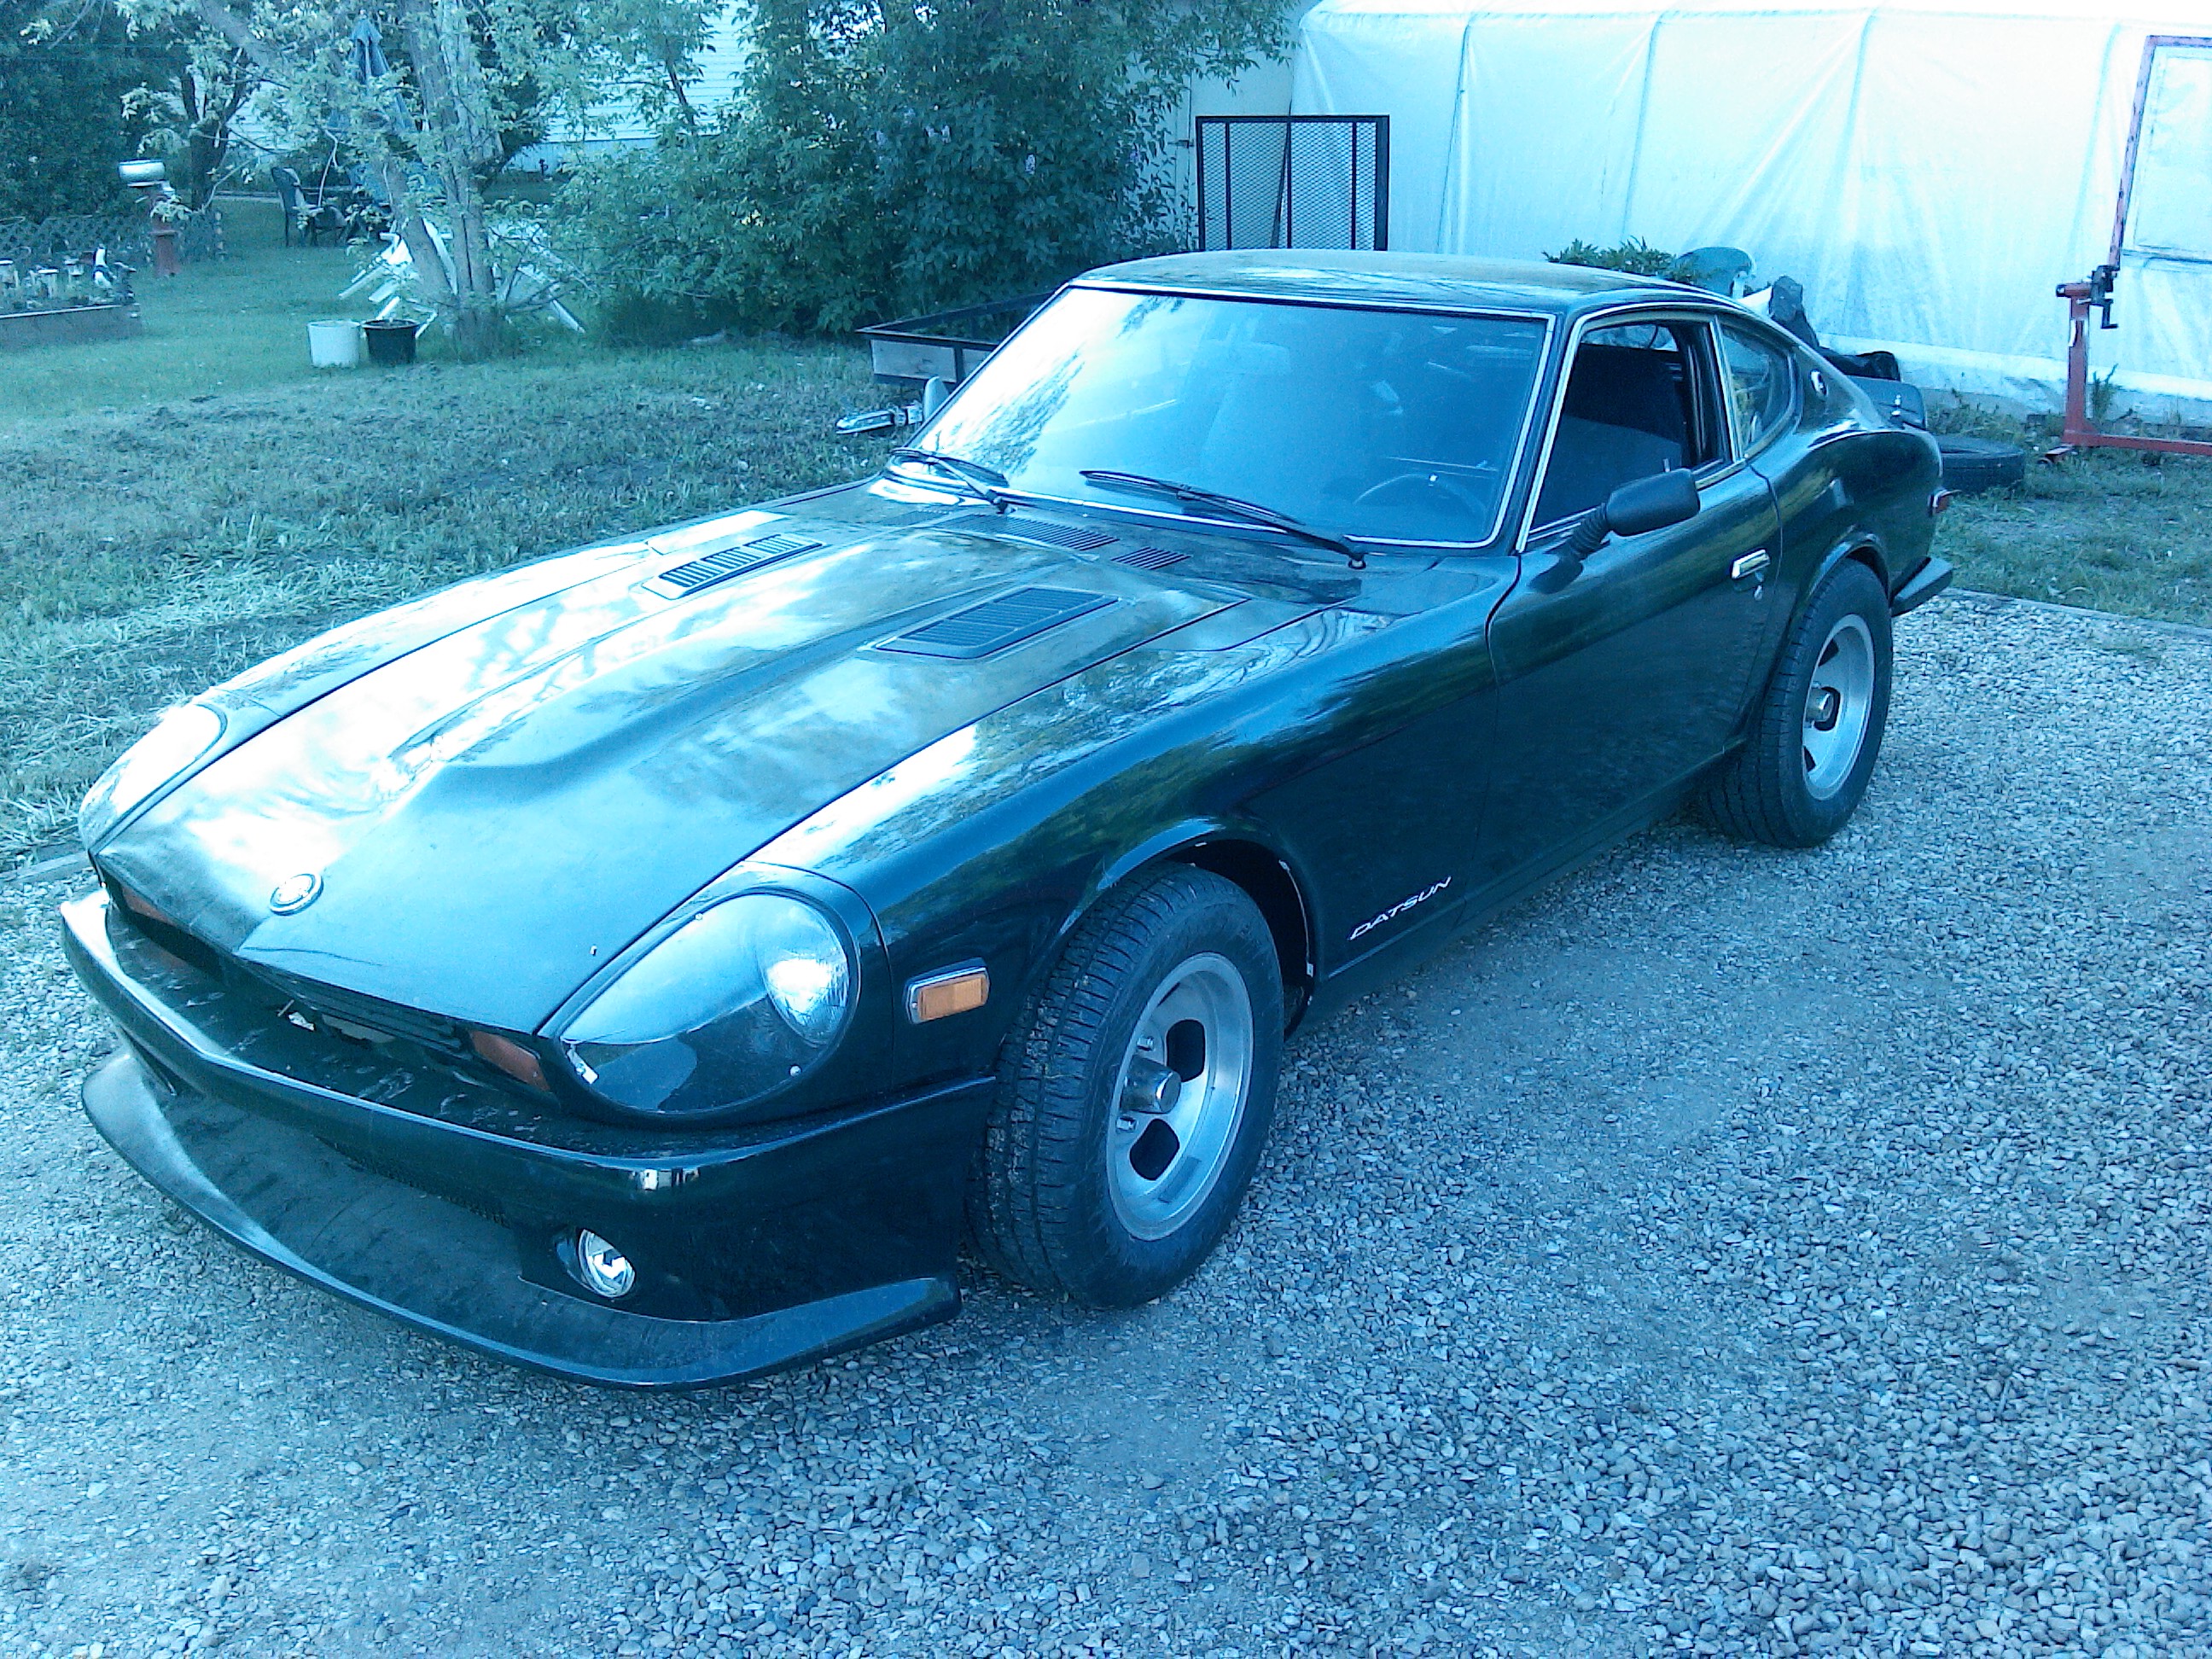
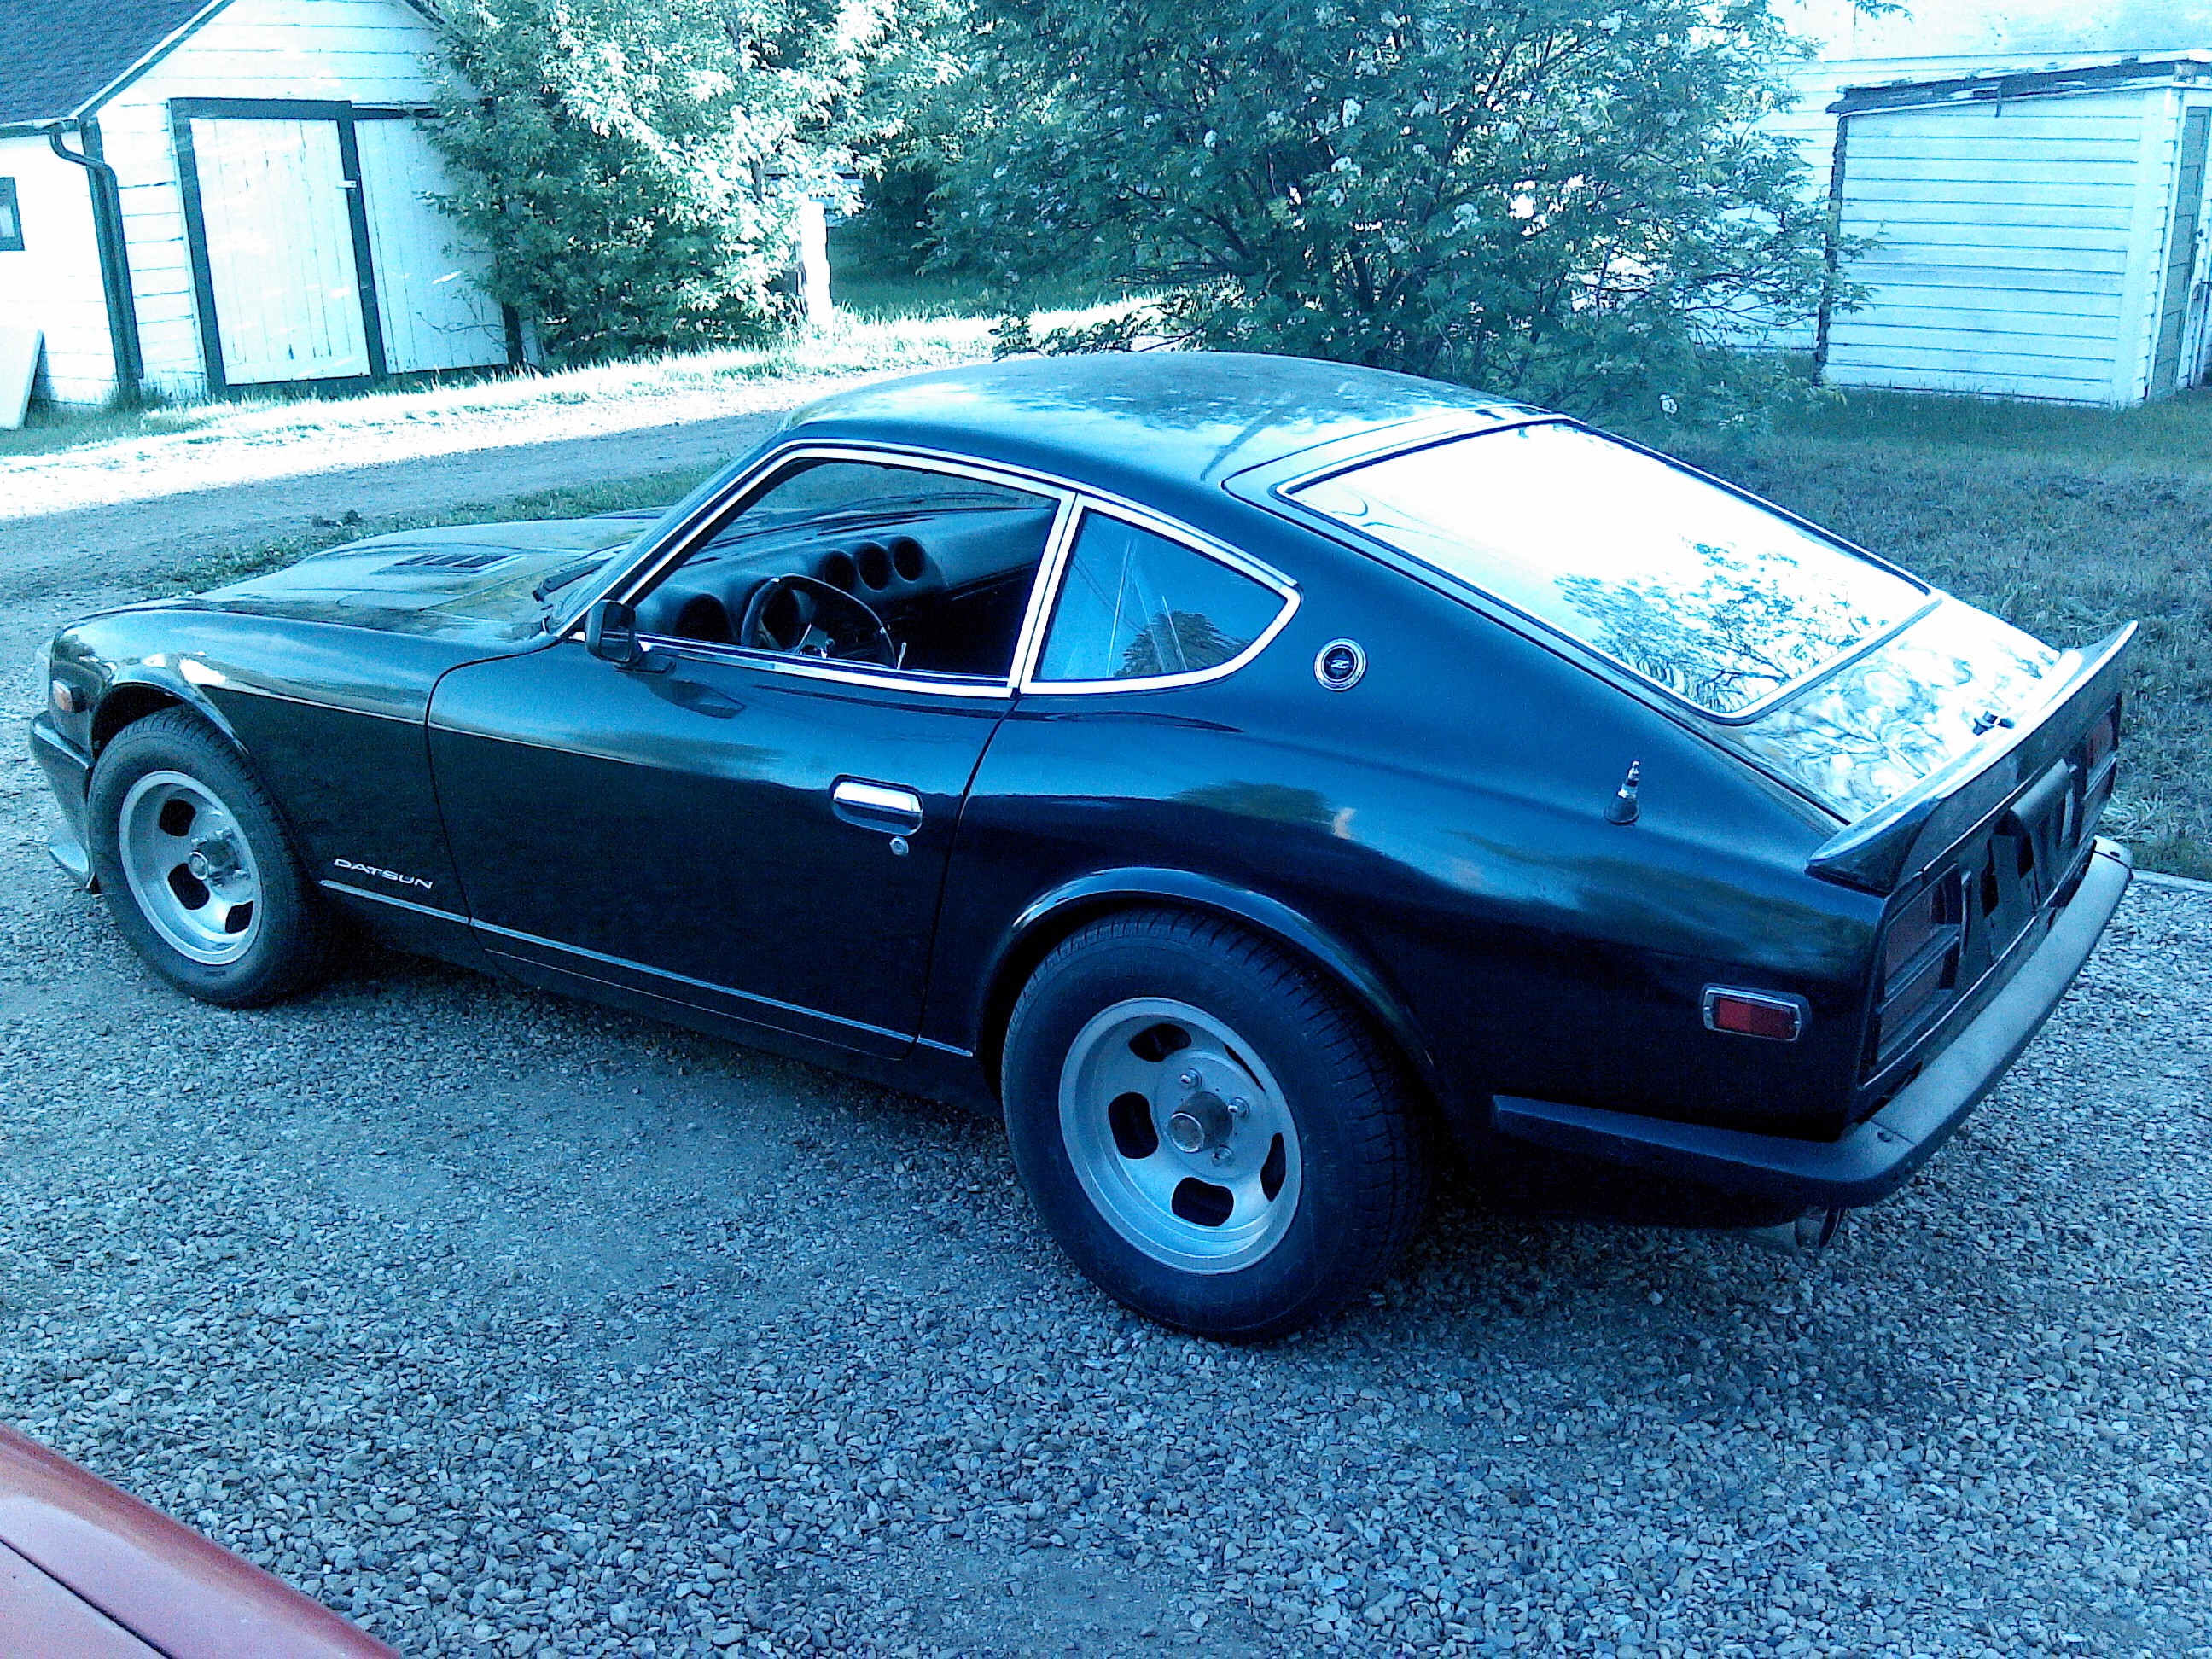
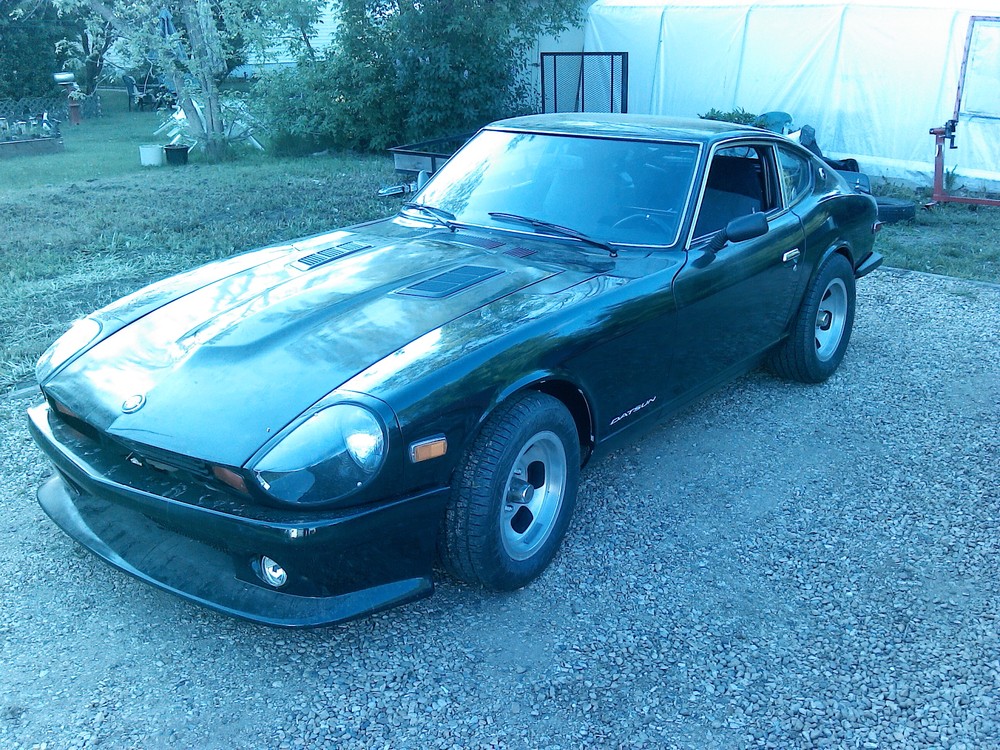
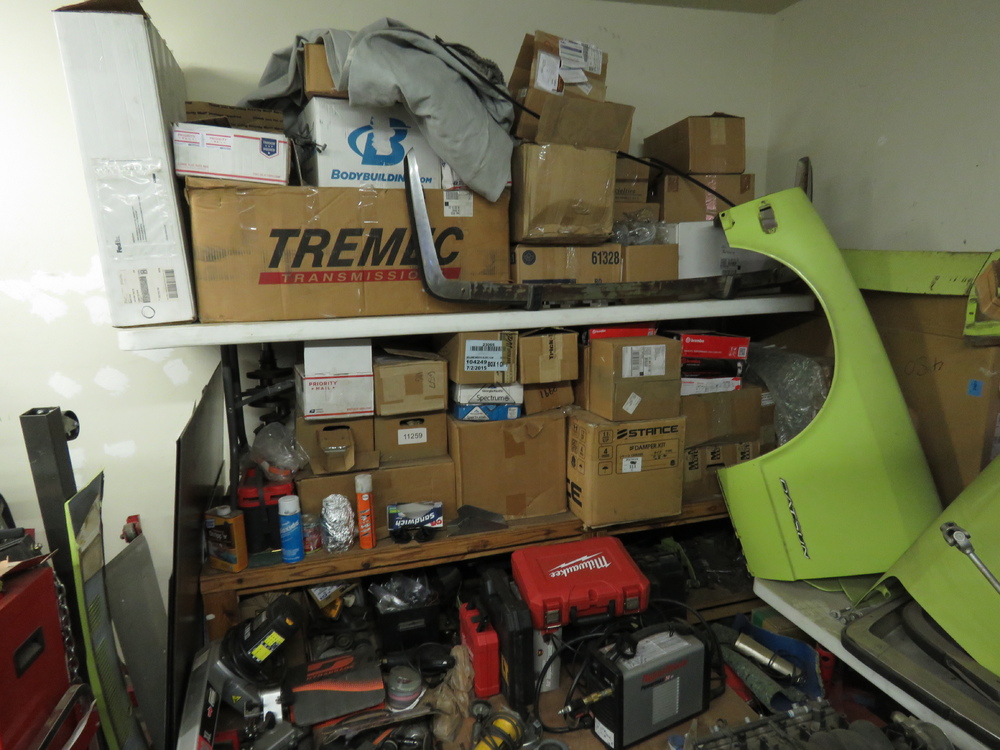
2 pointsGreetings all from the depths of central Alberta Canada where we get a max of 5 good driving months and 7 of just obsessing on what you can do to your Z next season l laugh but really its getting expensive and on a city workers salary people beginning to wonder if i have started to slip a little mentally 26k$ deep and no sign of stopping soon , oh and please don't say recognizing you have a problem is the first step in recovery cause now one likes a quitter . i will update pics when its warmed up a bit to many things have change since these pics were taken a 3.1 stroker now resides in that engines place now

 2 points
 -
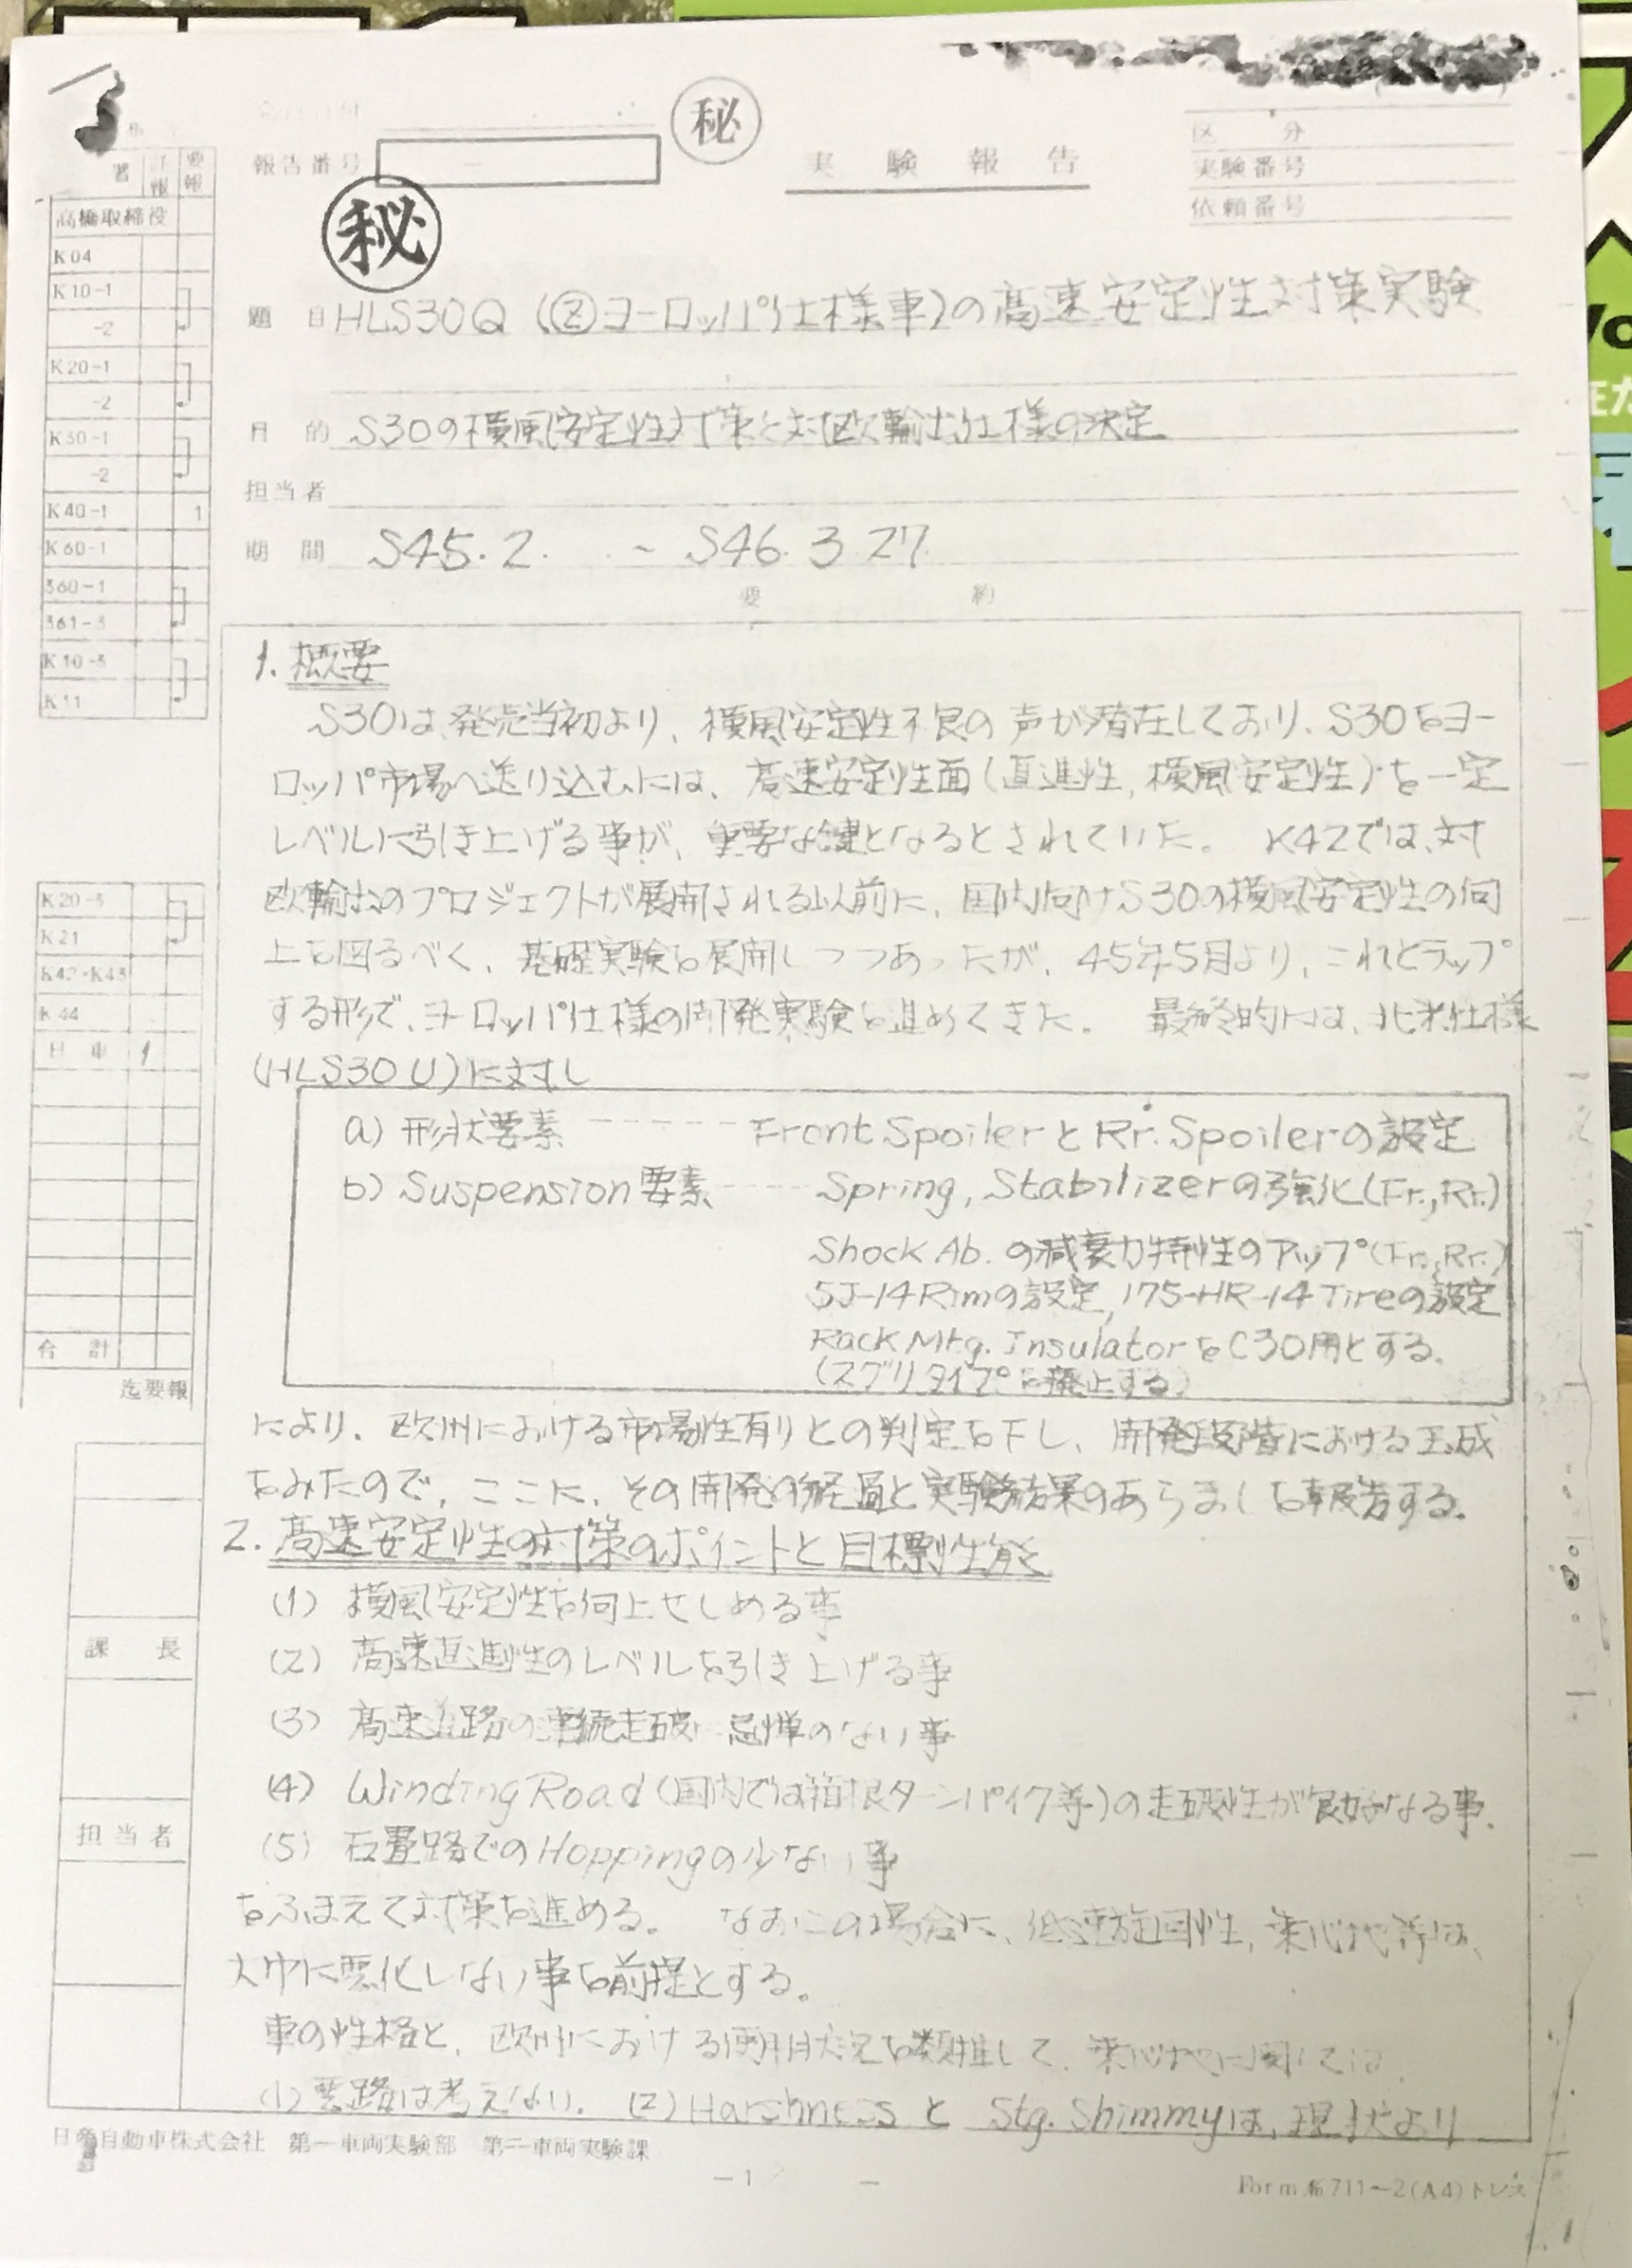
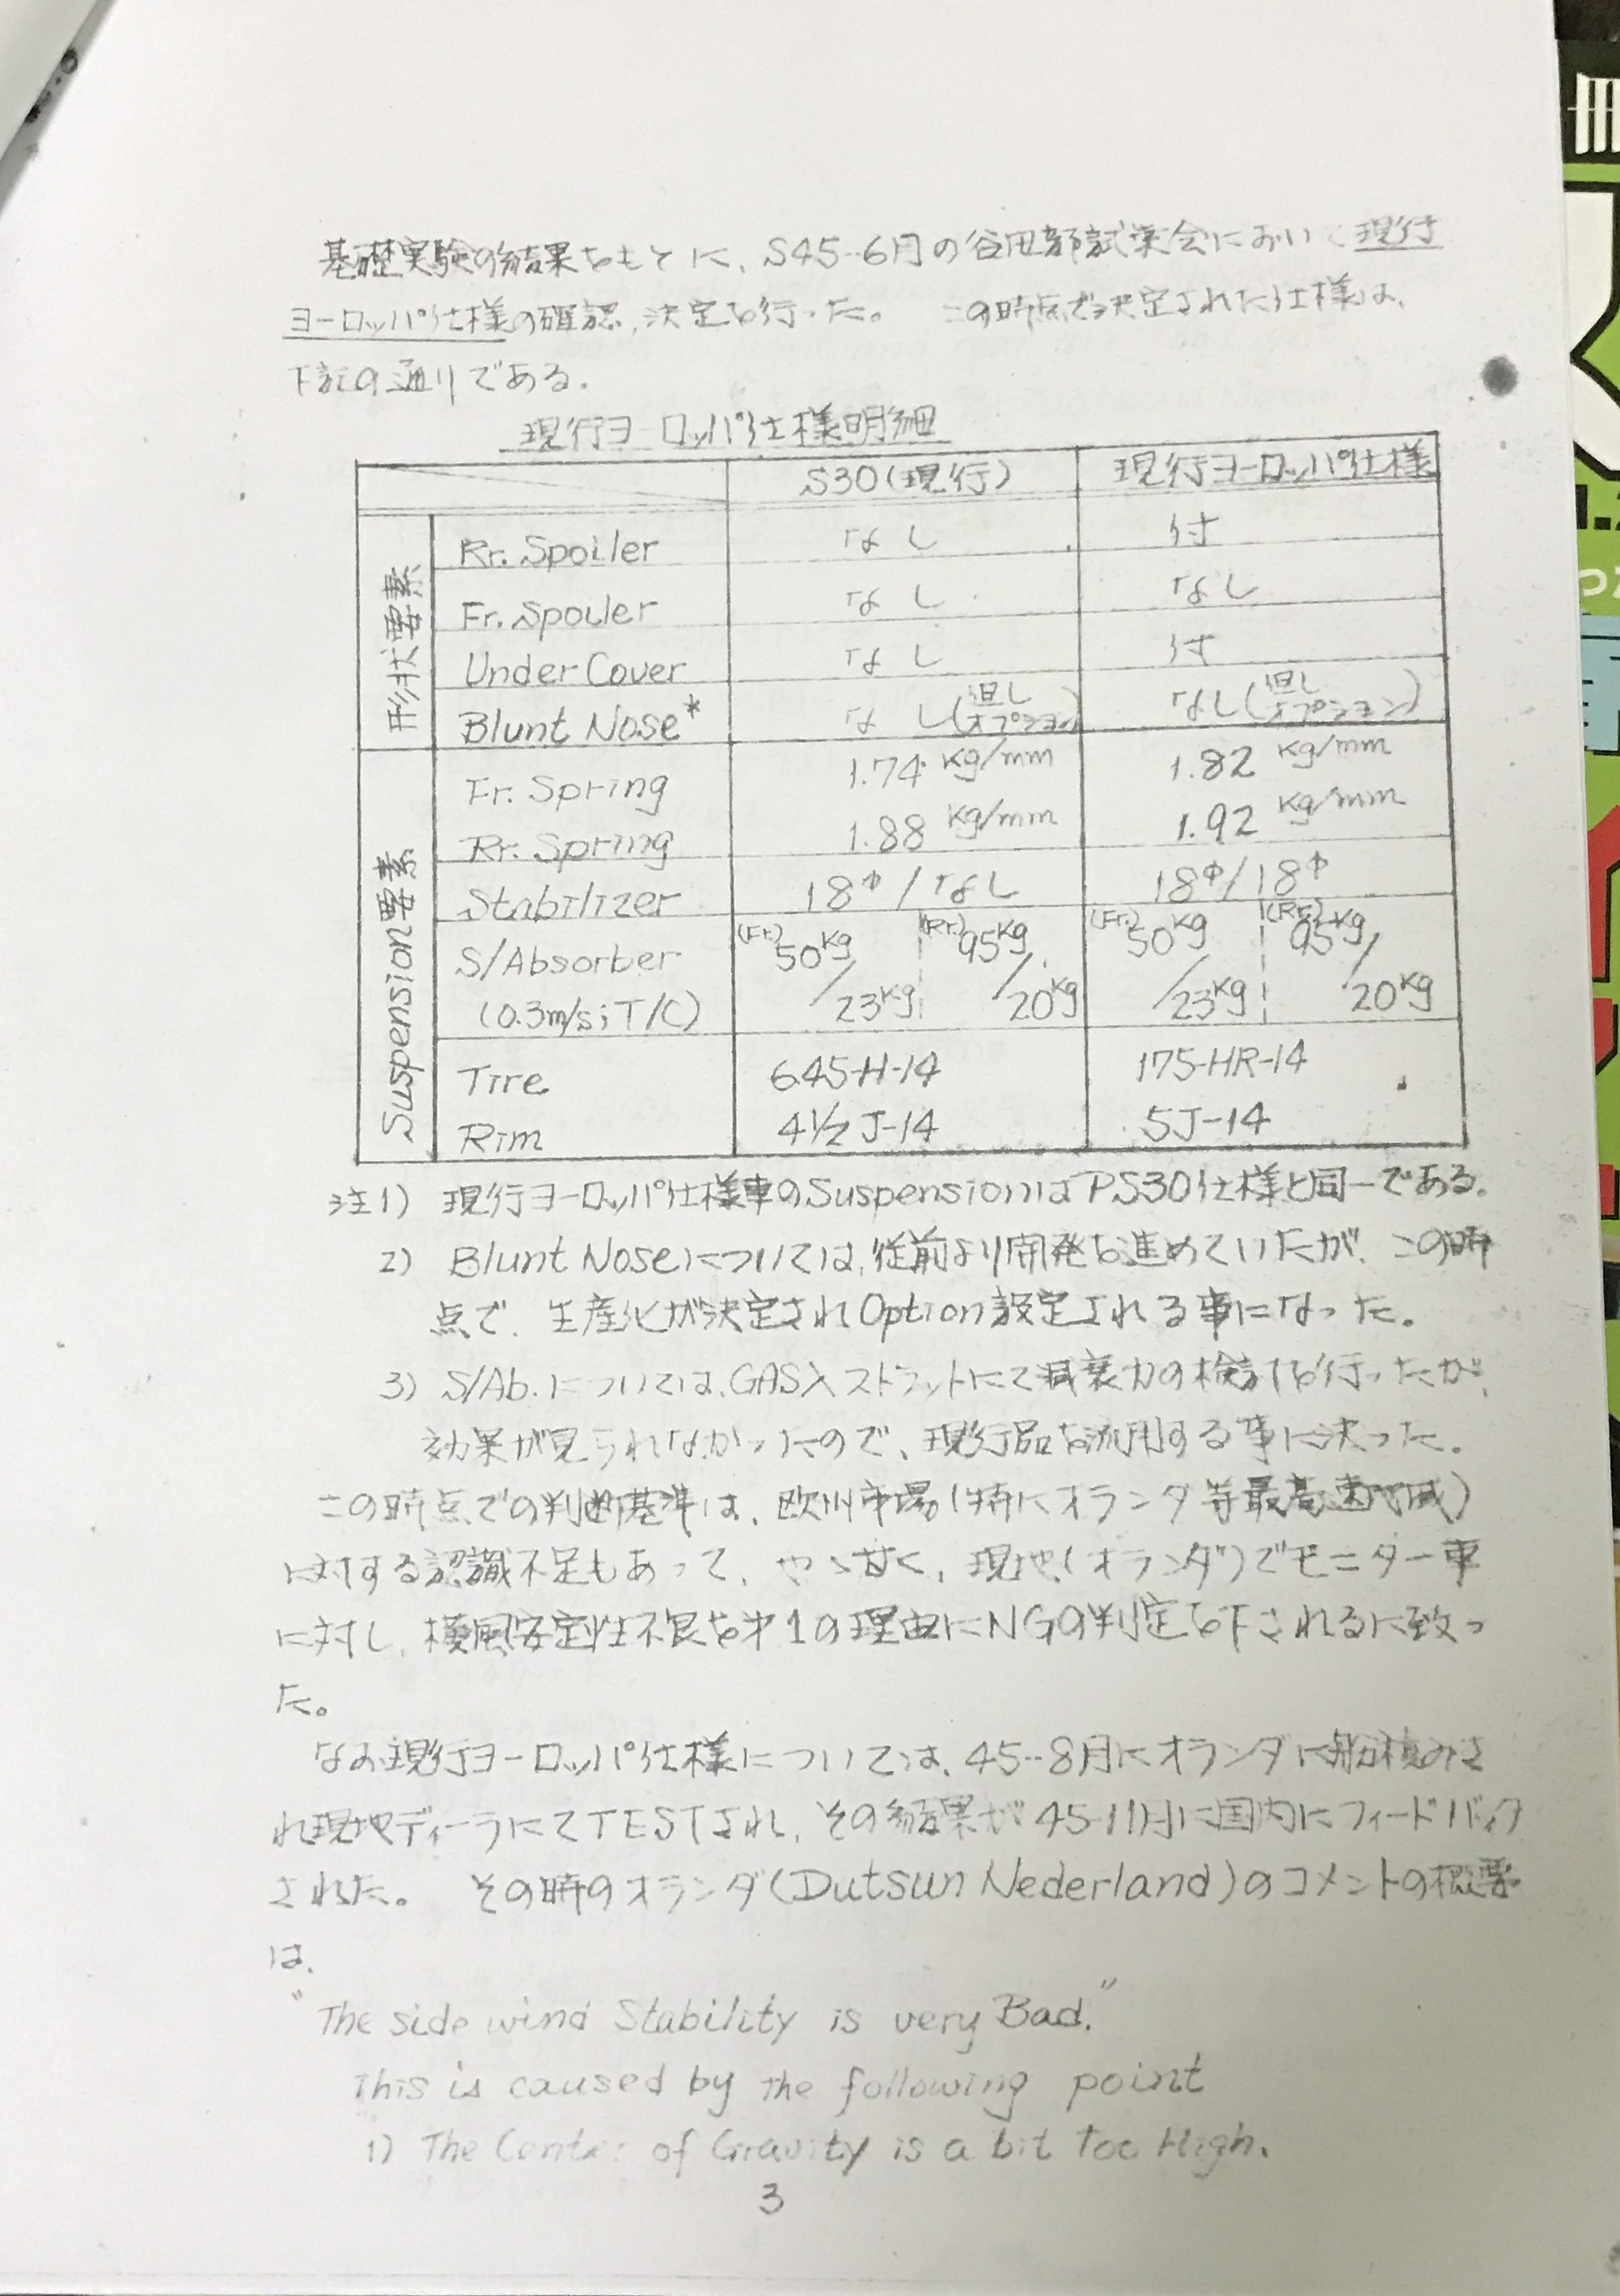
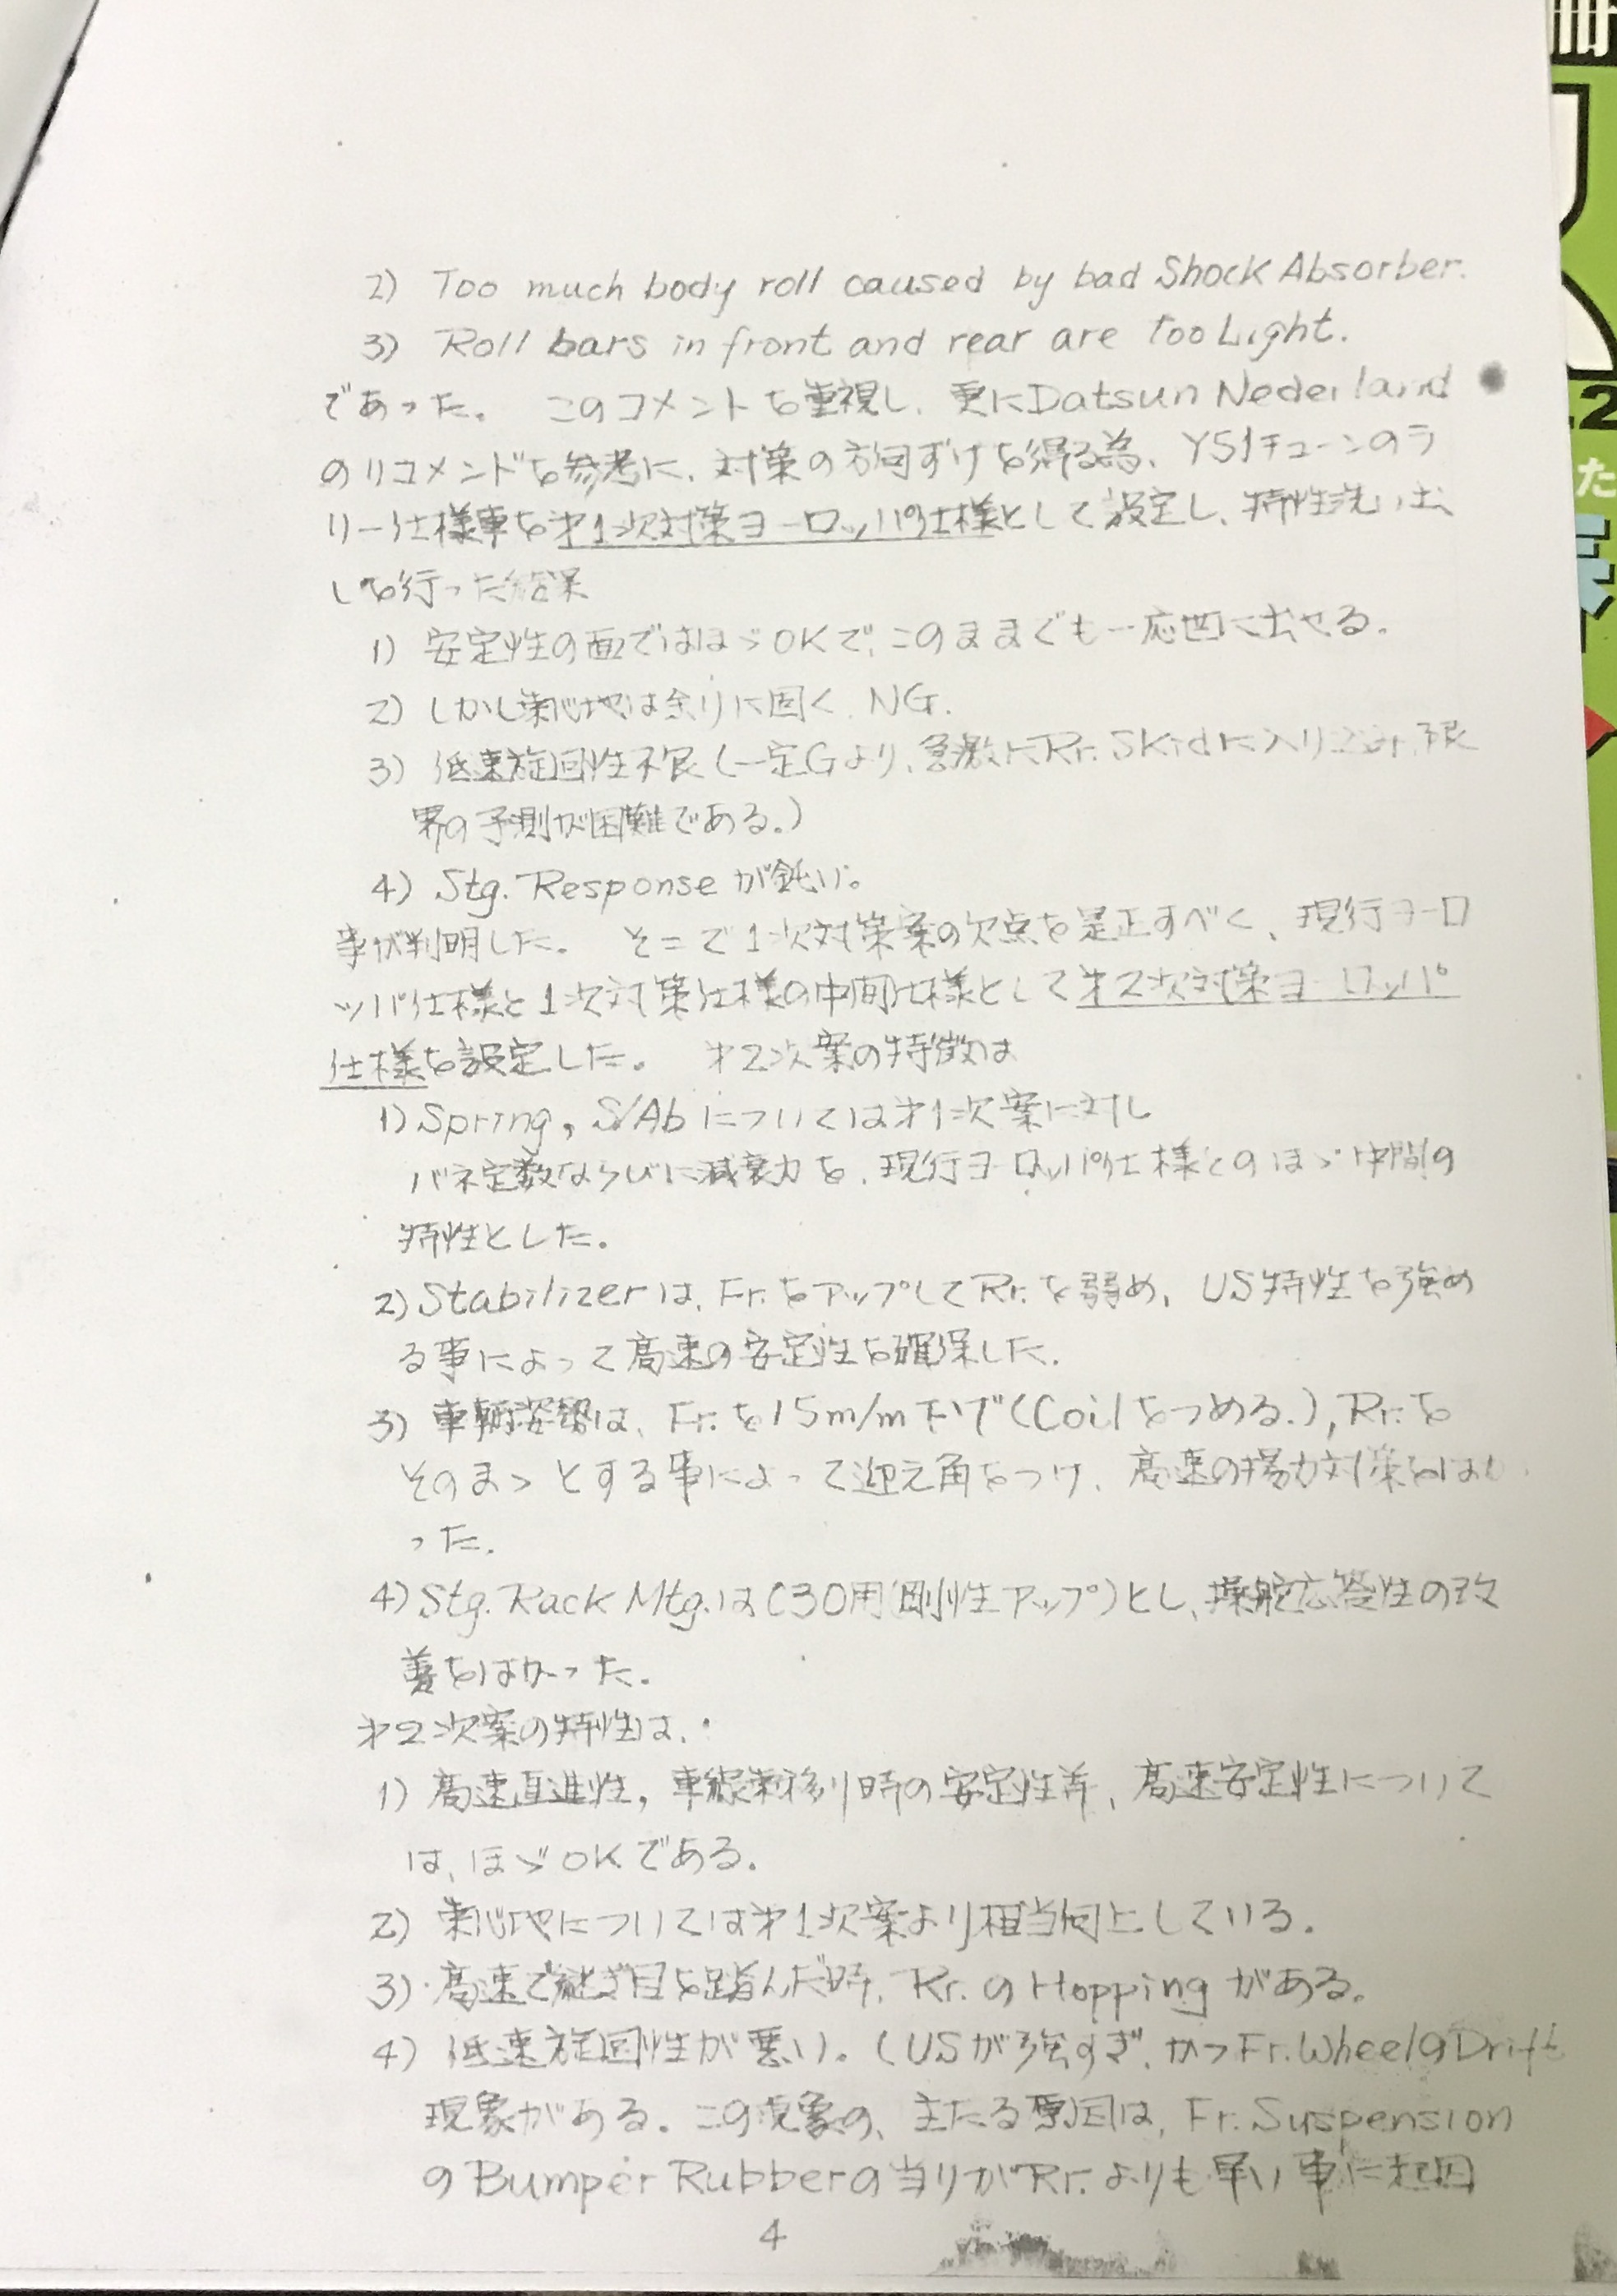
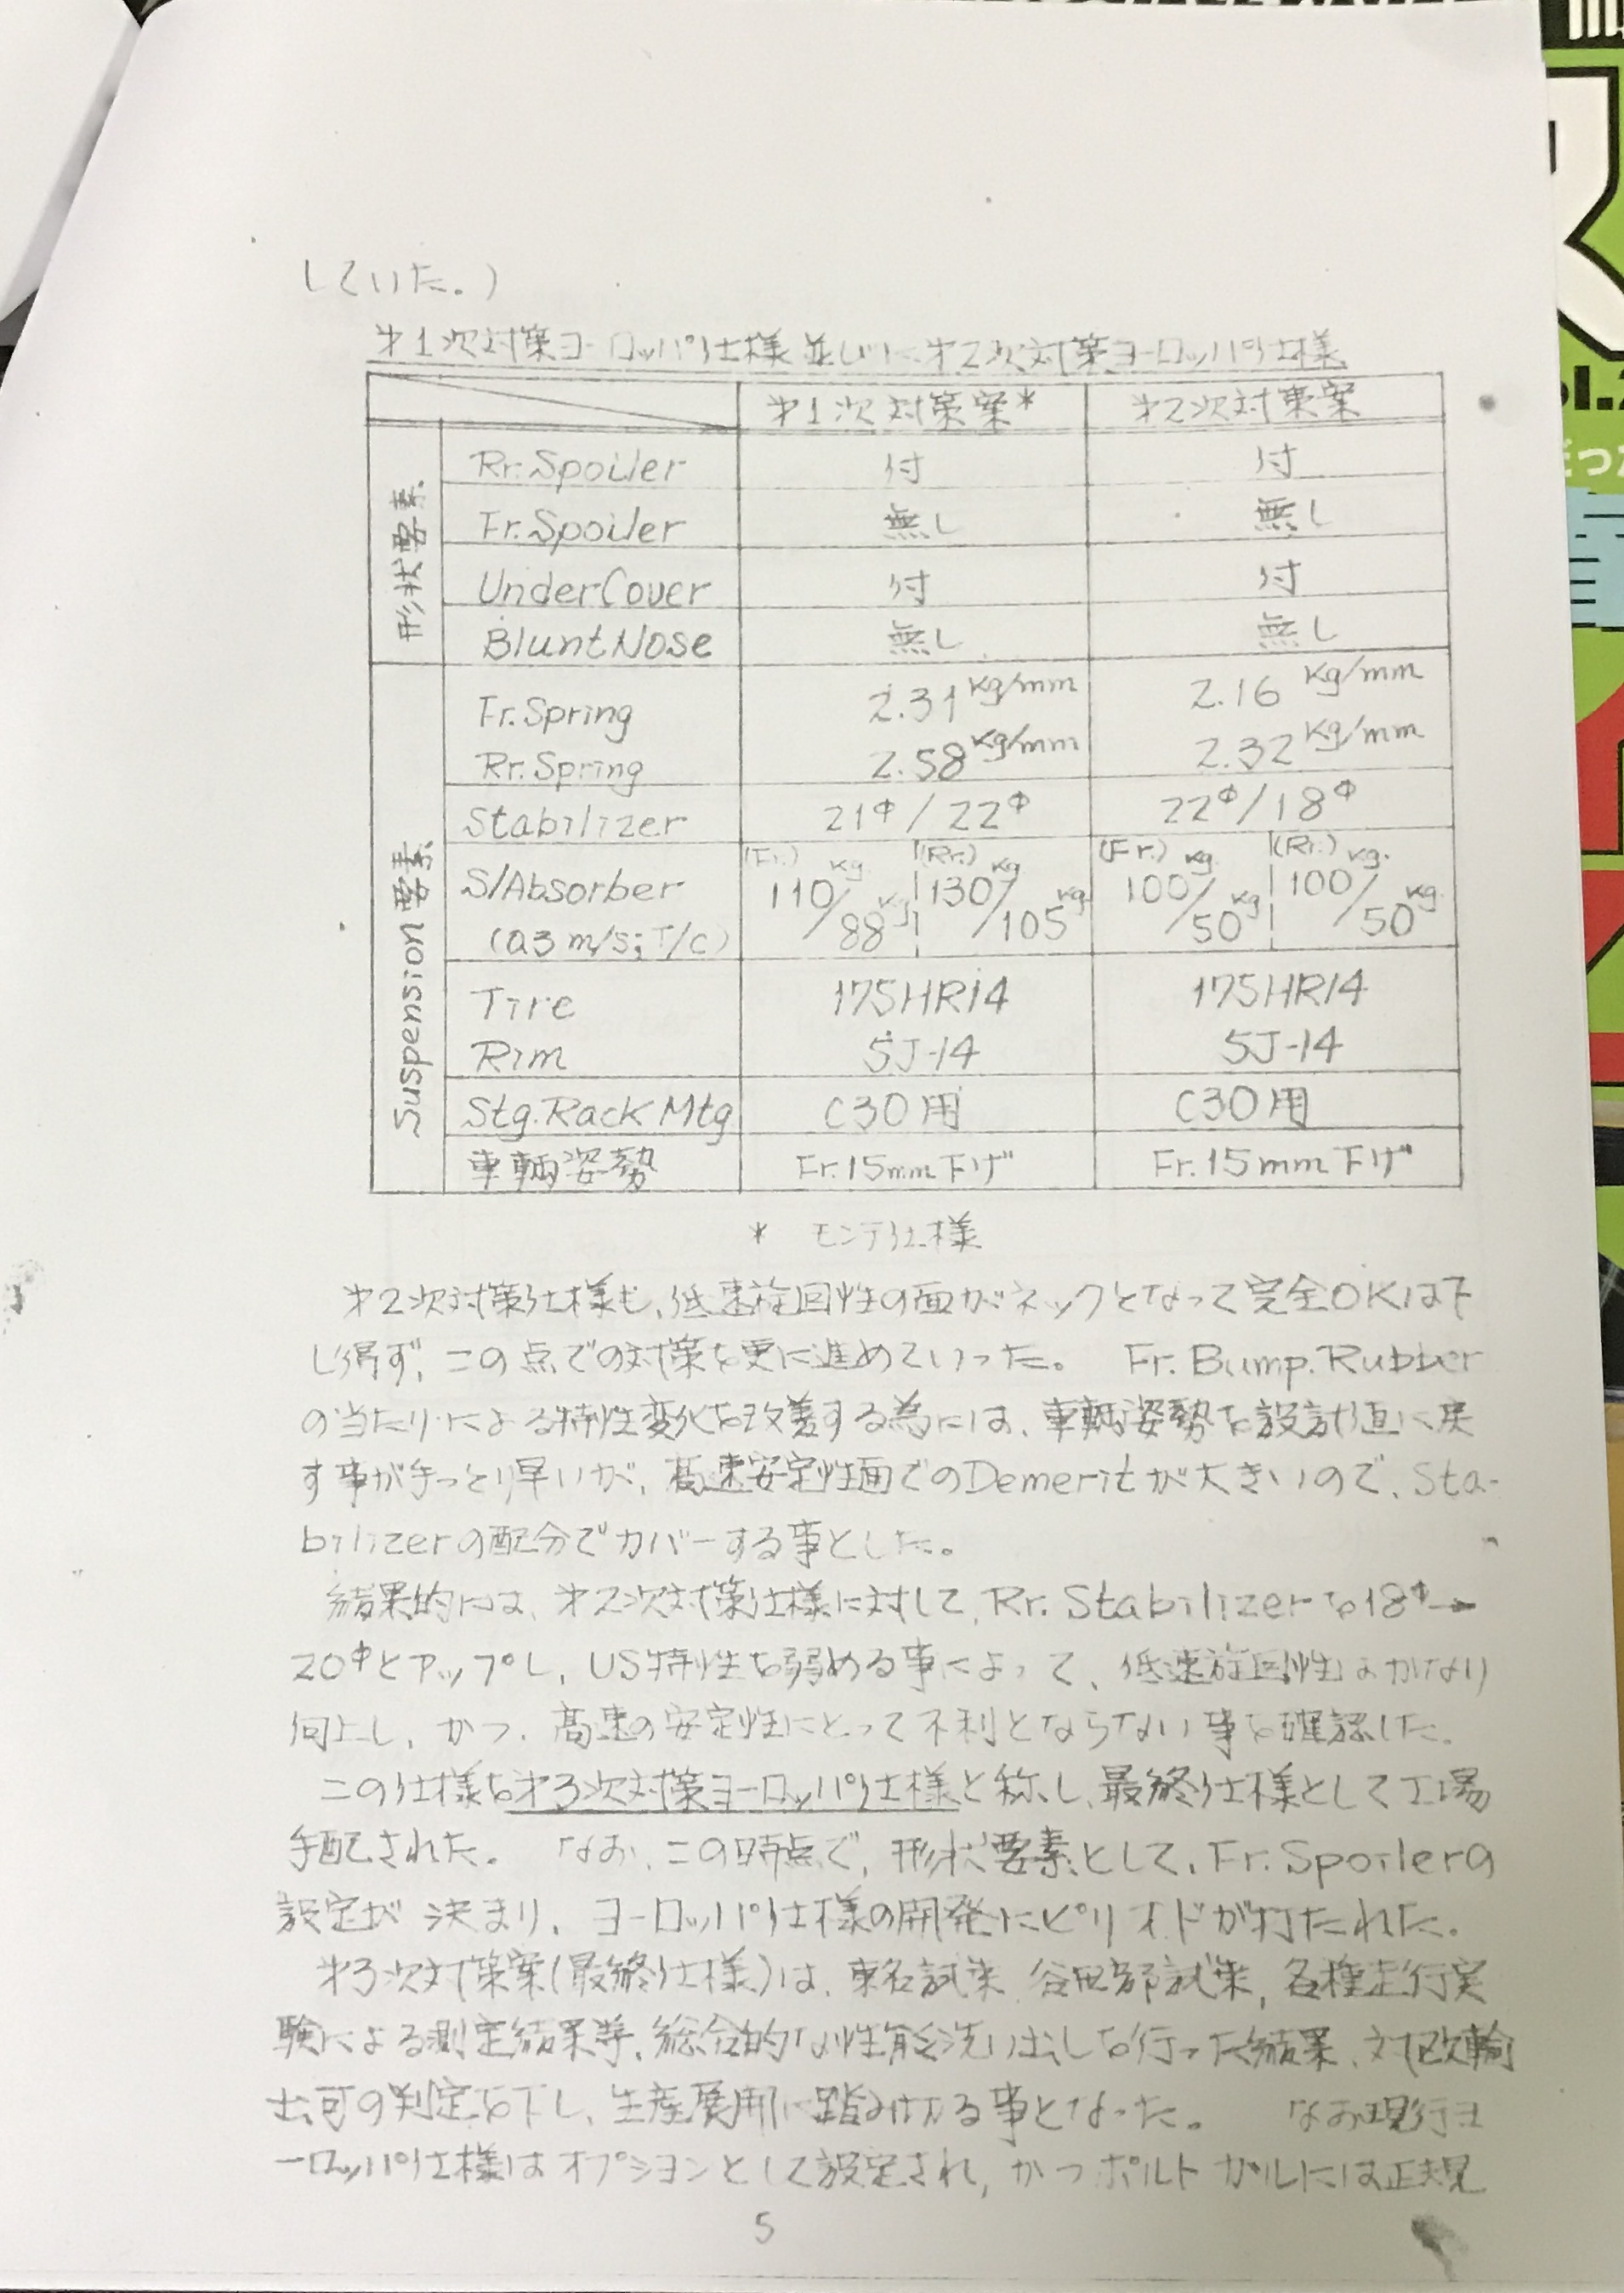
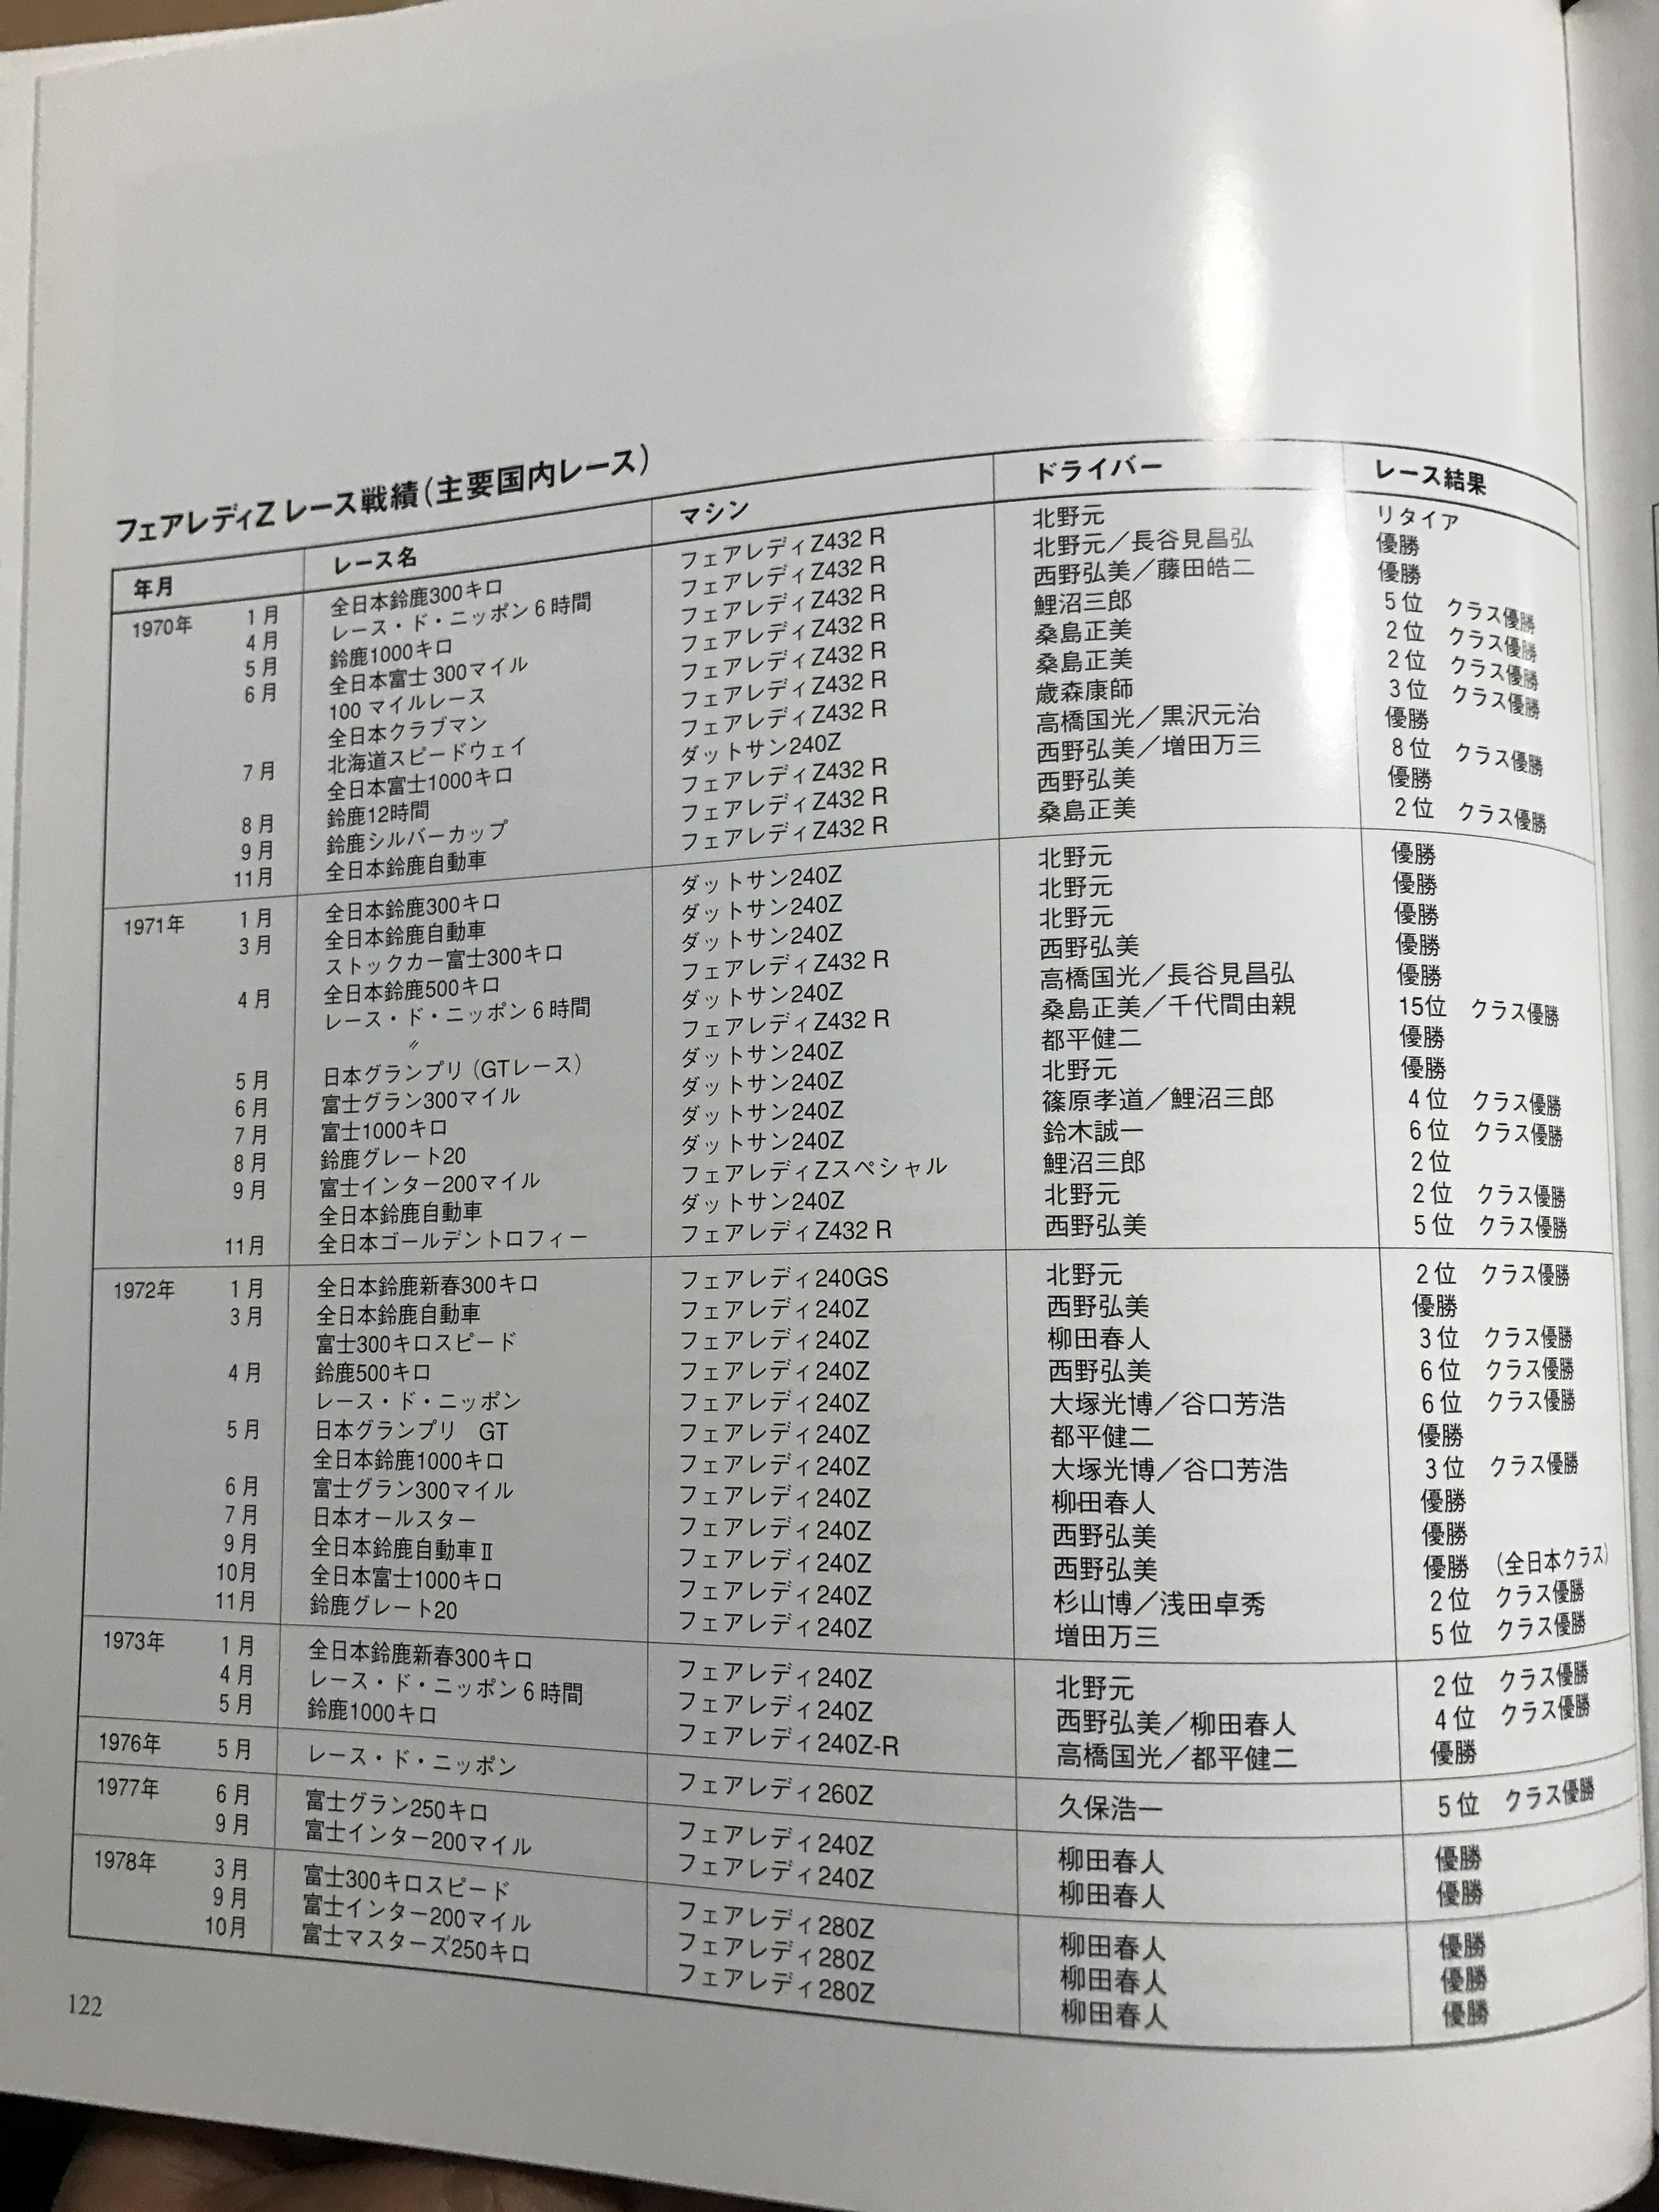
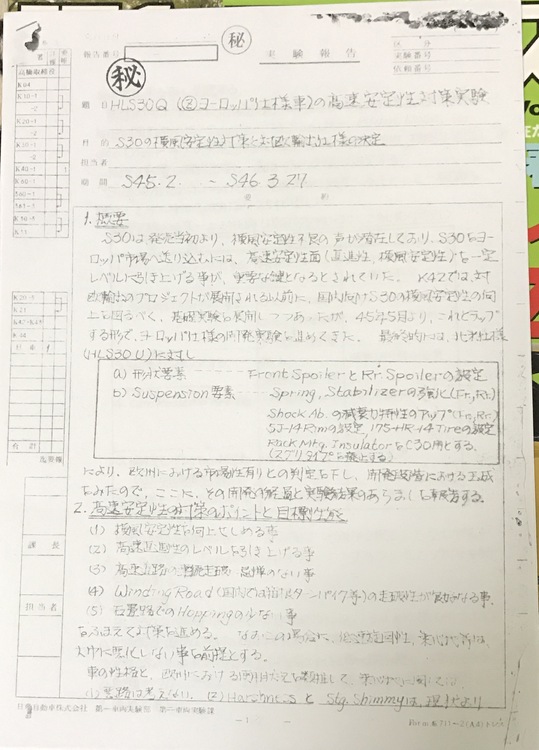
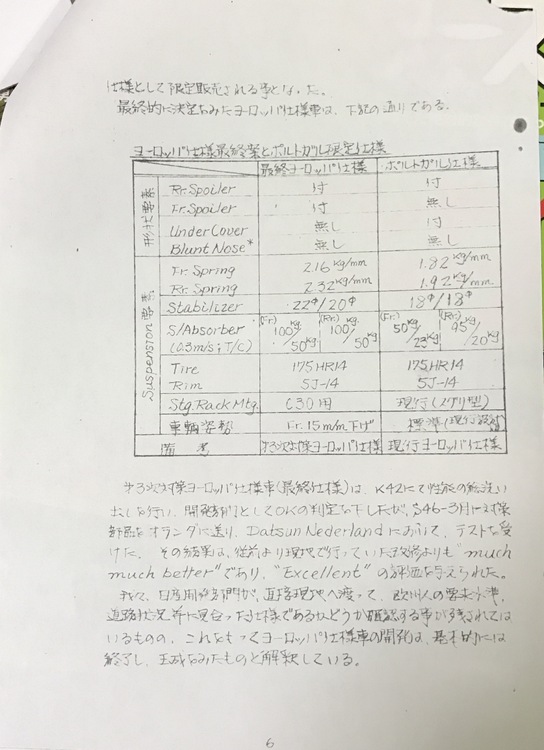
Hello, I think the best performance 240Z is Europe model, after seeing this report. I try to show and I do my best , I hope you enjoy. First of all, Nissan started development faithfully from February 1970 for the Euro model . Not before the beginning of its production. Nissan did not think about being famous in Europe? Or they wanted to do the development without hurrying up? Anyway March 1971, they finally set the spec like this, Final Europe version Stabilizer bar front 22mm / rear 20mm Stiffer spring front & rear Stiffer shock absorber front & rear Front height minus 15mm Spoilers front & rear With this spec, the optional magnesium wheels (same as Z432 )would add more better handling and performance, I saw some car has the wheels in Europe. One interesting note is, there is a "Portugal Version " This is like a Z432, because spring rate and stabilizer bars are the same. Not as sporty as Final Europe version but it has a little more sporty feelings than others. Kats


 1 point
 -
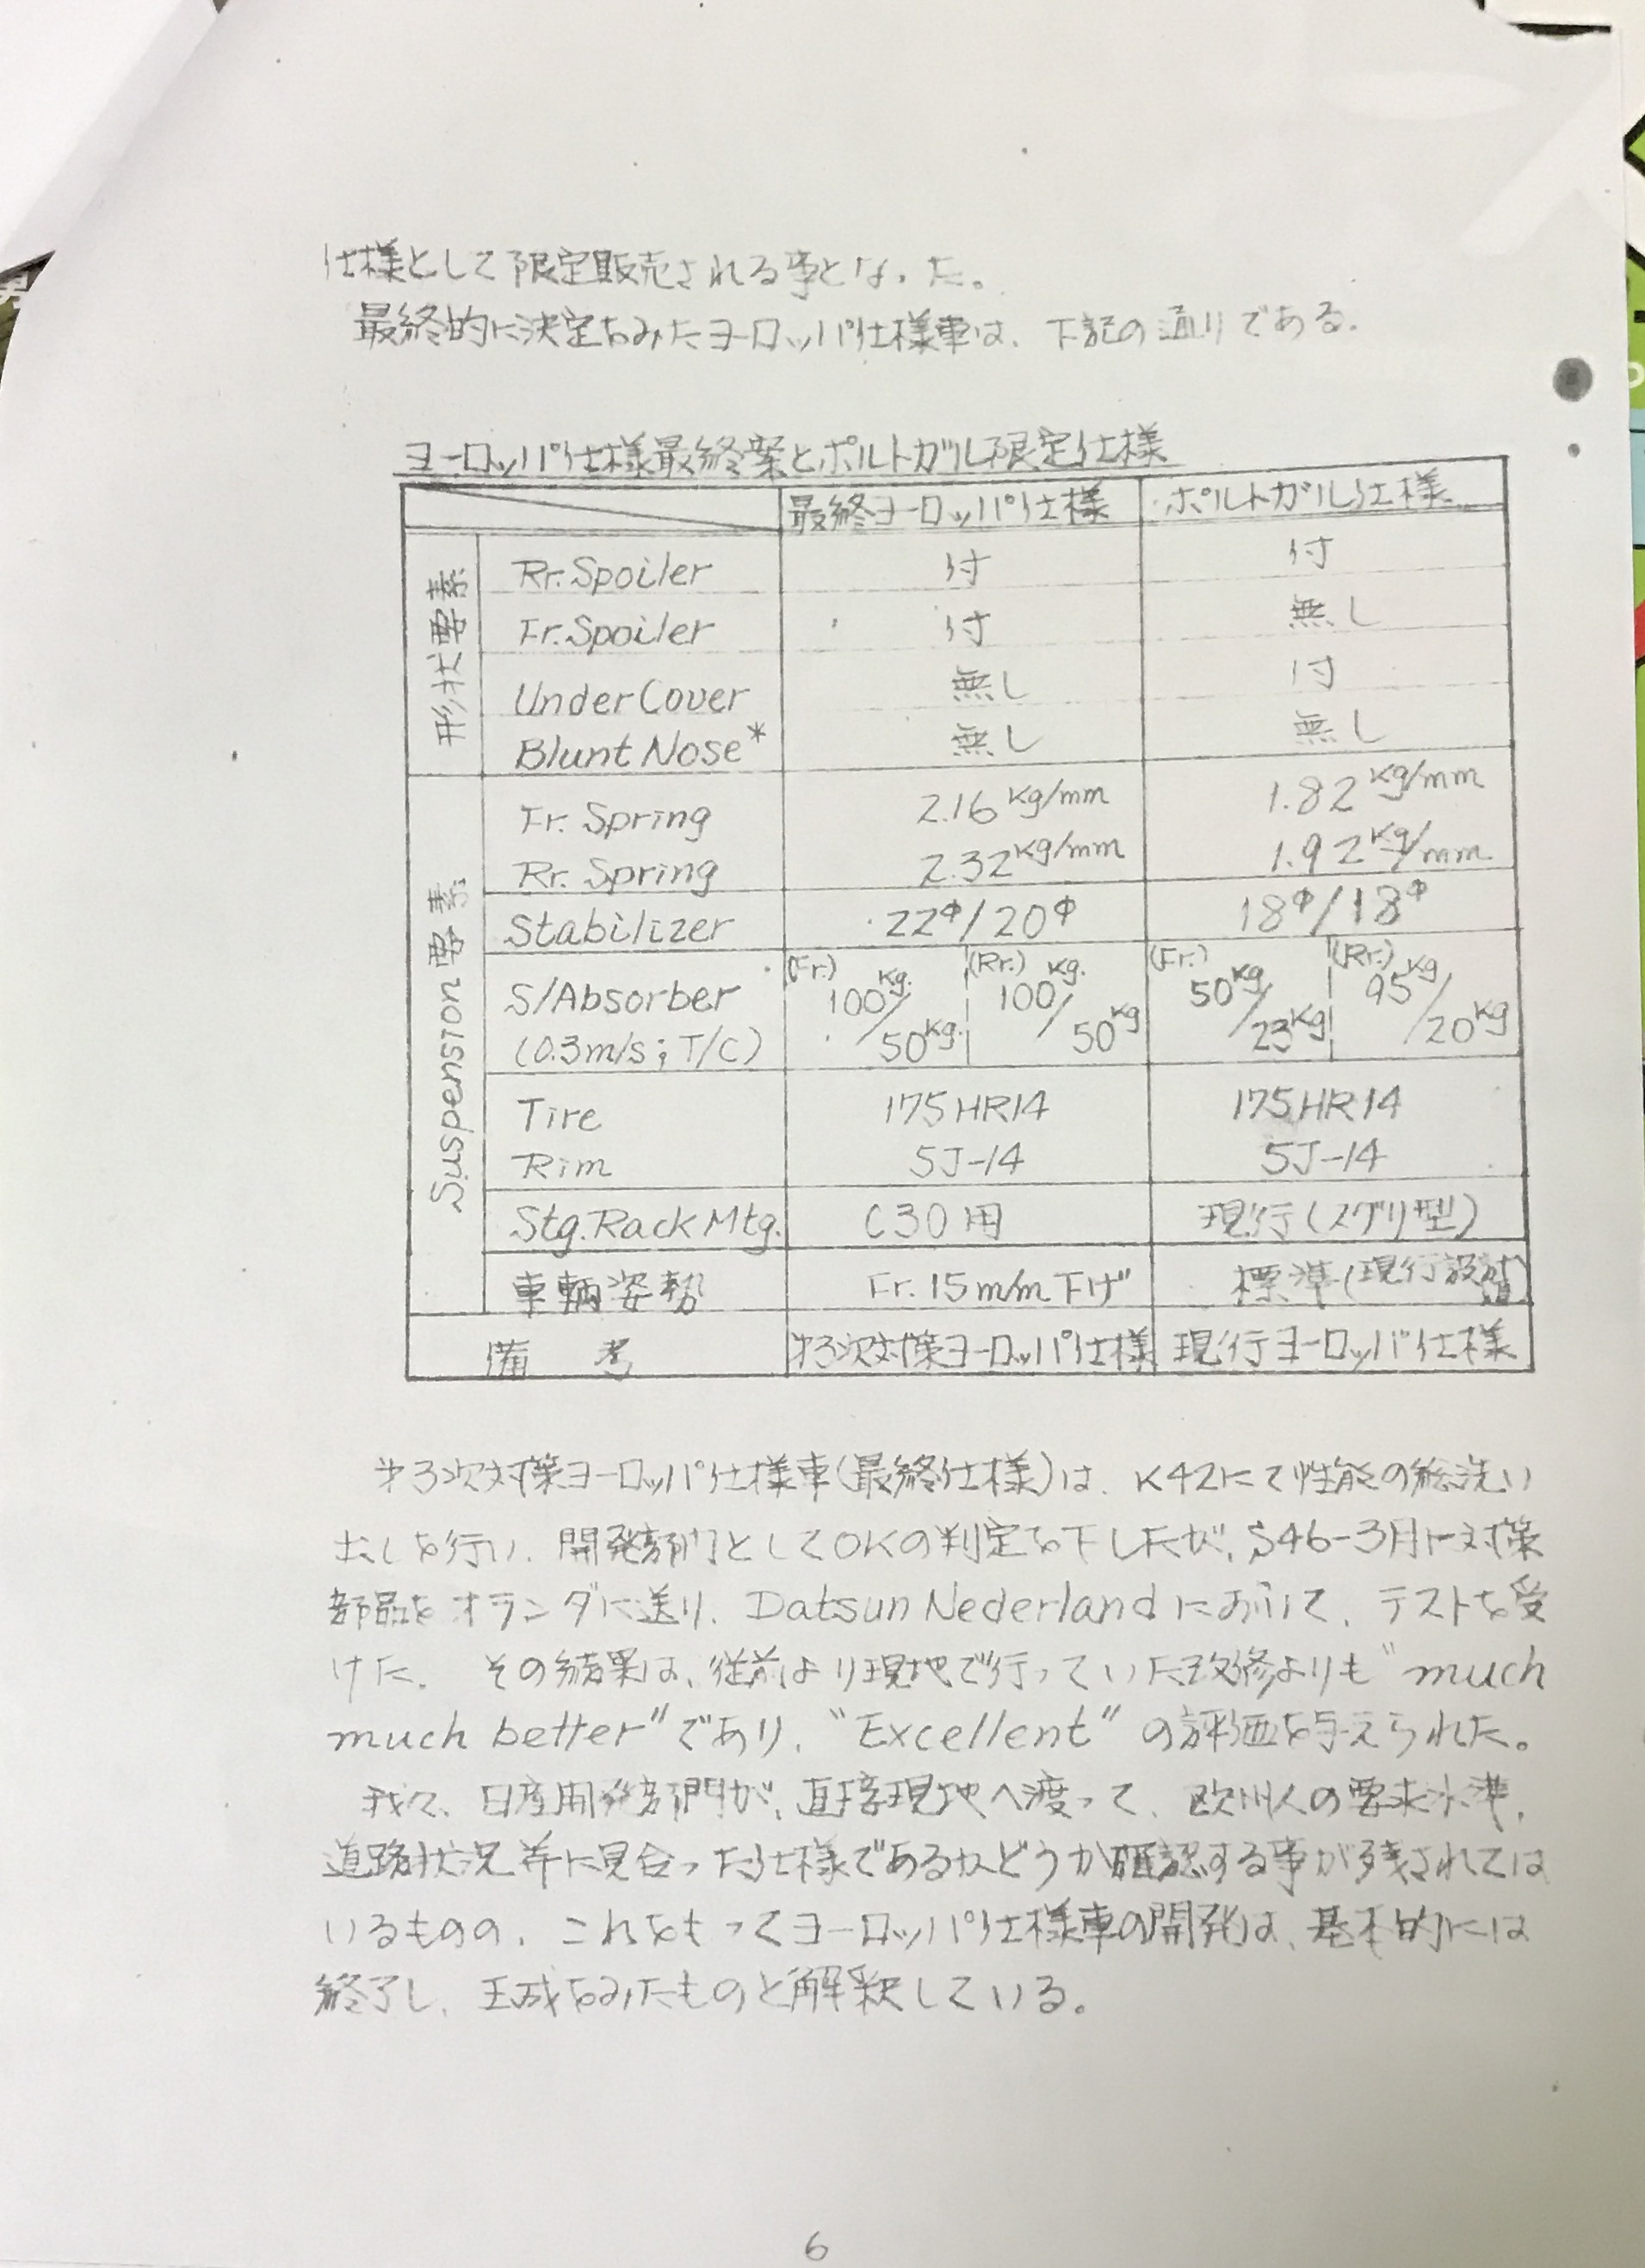
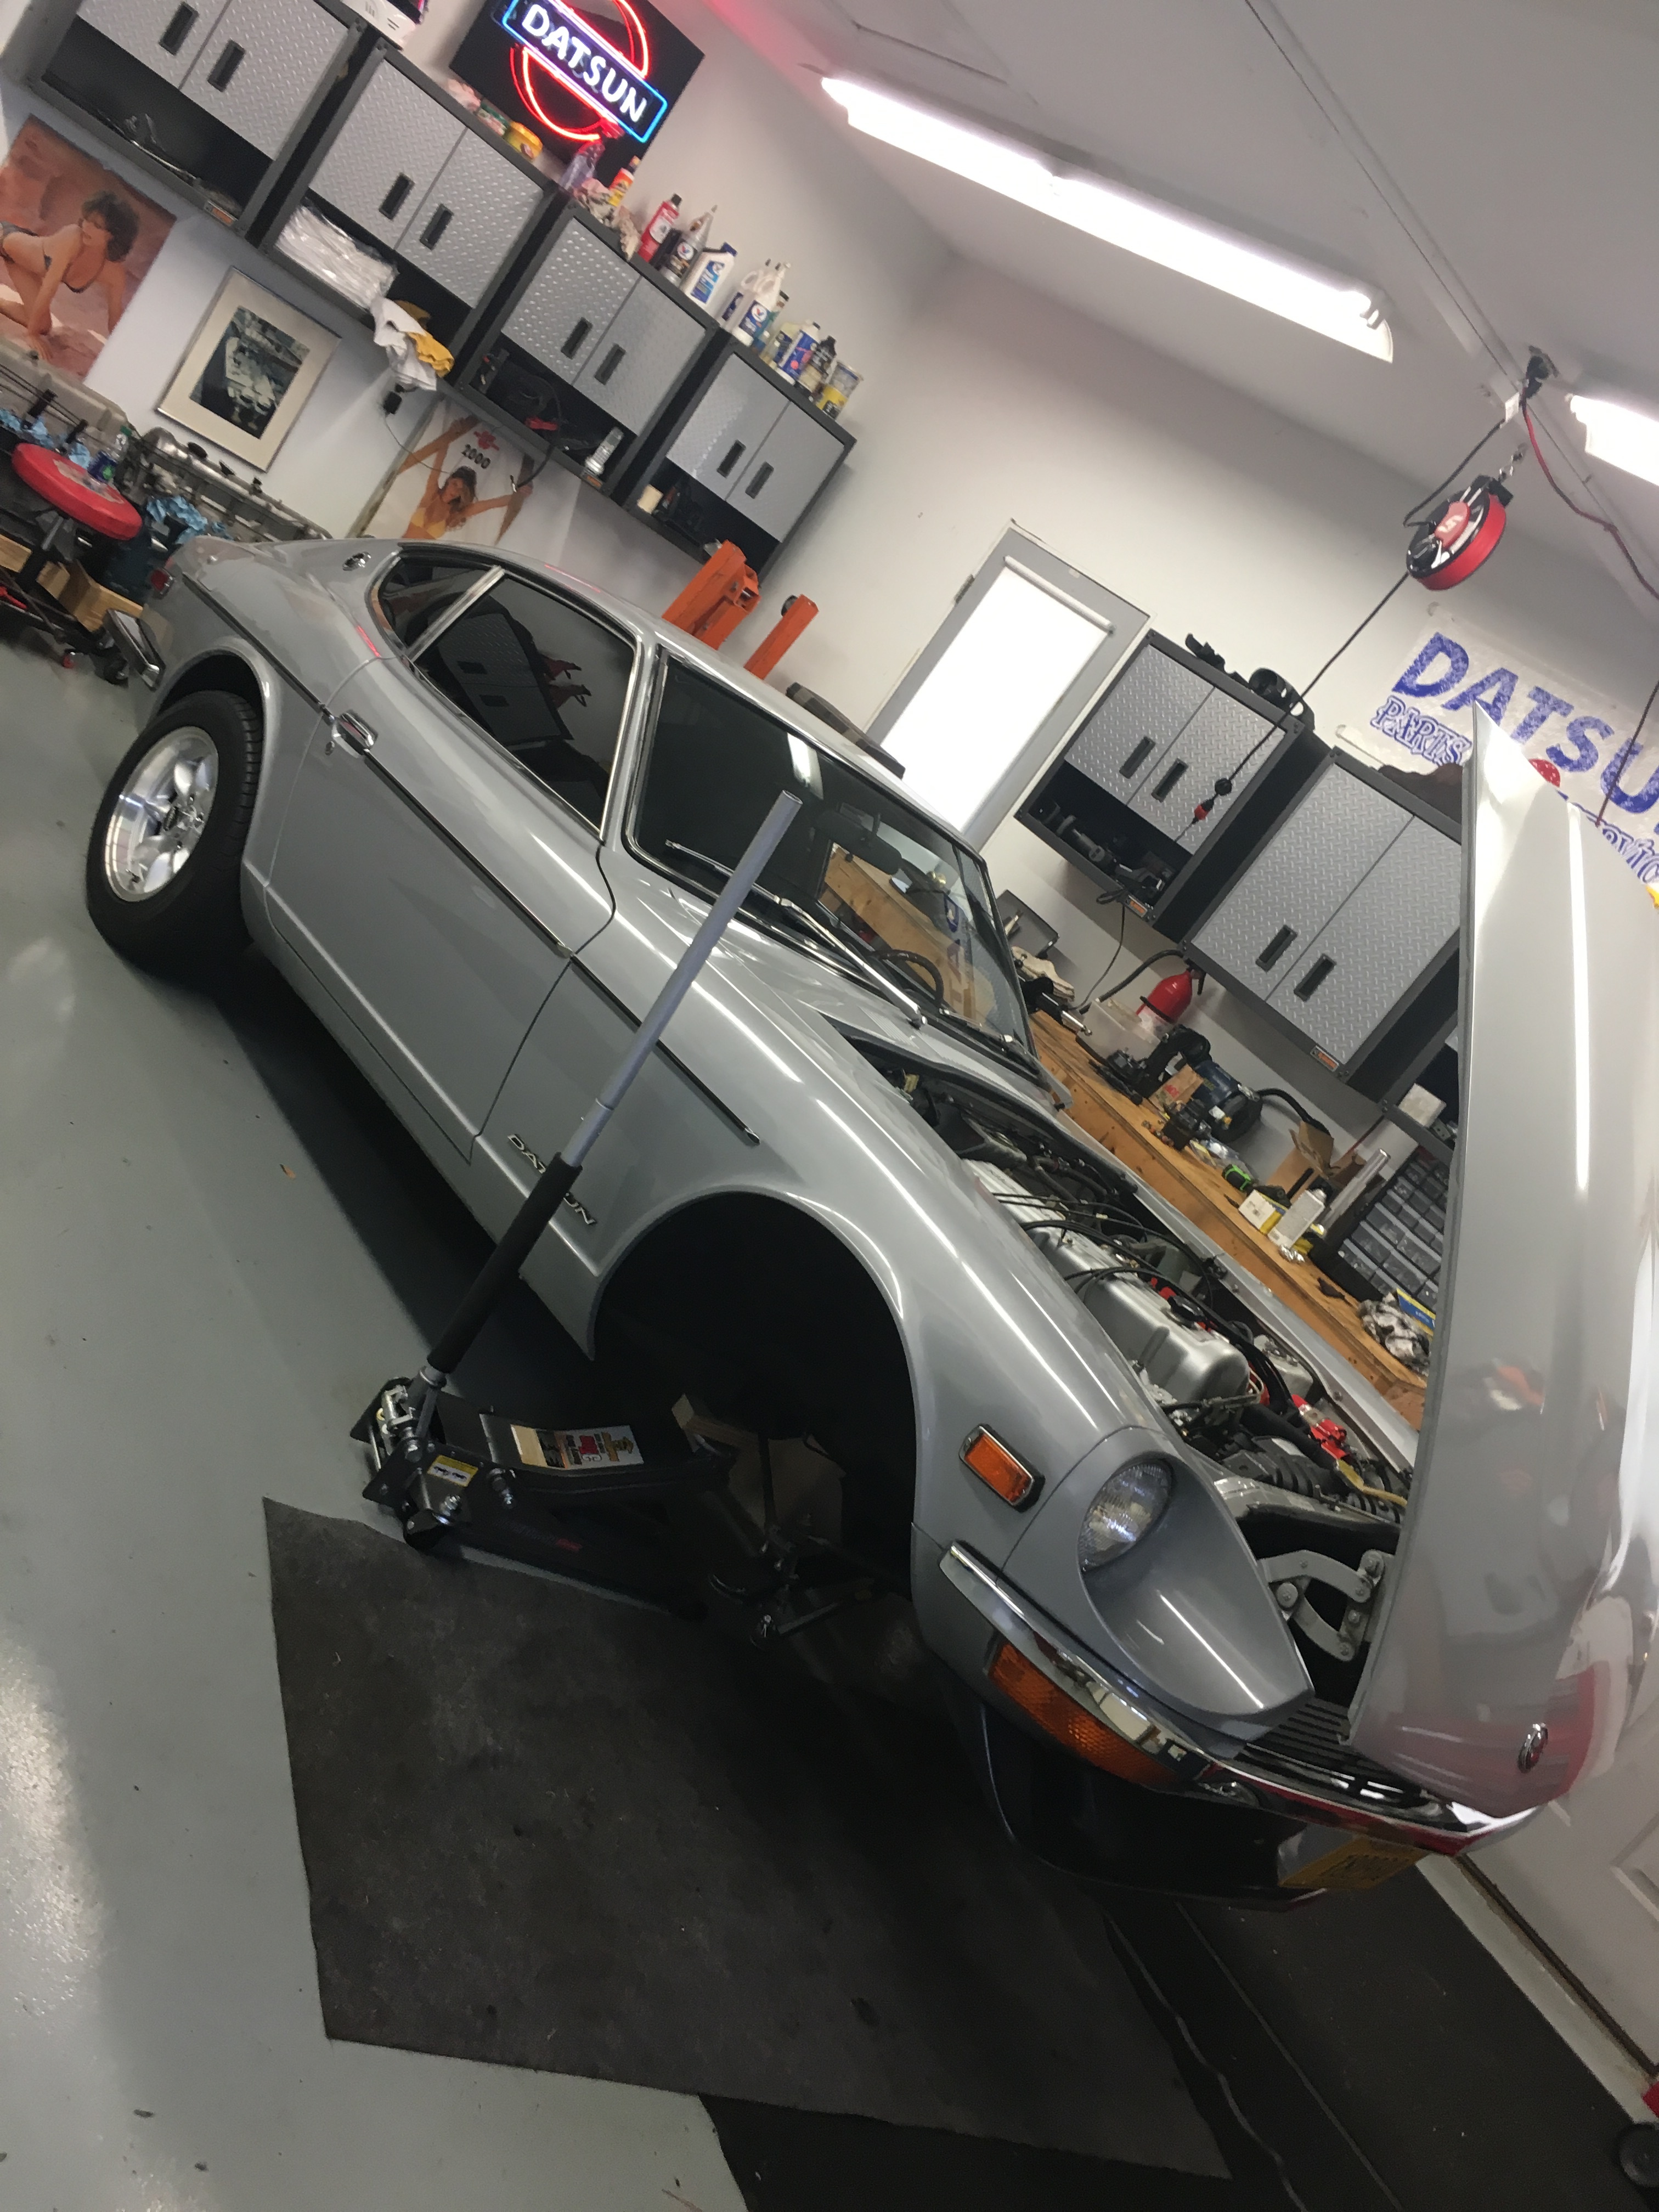
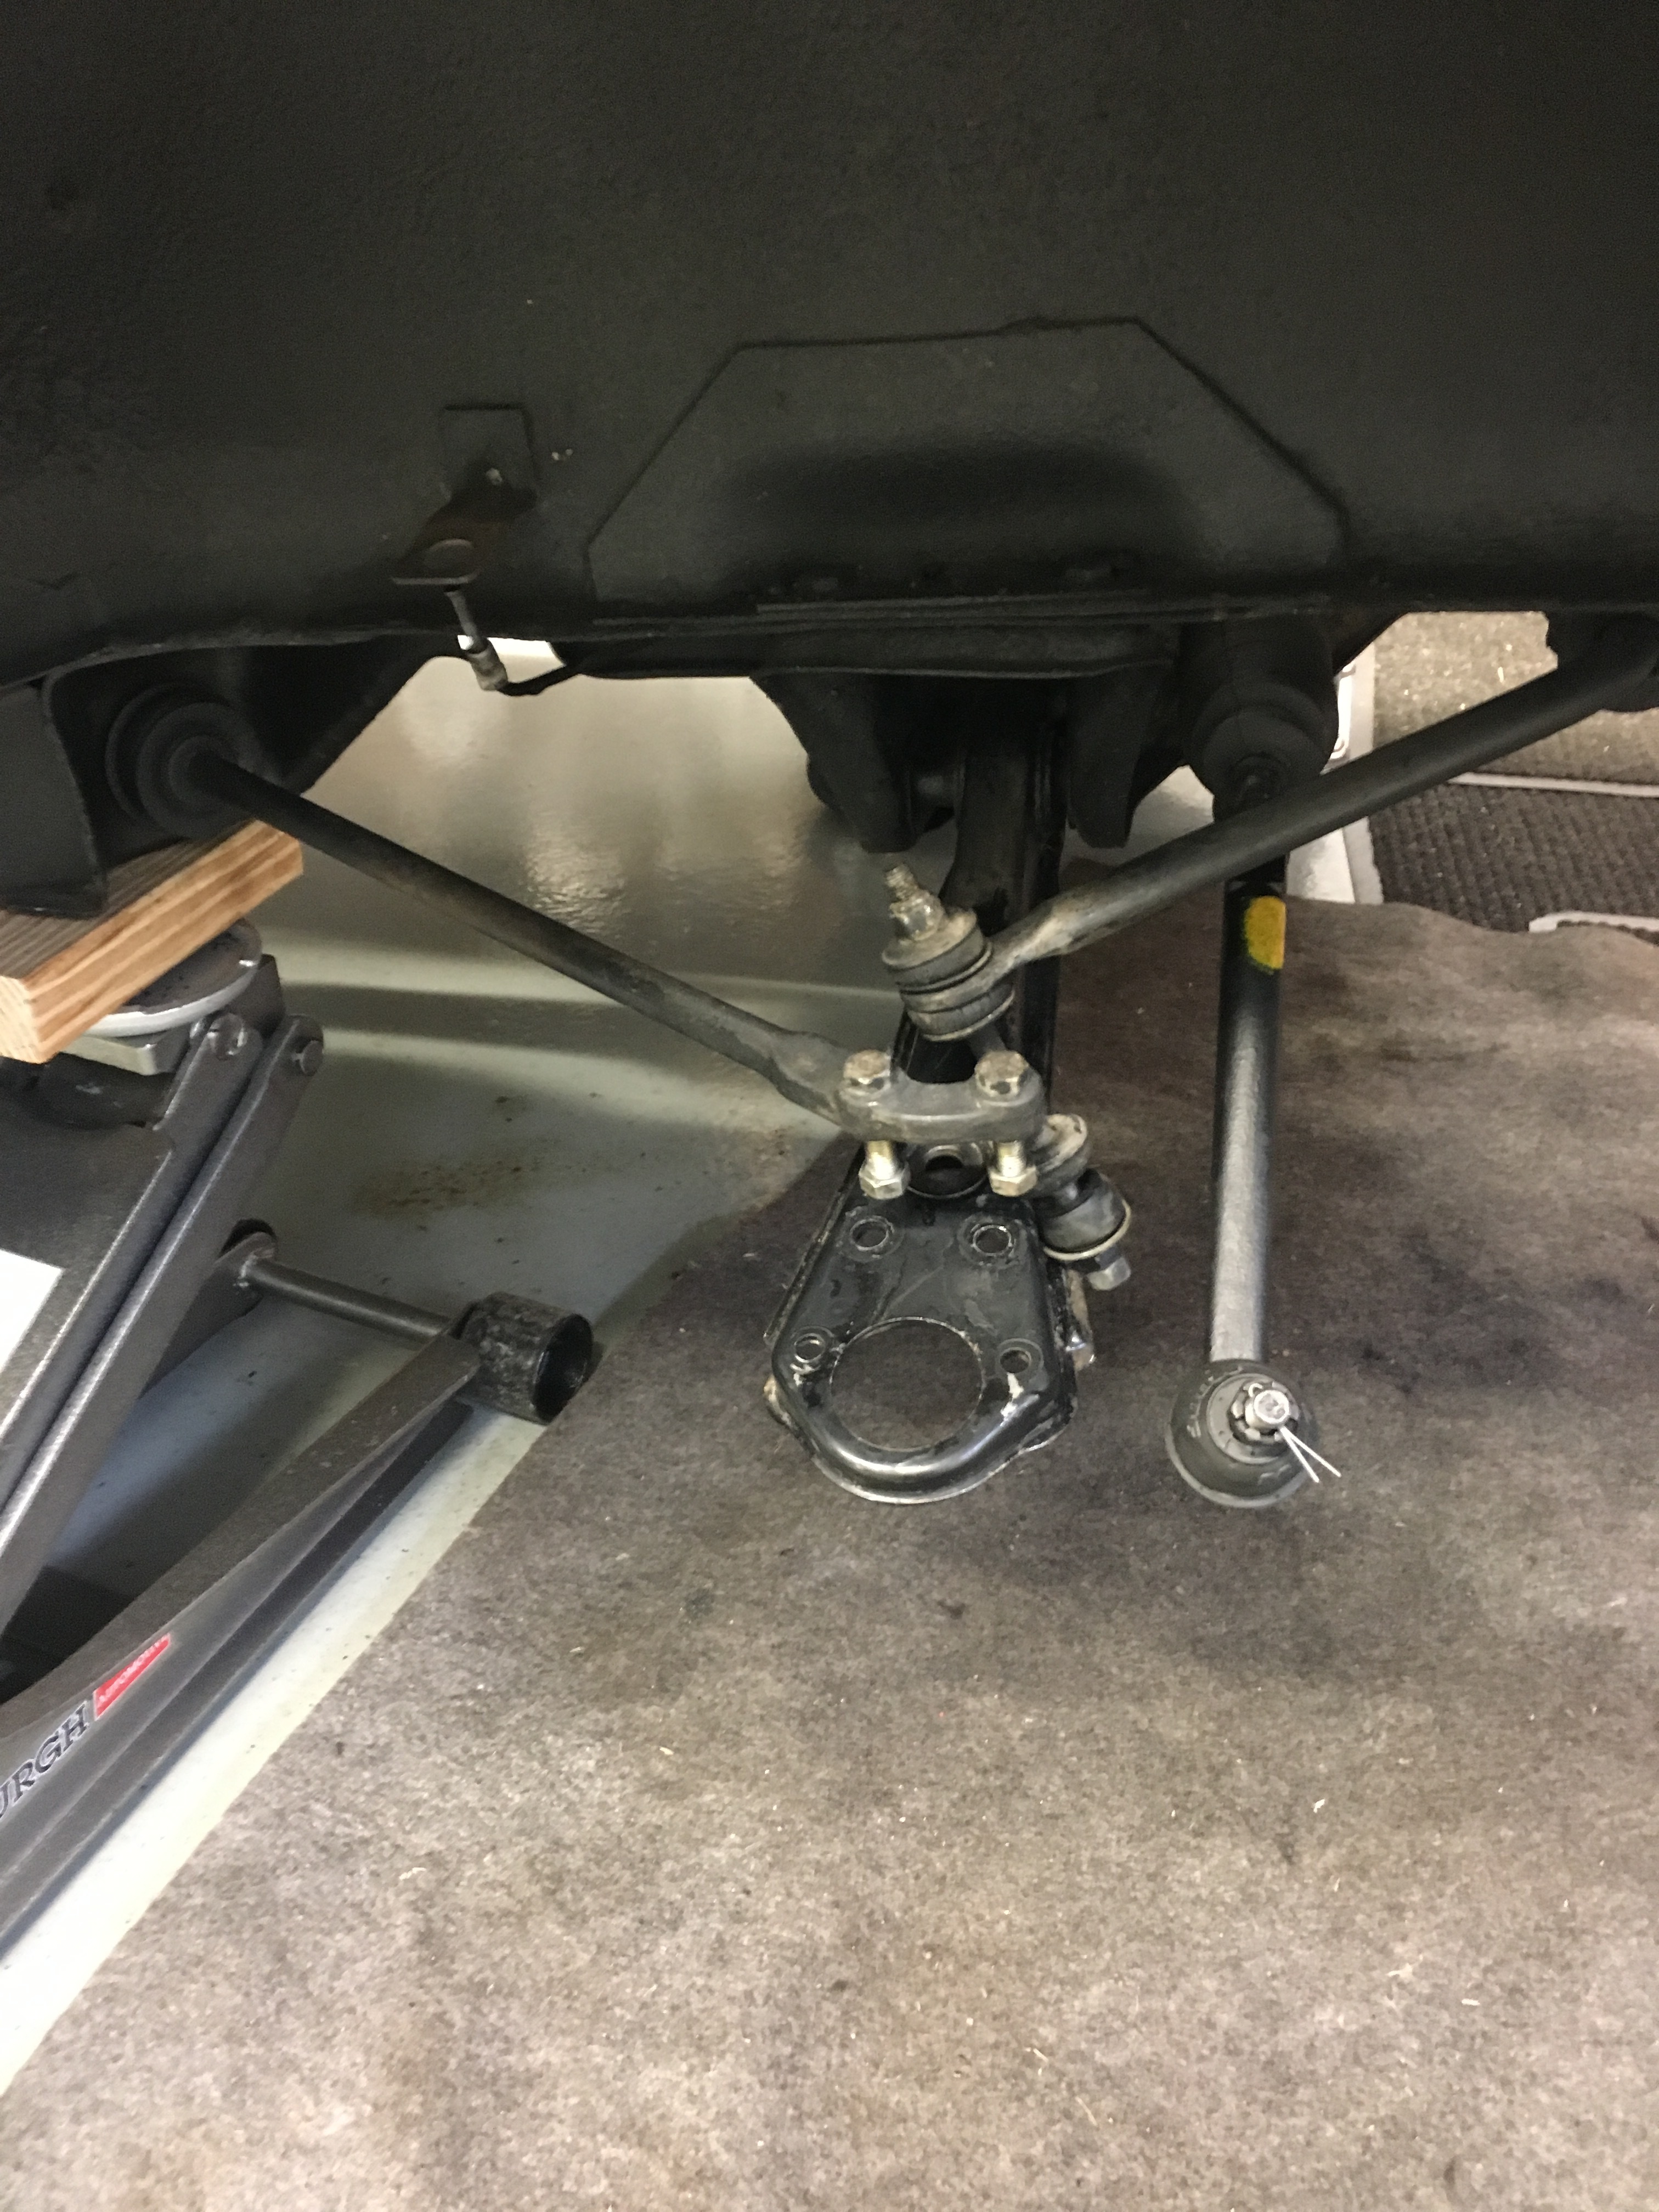
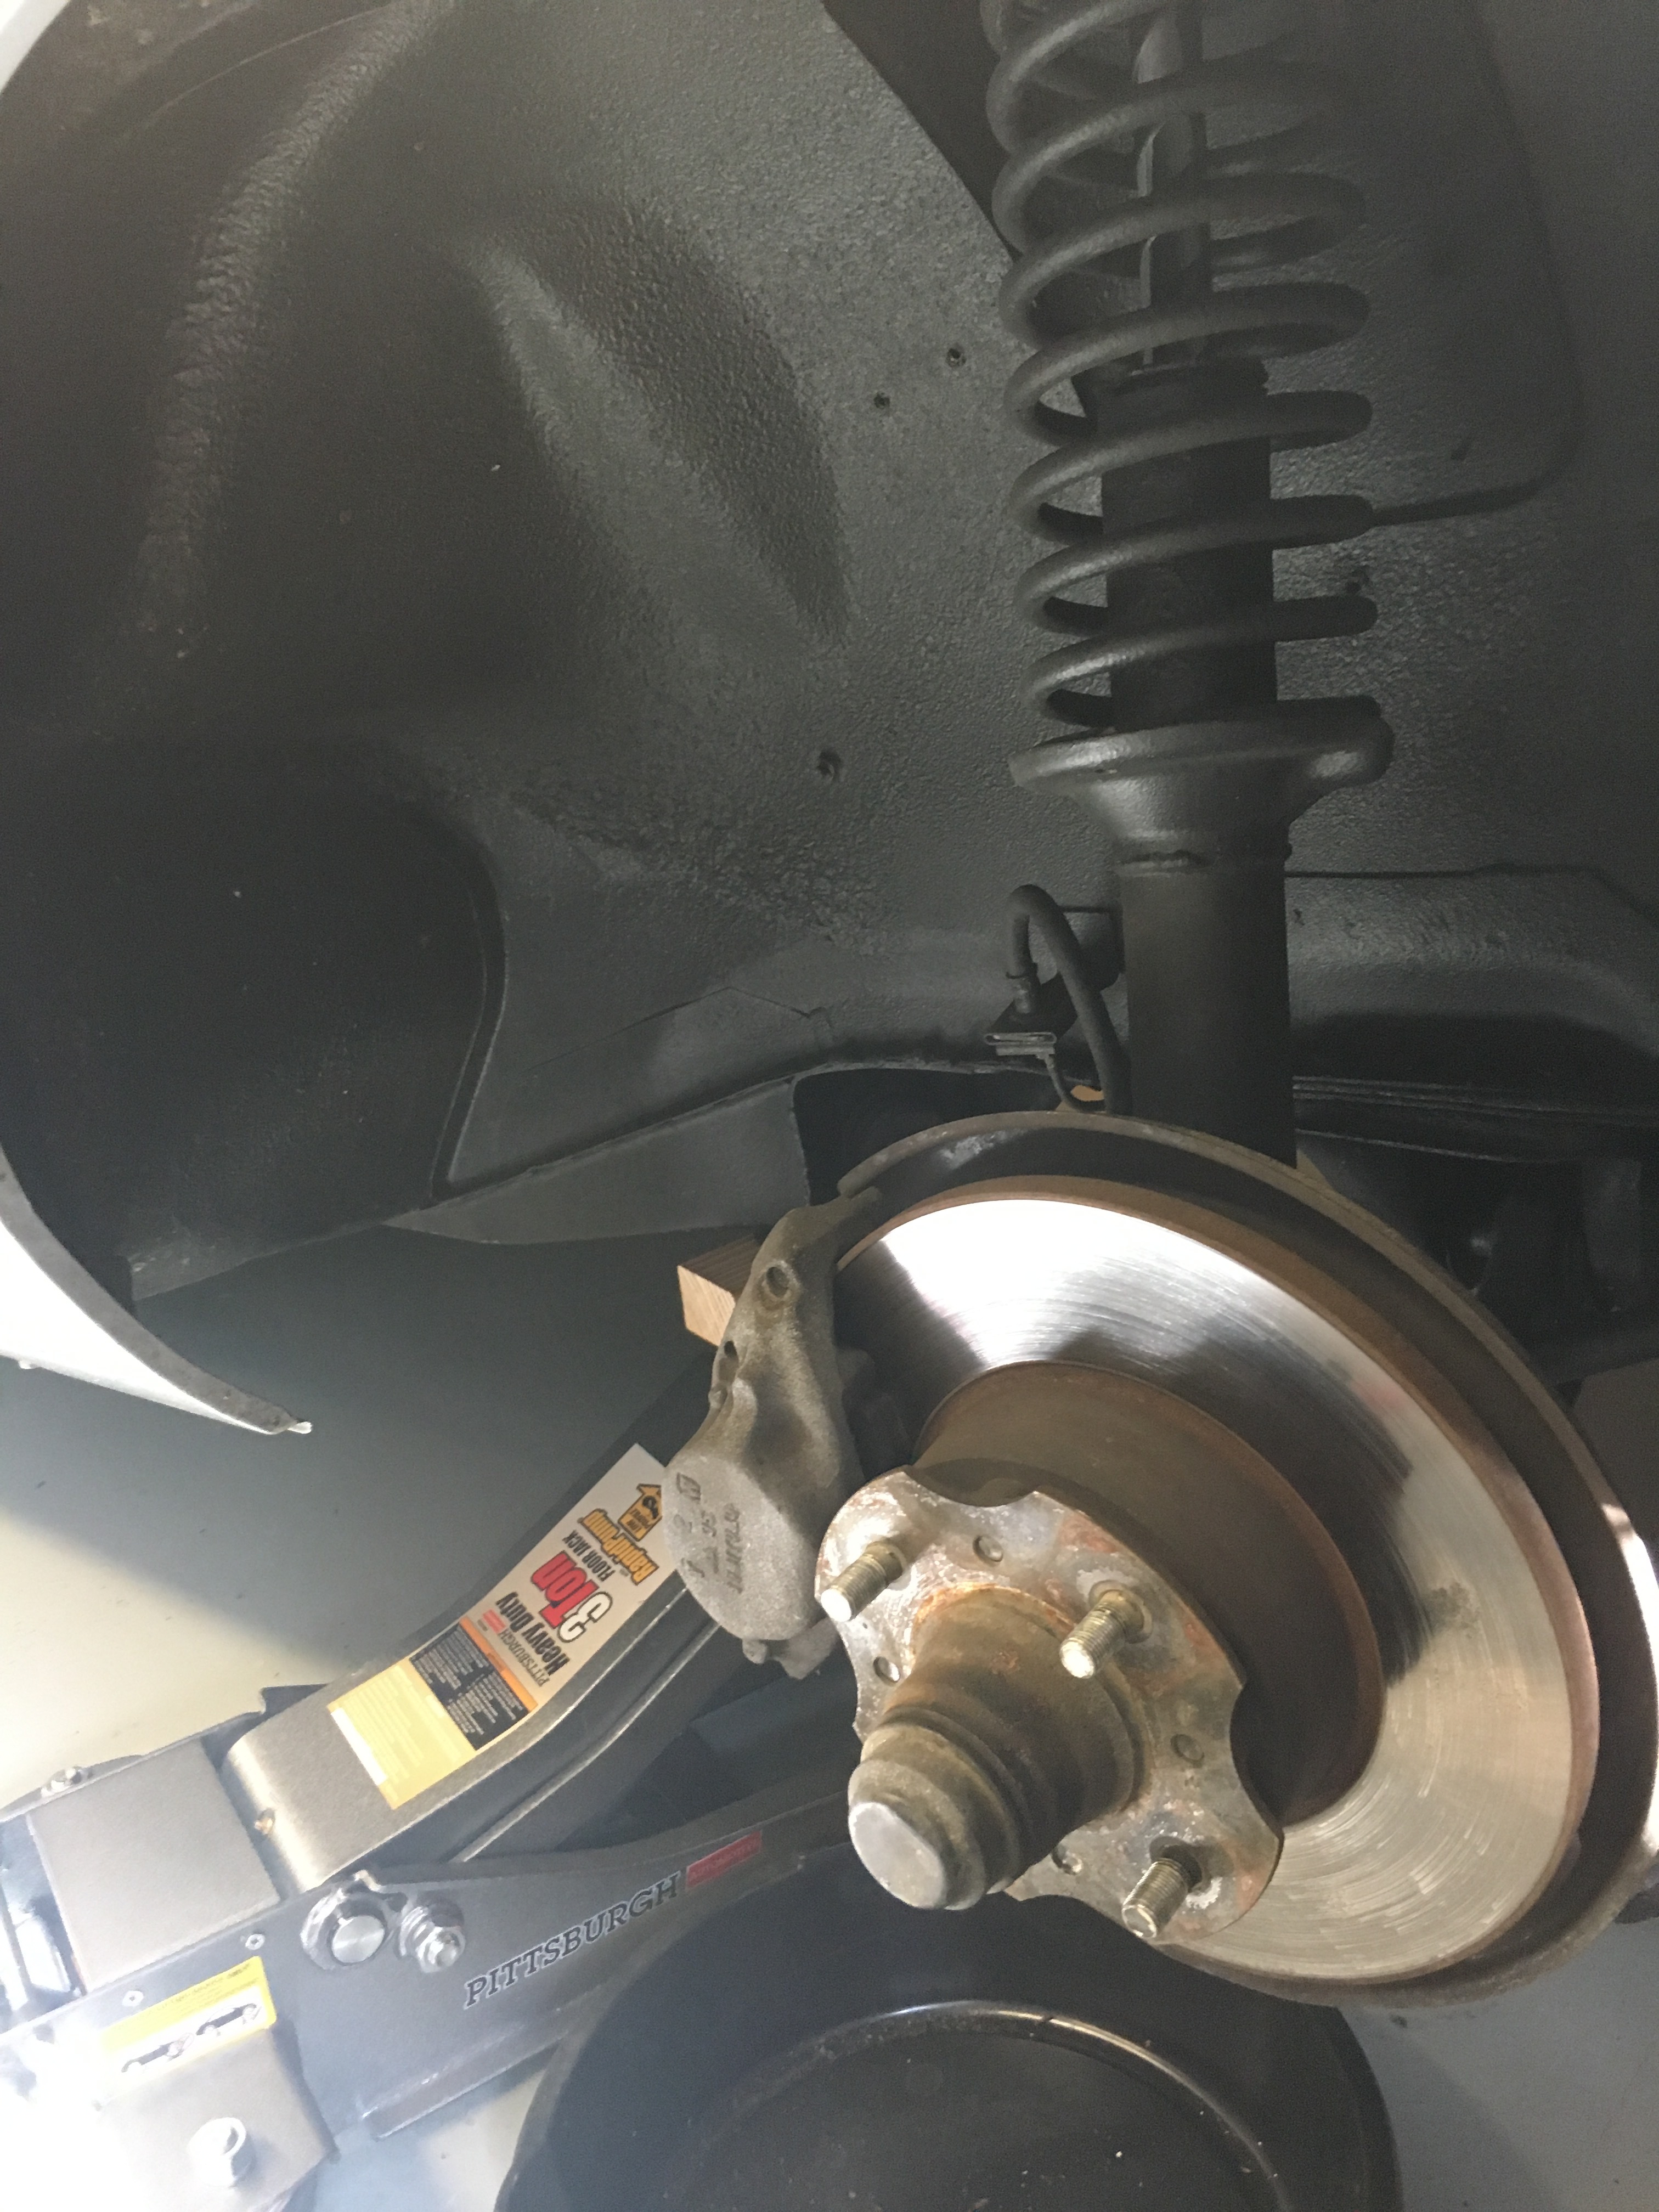
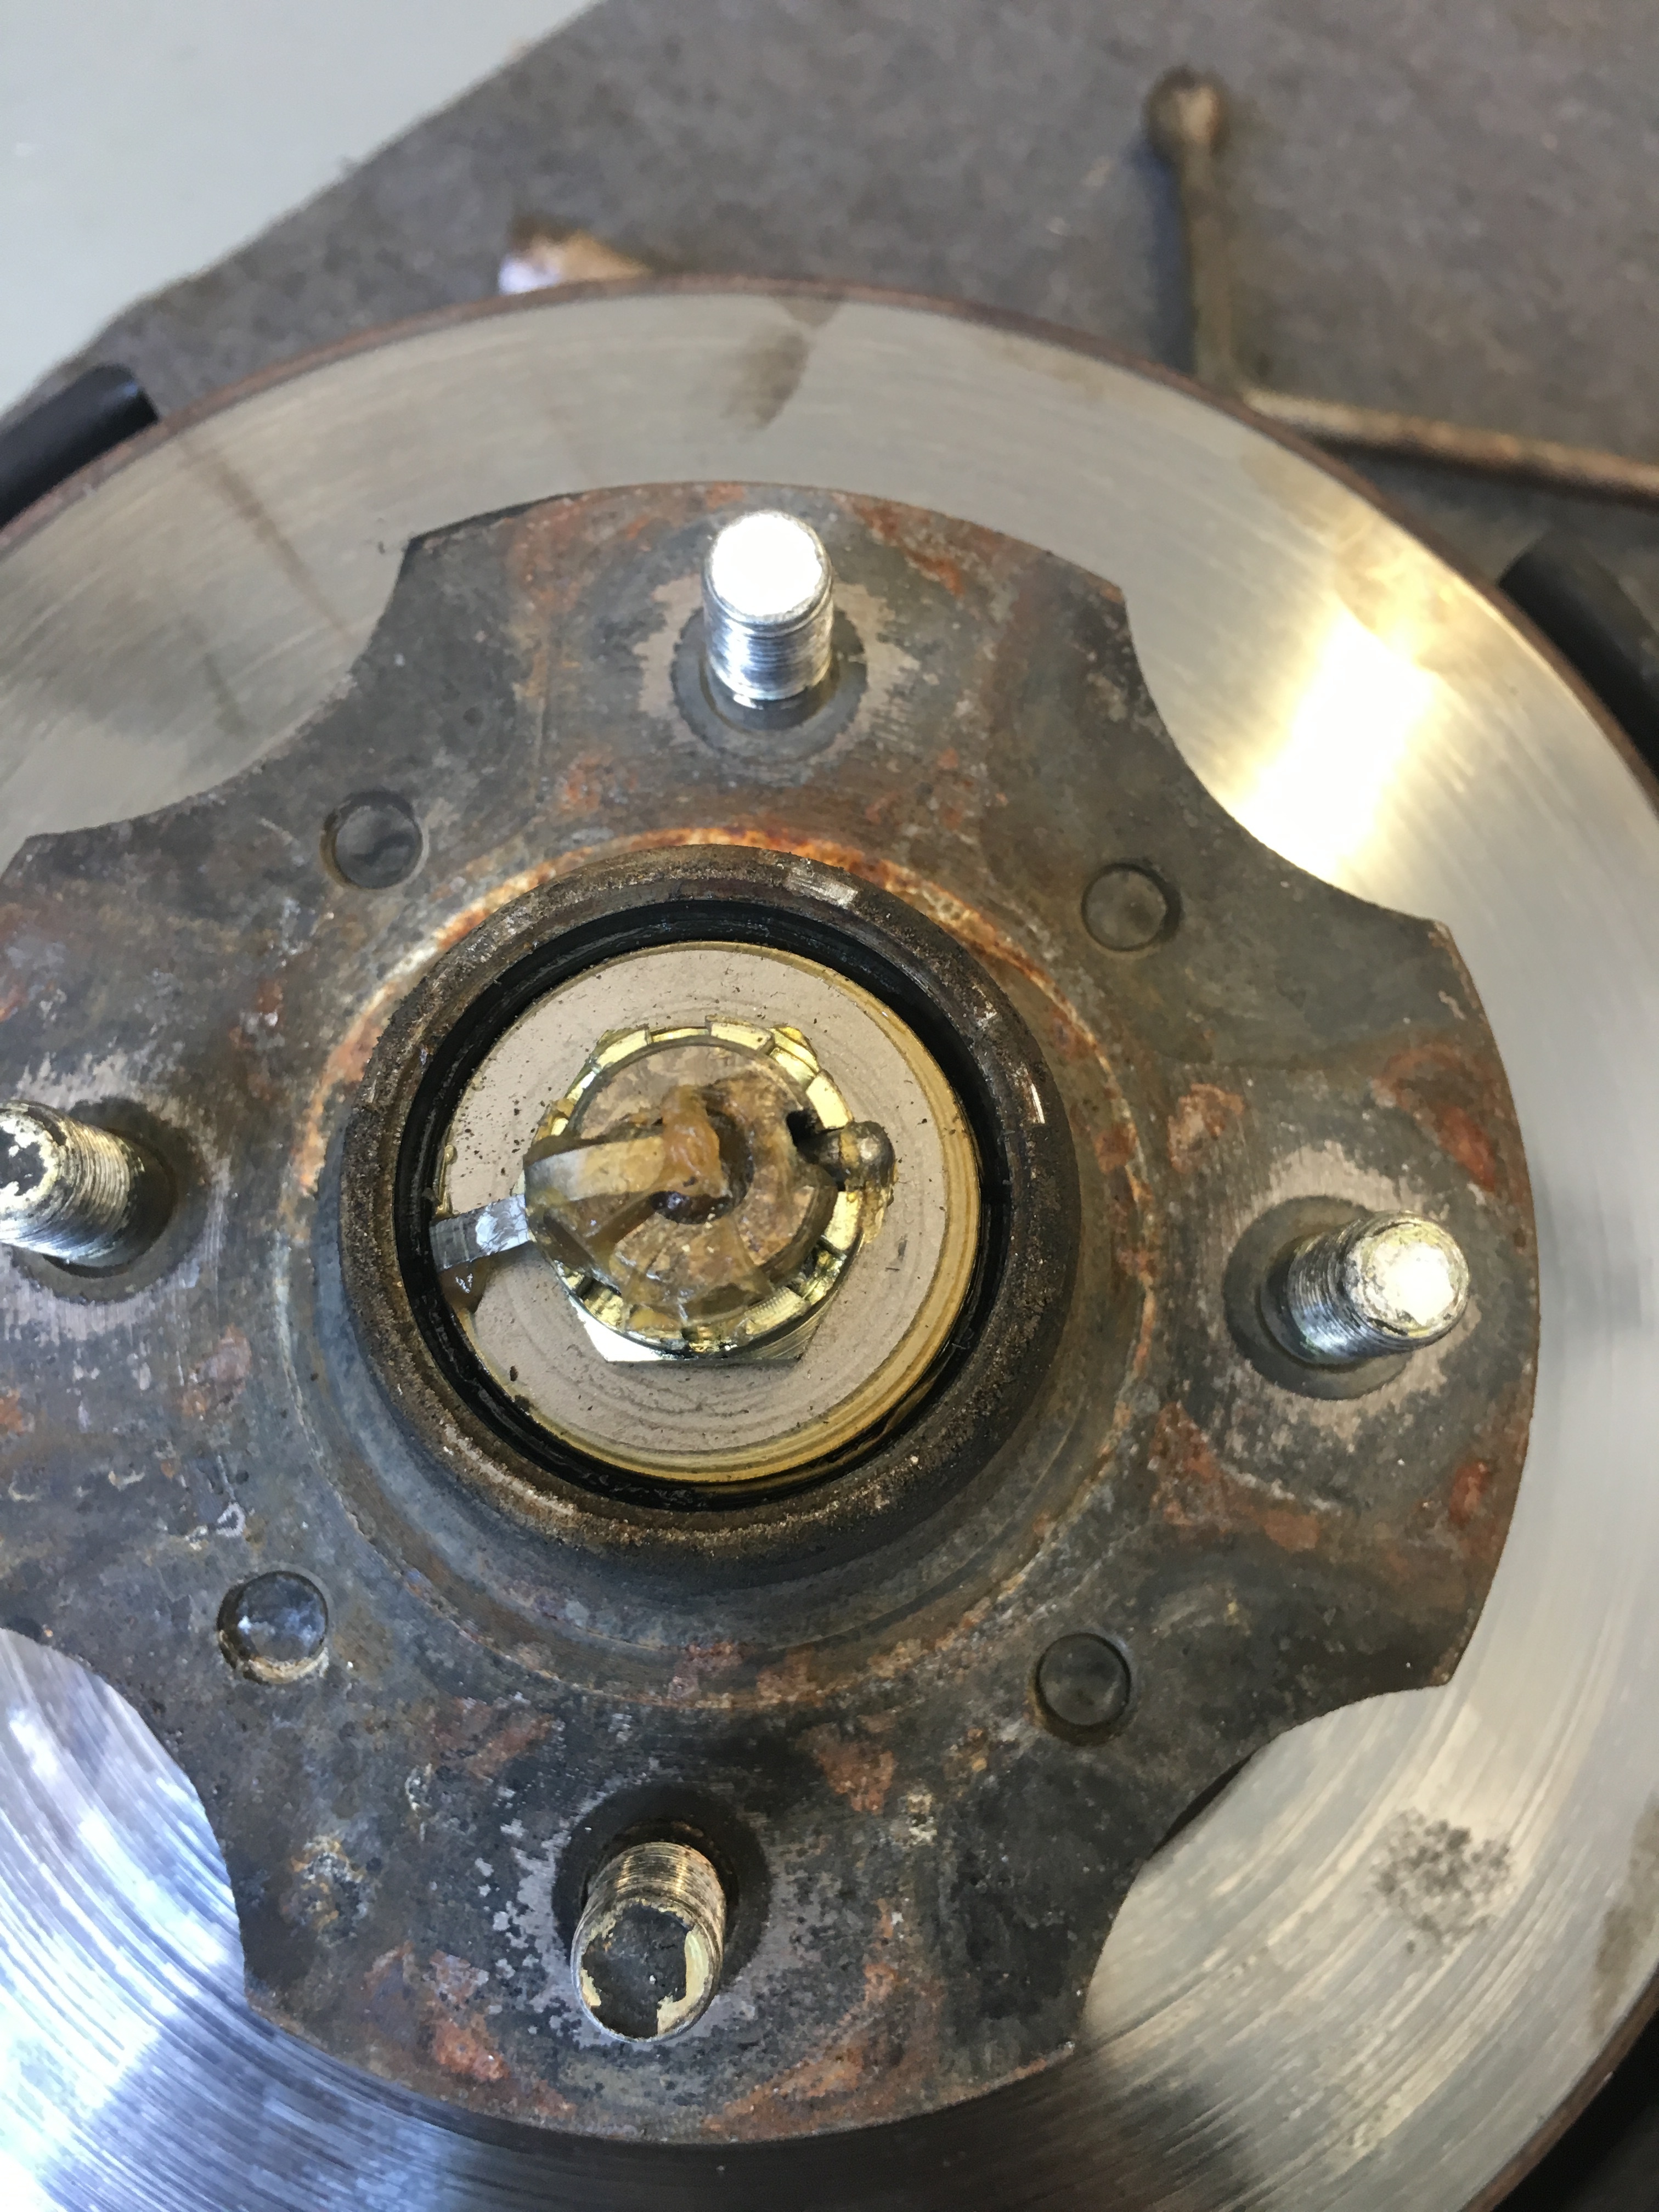
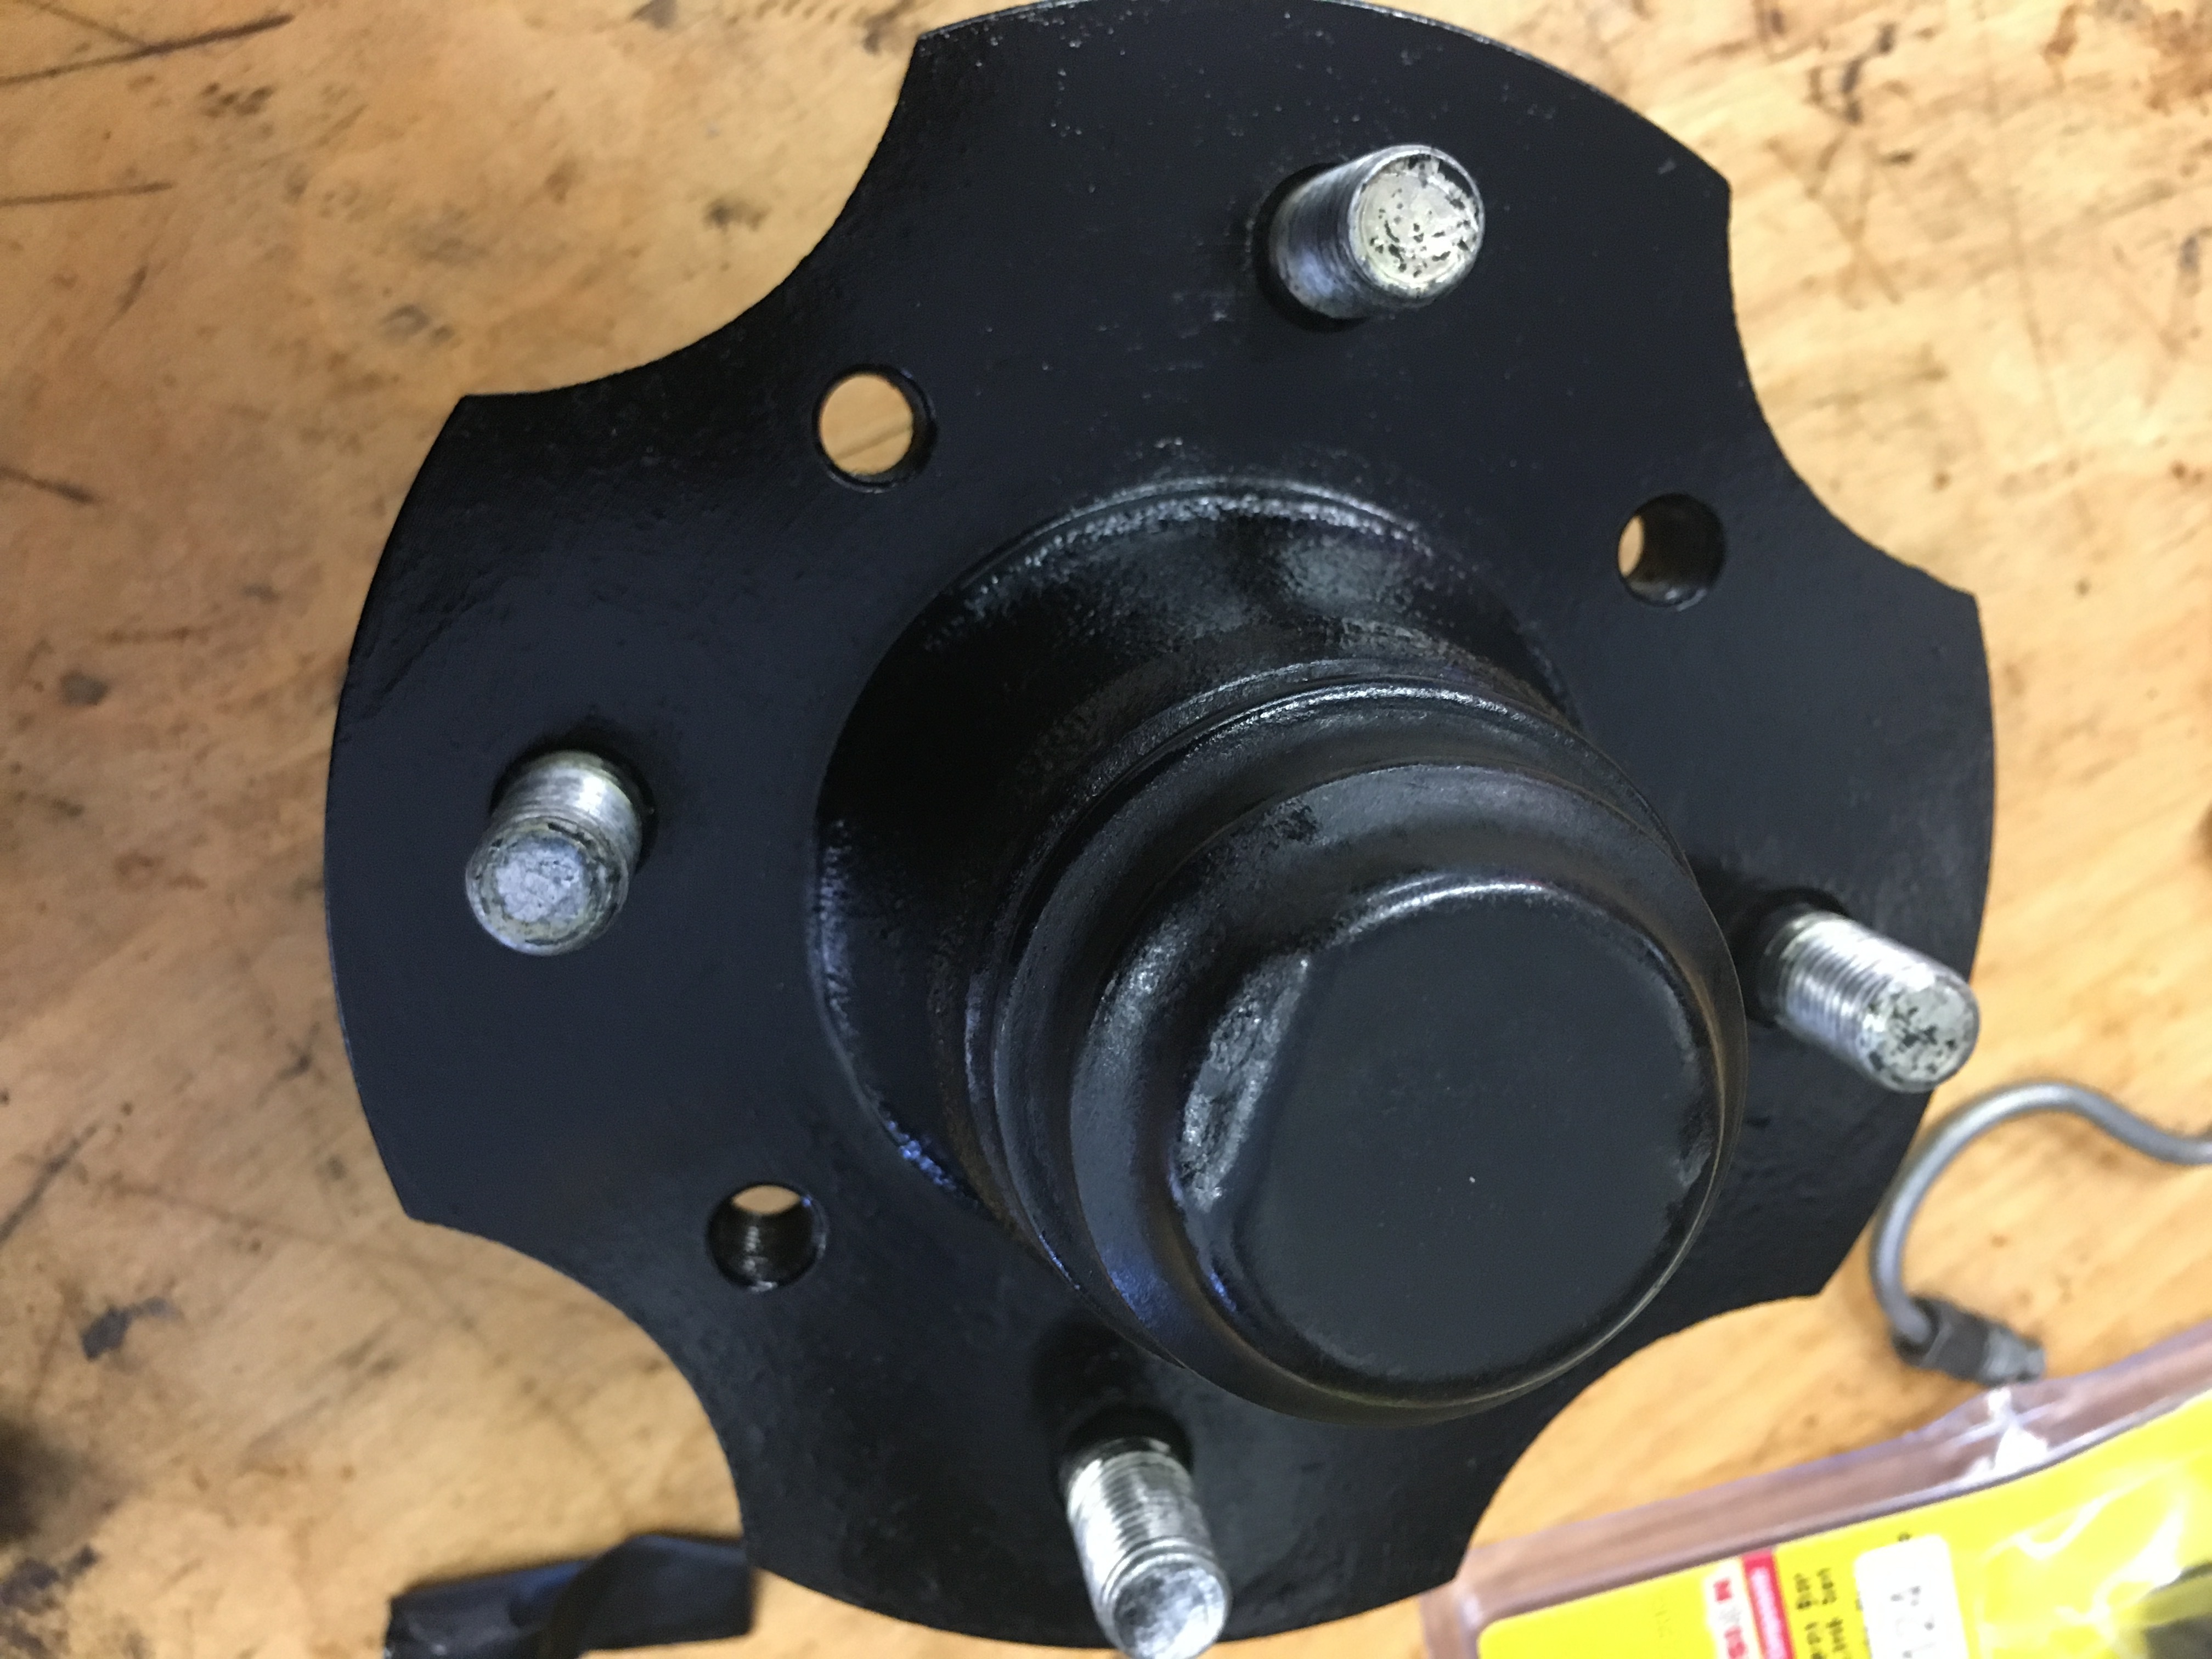
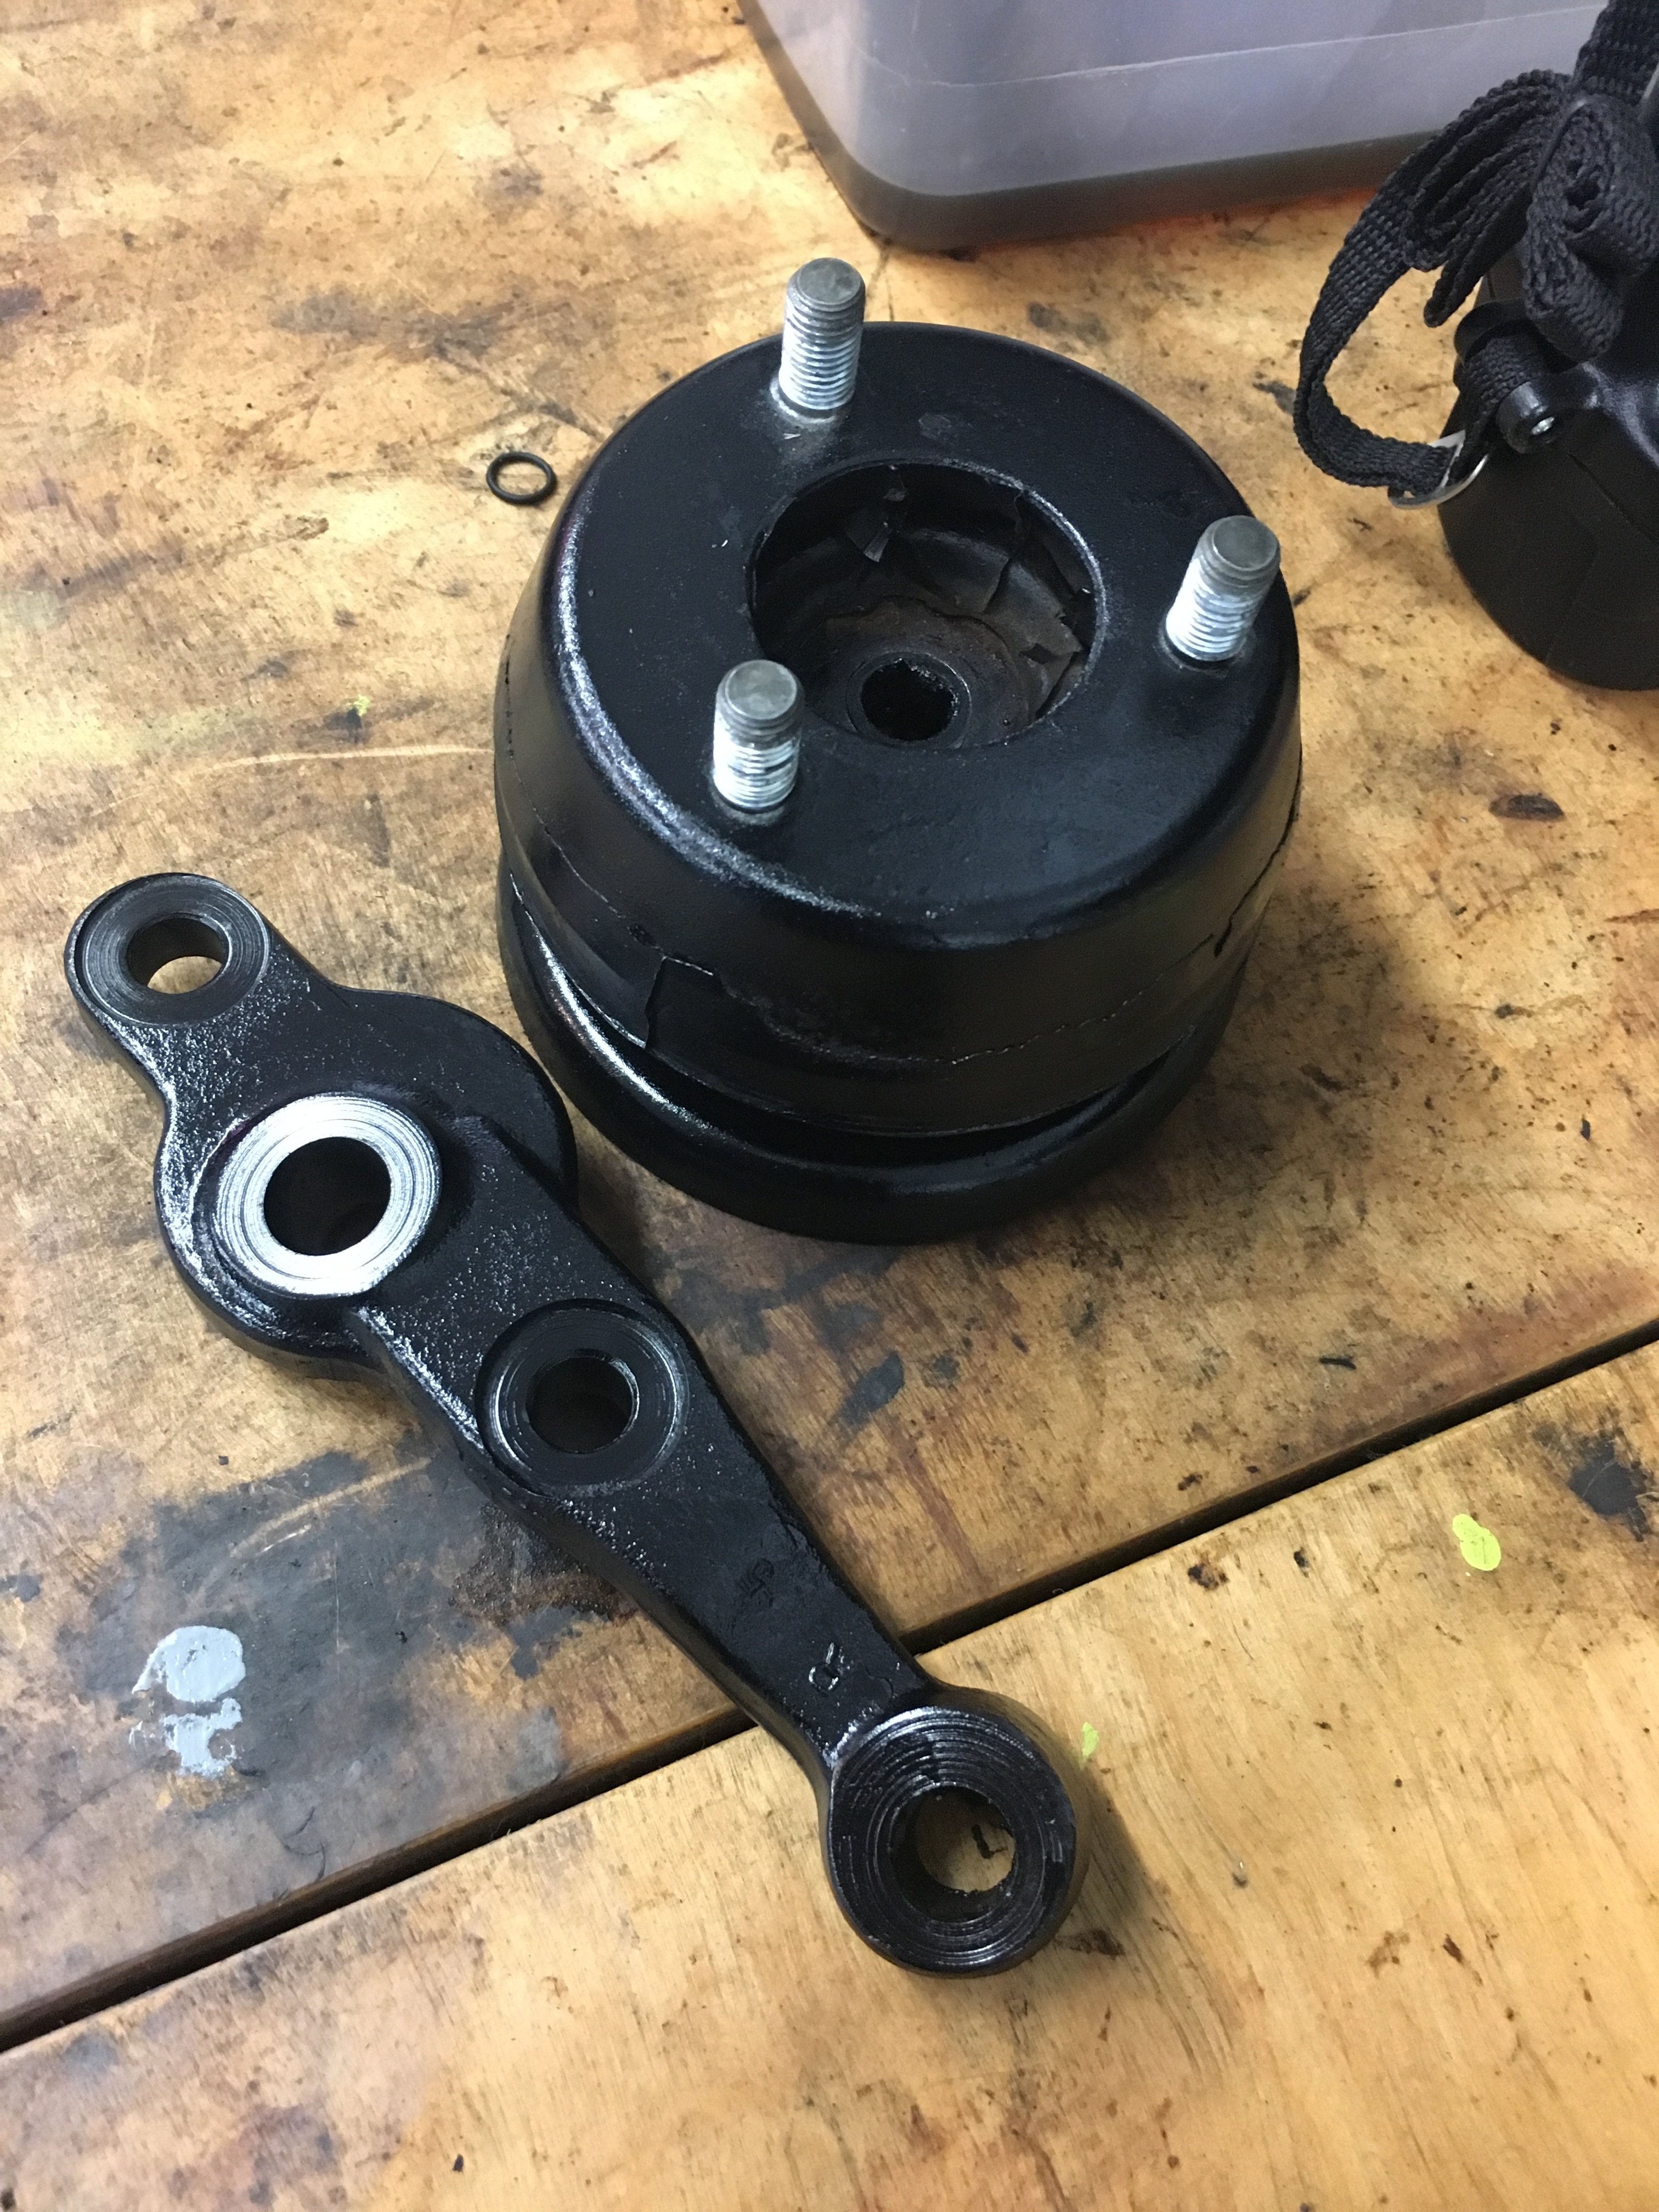
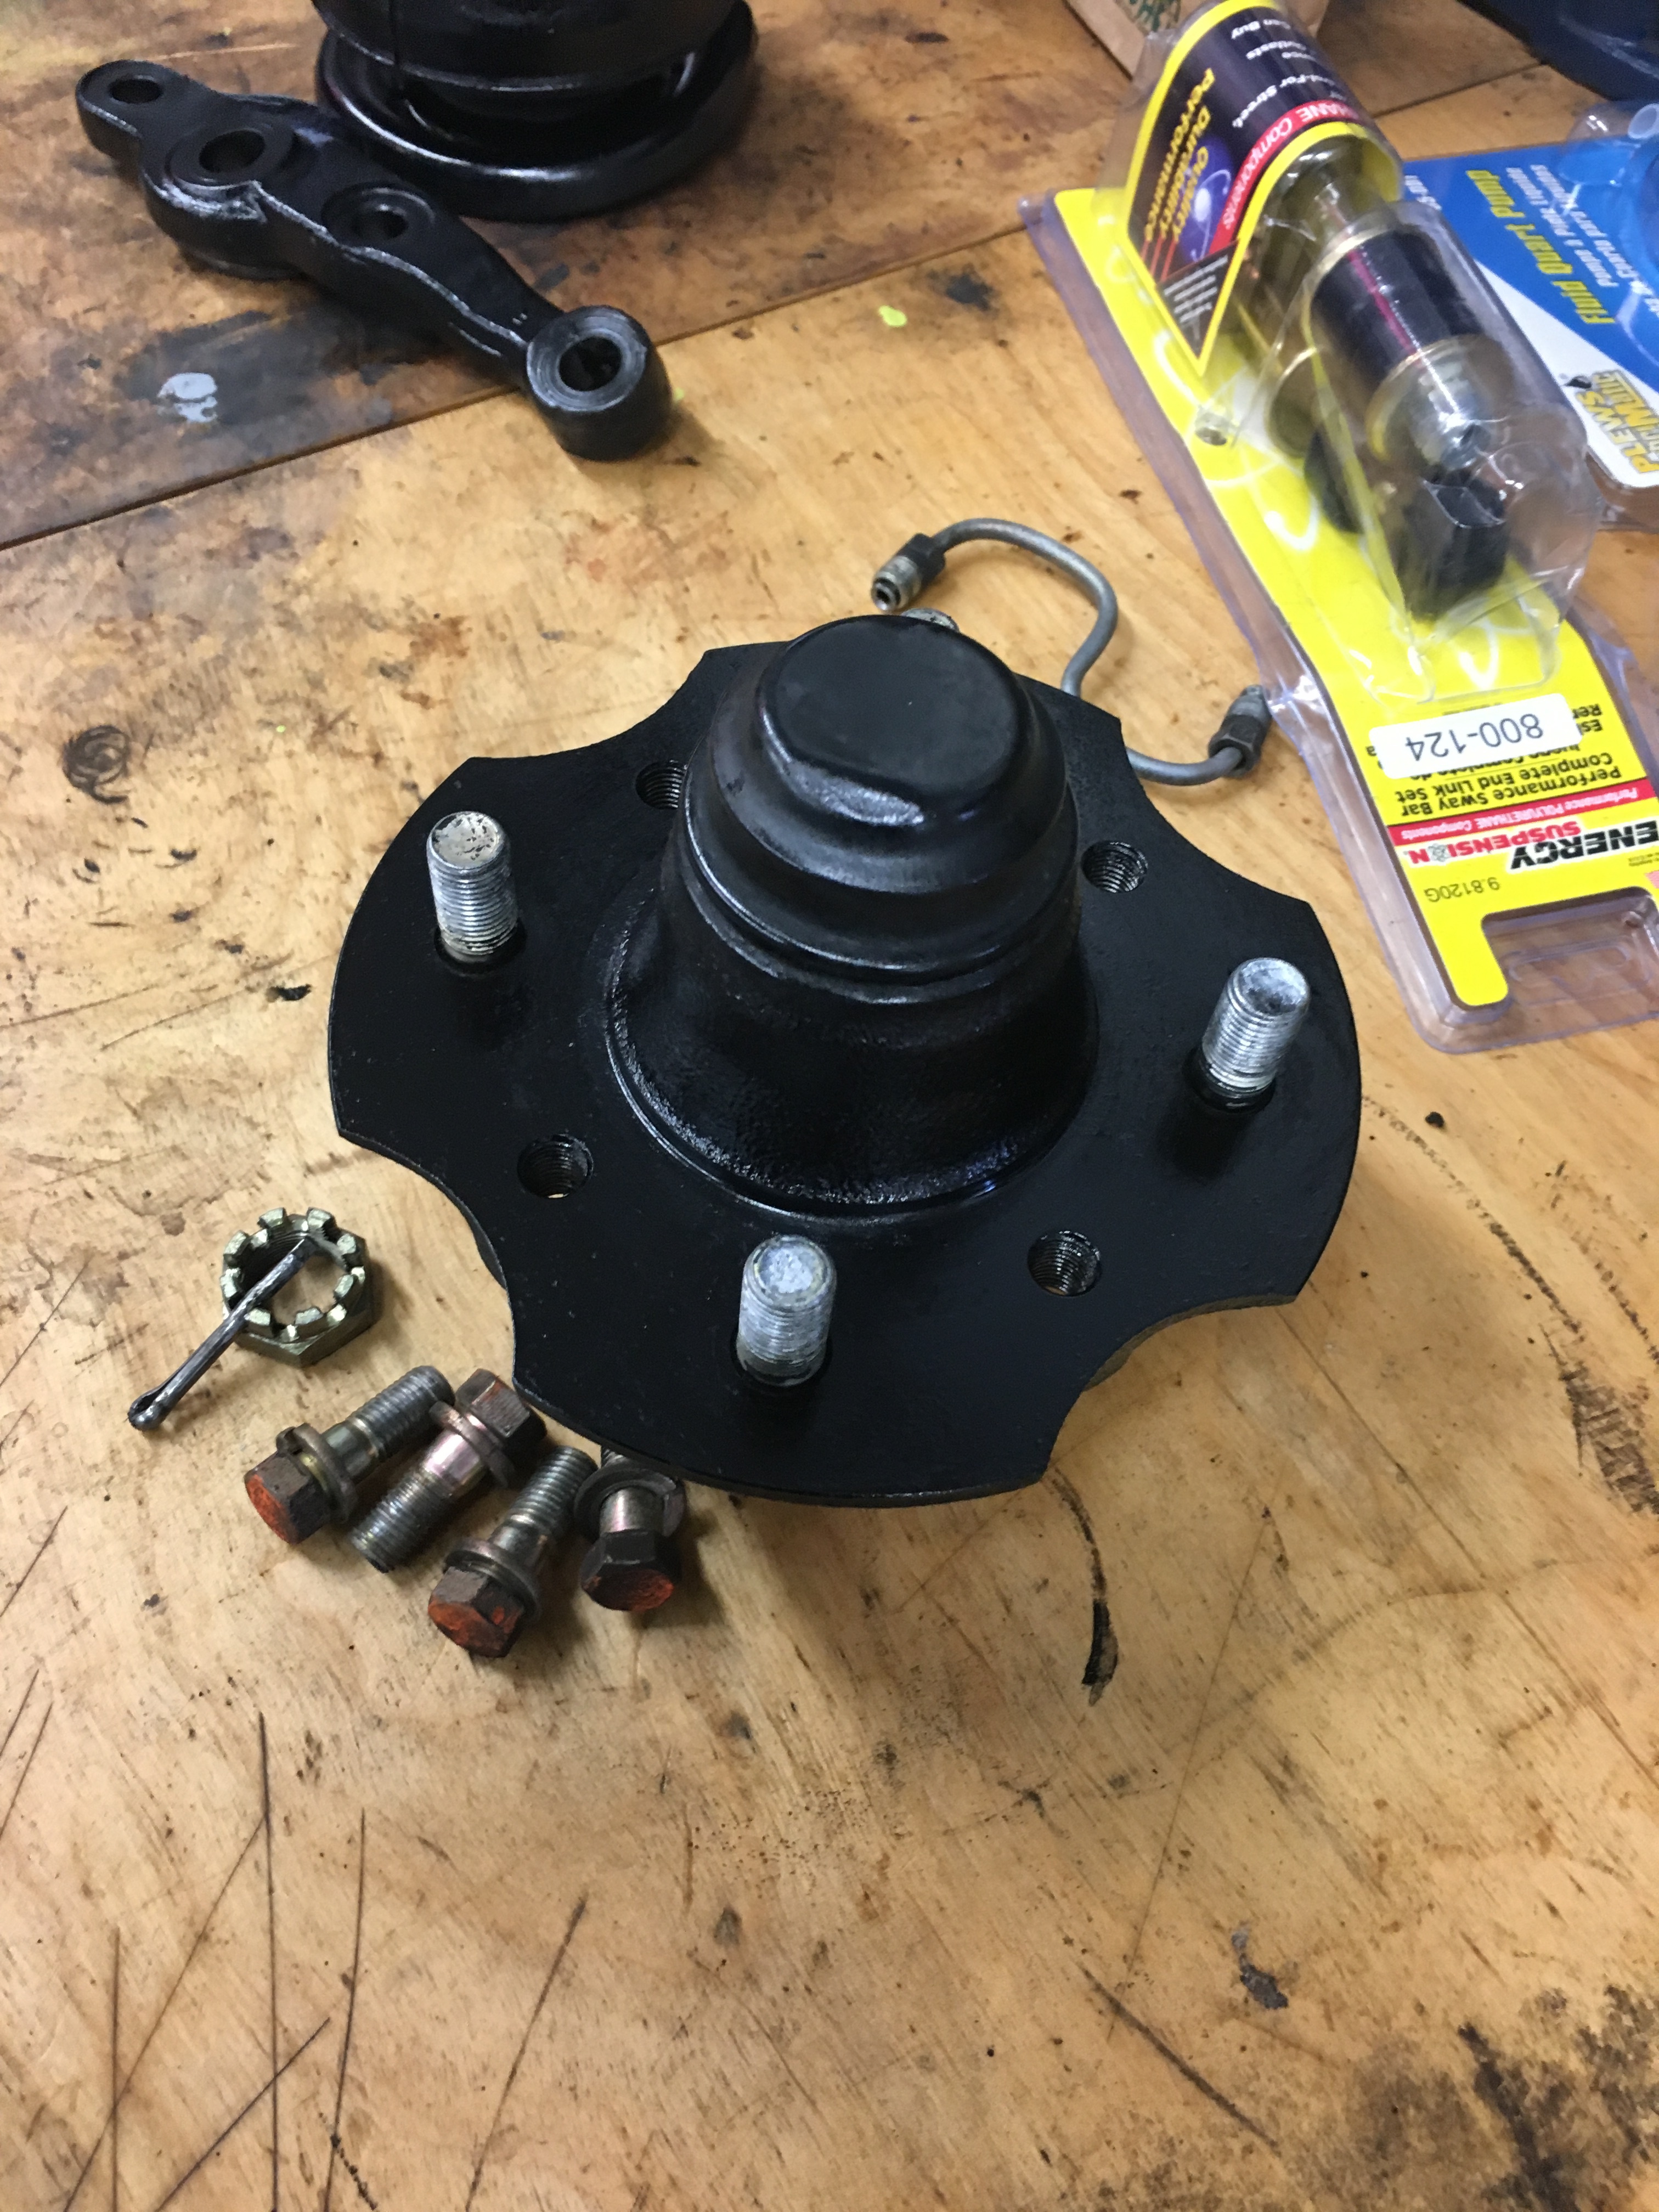
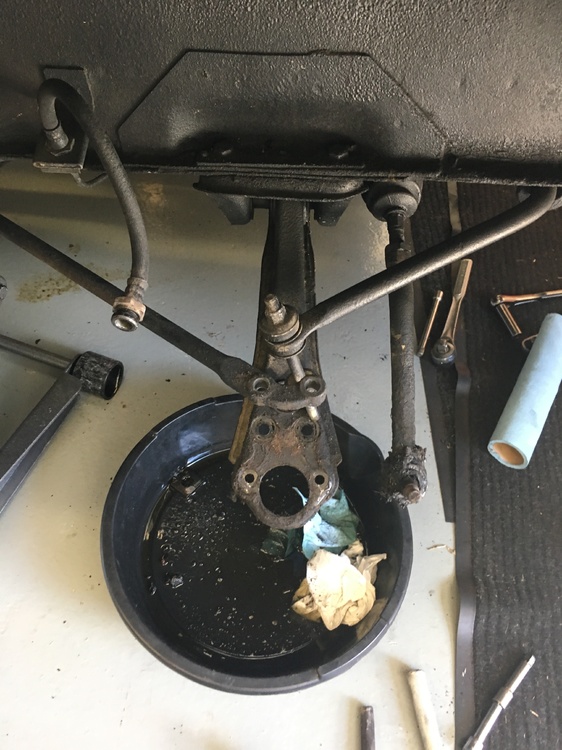
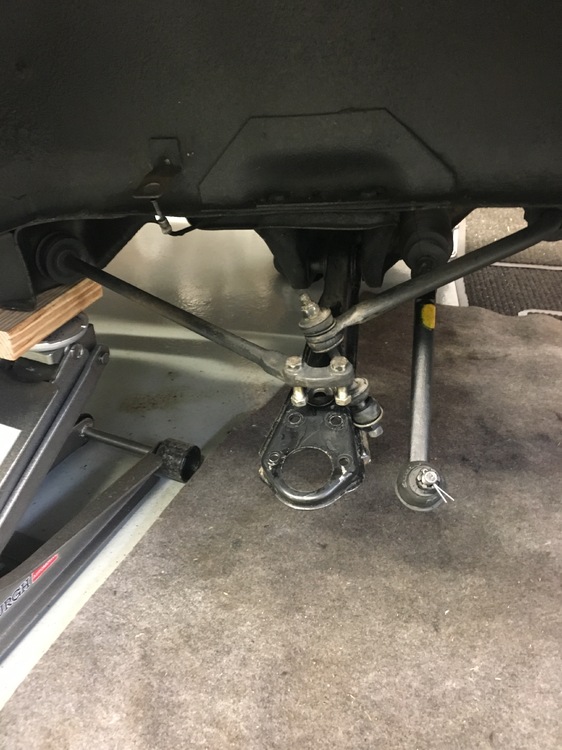
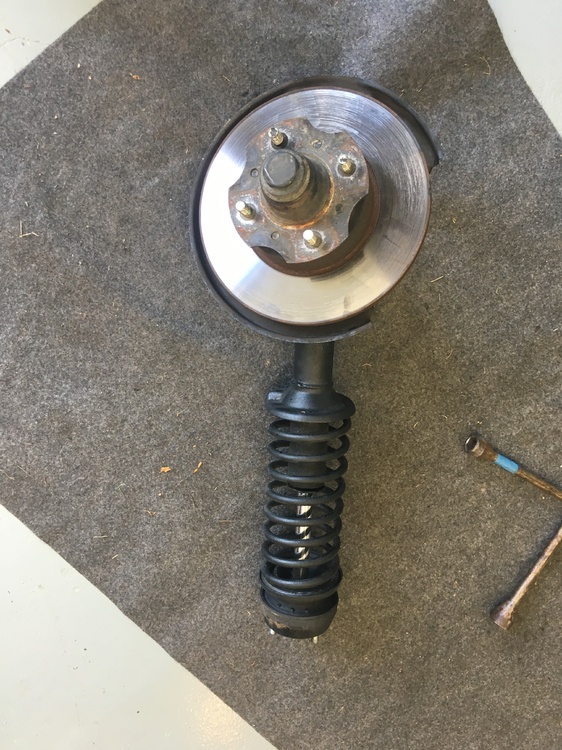
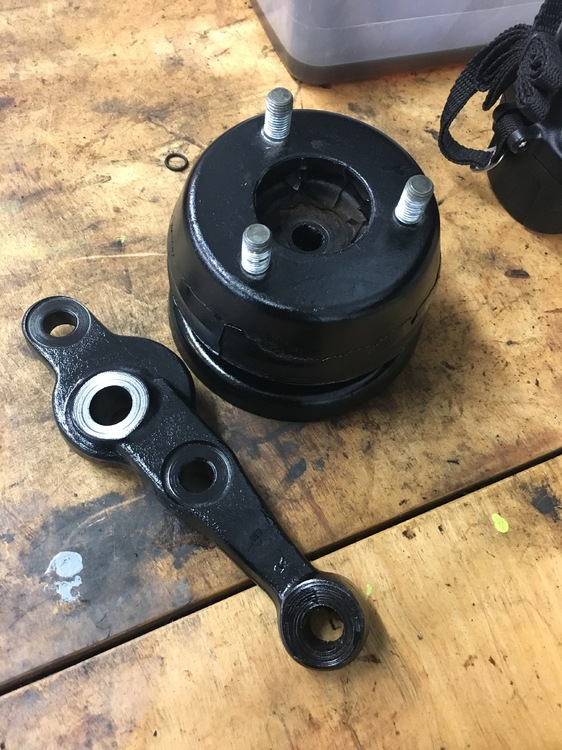
1 pointI decided to start a thread on my front end overhaul since there is many items to replace. Started off by disassembling the suspension parts.....disconnected brake lines (lots of heat needed on some fittings) . Next, remove tie rod end ( tie rod fork and several good blows with a hammer).....then the two bolts attaching the torsion rods to the control arm....next, the two bolts holding the calipers (removed them) and the one nut under the grease cap and remove the rotor, then, the sway bar end link, then remove the three nuts holding the strut under the hood (get someone to help so as not to torque the ball joint connections too much) and lower the strut and remove the last two bolts holding the ball joint to the strut, and remove strut.


 1 point
 -
Kats, We are very privileged to be able to see 'Maruhi' (Secret) factory internal documentation such as this. Thank you! This was the testing that Takei san was involved in, yes? I see the name Takahashi on the report too. Datsun Netherlands was clearly a great influence on all this as Nissan's European base. I had heard in the past that Nissan had a lot of feedback coming from Datsun Netherlands with regard to product refinement and development, and Nissan took it seriously. Lots of sightings in period of mysterious Japanese cars on Japanese temporary-export 'Carnet' plates whizzing around on European roads. Some of them full of electronic measuring instruments and men with clipboards taking notes... For me, the 'Entreposto' Portuguese market 240Zs were the prettiest and nicest-equipped of all the Export market versions.1 point
-
1 pointSomewhere between $1000 and $1200. Any less and you're giving them away. Some, like the 48DCOE were the same design but used on Ferrari race cars and Maserati street cars. They can be worth a good deal more to a person trying to make one of those Original again.1 point
-
1 point
-
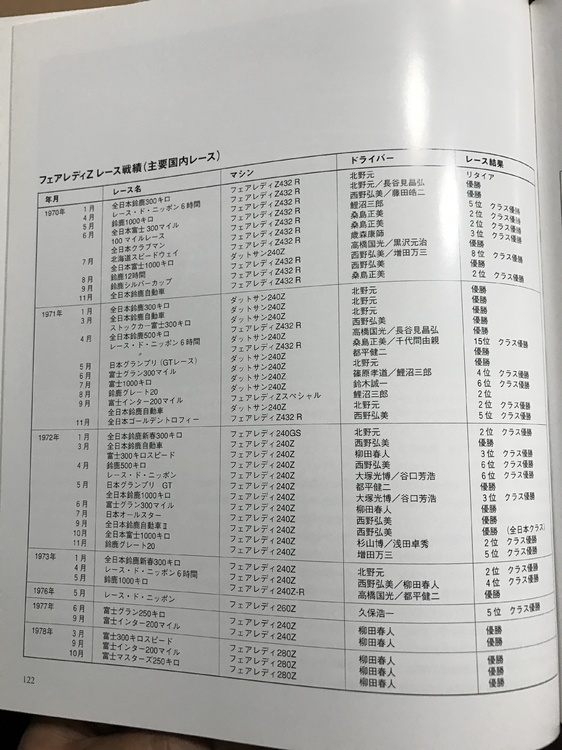
1 pointThanks Fred ! Can I get 175 HP just using the triple carbs and the race exhaust? If so, what a great engine ! At Japanese race tracks, Z432R was fading out after Nissan works switched to L24. From 1971, most of results were made by 240Z. Kats
 1 point
 -
1 point
-
1 point
-
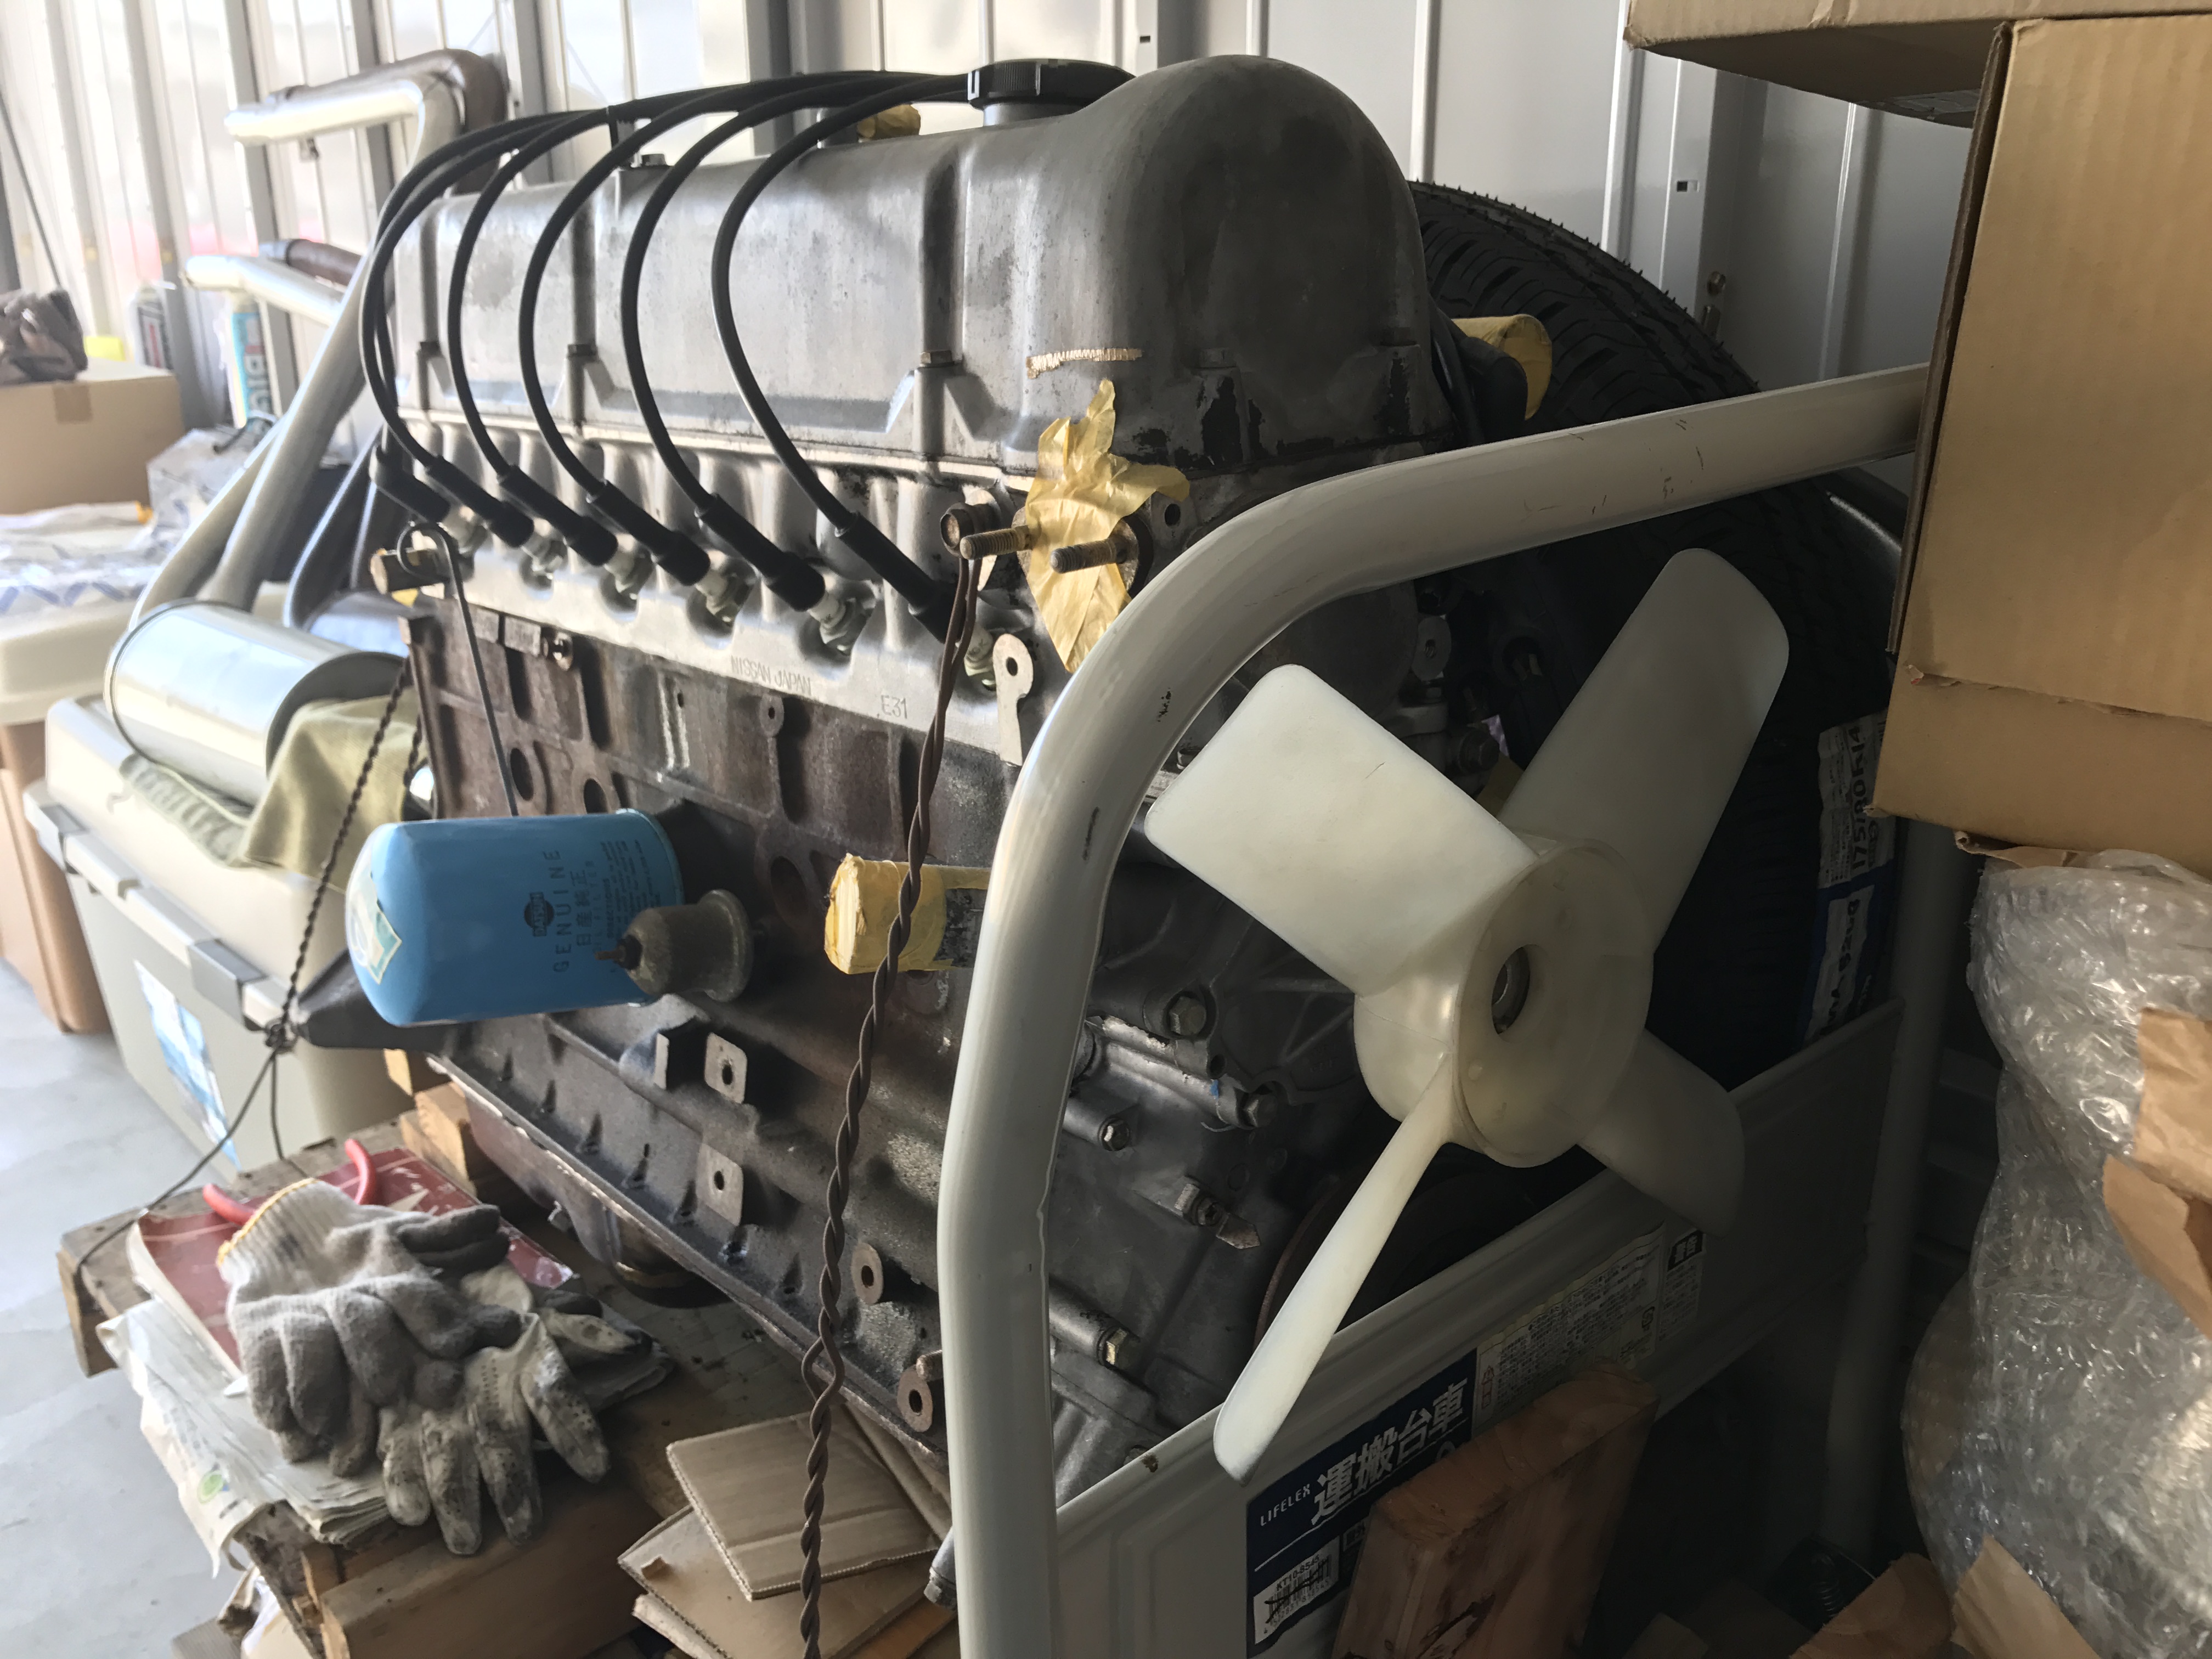
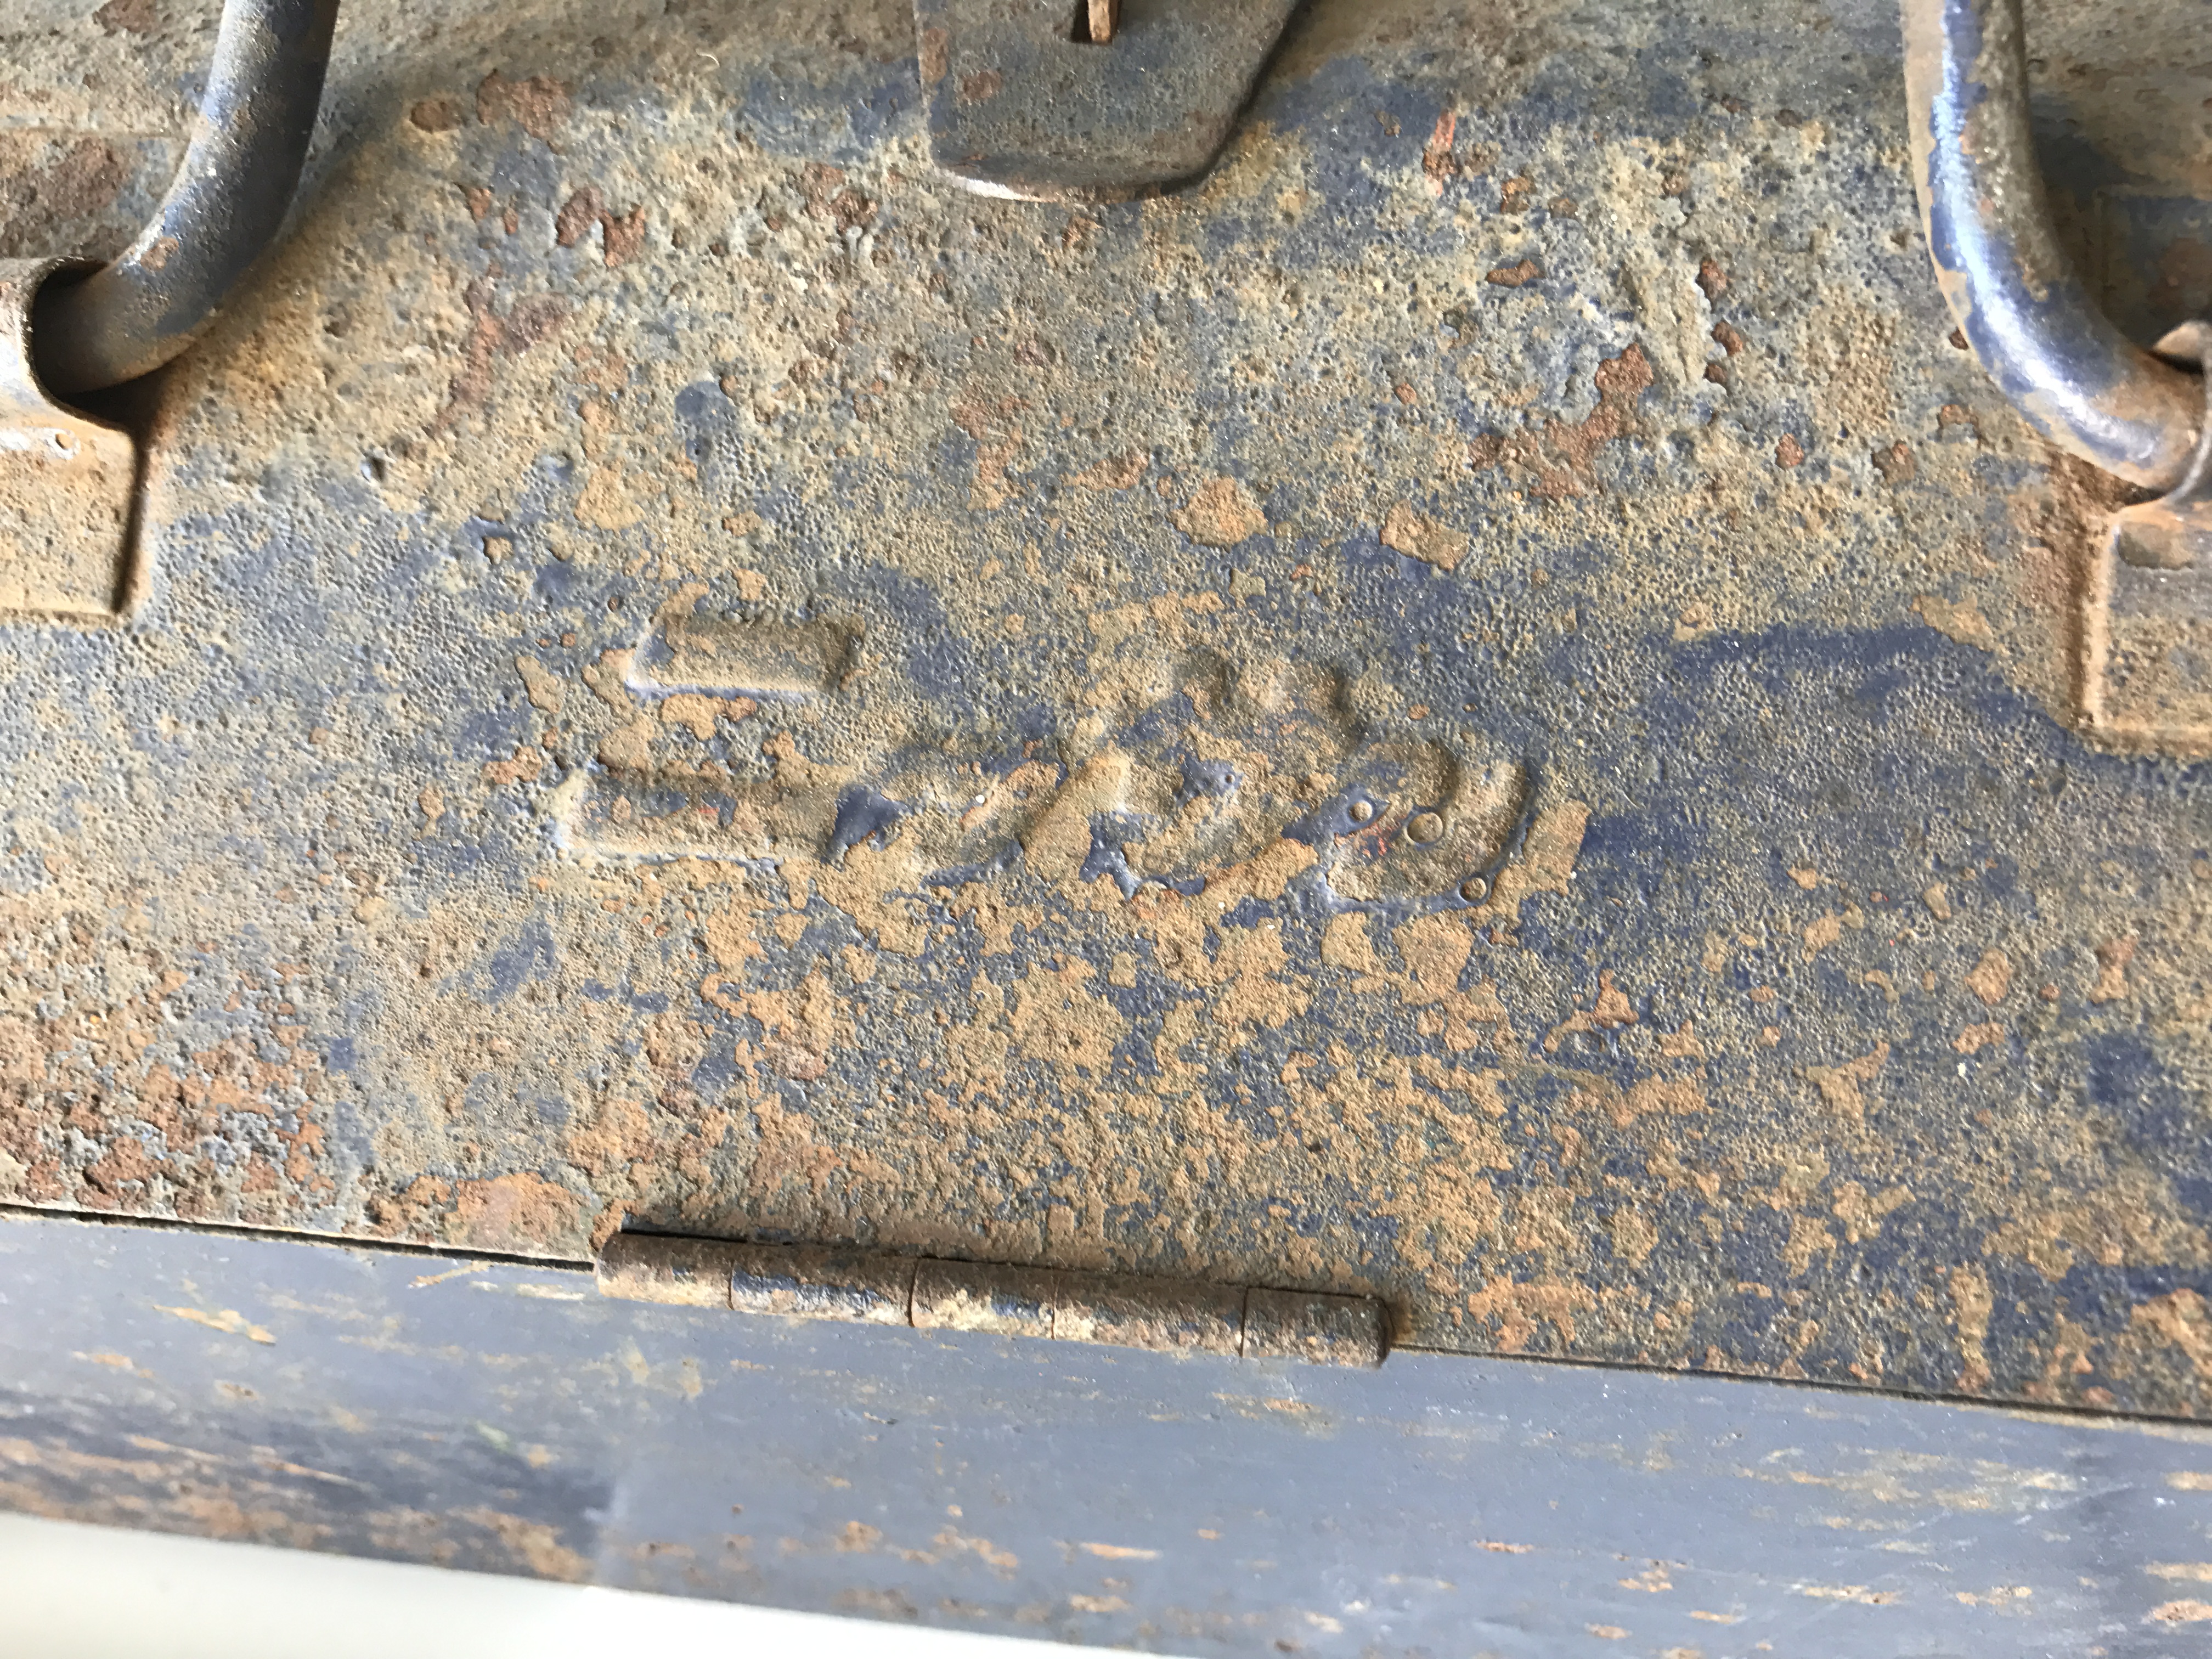
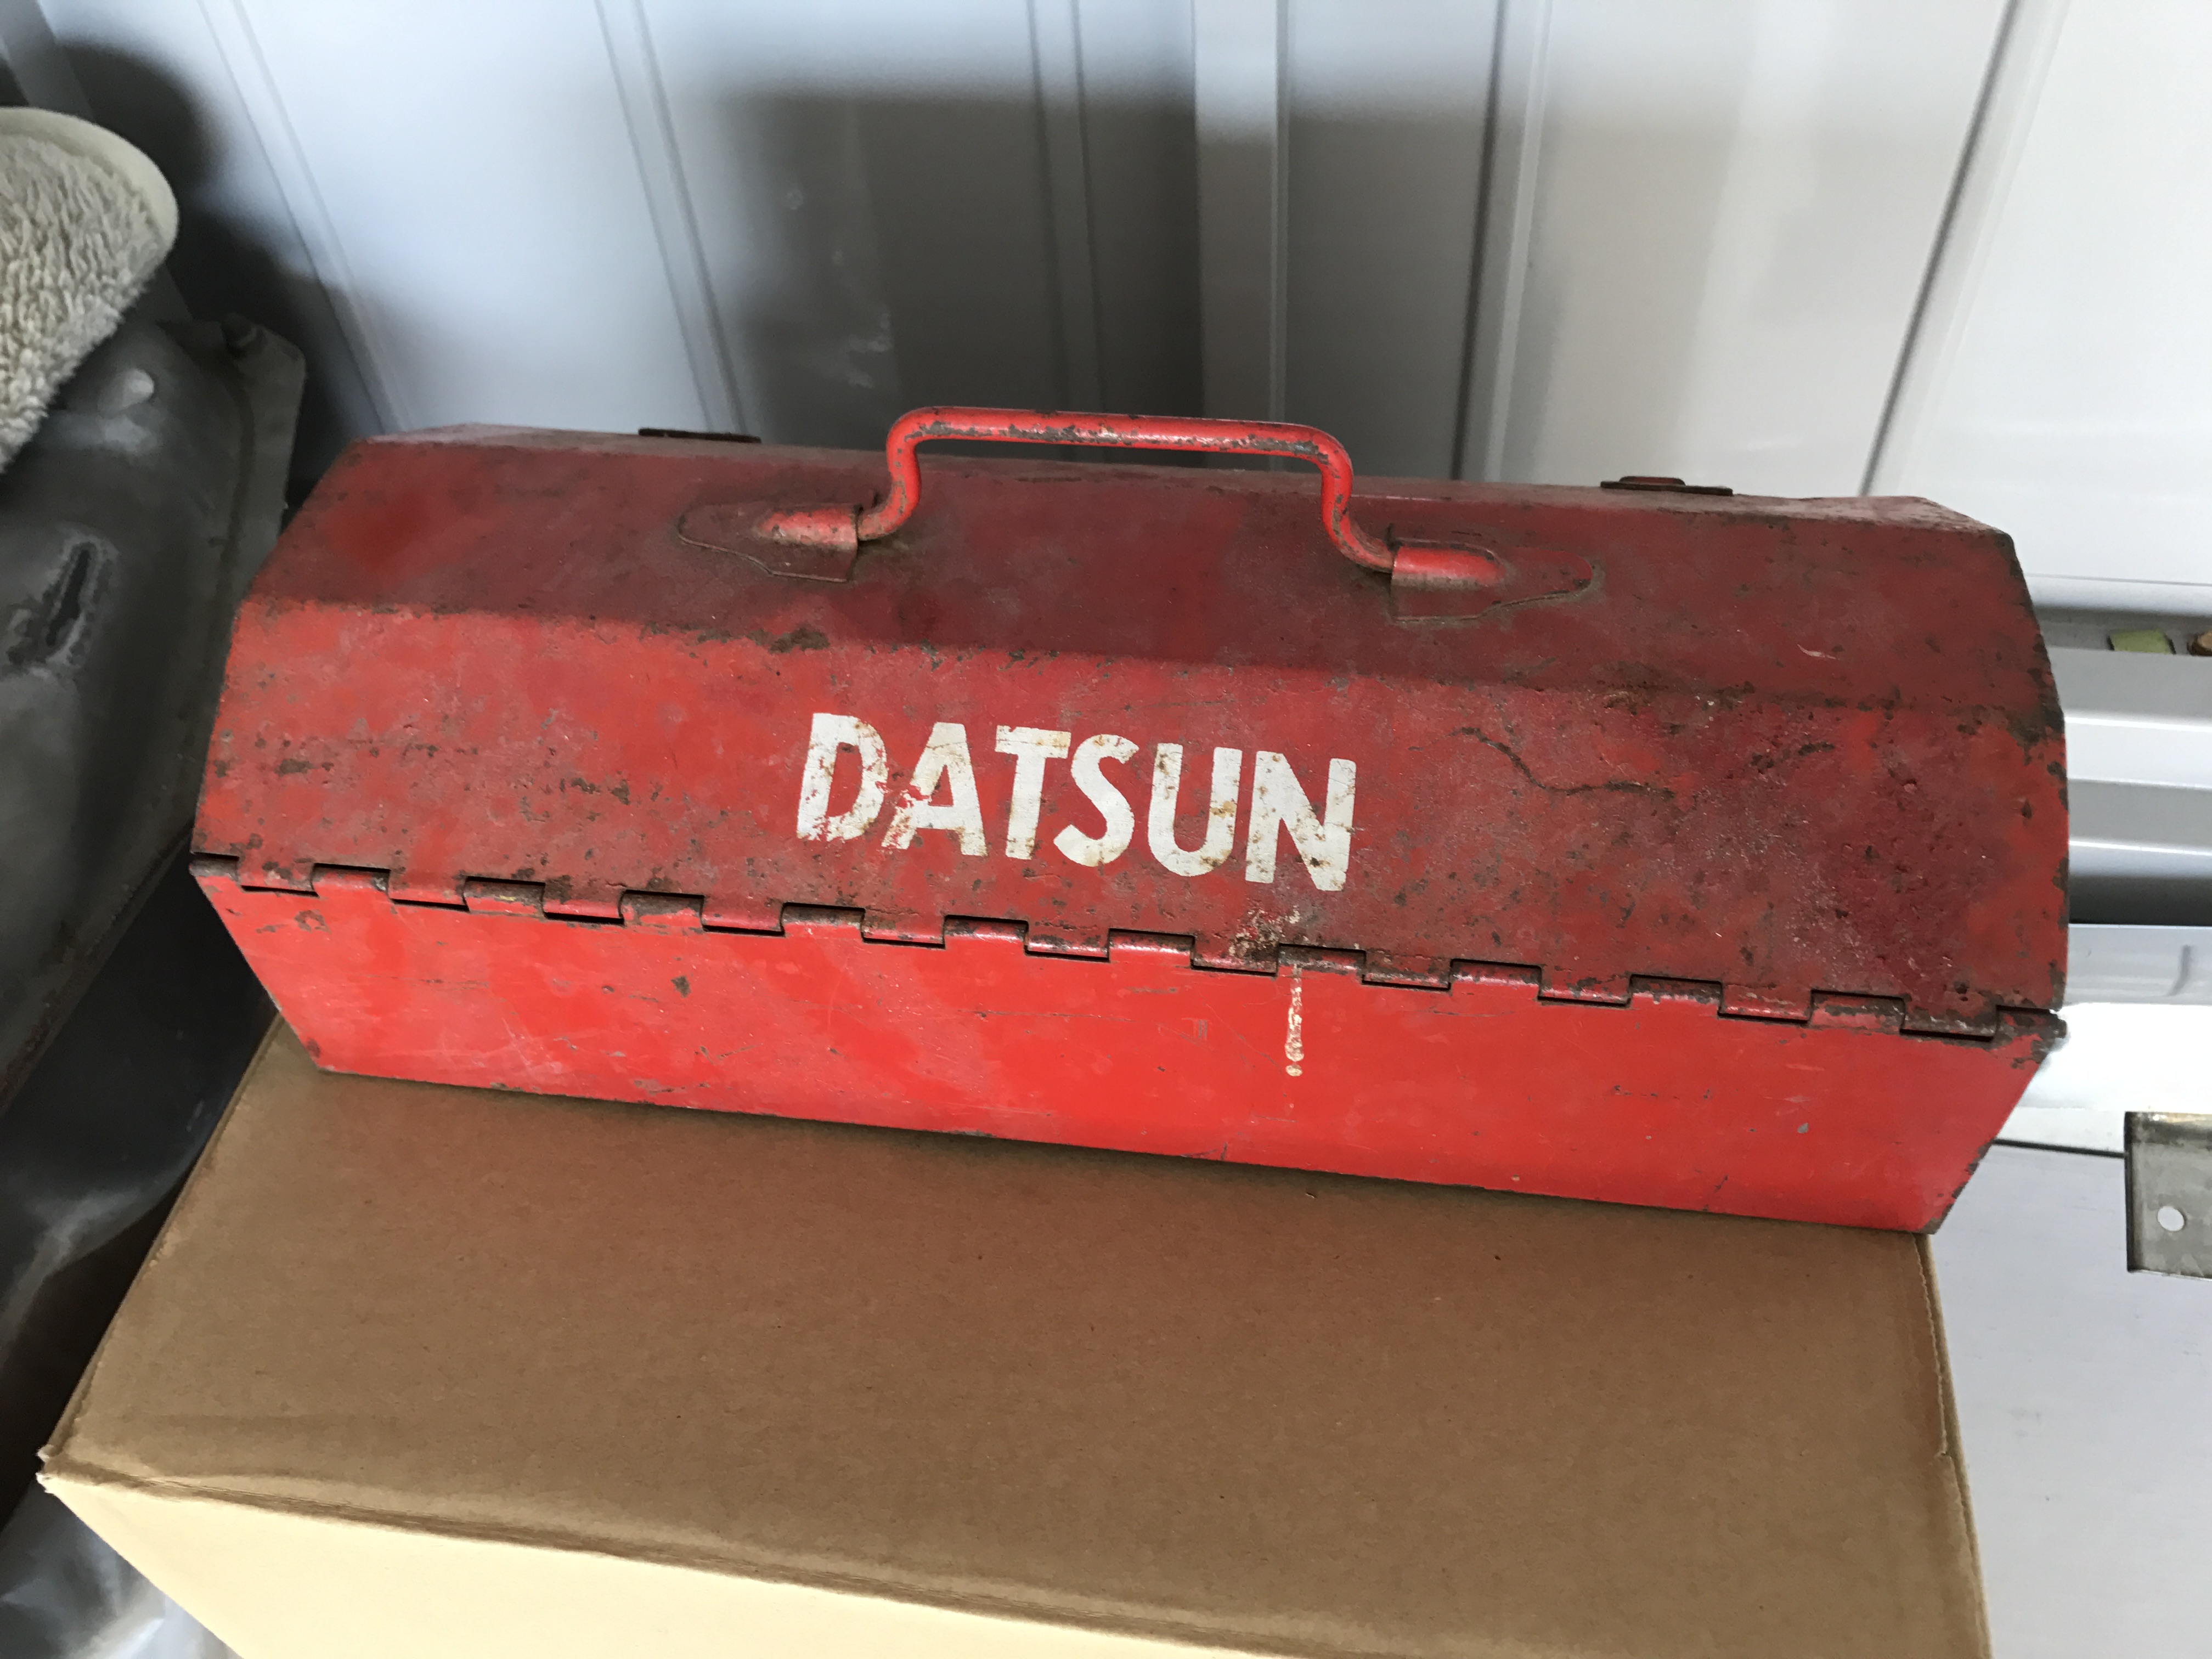
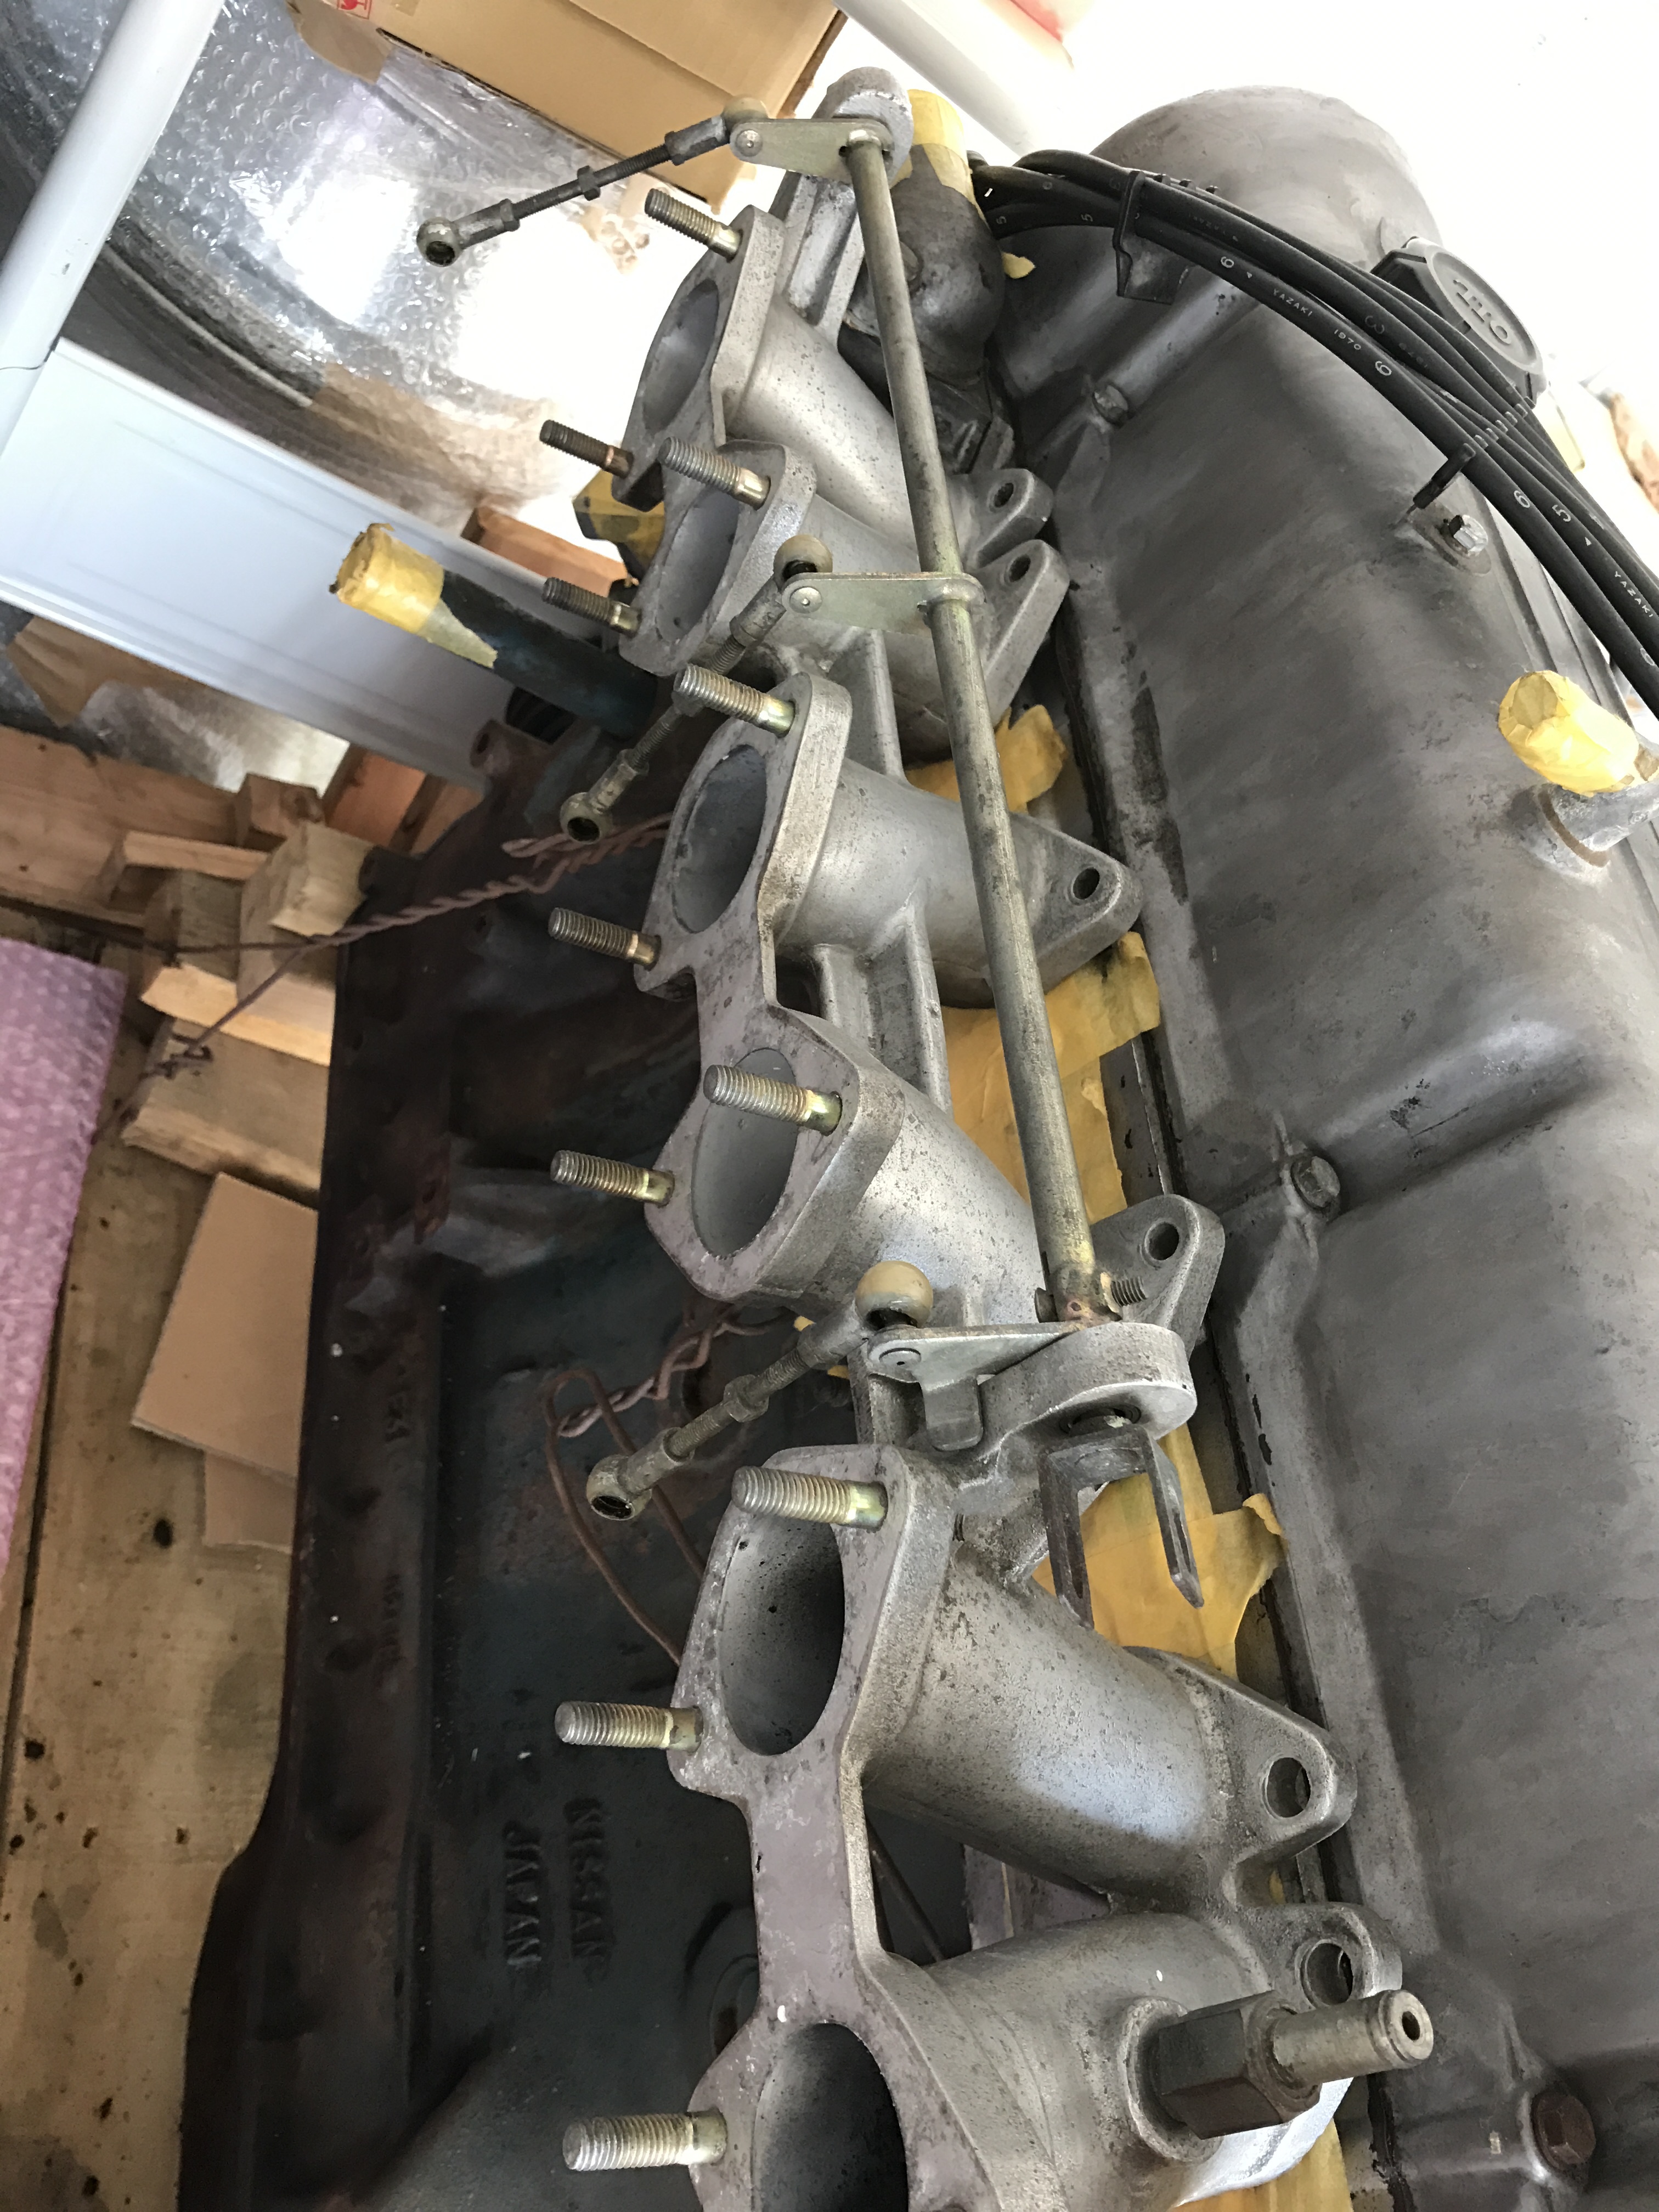
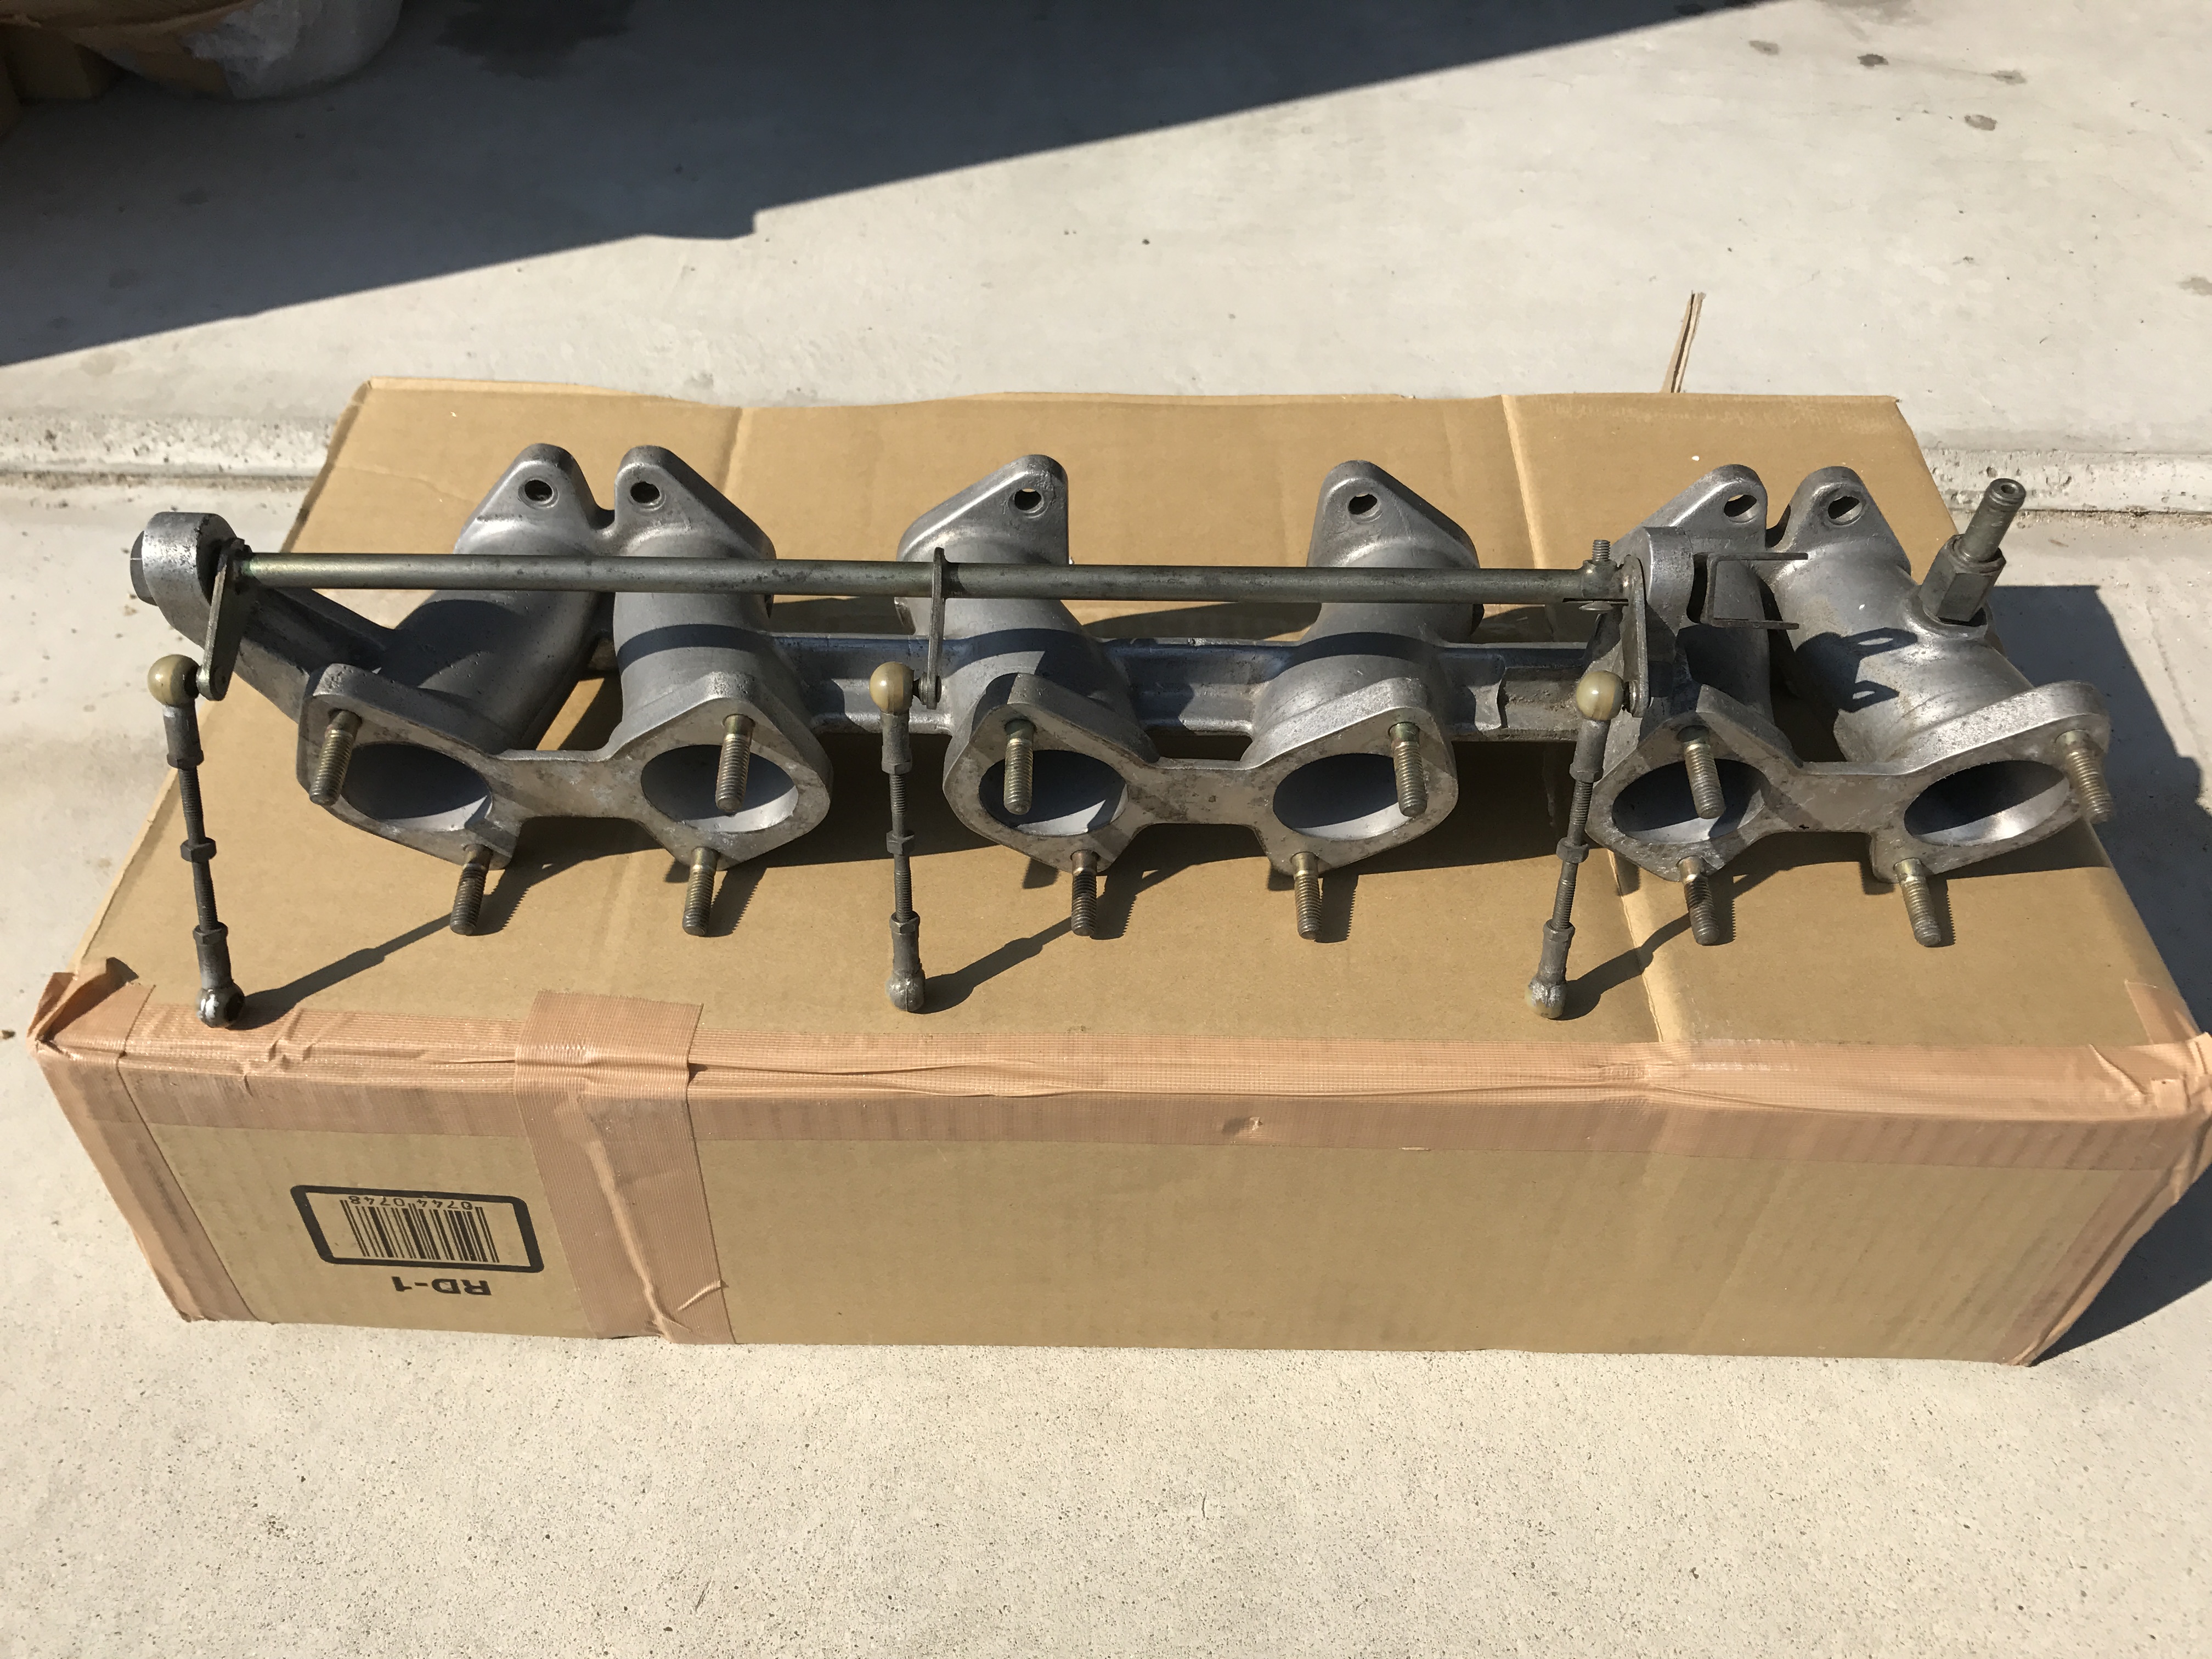
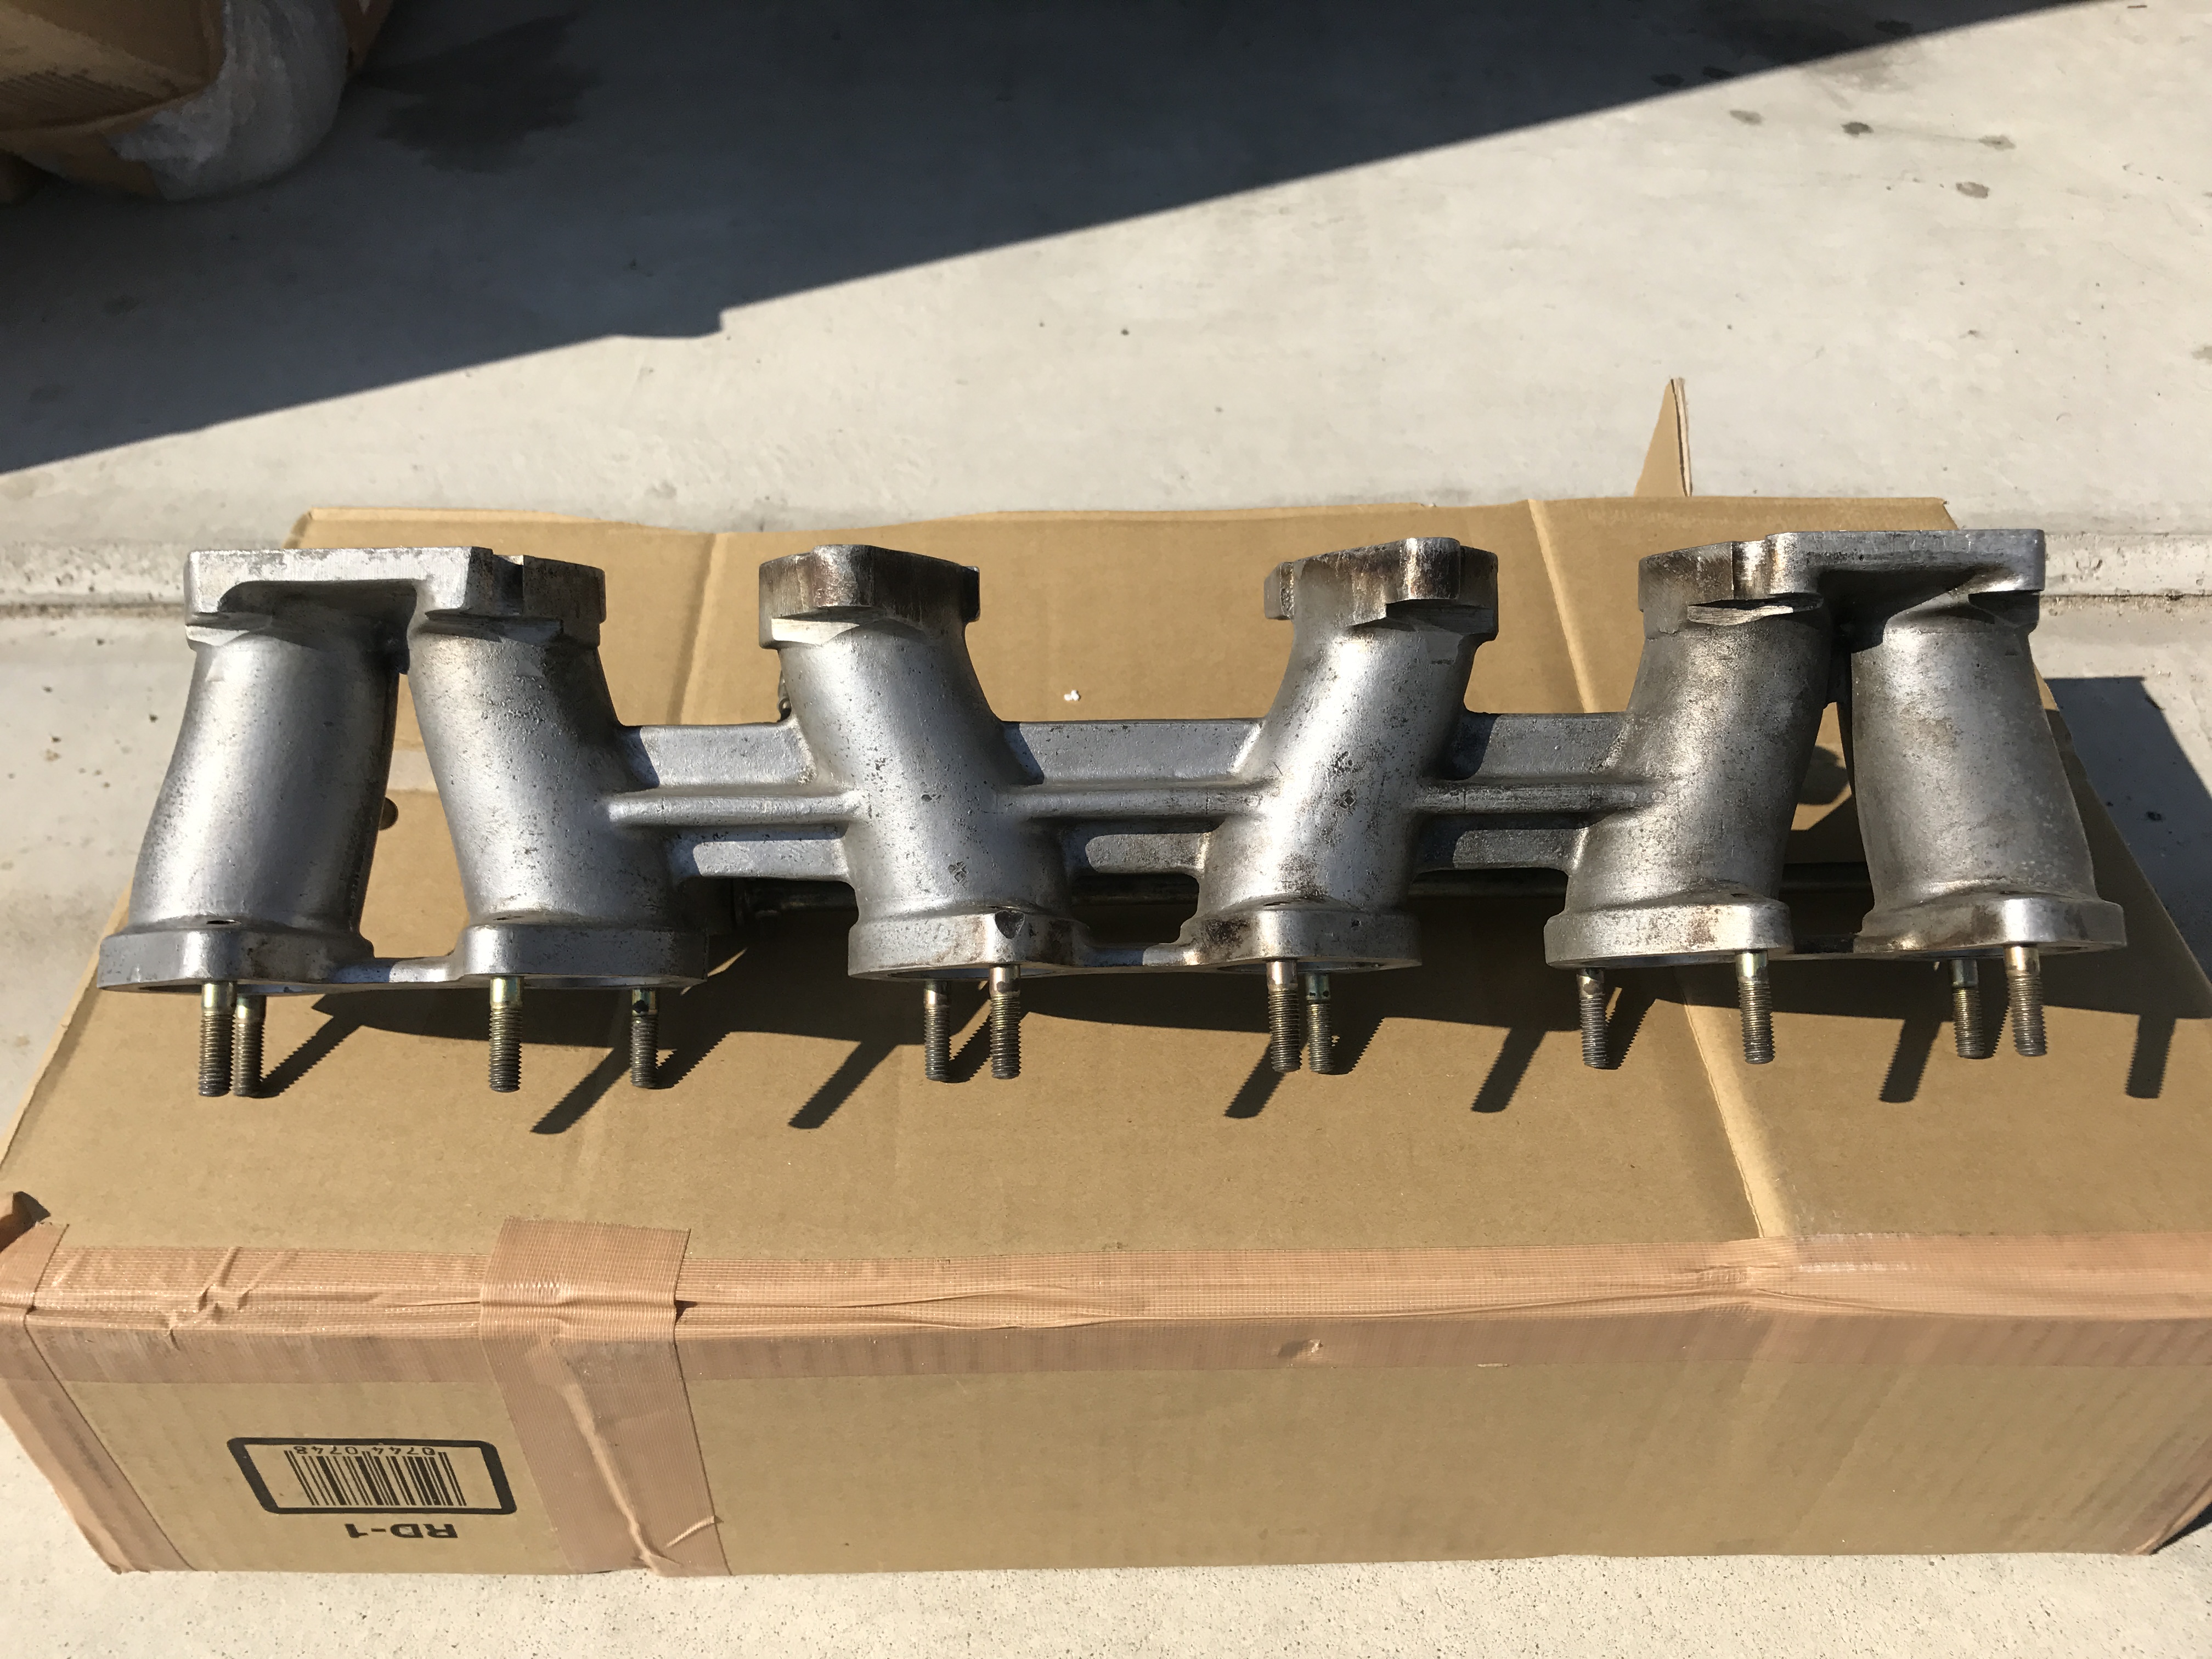
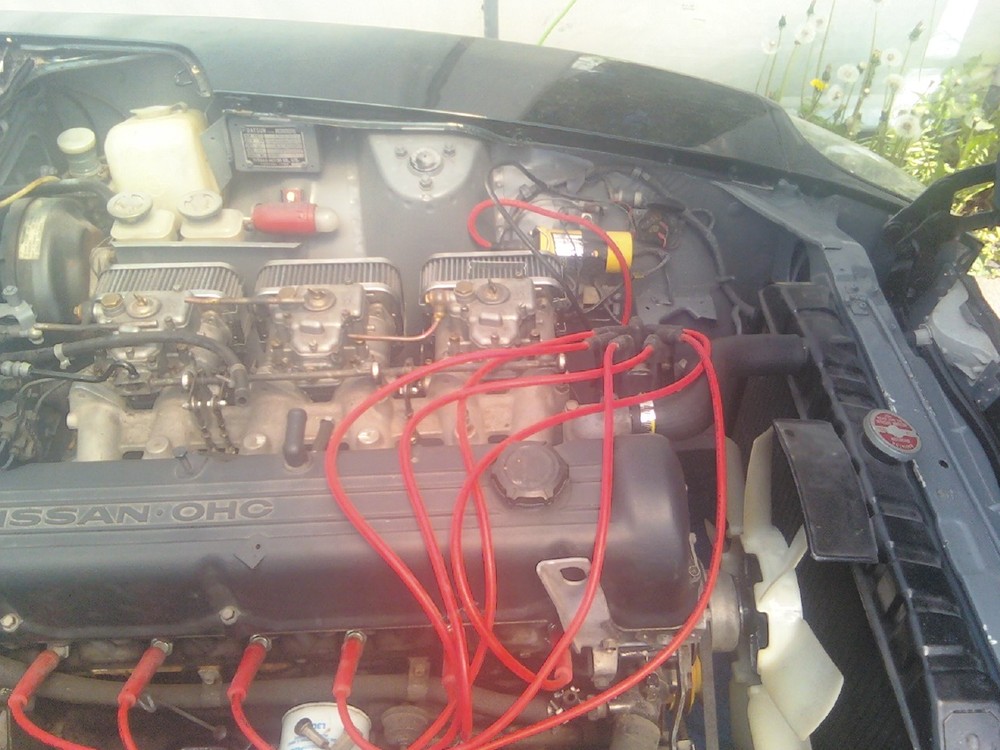
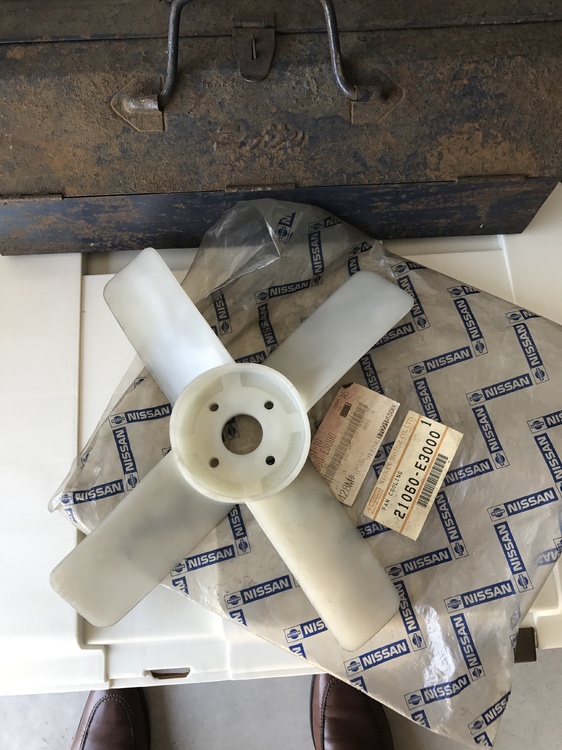
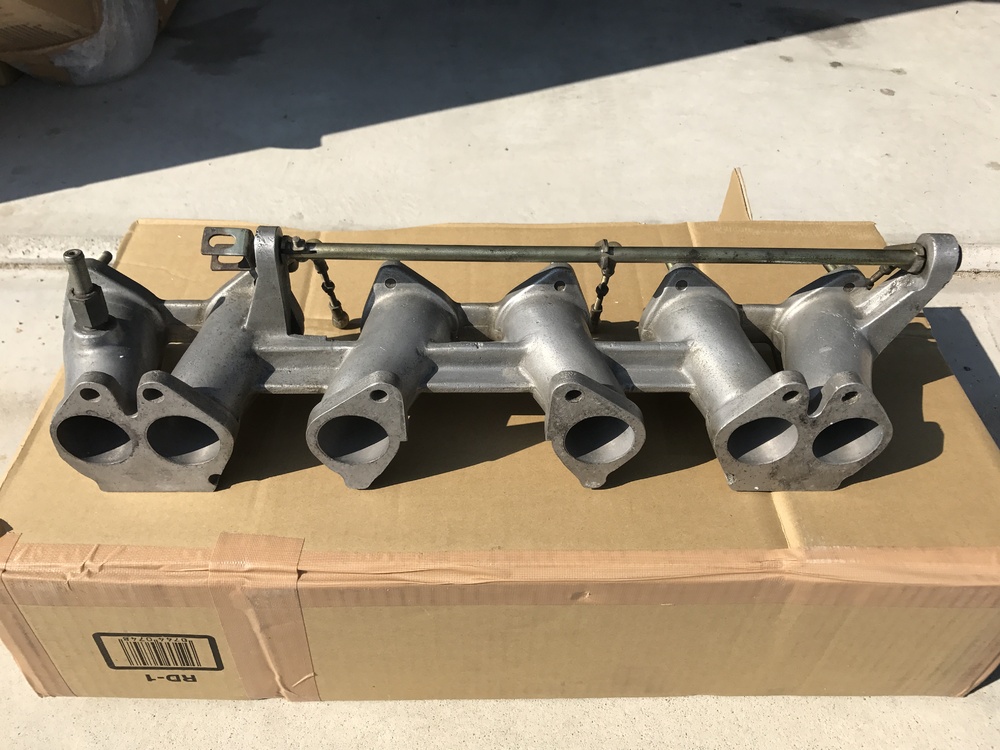
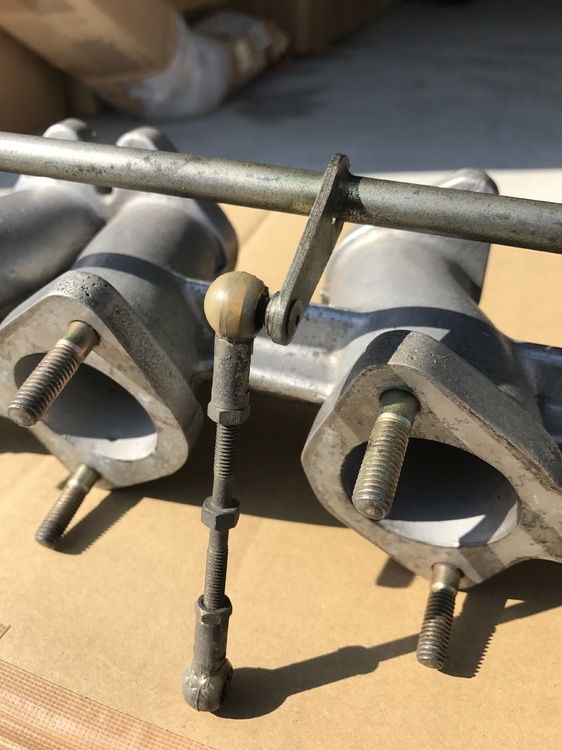
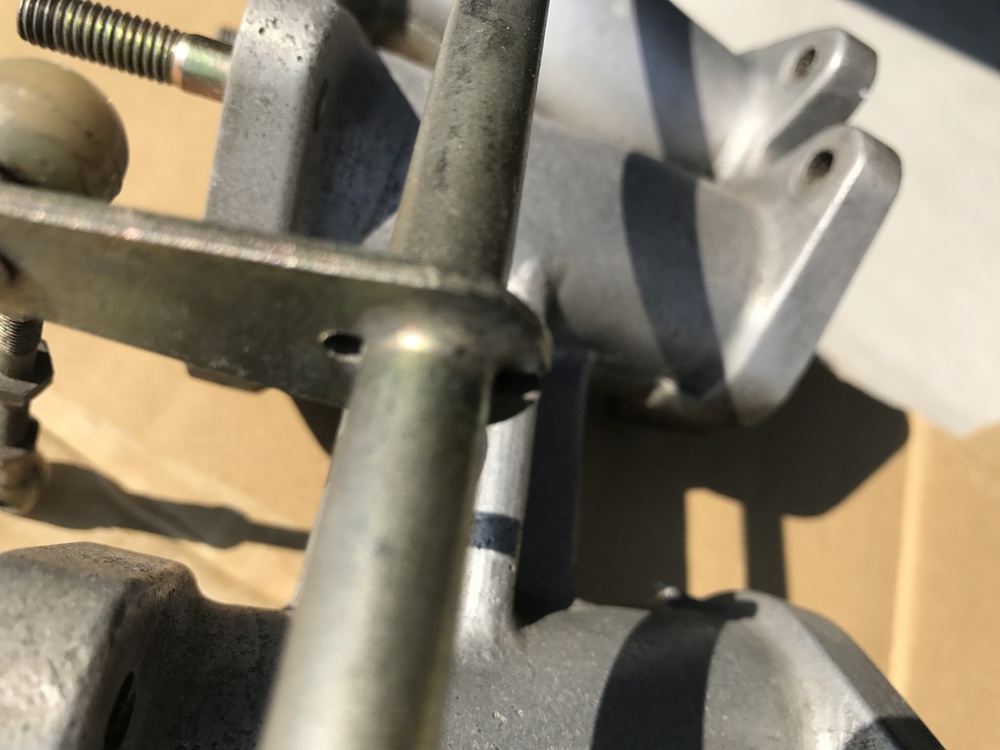
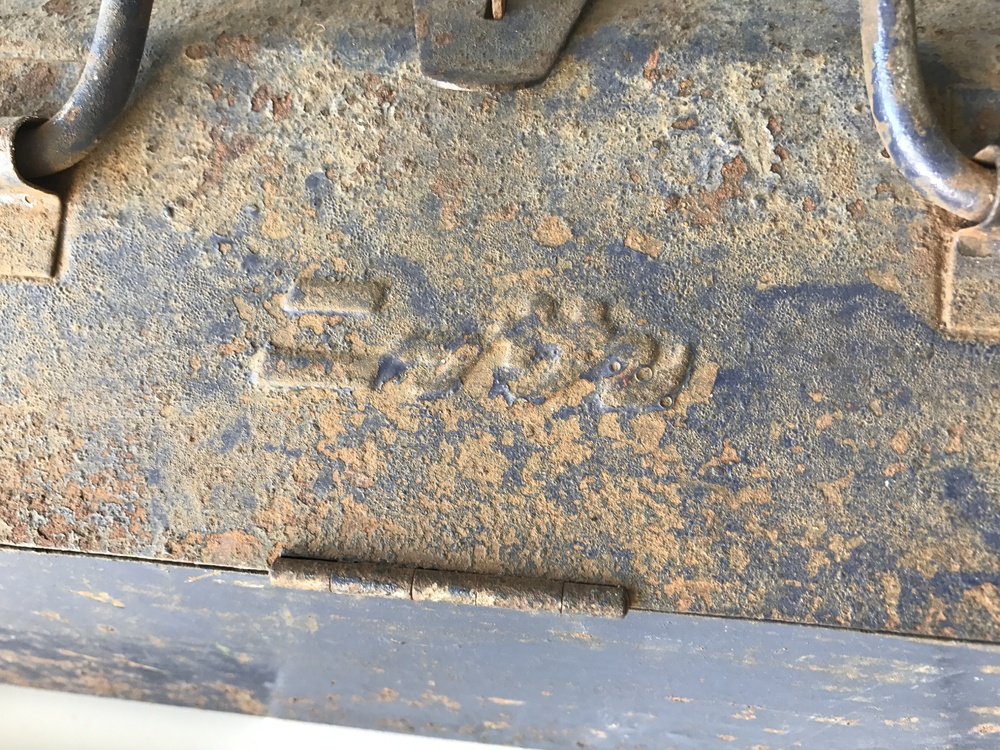
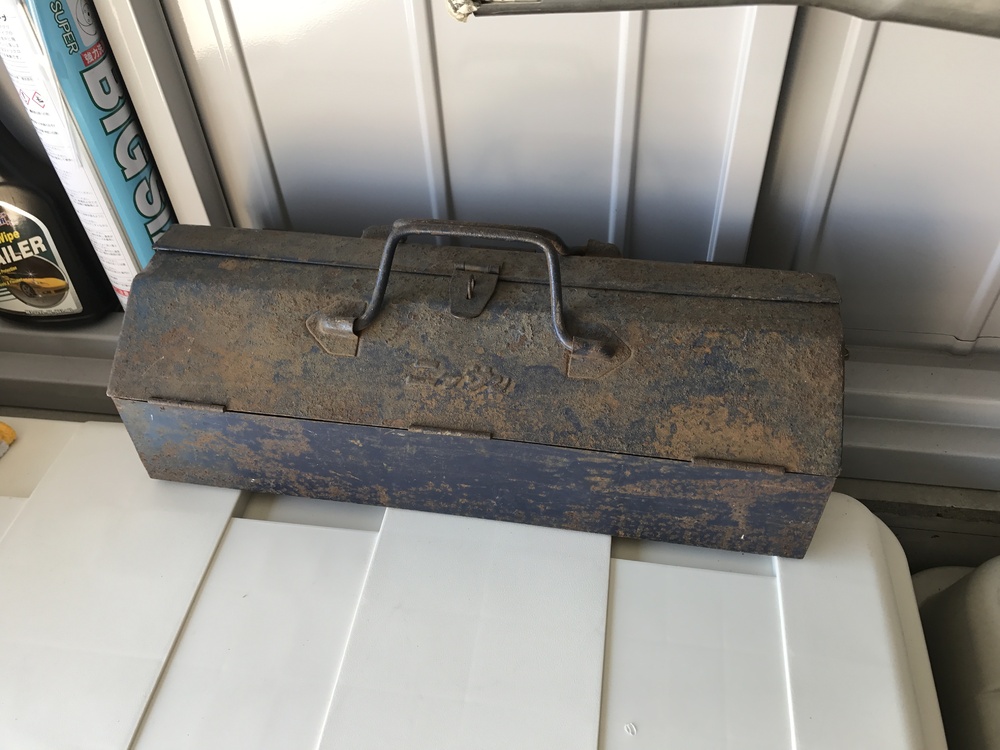
1 pointHi , today I found a plastic fan for L20, this is a good chance to make a tribute engine , "L24 with triple carbs for 240Z" Nissan did not sell that engine, just planned. I have got a inlet manifold, people saying this is made by NISMO, looking at some details, it is different from the others. I can not find any manufacturer's stamp or marking on it, the most interesting thing is the lever which is welded to the shaft. With this inlet manifold, plastic fan, and a race option exhaust header, it is going to be looking good. Kats PS tool boxes, they are old ! ニッサン & DATSUN .


 1 point
 -
1 pointFor what it's worth I have never heard a non ticking L series engine they all make some valve train noise1 point
-
1 point
-
1 point
-
1 pointWelcome to the somewhat perverted (in a good way) world of the truly obsessed. That's a good looking ride - with any luck the RCMP is scarce enough for you to really stretch it out on occasion. And... the pic from Guy proves that we all appreciate curvy shapes in many forms.1 point
-
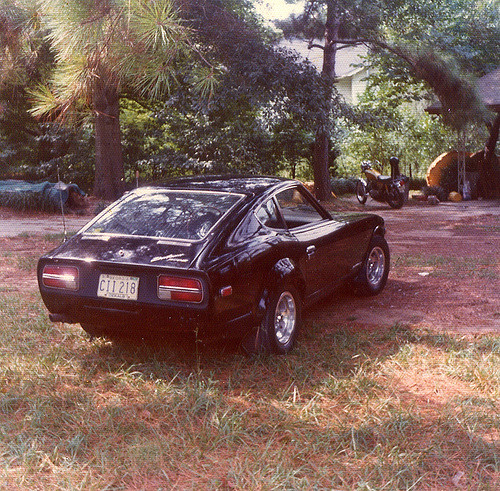
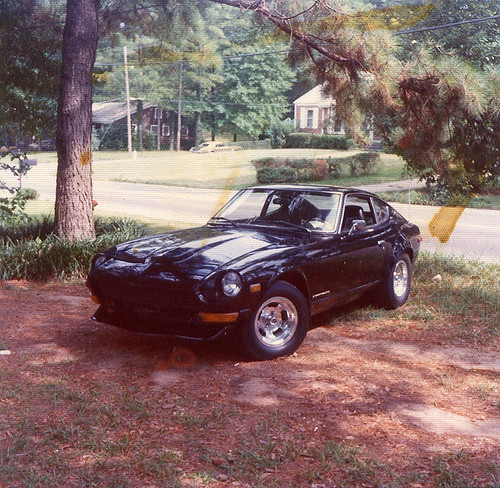
1 pointBrings back memories of my first Z back in 71.....wonder why Datsun never did an early Z in black? BTW....I like your blood type!
 1 point
 -
1 point
-
1 pointMe too! He makes higher education look like what I'd expect. Guy's the Man.1 point
-
It is is a interesting idea but in a zed dash it would be hard to fit in with out clashing with the all the the rounded lines. i don't know about you cat's but a Z drivers compartment feels like a fighter plane. maybe its just me , i just run a digital tac1 point
-
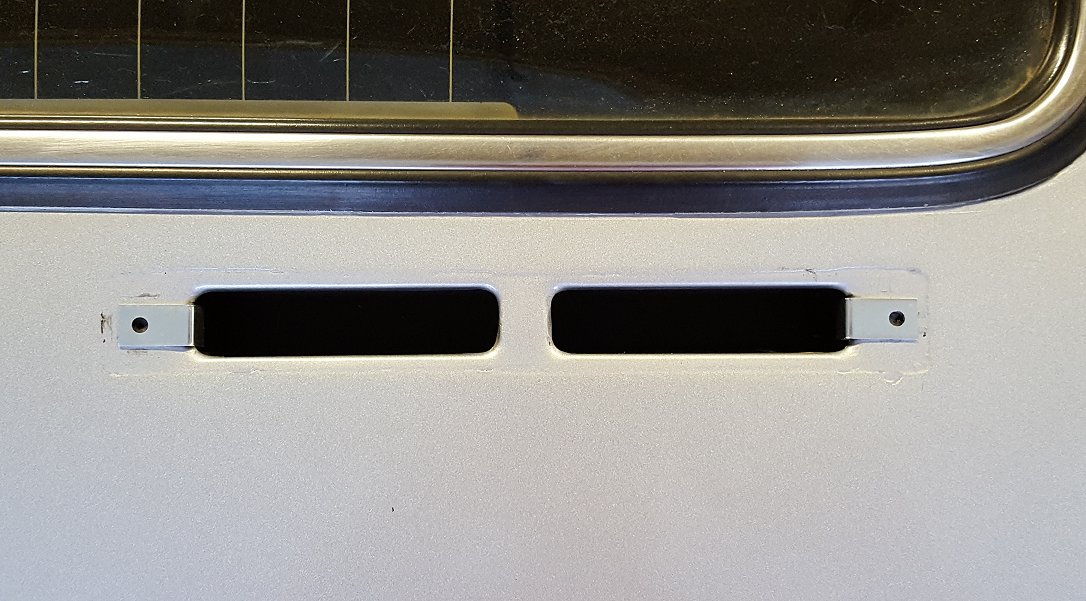
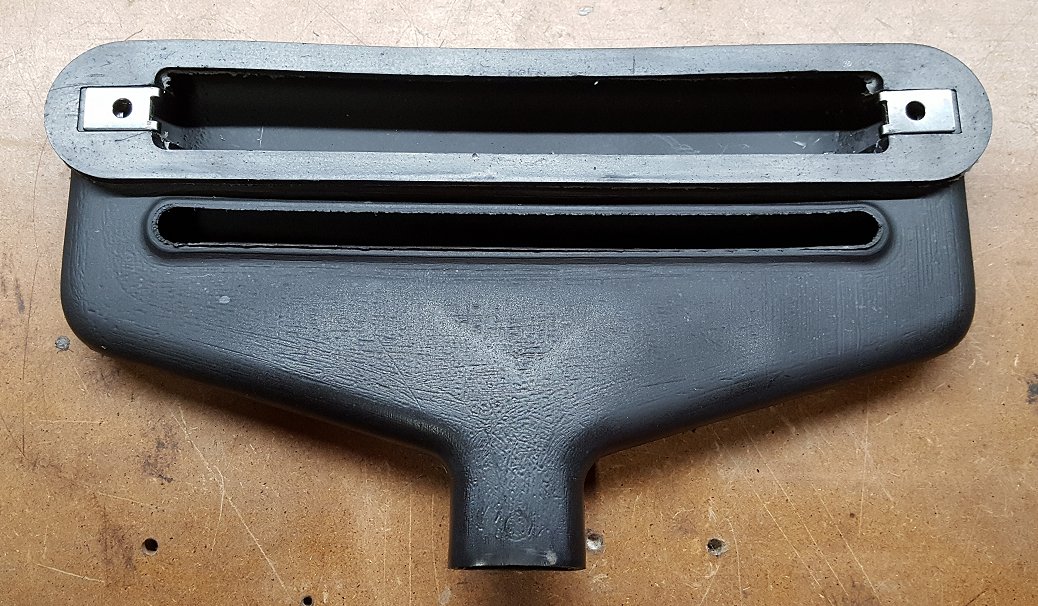
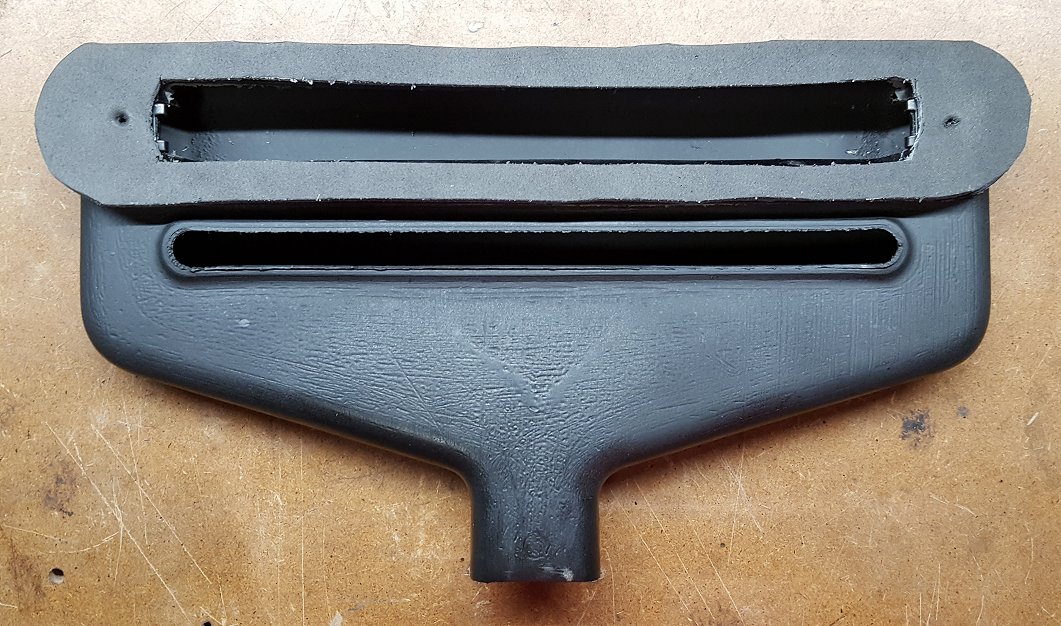
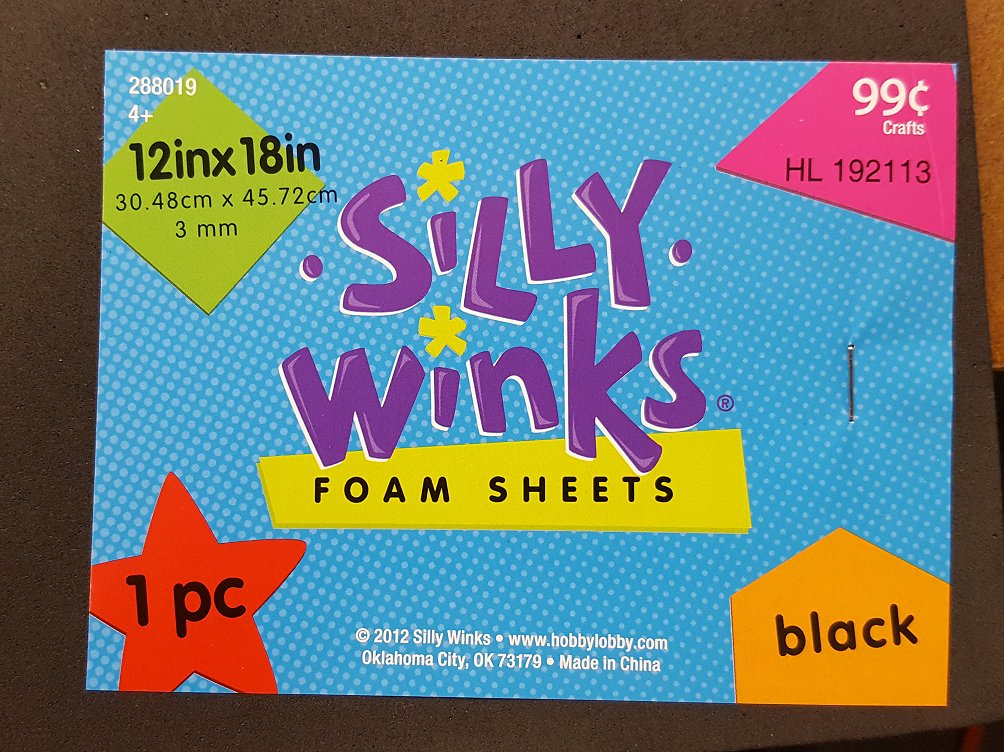
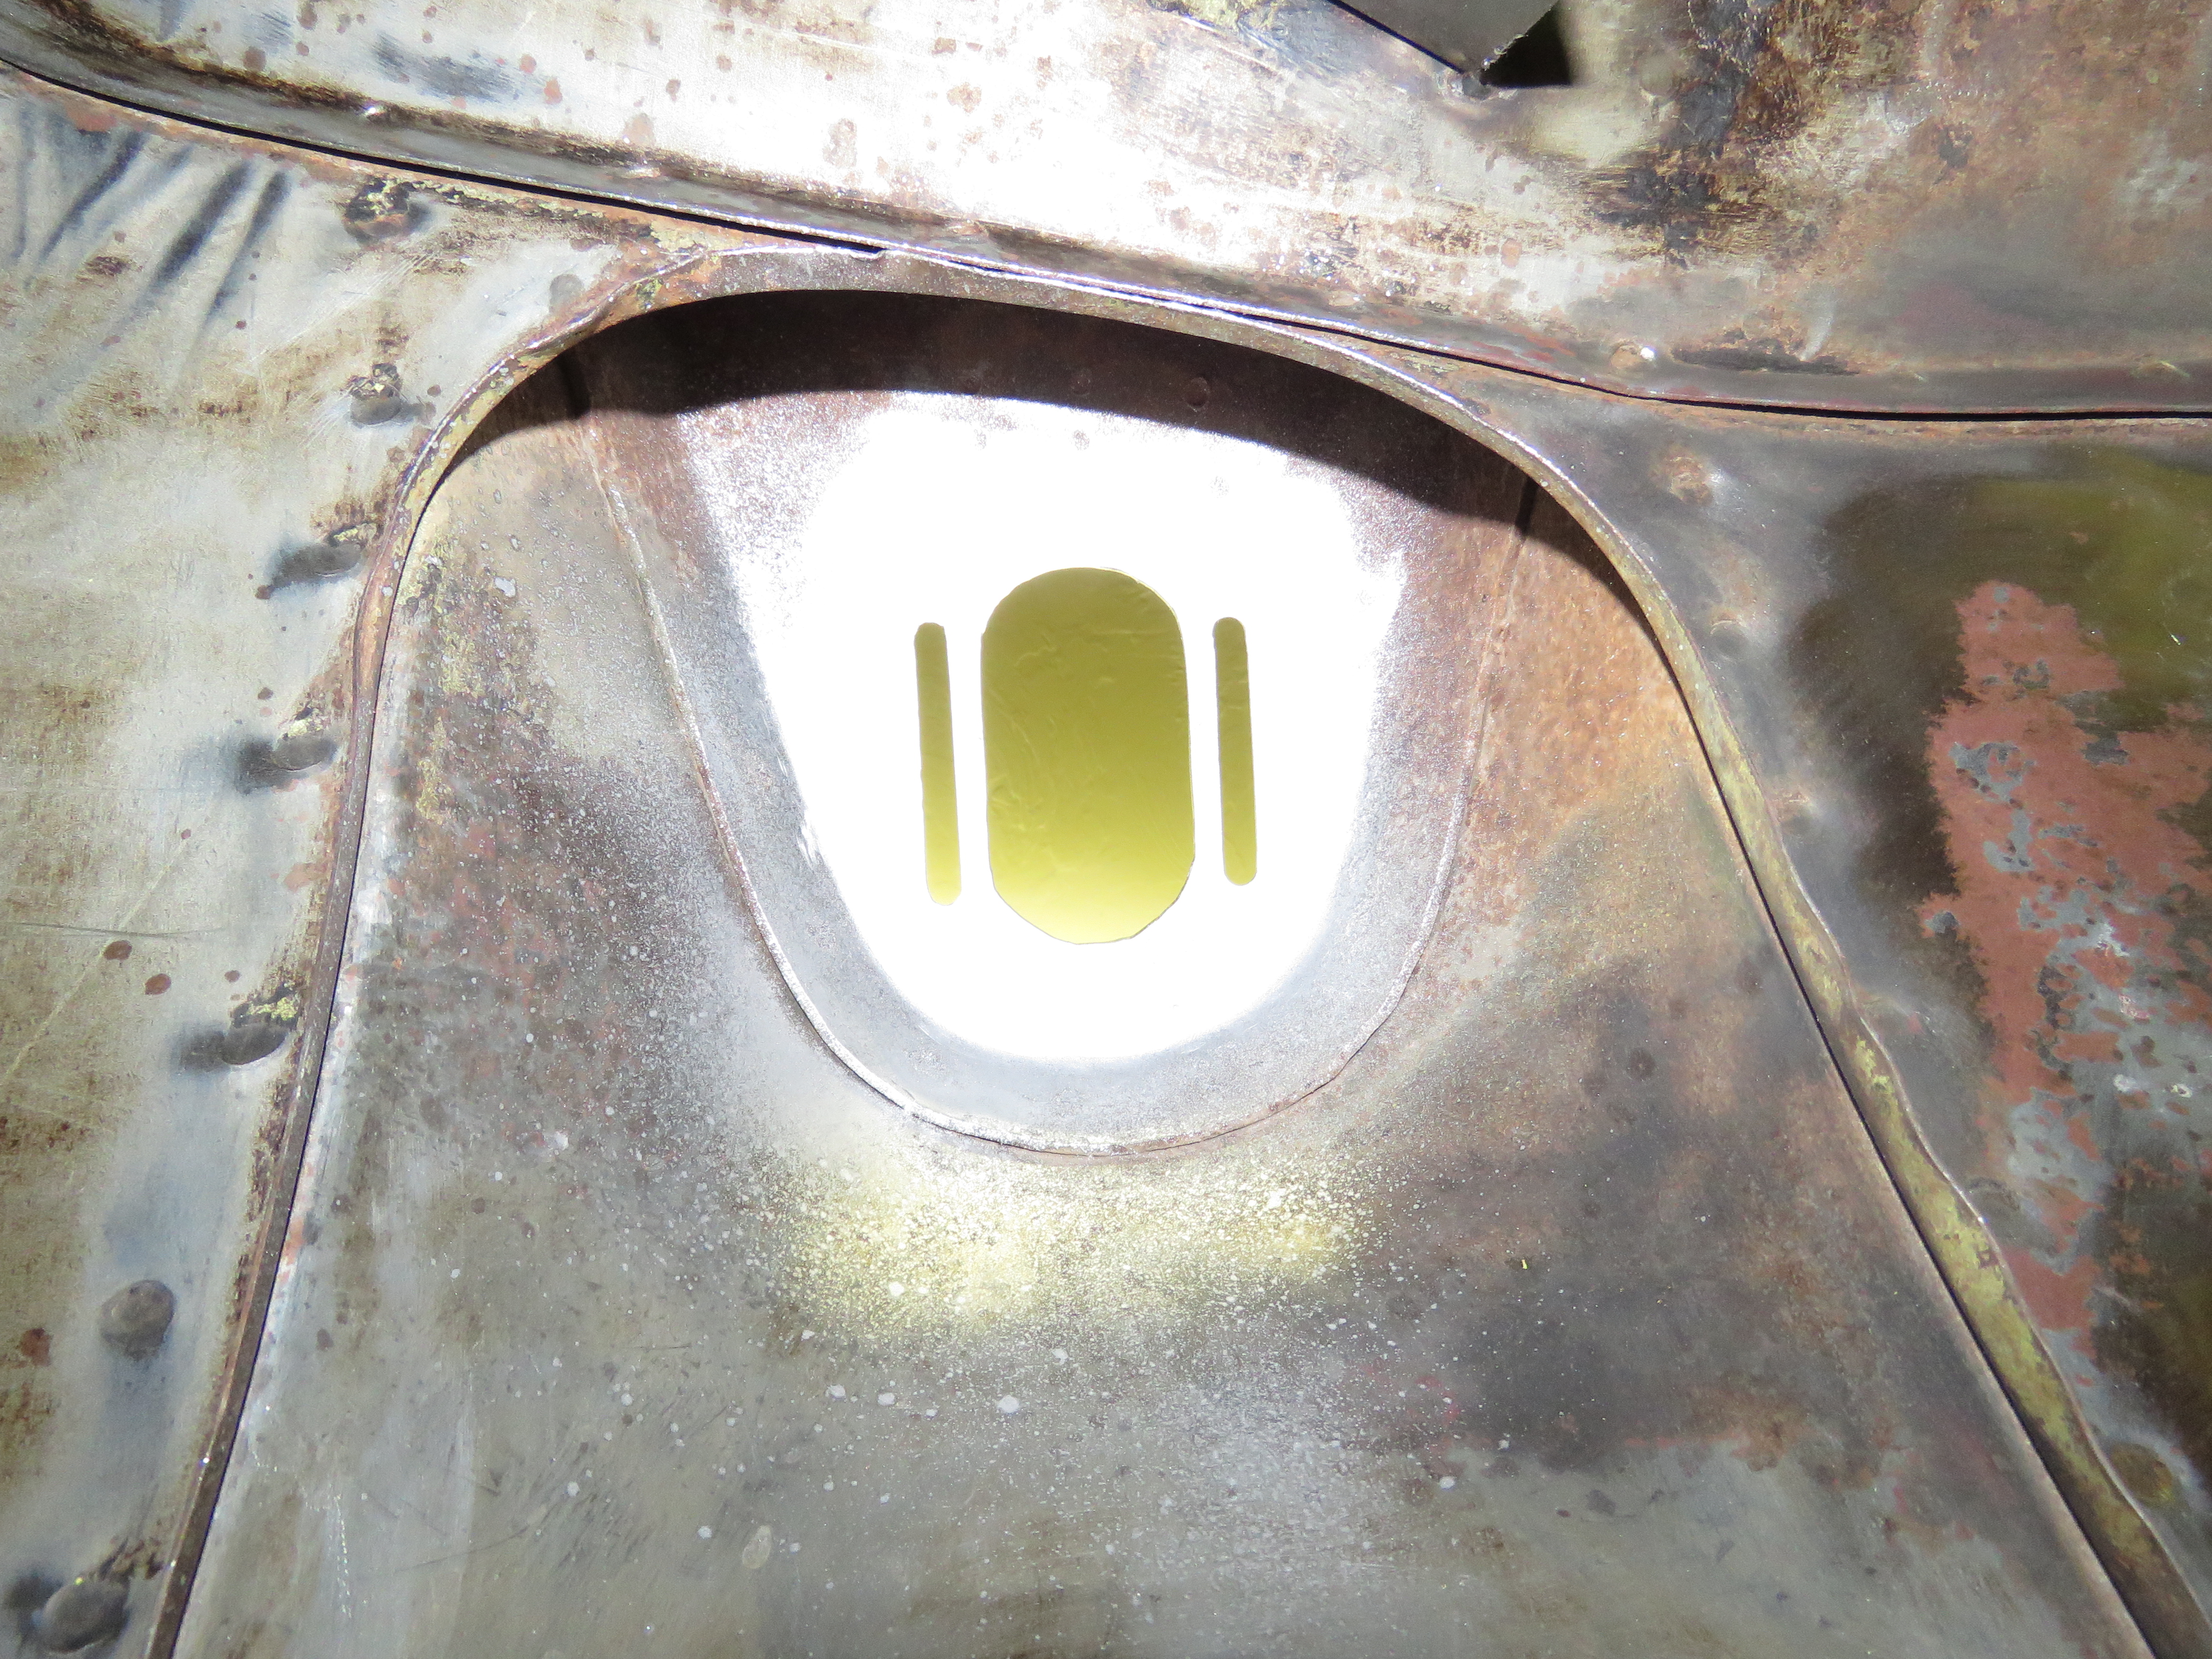
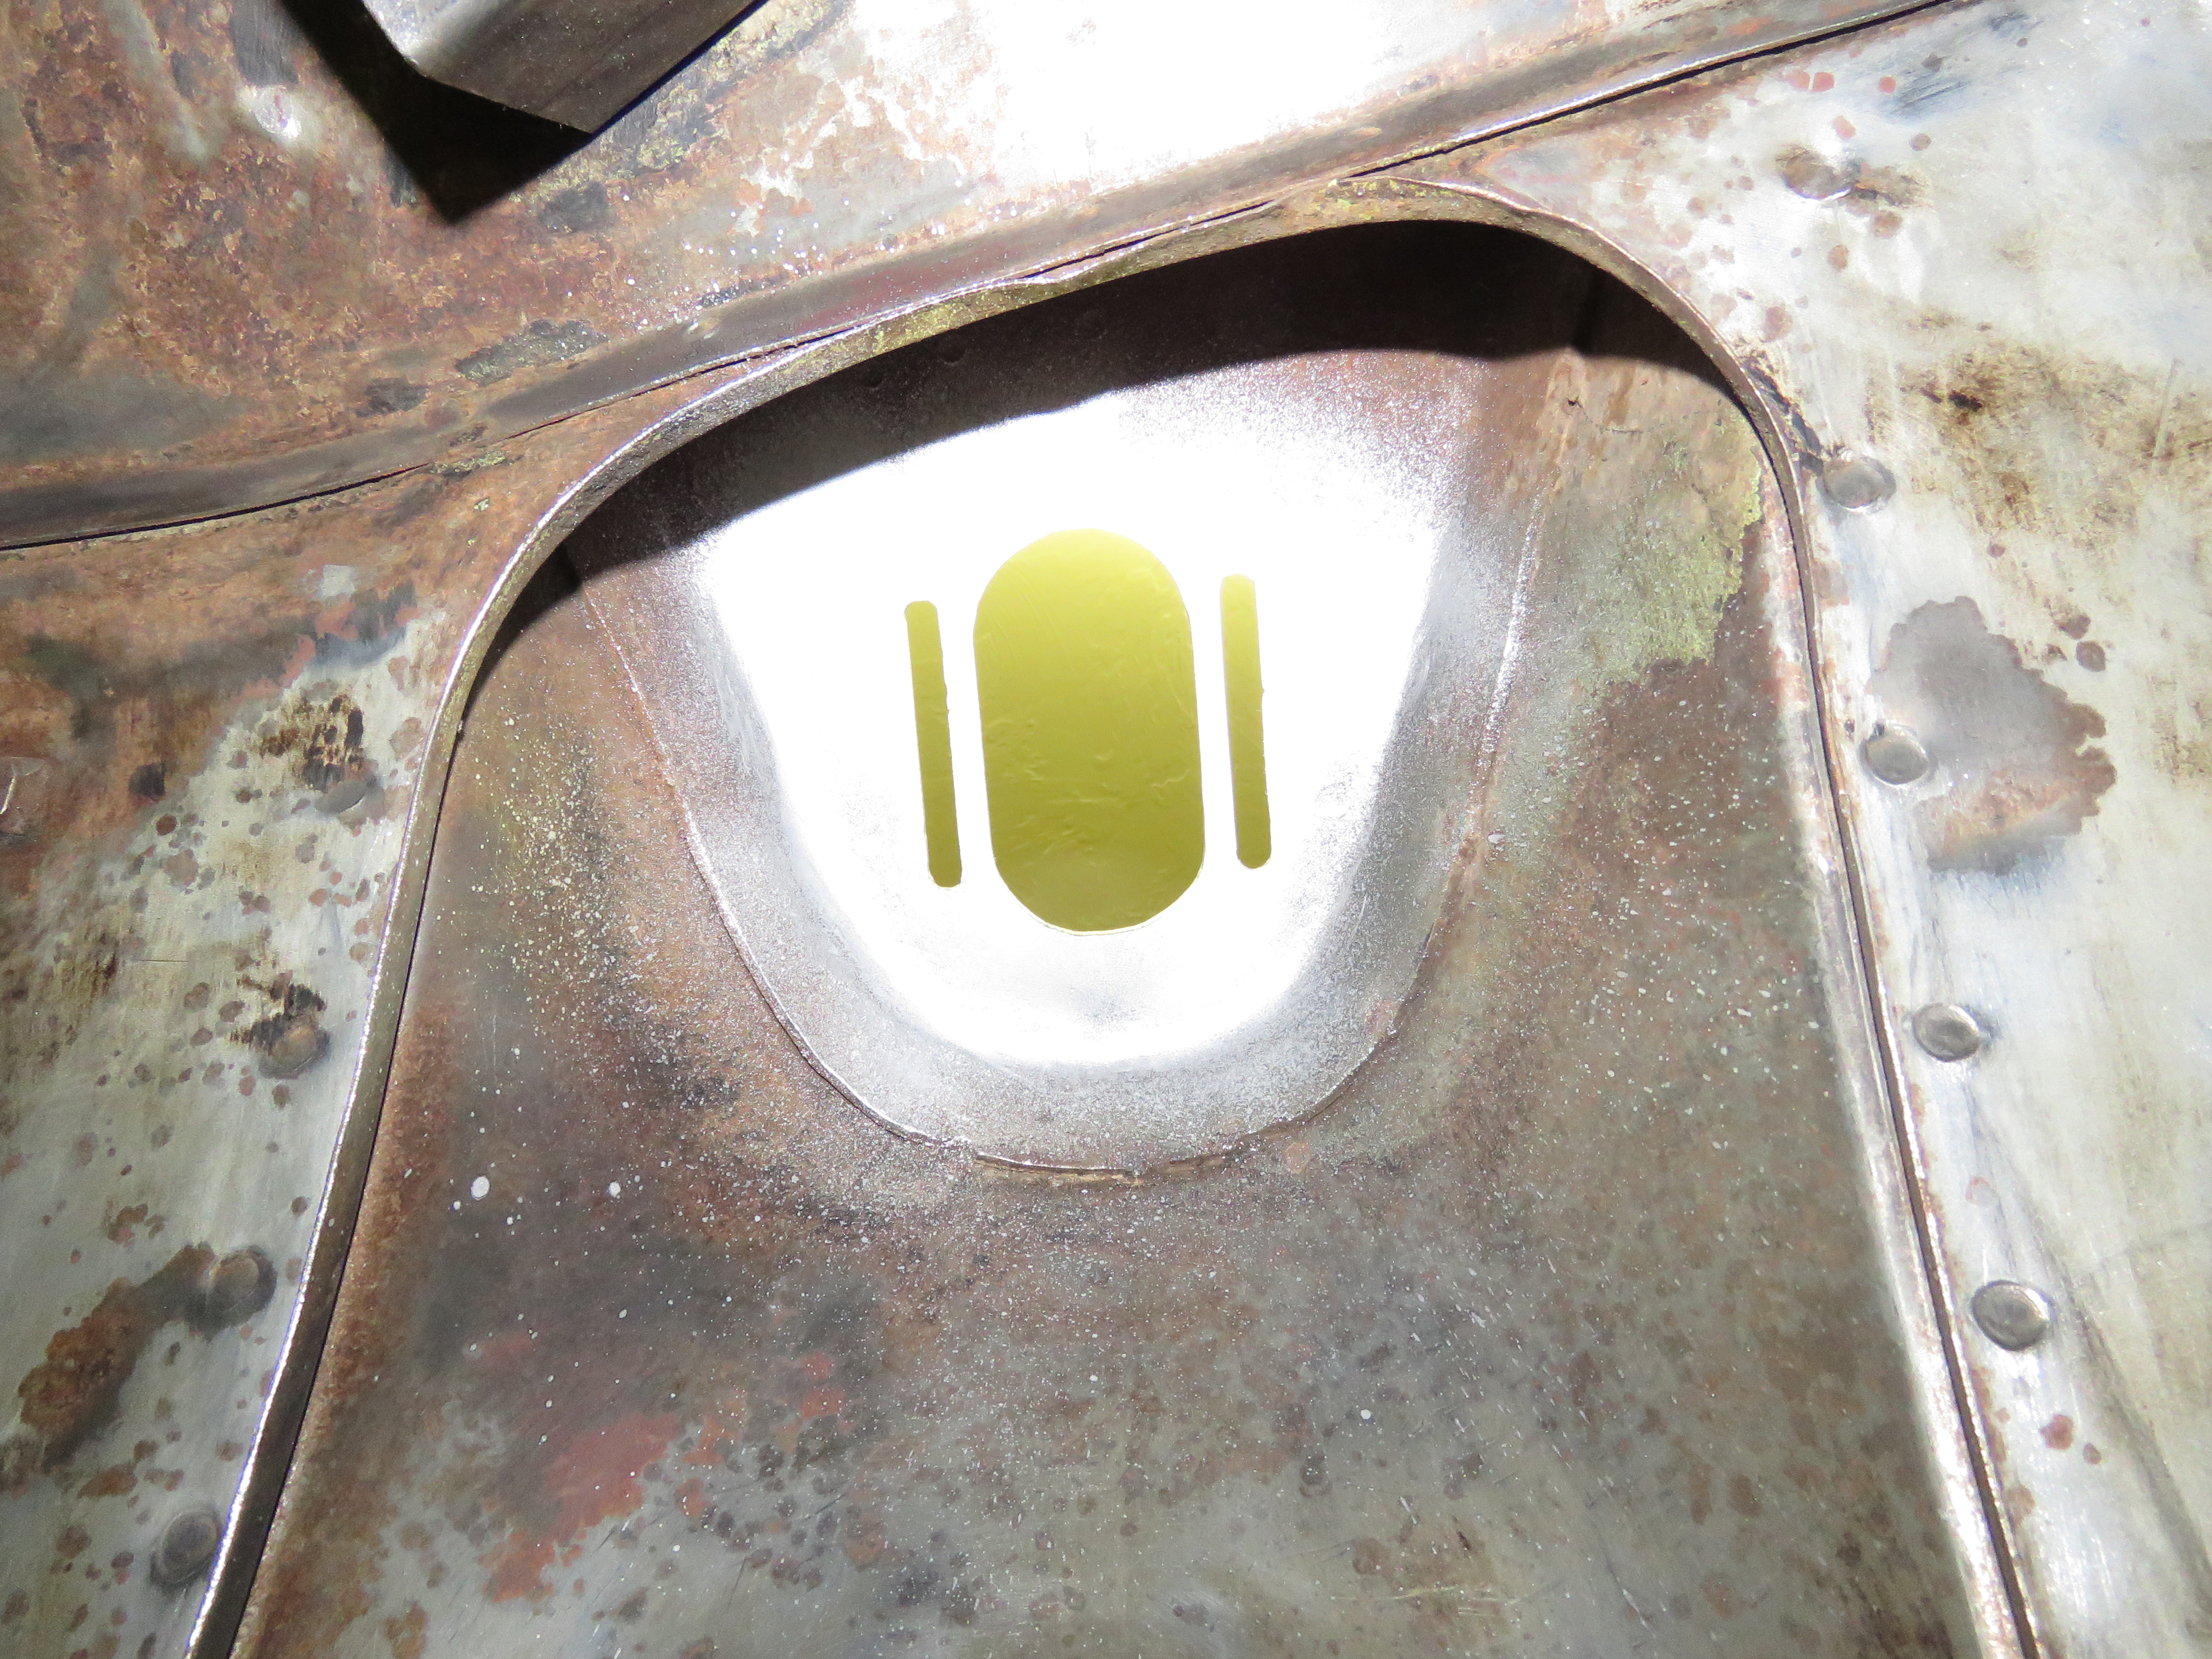
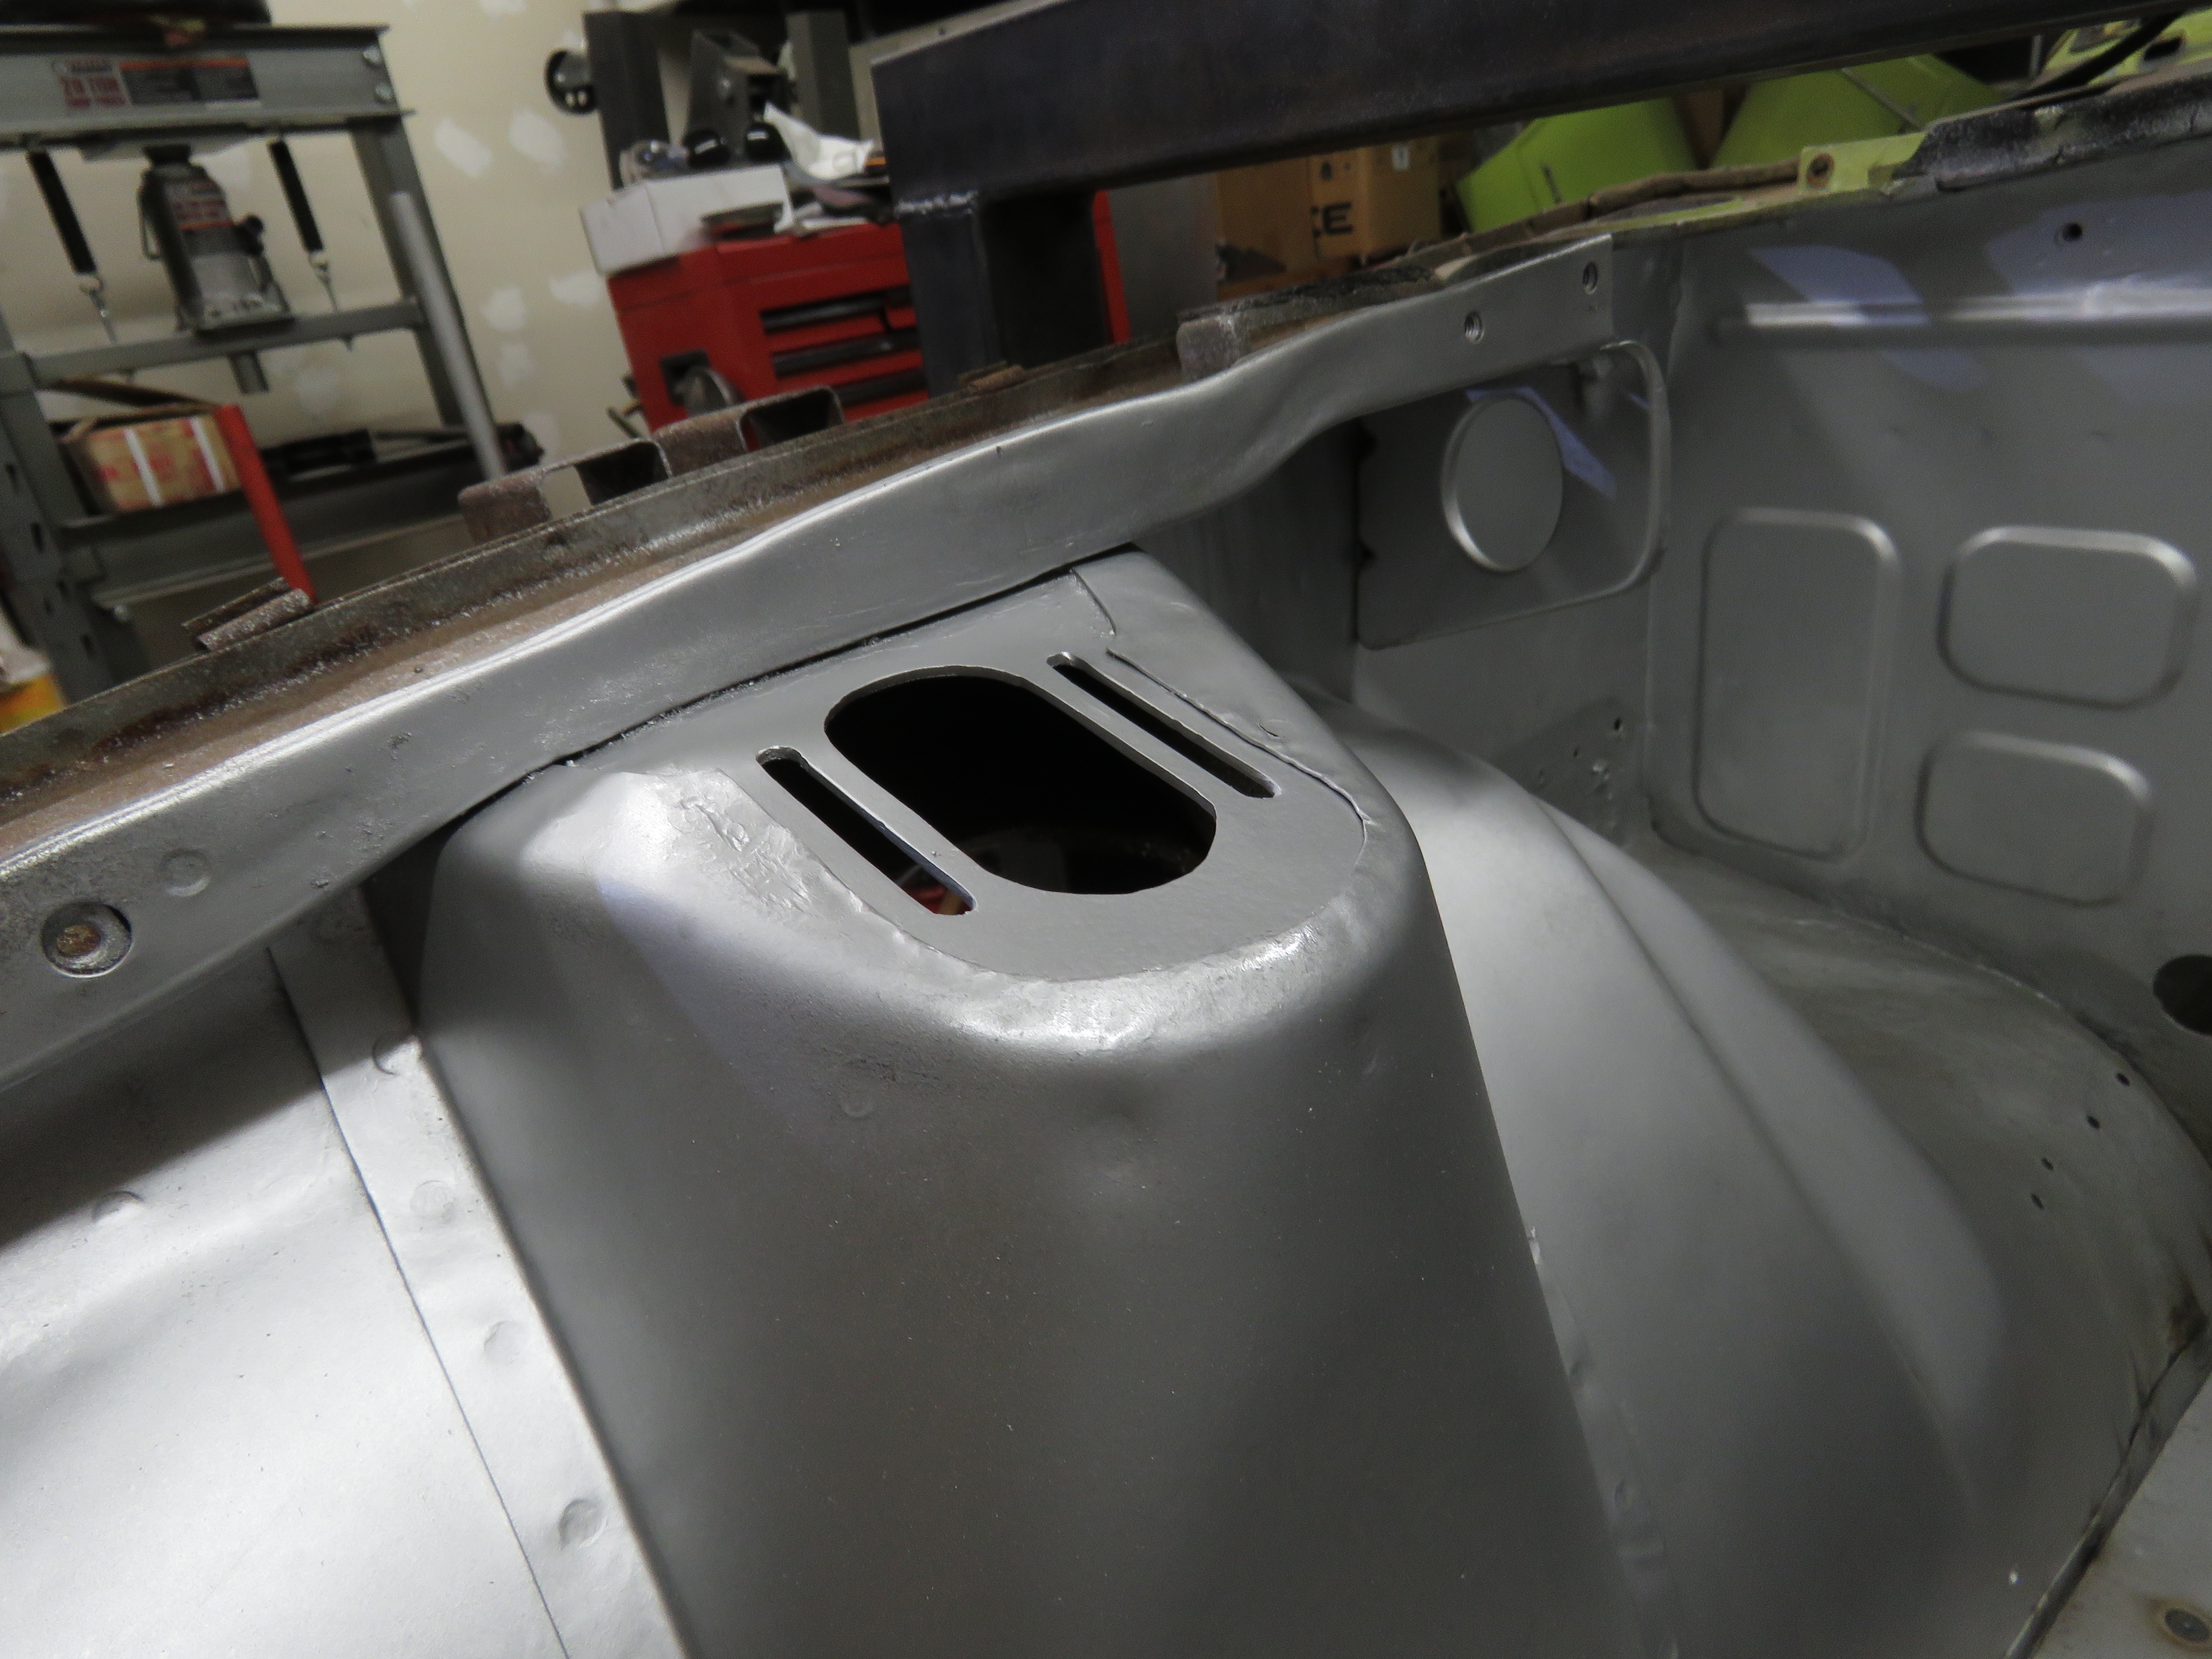
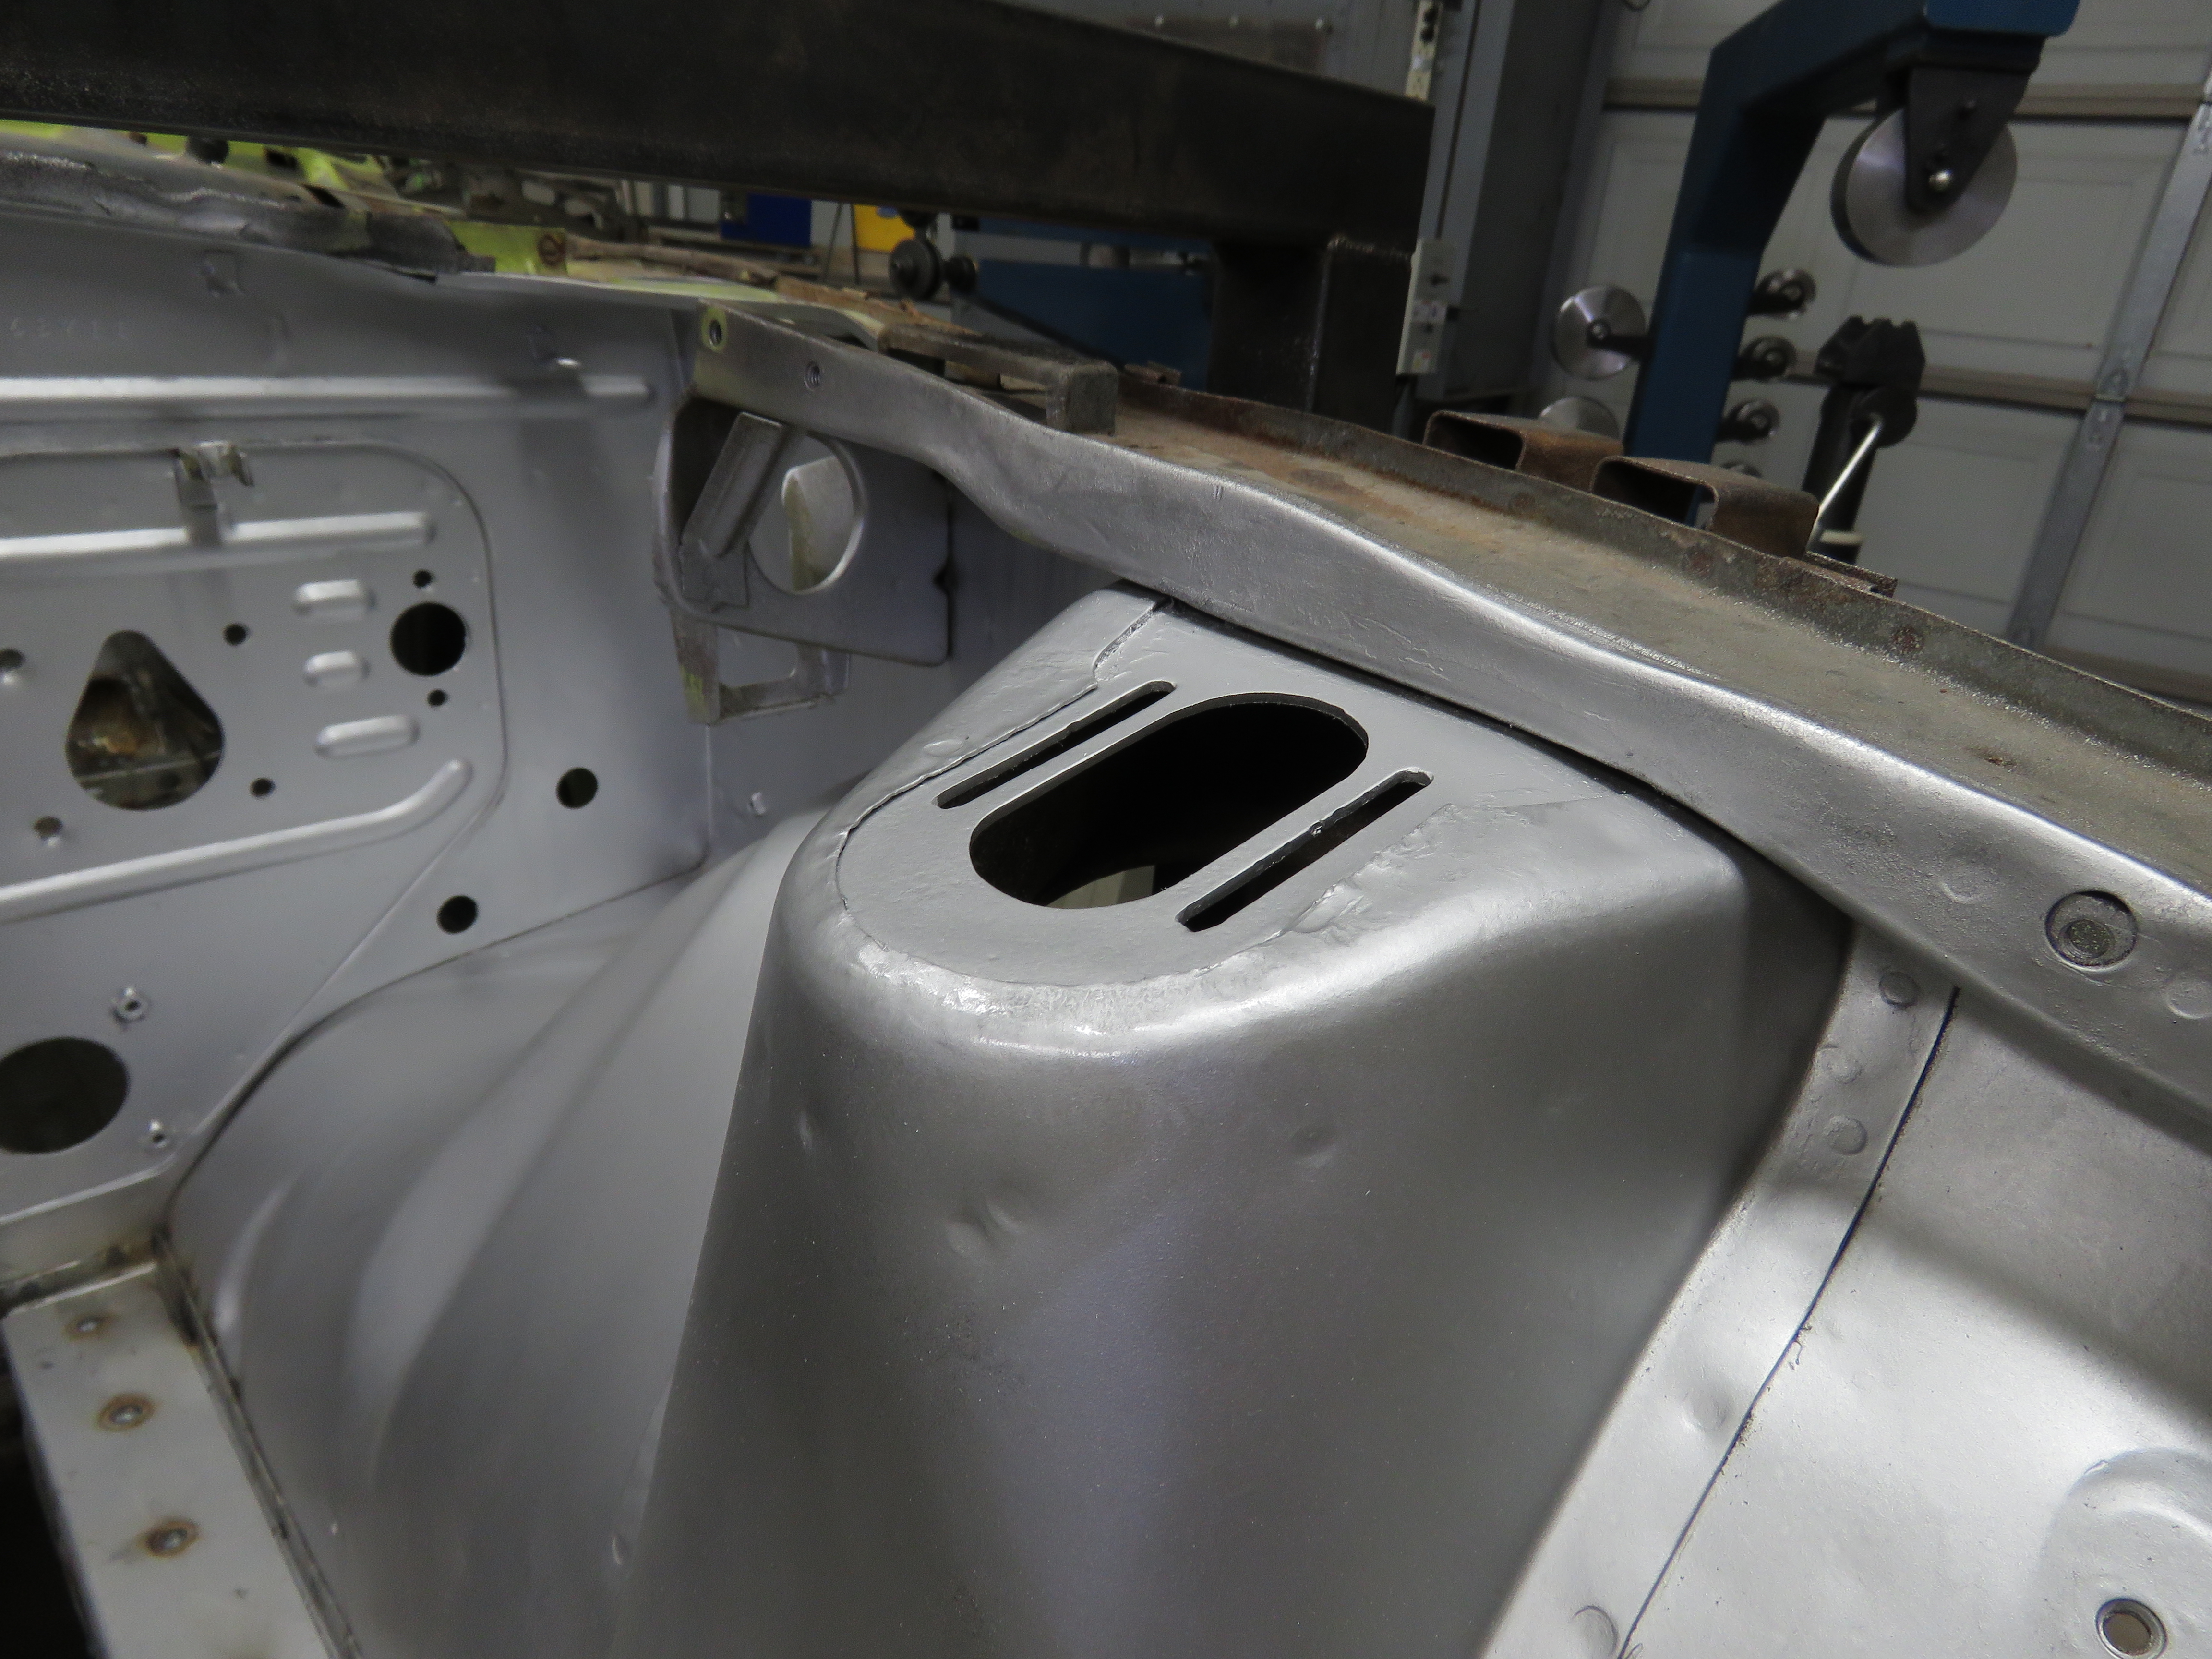
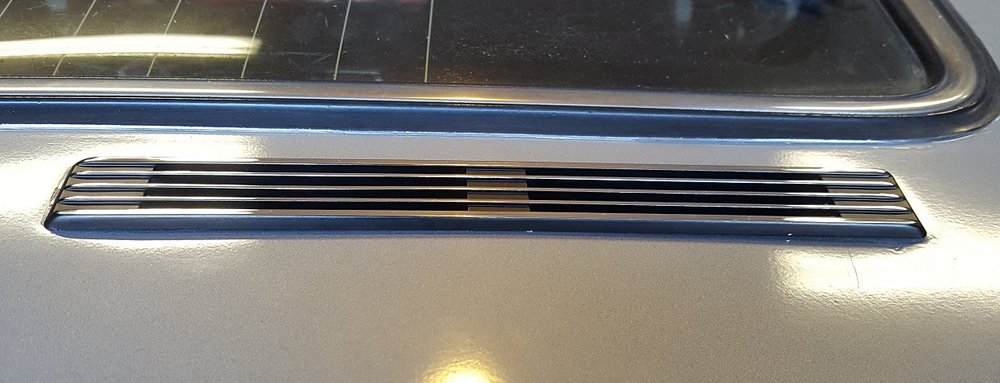
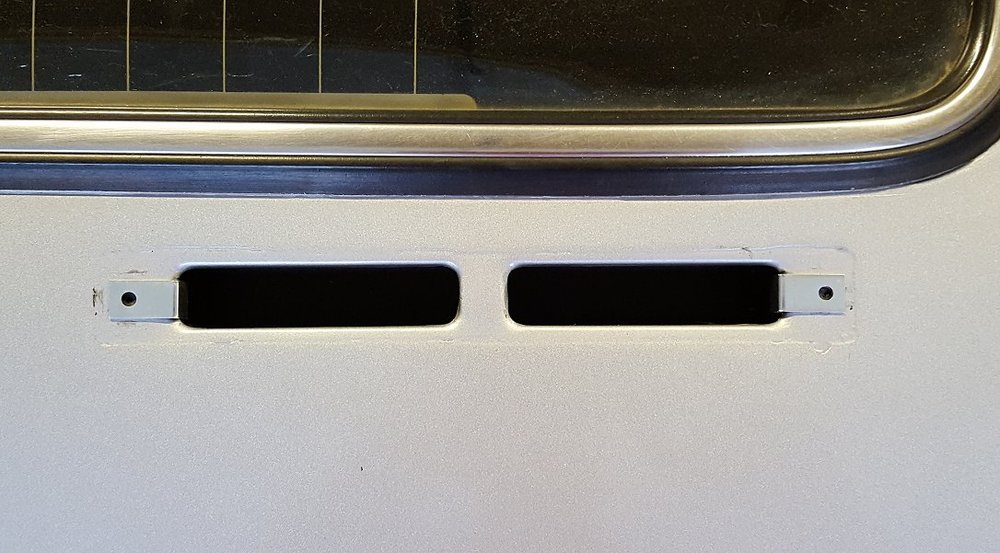
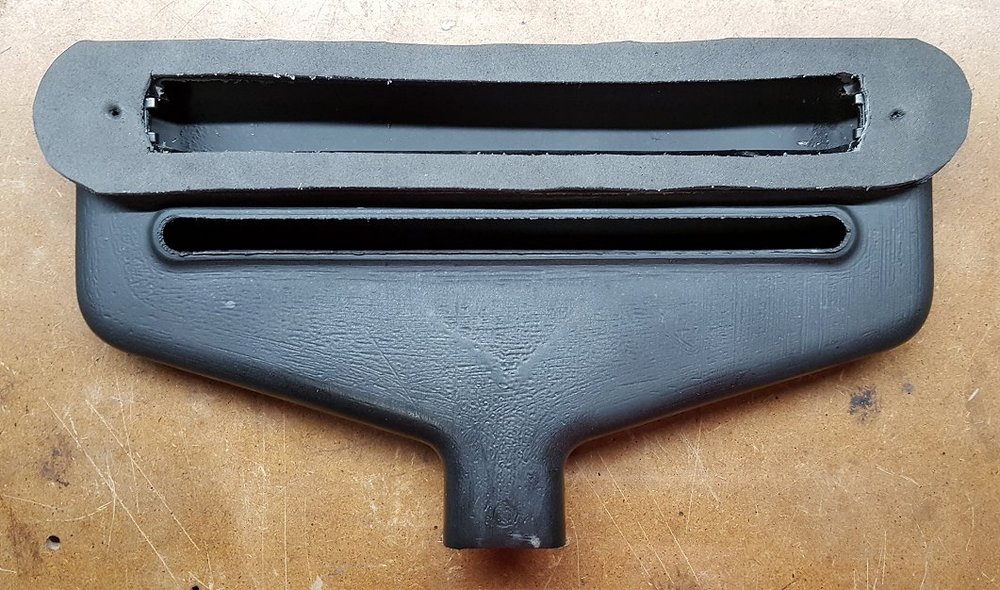
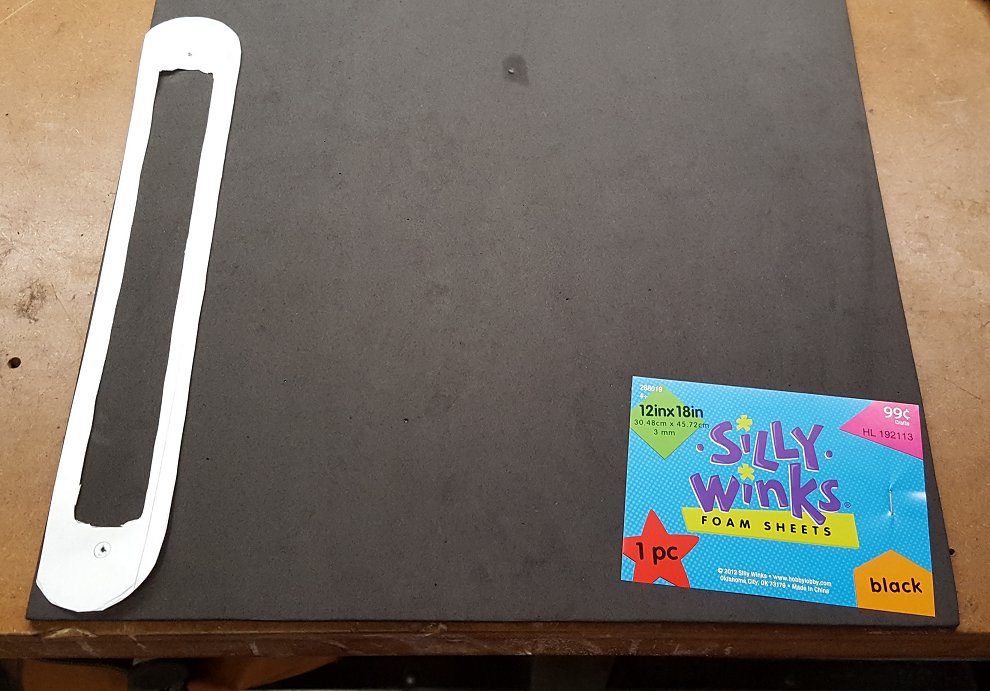
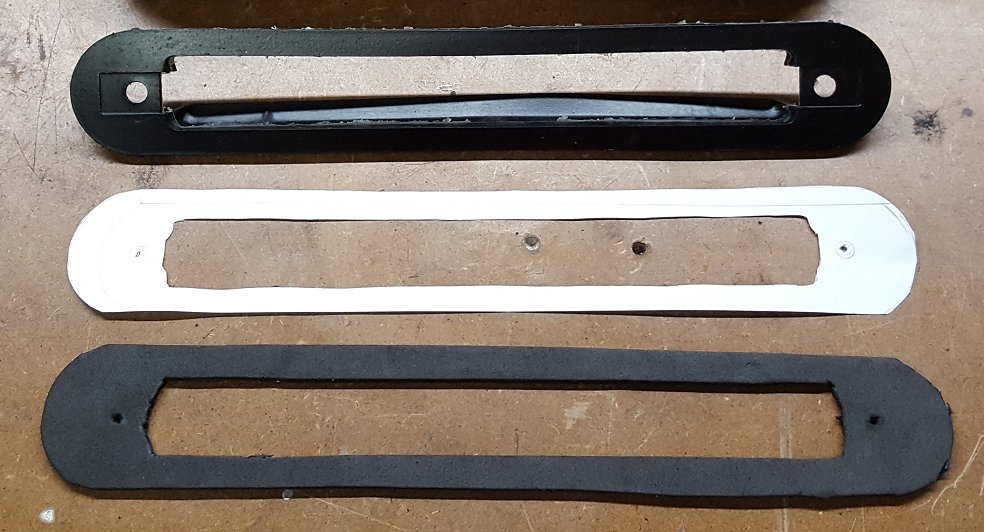
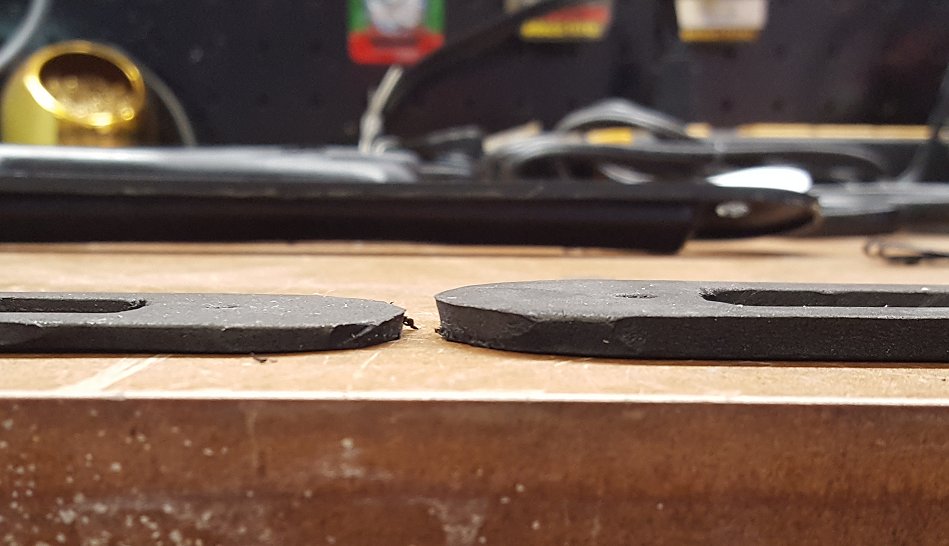
With the new hatch vent clips in hand I set about getting everything back together. I stopped by Hobby Lobby and picked up some 3mm and 7mm closed cell foam. It is made by Silly Winks. Using the rubber duct seal I bought from Steve I made a template of what the seal should look like. Since I had both sizes of foam I cut out gaskets from each size. After some initial testing I determined the thicker foam would not collapse enough to fit in the hatch opening. Below is a comparison. Using some automotive contact cement I glued the rubber gasket to the duct. The used the #10 speed nut I bought from the auto parts store as it is a 95% match to the original. I sprayed some 3M spray adhesive to the foam gasket I made, placed it on the rubber gasket and let it set up for about 15 minutes. I patiently worked the assembly duct back in to the hatch opening, taking care not to damage the foam gasket. After a few minutes of fiddling, it was in. I then secured it using the clips I had made. The clips hold the assembly nice and tight! Now that the severe weather has passed I am going to track down some barrel clips so I can attach the chrome plastic grilles over the vent openings. The finish line is in sight!


 1 point
 -
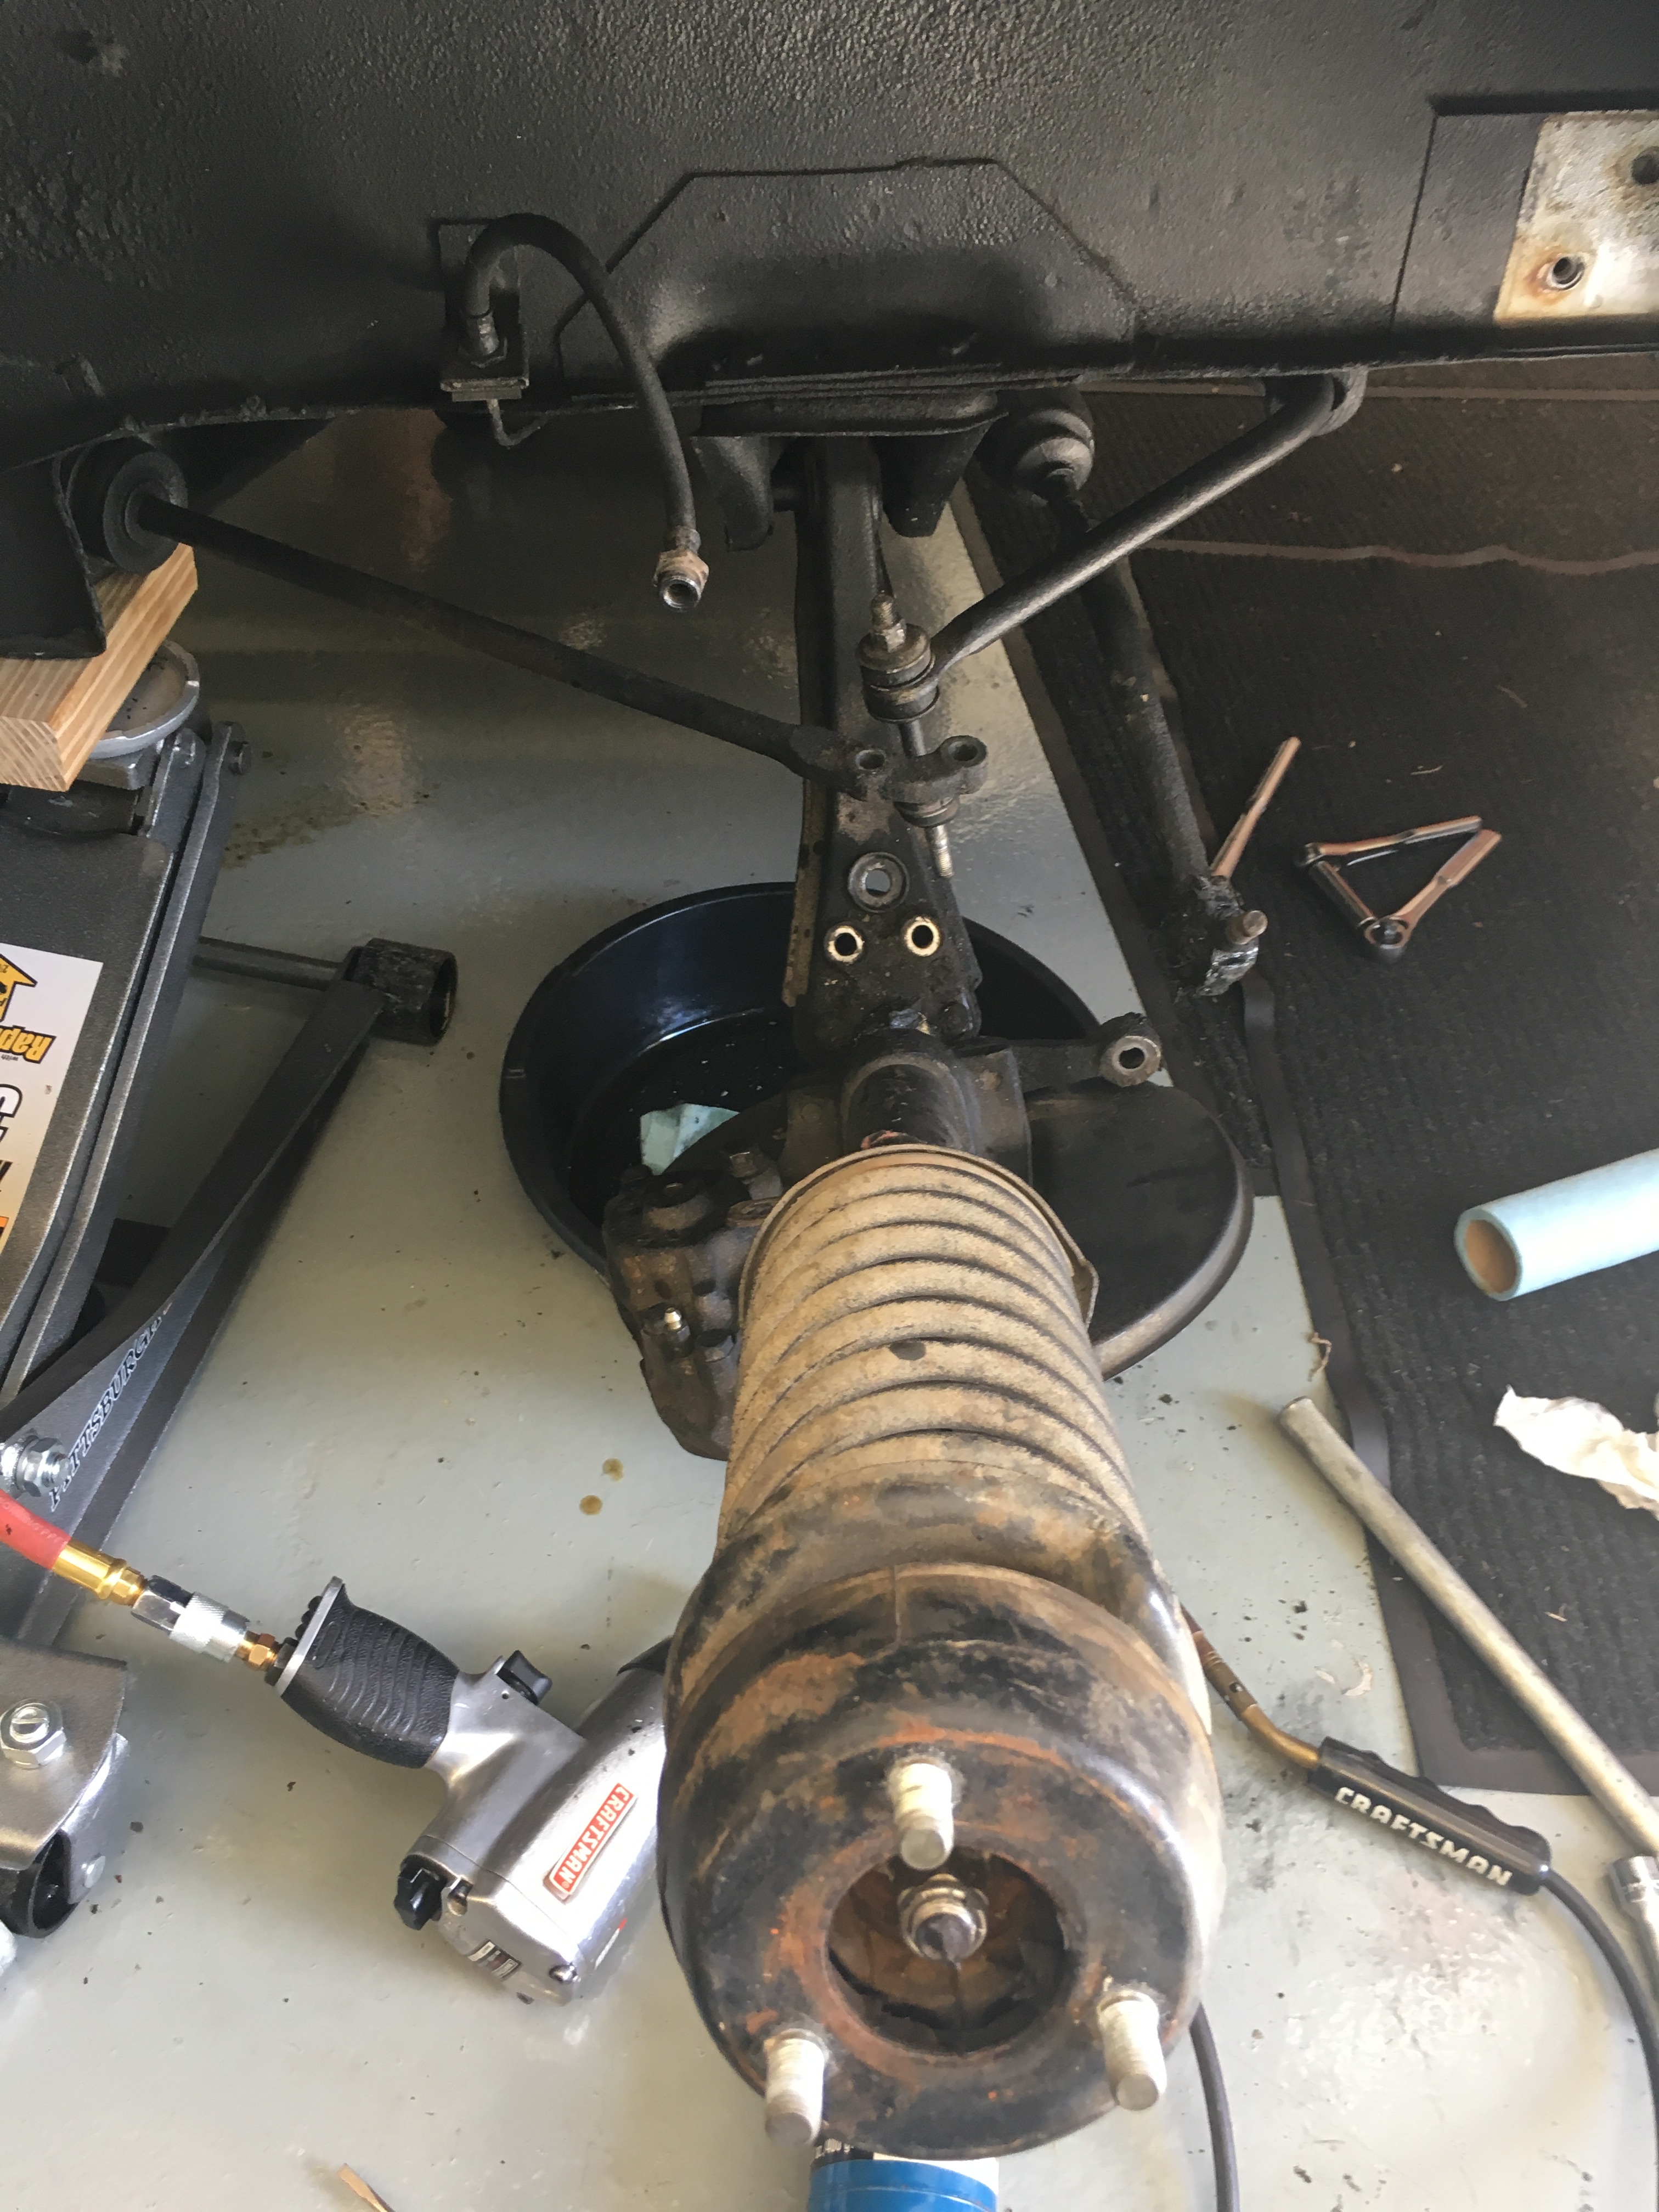
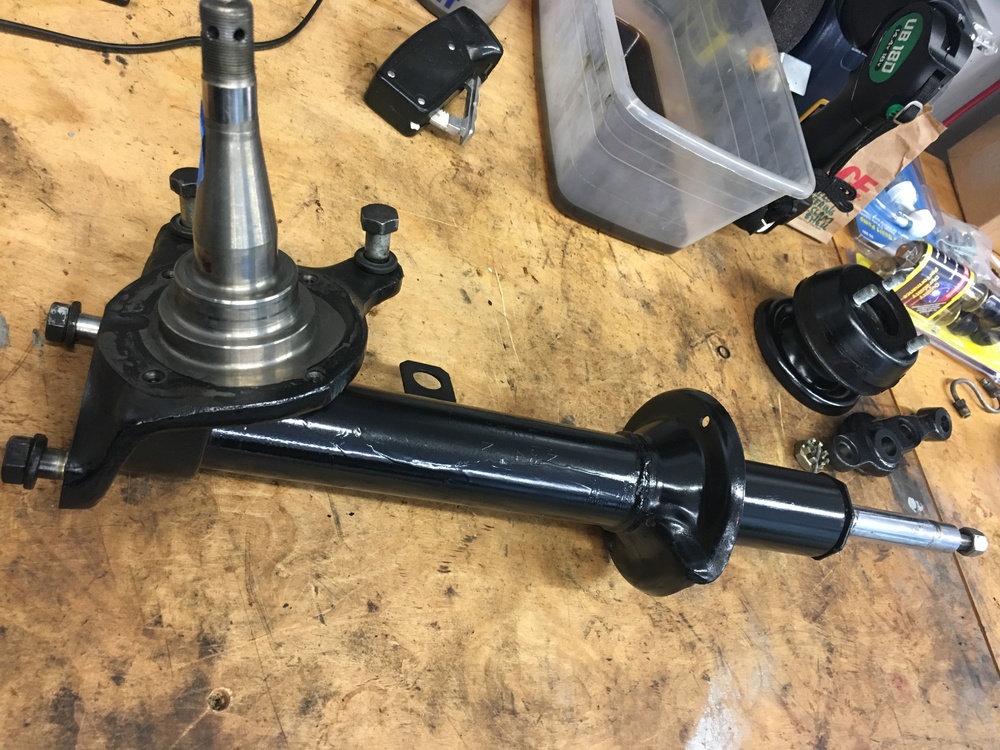
Redoing the front end of the 73....new ball joints, tierod ends, Tokico Blues, Eibach and Willwood brakes.


 1 point
 -
Polished SASSZ's little sister RoZy! Almost warm enough to hit the road!1 point
-
1 point
-
Jeff, If you haven't already, try Auveco. https://www.auveco.com/ I have found numerous parts there for my Z that I could not find anywhere else and their catalog is extensive. They even have an entire section dedicated to metric. This is where I was able to locate the plastic door panel clips that hold the door panel to the door itself. Not an exact match to the originals but they worked perfectly. They might just have what you are looking for. Hope that helps. Mike.1 point
-
1 pointThanks Charles! I'm gonna have to man up and sale on ebay. Always a buyer, never been much of a seller. I'm too honest to be a salesman.1 point
-
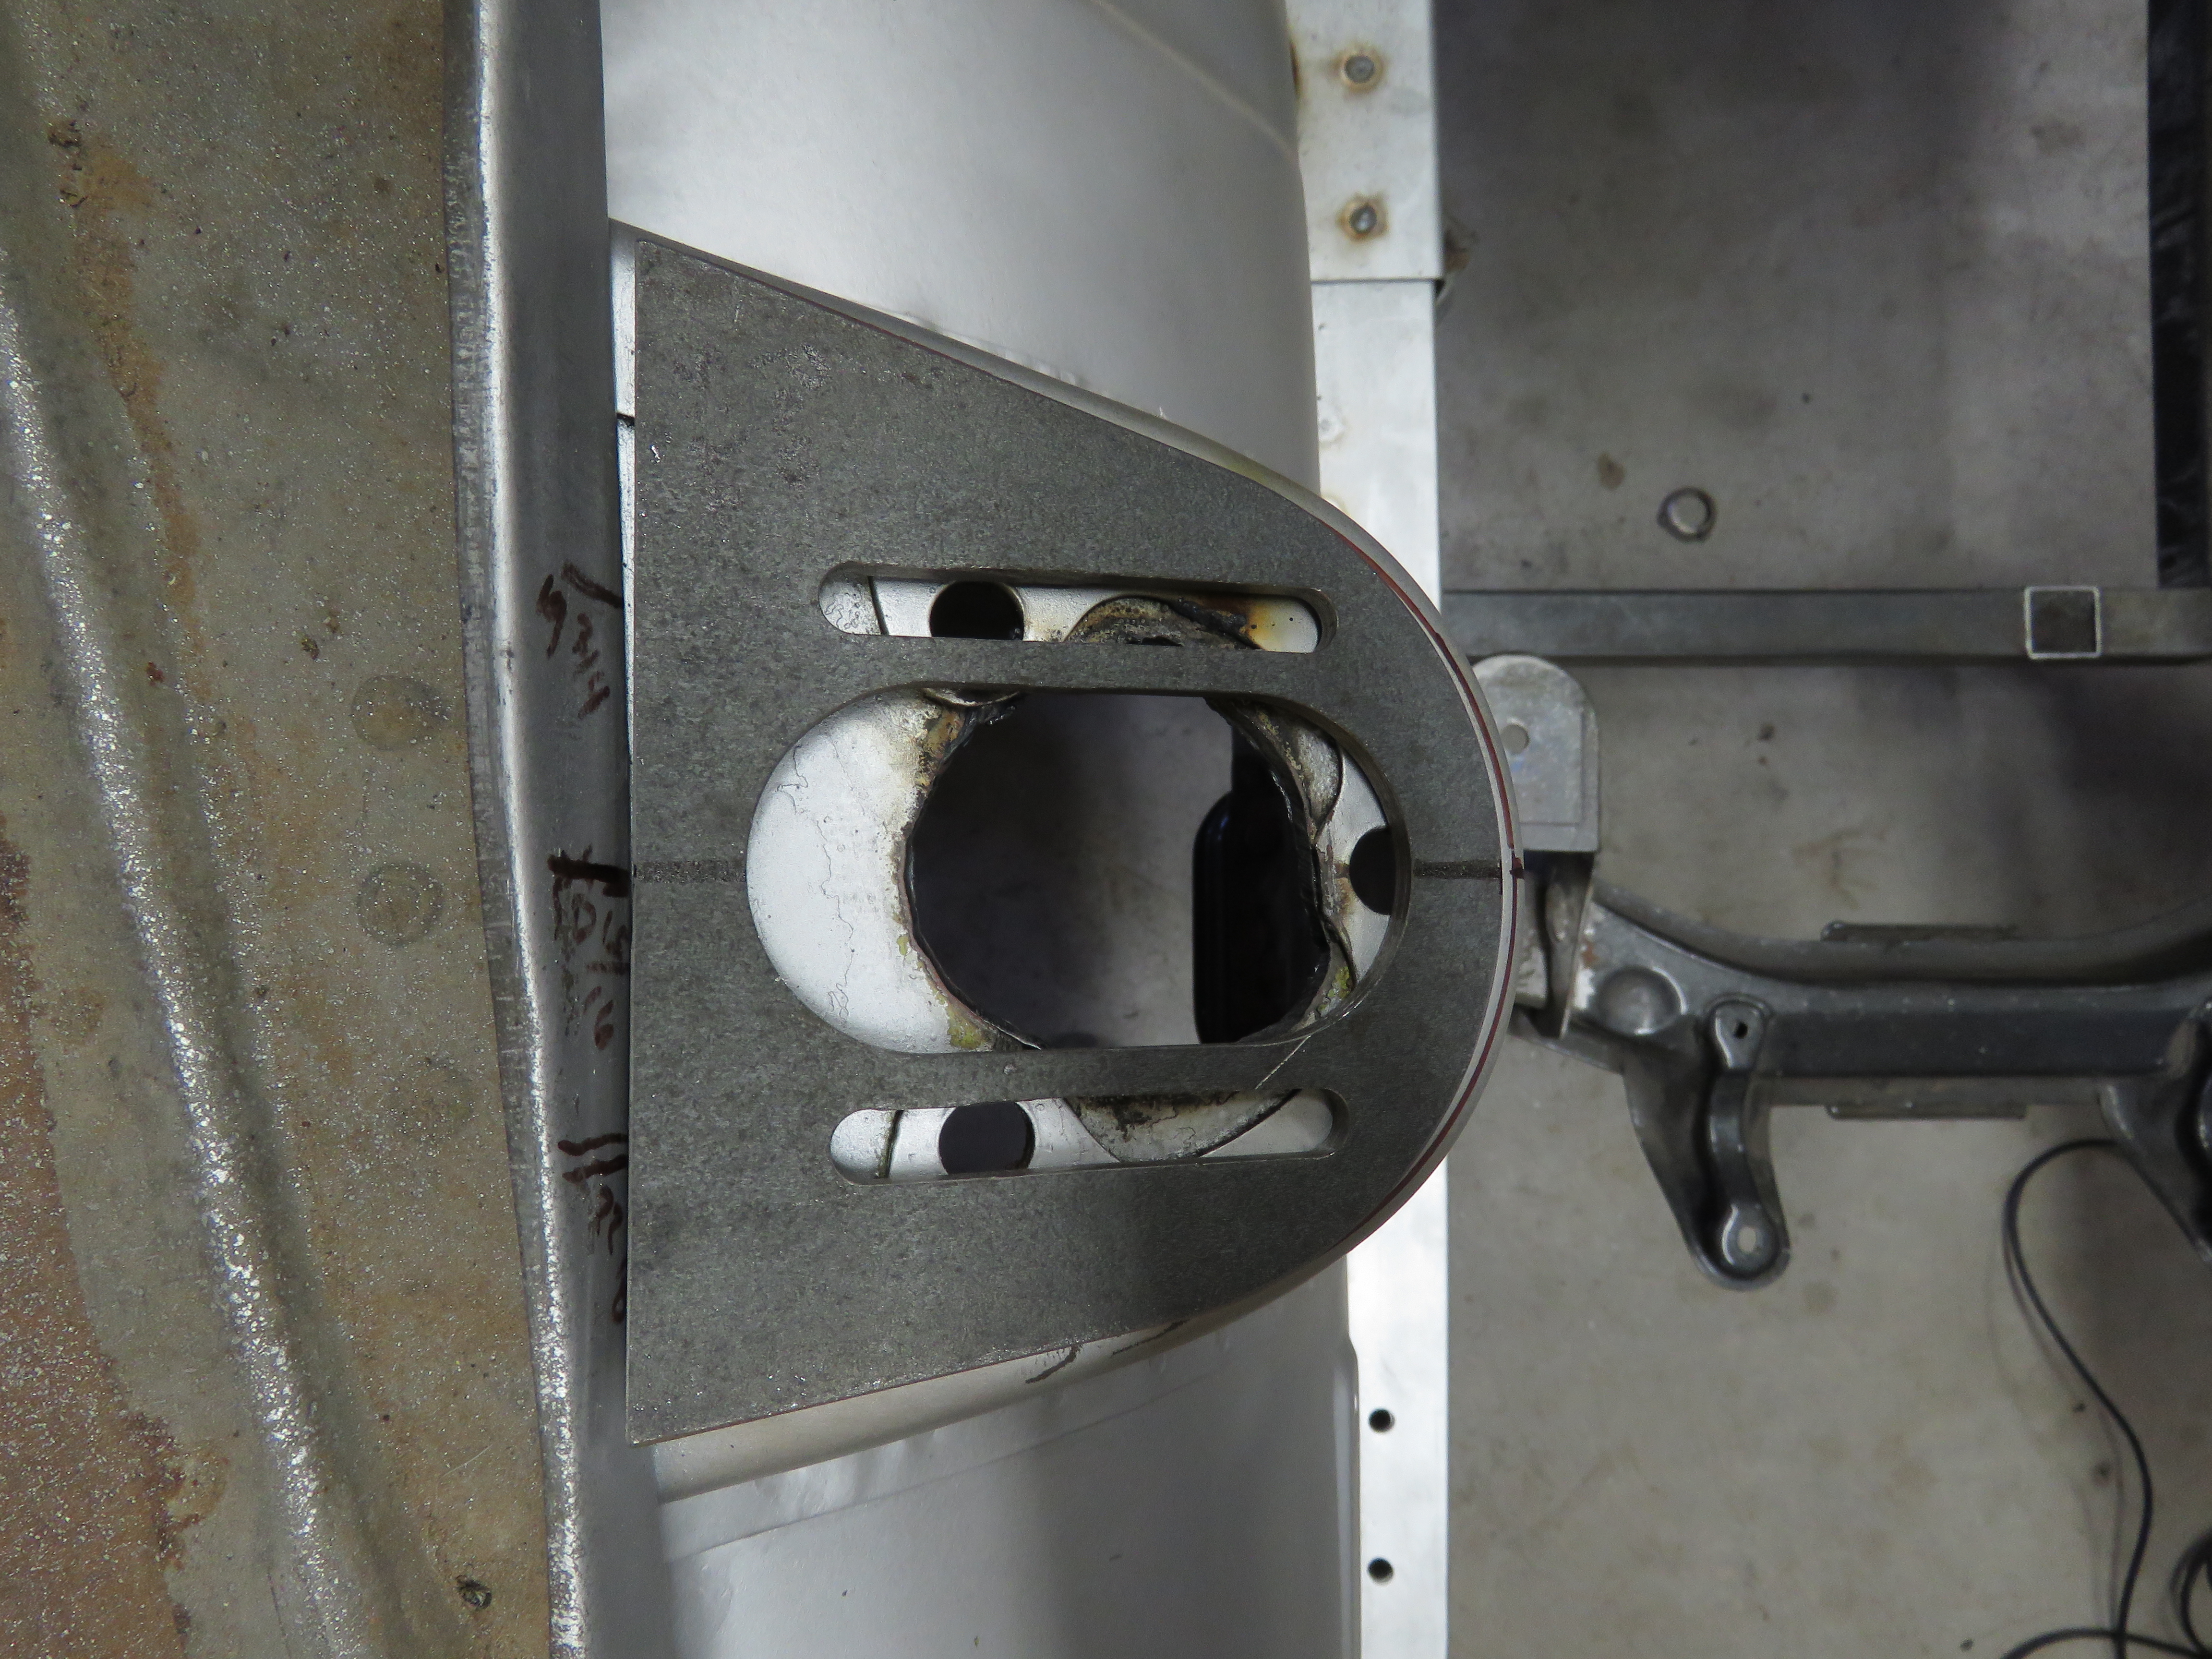
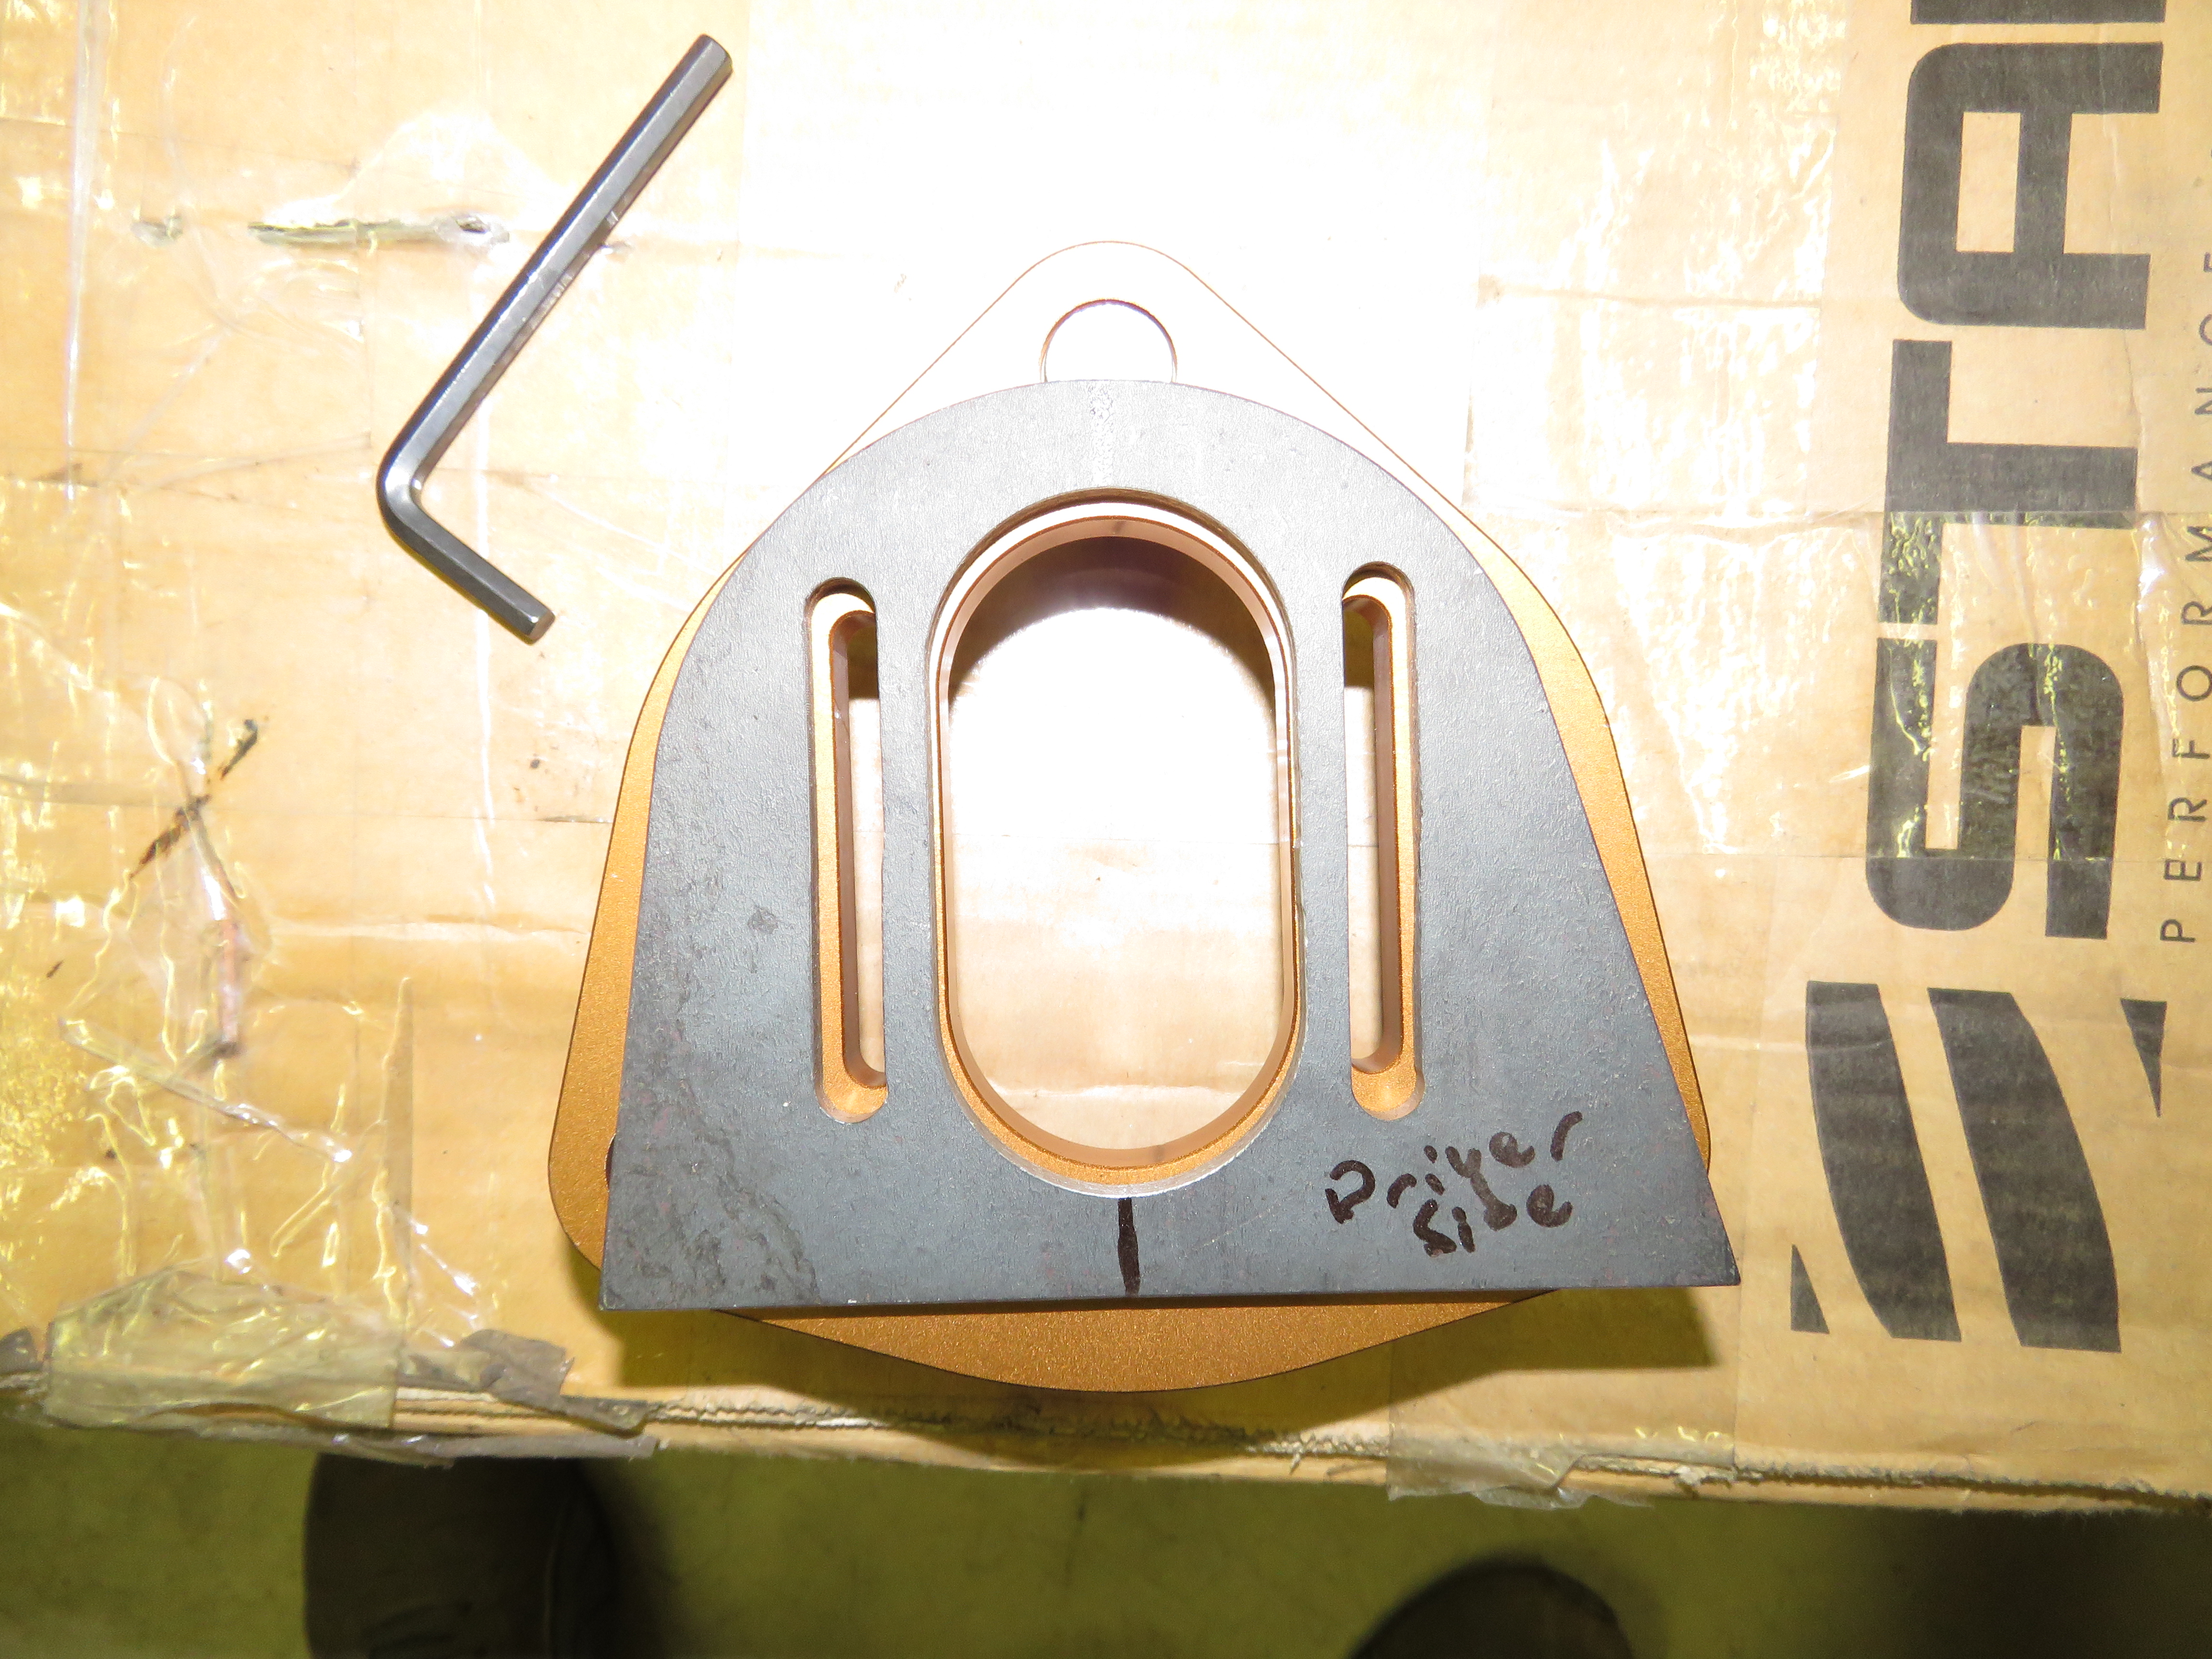
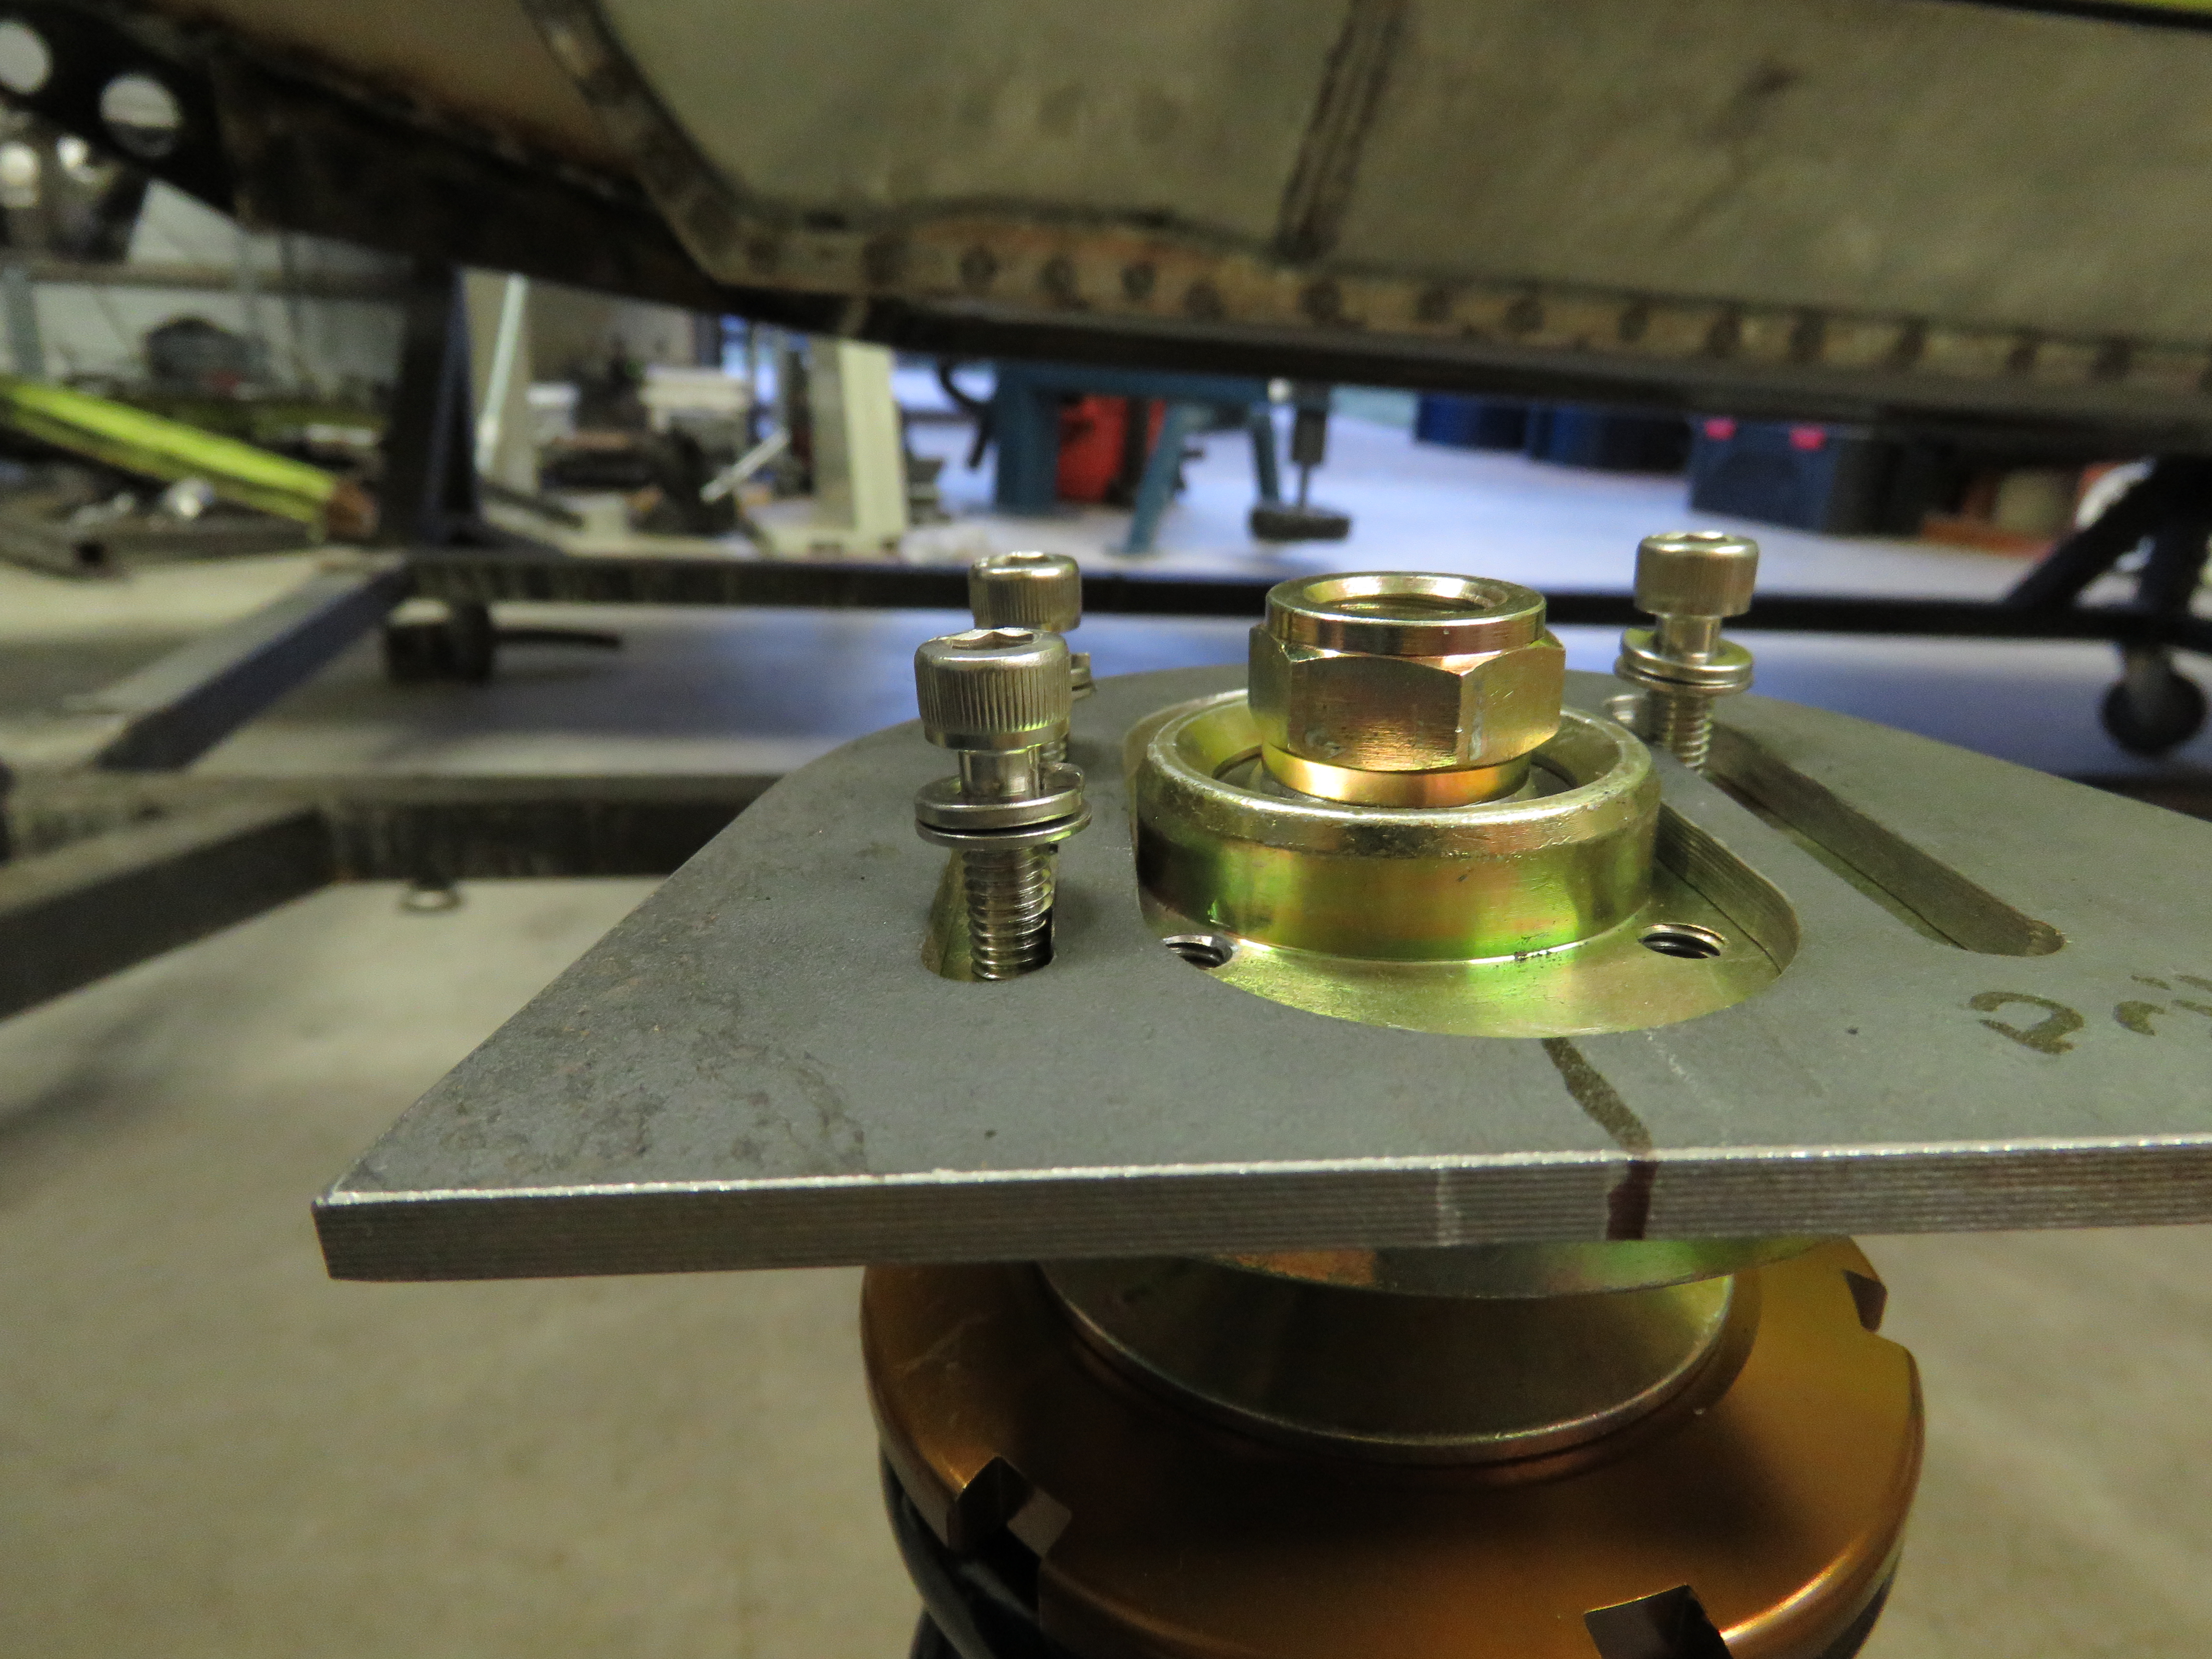
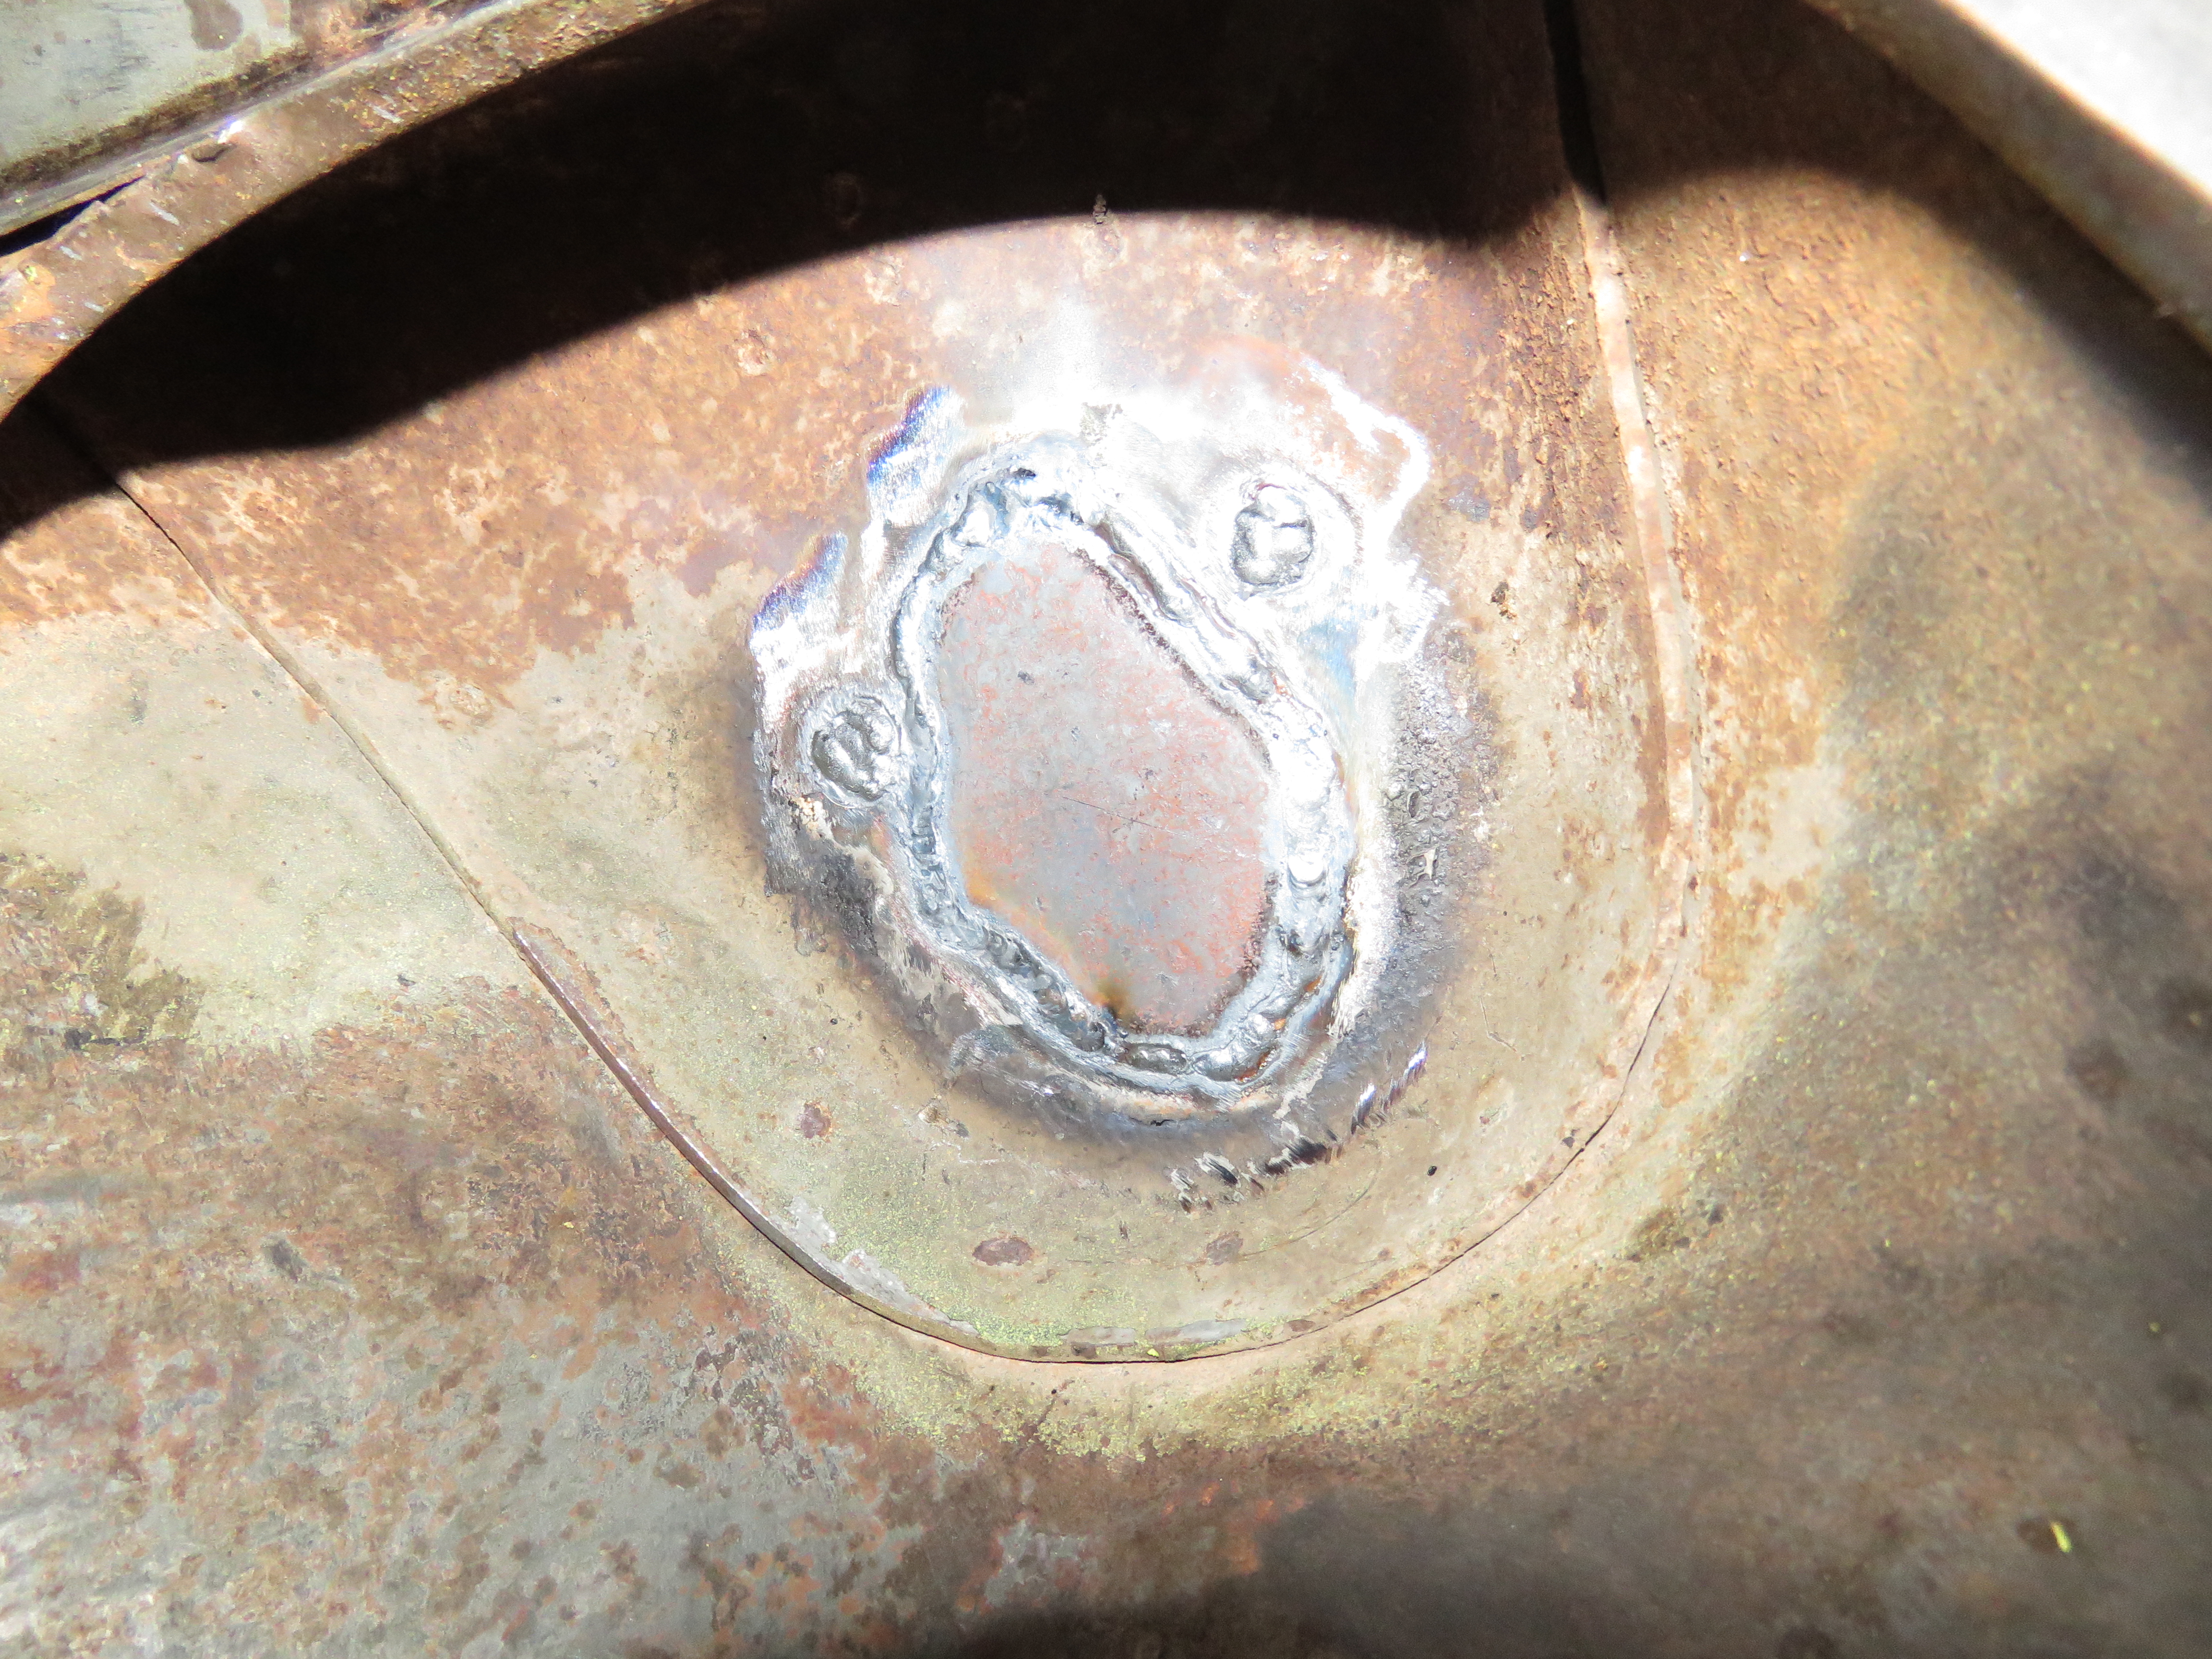
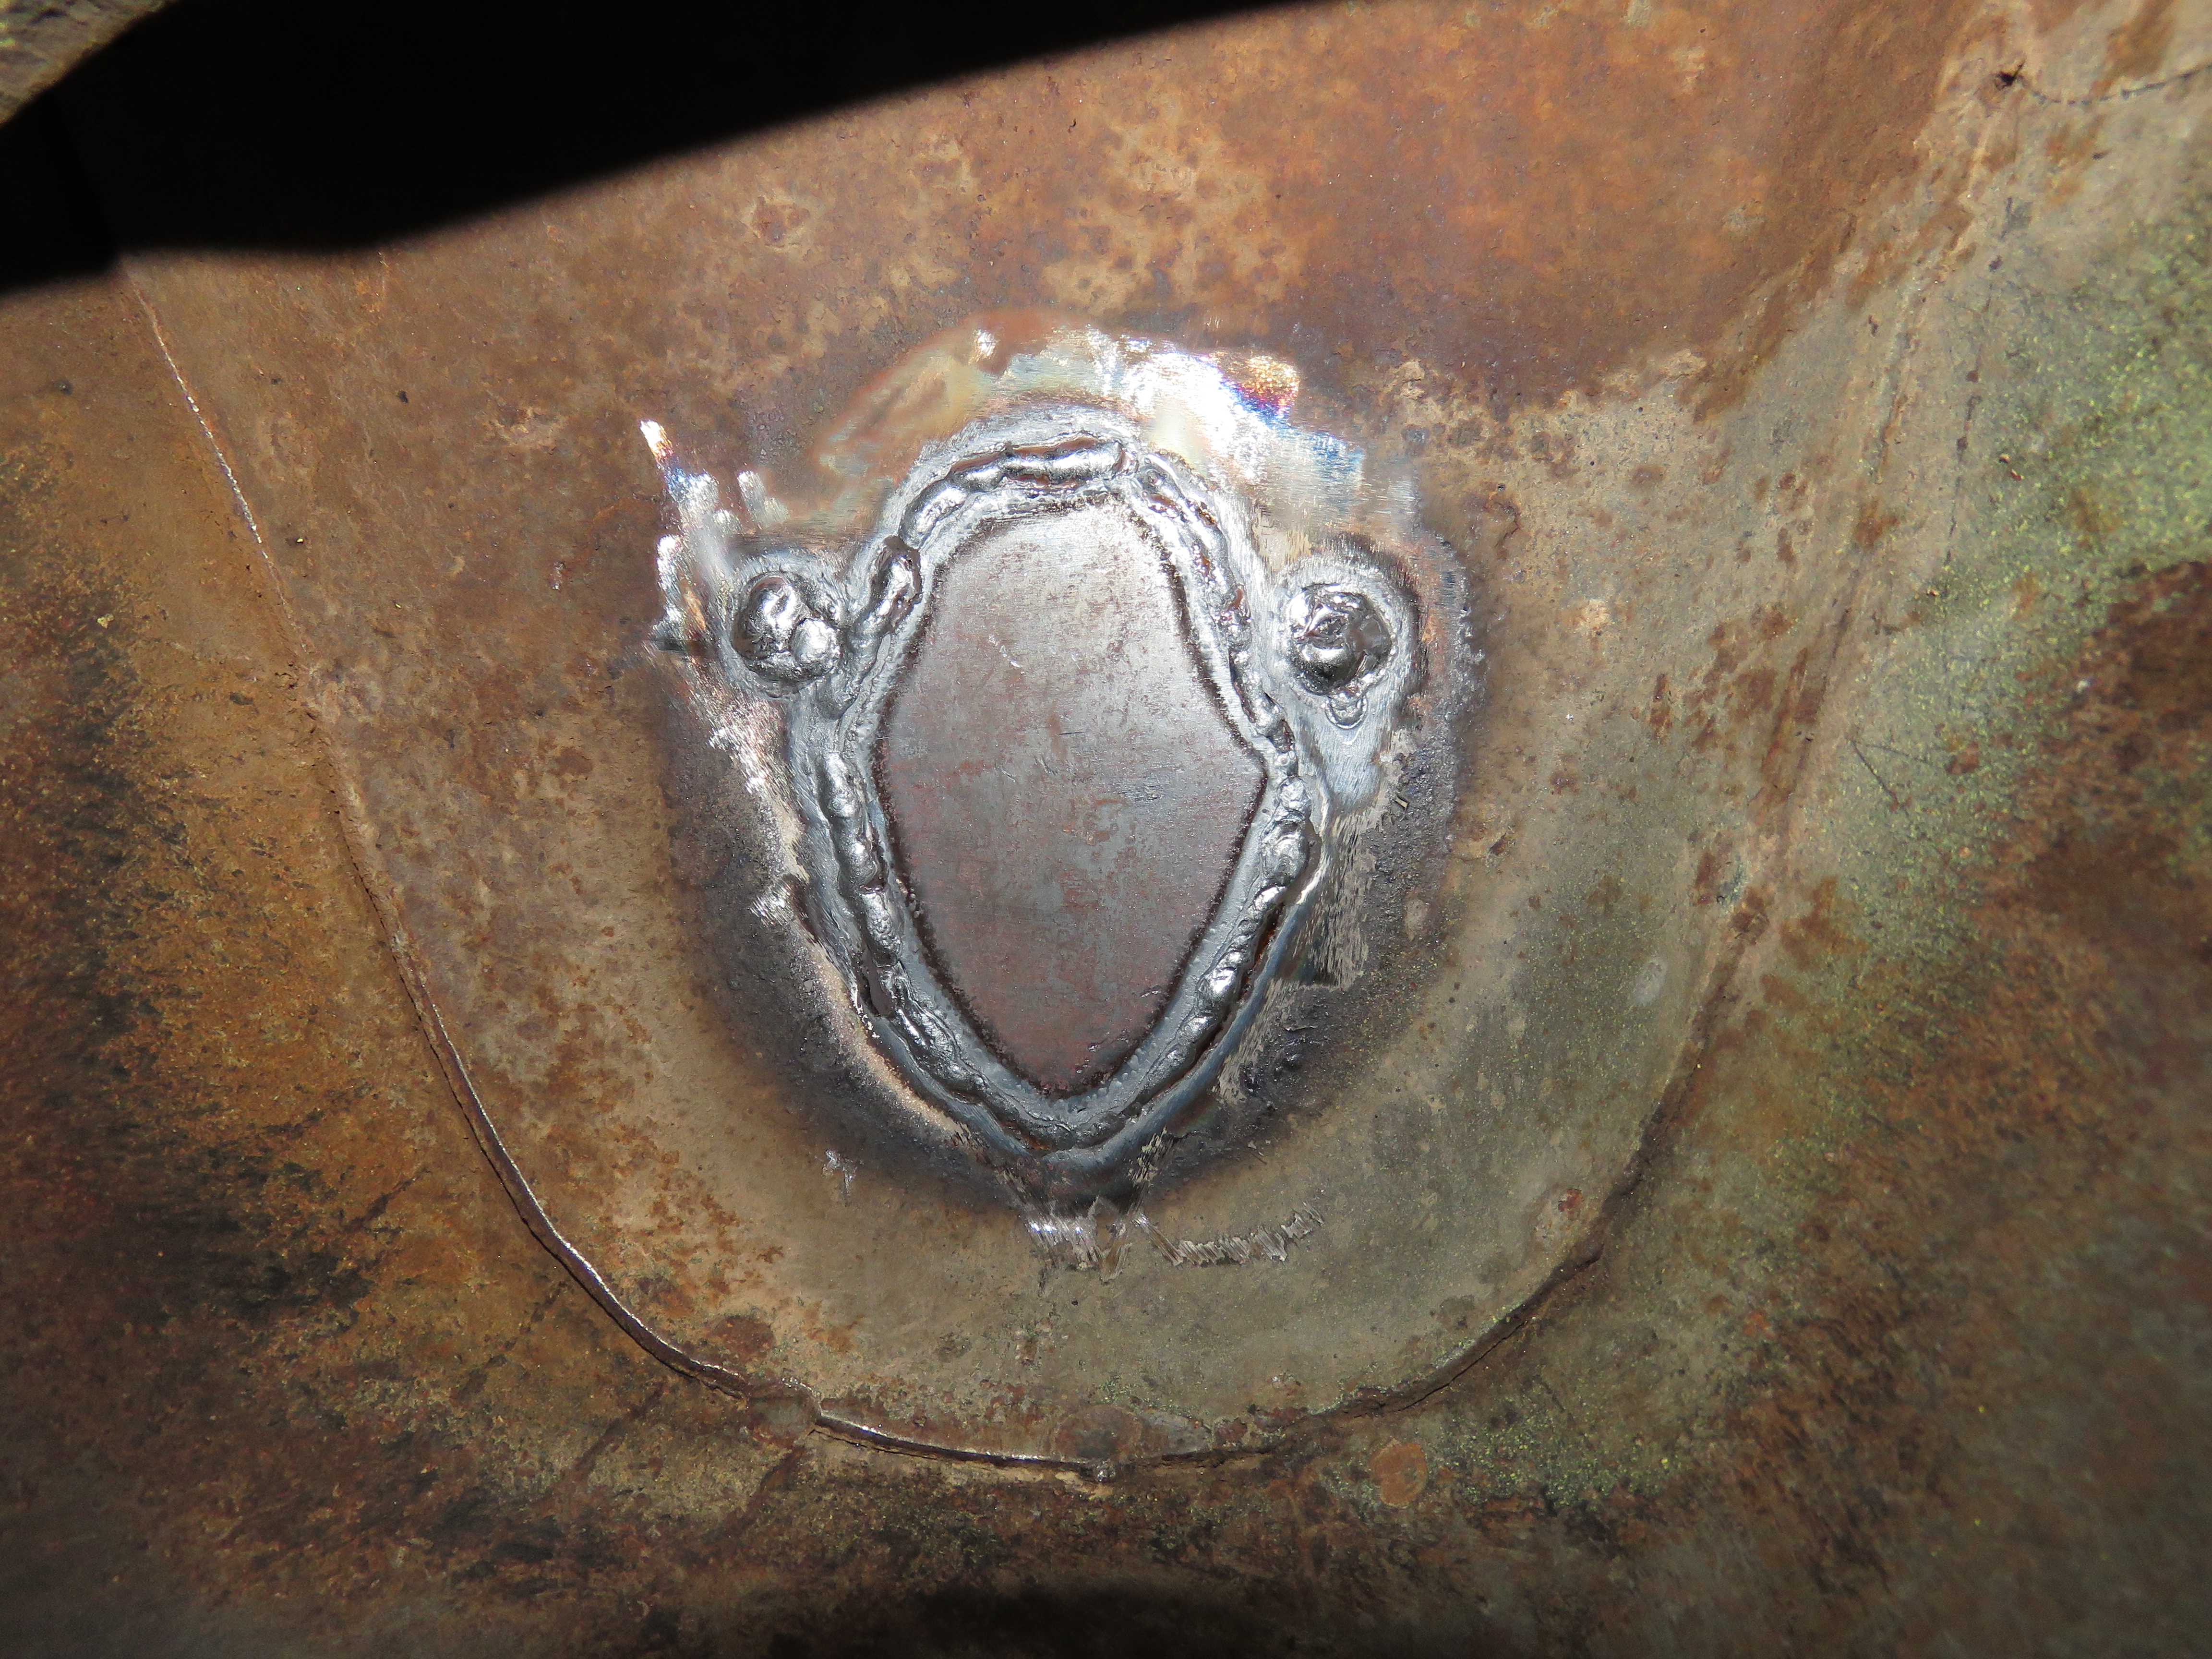
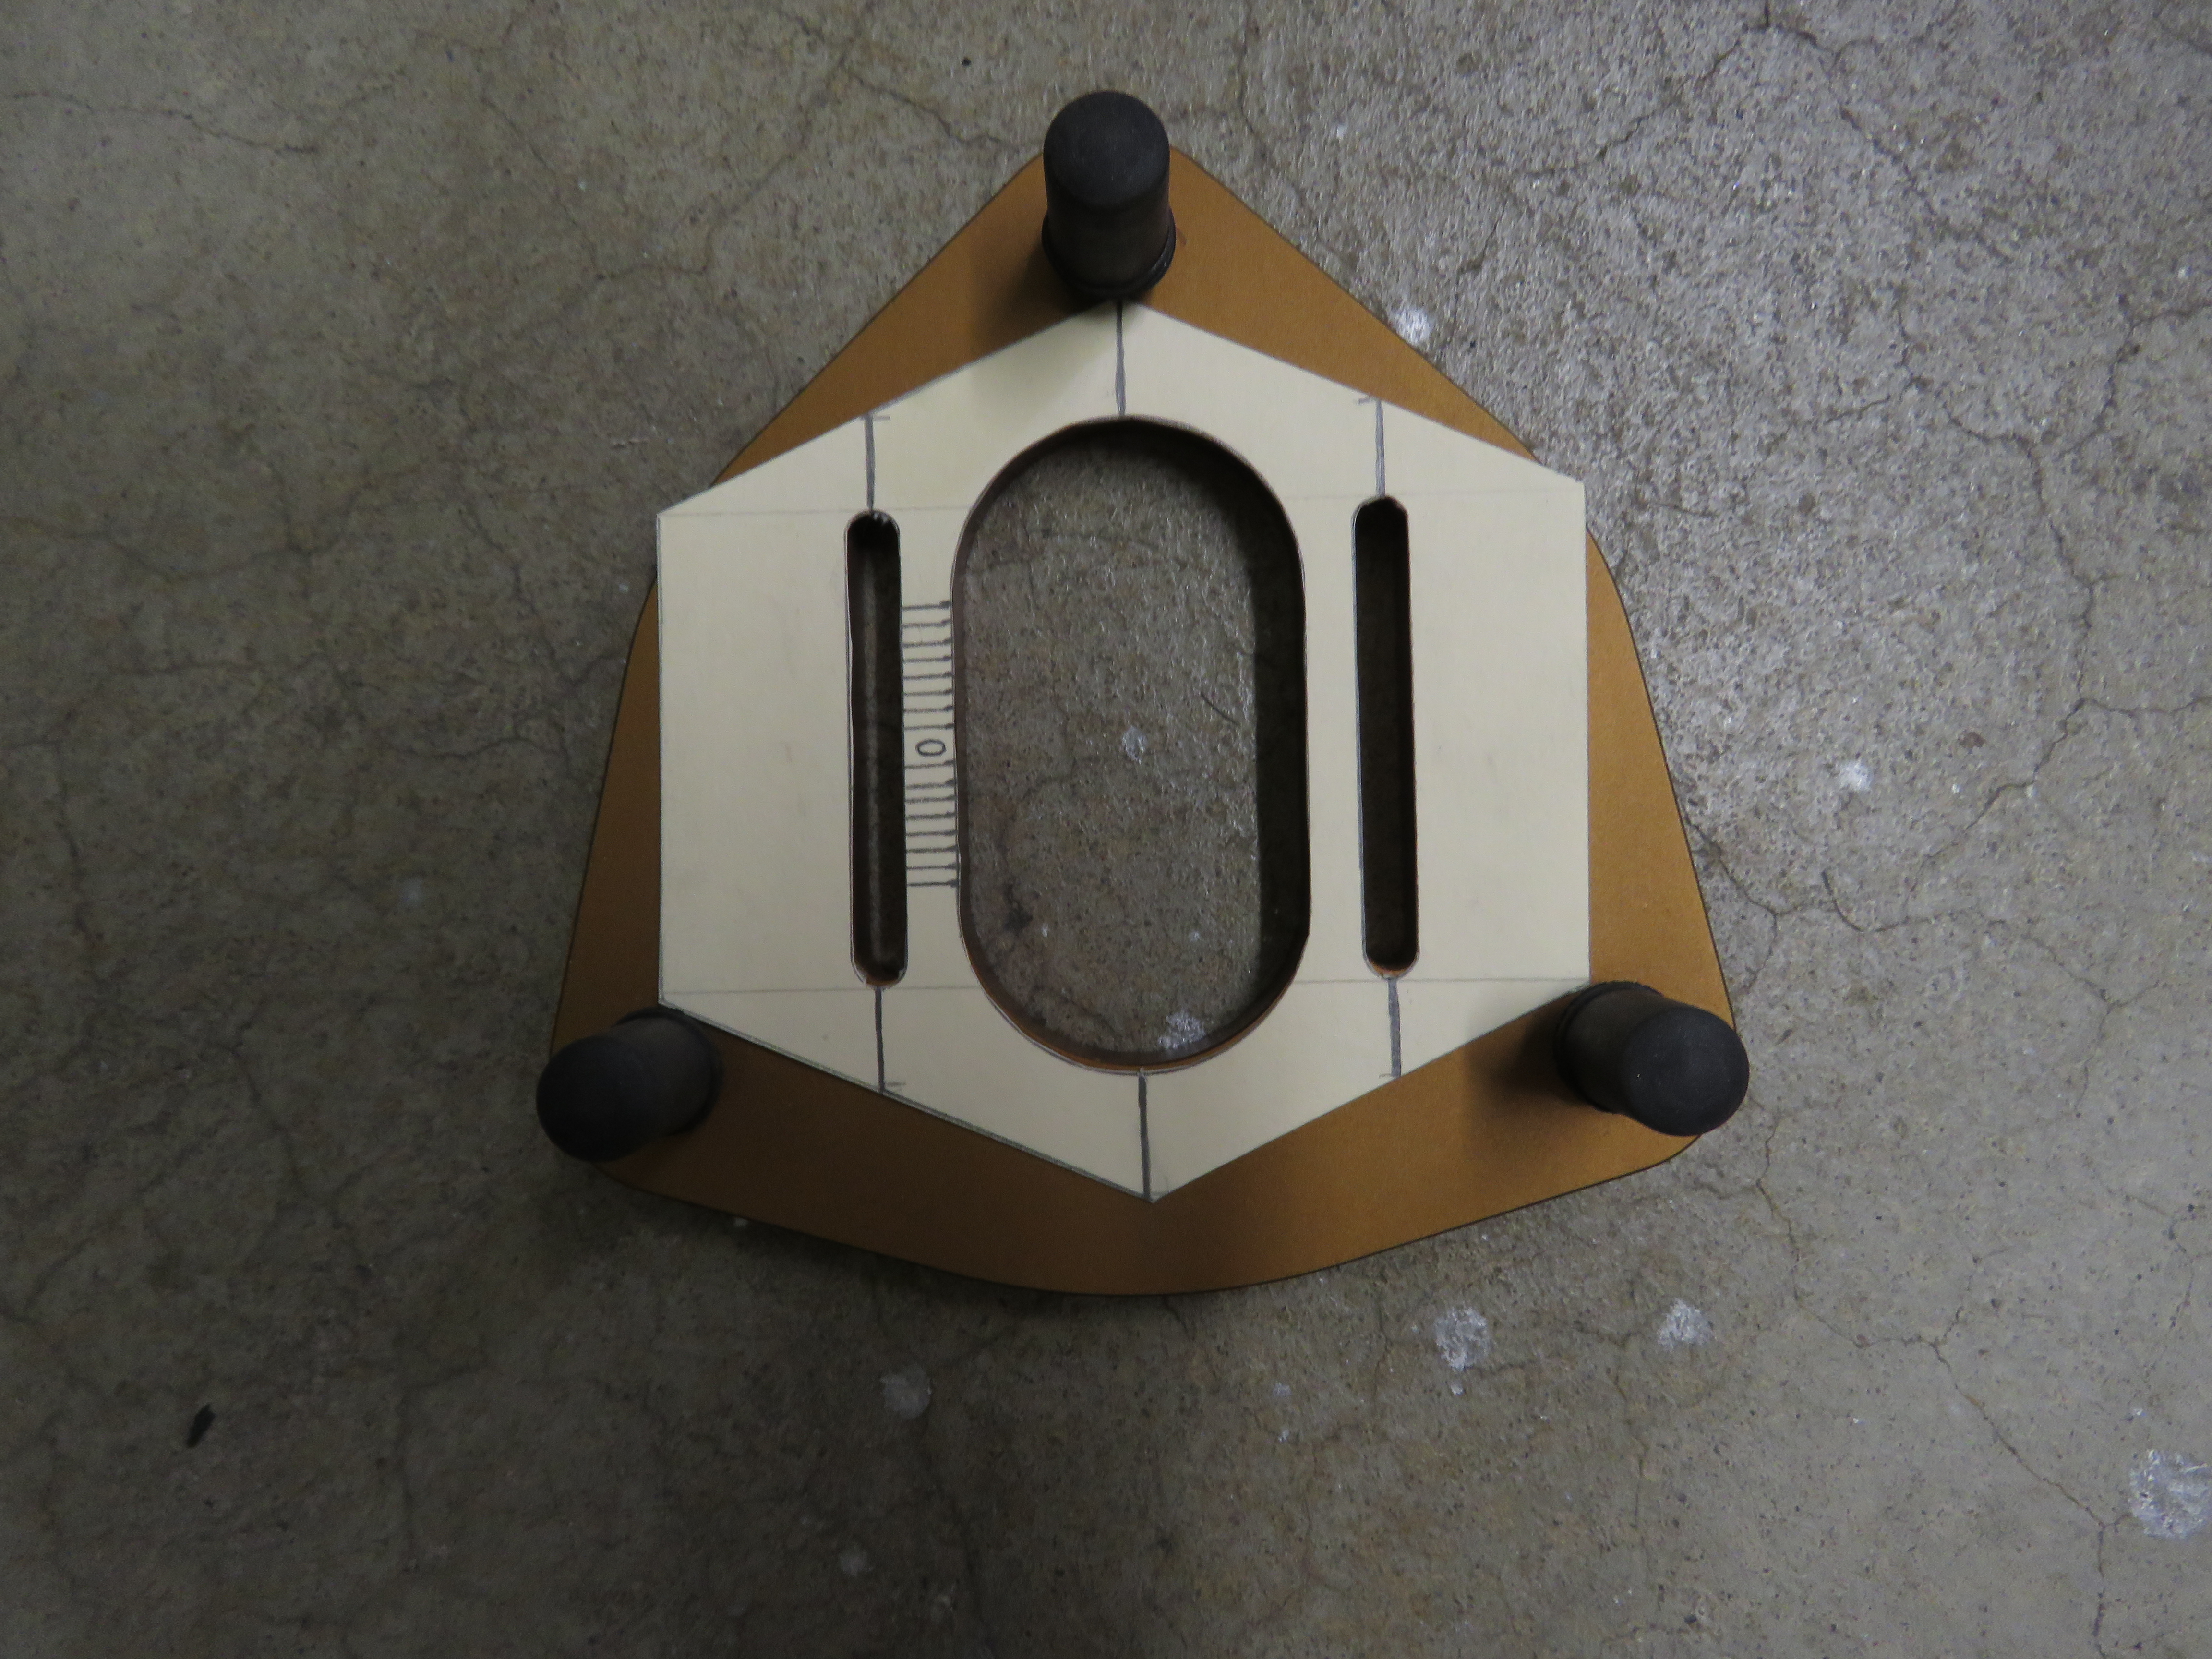
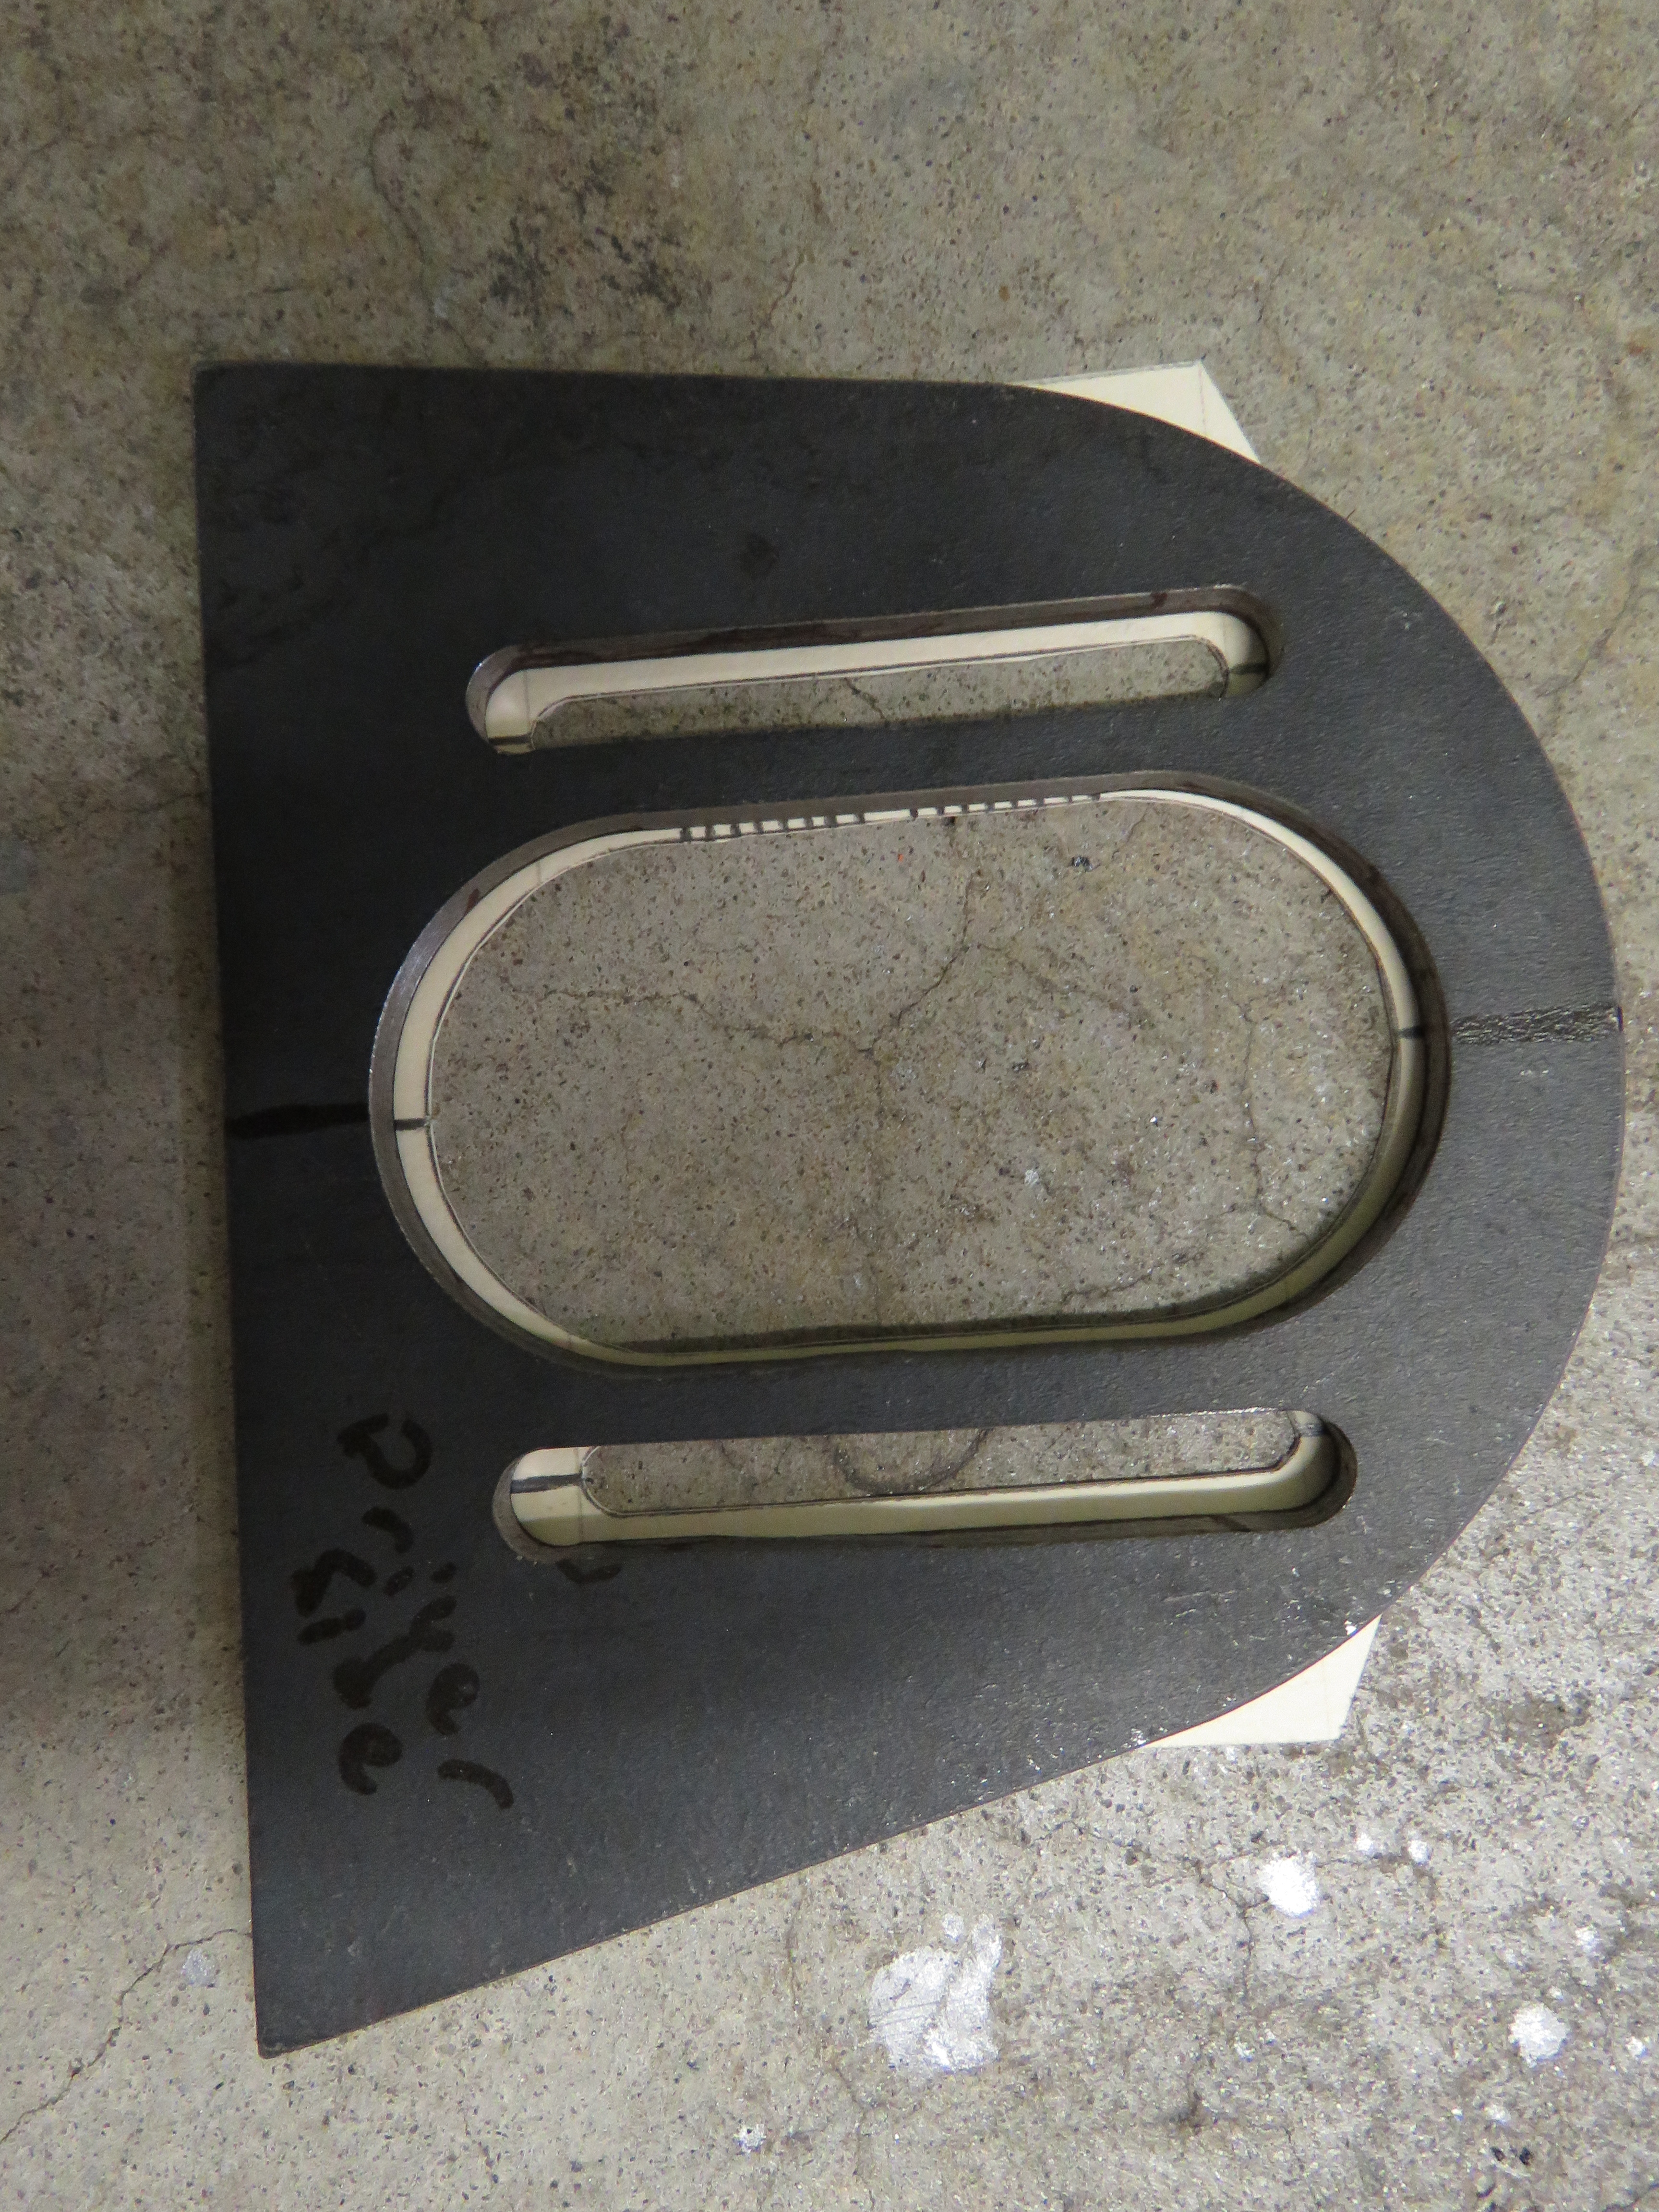
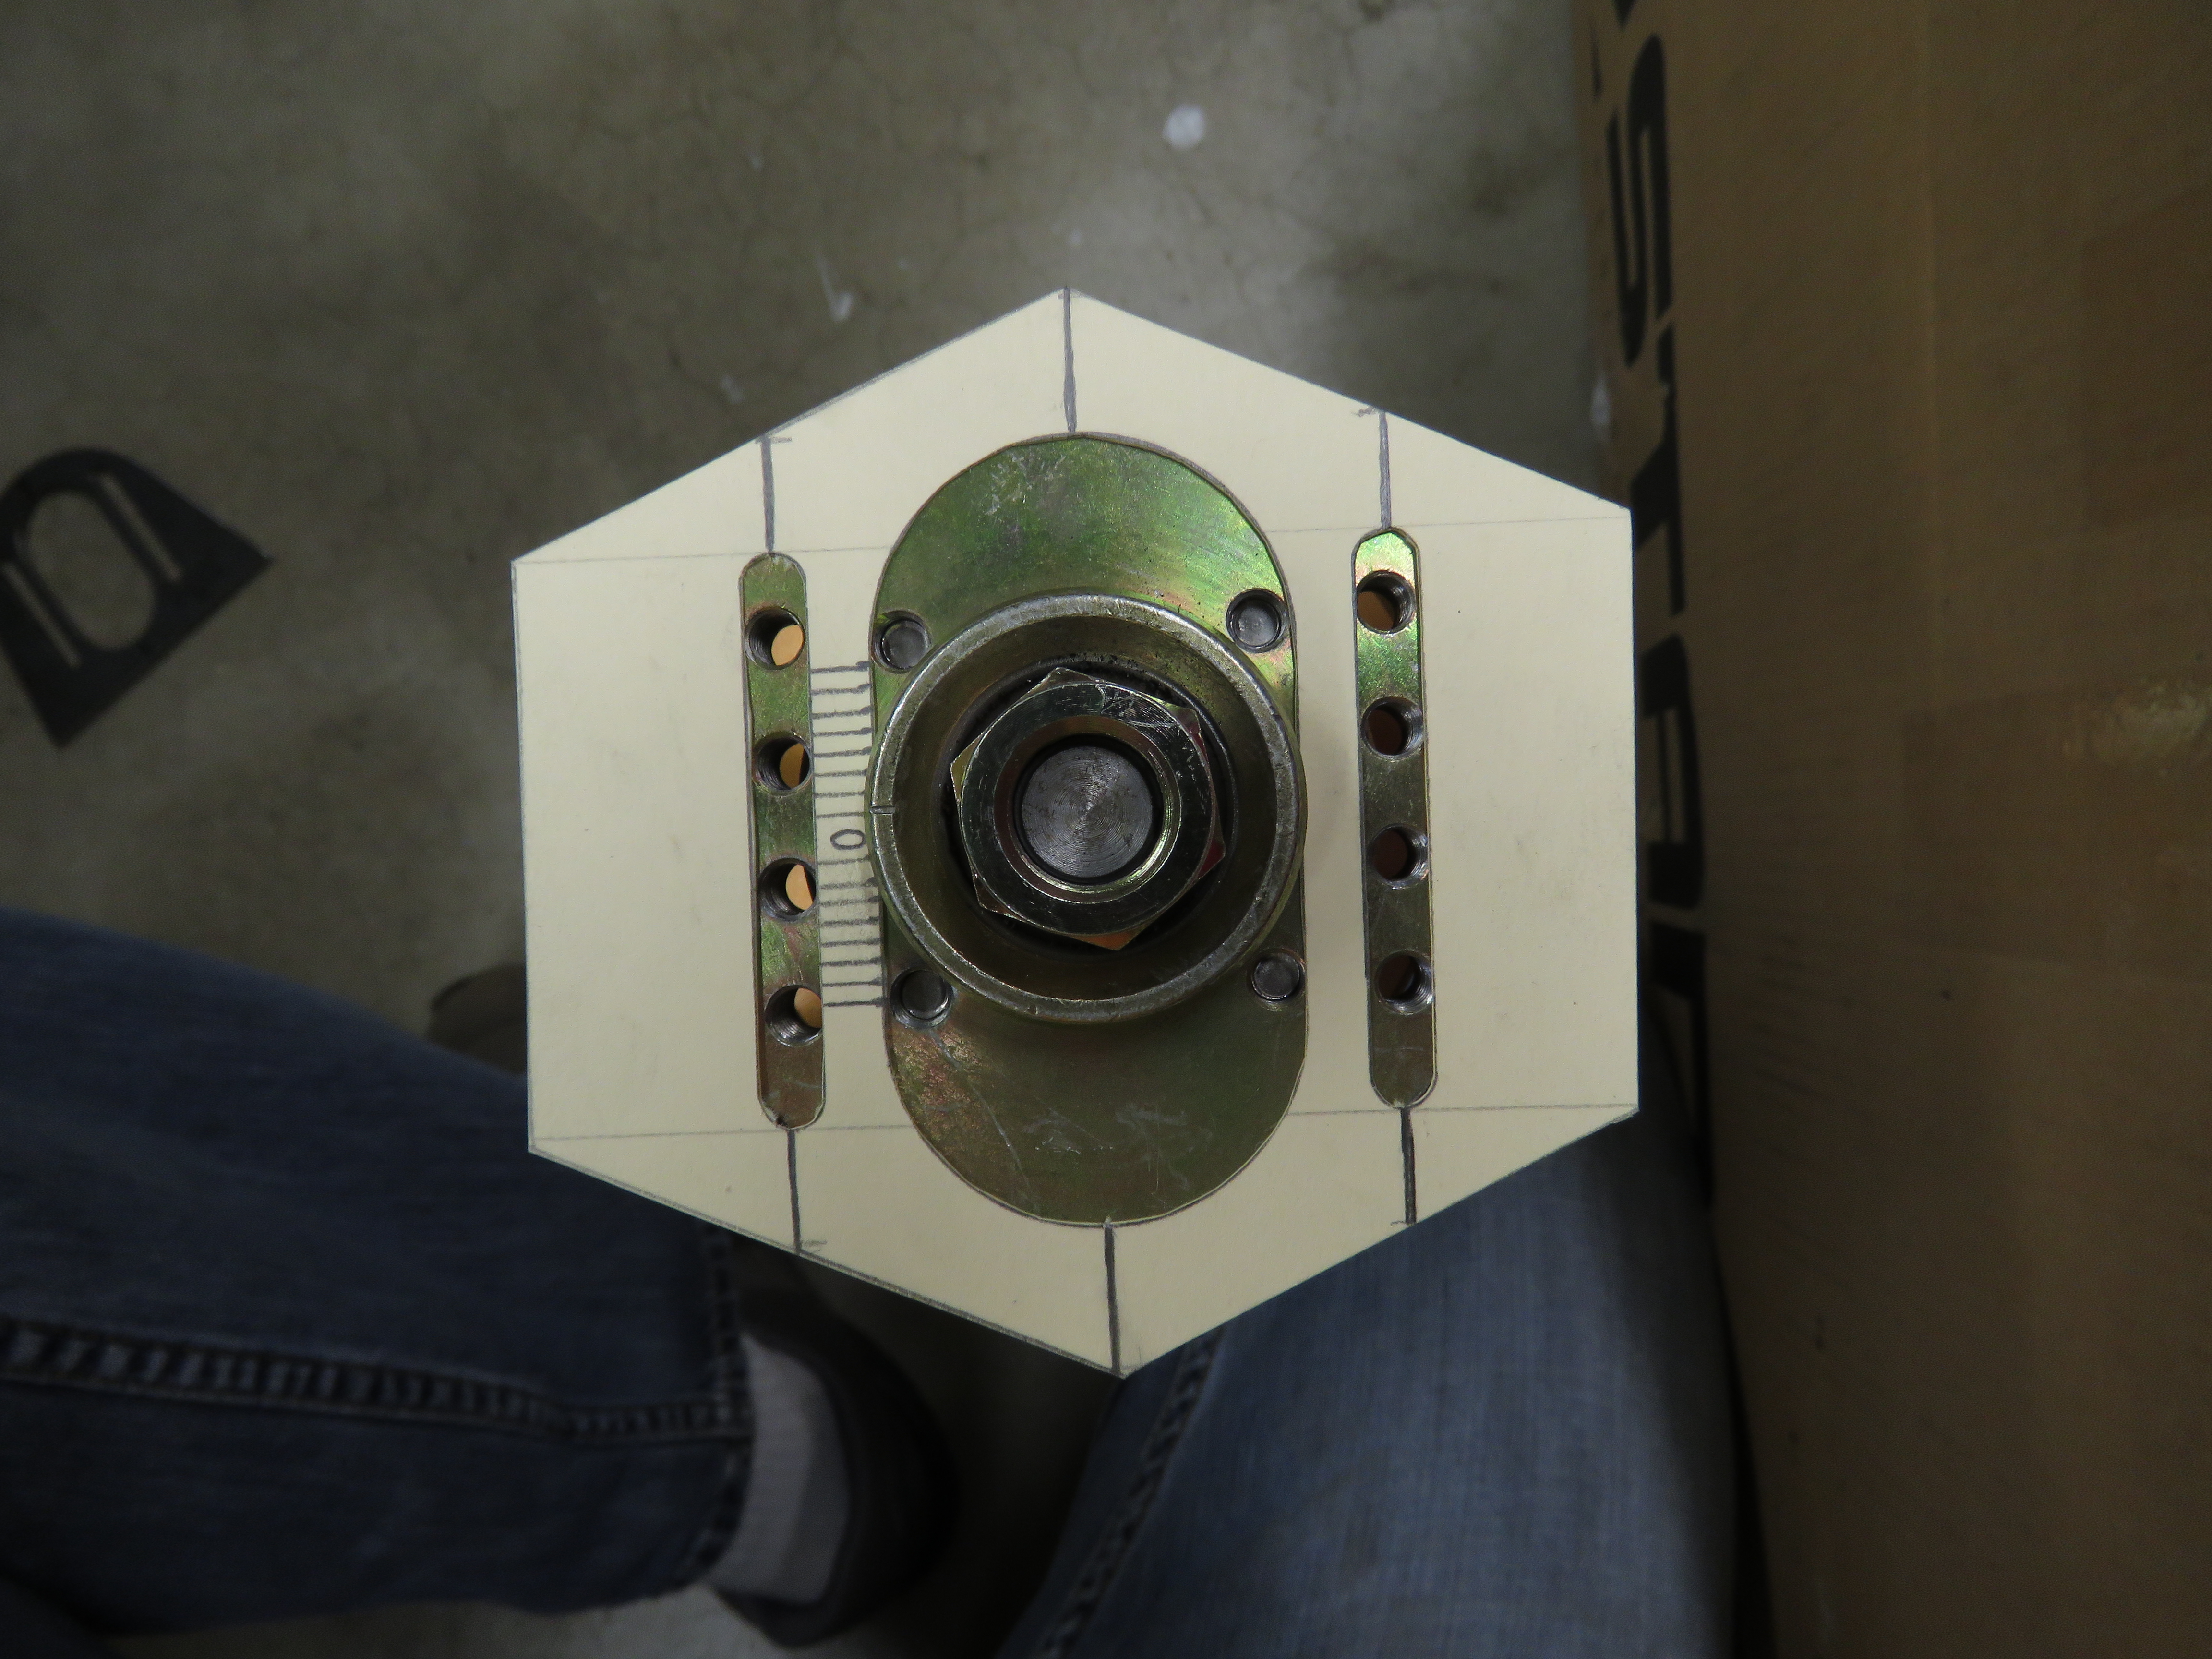
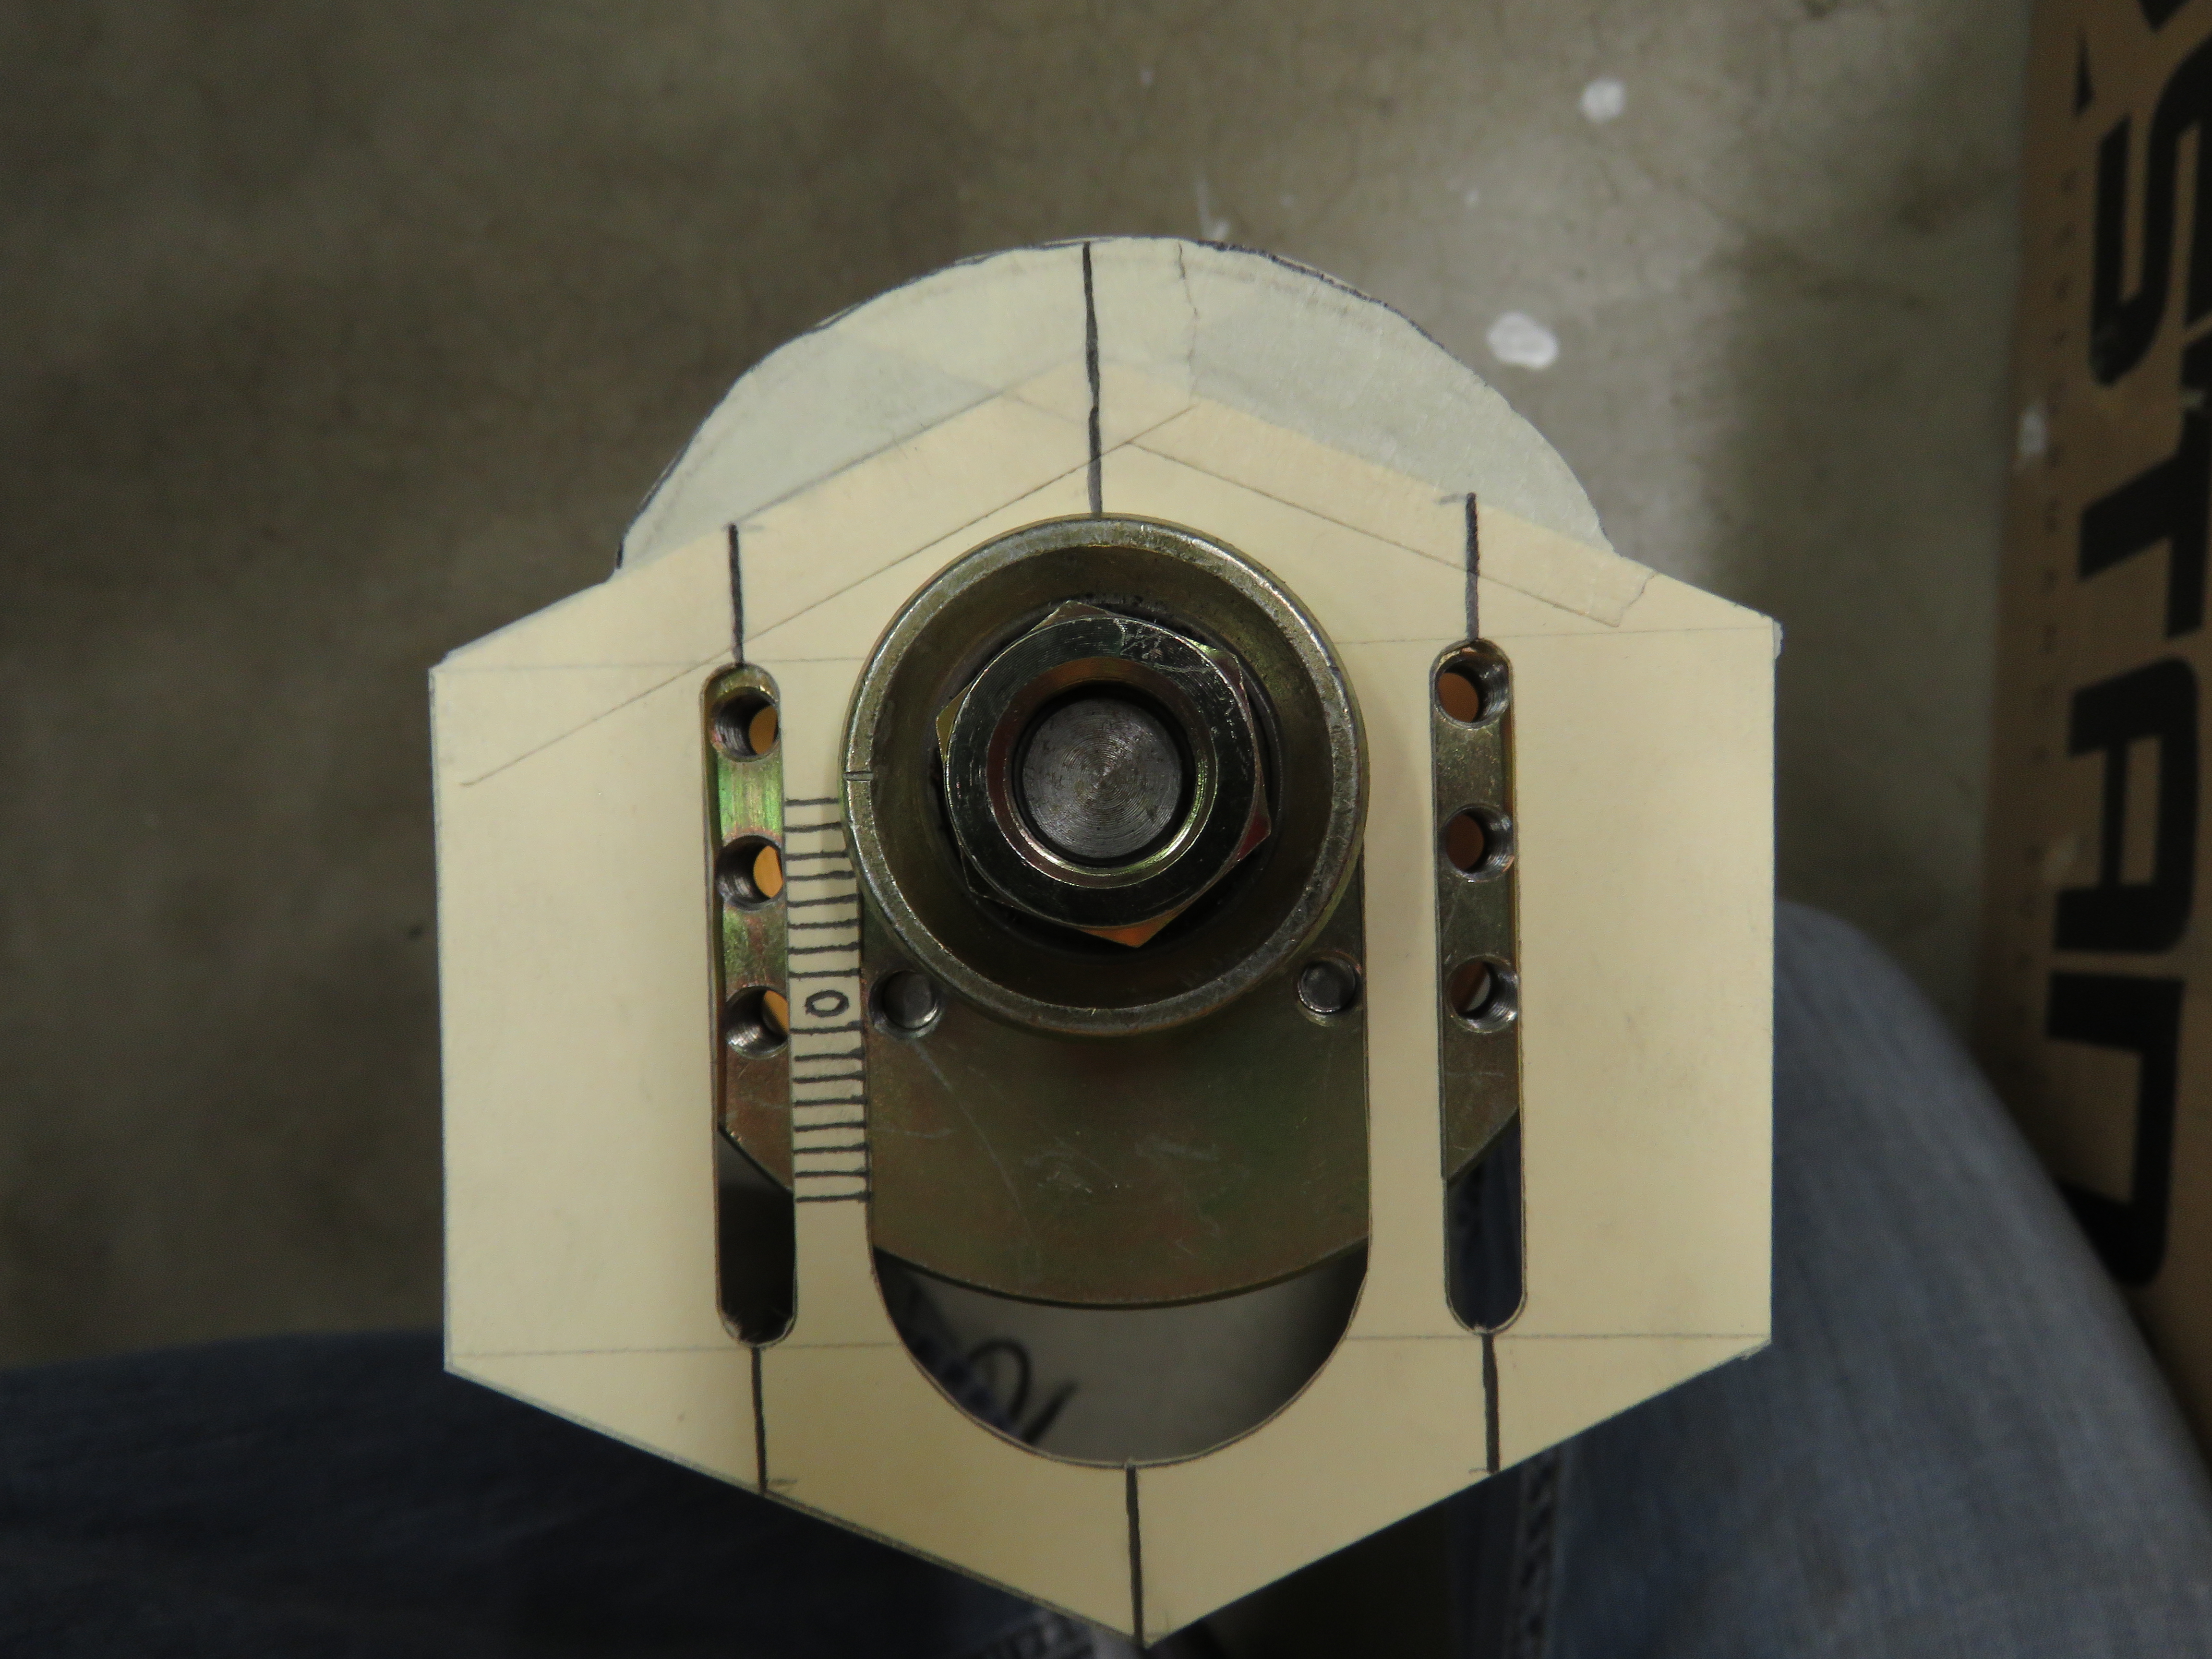
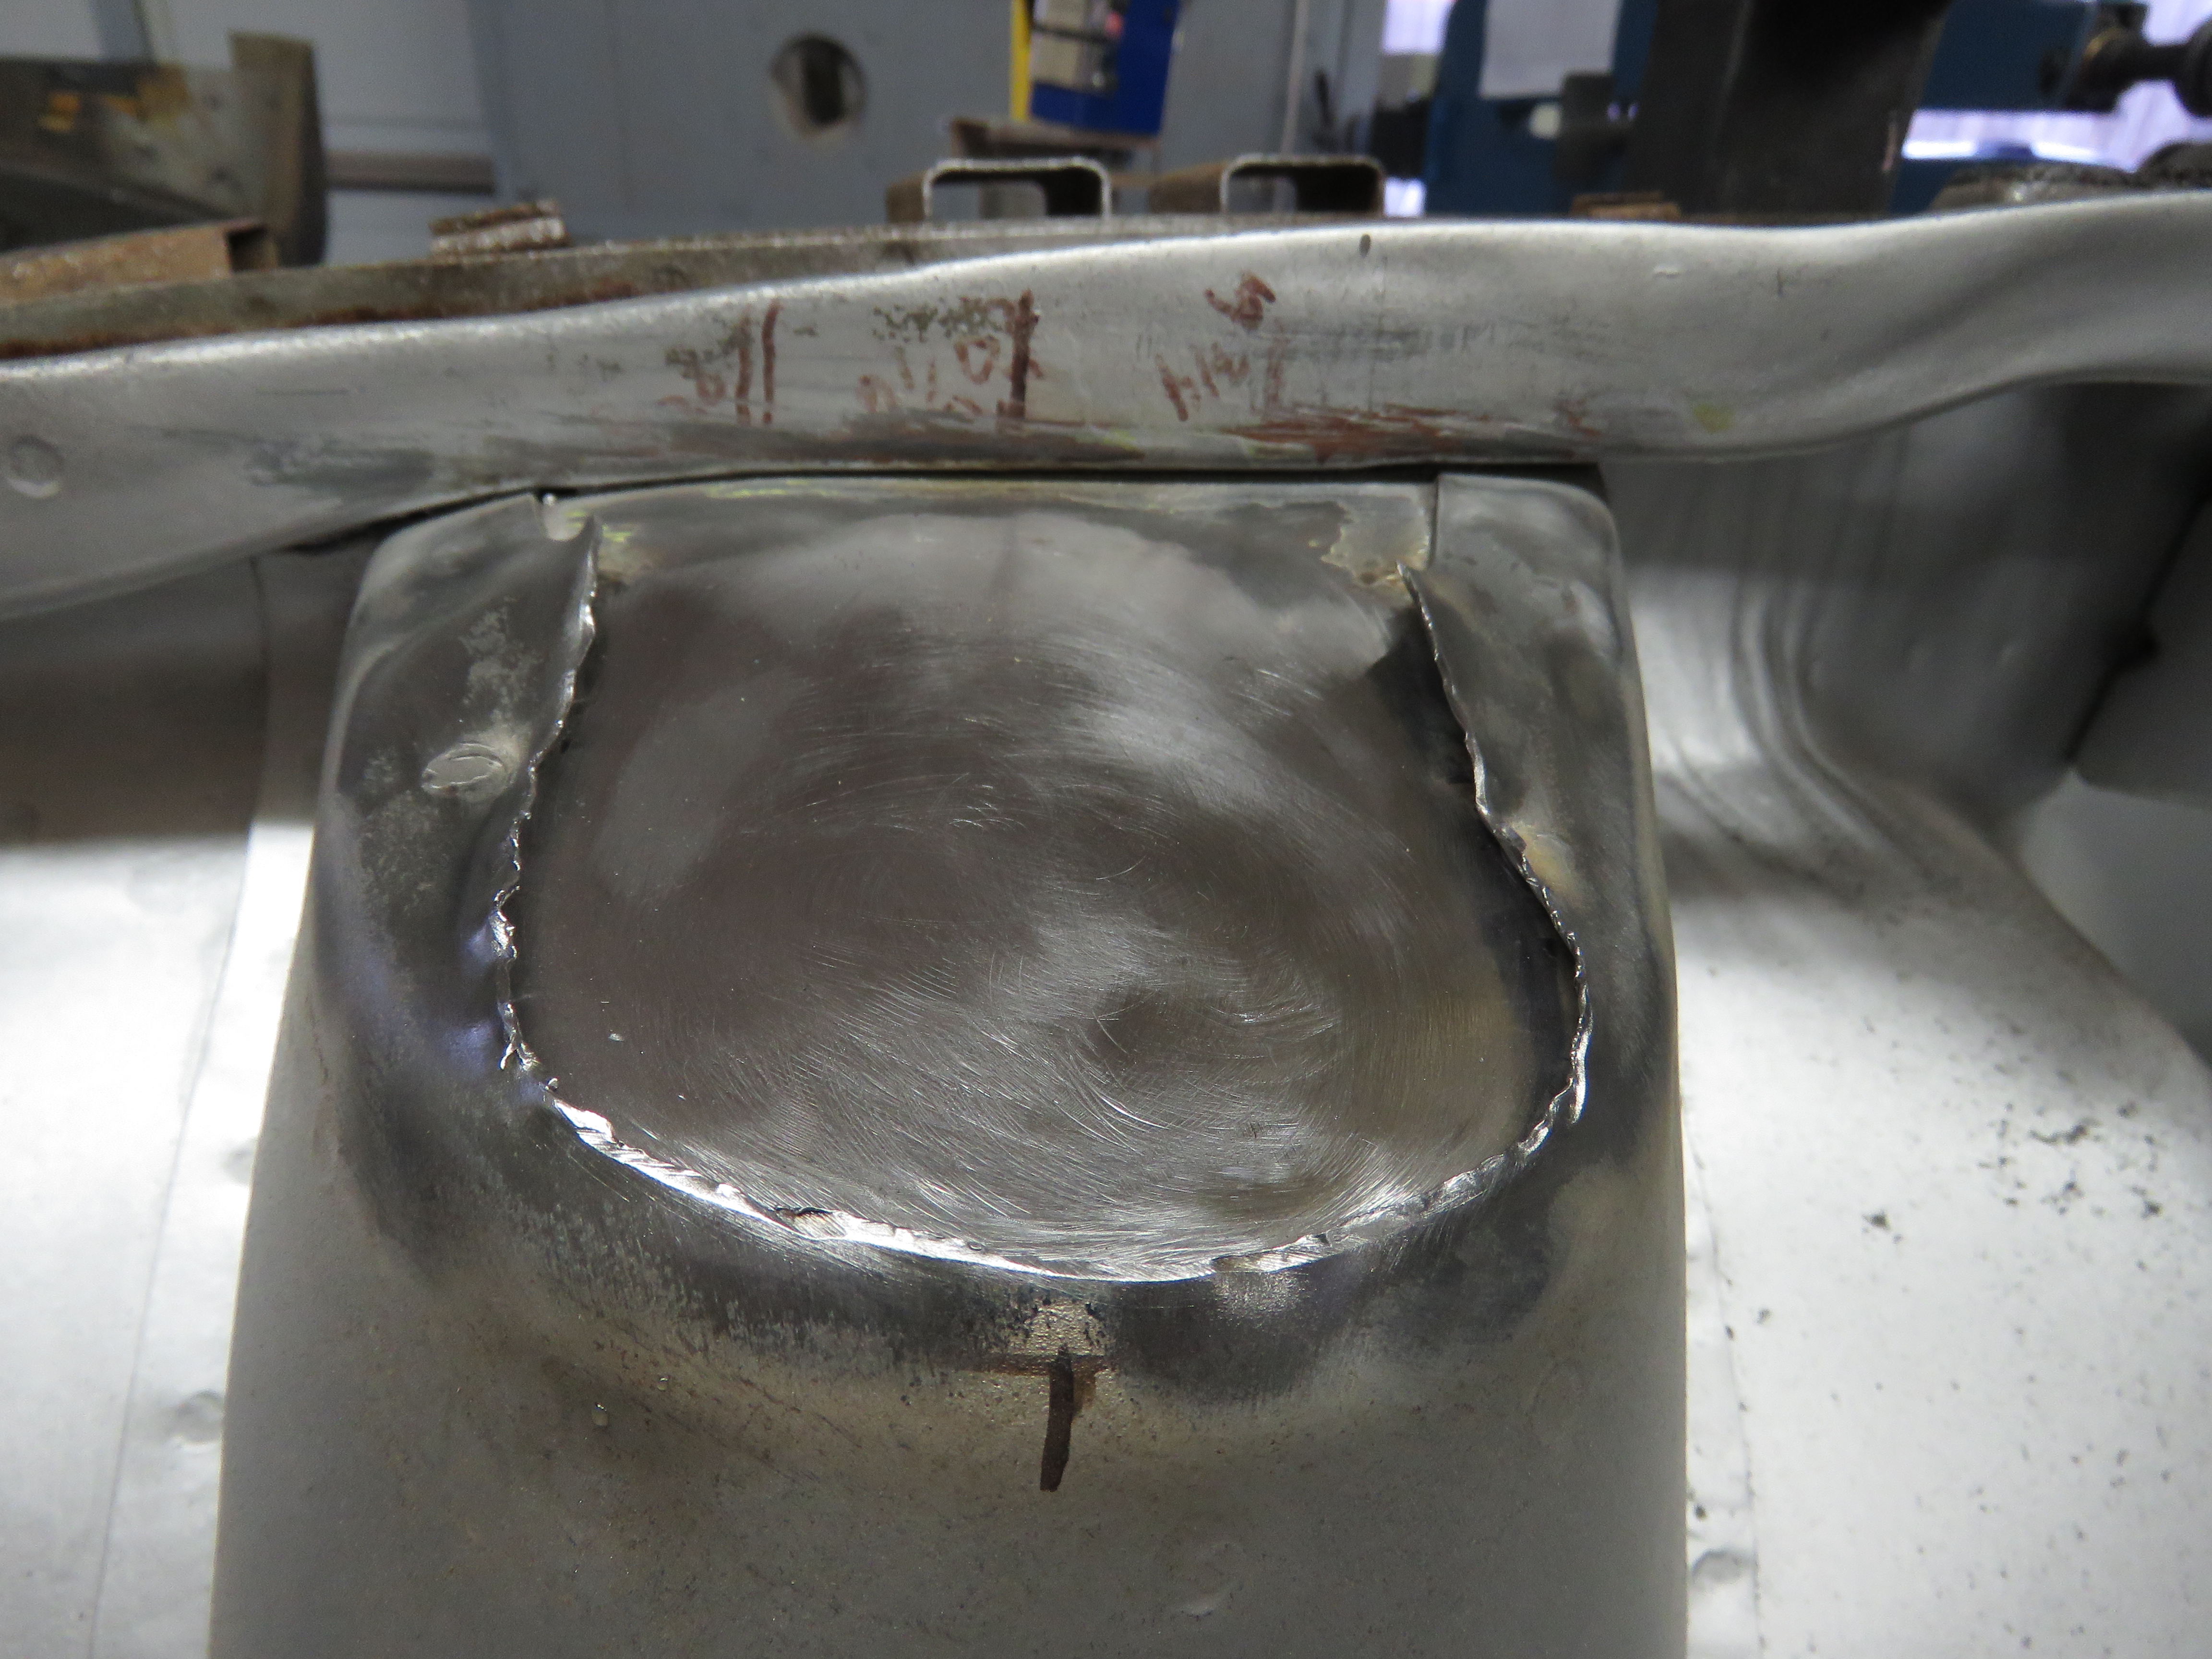
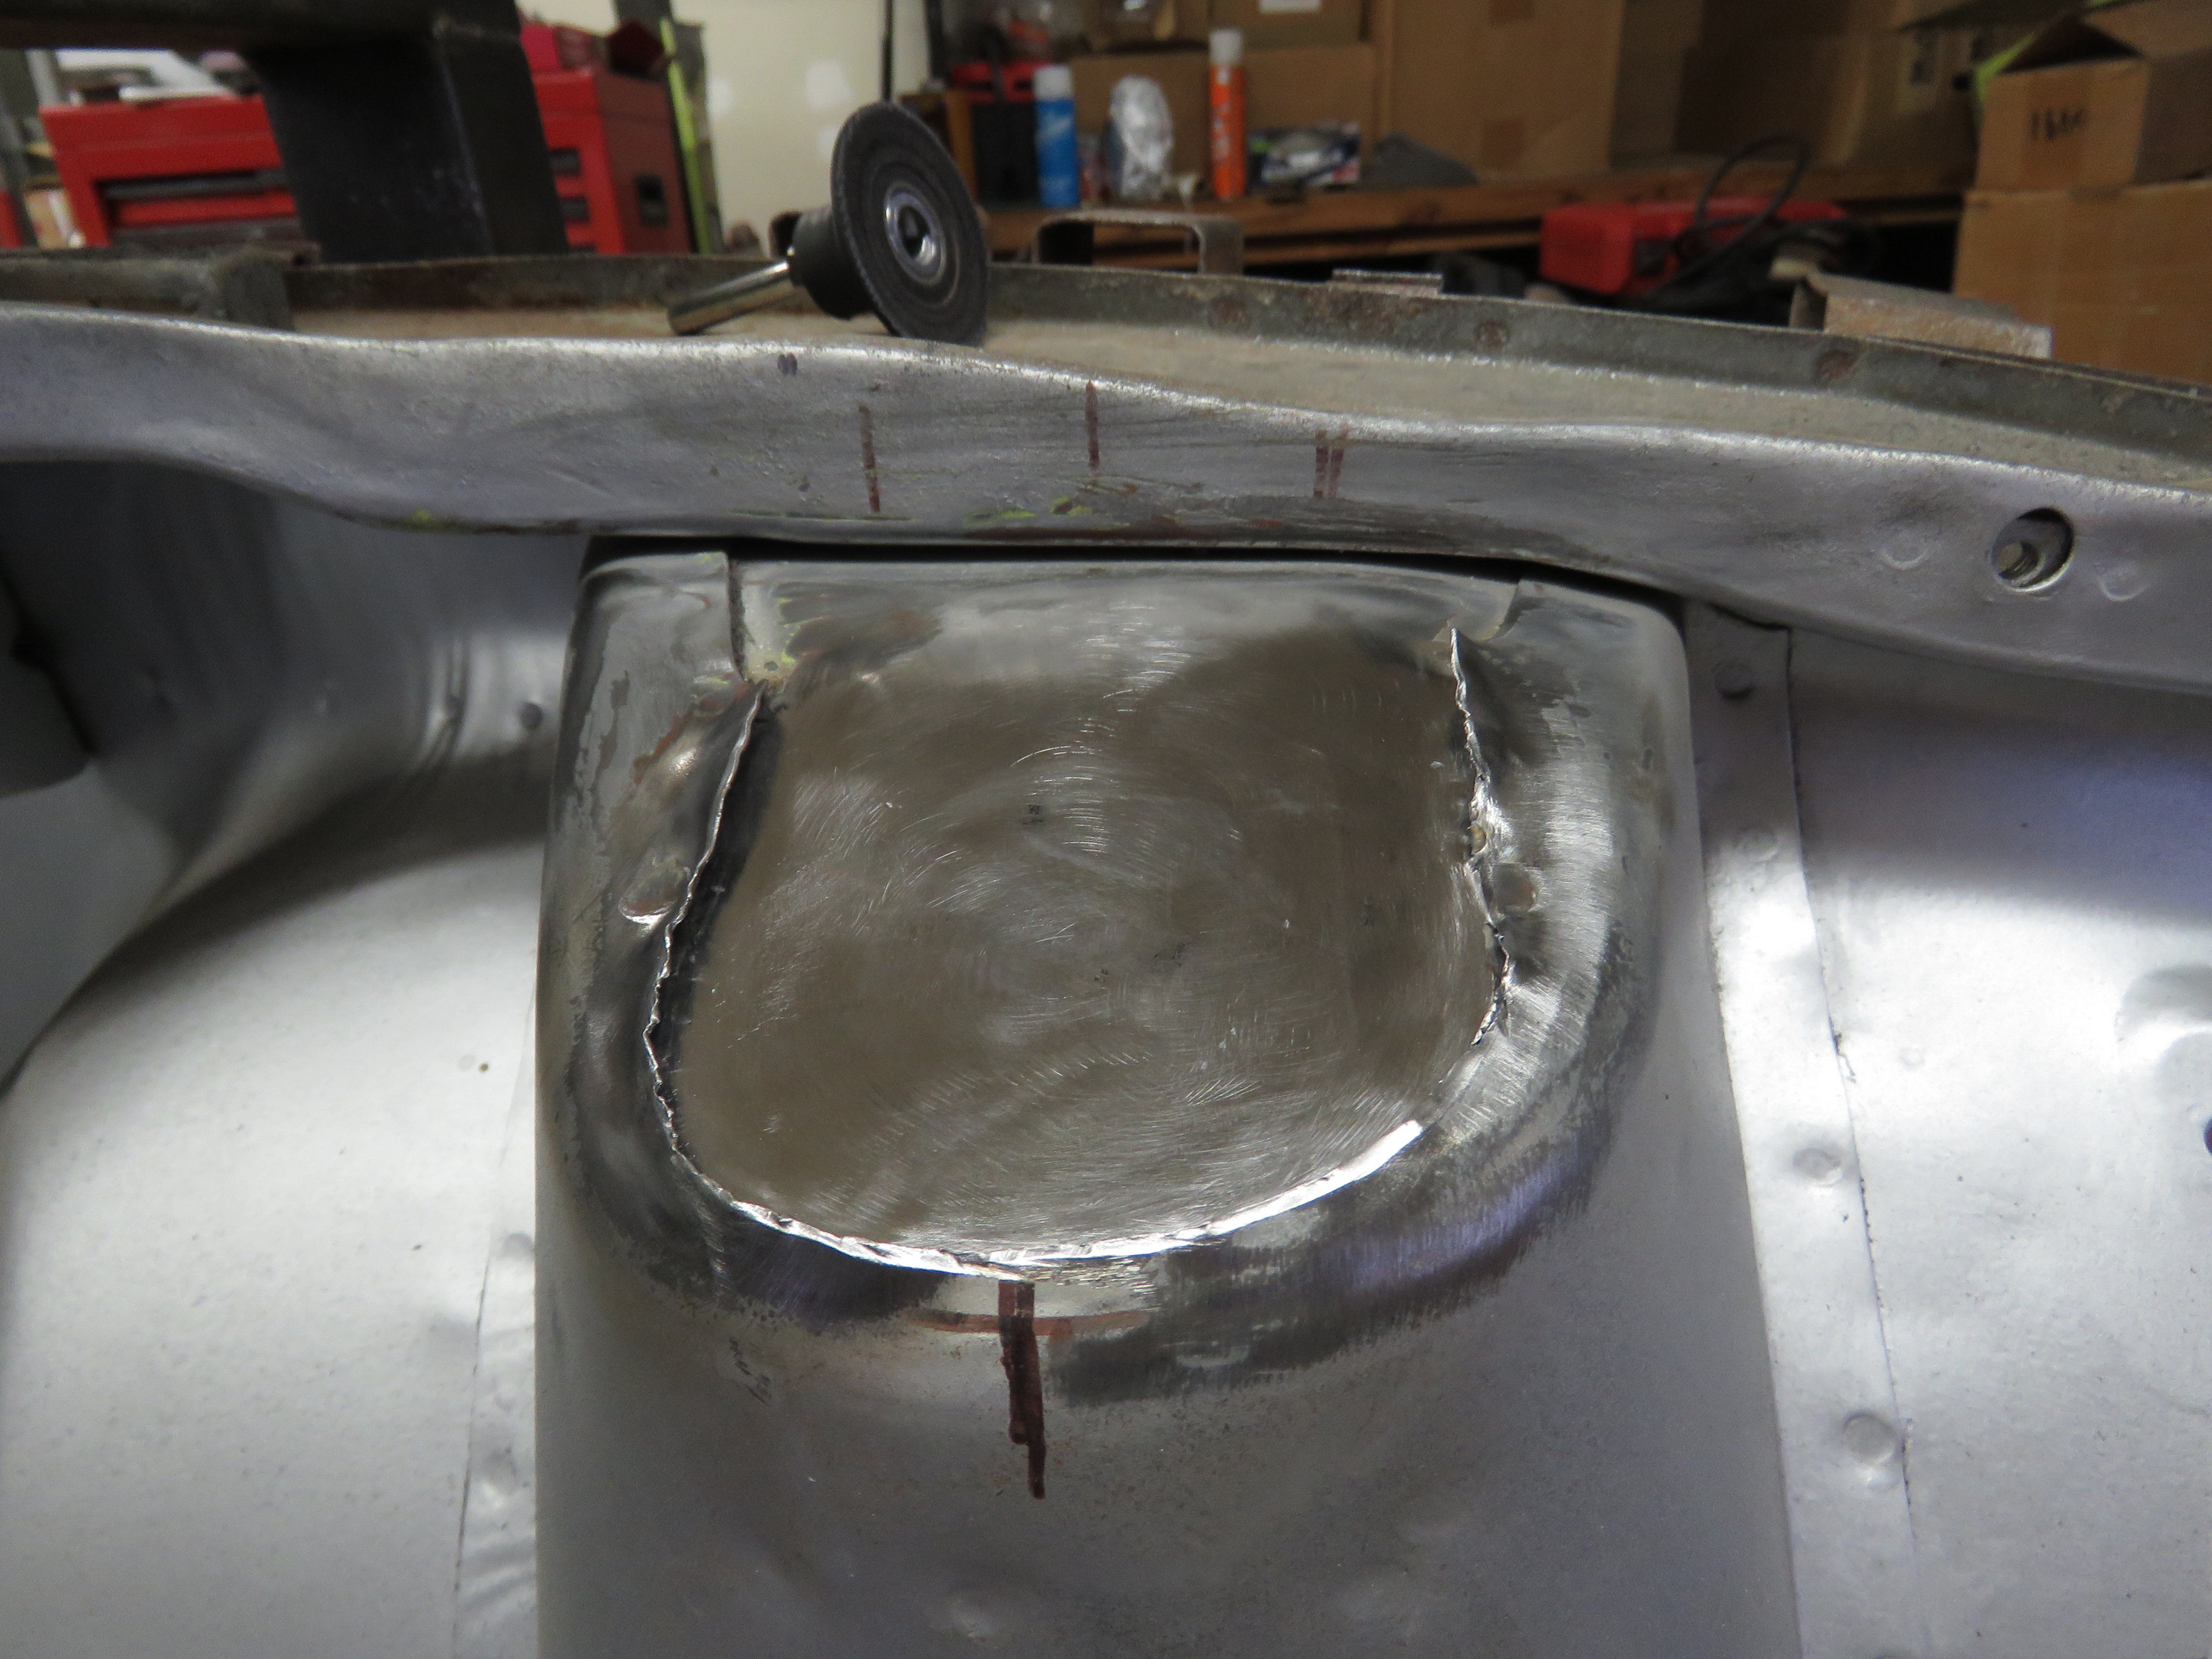
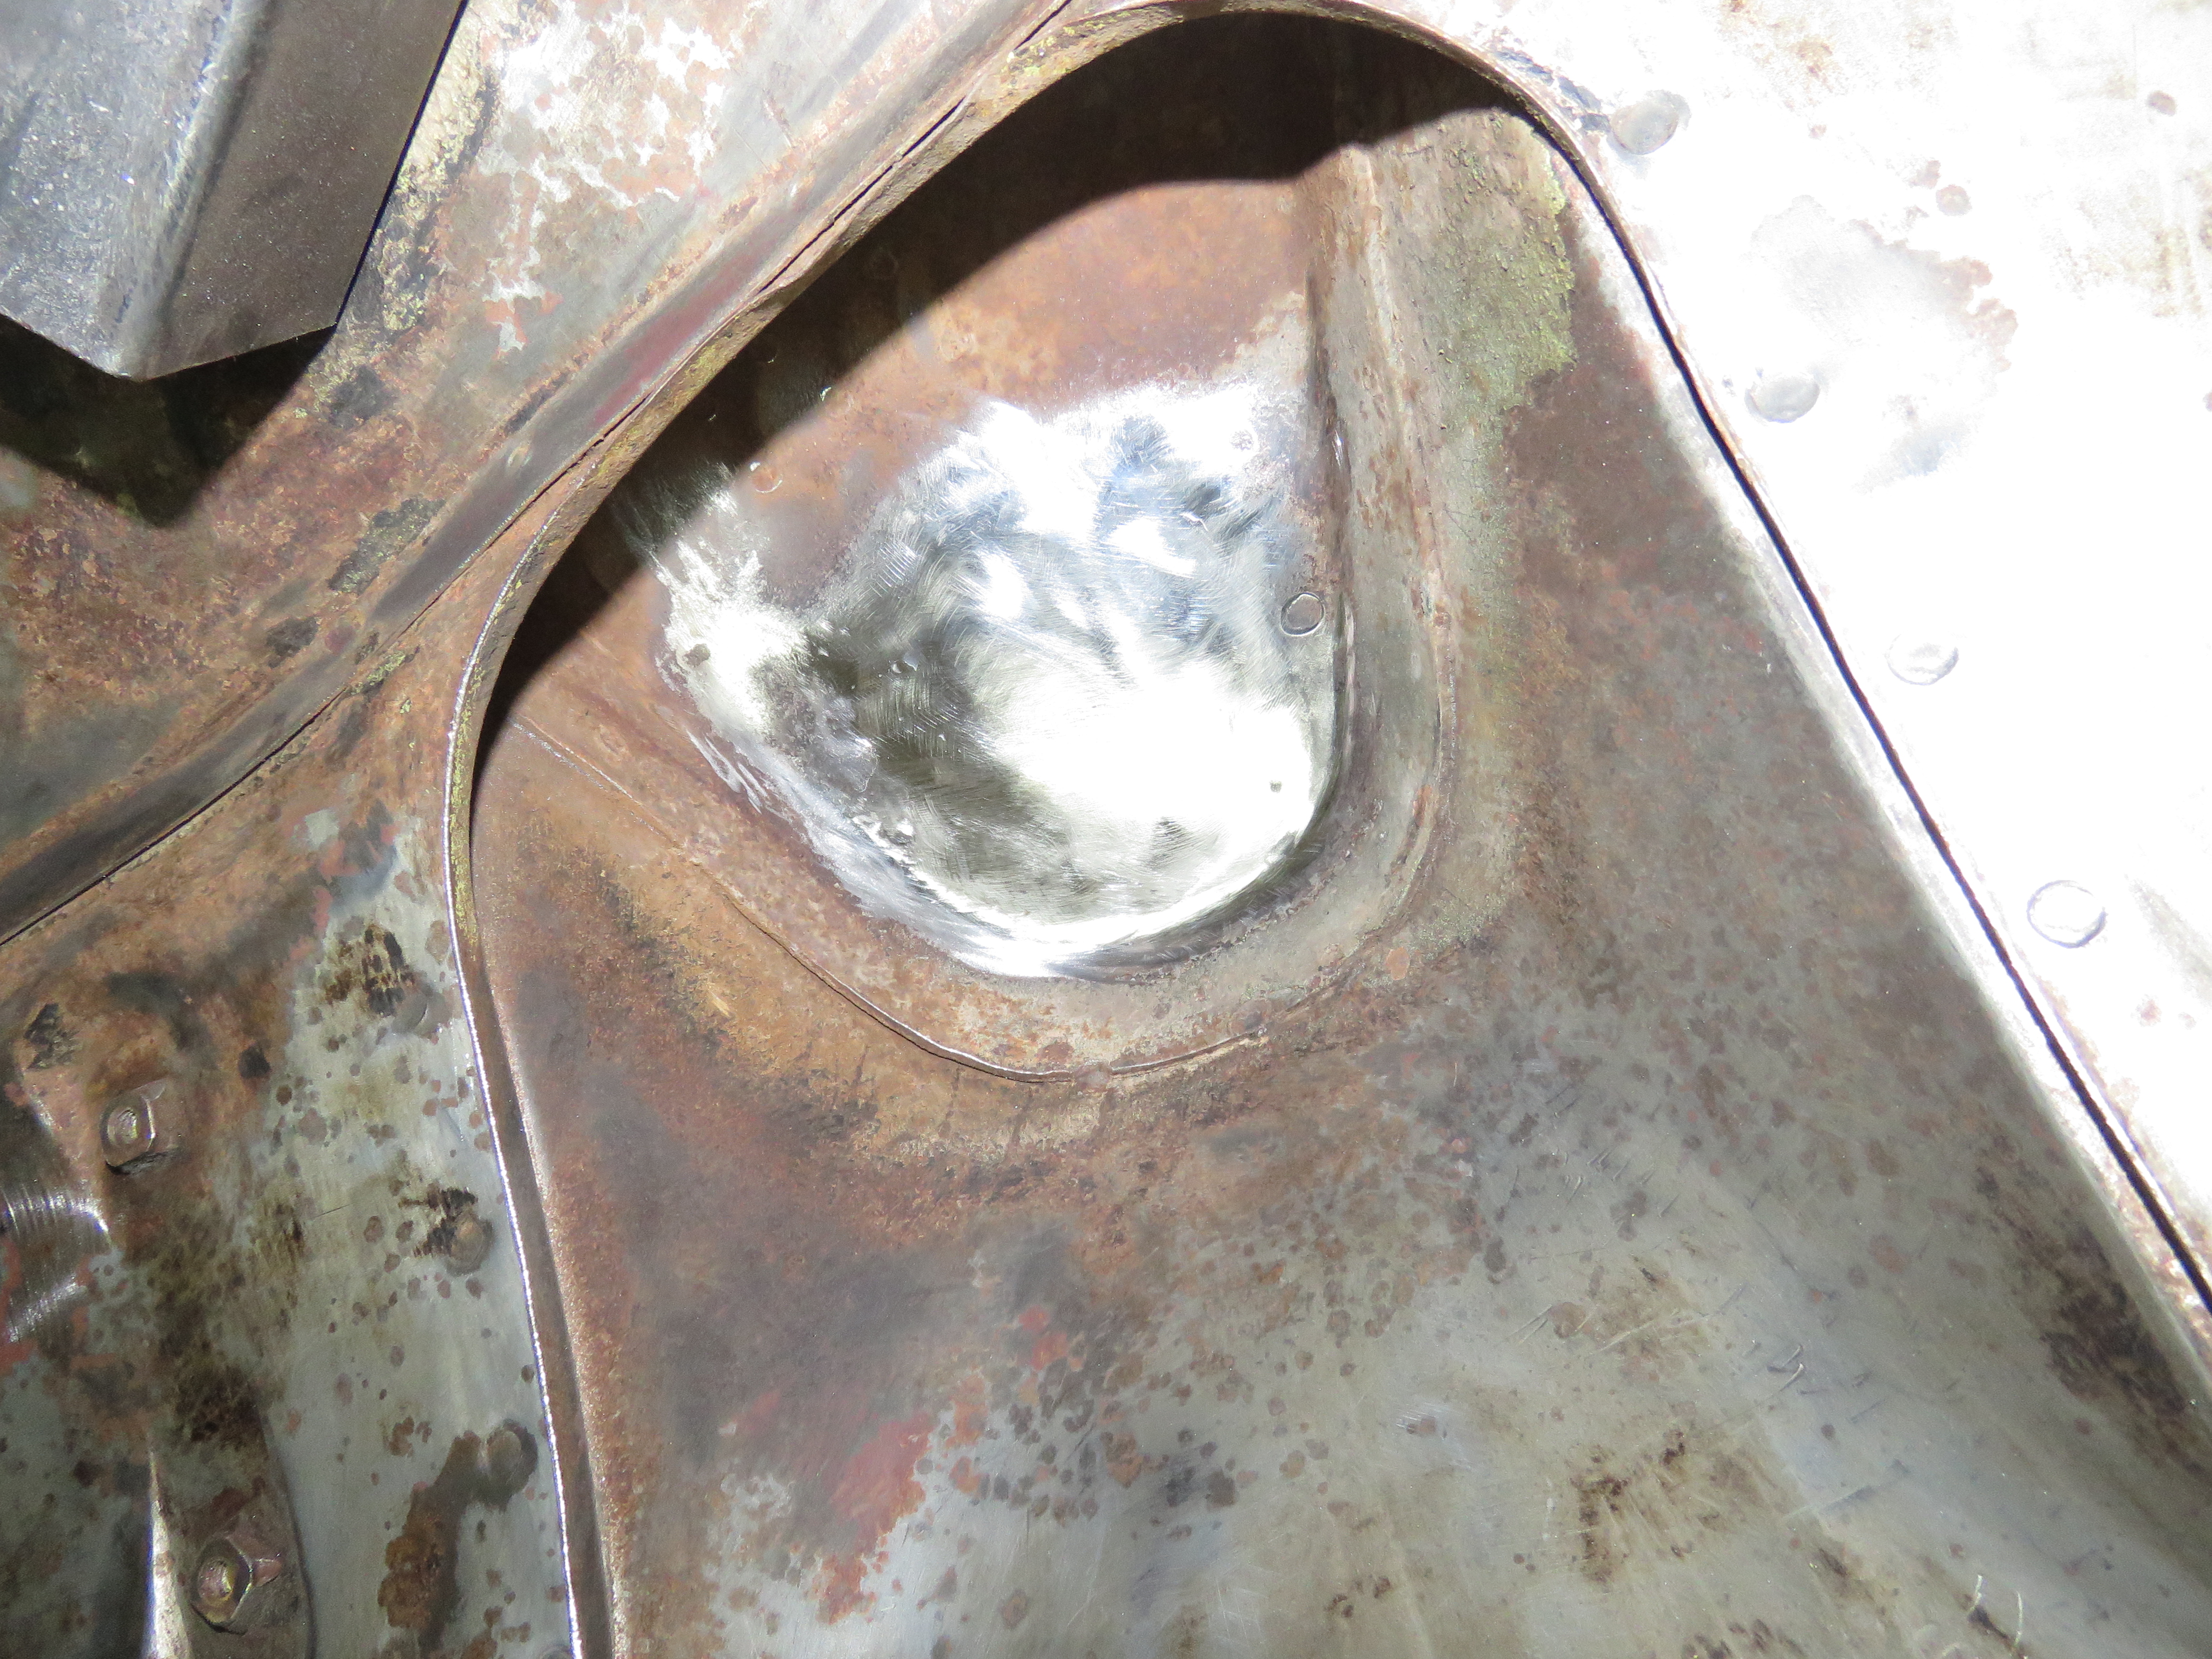
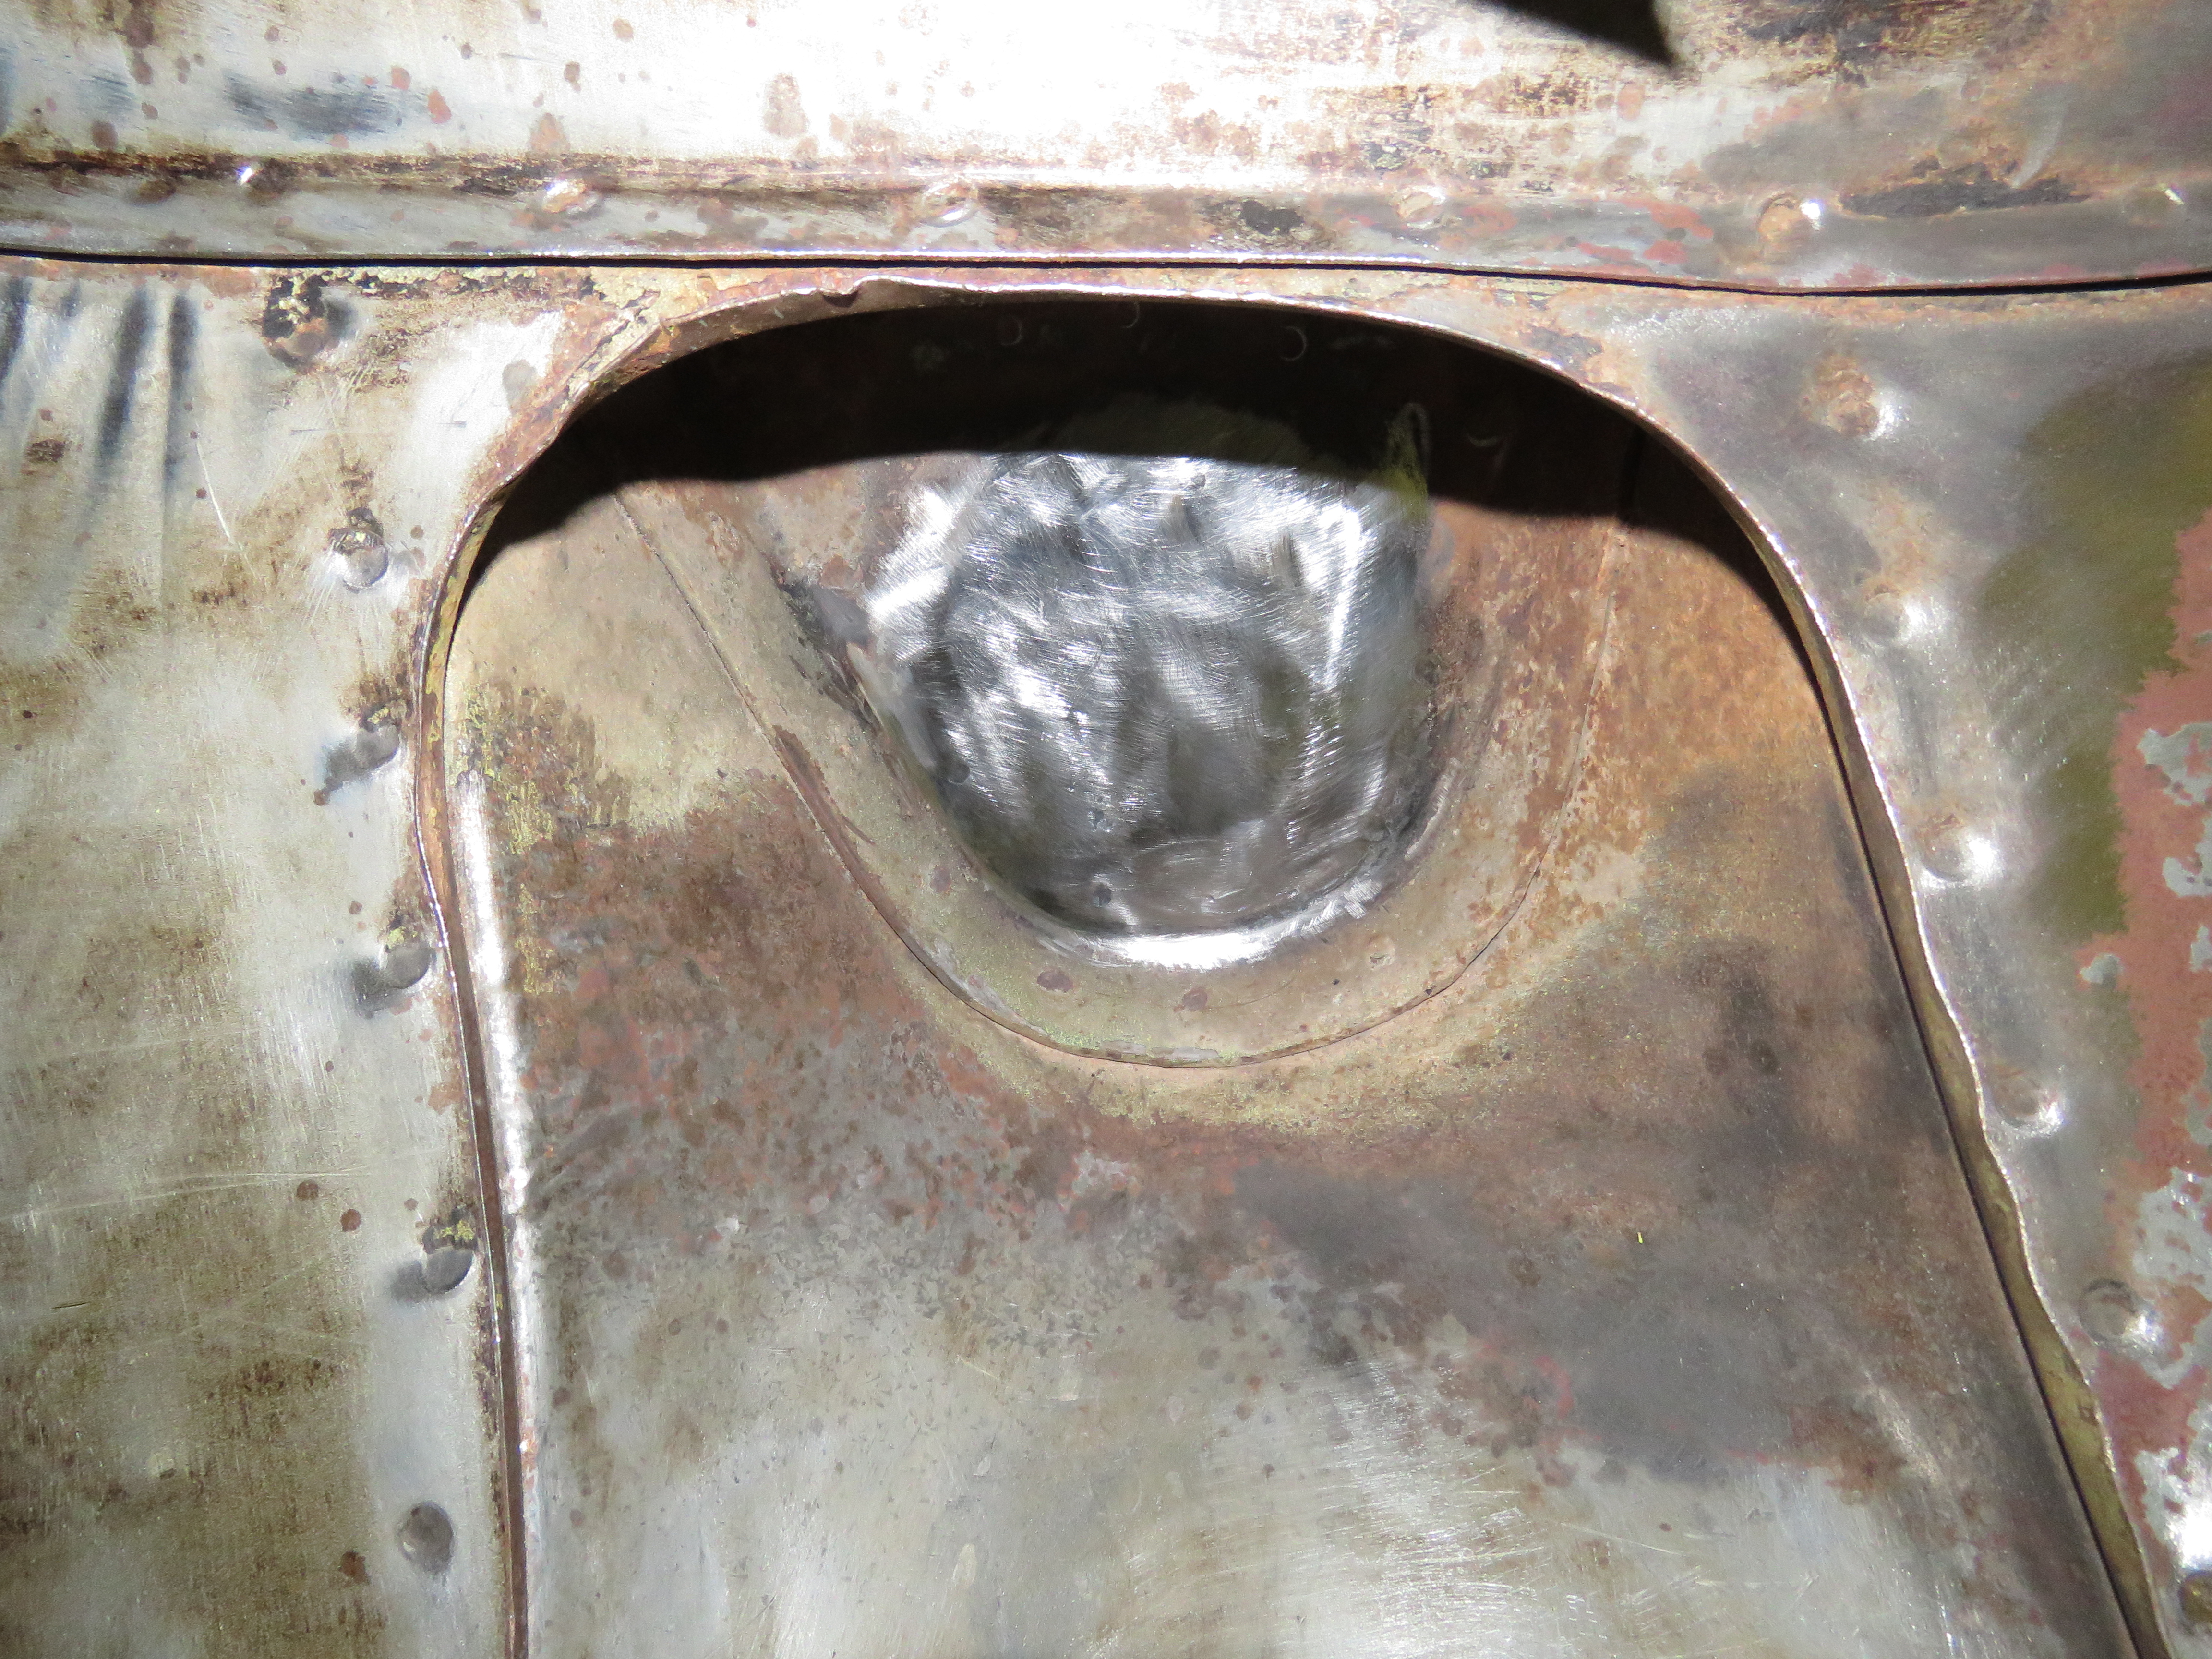
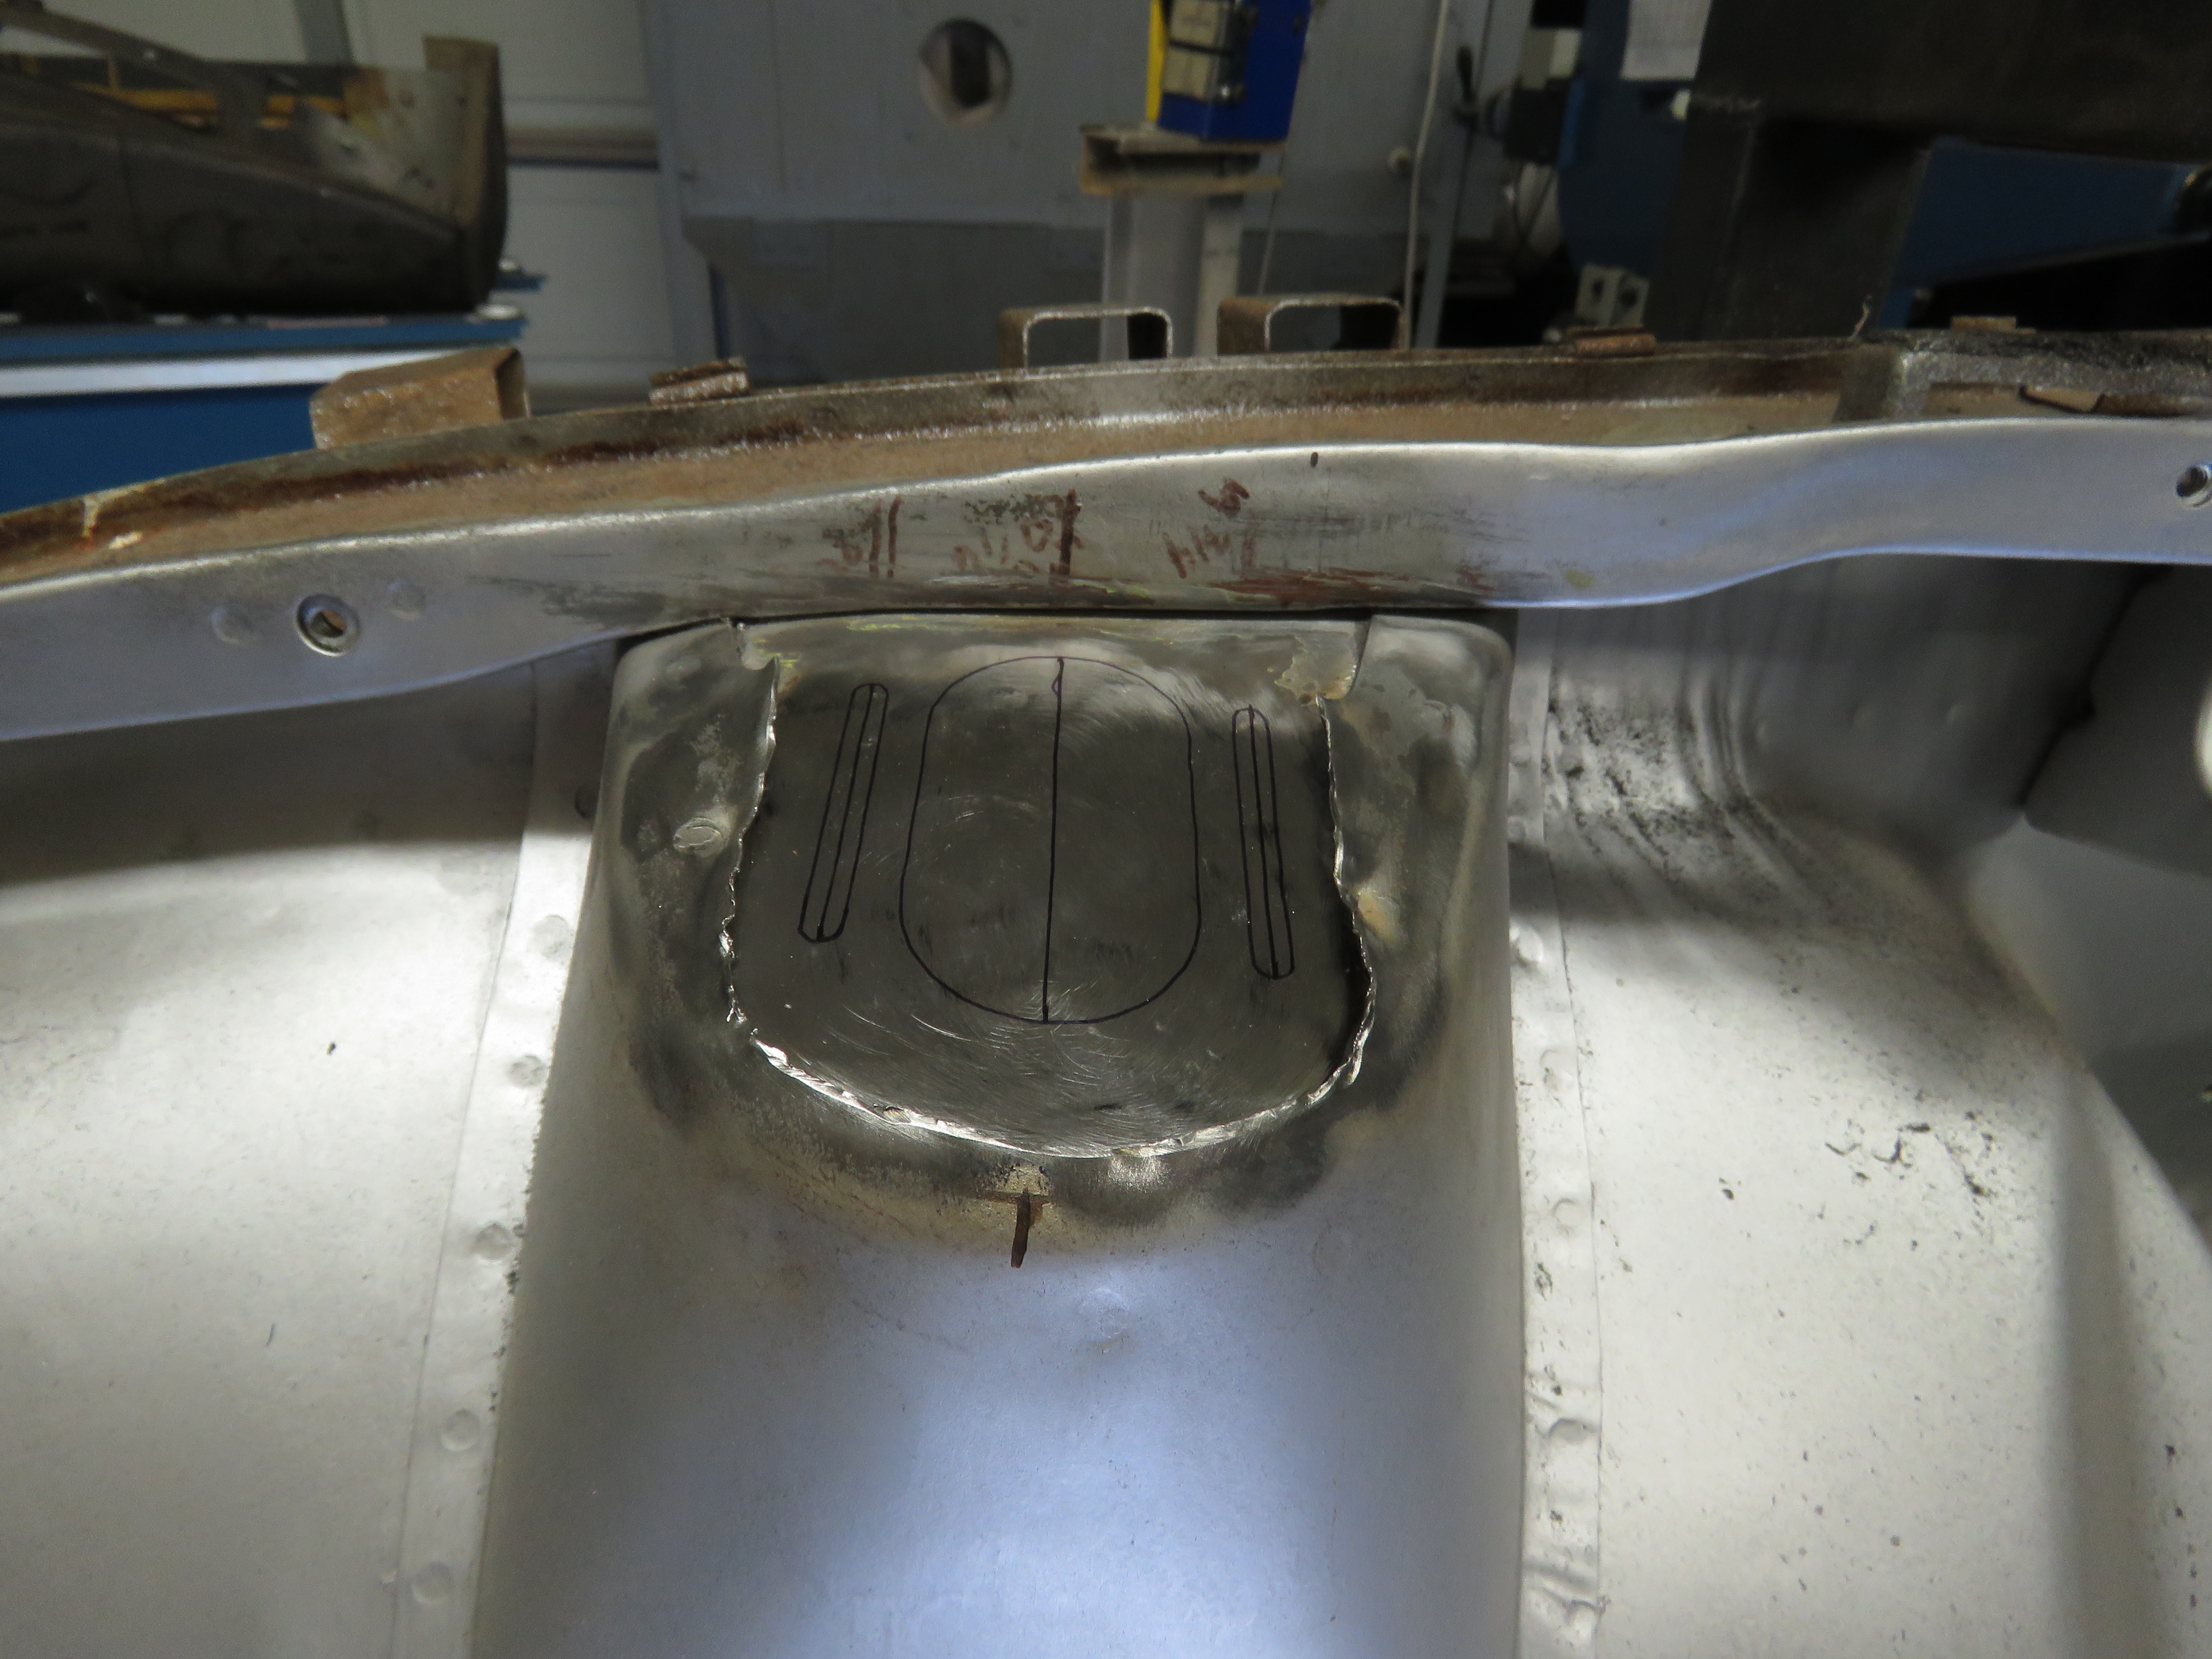
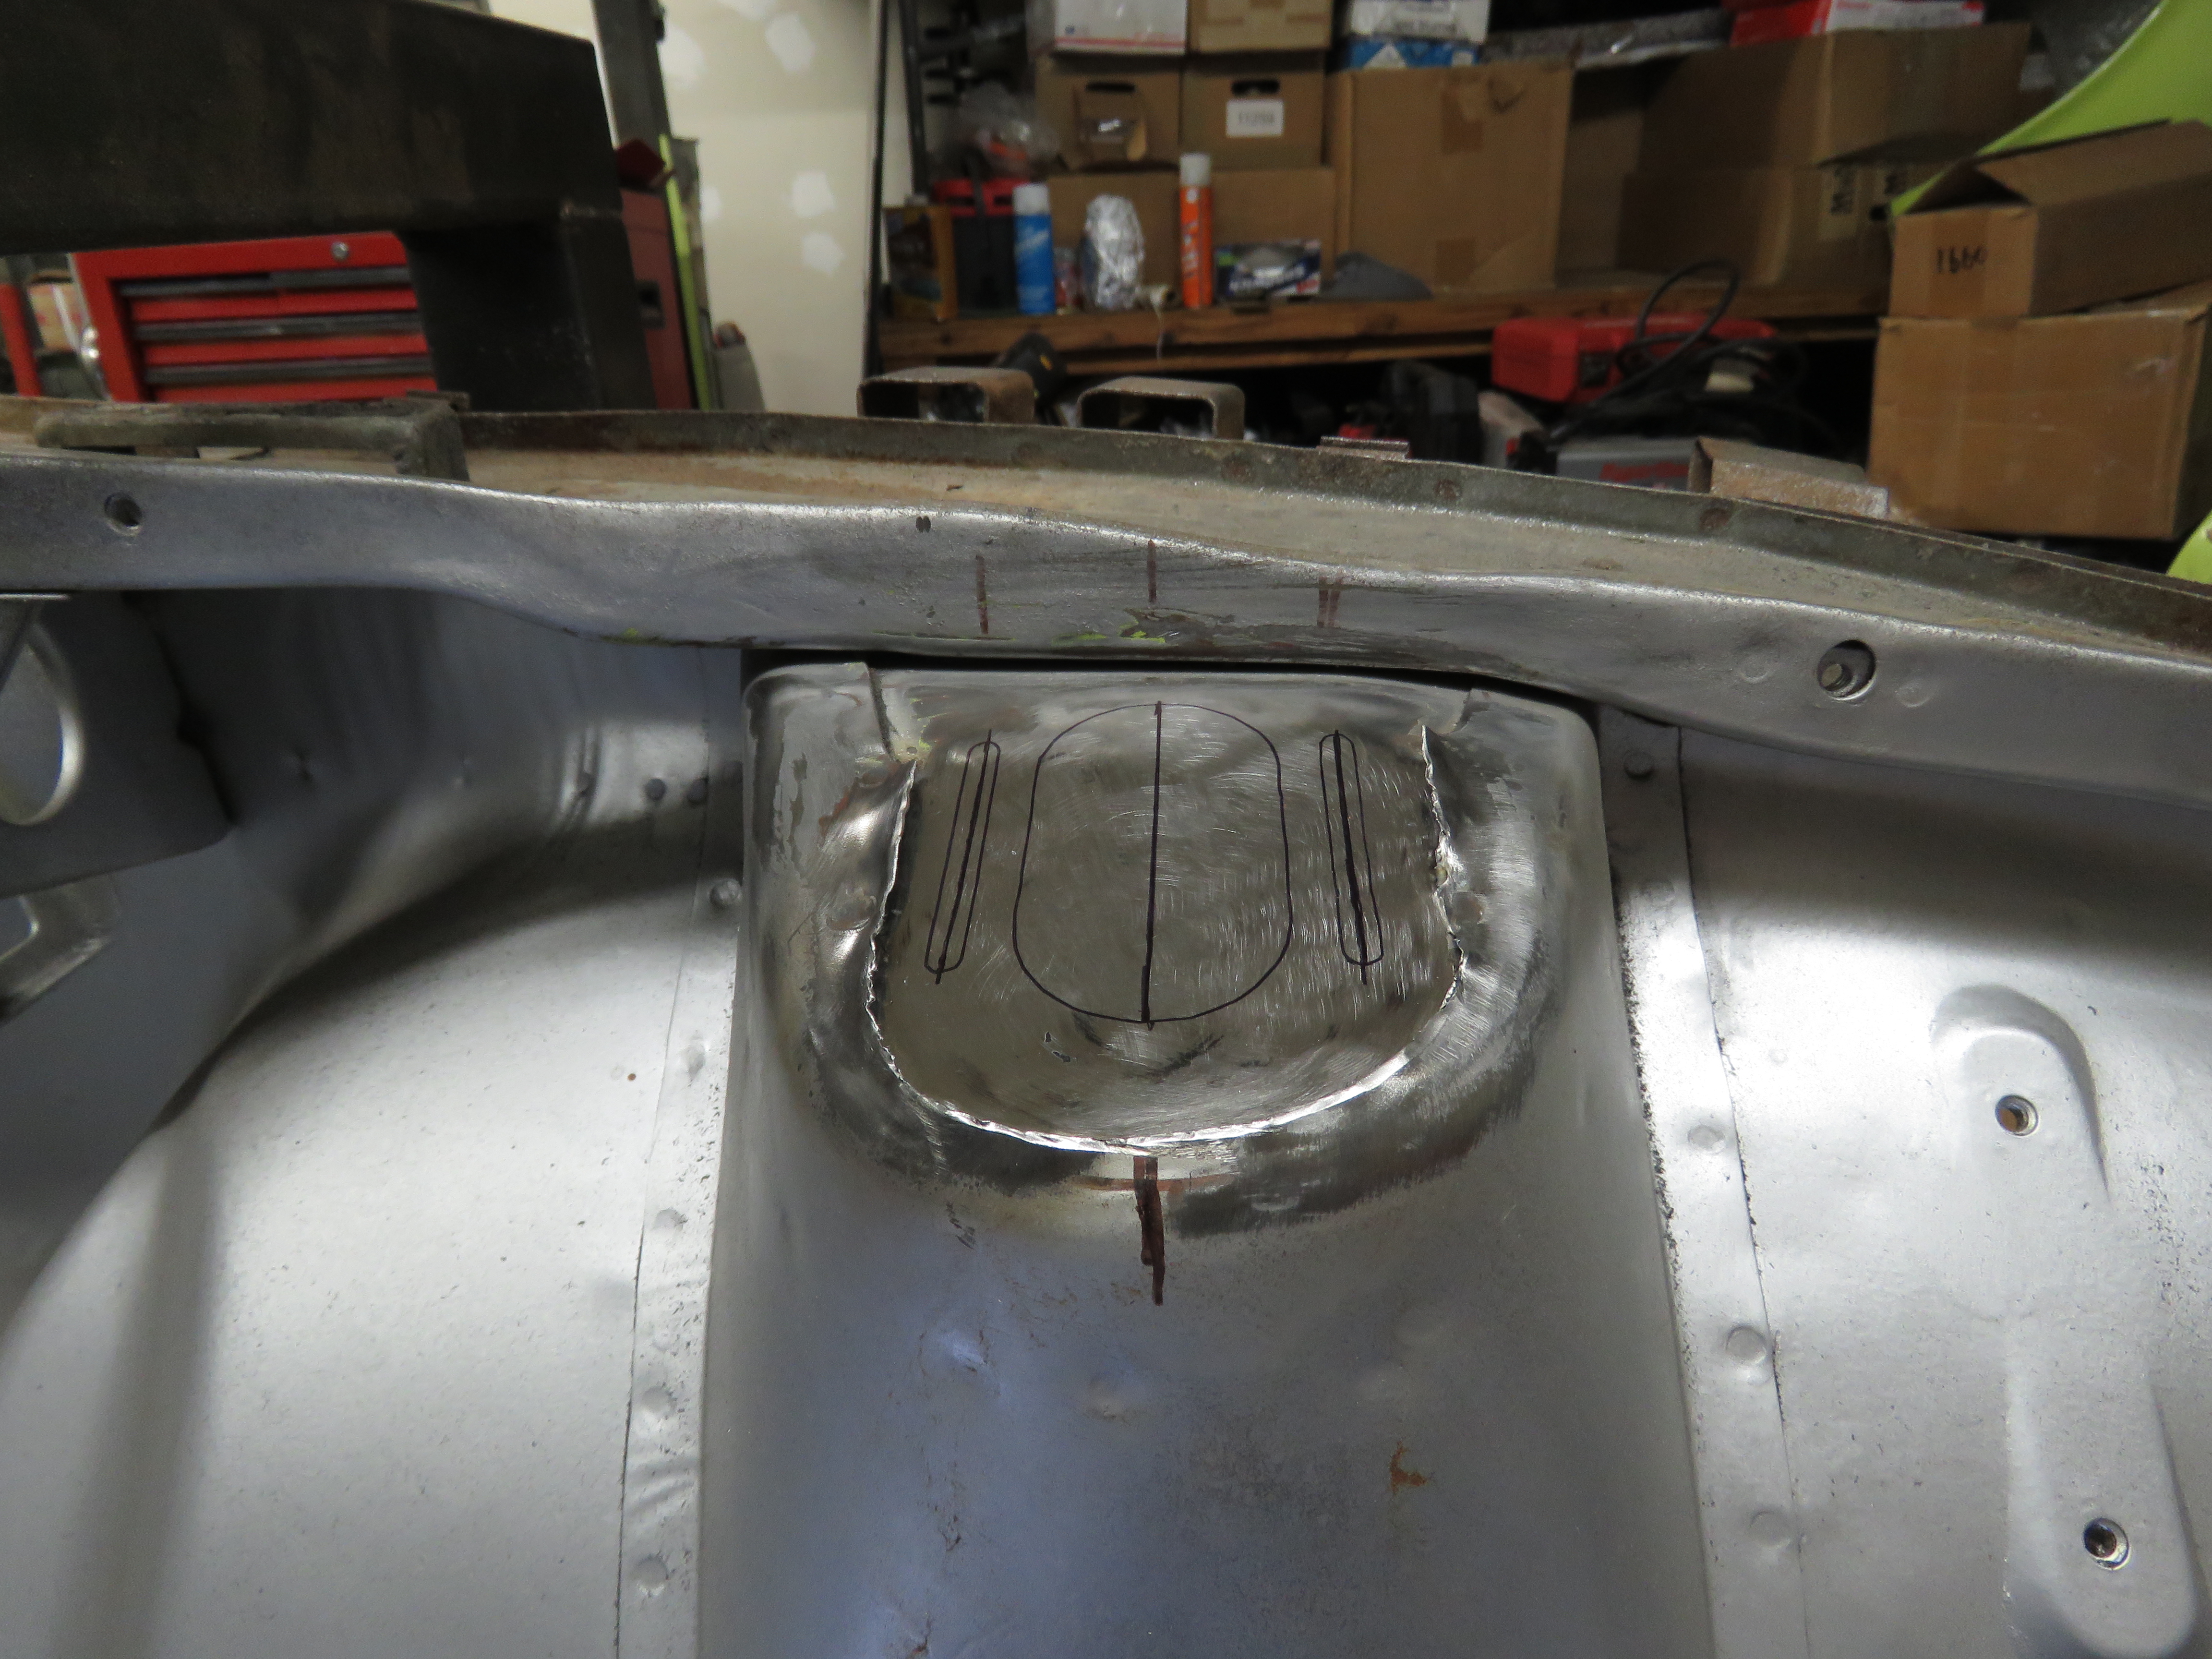
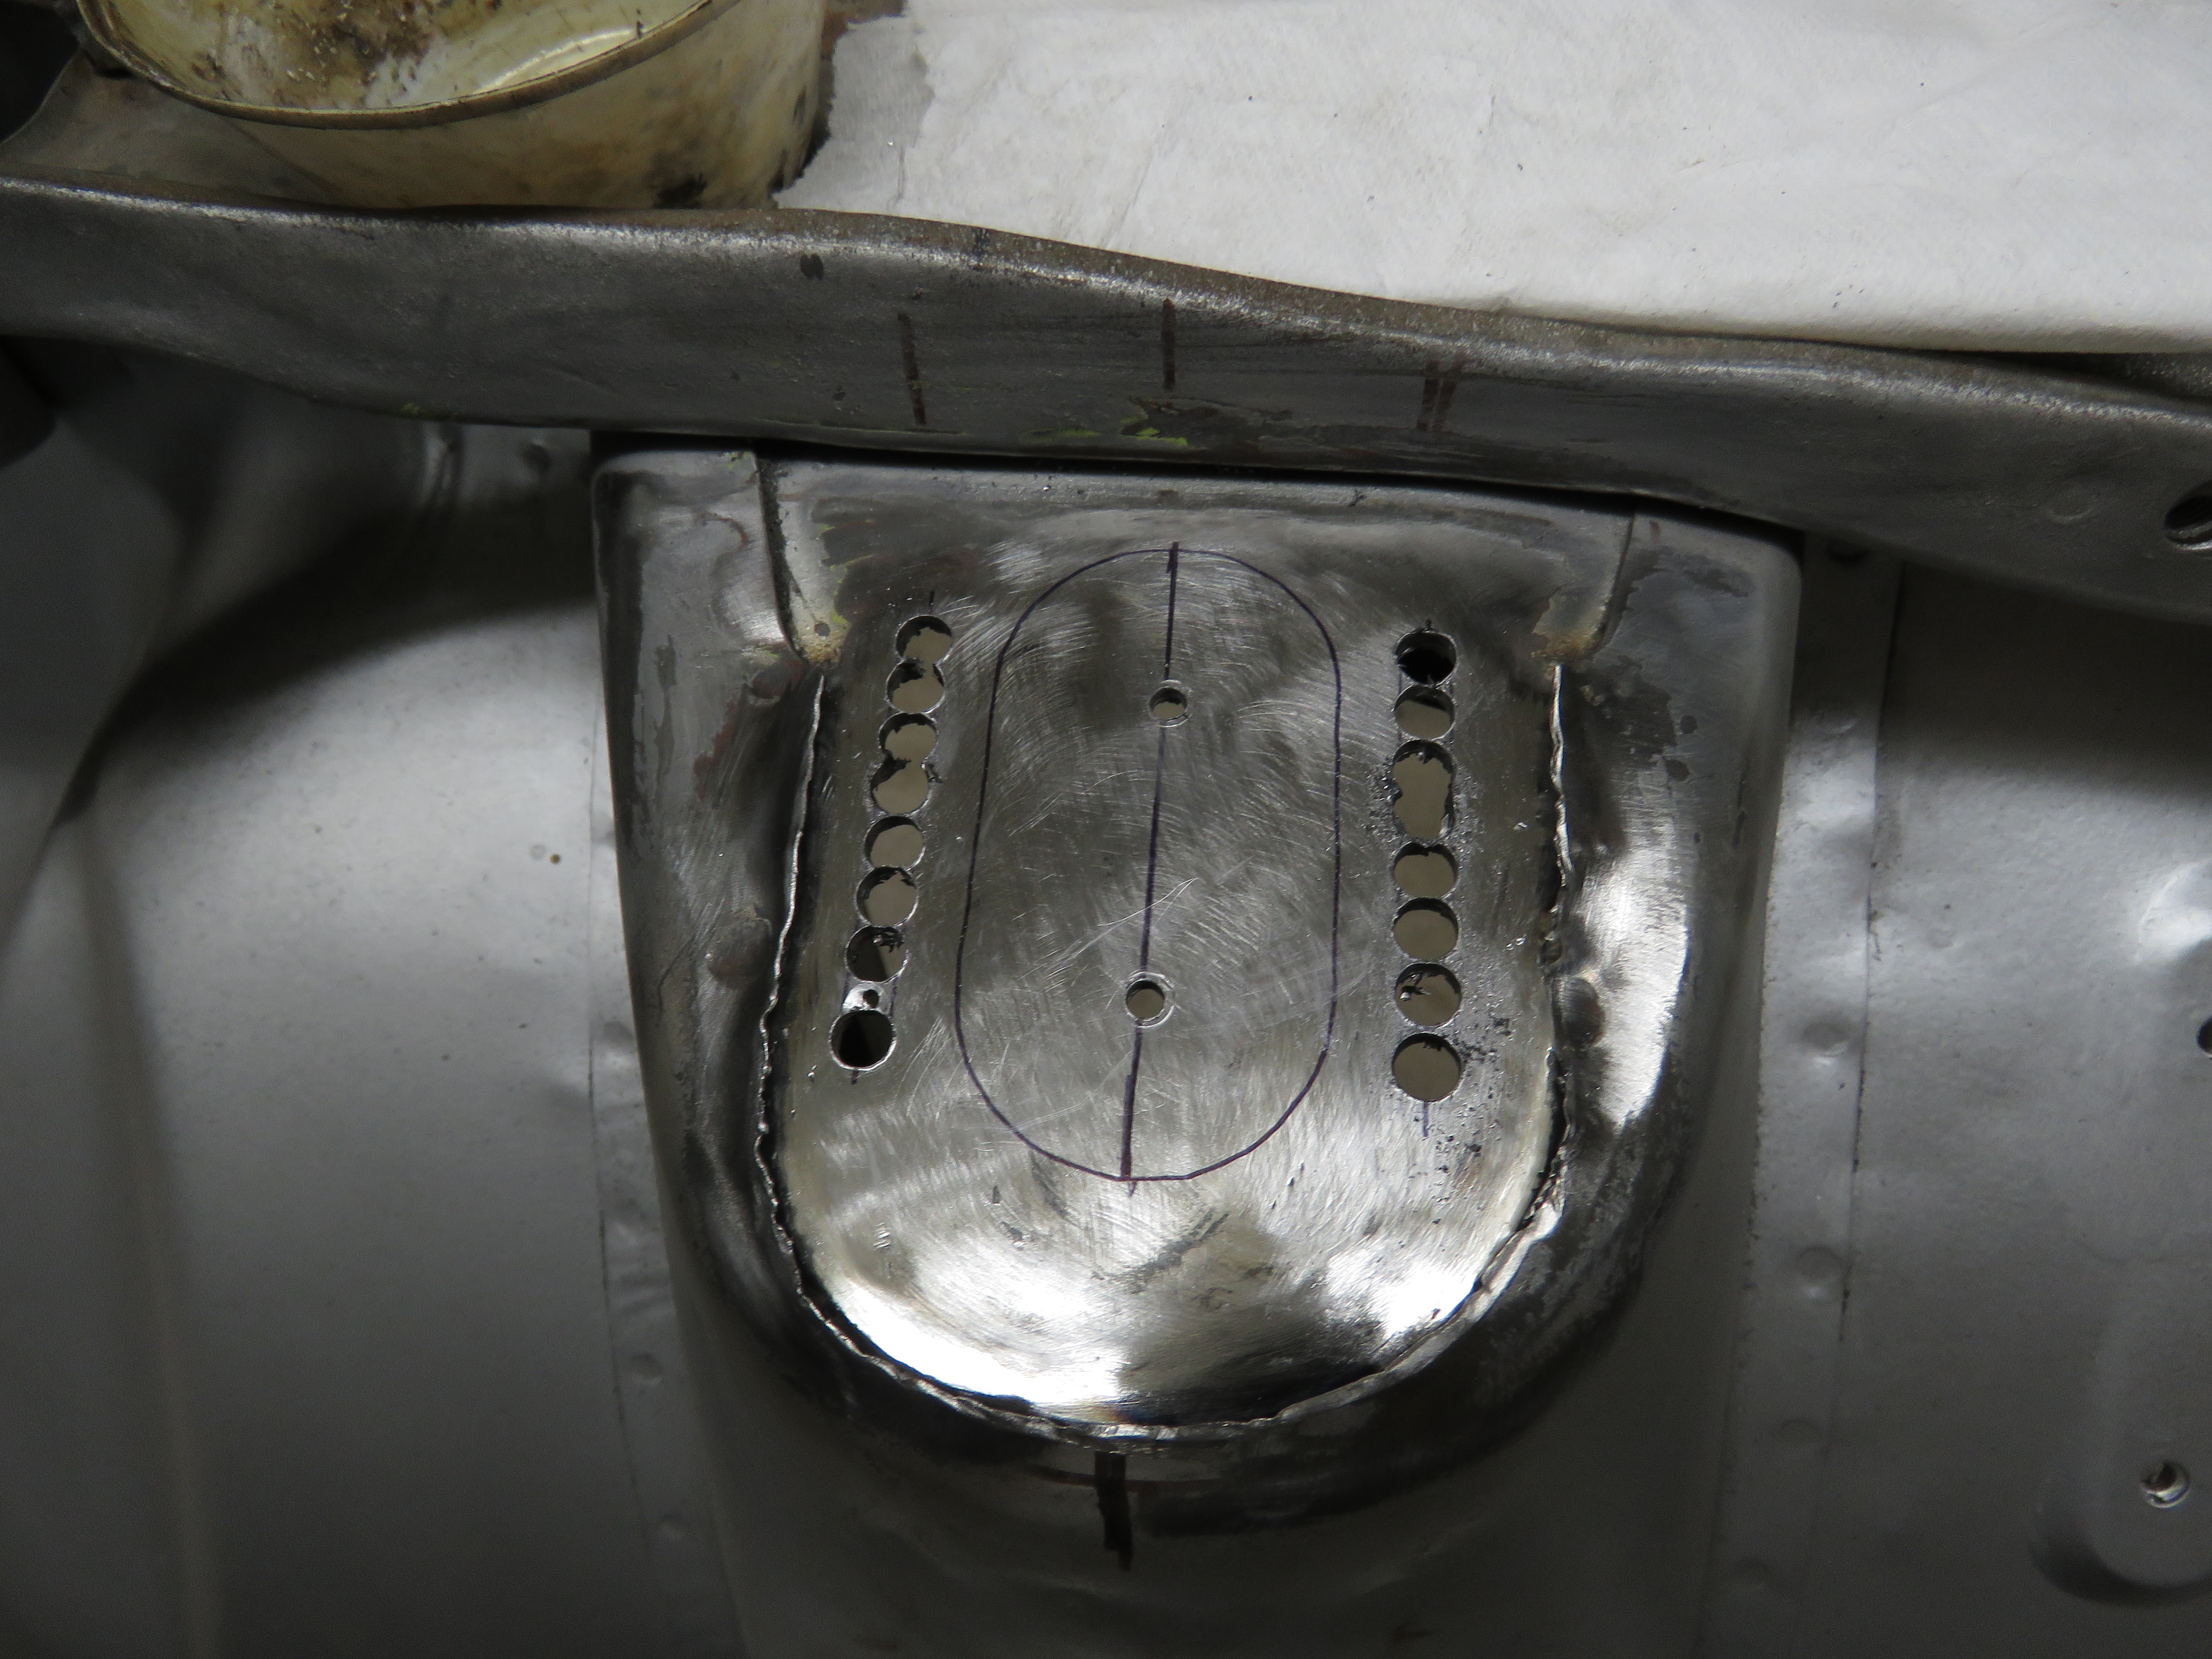
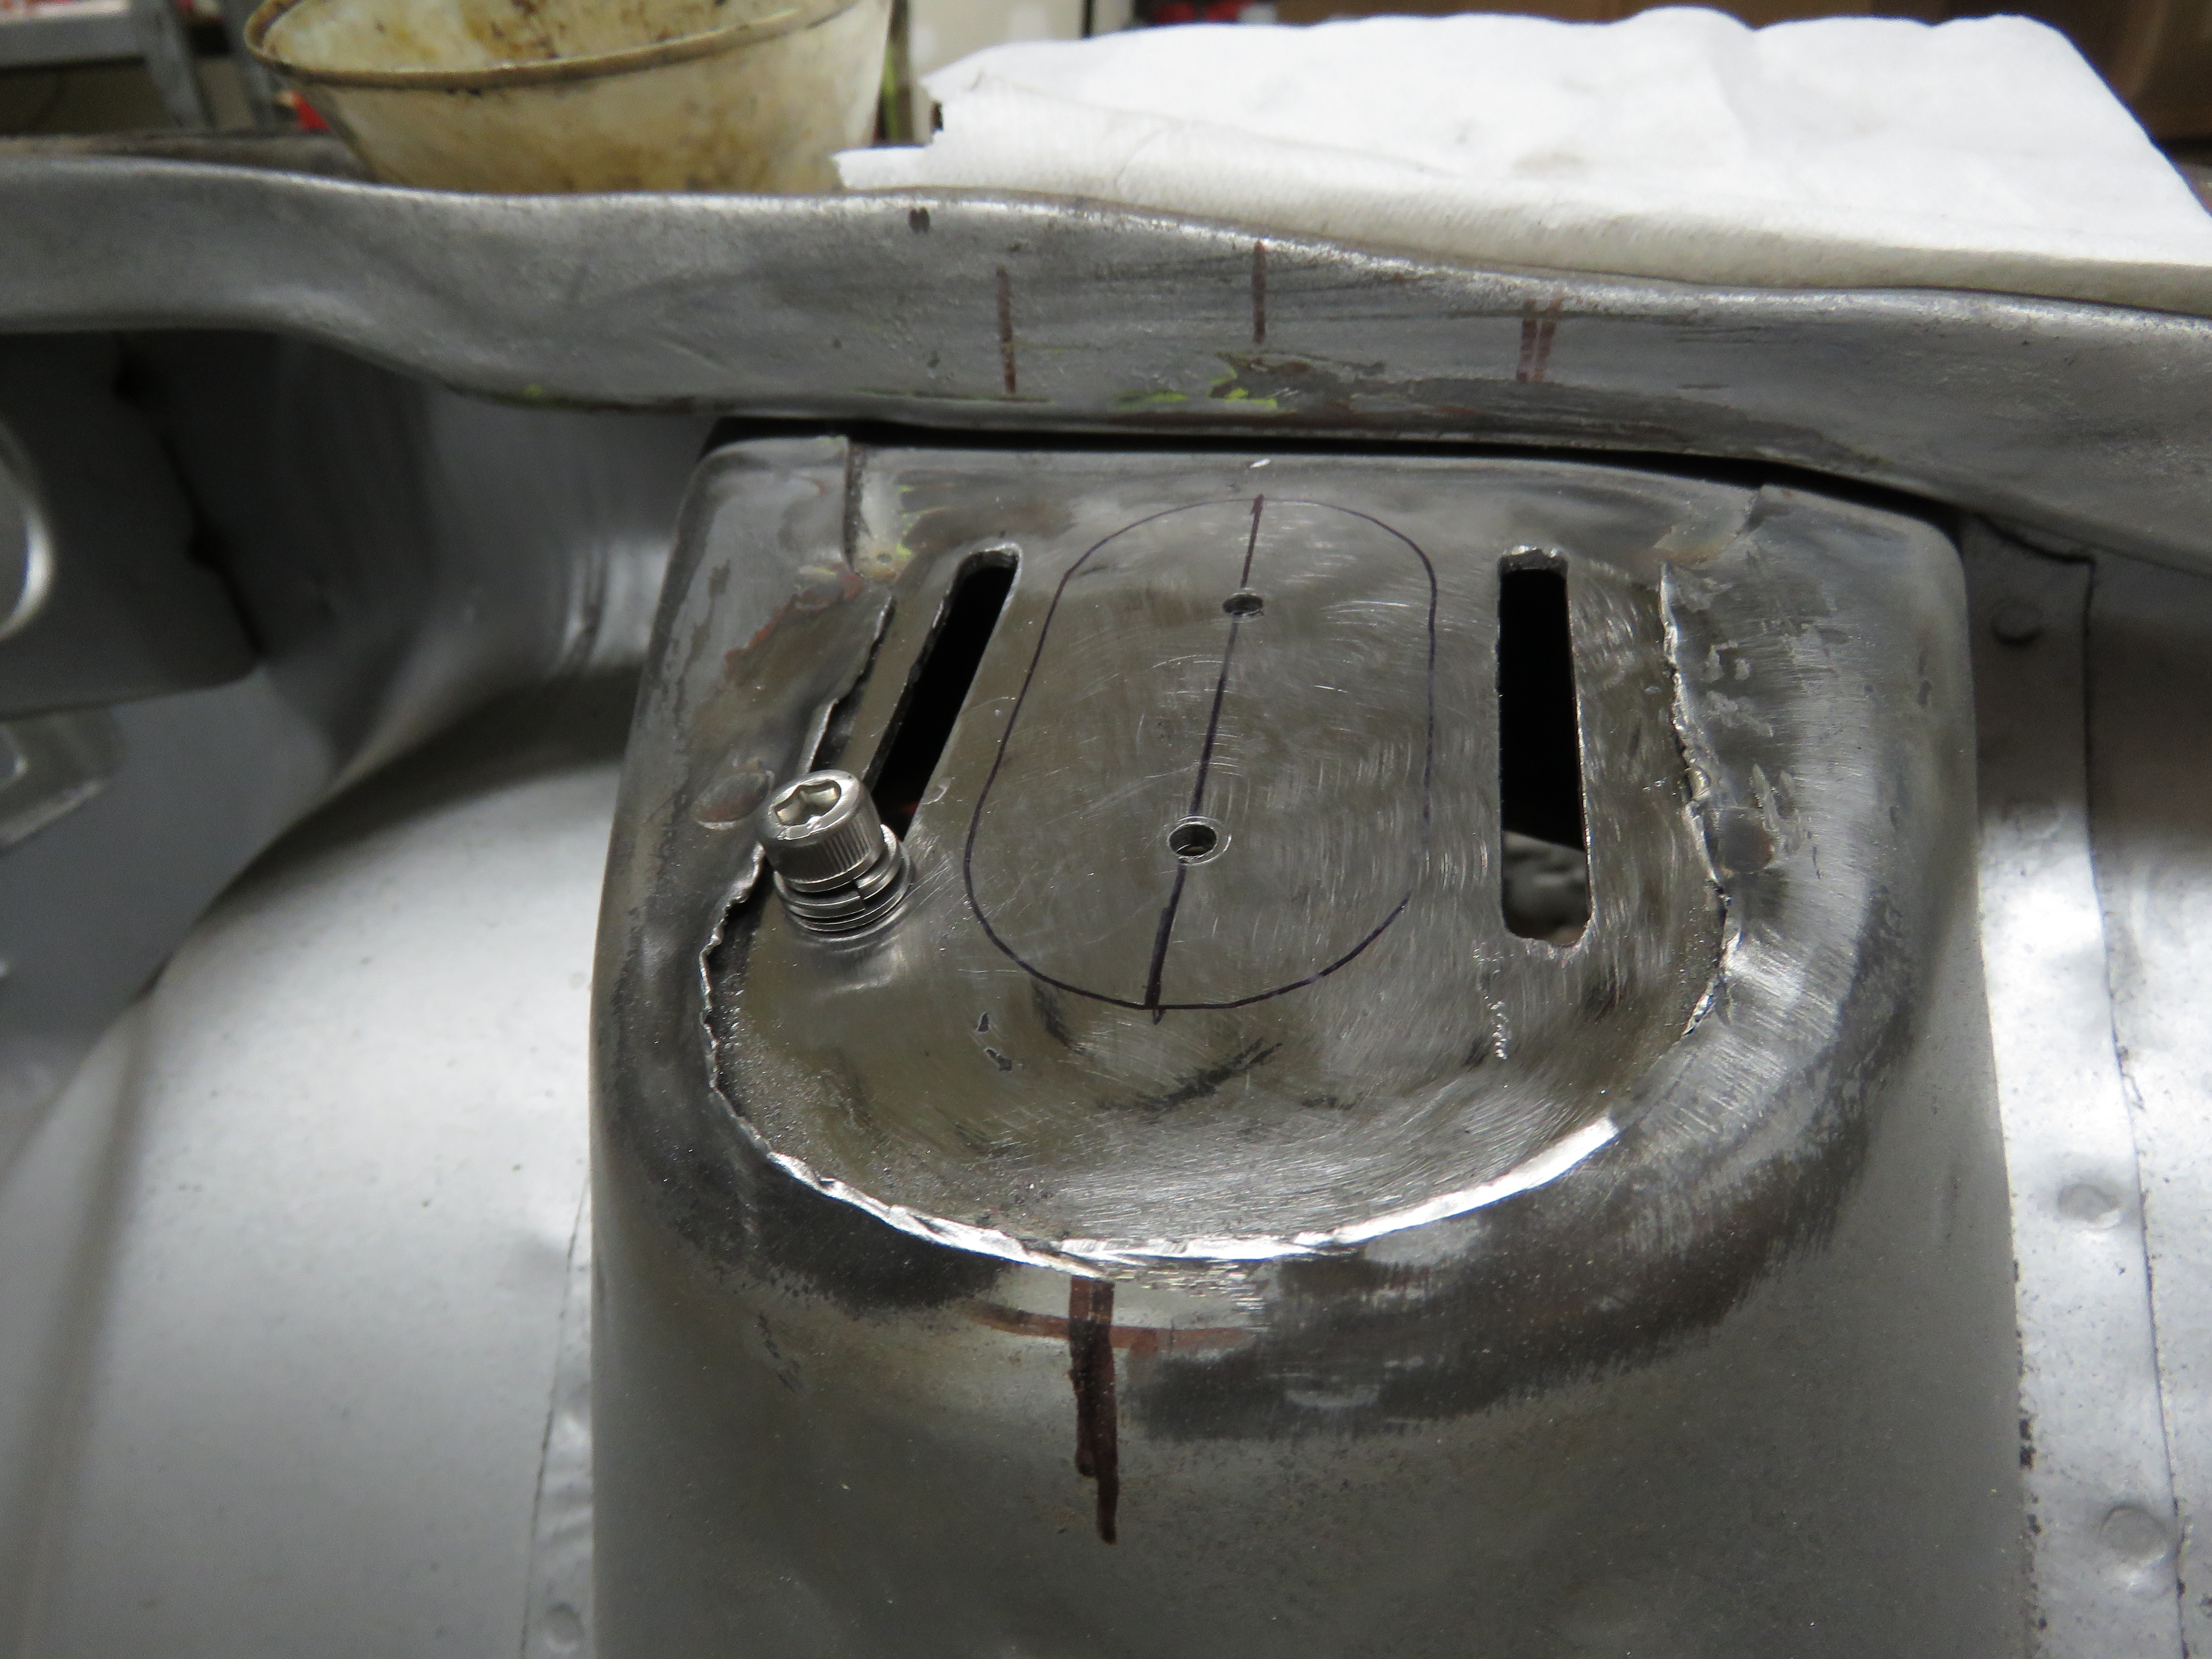
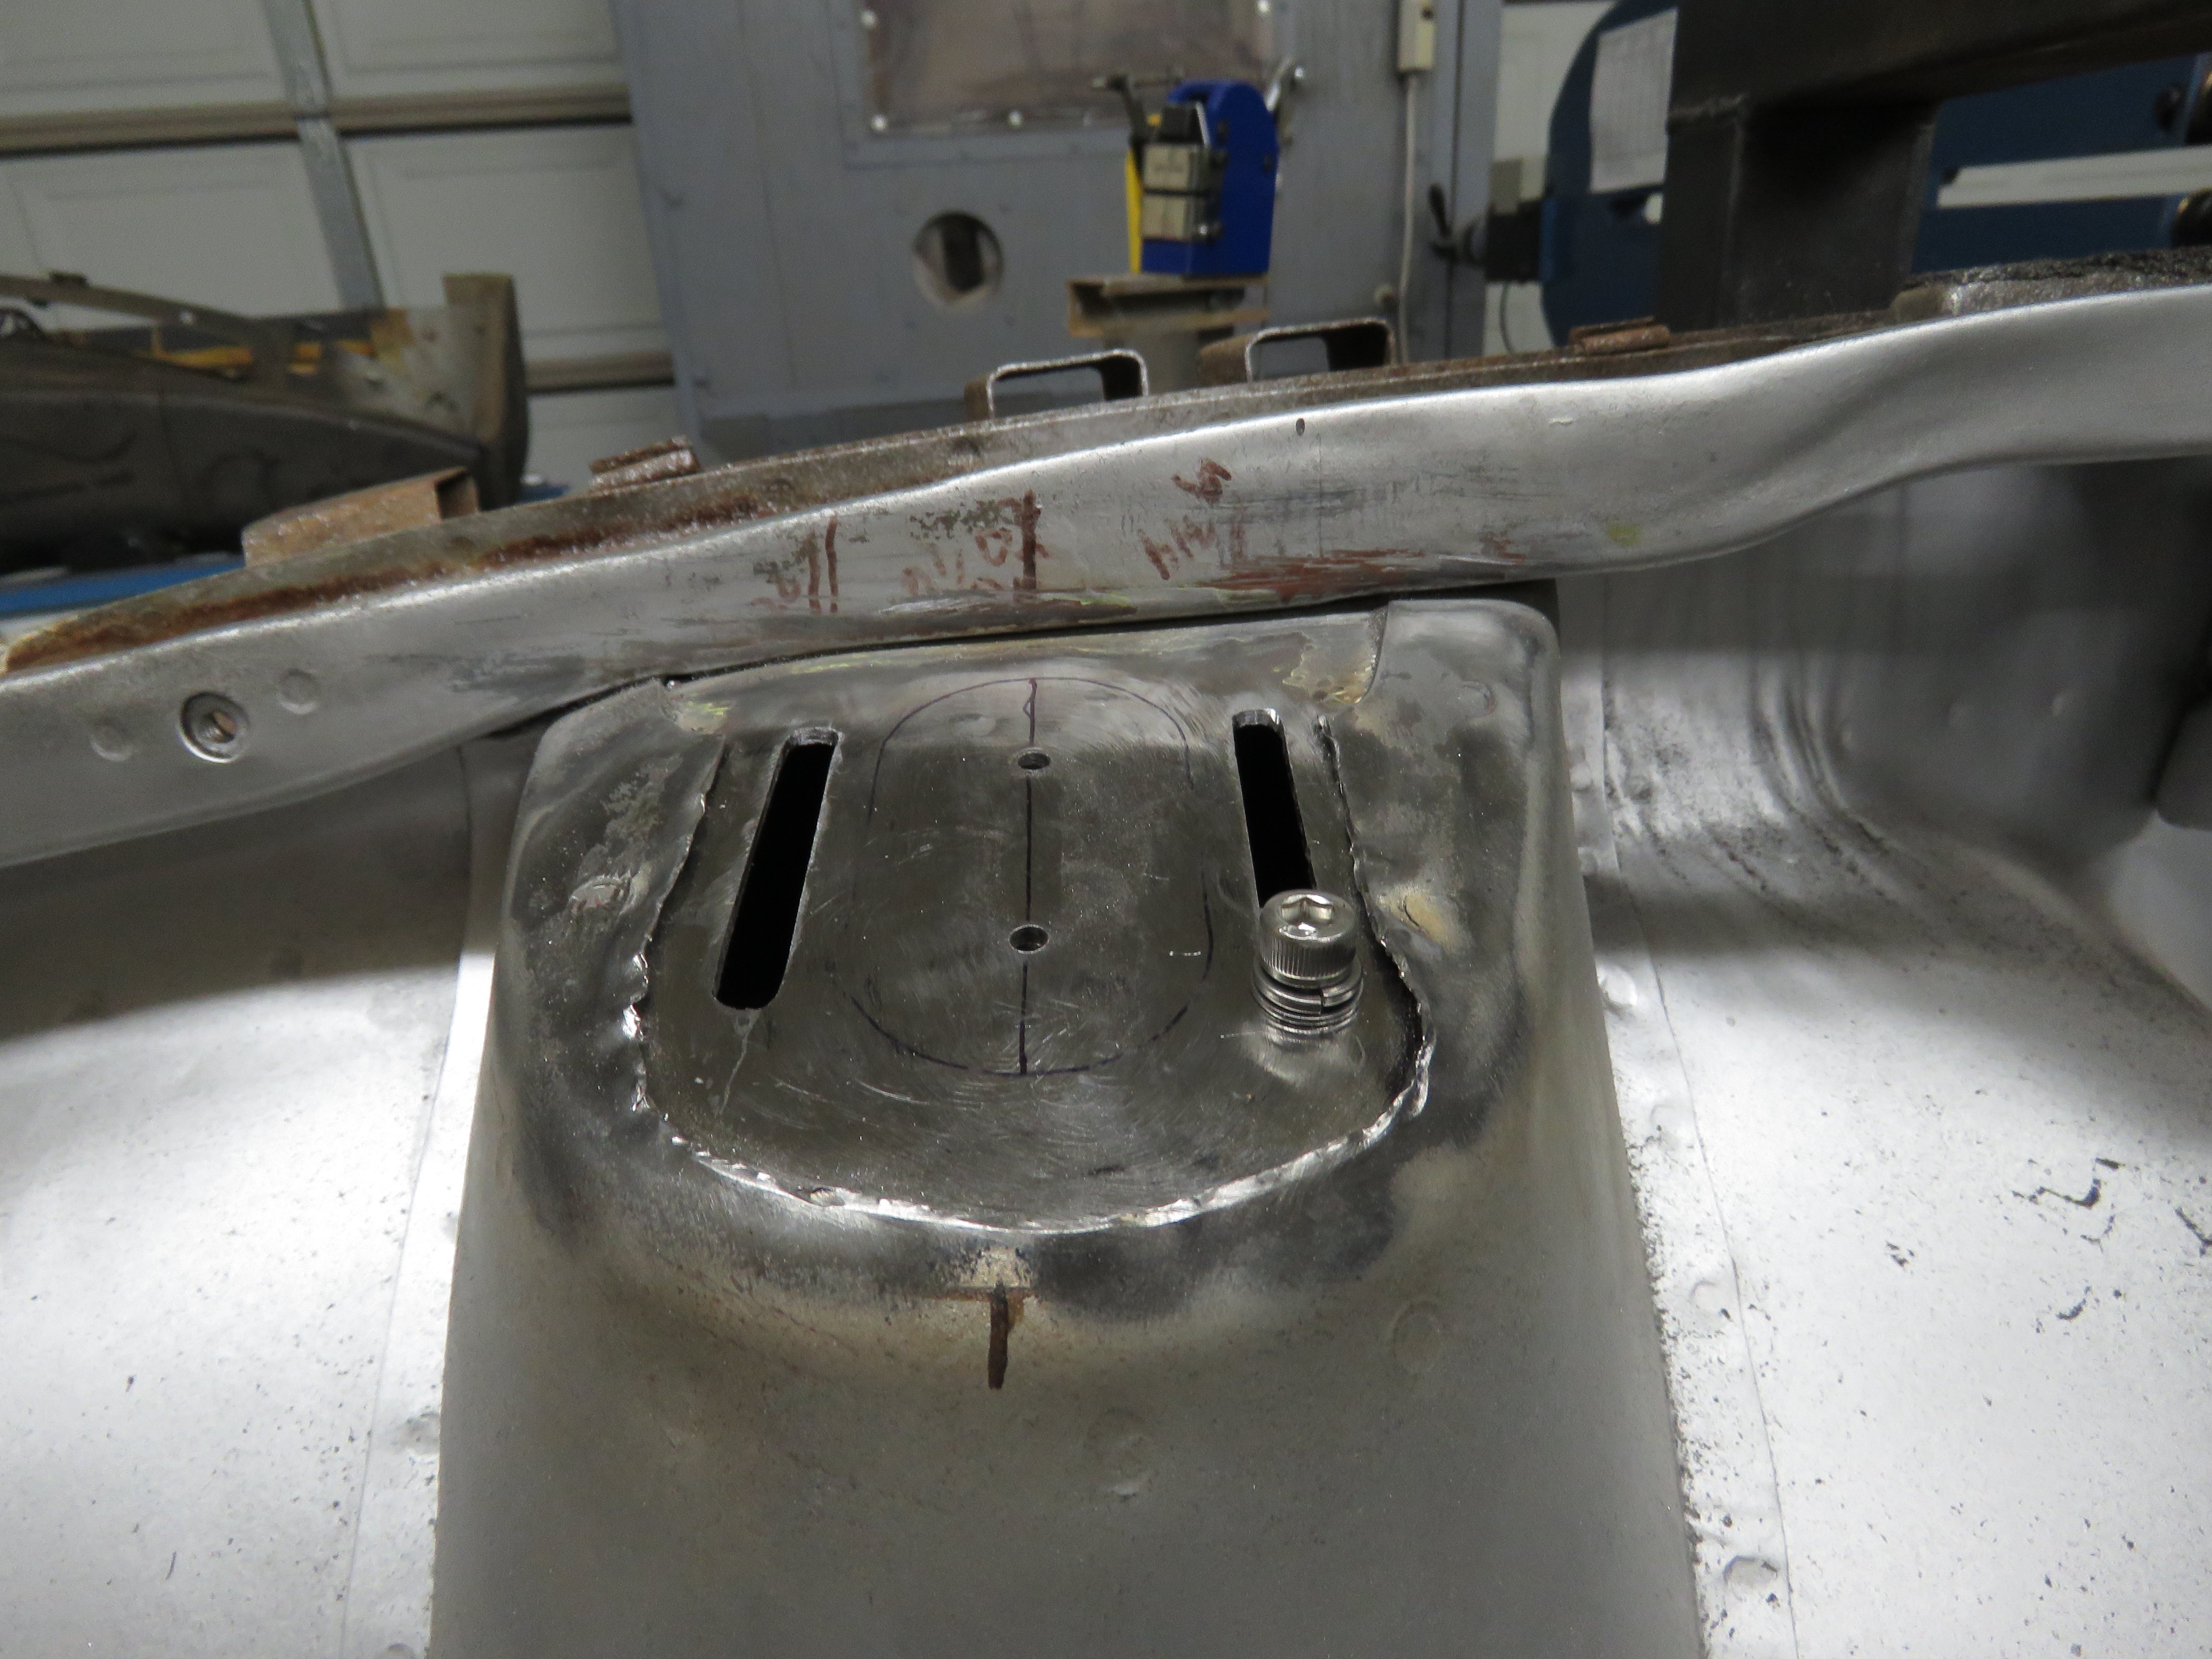
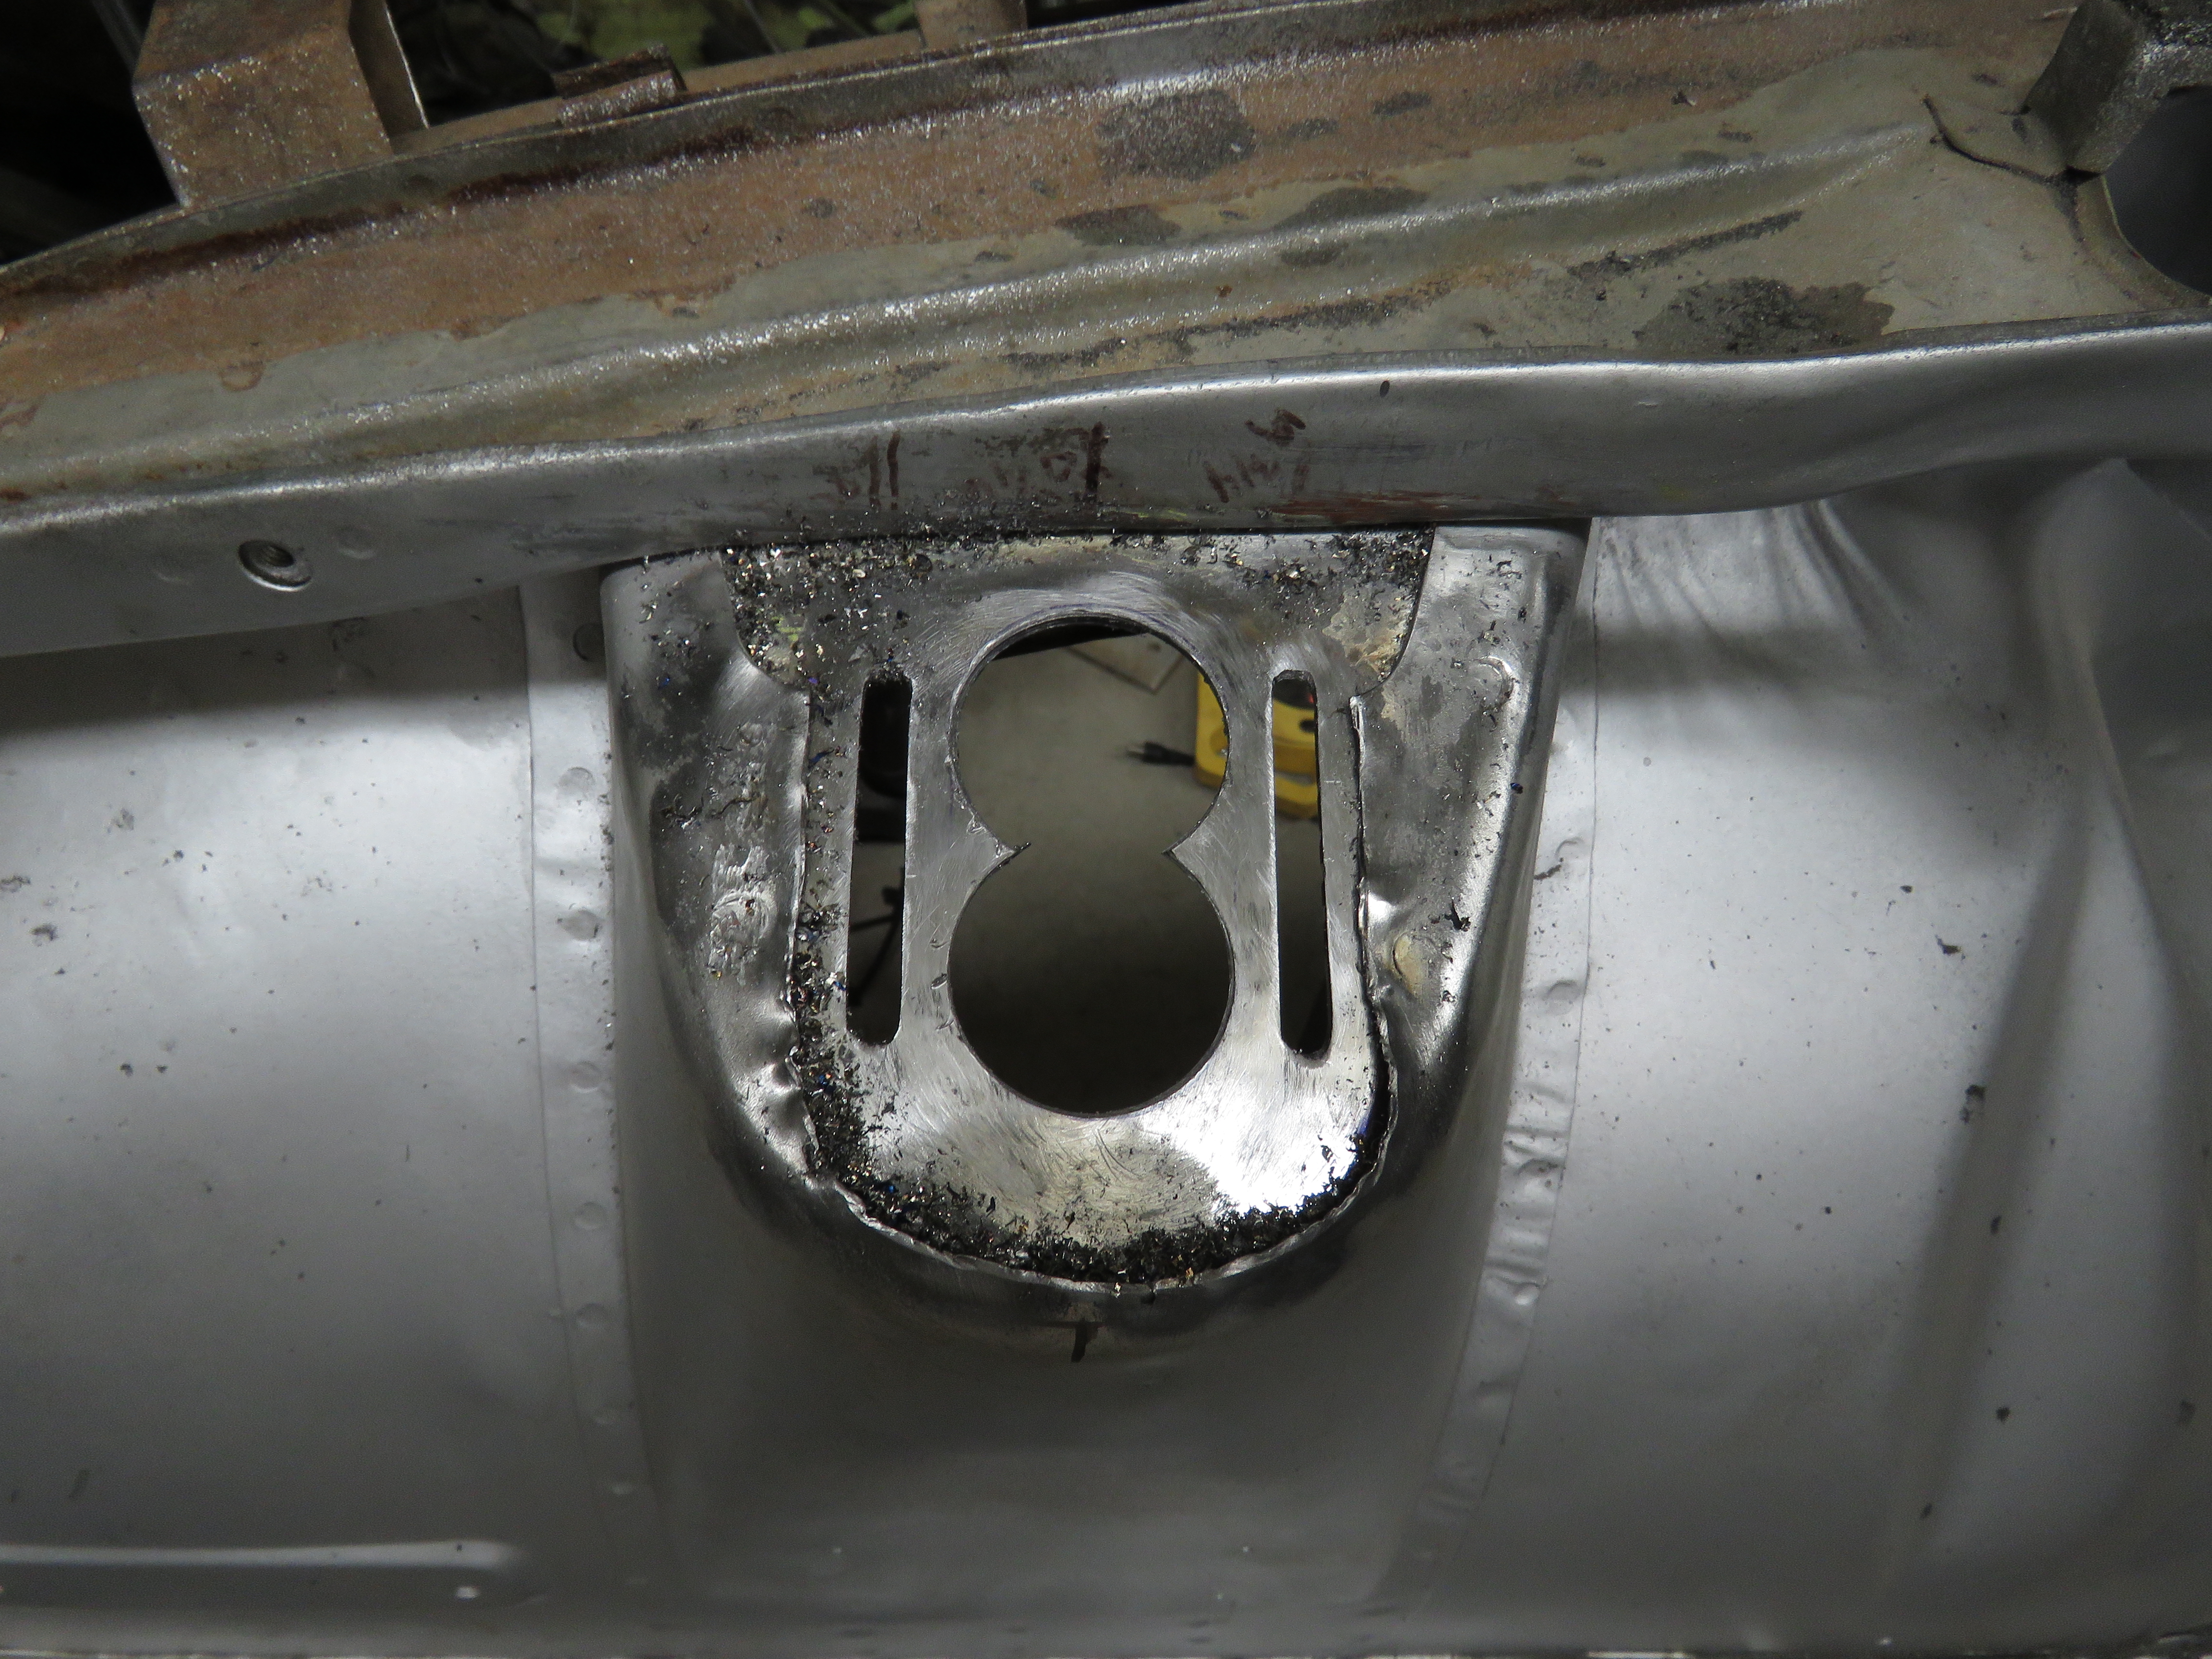
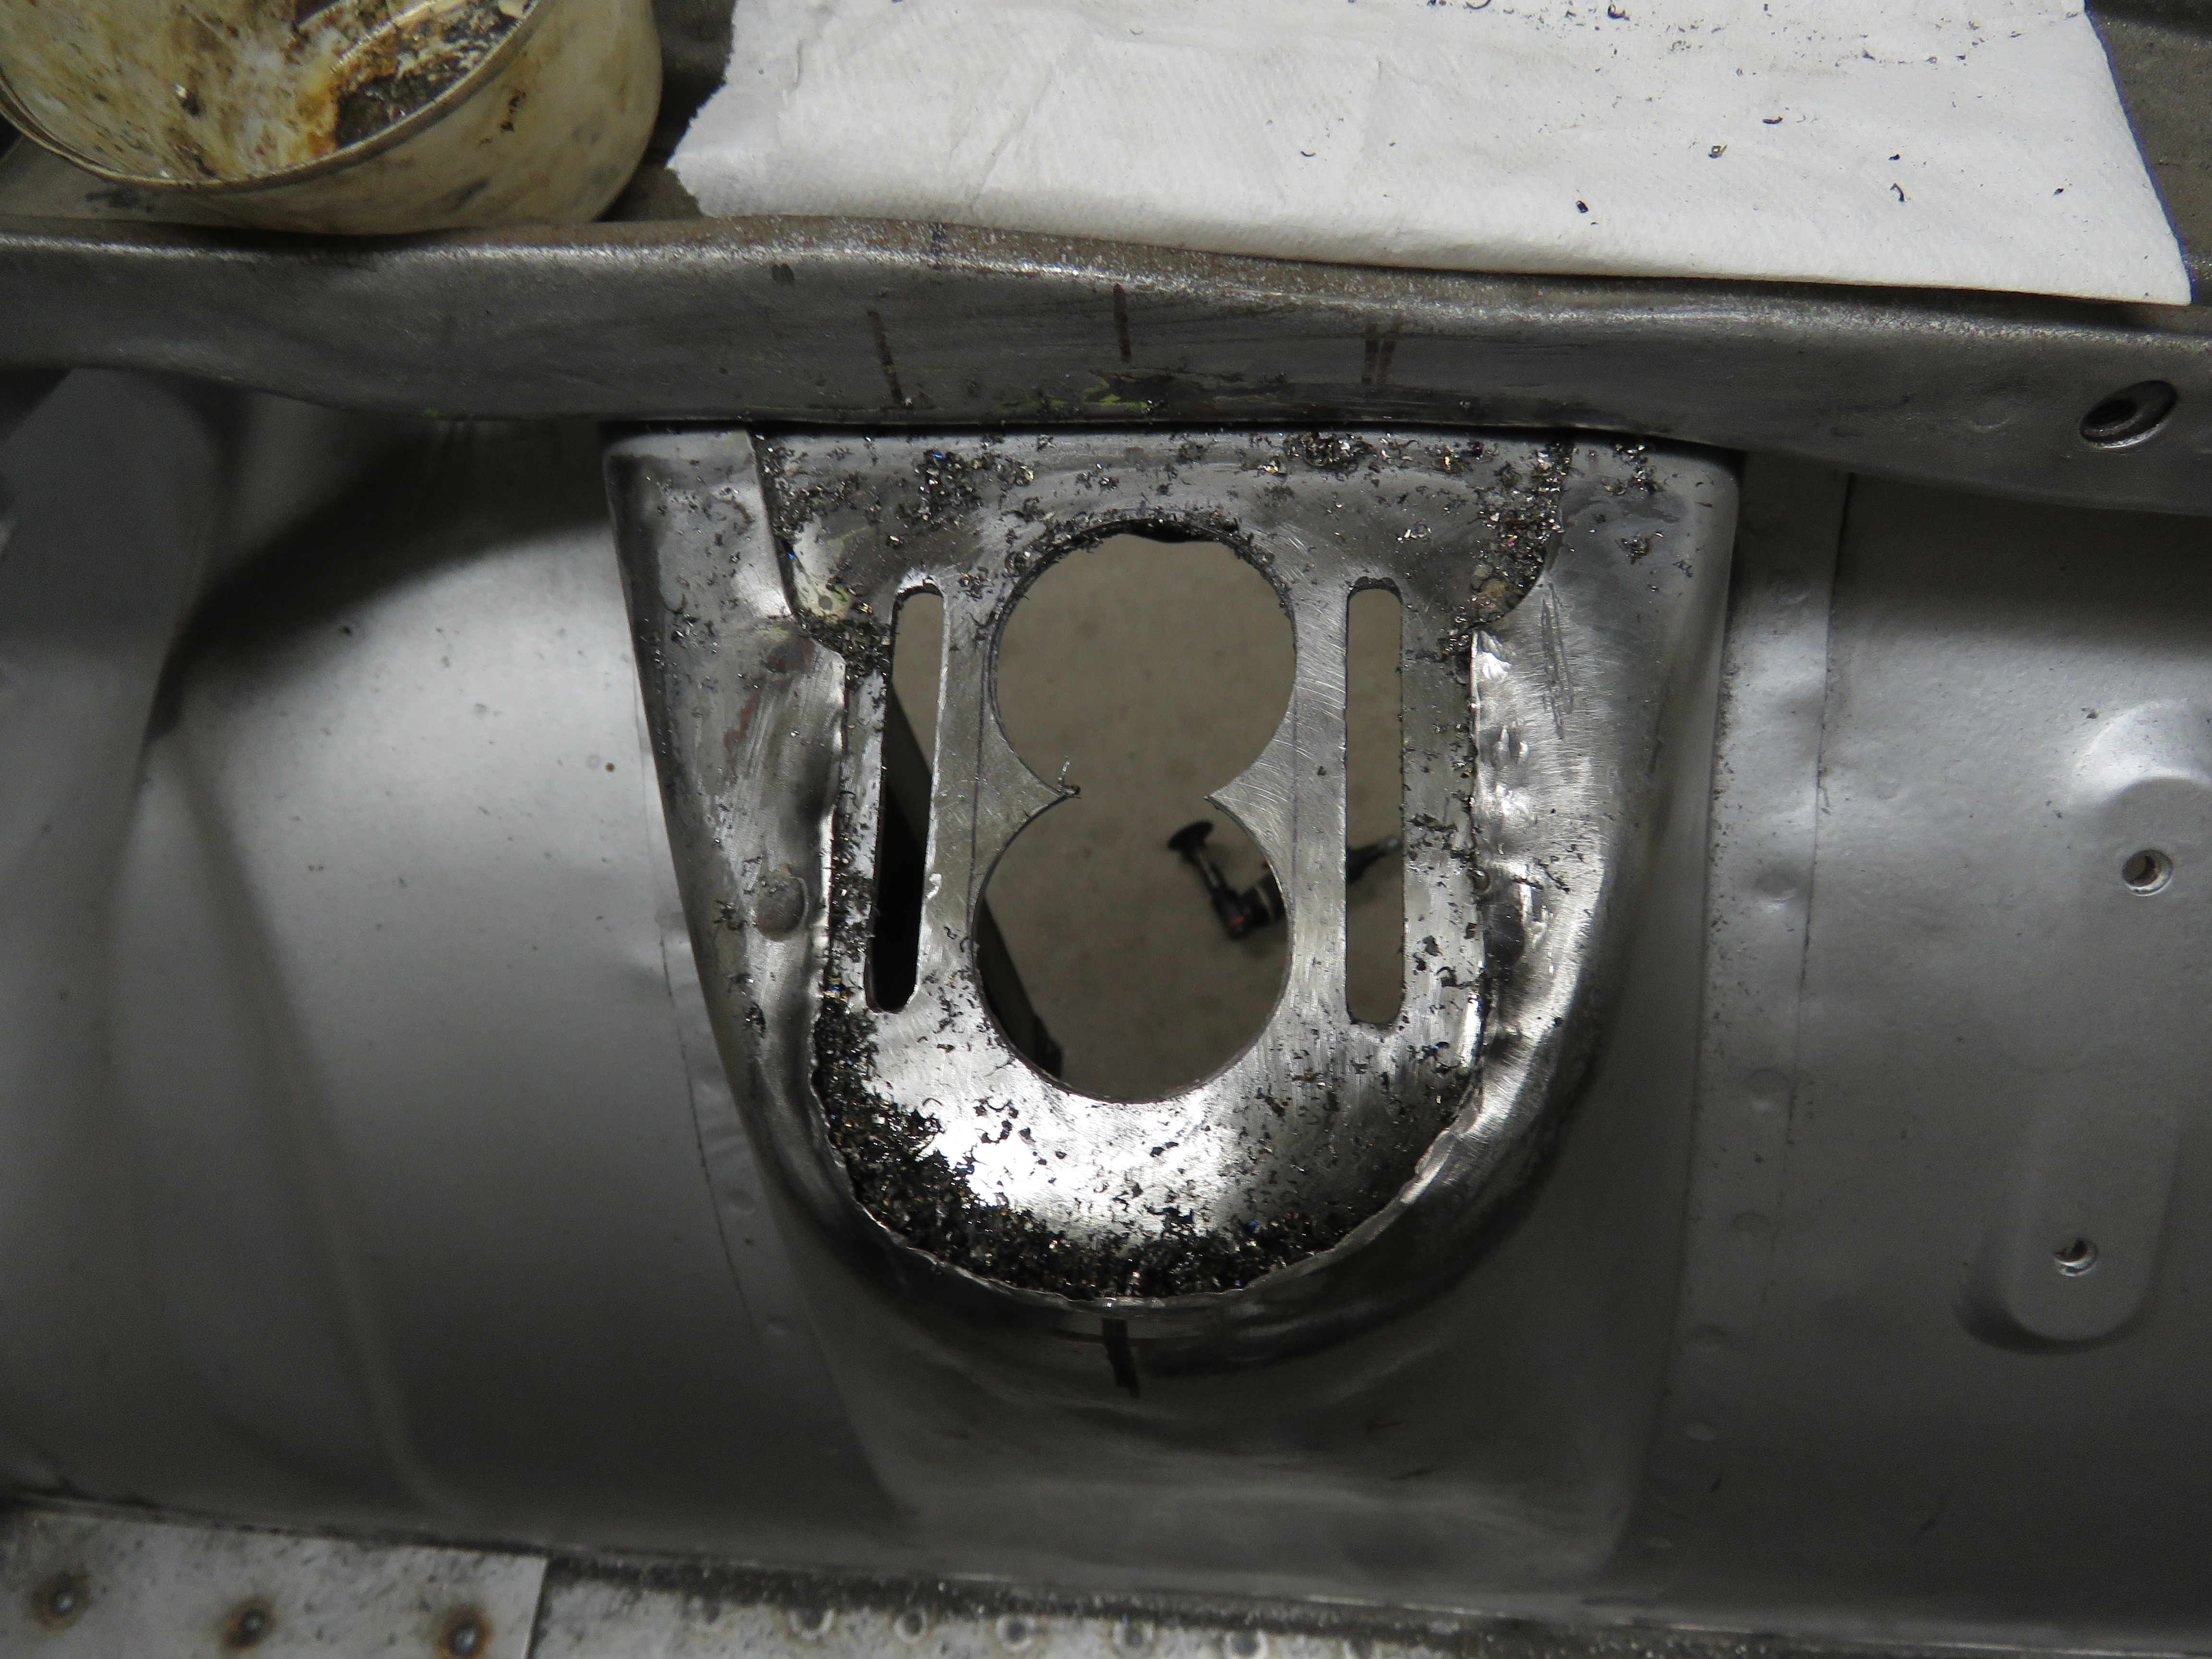
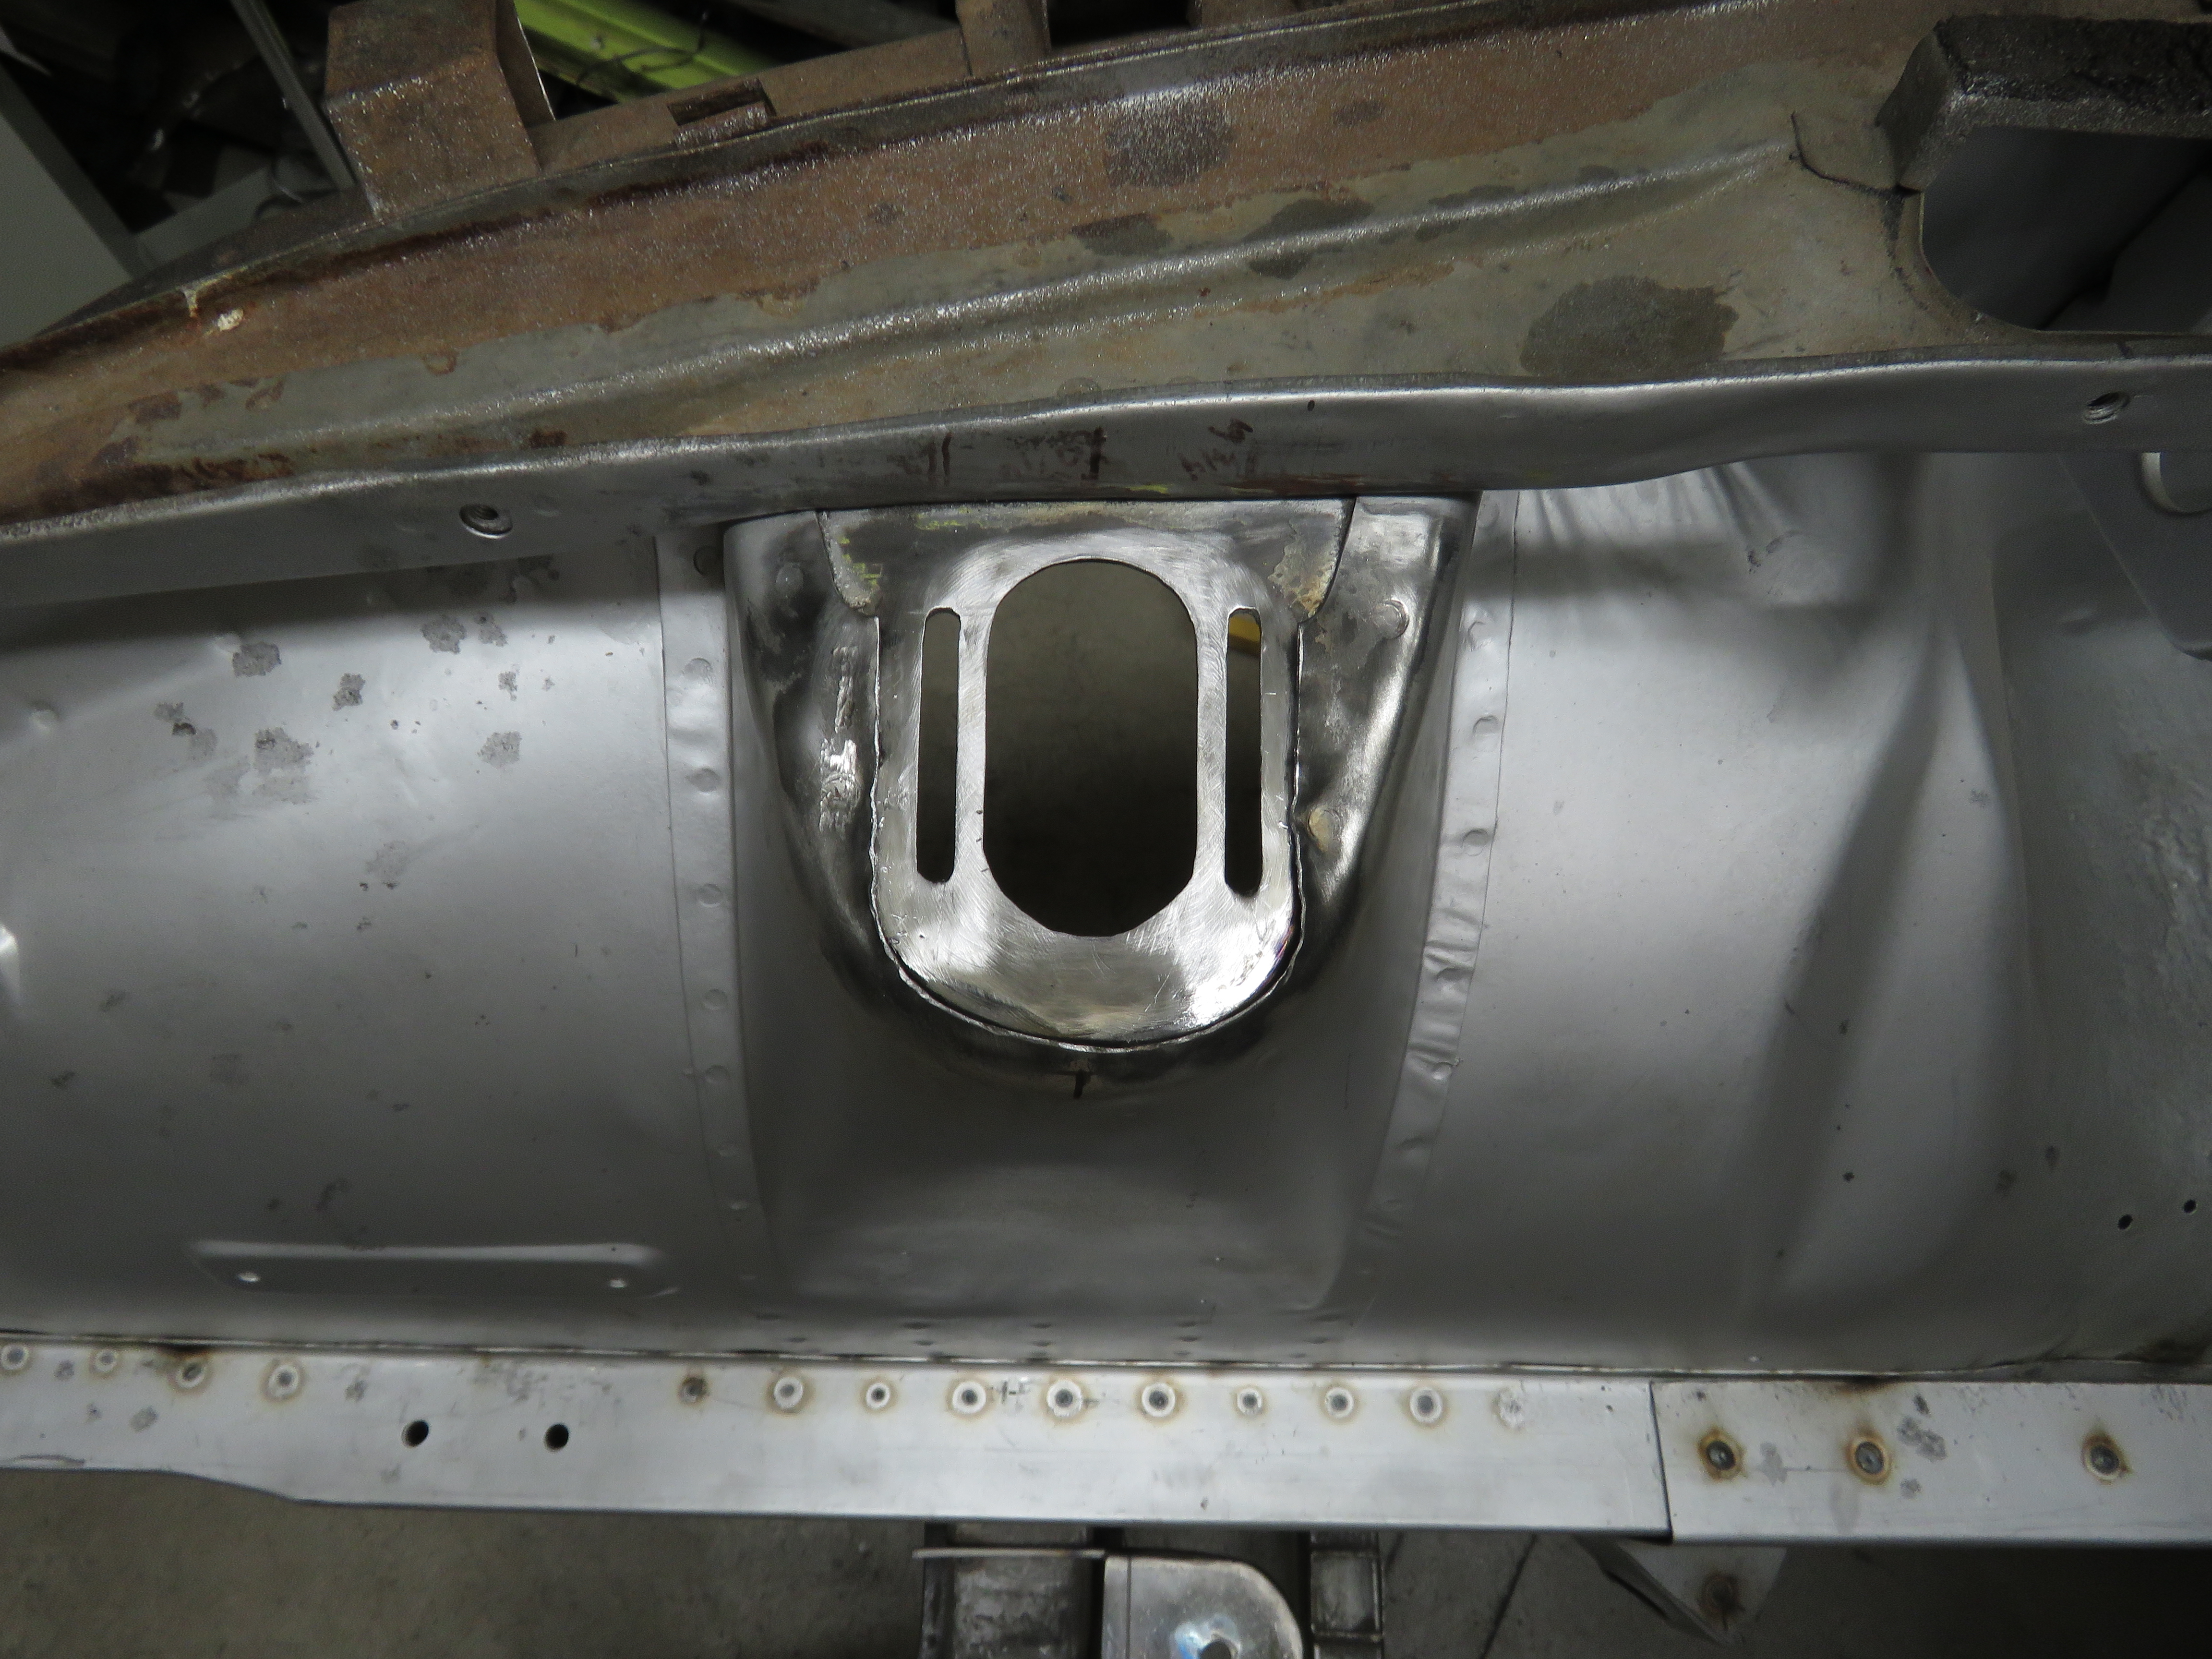
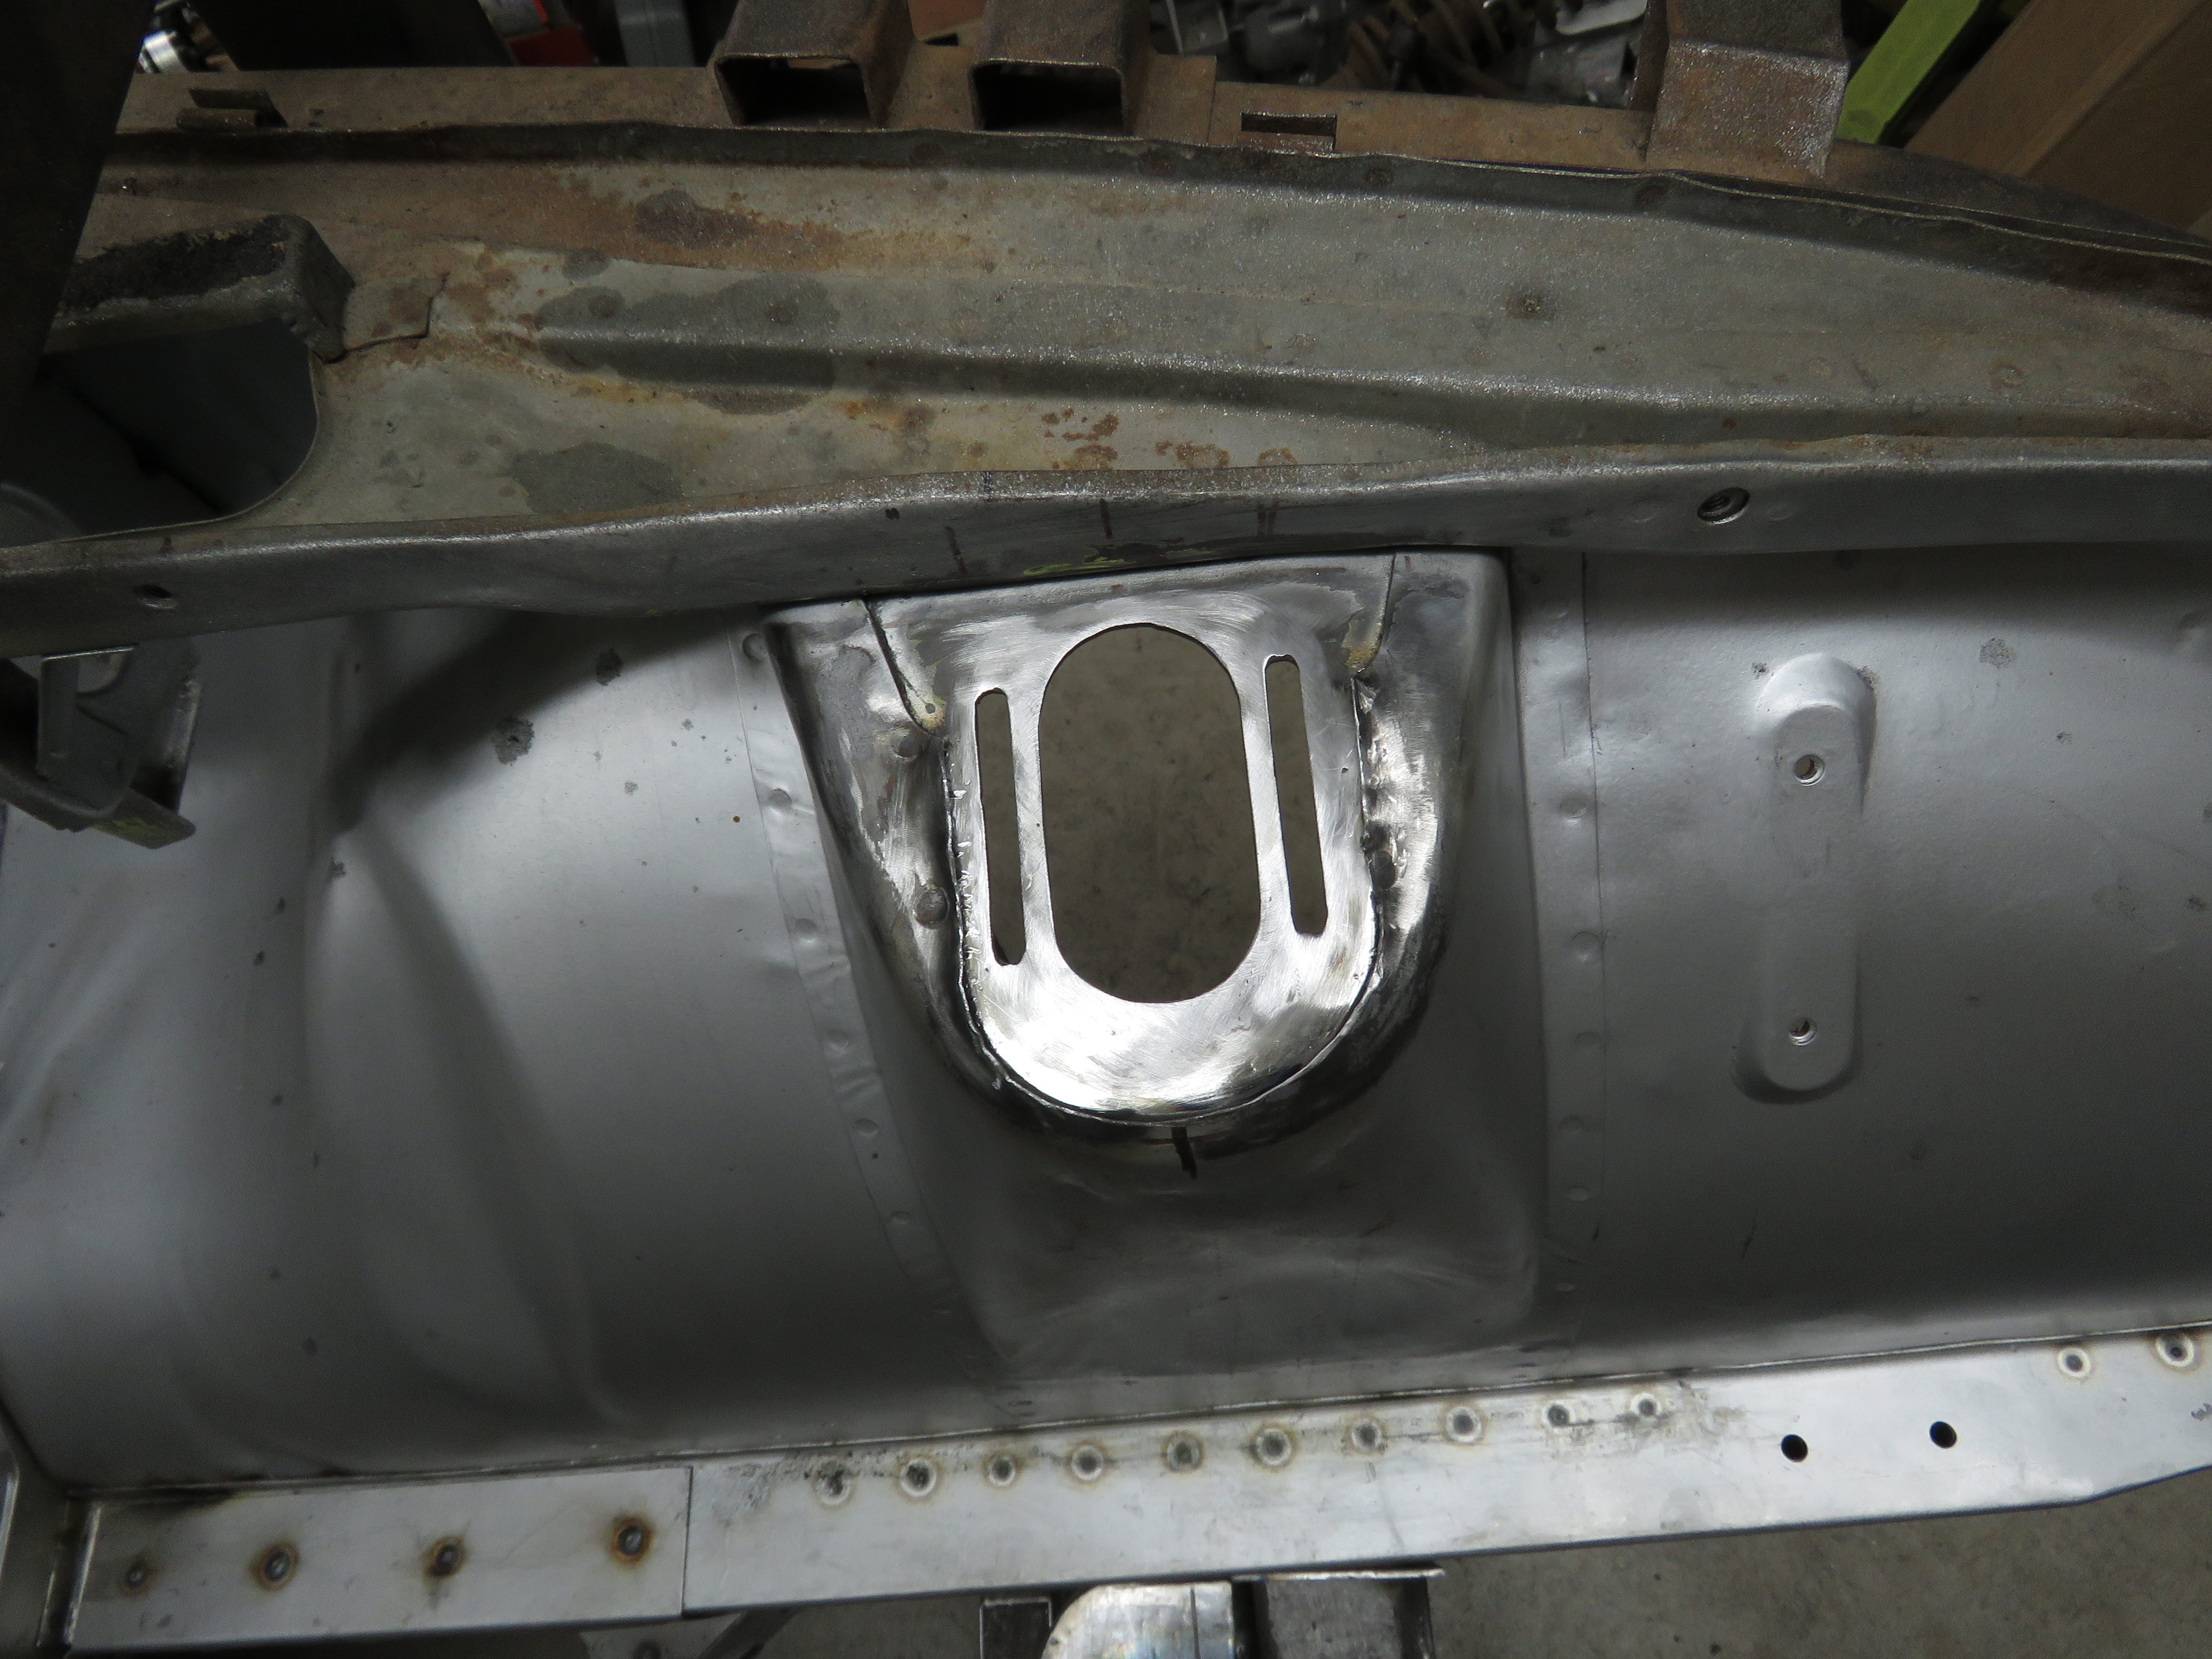
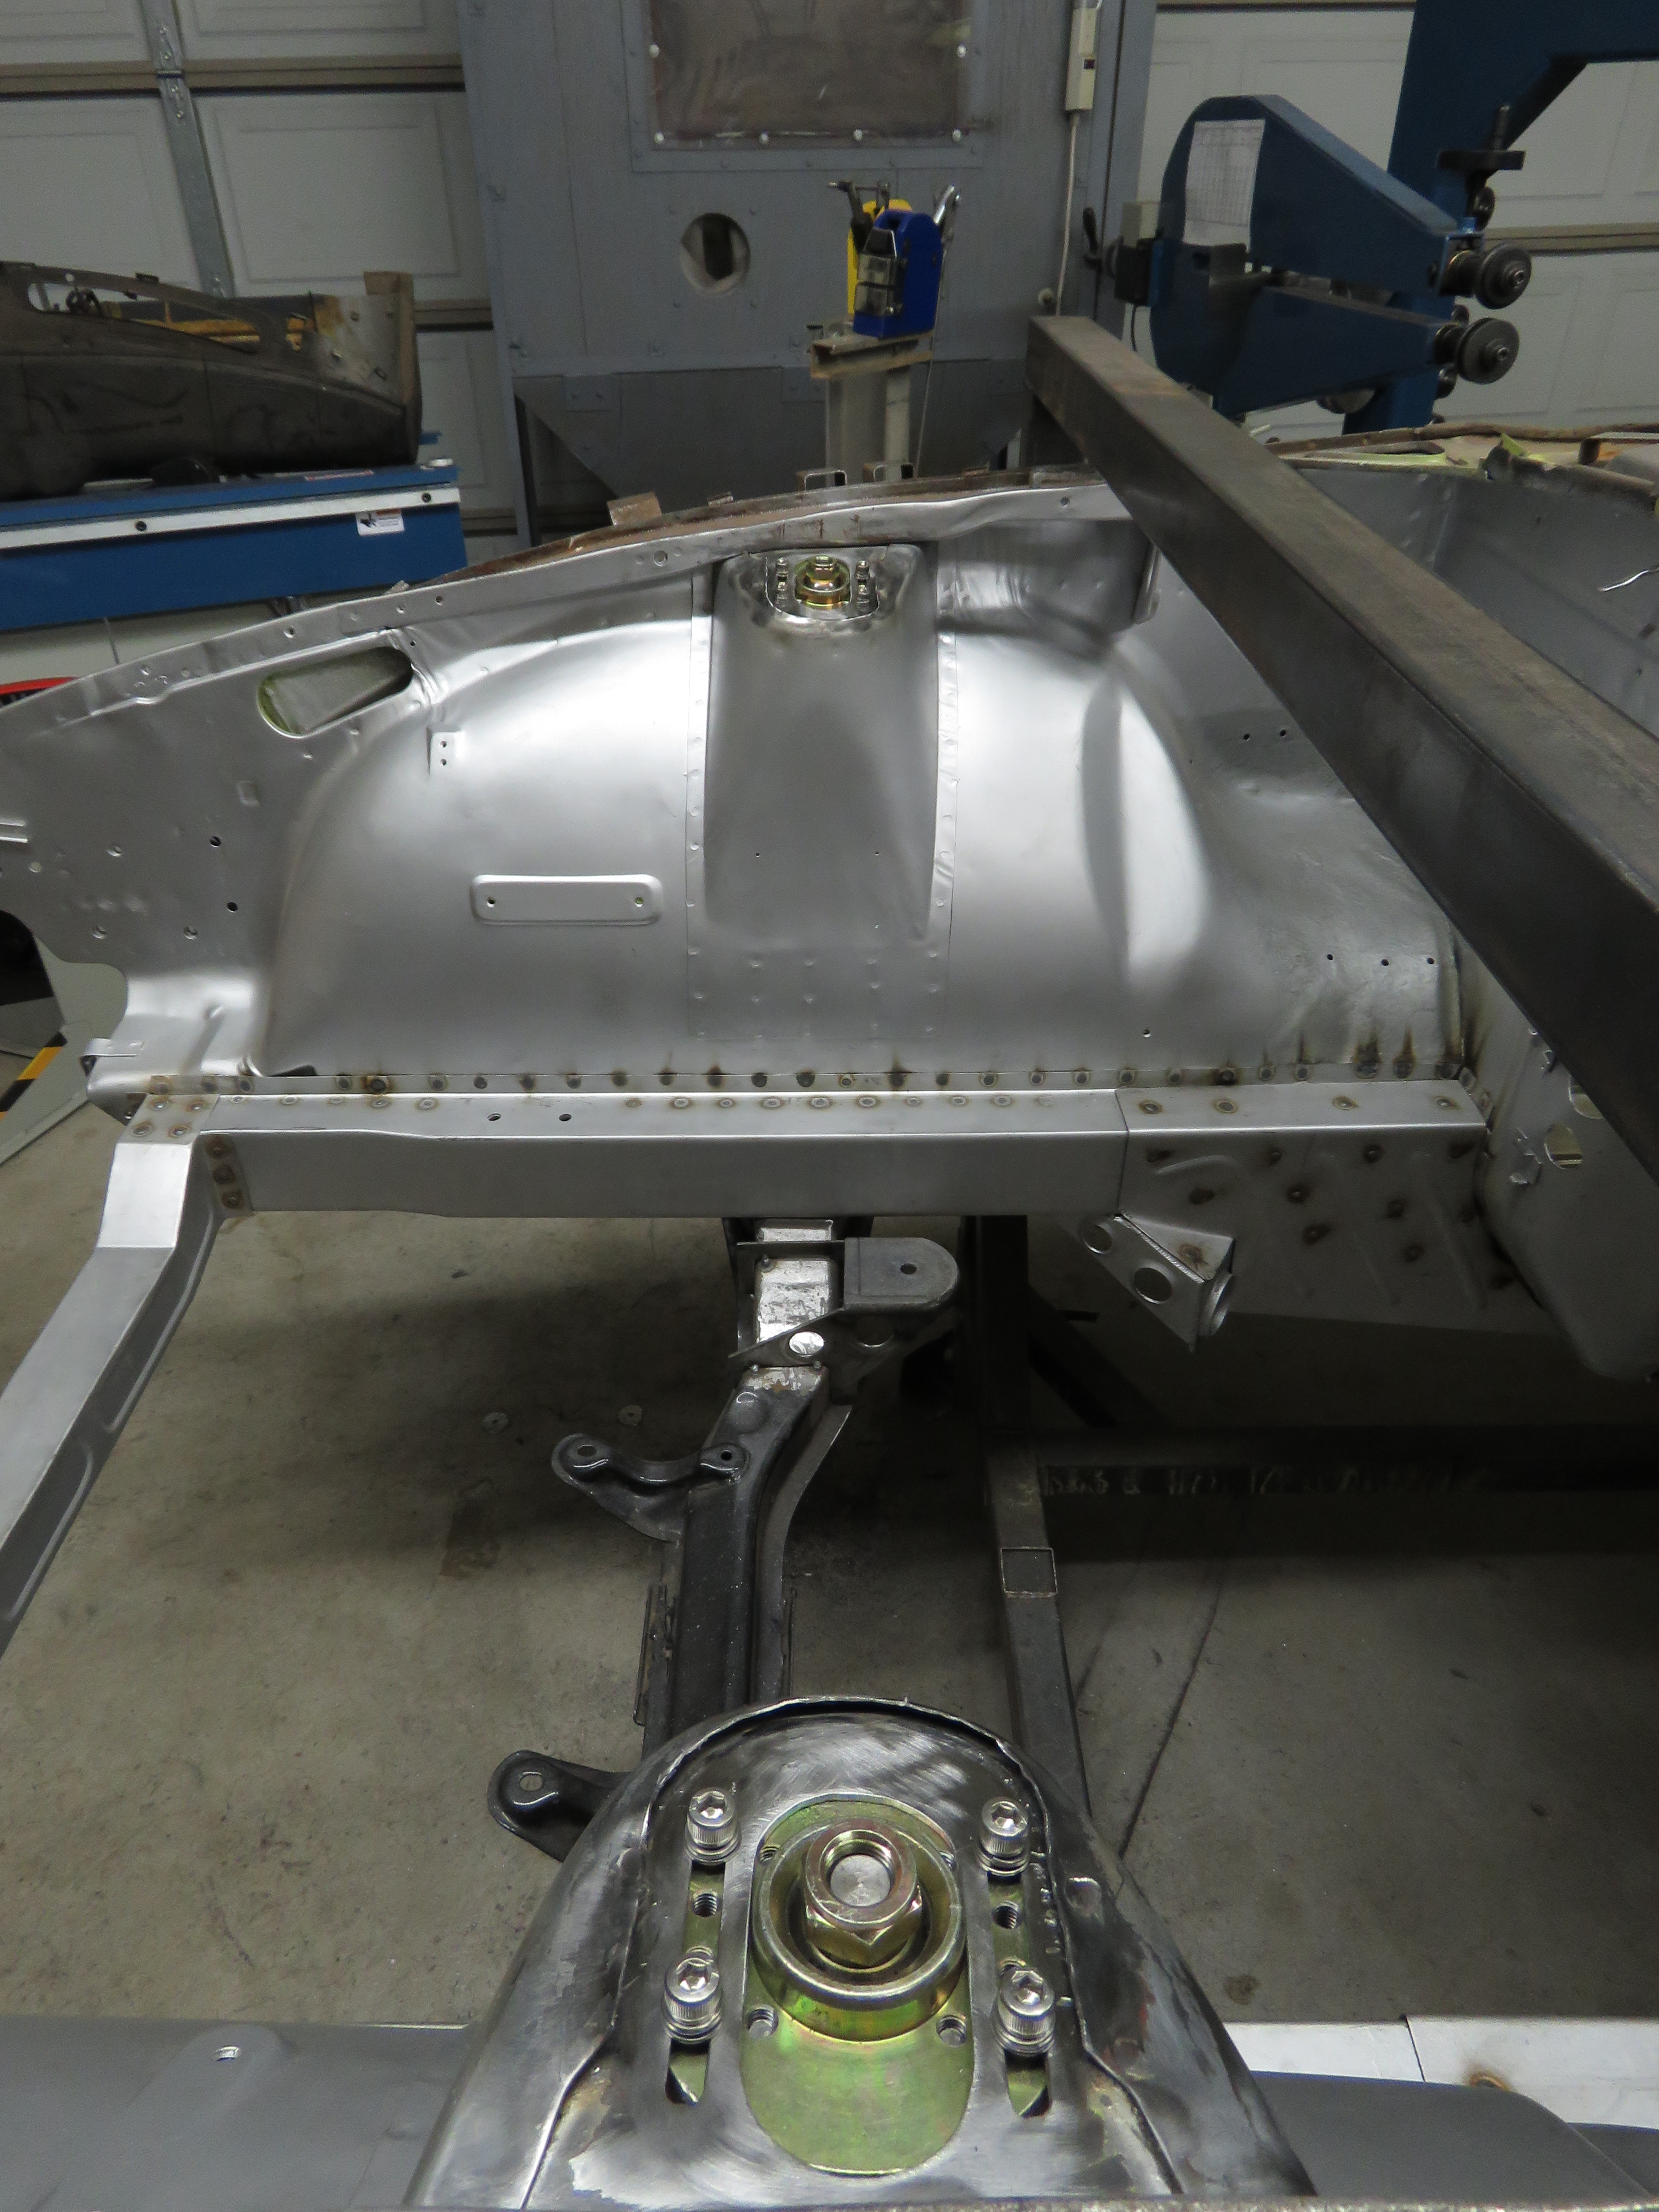
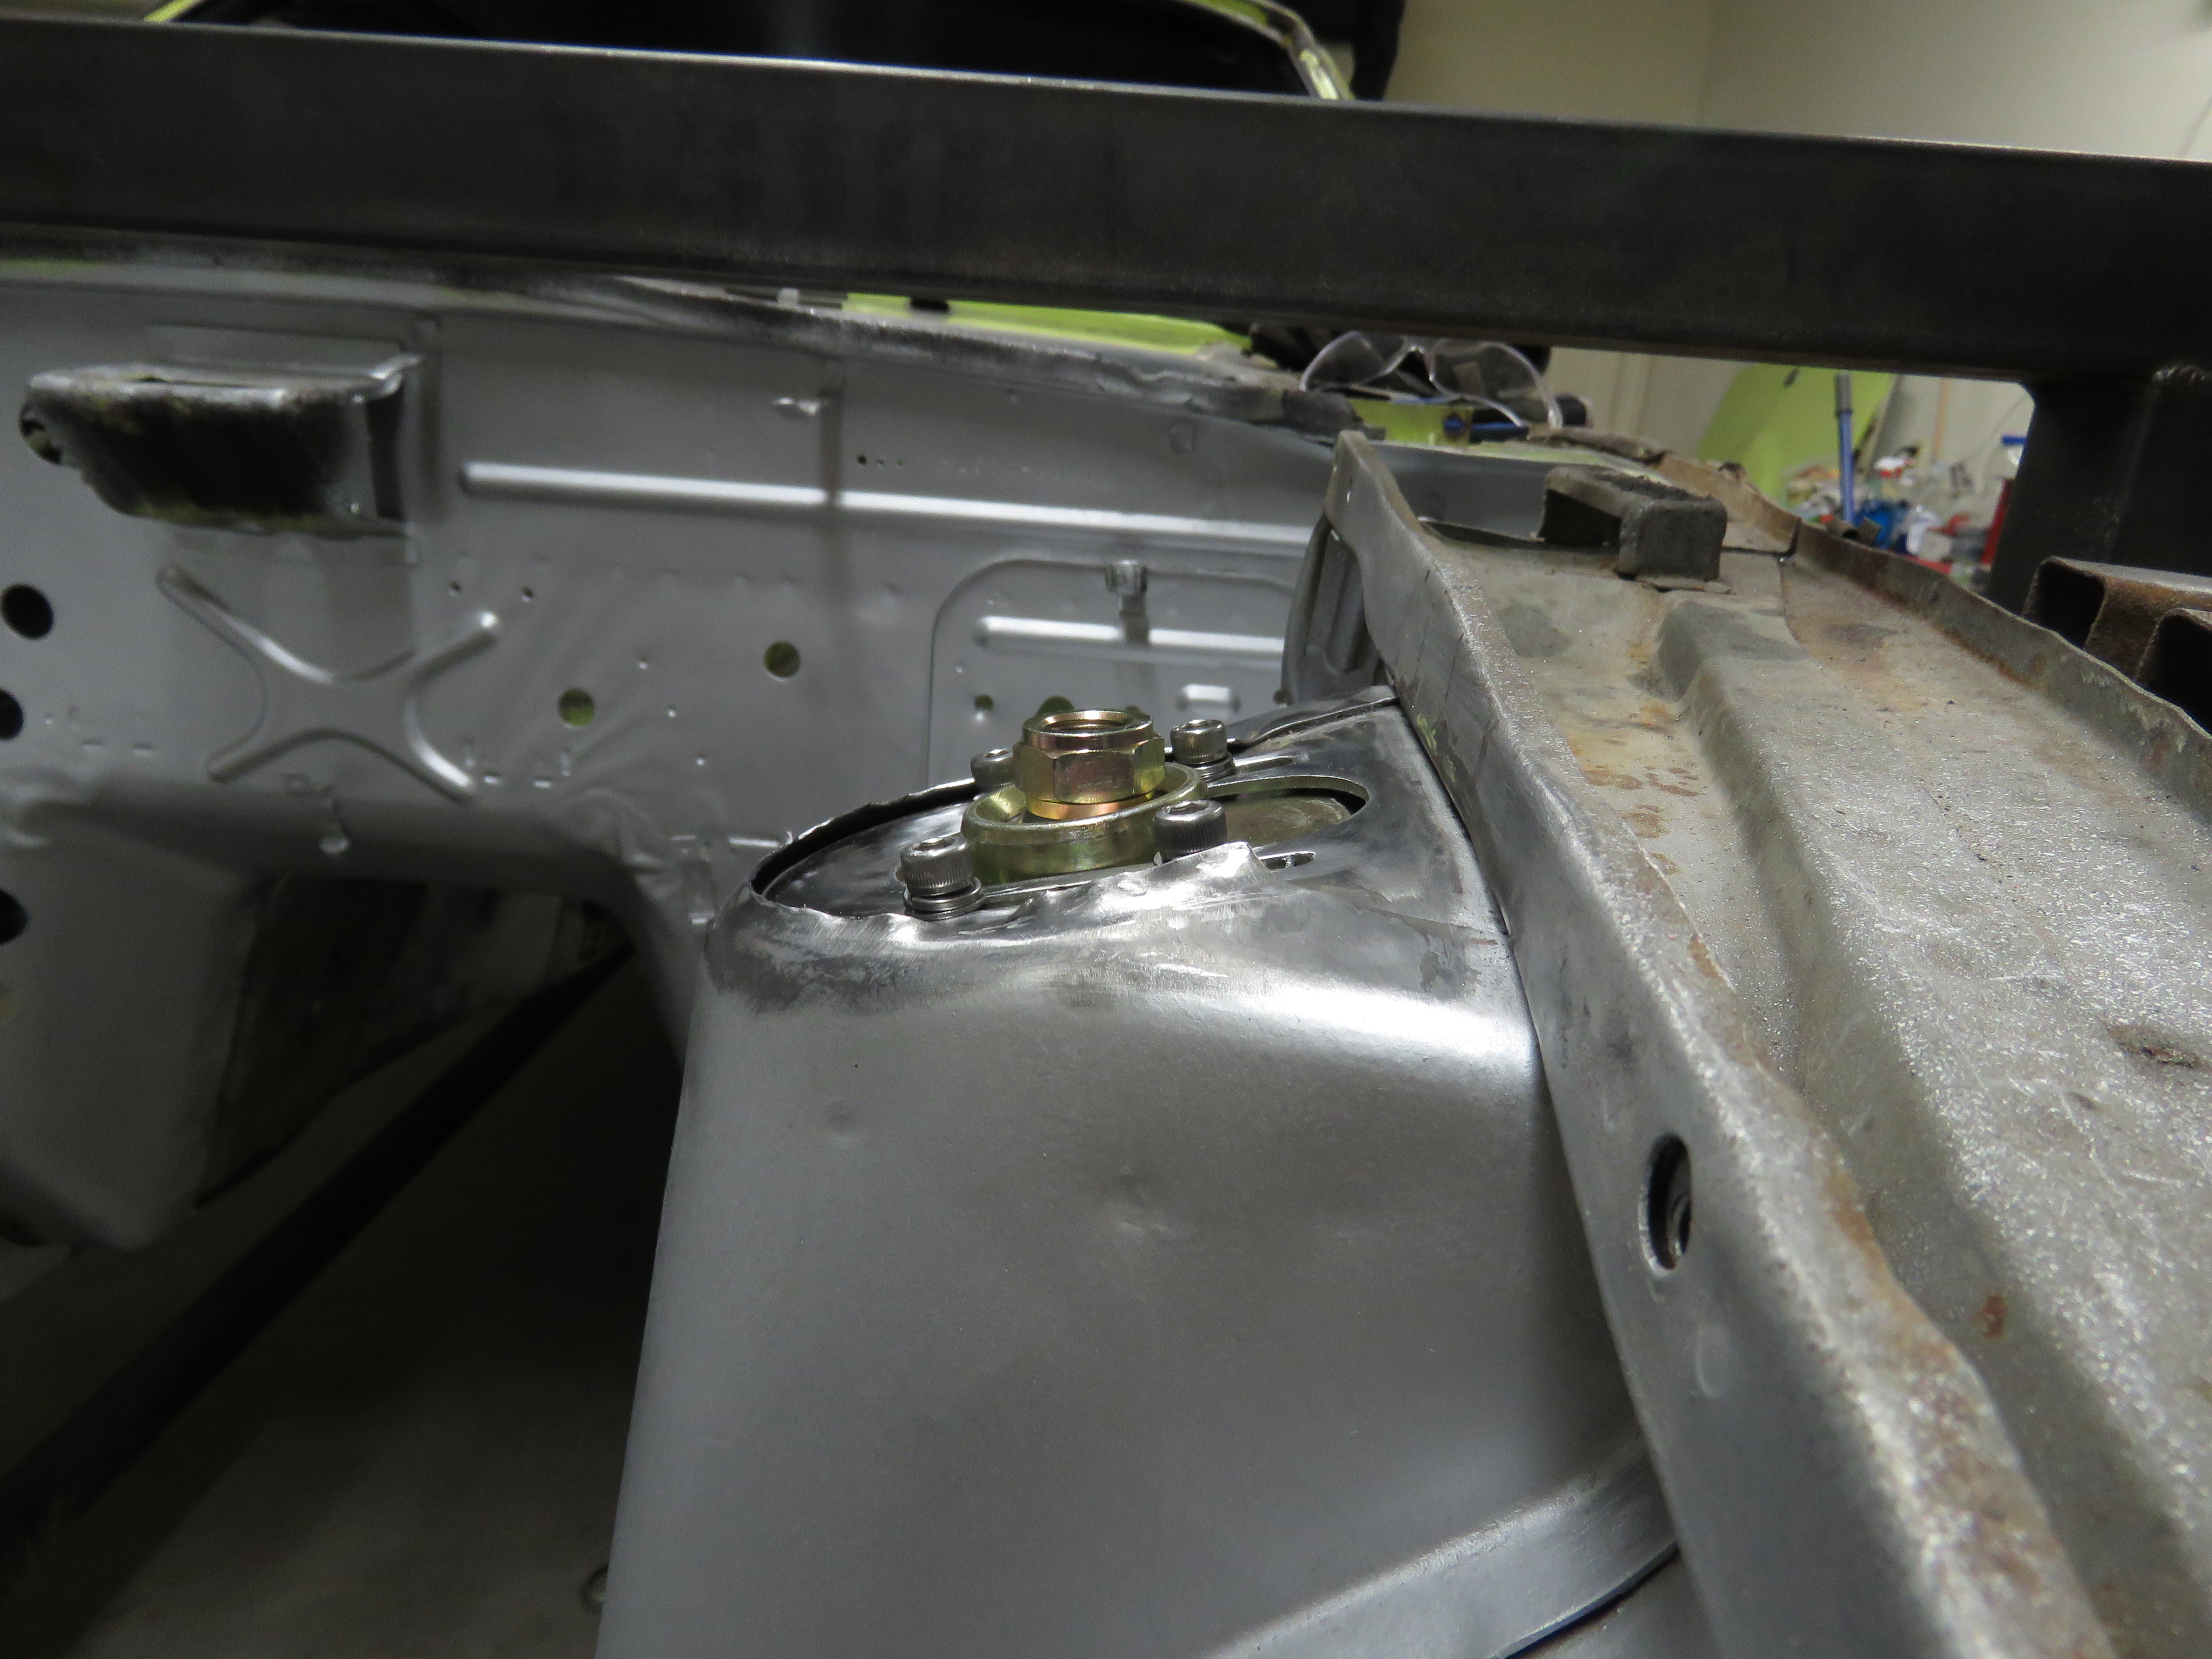
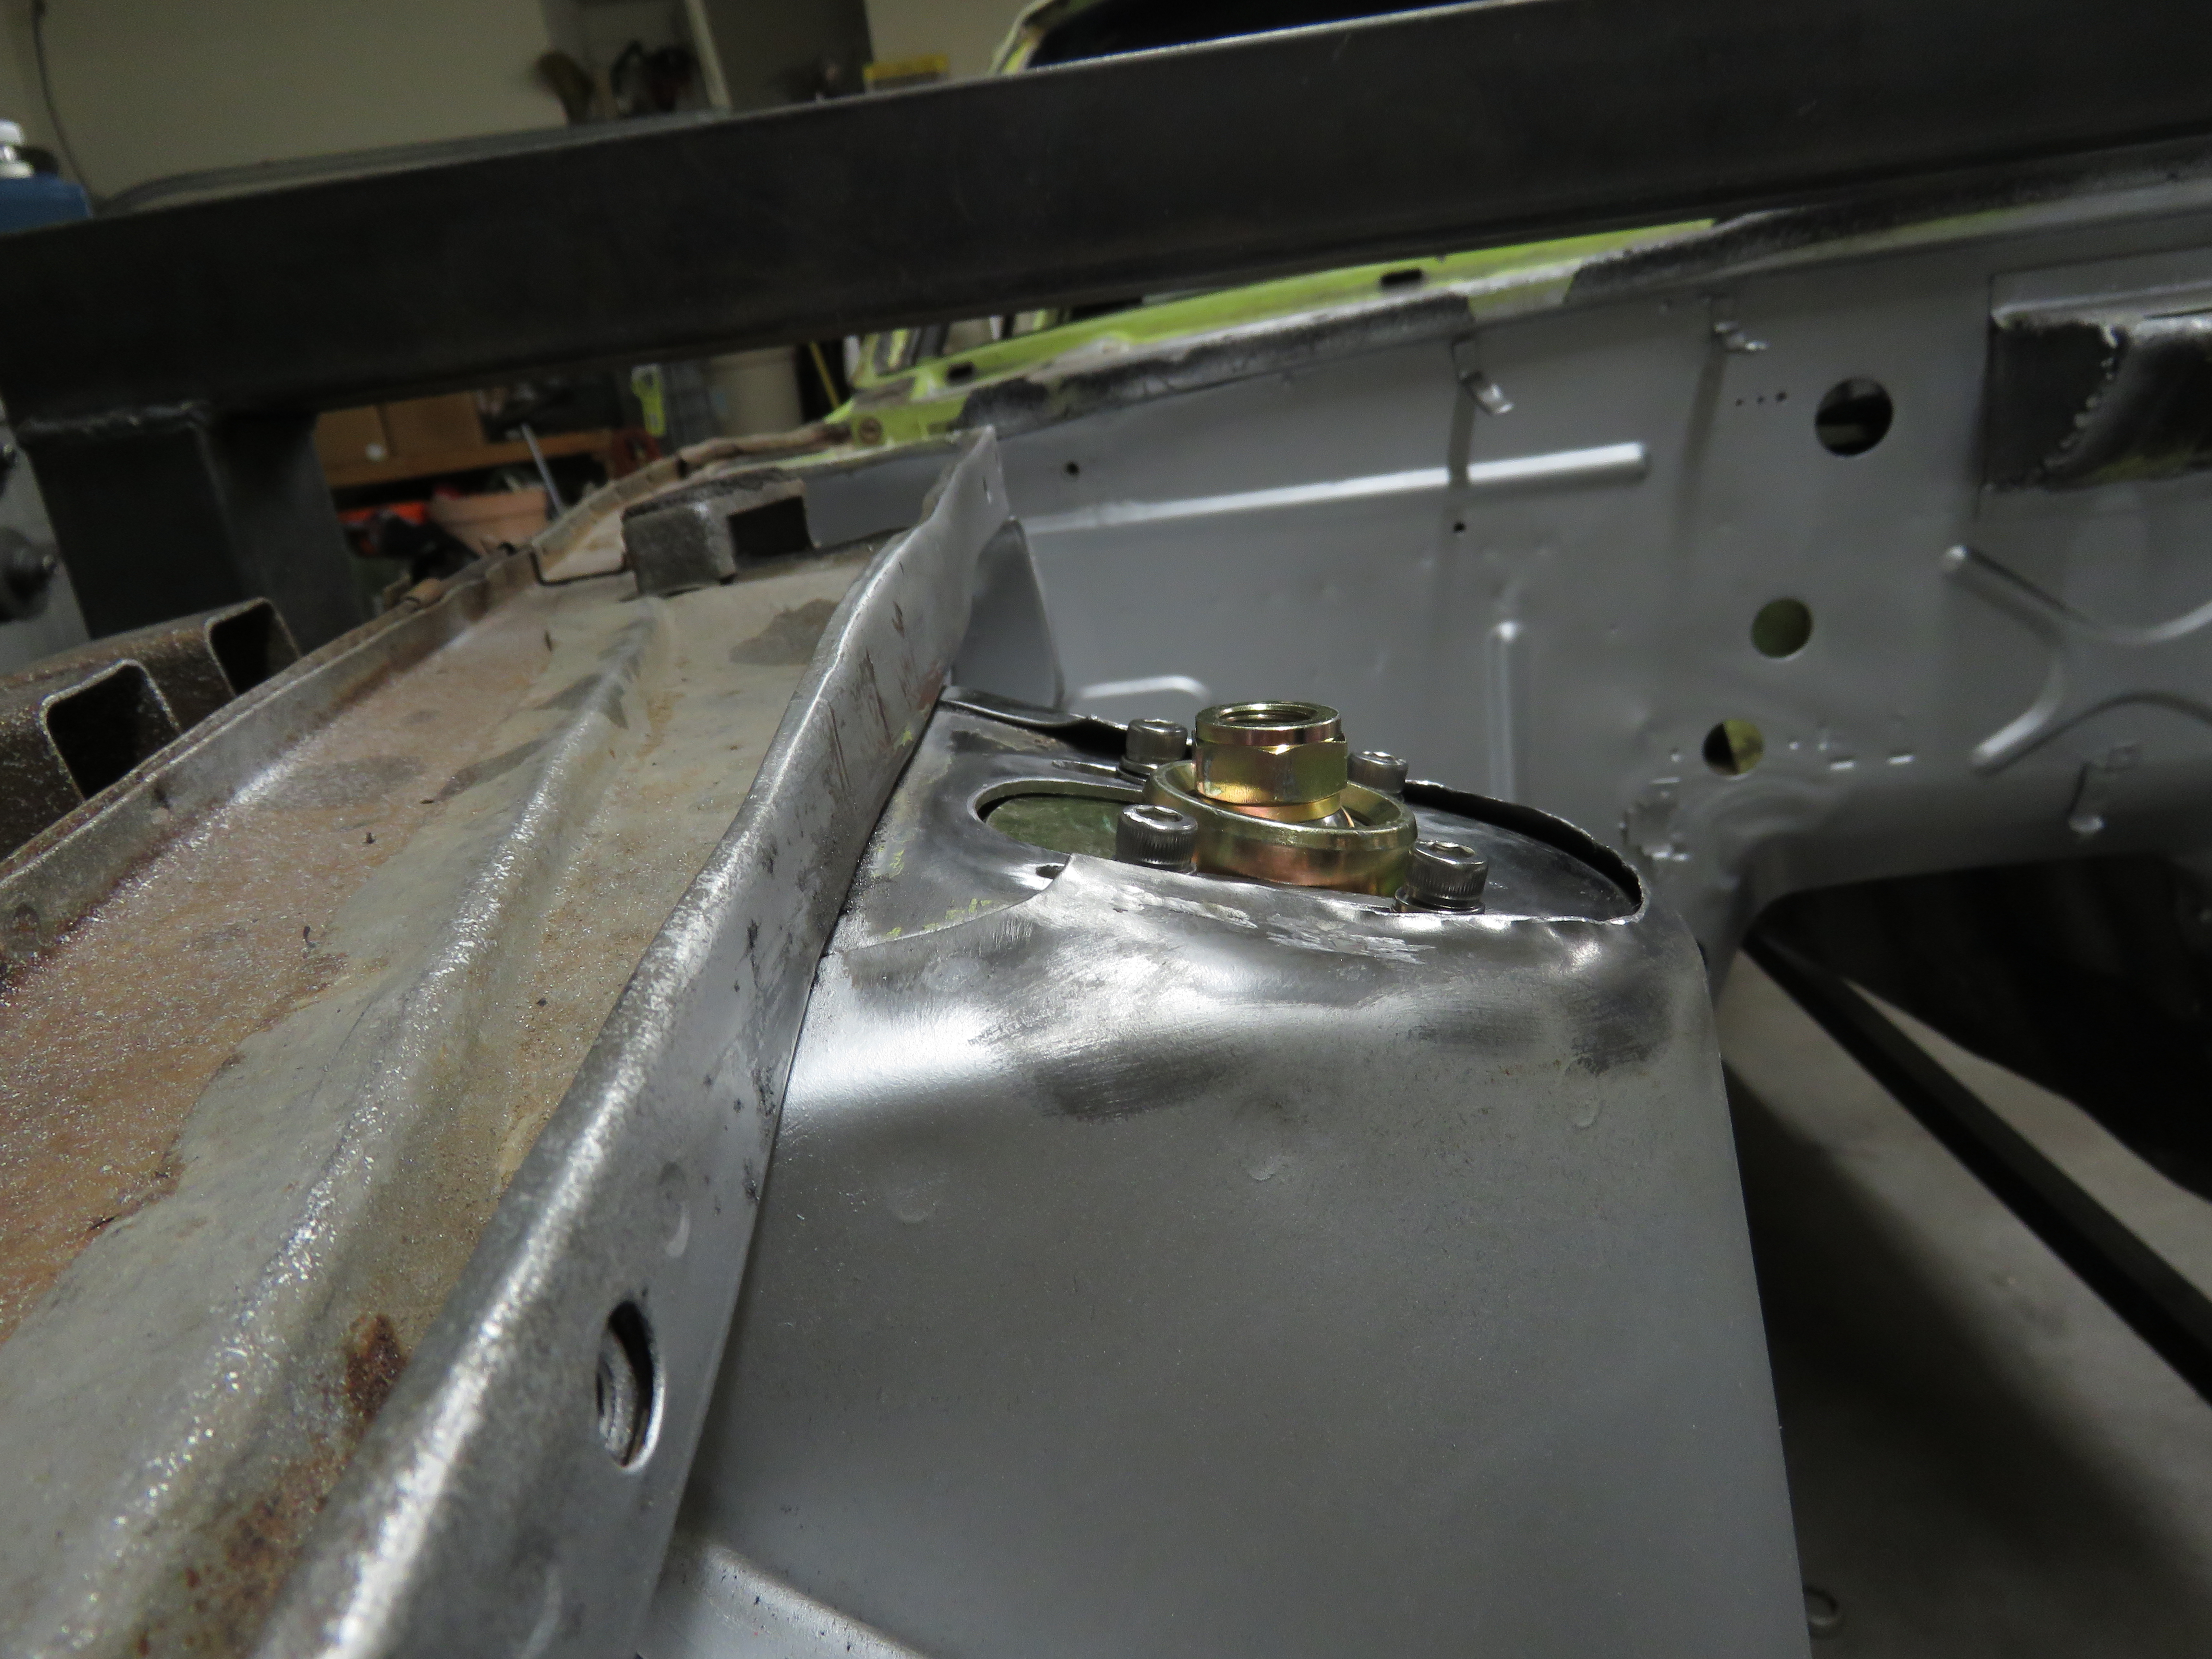
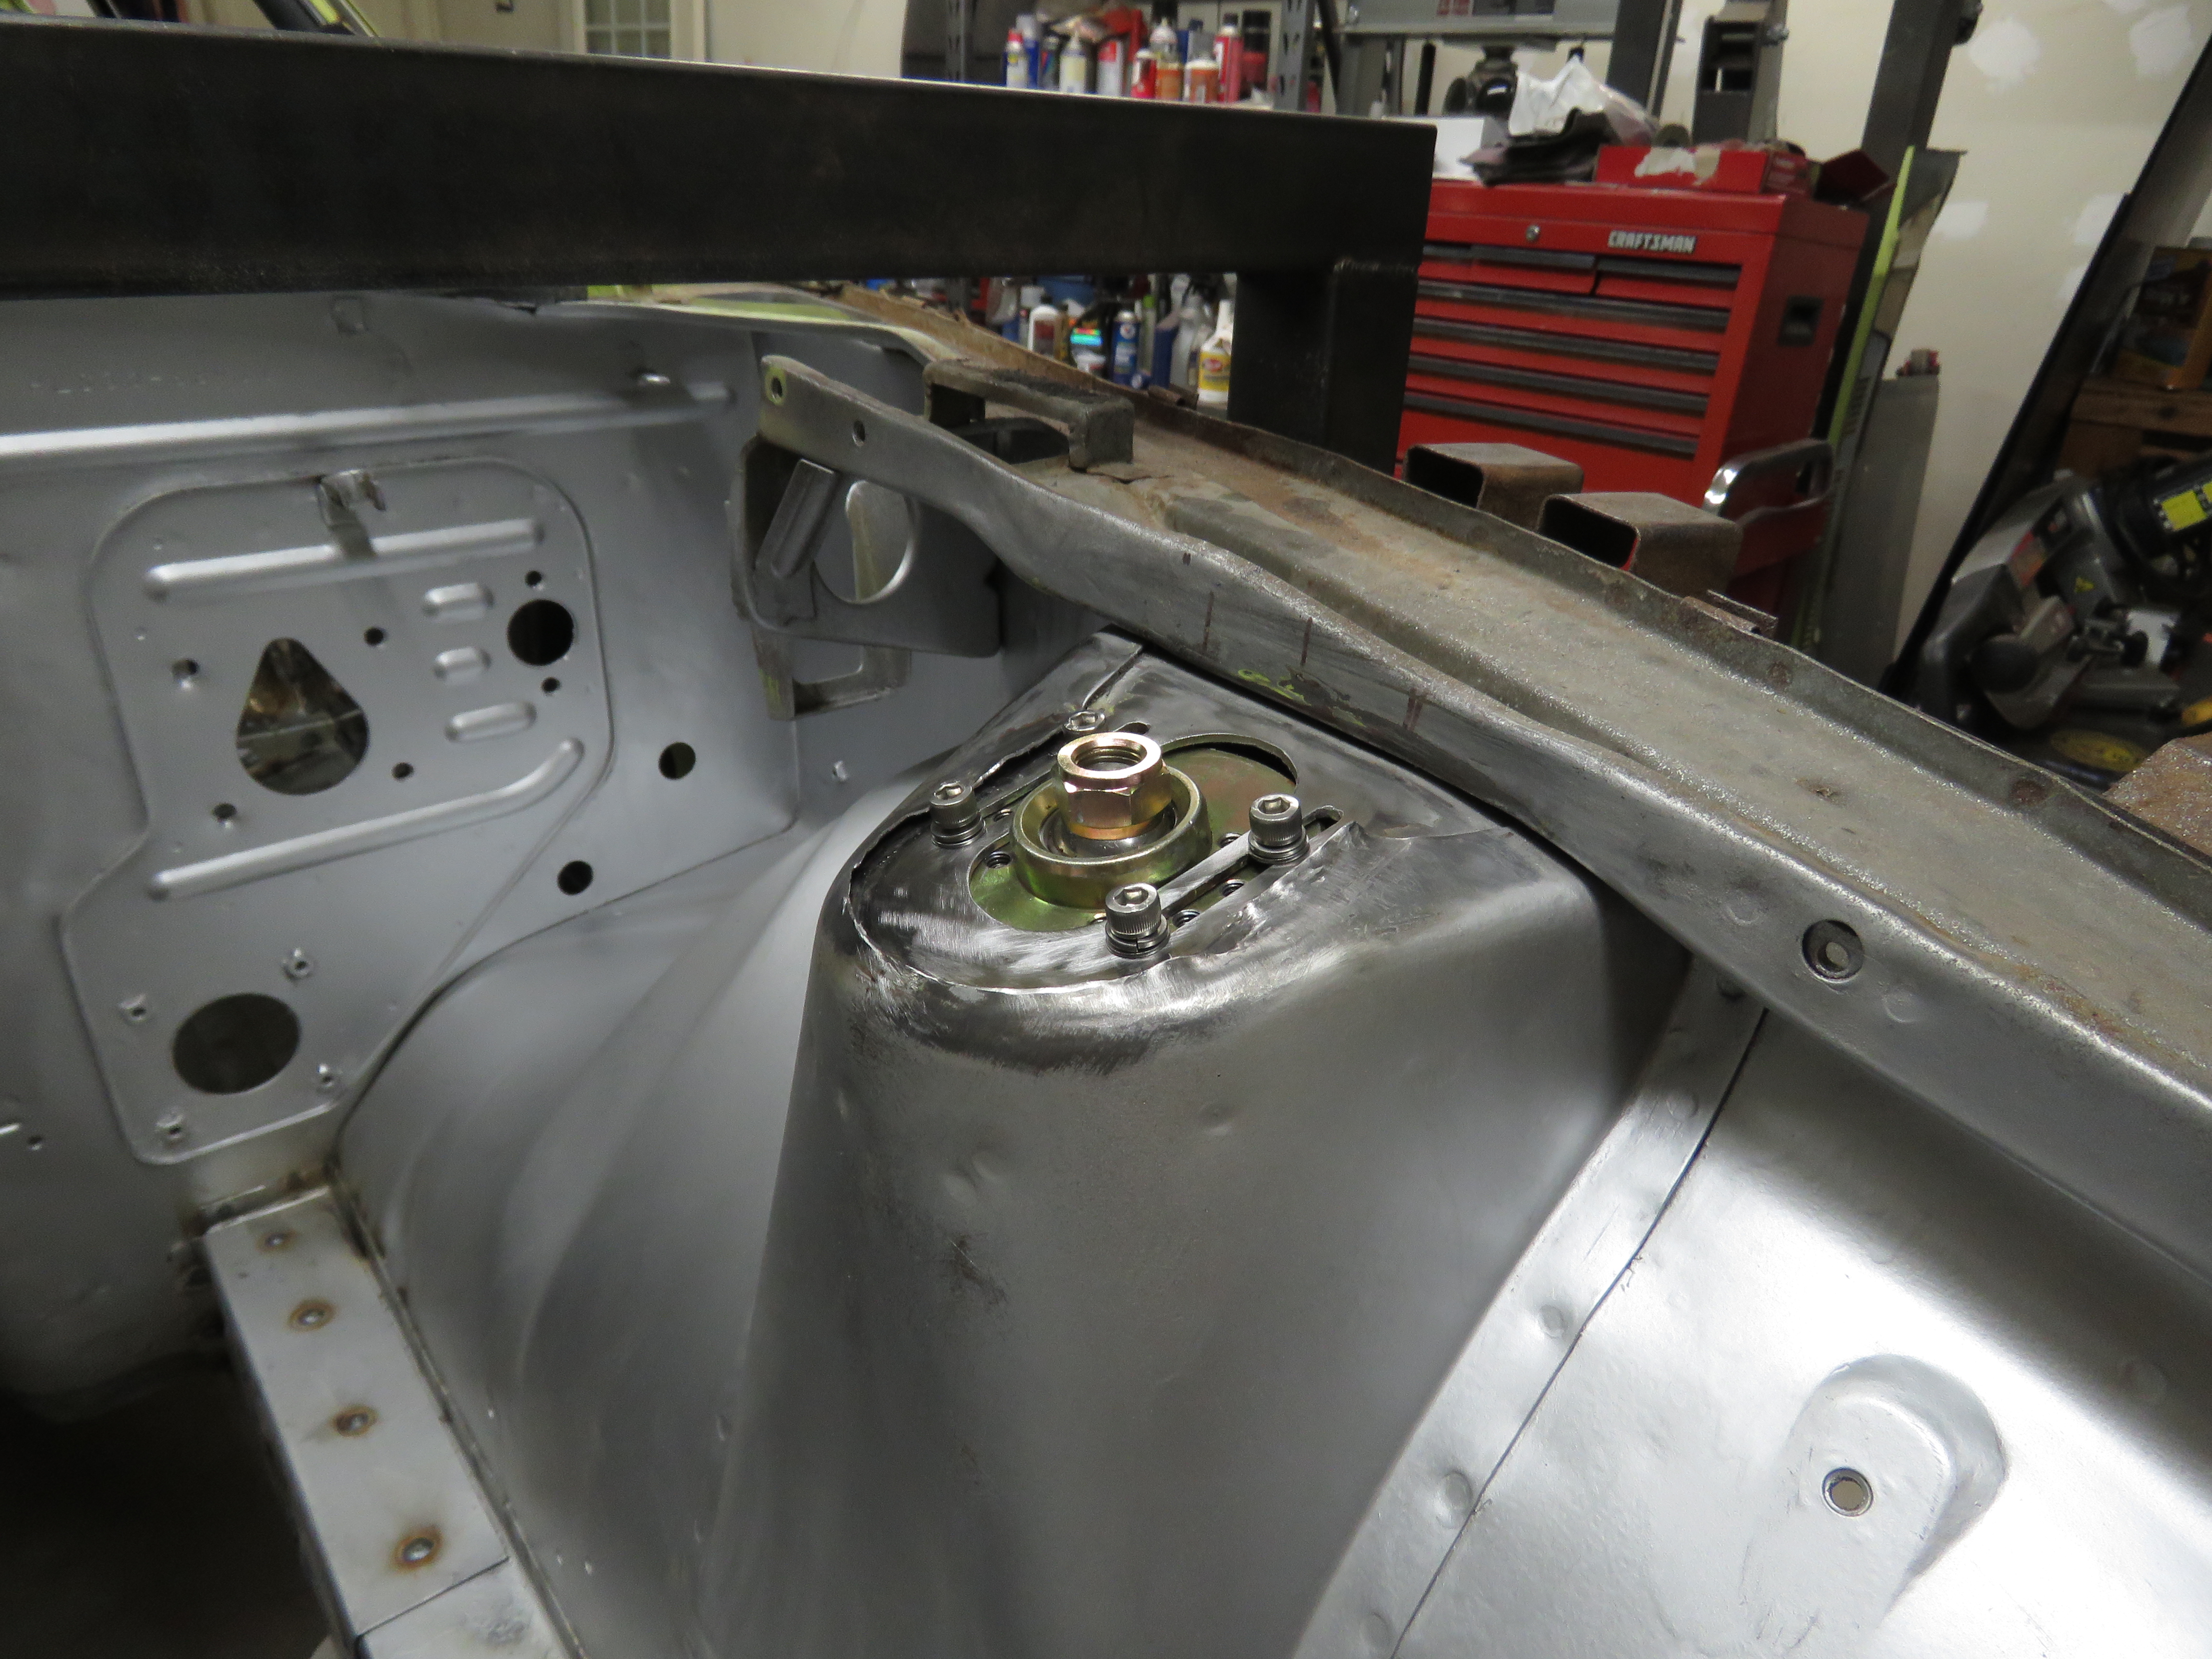
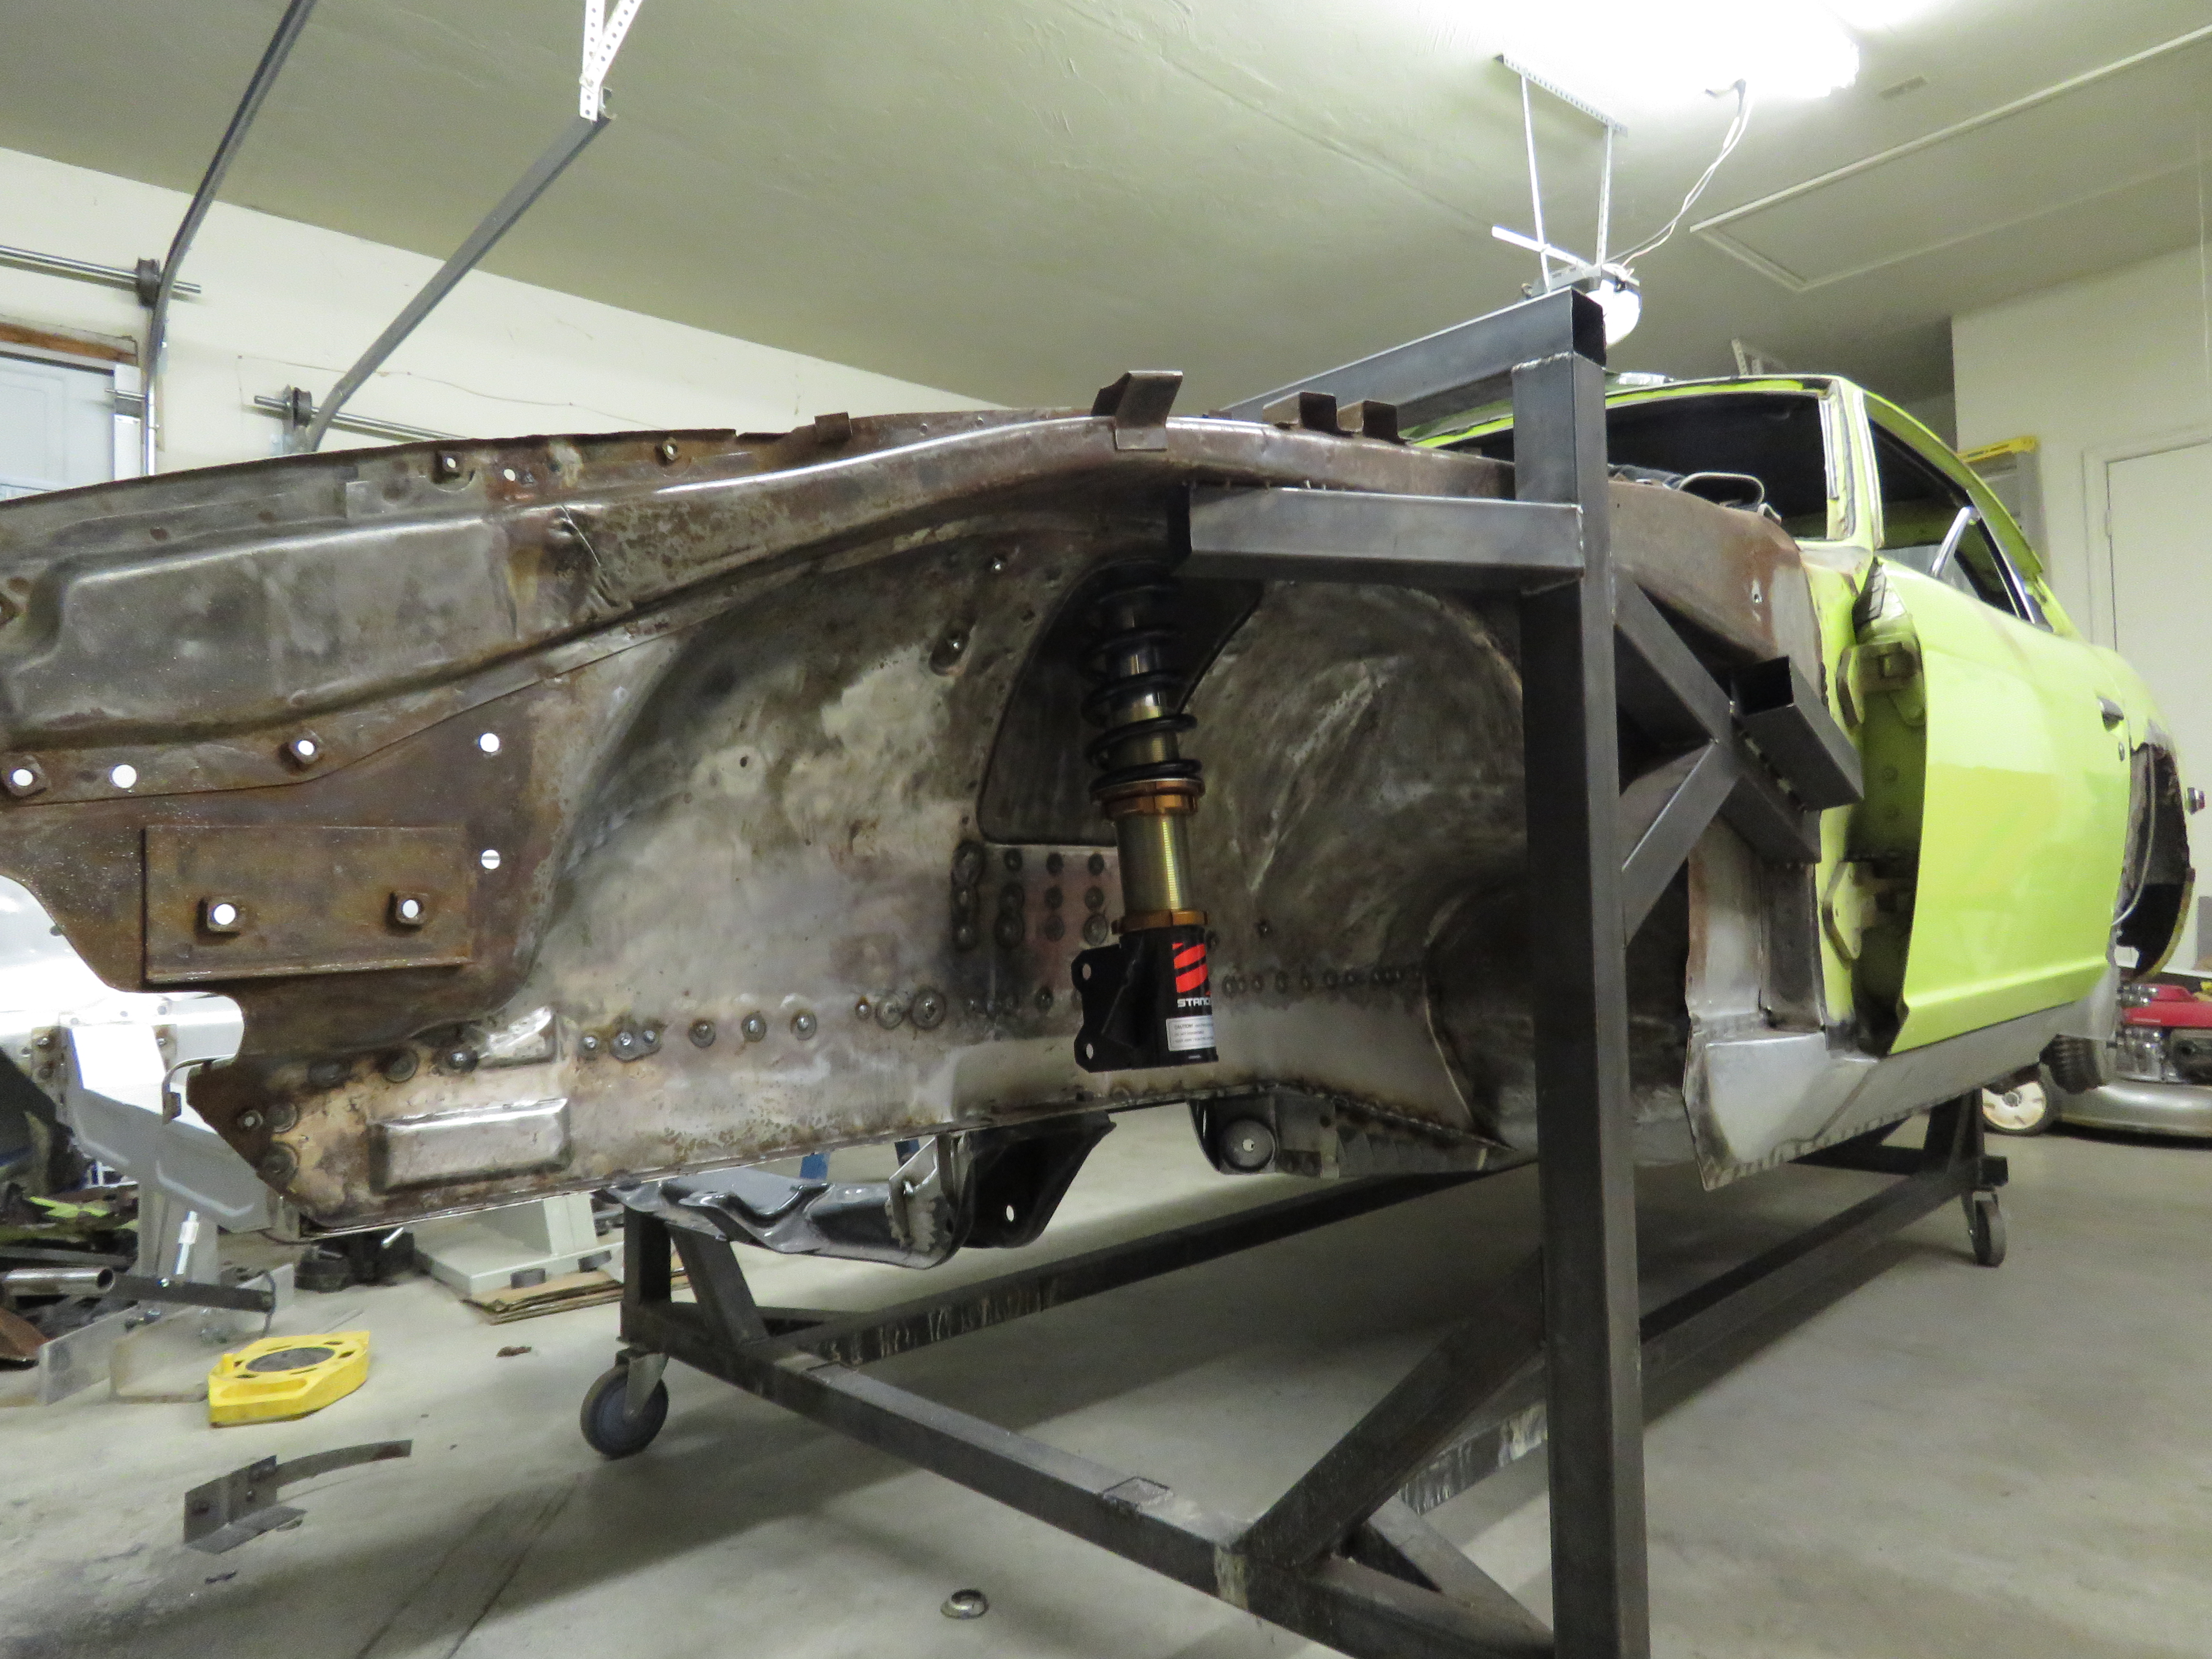
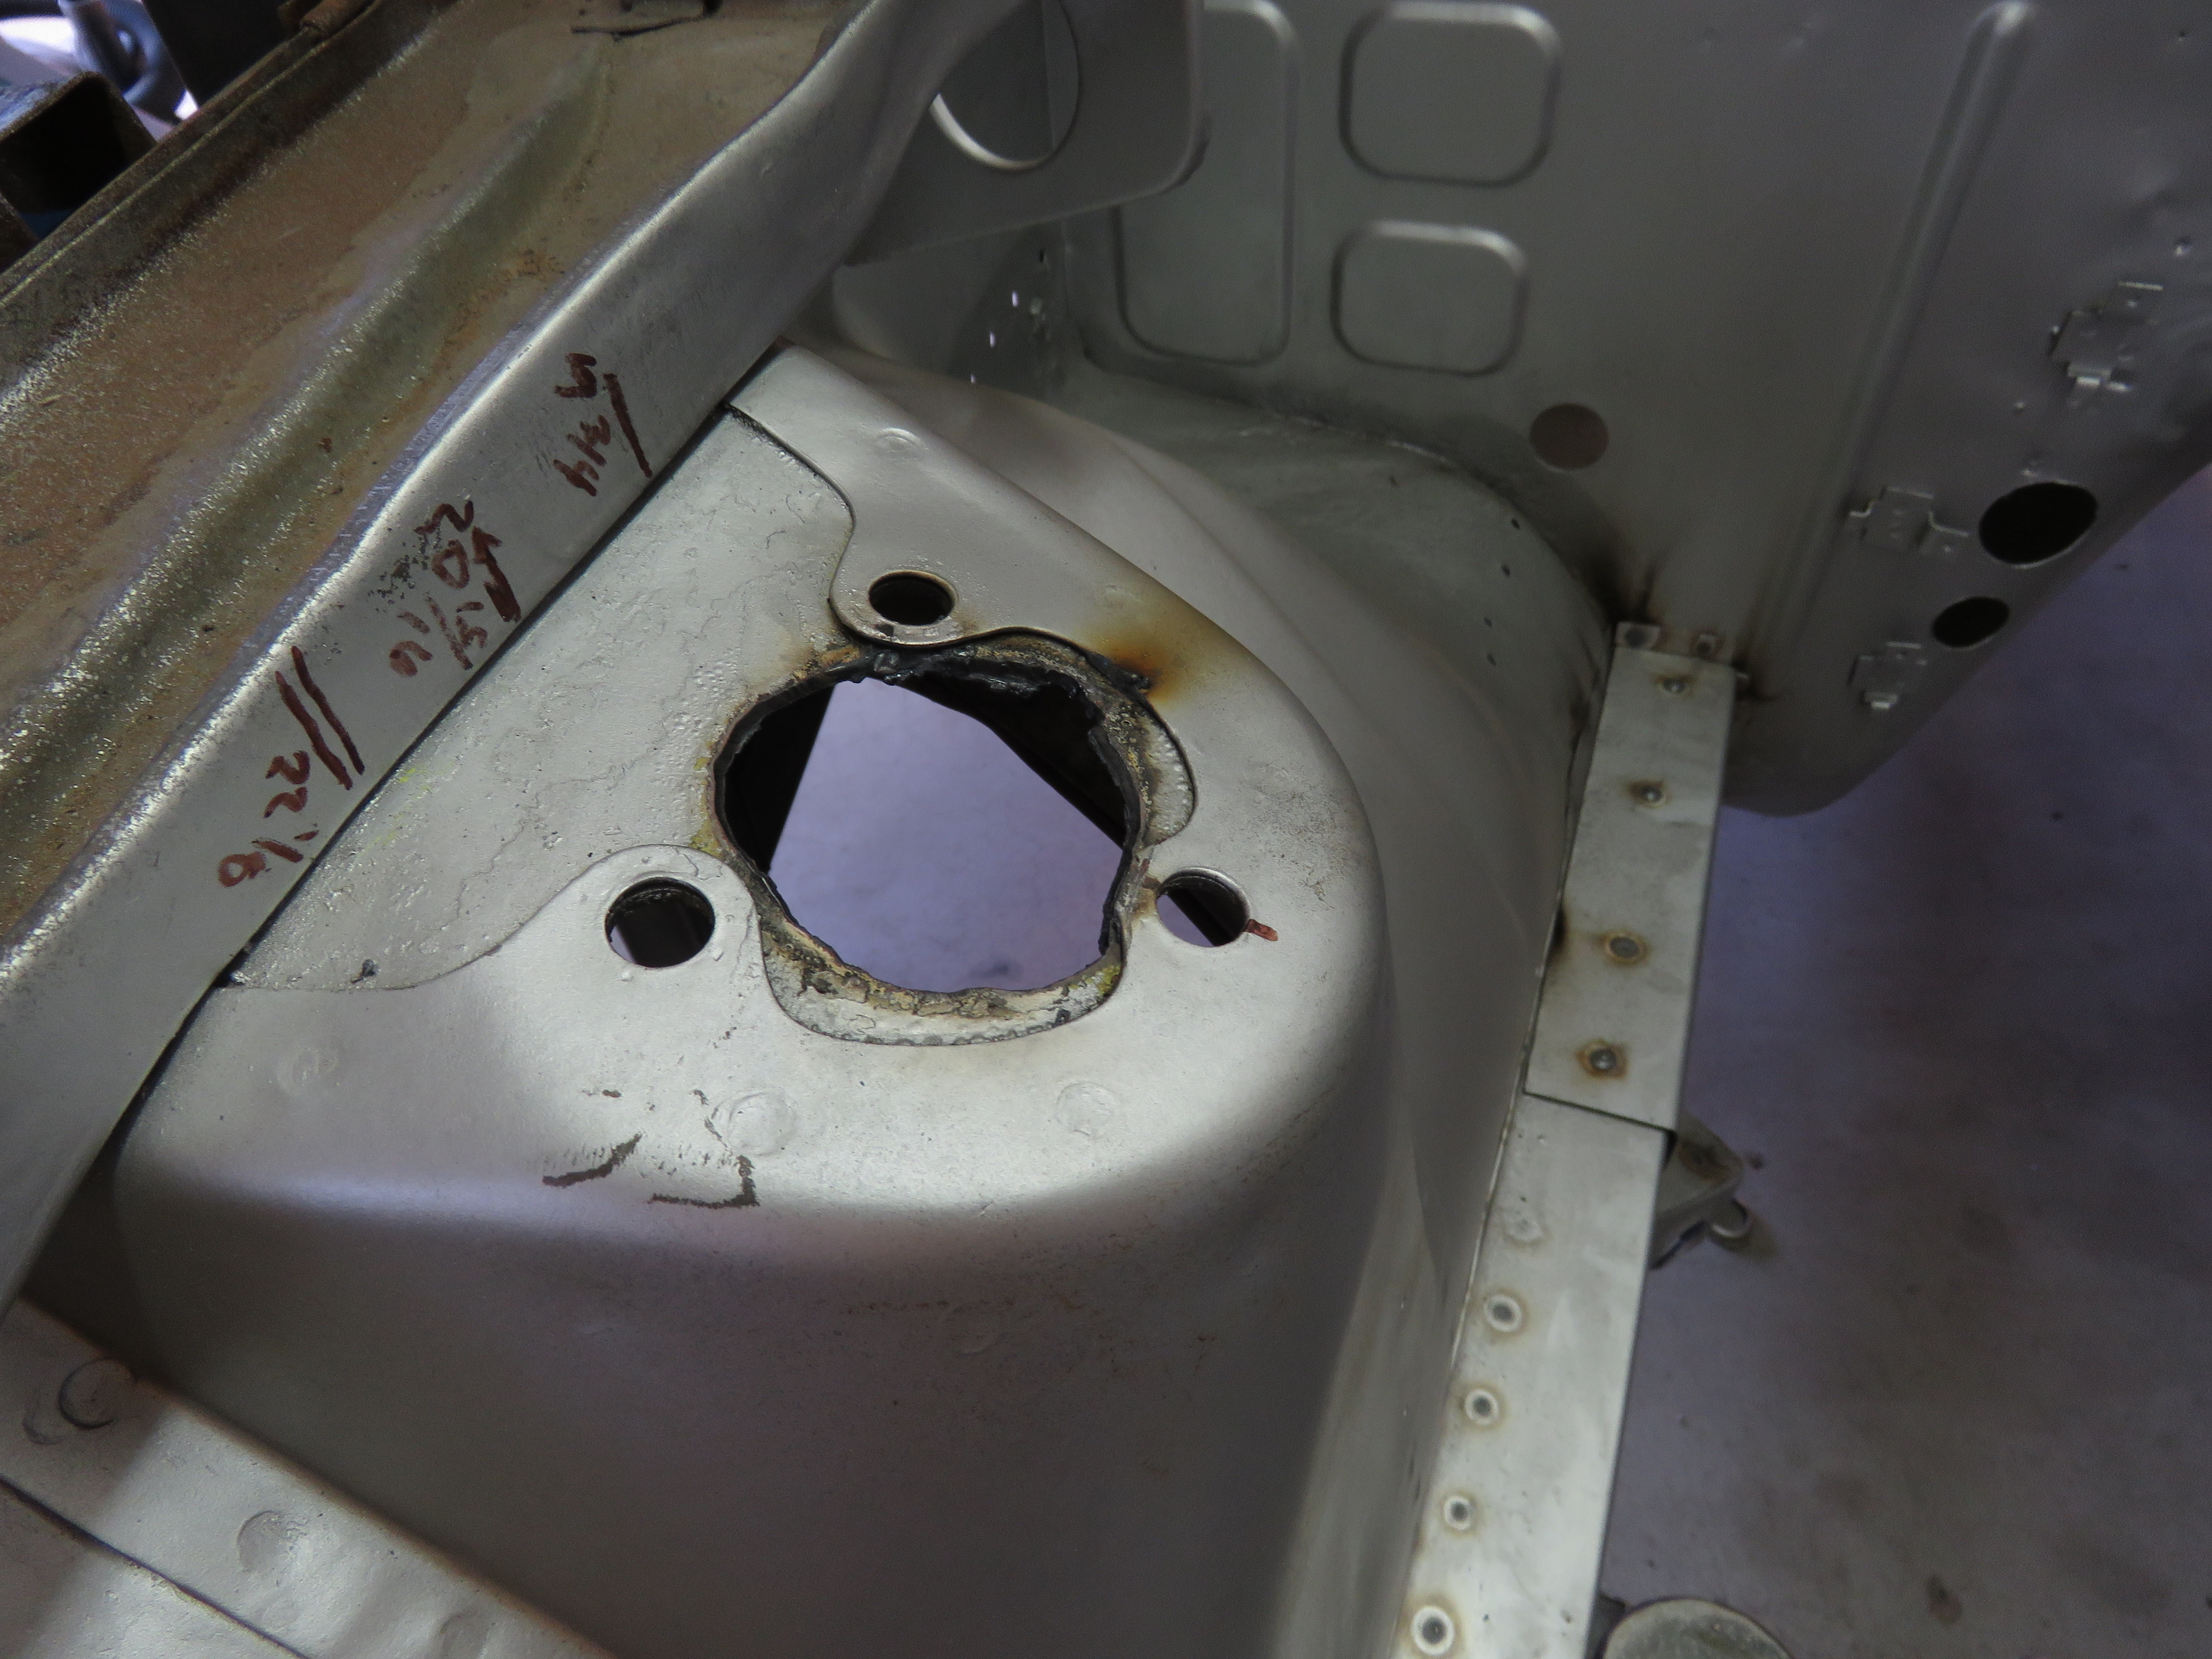
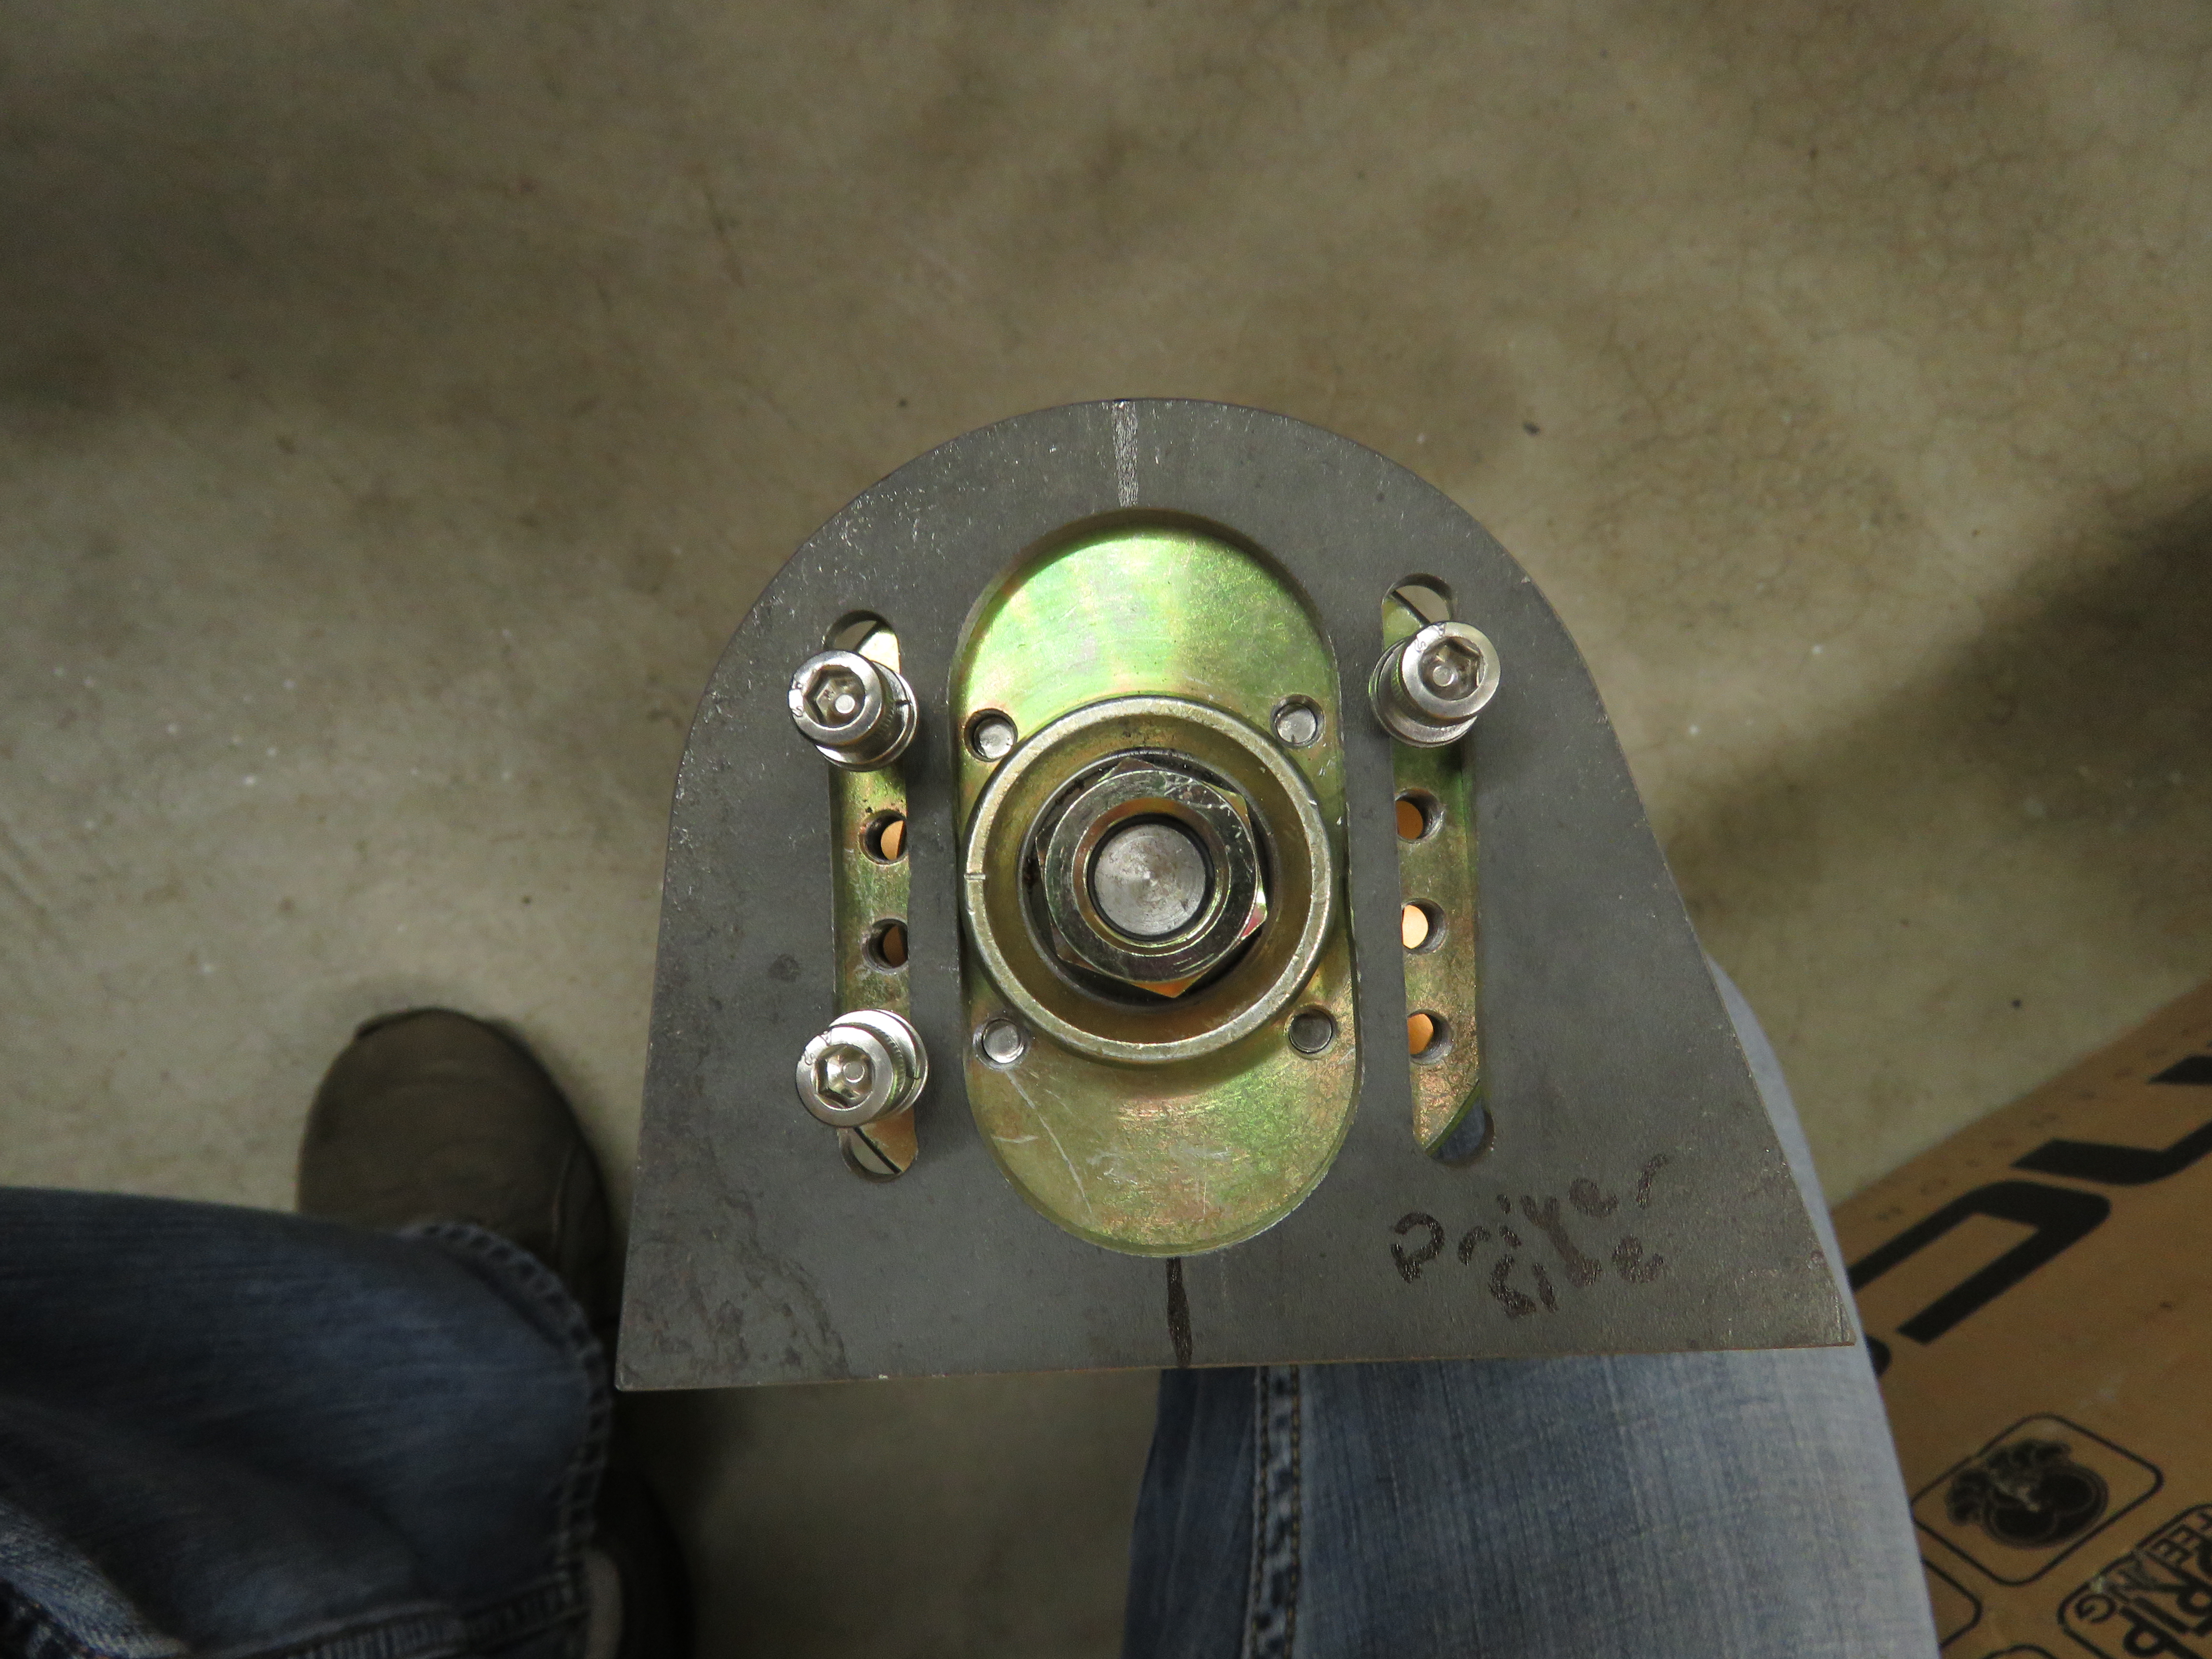
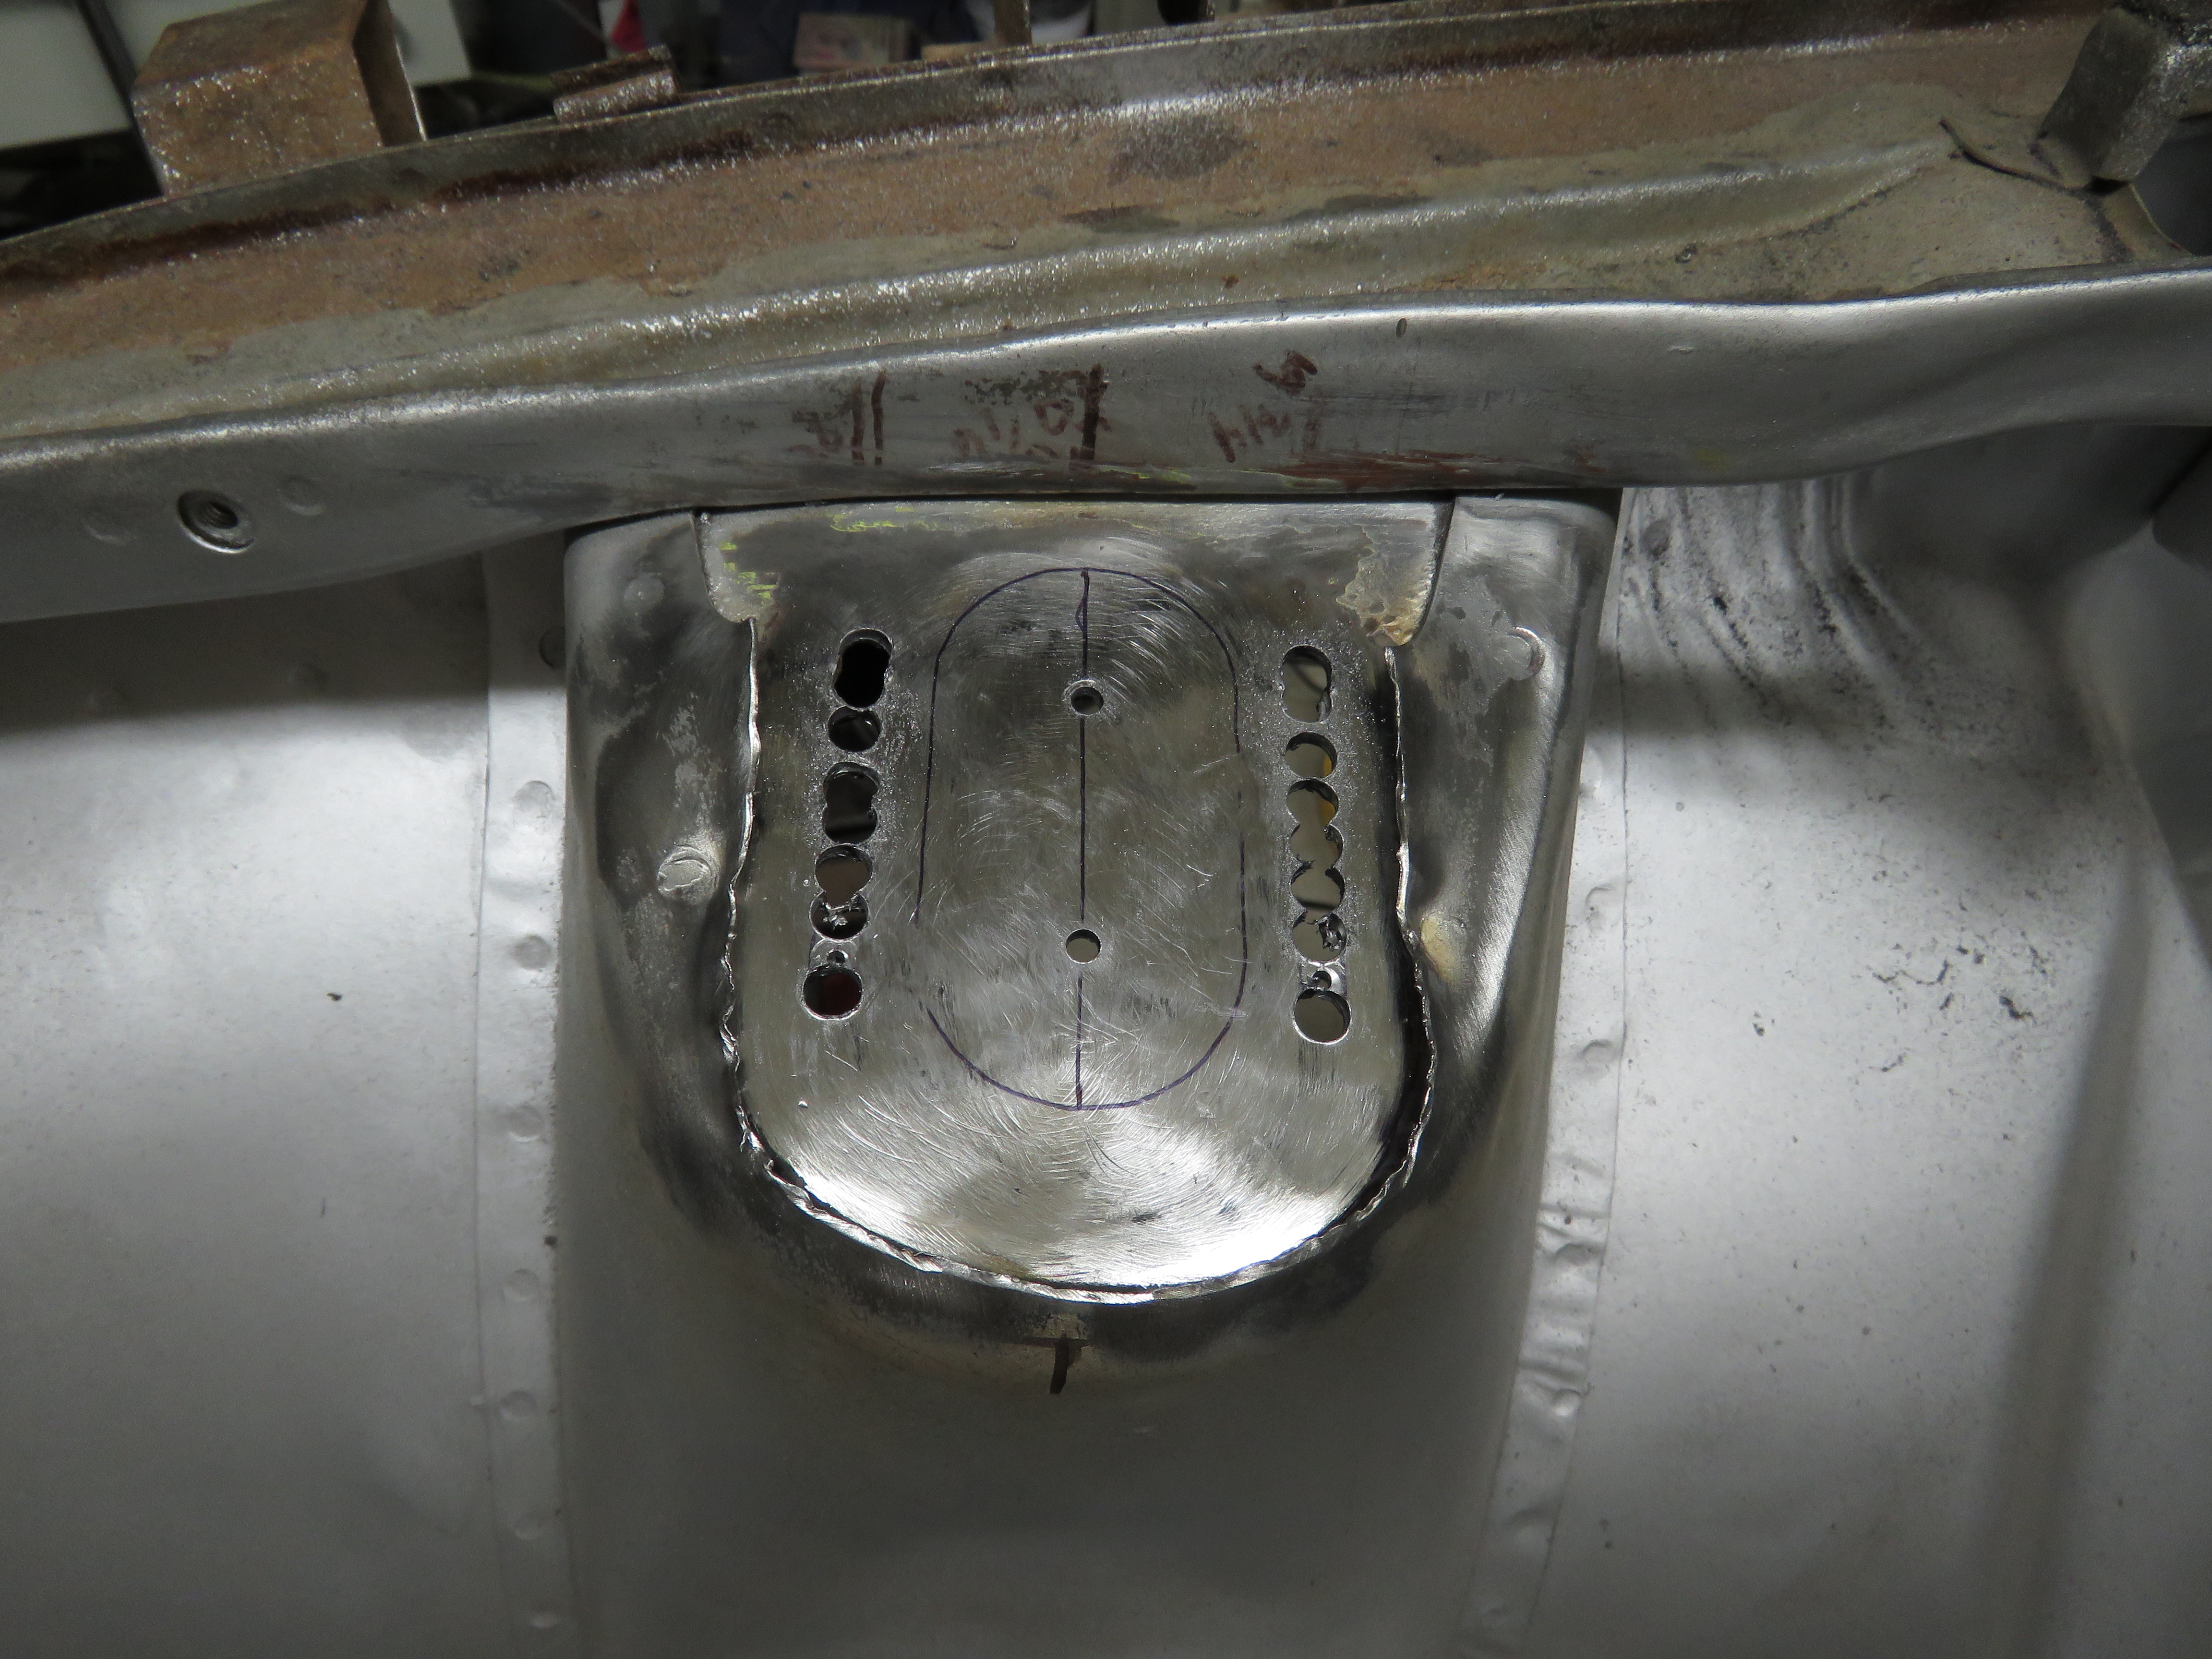
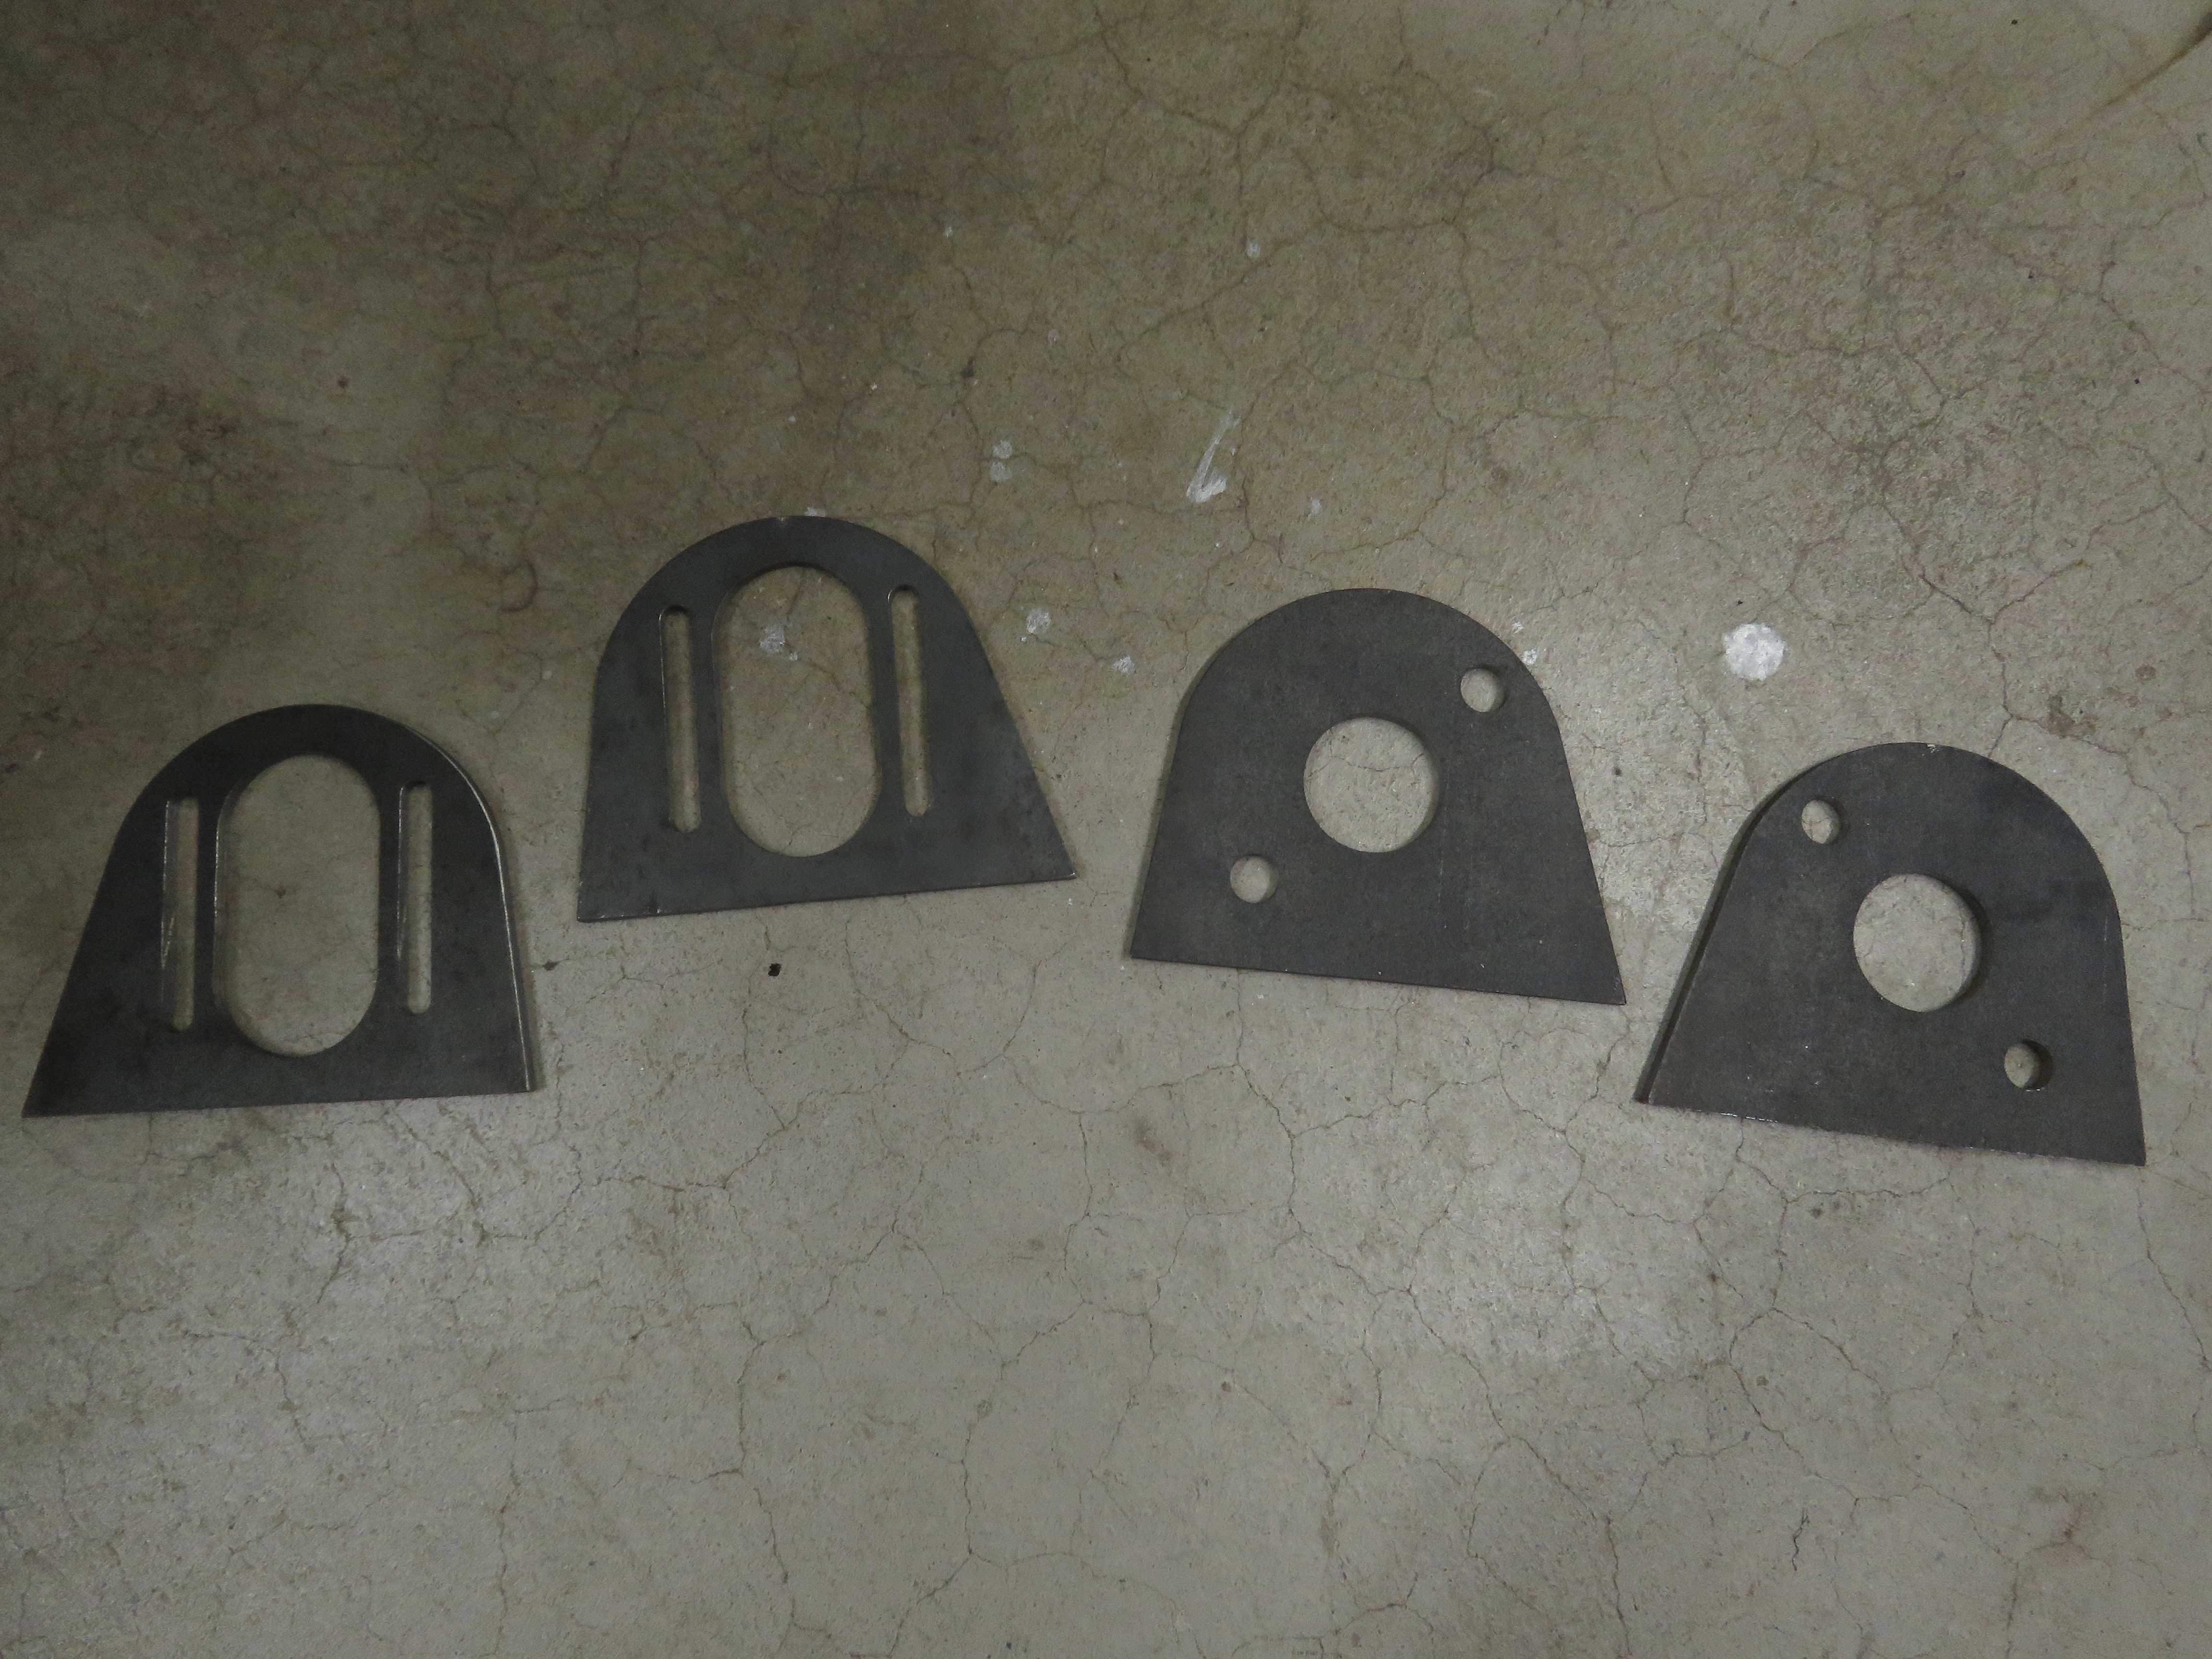
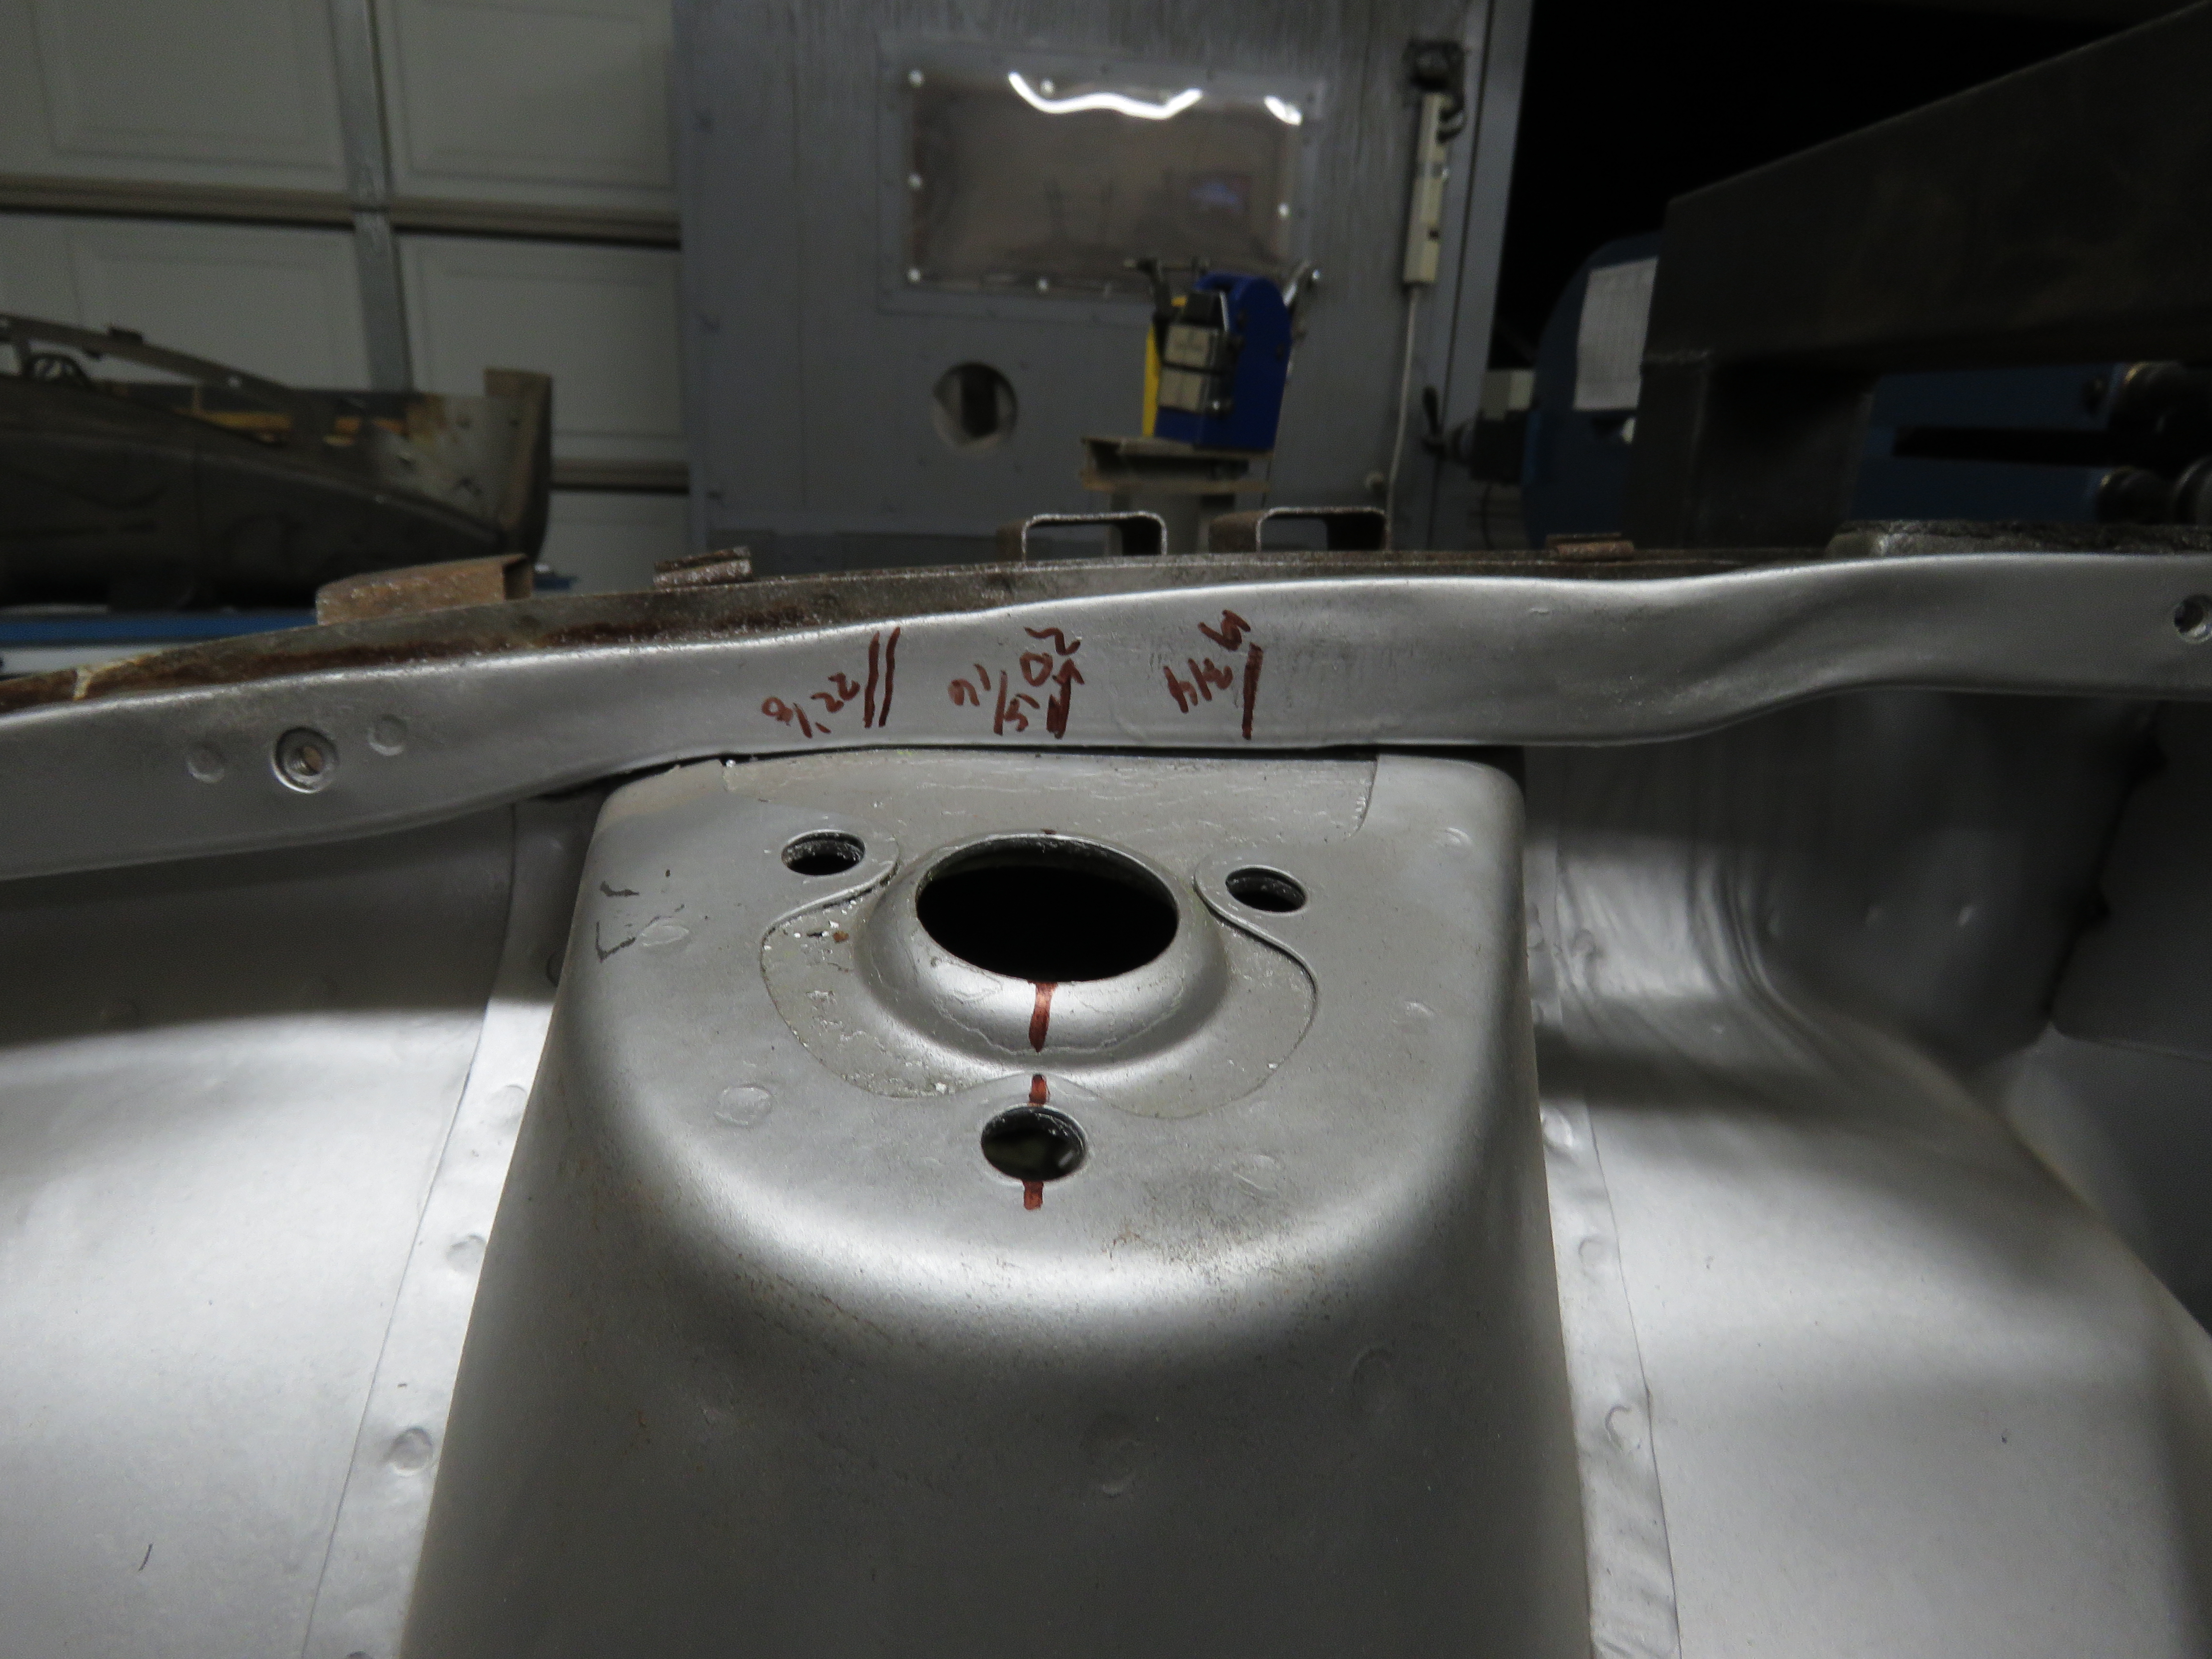
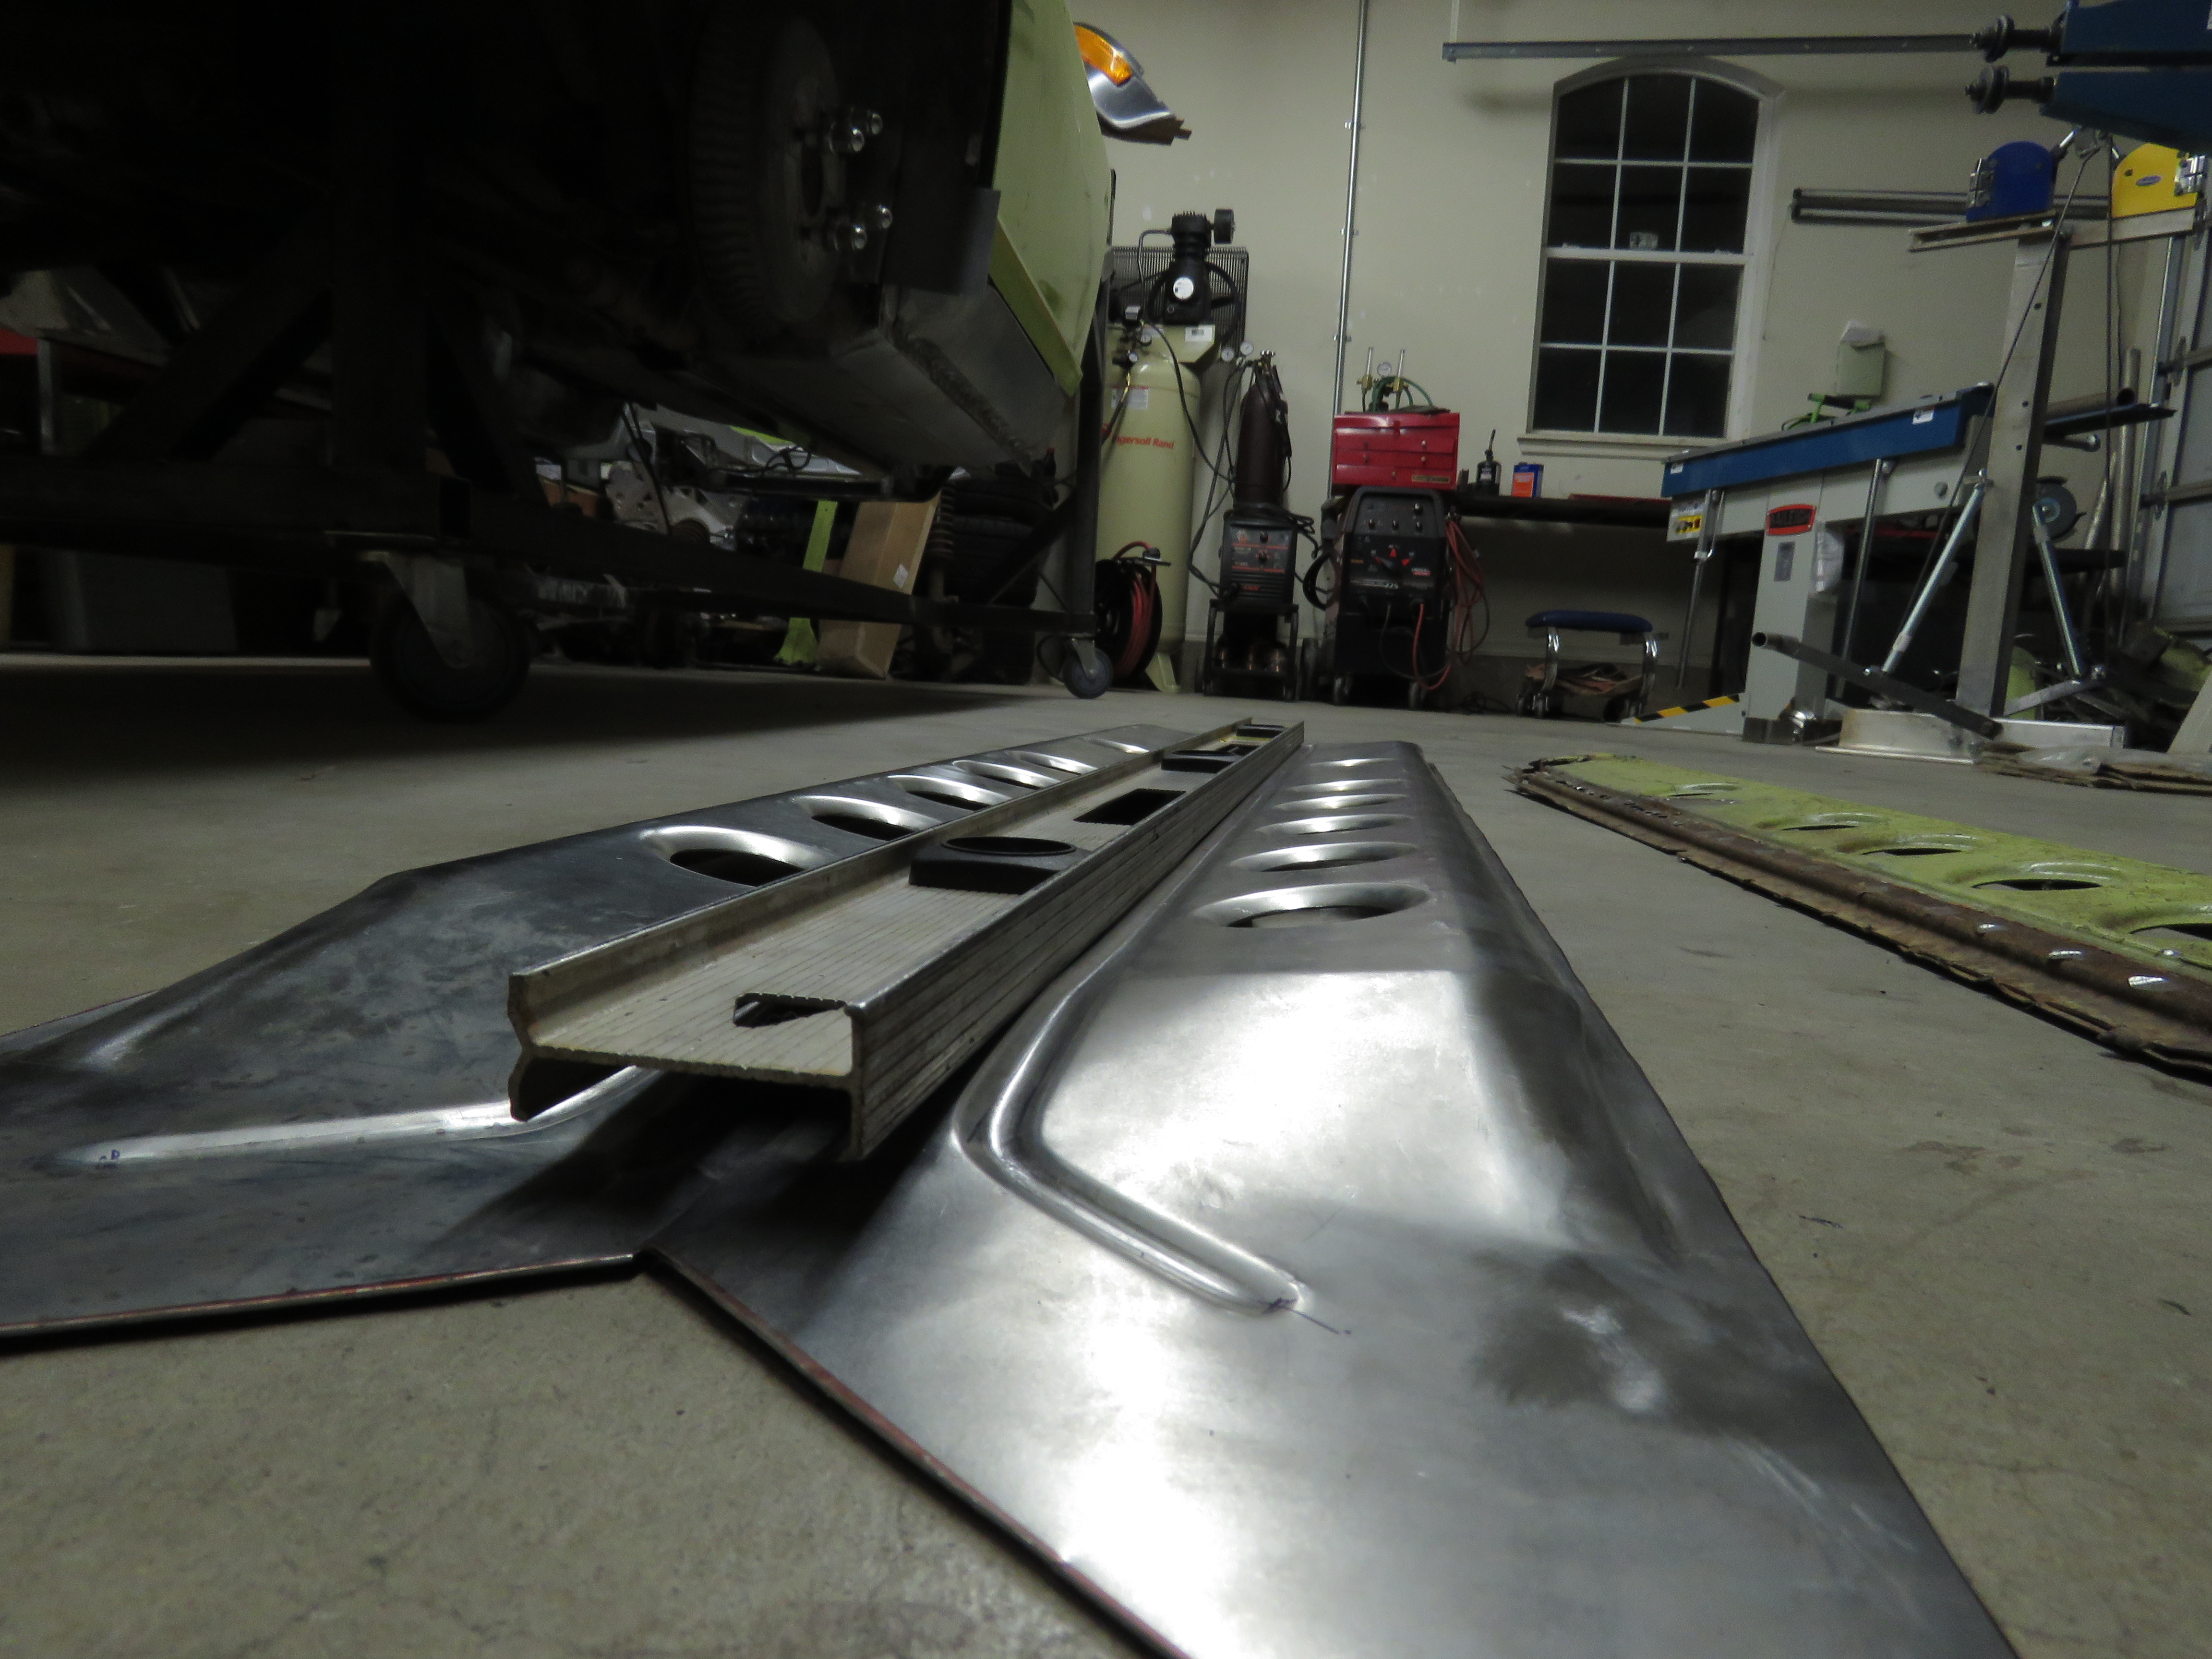
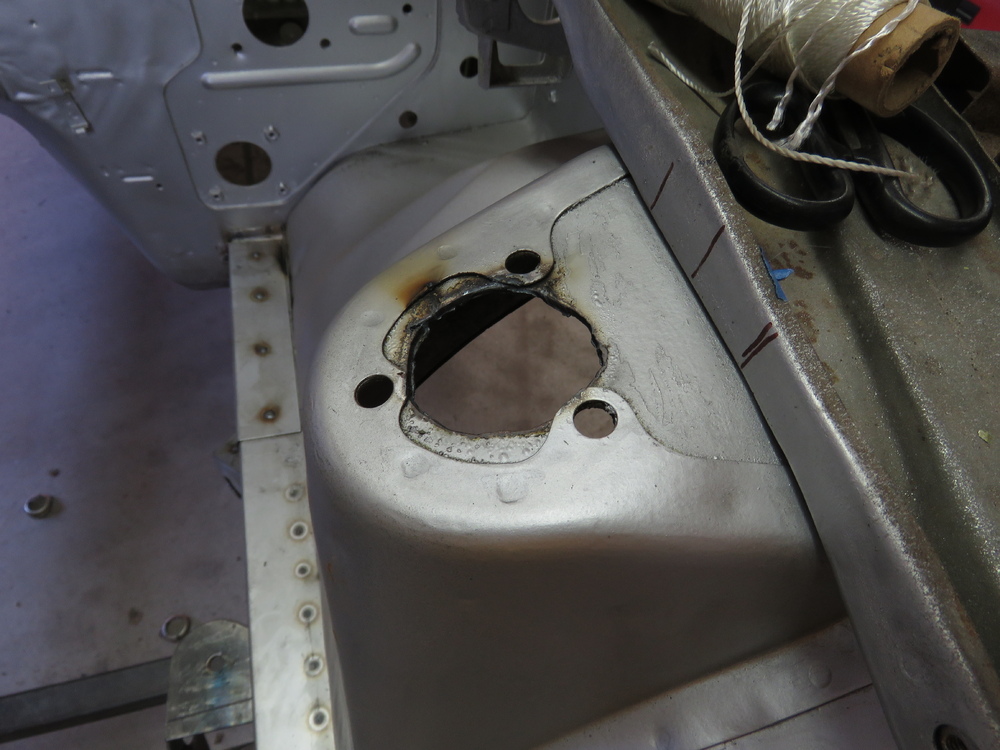
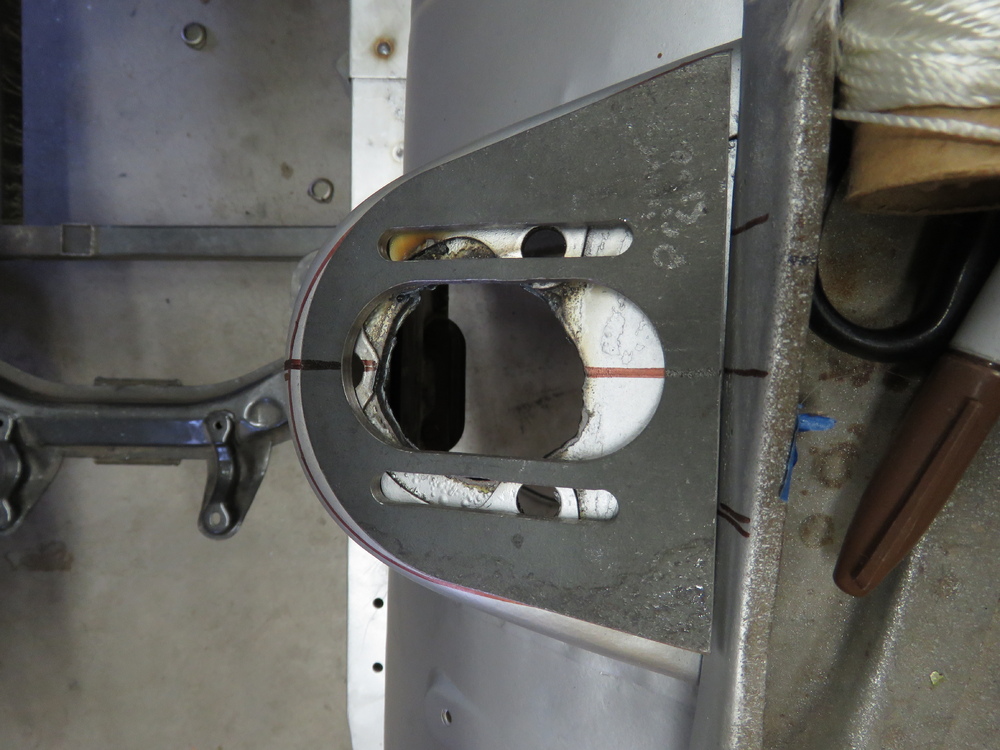
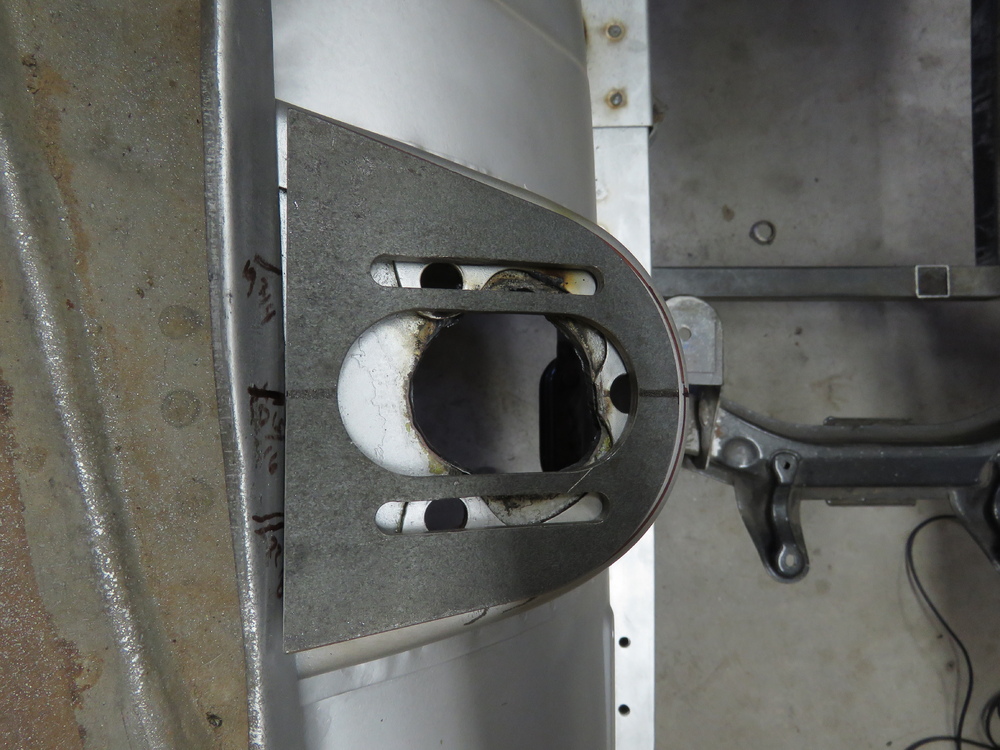
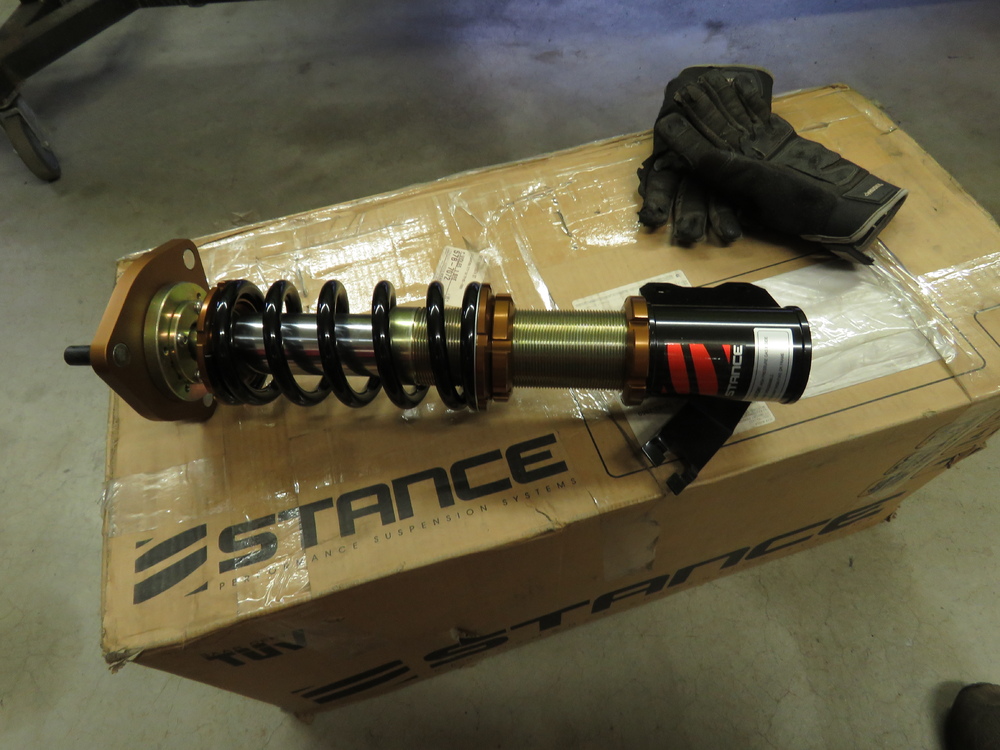
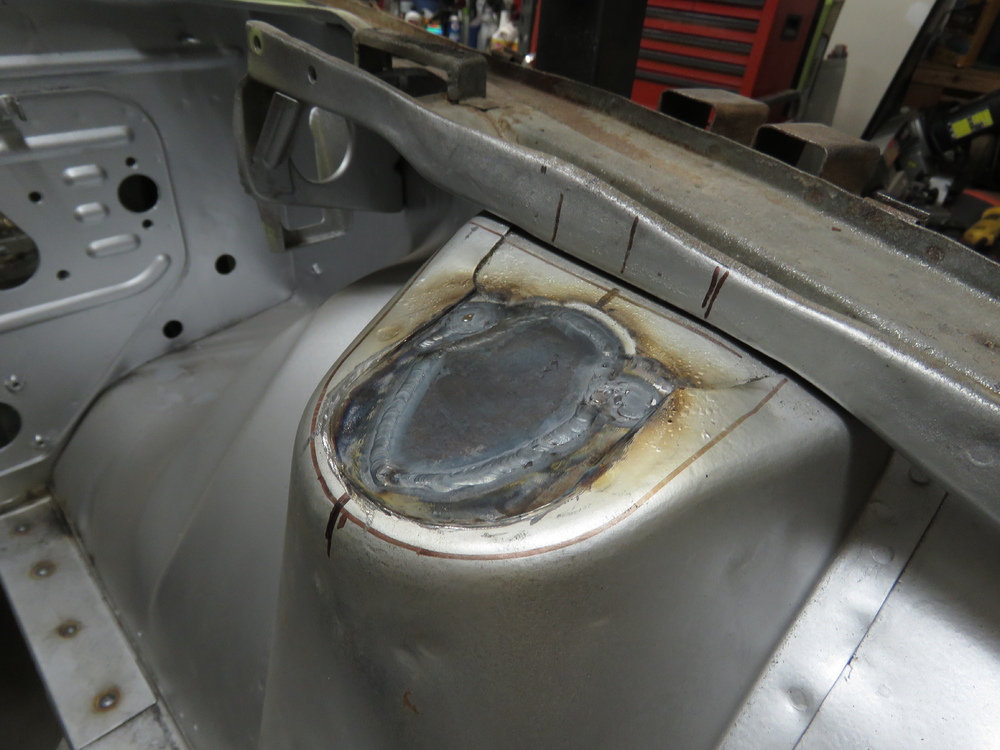
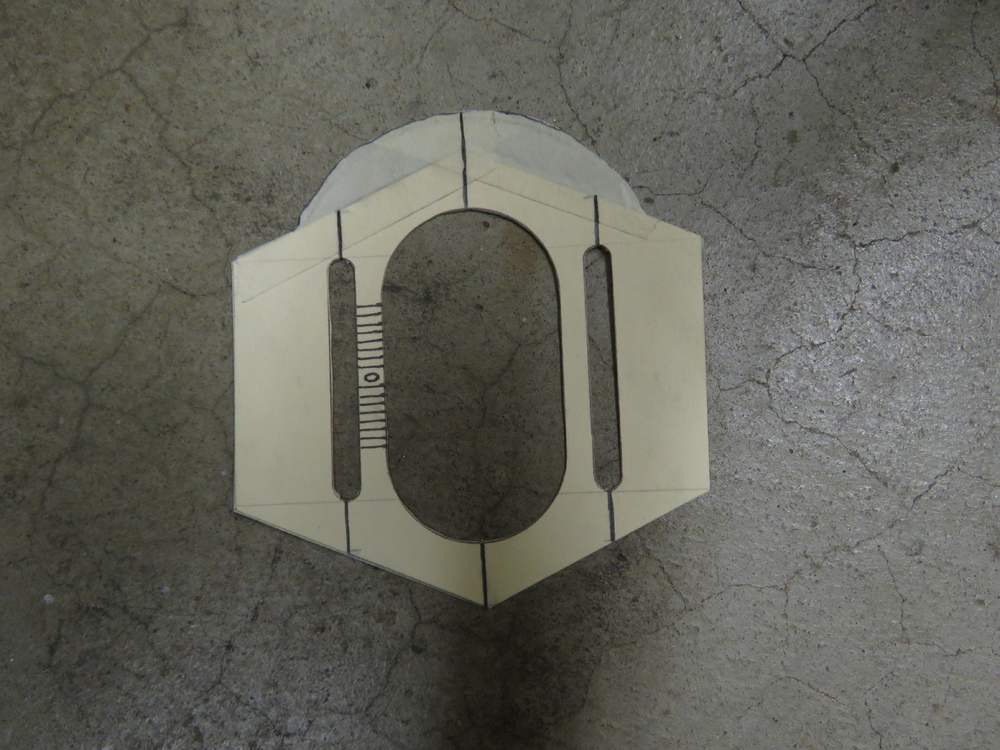
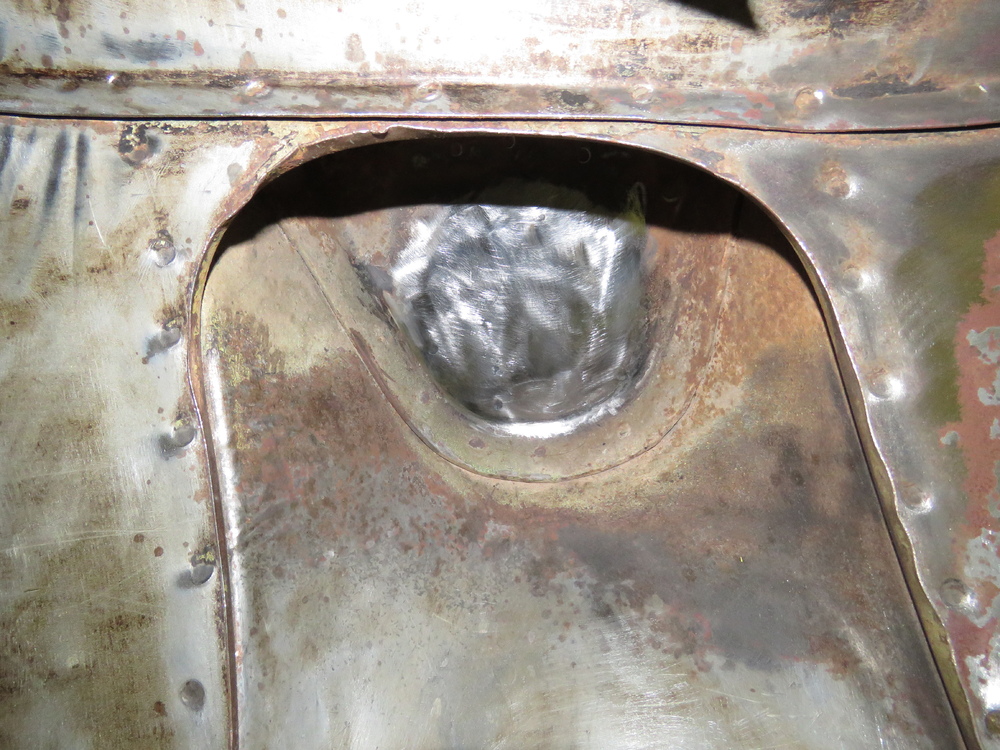
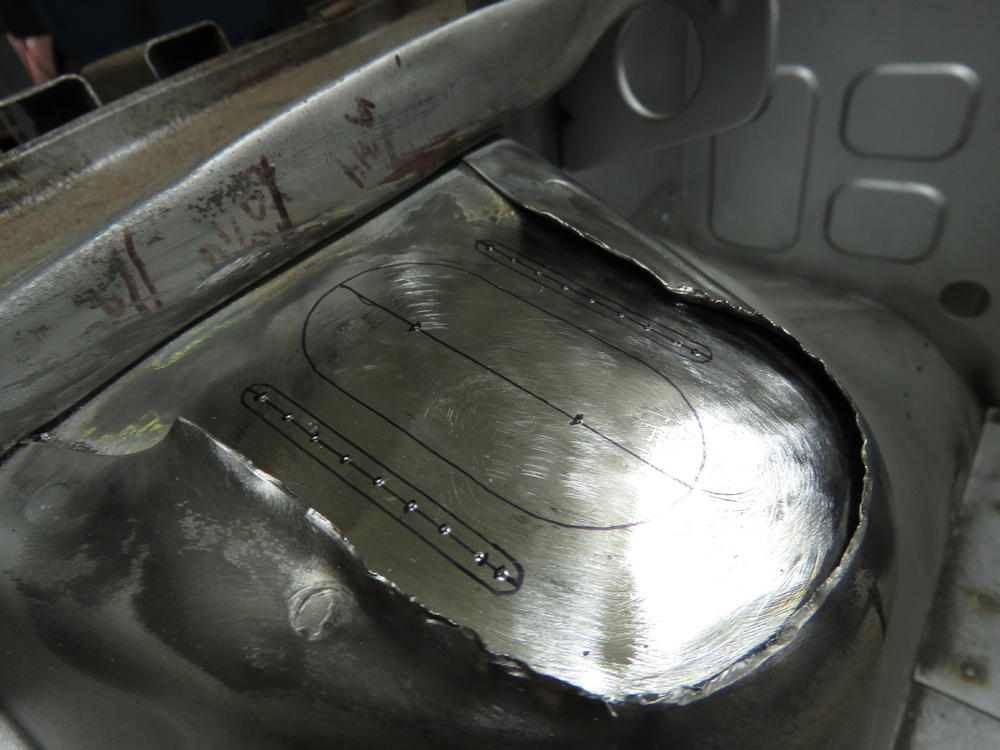
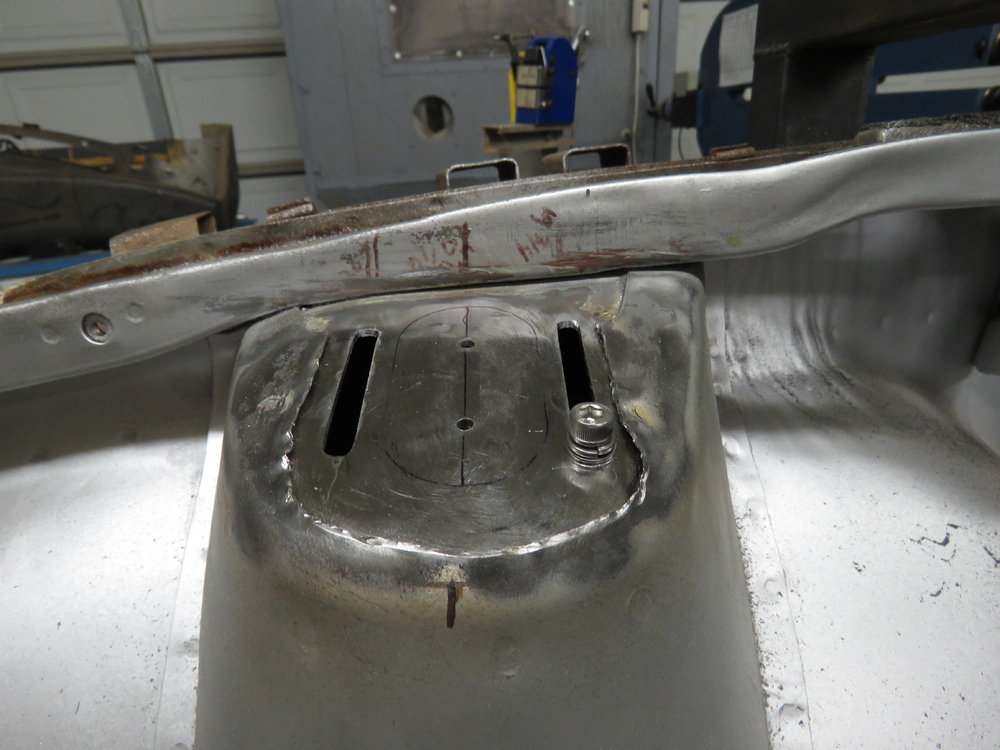
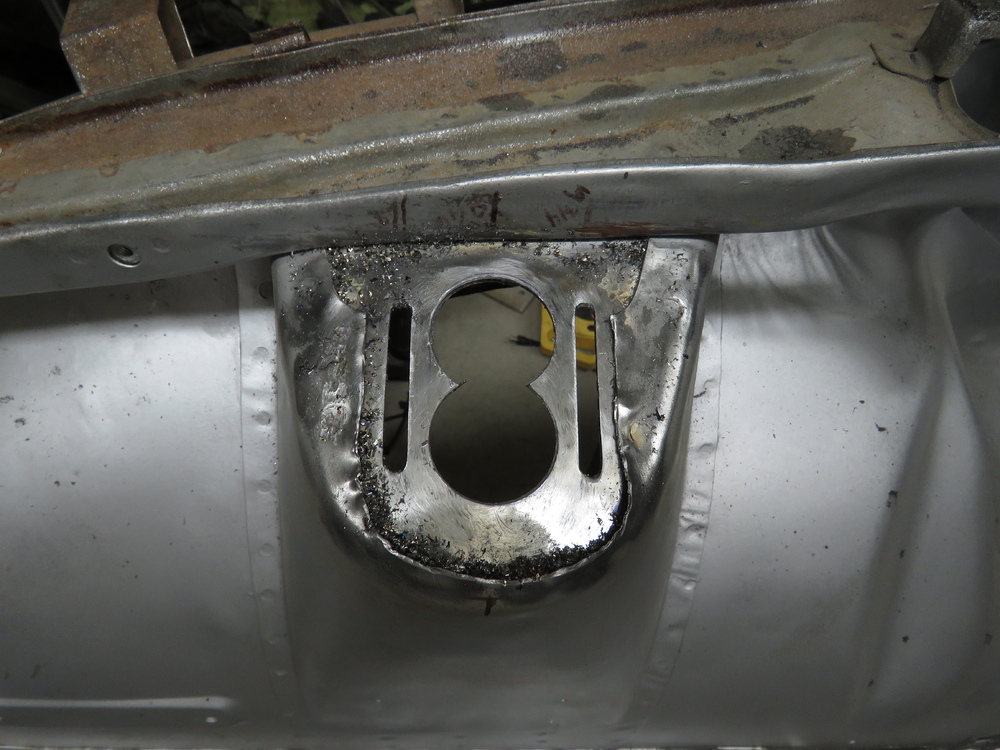
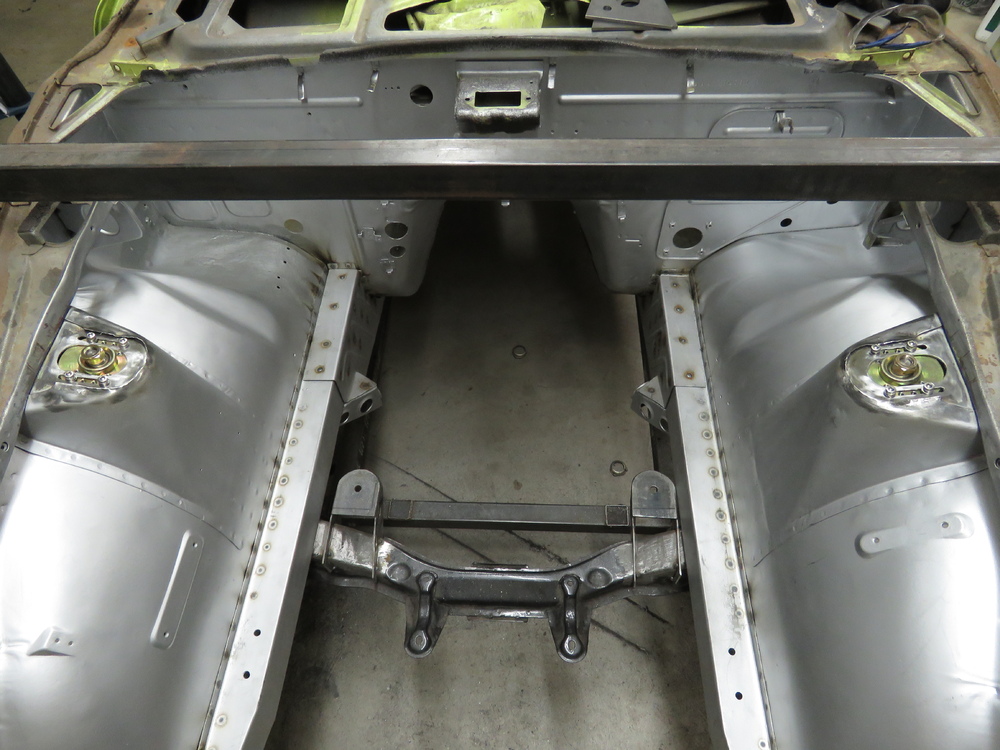
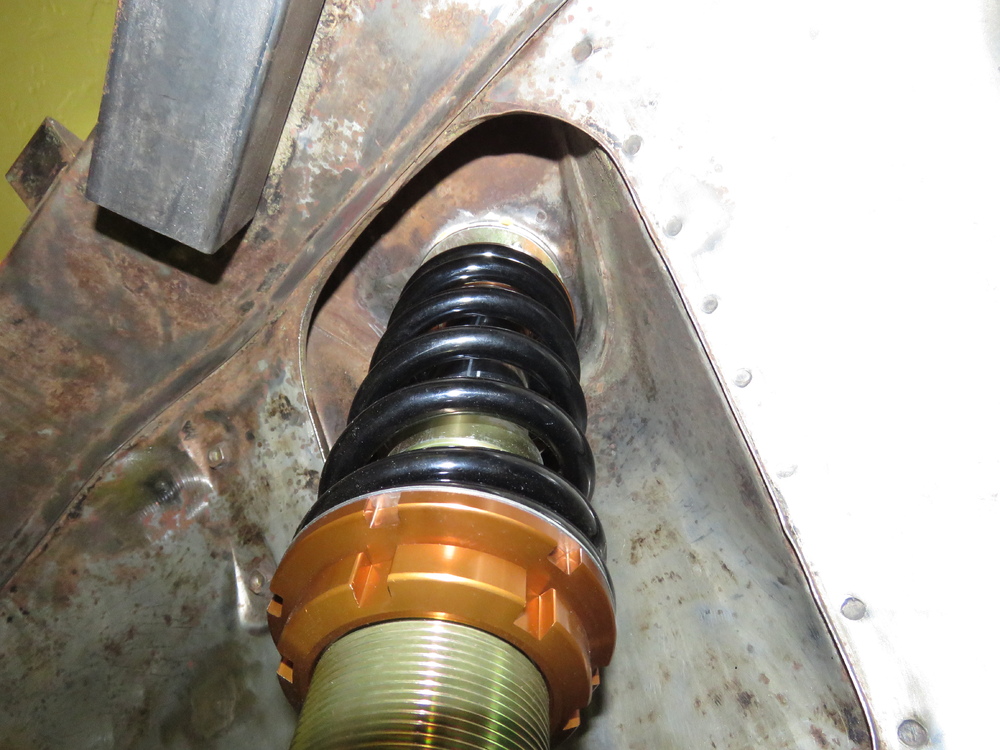
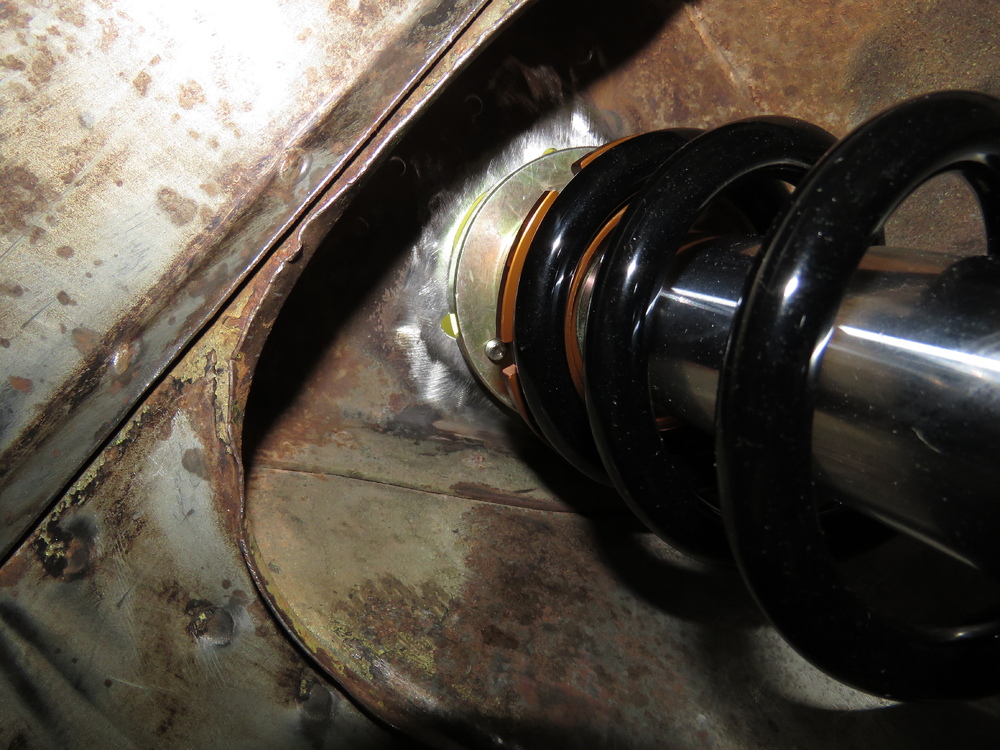
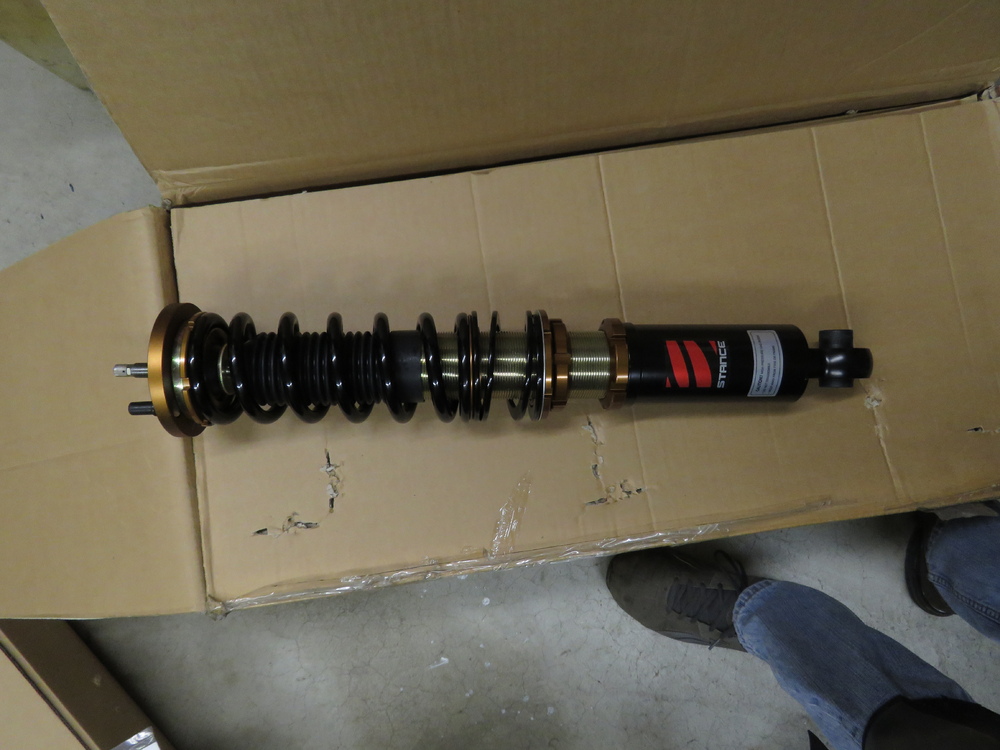
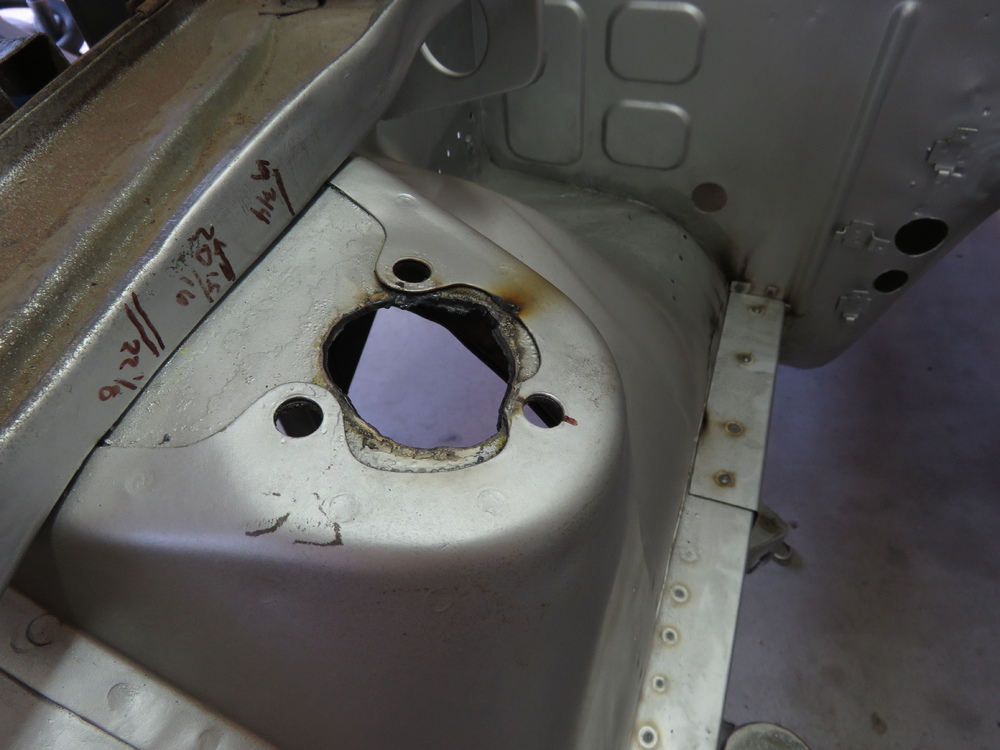
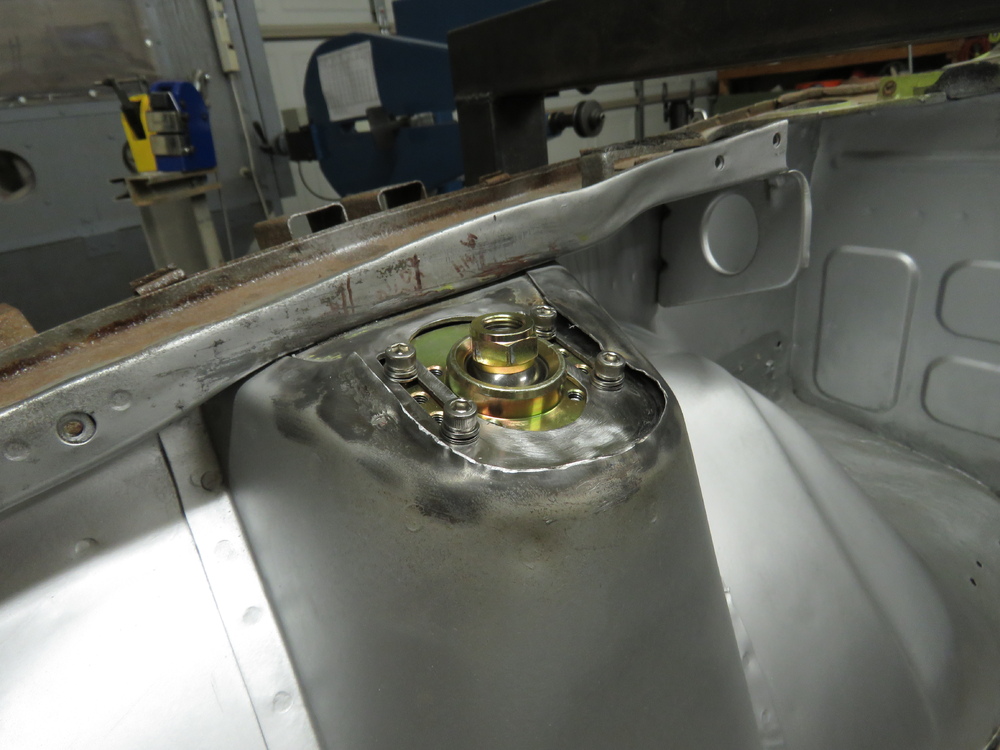
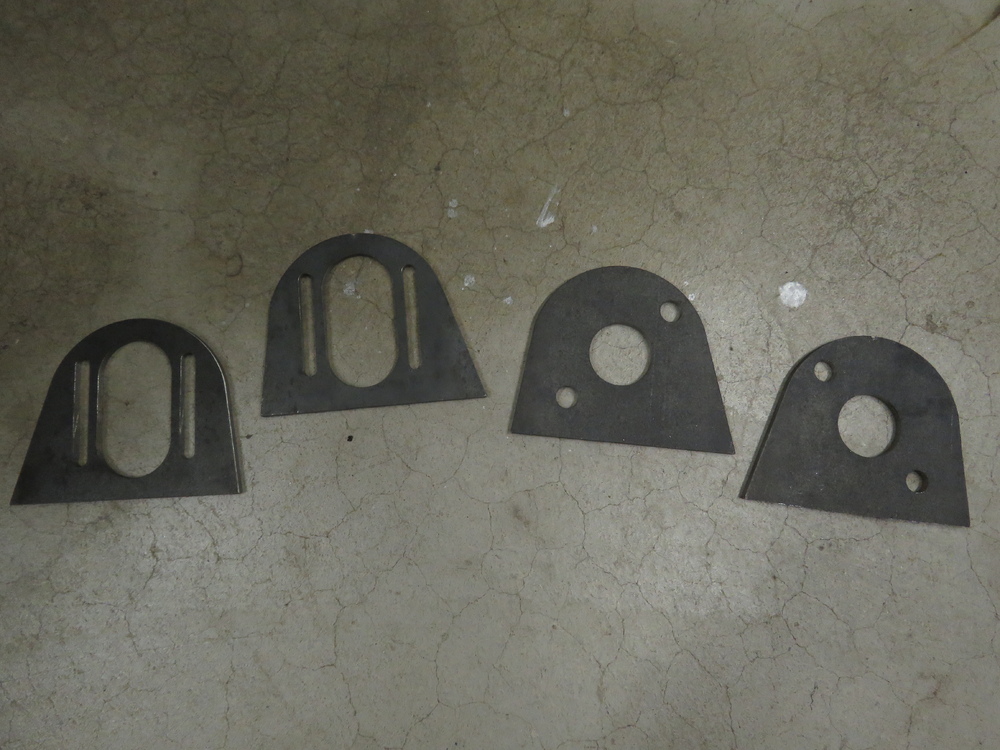
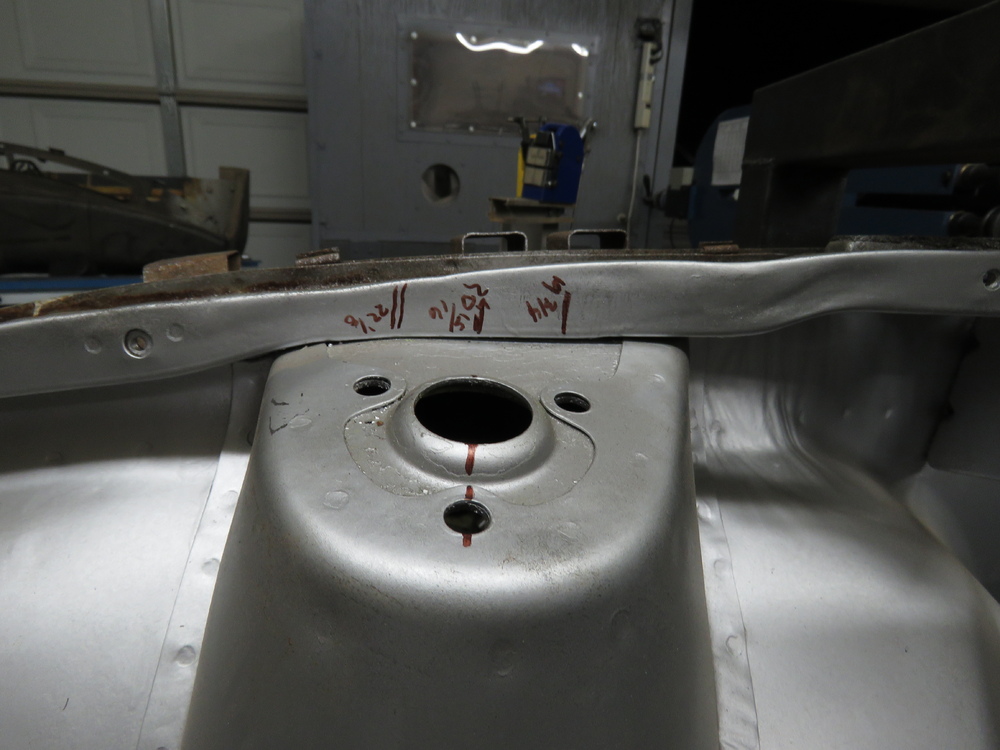
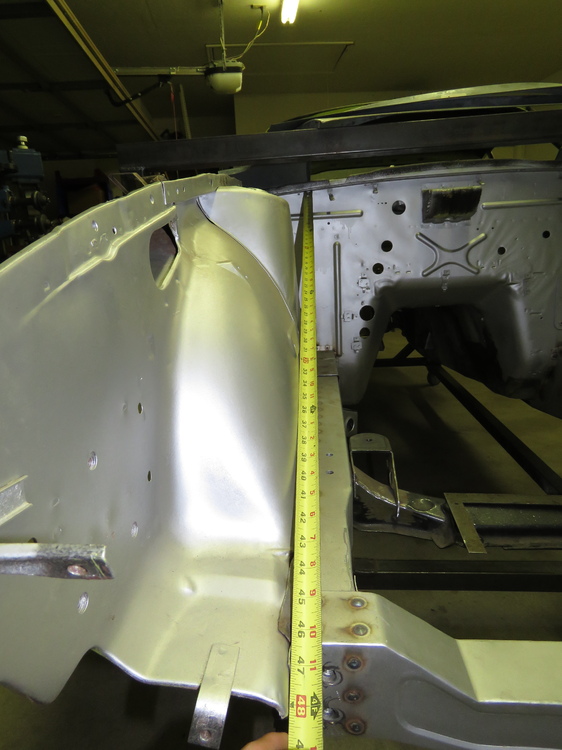
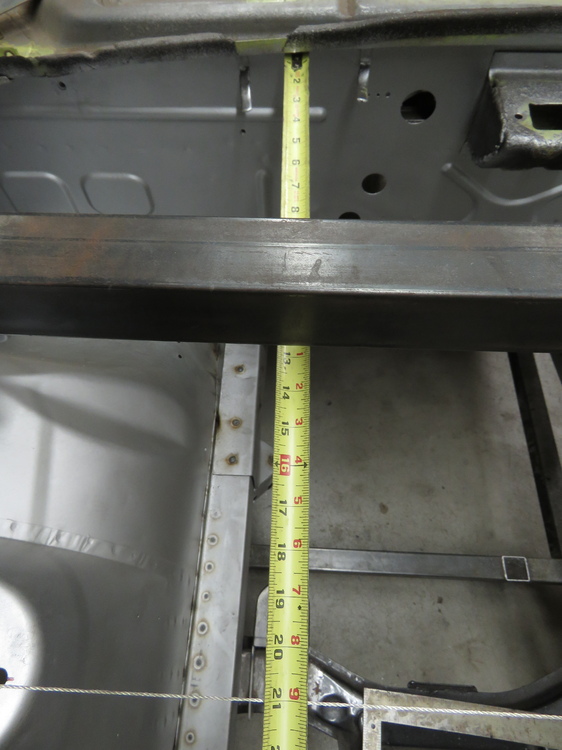
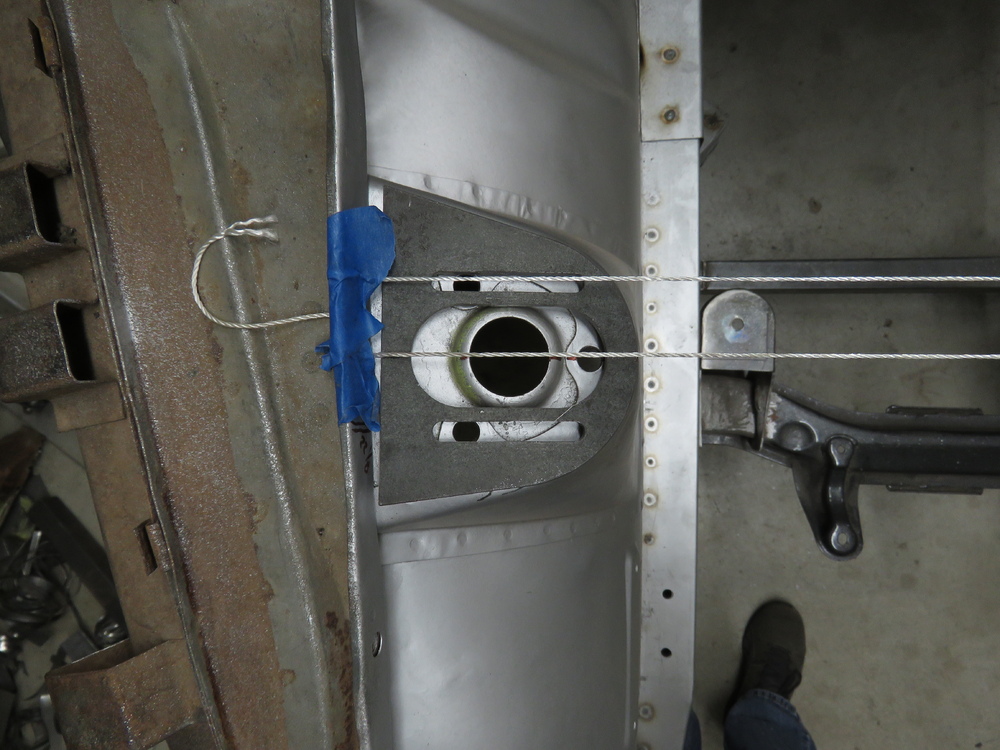
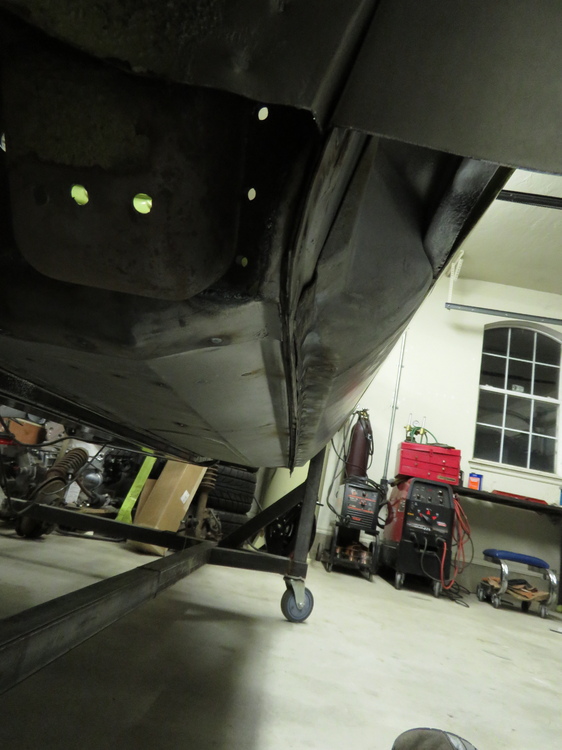
1 pointKeep posting updates in your thread, I really enjoy looking at other peoples process and ideas, Its how I got started. Great to share around. There are times where I dont post updates on purpose because with all the pictures I have, I feel like others get annoyed when they keep seeing my thread pop up, haha. Than you sir. Well finally got the camber plates dealt with, however its not what you would of thought... Started with cutting out the bulge in the strut tower top plate using my plasma cutter. Another look at the camber plates I had bought from ZCCJDM.com on the strut tower. Discovered that they dont fit my Stance Coilovers. Reason I think is because these are probably for the Megan coilovers. Comparison picture of the camber plate to the stance camber plate. As you can see the bolt holes dont align, and the main center hole is to big on the ZCCJDM camber plate. The forth bolt wont go in, I can force it, but shouldnt ever have to force a bolt in. So I decided to ditch them as I didnt like the fitment, too tight and loose in areas. Also bothered me that the preferred method of welding these plates on is to weld them on top of the sheet metal of the tower wall/cover and not directly onto the stock upper plate as this is thicker and more structurally sound. But I guess that method was proven buy numerous of Datsuns to work. Plus I wanted a factory look for some reason. Here is how I did it. Keep in mind that I will later on be adding in strut bar mounts. Havent thought about how I will do it, will need my LS1 engine in place to see how much room to work with, but hopefully after I get the strut bar mounts welded in, the camber plates will much stronger and more connected with its surroundings. Played around with the idea of trying to make the stock top strut tower plate to work with out having to do a lot of work. Bad Idea, haha. ended up just welding a plate in to close up the holes and start with a fresh canvas. Got to do things right otherwise you will get a crappy result. Holes closed up with tig welding plates in of similar thickness as the stock plate. Made damn sure I got penetration all the way through, purposely gave my welds loads of filler rod. Sanded down. Made a template from the Stance coilover camber plate. Comparison to the ZCCJDM plate. Template test fitted on coilover. Though for full adjustment locked all the way positive and negative, added some tape on and cut it out, this will make sure I dont place the template too far in/forward on the tower considering the limited room to work with underneath the strut tower. Lines marked. Since I dont have the proper bits/tungsten carbide bits or whatever to make life easier in making an elongated straight hole, I opted for the drilling of multiple holes and then used a cut off wheel on my air dremel tool to blended in the holes. Centers punched in for drilling. Checking the alignment one last time, always good to check constantly. Started with drilling the bolt holes first. Holes blended in. Probably would of been cleaner with a thinner/smaller cut off wheel. Oh well, it works. Then off to work on the middle hole. Used a 1 1/2' hole saw. used my air belt sander (one of my favorite most used air tools) to blend them together. Coilovers test fitted. Finally coated with paint (for temporary purposes) and hammered down the lip of the tower wall cover or whatever you call it. Will need to spot/plug weld the lips later on, but will wait till I get the struct brace mounts figured out. Doesnt look like much of a noticeable change from stock... Thats it for now, stay tuned!! Forgot about this picture. This is what the rear coilover looks like.


 1 point
 -
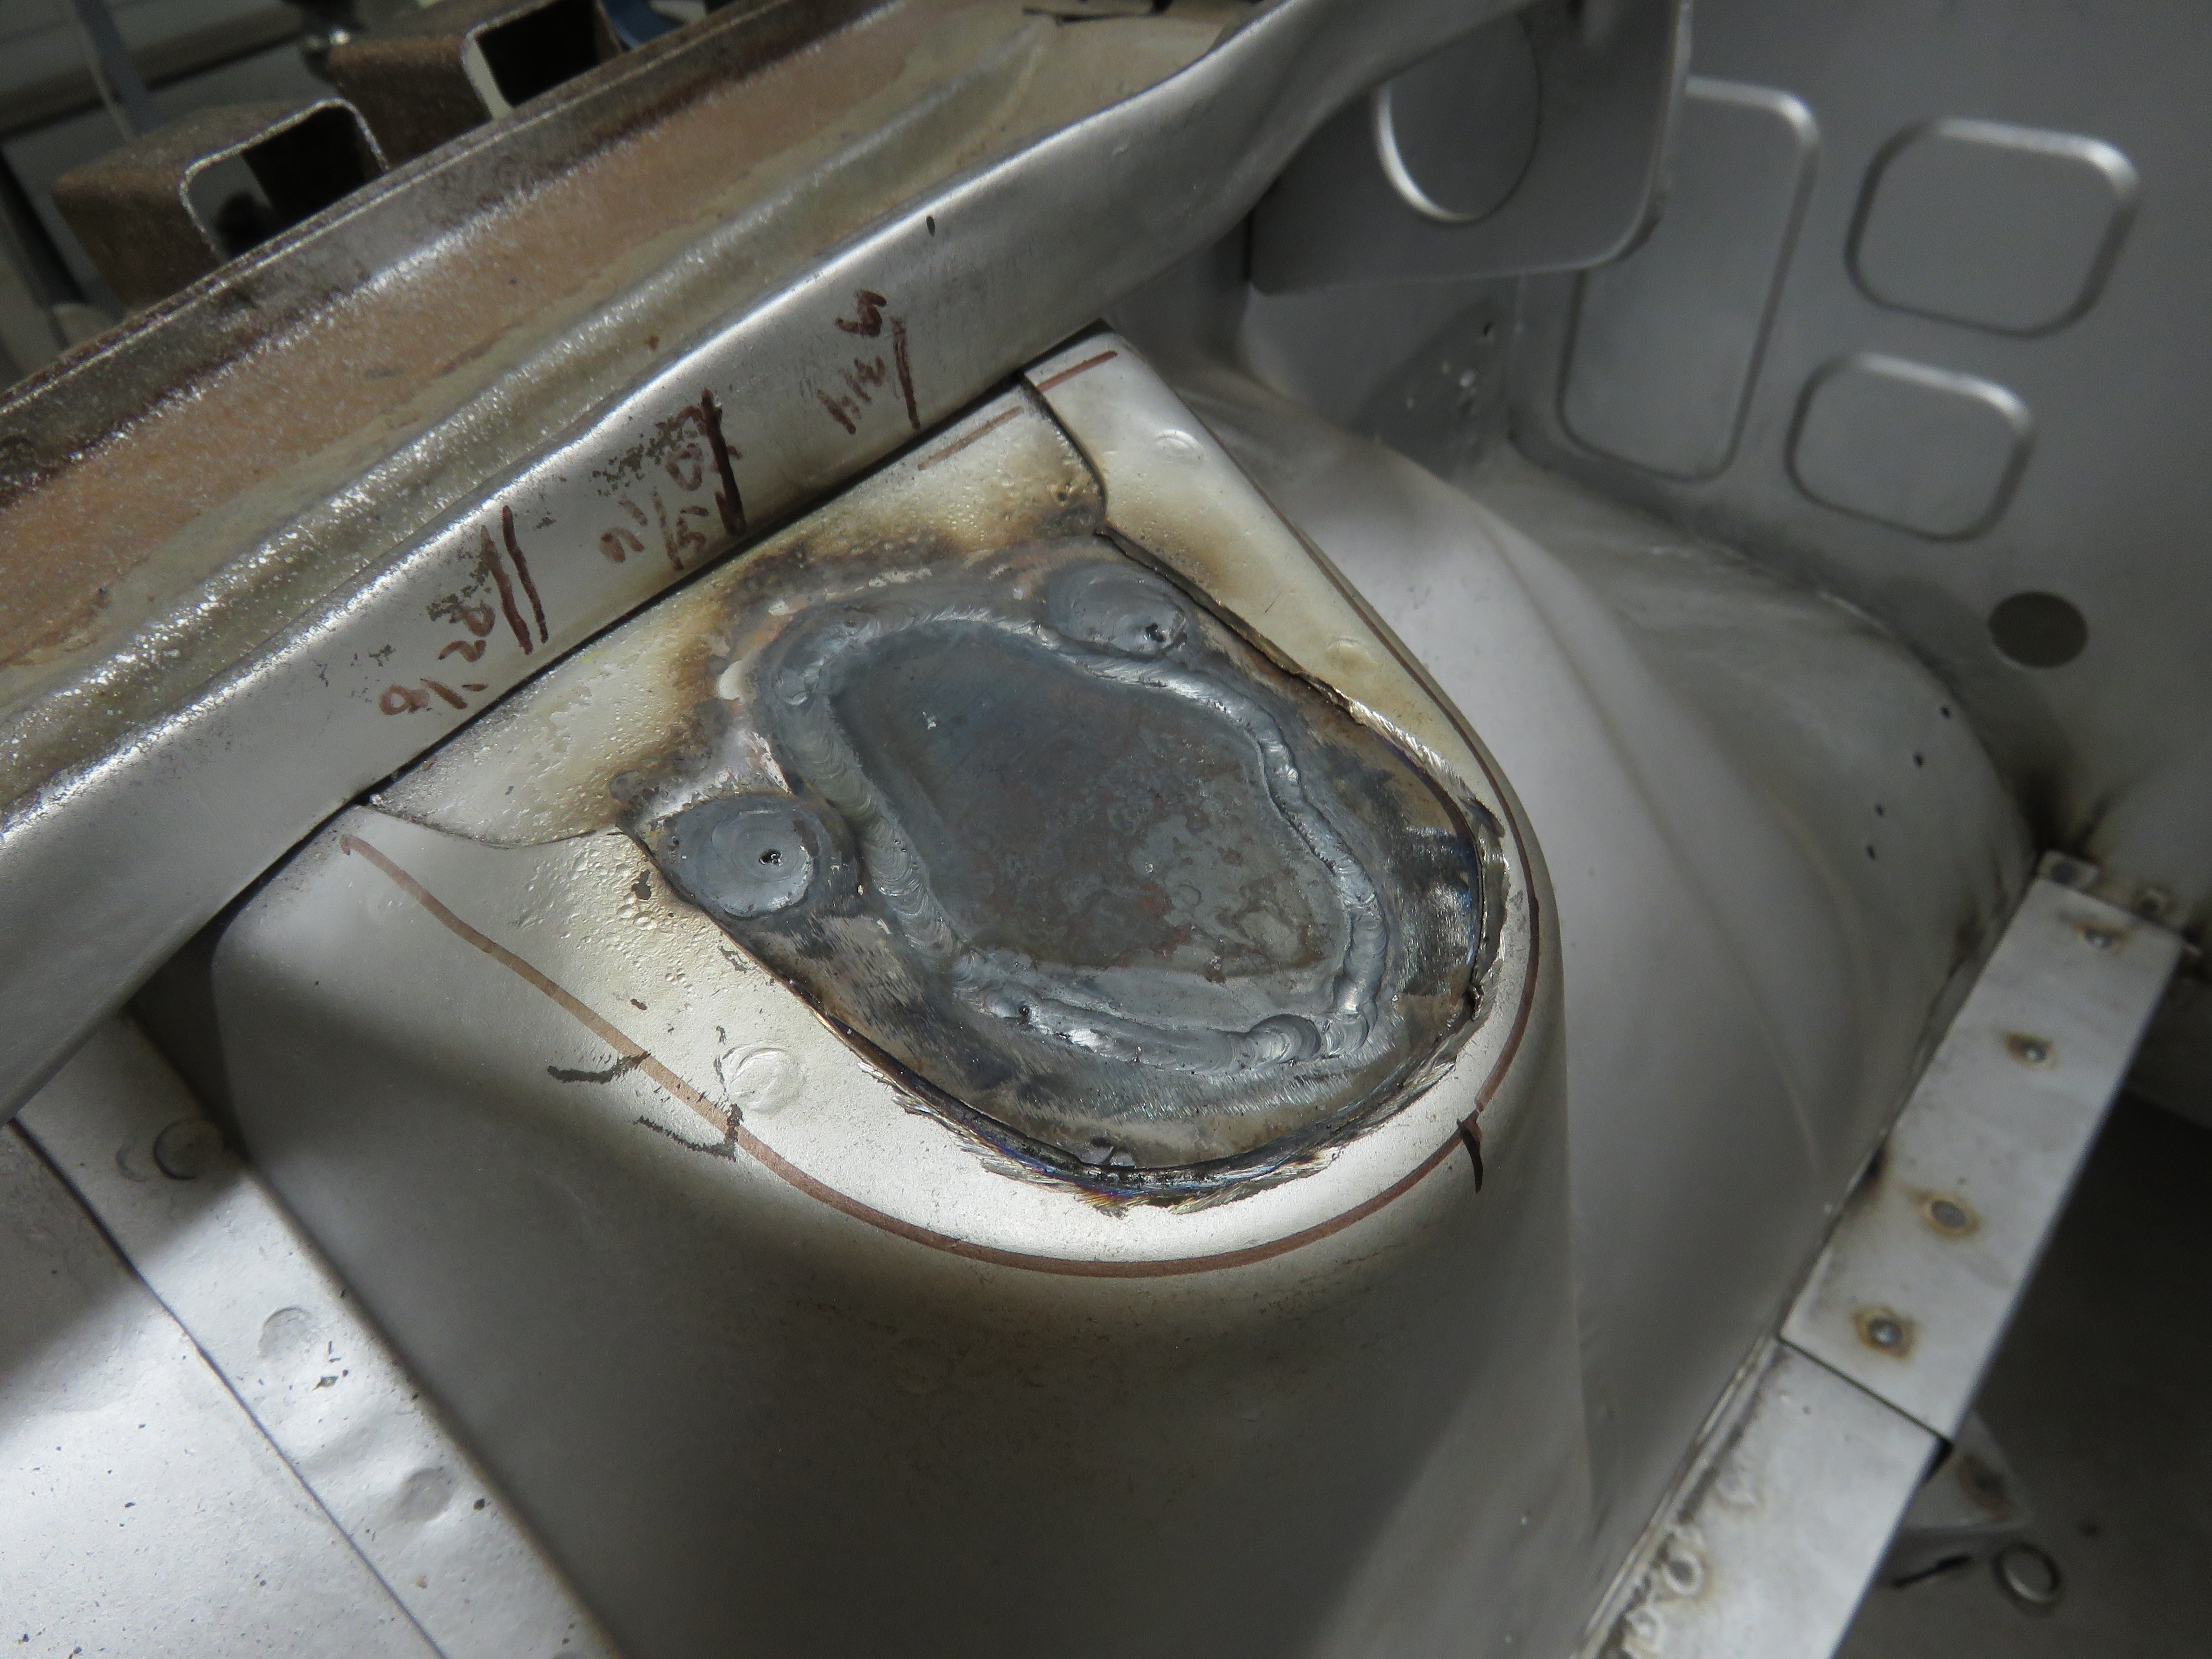
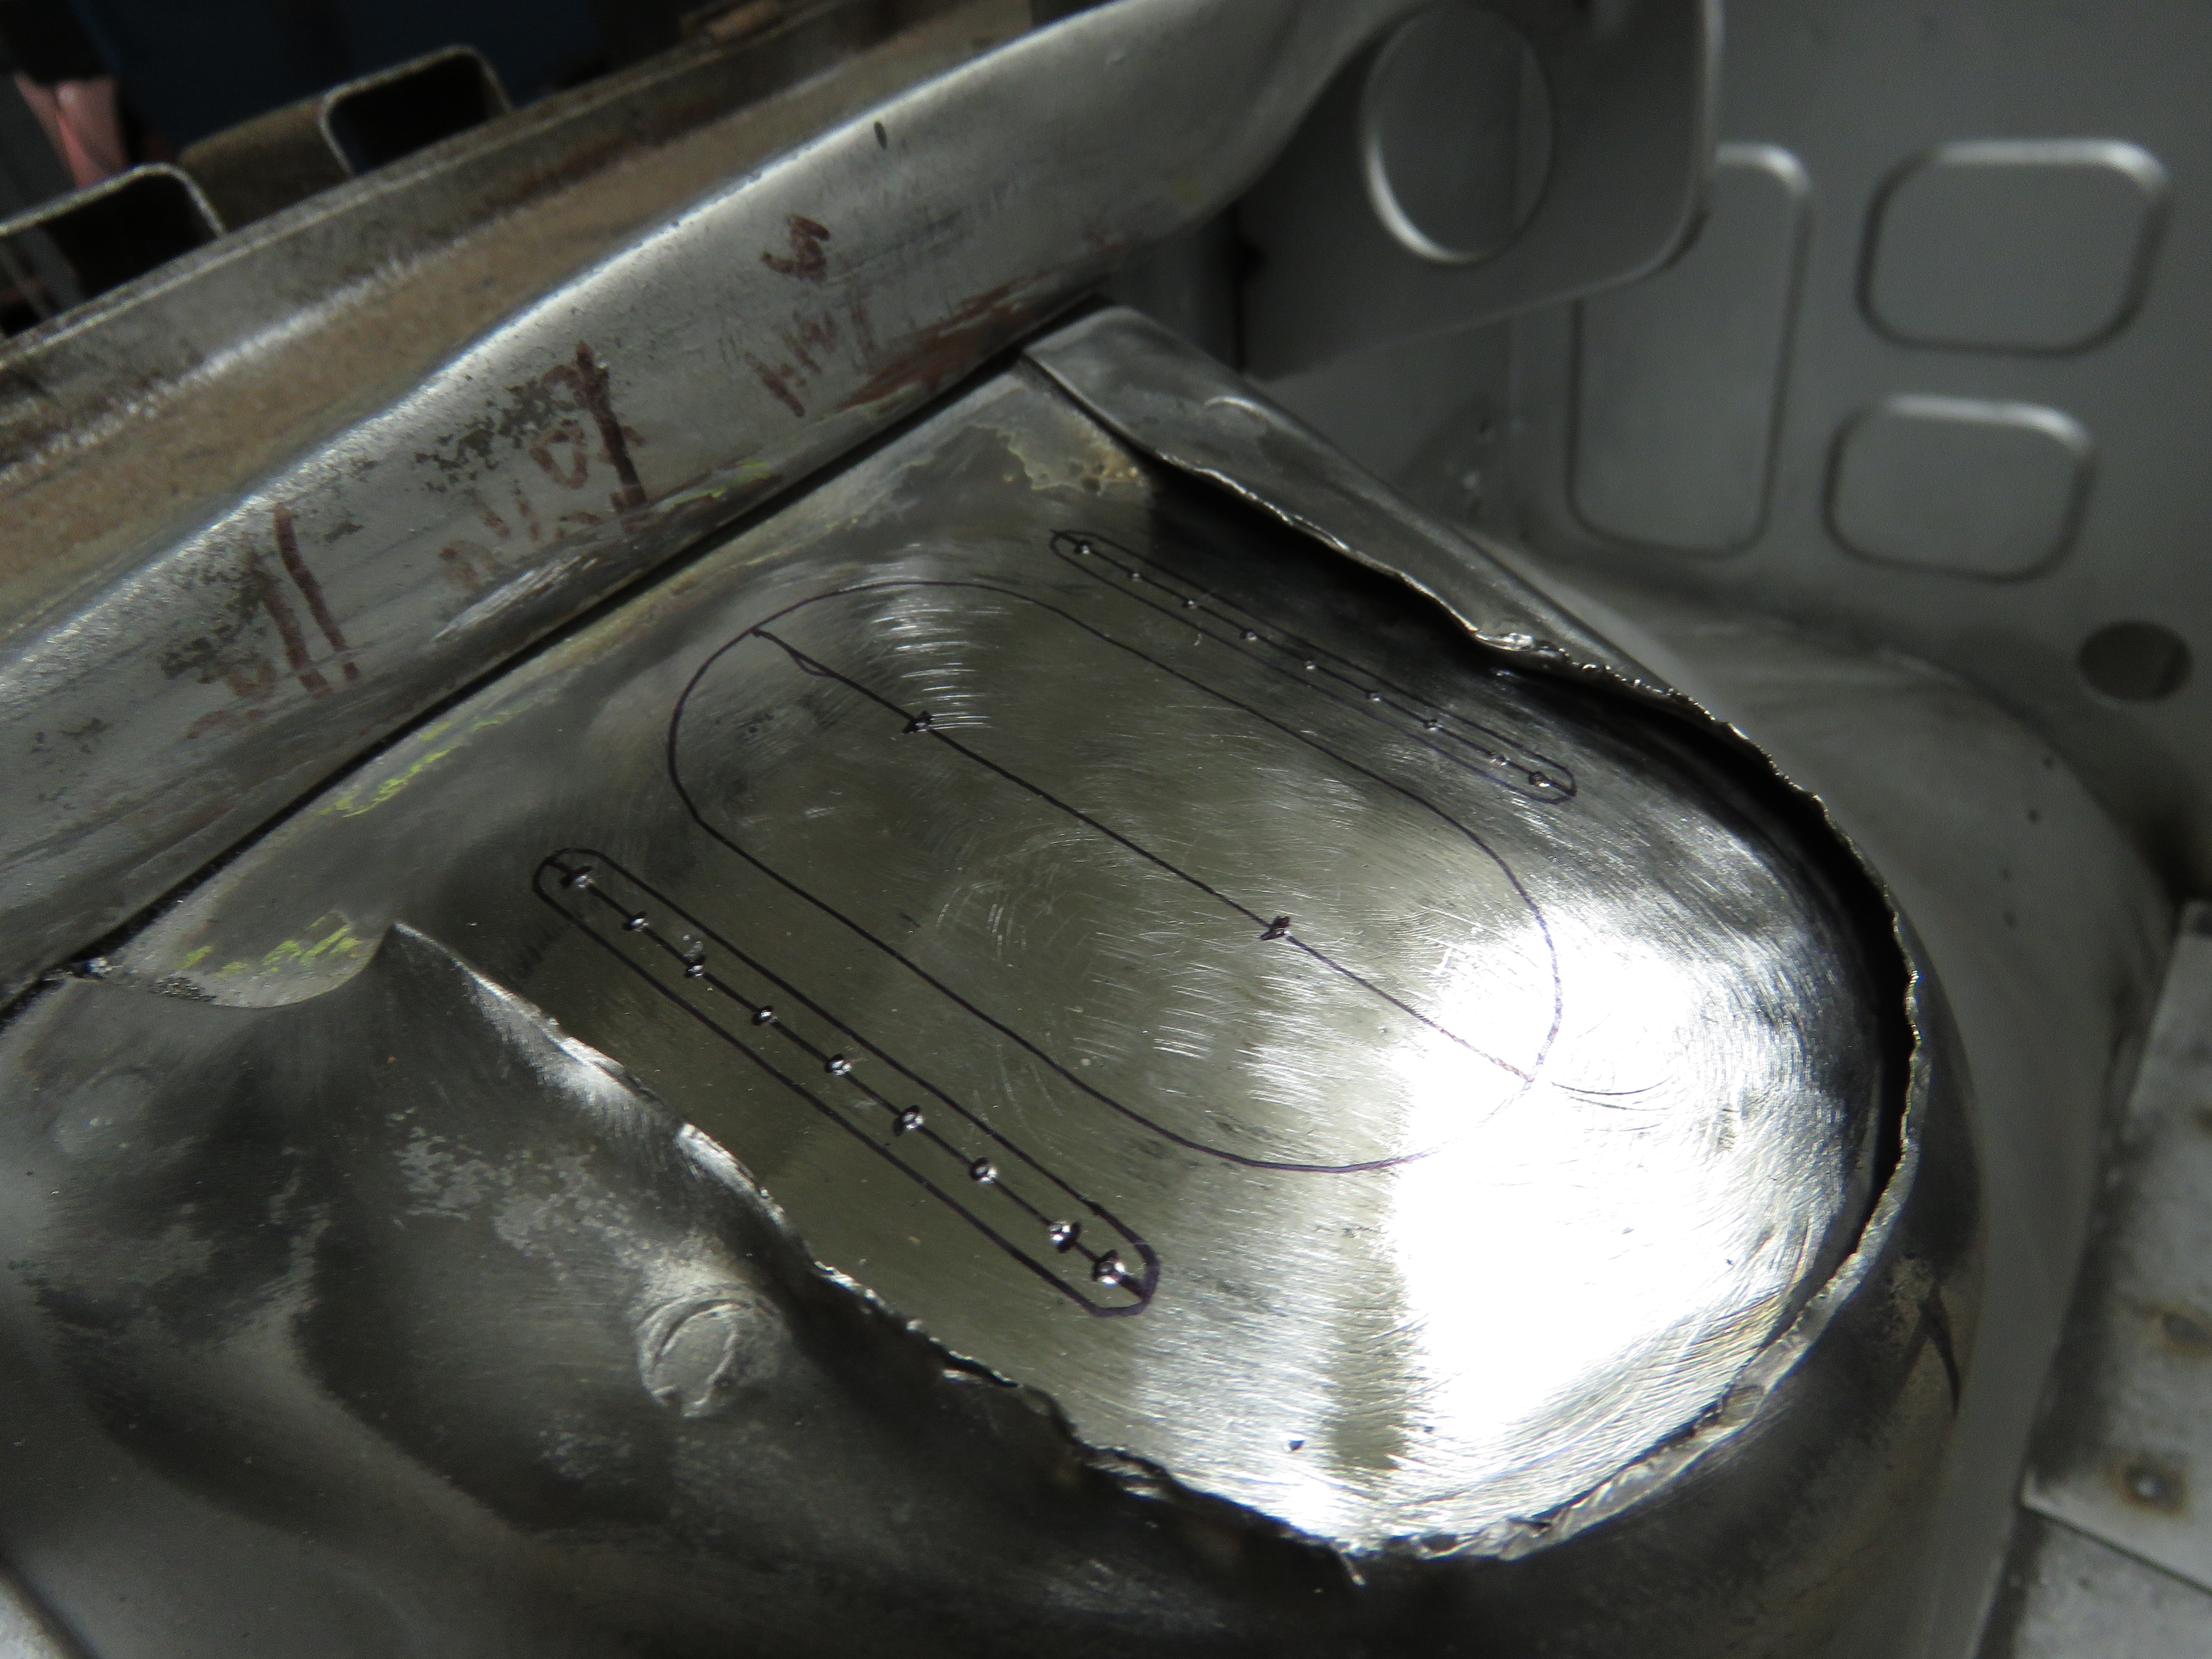
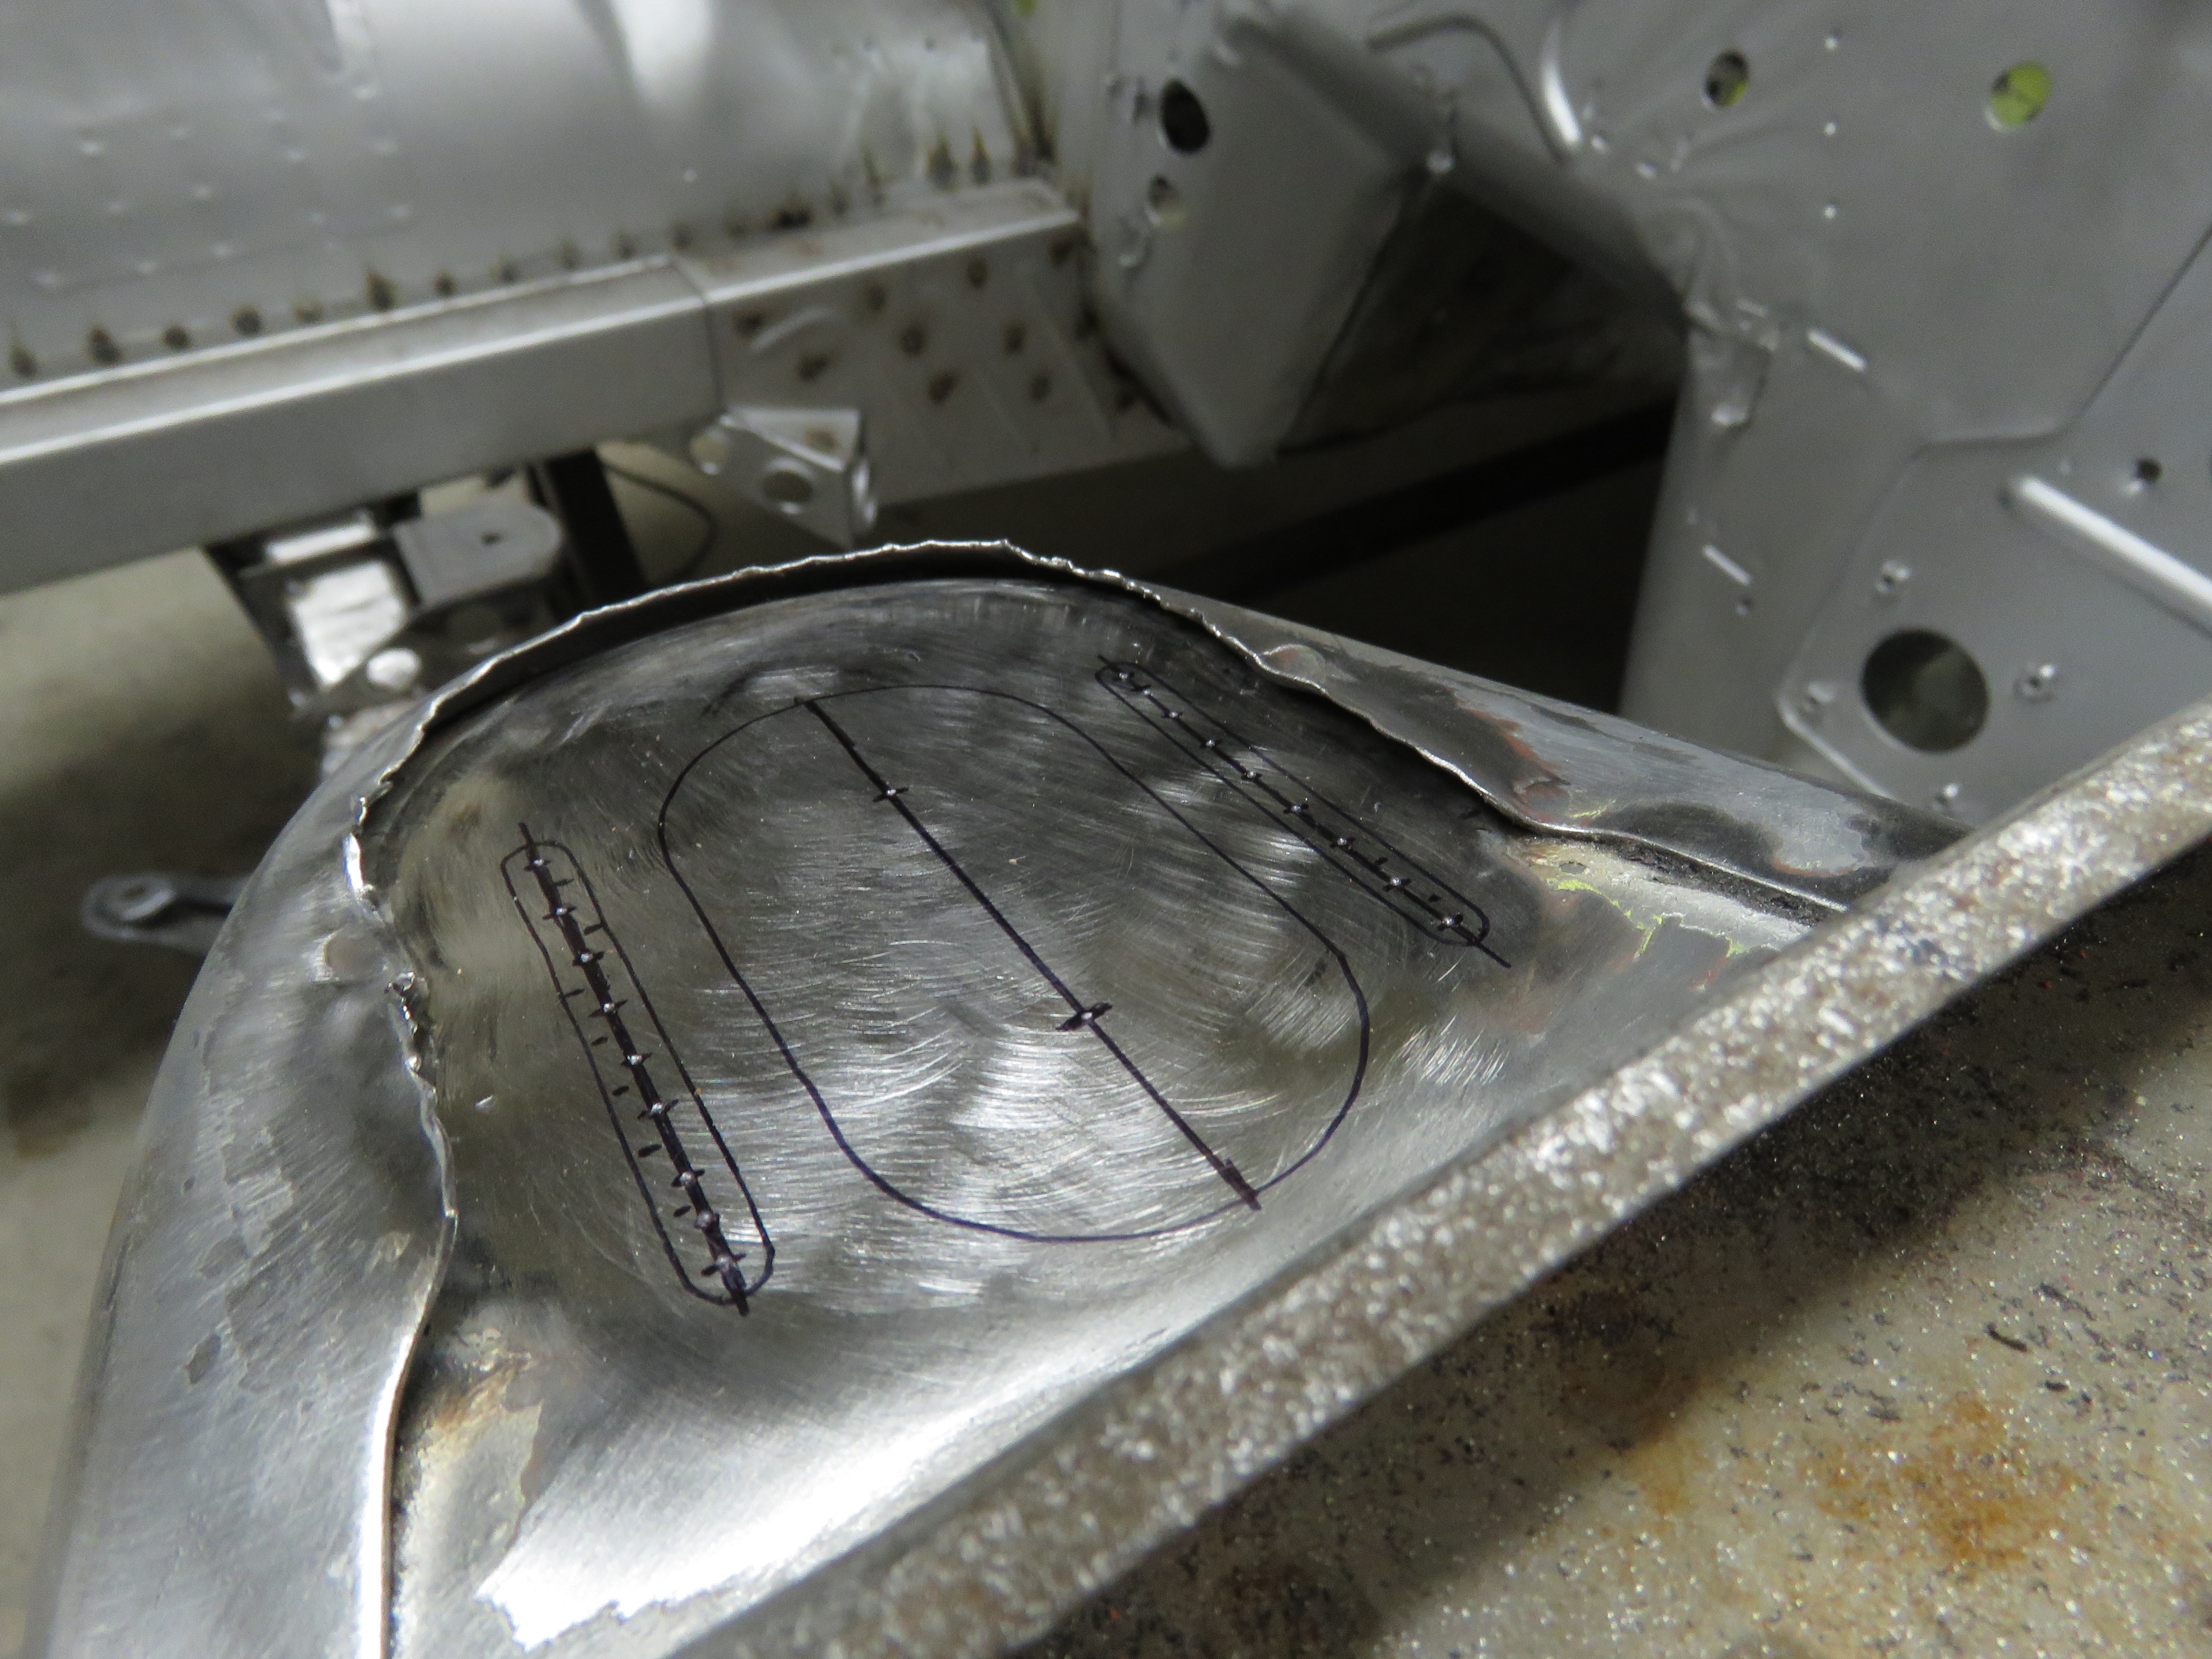
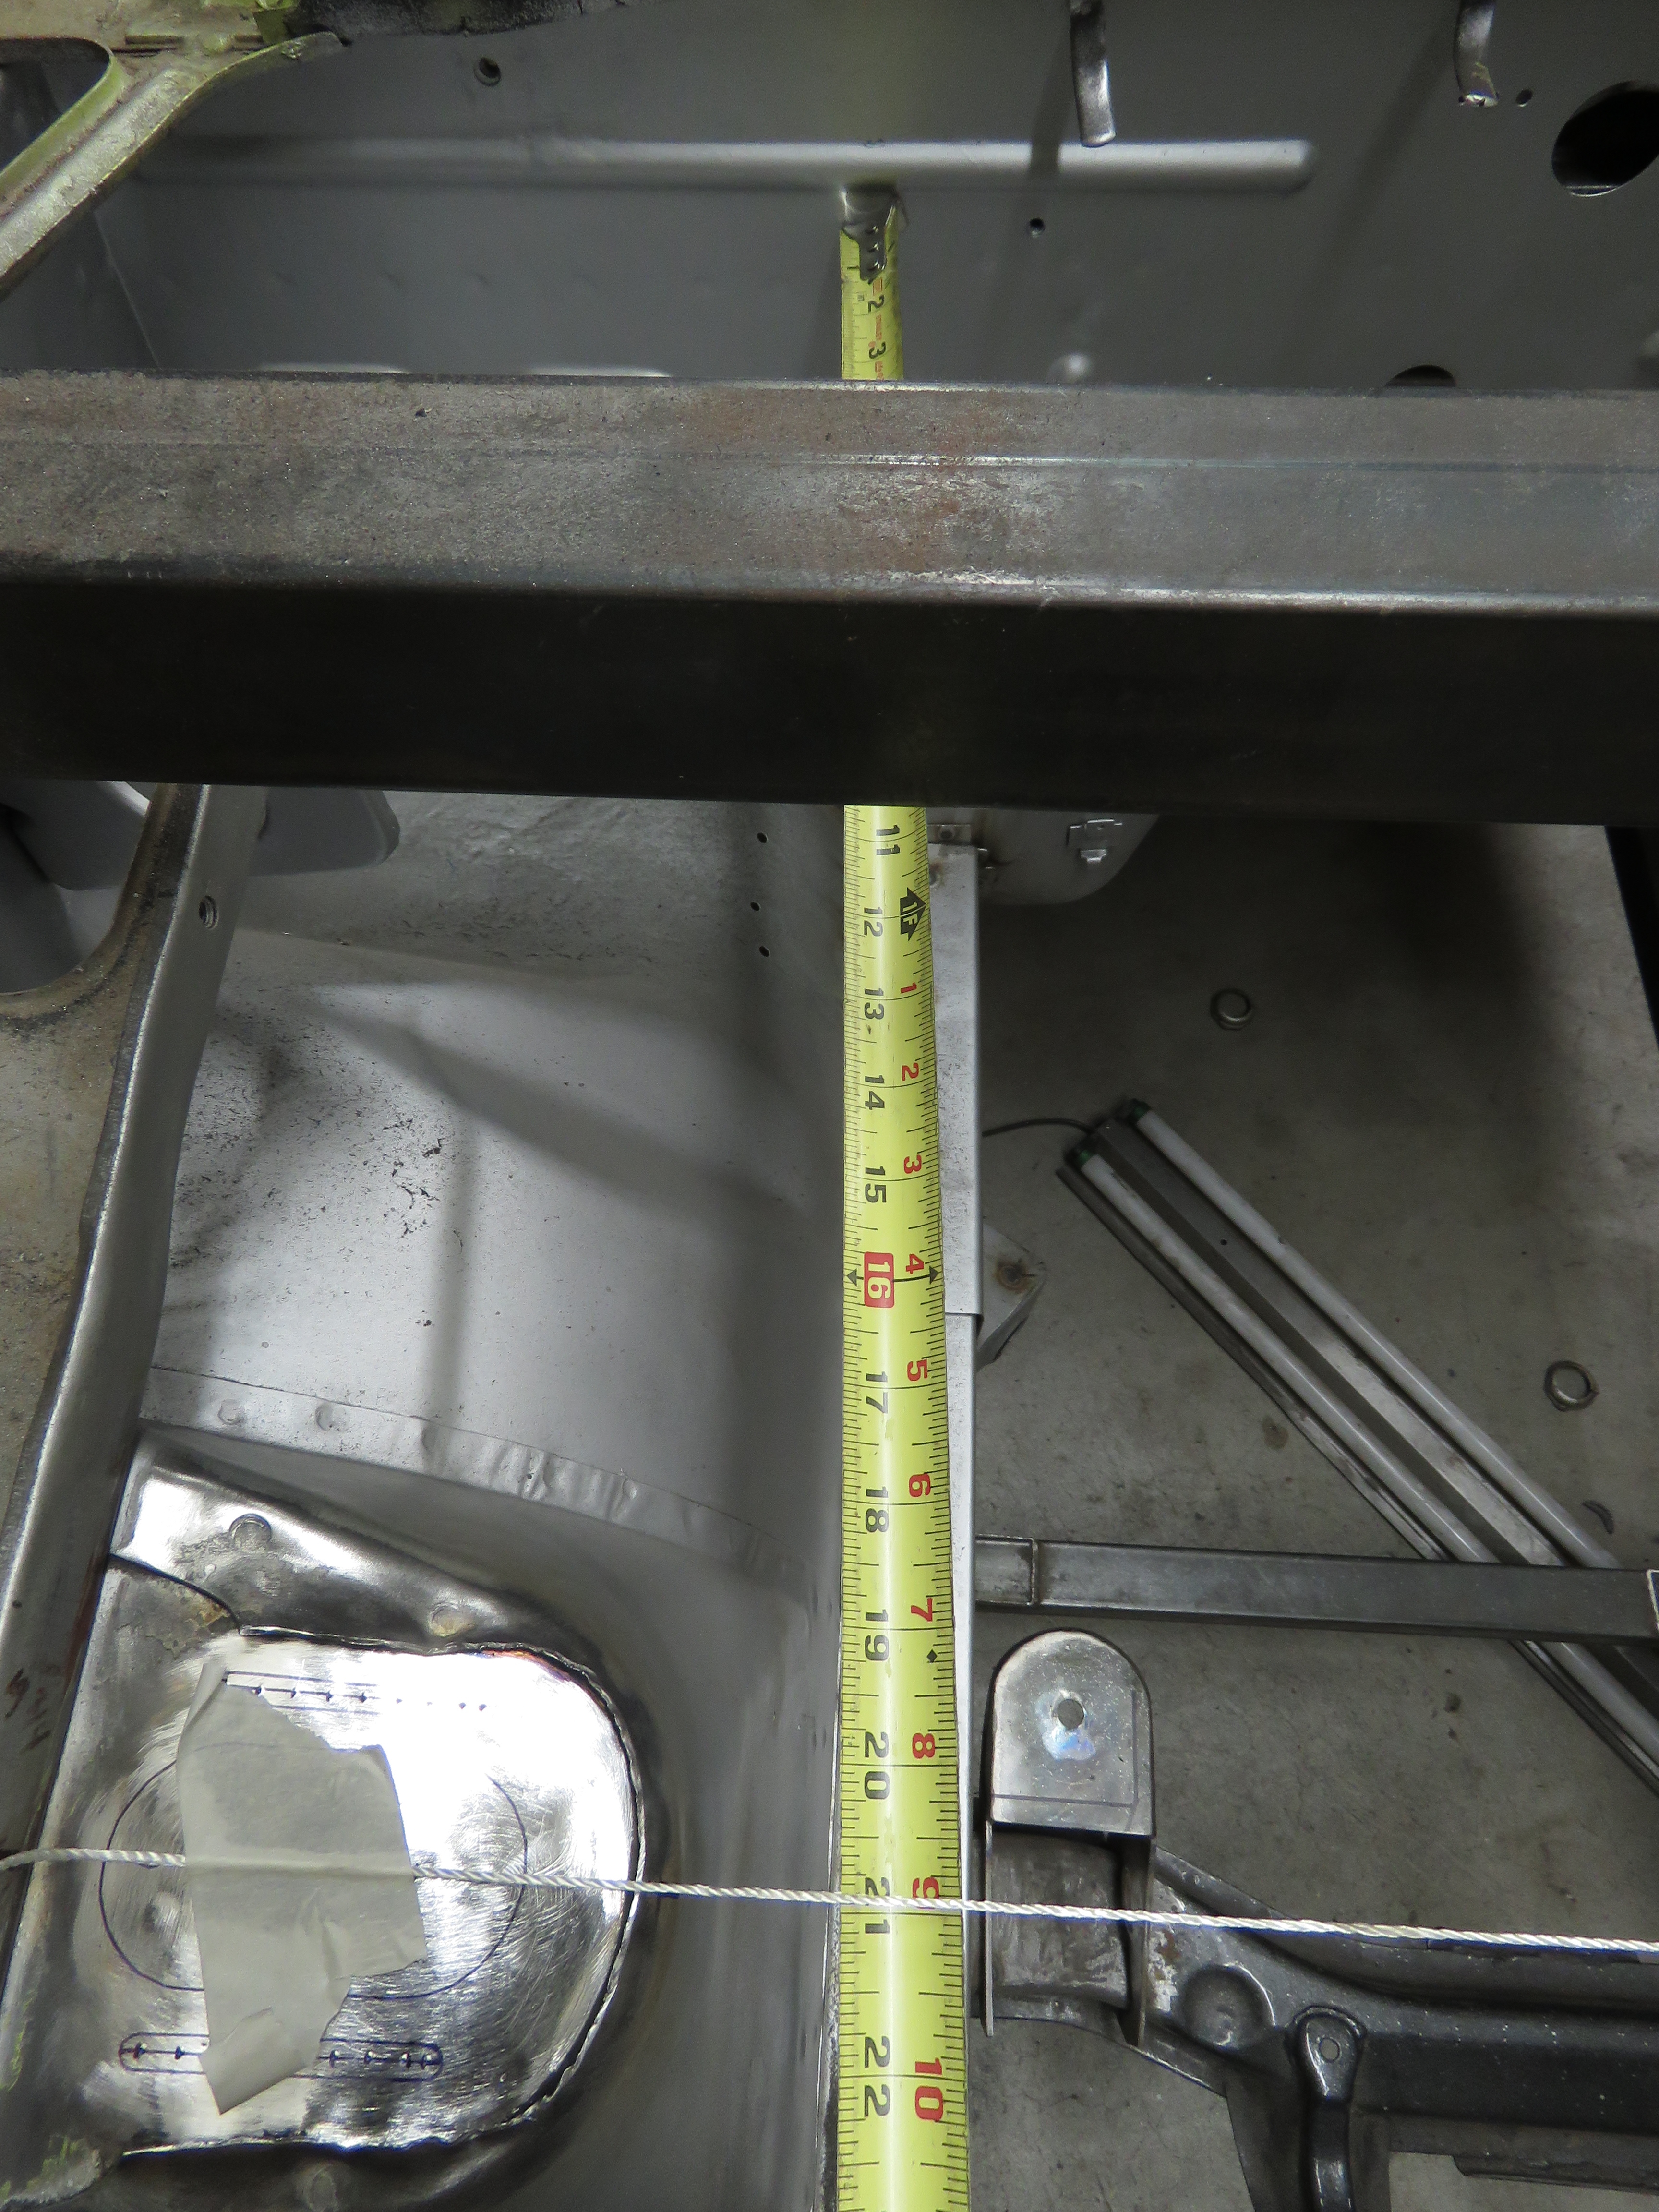
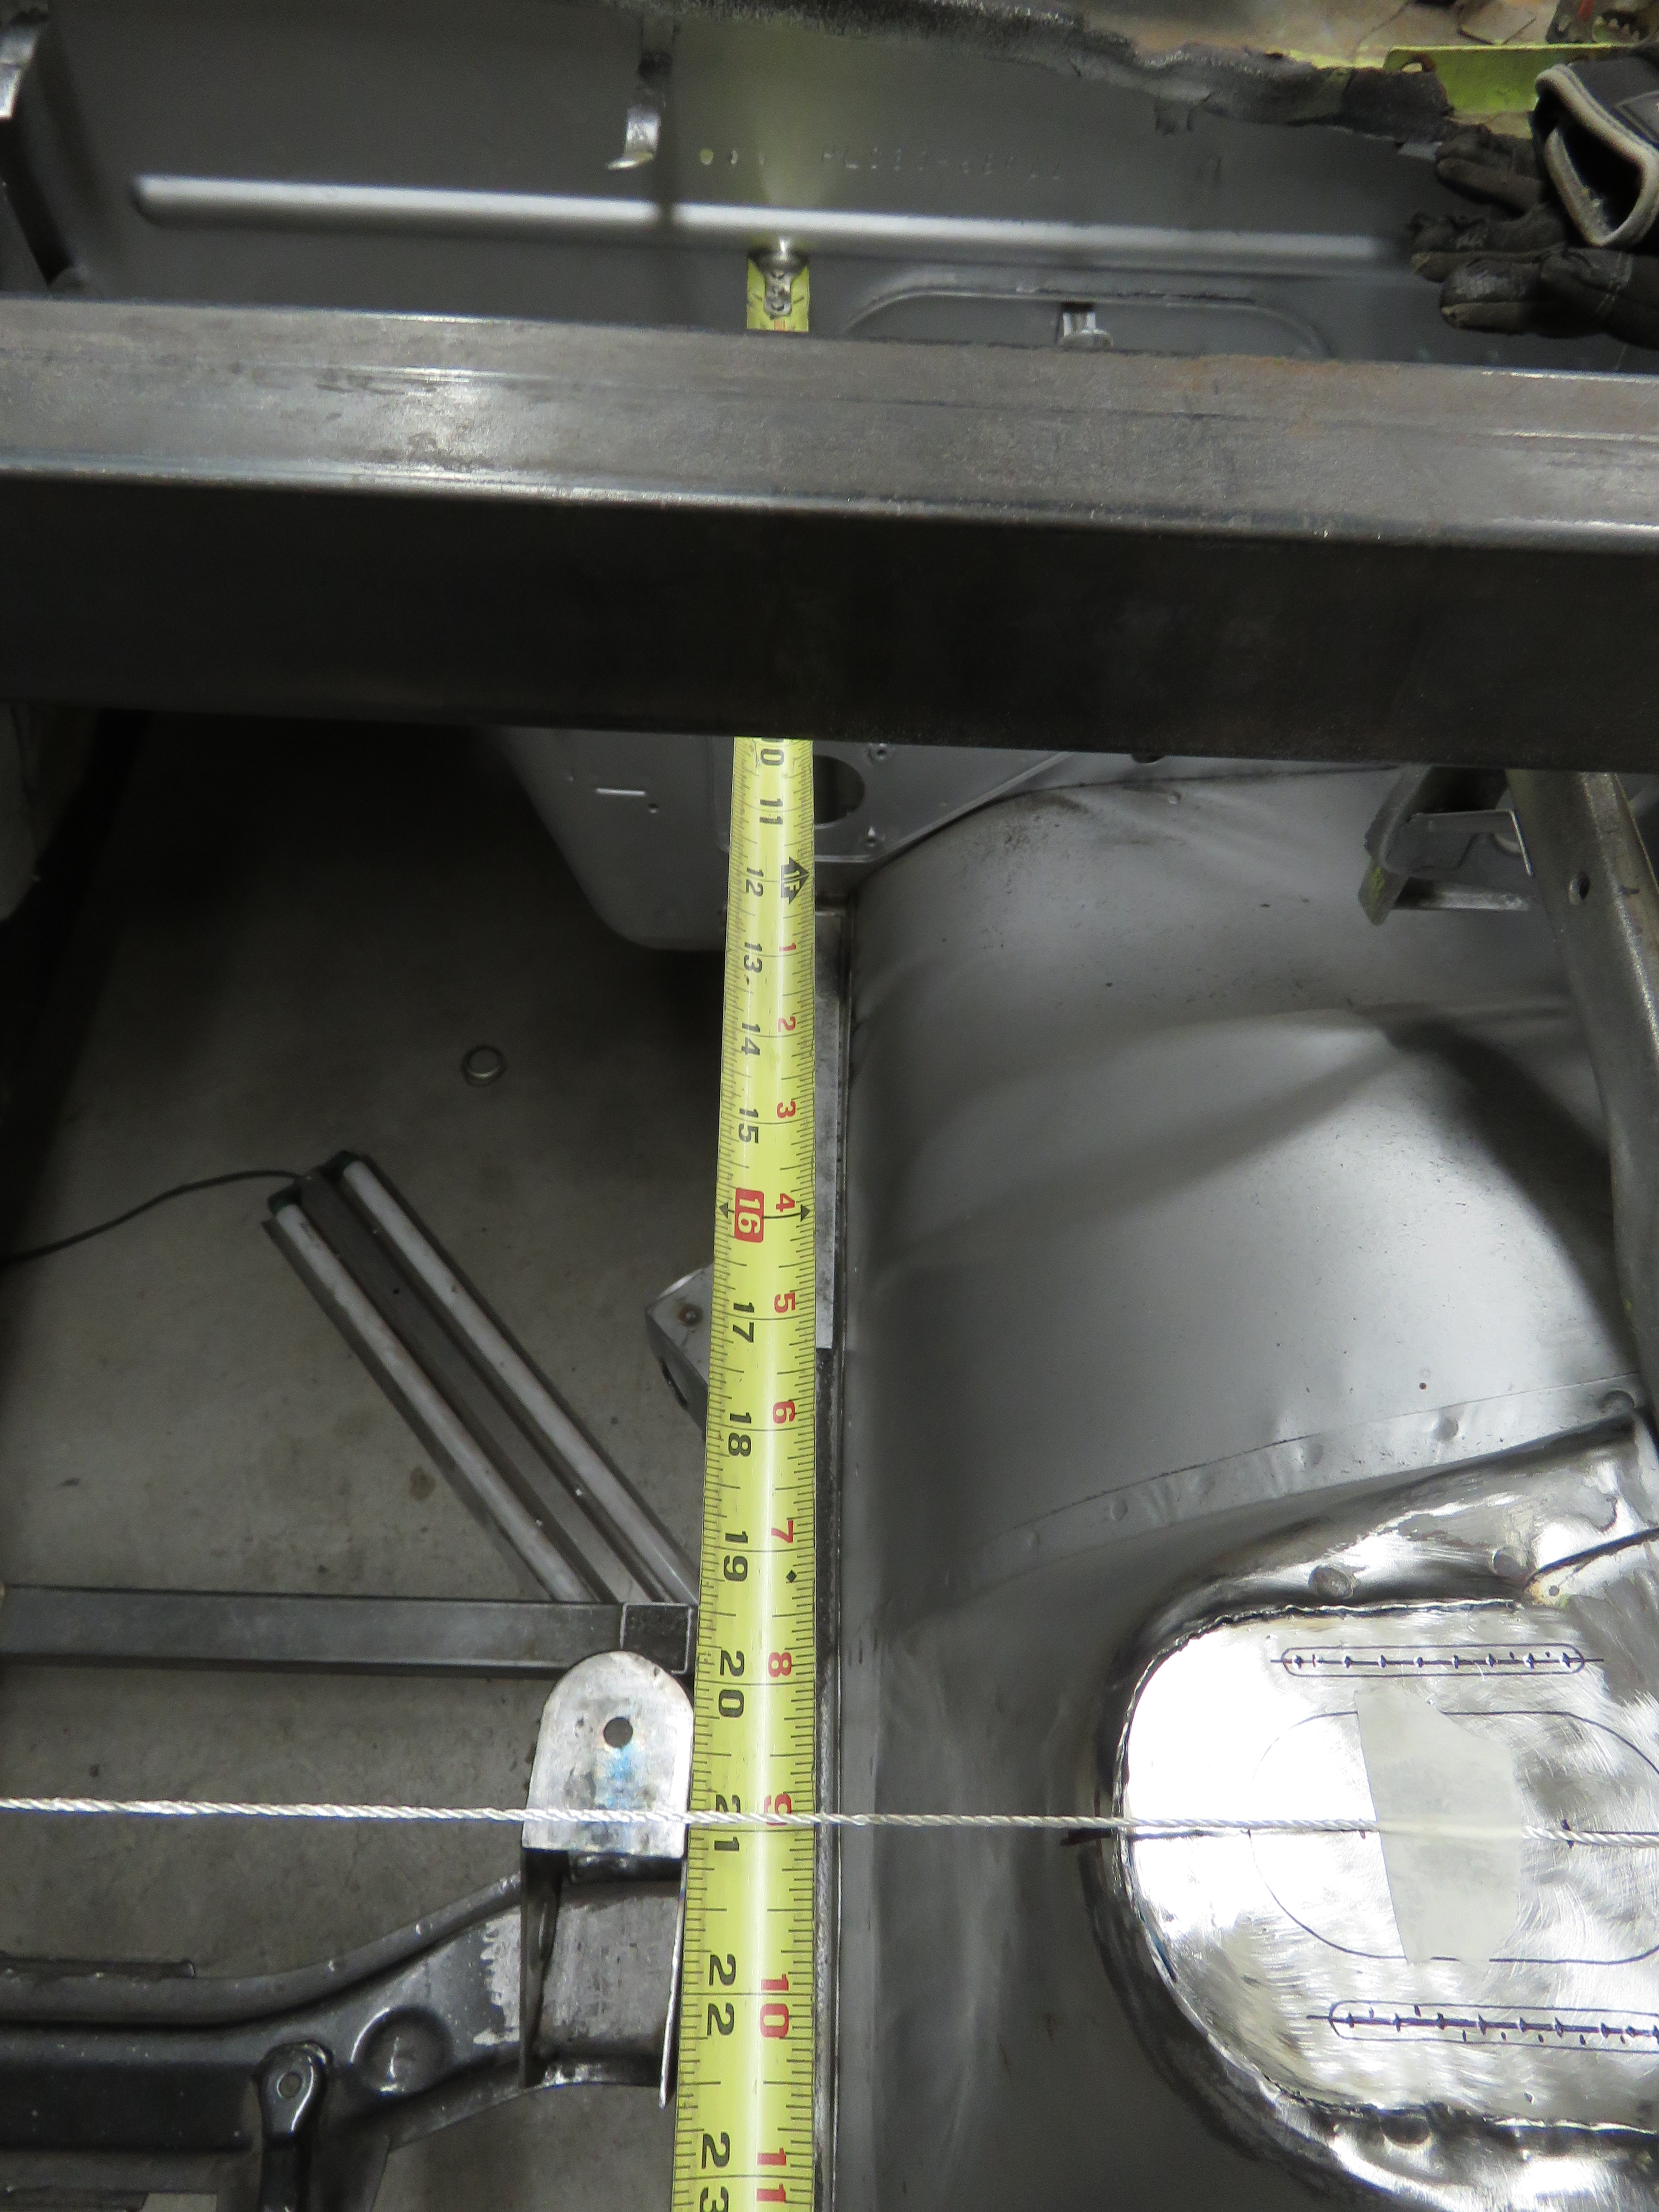
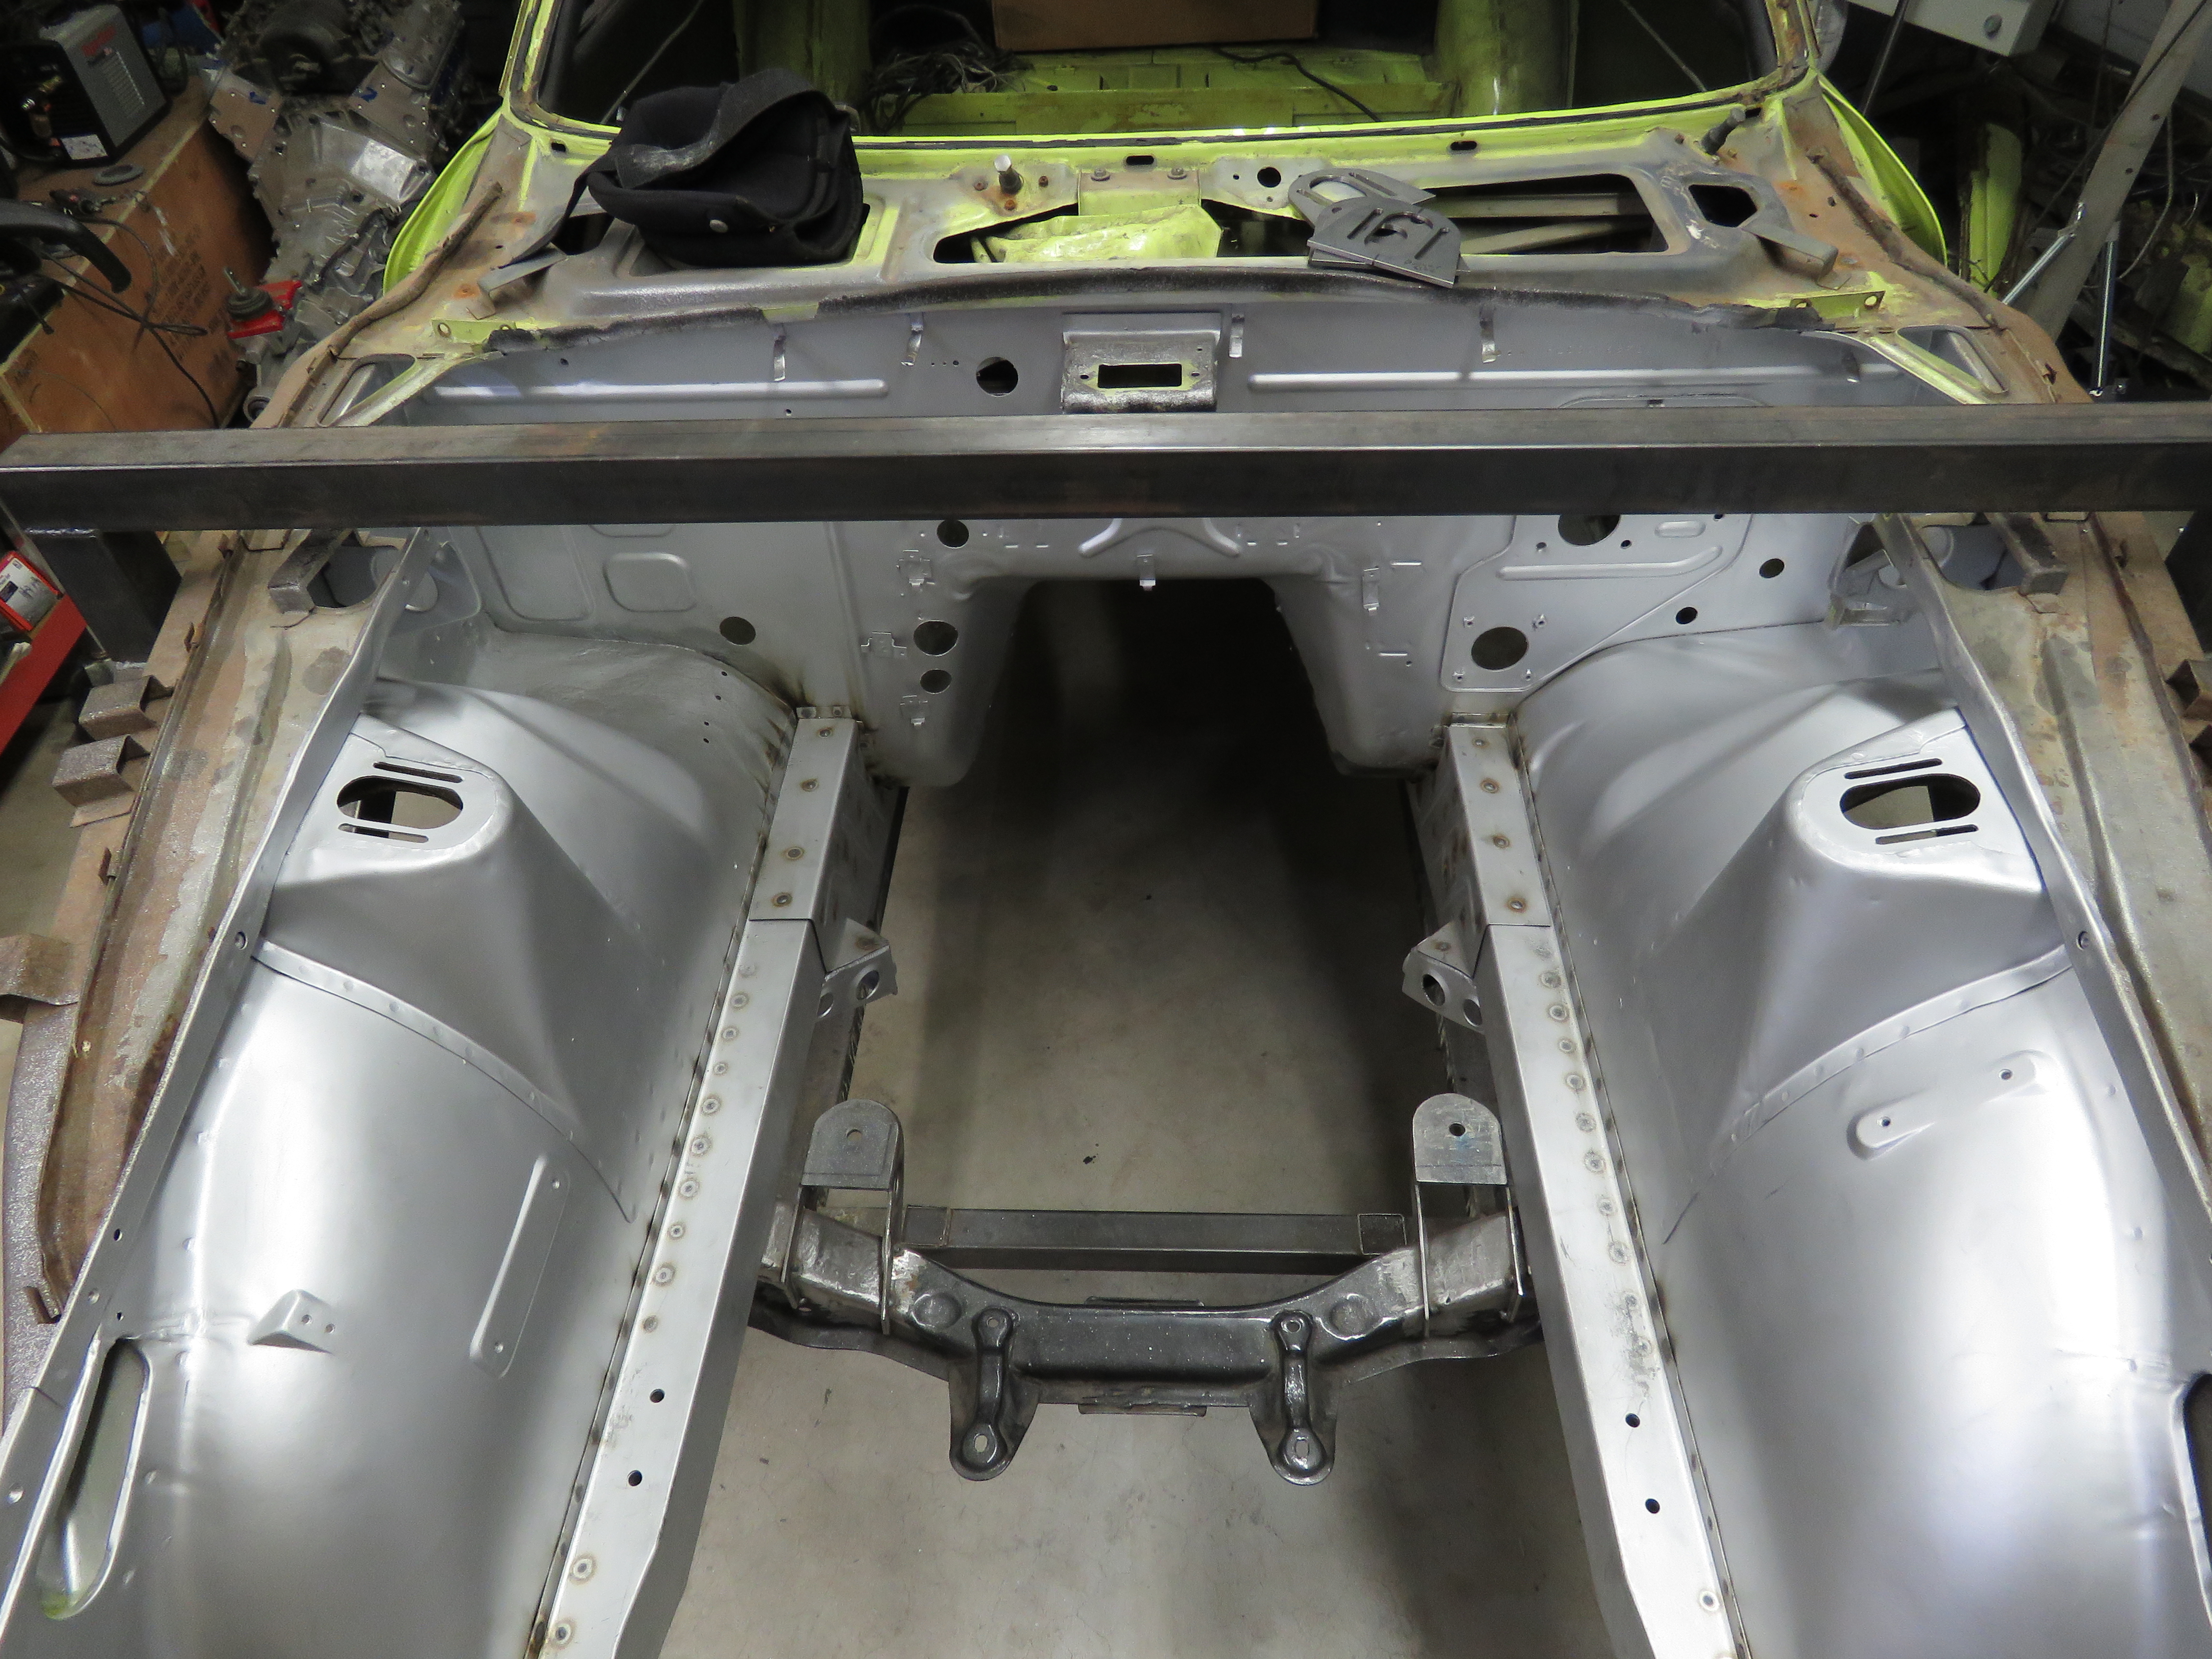
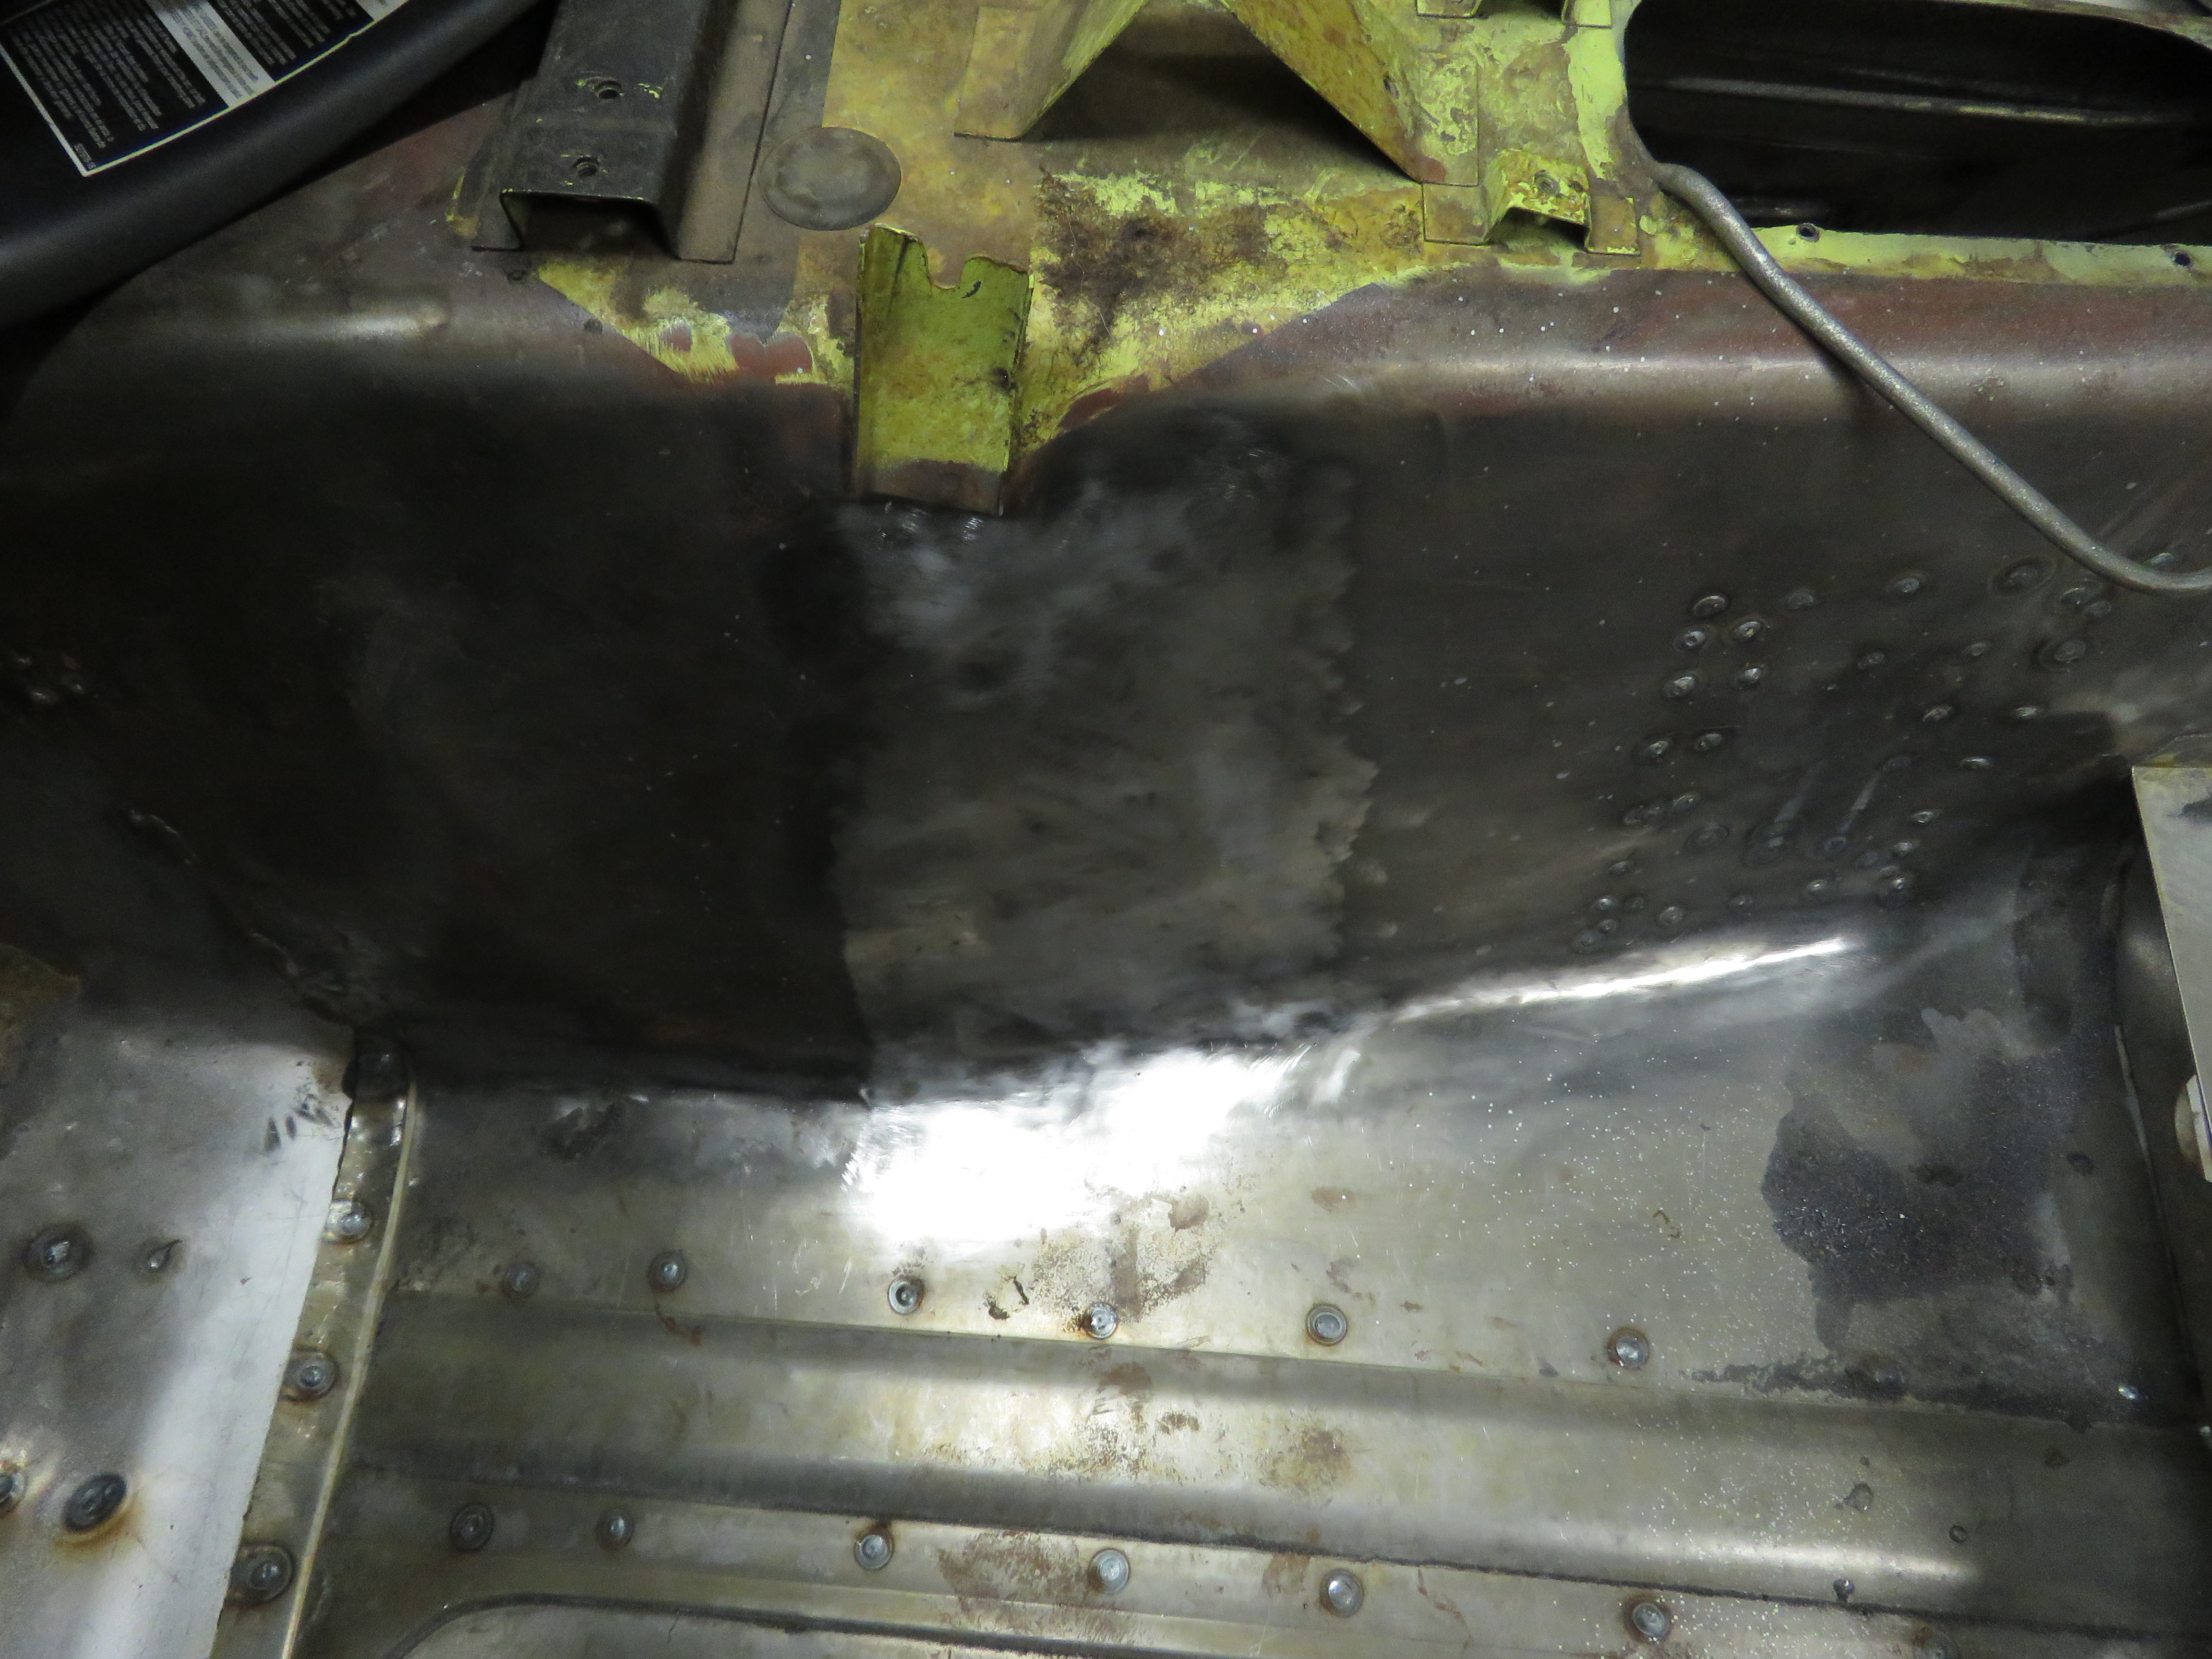
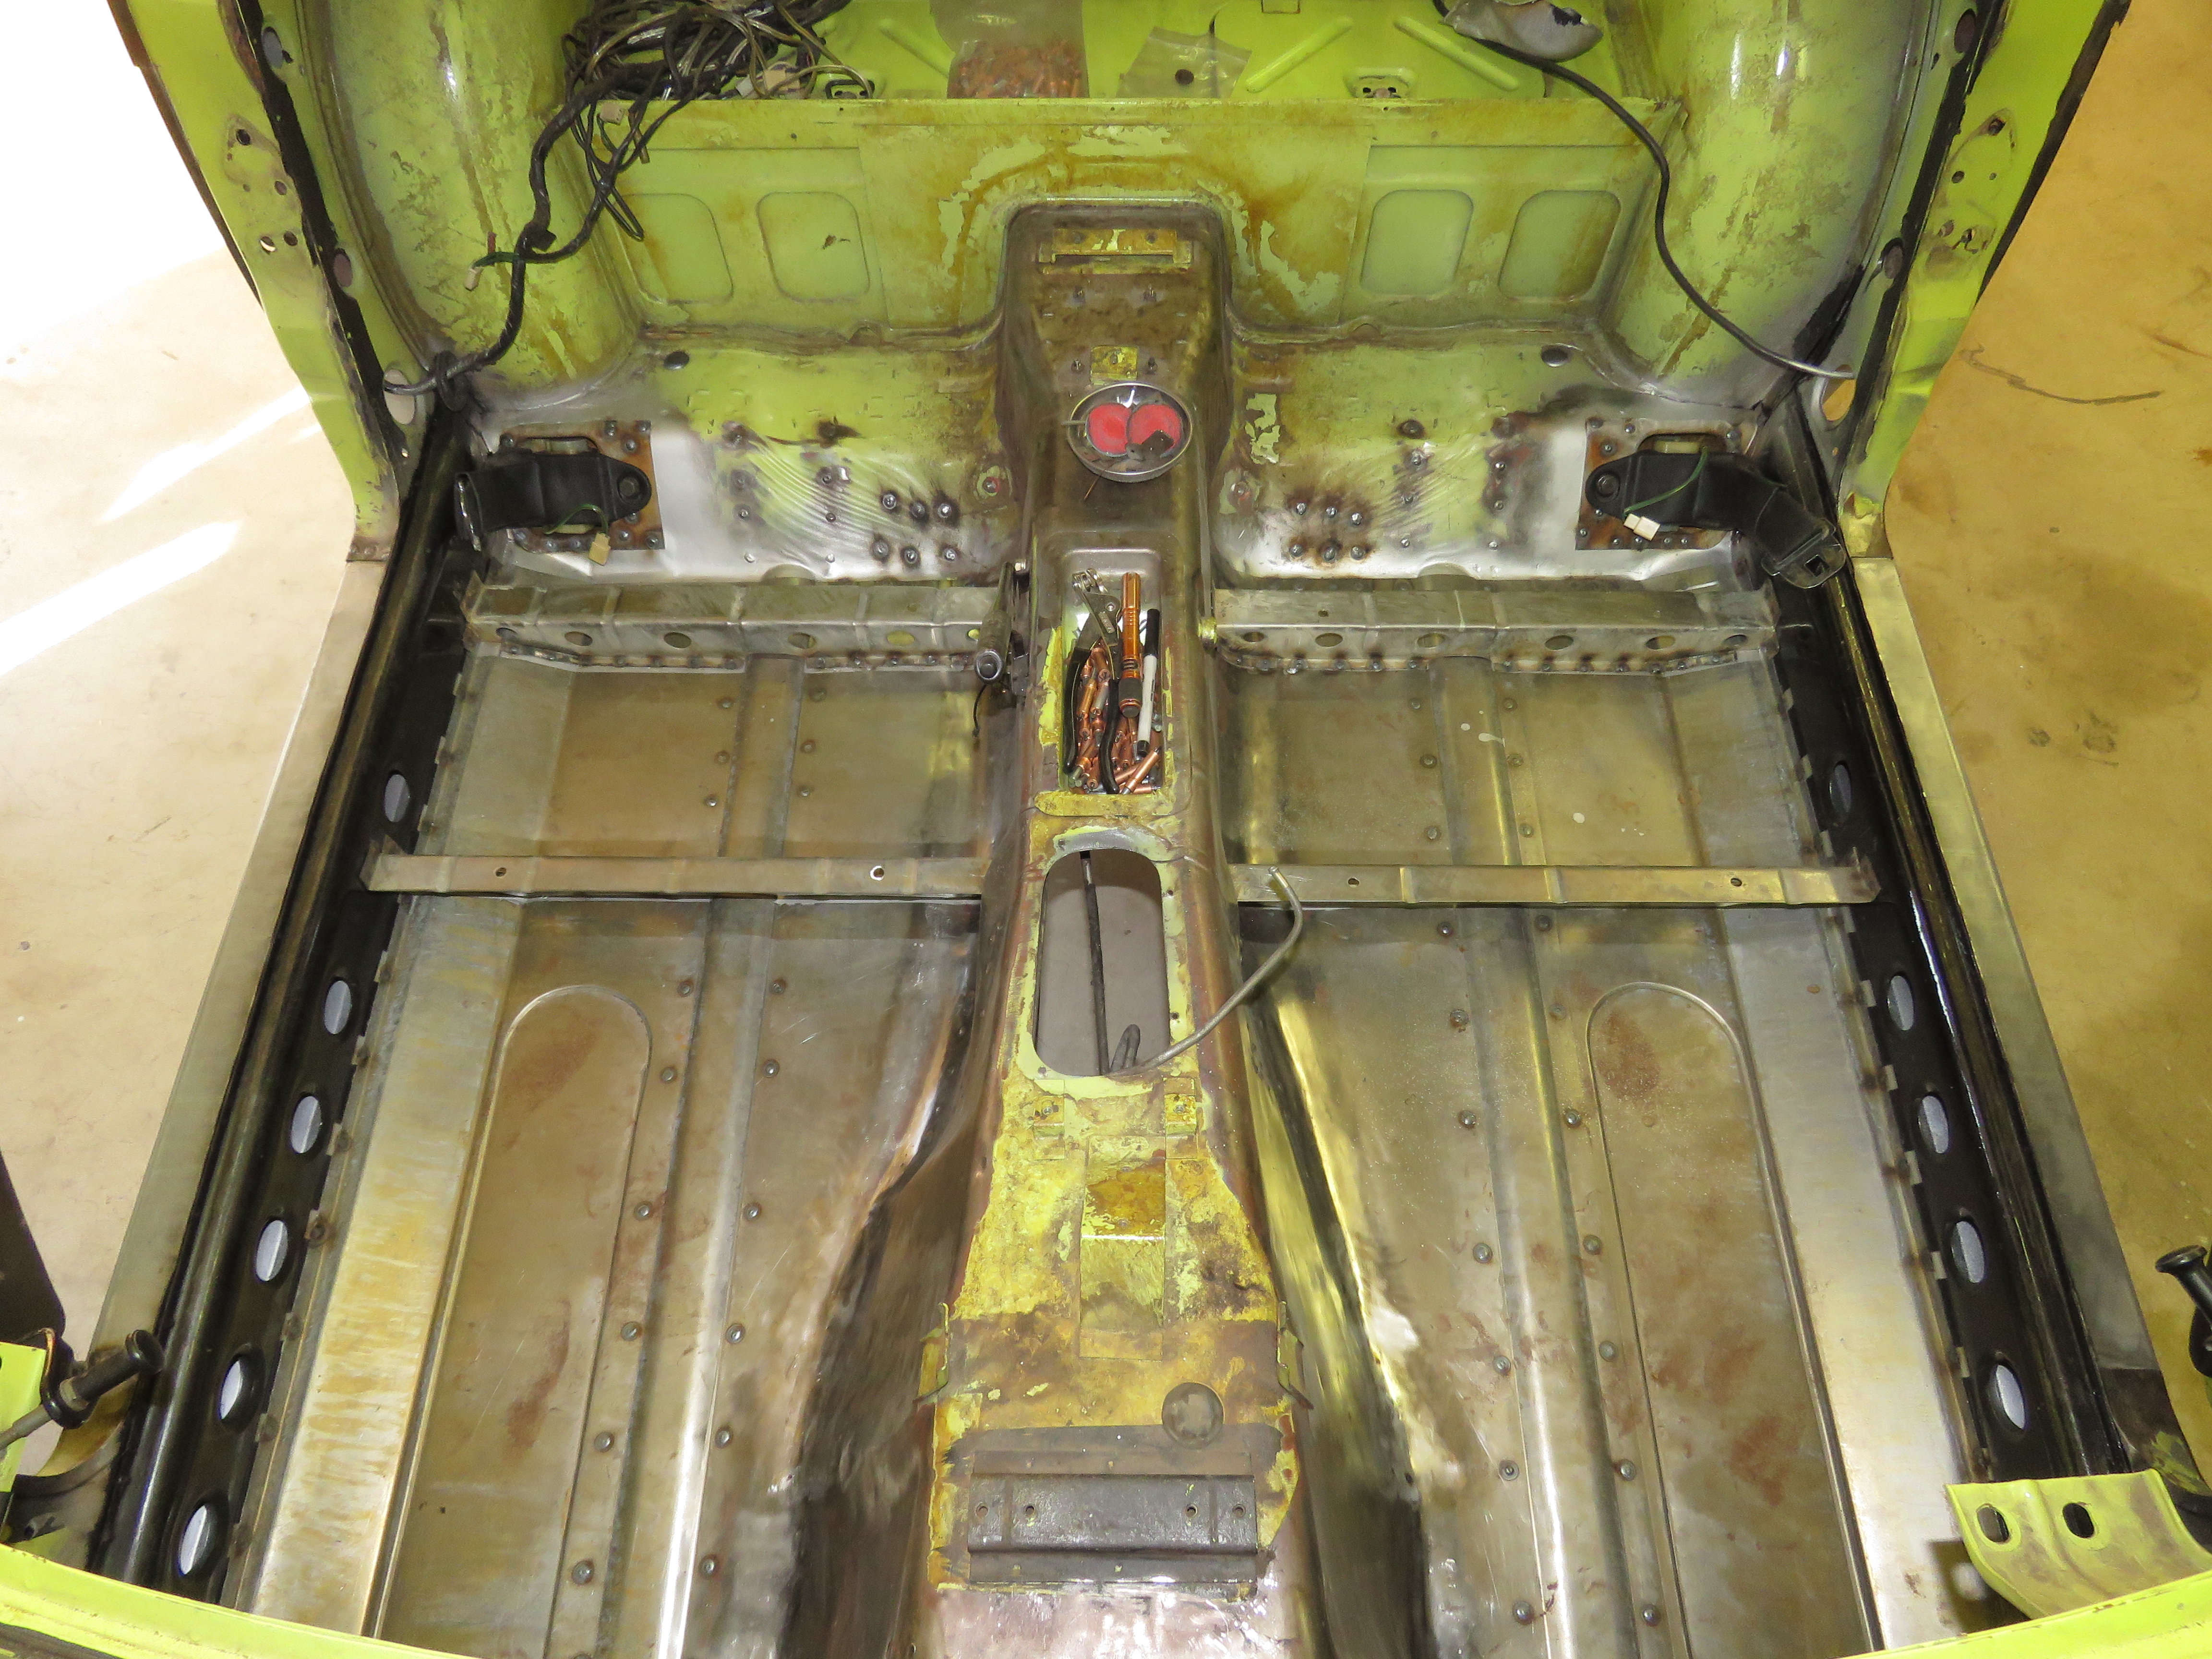
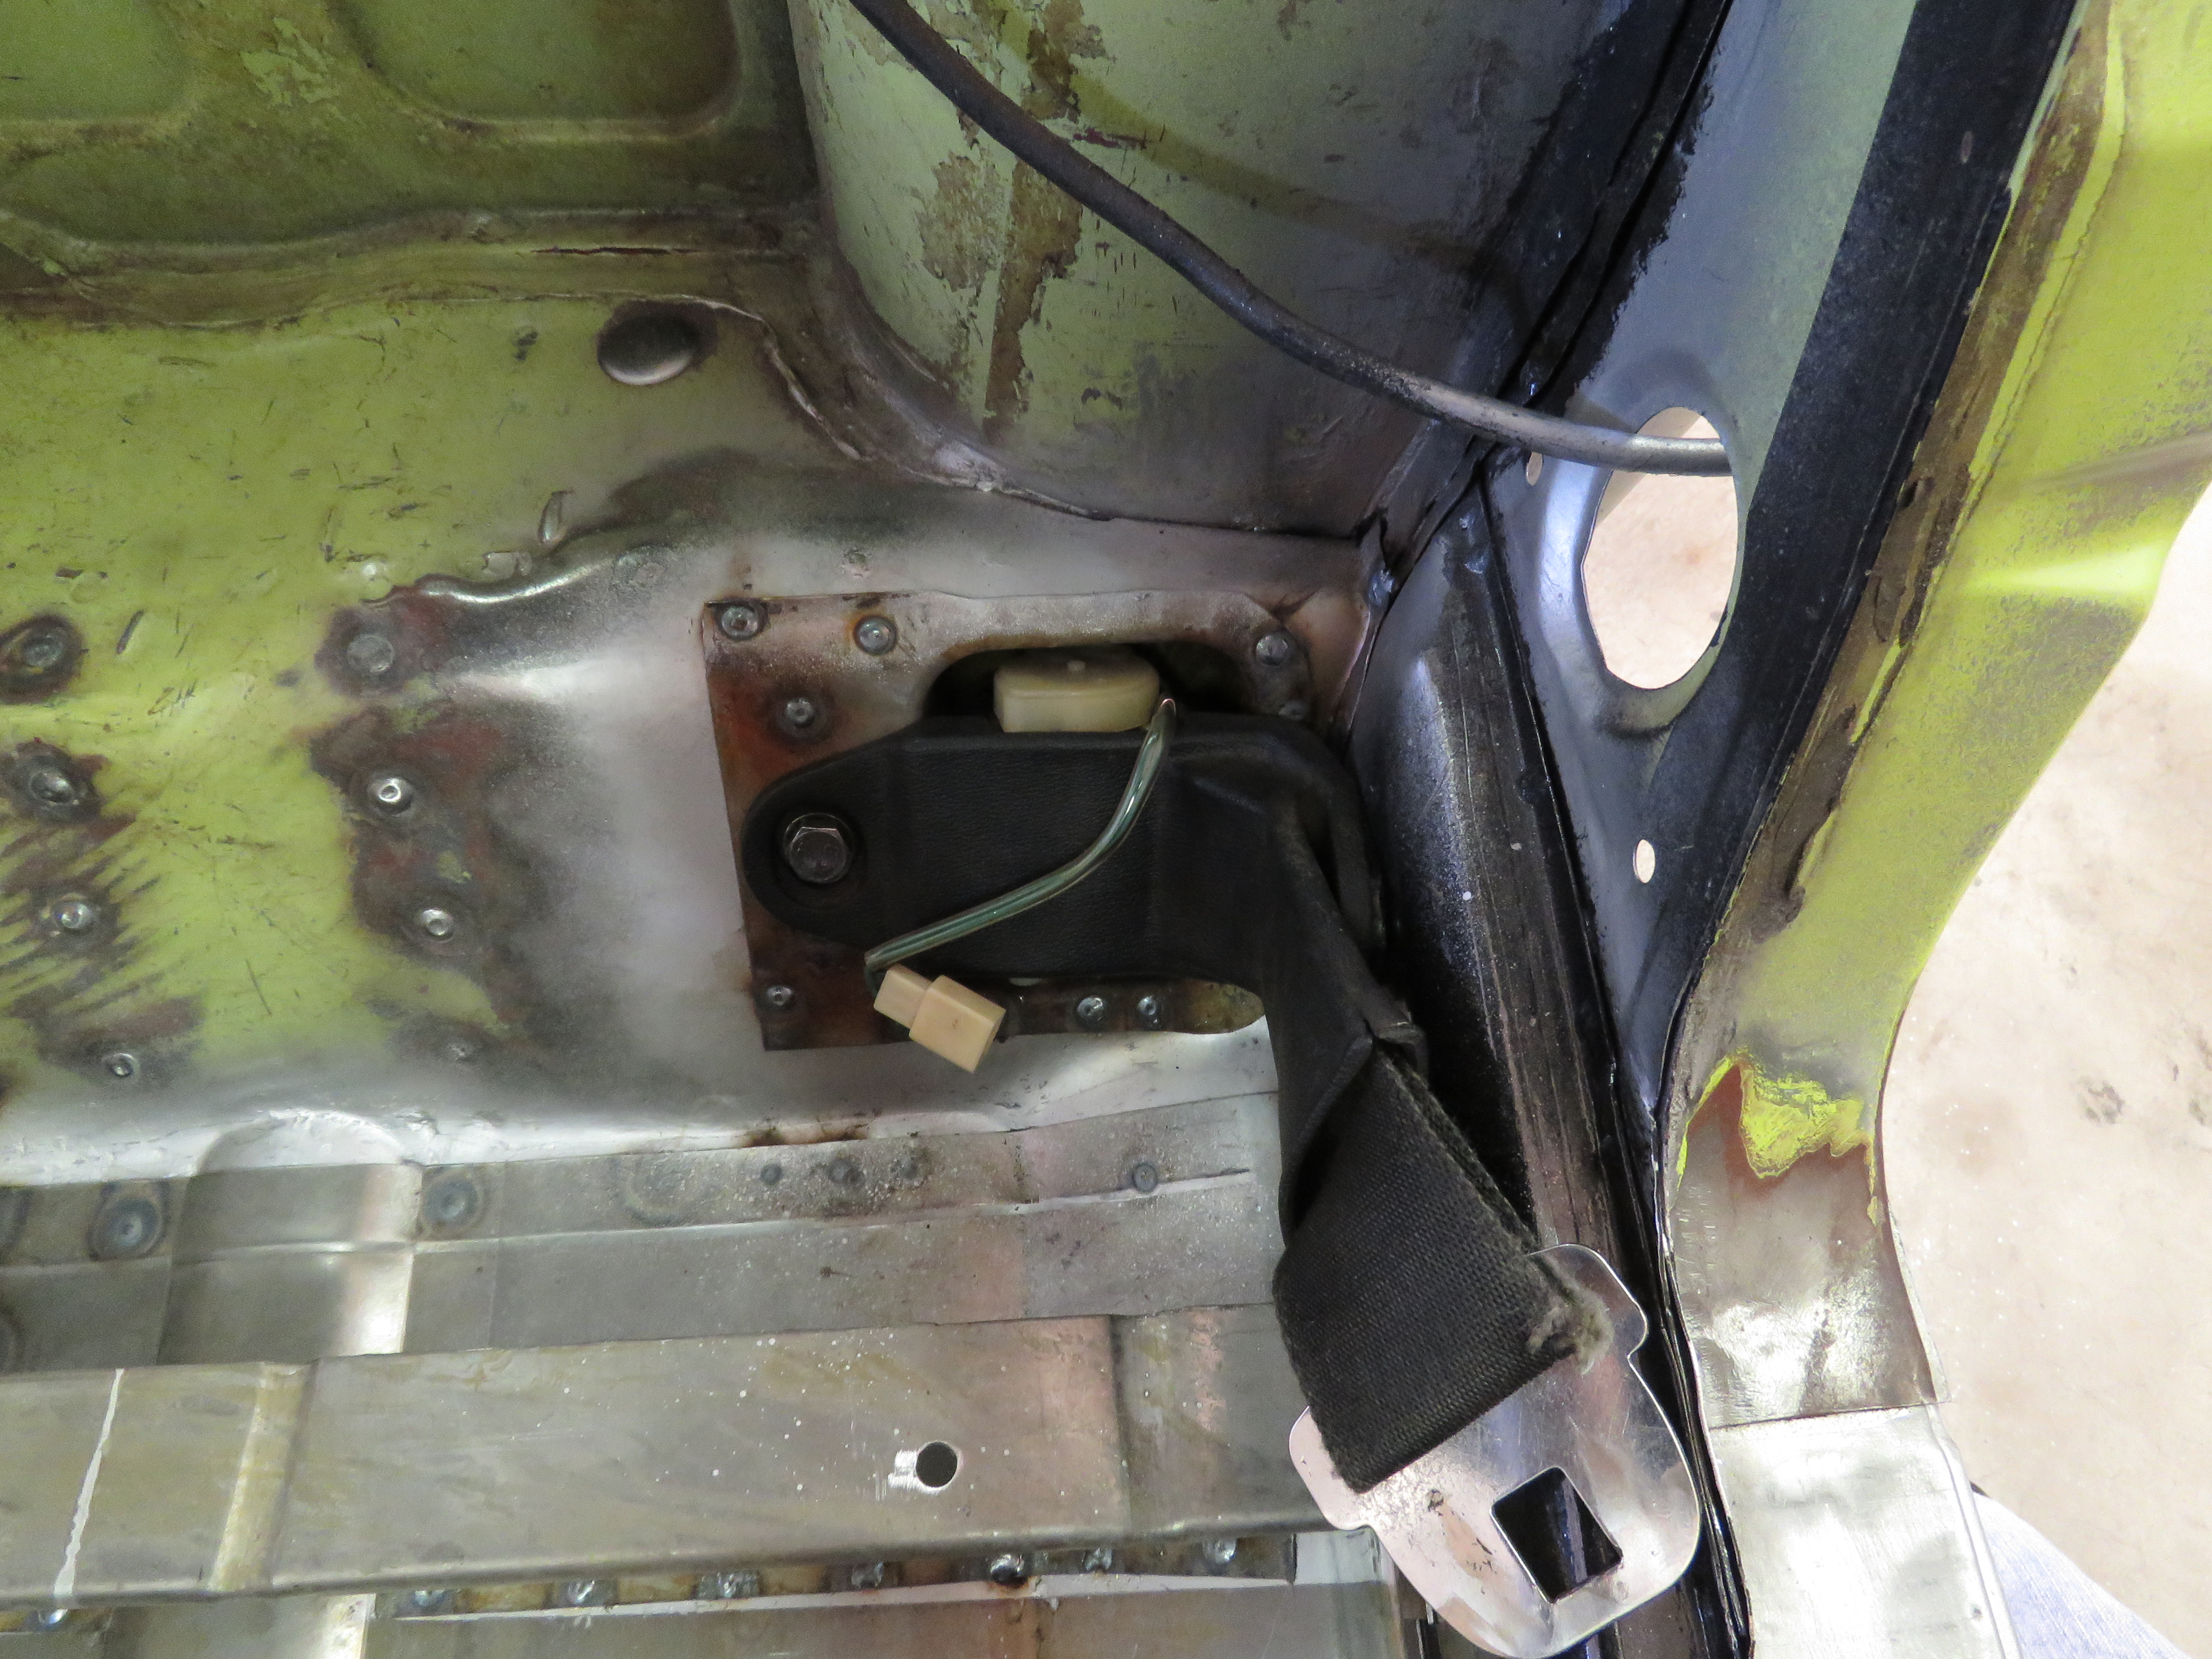
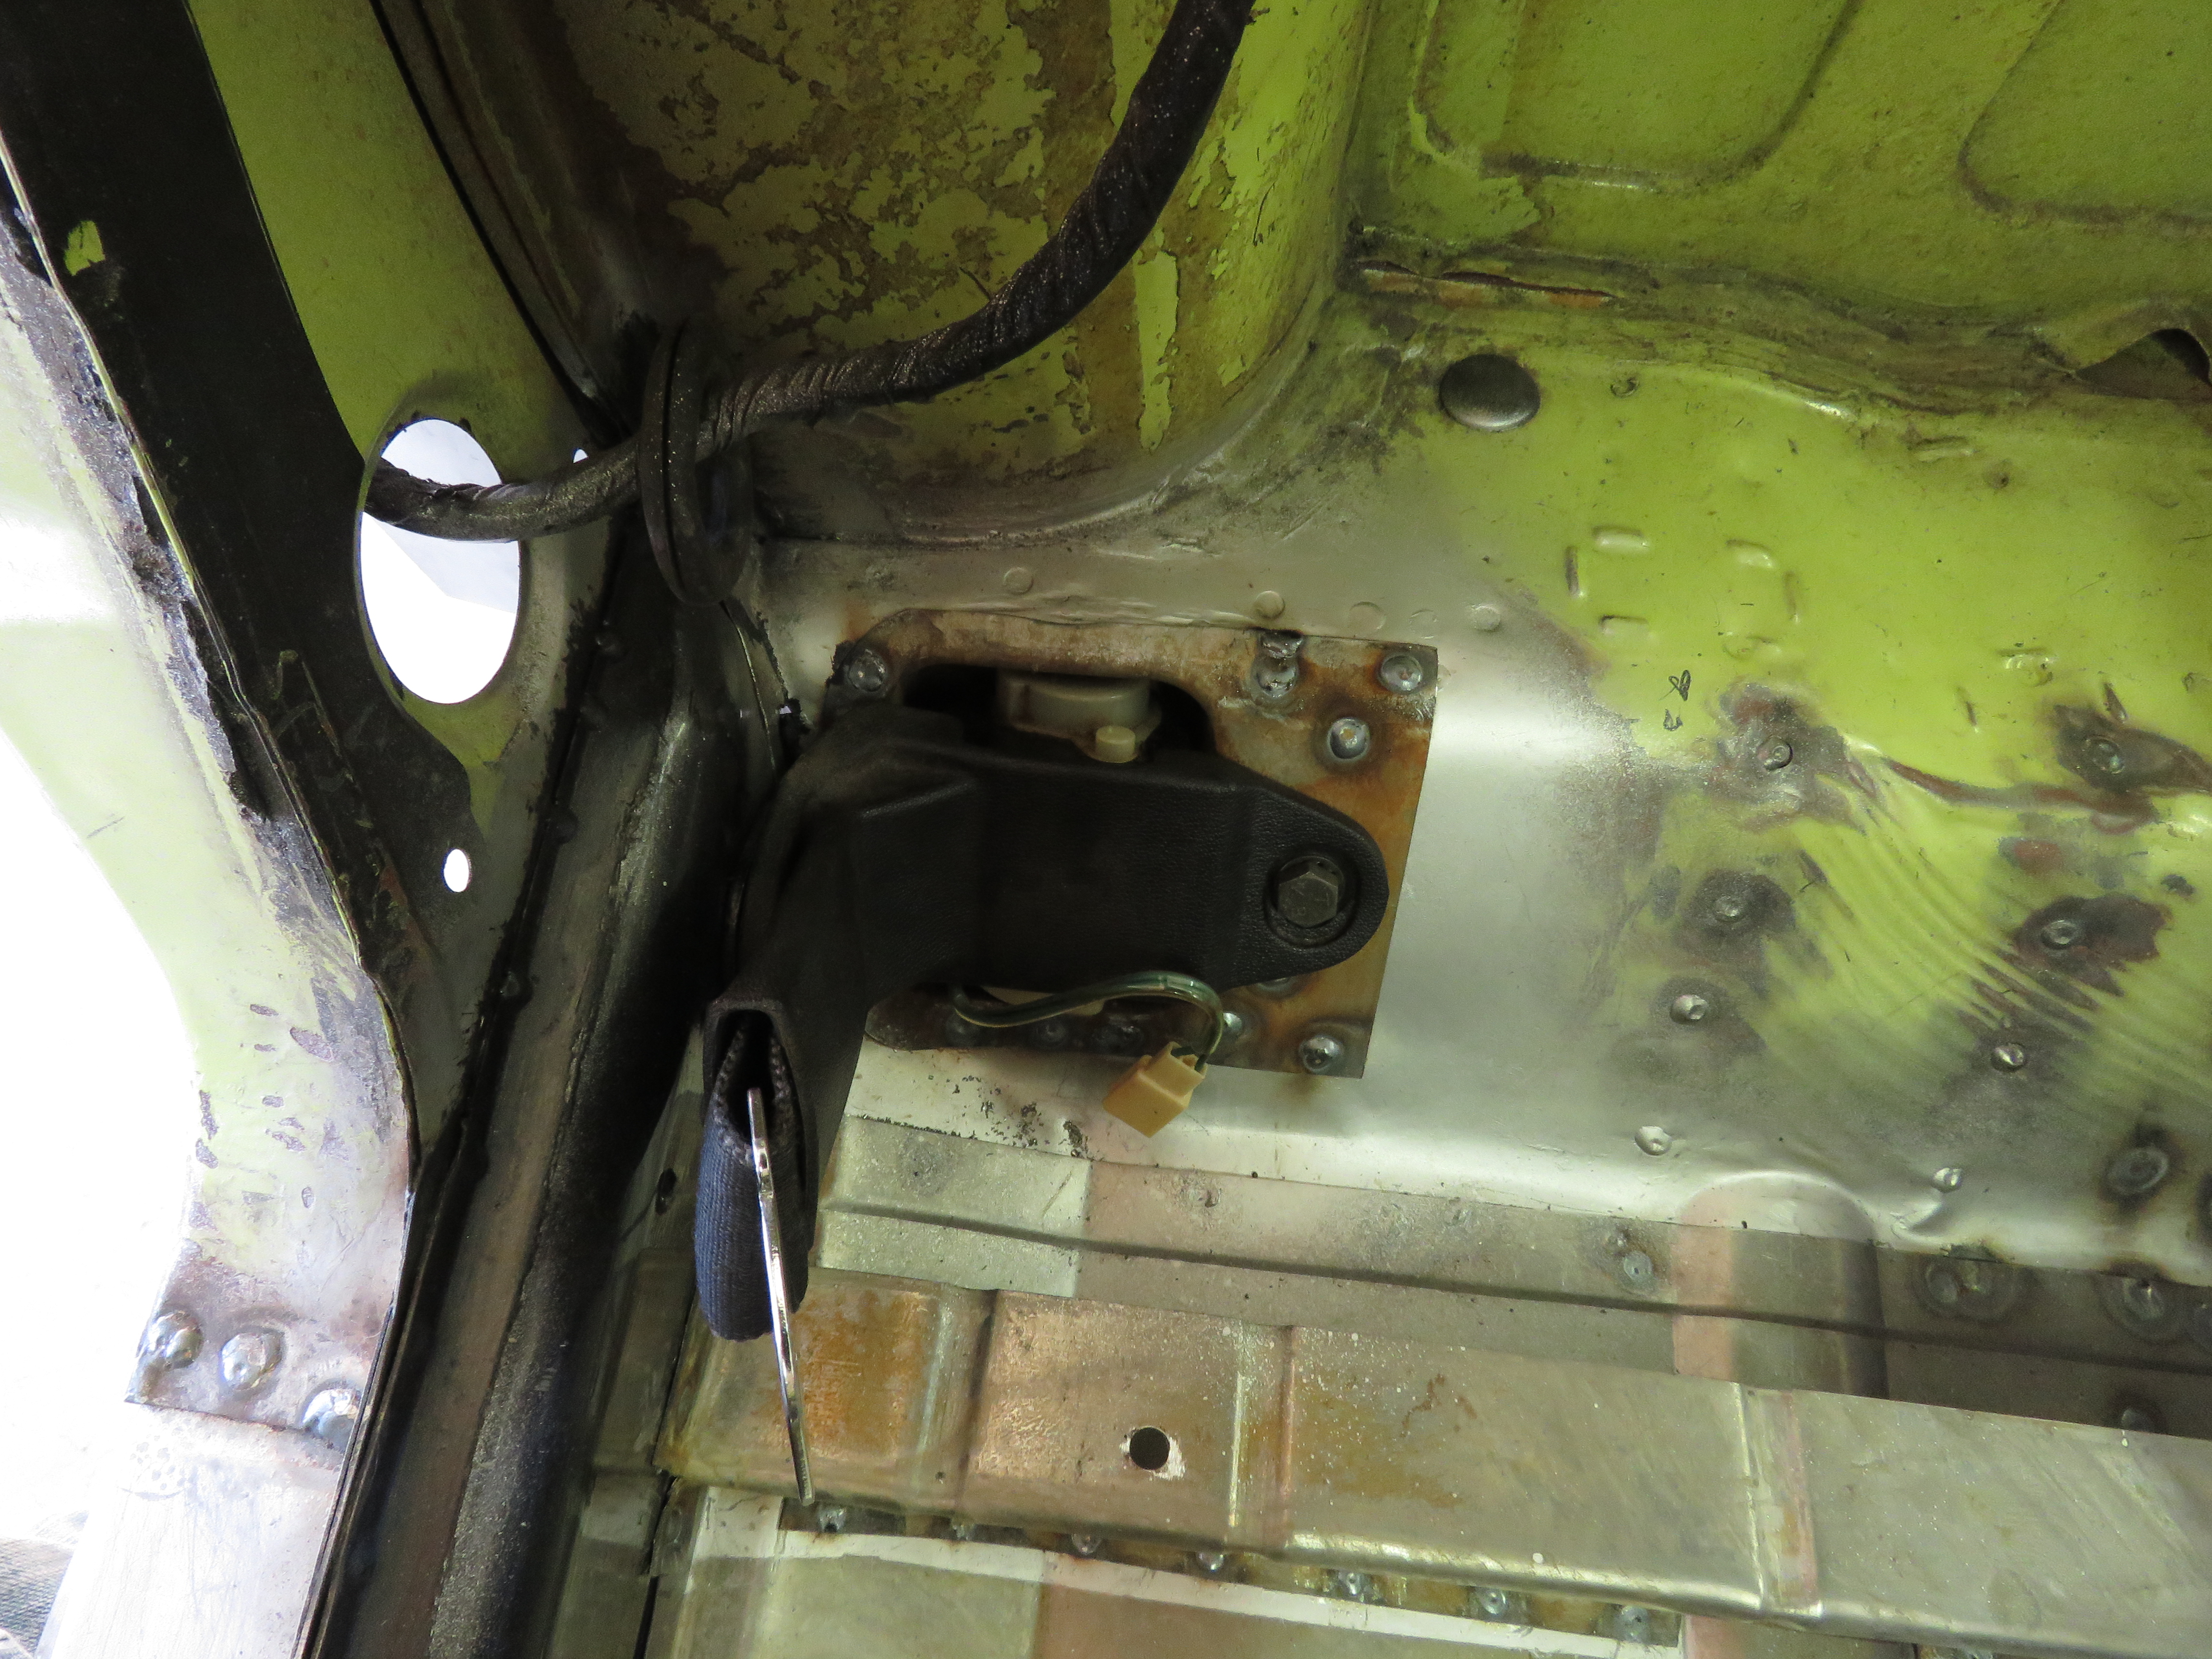
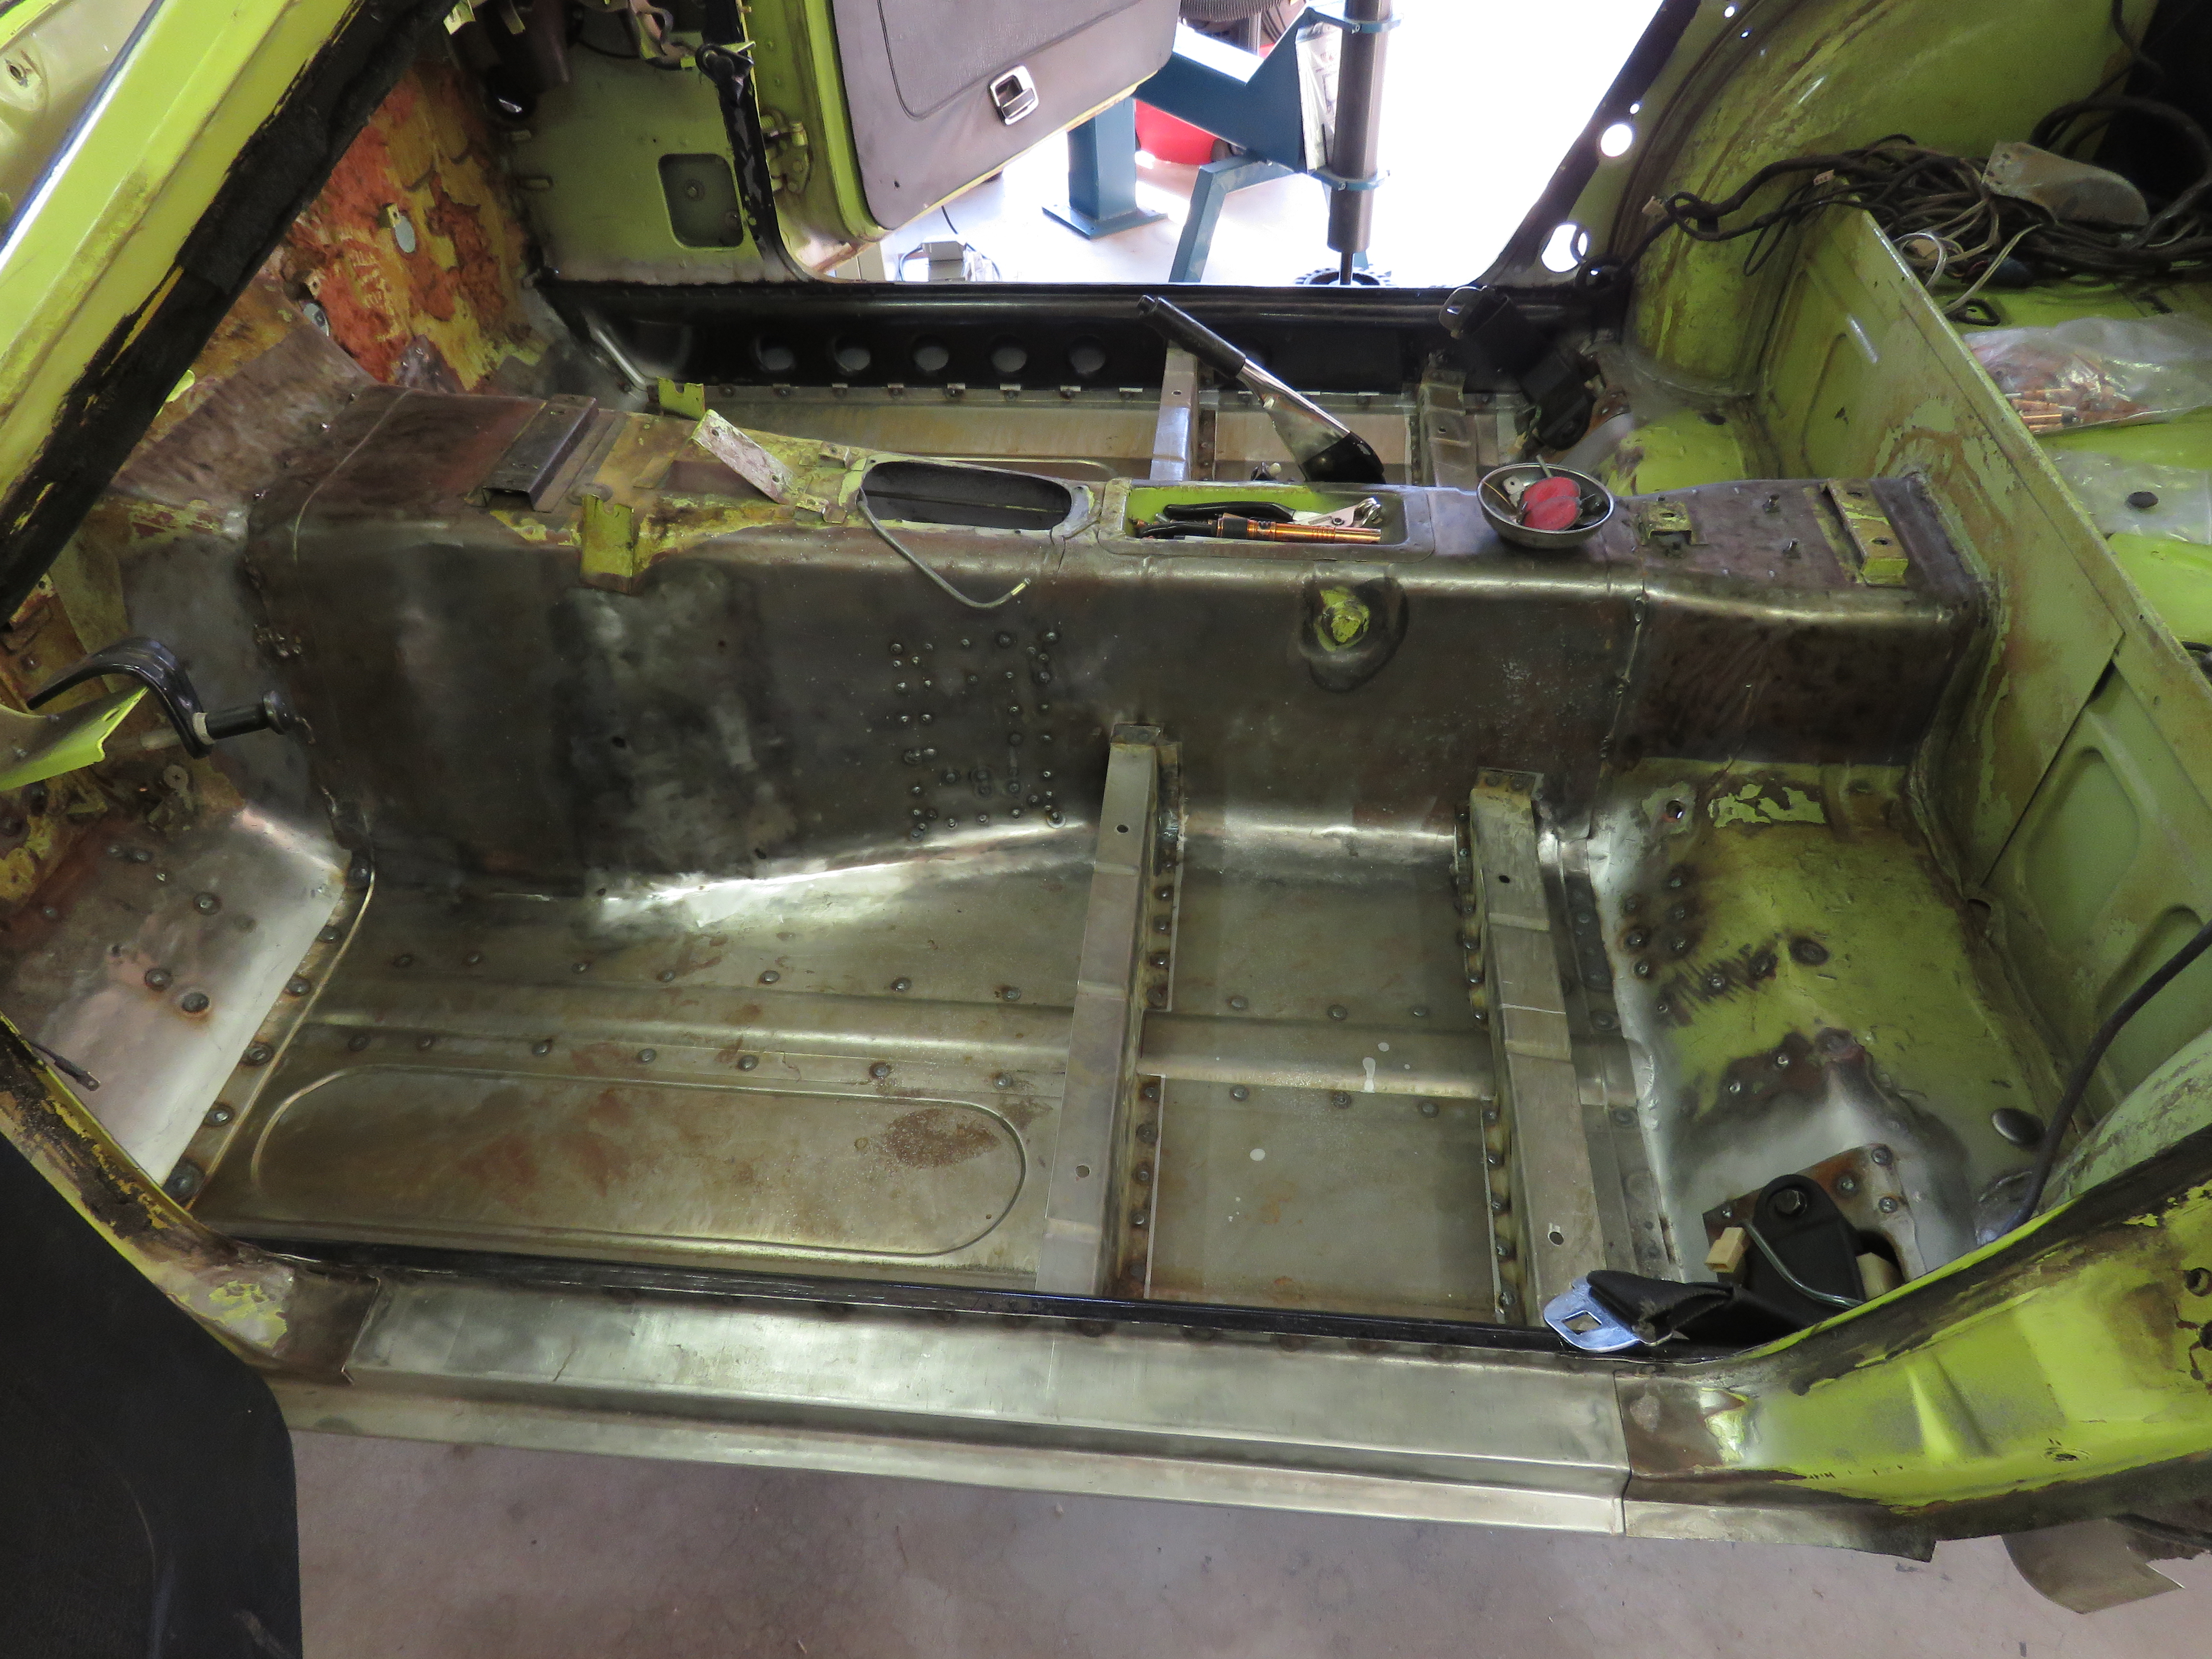
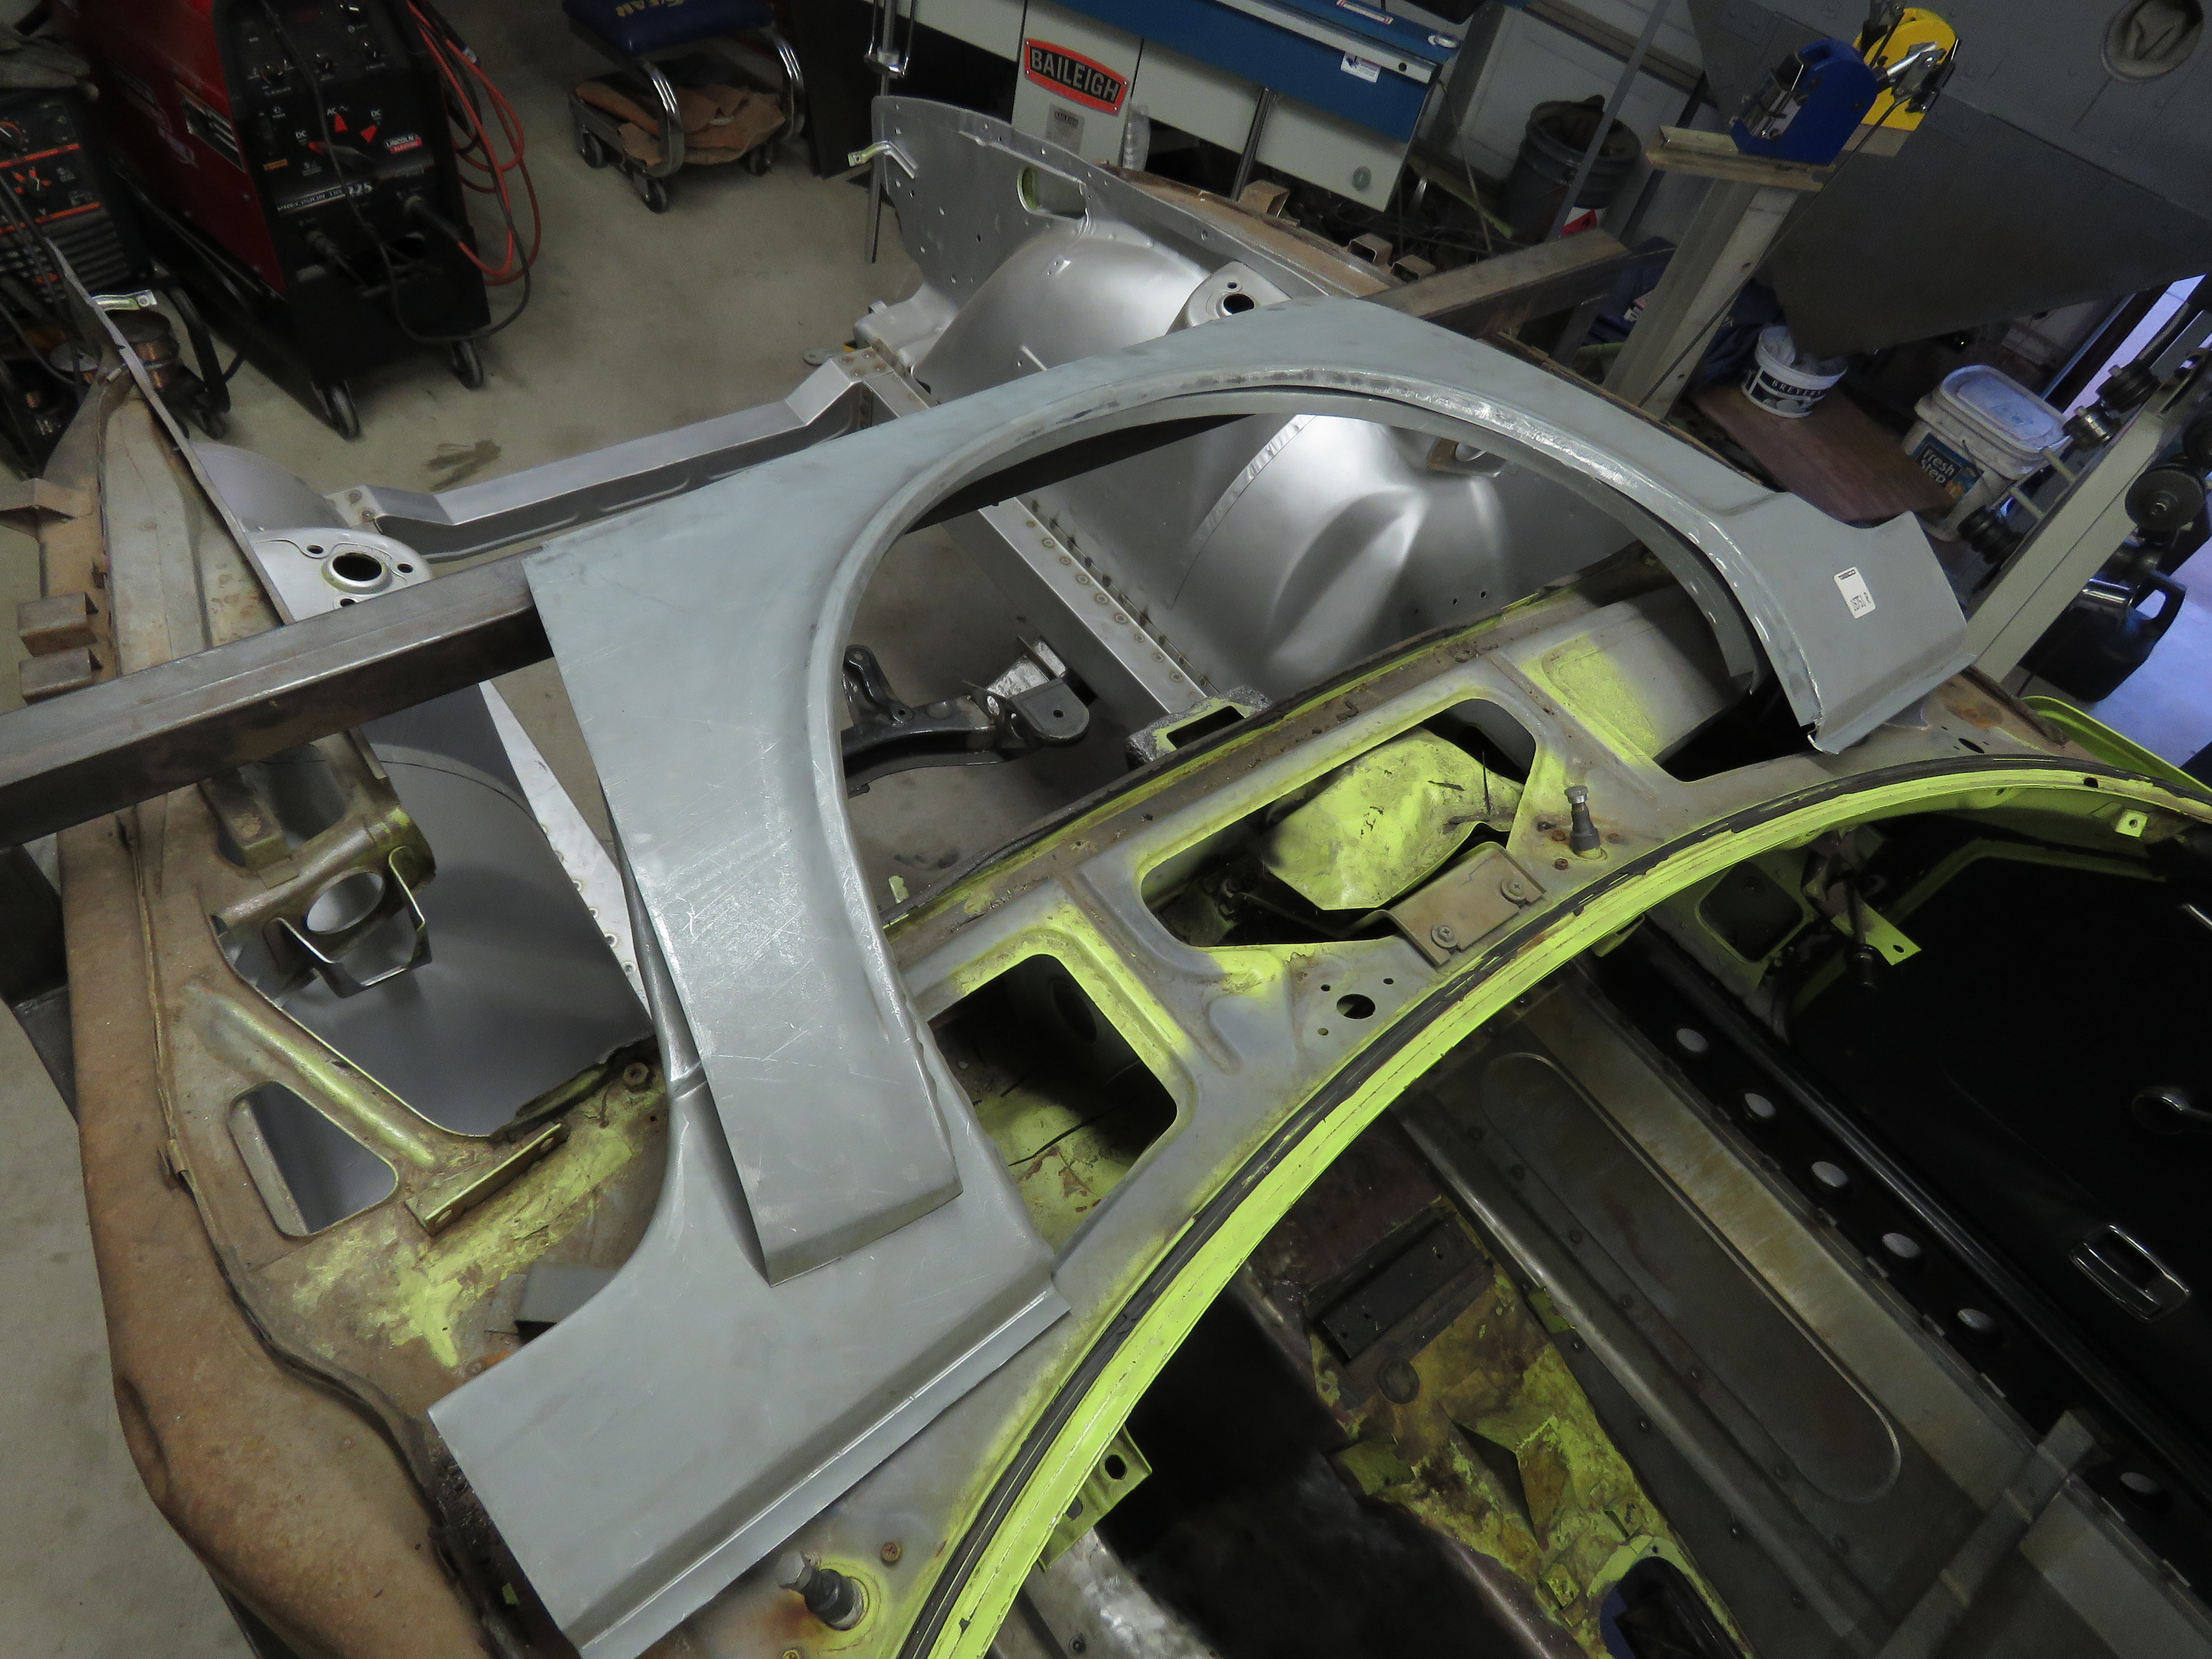
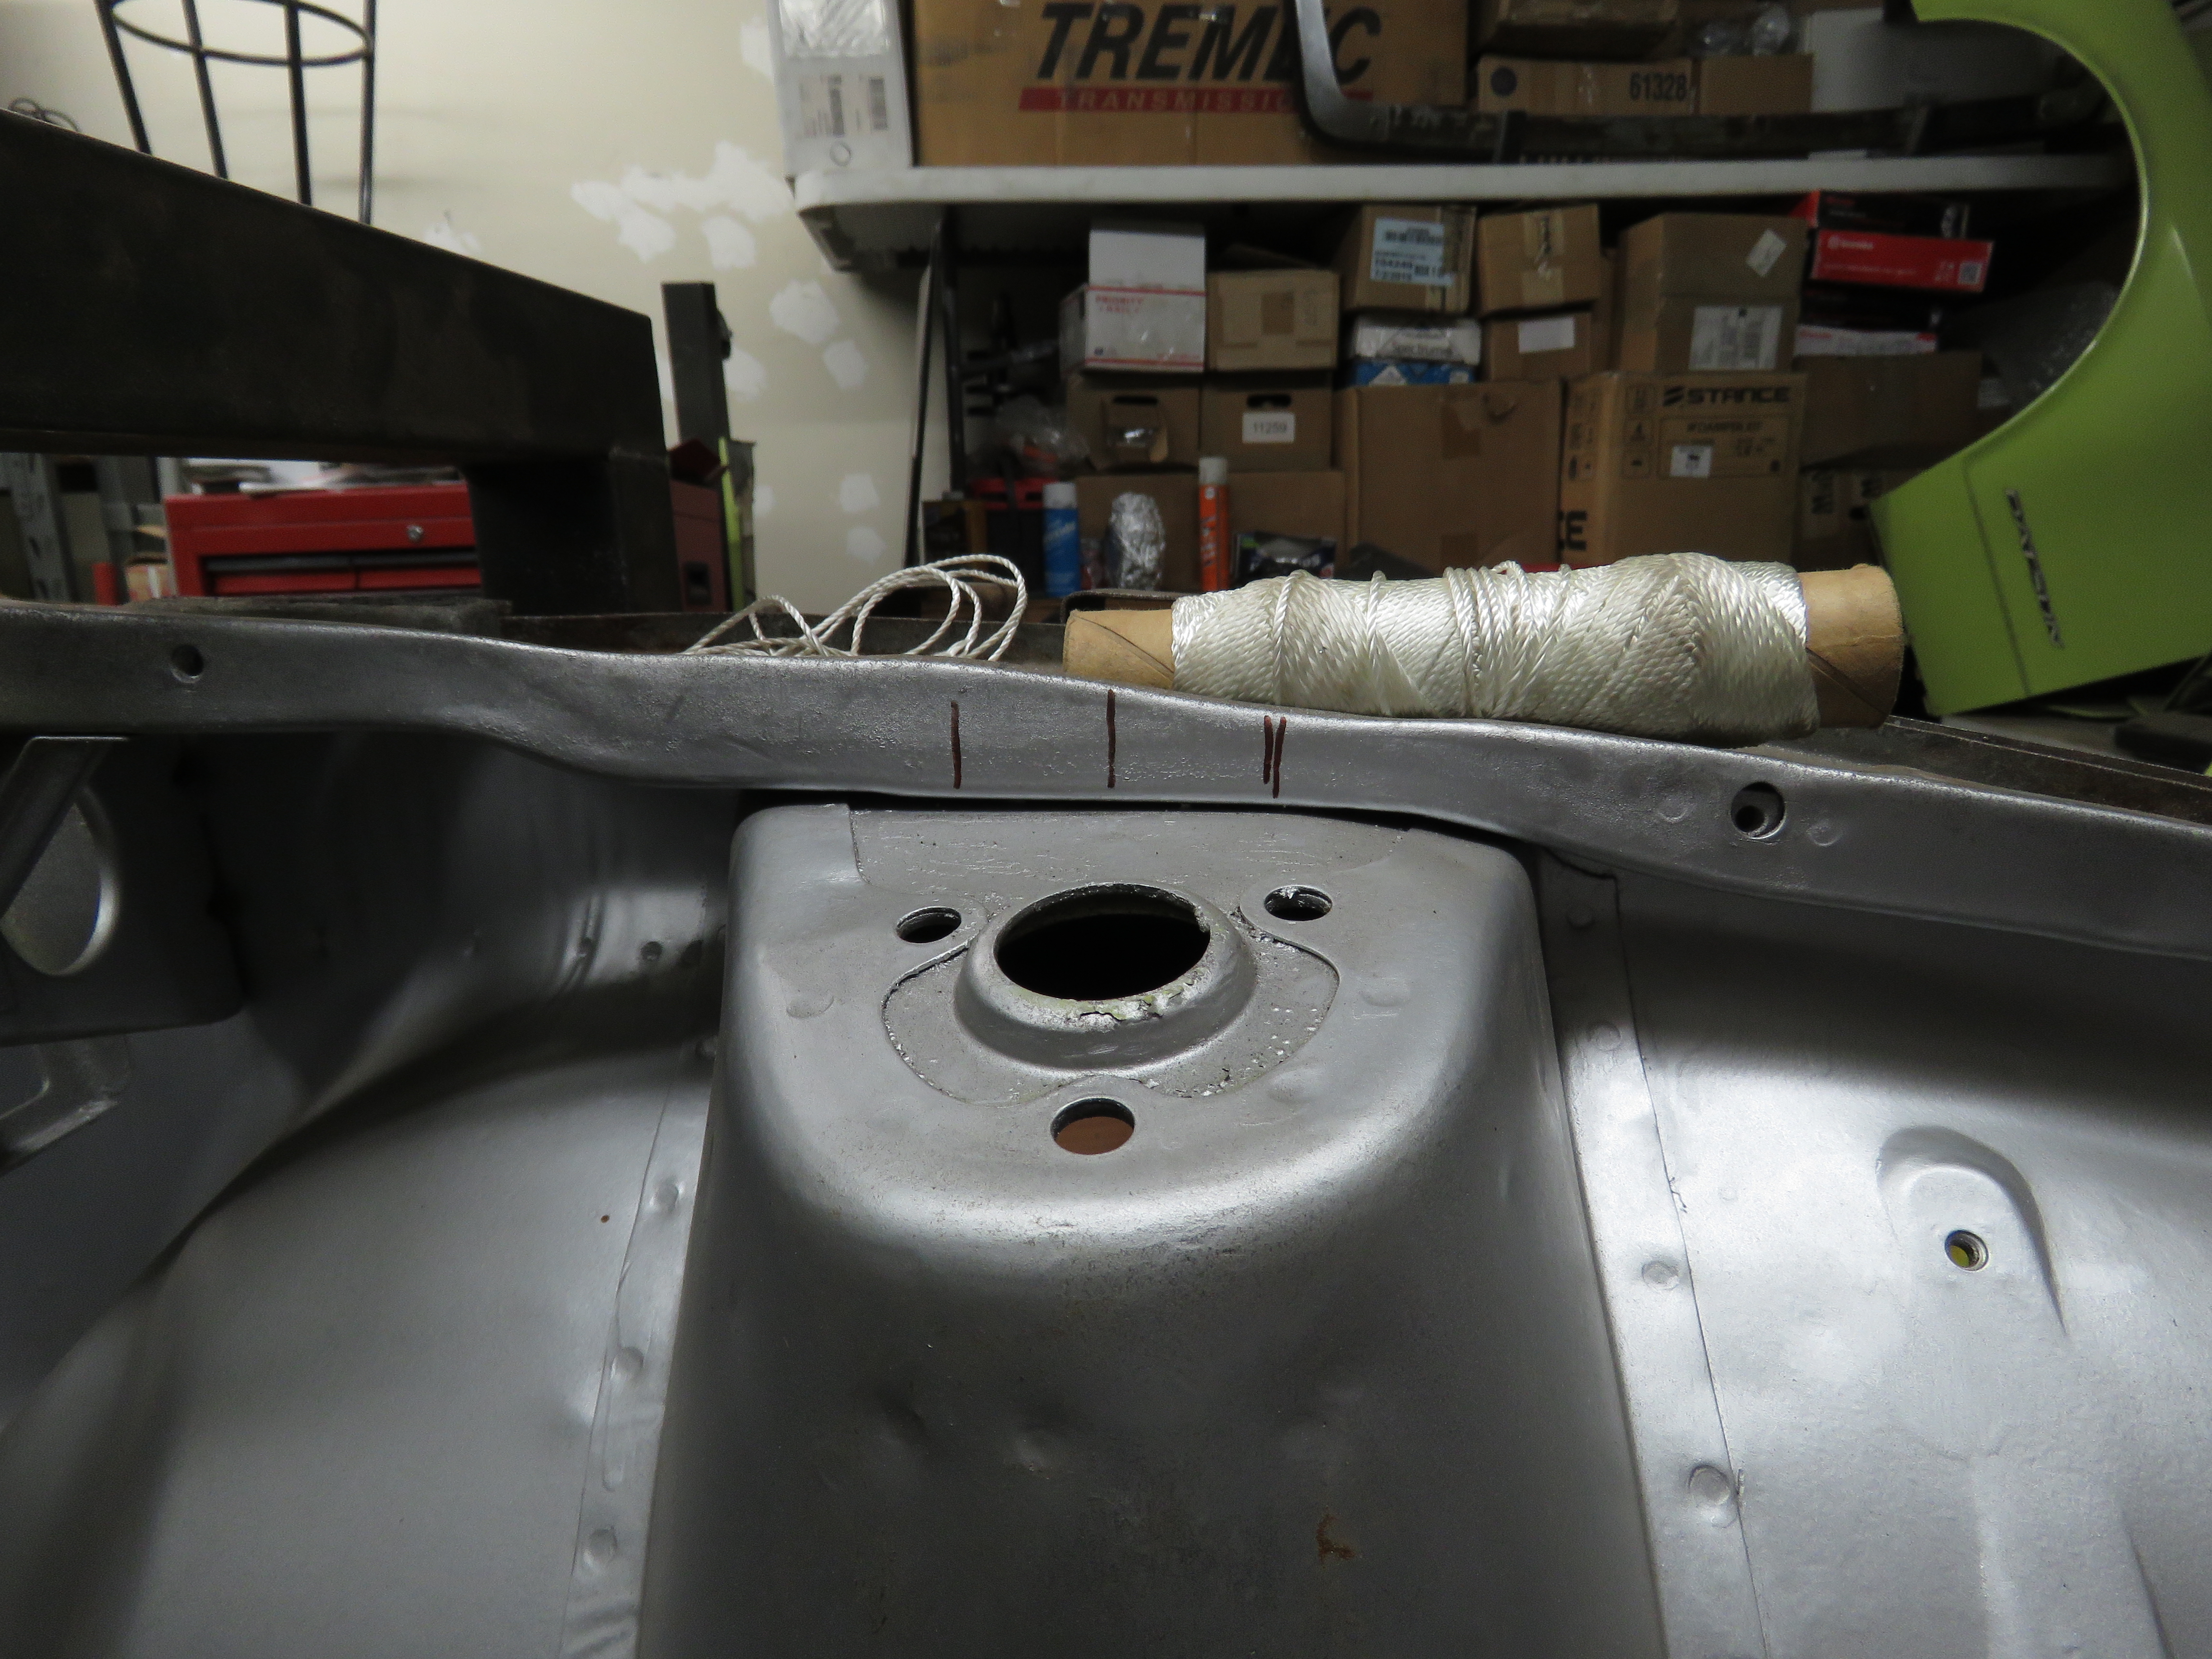
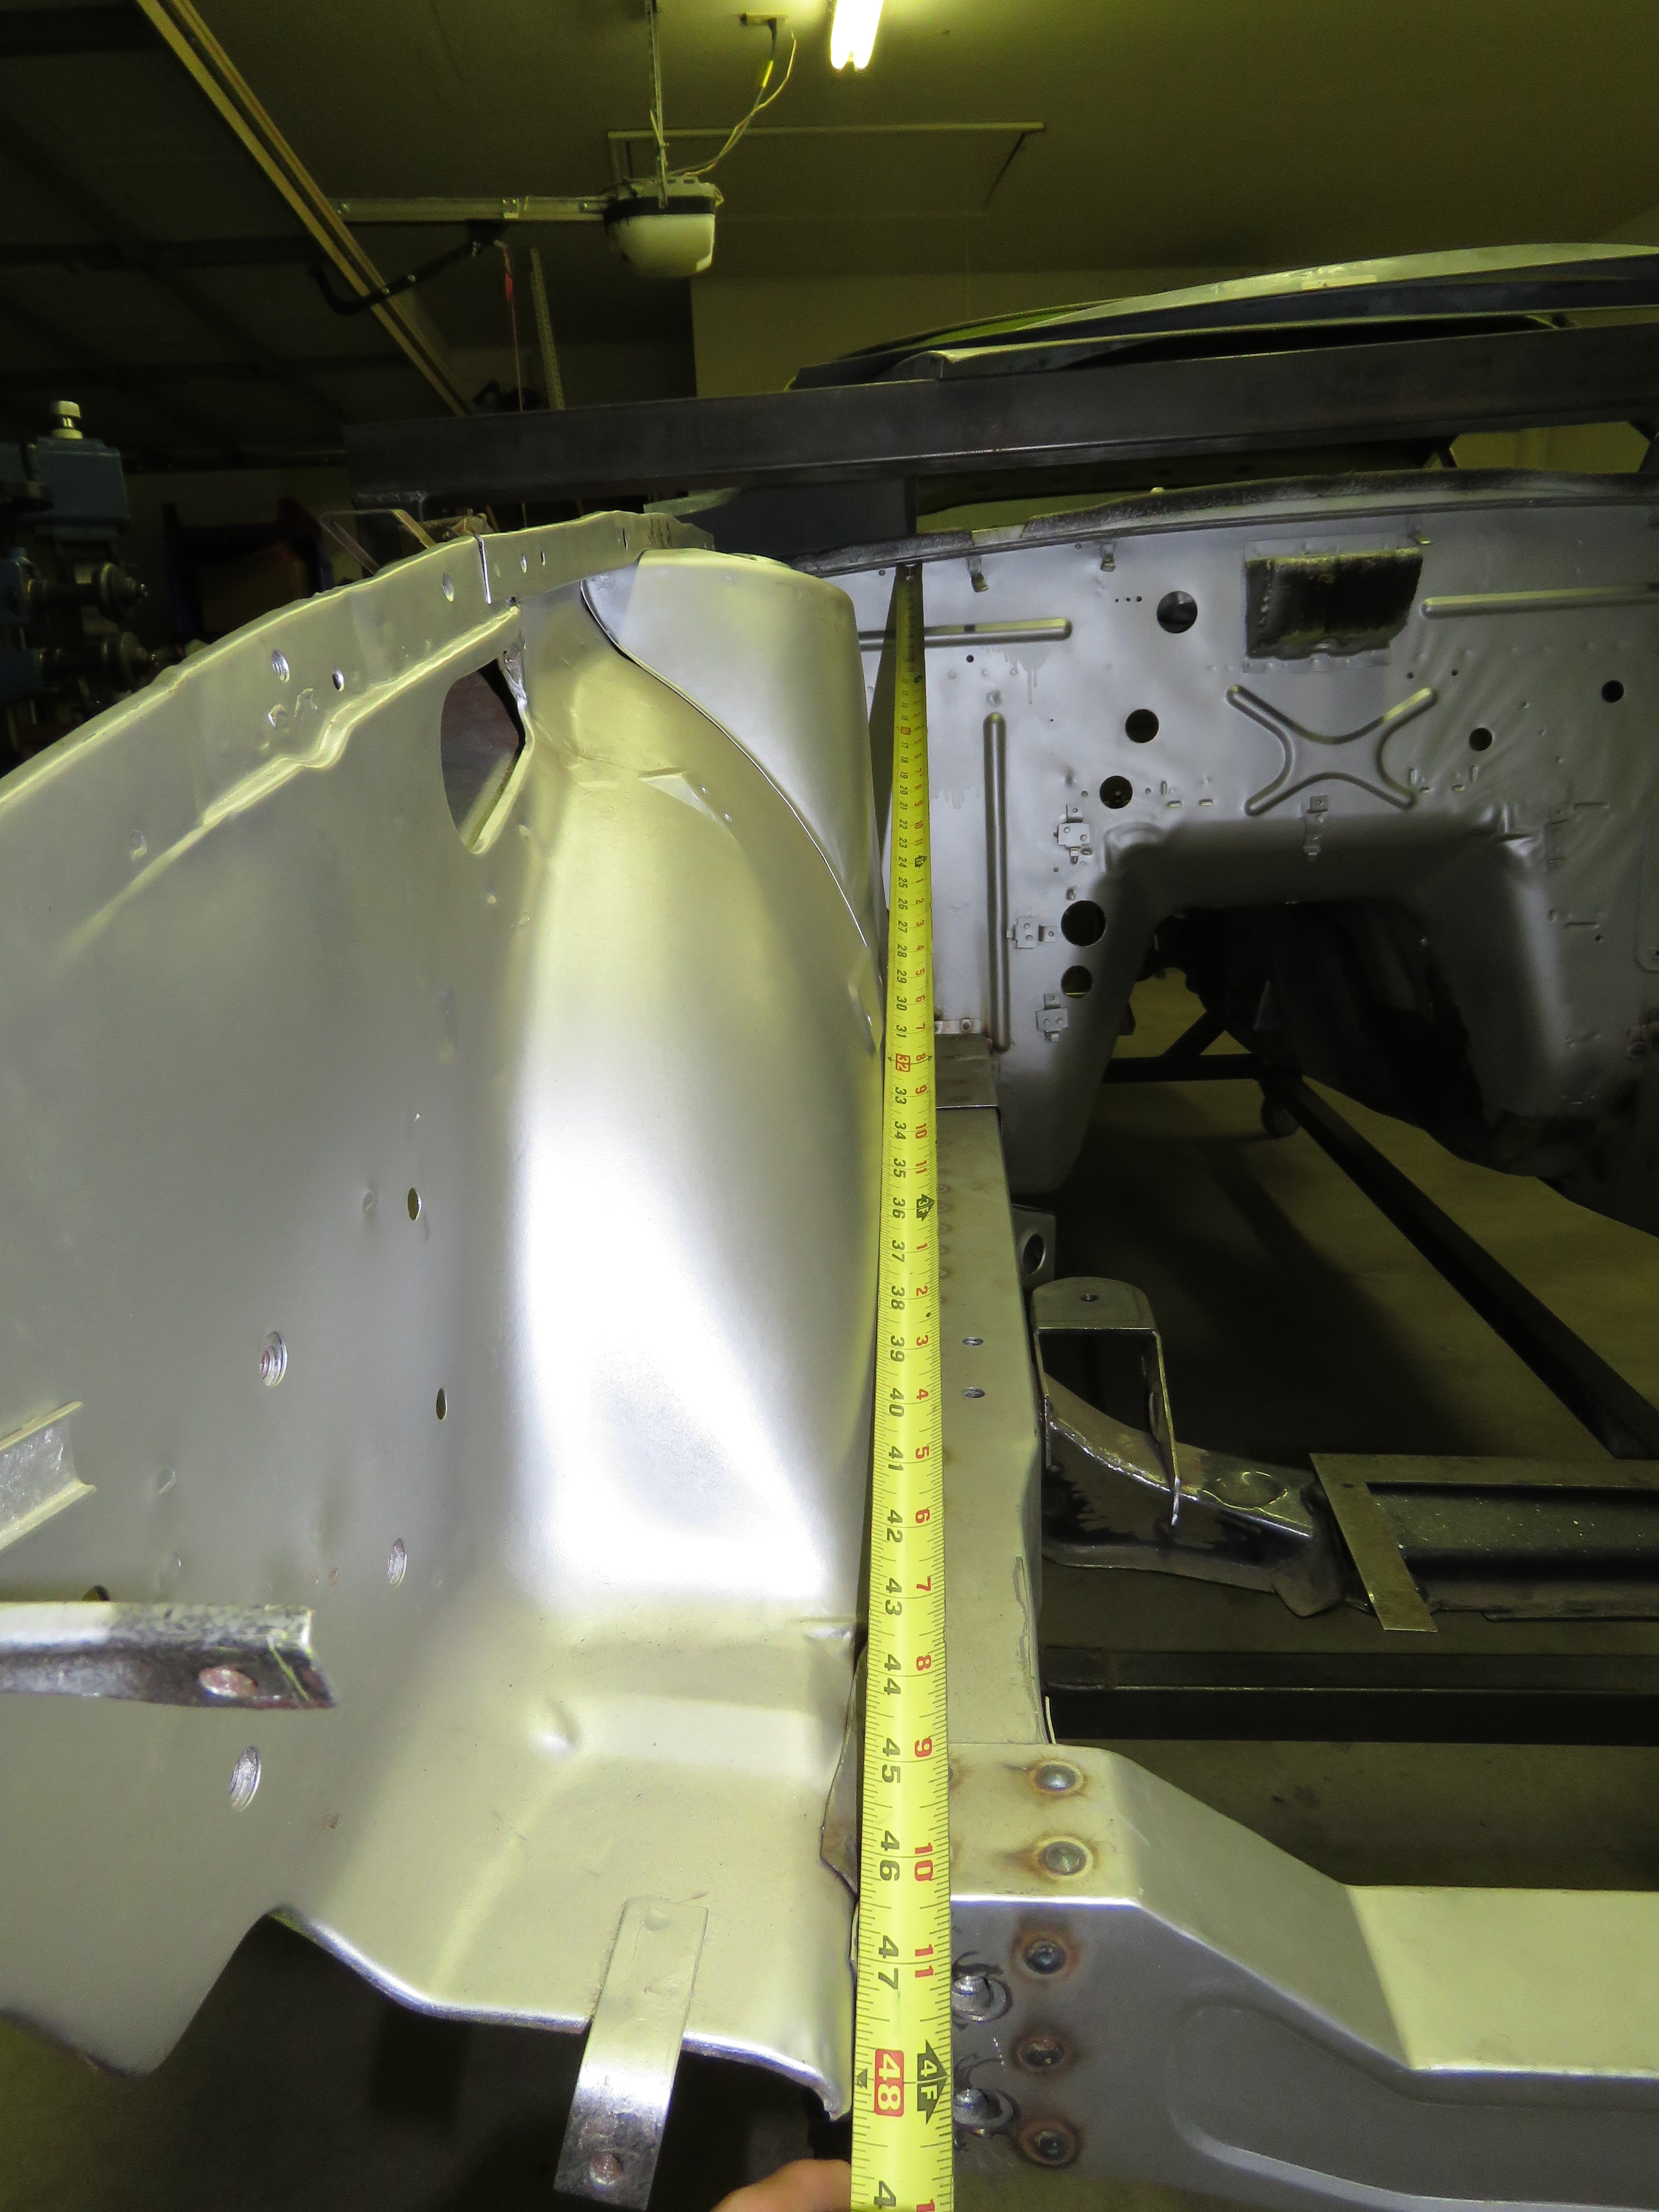
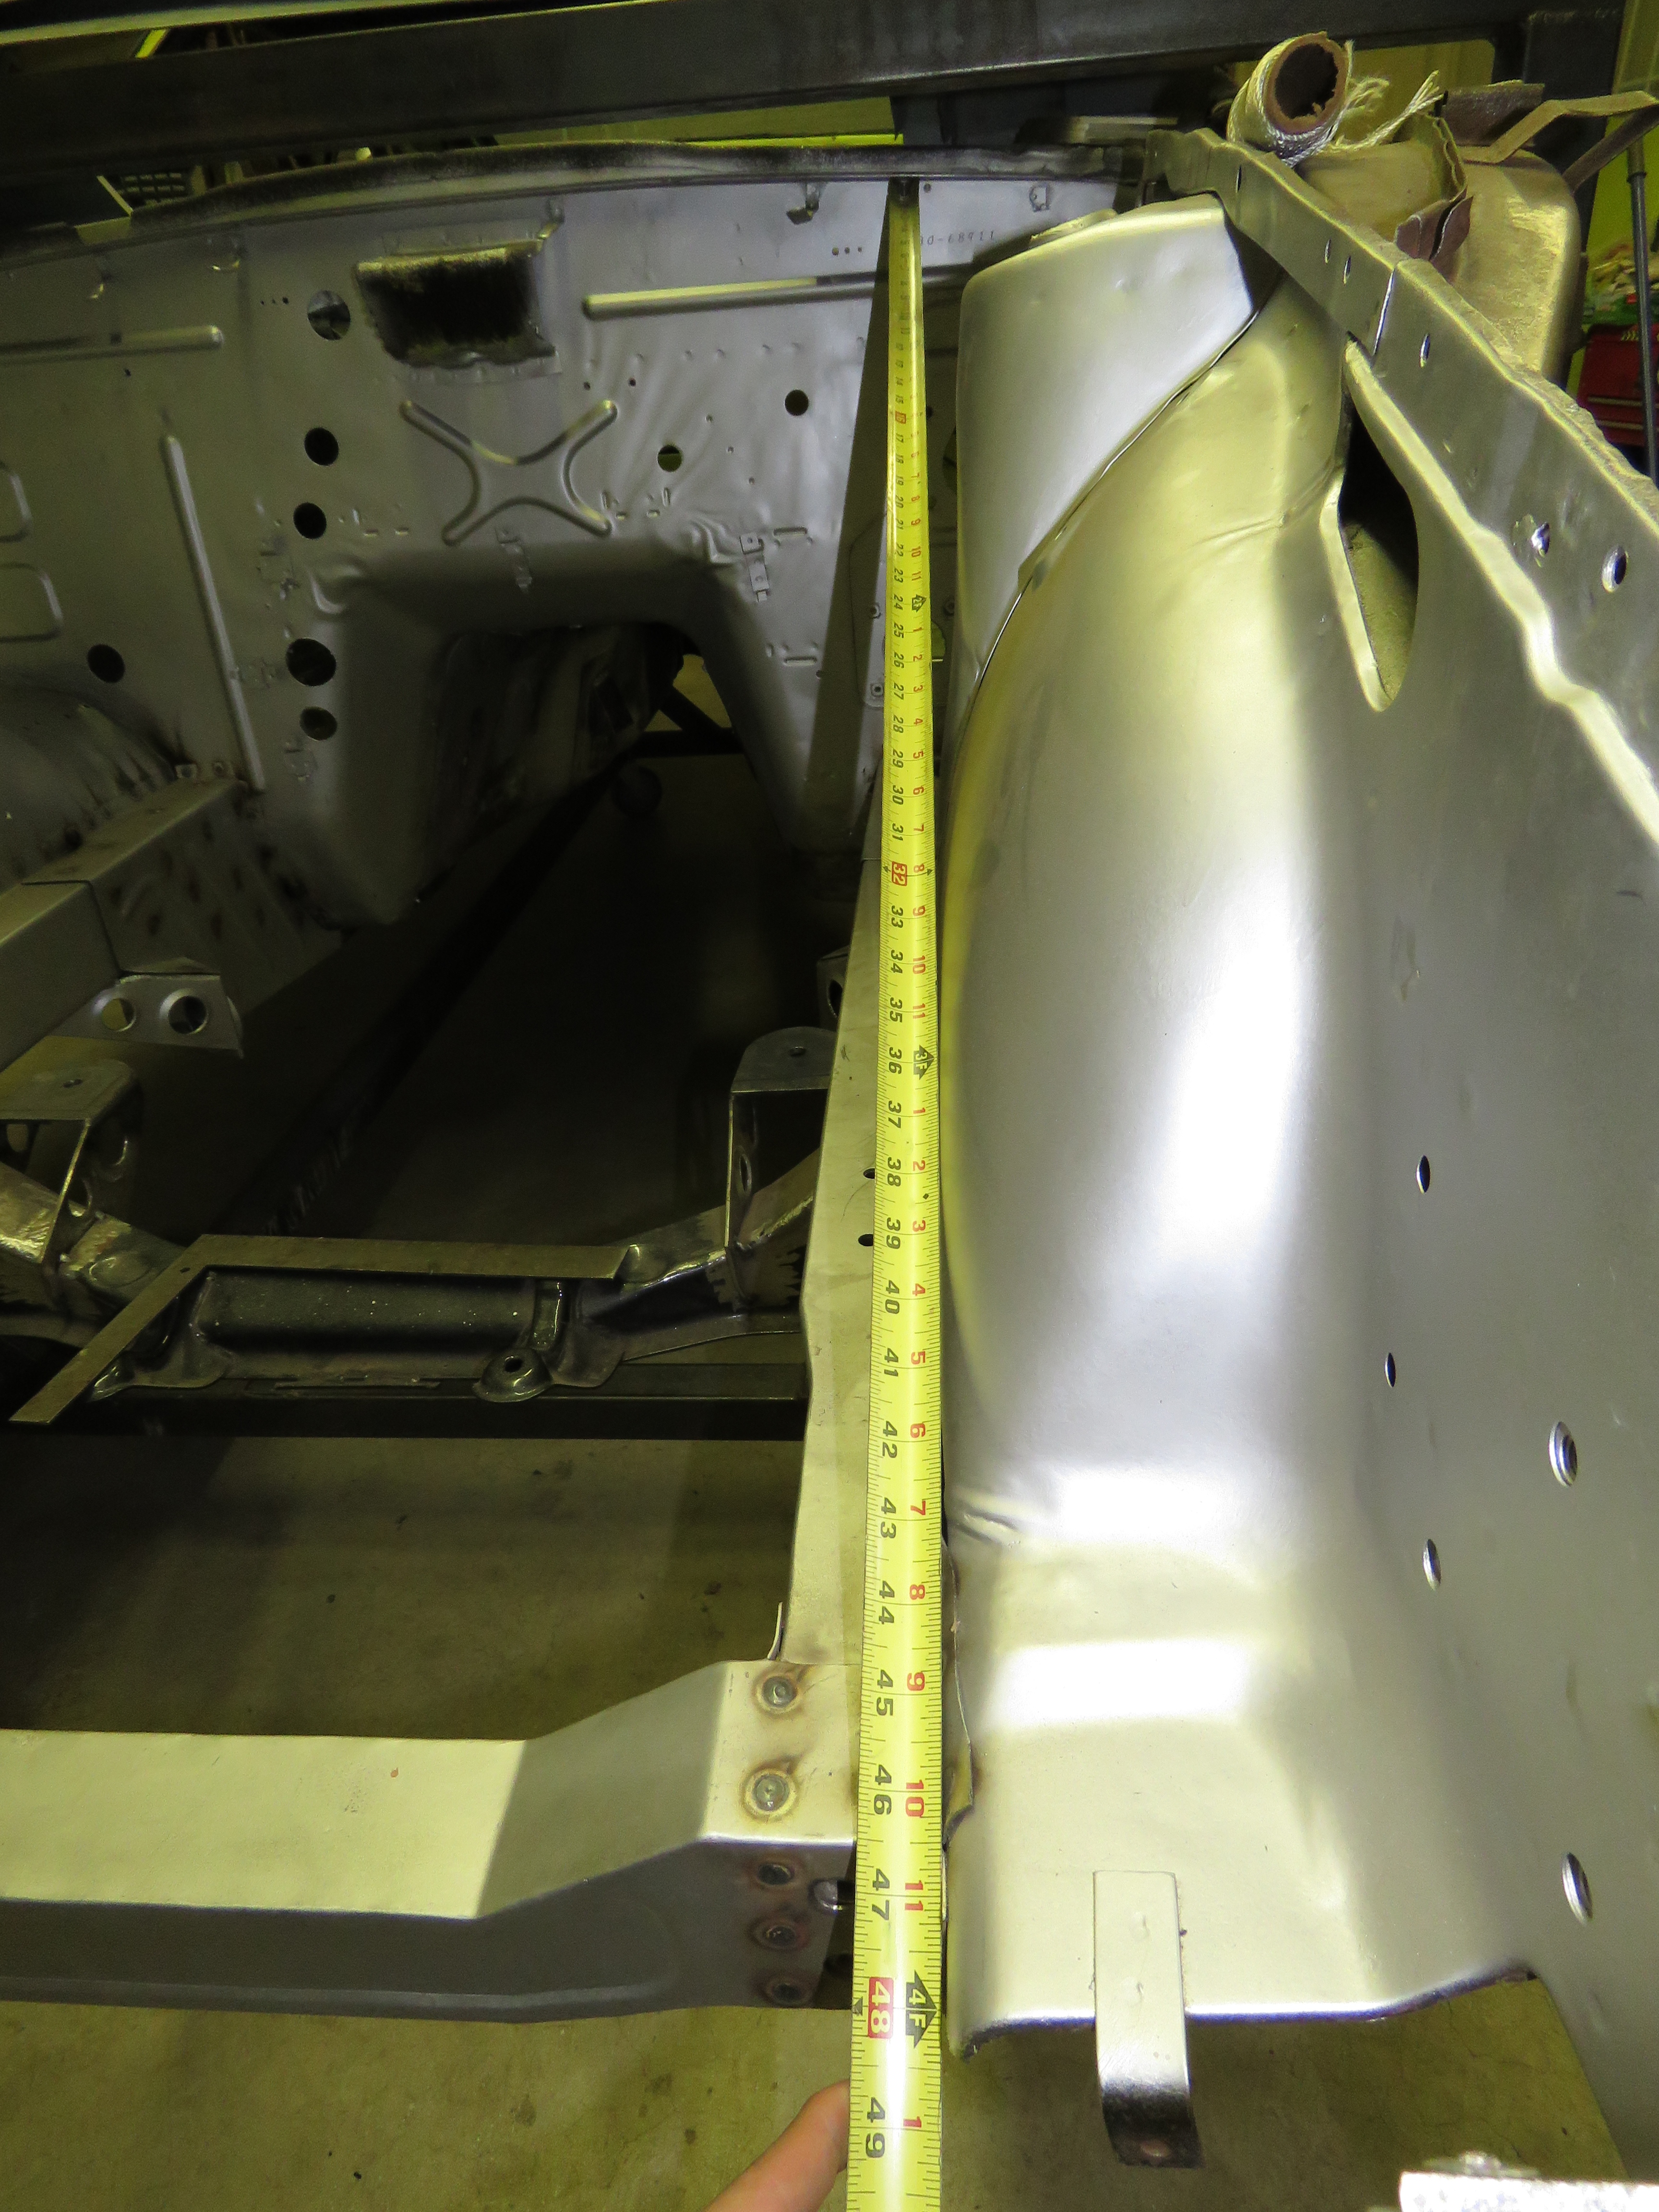
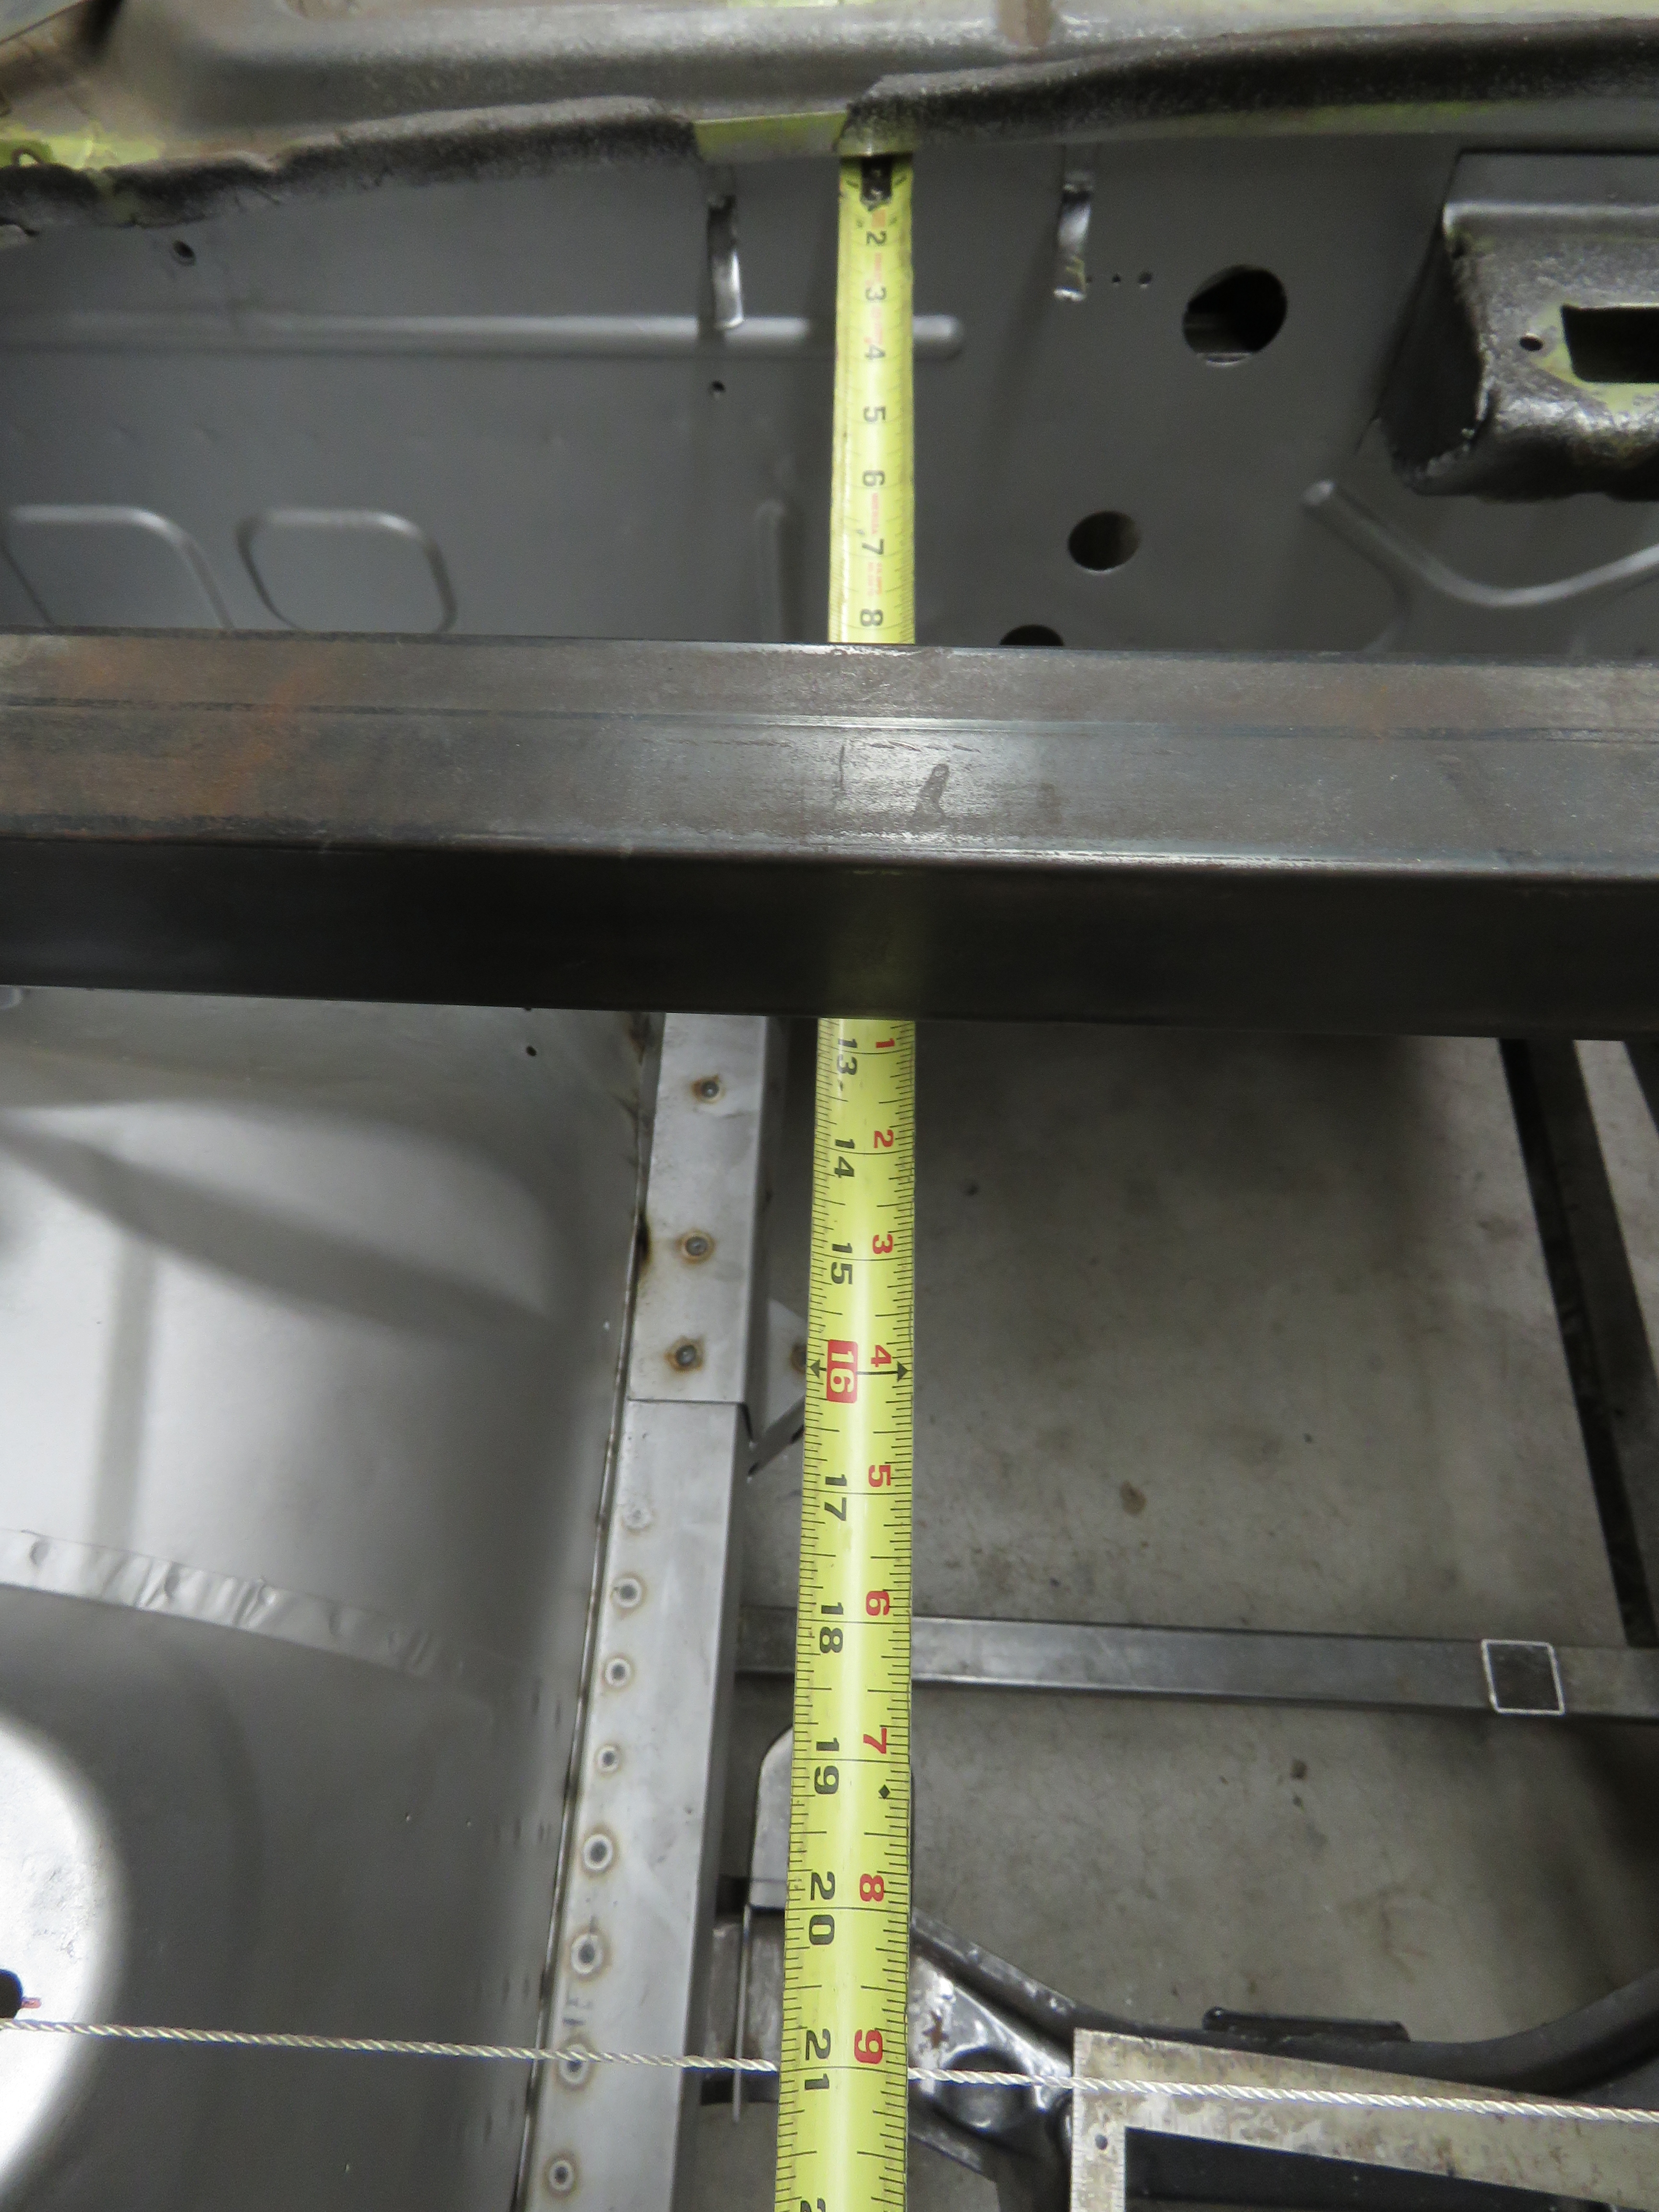
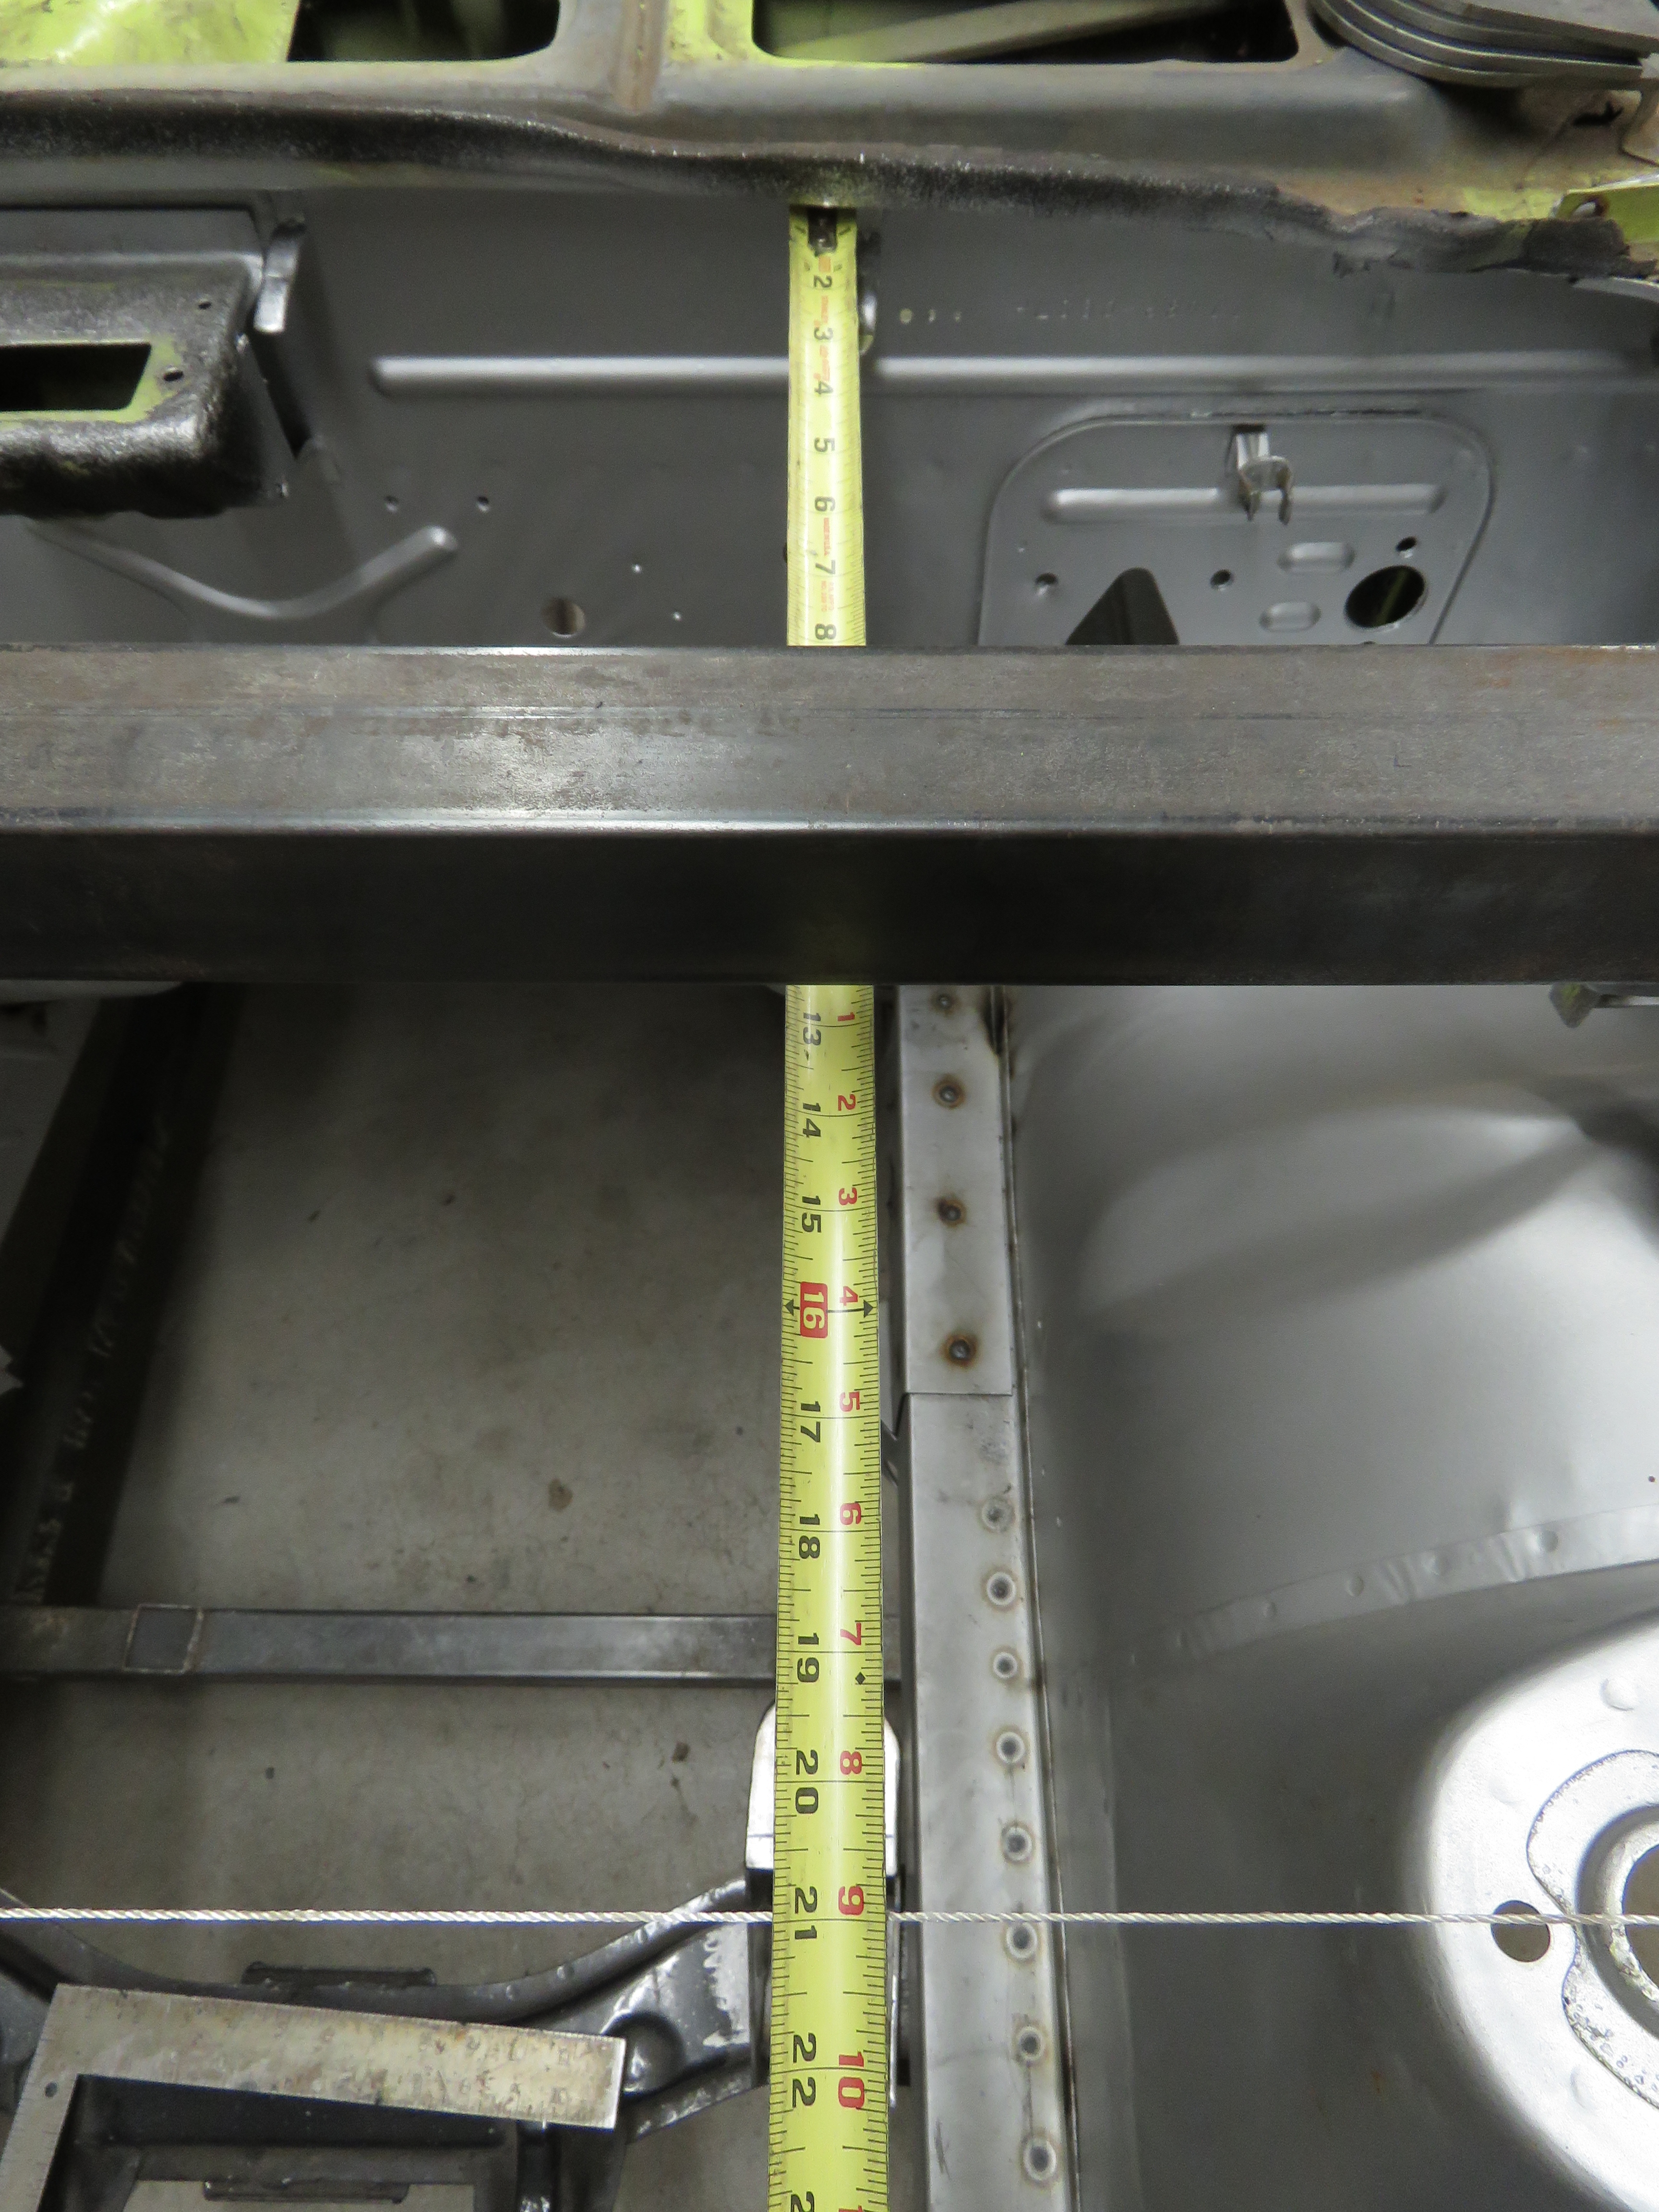
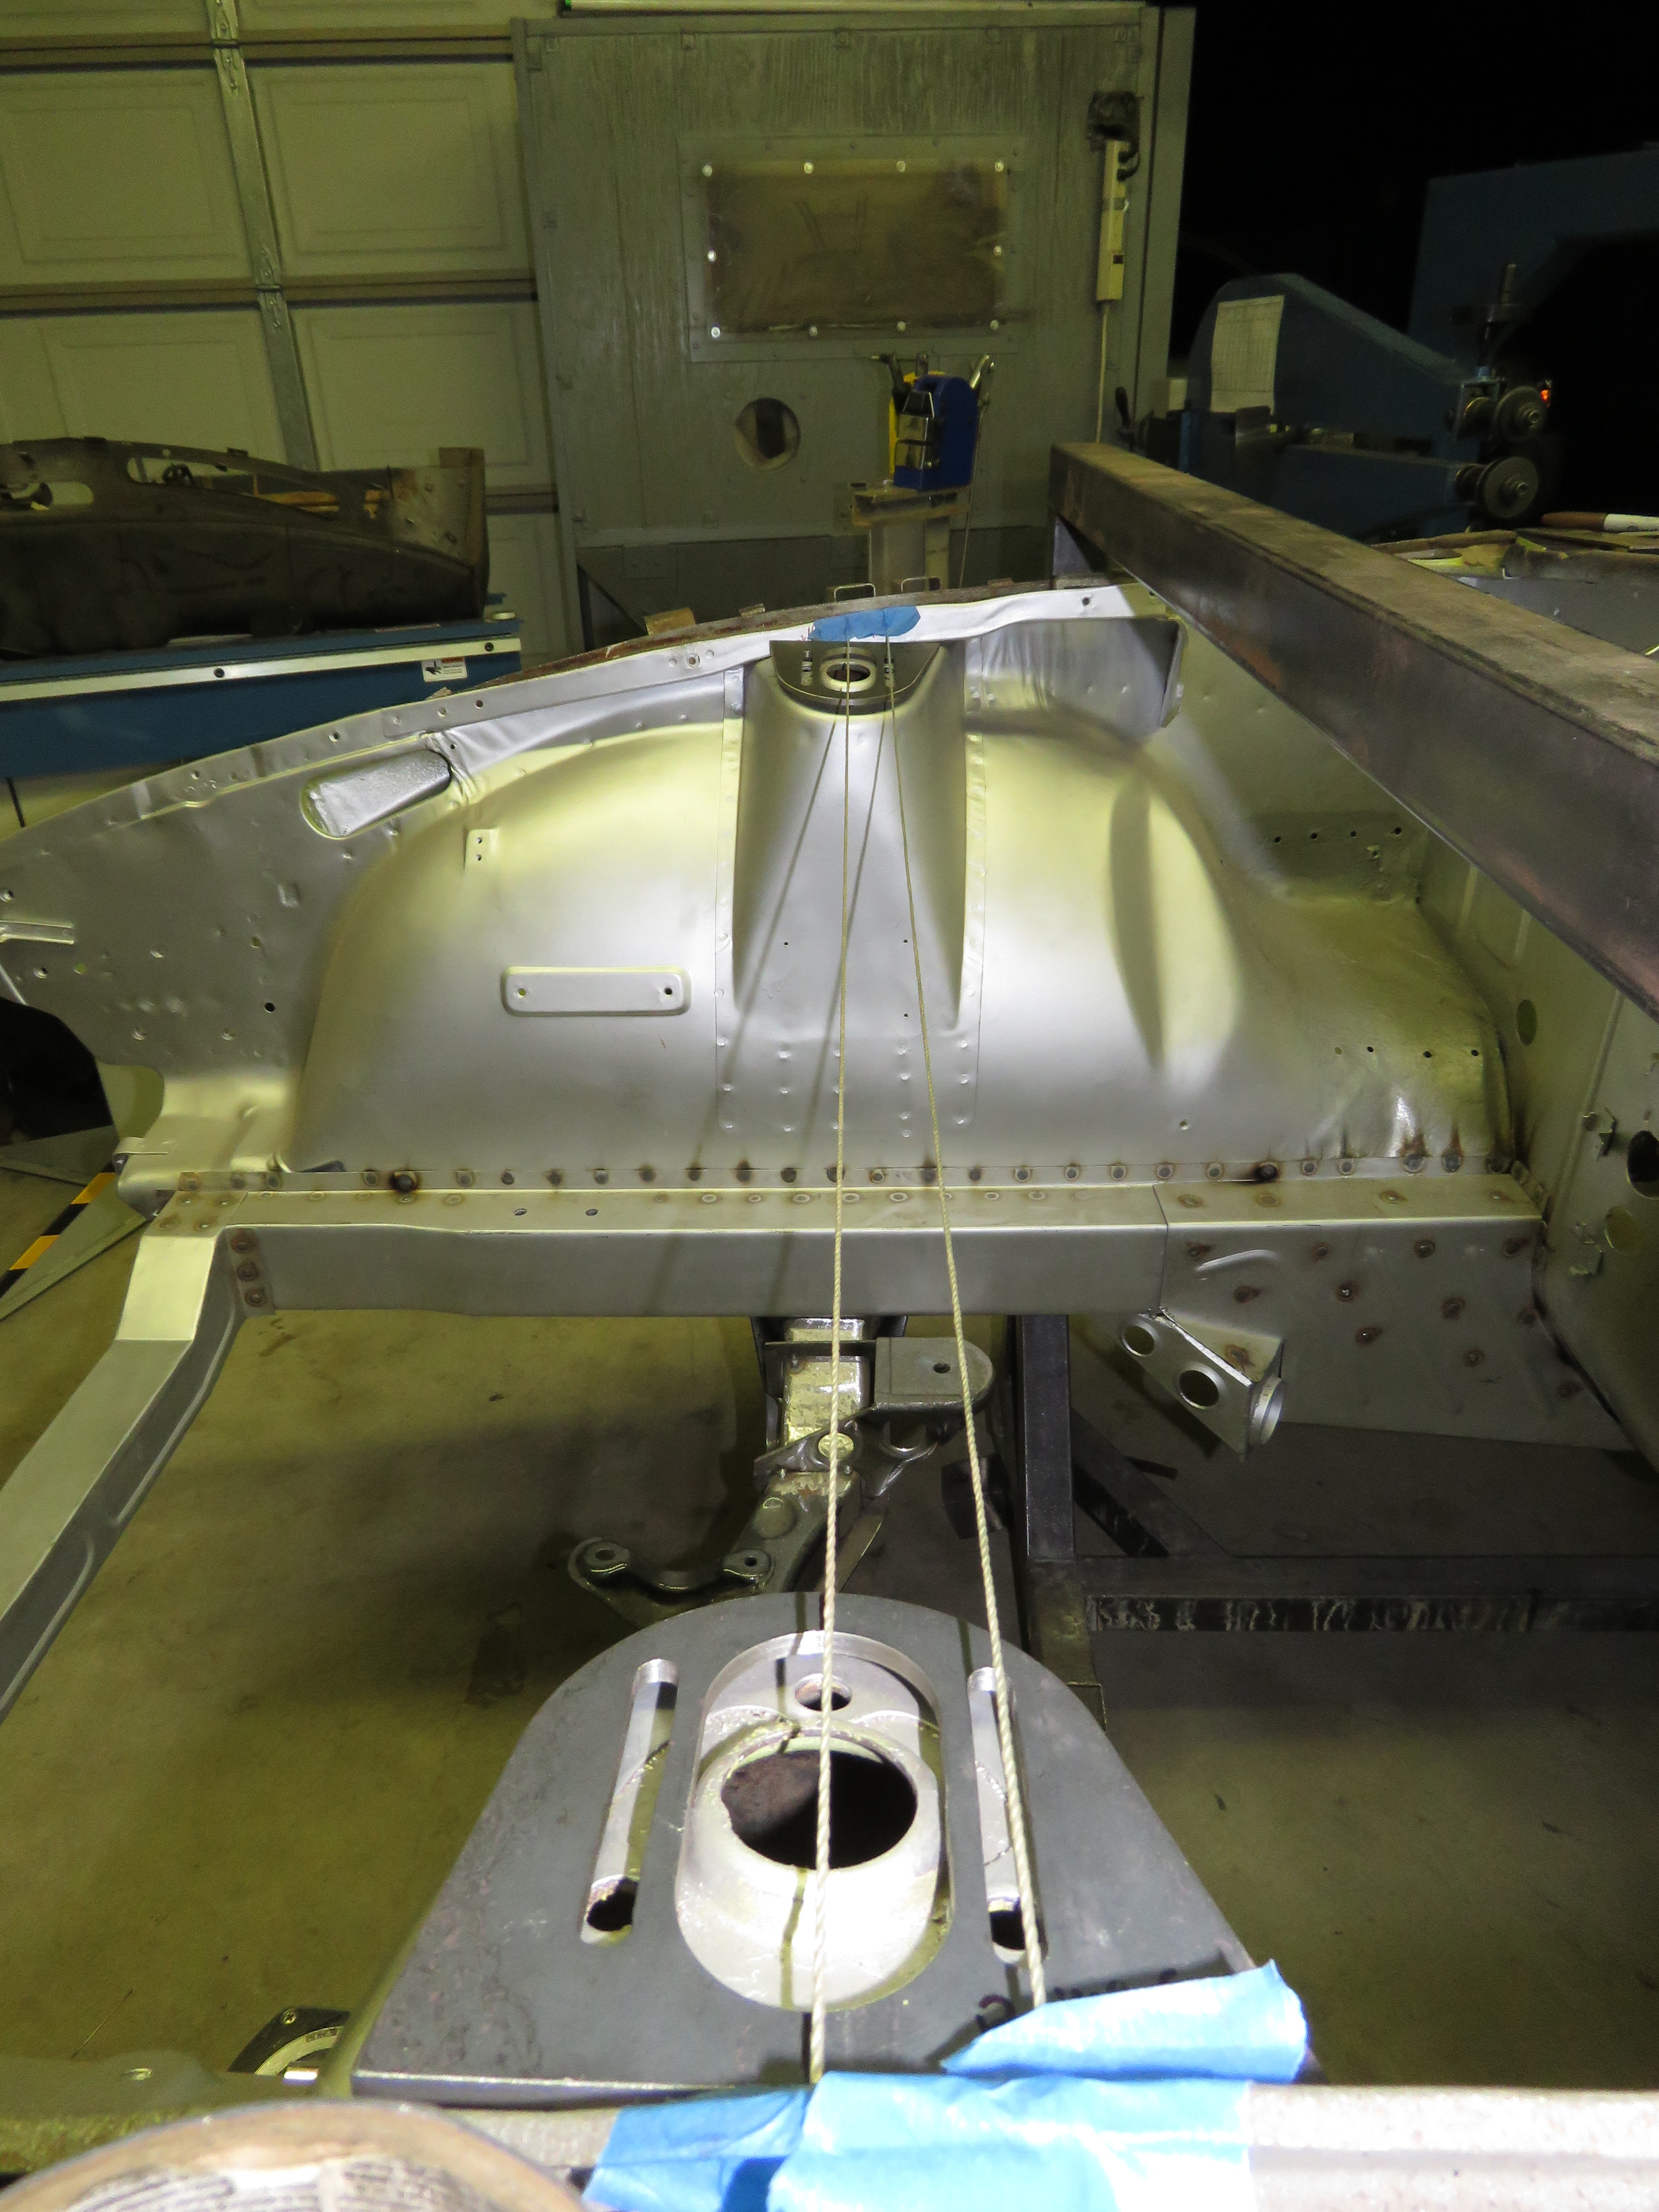
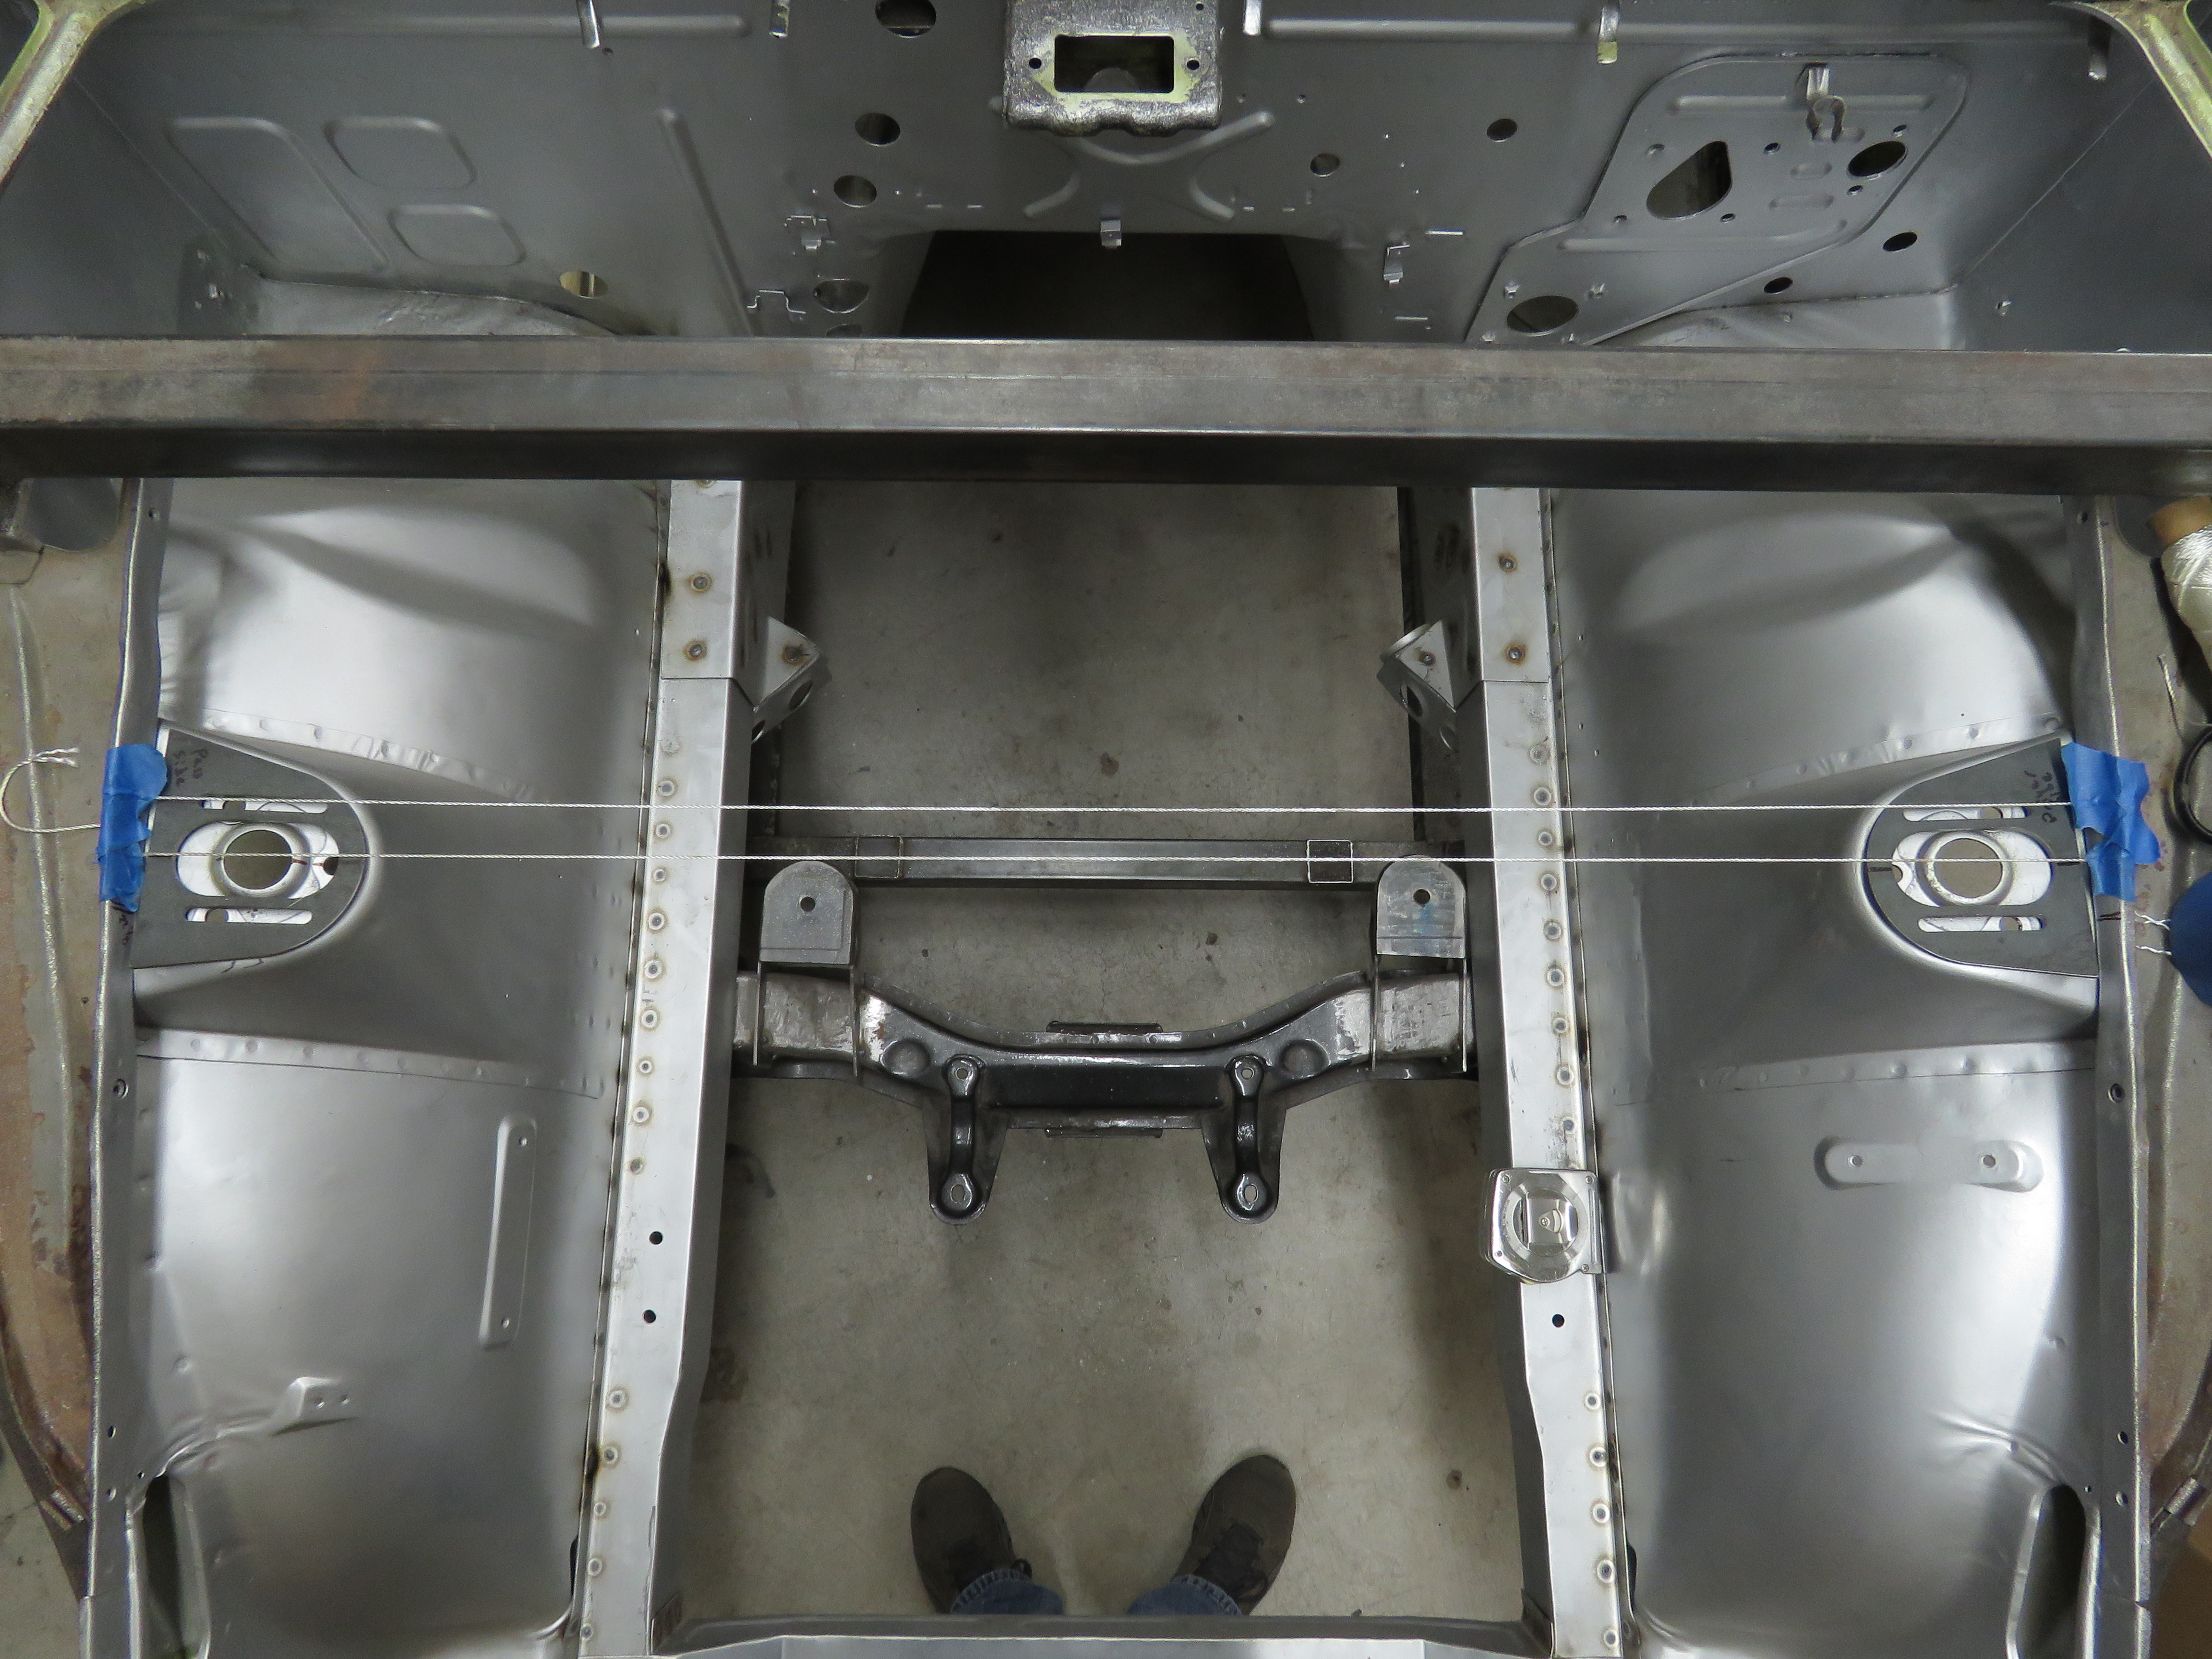
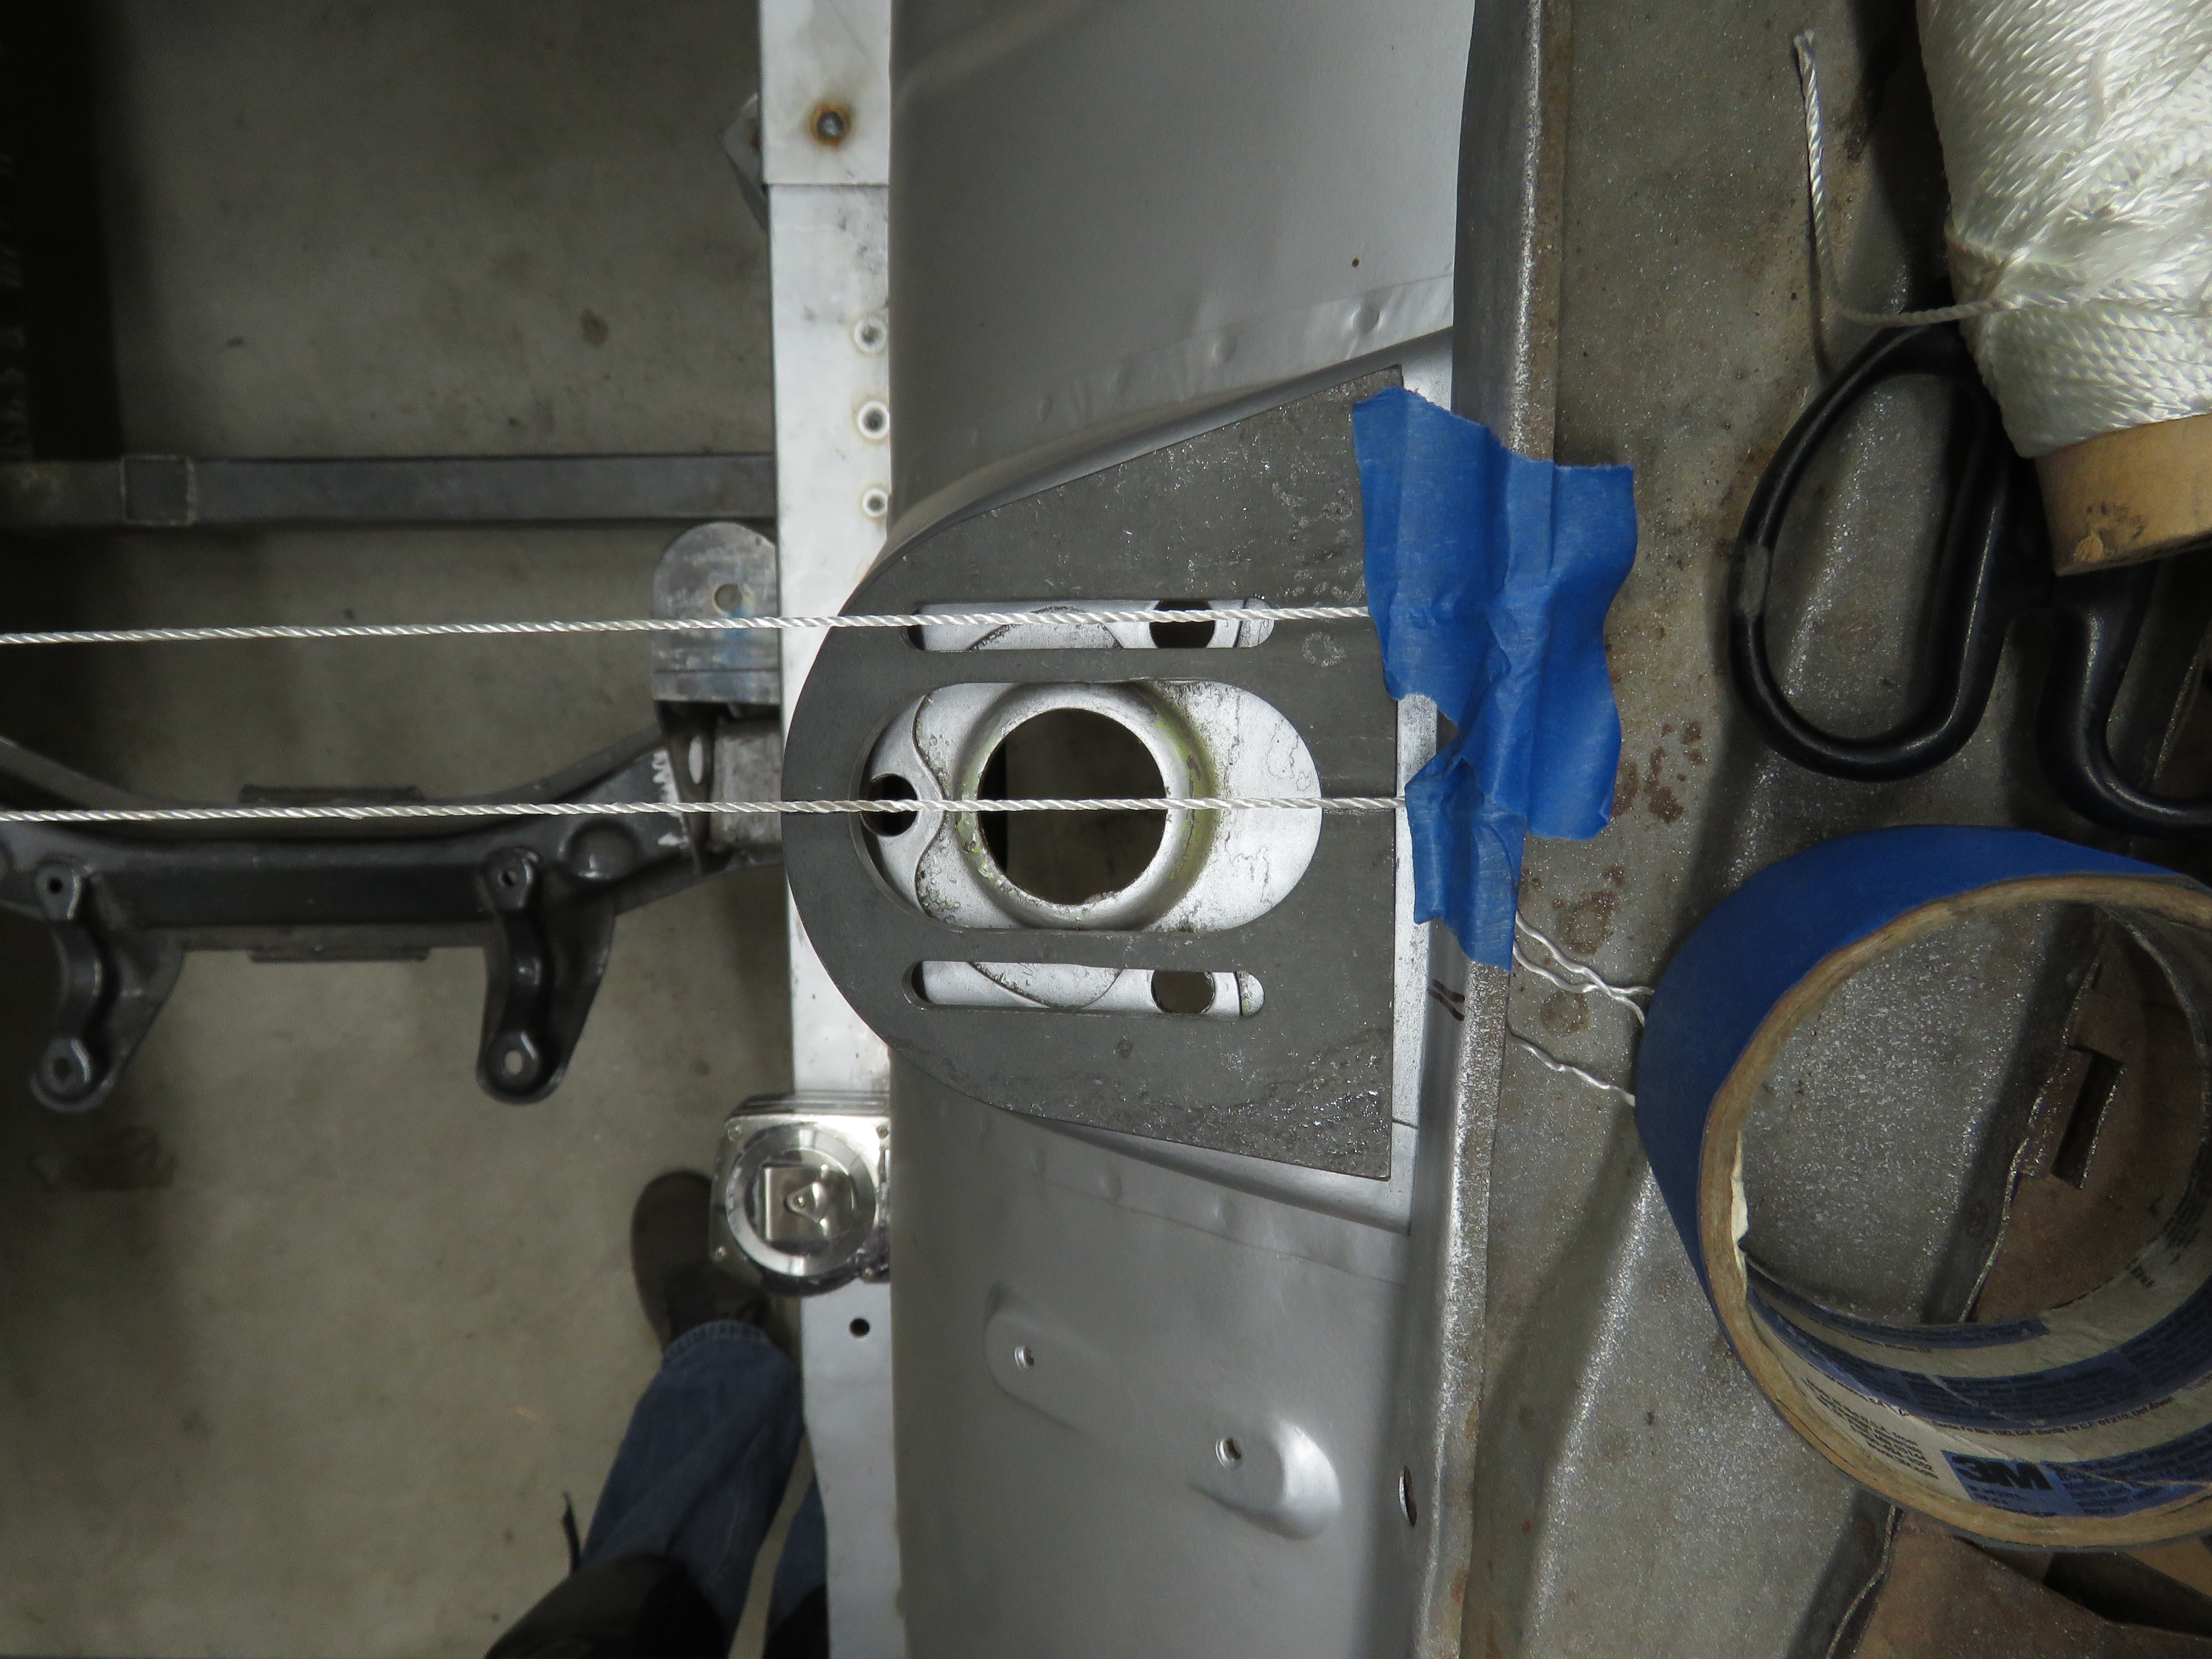
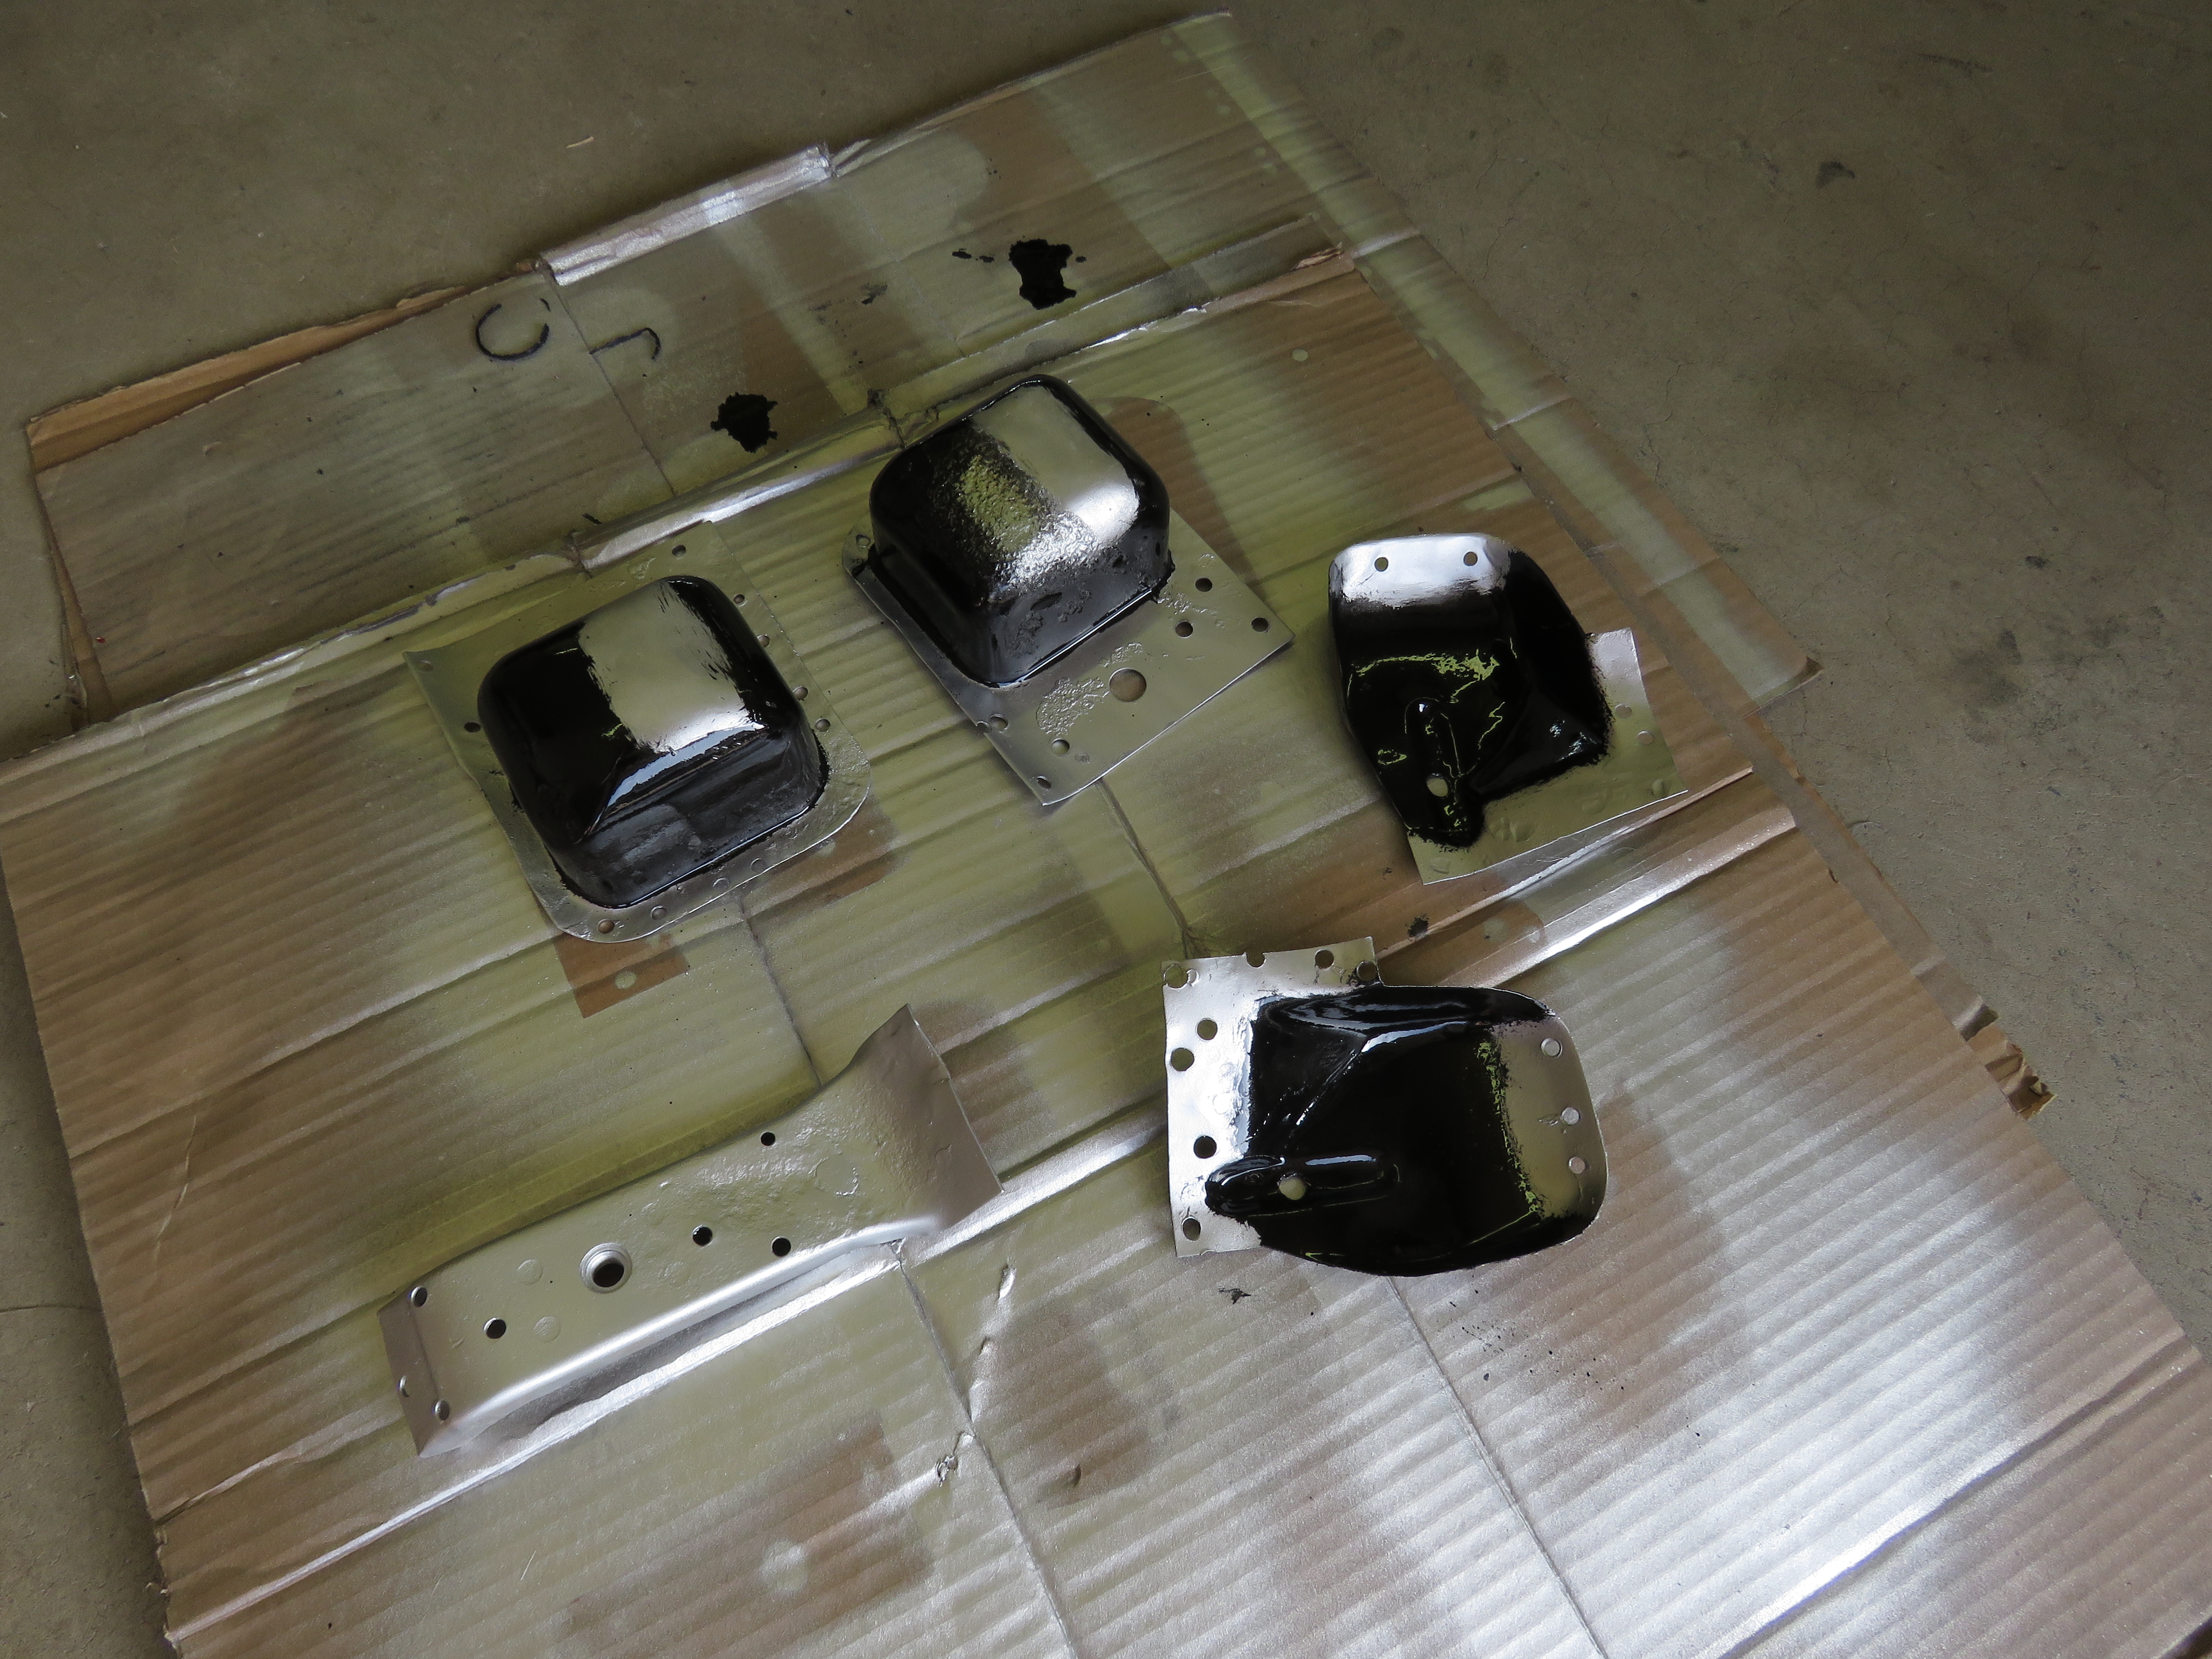
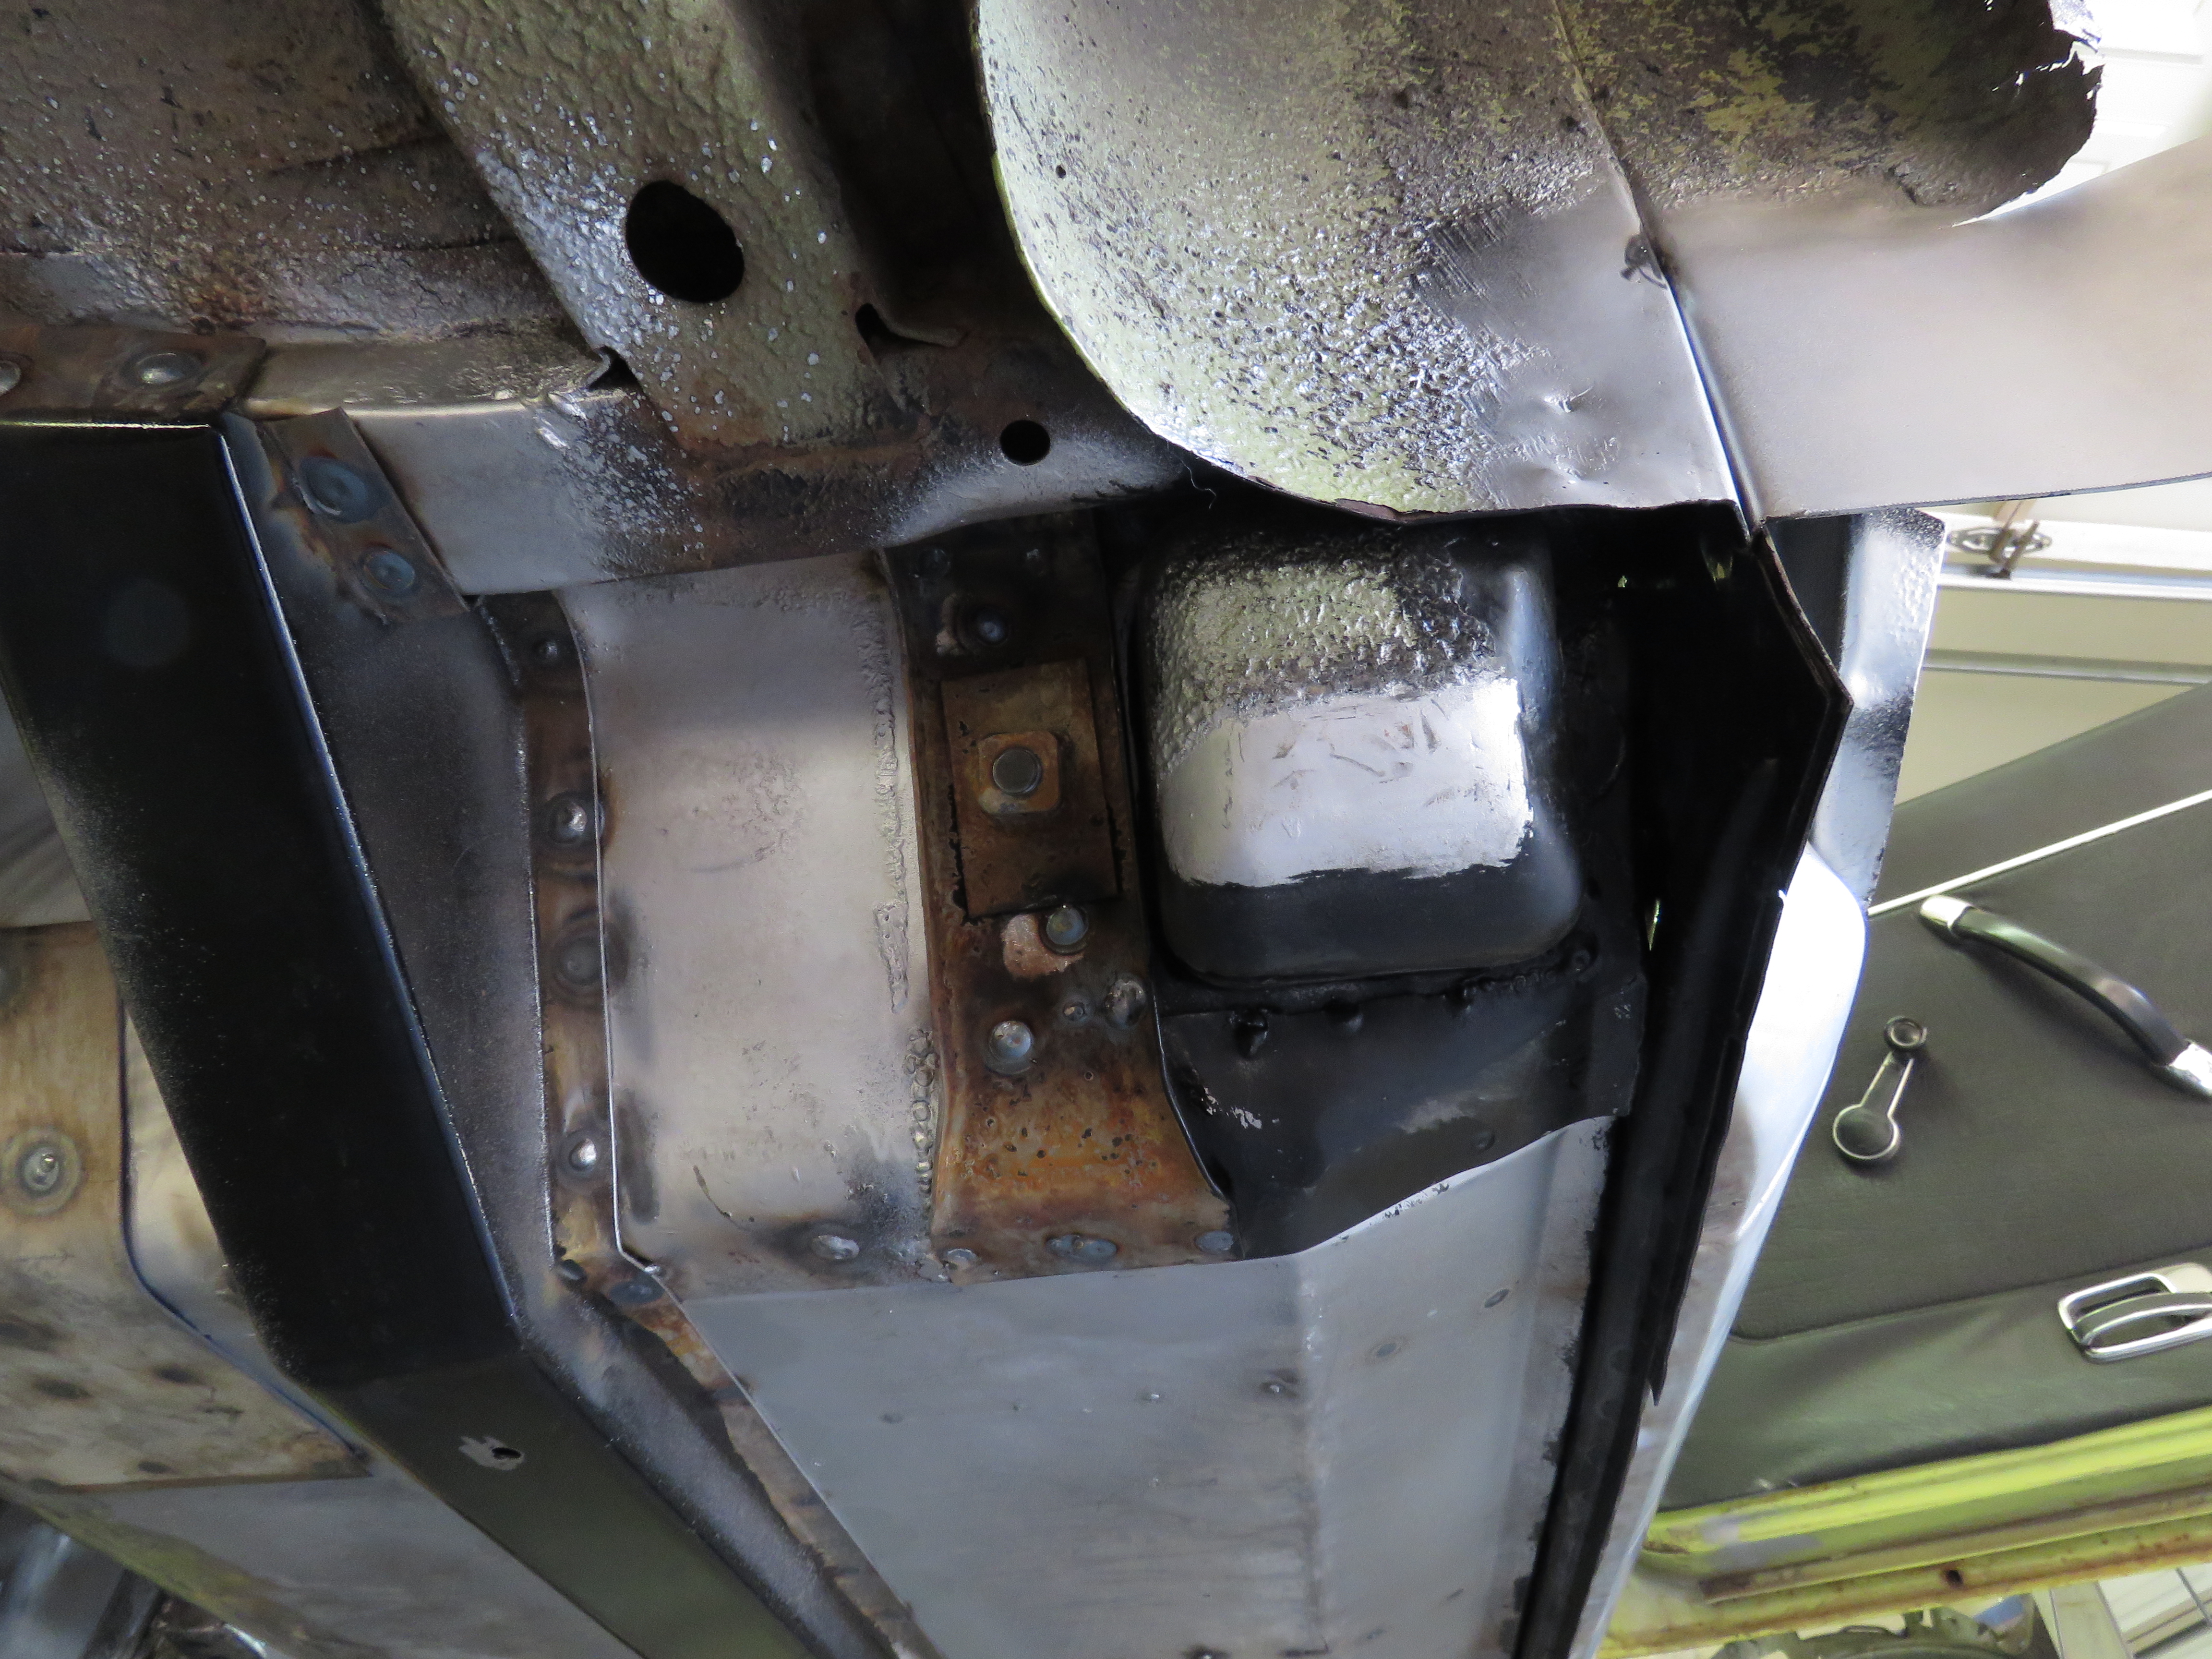
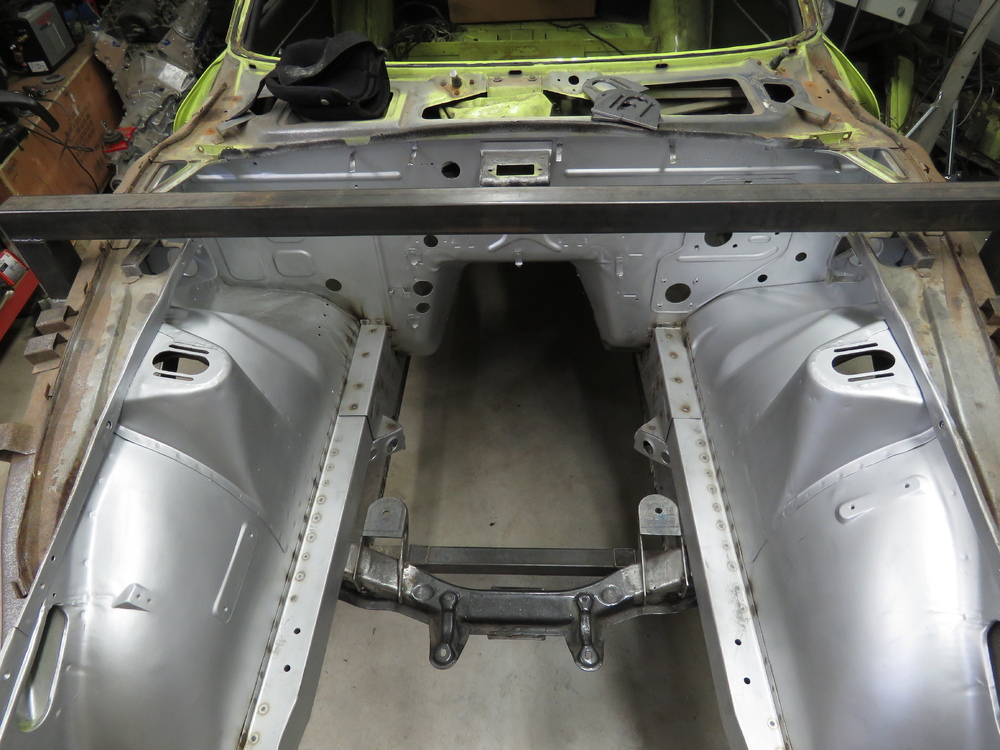
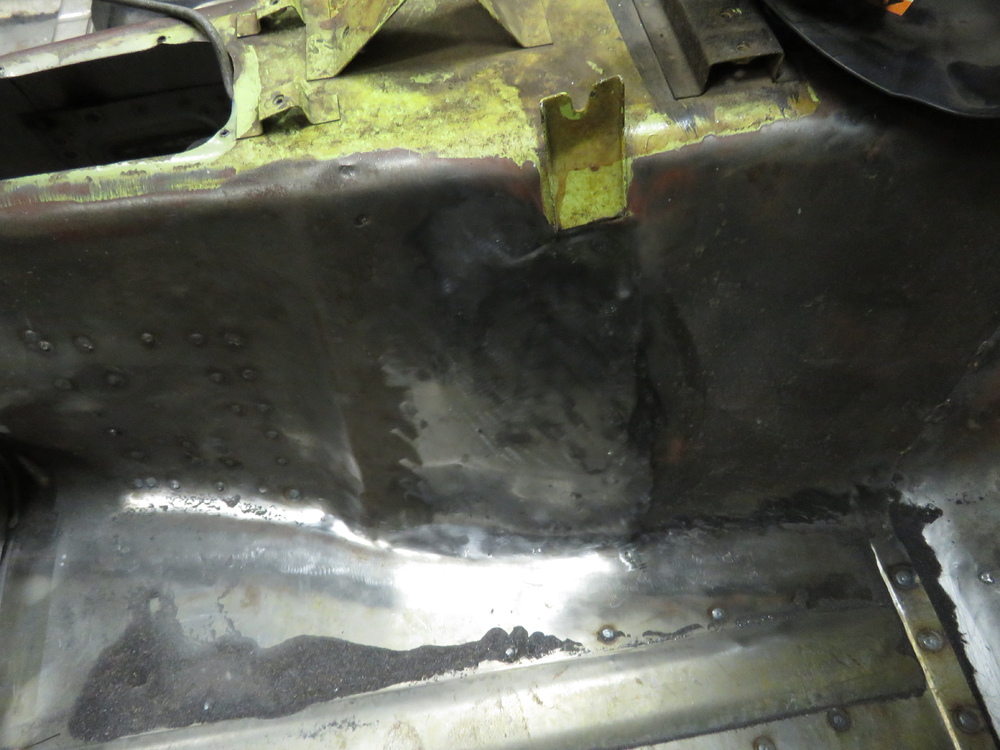
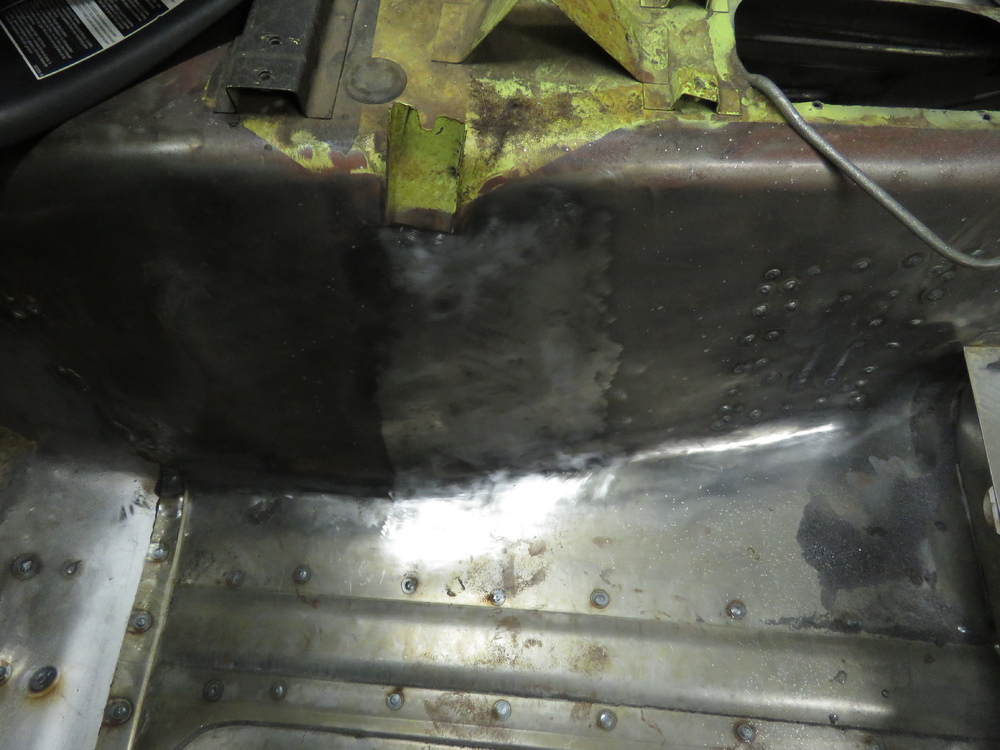
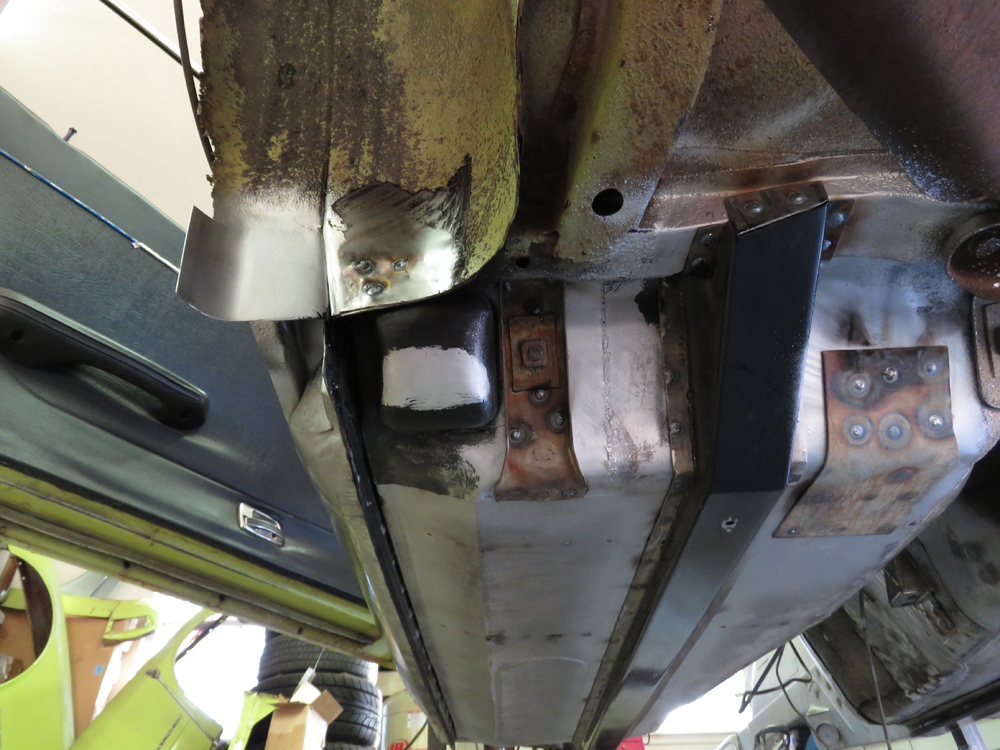
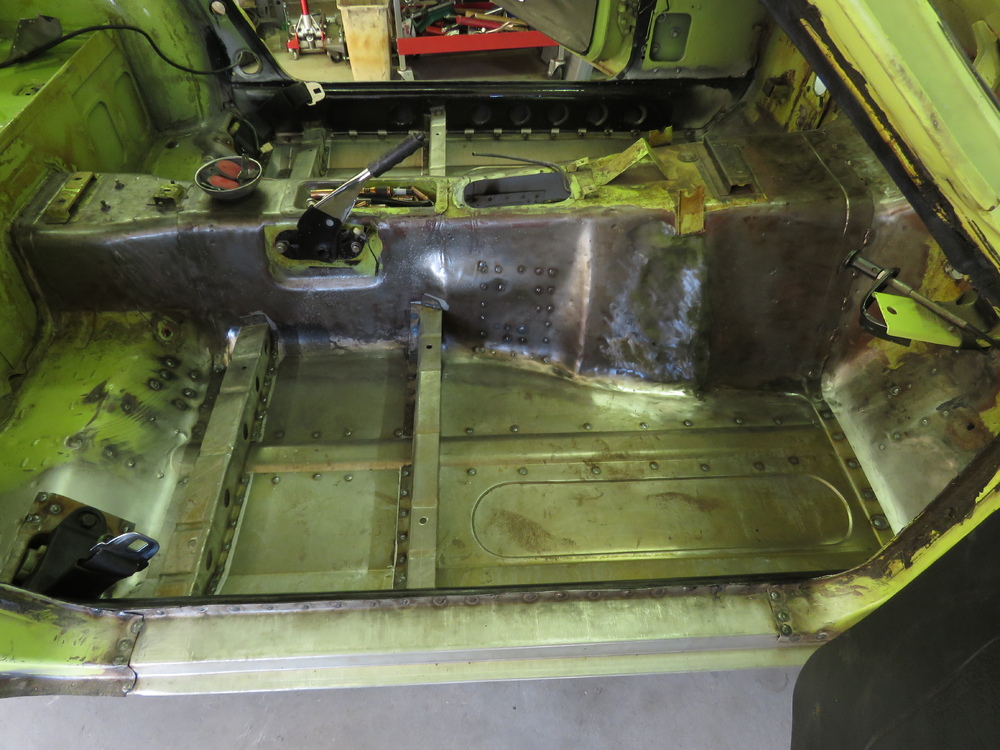
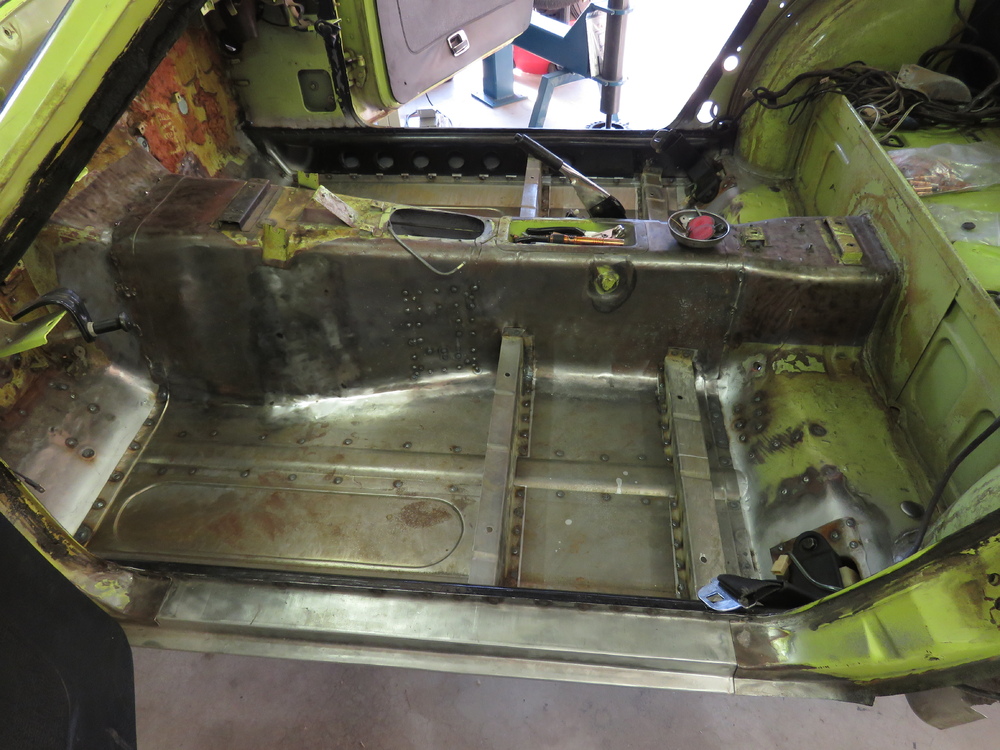
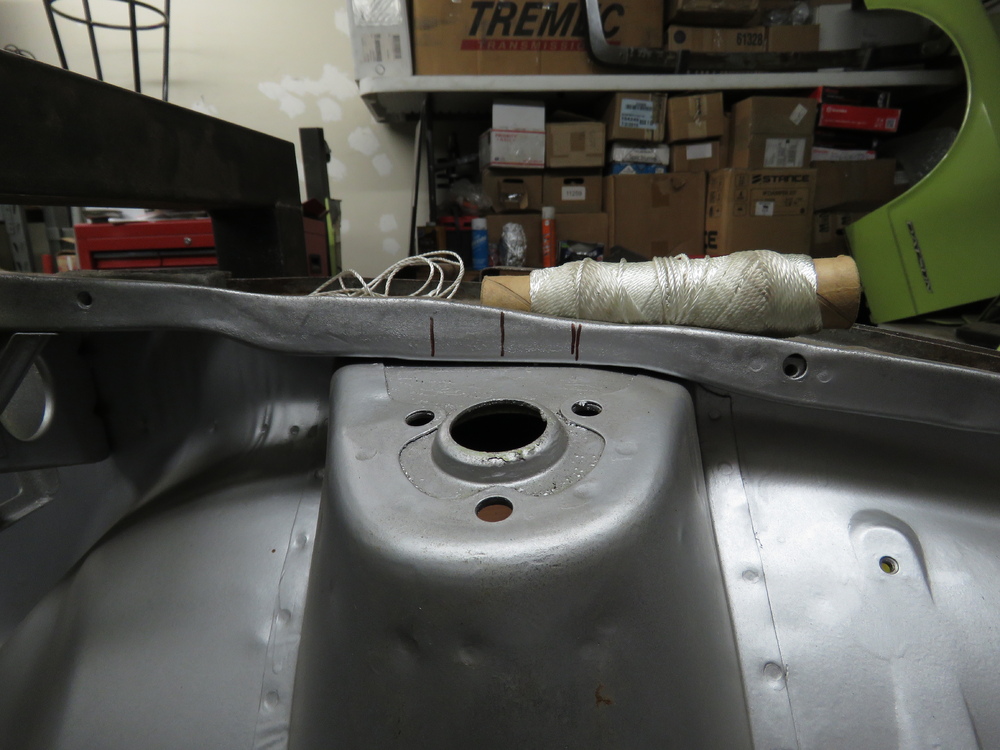
1 pointThanks guys for the comments. Hehe yeah I suspect a lot of you are older than me, I am 28 years old. Goal is to get this car finished before I turn 30, will only happen if I stop being lazy. Once I get all the body work finished and some more of the custom fab work completed for the LS1 swap, everything else will go fairly quickly hopefully. Yeah hopefully Charlie will like the panels I made for him. he wont get them till next Monday. I will go with a different color than the factory lime green (I think thats the original color name). Had some friends here locally tell me to keep it same color, but I am just not feeling it. As of right now, I have no idea what color I will want. Small update to show. Just glad the interior is all finished. Now to work on the rear of the car. Filled in any rusted holes and sanded down on these parts pictured below. Coated those parts I sandblasted for the seat belt mechanisms. Parts welded on. Gonna hold off on welding the tie in plates for the seat belt mechanism housing (not sure what their called) because I have plans to make some jack support braces later on. The rear jack stand points will be in this area somewhere. Havent planned it out yet in details but will. Besides the tie in plates dont fit that great for some reason, most likely since everything I made wasnt an exact OE fit in order for the seat belt mechanism housing tie plates to fit perfectly. Finally welded in all those holes shut and sanded down from when I removed the original transmission tunnel mounts. Had to make my own and move them back a little ways for the T56 magnum trans for the LS1. Well thats it for the interior, at least for now anyways. Rear Tabco quater panel replacements. Though before I work on that, I want to get the front camber plates installed. Took me forever to figure out where I had placed them in this mess. Found them.. Get alignments made for when its time to weld the camber plates. Wanted to make sure first that the fire wall was same distance on each side, I just choose two points on the front end of the car. Marks measured and scribed. Rough mock up to see how it looks. Thats it for now, stay tuned!


 1 point
 -
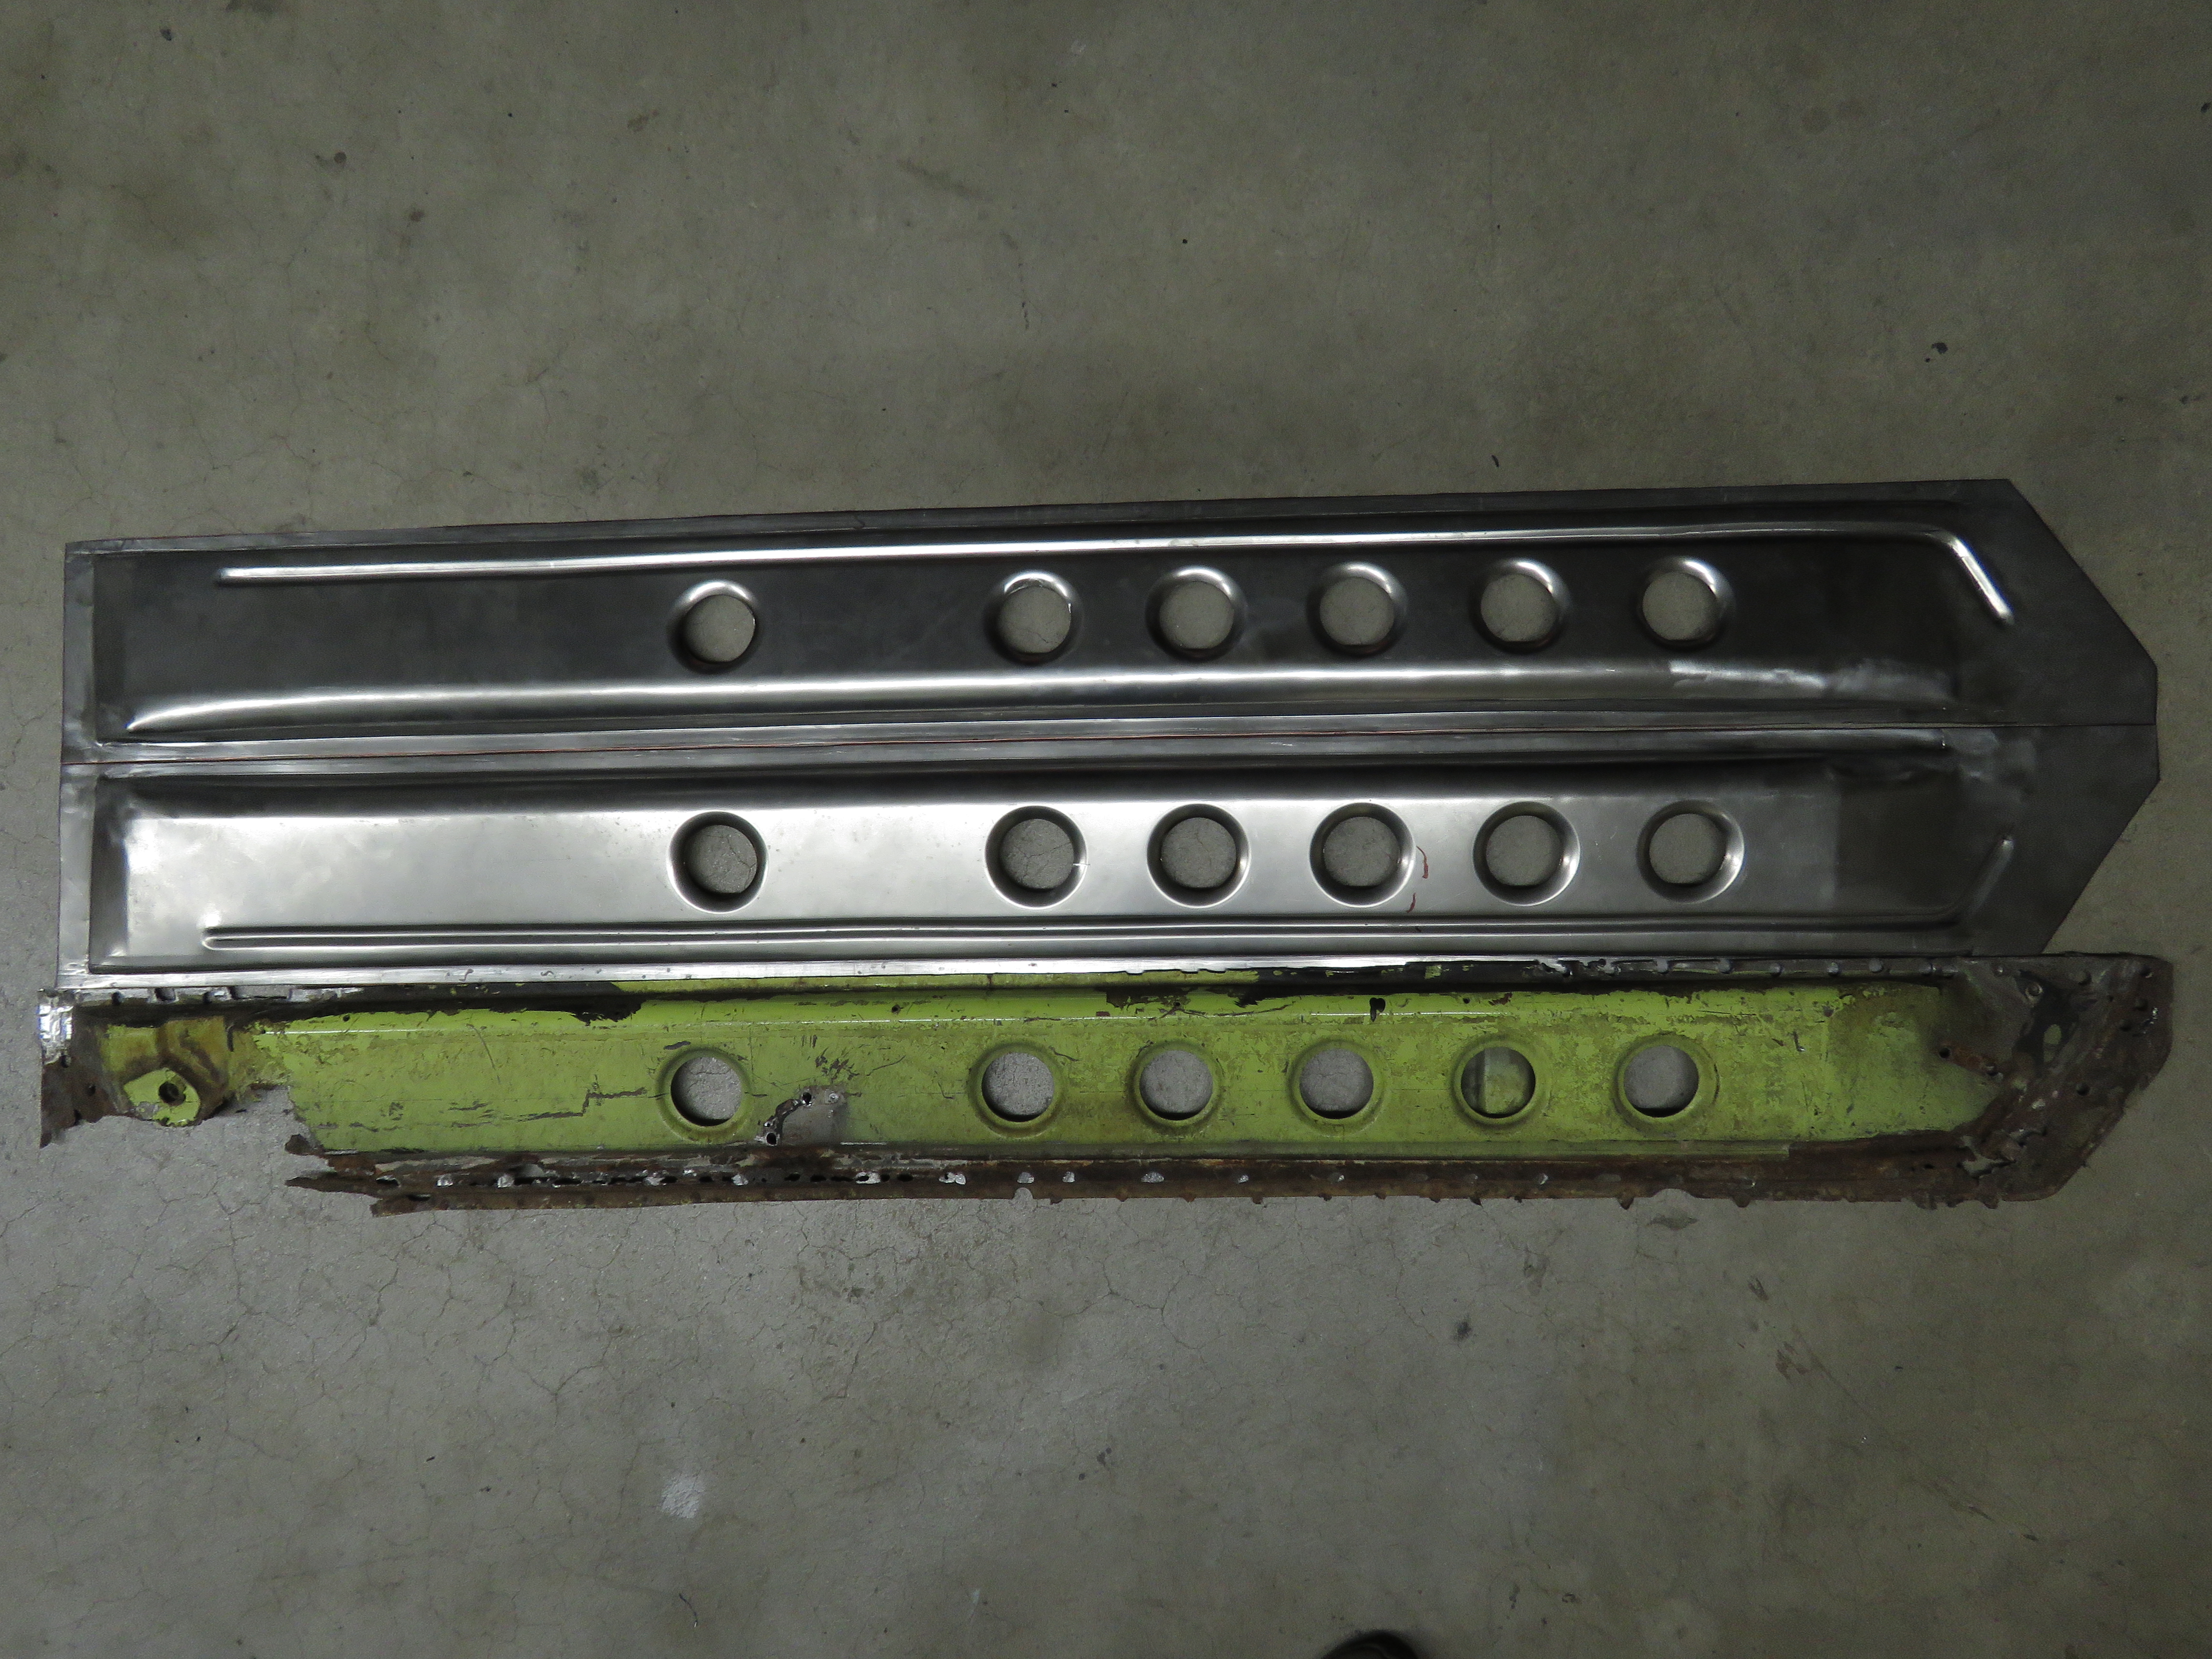
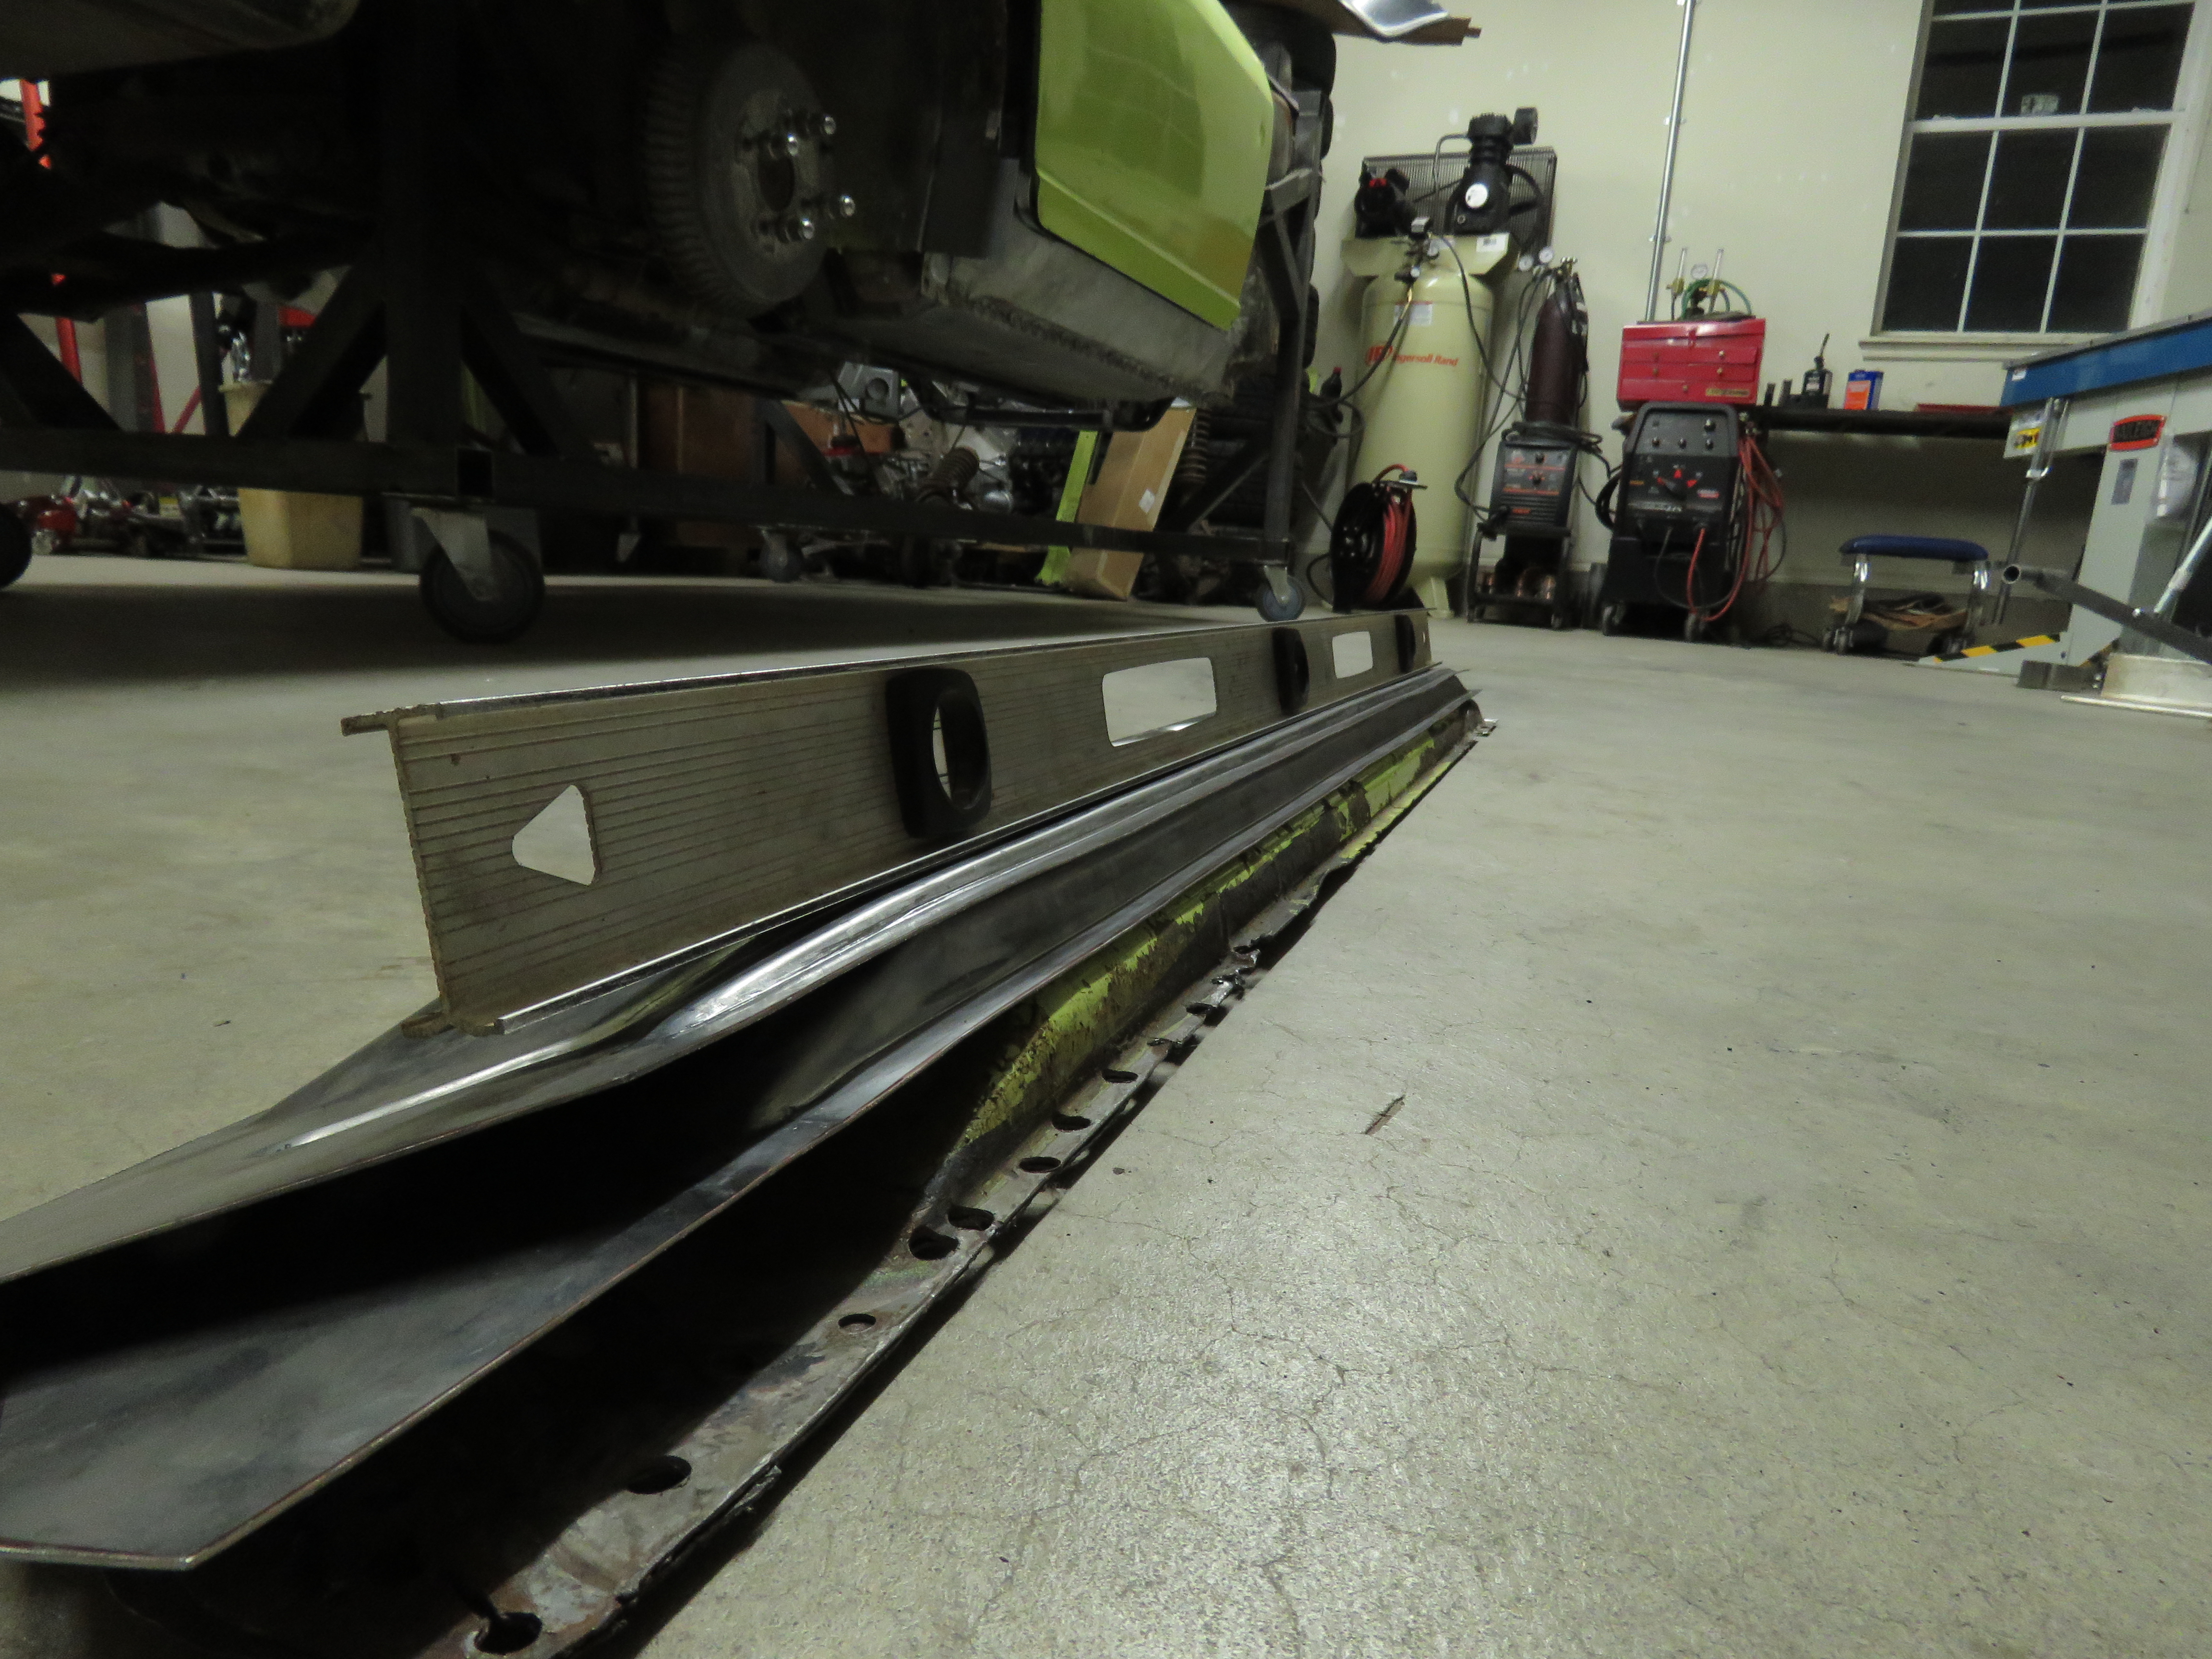
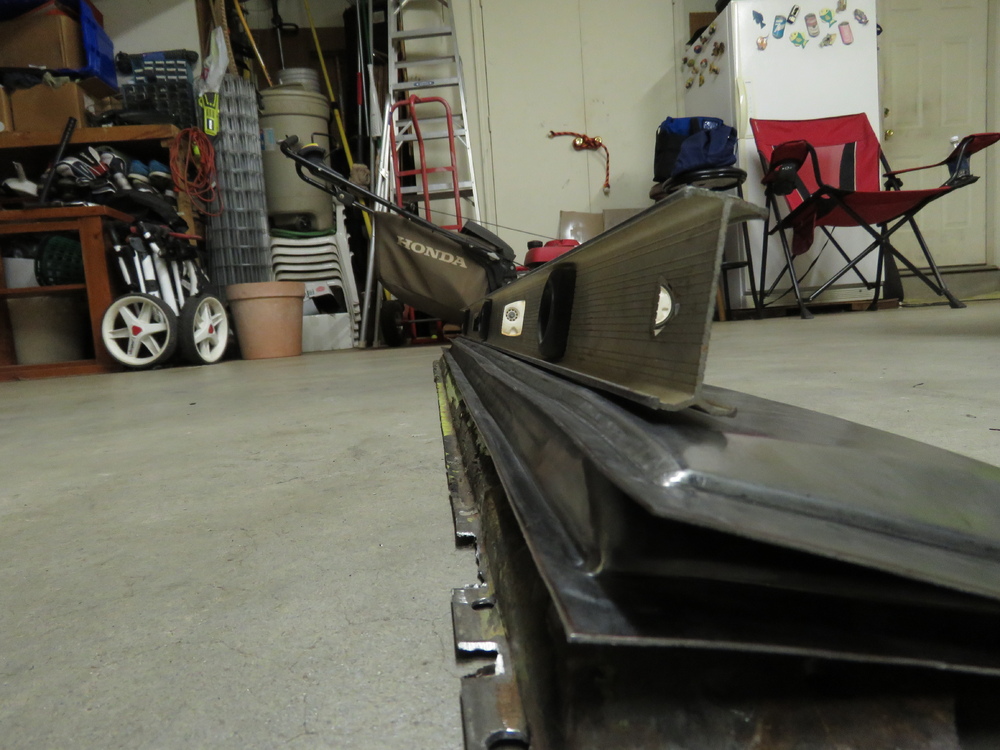
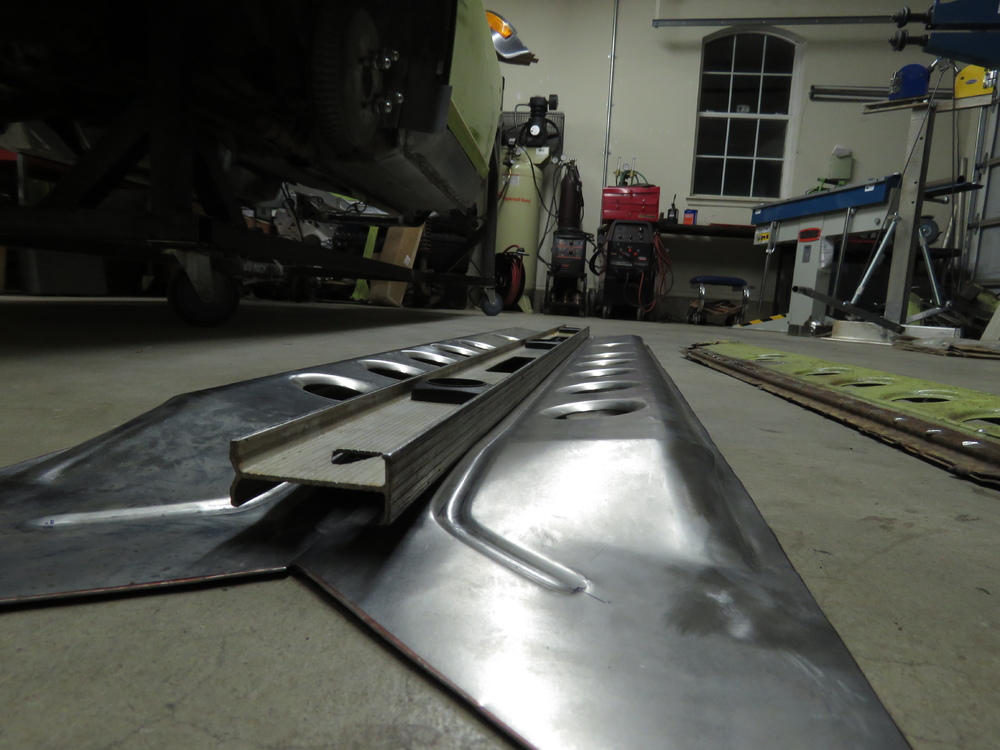
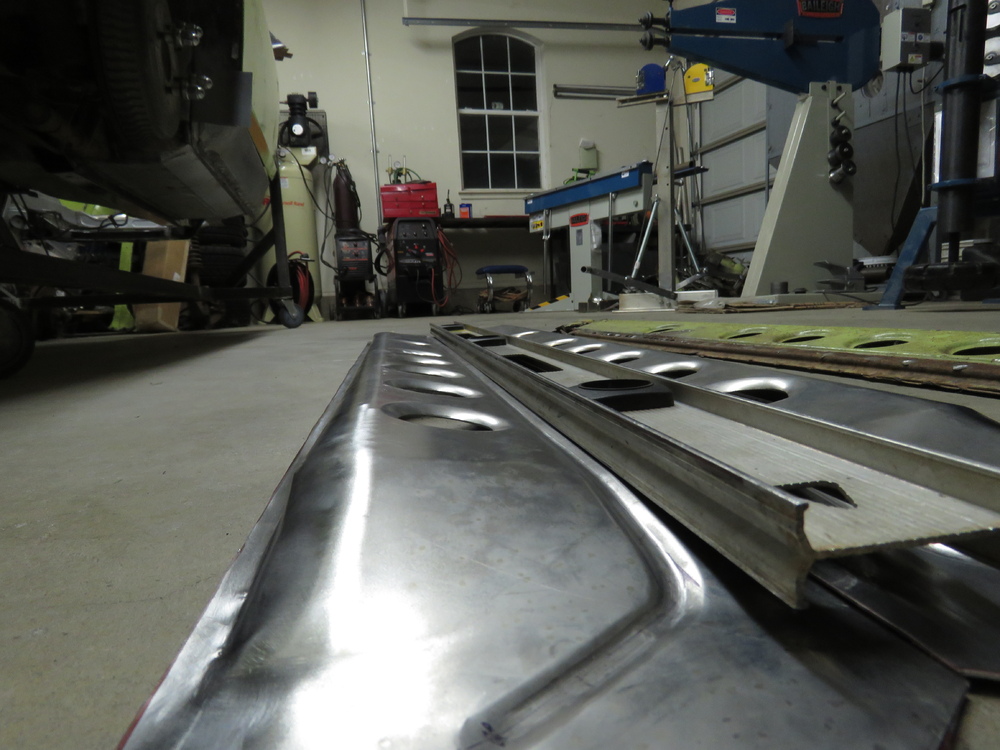
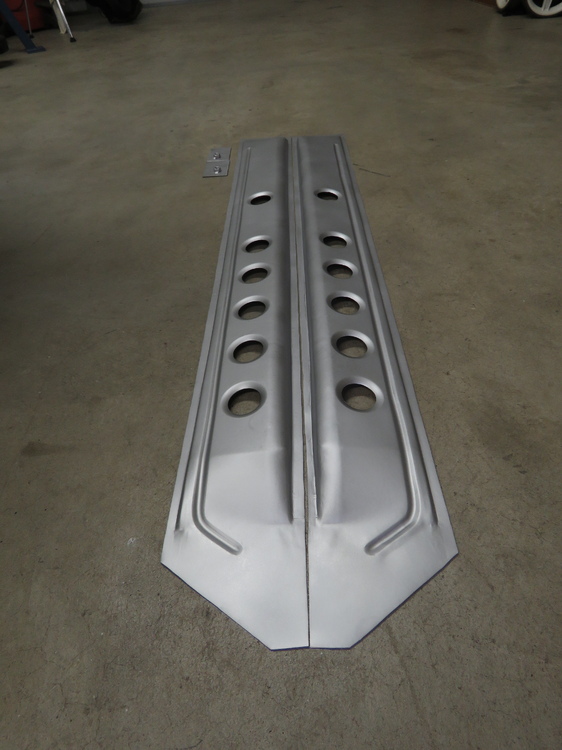
1 pointHaha, I have my fair share of UH OH's such as the one pictured below. The first set of Interior rocker panels I made which were for my car, you can see in the picture below that the bottom of it has a bow. Though it has a bow in it, Everything still aligned up, the only fitment issue I had was with my floor pans, had to put a curve in it at the flange end that gets welded to the rocker panel in this area. Oh well I guess, part of learning. Was working on making a set of 240z Interior rocker panels yesterday and finished tonight for Charlie at Zedd Findings. You can see in the pictures below, that the bottom of it is straight like its supposed too, unlike the one pictured above. Before painted comparison picture. After a light coat of Rust preventative Weldable Primer.


 1 point