AZ-240z
Supporting Member
-
Joined
-
Last visited
Everything posted by AZ-240z
-
Sorry, but I miss-spoke in my reply, as it was late! The right front color code paint dab should be blue, not white.
-
Brian, The springs could very well be stock. The correct color would have been a semi-gloss black, but depending on the location, each spring was coded with a splash of color. The rear springs had a white dab of paint, the right front had a white dab of paint, and the left front had both a red and a blue dab of paint. Do a search on stock springs and I am sure you will find a nice picture and explanation of what you need. Dan
-
Glad I could help, Mike. The secret is using the thinnest sheet steel you can find. I got a two foot square sheet at home depot. The clips can be somewhat adjusted to fit a little more thickness in the backerboard, and once fastened with the glue, will be plently strong to hold the clips without bending the washers. The clips do need to be adjusted so that they fit the holes in the body securely, but not so tight that prying them off will damage the trim piece which usually happens, especially if the trim piece has seen any water damage over the years. Dan
-
I would recommend taking one of the clips off of the trim panel and seeing how they fit by hand. The clip can be adjusted with some pliars to either widen or pinch the clips for the best fit. I needed to do that with all of mine for both door panels, which did have the plastic cups, and both dog leg panels, which don't use the plastic cups. It is very easy, given the fragility of the masonite backer board, to break the mounting holes in the backer board, and then you have a bigger problem. This was what worked for me, so good luck, and be careful. Dan Edit: The thing that brought me to adjusting the clips that were too big right out of the bag for the holes was, I did crack one of the mounting holes in the backer board. My fix, for anyone experiencing the same problem, was to get a sheet of super-thin gage steel, cut some large washers that would fit without going over the edge of the board, with correct hole size, and using gorilla glue to fasten one on each side of the backer board hole. steel has to be very thin to allow clips, with a little tweeking, to fit the backer board opening. You will have to peal the vinyl away from the area to do the inside washer, but easy to do and works and looks perfect. If you use gorilla glue, apply it very sparingly and clamp tightly as this glue will try to expand making for a larger sandwich than you want.
-
Do you still have the emissions air pump shown here? If so, and it works correctly without squeeks and chirps normally associated with noisy bearings and seals, these could be useful to a restorer concerned with originality. The bearing and seal kits to rebuild these emissions pumps are NLA. Same thoughts apply to the A/C system also shown in posts which appears to be in very nice condition, another important item, even though it is a dealer add-on. Dan
-
Bart, It is a design short-coming in the geometry of the 240z throttle linkage, and plagues every car. I have heard that it is possible to solve this problem by re-configuring some of the linkage attachment points, but I have not done any further investigation. I'm sure someone here has attempted to do a modification to the linkage to allow for a smoother accelerator pedal application. Dan
-
Thomas, Does your splash pan have a drain hole in the front right corner? If so, it is for cars produced after 09/74, and wouldn't fit an early 240Z. It was made to accomodate a radiator that extends lower below radiator support.
-
Stanley, I have used rad hoses and heater hoses, lightly used and OEM, that came off of my restoration in favor of factory braided hoses. All hoses are soft and maybe 8 years old with about 4,000 miles of use. Car is a garage queen. PM me if interested in a "PAY IT FORWARD" deal and I'll even throw in free shipping. Dan
-
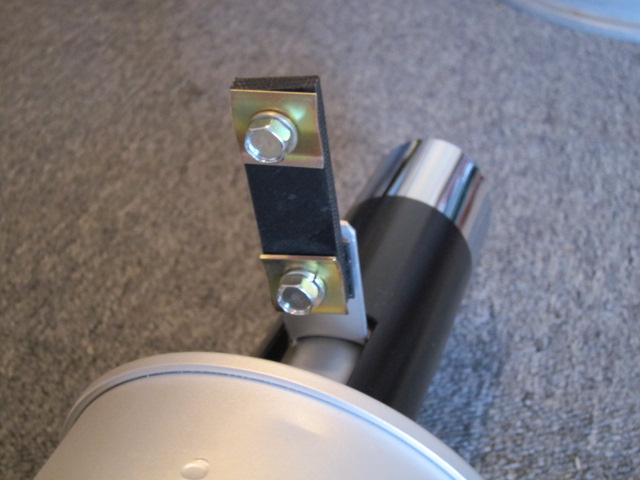
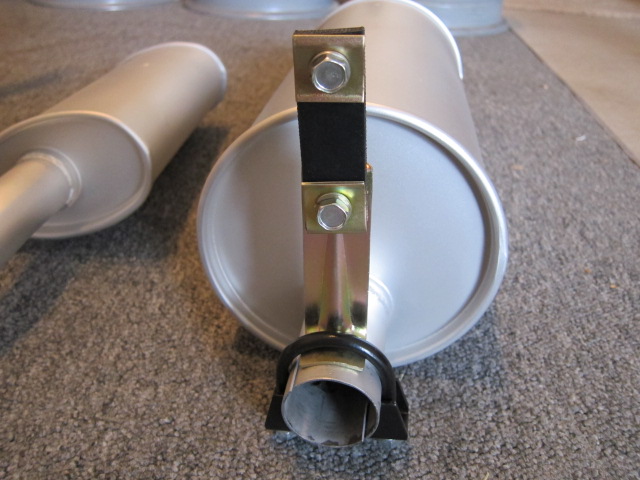
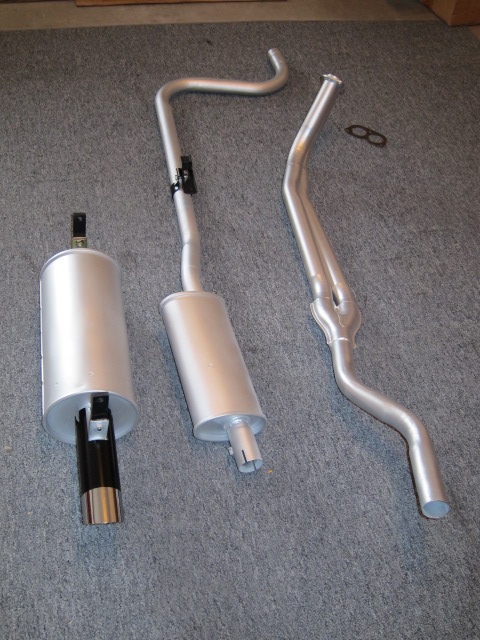
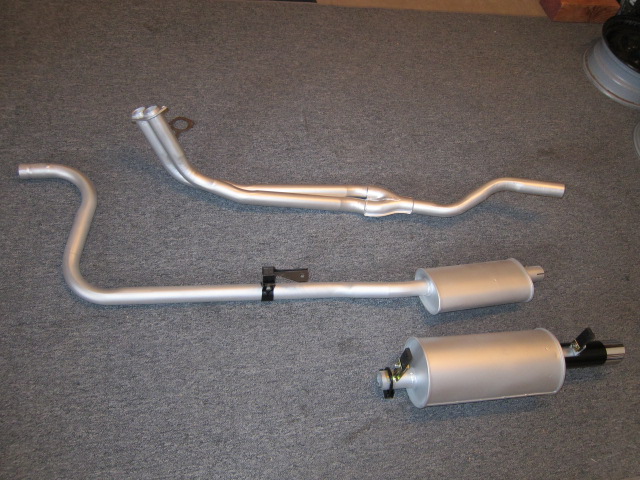
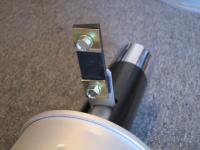
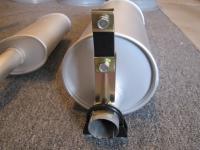
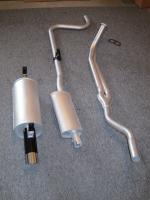
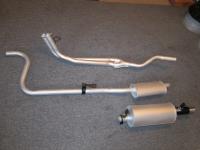
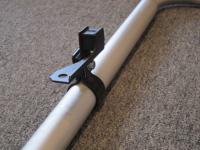
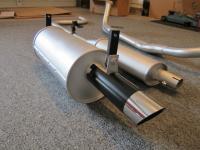
Since I'm an originality GEEK, thought I would show the NOS OEM hangars I found when restoring my series 1 car. Stuff like this is still out there, just takes a lot of patience. Dan
-
Hello Ken, To be correct, the squirrel cage fan should be metal for series 1 cars. No sure when the use of plastic started, but I seem to remember that the pastic would put out a little more volume, but was interchangeable with the metal fan squirrel cage fans. Dan
-
I'll try to give you an educated guess. The parts CD offered by Classiczcars, lists two part numbers for this item. Under the catagory, body, L24, up to 7/73. The first part number is 86823-E8800. E8800 part numbers are generally for cars manufactured up to 6/72. The second part number is 86823-N3300. N3300 part numbers are generally for cars manufactured from 7/72 to 7/73. I can tell you that my 1/71 series 1 car did not have this seat belt holder, and part numbers for cars manufactured up to 1/71 generally have part numbers ending in E4100, so my assumption would be that this holder started in use sometime between 1/71 and 6/72. The parts CD does not list any dates of use. Hope this helps. Dan
-
My two cents, as an aside. Generally, when tightening belts, I believe people have a tendancy to over-tighten, putting undue stress on drive shaft bearings and seals associated with whatever is being driven. When the recommended slack is, say, 1", I try to err on the loose side. I would rather re-adjust for any slipage resulting. Dan
-
You are quite welcome, Charlie. Glad I could be useful. Dan
-
When you say "factory Air Conditioning", I think you mean "dealer installed Air Conditioning". I think Factory air was not available until August of 1973. For a dealer installed system, at least on earlier series 1 cars with Frigi-king units, all heater/vent function control levers should be in the left, OFF, position. Your system should have an air conditioning controller mounted either at the bottom edge of dash below the emergency flasher switch for Frigi-King, or on the front, left edge of the center console for another dealer installed manufacturer which I can't remember right now. With this controller you can turn the A/C on or off. The reason, on early Frigi-King cars, that the top OFF-VENT-HEAT slide lever on the heater control panel needs to be in the OFF position is: 1. A mirco-switch is installed at this vent door actuator cable located behind the fan motor on the passenger side under the dash. You can follow this actuator cable up to the right side of the heater plenum behind the heater fan motor/squirrel cage housing to locate where this micro-switch is installed at the pivot point of this vent door cable actuator. 2. If the air conditioning controller is left in the ON position, moving the top heater control lever from VENT to OFF will turn the Acompressor on, and visa versa. I used to just leave my A/C controller in the ON postion, and would turn my A/C on or off by must moving this top heater control slide lever between VENT and OFF to controll the A/C. I welcome any corrections to this analysis, and hope this explanation is helpful. Dan
-
Remove the drivers side quarter window plastic trim panel, remove the tail light interior plastic finisher panel, prop open the hatch with a hold-open rod, wooden broom handle, or whatever works, (be sure to cushion ends at glass and floor), and remove the 10mm nut which secures the hatch strut to the bracket welded at the hatch opening. To remove this plastic trim panel, gently flex the trim panel under this bracket. To install the trim panel, start from the bottom, placing the trim panel in position at the floor level and over the strut tower, and, again, gently flexing the top edge of the panel under the strut hold open bracket. The hatch is heavy so be careful not to bump whatever you use to hold the hatch open. These plastic panels are usually very fragile from age and are easily cracked unless your is a new reproduction panel. This is my method, and others might have other methods. FWIW Dan
-
Check out Banzai Motorworks, Banzai Motorworks
-
Just as a point of interest, my original owners manual for a '71 series 1 240Z describes the operation of the water temp gage. It states that the normal range for the temp. gage is between 170F and 220F indicated. It further states that should the gage read over 240F for more than a minute or two, stop the car, have the engine cooled down, keeping the engine speed at 1,000 to 1,500 rpm, and then check coolant level. 220F on my gage is just a hair over 3/4 needle travel, considered the high end of NORMAL. I bought my car new in Tucson and drove it in the hottest climates for over 138,000 miles. The temp normally resided over the right leg of the M for most of that time with the A/C on, 100F+ temps, in the deserts of Arizona, California, and the plains of Florida for 42 years. The engine had never had any issues. A contributor to this sight, Dr. Joseph Demers, had presented a way to calibrate the temp gage by measuring the correct resistance in the temp sending unit. I used this to calibrate my temp gage and the reading now perfectly matches temps I am getting using my infrared thermometer. If I can find his article, I will add it to this discussion. FWIW, Dan
-
Great points, Chris. And, to take these details a step further, the black covers on both the original valve stem cap, and the new iteration offered by MSA, have the word PACIFIC with STARS embossed on the top. The Metal base of the new cap offered by MSA also has the word PACIFIC but with no "stars" incscribed on the barrel of the base. Just my opinion, but I think, for total originality, the most obvious difference has to be the shape of the metal base.
-
Thanks Bob. The shape of the metal base is obviously a closer match to the original. I have an original on my NOS spare tire and was able to source four more to use for the 2012 ZCON show.
-
Bob, Nice, inovative, solution. Well done! Did the black plastic/rubber protective cap come with it, or where did you source those? Dan
-
Mike, Could you tell me the approximate cost of chroming one plastic "D" hubcap medallion? Thanks, Dan
-
Datsun Z & ZX Parts, Datsun 240Z 260Z 280Z 280ZX Nissan 300ZX Parts
-
jdm-car-parts.com
-
img001.pdf I had the same questions when I purchased my car from the dealer new. It is just the nature of the beast. My car, recently restored to include a rebuild of the engine, is completely stock with the correct new gages and oil sender unit. At idle, the oil pressure goes to a needle off the 0 mark. At cruise speed of 3600 RPM, the pressure reads approximately 45 PSI. This has been 100% normal for my car for the last 42 years. The page I have attached is from Wick Humble's book, "How To Restore Your Datsun Z-Car" by way of a reasoned explanation from a professional. This is not to say your car may not have other related issues, but only to shed light on a very common complaint from day one. Dan
-
Hello Fred, I had the same, or similar, problem with my '71 Z. Turned out that the ignition key lock tumbler had worn out and was not engaging the electrical ignition switch mounted on the back of this key lock by two small phillips screws. My indications were intermittent starting with the same accessory click you hear from the passenger kick panel area. I bought a new key lock assembly and problem solved. To check this on your car, it is possible to remove the plastic steering clam shell housings and unscrew the ignition switch on the back of the ignition key lock. There is enough room to access this switch. Then, using a screw driver inserted into the electrical ignition switch, turn the switch, which obviously by-passes the key lock, to see if your car starts. Worn key locks on our early cars is a common problem. When removing the plastic steering column clam-shells, keep track of where each screw came from. I think there are 5 screws holding these plastic covers together. Good luck, and hope this explanation is clear enough. Dan