AZ-240z
Supporting Member
-
Joined
-
Last visited
Everything posted by AZ-240z
-
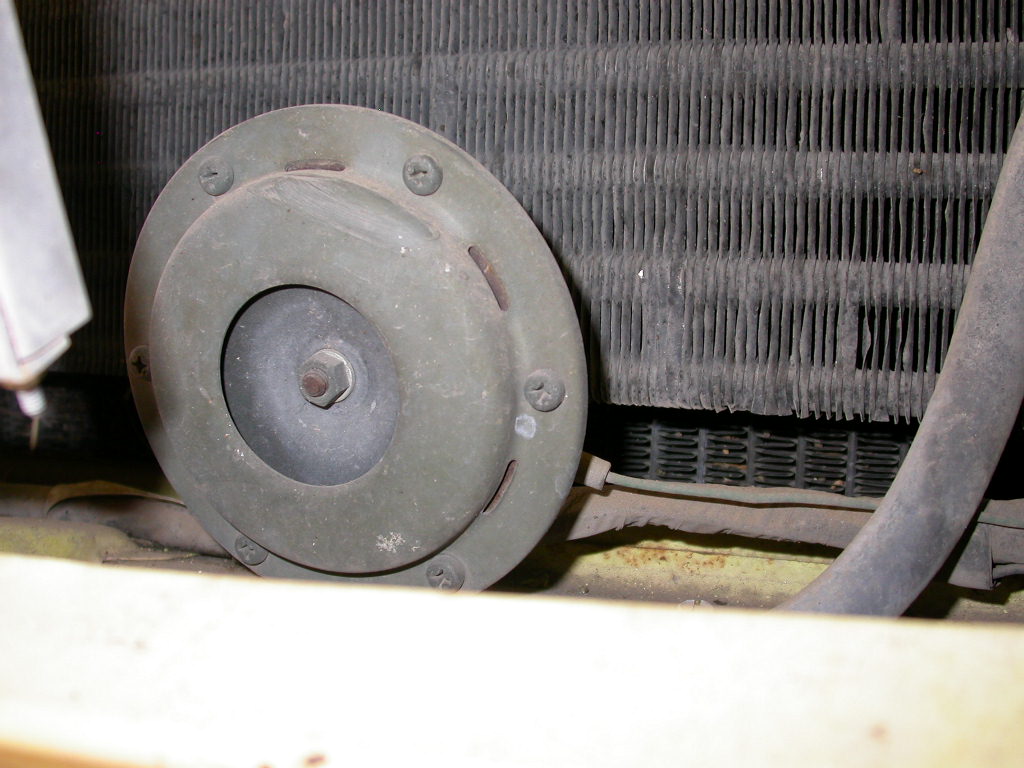
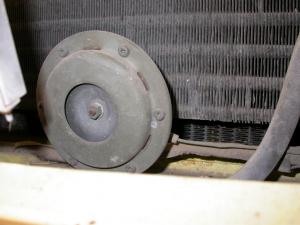
There have been many thoughts on what is factory correct for refinishing our horns. I have attached a picture of an early 1970 Z horn to support what I feel is correct when talking about "how it came from the factory"/ 1. Front cover is olive drab. 2, Center diaphragm is satin black 3. Center bolt and nut clear zinc. 4. outer mounting screws, front side, olive drab. 5. rear cover and nuts are natural finish. 6. mounting brackets are natural finish. 7. 4 large mounting machine screws and washers are yellow zinc. I may know of someone who offers a kit of gaskets and screws, nuts, and washers for rebuilds. Dan
-
Mike, Bueller, anyone, Bueller, Anyone, Can anyone tell me why I can't view new content?
-
http://www.classiczcars.com/topic/50679-rebuilding-the-nikki-fuel-pump/
-
Something that is probably obvious to everyone, but occasionally overlooked is, when you have the oil pan in hand, make sure that the mounting flange is as flat as possible. I have been guilty of over-tightening the oil pan mounting screws in the past which will definitely deform that flange and make leaks highly probable. Just my two cents. Dan
-
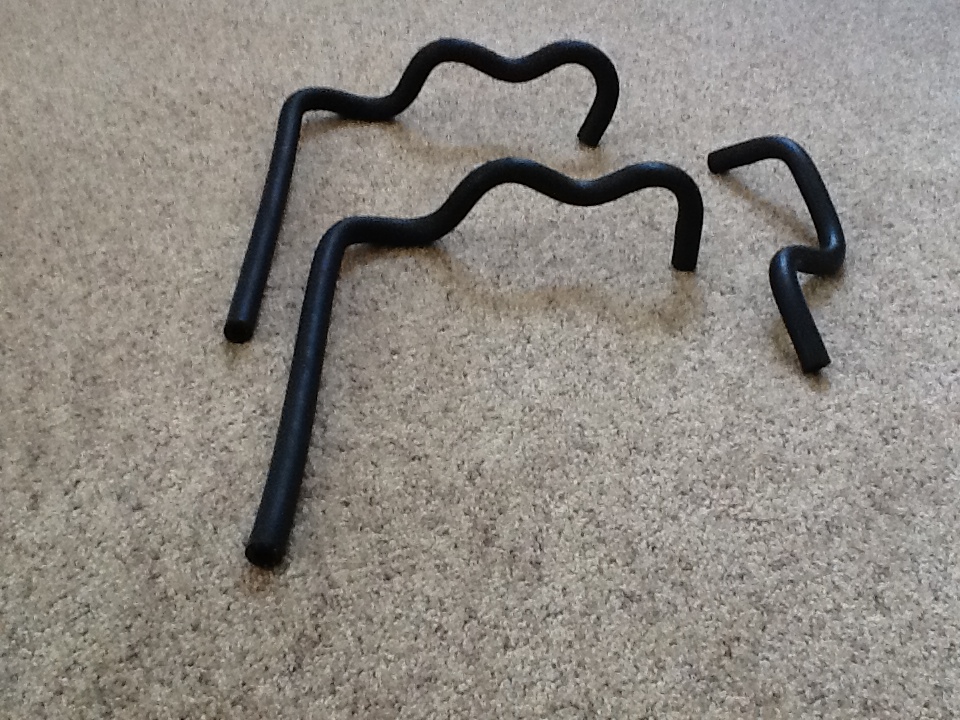
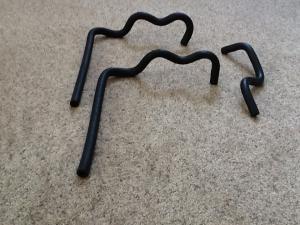
Just to add to my last post, and I thought that this would be the most logical place for this, I wanted to see how difficult it would be to make a full set of these hoses using my technique. I did make a pretty nice set with the correct 11/32" ID brake vacuum hose and 1/4" copper tubing. I first formed the copper tubing, and then, with some sil-glide lube, threaded to hose over the tubing. In retrospect, I probably wouldn't compete the copper tubing bends, just start them so as to make getting the hose on a little easier. I have attached an image of the hoses with the ones I made in the foreground and to the right. The vac side hose in the back of the image is an NOS rubber vac hose I used to replicate. I trial fitted both hoses to my car and the fit was perfect, as far as I could tell. My experiment successfully completed, I am offering these to anyone in need of a set of early mastervac hoses for the cost of mailing. Please PM me with your response, and I hope that this may help others on this forum. Dan
-
http://ZHome.com/ZCM...andE88Heads.htm
-
The process I used to create this master vac hose section is something I learned from Kats. Kats used braided fuel hose which is the exact correct size, but much softer than rubber vacuum tubing, and brass rod to give the hose perminent shape. I used 11/32" ID brake vacuum hose from NAPA AUTO PARTS which is an exact match in size and texture to the Nissan hose, and 1/4" copper refrigerant tubing from Home Depot. Using a length of the copper tubing, I shaped it first and then slid the rubber hose over the tubing. A little sil-glyde on the tubing made the process fairly smooth but guard against using excessive pressure that might kink the copper tubing. Before inserting the copper tubing, you must cut enough off of each end of the copper tubing, one to one and a half inches, to allow room for the master vac, check valve, or engine mounting fitting in the rubber tubing. I, also, leave an extra 1/2" or so on the rubber tubing that can later be trimmed for a perfect fit. I plan to make a compete set of these master vac hoses and will take all the measurments for those who might want to try this for there own project. I'll try to attach the reference to Kats posting. http://www.classiczcars.com/topic/23900-datsun-240z-vs-fairlady-z432/page-8 Look at post #154 on this page. Let me know if there are any questions as to how I made this hose. And, yes, the copper tubing remains in the vacuum hose to maintain the shape. Dan
-
Mike B, Is this spreadsheet still available? I'm unable to access it with the above address. Dan
-
I believe that the booster side hoses are all the same up to 6/72. As for the balance tube, or engine side hose, as Marty mentioned, some balance tubes had an optional plug on the top of the balance tube as well as the end. If your balance tube has this optional plug on top, and you wanted to move the location of your engine side hose to accomodate the hose I have, then my hose would work. As your cars build date is 8/70 which is approximately the model year change-over date from '70 to '71, this is most likely the change-over for this hose configuration. If you are concerned about originality, there is a general consensus that parts usage became blurred as to what was correct during model changes, but this would be your call. Dan This is a reference for dates from our parts CD. D:\ZCD\BASEQ3\PAK\YODA\S30_5c.pdf
-
Hardway, from the pictures in your signature thread, it looks like your engine side master vac hose is the early style that plugs into the end, rather than the top, of the balance tube, correct? I may be able to help you out on the master vac side hose, and the engine side hose, only if it plugged into the top of your balance tube. What I have are lightly used rubber style OEM hoses that are in new condition, except for the clamp impressions. PM me if interested. Dan
-
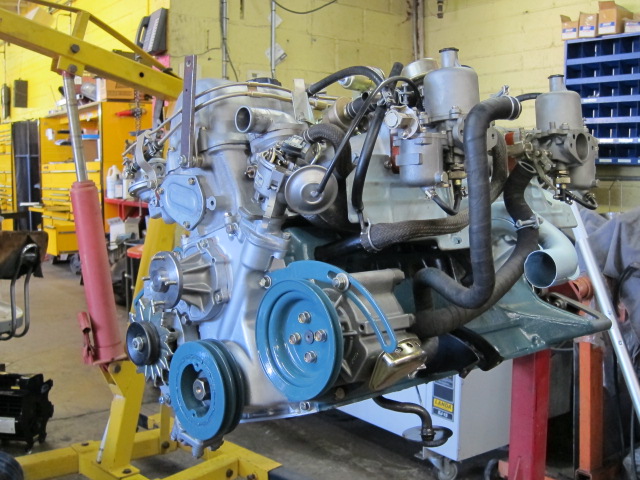
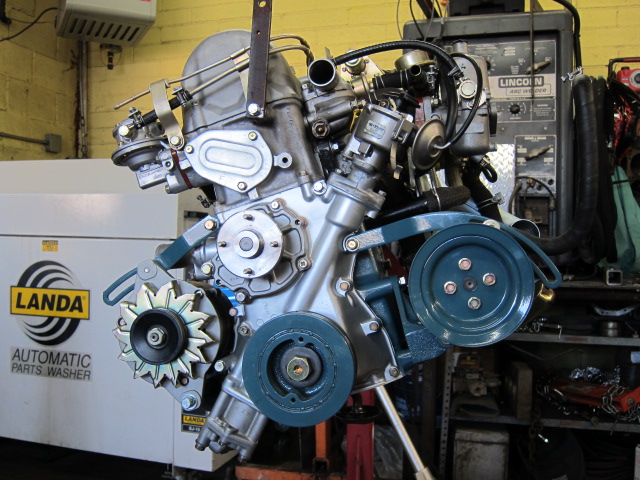
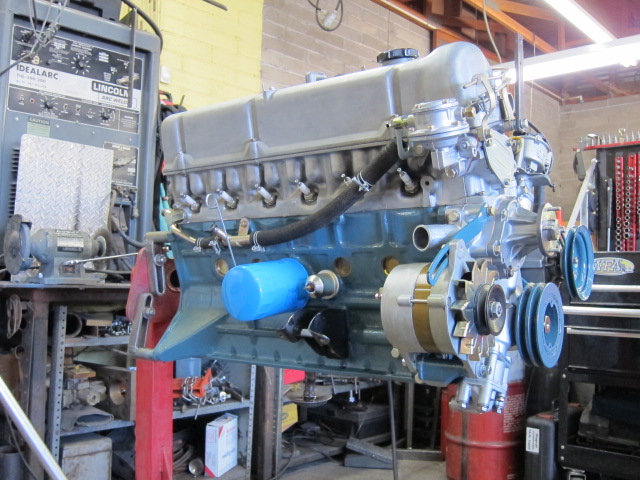
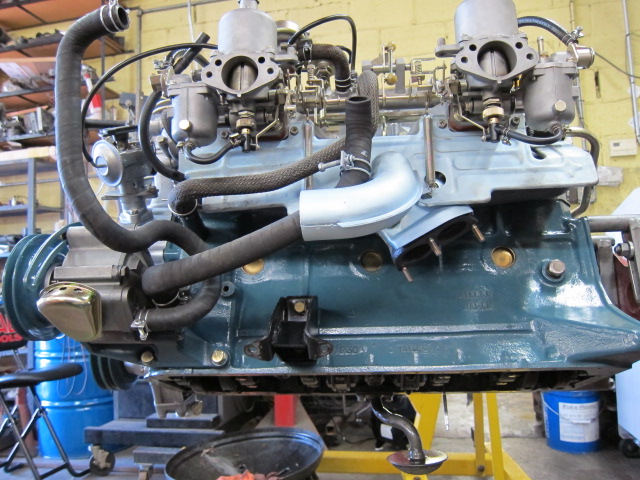
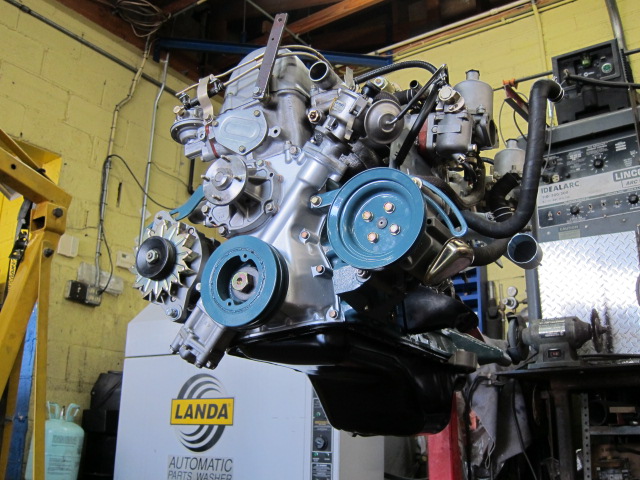
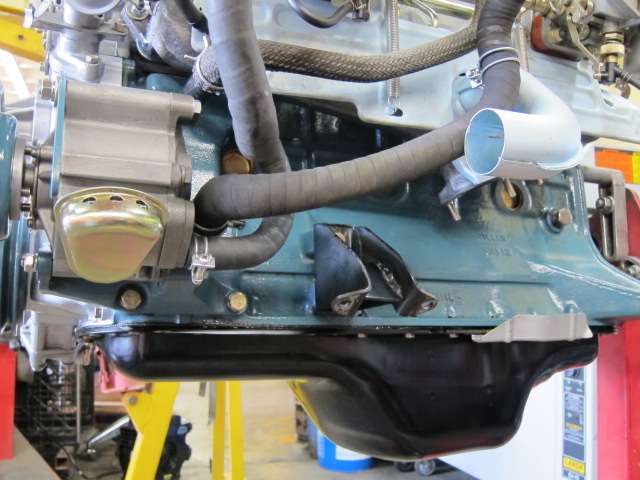
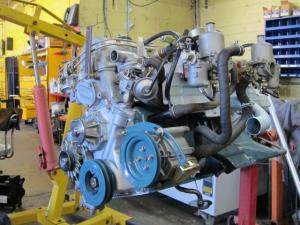
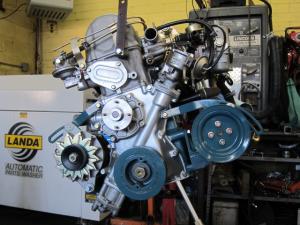
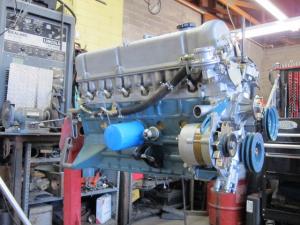
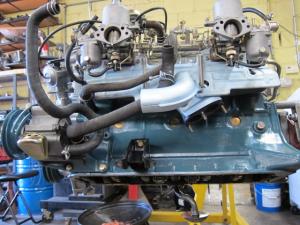
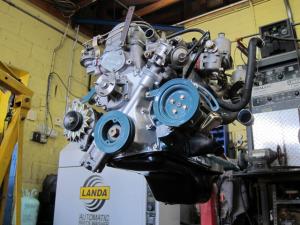
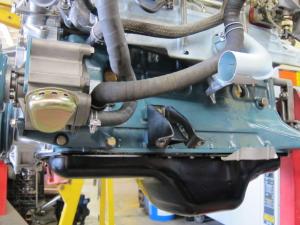
Here are a few pictures of my engine while I was preparing it for the 2012 Convention that shows the exhaust manifold heat riser.
-
And, here are some pictures of my engine which shows the exhaust manifold heat riser attached.
-
-
Here is a discussion I was able to find that may be of help. http://www.classiczcars.com/topic/30810-correct-air-cleaner-for-series-one/?hl=%2Bcleaner+%2Bhousing#entry289842 From what I have learned in the past, August of 1970 was the model changeover between the 1970 & 71 modl years. Smog laws required the addition of carb pre-heat starting in 1971. As you can see from your picture, there are two bosses cast into your exhaust manifold just above the exhaust pipe mating flange. Those bosses would have threaded holes to accomodate the exhaust carb heat riser cover if your car had the air cleaner snorkel for a flex tube connecting the air cleaner to the exhaust manifold heat riser cover. Since there are no threaded holes in the exhaust manifold hosses, your car did not have the air cleaner with snorkel for carb pre-heater. I also associate the model changeover month wih the valve cover change from "Nissan 2400" to "Nissan OHC" covers. This and other model year changes can be flexible due to the availability of parts at the time of manufacture. Again, these are just my opinions from research I have done for the restoration o my car. Hope it helps. Dan
-
-
Andy, I still can't help but think that the little white plastic terminal insulator mounted on the top edge of the dizzy housing could be the issue. Have you tried ordering it from Nissan (part # 22403 - 18005 / Assy terminal) to see if it is available? You may not see a crack in yours, but it doesn't take much for arcing to occur, and it sure stopped the missing, bucking, power loss issues I was having. My dizzy was a new factory re-manufactured dizzy and was defective. I hesitate pressing the issue, but, if I am wrong, you are out maybe $5 for trying. Best of luck with a very frustrating issue. Dan
-
Funny you should ask! This is the exact combo of tire and wheels is on my bucket list. I also have an orange, totally stock, car and have been exploring a wheel and tire combo to compliment my 240z. I like the 14 x 7 & 14 x 7.5 Watanabe wheels for the old school look, but finding tires that legally fit wheels that wide with stock dimensions of 195/70 x 14 tires is impossible. On a totally stock suspended car, this is the only tire size that fills the wheel well, looks best, and fits without rub, in my opinion. Watanabe recommends their wheel size for an S30/240z as follows: (This information can be found on the follow Watanabe site listed under matching data. http://www.watanabe.com.au/ F: A 14-7.0 +3 offset & R: B 14-7.5 +1.5 offset So, now I am considering 15" Watanabe wheel as pictured by haZmatt with 205 / 60 x 15 tires and whose demensions are almost exactly the same as the stock 240z wheel (195 / 70 x 14). 205 / 60 x 15 tires which can be legally mounted on 7" & 7.5" wheels are, also, plentiful. Let me know what you think about my thoughts. Also, tire dimension comparisons can be easily made here: http://www.discounttire.com/dtcs/infoTireMath.dos Additionally, haZmatt, I do not know the tire size you have pictured so would not hazard a guess.
-
Crimping and over-tightening screws could very easily crack this old, brittle, plastic insulator. I was amazed at how a little crack in this insulator caused such a profound engine problem. This would be an easy fix for a few bucks, and I think you can still find these connectors through Nissan, but not positive. Dan
-
-
The tach jumped only to reflect engine misfire due to the intermittent grounding problem with this faulty isolator/connector assembly.
-
Andy, I had a similar problem, though probably not as severe as yours. There is a part on your dizzy called the "assy-terminal" mounted on the lip of the dizzy under the cap, part # 22403-18005. It is a white plastic isolator which makes the electrical connection to the dizzy. If you remove this white plastic part and inspect it for cracks or deterioration, you may find that with this type of deterioration, as old plastic is want to do, could be causing a random grounding issue causing this intermittent problem. Replacing this little plastic part solved my surging, bucking, power problem and may take care of yours. FWIW, Dan
-
http://www.classiczcars.com/topic/26879-exhaust-manifold-finish/?hl=%2Bexhaust+%2Bmanifold+%2Bfinish#entry235378
-
#4 vaccum advance goes to #2 front carb small port. #3 lower port goes to #5 small line on large block breather tube. #3 upper port goes to #1 small port on right side of your picture. ( The larger hose shown in #1 goes to the emissions air pump inlet fitting). I think I have that about right.
-
Glad to help when I can. Have fun with your project. Dan
-
I measured the cables on my car as follows: Negative cable length, not to include connectors --------------- 22 inches Positive cable length --------------------------------------------------- 25 inches Firewall ground cable length --------------------------------------------9 inches My cables are the correct OEM, NOS Nissan parts for my '71 240Z. Dan