AZ-240z
Supporting Member
-
Joined
-
Last visited
Everything posted by AZ-240z
-
Thanks for the positive critique Chris. Am I sensing an interest in my early oil pan? It has been media blasted and painted with gloss black catalyzed paint. Would be great to have a color code or sample match for the red.
-
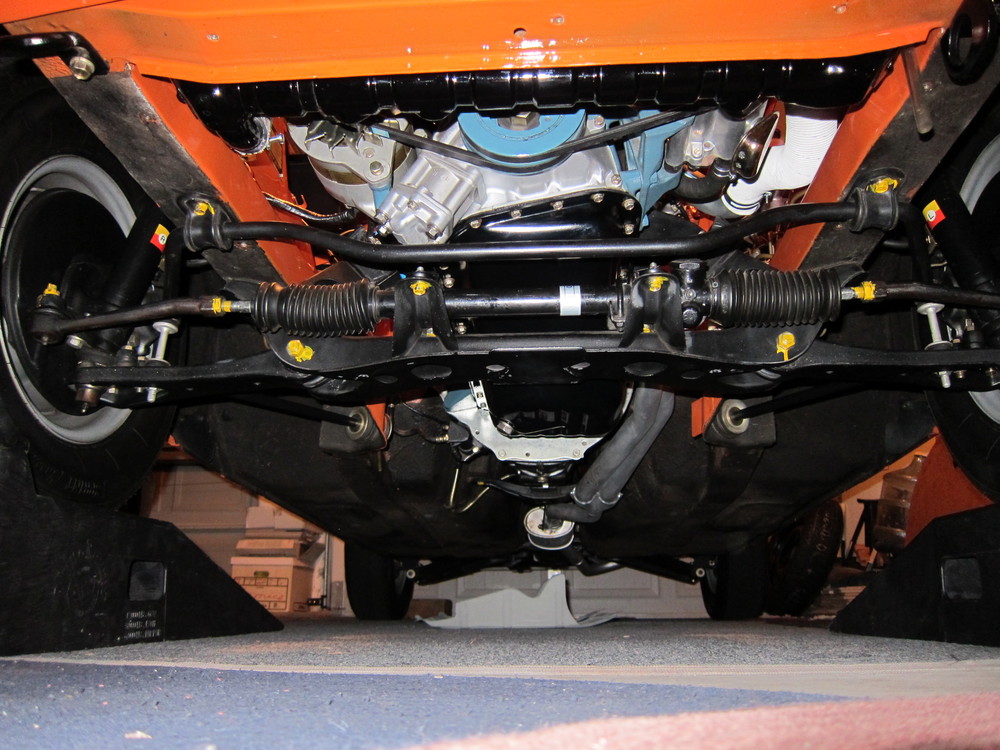
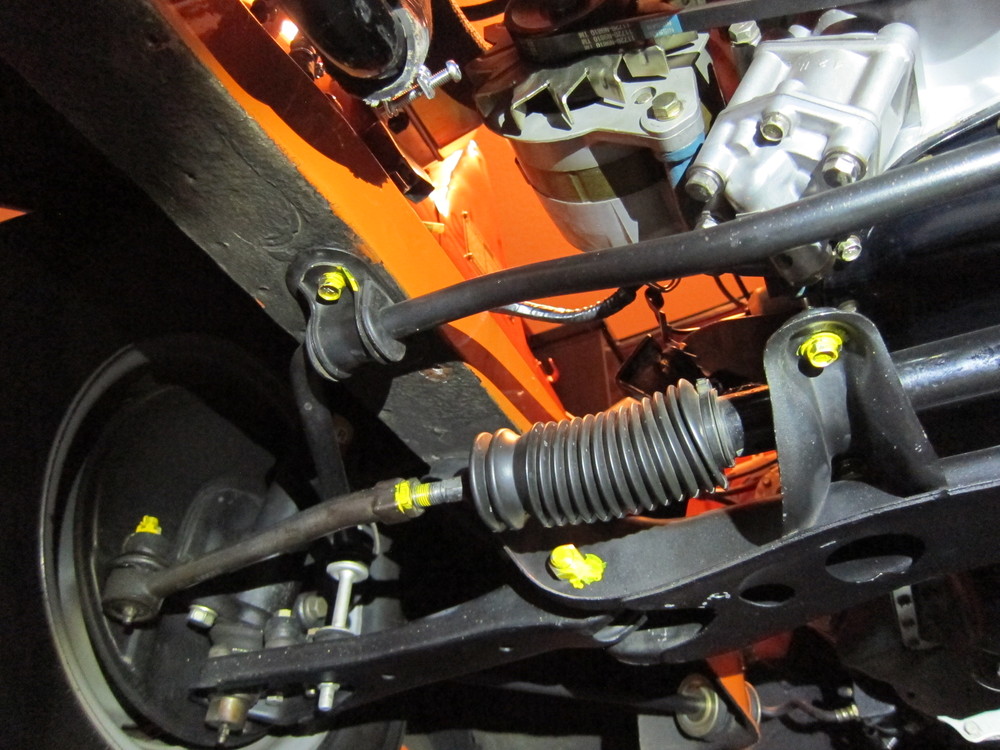
Hi Rich, thanks for those. I'm not seeing anything on the steering rack other than the colored tape. I'll definitely do the yellow mark on the engine. you have the earliest of oil pans, so may need to do some more research on the preserved white V marking. I've got one of those early pans in the attic which will go on eBay unless someone here wants to offer on it. Dan
-
If all 4 wheels are 4-71, in my humble opinion, that adds a lot of value for someone doing a stock, original restoration. And, I believe these wheels would be considered original for any car with a build date from 4-71 to 6-71 without stretching the point. Good luck to you! also, you really should post pictures of all the wheels, front and back.
-
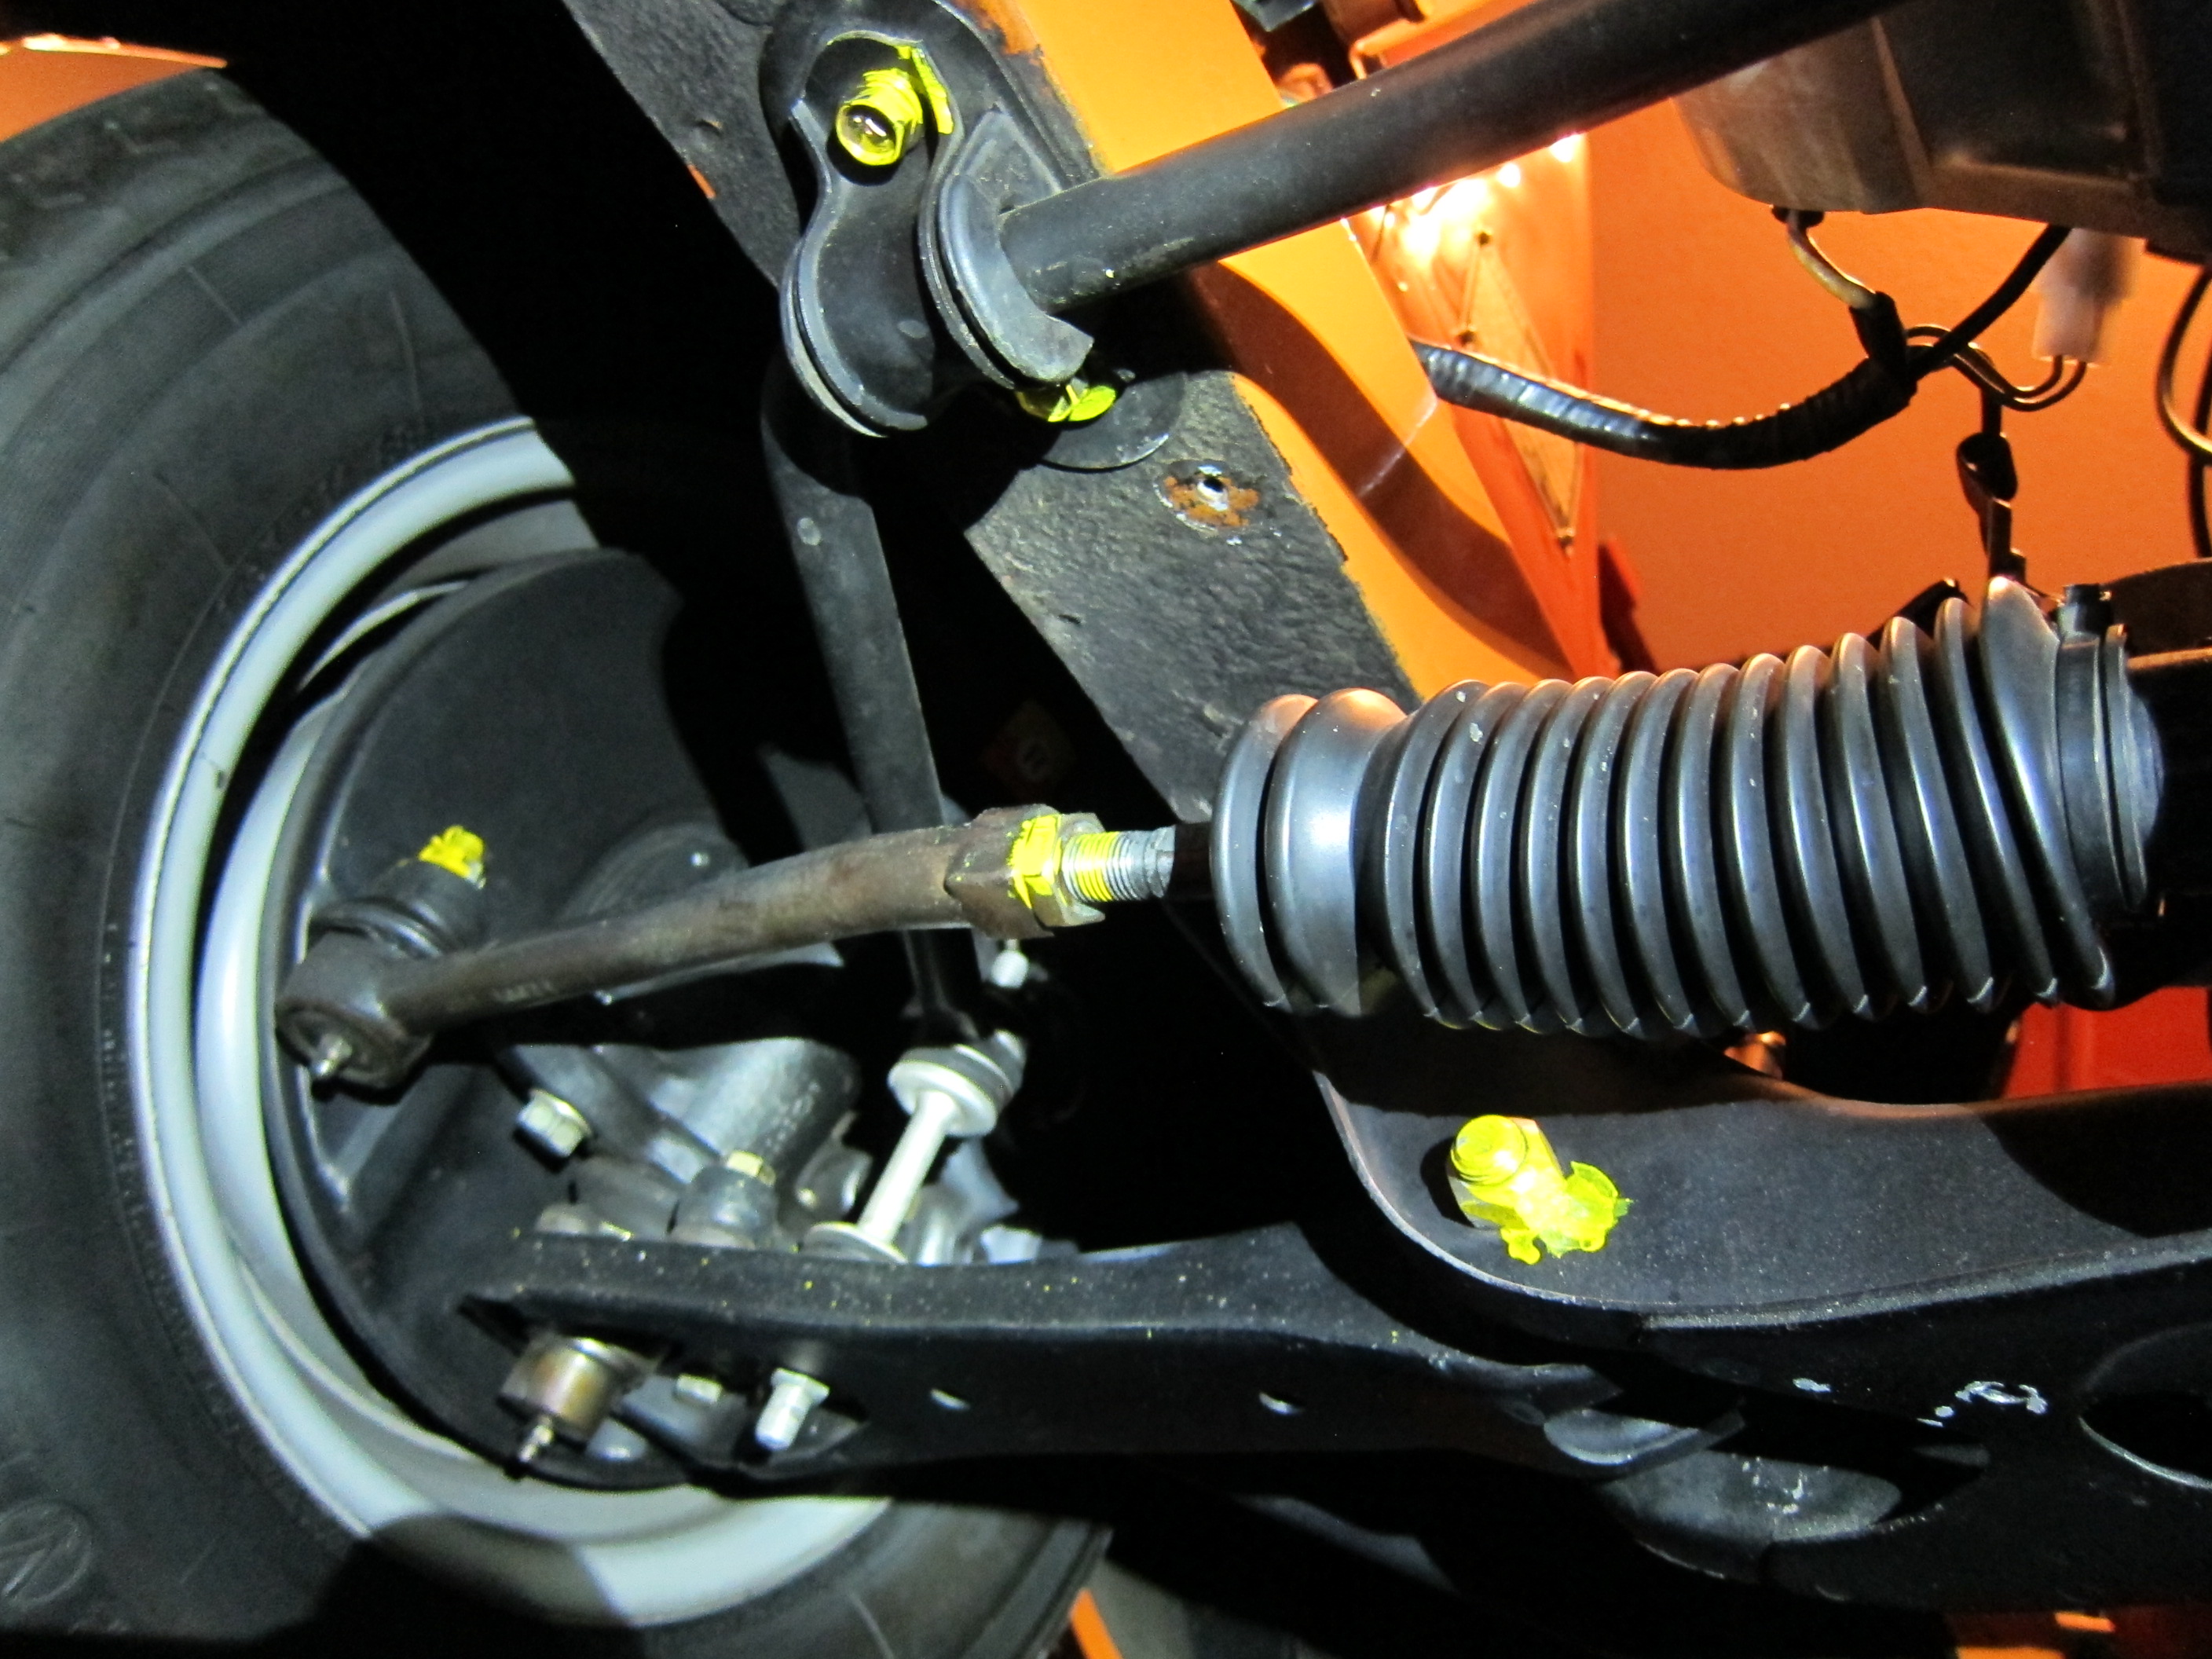
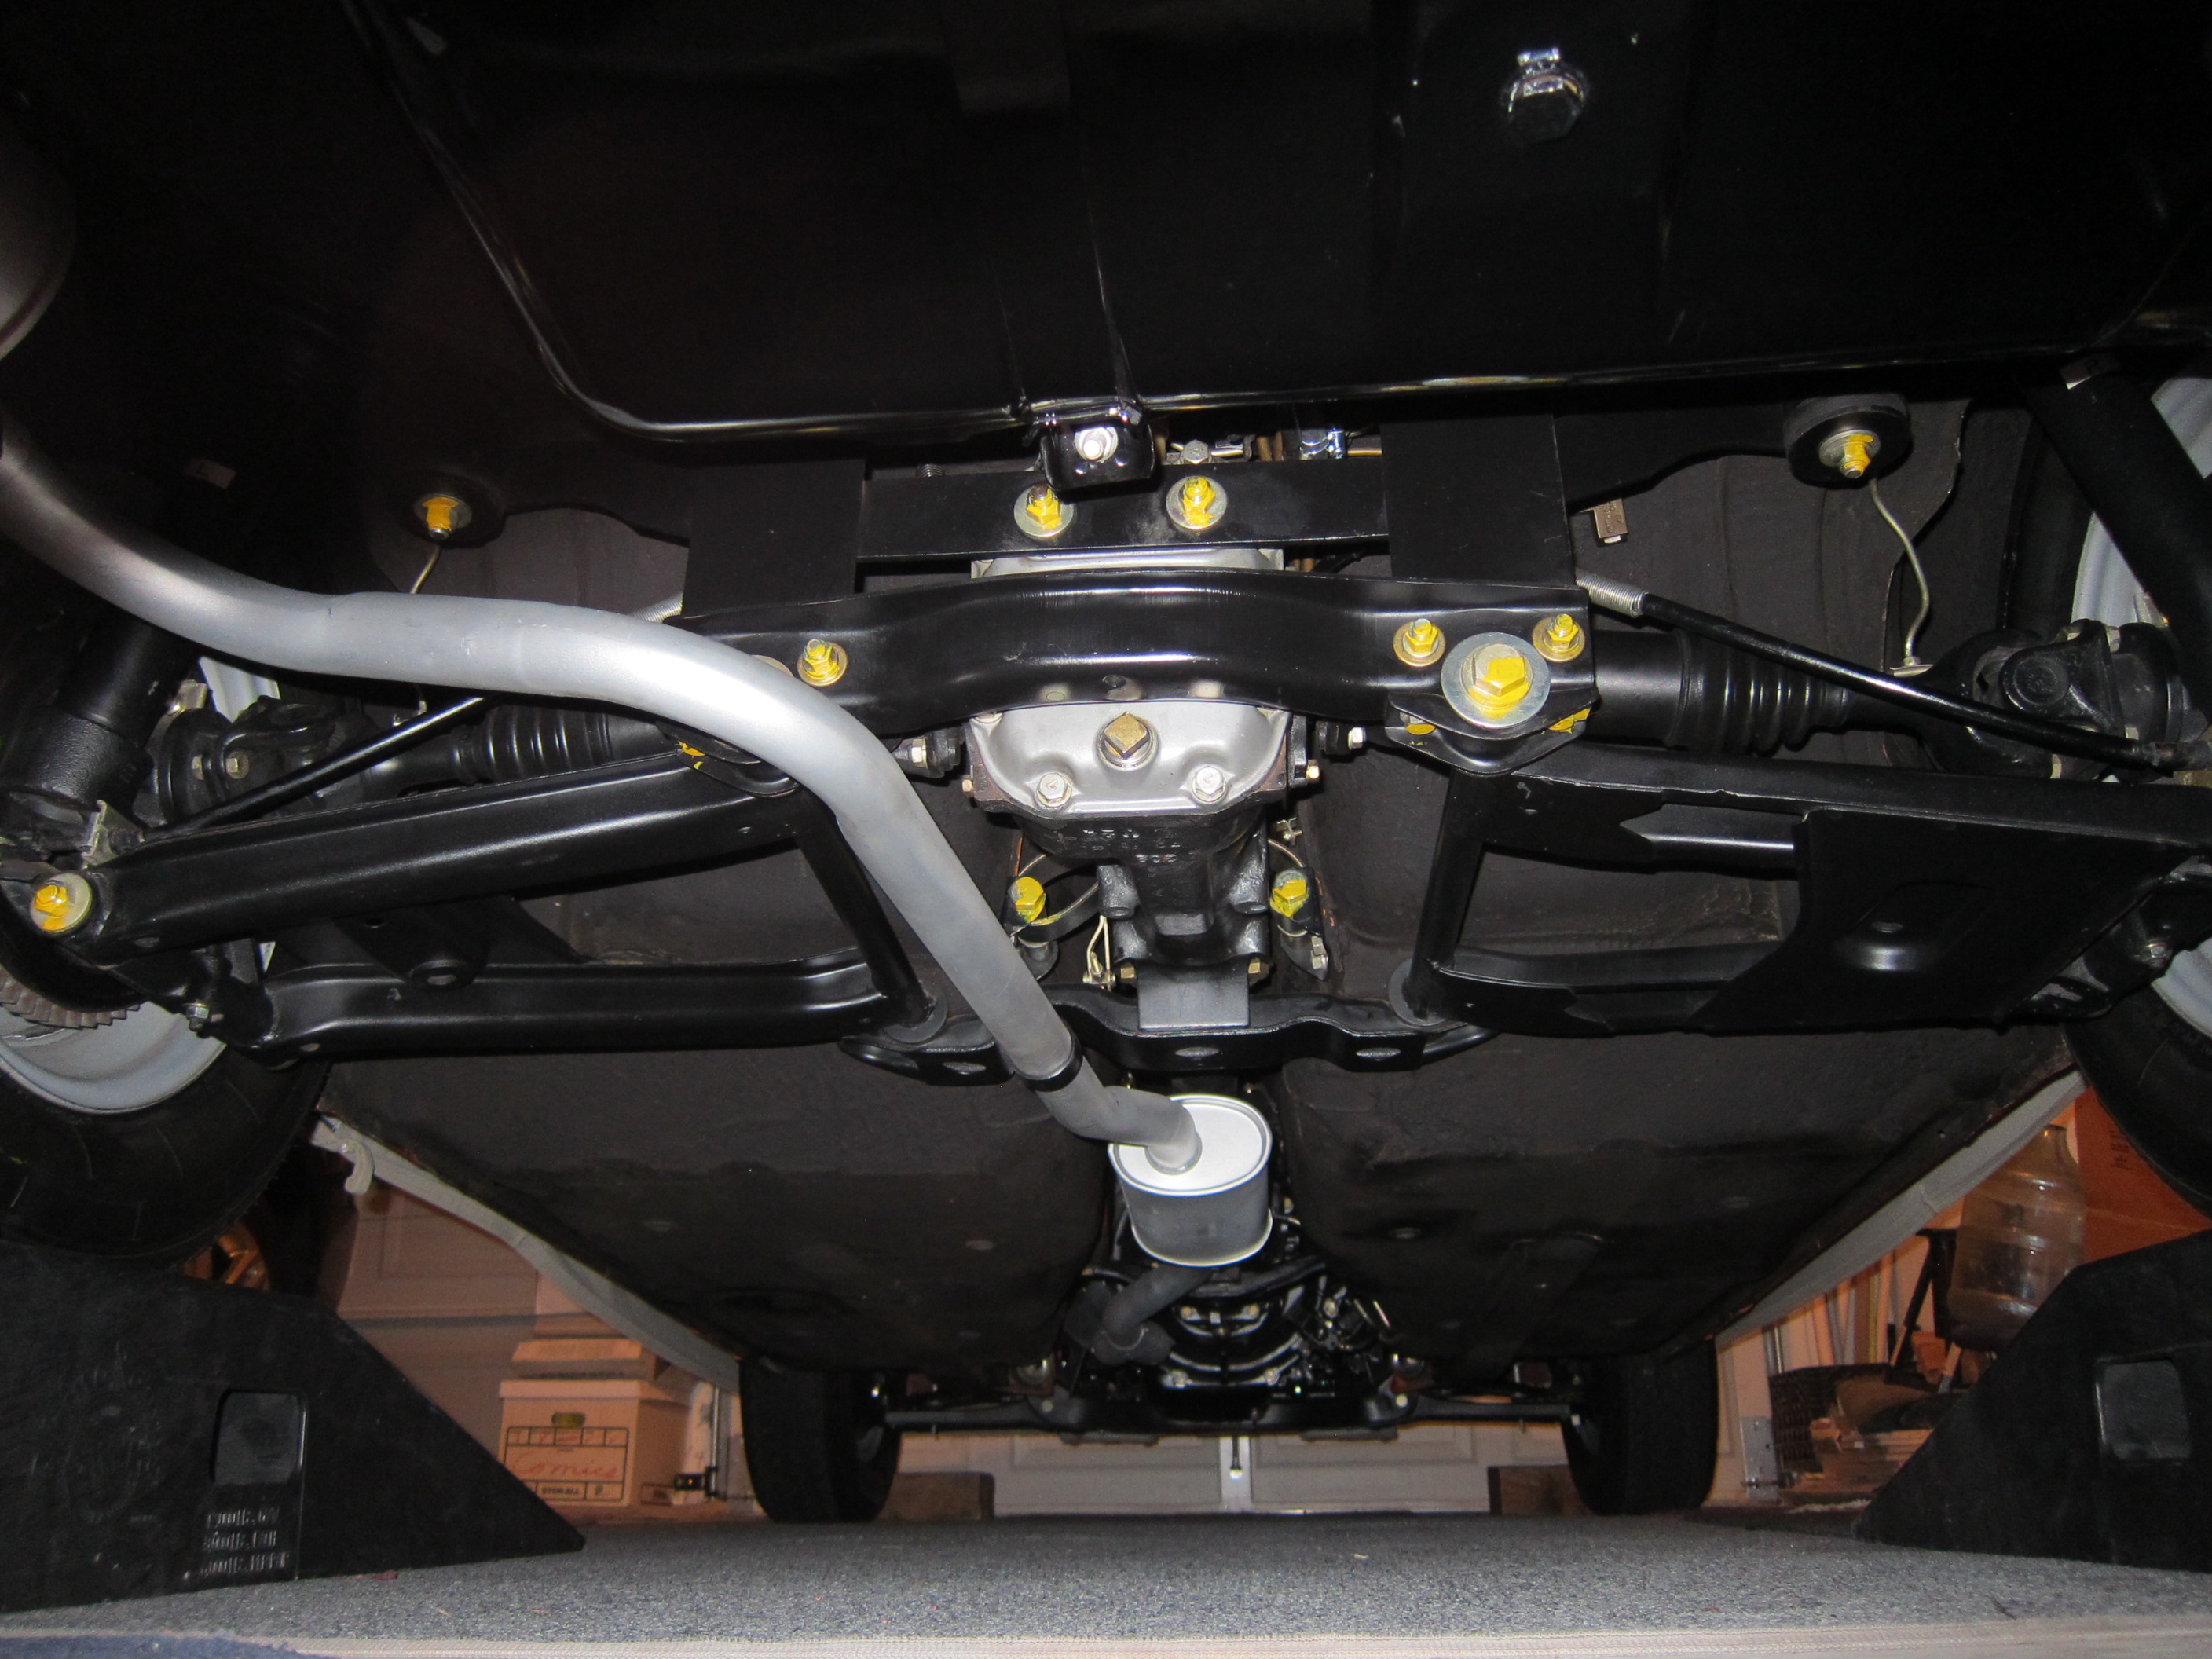
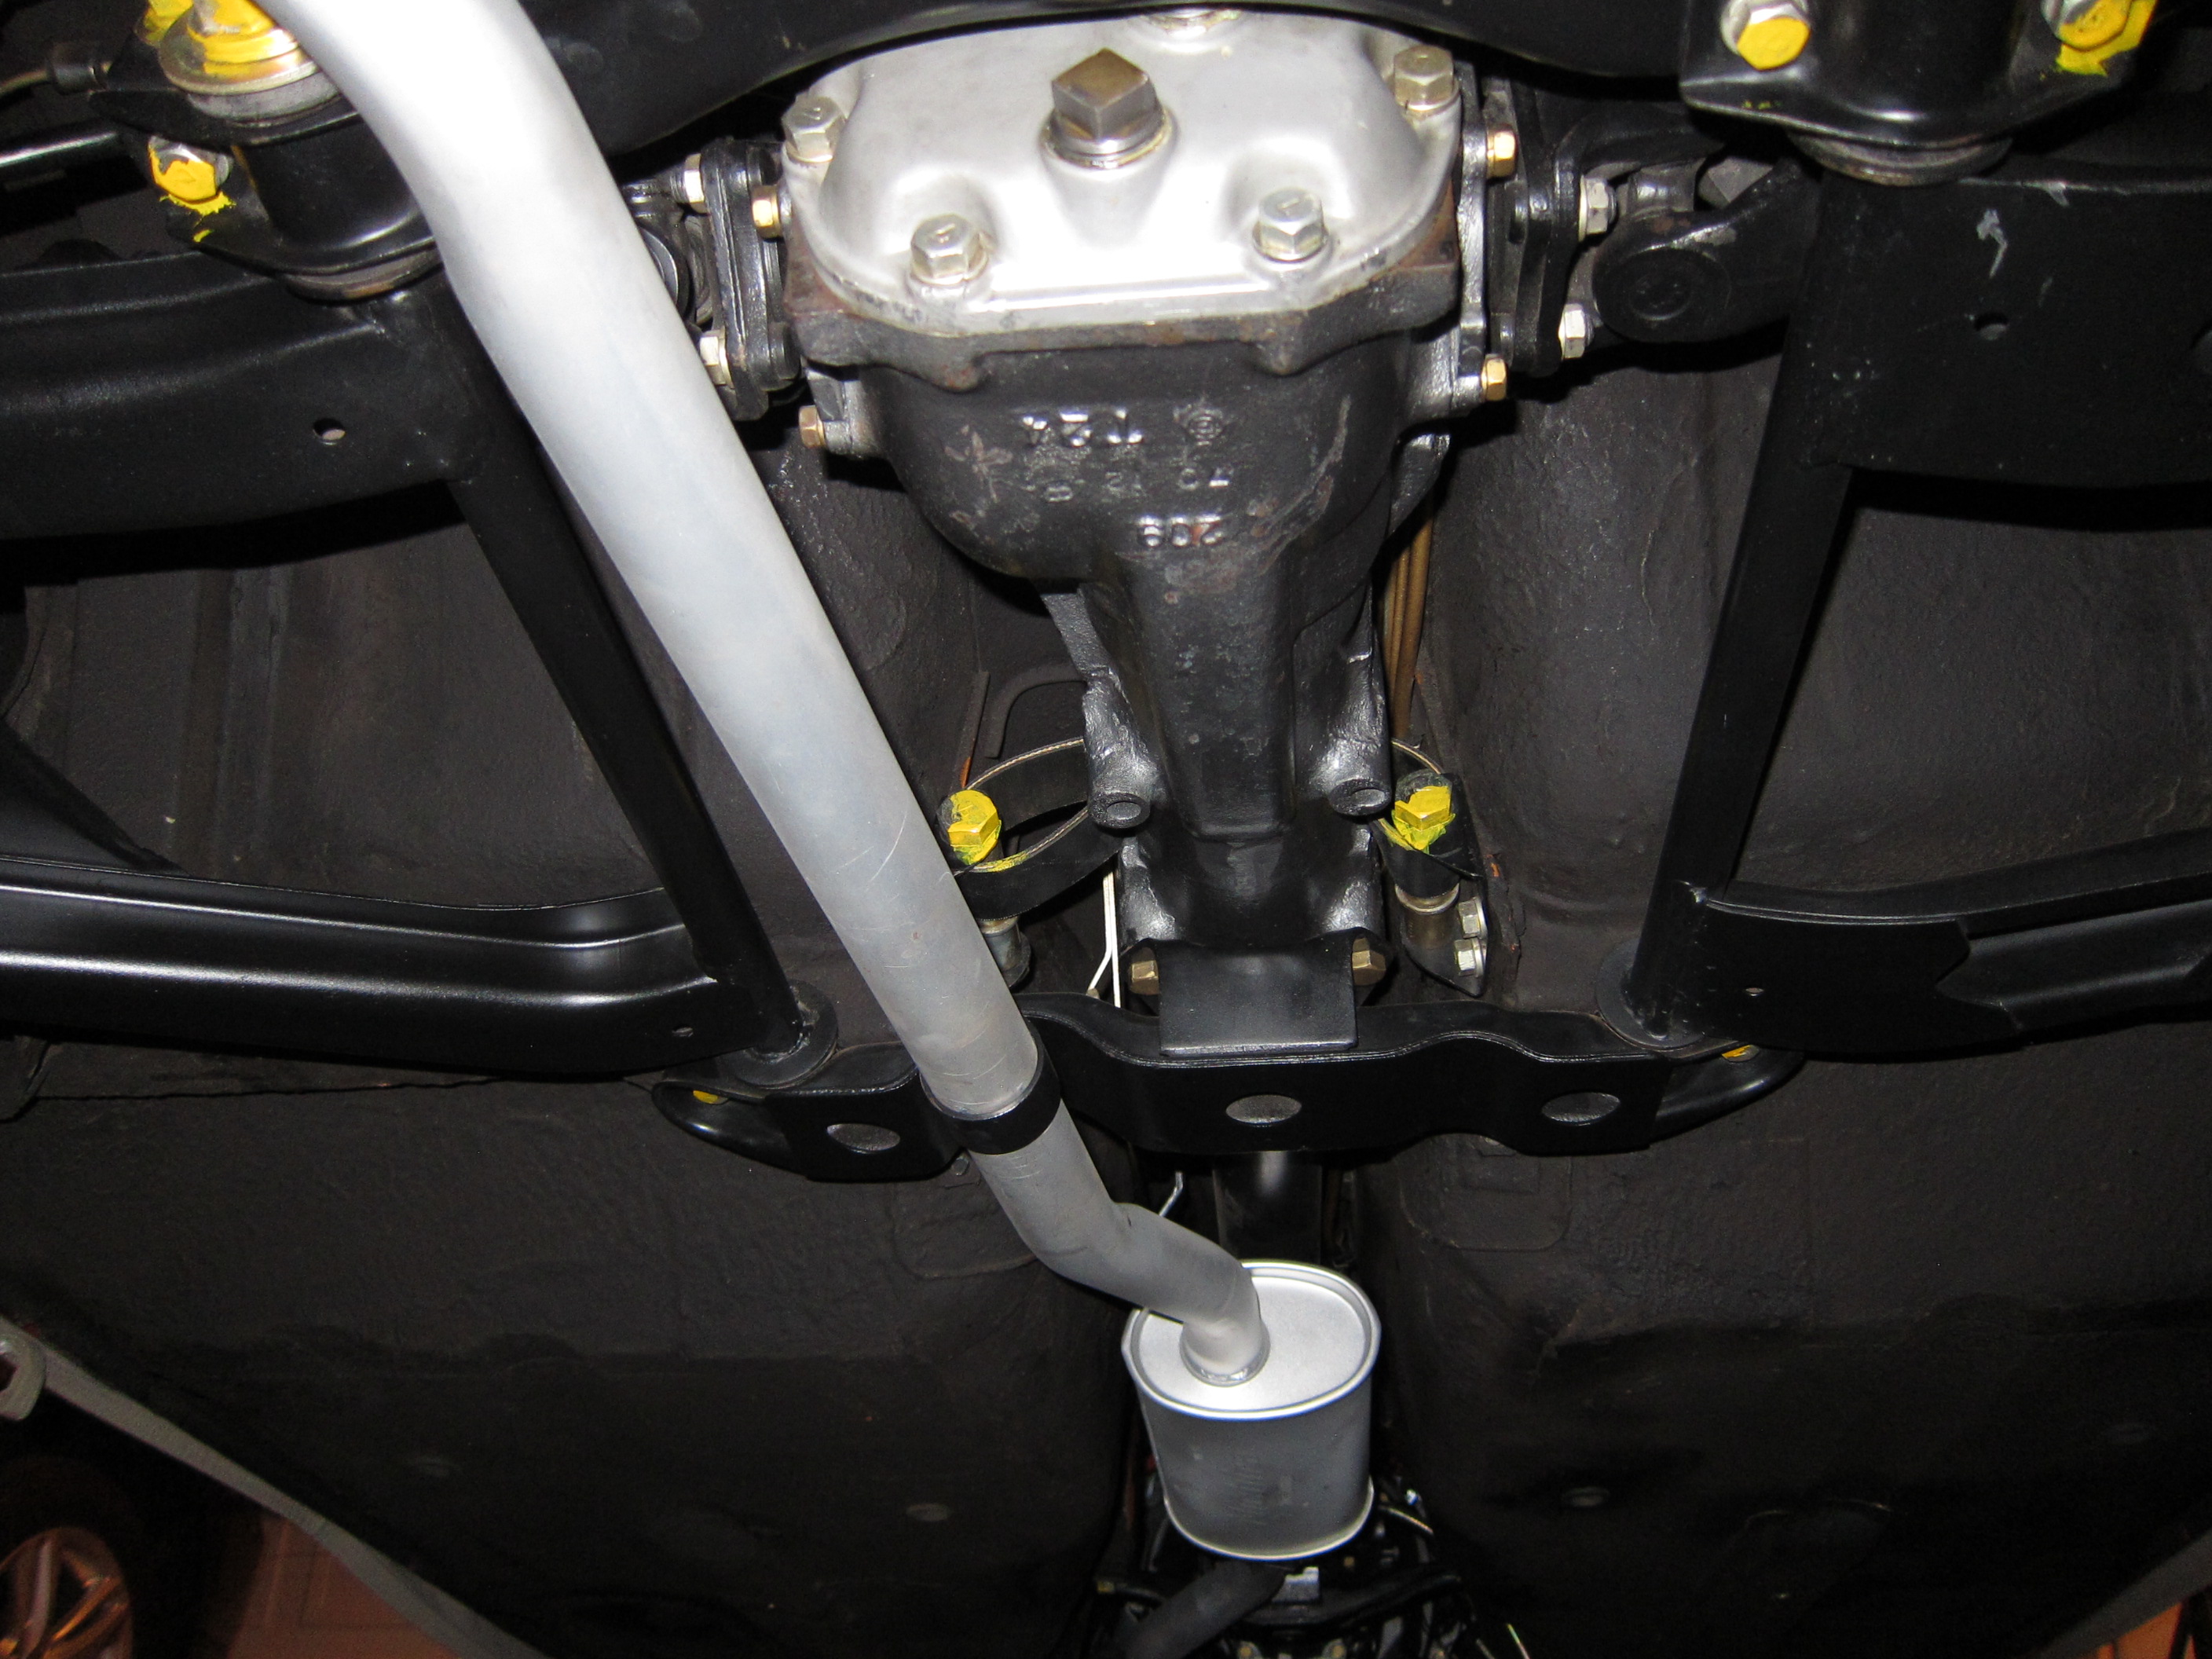
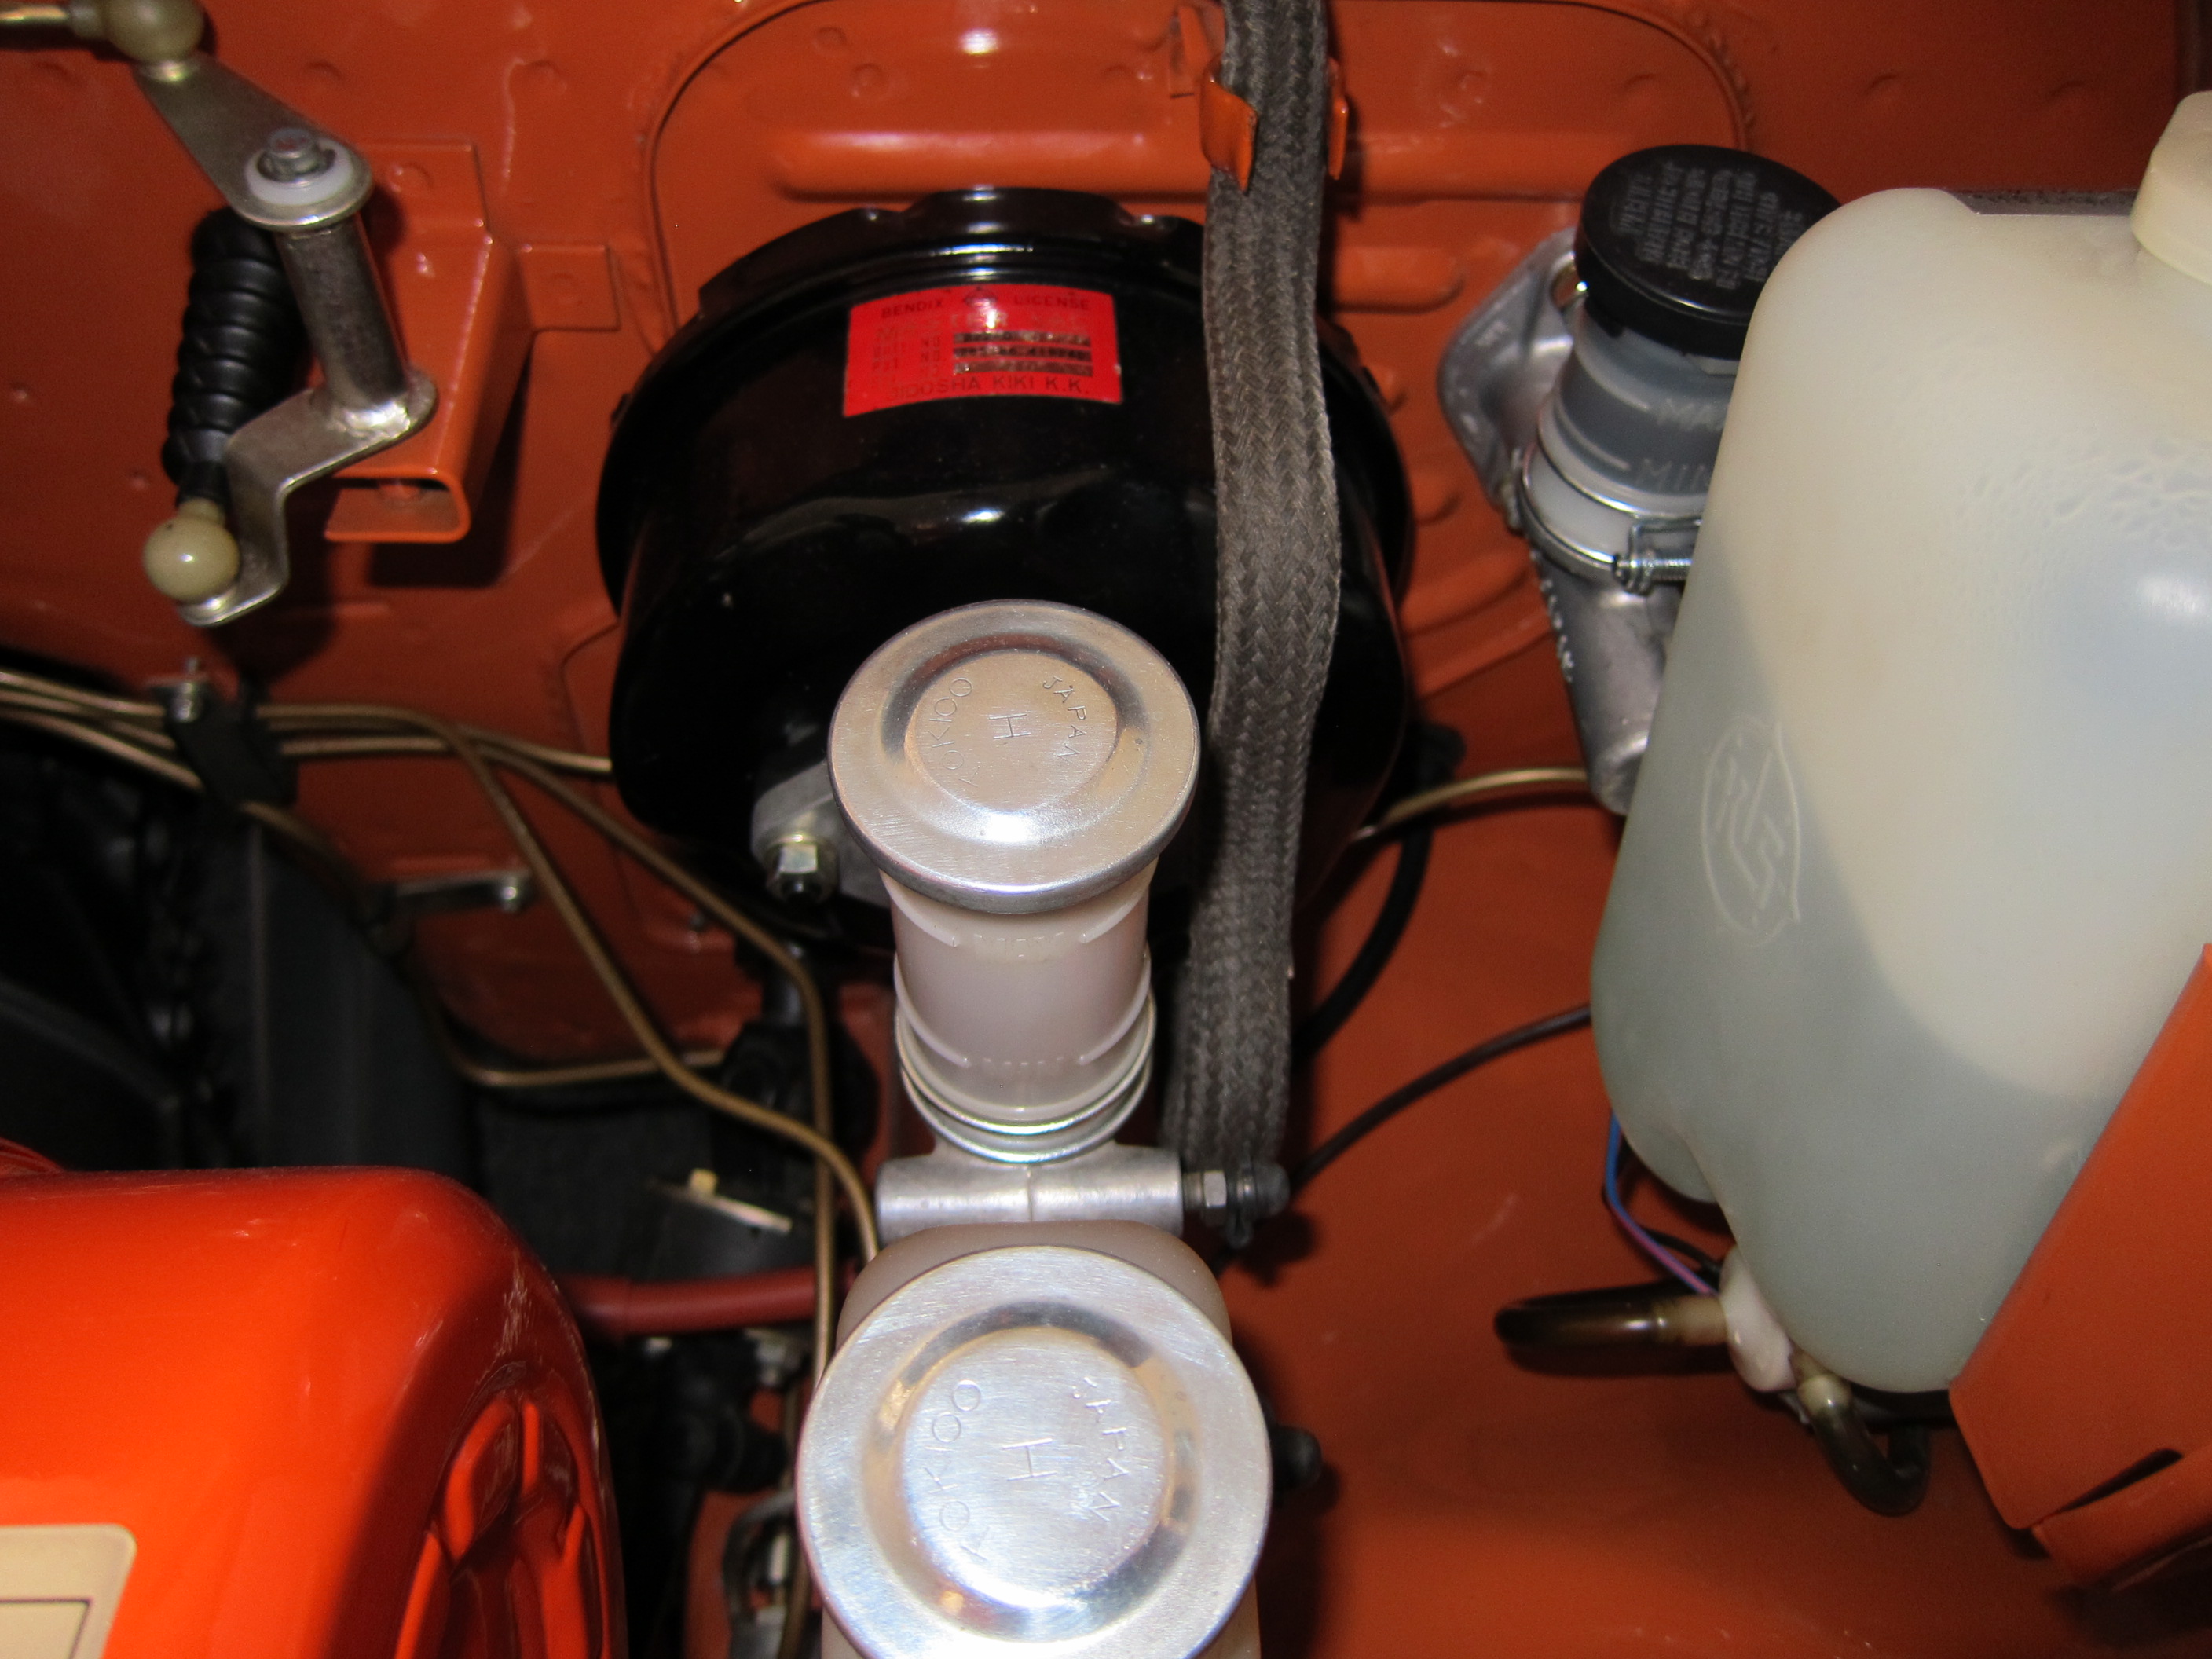
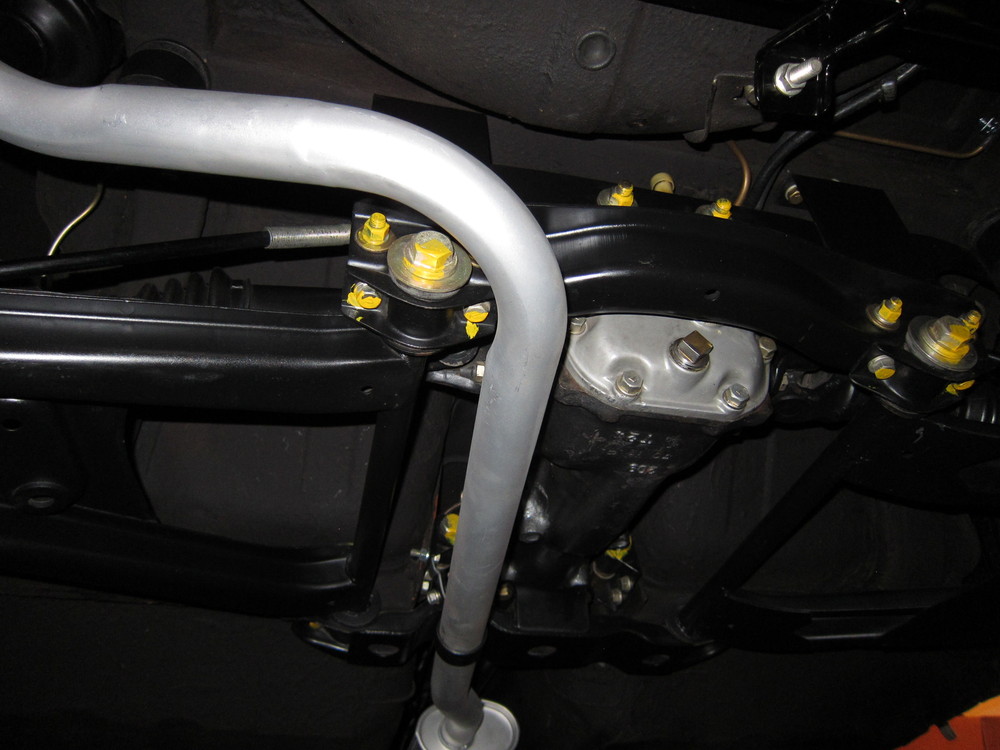
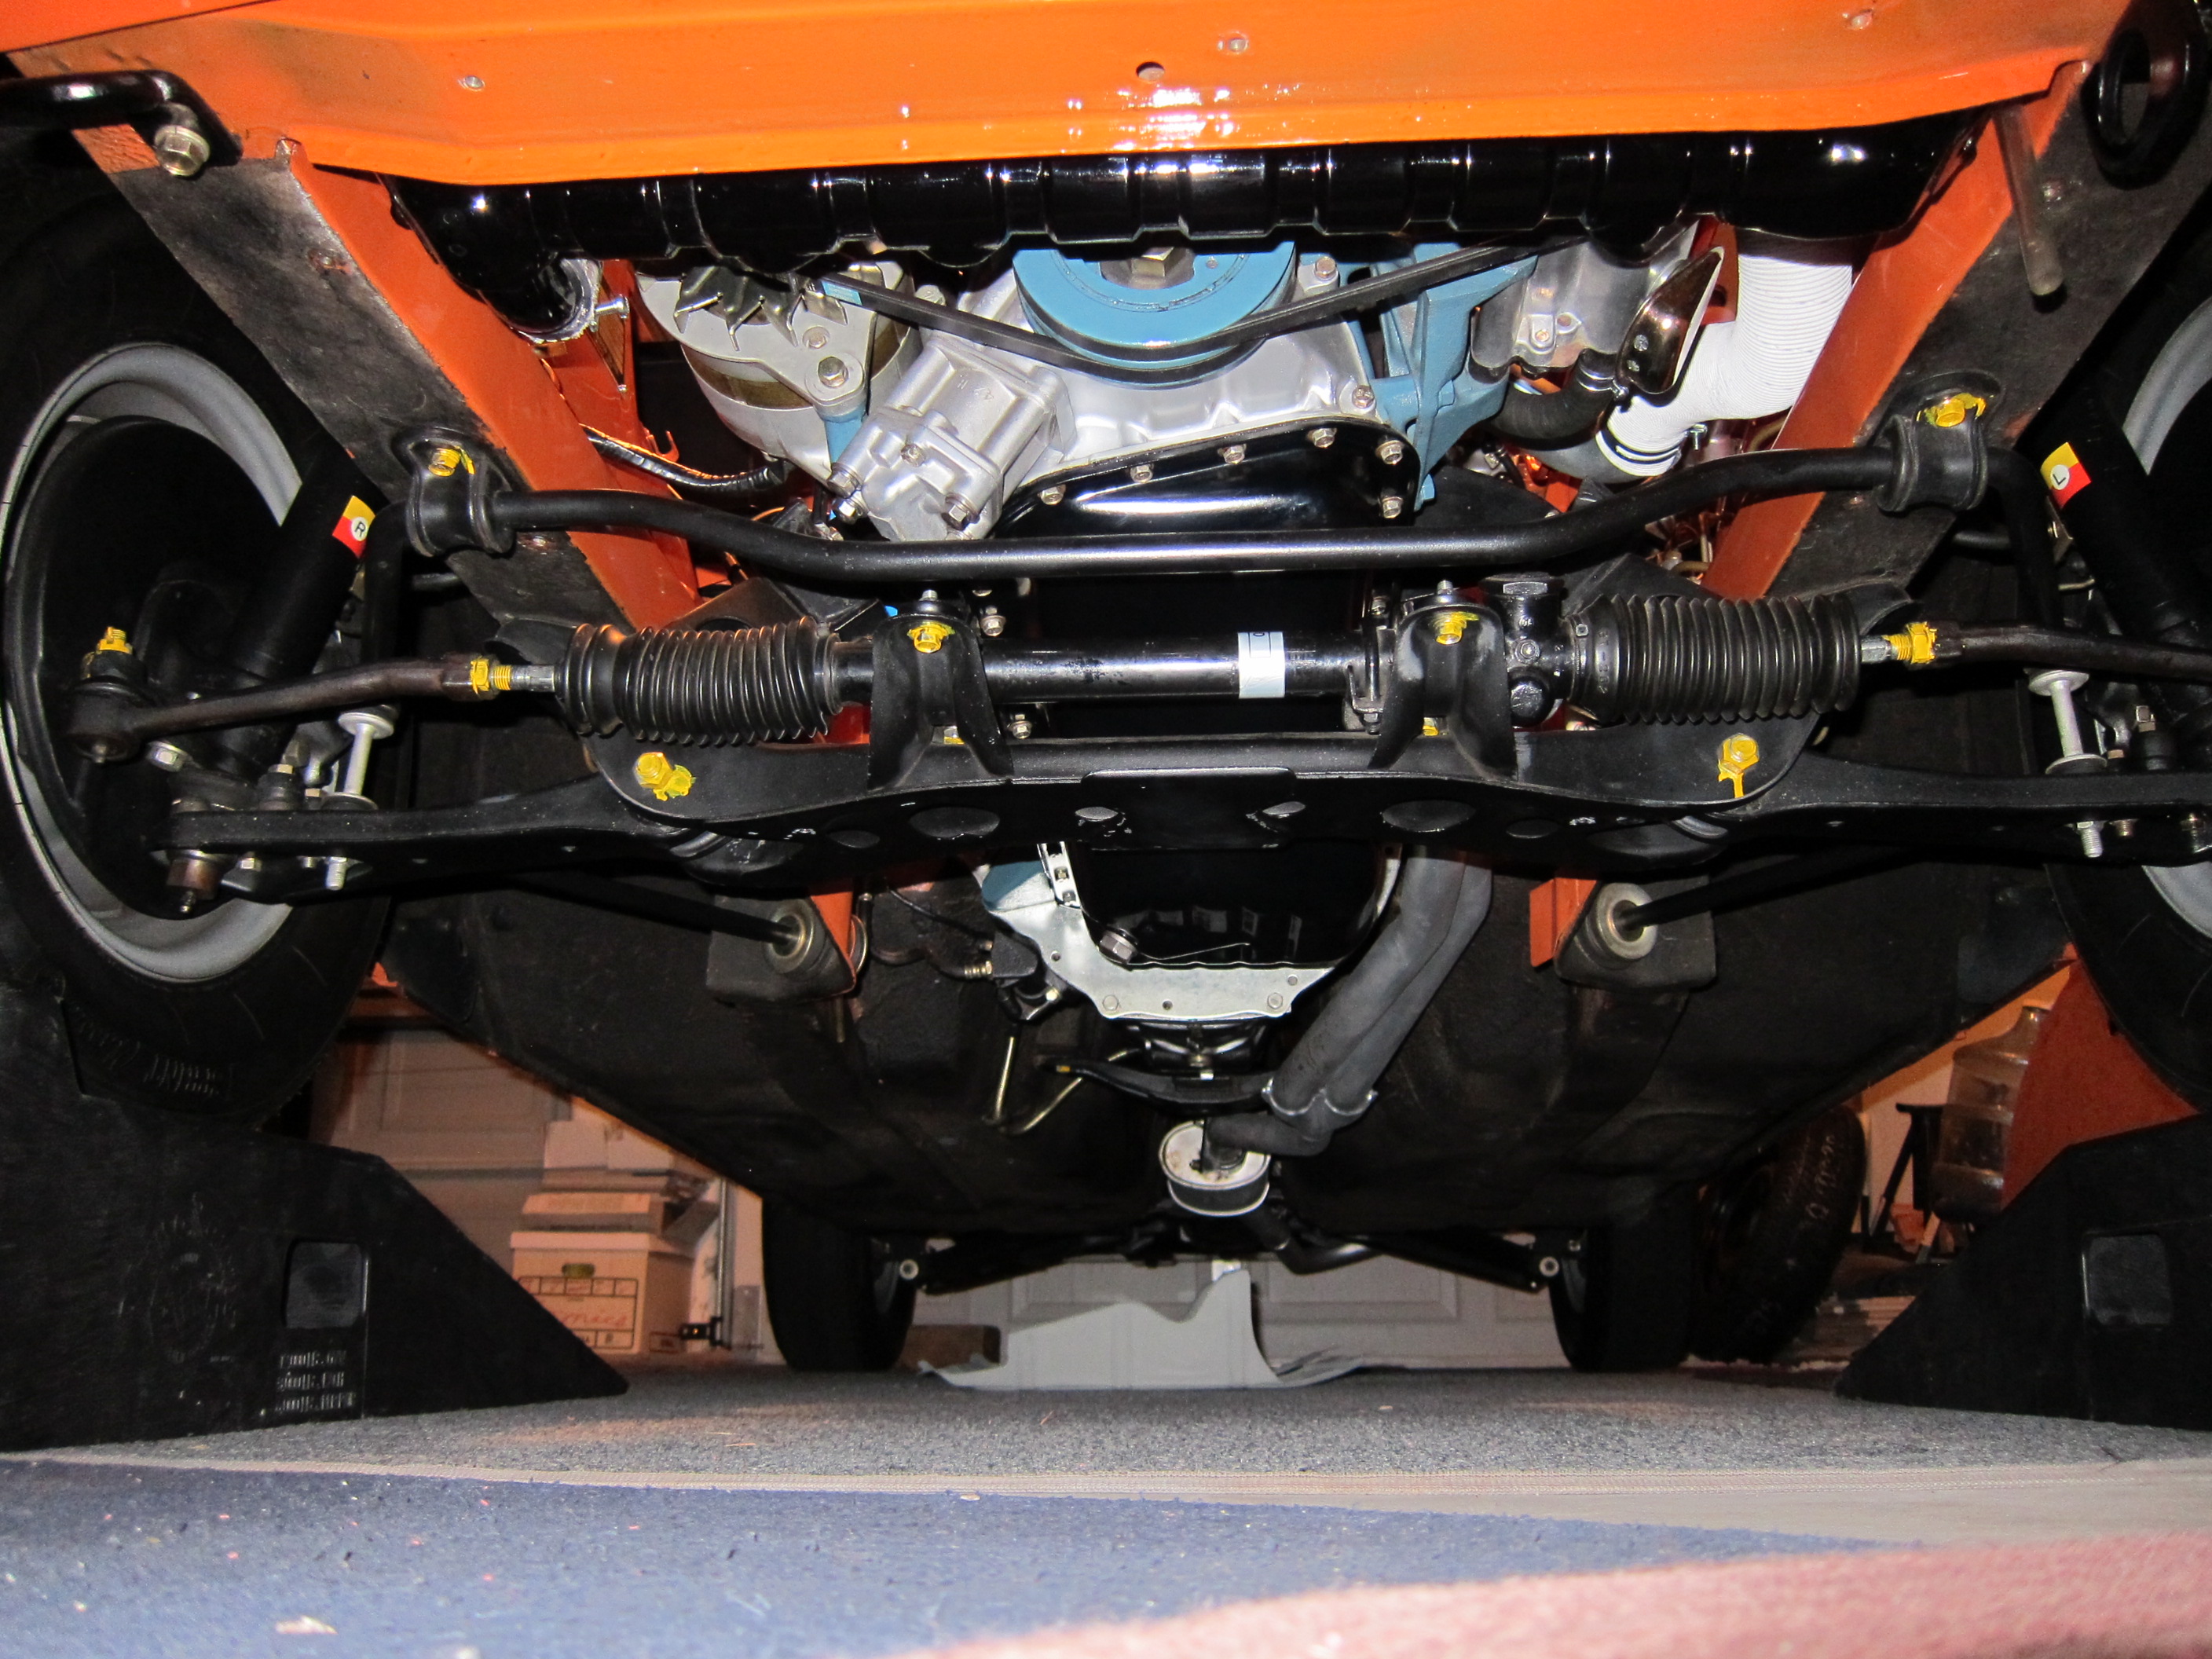
Thought I would update my pictures after re-doing a lot of the manufacture inspection marks on my car. Not quite as neat and sterile as before. I still need to research the correct red for the front suspension compression rods that 26th-z mentioned and for the tranny bell housing splotches also shown in previous posts. I still need more evidence that those red inspection marks would be correct for my car.

.thumb.JPG.31b7226502695445ad62cf0d5113158f.JPG)


-
See my previous post which I amended. If you look at the outer rim surface the date code/wheel size information will be engraved in the rim toward the outer circumference.
-
A couple of things that might help you. Pictures sell almost anything, and, could you list the date codes of all 4? The date code and wheel size information are found on the outer rim and start with TOPY. If the dates all match, that would be of great help. They are probably 41/2" wheels as opposed to the later 5" wheels.
-
Did you get my PM?
-
I did use the factory weatherstrip with the separate weltimg. I, also, did not use any adhesive as the welting does a nice job of holding it all together on the pinch weld.
-
I struggled with this issue and will tell you what worked for me. As my car was to be restored to completely stock, OEM, NOS weatherstripping and welting needed to fit correctly. If you do a search for "door weatherstip", there is a large amount of discussion archived. Two things that worked for me were, first loosen the door latches to the point where the door would latch just short of slamming it closed. Next, liberally apply a vinyl and rubber dressing such as Armorall almost to the point of soaking. It helps if these tasks are done in warm weather. Leave the doors in this loosened comdition for several weeks until you notice the doors begin to close more easily as the weatherstrip takes a set. From there, progressively Adjust the latches with continued liberal use of the armorall until the doors close normally. This may take a couple more adjustment. my doors now "thunk" like a Porsche. Good luck.
-
Hi Kats, you are exactly correct in your observation of E31 head differences. someone who was a noted Z engine builder tried to sell me an E31 head that had the E31 ground off of the head. I brought this mold (banana) difference to his attention and he admitted that it was actually an E88 head. Unfortunately, he (who will remain unnamed) is still in business. Dan
-
I have a 2/71 wheel that is in excellent, no rust condition. This is a 4 1/2" wheel and I don't know if the 5/71 wheel is 4 1/2" or 5" wheel. Let me know if this is of any interest to you and we can talk.
-
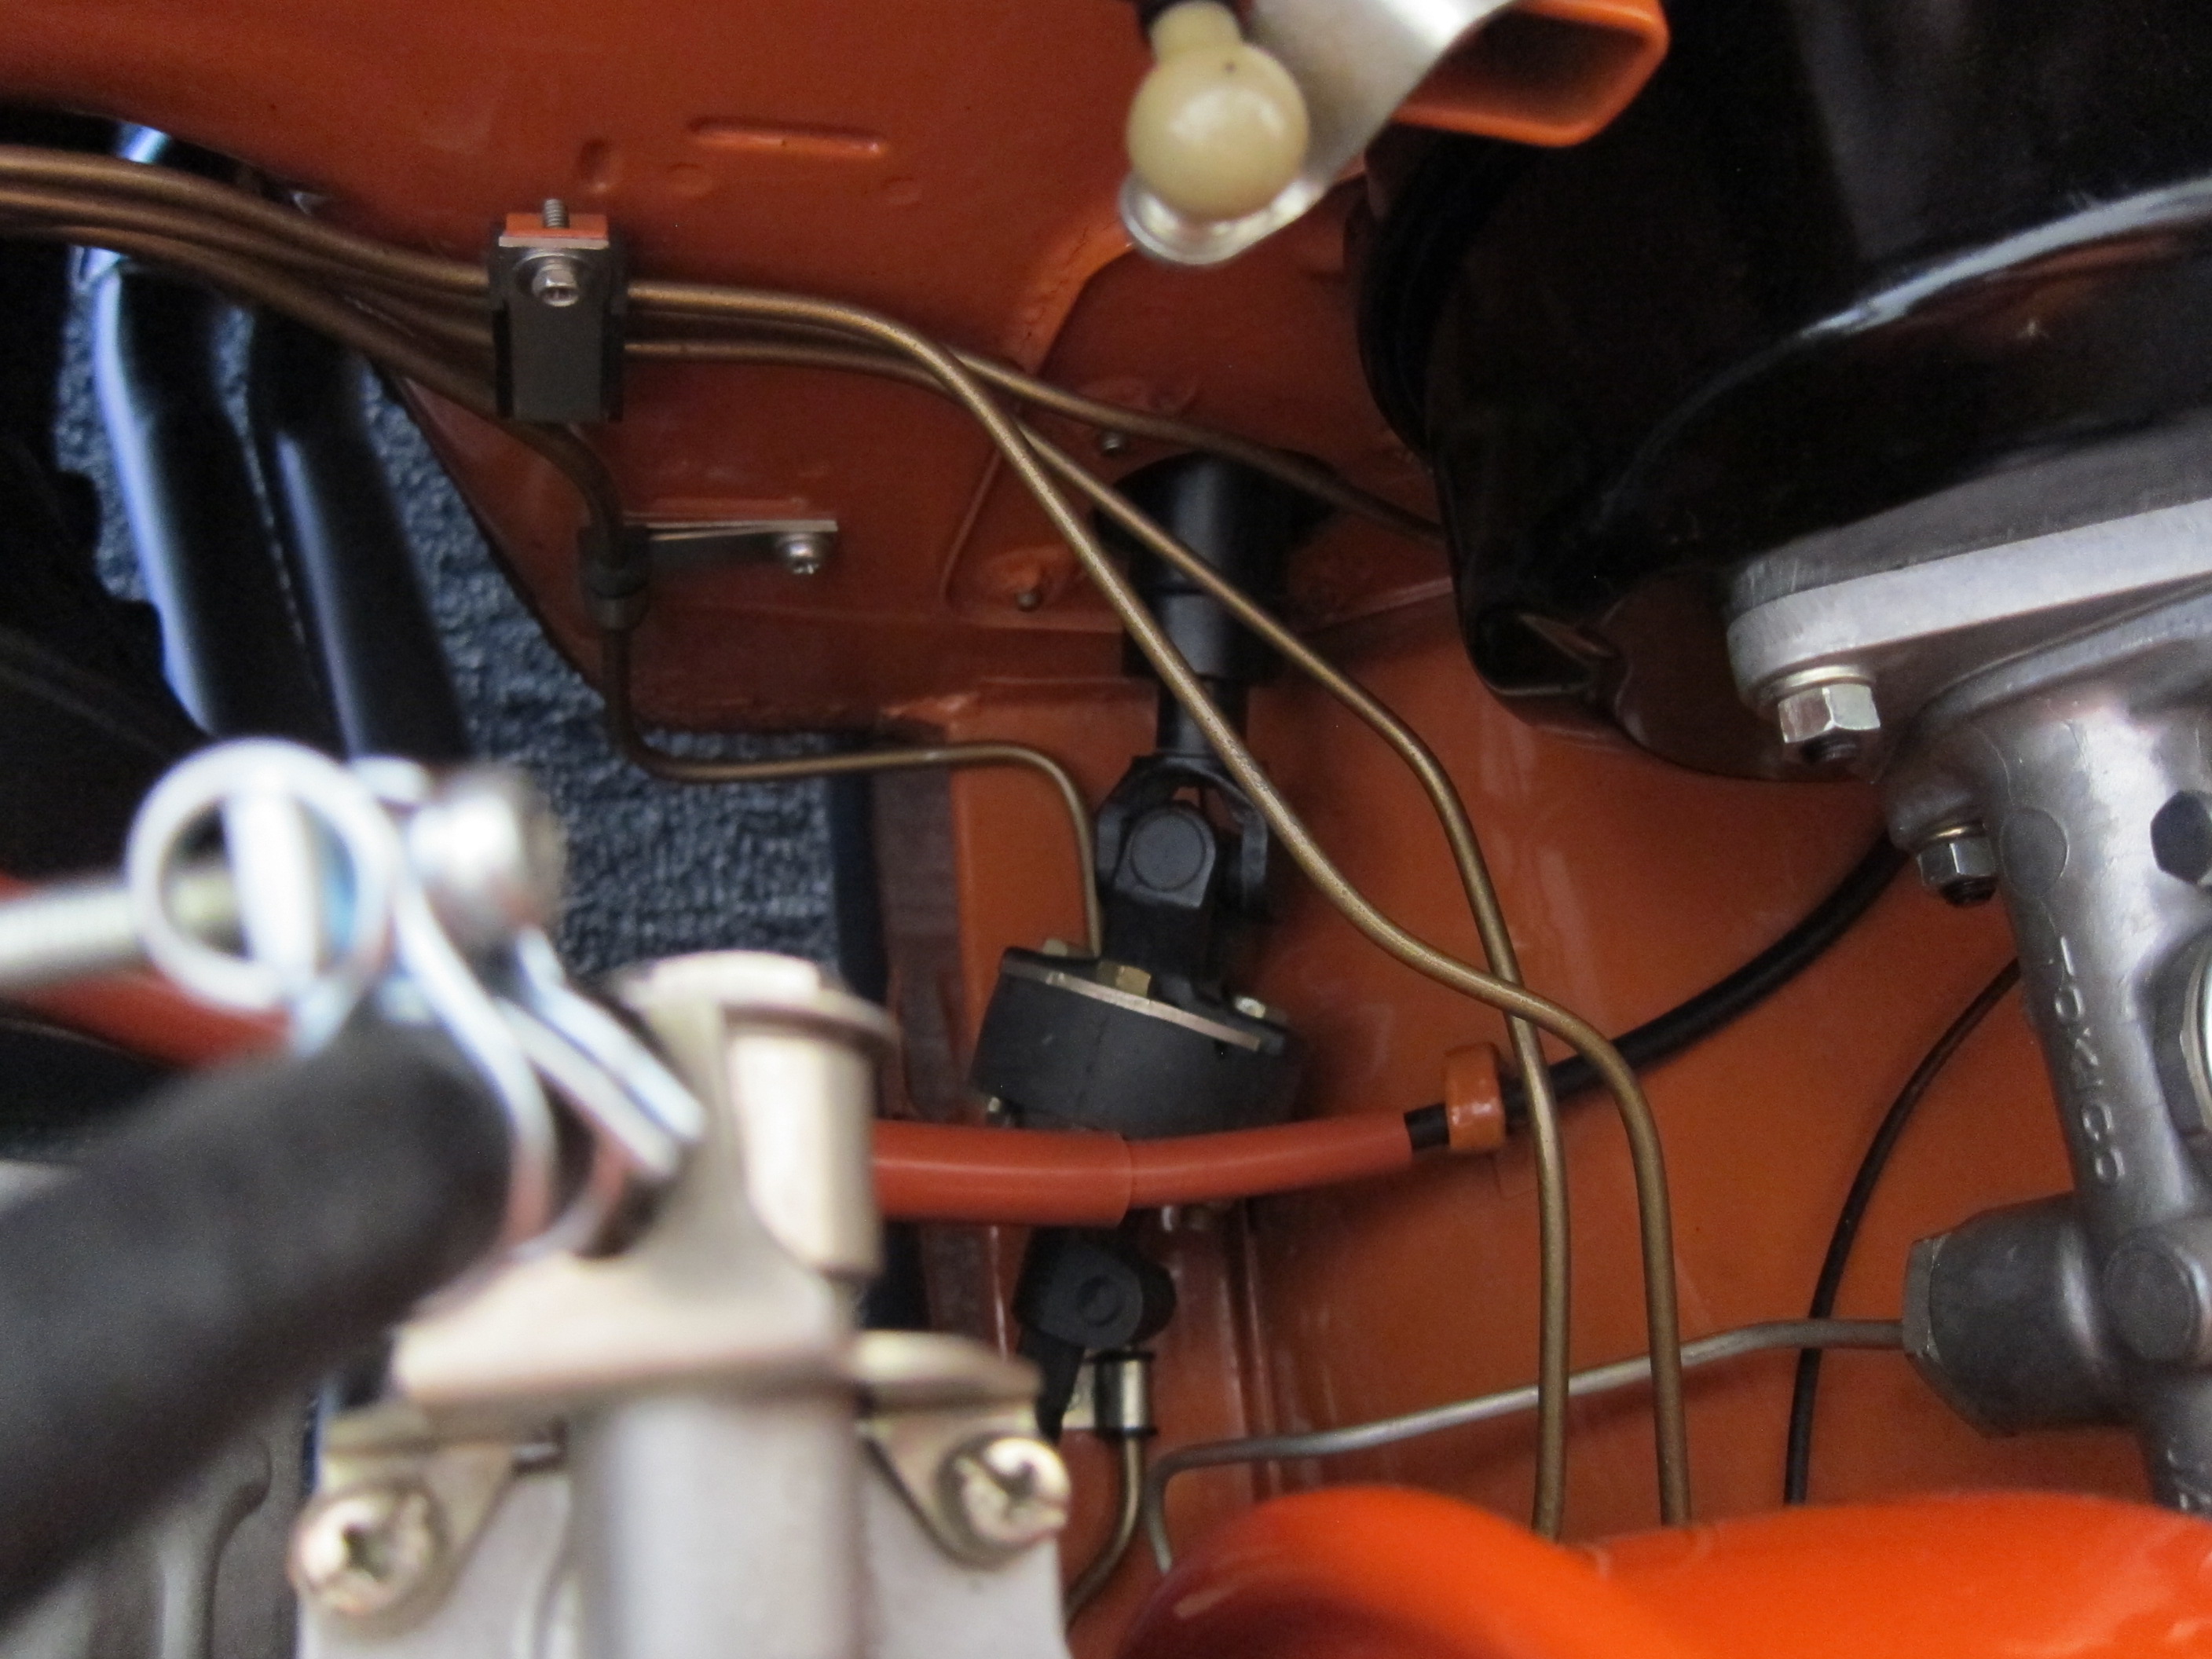
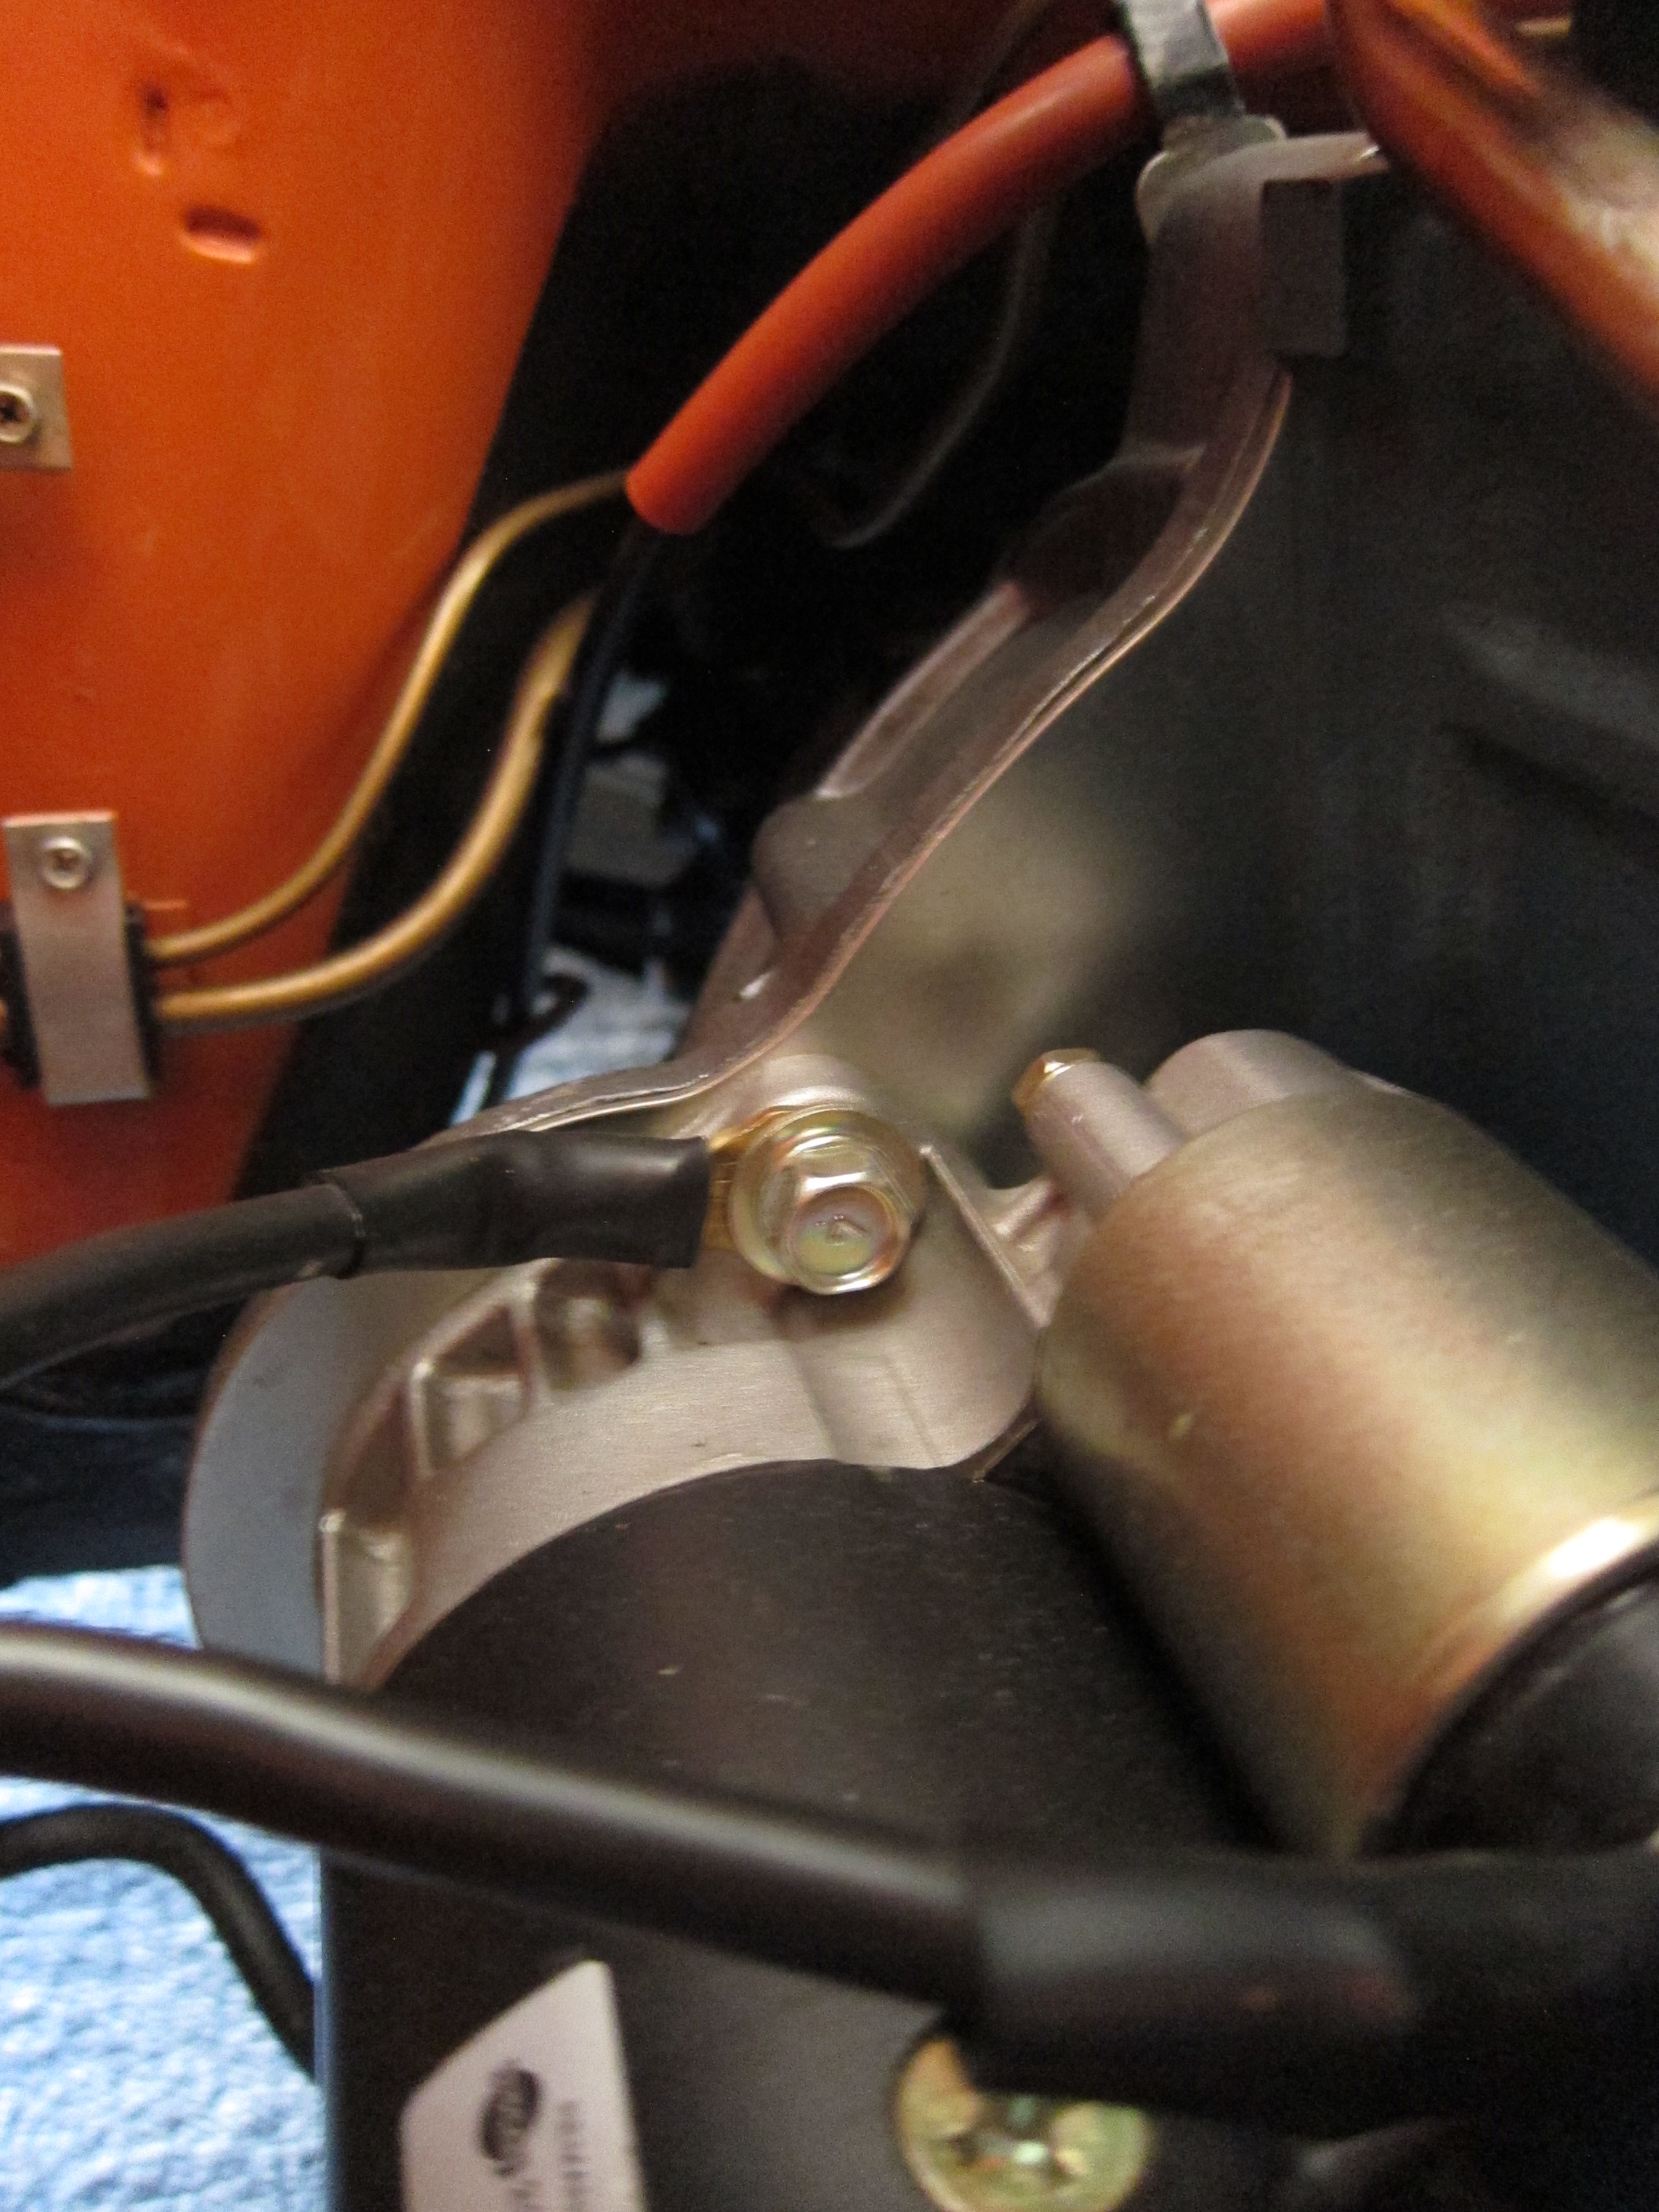
Thanks Grannyknot, and, yes, the car sits on a mat of indoor/outdoor carpeting. "Clean" is my mantra. sweatybetty, the only shielding for the speedo cable is the orange rubber tubing that the cable passes through. I assume it protects the cable from chafing from vibration as well as a degree of heat protection from the engine and exhaust.
-
Here are the pictures from my 1/71 series 1 car. I am 100% cerain that this is the factory speedo cable routing. Dan


-
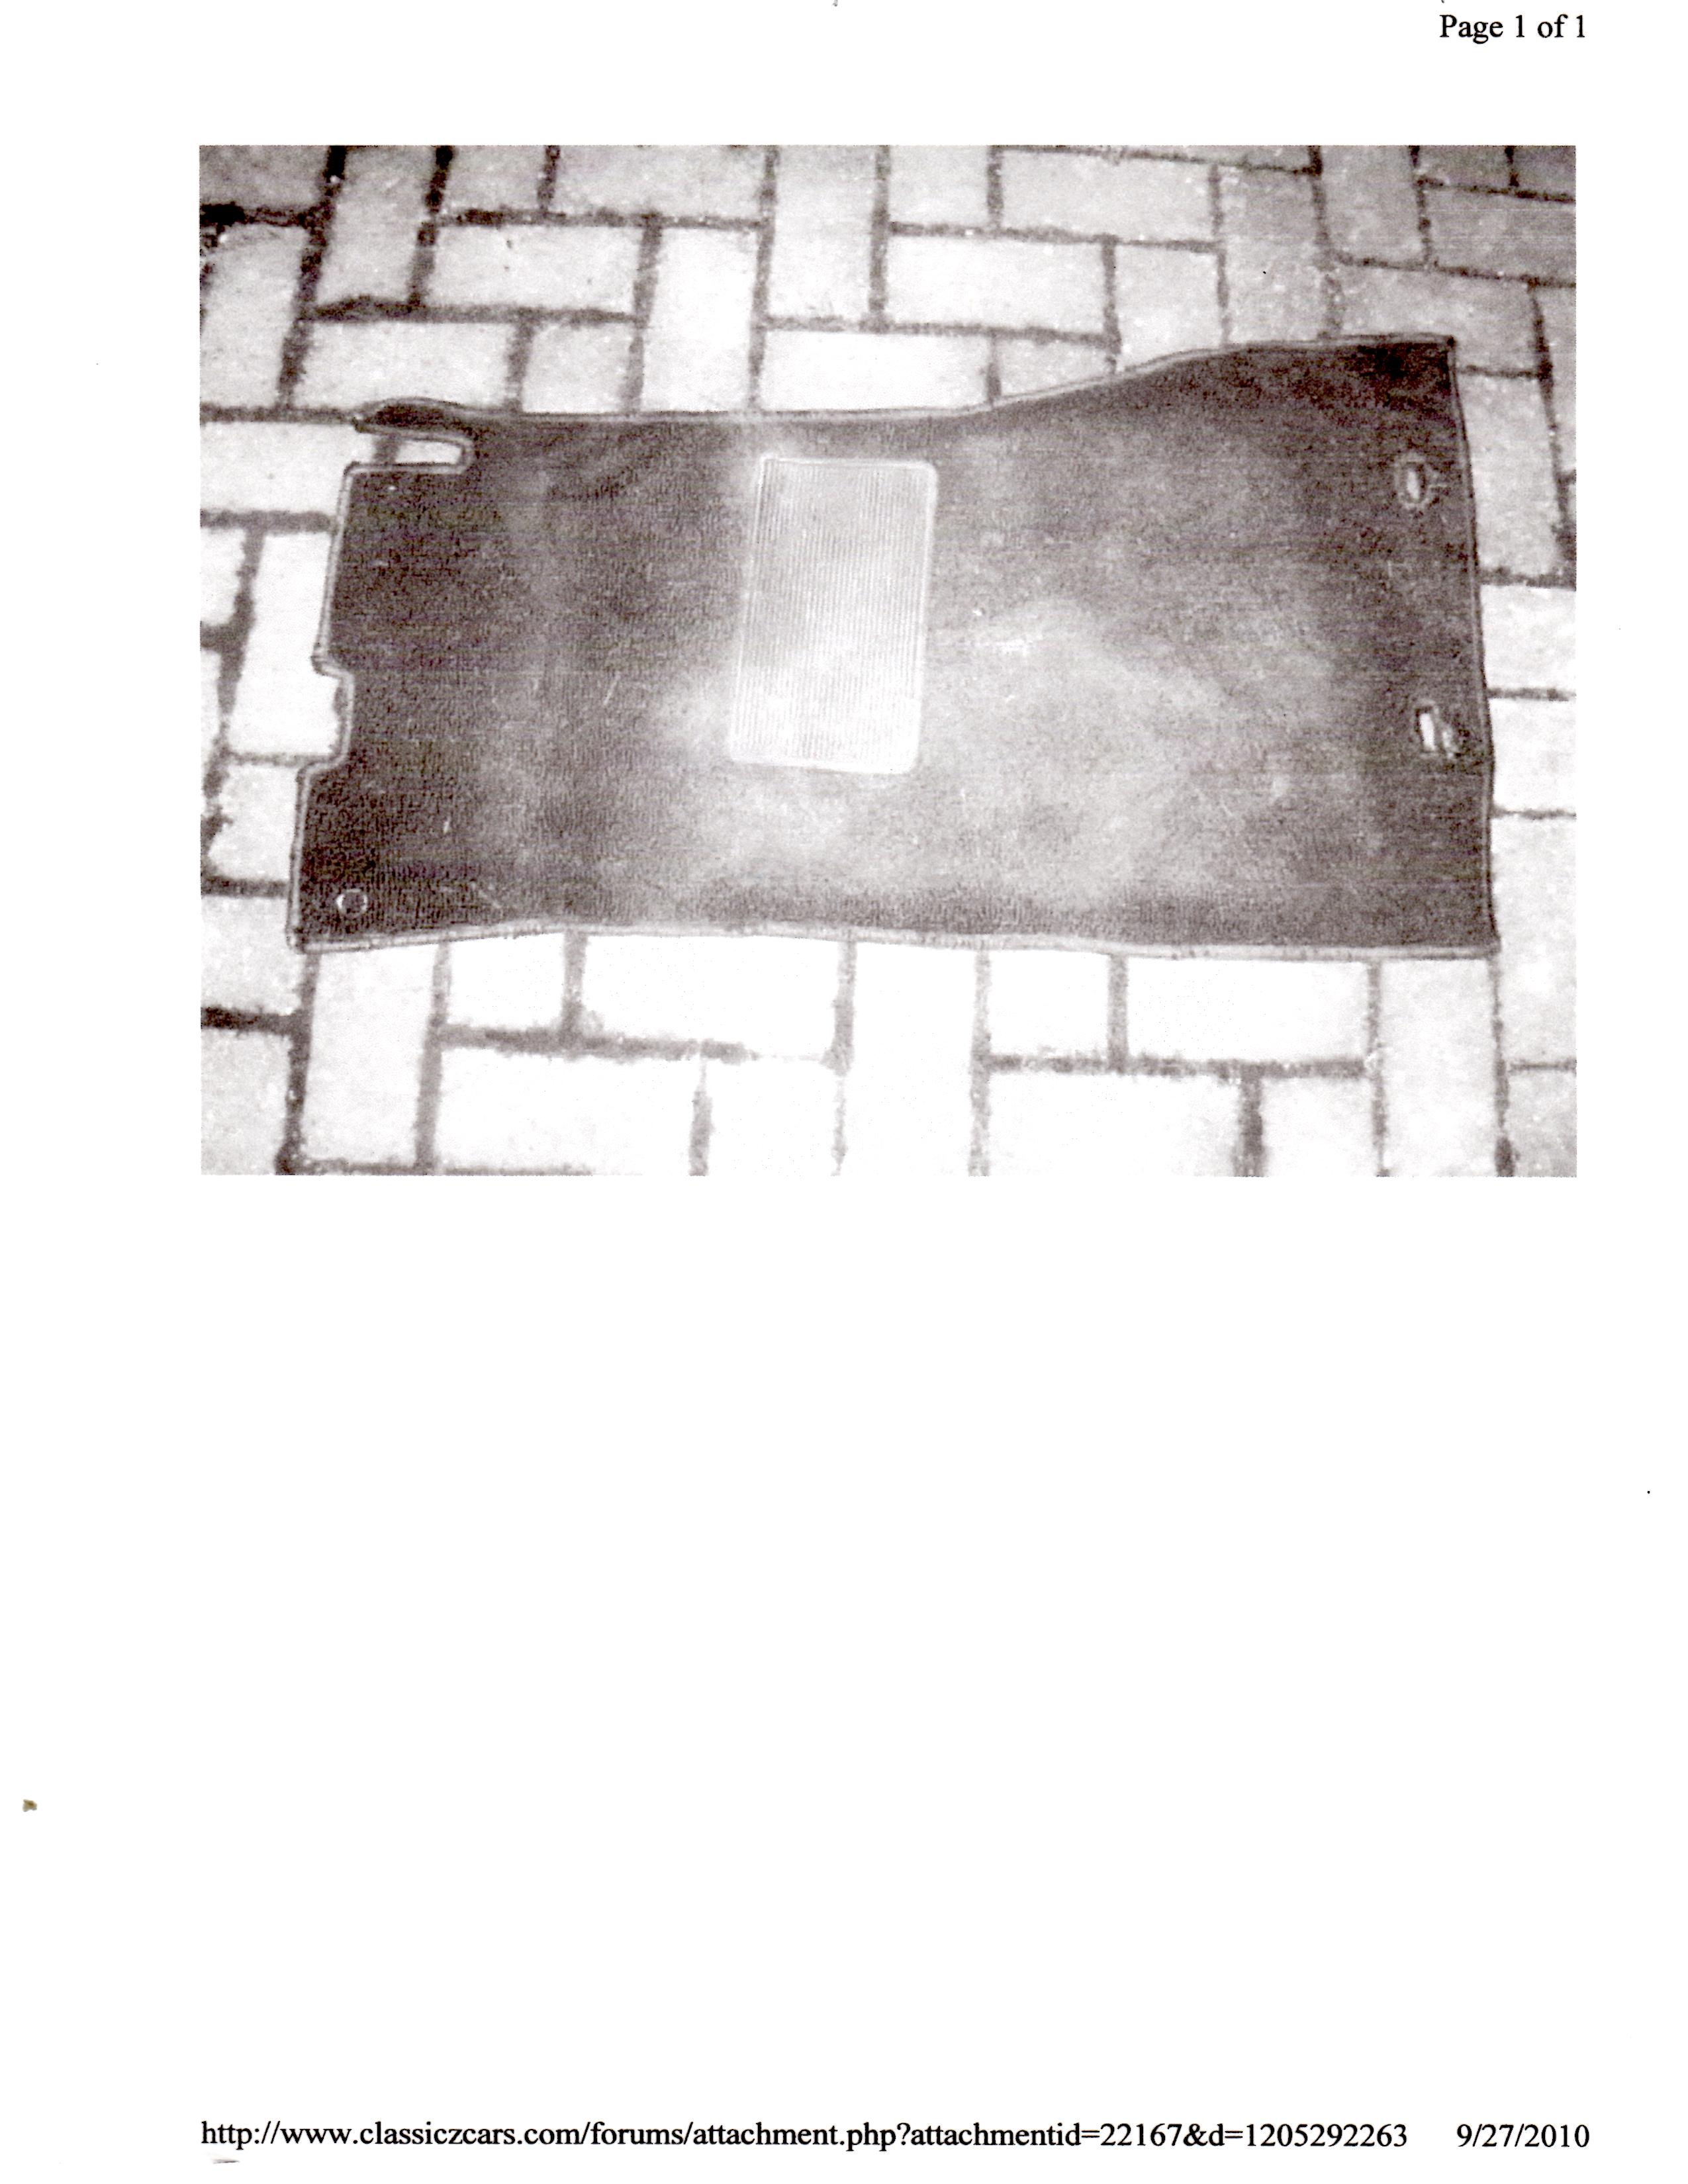
.Keith, I tried to lift the demensions from a photo of an original driver's side carpet. The top photo is my efforts at reproducing this carpet with heel pad. The second photo is of an original carpet with heel pad. The demensions I came up with are 7" by 11". I got the heel pad from Jim at Chester and Herod. It was actually twice as big as needed, so I cut it into two pieces and shaped the cut edge to match the other finished edges, if that make sense to you. It was close to the original profile and light enough in thickness to allow machine sewing easily to the carpet. Many heel pads are very thick and heavy for the weight of carpet used to make a good reproduction. Hope this helps. Dan


-
Careless, I have a used RD-150 tire in pretty nice shape if you are interested. I have the VREDESTEIN 175 HR 14 tires on my car and my spare is a NOS Bridgestone Super speed-20 radial 175 SR 14 with the original valve caps, chalk marking, and paint stripes. The date codes on all of my 4.5" wheels are identical and correct for my 1/71 car, although I don't think judges checked the dates. I mention all of this only because, if some of your concern is judged point deductions in competition, my car was awarded best exterior at the 2012 ZCON with zero point deductions, as well as the Gold Medallion, and the NOS spare was never looked at. My main objective was to return my car to perfect originality after 45 years, but I won't deny that it was nice to have my efforts validated at concours shows and the ZCON convention. the VREDESTEIN tires are the only tires I have found with the correct tire size as compared to the original, and marked on the sidewalls. also, concerning hubcap and tail light finisher color, I have a set of NOS D-caps and a NOS front grill. I can see no color or texture variations between these items. Hope this helps, and, if interested in the HD-150, a good deal will be available. I would be happy to provide any addition information thet may be helpful. Dan
-
Hi Rich, Truly amazing work on a beautiful car. My car looking in a mirror. is this the plastic battery cover you are looking for? If so, send me a mailing address and its yours. Dan
-
this is what I could find using the search function. I, too, needed these answers. hope my copy and paste works.
-
Did you check out www.240zrubberparts.com?
-
Qlooks Iike we have a mini-society of original owners gathered here. My original ownership anniversary was 4 days ago. Congrats, Jim, on your faithful stewardship of such a beautiful car for The past 4 & 1/2 decades.
-
Tomohawk, I have a couple of newly yellow plated wire clamps that look like the one pictured by Zedhead. One measures 2 3/4" and the other measures 3 1/4". let me know if these would work for you.
-
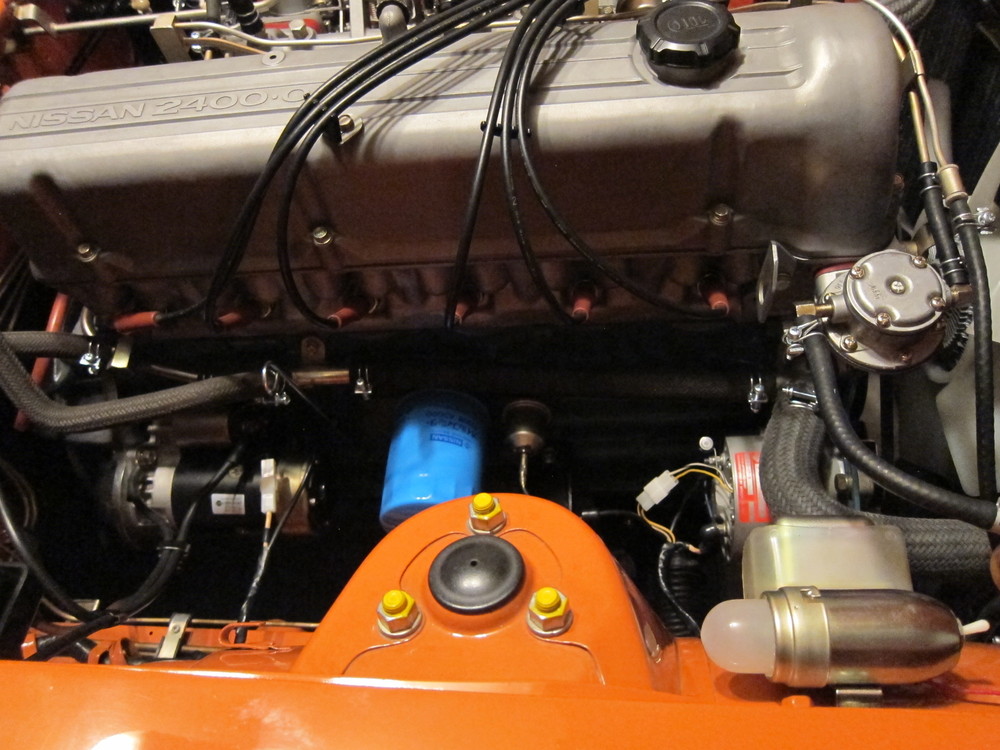
The valve cover was not painted from th factory. The finish was a dull, grainy, cast, finish. I would look at your SU carb domes, and balance tube if they have not also been polished. In stock condition, they should have the same raw metal, cast finish as well. You may be able to restore the stock finish and appearance by experimenting with media blasting, possibly using glass beading. www.ztherapy.com has some pictures of valve covers that I believe represent the original stock appearance. Hope this helps. Dan
-
Hi Jerry. I've used Mike's decals on my air cleaner with no problems.. i think a good wax and grease remover product should take care of the pealing issue you are having. Make sure you place your decals on the flat surface as decals don't do well covering compound curves which will cause the edge to pucker. Dan
-
Looks like mine which I know to be correct. There should be the number 4 embossed on The head of the weld-in machine screw.
-
87mj, here are some more info which may be of help, and just interesting reading. http://www.classiczcars.com/topic/47879-carpet-snaps-source-for-footwell/?hl=%2Boriginal+%2Bcarpet+%2Bjute#entry435409 http://www.classiczcars.com/topic/8002-original-jute-material/page-1?hl= original carpet jute See item #4 in the second item shown above. It gives a good picture of the velco solution I mentioned. If you are interested in correct originality, Kats offerings are some of the best on this forum. Dan
-
To add to what Chuck said, above, you will need to see if the male snaps are still on the firewall insulator. If so, you will need the carpet snap fasteners to put on your new carpet. Here is a possible source for those. http://www.newportupholstery.com/auto_hardware.htm As for the metal tabs at the aft end of the footwells in front of each seat, you will need to make about 2" slits, do not cut loops, in the appropriate places to accommodate the metal tabs. And finally, if the replacement carpet edges are surge bound with thread, you will need to find someone with a commercial surging machine to surge bind the edges of the slits as you would a button hole on a shirt. If the replacement carpet is bound with vinyl, just bind the edges of the slits with vinyl using the same technique as the outer edges of the carpet. If you do a search, you may also find that some years of the 240z used squares of velcro sewn to the carpet and glued to the floor. If I find some examples I will add to this thread Best of luck. Dan


.JPG.40cddc5871d86b9ad98635a0a9fbb5c9.JPG)