Leaderboard
-

grannyknot
Free Member4Points5,158Posts -


dutchzcarguy
Free Member3Points2,630Posts -

texasz
Free Member3Points2,345Posts -

Mark Maras
Free Member3Points3,709Posts
Popular Content
Showing content with the highest reputation on 08/02/2021 in all areas
-
3 pointsI use zinc rich primer for steel. Great protection and you can weld without removing it.3 points
-
3 pointsAsk him if he has them, KlasicFab's website does not have everything available listed...just reach out and ask him. 🙂3 points
-
 2 pointsI think you are being a little hard on Mr. Leno. He is a true enthusiast. His only interest in putting up a video on the Evans product is because he looks for interesting products that can be of benefit the classic car world. I would imagine he received no compensation from Evans other than probably some product to test and possibly endorse it. As far as being a "car expert", his record on marques he cares about speaks for itself. My 2 cents ....2 points
 -
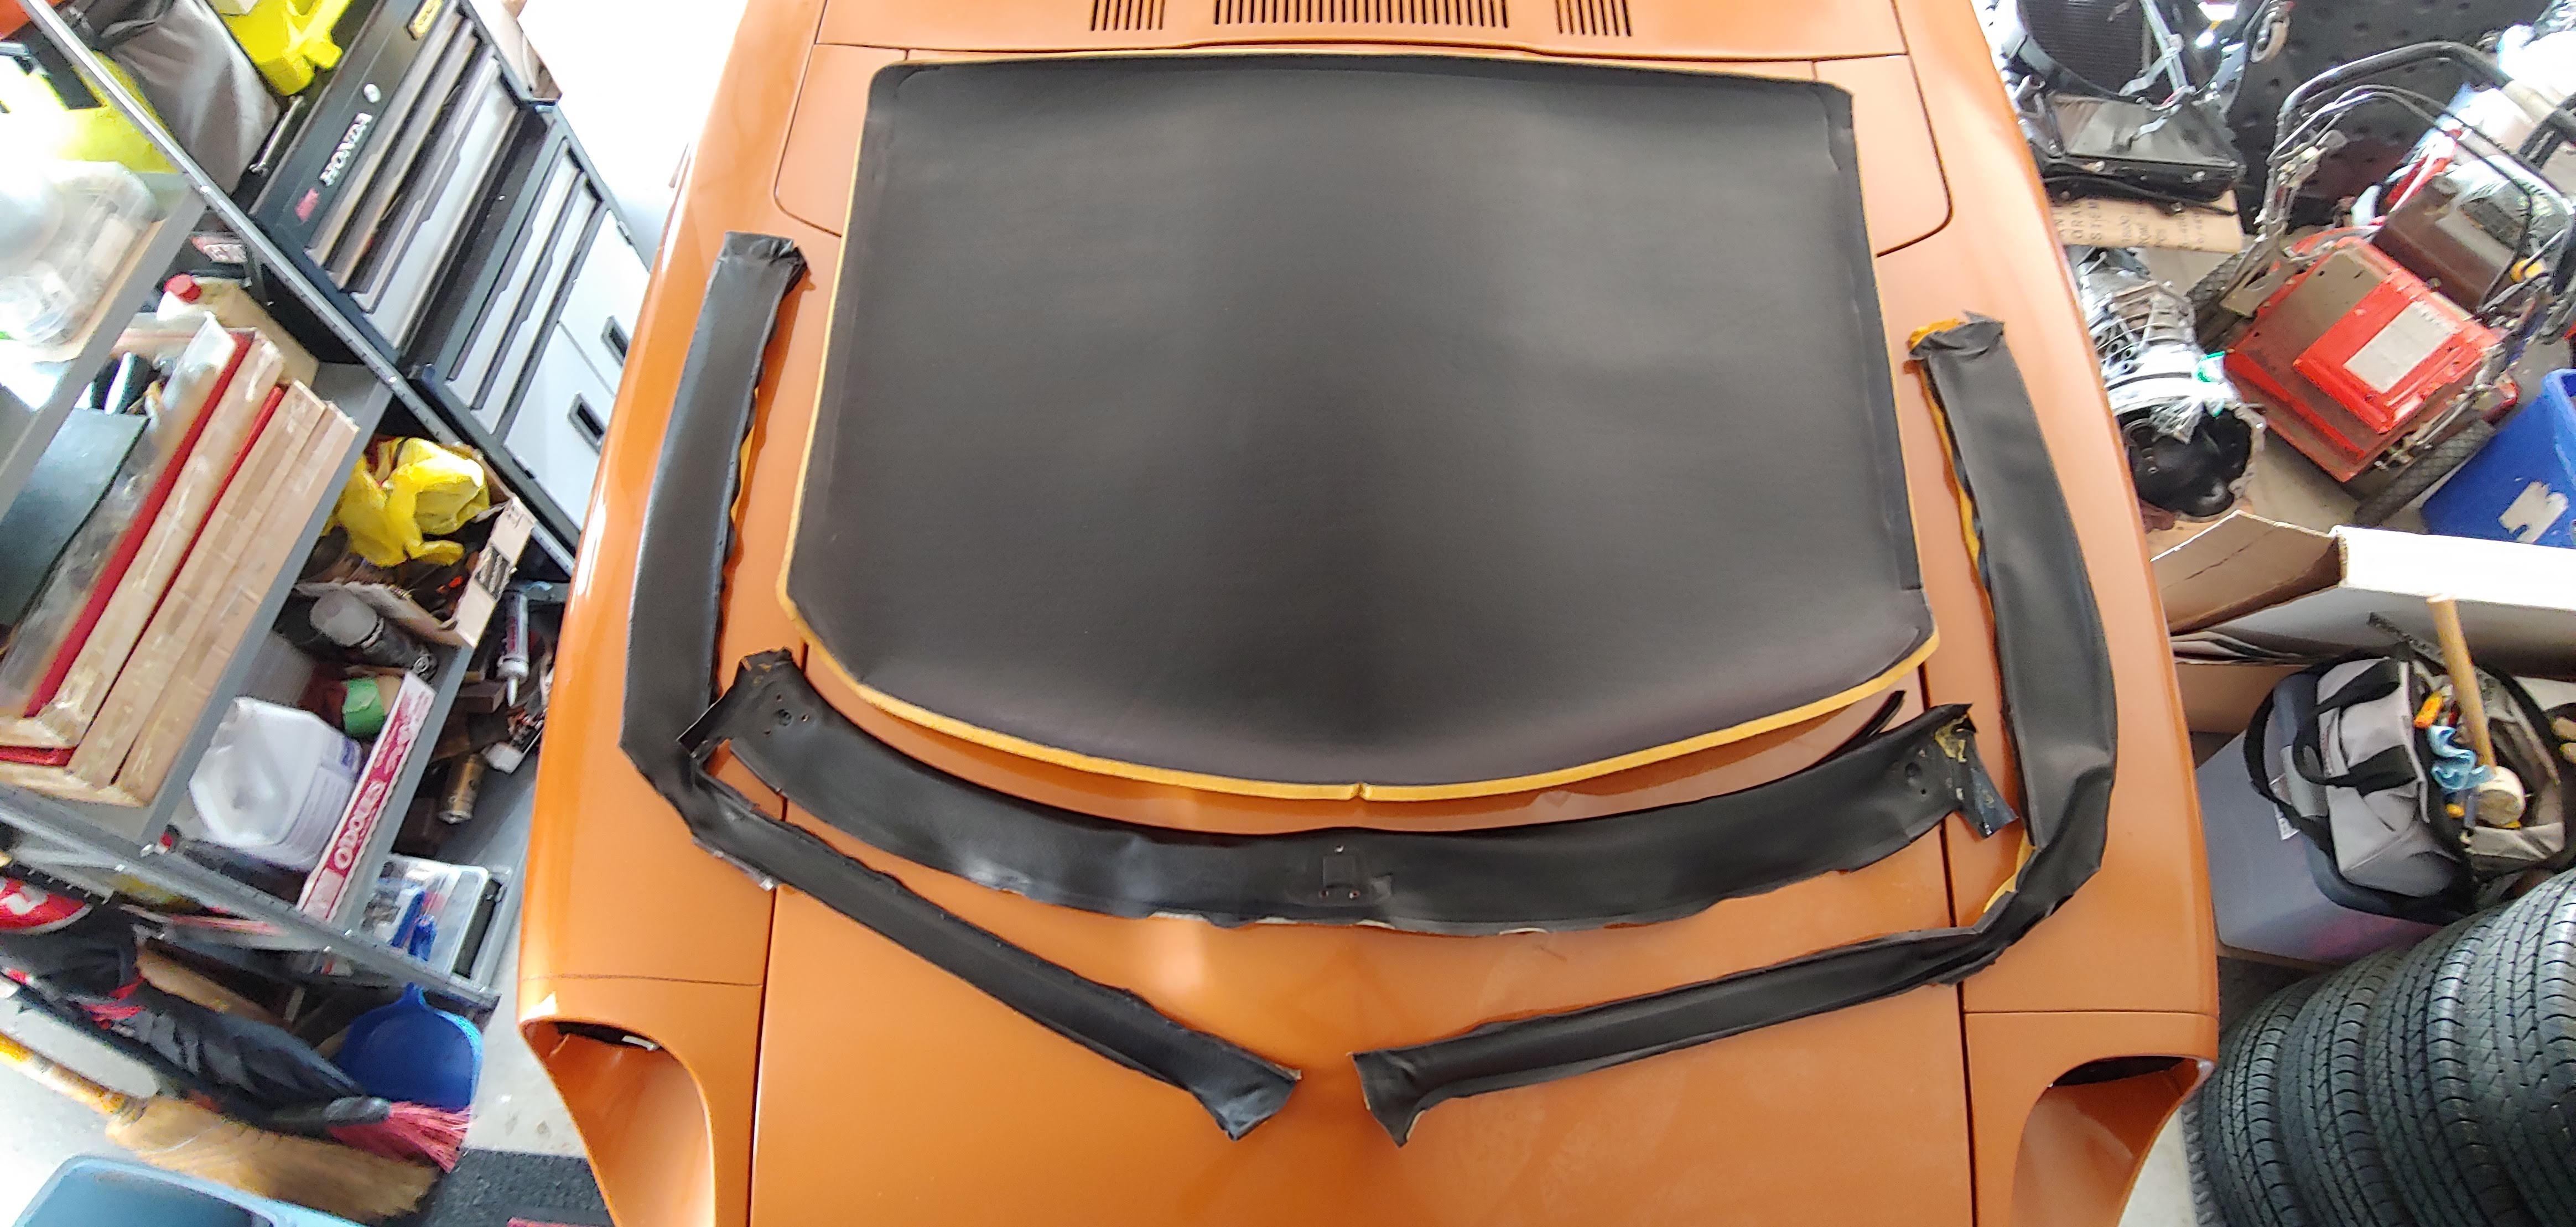
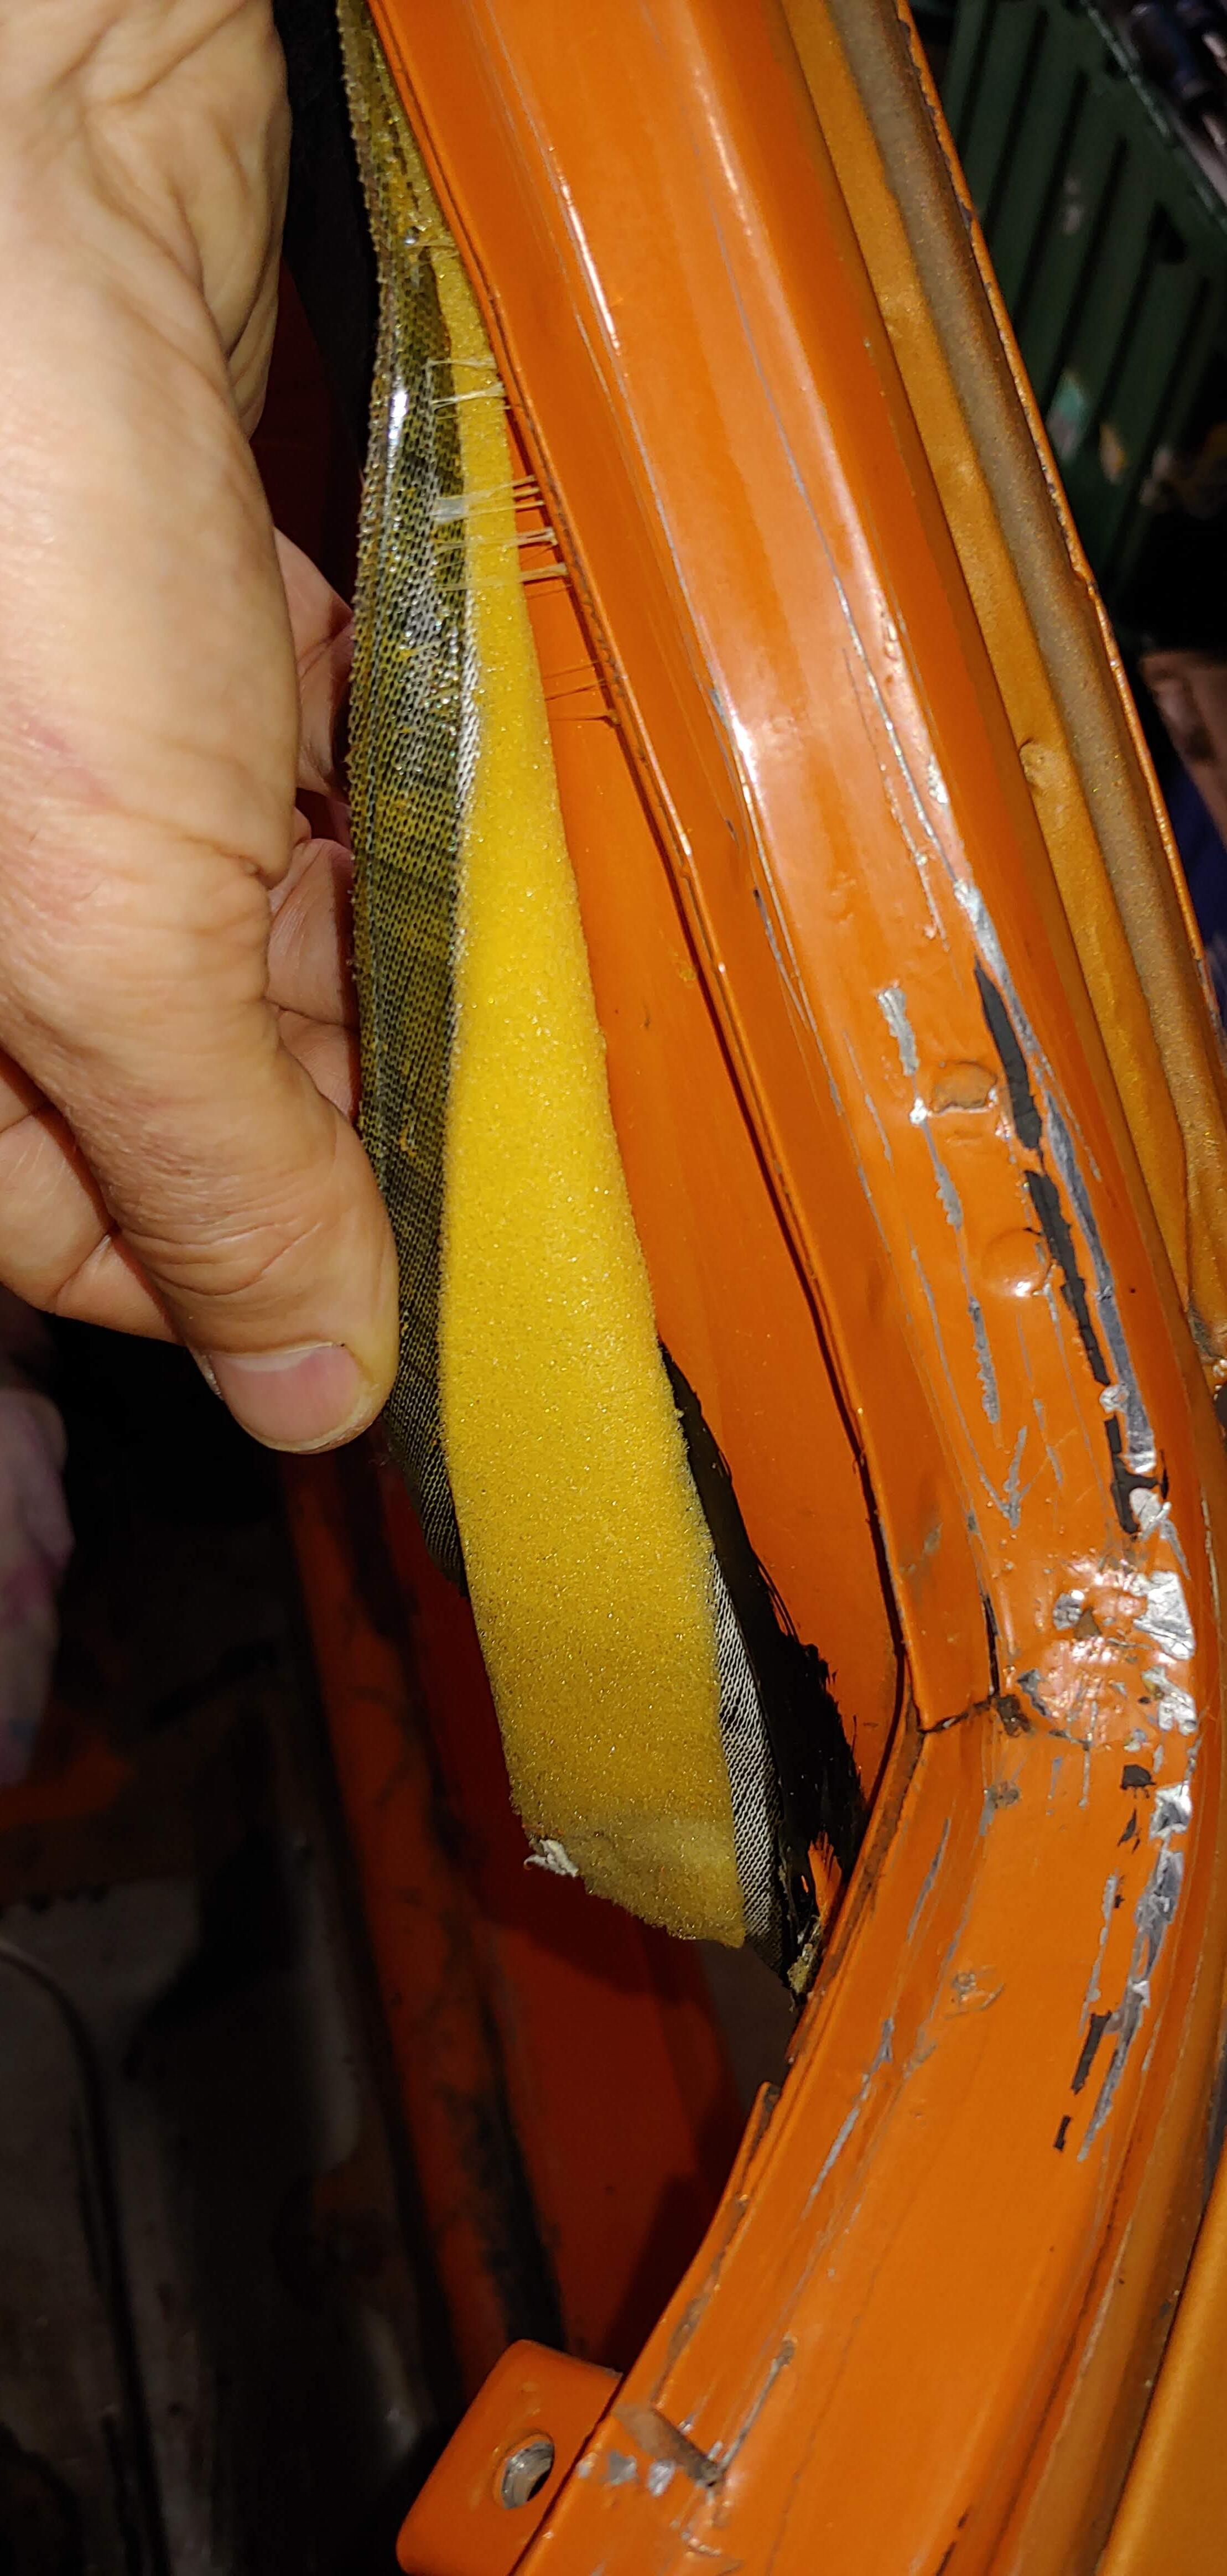
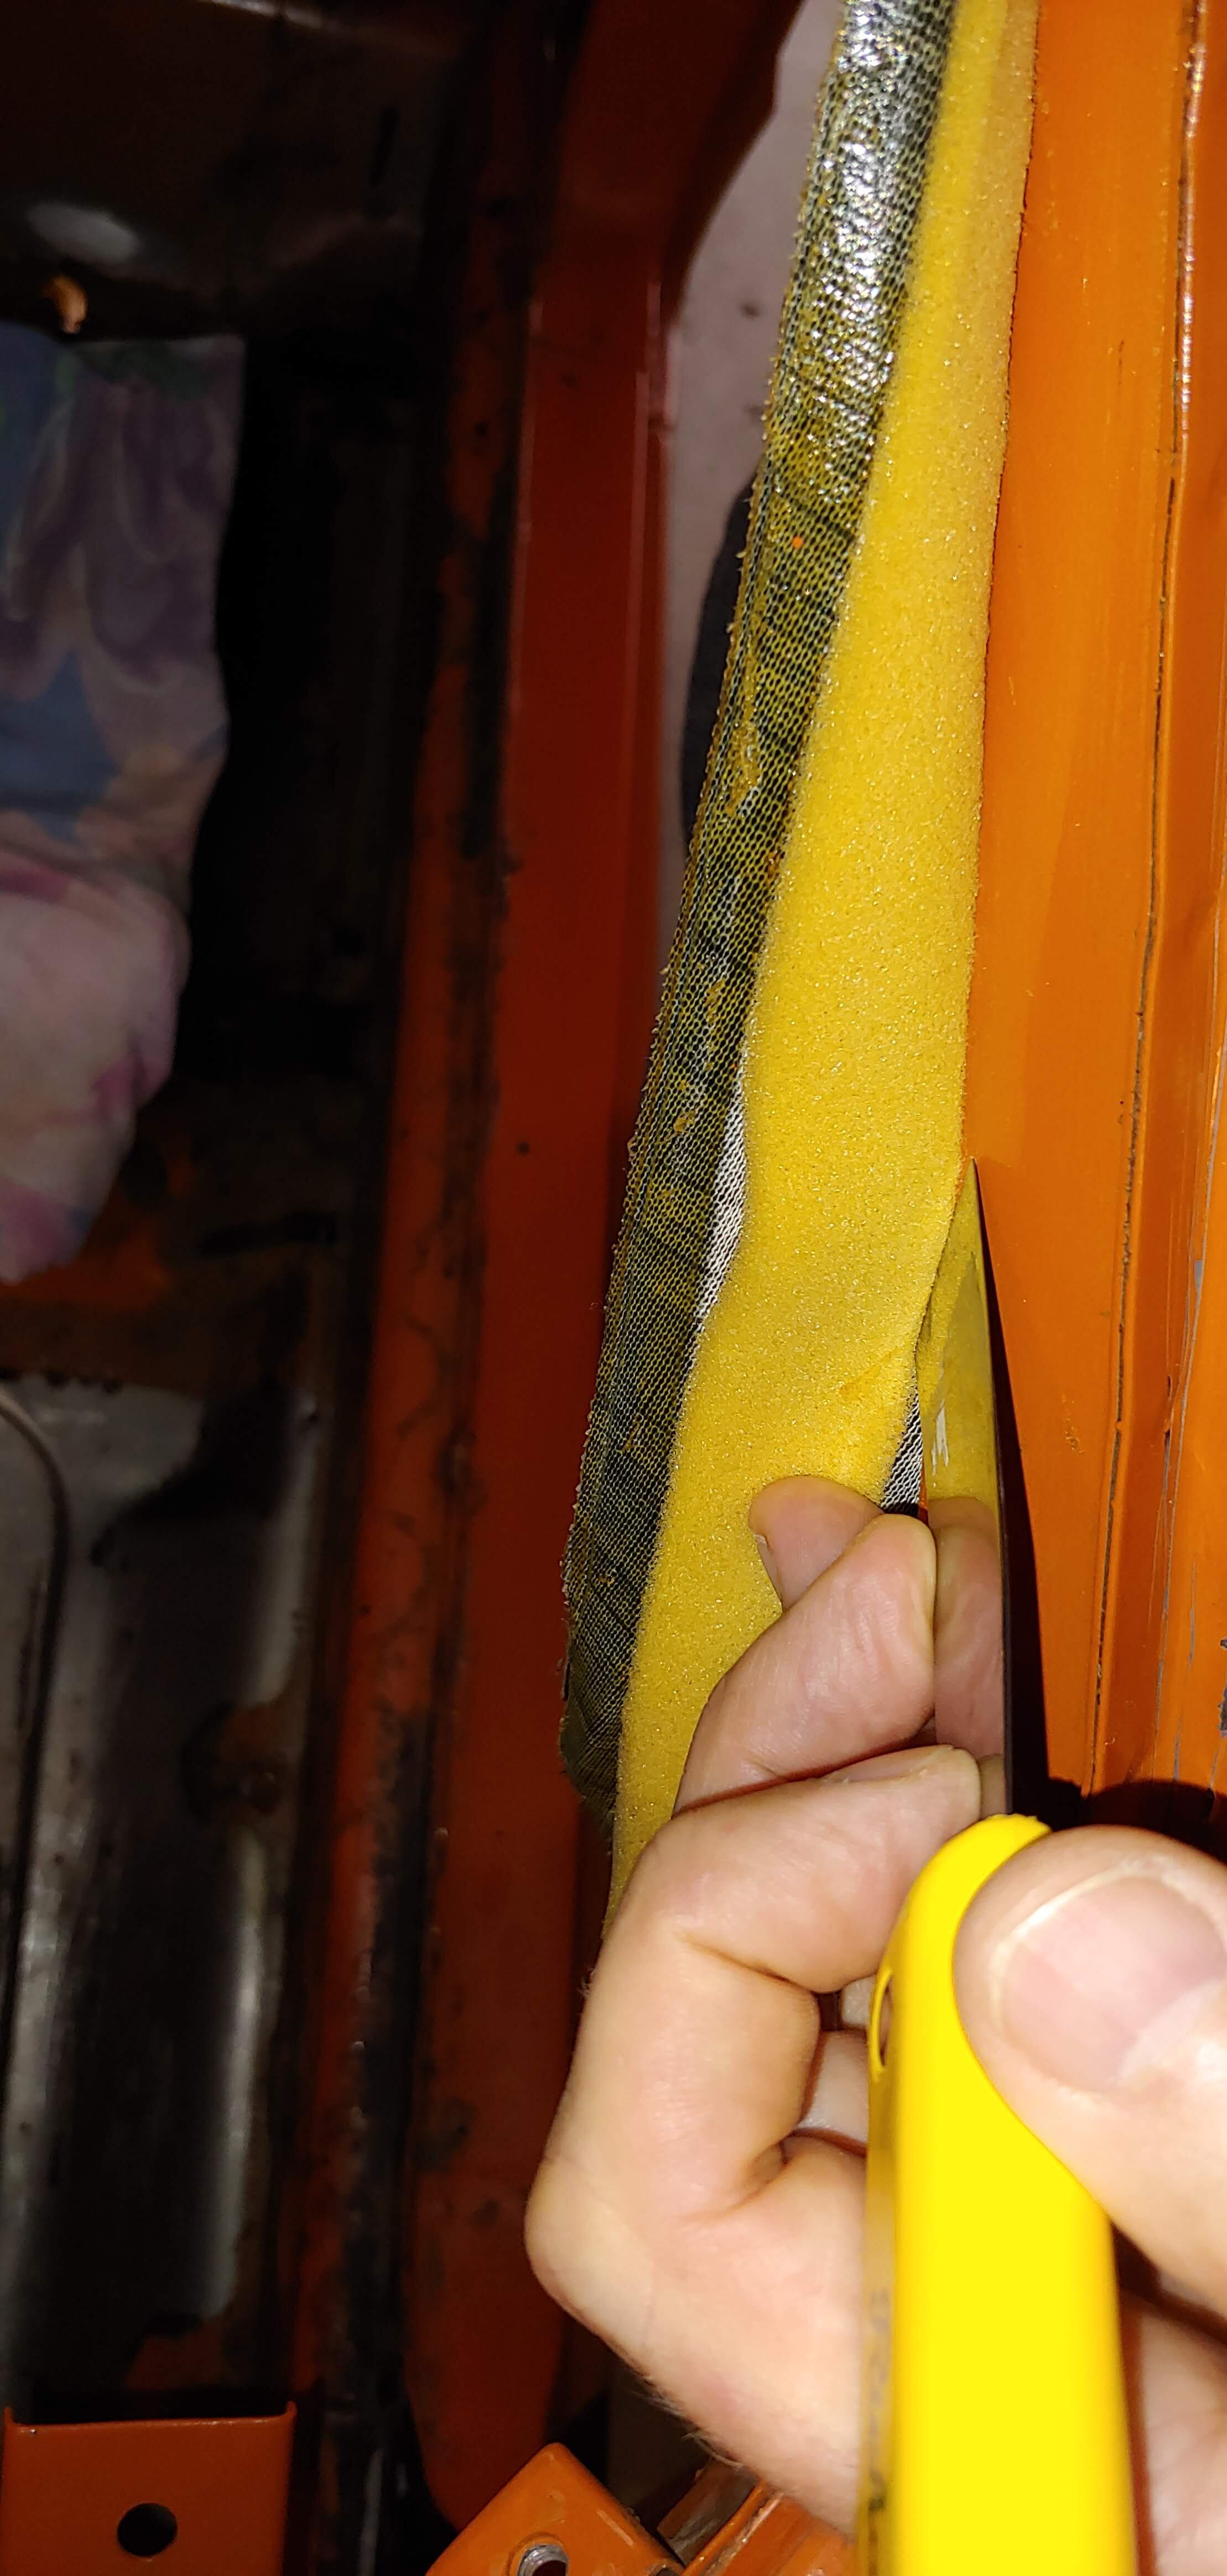
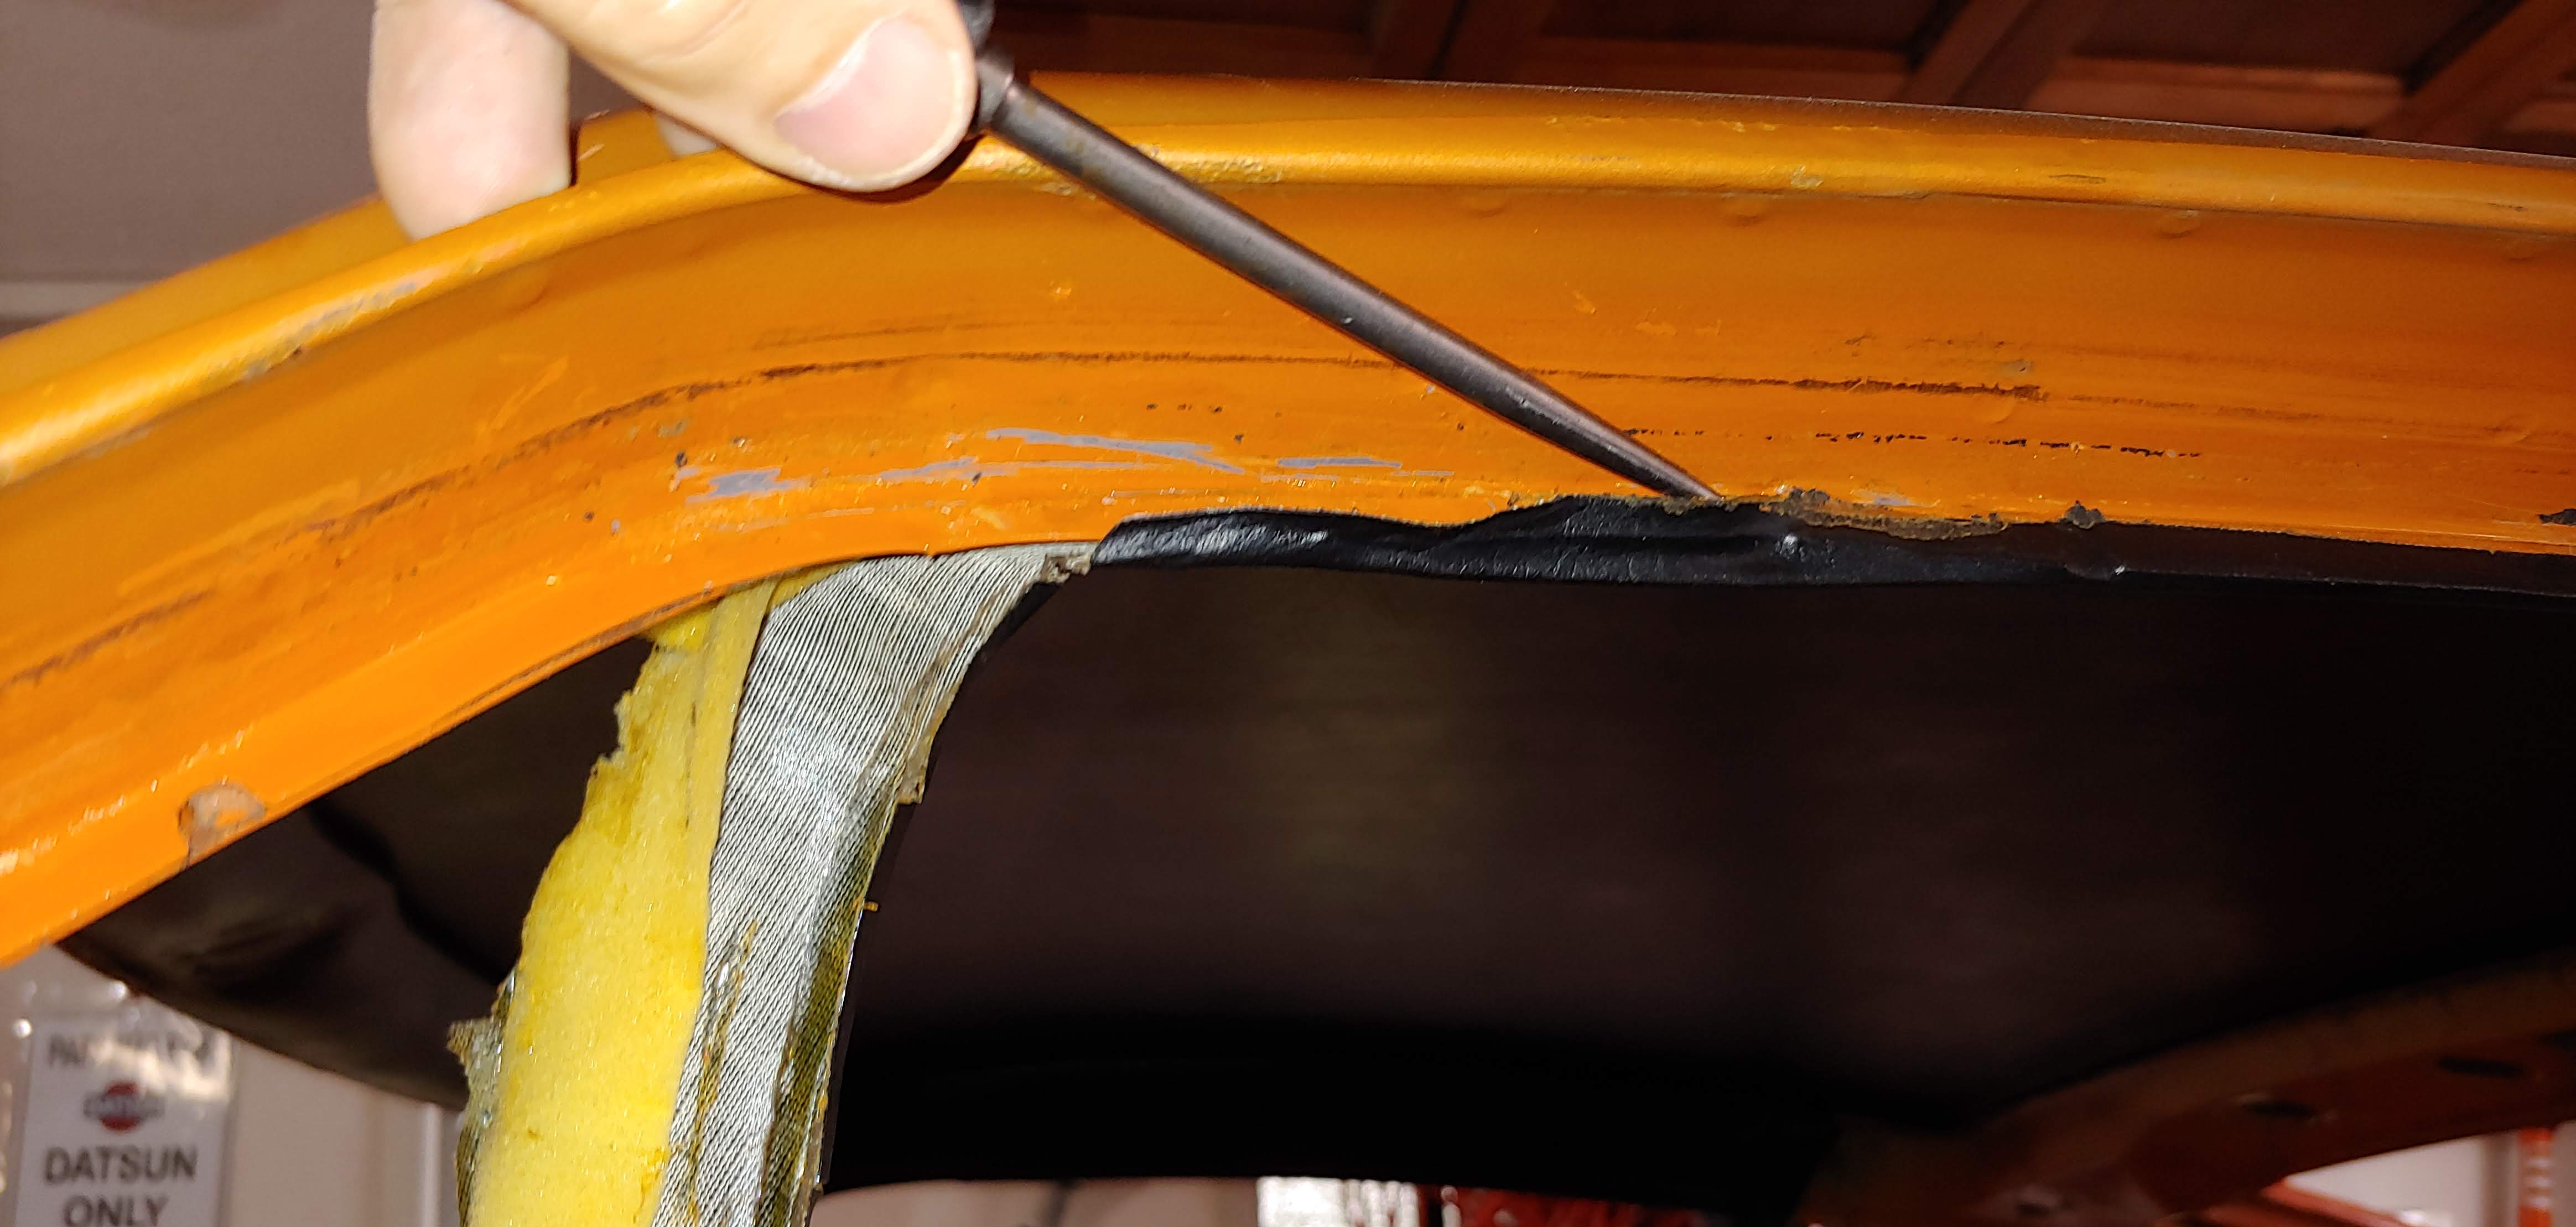
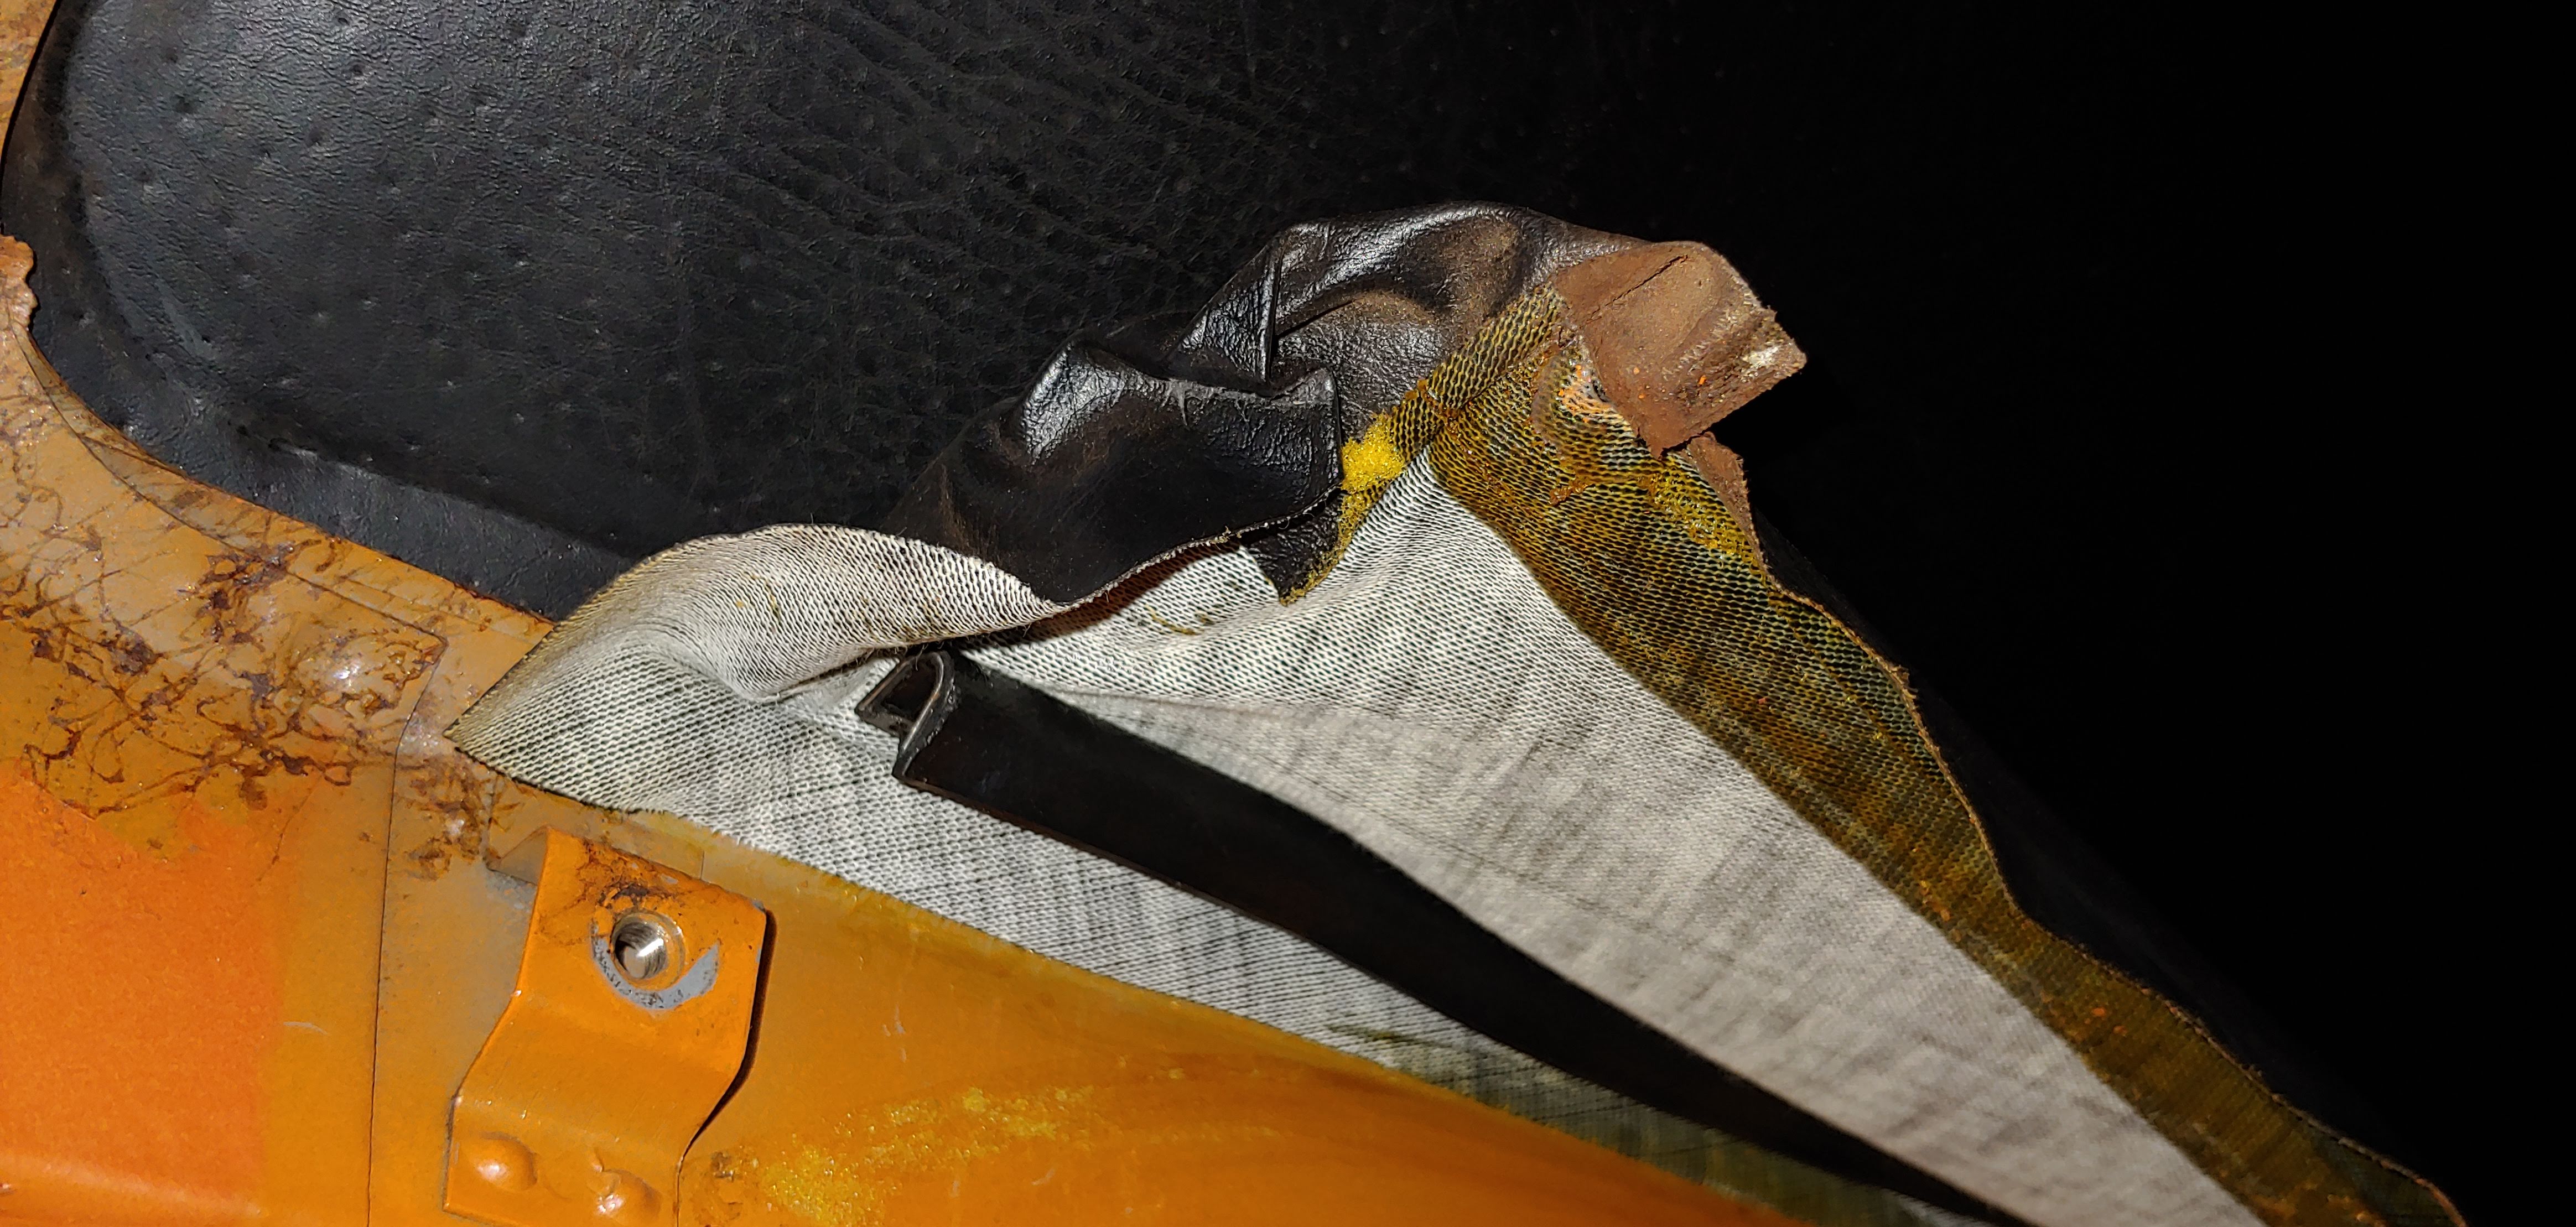
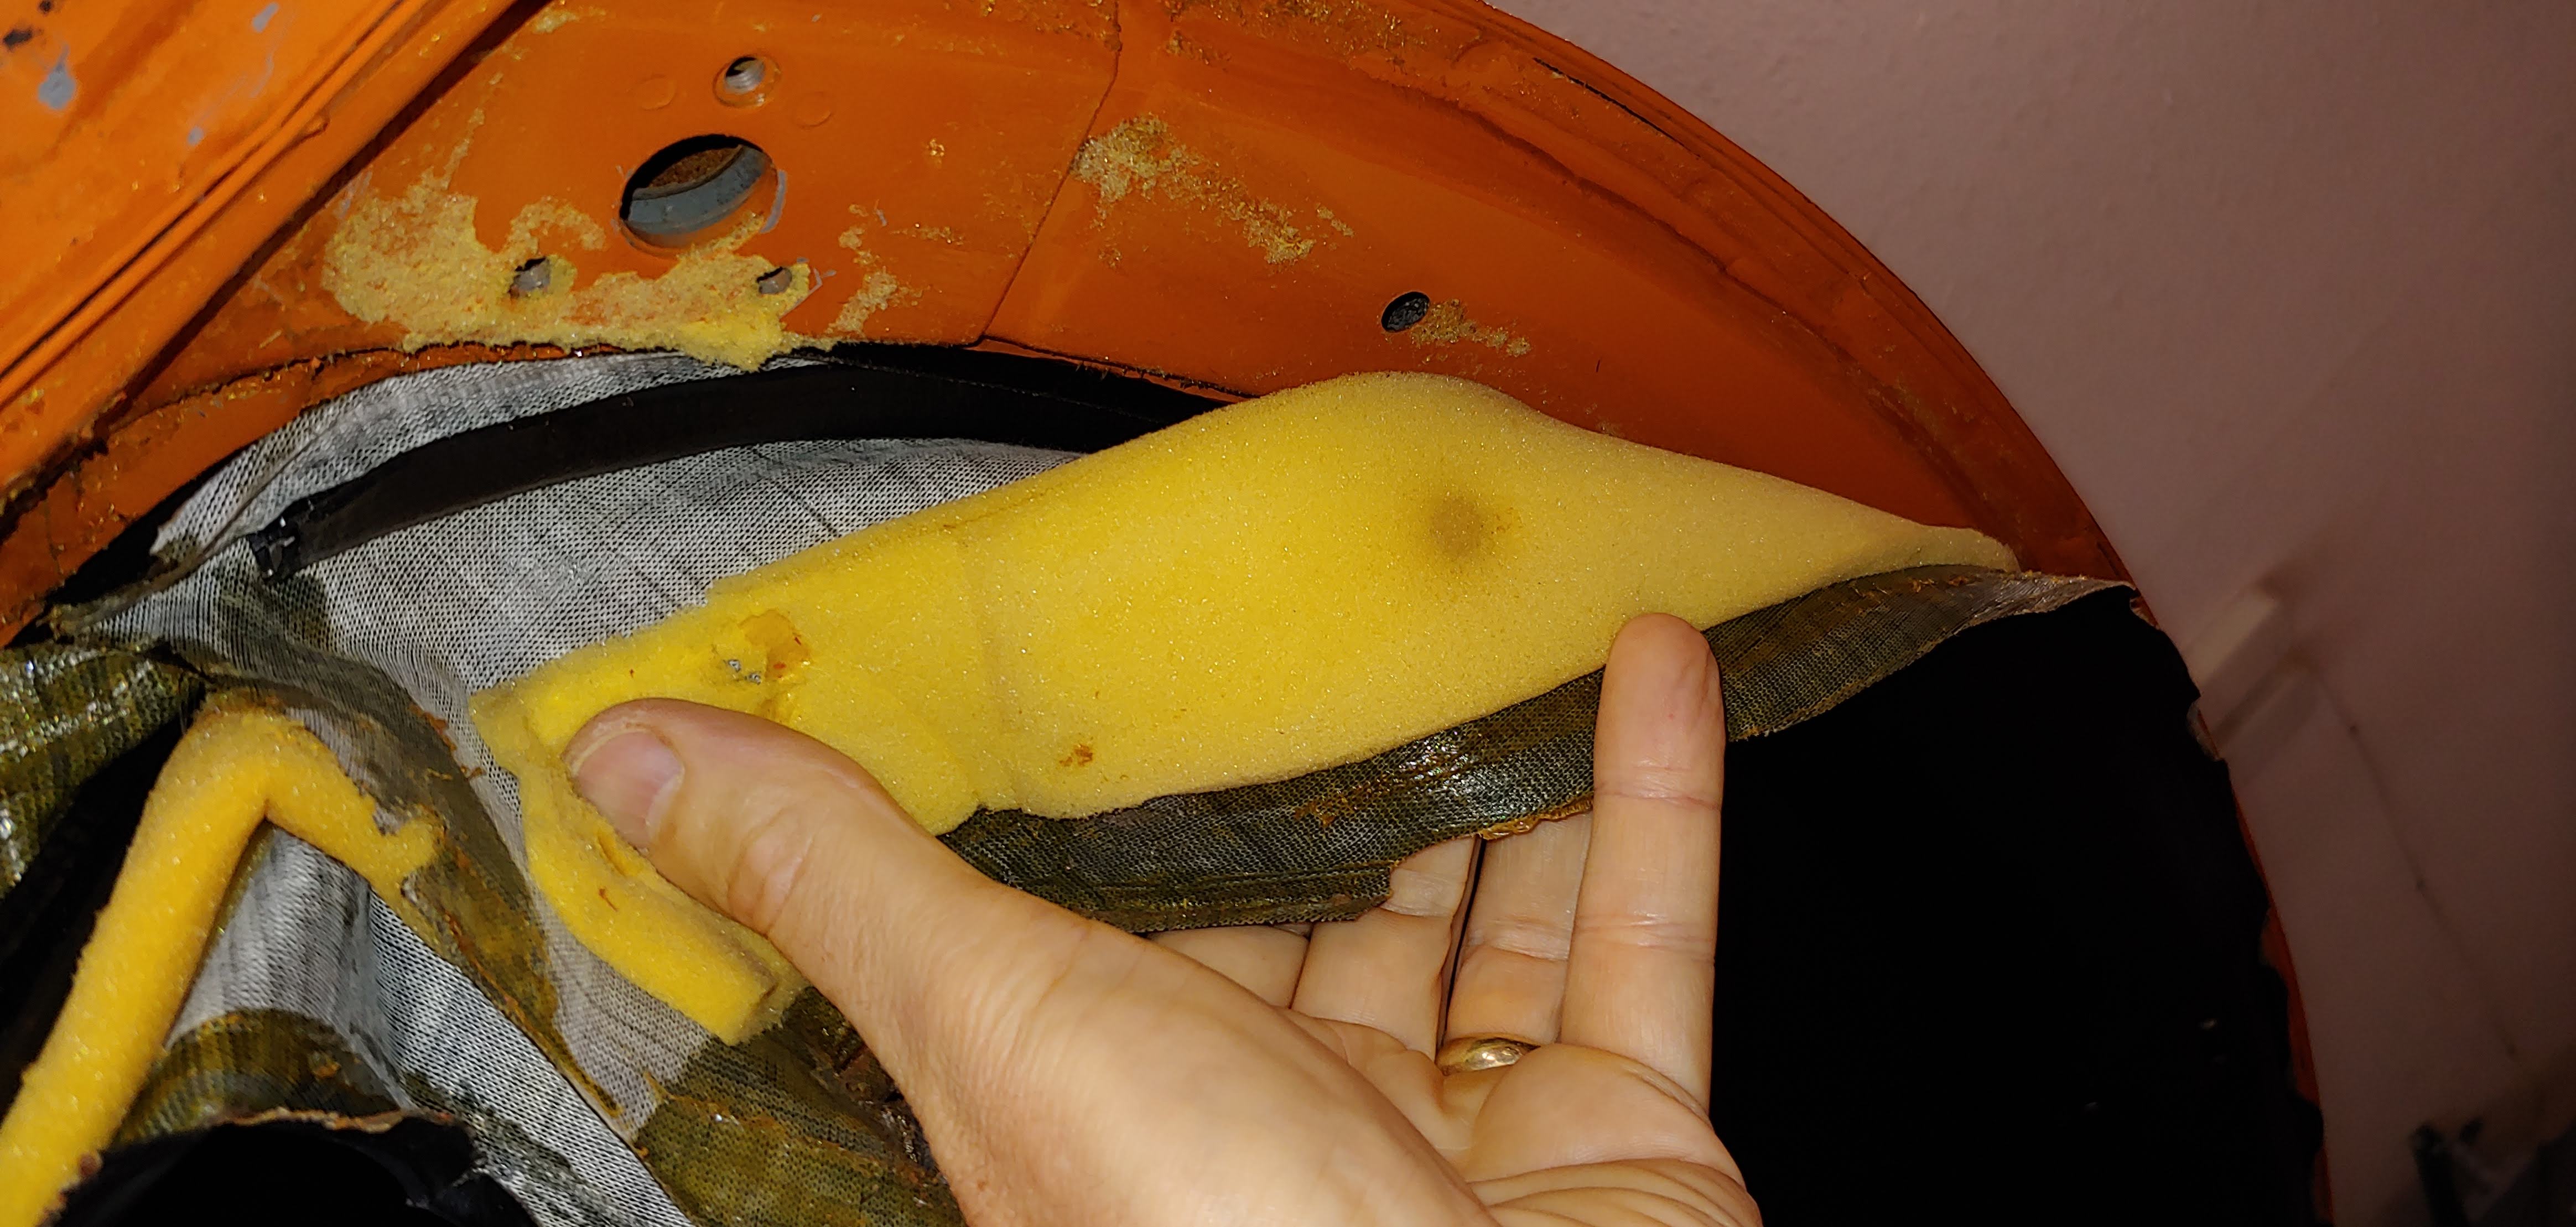
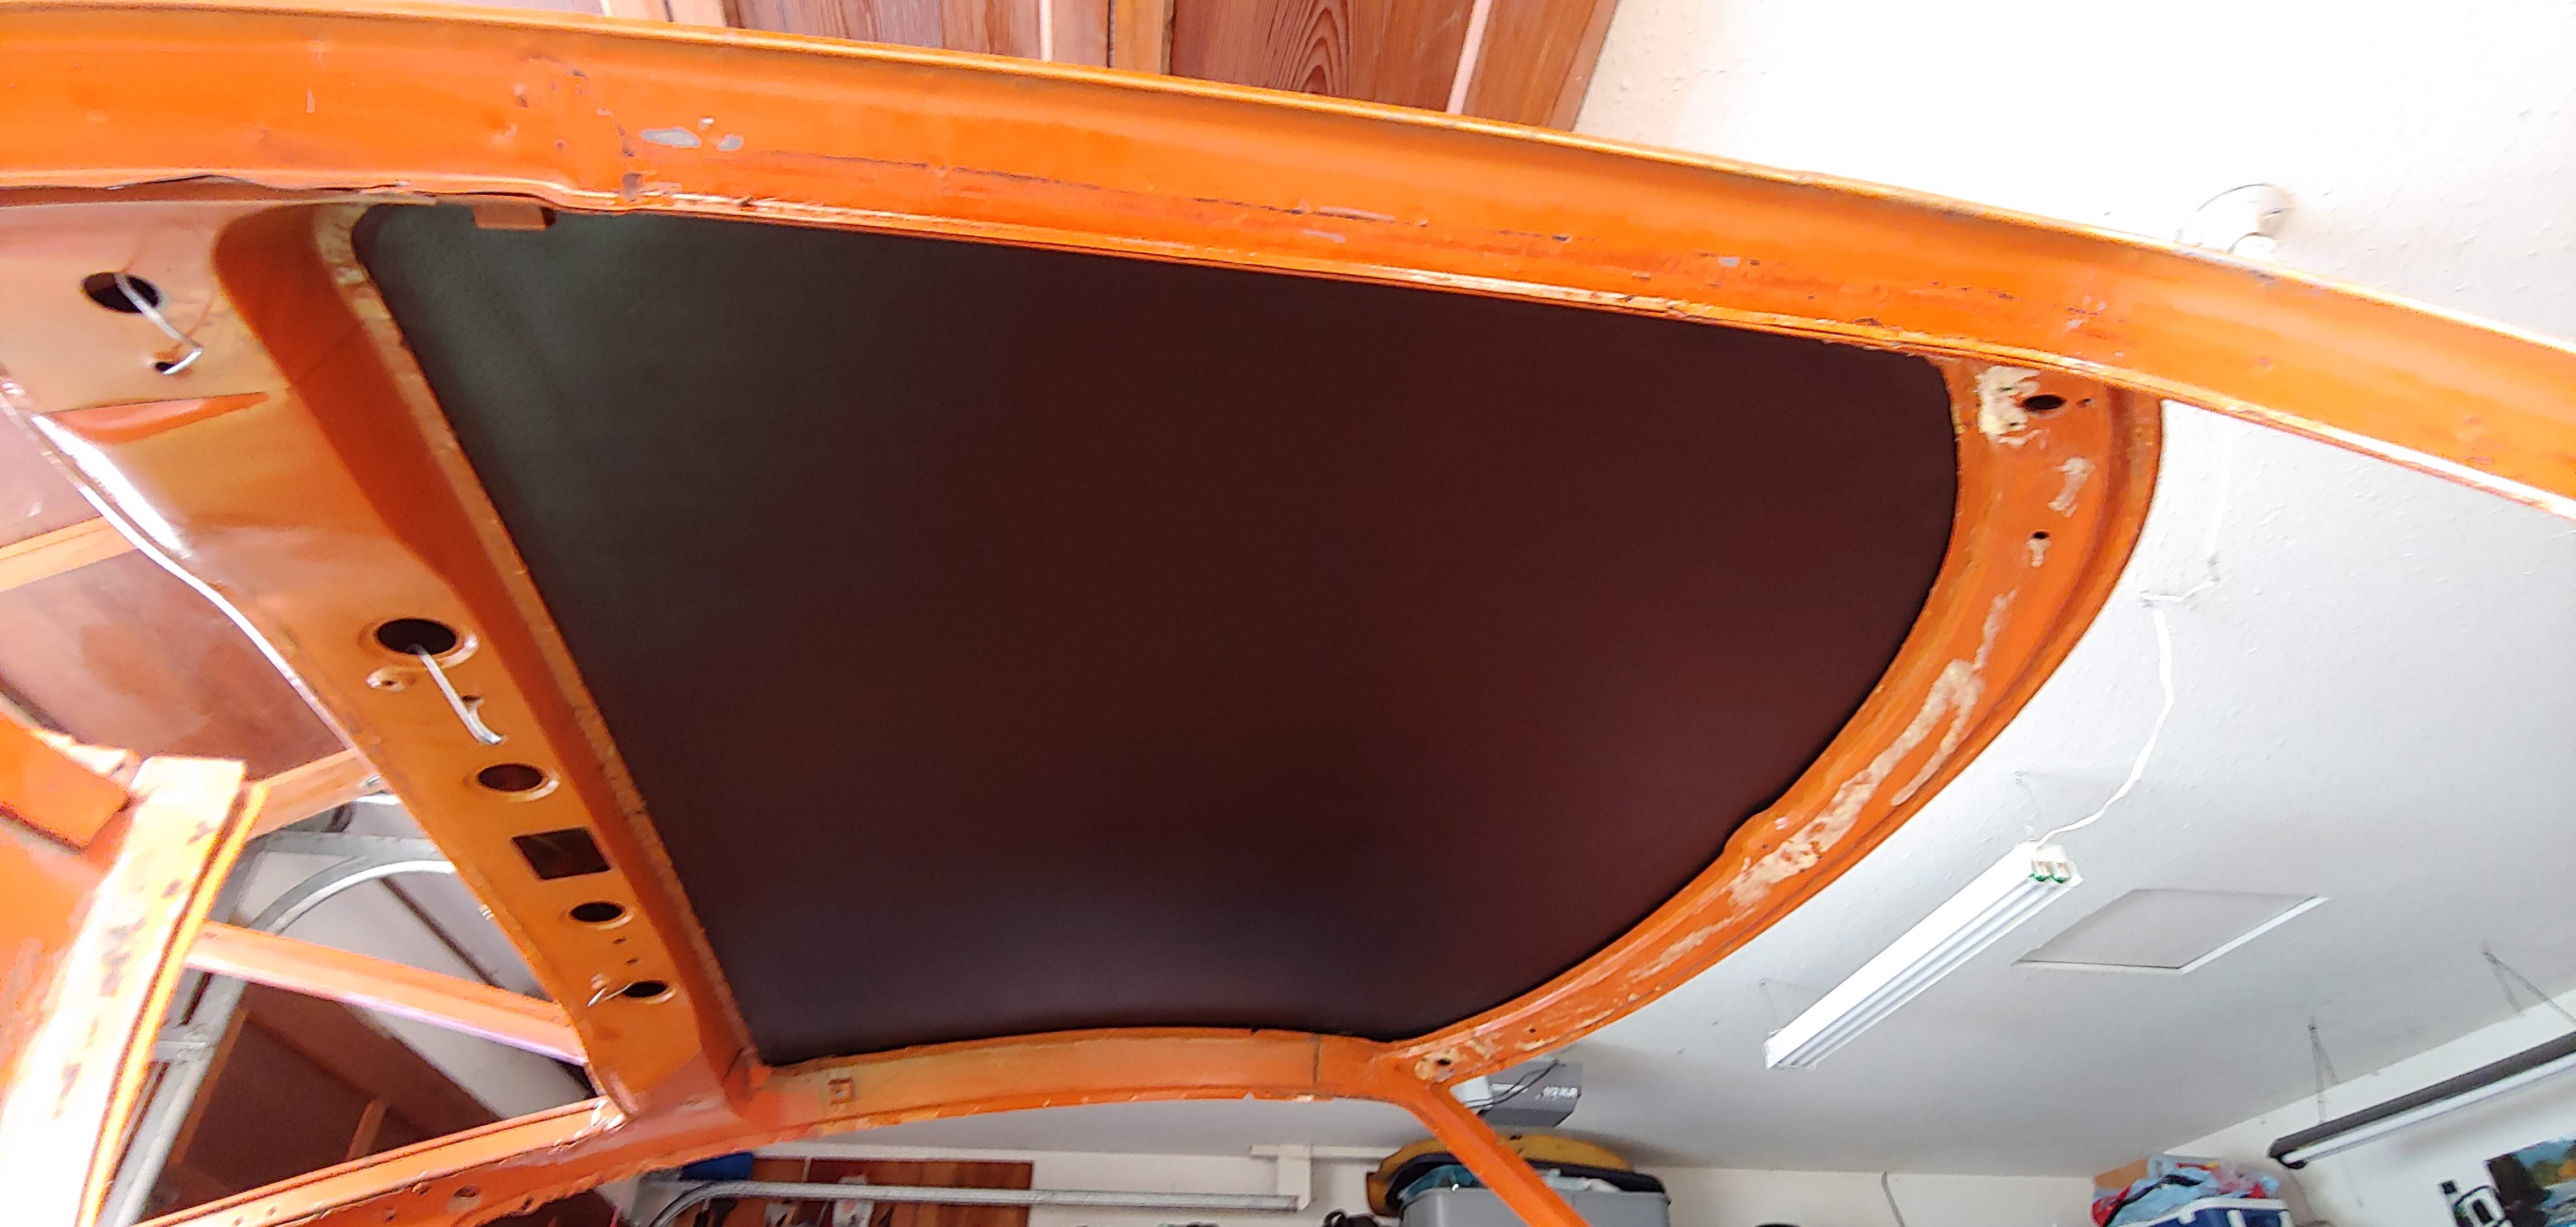
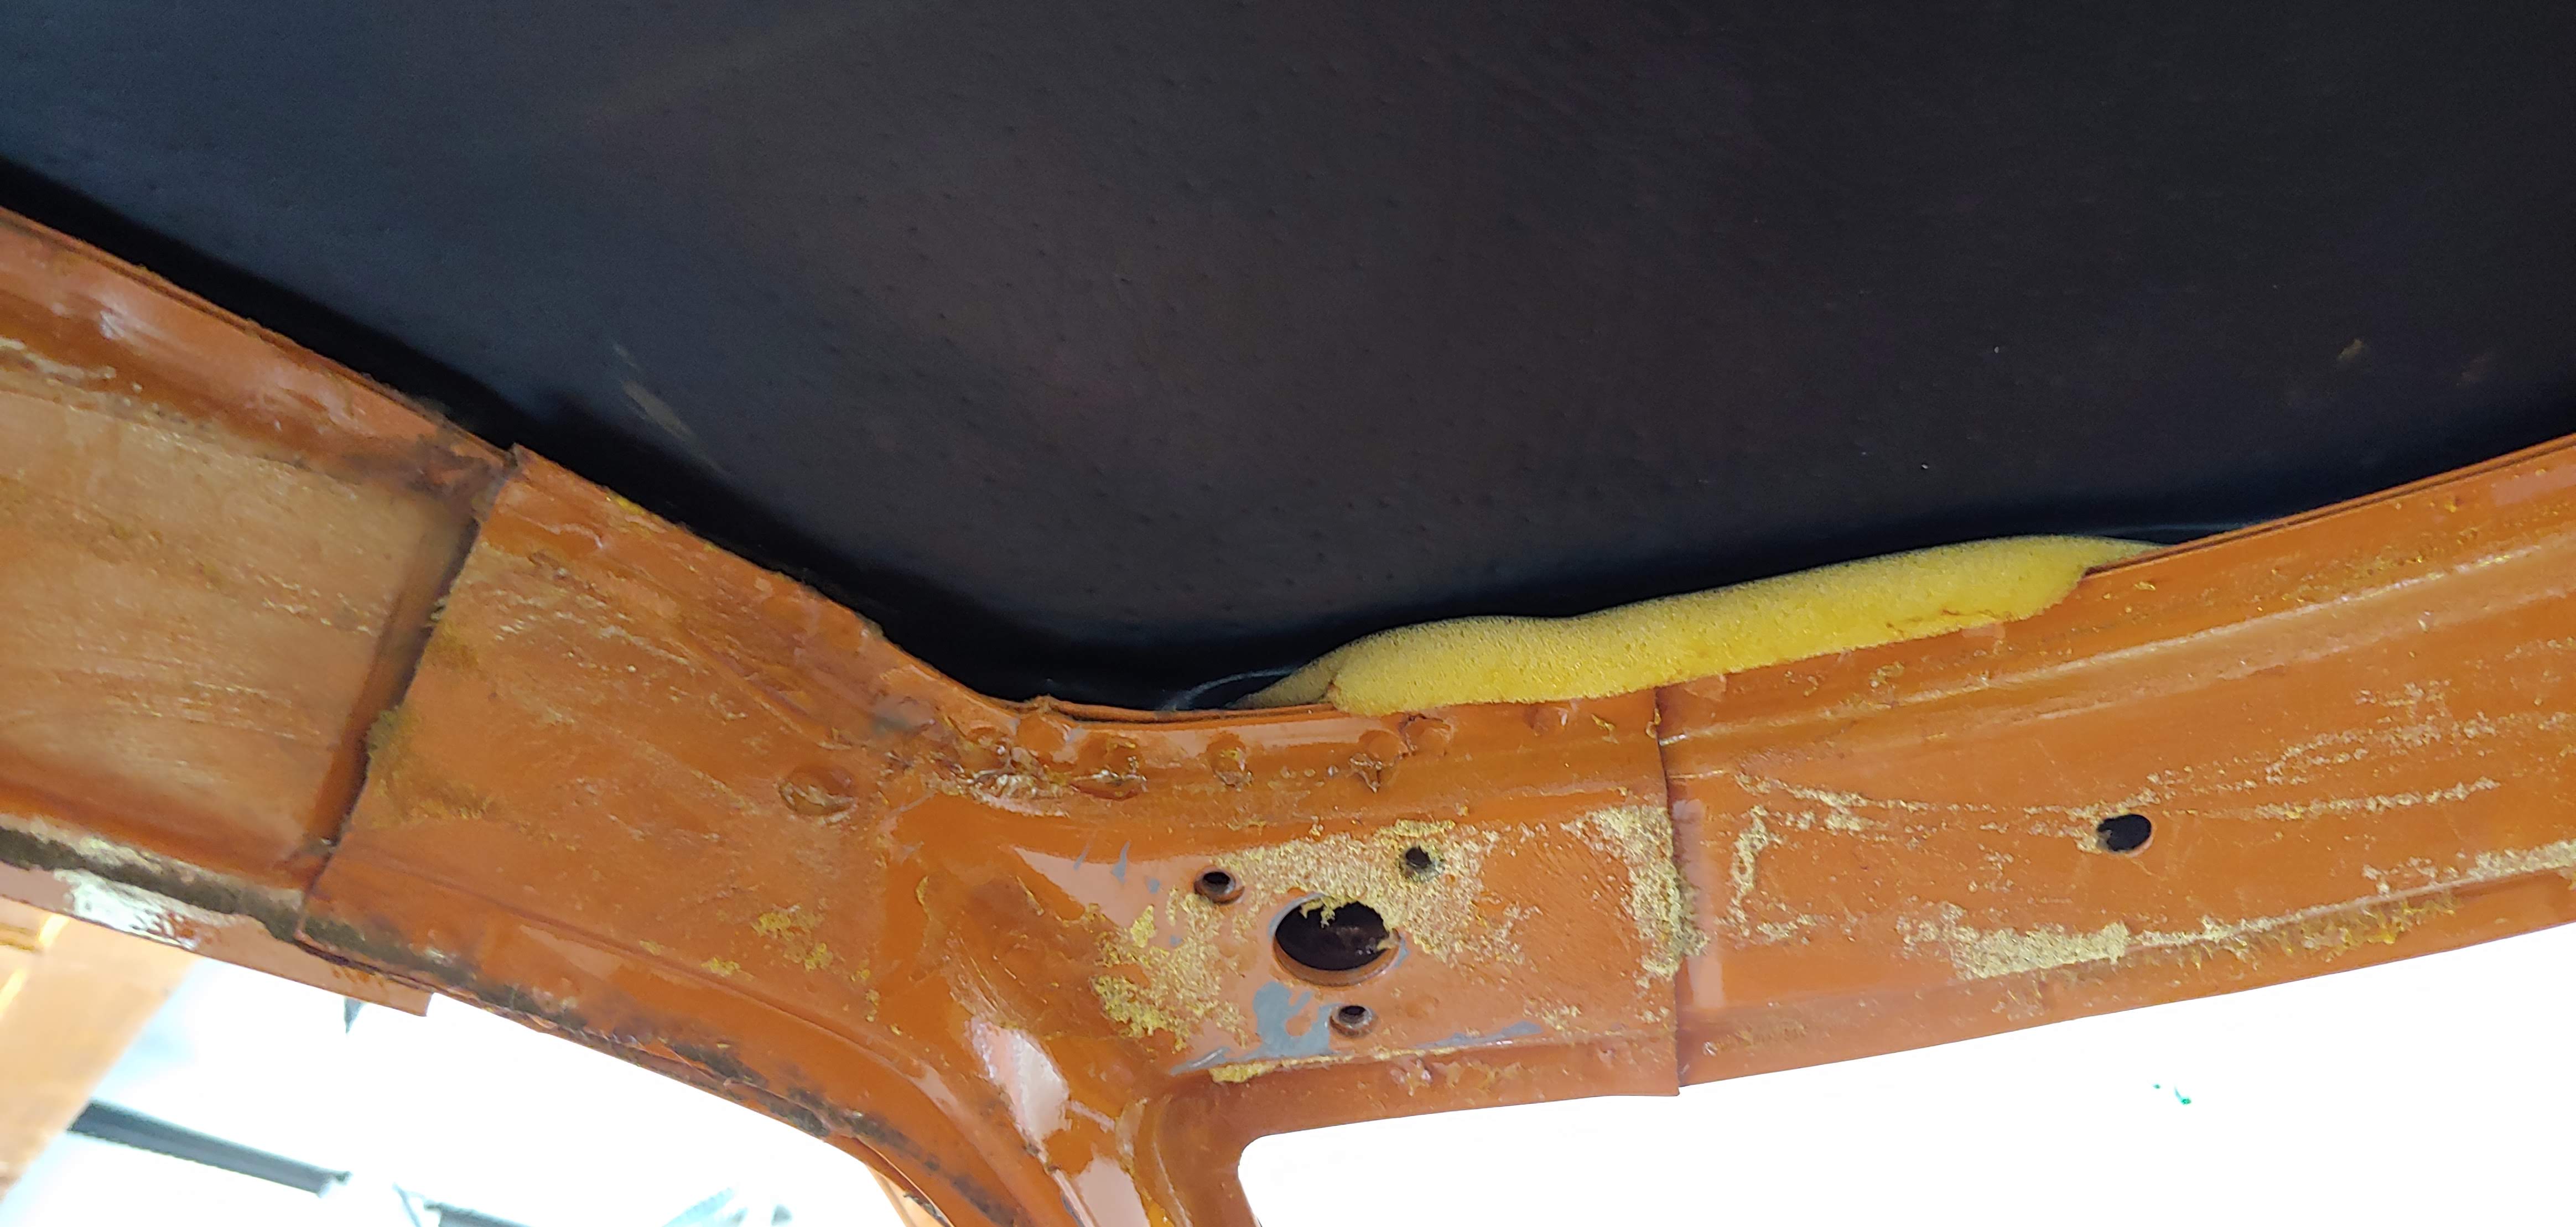
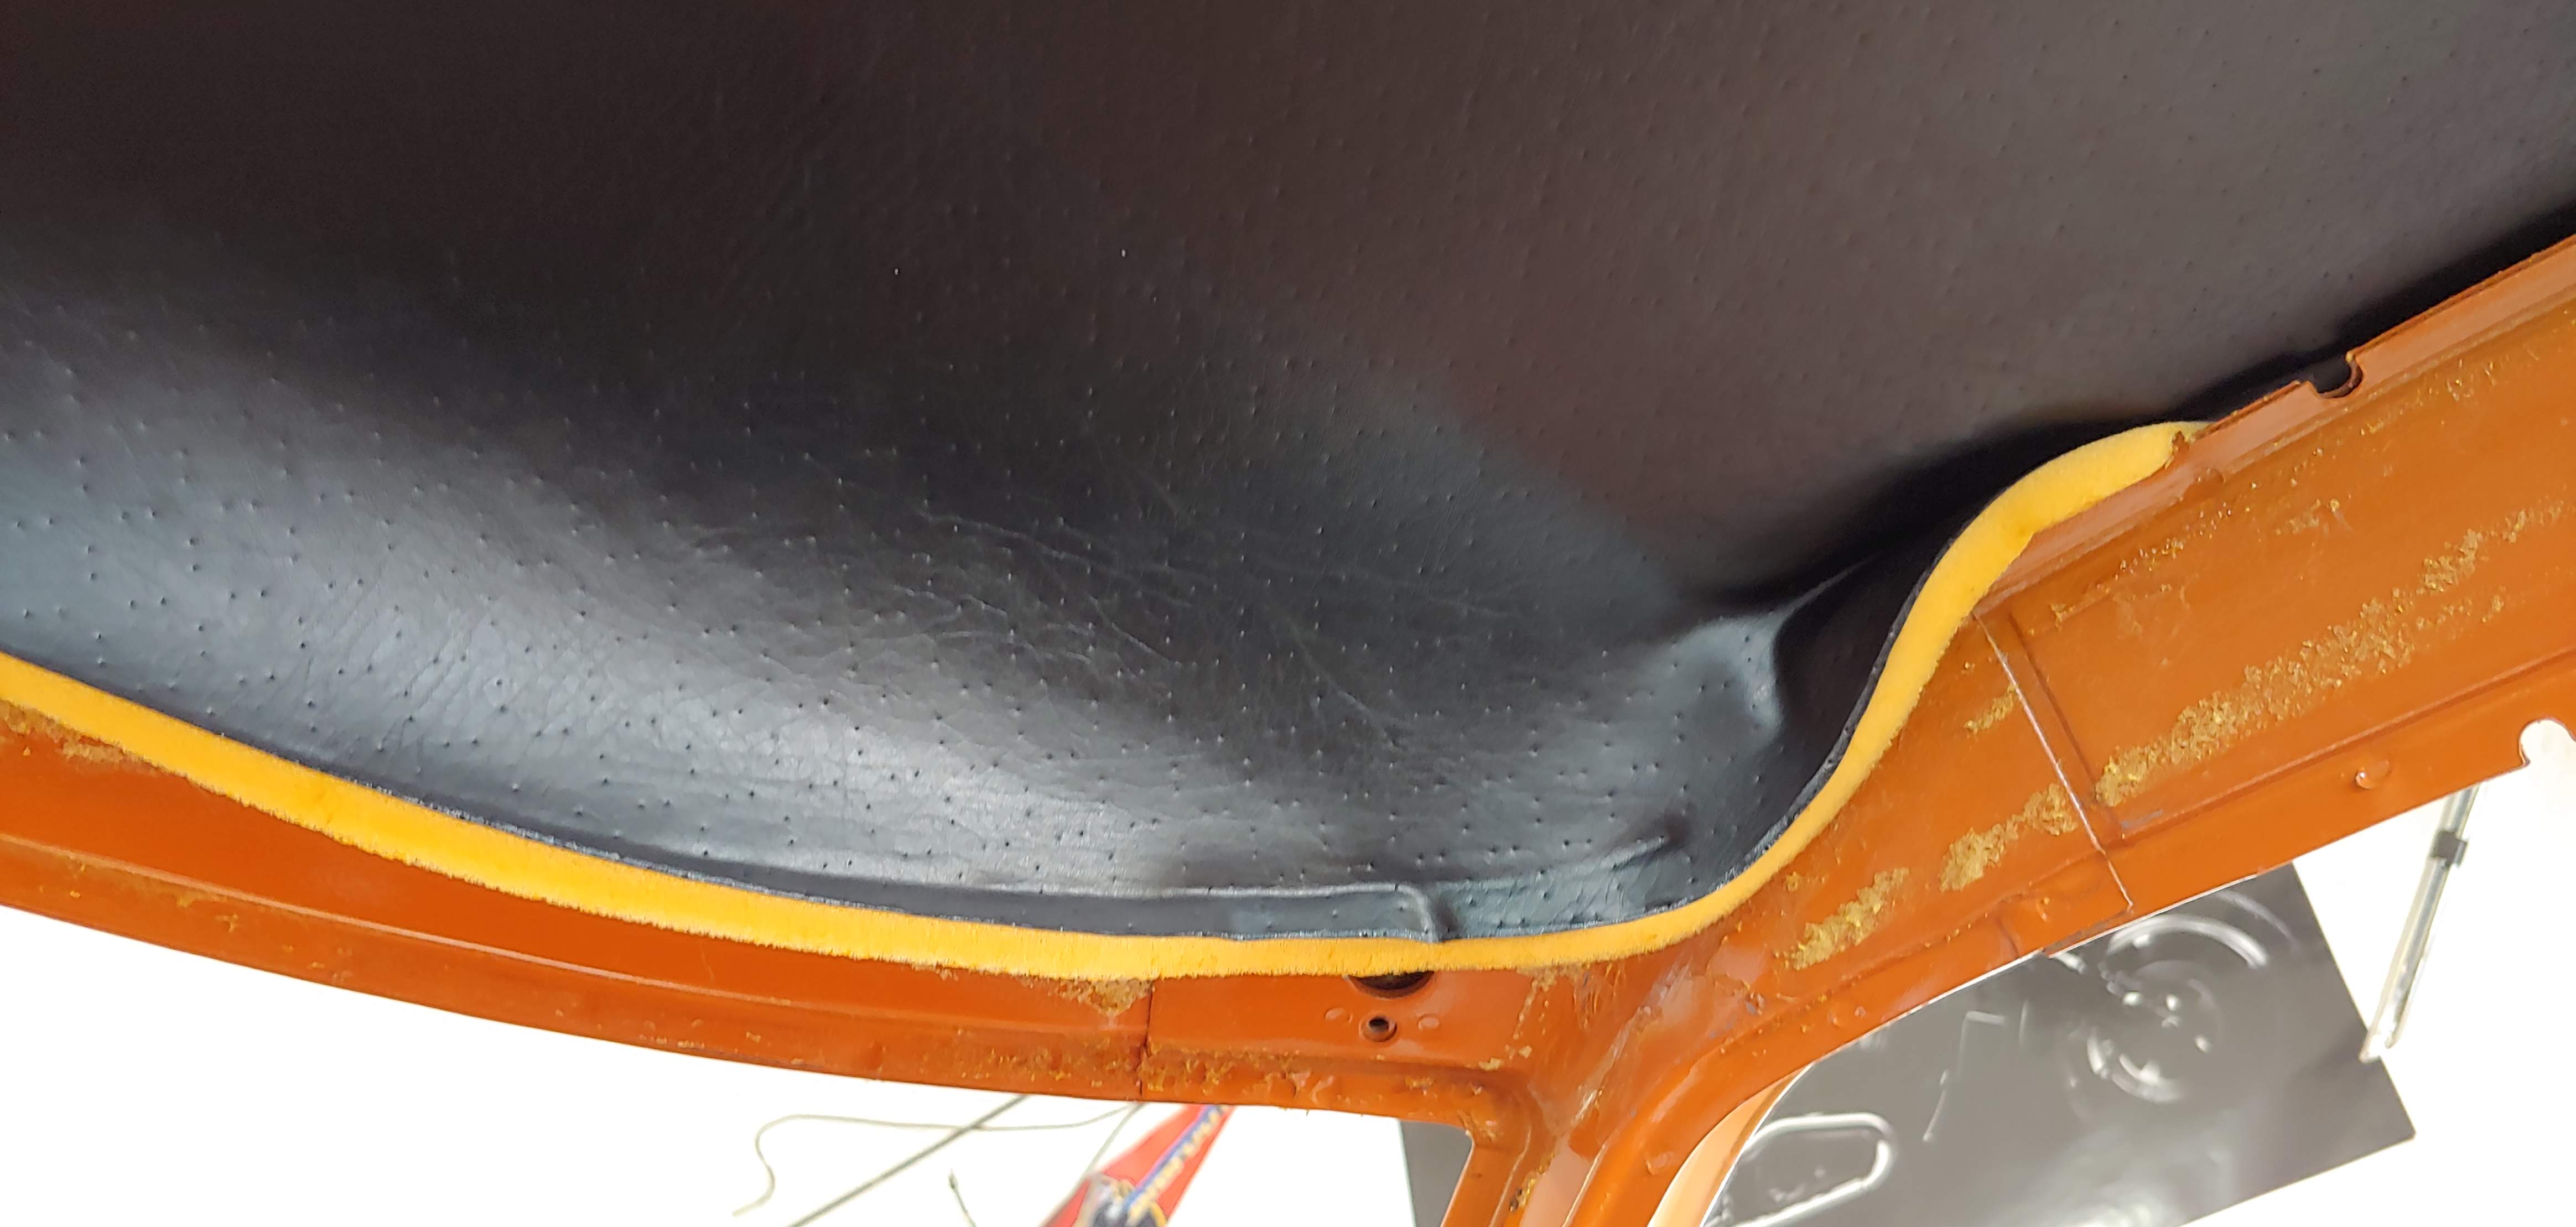
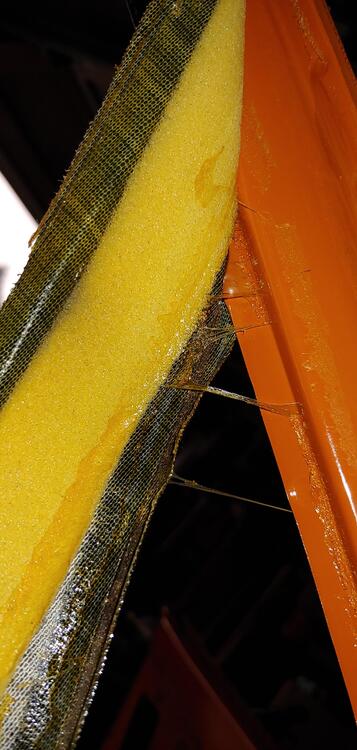
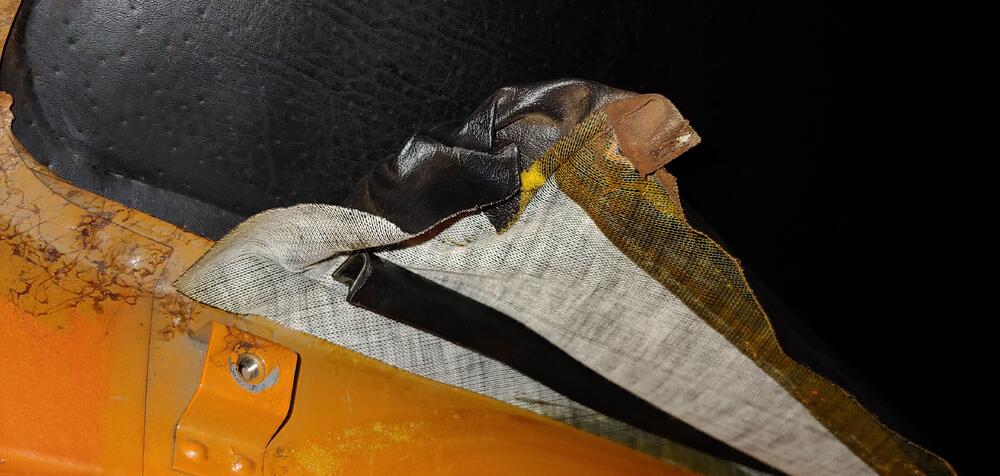
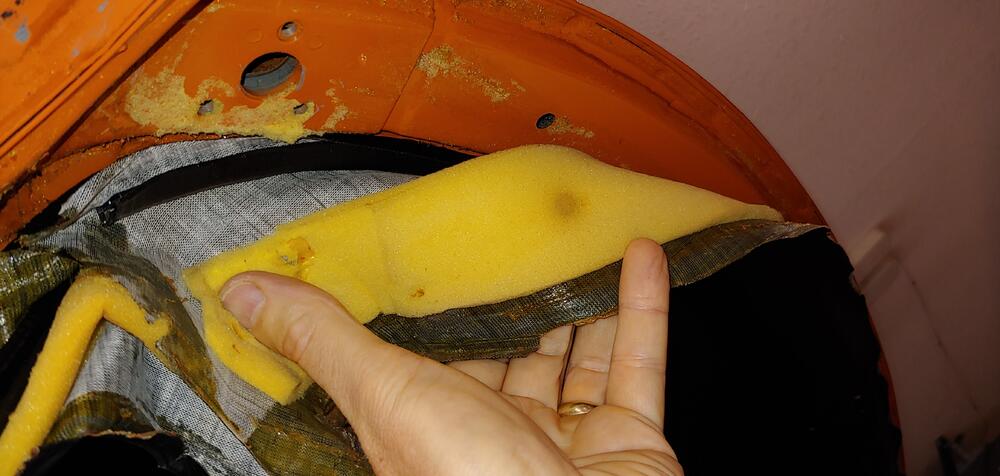
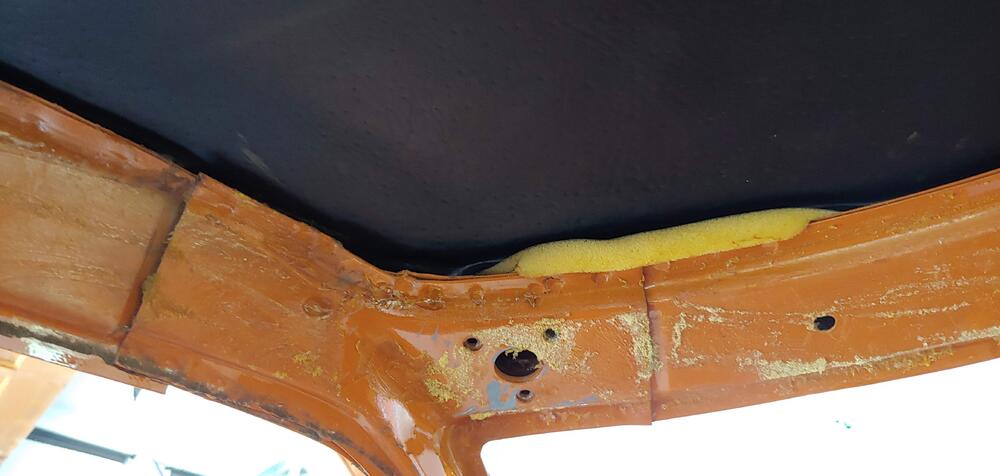
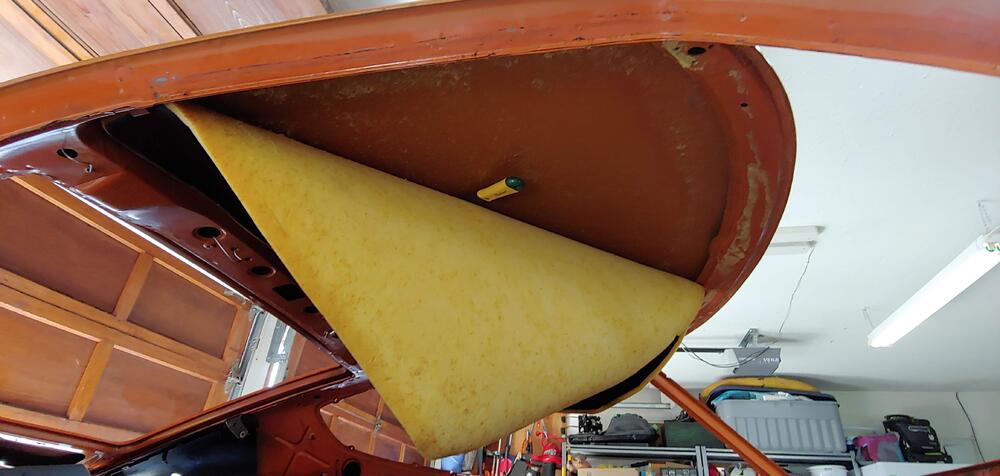
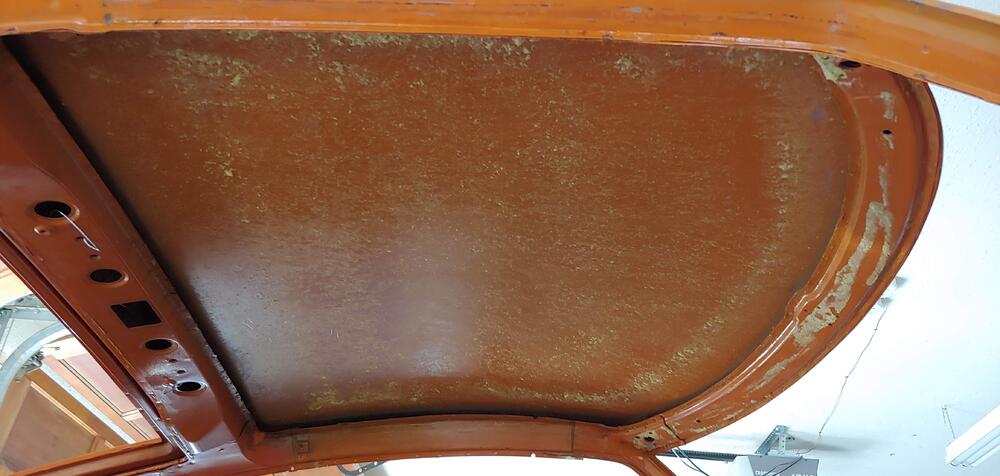
 2 pointsThis weekend I removed the headliner and surrounding padded vinyl trim and A-pillar trim. I had a little anxiety about doing this as they are are in very good shape. Luckily all came out with no issues and will be reusable, including the foam padding. I took lots of pictures of the joint details to help when I reinstall. Here are some pictures of my process, the only tools I used were a 1.25" paint scraper with corners rounded off and an awl. I started at the lower end of the A-pillars and carefully peeled back the vinyl exposing the foam padding. In some areas I could do this with just my fingers and other areas I had to use the scrapper to break away the adhesive as I pulled. When I got to the vinyl over the door opening I used the awl to break the adhesive as space was limited. For most of the length the foam was glued at the edges to I had to go very slow using the scraper gently while keeping light tension on the foam. There is also U shaped welting that holds the vinyl to the roof frame that had to be pulled away. After removing the A-pillar and over the door opening trim I used the same process for over the windshield opening. For the headliner I found that there was no adhesive where it tucked into the roof frame but there was a very uniform coating of the adhesive on the rest. To get started I poked my little finger in to the hole for the LH visor mounting bracket pushing the unglued edge of the headliner and at the same time gently pushing inward with the fingers of my other hand until I had exposed the edge of the headliner foam. From there I could work the unglued edge out of the frame for the full perimeter. I freed the headliner using the scraper with a short jabbing motion, keeping light pressure on the roof and holding the headliner with light tension with my other hand. I had the scrapper at about a 30 to 45 degree angle to the roof while doing the scrapping. Using this technique very little of the foam was damaged. All in all it when quite smoothly and there was very little foam reside left on the steel. It was definitely worth taking my time to be able to salvage everything.


 2 points
 -
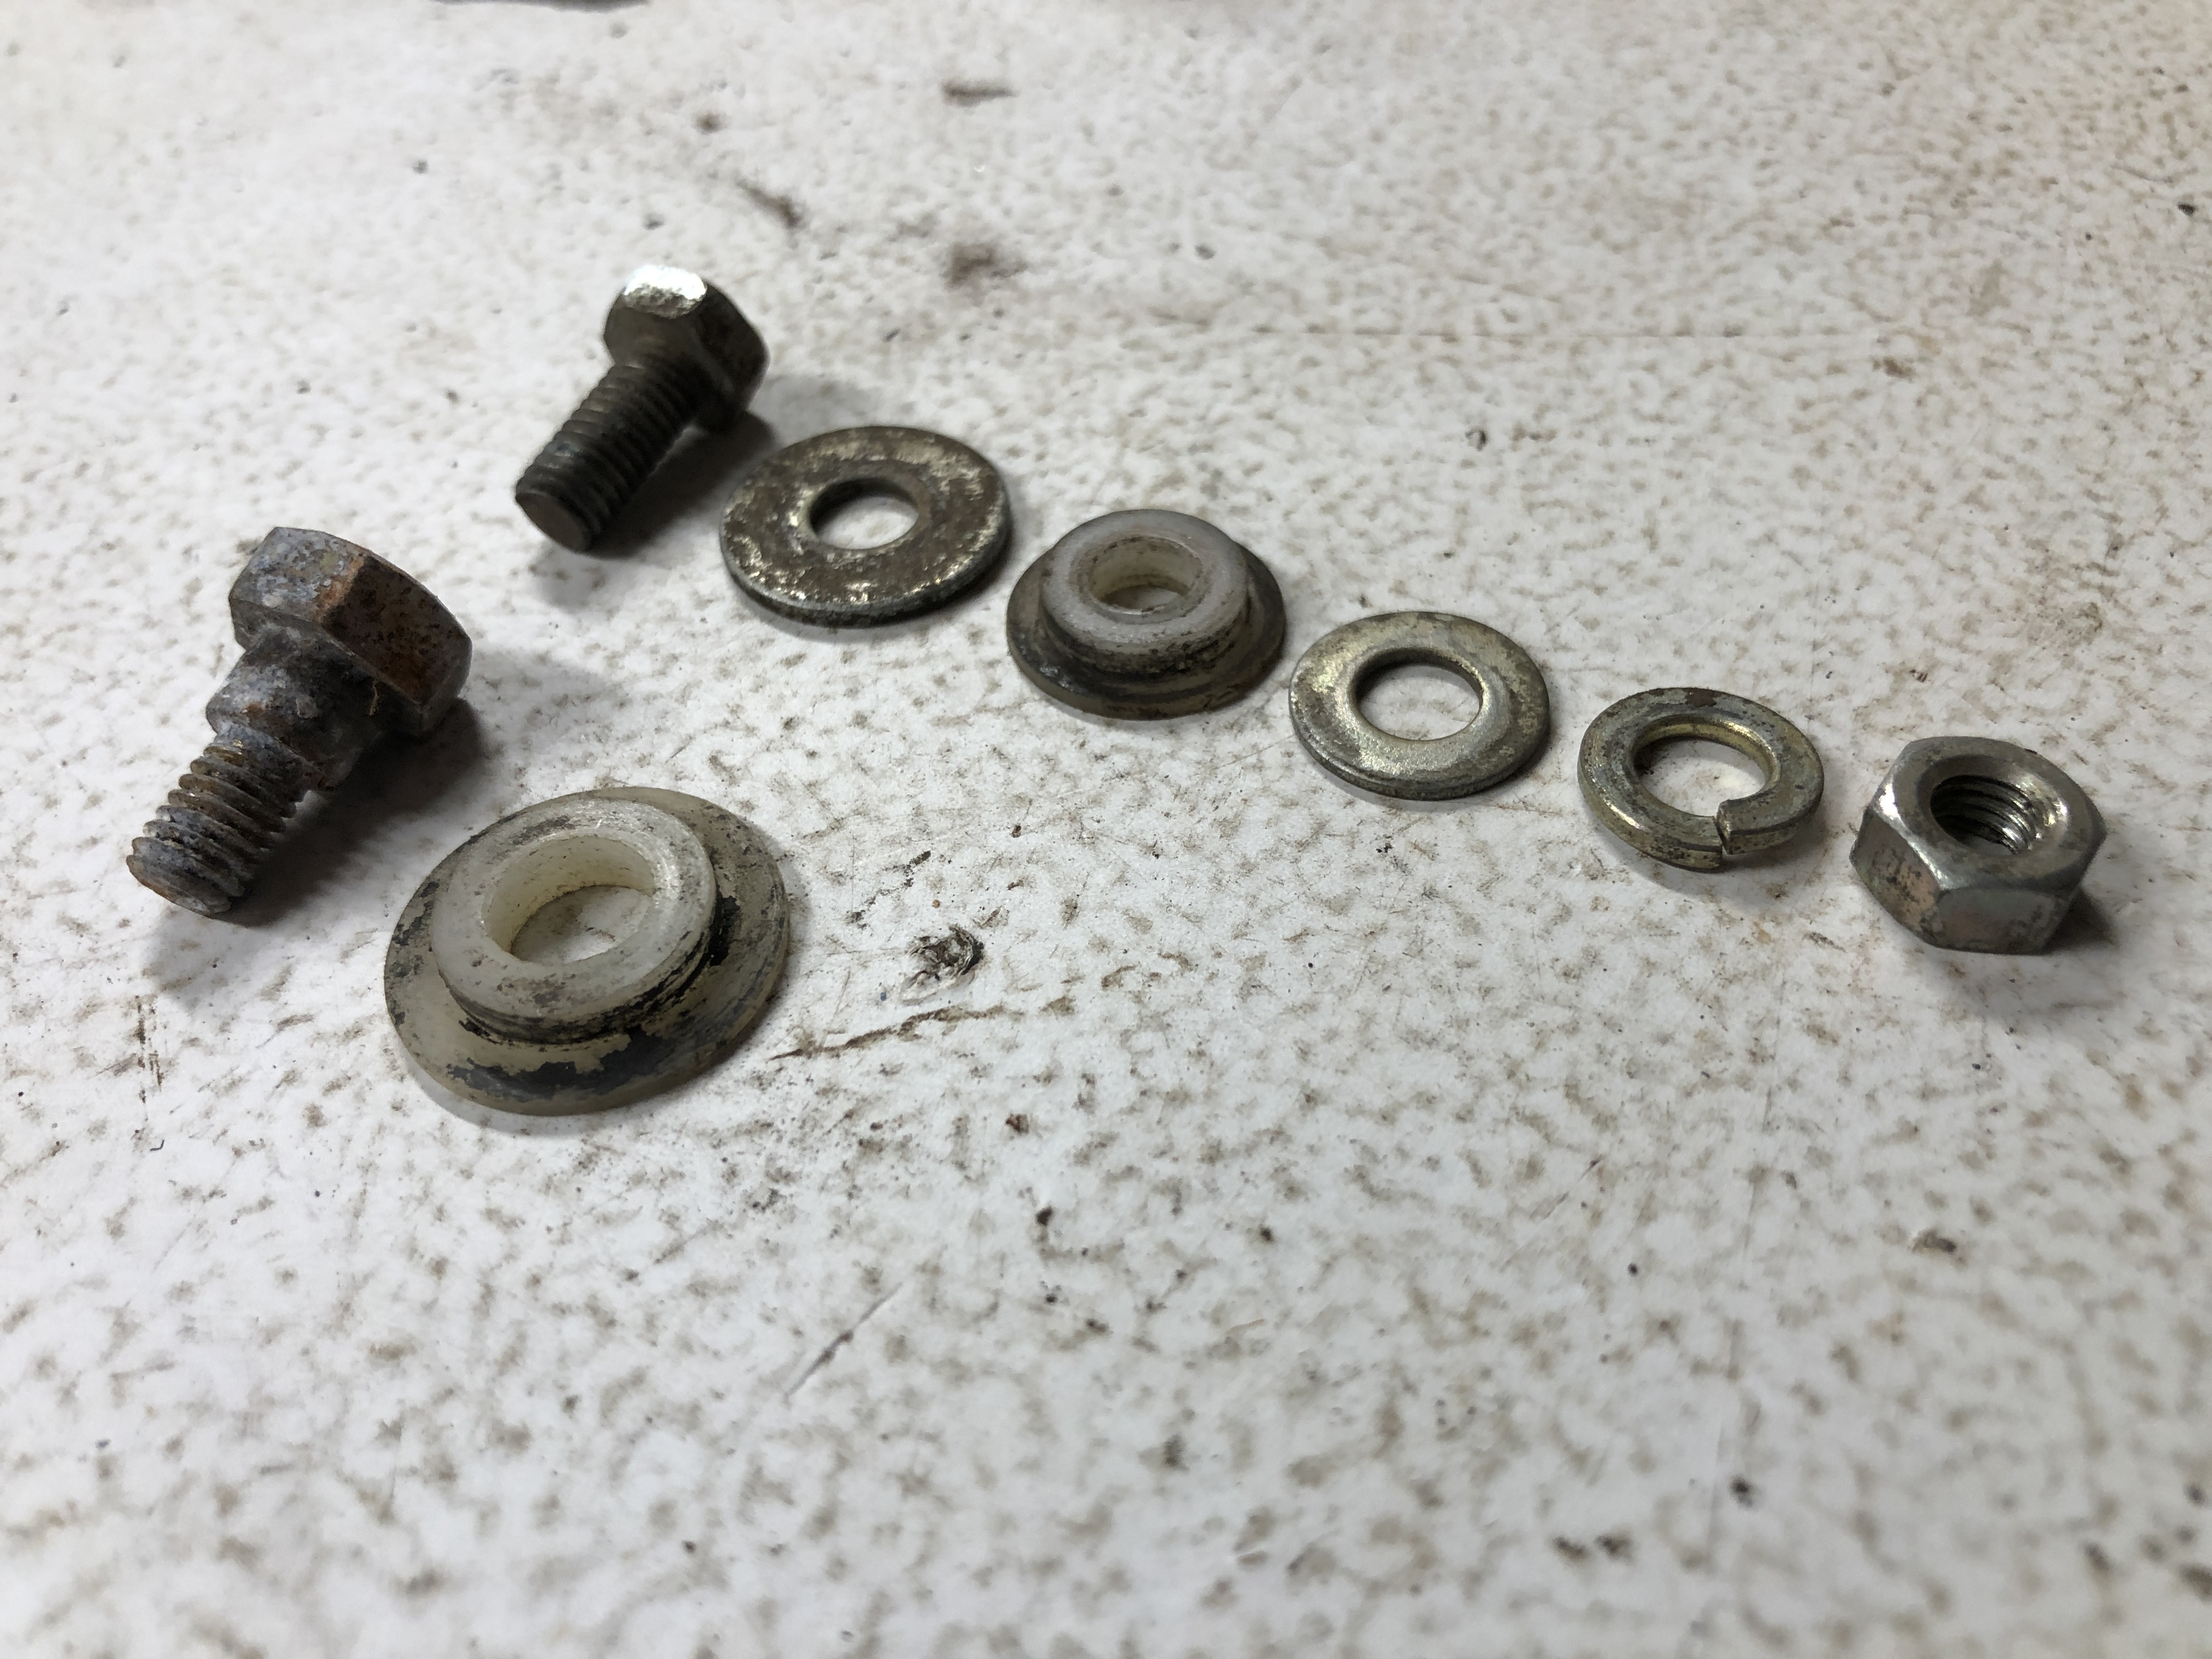
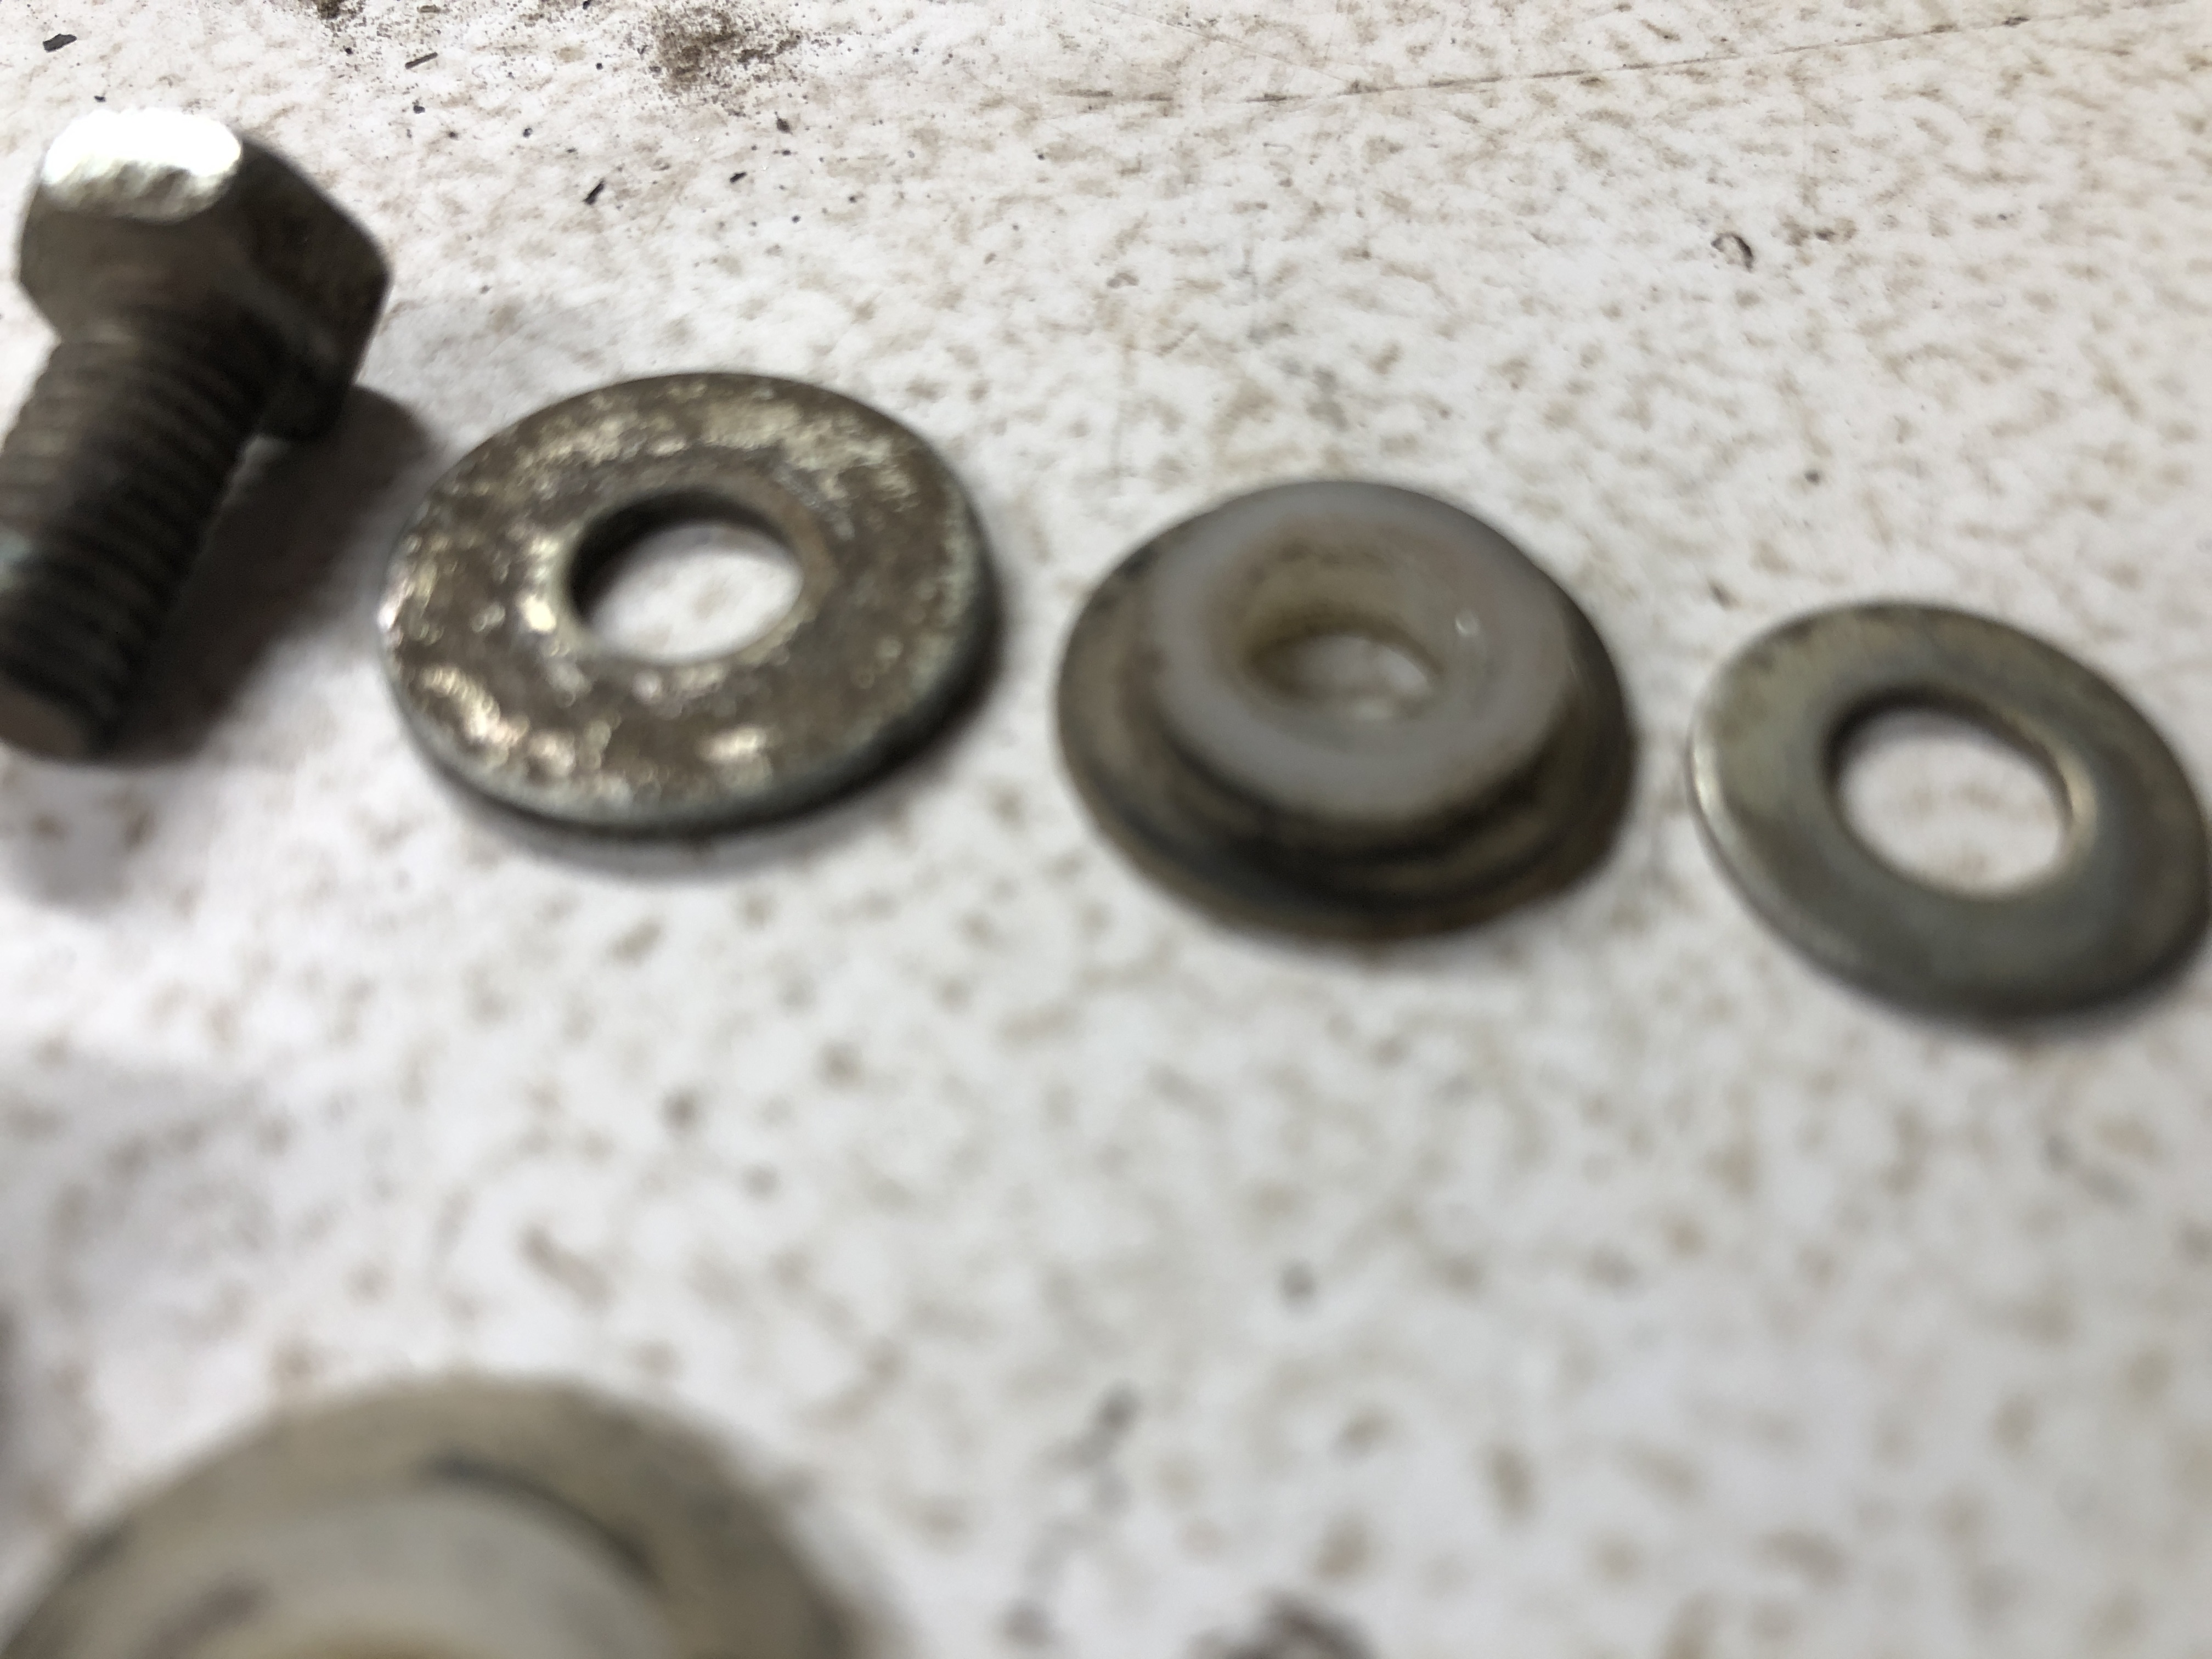
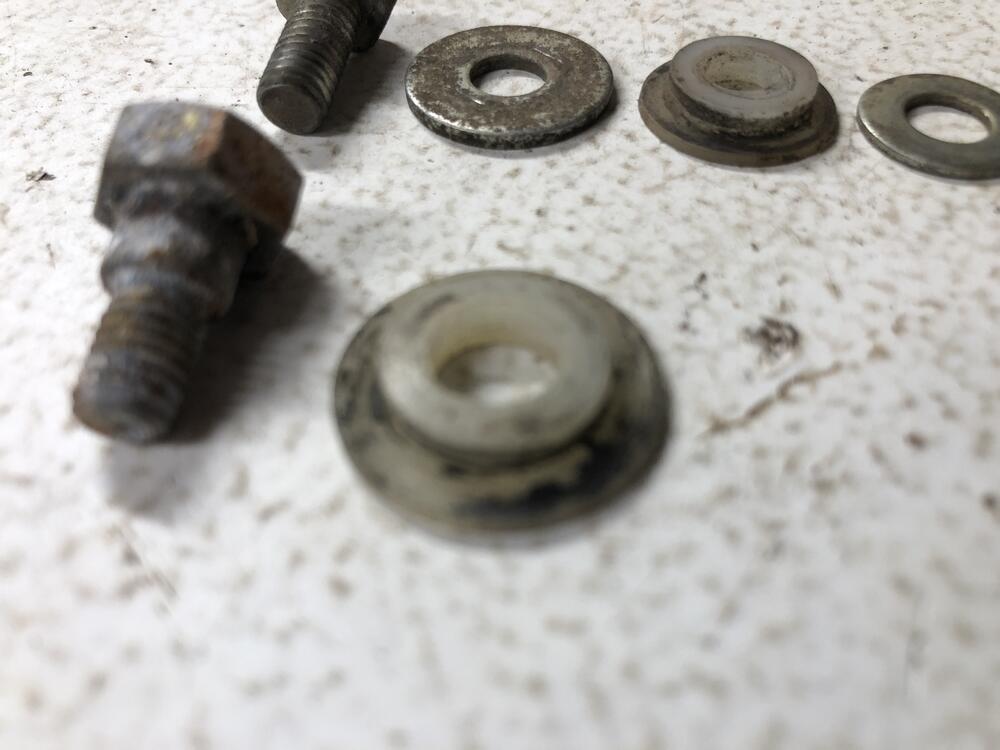
 I seem to have one of each type. Small type uses a simple bolt, larger type uses a shoulder bolt. Both are M6 Now you’re going to make me measure everything, aren’t you? PS. The bottom row larger style would have the same flat/lock/nut as shown in the top set I’ve certainly found all manner of “user selected” hardware that more or less functions as a rotation point. Not all that critical as long as there is little slop and pivots freely. And will continue to do that for a long time.
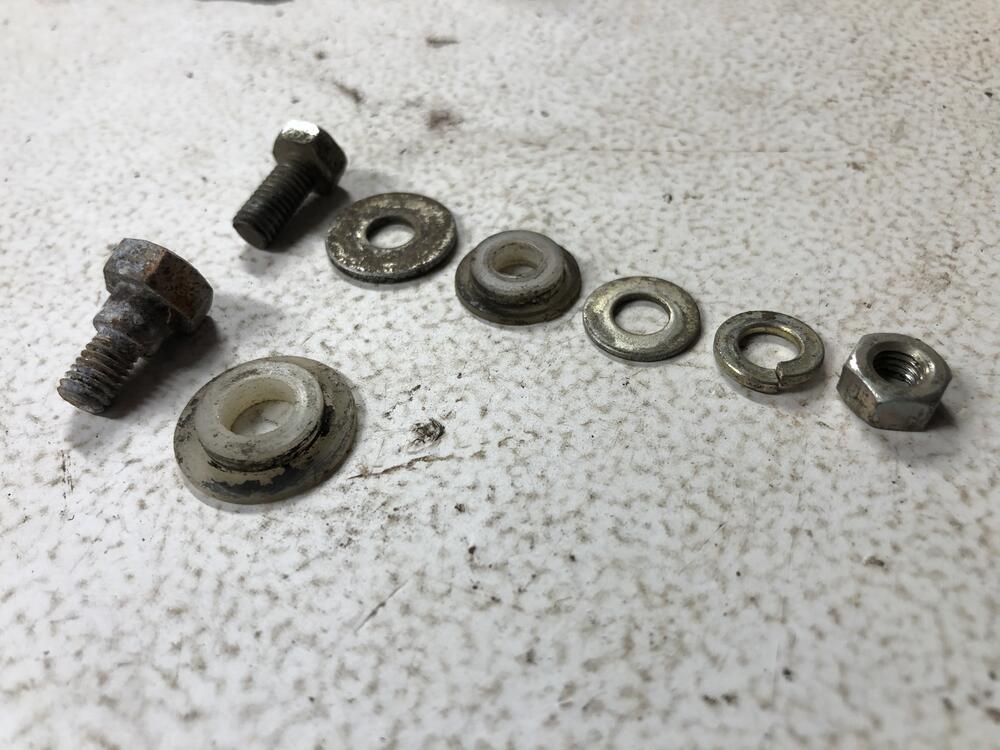

 2 points
 -
 2 pointsI had the same problem with the motor not running. I bypassed the relay and connected a battery straight to the motor, and it ran. Power goes through the relay before the motor, so I cleaned the contacts on the relay, and it worked fine. You might give that a try.2 points
 -
2 points@ArcticFoxCJ instead of the yellow paint use "silverish" paint that can be welded it's perfect for the job, you can ask a shop for welding stuff.. local. BTW... is it a 260 or 280z you are working on?2 points
-
2 pointsThanks, they are from the last year of the Mazda RX8, one of the few things that was good about that car.2 points
-
Silver..ish. i meant.. It looks like silver/aluminum but you can weld on it.. ideal stuff..1 point
-
 1 pointI'm looking into stabilized wood (see https://blog.woodturnerscatalog.com/2014/02/wood-stabilizing-v-2/ ) I found a piece of 20 year or so old black walnut that I might cut up and stabilize with clear epoxy. I'm taking photographs and will post the procedures in the future unless it is a complete fail. I plan on generally following the instructions posted on an MG forum. https://www.mgexp.com/article/diy-wood-steering-wheel-part-1.3291 point
 -
 I sent Woody a message last night. Can't wait to hear back.1 point
 -
 1 pointAwesome work! That steering wheel looks like an aftermarket one.1 point
 -
 Ps. Just realised his “gallery” has pics of some of the panels he does ... https://zclub.net/community/index.php?media/albums/z-repair-panels.159/ ... but don’t assume this is all of them, ask him and if he doesn’t have it he may even make one for you and add it to his list of parts.1 point
 -
 Jeff Palya at Paltech was the only person I could find to do flat top carbs. Very courteous and customer oriented. Beautiful work---came back like jewelry! Price was very good (but not cheap) considering the work done, as Mike said above. Only place that assured me that whatever carbs I sent would be the same carbs returned, as inline6 said. I have had him do 4 screw rounds tops also. Same quality. Over polished if anything. A word of caution---the work he does is very good----but go over your carbs carefully when you get them back to ensure that everything is adjusted properly according to the FSM. I had to reset the internal fuel nozzles on the flat tops to get them right. Didn't figure that out until ---once installed--- the carbs didn't run correctly at all. Had to remove them (PITA with flat tops) and adjust them, reinstalled and all was good. A lot easier to do on round tops, but thought I would mention it for others to note and keep in mind.1 point
 -
1 pointOh right that happened to me as well so I coated the rubber seal and the door frame it rests on with some light lithium grease so the seal slipped pass area that it wants to hang up on, I had to reach down to that area from inside the car with long knife and once the seal was sitting properly close the door and leave it that way for a couple of days.1 point
-
The compounds I mentioned are heavy cut compounds that break down in a very uniform way into polish, If you start with polish your surface has to already be shiny.1 point
-
And he’s a top bloke!!! Very friendly and helpful with great panels to boot! He goes by the handle “woody” in the UK Zclub. https://zclub.net/community/index.php?members/woody.2636/ If you don’t have FB but want to contact him, just set yourself up on the UK forum and use the “conversation” option to send him a PM. https://zclub.net/community/index.php1 point
-
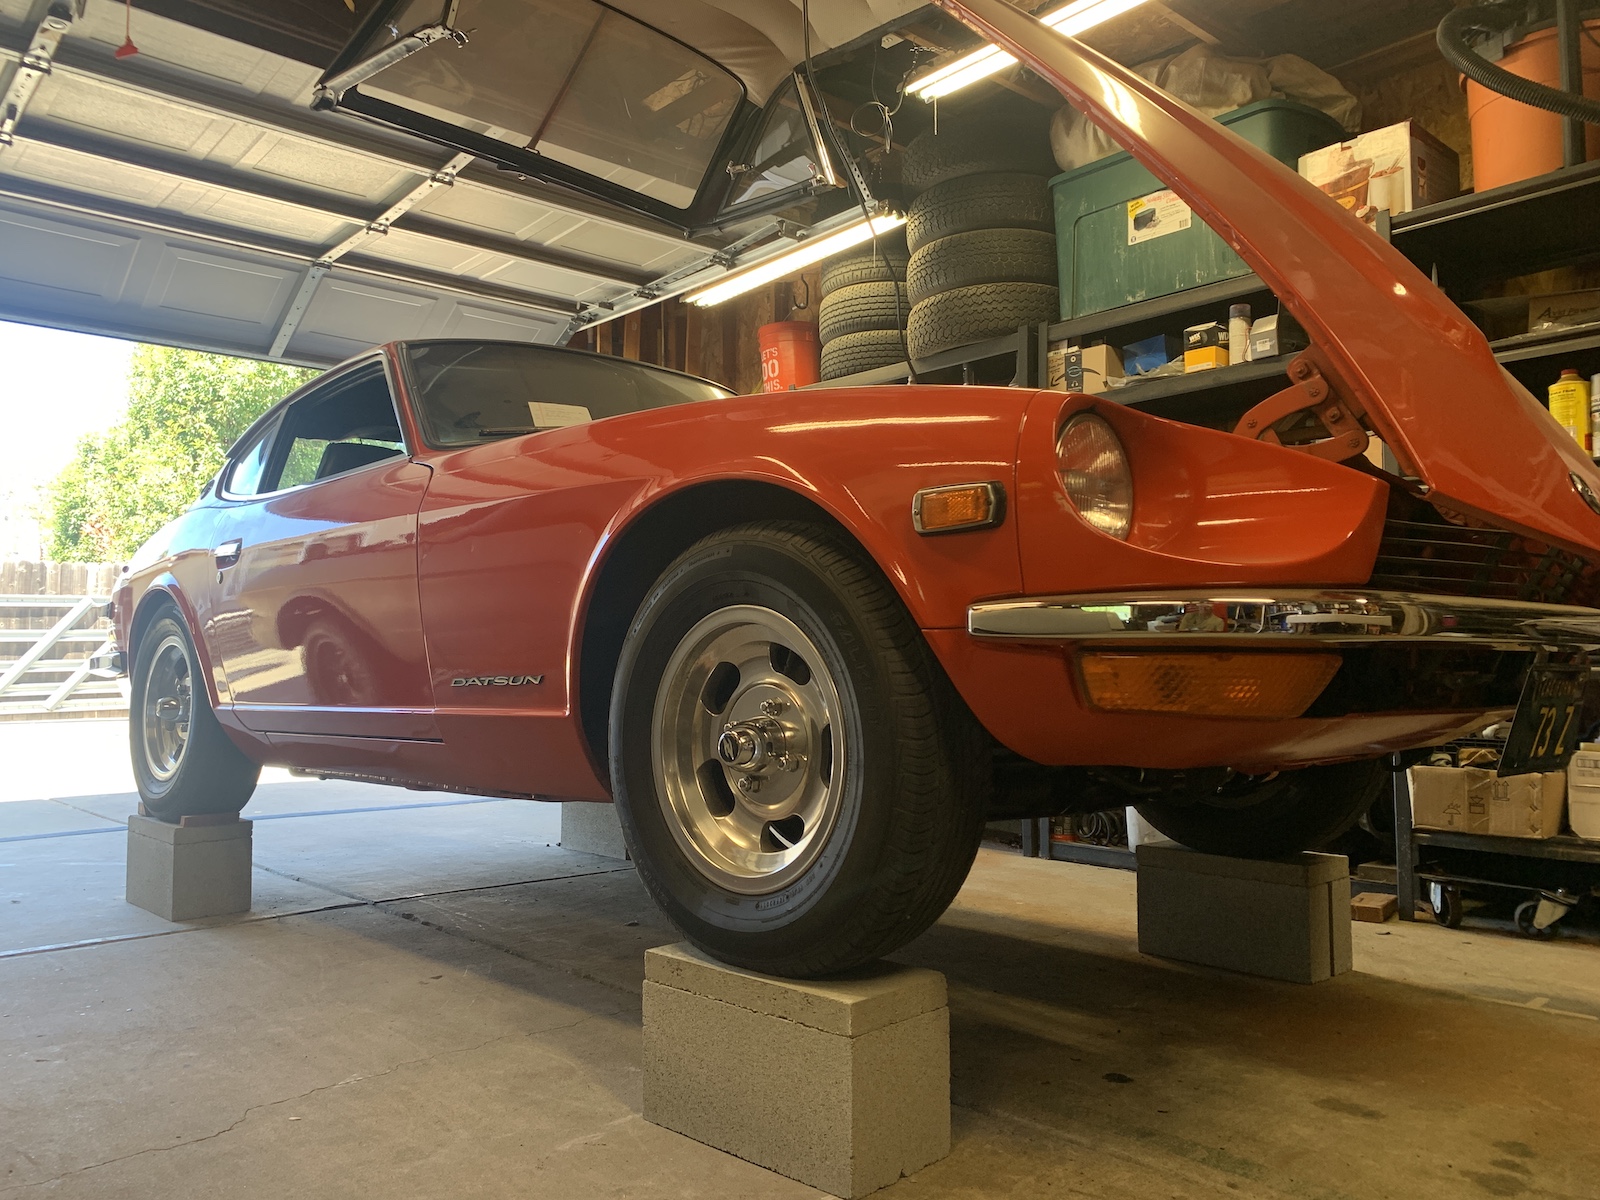
 1 pointHere are my "two passengers" loaded per the FSM while tightening a few of the suspension bolts. Not sure what size passengers they had in mind, a Sumo wrestler, or a petite lady. 180 and 120 lbs should do. I bounced the springs several times before tightening. I guess I'll make up something to get the toe-in adjusted close enough to get it to an alignment shop. The normal flat rate alignment charge is ridiculous for 240Z's, not much to adjust really! But I'll bite the bullet and get it done, at least I'll know where it's at. Once I get a few miles on the Eibach springs, I'll let you know how much the drop was.
 1 point
 -
1 point
-
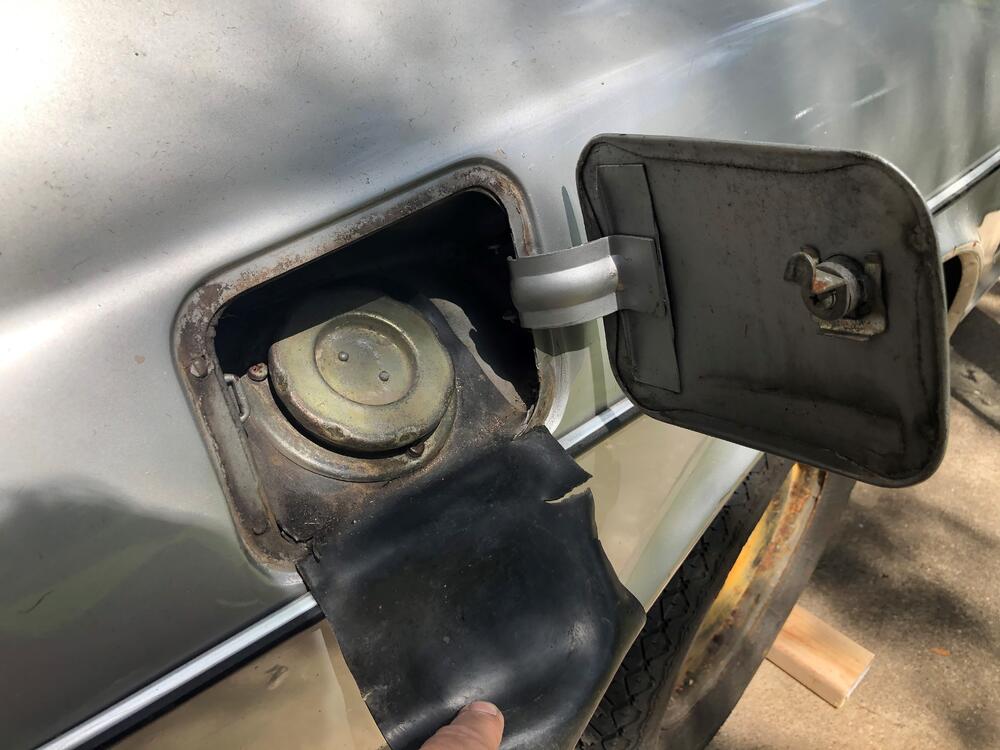
 1 pointBefore and after for the gas fill area on the Z. Everything replated with new rubber bits to finish it off.
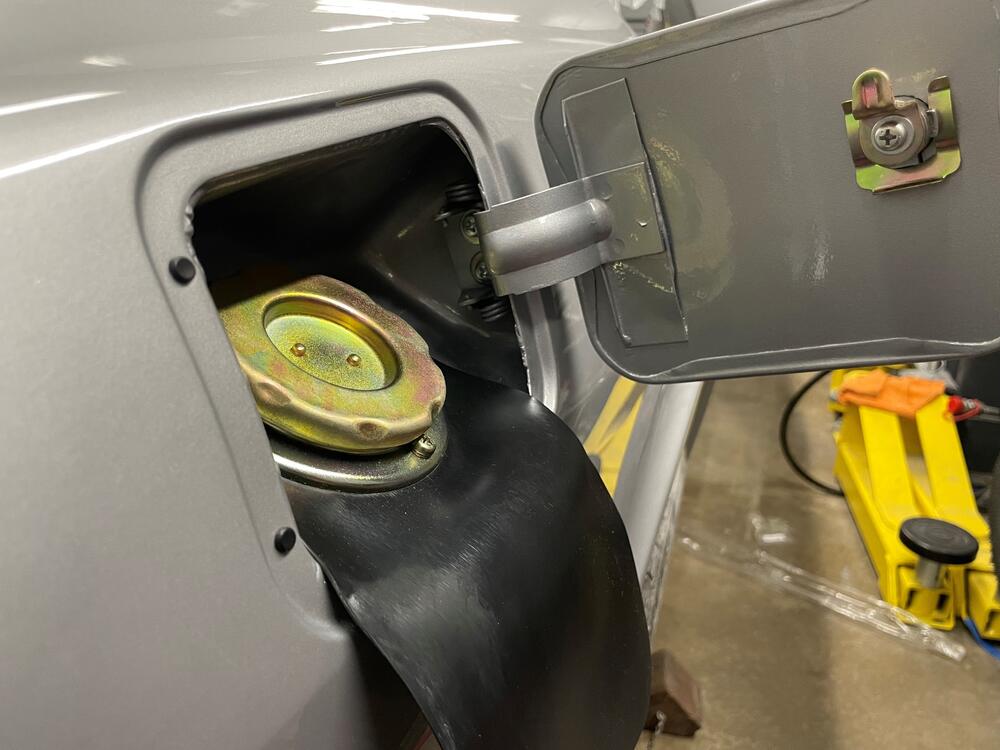
 1 point
 -
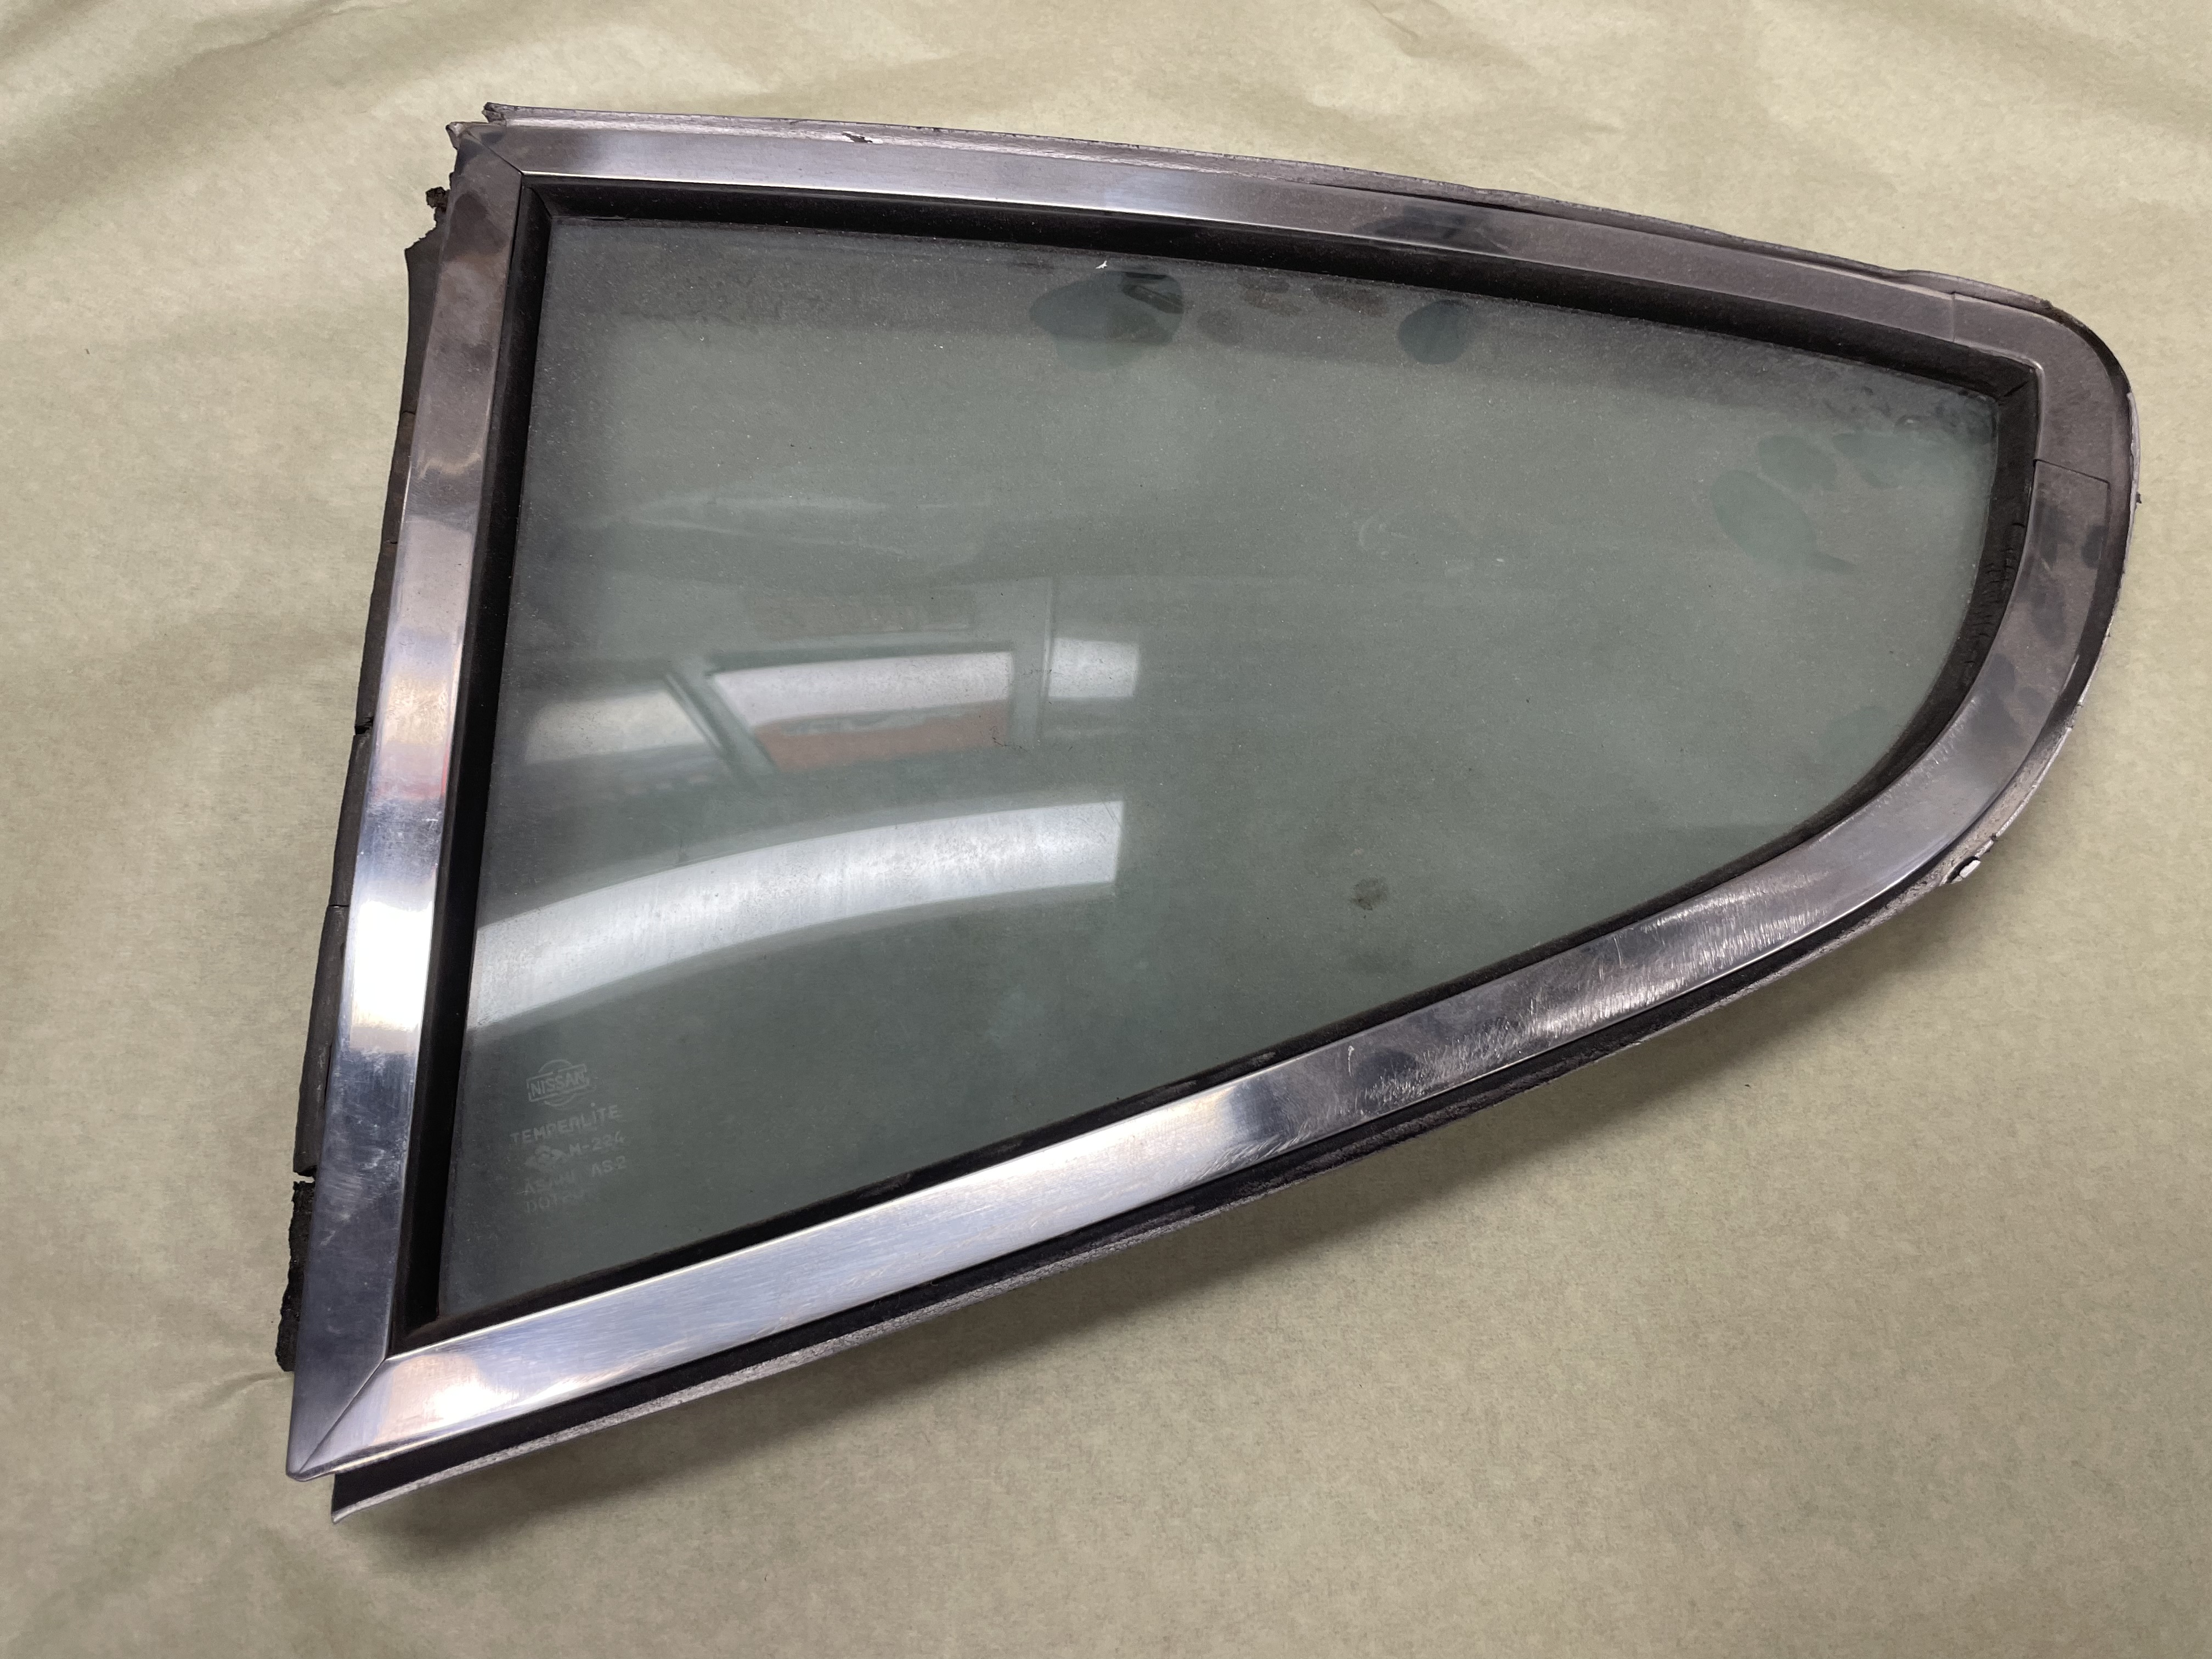
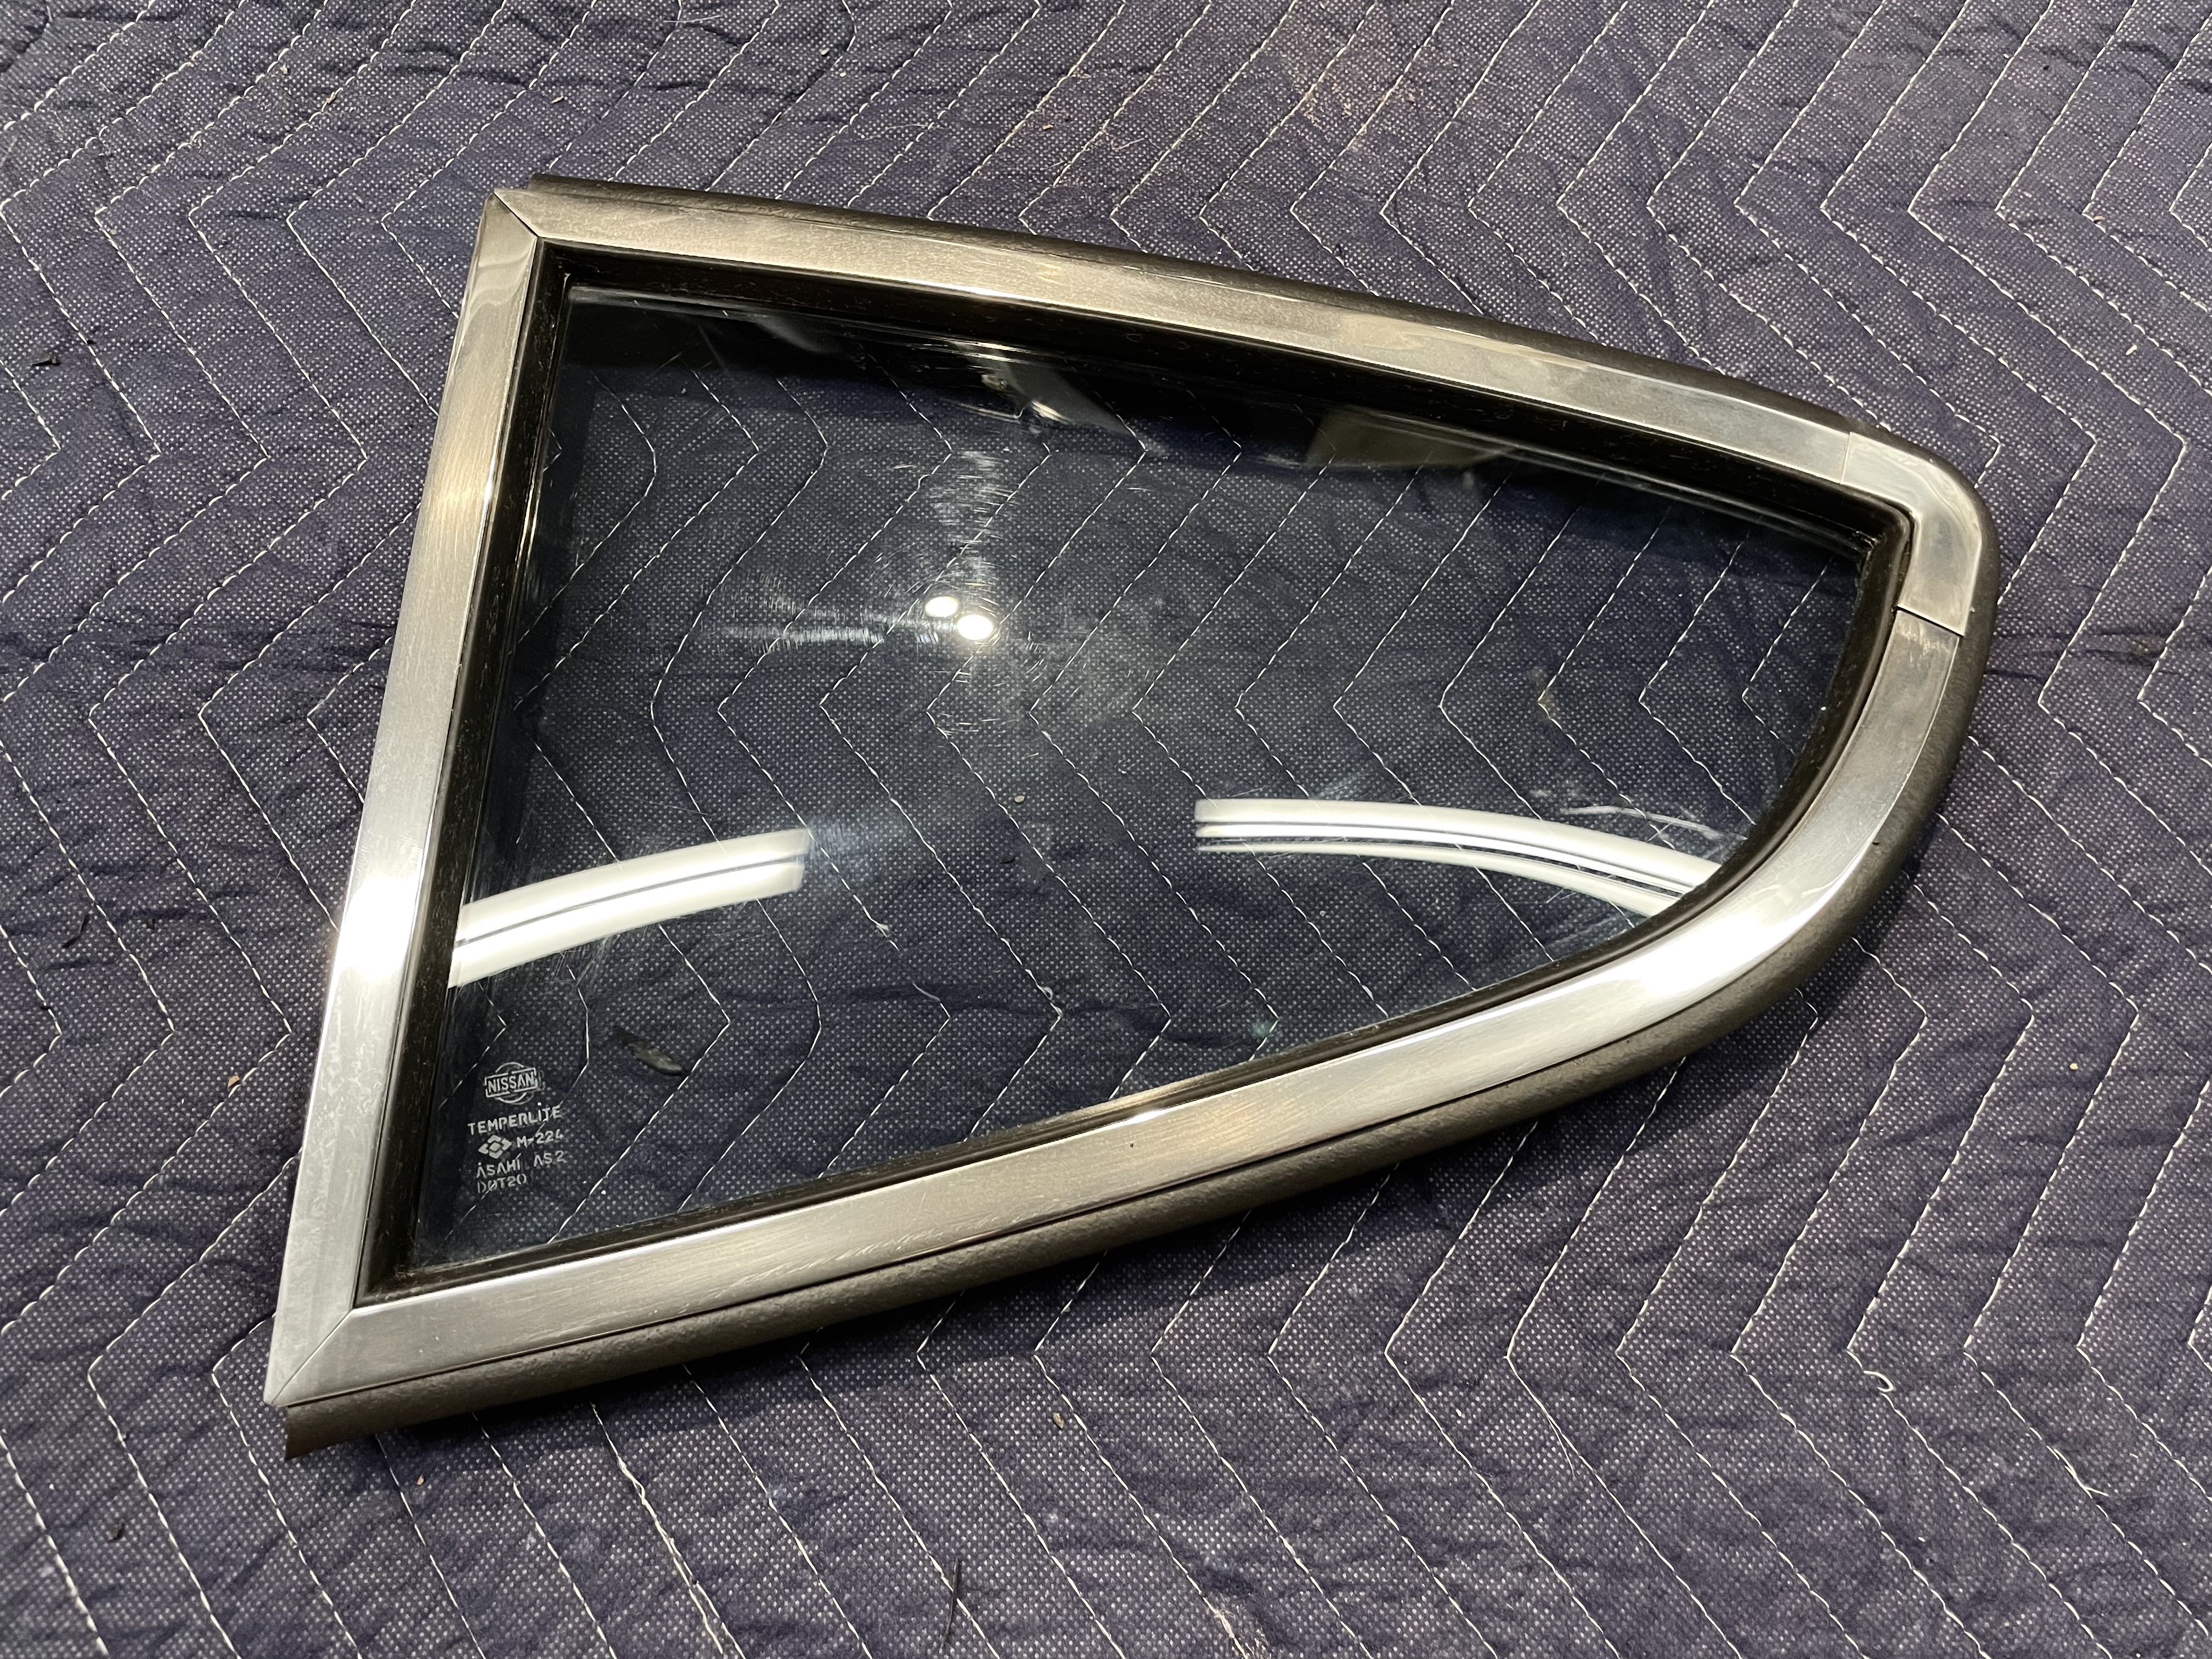
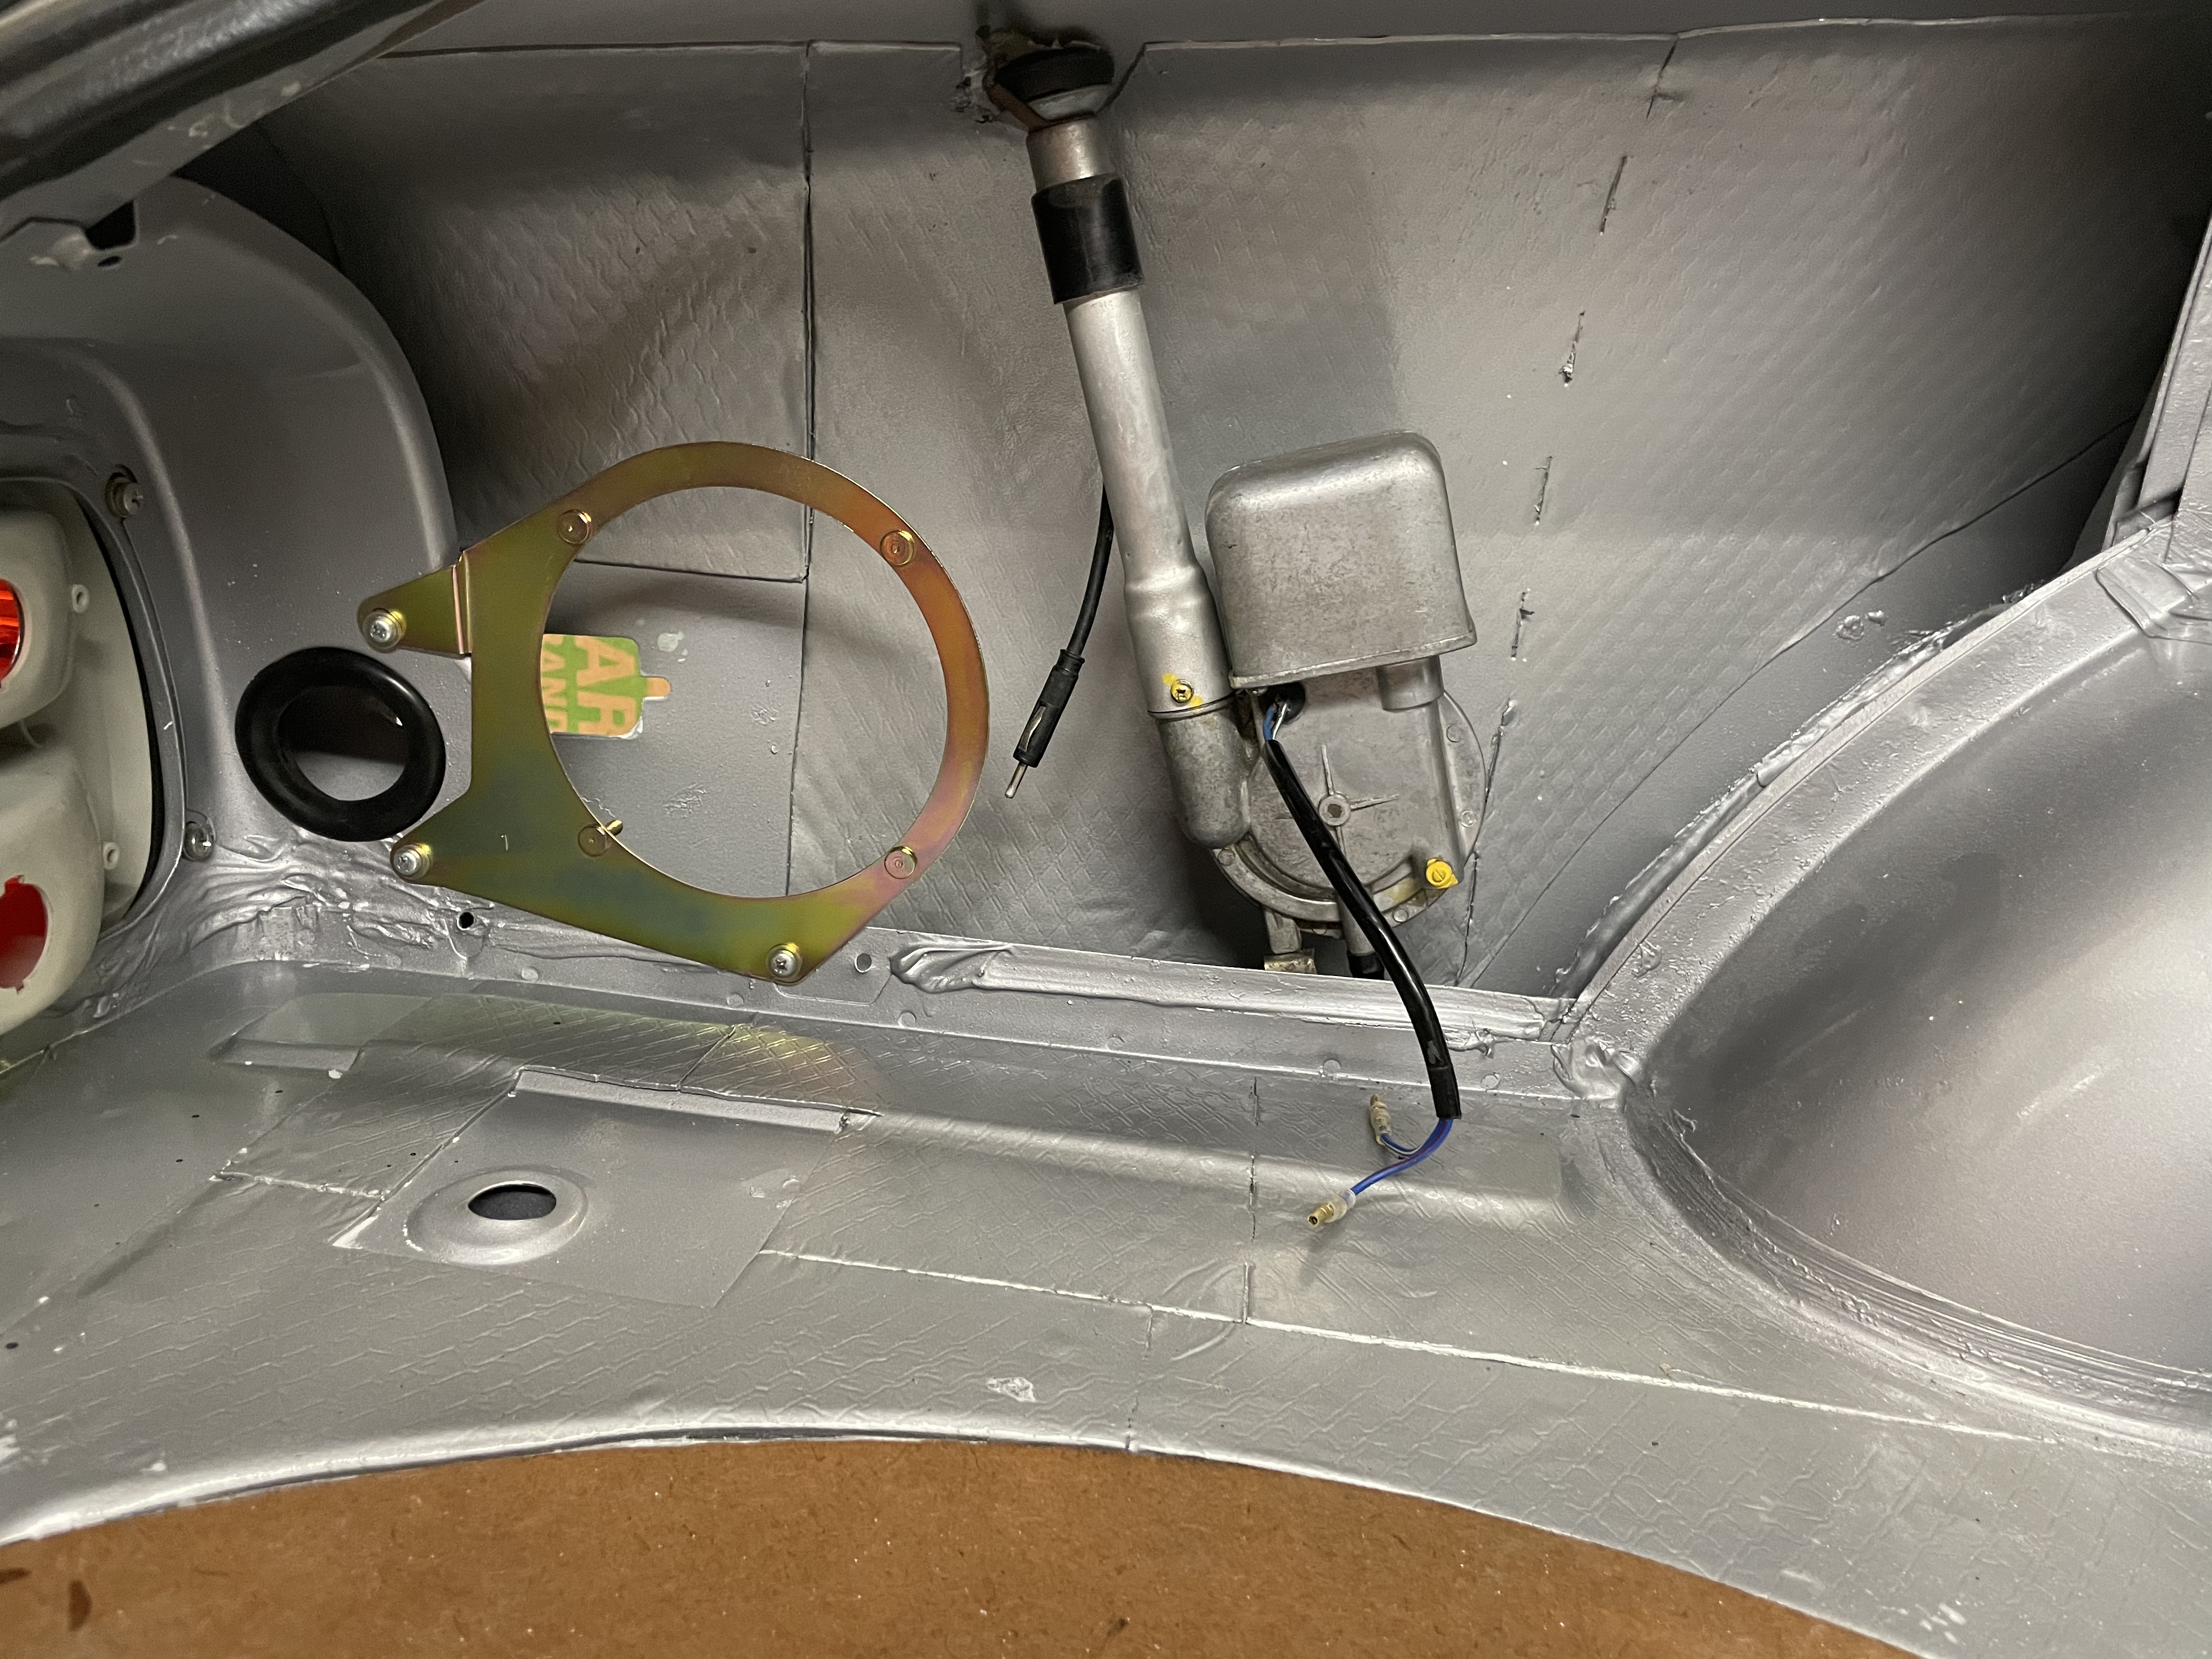
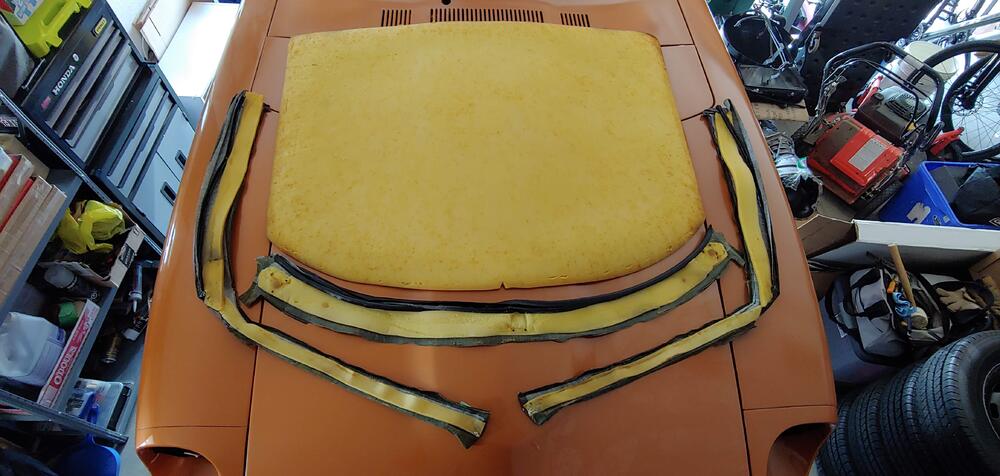
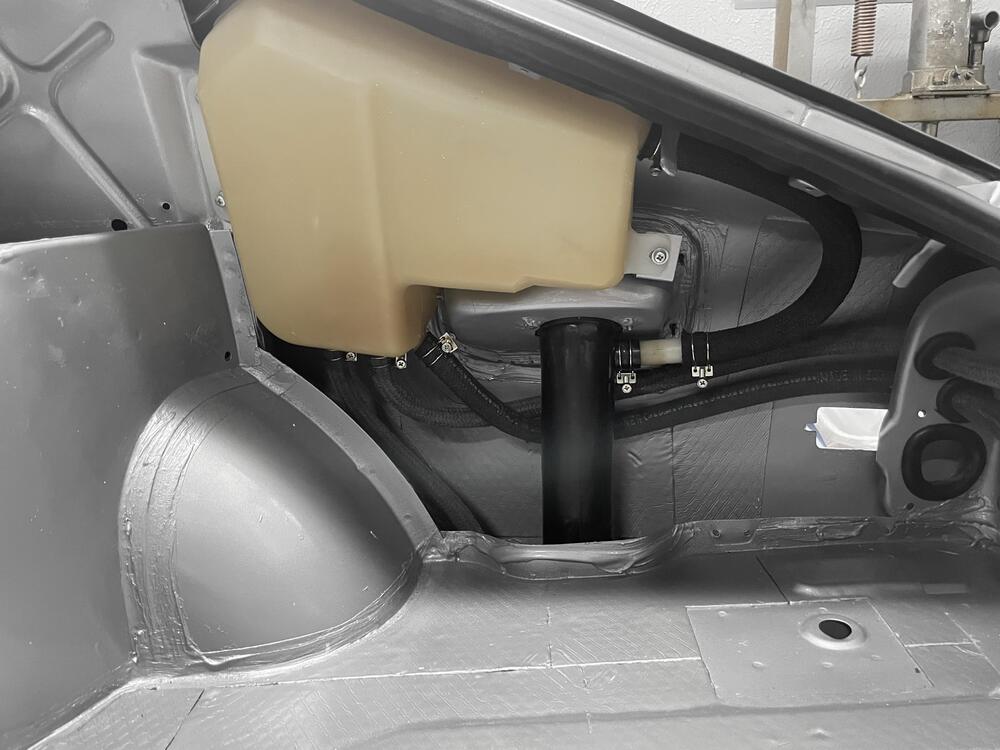
1 pointFew more updates on the Z. Worked on rebuilding the quarter windows, finished up the vapor canister install, and got the antenna/speaker bracket in. Next I’ll get the wiring harness routed and have the hatch area just about done.


 1 point
 -
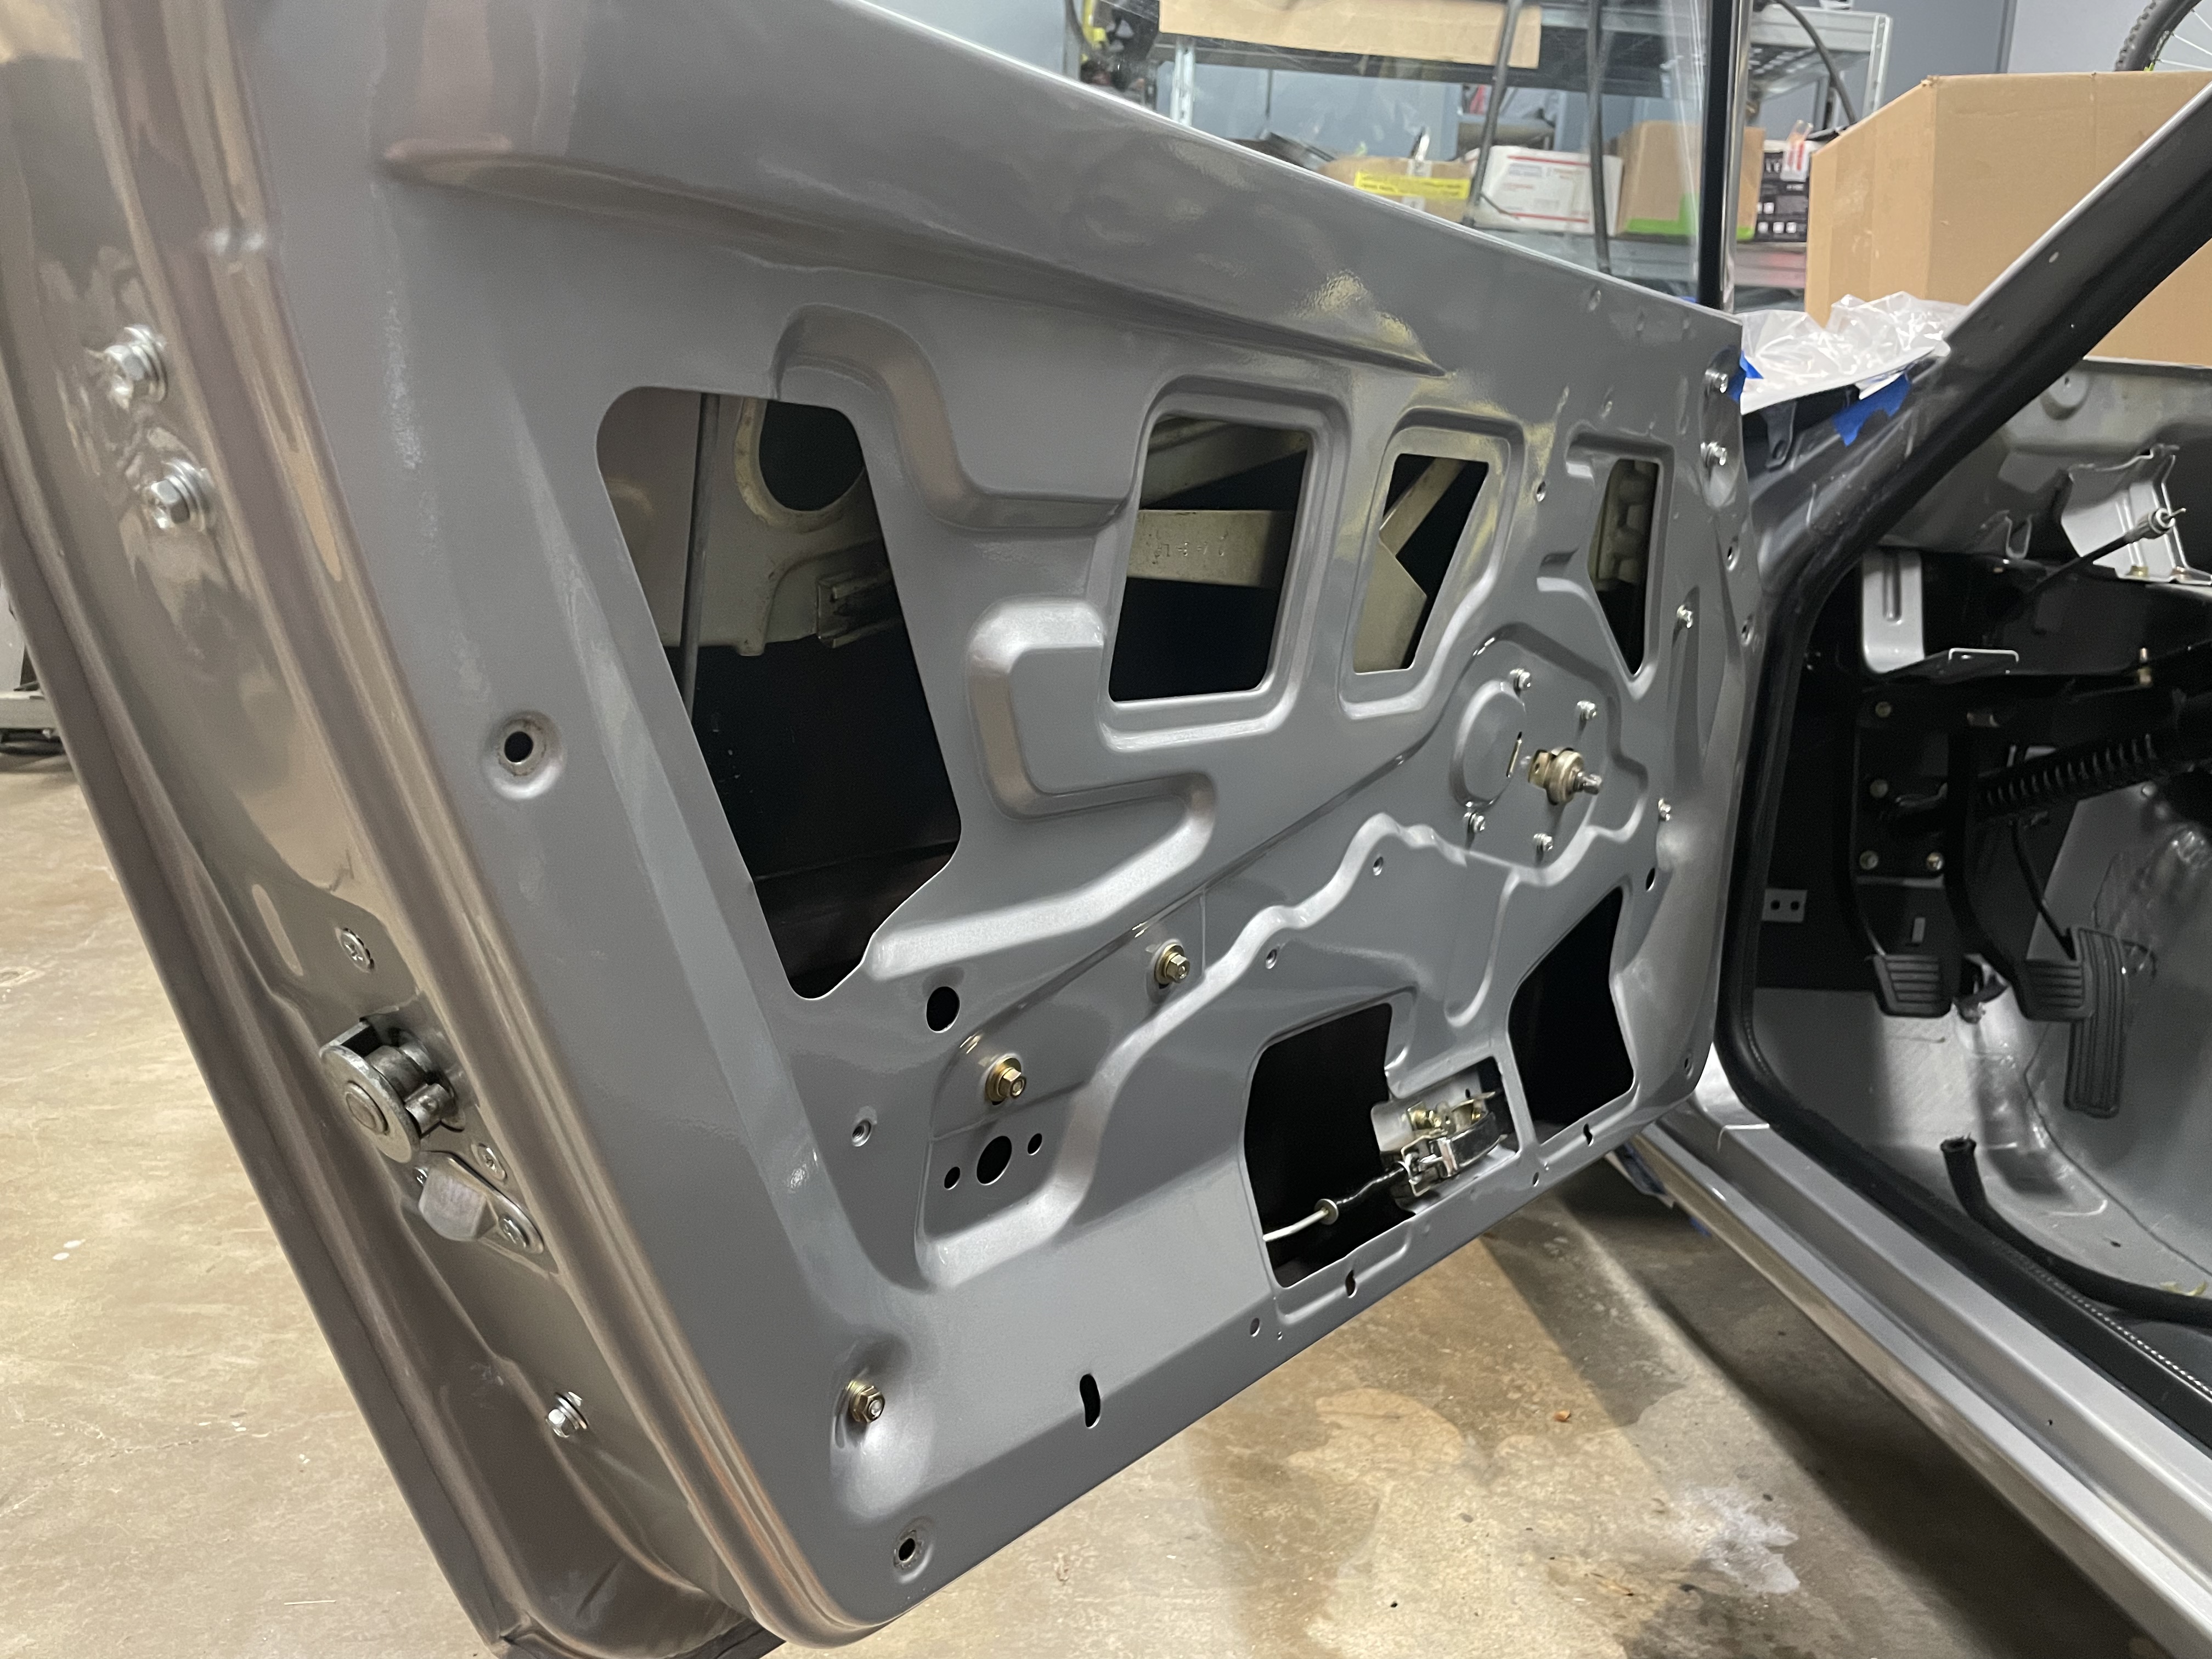
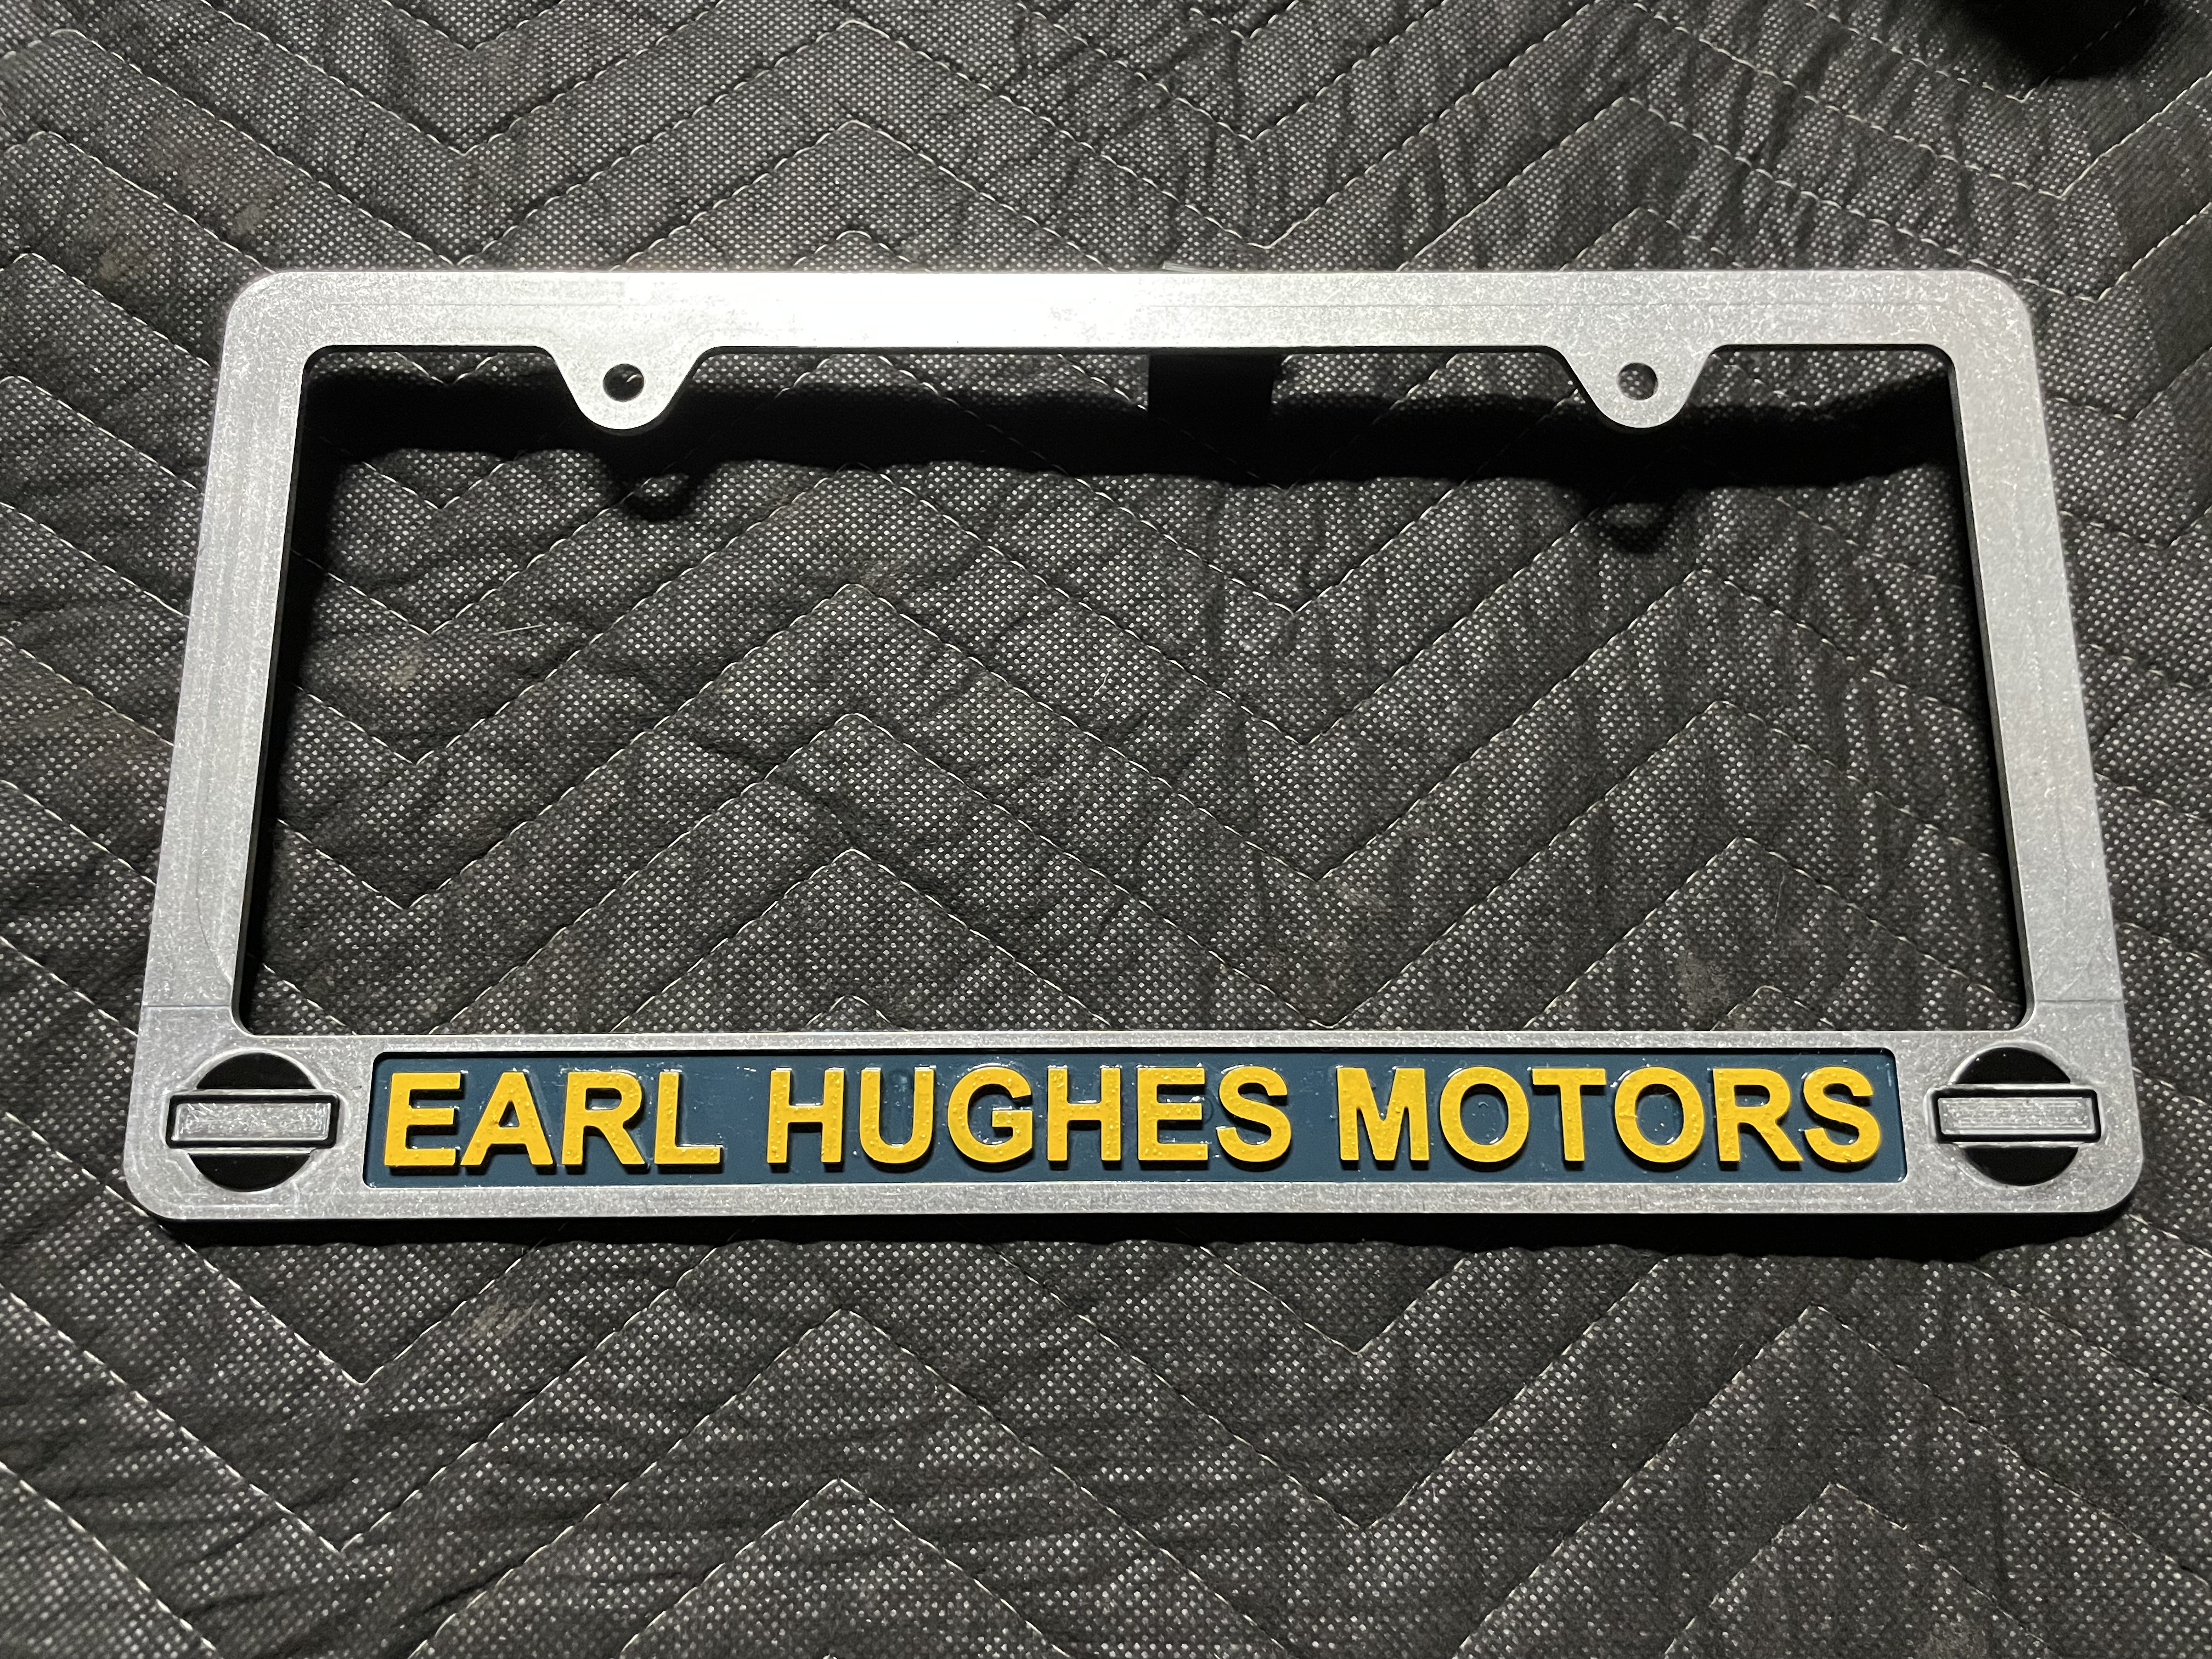
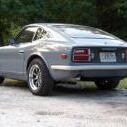
1 pointFew updates on the Z. Tail lights are back together with trim and gaskets Added some color to the license plate frame. Used the L series engine blue and 280Z yellow I had from a previous car. And finally, getting the drivers door back together. New hardware, seals, and rubber bits.
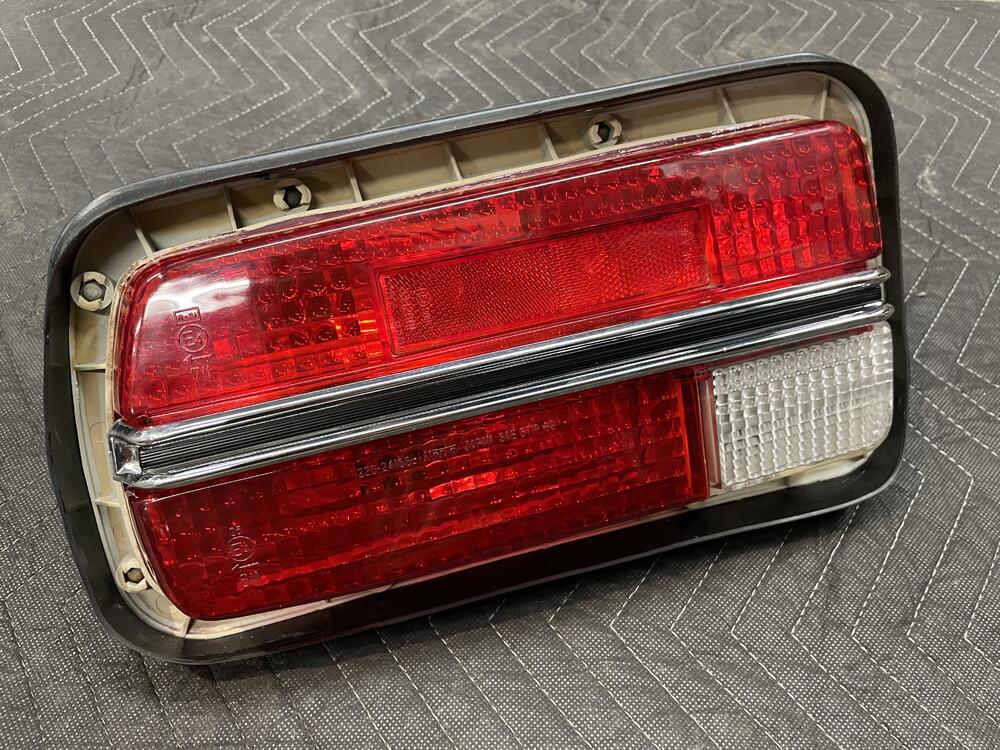

 1 point