Leaderboard
-

CanTechZ
Free Member9Points1,311Posts -
conedodger
Free Member6Points12,513Posts -
Captain Obvious
Free Member3Points10,081Posts -
HS30-H
Free Member3Points5,509Posts


Popular Content
Showing content with the highest reputation on 09/26/2024 in all areas
-
3 pointsThanks very much for your insight. The additional information is very much appreciated. I find this subject fascinating and will create a new topic soon about this collection or add to an existing one.3 points
-
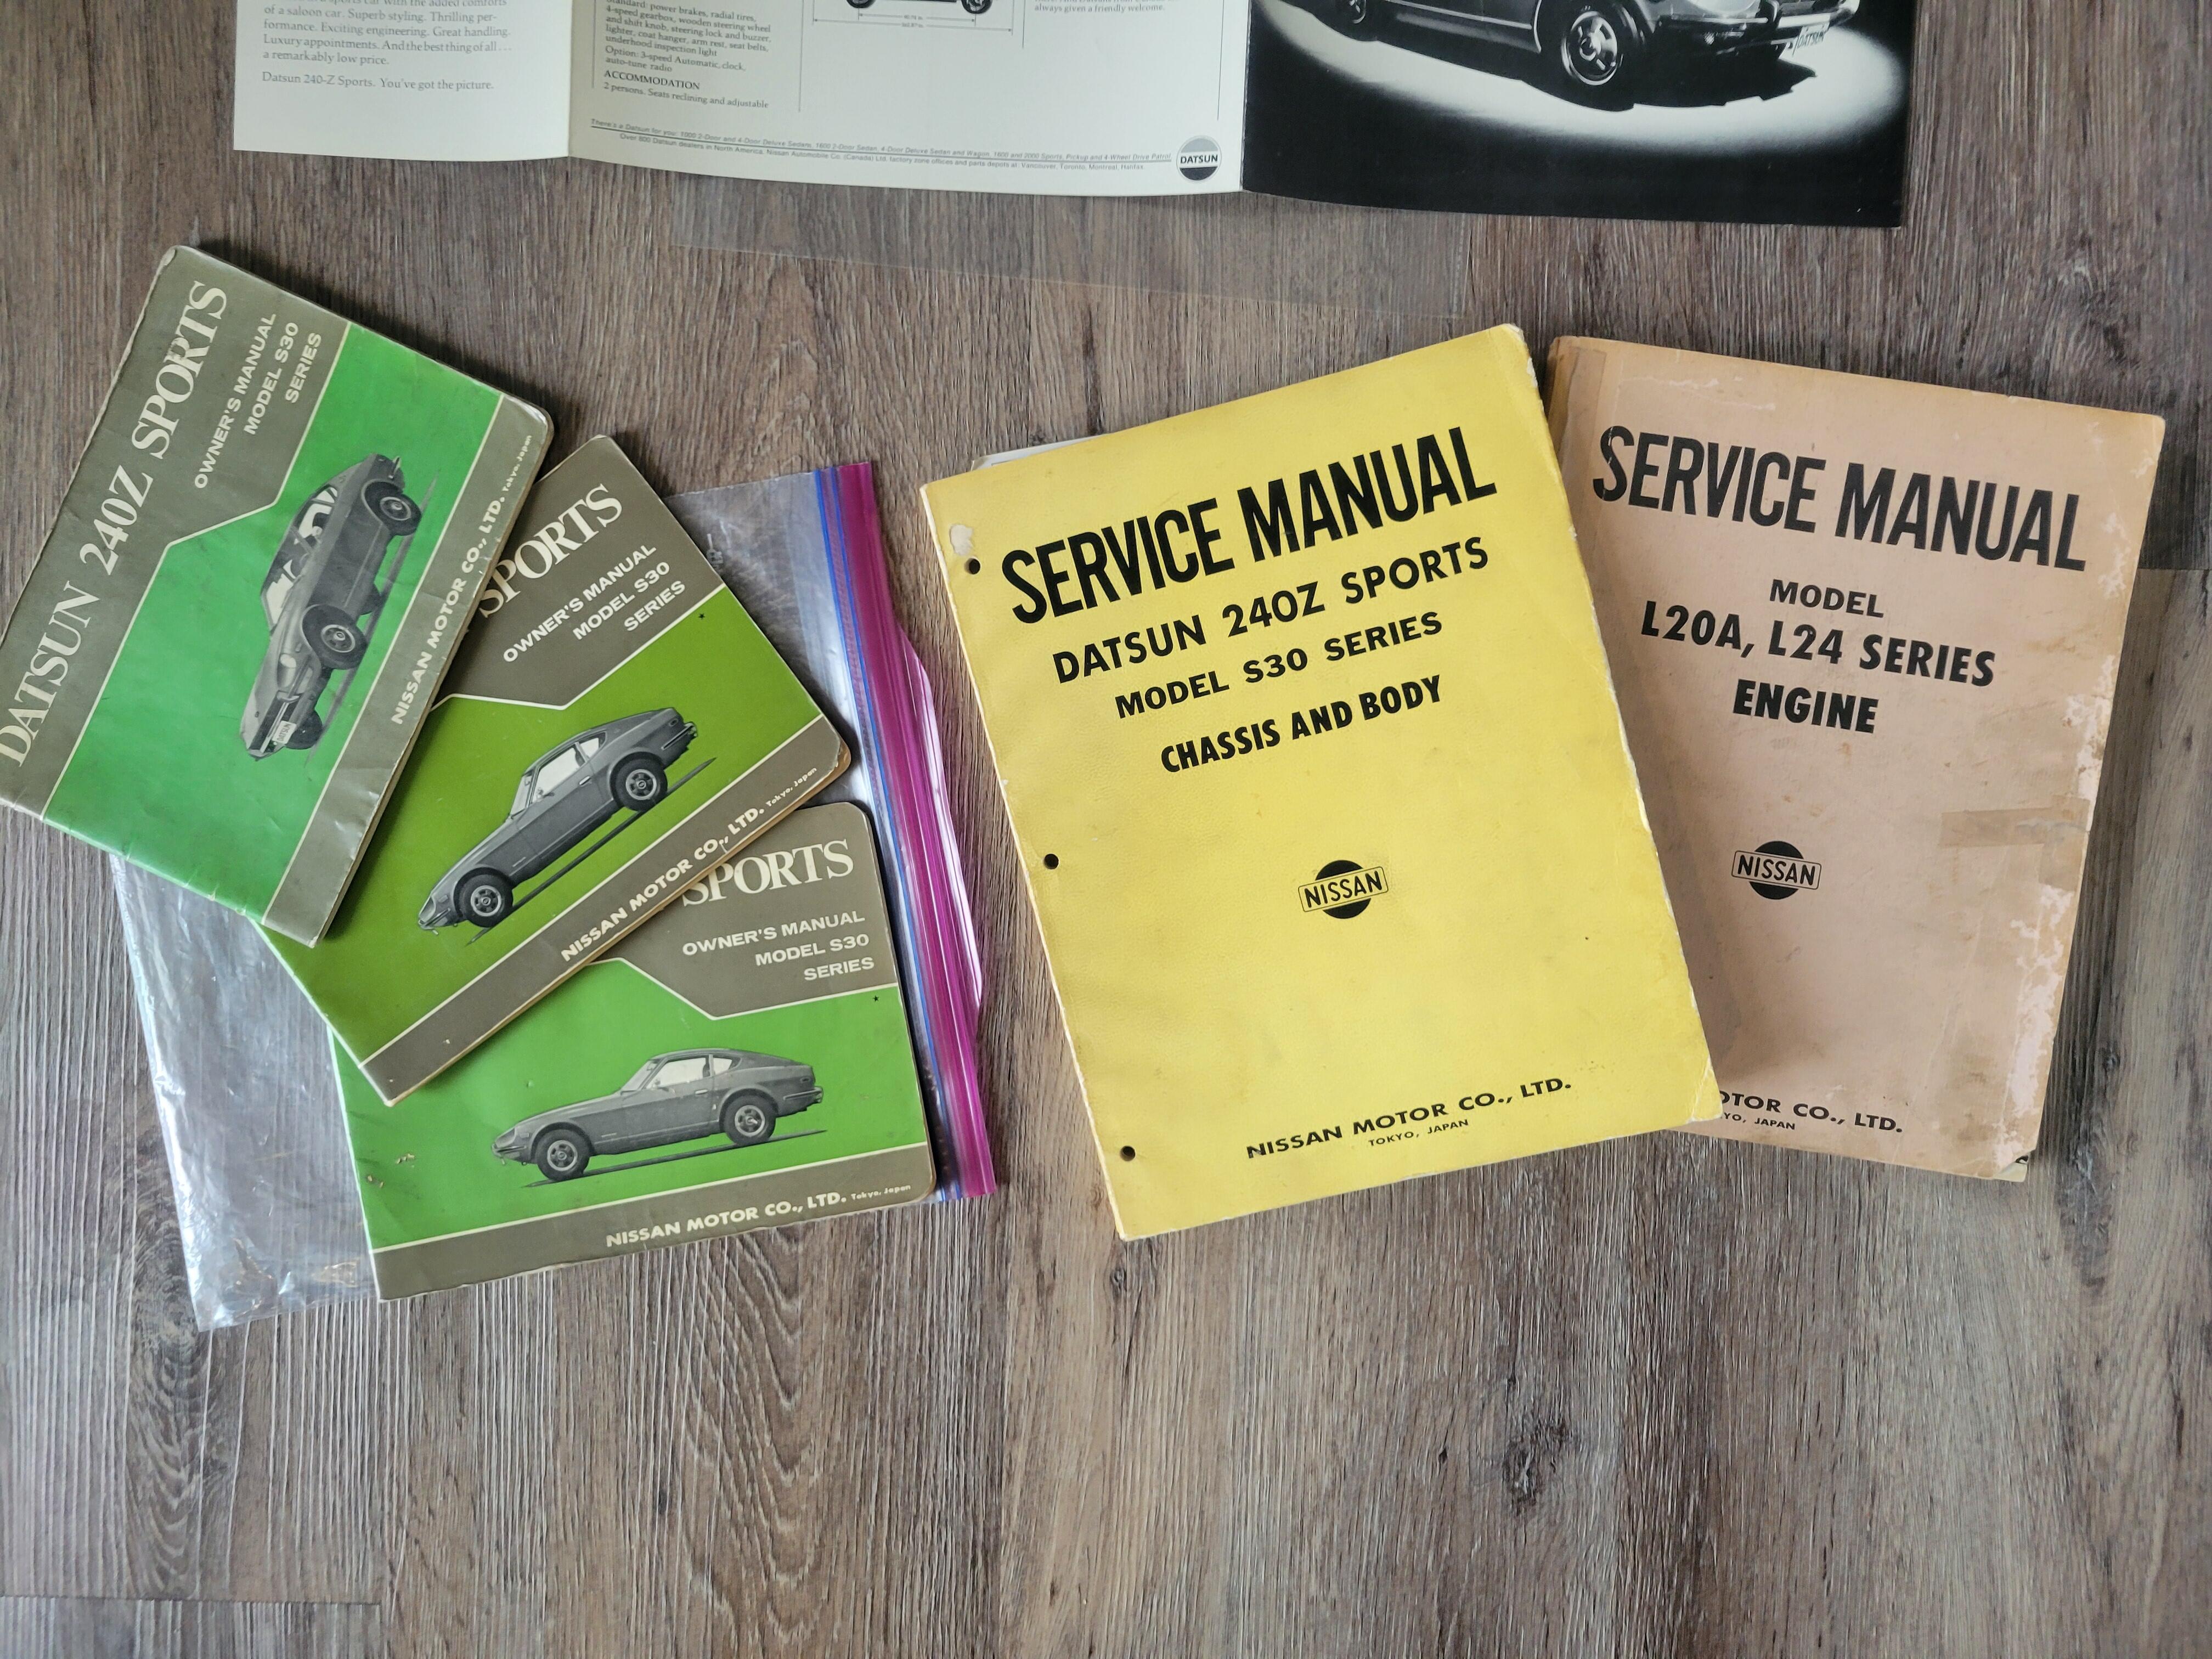
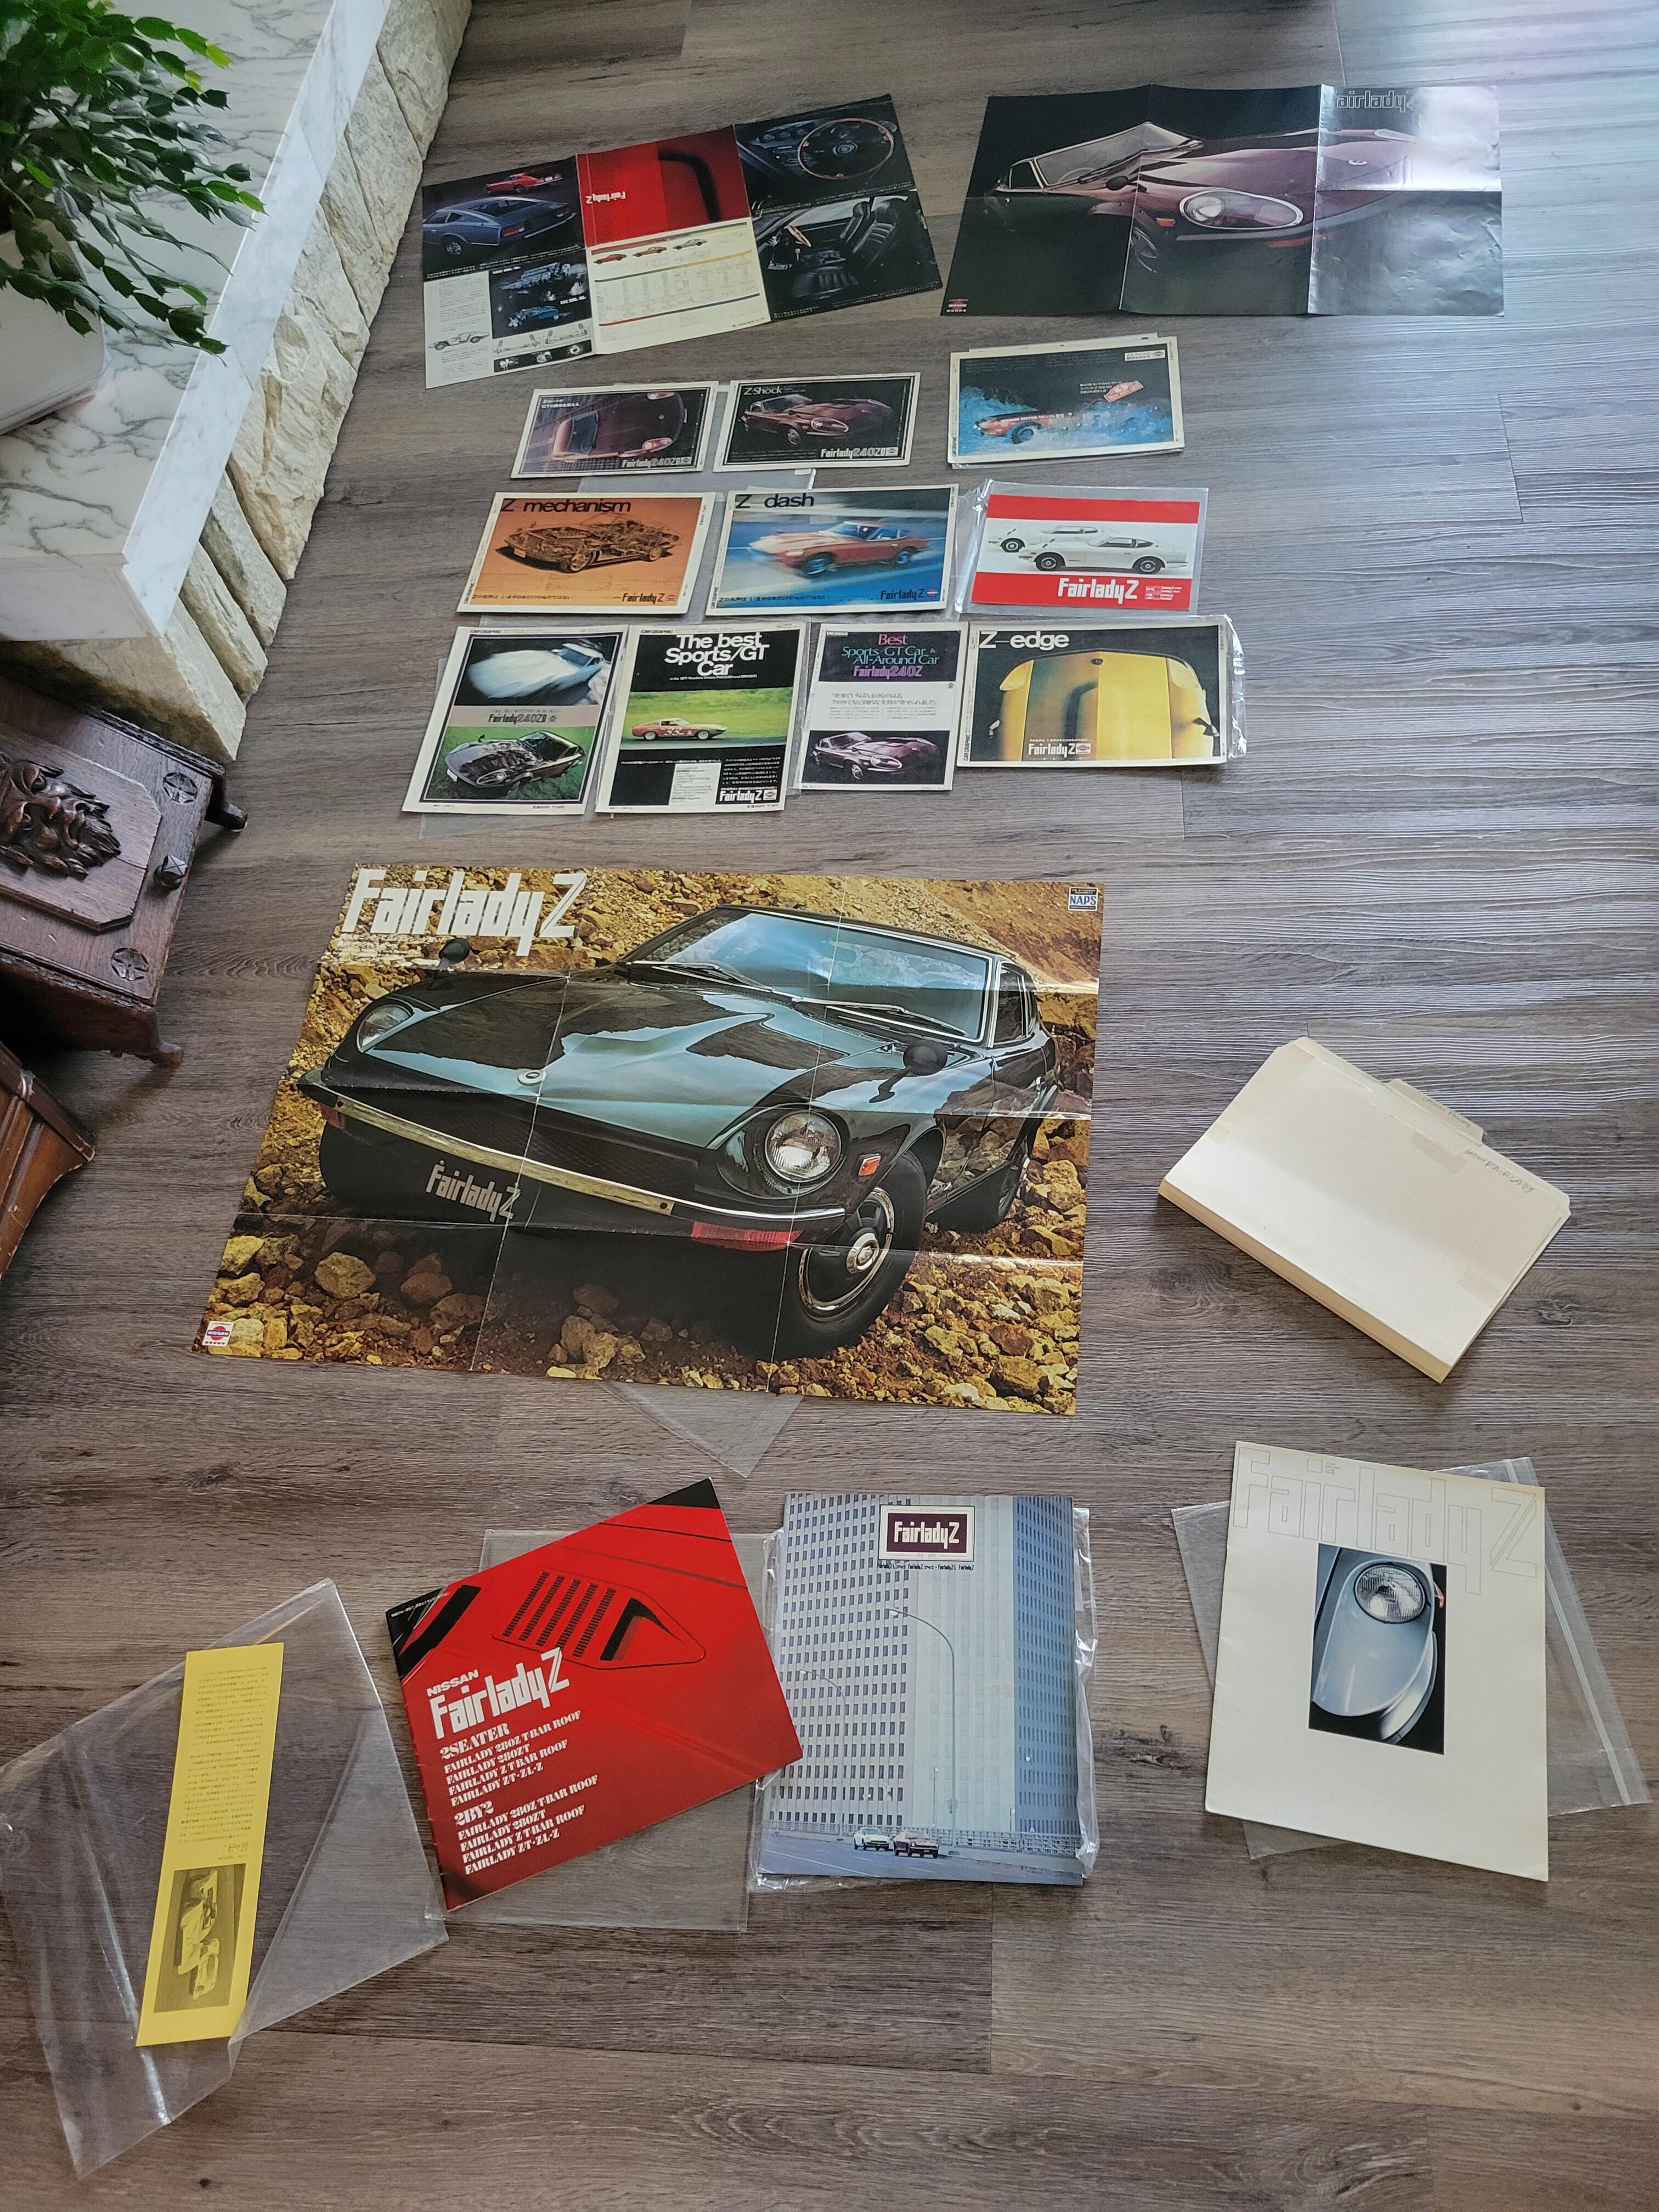
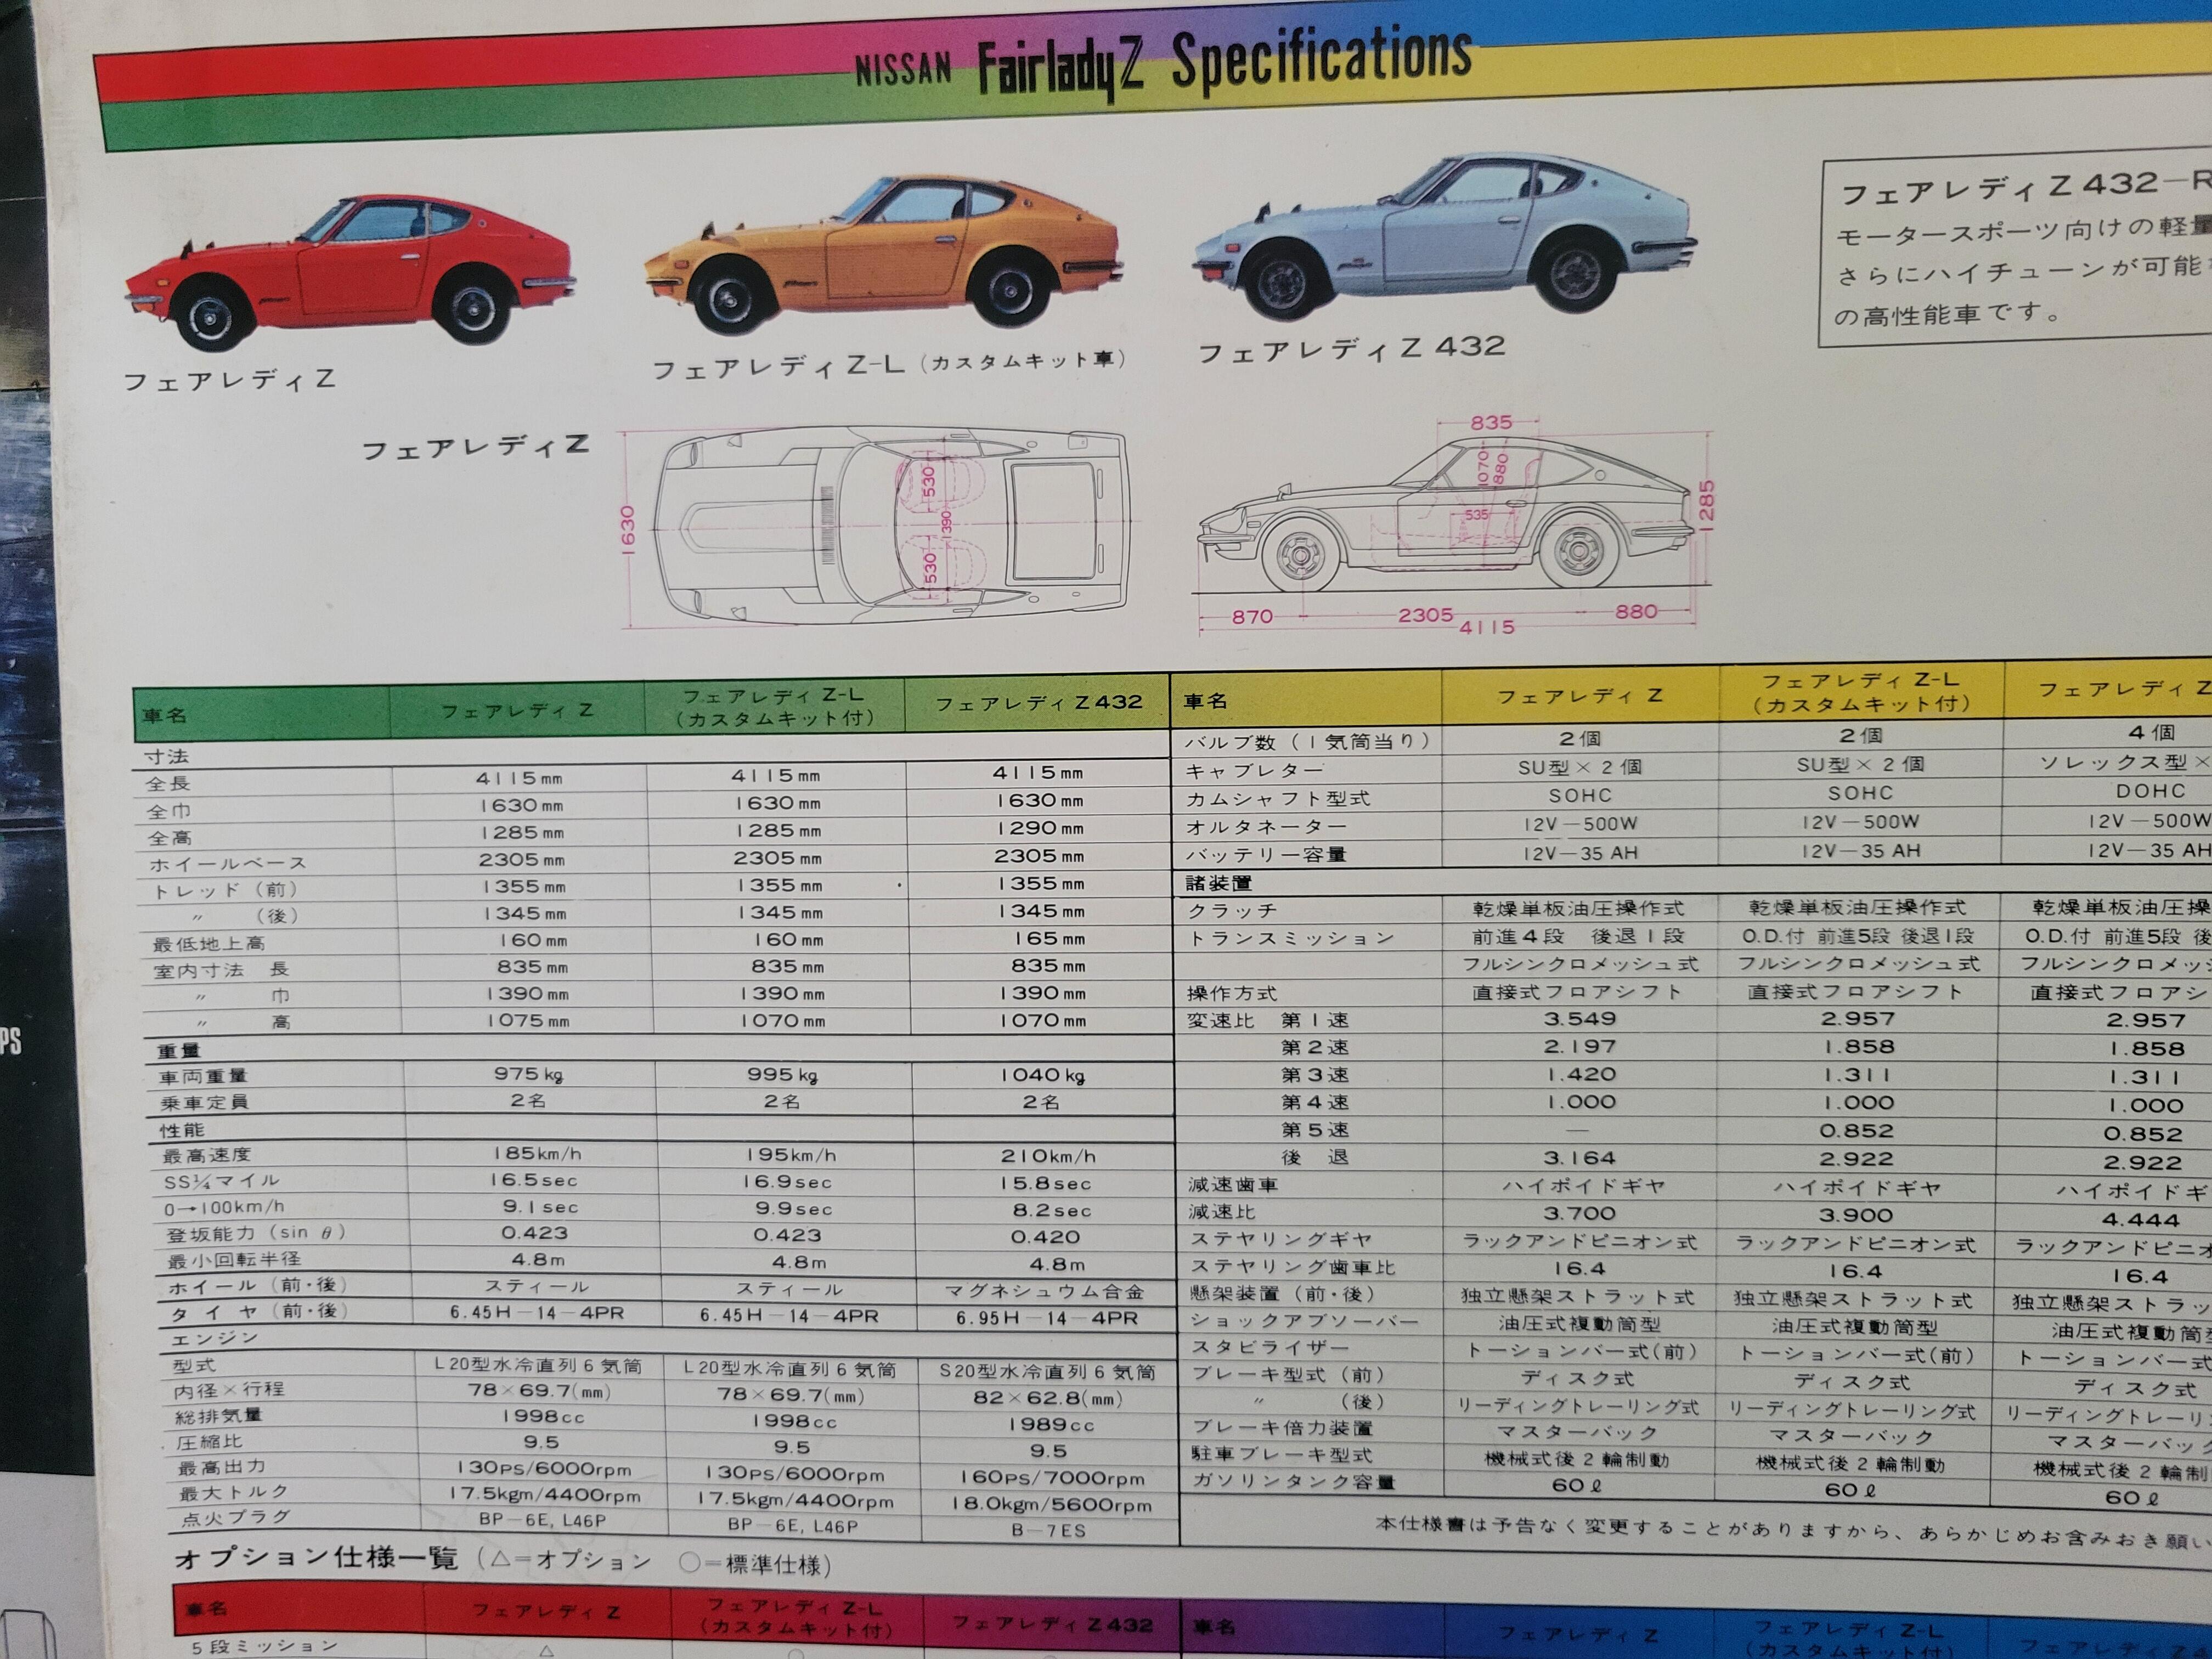
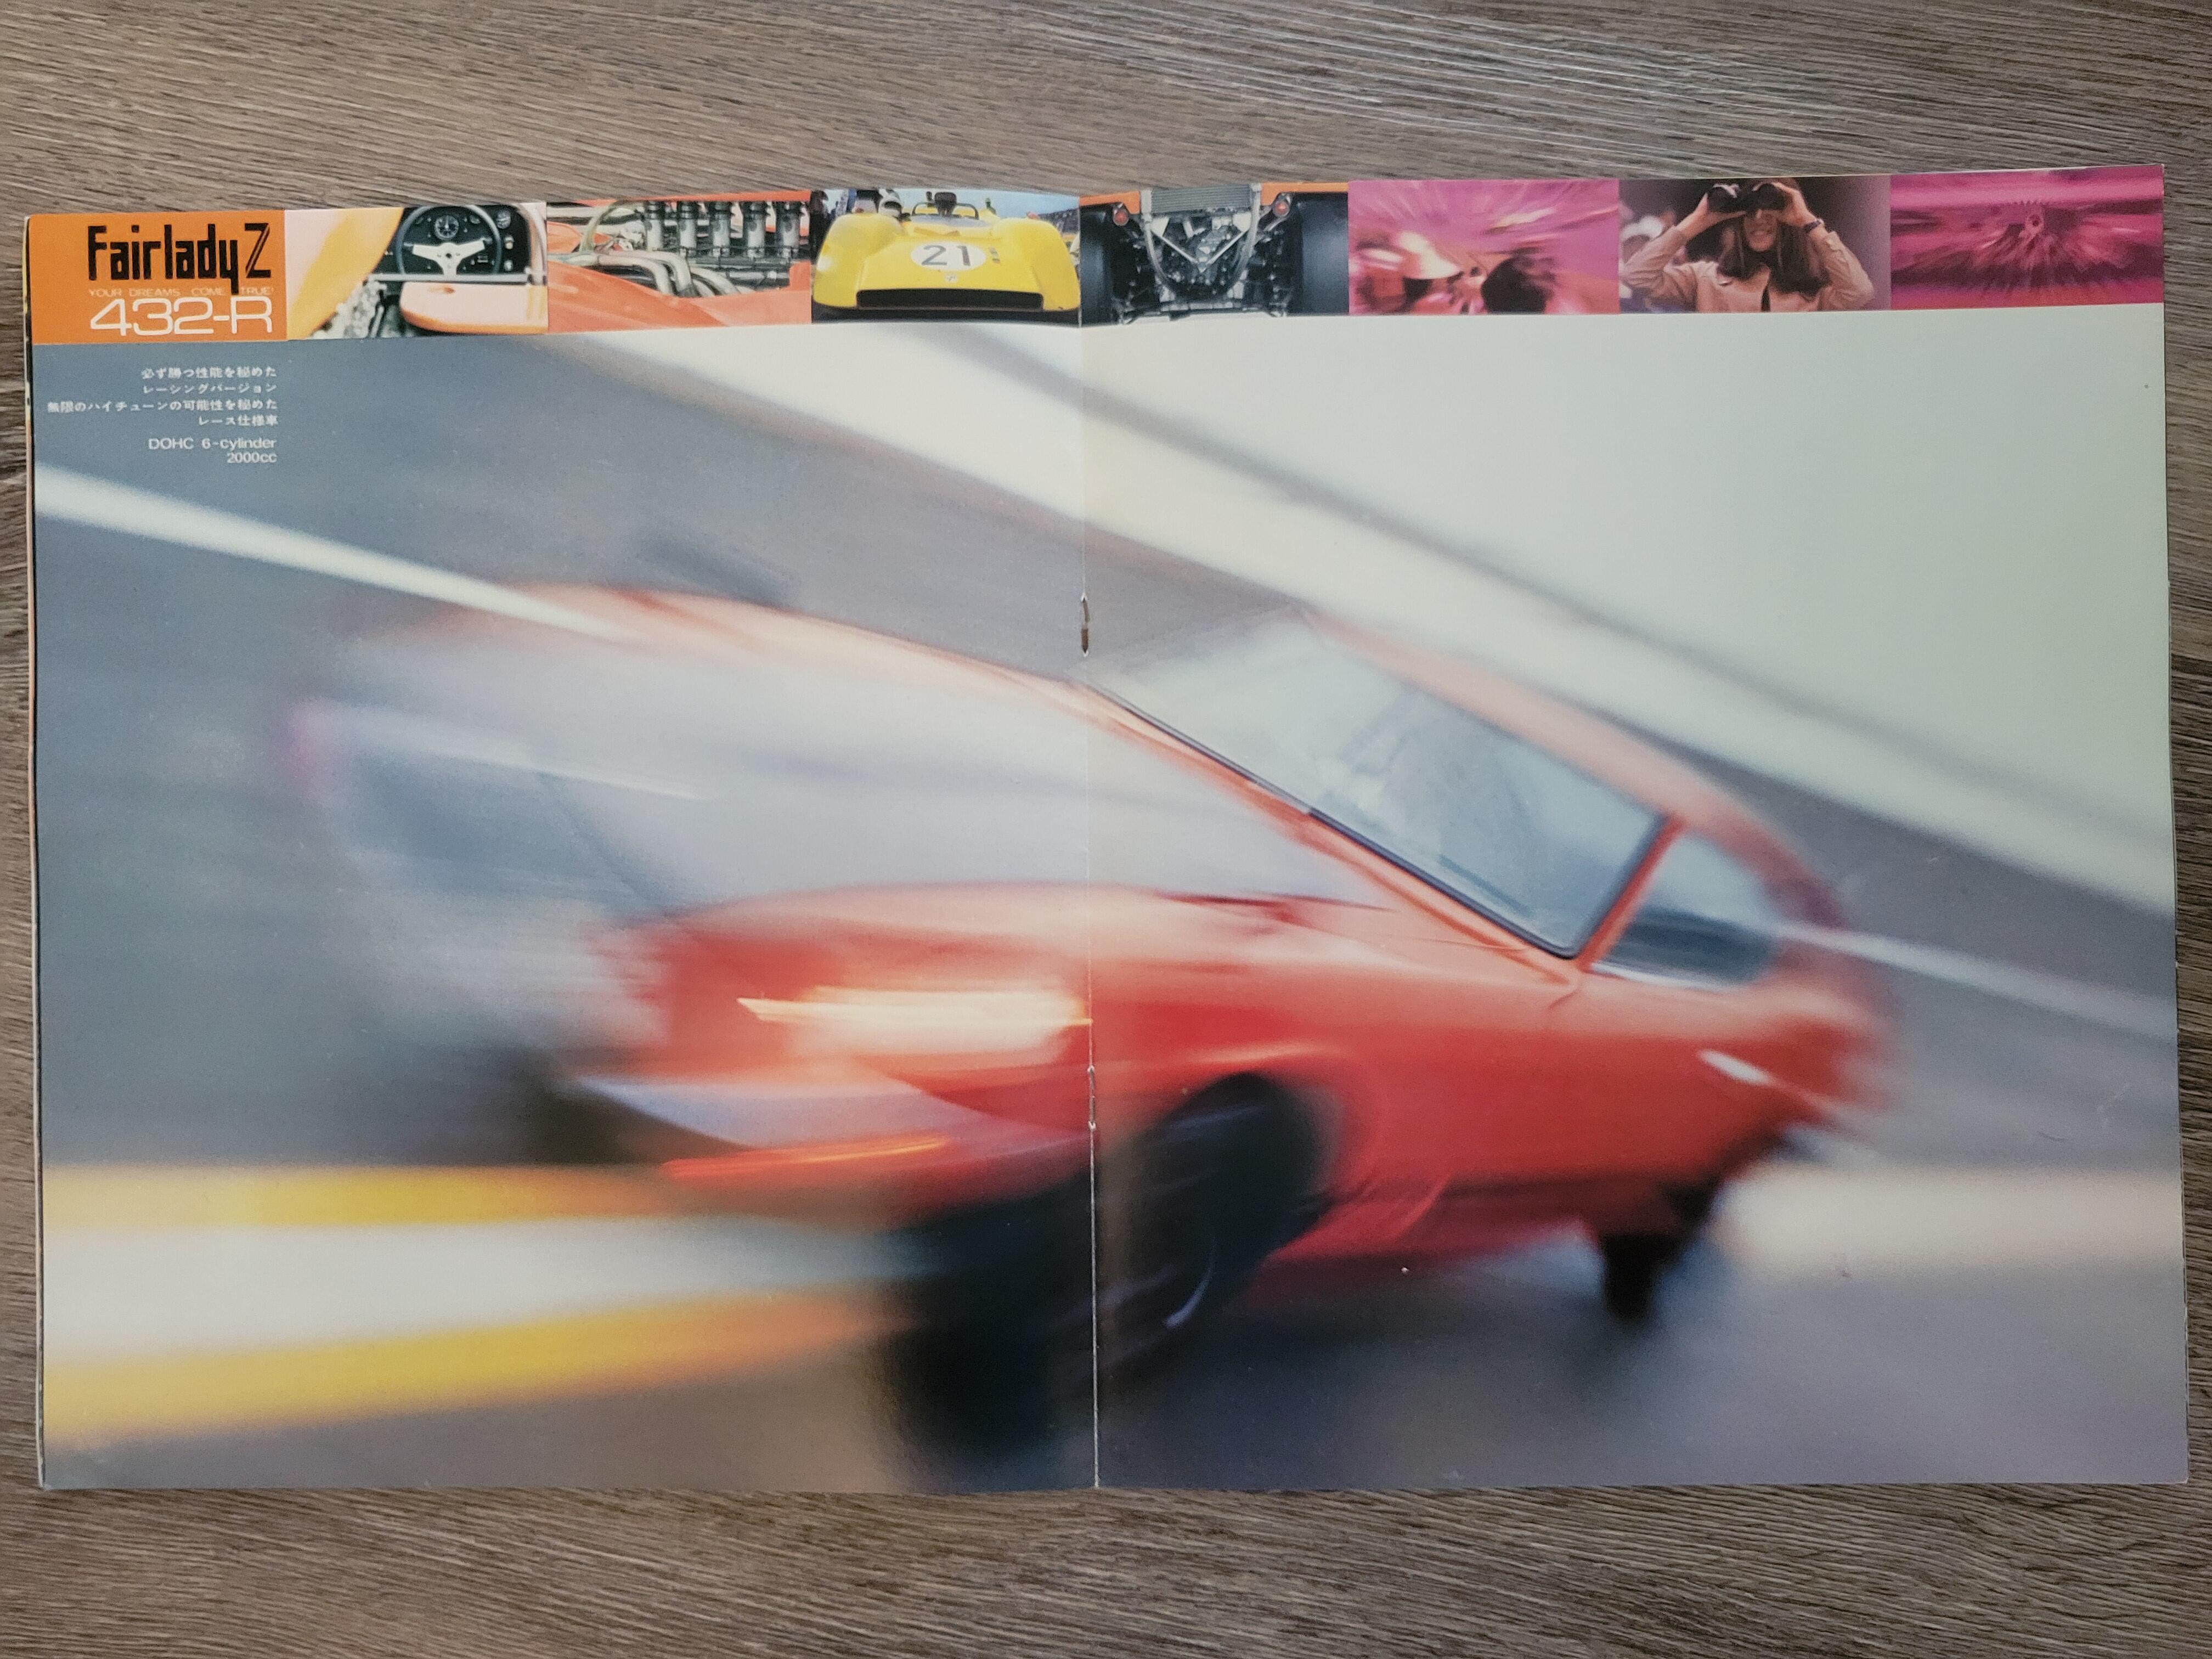
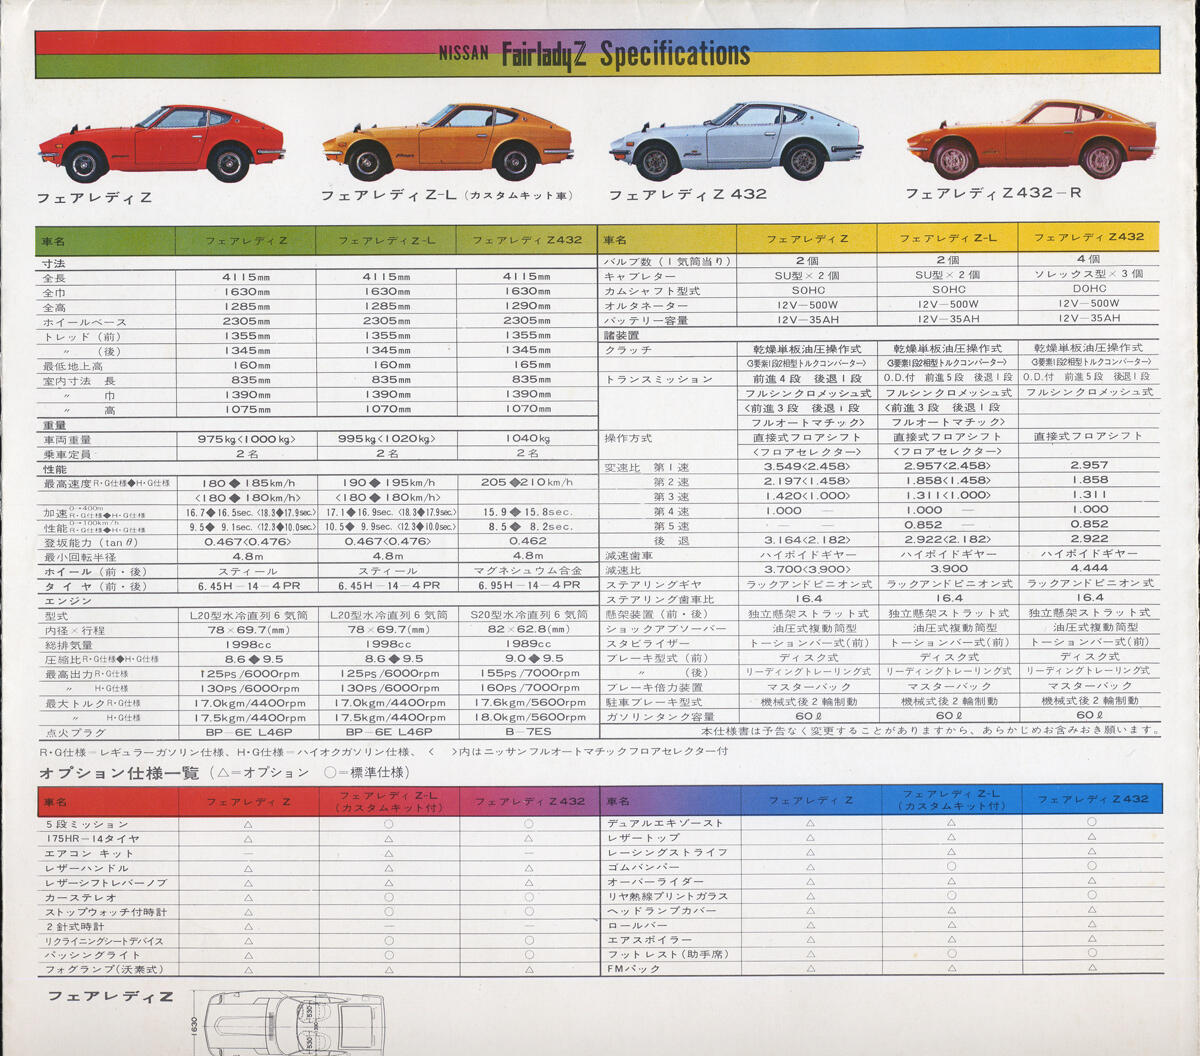
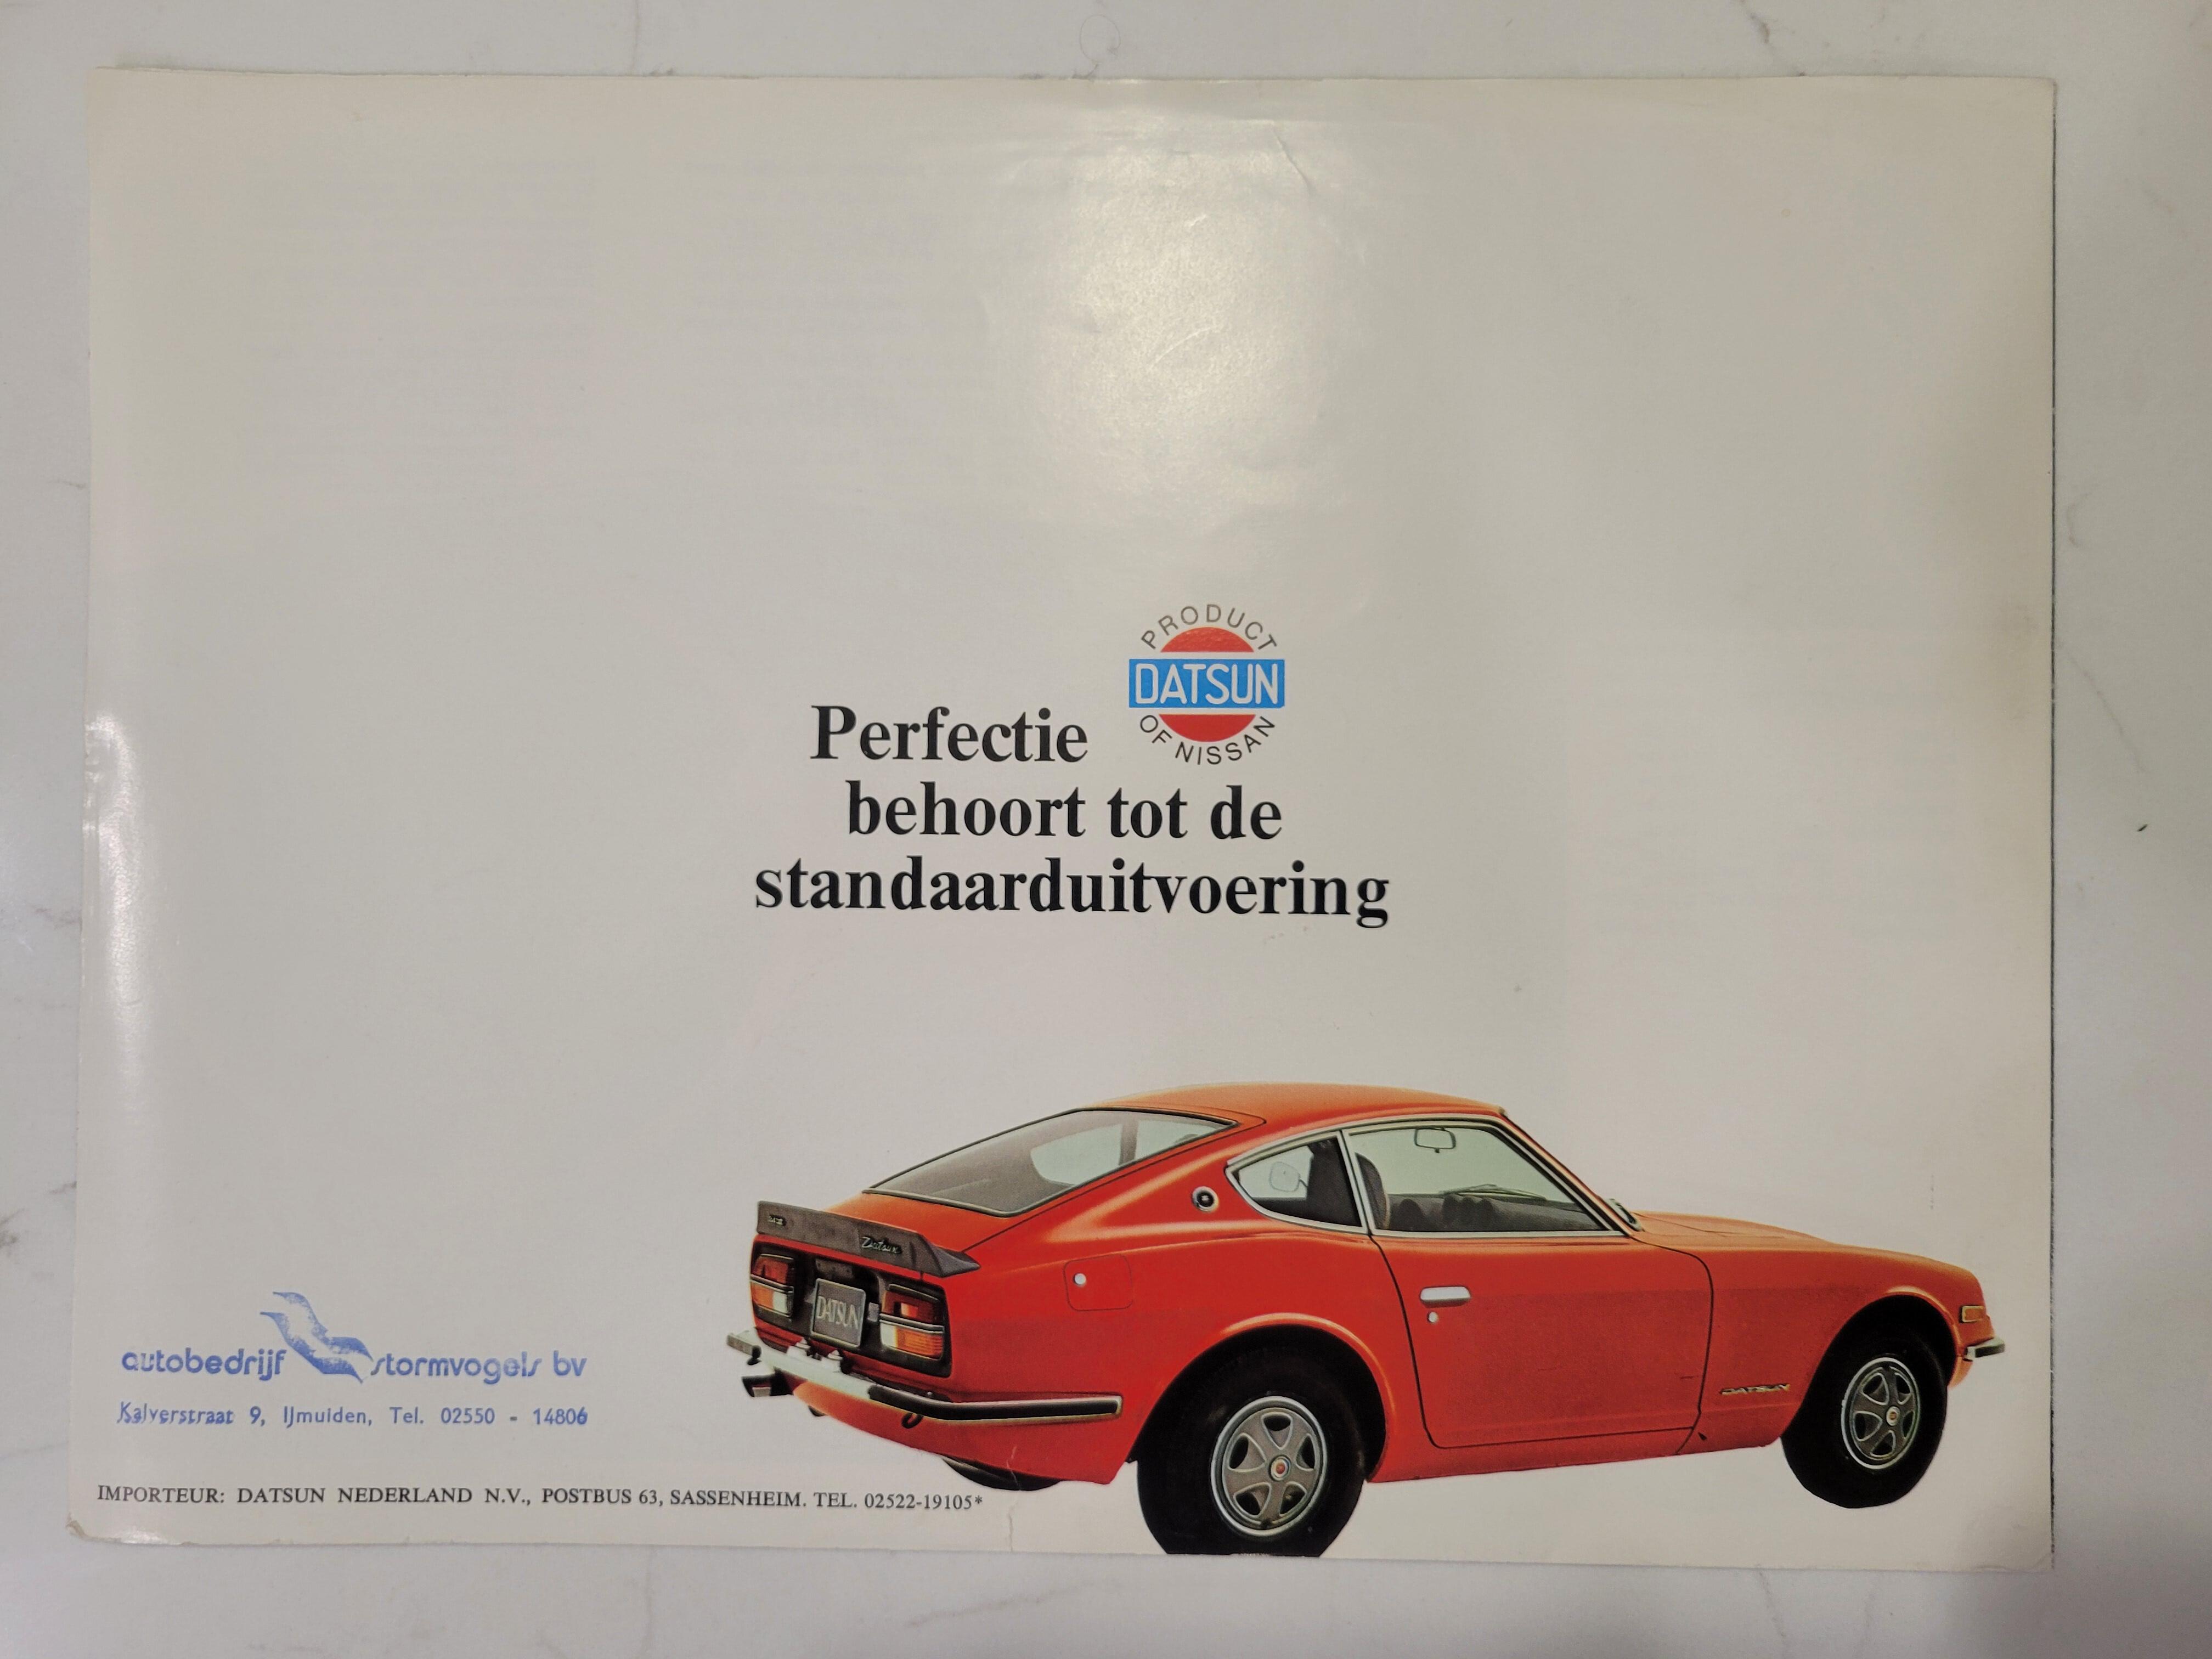
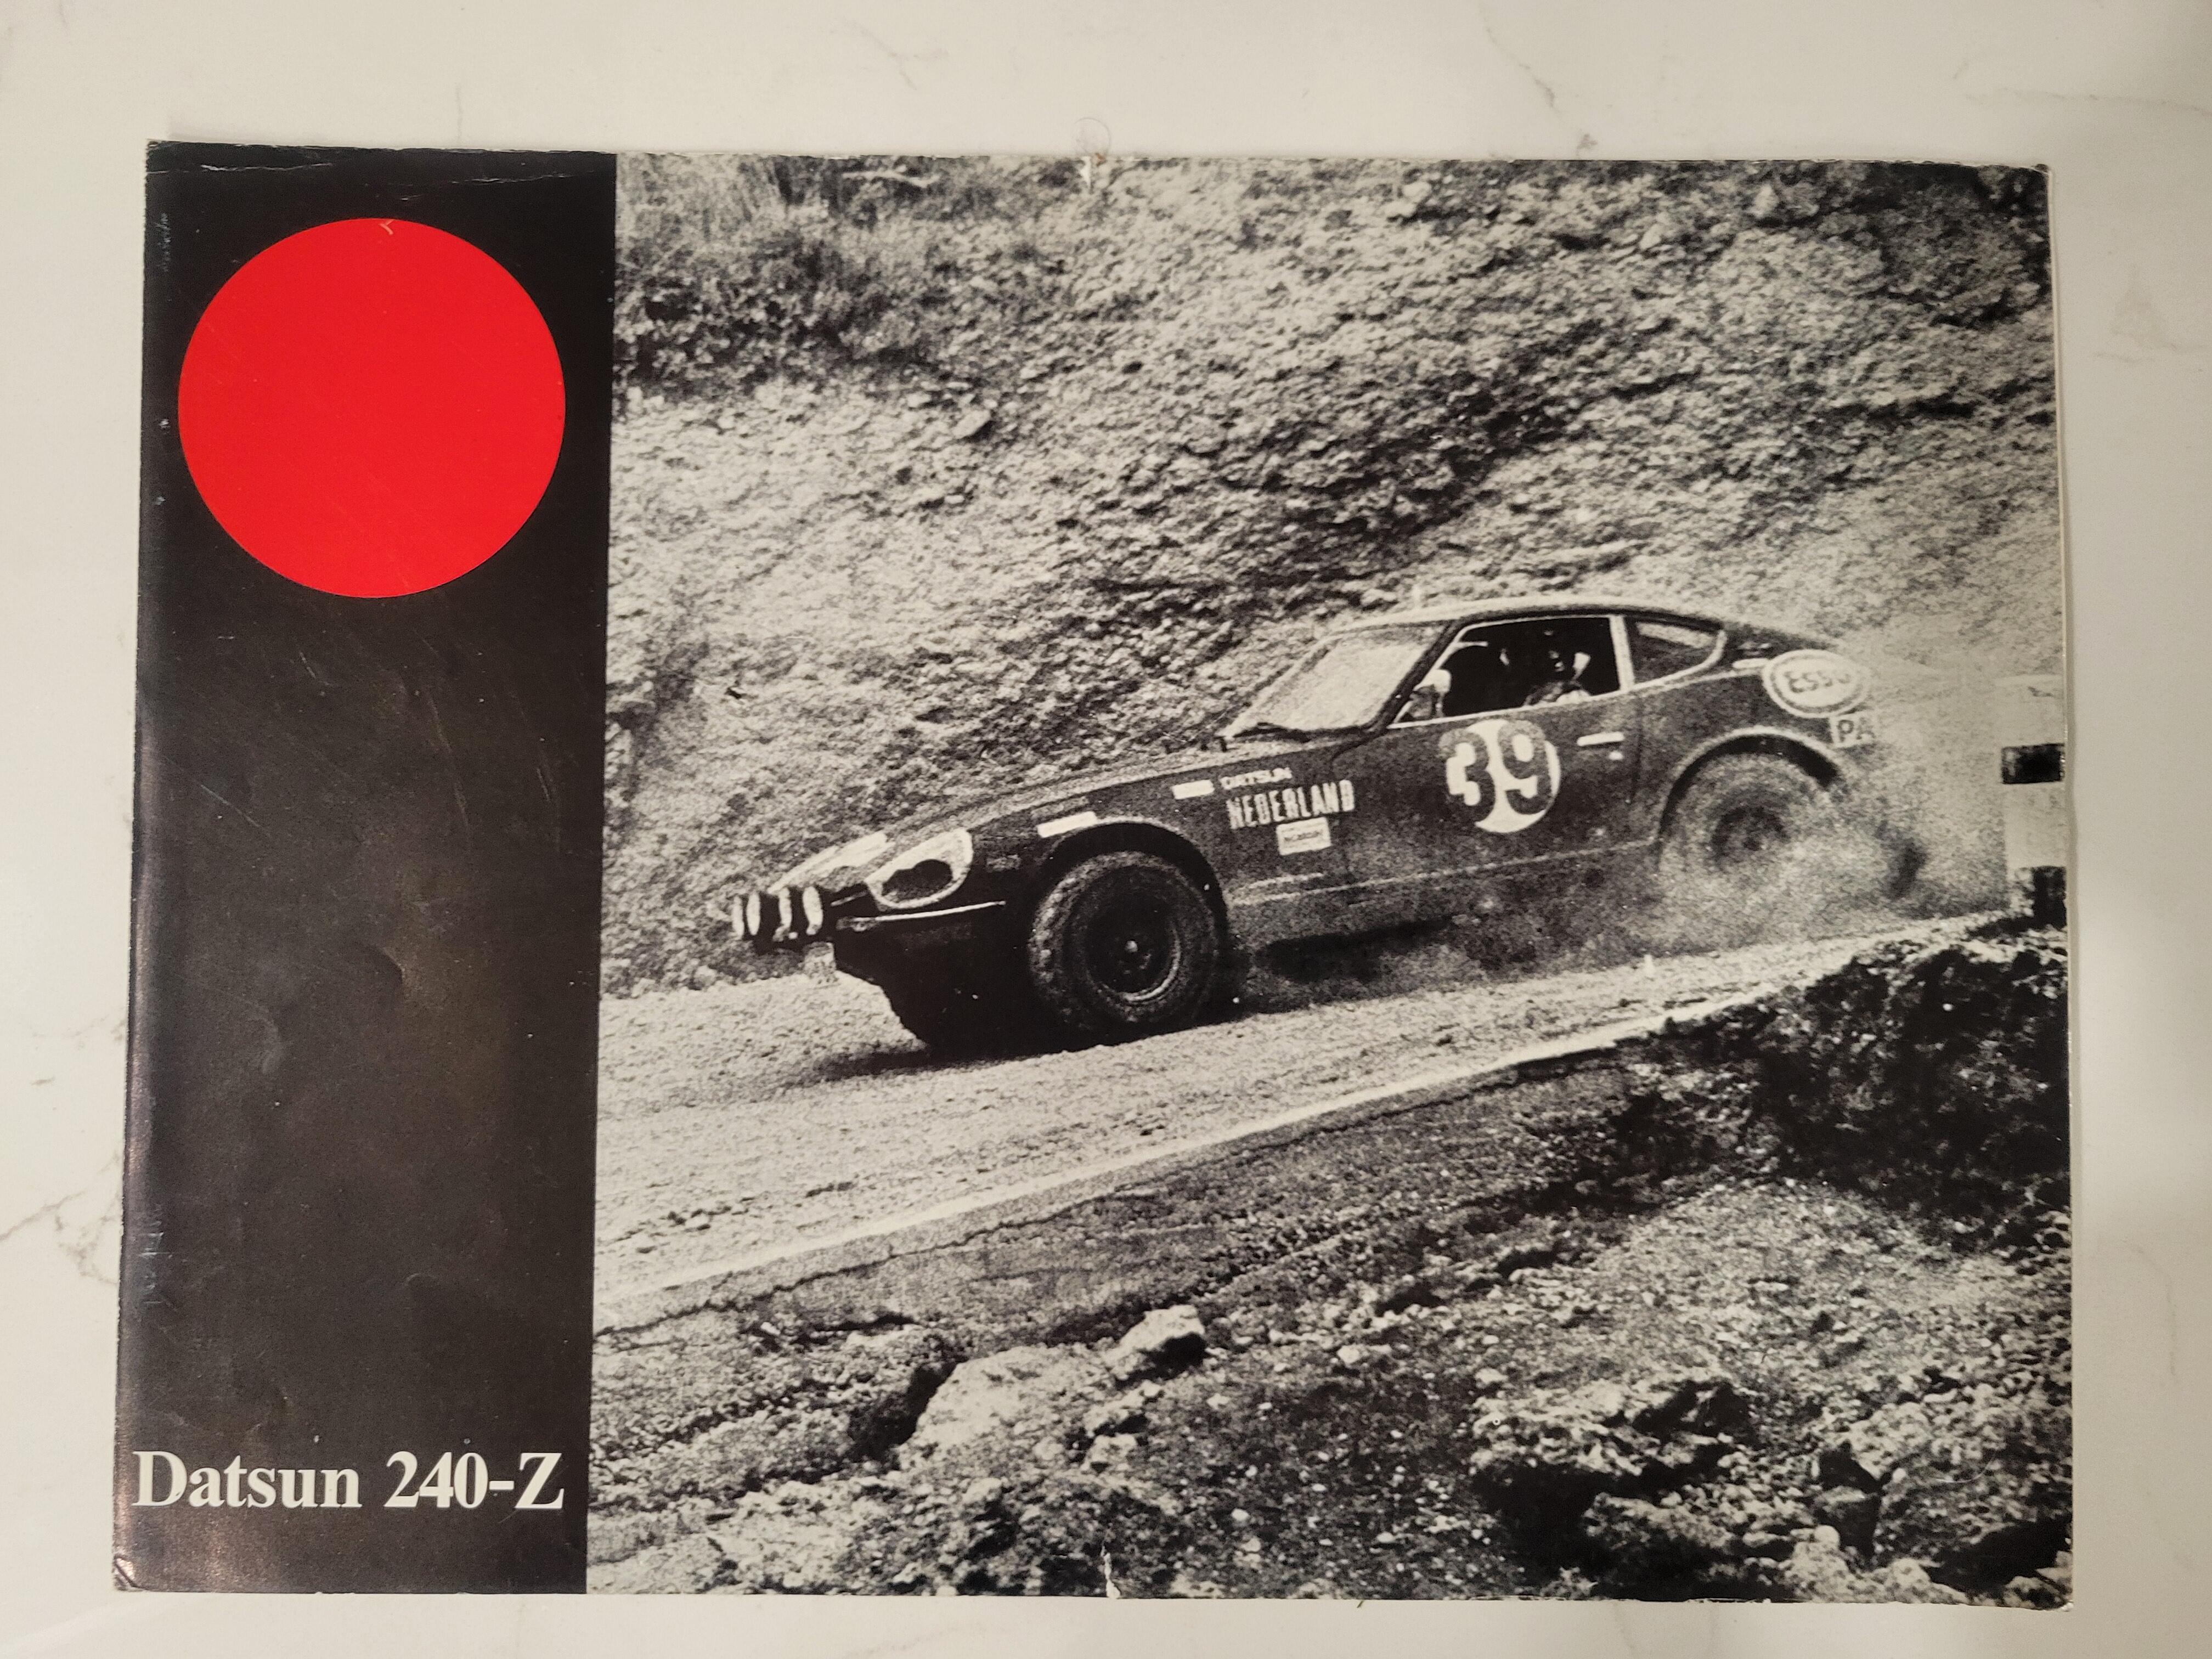
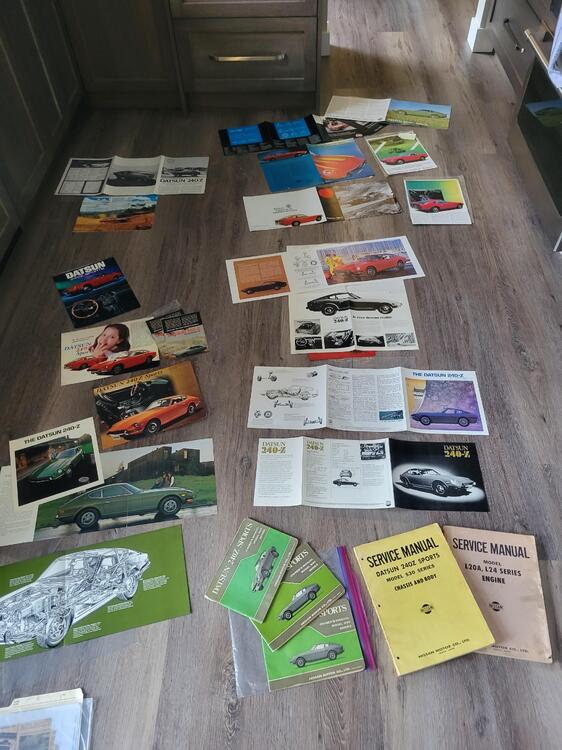
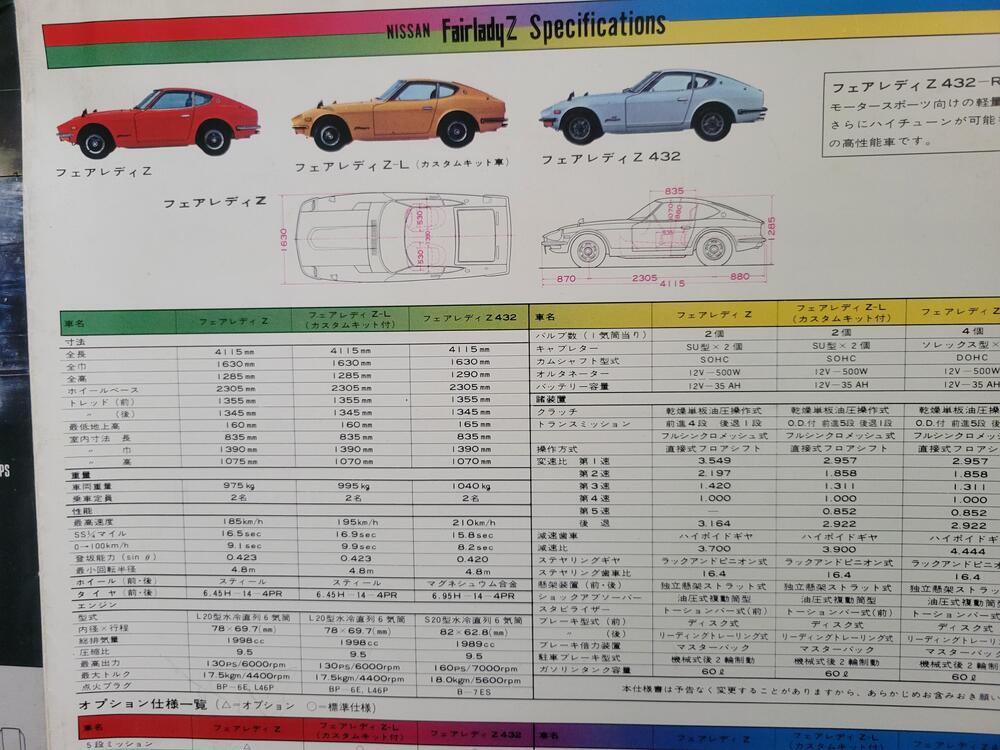
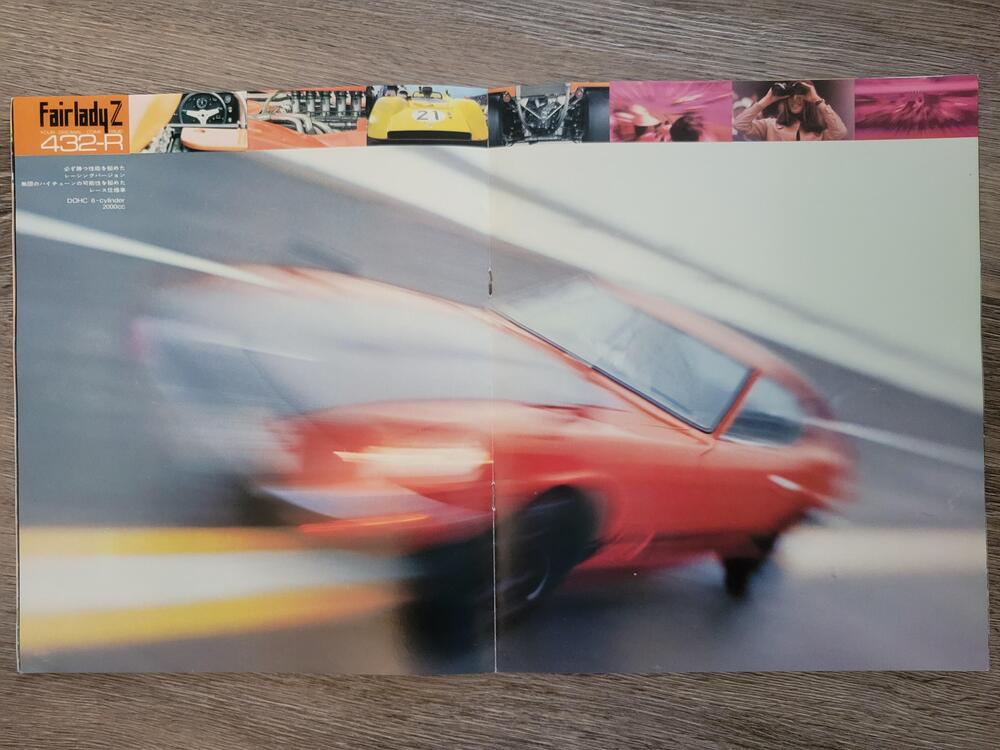
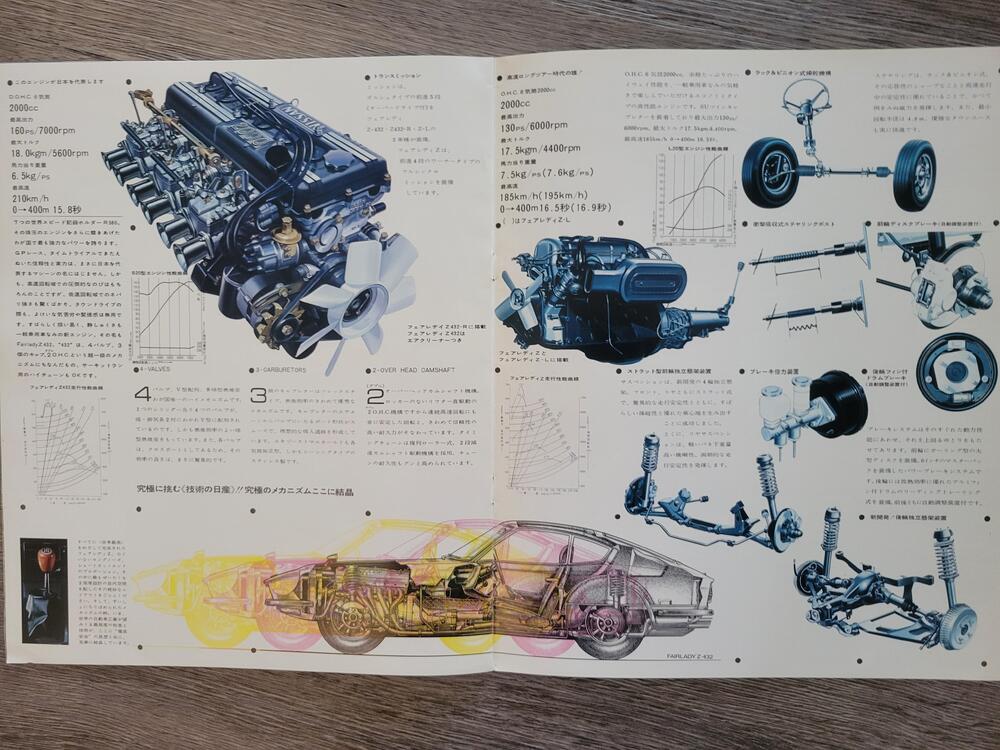
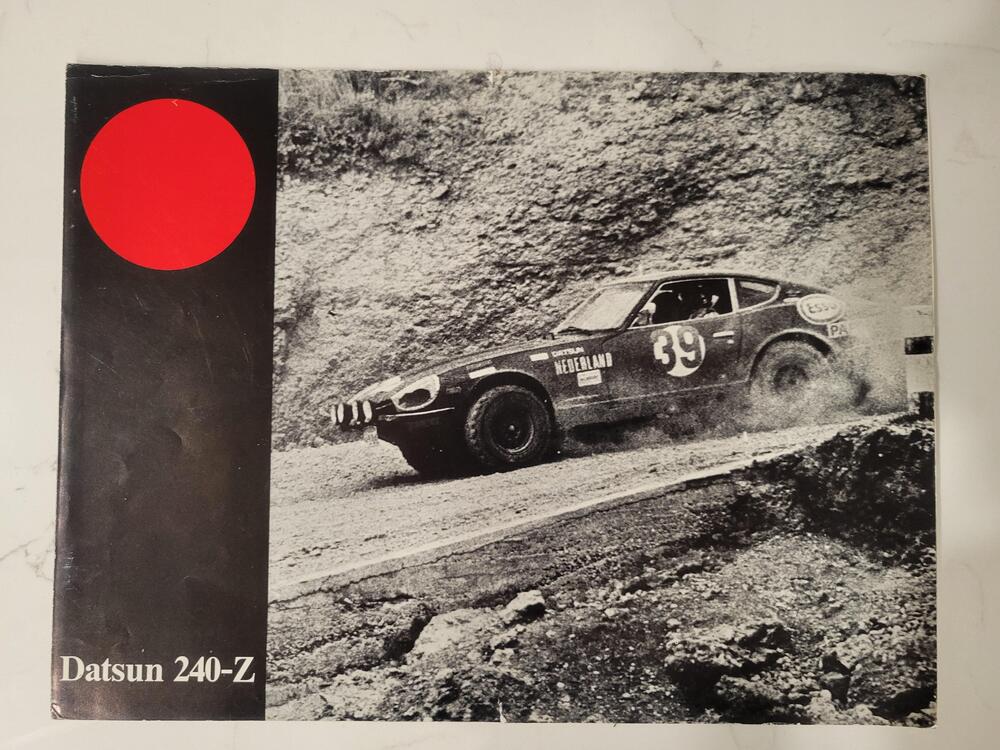
3 pointsI forgot to mention that the previous owner, Pete, was a prolific collector of automotive literature and a huge amount of Datsun/Nissan literature was included with HLS30-00957 when I went to pick it up from his son. I will show a sampling here. Later I will search for a more appropriate thread to do a more thorough post. 1970 Owners Manuals from 12/69, 3/70 and 7/70 plus a factory service manual set from November 1, 1969. Many brochures from Canada, US, UK, Belgium, Finland, Netherlands, and Australia. Plus four copies on this 1970 brochure you will recognize. Also a large selection from the Japanese domestic market, some of which are poster on one side and specs on the back, very cool. One multi page booklet even includes the Z432 and Z432-R


 3 points
 -
I wouldn't even try to adjust the window tracking without the frame installed2 points
-
2 pointsThe master cylinders are usually bored out larger in the area where the retaining clip goes. So if you are measuring the bore with all the guts installed, It's likely that you aren't measuring the actual working diameter of the cylinder. You are probably just measuring the diameter where the lead-in and retainer are located. My guess (from my chair) is that the bore down deeper in the cylinder is smaller than what you are measuring out at the end where you have the caliper.2 points
-
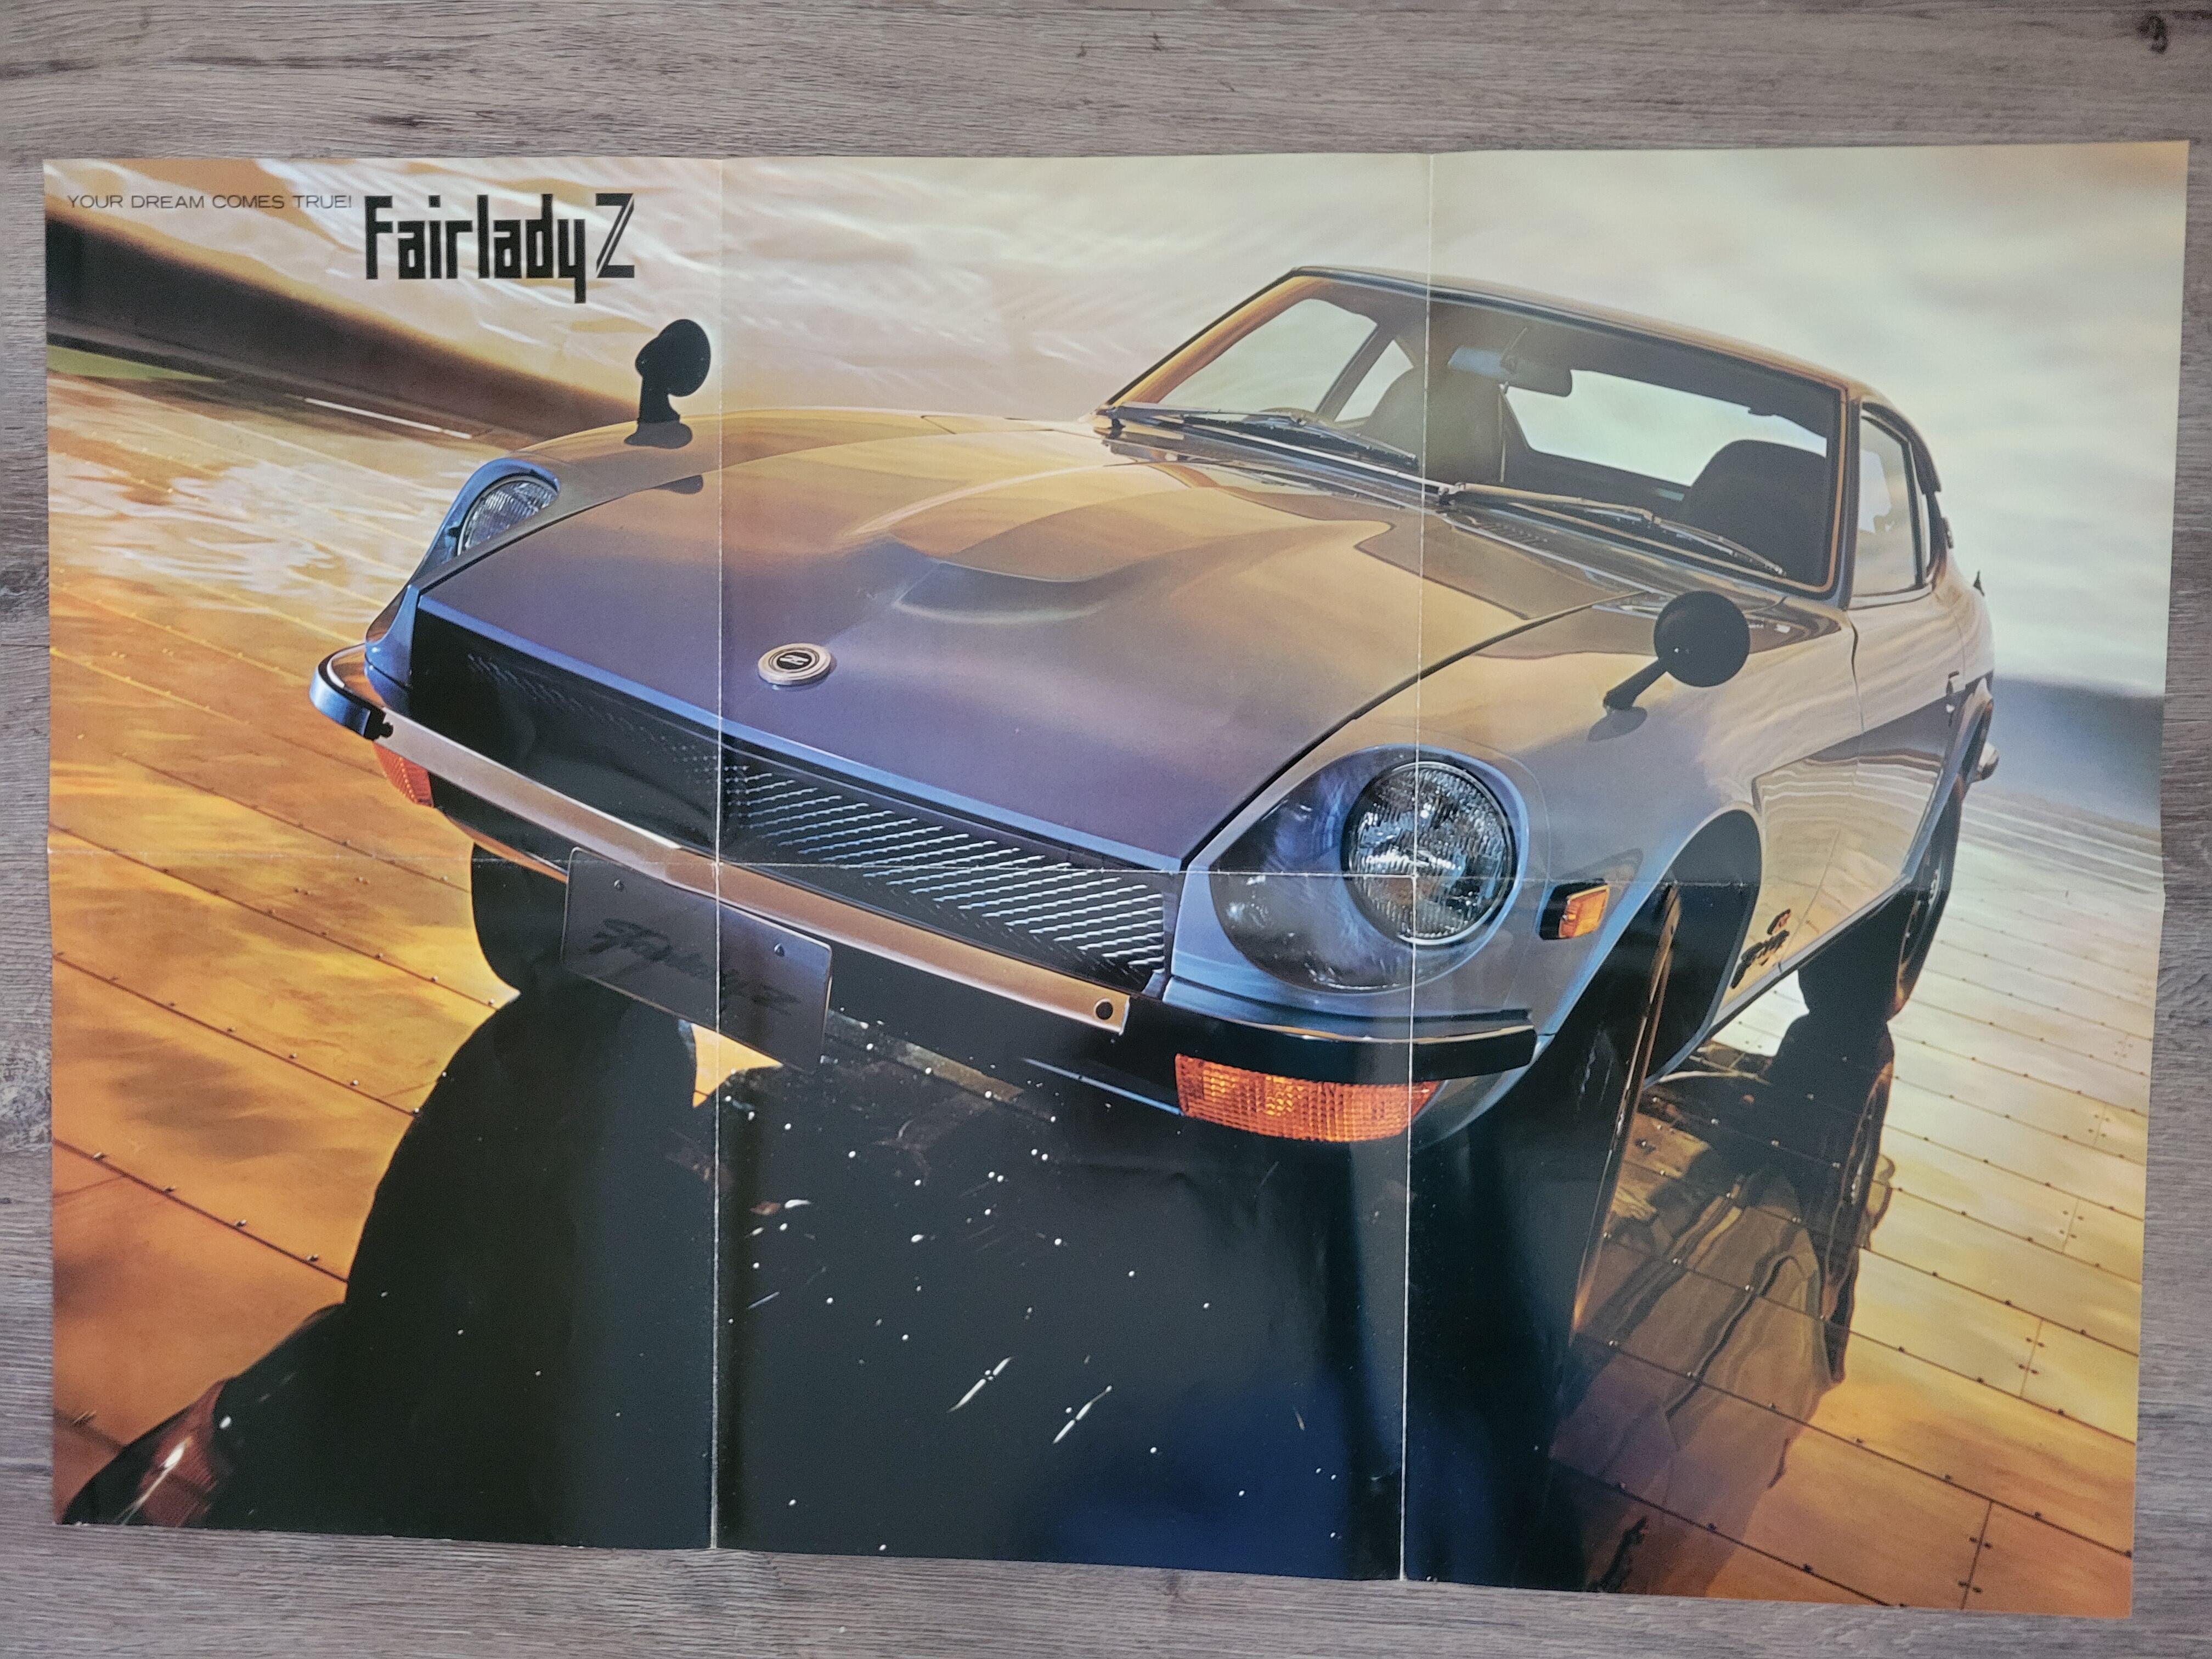
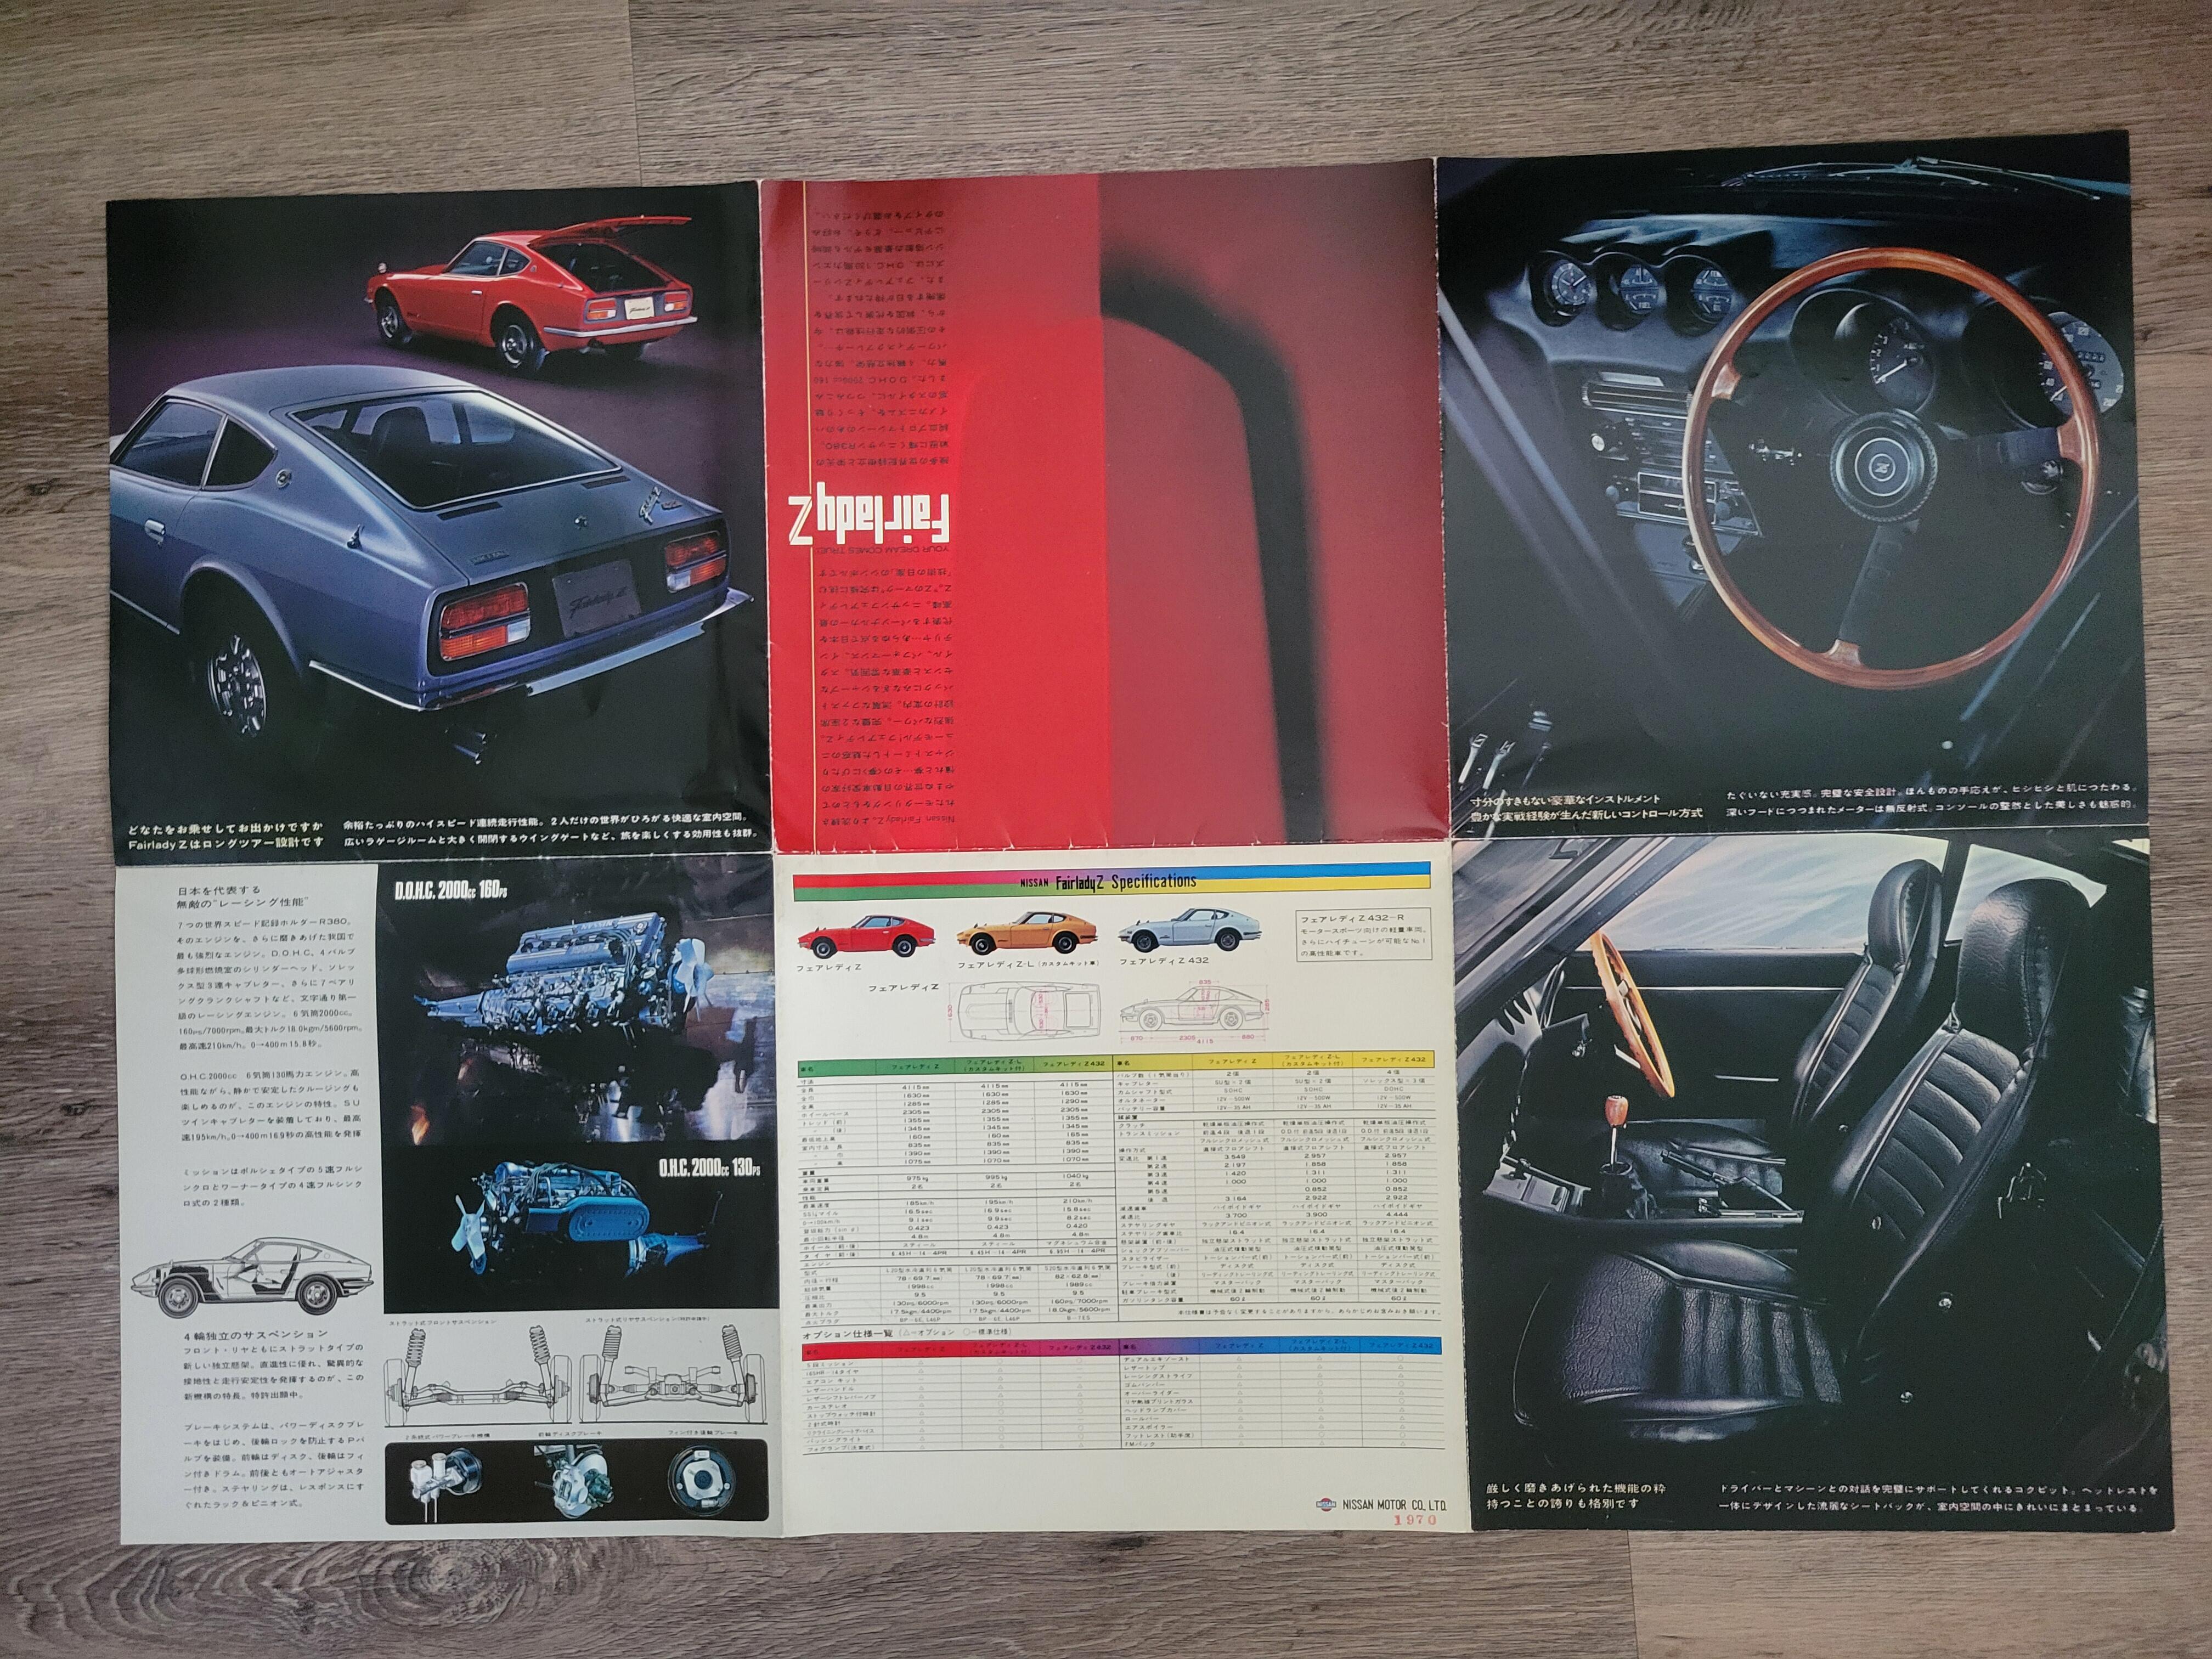
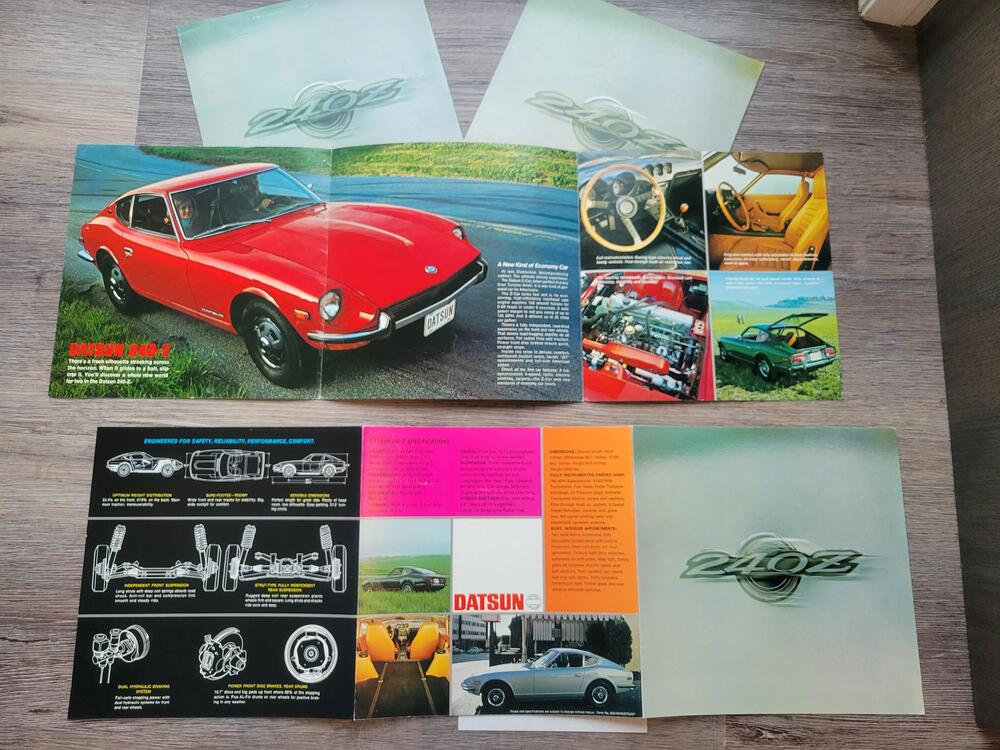
2 pointsGreat collection! Some of them are frighteningly valuable these days. The white-bordered 'Fairlady Z' booklet brochure was the first full Japanese market brochure (as opposed to a fold-out/flyer) and there was a reduced-size reprint in the 1990s. You appear to have the original yellow paper insert with Nissan Works racing team driver Tatsu Yokoyama's notes on driving the Fairlady Z intact. Good! The red bonnet/hood fronted 'Your Dreams Come True' campaign flyer with the fold-out poster was handed out at the 1969 Tokyo Motor Show. There's more than one version and the differences are in the rear cover (Fairlady Z432-R photo vs Fairlady Z432-R text box) and one of the interior photos. I believe you have the earlier version with the text box and that is the more sought-after version. Here's the other one:
 2 points
 -
2 pointsI think this one is likely an original. It has a Dutch dealer stamp and the condition is very good but not pristine. You are right that it is nice to have, either way. Here are pics of both sides.

 2 points
 -
2 pointsThere is a Gold set on eBay right now. I don't know why these peeps think everything was gold. "I Love Gollllld" I have a few loose ones, A blue one.. . An Orange one... And one only a mother could love.....


 2 points
 -
$10,500 is pretty cheap. The seller admits he didn't know squat about the car so it was a gamble. I got mine from the same type guy but for $2,000. Back in the good old days, 2015.1 point
-
1 pointSo there’s your answer. They did print the brochure in French for the Quebec market. @CanTechZ @Namerow1 point
-
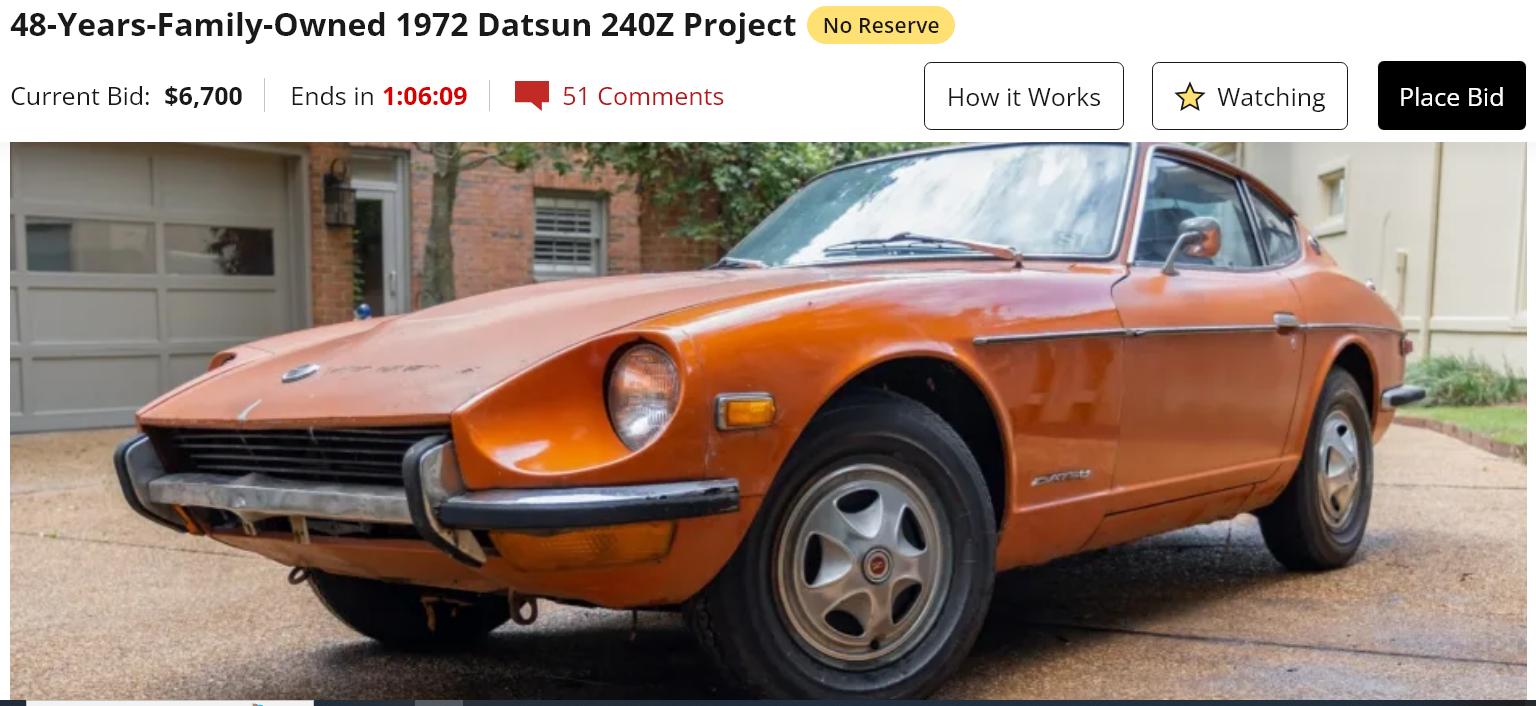
Here's a good starter Z. The usual been sitting for years but ran when parked problems, probably. https://bringatrailer.com/listing/1972-datsun-240z-337/
 1 point
 -
I agree in your opinion about the market being depressed, it applies to the majority of the classic car market. The dip in prices is one of the reasons that I recently purchased number 957.1 point
-
Oh, I wouldn't say free fall. It's depressed, certainly, and I agree with Carl that the buyers just aren't there like they used to be. I think that car, bluez, was well priced and needed a bunch of work to make it worth more.1 point
-
1 pointYes, I agree yours is an original. I have an original too, purchased many years ago. Mainly because it has Works rally car '988' on the front cover...1 point
-
1 pointAh yes.. the red car on the big white page in middle and upper half of this picture.. i recognize it.. it's the Dutch folder.. It's (i BET) in new condition.. as it is a new made copy! I've seen those overhere everywhere for sale.. someone ordered 1000 copy's and wend selling them for originals.. but still a nice thing to have but not from the 70's..1 point
-
1 pointCould be Mart haha, anyhow, no bitumen wouldn't work here, it would be rusted away quicker then I can restore lol1 point
-
1 pointThose are cool, the French one in the middle of the first photo with the red vinyl pouch. Does it say it is printed in France or Quebec?1 point
-
The market has changed significantly since 2018 and 2020. Since Feb of 2020 Inflation has driven consumer prices up over 21%. That can quickly cut deeply into what anyone thought was part of their "disposable" income. Plus make anyone have second thoughts about retained or increasing values... The "Buyers" just aren't there today...I'd be surprised to see bids on this go above $30k... The Bubble hasn't burst yet, nor are the Classic Car Markets in Free Fall.... but there is a great deal of uncertainly. The old saying is "don't try to catch a falling knife".1 point
-
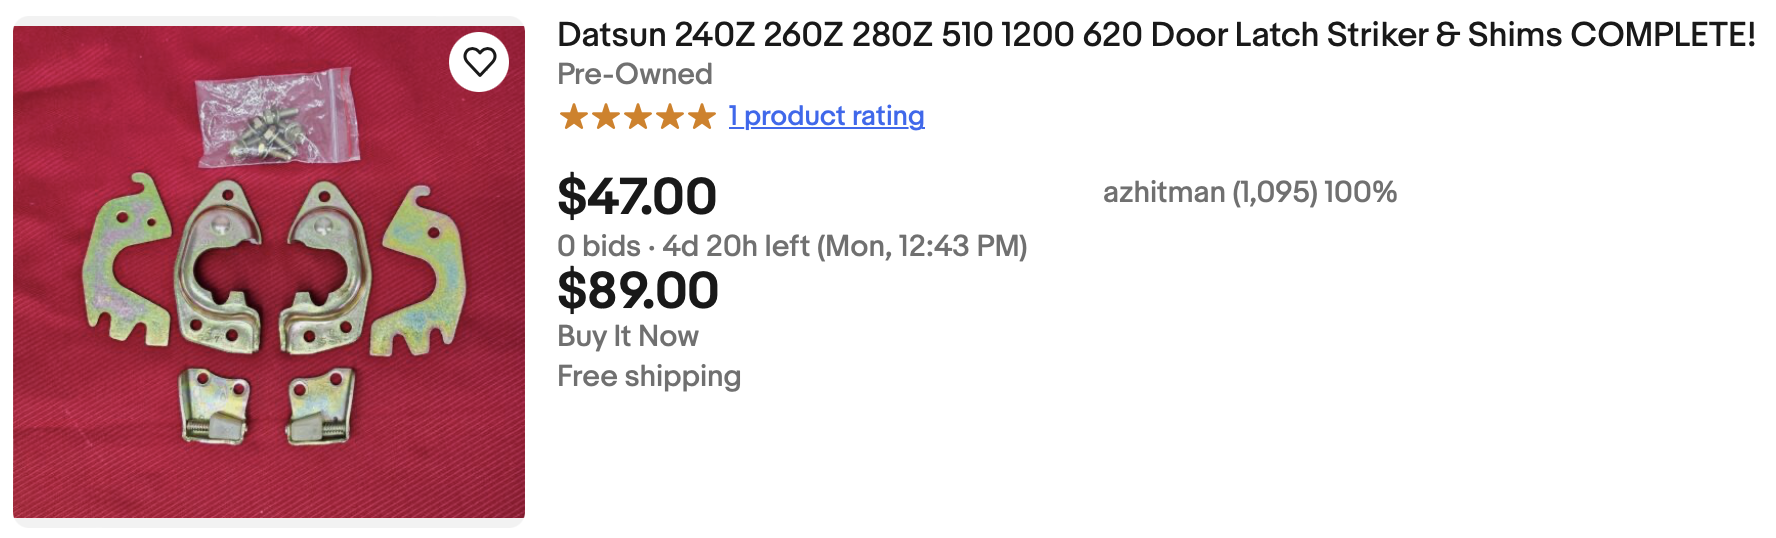
1 pointI have a couple dozen of these, somehow they all migrated to my basement making them hard to find for the rest of you. Sorry about that. In the USA, I'm betting Sal Ceja has plenty and all plated purdy. He lurks on FB in S30 Life or similar.1 point
-
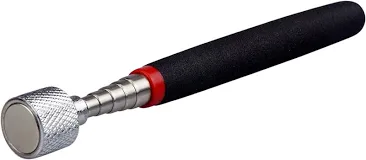
The few I've done a telescoping magnet was a big help for the retainers.
 1 point
 -
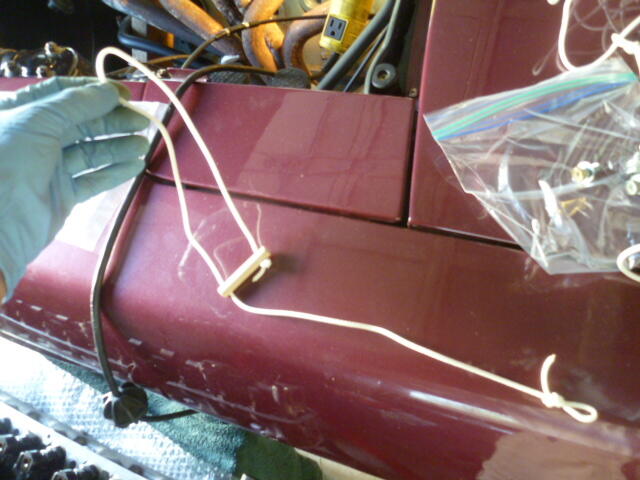
When I was doing that job alone (taking valves apart with engine in the car), I found that working with one hand on the tool at all times to keep the spring compressed is an extra special pain. So I used a piece of nylon cord to hold the tool down so at least I had two hands to work on getting the retainers out and back in. Tie the cord off onto something an anchor. Looked like this: Still a pain, but way easier!!

 1 point
 -
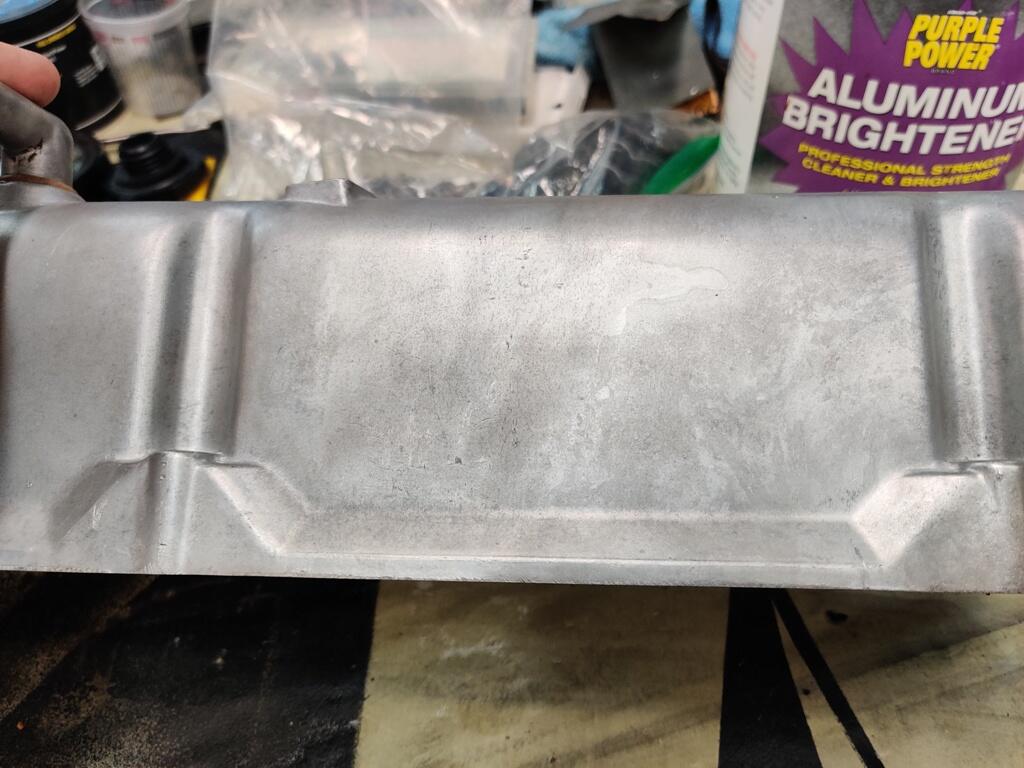
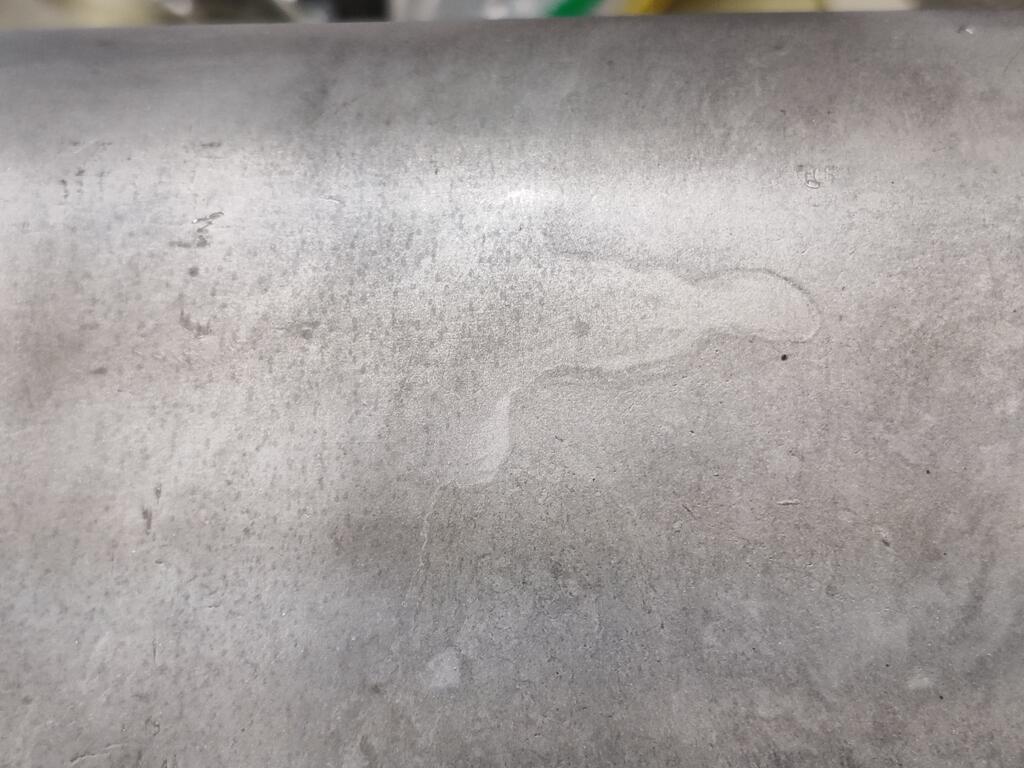
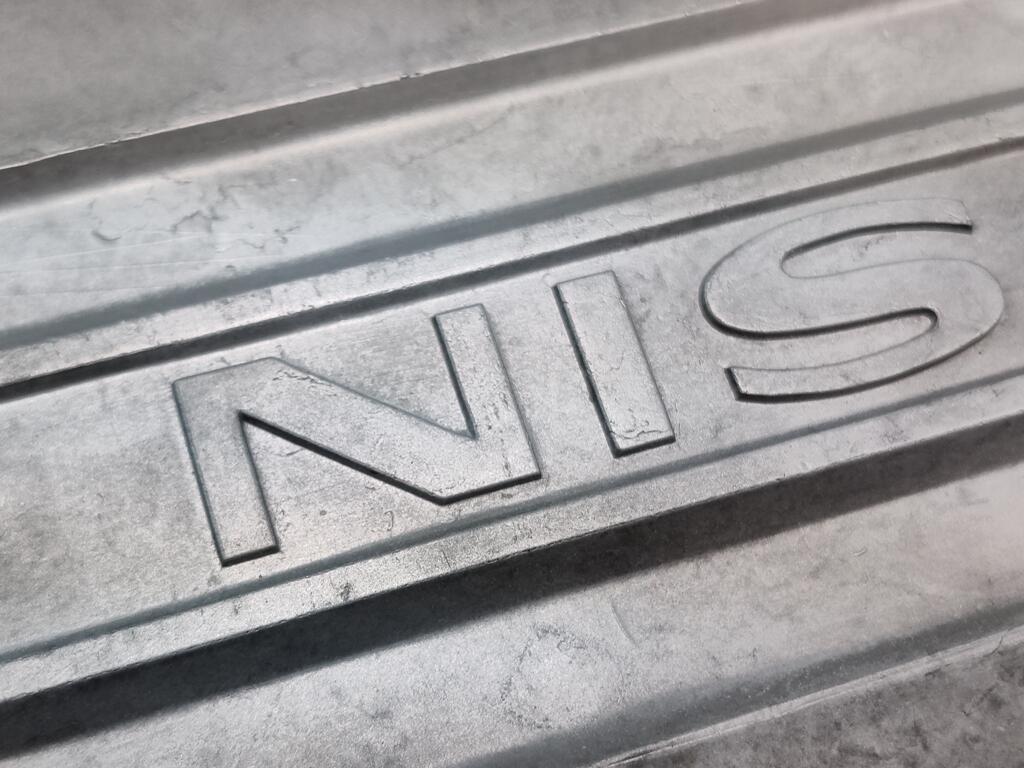
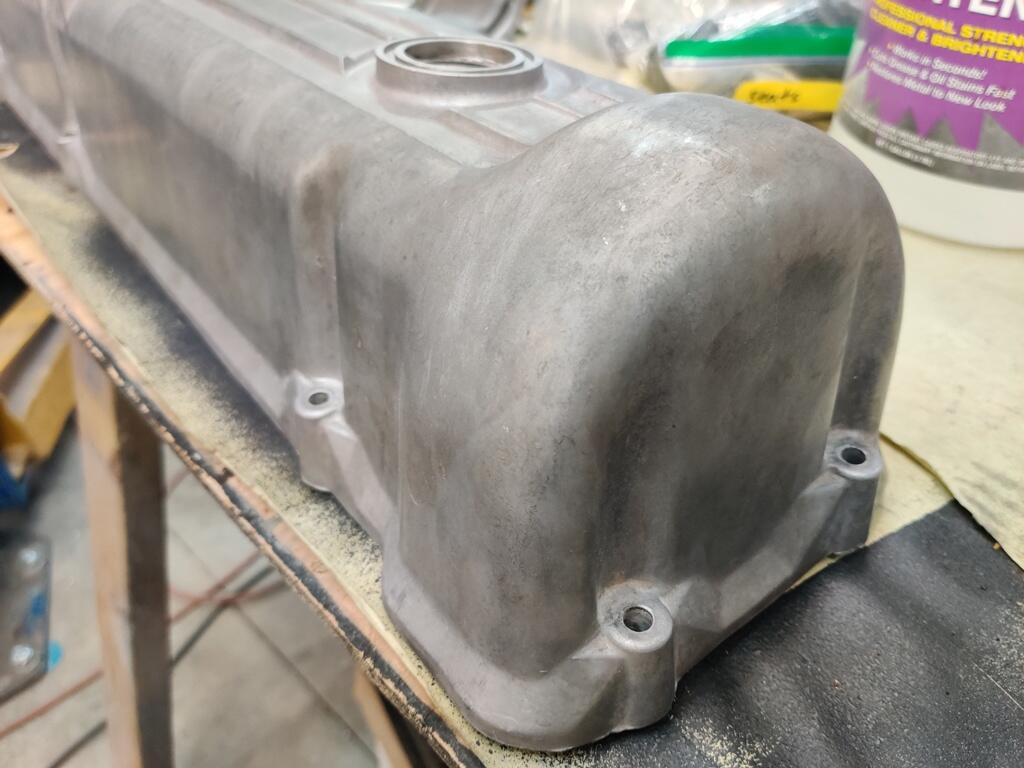
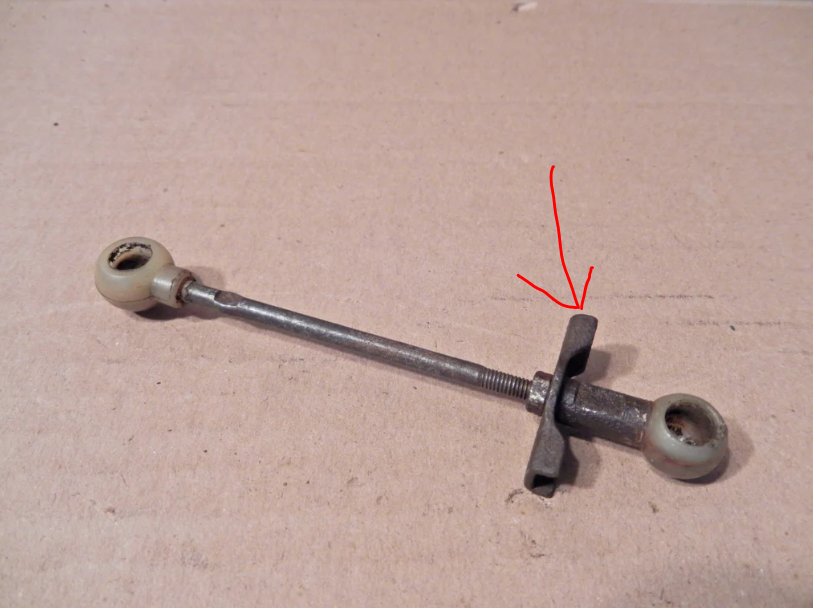
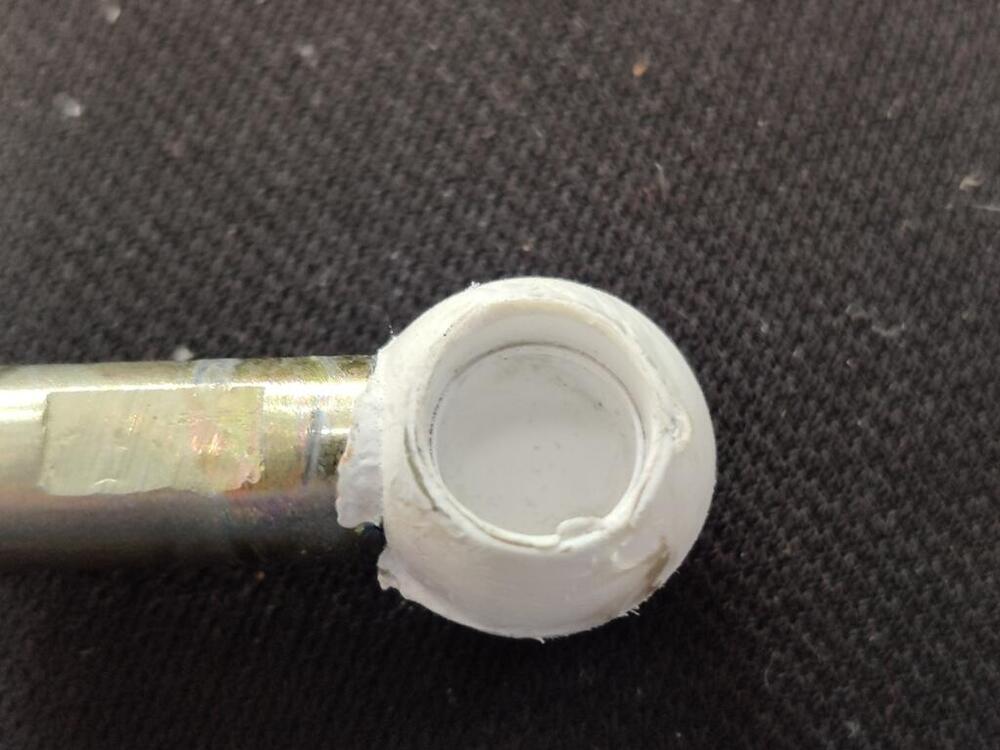
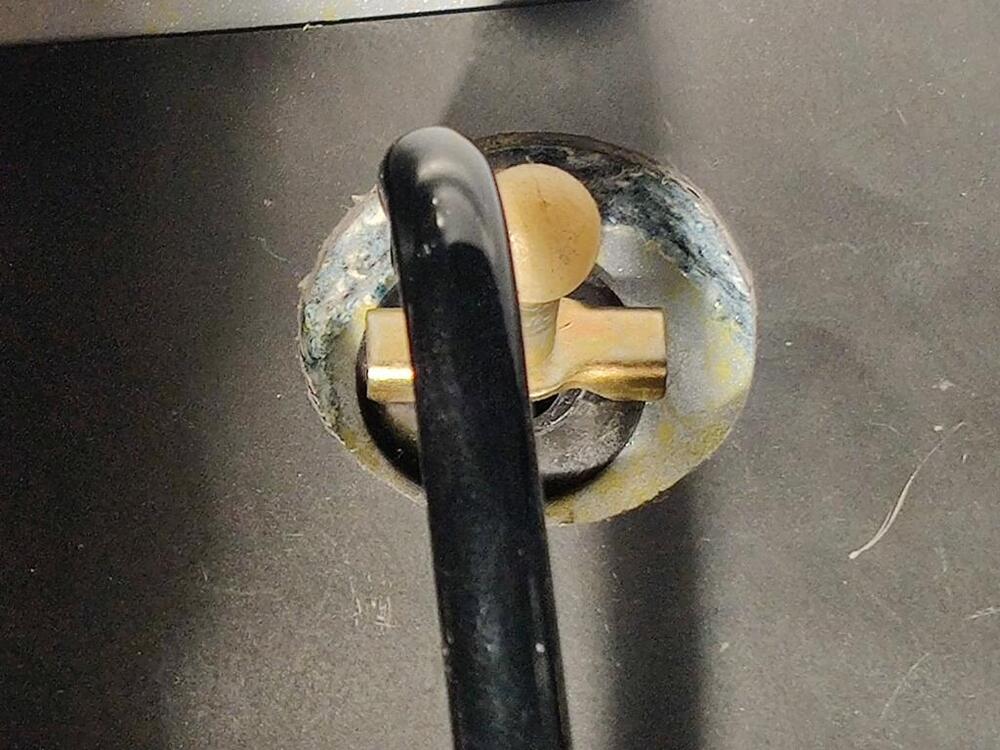
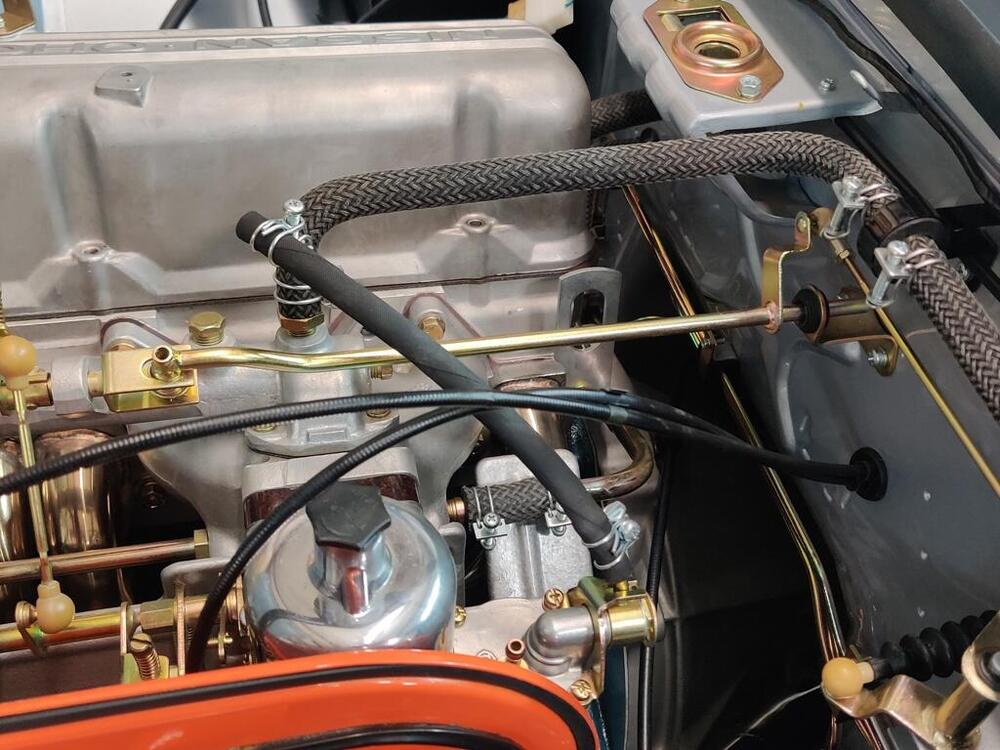
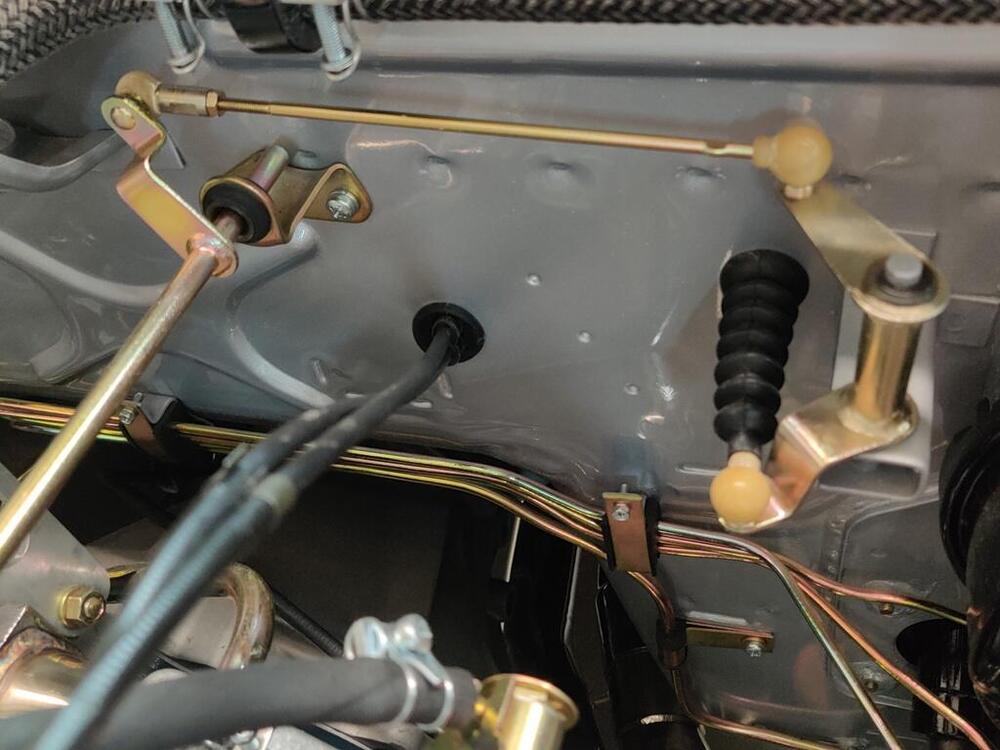
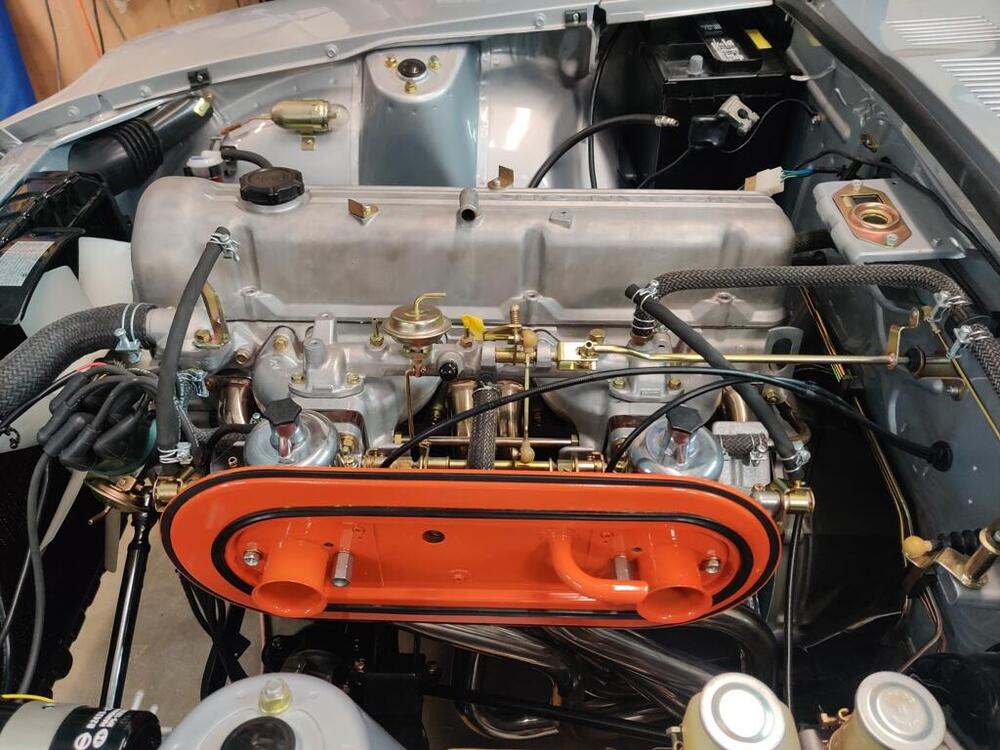
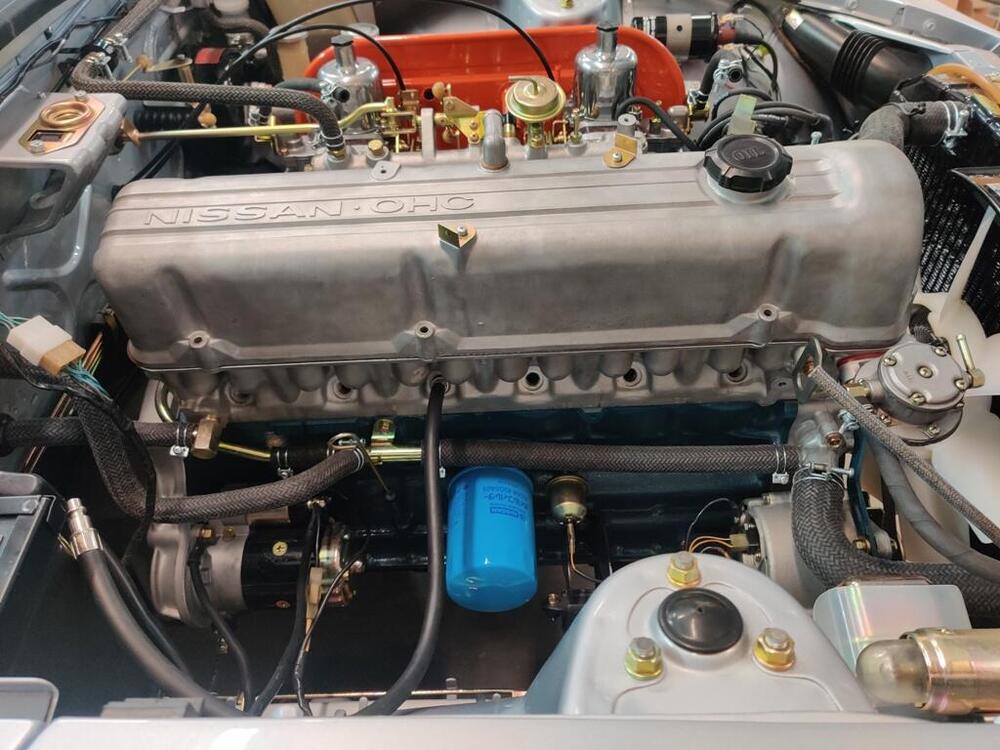
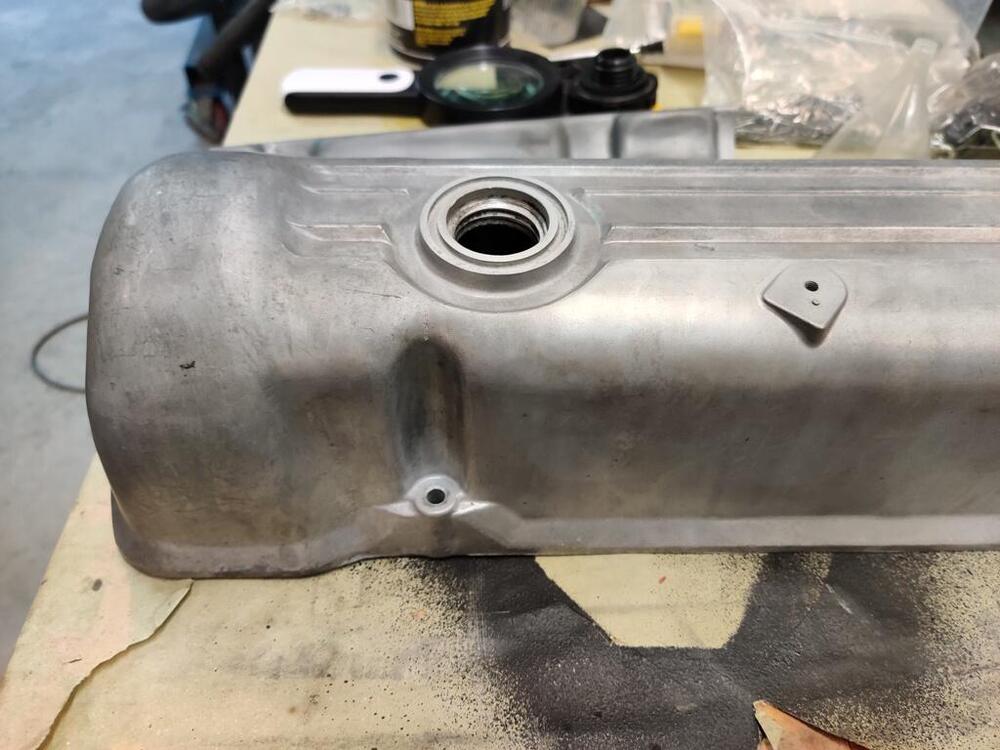
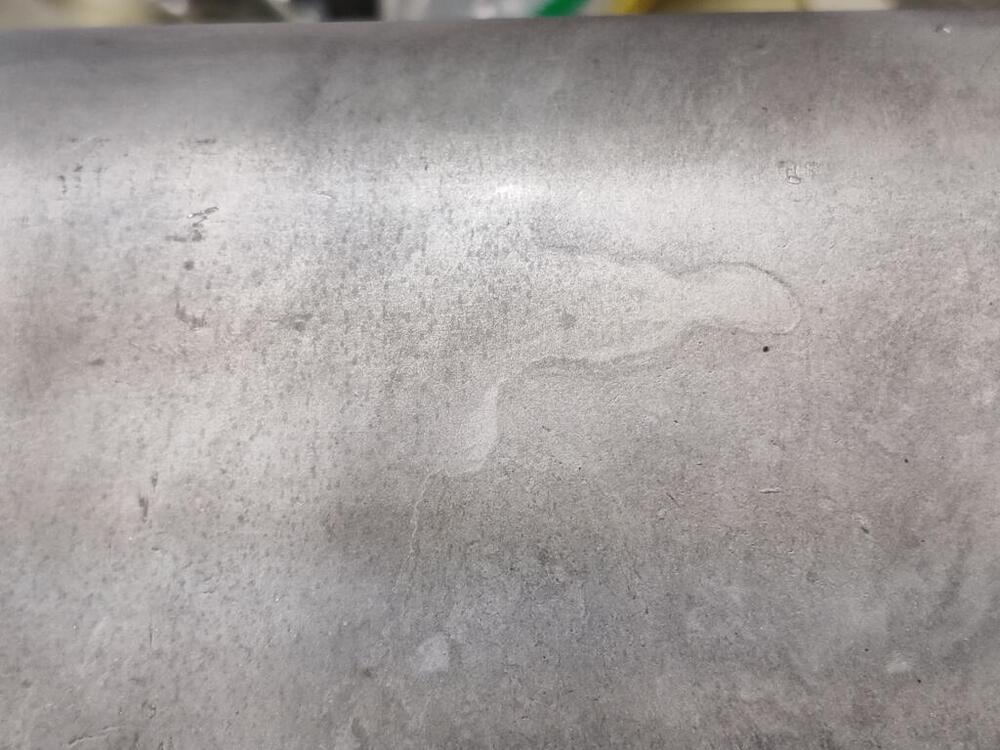
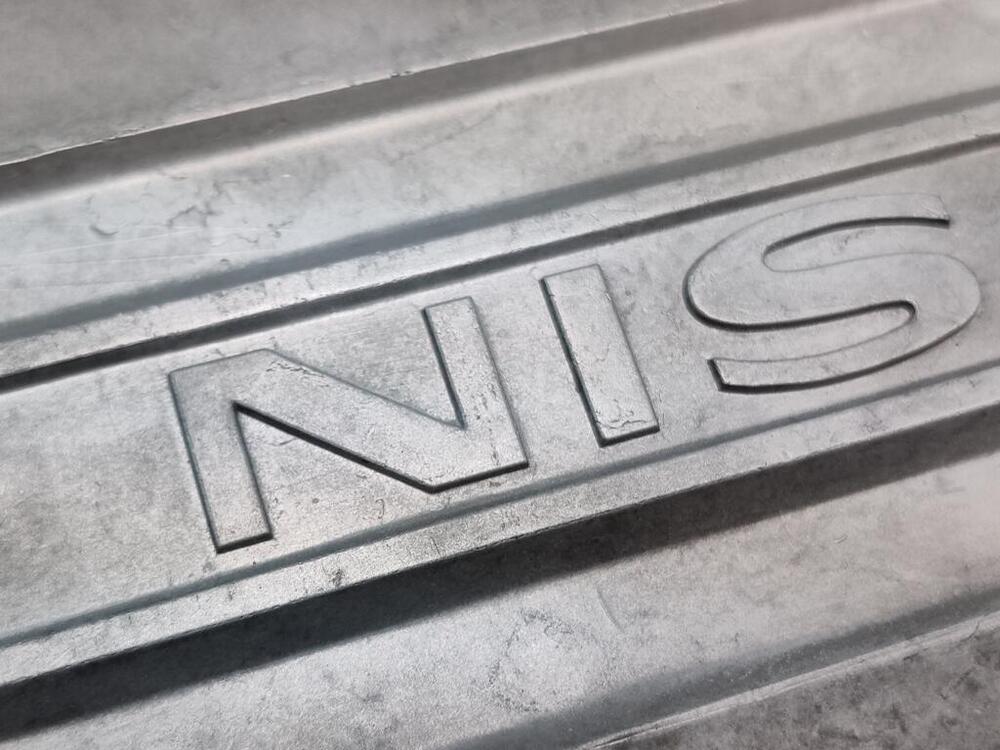
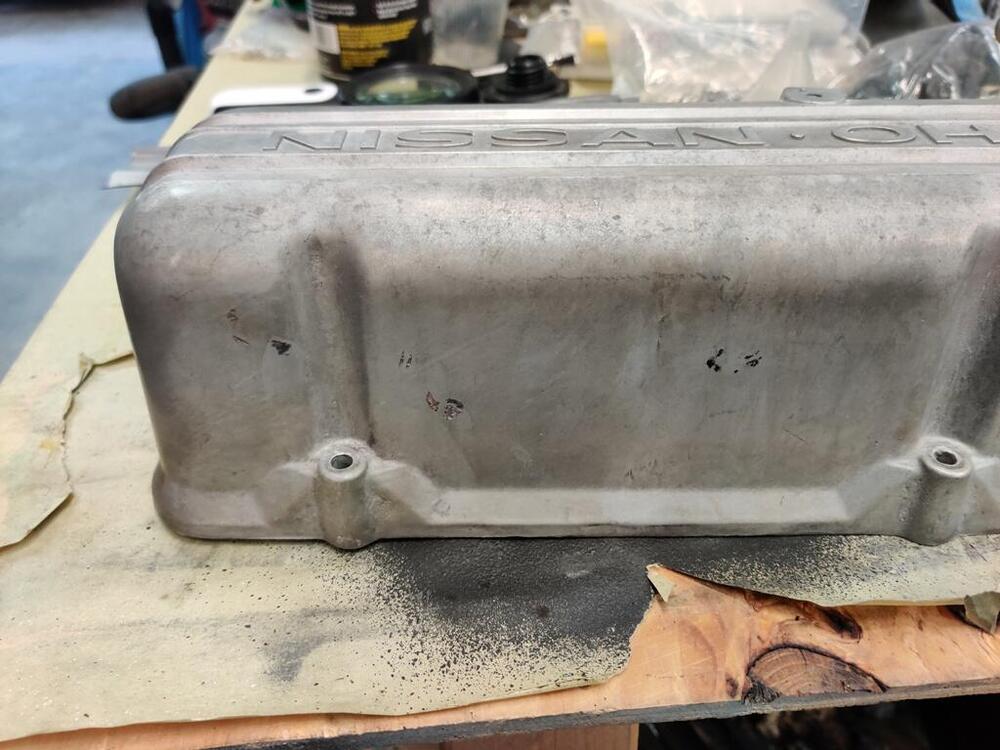
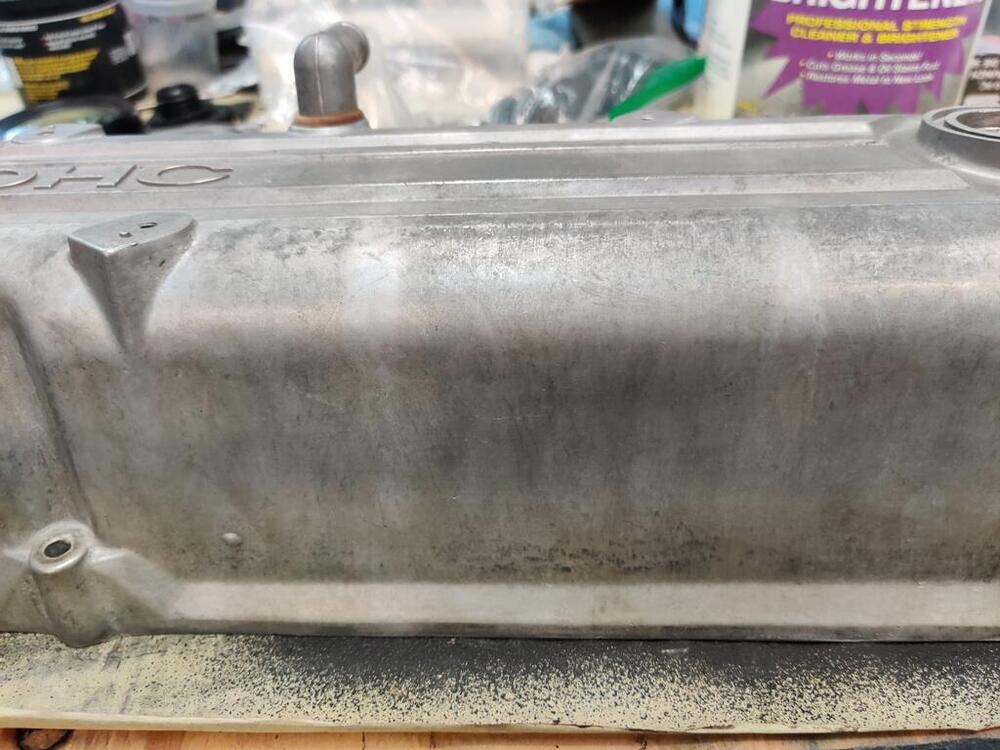
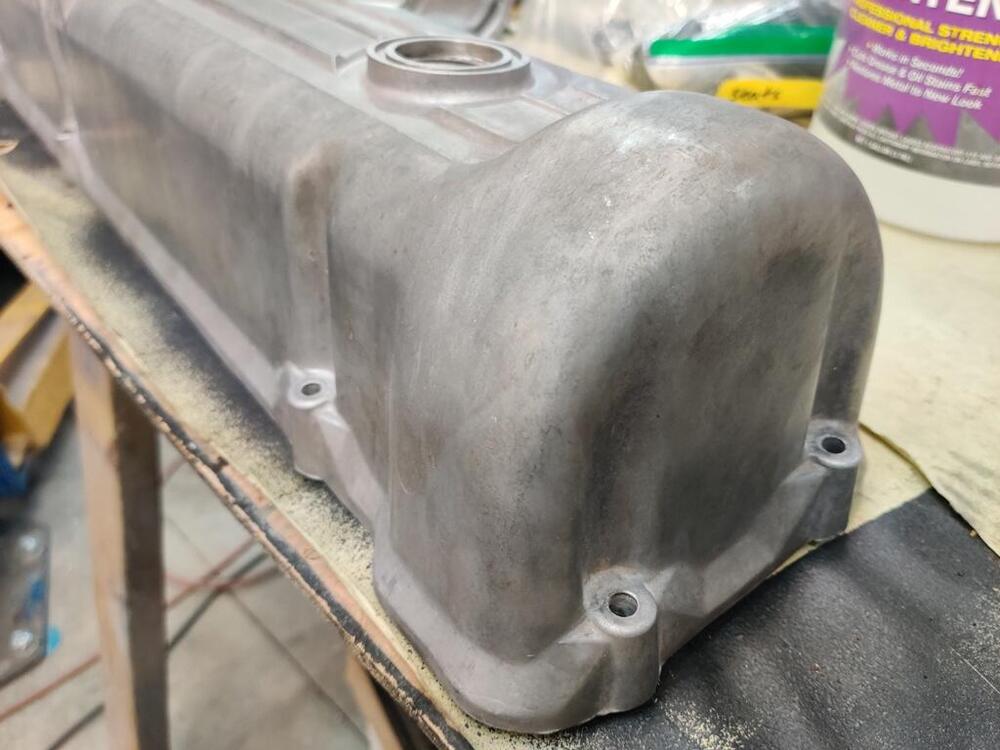
I attempted to remove the valve spring retainers from my exhaust valves this weekend with the homemade valve spring compressor tool I have use successfully before. However, this time, it didn't work as well as I recall it did last time. After futzing with it for a couple of hours and only getting one retainer off, I gave up and ordered one from Zcardepot.com. My homemade one interferes with the came towers and extracting the collets out is a real pain. Hopefully the new one will be a lot easier to use. In the meantime, I am working on what there is left. One of those things was installing and adjusting the throttle linkage arms. While I am familiar with this part (see red arrow), I never knew what its purpose was - do you know? Well, I may have figured it out. I think it is a linkage "stop". As I was assembling the linkage, it seemed logical to me that the little wings on this part may have been intended to contact the back of the rubber bellows that attached to the firewall. As I worked to set the lengths of the rod (this short one and a longer one have one threaded ball socket end) the location of this piece fell naturally to a position that eliminated all of the "slop" in the linkage after the throttle plates in the carburetors had just contacted their screw stops. In other words, you can then set the depth of this "winged" piece to contact the back surface of the bellows just at the point where the throttle plates in the carburetors have closed. Doing this, you will prevent introducing slop in the linkage which occurs after the throttle plates are shut but you continue to release the gas pedal as far as the pedal return spring will pull it from the floor. After setting the winged piece, I confirmed that even the slightest movement at the pedal caused carburetor shaft (and thus, throttle plate) movement. When releasing the gas pedal I now have a muted "thud" as this piece hits the back of the rubber bellows... and allows no more movement in the linkage beyond the throttle plates in the carburetors' seating. Kind of cool! It will be interesting to see how that all feels when driving the car. While I was doing all this, I ensured that I got full throttle opening at (both) carburetors by pressing only on the gas pedal inside the car. I am never all that surprised when I check and find that pressing the pedal to the floor does not fully open the throttle at the engine! The plastic ball sockets on the linkage turned white during the plating process. To address, I used a propane torch and very carefully heated them. The heat causes some type of reaction which restores the color of the ball socket. But, you have to get it hot enough that melting starts to occur. After heating, I went over them with some fine grits of sand paper to restore areas that has melted a tad. White socket... and my throttle linkage stopper in action (though I think I need to flip it around 180 degrees): Throttle linkage detail: I have read about getting dinged at Zcon for valve covers which have been glass bead blasted. I also know that there is quite a bit of variance in finish with glass bead blasting. You can use different media, different pressures, and even do vapor blasting which uses media along with water. For my valve cover, I tried cleaning it really well with #0000 steel wool and degreaser. And then I tried some Aluminum Brightener. After those efforts, I still had darkish areas that looked like stains on my valve cover: So, I started experimenting with glass beads set at very low pressure. The glass beads I was using have seen may work cycles and I was using only 20 psi. However, I was getting pretty good results. In this first pic for example, I concentrated efforts on the area at the top of the valve cover between the oil cap hole and the casting bump (for the spark plug wire holder). In the second picture I was concentrating in the area between the two bolts. In the third picture you can see the area of transition (darker, not blasted area on the right). In this first picture below, I had hit the N and and the I in Nissan and some of the area above and below the N. The downside is that it takes a lot of time at 20 psi. But, it did make a big difference in lightening the valve cover. I got a little more aggressive in a few areas with 25 psi, but I think that started to look unnatural. Anyway, I was pleased with the overall result. A note, if you do this, you have to seal the vapor compartment in the valve cover, or remove that plate inside the valve cover like I did so that you don't leave glass beads in there.


 1 point