Leaderboard
-
conedodger
Free Member6Points12,513Posts -
.JPG.cfcada9cf1c1b502df3f5f2f2ca3ff36.JPG)
SteveJ
Free Member6Points9,646Posts -
Captain Obvious
Free Member3Points10,081Posts -

Jeff Berk
Free Member2Points620Posts


Popular Content
Showing content with the highest reputation on 08/27/2024 in all areas
-
So over the recent days i found some minutes here and there to get some work done. First i had to remove the Fenders To install the Splash guards: (Rubber pieces still need to be installed: At that point i also realized that the bodyshop was nice enough to remove the factory brackets / Spacers between the air channel and fender. They thought since they were missing on the "original" (= not so original) chassis, it needs to be removed. At least they were nice enough to give it to me, so it's easy to weld them back. Next up was the hood locking mechanism: And upper one: Then it was about time to install the fender mirrors. I used the JDM Fairlady Z symetric template from JDM-Car-Parts Drilled the holes Did a super-shady primer job (just temporary rust protection for the new-cut holes: And here we go: A set of NOS JDM Fairlady Z Long stalk fender mirrors installed. At this point i also realized that the area where the headlight bucket is installed on the RH side has a strange bend. probably from a previous hit? Anyway, i'll sort that out next time. I still need to do some details on the fenders before they go back on temporarly, but another few to-do's can now be checked off from my list. What else? Oh i always loved this and finally managed to find a reasonably priced "Datsun Saves" Can, plus an original 80ies Advertizement from a Playboy magazine 🙂 Then got this lovely Motorhead Coffee table book collection it's mainly about 90ies skylines and the tuners like HKS and so on, but covers their story very well back to their beginning I mainly bought it because it also covers the history of Japans oldest Alloy wheel maker (besides RS Watanabe), which is Enkei, who made the OEM wheels on my EK9, and Bride Jp, but also the story behind the OS-Giken TC24B1 and TC16 engines, with some beautiful fotos and History from the factory. Did you know that OS-giken raced the TC24B1 in the USA with Nobuhiro "Monster" Tajima (of later Suzuki pikes peak hillclimb fame) at the wheel? I wasn't aware of that and i think that's pretty damn cool. Oh and i'm currently working on a huge knowledge Post about the Z's audio system / radios, so i got an original Hitachi factory operation and service Manual for the AM/FM radio via some friends of mine from back in the days when i repaired those things. Expect an in-depth analysis of the circuit design and loads of details about the Z-specific radios in the coming months. I'm still collecting and researching all the details and i need some time to figure out all those options and details.2 points
-
Year of car? Was it originally manual or automatic? Please go here and click on the link to create a signature. https://www.classiczcars.com/settings/ Include information such as the year of your car and any known modifications. It helps a lot with troubleshooting.2 points
-
The key piece of missing information: What is the voltage to ground at the WR wire? If there is no voltage at the WR wire in a 240Z there are two primary causes: The fusible link is bad. The ammeter gauge is bad. Does your horn work? Do your hazard lights work? Do your brake lights work? If the answer to all 3 are "no", then look at the fusible link. Next: If the answer to any of those 3 is "yes", then do you have power at the cigarette lighter? Do your running lights work? Does the inspection light work? If none of those circuits work while you have hazards, horn, or brake lights, then it's quite possible the ammeter gauge is bad. (Note: I have seen a couple of real-life cases where the ammeter gauge blew because someone connected a battery backwards.)2 points
-
2 pointsIgnition modules can fail due to heat then come back to life when they cool down. You could take some cooling spray, like Dust-Off Duster, and spray the Pertronix module under the cap in those minutes when it's not restarting. Or take a spare spark plug, pop a plug boot, and check for spark. Wouldn't be a surprise if it was the Pertronix module. Apparently quality dropped dramatically many years ago. There are old posts about it. The Pertronix I's were also sensitive to leaving the key on. It can damage them.2 points
-
2 pointsHi Kats, If I were trying to get that piece out, I think would use a small tap to thread the inside of the brass piece. Then once there were threads inside, I would use a screw as a handle and try to pull it out. I would also make a small arbor that I would put between the screw and the carb body. I have made similar adapter arbors in the past and I will take a picture tomorrow of something similar. Also, I've messed with other similar fittings on the carbs and they are usually very tight, I would use heat before I tried to pull it. Small butane torch. And if all that fails, I would use progressively larger drill bits and drill out the brass until I could pick out the small pieces.2 points
-
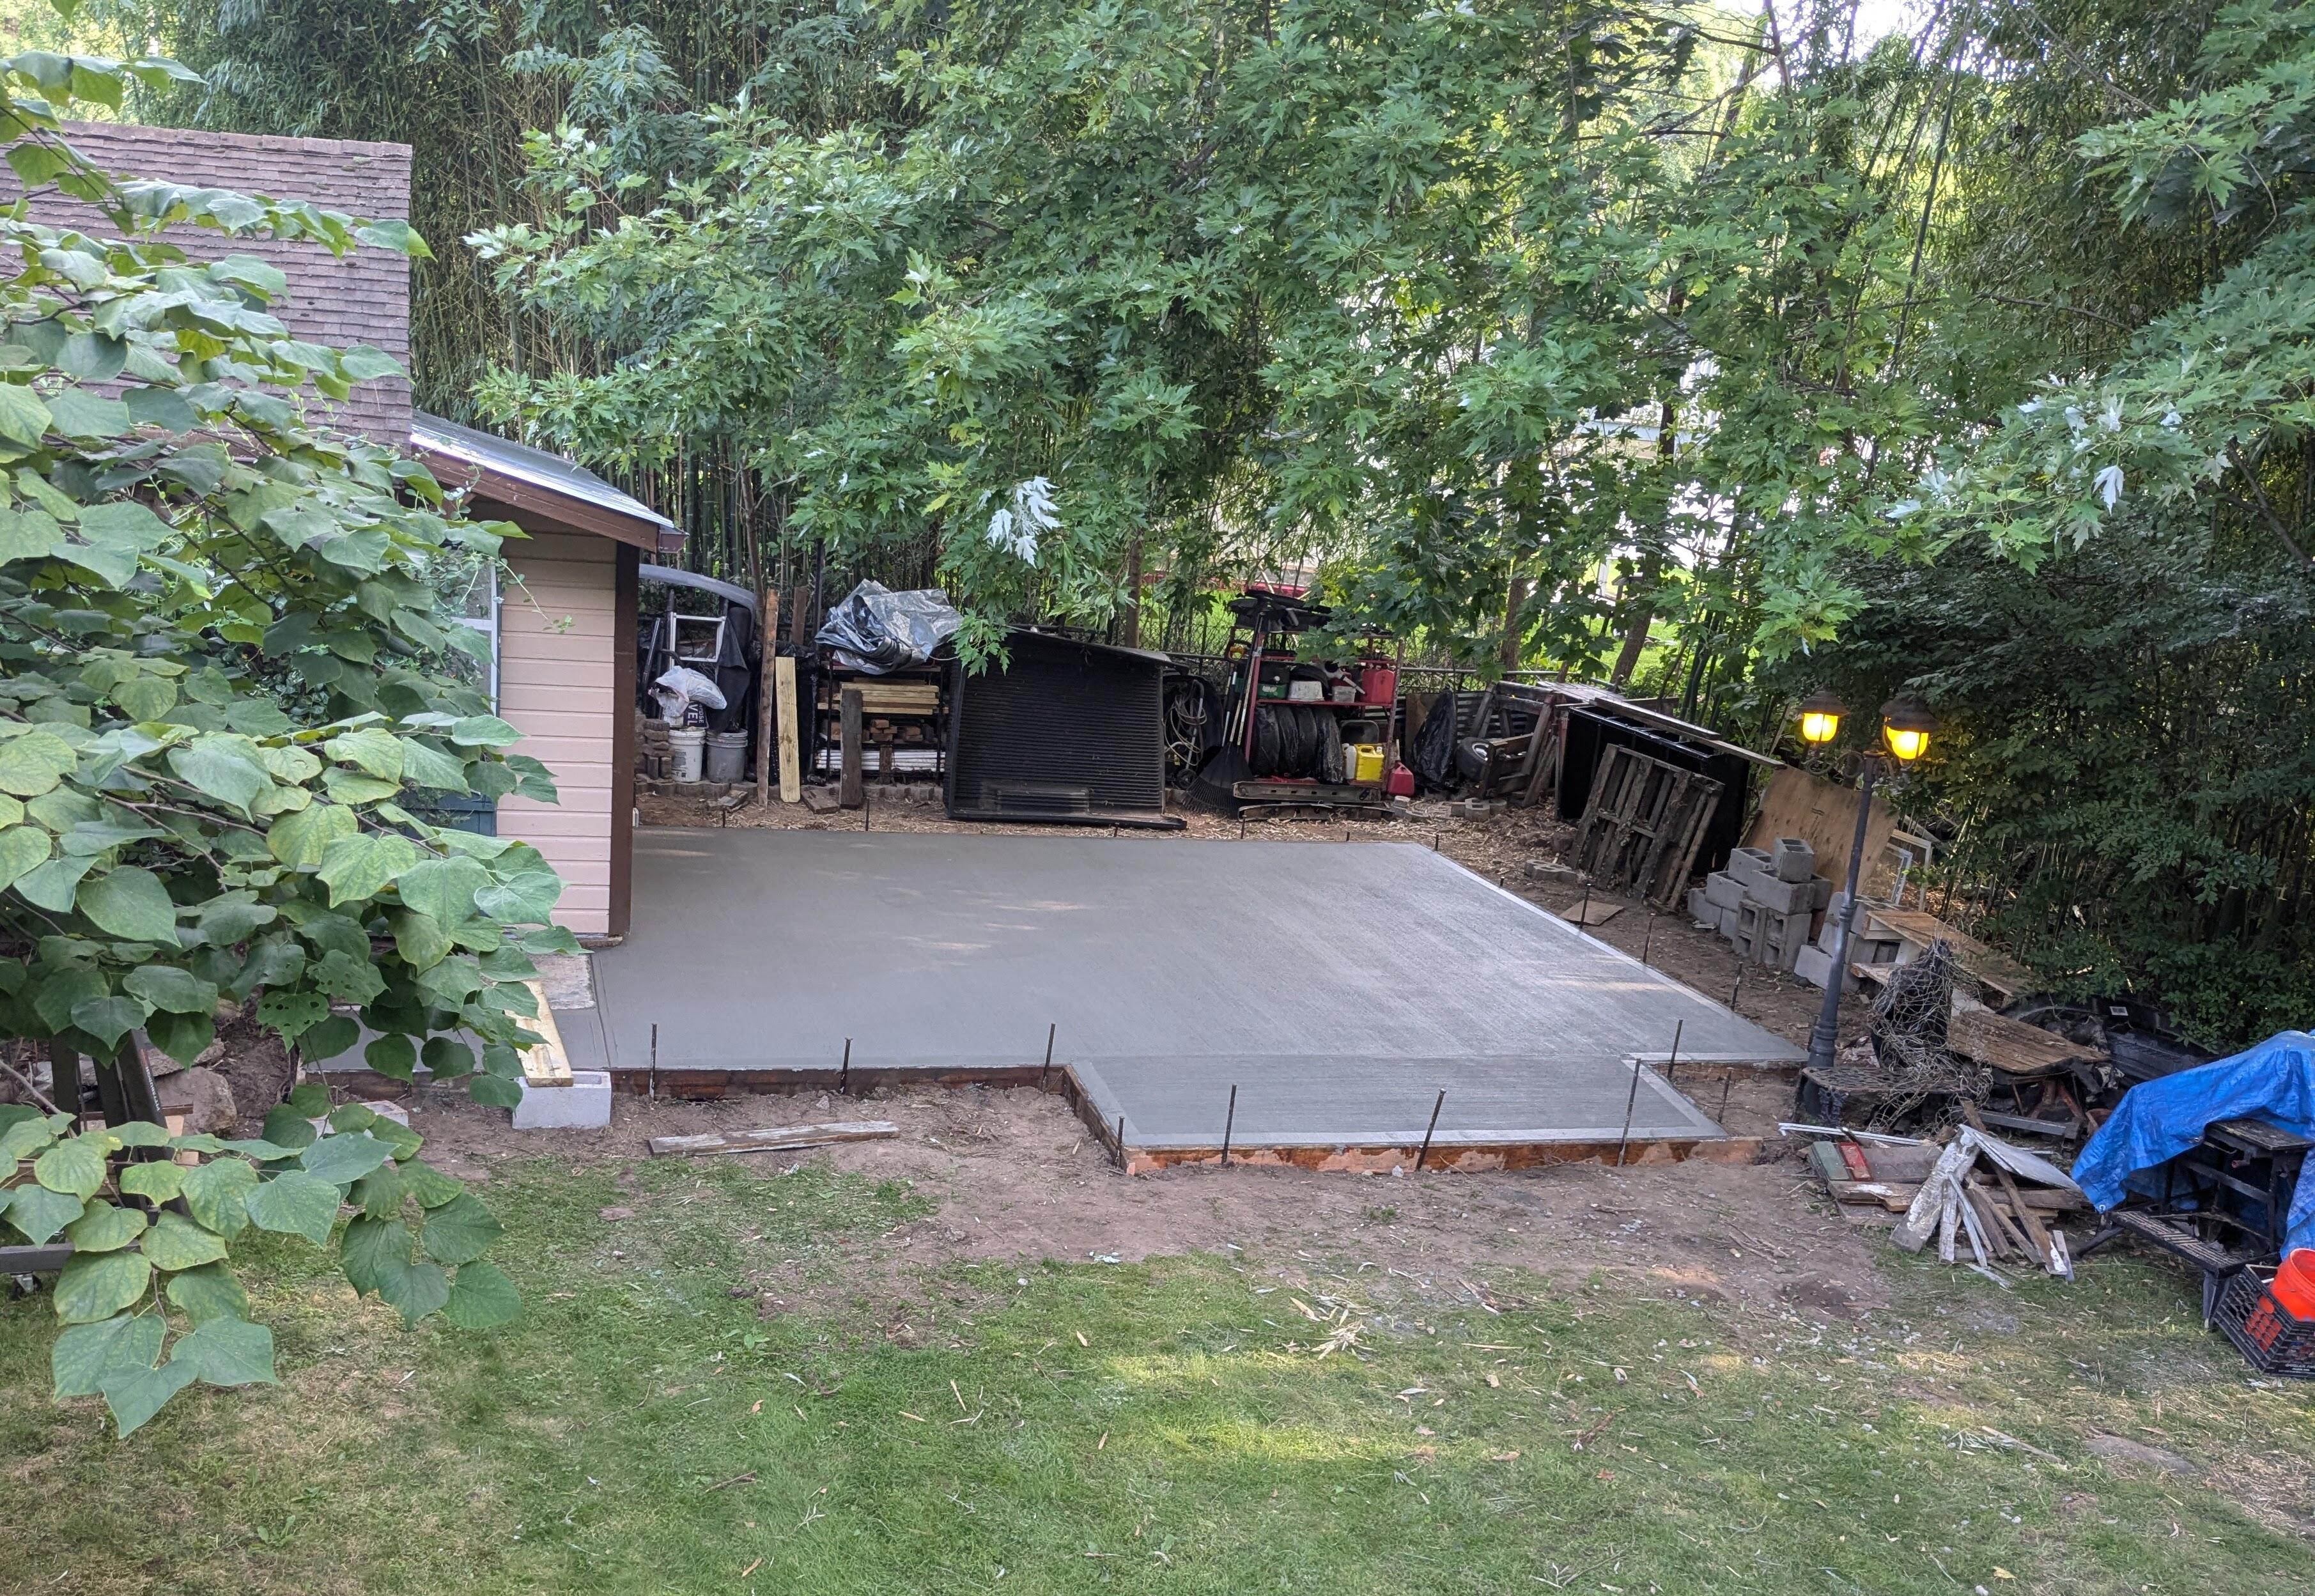
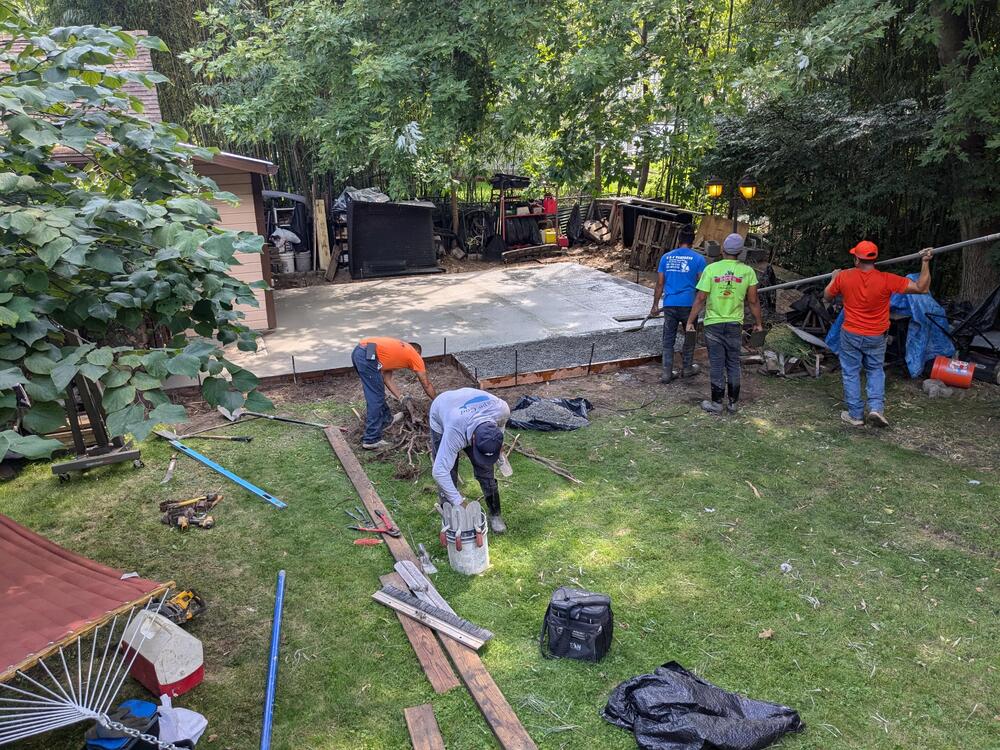
Been working on a friend's old Volvo, needed a replacement turbo. I had called a contractor last week, to get a quote on the patio/slab behind the garage. Approx 16x20' They were able to come & do it today, so I went ahead & had it done. I'll have to get some fill to grade the ground around it. Have to wait a week before the 350Z can be moved onto it.
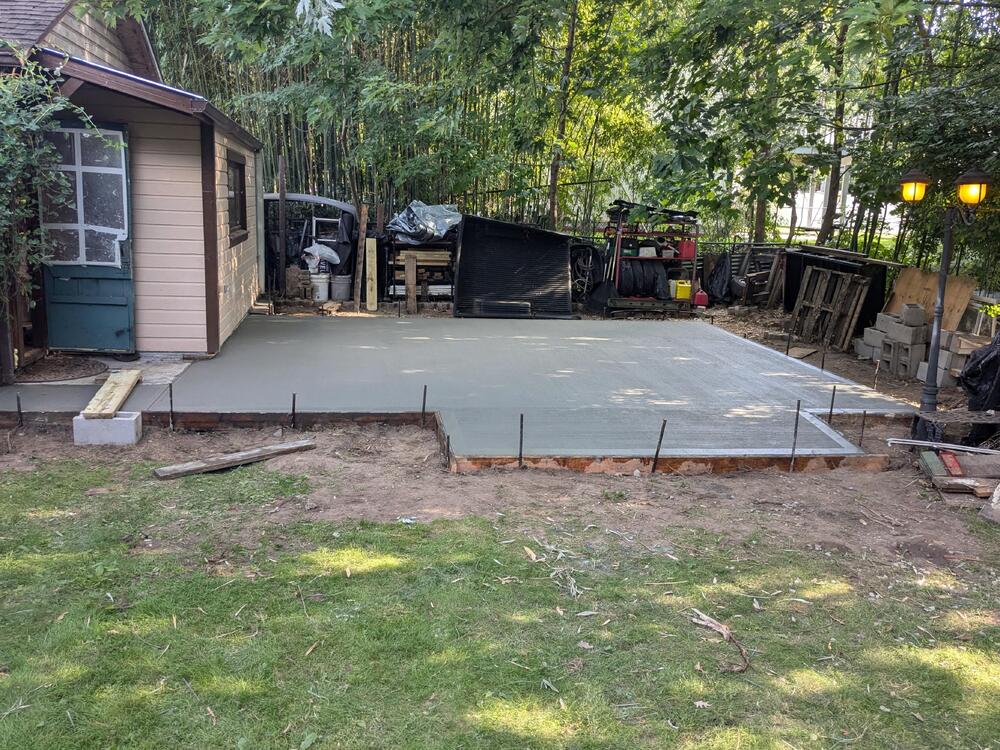
 2 points
 -
Yup. I created a post on August 17th. After the auction, I was ready to contact the BAT police to report an incident of grand theft auto!!! Frankly, I was a bit surprised the seller agreed to the lowball reserve BAT offered up to place this car on the auction block. The buyer got the deal of the year snagging a blue chip example for less than half it would cost to embark on a 240Z restoration of this caliber today.2 points
-
2 pointsHi Kats, I know you look at eBay in the US. Are these too expensive? https://www.ebay.com/itm/235682782552?_nkw=datsun+240z+brake+master+cylinder+cap&itmmeta=01J67QJ9PY0AS770M2QXW1T476&hash=item36dfc9dd58:g:K2MAAOSwjqNgPFM8&itmprp=enc%3AAQAJAAABAHoV3kP08IDx%2BKZ9MfhVJKkgEI8xlrOrXR35ZVEauWhWy3b8zqM5sCMdsPS%2B6W3J1gShEGzW56wS9%2BnAJ57eSUYPiXhT2D6XTQLZmKj9x85i31Kt6IooZKn4Sx3mT5vUNWaVGsIRnMyhcxGwYZJ2Hgnww%2FiWahettnb9CA7%2BQHysIe6DnRn683anTugQjDTwOkVbycEemnRtOZKwFIDGcZAAI09Gc%2B9EnVkTT9OZras%2BdFMv04JujhXmtUyosCFGeZI68fy62idnDVpZbRC2KqRdOH%2FDSaNqZ1--0AQZ%2B4PuGZJOCidpcoNO3tRNpvtPXV%2BUW0Td8LqreQYYFC2GITM%3D|tkp%3ABk9SR8ibyfexZA2 points
-
1 pointAnd if that doesn't work, you might be able to get the piece out with a drill like this:


 1 point
 -
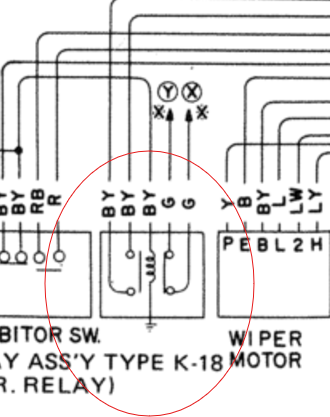
Okay, I had to dig through the 73 wiring diagram. That looks like the K18 relay. If the relay has failed or lost its ground, then the car won't start. That's part of the nag warning for the seat belts. While it's present in the 72, the circuit didn't make it into the wiring diagrams. You can get this connector from Vintage Connections (https://www.vintageconnections.com/products/6-3mm-connectors?variant=46131501236545) and make a nice, plug-in jumper.
 1 point
 -
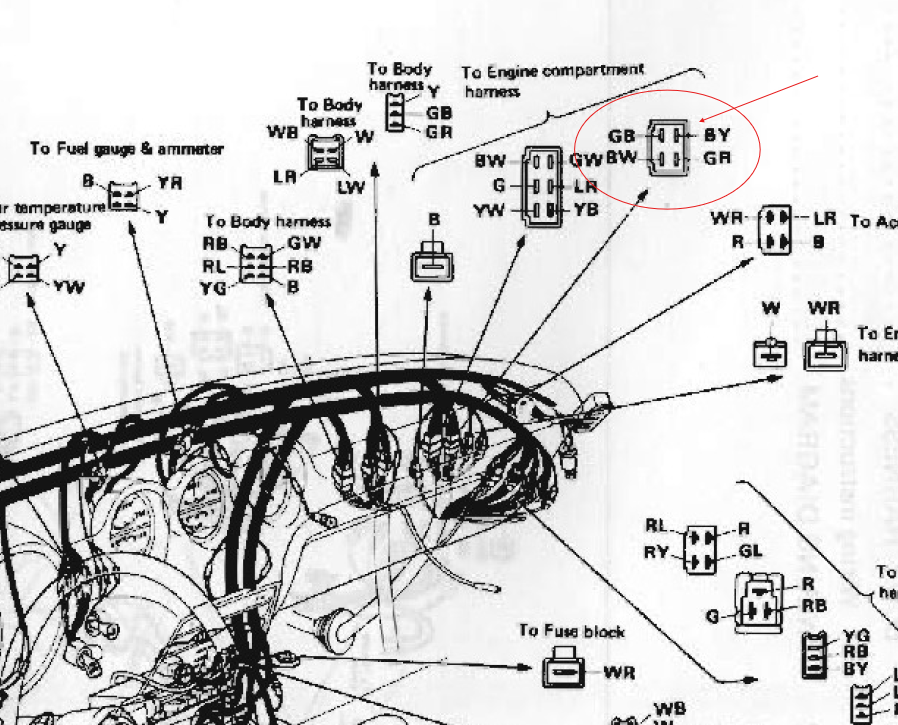
First check the jumper. Make sure it's still in place. Next, you want to make sure you have continuity in your wiring harness between the ignition switch connector and the solenoid. You want to make sure the dash harness to engine harness connector is still connected firmly (and free of corrosion). This is the connector you are looking for: You might have to get some help to test the entire length. One way of testing is to take the BY wire off the solenoid and make a jumper wire to ground it. Then see if you have continuity to ground at the ignition switch connector. I cheat. I have long enough leads to test wires from the front to back of my Zs.
 1 point
 -
1 point
-
1 point
-
1 pointYup, that's what I have. I'm e-mailing e-za@vintagecraft-e-za.com to arrange purchasing 4 more rings since I only have enough to do one of the two calipers.1 point
-
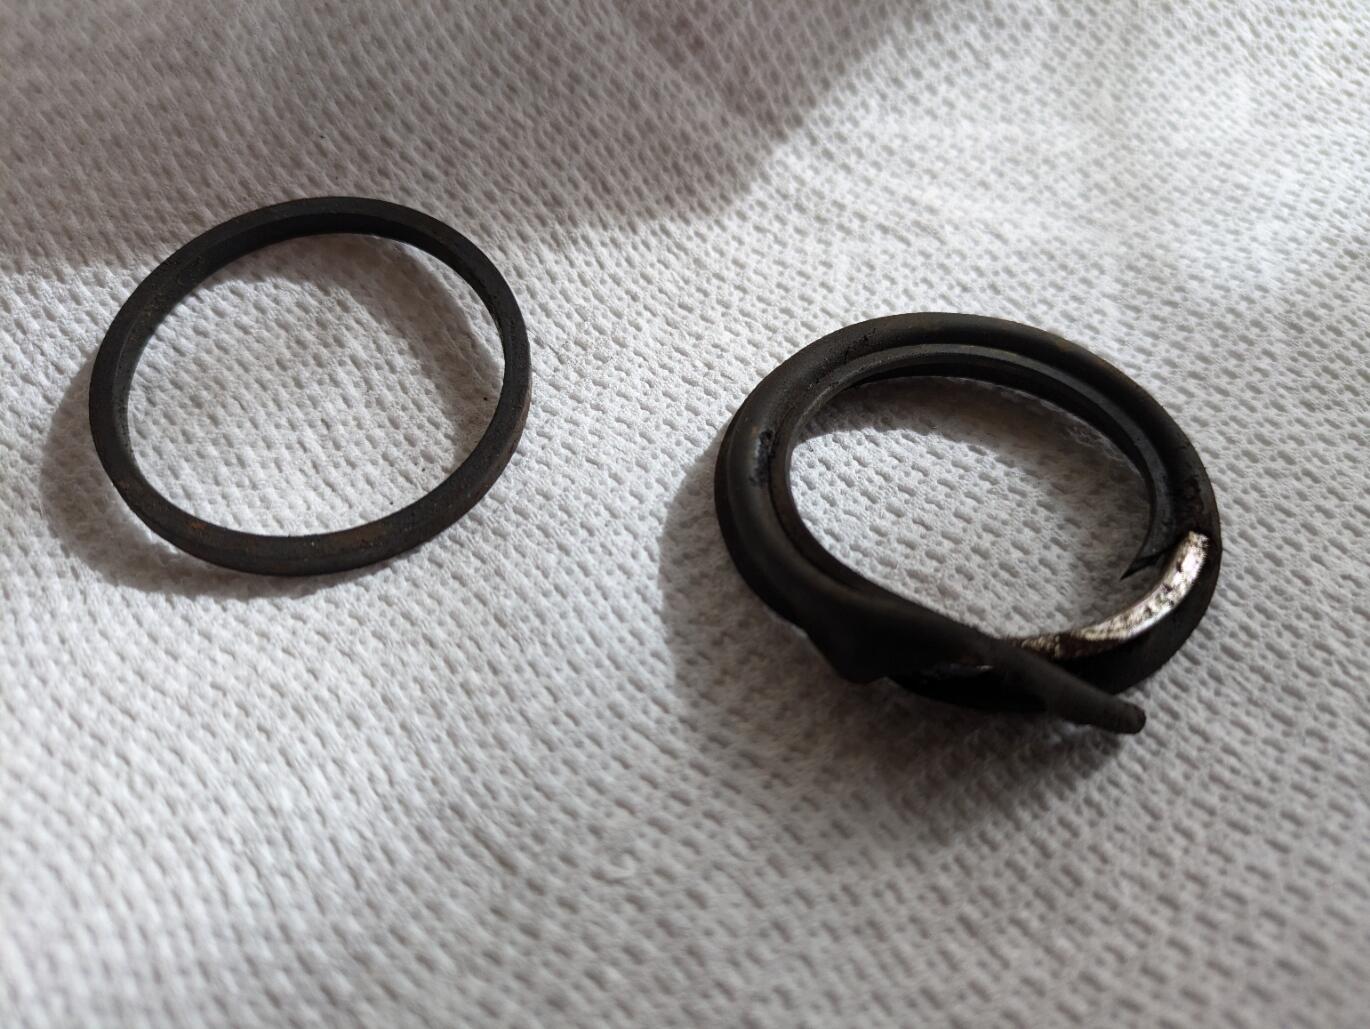
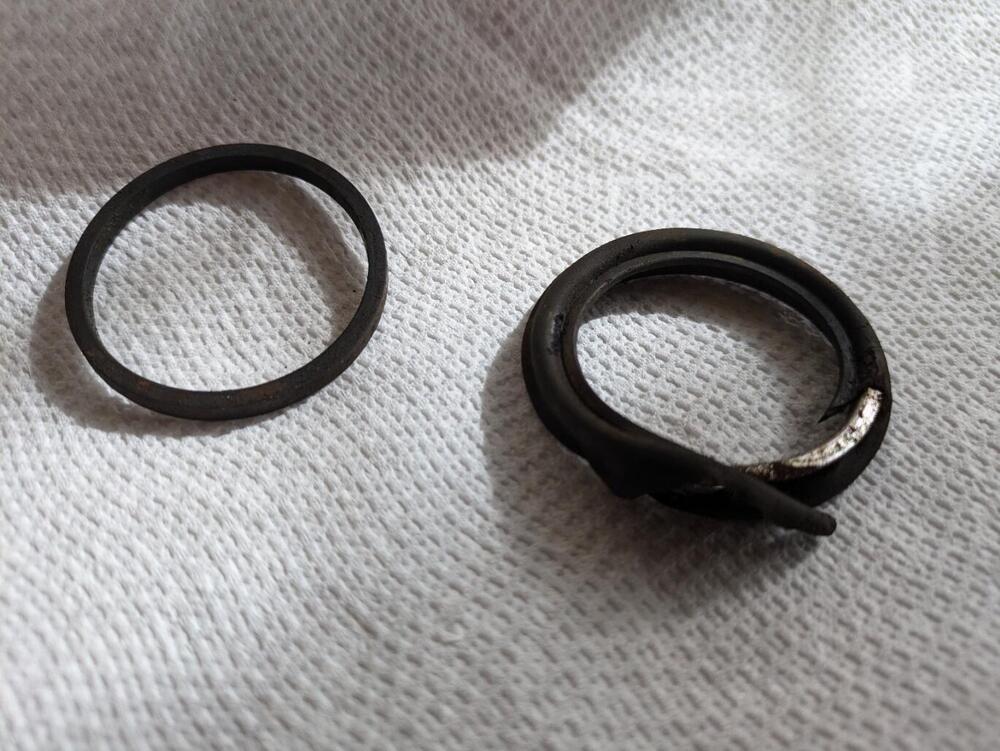
1 pointI'm impressed by all the responses. First, part 4 is labeled as a "piston seal". I included a photograph showing the old one on the left. On the right is the old dust seal with the metal ring inside. I mistakenly assumed it was a retaining clip. I need to clean them up but at least the couple I looked at this morning look serviceable. I am also assuming that the dust seals likely came with these retaining rings back when Nissan supplied them. I had to purchase an aftermarket set because that's all I could find. I really want this put together by tomorrow so I can register for my first autocross of the year this weekend.
 1 point
 -
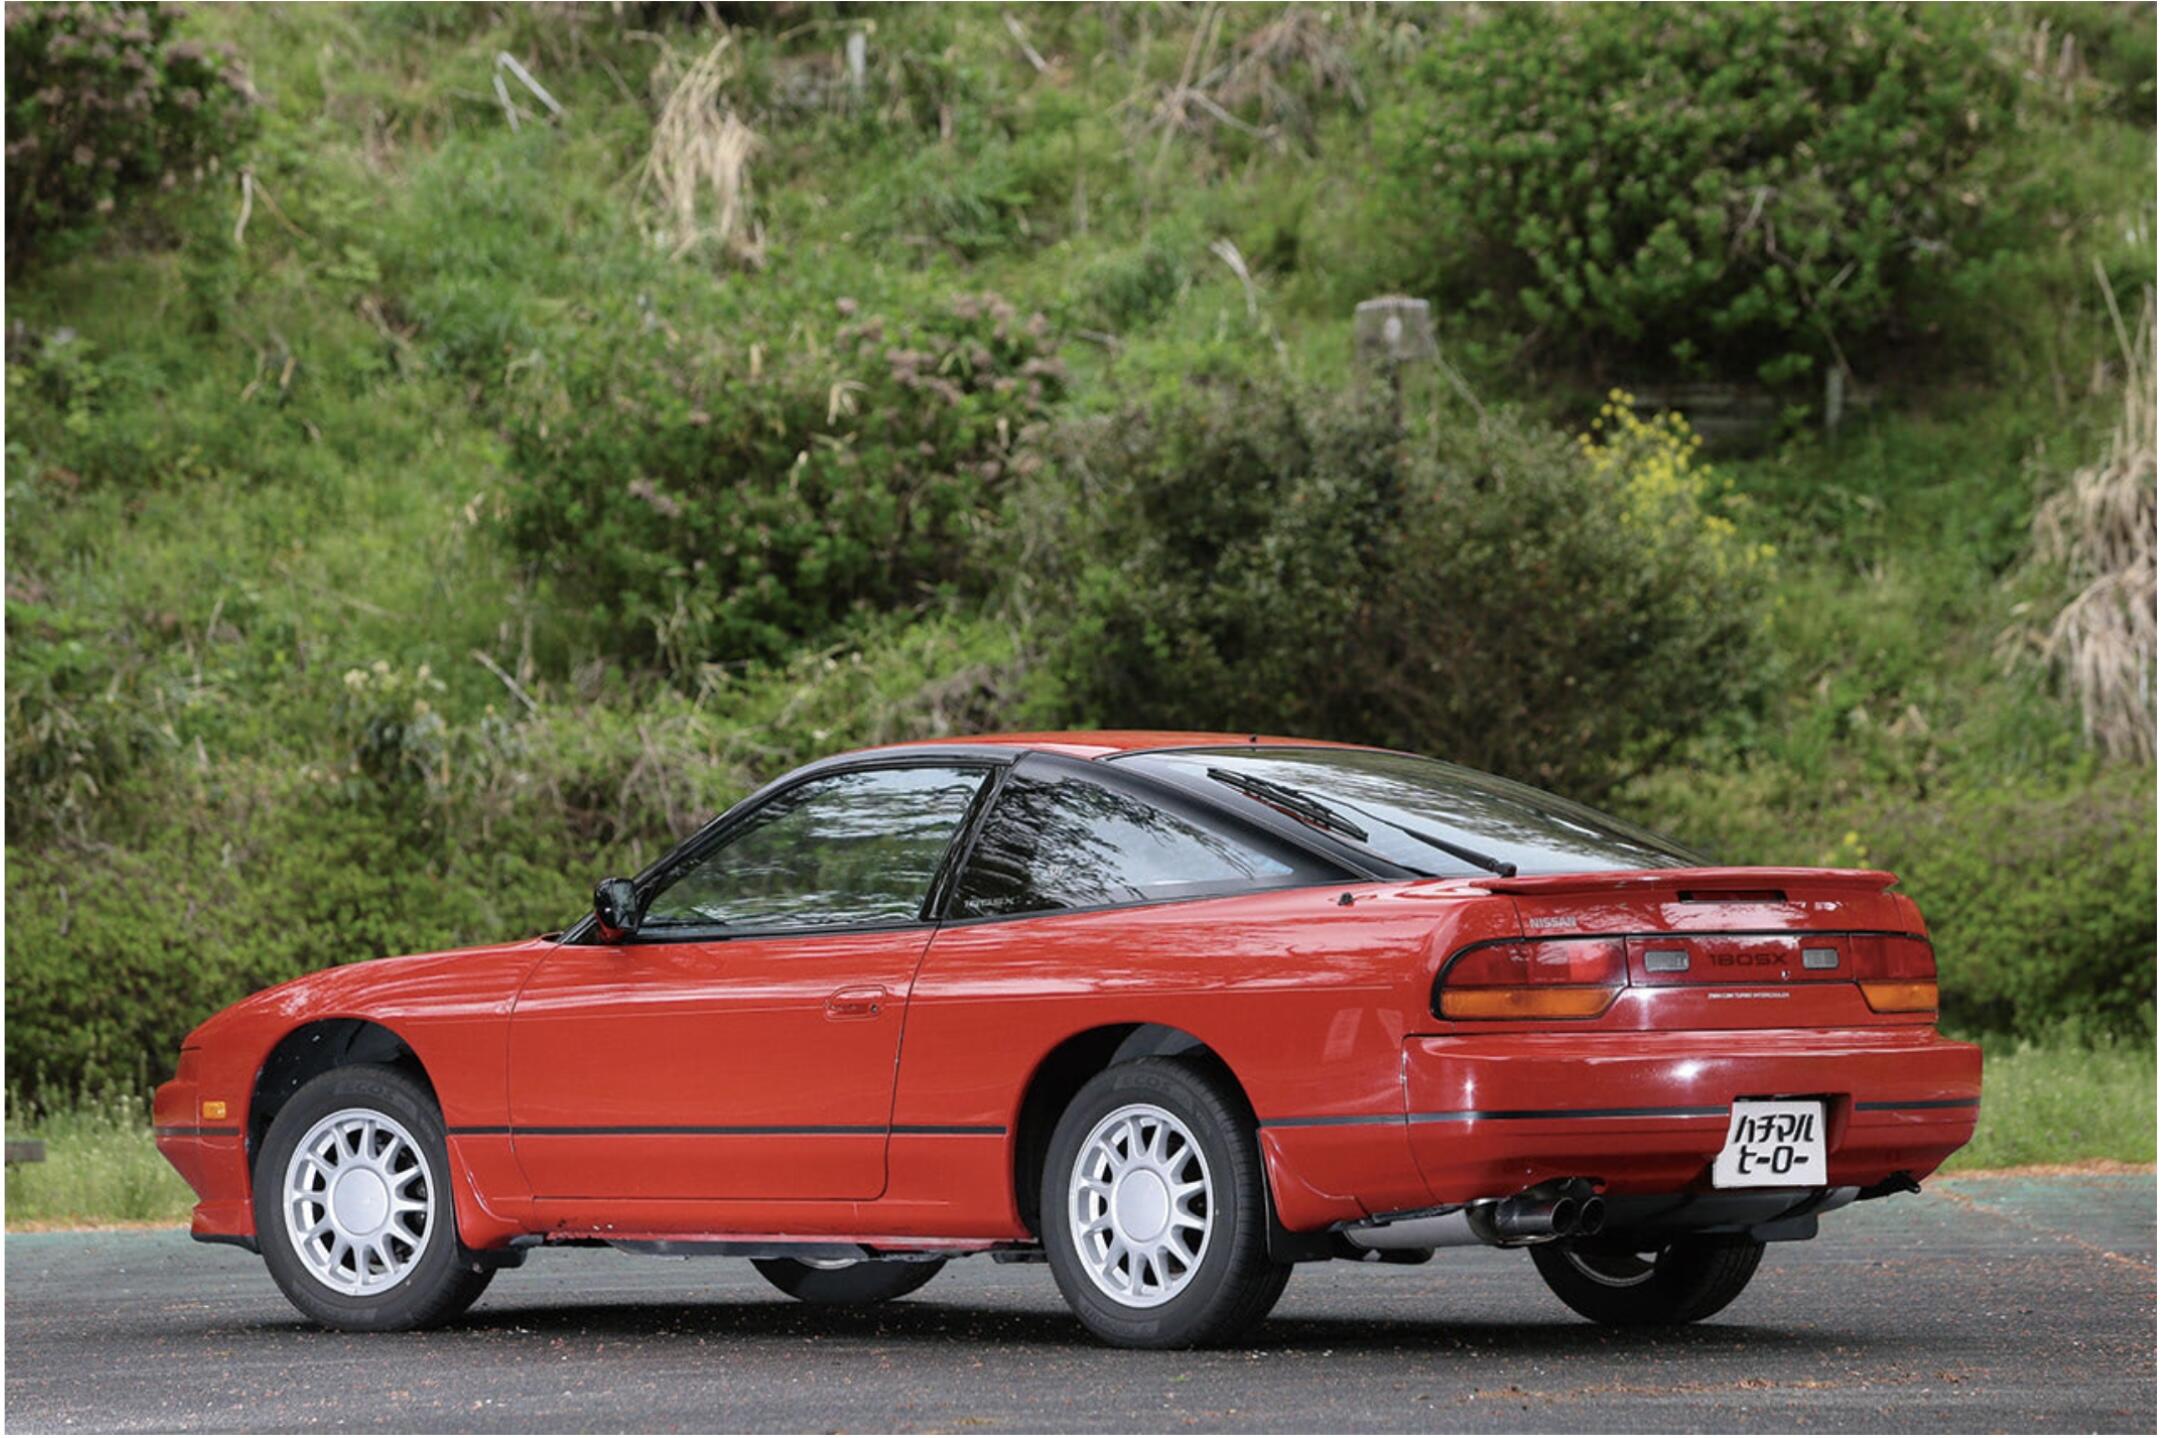
1 pointI like it!! Now I don’t have to worry about if I lost all my Zs. I have this red 180 SX.. Kats
 1 point
 -
1 pointYJ auction vendor 'velo1955z' is VintageCraft e-za, the manufacturer of the stainless steel MK63 seal retainer rings and one of those classic one-man-band Japanese craftsmen. Great guy and a fellow member of Club S30 Japan. He makes all sorts of other interesting stuff too. https://www.vintagecraft-e-za.com/ I'm not aware of any other people who make the retainer rings in stainless steel. They are a boon as they don't rust and can survive multiple re-use, unlike the originals.1 point
-
1 pointJeff, I pointed out these retaining rings in post 40, here is a link; https://www.jauce.com/auction/w1147945499 Unless H30-H or Kats know of another place the get original or someone else who makes these, velo1955z is the only place I have found. I have another set of rings arriving today from Japan.1 point
-
1 pointPart No.4 on the diagram are the steel rings which retain the rubber dust seals (Part No.5) in the caliper halves. The rings are a tight push fit in the caliper casting, leaving a lip around which the dust seals grip. In this way the dust seals remain fixed in one place and the pistons are free to move past them. Wire spring clips retaining the dust seals do not sound like original parts and may in fact be the work of a previous owner? The original steel retaining rings tend to rust over time and - in some cases - can all too easily get damaged/deformed when being removed. A previous rebuild/seal replacement may have forced some improvisation? In any case, you do need the correct seal retainer rings as without them the seals are going to move away from the caliper casting as the pistons operate, uncovering the gap between the pistons and the caliper castings. They won't last long like that...1 point
-
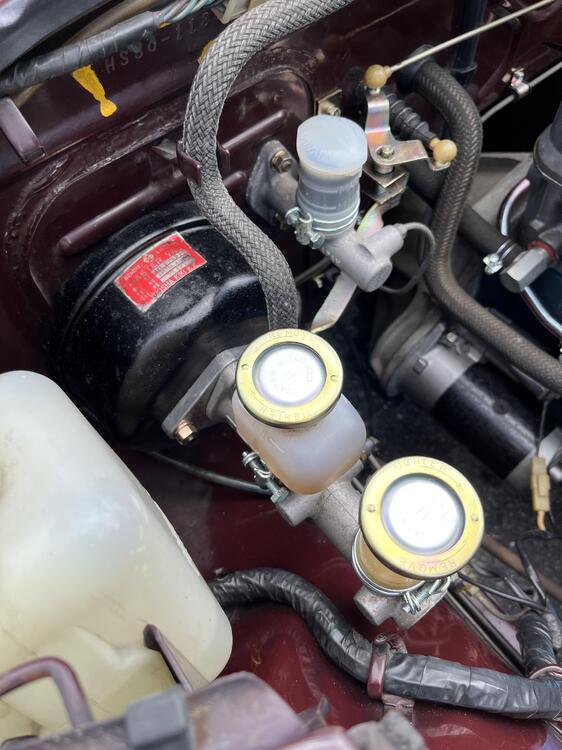
1 pointThanks inline6, eBay selling the cap! But it is expensive for me. Japanese currency is now way low compared dollars, I can’t enjoy shopping from USA anymore. So I have got a set of the cap at a local car workshop. They were a half of money which I would pay for the one on eBay. Kats
 1 point
 -
0 pointsThere is adjustment to the parking brake system. You probably won't like where it's at...0 points