


Leaderboard
-
conedodger
Free Member15Points12,513Posts -
Yarb
 Subscriber
 10Points1,935Posts
 -

Zed Head
Free Member10Points19,236Posts -

siteunseen
Free Member7Points15,115Posts


Popular Content
Showing content with the highest reputation on 05/09/2024 in Posts
-
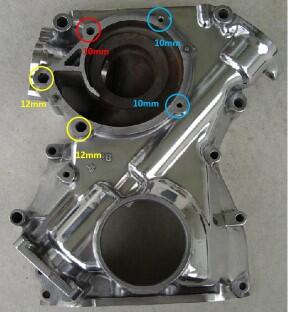
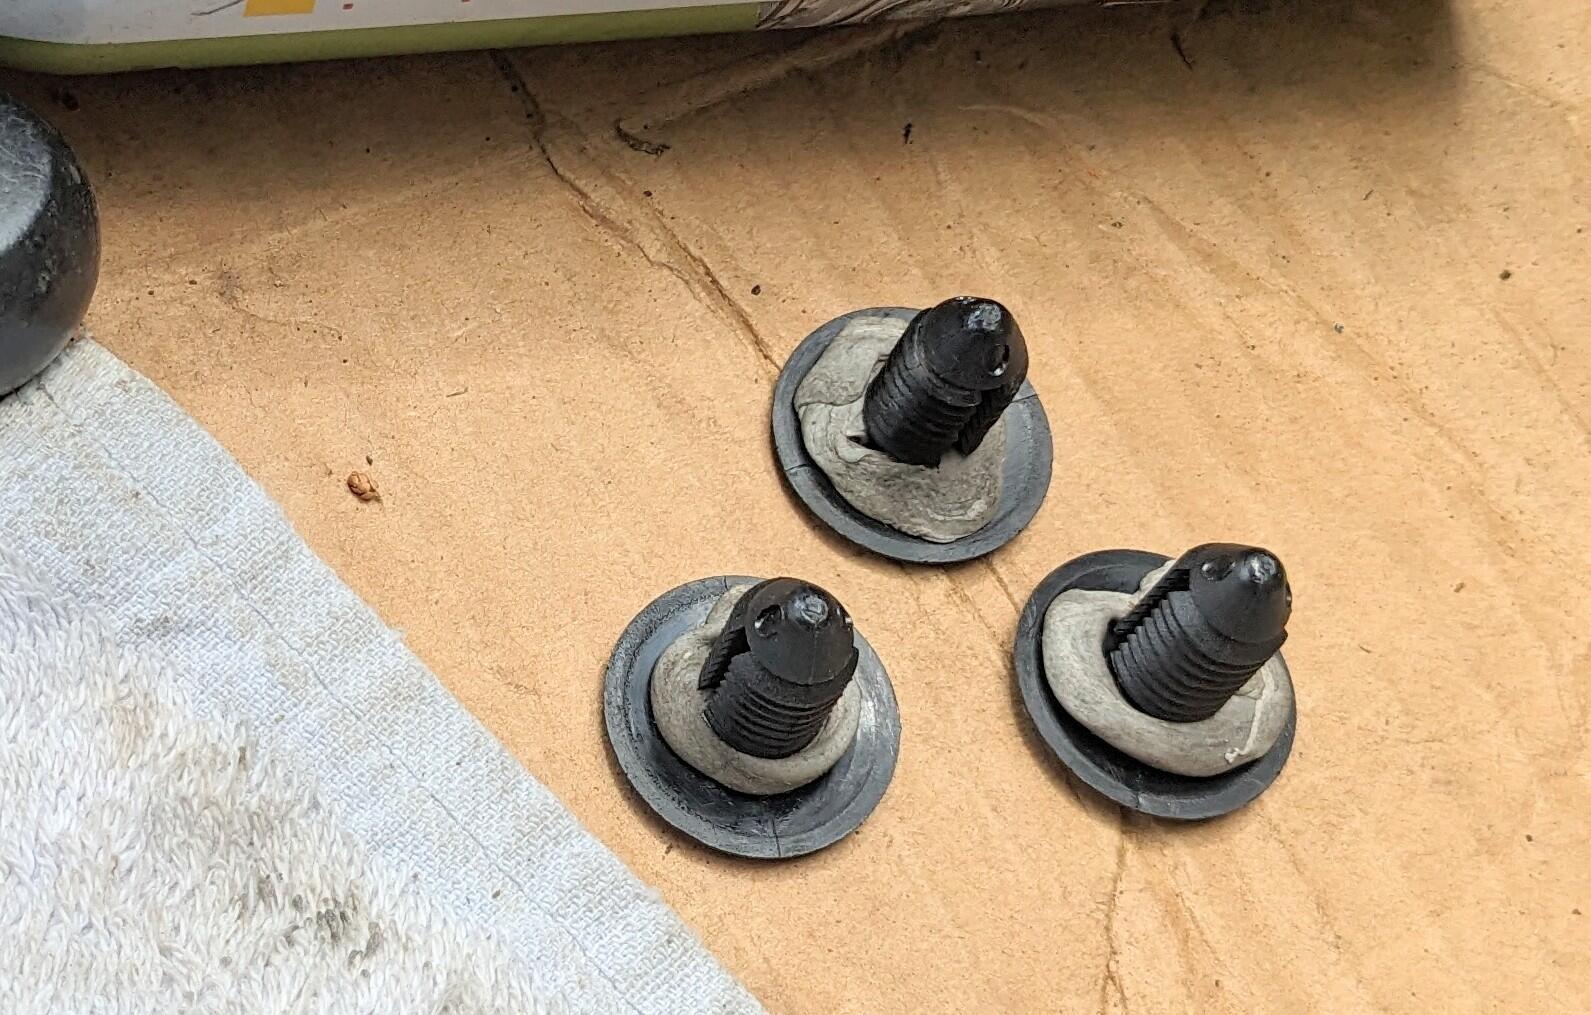
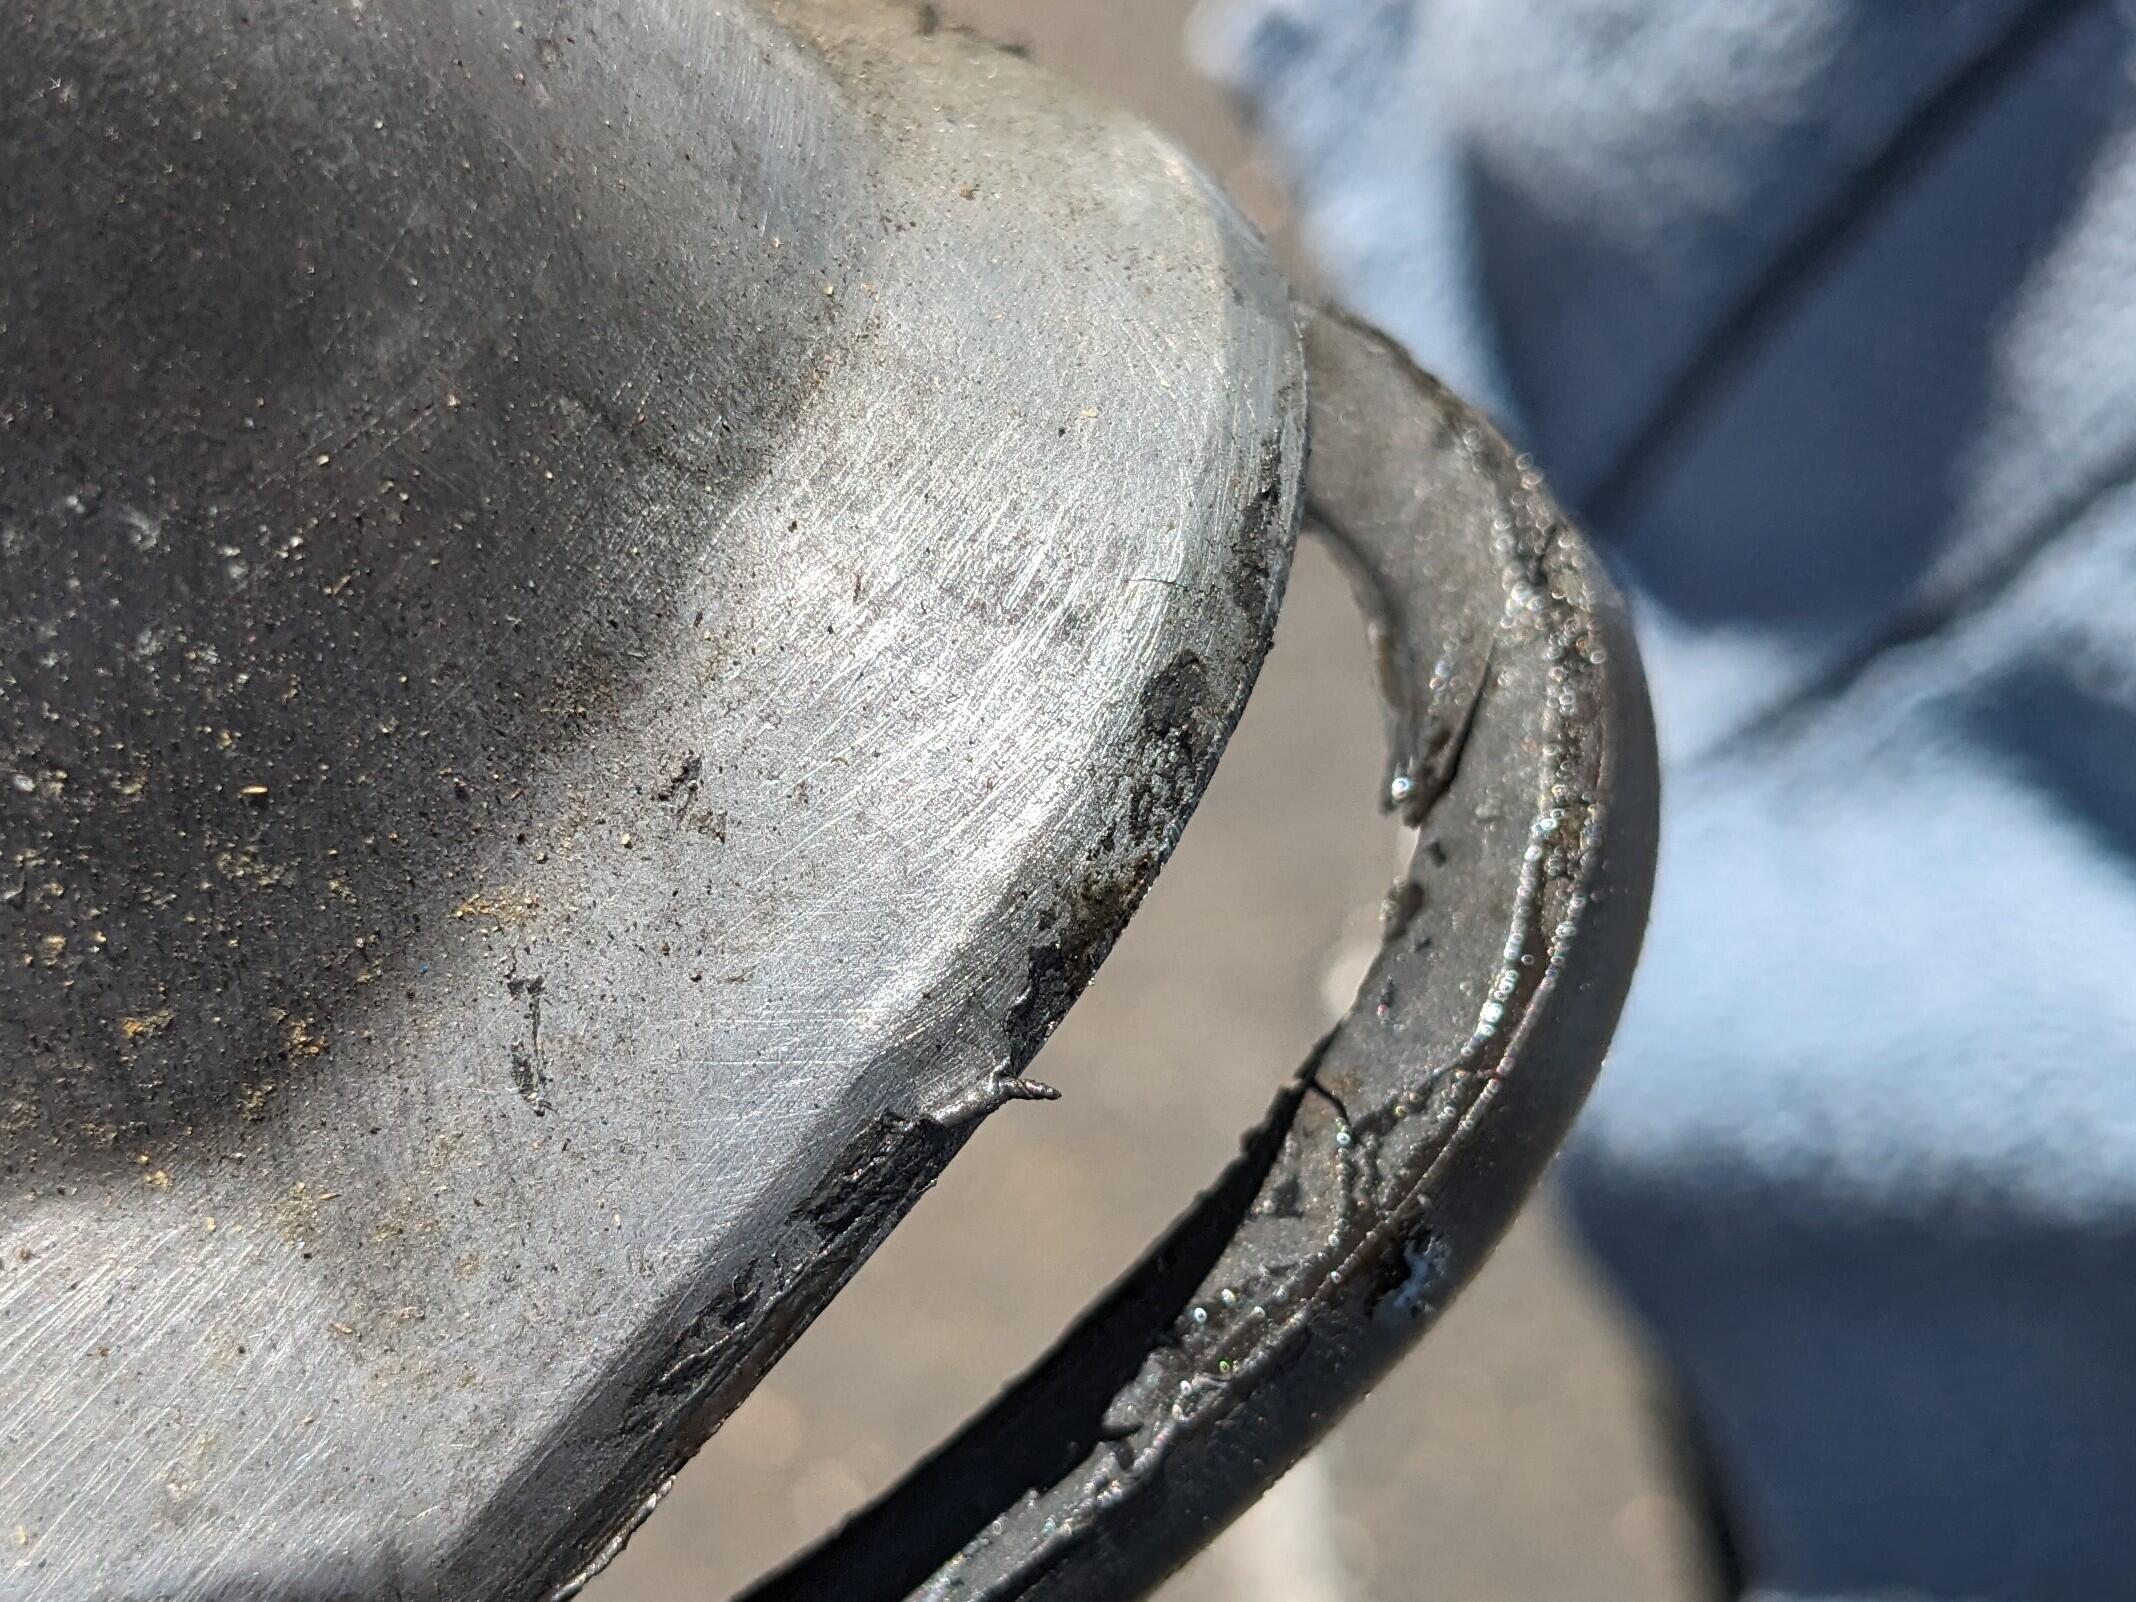
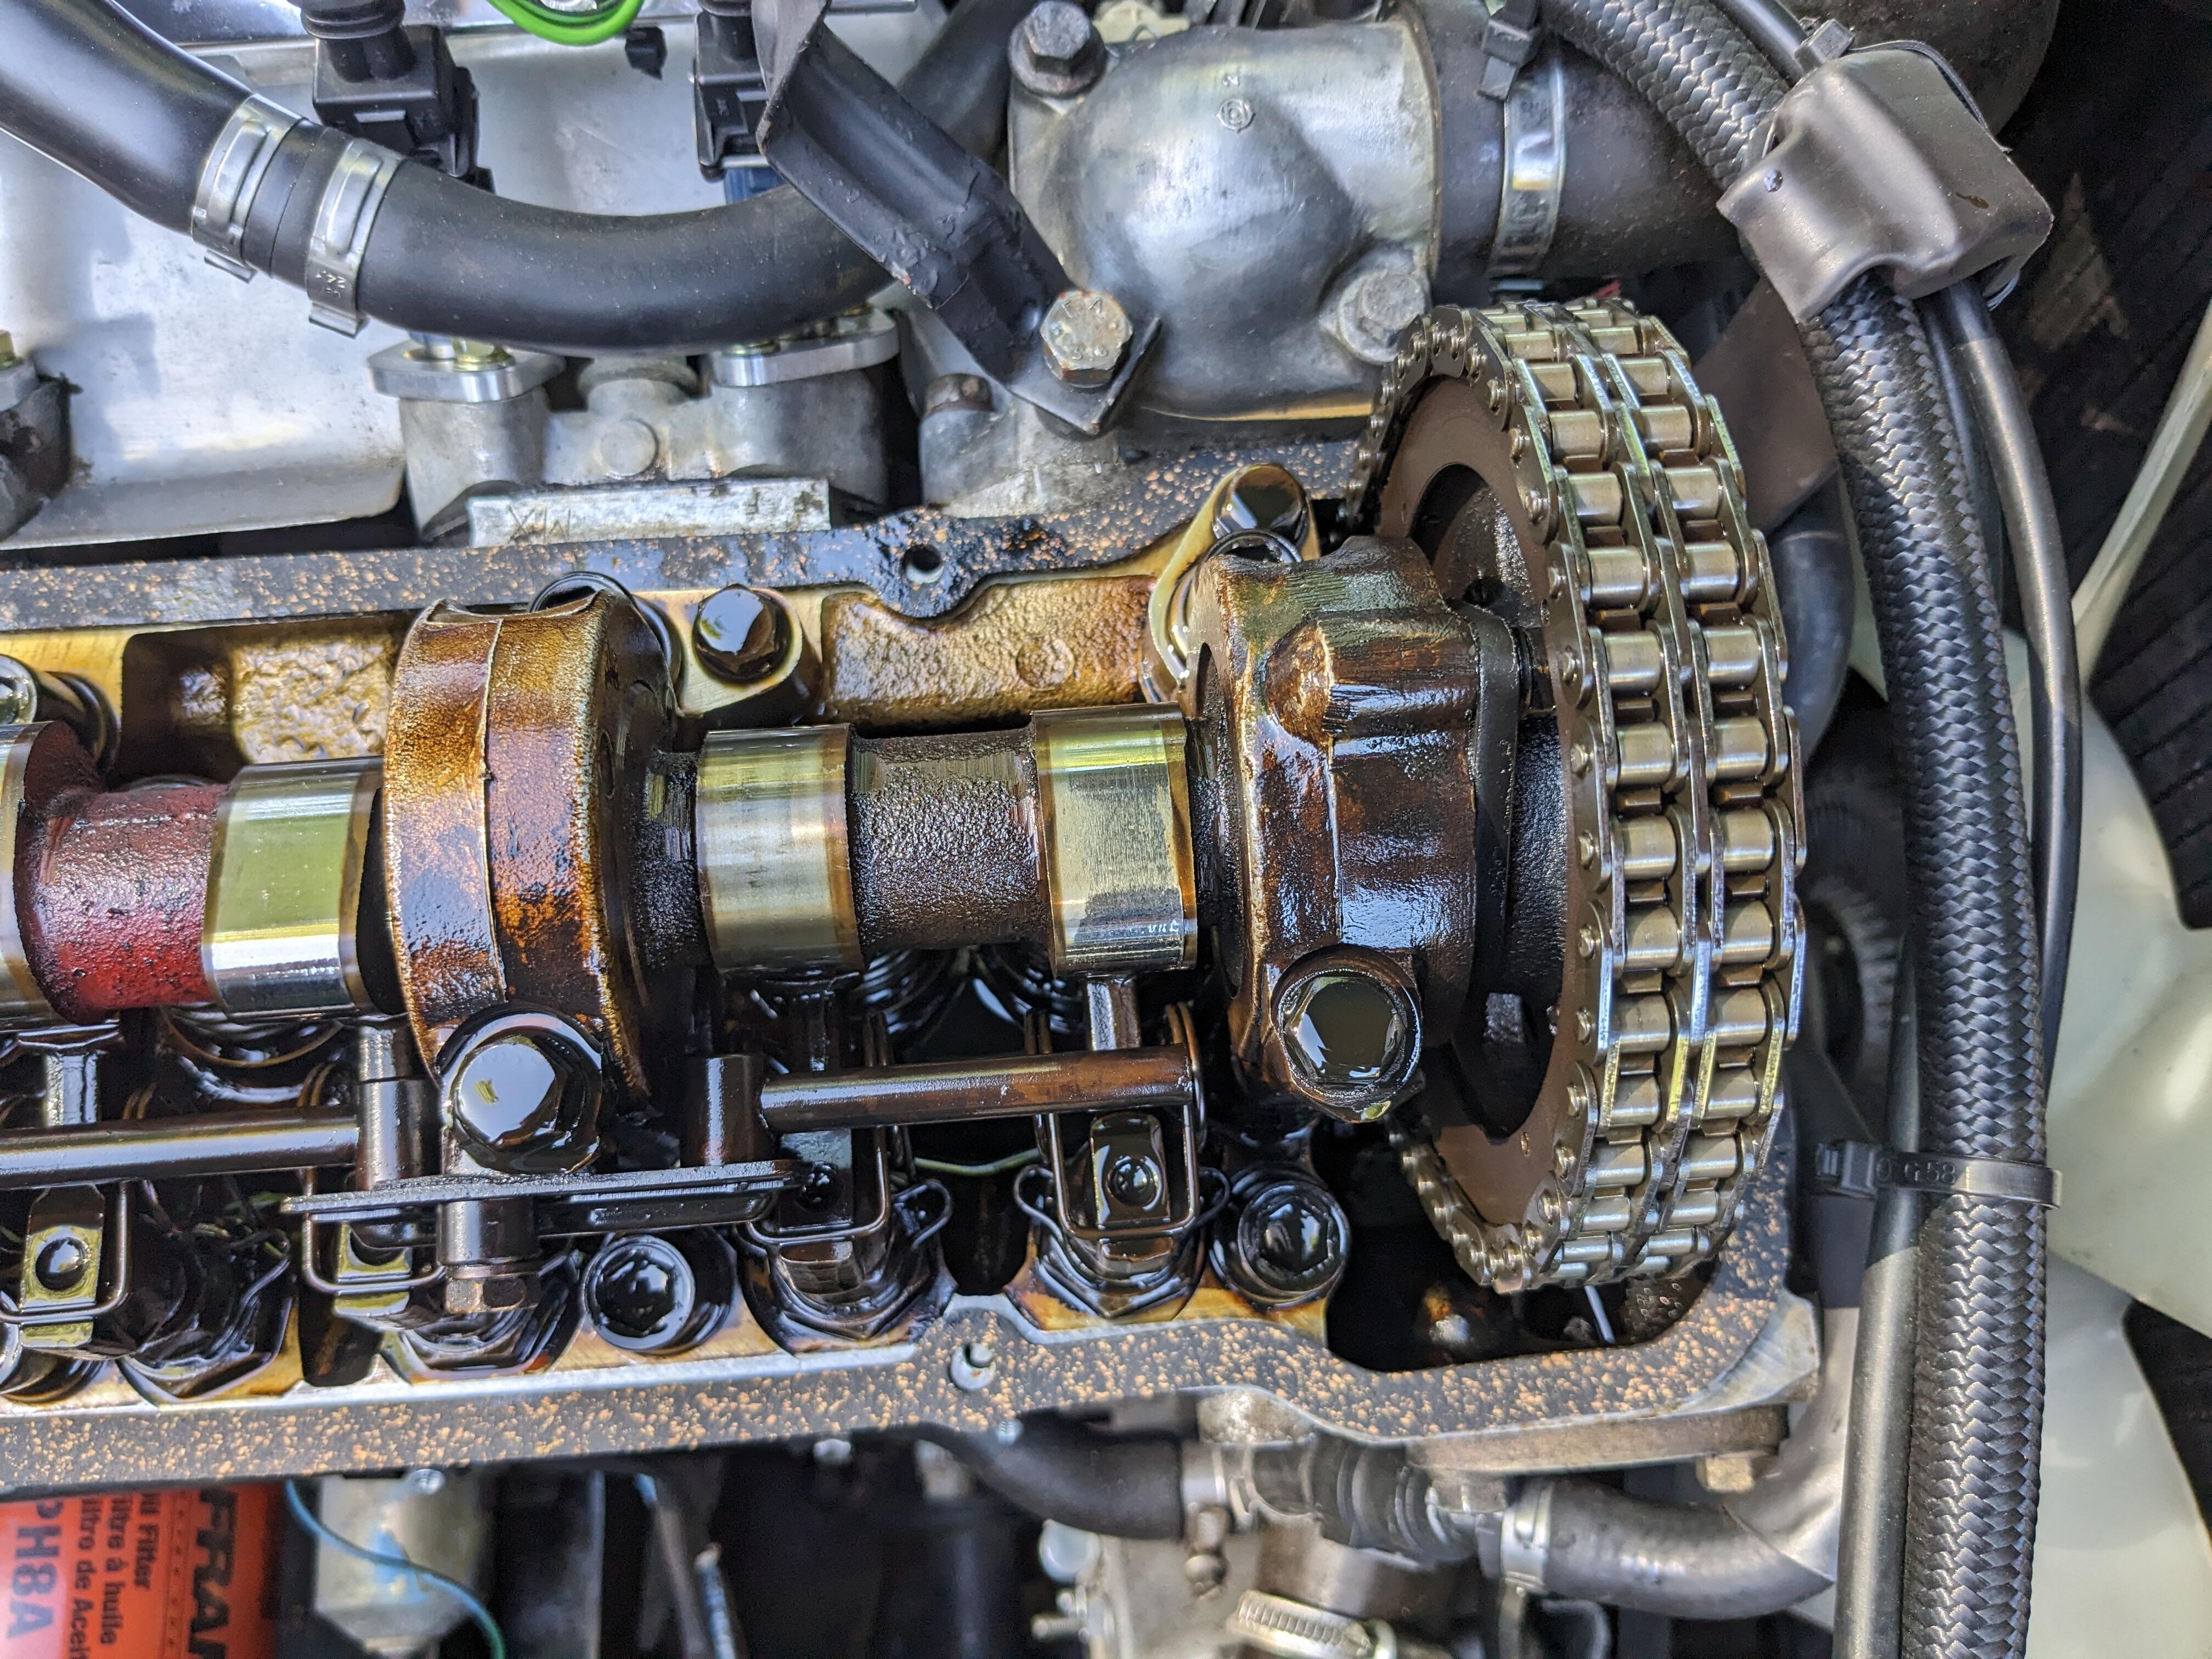
3 points3 points3 pointsPoints/Condenser is the simplest ignition system ever. Frequent maintenance is what took them away from the industry. Easiest system to debug.3 pointsTry this... 1) Take the valve cover off. 2) Use a screwdriver to set cylinder #1 at TDC while the two front lobes are pointing up. 3) Look at the timing notch on the crank pulley. It should be pointing at zero. At that point, your distributor rotor is pointing at #1 cylinder spark plug wire. If the rotor is pointing at some crazy direction like 8:30, it means that someone put your oil pump drive shaft in the wrong position. You can either simply readjust the spark plug wires to put wire going to #1 at the same crazy angle where the rotor is pointing, or you can drop the oil pump and realign it to where it SHOULD be pointing. My suspicion is that someone dropped the oil pump in the past and when they reinstalled it, they had the engine on TDC #1, but were on the exhaust stroke instead of on #1 compression. I'll admit it... I've done it.3 points2 pointsIt was March 14th when I posted that message. Today I got a call from the Ministry of Transport Ontario saying I own the car again! The paperwork to have it transferred back to me disappeared twice in the depths of MTO, but good eventually triumphed over bureaucracy. I wasted no time getting insurance on the car, and picking up the new ownership papers and license plates. We're now one exhaust system and a signature on a Vehicle Condition Report away from being on the road! MTO doesn't require the Vehicle Condition Report - they returned the car to "fit" condition, because that's the state it was in when transferred to the wrecker. My insurance company needs the form completed before they can put collision coverage on it.2 points2 points"Internet wisdom" that's too funny an oxymoron like "model prisoner". I've read that as well and I've always used the cone shaped cast iron prop, Asin one too. From what I remember it was the steel impeller causing electrolysis and freezing up the steel bolts in the aluminum front cover? Both my Zs had the OE cast iron pumps and they were still flowing great. I think they're designed better on side by side comparison. I'm an old timer!2 points2 pointsI’m frustrated at this point and can’t keep participating in a thread where not reporting back the findings in order to move forward in a systematic manner for a positive outcome is extremely frustrating for me personally. Familiarizing and educating yourself before jumping into this is extremely important. For that reason I’m out. Wish you the best yarb2 pointsI agree, because his vacuum advance is at 12 o’clock. But did not want to go down that rabbit hole. Thought readjusting the plug wires was a better option.2 points2 pointsUnlikely. No offense intended. Electrical connections, firing order, and timing apply to electronic distributors too.2 points2 pointsOther stuff can make noise up there. Worth checking before you start breaking bolts.2 points2 pointsRecommend that you use an impact driver* to free up the bolts. To gain the required access, you'll need to drain the cooling system and remove the radiator. (* Do not use an electric or pneumatic impact driver. Use the good-old-fashioned, hammer-blow type. It may take a bit more time and effort, but it prevents overpowering the bolts. A high-torque power impact driver will snap those long bolts just as surely as you leaning on them too hard with a wrench.) Here's a picture of what you'll be working with. The numbers refer to the wrench size... x The pump is secured by a total of five bolts. Three of these also help to secure the Timing Cover to the front of the engine block. The small-head bolts at 1 o’clock and 4 o’clock are short and thread into the cover – M6 (10mm wrench) The large-head bolts at 7 o’clock and 9 o’clock are long and fat and thread into the block – M8 (12mm wrench) The small-head bolt at 11 o’clock is long and skinny and also threads into the block – M6 (10mm wrench) The long, skinny bolt @ 11 o'clock is usually the one that snaps off when removing or tightening. The rad, pulley, pump, and the timing cover will all have to come off to get the access needed to extract the remains. Removing and reinstalling the timing cover will open up the potential for oil leaks where it meets the oil pan. In other words, there's going to be a high price to pay if you snap off one of these water pump bolts. It doesn't need to happen... but it very well may if you try to rush the job and use too much tool and not enough caution.

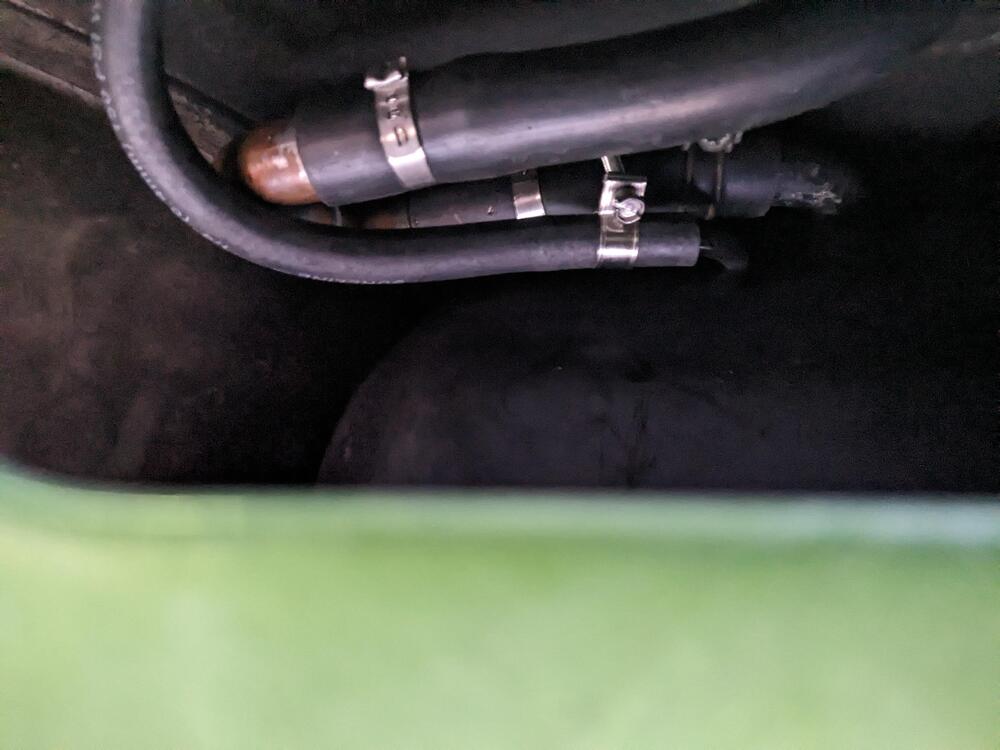
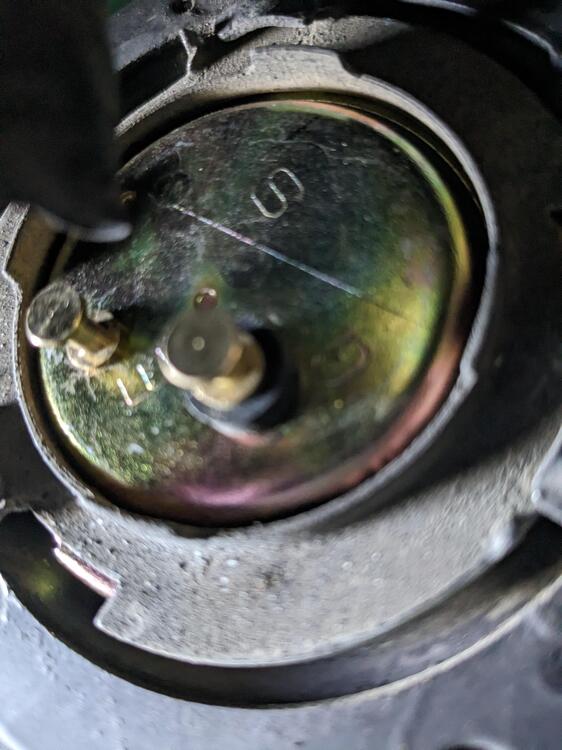
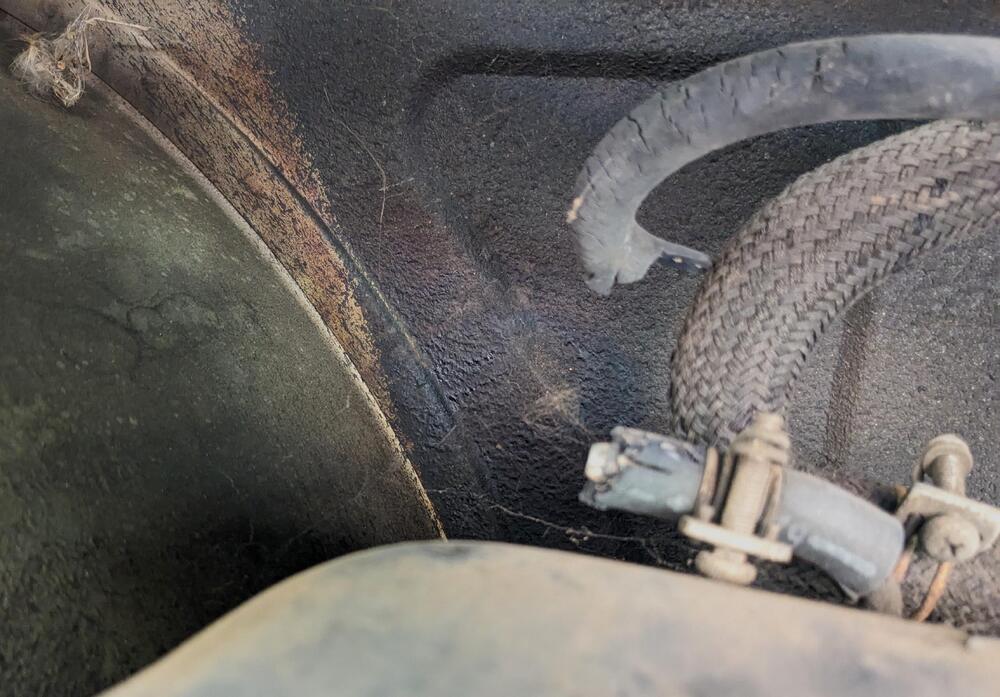
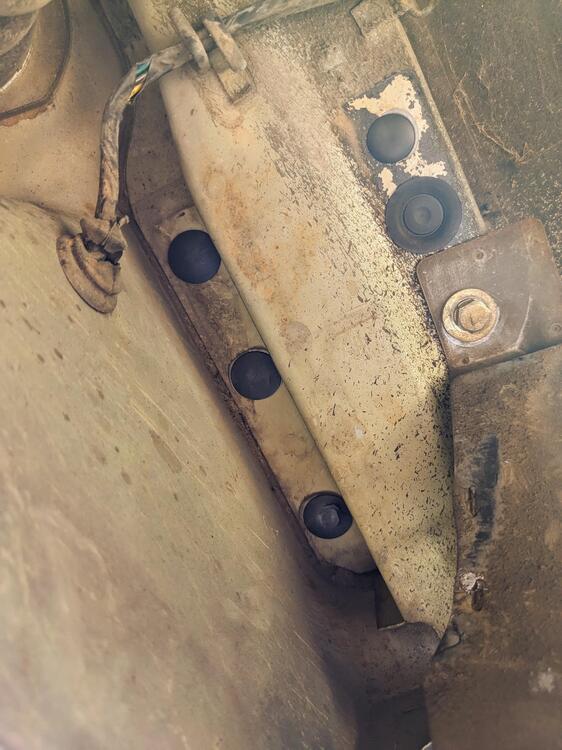
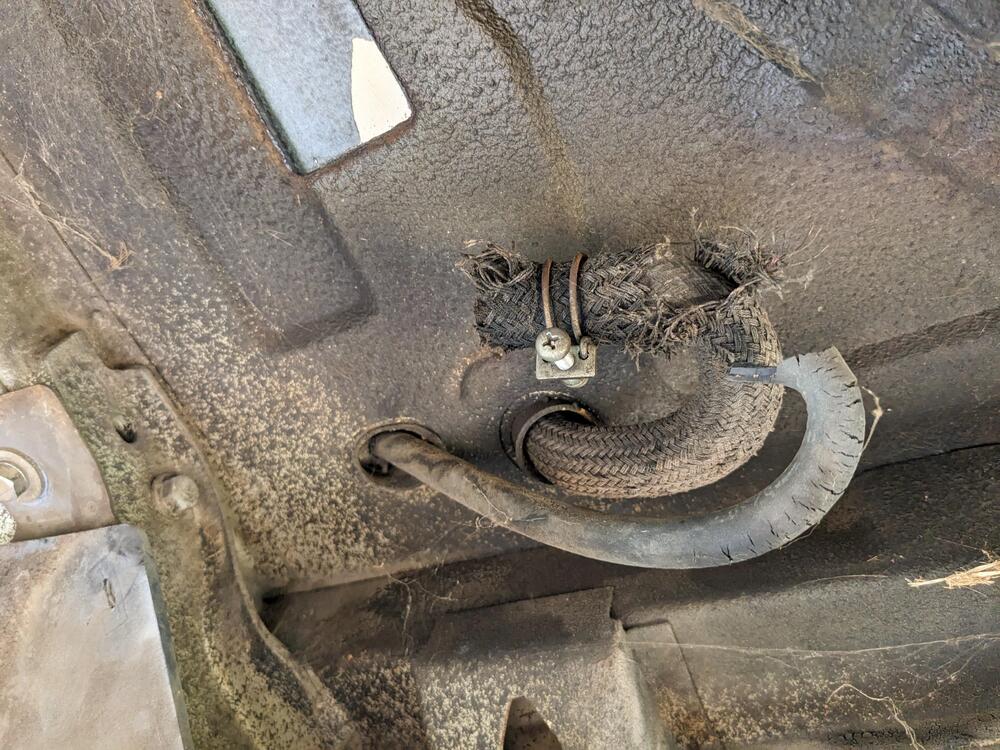
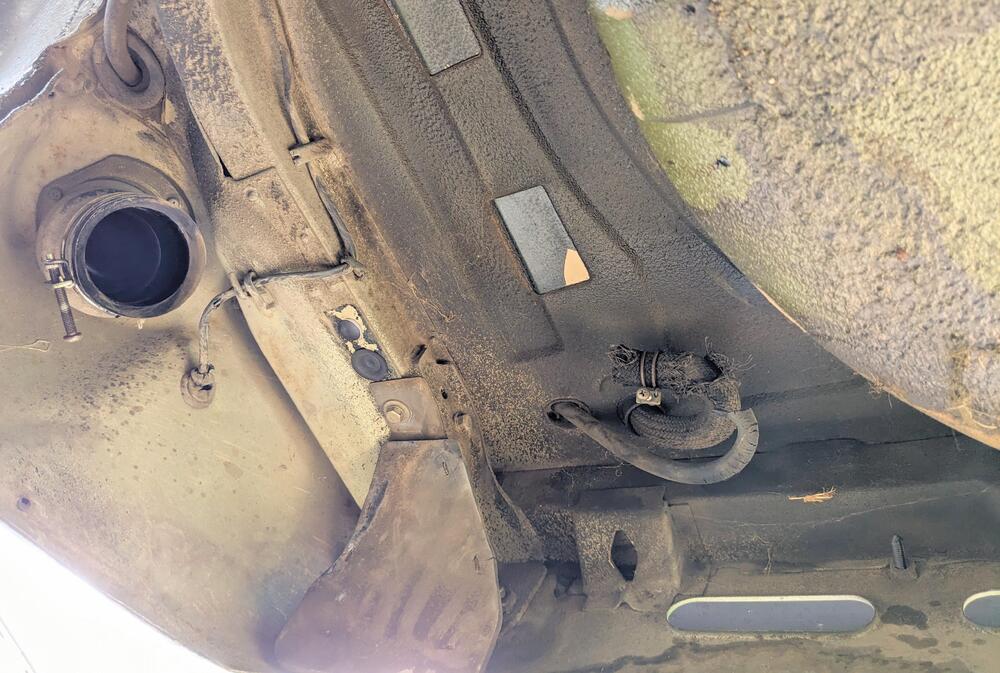
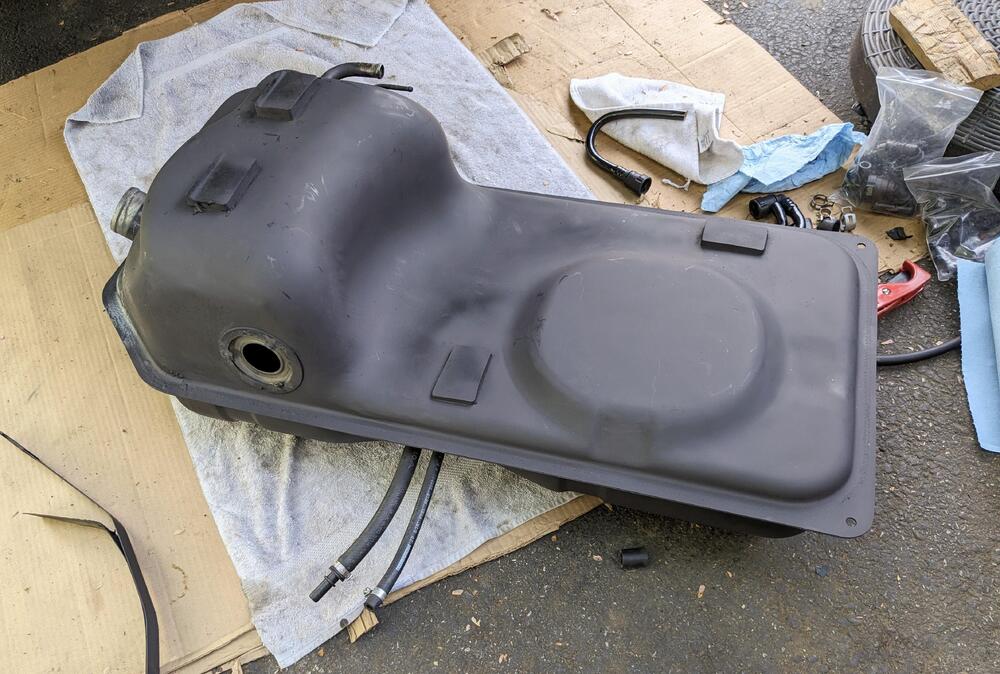
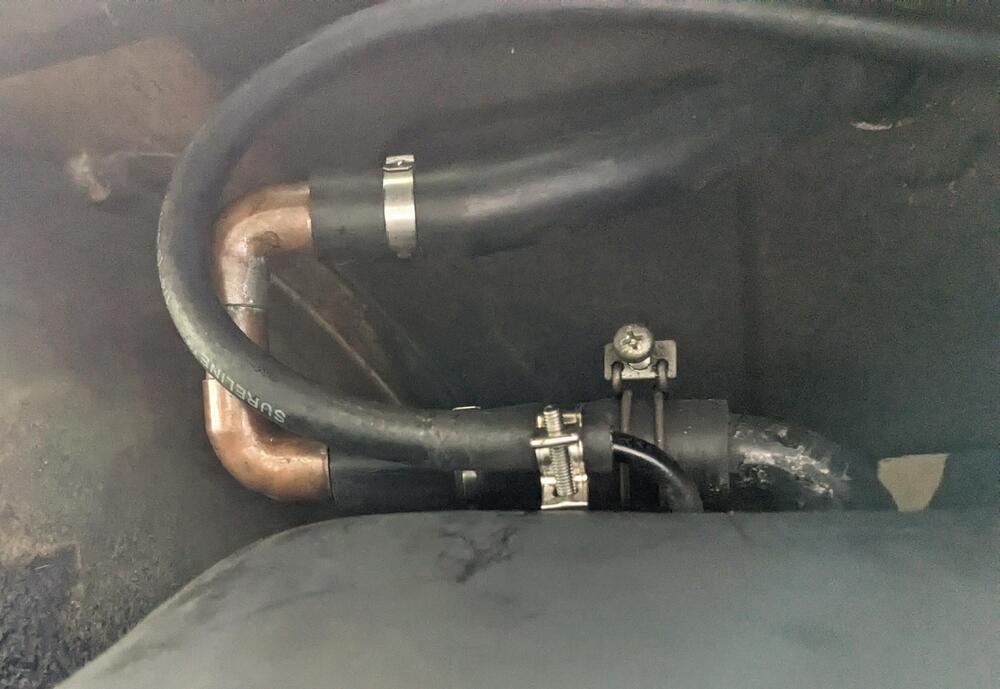
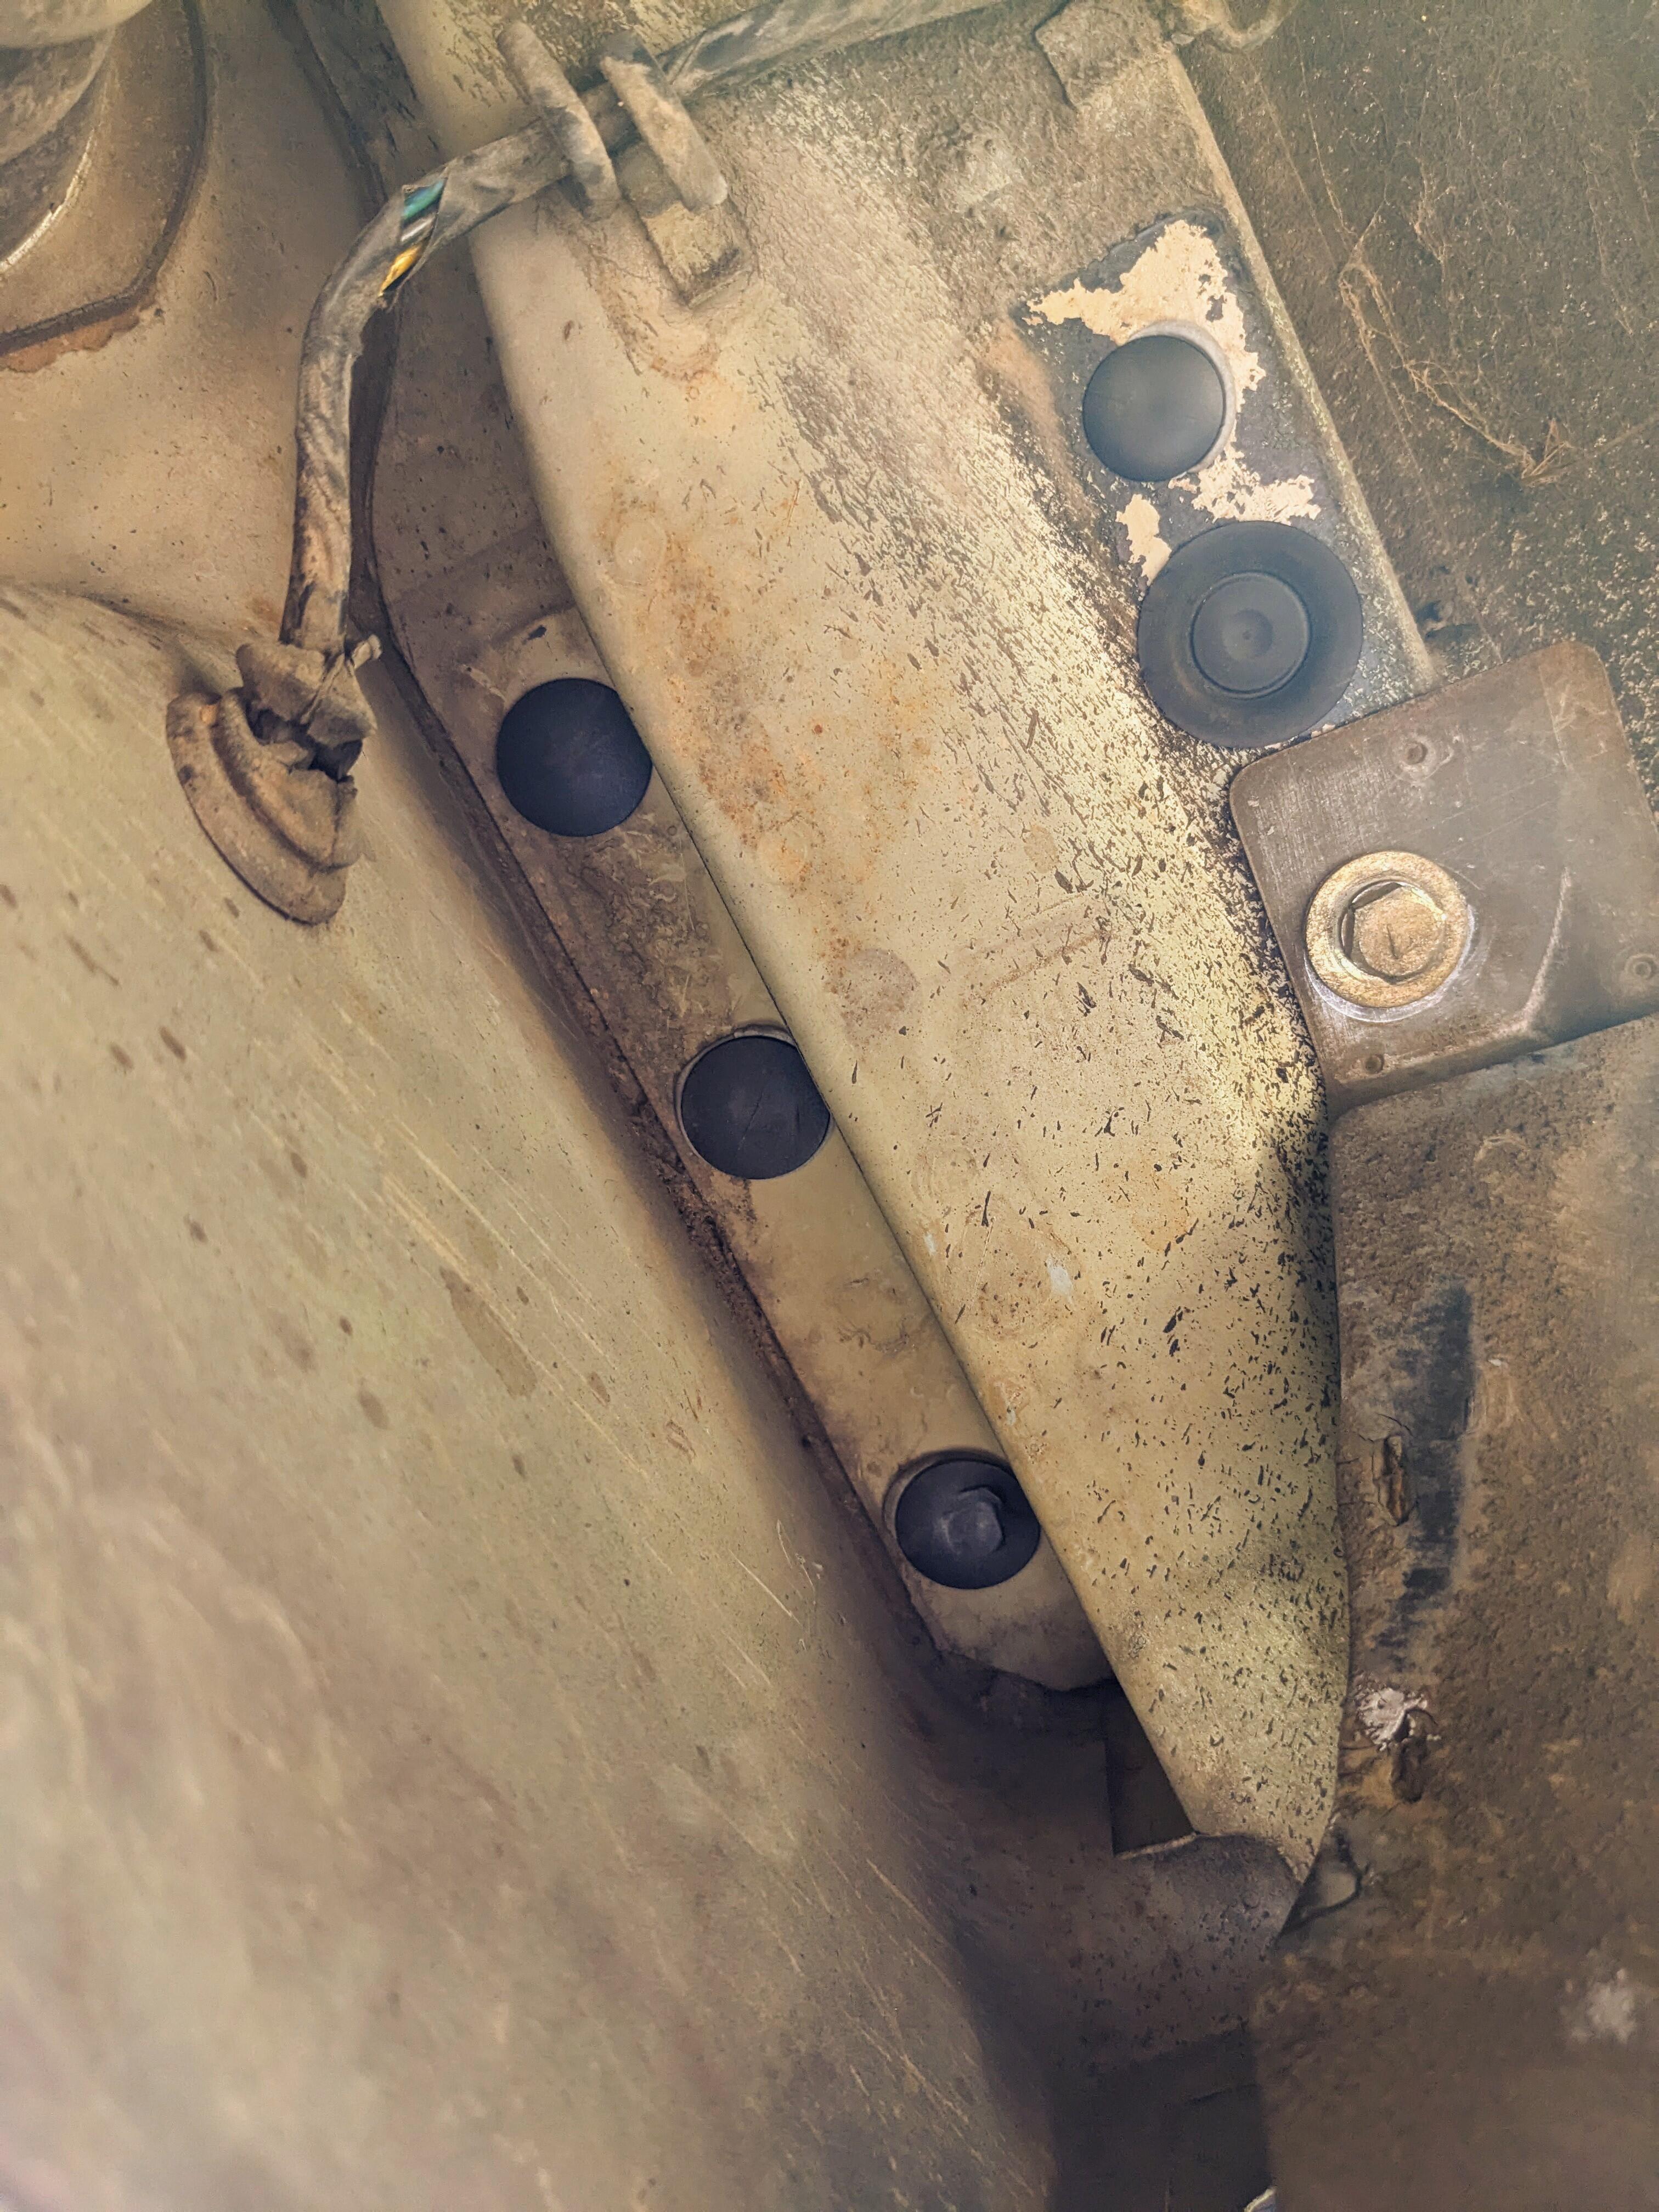
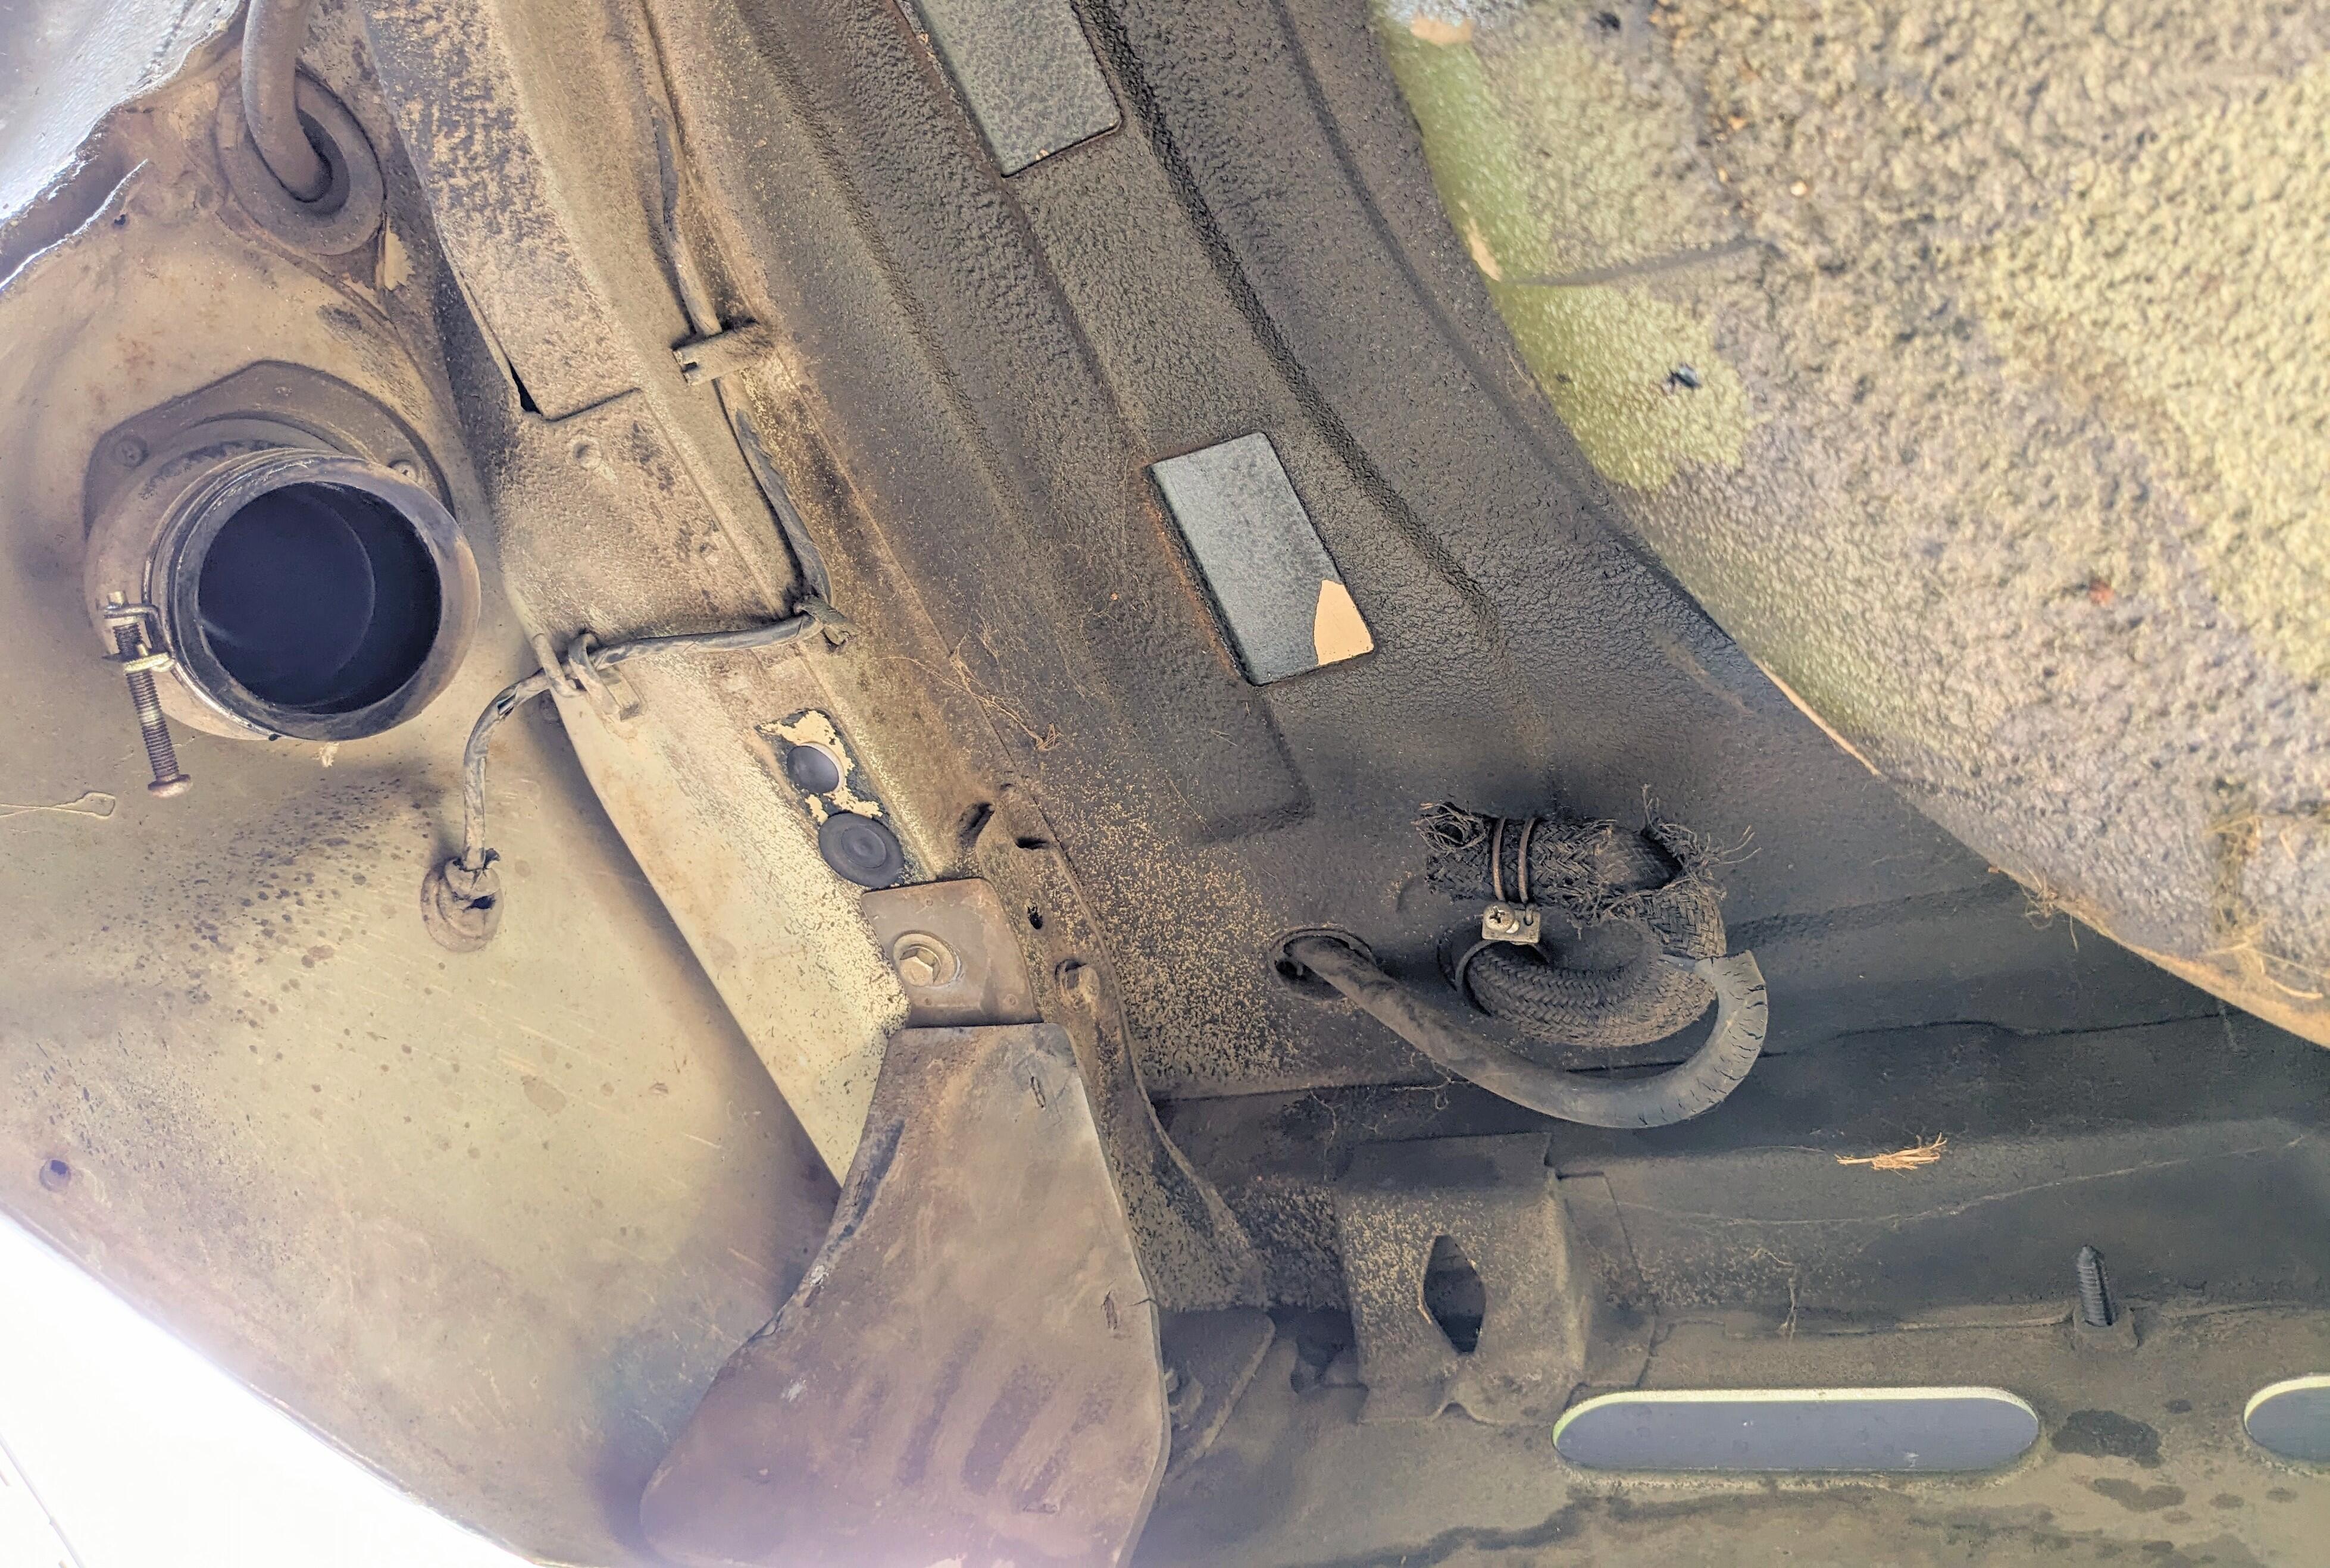
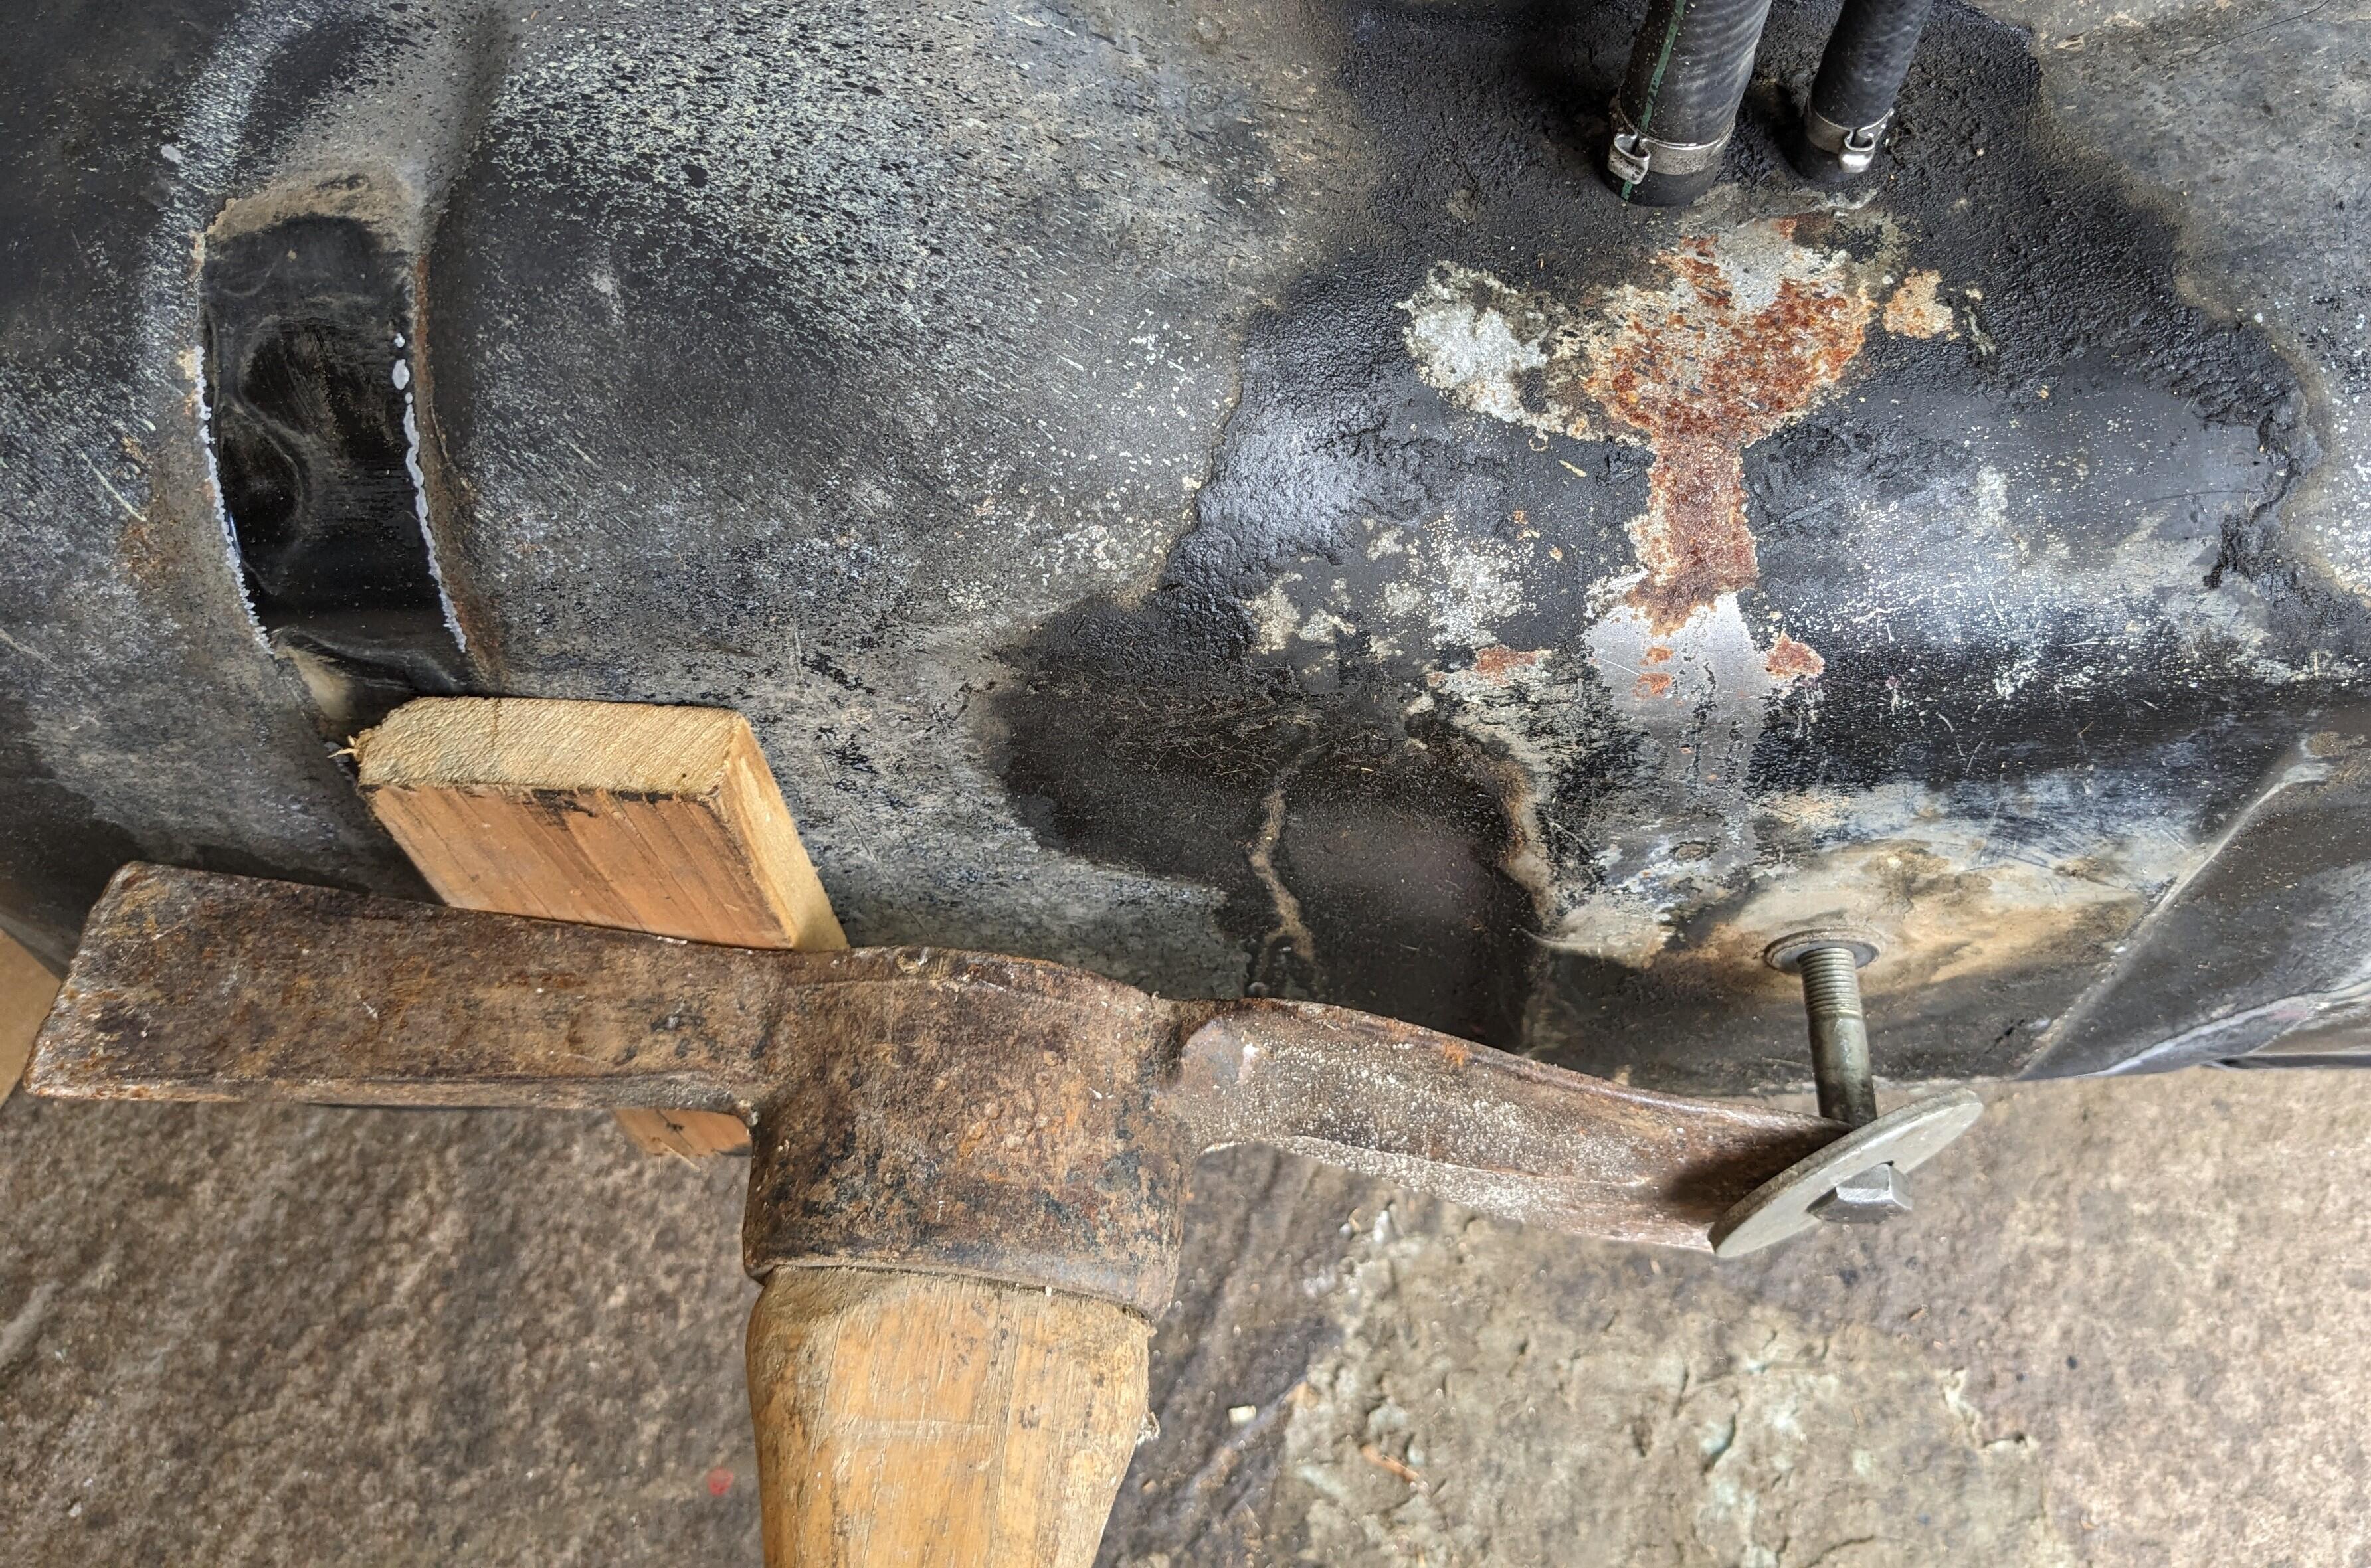
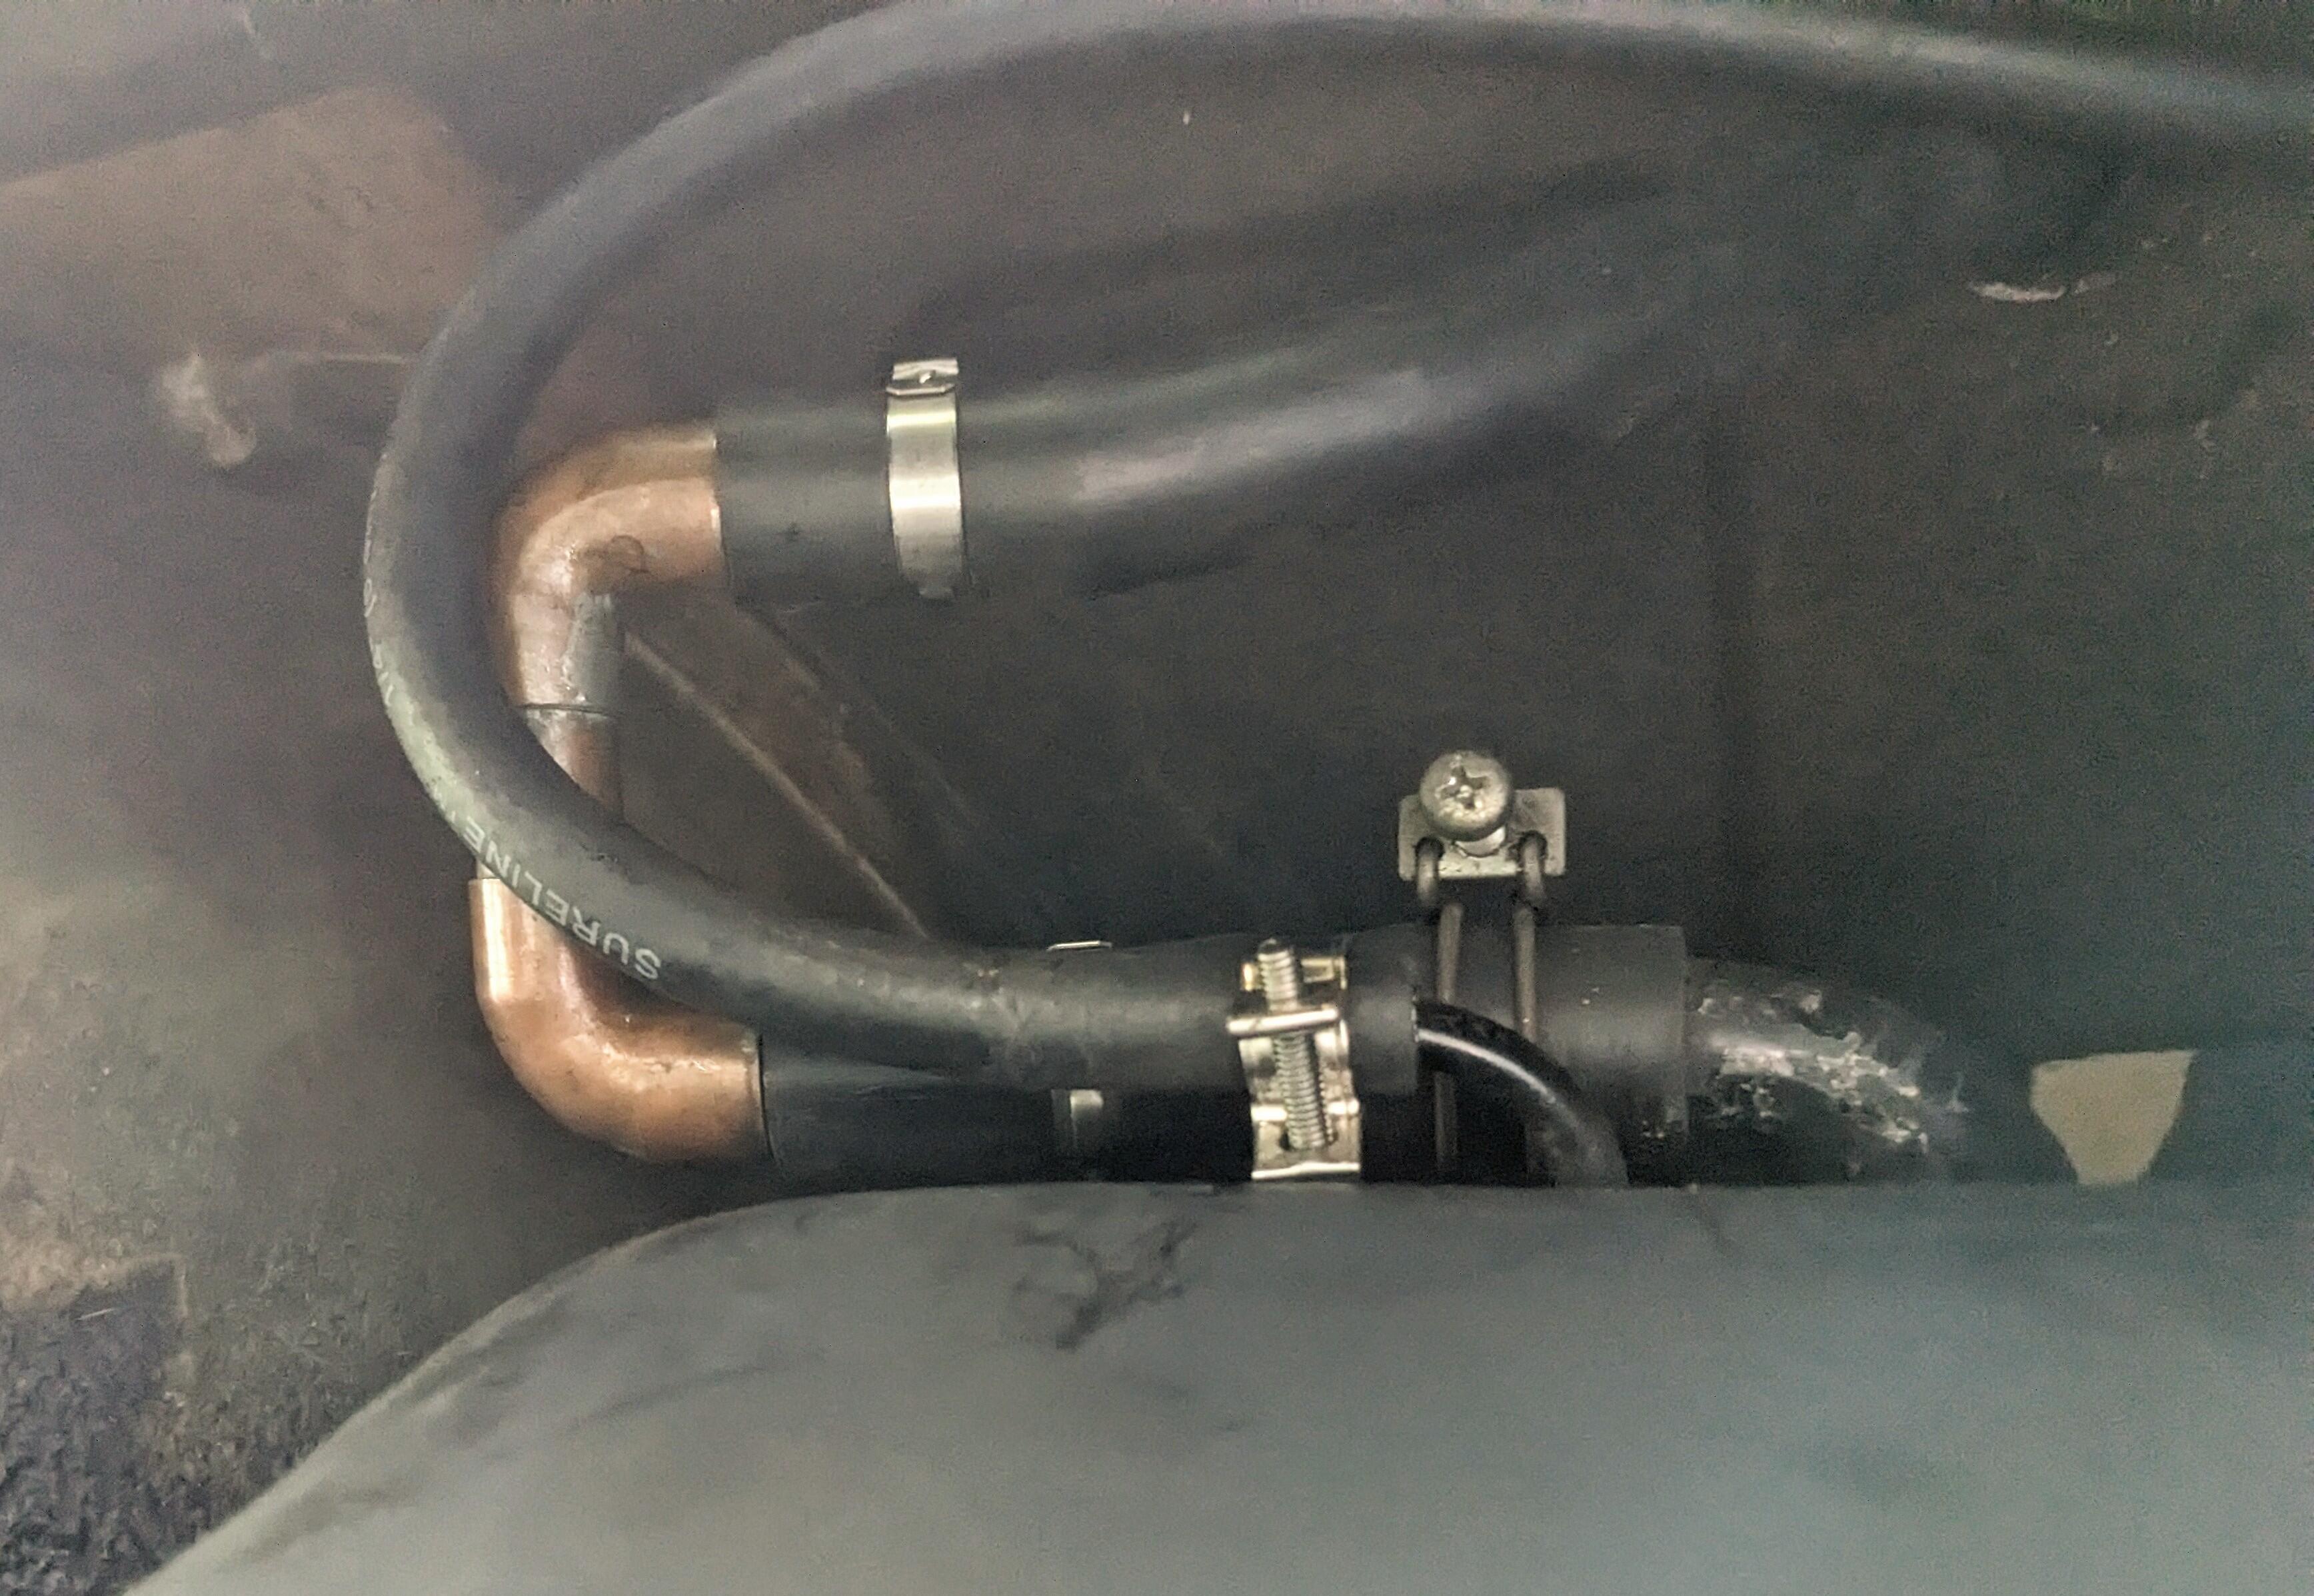
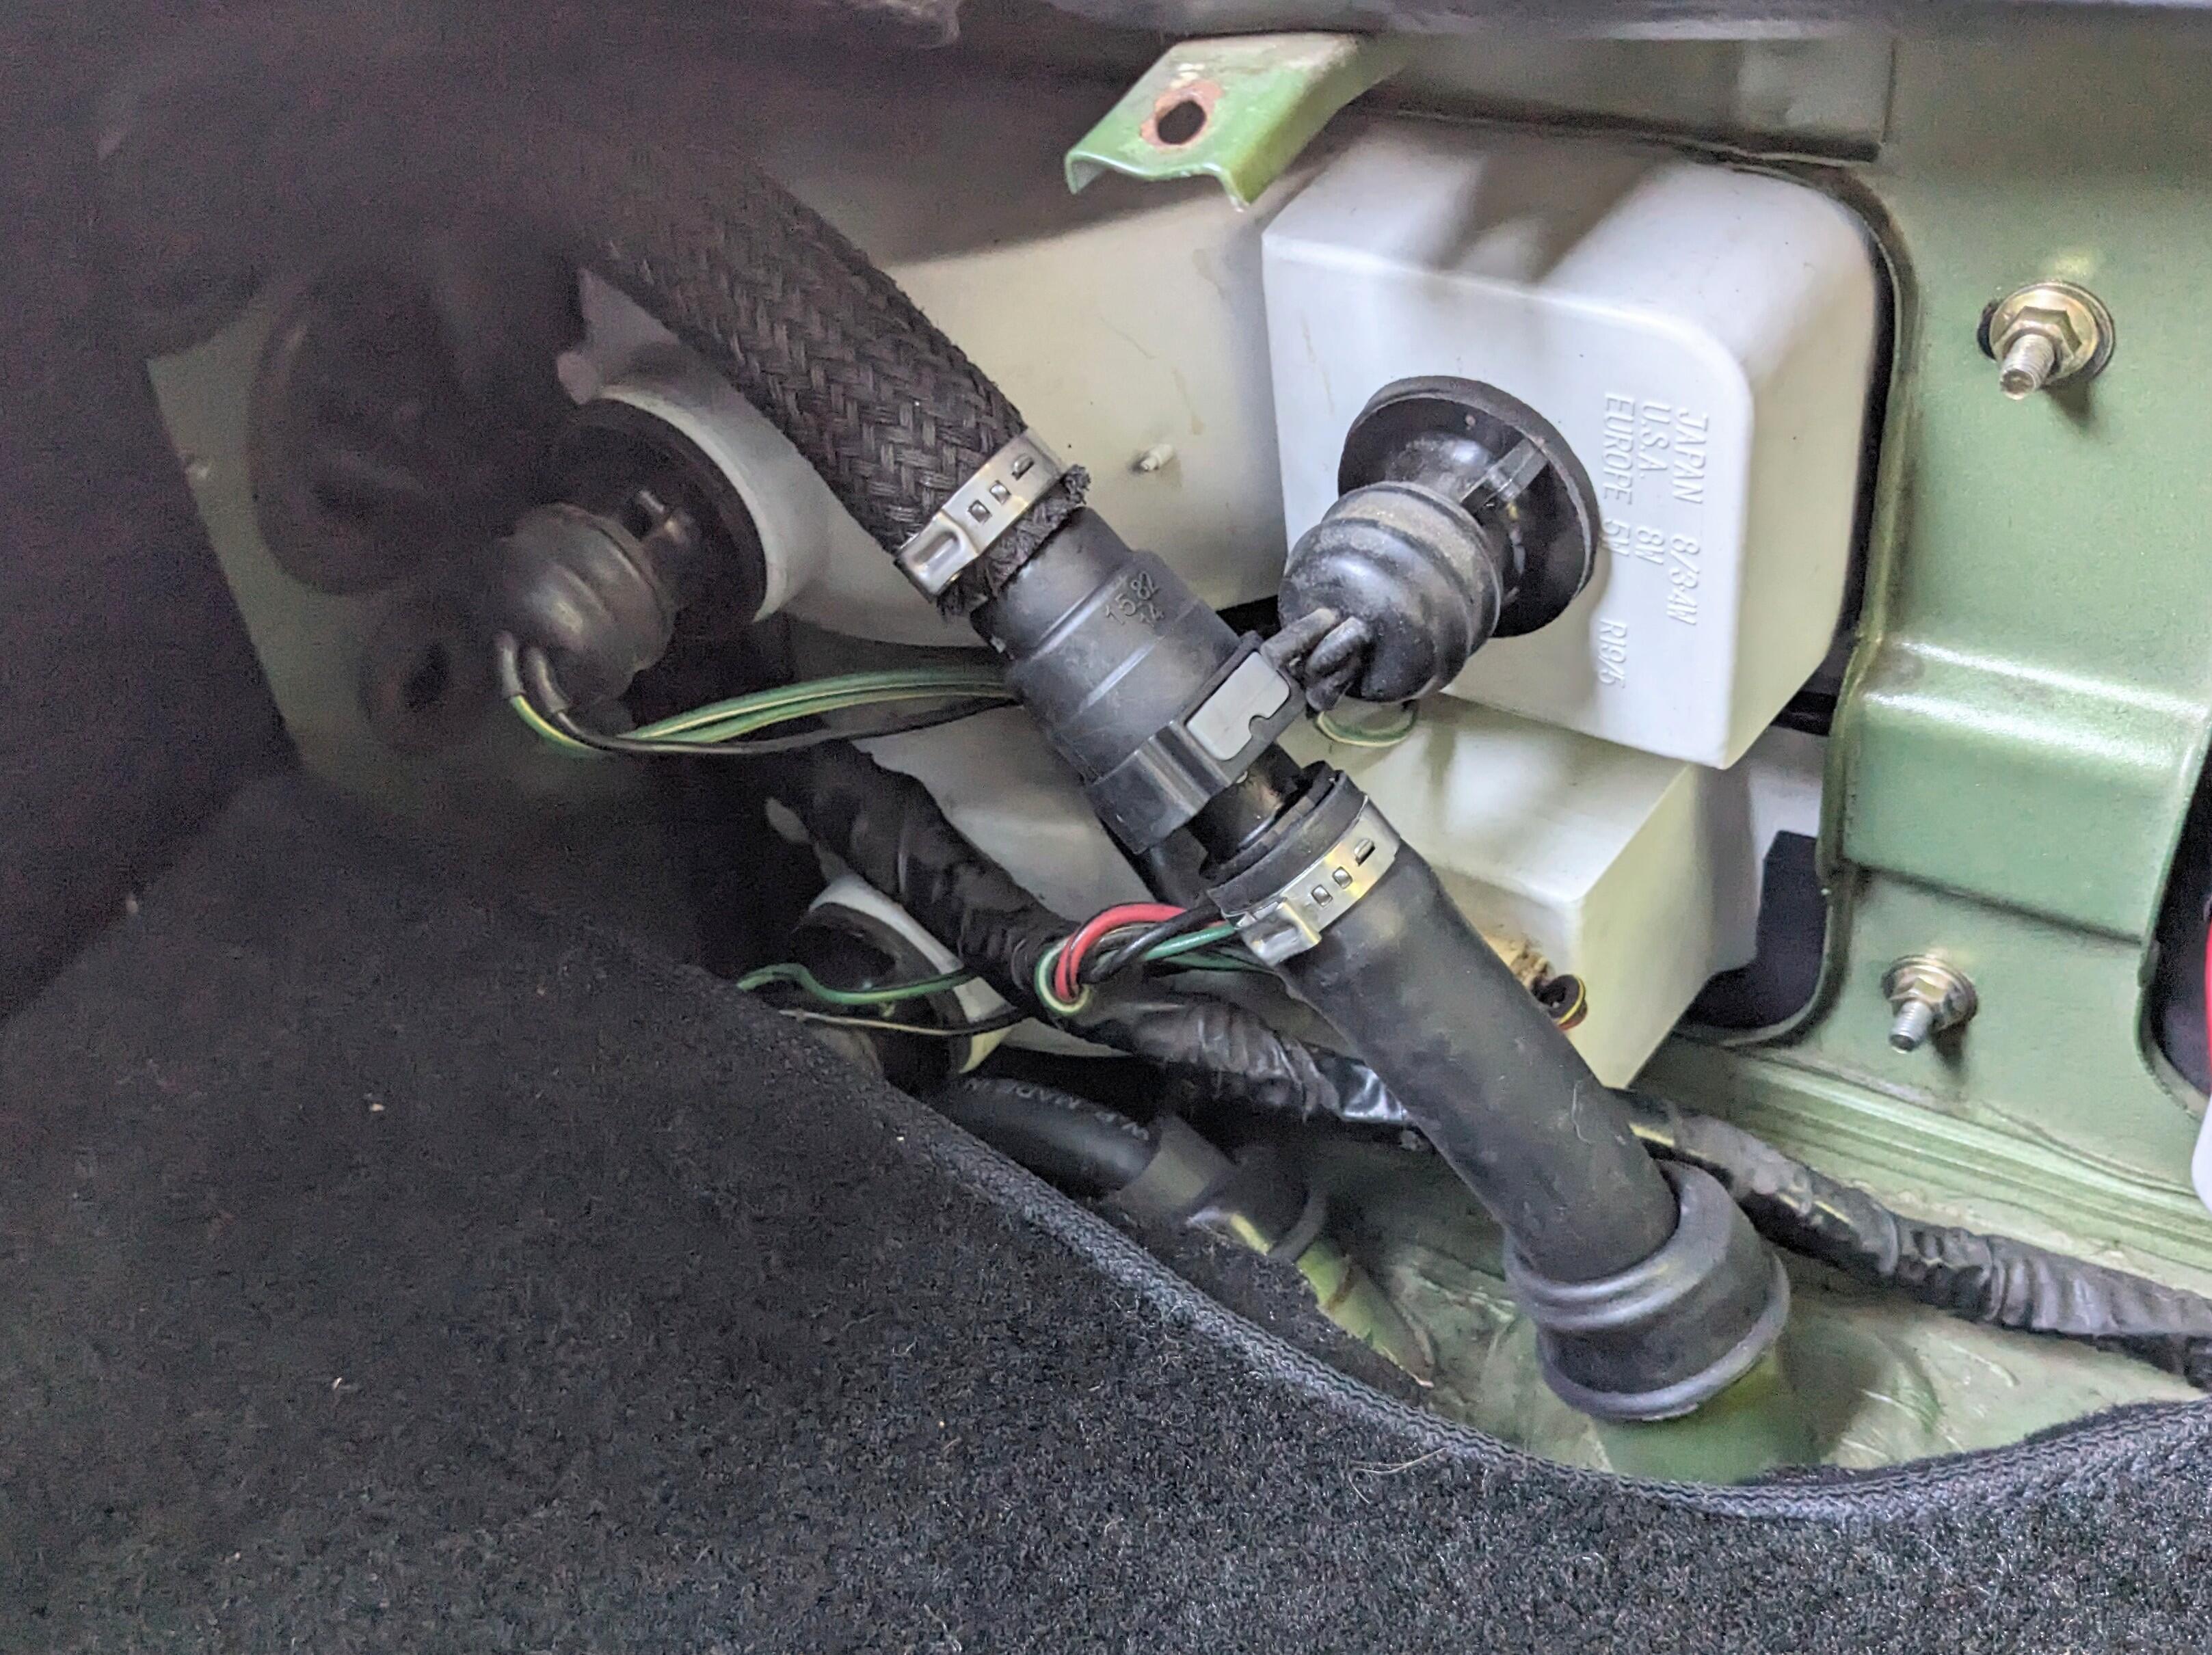
 2 pointsLike everyone has said before…….you must be at TDC of the compression stroke…..lobes up. My guess is if the car has been running in the past, and hasn’t been taken apart since, your distributor is probably correctly oriented. Looks like you are 180 degrees out……TDC exhaust stroke. Set it TDC compression stroke and your rotor should be pointing approximately toward the little mark on your distributor cap (number 1). Then if you follow the timing firing order going counter clockwise, you should be running and driving.2 pointsGasoline in it's liquid form isn't flammable. The fumes are! Old gas even less so. One step at a time. Take the advise given and don't frustrate your help or it will dry up.2 points@ShawninvancouverPlease read the FSM. You are asking questions without doing research. You have a long road ahead. Prepare yourself and get educated on this car.2 points2 pointsThere is a Japanese brand out there that’s superior. Gates is in the hose and belt industry IMO. I’ll follow up with the name. Aisin available on Amazon $38.502 points2 pointsI might as well add my pics here - since it's related to the original thread. Drop the tank, and found the source of my gas fumes/overflow when filling. Smaller vent line off the tank was ruptured. I actually realized I could have seen that if I looked through the louver slots in the tail panel Manual for reference filler neck base & clamp in great shape. Removed the remnants of the right side bumper shock, and plugged all the holes. Added butyl to ensure a seal Had to pull out the bottom of the tank a little. I realized there was no way to lever in there from the fuel sender port as there is a baffle in the way. So I just put a threaded bolt in the drain plug and levered the sucker out evenly working around the circumference of the bolt/plug hole Degrease / clean and paint tank. Made an elbow to replace the original large loop, the small line I just ran a longer piece, so it could loop gently Visible through louvers beneath bumper. For the inside, I cut the original hose - most of the inside was perfectly good there was no cracks in the the material, so I just ran a splice section from the tank, and used a large quick connect to join the two. new grommets for the lines from ZcarDepot. I did find out that I put the sender in upside down, as when I started it the gauge pegged full. Drained about 4 gallons, prior to doing the work. I realized the notch in the sender plate was supposed to be on the right not on the left - upside down in this pic
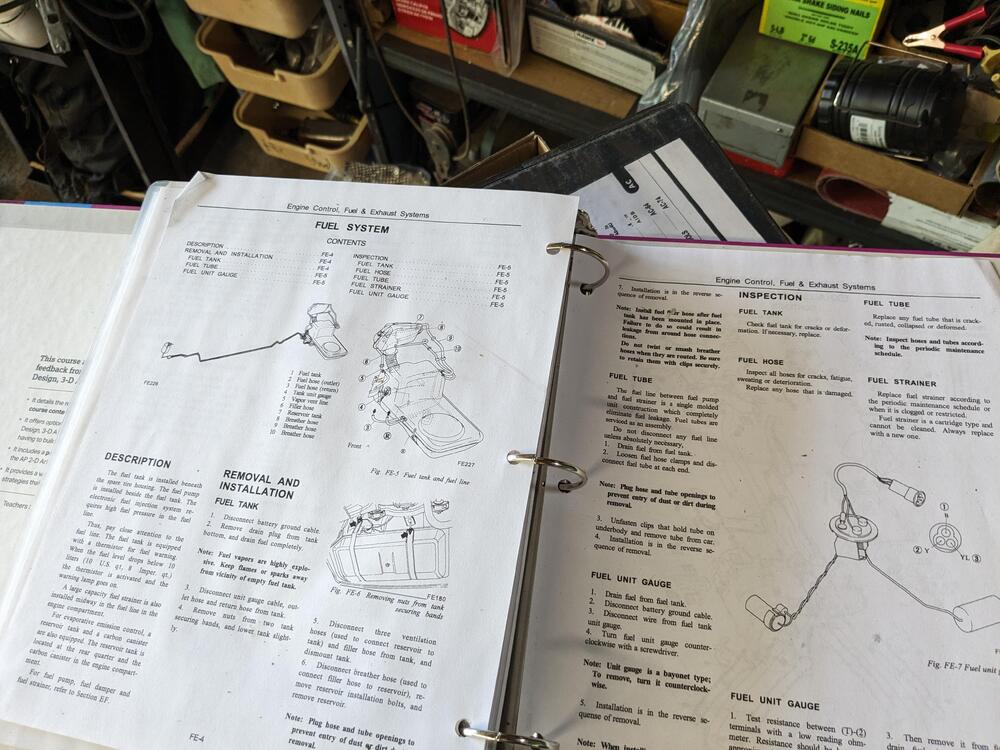


 2 pointsAre you talking about mine, I resemble that comment. Lol2 points1 pointGoogle images will help you, try it and see if you can find the drain. Damn! You've got my opening 24 hours of topics all about you and your car. Slow down. It's free advice, we're not charging by the hour.1 pointWeird how I have the urge to post. But then change my mind. So far, the car has only made a few sparks. Carb swapping is far in the future. This is unknown -1 point1 pointI'll go out on a limb and say they didn't, just the last one. The other two probably worked fine, but we spent ten pages trying to solve multiple problems at the same time instead of breaking it into simpler, easier to diagnose parts. Back when the other distributers were in there, the coil wasn't getting power like it should have. So no spark, but because of problems upstream, not the distributer. Then by the time we finally hotwired the thing, we had installed a bad distributer. That's my read.1 point1 pointIn Post #15 on the second page you said that you tried "3 distributors". Seems unlikely that all 3 would have bad points and/or a "dead wire". I think that the "hot wire", the sidenote, was probably the solution. Just posting for the record.1 point1 pointThat all depends on the internal design of the ignition switch. Some of them are designed such that the power on the ON terminal drops out when you rotate the key to the START position, and some of them keep the ON terminal hot even when the key is in the START position. It's clear (from the behavior of the car in question) that he has a switch that does not drop out the ON connection, but in fact, keeps that connection hot even when the key is rotated to the START position. Depends on the car year and whether the switch is factory or has been replaced by aftermarket at some time in the past, etc.1 point1 point1 pointThe toughest part of doing the water pump is getting the old bolts out without breaking them. Some of them are long and skinny. A little corrosion makes them difficult to get out.1 pointHere's where the FSM is for a '73 240Z on this site. You've got some reading to do. And hey, there's lots of pictures of the parts talked about in the different sections.1 pointAs @240dkw says. Ignore where you think it should be. Once TDC is achieved per the cam lobes and cyl #1 all the way up the rotor in the distributor will be pointing at #1, then the firing order goes counter clockwise from there in the order stated in post #2.1 pointAs well, yes your distributor is in the wrong orientation, but just leave it like that. Find TDC on cylinder #1 on the compression stroke. Where ever the rotor is pointing install plug wire #1 there and do the rest in the right firing order counterclockwise. Fixing you distributor orientation is best left for another time.1 point1 pointOk. The problem has finally been solved. For all of you who guessed at what the problem might be here is the answer. a - I bought new points. And put them in. I finally took a multimeter and checked for continuity across the connection to the distributor and to the points and there is no continuity. I then figured out the wire was dead between the connecter on the distributor to the points. It’s a little old wire. It’s tiny. I put a new wire in and checked for continuity and had continuity from the tiny little plug where they wire coming from the coil goes to the distributor. I checked from the distributor connection to the points and finally had continuity. Then with the points closed had continuity on the other side of the points, and that finally solved the problem, spark now happens. Now the next thing will be to figure out how to get this to run. We got spark, but could not get it to ignite anything. My next thread will be how to get it to run with these stupid flat carbs. thank you to all the guys that gave me ideas on what to do and bring out the multimeter and check for continuity and really keep focussing on the stupid distributor. It was old. I did get new points but even had to pull out another wire from an old distributor and make sure that that wire had continuity finally solved the problem. I now have spark and now I gotta get this baby to run. another sidenote, I did this by bypassing the tack and not using the green and white and one of the black whites. I only used the one black white that was hot on run and put that to the resistor then from the resistor to the positive on the coil and that’s why I finally got the spark. hopefully this thread will help some other guy out one day. !!1 pointFactory-fitted air conditioning was available from the beginning of production in the Japanese market. The core support panel was shared between Domestic and Export markets, hence the mounting holes for the S20-specific air cleaner box and radiator overflow bottle being present on Export cars.1 pointHere's the calculator I used when I changed to 15x7 wheels. Tire Size Calculator | Tire Size Chart | Tire Size Conversion | Discount Tire Ended up with 205/60 R15 which calculated out to be almost identical to stock tire height (assuming 195/70-14) so when my speedo reads 65 MPH actual would be 64.8 MPH, pretty close. The 205 is tire width and 60 is a tire height percent of tire width and the R15 is the wheel diameter.
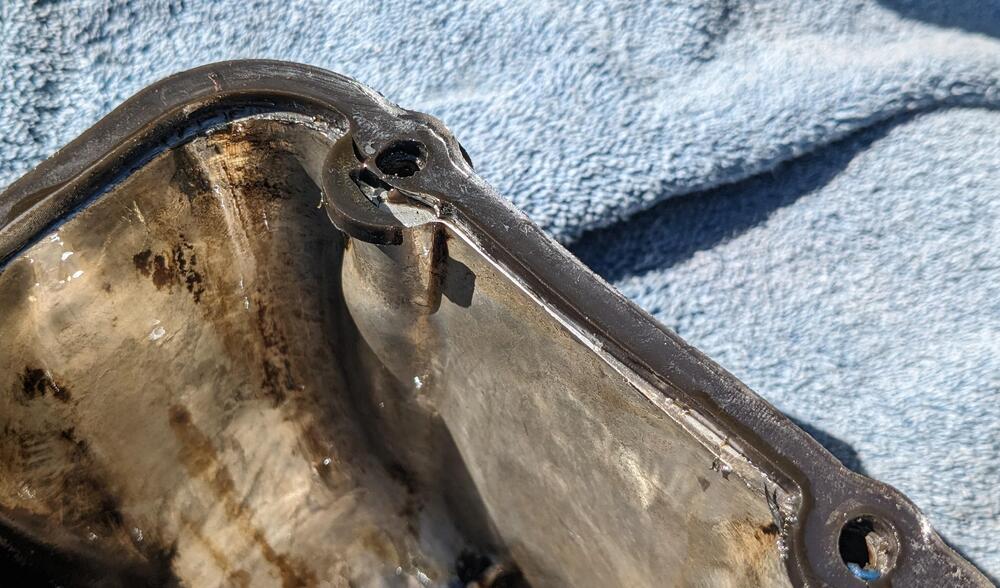
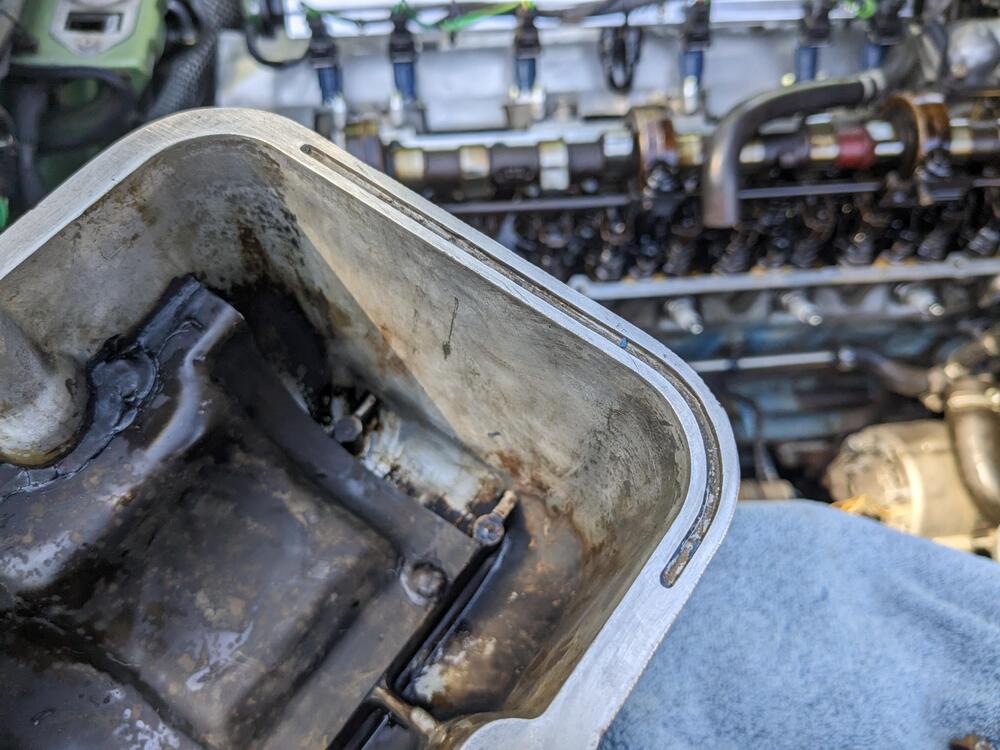
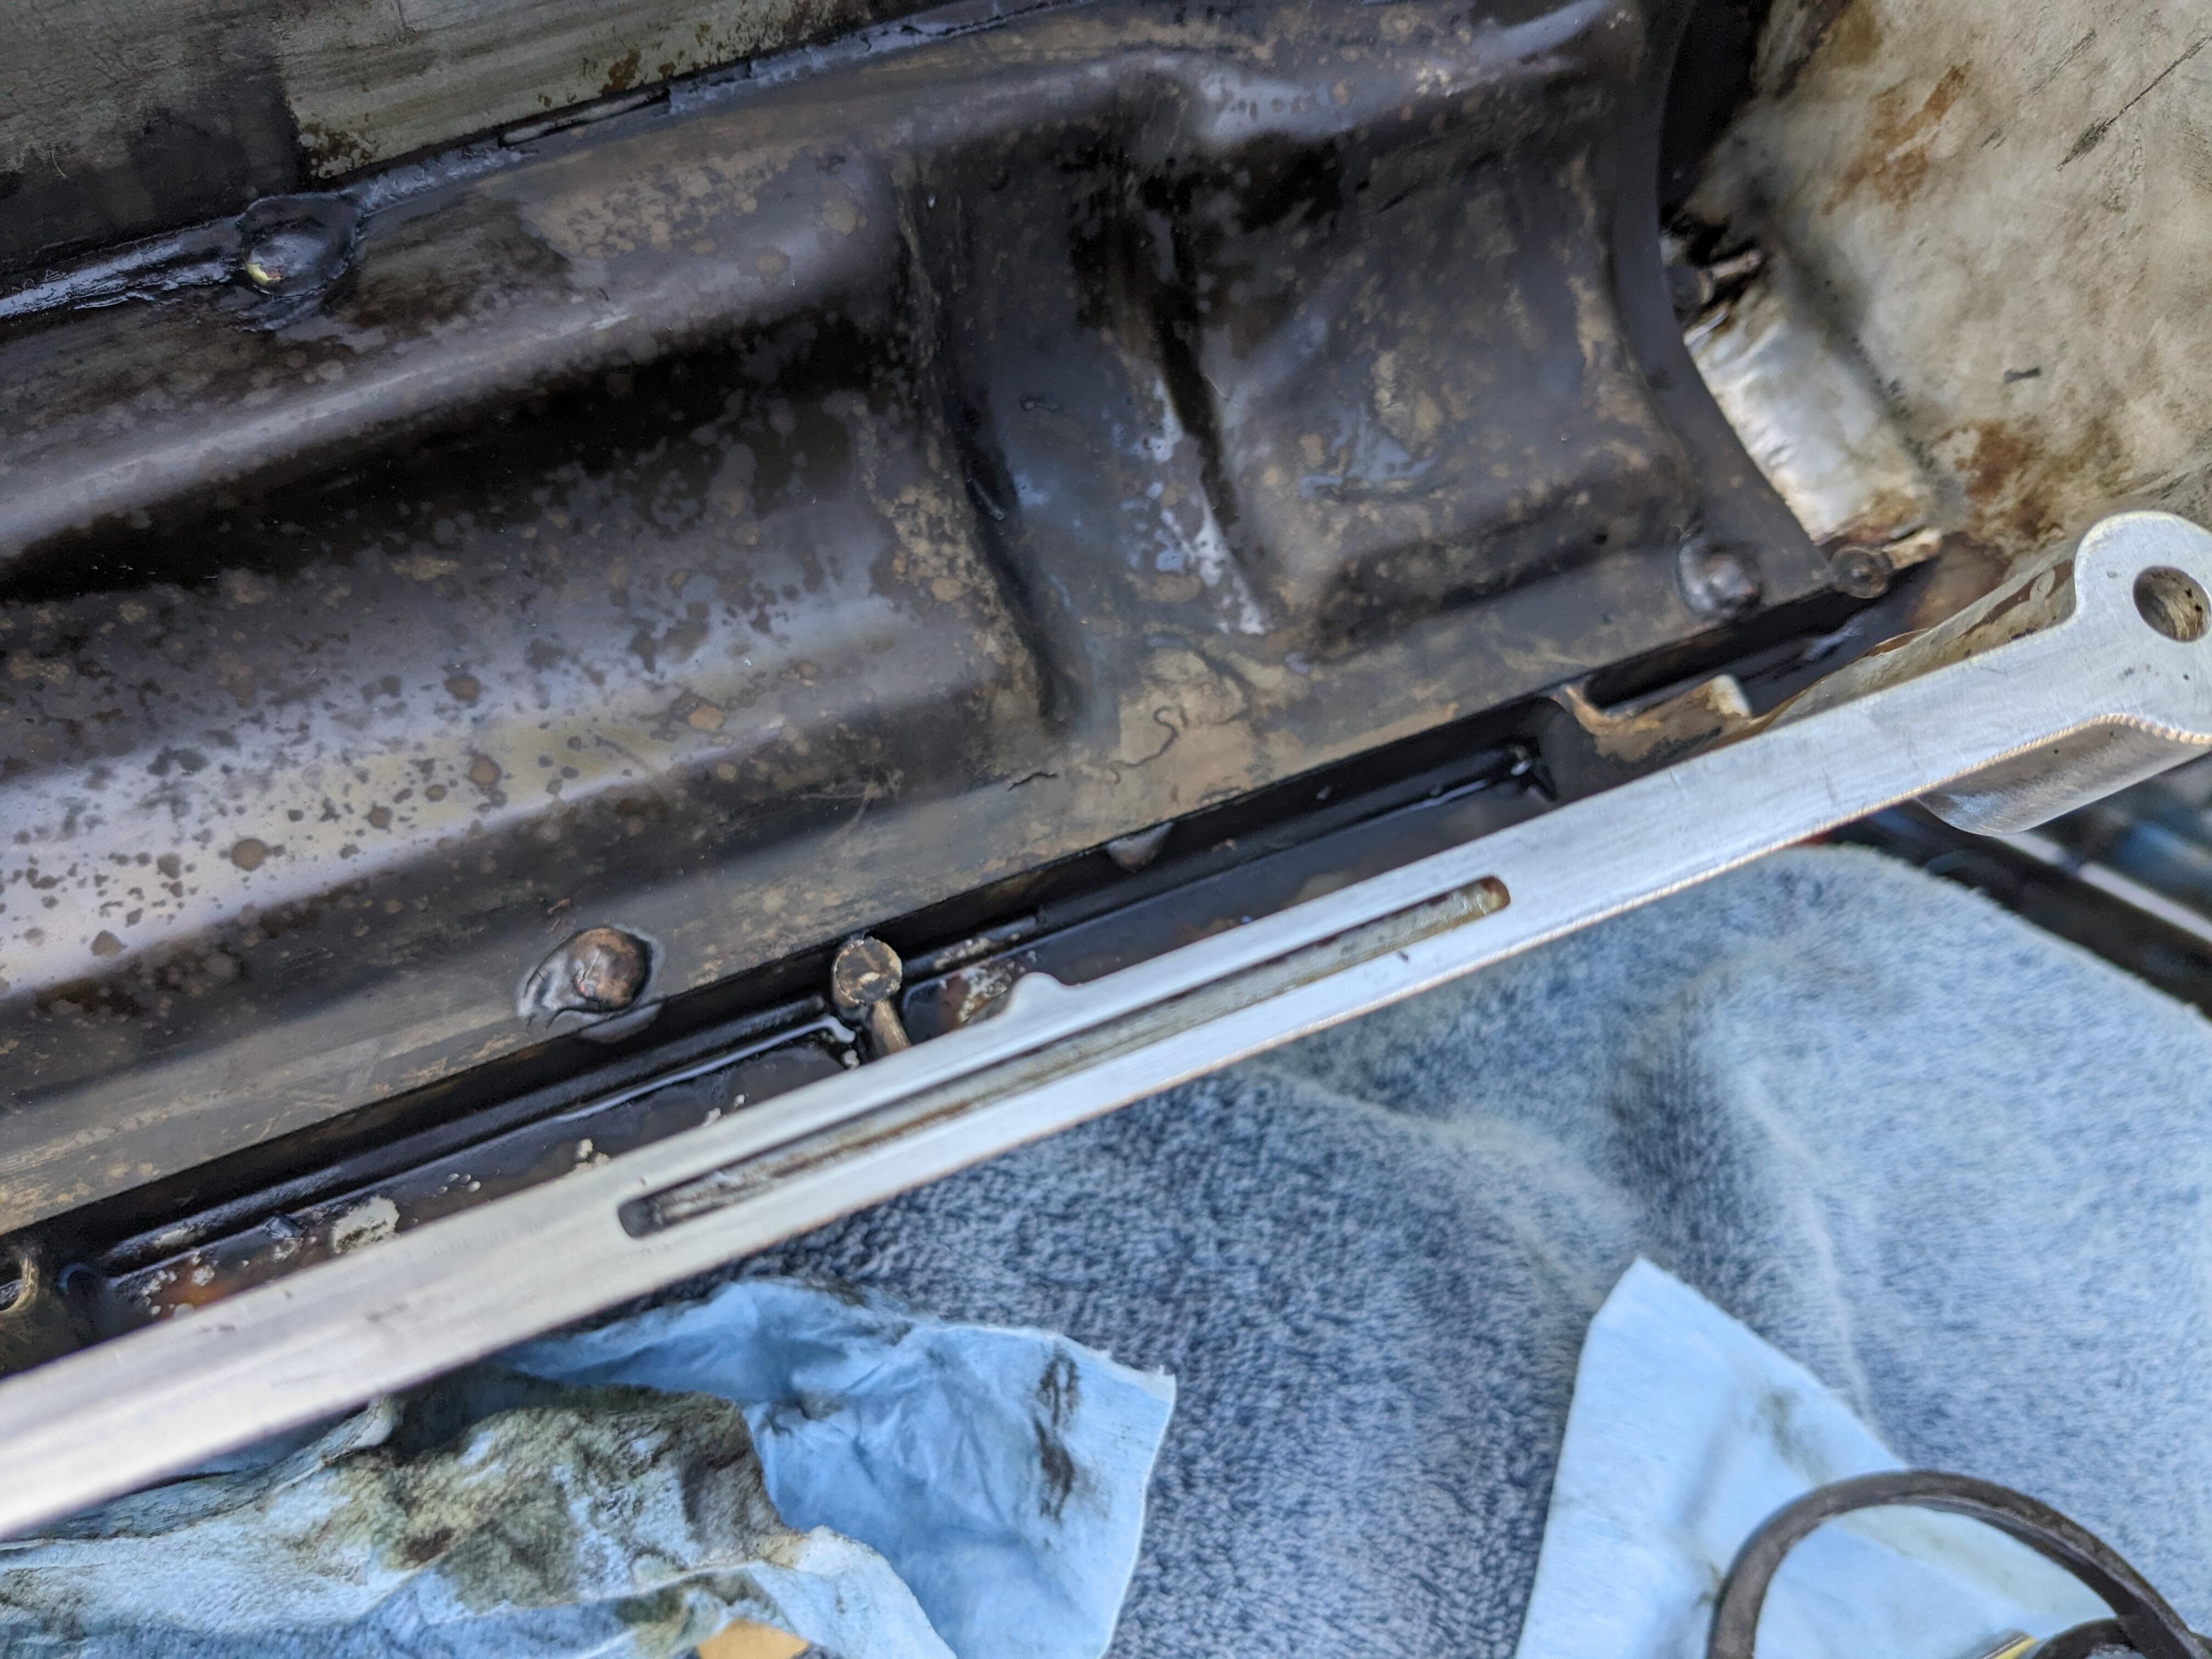
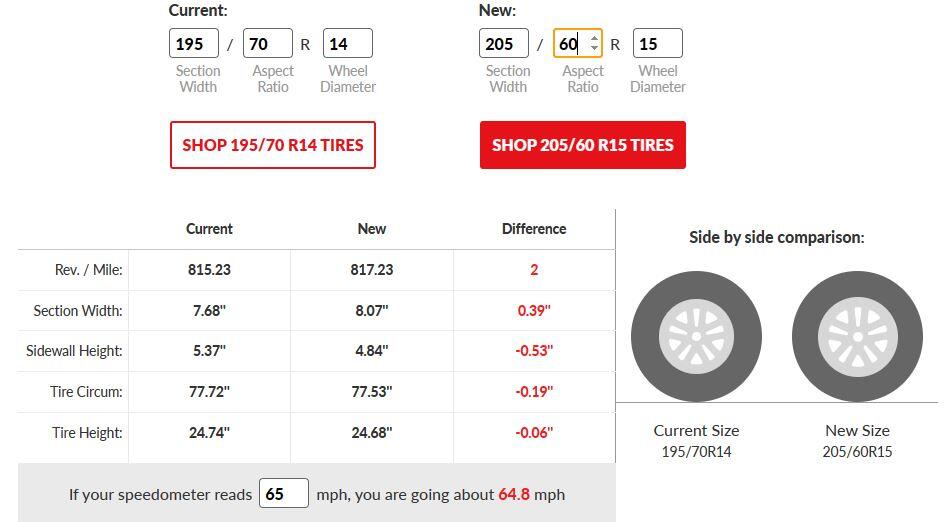 1 point1 pointThere was a belgian that said he went to the SUN! I asked.. didn't you get burned? NO he said.. we went at night..1 point1 pointI found the issue. It was the gauge. When I tried the new gauge the first time it must have not been plugged in fully. Thank you guys for the help. I really appreciate you helping a newbie.1 pointCork/rubber composite gasket arrived last night, so I changed it out after work The silicone one (Milkfab is responsive to my inquiry) has torn in several places - note that I did not over torque the cover, in fact they probably could have been snugged tighter, as it took minimal effort using a 1/4 short rachet to crack them free. Main tear that was pushing out in the left rear corner - note that they spec a bead of silicone to adhere the gasket to the cover. That was allowed to set up prior to install. Other internal tears I thoroughly cleaned out all the silicone from the gasket retention grooves in the cover. I could find nothing in the factory manual that referenced using any sort of silicone or other agent to secure the stock type gasket. Noting the staggered offset of the gasket at the gear end


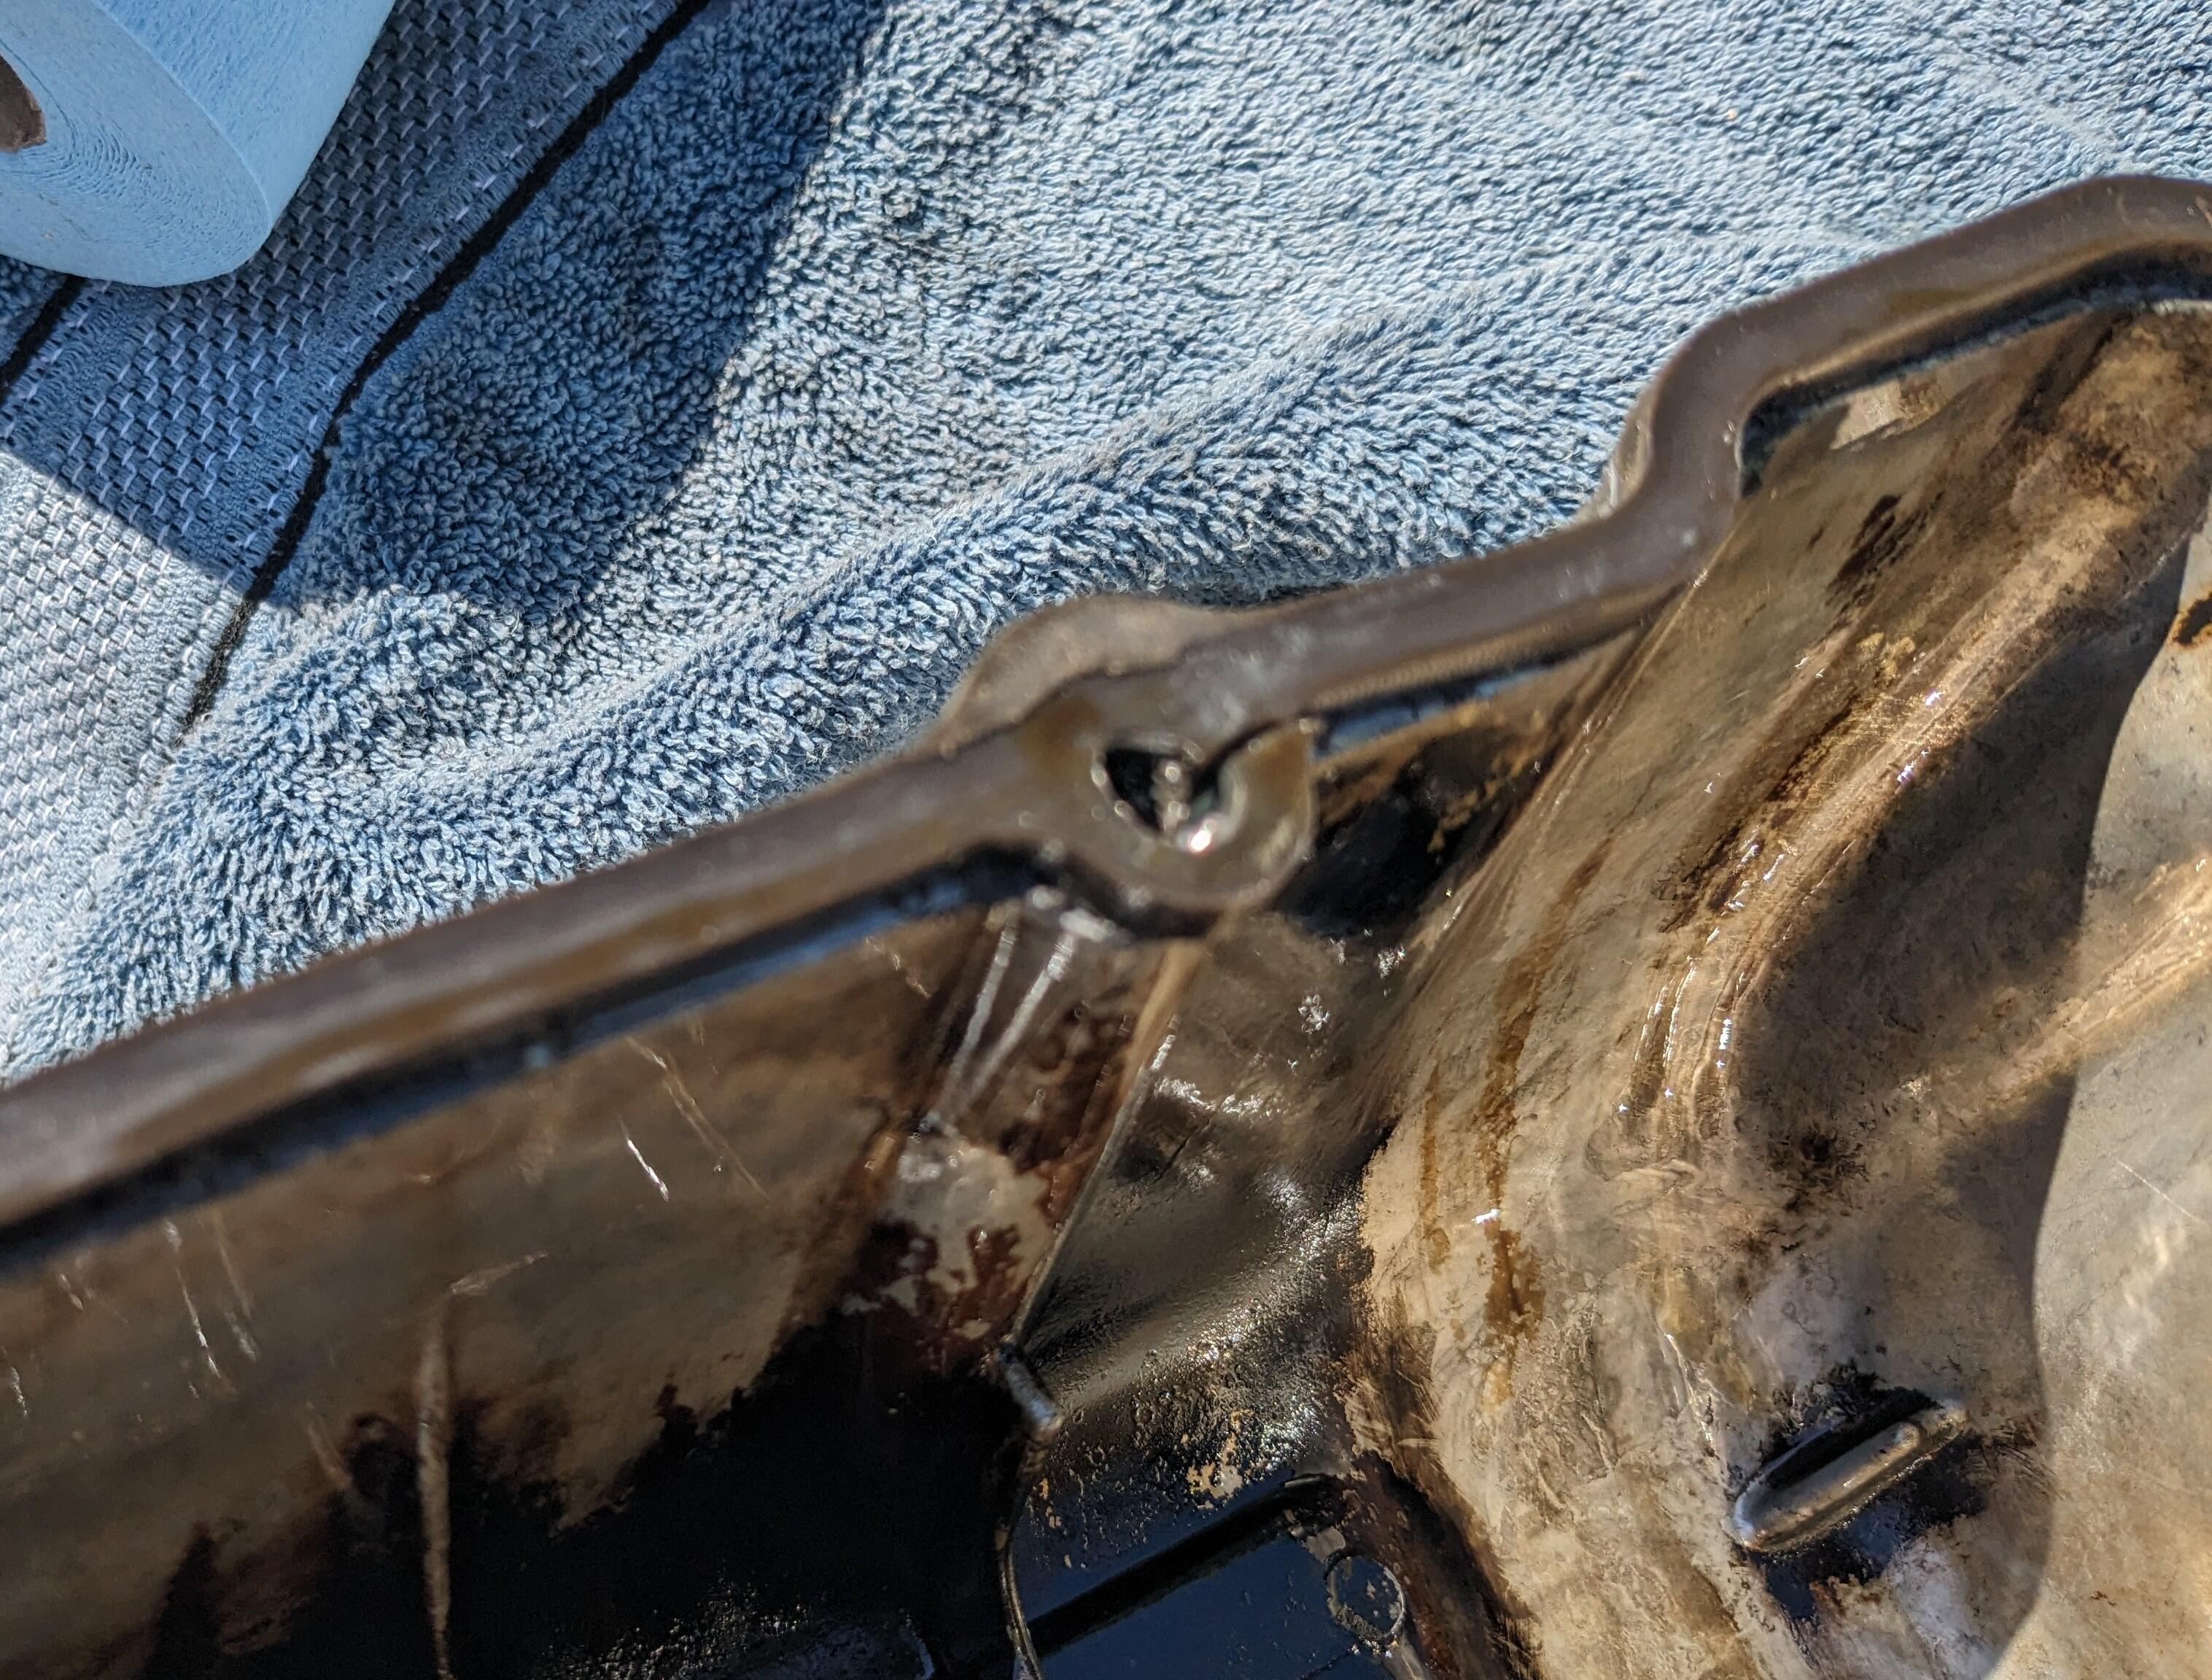
 1 pointExactly what @Captain Obvious was talking about and what I am going to install. If interested I can follow up with more instructions.
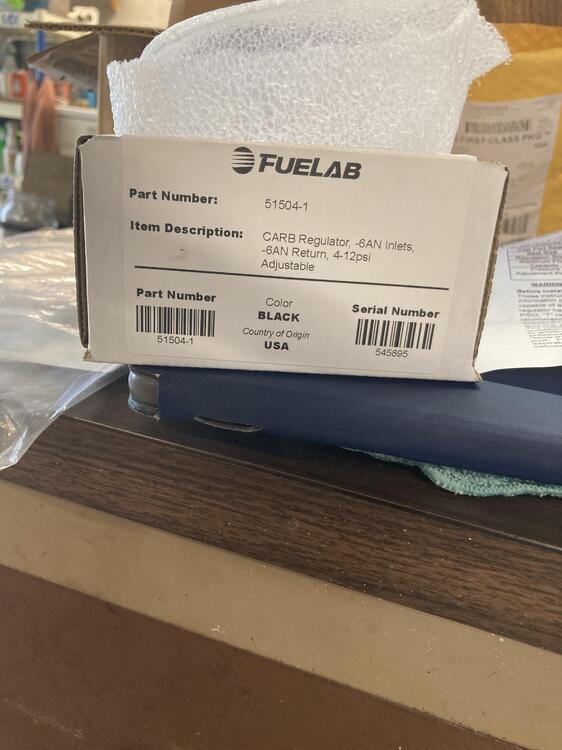 1 point1 point1 point1 point1 point1 point1 point1 pointDon’t be so quick to bash the vendor. What did that guy think he was buying for $50? A hand made, custom designed one of kind bespoke wonder device with gold trim? Maybe he’s never looked at the near infinite supply of 100’s varieties of a 1000 such automotive products on Amazon and thought this was a nice custom piece for his Z and decided, on his own, to spend his money as he saw fit. Only after he realized what he bought, how cheap they are to buy himself, and how little value was actually added by Harmon, did he get indignant about it. Typical. Let the market decide if a product price is too high. Just buy the USB charger thingy that fits into your existing cig lighter hole and avoid the buy it or build it hassle completely.
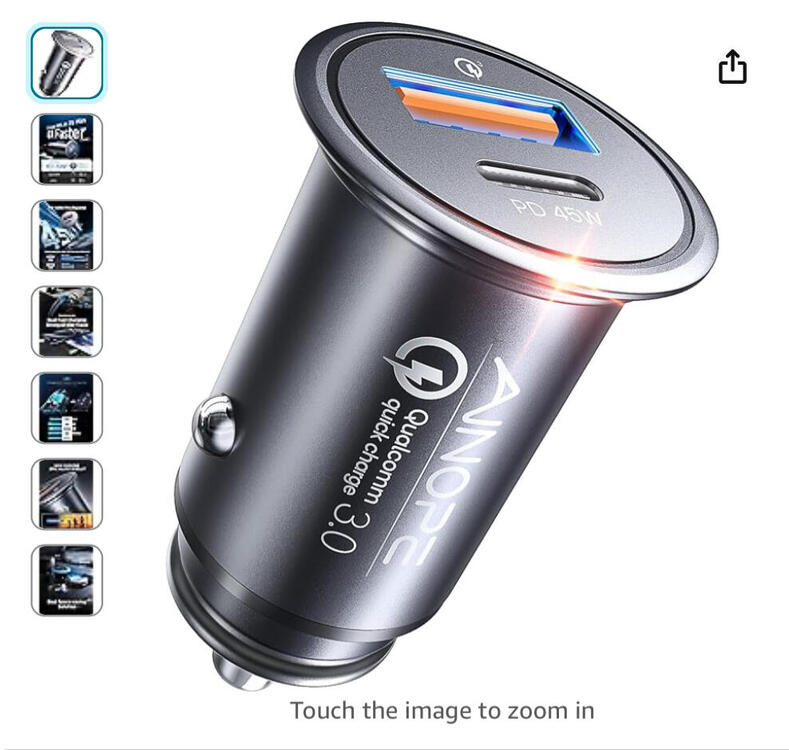 1 point
Important Information
By using this site, you agree to our Privacy Policy and Guidelines. We have placed cookies on your device to help make this website better. You can adjust your cookie settings, otherwise we'll assume you're okay to continue.


Account
Search
Configure browser push notifications
Chrome (Android)
- Tap the lock icon next to the address bar.
- Tap Permissions → Notifications.
- Adjust your preference.
Chrome (Desktop)
- Click the padlock icon in the address bar.
- Select Site settings.
- Find Notifications and adjust your preference.
Safari (iOS 16.4+)
- Ensure the site is installed via Add to Home Screen.
- Open Settings App → Notifications.
- Find your app name and adjust your preference.
Safari (macOS)
- Go to Safari → Preferences.
- Click the Websites tab.
- Select Notifications in the sidebar.
- Find this website and adjust your preference.
Edge (Android)
- Tap the lock icon next to the address bar.
- Tap Permissions.
- Find Notifications and adjust your preference.
Edge (Desktop)
- Click the padlock icon in the address bar.
- Click Permissions for this site.
- Find Notifications and adjust your preference.
Firefox (Android)
- Go to Settings → Site permissions.
- Tap Notifications.
- Find this site in the list and adjust your preference.
Firefox (Desktop)
- Open Firefox Settings.
- Search for Notifications.
- Find this site in the list and adjust your preference.