Leaderboard
-
Patcon
 Subscriber
 5Points11,142Posts
 -
jonbill
Free Member4Points458Posts -
Paulytunes
Subscriber3Points107Posts -
conedodger
Free Member3Points12,513Posts


Popular Content
Showing content with the highest reputation on 01/22/2024 in all areas
-
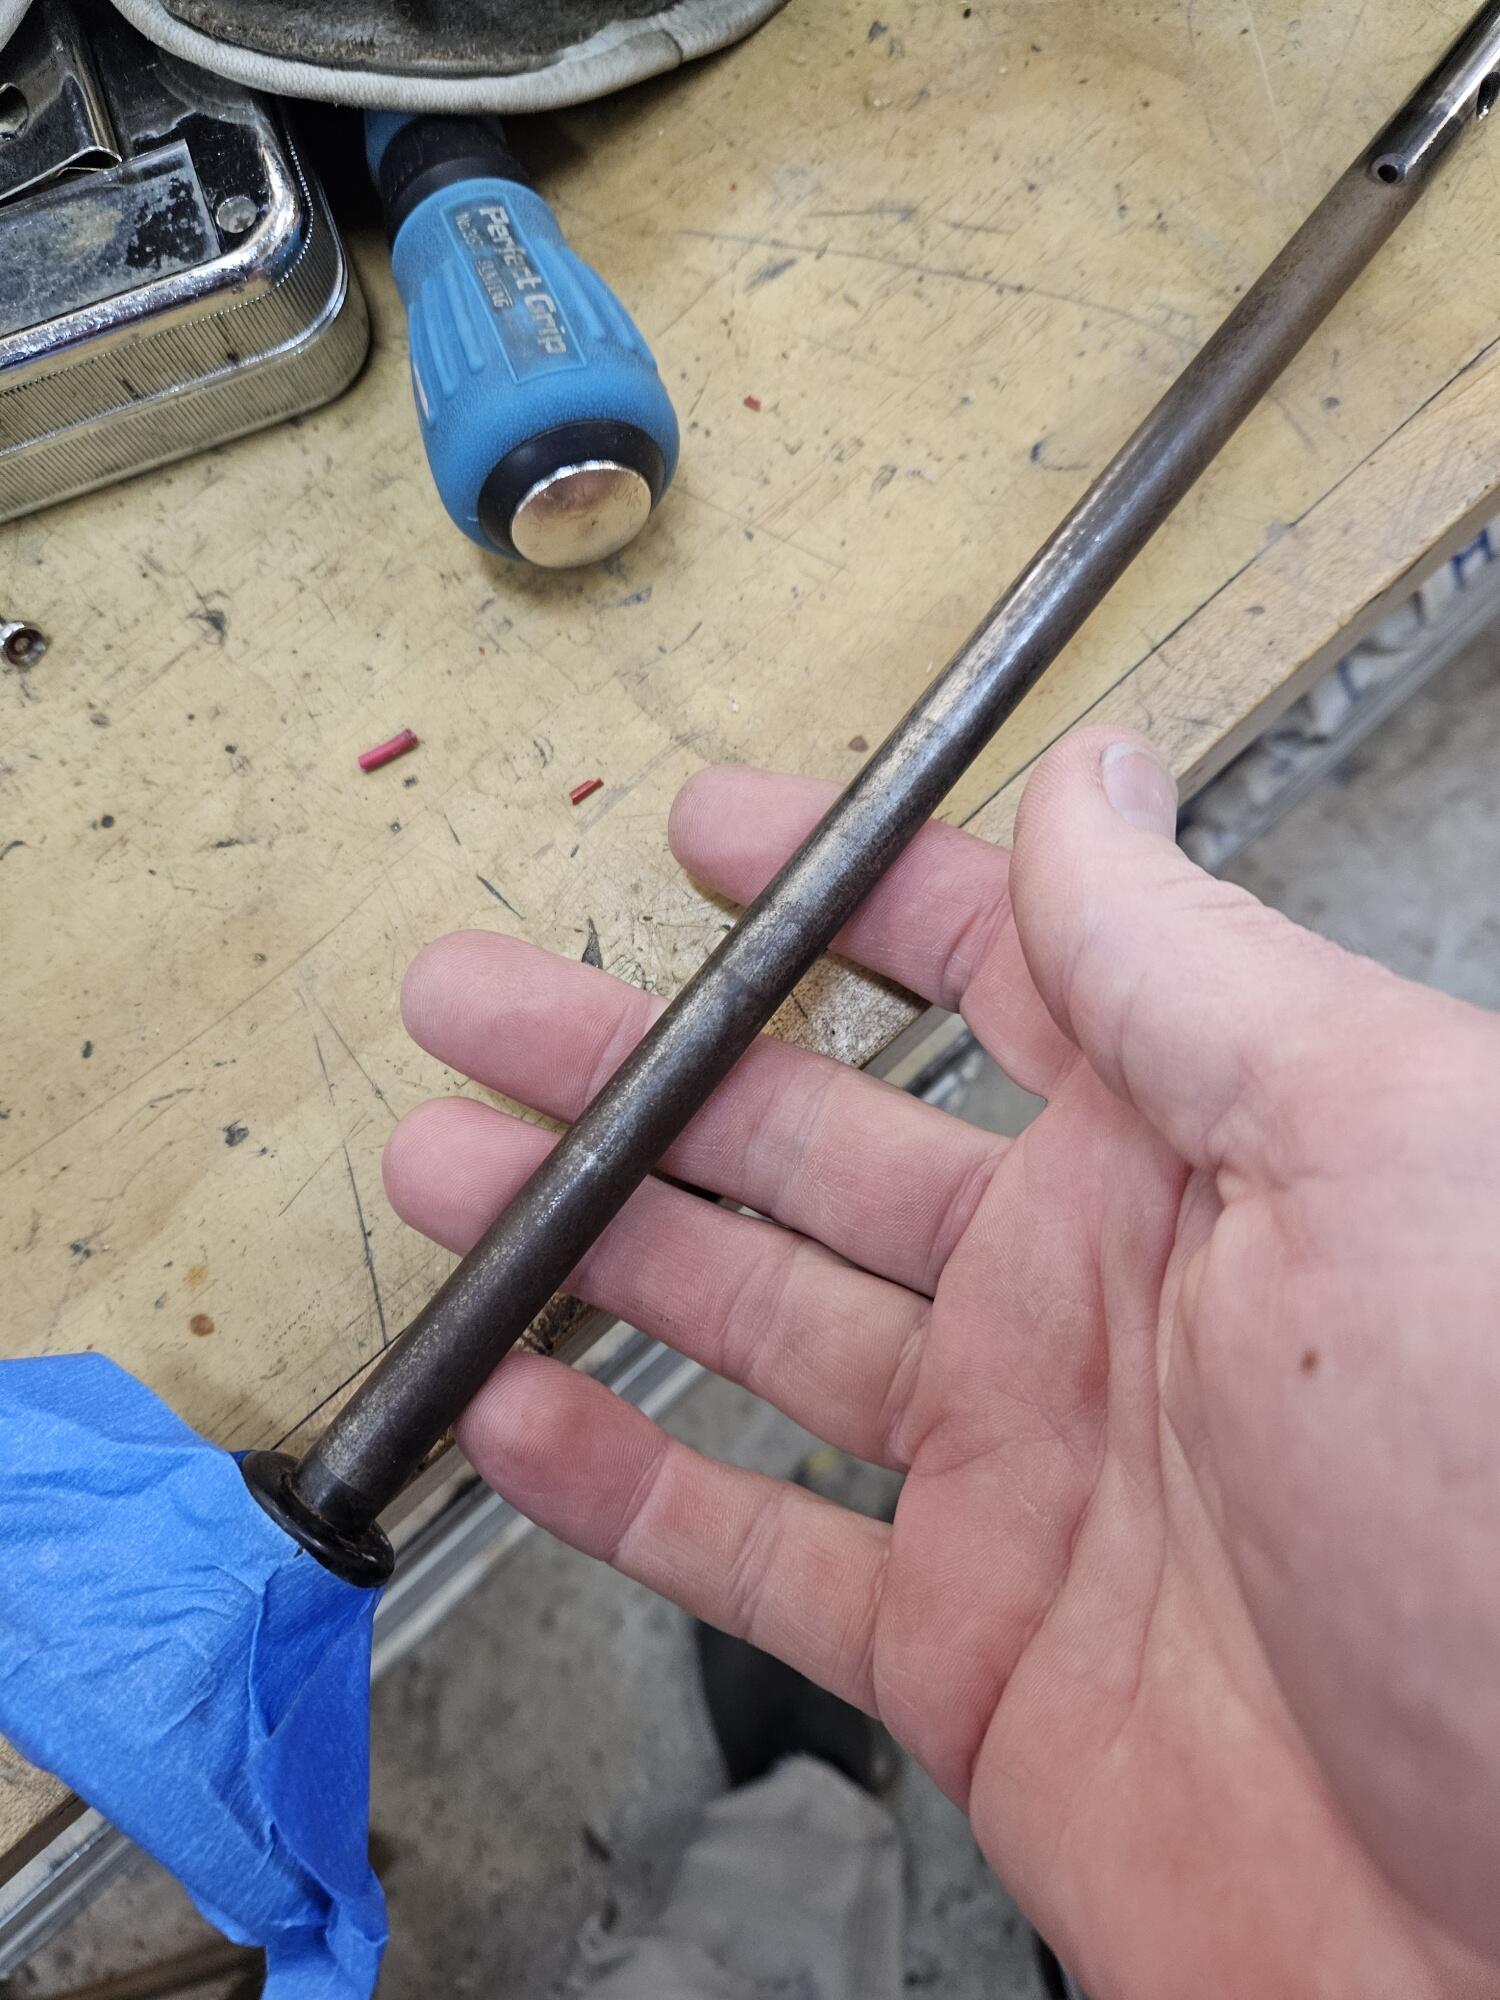
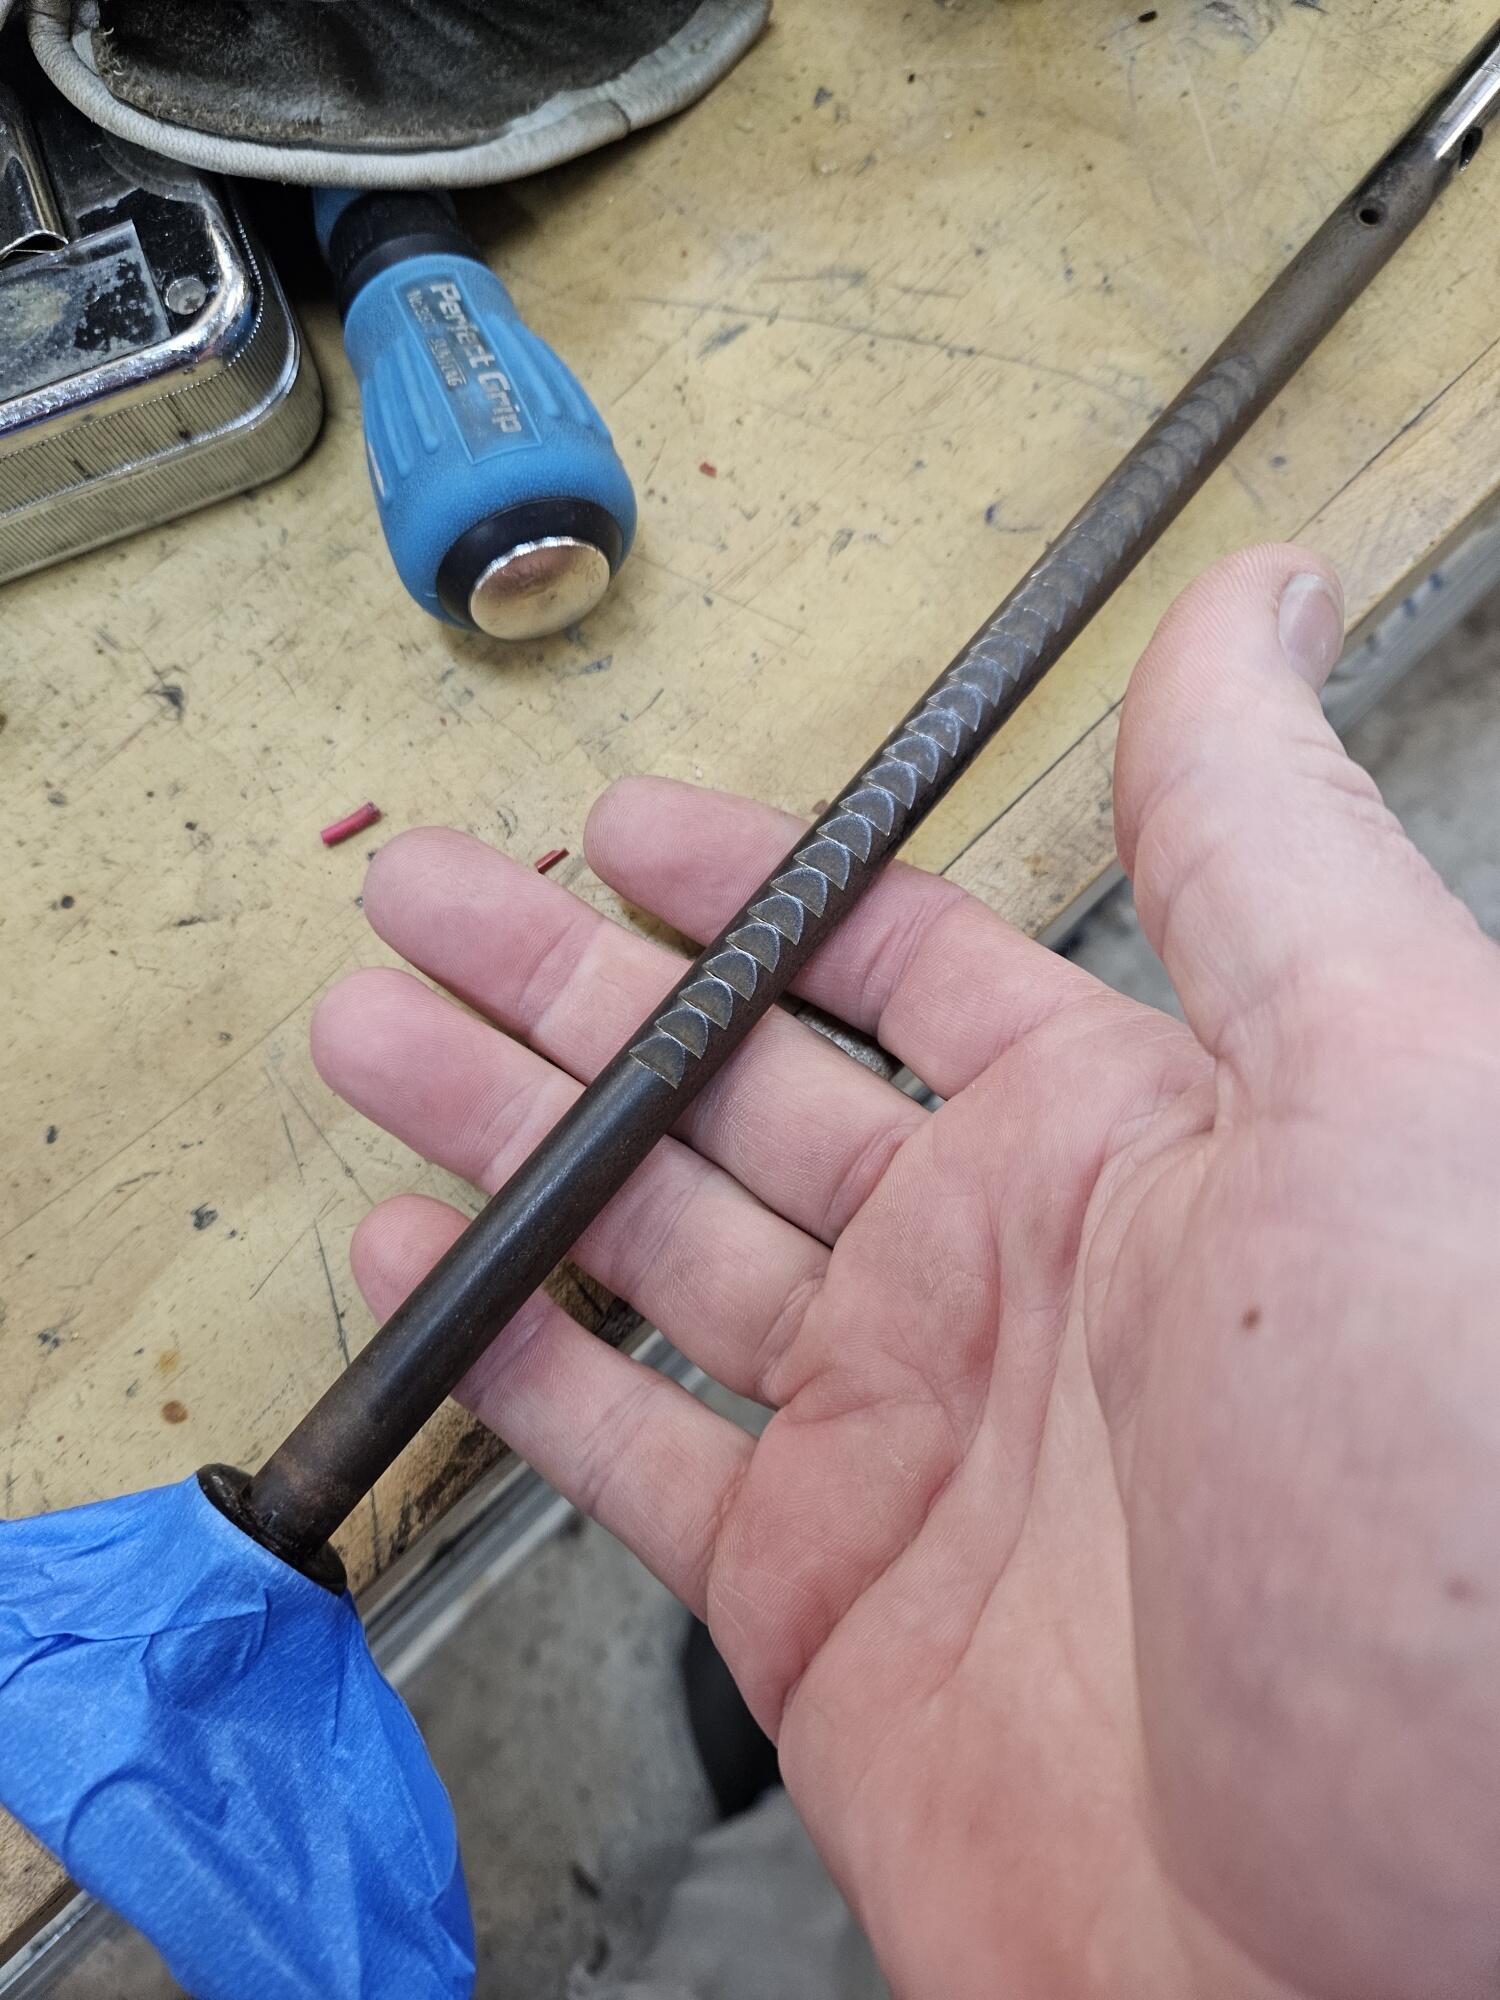
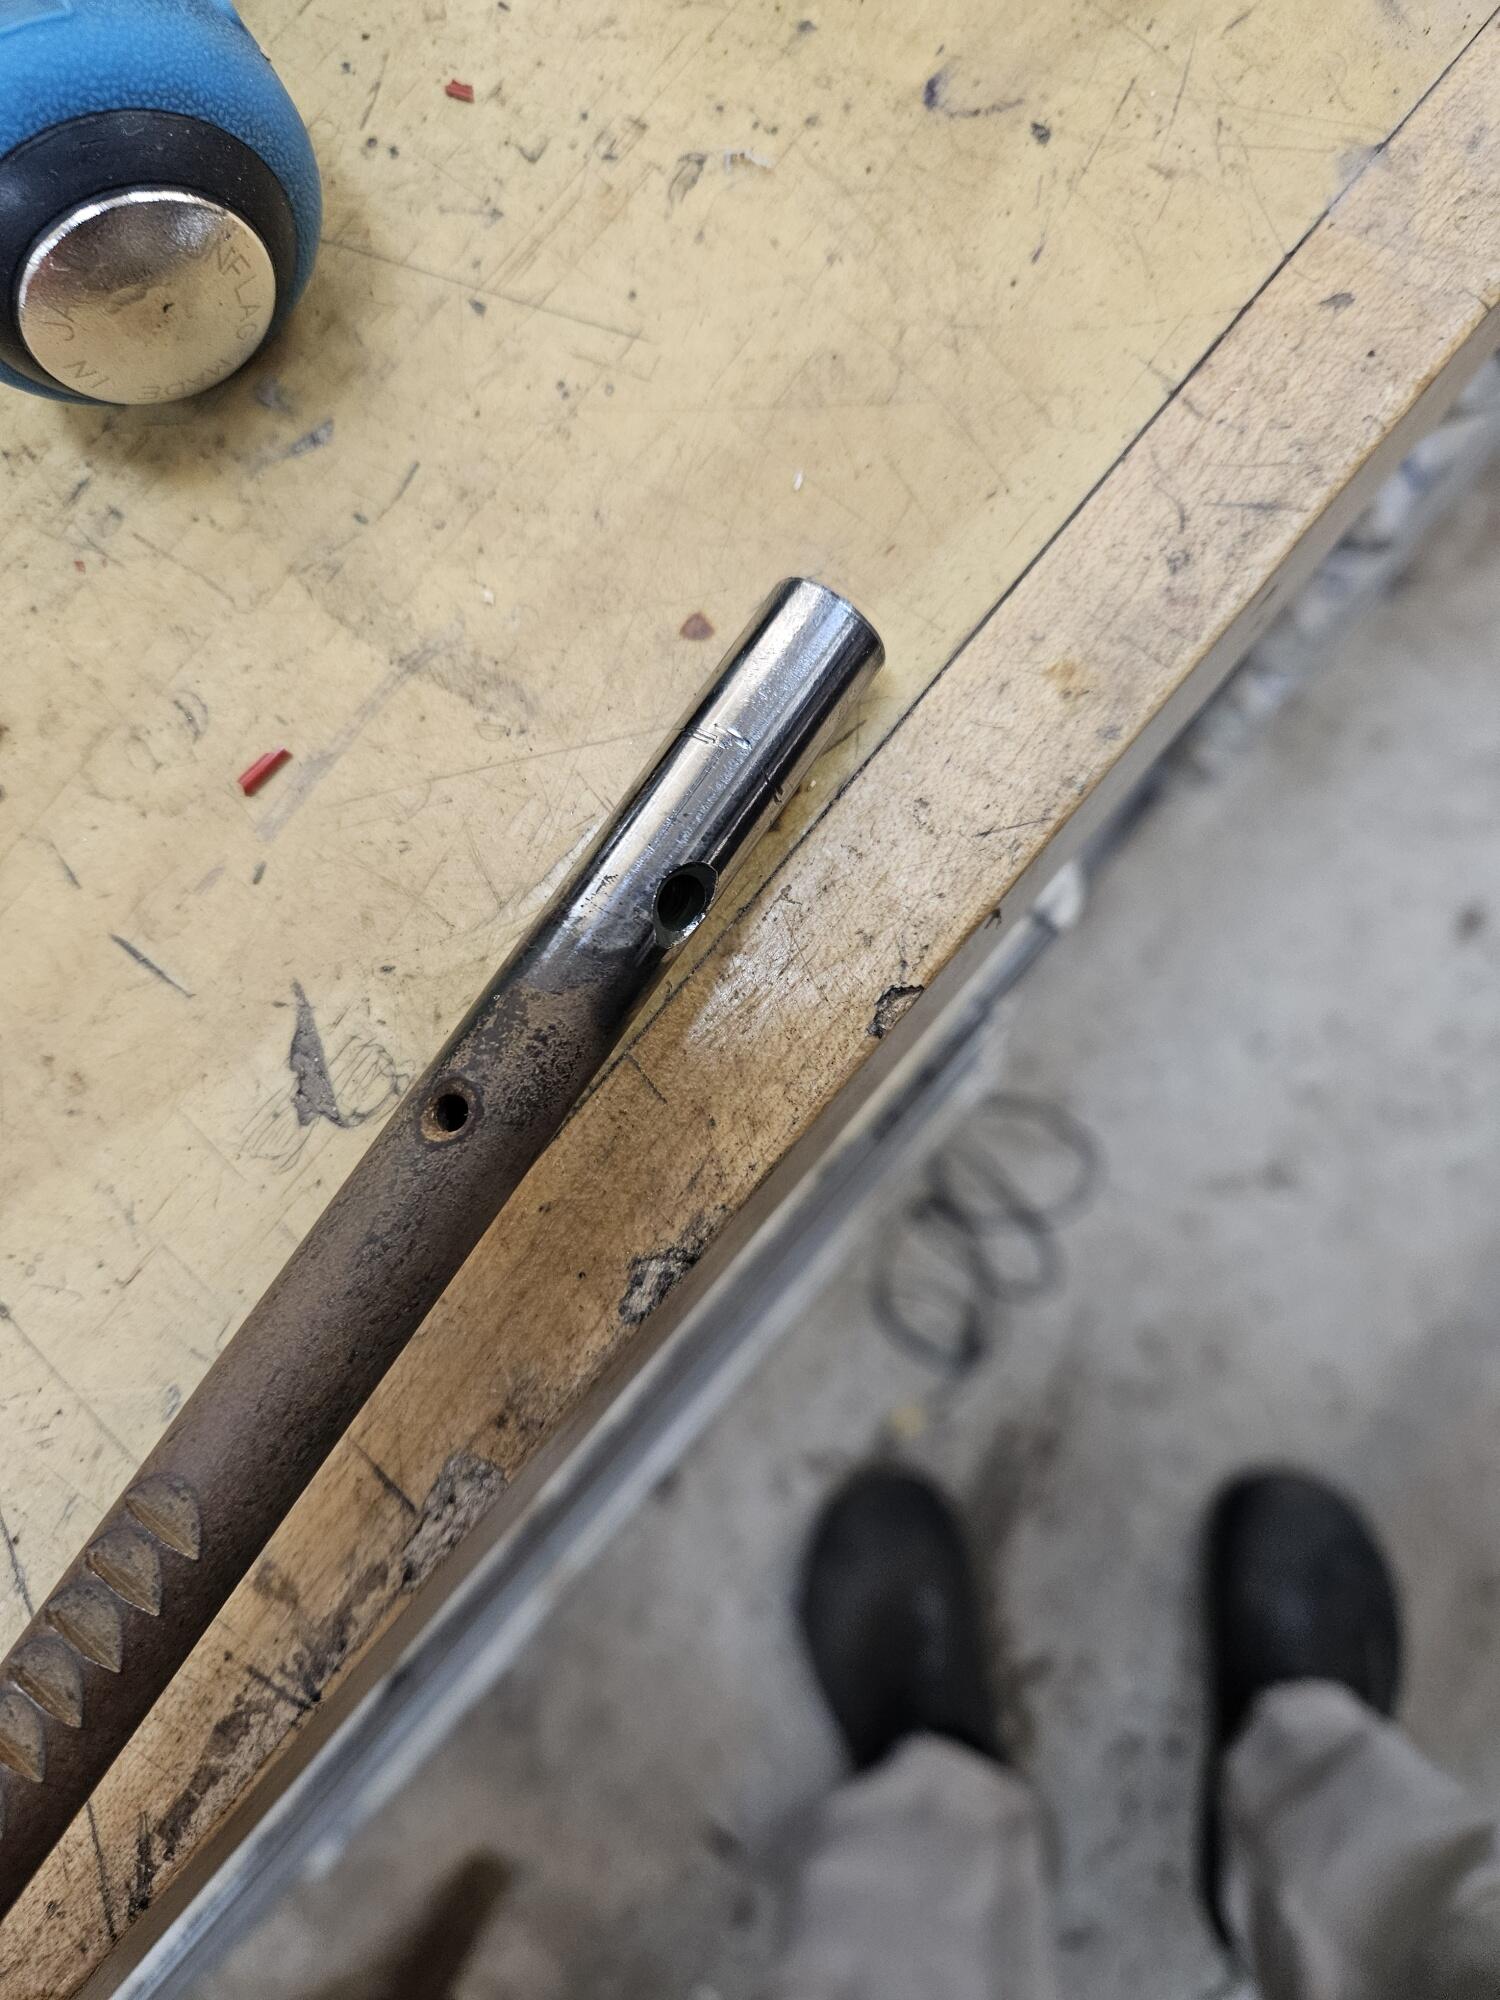
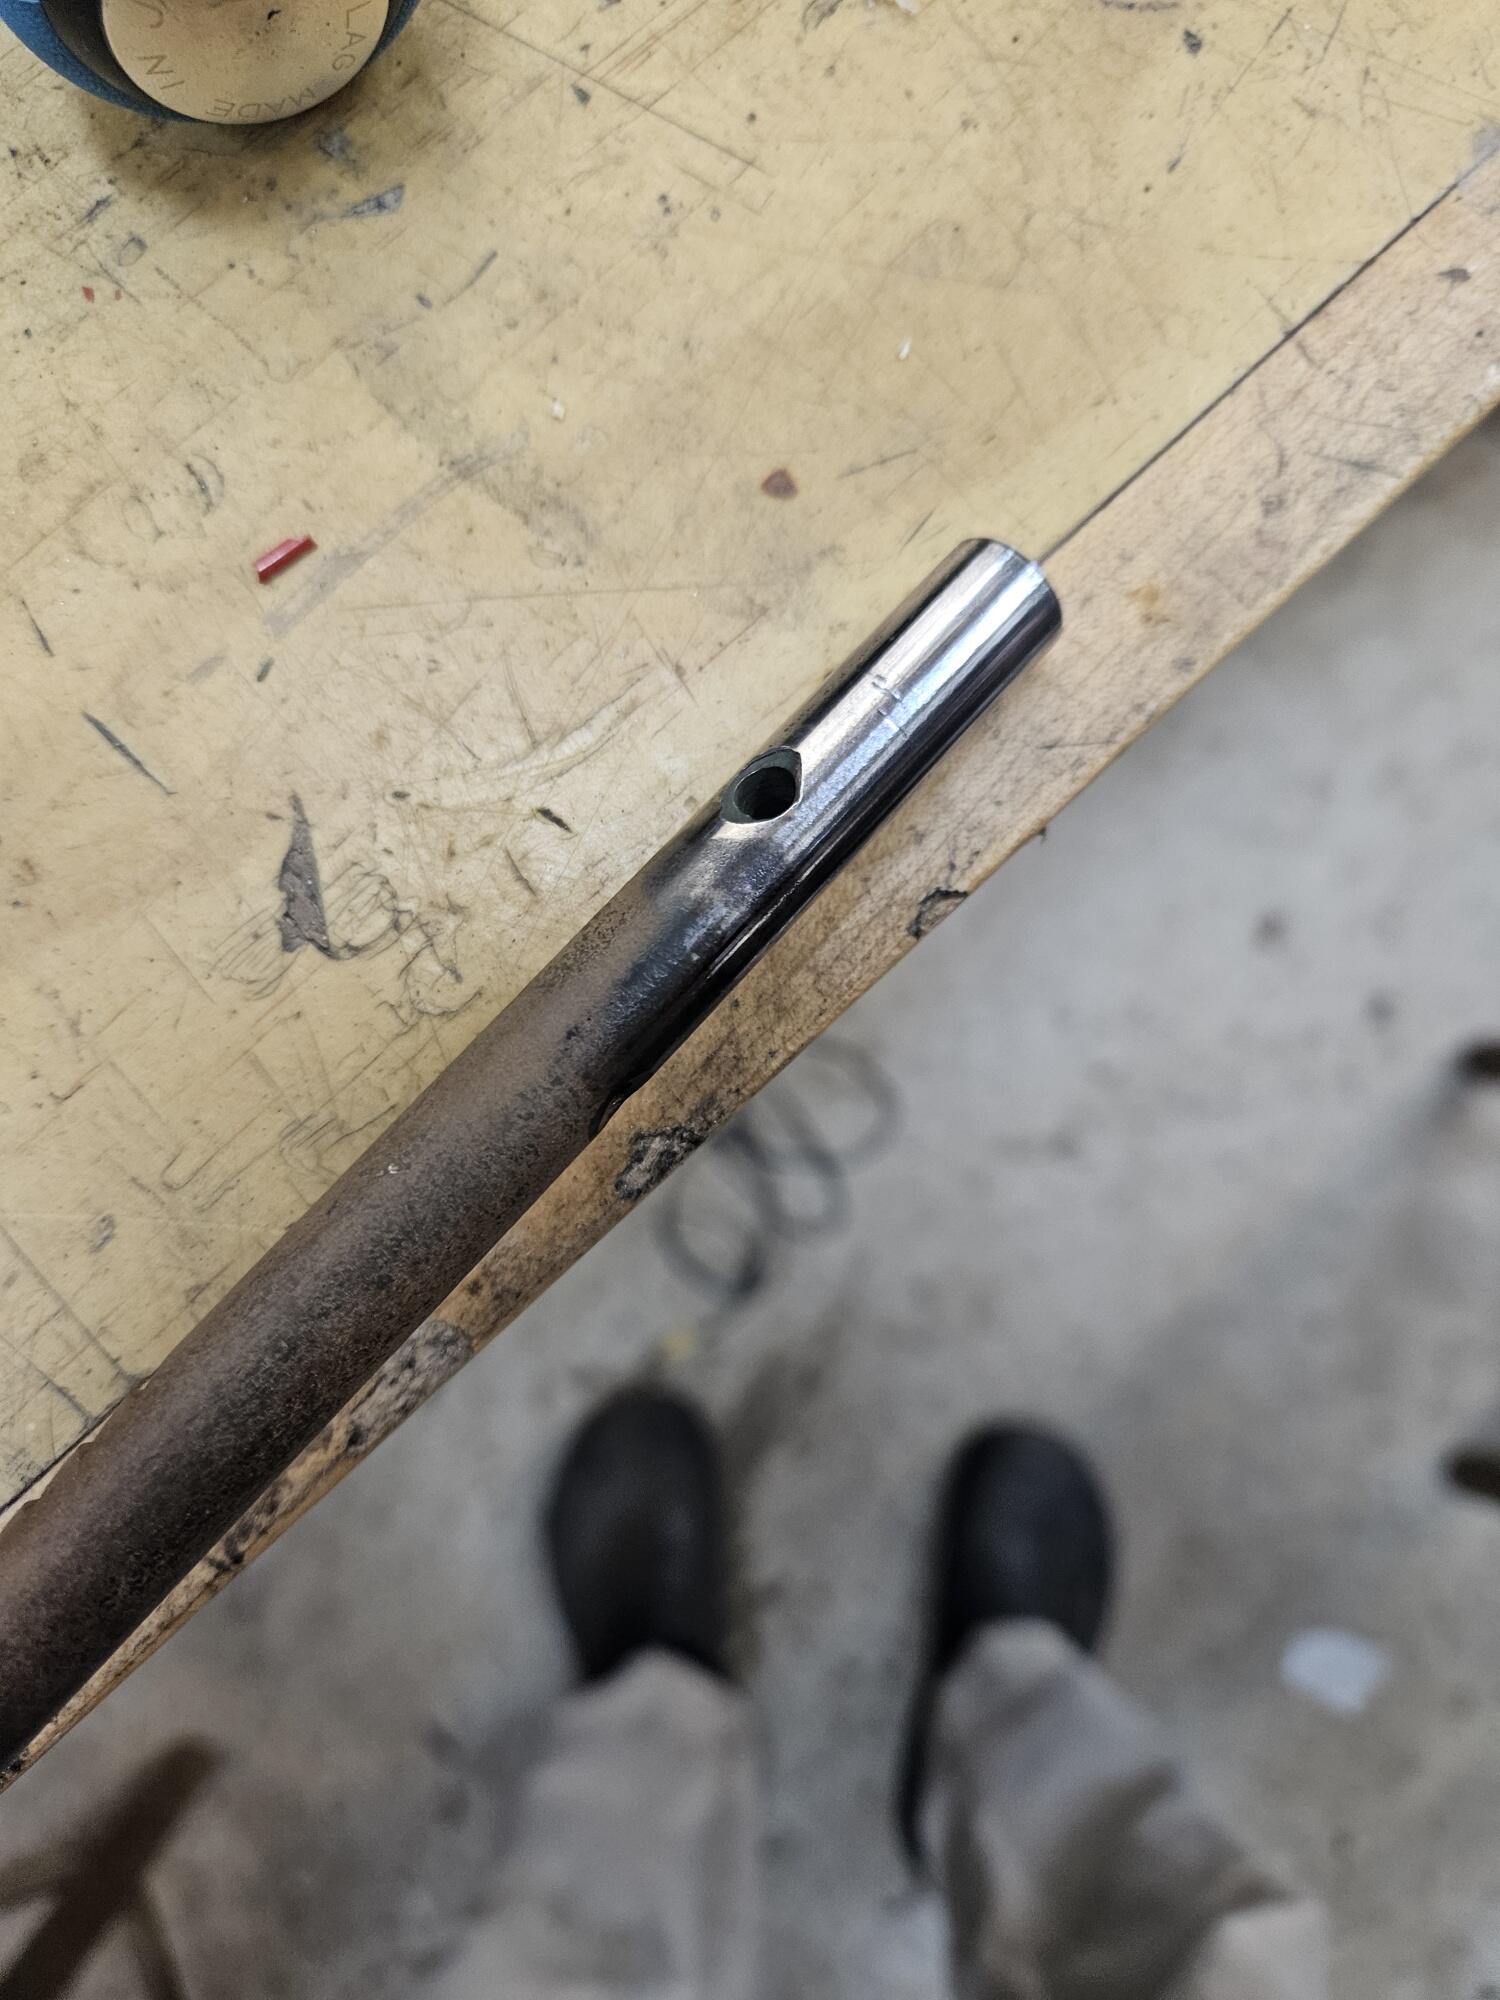
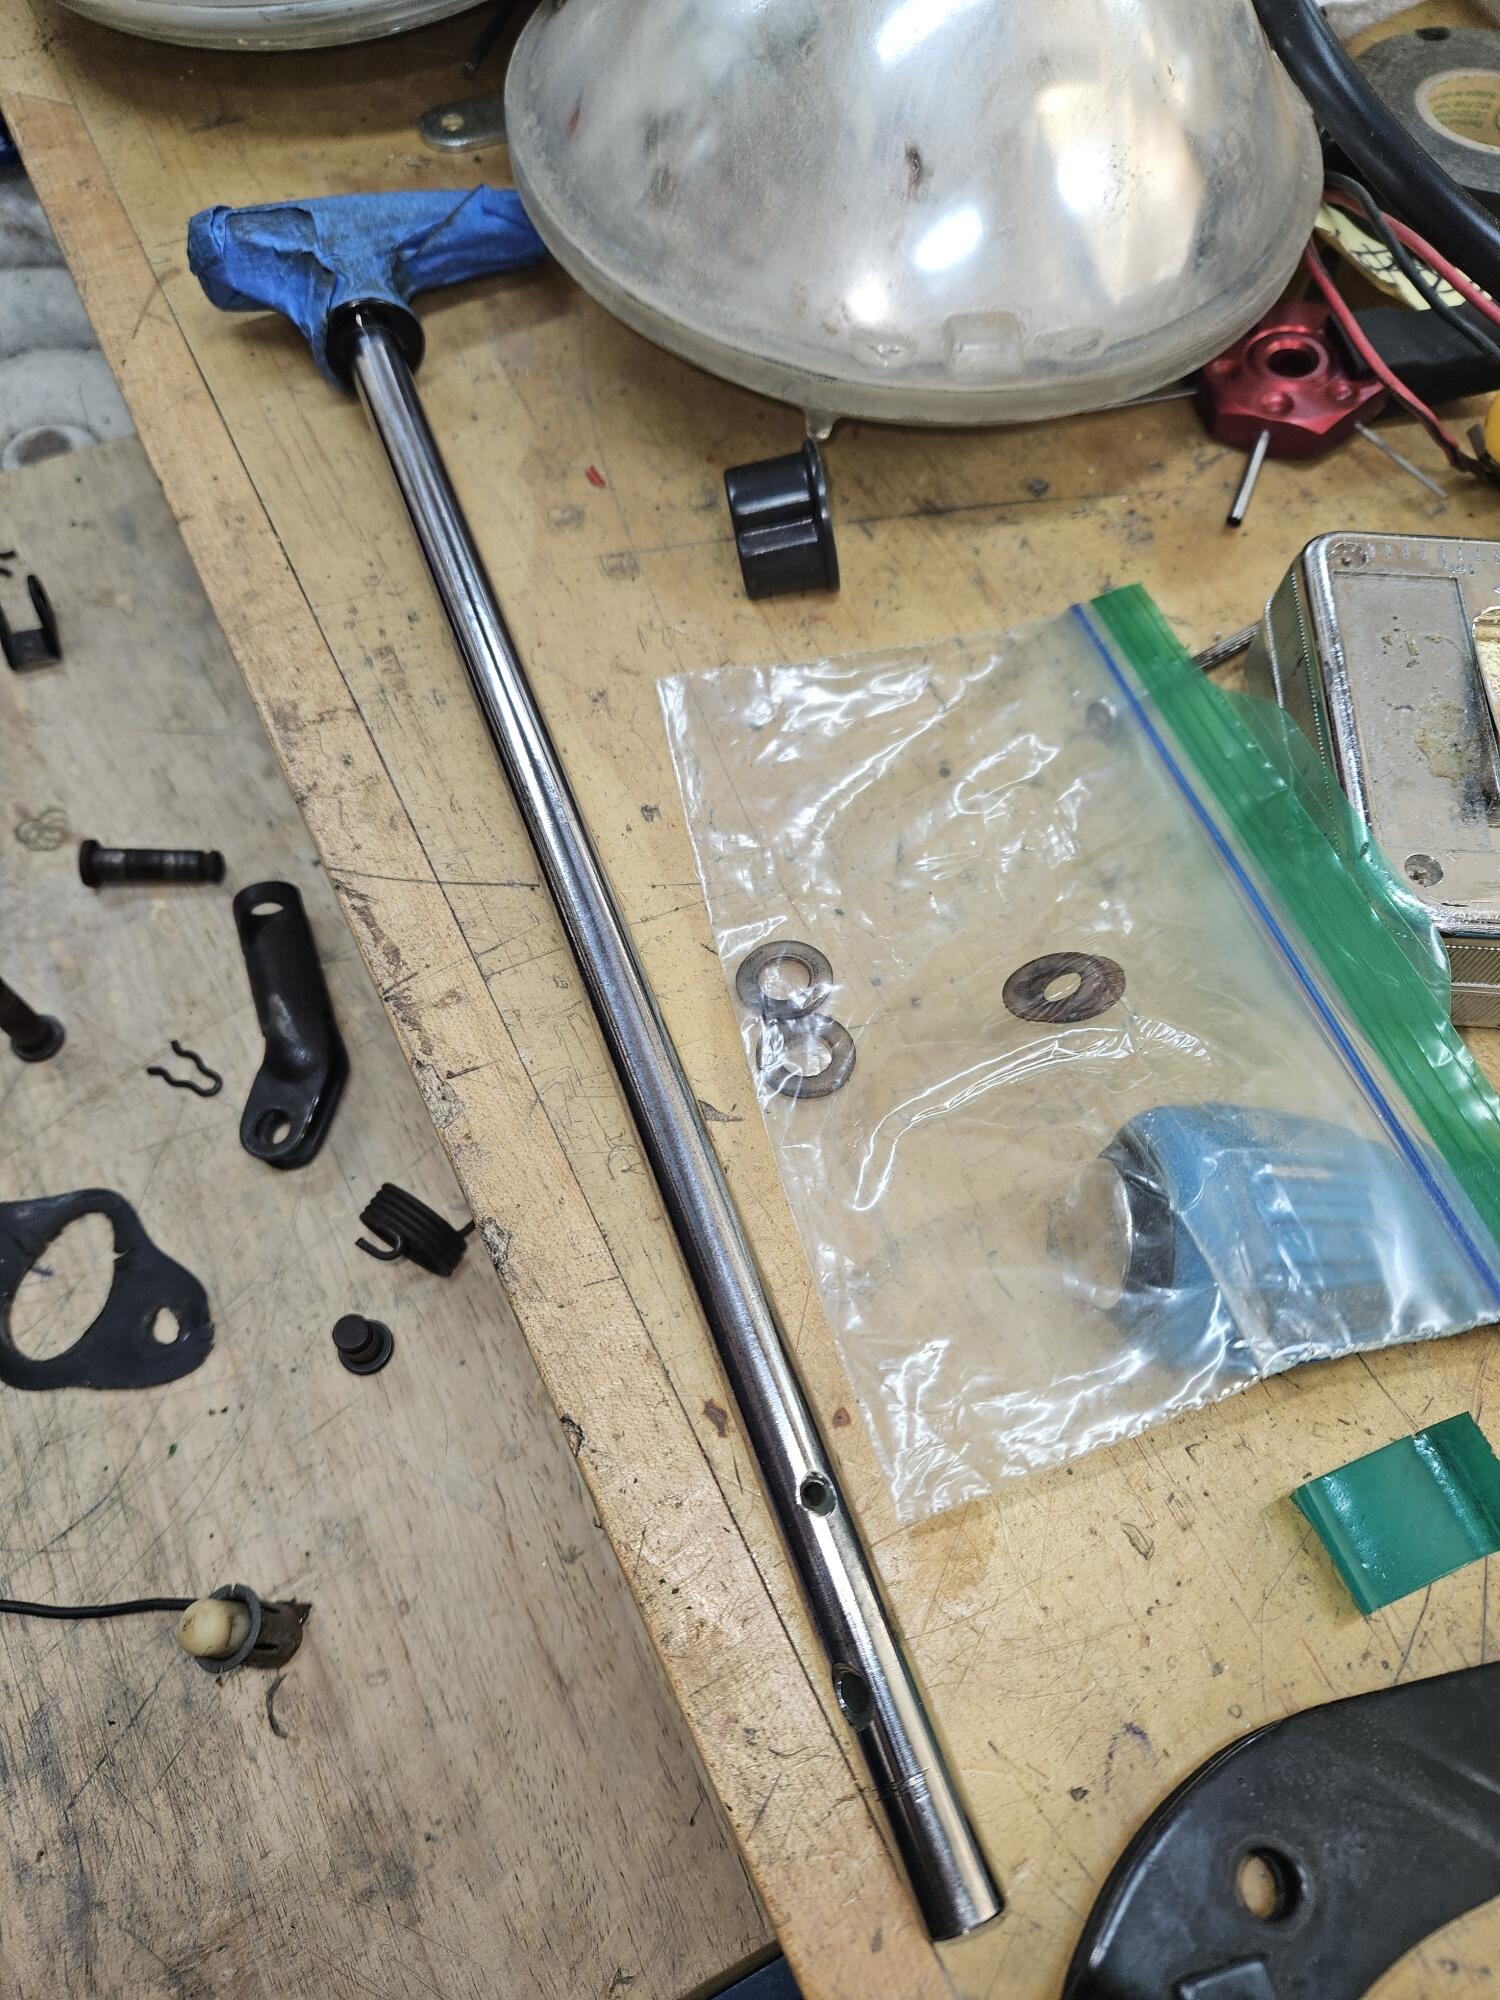
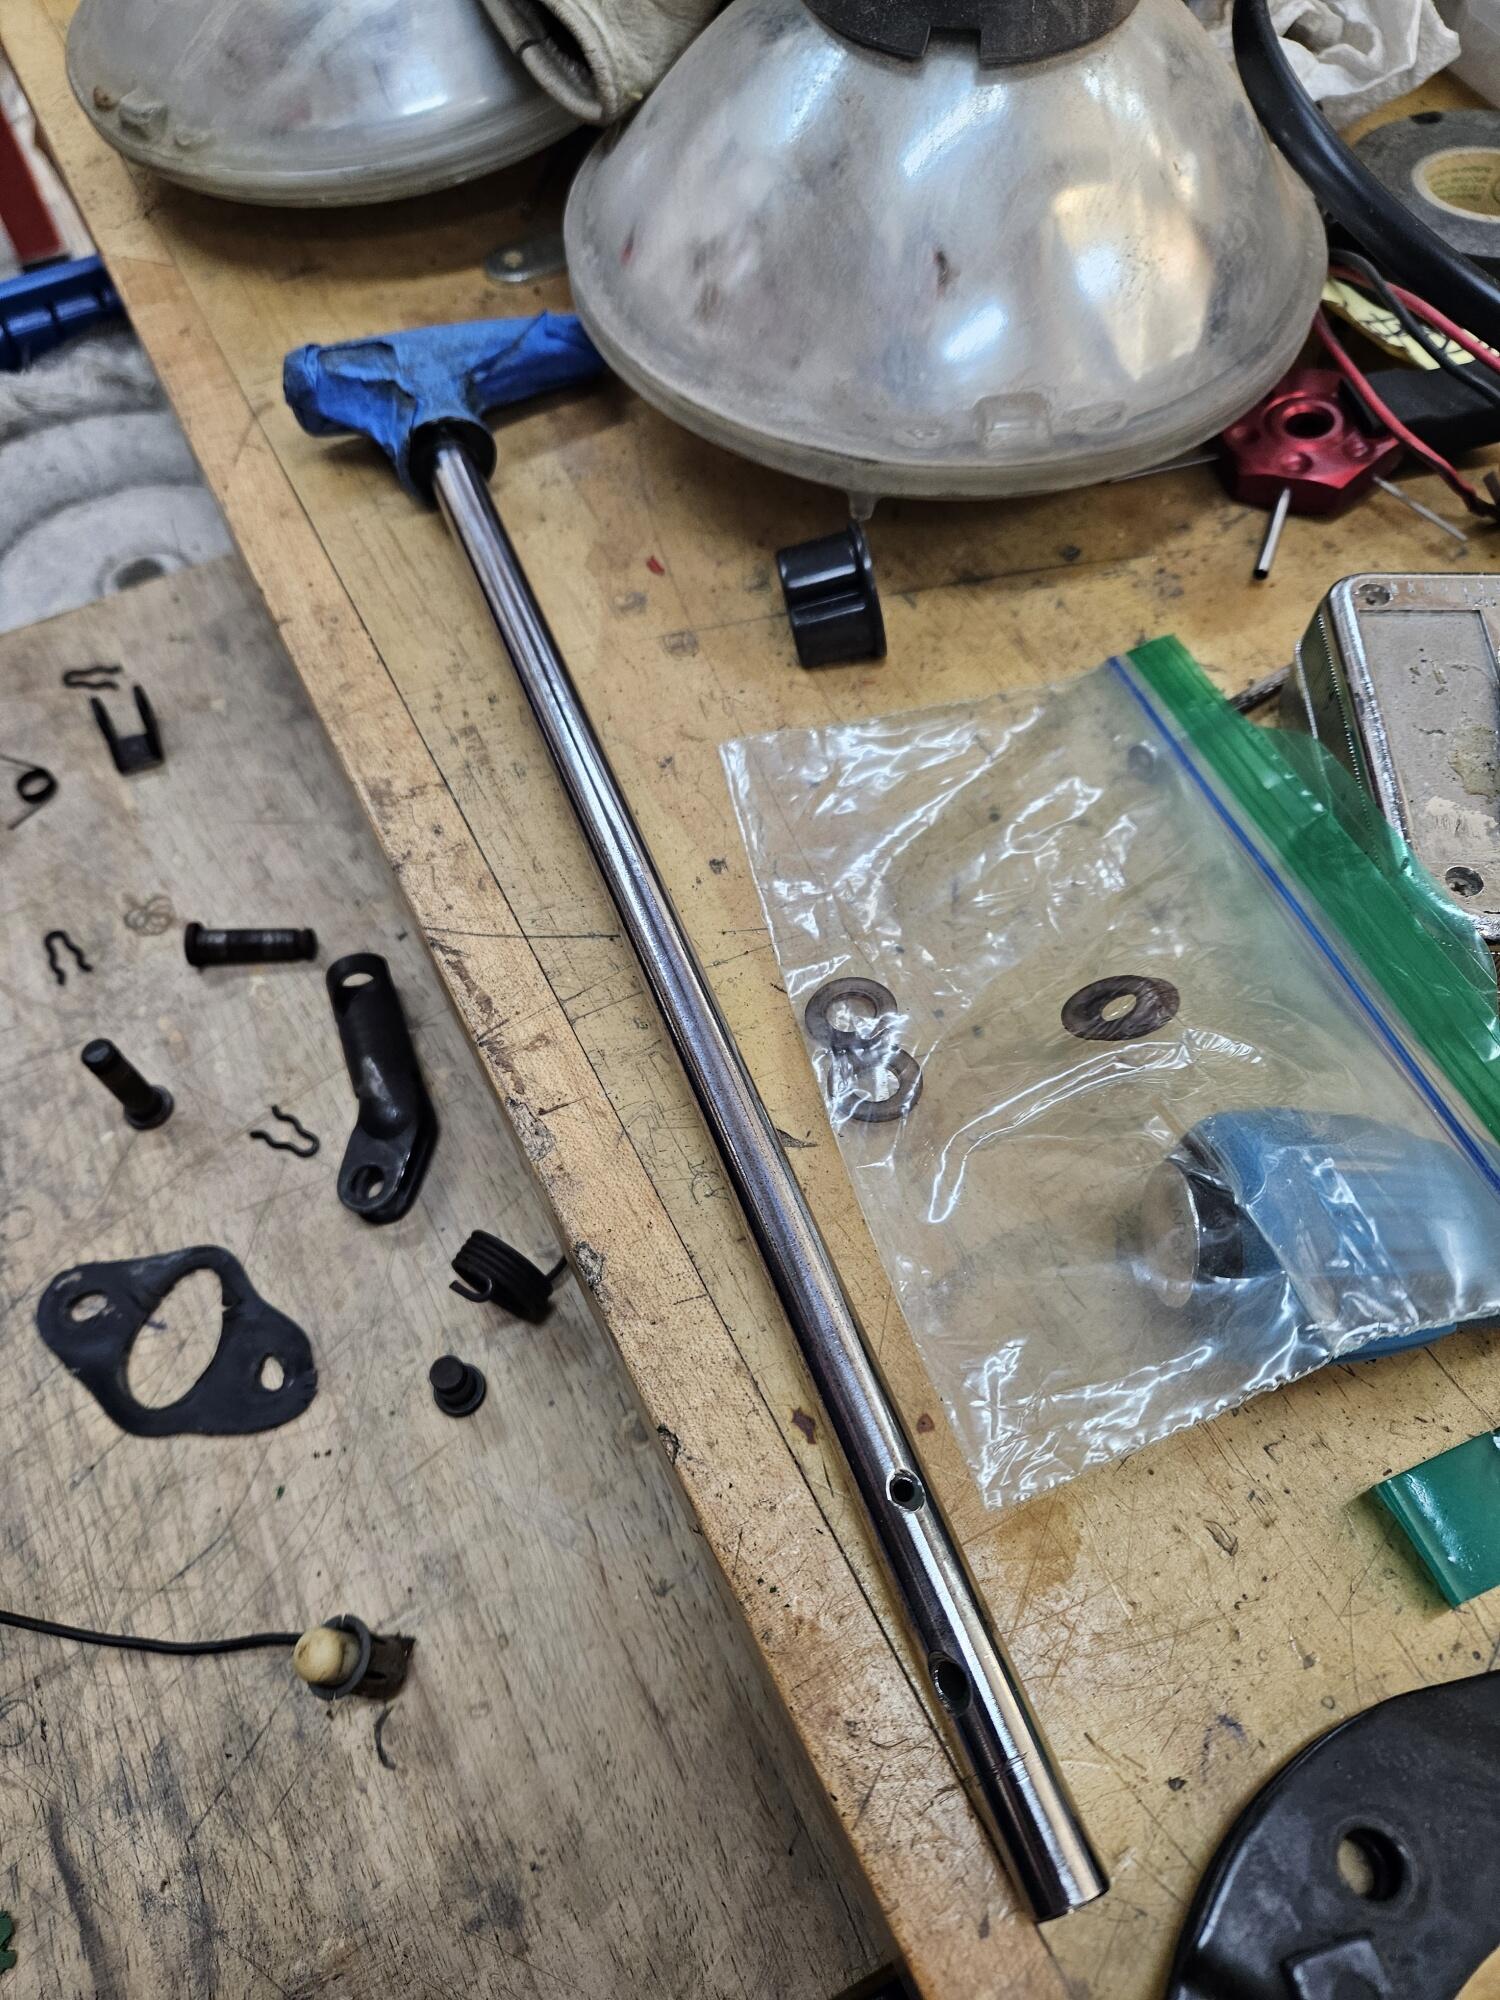
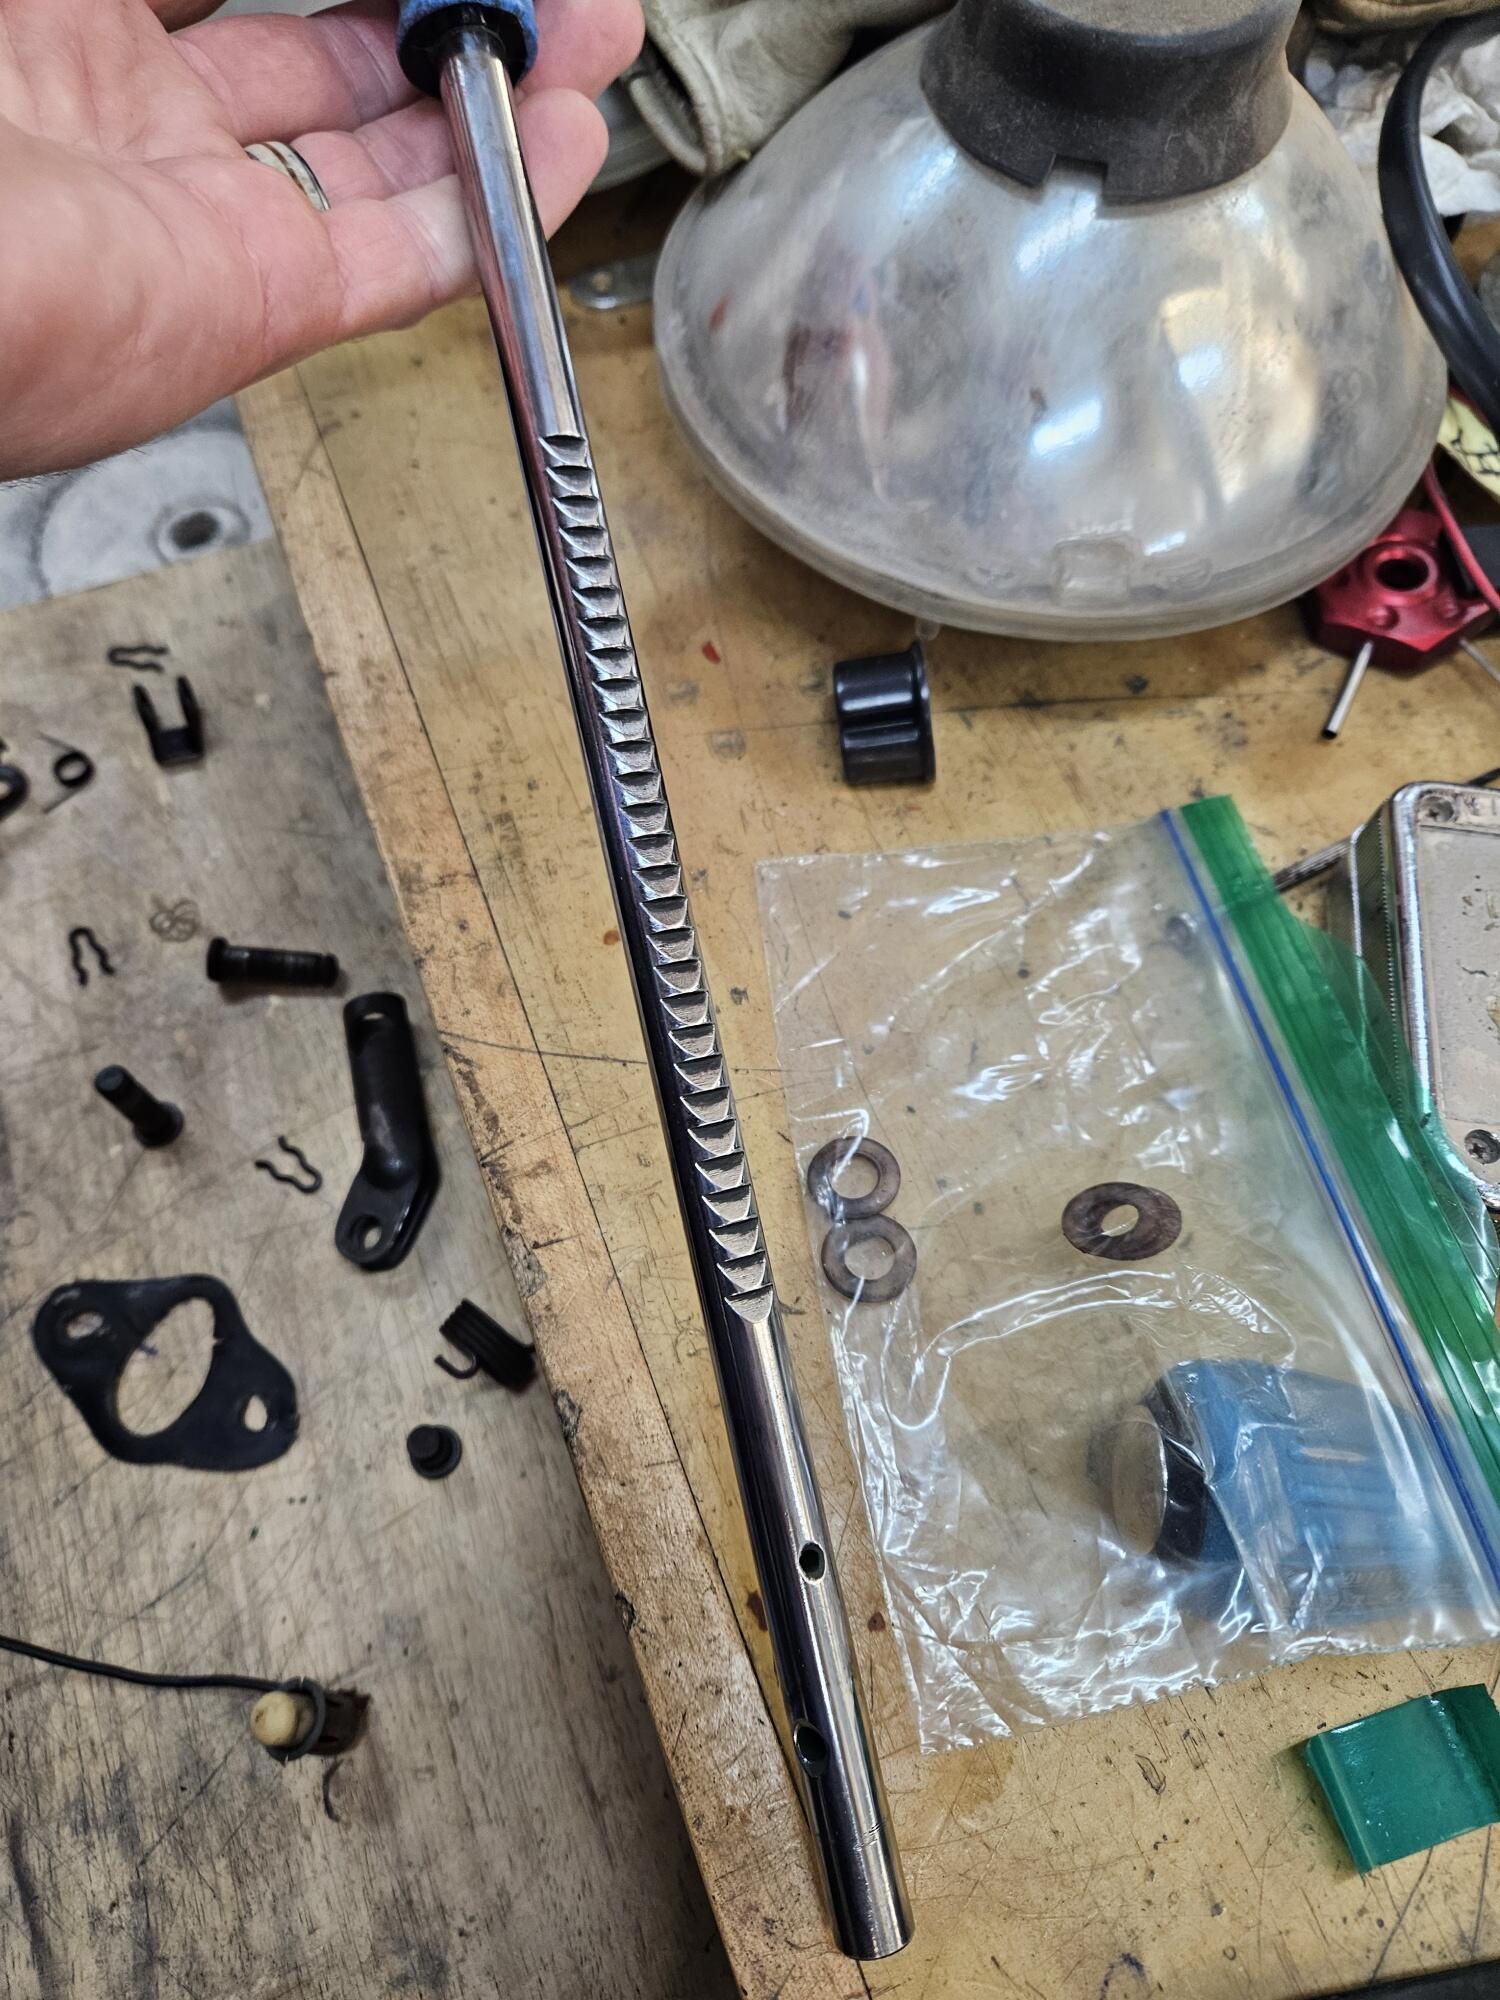
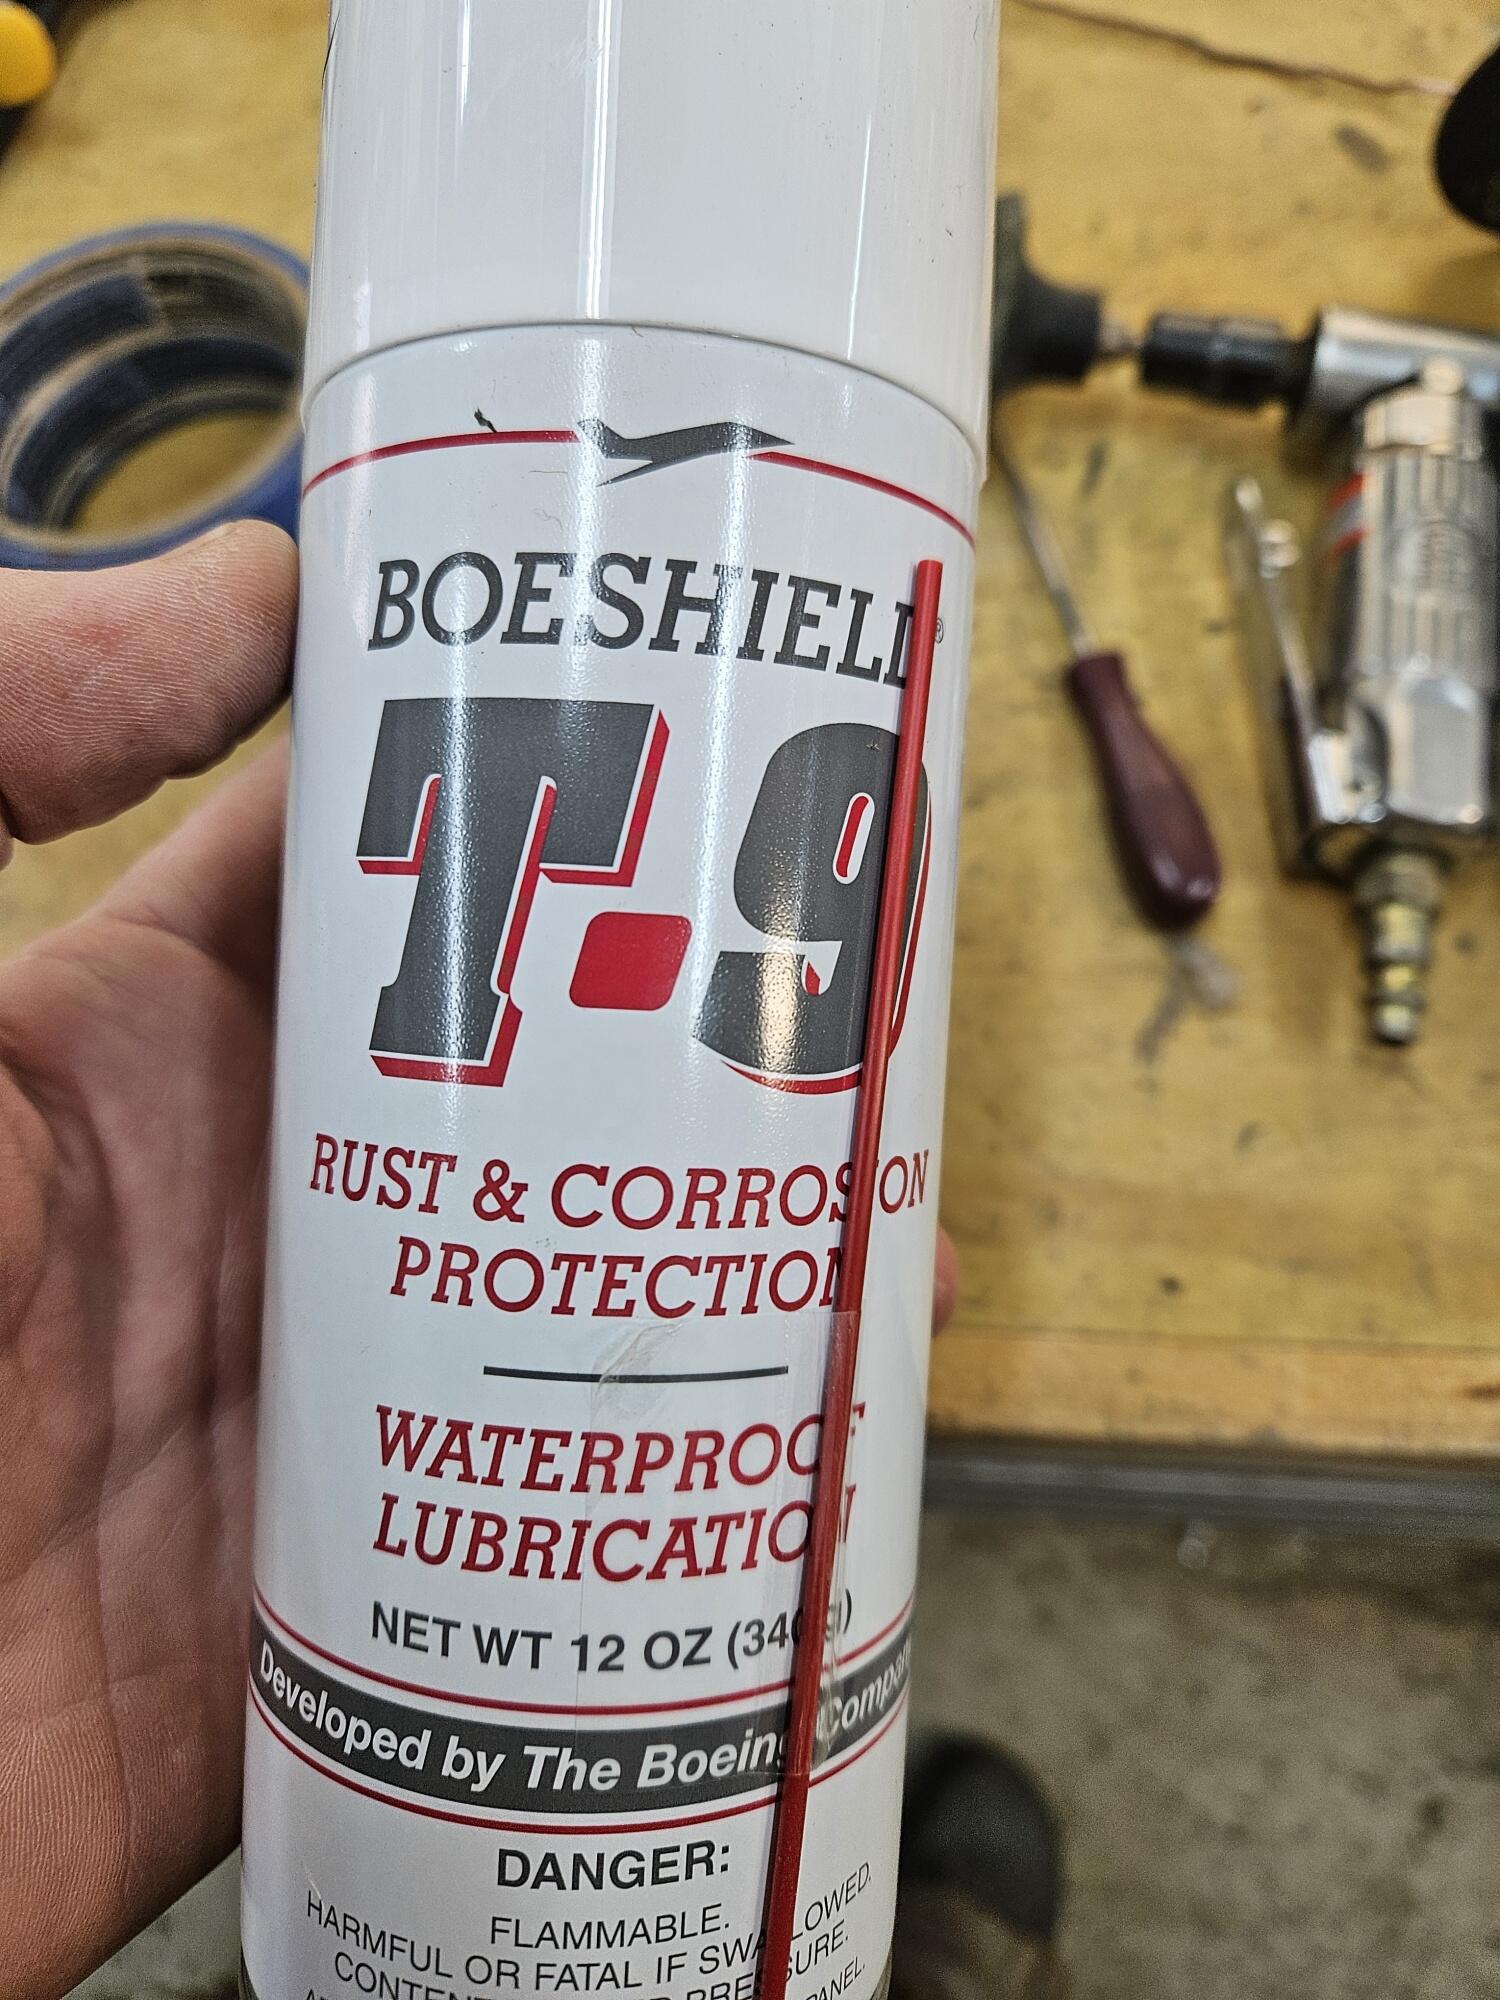
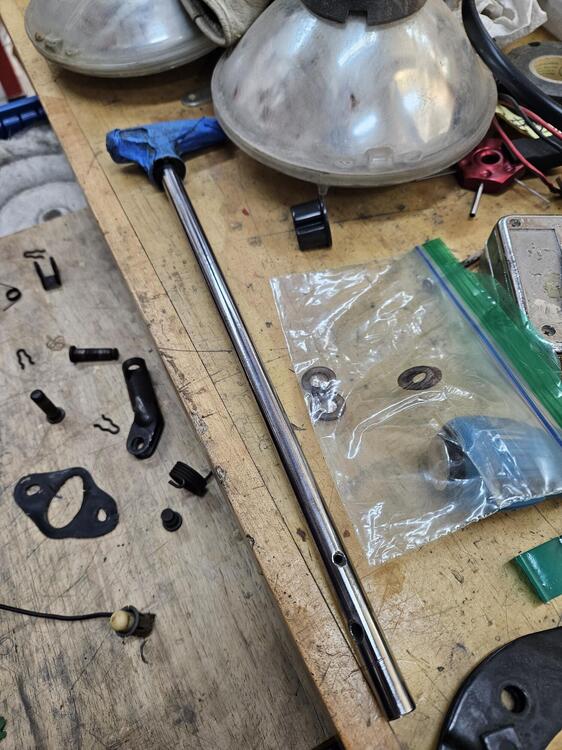
3 pointsCody worked on the parking brake some more. We figured "while we were at it..." So he took it all apart. He bead blasted the black parts. We didn't paint them yet because it's been so cold. He did buff out the brake handle Finished Didn't get the teeth totally perfect but I think it will be ok Used a little Boeshield to protect it


 3 points
 -
The point I was trying to get across is that BaT, along with the collector car market, has evolved. I remember a few years back (before COVID and before BaT was as well known), you could find a large volume of classic Japanese cars for around $10K. Now that it has become more notorious, I am sure there are a lot more in the car collector business that are bidding on and buying cars on the site, and then reselling in the more traditional markets. It has become much harder for the first time buyer of a classic car to get a good deal. There's not necessarily anything wrong with that, that's just the way it is now. I do enjoy reading the listings and fantasizing sometimes, but that's likely all it will ever amount to for me now. Your experience may be different. Hell, I remember back in the early 2000's, when the classic car bug bit one of my friends and coworkers and he decided to buy a Porsche 914 on eBay from a listing in Chicago. I said, "Great, when are you going to book a flight and go look at it?" His response was, "Paul, there's no need to, the guy posted 100 photos. I'm going to buy it and have it shipped here." I thought he was crazy at the time! Well, needless to say, the car had a lot more undisclosed issues and rust than advertised and he ended up buying a second 914 as a donor car. Sadly, I don't think the project(s) were ever completed. Anyway, I digress. I think the only time I would consider buying a car on BaT would be if I was really familiar with the make and knew what to look for and what questions to ask during the bid. Or if I won the lottery, suddenly had a huge windfall of disposable income, and happened to see a dream car (Ferrari 288 GTO, BMW M1, Porsche 959) on BaT. I'd also have a healthy balance set aside for any needed repairs not readily disclosed at the listing.3 points
-
2 pointsBecause cylinder temps aren't much changed by being somewhat leaner at idle.2 points
-
2 points100kpa is about 15psi is about 1 bar is about atmospheric pressure.2 points
-
IMHO, the internet as a whole killed off most of the "Stole it from a senior citizen" stories that we all used to hear about. In that regard, I think we've got a more fair system now, where anyone can look at a glance and see what prices are for most 2nd hand things, from cars to Lego sets, and everything in between. Of course, that's led to the market swinging the other way, where unseasoned sellers think that a sale of a top car makes their rusty hulk worth the same. I'd agree it's odd how much bidders have become accustomed to purchasing something sight-unseen. In my experience, there's really no such thing as "bidding with confidence" on a car that no one has put eyes on. Otherwise, the law of 10K is in effect - regardless of stated condition, any car purchased at auction will require a minimum of $10,000 of work in order to become the car you thought you were buying off the auction block.1 point
-
1 pointVery cool!! Thanks for posting this chart. Answered a lot of questions?👍👍1 point
-
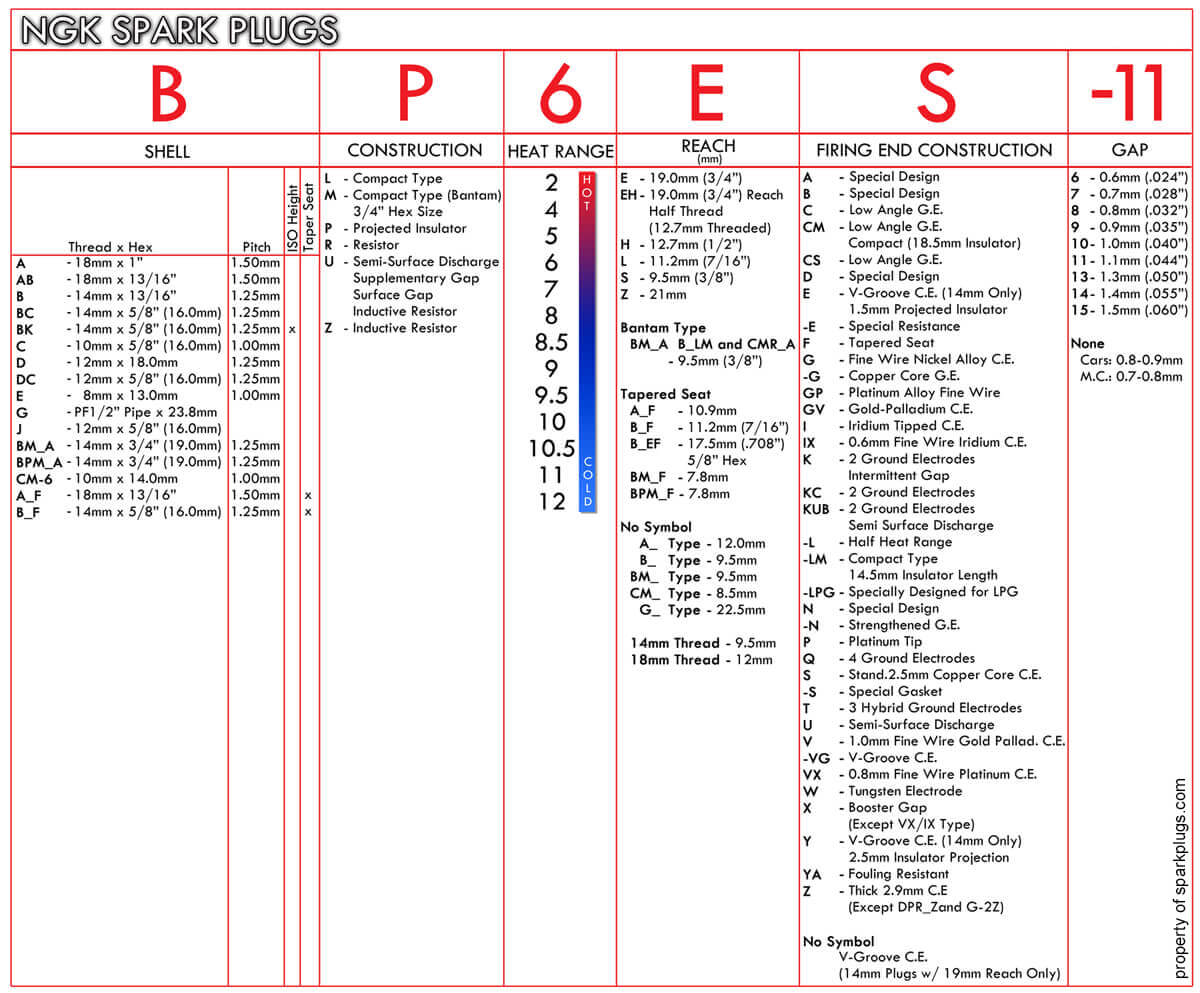
1 pointThis may help The R just means Resistor - used to reduce EM “noise”. good read on heat range and the why https://www.ngk.com/what-is-a-spark-plugs-heat-range-2
 1 point
 -
1 pointYah, that is about 15 miles south of me. I may take my truck and fill up 3-4 5 gallon jugs. May be fine. But ethanol really wreaks havok. Could have bought a bunch of gas for how much 3 new webers and a sonic cleaner cost, LOL1 point
-
1 pointIt appears that a company called Buc-ees in and around Angleton, Texas sells ethanol-free fuel. A bit of a drive but I'd do it.1 point
-
Power is supplied by two wires - one for the headlights and one for the parking lights, both power sources enter via the center posts. The white/red wire is power in for the headlights, the green wire is power in for the parking lights. When the switch is off, you will have continuity between the white/red wire and the unused post in front of it, the same is true for the green wire and the unsed post in front of it. The first click on the switch activates the parking light circuit, continuity moves to the green wire and green/white wire, no change on the white/red wire. The second click adds in the headlight circuit and continuity shifts between the white/red wire and the red wire. I hope my explanation is clear and this helps a bit. Sorry, no spare nubbins.1 point
-
Those little springs and caps are notorious for disappearing, unless one of the guys here has some spares, you may have to purchase another unit. @zKars, is the 1st guy I would contact.1 point
-
The whole prize craze really started when banks started giving bad to non rates on savings. People started to invest in housing ( real estate ), art, classics etc.. anything with value increase over time1 point
-
1 point@chaseincats Being in Texas I wouldn't think smog or inspections would be an issue?1 point
-
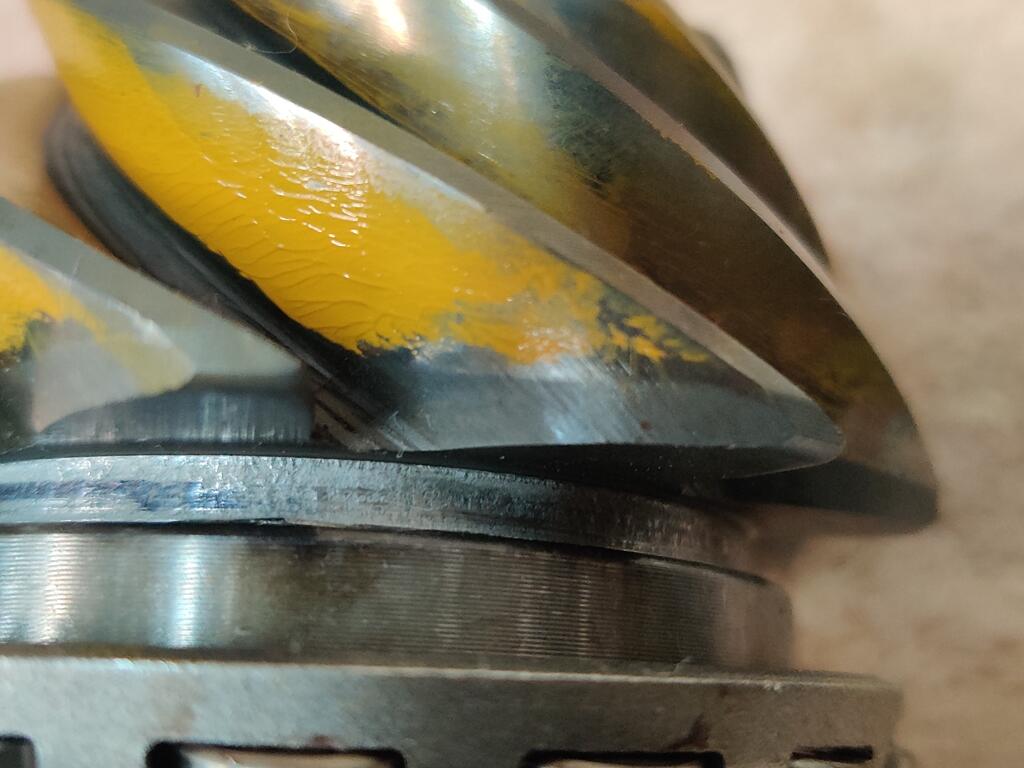
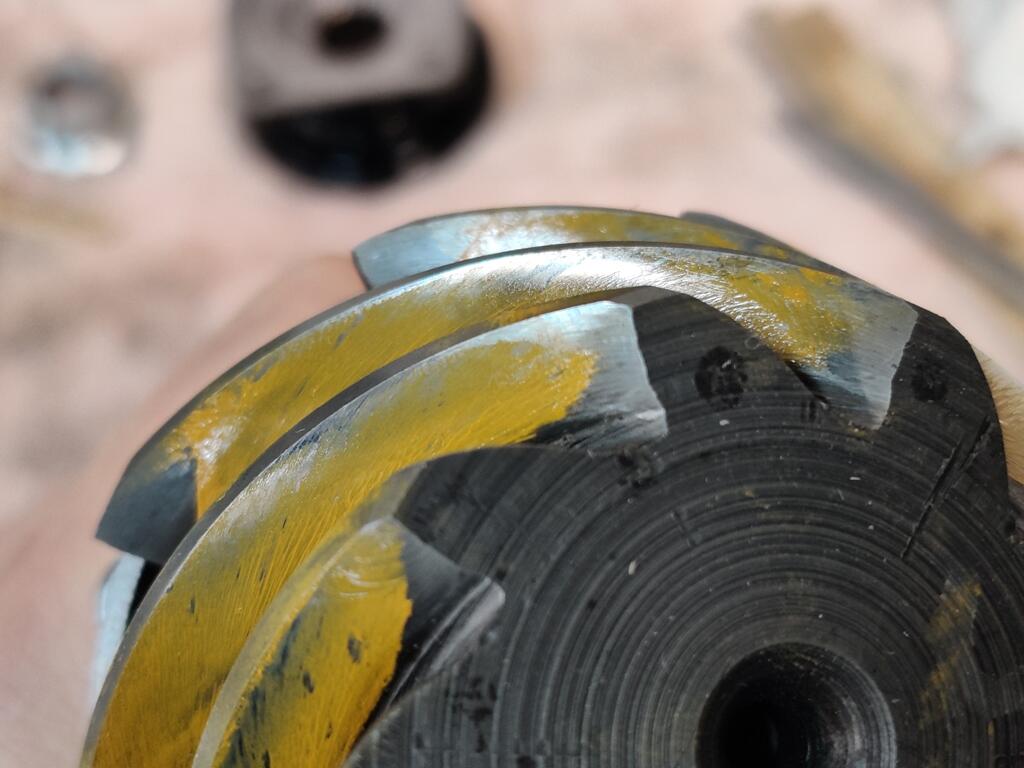
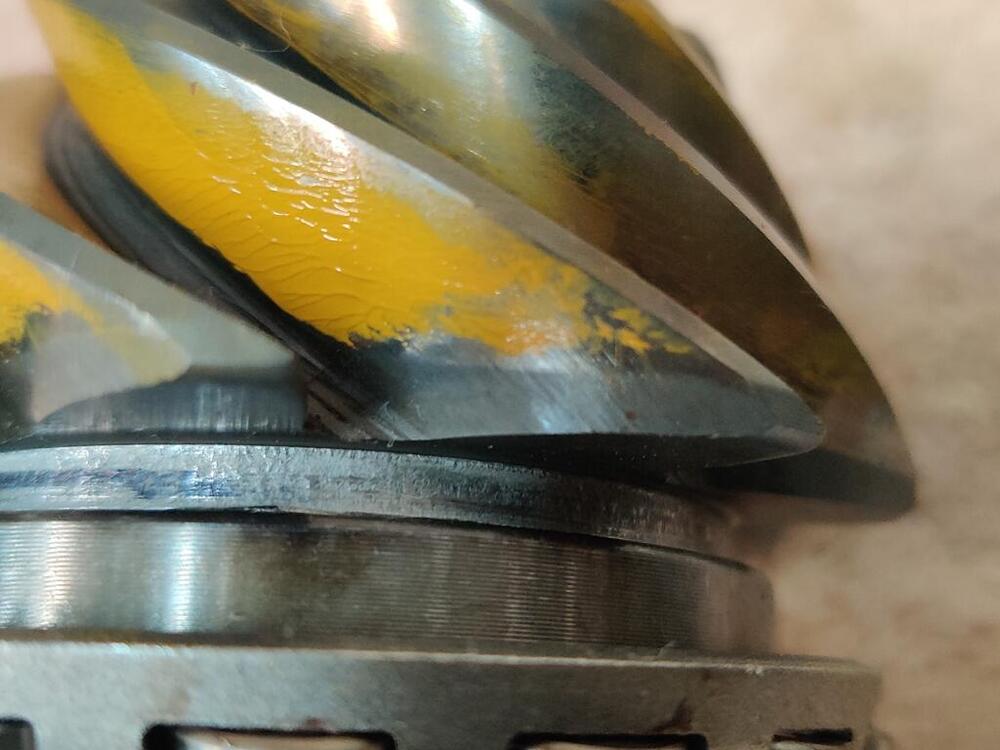
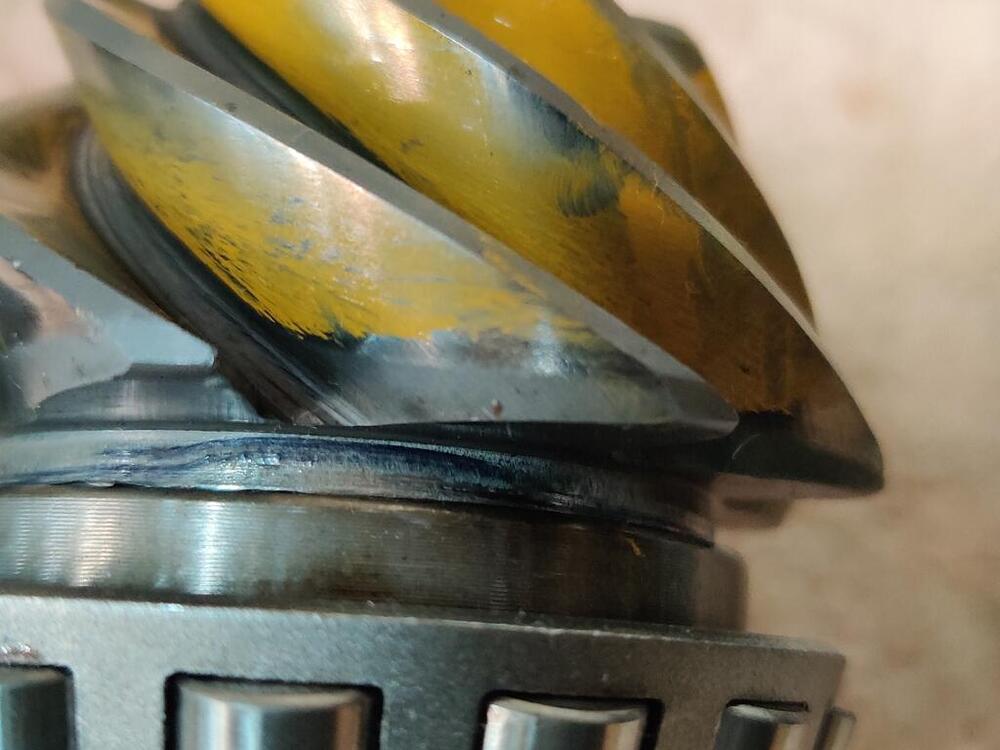
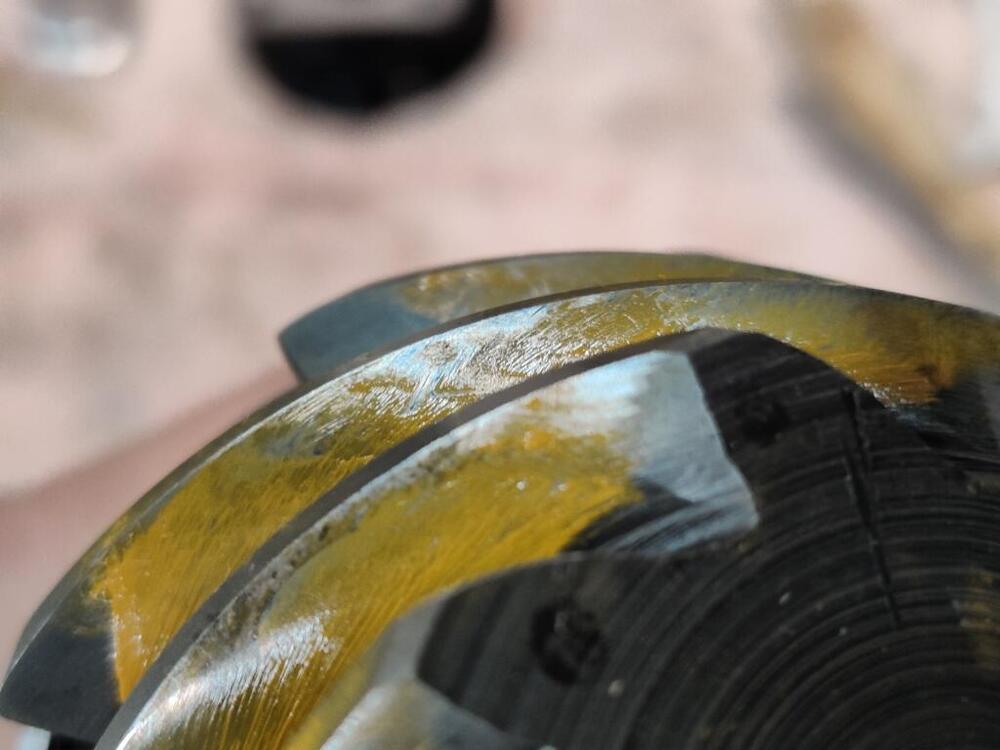
I read these this morning and got some good info and reinforcement from them. Thanks for sharing them. I tried backing of the pinion nut and pressing the pinion shaft down a touch to unload the bearing before retorquing to 101... but the turning torque was still far too much. Long story short, I discovered that I had damaged the "pilot bearing". I had to remove the front seal (destroy in the process) and the pilot bearing. When I ordered all of the diff parts, I ordered two sets of everything because I planned on rebuilding the stock differential as well. I don't know if I will do that, but at least I had spares on hand. How I damaged the bearing is a bit hard to explain. Basically, when you press the pinion shaft in place, if the pilot bearing is already installed, it tends to move a bit from its correct position. Normally, the pilot bearing is installed after the pinion and pinion bearings. It is a lighter press fit the than the pinion bearings. But, since I was working a bit differently with the pilot bearing and pinion seal already installed, when I would press the pinion gear in place the pilot bearing would shift out of place a little. The mistake was putting on the pinion nut and using the action of tightening the pinion nut to squeeze everything together... including shifting the pilot bearing back into place. Once, or perhaps after a couple of times doing that, the pilot bearing got damaged. Along the lines of getting the pinion to mesh with the crown gear has before, have a look at these pics - when I removed the pinion gear today, I noticed the yellow paint vs. the previous wear on the pinion gear: Do you see how the yellow gear marking compound does not quite start at the same place as the old wear line in the above pictures? And, in the below pictures, the yellow extends a bit past the wear marks (I rubbed it off partially so I could see the wear line). I find that to be very interesting. This seems to indicate that the pinion gear is still not extended out as far as it used to be to match the assembled location from the factory! While the pinion gear was out, I installed the carrier and side flanges to check the pre-load on those bearings. It has some... and it feels very similar to the pre-load on the pinion, before I damage the bearing. I think the side shims are sized correctly, so I will not be messing with changes there. My next step is to make 8 more shims and stack them with the first 8 and see how things look. I put together this set of changes based on my experiments thus far. I don't know if it is actually accurate, but it is based on what I have seen with my various changes. shim thickness backlash movement 0.126 .020-.021 0.130 .017-.018 3 to 4 thou 0.134 .014-.015 3 to 4 thou 0.138 .011-.012 3 to 4 thou 0.142 .008-.009 3 to 4 thou 0.146 .005-.006 3 to 4 thou 8 more shims should give me something close to the .142 thickness. We'll see where that puts me. I will be shooting for .005" backlash as that is what it was before I took it apart.
 1 point
 -
1 pointWell this is the point where you need to decide whether to continue with the OEM EFI or go programmable . Yes the 123 ignition basically drops in with some wiring to adapt to factory wiring . It’s 600$ approx. You should watch a you tube video on it . Same amount of money would get you a basic programmable ECU like a Megasquirt . Then you would have full control of the engine with many options - ESPECIALLY if you want to modify your engine one day .1 point
-
1 pointAs said above - using MAP density tuning - KPA would be your measurement for load. Tuning for cruise would be difficult not knowing how the engine is loading . Loading can change a lot just climbing a slight grade though you aren’t putting much throttle to the engine . The OEM injection biases everything to the rich side to be safe . Those plugs took a while to look like that and most of the time we spend in cruise . That’s why the 123 ignition is a nice supplement to help keep the engine safe while tuning since it does have MAP sensor1 point
-
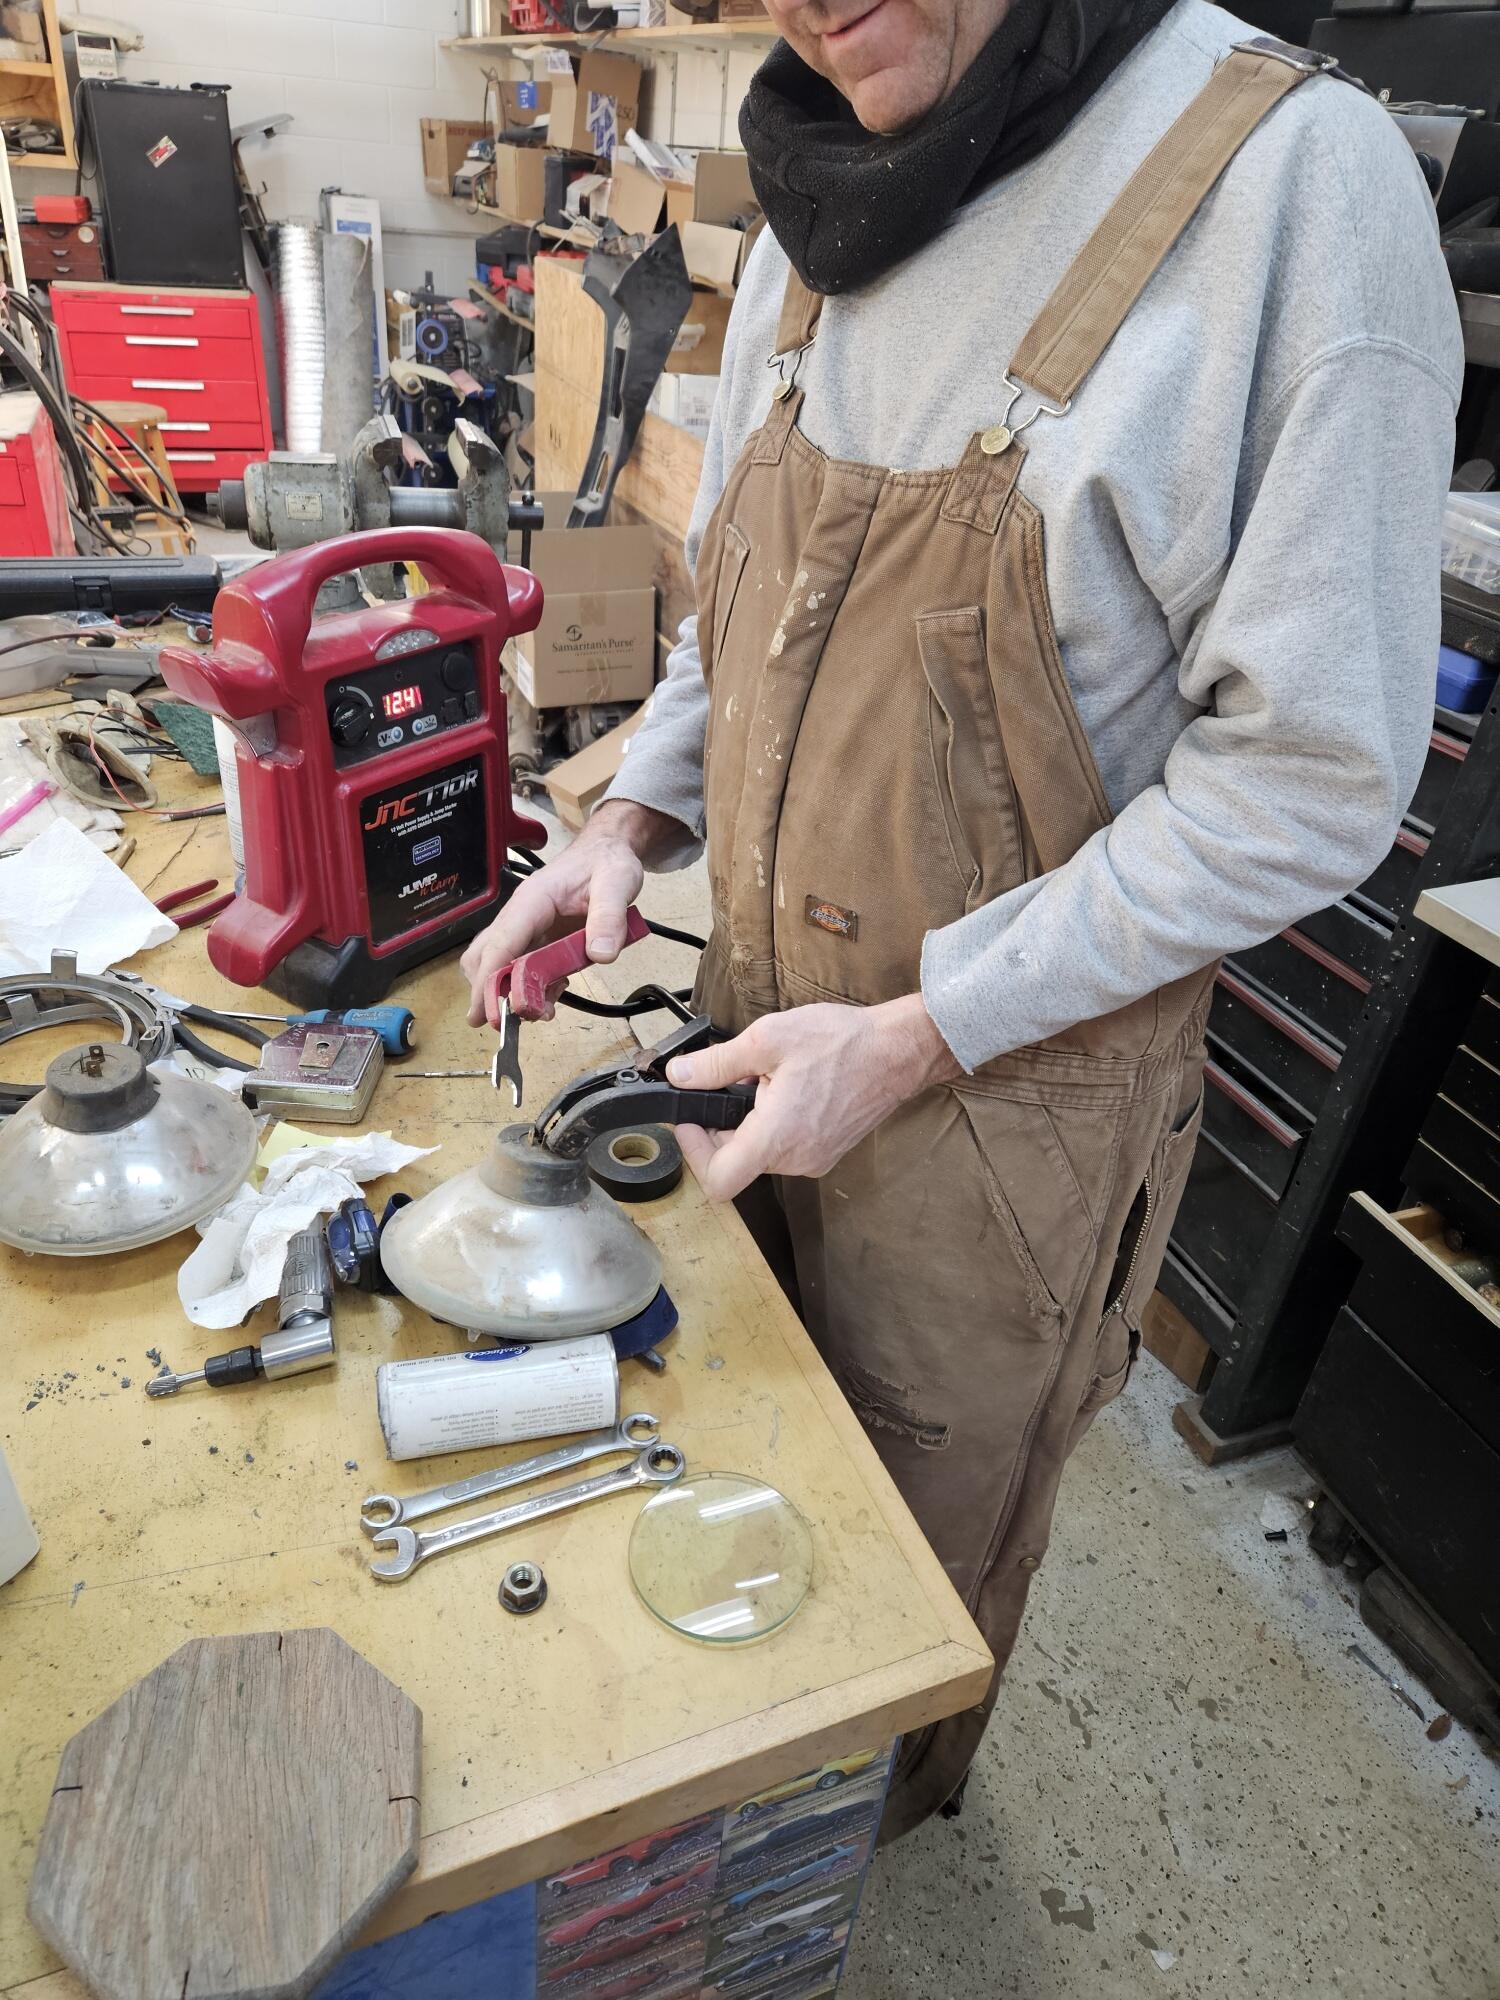
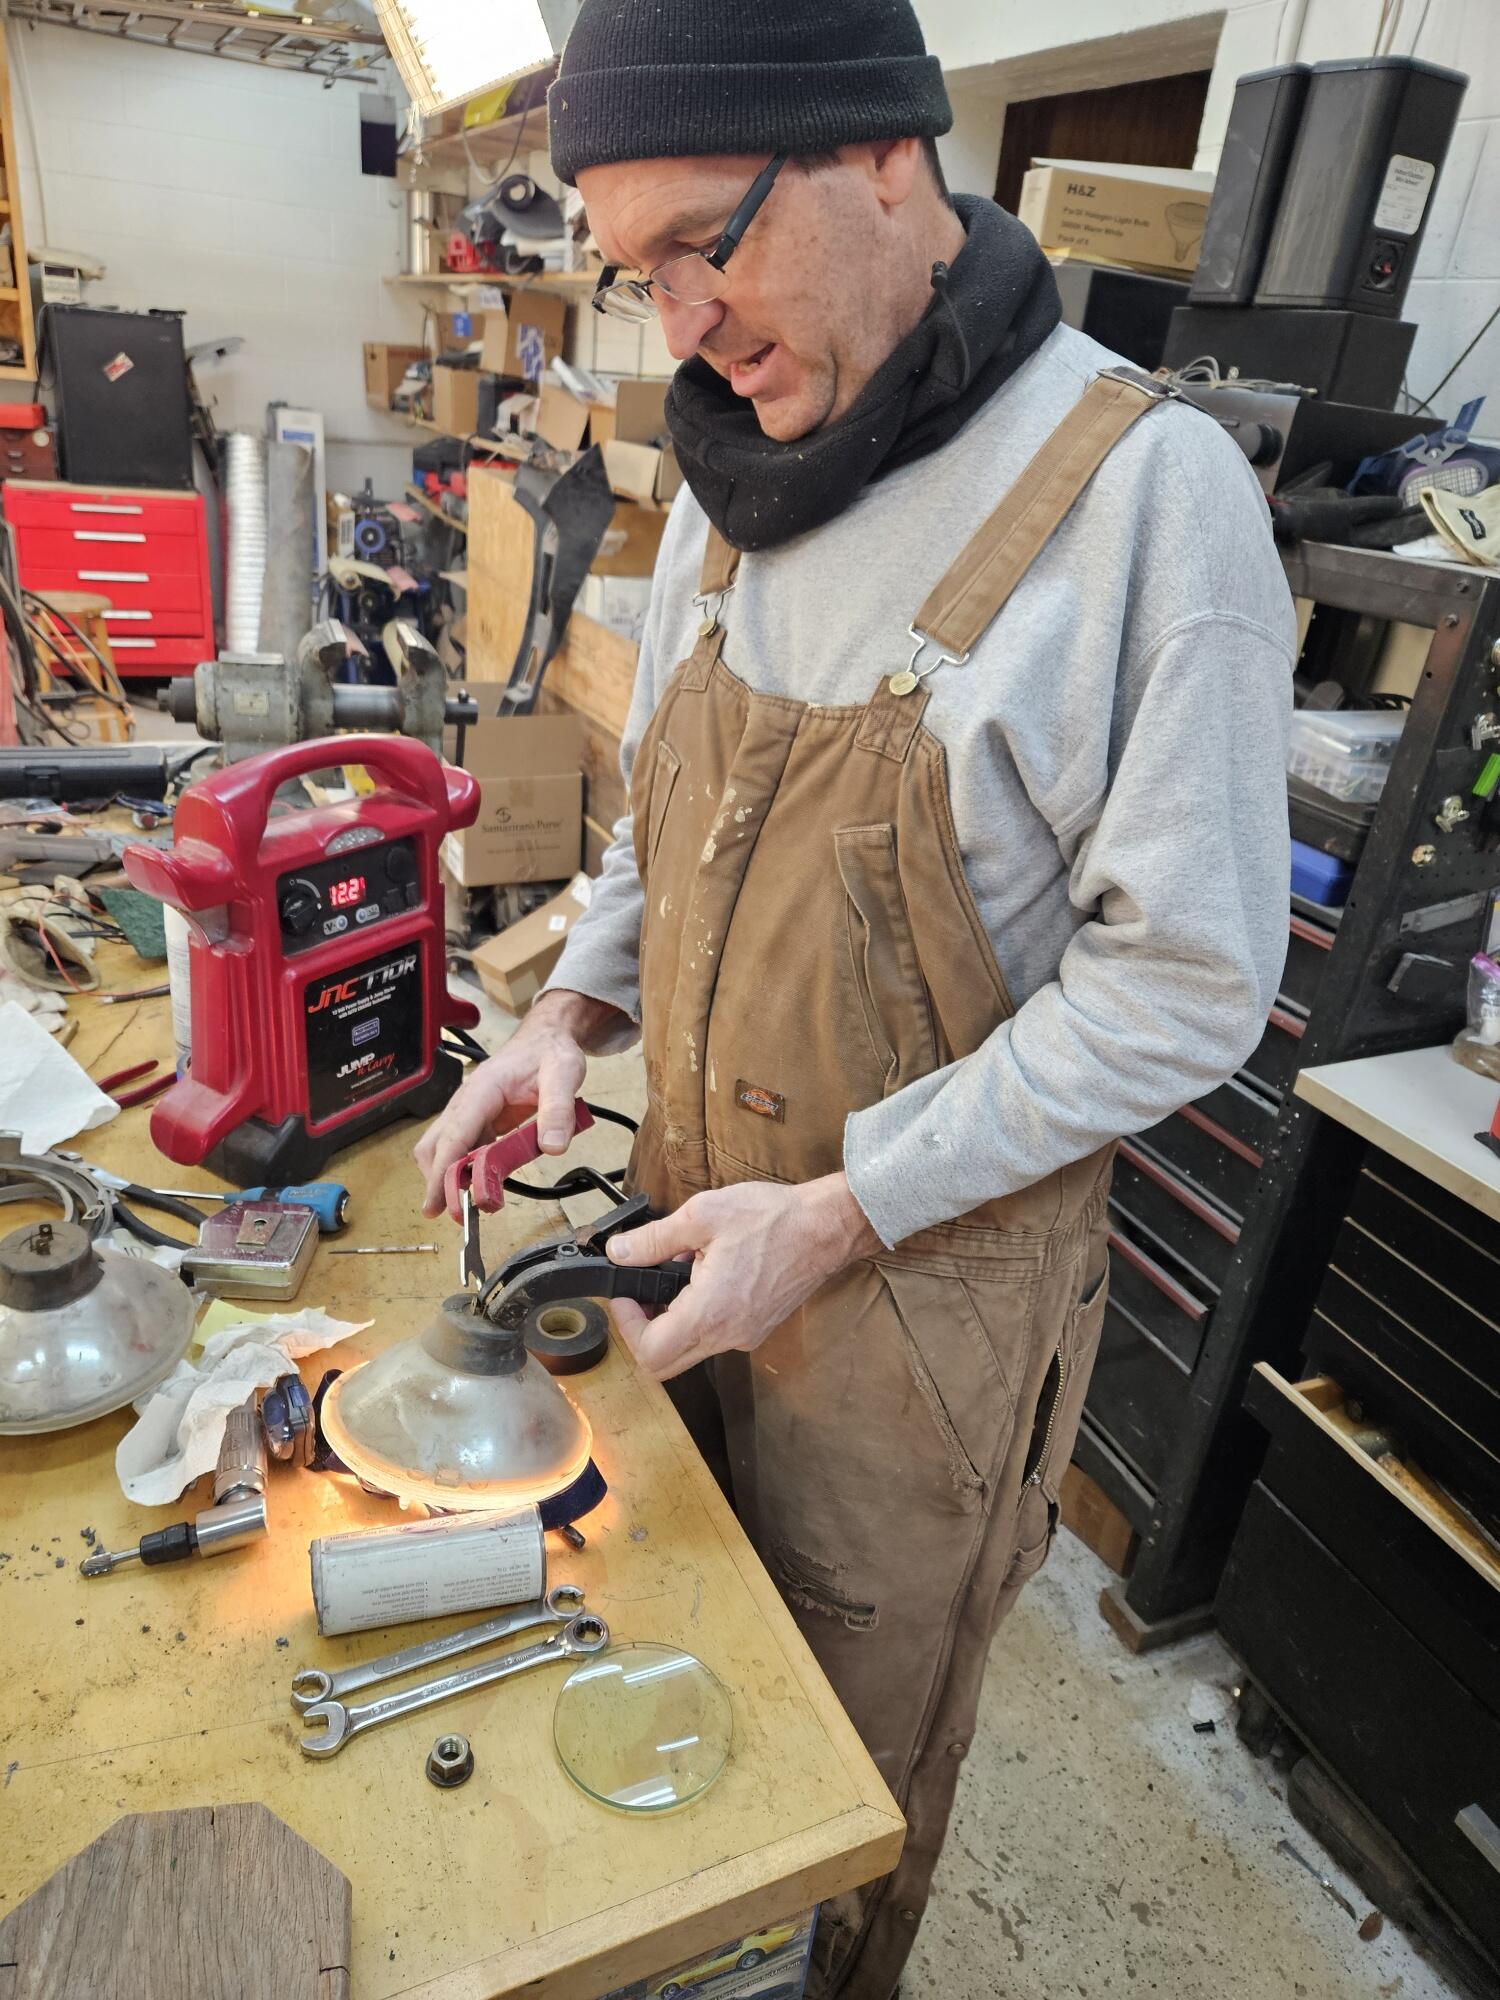
1 pointTesting headlamp bulbs in the shop the other day. Another use for the jump box. I have an LED kit that SteveJ recommended but I figured I would start this way and then add the LED's in later

 1 point
 -
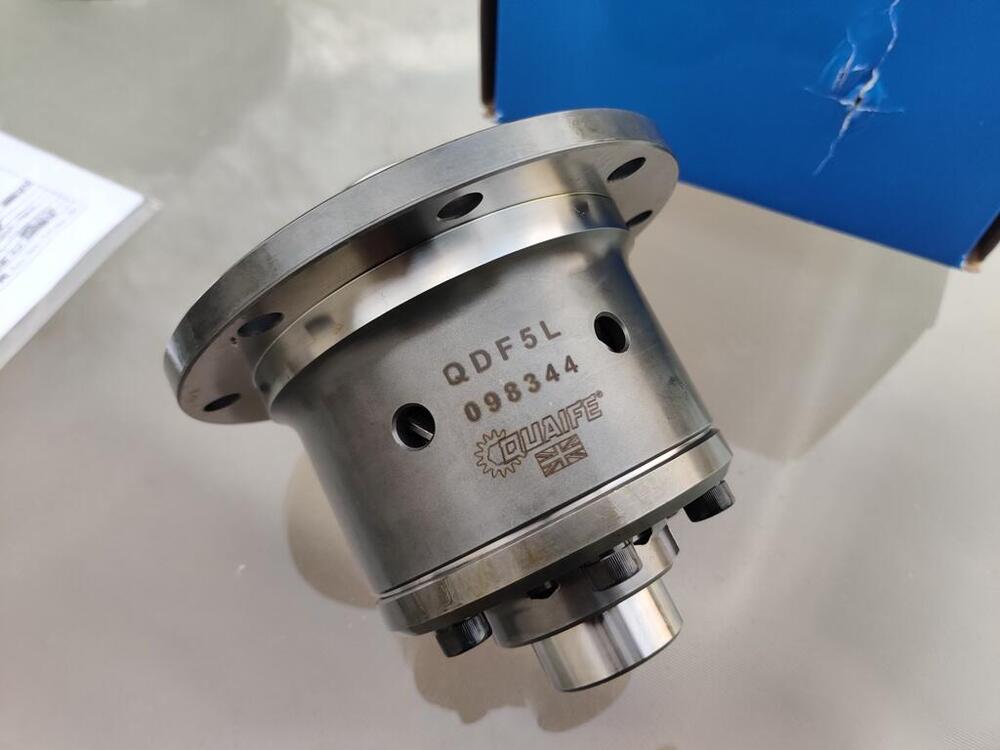
Yes to the question about the pinion shims and washer (4 and 5) - this differential only had one pinion washer and no shims at that location. I am stacking the .001" shims at item 4 location. Oddly, the side retainer shims do not appear to be in that picture. The side retainer shims can be seen in this picture. 9 and 18 are probably in the stock carrier, which I am not using - I have replaced with the Quaife unit: Note that I have not and will not be touching #30 in your picture. Therefore, the "stack" of parts between the front and rear pinion bearings is staying the same. I was able to achieve correct pinion bearing pre-load with about 124 ft lbs of torque on the pinion nut (a couple of times). So, I am hopeful that none of those parts needs to be changed. From your comments about getting the mating of the gears as close to what it was as possible or they may sing/make noise, I will make all the effort I can to make the wipe pattern ideal. Too much back lash impacts the wipe pattern a lot. So, getting the backlash back to .004" or .005" (what I measured before taking it apart from stock) is going to be a goal here. Another thought I had today: just as the pinion spacer has to change because of the new bearings, so it is possible that my side retainer shim "stack" may have to change. The side retainer bearings also were replaced with new. And, as such, they may have slightly different thicknesses from the ones that came out. If so, that changes the preload on the side bearings. I don't have the factory tools, so I can't follow the procedures in the differential manual, but it has been quite helpful. The next time I take the carrier and pinion gear out, I will assemble just the carrier portion to make some kind of assessment on the preload for the retainer bearings.
 1 point
 -
1 pointAFAIK, the rear trim panel on the earliest S30's didn't have removable taillight access covers at all and, when those covers were eventually introduced, they were flat. I think that what you've got in your car is, as you say, taken from a 260Z. All of these interior trim panels are tricky to remove and replace without causing them damage. Also, the Z arrived just at the time when owners were being introduced to higher-quality home sound systems. Many (if not most) Z owners decided that they wanted an aftermarket sound system with stereo and a tape player, as well as something better than the single, small, lo-fi speaker. I expect that a lot of side trim panels got cracked in the process of getting access for wiring and speaker installations. I also think that a lot of rear trim panels got butchered when the owner or installer decided to get creative in order to make big speakers fit.1 point
-
Yahoo! Auctions does the same, just means no last minute sniper bids. Kind of a good thing.1 point