Leaderboard

 Subscriber
.JPG.cfcada9cf1c1b502df3f5f2f2ca3ff36.JPG)


Popular Content
Showing content with the highest reputation on 10/08/2023 in all areas
-
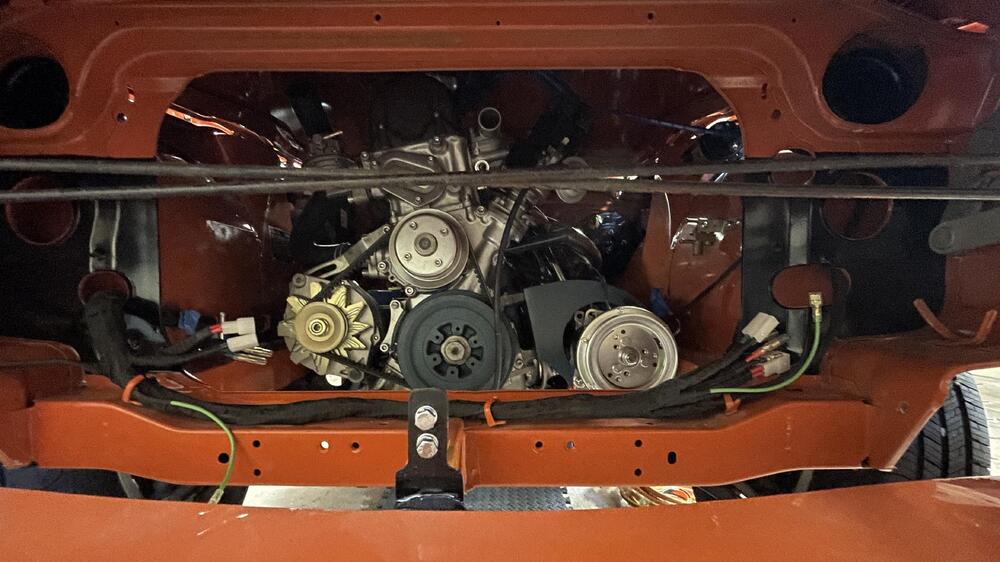
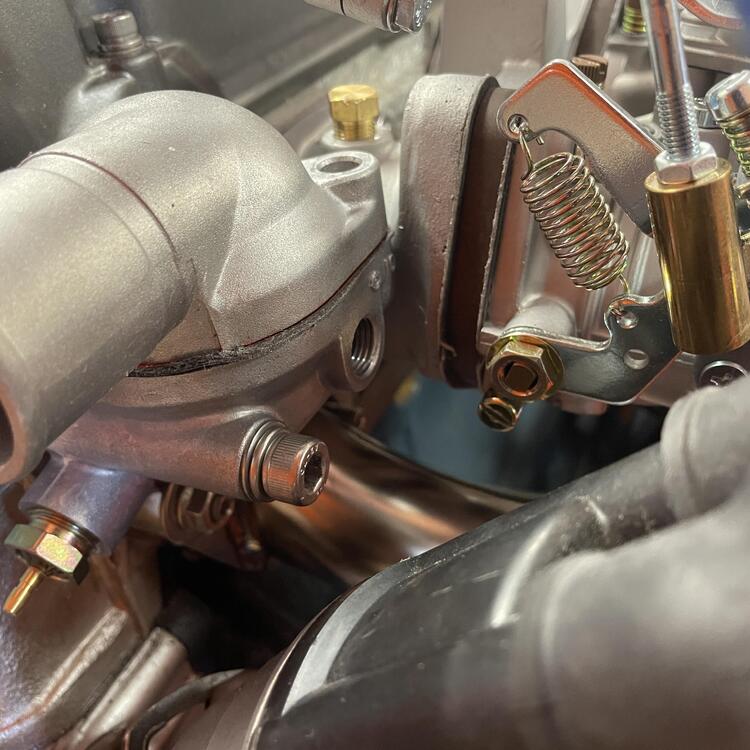
5 pointsSo I wanted to be sure the motor was still viable. So I hooked it up to a battery sitting on a trailer and spun it over with a remote starter switch. It spun freely with no plugs in it. So then I wanted to try to fire it over. It didn't have any carbs or exhaust on it. I messed with it for a while. Tried three different coils and two distributors called SteveJ to make sure I knew what I was doing. I then put the matchbox dizzy back in and got it to run on ether. I have a set of Ztherpay carbs that are evidently from 2011 that still look surprisingly good. They were on this engine and I will clean them up and reuse them for now 20231007_172650_447749883773934.mp4 It lives!!!5 points
-
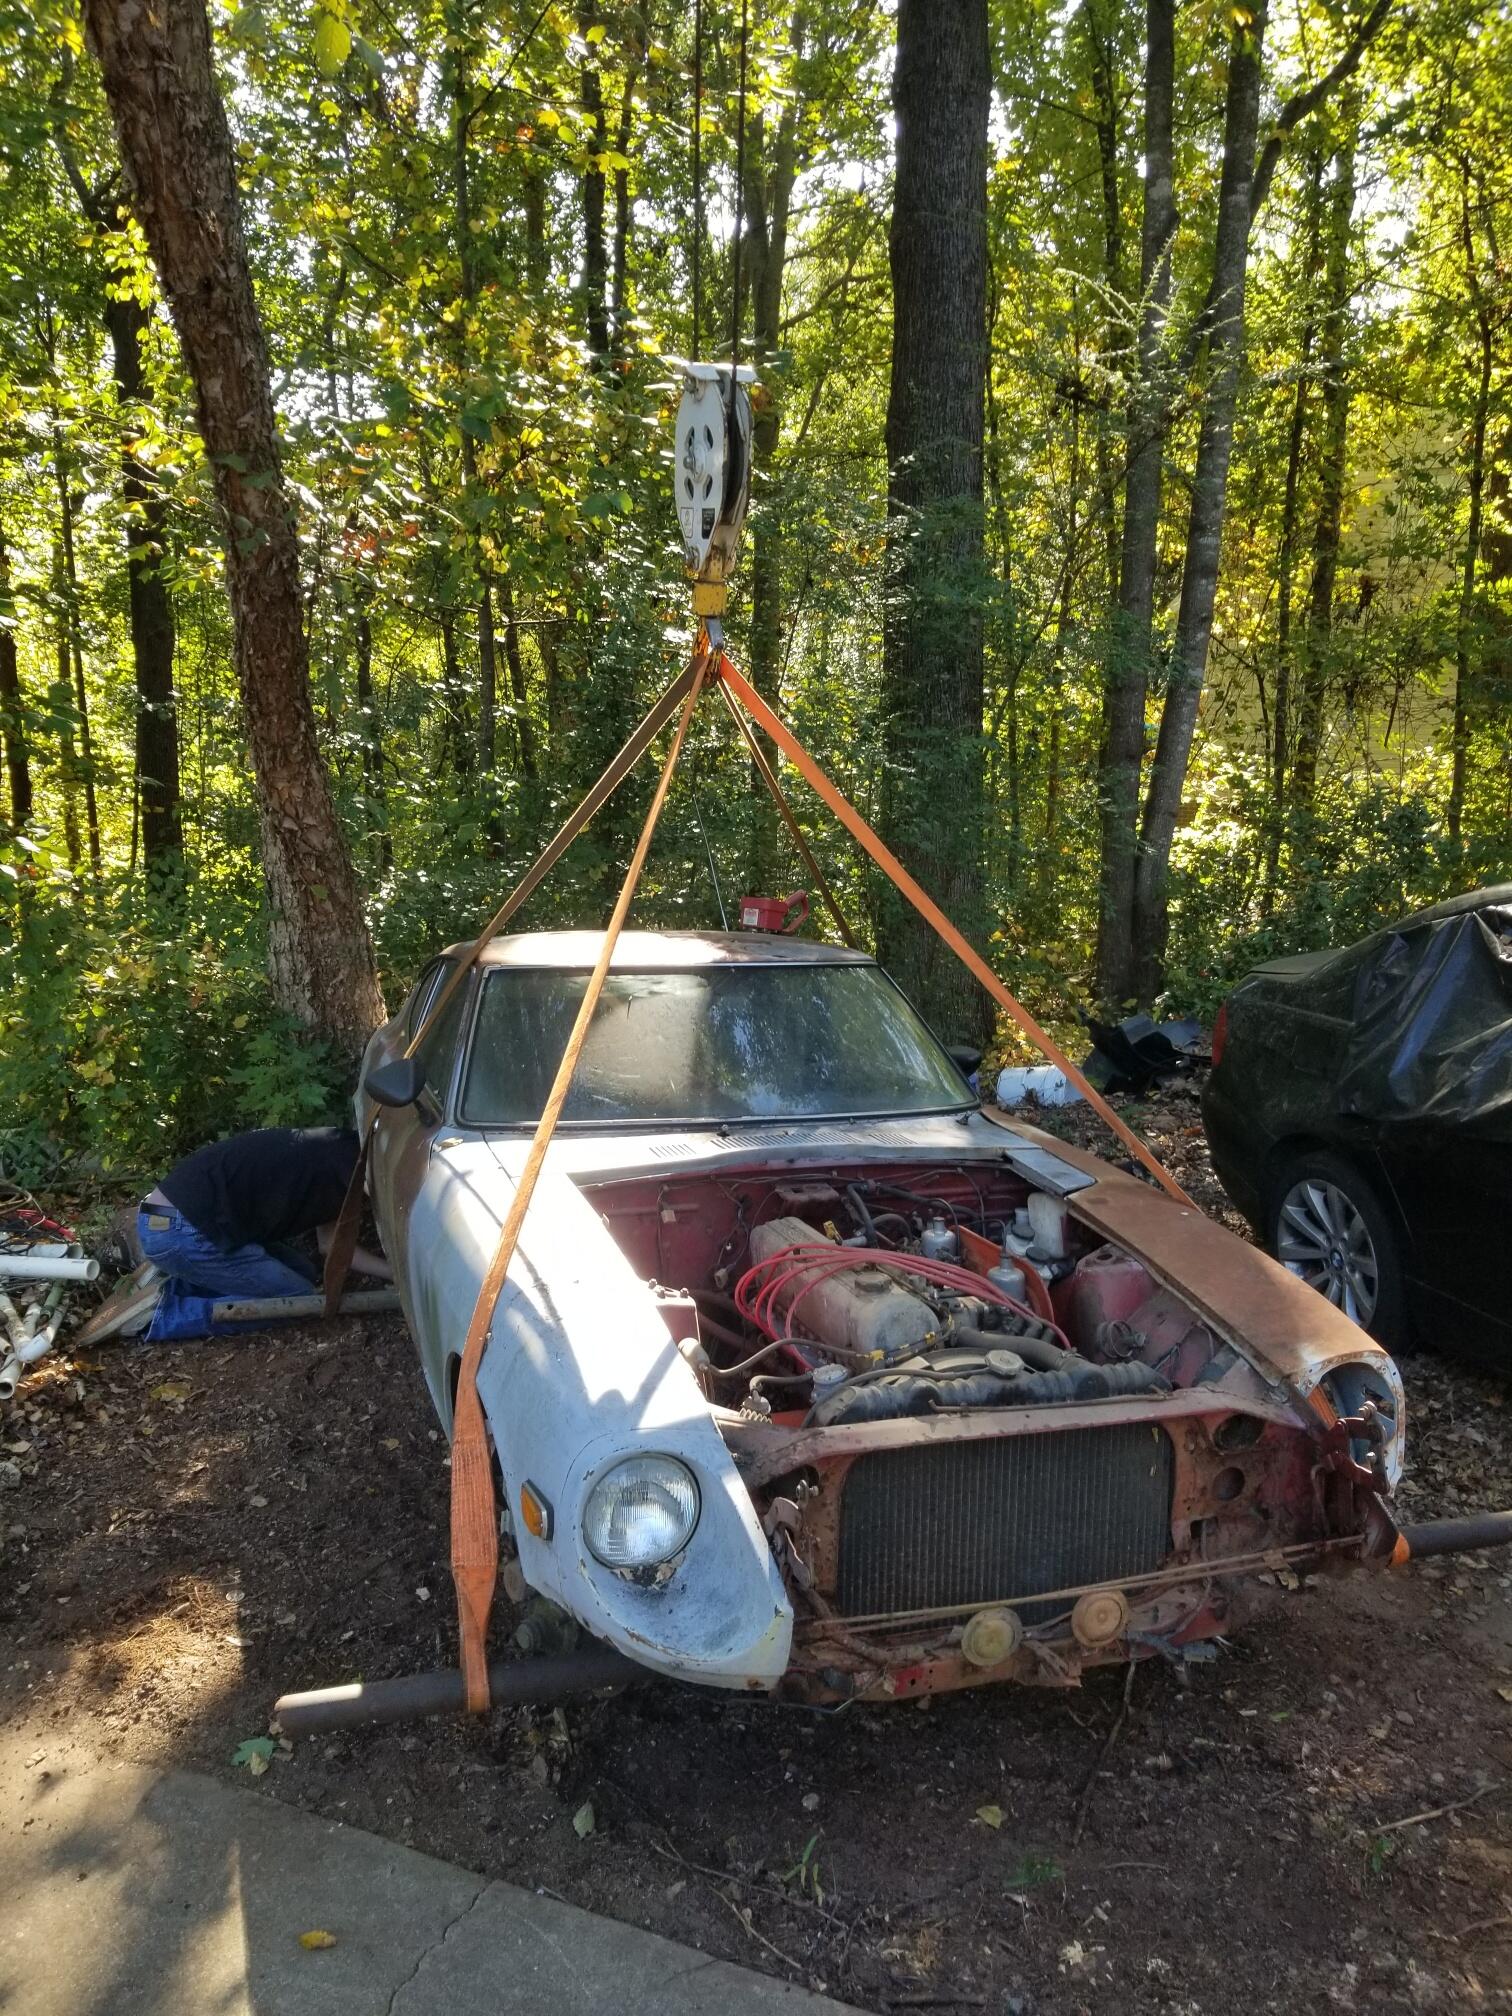
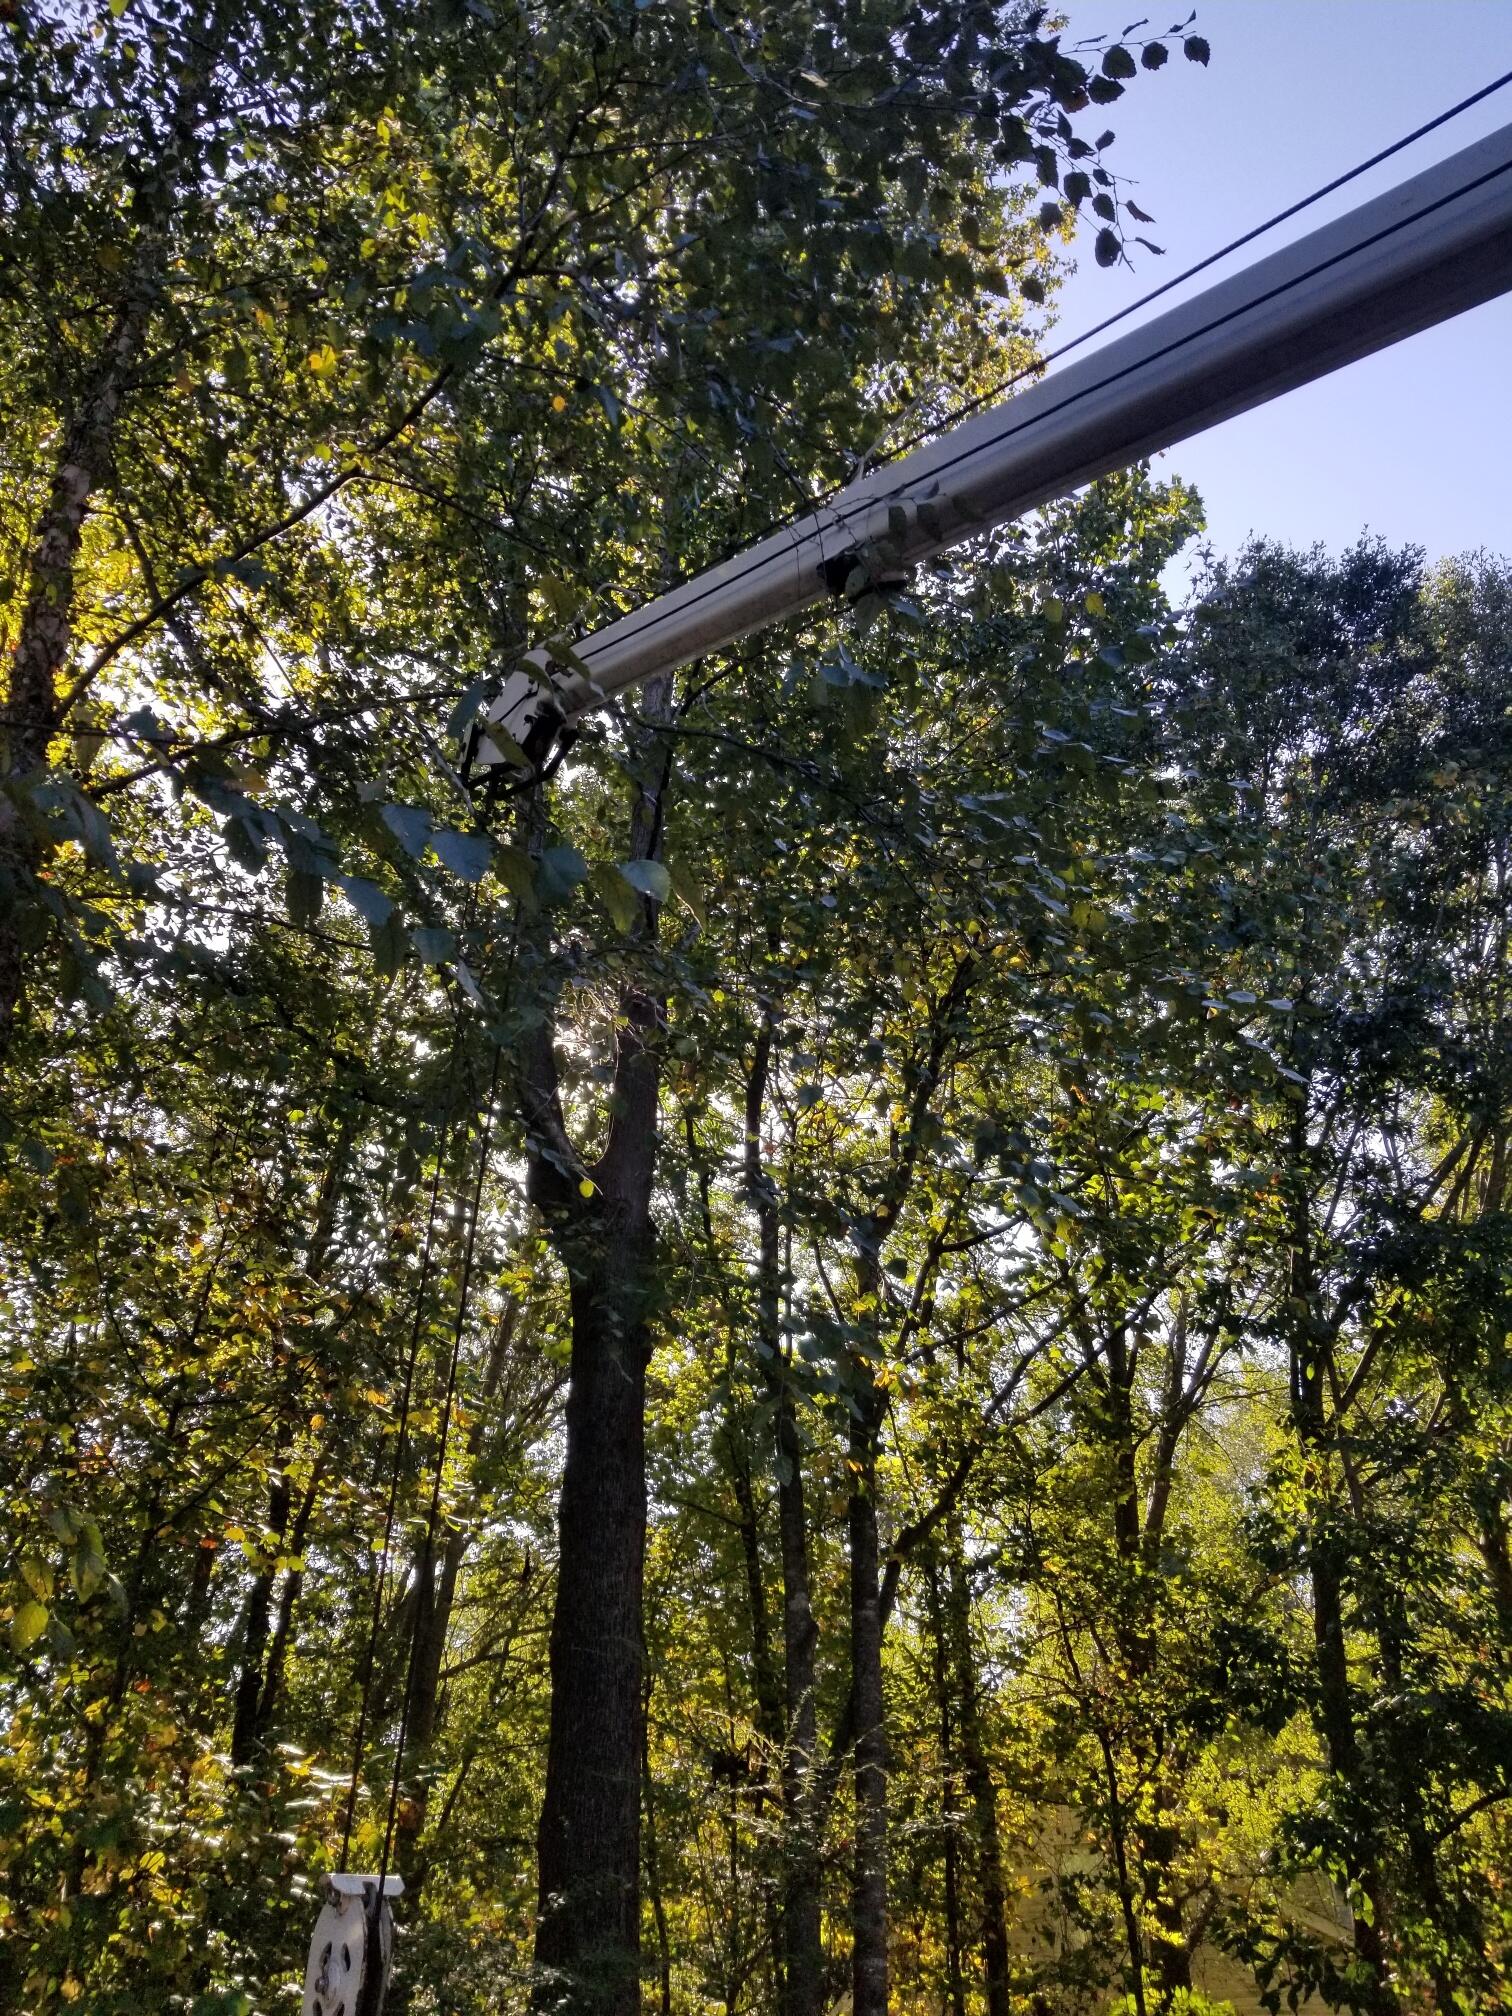
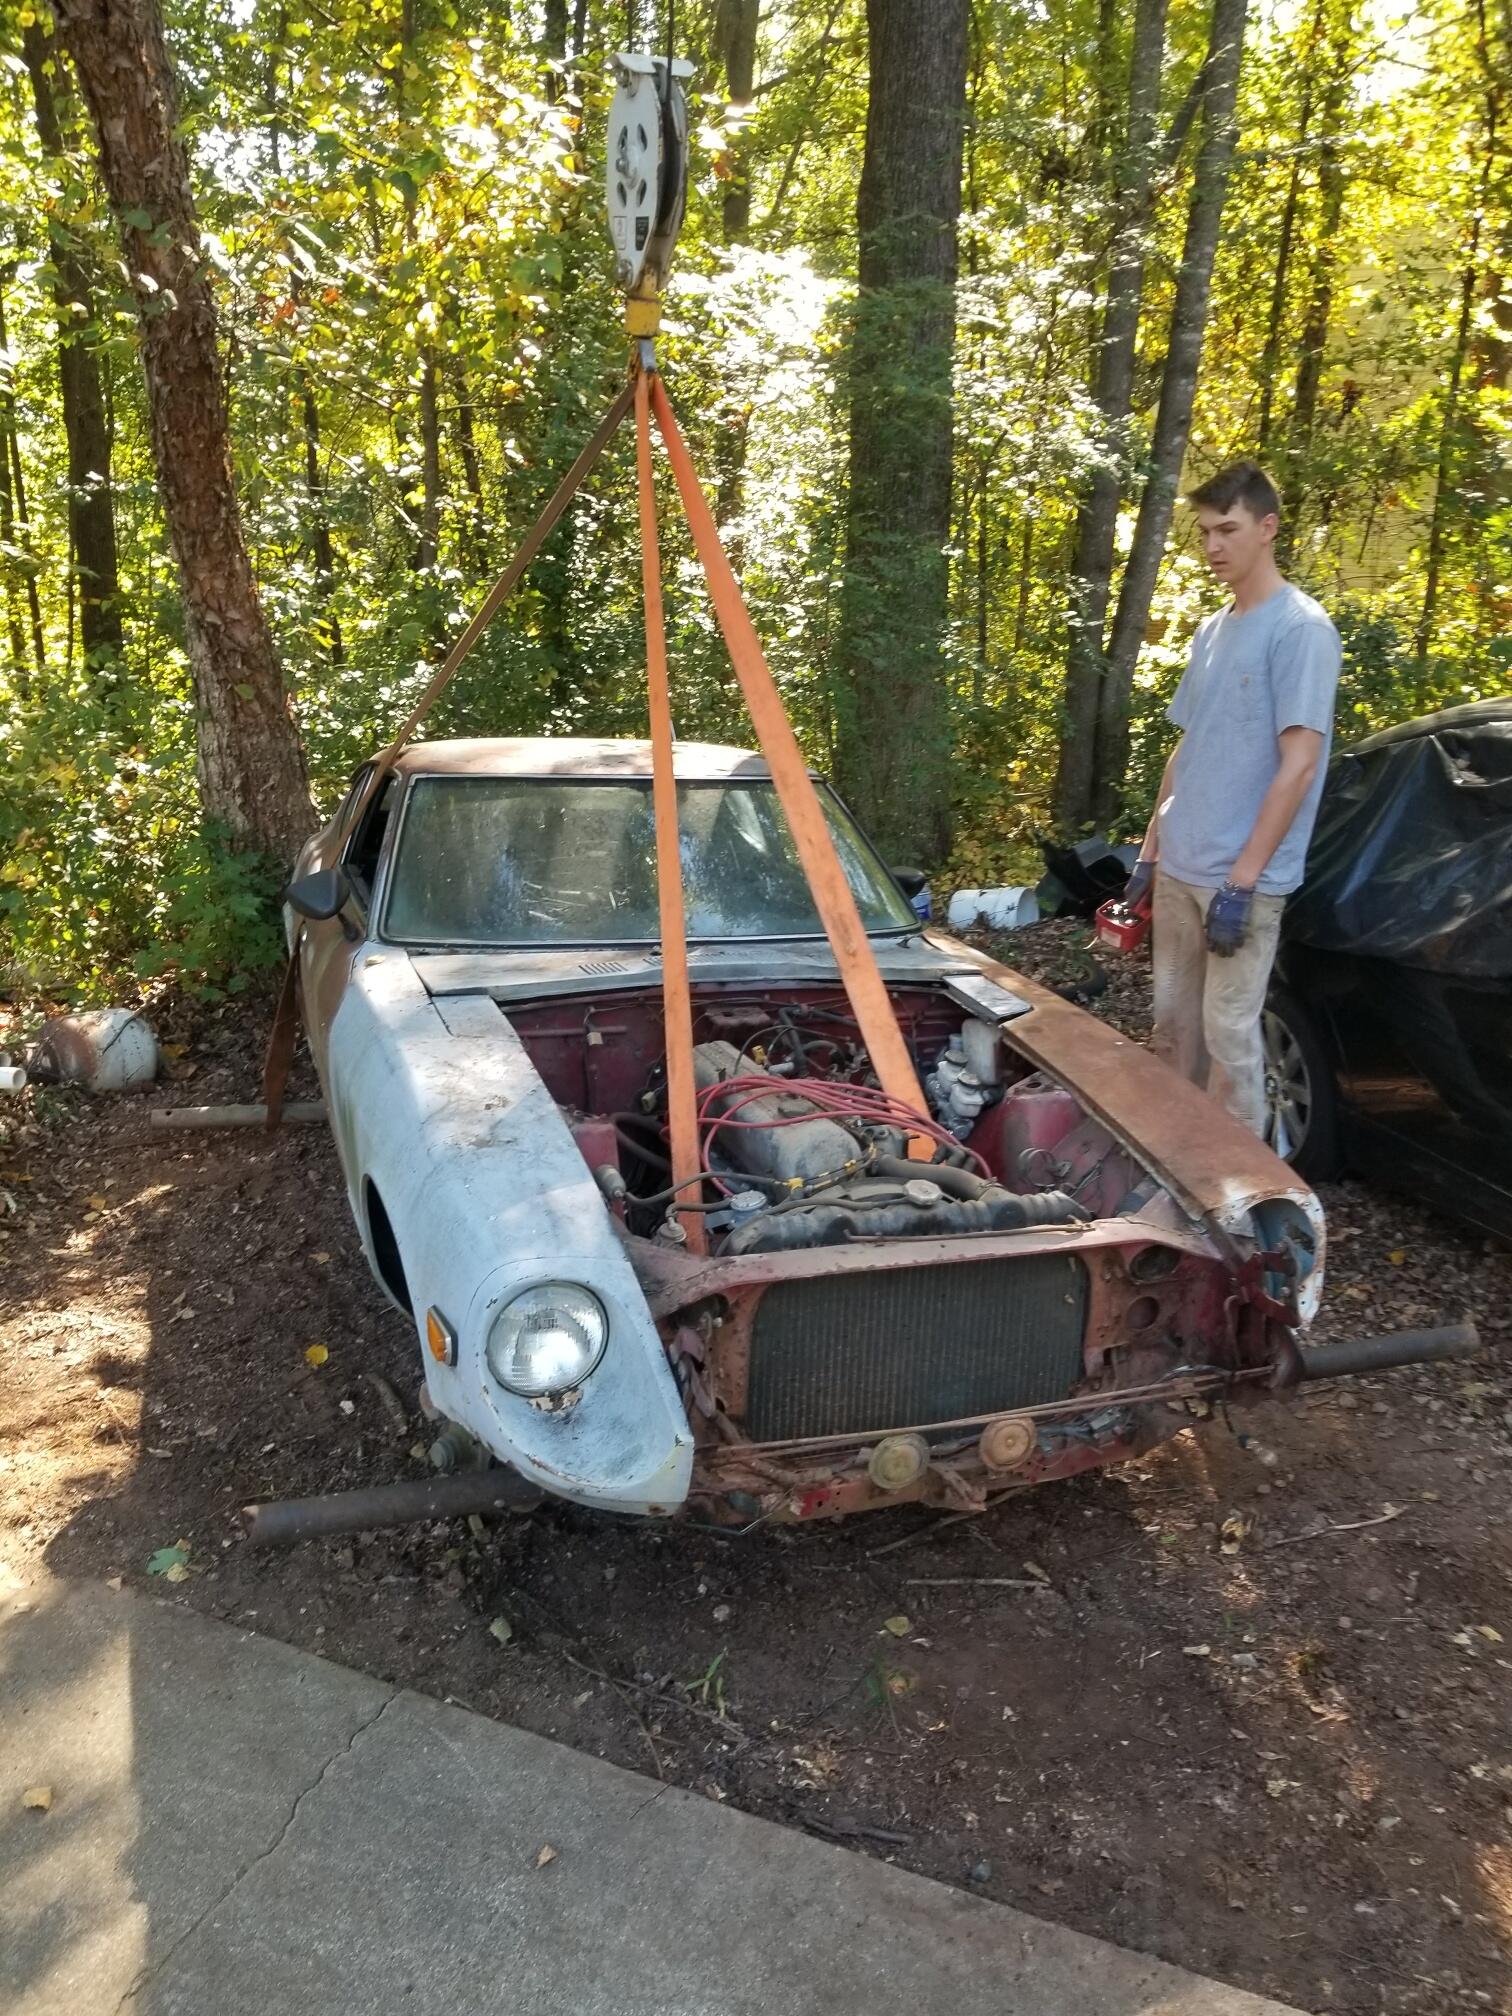
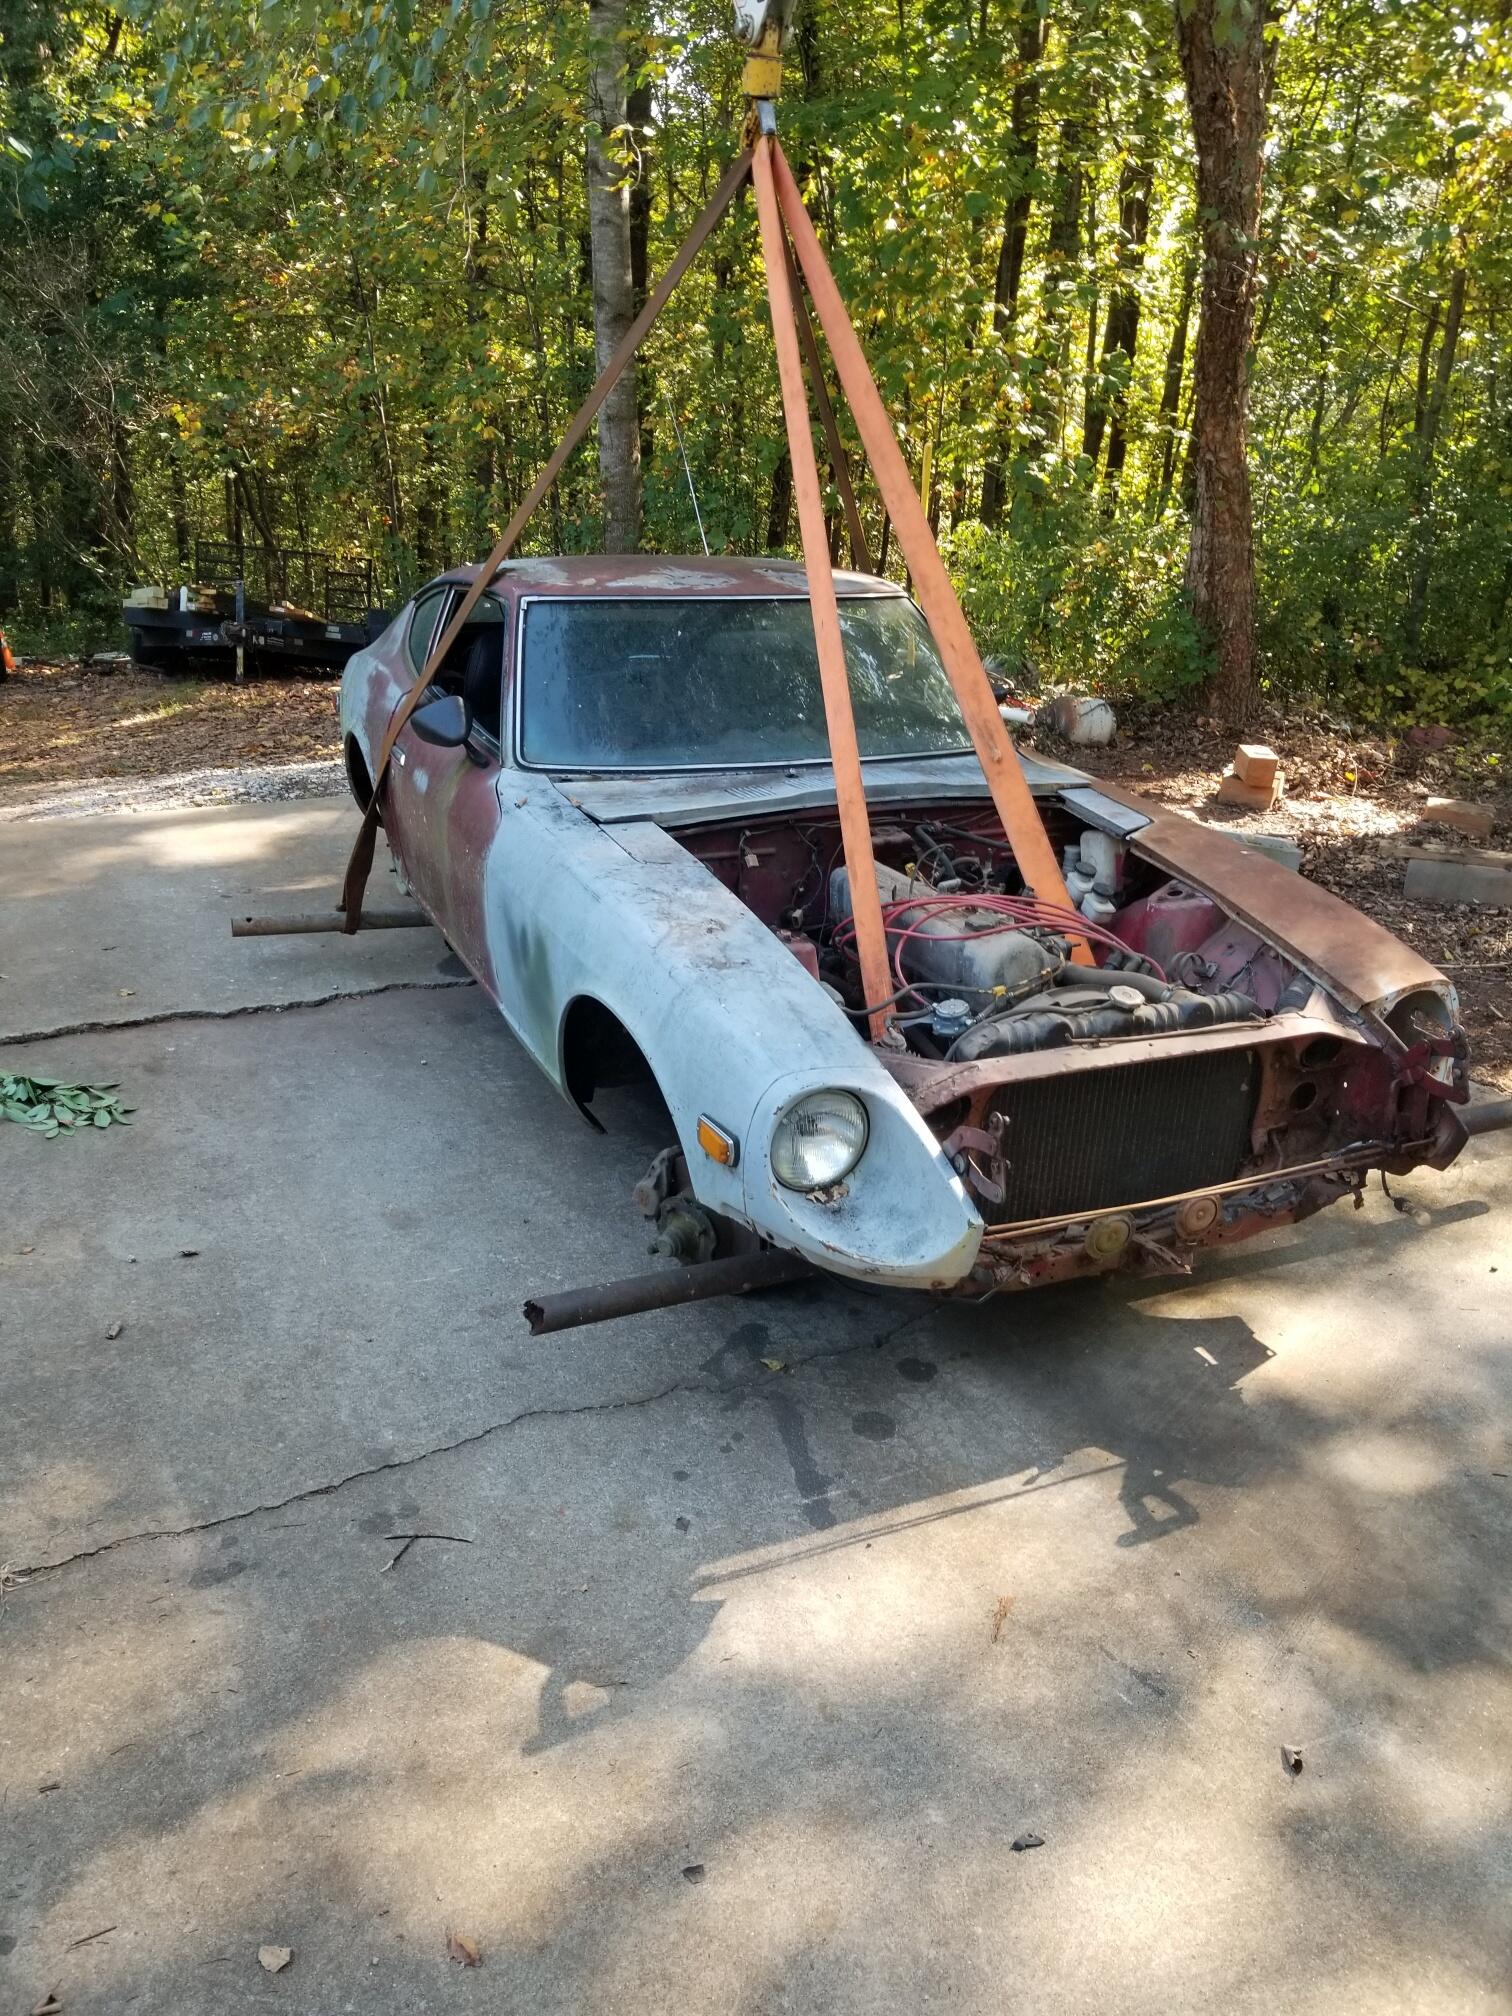
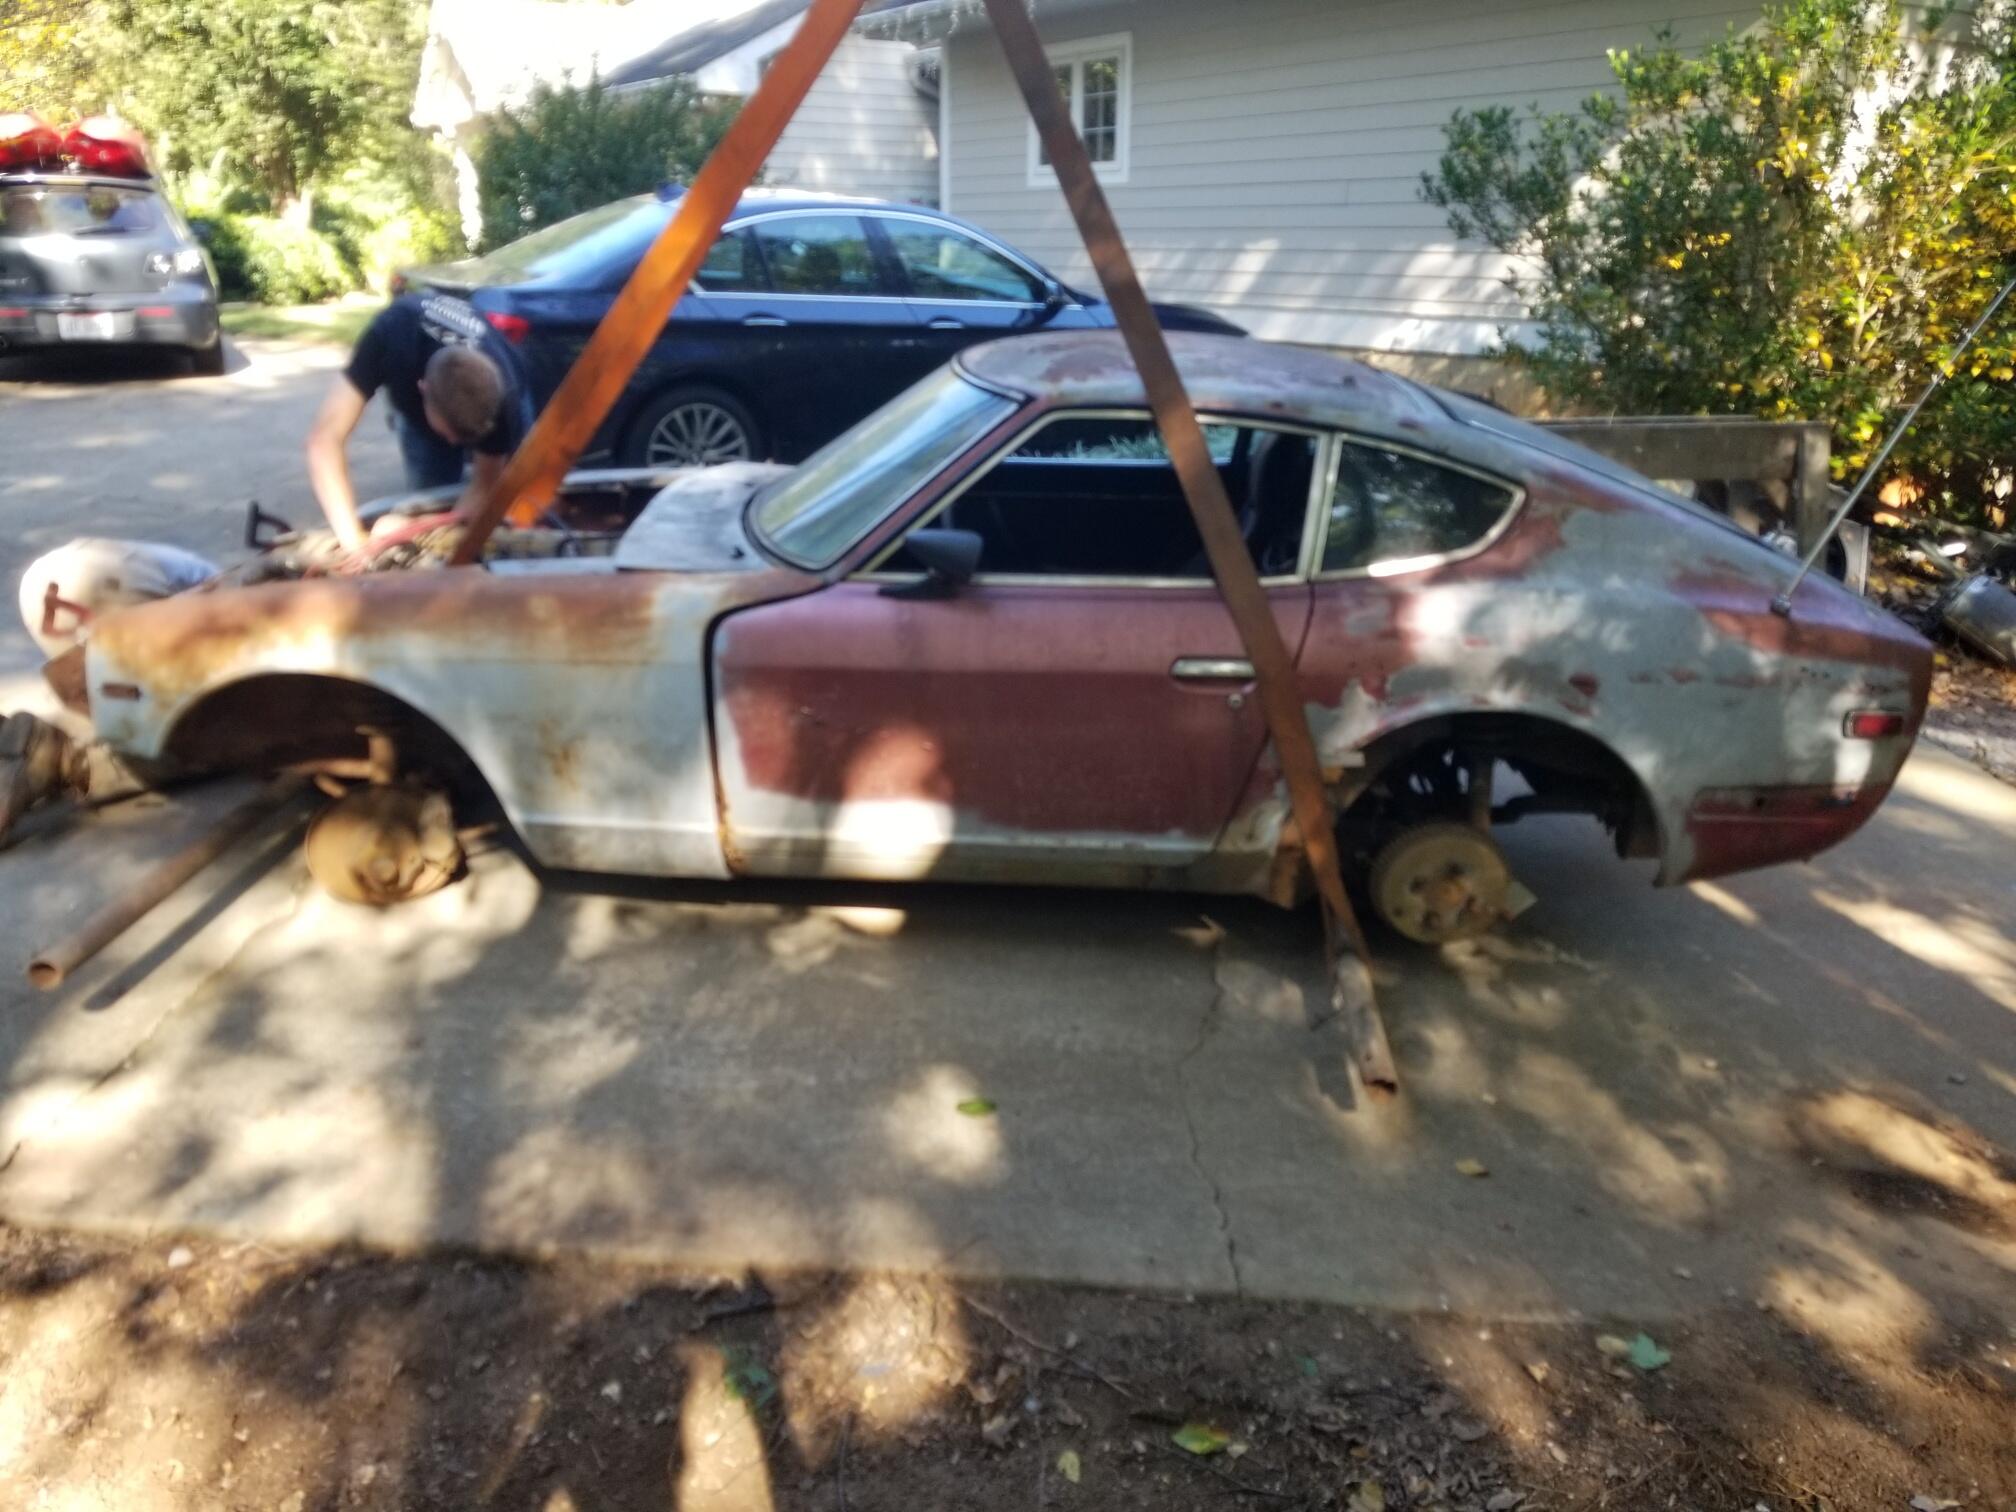
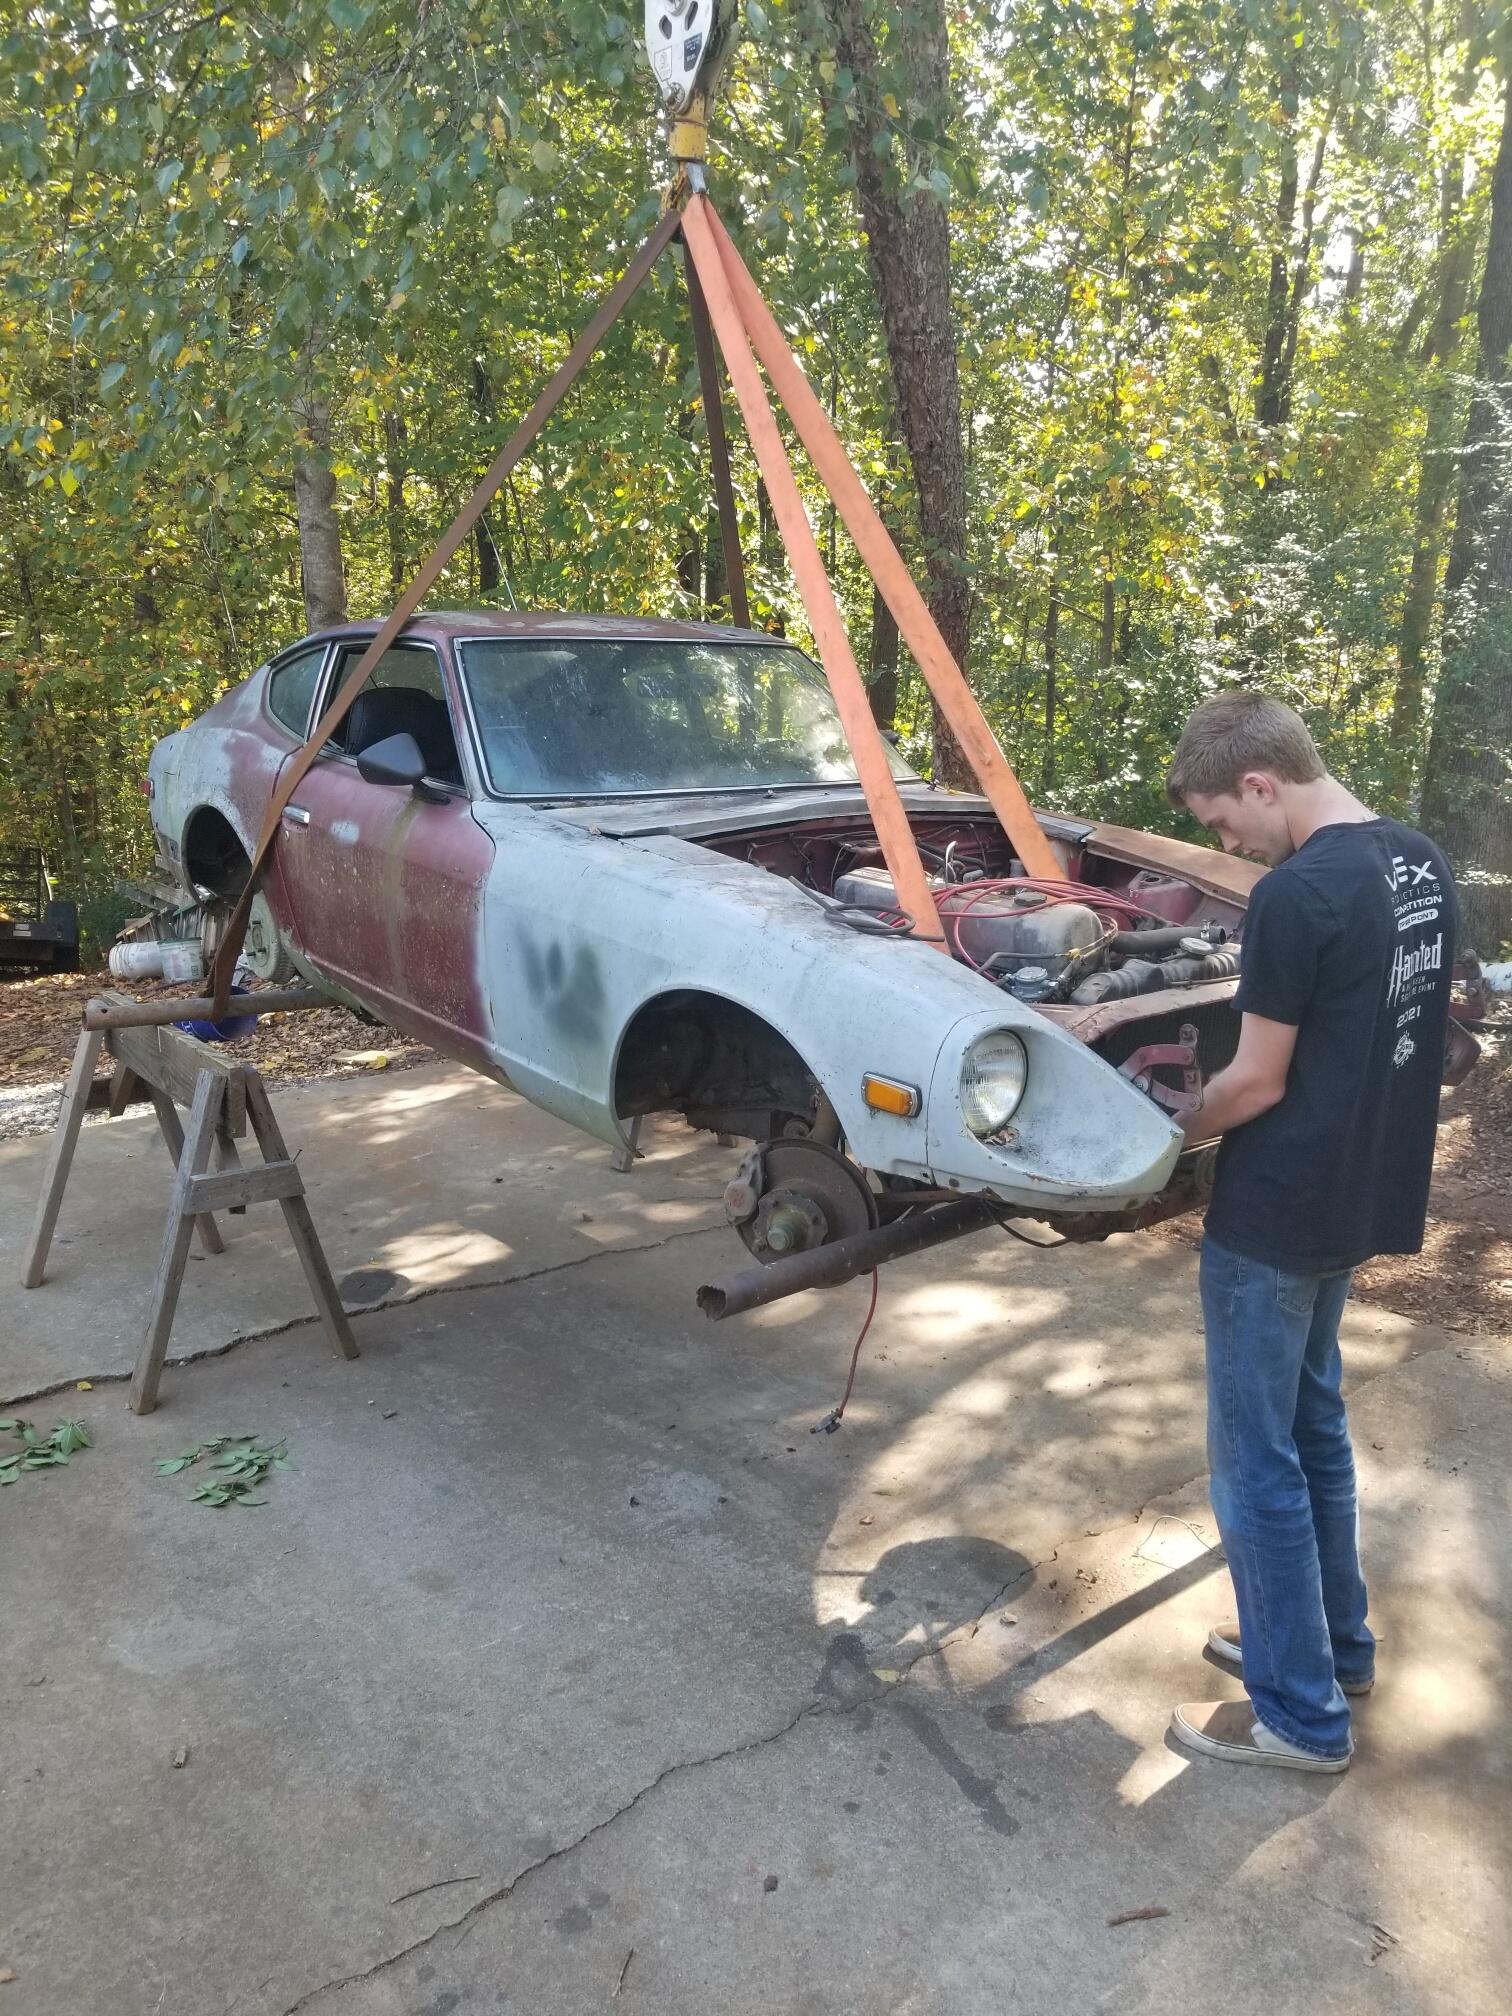
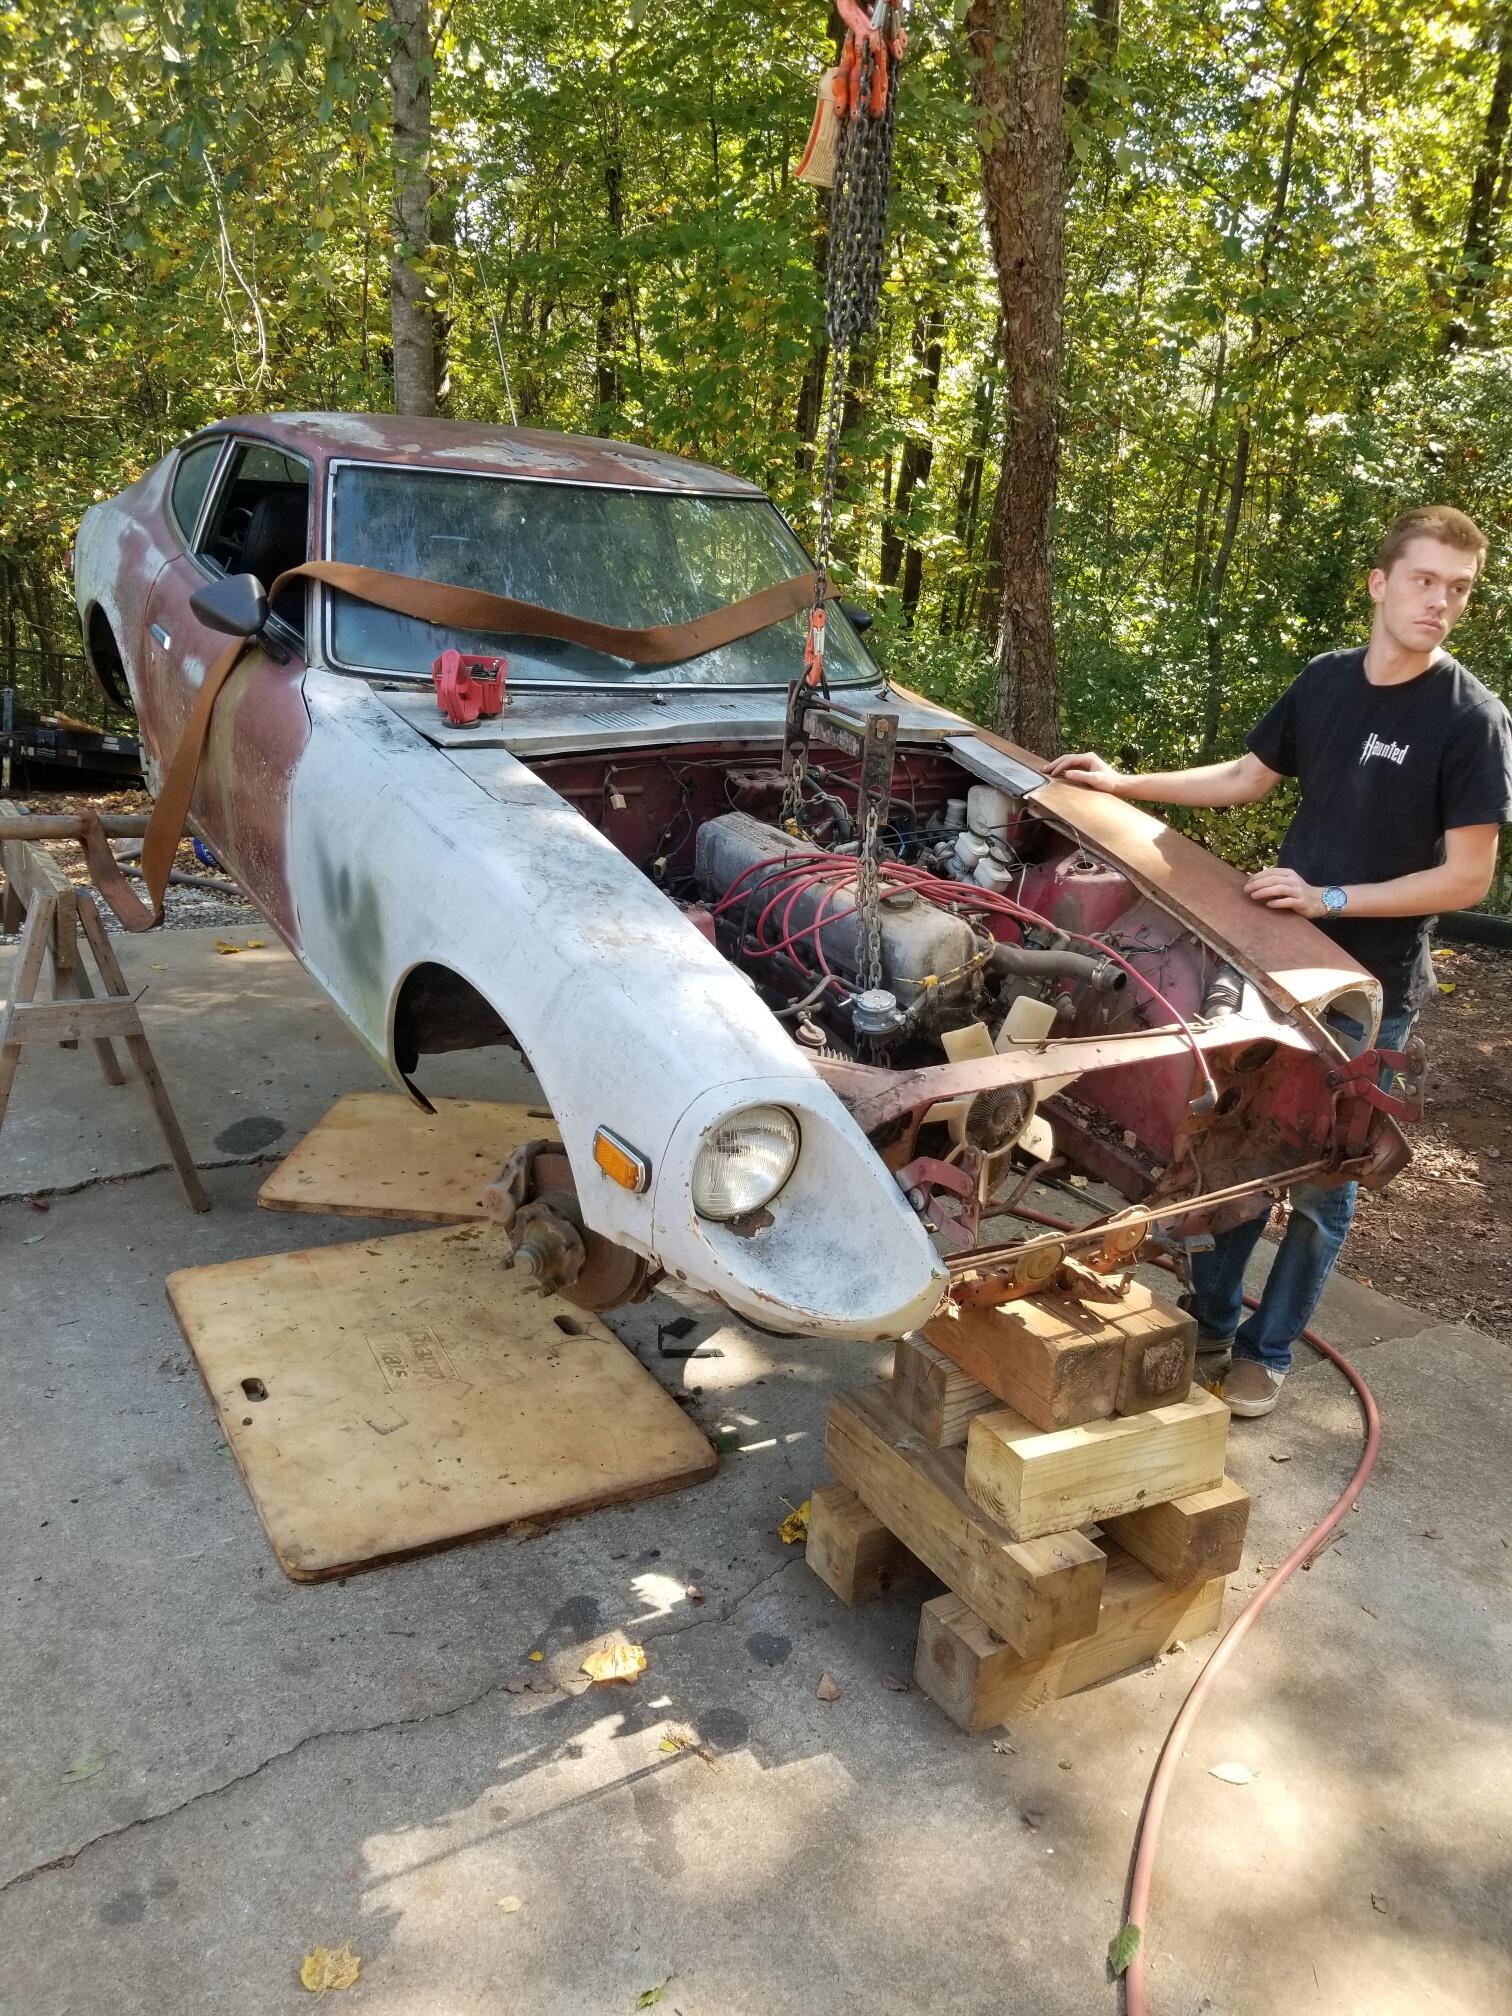
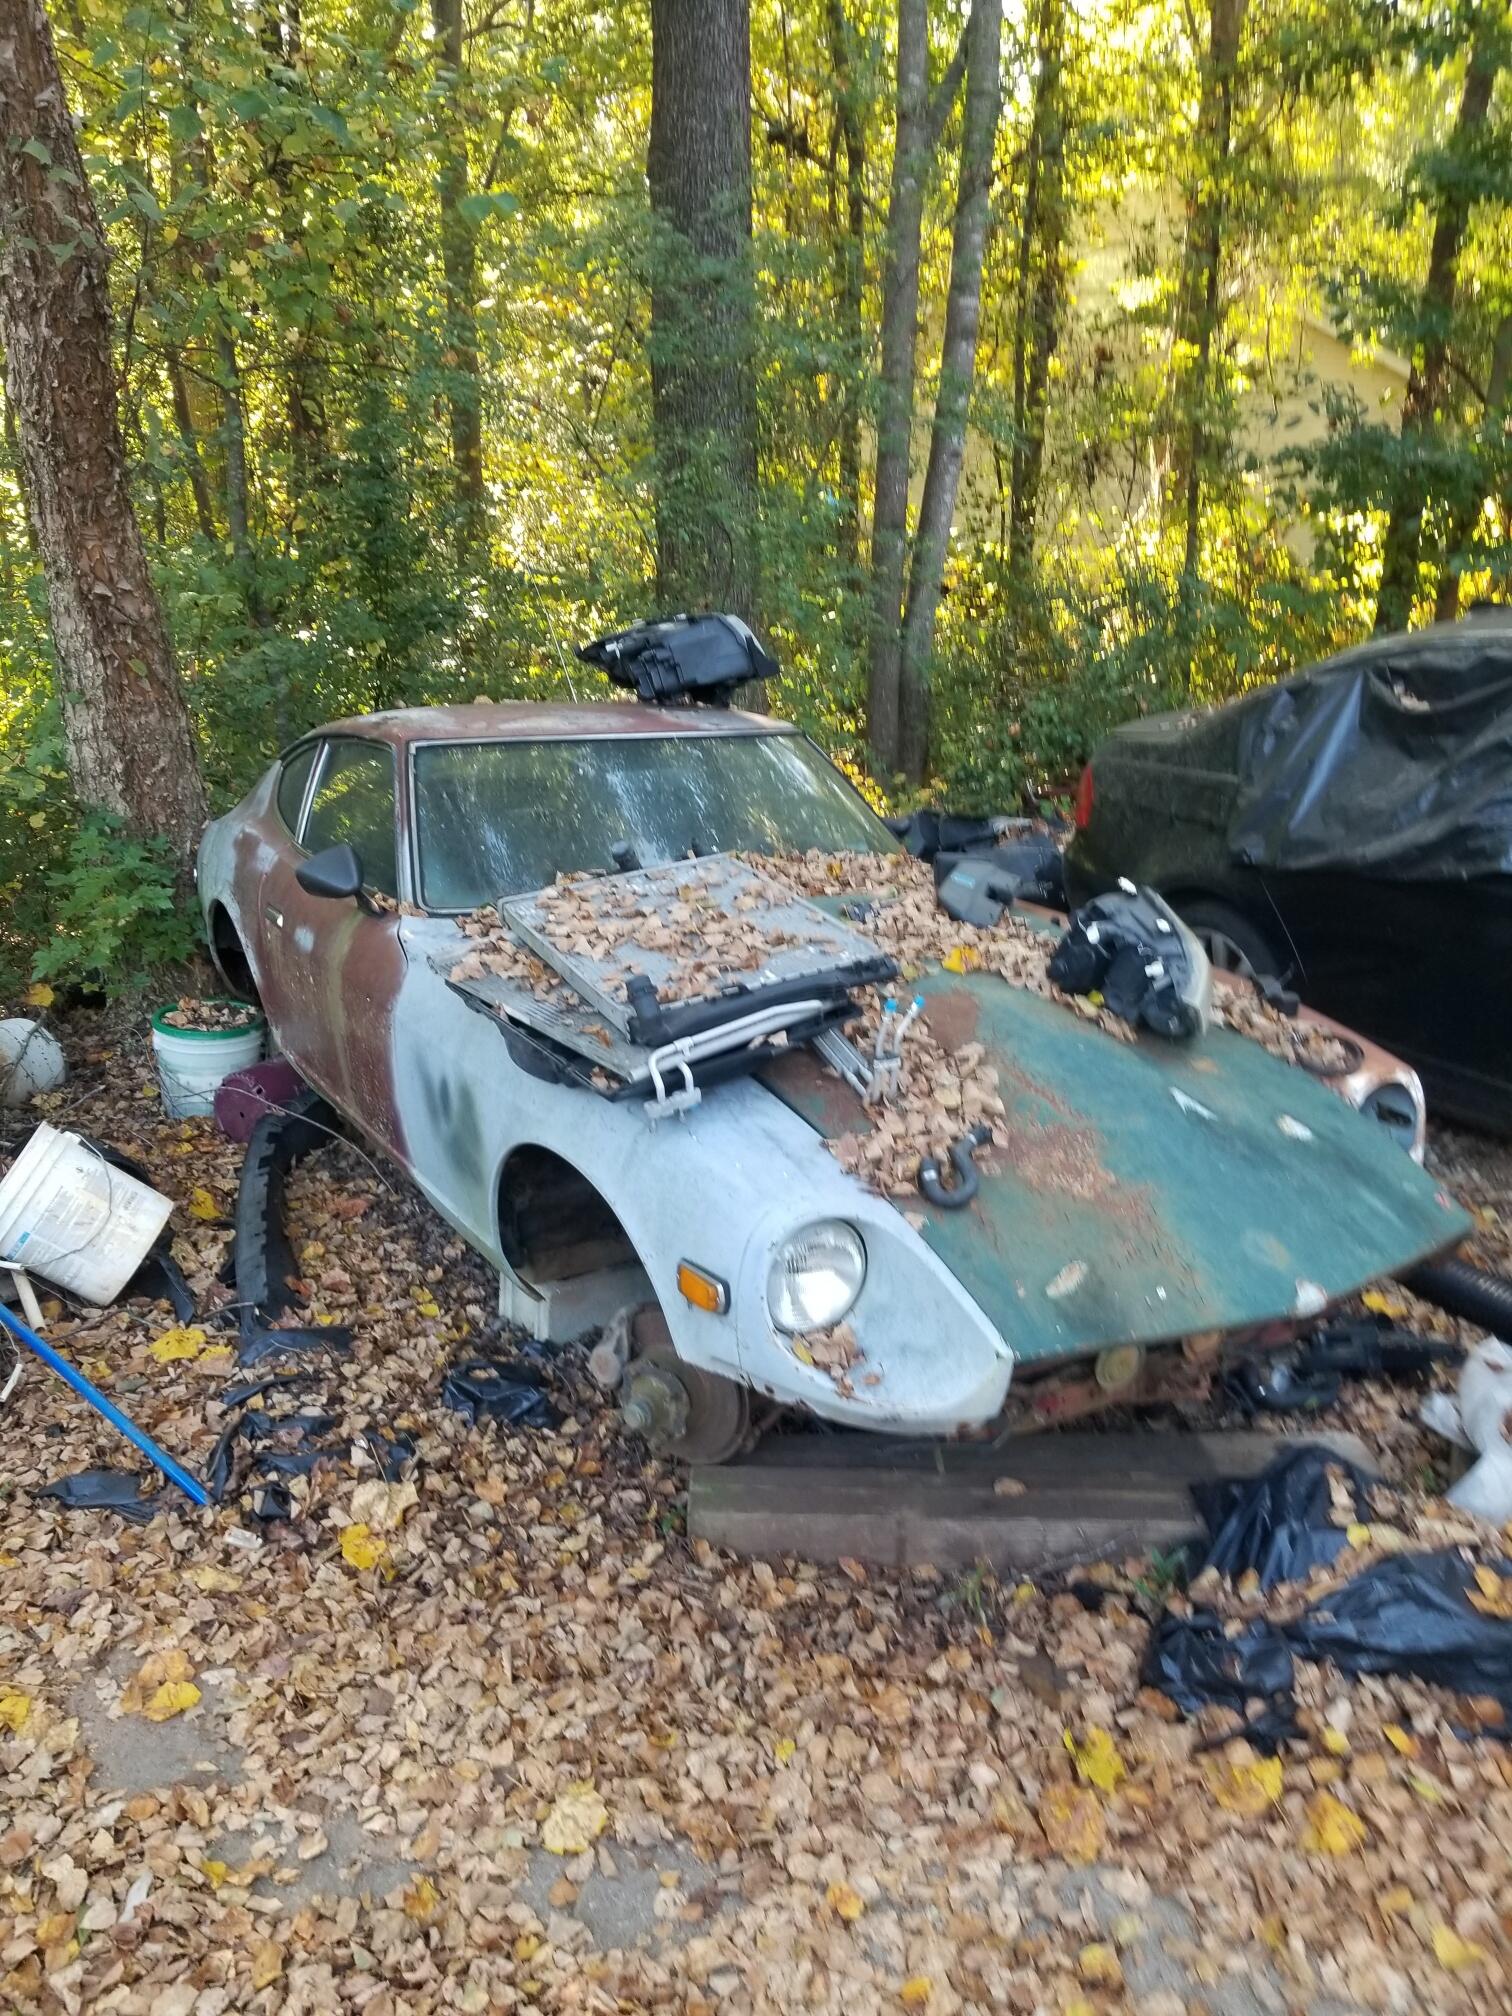
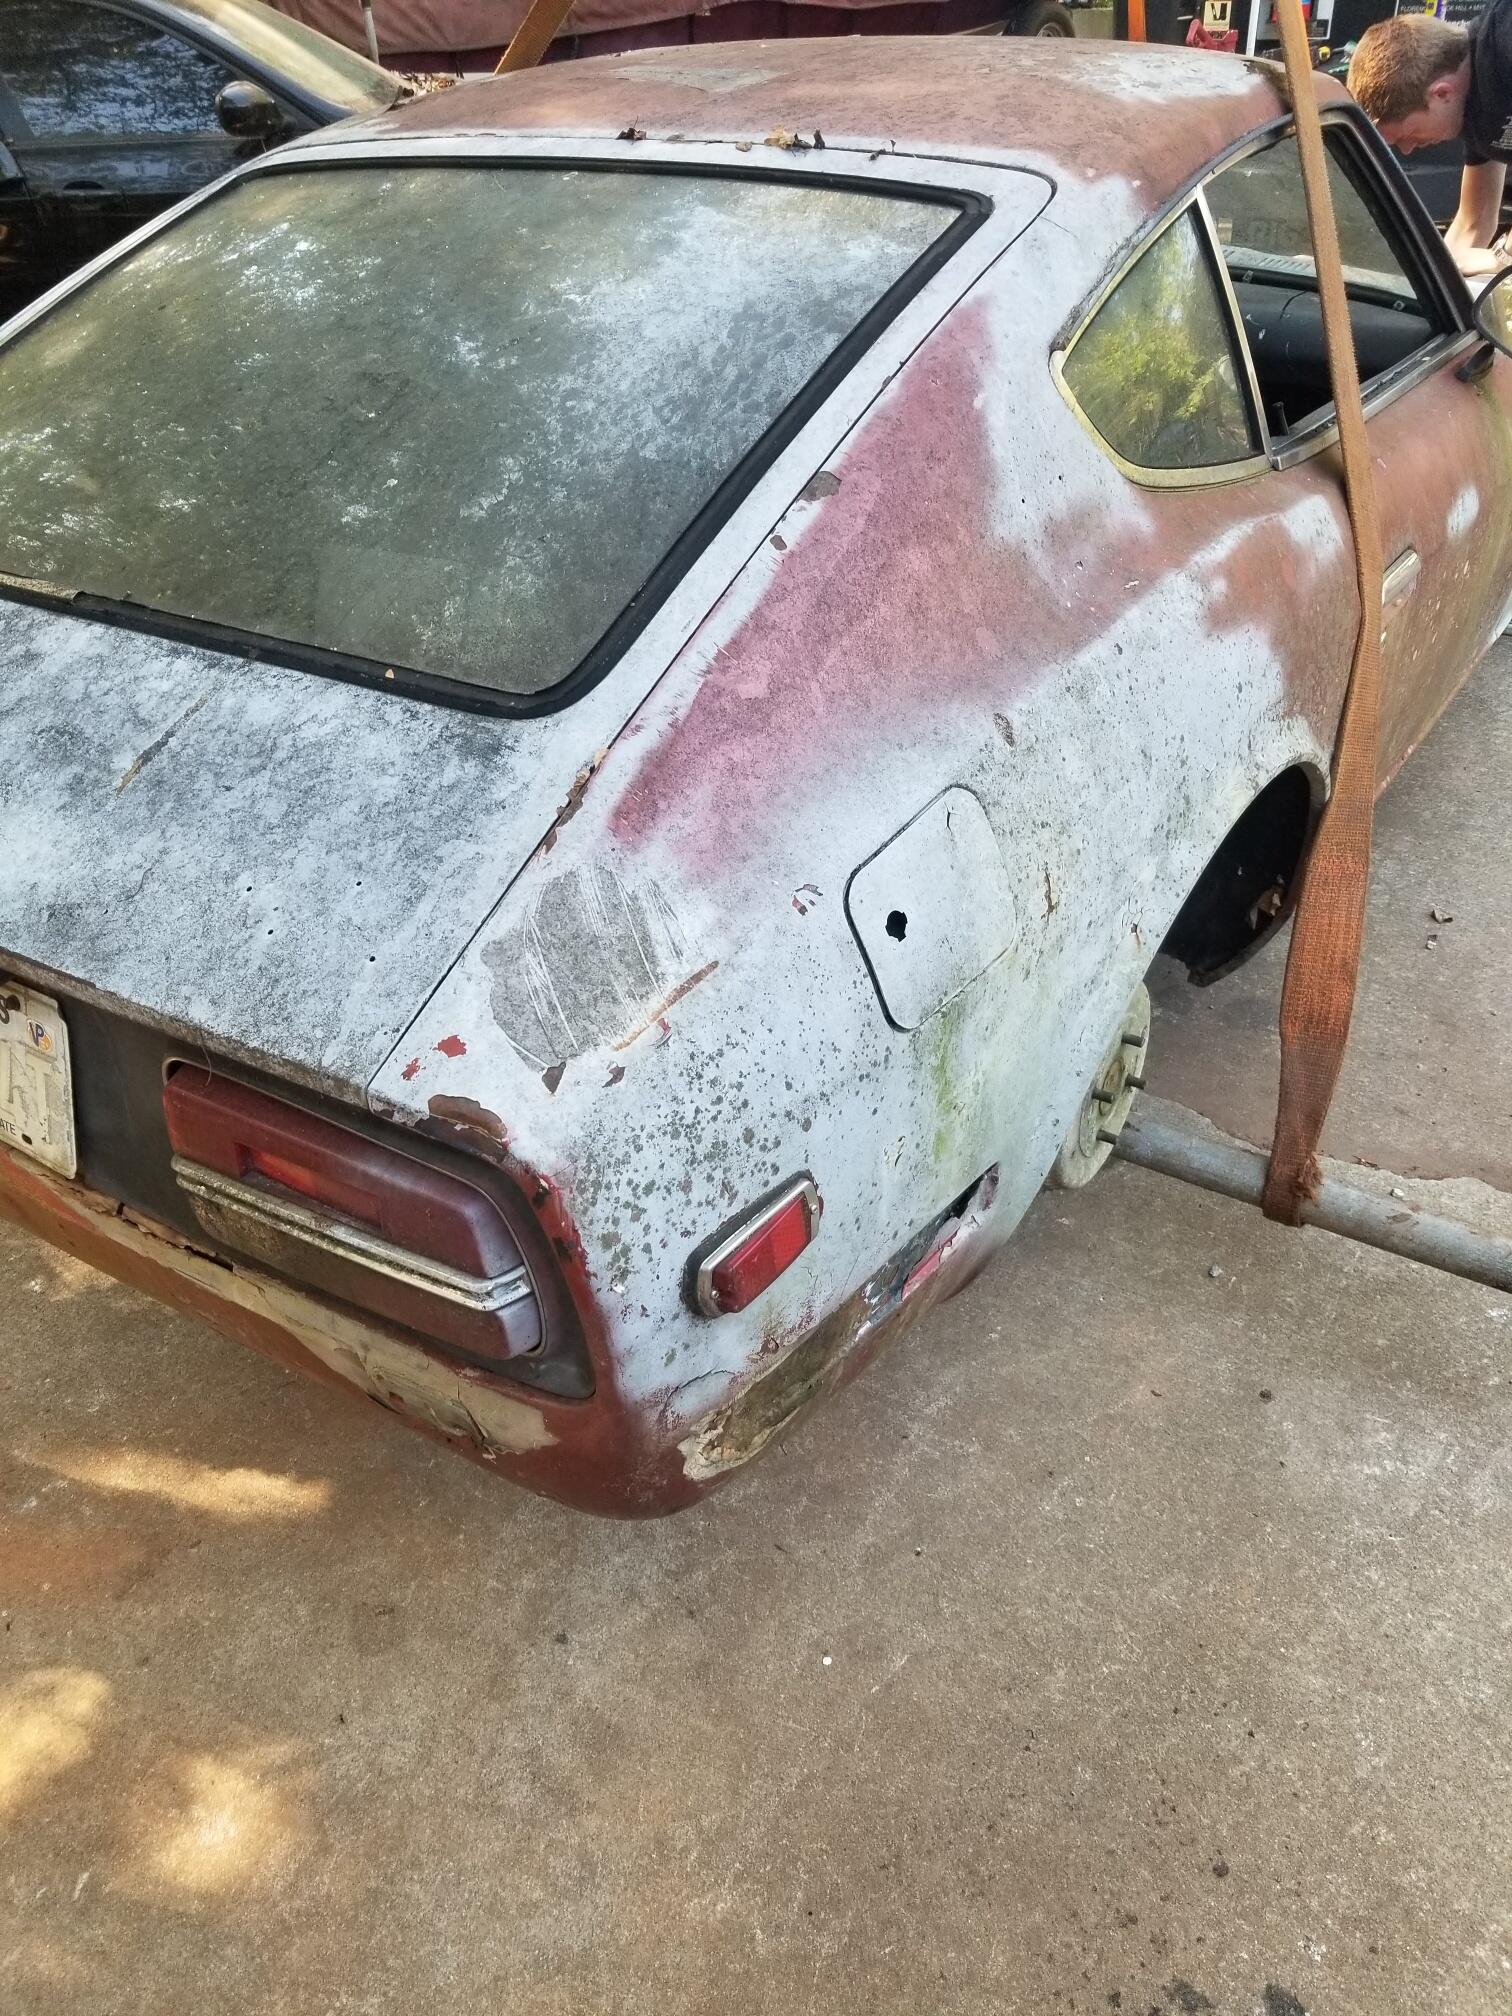
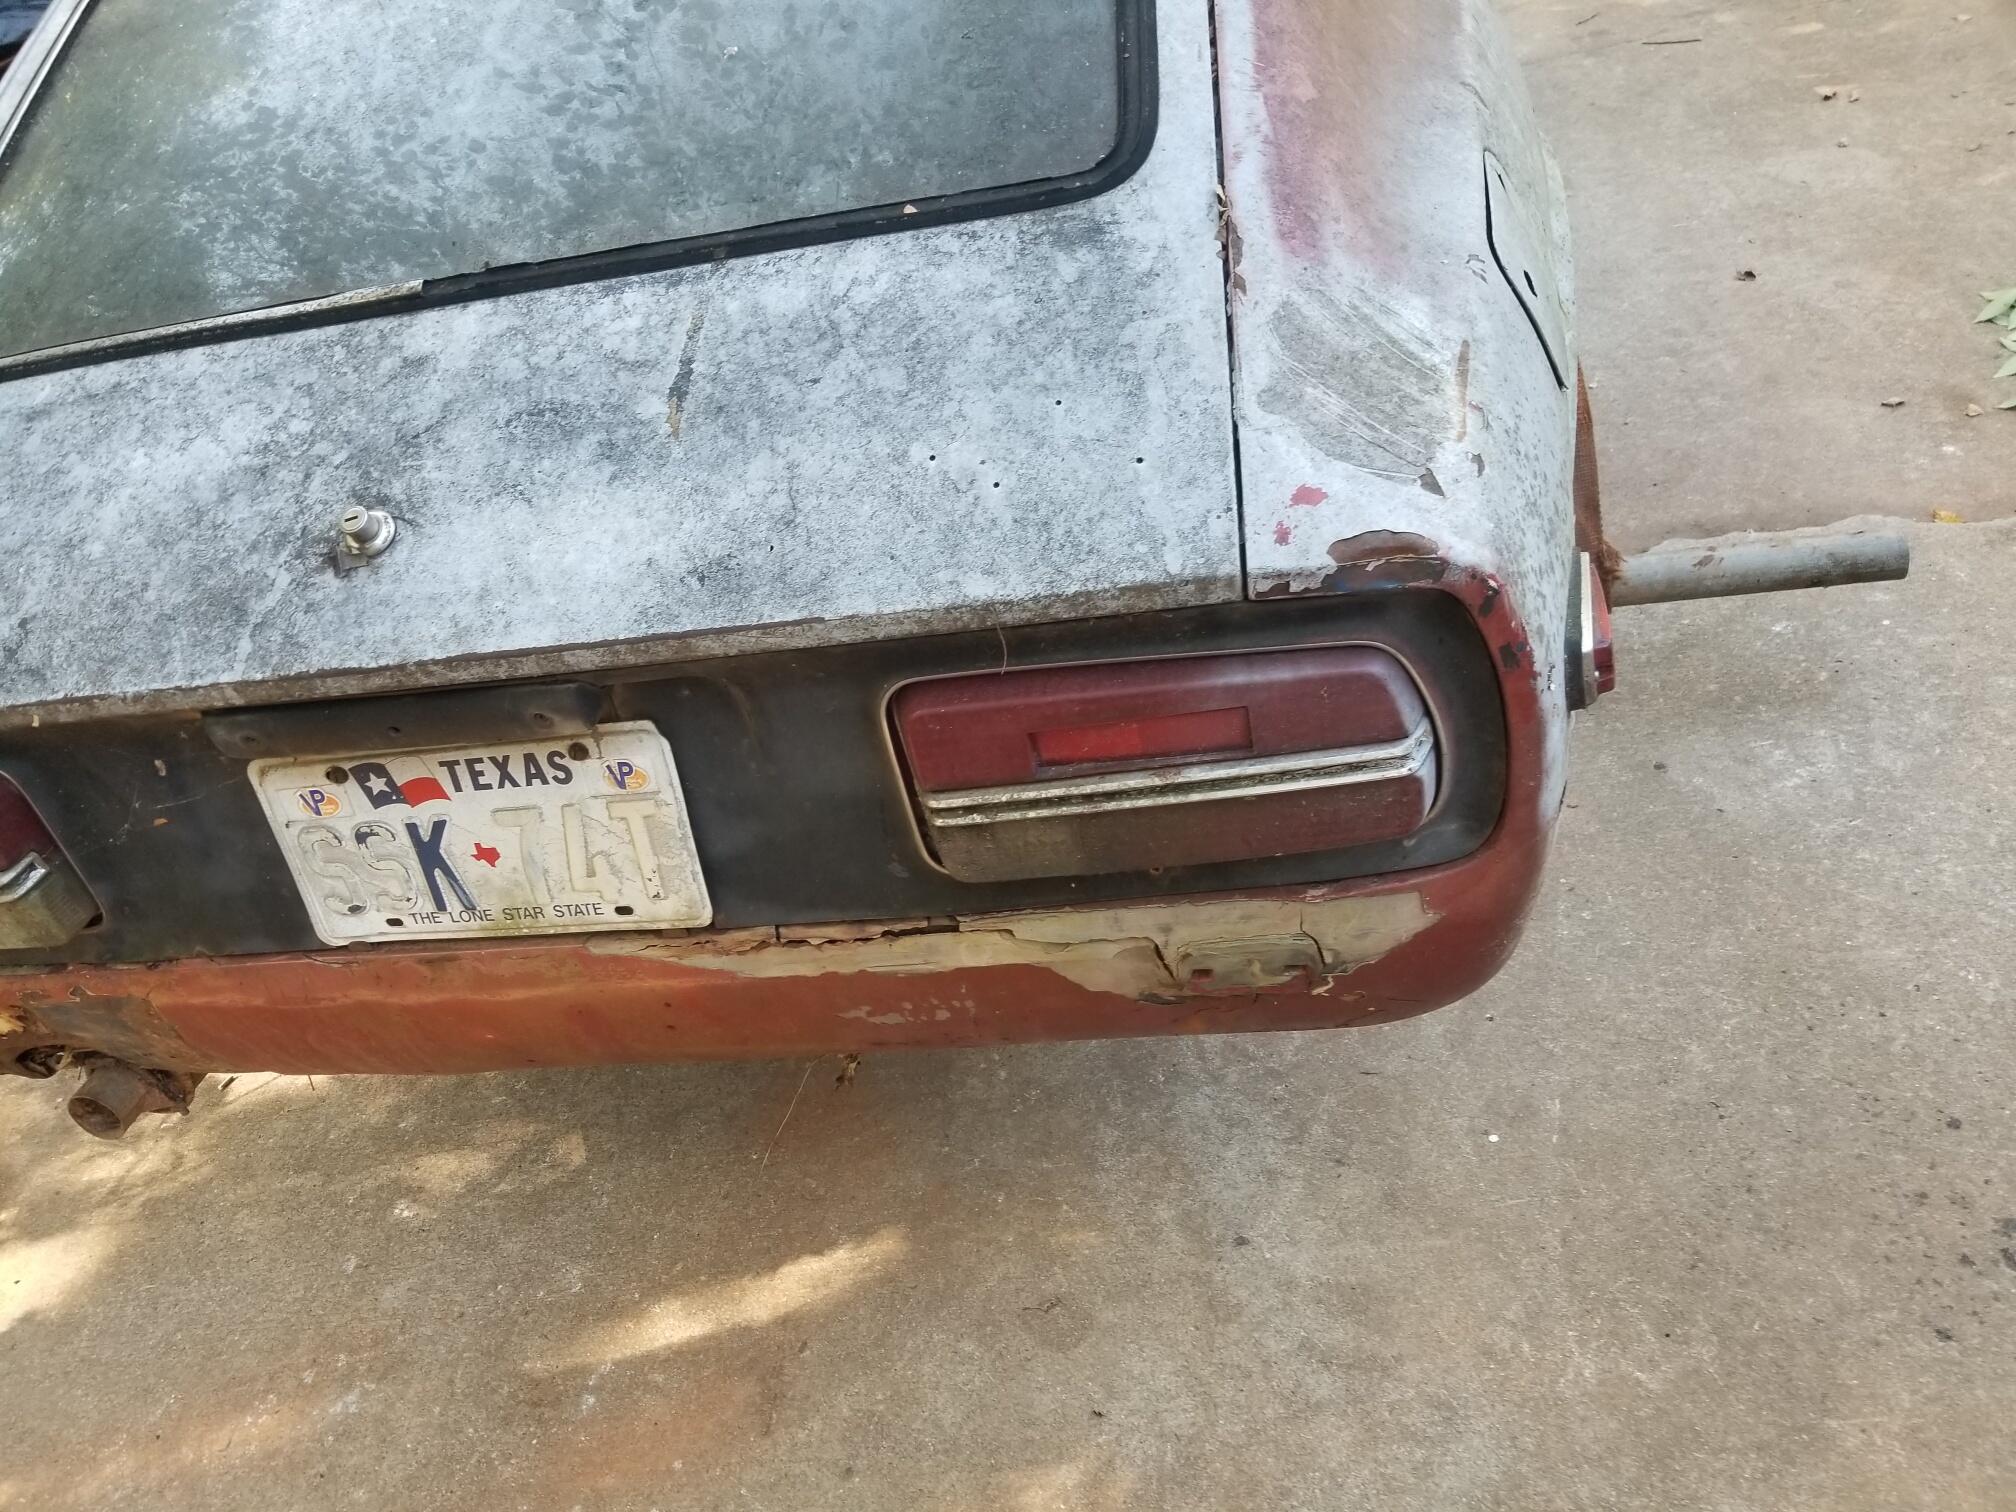
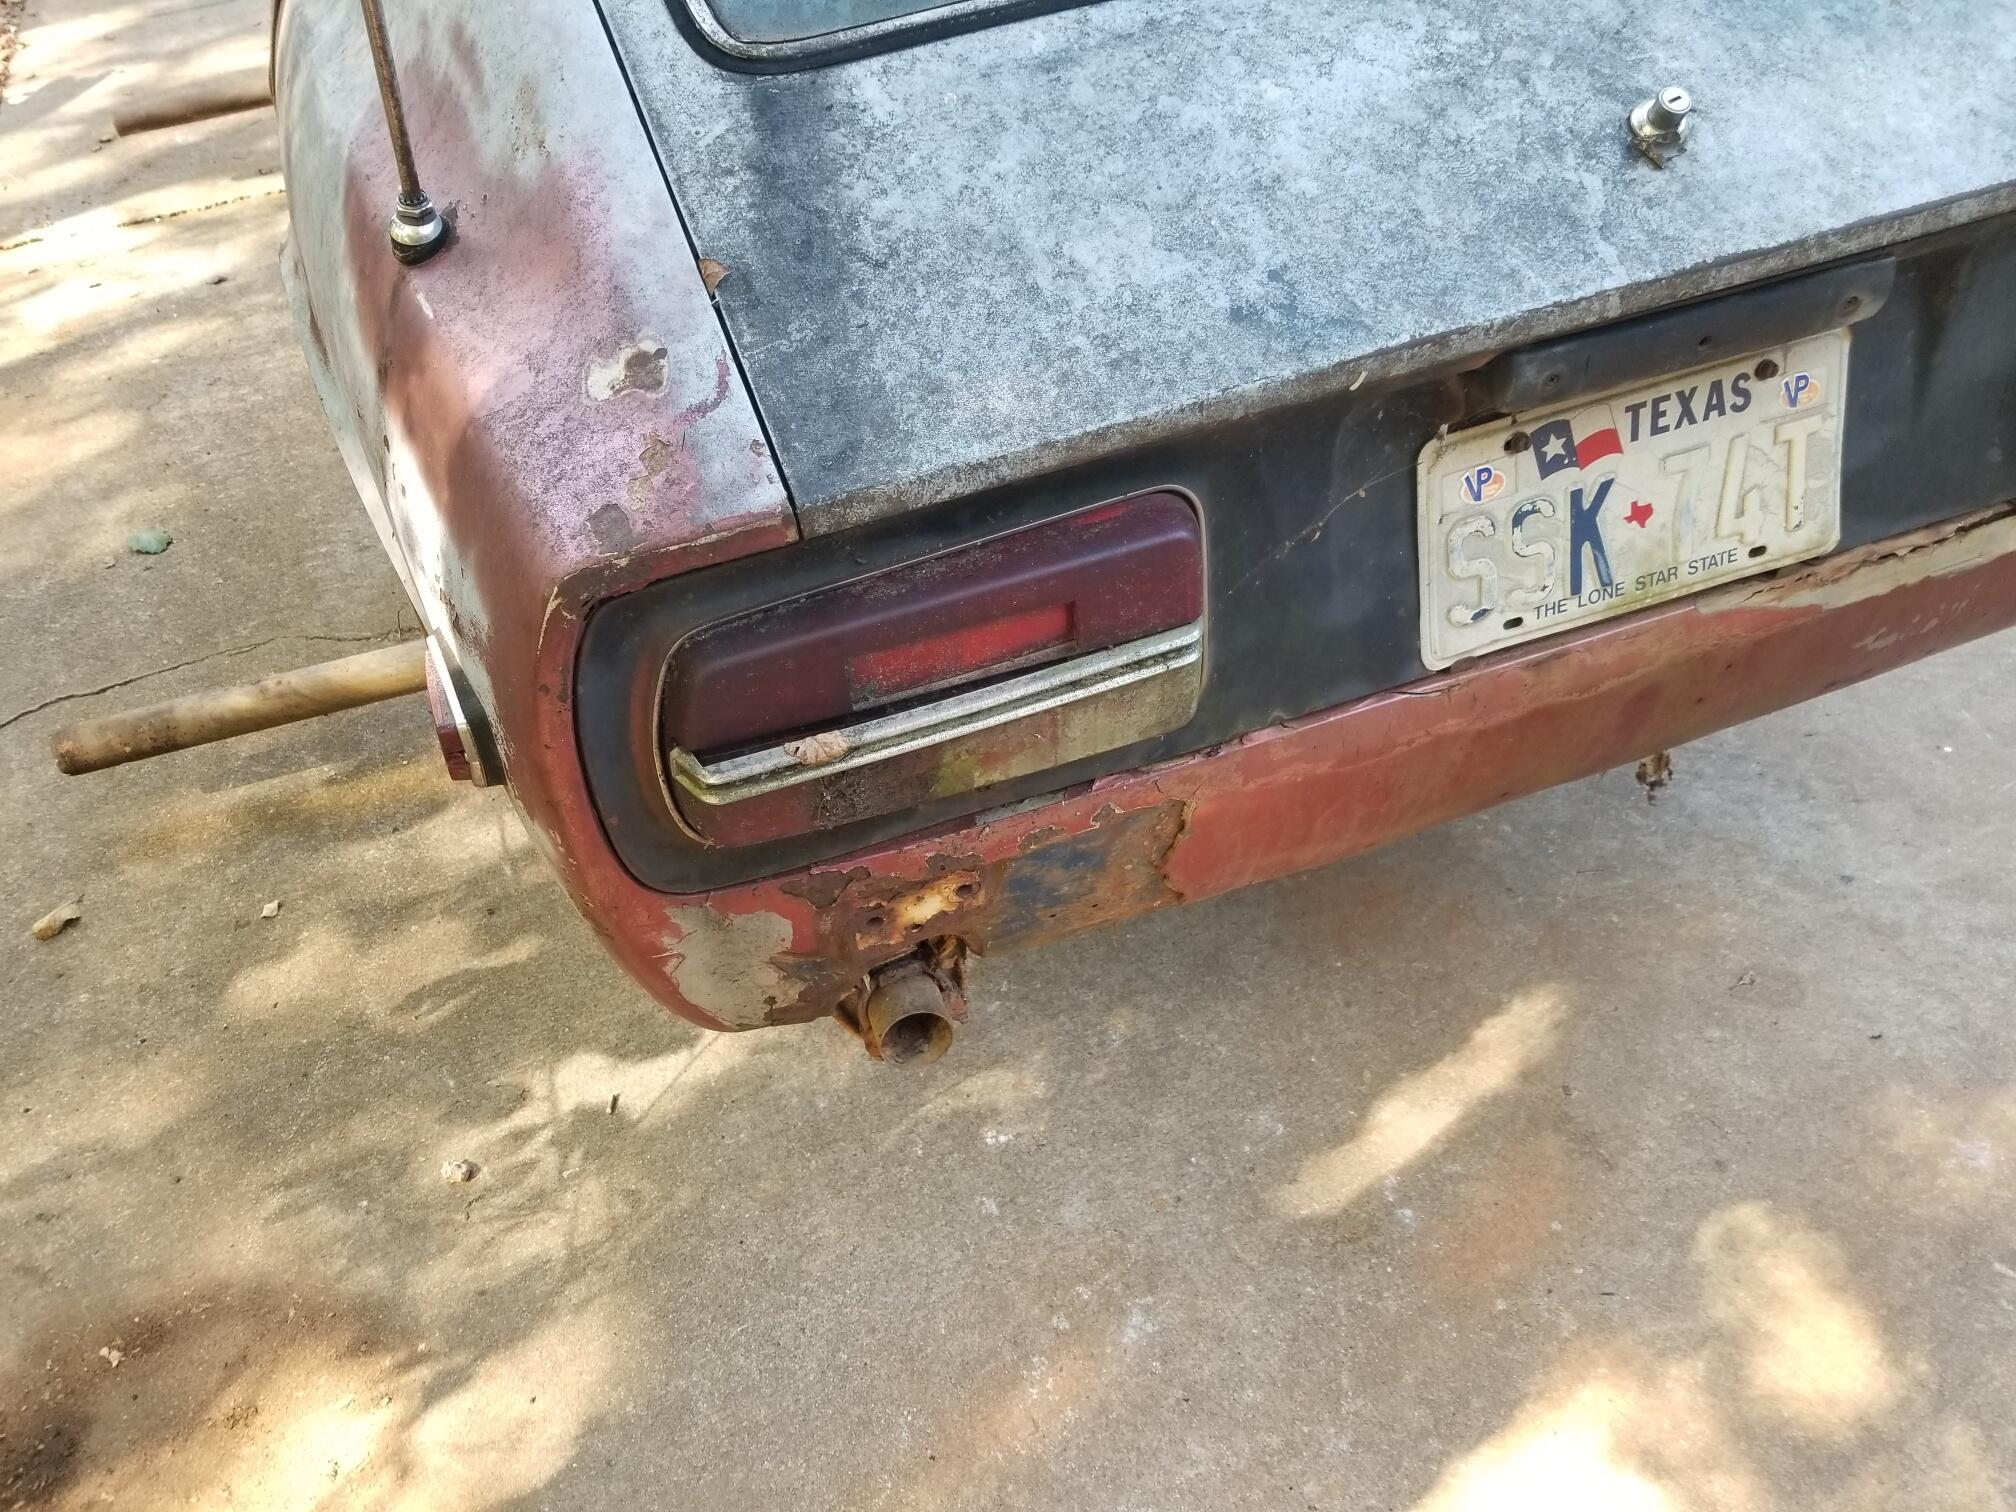
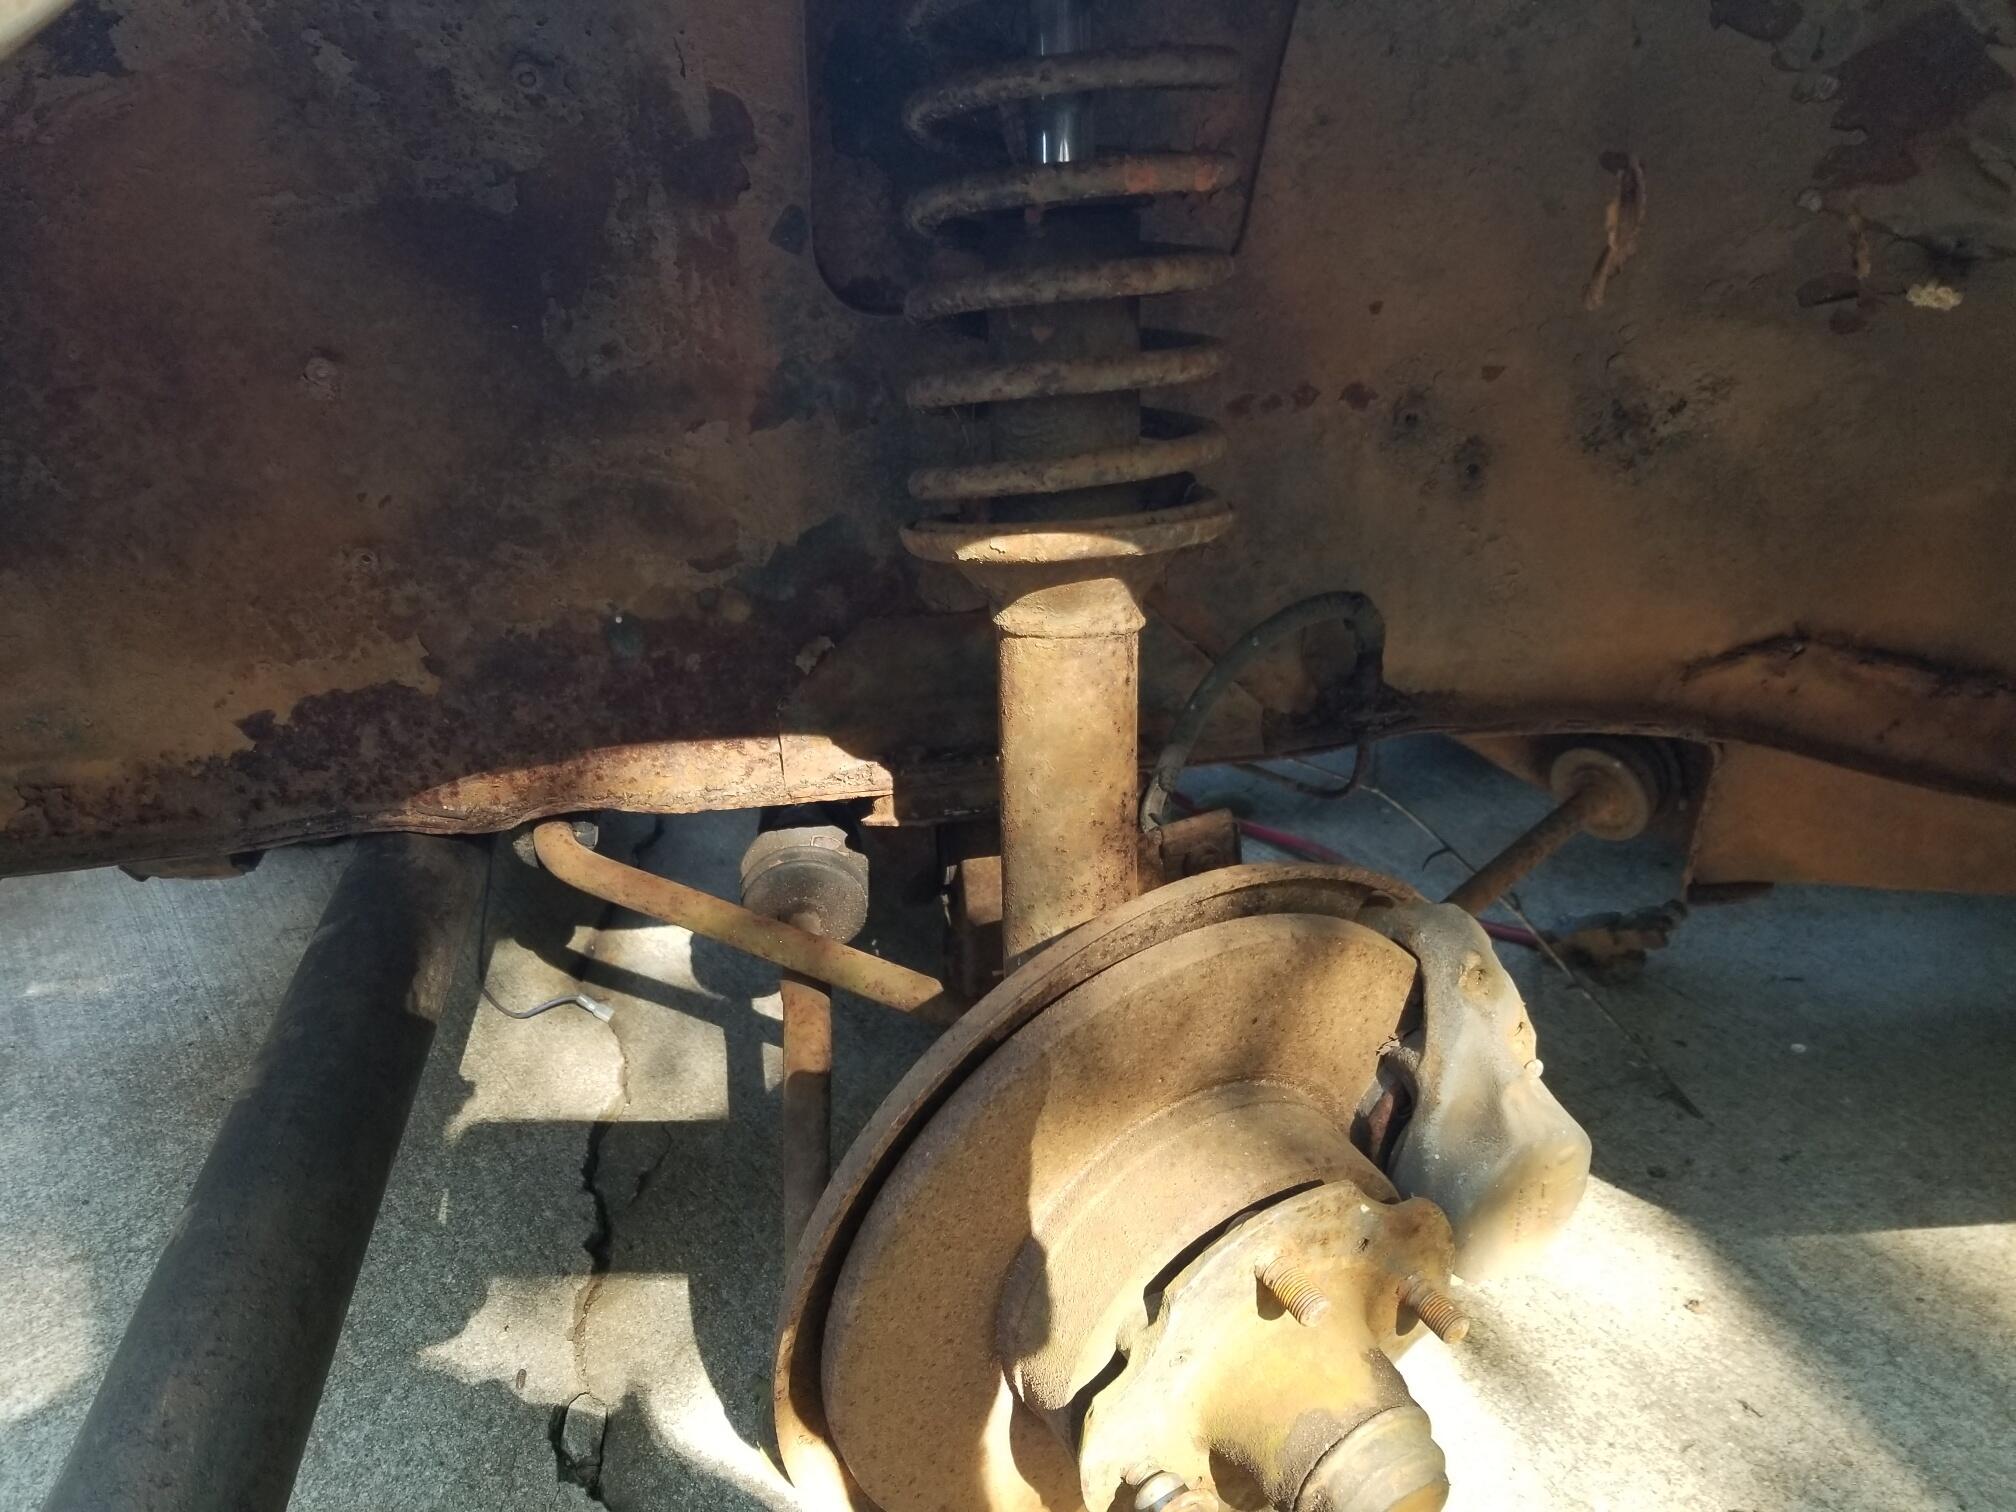
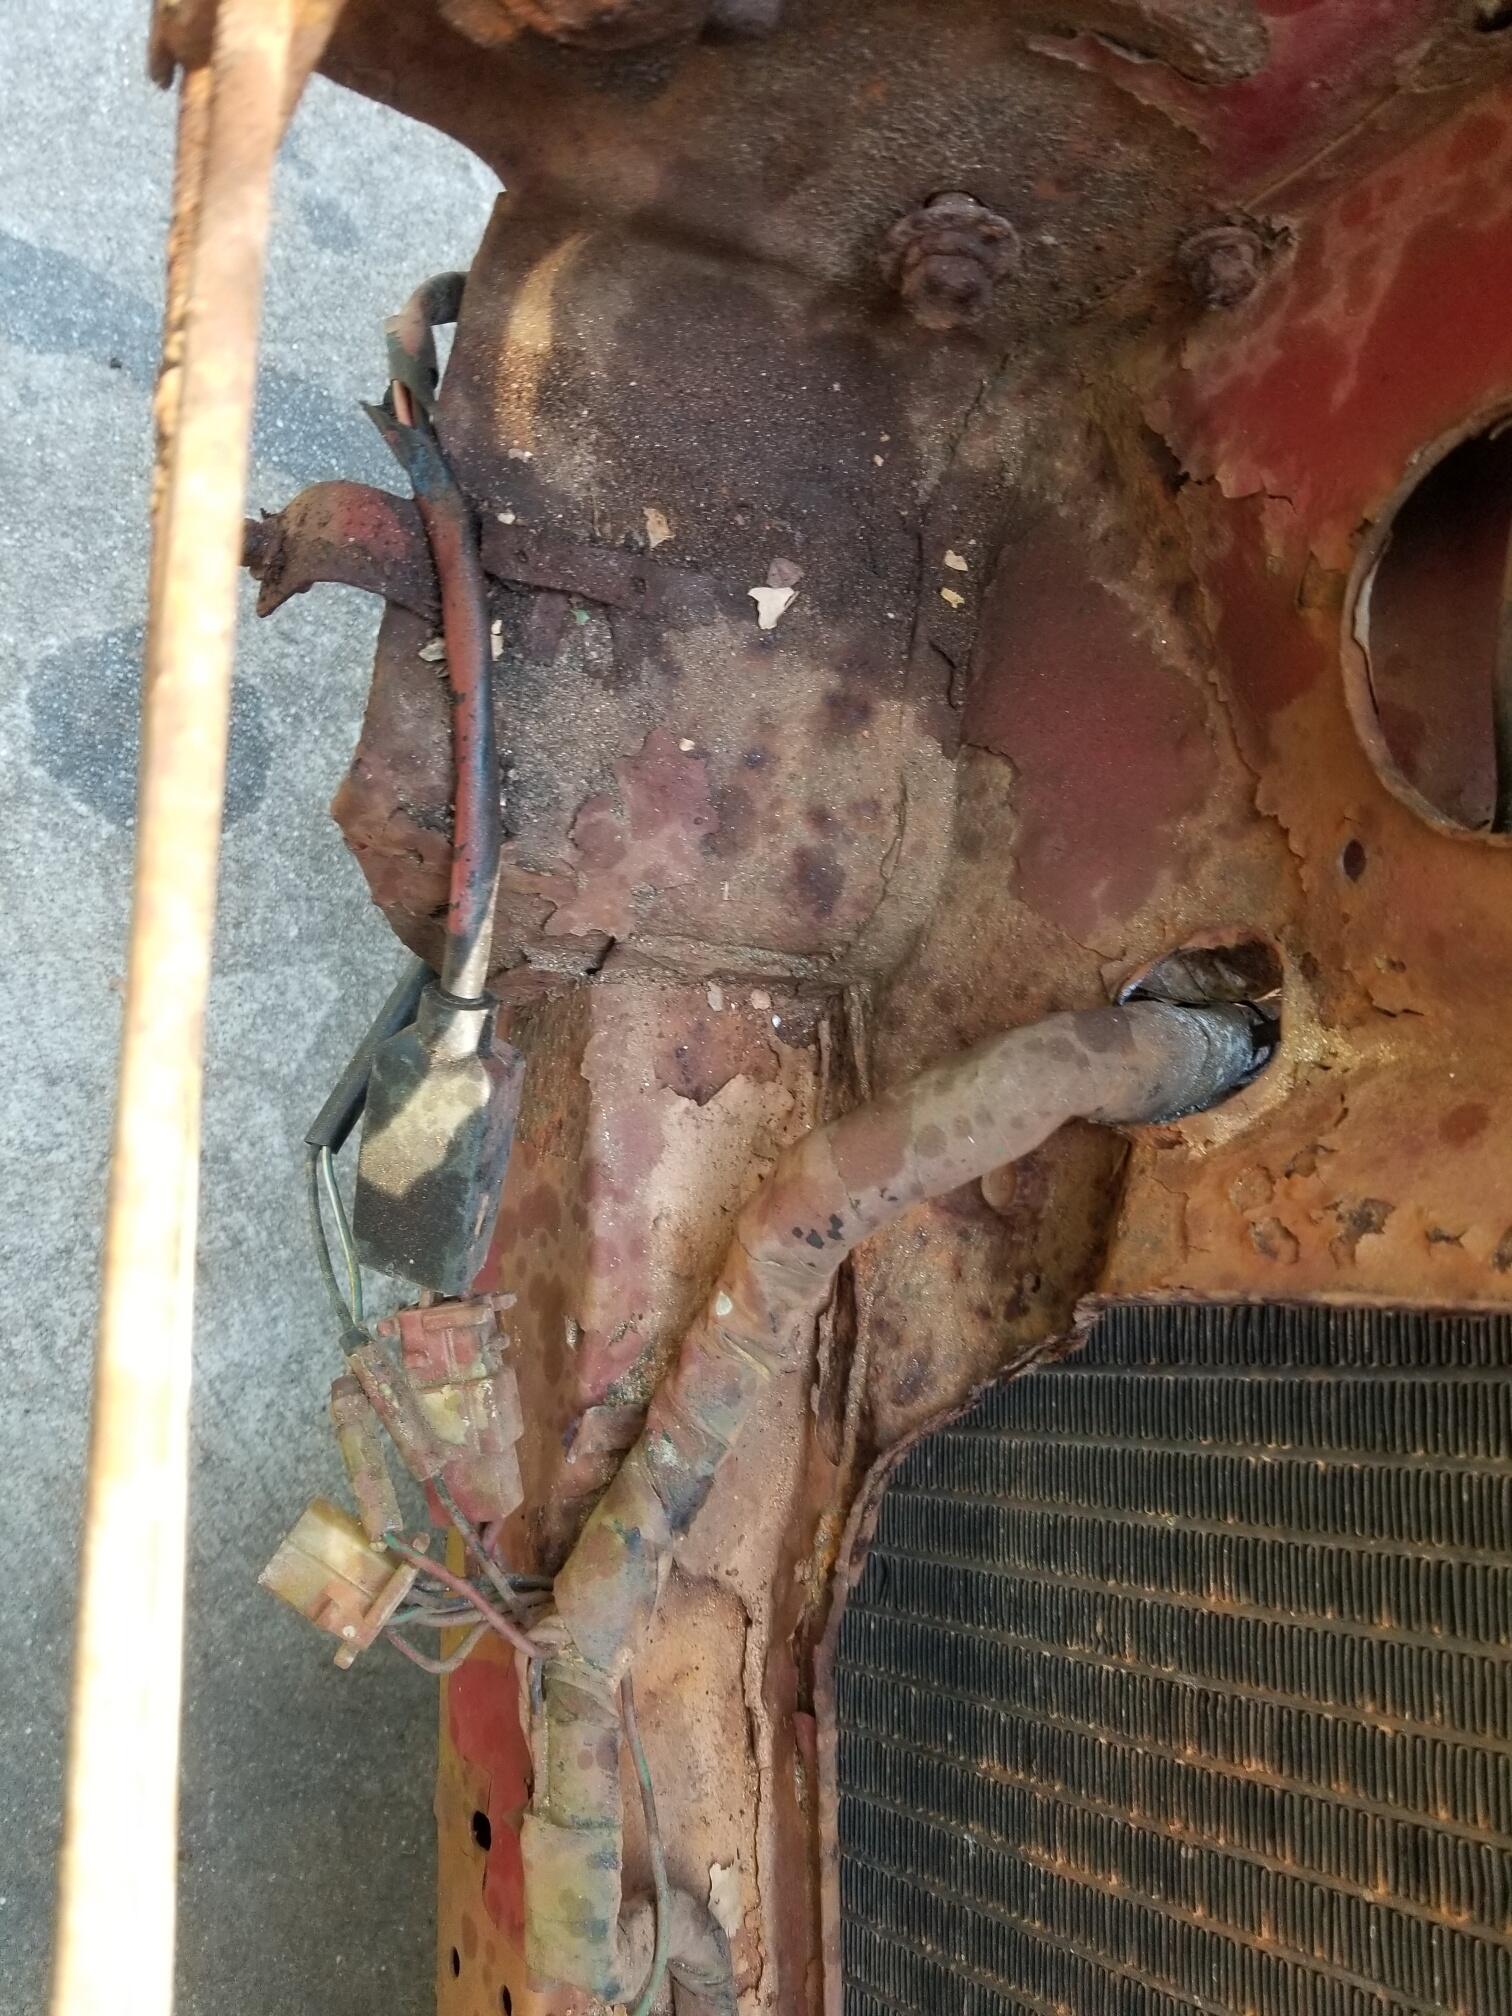
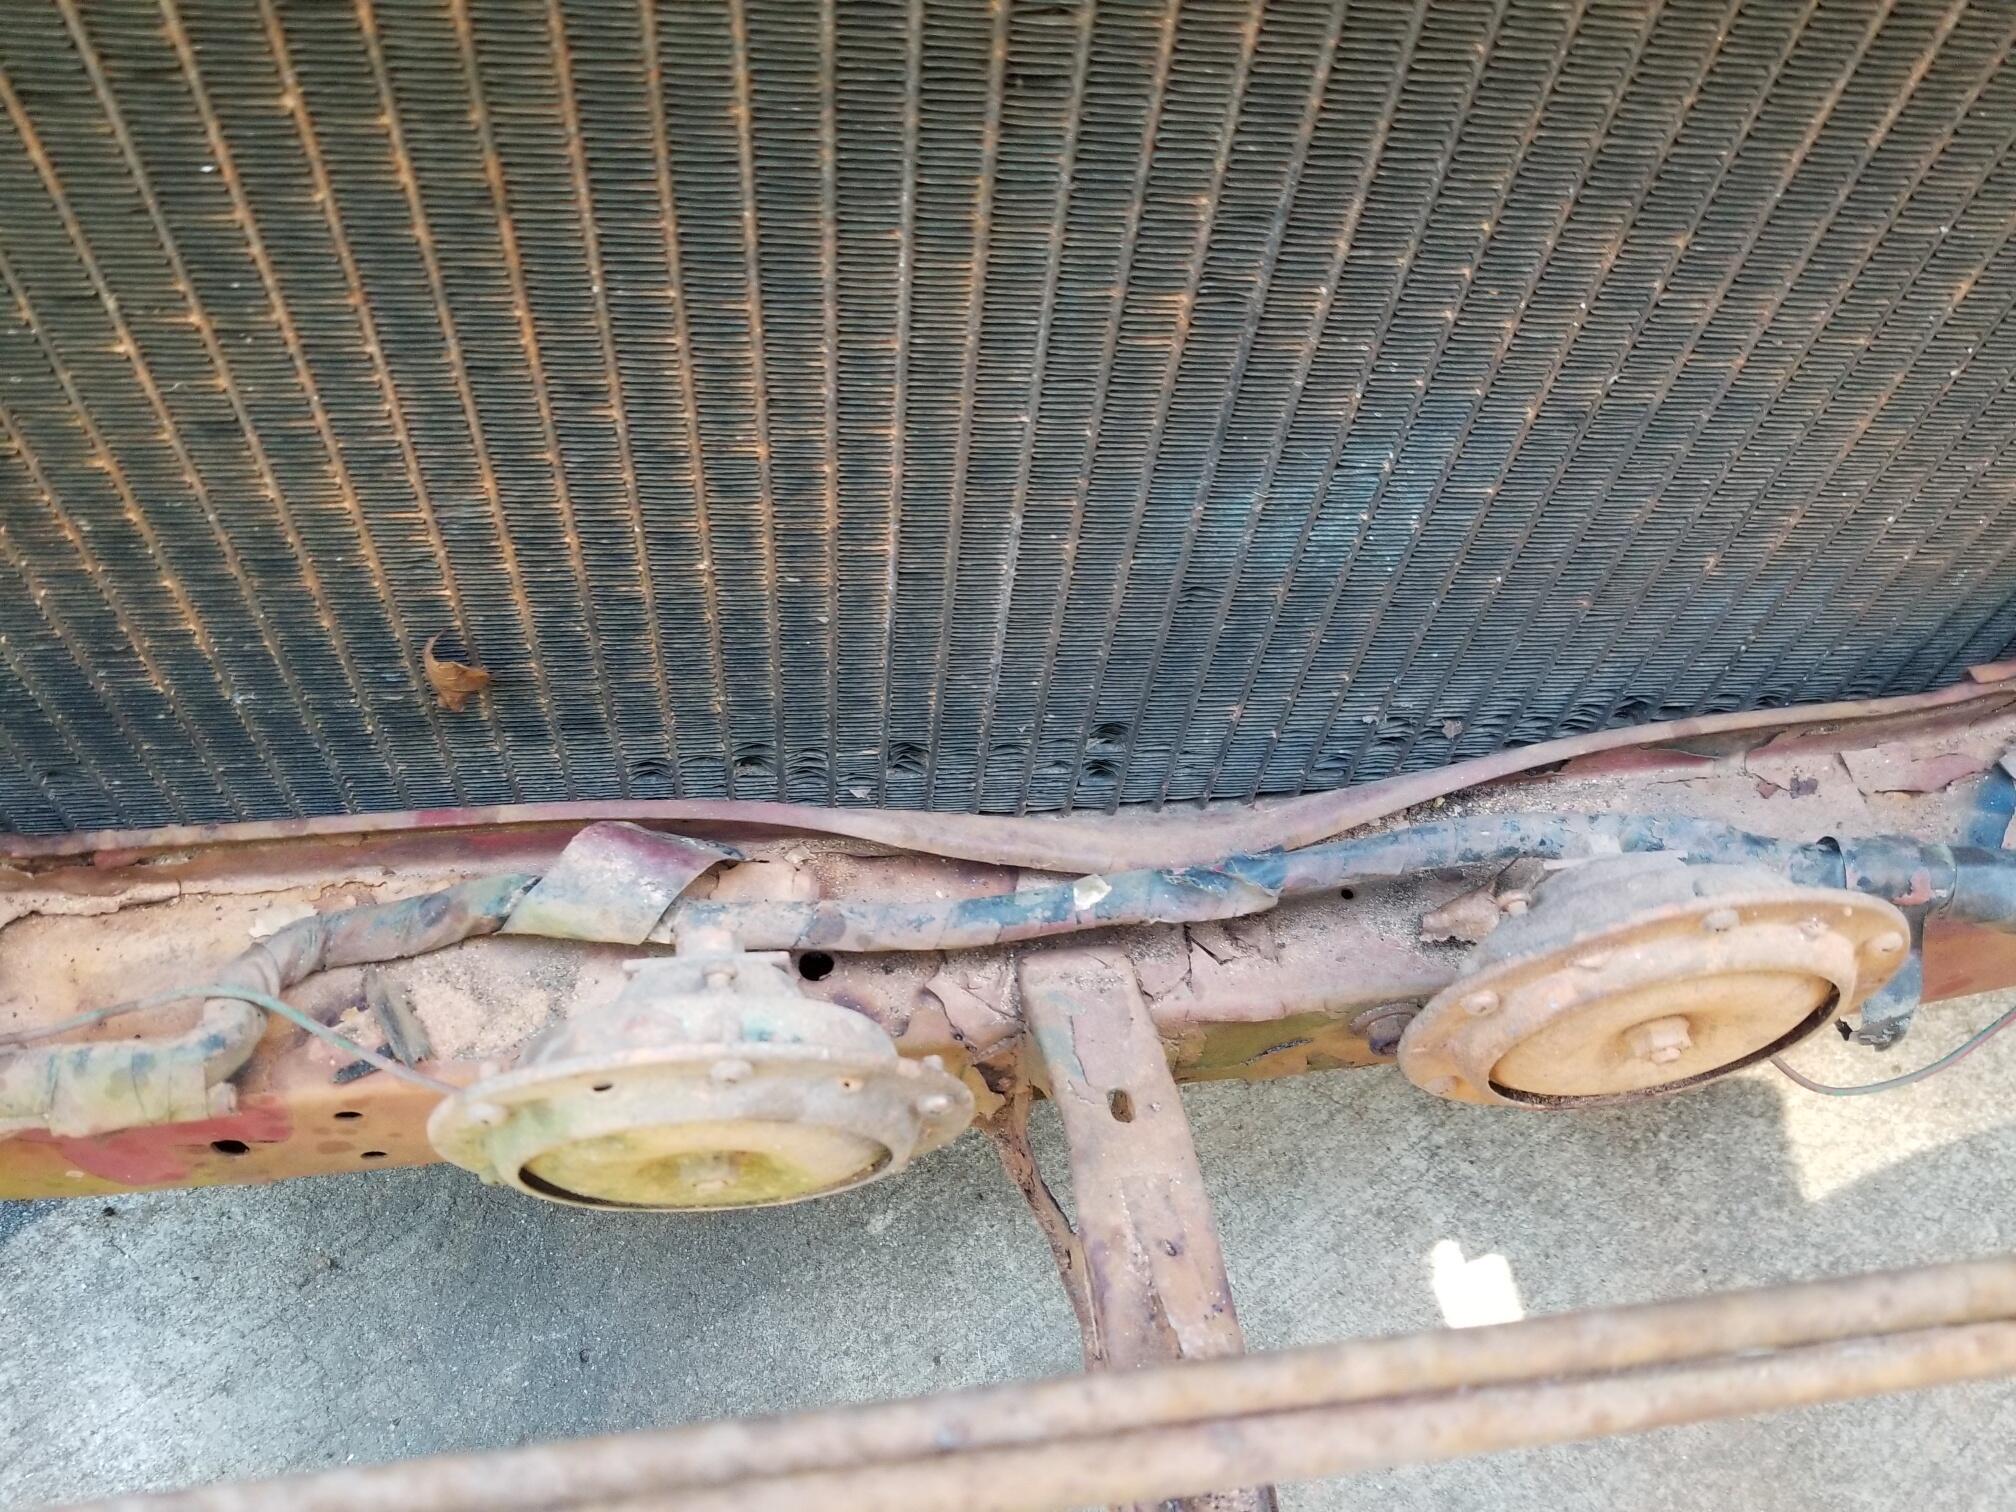
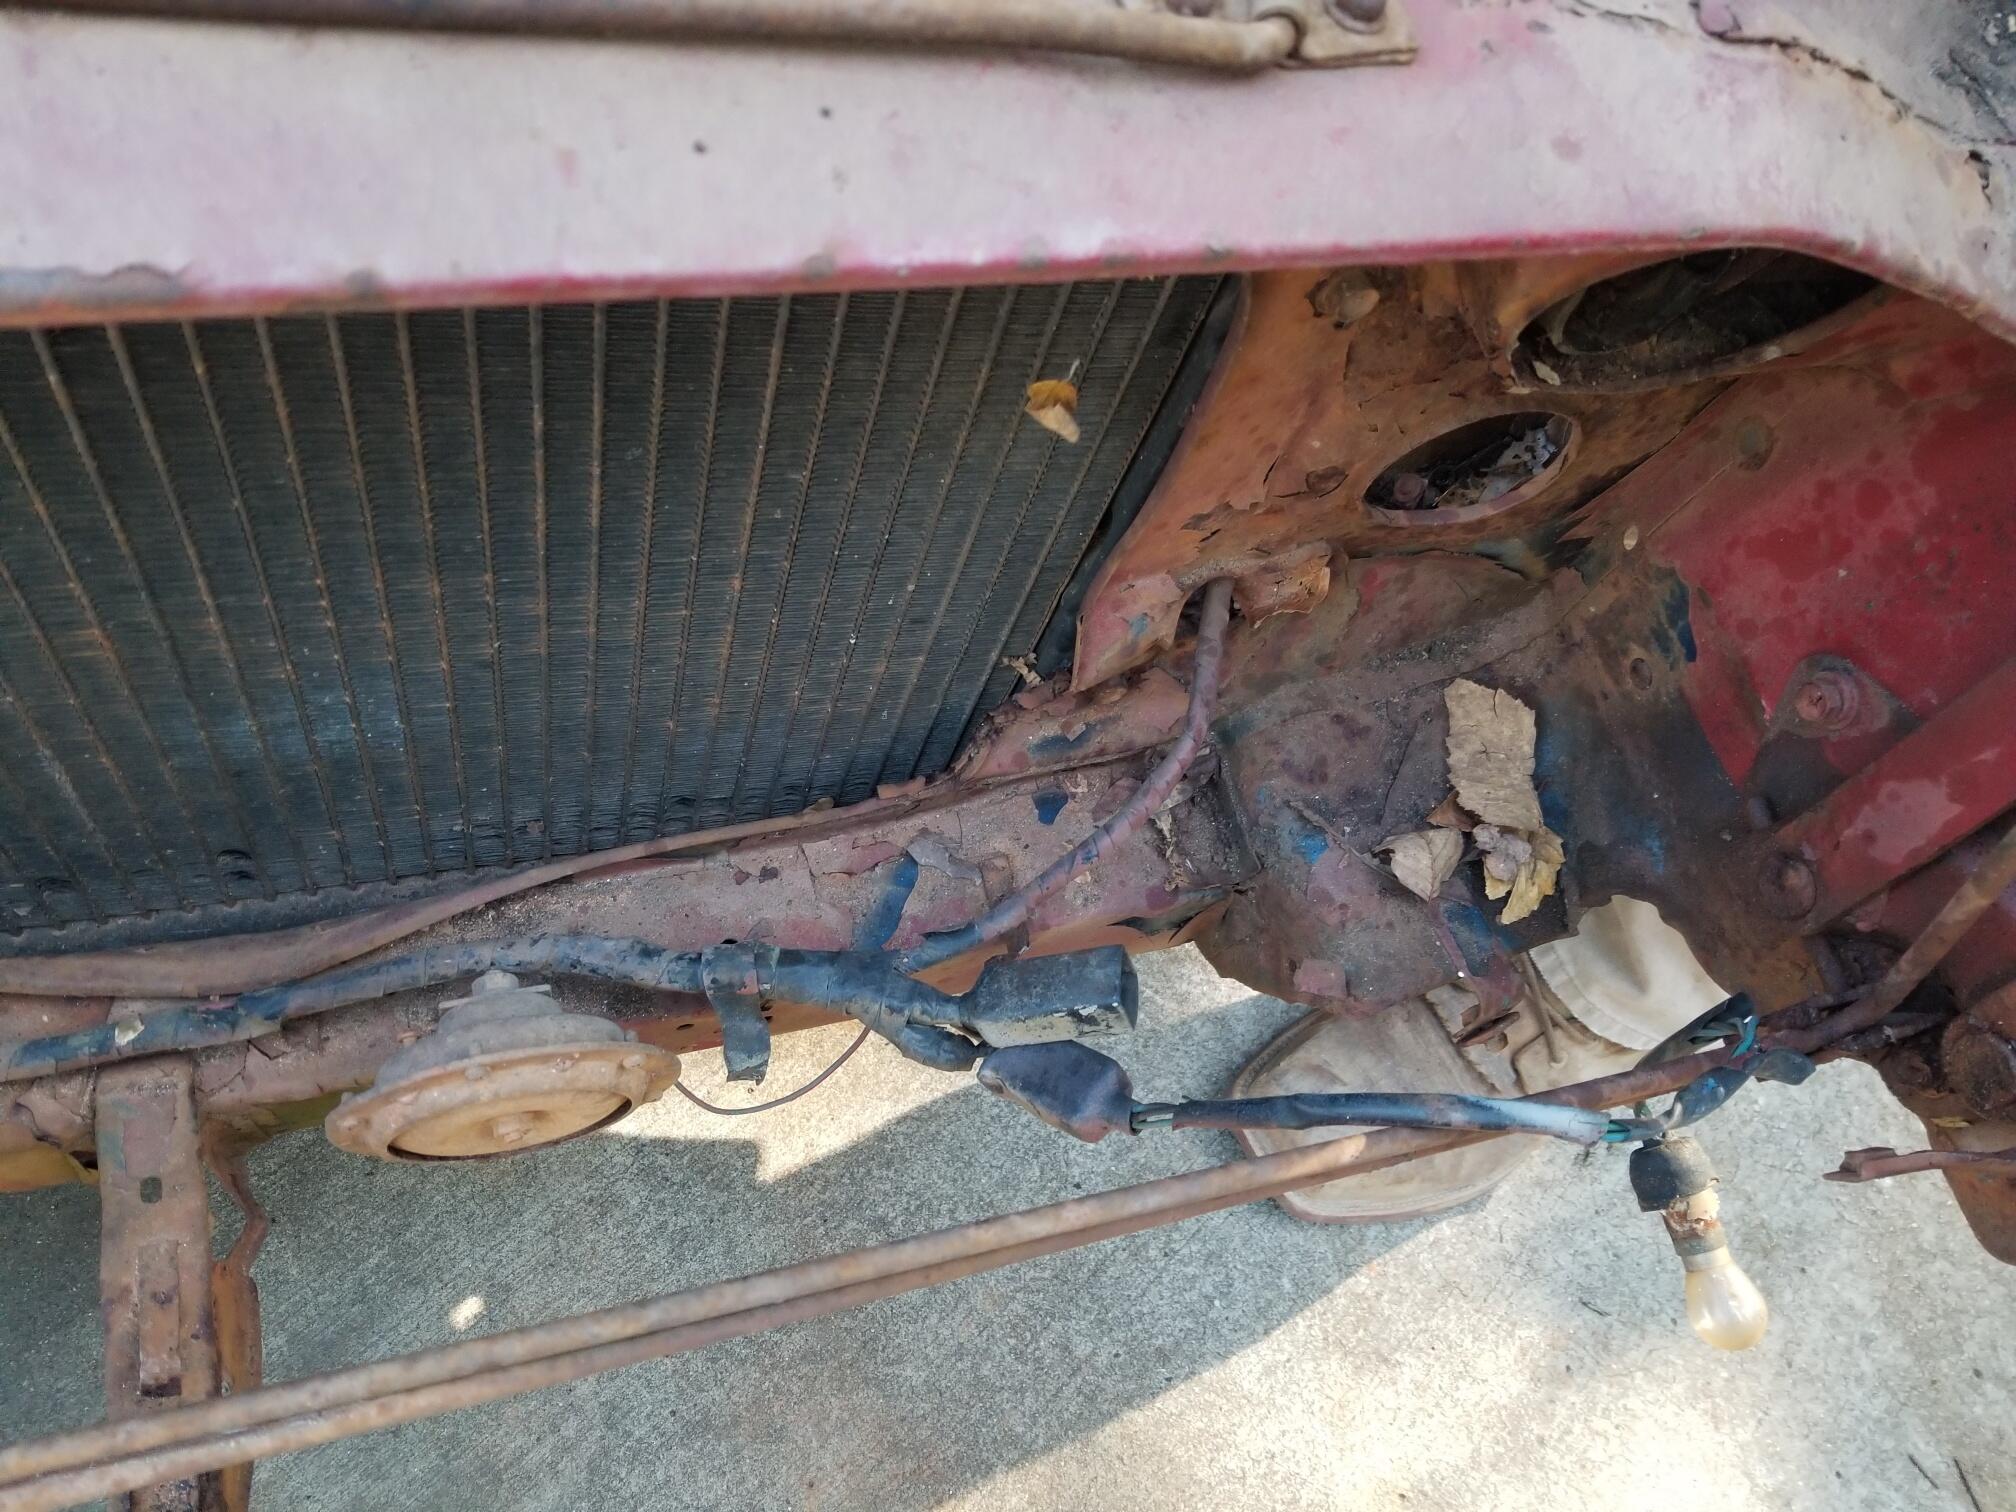
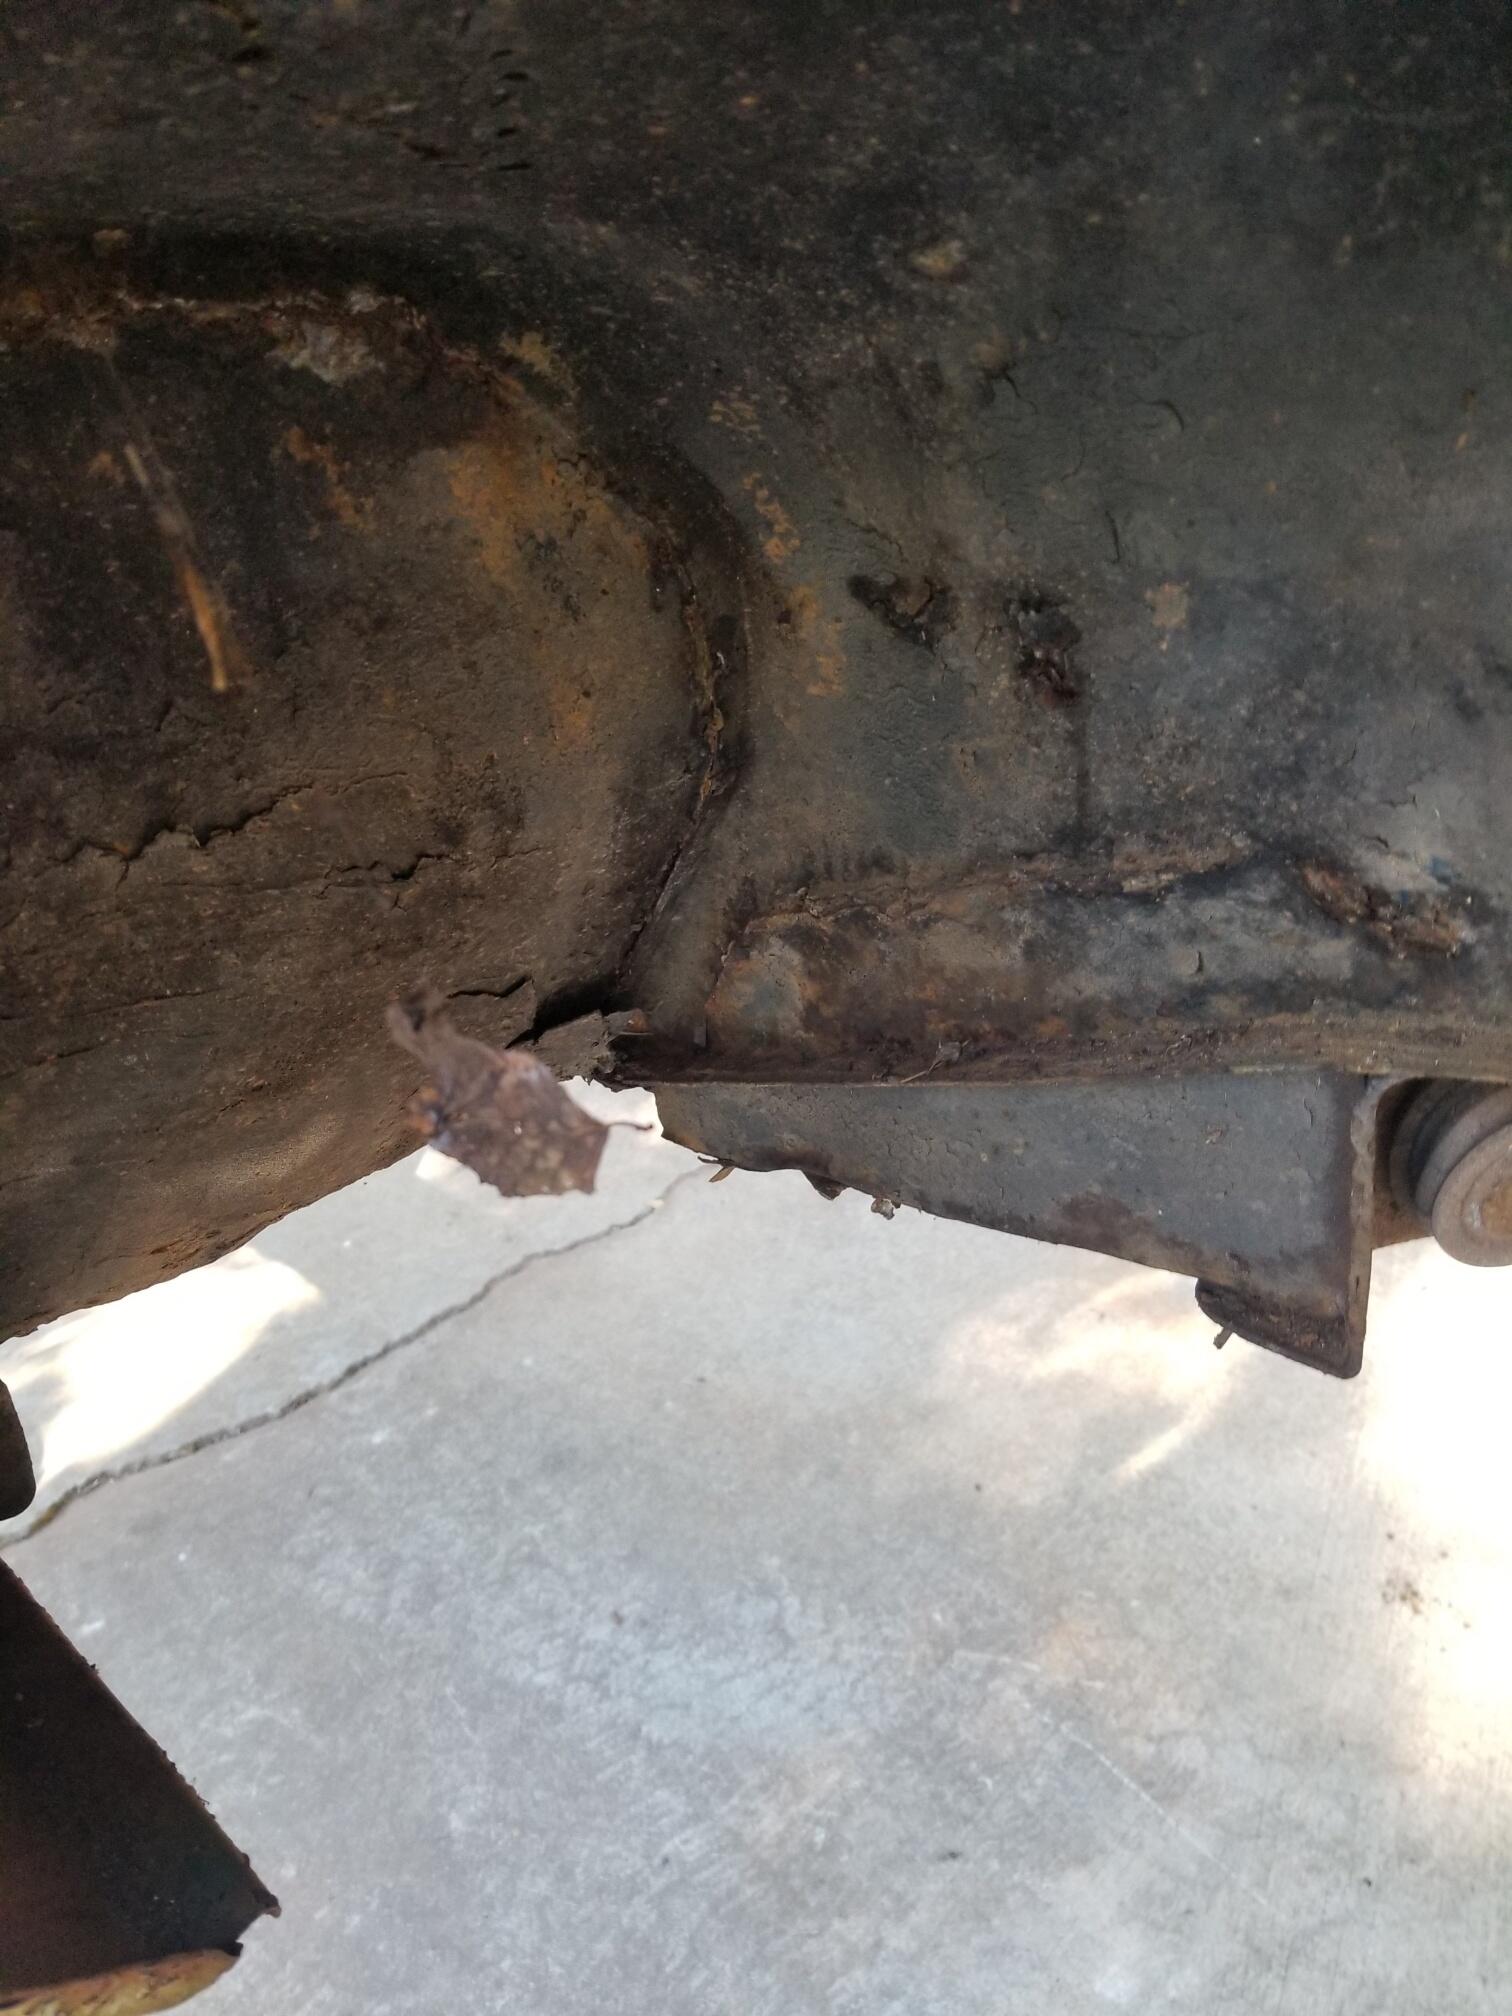
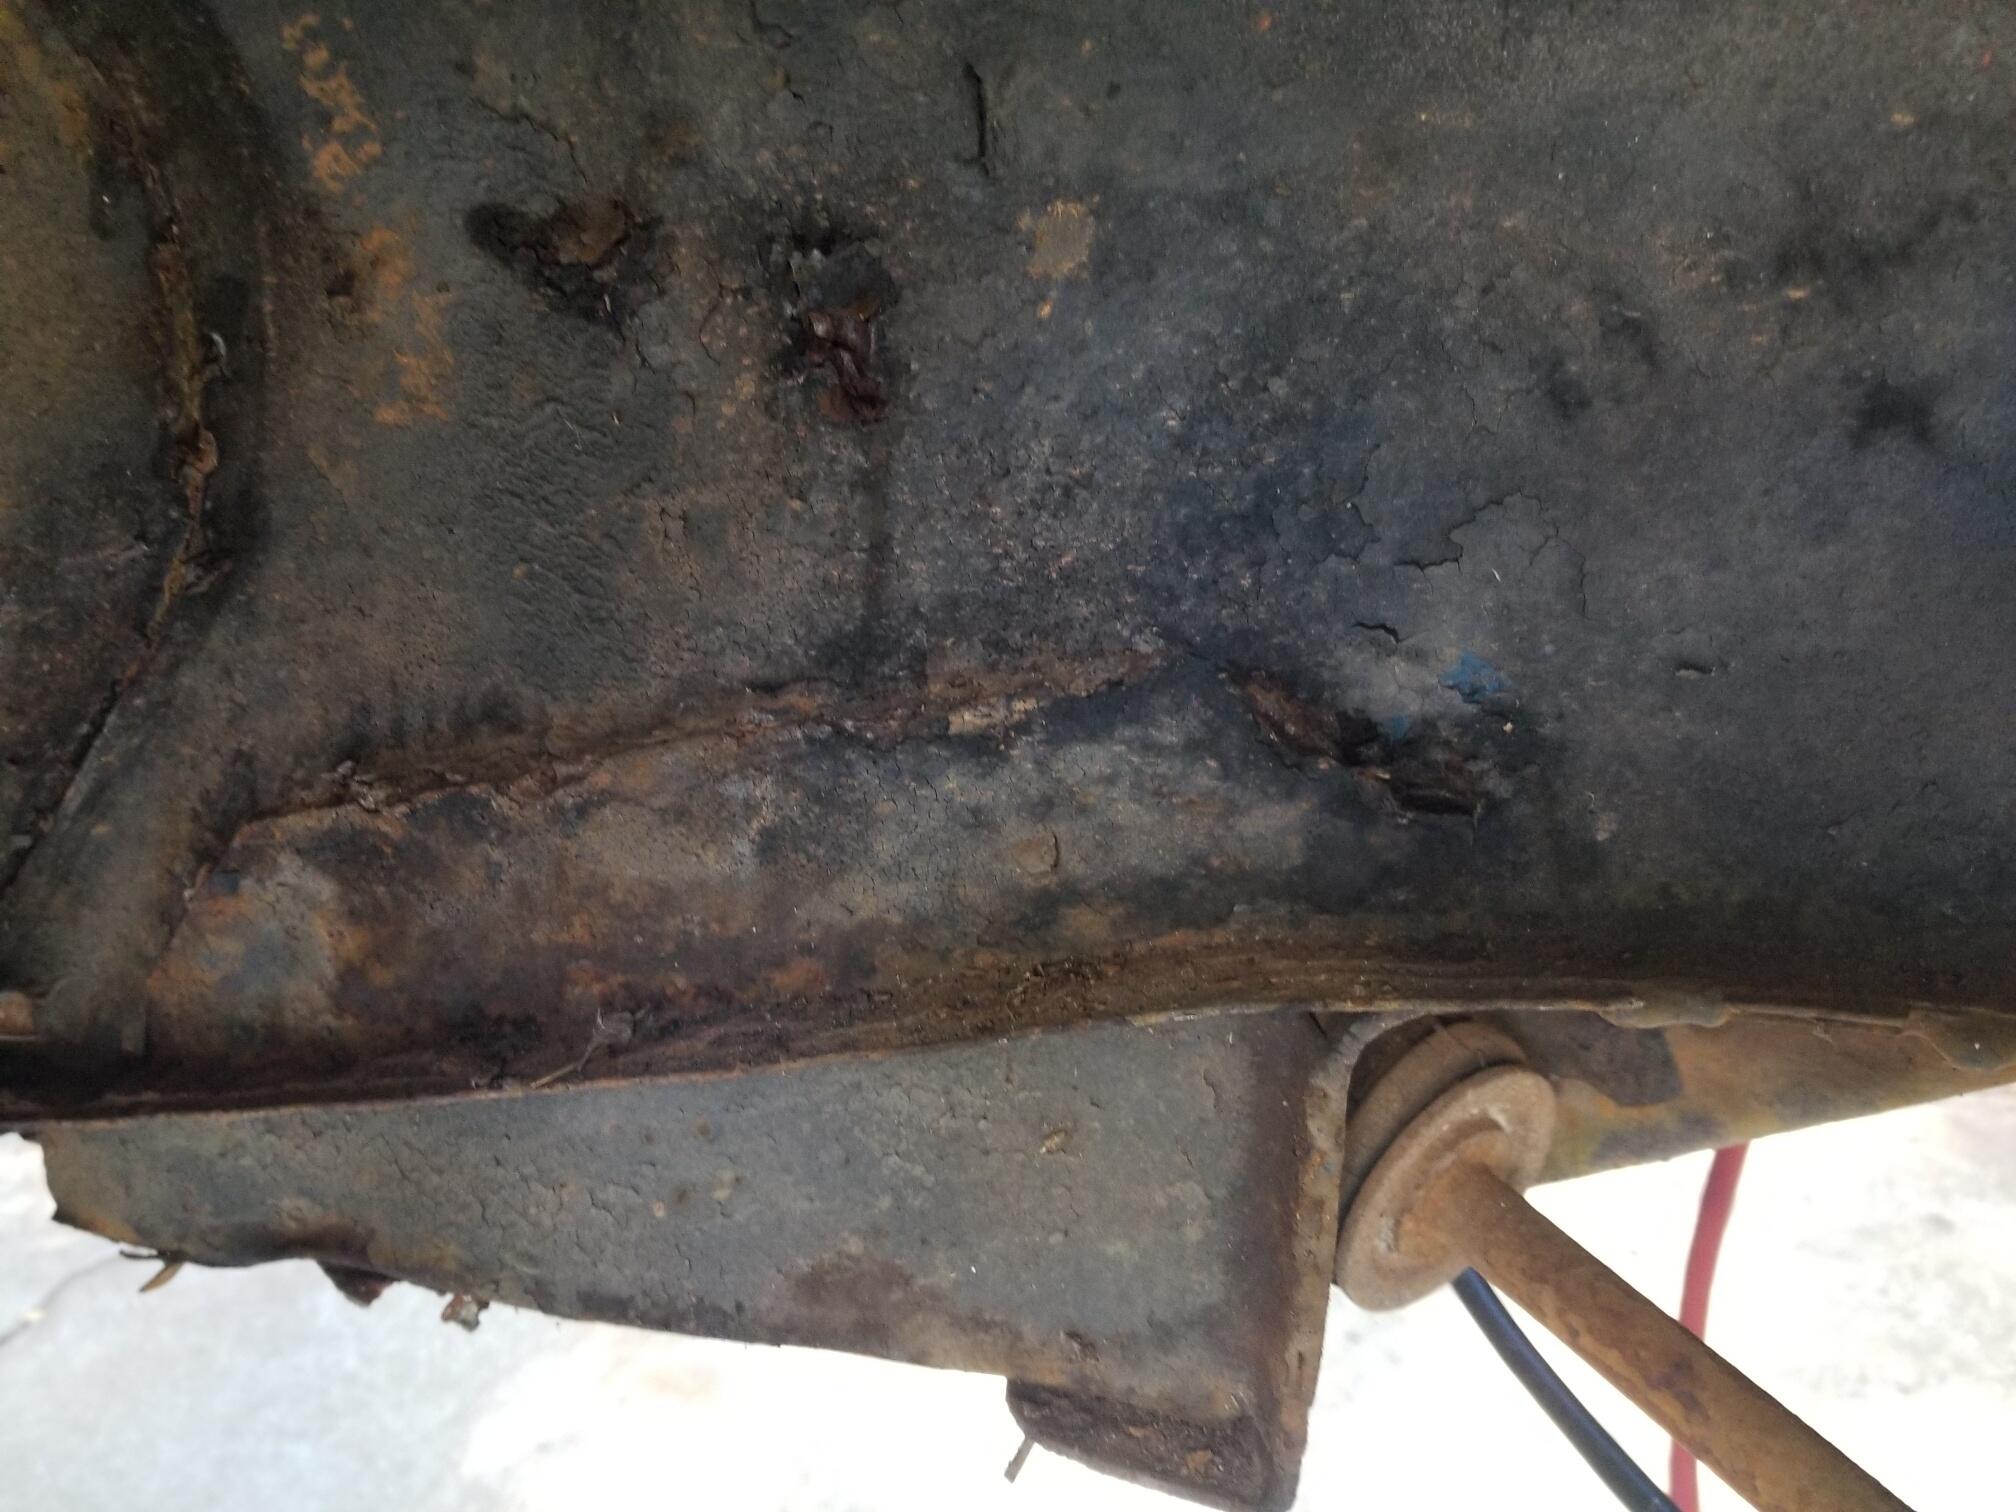
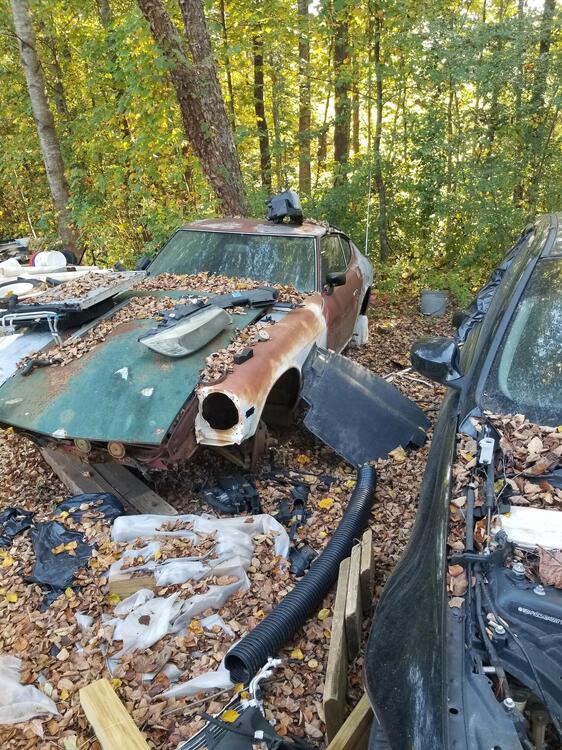
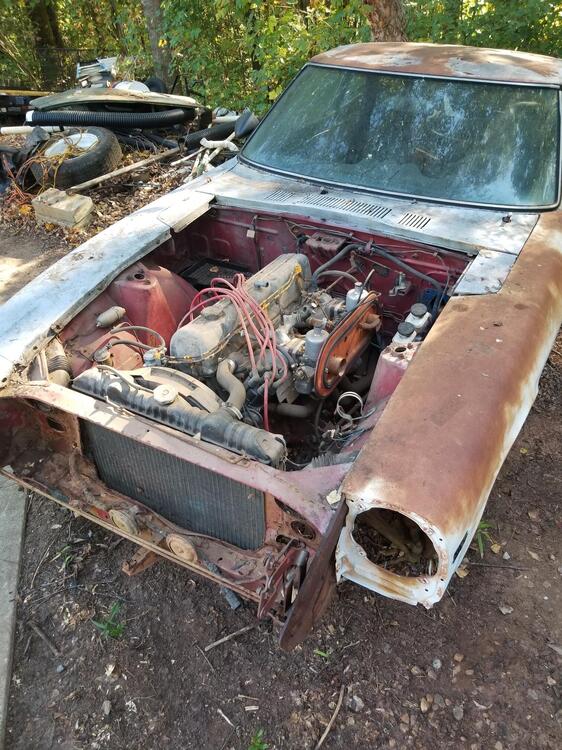
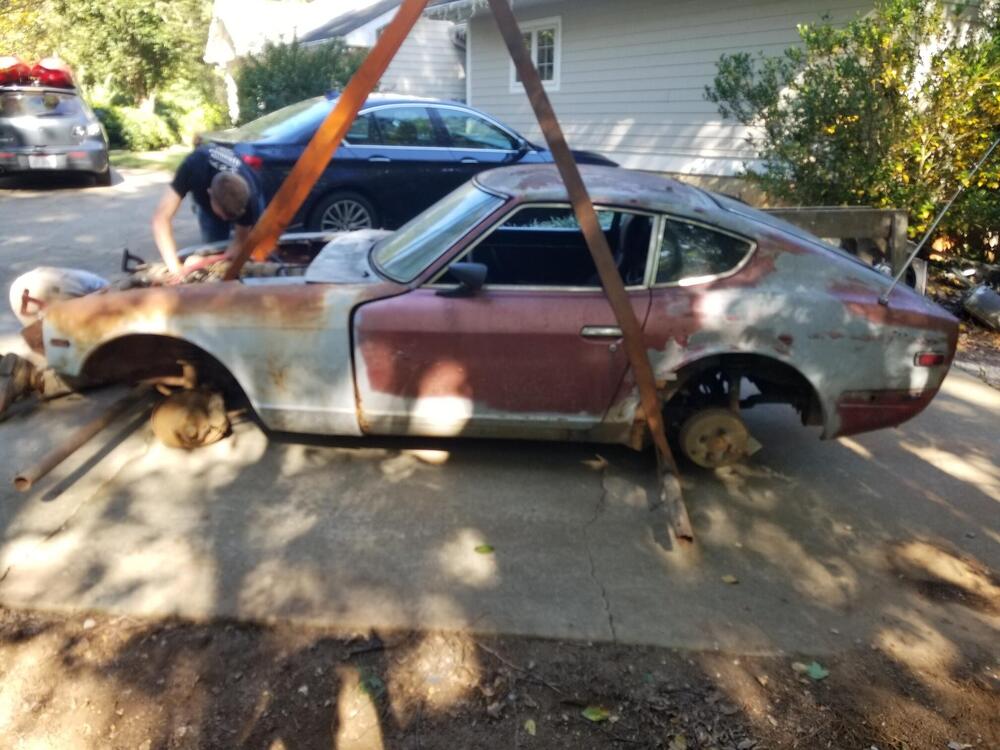
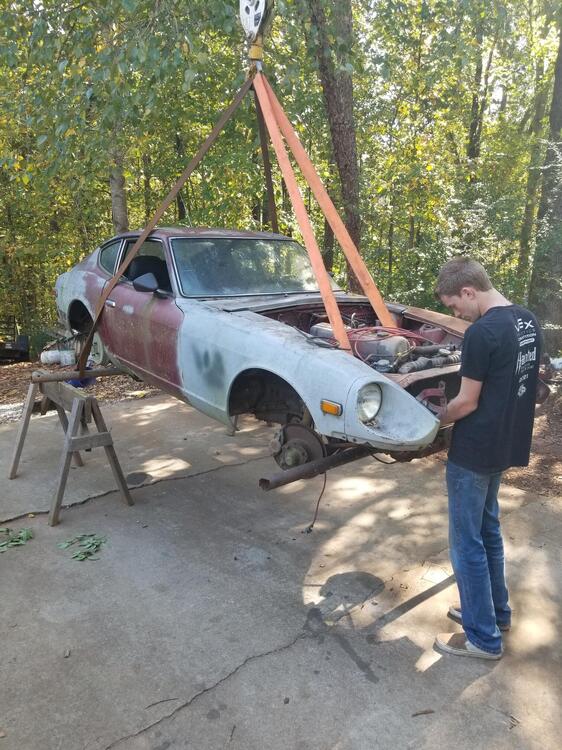
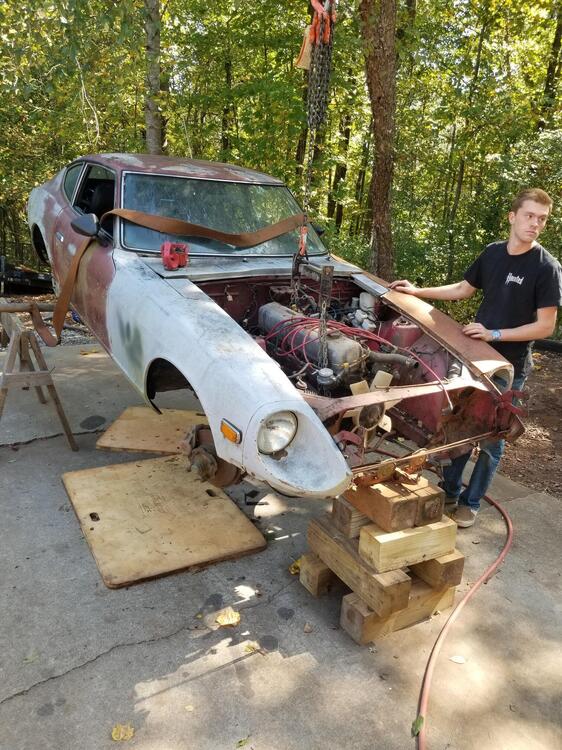
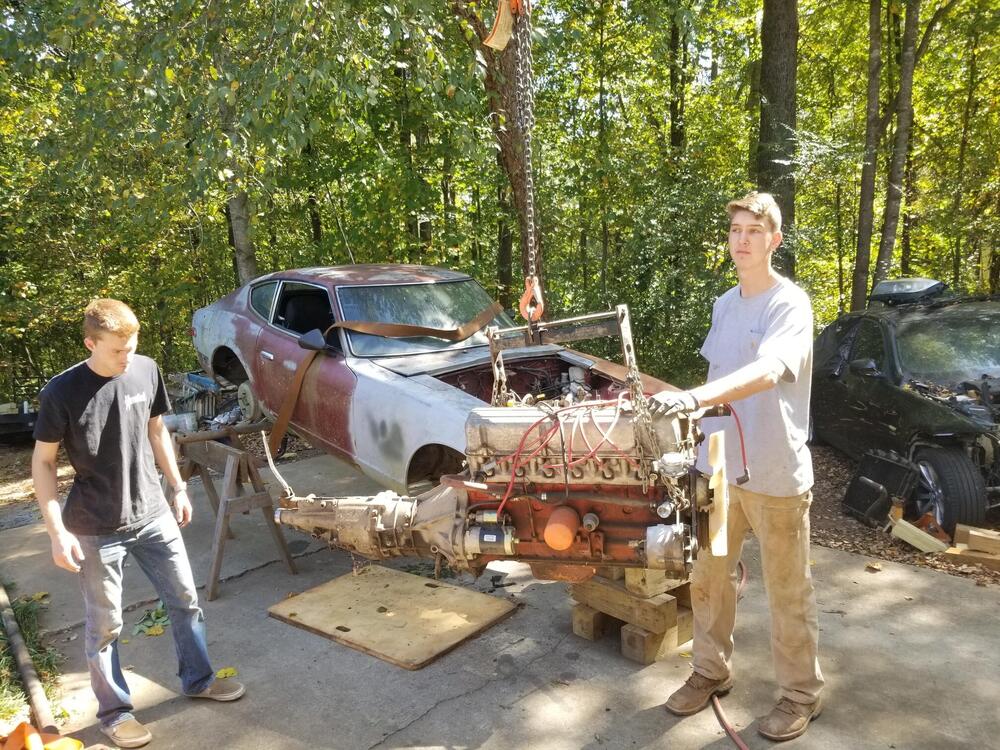
4 pointsSo this is another car that has been sitting around at our places for decades. It was my daily driver in about 1992. I rebuilt the engine in high school and it has a five speed that I installed at some point. It has gotten very rusty over the years. I am planning on trying to save it at some point now that a great many more good body panels are available now, if I live long enough. I decided that I would pull the drive train and use it in Lily for the time being to get her running and then down the road I will probably go L28eT, but after Zcon 2024. So that is what we did today Surrounded by BMW parts and parts cars Added some pipes underneath and some lifting straps Had to move the front straps to the inside to protect the fenders O Our engine hoist 😉 Tipped it down on some blocks and used a power ratchet on the leveler. Didn't have any issues even with the shifter still in the transmission. It was going to be a pain to get out so we just left it.


 4 points
 -
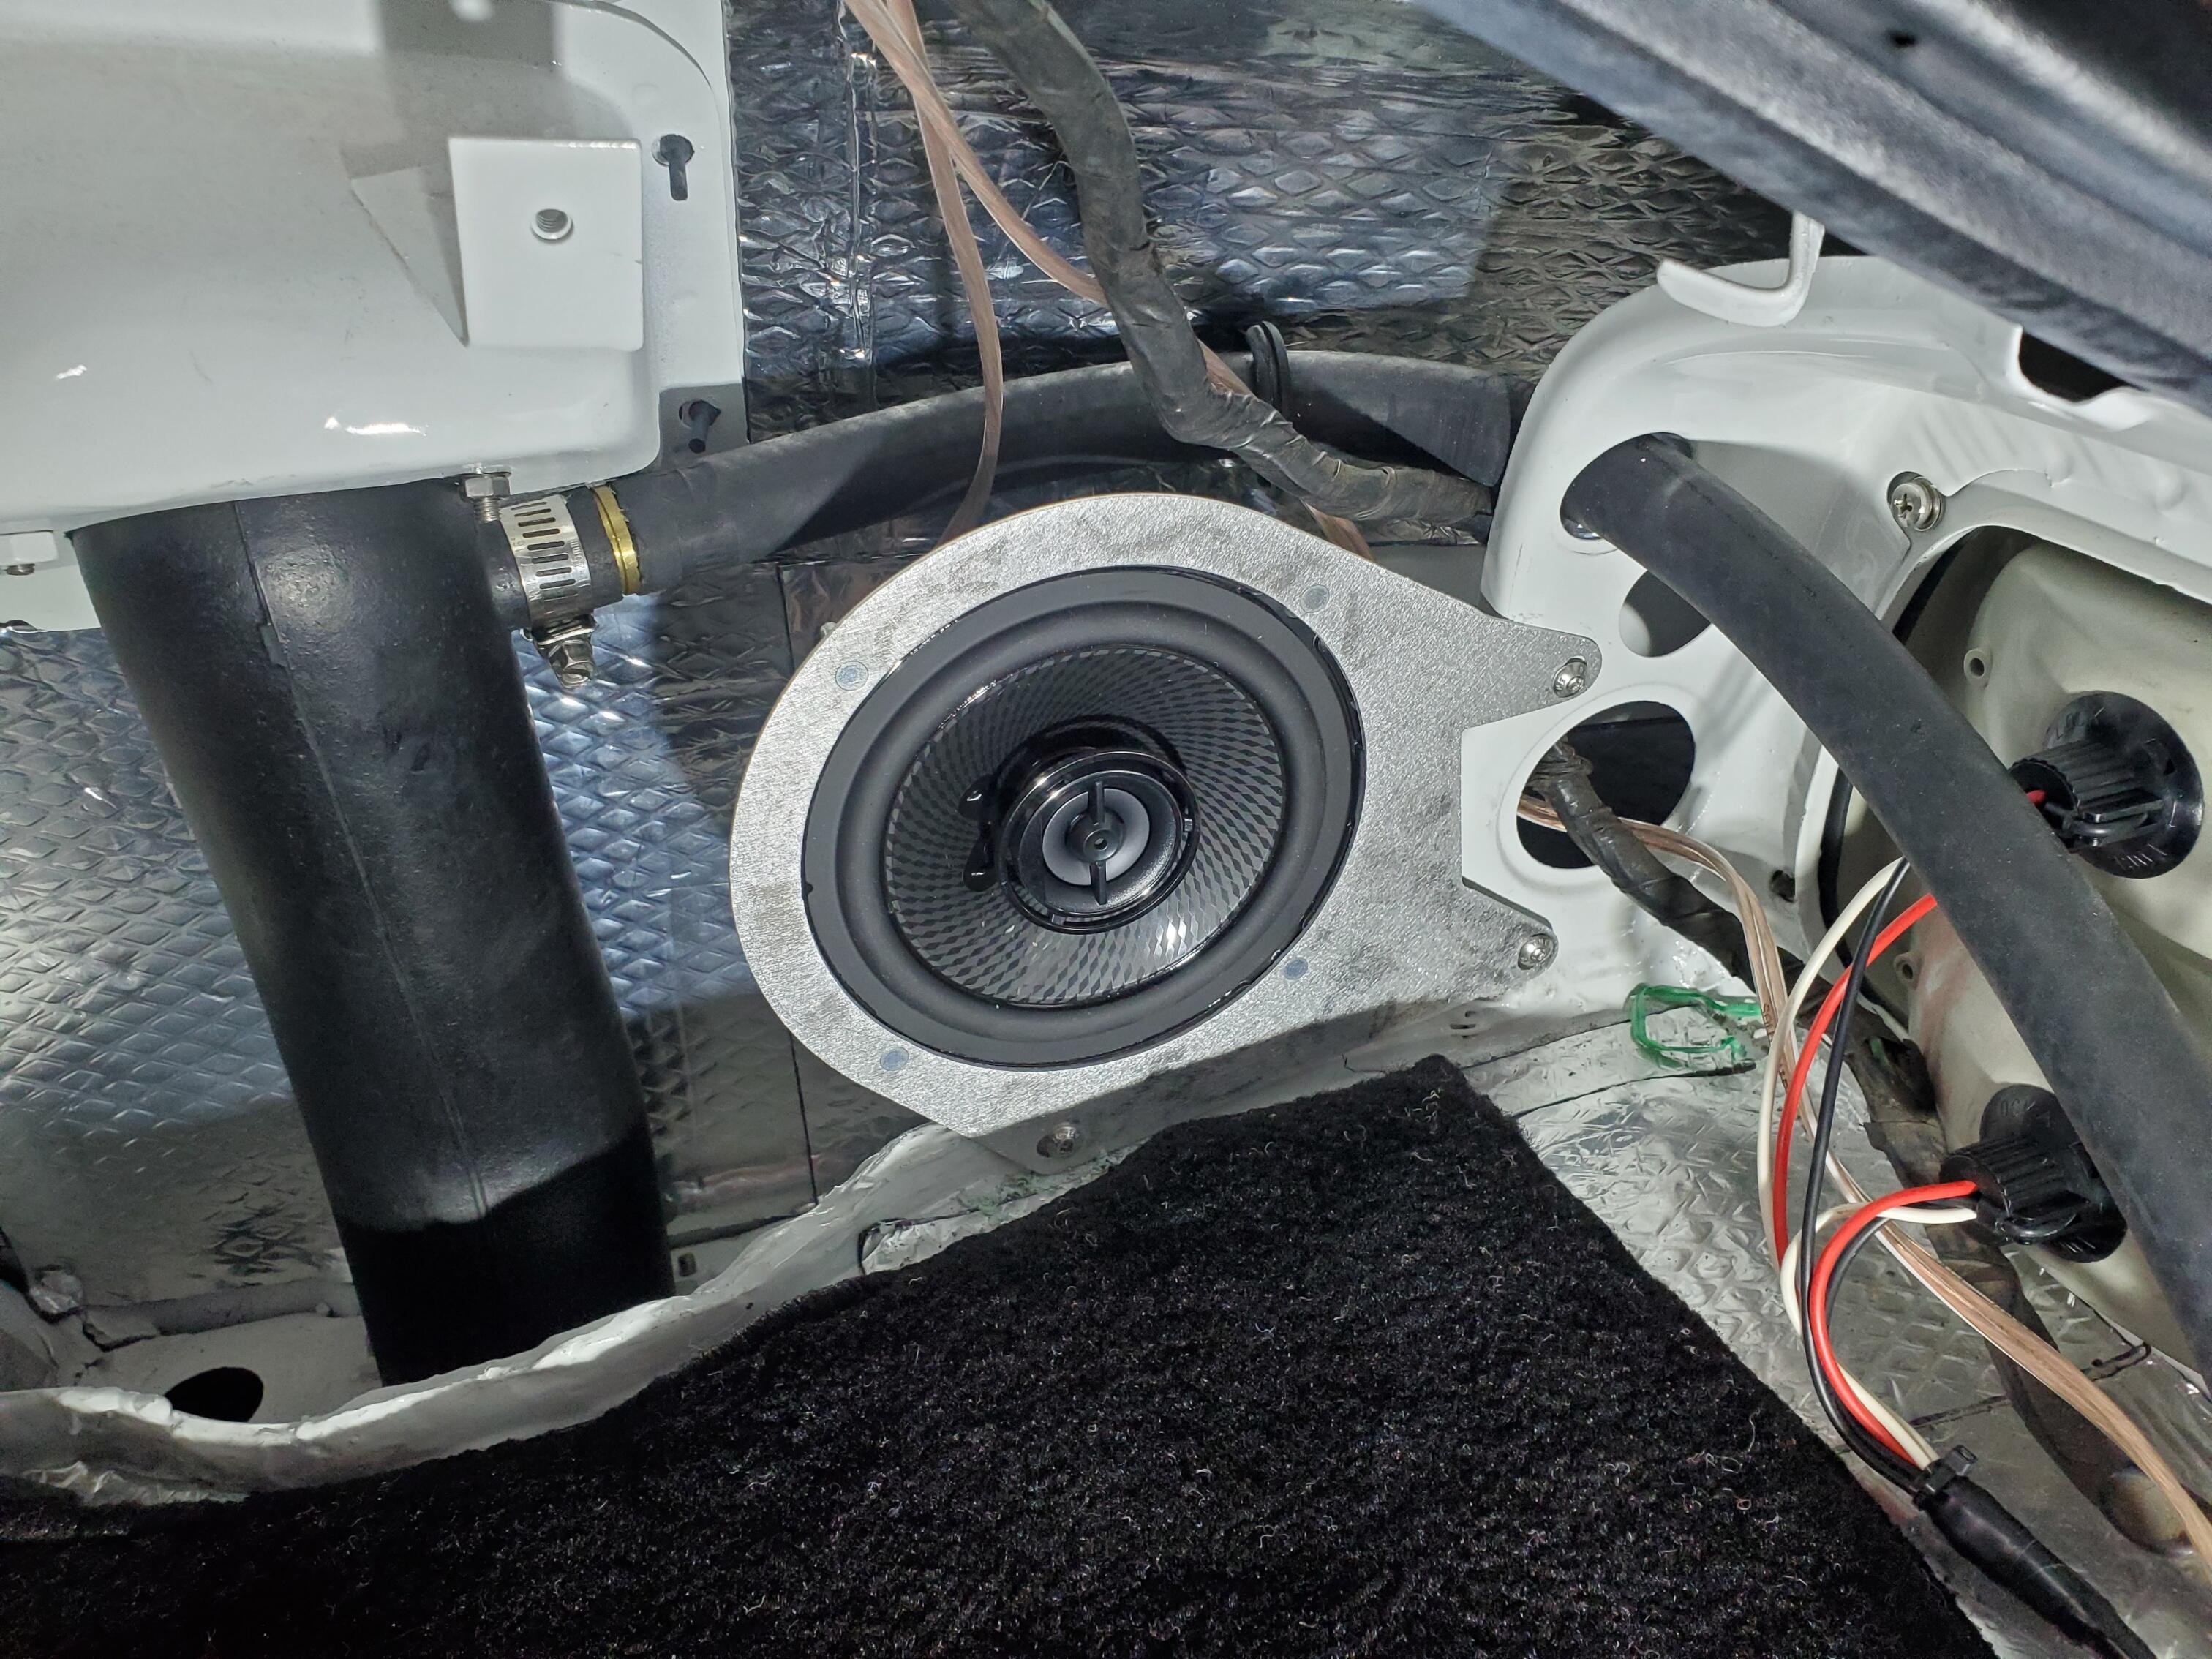
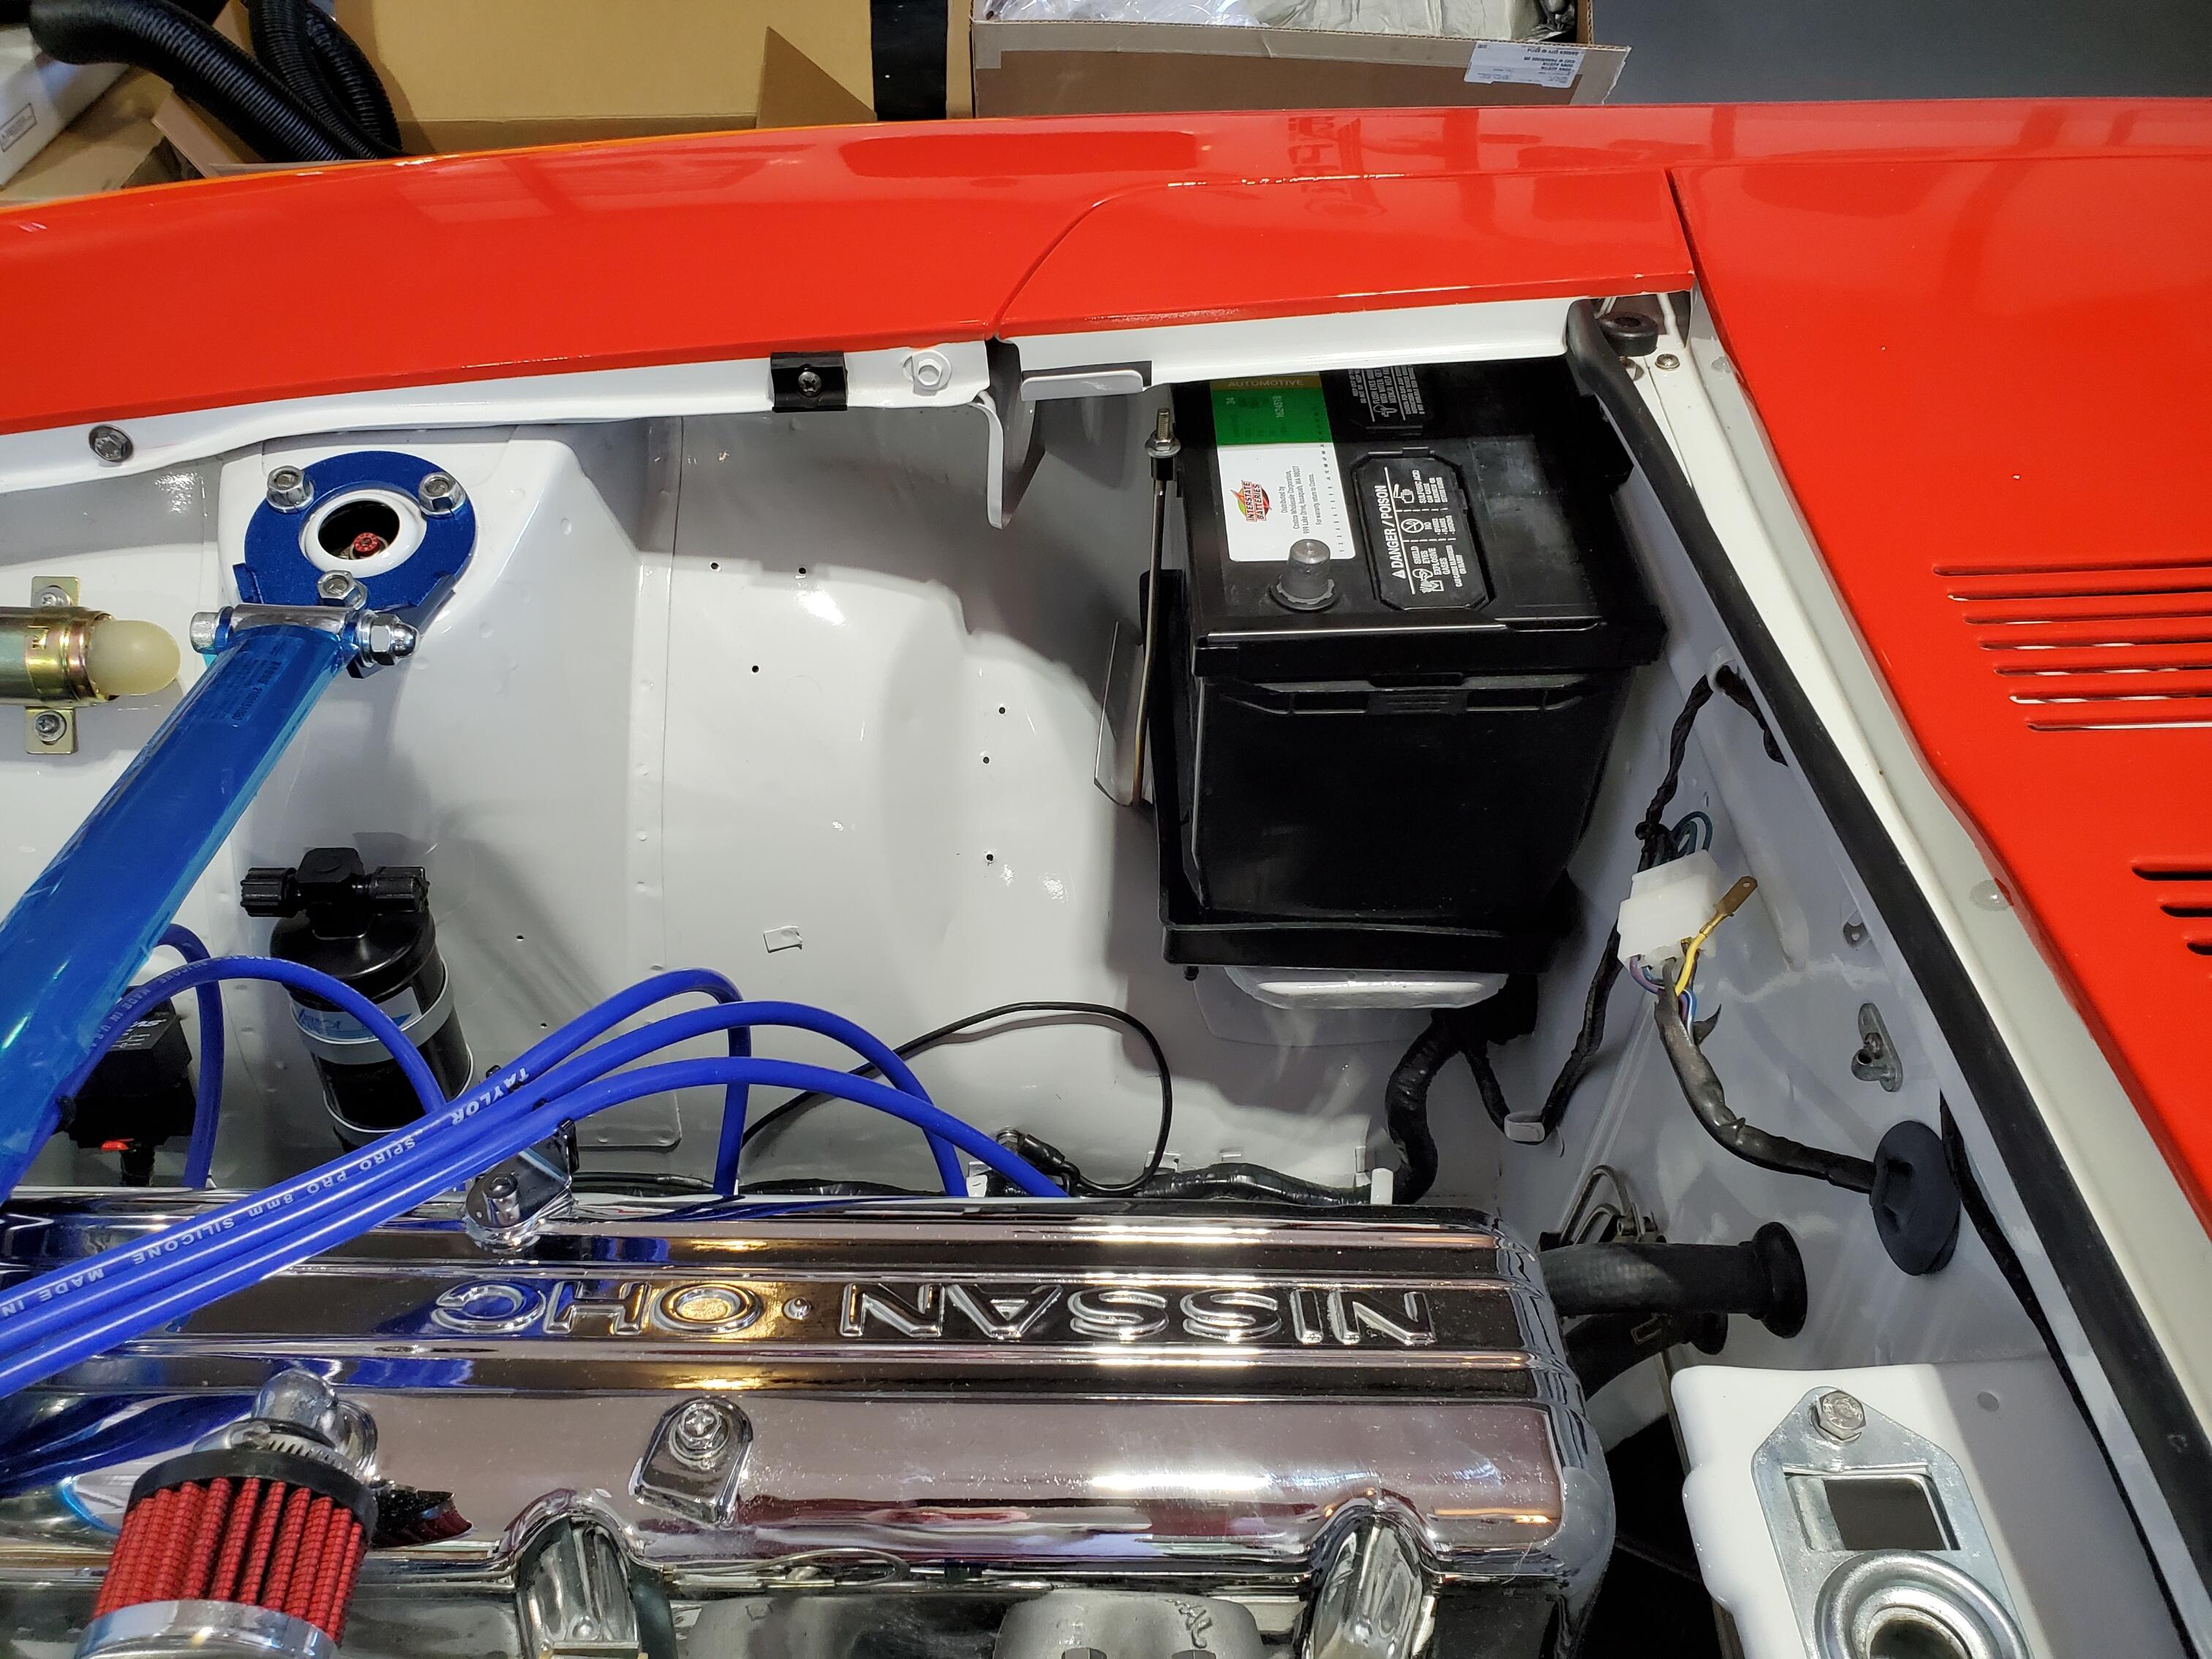
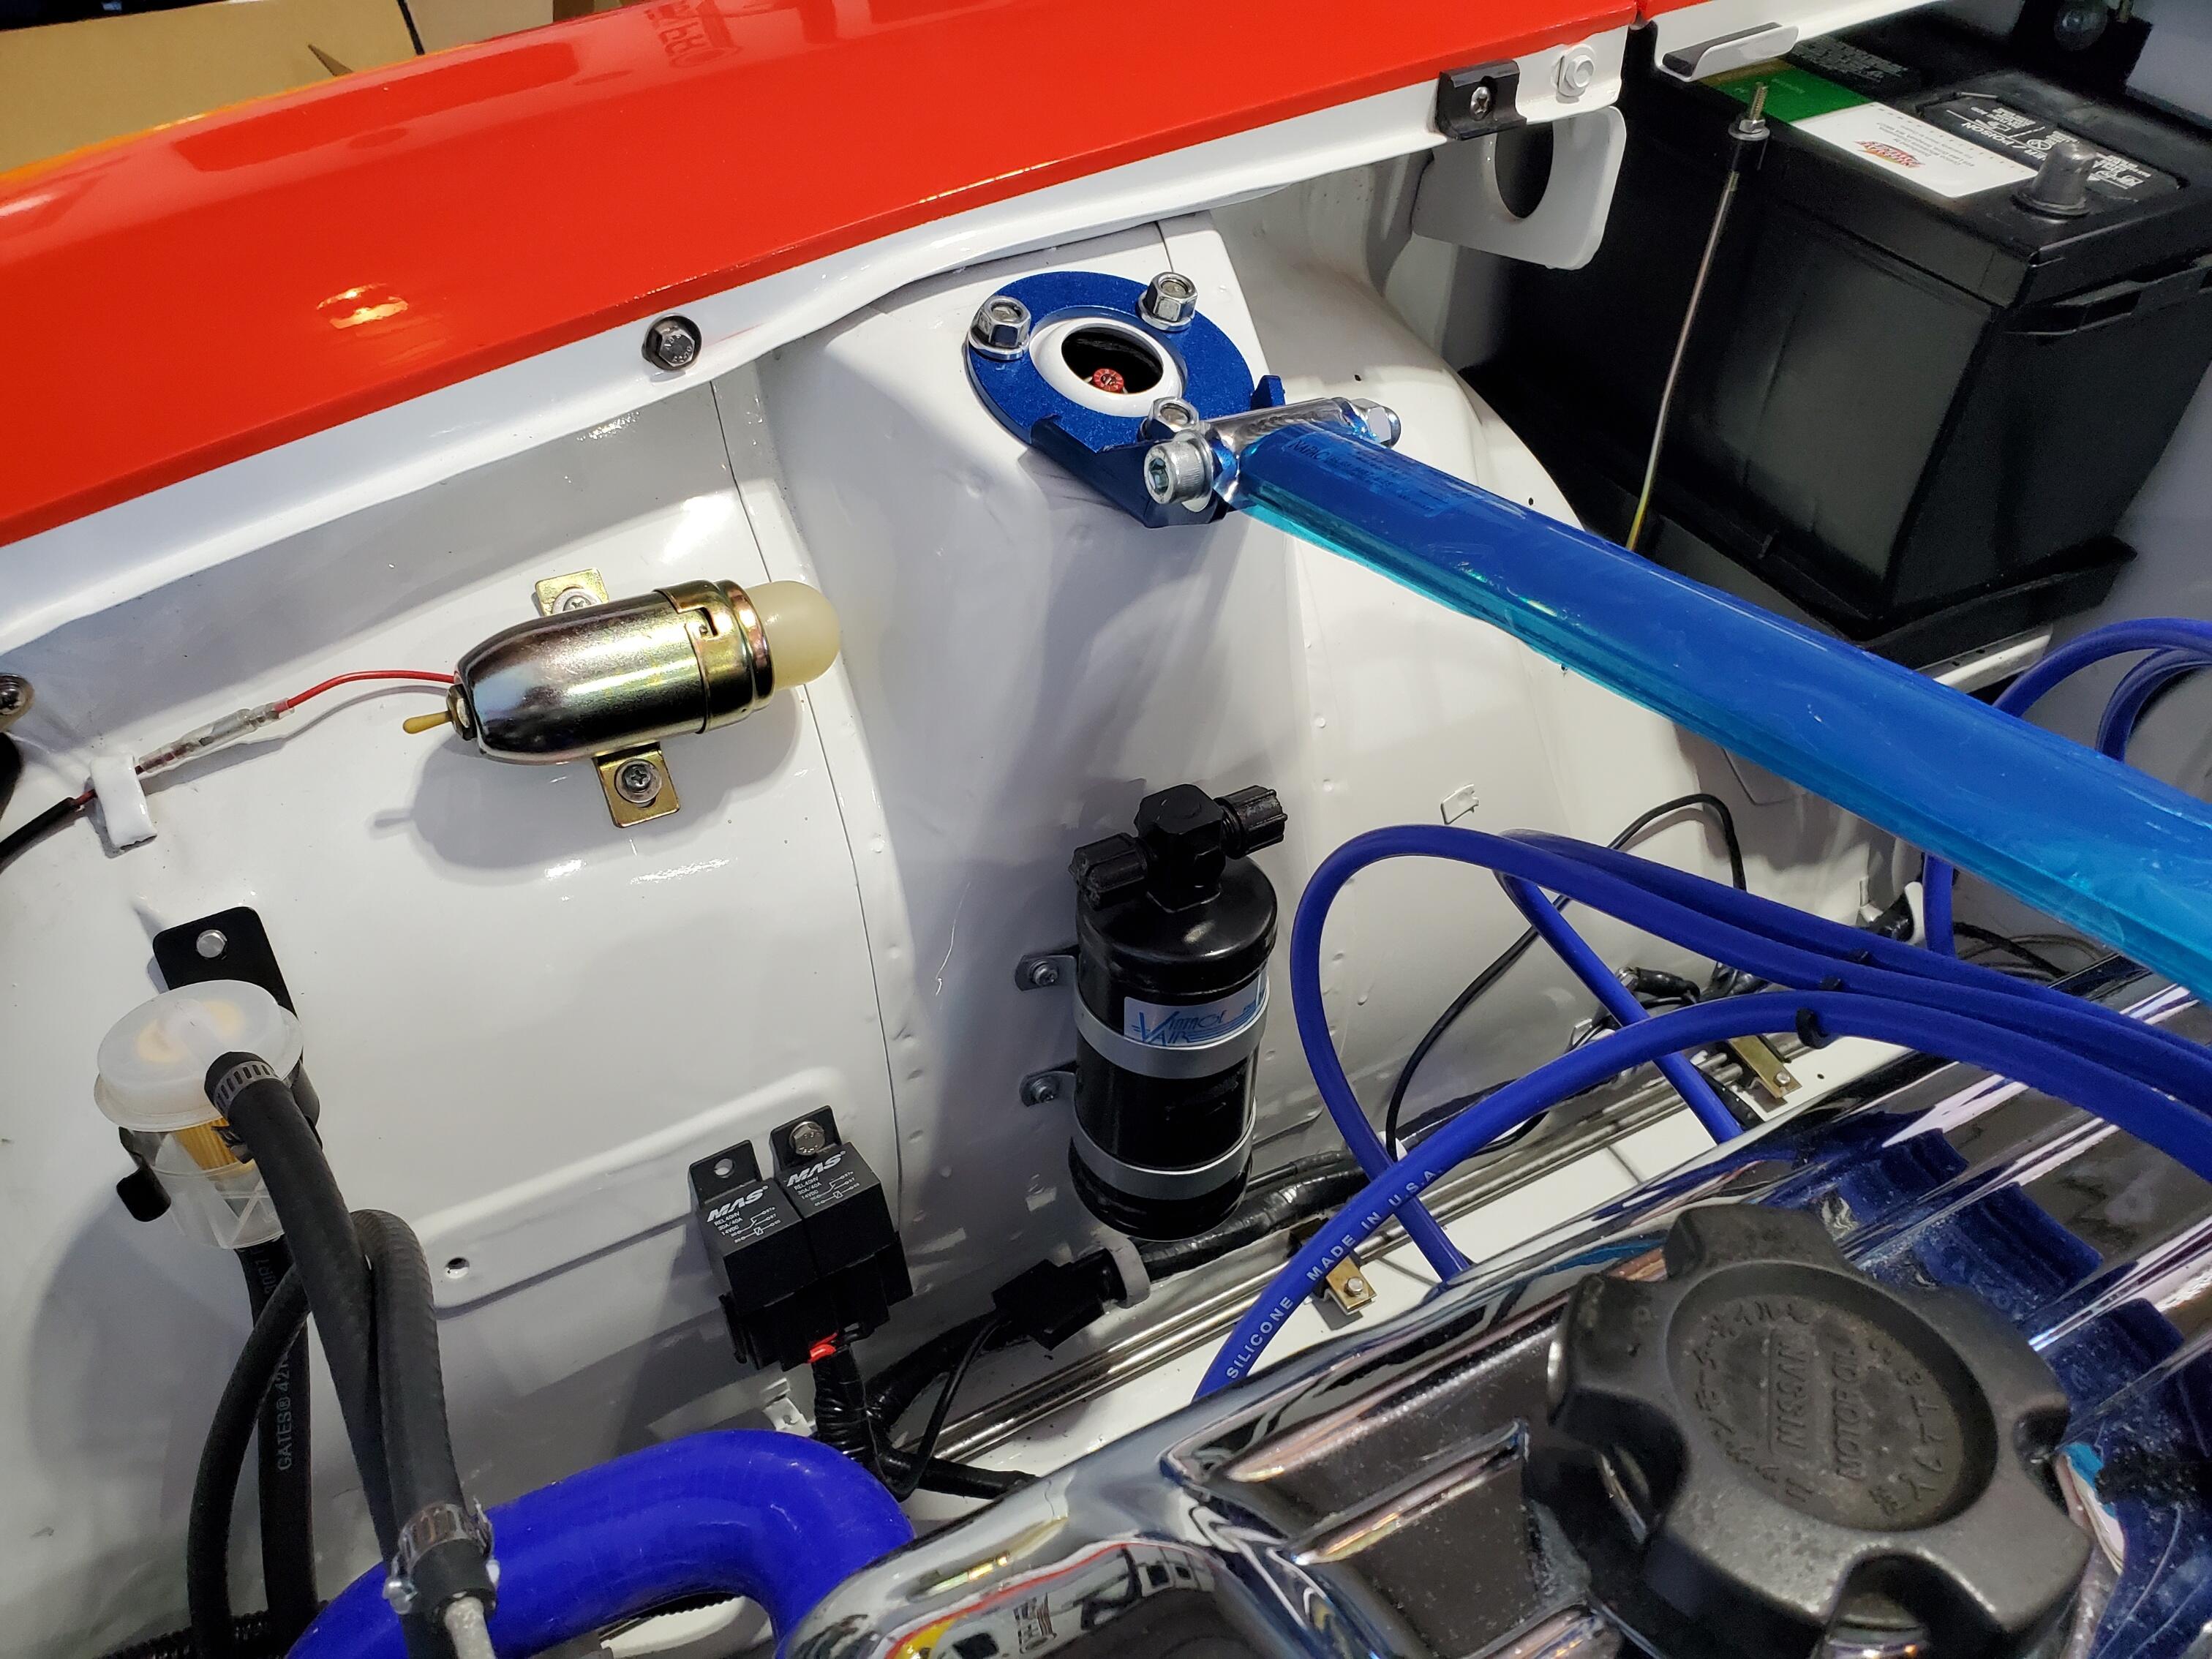
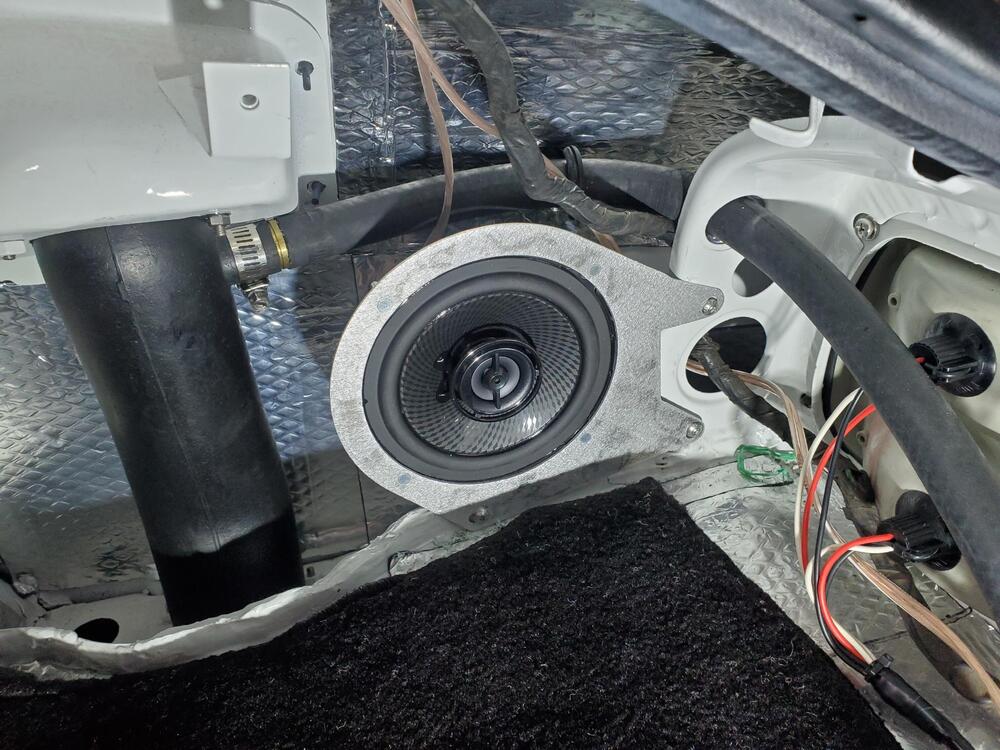
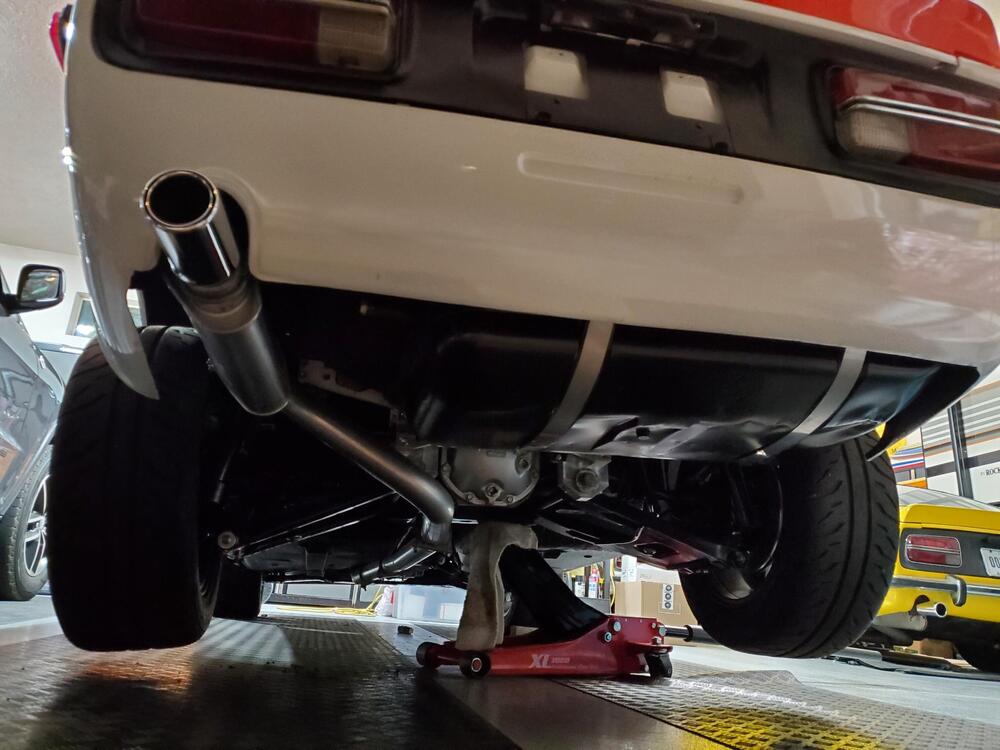
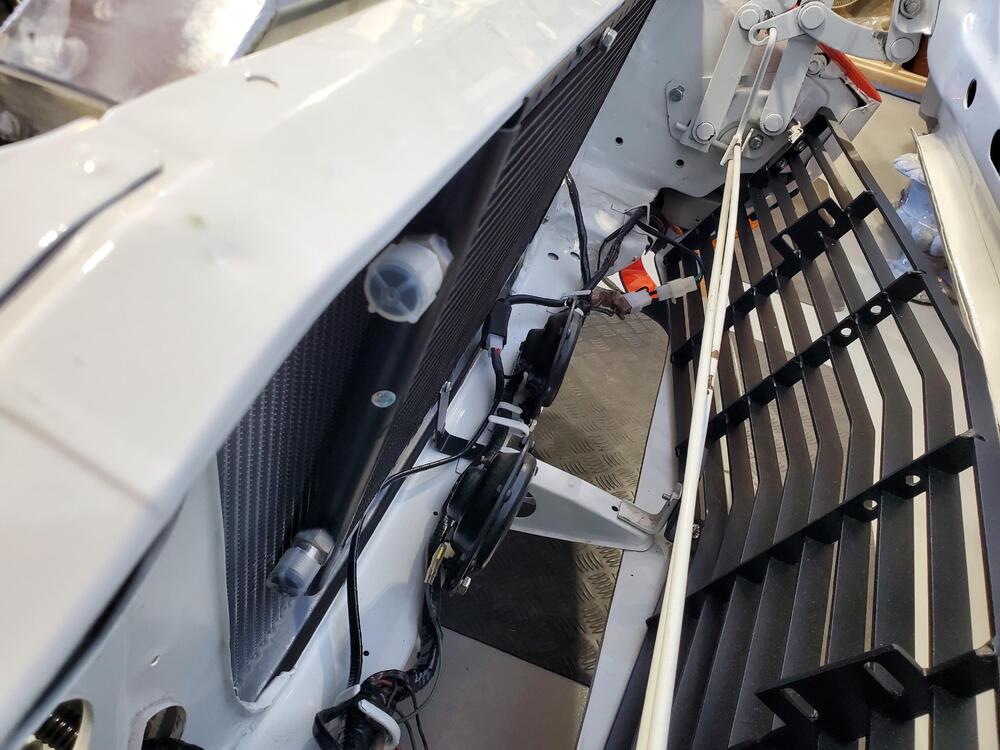
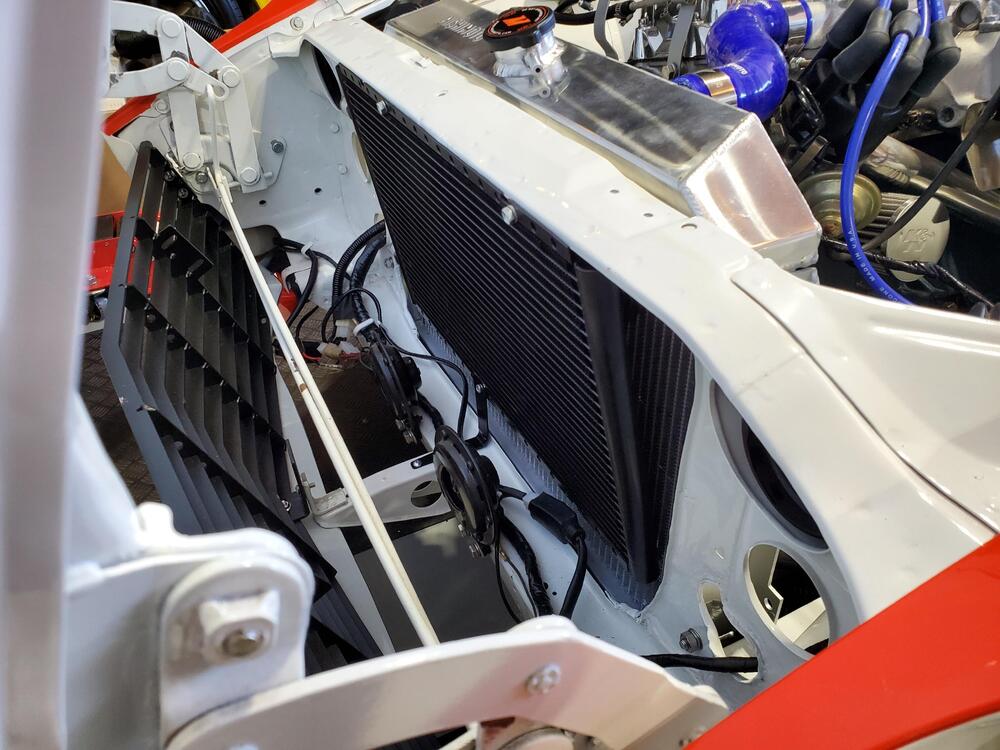
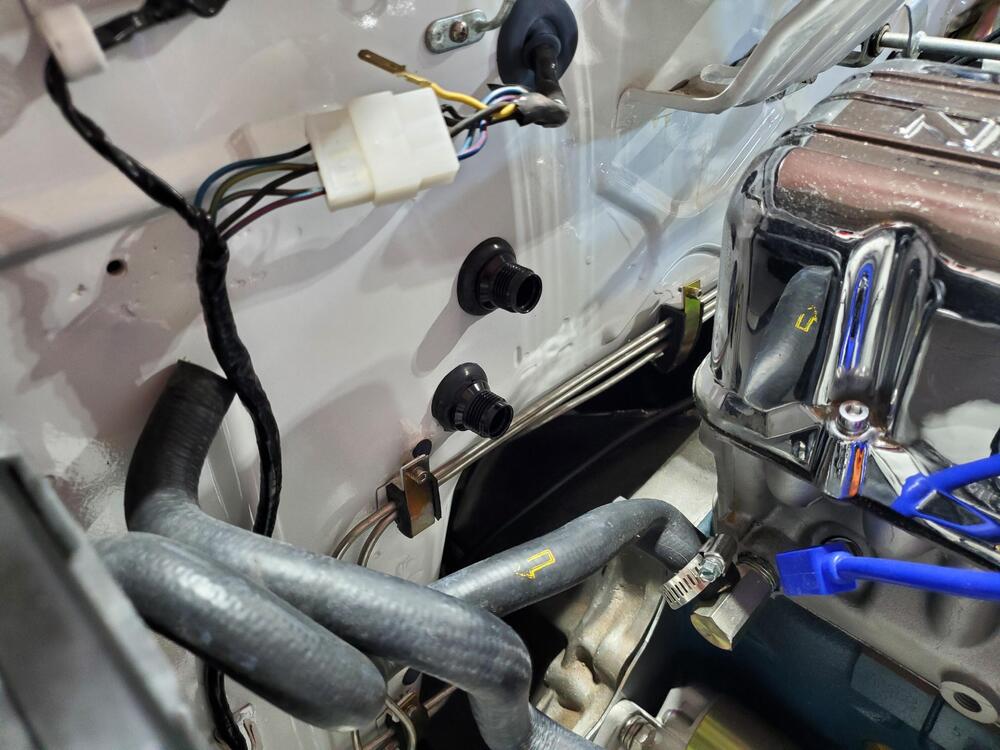
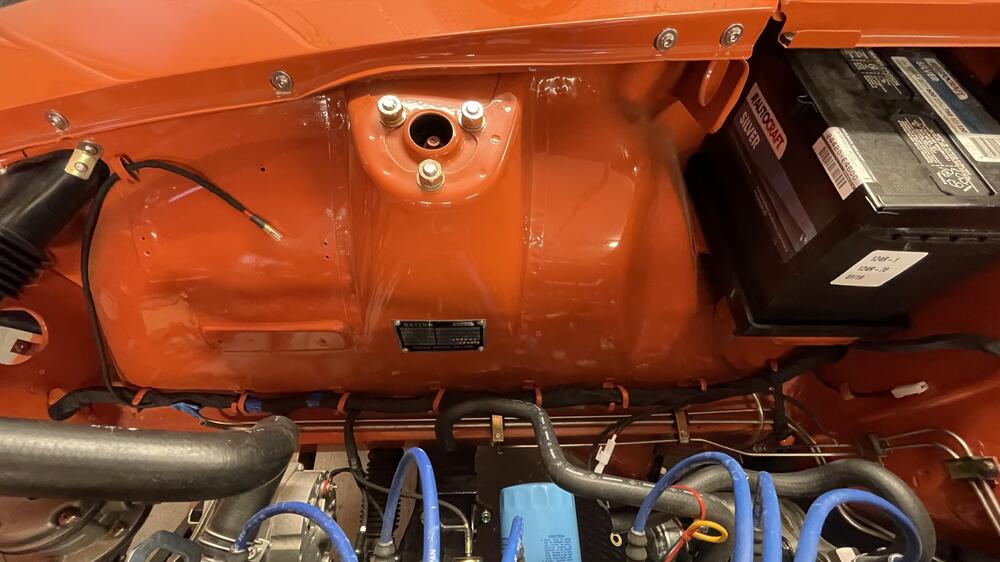
4 pointsI ordered the Skillard speaker supports and installed the Kenwood 5 1/4" speakers on each side in the rear hatch of the the car. I attached 16GA wire (overkill) to the speakers and routed them to the front for future attachment. Also installed the battery, picked that up from Costco, Model #34. The posts are in the correct orientation with this model although the battery is a bit on the short side. Finished the exhaust and muffler installation. That was fairly straight forward with the off the shelf Motorsport assembly which I also have on my yellow Z. Received the AC kit from Vintage Air, so started the install on that. Installed the Condenser and Dryer using existing holes. Trying to be minimally invasive here and not drill any new holes when possible. Not sure what they were for, but there were two nice 5mm holes with nut plates at the top forward part of the radiator support frame that I used for the top support of the Condenser. Amazingly hole spacing on the radiator support frame matched the holes on the Condenser so I used those for a nice solid top mount. I custom fabbed a bracket on the lower end for base support . The angle looks steep in the pics because of the perspective, but I am guessing it is about 7 degrees from being parallel with the radiator, so should be fine for air flow. I installed the Dryer using the holes that are typically for the ID plate. I haven't come accross the plate in the stash of parts yet, so I will leave it here for now as it makes for a clean hose routing. The bulkhead fittings for the water lines fit nicely in the original rubber for the heater hoses, so for now I will keep it this way. The next project will be to install the evaporator in the interior. Will show pics of that once I get that going. Special thanks to this thread for doing the pioneering work on the AC install. I am using this as reverence.


 4 points
 -
3 pointsYou gotta love the double-fisted engine starting fluid technique.3 points
-
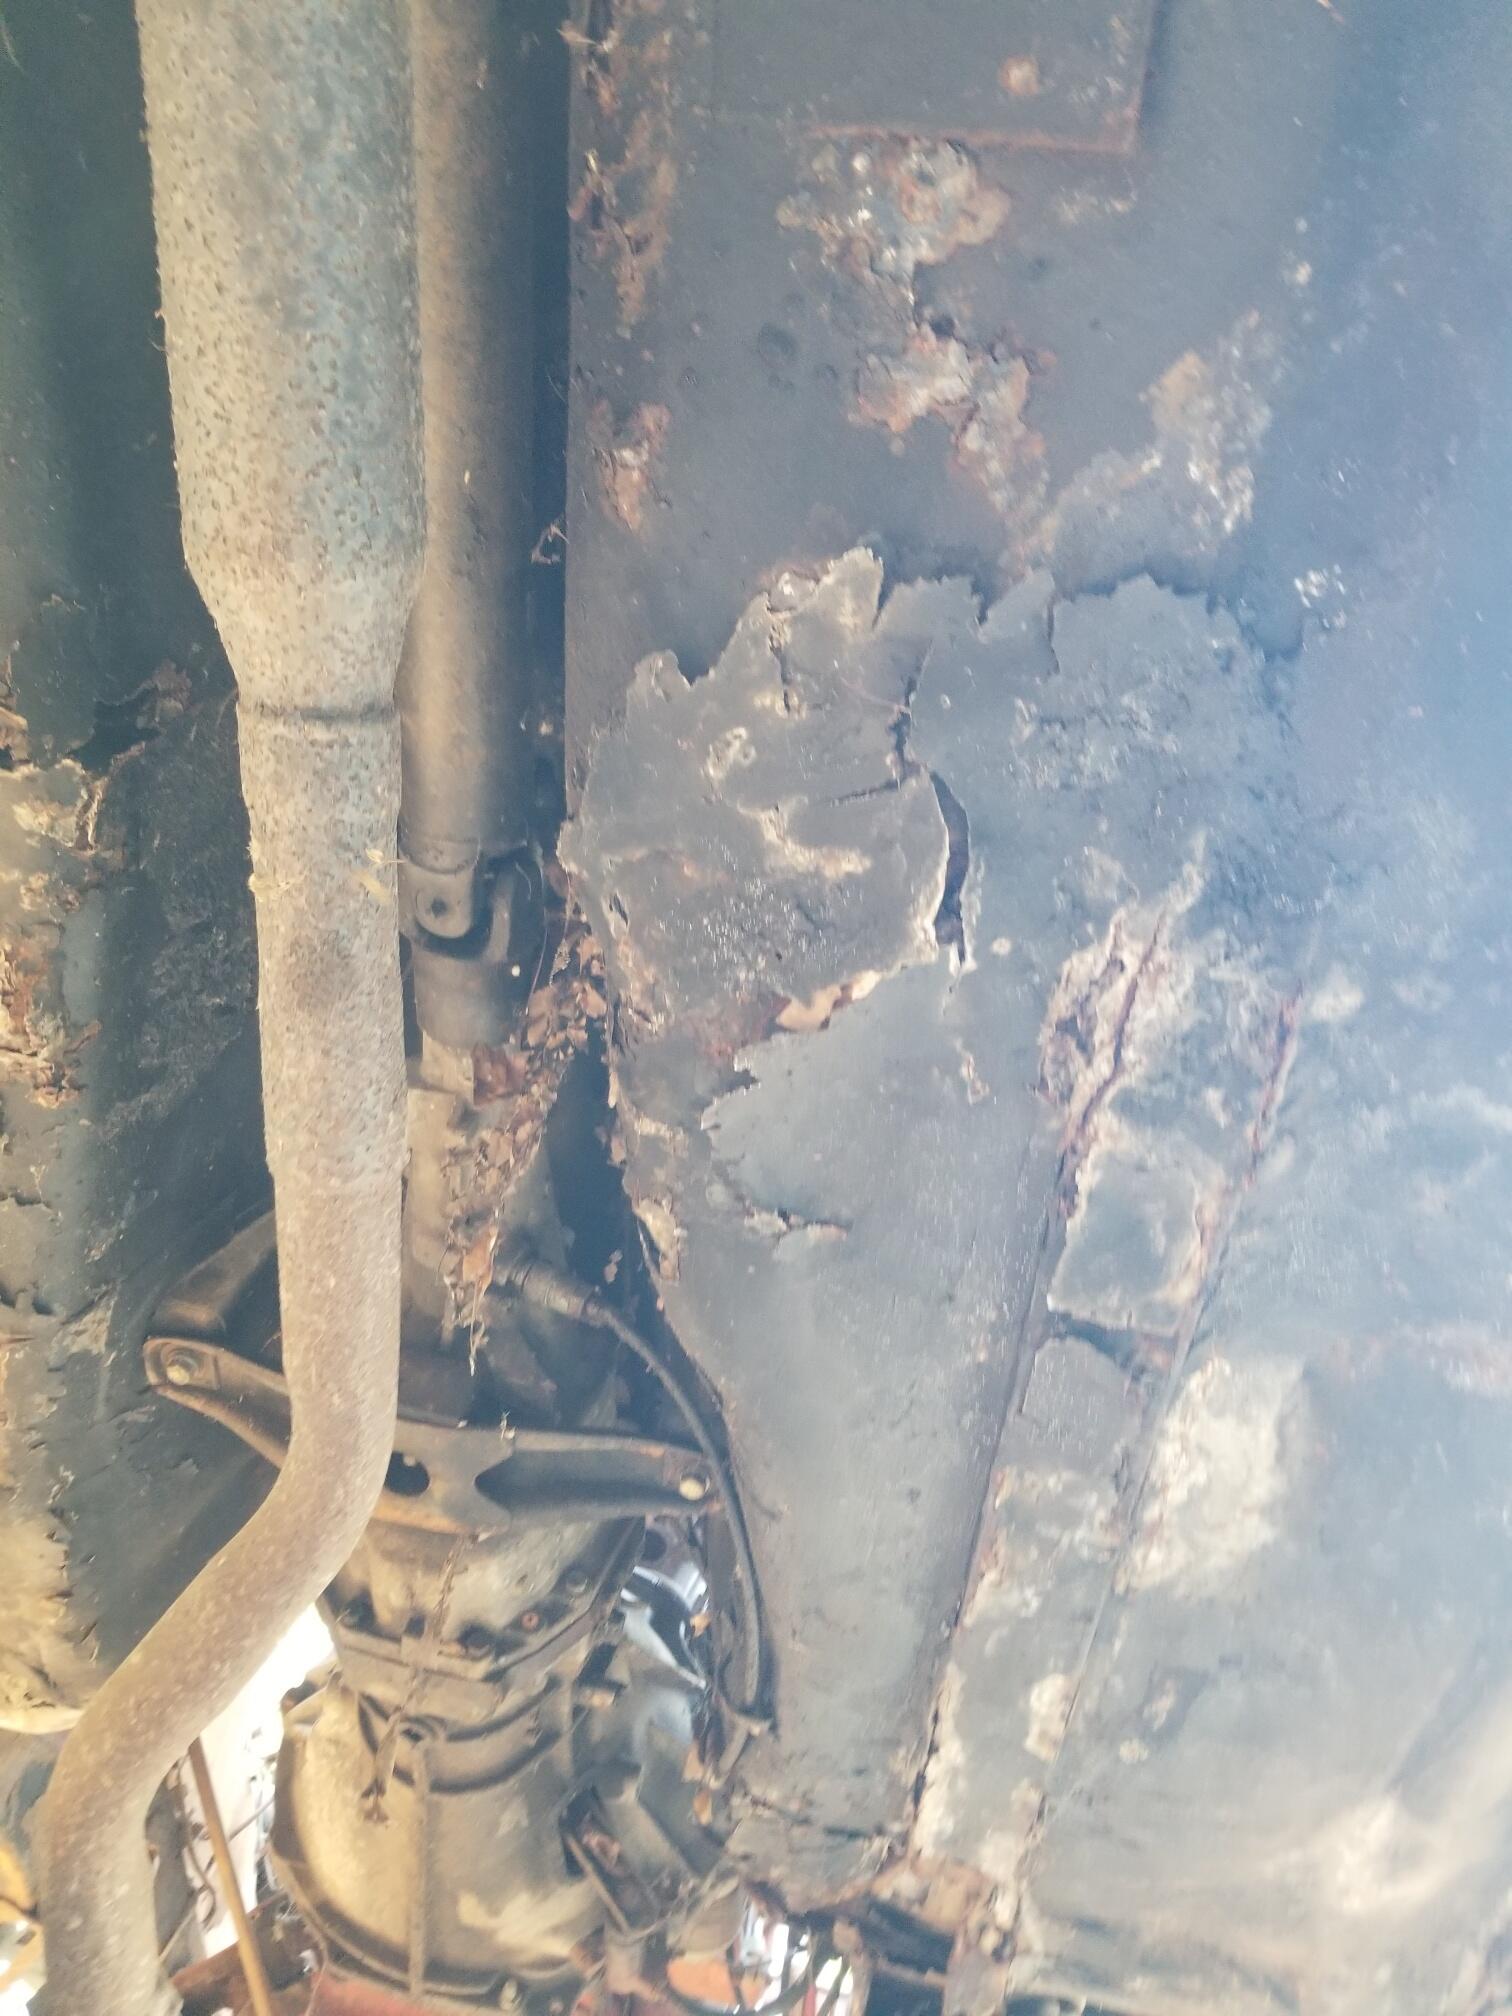
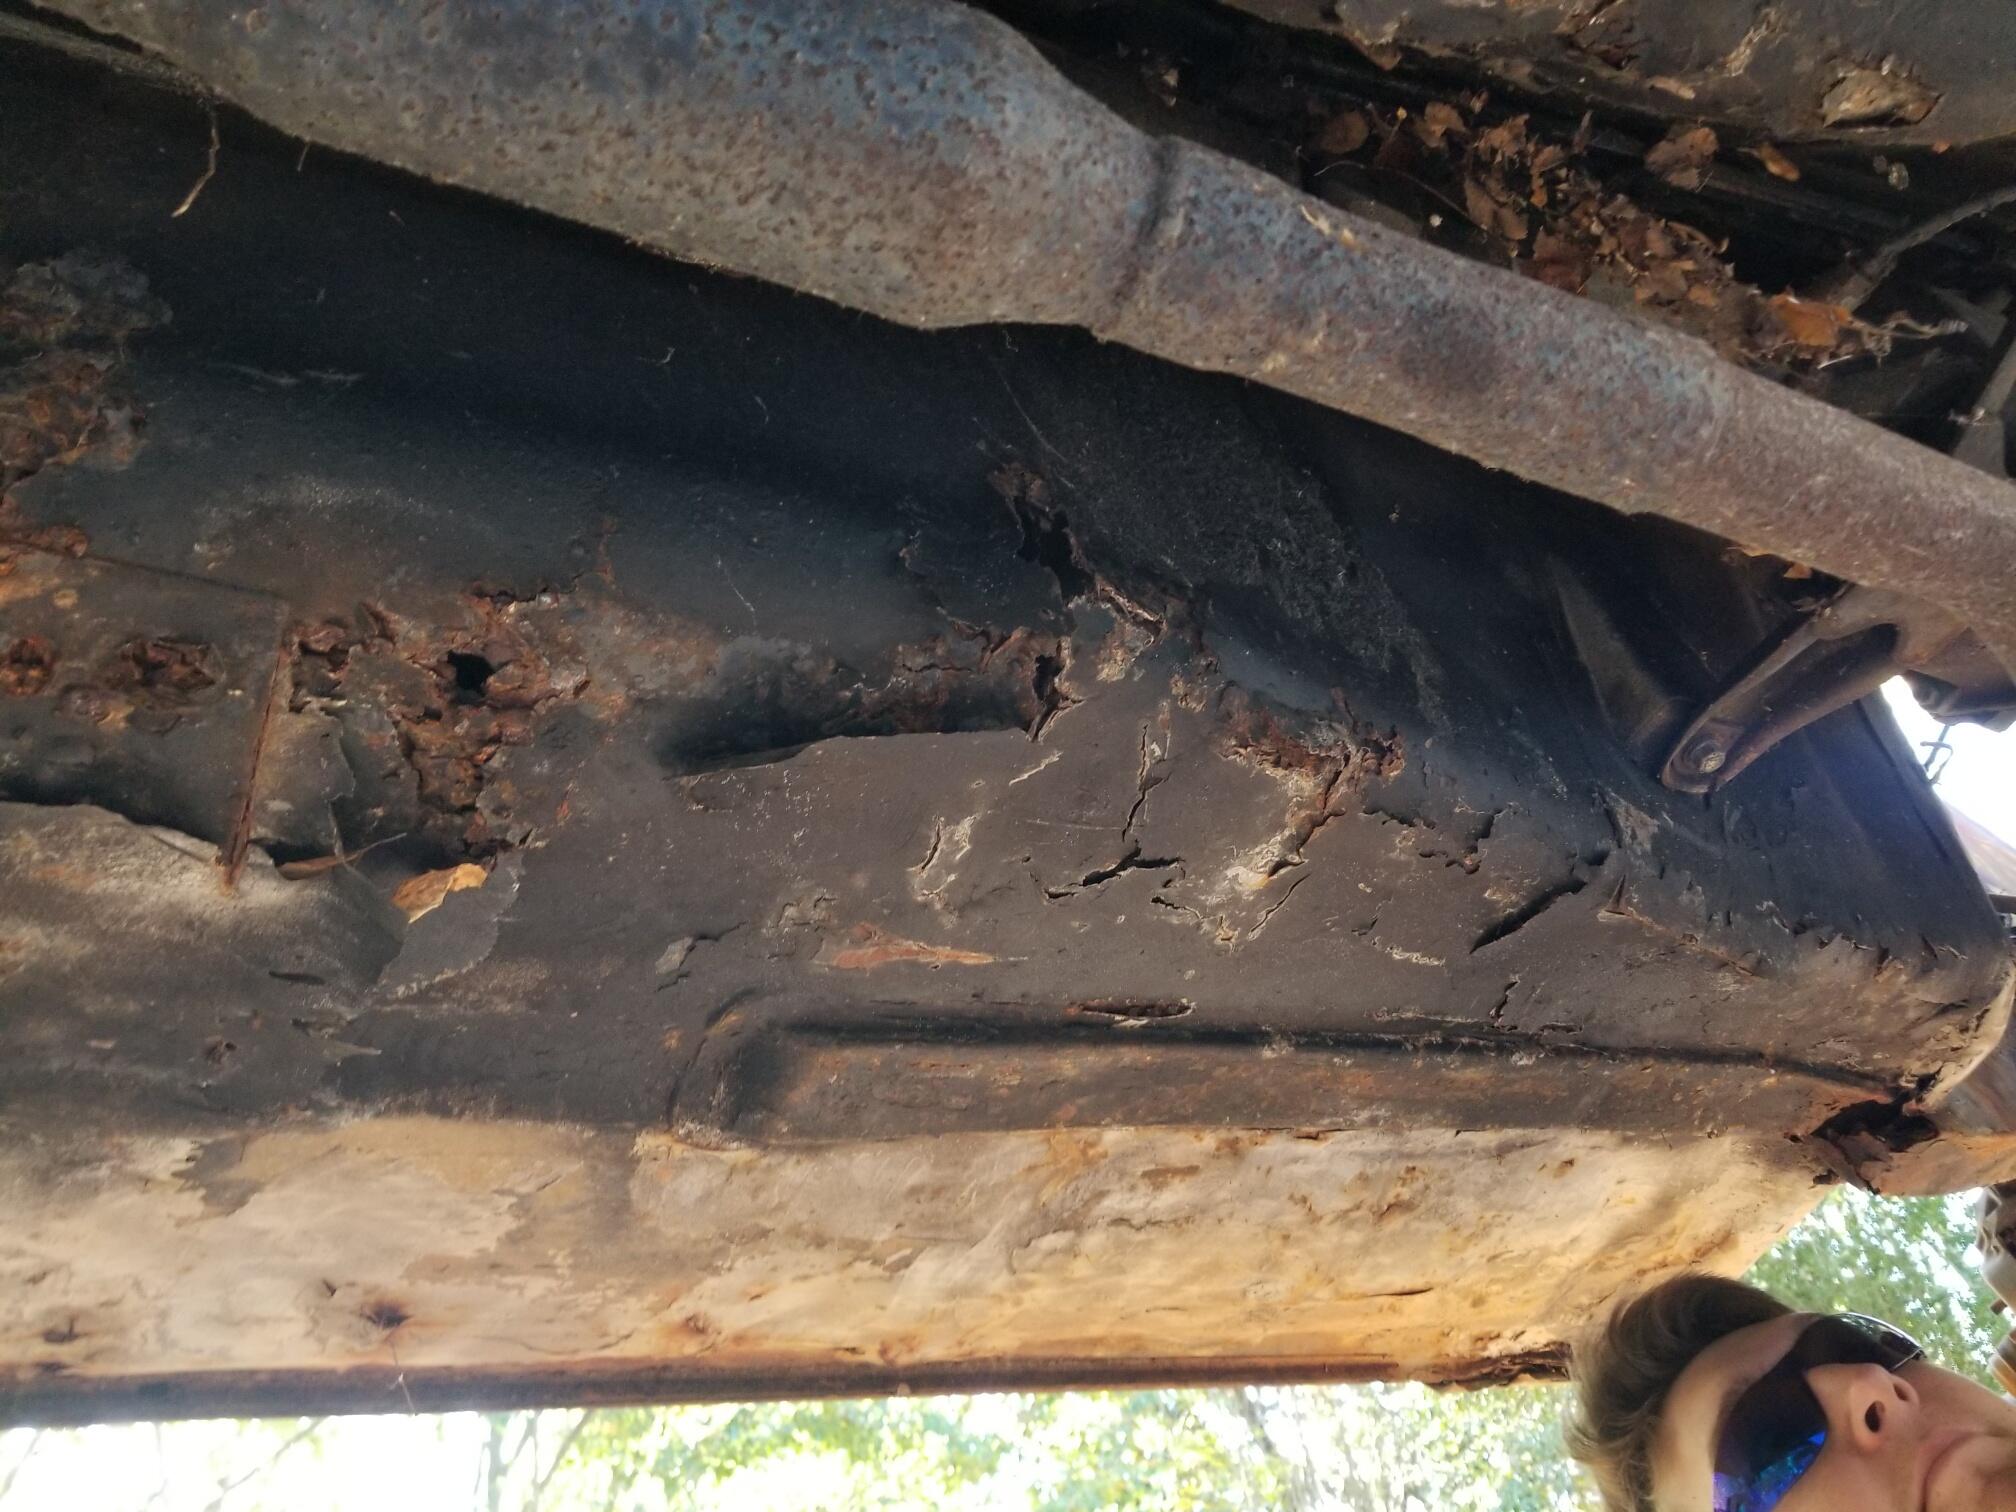
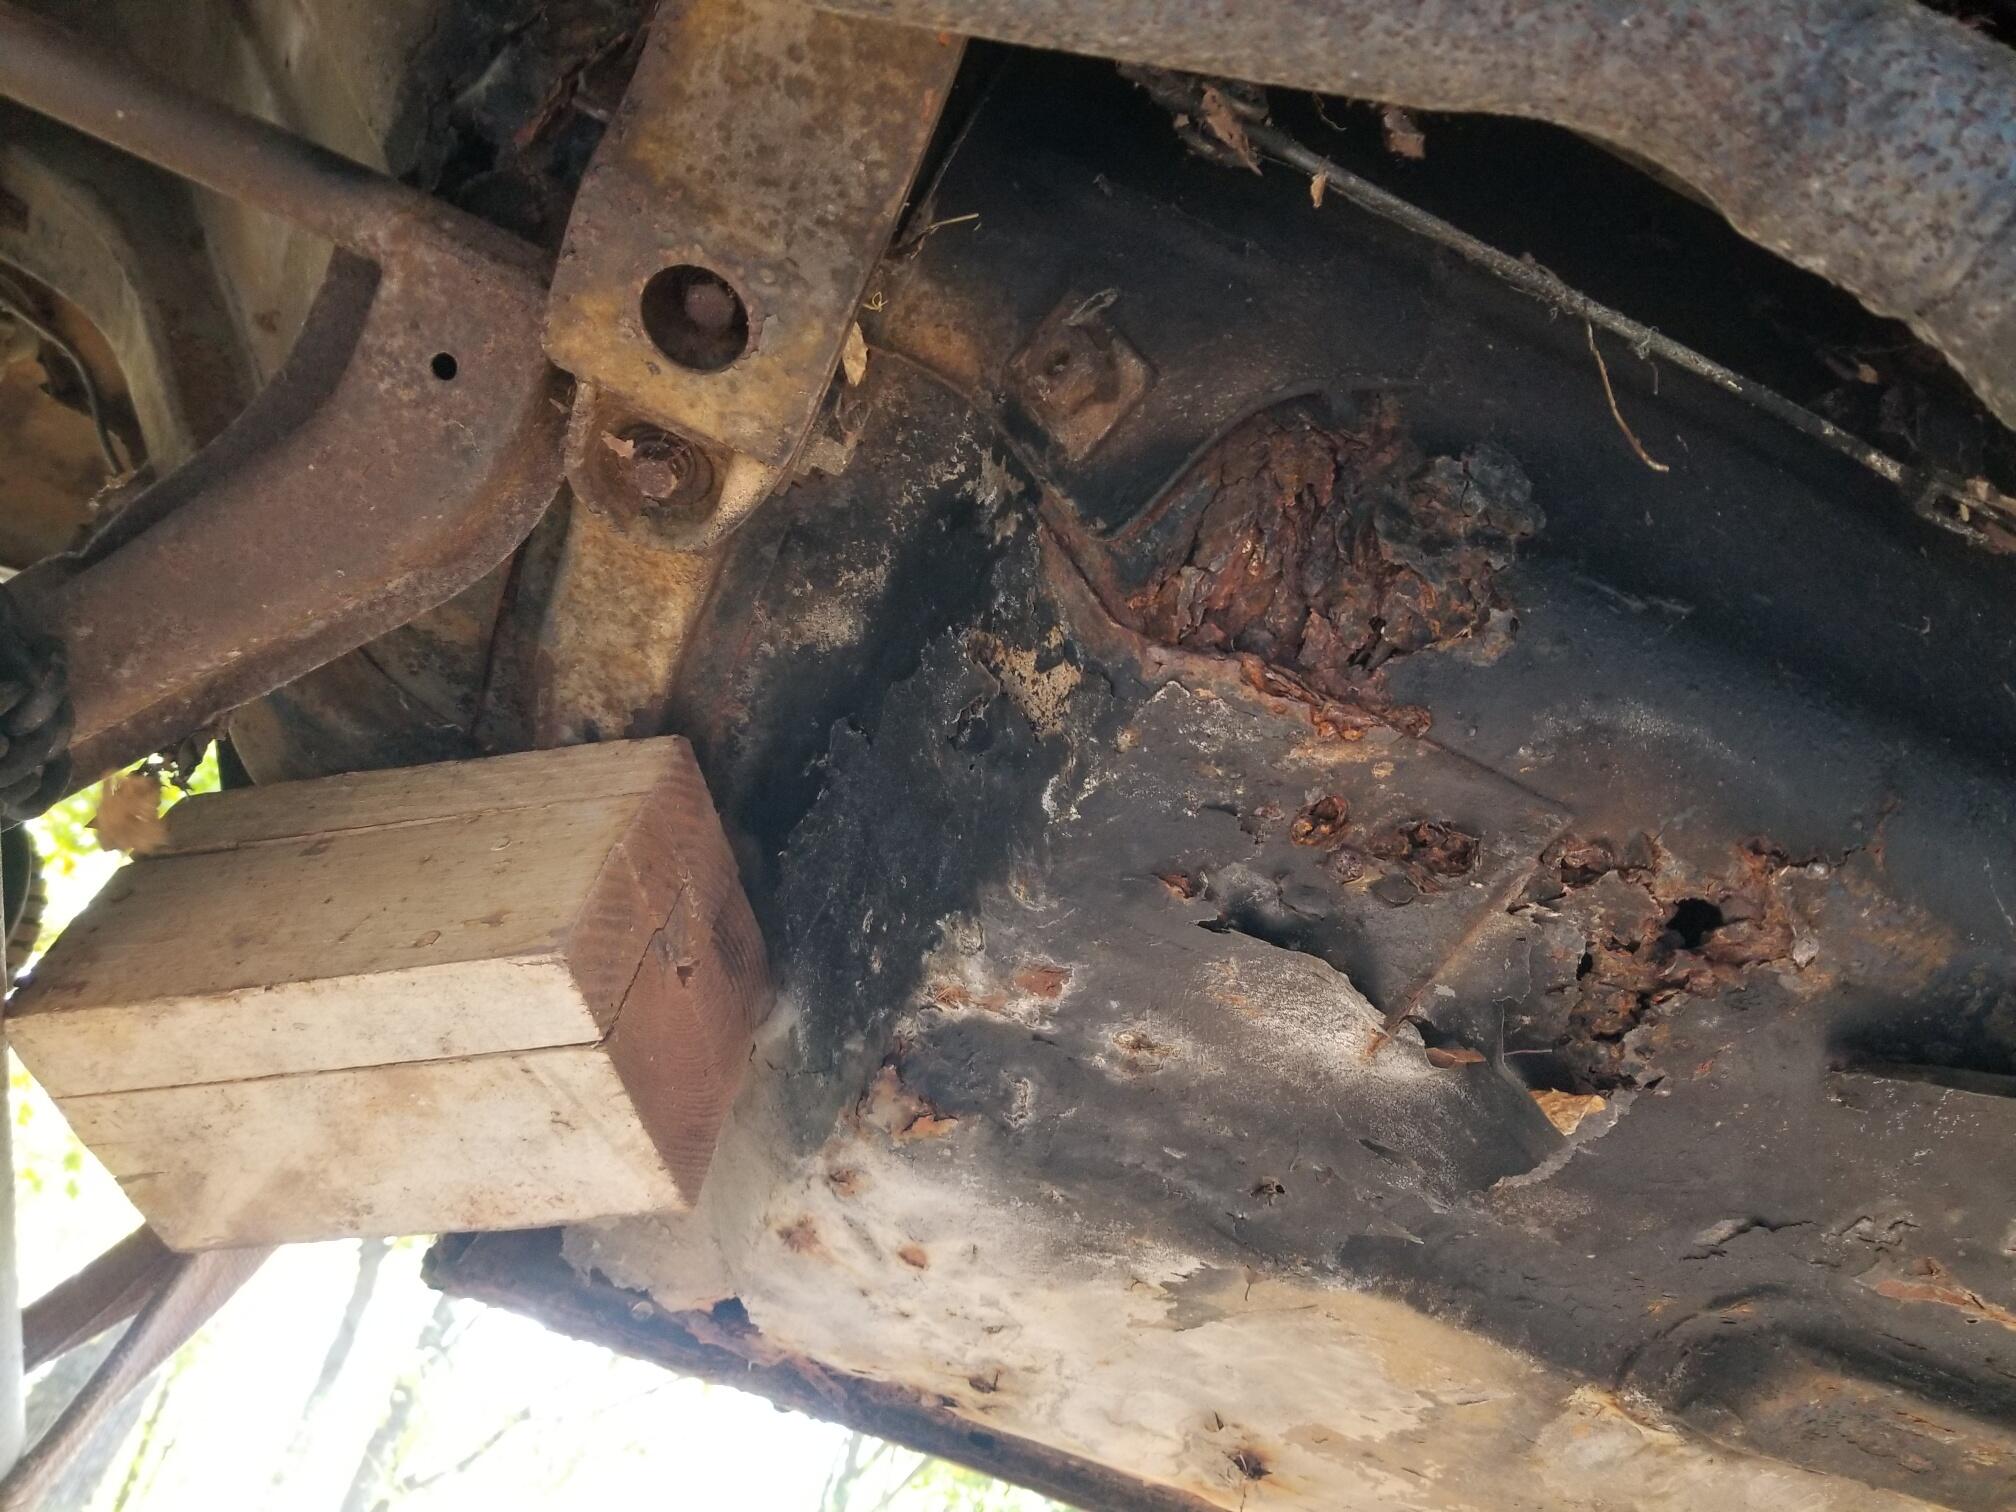
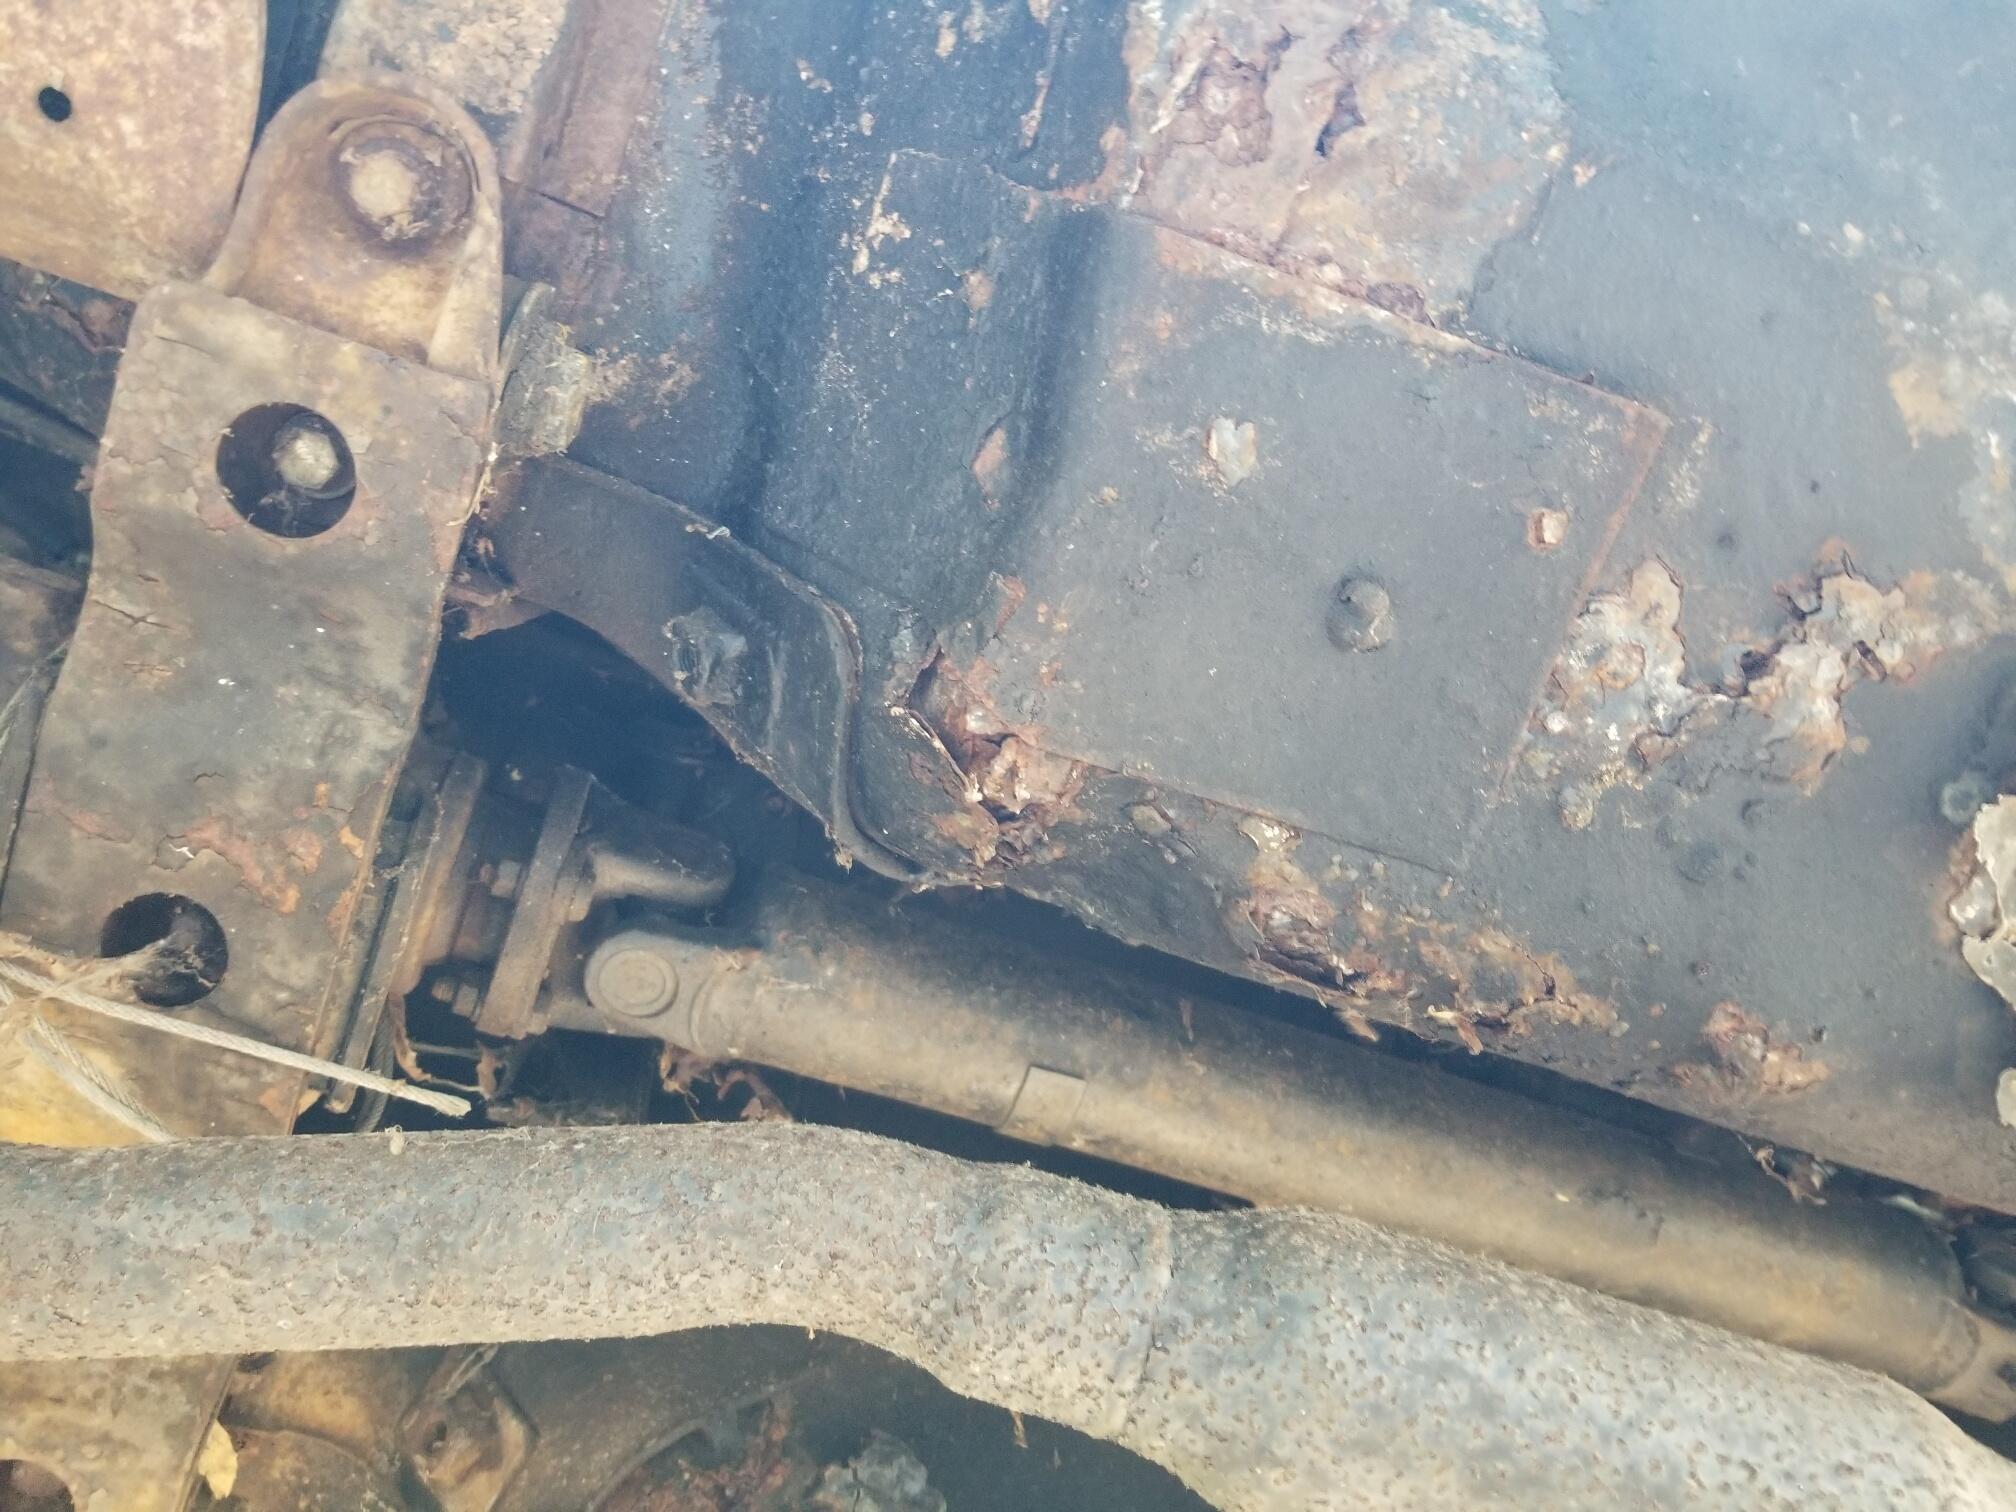
Go buy some gunk degreaser and clean the bottom area. Either way the transmission needs to come out to do any of the repairs needed. Common problem. Better to drop it and everything will become obvious2 points
-
A bad crankshaft rear main seal will look just like that. What does the oil smell like? Gear oil has a very strong odor while engine oil has very little smell. Is your clutch slave wet as well? It's very common for the clutch slave to fail which causes the hard engagements. No matter what, the trans has to come out. I did mine a few weeks ago for similar leaks. My rear main seal as well as the trans output shaft seal and speedometer O ring were all leaking badly. The job isn't too bad, but there are quite a few things that have to come apart. The exhaust, driveshaft, starter, clutch slave, console, shifter, and speedo cable must come off before you can pull the trans. While you are in there, replace the rear main seal, clutch kit if it hasn't been done in a while, and slave. Pulling the trans is not hard, but you don't want to pull it again in 6 months to replace something you didn't do this time. Read my "what did you do today 2023" post about making alignment pins. They turn a frustrating job into a piece of cake when you reinstall the trans.2 points
-
2 pointsYes. I'll investigate adjusting te VR. I didn't have time today because I WAS TOO BUSY DRIVING THE CAR!!! It runs strong and pulls to 5k. The hesitation and backfiring from before is completely gone. Of course I've got a new list of issues now; restoring the fuel tank, adjusting the voltage regulator, the brake booster inoperative, and after driving for a while the tachometer has developed a mind of its own. For now I'm extatic.
 2 points
 -
2 points
-
2 pointsFinally getting the Vintage dash back in. Fit is very good, however there does seem to be excessive gap on the vertical surrounding the center console trim. I'm wishing I hadn't precut the excess vinyl to match the factory in this area. I'll add a pic later to illustrate. I left much of the excess material in the glove box area, I'll deal with that when I'm actually ready to install the glovebox. Have to deal with all the HVAC ducting before that happens

 2 points
 -
2 points
-
If it’s gear oil that’s not hard to determine. Have you noticed a major oil leak under the trans. Could be multiple problems starting with the clutch master and slave. Try bleeding the system first and check the trans level for oil.2 points
-
If you have ruled out a leaking clutch master and slave cylinder as the culprit, then I would look manual transmission oil seal.2 points
-
2 pointsDown under we called that outback engineering, love that you got it to run!2 points
-
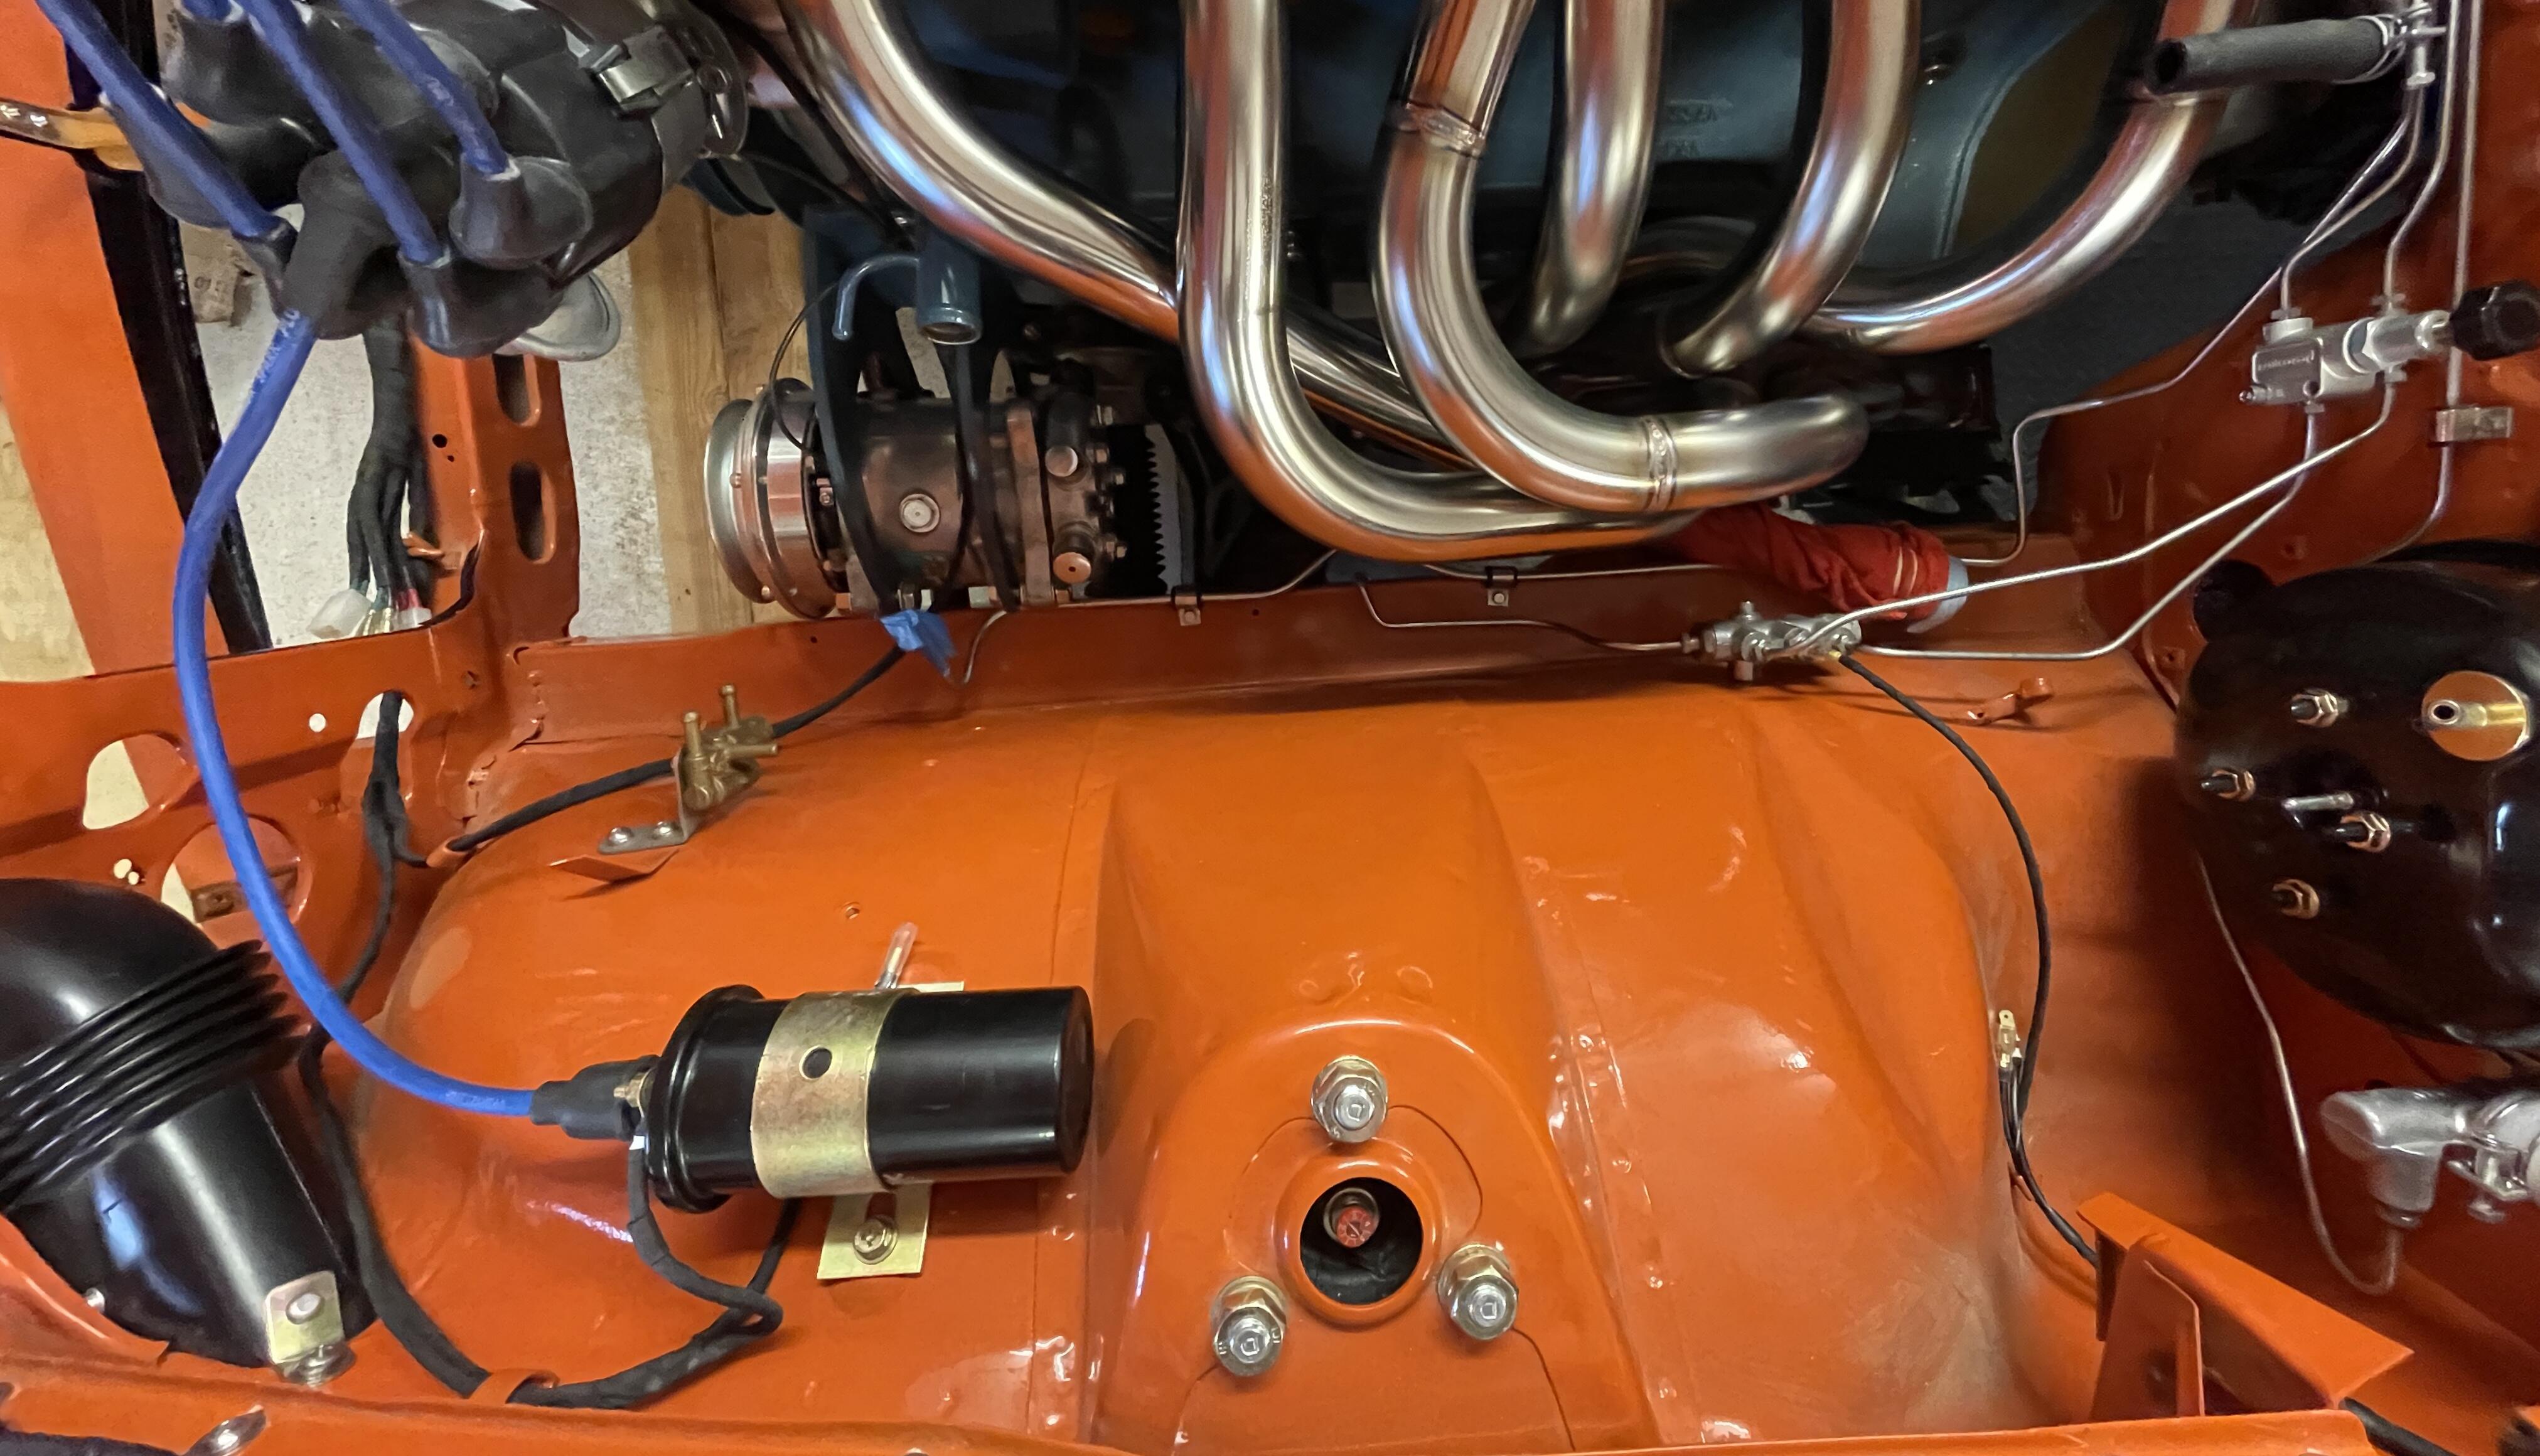
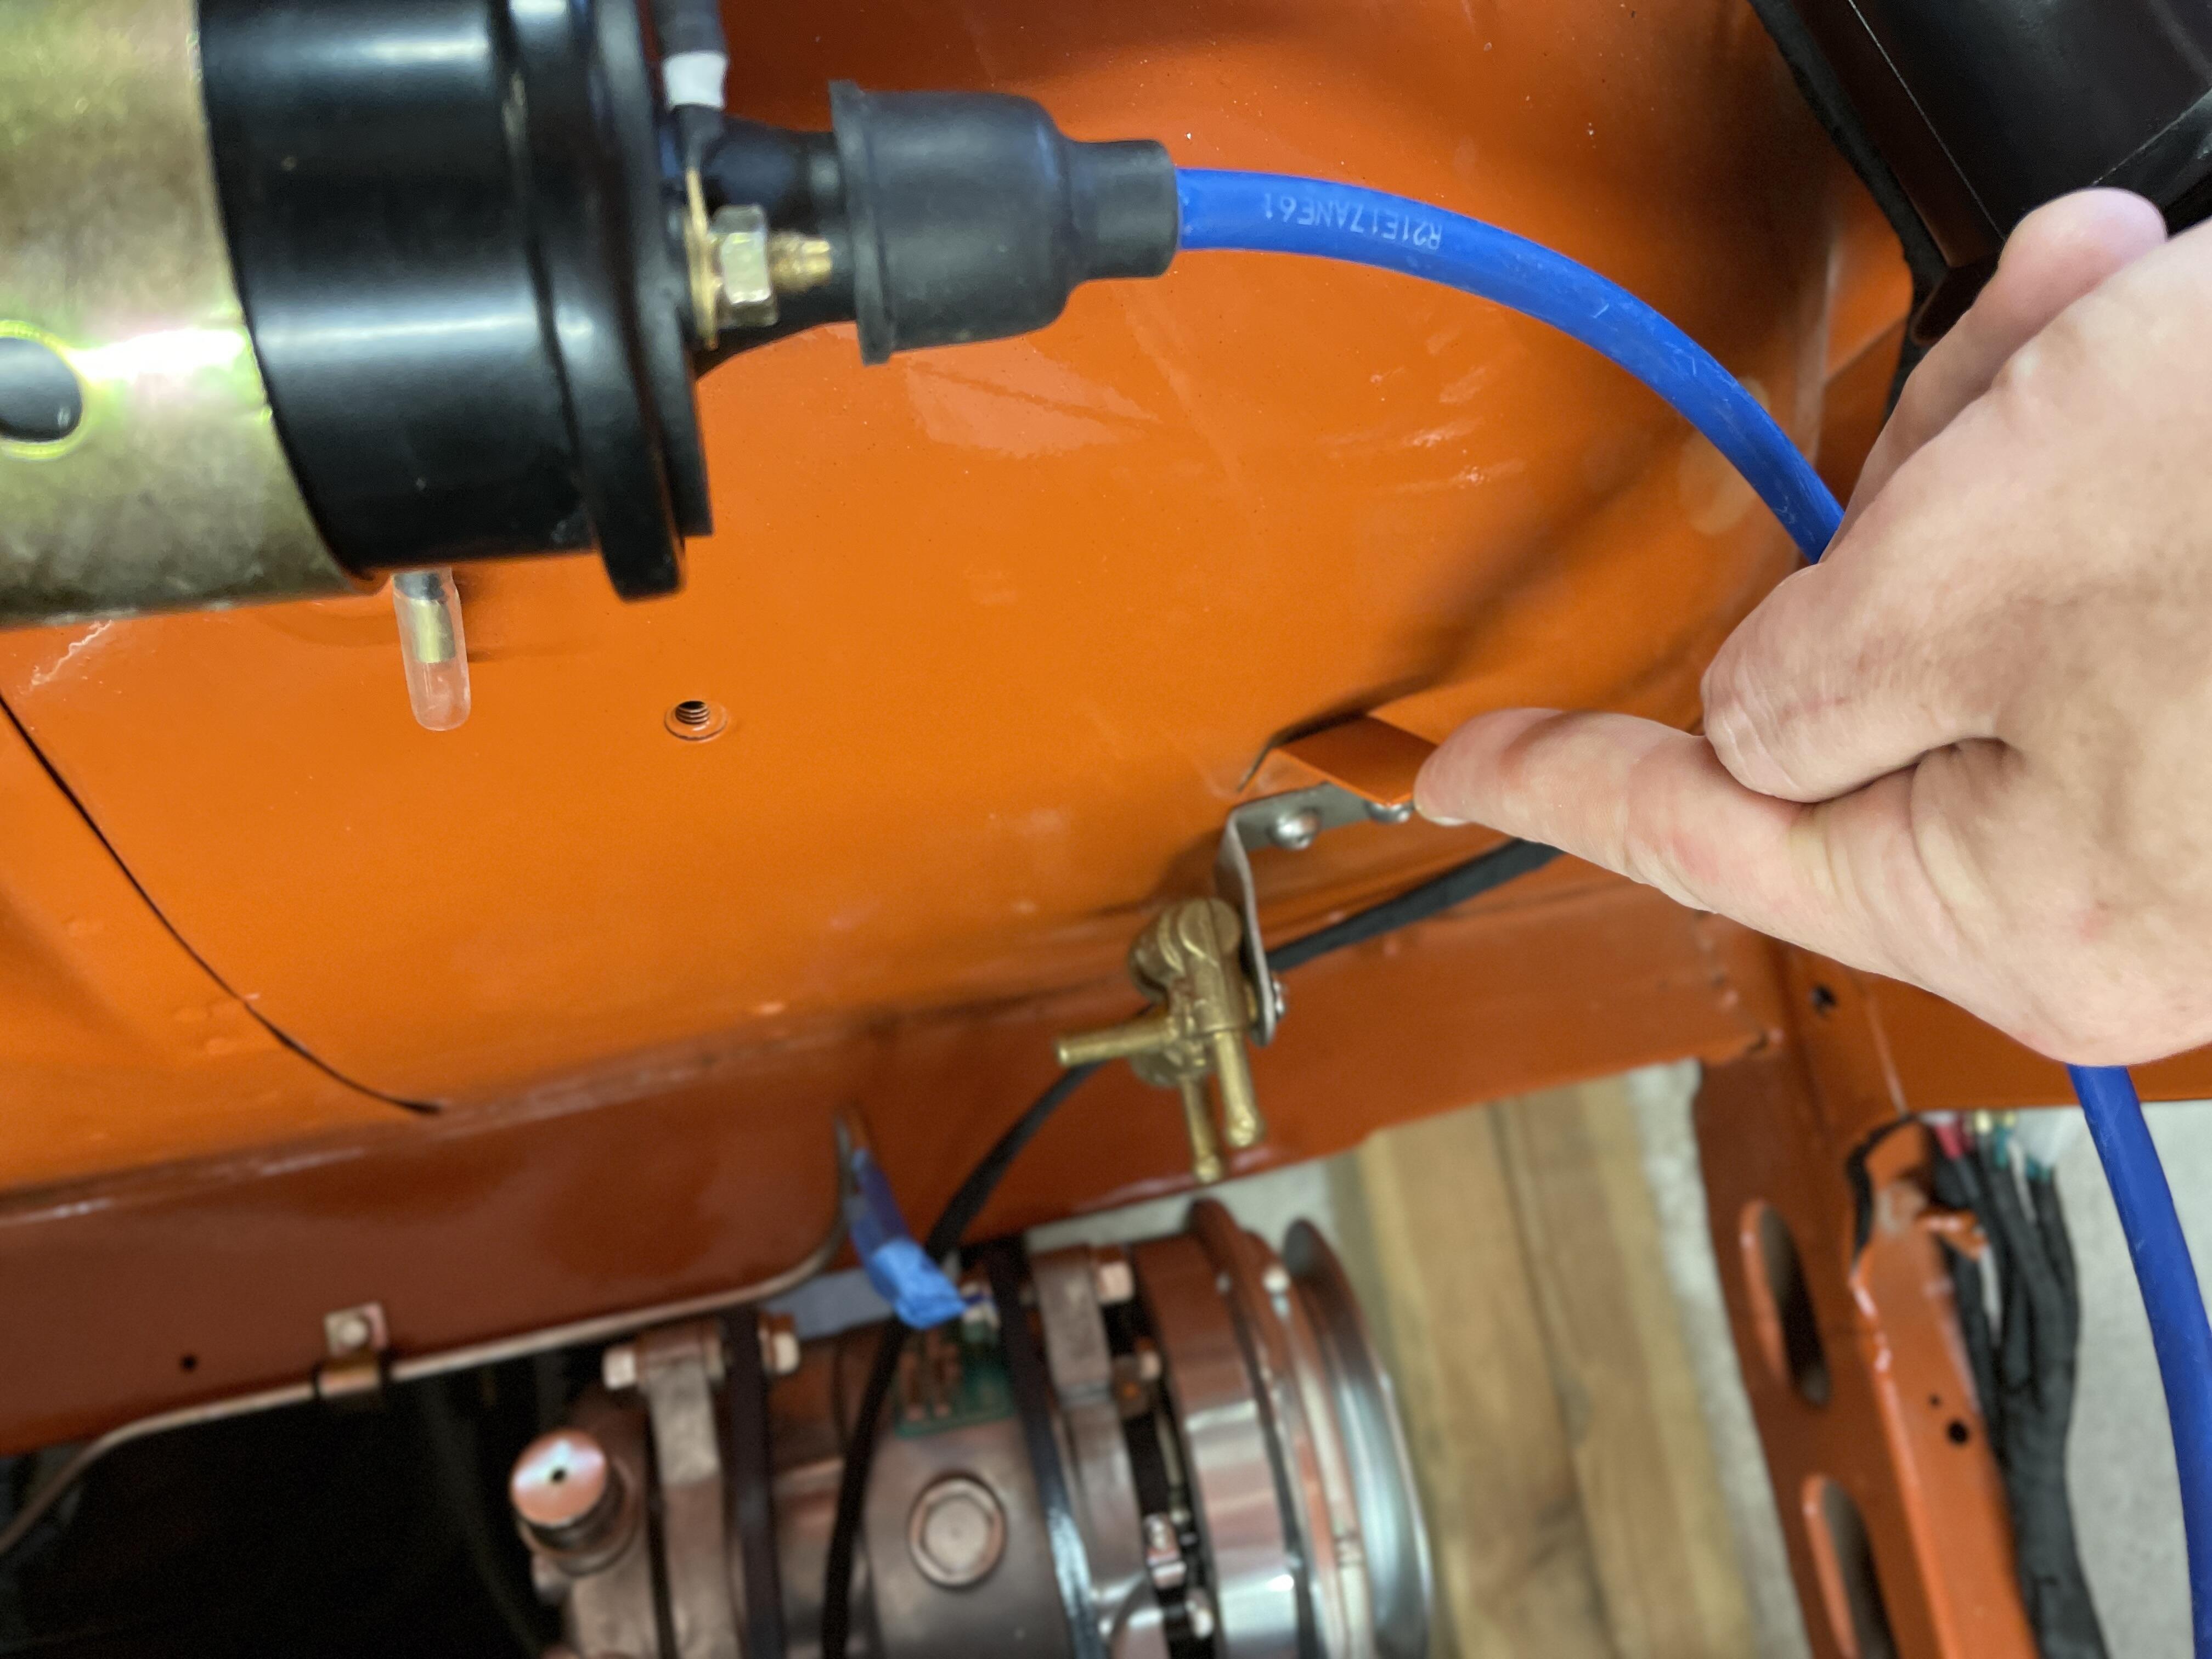
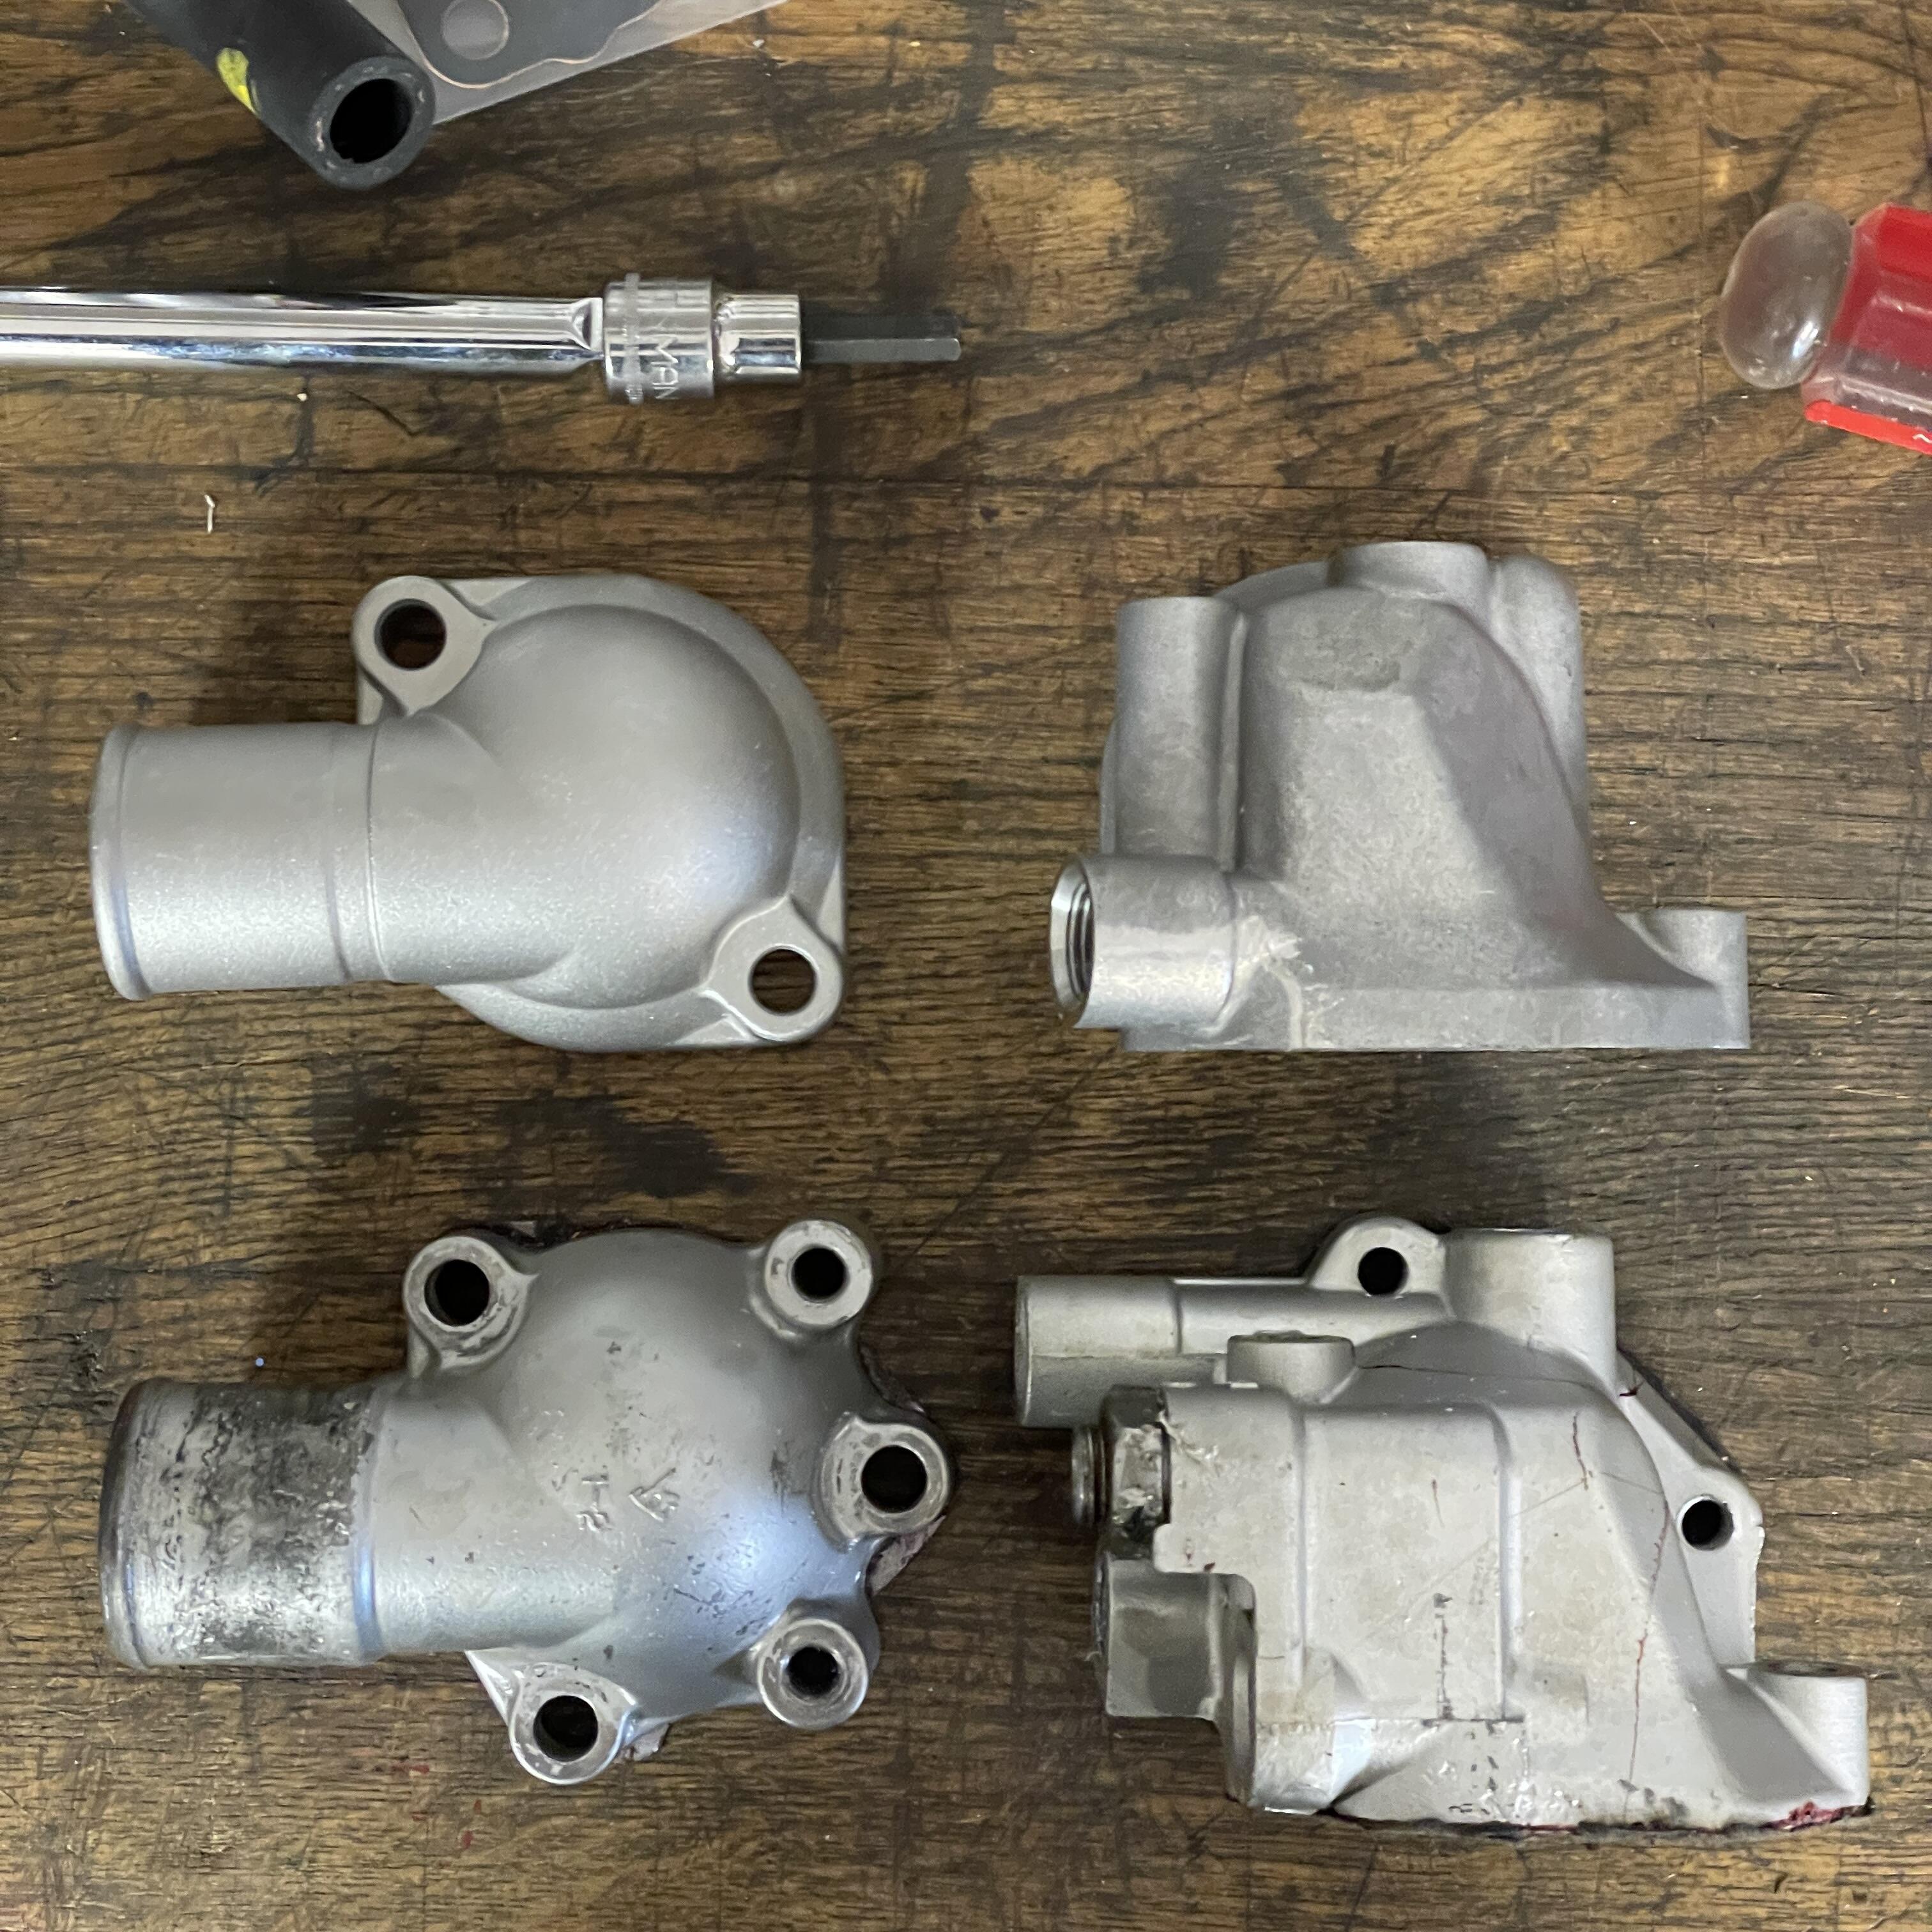
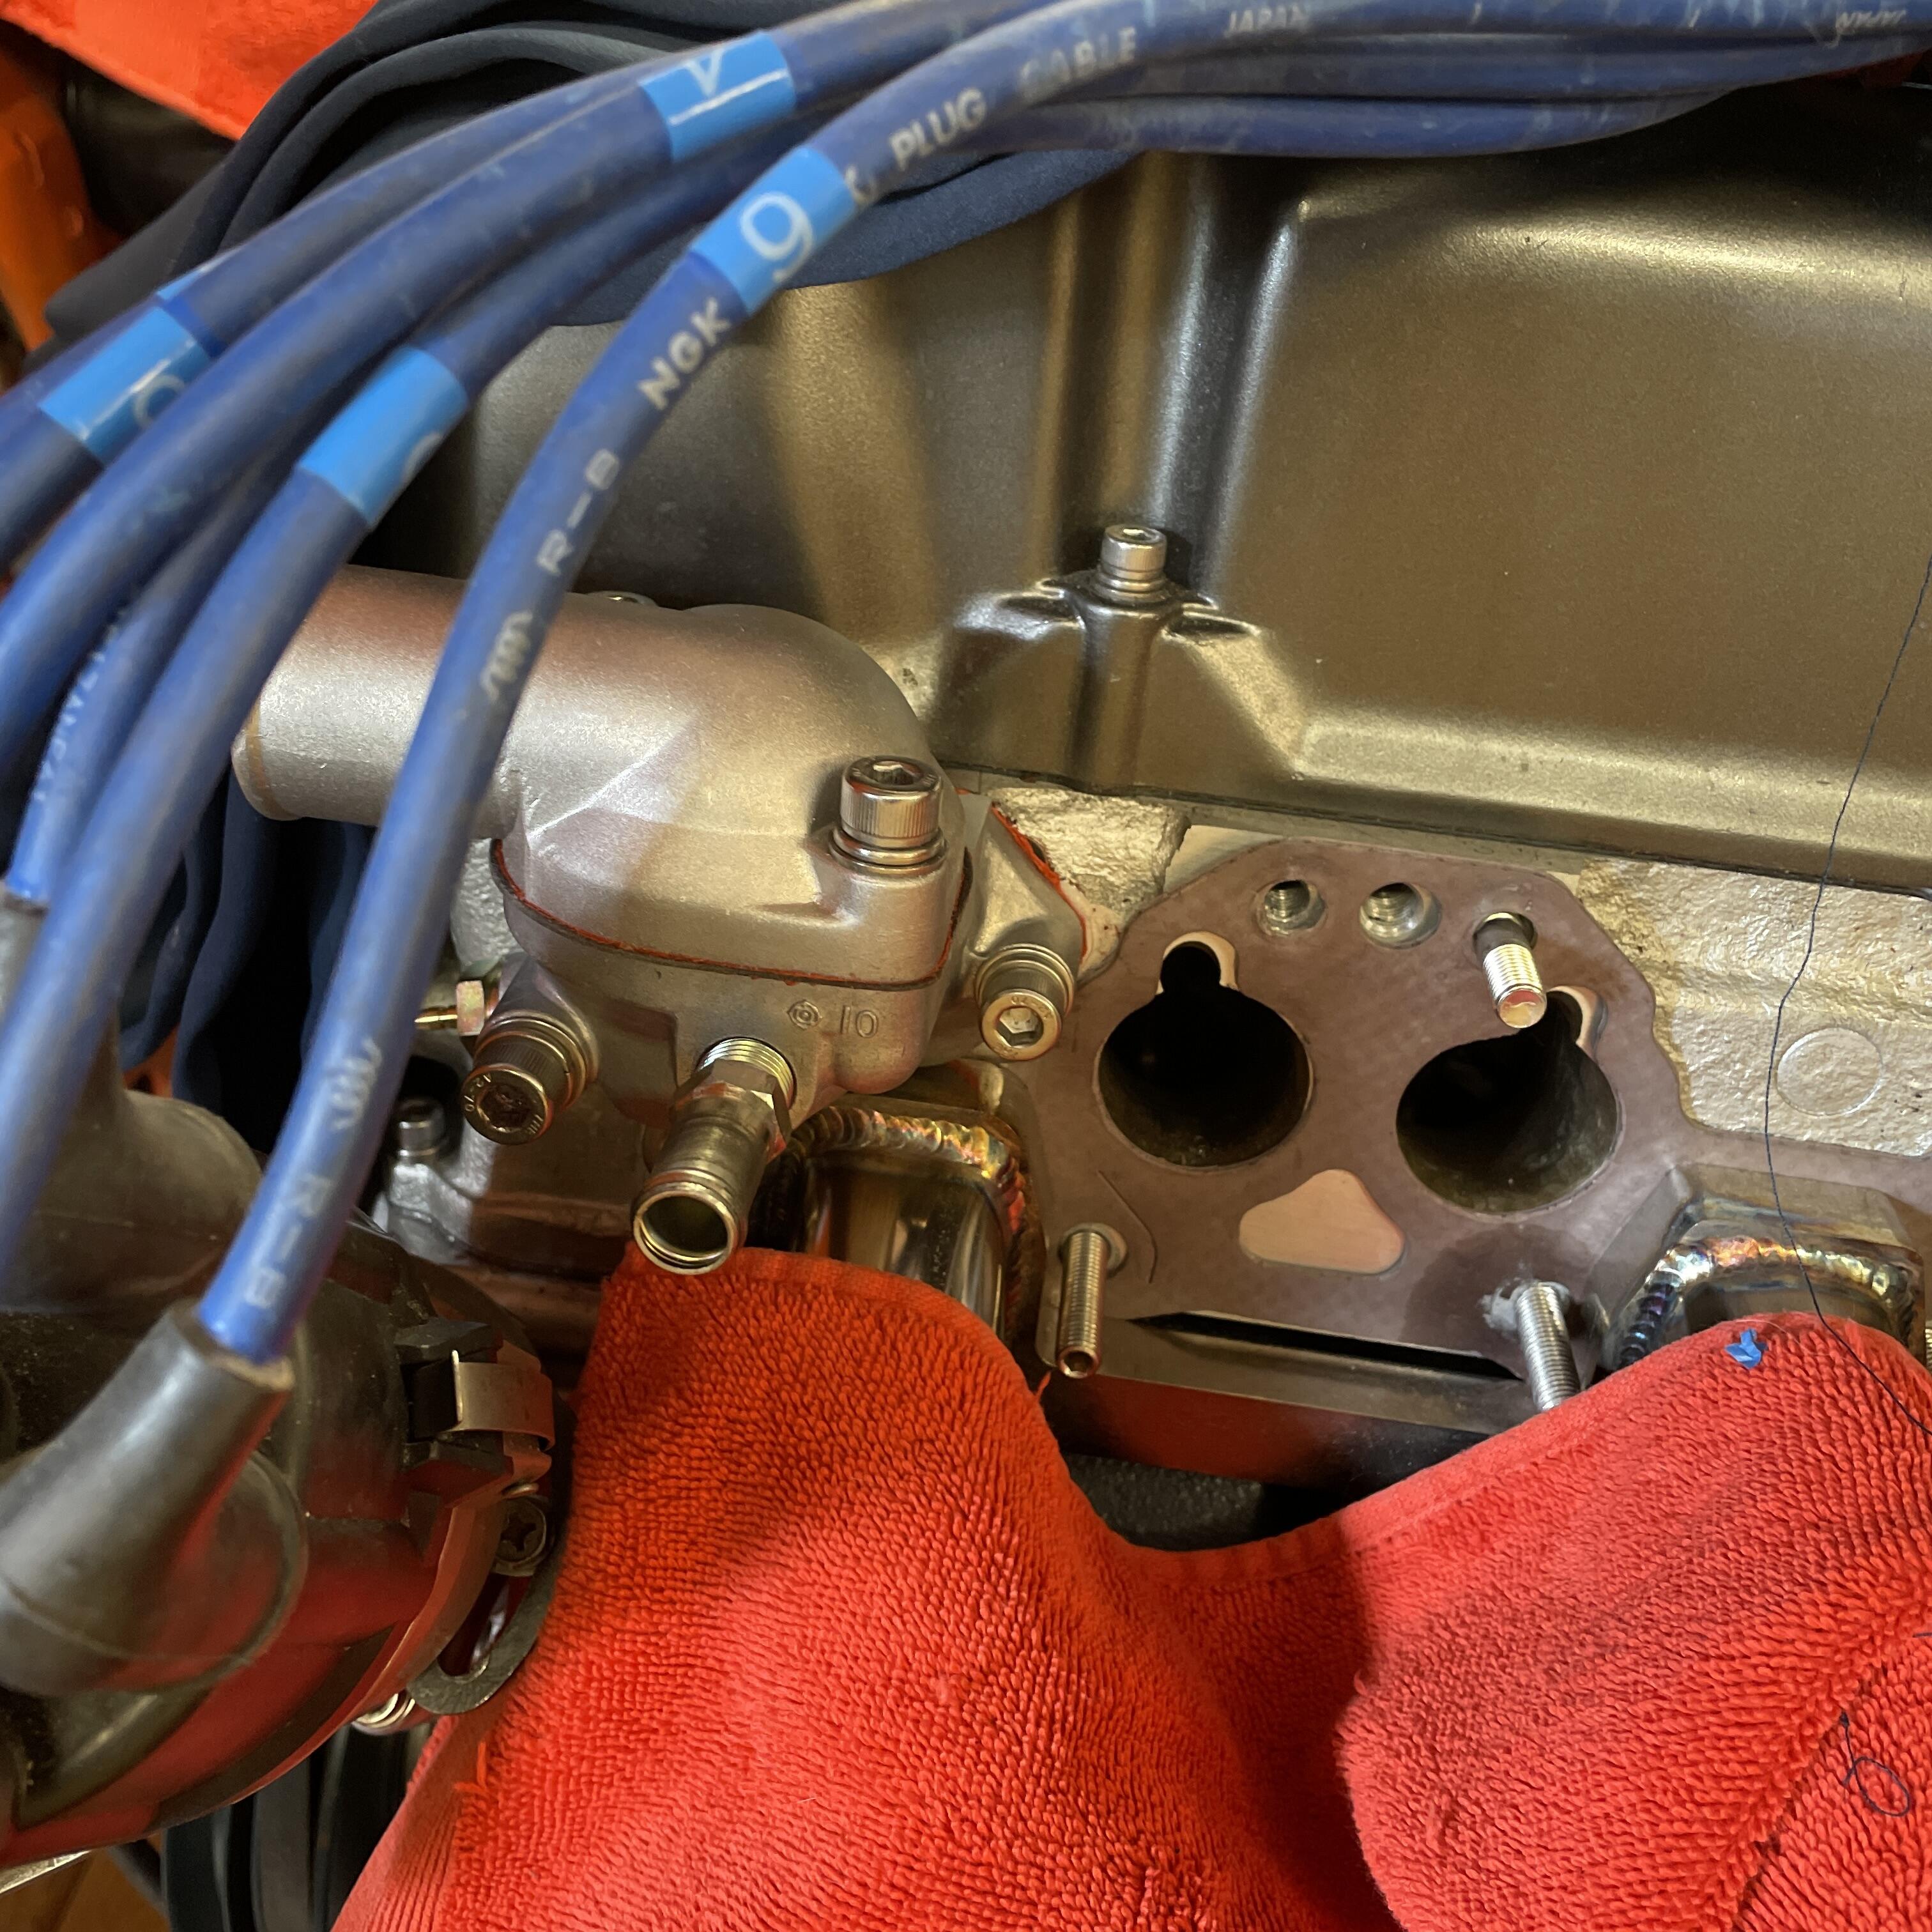
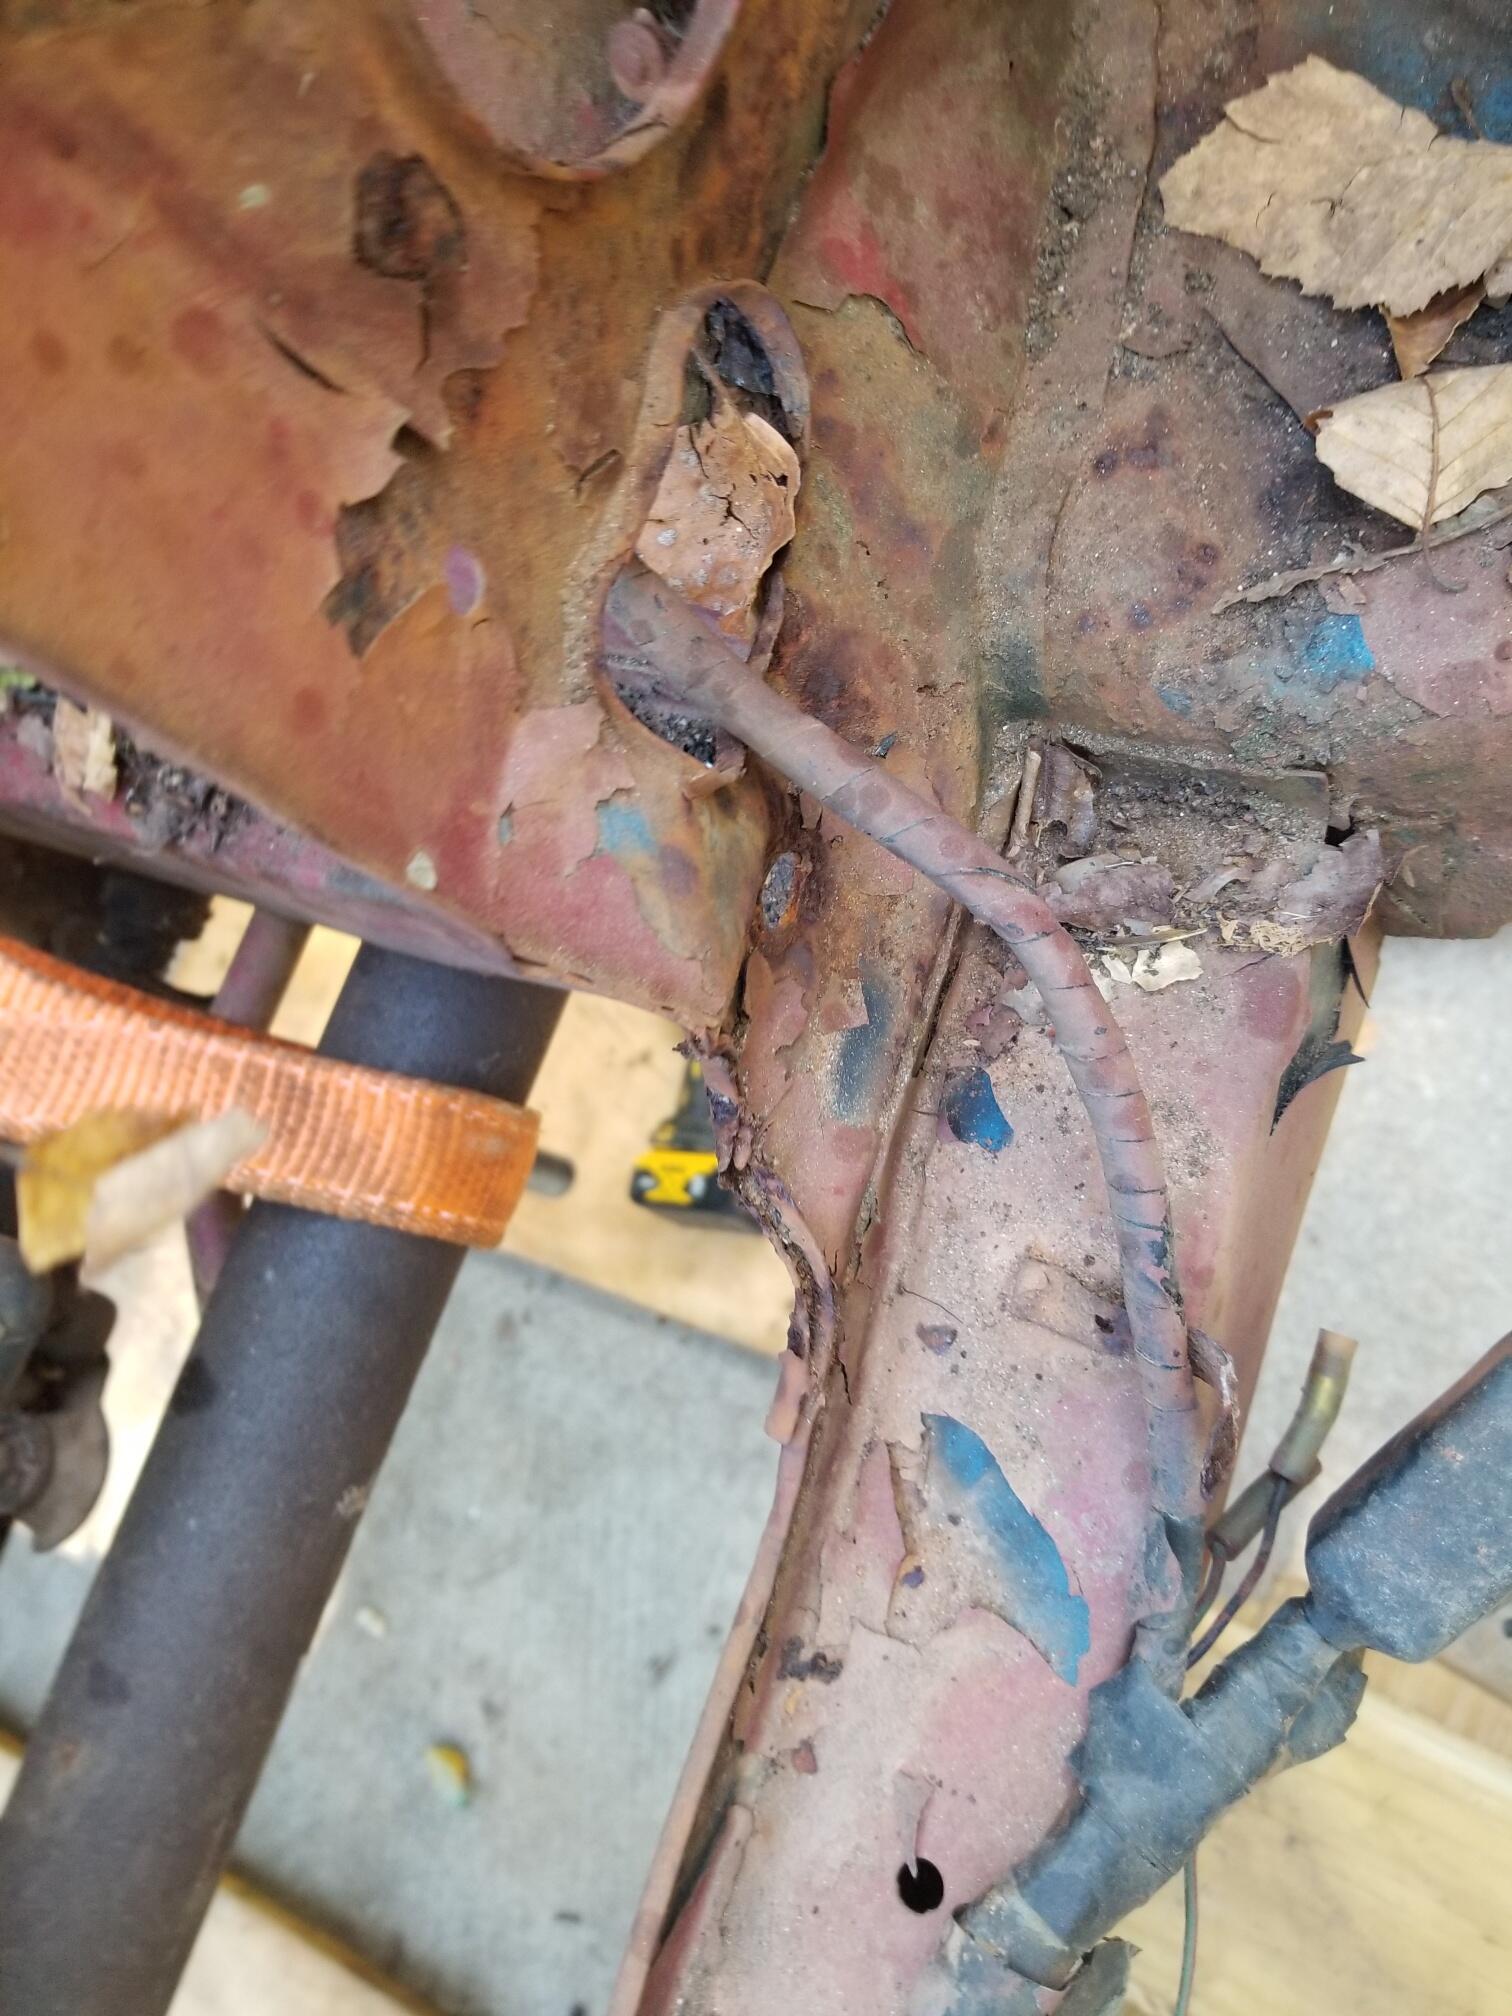
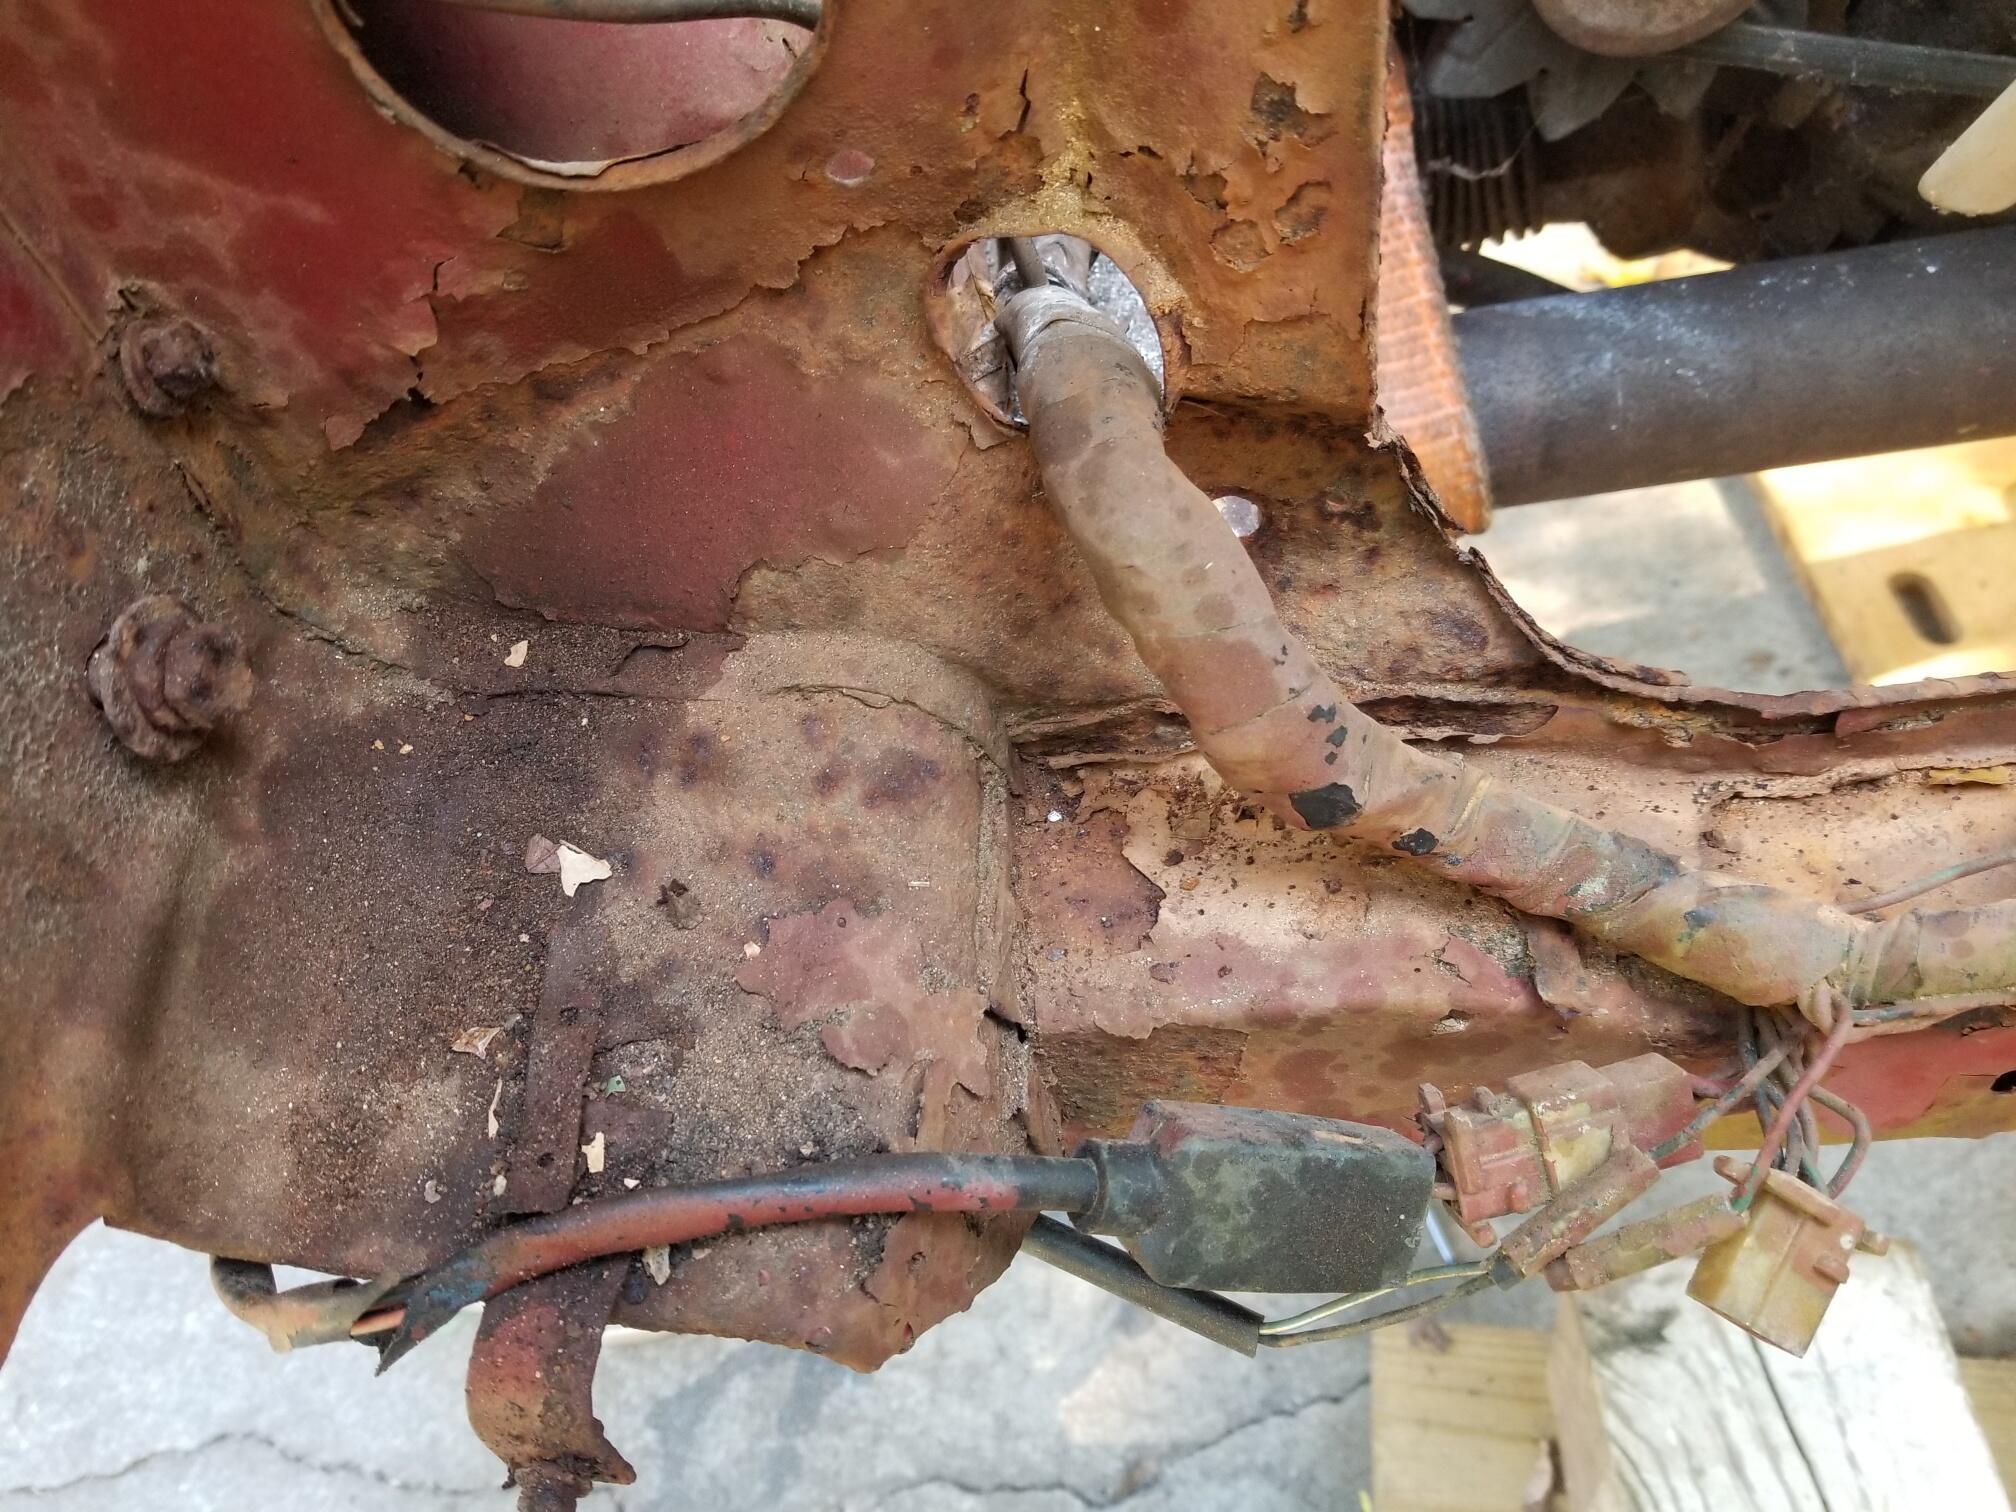
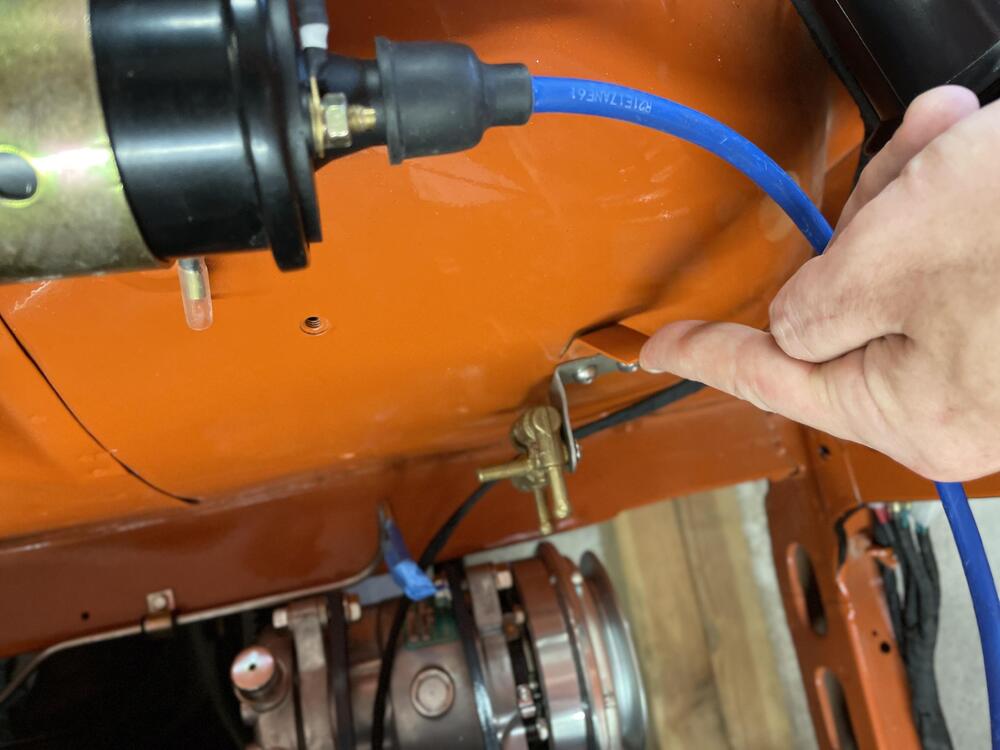
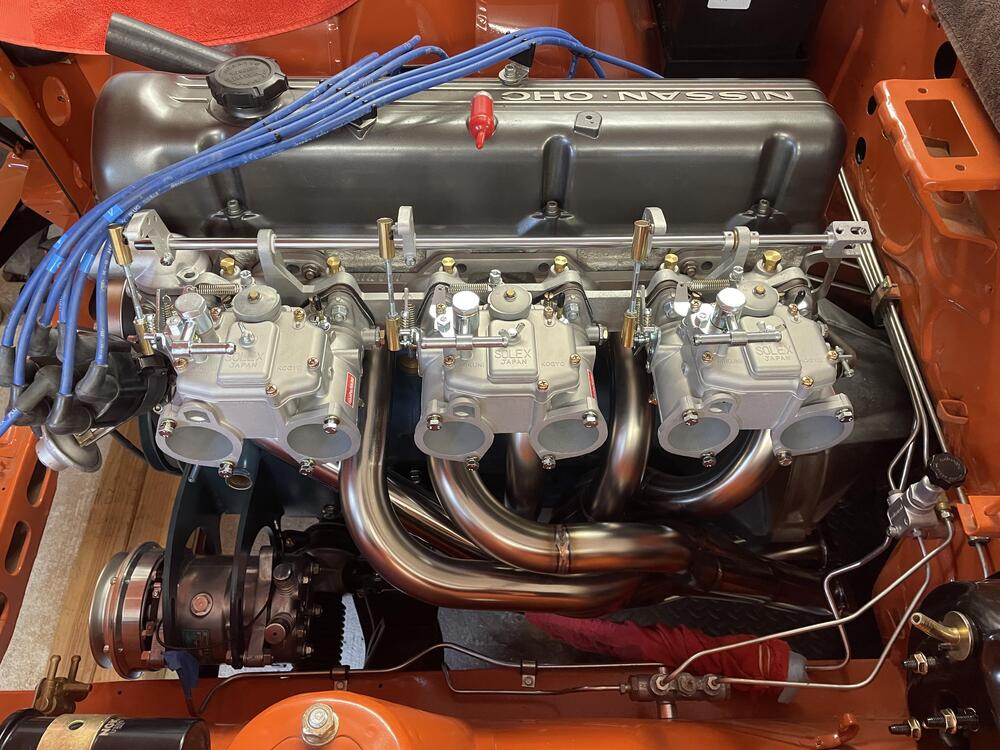
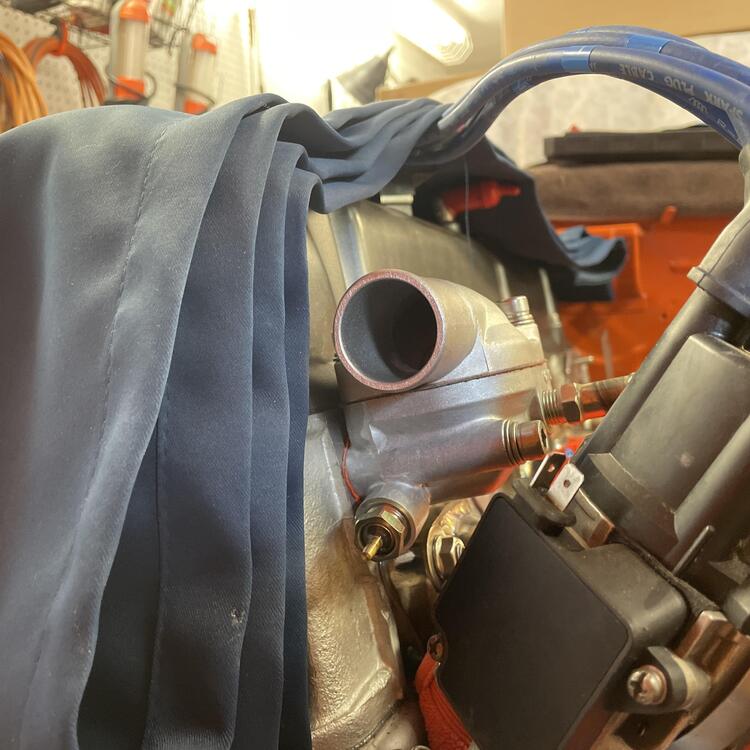
1 pointThe engine harness is in. Everything is pretty much right. There are a few places where it got twisted as I was wrapping it, and the headlight plugs aren’t exactly in the right place, but I can mitigate that when I require the front lights. The harness is quite a bit thicker than OEM because I used marine wire, so I had to trim the firewall boot all the way to the widest hole size. As a result it’s not quite tight, so I need to fix that, but otherwise it’s done. ☝By the way, does anyone know what this tab is for? I assumed it’s for a clip to hold the coil wire because it’s similar to the tabs for the plug wire clips. *** I also test fit my Mikuni setup: Okay, so… It wouldn’t be my car without some substantial but not insurmountable problems. They are almost entirely because I went with the Mikuni manifold, which has the shortest runners of all of the options. The Harada I traded for this one probably wouldn’t have had any of them. There is interference between the manifold/carbs and a few of the factory configurations: 1. The water pipe that goes into the thermostat hits the throttle linkage. Yes, the one I just made that stainless steel pipe for. I’m going to see what a 45° or 90° elbow adapter does to fix it. 2. The OEM manifold studs are too long by around 3mm and the stainless ones by about 11mm. Luckily I was able to figure out that the stainless “manifold studs” that you see all over are actually set screws, and you can get them in any length (in 5mm increments) at McMaster Carr. I have 40 and 45mm studs/set screws on the way (watch, I’ll end up needing 35mm). 3. The metal riser for the plug wire clip hits the manifold. It definitely has to come off to get the manifold on, but I think this one is for a ZX. The 240z one at Z Car Depot is different and may work. 4. The plug wires bind up in the throttle linkage. I think I can partially fix this by adjusting the linkage so it isn’t sticking straight up, but I may end up rerouting them. *** Lastly, I replaced my corroded and beat up 280ZX thermostat housing with a new one for a 240z. It didn’t fix any of the interference issues but it looks nice and I don’t have a bunch of plugged sensor holes.


 1 point
 -
1 point
-
1 point
-
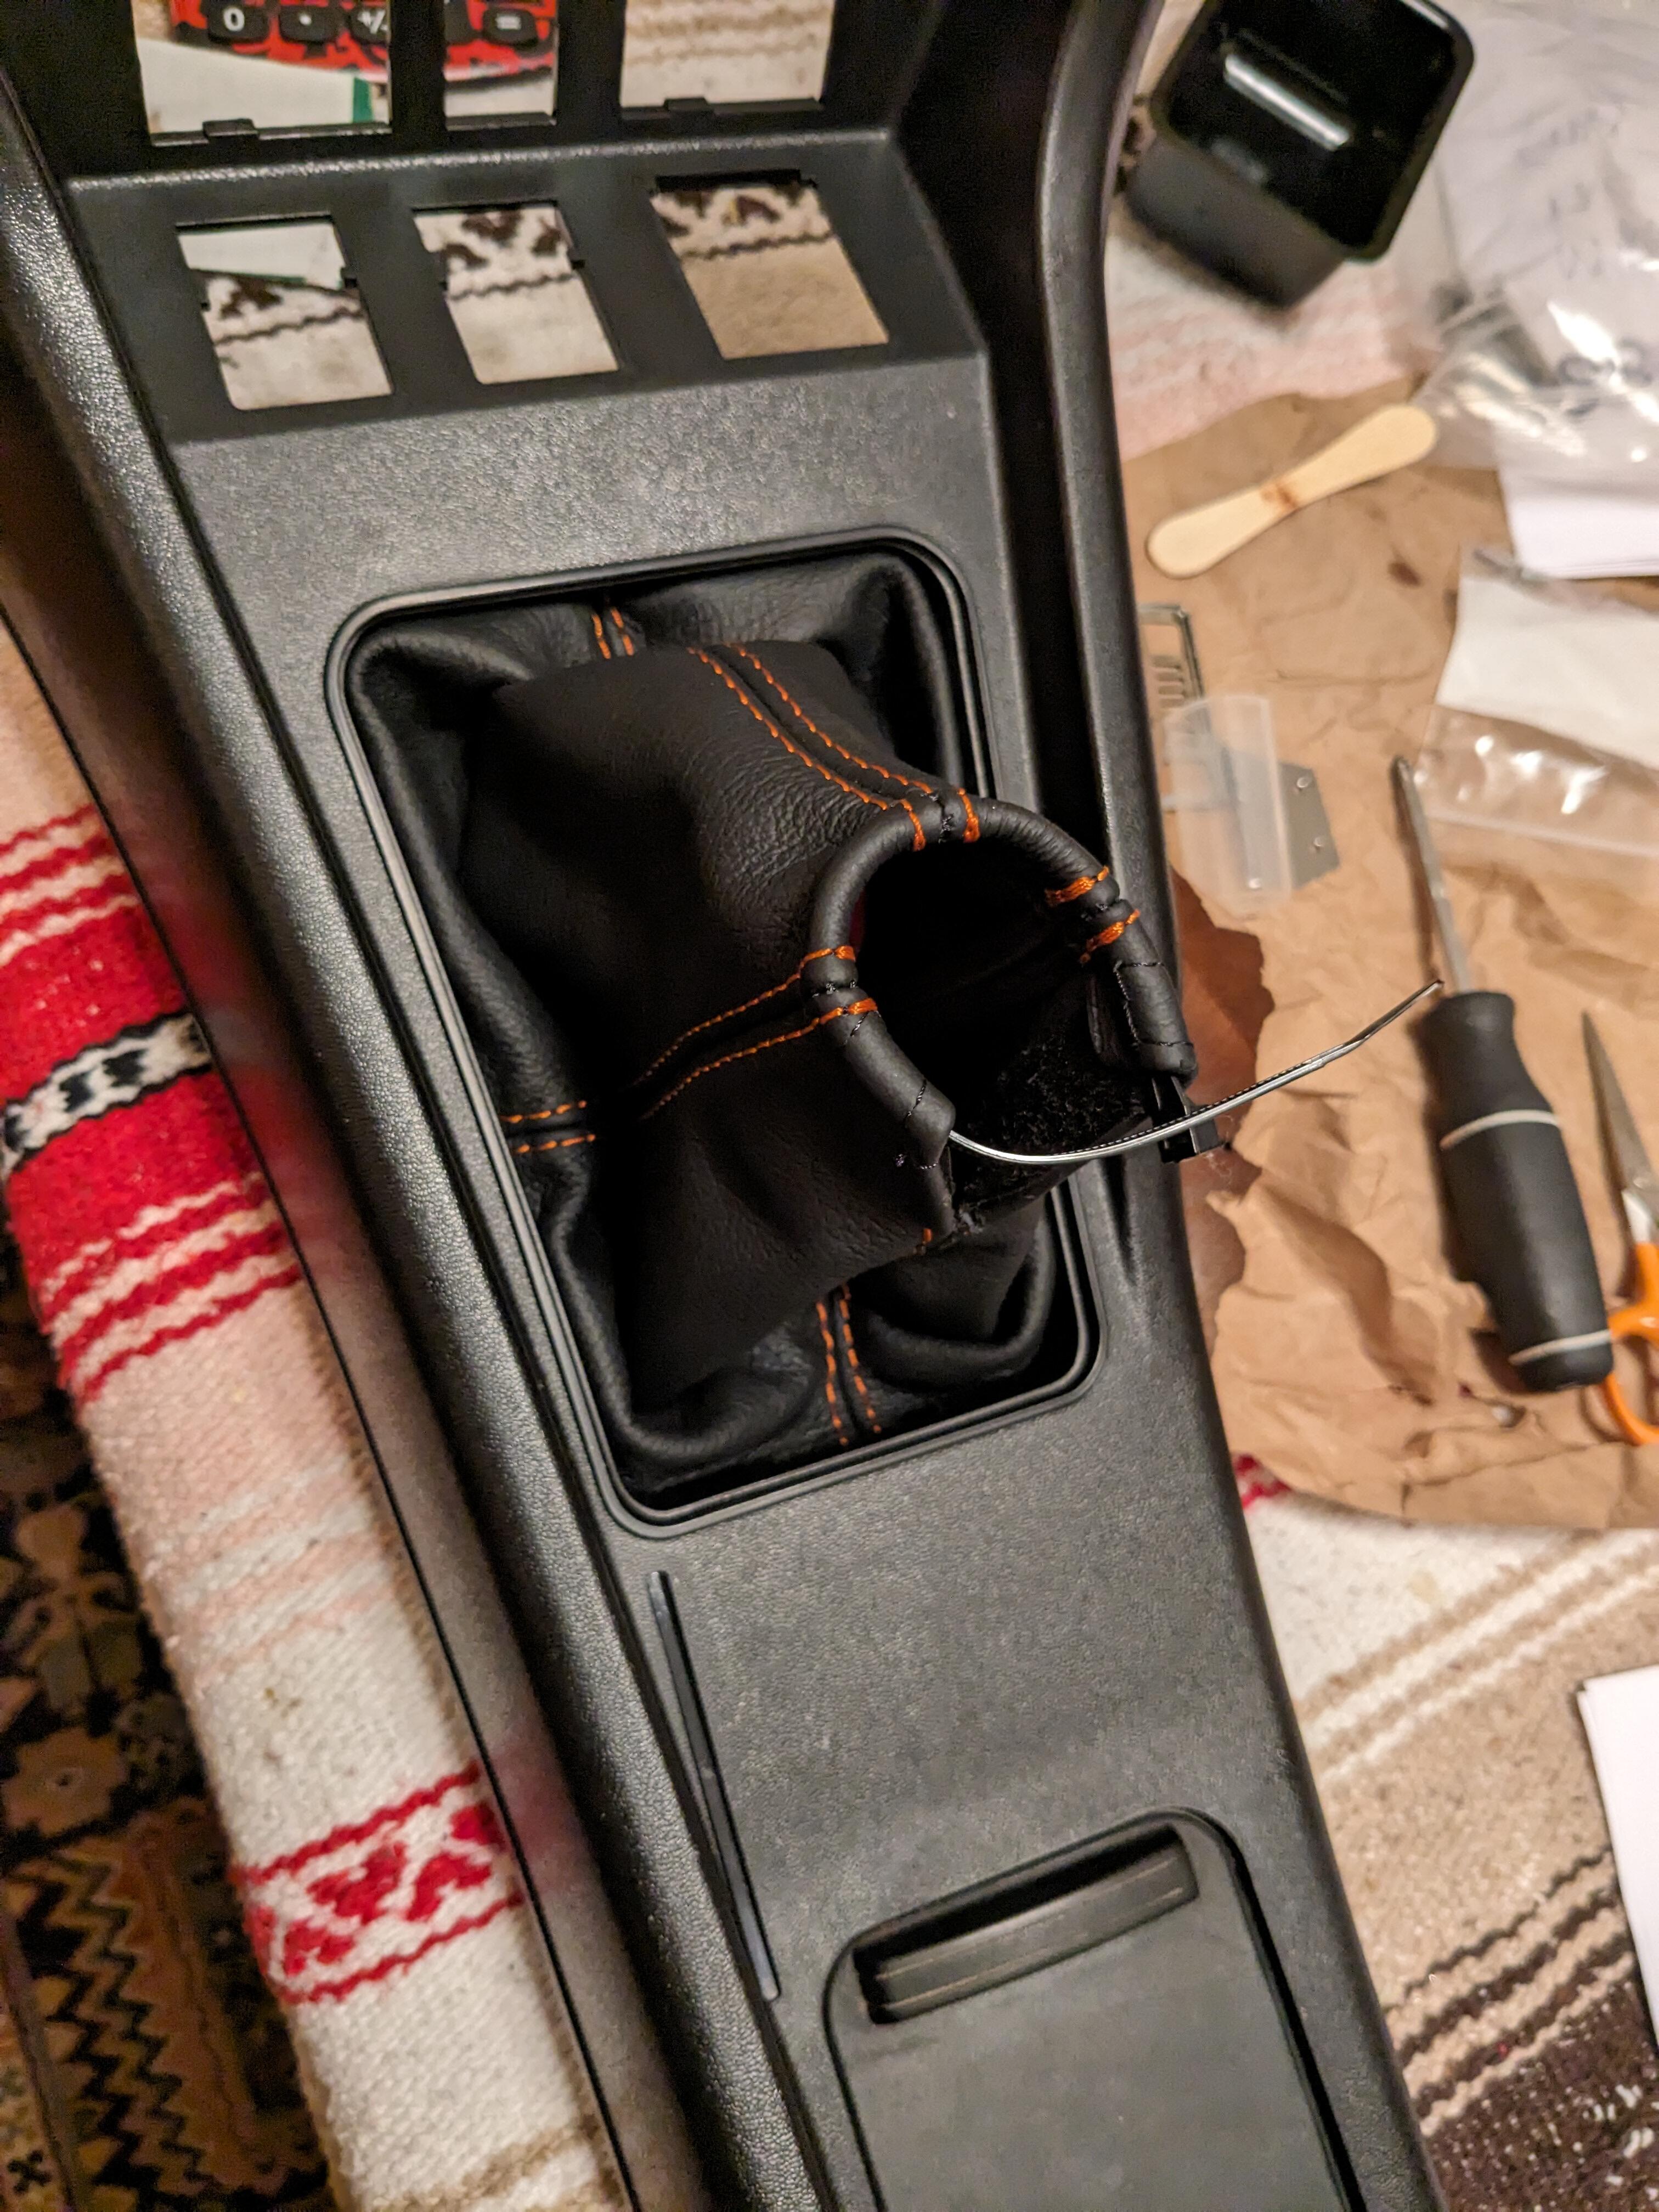
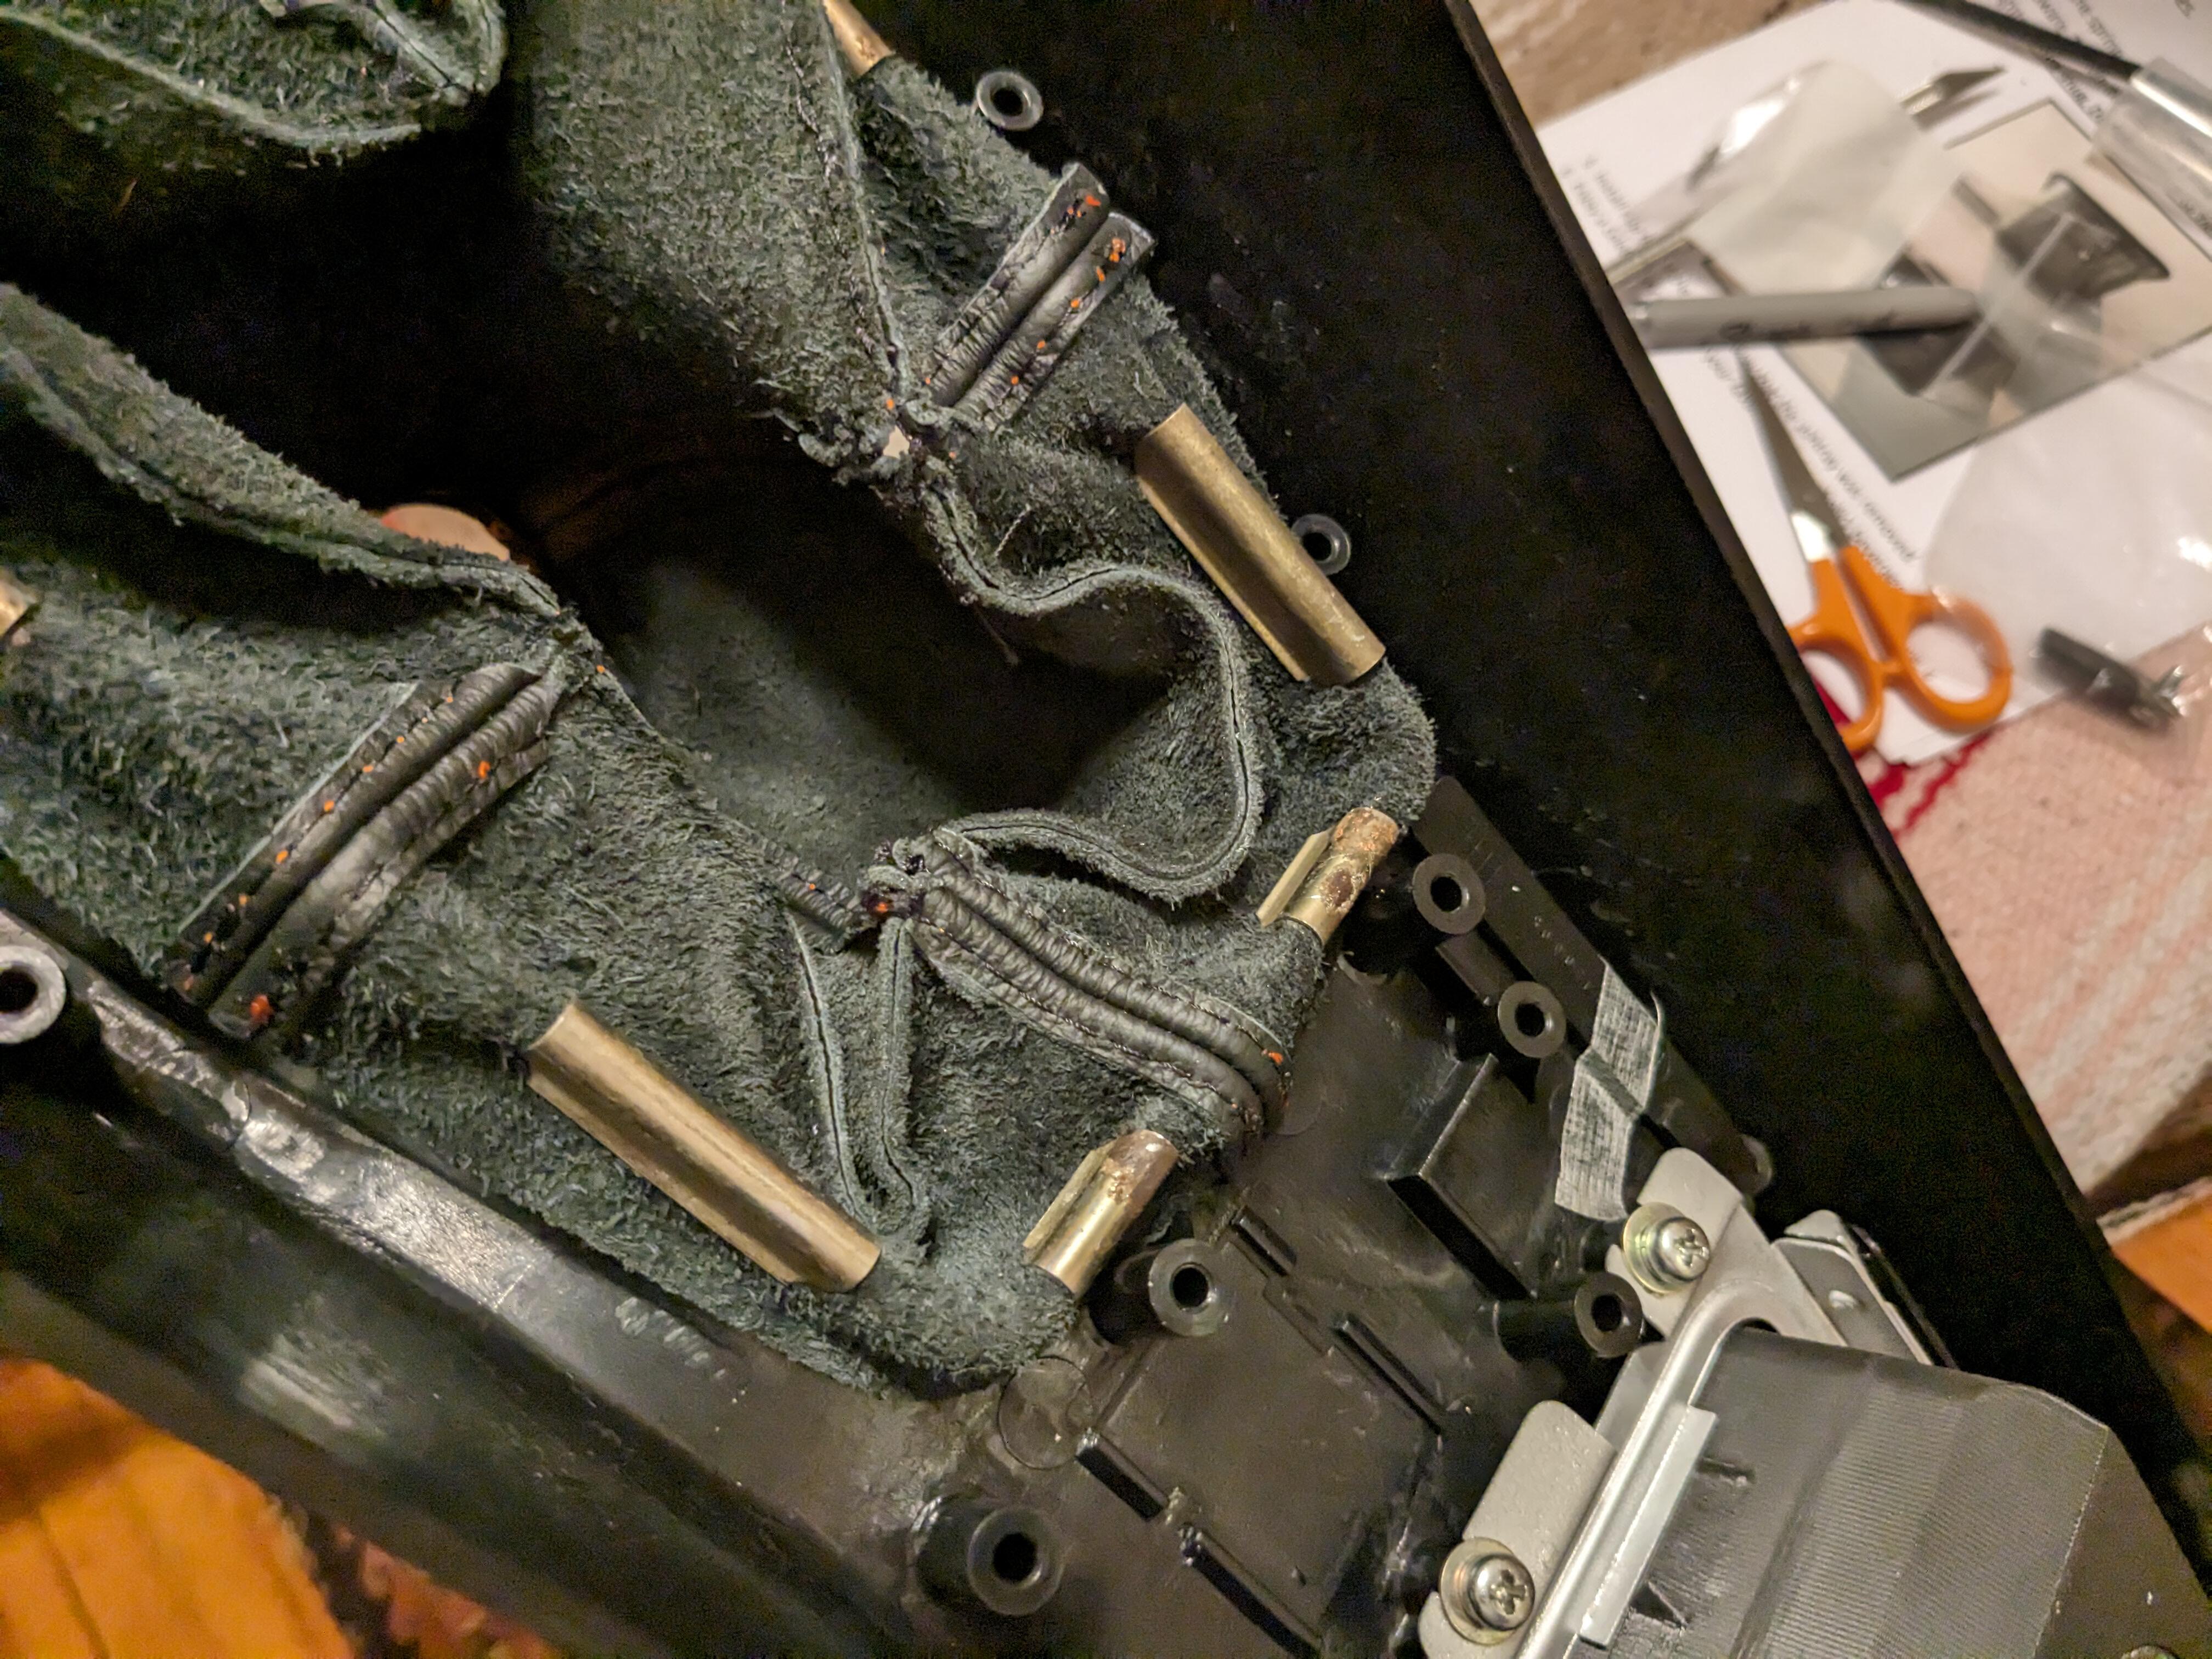
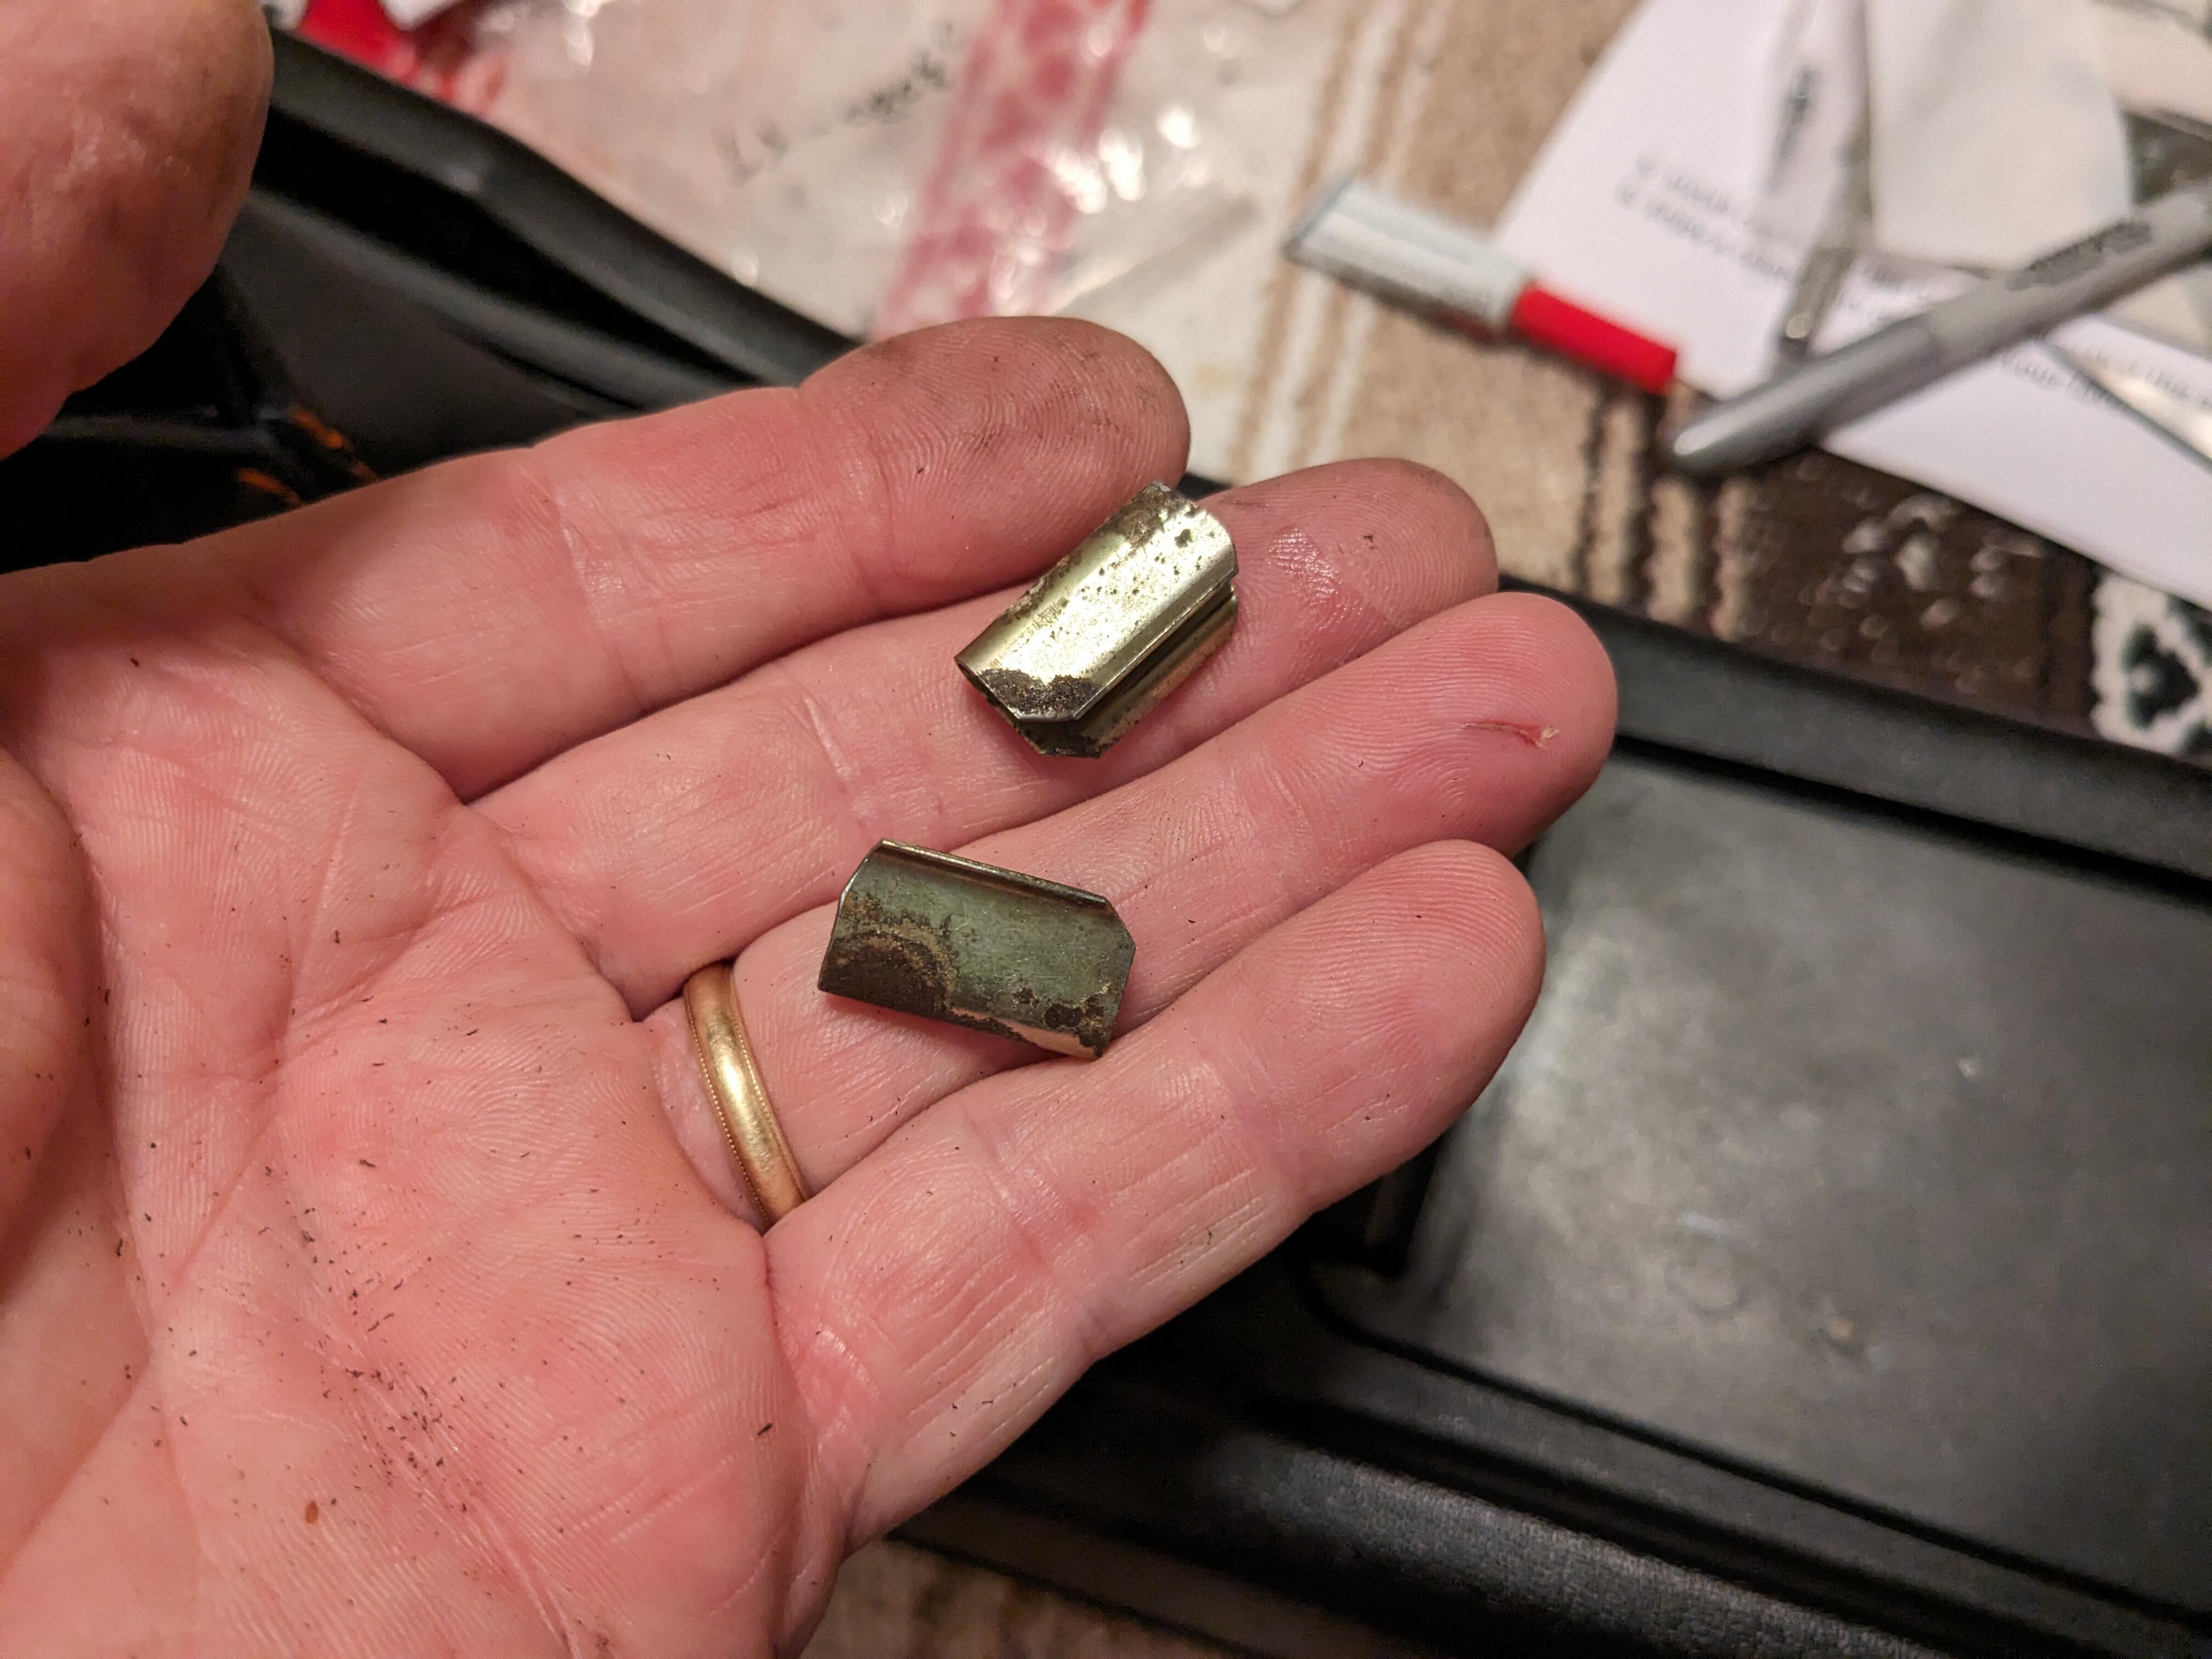
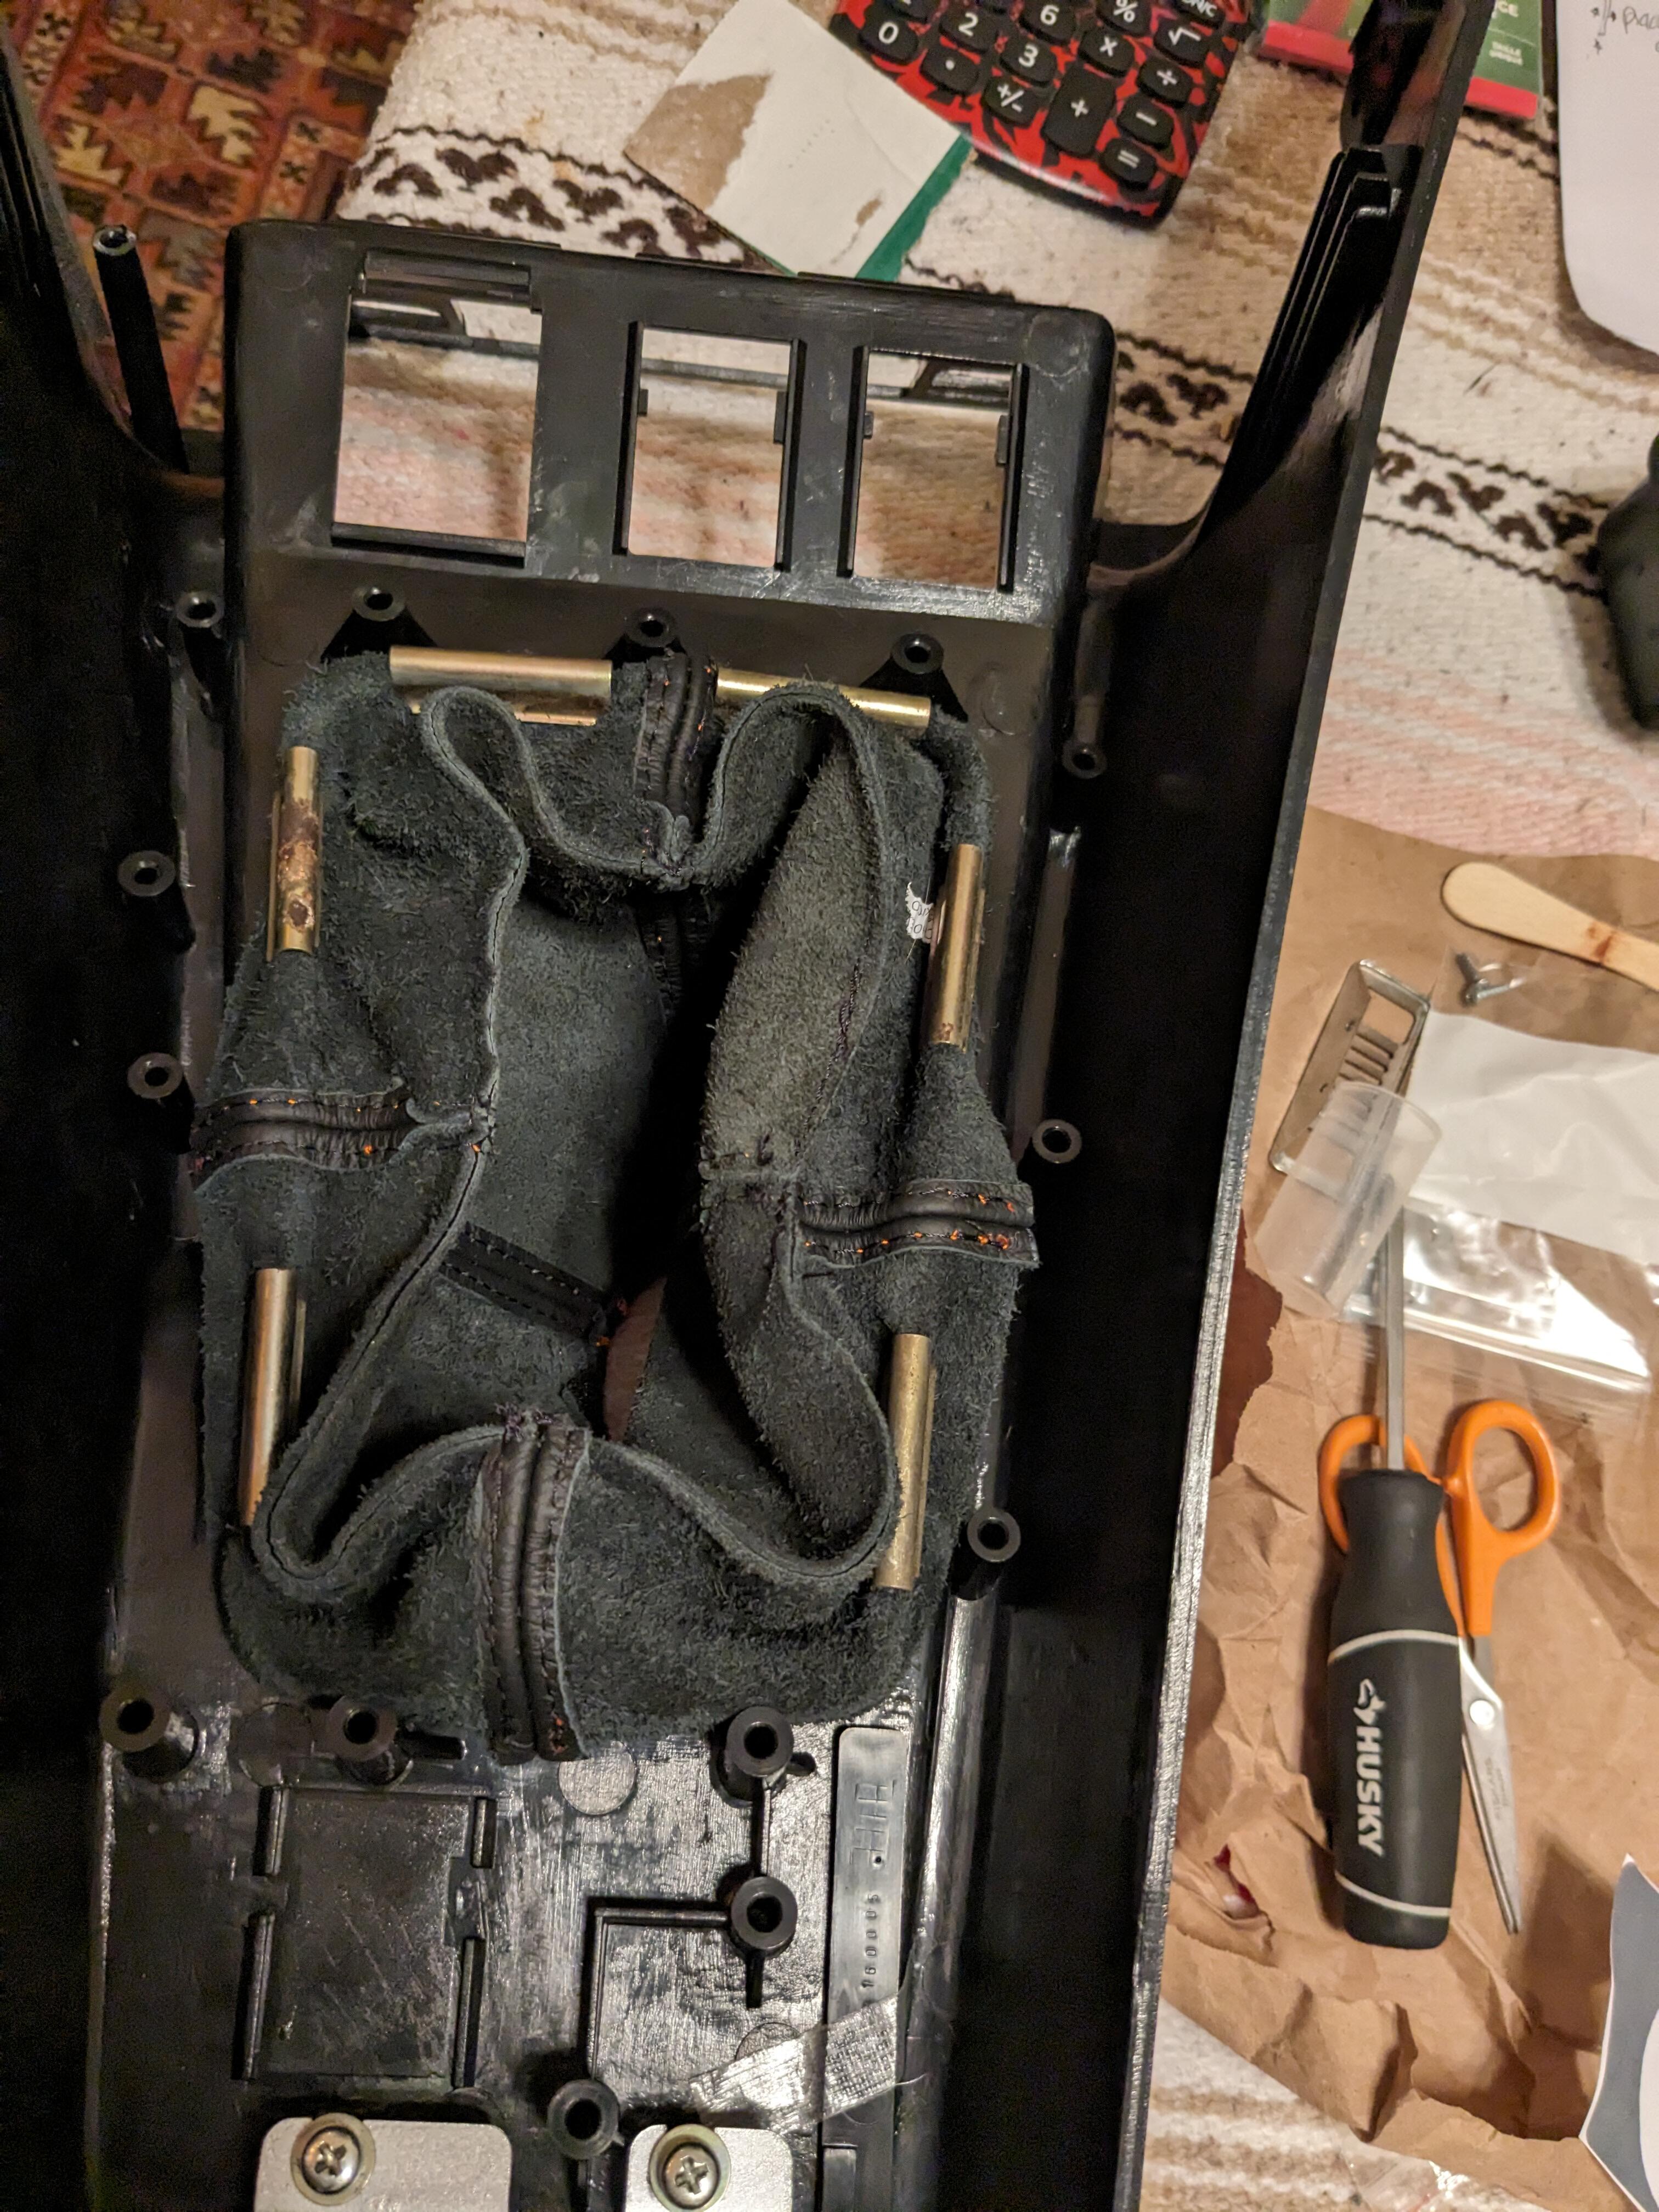
1 pointIt's a shame that so many ppl don't think to add pics that would clarify so much. I installed a leather boot in mine, getting ready to put the console back had to cut a clip for the rear, the full width don't fit the aftermarket leather boot


 1 point
 -
1 point
-
I would want molded if I could get it. The molded should fit better in the corners if it's done properly1 point
-
1 point
-
1 pointI am not a fan of doing front frame rail (the rails down each side of the engine bay) work when it's on the rotisserie. I worry about distortion and flexing because of the way its suspended.1 point
-
The only things in your pic that look stock Nissan to me are the lock washers. Maybe a previous owner had the dash off and improvised on the fasteners. What year of 240Z are you working on?1 point
-
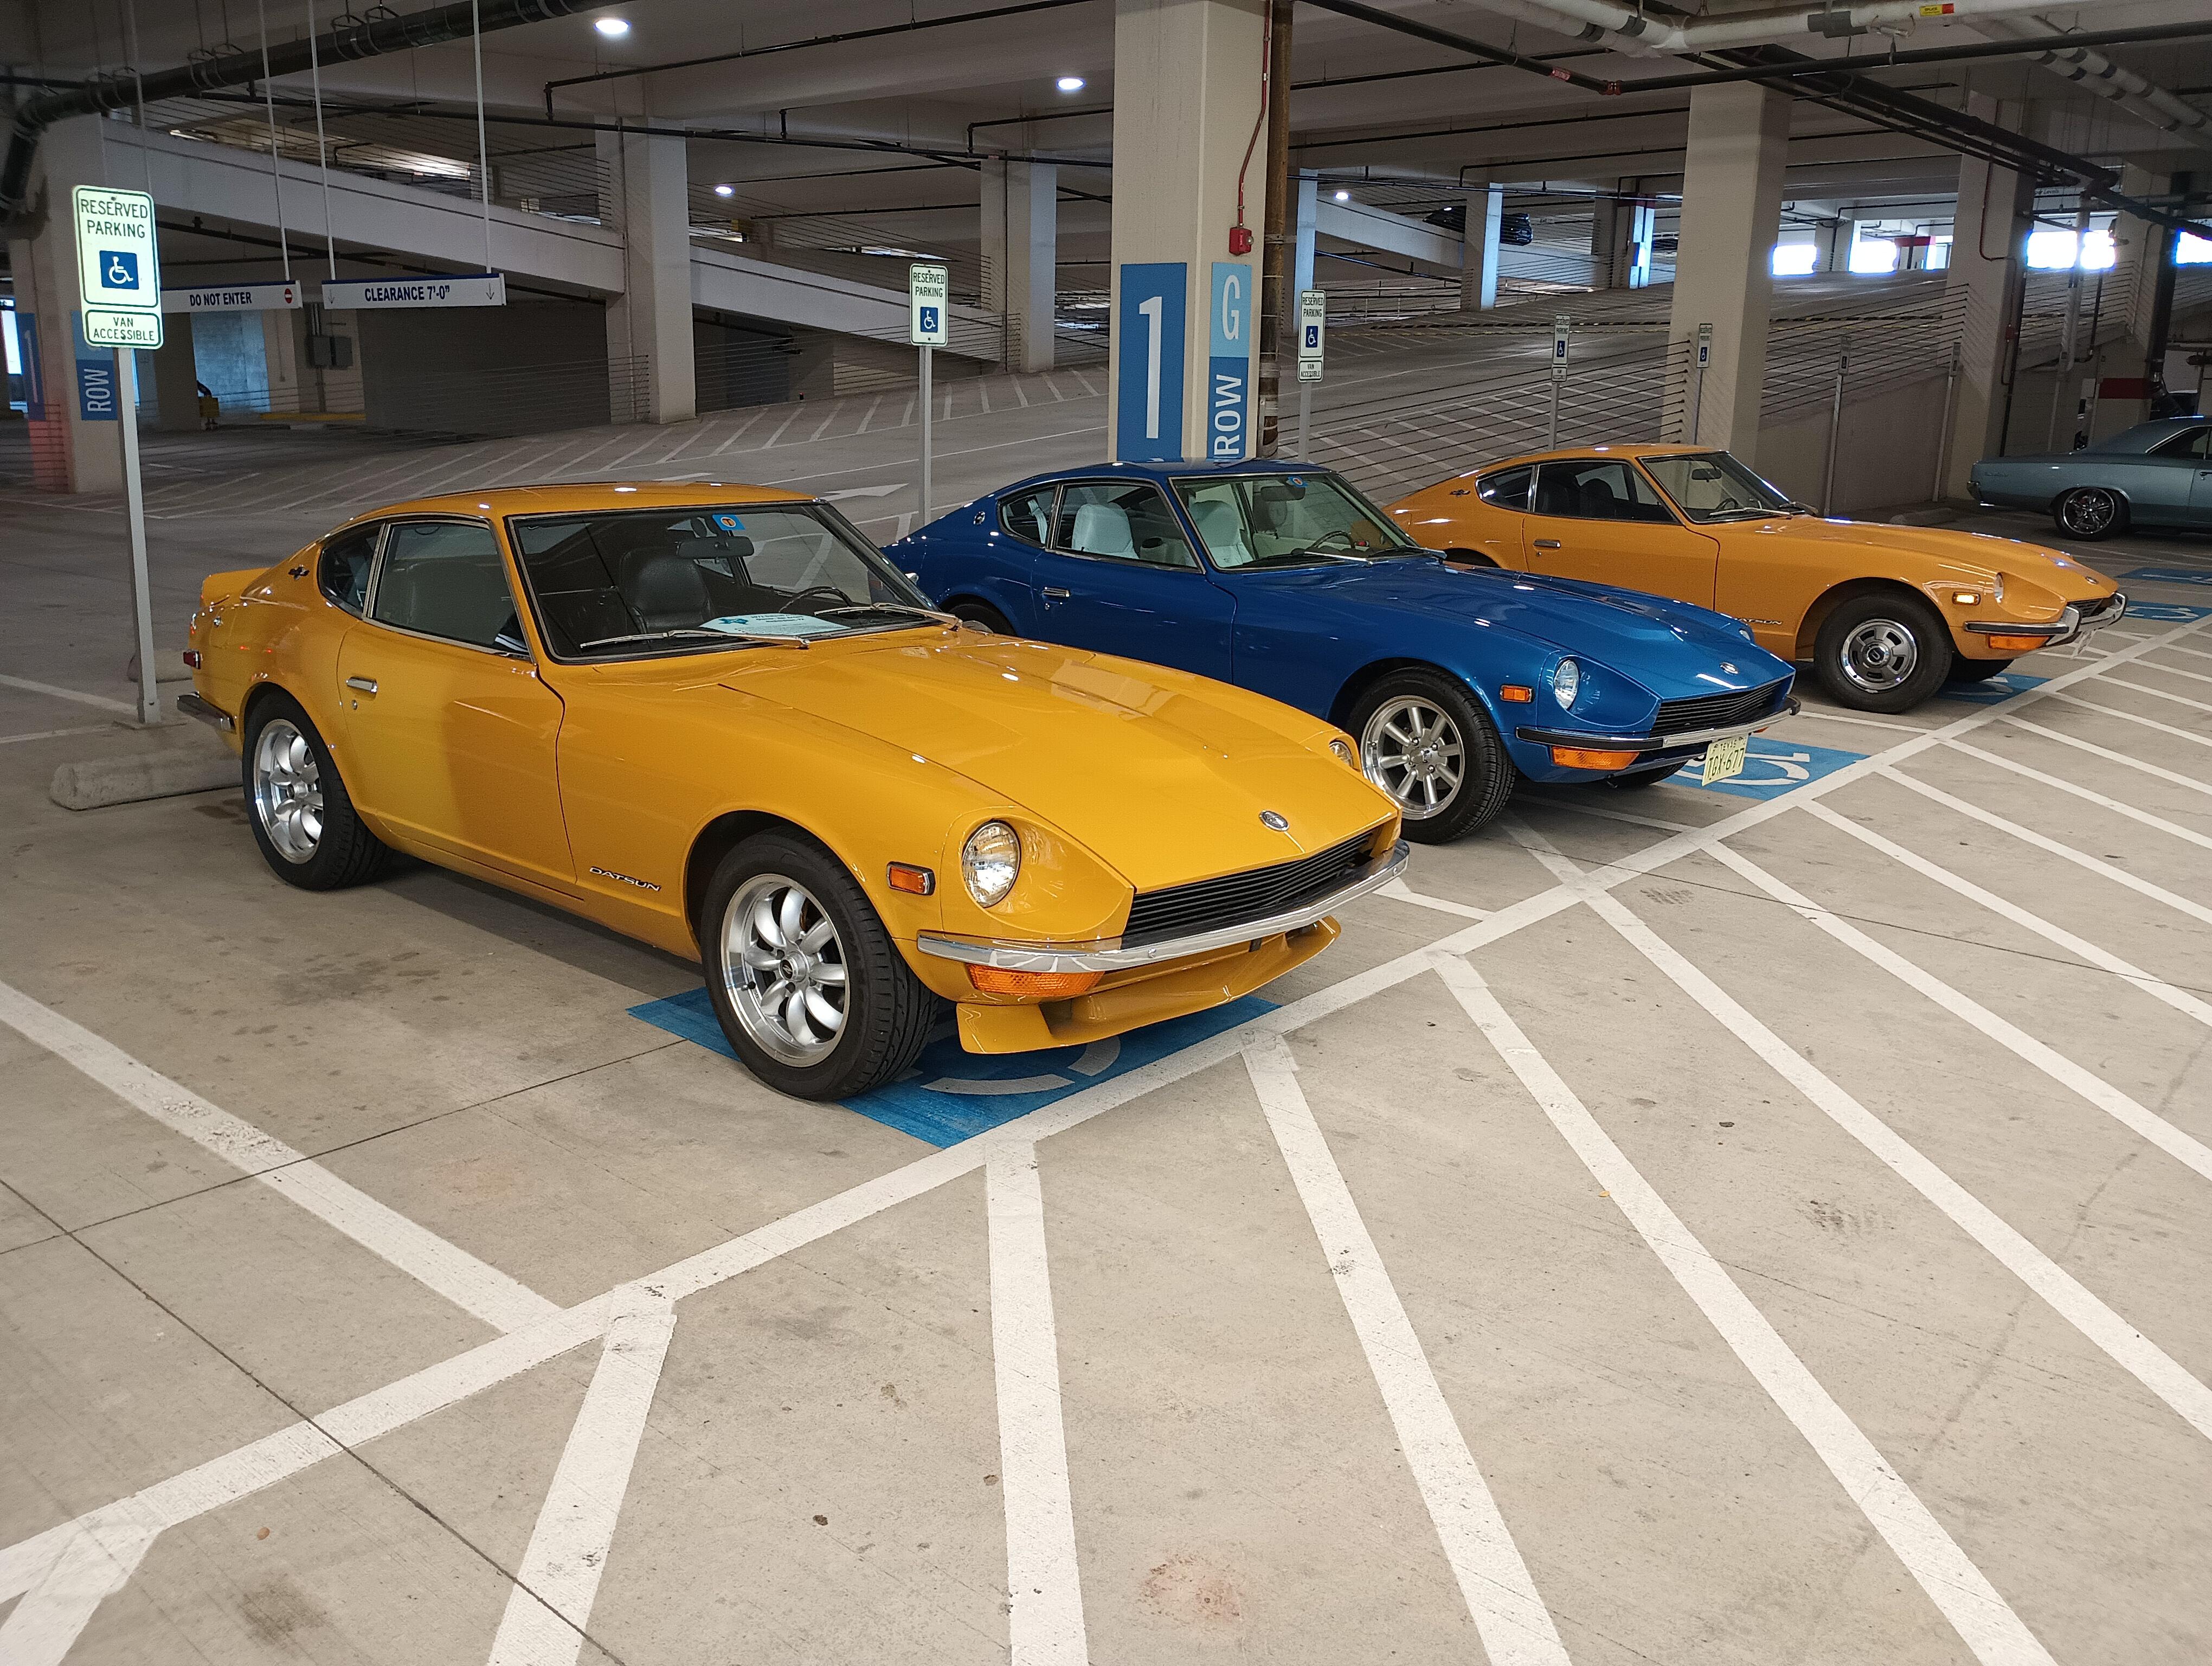
Attended a Hagerty Cars & Caffeine event this morning, co-sponsored by Liberty Mutual and held in their parkling garage. Joining me were fellow members @Dens240 and @zed2. After the cars thinned out we were able to get our rides together for a pic. That is Dennis' beatifully restored blue over white '72 and Keith's very original '70 parked beside me. There was probably close to $5-6 milion worth of exotics at the gathering with a Ferrari F40 as a featured display car.

 1 point
 -
1 pointNot much magic here, the three trapped nuts in the mounting brackets at the back are M5x0.8 thread, the bolts are black nearly flat headed phillips (ok, yes, JIS…) about 16mm long, The front two on the sides are self taping metal screws, now what size is a bit of a trick to describe, they thread into spring clips on the sides of the mounting bracket, something akin to #8 wood screws. They were oval headed, but whatever sits flush and doesn’t catch your knee…..1 point