Leaderboard
-
HusseinHolland
Free Member7Points1,031Posts -

Dave WM
Free Member5Points3,591Posts -
jfa.series1
 Subscriber
 4Points2,733Posts
 -
Captain Obvious
Free Member4Points10,081Posts


Popular Content
Showing content with the highest reputation on 09/15/2023 in all areas
-
4 pointsI’ll take my wife to the parts store and send her in to get it. Sent from my iPhone using Tapatalk4 points
-
4 pointsYou're making my head hurt. I have enough trouble doing the math to determine resistance in parallel 😁4 points
-
3 pointsI we are about the same vintage. I have so tube testers that go back even further. 🙂3 points
-
3 points
-
3 points
-
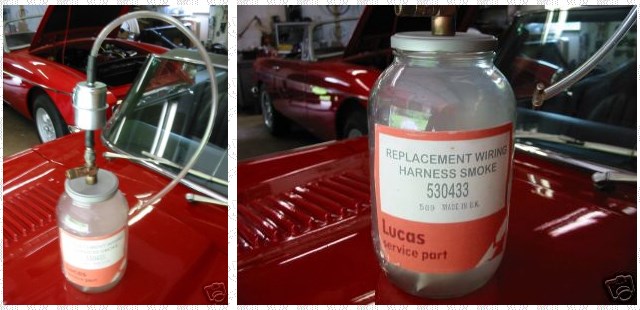
2 pointsAfter you get things put back together you should get the "Smoke replacement kit". These were initially created for Lucas wiring in British cars, but I think they'll work in ours too. 🤣🤣
 2 points
 -
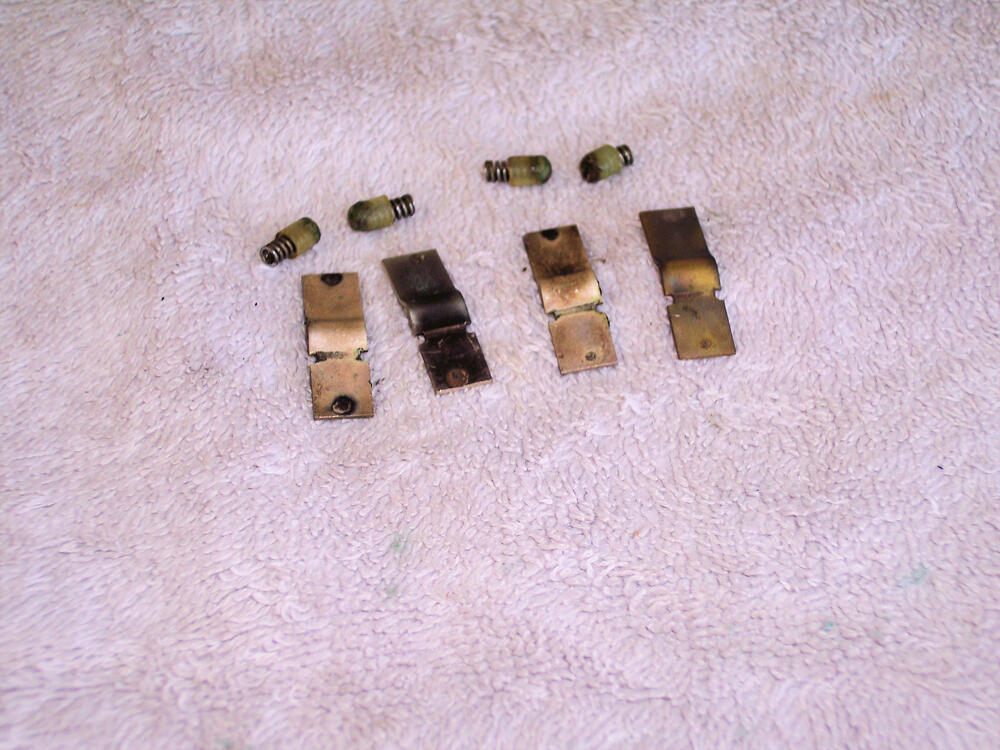
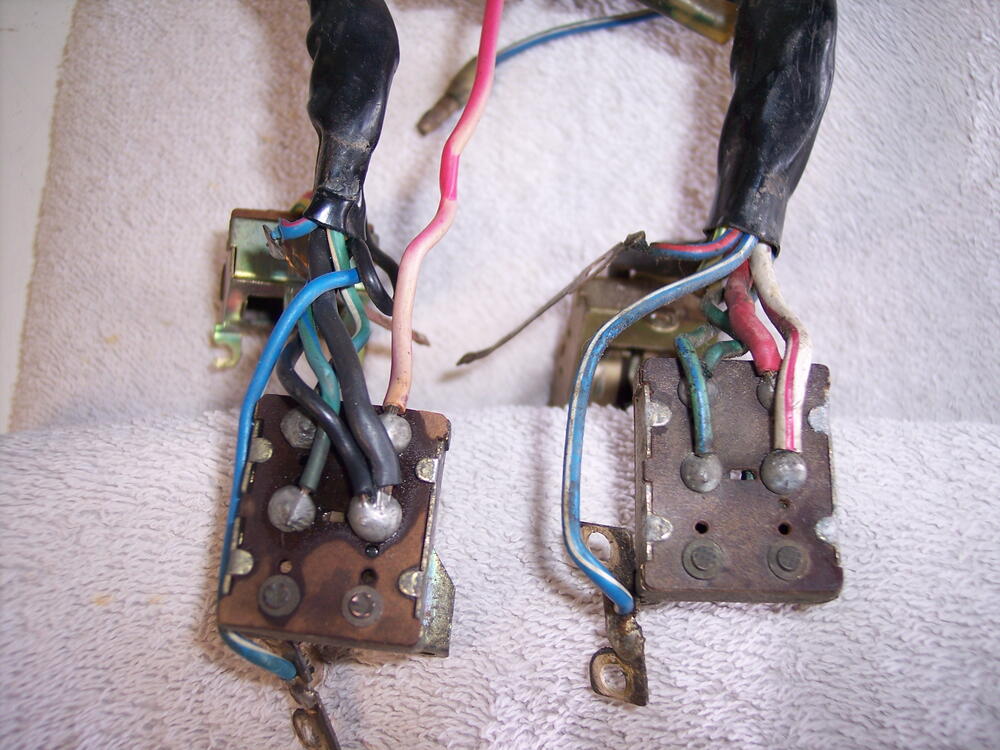
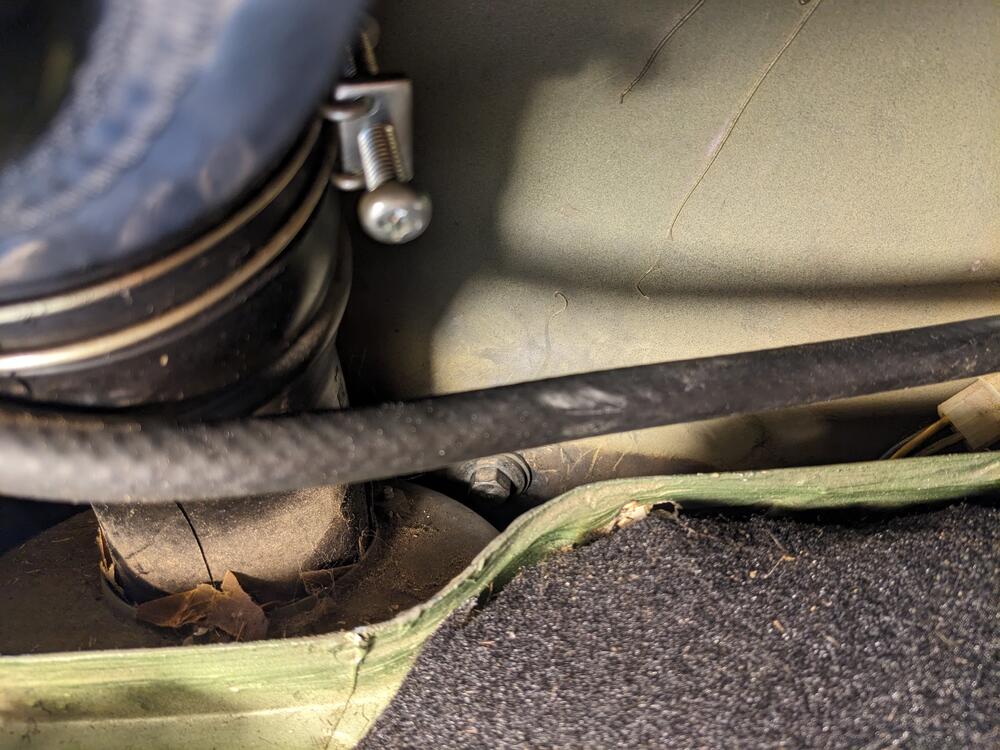
2 pointsThe large gauge black wire on the center post is the high amperage power coming into the light switch from the fuse block, the small gauge black wire on that post is a jumper carrying power to the other side for the wiper switch. Smoke in this area says you have very high resistance either inside the switch or downstream in the wiring or at the lights. If you decide to open up the switch, I recommend you do so on a work bench topped with a soft towel. Tiny bits tend to bounce and run away on a hard surface - ask me how I know. Here's a pic of the small bits inside the switch box - rockers, tiny springs, and nylon "nubbins". You can see heavy carbon buildup on the rockers where they contact the posts on the circuit board. In the pic, one nubbin at the far right is actually melted from heat - it had to be replaced with one from a cannibalized switch.
 2 points
 -
2 points
-
There is a gentleman named Sal Ceja on several of the FB Datsun groups that sells shims for our diffs. He may also be able to supply technical help.2 points
-
2 pointsThe last thing i want to do is humiliate people but.. yes, the first thing i said to myself was.. they are going to regret that! All that paperwork alone (something i REALLY HATE!!) Comes back.. tonnes of work, for what? It was just a big mistake.. get back in there! TODAY!! 🙂 Back on topic, guys, thanks for testing that site! Thanks, Chas!2 points
-
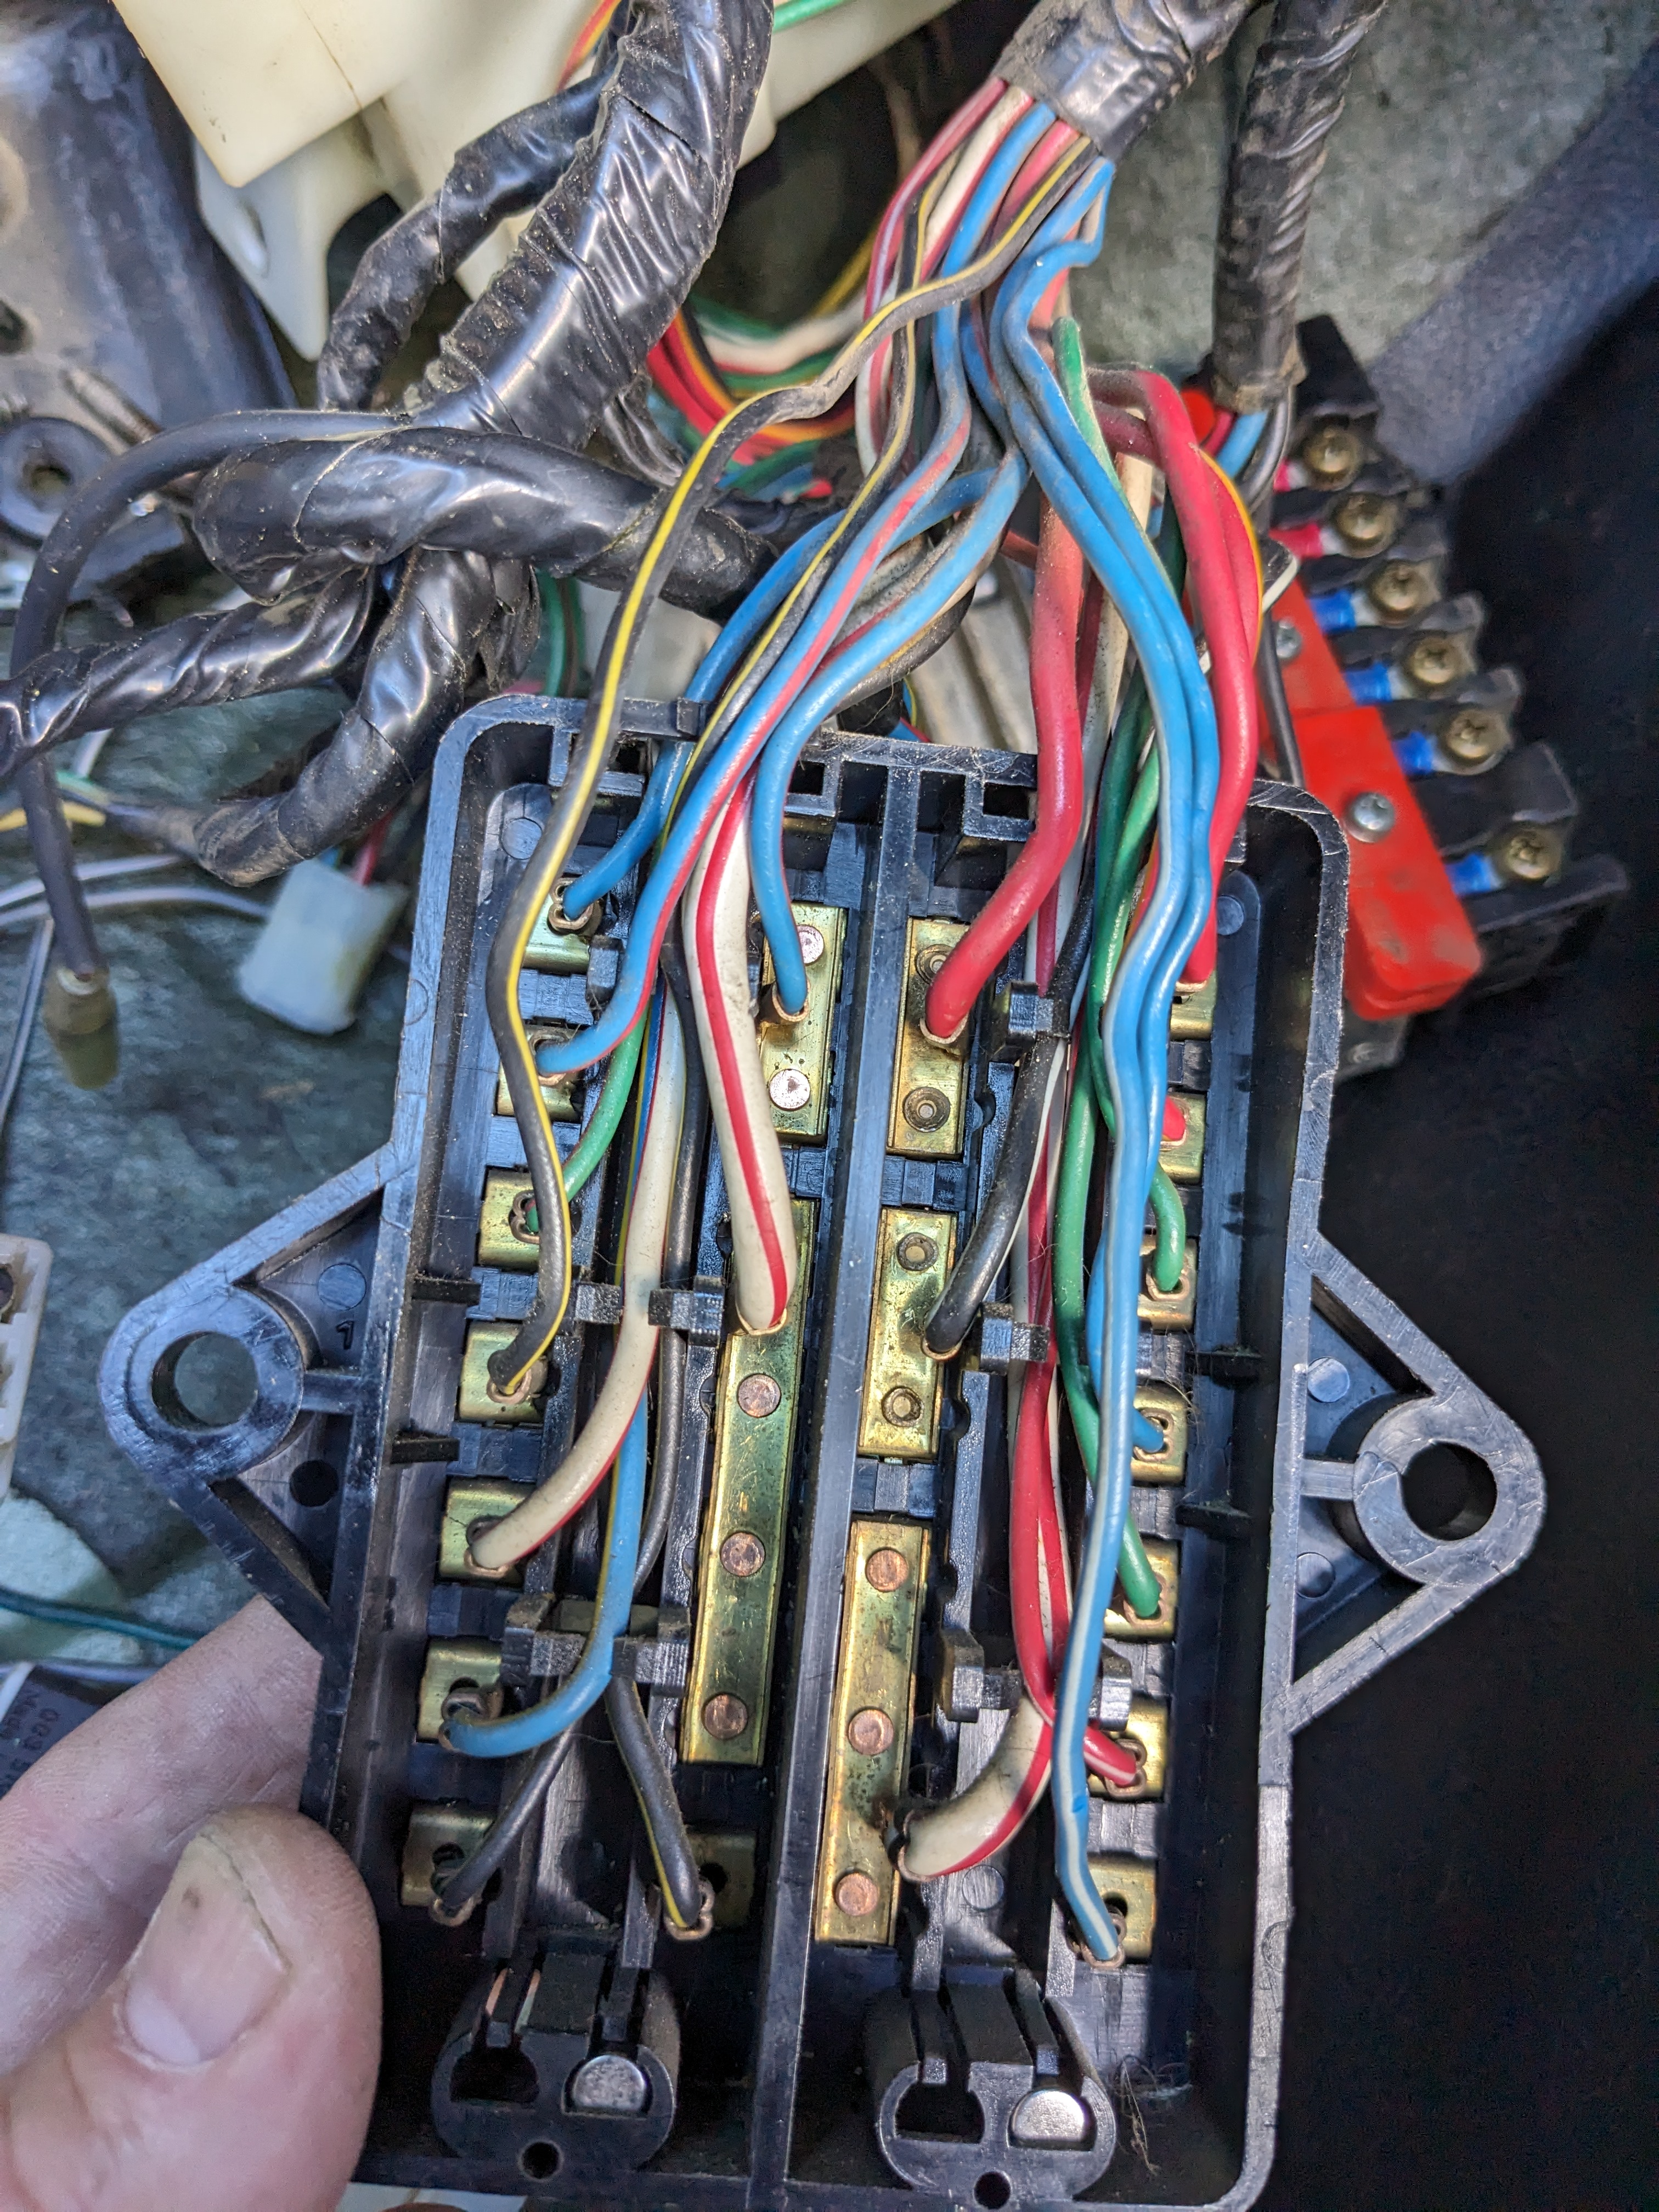
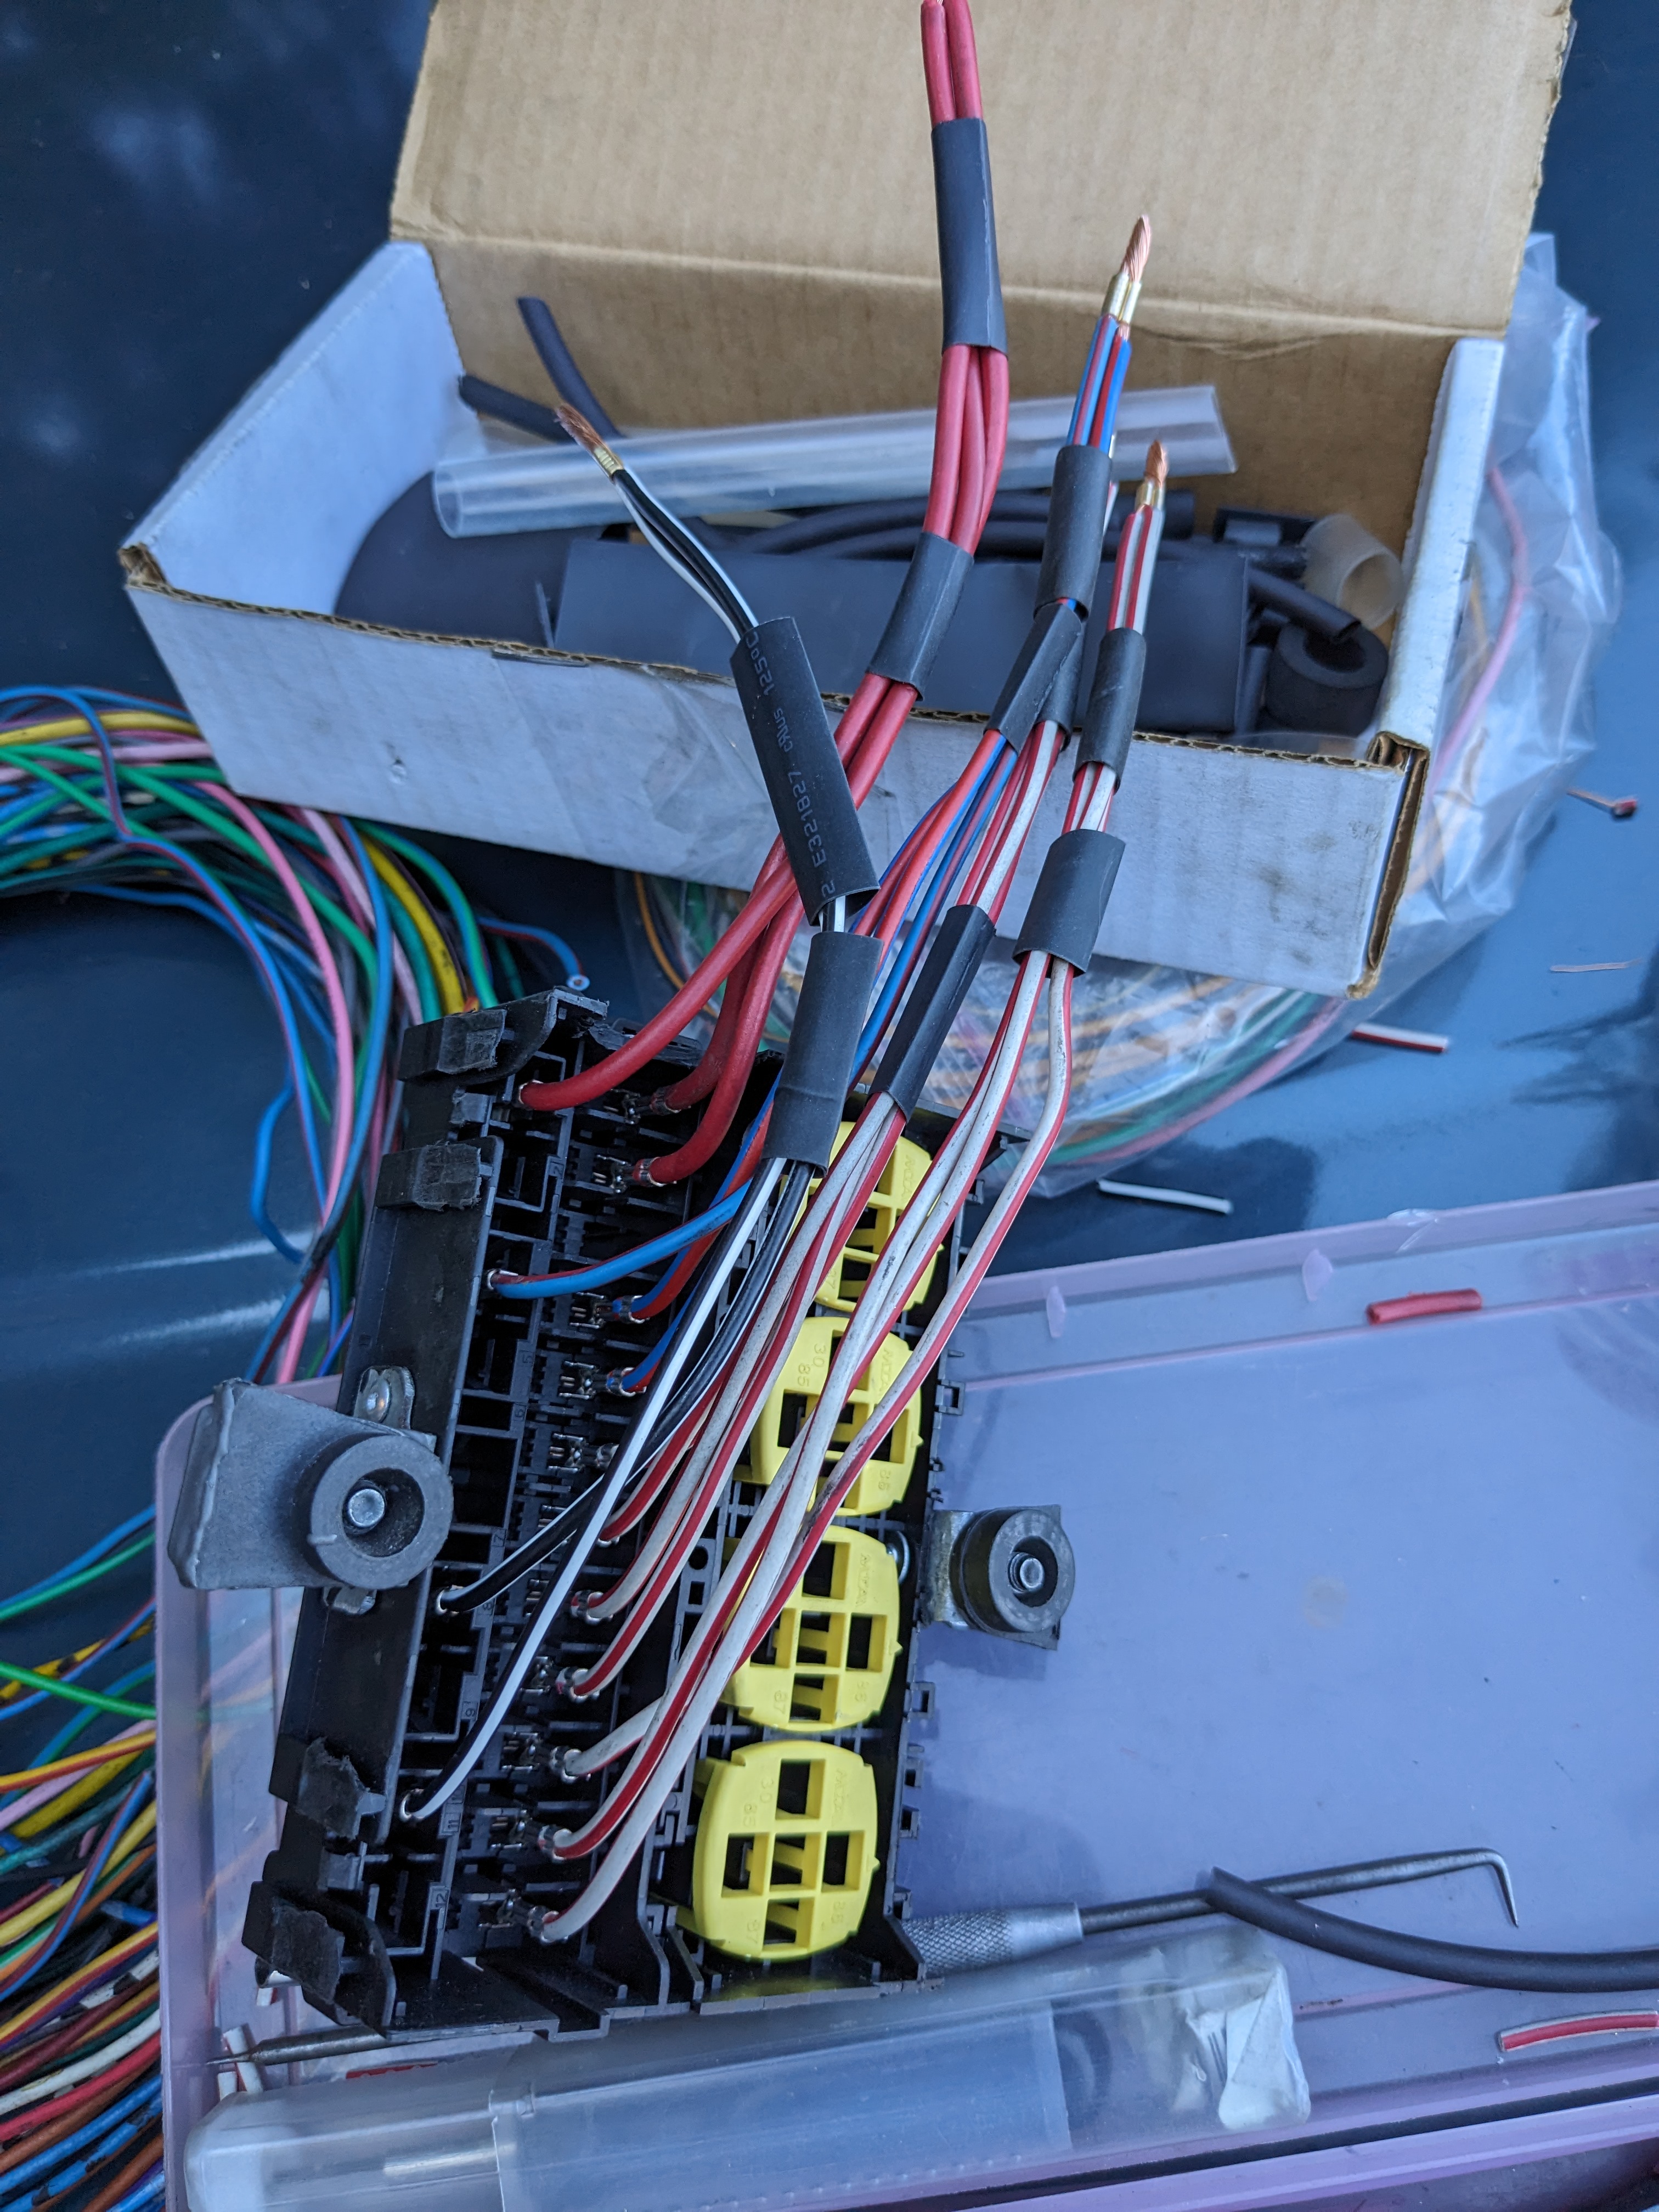
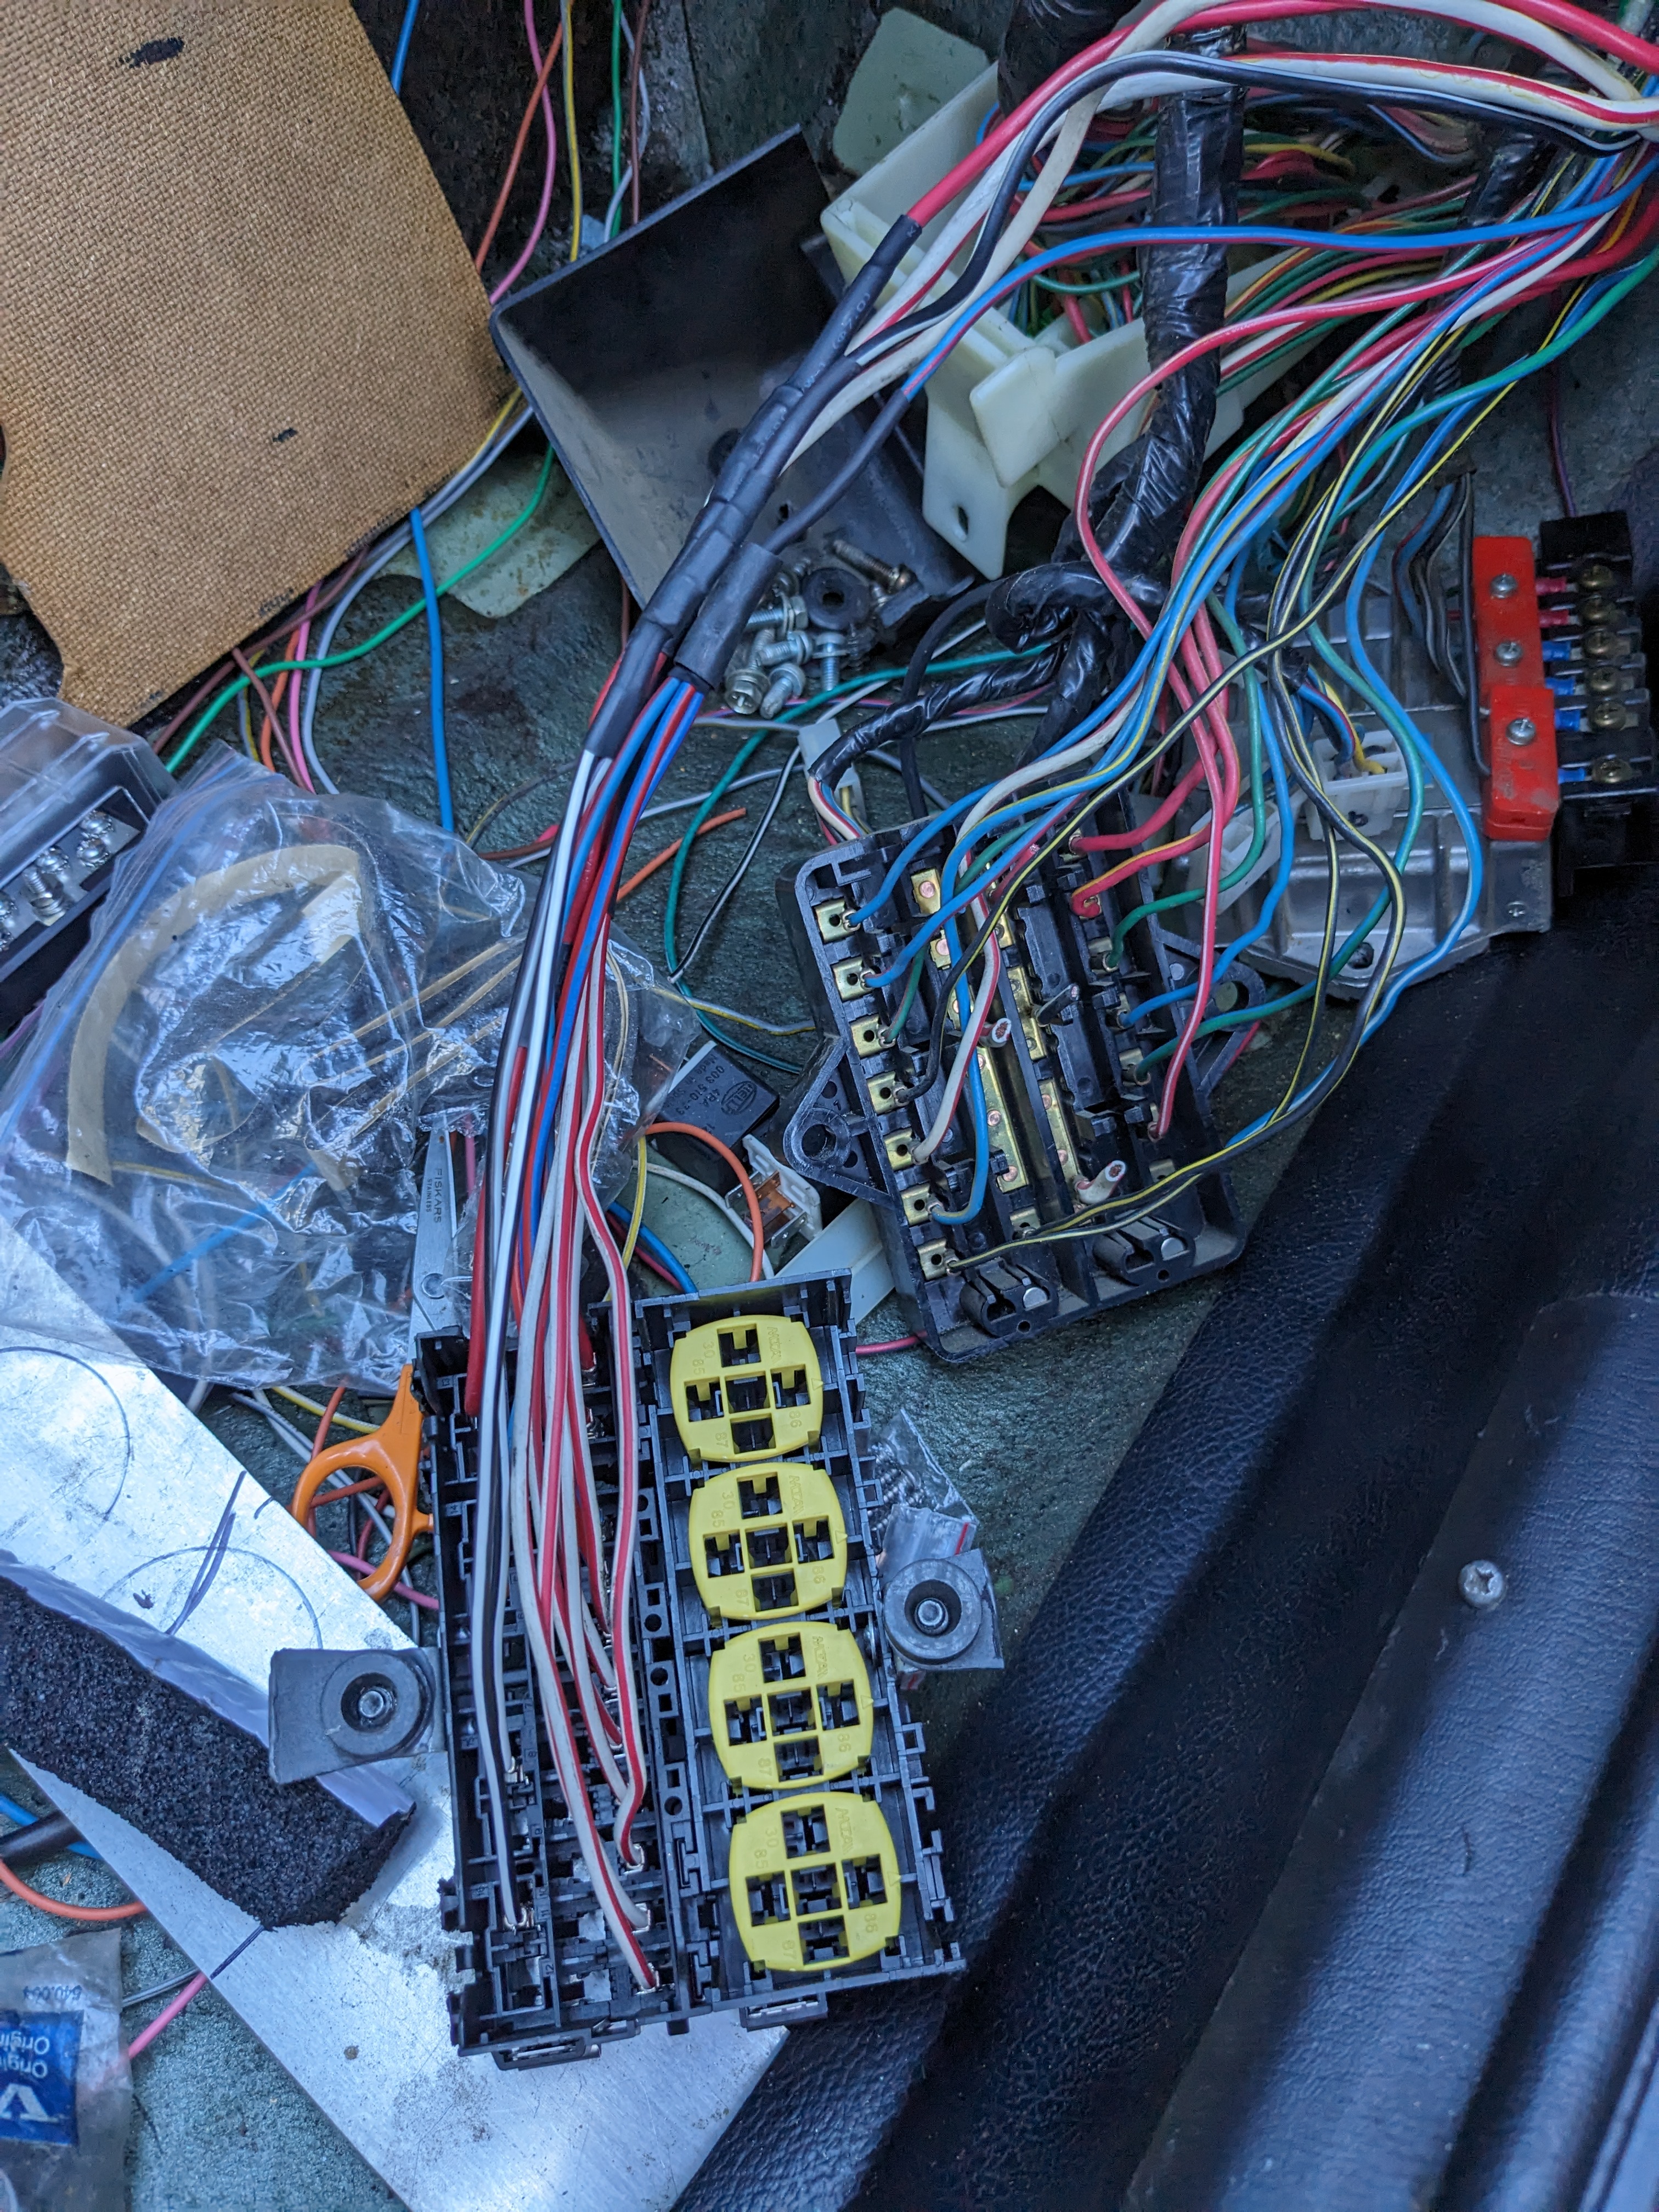
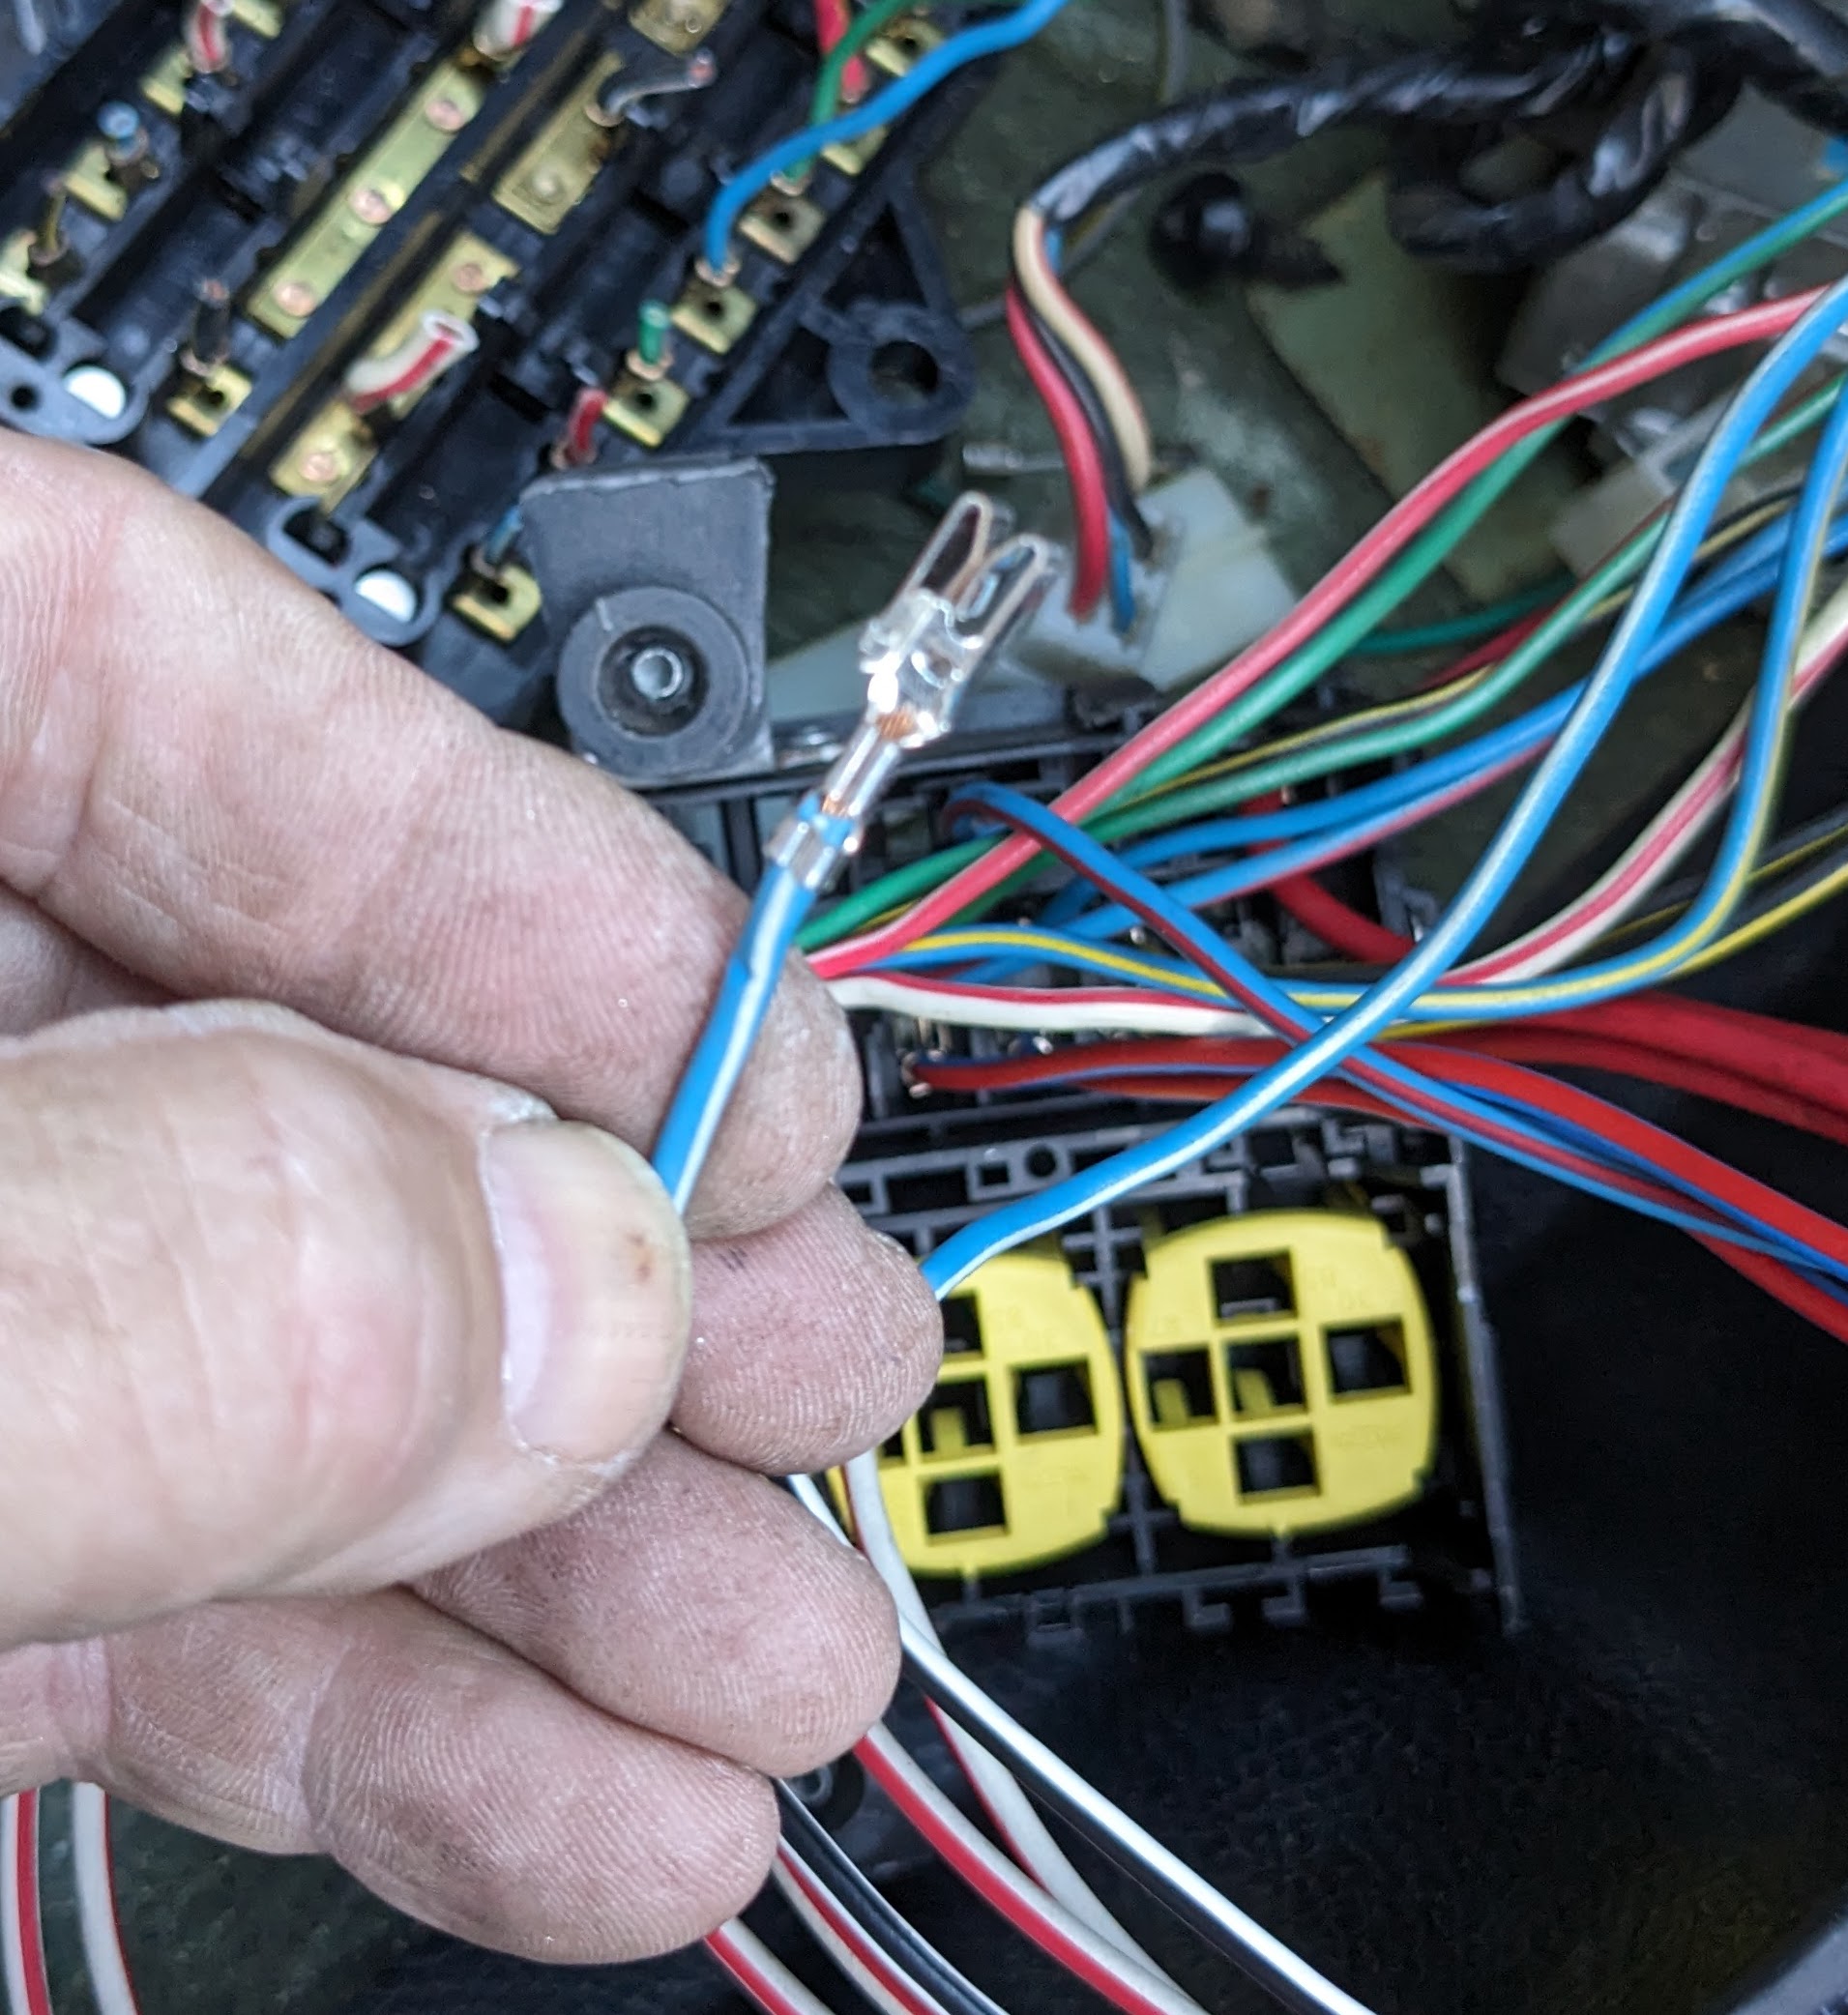
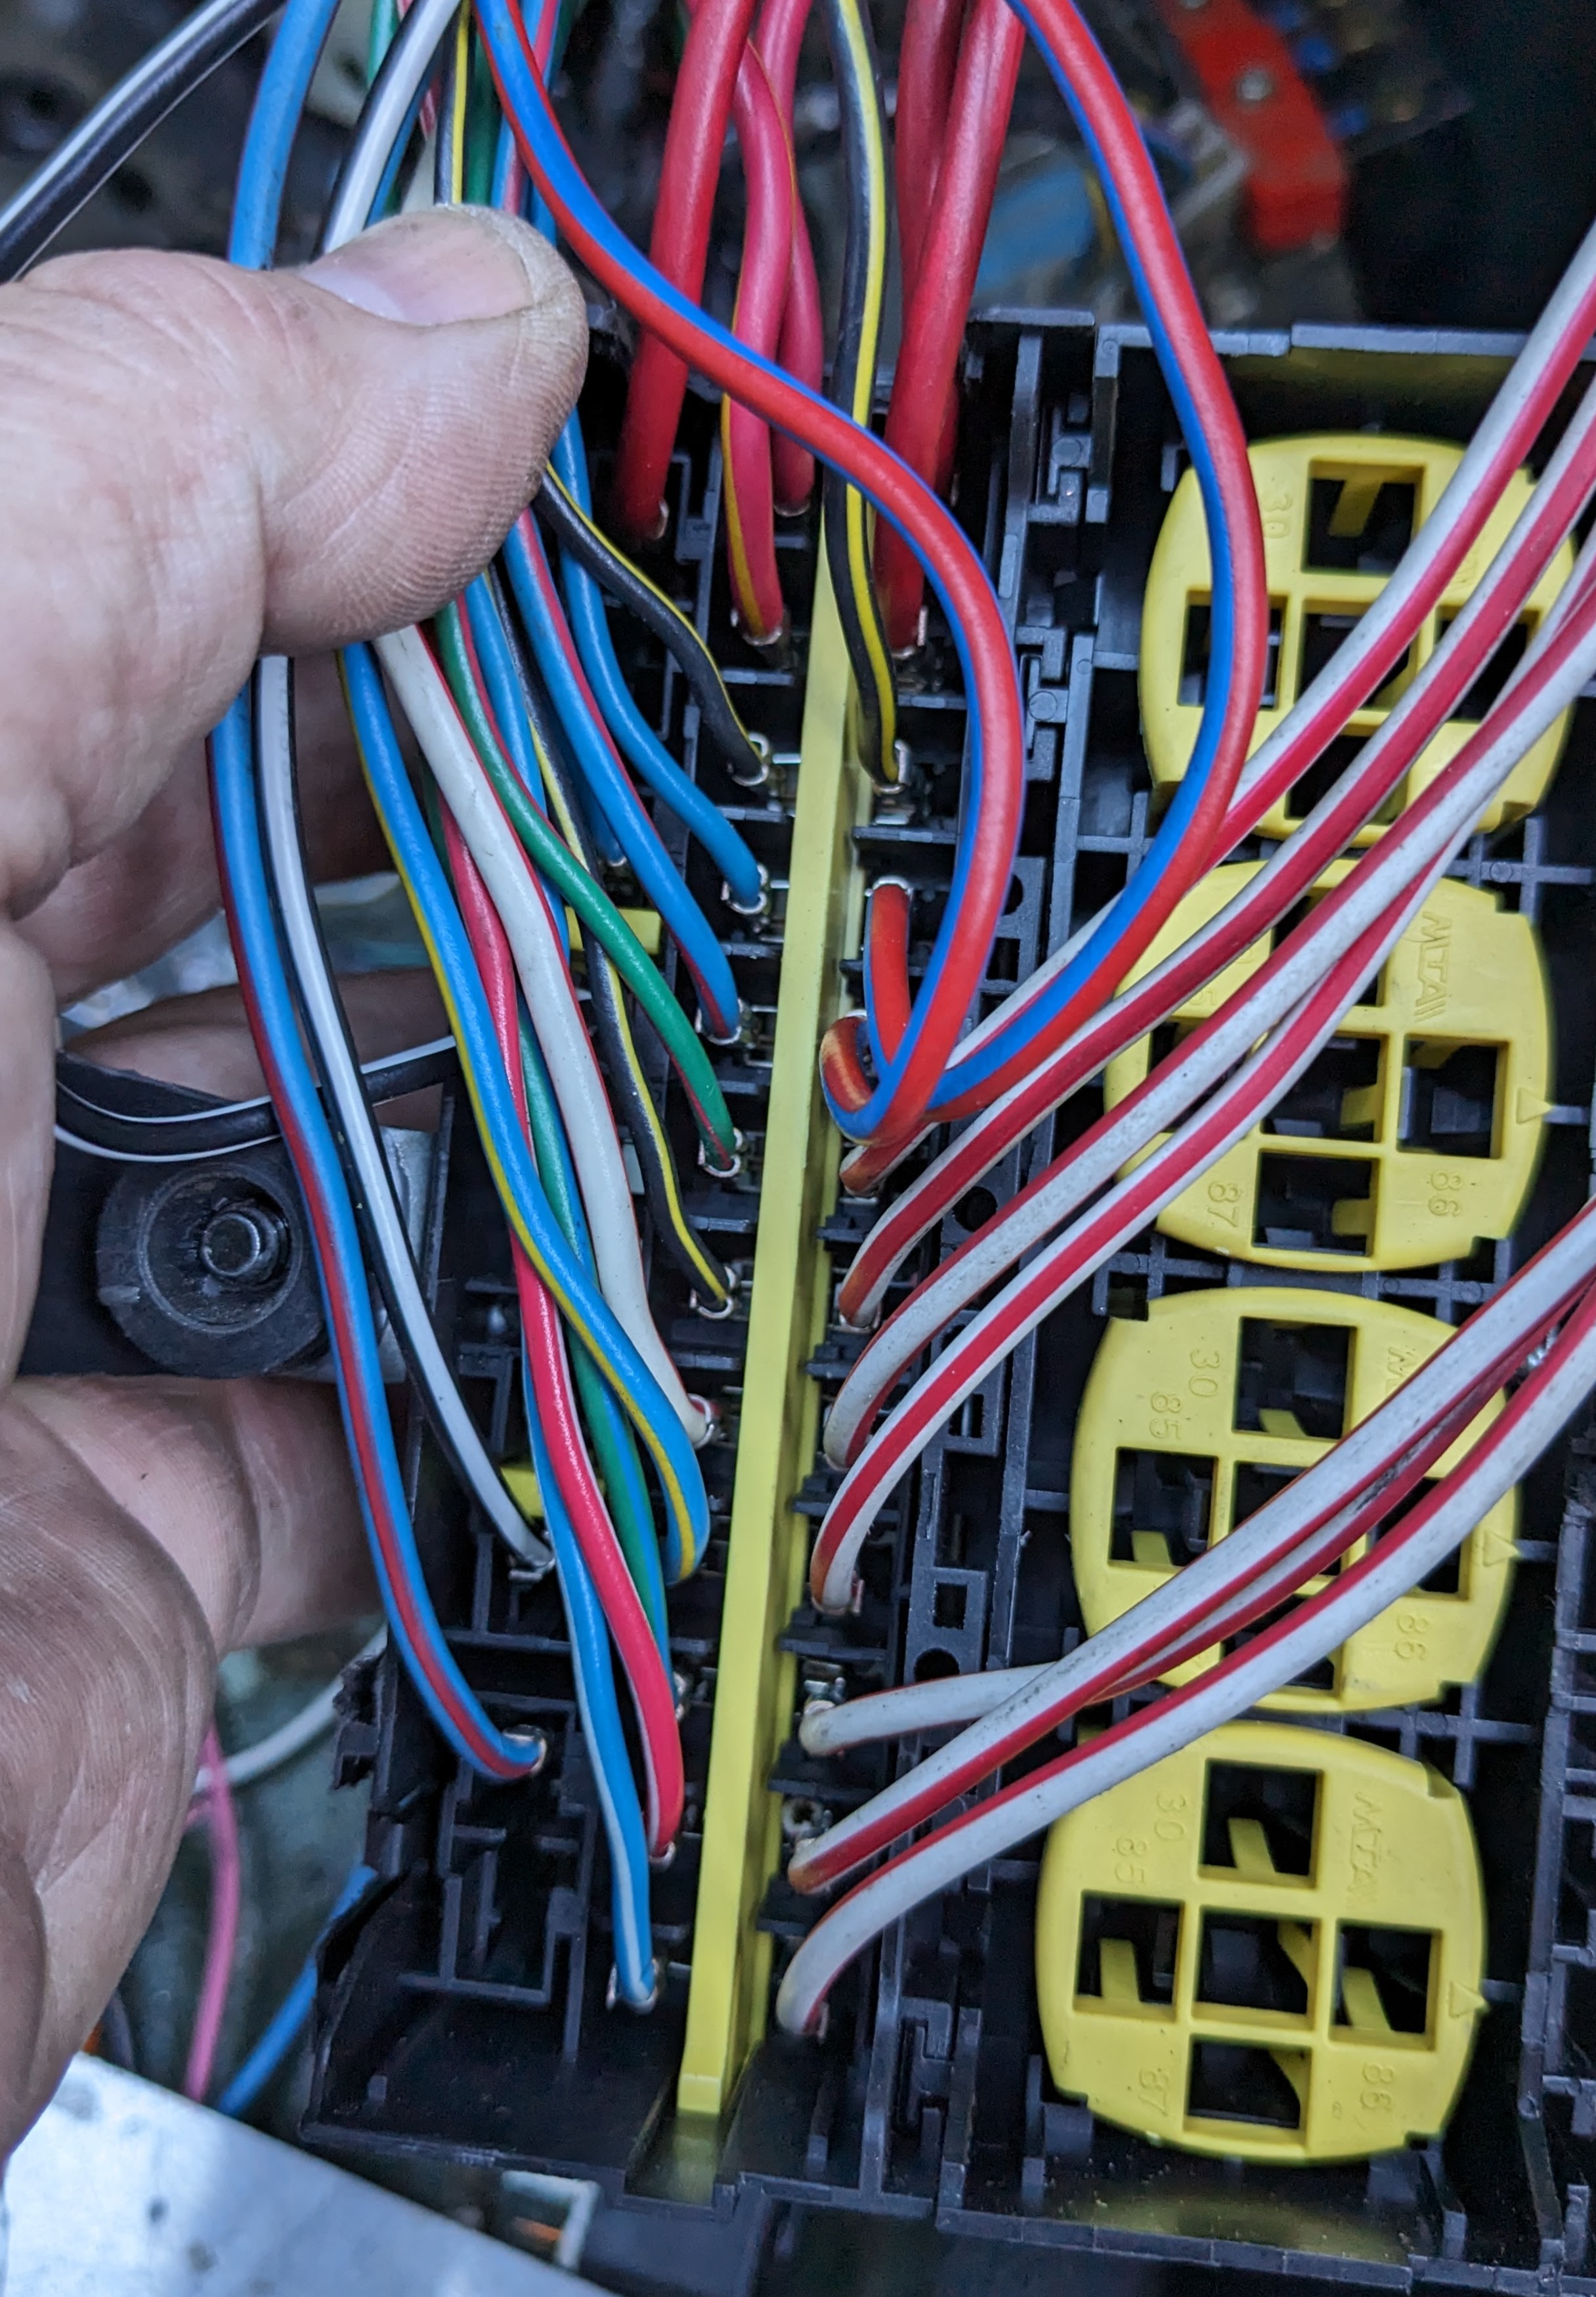
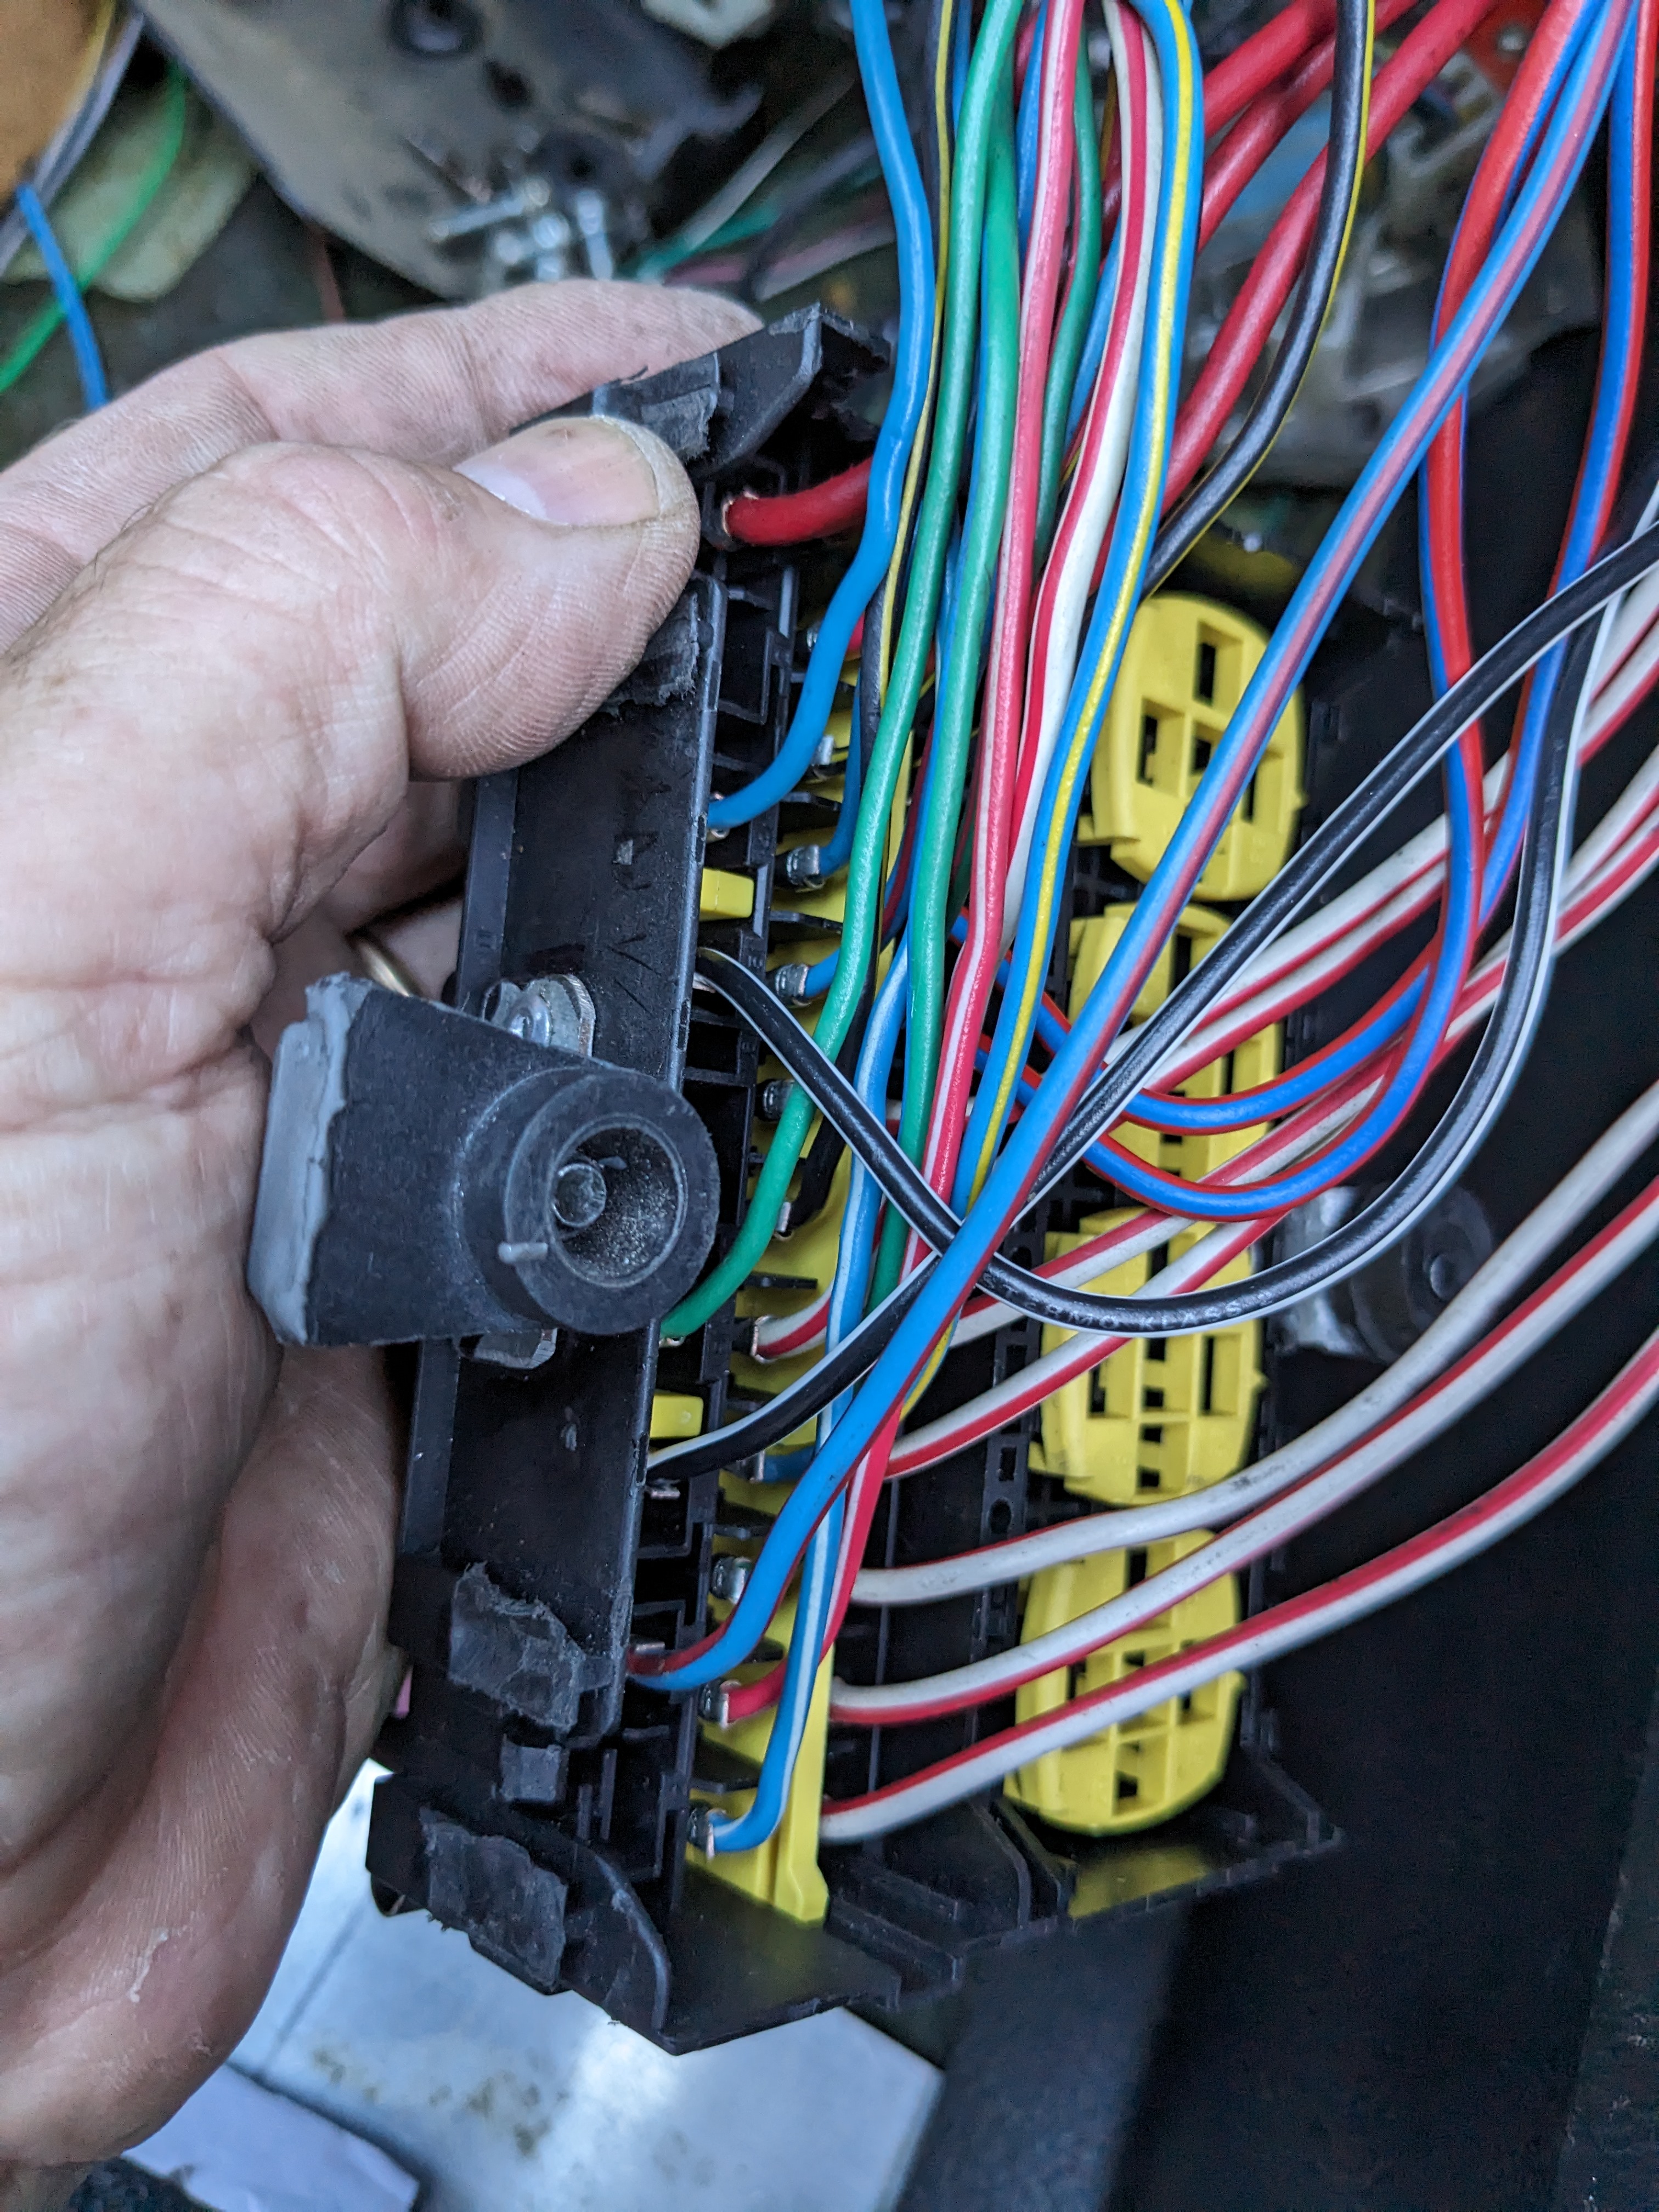
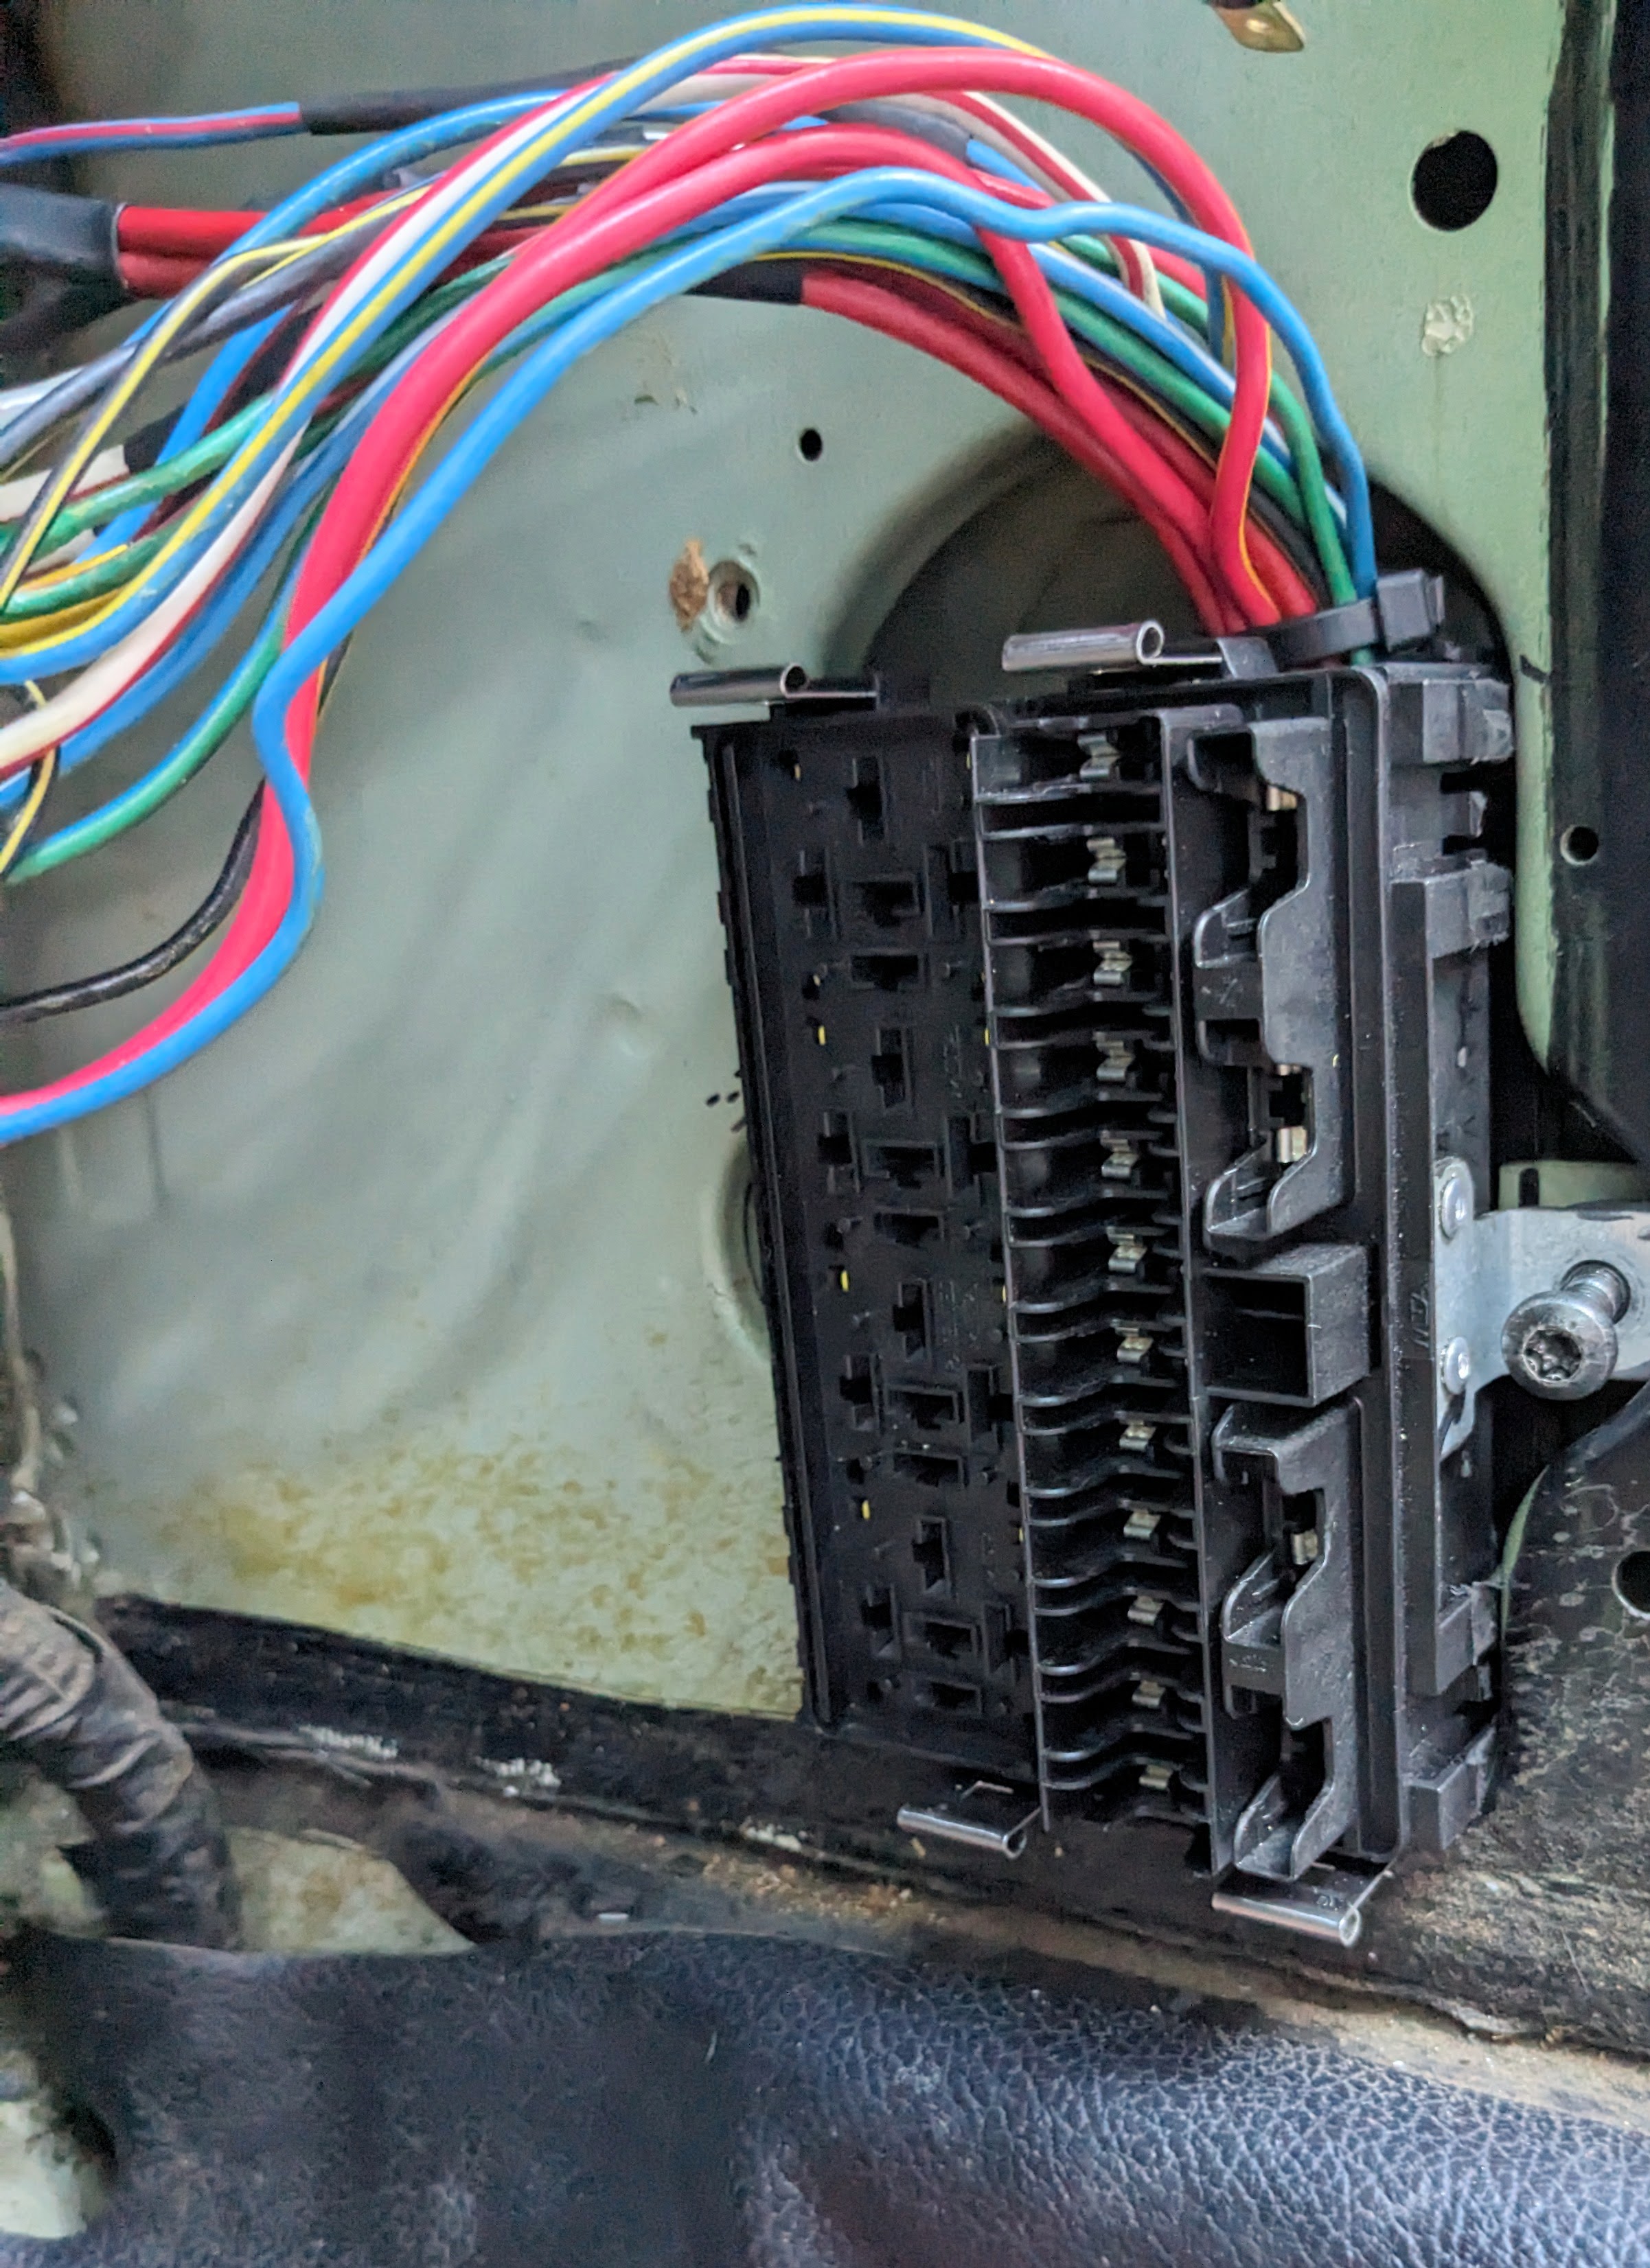
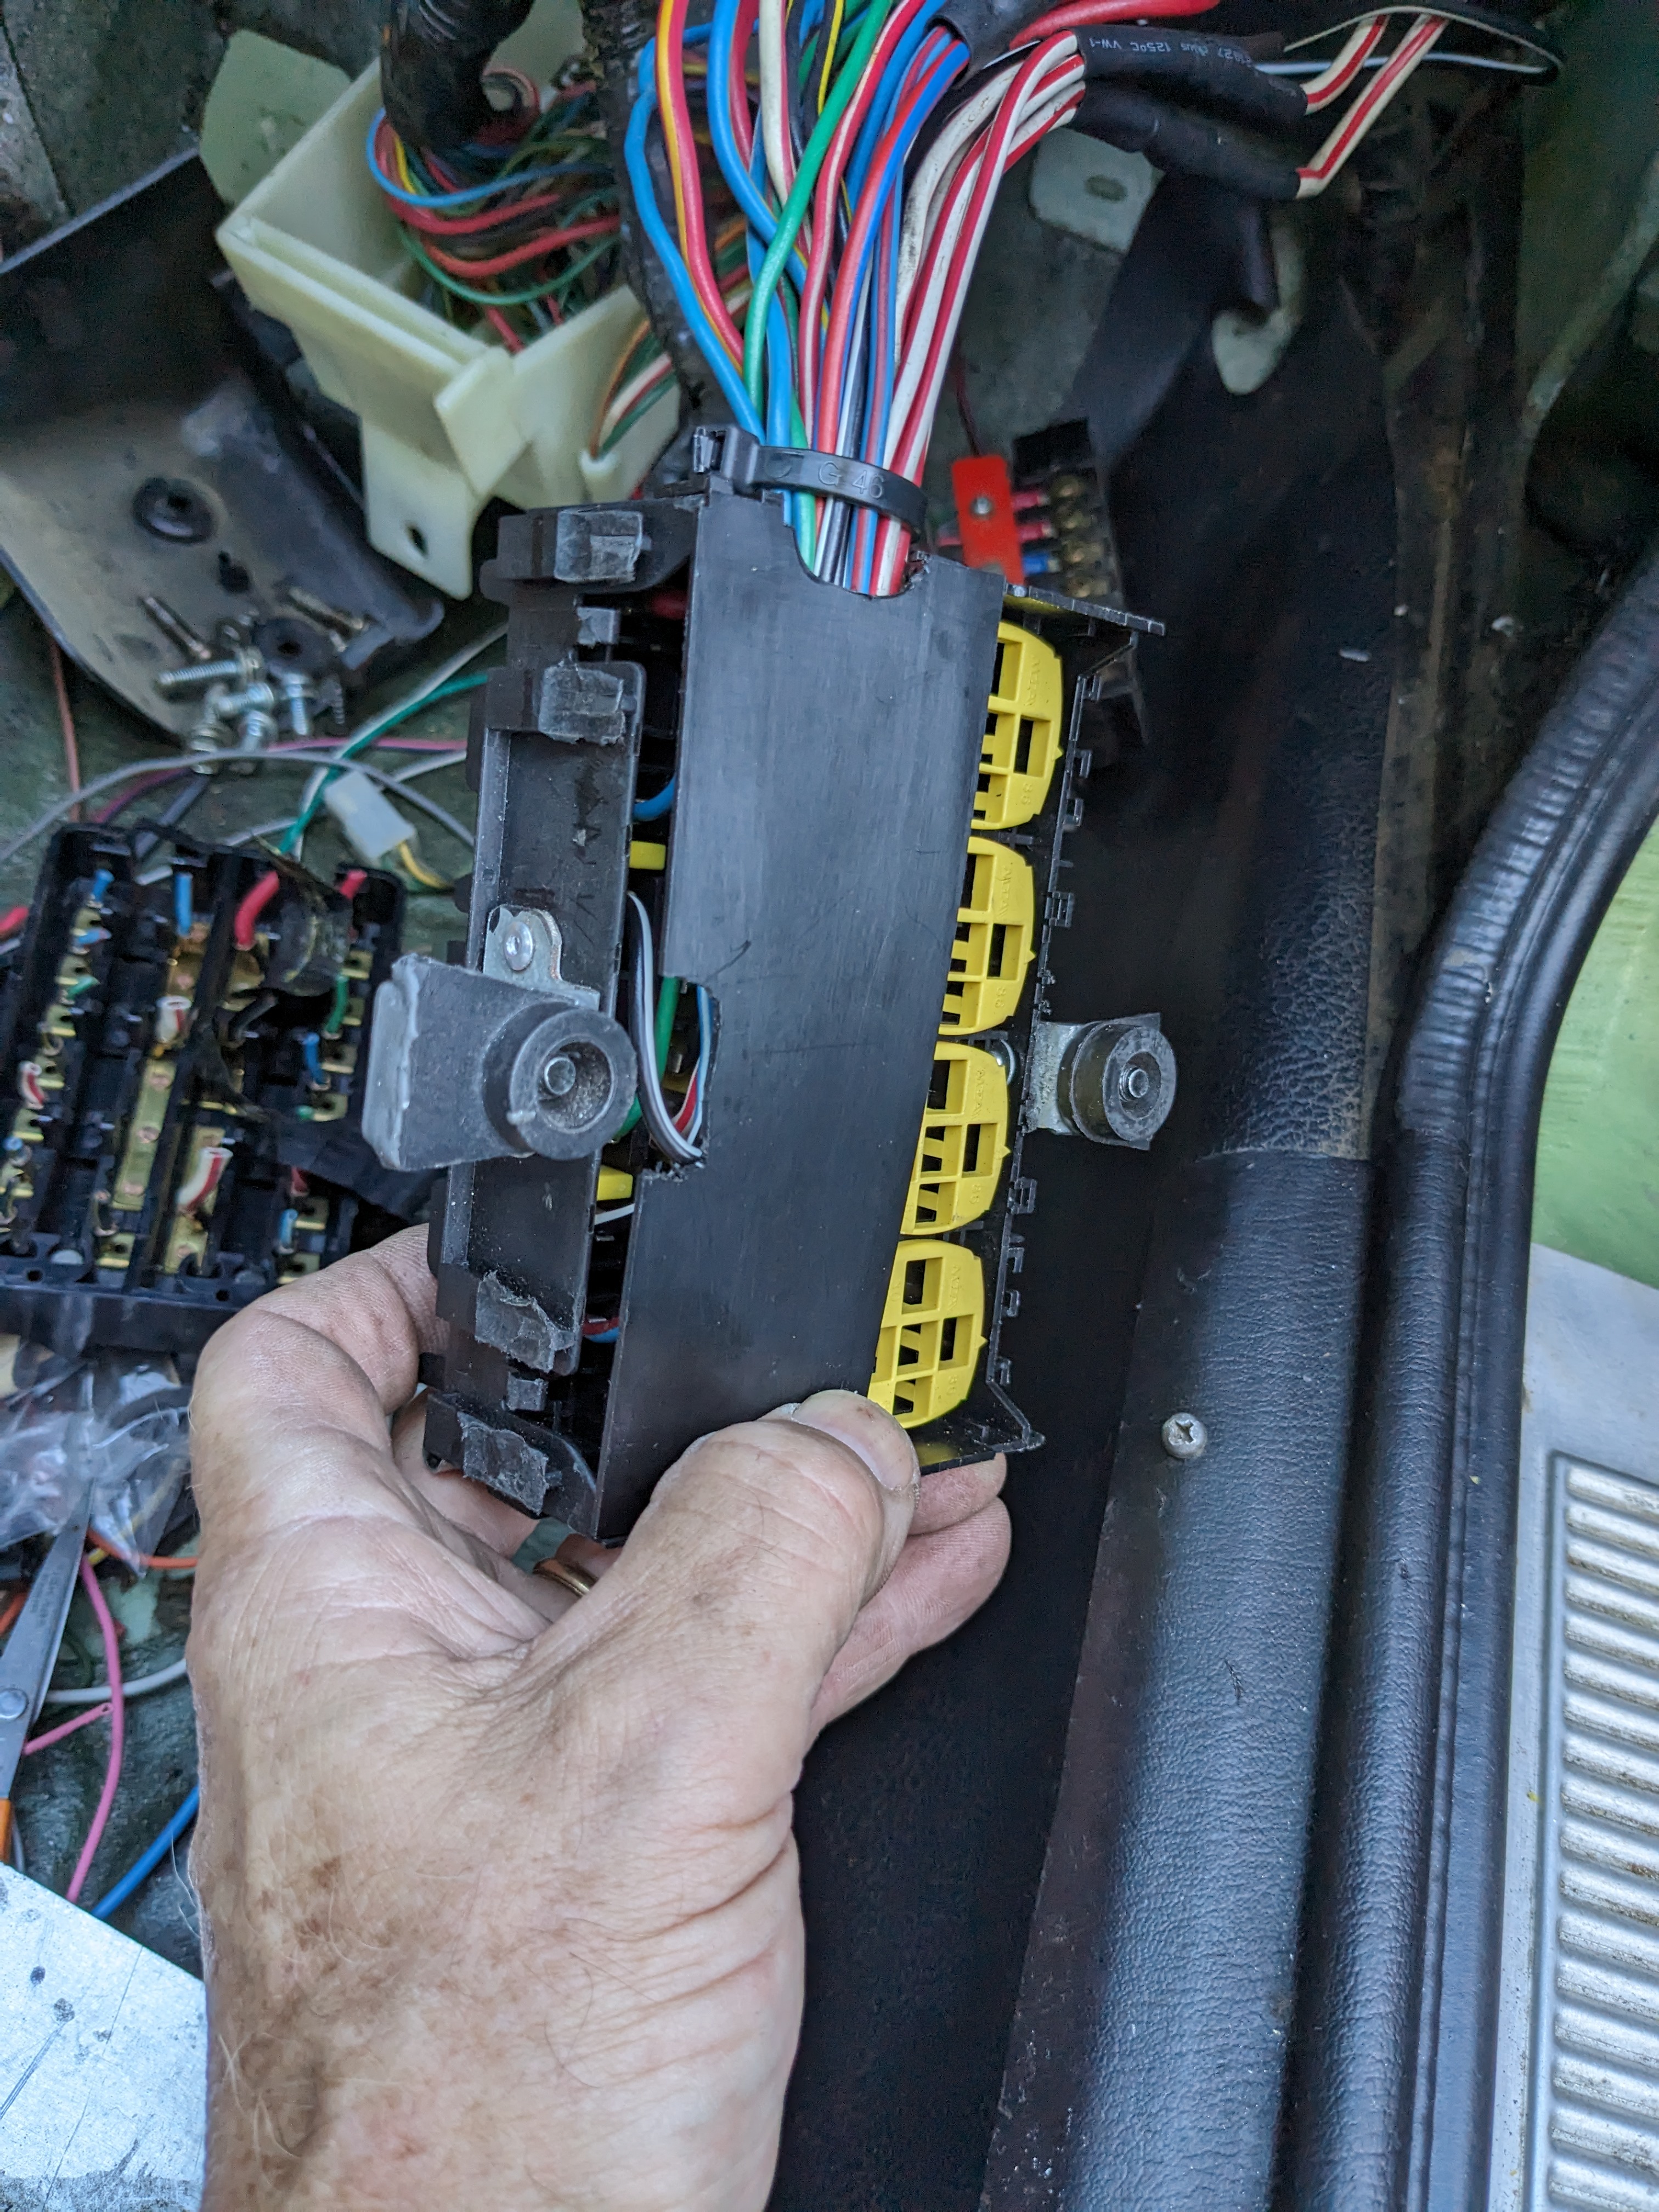
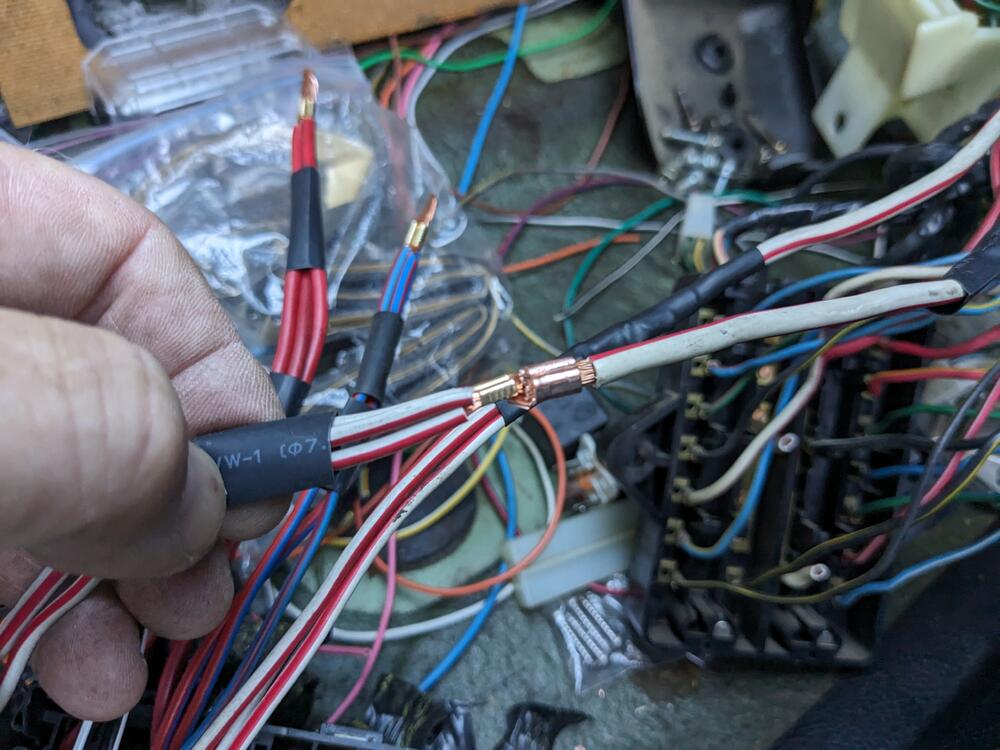
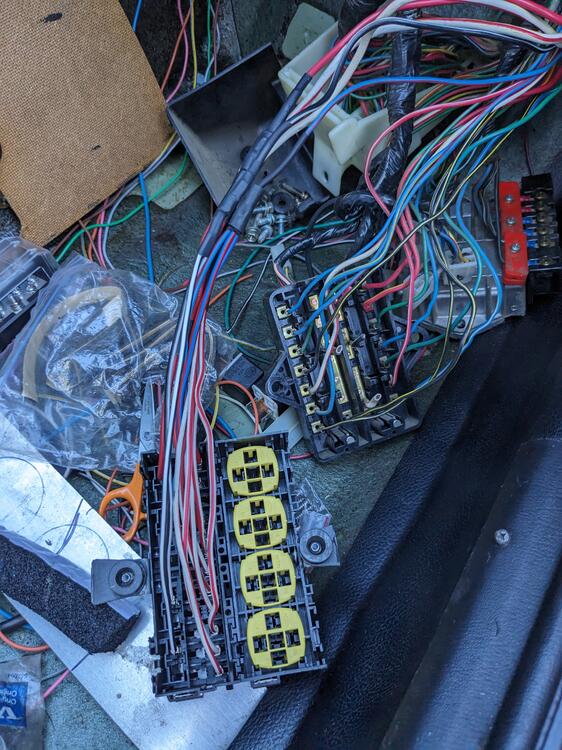
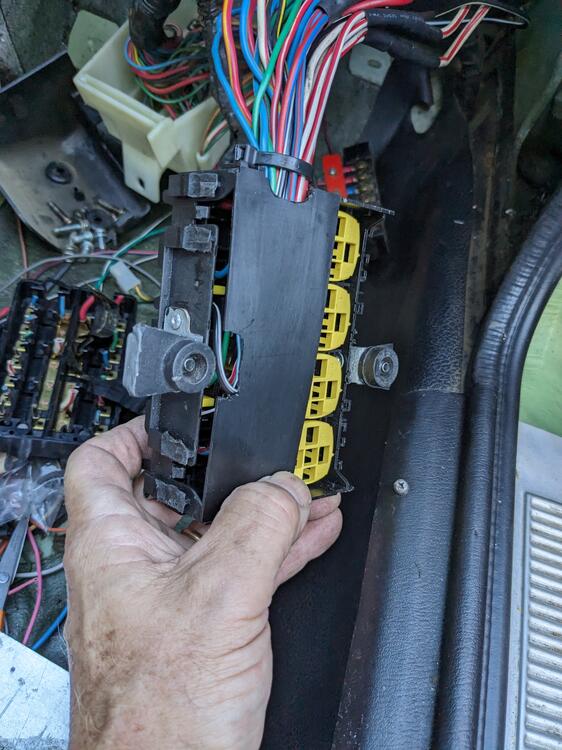
Cut out the Fusebox today & wired the Hella (MTA) 16 position ATC fuse panel in Noting the grouped inputs I batched the fuses following the input groupings above (14 total) 3 Red (1 spare) 2 Black-white 3 Blue-red (1 spare) 4 White-red 3 White -red 1 Black-yellow No space to batch within the fuse panel, so the splices are outside the box. Small crimp to unify individual wires Larger crimp to join feed wires individual circuits added in decending order separator/ pin retainer in place added spacers to the mount brackets - the door hinge bolt heads are otherwise too close to the wiring passing behind annoying thing is that only standard cube relays will fit, not the rectangular ones I have for the AC delay & Interval, so those have to go elsewhere. The only one I need to add here right now is the relay to switch the blower on when the AC is engaged.


 2 points
 -
2 pointsI'm getting the same error. Probably the EU authorities "protecting" us from learning too much.....

 2 points
 -
Here's a good one that I used. It's older PDF so you'll have to download it. It's clean I promise. 😇 repairing-240z-combination-kamikazeracing-org.pdf1 point
-
Here's anothe pic that might help a bit. To @Zed Head's point, the switch on the left is the same as yours, on the right is a later design. On your switch the large gauge black wire on the senter post is headlight power in and the faded red/white heavy gauge above it is headlight power out. On the left side is the parking light circuit - solid green wire in the center is power in, the green/white wire above it is power out. The unwired posts at the bottom are for the off positions of the rockers.
 1 point
 -
1 pointgot it all disconnected and back on the test stand with the test stand key switch so I can drive my car, and will be testing that IAC when it comes in. Before disconnecting everything I tried multiple times on starting, no glitch like in the video, cranked right up. I looked at the exhaust, looks like the bend is about 1" lower (so the down pipe 1st bend back would put the exhaust tube about 1" lower than the stock position. I could probably just live with that, but I dont like idea of the exhaust hanging any lower than it already does. So I may try cutting and welding it back to get to a more stock position that I can then work with back to the muffler. OR I may just use the MSA exhaust designed for this. The only issue I have with that is it does not have the EGR bung and not sure if I could add one. Thats all down stream some as I dont plan to do the swap until prob next year. I want to enjoy it as is for a while.1 point
-
You have to clean both the rockers and the contact posts on the circuit board. The springs and nubbins just move the rockers to the various positions to make contact between the rockers and posts.1 point
-
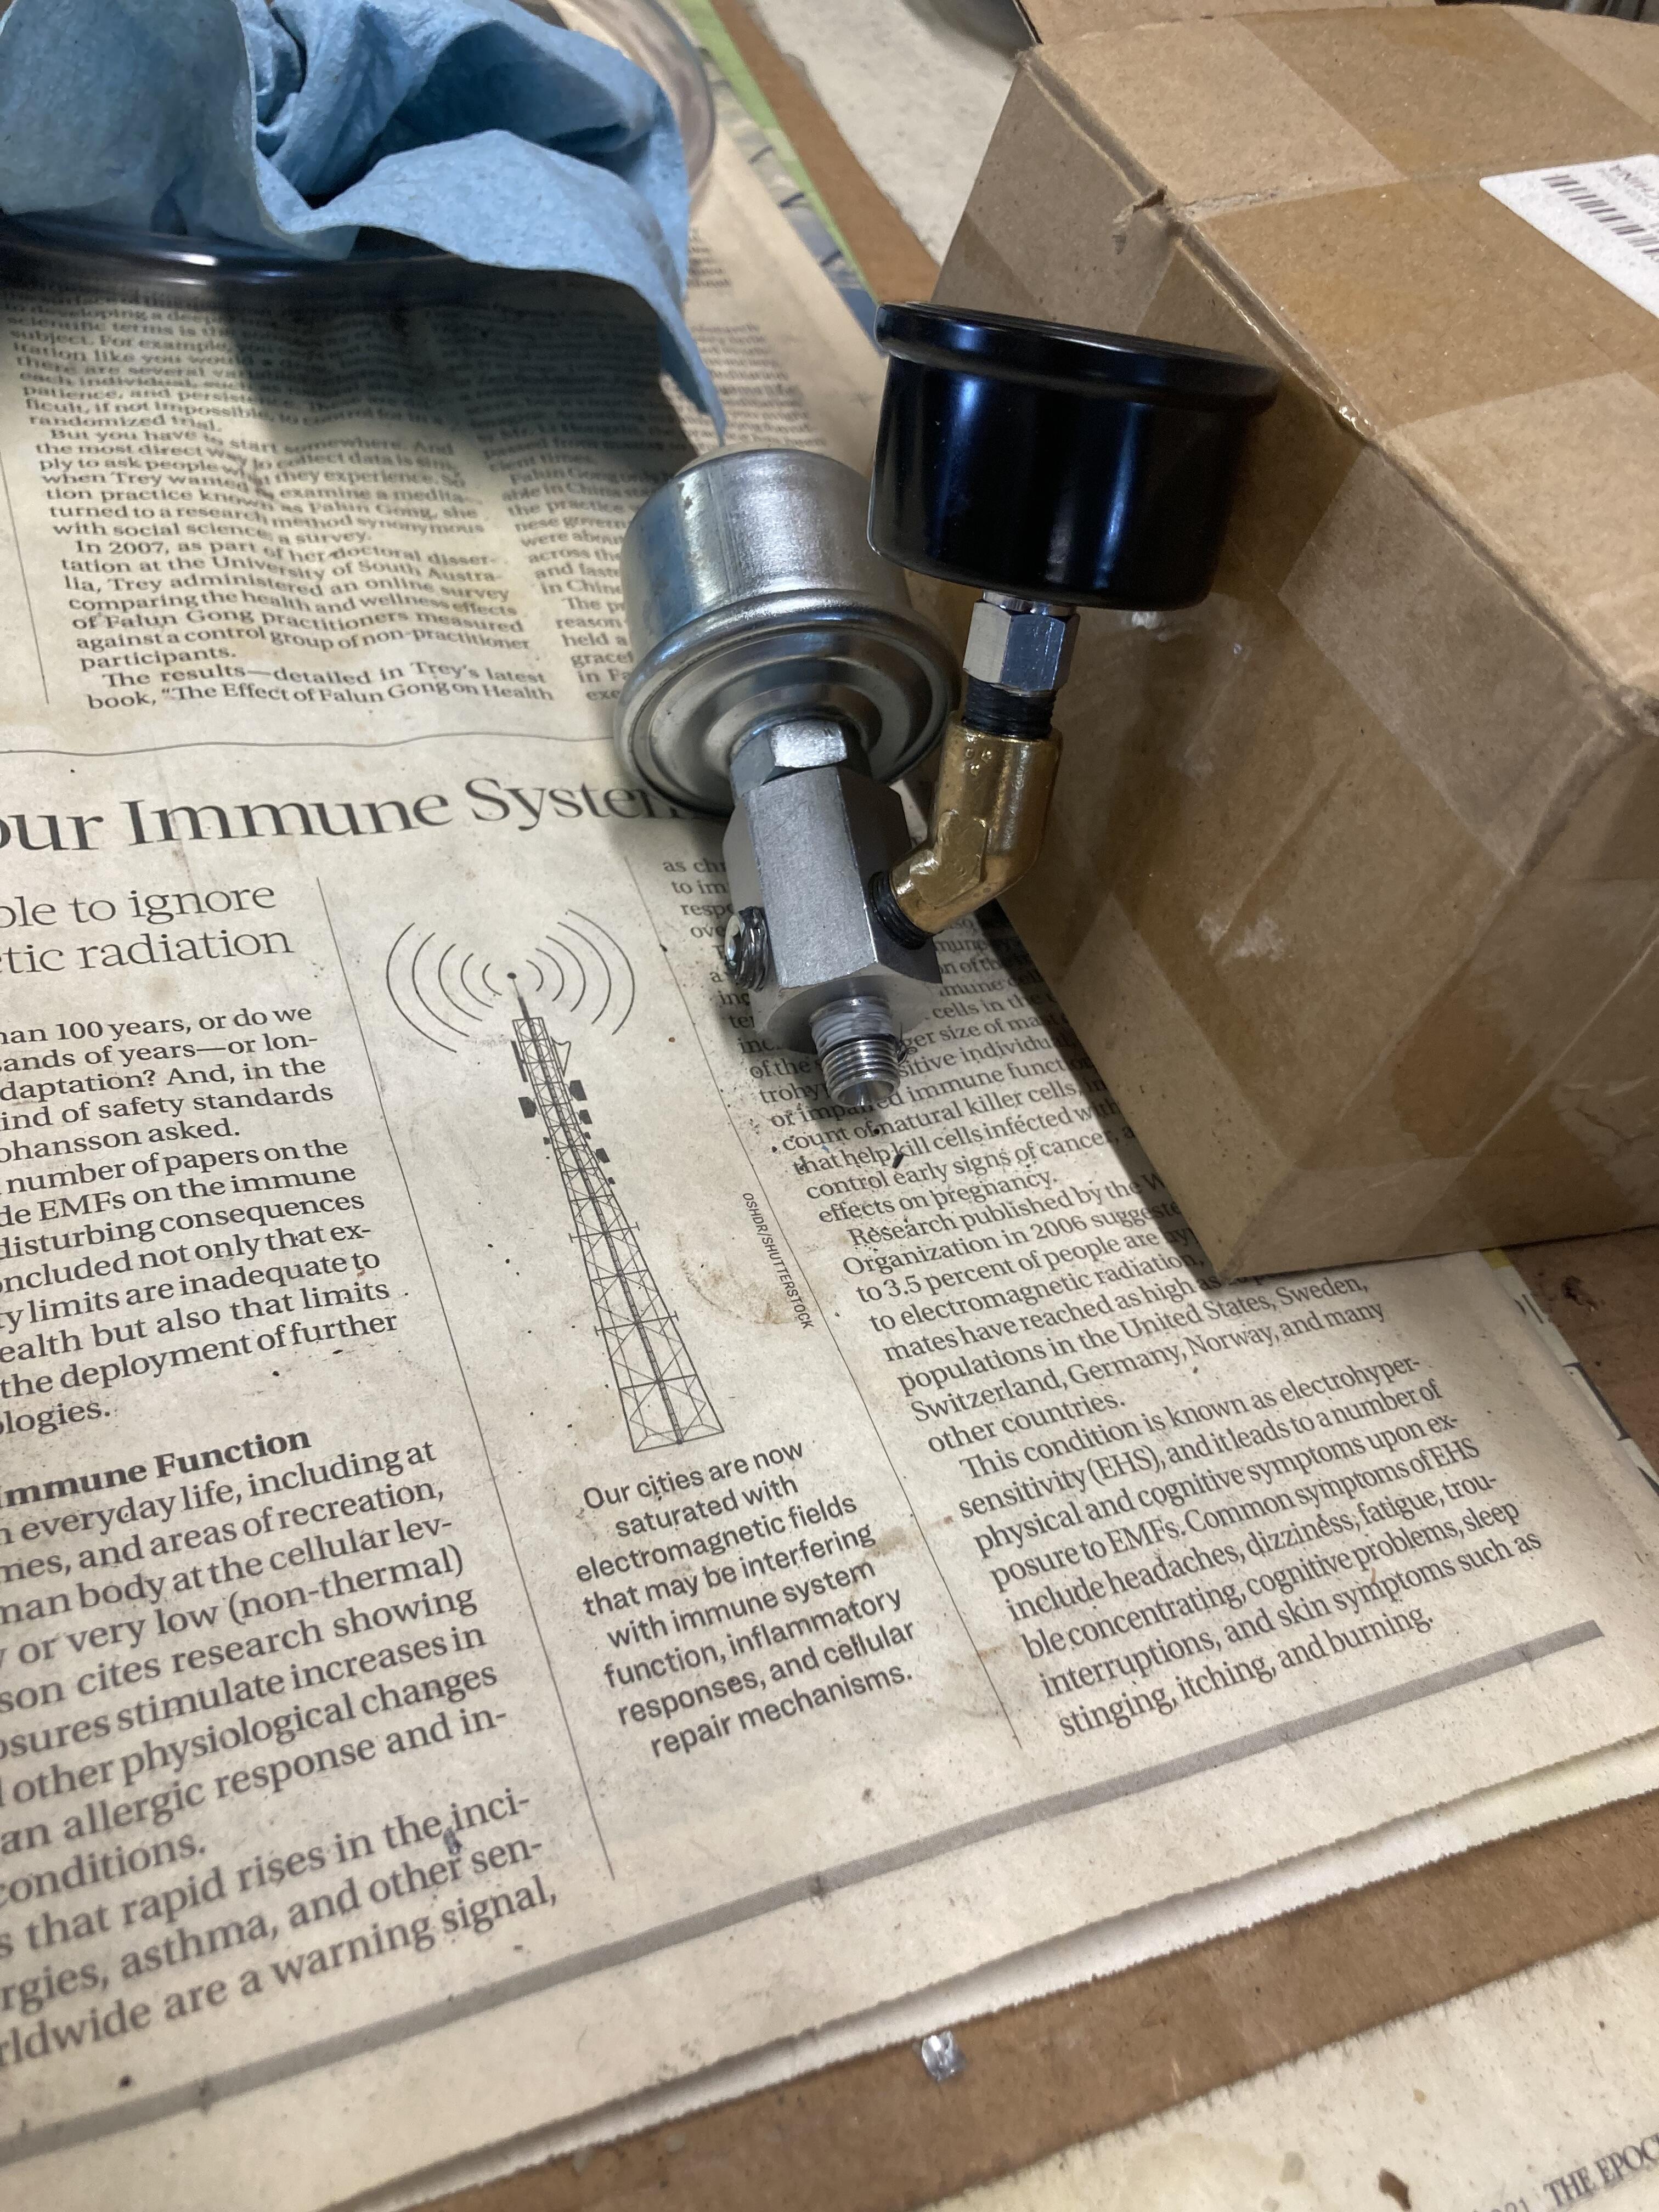
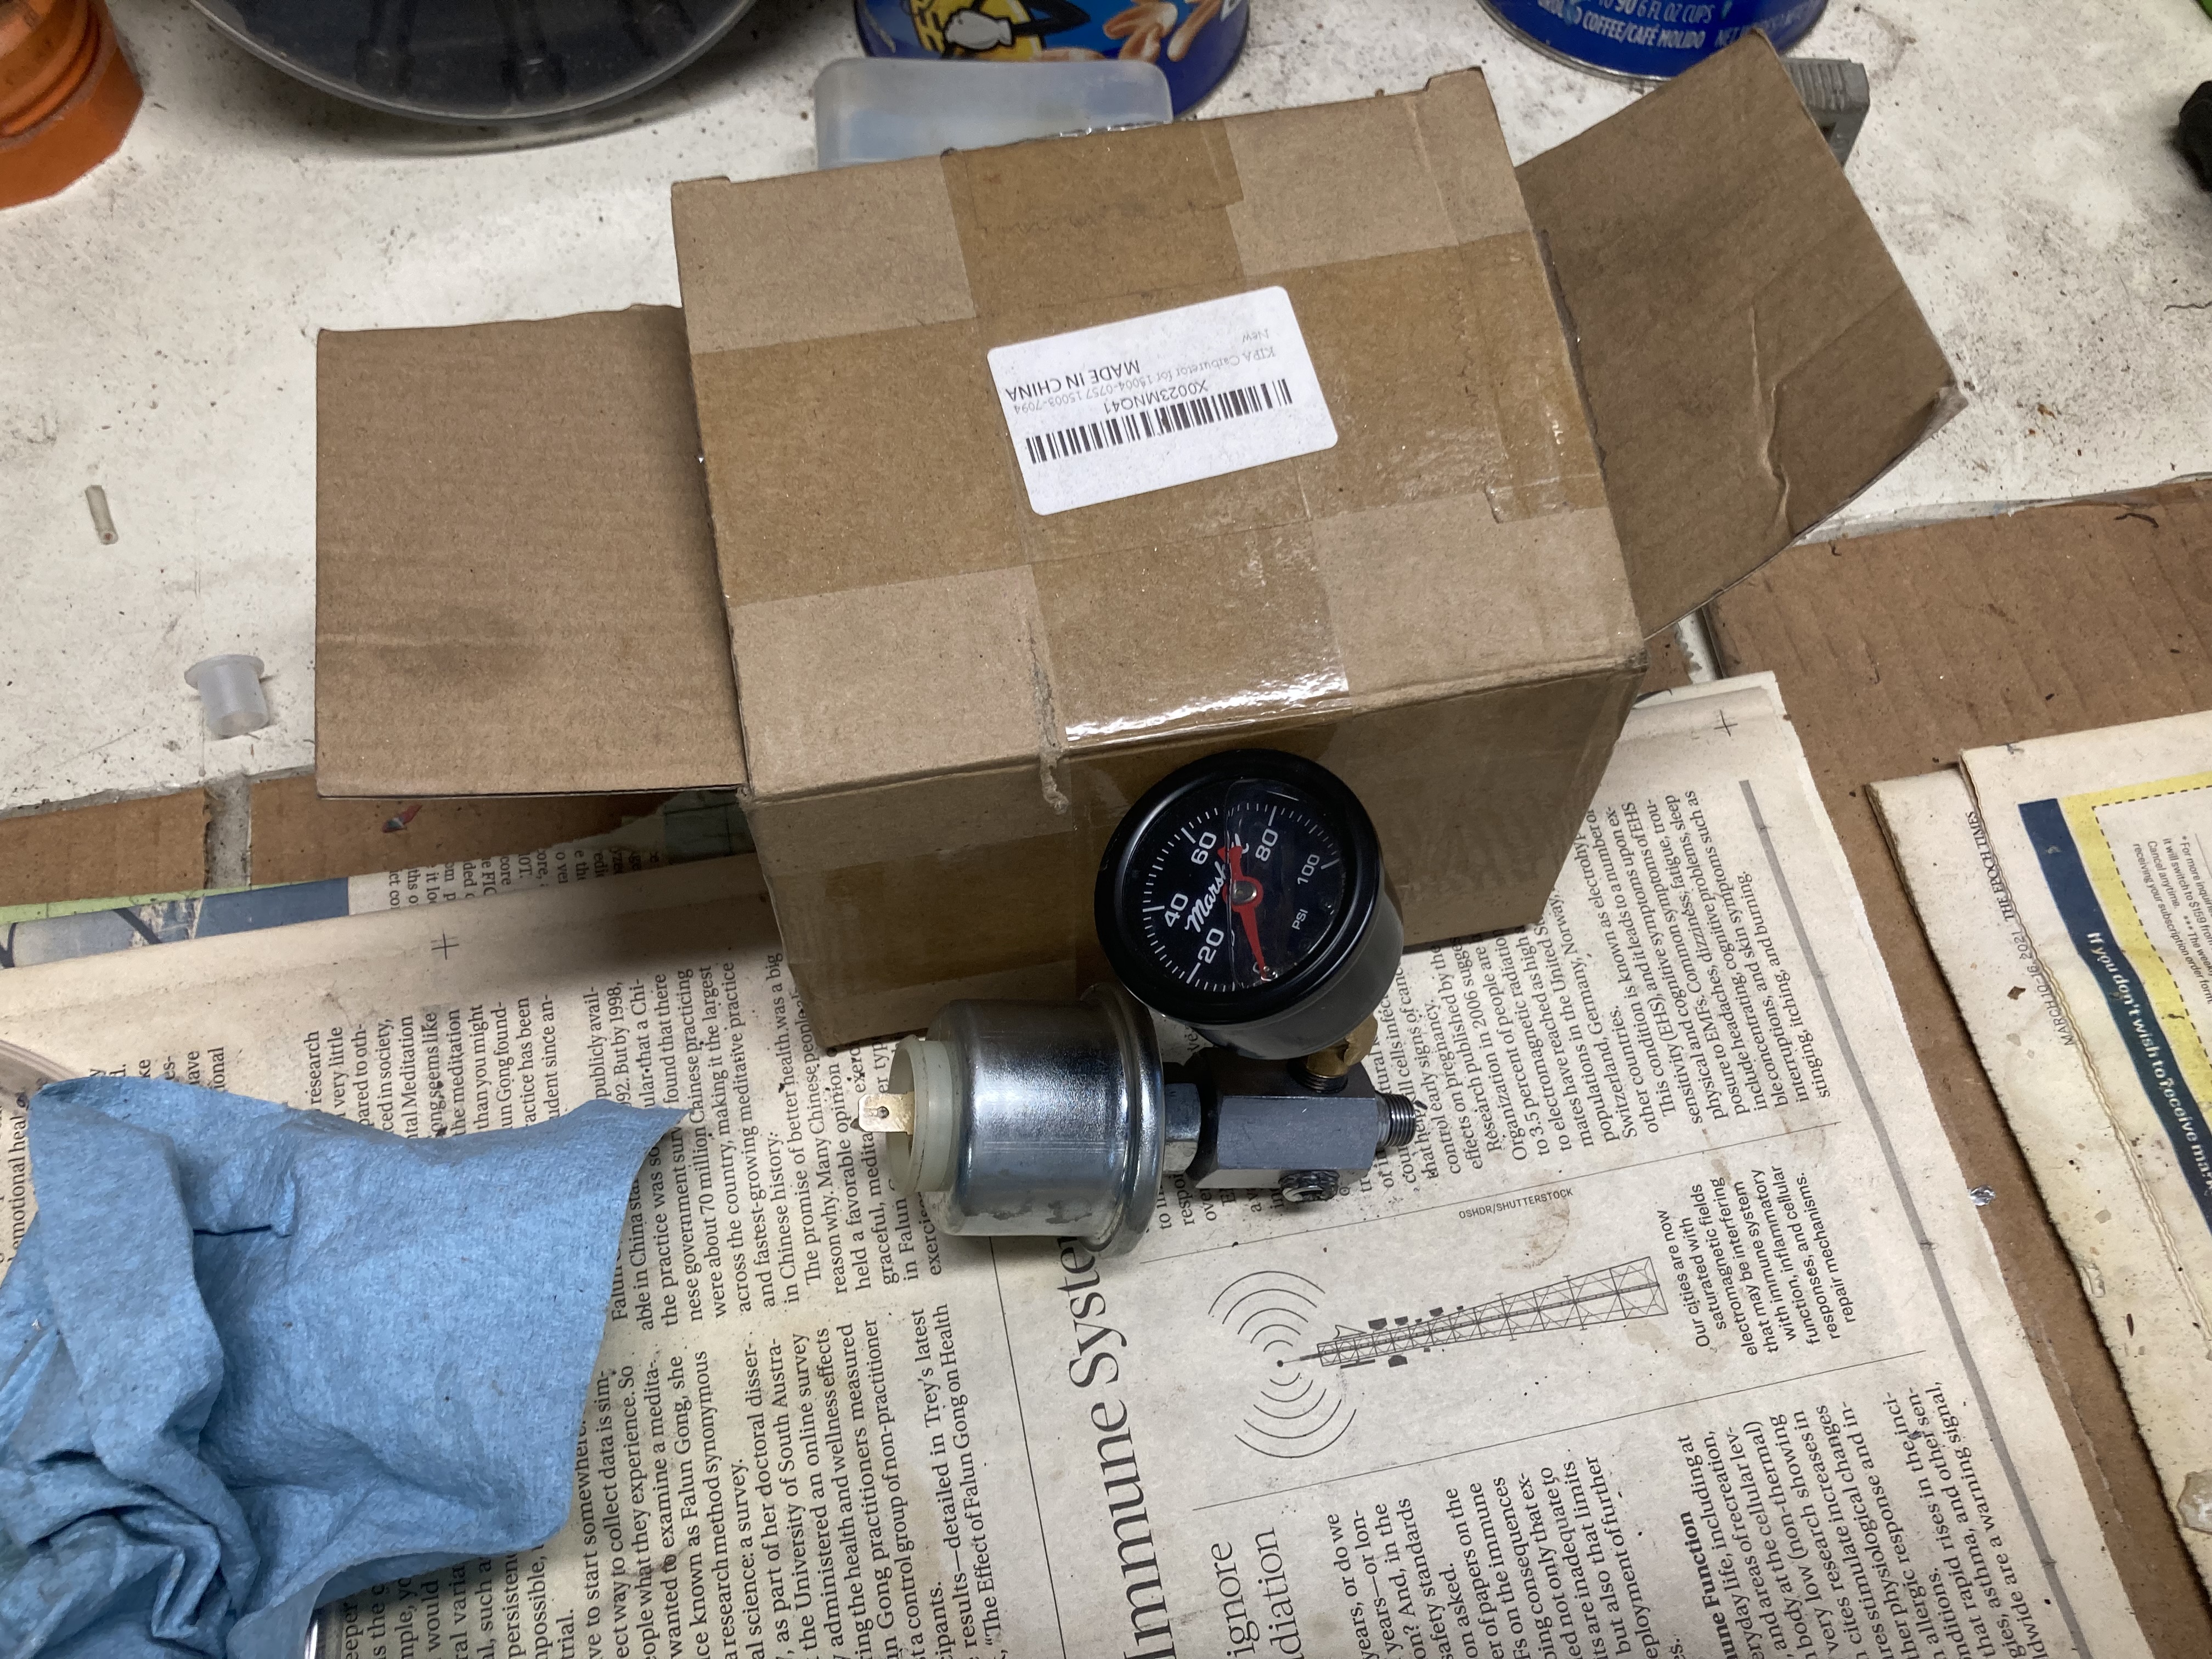
1 pointDid you consider ordering the tee fitting where you will get a true pressure reading with the mechanical gauge? The adapter came from Glow Shift Gauges. The gauge and brass adapter Amazon. I had heard GlowShift sells on Amazon. Bought it directly from them. Have a p/n somewhere if needed.

 1 point
 -
Here's another that shows the little pieces. Don't lose them.1 point
-
1 pointhere is the final check out of the plug and play. I just extended the existing harness from the car and plugged into the turbo harness connector.1 point
-
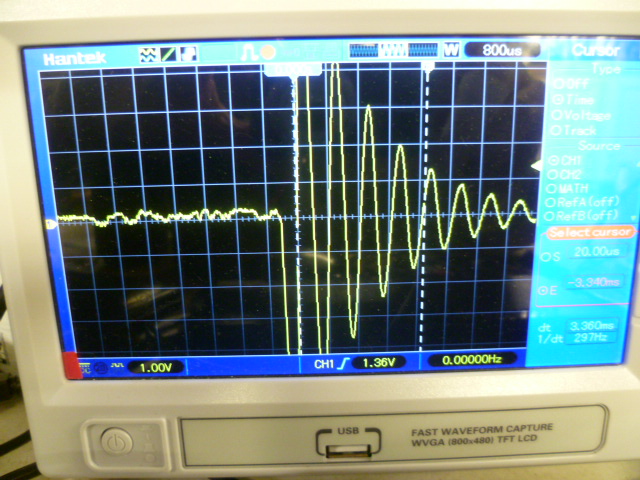
1 pointOh, and just to be ridiculous... Here's how I measure capacitance. Put the cap in parallel with a known inductance, hit it with an impulse function, and then simply measure the harmonic response: Little bit of algebra, and you got it!
 1 point
 -
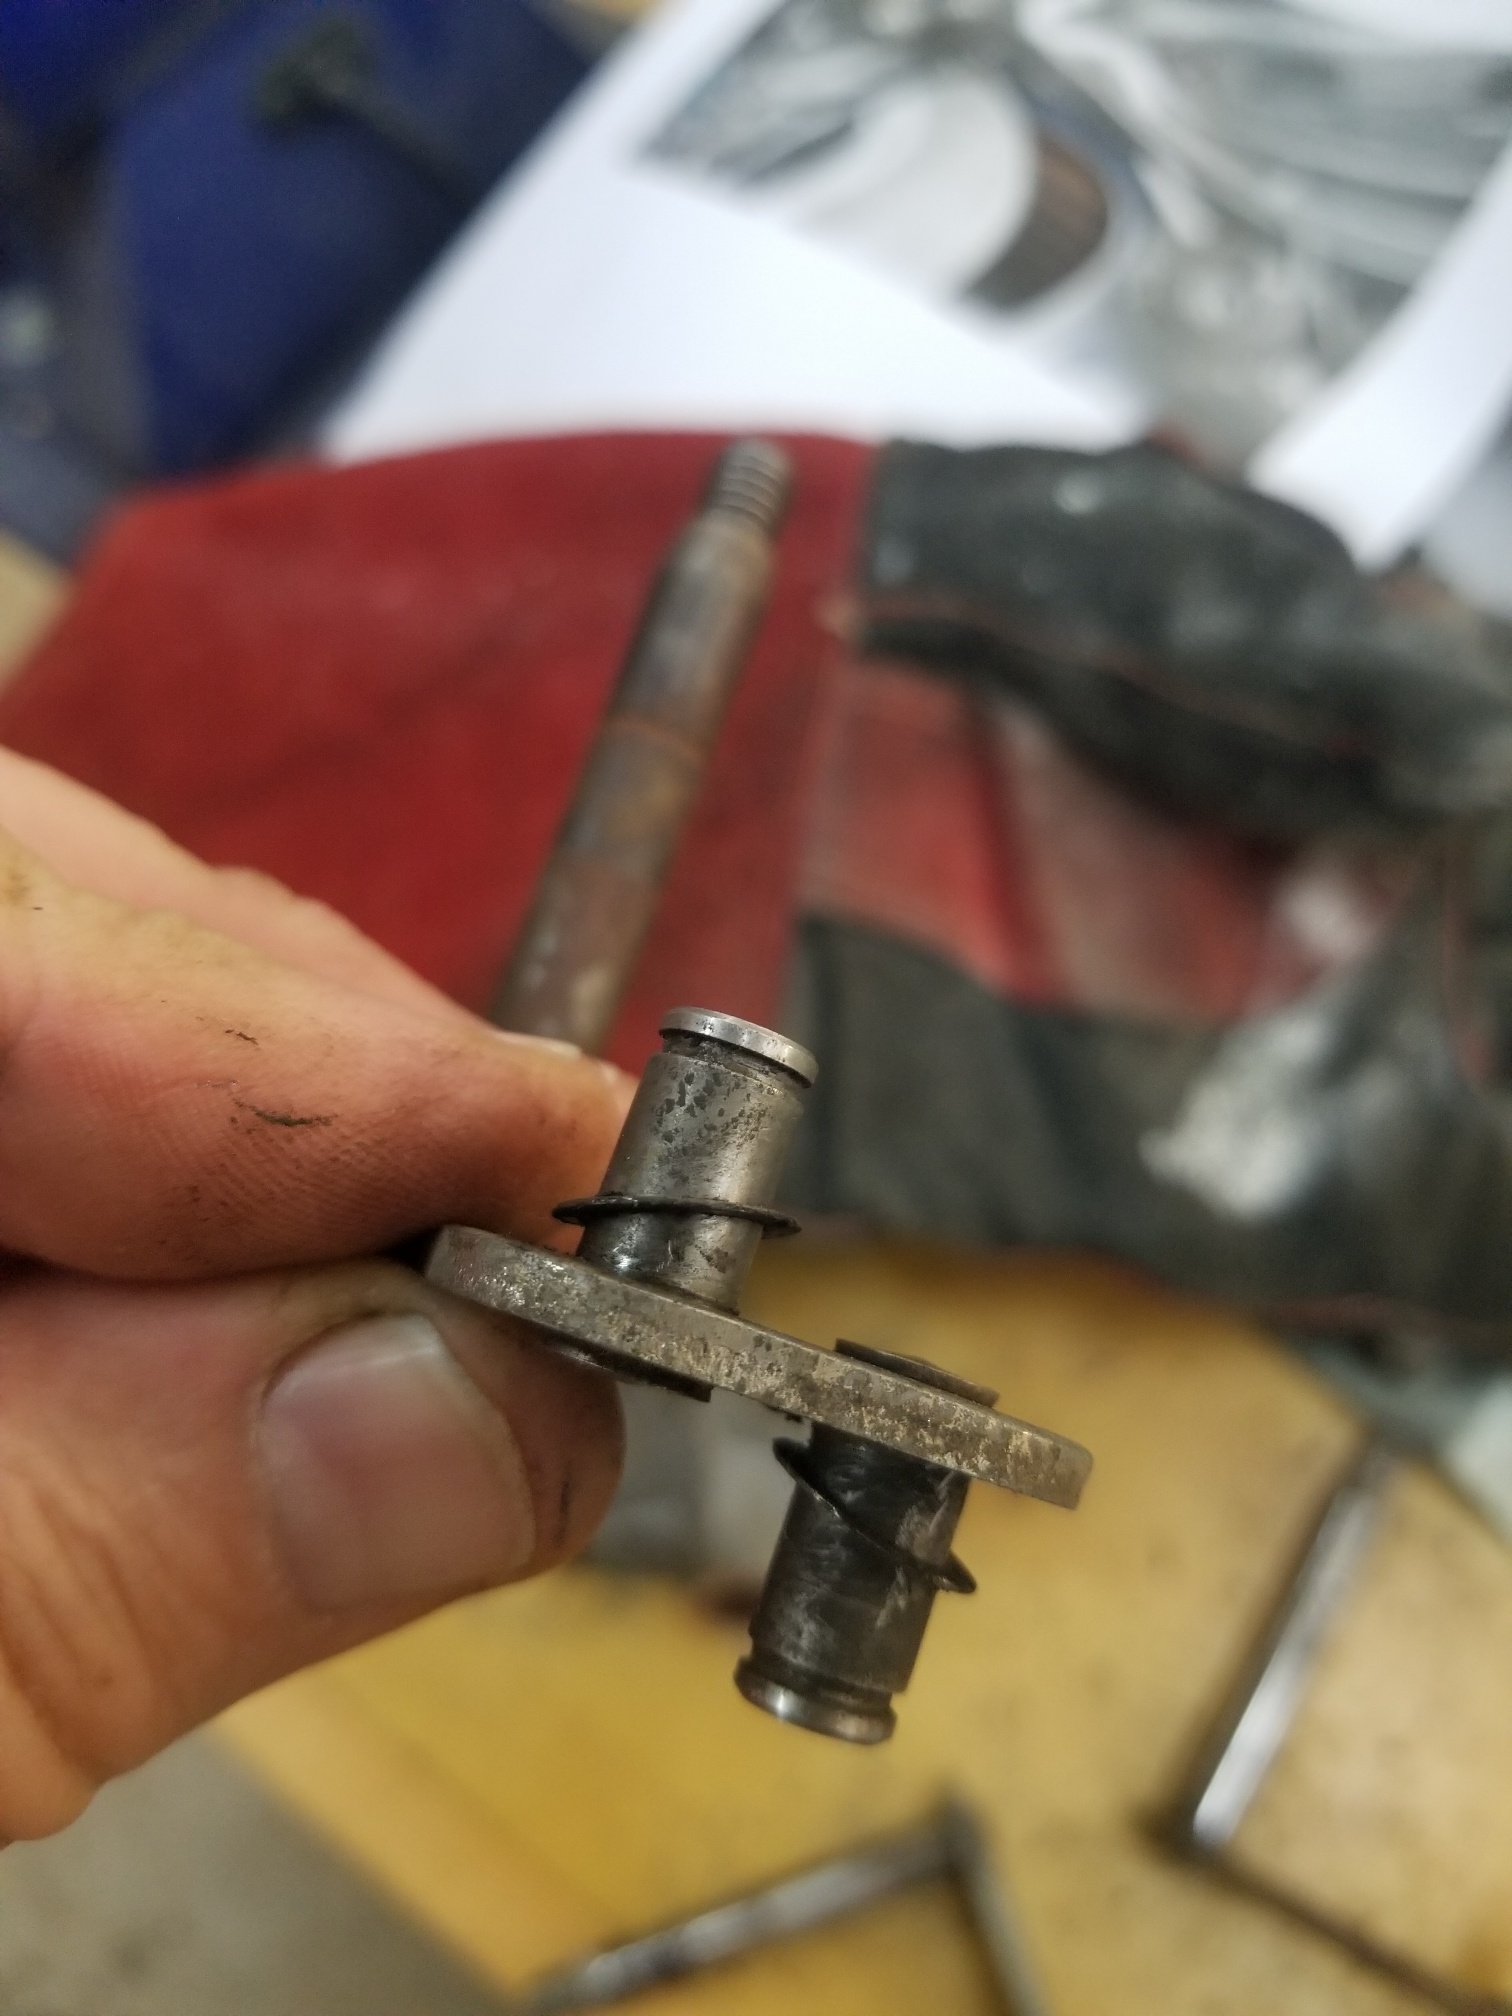
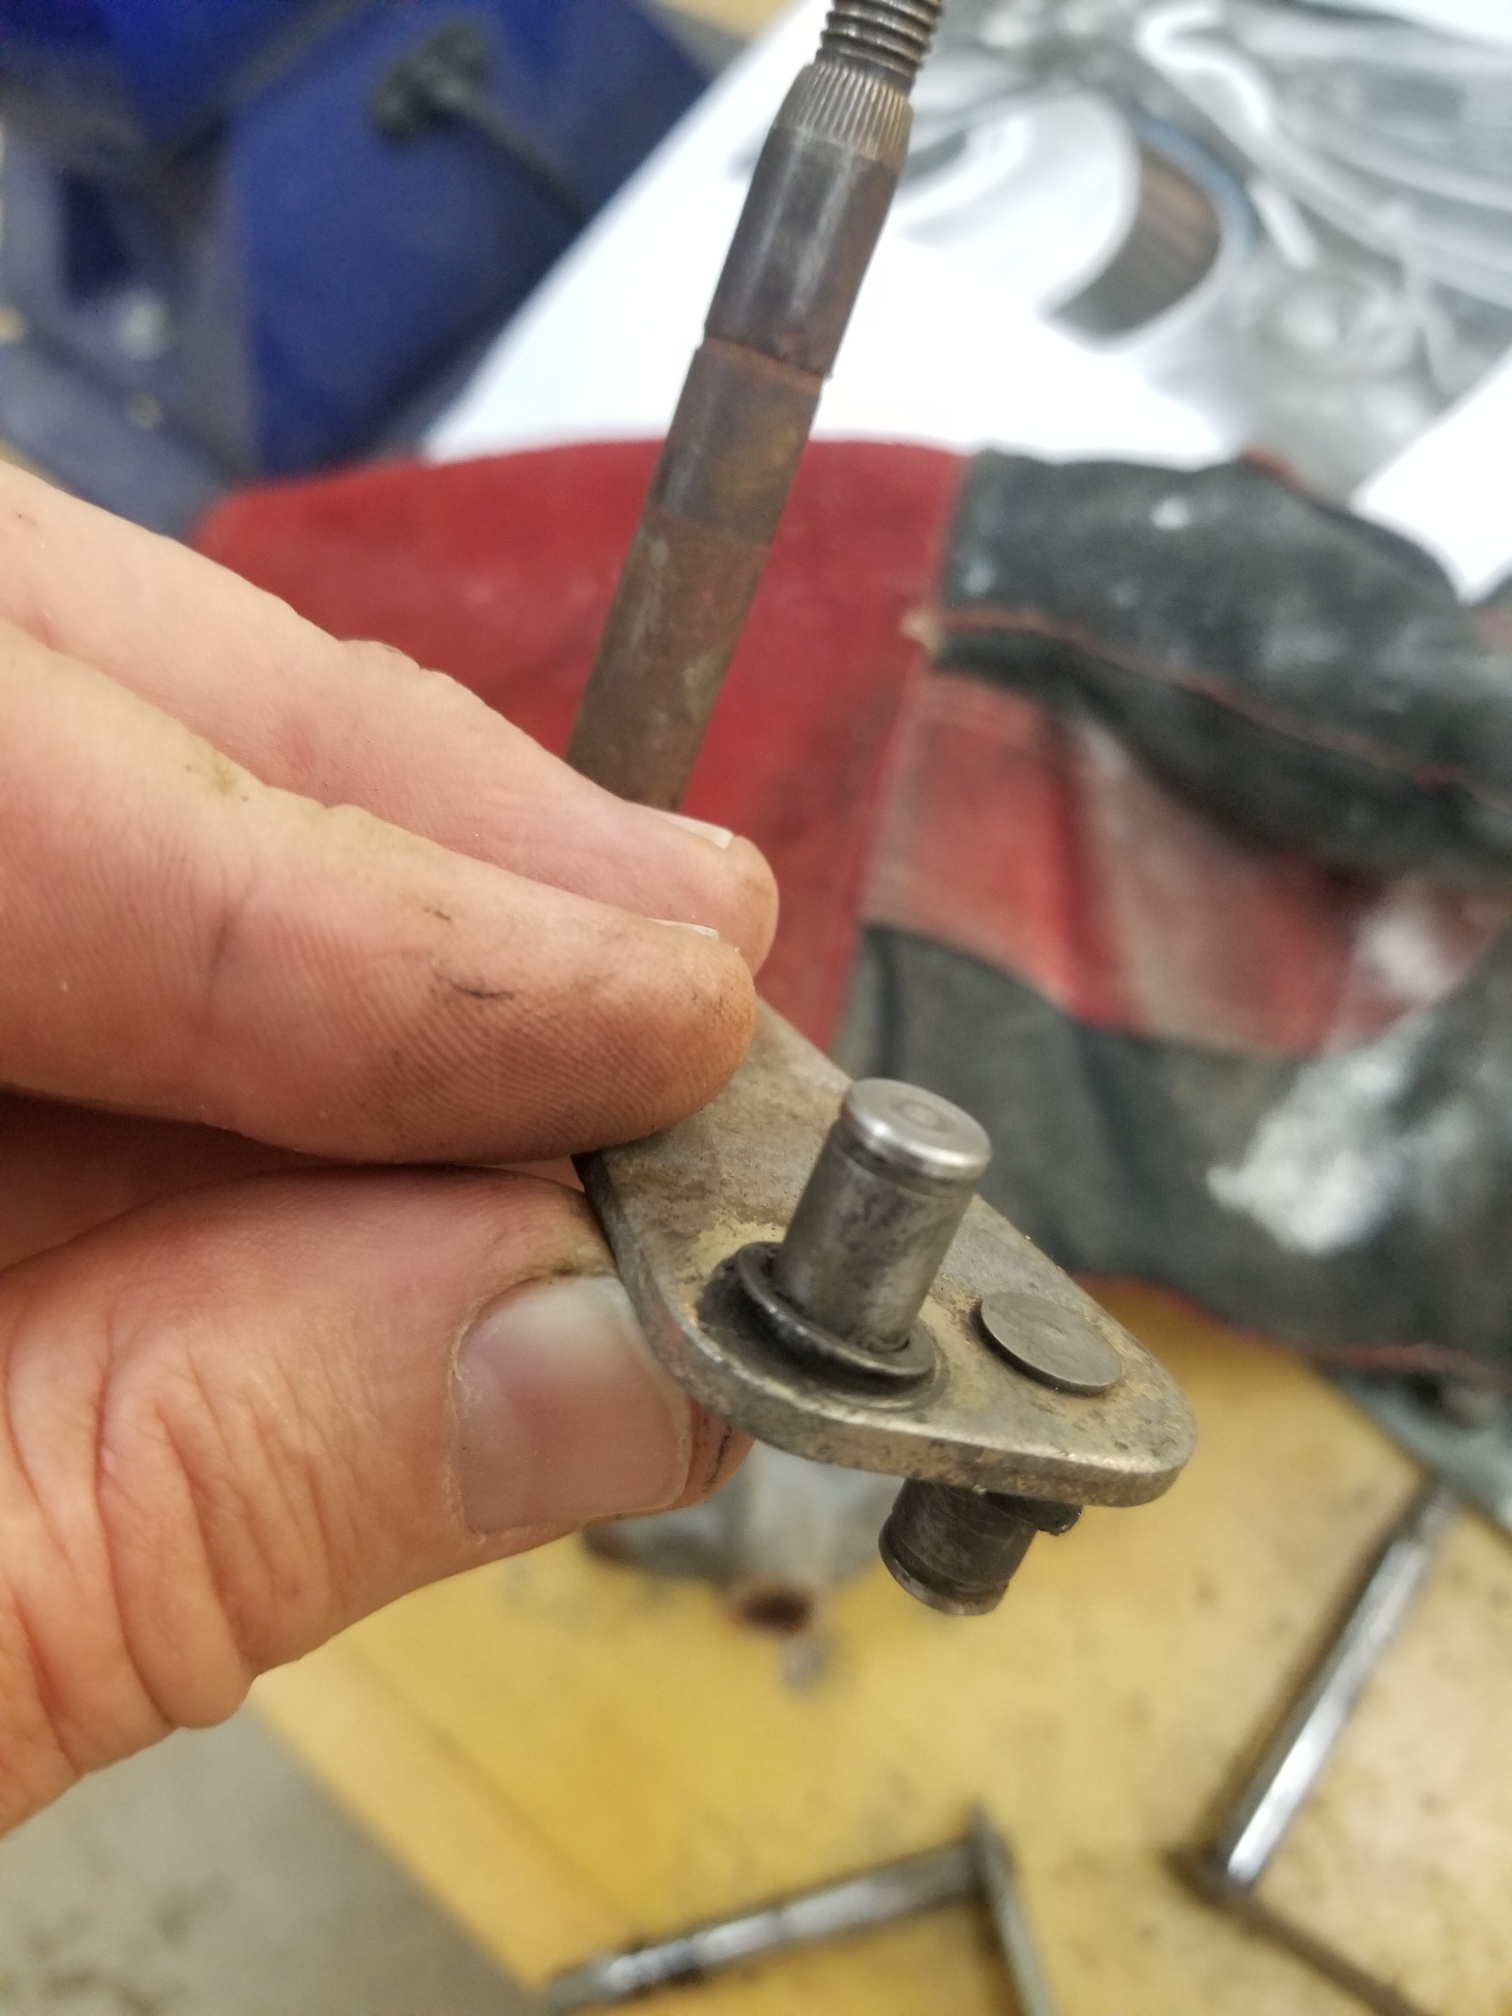
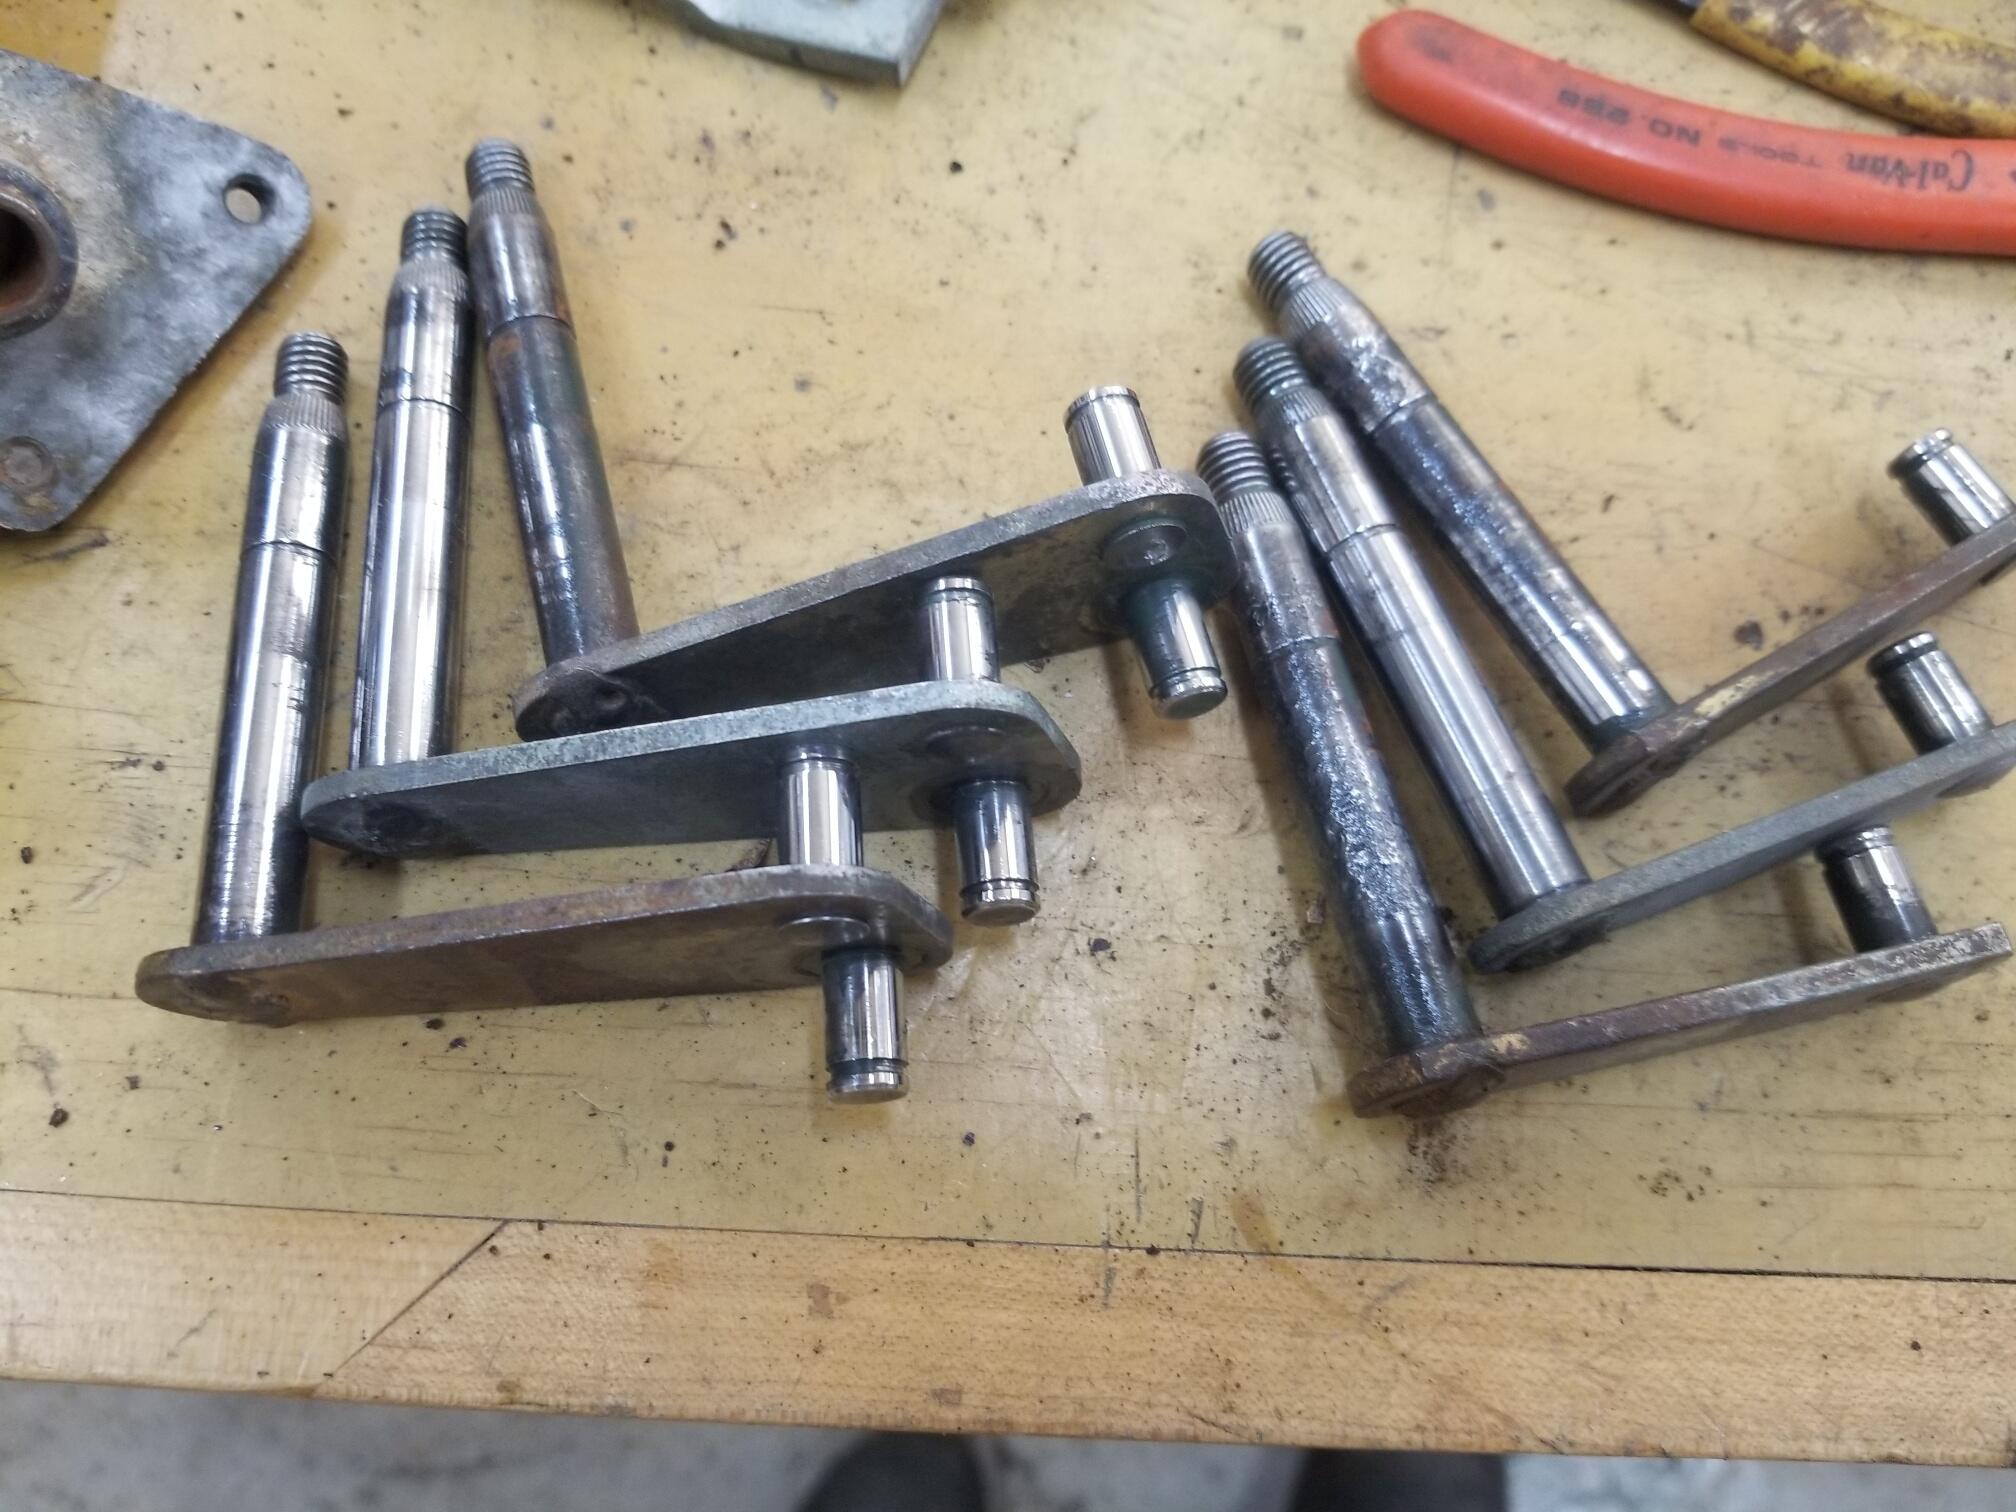
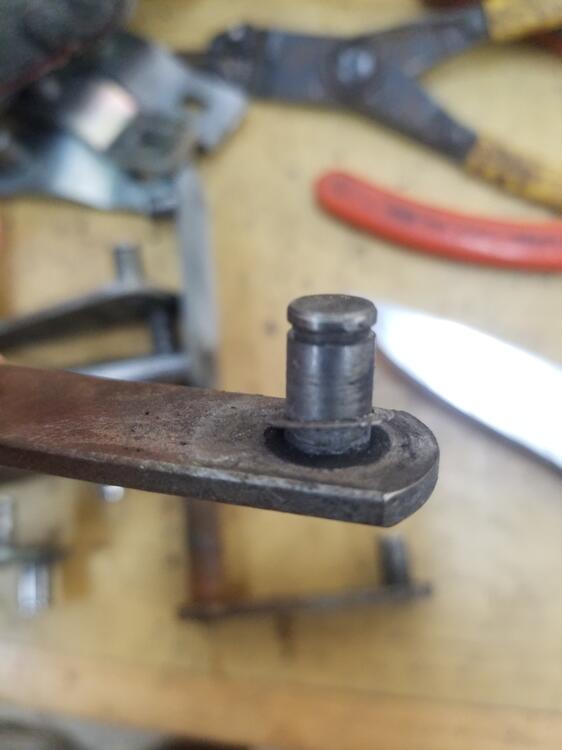
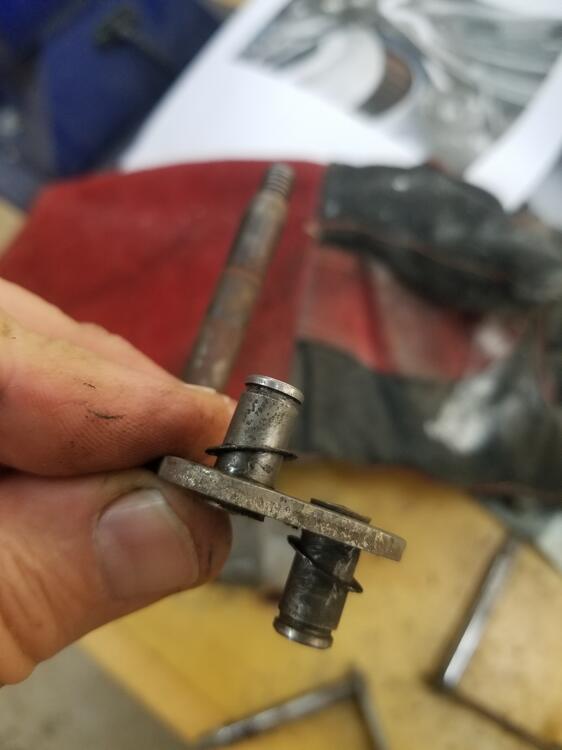
1 pointPolished the pivots some today and bead blasted the wiper pivots I noticed a thin hard washer on all the short pivots. Very hard to see and I had to use a knife to separate them from the pivots. Three of these pivots have a broken bolt in them


 1 point
 -
1 point
-
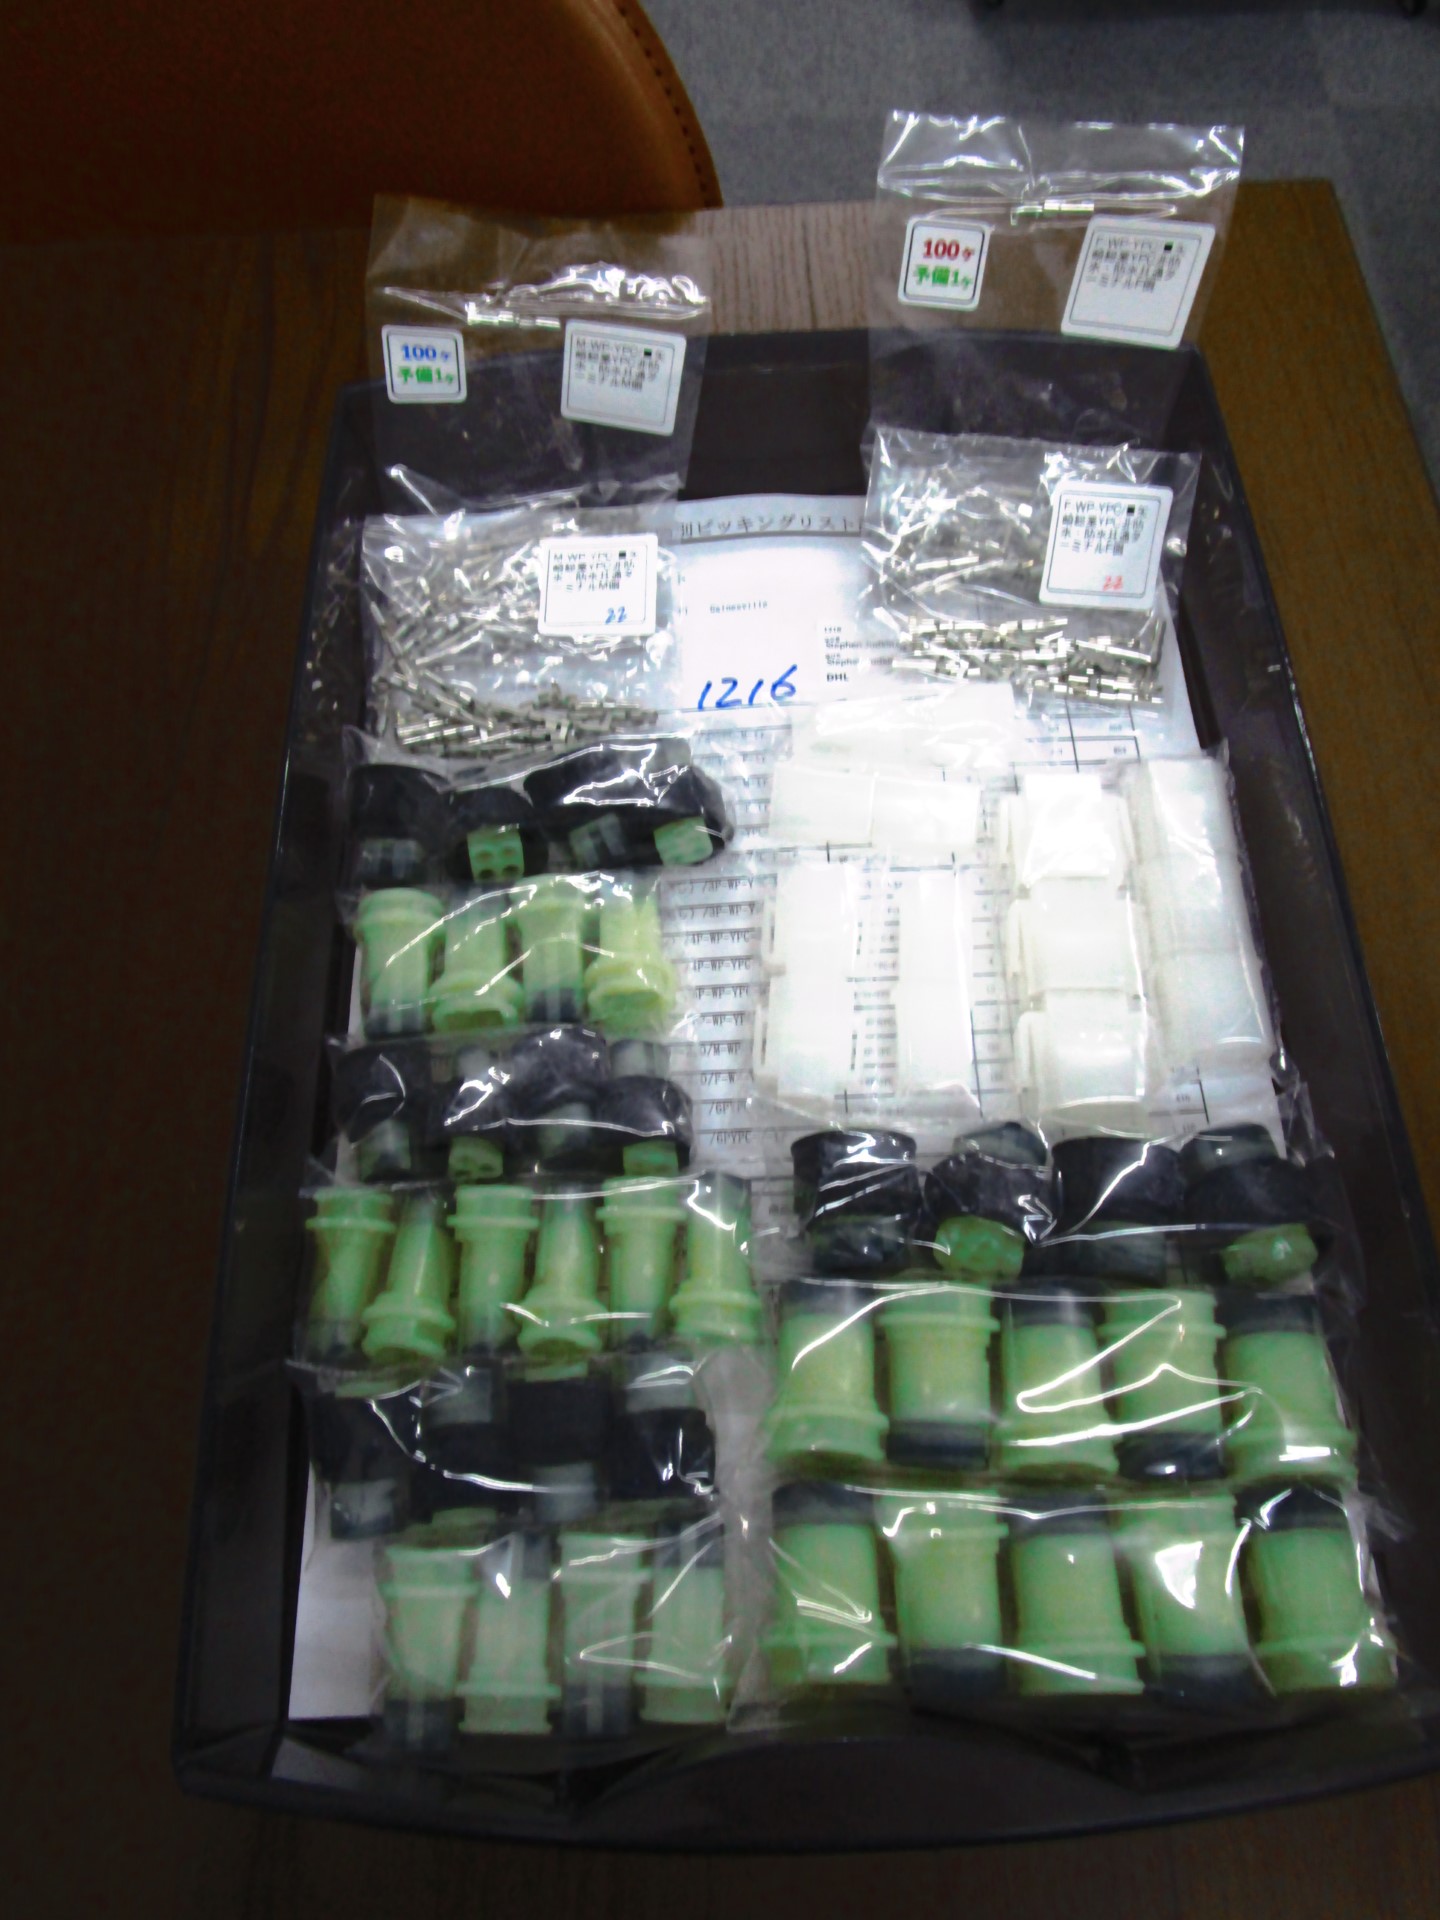
1 pointI found a website that lists many of the old YPC connectors for sale. Here's a link to their YPC inventory: https://www.hi-1000ec.com/product-list?keyword=ypc&Submit=Search&page=1 The last item in the search is for a pin removal tool, too. The website whois shows a registration in Japan. I placed an order last night, and today I received an email with a photo of the shipping label and a photo of the parts I ordered bagged up. That certainly inspires confidence in ordering. This should help in making repairs and modifications to 260Zs and 280Zs.
 1 point
 -
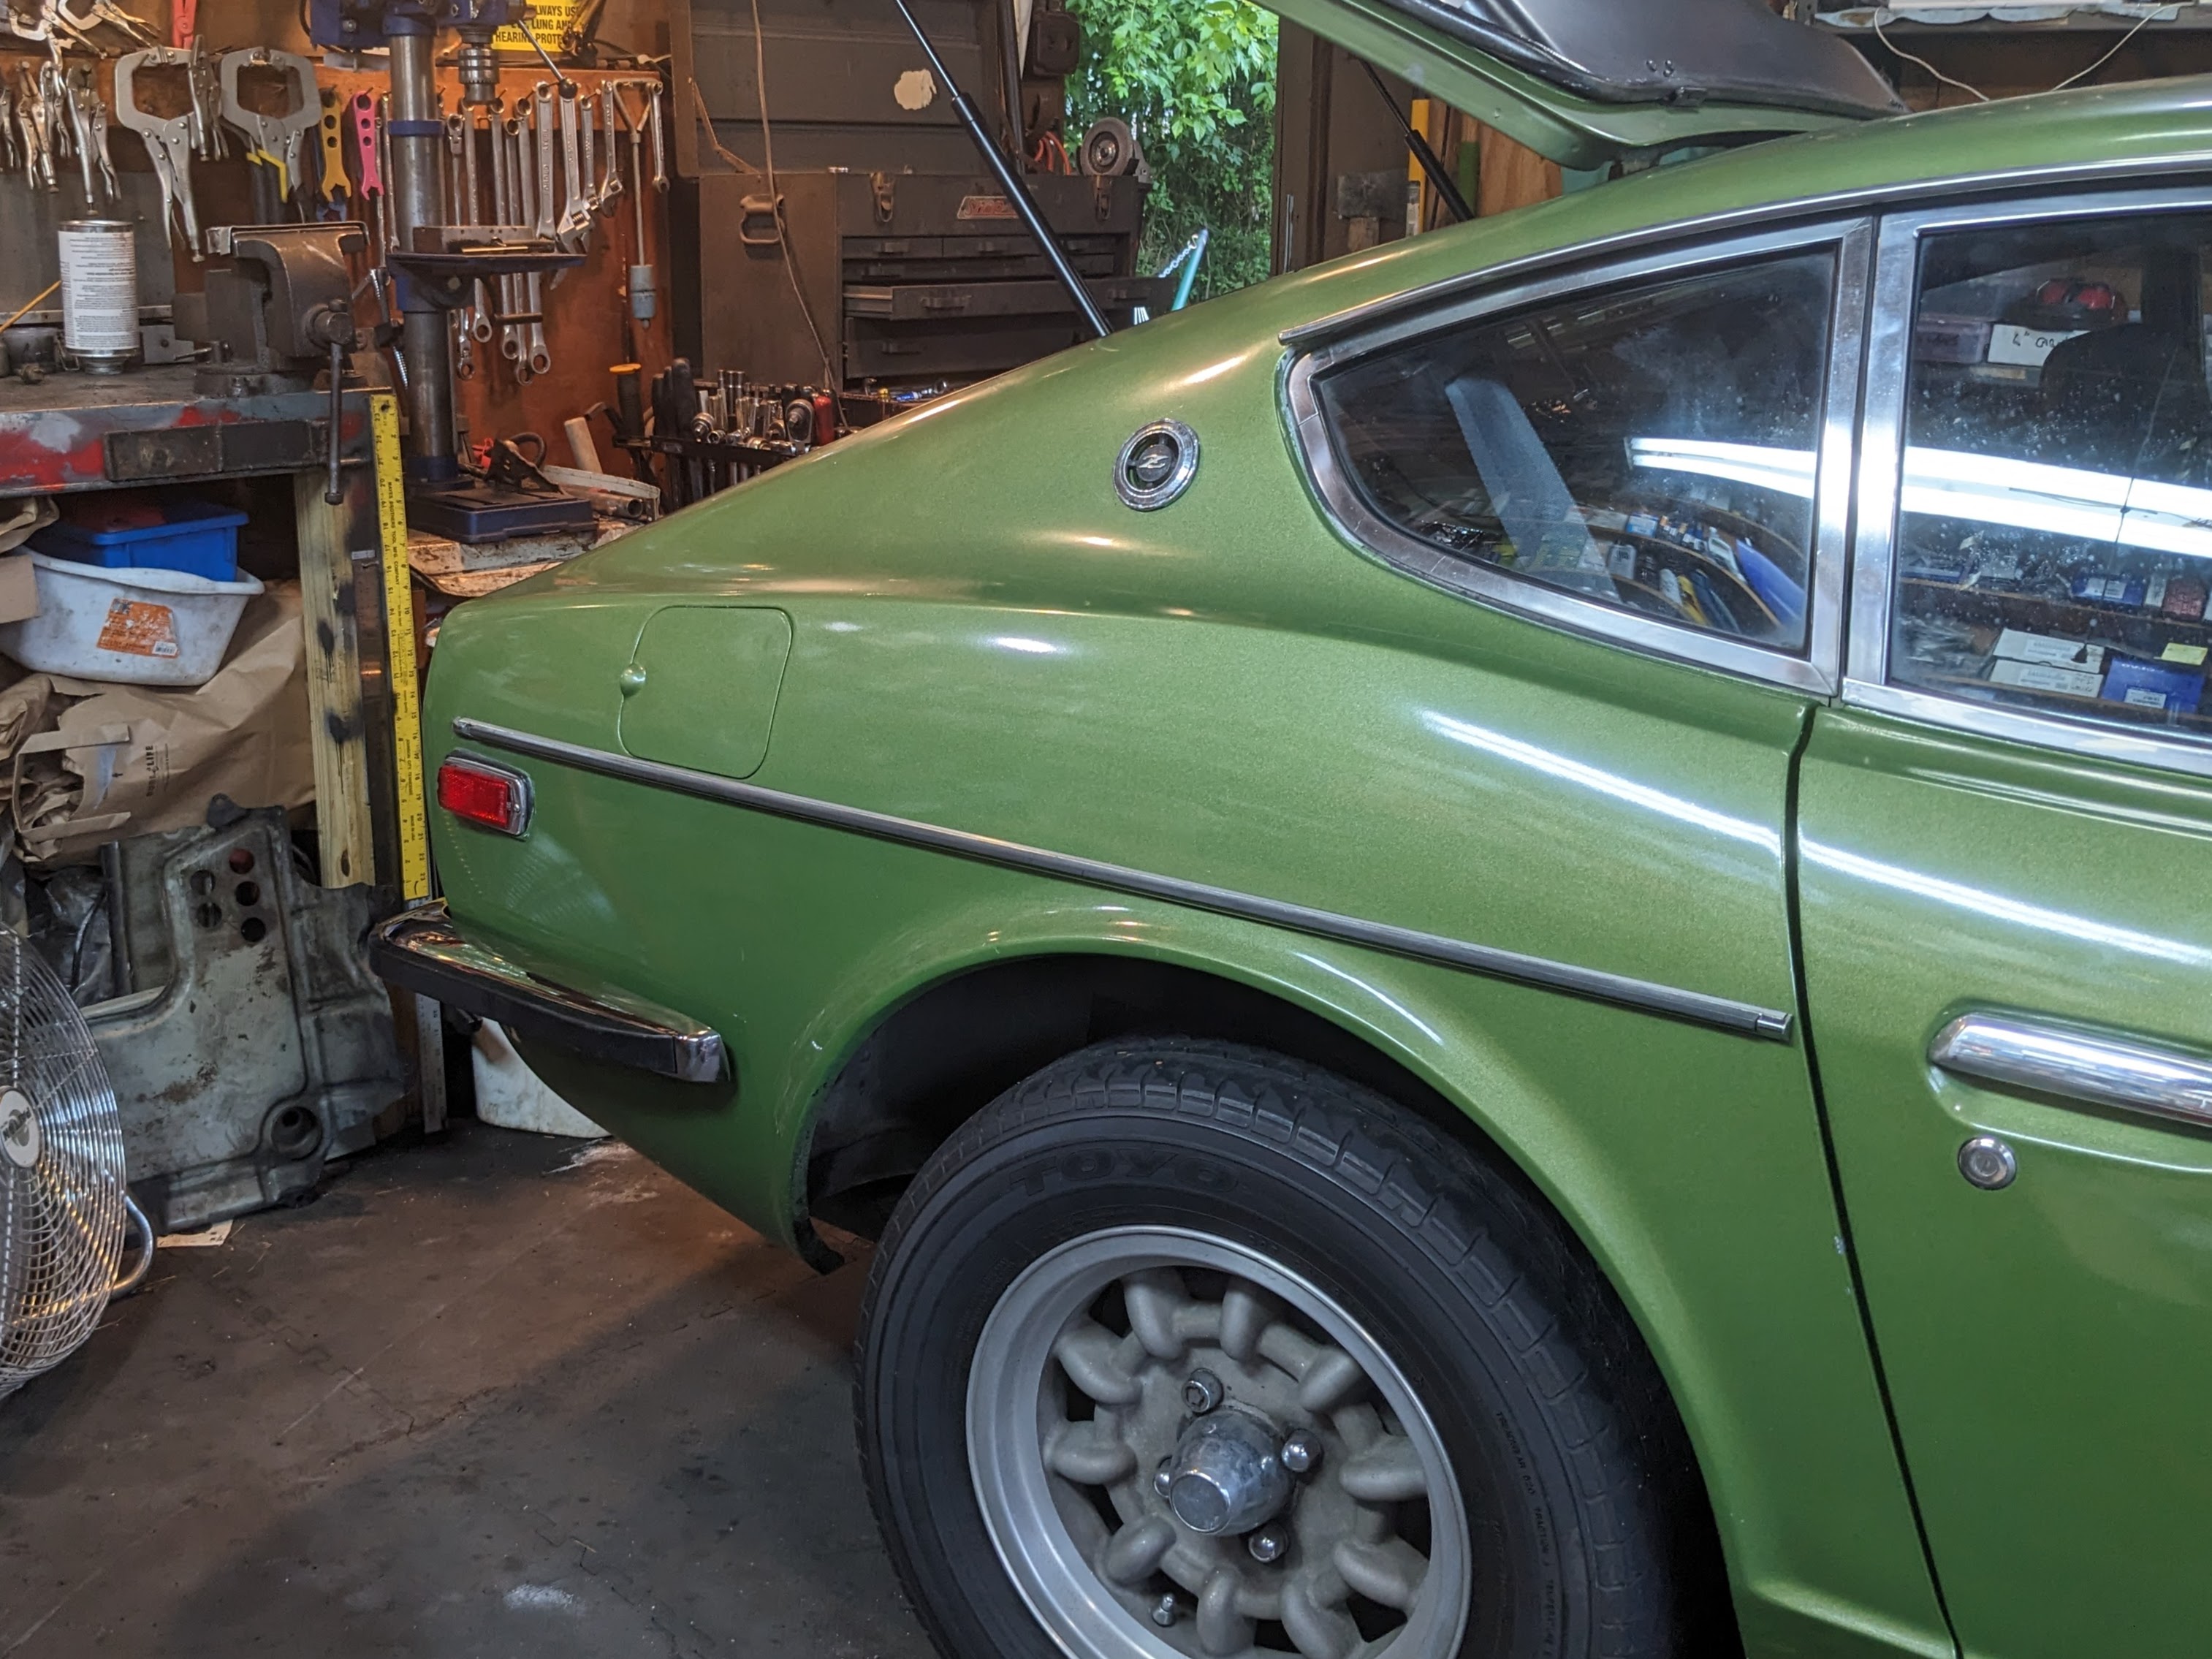
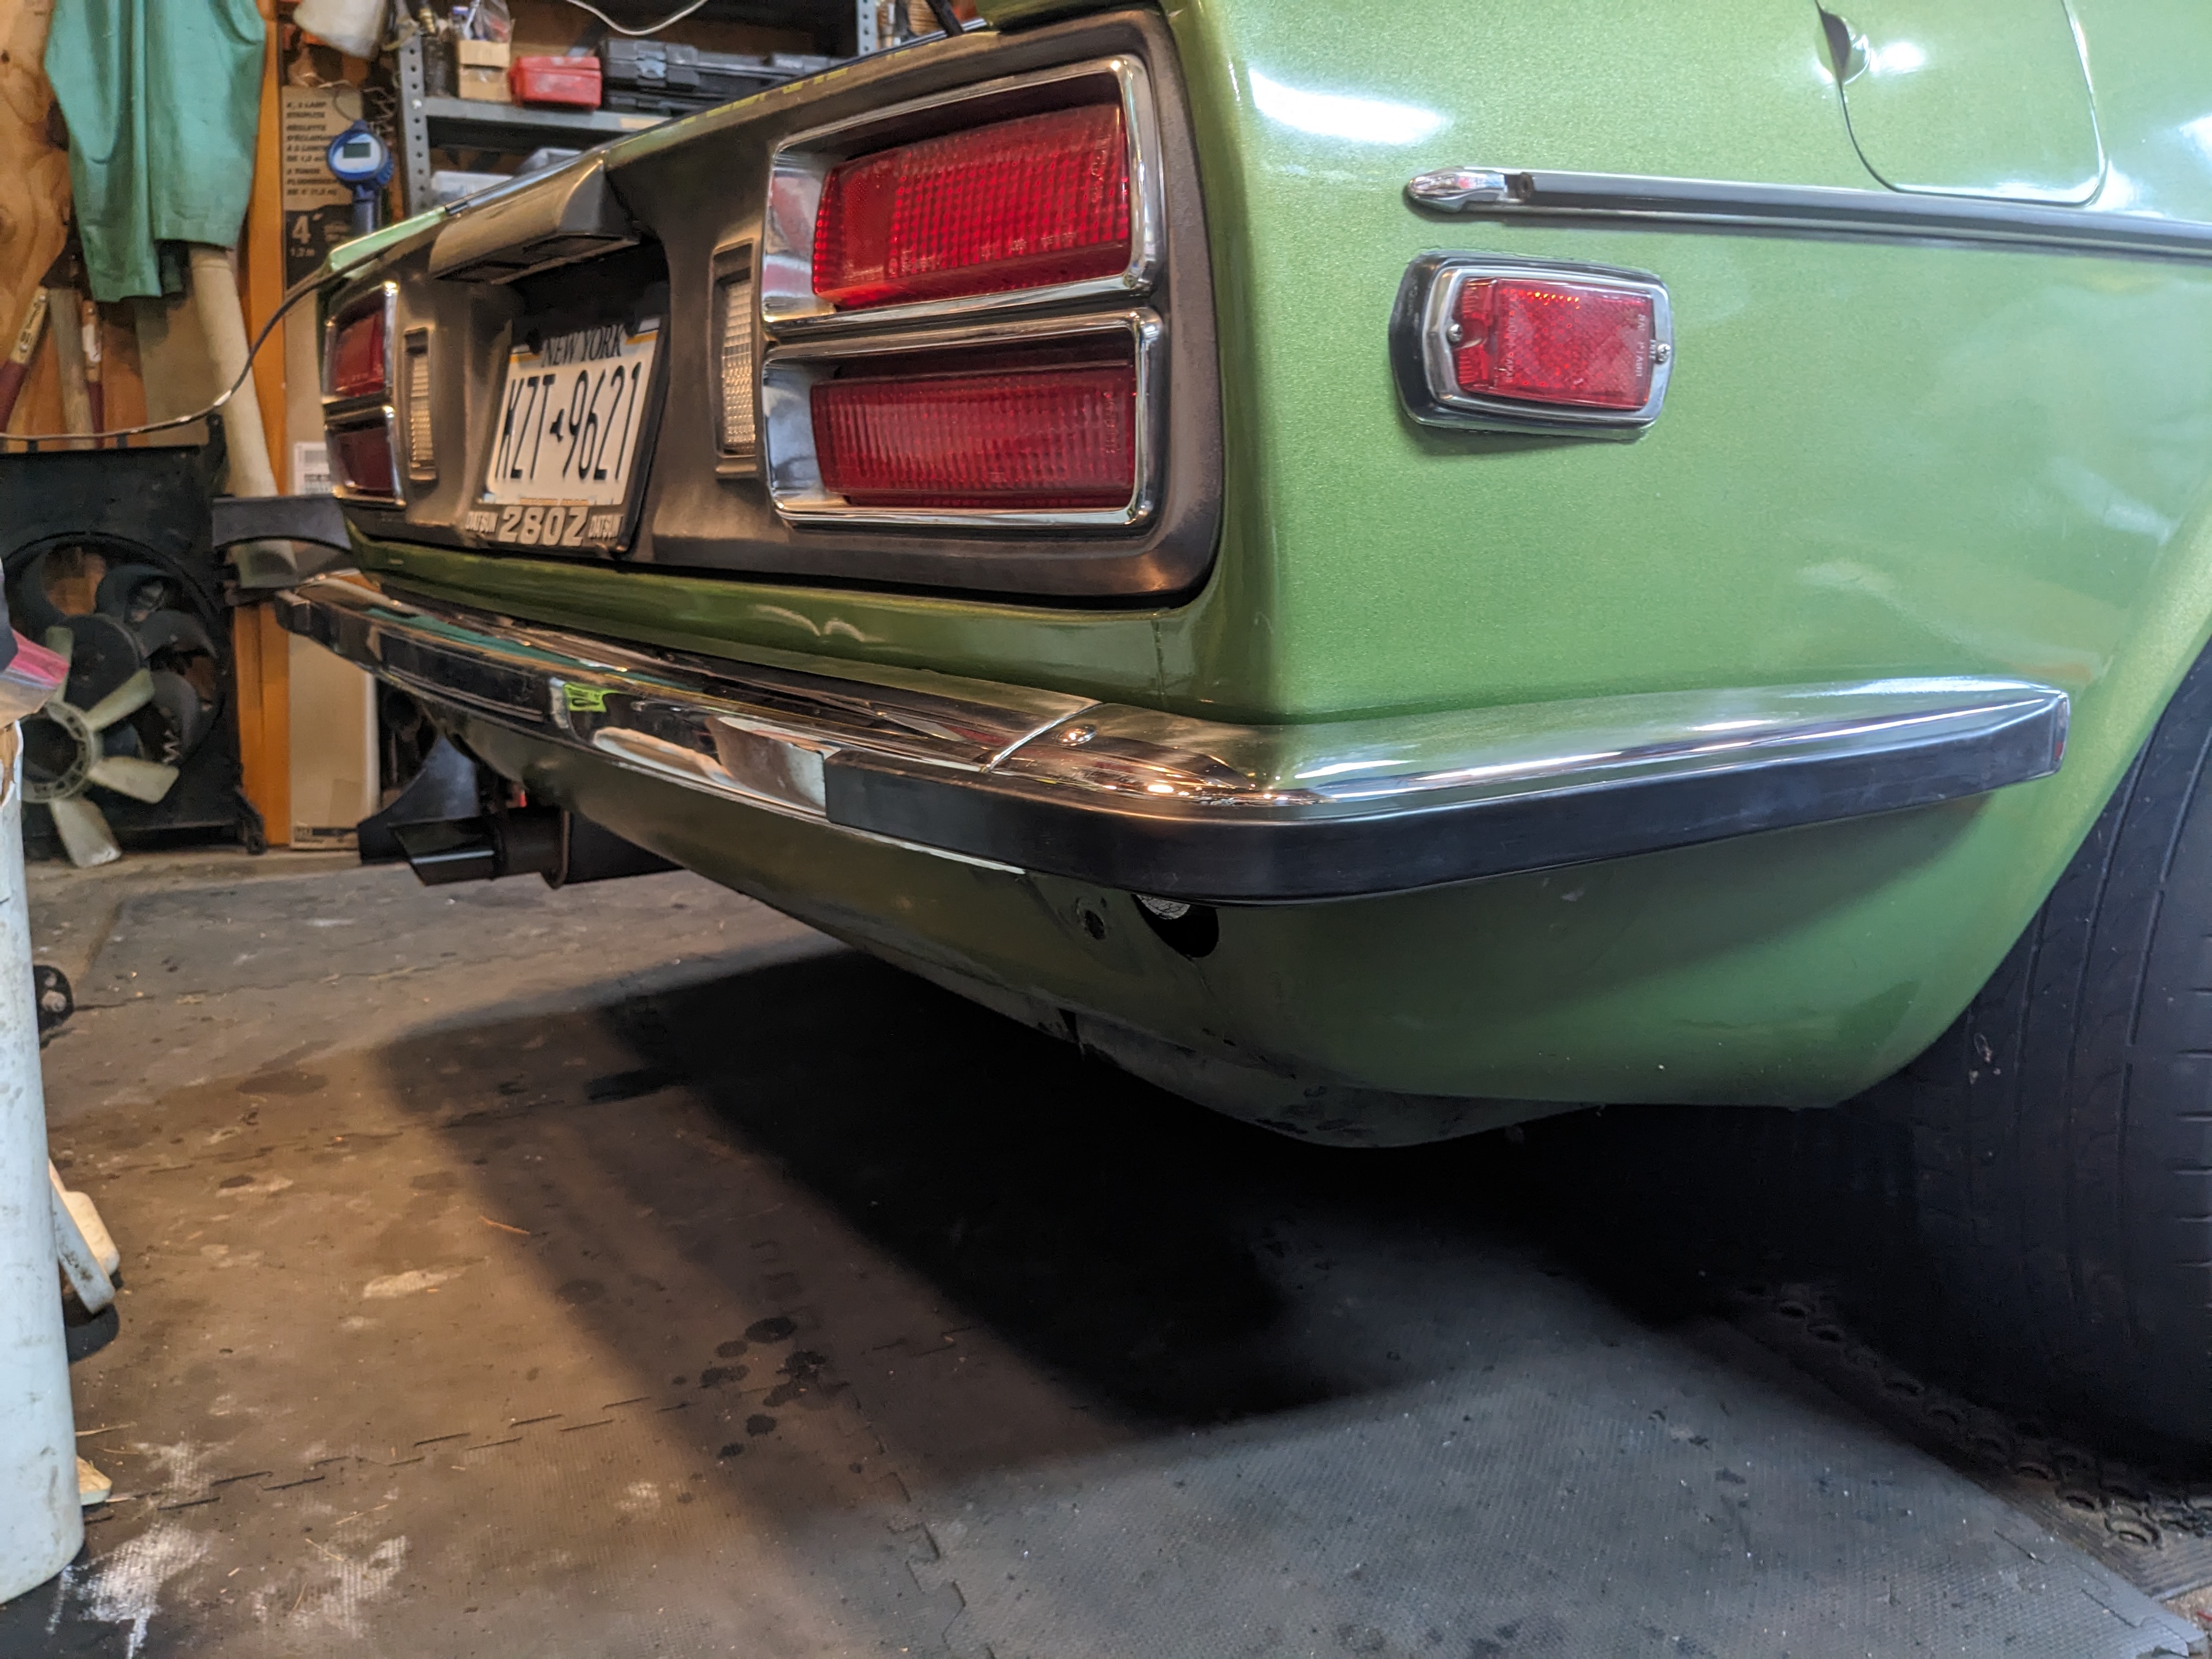
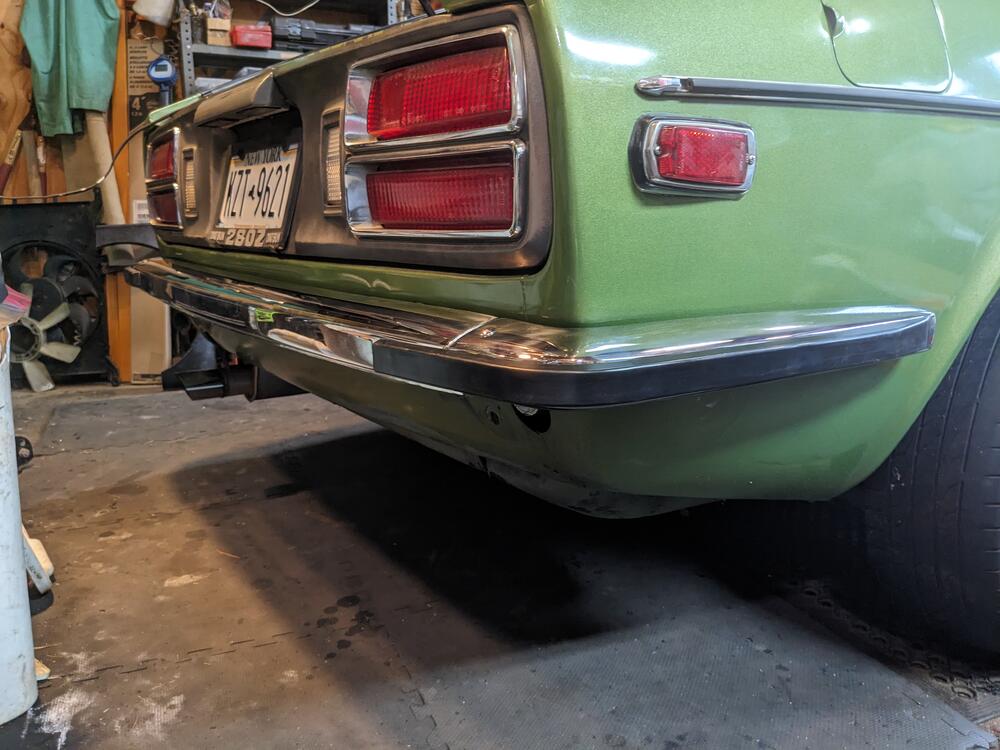
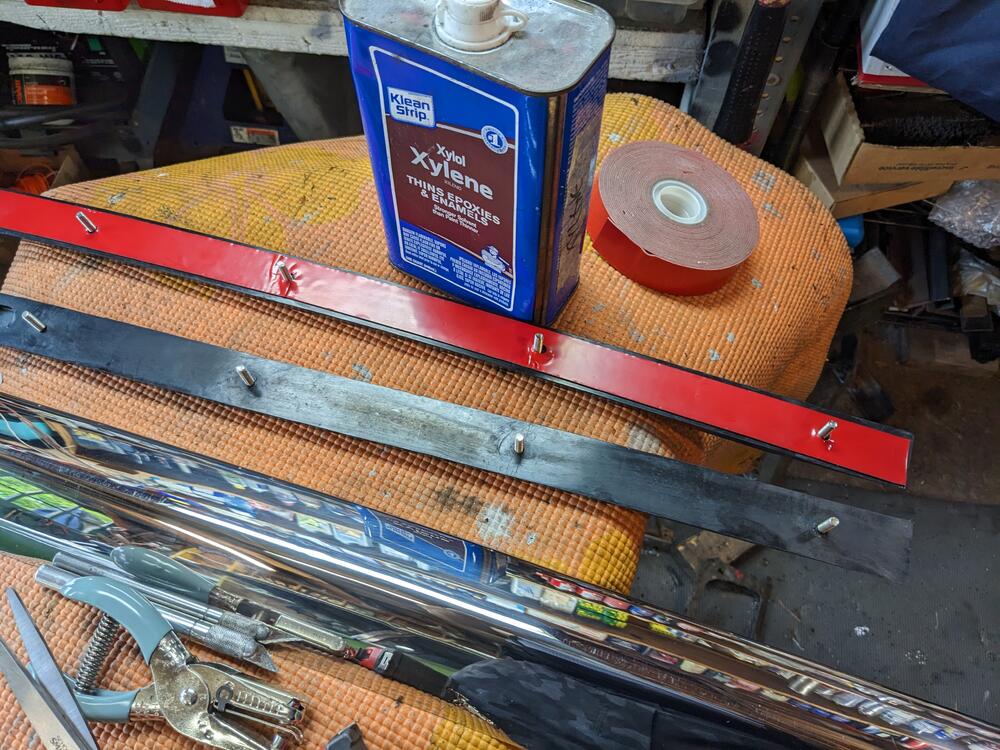
Finally got back to this - assembled & installed the rear bumper today. I test-fitted it yesterday & marked the 2 drill locations for the side attachments. Primed & painted the holes prior to assembly. Had to do it jammed in the garage, it rained all day. I had to retap both the side captive nuts - neither would accept the M12x1.25 bolts. Also had to use 3M VHB tape to secure the rubber strips - otherwise they 'flop' away from the bumper in-between the mount studs. I had removed the fronts & done the same previously. The vendor claims you just have to pull the rubber & then tighten in place. That would work if the bolt holes were elongated, which they are not. The right side I had to shorten the bolt & grind the tip to a point to guide it into the bumper bracket. Not much room given the gas tank proximity Made sure both sides were level - holes were about 9" down from the side molding, and about 5.5" forward of the existing bumper side mount captive nut rubber sleeve over side bracket
 1 point