Leaderboard
-
zKars
 Subscriber
 5Points3,770Posts
 -
HusseinHolland
Free Member4Points1,031Posts -
Captain Obvious
Free Member4Points10,081Posts -
grannyknot
Free Member4Points5,158Posts


Popular Content
Showing content with the highest reputation on 07/19/2023 in all areas
-
4 pointsNot much magic here, the three trapped nuts in the mounting brackets at the back are M5x0.8 thread, the bolts are black nearly flat headed phillips (ok, yes, JIS…) about 16mm long, The front two on the sides are self taping metal screws, now what size is a bit of a trick to describe, they thread into spring clips on the sides of the mounting bracket, something akin to #8 wood screws. They were oval headed, but whatever sits flush and doesn’t catch your knee…..4 points
-
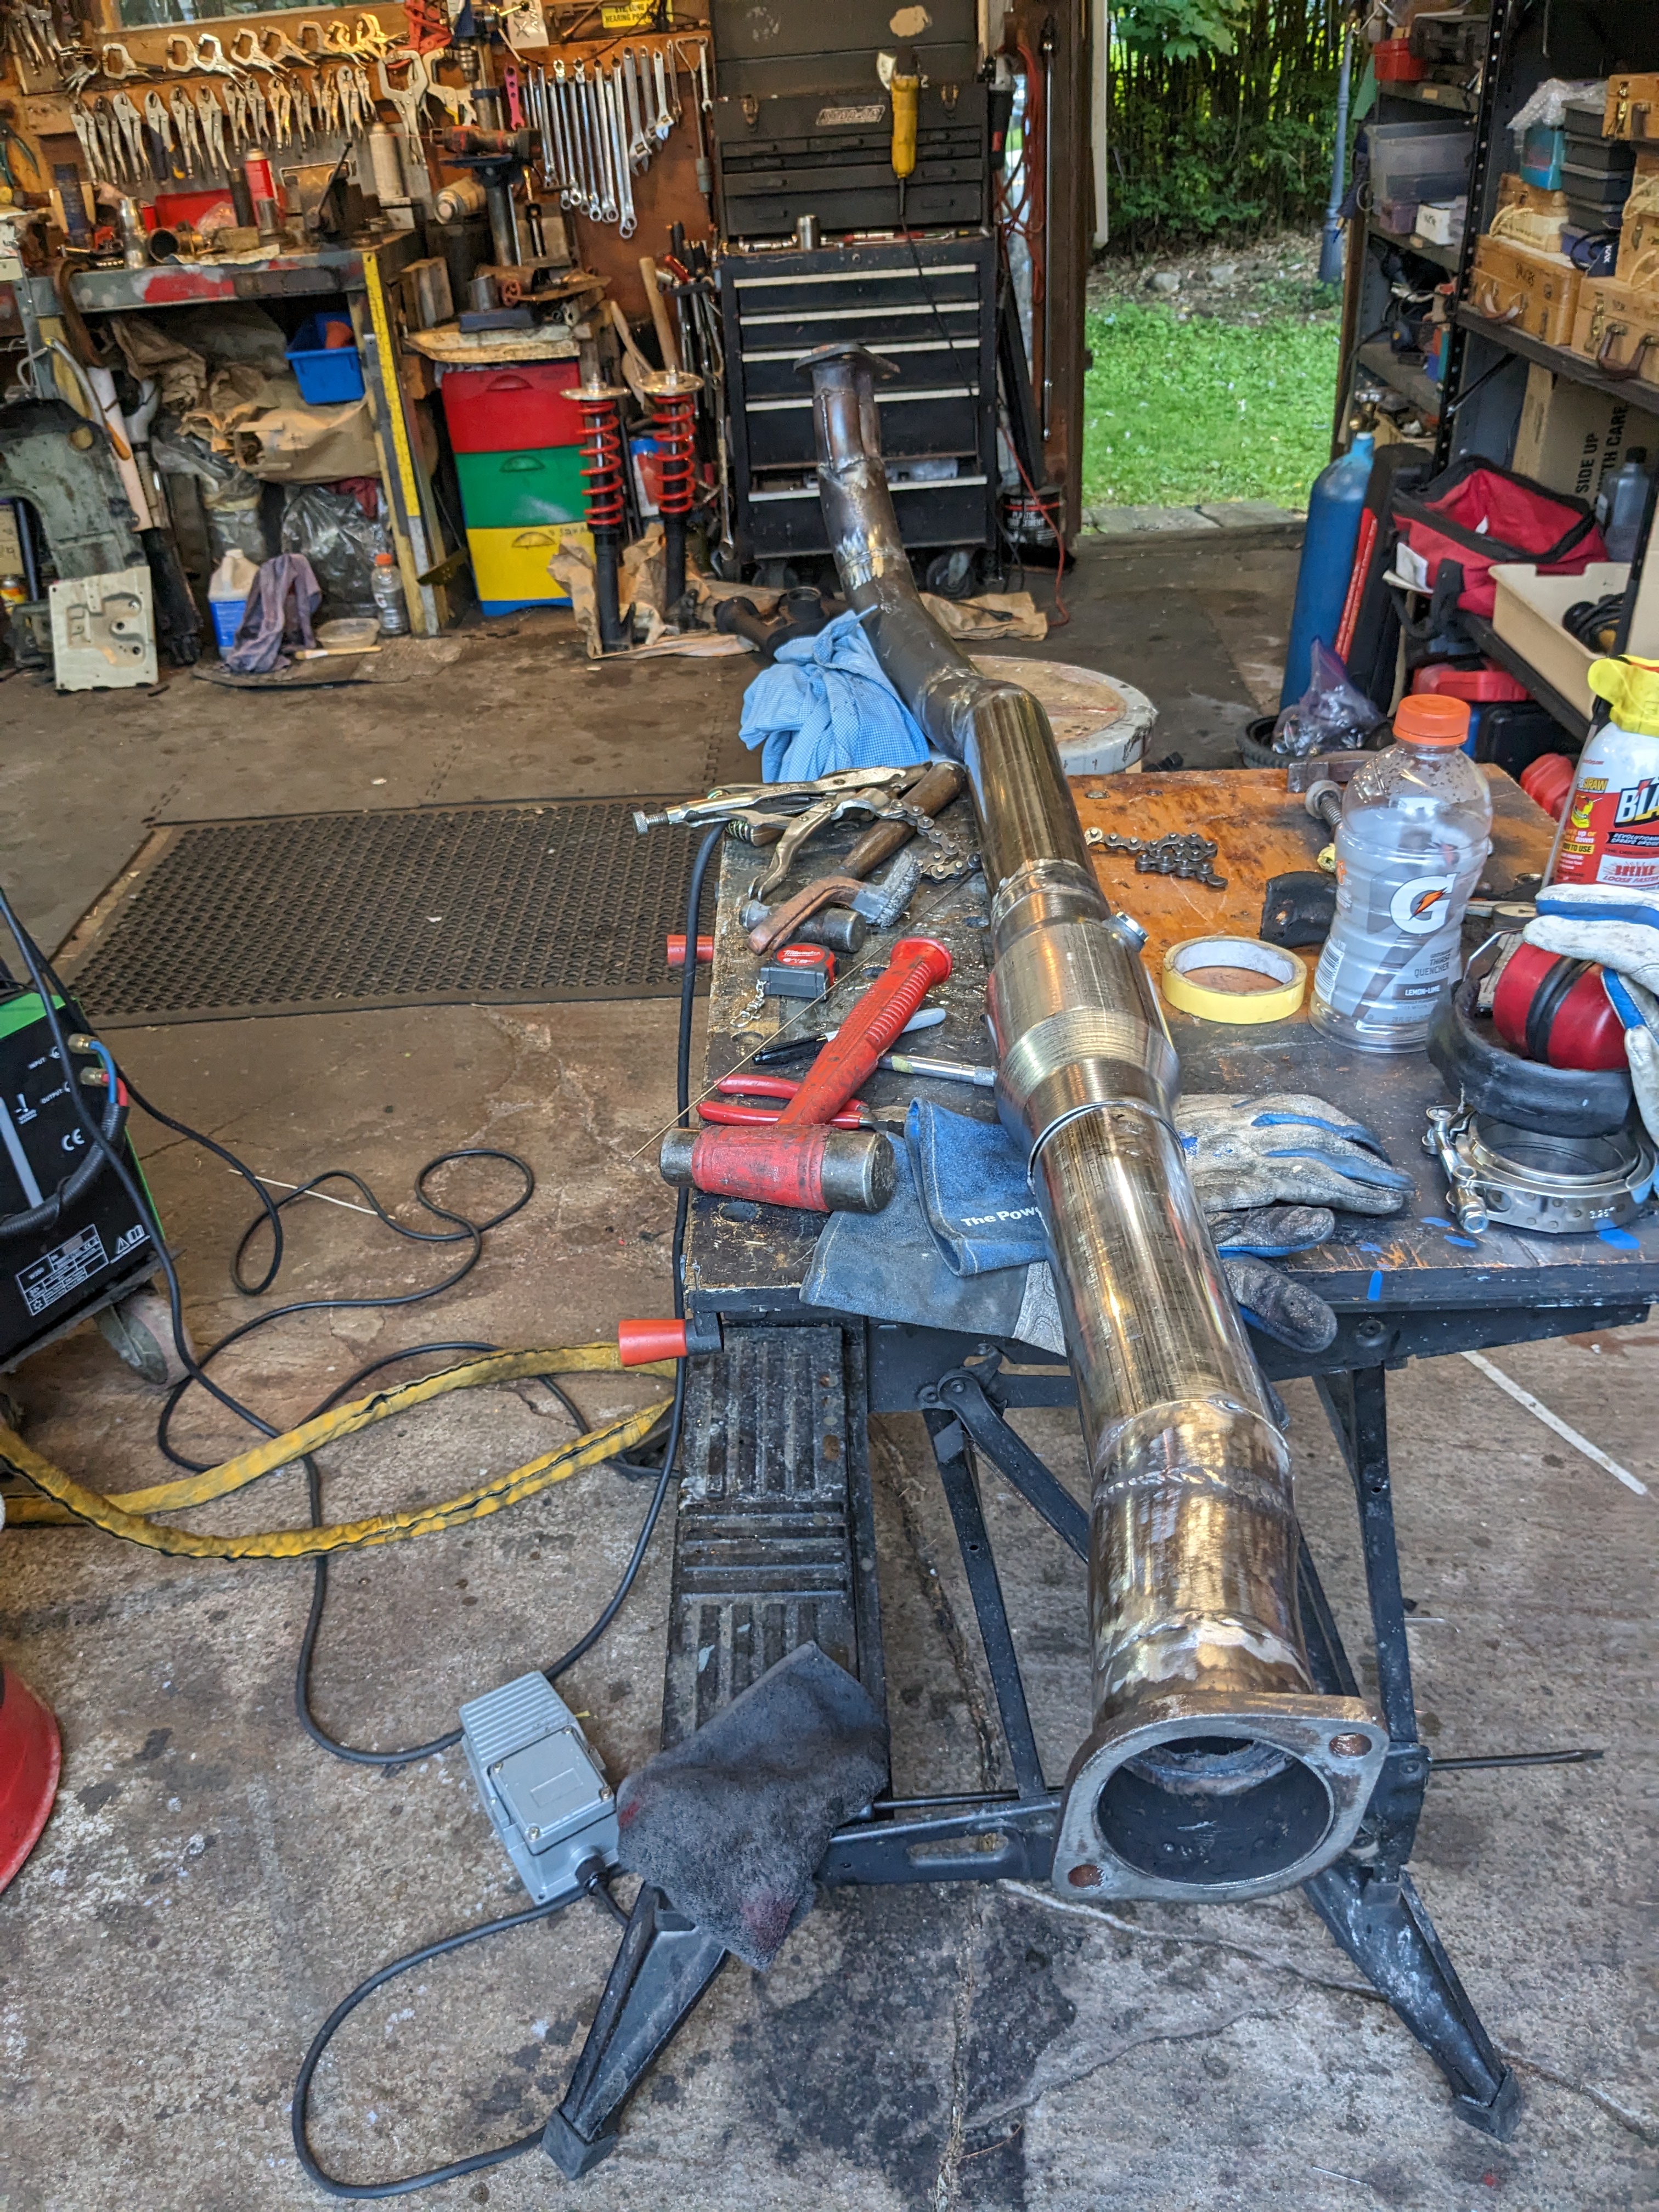
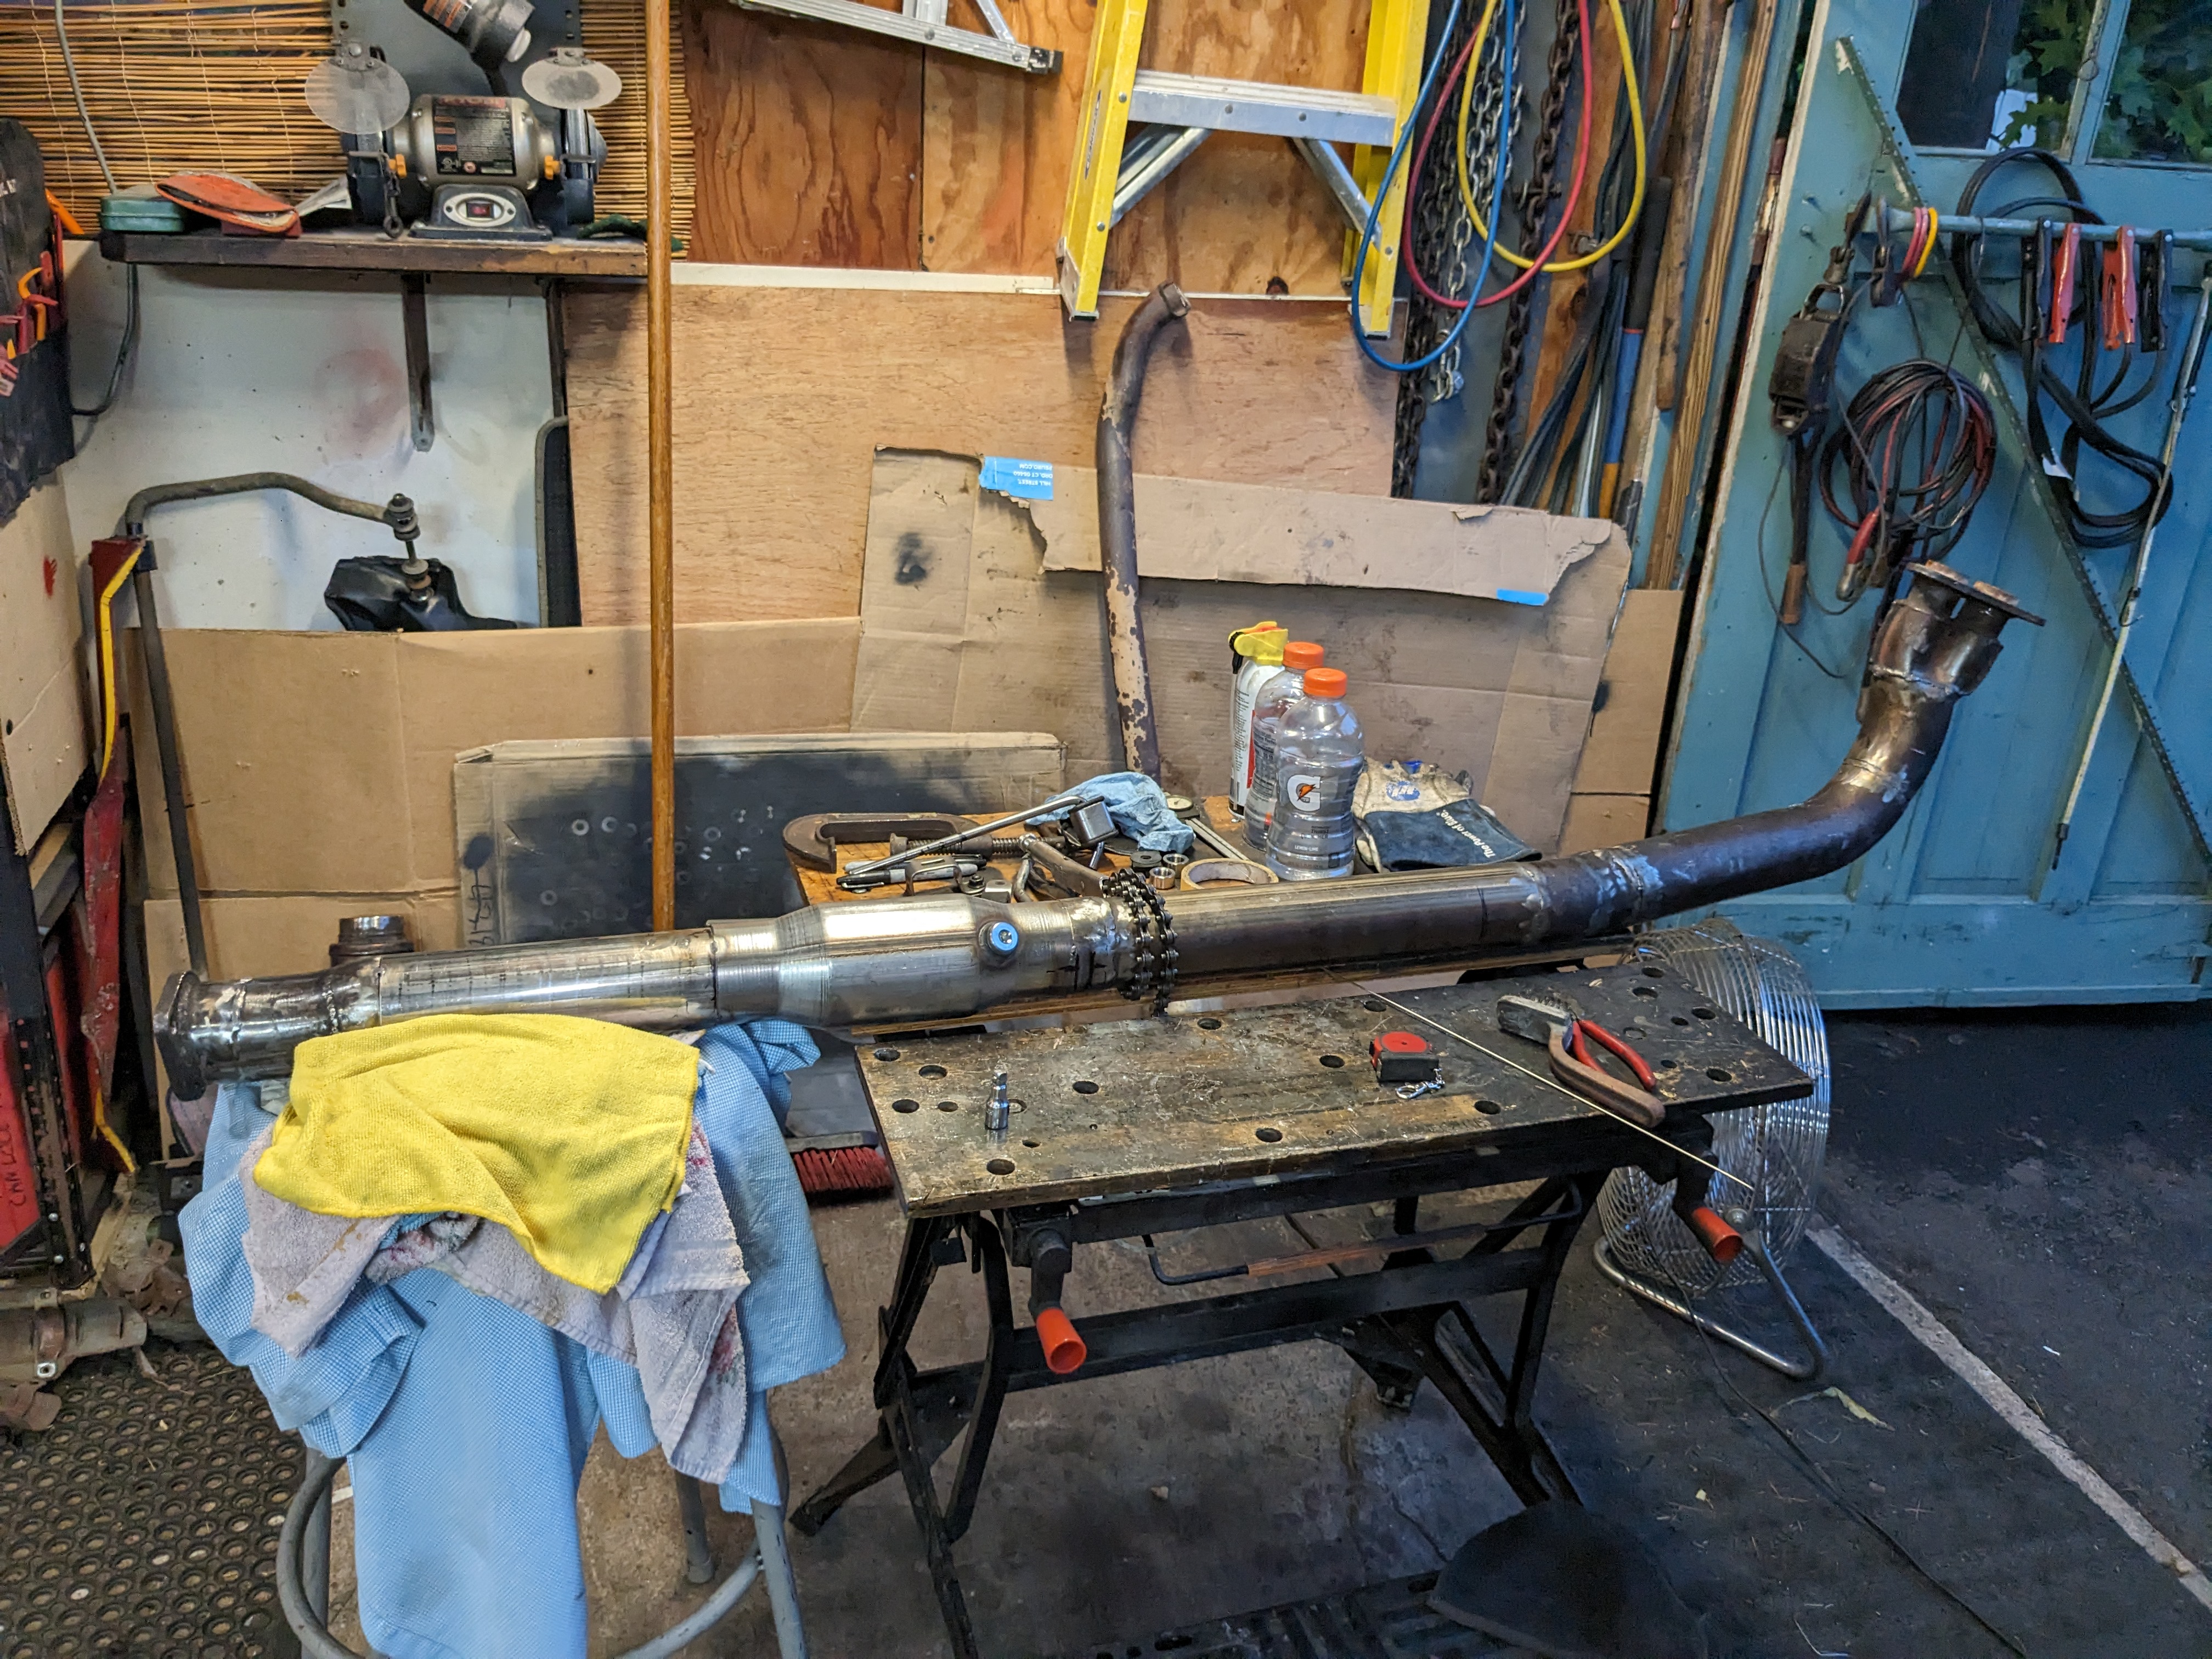
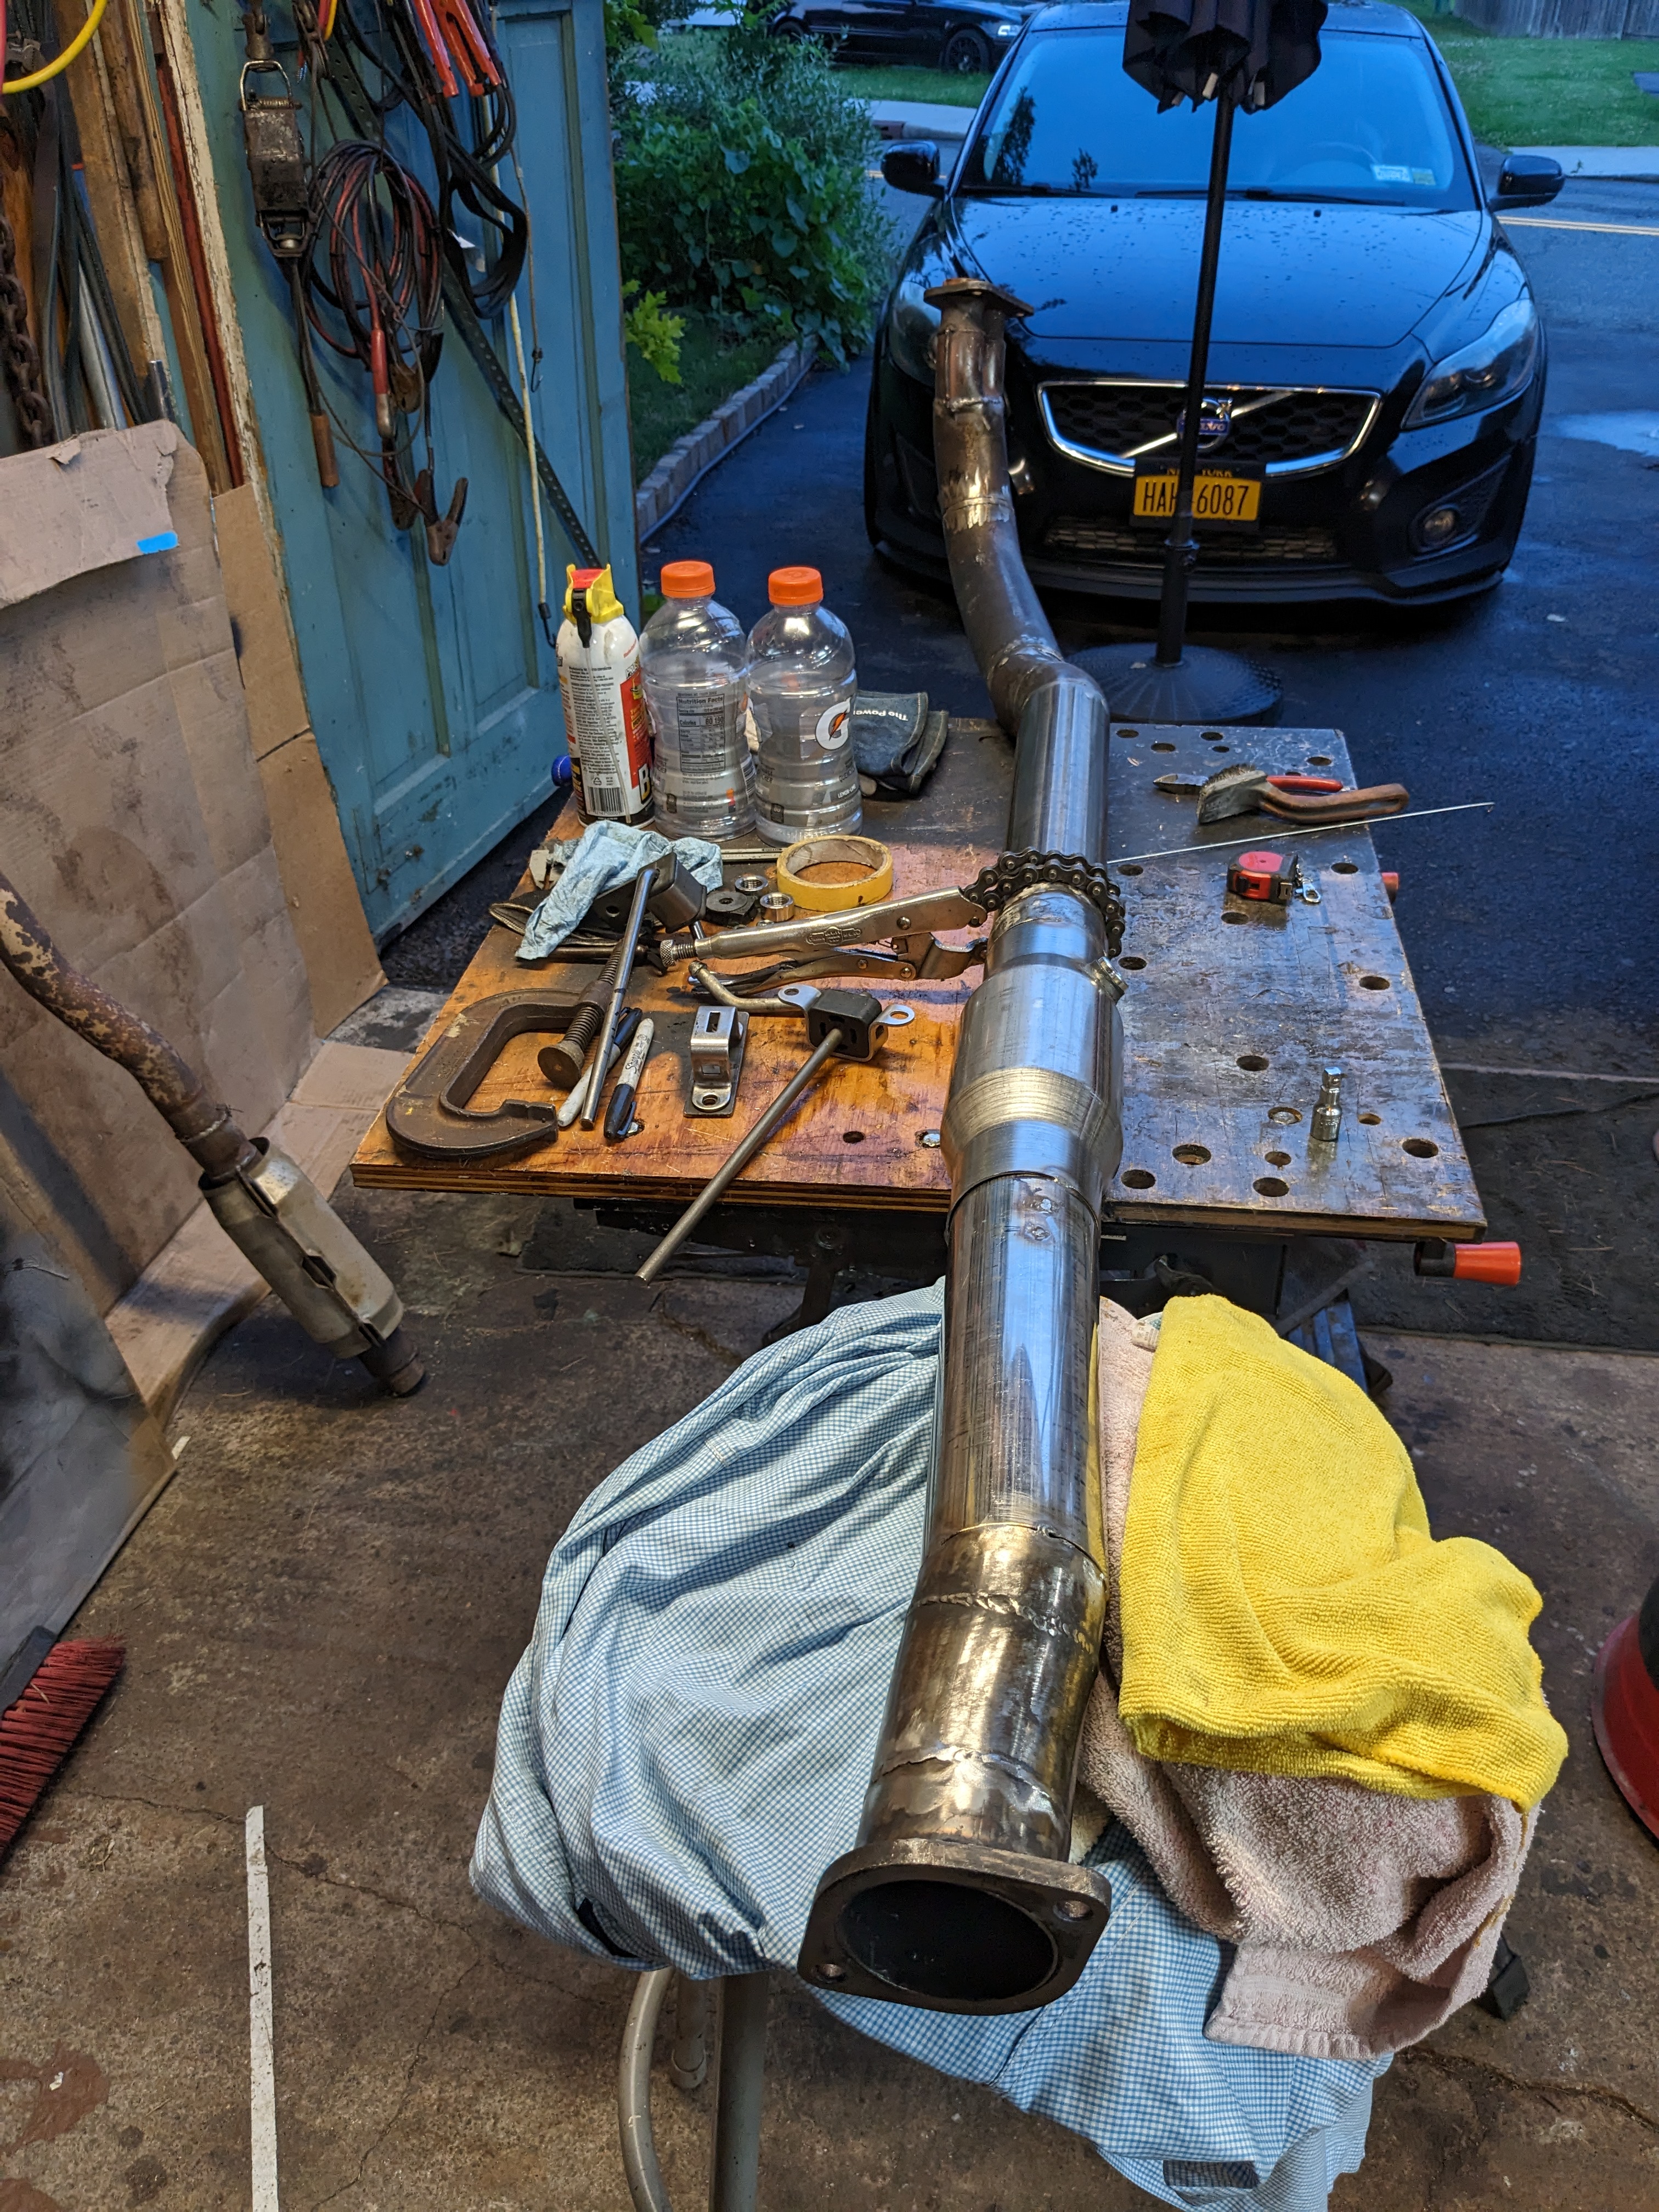
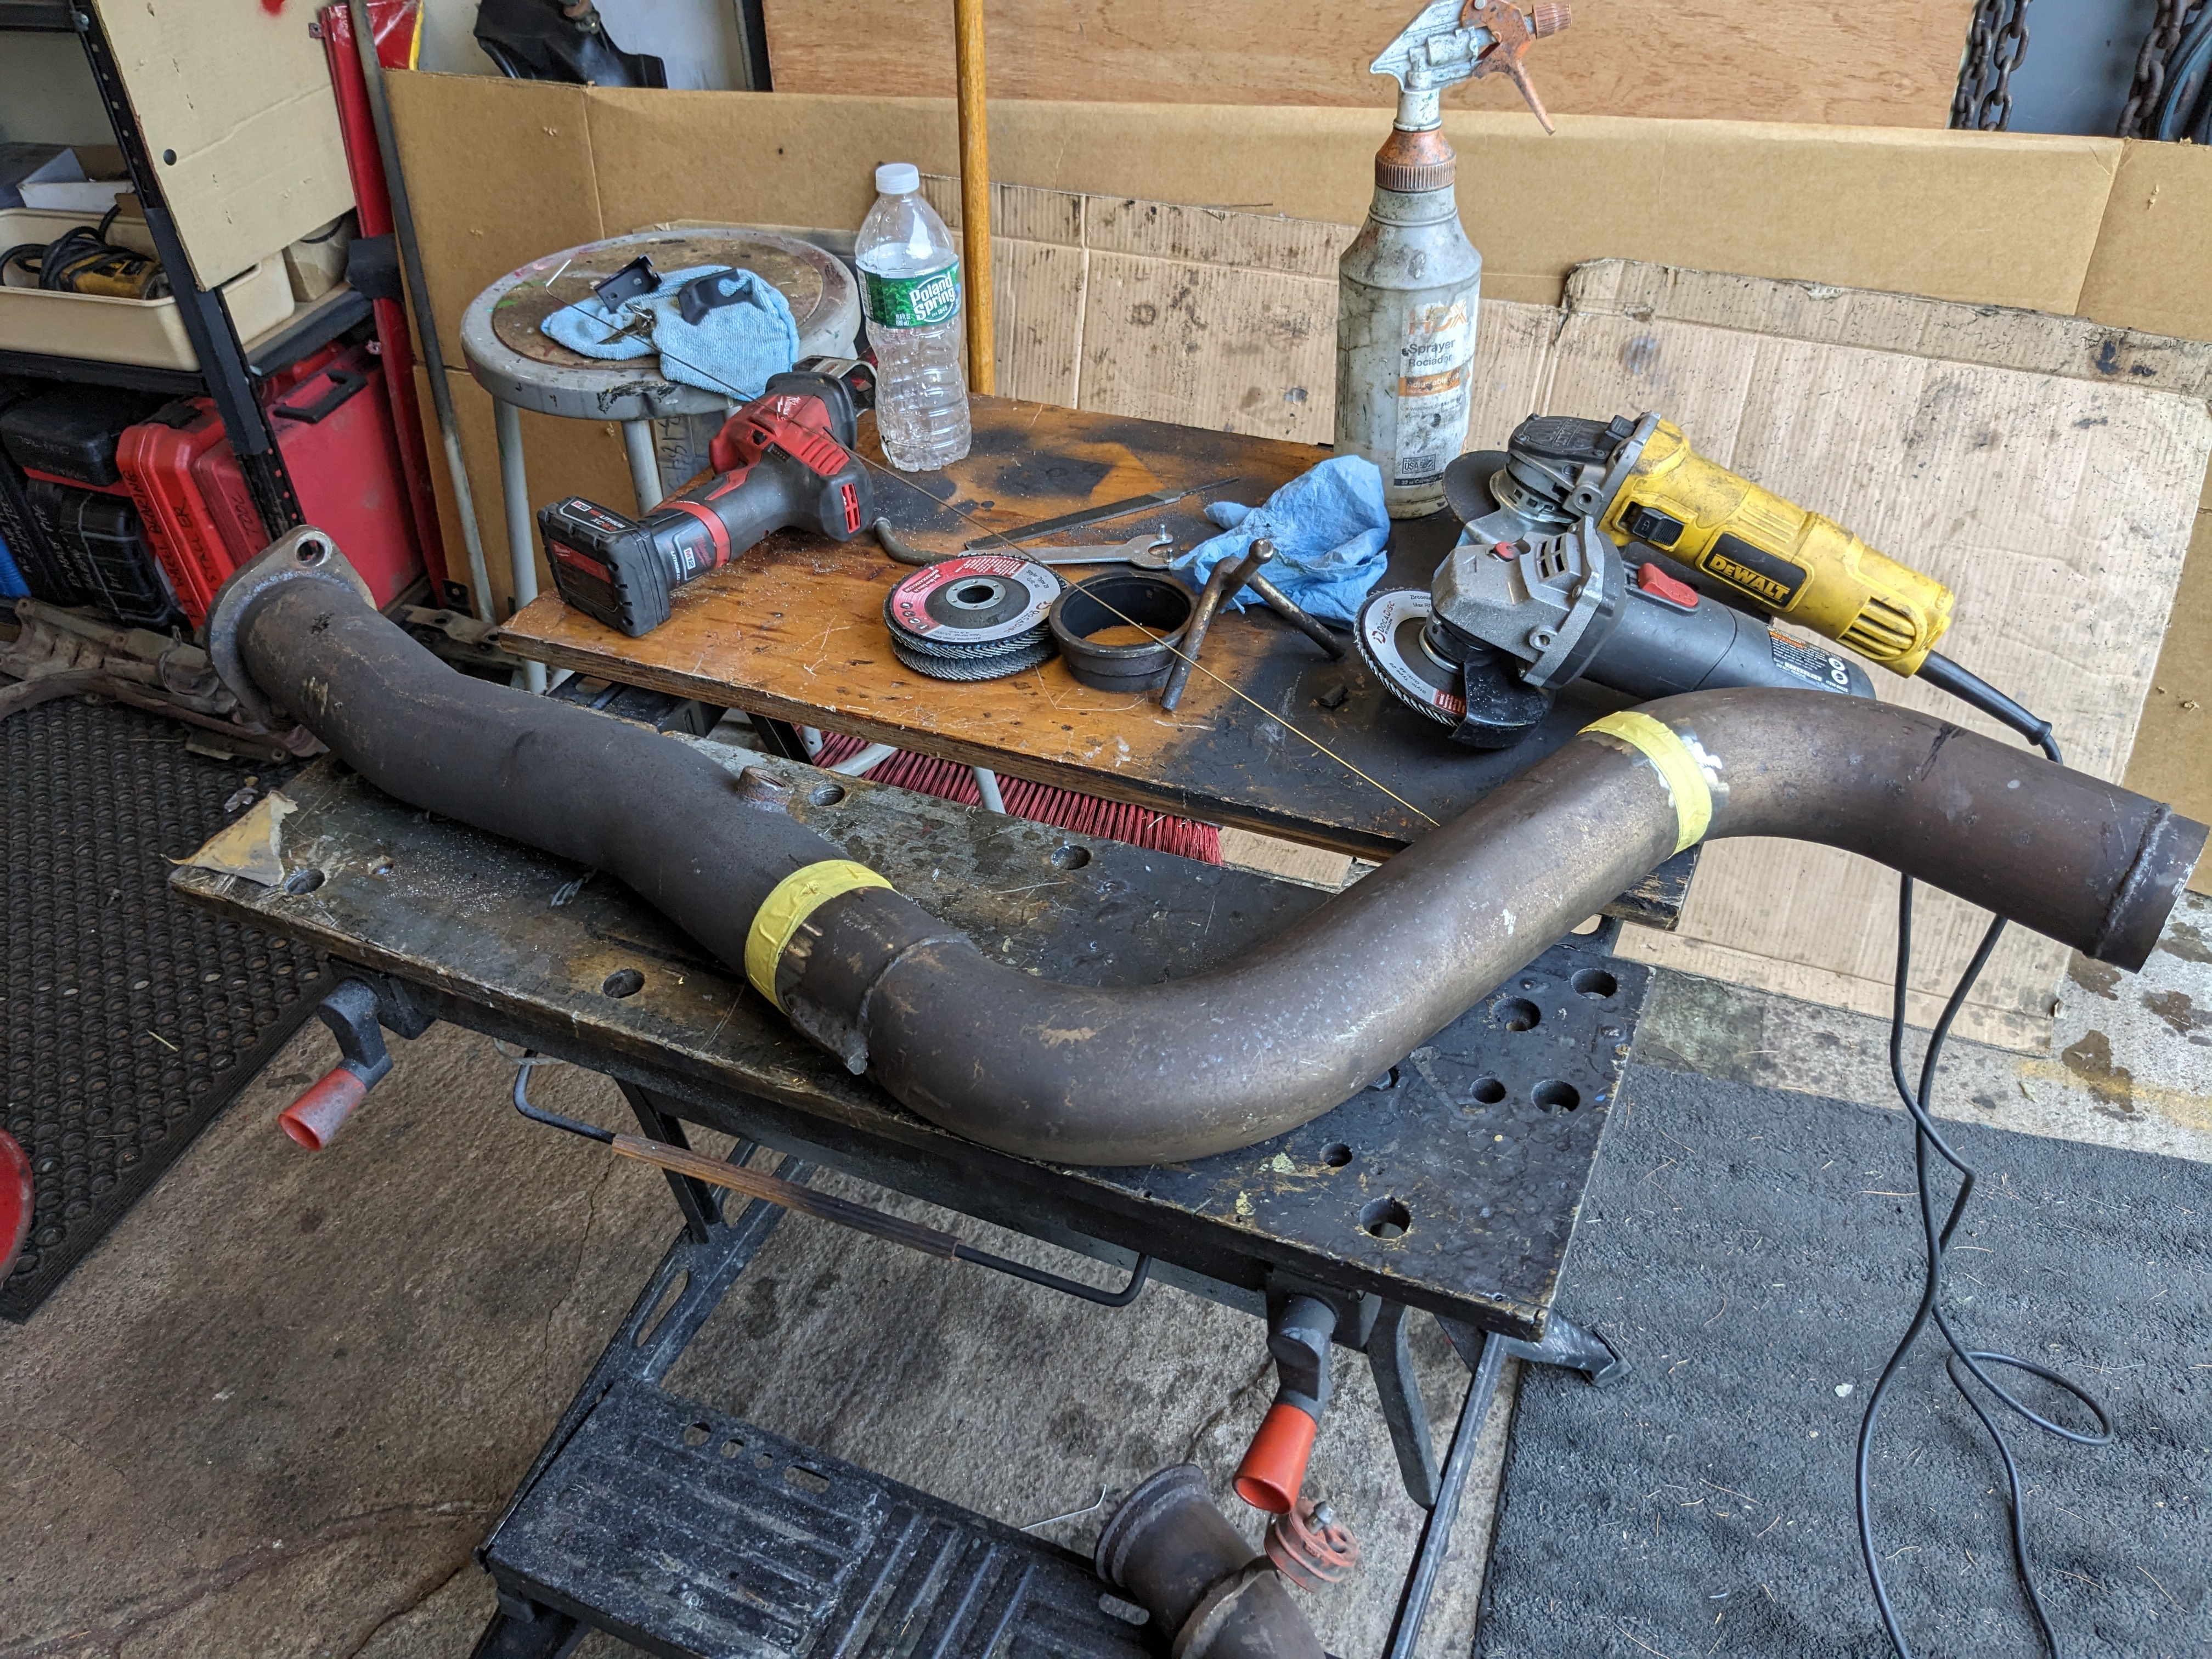
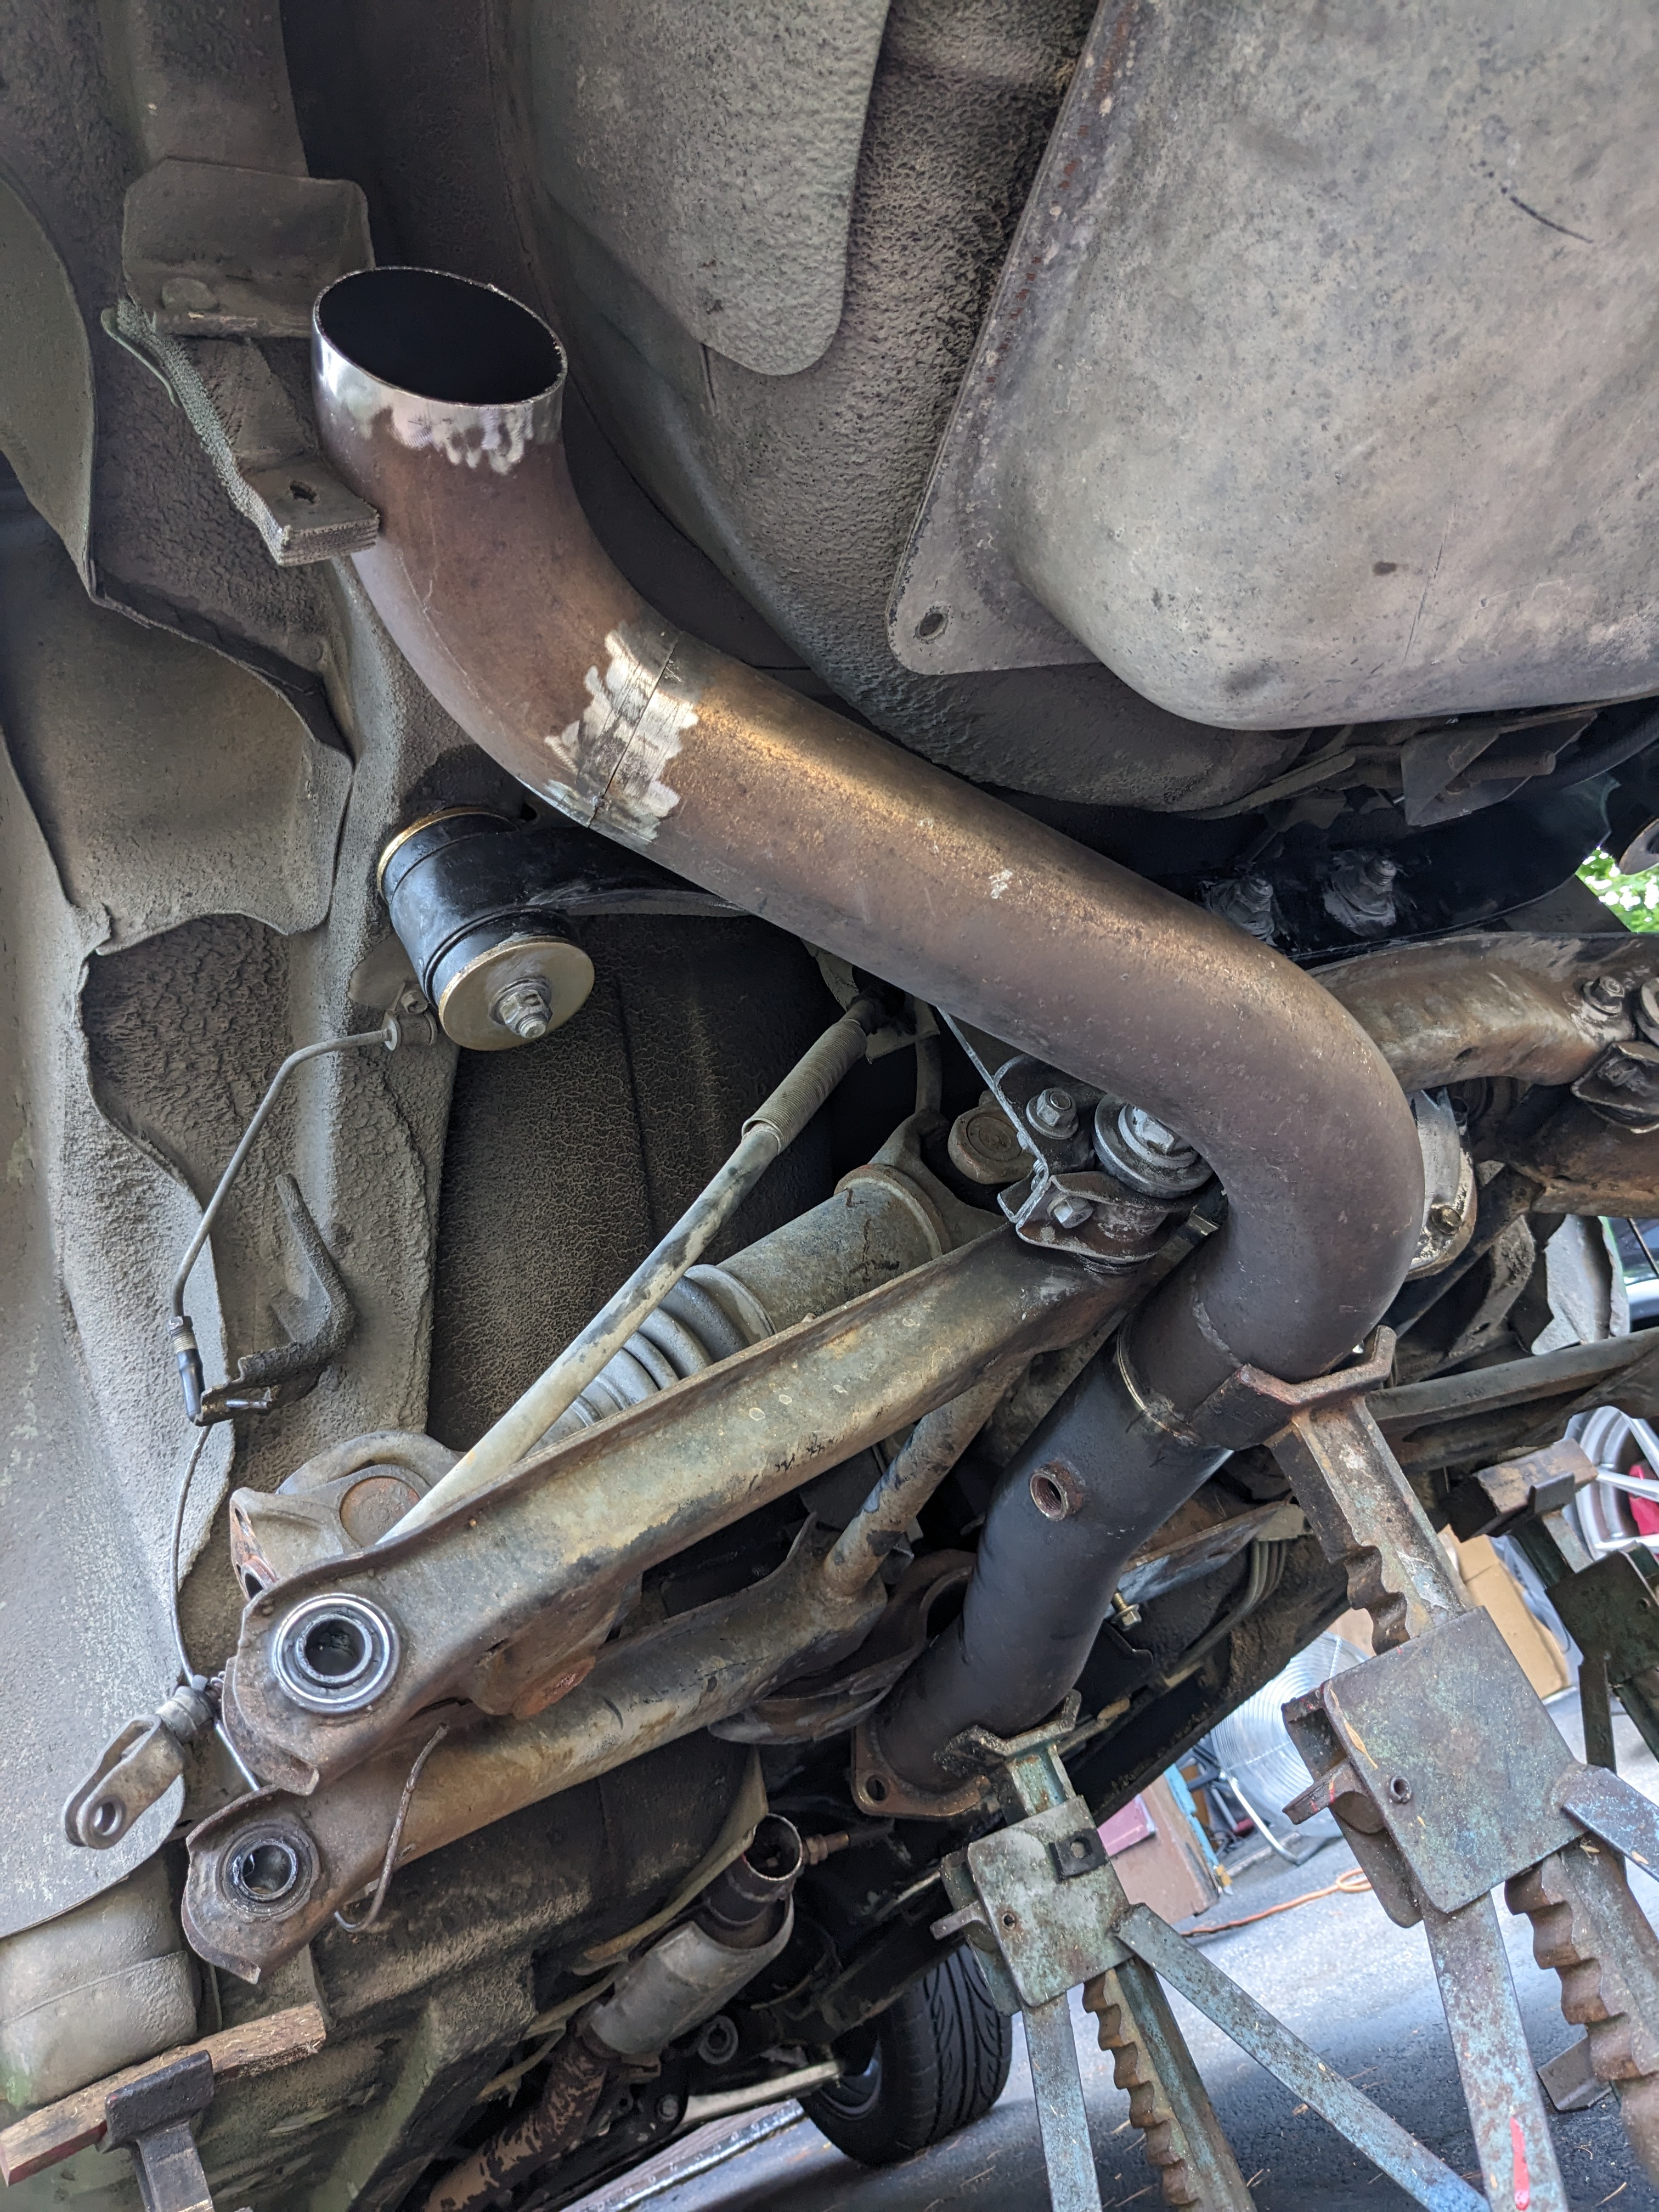
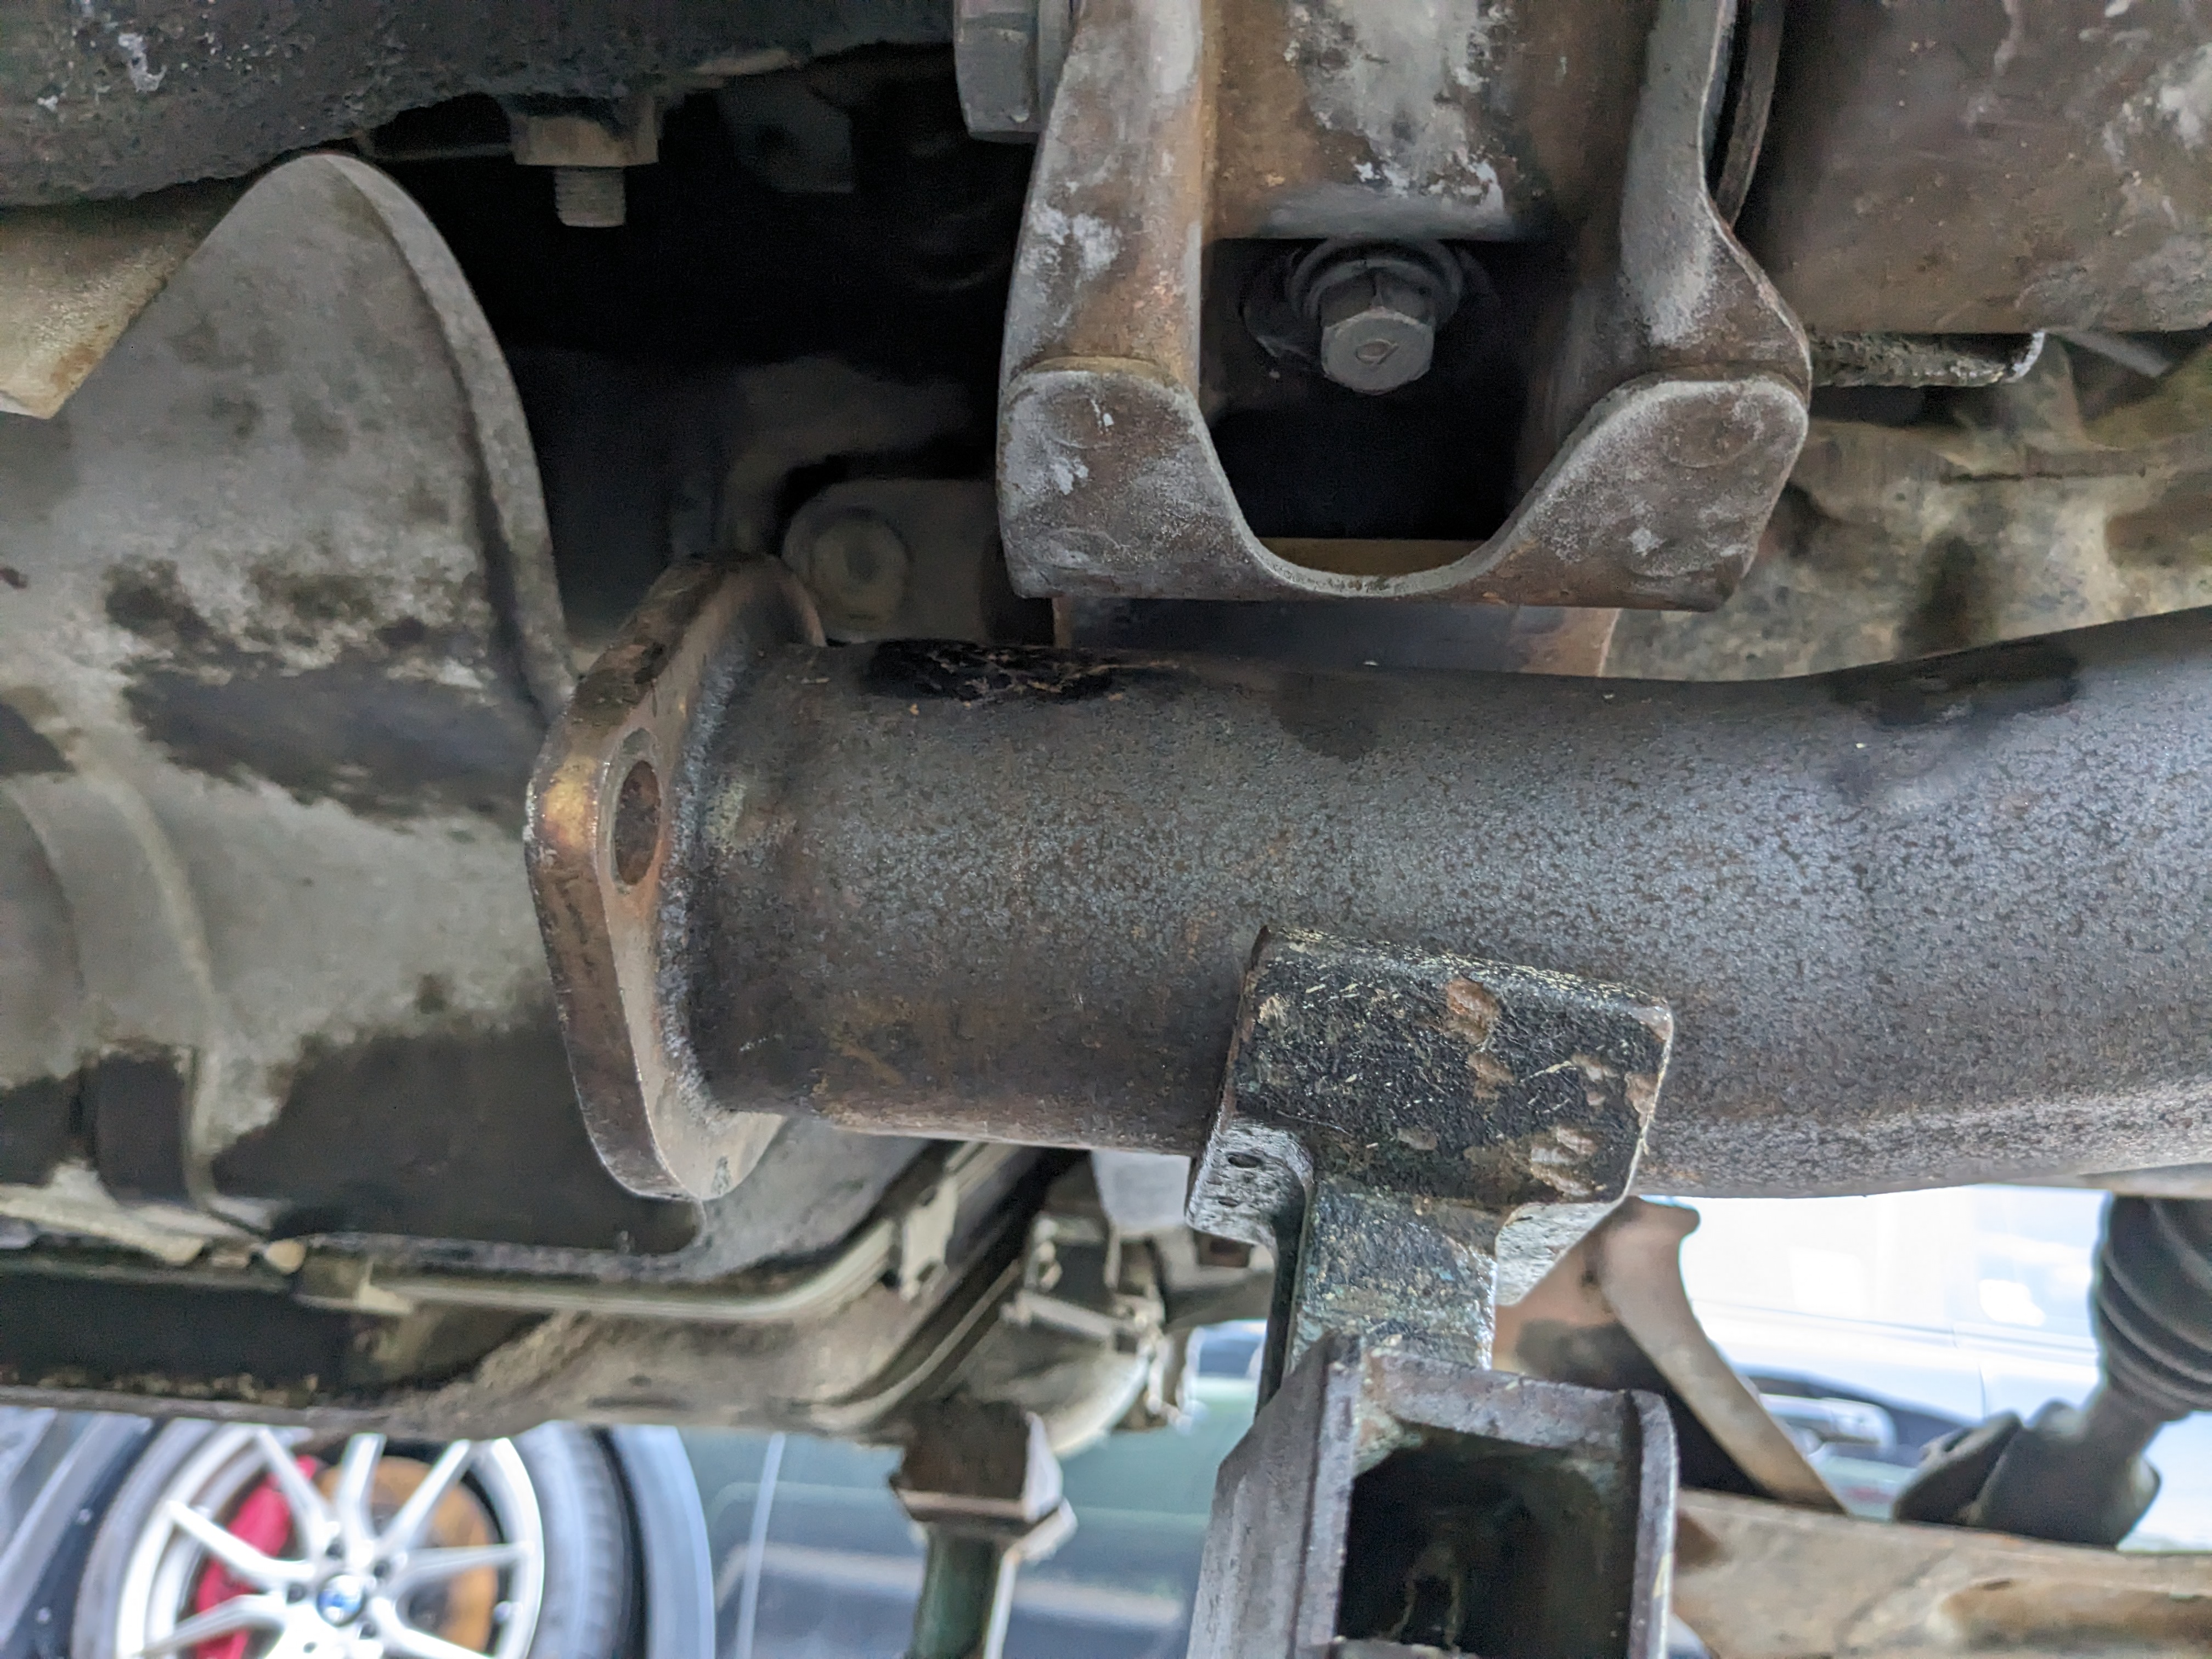
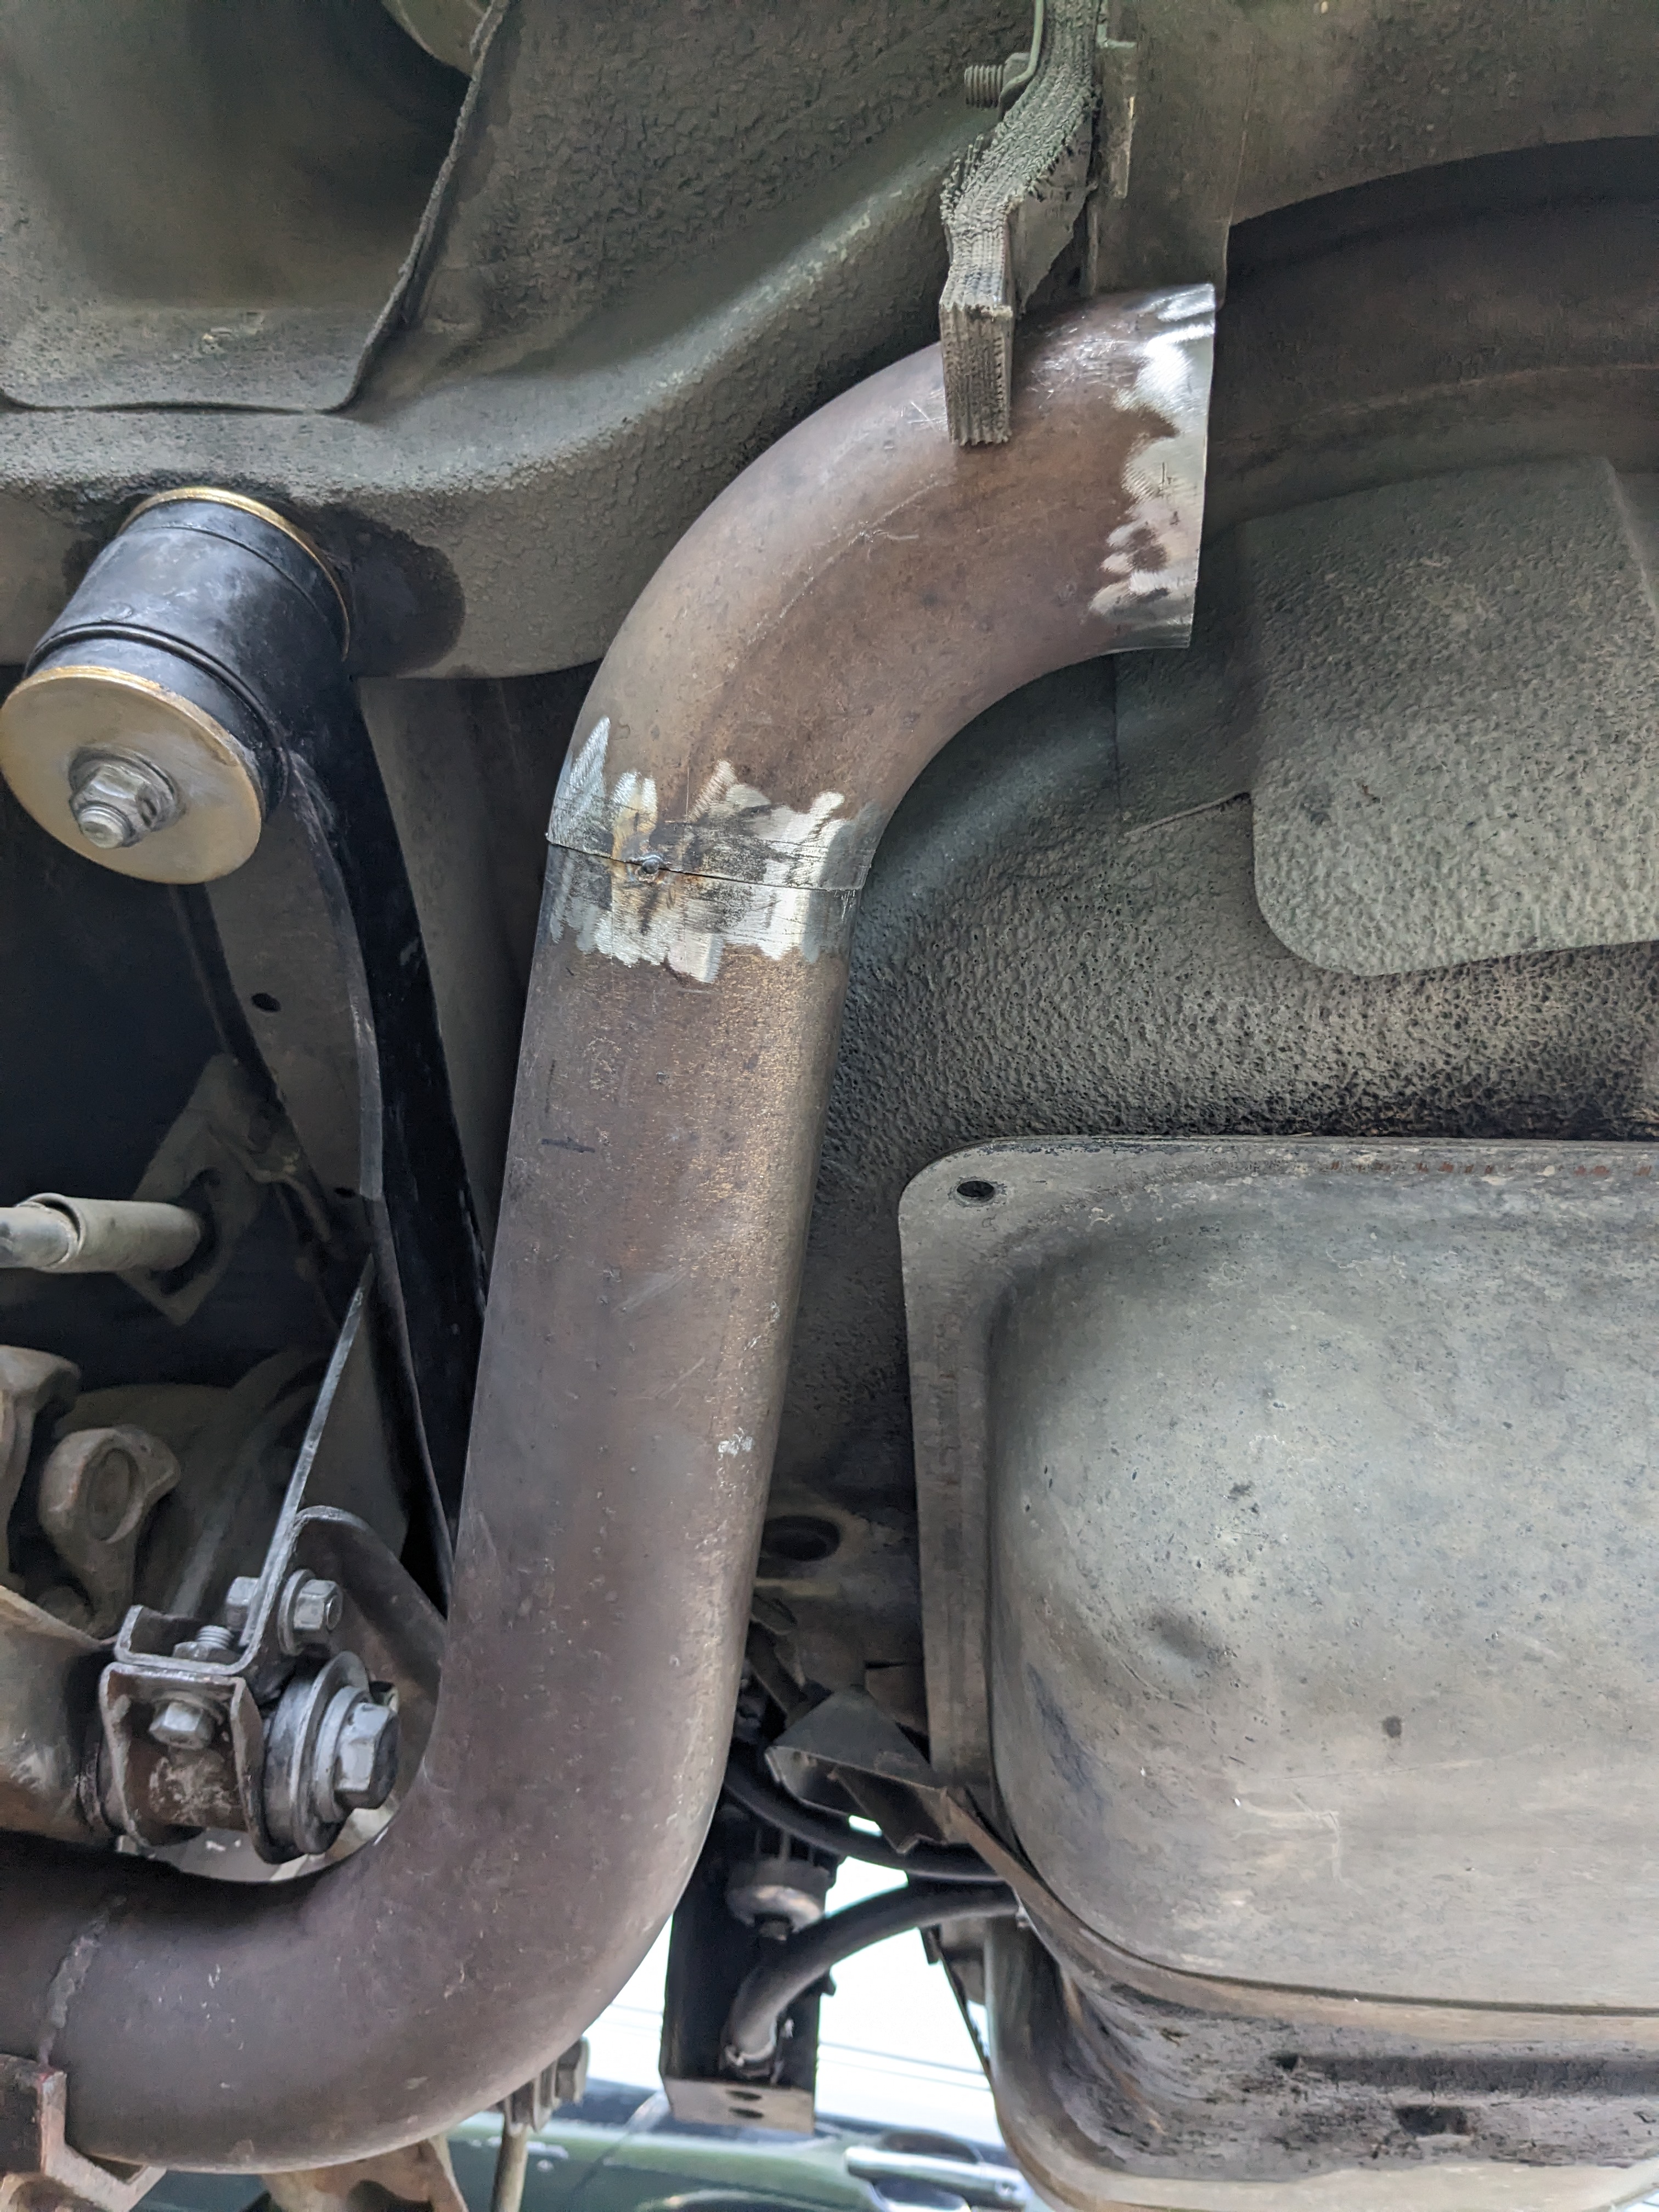
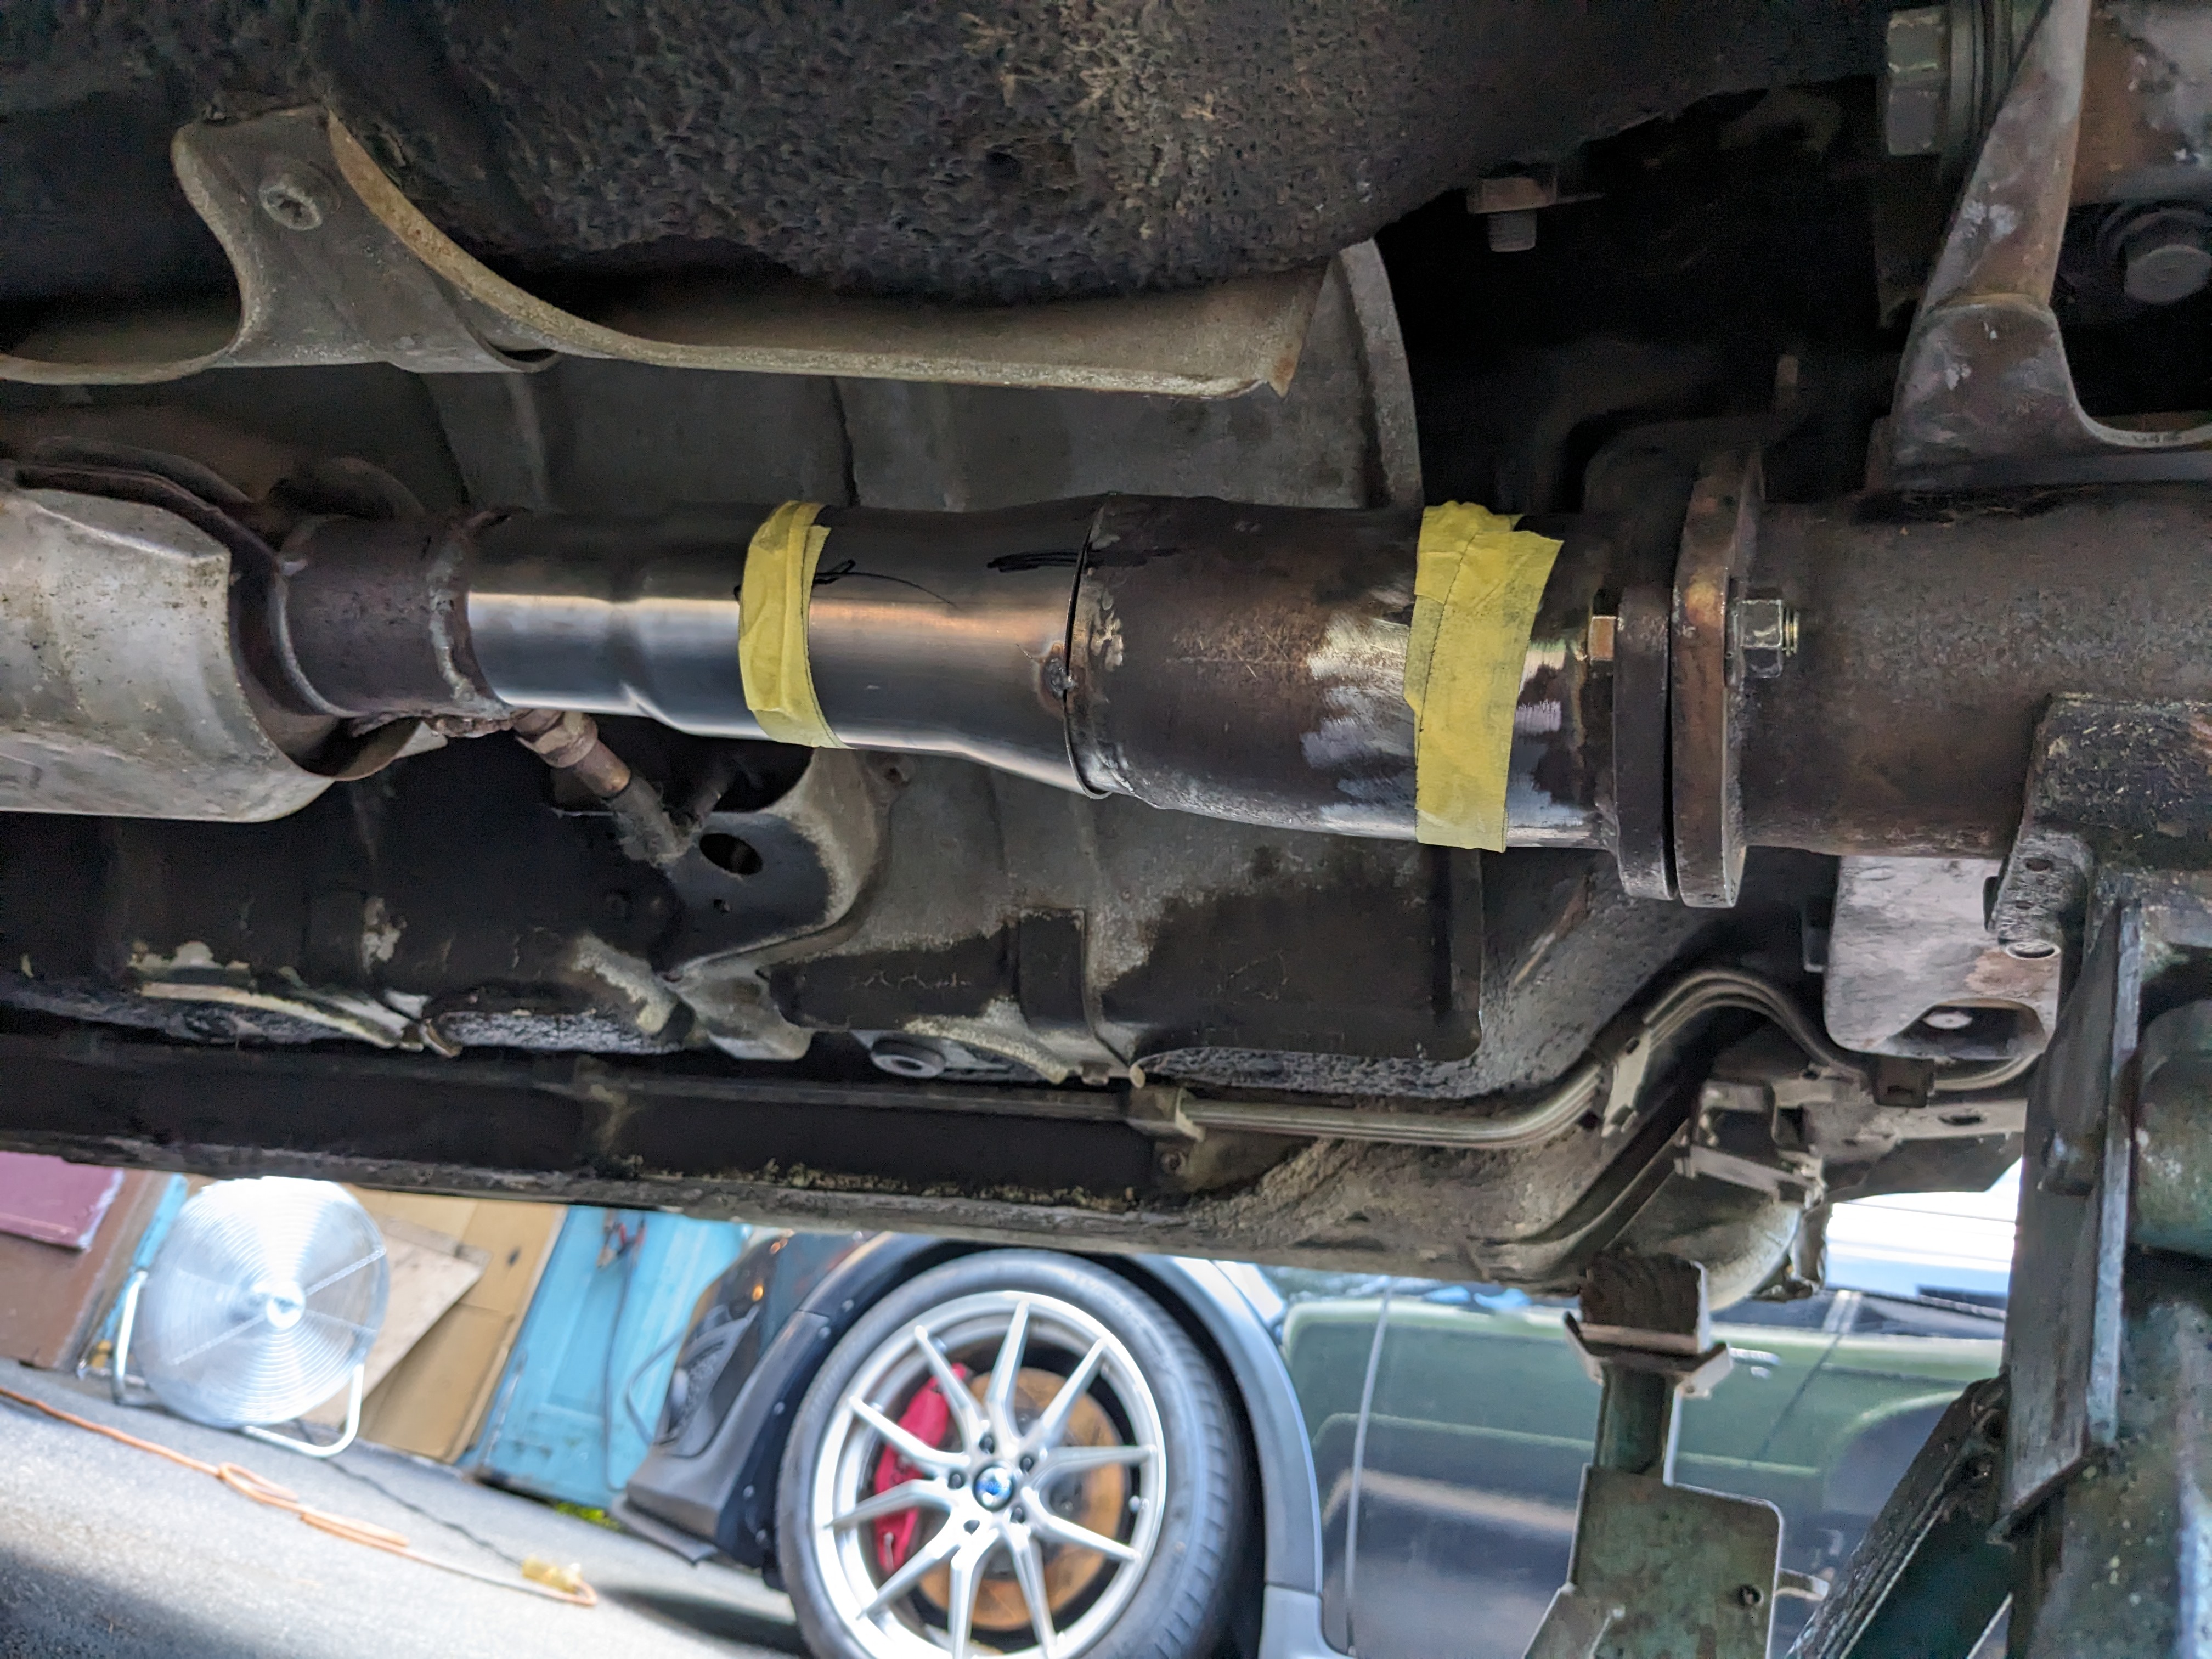
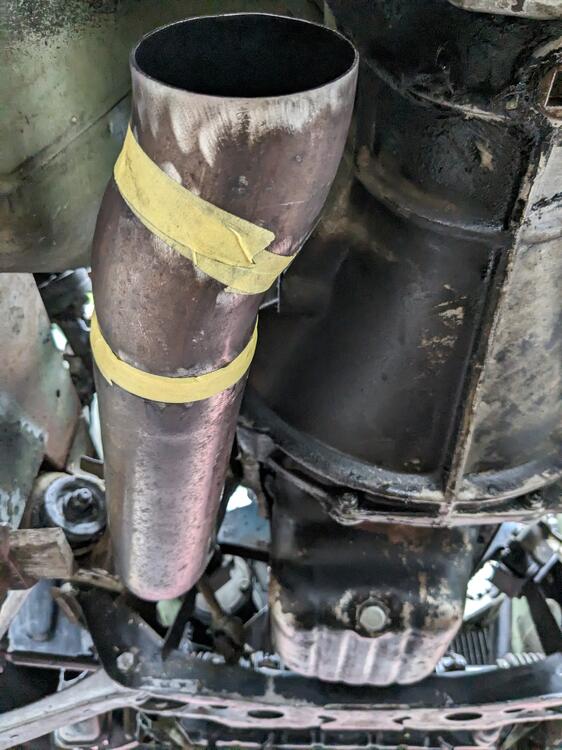
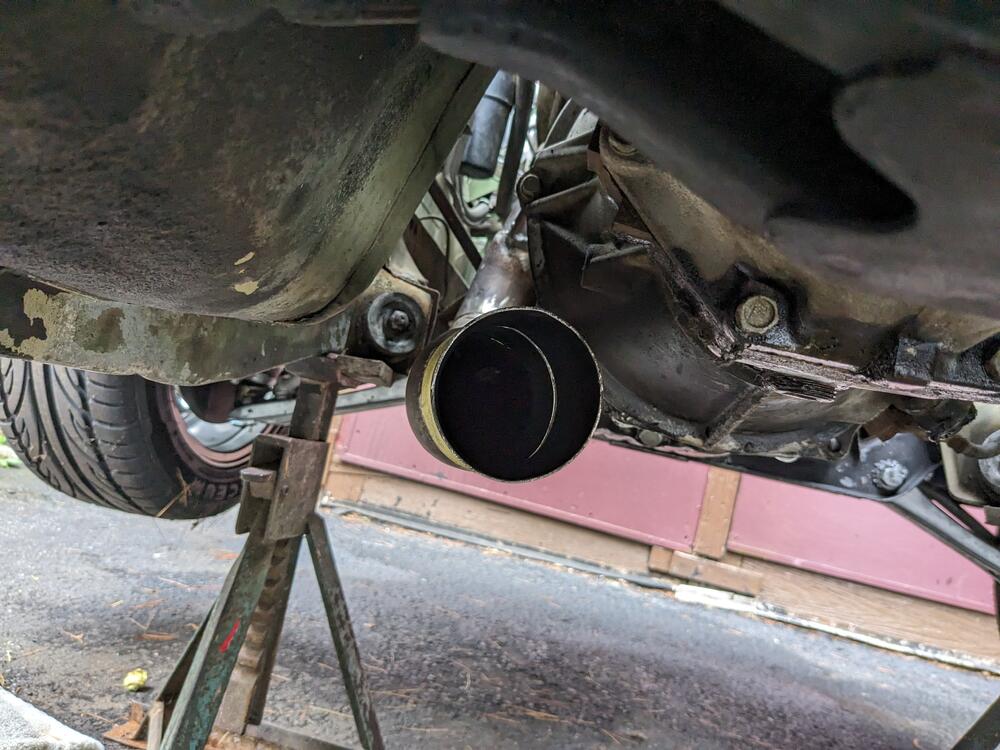
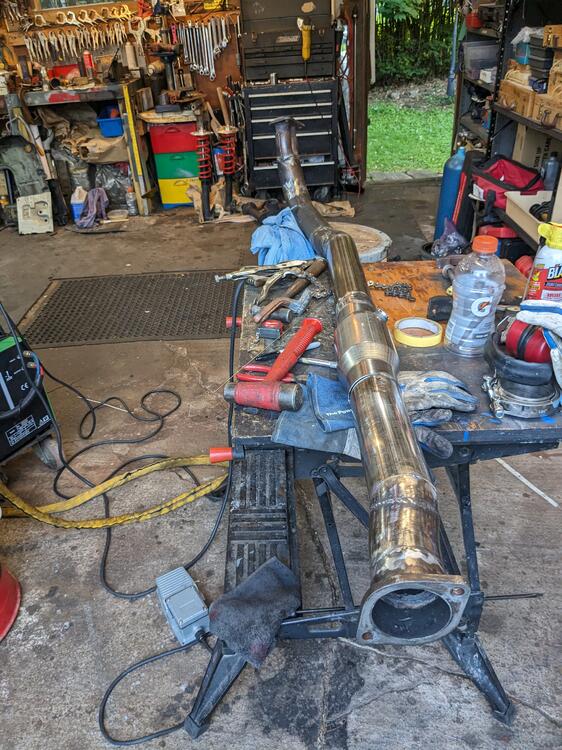
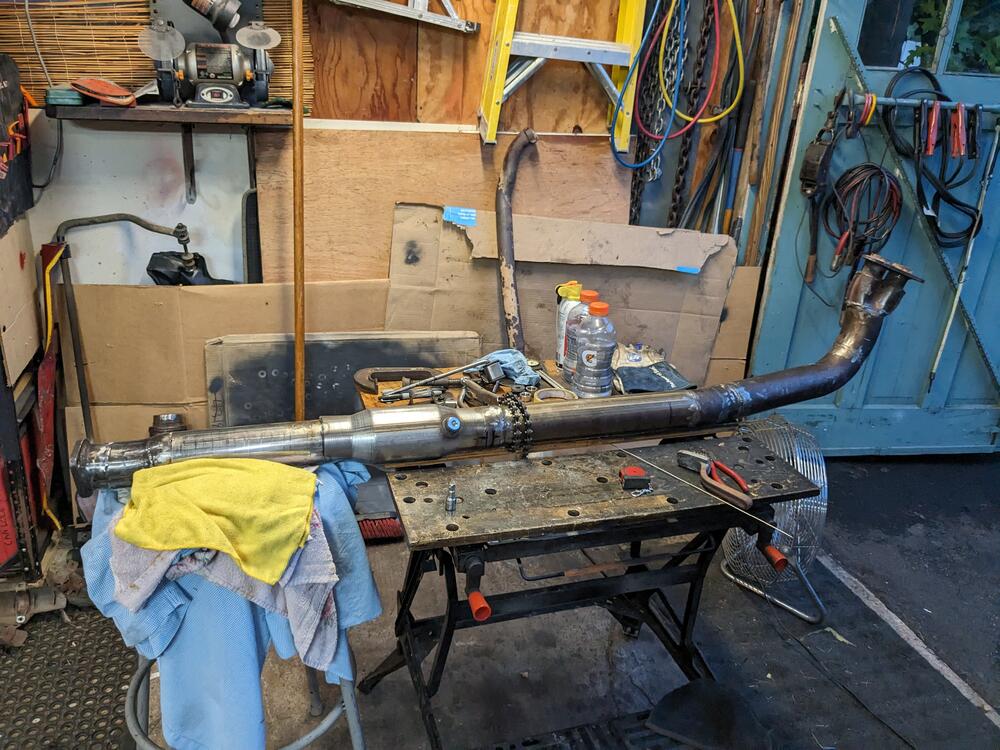
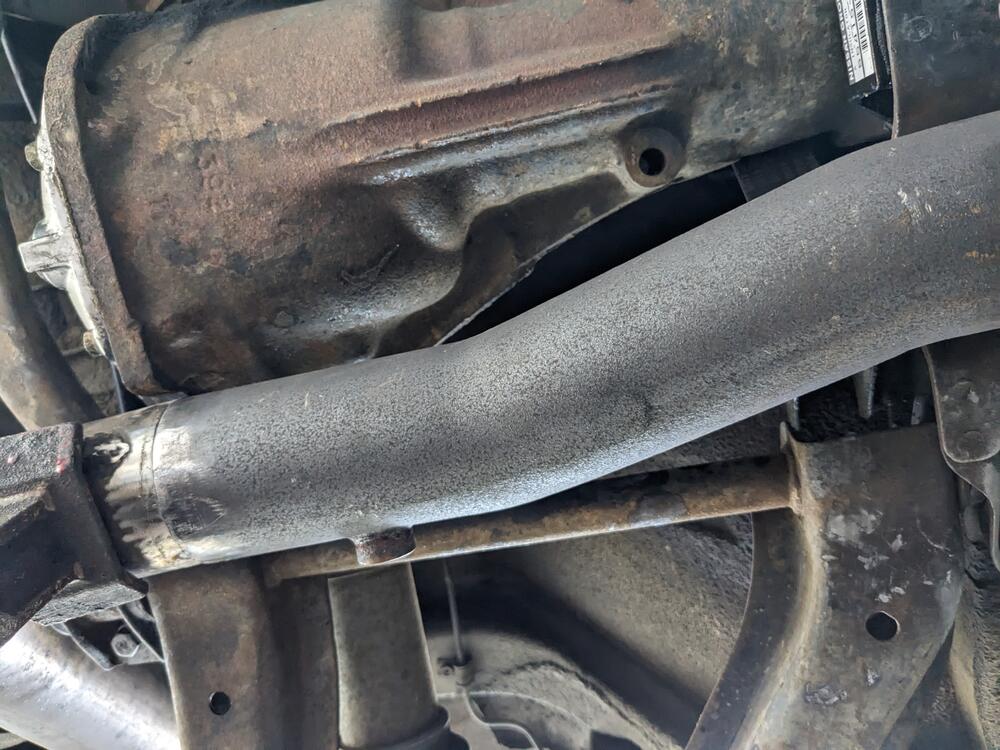
Got the rest of the front section figured out. No room for the 3" resonator though. Added a dogleg to get good alignment with the rest of the front section added a straight section off that, into a 3" cat, then another 10" section into the mid connection good clearance all around fitted the cat behind that 10" section between cat & dogleg into 3" flange removed again to tack rear mid section re-installed one more time to figure out the hanger off the transmission case, then removed. Now I have to seam weld all the junctions


 3 points
 -
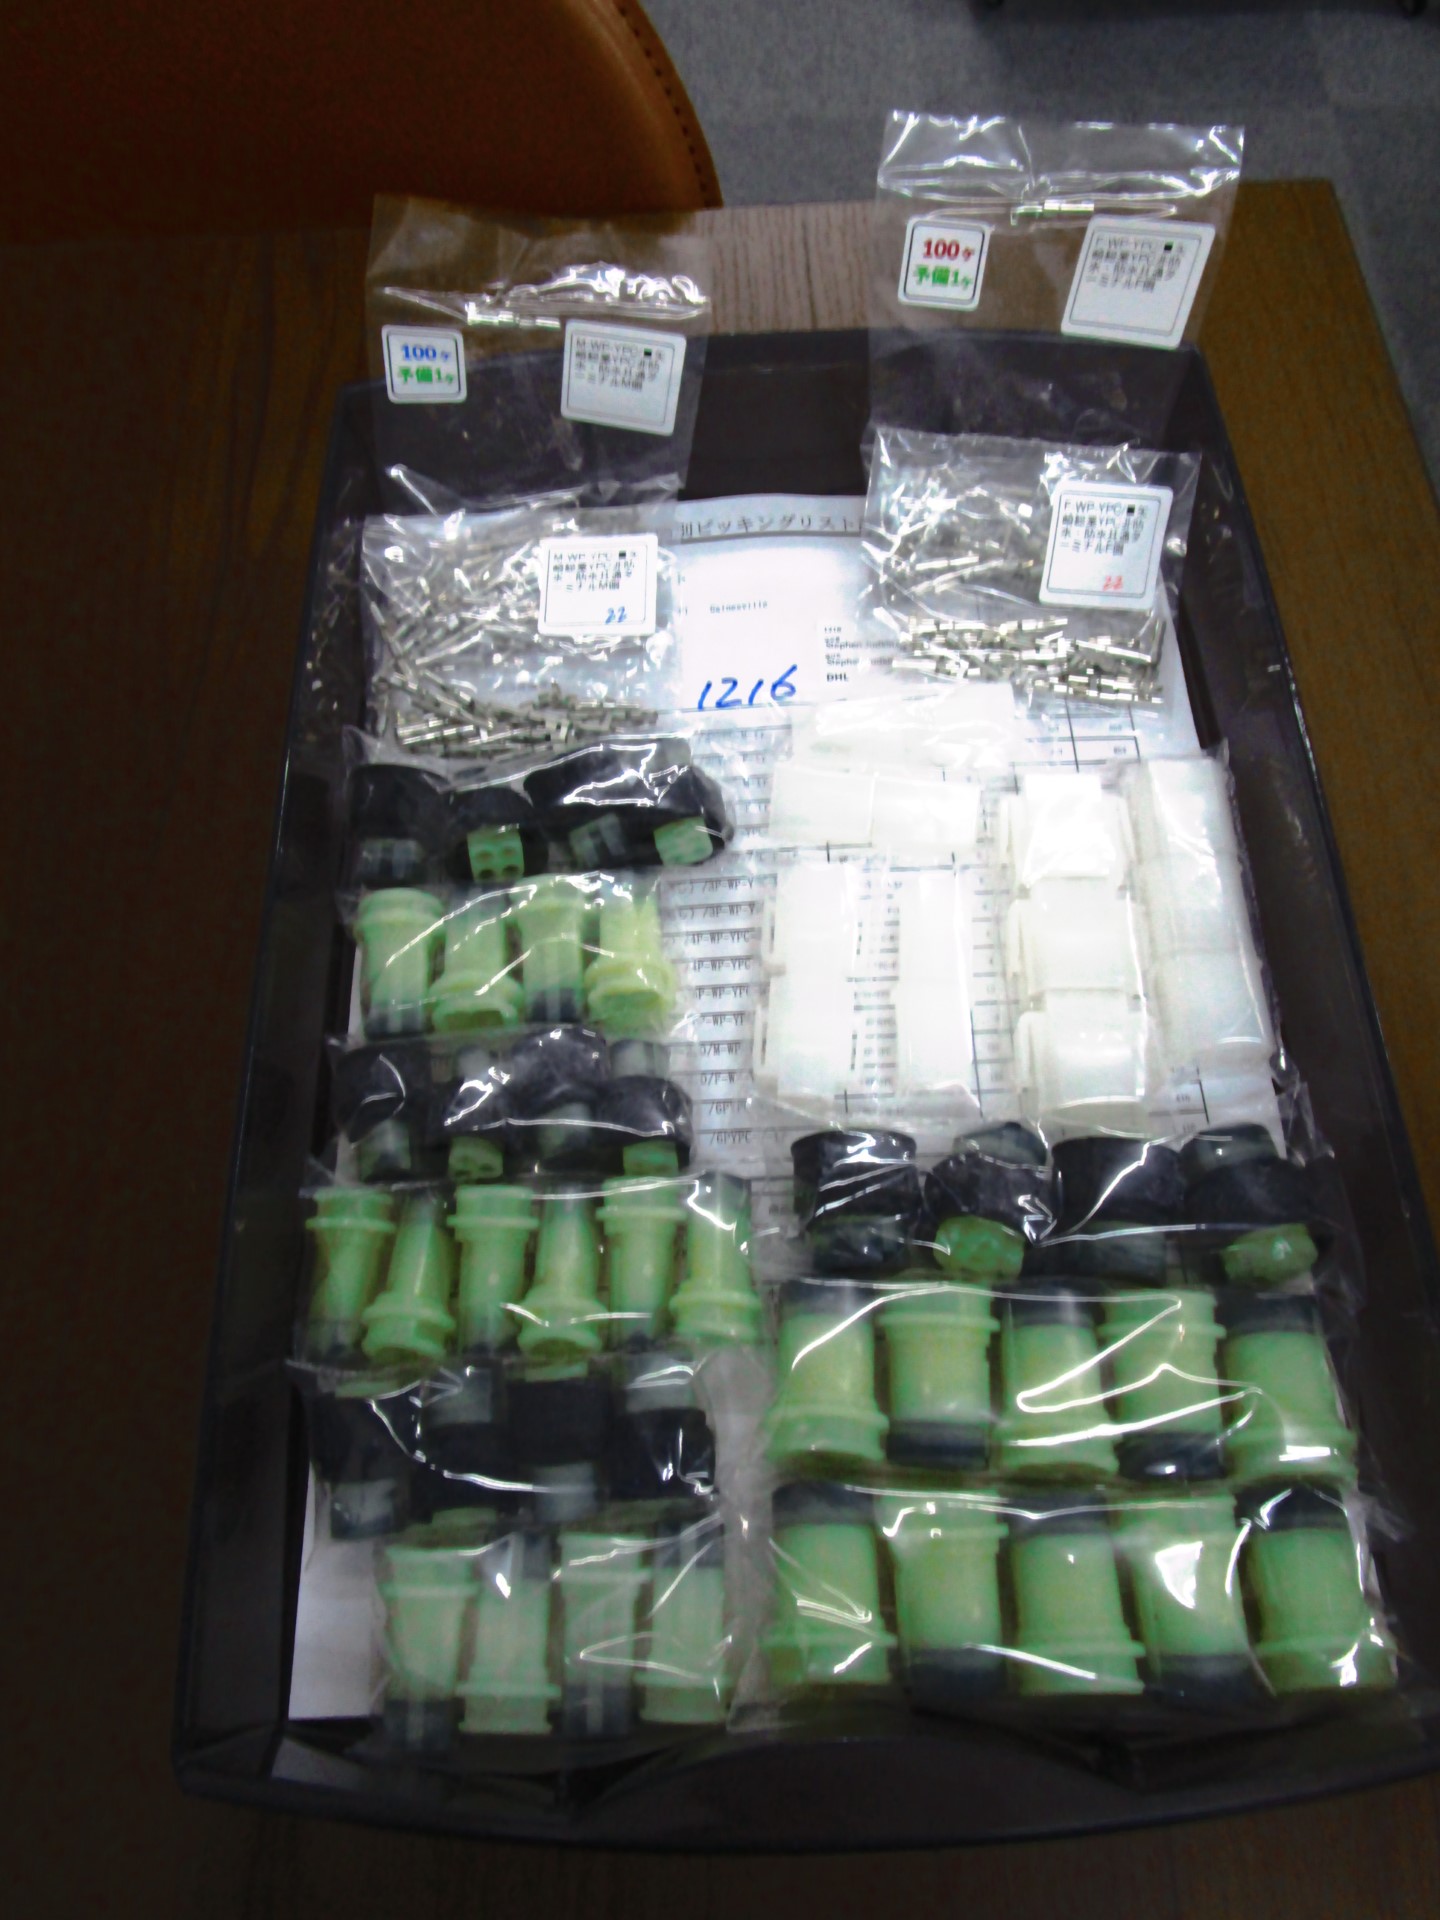
2 pointsI found a website that lists many of the old YPC connectors for sale. Here's a link to their YPC inventory: https://www.hi-1000ec.com/product-list?keyword=ypc&Submit=Search&page=1 The last item in the search is for a pin removal tool, too. The website whois shows a registration in Japan. I placed an order last night, and today I received an email with a photo of the shipping label and a photo of the parts I ordered bagged up. That certainly inspires confidence in ordering. This should help in making repairs and modifications to 260Zs and 280Zs.
 2 points
 -
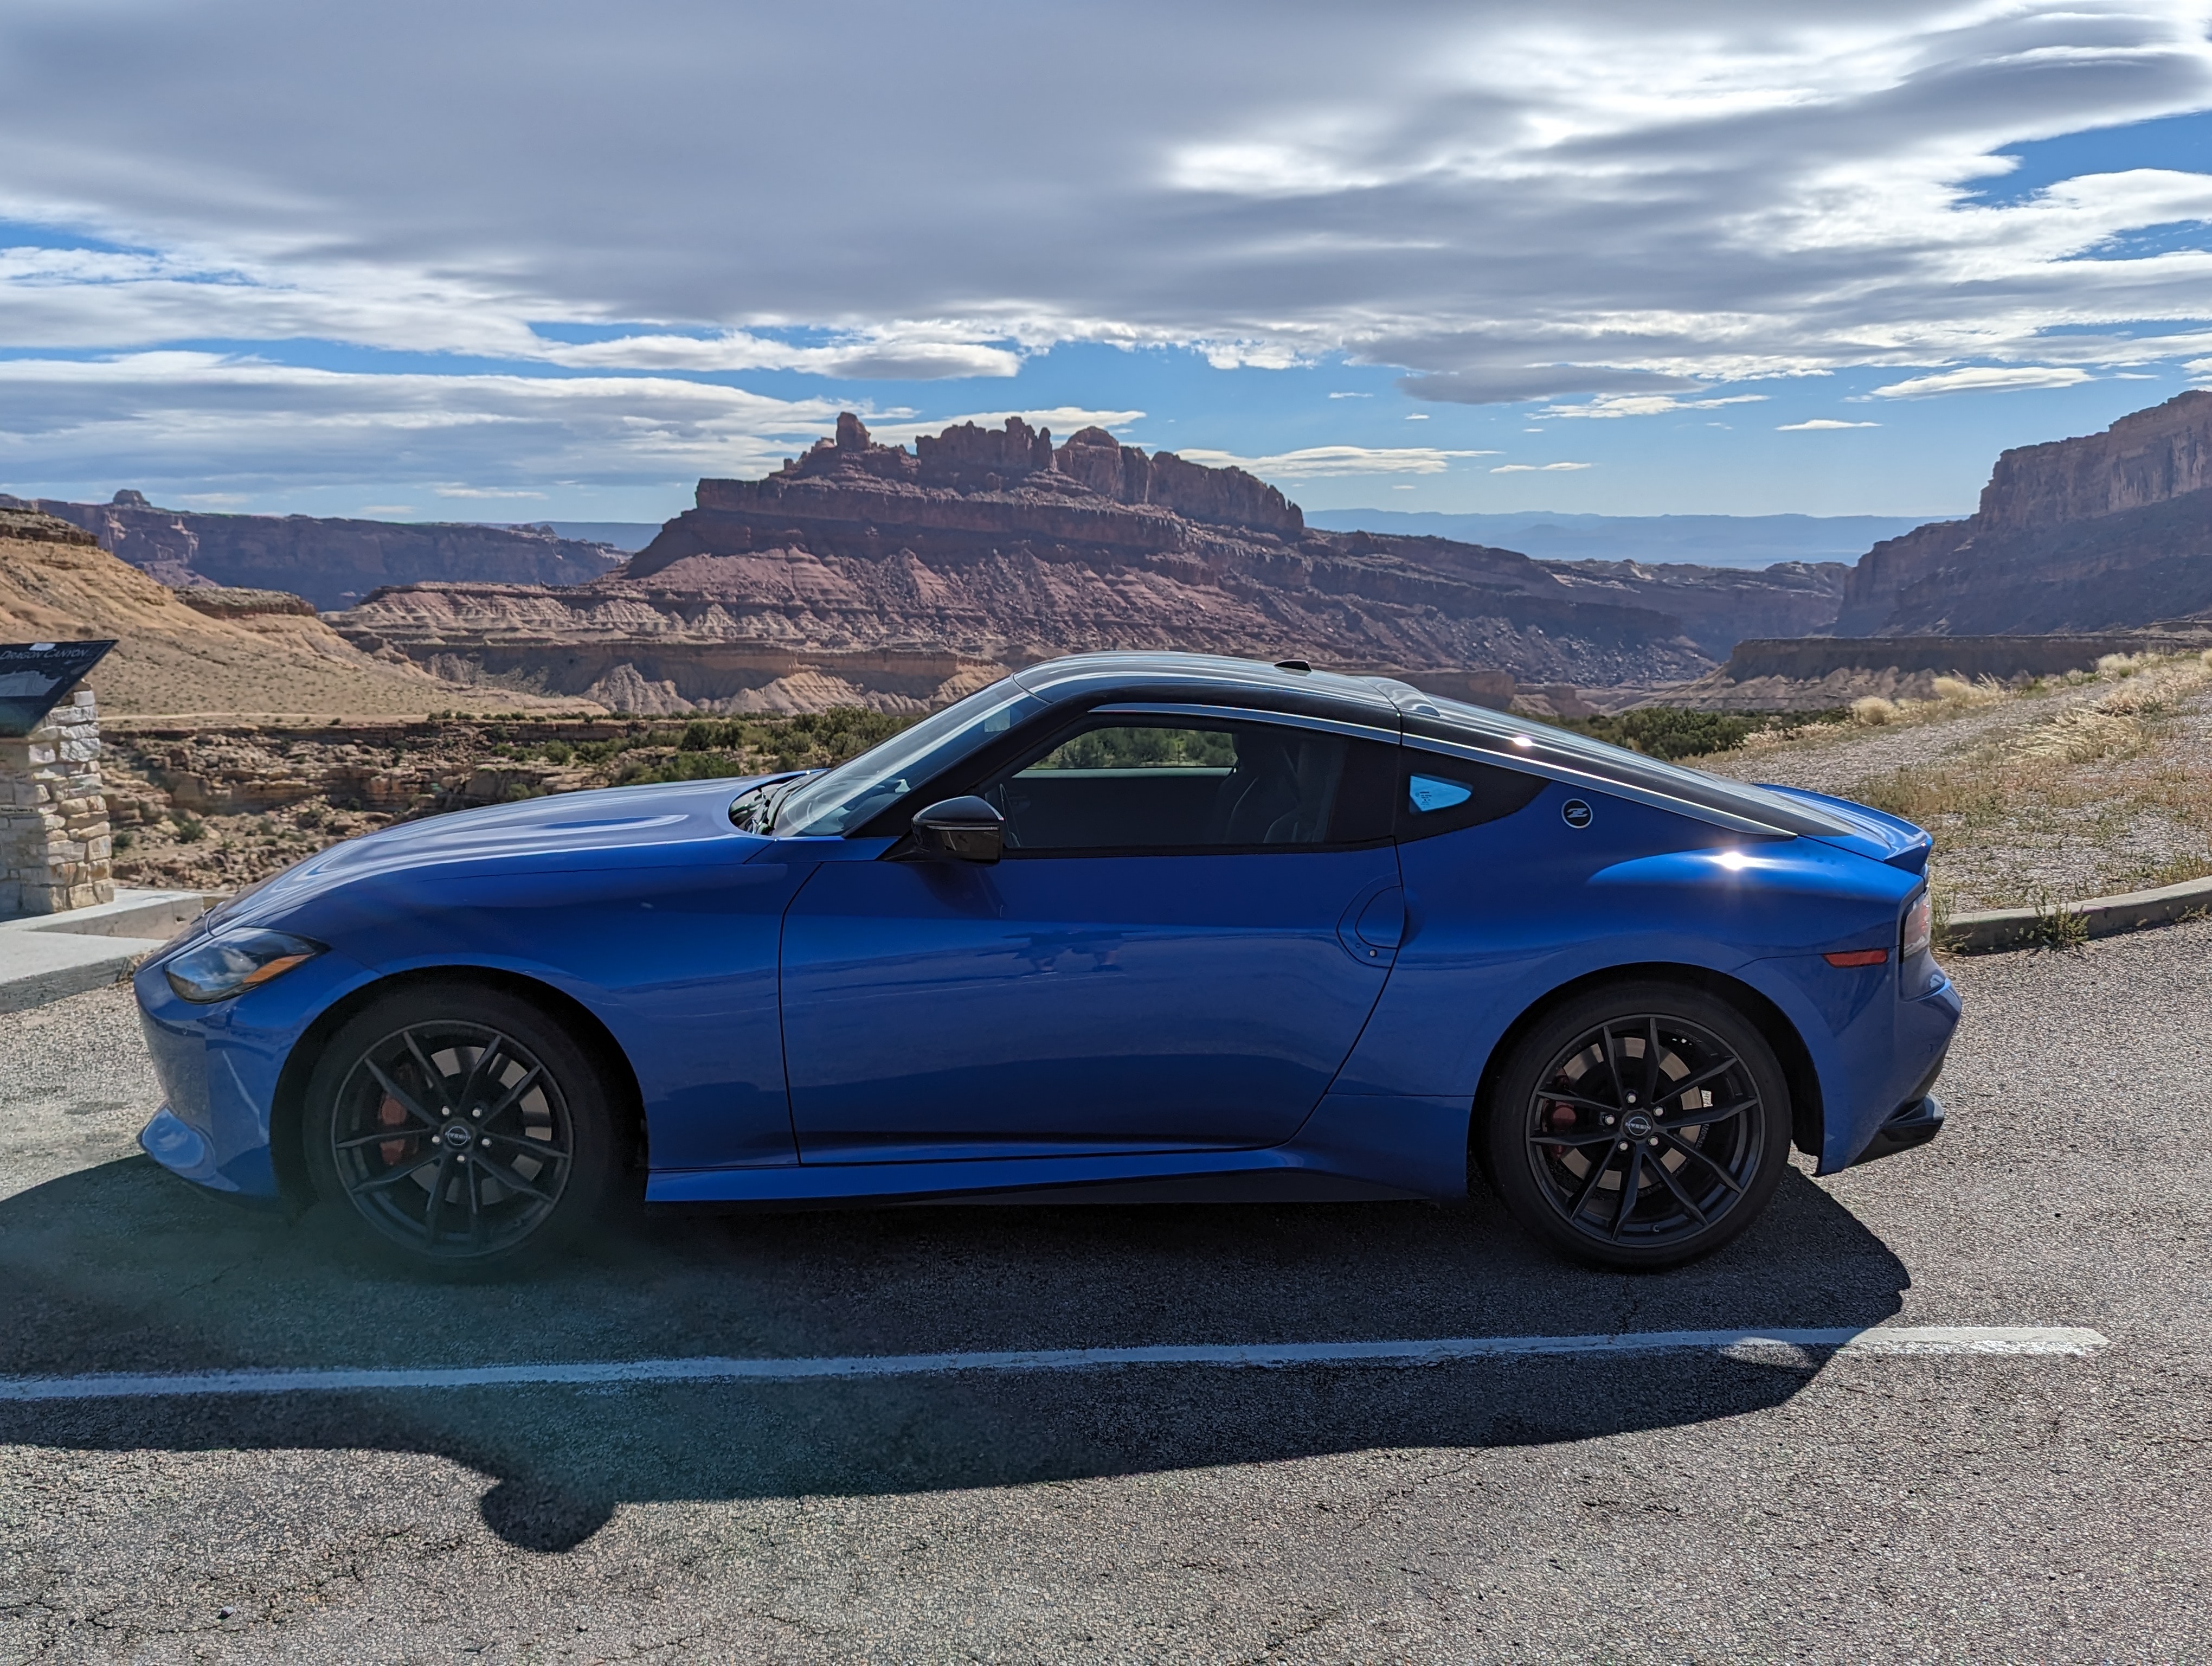
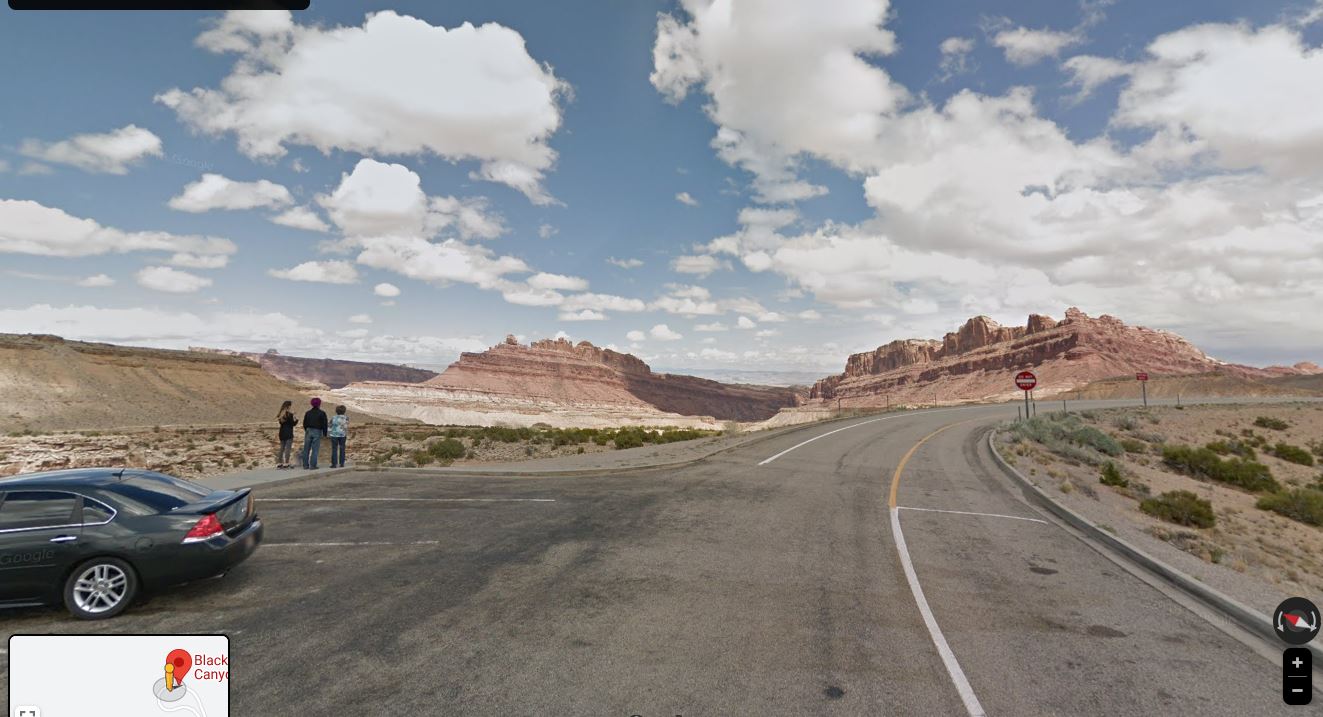
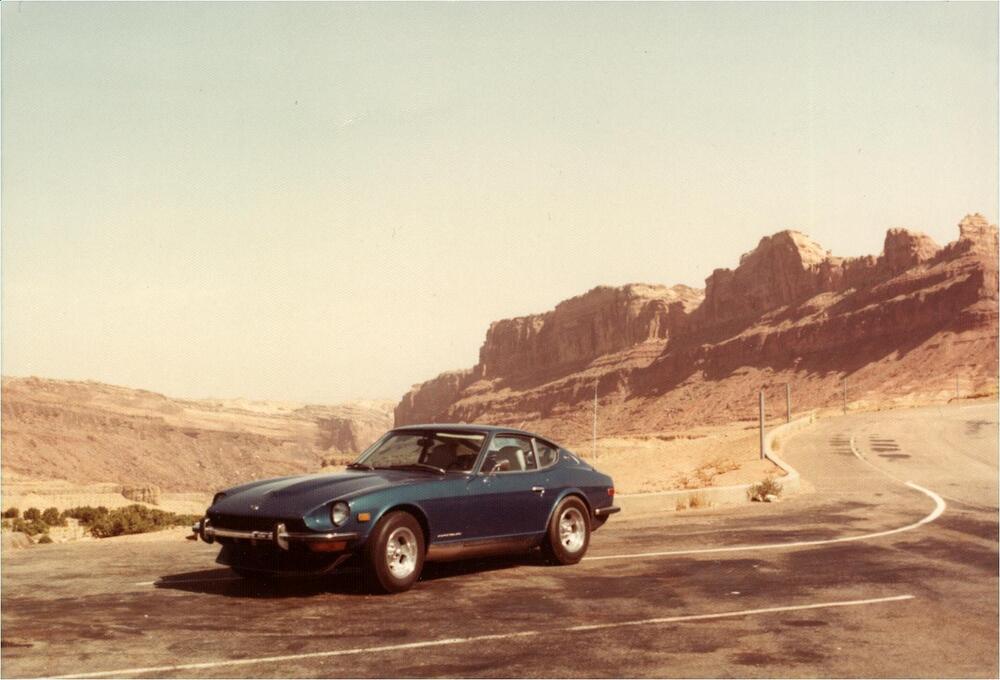
While editing, I noticed something very interesting. The 1974 photo of my 240Z "somewhere in Utah" had cliffs in the background that looked similar to the View Point stop in the new Z. Notice the profile of the cliff right above the 240Z. This it the original photo. (The one in the post above was cropped.) And again the photo of the new Z view point stop in Utah: The profile of the cliffs on the right was the give away! Realized both photos were taken at the same place! 49 years apart! Using the geotag info in the new photos, identified the location as the Black Dragon Canyon View Point on I70 in Utah. Google Street view of the View Point: I guess Zs like to stop at the same place.

 2 points
 -
2 pointsElectric fans can also be setup to come on with the AC or speed up when the AC is used. Another anecdote, if mechanical fans are superior why are they pretty much no longer used on new vehicles?2 points
-
2 pointsAn electric fan comes on only when needed, mechanical fan is robbing power from the engine all the time regardless of whether it's needed. With the E fan off, as in hwy driving and the M fan has been removed, there is more power available to the rear wheels, not much more but some.2 points
-
2 pointsDing DIng! We have a winner! I don't think we needed the entire song lyrics quoted, but we have a winner! Wango Zee Tango!!! Hahahahaha!! Now go pretend your face is a Maserati and sorry for the diversion!!2 points
-
2 points
-
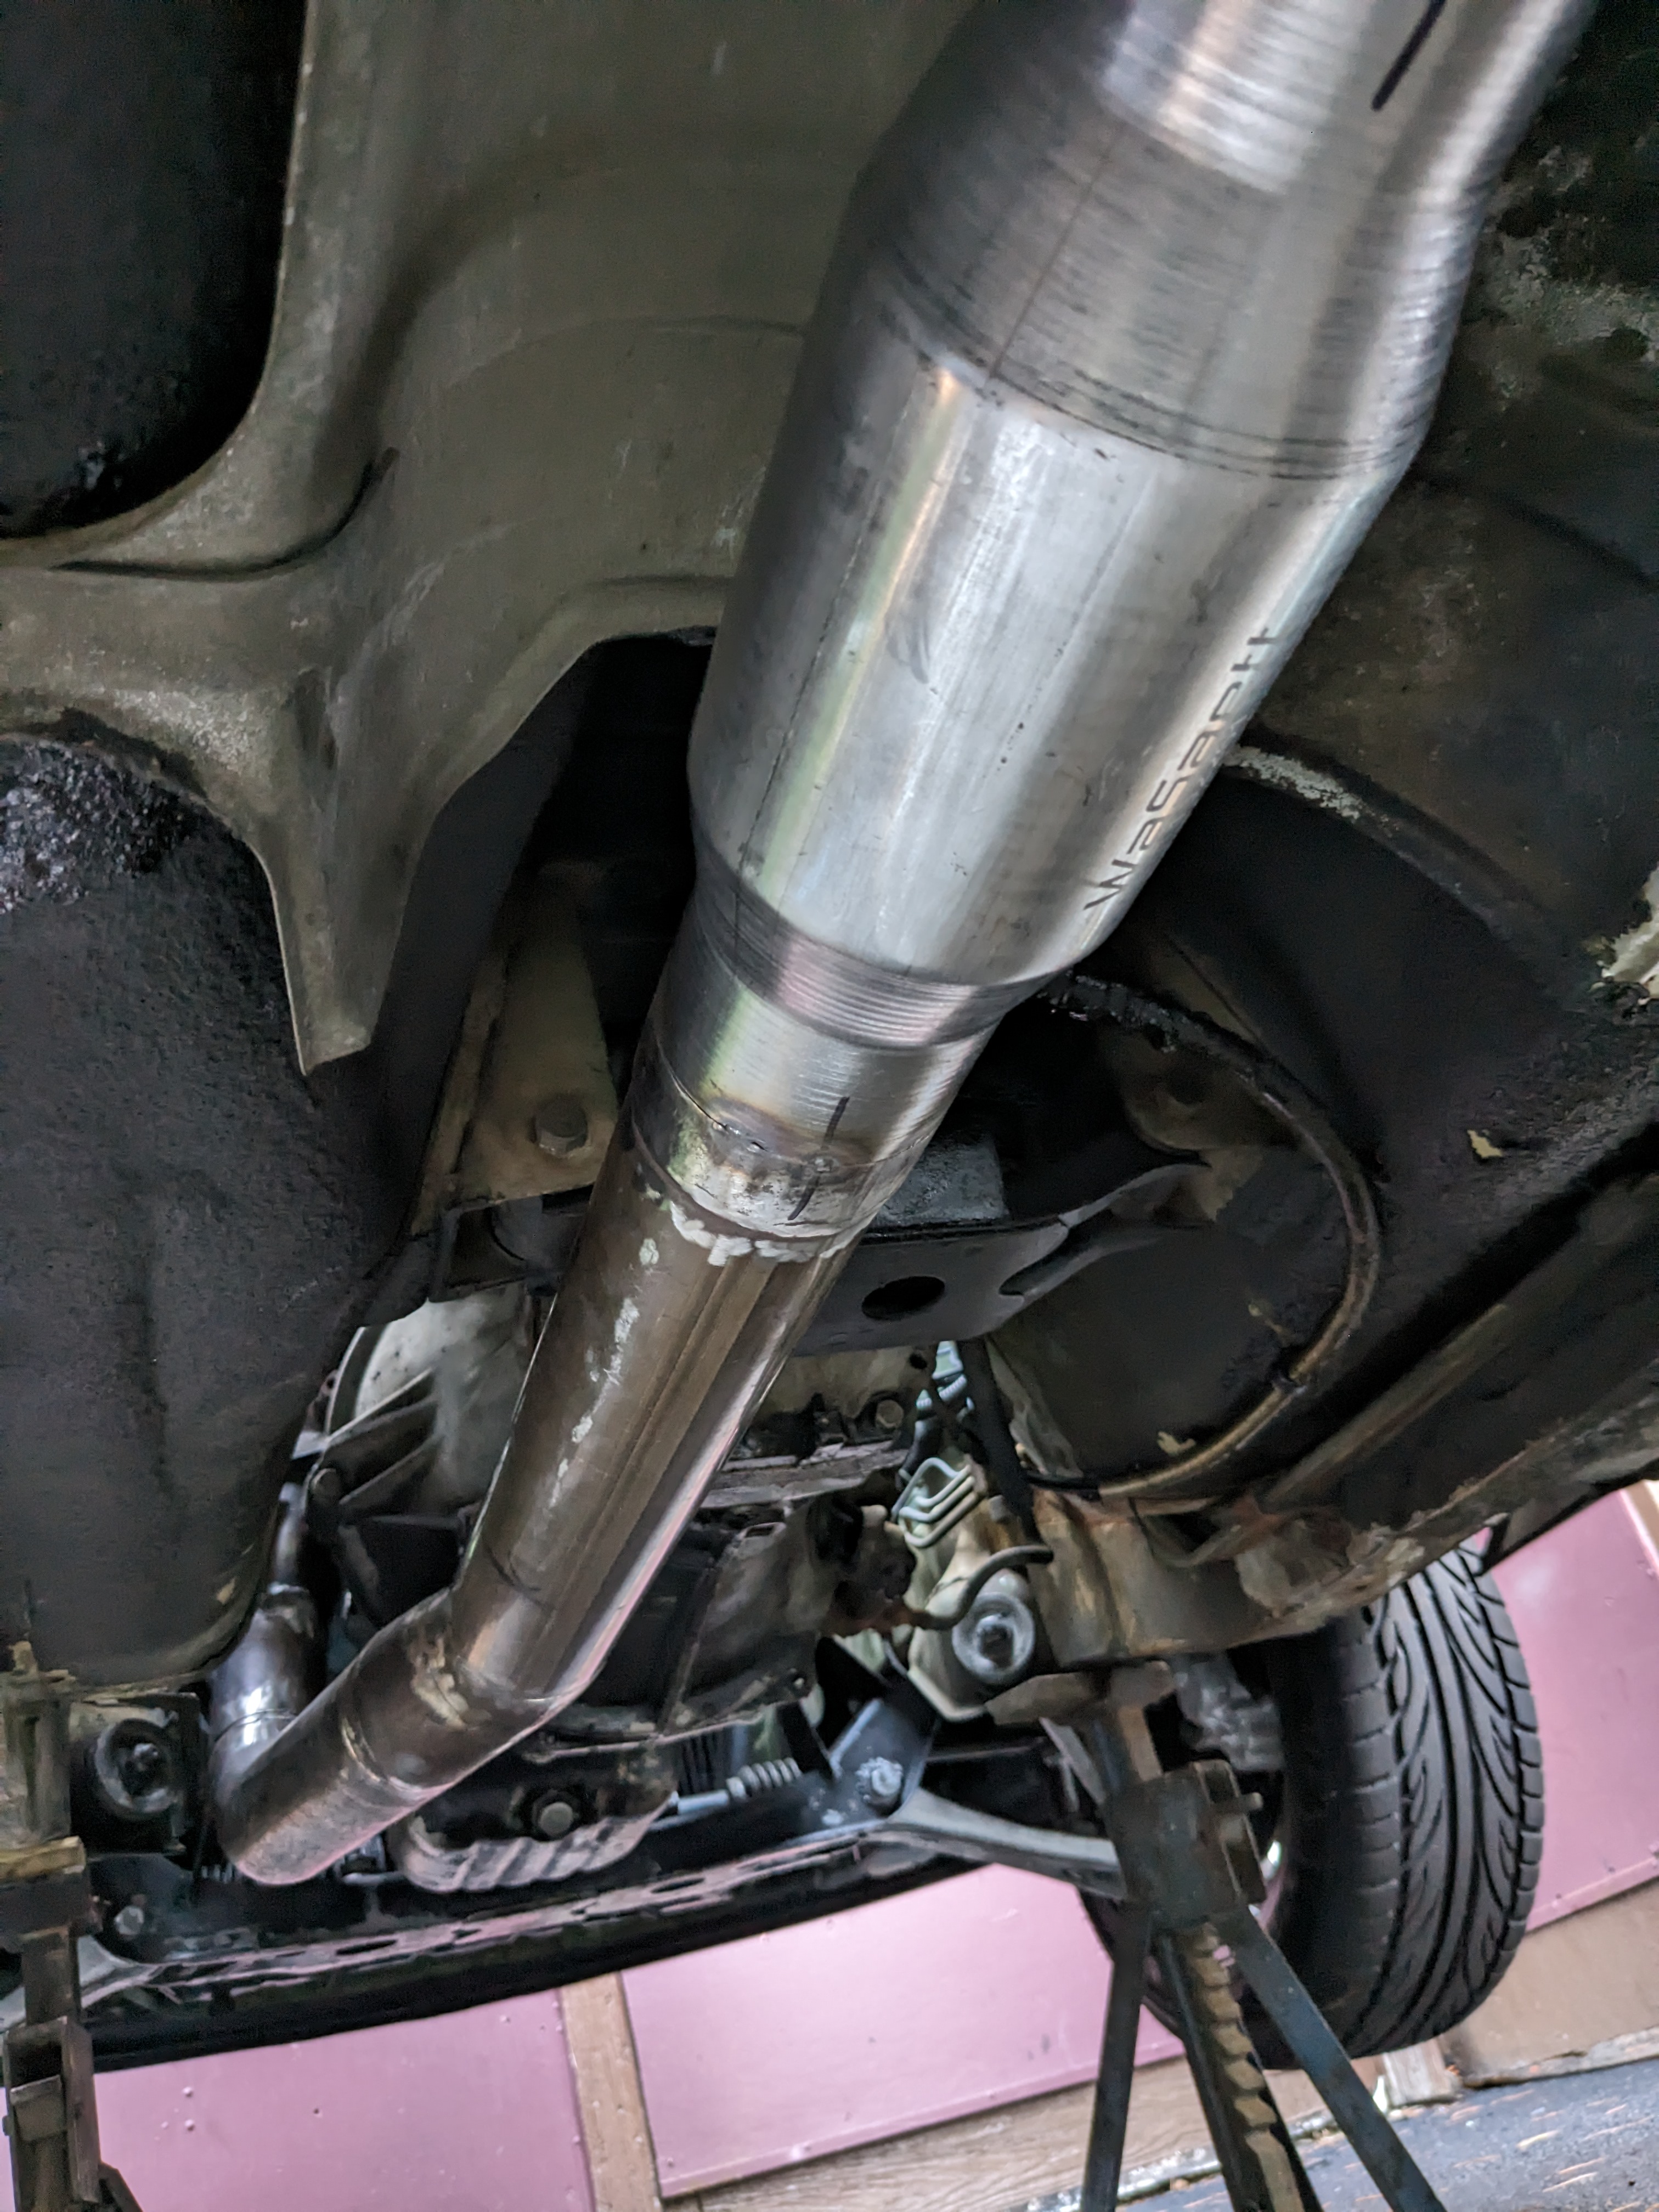
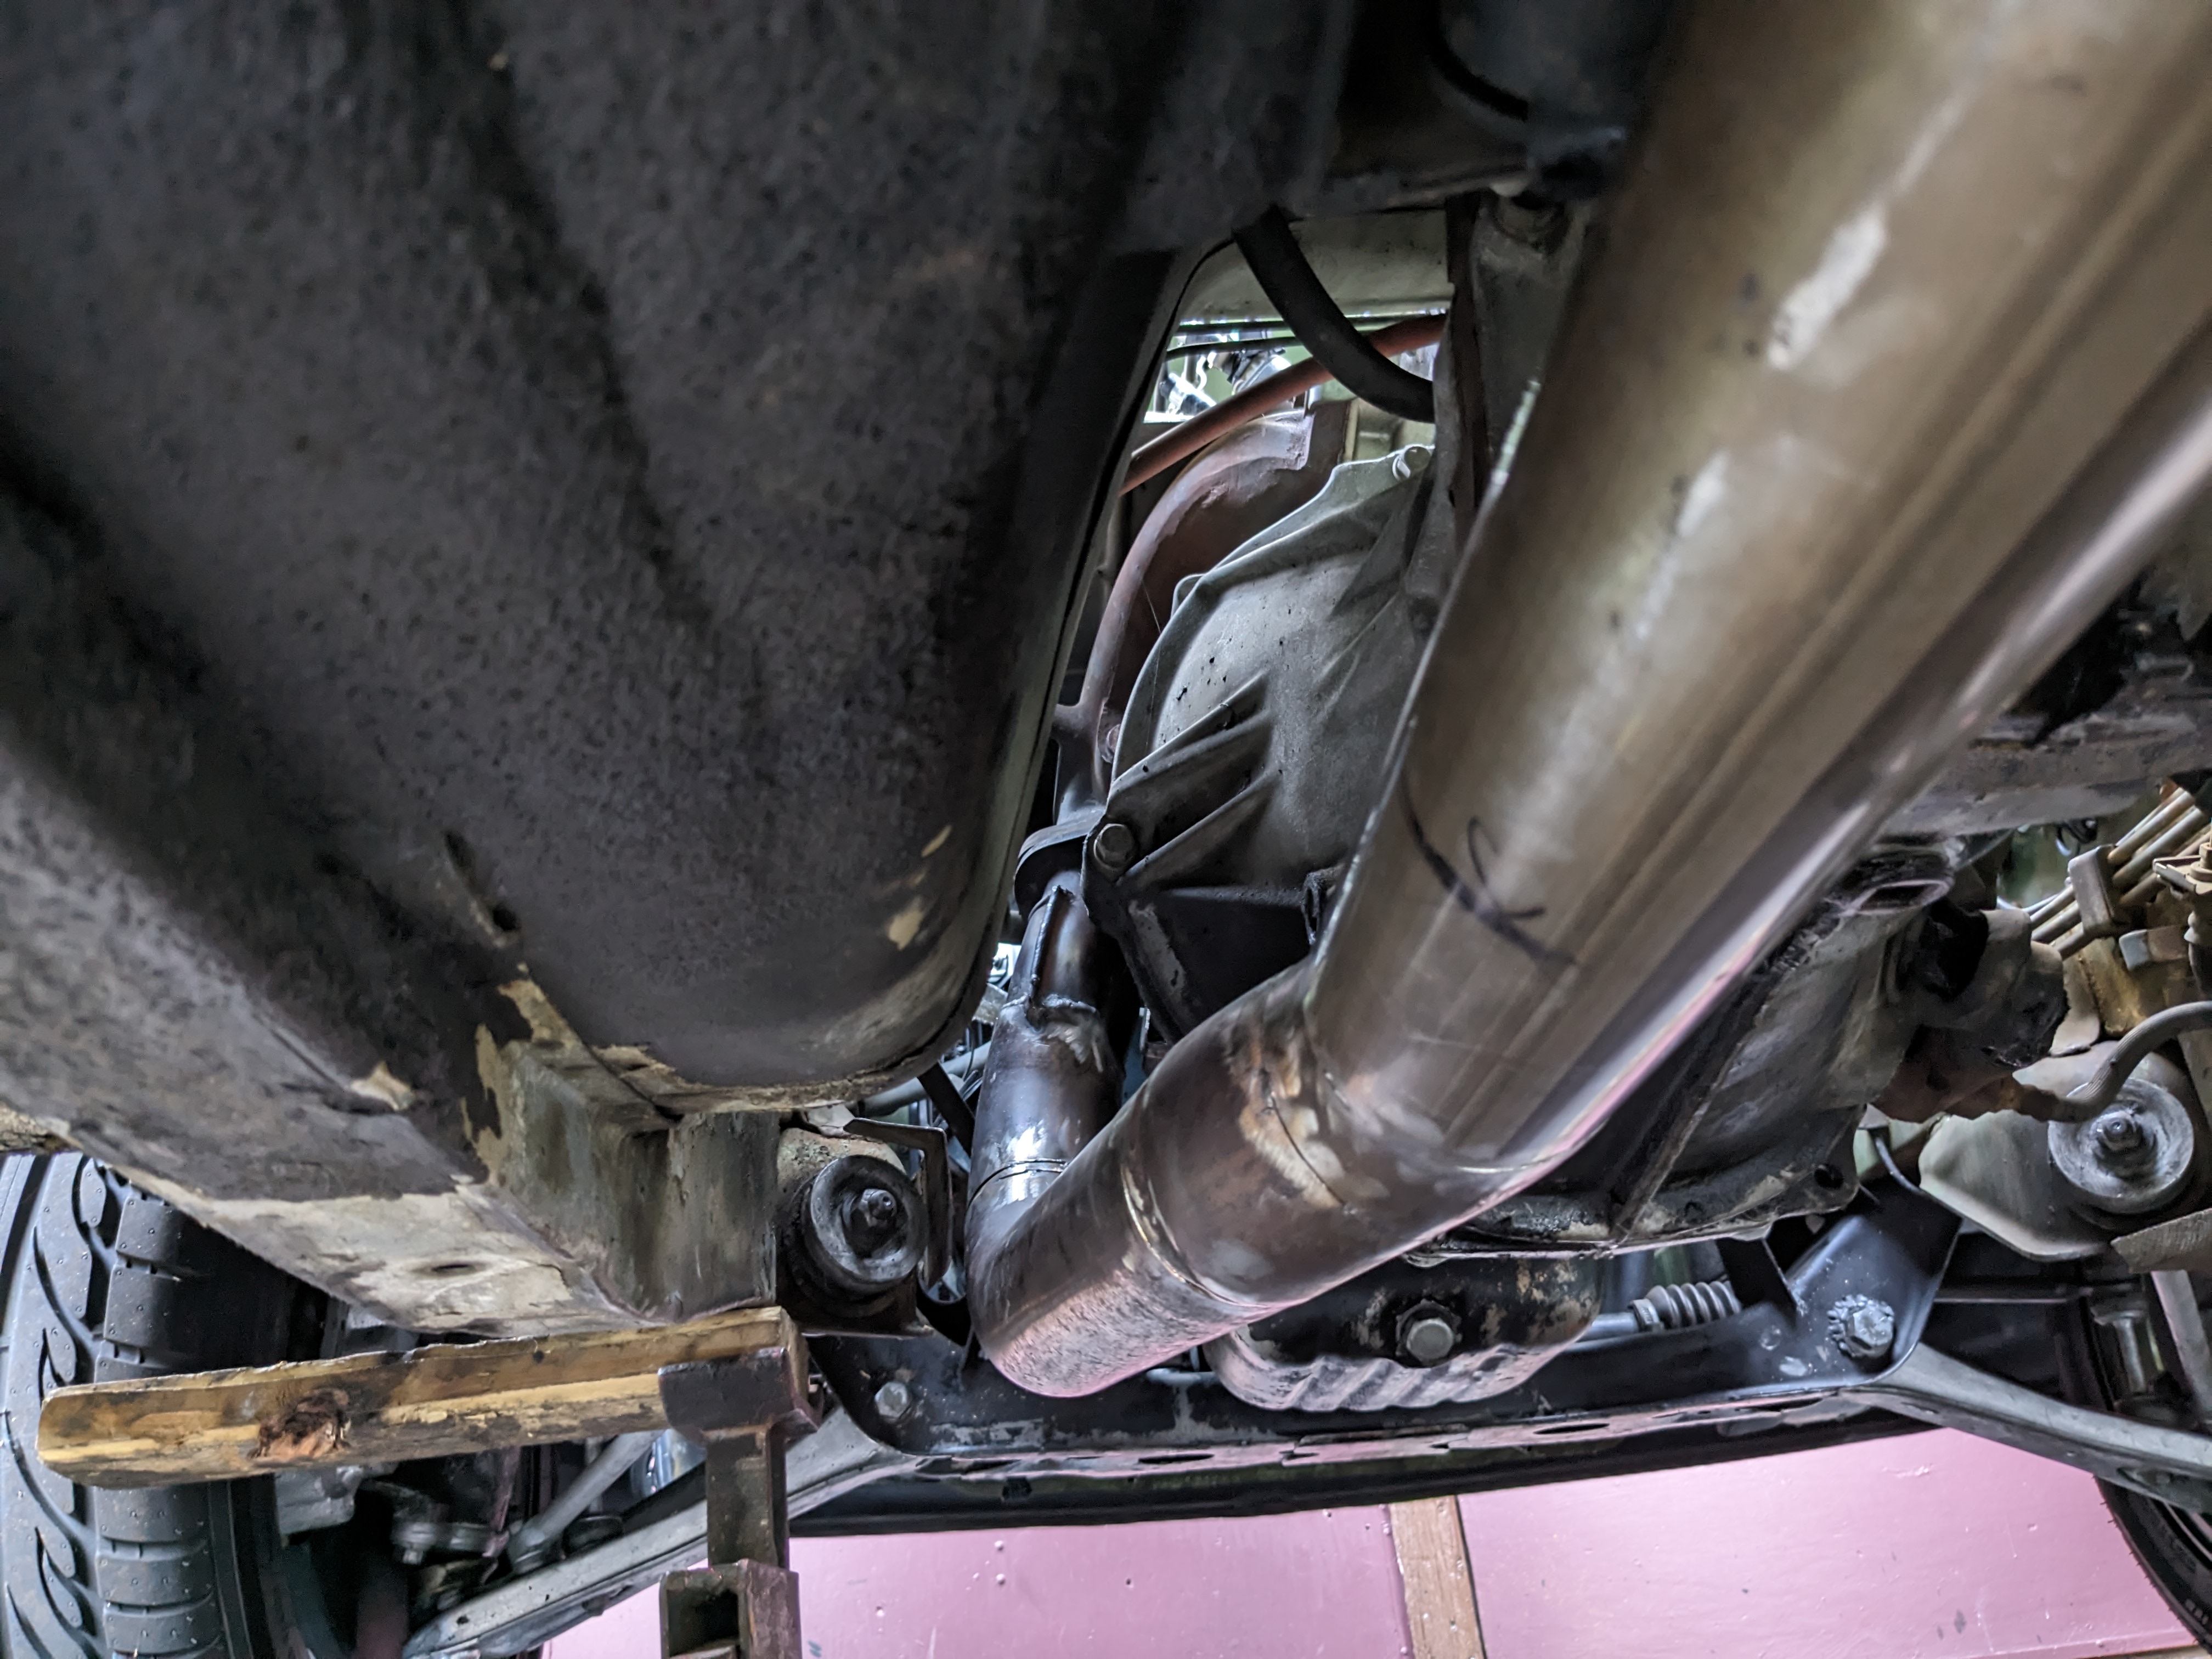
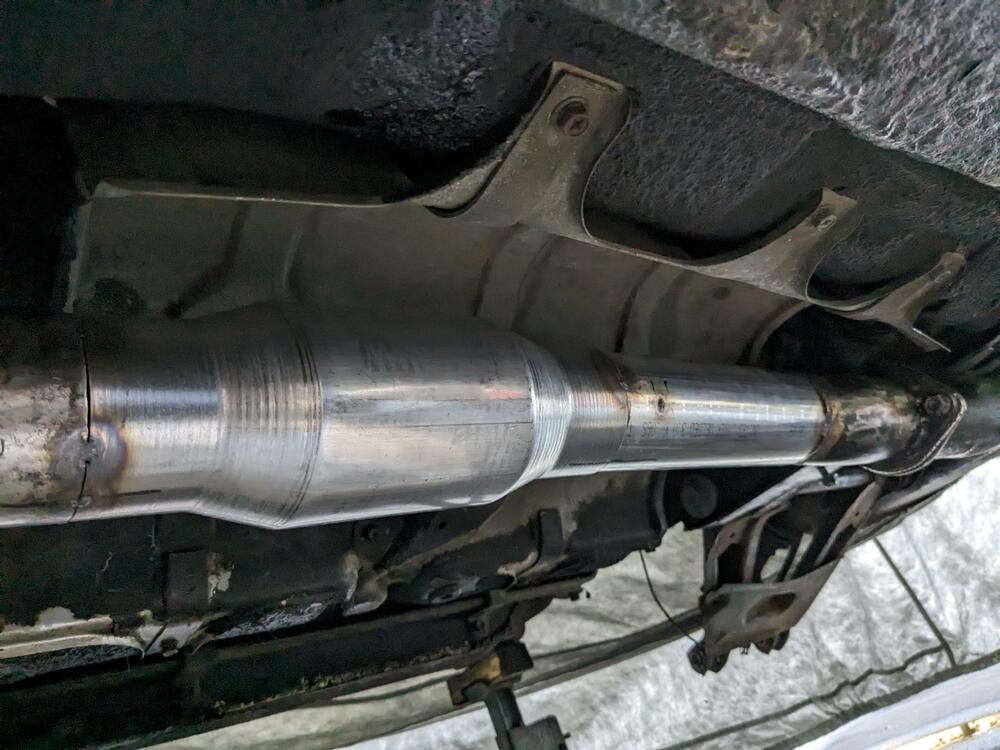
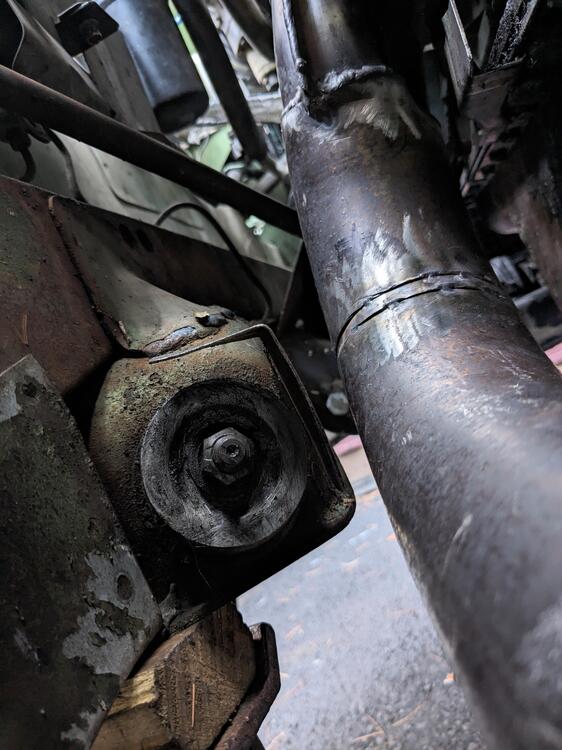
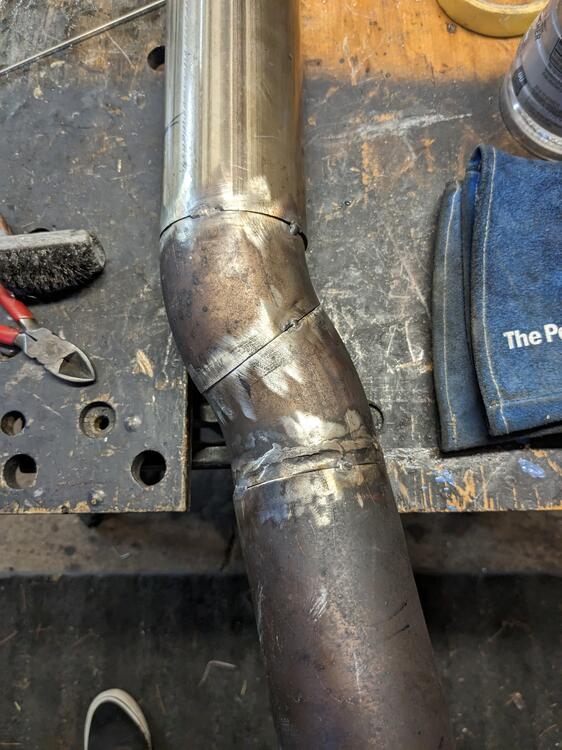
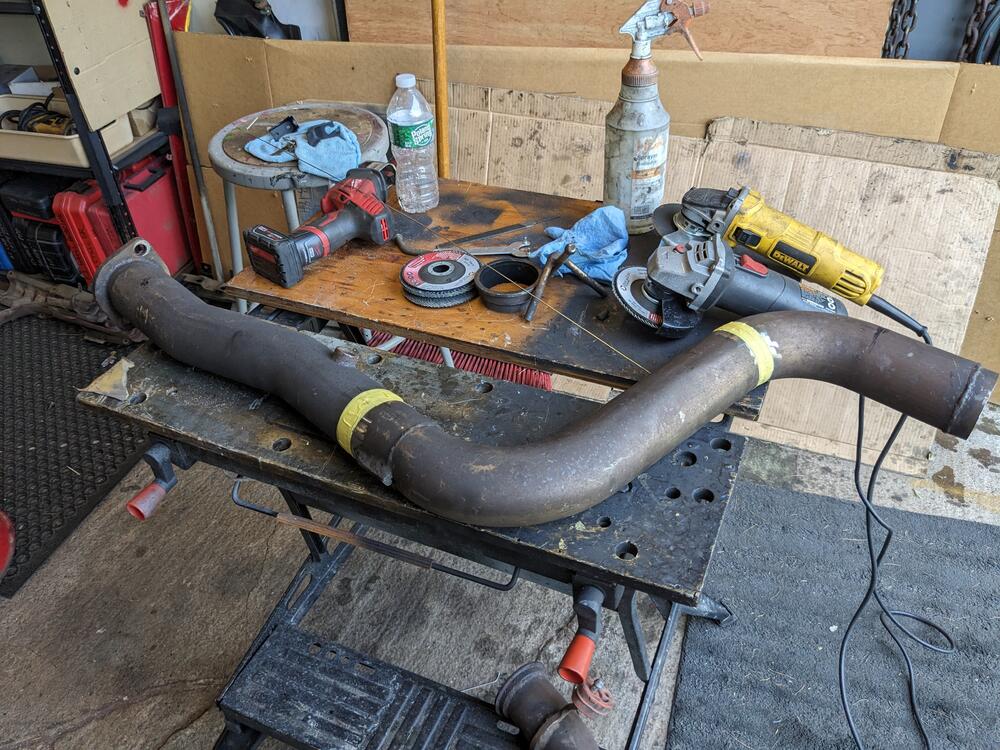
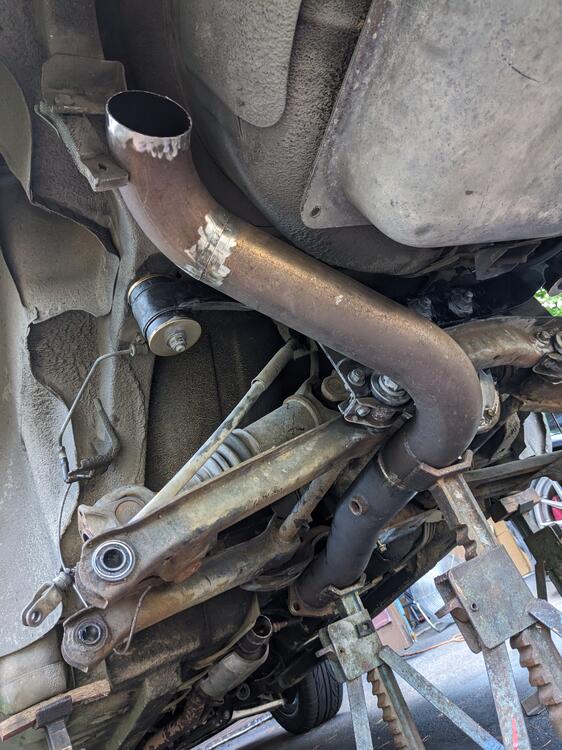
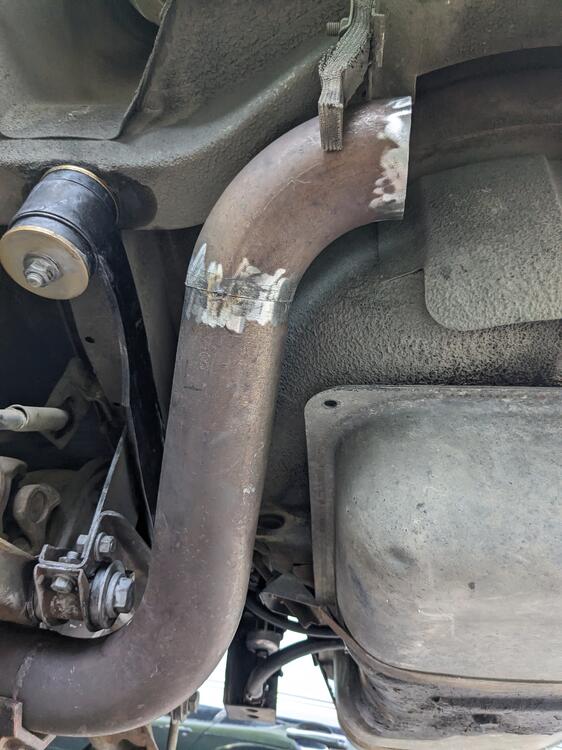
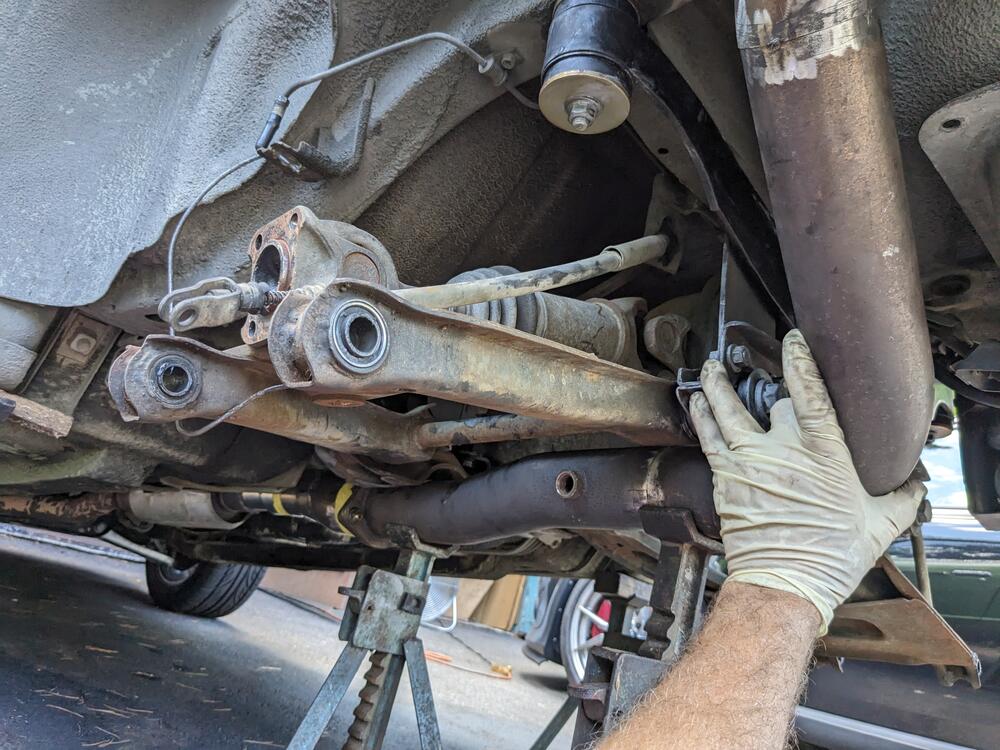
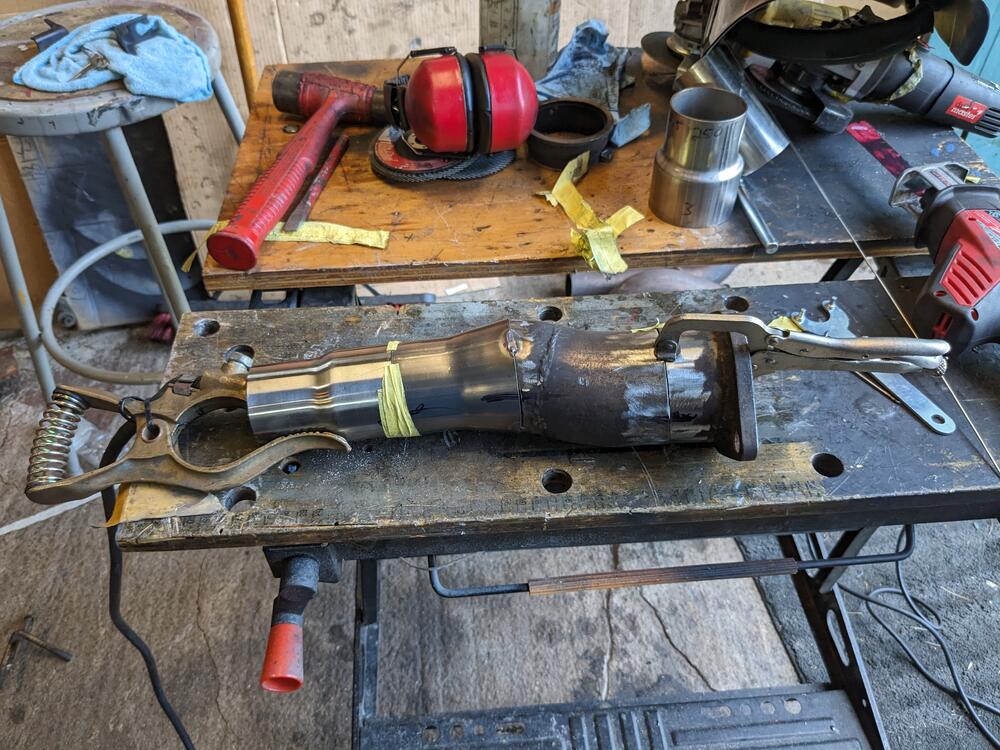
Since I had to cut off the exhaust to deal with all the rear suspension work, I decided to put together a 3" SS rear section, starting after the existing cat, then going to a 2.5" Stainless Works rear muffler (ran it on my X1/9 K24 swap for a few months). The 3" SS exhaust I put together from a exhaust I had made years ago for my Volvo C30, before I converted it to AWD & had to make it all over again. Forgot to take pic before I cut it up - this is what it was Eyeball the general placement, then cut, & tape together to check clearance off the forward crossmember and lower control pivot & diff casing tack welded, then recheck fit I'll be adding a 3" - 2.5" step from this into the muffler looks pretty good step down & dogleg to attach to existing exhaust/cat. I'll rework the entire exhaust forward of the 2 bolt 3" flange when I do the VQ35DE 2"-2.5" - 2.5"- 3" steps


 1 point
 -
Well, most non-trucks have transverse mounted engines, so they aren't positioned for an engine mounted fan to draw air through a radiator.1 point
-
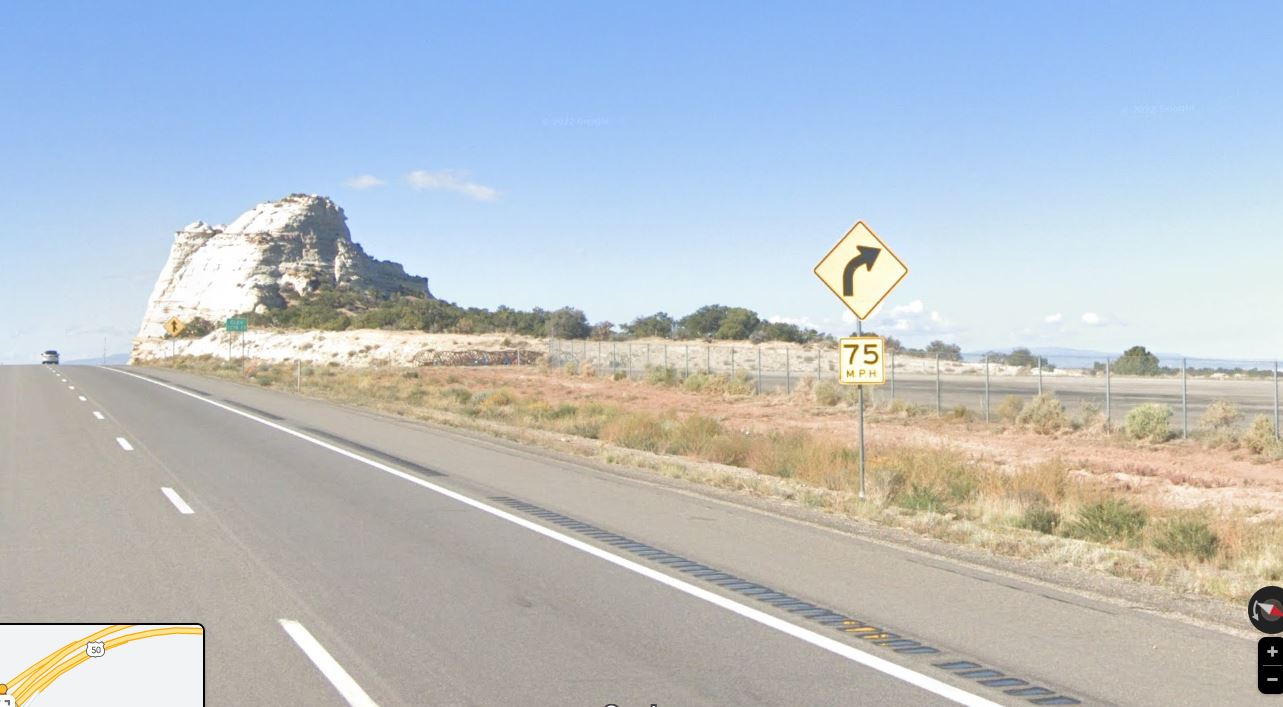
I agree, but only get there very rarely. (like driving through in a Z...) Another interesting thing we saw on the stretch of US 50/I-70: Every seen a curve ahead speed sign of 75mph? (Saw this on our trip, but did not get a picture then. Had to go back to Google Street view to find this again)
 1 point
 -
1 pointNot sure you knew, CarPartsManual.com is the saving grace for finding anything related with a p/n attached1 point
-
1 point
-
I think they stopped using them because they rob horsepower anytime the engine is running. Although they seem to be unpopular on this site, I ran a flex fan on my 240 for many years after the fan clutch locked up. I did notice the slight gain in horsepower (butt dyno) and it cooled just fine.1 point
-
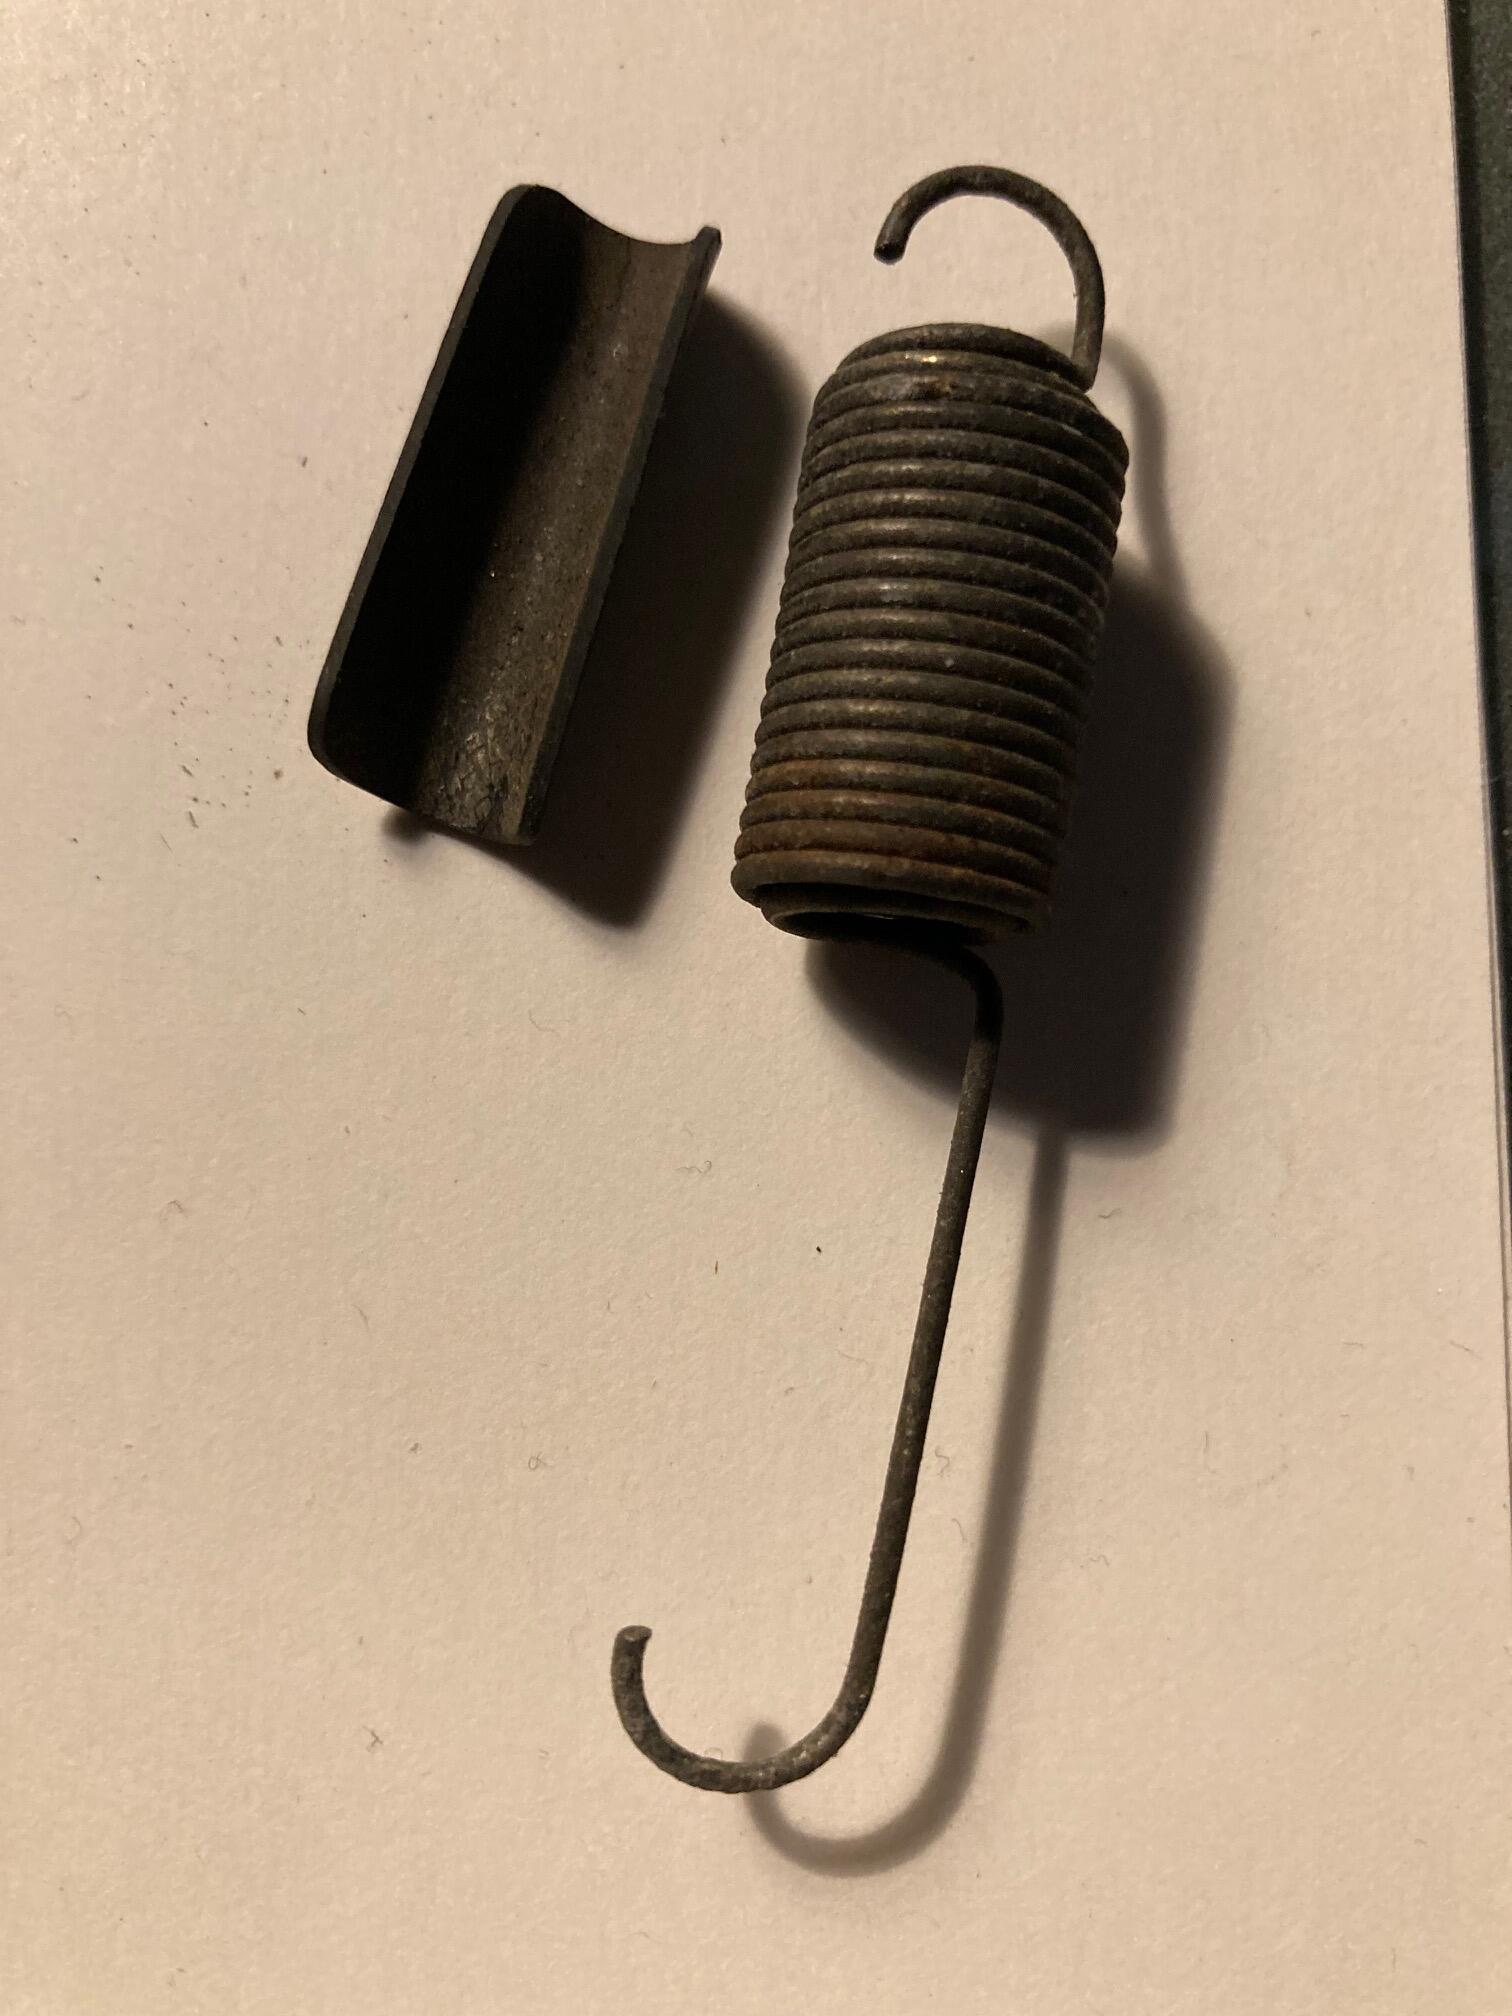
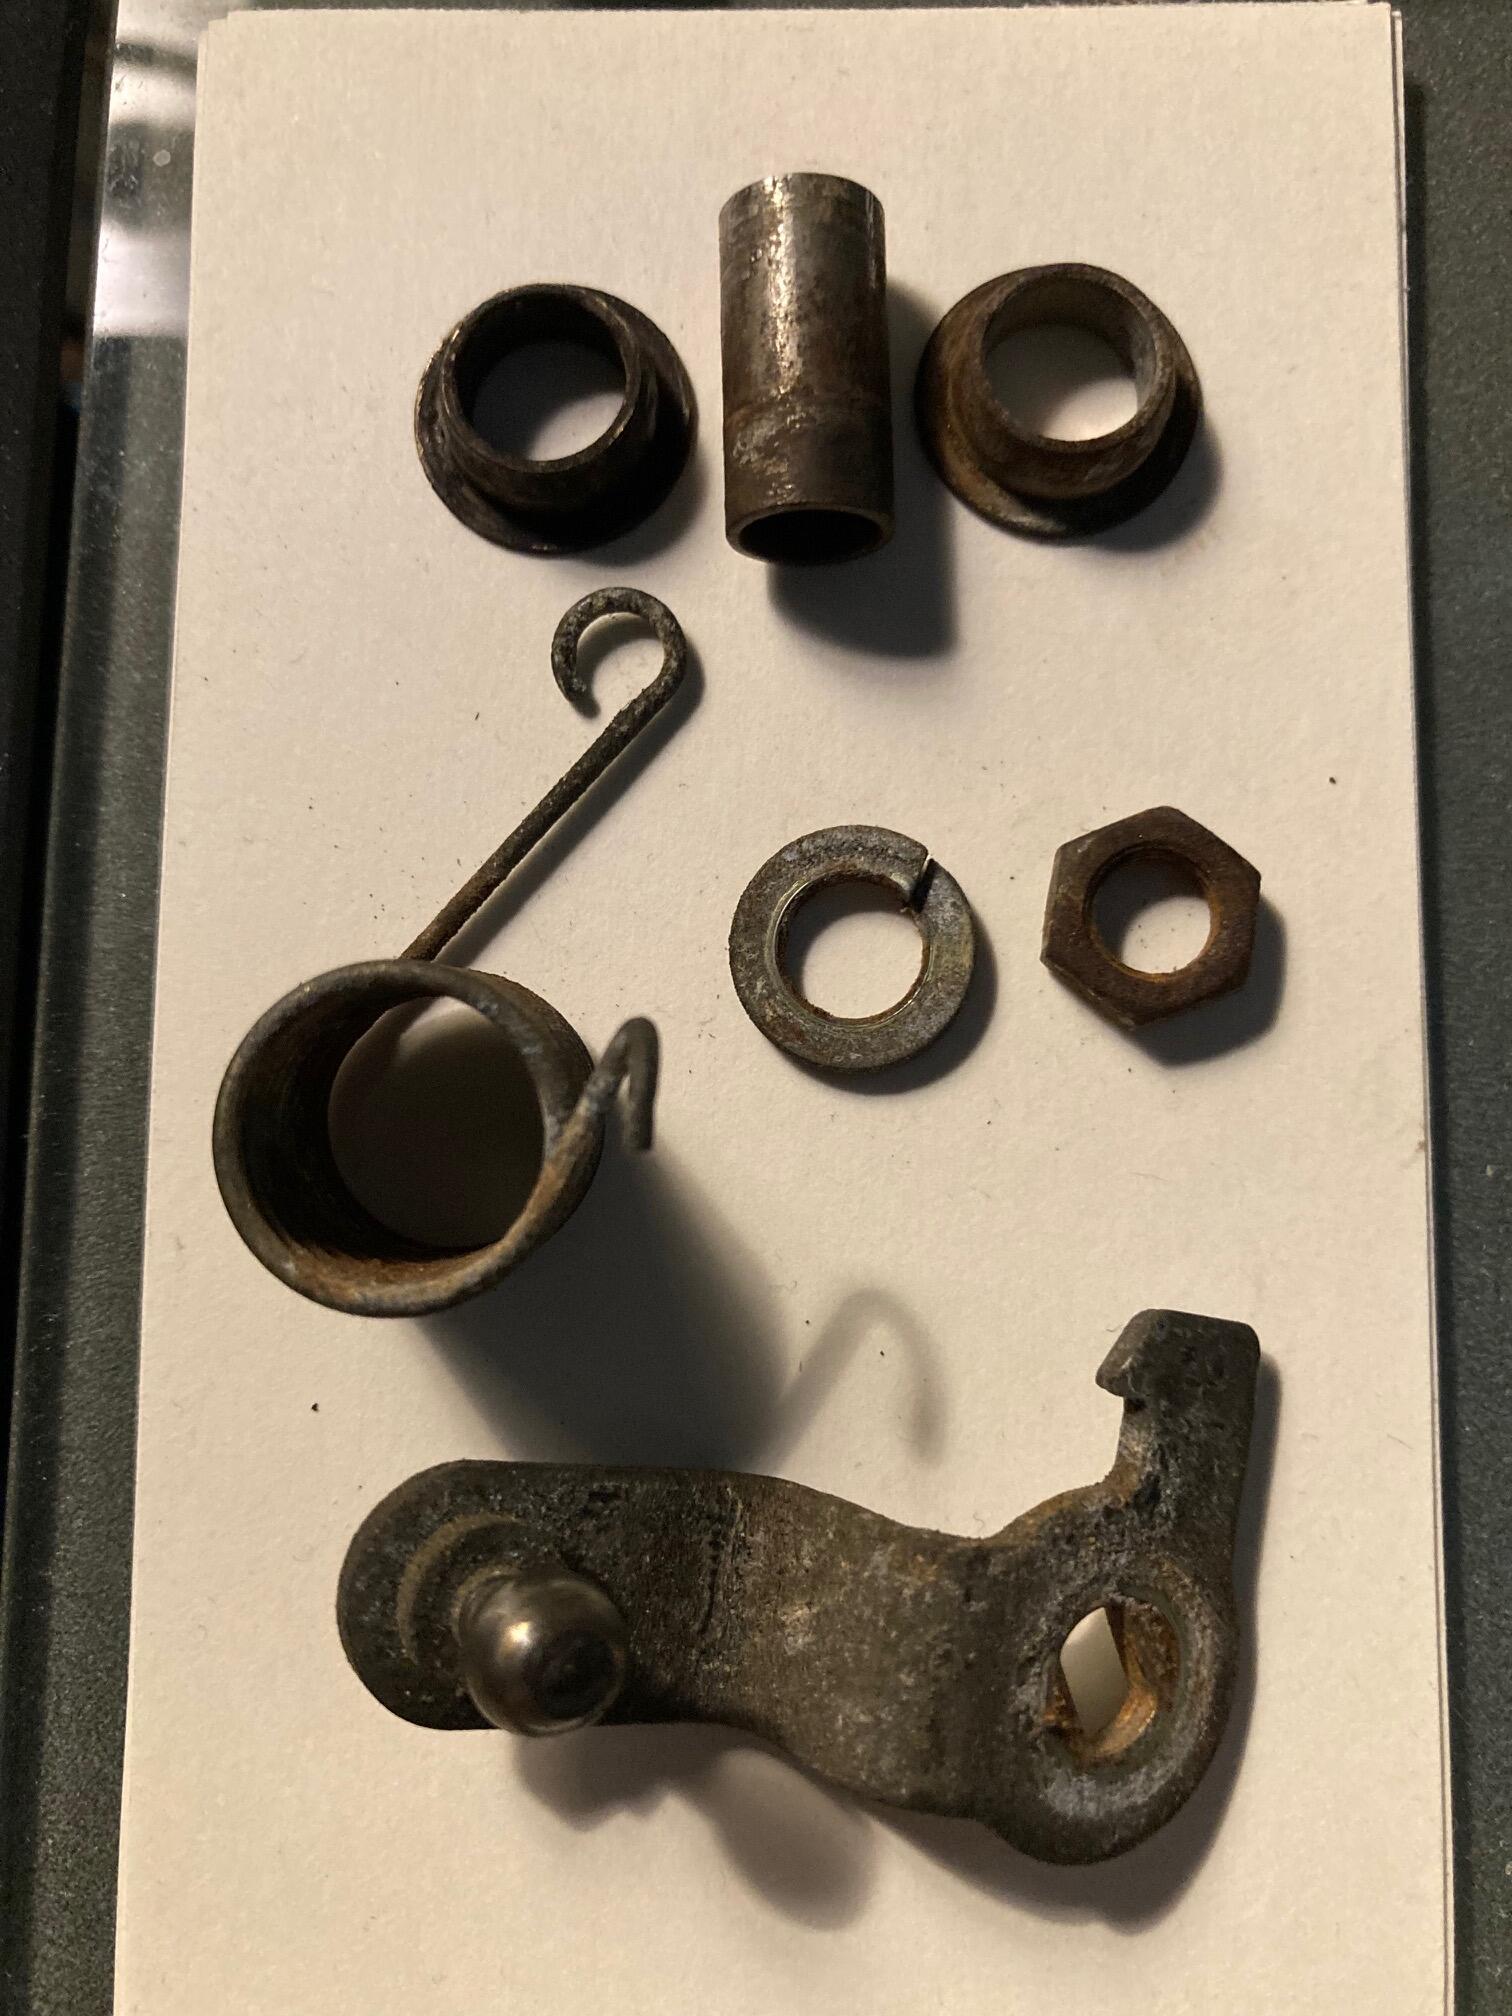
Just had to dig for an old TB. My spring had this little piece of rubber inside it. The collars and pin need clean up. It needed a little heat to get it apart. The collars are metal on my set up. No plastic parts that I saw. Car parts manual only identifies the spring, and does not show the collars or pin.

 1 point
 -
Update: I made a major decision to scrap the electric fans. After much digging around I had three major issues that were not insurmountable but we’re hanging me up and not really worth the effort. 1. I could not find a relay module that could handle 40 amps and had a provision for 6 relays (headlights, parking lights, and fans). I found some from MSD that can hold 1, 2, or 4, and I could gang them up, but it was getting sloppy. On top of that the extra wiring was not appealing. 2. Making sure that I was pulling at least as much air as the mechanical fan was also starting to become a mess of options and getting a fan shroud that works with the various radiators I am considering, fits fans that pull enough air (>2,800 CFM total) was not impossible but was giving me a headache. 3. Buying everything necessary to do an electric fan setup is more expensive that replacing my mechanical fan (or refurbishing my old one) and having been out of work for seven months now, I can justify that. So, I am probably going to get a new fan and clutch, buy a fiberglass fan shroud from MSA, and call it a day. Now back to our regularly scheduled programming.1 point
-
The carbs Ryan has here should work fine in a stroker, given proper cylinder head prep and porting, larger valves, proper tuned exhaust…… With the caveat regarding the tuning and jetting. They will certainly give more to the right foot fun factor.1 point
-
1 pointAll right! It's zee Wango, zee Tango 1-2-3-4 Come on boys Time to Wango My baby she like to rock My baby she like to roll My baby she can dance all night My baby got no control She do the Wango Tango My baby she can scream and shout My baby she can move it out My baby she can take a chance My baby got a brand new dance Wango Tango Wango Tango It's a Wango Tango Ooooh yeah! (oooooh.) Baby! My baby like to rock My baby like to roll My baby like to dance all night She got no control She do... Wango Tango Wango Tango Wango Tango Ooooh yeah! (oooooh.) Yeahhhhhhhhhh! Baby! Baby! Baby! Ooooh I like the way you look baby You look like you're made for me honey If you wanna take a little chance I'm gonna show you a new dance Baby I gotta Wango down one time with you honey I like it, I like it, I like it, I like it, I like it Well, it's a brand new dance Yeah been sweepin' the nation I said a brand new dance A rock 'n' roll sensation Yeah I like it baby, I do it every night I got to do it 'cos I like it so much Oh honey believe it baby You see it's a crazed gyration of the rock generation It's my motivation to avoid the nauseation, frustration When I need some lubrication - Baby! Kinda like, goes kinda like this You take her right ankle out You take her left ankle out You get her belly propped down You get her butt propped up Yeah lookin' good now baby I think you're in the right position now baby Yeah but if you ain't quite ready I'll make sure everything is a little bit nicer 'cos I'm gonna get a little talcum I'm gonna borrow it from Malcolm Yeah you look so good baby I'm startin to drool all over myself I got the droolin', droolin', get all wet, salivate, salivate I got salivate late, salivate late, salivate late Got salivate, salivate, salivate, salivate, heh heh heh Yeah you look so good baby, I like it, I like it, I like it You know what I been talkin' about honey It's a nice dance, we gotta a nice dance goin' here Now what you gotta do, I'll tell you what you gotta do You got to pretend your face is a Maserati It's a Maserati It's a Maserati It's a gettin' hotty It's a Maserati, Maserati, Maserati It's a fast one too man, that thing's turbocharged You feel like a little fuel injection honey? I'll tell ya about it, I'll tell you about it I'll check out the hood scoop I gotta get that hood scoop off, shine and shine and buff I gotta buff it up, buff it up, buff it up, buff it up, buff it up, Yeah, shiny now baby, heh heh heh You've been drivin' all night long It's time to put the old Maserati away So you look for a garage, you think you see a garage Wait a minute, Hey!, there's one up ahead And the damn thing's open Hello! Get in there! Is my baby alive? (Is my baby alive?) Is my baby alive? (Is my baby alive?) Is my baby alive? She Wango'd to death Wango Tango (Wango Tango) Wango Tango (Wango Tango) Wango Tango (Wango Tango) Wango Tango (Wango Tango) Wango Tango Wango Tango Wango Tango Wango Tango Wango Wango Tango Tango Wango Wango Wango Wango Tango Tango Tango Tango, yeah... (echoing)1 point
-
1 pointHonestly, I was just using this as an opportunity to drop the talcum / Malcolm reference. And surprisingly enough, it's not as simple as a quick google search. It seems a little more obscure than that. I know someone will get it, but they'll have to honestly know it. So... Game on!1 point
-
@Racer XCan probably give you the best advice on what you need to do going forward. My 3.1 build is designed by the engine builder. Time comes to where you have to rely on experience and who you trust.1 point
-
1 pointI have a friend who's a big bicycle rider / repair guy and is always putting inner-tubes in bike tires. He says the popular technique in the bike realm is to get a little talcum. He borrows it from Malcolm. He says it's great lube for the inner tube to squirm around inside the tire while getting everything mounted up and inflated. I'm thinking that would work great on the windshield seal as well if you're looking for an alternative to corn starch?1 point
-
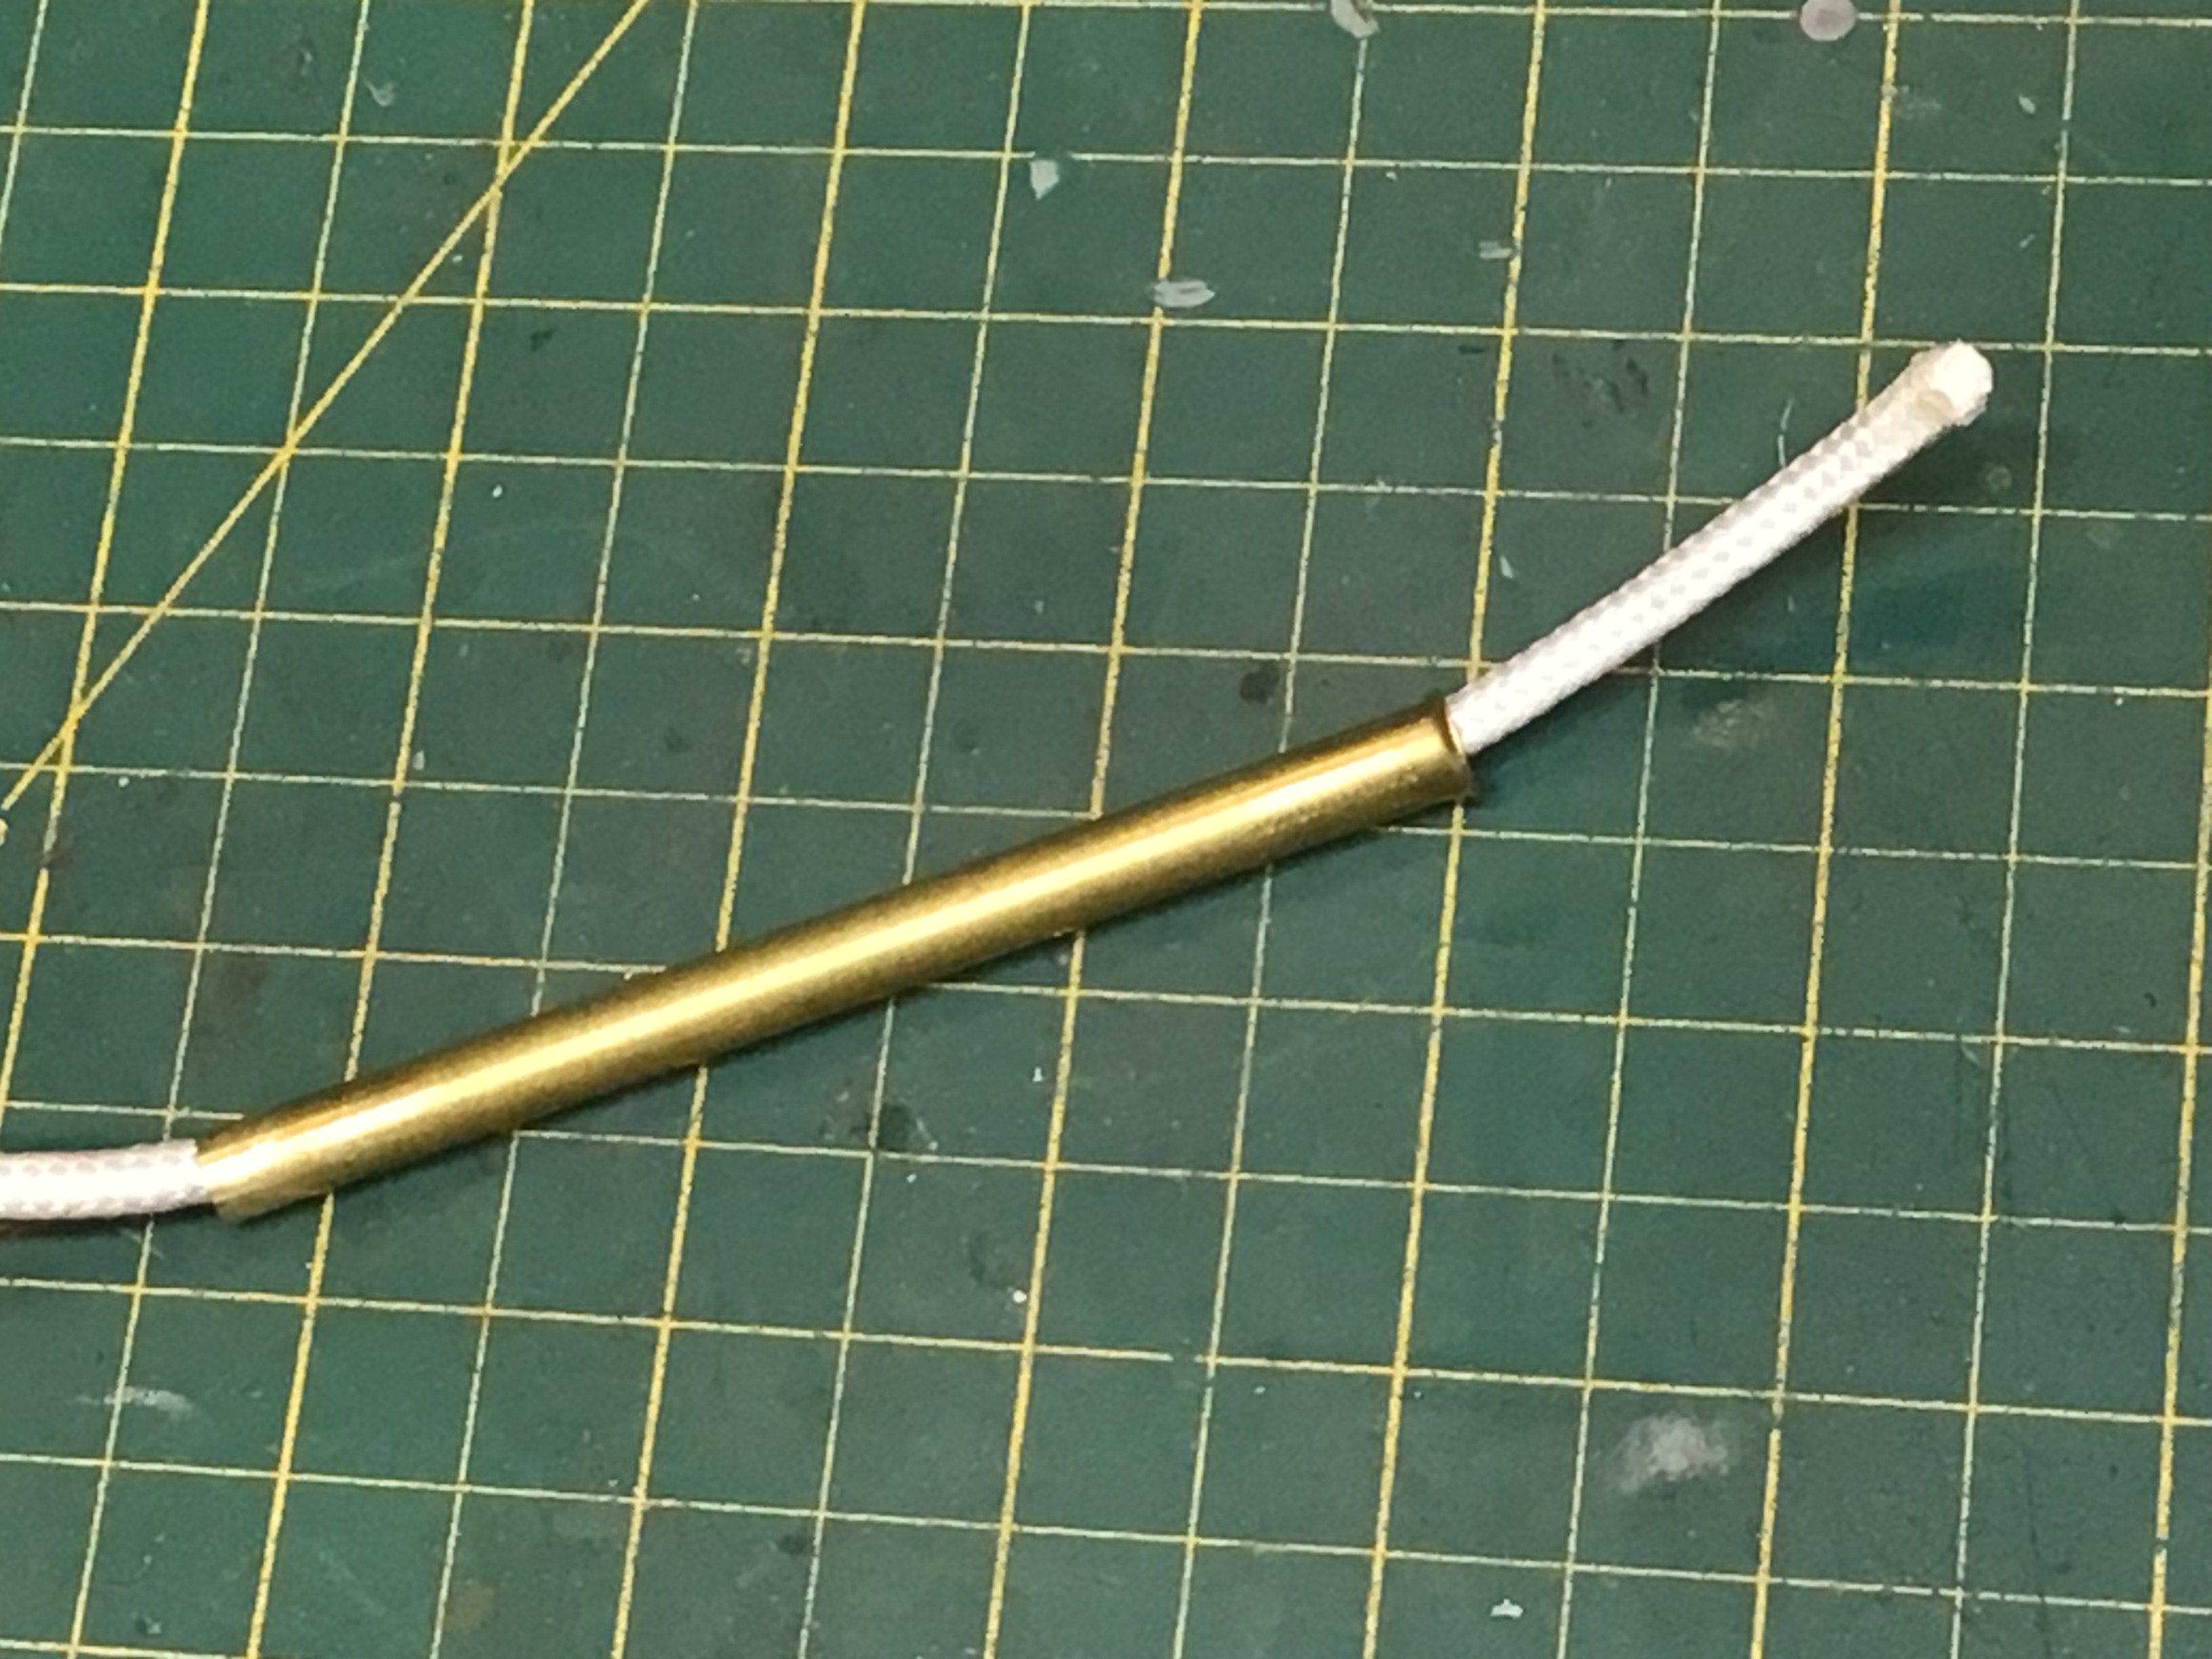
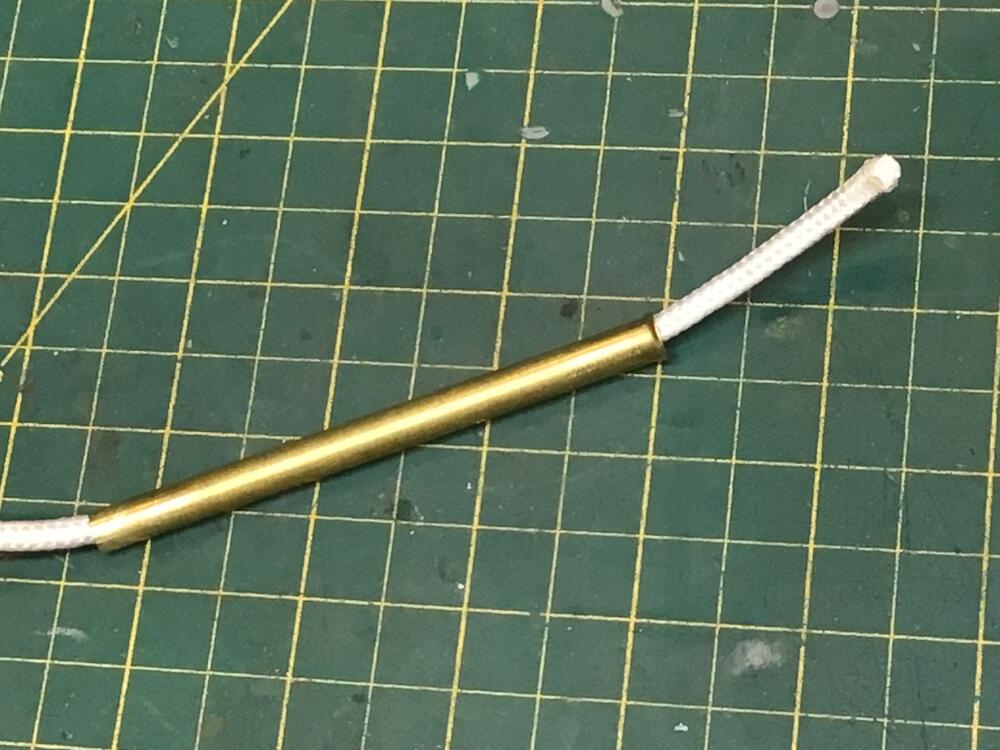
1 pointJim, you clever bugger, I love that cord in the tube idea and the corn starch, I'm going to try both next time.1 point
-
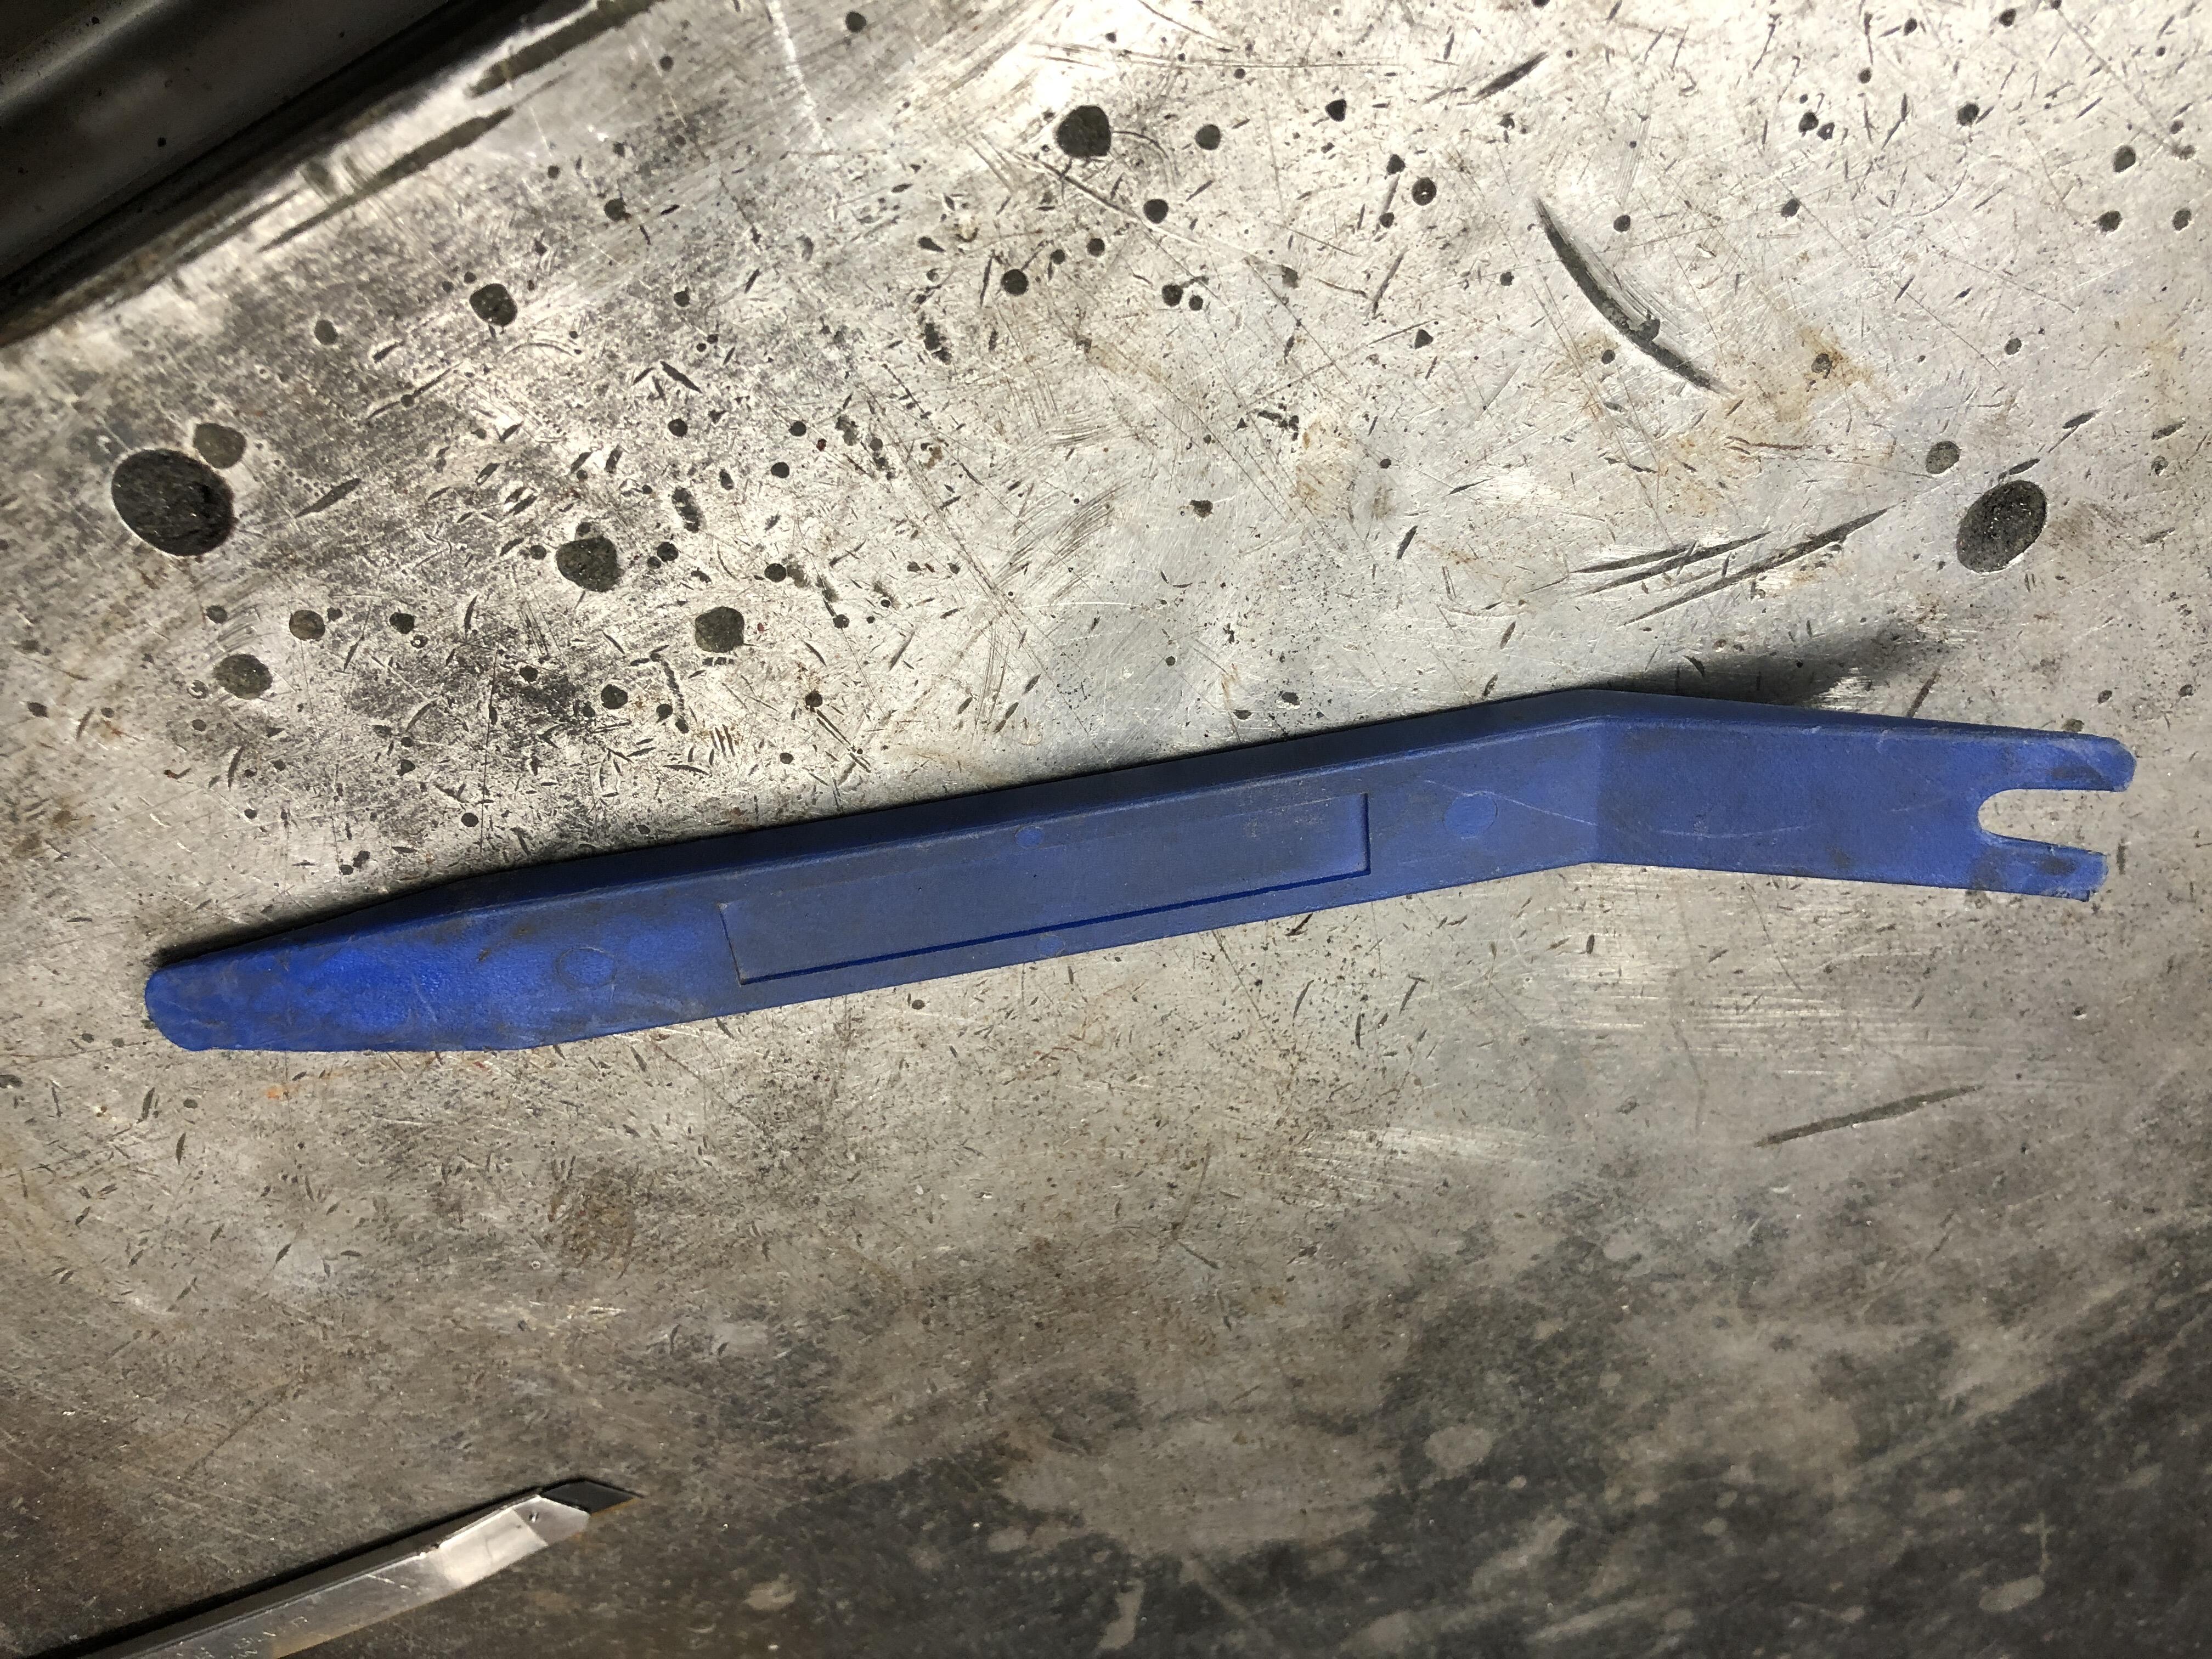
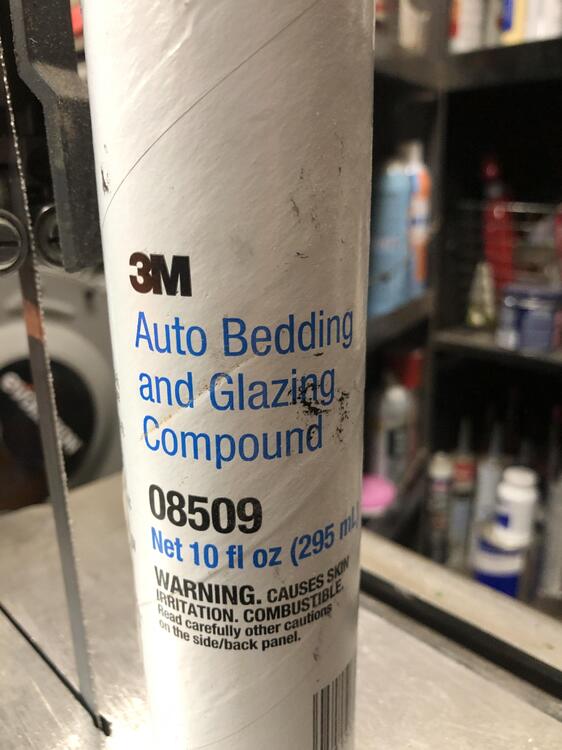
1 pointExcellent write up. If I may add a couple of personal experience notes. 1. Putting the cord in the groove. I use a short piece of brass tubing, 1/4 OD or something, 4 inches longish, whatever will let your cord of choice pass through easily. Poke the end of the tube into the groove and drag it along, it will deposit the cord in the groove like magic. Should take you literally 30 seconds to do the entire circumference. 2. Lube. Tried all kinds of wet lubes, none were all that useful. If you feel compelled to use lube, try corn starch. Dry, stays put, cheap, easy clean up (blows away without doing anything actually) and makes rubber slippery without being greasy or drys out like soap. 4. Spend more time than you think you should getting the gasket/glass sitting as low and close into the window channel as you can, flush with the body all around, and centered left right. This will ensure an easy cord pull as the rubber lip is nice and close to the pinch weld. 3. Biggest trick of all is to use two cords instead of one. Start one top center and go around left, end at bottom center. Same for the right. Leave a foot at each end top and bottom. Pull a bit of the bottom, left and right six inches, then repeat on the top, left and right, continue left and right, balancing your pull top and bottom. Go around bottom corners first, then the top, though it really doesn’t matter. Why is this such a great deal? Balance. All the problem I had during the first dozen installs revolved around gravity. I always started at the pull at the bottom and ended at the top, if I went the other way, gravity would pull down and make the bottom sit far too far away from the pinch weld. At least if you set the bottom first, then the top is likely to stay closer. Still by the time you get around the top corners 3 of the 4 sides are in, and the top “tends” to be farther away from the pinch weld than is ideal and you end up fighting to get that rubber lip over the pinch weld. If you do the top and bottom at the same time, you have balanced gravity and trap the glass top and bottom, which are also the longer edges, so by the time you get to the sides, it’s all over but the beer drinking. You can also see if you’re slightly off center left/right before you do the sides, and have a chance of easily pushing it back out to start over. You do NOT want it off center of course. Leads to leaks. Bad enough that most seals I see don’t have molded bottom corners. Rubber never seems to sit right often exposing those bottom corners. Sealant time. See the picture below of what I use. Doing this balanced technique, I often don’t need a second person pushing on the glass from the outside. As long as ensure you get the glass/gasket down as tight to the body as possible before you start and maybe get out a couple of times to push it down as you get going around the top, or just before you start going around the corners. If you’re a social person, then get four buddies, one on each corner and you’ll be done in 5 minutes. 4. Setting the lip over the pinch weld. As you pull cord and the rubber lips slips over the pinch weld, I spend a few moments pushing the lip firmly down onto the pinch weld, seating it more completely than just where ever it sits after the rope passes that point. Makes double sure the glass is pulled down into place. I use a flat plastic tool to get between the glass and lip and press the lip away from then down over the pinch weld. I use a 5/32 white nylon cord, but I like the idea of thick string trimmer cord. Should have less friction. Whatever you use, wear thick leather gloves so you can pull without pain. Too old for that grin and bear it crap.

 1 point
 -
1 point
-
1 pointI remove and install windshields exactly as you describe except now I use 3mm string trimmer (weed wacker) filament line instead of cord, I would never go back. The filament slides over the lip and rubber seal very easily with hardly any resistance which is especially good rounding the corners.1 point
-
1 pointWe have never broken one during removal or install. We were very nervous about removing and reinstalling the windshield with the crack so we were super careful (and had a fair amount of experience on our side at that point.) In the beginning, we were super careful because we weren't sure we could find a replacement. Then we had some solid experience, and had developed a removal method once we found that we could source replacements. I have broken a windshield out of the car... On our shop move a few years ago, I didn't pack one well enough... And, who says it doesn't get cold in Arizona? Why I've seen temps in the mid-to-upper 30's!! - well, until the sun comes up... (and I'm wearing a light jacket while these Arizonan's are bundled up in ski parkas - I grew up in Idaho and waited for the school bus in -30 temps.) Okay, I'll admit that we don't trust any modern windshield installers. They glue windshields in. That's pretty much all they know. A gasketed windshield installed over a flange is foreign to them. So, here's how we don't crack windshields: A. Use a utility knife (Xacto knife, single edge razor blade) to slice away the thin rubber that holds the trim on. Remove the stainless steel trim. 2. Utility knife - slice the exterior gasket carefully in the flat that was covered by the trim. You're looking for the edge of the glass. Once you find it, cut around it - all the way - enough that you can remove all the rubber from the outside face of the glass. 2b. You can do the above by yourself, but what follows really needs an assistant. Or two. c. Carefully push the glass out from inside the car. Lift just a little bit all along the perimeter until you're sure that all edges of the glass are unattached and it can be removed without interference. D. Remove the rest of the original gasket from the flange and clean the flange completely. REMOVE the dash finisher (the black crescent moon shape metal piece). 5. Get the new or exisiting windshield on a stand and install the new gasket on the glass. Be sure the glass is fully in the channel all around. Lube helps - very soapy water. 6. Install the stainless steel trim - not the corners, just the long pieces. Ya, do it now - it's MUCH easier than after the windshield is in place. The back side of the trim IS SHARP. It'll slice the rubber if you're not careful. You can file or sand the sharp edges if you're OCD (or even if you're not...) You have to raise the rubber flap up and over the edge of the trim. Lube helps - we use Meguiar's Hyper Dressing - and a smooth skinny tool: Awl, pick, screwdriver, smooth without sharp anything that will cut the thin flaps that hold the trim. g. Install a long cord in the gasket groove - thicker is better - like the olde tyme clothes line cord, cotton is better, but I have 3/8" polyester that works. WET the cord FIRST - yup, soak it in water. Add a little dish soap if you want, we need lubrication. The cord needs to pass each other at the meeting point by 10-12 inches. We like the meeting point at the top of the glass in the middle and the ends need to hang out fairly far - you need to get a good grip on either one - perhaps wrapping it around your hand. H. Lube up the windshield flange metal with some dish soap and water or Hyper Dressing. i. Two people - set the windshield - with the gasket snug all around - into the flange. Cord ends should be inside the car. Make sure it's centered all around. ii. One person is going to pull the cords inside to pull the rubber gasket into the interior of the car, sealing it to the interior side of the flange. At the top and on the pillars it'll be set over the vinyl. The other person is going to be on the outside holding the glass in place while the cord is being pulled. That person will use both hands as often as possible, palms down, fingers splayed on the glass. Their job is two-fold: 1. As the cord is pulled, the glass will want to move opposite of the pull (starts at the top, it'll want to move down, when the pull is on a side, it'll want to push to the other side. Exterior person needs to keep the edges of the glass/gasket from moving out of the hole the windshield sits in. 2. When the cord is pulled the glass needs to sink into the frame when the rubber is pulled into the interior. So, a certain amount of exterior pressure can be needed to keep the glass settling inward as the cord pull progresses. J. With the person with hands on the glass externally, the person inside starts to pull the cord. The cord hanging on the right side will be pulled to the left, and vice versa. Pull one cord only. Pull it at a 90 degree angle to the glass. Pull carefully and slowly if necessary. Don't pull so fast that the person on the exterior can't manage keeping the glass in place or help you get the glass to sink into the hole. I'll be easy until you get to the top corner(s). Stop at the corner and pull the gasket up on the inside and get it set into the flange as much as possible. The gasket needs to be pulled outward (like lifting it the same direction as the outside edge of the glass) getting it to set firmly in the flange. That helps the glass pull inward as well. At the corner, go very slowly and swing the cord in a circle as you're carefully pulling corner gasket rubber. Sounds stupid, but it works and doesn't cut the gasket. Once past, make sure your helper keeps the glass from moving out of the hole on the opposite side. Before getting to the bottom corner, pull the gasket into the flange - do it as you go and it'll help. Now pull across the bottom - it'll want to make the glass pop out of the side that's not pulled yet. All this time your helper needs to be getting the windshield to push inward as you're pulling cord and setting gasket into flange. If you have two helpers, it makes it very easy. Keep going around the entire windshield and do the second top corner same as the first. Pressure on the outside. Finish up by pressing firmly down on the outside, and pulling the gasket firmly into the flange on the inside. k. if it doesn't set right - have no fear - just remove it and start again. Pull the gasket rubber on the inside down on one corner and push that corner out carefully - continue around the whole windshield, take a deep breath, lube it up, try again. (But... It's a LOT easier if you're patient and get it right the first time...) L. Push the gasket out as far as you can - especially at the top corners. Install the trim corners and gap cover pieces. The stainless steel trim is not just for looks - it helps maintain the gasket in it's proper place and will help stop the gasket from pulling away from the top corners. Don't use it at you own peril... Note: I do not use any adhesive or gasket seal. These gaskets were designed to seal around the glass and flange without it. Now, I'm fully aware that that isn't always true. BUT, Arizona (no rain) and Z owners here wouldn't (don't) drive their Z's in the rain even if there was. Okay, they still wash their cars, but heat and NO humidity dries things FAST here. YOU can decide for yourself if you want to use such a thing - Nissan did - in spots - on the later models. I still don't. And: Patience is the key to Joy... Fortune cookie...1 point
-
Well it's holiday season. First i was away for two weeks enjoying the sea, now my bodyshop us running on low flame, so the recent progress is a bit slow. Also because they have to finish another nice project for another customer first. Here's what happened in the last few weeks. The inner wheel tub has been repaired on the inside and outside visible part, as well as LH inside trunk area which my previos bodyshop messed up a bit. The rusty swiss-cheese bit which you still see is the part from the rear quarter, which will be replaceed completely with the NOS piece in my posession soon. The main task is to rework the KFV side sills before putting them into the car. Generally their part is as close to OEM specs as it gets and fit really excellent, but these are somehow quite off in all directions. We made several templates to compare them to the OEM ones and nothing fits. so my bodyshop has to rework them. I'm a bit surprized as their stuff usually is really ace, but these not, on both sides. I tried to reach out to them with many pictures and measurements but haven't got any feedback, sadly. So the only thing we can do is rework them. Any bodyshop will anyway tell you that usually not a single replacement panel is a straight-on swap, so it's not a big deal, but some extra hours. And he had to go to a different shop which has a longer metal-scissor long enough to gut this pieces: On the already finished part, their in-house paintshop had the finished area sanded down and primered so it doesn't start to rust in the summer heat. That's it for now. I expect a pallette of goodies from Japan here mid-august and i have put an eye on a nice collection of parts, but negotiation will surely take a bit of time. wish me luck. And i hop in the coming weeks the bodyshop speeds up things a bit, when the yellow VW Bus in the background is completed (only small damage repair).1 point