Jump to content
Remove Ads

Leaderboard

Popular Content

Showing content with the highest reputation on 05/27/2023 in all areas

  1. Turned mine around and what do you know...BRAKES...! Thanks...!
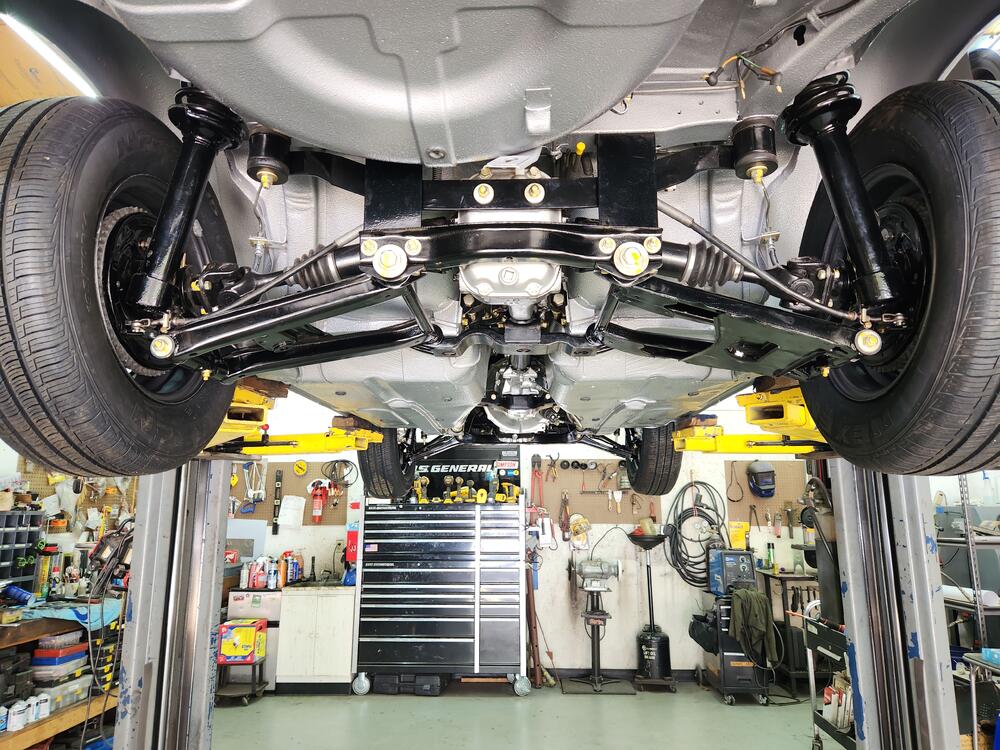
  2. Unexpected update! Evidently "they had a window open" and I was told that if I wanted to inspect the work before color was sprayed, I needed to come next week! Various things aligned - I had taken today off to travel to Charleston, SC for a soccer tournament... and John, the guy that put me onto these painters was itching to go flying today. So, we flew to AL today and dropped in to check out the work they have done thus far. I talked with the two guys who have worked on it thus far, and all is looking good. There is an issue with hood alignment, but they are hoping that when they install the hood springs, it will resolve. They had to straighten the belt line in a few places, align the rear hatch, and they found a hairline crack in the driver side headlight housing, which they fixed. I suspect I caused that crack the day before I delivered the car when I was assembling panels. I asked again for "spray cards" of the 901 silver to be sent to me ASAP - next day or second day, as necessary. As things stand now, they may paint the car before the close of business next Friday! Or not. We'll see.
  3. If you ever need to cover a hole, don't use duct tape. Use foil tape. It is actually the correct tape to use for ducts too. šŸ™‚ It sticks great and will not fall apart like duct tape does. We use it all the time on prototype vehicles. I always use it on race cars to cover stick-on wheel weights so they don't fall off from the brake heat.
  4. Here's a possible approach: if the relay appears to be the only PO mod, consider using your FSM wiring diagram to put everything back to OE state. Then proceed with debugging your wiring from a known baseline. Otherwise you are chasing bugs from an unknown starting position and having to compensate for his mod(s)..
  5. Put a bung on the Z and installed. after warm up idle mix is around 12.5 ish, tried to lean more with the bypass screw but that was as lean as it would go, started at about 11.5 so I was able to bring up some. I did confrim TPS sensor was closed during the idle. Drive around the block test results in mostly 13-13.5 with occasional blips into low 14's, but never sustained above 13's. Will do some highway driving tomorrow just to base line it. I have a few AFM's to try out and see if there is any difference. I am sure at least one has been opened up so I will prob experiment with that one to see if I can get to an optimal lamba reading or a mix of 14.7 while steady cruising. This is a 75 with NO closed loop (no narrow band O2 sensor for the ECU to monitor. I assume without a closed loop capability its prob best to err on the side of rich vs lean. I will get some videos later (or it never happened.....)
  6. Well for me, the "old standby" method is using a razor knife to cut a slit into the rubber hose allowing it to be pulled off the barbs. That and a lot of swearing. The swearing is especially important when you get down to the bottom and are digging around inside the ferrule with the tip of the razor knife. But the problem with that old standby method is that no matter how much swearing is employed and despite how careful you are (I am?) with the razor, you always cut a little too deep and put cut lines into the barbs of the injectors. Memory says I've seen pictures and instructions put out by Datsun that warn exactly NOT to do it that way because of the inevitable damage, but that's the same old memory that says I've seen many recommendations for grinding the tubing off. As for the purpose of the ferrule? I'm thinking it's primarily there to prevent the tubing from being inserted too far onto the barb. It might also provide some support to the end of the tubing to prevent fraying and cracking over the years, but mostly for insertion depth. And as for how to get new tubing on? The service manual says to just put a little gasoline into the end of the new tube (as lubrication) and push it on. No clamp required. So I will try the soldering iron method for removal. Since the reinforcing threads inside the tubing are polyester, it makes a lot of sense. I have high hopes.
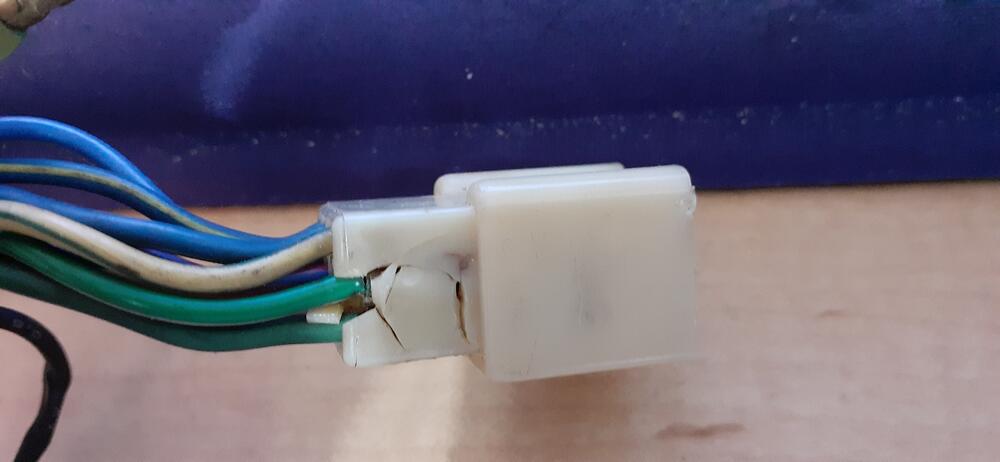
  7. There is a problem with the 73-76 cars, and the 77-78 cars are only marginally better. The 20A fuse is too big to protect the wiring, especially with all of the connectors. The weakest connector is the 9-pin connector between the combo switch and dash harness. (The connector is different in the 77-78, but I've seen the problem there, too.) It will overheat with too much current flowing through it. Here is an example of a damaged one that I happen to have handy. The green wires you see are the ones for the parking light circuit. I hope the damage is obvious. The connection got so hot, the plastic started to melt. A solution: Replace the connector. You can find it at http://www.vintageconnections.com/ You may want to buy the pin removal tools. No matter what, it's a PITA to de-pin the old connector IMHO. Replace the side markers and gauge lights with LEDs. If you replace the front and rear markers, you'll also need to change to electronic turn signal flasher relays. Note: You can't just buy any LED bulbs for the gauge lights. Another user on this site found polarity independent bulbs that fit well. I will attach a suggested list of LED bulbs. Change the fuse for the parking lights to 10A. The reason why this solution works is that the current draw through the circuit has been reduced. That reduces the heat through the connector. If there is a short in the circuit, the fuse will blow before there is too much current flowing through the vulnerable connector. LED bulb list.txt
  8. We’ll never pass up a chance to tell the people in your life that you value them. My father told always tell your loved ones, you love them every chance you get because it might be your last. My good buddy Yarb has embraced this philosophy [emoji6] 2 weeks ago a friend of the family lost those 34 yr old son suddenly. Fell asleep at the wheel late at night, hit a tree and died instantly. Stay strong Cliff!
  9. Burn it like a bushing. Burn it! burn! burn!
  10. I have a used 280z hub i'd sell.
  11. Z engines are so easy to remove that this comment doesn't really have any weight. Looks more like a guy with a business trying to get some business. That's my first impression. Mechanics need to mechanic. As Mark M. says, inspect first, then decide. I've noticed that the high quality parts seem less available today. You could end up replacing good used parts with bad new parts. If it's not broke don't try to fix it.
  12. Haha!! You know me well my friend! I'm pretty sure I could make them, but I'm also pretty sure I would just rather buy them!
  13. I don't know if the ferrules are available but I'm sure you've already thought about how to make them.
  14. Update: So I just went under the car and looked around, tightened hose clamps, etc. All the hoses under the car looked newish with modern belt-style hose clamps except for one which I yanked off (image below) which will be replaced tomorrow along with belt clamps so I think we're in business here. I also found one screw hole that was missing a screw so I dug one up strictly to plug that leak hole.
  15. I've learned something very important about end of life. People need closure even it's just a minute or 2. My guy was abducted it feels like and it still bothers me. I can't imagine how his wife and kids feel. Thank you all for your kindness towards me. It has always been comforting to be accepted by smart, thoughtful people that make this forum special to me.
  16. Wish I lived closer, I’d take them. I forget how many sets I have. When I first got my race Z I picked up several sets, both 6ā€, and 7ā€. The class I ran in required 14ā€ wheels. Hoosier still makes tires, the Street TD, a DOT legal bias ply with tread that works very well in 225/50-14. They fit well on a Z. And look just as good on the pavement as they do ten to twelve inches in the air.
  17. Seems like you have your priorities right. Good luck. Don't press too hard. Slow and steady on the big jobs.
  18. I did raptor liner with body color over it. I am really happy with how it turned out. Maybe one day the other side will get paint!
  19. Just an update on the reproduction Yazaki plug leads, Thanks to Mike @zspert and @CanTechZexcellent drawings, along with a set of NOS 1971 Yazaki coil leads from Kuwait of all places, I have finished up the CAD drawings and produced some rubber pieces for testing of fit and function. In the meantime I'm sourcing the correct 7mm carbon core leads. I'll be trialing a set on my 1970 240Z this week before I screen print the original markings onto the leads in yellow as originally done. The plan is to offer a limited run of 1969 and 1970 sets initially, both those years used the same rubber connector boots and yellow markings. Once I've sourced one of the angled boots for #6 lead on the 1971, 1972 and 1973 240Z I'll offer those as well which have the white markings. Apologies for taking so long to get this sorted but sourcing original parts to replicate was the main stumbling block. Initial cost estimate is around USD$250 for a set of reproduction leads. They will be made here in the USA not outsourced to China! Interested owners so far include @hiyabrad @Zup @VaCat33 @26th-Z @240dkw @inline6 Feel free to add any comments.
Remove Ads

Important Information

By using this site, you agree to our Privacy Policy and Guidelines. We have placed cookies on your device to help make this website better. You can adjust your cookie settings, otherwise we'll assume you're okay to continue.