Leaderboard
-
240ZBUILTBYME
Free Member11Points237Posts -
conedodger
Free Member10Points12,513Posts -
w3wilkes
Free Member4Points972Posts -
Captain Obvious
Free Member3Points10,081Posts


Popular Content
Showing content with the highest reputation on 03/21/2023 in all areas
-
Grand kids are even more fun! You can spoil them like their parents won't.4 points
-
I have never used the special bent crow's foot wrench. I've always just used two open end wrenches and snugged the lock nut. After hundreds of adjustments over a dozen cars and 40 years, I've never had one loosen. Of course, I always check the clearance after it's tight to make sure it is still correct. After a while, you get a feel for how loose to leave the clearance so they tighten just right when the lock nut is snugged up.3 points
-
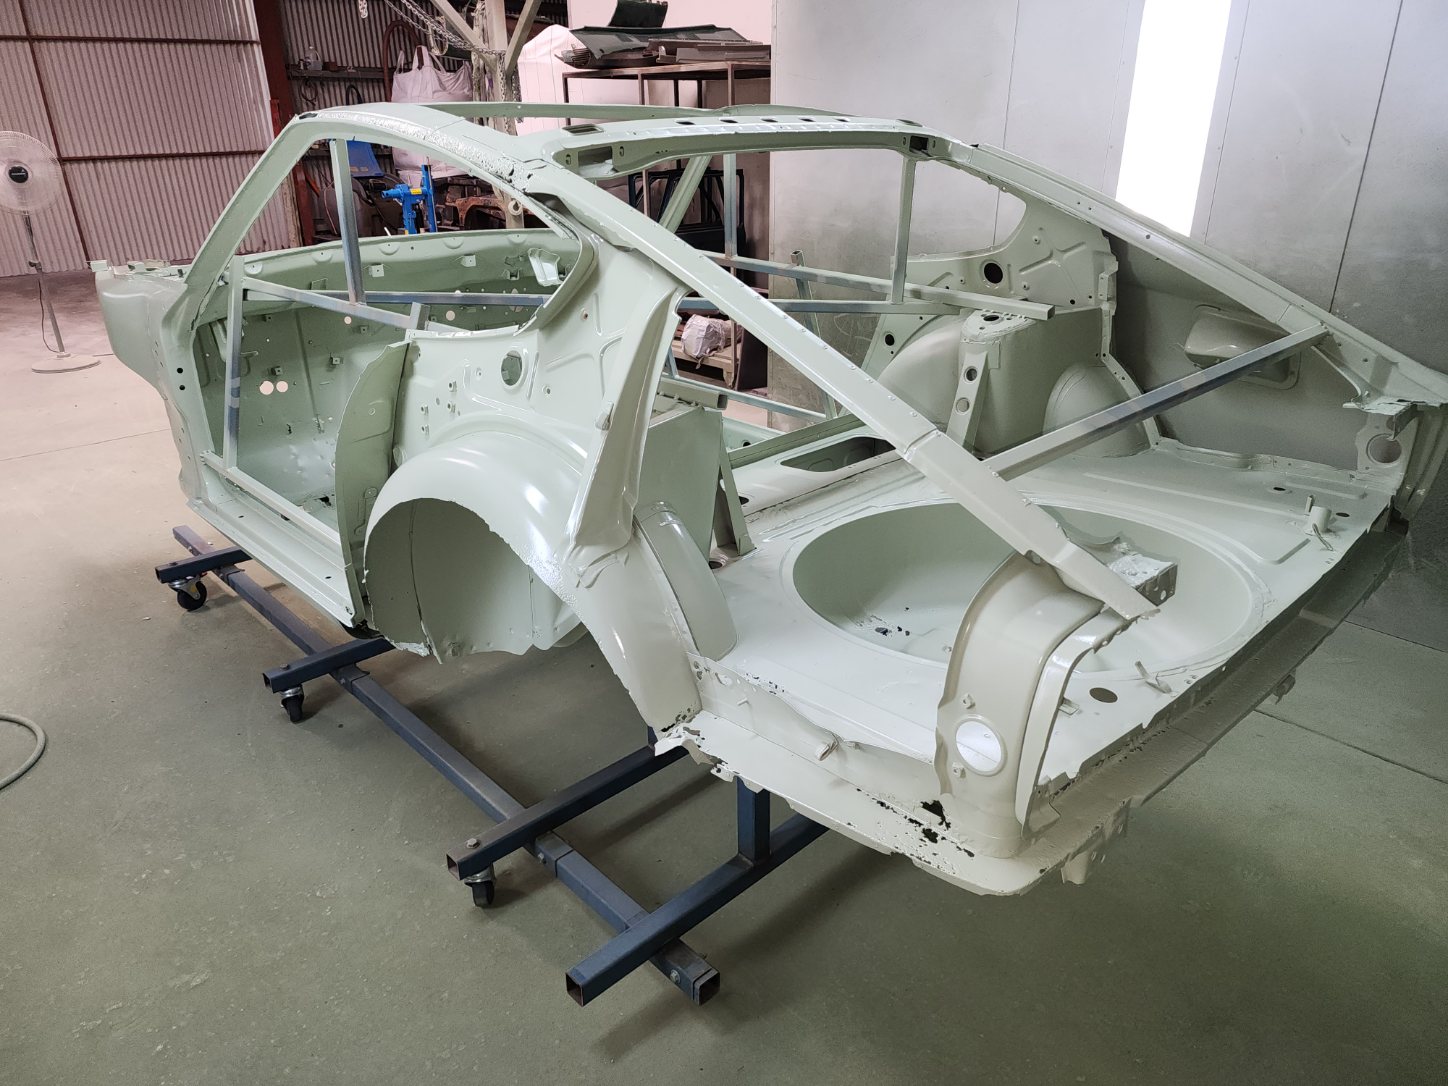
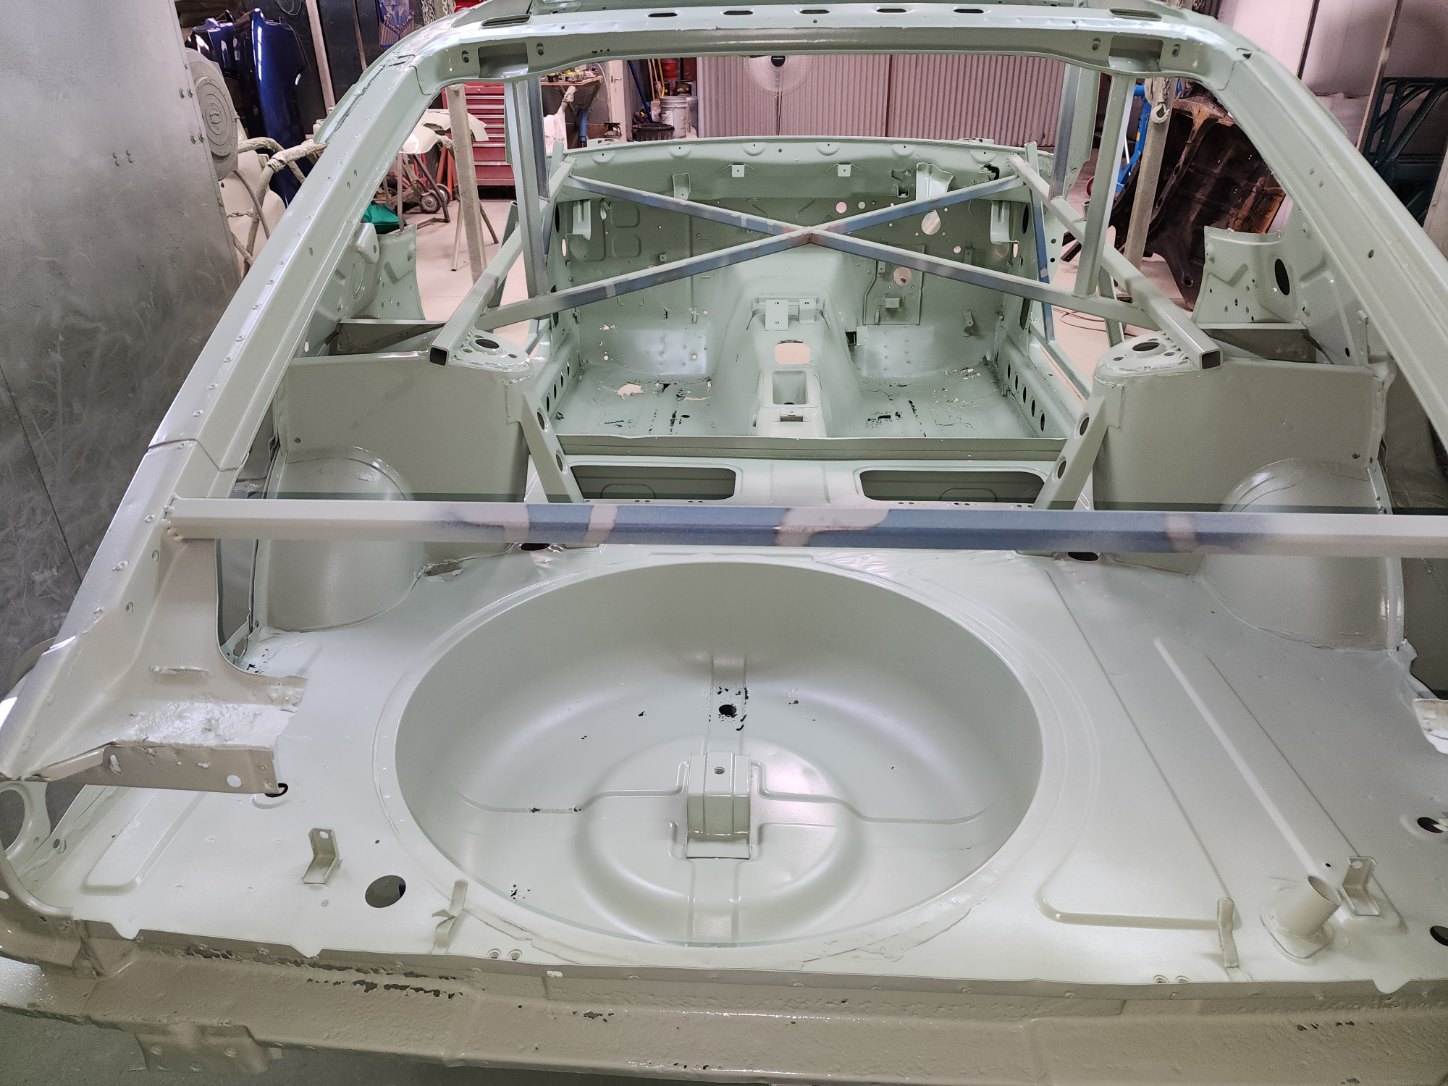
And shell is now in 2K Epoxy! how exciting...
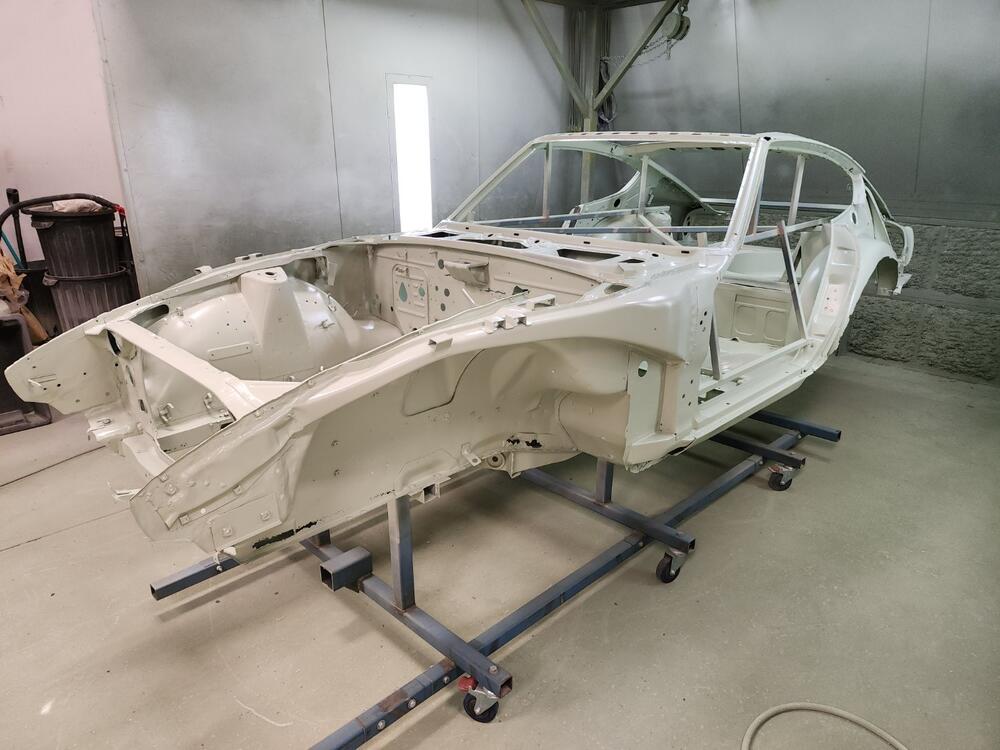
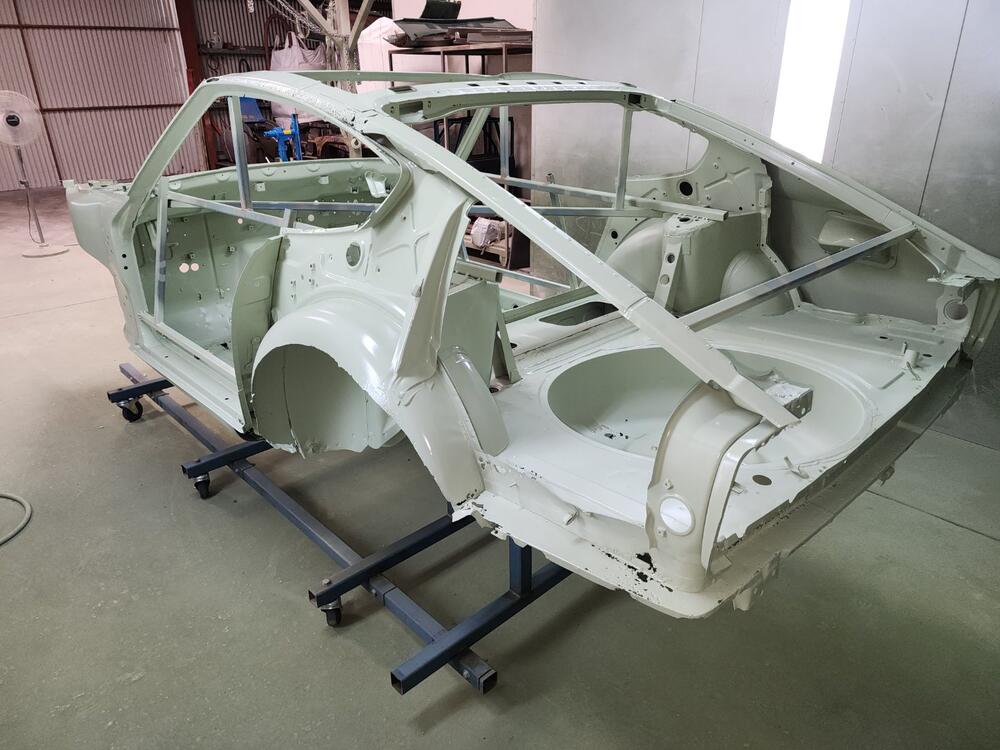


 3 points
 -
3 points
-
I agree. Over the years it always seemed that the lock nuts were tighter than I had tightened them. I found that just giving the wrench a good bump (not enough to hurt) with my hand would secure them.2 points
-
2 pointsCouple things... First, it's not DC, so if you're using a meter set on DC, you won't see anything. Then next, if it's music, it's a whole bunch of frequencies all mixed together up to about 20KHz. So even if you have a meter set on AC, it might not recognize frequencies that high. And finally, the voltage peaks will be proportional to how loud the music would be. So trying to make some sort of "portable scale" to measure things... If you've got a 20W system turned all the way up, it would/could/should? light a 20W bulb to a reasonable brightness. But if you've got the volume turned down to a reasonable listening level, the brightness will be way lower. Not sure I'm doing a good job of explaining this... Does any of that make sense?2 points
-
The low clearance could be because the valve seats have worn. Maybe due to unleaded fuel on old seat material. People use brute force on the locking nut with a wrench and suffer busted/cut knuckles. The parts up there are sharp. I found that a small sledge hammer, like a 3 lber, used to tap on an open end wrench on the lock nut worked well for loosening. There's room for an open wrench on all of the locknuts, you don't need the crow's foot adapter unless you want to get precise on tightening torque. It's about as simple as it looks. There's a threaded stud with a locknut. Loosen the locknut, turn the stud, tighten the locknut, confirm lash. After a few you'll realize that tightening the locknut pulls the stud up and reduces clearance a little bit. There's a tutorial out there somewhere with pictures. Can't remember the name, it might actually be linked in this thread somewhere.2 points
-
Agreed! Life is certainly more full of love with them around2 points
-
Yes, they are, but I have found they're worth it!2 points
-
siteunseen, thanks for that. That tells me essentially what I need to know which is all 280's have the same dash. Jim1 point
-
Something I realized after a couple is when tightening the lock nut the adjuster nut will turn and get the spec off so I always hold the 14mm adjuster while I tighten the 17mm lock nut. Another thing I do that most people laugh at but why not? . Our motors are tilted pretty hard if you look so I've marked the center off my cam towers with a Sharpie and get the lobes lined up with my mark instead off straight up. It's one of those why not OCD things but...why not.1 point
-
It doesn’t take much to get the nut tight enough to stay put. Unfortunately, some hacks think if some is good, more is better. In this case, it isn’t.1 point
-
Heck, you could drive up to my neck of the woods and use my 20T arbor press.1 point
-
I dont think they could ship it for $68! My 20T is pretty heavy. Get the HF 20T and sell the old one, thats what I did. As others said, heat helps. https://www.trustpilot.com/review/strictlymot.com Here is where they stole the image from....scam https://perfectionindustrial.auctionserver.net/m/lot-details/index/catalog/132/lot/21978/ google images is a neat tool1 point
-
1 point
-
Yes, the 17mm nut is the lock nut, the 14mm is the adjustment. I’ve never torqued the locknut when adjusting the clearances, but as Zed points out, some people tighten the locknut way too tight. As for tools, there is a wrench made specifically for loosening and tightening the locknut. It is made to be used with a ratchet, 1/2” drive if memory serves me. The Snap On part number is S6014. I see them on eBay occasionally. I’ll try and post a picture of the tools I use shortly.1 point
-
1 pointThat does and since I had the volume at a mid level, the bulb being half-lit makes sense then. Thanks EDIT: Why wouldn't setting the multimeter to DC work though? Doesn't the car run off of DC power?1 point
-
Cheers for the words of encouragement! Kids are the biggest time vampires...1 point
-
I thought my 240's core was bad when I bought the car but after pressure testing it with positive air or my shop-vac sucking negative pressure I realized it was okay. The flow valve was where all the leaking was coming from. Check the core somehow before you buy another one. It may be the same situation I had, still a tough job but nowhere near as much as replacing the heater core. I suggest taking the passenger's seat out and put a couch cushion over the door sill and use 1/4" drive sockets.1 point
-
1 pointThanks everyone. After taking in all suggestions, I just followed Robert Pirsig's advice: "Assembly of Japanese bicycle require great peace of mind." I eyeballed the stainless line and figured there's enough spare line length in the big curve to "stretch" it an enable the tight 90 degree turn, and I just futzed with it until it worked. Putting it on, taking it off, over and over until I mentally pictured how it should go. I used a sharpie to mark which axis to bend and when my tube bender wouldn't work, used imagination and problem solving to jerry-rig a tube bending jig until I got all the bends right. Like, I used the end of a crescent wrench, which was held fast on a 2x4, as something to carefully bend the line around. Sure, it would have been a snap to pay the exorbitant price for the 1972 cylinder, but I made $200 an hour adapting the line to the cheaper brake cylinder. Success!1 point
-
Keep plugging away friend. Life gets in the way sometimes but you will get there.1 point
-
Unless you are planning to go with poly, then burning them out won't do you any good. You'll still have to get the outer shell out before you press the new bushings in. You could burn the rubber out and then use a hacksaw to cut through the outer shell to relieve the retaining force. You don't have to cut 100% of the way through... It'll start to cave in before you get all the way through. Even with a couple thousandths remaining and it will be a lot easier to press out. I did mine (whole without burning) on a hydraulic press, and like most operations on a press, it all comes down to having properly sized drifts and anvils. A square (normal) force applied in the correct location with the proper sized backup anvil should do it. How many tons is your press? I've got a 20T and had no problems.1 point
-
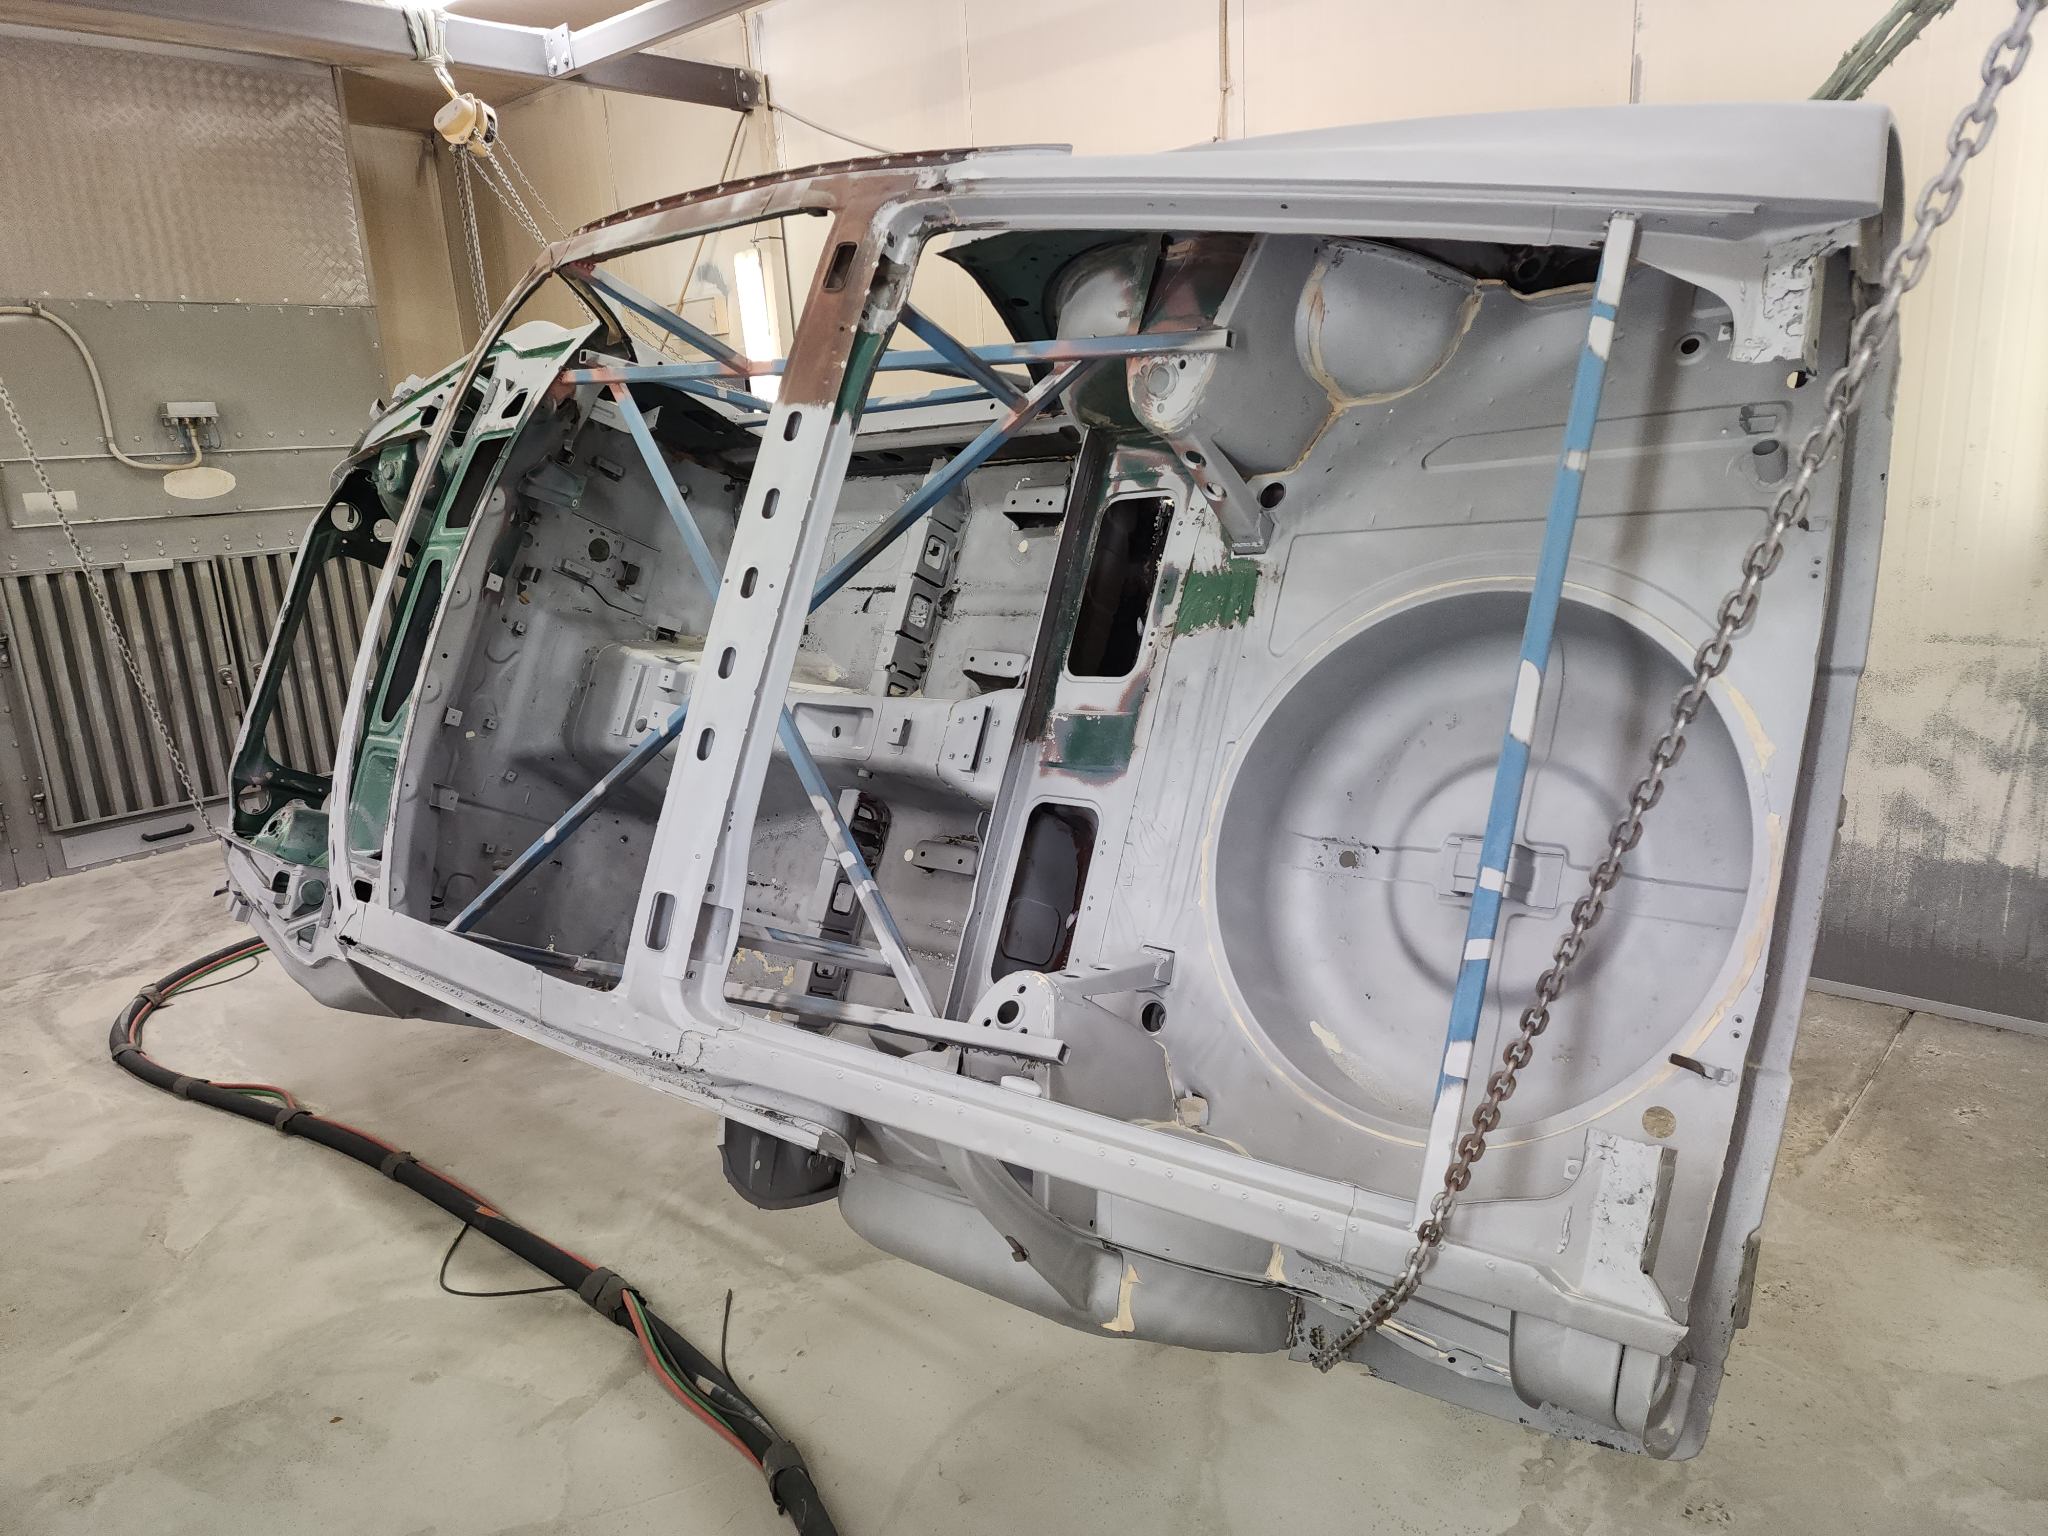
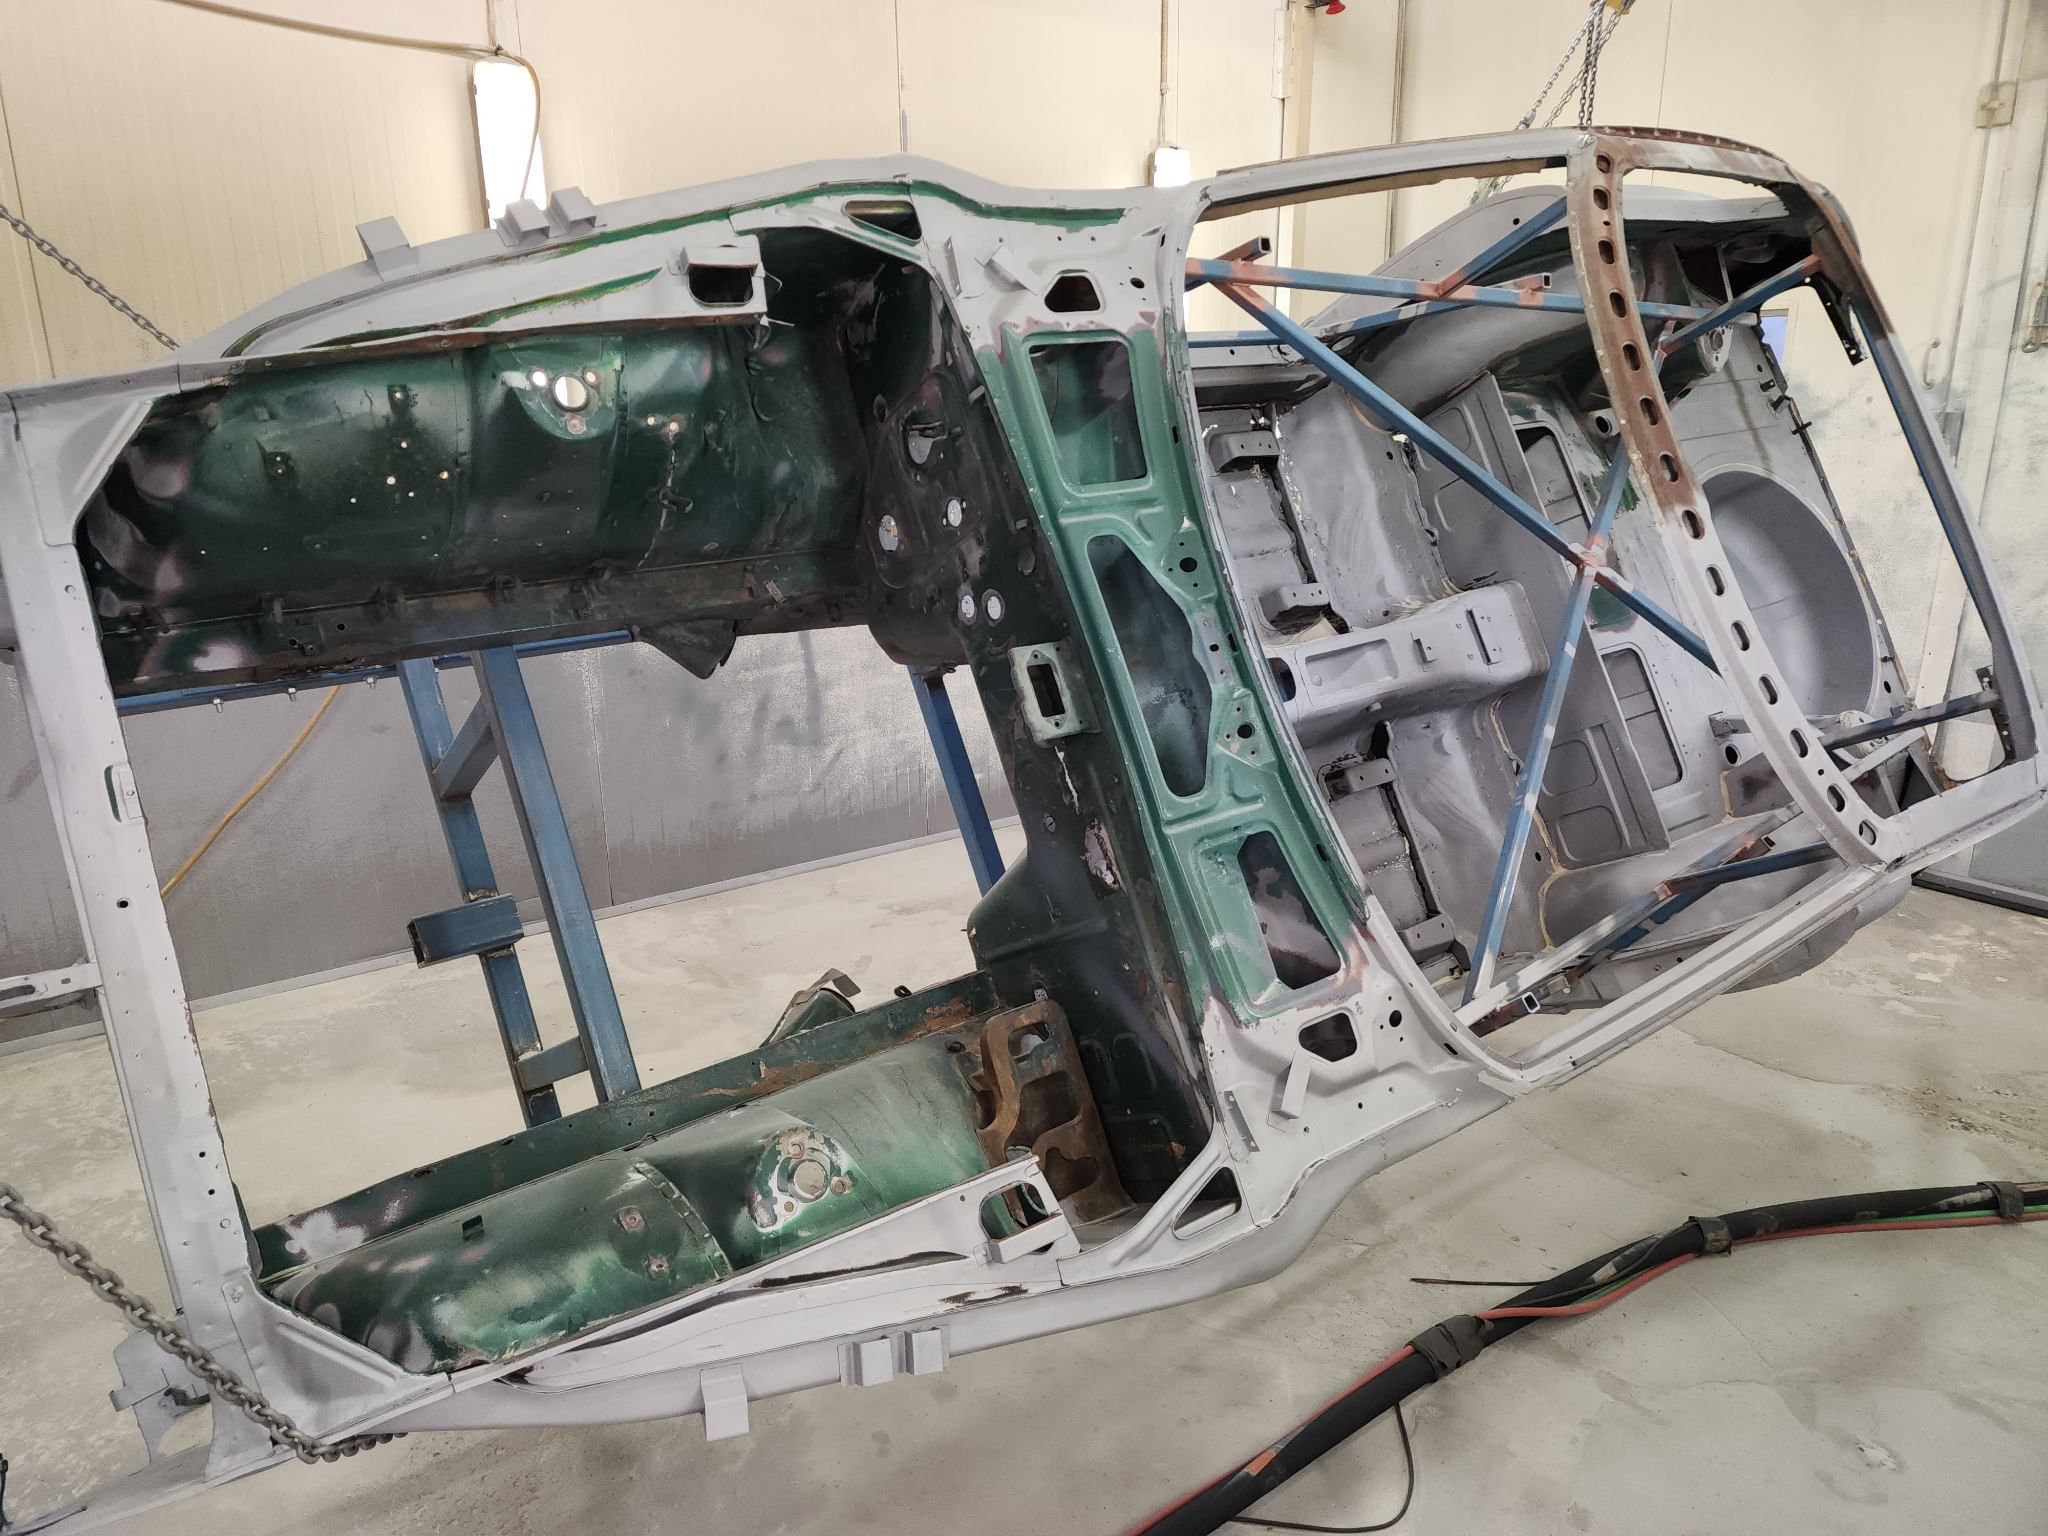
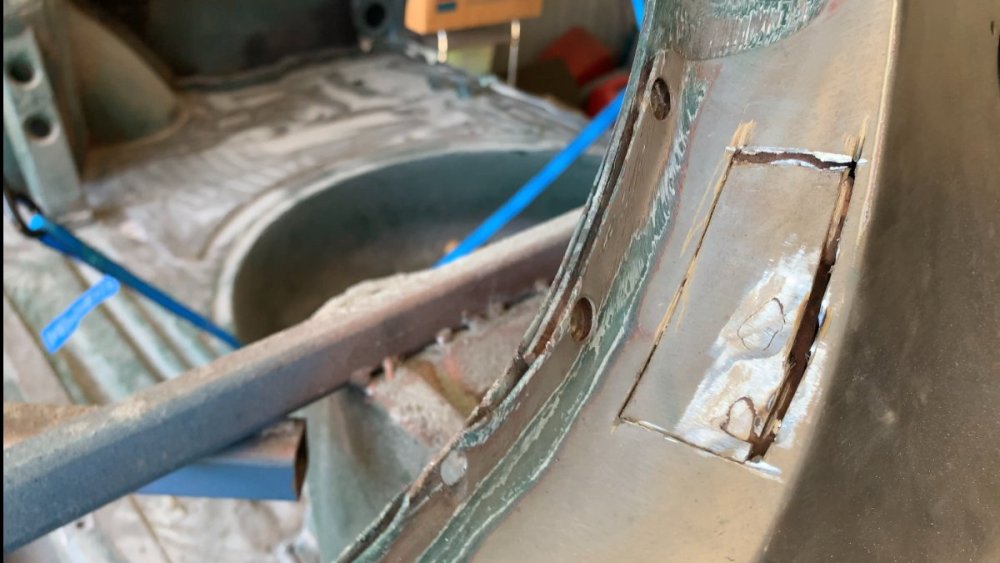
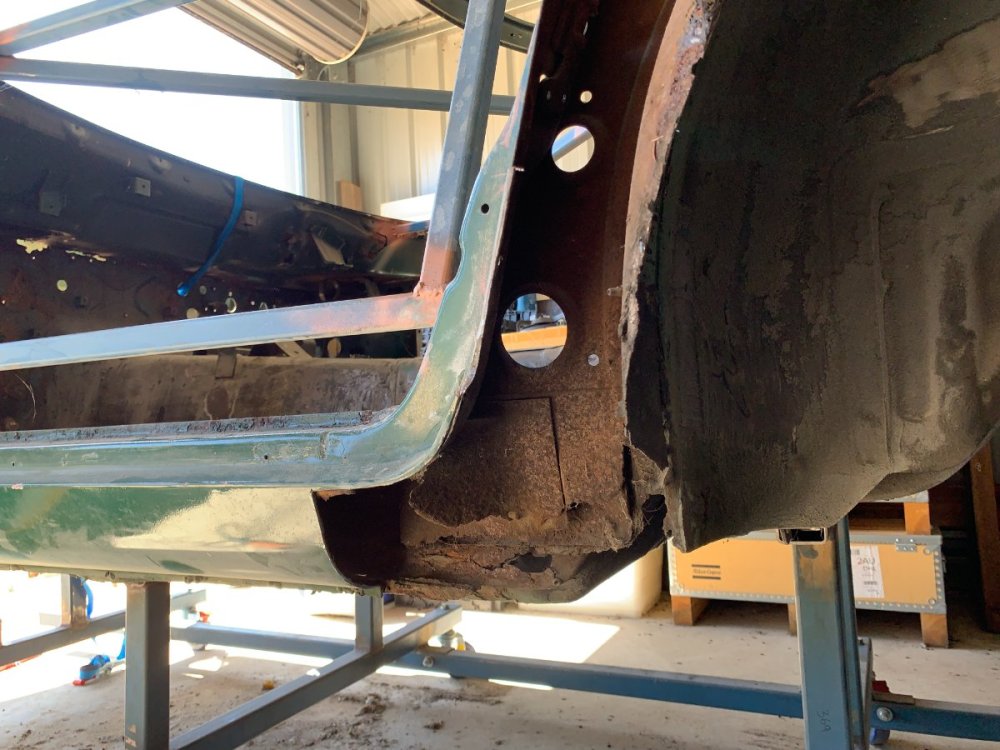
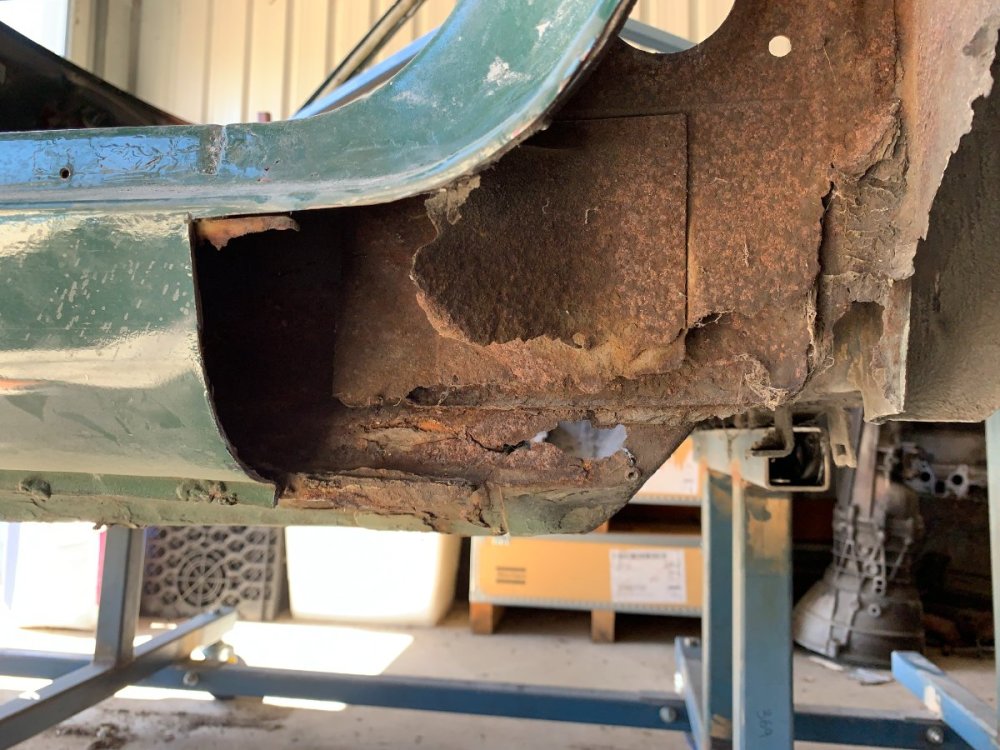
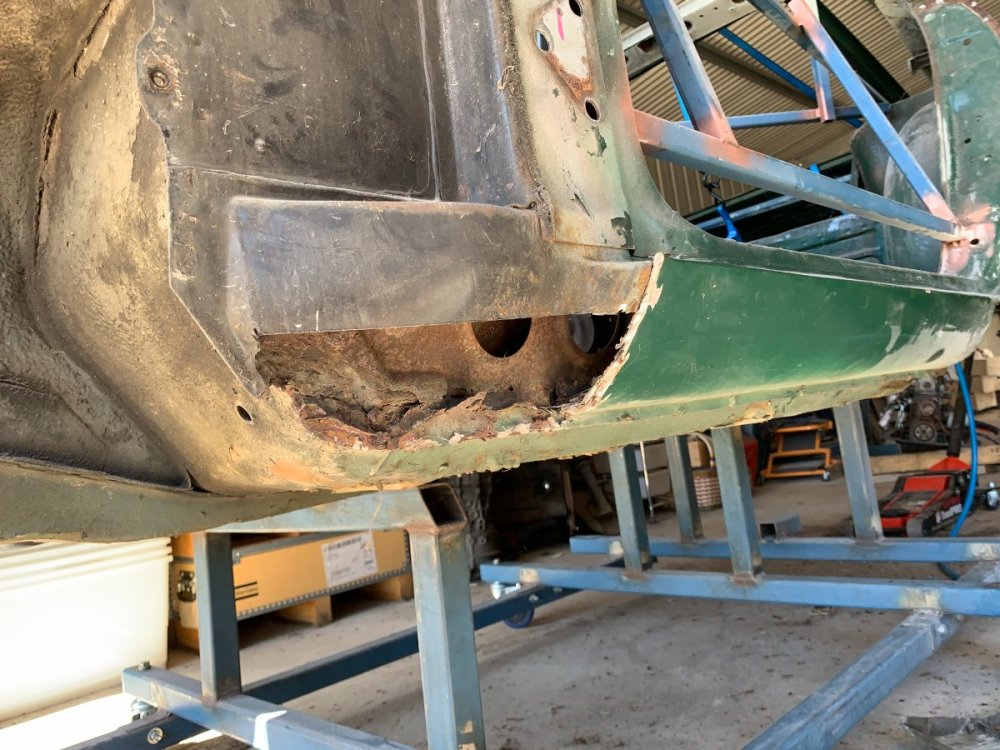
My car has been booked into the blasters for 6 months now I was supposed to get a few things done before sending it off, however my son recently started Kindy and the hours are much less conducive to working on the car. Resulting in me not quite finishing what I wanted to before it left. Castor wheels were installed LHS rear quarter was removed If you recall i had trouble finding the spot welds on the window sill, i didnt have any success in unccovering them so i cut around the area i knew they were and ill have to patch it later. I would like to get some new quarter panels from KFVJDM but the shipping to get it to Australia is extortion. I have heard fit is not the best as well. Some rust I didnt know about hiding behind the rear wheel well I ended up cutting out the dog leg and front of the outer rocker on the LHS to give more access to the blaster, as you can see theres not much left of it! I wanted to remove the RHS rear quarter as well but ran out of time unfortunately Car was loaded onto the truck and off at the blasters with no issues, Im both excited and nervous to see what comes back. Couple of weeks and it should be ready
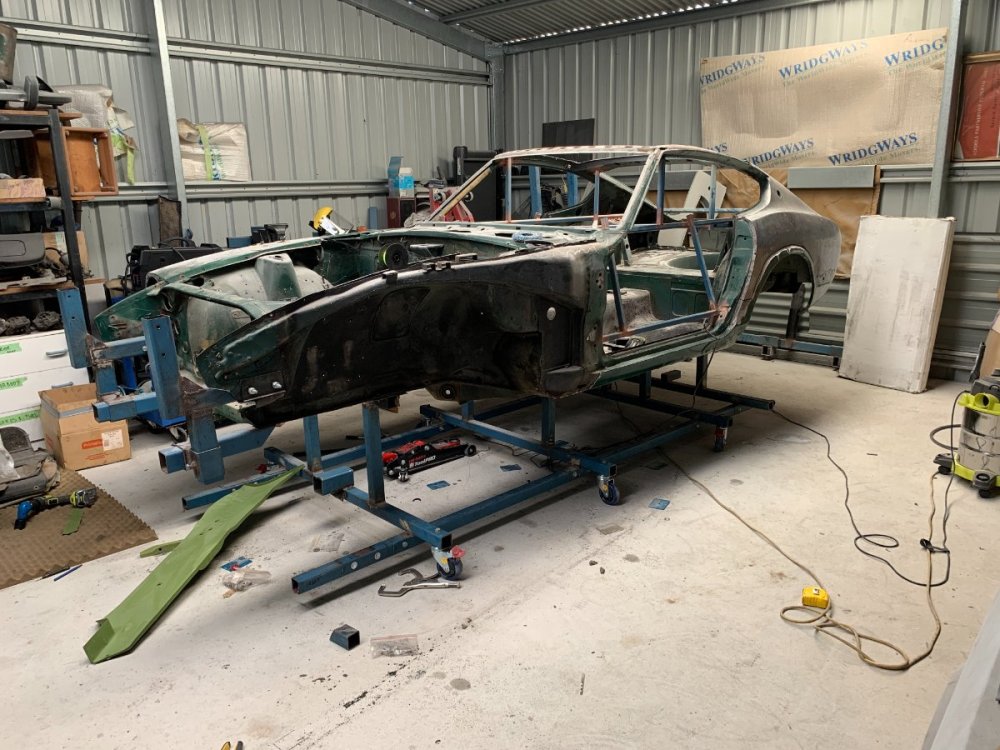
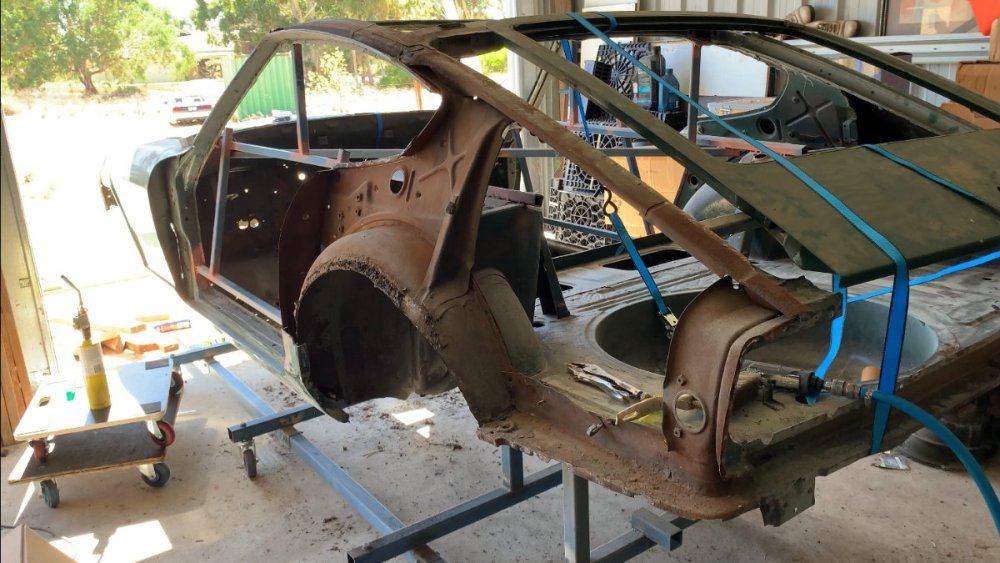


 1 point
 -
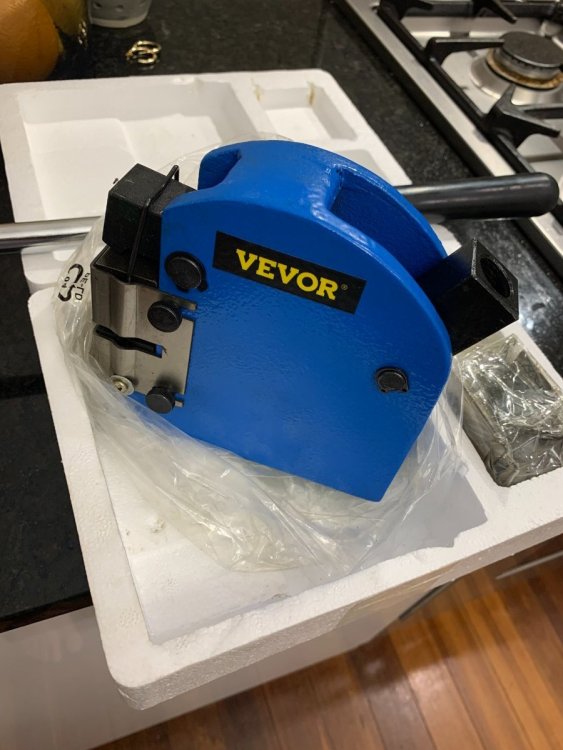
Its been a while since I've posted, I've been very slack on all platforms lately During the black friday sales I picked up a few goodies as i do each year got some new rear tail lights and OEM rubber seals, beautiful units. I recently got a new job based in Perth so no more Fly in FLy out! So i bought myself a present to celebrate. A few things from the lonely drivers club catalogue, have long been a fan of his work. Pedal covers, engine blank plates, door pulls, plug wire holders Also picked up the vintage connections 240z kit for when i refurb my wiring harness, probably not the most cost effective way to buy them but definitely the most convenient! got a shrinker stretcher for when the metal work starts


 1 point
 -
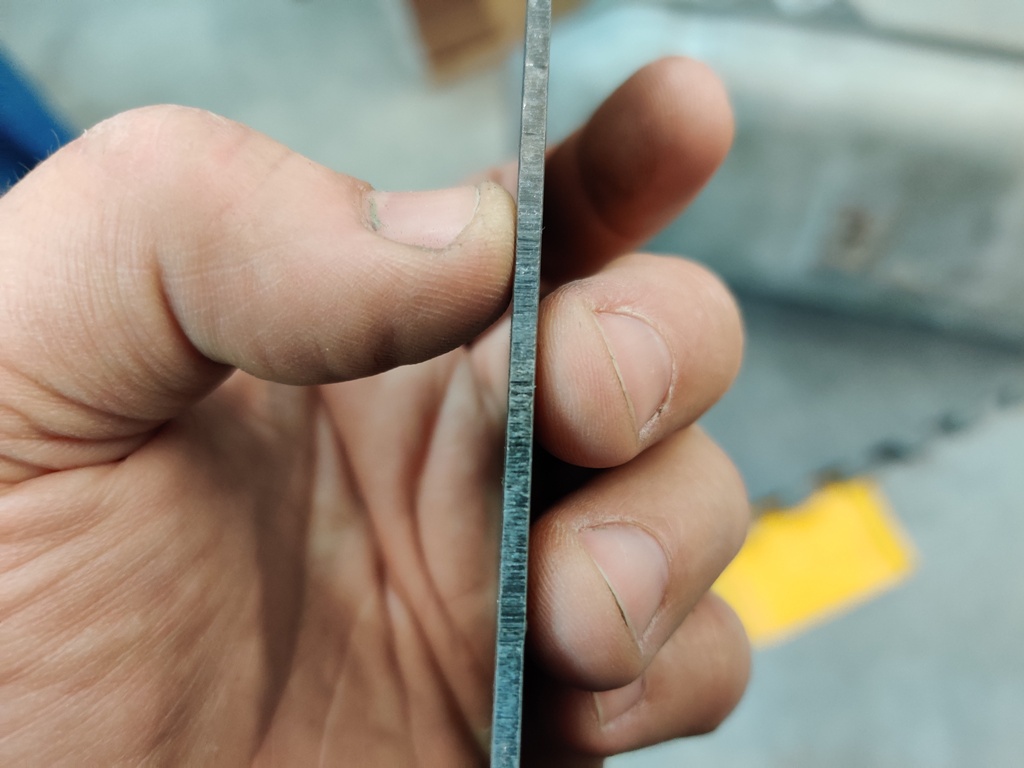
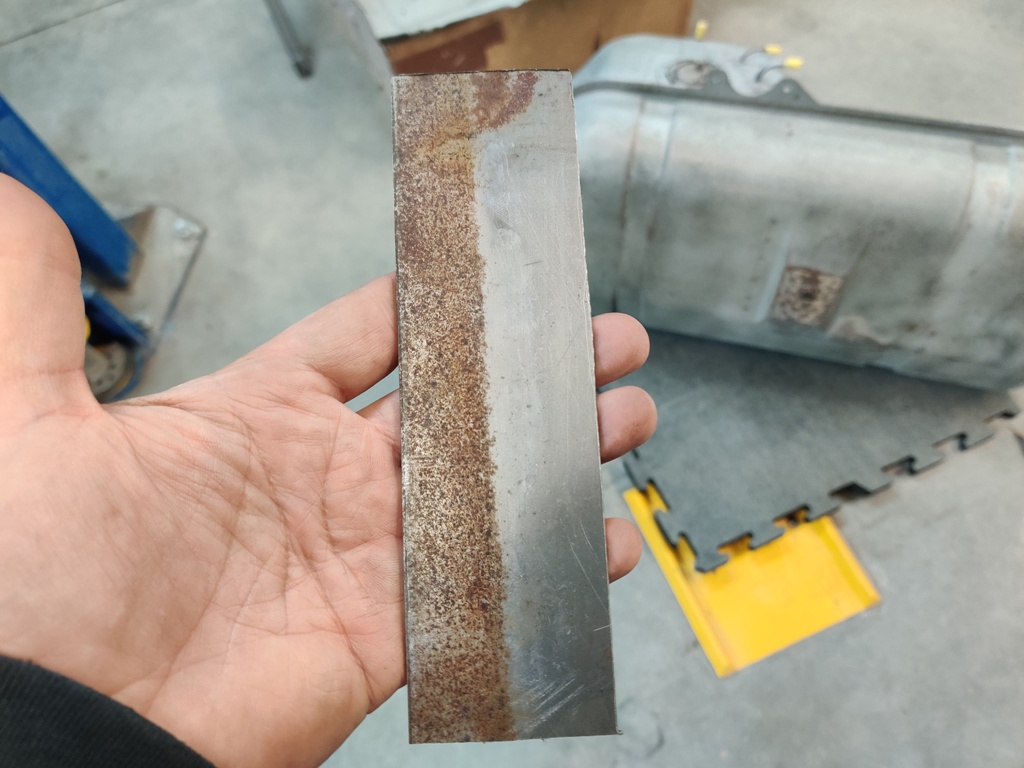
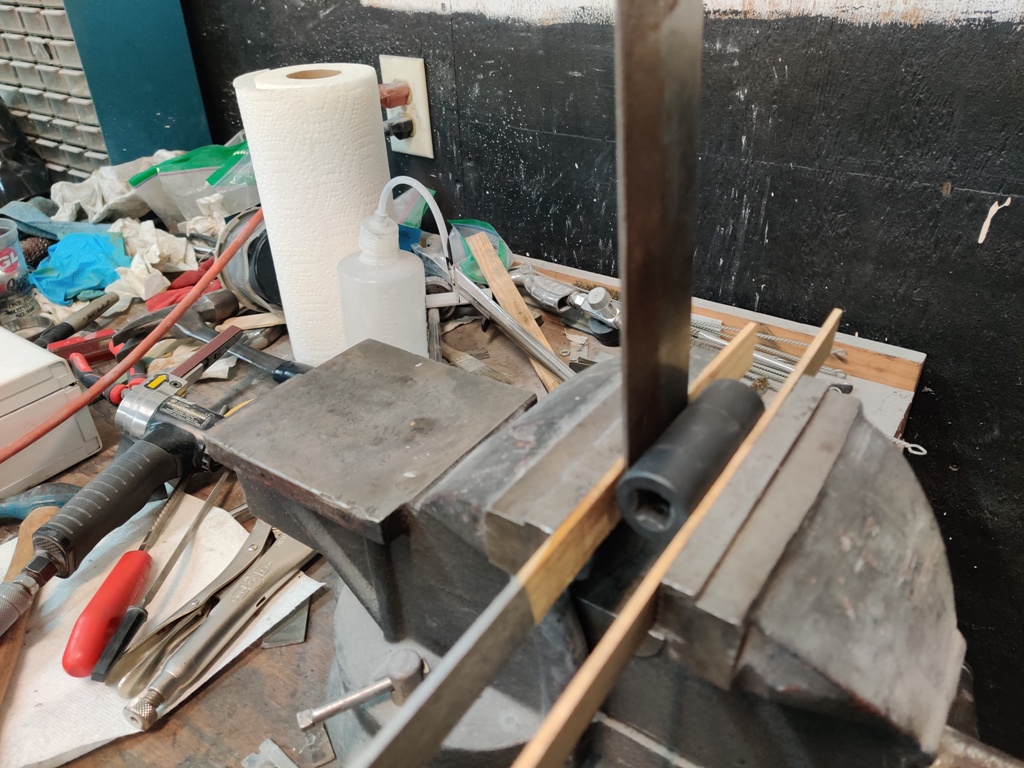
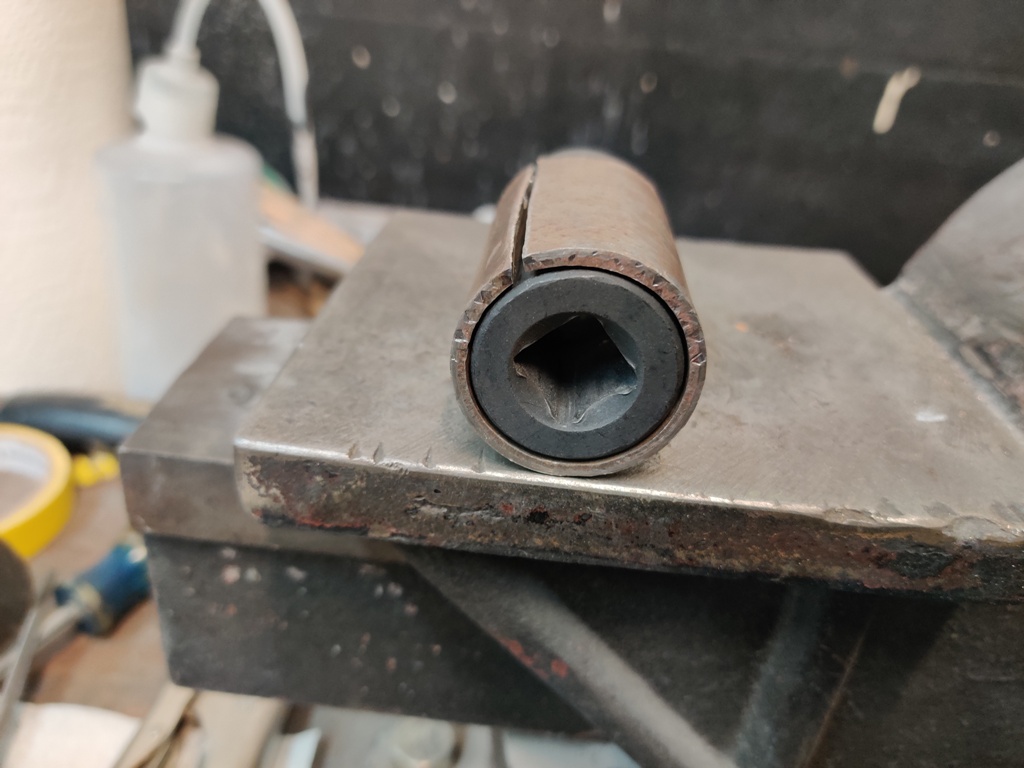
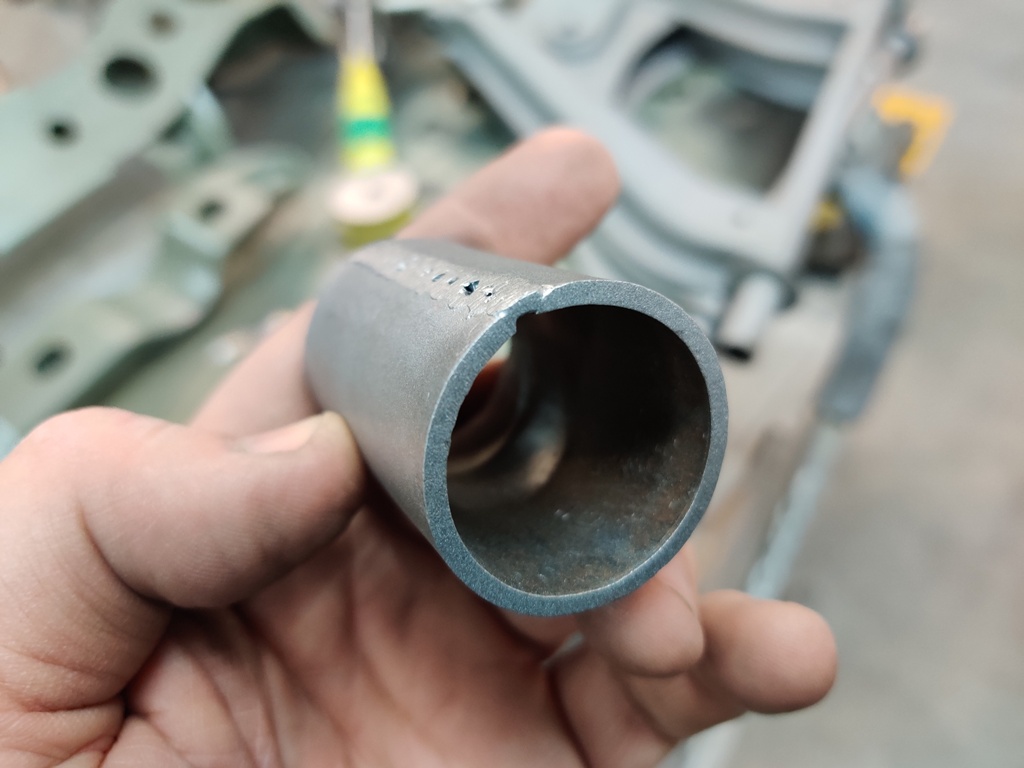
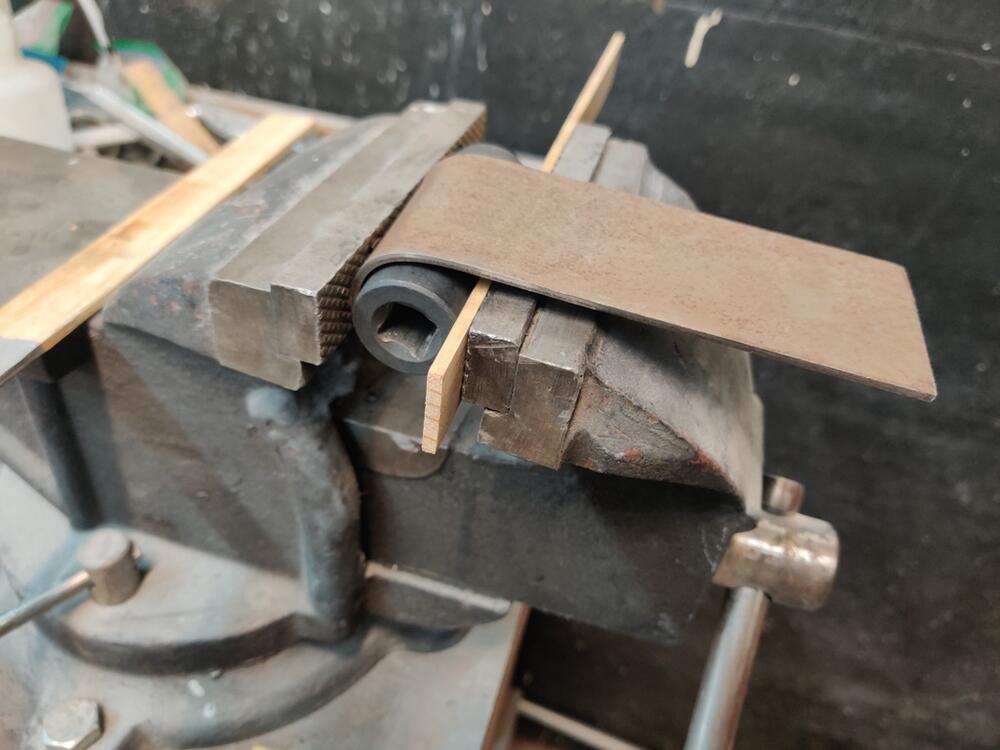
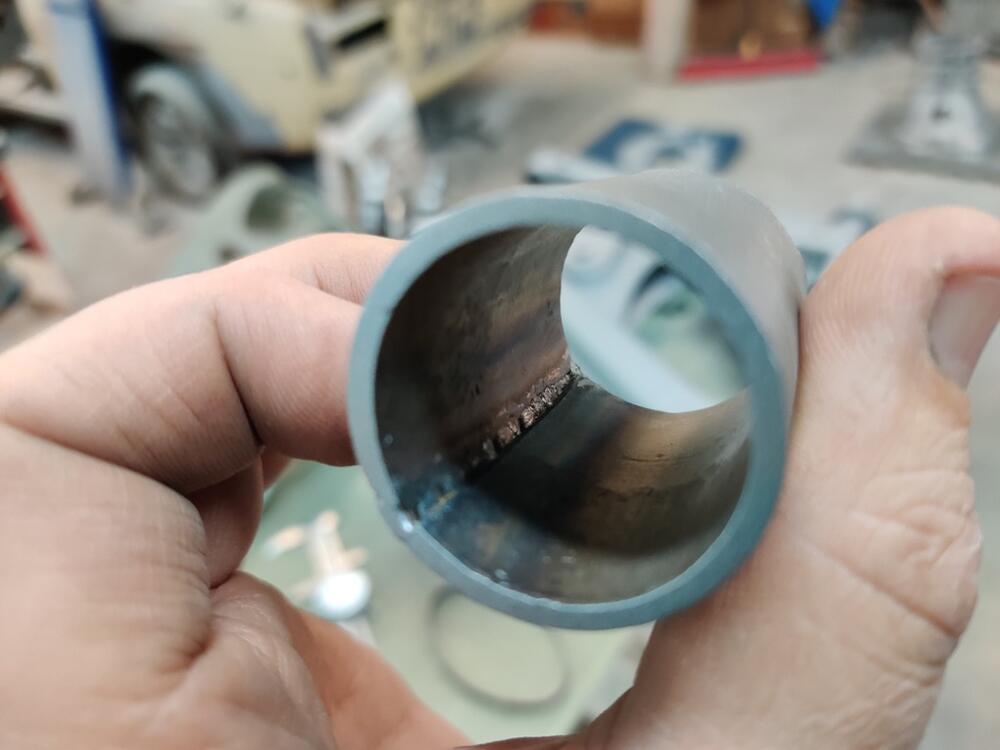
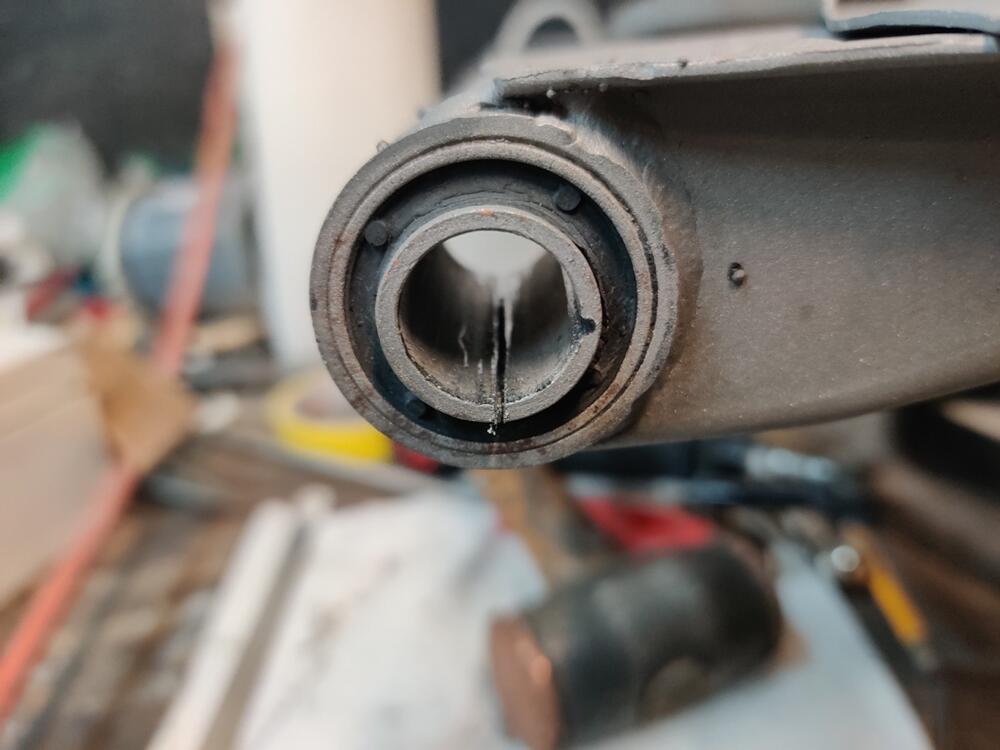
I decided in the few hours I had to work on the car today, I would make a pipe section for pressing the rear control arm bushings out and remove those. I cut a piece off of my .125 sheet that was suitably wide enough to accommodate the full depth of the bushing when pressed out of the arm, and began bending it. Using the vise, and an impact socket, I continued bending until it wrapped around the socket. Then I cut it to length and hammer formed it around the socket: I then welded the seam, dressed the weld with my hand held belt sander, and the ends with my bench grinder. Then, I bead blasted it to make it look nice. Under an hour and I was at my press with this, the control arms, and various bits to use in pressing the bushings out. Two hours later, I still hadn't gotten even one bushing to budge a millimeter. OD on a new bushing is about 1.185" if I recall correctly. And the impact socket I was using to press the bushing out is 1.182. It's a bit to big, but I should have been able to get a few thousands of an inch, but I got no movement... at... all! I tried going down in size to the next thing I had, another socket that was 1.165". But it wasn't catching enough of the bushing outer sleeve. These bushings have a very thin outer wall sleeve. In frustration, I took a hack saw to one of the bushings and cut through the inner sleeve. But, as soon as I got through it, it collapsed a bit and kept the hack saw blade from moving in and out anymore. What a royal pain in the arse. First time I have been stuck on something in a long time. I am thinking about burning them out. 😠 I will see what others have done first.


 1 point
 -
1 pointI'm not knowledgeable enough to help out here (yet!), still dealing with changing out my own vent hoses. Did want to comment on one thing though, I too will miss that mix of vinyl and vapor smells when I'm done lol. My 5 year old and I open the car door and stick our heads in to catch a whiff every now and then.1 point
-
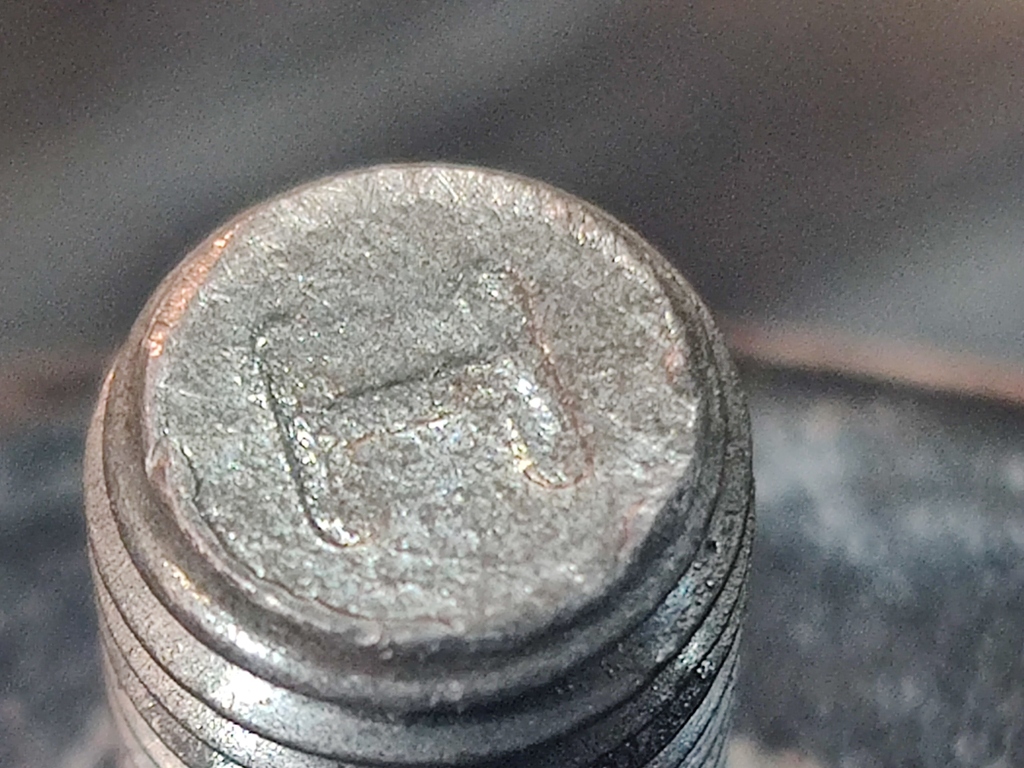
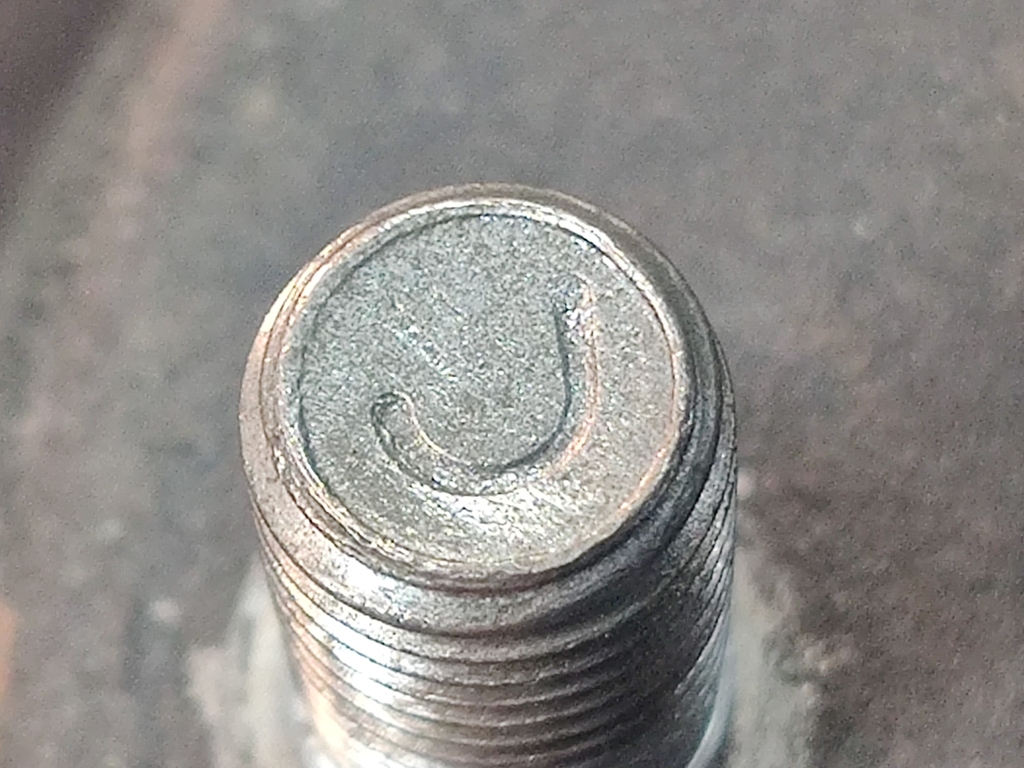
Crazy cool weather overnight for the last week here in SC as well. I have been covering up the blueberries! I wonder if those marks on the front strut tower are for assembly?1 point
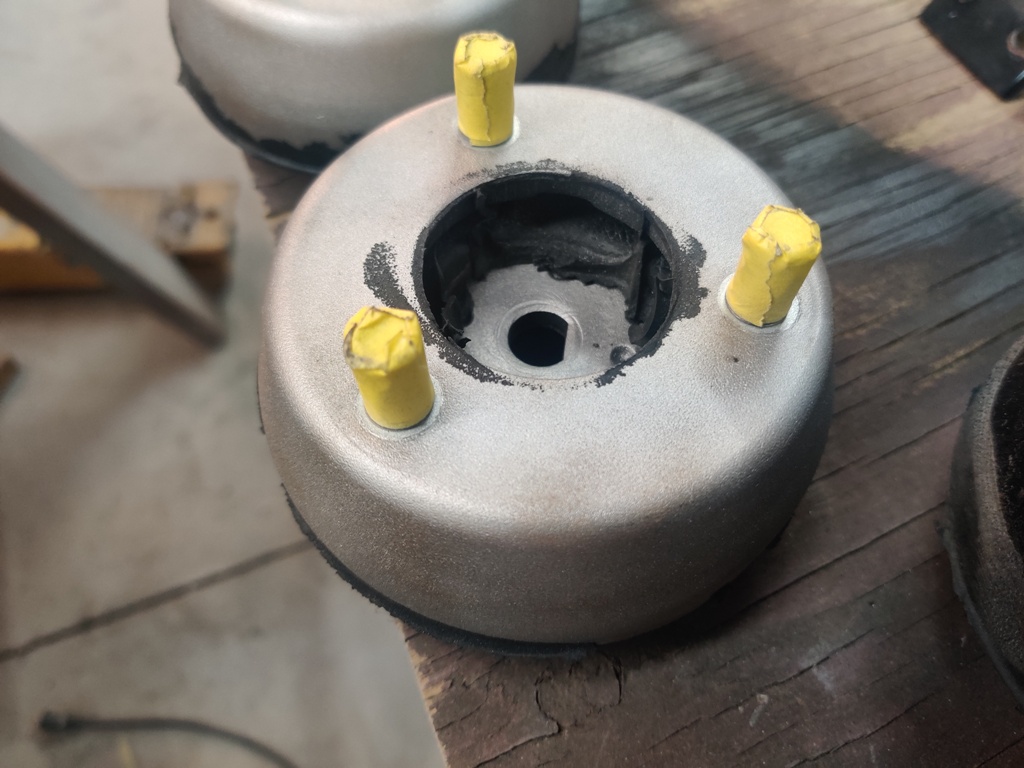
-
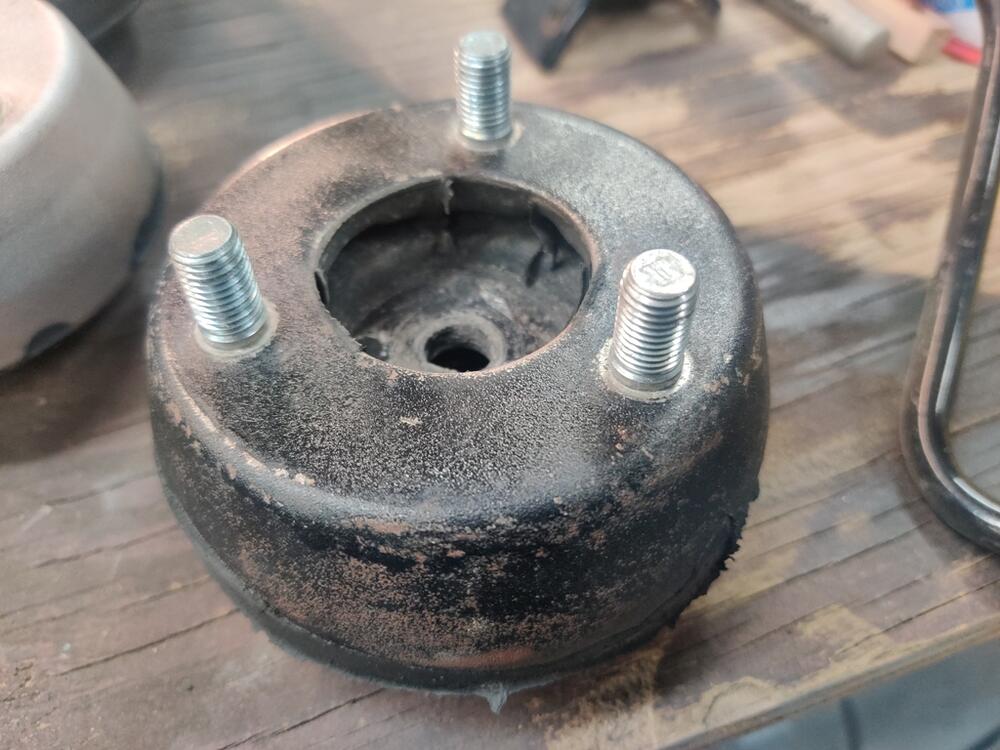
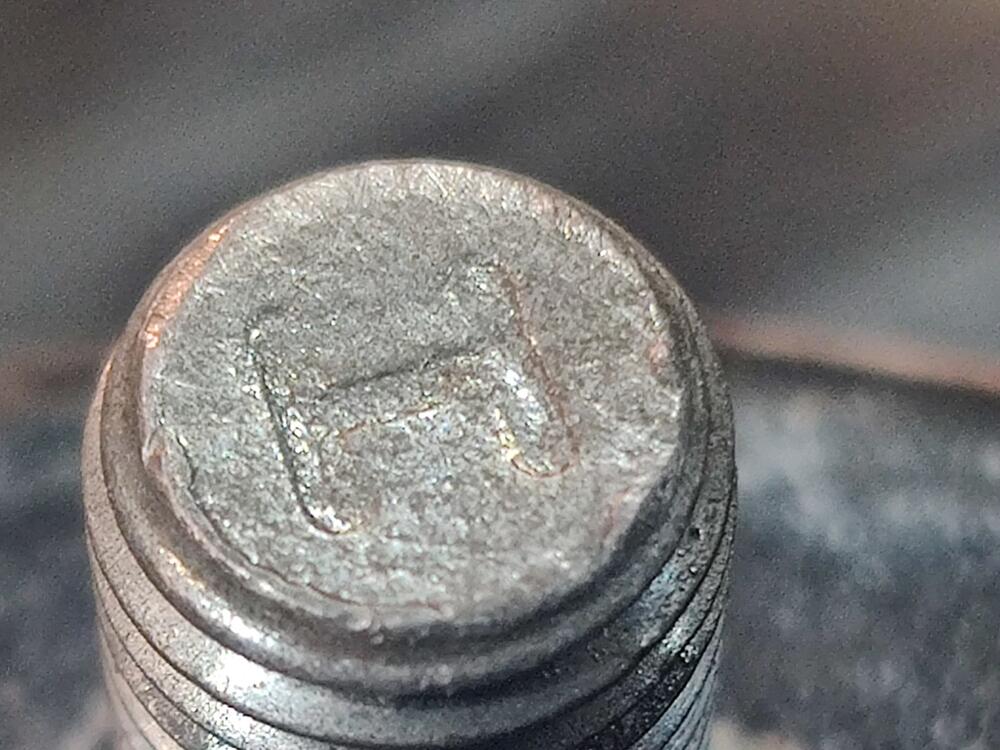
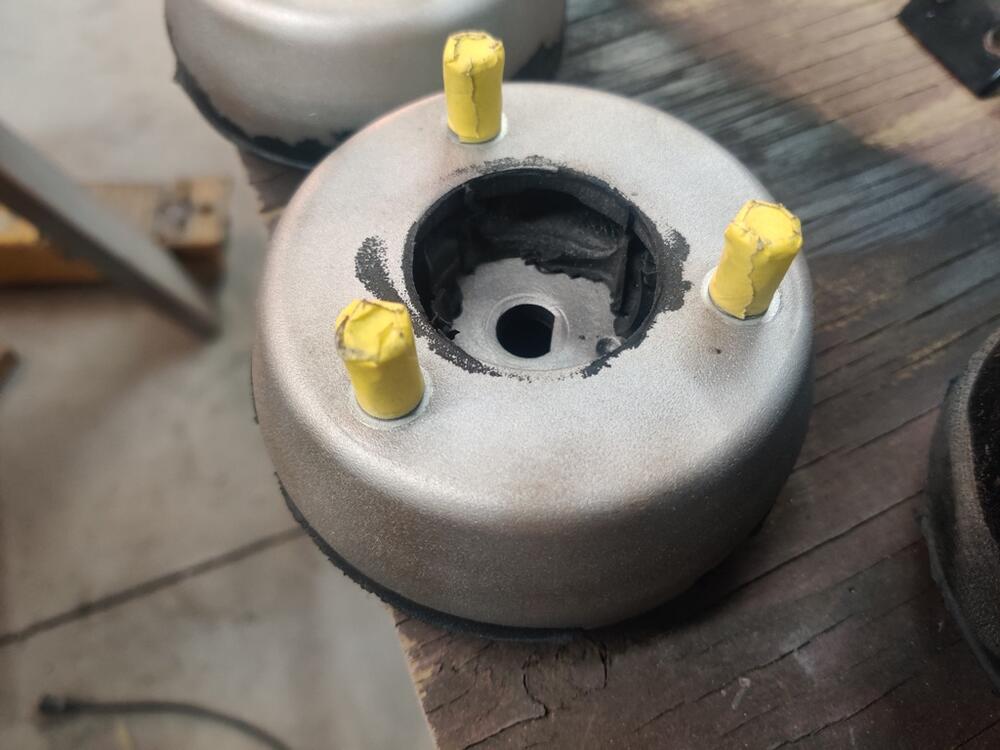
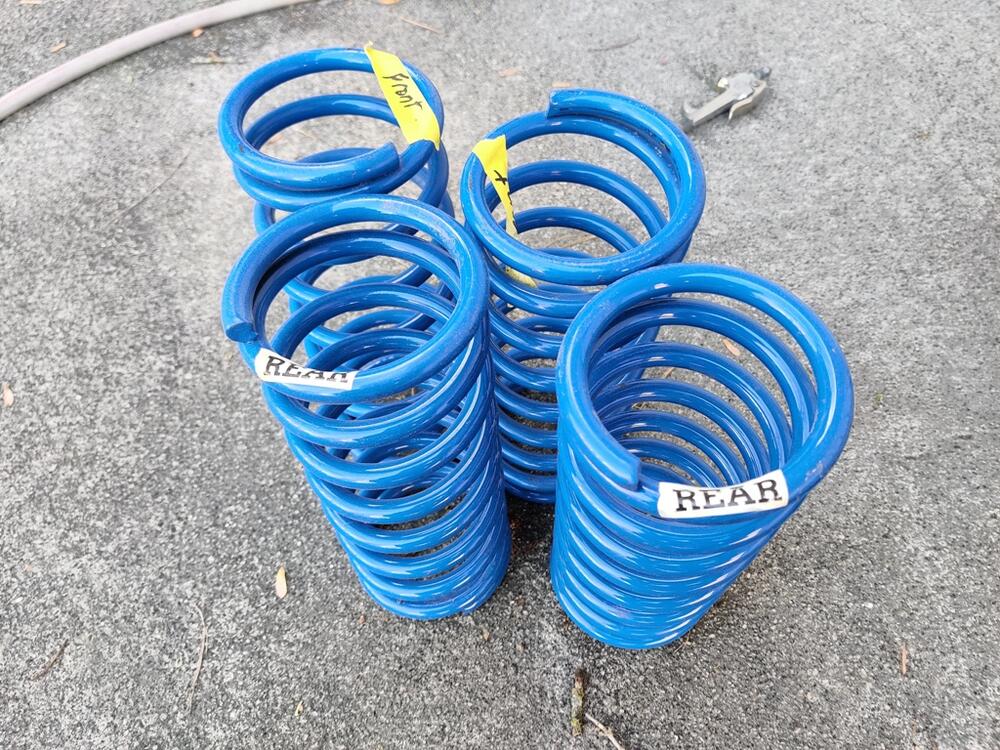
I believe I finished blasting the remainder of my parts today. It was cold... with wind gusts at times, which tried to lift the tarp up. I pushed through though. Next, I'll need to run many of the parts stripped today through the glass bead cabinet to finish them off. I welded metal in to repair the brake hose brackets on the front struts, and finished them with a 13" hand held belt sander. Didn't get pics, but I will and will show later. I forgot to get scrap tube of the right diameter this week to use to press the old bushings out of the rear control arms. I'll have to hold off on priming them until I remove those. Looking at the strut upper mounts, I observe that from the factory, the studs were not painted black: Another thing, which I never noticed before, the studs have letters... or marks pressed into the ends. Does anyone know what these mean? I decided to lightly brush the studs with a brass brush and then tape them off before putting them in the glass bead cabinet. I will leave them taped for priming and painting. I was going to strip the powder coated paint off of the Suspension Techniques springs, but I think I have decided against it. I don't like the blue color. But instead of stripping, I think I will scuff them with green Scotch-Brite and paint them black. Wish I could have sprayed primer on all these tonight, but I ran out of time, and the temp is supposed to hit 24 degrees over night. Not ideal. The epoxy primer needs 60 minimum for 8 hours to dry. Hopefully, no surface rust will start forming before I have the time and the right conditions to prime and paint.

 1 point