


Leaderboard
-

Mike
Administrator4Points23,065Posts -
EuroDat
Free Member3Points3,309Posts -
inline6
 Subscriber
 3Points1,282Posts
 -
Barefootdan
Free Member3Points275Posts


Popular Content
Showing content with the highest reputation on 02/26/2023 in all areas
-
3 pointsSo I've been working with AI for the last several years of my career. Most of my experience is with graphics and video AI. However, after running into this new text-based chat system, called Chat GPT, I decided to give it a try with our Z hobby. Here's some text generated with my inquiry "Tell me the history of the Datsun 240z"
 3 points
 -
That's unfortunate considering the numbers are not accurate and basically useless. I agree with buying your own gauge and doing it yourself. I am sure you have the skills to accomplish this with a little instruction from us.2 points
-
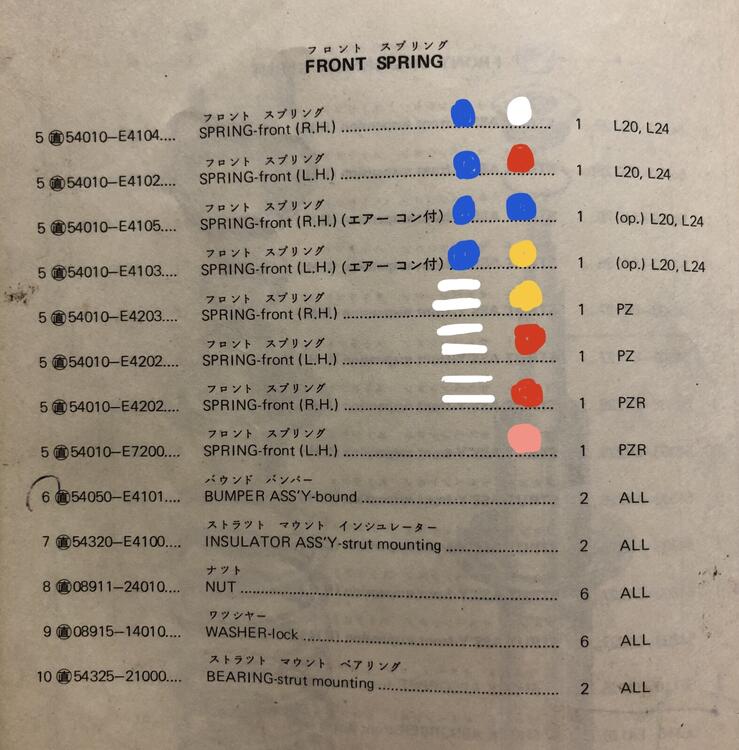
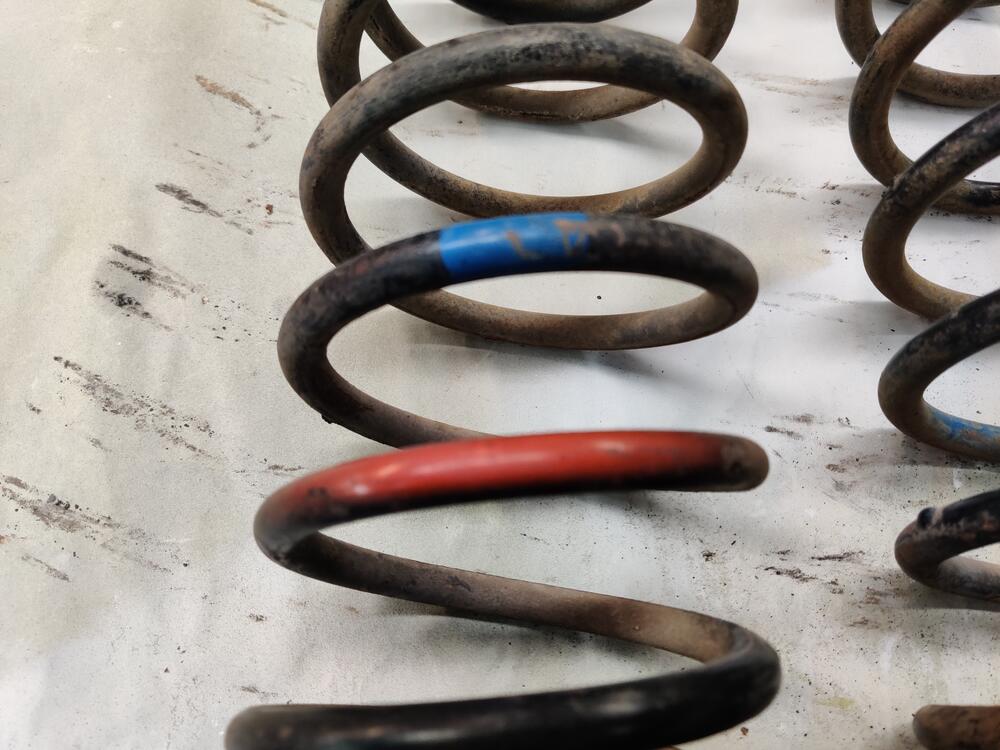
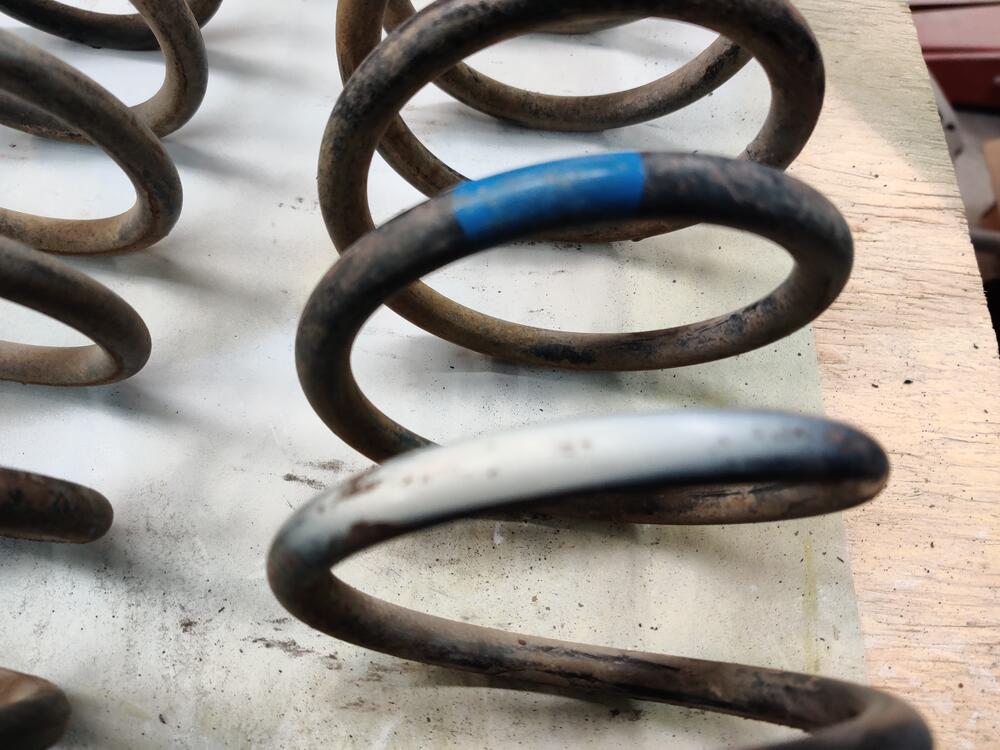
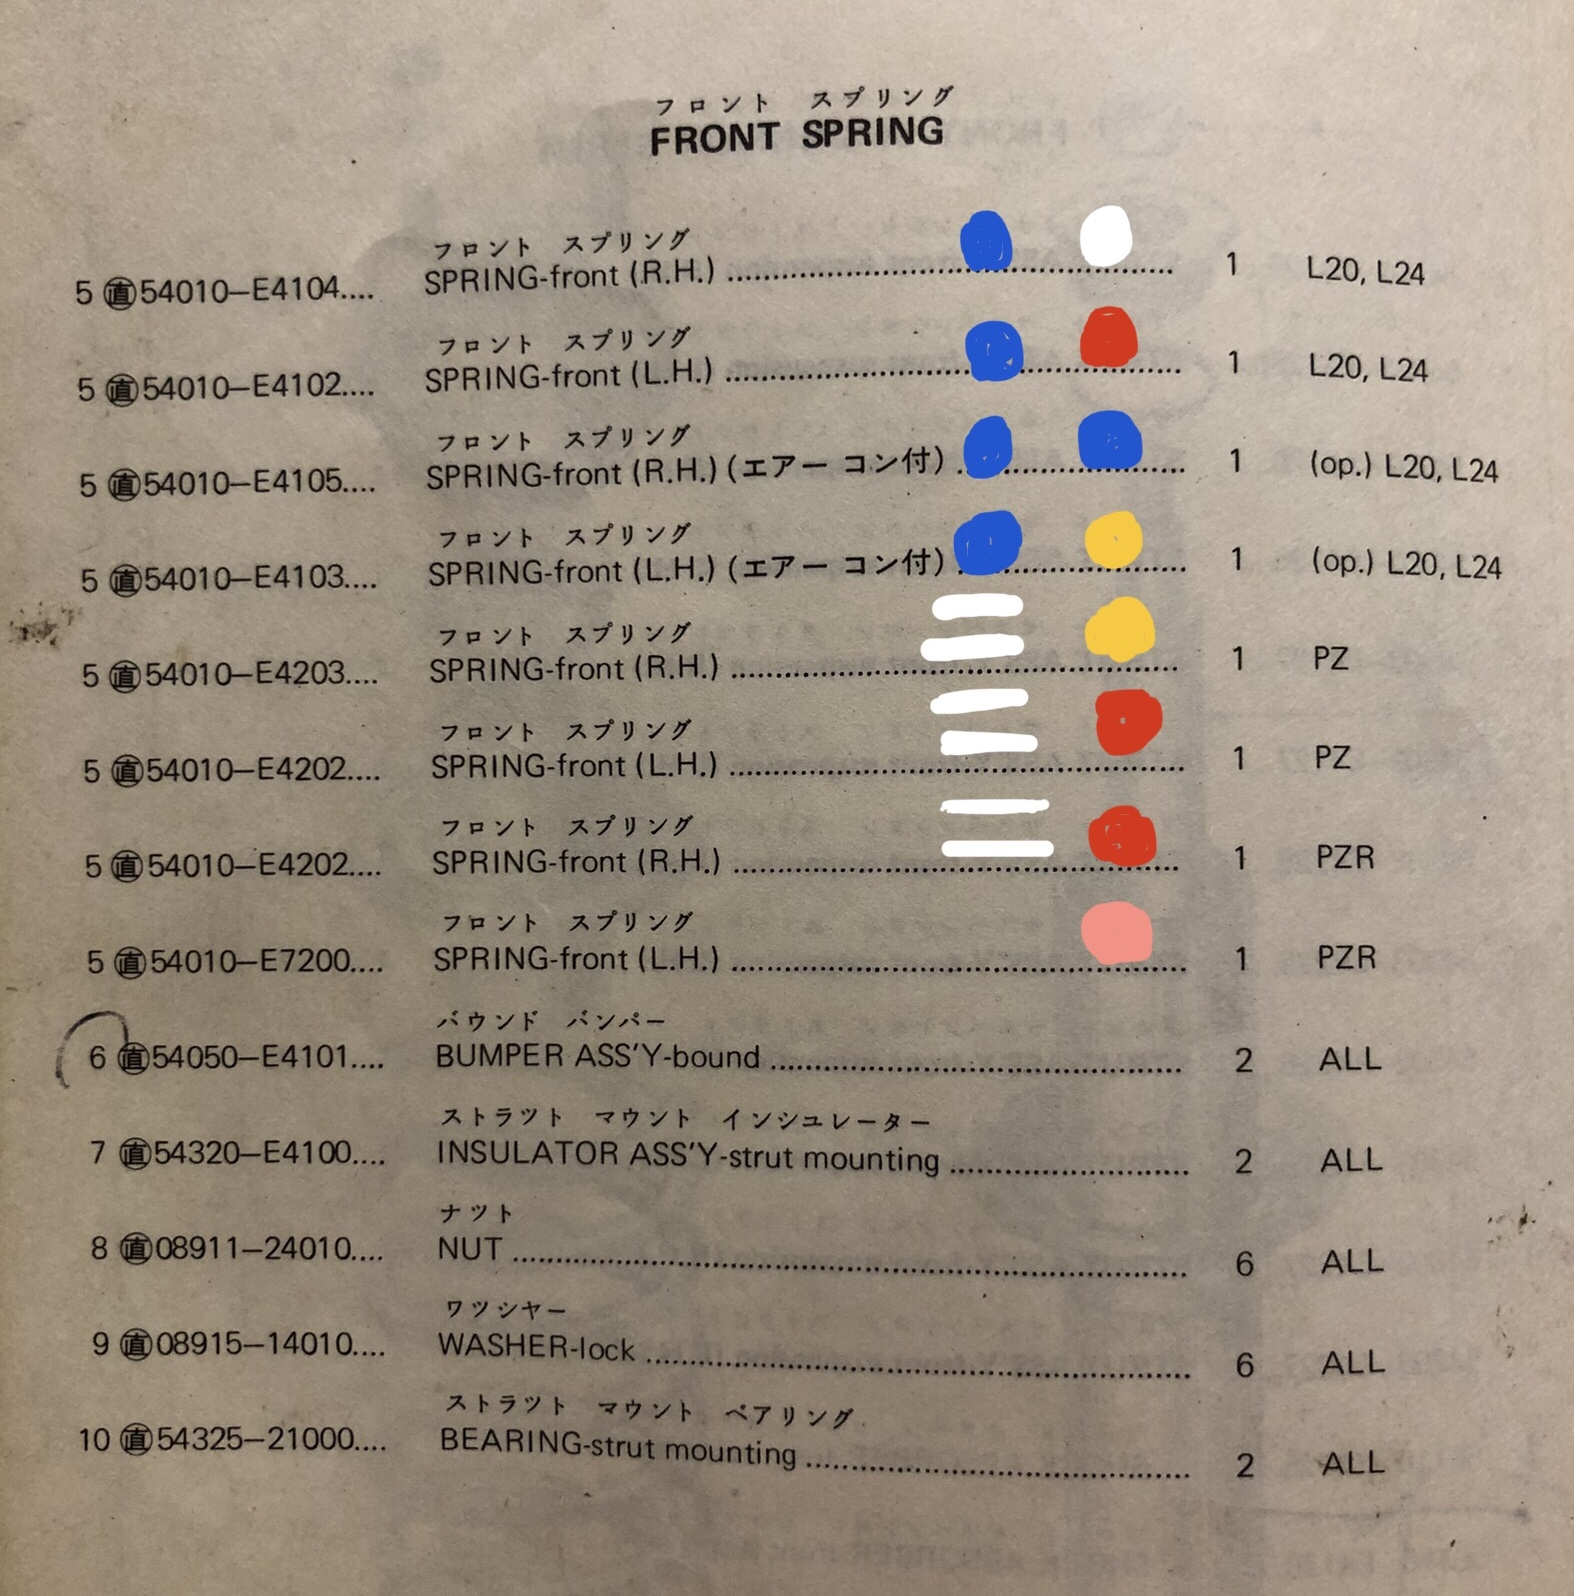
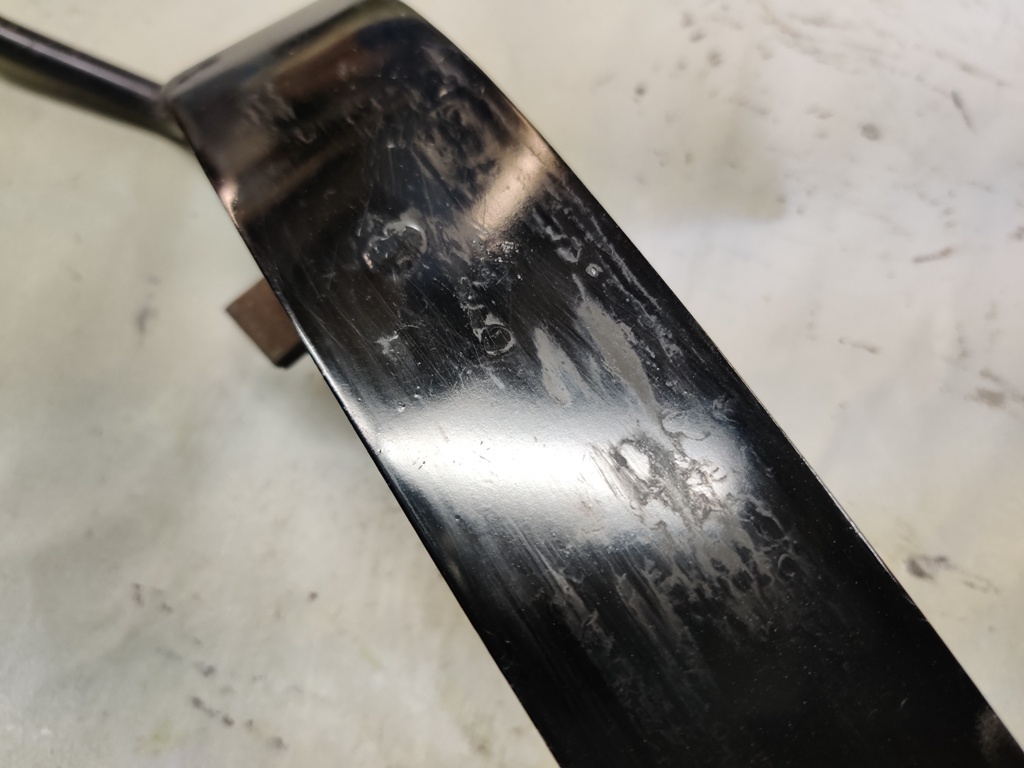
Yes you are reading it correctly. And yes they are different in free length. For the front, blue and white is RH 54010-E4104, blue and red is LH 54010-E4102. (Although the picture which I post in that thread had an error for the LH, it says -E4202 this is for PZ) Today I post this, from a parts catalog of Fairlady Z series 1972. This is correct. Kats
 2 points
 -
2 pointsSchool kids use it here to make their essays for school projects. The schools are having a hell of a time trying to sort out what is done by the students and what this bot has generated. Some things fail the test quickly, a little like the statement in the first post: In 1972, the engine was upgraded to a 2.6-liter unit that produced 162 horsepower and 157 lb-ft of torque.2 points
-
You know you are in trouble when the shop asks "is it OBD1 or 2?"🤣2 points
-
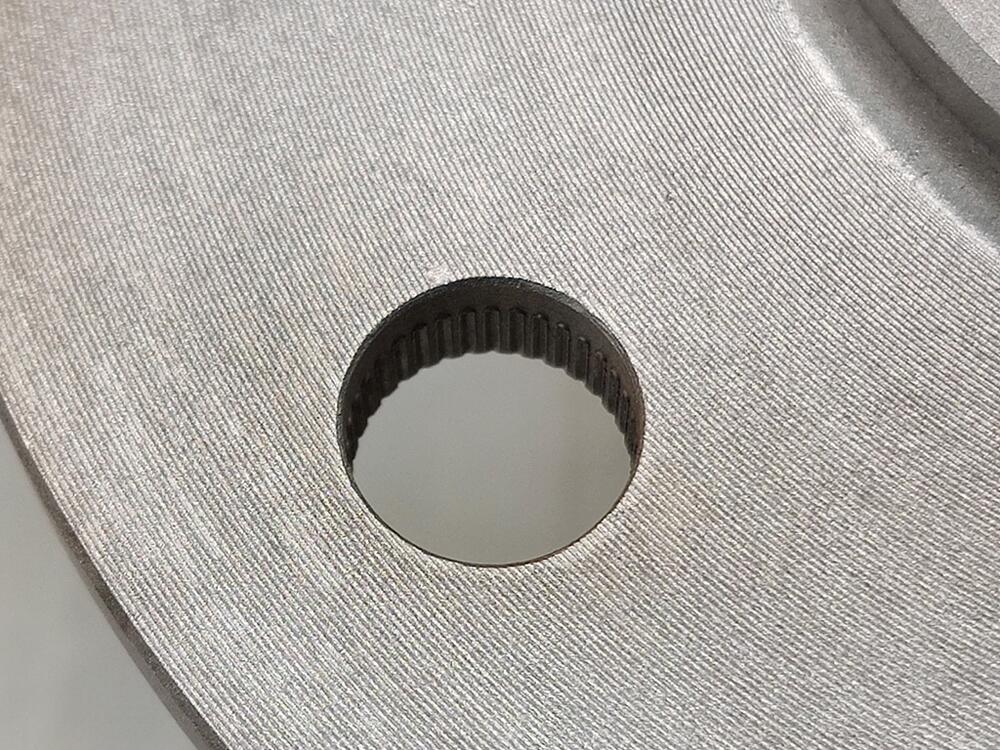
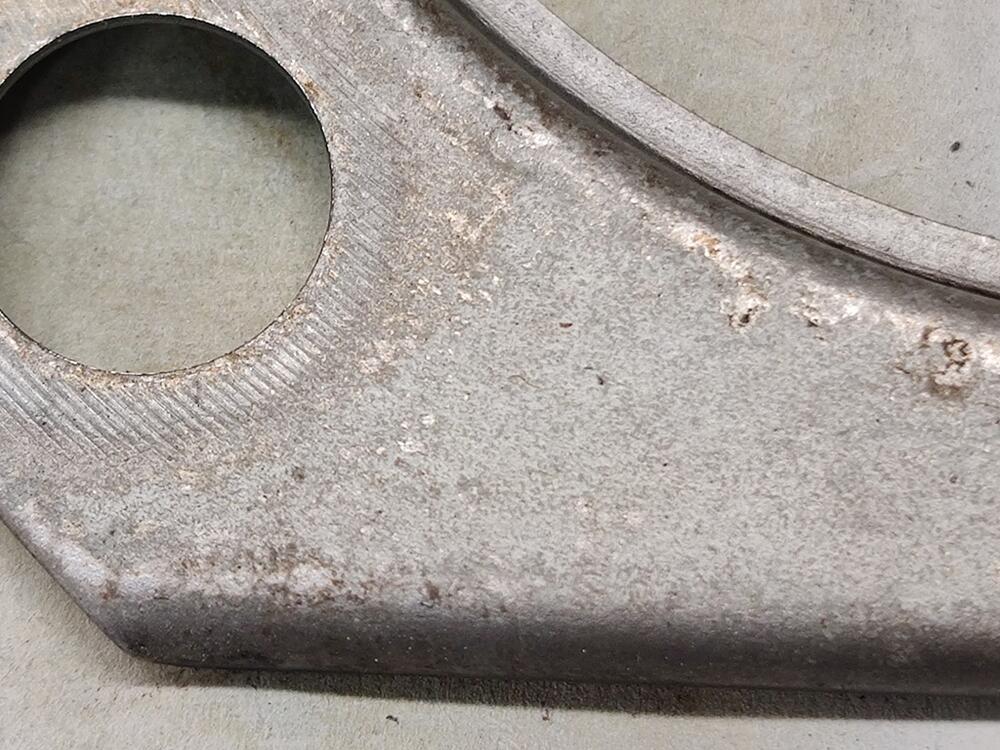
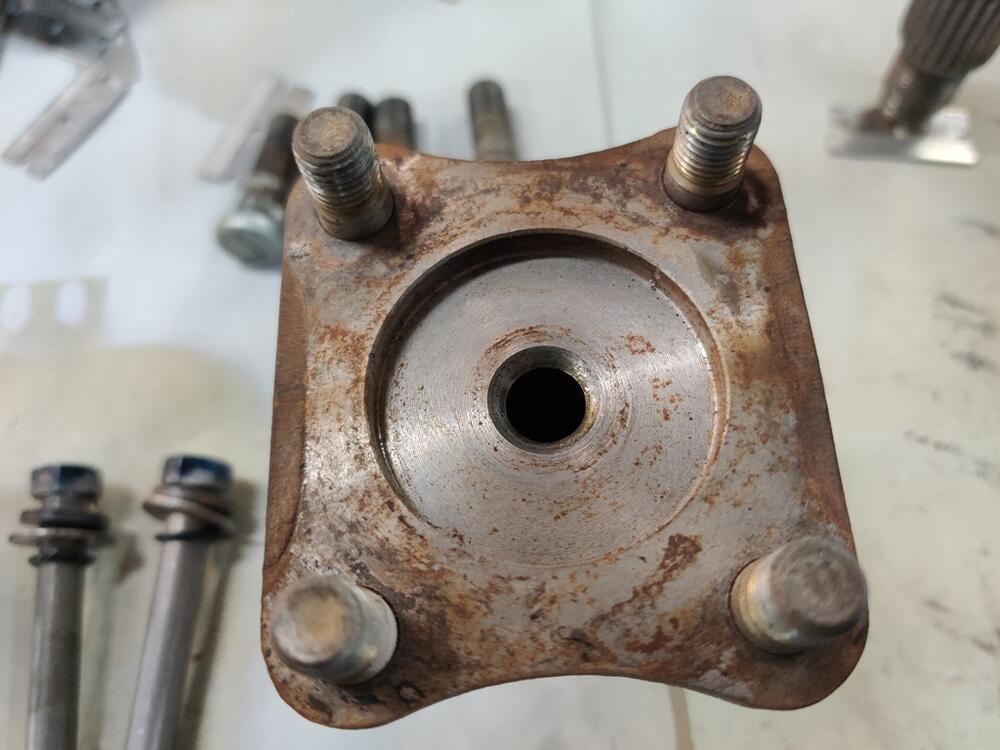
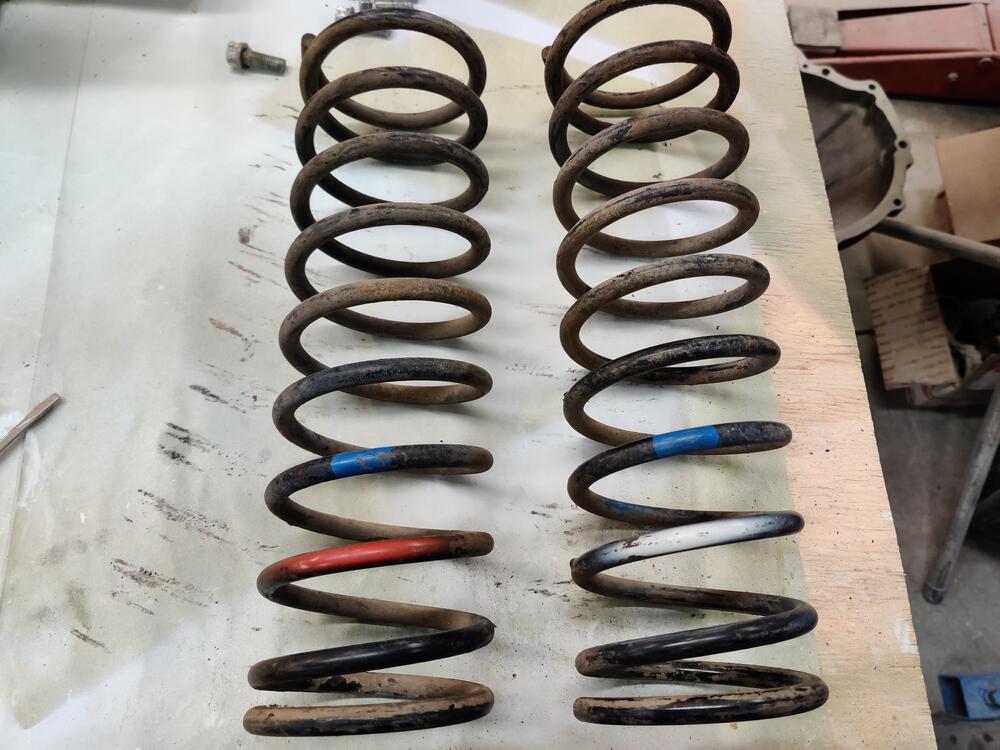
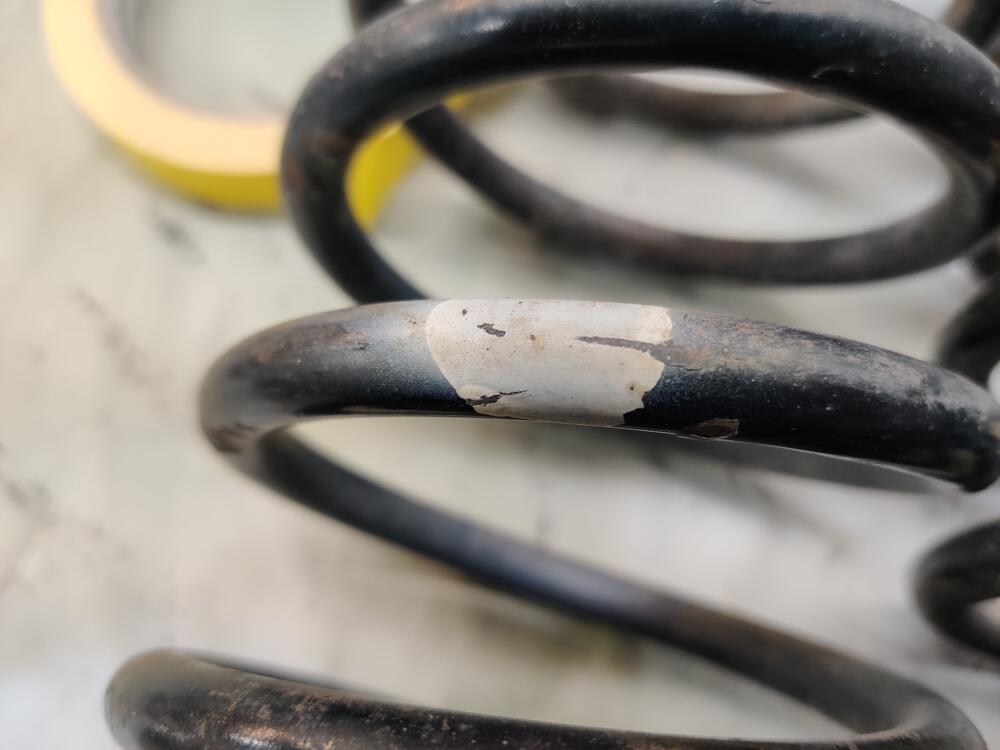
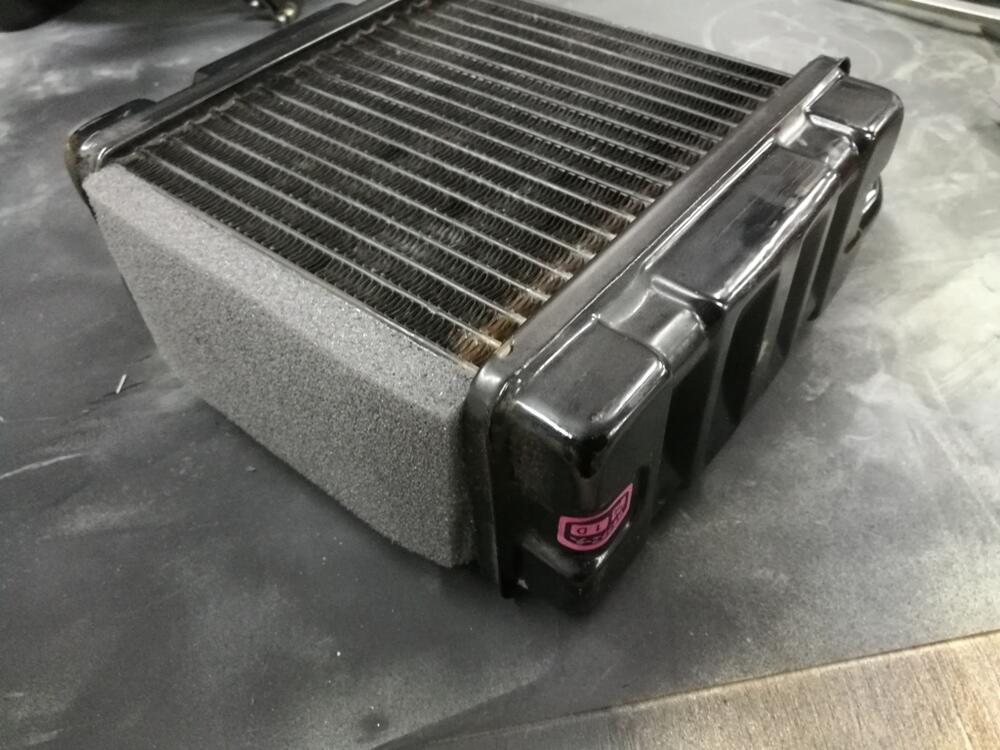
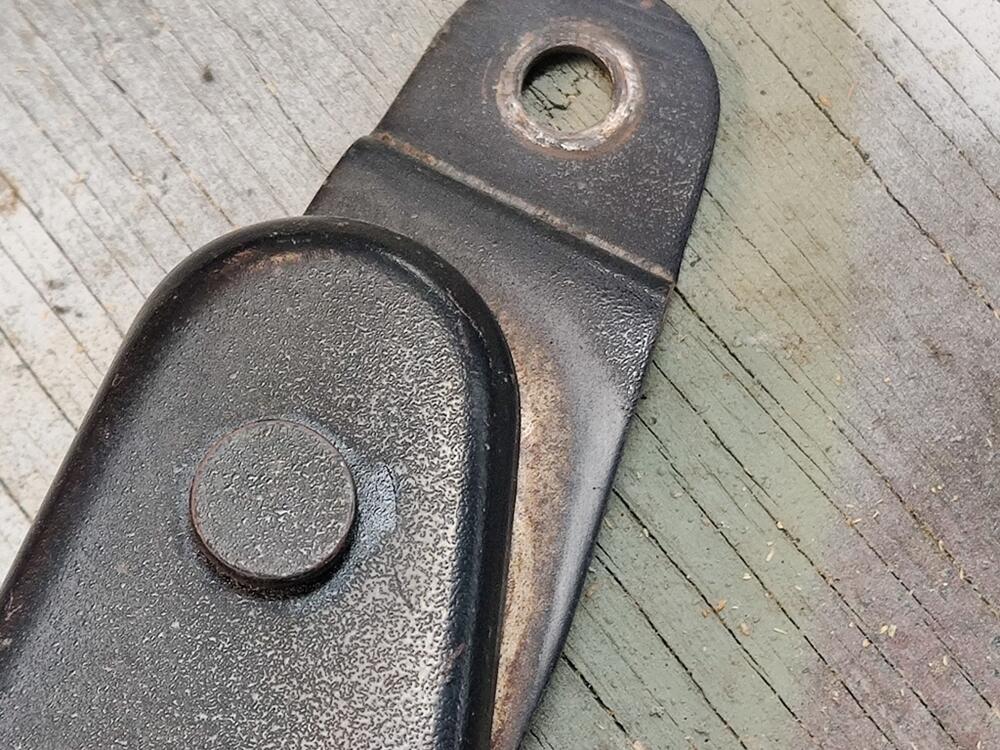
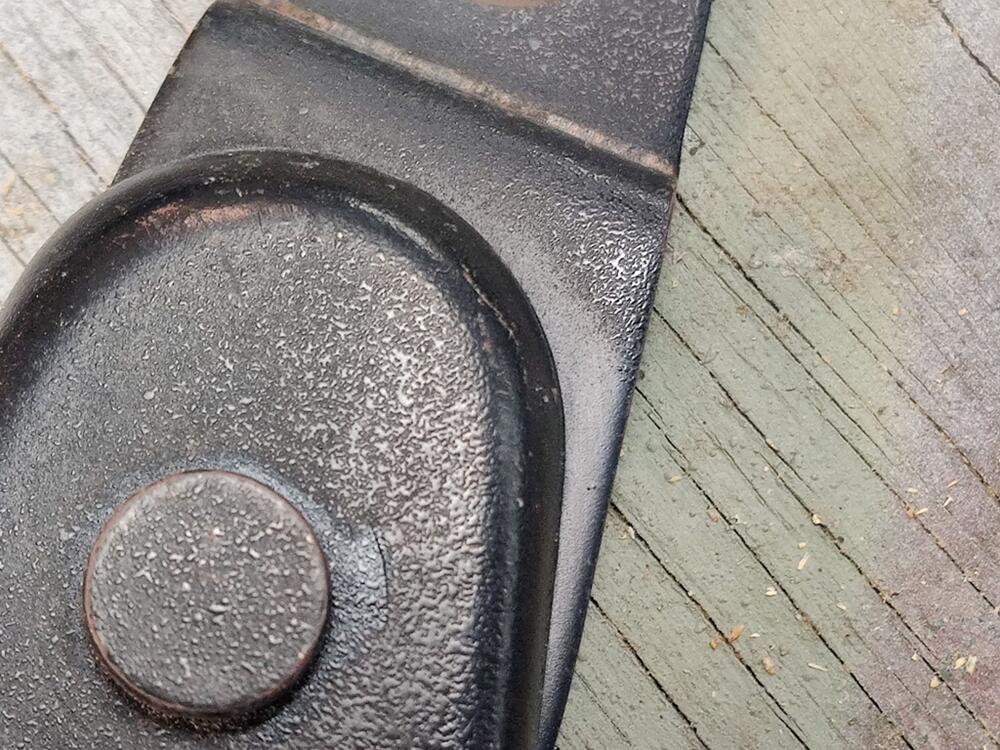
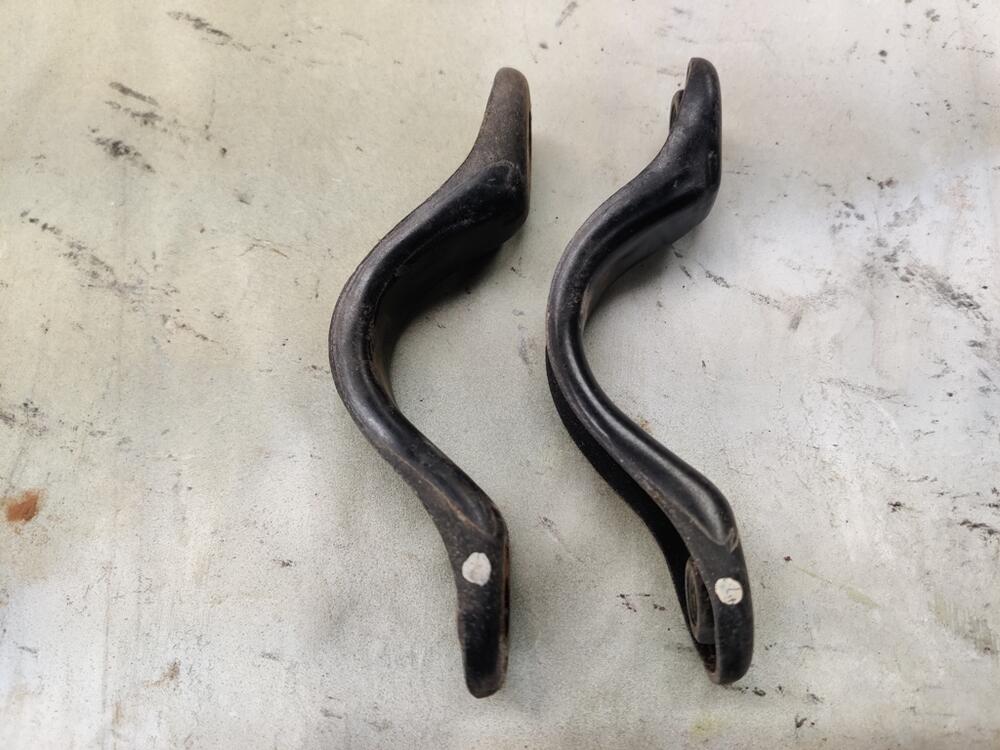
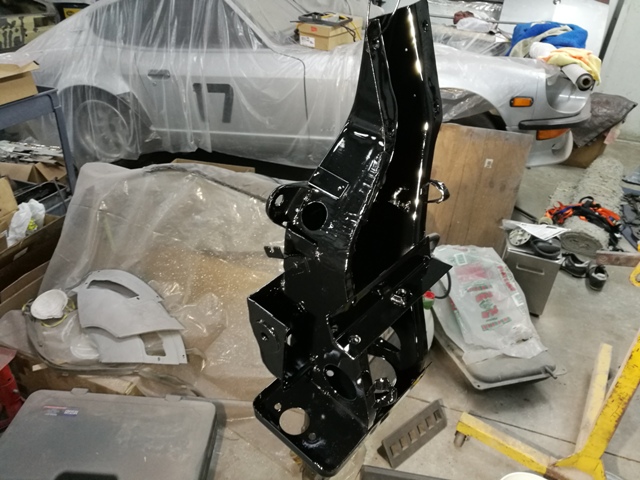
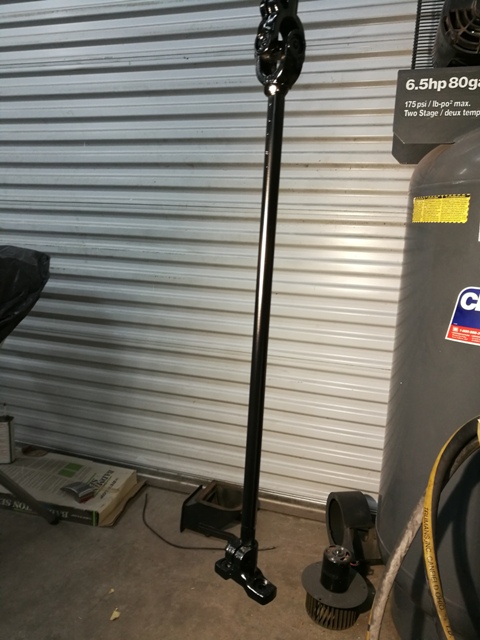
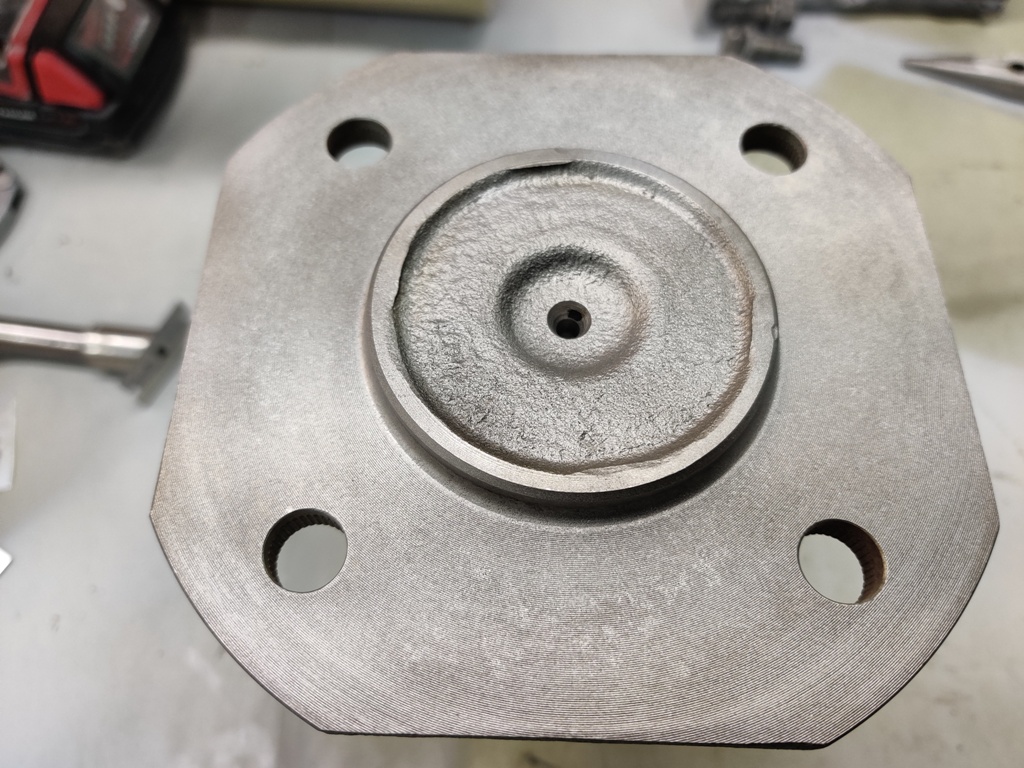
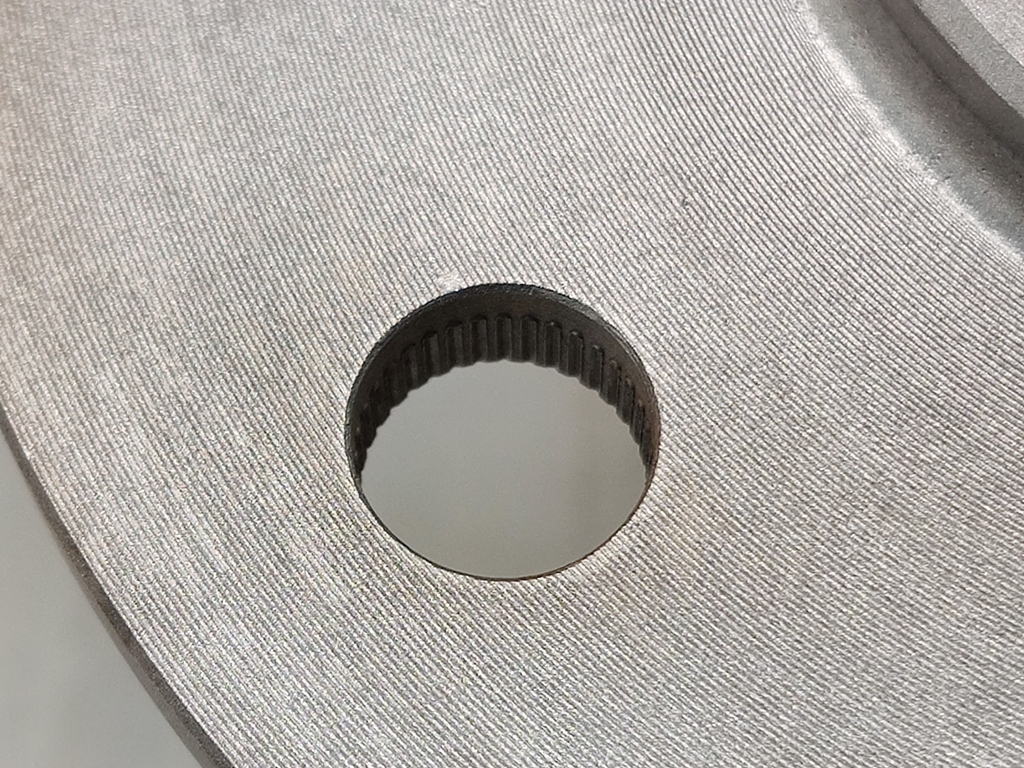
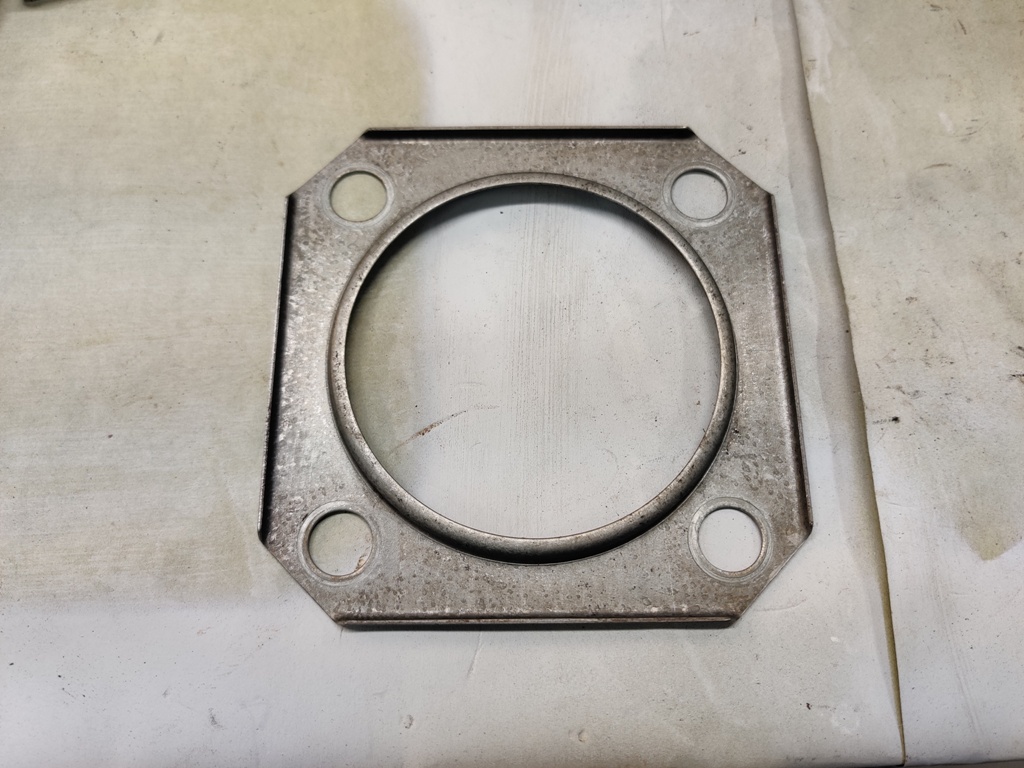
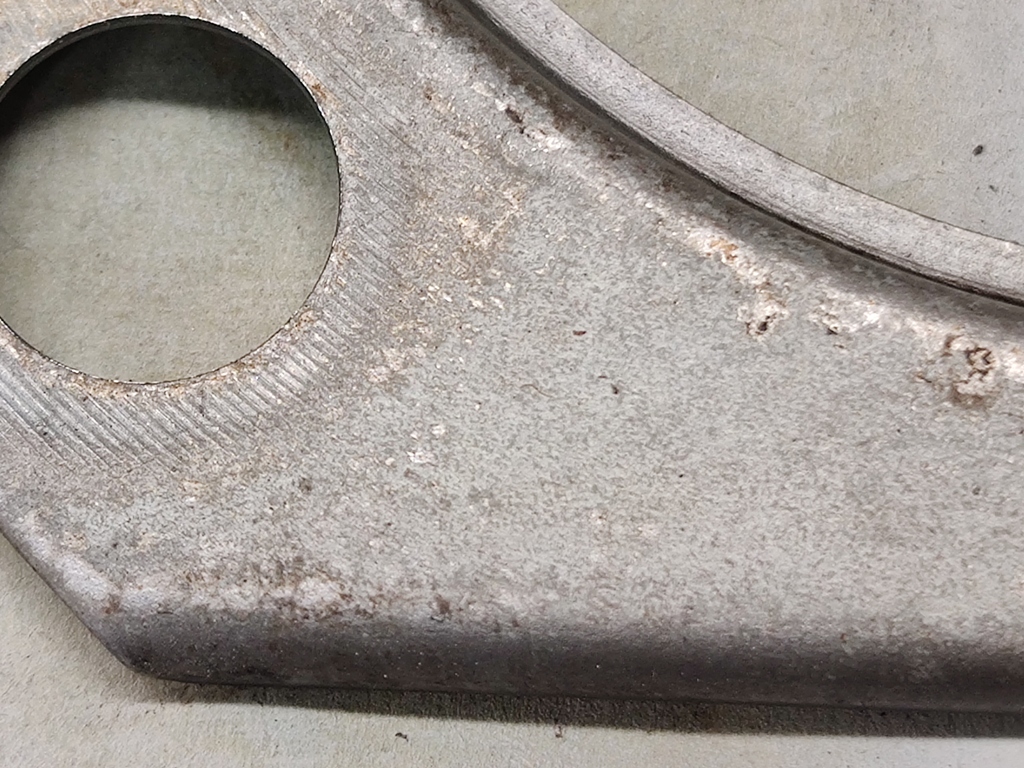
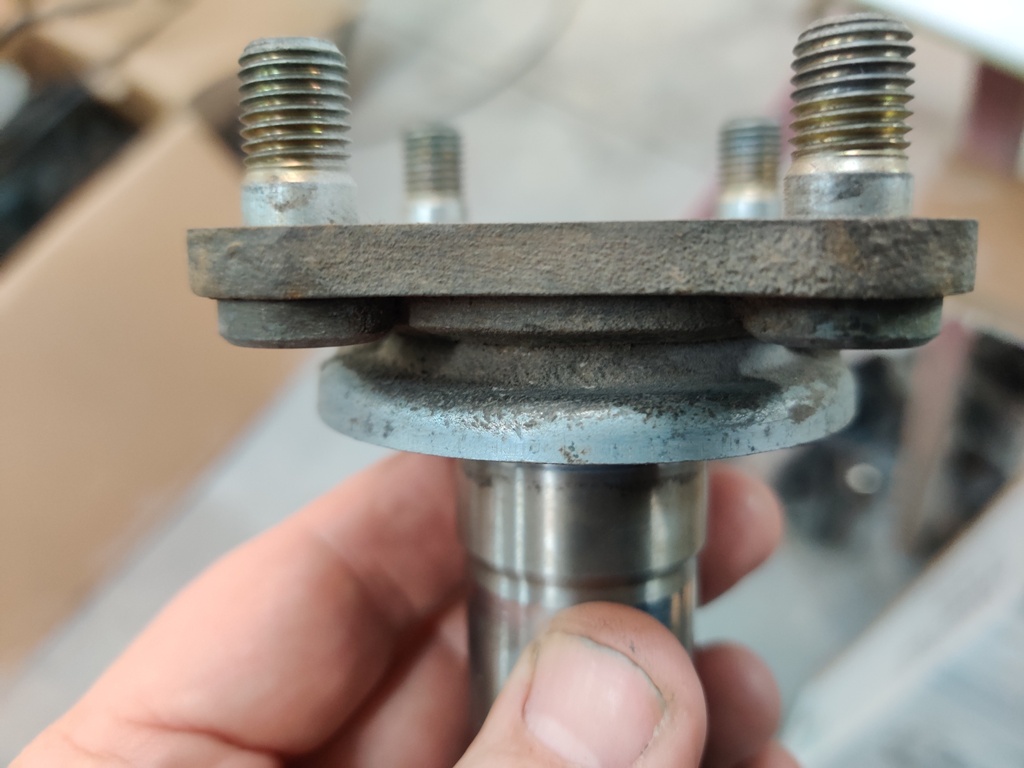
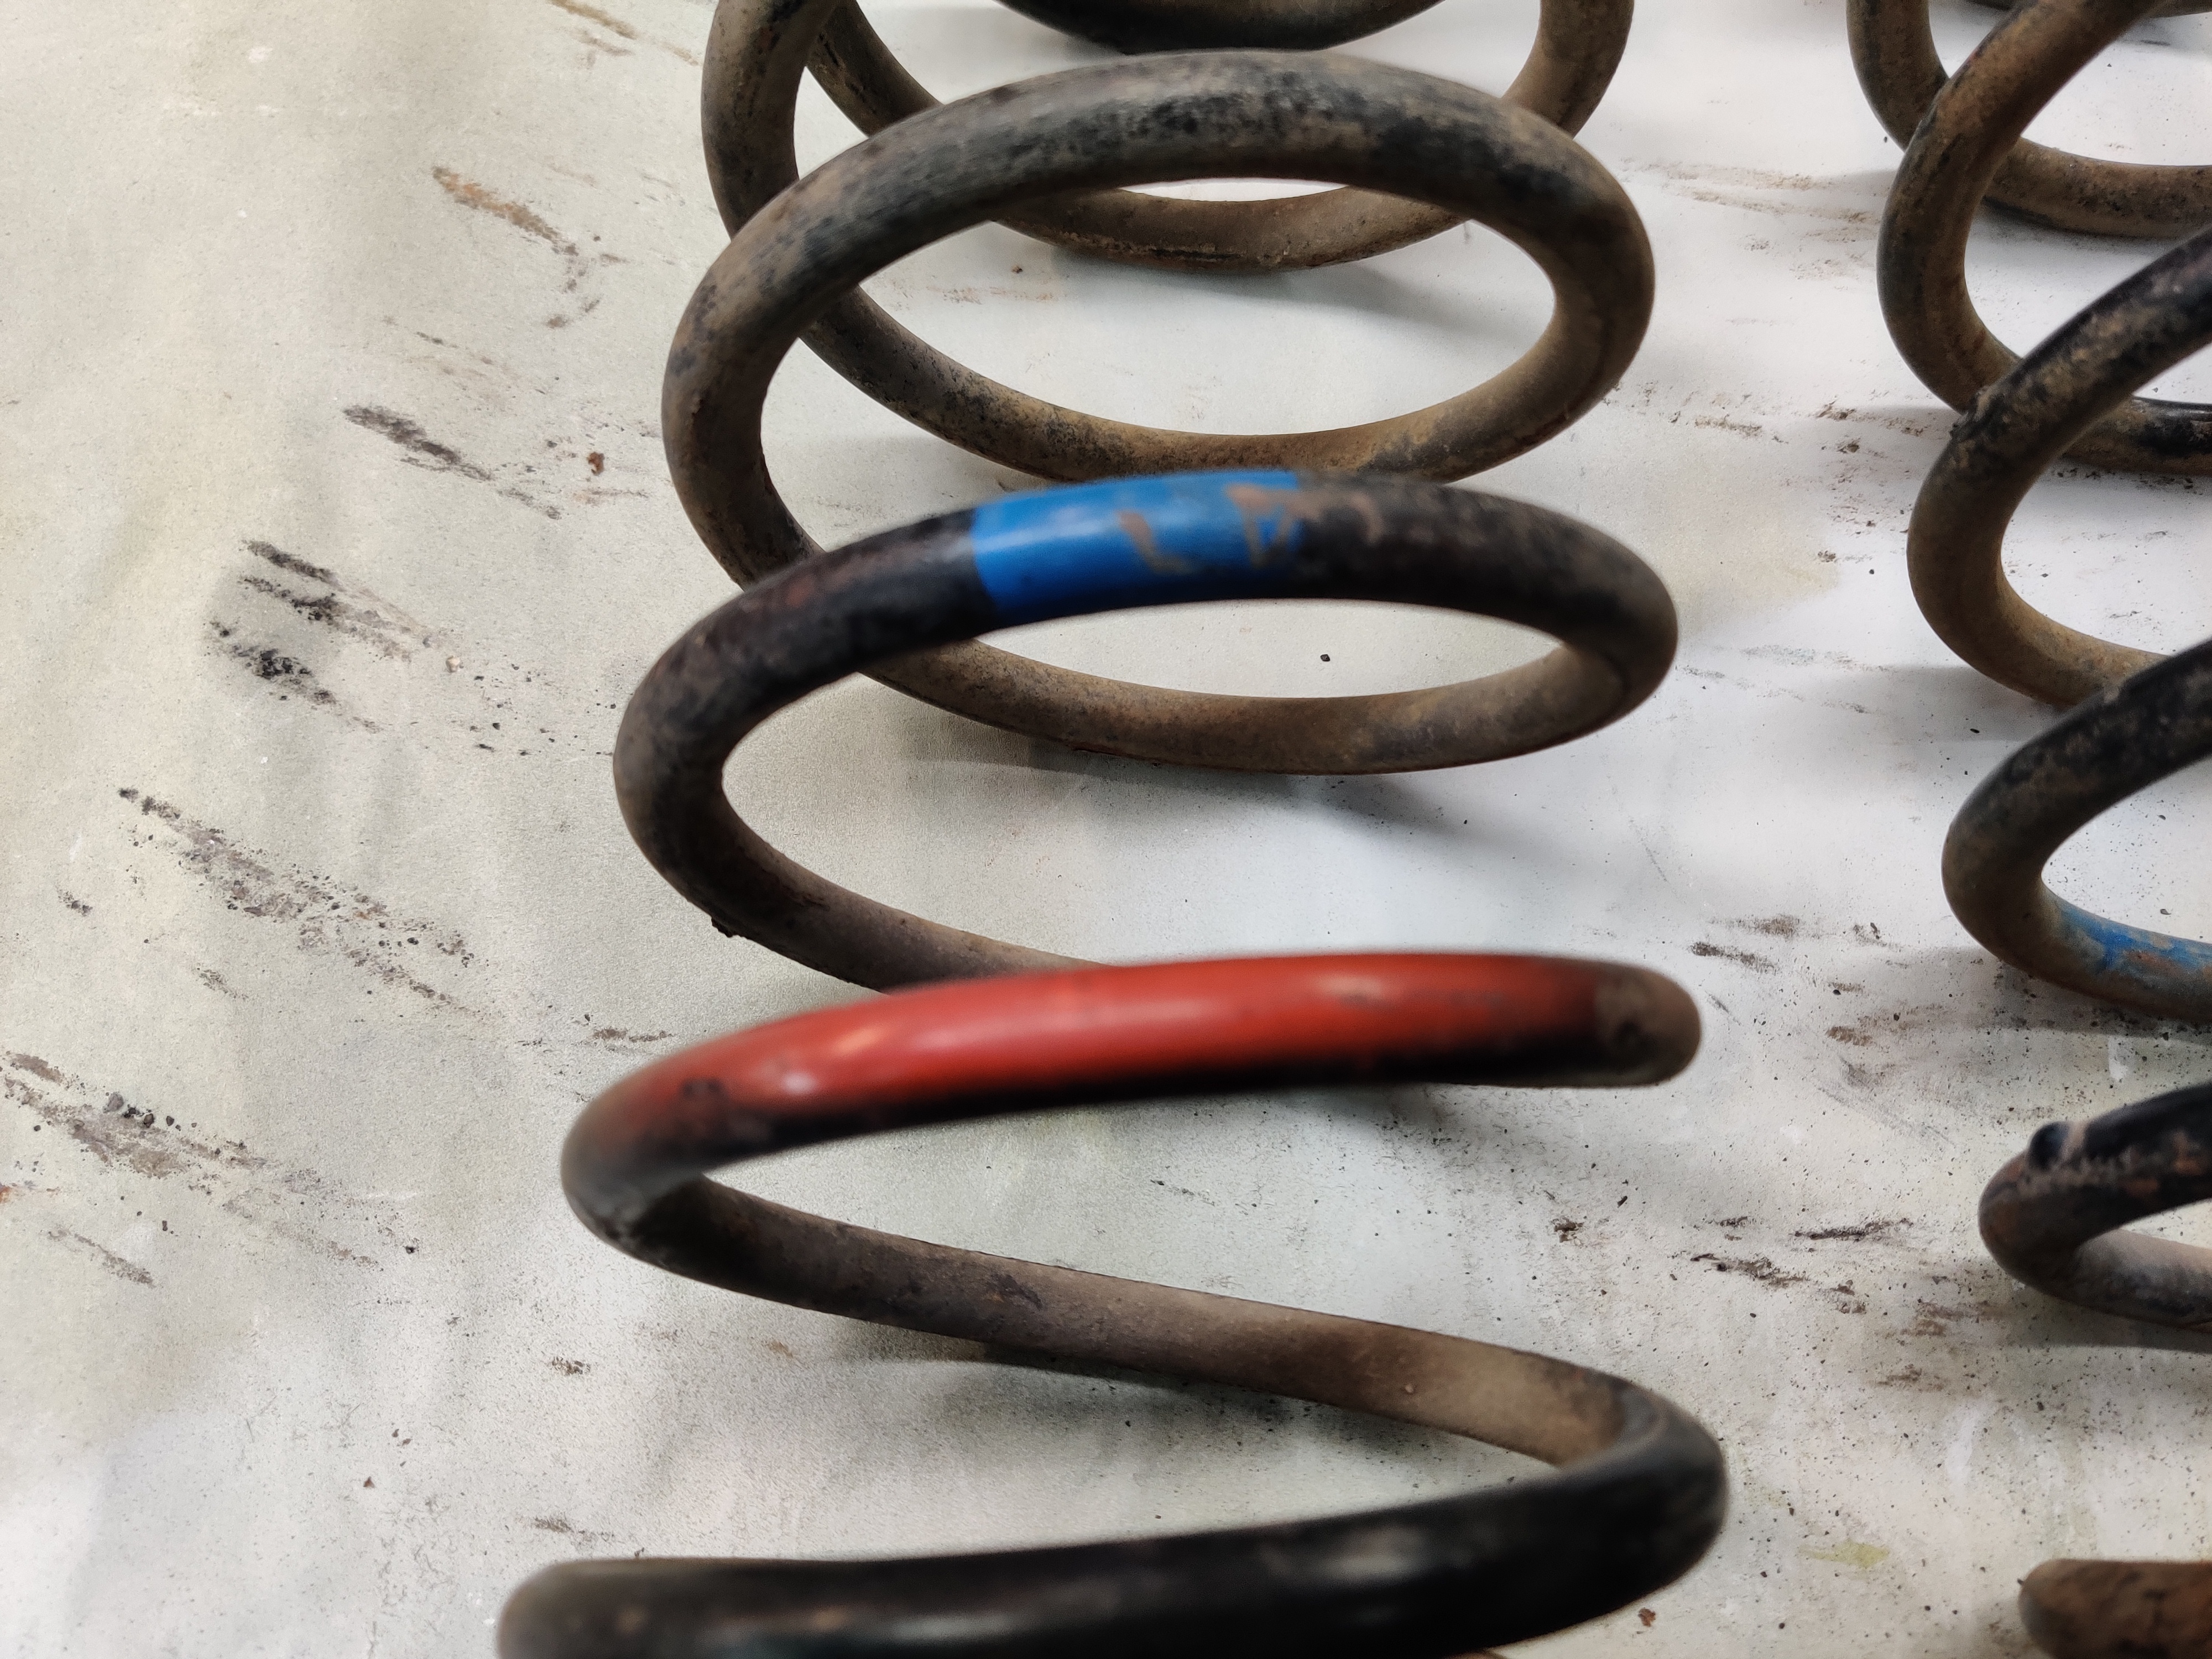
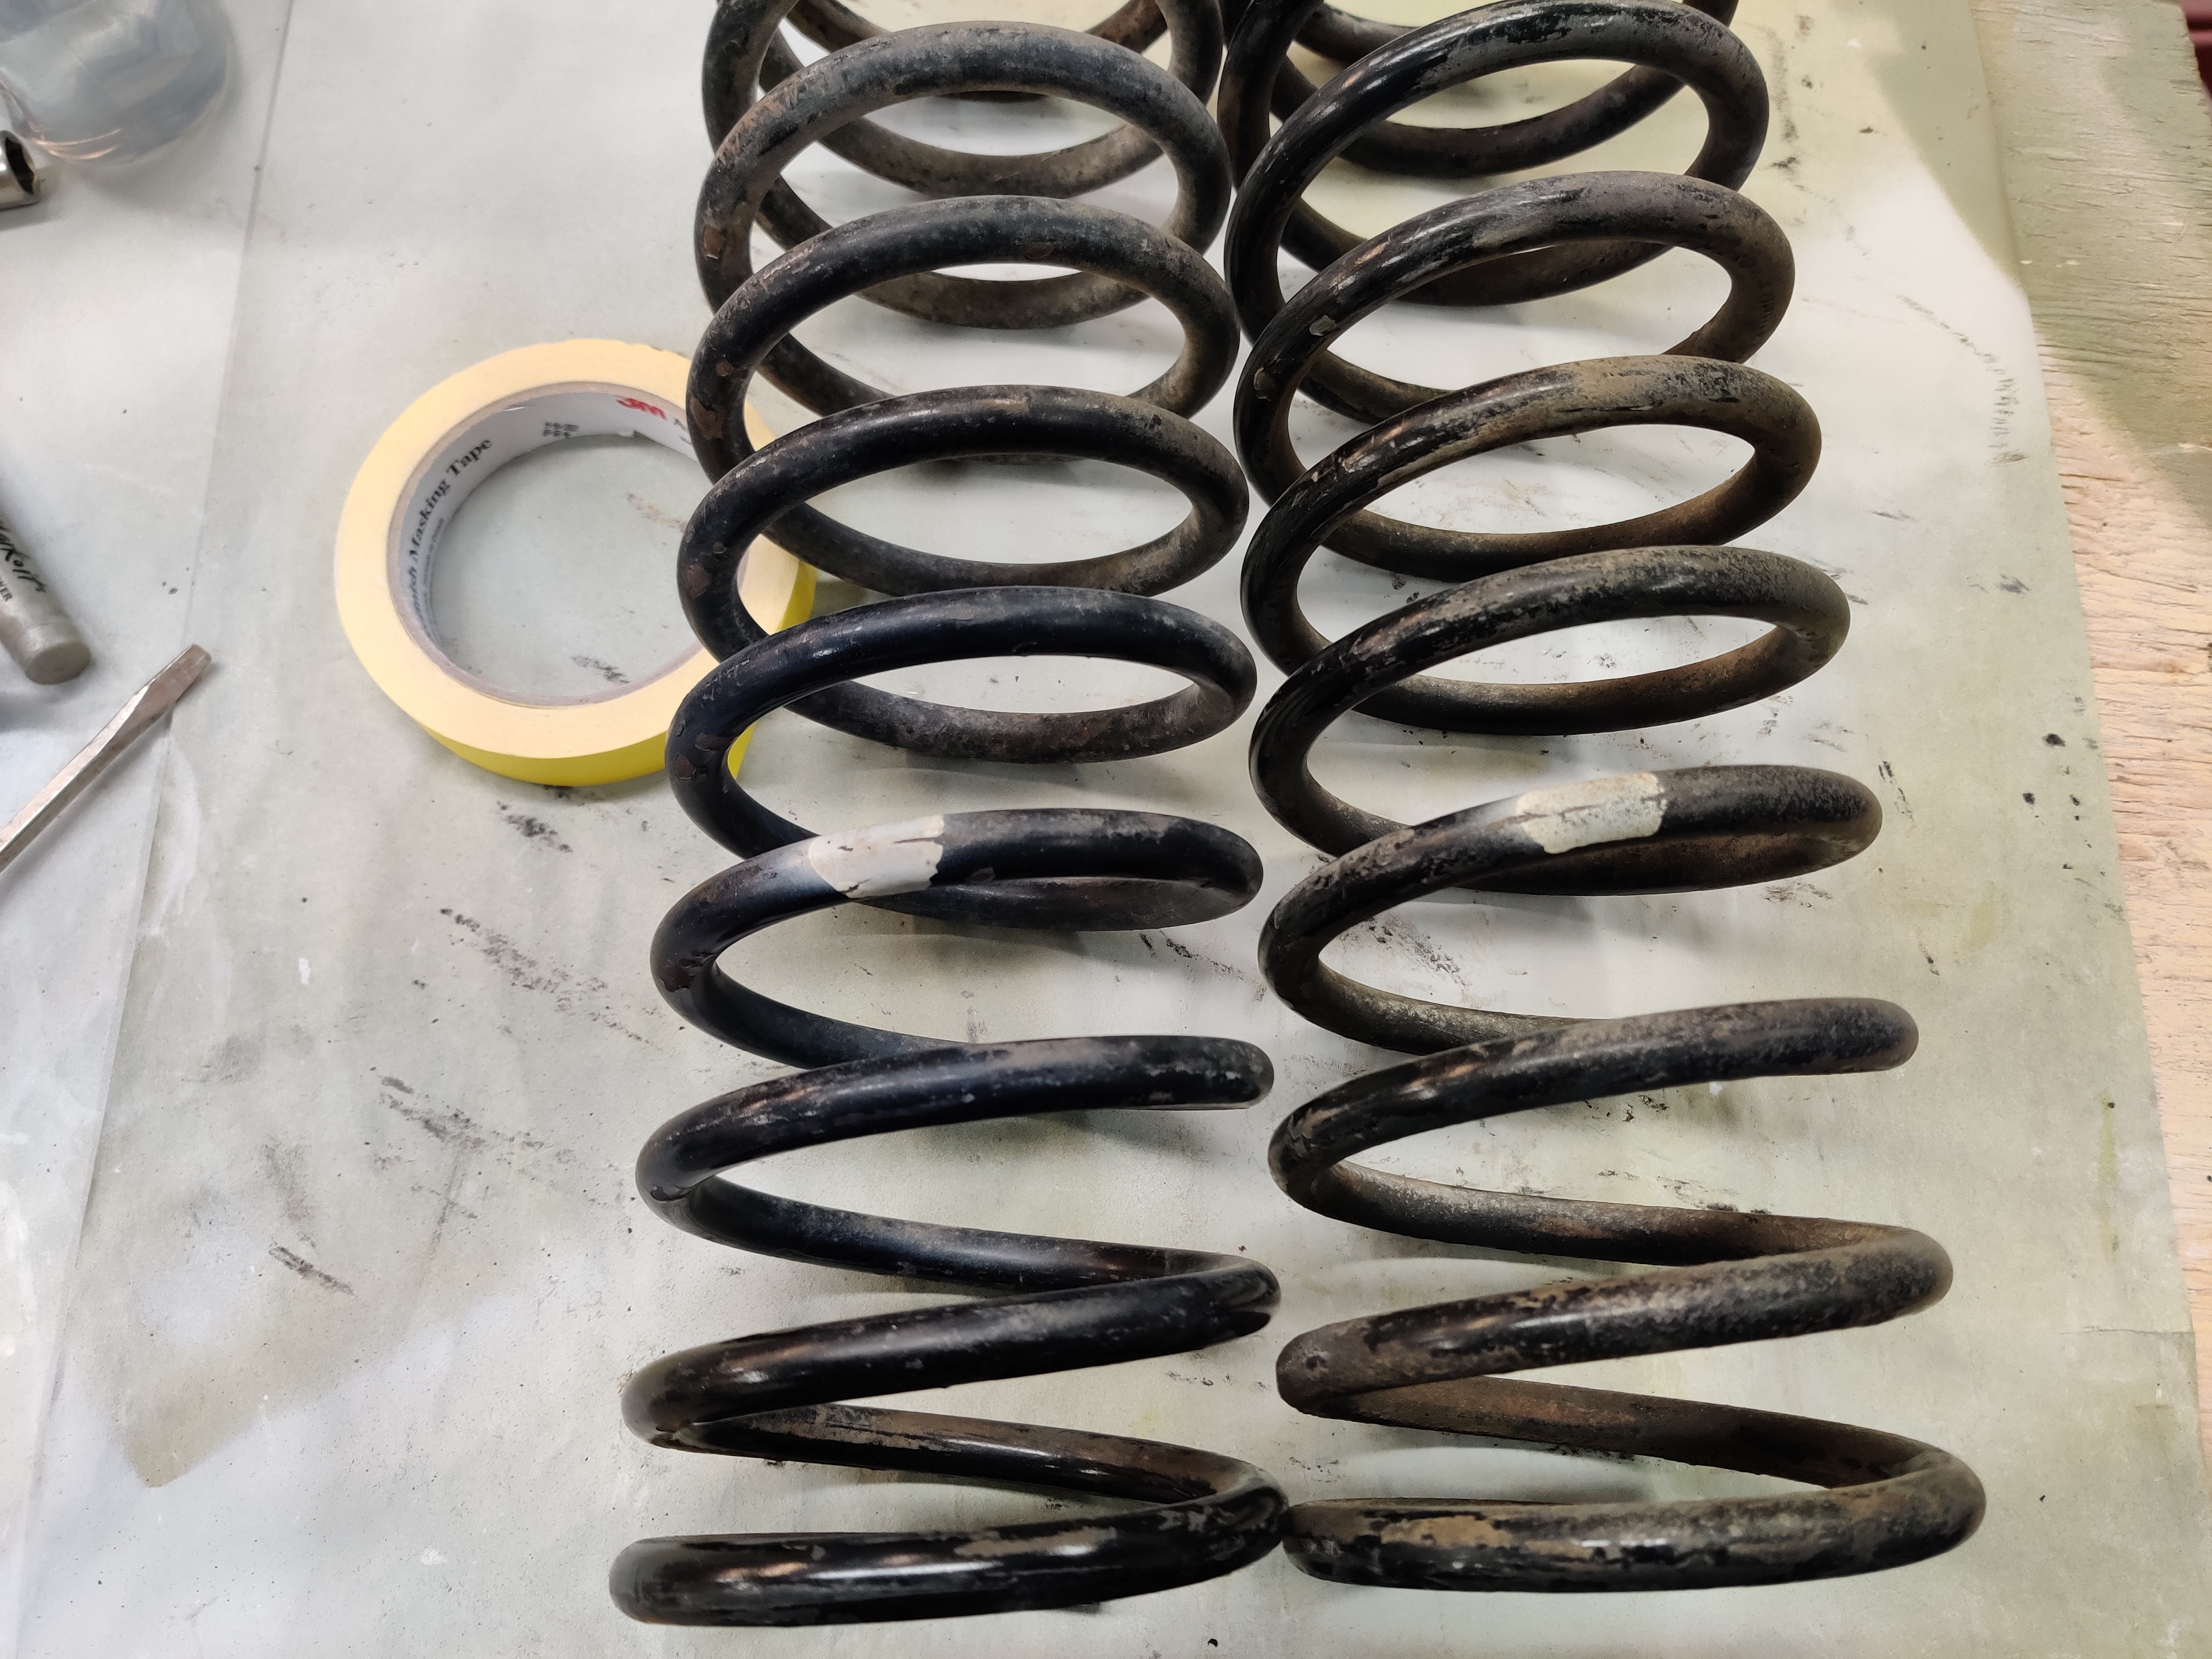
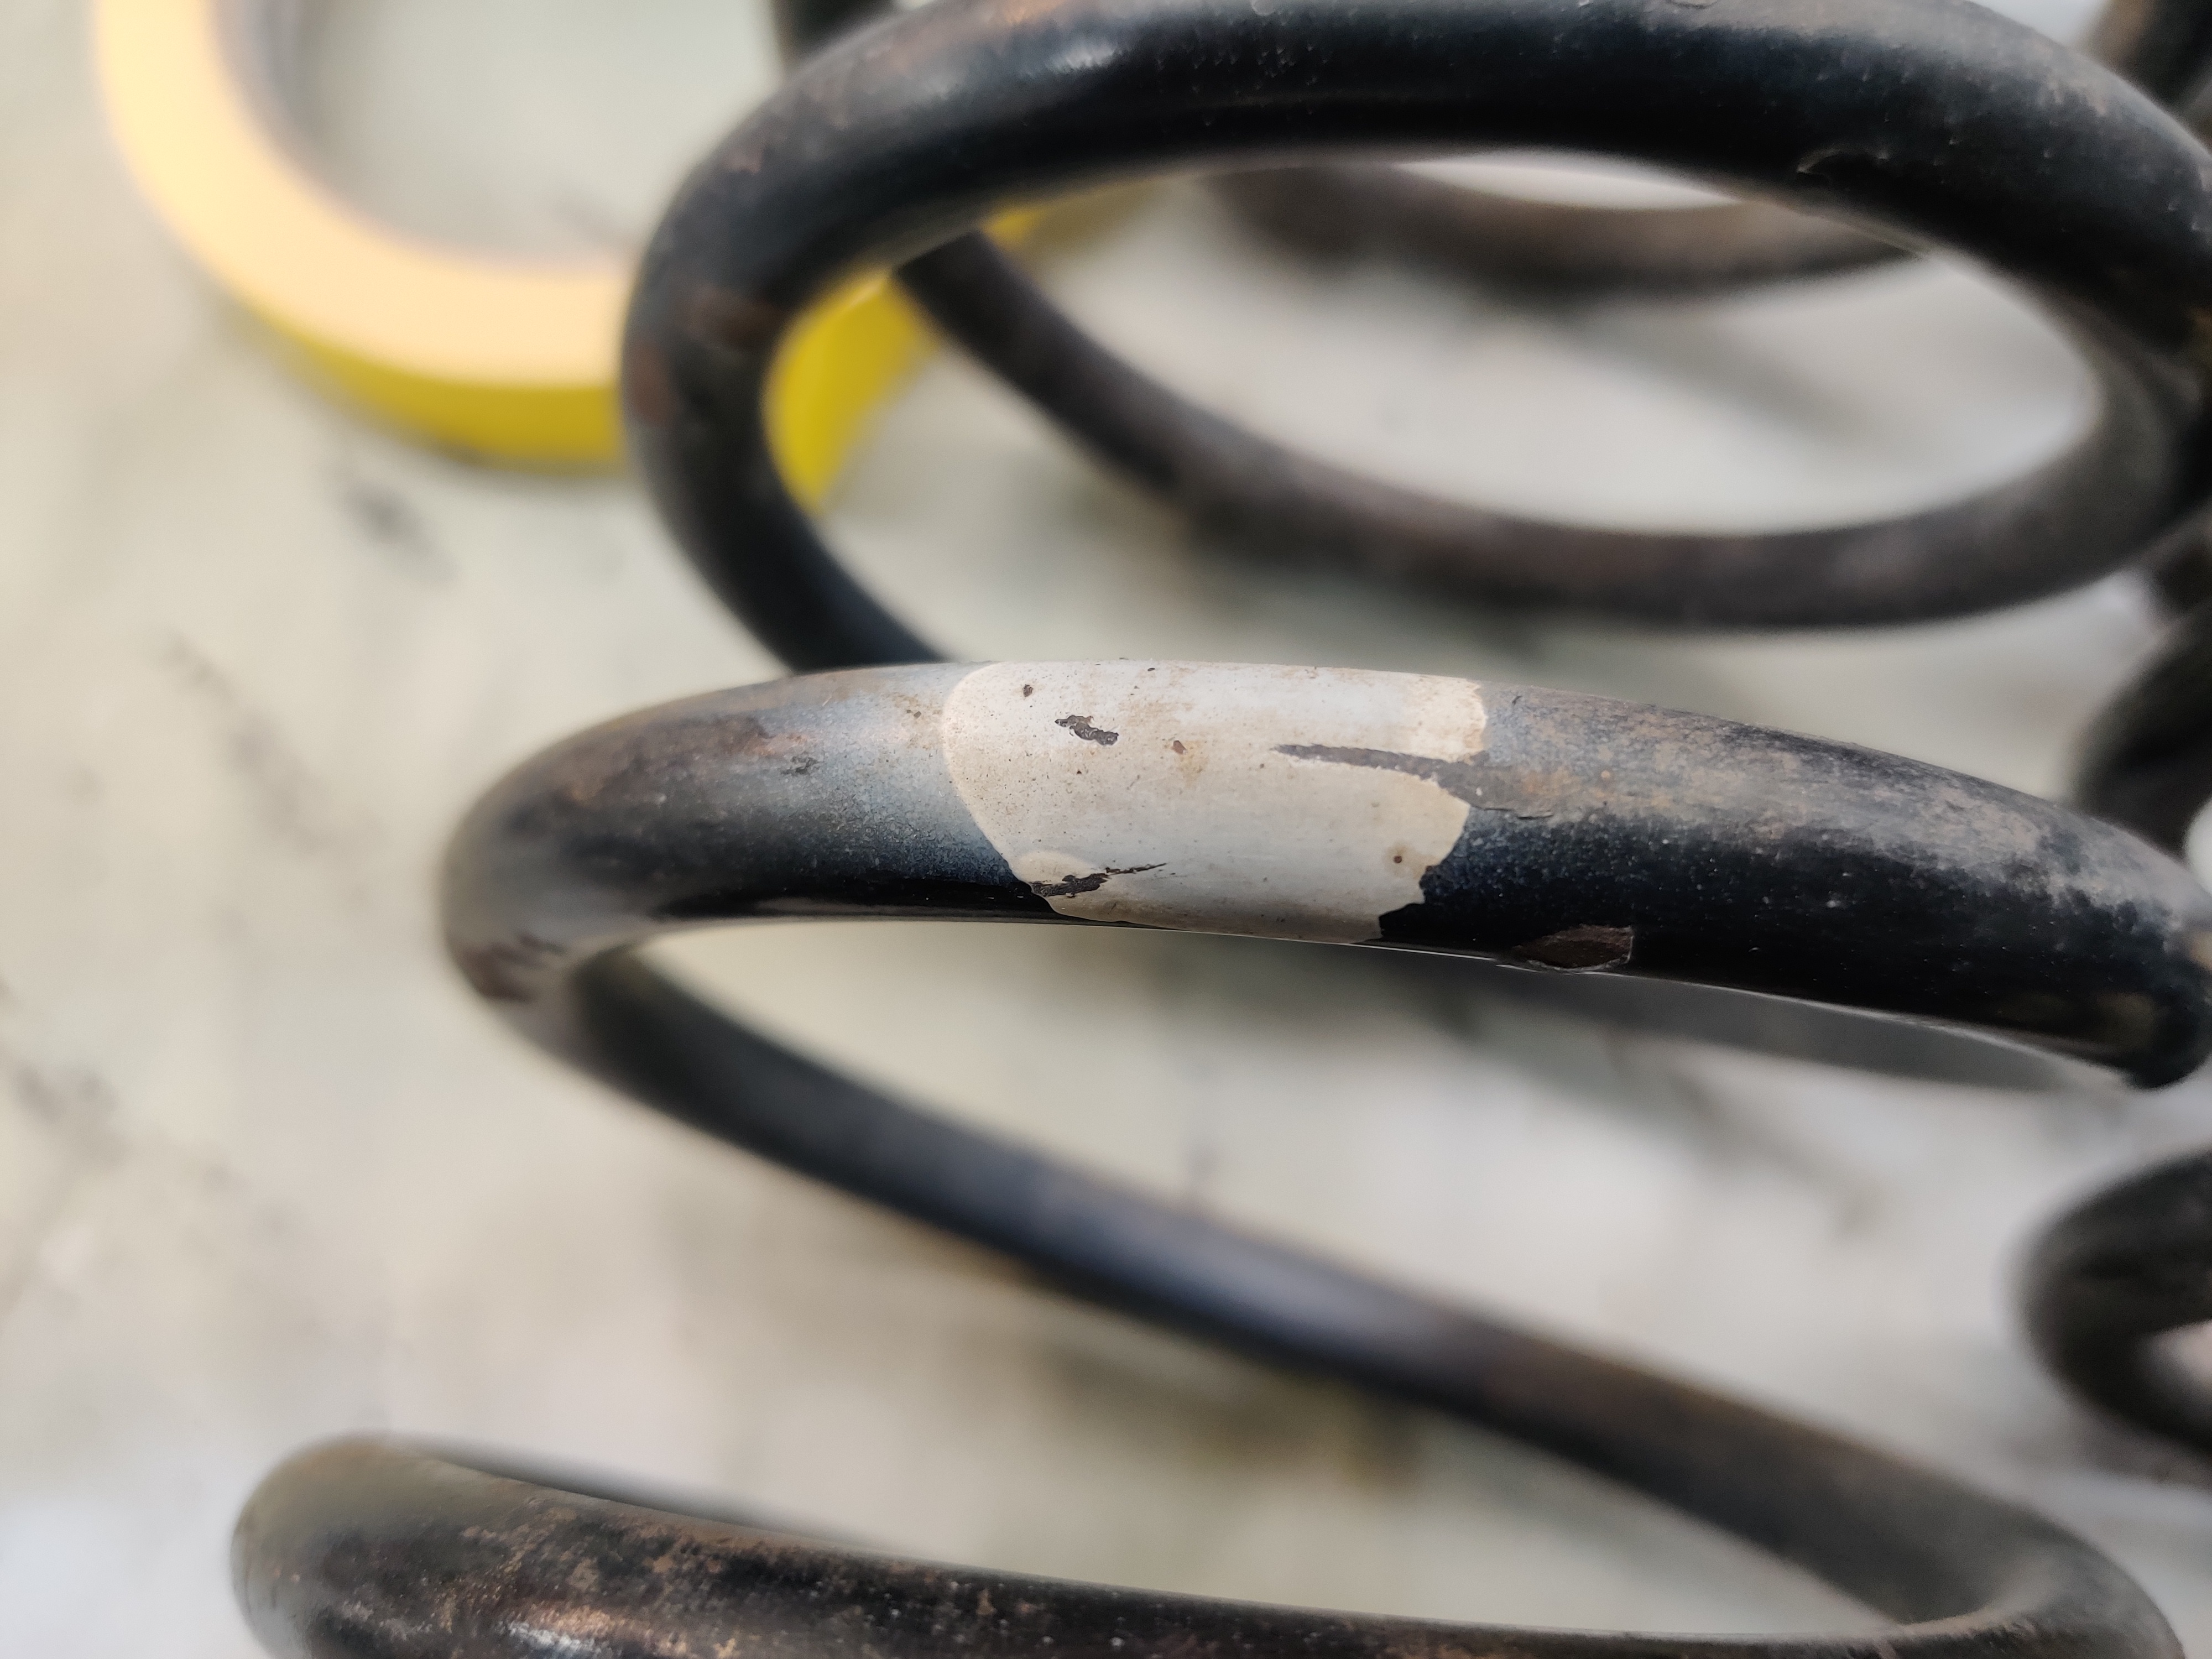
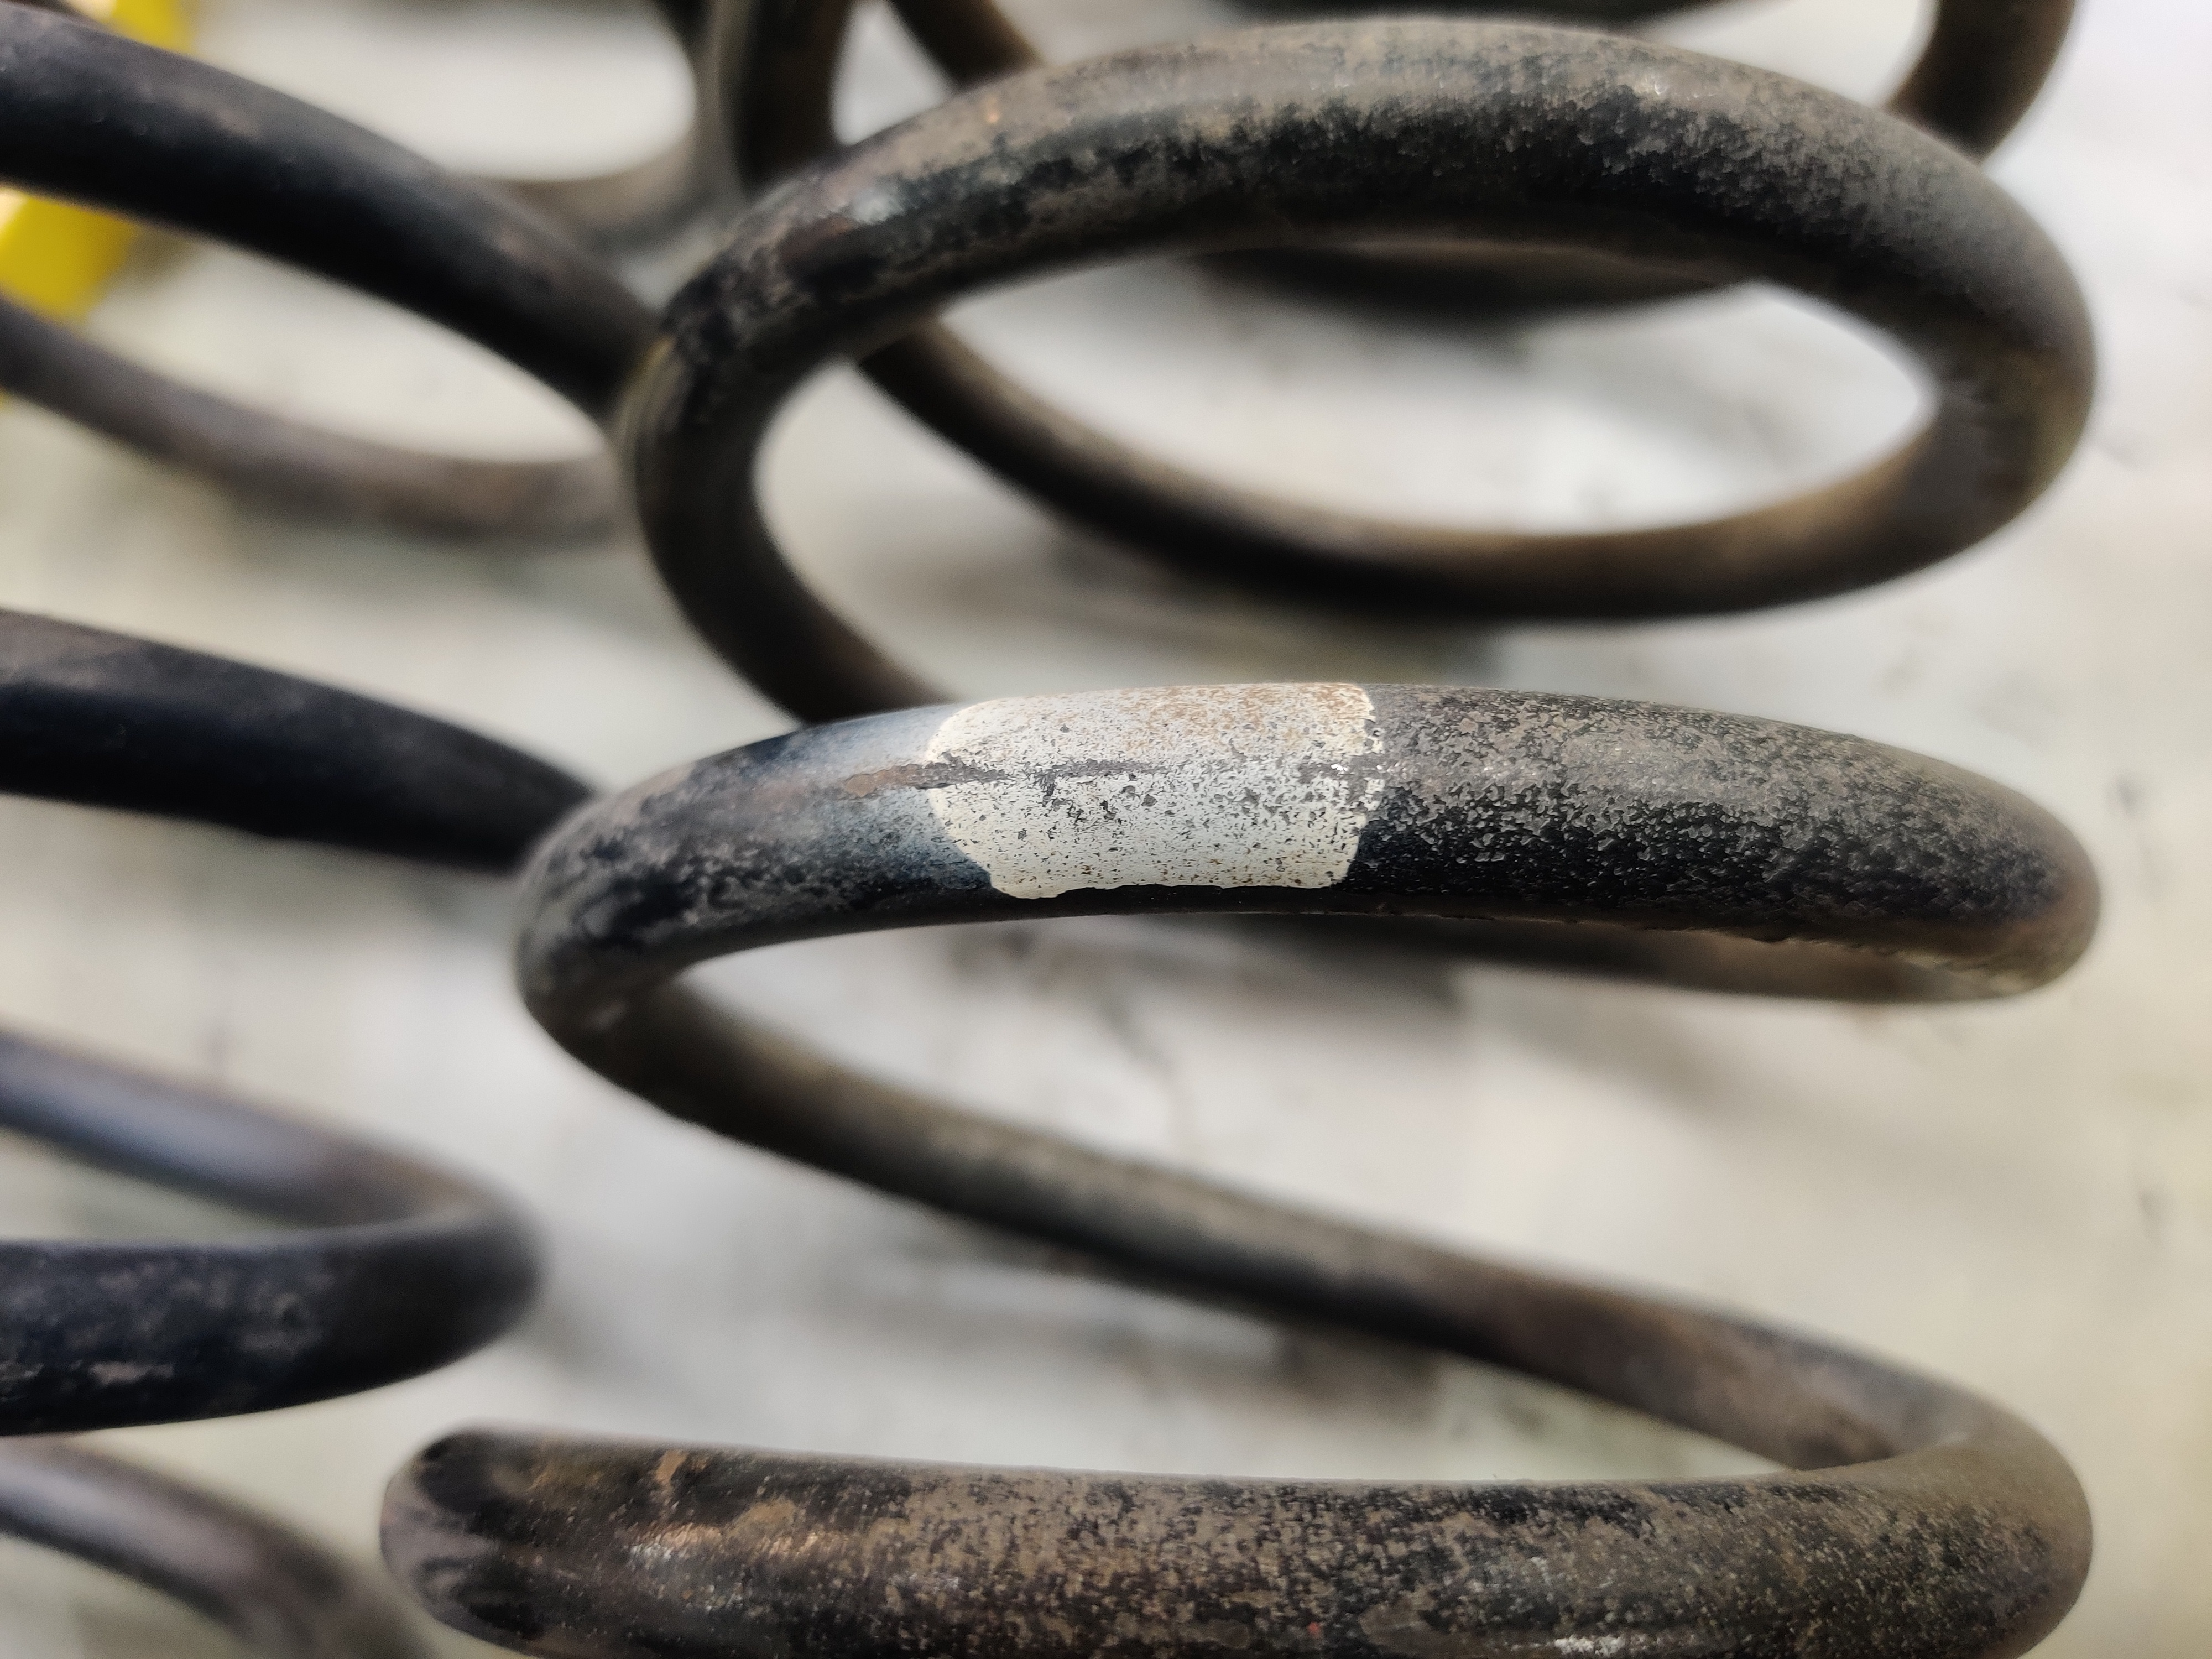
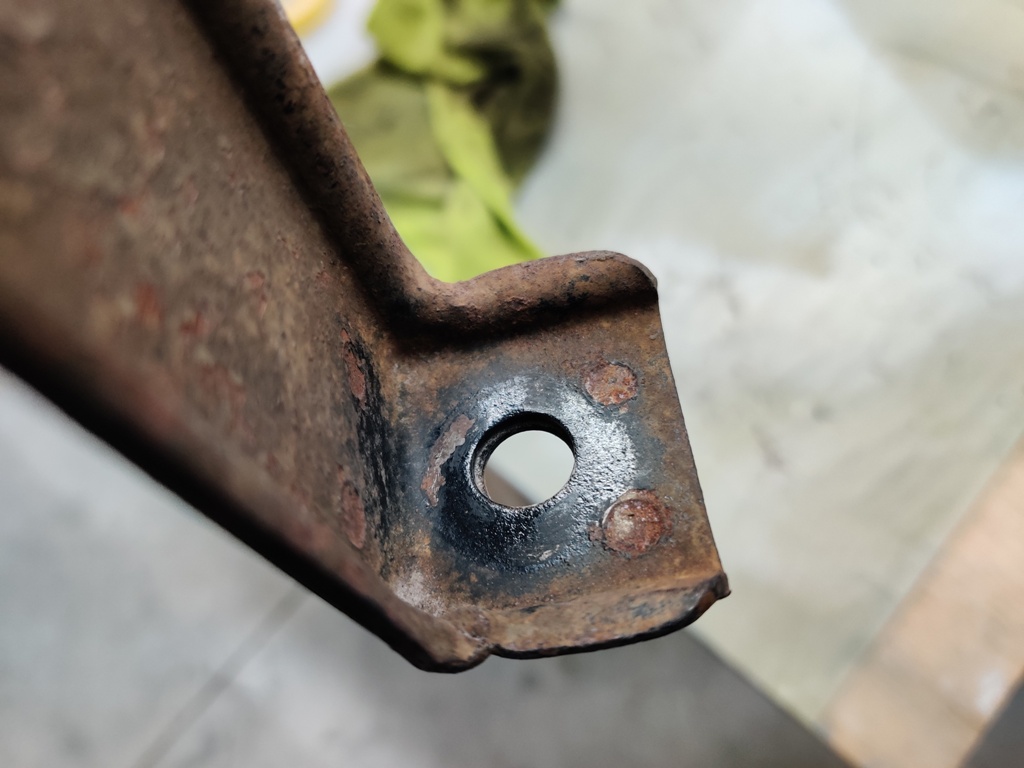
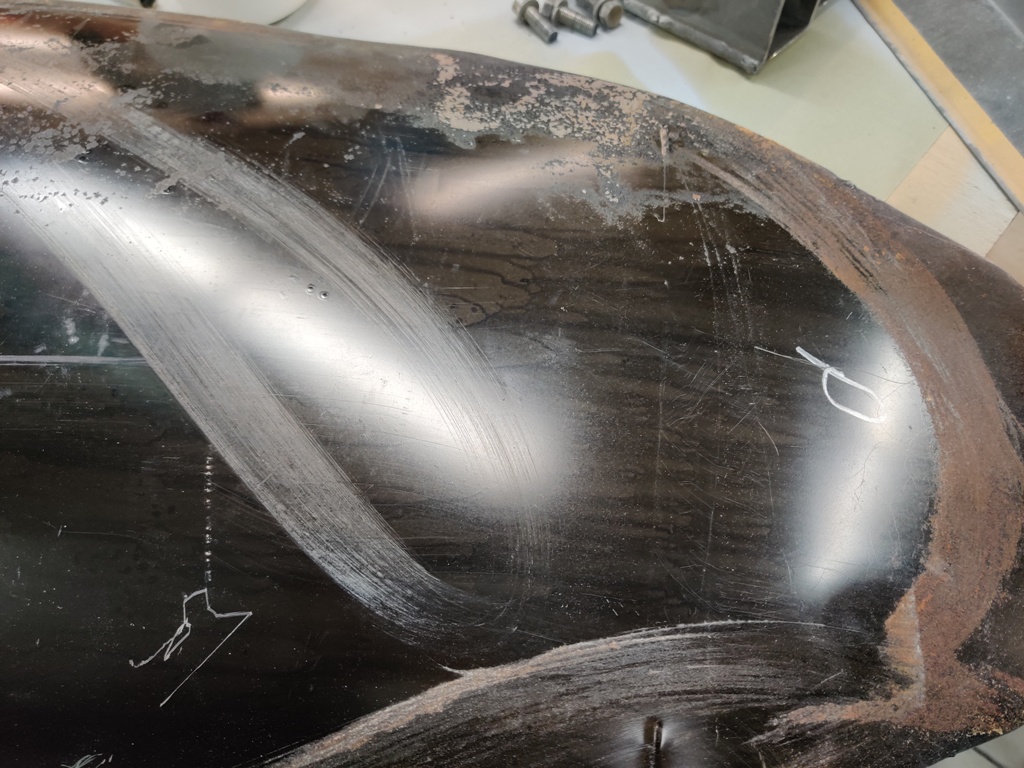
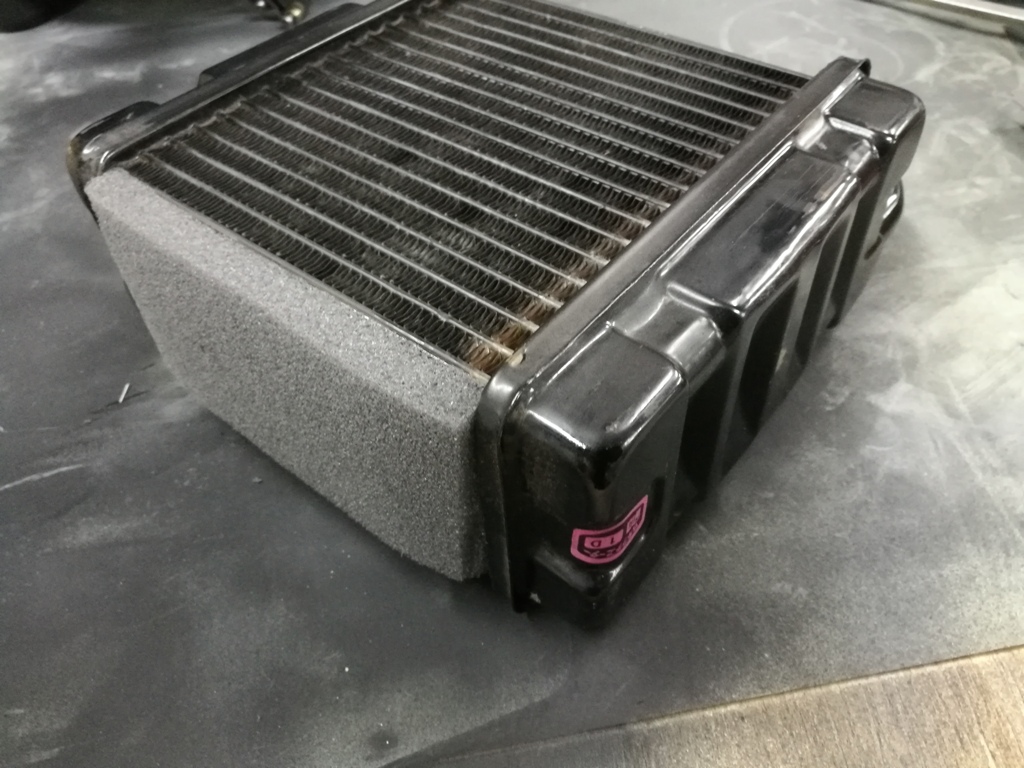
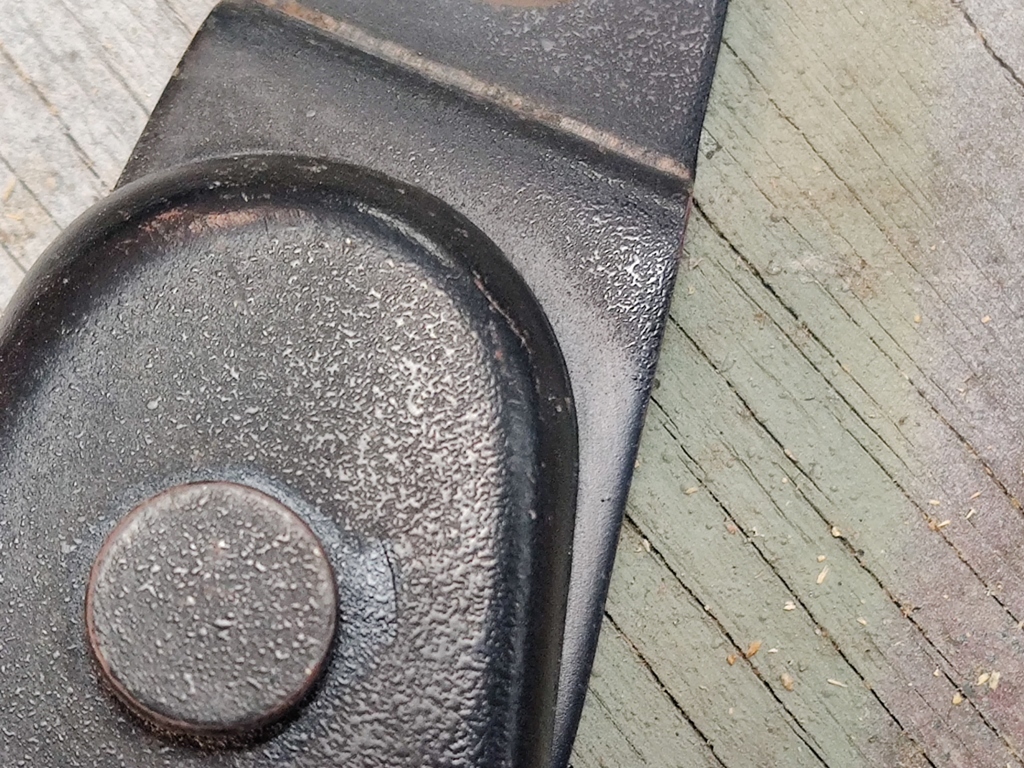
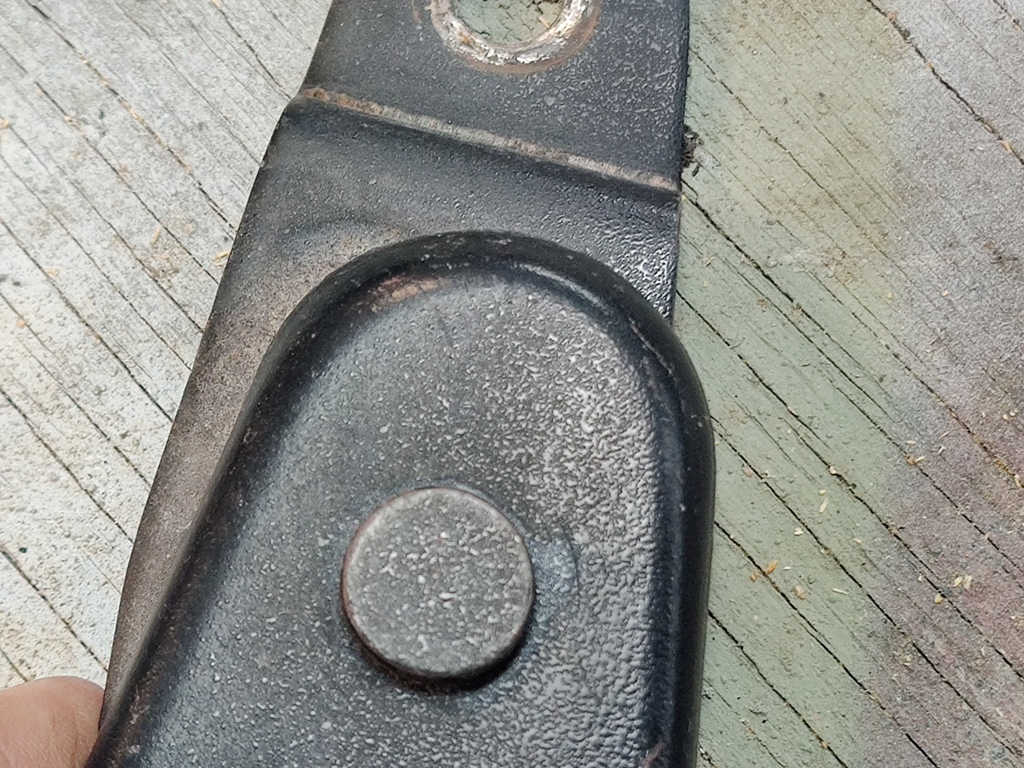
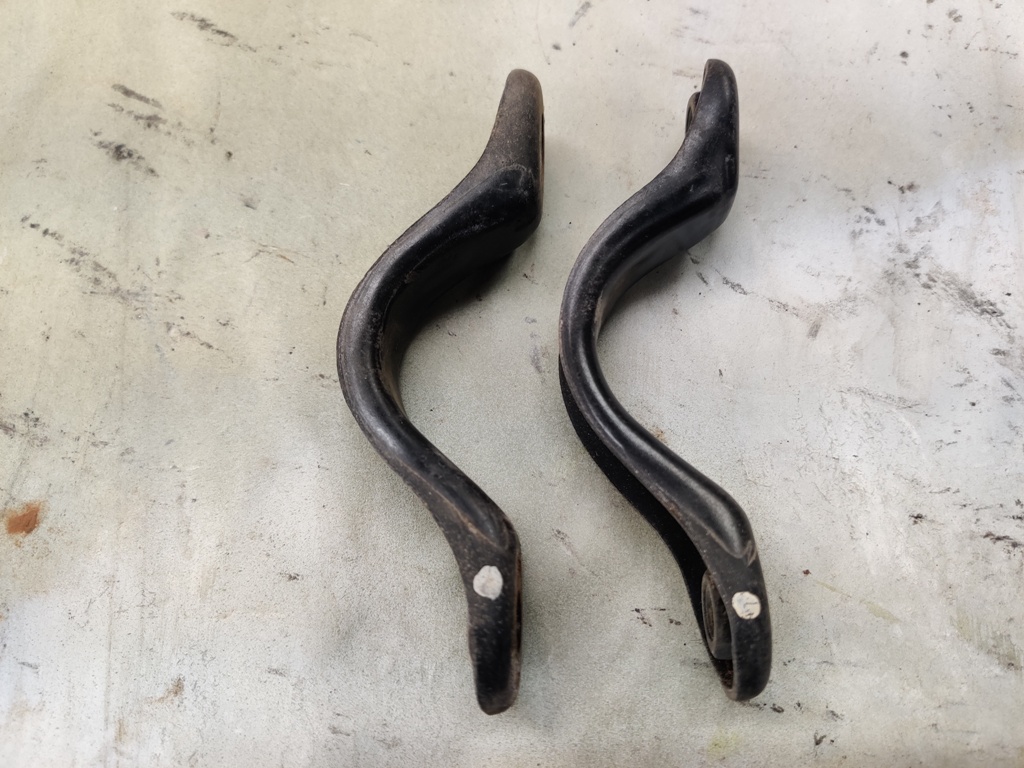
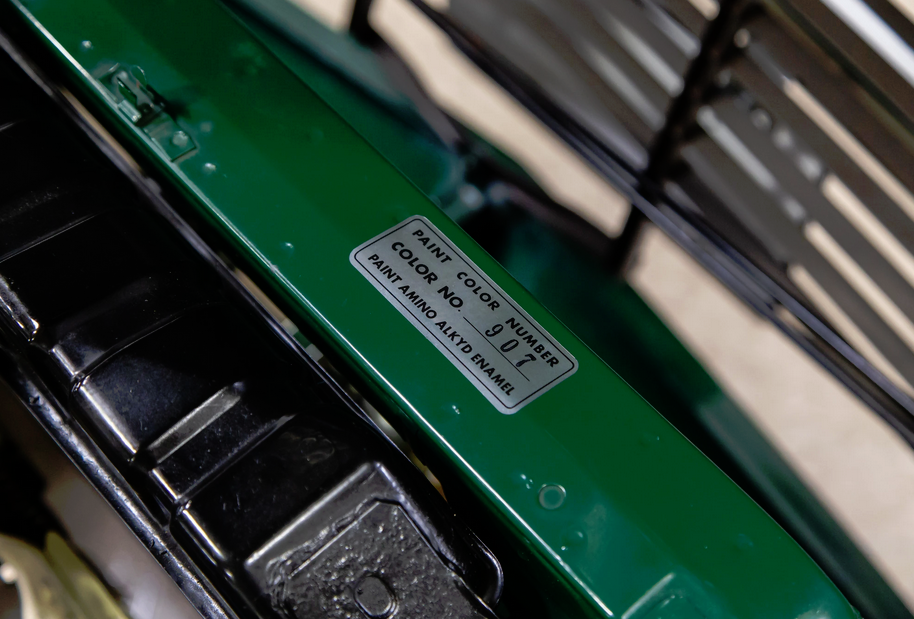
I located all of the following parts today, pulled them out of boxes and gave them a good look. Some needed a bit of filing... this and that - nothing major. The plan is to sandblast almost all of these items in a day, and prime and paint them the next day. There may be a few exceptions. For example, the seat backs are just thin sheet metal. Also, the torsion springs for the hood have some really durable paint on them - paint that laughed at lacquer thinner. I have never seen that before. But it clearly is paint. They are pock marked from road debris on their front sides, but not their backsides. A few other, more fragile pieces will get bead blasted instead. Anyway, if you see anything that is supposed to be black which is missing from my list, please say something. anti-roll bar anti-roll bar mounting brackets anti-roll bar mounting reinforcement plates battery upper frame brake booster brake booster one way valve mounting bracket brake pedal clutch pedal clutch slave cylinder differential belt arrestor strap brackets differential case differential front flange to driveshaft differential front crossmember - diff and front suspension mount differential rear mount - mustache bar differential rear mount - mustache bar washers with bonded rubber differential rubber isolator mount - front driveshaft engine mounting brackets engine mounting isolators engine oil pan front ball joints front brake backing plates front compression rods front control arms front crossmember front strut springs front strut upper mounts front strut upper spring seats front struts front tow hooks front wheel hubs gas pedal gas tank gas tank securing straps handbrake handle assembly (partial) hatch gas lift support bracket hood pull bracket hood tension rods inner front fender supports left and right air vent pull brackets lower dash mount brackets to tunnel pedal box (already painted) radiator rear axle shaft - inner flange to differential rear axle shaft - outer flange to axle/hub rear axle shafts rear brake backing plates rear strut housings rear strut springs rear strut upper mounts rear strut upper spring seat rear suspension brackets - control arms to vertical supports rear suspension control arms rear suspension crossmember - rear suspension mount rear suspension vertical supports rear tow hooks rear wheel axle/hubs seat backs upper seat frames lower steering knuckles steering rack housing steering rack mounting brackets steering rack stop bracket steering shaft with u-joint tie rod ends - outer transmission mount transmission mounting isolator Some pics: Surface rust removed from rear hubs by glass beading. Nice to see so little rust damage (first two pics). Plate behind hubs has an interesting grey coating (pic 3 and 4): Differential stub axles received no paint from the factory (pics 4 and 5): Stock springs... I need to search to determine what these paint marks mean. I recall something about location on the car... First pair: Second pair: I am taking note of different amounts of gloss on the various pieces. The dash vent control knob brackets are pretty glossy compared to the lower dash mounting brackets (pic 1). Most parts have a gloss level like this gas pedal, shiny, but not super shiny. (pic 2). Gas tank straps were originally gloss black (pic 3): More parts that were glossy but not very: transmission mount bracket (pic 1), seat back - note florescent light reflection is "dull" (pic 2), heater core (pic 3): Some interesting pics - the seat adjuster brackets seem to have been sprayed with a coat and this "spritzed" with another to give them a bit of texture: Steering rack securing brackets have interesting paint marks on them: Near the beginning of this restoration, I experimented with painting some parts black using different amounts of "flattening agent". The plan for most of these parts will be to utilized 10% to knock the gloss down. I have a suspicion that the flattening agent takes a few minutes to "work in". This pedal box was shot without any flattening agent, the steering rod has 10% and the mustache bar has 20 or 30%, can't remember which, but it is too much. I am looking forward to getting all these parts stripped and painted.


 2 points
 -
Surprised the mechanic let you/showed you this method. At least this explains the low compression numbers. If you can, do the test again with all spark plugs removed and throttle wide open. You'll get better results 🙂2 points
-
Thanks guys - very helpful. The springs were represented as correct for a 1972 240Z. Can I be sure that different springs will give me a diffent height. Will it eventually sit lower with time/miles? Can I get a better look (i.e. less gap) by changing the tires? @DatsunZGuy: Thanks for the data point1 point
-
1 pointhttps://www.automotivetouchup.com/touch-up-paint/nissan/1977/all-models/ These guys have the 305. Will be ordering a sample.1 point
-
1 pointThanks for sharing the picture. I have the same feeling. It is definitely light blue and not dark blue. #305 Light Blue Metallic it is then. I have decided to go back to the original. Will post pics once I am through paint. Next step I am planning blasting door hinge areas and taking care of cowl area surface rust which has been a pain.1 point
-
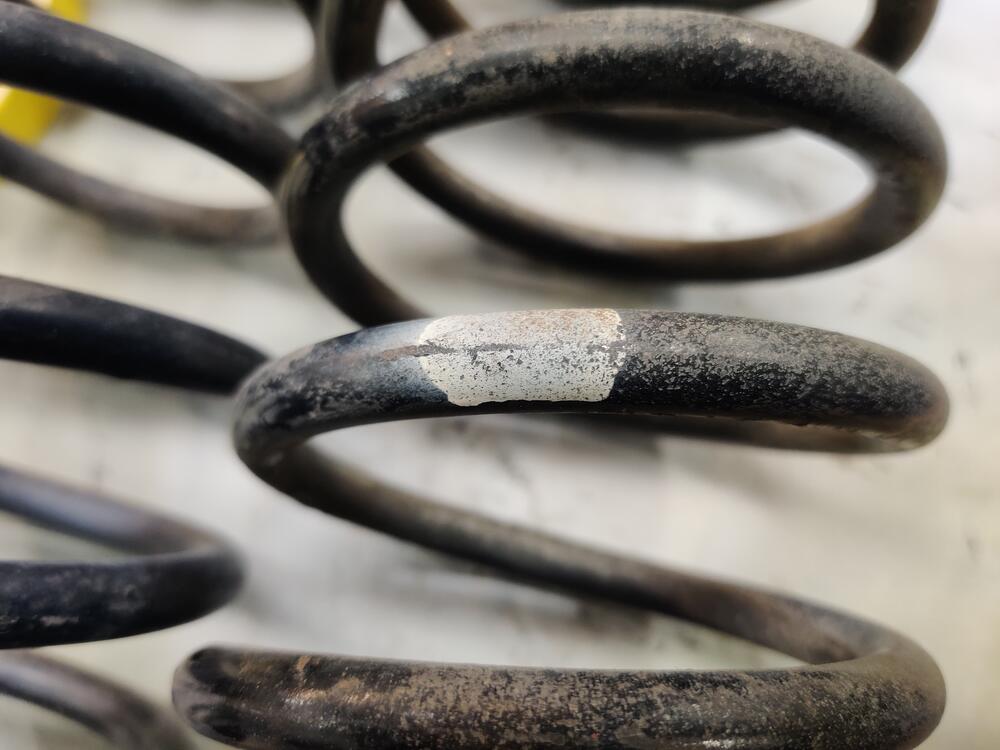
Found a post about the colors on the springs. Thanks @KatZ. I don't know if I am reading this correctly. So the two springs with one white mark only are rear springs for my car - HLS30. Looks like the part number is 55020-E4102. The front springs are the two with blue... I don't know what is different between the two. Perhaps the free length?1 point
-
I used a piece of chisel steel in a press and staked it in between the original marks. It's not as easy as it sounds to replicate the original staking. The uni-joint will bind up and you will need to press the cups out a fraction to give them some clearance to move freely. I have seen someone tack the edge of the yoke with a mig welder. Concentrating most of the heat in the yoke. These uni-joints rotate at low speed so balance is not an issue.1 point
-
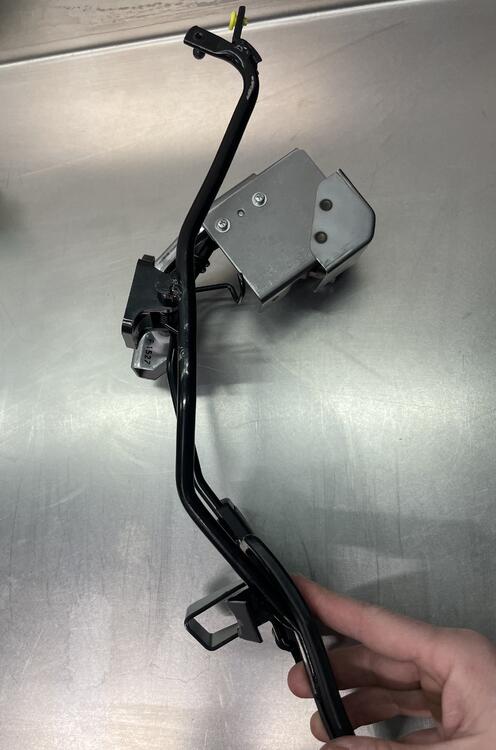
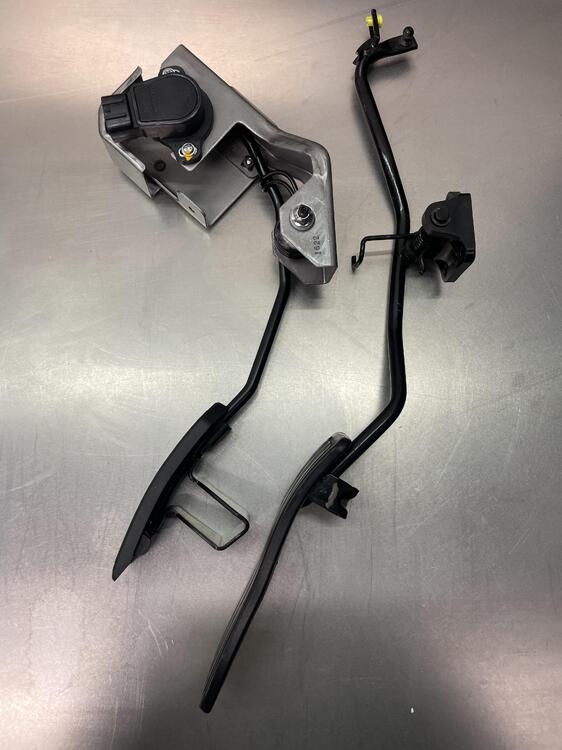
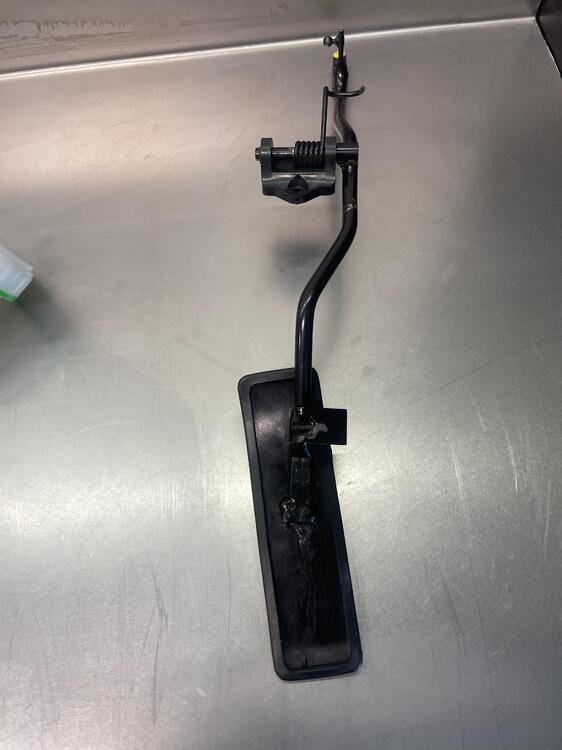
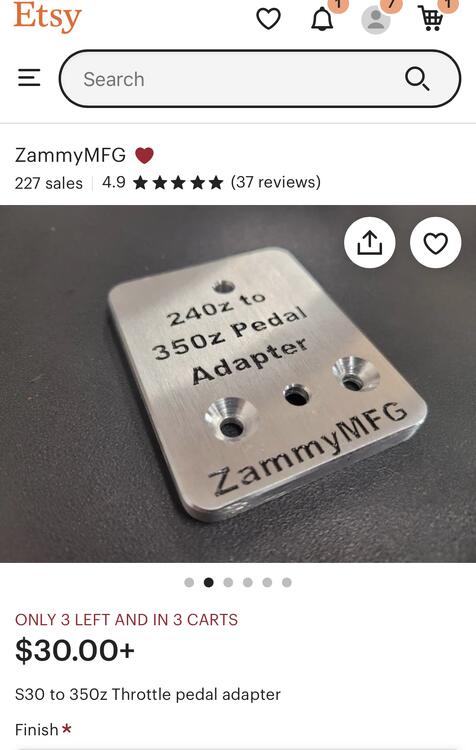
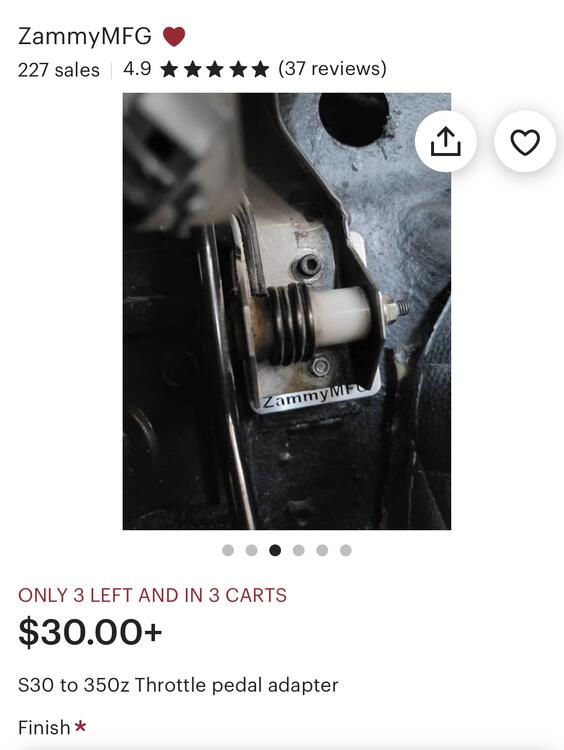
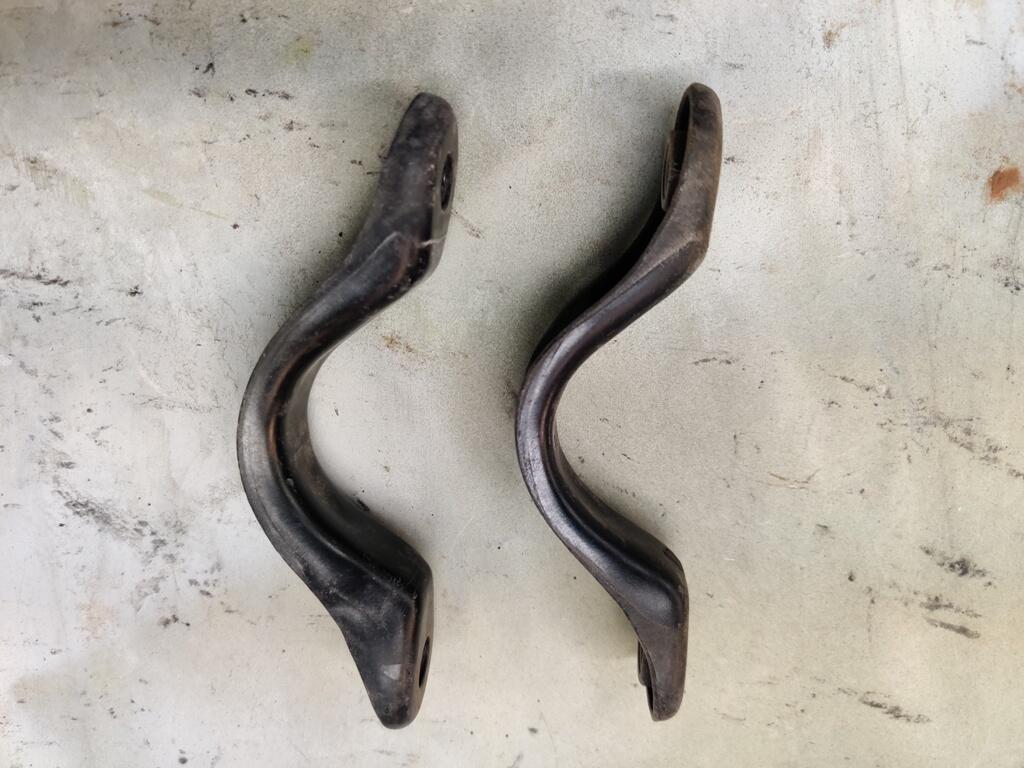
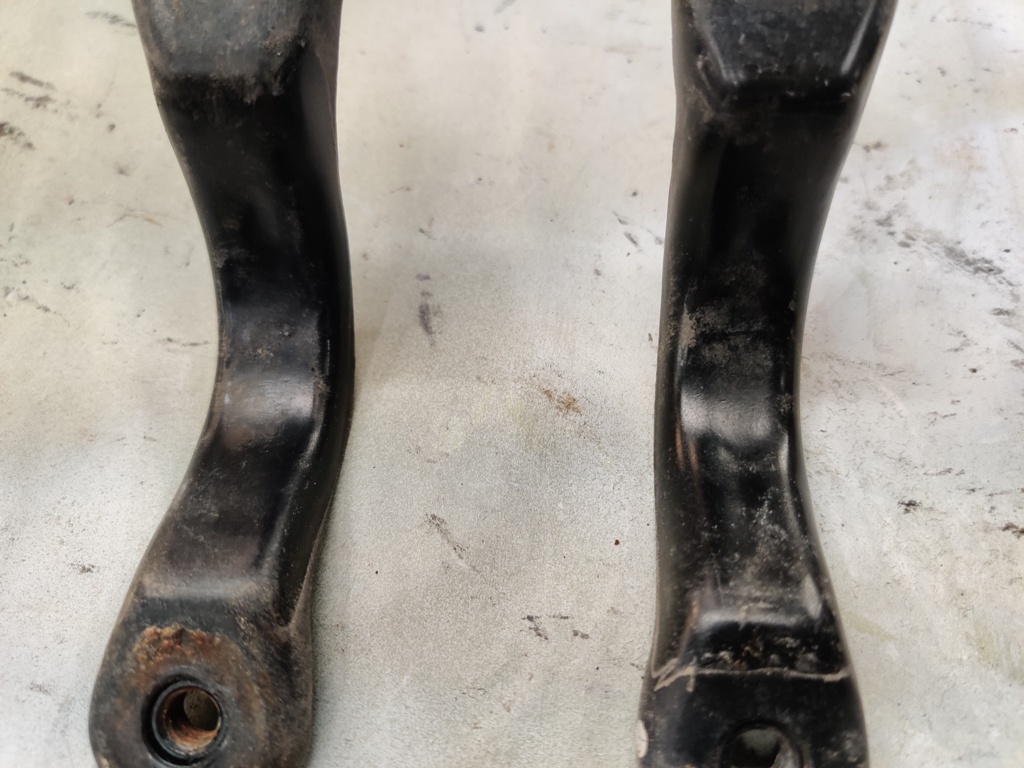
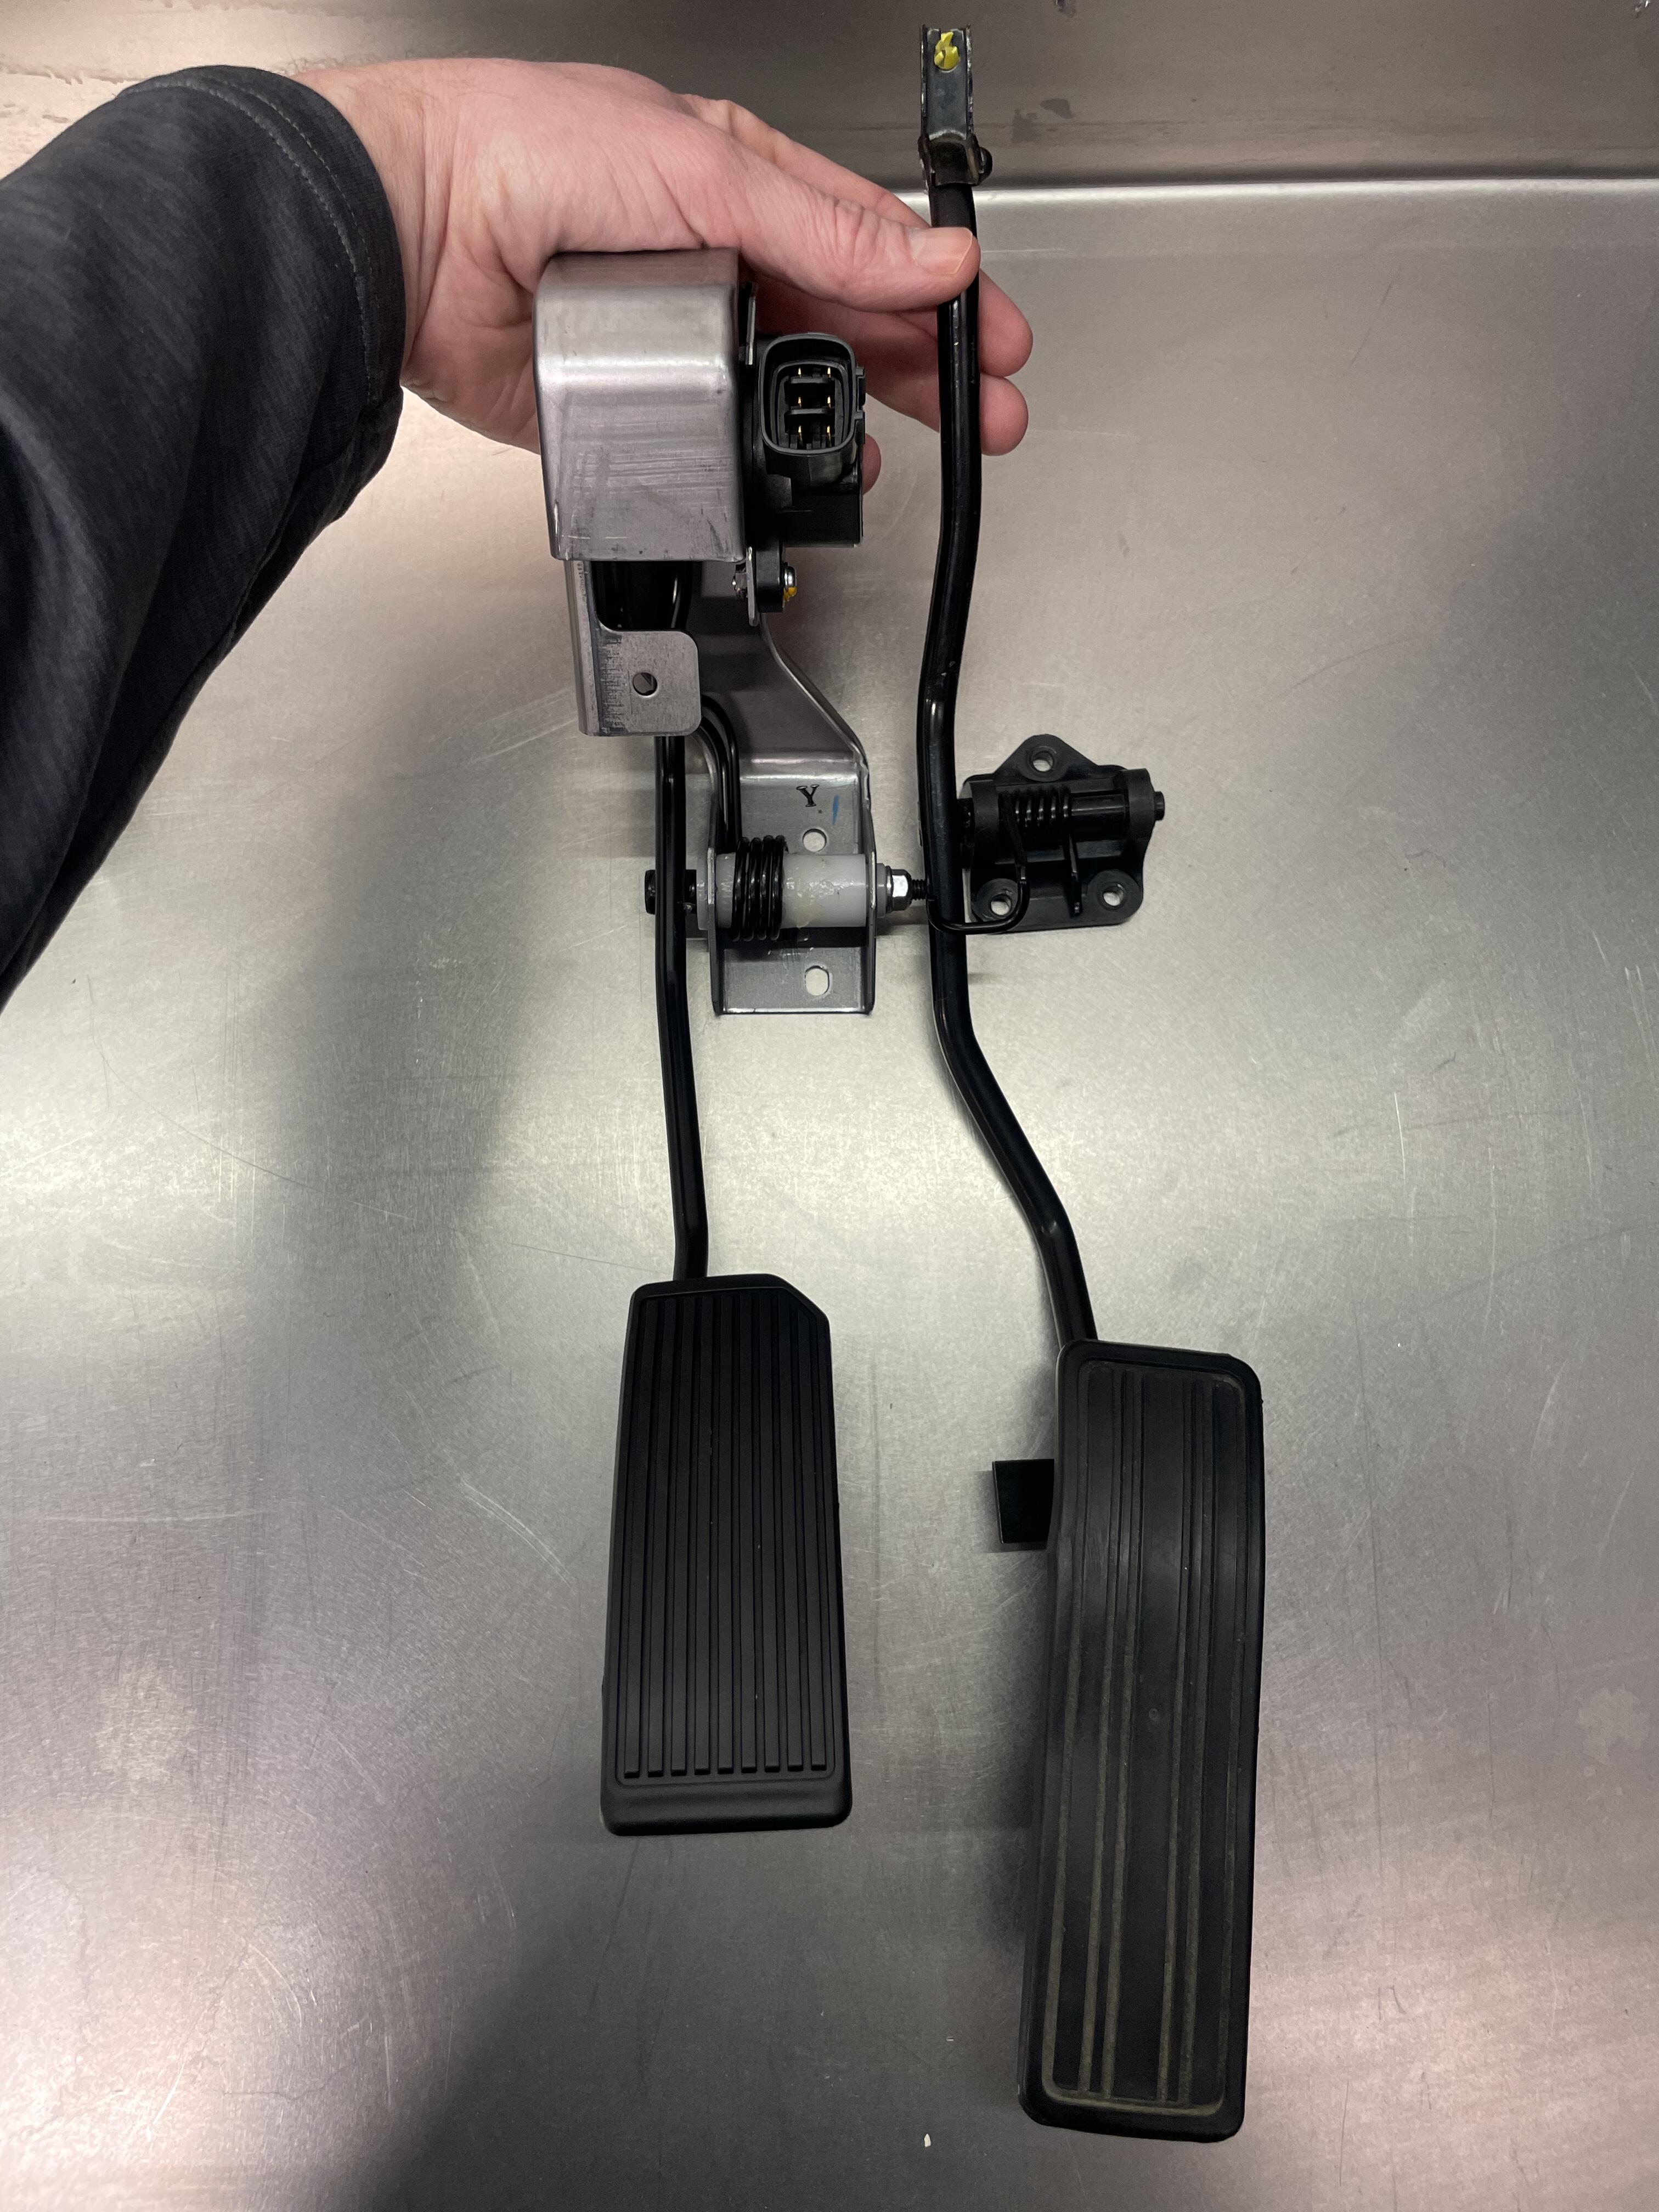
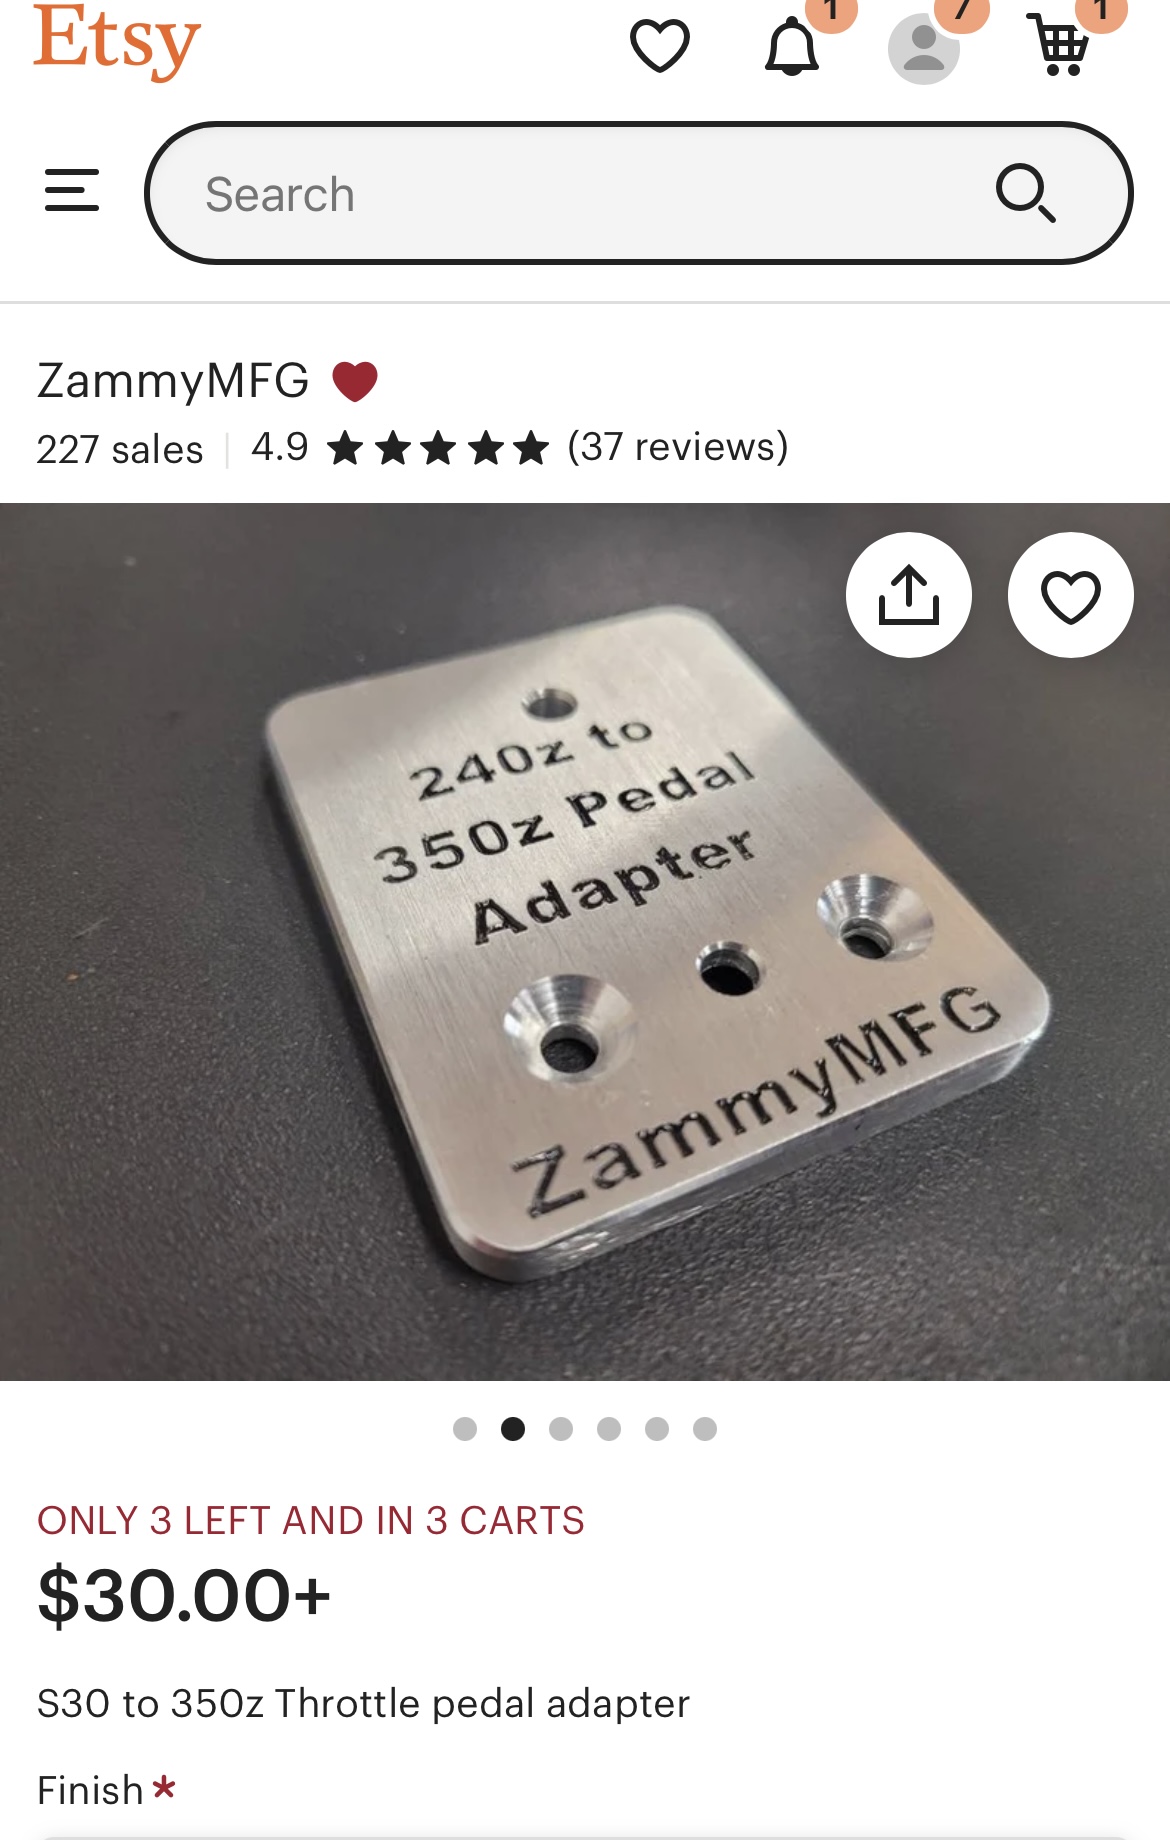
1 pointWell I’m 99% sure I’m going DBW(drive by wire) on my ITB setup. I will be swapping ecus when I get Larry Asp new injectors at the head intake. I was googling DBW pedals and I thought the 350z pedal box looked mighty similar to the 240z one. I got one to check and wow it’s close. I love when manufacturers don’t stray too far from designs. Then googling some more and freaking Etsy sells a direct mount for it! Now I need to change the pedal pad to look stock, and powder coat the housing. But it should be a very simple mod/ install. This will unlock cold starts, progressive throttles and a host of other things like torque control etc… This is all Aaron Neubauer fault for posting about Emtron and their neat tuning method throttle mass flow.

 1 point
 -
1 point
-
1 point
-
1 point
-
1 point
-
1 point
-
1 pointHi DuffyMahoney. I'd be interested to know if you put together a "Guide To Injection" type of document for the conversion you did to your Z. I just recently acquired a 7/71 DOM 240Z with the original 240 L24 motor (with a few upgrades) and would like to convert to injection. But, I haven't really found a good tutorial that has a parts list and step by step guide....I don't really know all that much about fuel injection other than how it works. But for this motor and these cars, I know a lot of people have accomplished it. Anyway, nice work on your Z. It's really incredible! Here's the Bring A Trailer link to the one I bought. https://bringatrailer.com/listing/1971-datsun-240z-244/ It didn't sell at auction, but I tracked down the owner and bought it. So now it's going to get some (more) loving attention. Thank you in advance sir!1 point
-
1 point1 point1 pointNobody cares each length. You buy 10 foot for less then 10$ take one hose out cut the length put it in and done.1 point0 points


Important Information
By using this site, you agree to our Privacy Policy and Guidelines. We have placed cookies on your device to help make this website better. You can adjust your cookie settings, otherwise we'll assume you're okay to continue.