Leaderboard
-

Racer X
Free Member4Points1,877Posts -

siteunseen
Free Member3Points15,115Posts -
emccallum
 Subscriber
 3Points428Posts
 -
Zooter71
Free Member2Points6Posts


Popular Content
Showing content with the highest reputation on 02/24/2023 in all areas
-
3 pointsWhile not a Malibu, my 95 F150, Eddie, has cost me less than this Malibu cost Mrs. Racer, and I’m happy to drive it anywhere, anytime.3 points
-
Typing to twisting wires! Hope the weather gets better soon. Down here cold equals kids. I bought a heat lamp when I was 15.3 points
-
2 pointsTurning an old car from carbs to EFI isn't super simple, also nobody tends to do it the same way. That is why there is no how to, I also don't want to write such a thing. I would consider myself a newbie at best. Why do you want efi? Su carbs are awesome and highly underated. If I was smart, I would put mine back on. Going ITB, has been extremely challenging. Luckily there is more info now and new ecu's are coming out that address some of the issues with ITB. A few things to think about. All of these can be solved with money, if you have it. How will the ecu know what stroke it's on? There are a few ways to do this, cam trigger, crank triggers, flywheel etc.. Plenum or ITB What ECU Are you good at wiring? Whats your end goal?2 points
-
2 pointsHi DuffyMahoney. I'd be interested to know if you put together a "Guide To Injection" type of document for the conversion you did to your Z. I just recently acquired a 7/71 DOM 240Z with the original 240 L24 motor (with a few upgrades) and would like to convert to injection. But, I haven't really found a good tutorial that has a parts list and step by step guide....I don't really know all that much about fuel injection other than how it works. But for this motor and these cars, I know a lot of people have accomplished it. Anyway, nice work on your Z. It's really incredible! Here's the Bring A Trailer link to the one I bought. https://bringatrailer.com/listing/1971-datsun-240z-244/ It didn't sell at auction, but I tracked down the owner and bought it. So now it's going to get some (more) loving attention. Thank you in advance sir!2 points
-
2 pointsThe upper knob is what I have on my 7/70, used up to 6/72. The more rounded one is used after that for 240's. There are other versions used on 260's and 280's. If I'm not mistaken the later ones used on 280's (maybe 260's) are just push on and don't require a screw. The push on ones also work on the 240Z controls, I have a heater control set from a 12/70 parts car that has them. Must have been installed by the previous owner. The pic above is from @hls30.com in this old post:2 points
-
2 pointsMaking some progress putting it back together. I didn't like the way the fender and hood fit, so I decided to paint the inside and put it together enough to get it to a frame machine. Then go after the exterior bodywork. Not the ideal, but it is the next right thing to do. Two things I have learned over the years: You cant take too many pictures and never throw anything away! One other thing, aftermarket is never as good as the original.
 2 points
 -
Greeting from freezing western Canada in February. When things get cold and you can’t drive, I spend the winters working on garage projects and this year is no different. Last winter I did a restoration on the latest 69 510 sedan I found, trying my dang-dest to do a as close to stock restoration as I could stand for a change. This one was kinda special, one owner, low miles, low rust and great backstory. I won’t share any of that story in this thread. Just suffice to say I had a hankering to drive a stock 510. Got it done and started driving it last fall, spent all of 2 months putting some miles on it and loving most of it. Gentle ride, decently quiet exhaust. Snappy little L!8 SSS motor. Ok, THAT’s not stock but it’s OEM un-modified SSS L18. So it was stock in SOMETHING, okay? Fine….. Then the first blast-O-winter hit Alberta in November and in the garage it went cause it had two problems. Noisy transmission in 5th and REALLY BAD seats. You think stock Z seats aren’t “perfectly comfortable and supportive”? Well 510 seats are AWFUL for long trips and or any sort of performance driving. Yes I had a very low mileage set that I restored to lovely appearance and function, but…… And so it began. Will I be able to restrain myself and limit the “upgrades” to just the barely acceptable minimums or will it get out of hand? Do I really have to tell you what happened?1 point
-
Compression test first of course. Leak down test after that if the first test isn’t conclusive. My 2 cents..1 point
-
1 pointI've been a first time owner of a 71 for about two years and just now getting around to doing some things I've had planned due to recent back surgery. Every time I have an idea on what to tackle next I come back to this thread and use it as a guide to how to do it right and what it should look like. Amazing work, some of the best I've seen in my few years catching up to this hobby.1 point
-
1 pointHave you examined the voltage regulator? Just to be sure that nobody has messed with the wiring. It should be under/inside that shelf that the fusible links blocks are attached to, protected. A small metal box.
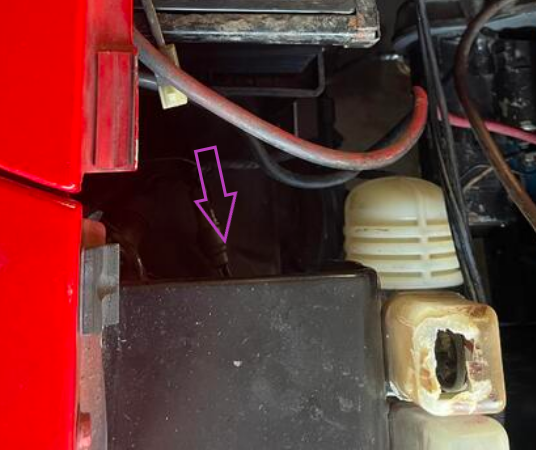 1 point
 -
1 point
-
1 pointHi Richie, Patcon's photo shows the correct shield. Nice that new replacement shield is available. The ZCarDepot catalog mentions use of stainless steel screws too. The shield I purchased off of eBay shows its age and matches the "52 year old" inside of my Z's wheel well. No painting required. Your Fuel Line/Filter Issue: The other question was back to my actual problem of starting after a few days of sitting. Another newbie I'm sure. I pretty much can predict the problem because I can see there is no fuel in the filter and the fuel level has probably dropped back down into the hard line. If i see fuel in the filter it seems to be fine. Is it normal for the fuel to drop like that after a few days of idle? Is that drop some indication of pressure loss somewhere even though I don't see any significant leaks? Response: I'm assuming your fuel filter is mounted on the wheel well next to the trouble light. Fuel is sucked from the tank and out through the top of the filter to the fuel pump, then to the two carbs. I would assume the loss of fuel in the filter (and unprimed fuel pump making the engine harder to start) is from an air leak between the carbs and the fuel filter output. 1. Are the fuel line hoses clamped tight? Sometimes hoses clamped too tight compromise the hose, leading to fuel or air leaks. 2. How old are your fuel hoses? My Z had six year old hoses that were junk. Dry and brittle, plus clamped too tight. 3. Check the carbs for air/fuel leakage. Check the short hose under each carb too. They can get brittle from exhaust manifold/header heat. Check for drips after running the engine, but only service the hoses with a cold engine. Replacement hoses are available from ZTherapy. The hoses are unique, but inexpensive. Do not use any other type of fuel hose. Try to salvage the wire hose clamps for reuse, but ZTherapy does provide a different type of clamp. 4. What about the fuel pump? They seem to last a long time, but maybe there is an air leak. With a good quality screwdriver, try tightening the 11 screws on the pump. Just be careful to not damage the screw heads. 5. After completing your fuel tank hose work and checking 1-4 above, if there is still a leak that drains your fuel filter (and probably your fuel pump), consider rebuilding or replacing the fuel pump. ZCarDepot does have a couple types of replacement pumps. If you want to keep the Z original, you can also rebuild your existing Nikki pump, using internal parts from a similar Nikki pump. Good luck with your project! Nate1 point
-
1 point
-
1 point
-
1 pointI like how they have the audacity to call that a Malibu. I drive a 2019 International medium duty commercial truck for work, and about every 3 months a fuse in the battery box blows. The fix: carry extra fuses and a box wrench. I'll bet you could buy an old Malibu from our beloved Beverly Hills auto club and it would be more reliable haha.1 point
-
2. Speedo Upgrades The issue here is the ever changing differential gears and tire selections we just can’t help making. The limited choices of transmission pinions gear tooth counts means you might get close, but you will never be very close….. Well, there is a cure. Actually many cures GPS Speedometers. These have been around for a while a. Cheap dash mounted little box that displays speed. Amazon is loaded with options. b. Your cell phone. There are 150 free speedo apps out there. Did I say free? Hardly easy to use in continuous and easy fashion though c. Dedicated aftermarket gauge manufactures. Speedhut, Dakota Digital and others. Seen and owned the Speedhut GPS speedo for my Z, it was great. There are now shops making 3D printed mounting rings for Z’s for all 5 holes. Fabulous. D. Here is where it gets interesting. In my 69 510 (same issue for 68), I do NOT have a round speedometer. It is an old school rectangular sweep speedo. See pic below (not my car, 68 actually but ~same as 69). I love it, I want to keep it, but there are no aftermarket options for this style of electronic speedo. So I start searching for solutions. Step one was DIY stepper motors. Pun intended. Cool stuff. You tell a motor EXACTLY how fast to move, or even better, where to EXACTLY STOP at whatever rotation position you like. How do you think all the OEM’s have been building their instrument clusters for 1000 years? How do you think Speedhut and others build THEIR gauges today? But you say “how can a simple backyard mechanic figure out how to get this electronic gizmo’s to work?” Well it turns out that while we have been toiling in the garage and watching Bachelor in the evenings, the engineering world has been invented a huge range of DIY electronic packages designed at the “young” to get them into robotics and STEM learning. Search ARDUINO or RASPBERRY PIE on youtube. You will spend countless hours saying “OMG” to yourself…… Let me sum this up. After spending $50 bucks in boards and bits, and investing 15 minutes watching a YouTube video, I had a working tiny stepper motor (actually a 2$/100 generic GM instrument stepper motor) driven by a square wave frequency input (more on that in a minute) moving a toothpick speedo needle to anywhere I decreed. FM! Now I have to admit to being a actual engineer (EE) and this stuff ain’t completely new to me so it was “easy” for me to make this leap, but I just didn’t understand the breadth and scope of what is truly EASILY possible now. This leads to the following revelations. Got a fuel gauge that doesn’t match your new fuel sender in your new tank? No problem. Don’t want to spend the current insane $500 USD and up to find a used and rare stock tach for your 510? Make you’re own…… Now I’ll show the next link in this chain, The VSS. Vehicle speed sensor. To drive all this fancy stuff, you need to have a digital signal that tells you have fast your driveshaft is spinning (needed for cruise control too!) Well there is this cool little device, available from ProTunerZ. I first tound it years ago through a Toyota 4x4 supplier. https://www.marlincrawler.com/transfer-case/parts-upgrade/misc-hardware/vehicle-speed-sensor-mci Turns out the threads on the toyota tranny’s speedo cable pinion is the same as Datsun. Screw this little gem on YOUR speedo pinion add 12v and a 1K resistor, and you get this lovely perfect 12v 50% duty cycle square wave output at a frequency 4 times the pinion rotation rate. For $28 buck.s Yeah. BTW, the gear ratio of YOUR speedo pinion is computed by dividing 6 by the # of teeth on whatever pinion you have. 6/16 (yellow 16 tooth I think) is .375. So at 3000 RPM driveshaft speed your pinion is going 0.375 times slower. Use your tire circumference and diff gear ratio to compute Rotations per mile.

 1 point
 -
I’m watching with the necessary accoutrements.
 1 point
 -
1 point
-
1 pointDid some reading last night on paint for the rear light surround and grill. After a couple of hours of interesting threads, I decided to go with Duplicolor dark shadow gray. The cap looked a little lighter than I thought it should be, but I trusted the forum and went with it. Once I saw it on the parts it was like being back in the 70's. Very close to what I remember. Going to use a clear matte over it. I have decided its good to be a gamecock fan (even though my kids go/went to Clemson) as there is no need to watch the entire game. Its usually over by half time 🙂 and I can get back to the shop.

 1 point
 -
1 pointHave to add my 2 1/2 cents to this thread, as the lucky new owner of this beautiful automobile. cw240Z72 is not only a master craftsman but a great guy, having had the pleasure to meet him at his home/workshop this week. Who but a mechanical engineer could do computer based drawings and 3D printer recreations of hard to source parts?! Too nice to drive.....but too bad! This car is going out on the road, and down to the local cars and coffee in the near future. Then "date night" with a girl I've known for a (long) while. Eagerly await delivery..decided I'd better not drive it home during the winter months. And thanks to all who posted here along the way.1 point
-
1 pointOk, so today I ventured out in a new direction. A container of wintergreen oil. About 4 oz of oil in 3 gallons of oil. Ran it over a propane burner. It never really boiled sort of simmered things for about 45 minutes. I started with a gas cap seal. It was really hard when I started... This is it when it came out So then I stepped up to a filler neck. These are really hard. I suspect the gas fumes make the rubber hard. These were too hard to get back into the chassis So simmer for about 45 minutes. Had to turn it over because it was too tall for the pot. Results were fabulous!!!! Indulgences for the videos. It's my first try at "You tube"1 point