


Leaderboard


 Subscriber

.JPG.cfcada9cf1c1b502df3f5f2f2ca3ff36.JPG)

Popular Content
Showing content with the highest reputation on 01/31/2023 in all areas
-
3 pointsIt would have been a good idea to talk with the guy before going to all the fuss you’ve gone through at this point. You would simply relate the concern and allow them to respond. I suspect the rebuild cost a few bucks, and you work hard for that money. You have every right to expect a quality product, eh? Should you decide to talk with the guy, don’t tell him all that you have done so far, as that would cloud the issue. Simply let them know that you have a concern about low oil pressure, and let them decide how they will address it.3 points
-
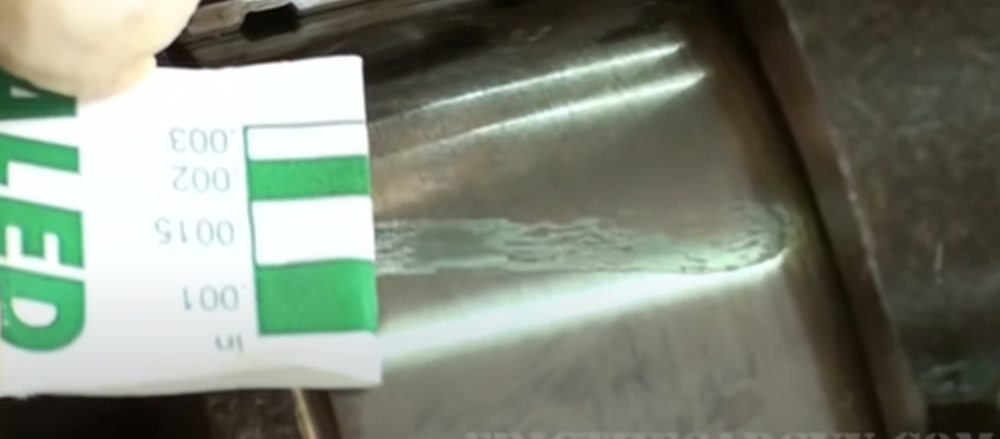
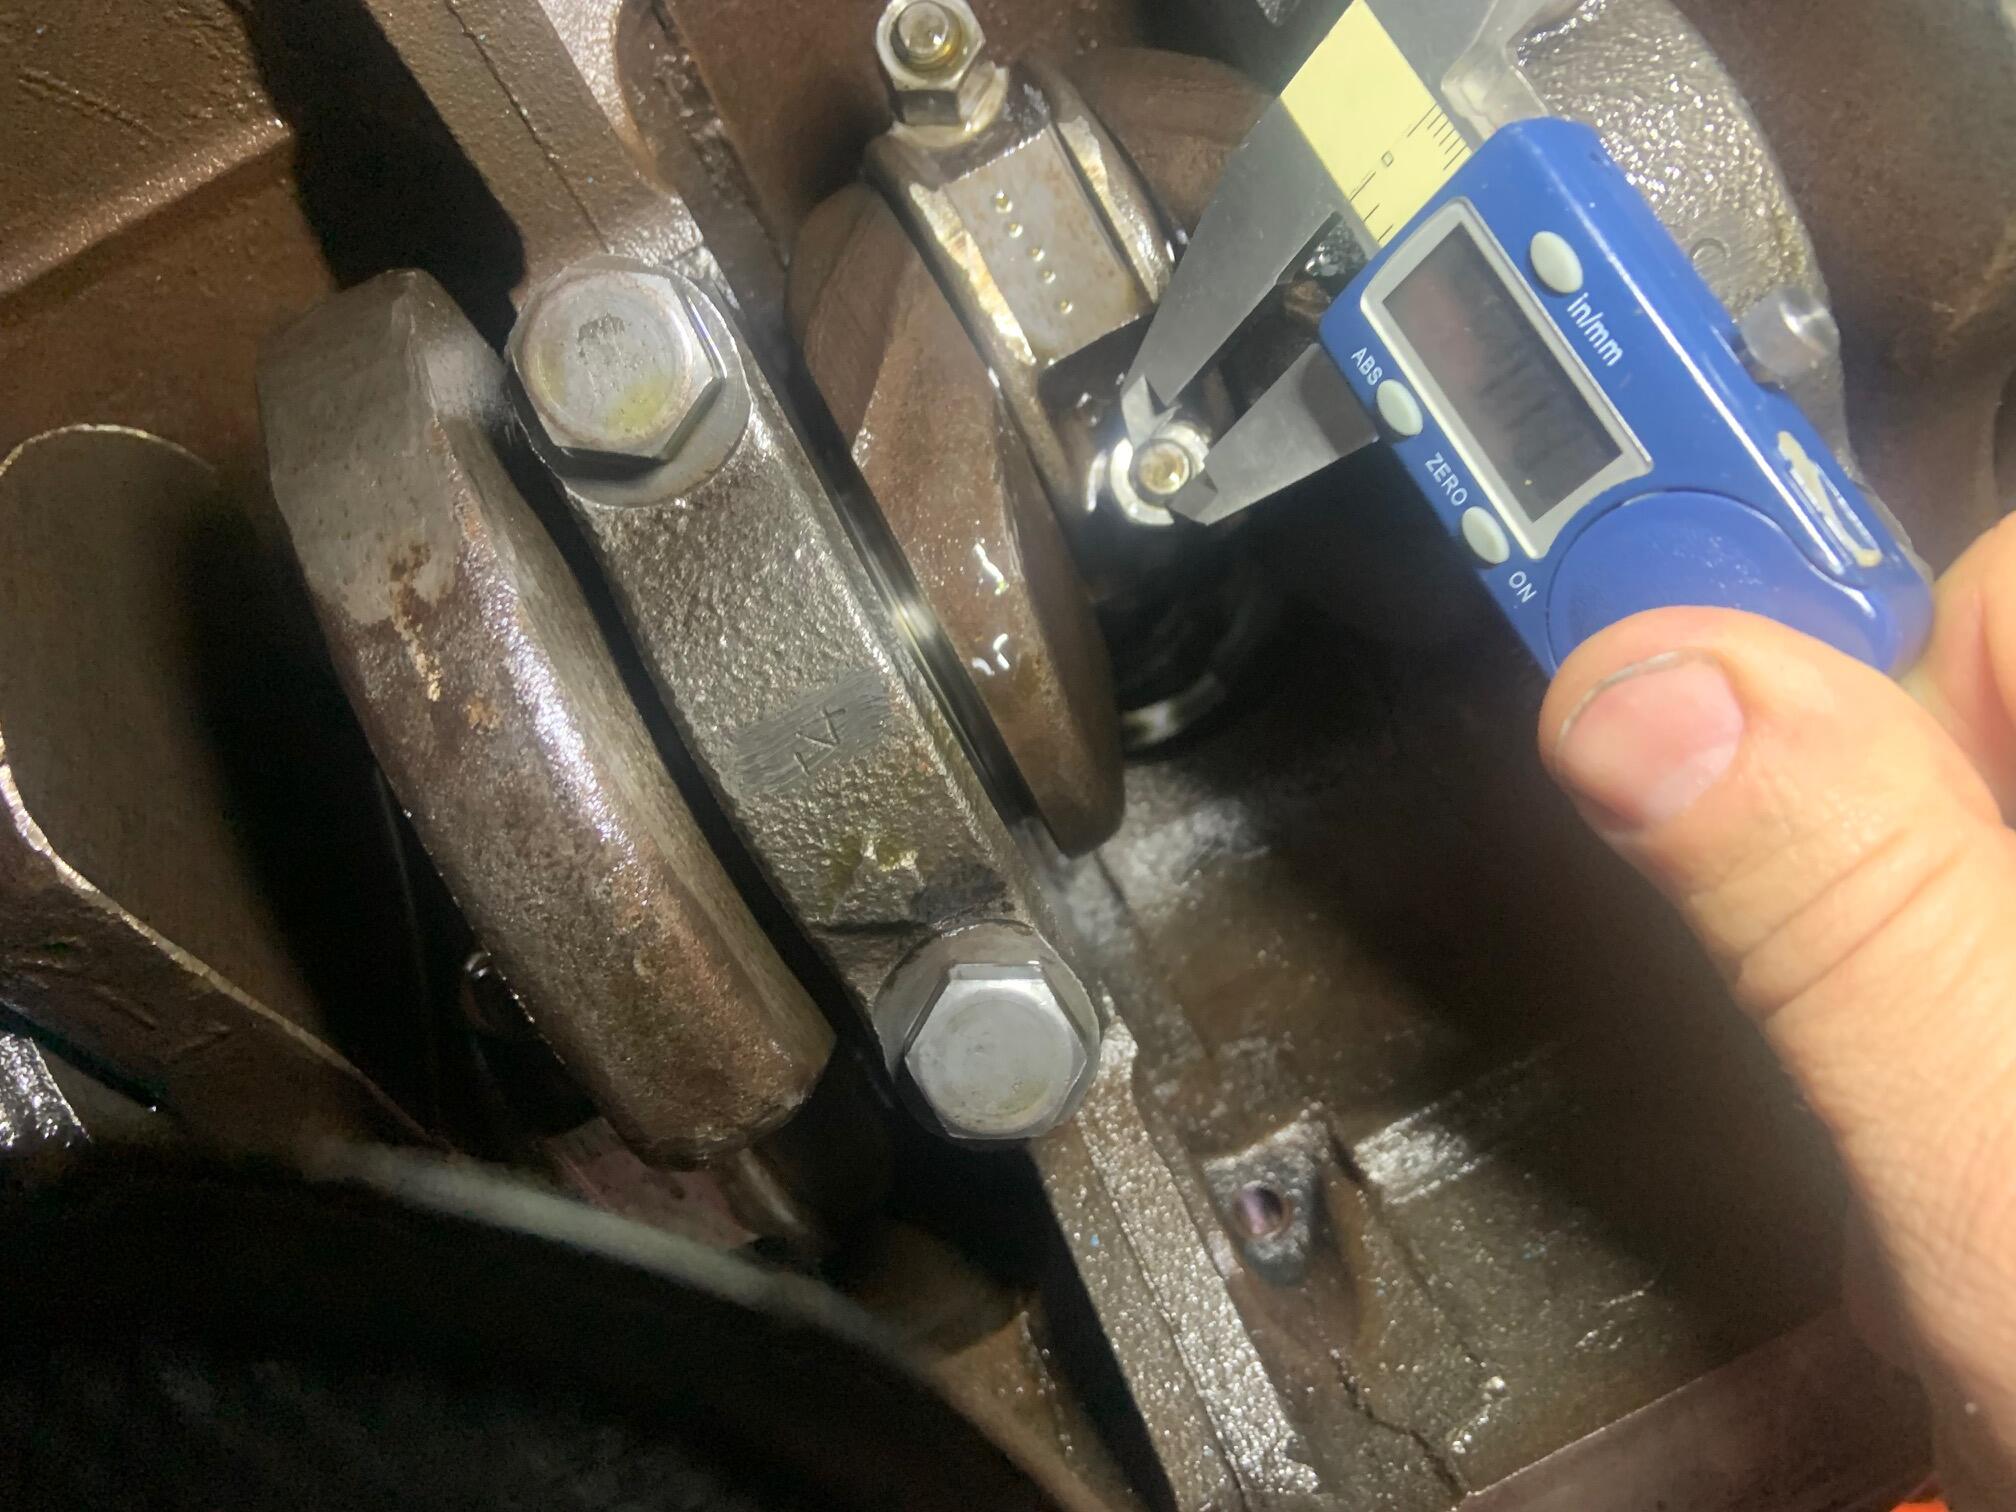
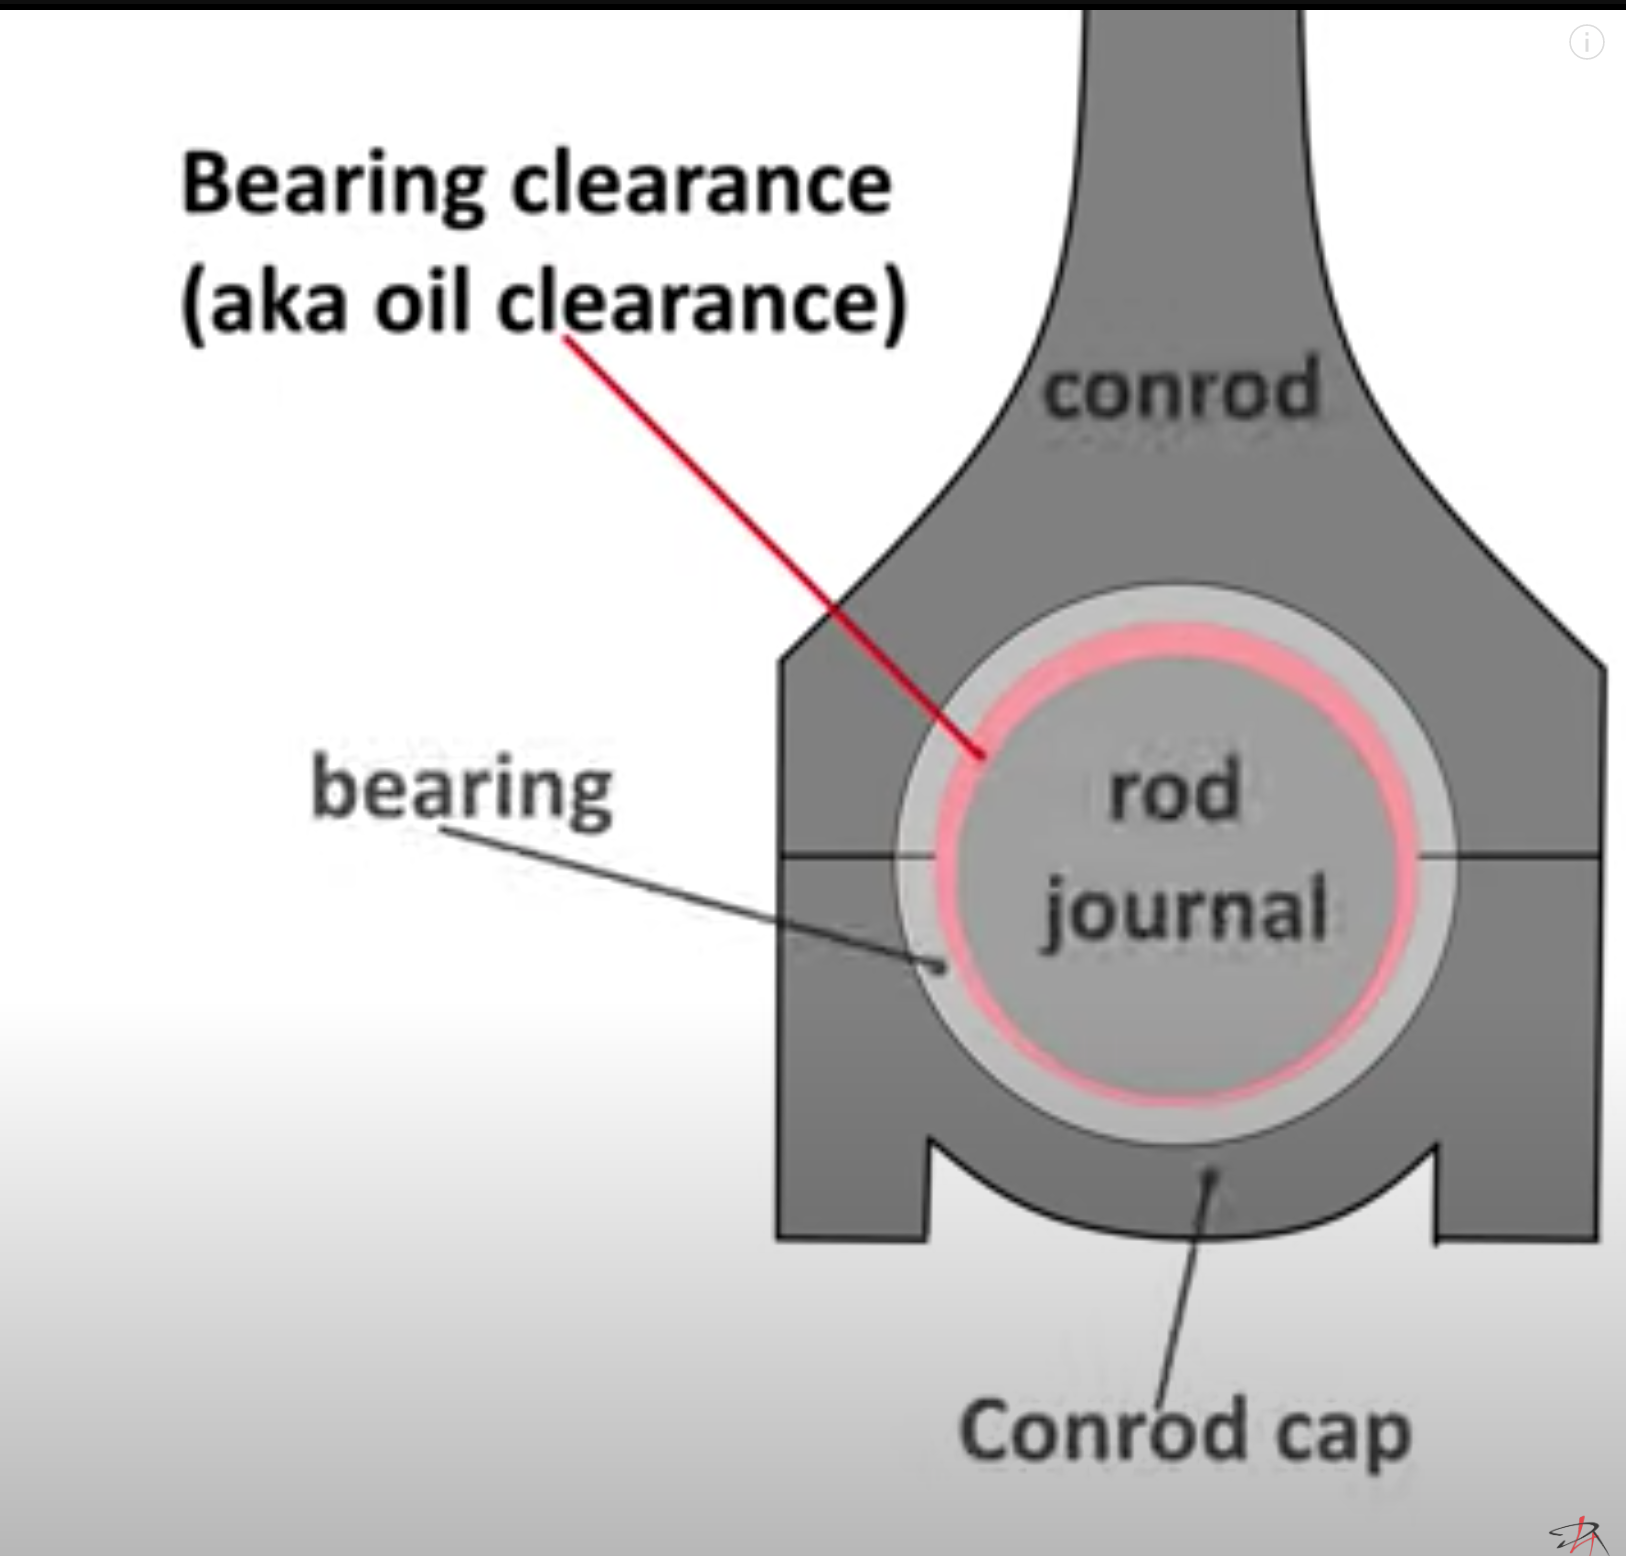
2 pointsi am watching lot of how to's on measure spacing with plastigauge. Just watched another video. can anyone confirm this is how they measure using the paper instrument? A micrometer? Also, 1) what are the torque specs on conrod bolts you use? On internet i found between 33-40 for 9mm and 20-24 for 8mm. How would i know which to use? i checked the preset torque range from front to back and they ranged from 30 to 37 ft lbs. i took a micrometer diameter of the bolt, like in image below. It was around 7.6ish mm. Would appreciate insight as this will let me know the torque i need to put them back at 2) what should be appropriate bearing clearance? After sleeping on it...i think i am gonna try to do this. never opened my torque wrench so might as well. Just need to run to oreilly's for the plastigauge.
 2 points
 -
The yellow paint marks were applied to certain fastenings that were part of the production line process at Nissan Shatai's Hiratsuka plant. Since the differential wasn't assembled at Hiratsuka - same as the engine and transmission - the guys on check duty at Hiratsuka would most likely not have been tasked with checking & marking them. As for self-locking nuts, I should imagine the guys tasked with checking and marking them were making sure they were (A) present and correct and (B) torqued to spec.2 points
-
2 pointsI'm kinda confused by a couple things. First is... What are you considering a "new method" for sealing? If the new method is the use of steel bushings pressed into the carb body, then you are mistaken. That's not new. That's how the carbs have been produced all along. Steel bushings pressed into the bodies, and (presumably) honed to alignment and size after being put into place. In other words, the carbs never ran the throttle shafts directly against the soft aluminum of the body. There was always a steel sleeve in there. Second thing that confuses me is... Why?? I mean, I see there are clearly impact marks and someone broke both the body and the steel bearing with an inappropriate amount of poorly aimed force, but why? What would make someone resort to hammering on the end of the throttle shaft? Was it stuck SO bad in the body that was the only way they could get the shaft out??? Why???2 points
-
I found some similar boots when I searched for RC boat parts like this on eBay.2 points
-
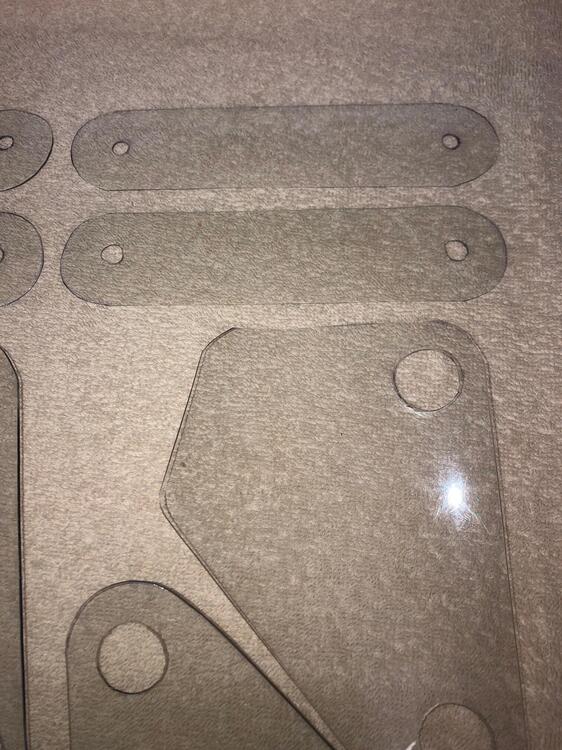
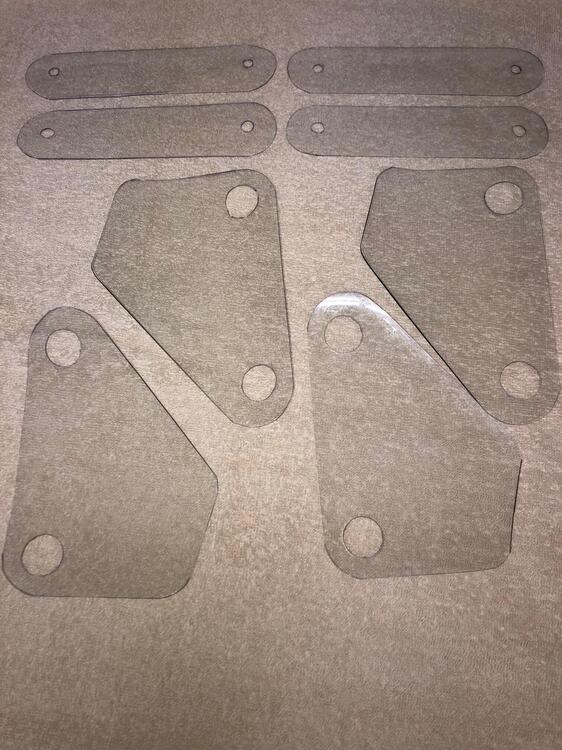
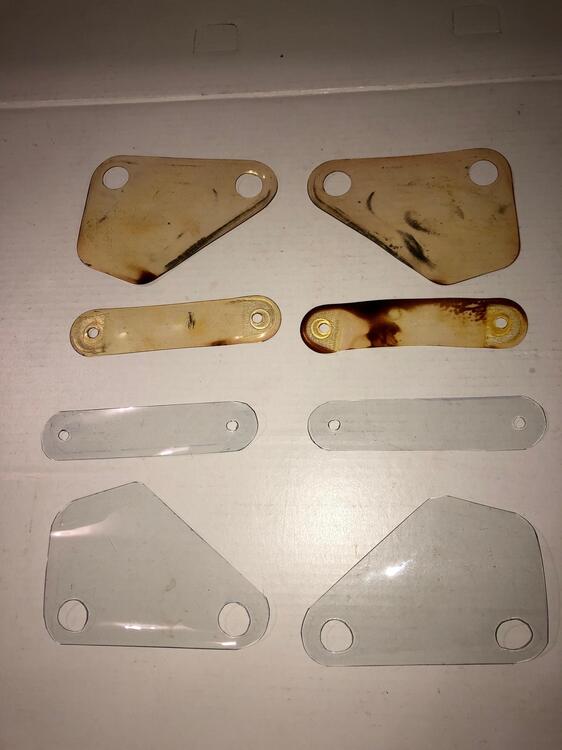
View Advert 1969-1971 240Z reproduction clear vinyl seat protectors Since these clear vinyl seat protectors are no longer available from Nissan, nor are reproductions available from existing fabricators, I sourced a large quantity of clear vinyl material to fabricate reproductions. These are for the 1969-1971 seats that do not have the recline mechanism. Set of eight (8) as shown in photo, (plus close-up photo) Material is same gauge/thickness as original Photos show: Set of four (4) original, aged and yellowed clear vinyl seat protectors and set of four (4) reproduction clear vinyl seat protectors. Set of eight (8) reproduction clear vinyl seat protectors - what you would receive upon ordering. The pricing is $48.00 shipped to a CONUS address. Shipping will be insured with tracking. If you are interested in a set, please PM me your full name, mailing address and Paypal address. I will then send you an invoice. Note, these are time consuming to produce. Therefore, I will only send the invoice when the set is available for shipment, production timefame as noted below Thanks, Keith Note: The last time I offered these was Fall 2022. So if you plan on needing a set before Spring 2023 please order now. Orders accepted in the first available production time frame ------------------------------------------------------------------------------ Maximum sets available with 2 week production time frame - 4 sets Reserved: Larry M (ClassicZCars) - 1 set - shipped 04/13/23 Advertiser zed2 Date 01/31/2023 Price $48 Category Parts for Sale
 1 point
 -
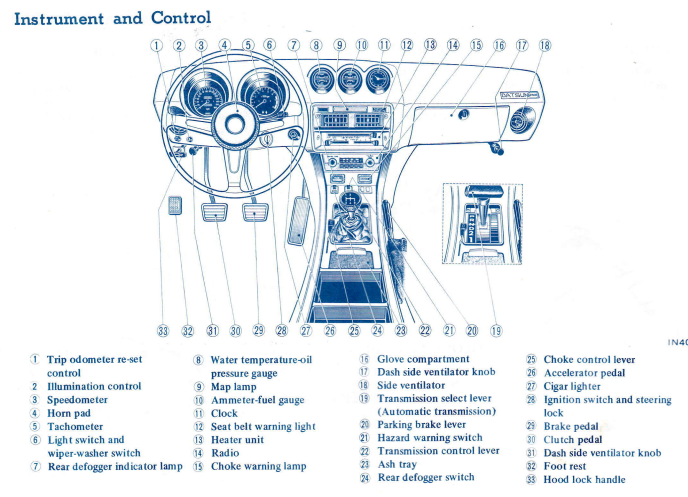
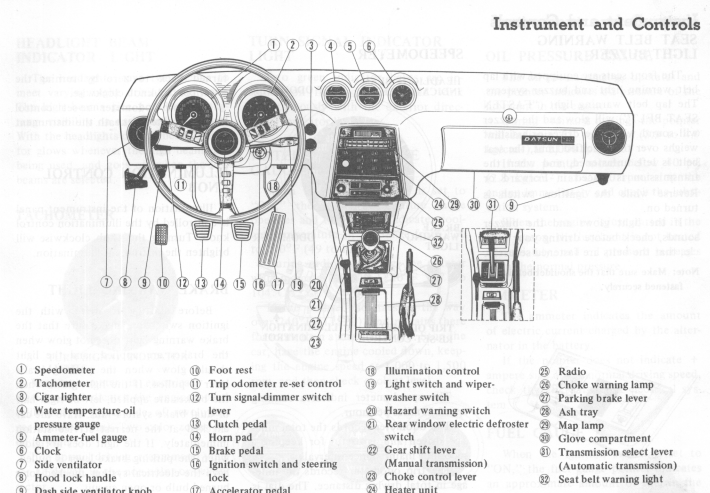
I'm not sure what you mean by the ignition hole. The ignition switch on my 240Z and 260Z are on the steering column. Differences: The 260Z dash does not go down as far as the 240Z dash. The 240Z dash has cutouts for the cigarette lighter and hazard switch. For the 260Z, the switch moved down to the center console. Note the hazard switch hole for the 240Z has variations, too. The shape of the ventilation controls area is different. The gauge lights dimmer and trip reset are on the front of the dash on a 260Z. There is a cutout for the glove box lock on the 240Z. The lock is integrated into the door on the 260Z. There are some contour differences, too. 240Z 260Z
 1 point
 -
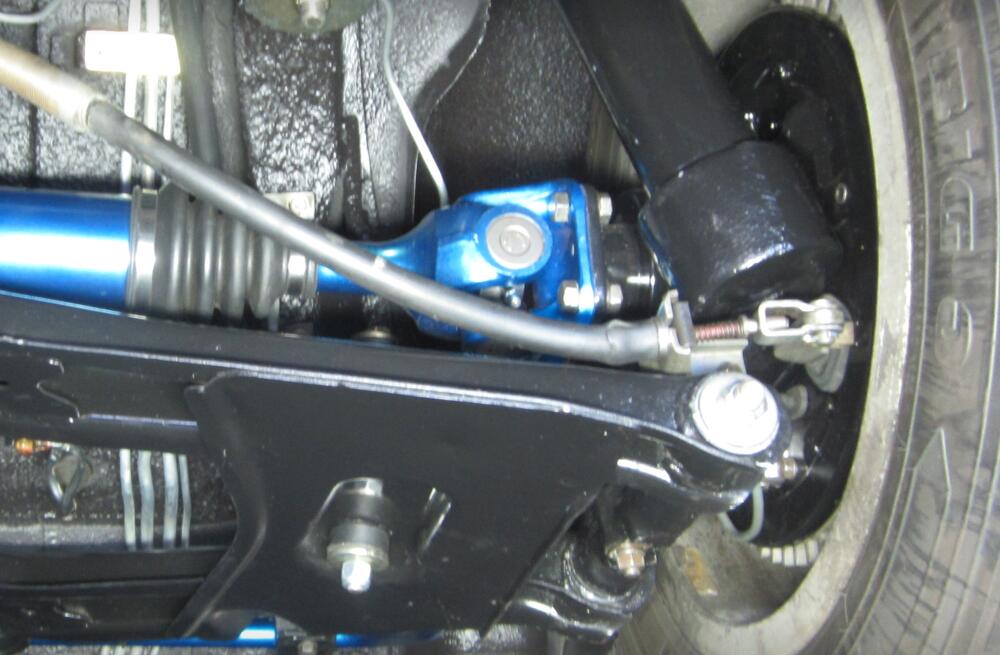
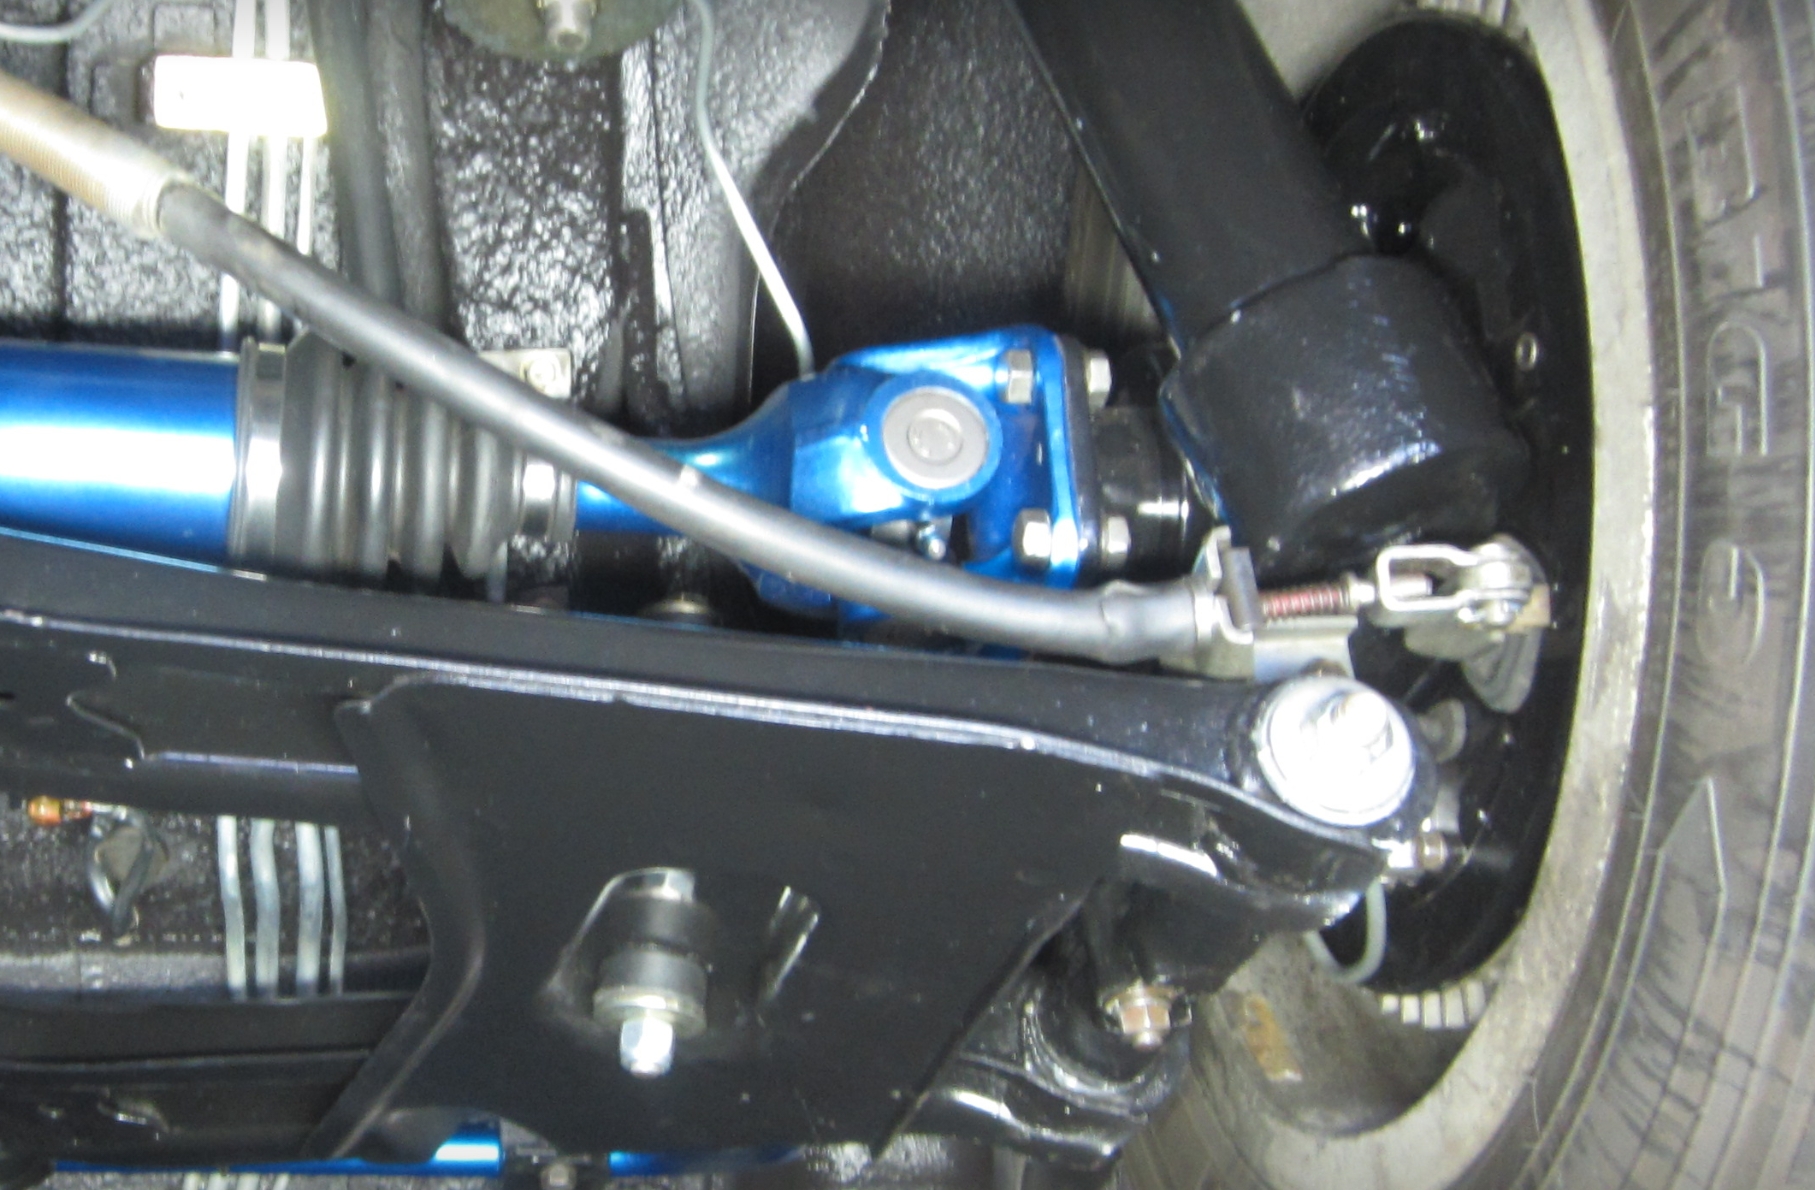
You will have trouble finding replacements and if you do it will be a pita getting them over the clevis. My cable is in good condition, but the rubber bellows are long gone. All the aftermarket products don't use the bellows type sealing, which I consider a better seal. They use a cup style cover the end of the cable sheath with a hole through it were the cable passes through. The twitched cable can pull road grime and water into the sheath and eventually seize up. If you do find a solution, I would like to see it.
 1 point
 -
Interesting how they used paint to mark self locking nuts, which will never come loose, but nothing on the differential cover bolts, which have nothing save for a lock washer under the head.1 point
-
The 123 ignition could help with performance and to help pass emissions - IMHO . A fully programmable ignition curve would allow a more aggressive power curve without giving too much vacuum advance . Your engine/ head combo is not the greatest for performance . Added compression would make a stronger case for adding a programmable dizzy . Cheap way to add a little power is to advance the cam to hole 2 or 3 . This would add noticeable power/ torque down low . Once again this would be better if you had full control of ignition . A cam and programmable ignition would be best bang for buck1 point
-
1 pointAn interesting idea, crudely executed. It would have been more effective, I think, to drill a large-ish hole into each shaft end and then use a tapered punch to expand the hollowed-out section. I suppose it would work, although the wear pattern on the bushings would be pretty extreme. You might quickly end up back where you started. This invites further examination by the CZCC R&D Department @Captain Obvious!1 point
-
Is that zink on the exhaust ? I don't get the marker thing, it's not like there are 500 nuts and bolts to torque down.. But anyhow if people feel better doing that, that's fine1 point
-
1 pointI have this belief that, generally speaking, successful selling and buying should be getting easier, not more difficult. If I had to source parts by dealing with local club members, or my local community, I am afraid it would cost me more and take me longer, and actually, I doubt I could source everything I need. It is apparent to me that the classifieds section of our forum is not a hot location to look for parts. But why is that the case? It seems to me that it has a couple of advantages over other options. For example, there are no seller fees, which is like 12.9% of the sale price on eBay.1 point
-
1 pointup until a little while ago didnt really know there was an issue. at first i thought it simply a malfunctioning gauge as the engine sounds great. Then i took the gauge out and swapped it and still nothing. Also wasnt really sure what to ask him just yet. thought i'd get as much info as i could before i go to him and sound like an idiot complaining.1 point
-
I think @Racer X is referring to https://www.240zrubberparts.com/. I don't see one, though.1 point
-
1 pointYes, the best way is to remove everything, and measure, and figure the difference. But as mentioned, plastigauge is what you would use in this case. Remove one bearing cap, wipe the journal and bearing shell with a clean, lint free cloth (I cannot overemphasize the importance of cleanliness), lay a line of plastigauge on per the instructions, replace the bearing cap (with the bearing shell), install and torque the fasteners, remove the cap and check the plastigauge against the standard printed on the paper sleeve the plastigauge came in (I cut a length of the sleeve a little narrower than the journal so I’m not trying to lay 6” of paper sleeve on it). After making a note of the reading, clean the plastigauge with a bit of denatured or isopropyl alcohol, and after ensuring the journal and bearing shell are clean, apply some assembly lube and reinstall, torquing fasteners to spec. Do not rotate the crank during this process, as doing so will smear the plastigauge and skew the results. You will need to rotate the crank for each rod journal, to the bottom of the stroke (precision isn’t a concern, you are only moving the journal to a position where it is easier to access). As I mentioned, now is the time to do this. All main bearings, and rod bearings can be checked, just only do one at a time. Work methodically, and remember, cleanliness is crucial. I’m confident that if you know how to handle tools, and feel ok using a torque wrench, you can do it. Thanks for the information about the time on the engine. I have to ask, why haven’t you engaged the builder about this? If I paid someone else to rebuild an engine, and it only had 100 miles on it, I would look to them to resolve it.1 point
-
1 point1 pointI've been getting too many mixed responses on that response but it seems to me that the case would make it harder to pass, question is how much added compression is too much? I am sure just a thinner head gasket should cause no harm. Starting to sound like it. Yea I believe its three test visual I am not worried about as all stock components will be in the car and anything that can be visually inspected I can hold off on. Just trying to avoid taking apart the motor again but a Cam is not that hard and can be done inside the engine bay. I believe I have a new AFM or rebuilt AFM so hopefully that gives me no problems as I always had AFM problems in the past on my last car. It seems to me I will have to do just a stock rebuild for now aside from the thinner head gasket and port and polish and just do the extra work when the time comes. At least it'll give me an opportunity to see how stock power really feels like and see if I can feel any improvements from there as I do all the mods in the future.1 point1 pointYou would use plastigage and remove one bearing cap. Install plastigage. Retorque cap and then remove the cap and analyze the crushed plastigage.1 point1 pointso as far as i know the method to check bearing clearance is to measure diameter of rod and subtract inside bearing diameter.. Thus the difference being the clearance. If so, yes, that does scare me to attempt. If there is a way to remove one conrod cap and measure the clearance gap i feel safe to do that...but i dont think that possible. I may drive up to the engine rebuild shop and ask the man to pull up his notes from my rebuild and see what he has written down. Of course this wont let me see shell condition Since rebuild, I have put maybe 100 miles on engine. Only oil change since then is one i am doing now.
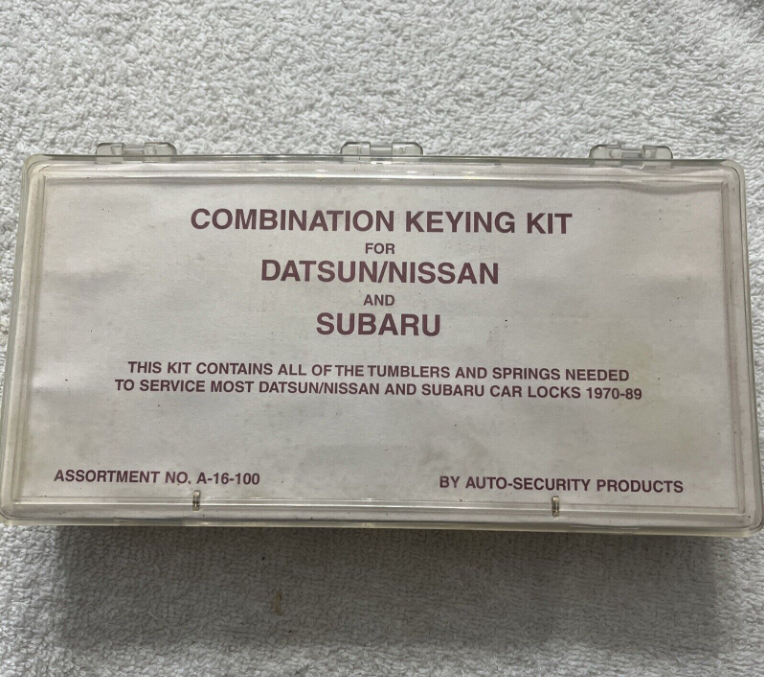
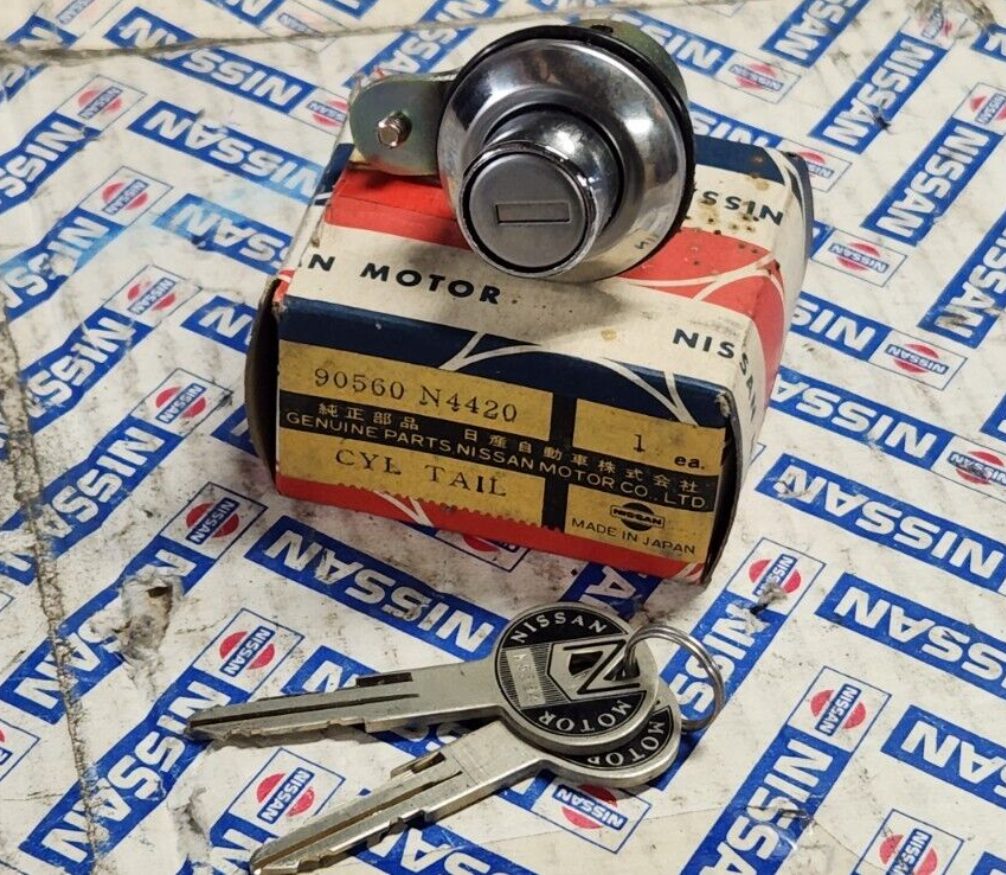
 1 pointI would think the higher compression would drive higher temperatures would drive higher NOx, and my friend, Google, was able to find links to say that is the case. Also, according to my friend, Google, in typical operation the EGR lowers the oxygen concentration and absorbs heat to reduce NOx formation.1 point1 pointGot lucky with this purchase this morning - a NOS hatch lock! And it comes with two of the old style keys! I bought a lock from Kuwait recently for a Cedric that came with two of these keys. Using a lock tumbler kit, I started rekeying my locks (which is not difficult). And now, this comes along. 🙂 Sometimes this happens: I buy one thing to solve a need (need two old style OEM keys), and then find a better deal that solves another (hatch cylinder even after re-keying was quite worn). So, now, I will have two sets of these old style keys, but a new hatch cylinder without wear (and no need to have the lock cylinder outer sleeve re-chromed). I also was able to find another Datsun tumbler kit. This one has the ignition switch tumblers.
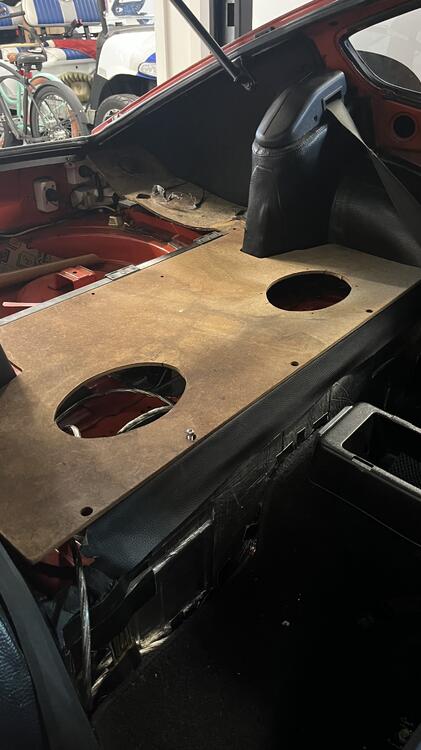
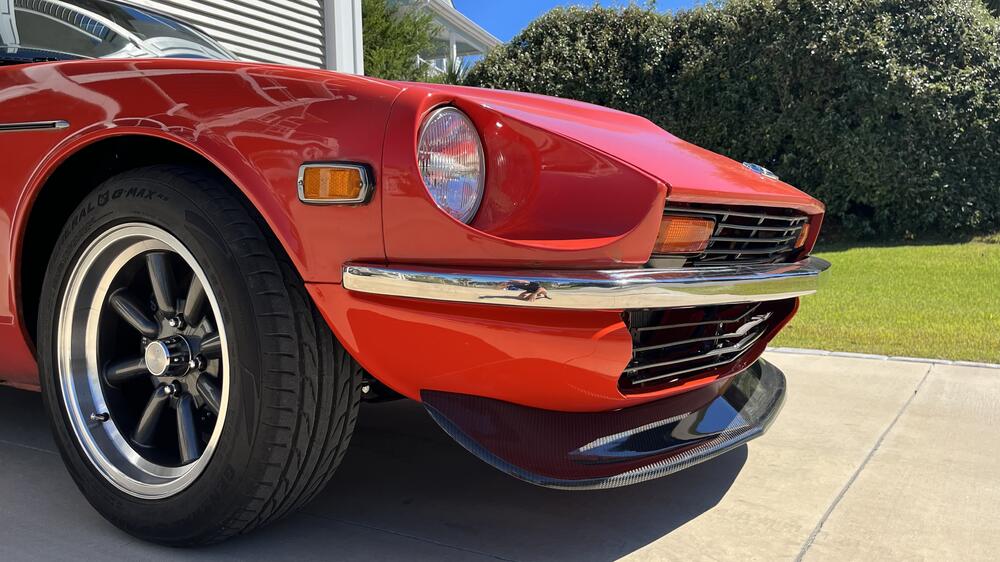
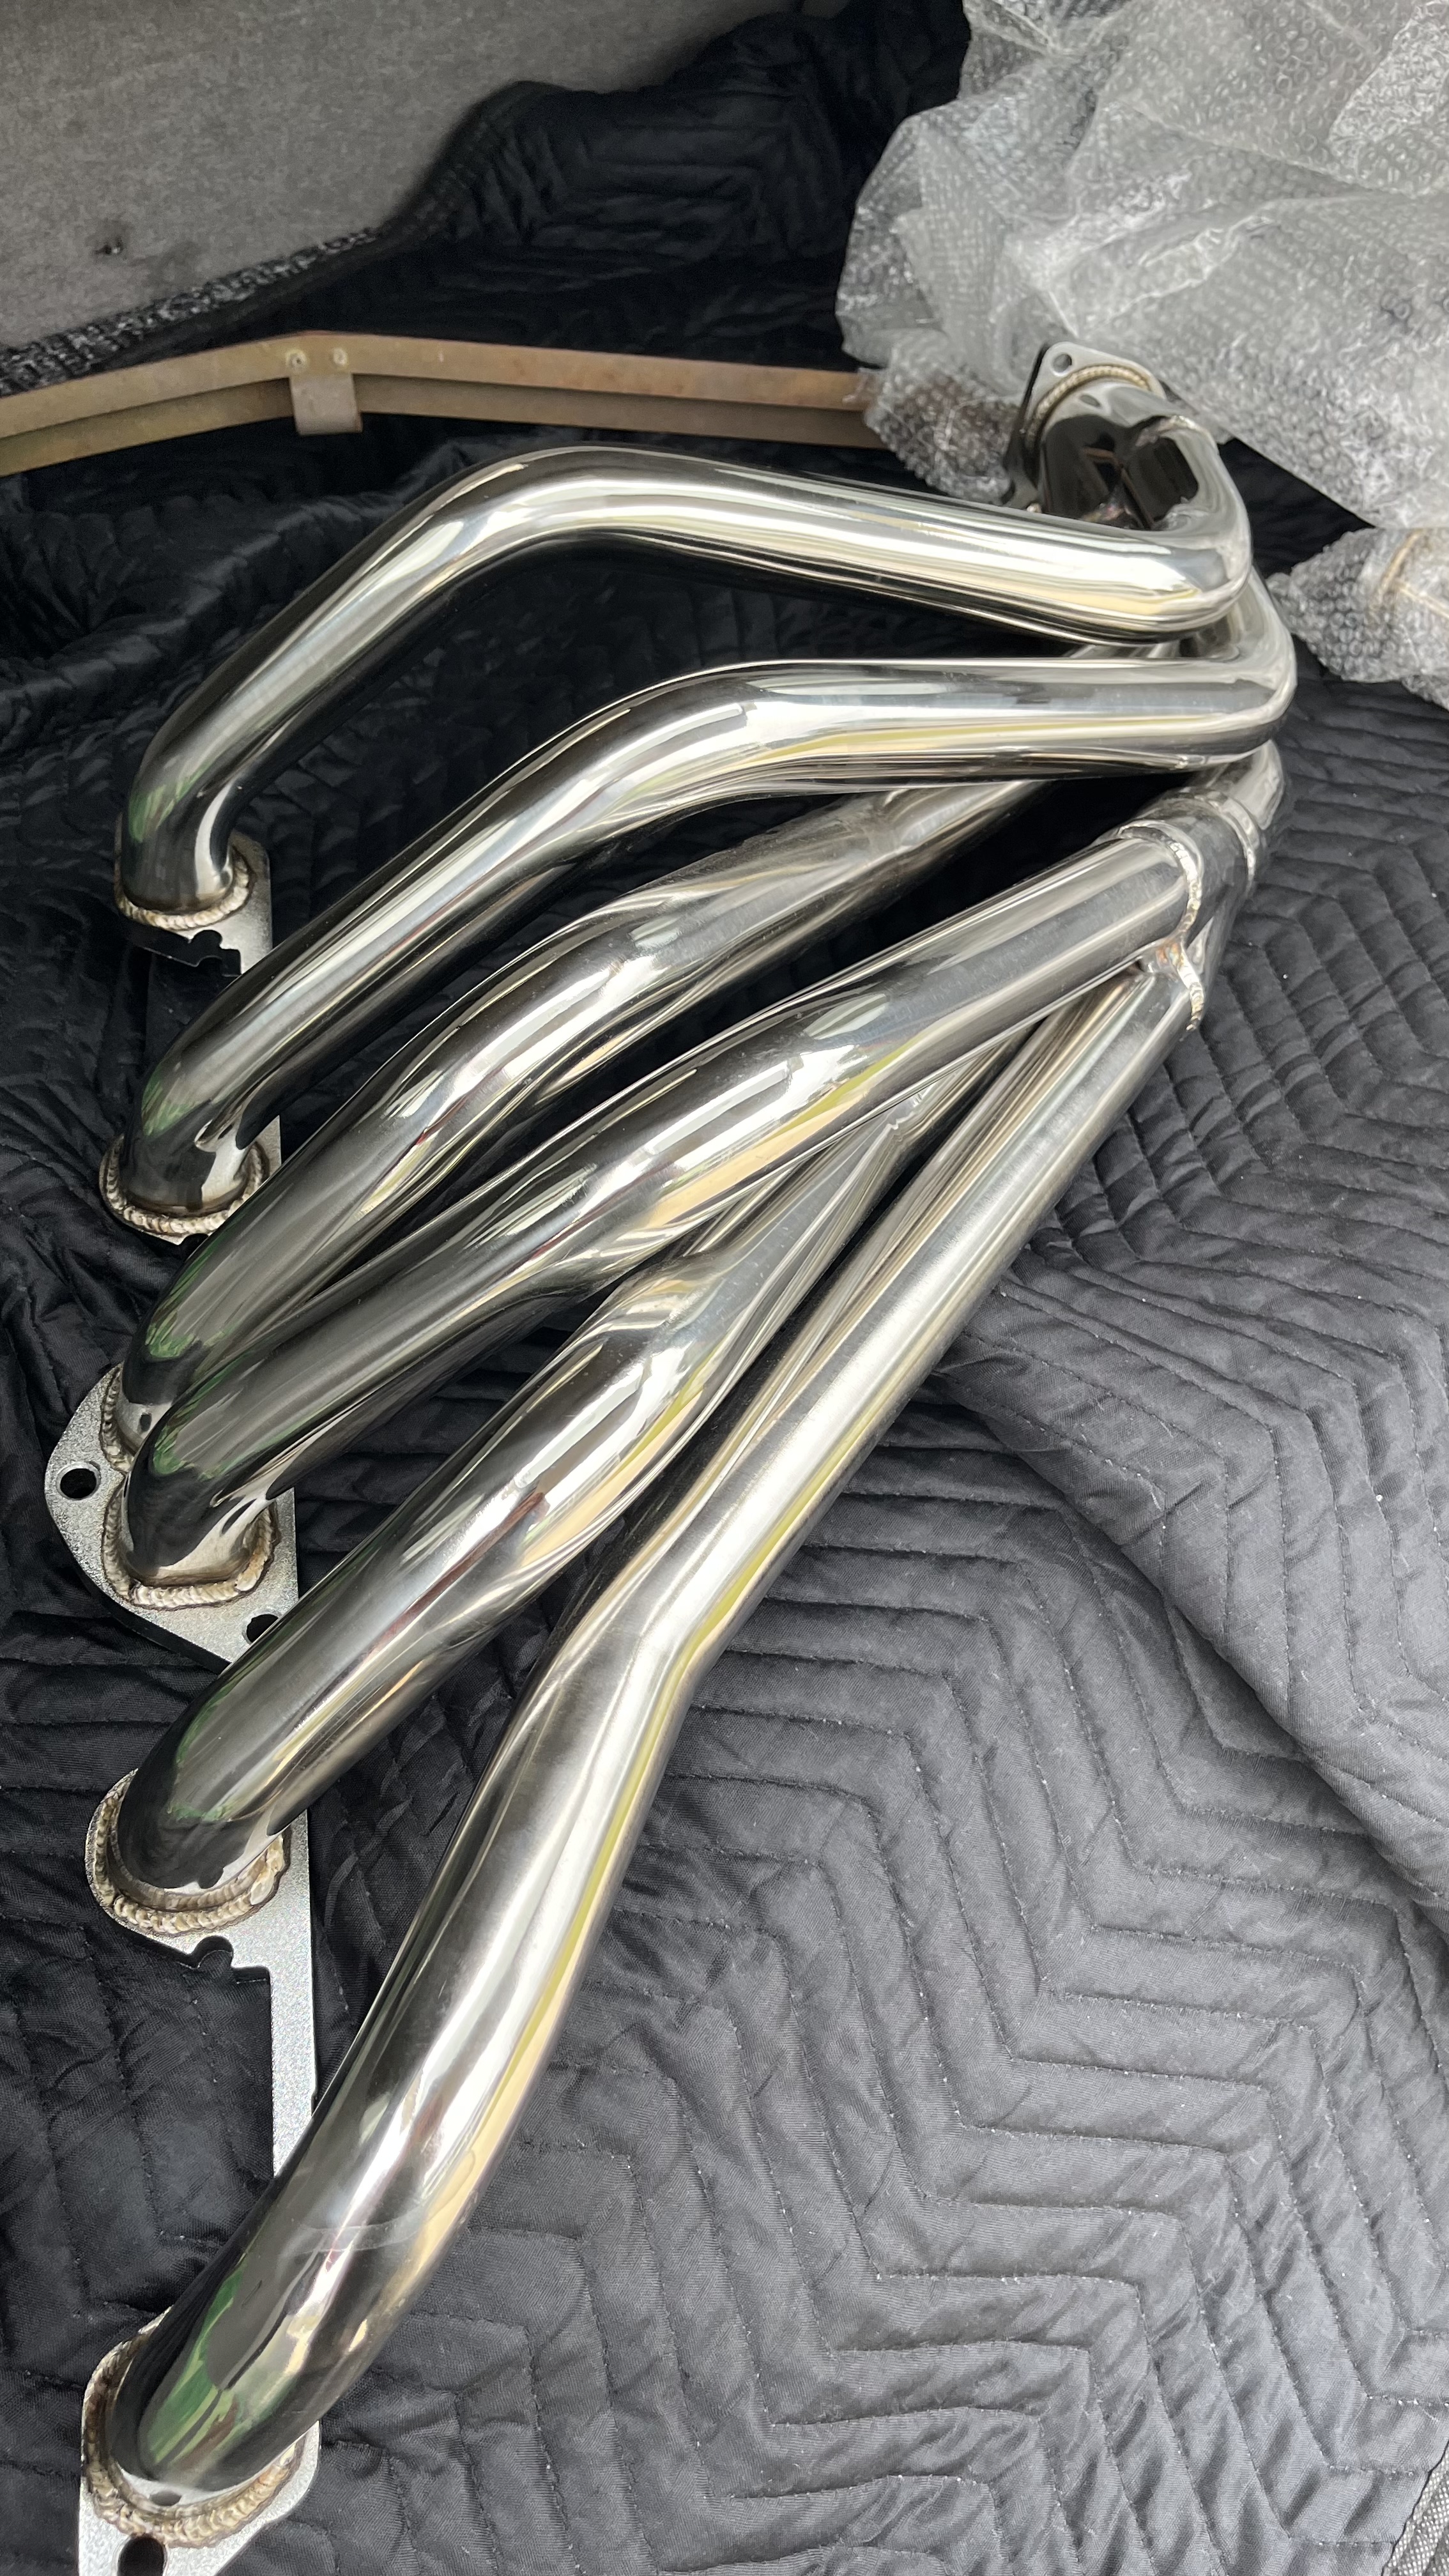
 1 point1 pointGents, I’ve been off the net that past month or so. Life, family, work and other issues have kept me away from my time in the garage with the Z. Currently sitting in the Paris airport waiting to return to the US. It’s been an 11 day trip and I’m ready to be home with the family and back to work in the garage. Here’s where I left off last time with the car. Working on the stereo speaker install, the work it a bit tedious because of my OCD. I bought some 6x9 speakers to build a box below the deck to improve the sound quality. I have a couple more days of work to do there. This is my extra deck, so I can always go back to OE look. My headers came in about a month ago from ZStory. They look great, very happy with the stuff he puts out. I had been waiting a long time for this last part of his system so that’s in the works too. Im taking it this week to get ceramic coated, for heat transfer mitigation. The car has been driving great, the more miles I put on it the more the kinks seems to be getting worked out. I have a couple issues to address. I also finished the from carbon fiber lip install. I like this much better that the xenon valance. I’ll post a few pics. 1. High Idle - car idles fine on start but after driving it around and coming to a stop the idle will hover around 1000-1100 RPM. In order to get it back down I have to pump the accelerator one time and then it returns to 800. Let me know if anyone has a clue why it does this but it’s pretty consistent. 2. I have a rattle on my right rear strut. I think I have the spacer loose from the shocks bouncing around there.. I’m not motivated right not to pull it out .and address it. 3. A small oil leak. Getting about 10 ml of fluid that appears to come from near the passenger side closer to transmission. I think it’s coming from the reverse switch but haven’t confirmed it. Got a new gaskets waiting to be installed.
 1 point


Important Information
By using this site, you agree to our Privacy Policy and Guidelines. We have placed cookies on your device to help make this website better. You can adjust your cookie settings, otherwise we'll assume you're okay to continue.