Leaderboard
-
Captain Obvious
Free Member7Points10,111Posts -
26th-Z
Free Member3Points5,264Posts -
HS30-H
Free Member2Points5,513Posts -

dutchzcarguy
Free Member2Points2,680Posts


Popular Content
Showing content with the highest reputation on 06/03/2022 in all areas
-
2 pointsThere are several. They call it a "friction kit". Use that term. https://www.fidanza.com/pages/catalog-search-sd2 points
-
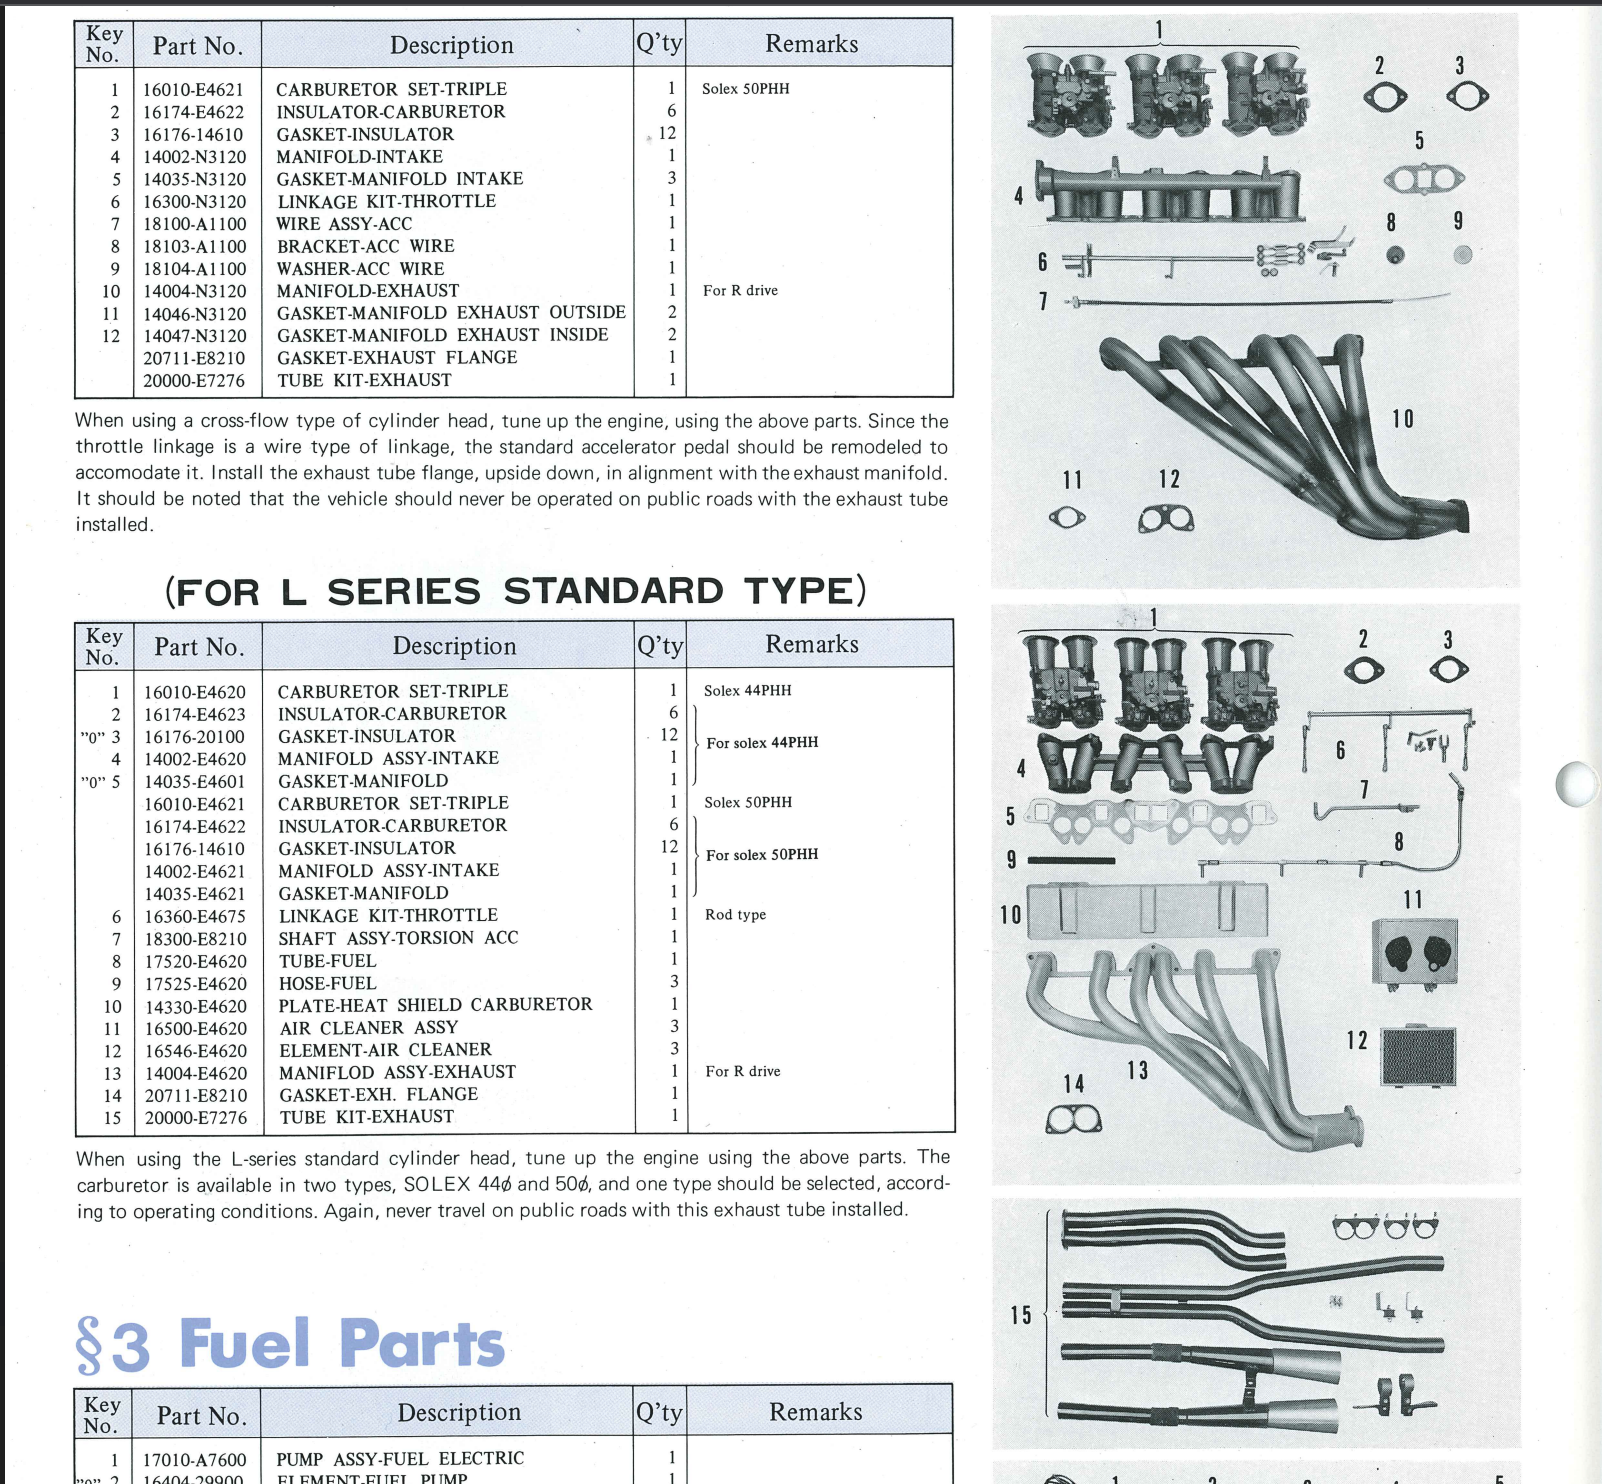
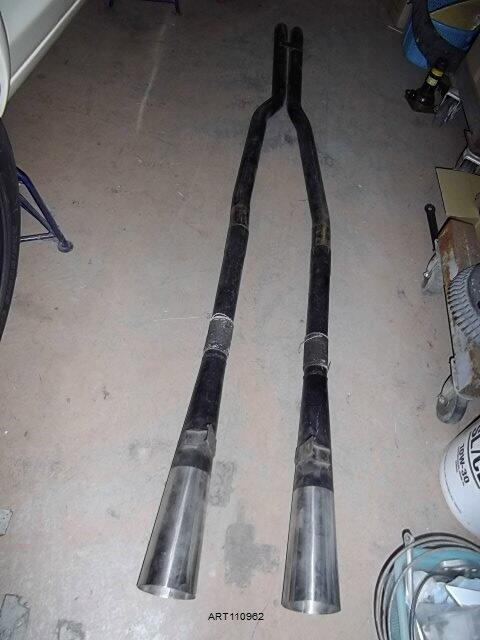
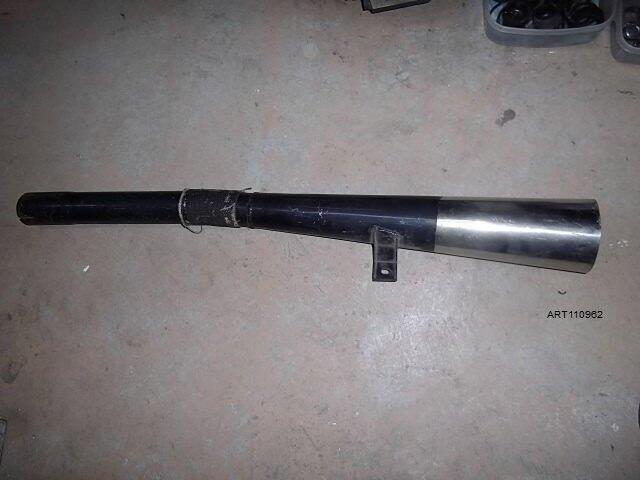
2 pointsLovely E4620 tubular manifold, Kats! Talking about the E7275 (later E7276) Race Option megaphone exhaust, a friend of mine owns this one. A rare survivor:
 2 points
 -
10 years later and I'm still sending 280Z owners to this Link....👍2 points
-
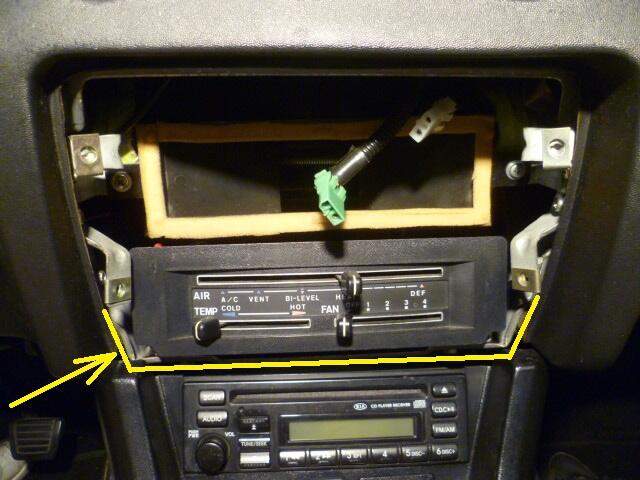
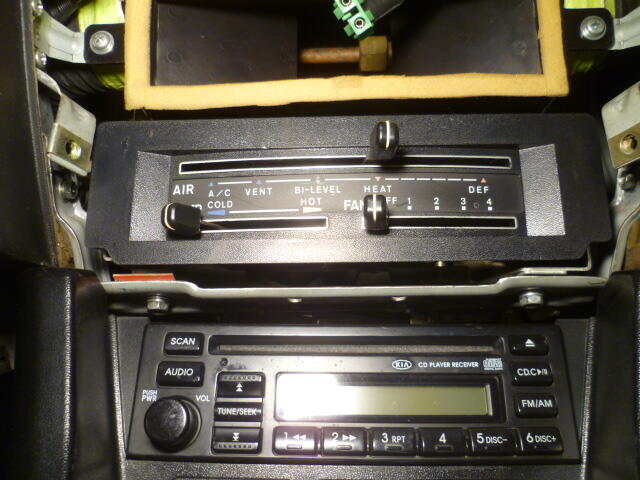
2 pointsHere's a couple pics showing where that bracket goes: And here's a closer-up trying to get a shot of the mounting hardware: Hope that helps!
 2 points
 -
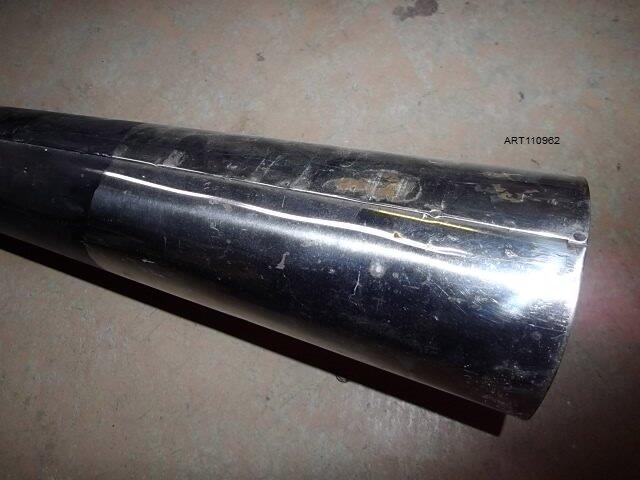
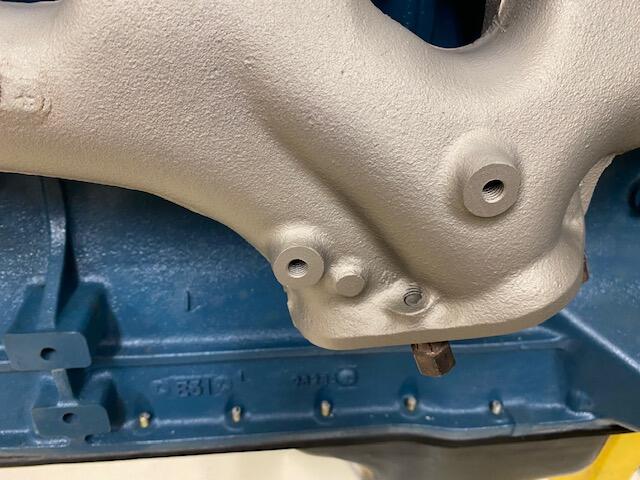
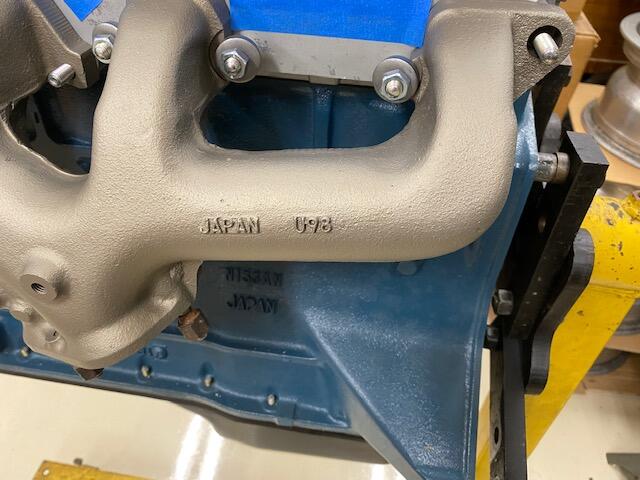
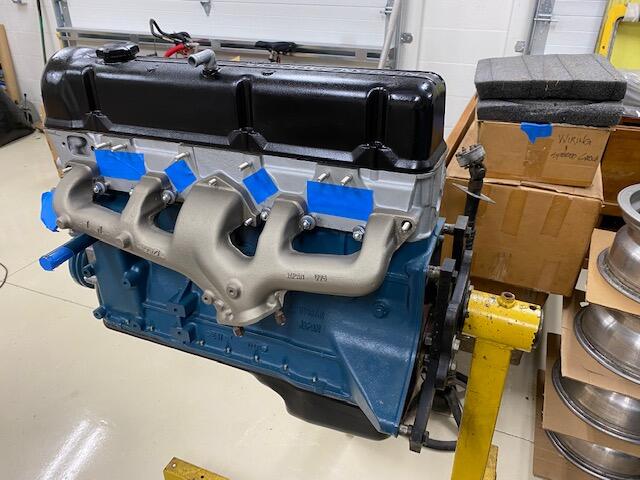
2 pointsHear are some pictures of the exhaust manifold I found for 26th. This was just after I had it ceramic coated and I was testing the fit. It came with a metal shroud for the air filter pre-heater tube bolted to the manifold. That's what those tapped holes are for. It has full casting nipples. Yours were ground off, Kats! My thought about this manifold is that the flow and pressure is about the same as a set of custom headers. I read some report that dyno tested the cast manifold against the headers for the gain in horsepower.

 2 points
 -
1 point
-
1 pointBreakthrough I hope...while waiting for a new collar to come in, I decided to adjust the slave cylinder to what I thought was an extreme amount. I desperately didn't want to drop the tranny again. The rod is now tight against the fork and there is zero play in the cylinder, BUT low and behold the clutch disengages. The car rolls forward while in gear with the clutch in. I hope the clutch doesn't slip now. I need to find where the sweet spot is. Taking out the clearance and backing the nut 1.5 turns per the FSM is too much and the clutch won't disengage from there. I have no way of measuring a 2mm gap (FSM) from the bearing plate springs. Trial and error? I guess this adjustment is ok as long as the clutch doesn't slip?
 1 point
 -
Hi all, This weekend I finally got around to tracking down that last vacuum leak -- in the pneumatics of the HVAC control apparatus. (I had previously identified a leak through the vacuum line leading through the firewall from the vacuum solenoids or "magnet valves" -- righthand/passenger side of hood compartment.) The larger source of the leak was immediately apparent. In their infinite wisdom, Nissan put a splice in the vacuum line in the righthand/passenger dash area. It's shown in the factory service manual diagrams. It seems like that's just more to go wrong, but I'm sure there was an assembly line rationale behind the splice. In my own case, I had three splices, apparently from repairs by the previous owner. The tubing was starting to rot and had split over one of the splice connectors, then falling off. So I did a quick fix of the splice and found that I still had a vacuum leak. Not surprising. Anyway, I had to tear into the dash to track down the remaining leak and to replace old tubing with new. (Joy!) The center console on my '78 didn't come out as nicely as I had remembered on my '75, but I got it out. No leaks in any of the vacuum actuators in the system. The leak was definitely in the vacuum selector valve. It looked as though I could simply remove it from the bottom of the control assembly, but I wasn't sure. I figured I'd be better off taking the conservative approach and removing the entire control assembly before worrying about the vacuum selector valve. This gave me the opportunity to clean and lube it, but in hindsight I would have left it in place, only removing the vacuum selector valve. There are too many things to take loose and reconnect, and the assembly doesn't really come out without a bit of a fight. Once I had the vacuum selector valve out, I was able to confirm that, yup, it leaked. It seemed like a rather simple construction -- and was. It consists of two metal plates faced against each other, sealed with vacuum grease. The design of the valve is such that it vents air to the actuators to allow them to relax. The problem is that dirt is sucked into the valve and combines with the grease over time, eventually resulting in accumulated gunk that doesn't seal the two plates together very well. Anyway, the valve disassembles very easily. Just remove the little c-clip on the shaft, and the valve disassembles into 5 parts -- the two plates, the shaft, the clip, and a spring (on the outside of the assembly, pressing the plates together). There was a bit of scoring on mine from the dirt, but it was very minor. I just cleaned the two plates, lubricated lightly with silicone vacuum grease, and reassembled. Note that there is a recess in the middle, right around the shaft. I packed that recess with extra grease to feed out over time. In the original assembly process, Nissan had apparently not packed this area. After reassembling, to my delight, the assembly was vacuum-tight. I reassembled the whole mess, properly adjusting the cables, and found that the HVAC system worked perfectly and my engine had no remaining vacuum leaks. Yea! Here's what I would have done differently -- things that the factory service manual doesn't tell you: Rather than taking out the entire HVAC control assembly, I would have removed the vacuum selector valve from the bottom of the assembly. The cleaning/lubing of the remainder of the control assembly simply isn't important enough to go through the headaches of R&R. To do this, I recommend the following procedure, and I'd advise penciling it in on the appropriate page of the factory service manual (page AC-31 of my 1978 manual): (1) Turn the mode lever to "defrost" (far right position). (2) Remove the two screws retaining the vacuum selector valve, and remove through the bottom of the assembly (very easy). Be careful not to turn the two plates (also very easy). Note that the selector valve could install either the way you took it out or 180 deg turned. I'm pretty sure from the construction of the valve that it would make no difference how it is turned during reassembly. Note also that the drawing of the vacuum selector valve in the factory service manual is not accurate, at least on my car. The nipples are located in different positions. Perhaps there is more than one configuration of valve. (3) Note when you remove the valve that the top and bottom plates have alignment pointers on their outer radius. In the "defrost" position, these pointers should be aligned. At least that's how it is on my valve. Again, there may be different configurations. If the arrows don't align, then make your own alignment marks. (4) Disassemble, clean, re-lube, and reassemble valve. Use silicone vacuum grease or (silicone brake grease?). (5) Realign the plates using the alignment arrows. (6) Without rotating the plates, reinstall into the assembly, gently meshing the gears together. (7) Check the final alignment with the air selector lever now in the A/C position (far left). In this position, the S nipple should be completely vacuum tight, and the other three nipples should vent to the outside. I believe this is the only position where this would be true. One final note: One of my "magnet valves" is bad in the engine compartment. It is the primary one that evacuates the reservoir when the HVAC system is turned on. When the system is turned off, it is supposed to vent air back into the HVAC pneumatic system (note: edited as per below), thereby relieving the vacuum on the entire system. (There is a little filter on the bottom of the valve.) In my car, someone had bypassed that valve. I was worried that with a healthy vacuum and no leaks that the vacuum actuators might remain actuated when the system was turned off. However, the design of the vacuum selector valve does vent air back to the actuators when the system is off. I suppose the vacuum reservoir does hold a vacuum when the system is in the A/C position and the HVAC system is shut off. I presume that's not a problem. Anyway, I hope this posting saves someone a few headaches. Peace, Sarah1 point
-
1 pointOK, got it. So getting into the details about the voltage number measurements you got... I'm pretty sure you already know this, but they don't really make sense. If you pull the all the injector connectors off, turn the key to ON, and measure across the two injector connections inside any of the connectors, I would expect to see a low voltage on all of them. But it's a little unpredictable because of the way the circuit works. One side of each connector should be connected to the battery (through the dropping resistor) and the other side of each connector should be floating pretty much as a no-connect. However, there is a capacitive load on each of those floating sides that could provide some weird numbers if you don't know what you're looking at. You could charge or discharge that capacitor through your meter and the numbers could change as you're watching them. So with all that in mind (and as mentioned above), it would probably be easiest to change the way you are taking your measurements and see what you get when you just measure from the injector contacts to a known good ground instead of measuring between the two contacts in the same shell. I mean, there's info to be gleaned from what you already did, but without being there and seeing what type of meter you're using and watching the numbers for stability, it would be simpler just to re-do the measurements and reference everything to ground.1 point
-
1 pointYou know? I have scans of that exact catalog also! The exhaust tube kit, 20000-E7276 shows up in my 1971 USA Datsun Competition Parts Bulletin as 99996-E1040, $180. That included mufflers but if you wanted the megaphone tail pipes, that was 99996-E1041 for $48. By 1973, the USA comp catalog # was 99996-E1045 and the megaphones were 99996-E1042.1 point
-
1 pointI took apart the rear suspension again to loosen it all up. I was sure to tighten in the correct order and with the weight of the car on the suspension. I feel that this did help quite a bit! Although, I am not sure if my eyes are playing a trick on me or what, but I think I still see some toe happening. I may need to do a quick and dirty toe measurement with some plates to get a better idea! But for now I am moving on until I can get my hands on new wheels and tires. Other fiddling I did was fixing my fuel gauge. It was always showing empty and never even budged when I turned power on. I started to diagnose the wiring and was just about to pull the gauge when I found a good post suggestion. Grounding at the connector near the fuel tank will simulate a full tank of gas. And funny enough when I did this, the gauge started to come to life! It was definitely sticky and jumped across its sweep until it came to Full. I think it just needed some OOMPH to get it moving 🙂 Glad to see my fuel amount now!1 point
-
1 point@kats not as far as I'm aware.. Attached are scans of a manual I have on hand (which was a Sports Option Catalog) for Australian market owners. You can see the stamps on it show Australian addresses etc.. with the exhaust parts available in the catalog. I do not know of anyone who purchased this stuff sadly. But it's nice to think in the 70s you could buy any of this stuff. Other parts of the catalog show the cross flow LY head etc.. so I just oogle at it all and wish I could collect it all. :). I do have some parts to be fair, as I'm sure a few of us here do.


 1 point
 -
1 pointIf, instead, you decide to pull out the glovebox liner first, these are the notes I wrote down after getting the liner out of my 70 Z's dash: Grasp the centre of the front lip of the liner’s roof panel, then pull the lip outwards until the top corners of the liner clear the inside corners of the dash opening. One corner may clear before the other does. Now continue pulling the liner Roof through the dash opening by about 1”, pivoting the liner on its front lower edge in the process. Working from behind the dash, push the lower corners of the liner inward so that the liner's floor panel buckles. Keep pushing until the lower corners of the liner clear the lower lip of the dash opening. Work from side to side. Push the lower corners of the liner out of the dash by about ½”. However, keep the front edge of the liner’s Floor resting on top of the lower ledge of the dash opening. With both of the liner’s lower corners now free, resume tilting the liner out from the top until the entire liner comes free. Throughout the process, the front edge of the liner Floor rests on top of the lower ledge of the dash opening. Good luck!1 point
-
1 point
-
1 pointYes, it is a 1971 240z with a 8/71 build date. Thanks for the replies. These cars are so easy to work on. I still can't believe it. Dash is out. The clock is headed out to Z clocks next week. I am hoping to keep the dash bulbs non LED but change them out. MSA doesn't stock dash bulbs. They said they can't find a bulb worth selling. I don't want to put crap bulbs all the way under the dash. Does anyone have lead on quality replacement dash bulbs for a 1971 240z. Thanks for your help, Bill1 point
-
1 point
-
We have used Meguiar's Hyper Dressing for 12+ years on Z car rubber, vinyl, and plastic. You don't ordinarily use it full strength, you thin it as desired with distilled water. We normally use a 50/50 mix but you can get any consistency you like. Cuz Arizona, we can get pretty crispy plastic, vinyl and rubber trim and weatherstrip. I've put plastics covered with Hyper Dressing in a zip-loc bag that are "dried out" to the cracking stage and brought them back to reasonably flexible within a few weeks (clam shell, switch plastics, gauge bezels, and etc.). We use it almost exclusively when we detail - great on tires too. A guy in the club here swears by 303 but I've never used it. I have Mothers Back To Black but it sits on the shop shelf.1 point