Leaderboard
.JPG.cfcada9cf1c1b502df3f5f2f2ca3ff36.JPG)


 Subscriber


Popular Content
Showing content with the highest reputation on 10/29/2021 in all areas
-
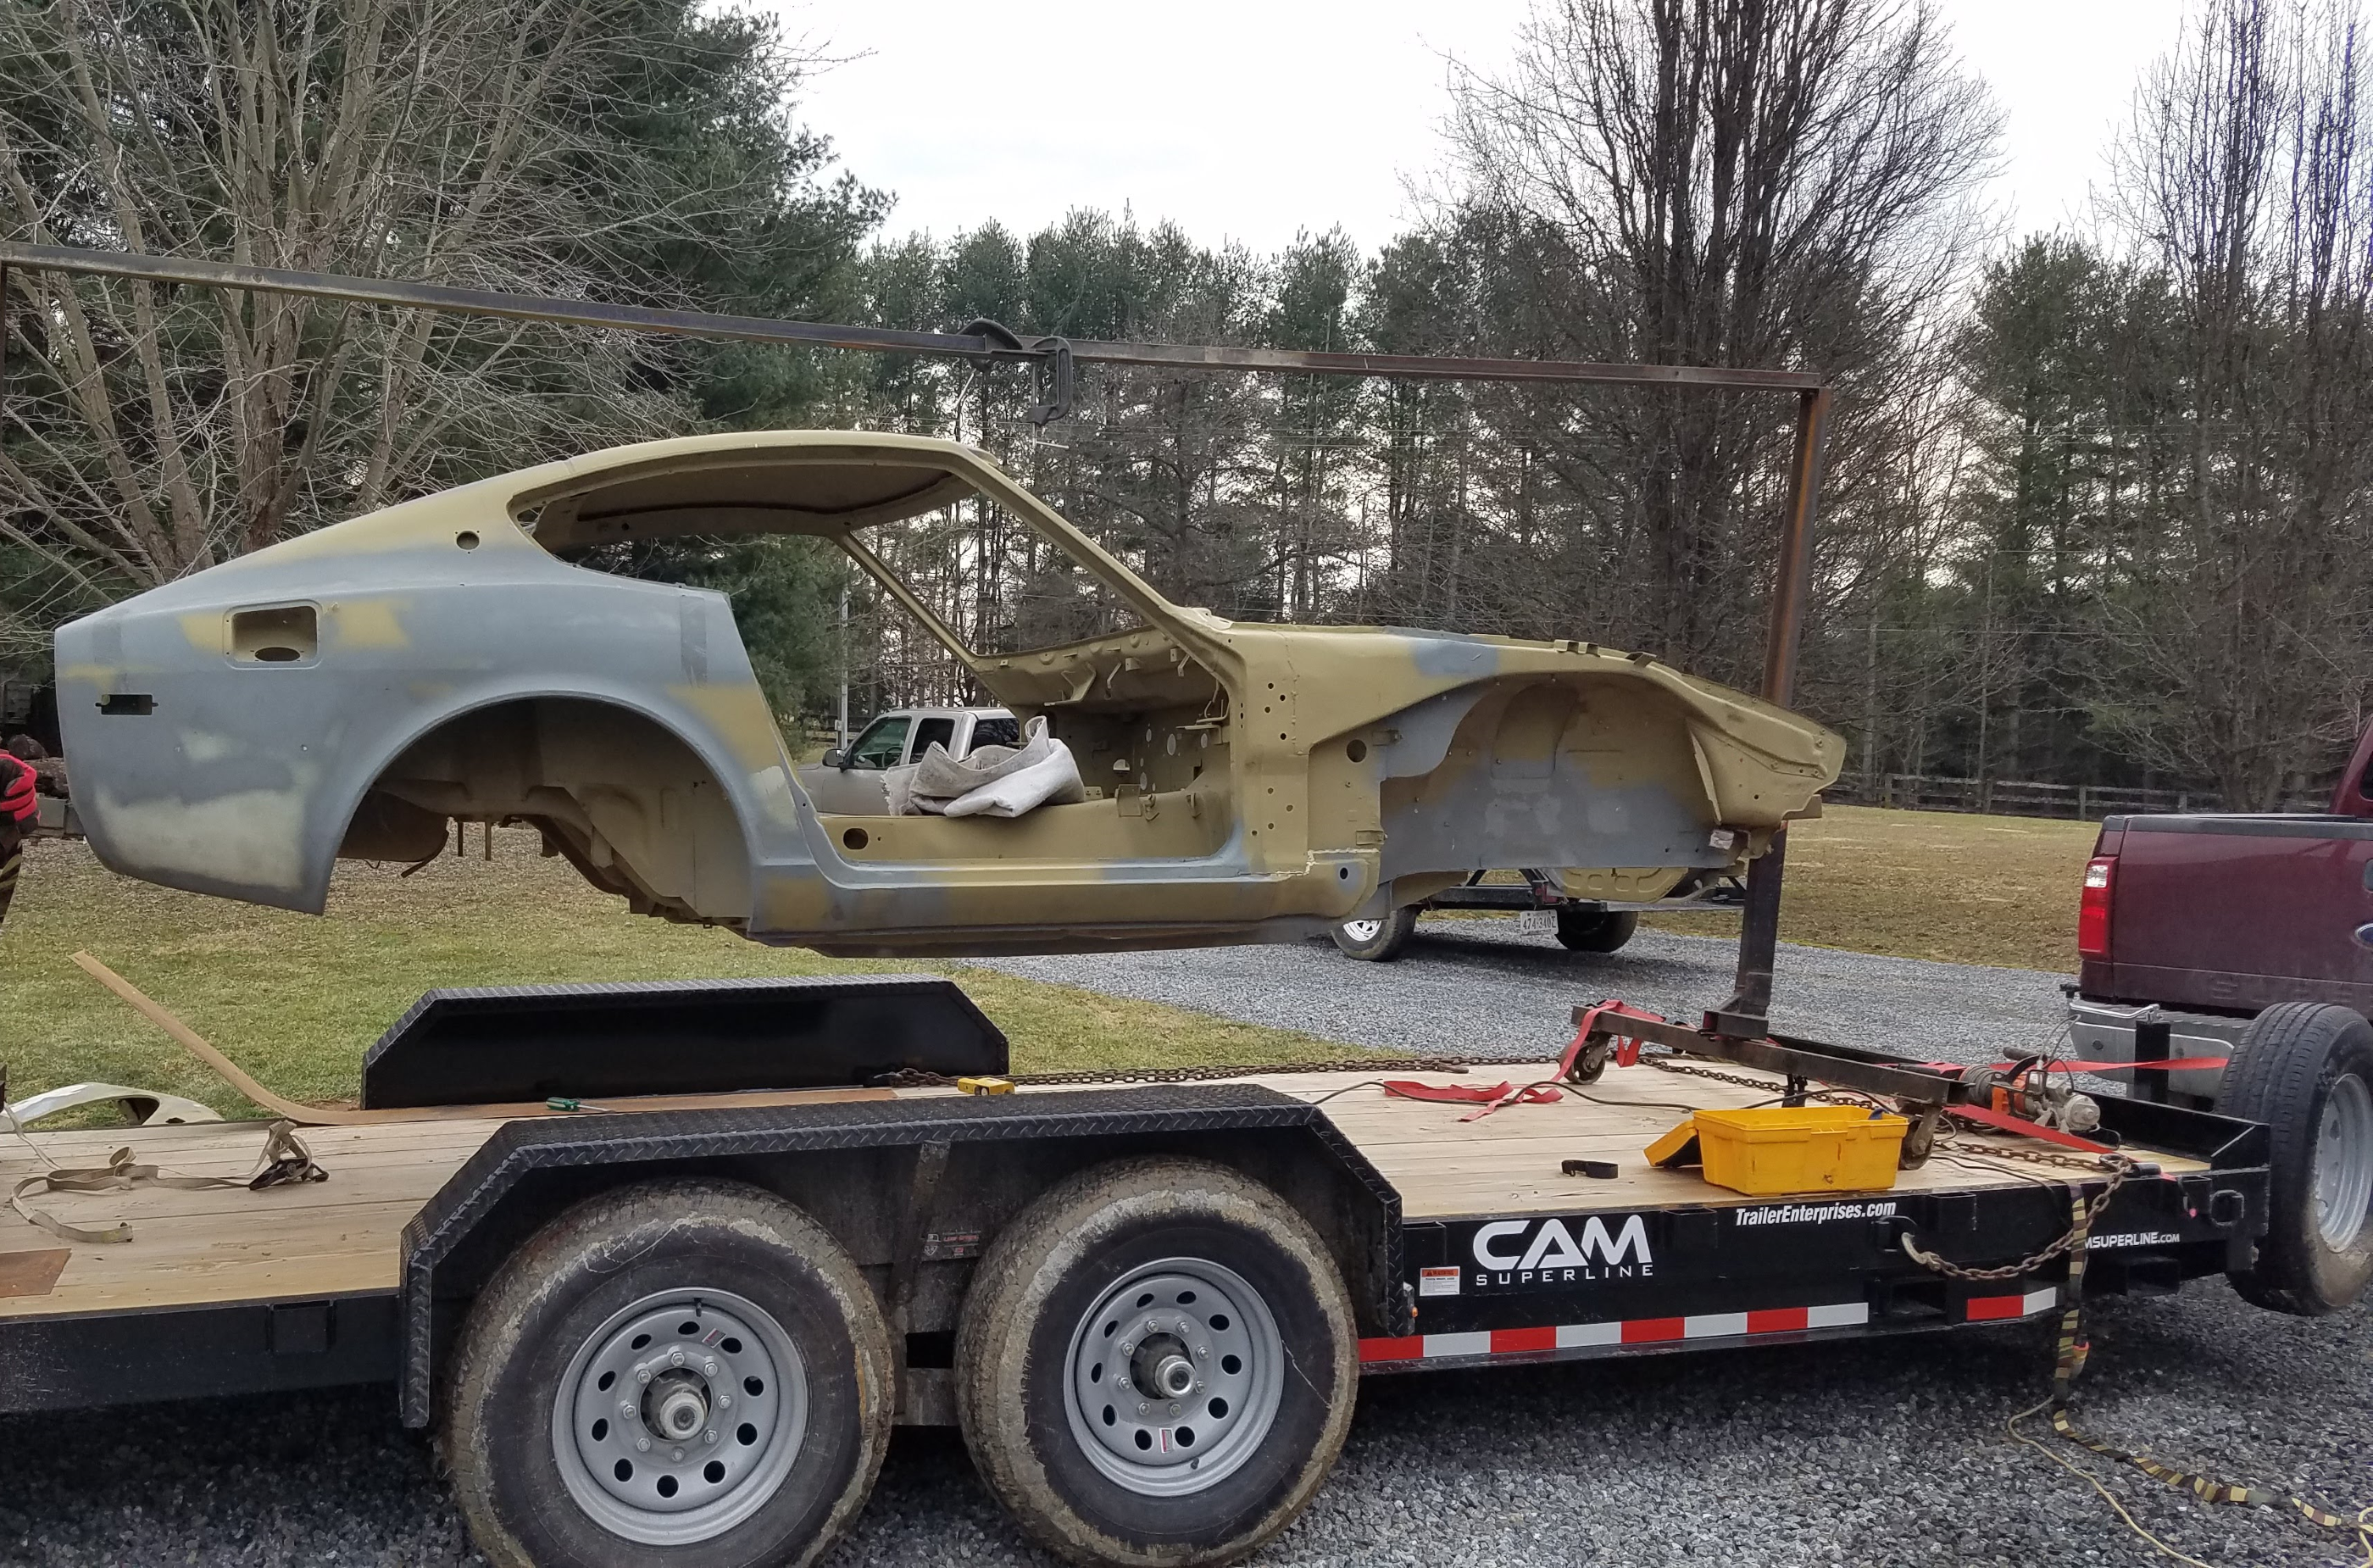
2 pointsSo I got the plating back I have the car back in the shop and the goons back outside. I hope to have color on it this fall before it gets too cold2 points
-
you should read the FSM fuel section. It explains how the entire fuel injection system works, including the fuel pressure. You should get a vacuum gage to confirm the fuel pressure reading with the engine running. most see about 29-30 psi at idle, you may have more vacuum than typical (16-20 inHg), or you may have a fuel delivery problem 36-38 is more normal engine off pump on.2 points
-
1 point
-
1 point
-
1 point
-
The fact that it hit 35 shows that the FPR is working. It blocks fuel flow until the design pressure is reached. The leak down to 25 isn't too bad, the systems always lose some pressure when the pump is not running. The 25 psi when the engine running is too low. When you try the pump check test make note of how fast the pressure rises. You might have just a weak pump or maybe a clogged filter. Pressure should rise to 36.3 within just a few seconds.1 point
-
1 pointIf the distributor was removed and reinstalled, you need to be sure the rotor points to #1 plug wire on the compression stroke. The distributor runs at half speed. I usually put a mark with a marker on the distributor body where the #1 wire is. When you remove the cap, you can see where the rotor is pointing. With the timing mark on the damper at zero advance on the tab, the engine should run. You can check the compression stroke by removing the plugs and crank the engine with your finger over the #1 spark plug hole.1 point
-
I have not seen any controversy over aftermarket pumps on an EFI car, except for people who use a very high volume pump like the Walbro 255. It's noisy because it's way too much fuel for the system. Otherwise, they are common, there are many good brands. The factory pumps are super expensive if a person can even find one. Not sure how controversy got involved here. The simple test for the pump is to remove the small wire from the starter solenoid and turn the key to Start. The pump will run, but the engine won't turn so you'll see the base no-vacuum pressure. As Dave WM said - it should be around 36.3 psi. (The FSM says 36.3 psi, which is 2.5 bar).1 point
-
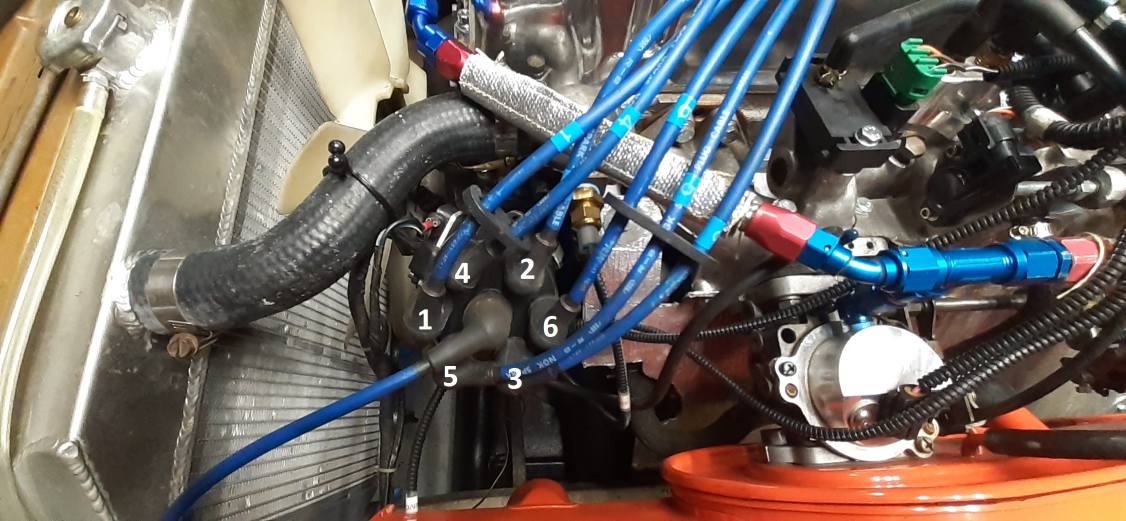
1 point@Wally Your coil wiring doesn't look quite right. For the Pertronix, the ignitor looks to be wired correctly to the coil. Just make sure the red wire is on the positive and black is on negative. There should be a black/white wire going to coil positive. The green/white wire should be connected at the same terminal on the ballast resistor as the black/white wire. Again, watch the video I linked on how to differentiate between the black/white wires. The jumper wire from the coil positive to the ballast resistor can go away once you have the other wires in the correct position. Static timing would be to check to make sure the rotor has moved just barely past the terminal for the #1 spark plug wire when cylinder #1 is at TDC on the compression stroke. (That sounds like a future video.) Unless someone has removed the distributor or oil pump and reinstalled incorrectly, about the only way for the static timing to be off by much would be if someone forced the rotor onto the distributor shaft in the wrong orientation. That's a challenge, but I've seen some people try. From your video I can tell you have a very weak battery. Make sure it is fully charged before you try again.1 point
-
I did see that and gave it a lot of thought. In the end, I was just looking for an excuse to make something on the lathe (and mill). 😁 I am really trying to clean up the engine bay to remove, or make less obvious, all the hoses, wires, etc. running around. That's why I decided to mount mine under the intake. The filtered air hose will run to a port at the bottom of the MAF sensor boot from the air filter. The air valve body can rotate to any position to facilitate the routing of the hose to get it to follow the same route as the boot. Also, the hose, air valve body, and boot will all be black and less visible - especially against the blinding brilliance of the polished intake, head, timing cover...... Well, a fella can dream can't he?1 point
-
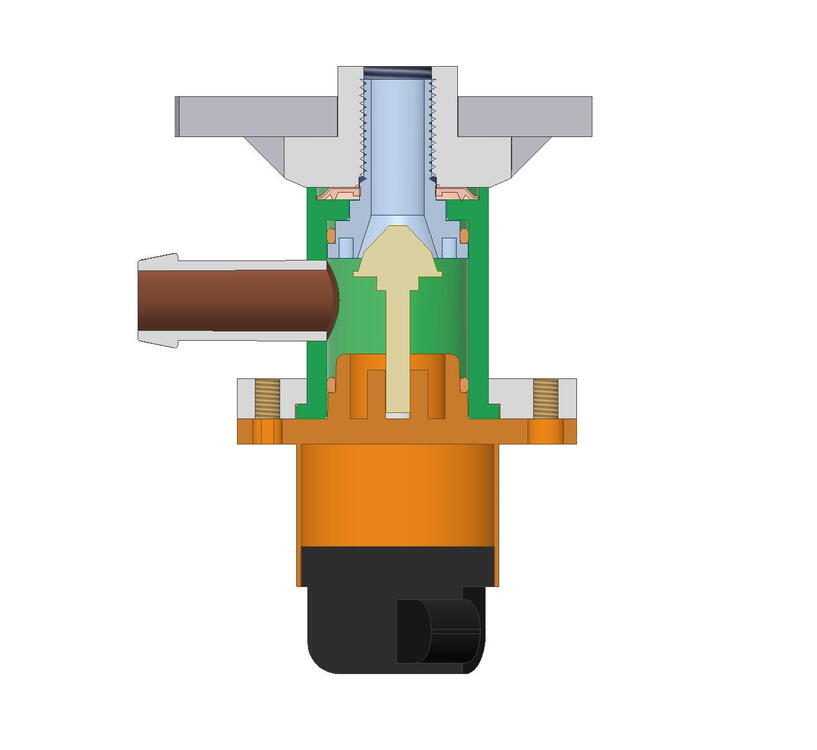
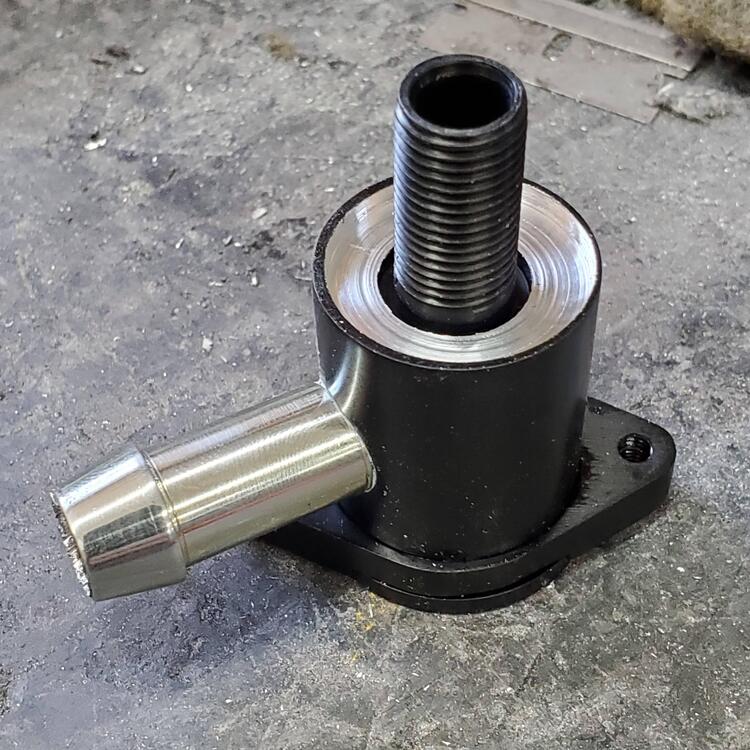
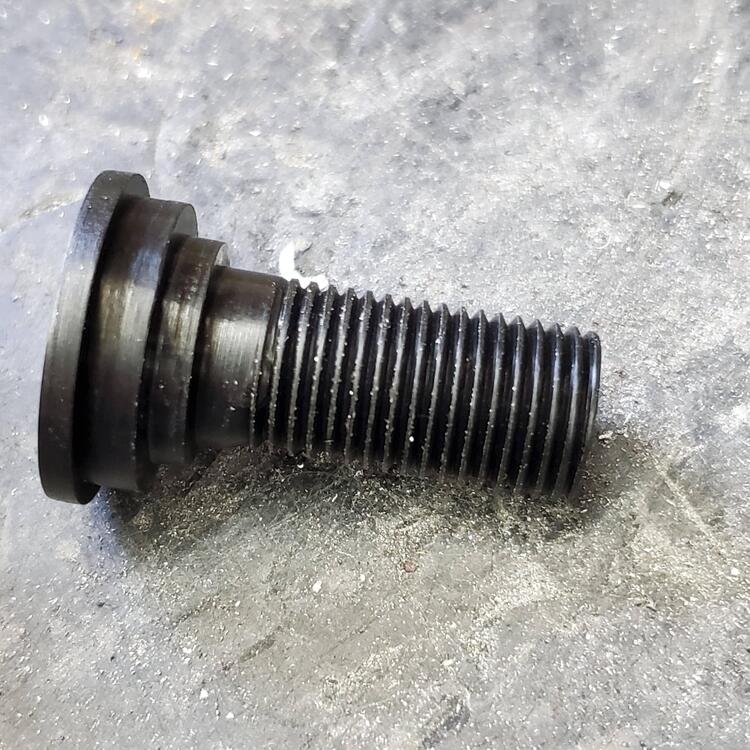
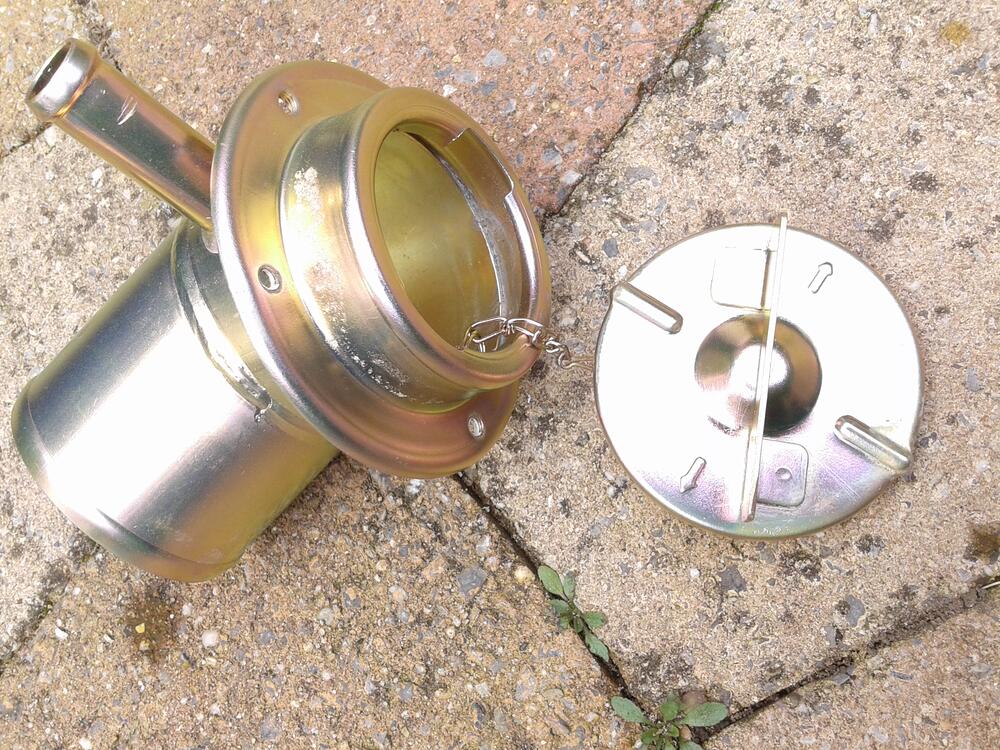
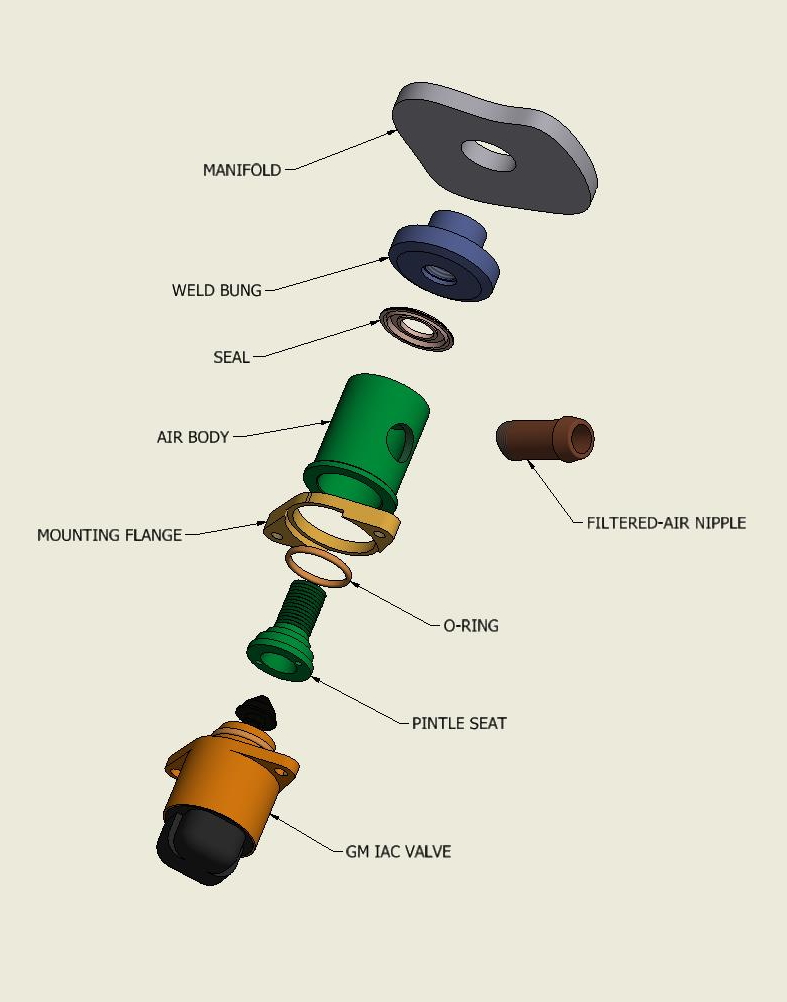
Next up, a new IAC valve and body. I will be using a stepper-type IAC valve from a GM motor to control idle speed. The problem is it also means I need an air body for the valve to mount to. I spent a long time trying to find something off-the-shelf and never found anything I liked very well, so I decided to make one. It's a bit complicated, but that's what I do best - make things more difficult than they have to be, but I have a blast doing it. The Concept It'll be located on the underside of the intake, to stay out of view. When I was shaving the intake, I bored a hole, made the bung and welded it in as I couldn't find one OTS with a wide enough flat to match the Seal diameter. I sent out the parts to be anodized. Found a place in Lynchburg that did a flawless job - Industrial Plating Corp. The guy who ran the shop (Brian) did the five parts plus two others that were zinc/clear for "lunch money" - $20. A deal AFAIC. The Realization The huge bung Assembled air body The pintle seat I have surface finish issues with these parts - they're okay but far from great. I recently acquired some decent carbide inserts to replace the Chineseum ones I used on this. What a difference. Oh well, another thing learned. The assembly seals well as best I can bench test it. Maybe this coming year I'll get to find out for real. 🤞


.thumb.jpg.492a08b9296a21ff4c84b5a439e79025.jpg)
 1 point
 -
At this point, I think I will reuse the rectangular piece if no other reason than to help align the hinge to the lid. However, I will drill two new holes through the hinge and plate in the middle of the plate, apply some zinc weld-through, and plug weld to the lid. I'll use the TIG machine to keep the heat as low as I can get away with and deal with the need to do a bit of bodywork on the lid exterior. No epoxy. There, another one done of only 13,000 more decisions. 👍1 point
-
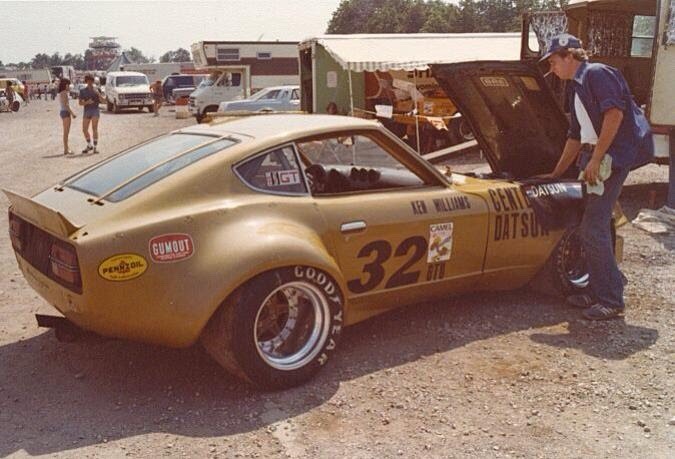
Credit: Car & Driver - https://www.caranddriver.com/news/g37340288/2023-nissan-z-designer-8-favorite-features/ Albaisa told us he was smitten by the Z at an early age, and he showed us places where the new Z takes inspiration (or learns from) the earlier models. BY CALEB MILLER AUG 18, 2021 NISSAN While the latest chapter in the Nissan Z saga effectively started when the Z Proto first arrived last year, the debut of the production car provides an opportunity to delve further into the new sports car’s details. We spoke to Nissan’s design chief, Alfonso Albaisa, at the reveal of the 2023 Nissan Z, and he gave us the full rundown on the new Z’s stunning design. JOHN ROECAR AND DRIVER 1 of 9 Nissan’s senior vice president for global design, Alfonso Albaisa, was born in Miami in the 1960s. While today’s Miami is full of influencers showing off in rented Lamborghinis, Albaisa says that the Miami he grew up in was humble. Even the sight of an affordable sports car was an exciting occurrence, and he says that he instantly fell in love when he first spotted a Datsun 240Z. His passion for the Z only increased when his uncle purchased one and picked him up from school in it. Albaisa joined Nissan a couple of decades later, and when he first traveled to the company’s headquarters in Japan he was captivated by a clay modeling buck for the then-unreleased Z32 300ZX. So when it came time for Nissan to redesign the Z for its seventh generation, Albaisa immediately knew which historic Z cars to emulate. NISSAN AND BRING A TRAILER 2 of 9 2023 Z and 1970 240Z One of Albaisa's priorities was for the front edge of the new Z to look as low as possible, moving away from the slightly bulbous look on the front of the outgoing 370Z. But engineers still needed to fit the 3.0-liter V-6 and both of its turbochargers under the aluminum hood, leading Nissan to evoke the 240Z with a raised, Y-shaped hood bulge. NISSAN 3 of 9 New Z Albaisa acknowledged that many people see the rectangular grille as a big, gaping mouth, but he instead envisions it as a hole carved out by the forms in the bodywork. The character line running from the A-pillar past the headlights forms the intake’s outer edges, while the top is bordered by a line swooping beneath the headlights and the front splitter acts as the base of the grille. JOHN ROECAR AND DRIVER 4 of 9 2023 Z The two split LED arcs within the headlights were designed to imitate the light patterns reflected by the headlight covers on the Japan-only 240Z G, a homologation special for Group 4 racing. Translating the Z Proto’s headlights into production brought packaging challenges, with Nissan squeezing the mandatory orange reflectors into the sides of the already tightly packed headlights and allowing them to retain the striking LED elements. JOHN ROE AND STEVE SILER 5 of 9 2023 Z and 2019 370Z Increasingly stringent safety regulations have made car designers feel “like boxers on their back foot,” Albaisa said, and made it difficult for Nissan to position the head- and taillights as low as they wanted. Albaisa pointed out a 370Z sitting nearby at the reveal, showing how the lights climbed up the front and rear fenders and made the car look too thin and tall. The new Z’s lighting units are horizontally oriented and don’t ascend up the fenders, making the car look lower and wider. JOHN ROECAR AND DRIVER 6 of 9 2023 Z When Nissan was first plotting the new Z’s design, Albaisa paid a visit to Peter Brock, who built dominant Datsun track cars with his Brock Racing Enterprises squad in the ‘60s and ‘70s. Albaisa said he “wanted to speak to God,” but the only note that God, or rather Brock, gave him was to “just make it beautiful.” Then Brock’s wife stepped in, saying the motorsport legend was being too polite and that Nissan should “suck the door handles back into the car,” which is how the new Z ended up with its sleek, flush handles. 7 of 9 2023 Z and 2019 370Z Another key factor in visually lowering the Z is the muscular rear haunches. Compared with the 370Z’s bloated, wide wheel arches, Albaisa created a concave scoop that carved away much of that volume for the new car. The curve of the haunches ends with the outer edge of the wheel well, which sticks out further than before to make the new Z look even more planted than its predecessor. 8 of 9 1970 240Z and 2023 Z One of the new Z’s subtlest design features is that the top edge of the taillights actually sit lower than top of the headlights. This is uncommon these days, as more and more vehicles adopt trendy fastback or SUV-like body styles, and Albaisa noted that the last Z to have this was the first-generation car that he was smitten with as a child. NISSAN AND BRING A TRAILER 9 of 9 2023 Z and 1991 300ZX The taillights themselves mimic those on the 300ZX of the 1990s, but Albaisa and his team used a clever trick to avoid recreating the chunky rear end of the Z32 300ZX. While the Z includes the 300ZX’s glossy black trim surrounding the actual lamps, Nissan made the black taillight housing much thinner, visually widening and lowering the car. But Nissan also included a character line on the body itself extending down and across the bumper to form a larger rectangle, calling to mind the 300ZX’s blocky rear while appearing more lithe and athletic.1 point
-
If you look carefully at the top big pic. (first one in this topic) . and see that the front of the car is a little higher on the pic (Put the rims on the screen edge) and you scroll the pic down you can see that the above is NOT true ?? Huh.. or am i wrong? 😮1 point
-
I'll try to remember to set up a test rig to demonstrate testing this weekend.1 point
-
1 pointMissing data: What ignition do you have? Is it stock points? Pertronix? Crane? 1-2-3? ZX? Stock wiring: There is a black/white wire that goes to coil positive. There is another black/white wire that goes to the ballast, and a green/white wire that goes to the other side of the ballast. @Captain Obvious has a nice drawing that he labeled. If you need to figure out which wire is which, I did this video. However, you said you're getting spark, so in all likelihood that is wired correctly. You have not said anything about verifying static timing. You have not said anything about verifying firing order (1-5-3-6-2-4 counterclockwise) Have you verified that there is fuel in the float bowls? As @Zed Headsuggested, will it fire with starting fluid?
 1 point
 -
1 point
-
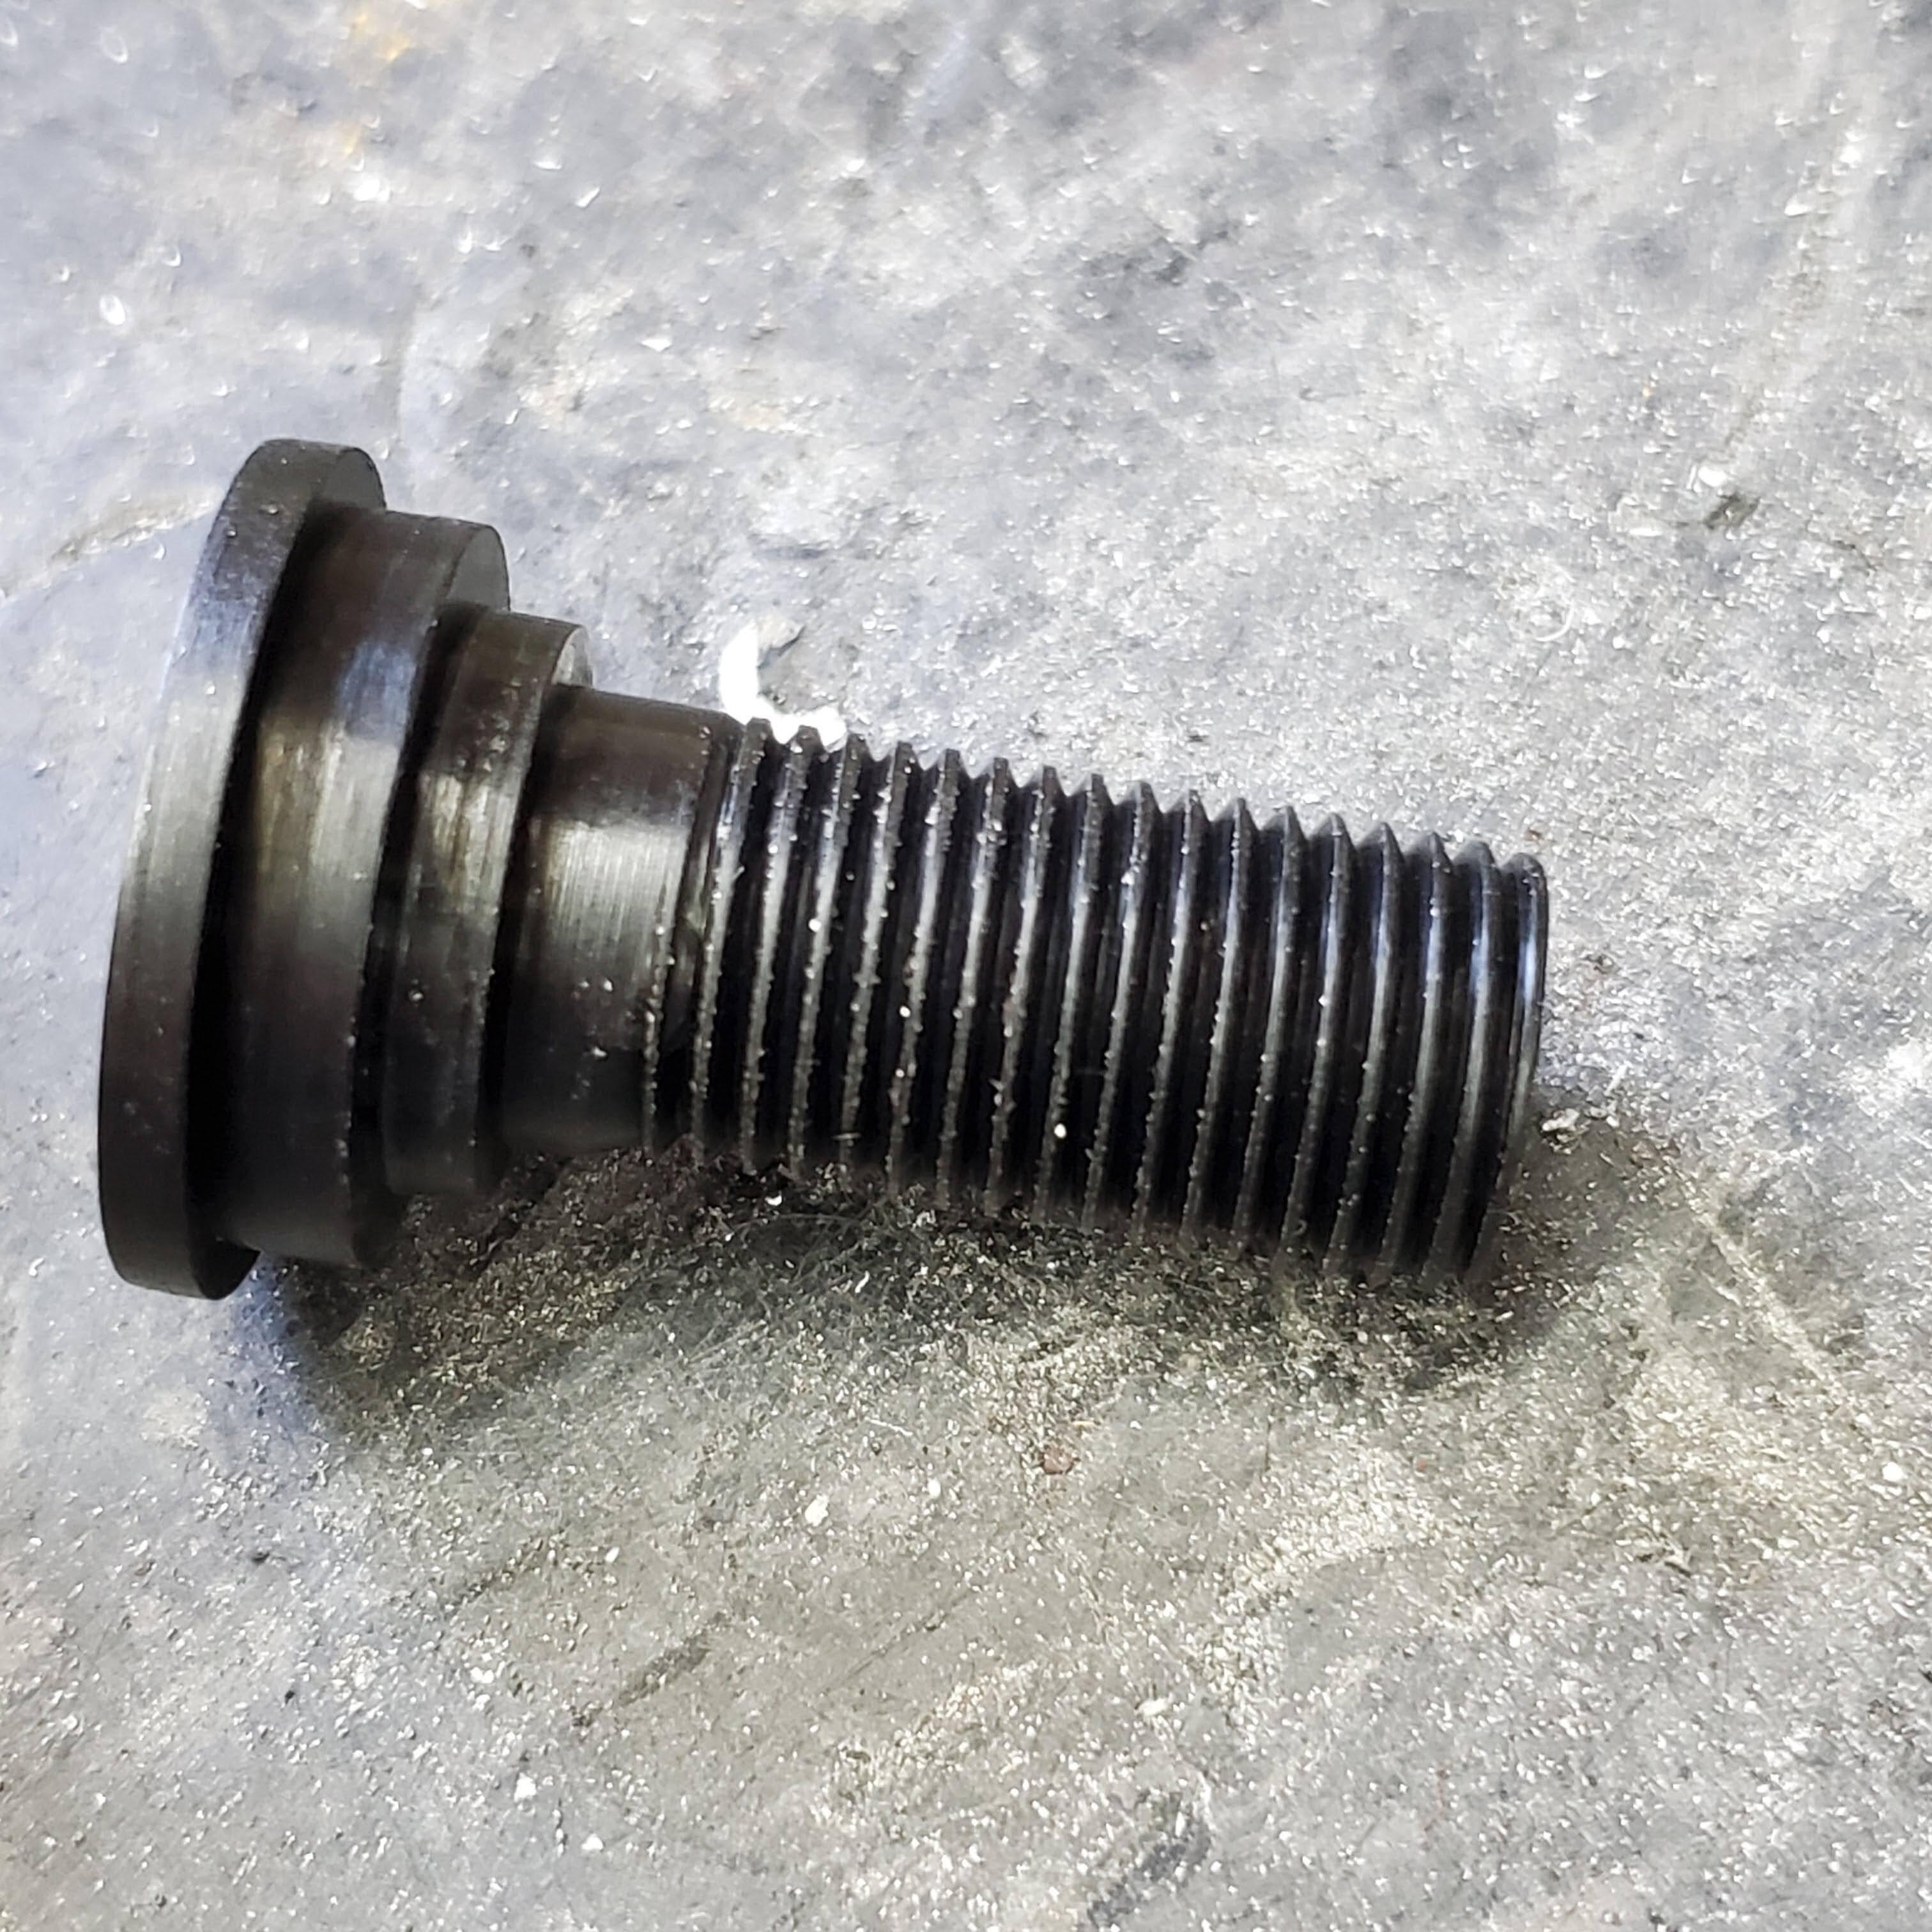
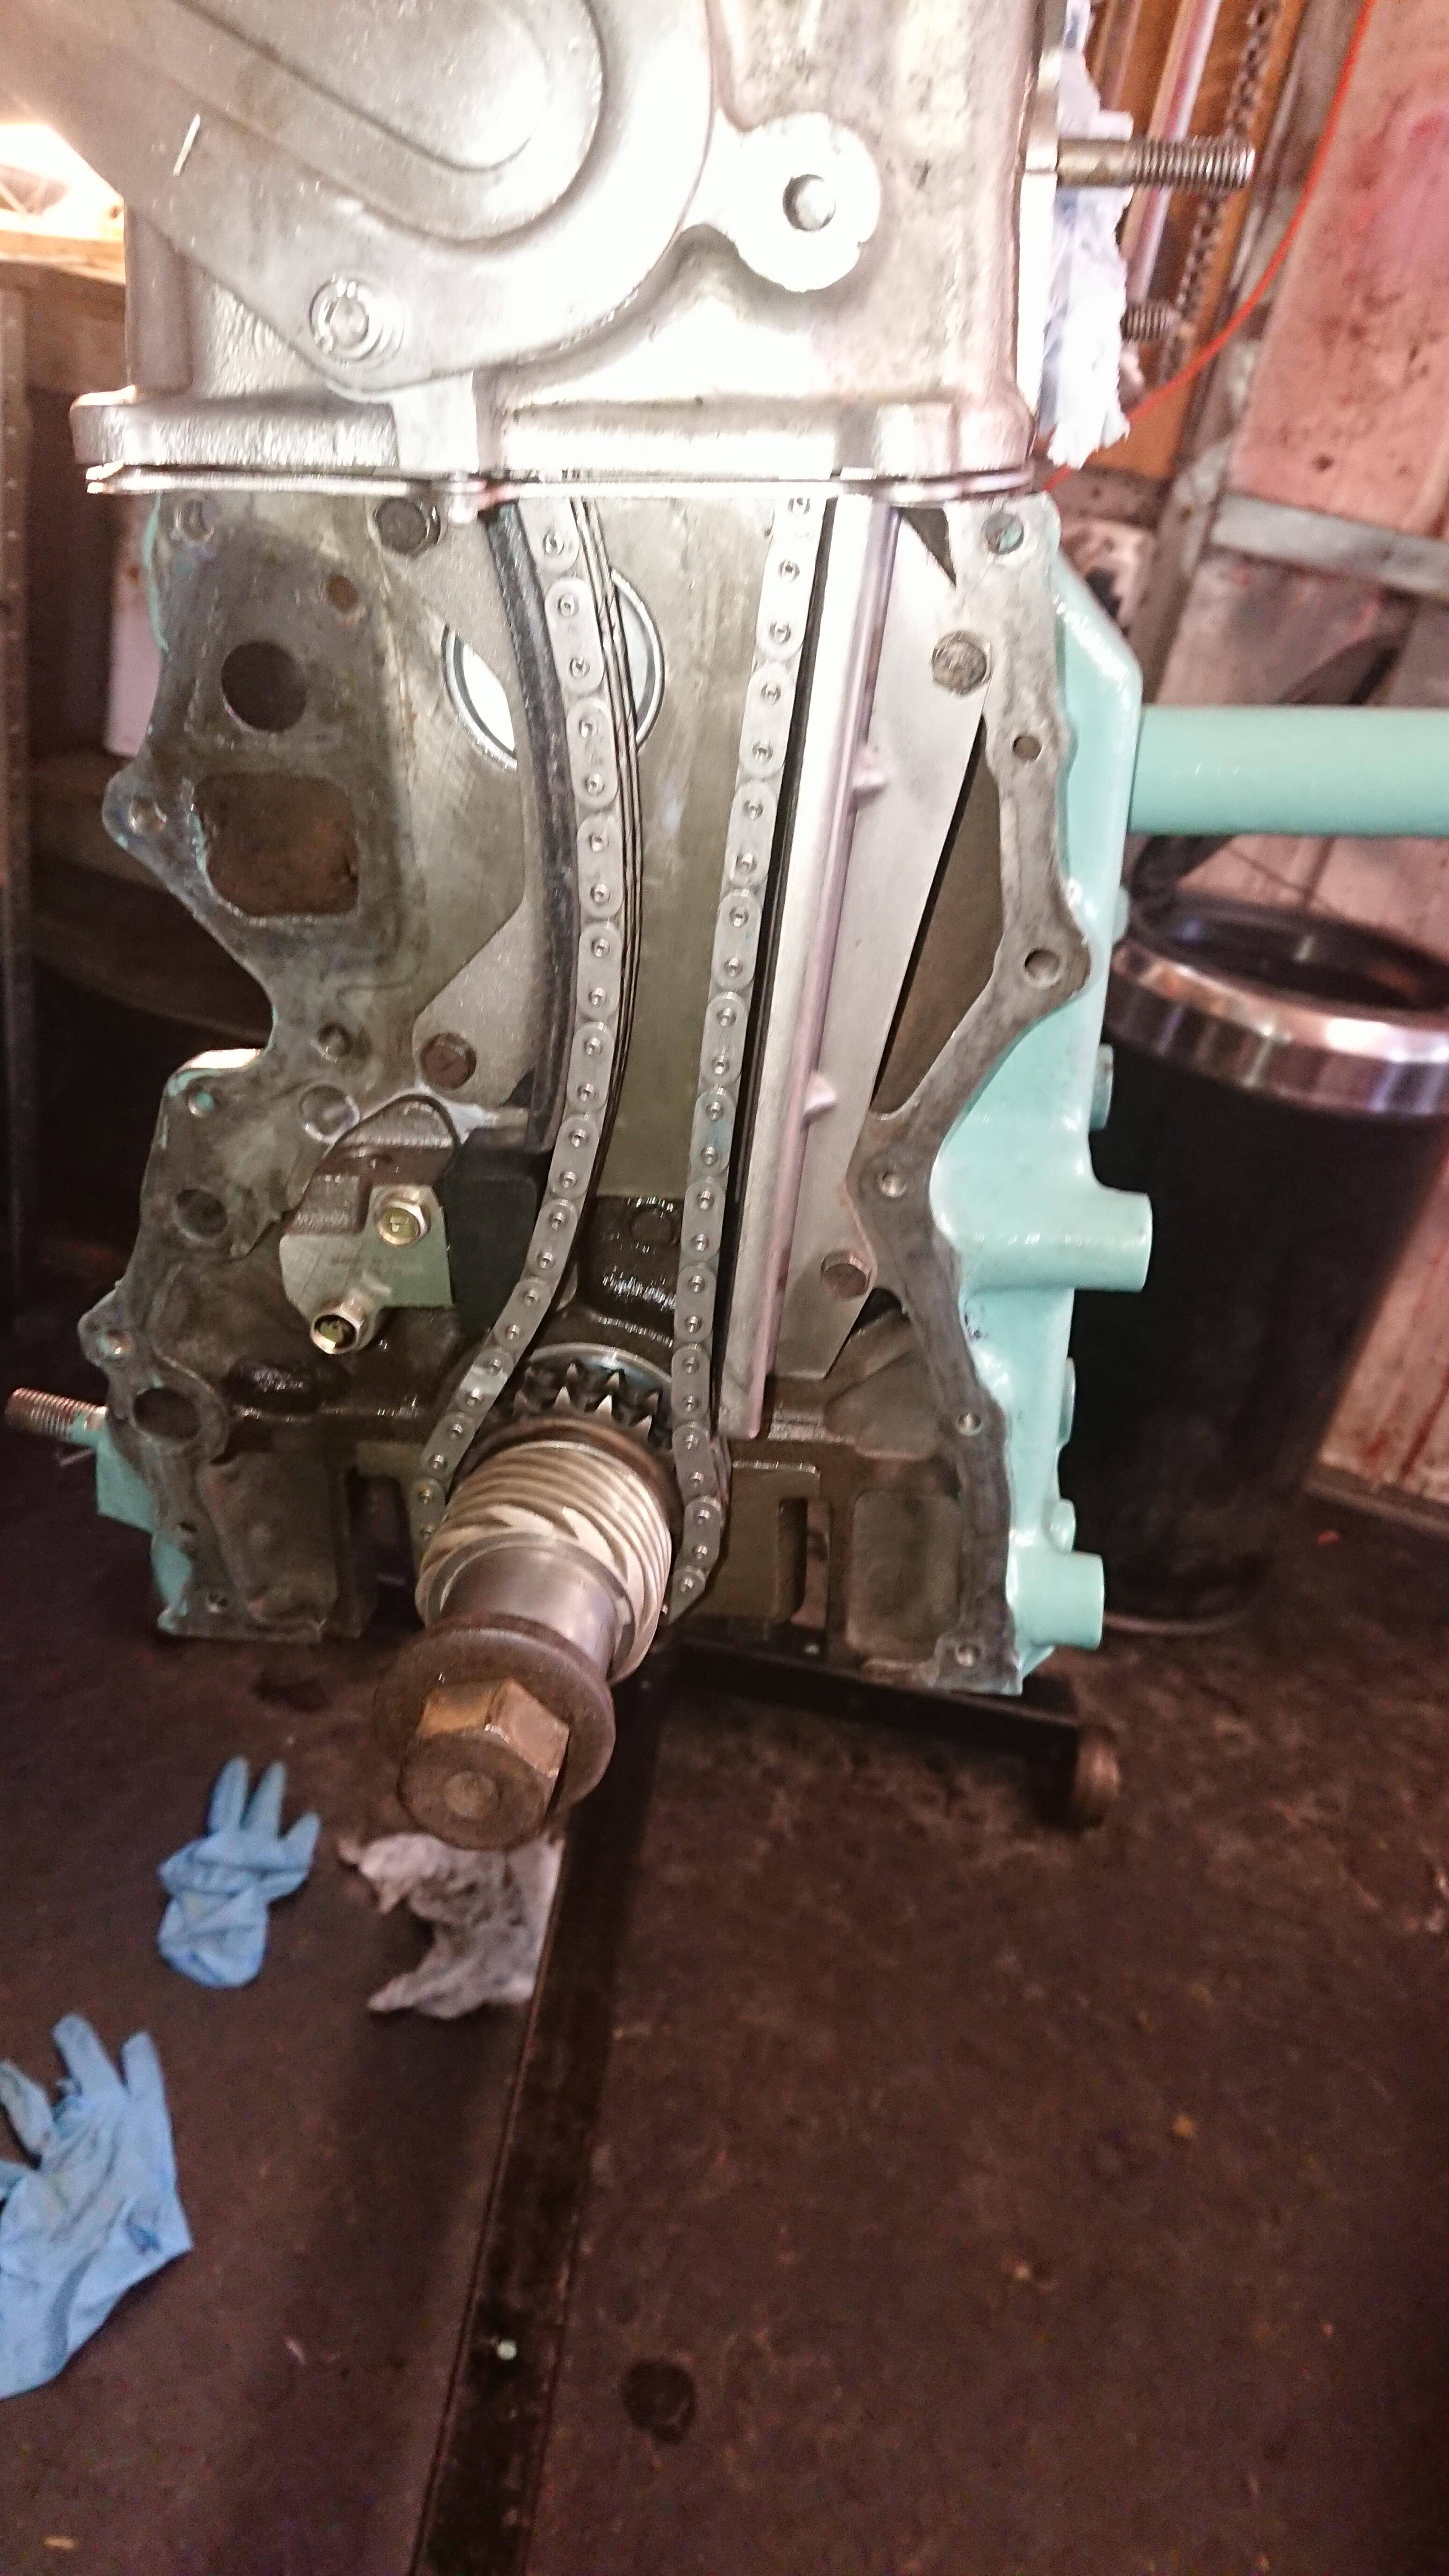
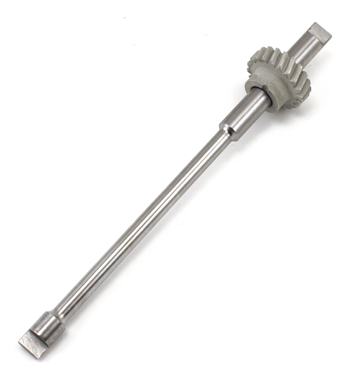
1 pointthis is the gear on the crank that that spindle engages with, as it goes diagonally across the top of it at about 10 o clock.

 1 point
 -
1 point
-
1 pointI used this place for my items. Way less money. They do smaller batches for automotive guys. Looked just as good. https://staging.craftcoating.com/craft-industrial-coating/1 point
-
1 pointThat'll just dilute the engine oil with rustbuster, won't go anywhere near the oil pump!1 point
-
1 pointIs that a crack or casting marks? Seems like if was a crack in the pump he'd have a hell off a messy floor from the oil leaking out. Once it's started the pressure builds pretty quick down there.1 point
-
1 pointI’ve used a place in San Diego that I’m pretty happy with. Turnaround was about a week. Prices are good. They charge by the hour and I’ve done two batches. Fist was about 13lbs and that cost me ~$210 with tax. I did a joint venture with Captain Obvious. I think the results were good, not perfect but very good. They didn’t lose any parts either. I actually walked into the place and watched thee process. They specialize in doing classic cars so they’re familiar with what people in the car hobby want. Here is the before and after of a few items. I had the do ALOT of bolts and nuts, they came out awesome. A note, I always take account of how a place looks to make a judgement of the type of management/leadership at a business. If it’s a mess and filthy with a bunch of dudes wearing nasty work clothes it can be an indicator. I use the same theory of restaurants. If the bathroom is a mess, imagine what the kitchen looks like . This place in San Diego was spotless, people were wearing matching overalls and the place was super nice for a plating business which you expect to be something from a Chinese slave labor camp. Place is called Anocote Metal Finishing. 858-566-1015 Ask for Debbie and tell her you want Yellow Zinc plate . Sent from my iPhone using Tapatalk1 point
-
1 pointThe spindle can't turn when it's engaged to the crankshaft. The pump stator will stay stationary in the pump when the outside body rotates1 point
-
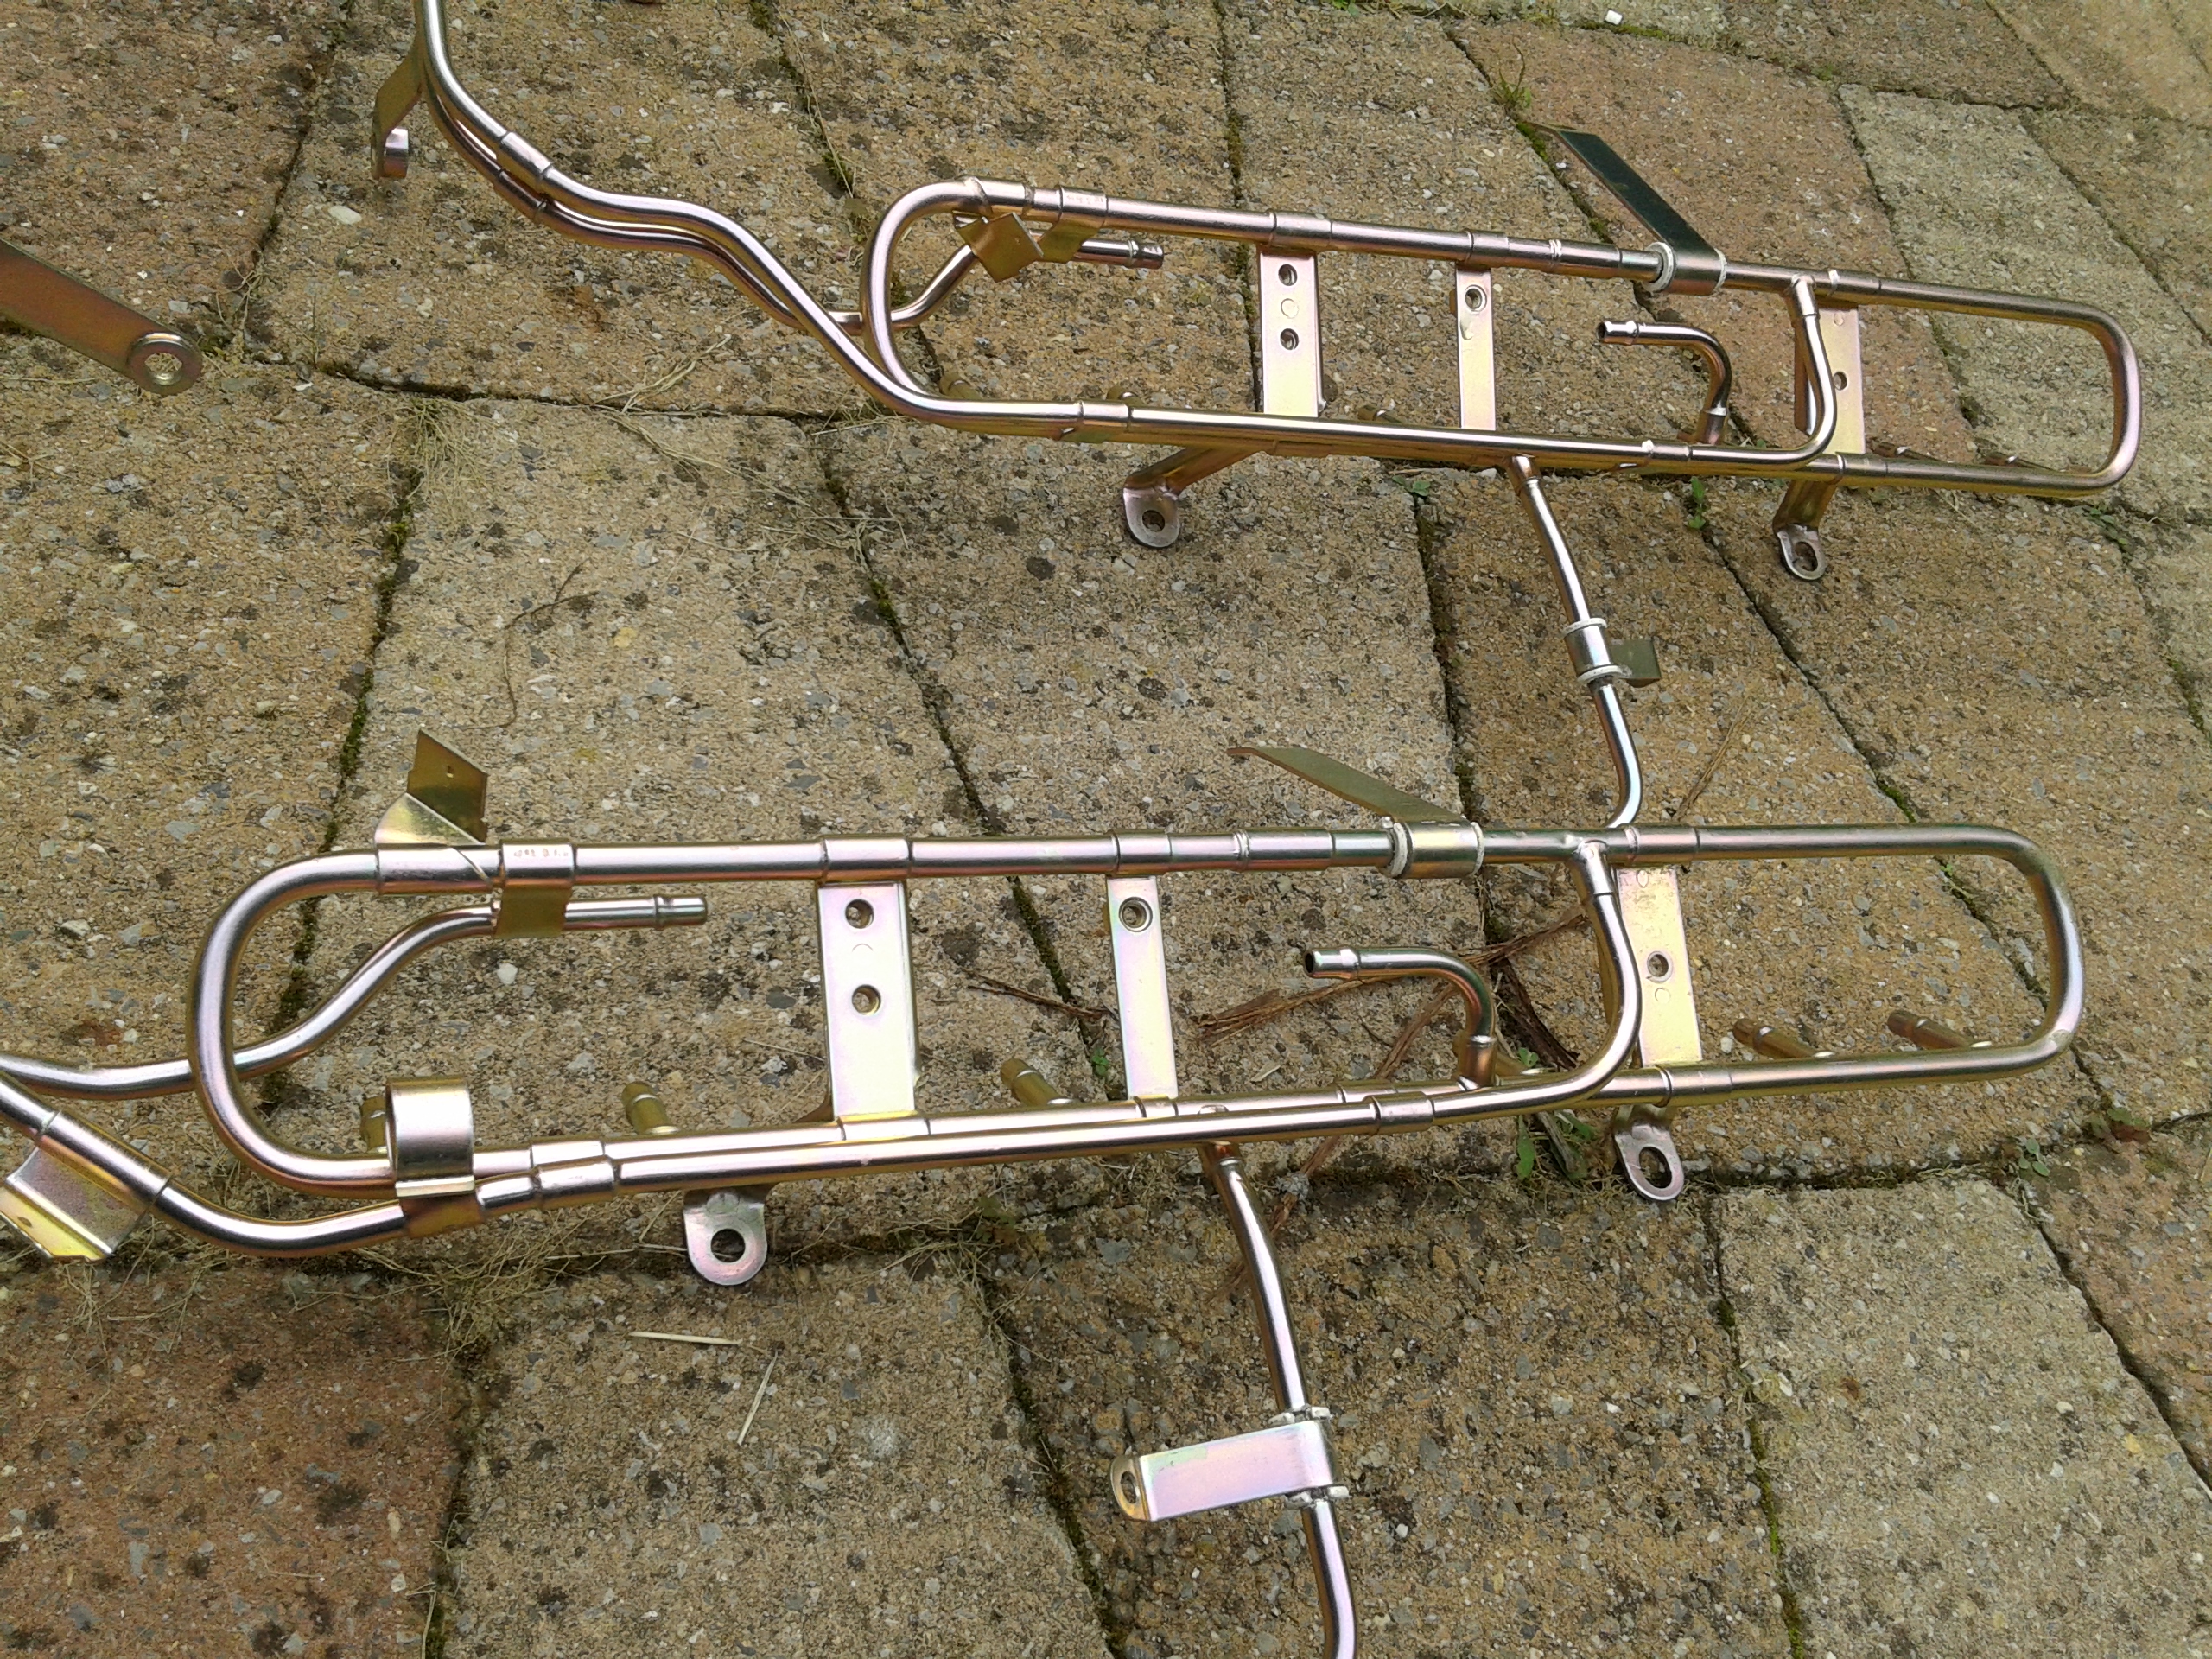
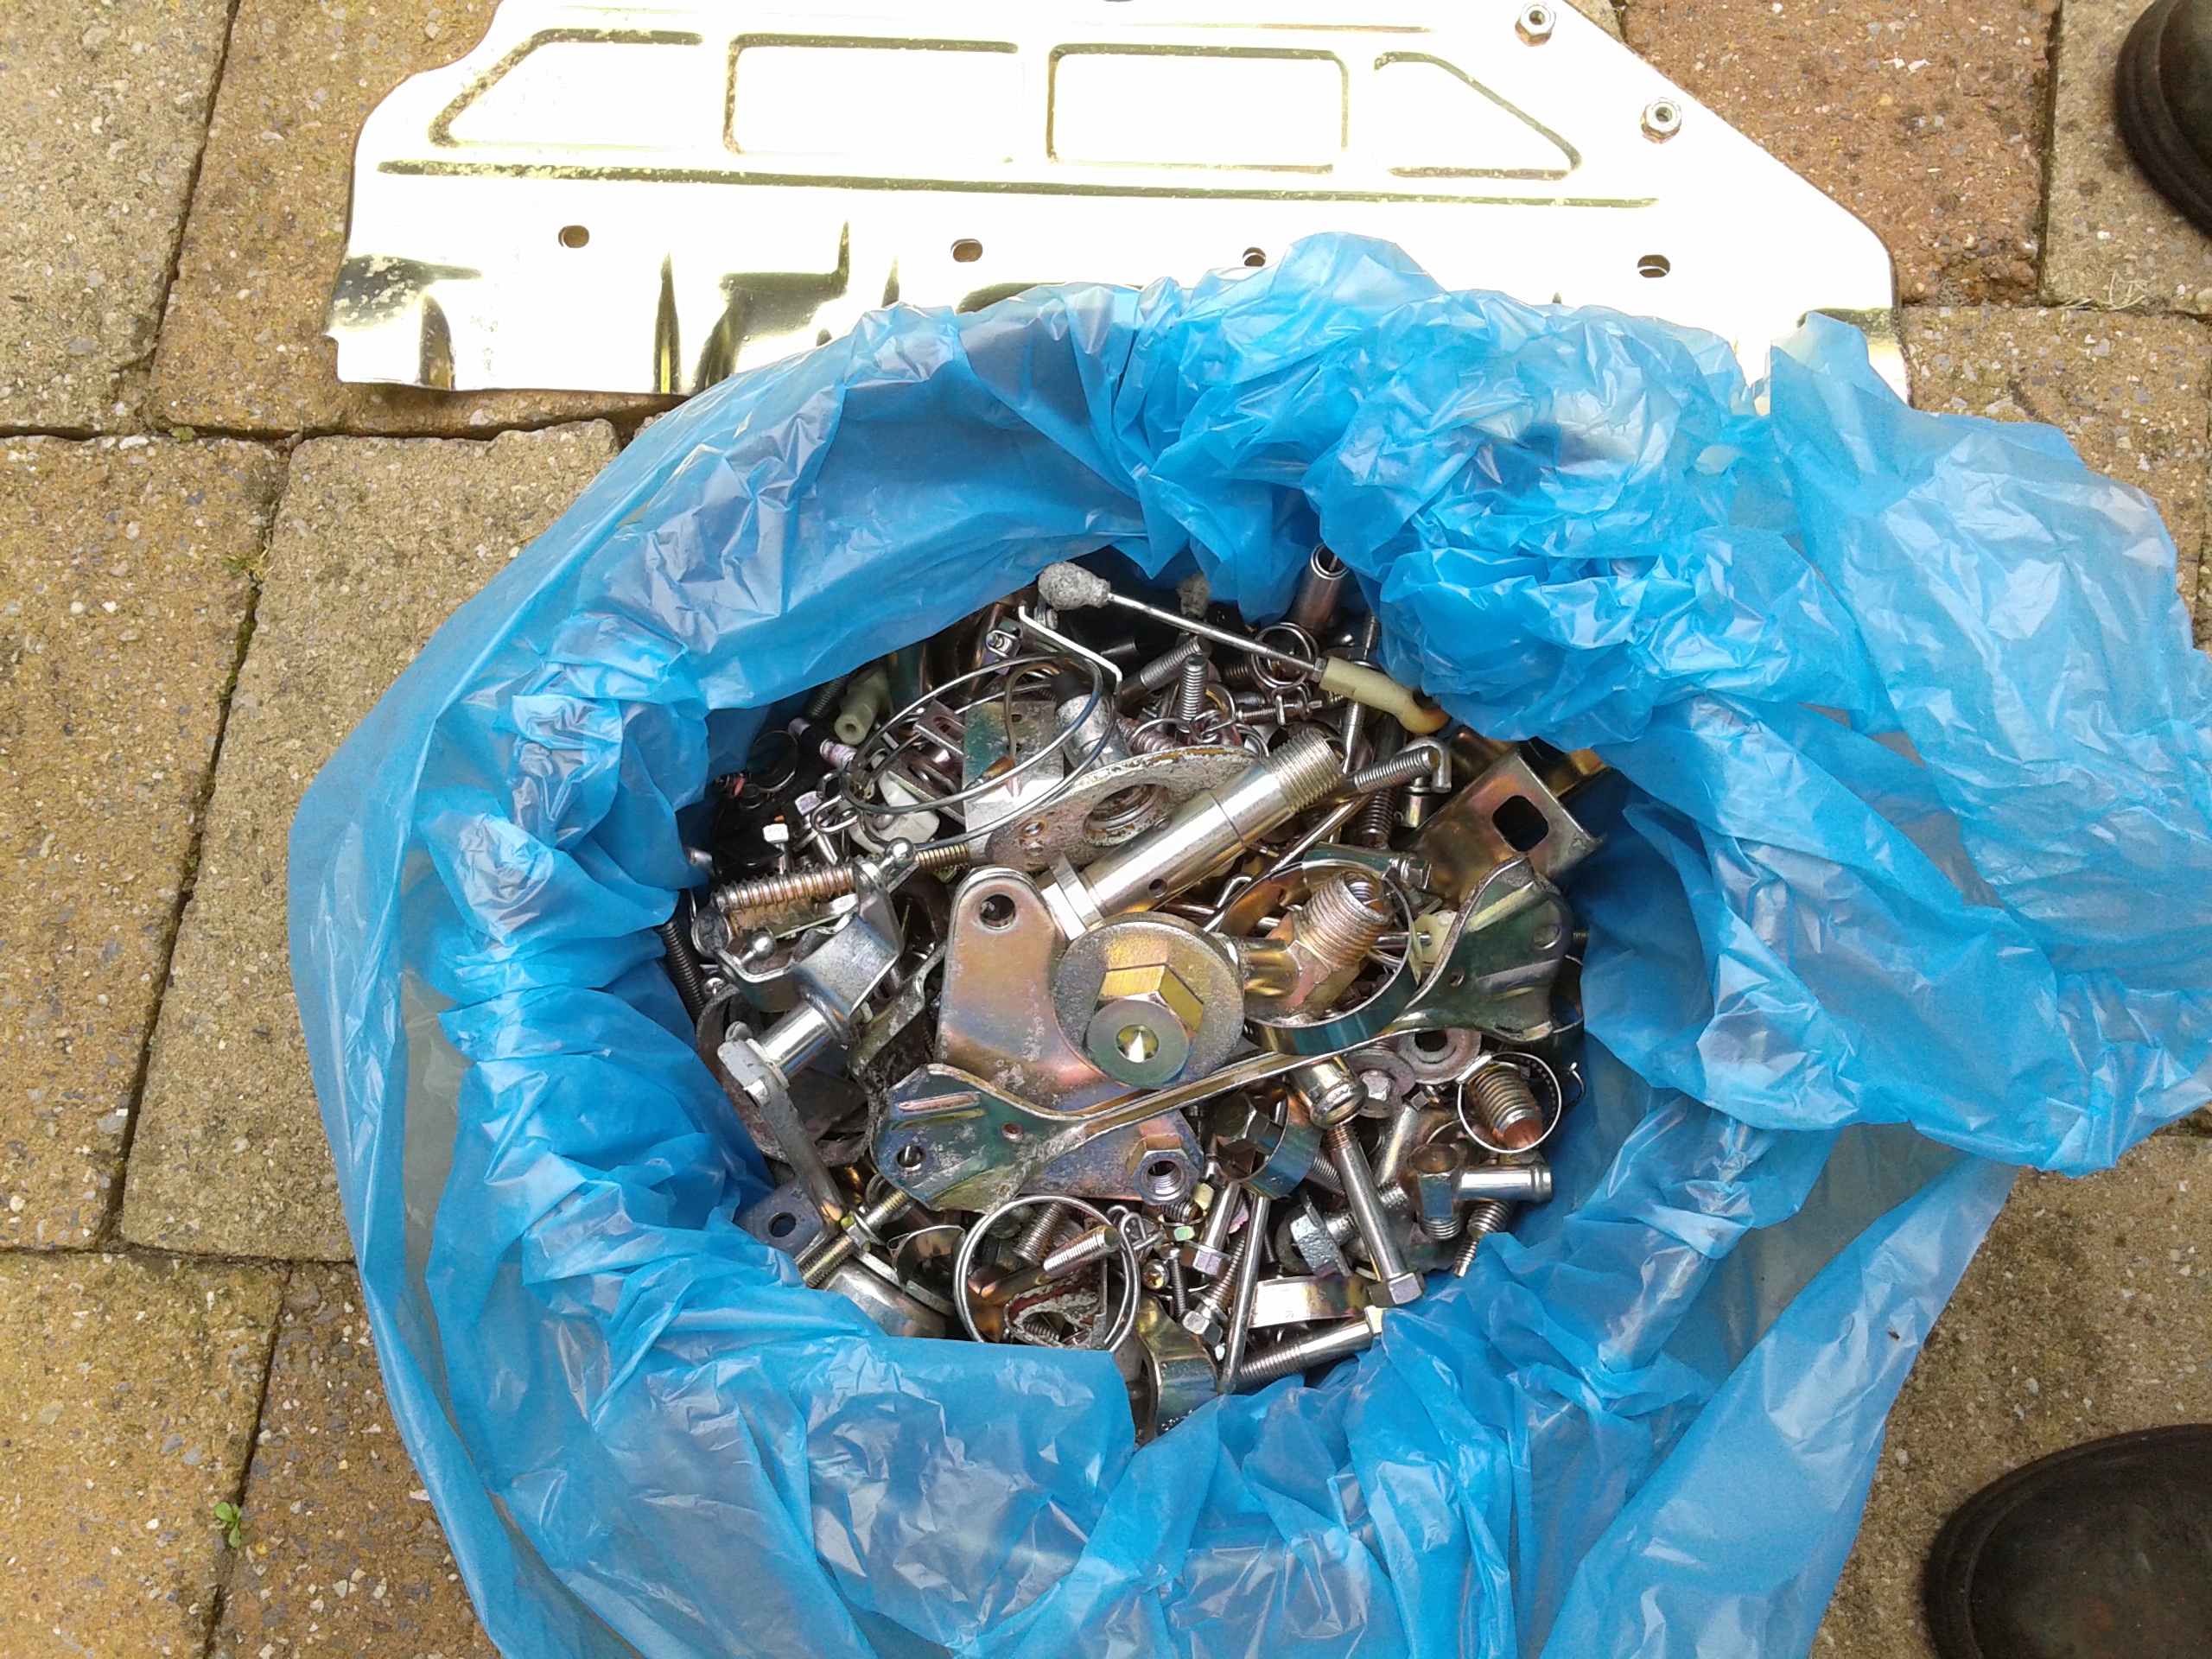
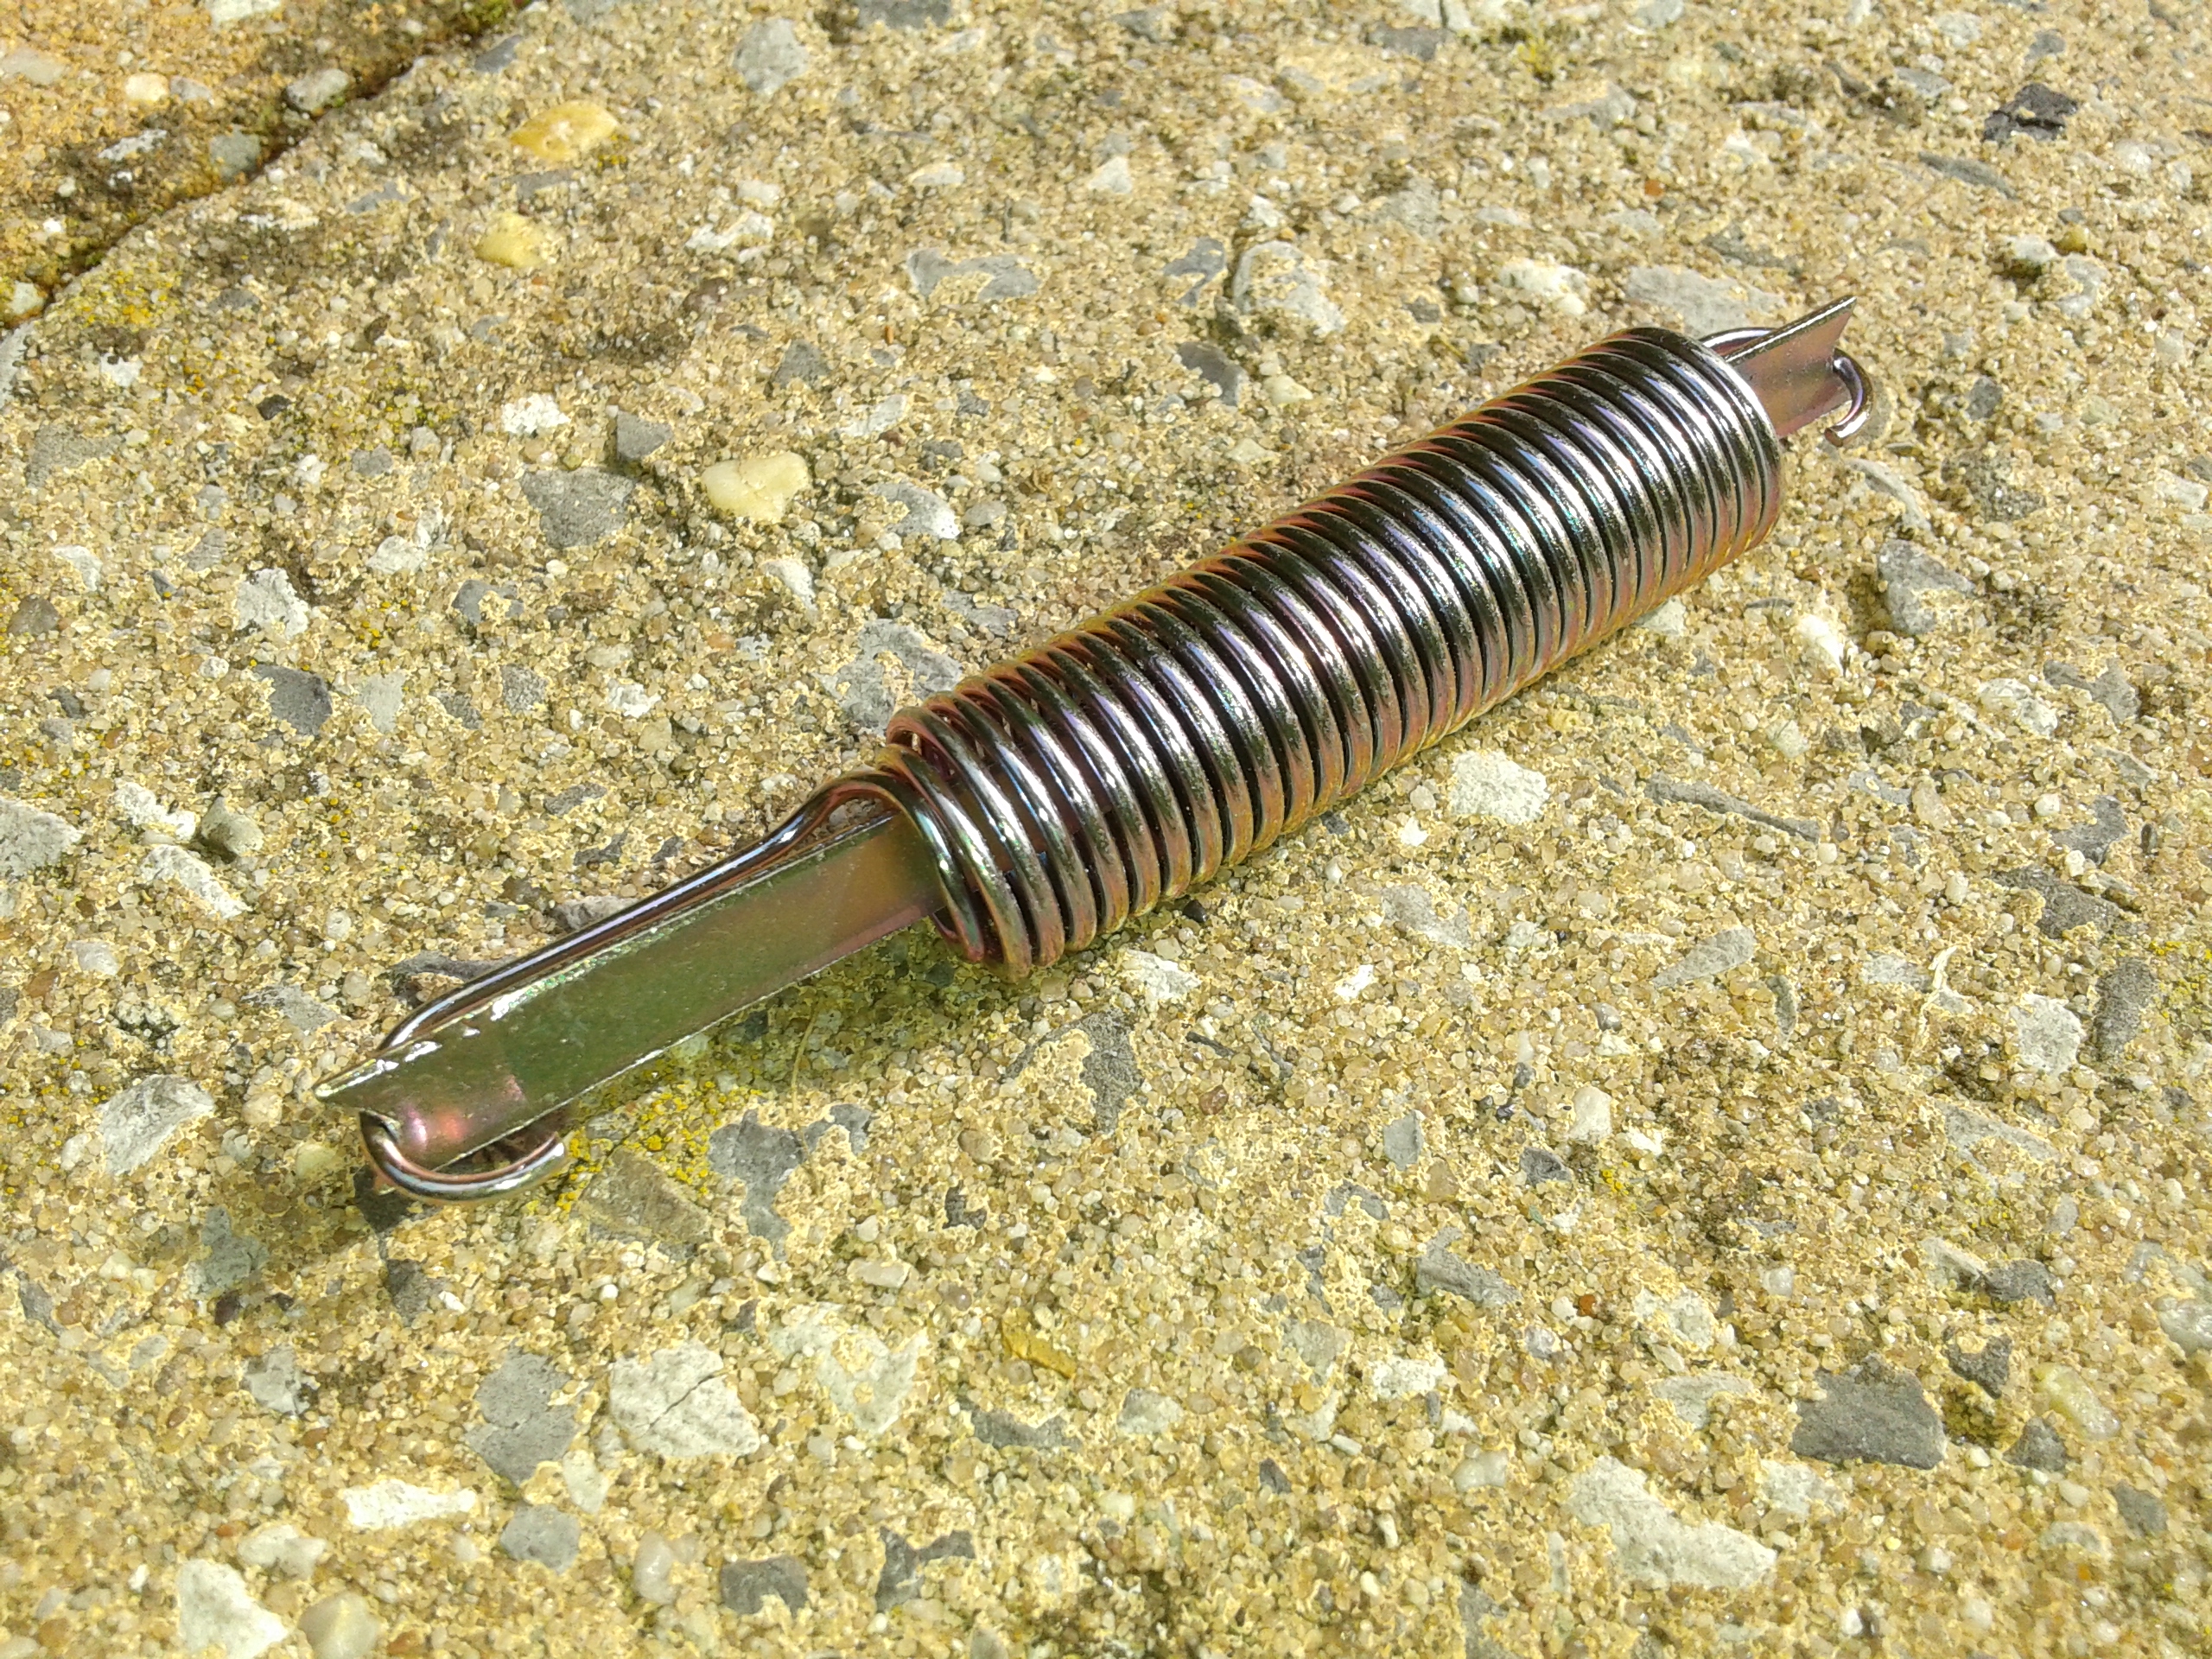
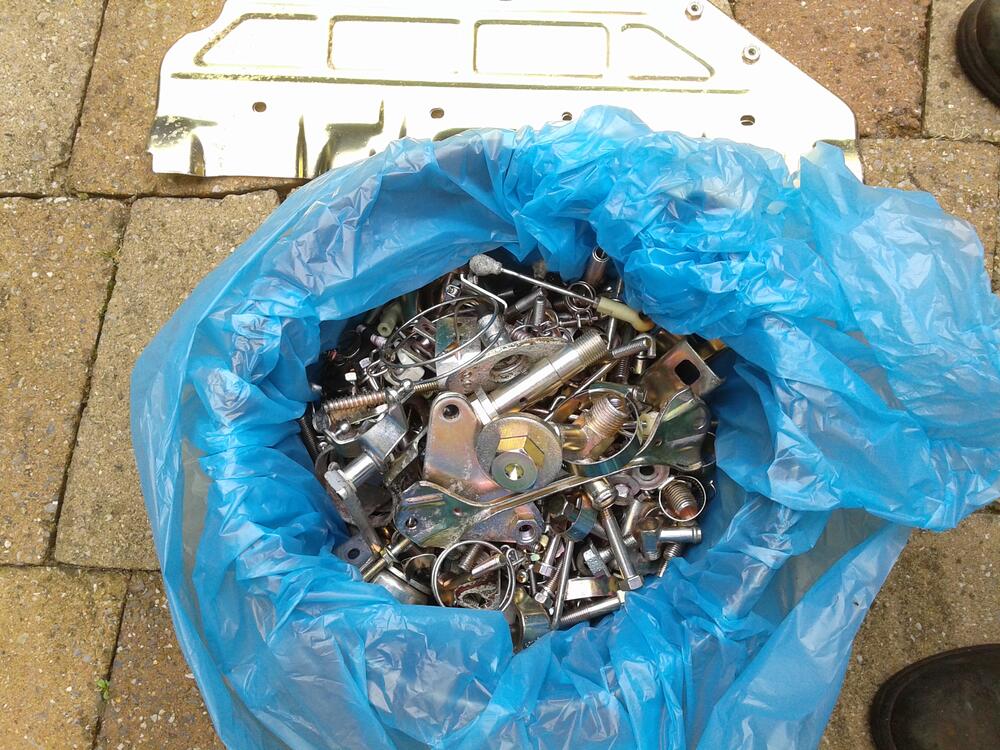
1 pointAh... Hope it's all there then! I just went a month ago? to the plater Galvano here in the netherlands and i always care to put nothing in it under lets say 8 mm big.. i had 3 very small screws in a batch of 50 Lbs or so? and... i got everything back in good as new condition.. (very small ones i put a ring on them and a nut that way they always come back.. never failed!) Including the thirsty ride in my 300zx 😉 i had to pay about 200Euro for the badge.. not bad.. they said it was not very profitable as there were a lot of big parts this time.. some nice fuel lines.. springs i use a small piece of steel to stretch them so it is plated perfect! 40 Lbs of steel stufffff........ fuel intake 280zx (gonna use this one on my 240z one day...i think it's better hope it fits.. (these are also on the 280z i think?))

 1 point
 -
0 points


.jpg.d0f7094f1b82a7ee7683adf618b6d38c.jpg)