


Leaderboard
-
grannyknot
Free Member7Points5,158Posts -

CW240Z72
Free Member7Points229Posts -
RIP260Z
Free Member4Points364Posts -
inline6
 Subscriber
 3Points1,282Posts


Popular Content
Showing content with the highest reputation on 08/01/2021 in all areas
-
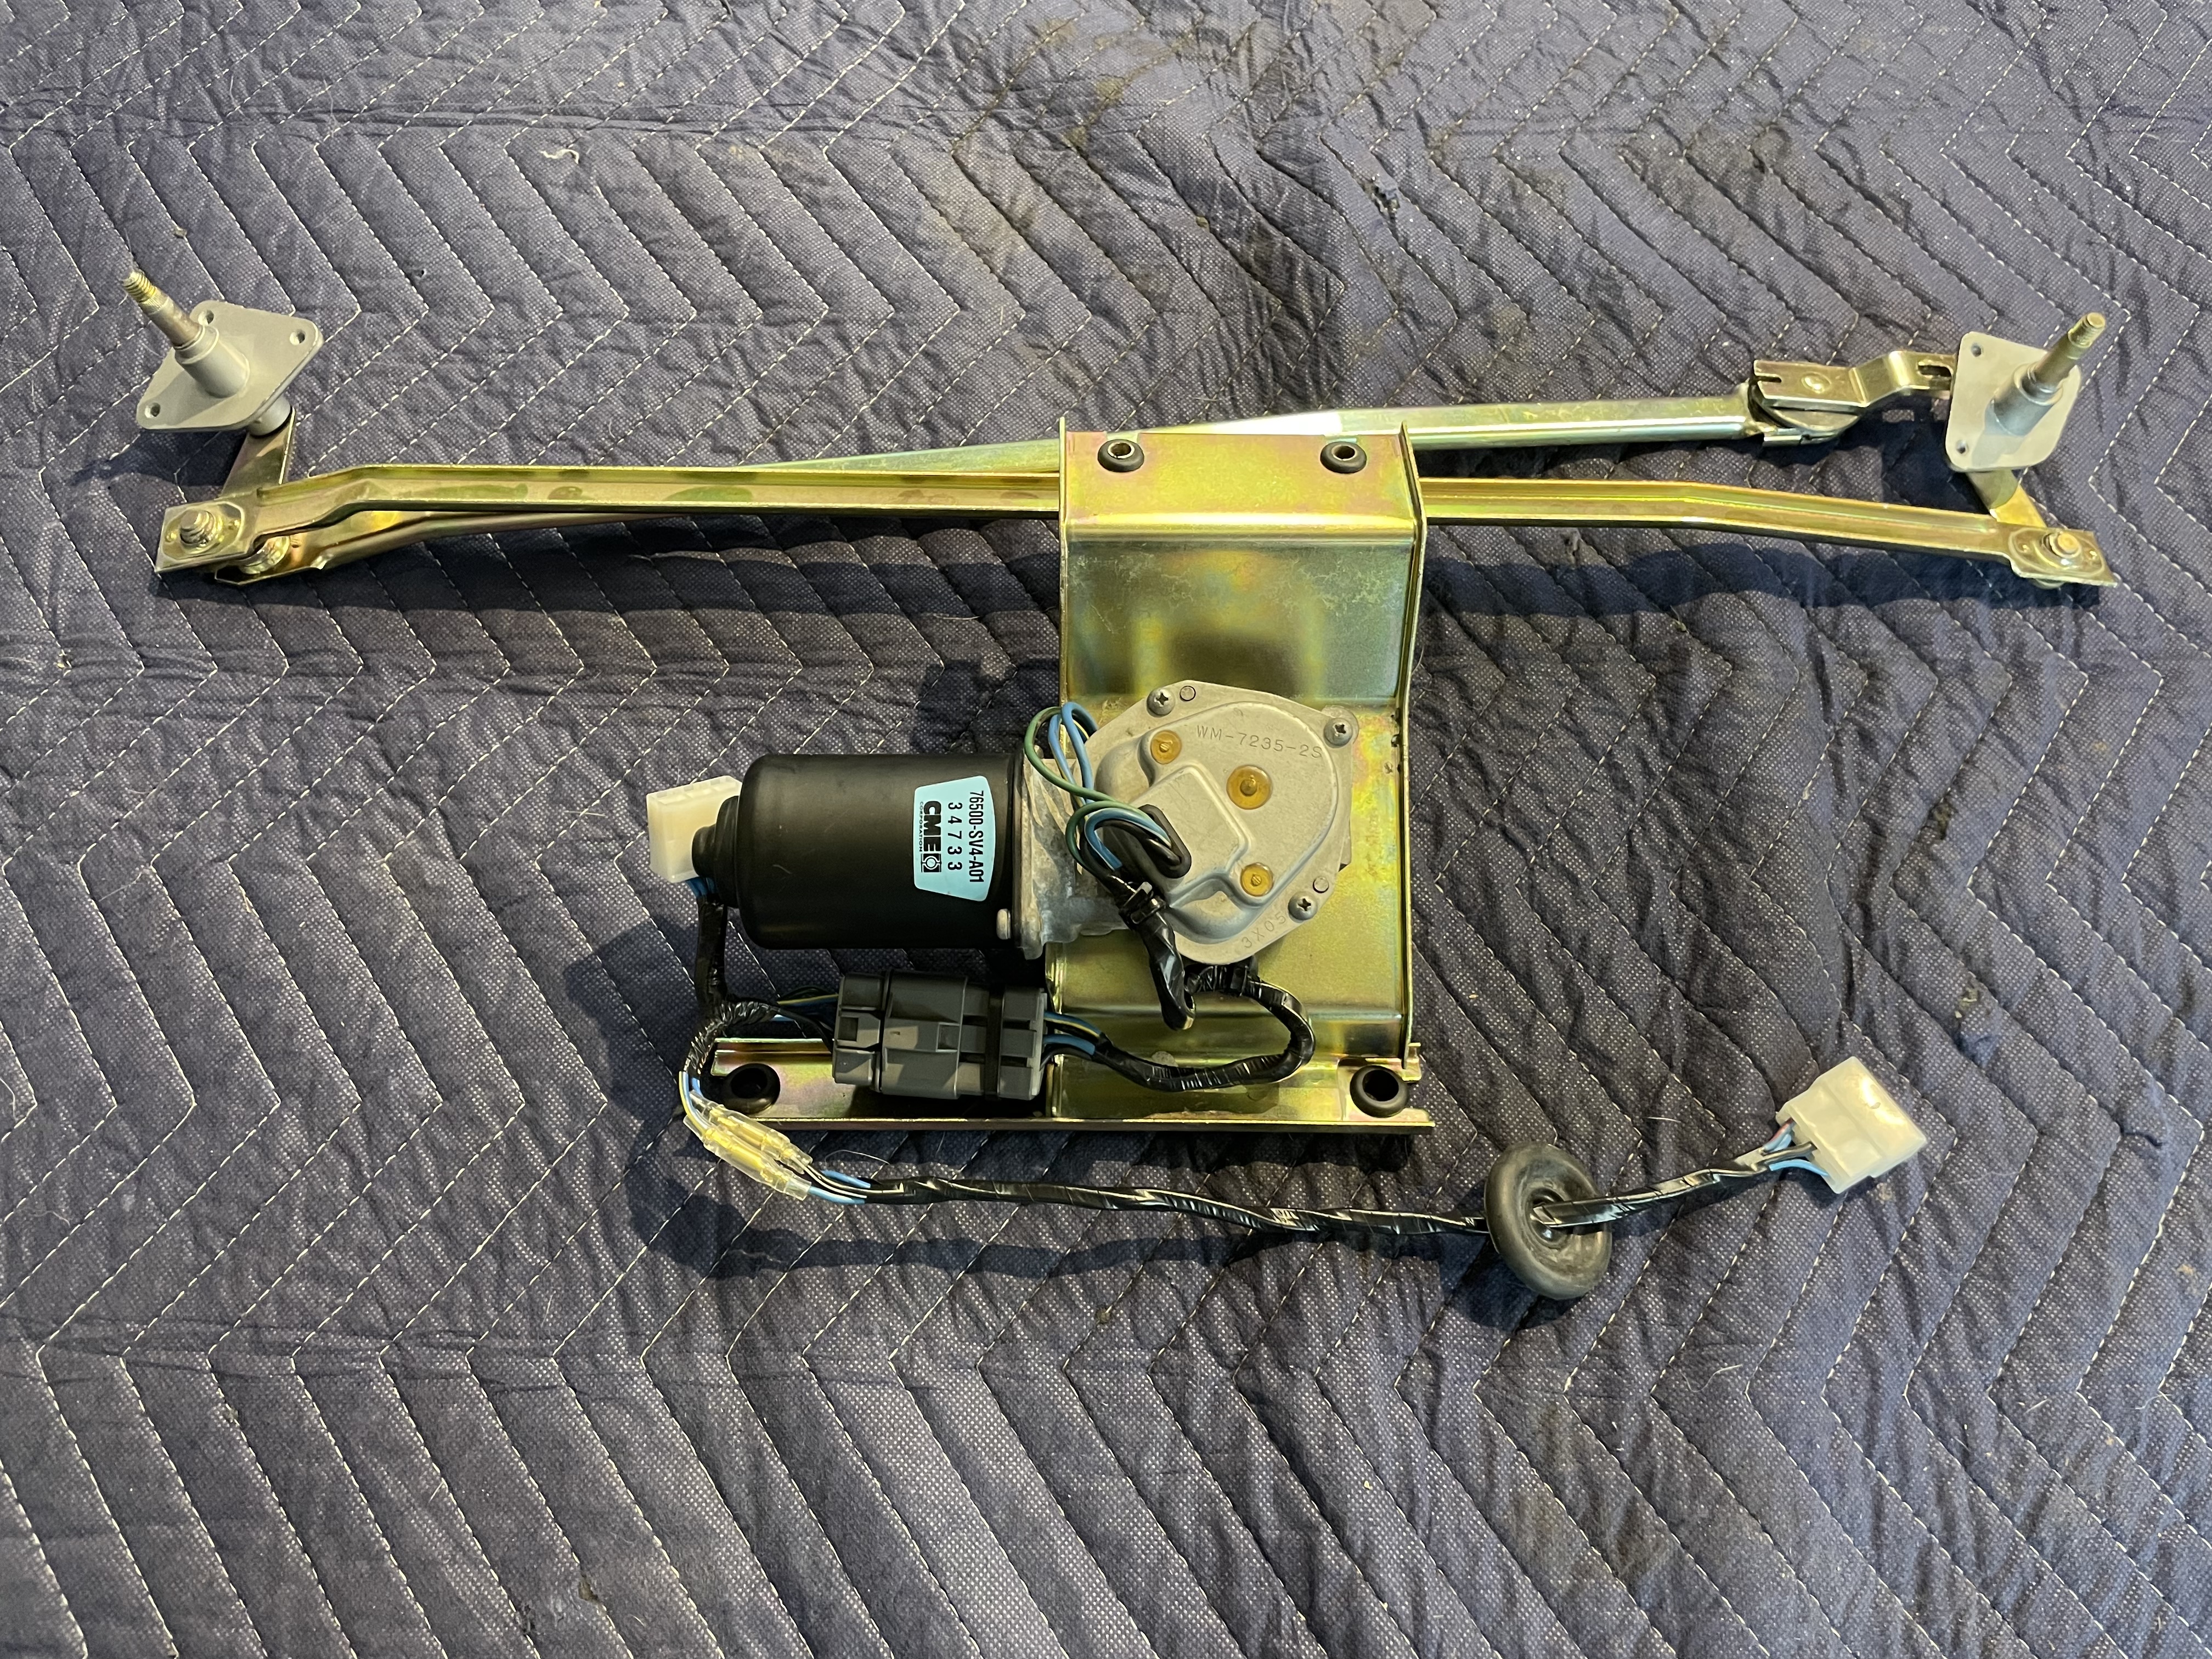
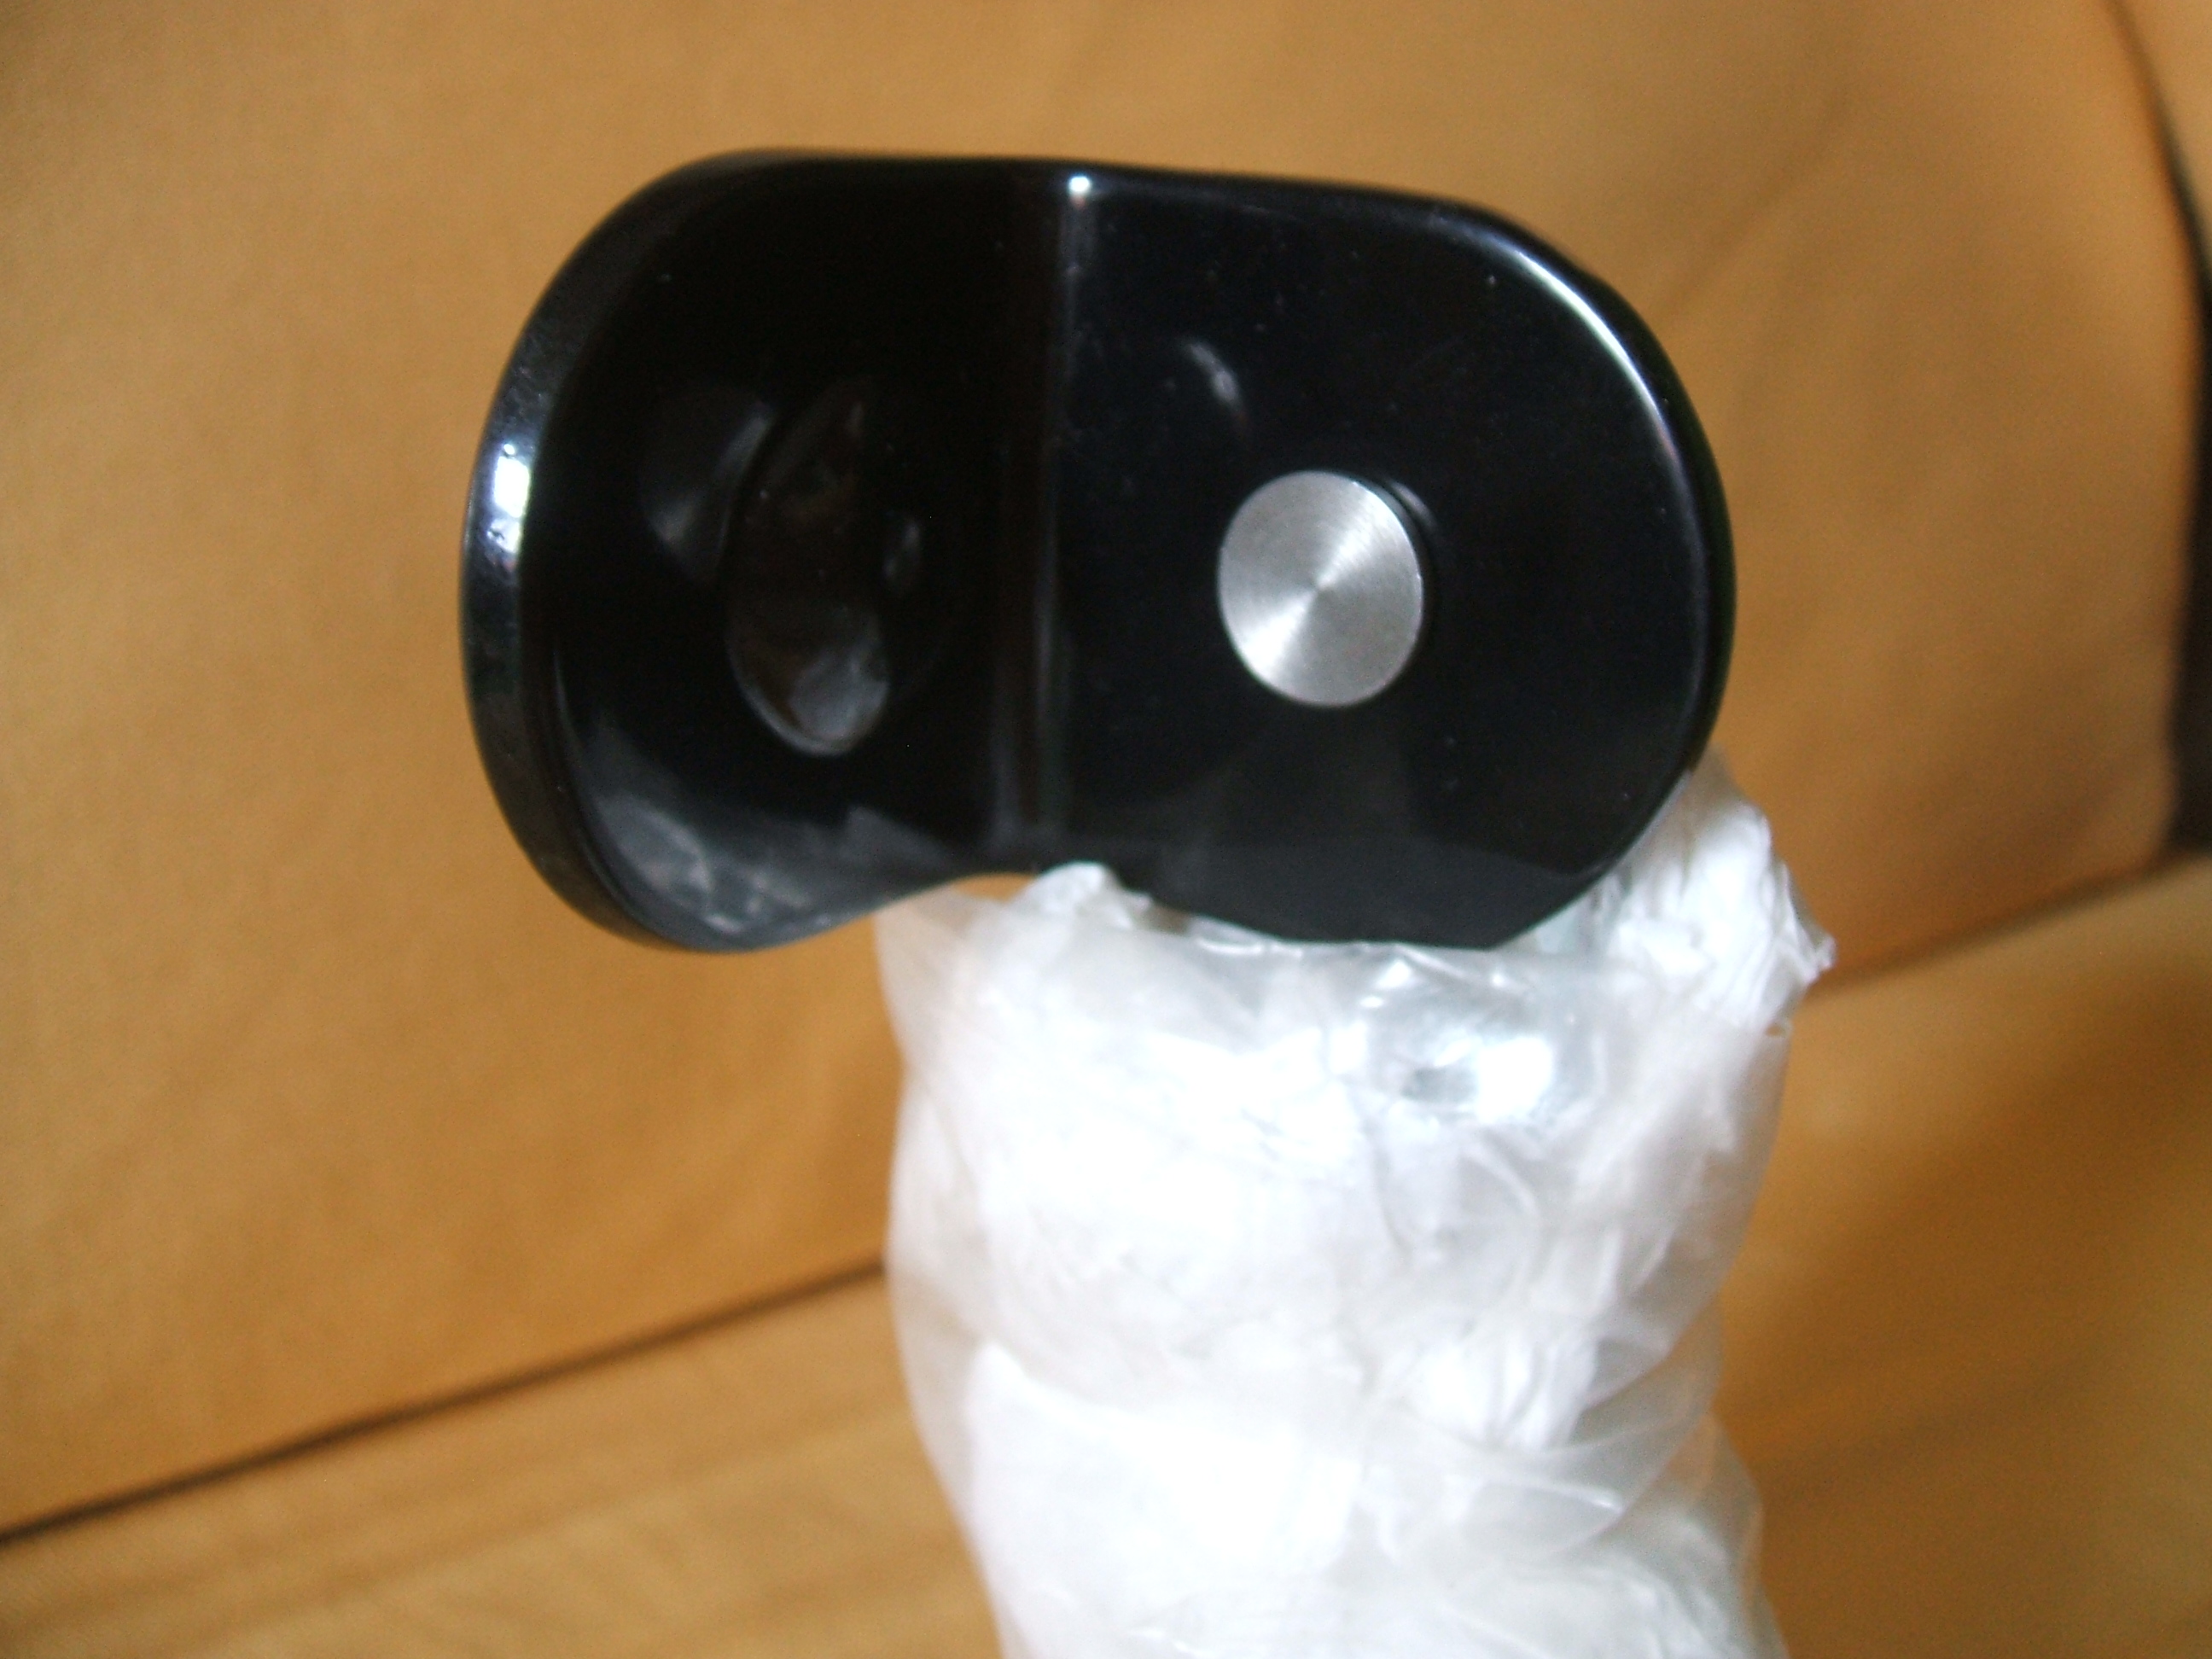
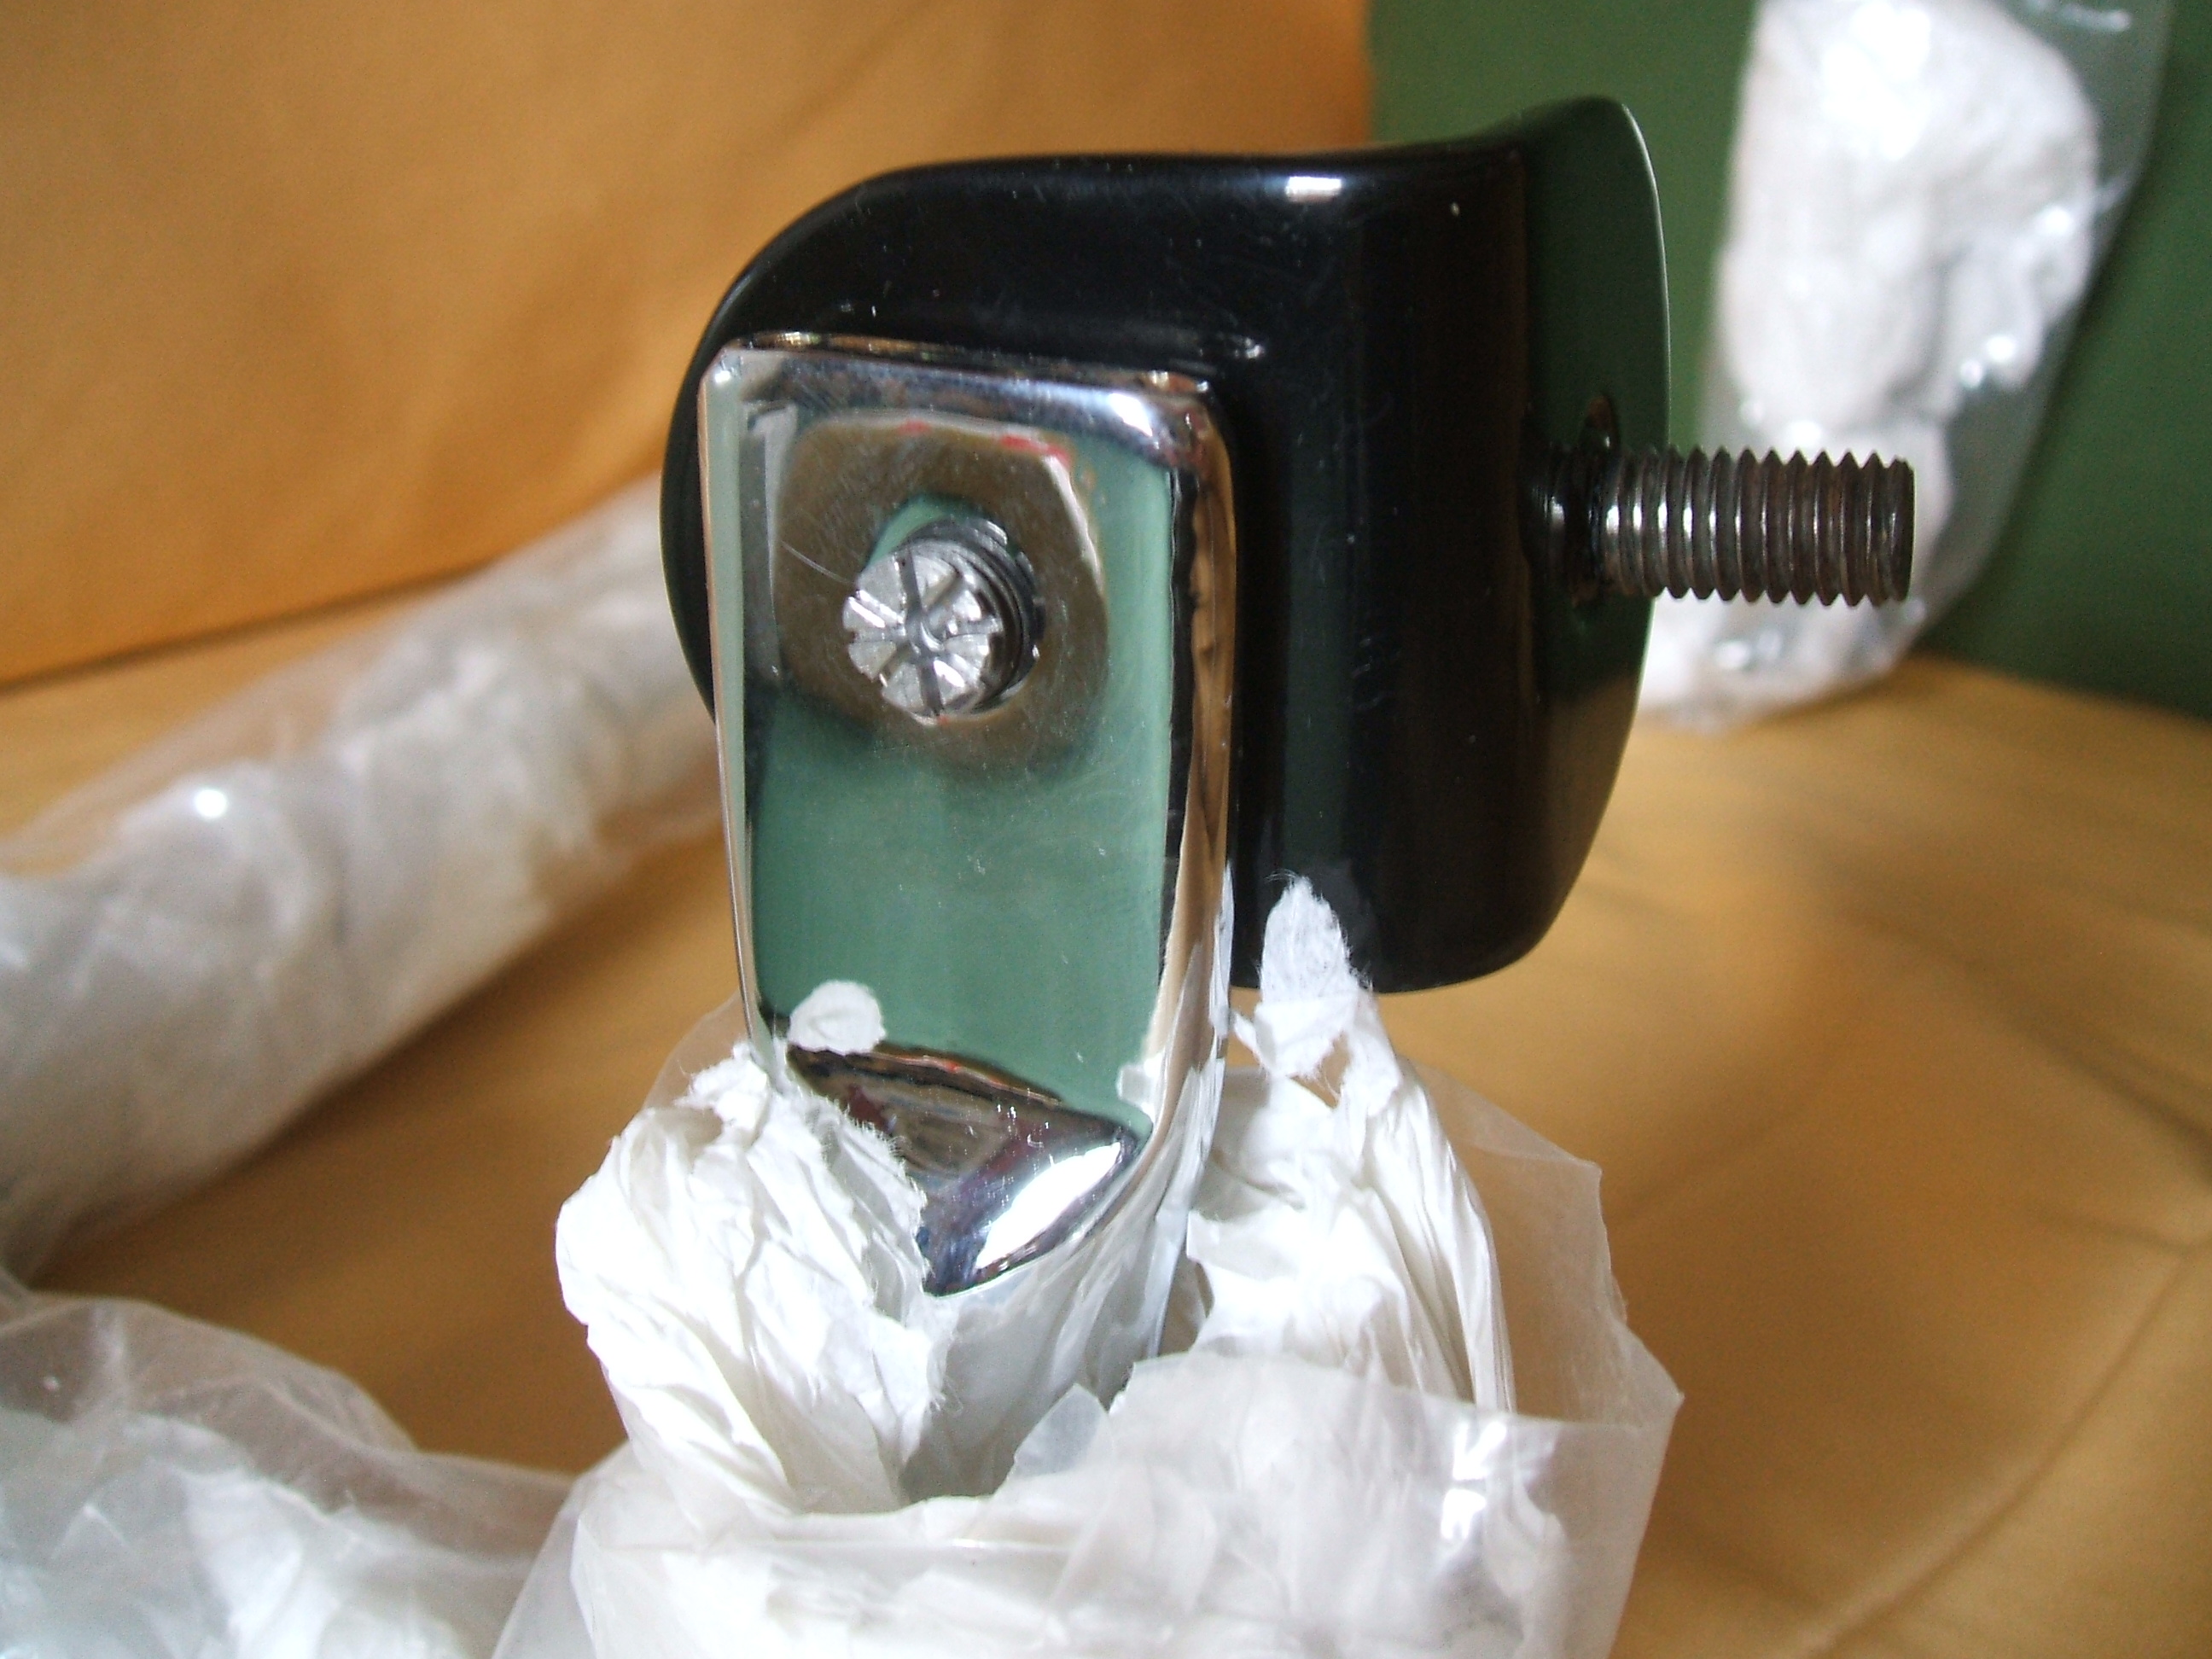
6 pointsRestored wiper linkage and motor mounting bracket, along with the Honda wiper motor upgrade. A jumper harness was made so that from the firewall forward the wiring would appear stock. Harness also allows for easy replacement of motor if it should ever fail.
 6 points
 -
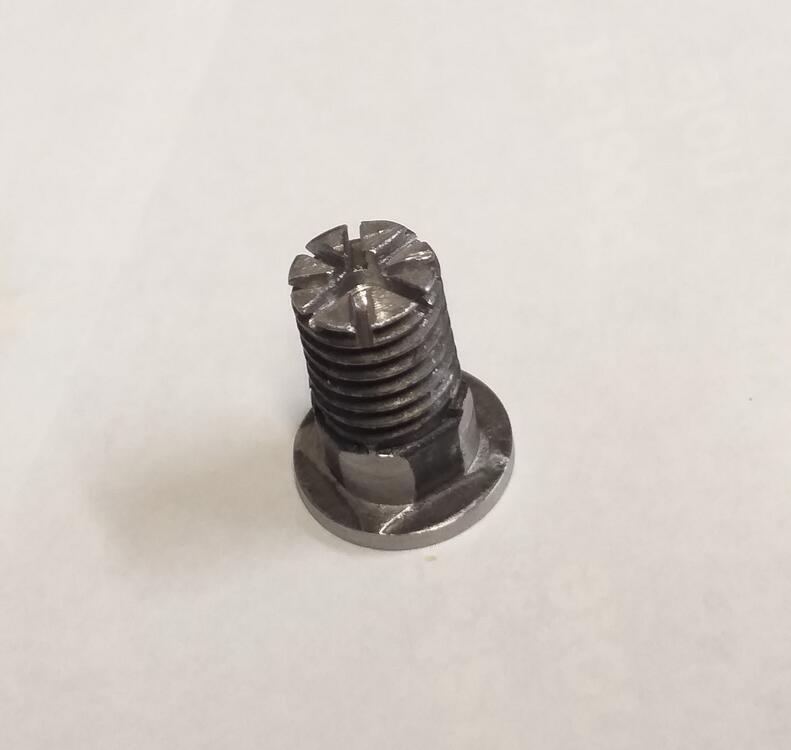
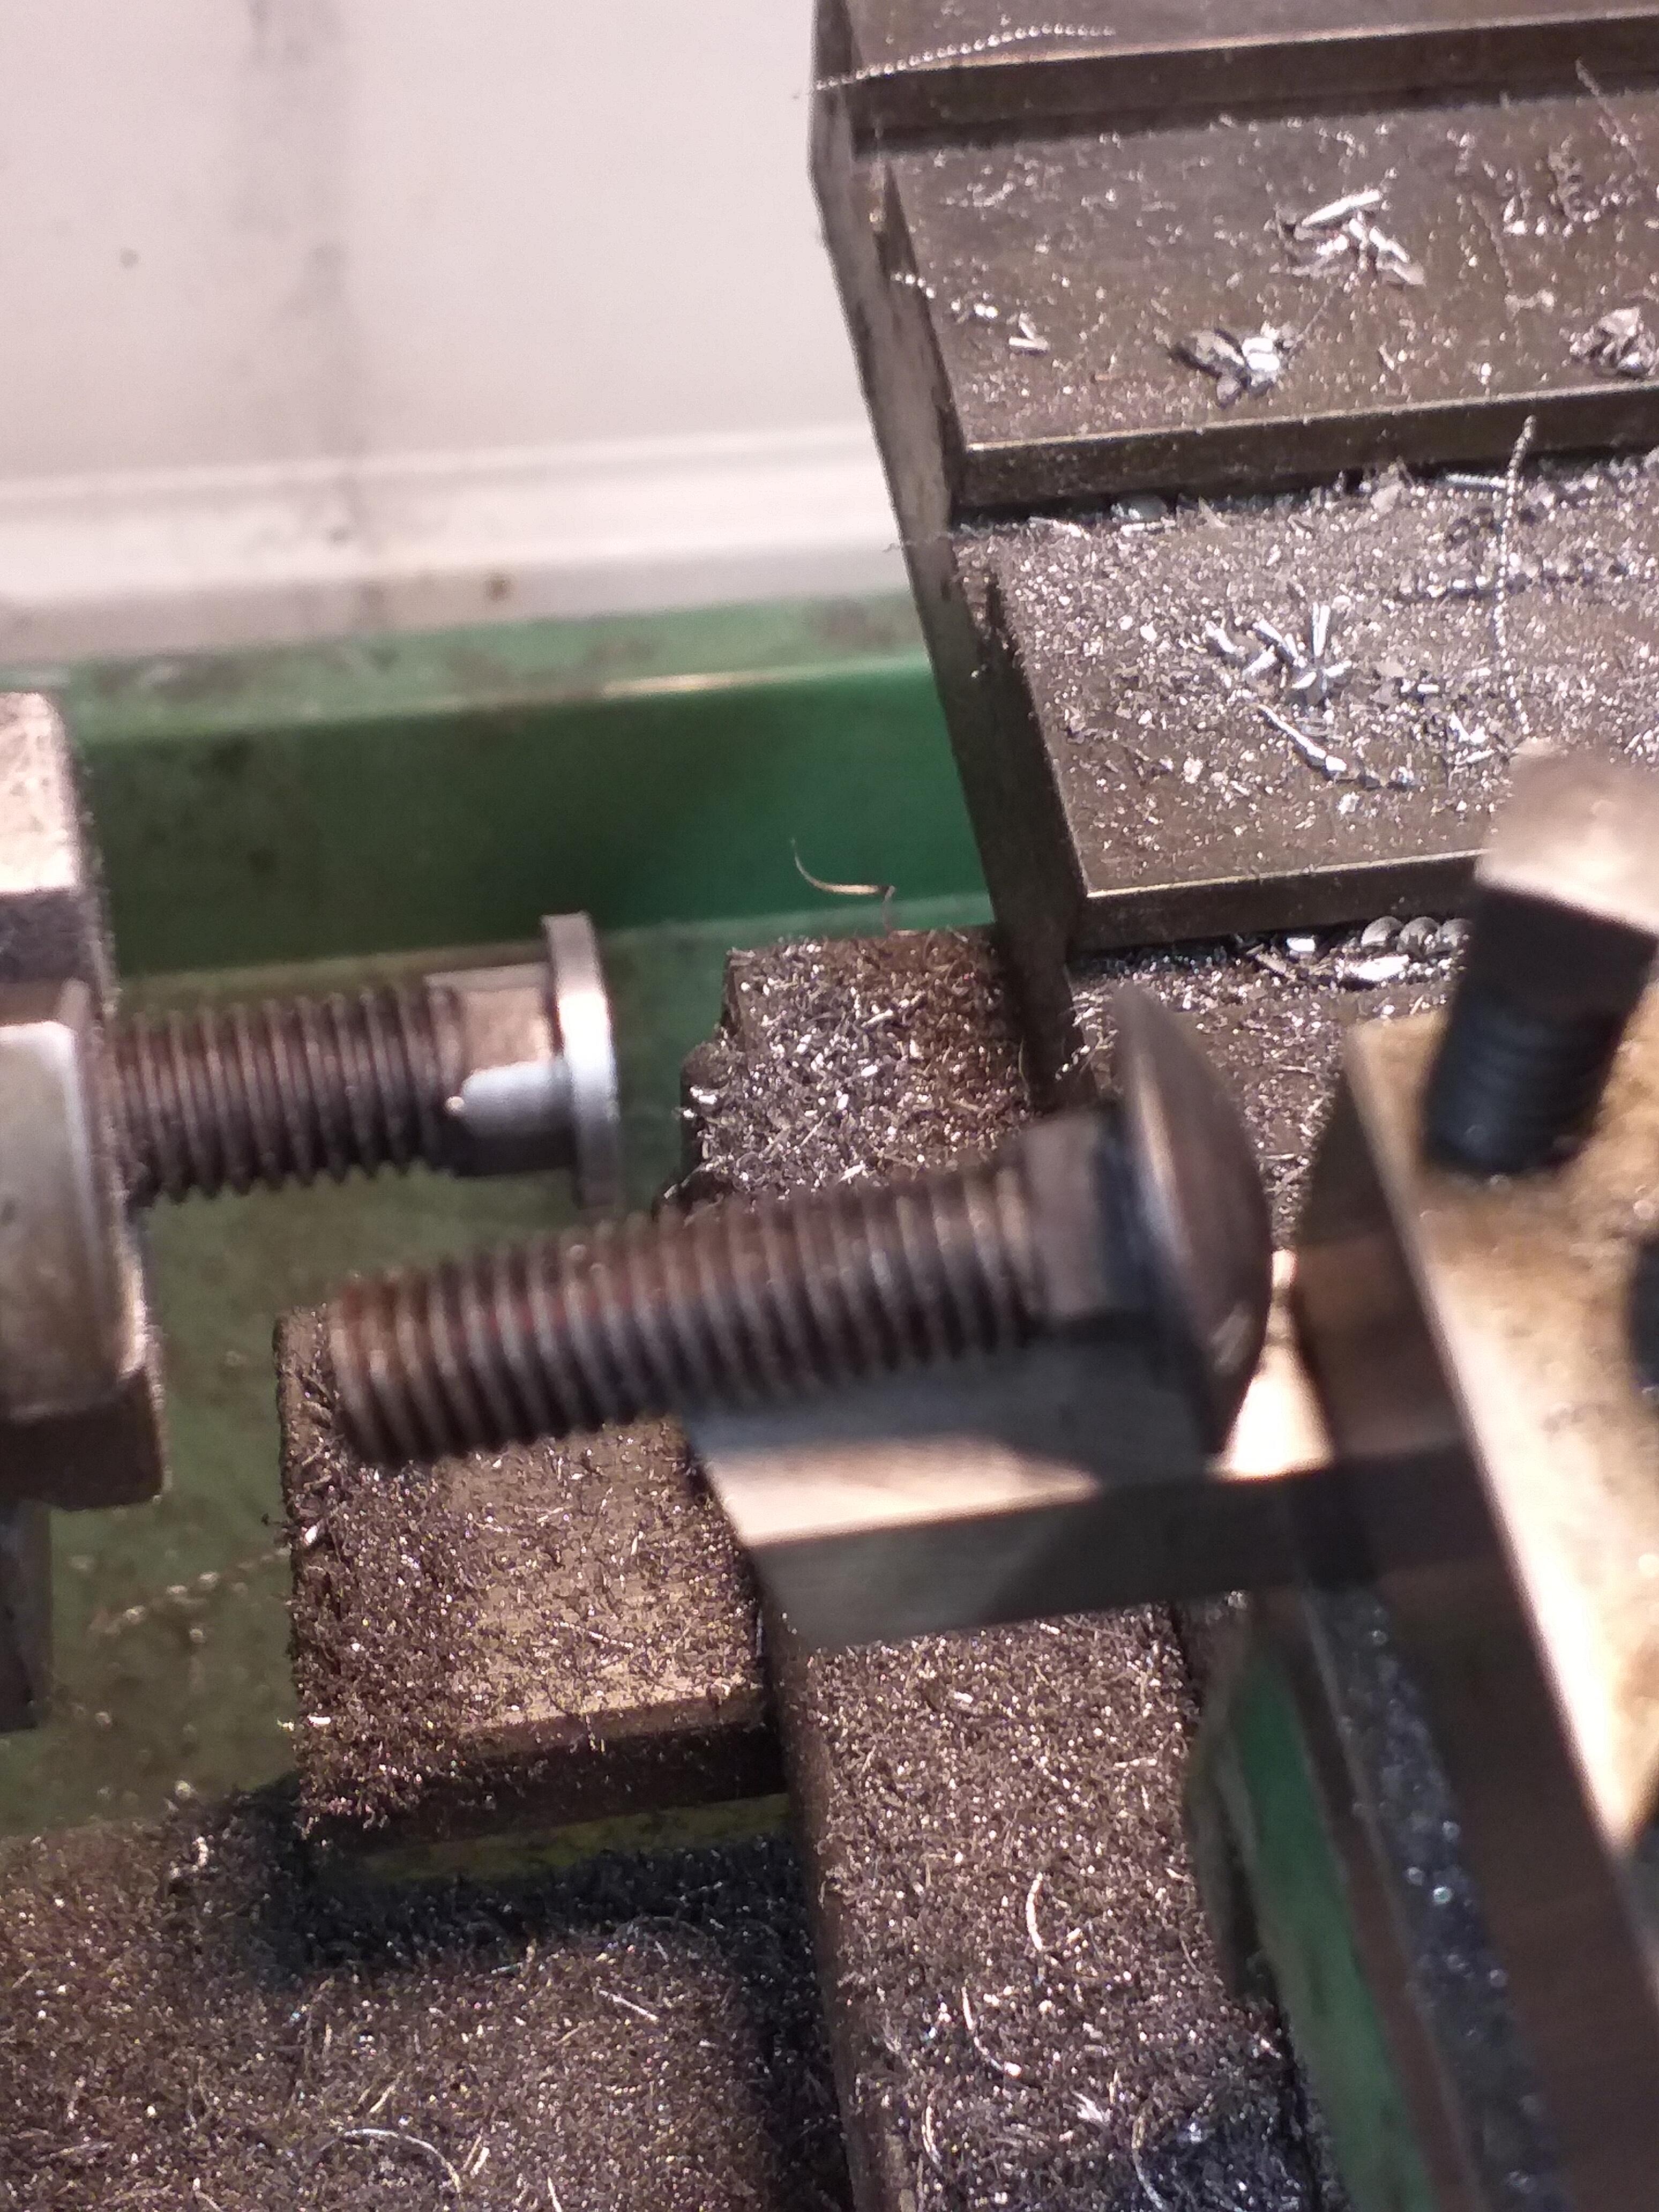
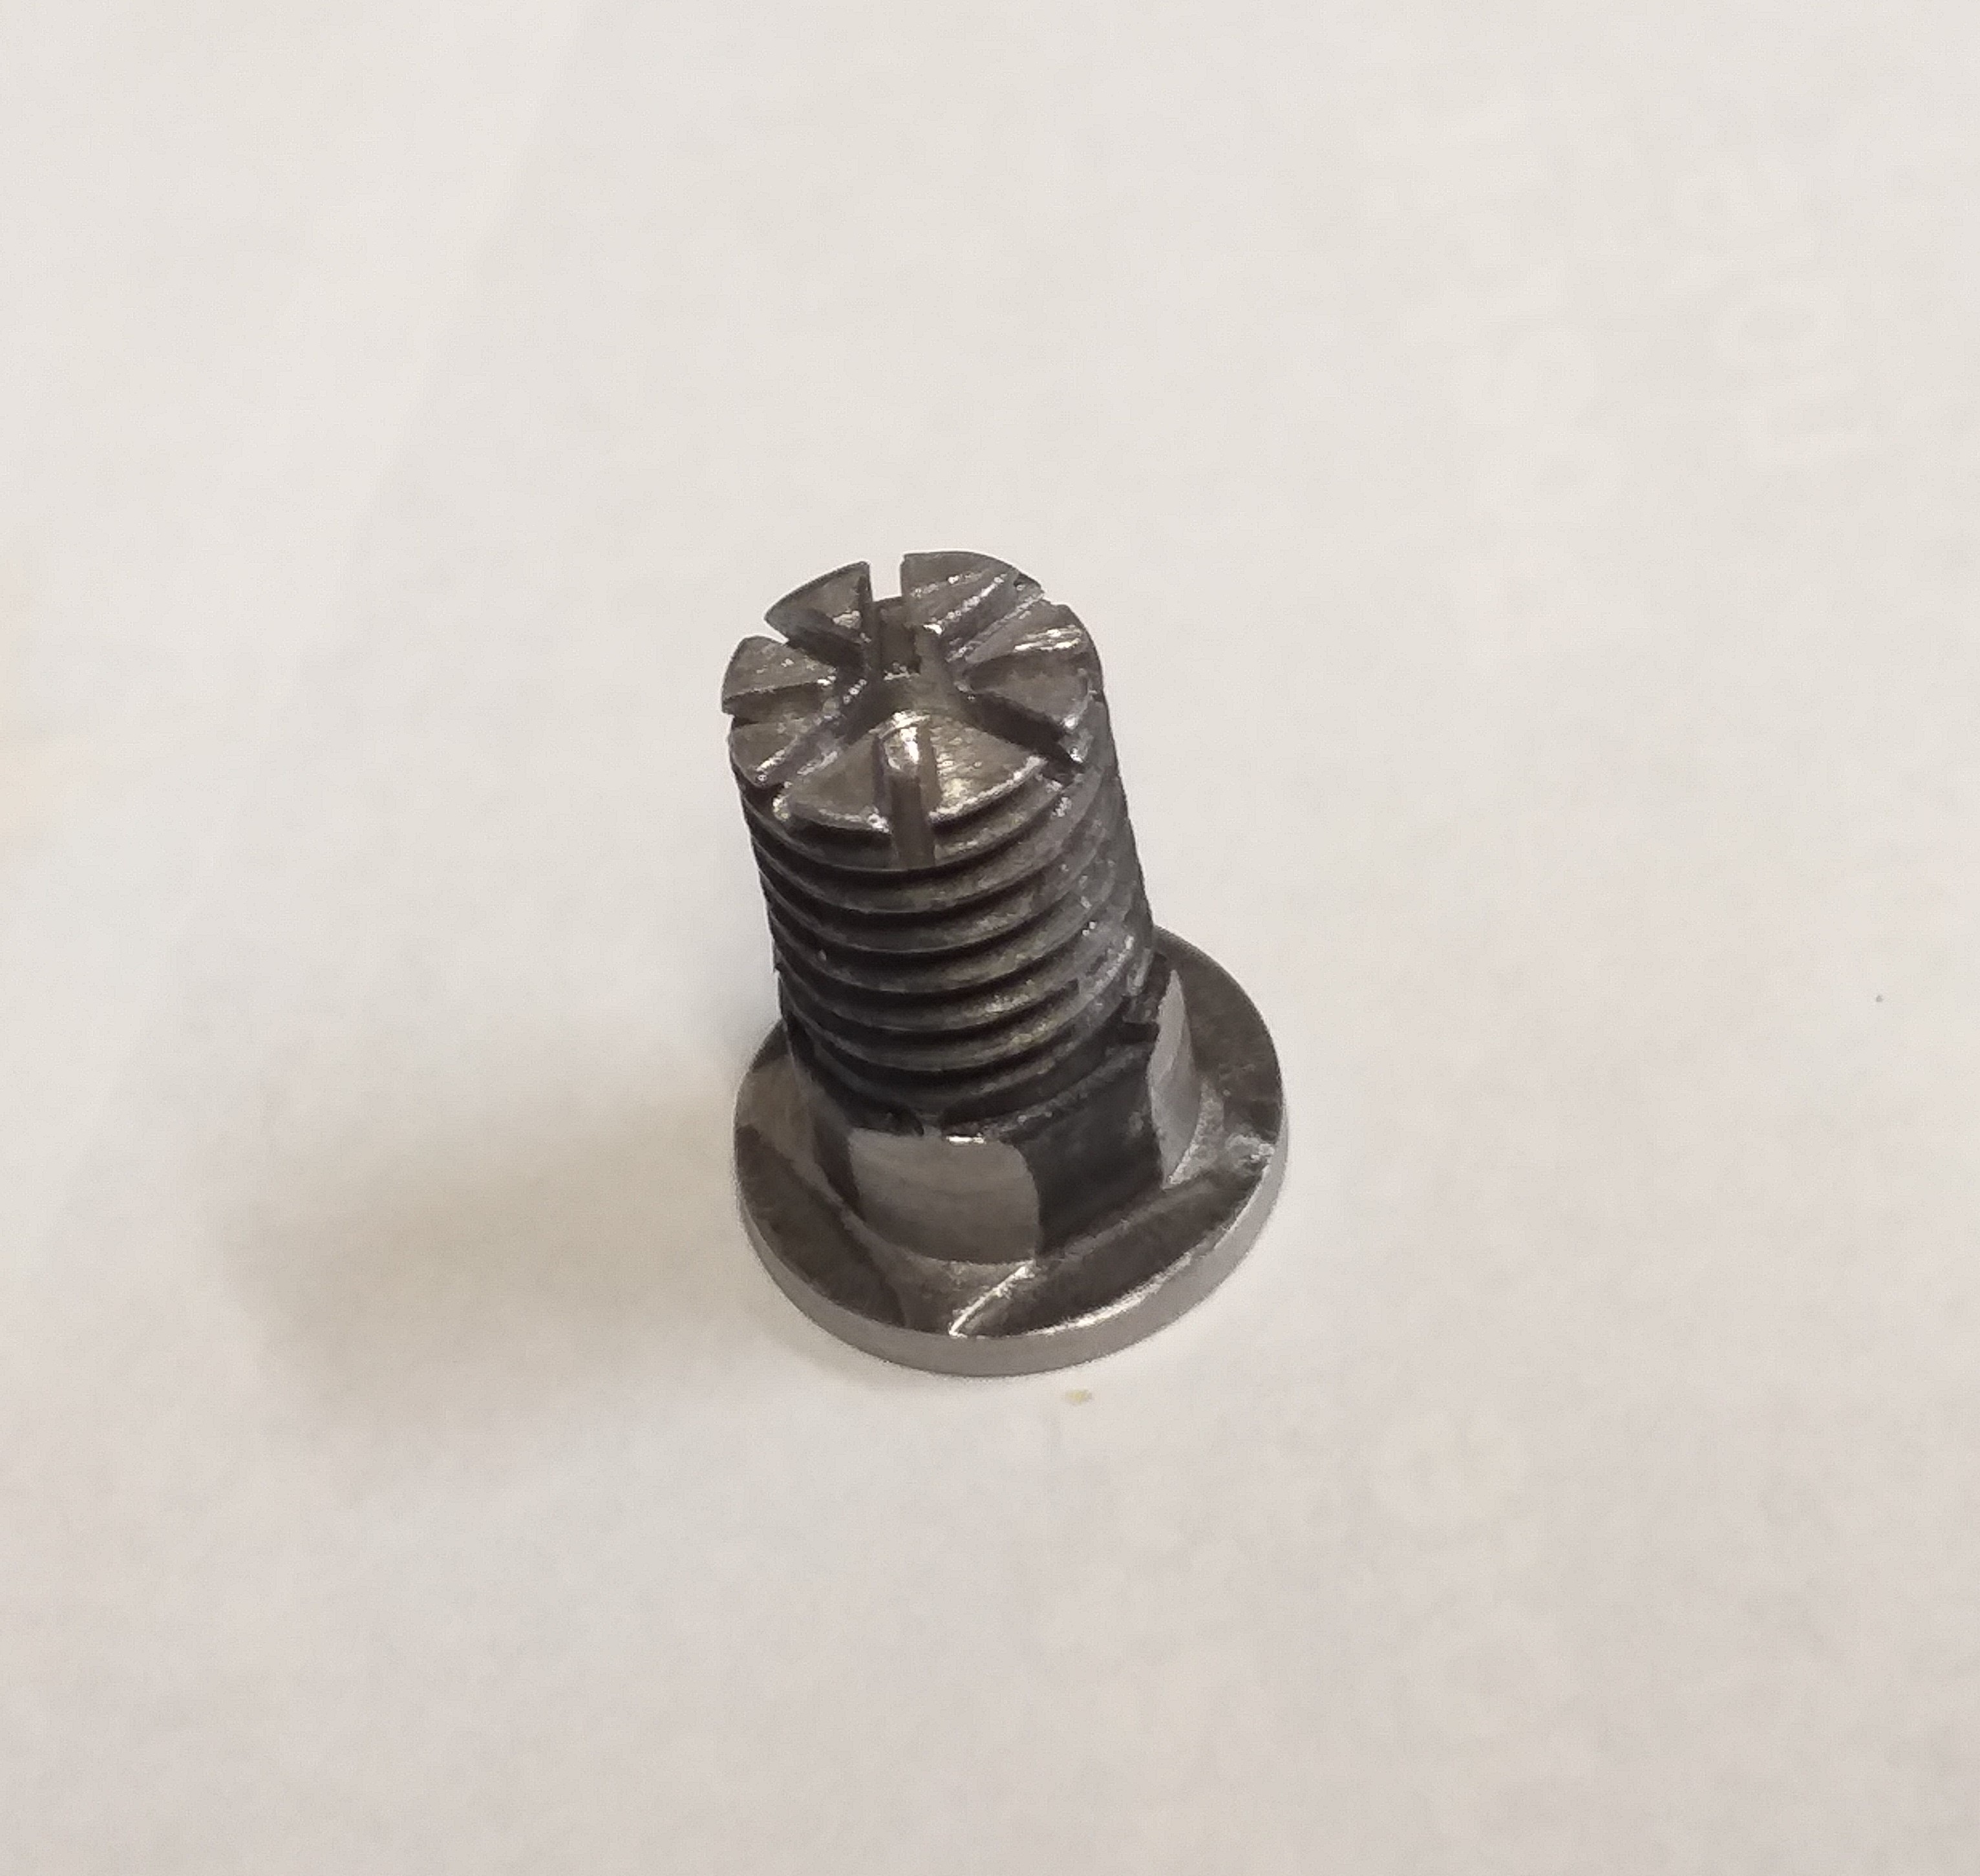
4 pointsCarrying on with the making parts for the footrest, and relevent, I needed to make some rivets for my SR/SP replica footrest, you see in the first post. I am using a S30 footrest as the donor here. The original rivets (either type) can't be removed without destroying them, (see ealier post). I wanted them to look original as much as I can.... With the original set up, the rivet holds position on the hoop, and the pivot point is on the foot. I decided to use a M8 coach bolt with a square shoulder, just like JDMjunkies above is using and turn it down. The hole size on the hoop is 6mm, so I drilled and tapped to take the M8 thread. The flat side of the rivet I have done is the correct size, whilst the "star shape" end is cut with a hacksaw. I also put a centre hole in (not what the original had) but the plan is use a centre punch to splay the "star shape" out from the centre. It looks a bit like the original, which I think was a press fit, as these type of rivets are found elsewhere on the CSP311 (seats). Plan is to thread the rivet on, can use the hacksaw blade cuts to tighten with a screwdriver until the required tension, then splay the rivet. It seems to work on some trial threaded bar. I think I need to trim the star part back a bit, it sticks out a little too much, but it is the prototype...


 4 points
 -
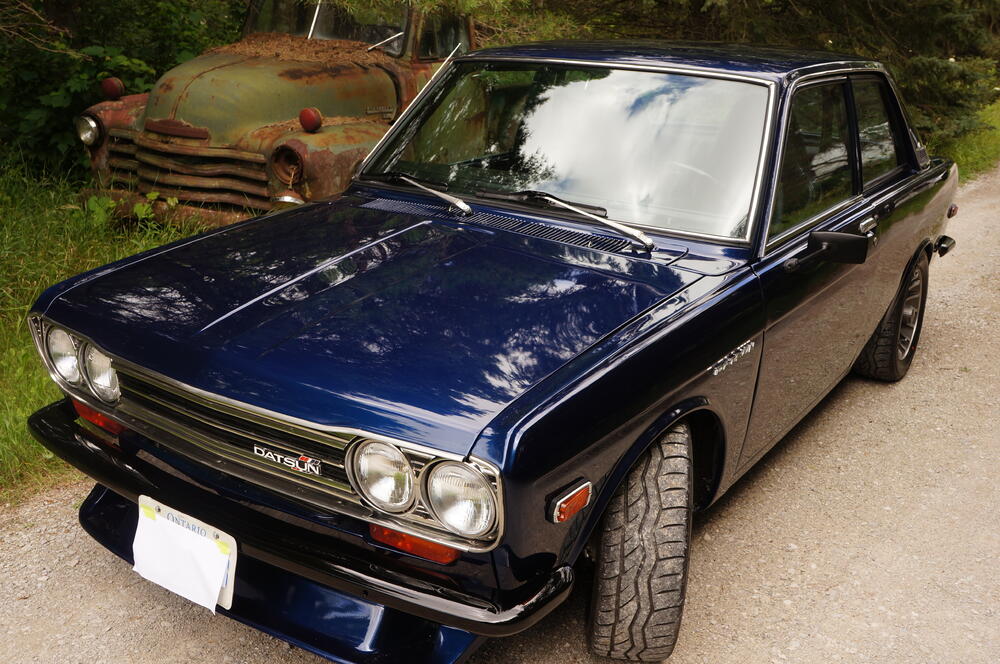
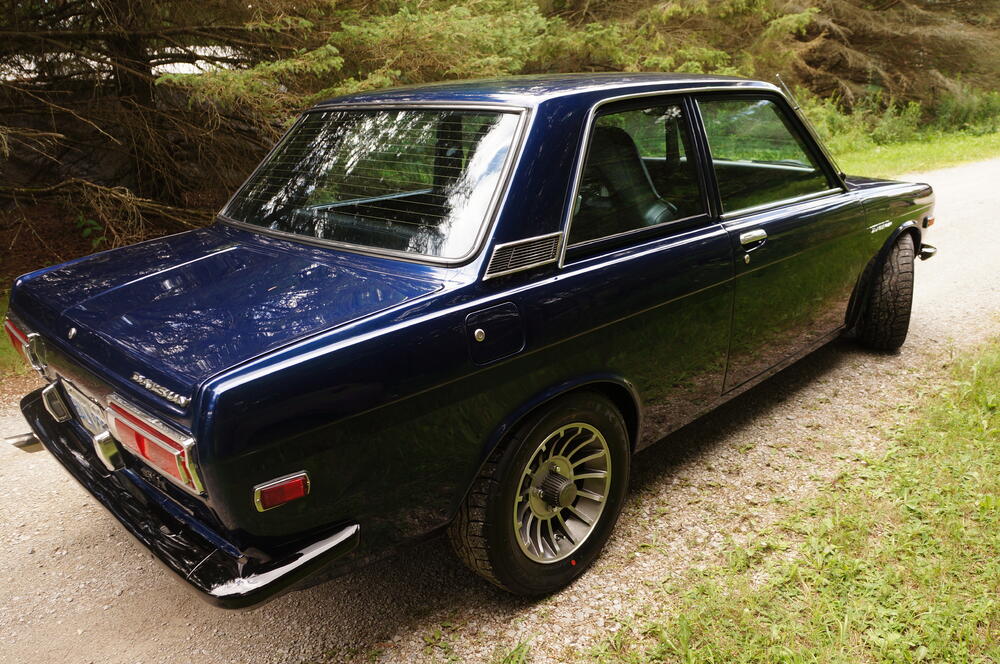
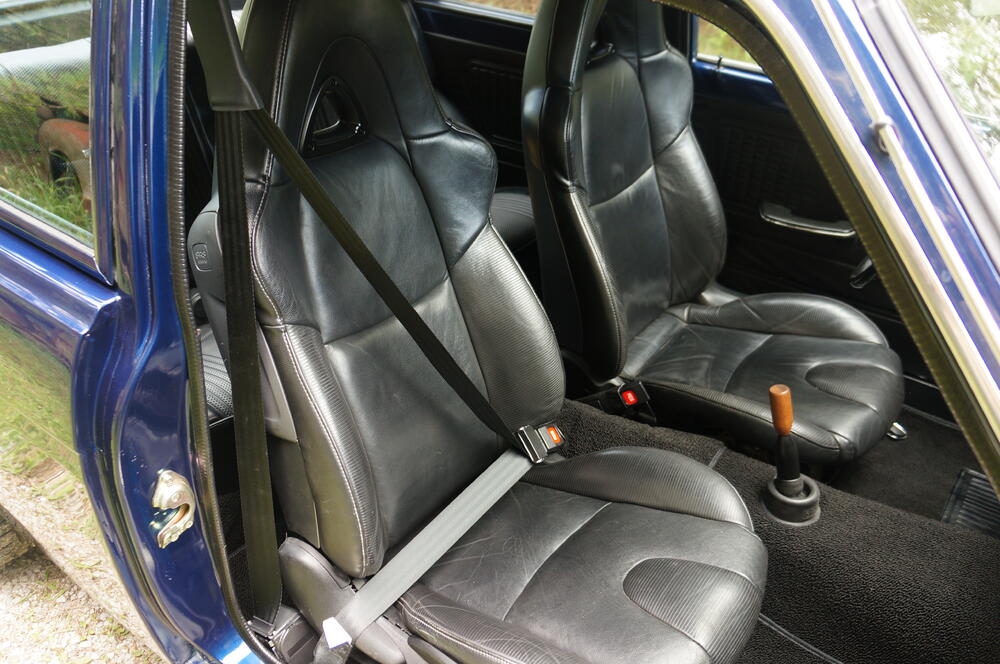
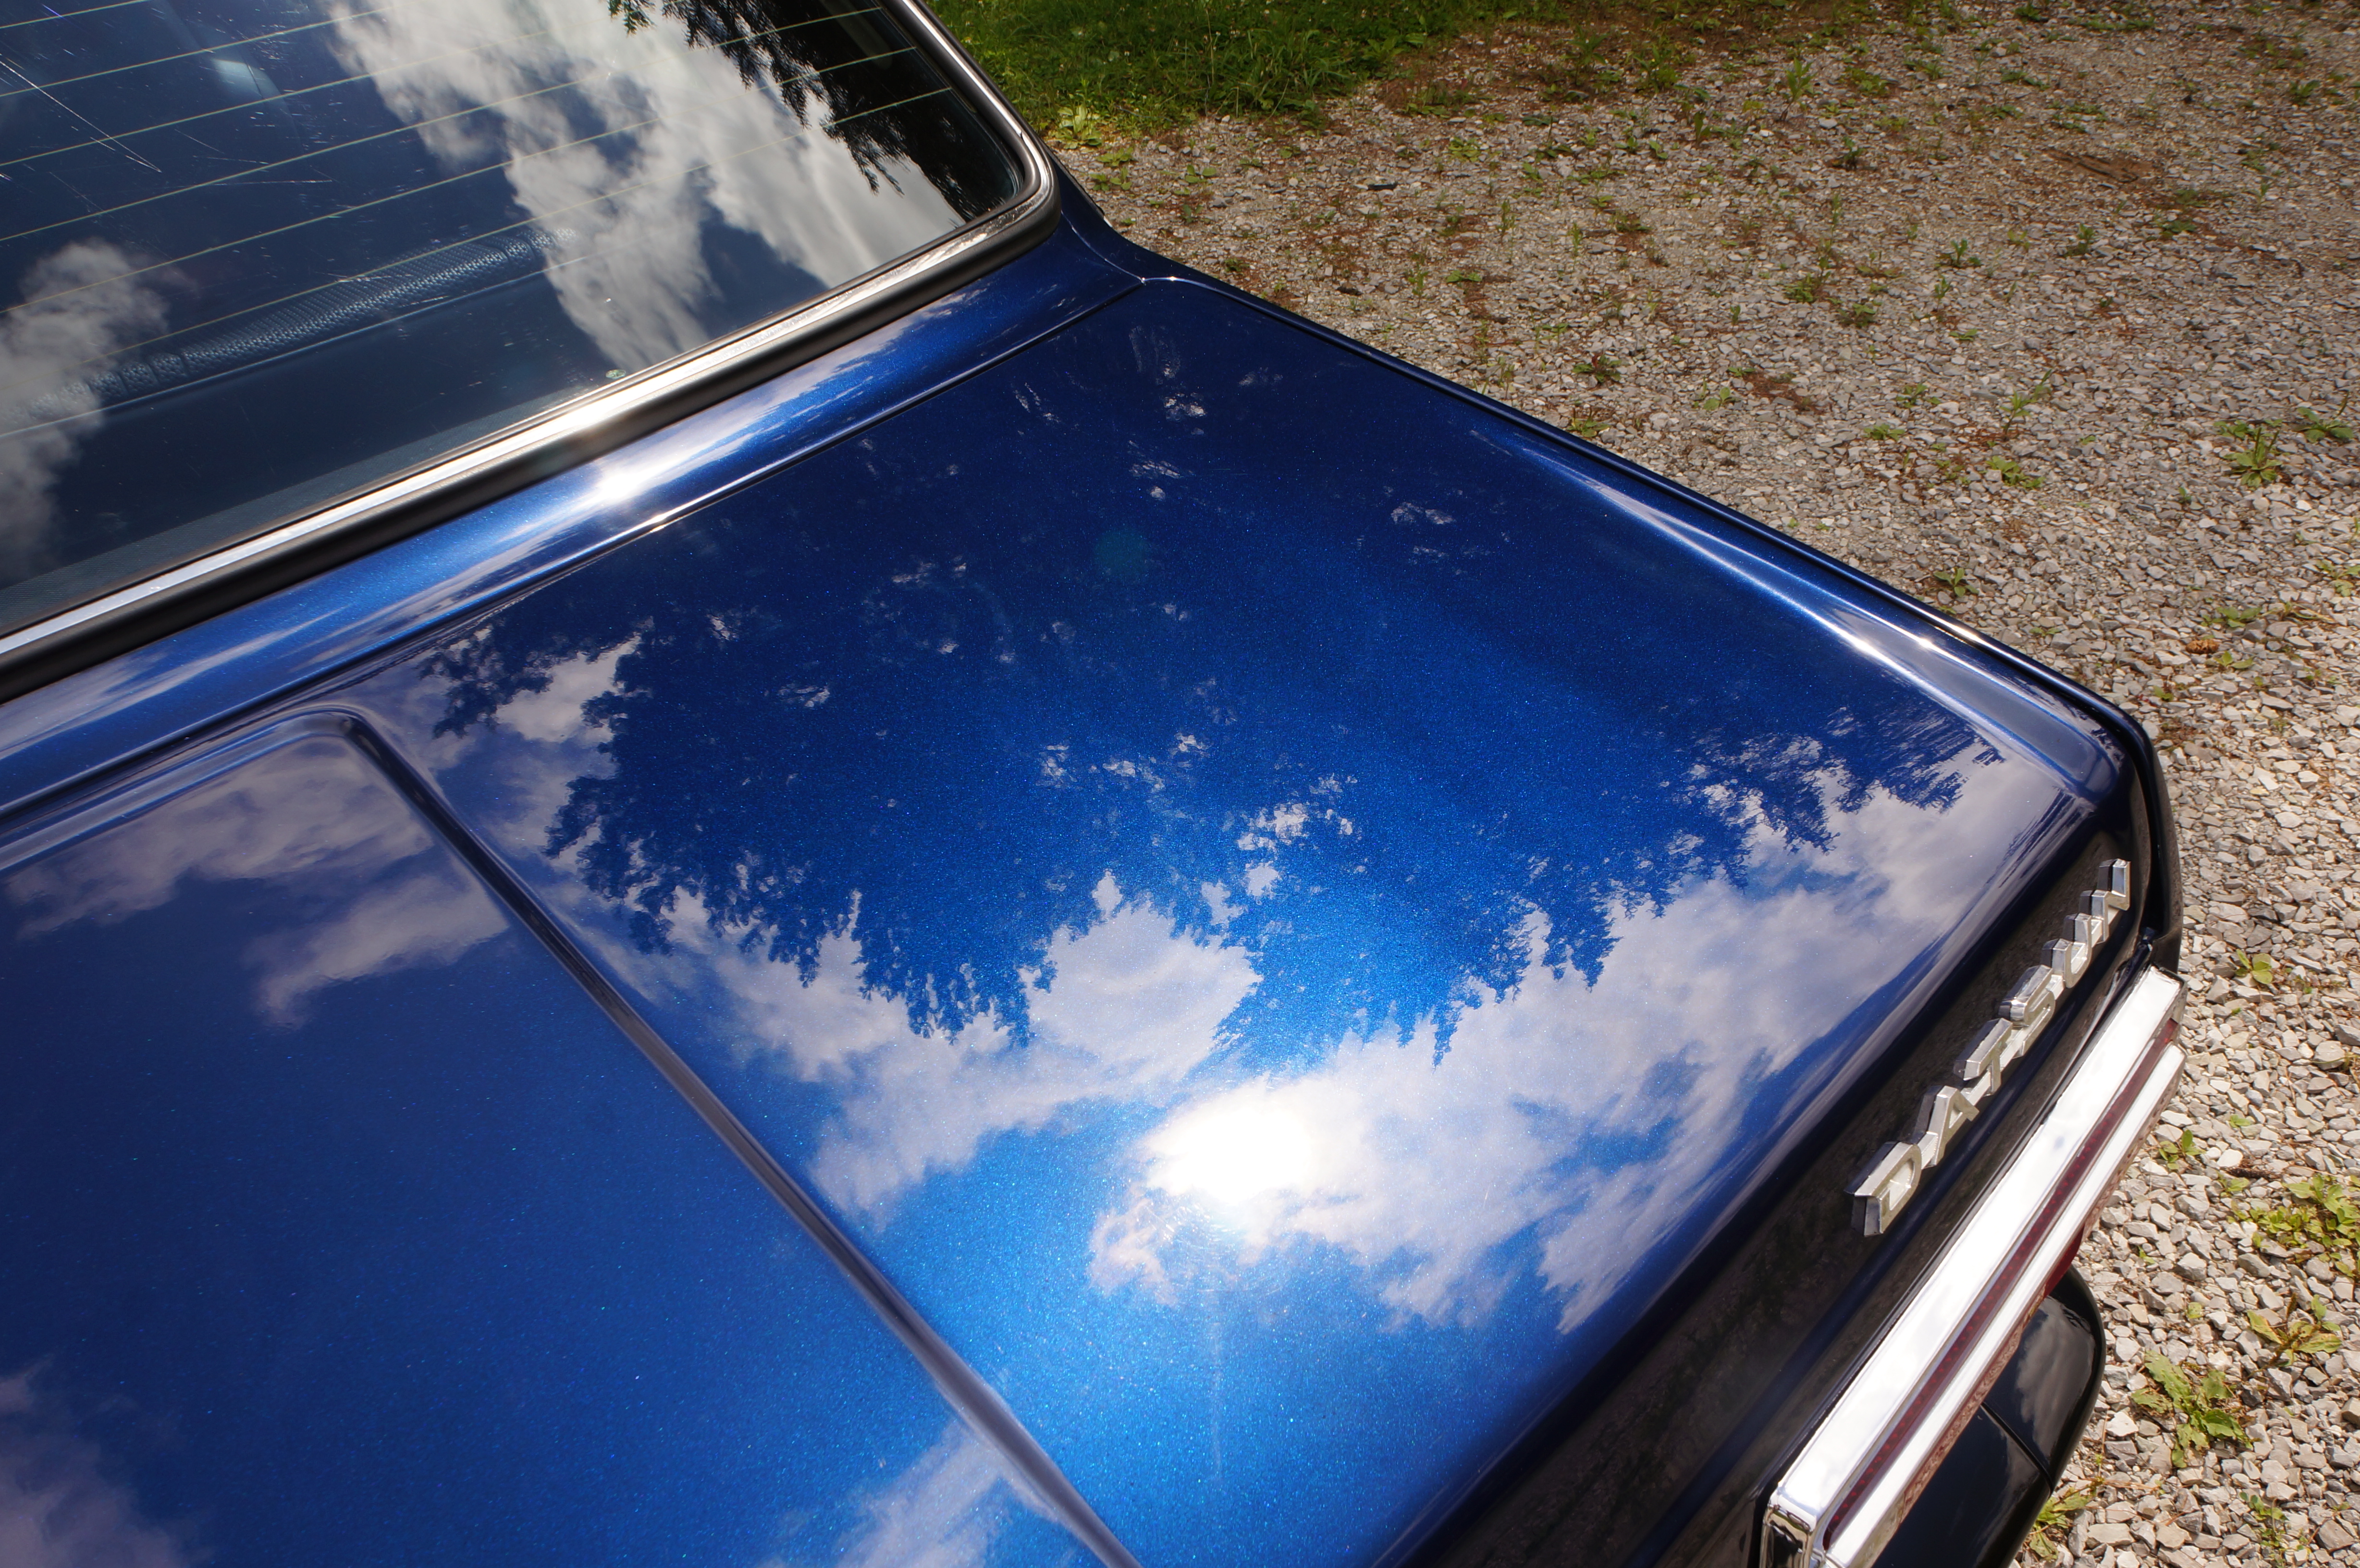
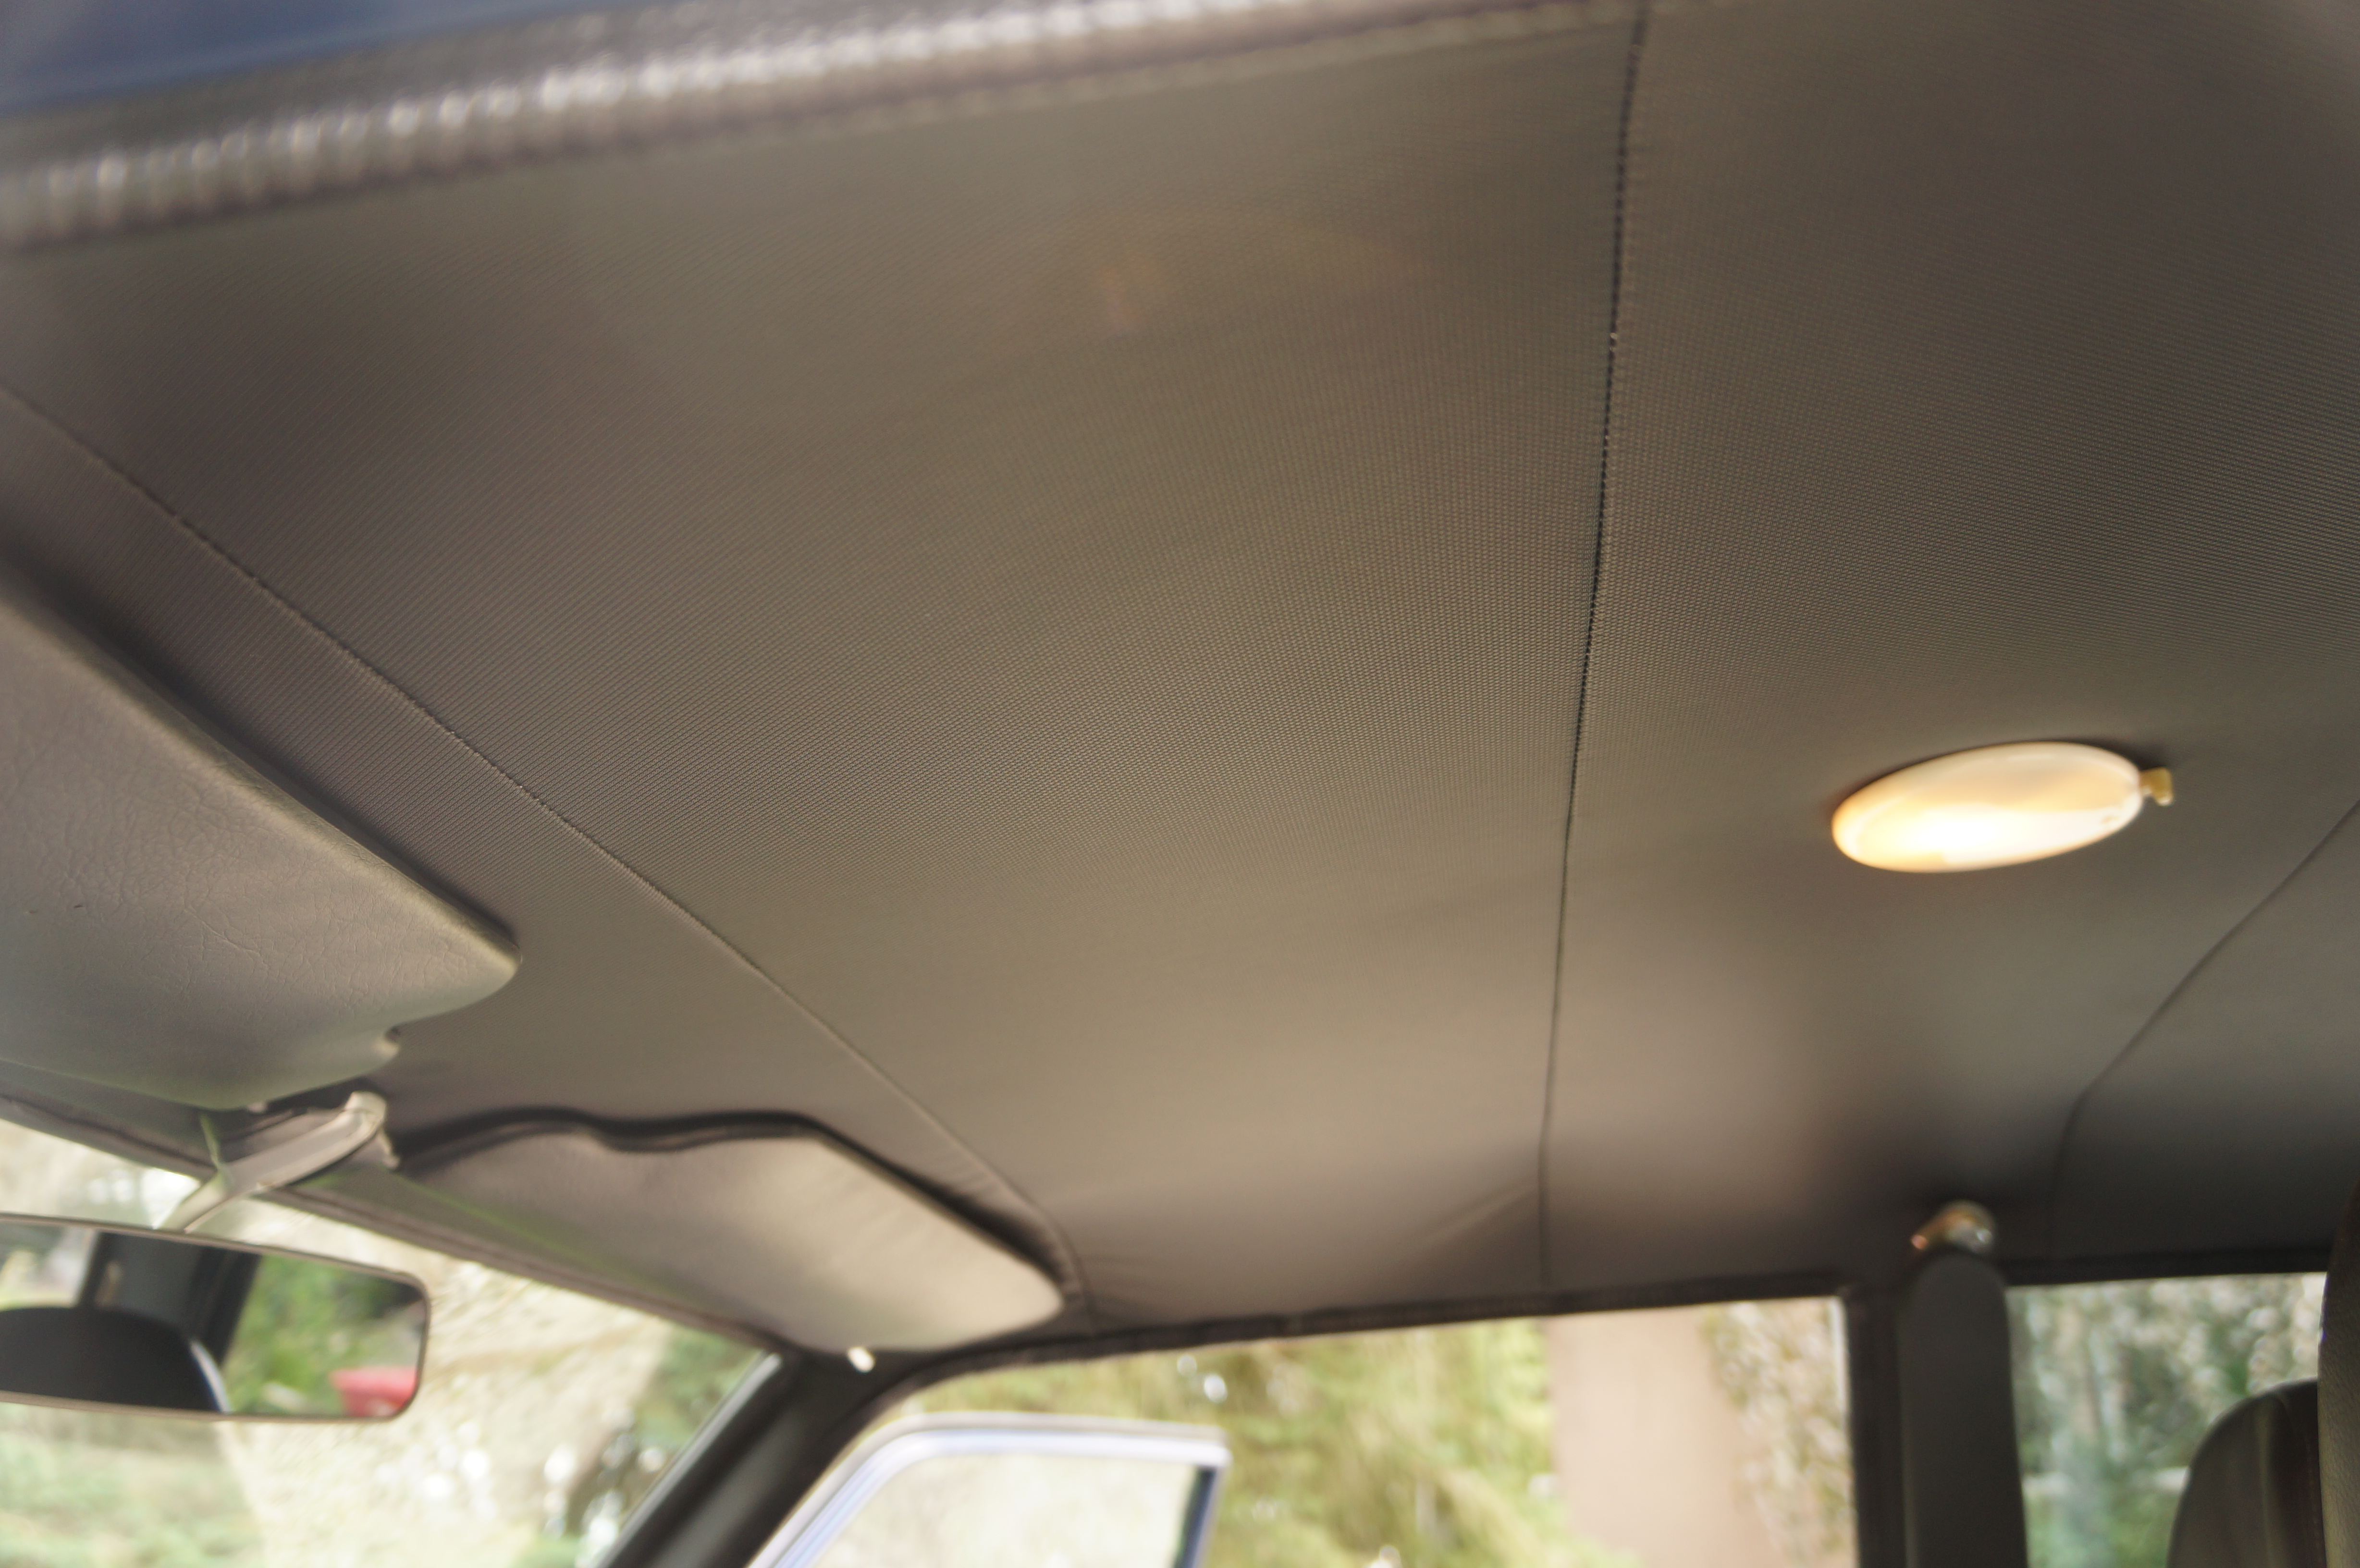
4 pointsAnd she's done! Licensed and on the road and it only took 42 yrs. I'm wondering anyone is even going to notice the 240Z sunvisors, they look like they could be stock.


 4 points
 -
If you want to know why the Z32 looks the way it does, the best thing to do is go to a ZCON where Toshio Yamashita (aka Yamasan) is presenting his story of the design. If you saw the competing designs, you might say that Nissan picked well. Anyway, Nissan did have a more affordable sports car (sports coupe) at the time. The 240SX/Sylvia slotted in well to the old 240Z role except for the lack of an engine in the North American market to keep up. Of course, with the strong Yen at the time, it was about impossible to have a sports car built in Japan that was "affordable".2 points
-
if its really that loud, you should try bench running it. a large drill and some rubber hose over the input shaft. I know its a long way off from actual loads and rpms, but its fun and who knows maybe something will turn up.2 points
-
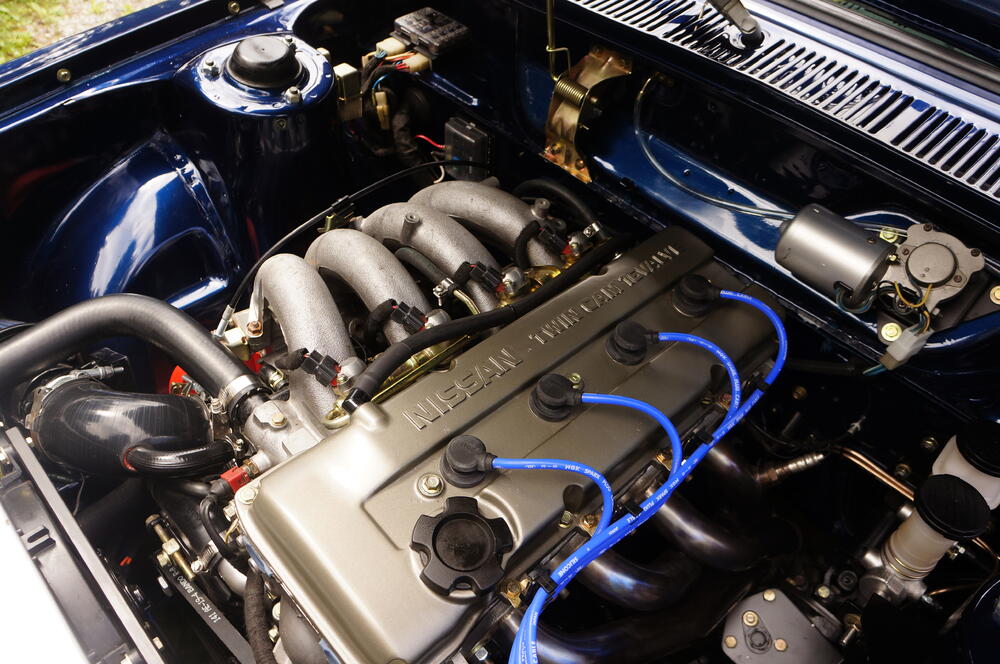
Paltech, actually. Jeff was great. My 4 screw carbs were in very good condition and I wanted them to be the ones I got back. ZTherapy told me that I had to accept an exchanged set - they would not rebuild mine and send them back to me. That works for most I guess, but my first 240Z SU carbs had a few issues that I would not have liked if I received a set with "repairs", and I didn't want to take the gamble. I dis-assembled a bit too far evidently, as some of the parts are plated as an assembly (choke linkage I think), and I had some extra parts plated at the same time, so the charge was a bit more, but I am very happy with them. It's going to be a lot of fun pulling all of my stash of new and refurbed parts out when it becomes time to put the car back together.2 points
-
2 points
-
2 points
-
2 pointsAuto Panel Solutions is in the UK so you may want to check KlasicFab first.2 points
-
And he’s a top bloke!!! Very friendly and helpful with great panels to boot! He goes by the handle “woody” in the UK Zclub. https://zclub.net/community/index.php?members/woody.2636/ If you don’t have FB but want to contact him, just set yourself up on the UK forum and use the “conversation” option to send him a PM. https://zclub.net/community/index.php1 point
-
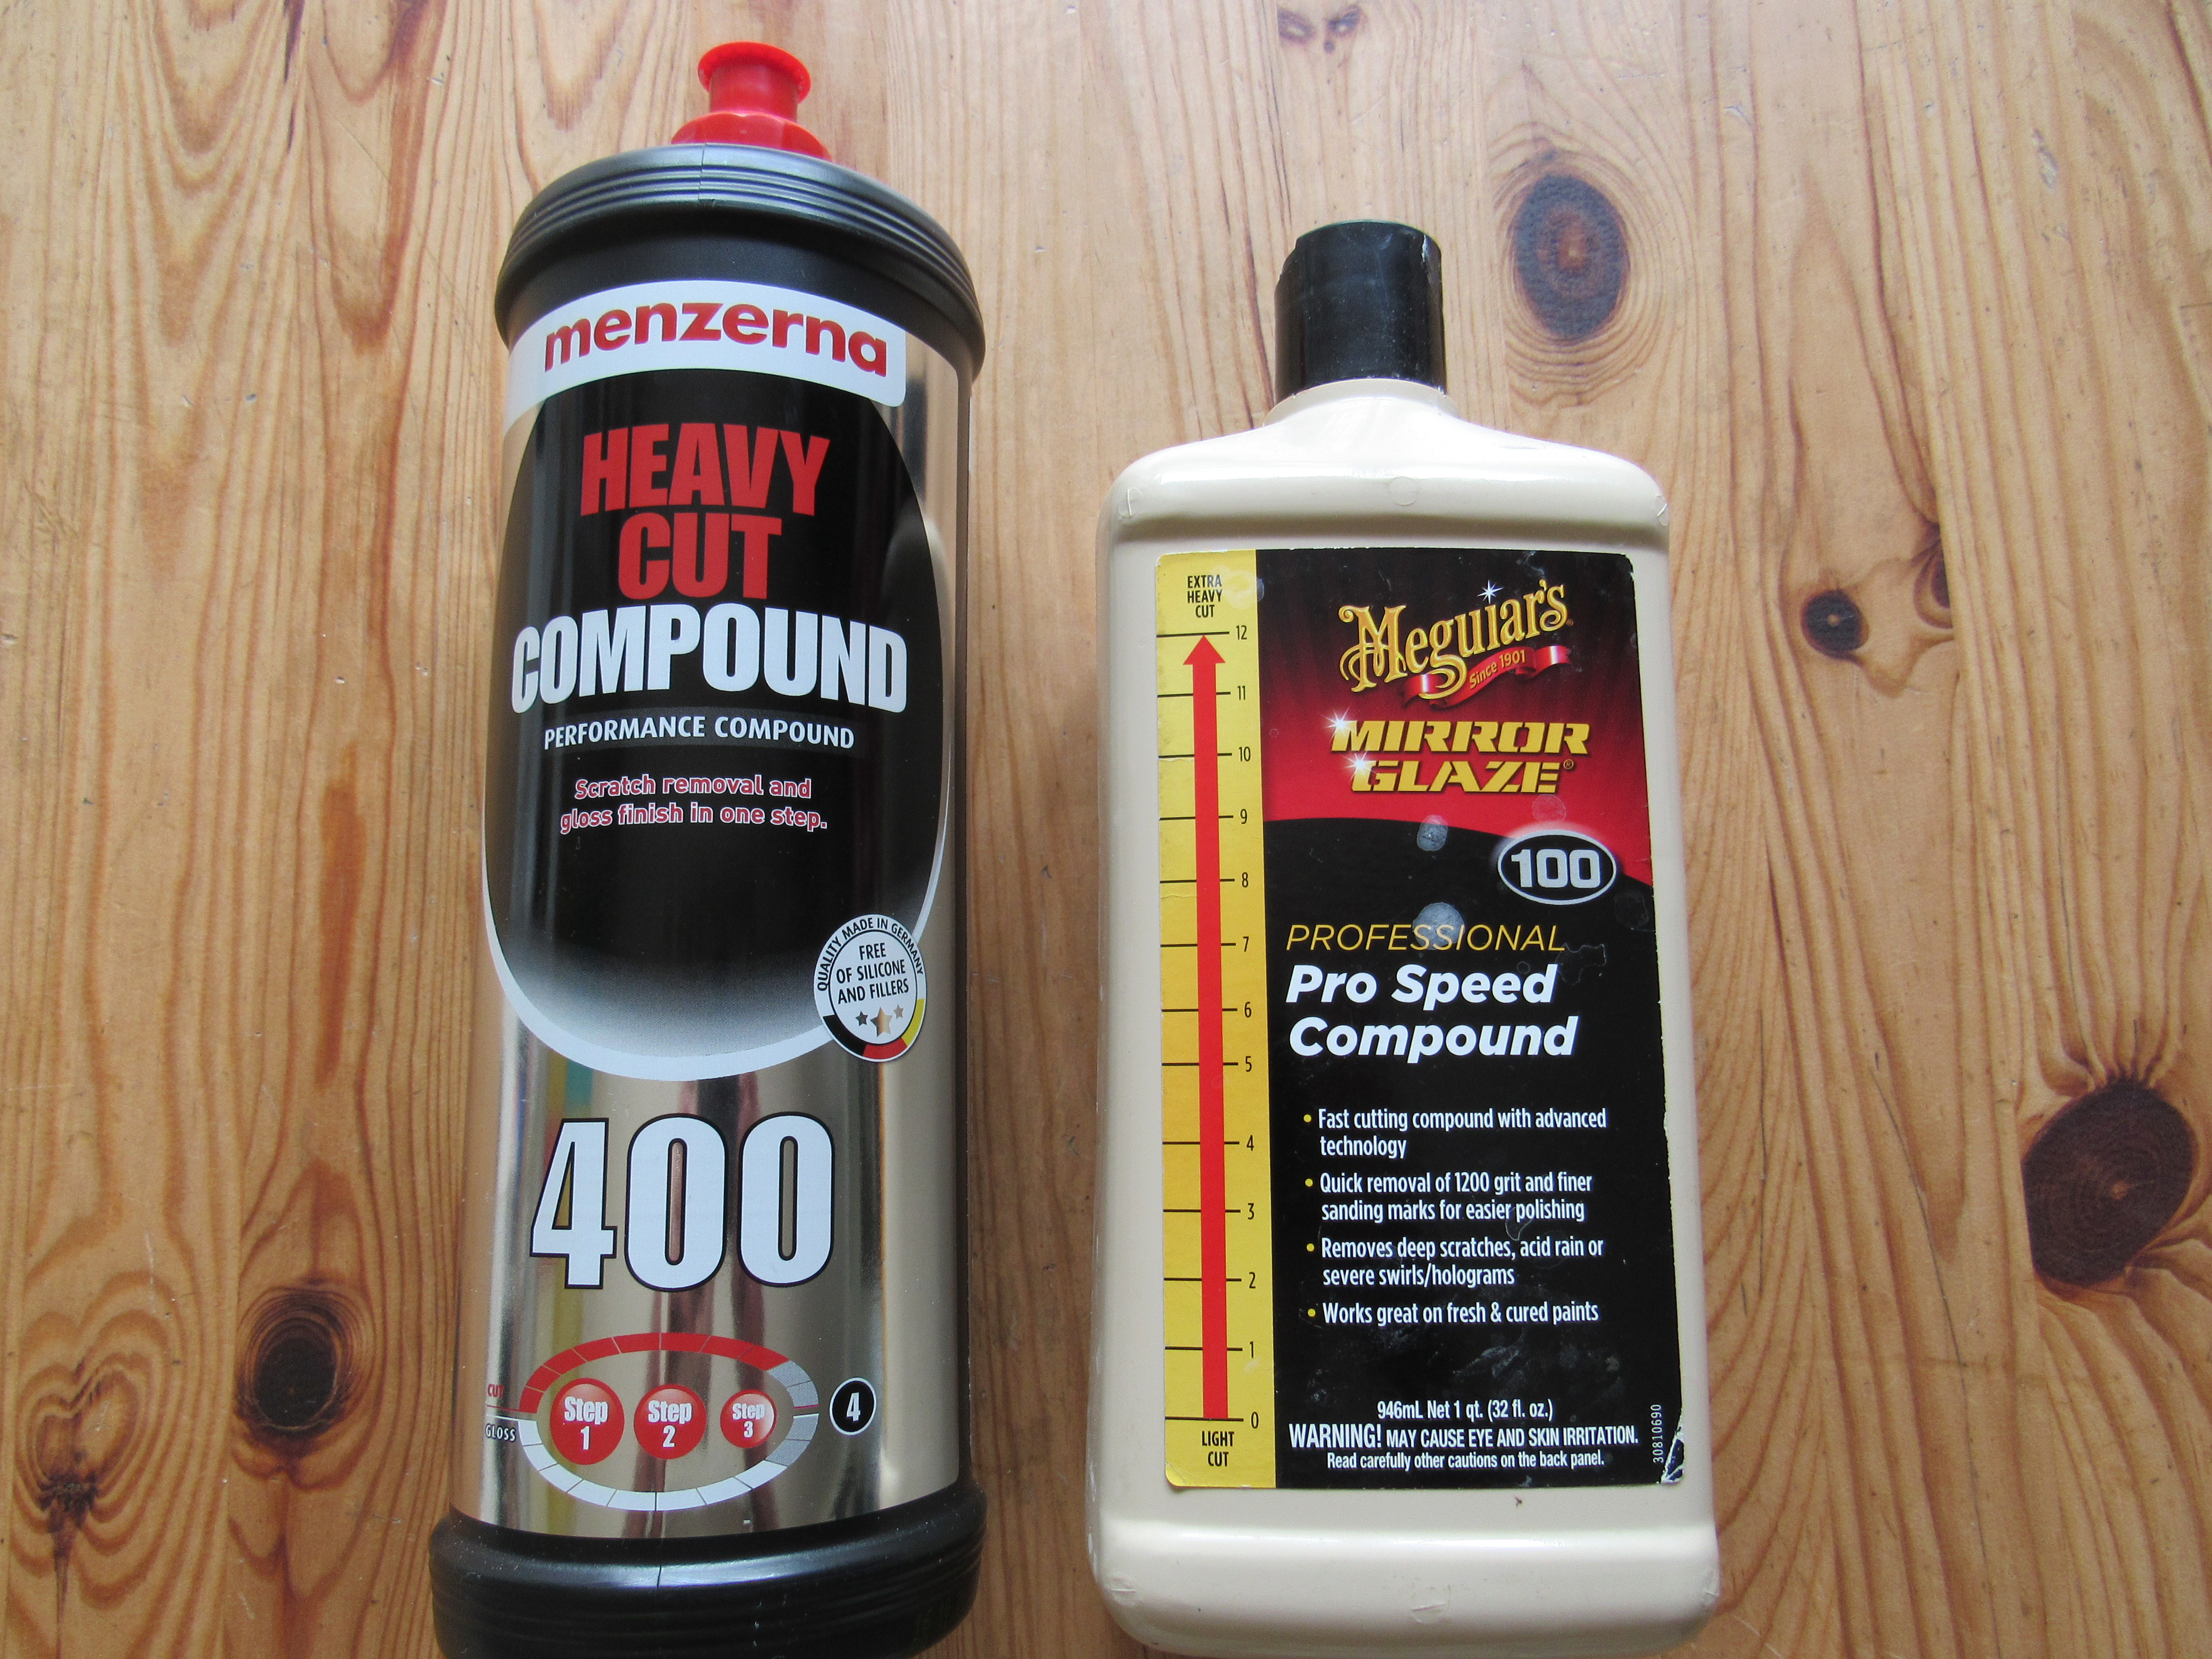
These are the 2 polishing compounds I use, both are considered professional quality and I have had good success with them, a lot of the products that are offered at the big box stores are pretty watered down. You might also want to have a look at this forum, https://www.autobody101.com/forums/viewforum.php?f=7&sid=96df9ee49358224206cc6444bd0b90b4 Some really knowledgeable guys, guys who actually make their living doing finishing.
 1 point
 -
1 pointHere are my "two passengers" loaded per the FSM while tightening a few of the suspension bolts. Not sure what size passengers they had in mind, a Sumo wrestler, or a petite lady. 180 and 120 lbs should do. I bounced the springs several times before tightening. I guess I'll make up something to get the toe-in adjusted close enough to get it to an alignment shop. The normal flat rate alignment charge is ridiculous for 240Z's, not much to adjust really! But I'll bite the bullet and get it done, at least I'll know where it's at. Once I get a few miles on the Eibach springs, I'll let you know how much the drop was.

 1 point
 -
1 point
-
1 pointThe idea for the amount of connections was to allow the motor to be unplugged and swapped out without splicing into the harness. There’s also a 30 amp relay in the system that’s needed for proper function. It’s not a simple wire to wire connection for this upgrade unfortunately.1 point
-
1 pointSort of, I got the idle down to 800 rpm and the timing set dead on 20*, it still hangs a bit but doesn't affect the driving of the car, it only does it at idle when I blip the throttle so at the moment it's not a problem. I have a new water temp sender coming this week, I've read that a bad sender can screw with the idle.1 point
-
The same here! I don't think they wanted to create something like a follow up of the s30 series.. they did that with the s130 then came the Z31 with a total new design and the z32 (300zxtt) was the following car with all the extra. It became indeed a expensive car. i remember walking into a showroom and see one for 80000 guilders (about 30000 dollar at the time i think..) for a four year old car with 80000 km on it (50kmiles) thought i never gonna afford one.. but in 2007 i bought a TT and i drive it this year for the 15th summer! Not a single hair on my head regrets buying this beaute... I bought it with 61000km and has now 86800km. there are VERY few cars that look this good..1 point
-
1 point
-
1 pointLove that old truck!! Also the car looks fabulous. How did your door seals turn out? Did you have similar problems to what I had?1 point
-
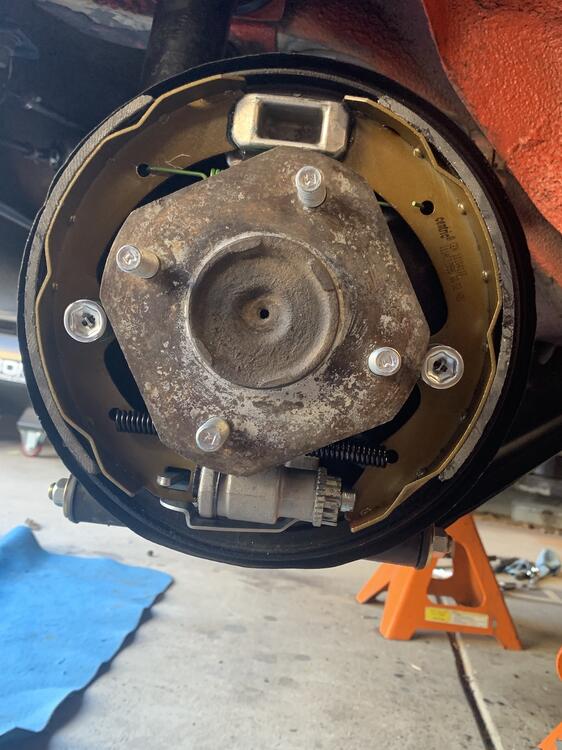
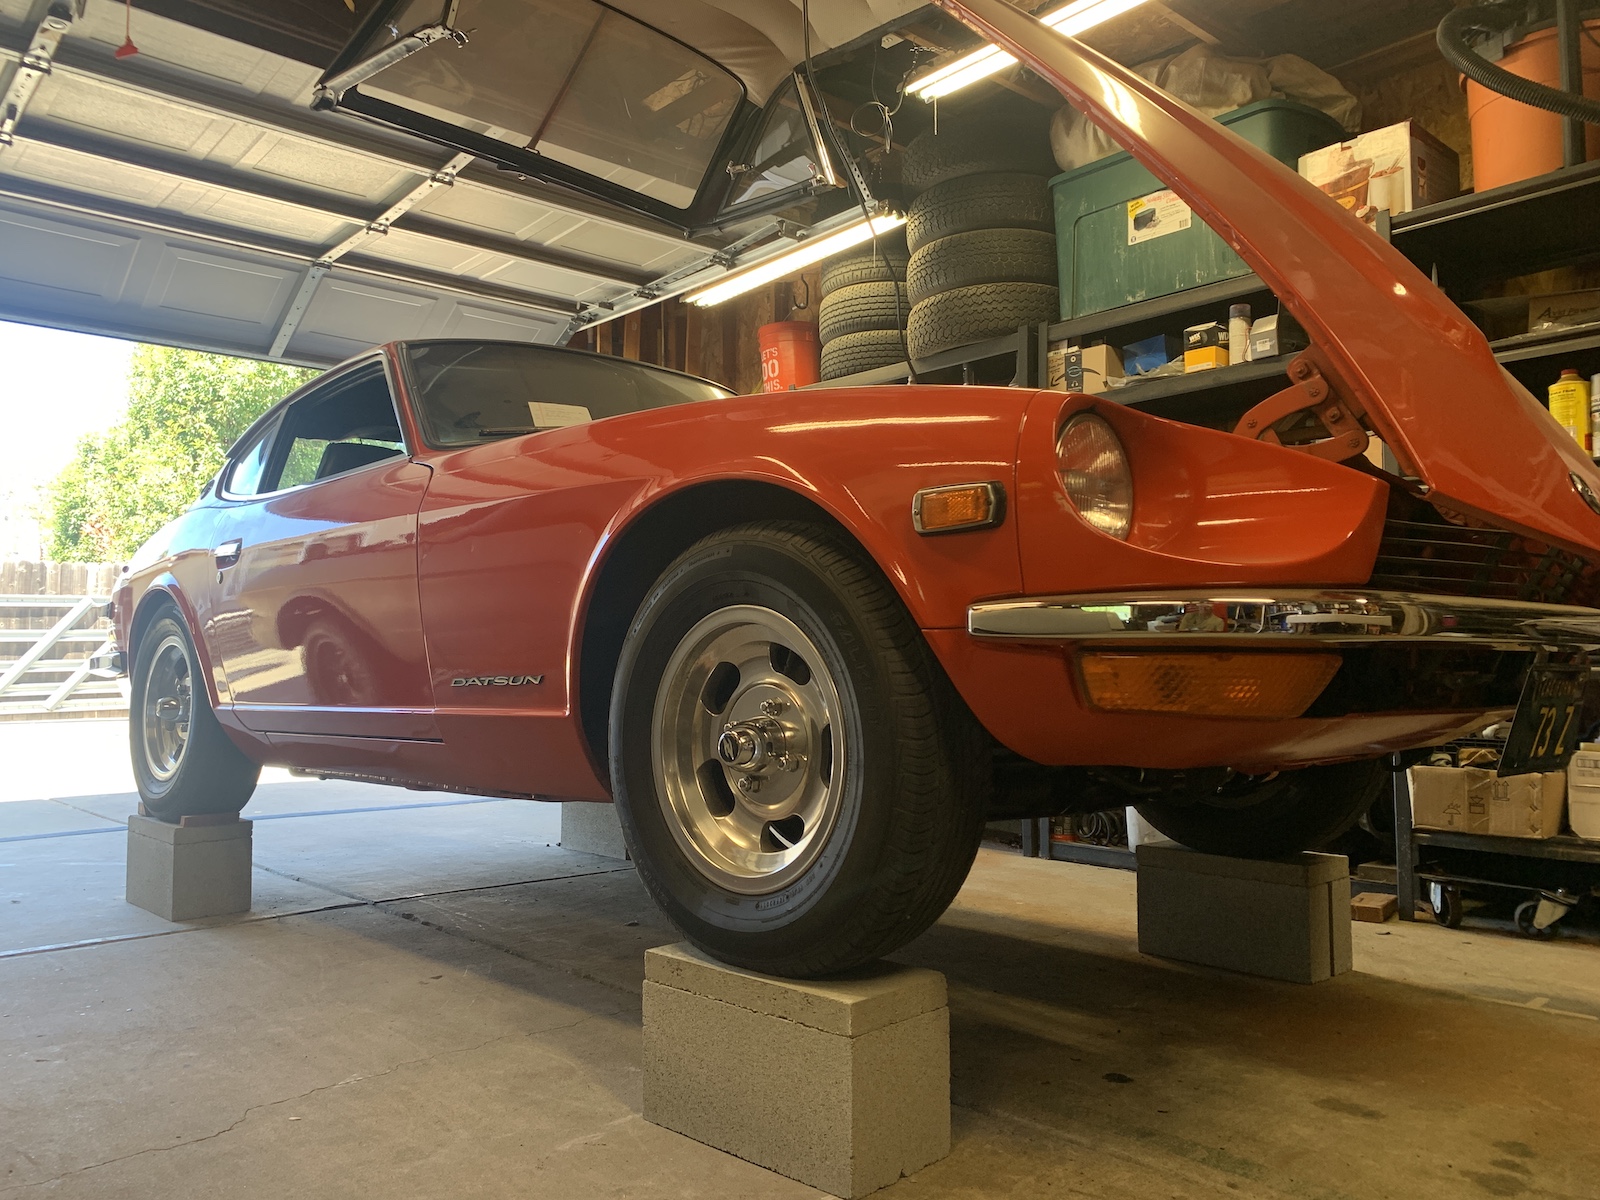
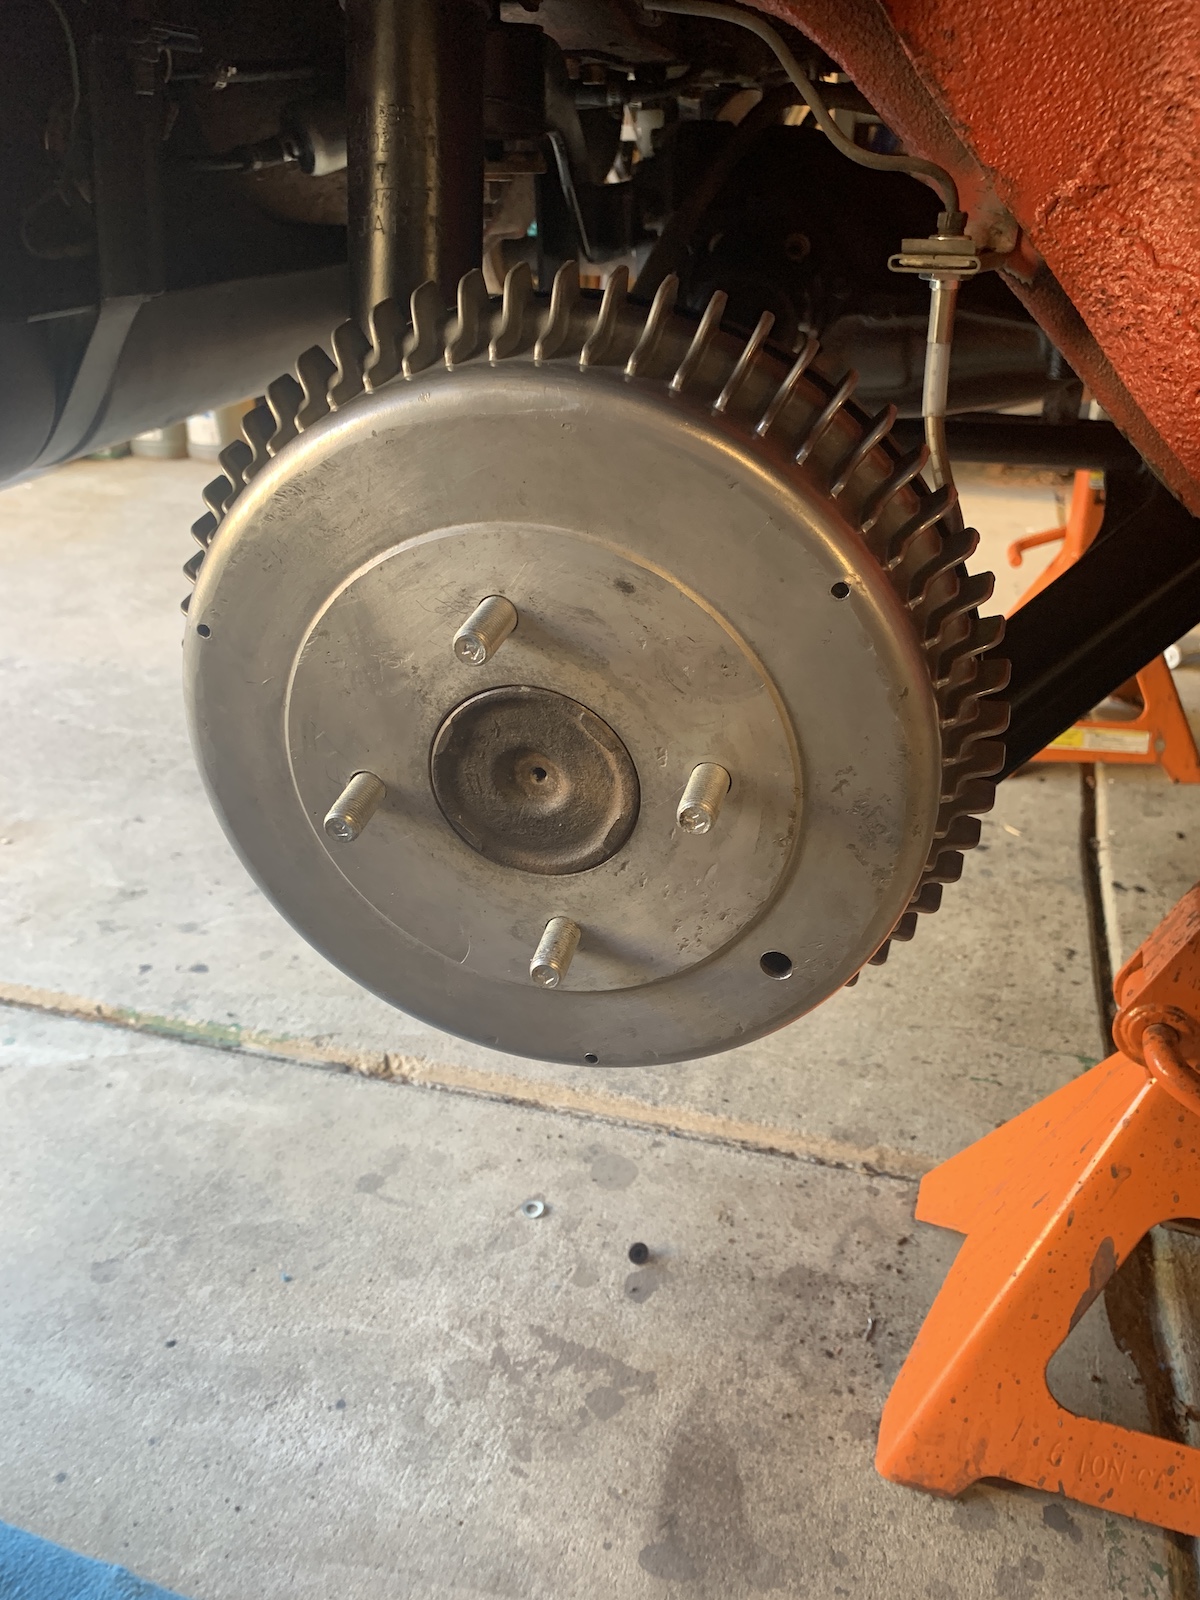
1 pointGot the rear brakes put back together. Next step is to get my wife out there to help me bleed the brakes. The new MSA wheel cylinders had a different angle on the inlet so ordered to new set of hard lines to fit.

 1 point
 -
The first time I saw that 300ZX design I was blown away. It’s a beautiful car without question, but a serious departure from the previous Z designs (maybe too far). It seems Nissan got a little lost. What was once an affordable car for the masses became a car that only few could afford back then. They lost the spirit of what made the Z amazing. A simple, well engineered , beautiful car that had enough performance to wow the population. They tried to make later model of the car too plush, too many bells and whistles and lost track of what made the car great. This car to me share little it any DNA to the original S30 design spirit. Sent from my iPhone using Tapatalk1 point
-
Possibly because it sold a few hours after it listed, or maybe the site is broken. It was a '76 2+2 in at least decent shape from the pictures for $1,000.001 point
-
1 point1 pointIt has evolved some, and now it consists of: Using these glass beads from Northern Tool and Equipment, important for size of grain, and bead blasting at 90 psi with a 1/8th inch nozzle to remove all rust, and to establish a consistent finish. I use one of these baskets and find that putting a variety of hardware (big and small) is great for trapping the parts in place so I can blast them without them flying around too much. For large parts, you don't need to use the basket, and you can then go back over them with the pressure at 50 psi to put a smoother, easier to "second stage prep" by hand, finish. For all hardware (bolts, washers, nuts, screws and odd small bits), I go straight from glass bead blasting to tumbling in one of these vibratory tumblers. I now use a stainless steel media (bought from Southern Shine Tumblers on Facebook). See pic below. It consists of tiny little bits of stainless steel that are good at getting into tight spaces, like between threads, phillips head recesses, etc. And now I use it dry. I was using water and a bit of citric acid, but I think that is best for doing brass shell casings. I was fighting keeping the parts from starting to oxidize/rust, and have found that the media works better and faster dry... to put a nice finish on the hardware. Time in the tumbler is about 2-3 hours. For large parts that I can't tumble, I use a Dremel tool and the little wire wheel brush attachments after glass bead blasting. For final, more consistent finish, I follow wire brushing by hand rub the large parts with #0000 fine steel wool. Doesn't take a lot of work by hand, but the combination of using the Dremel followed by fine steel wool by hand does end up taking some time. The glass bead finish can be altered on aluminum parts, by the way. It can look really nice, if after going over it once with 90 psi, you lower the pressure and go over the part slowly. Extending the distance from the gun tip to the part also smooths out the finish, giving it a nice satin look. I am still experimenting, with some aluminum parts, but a once over with 90 psi to clean followed by a once over with 50 psi achieves a really nice finish.
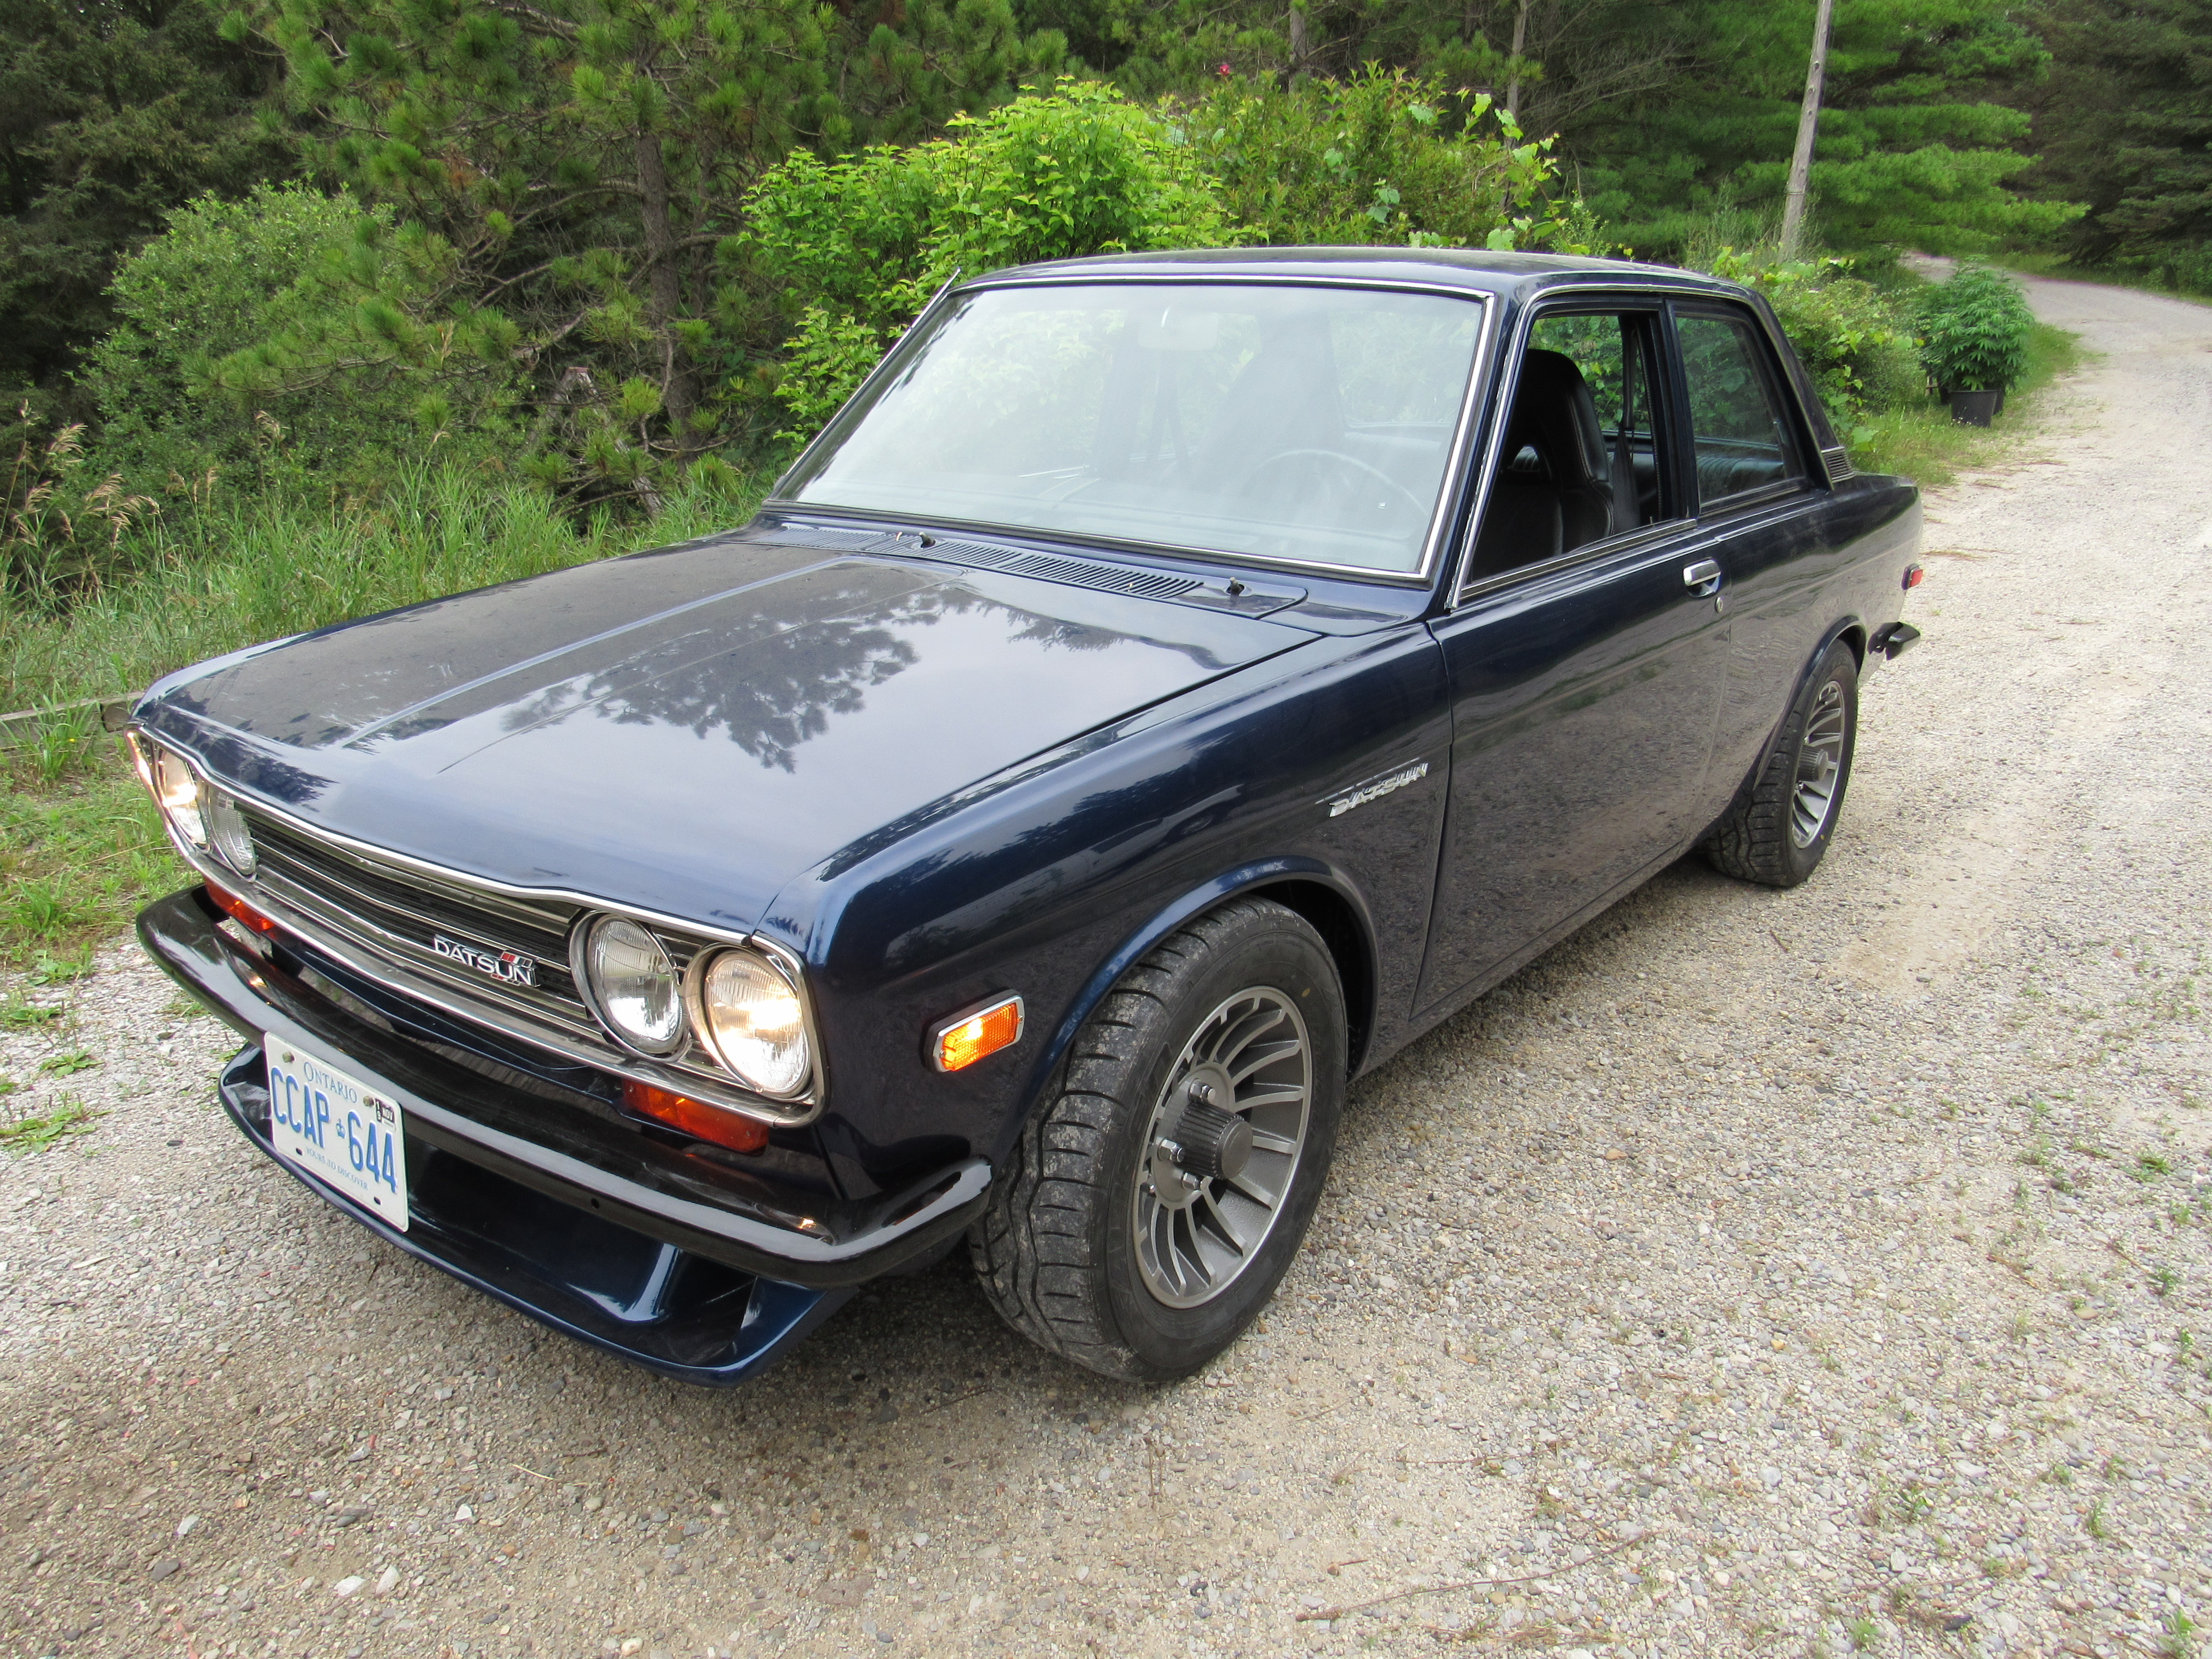
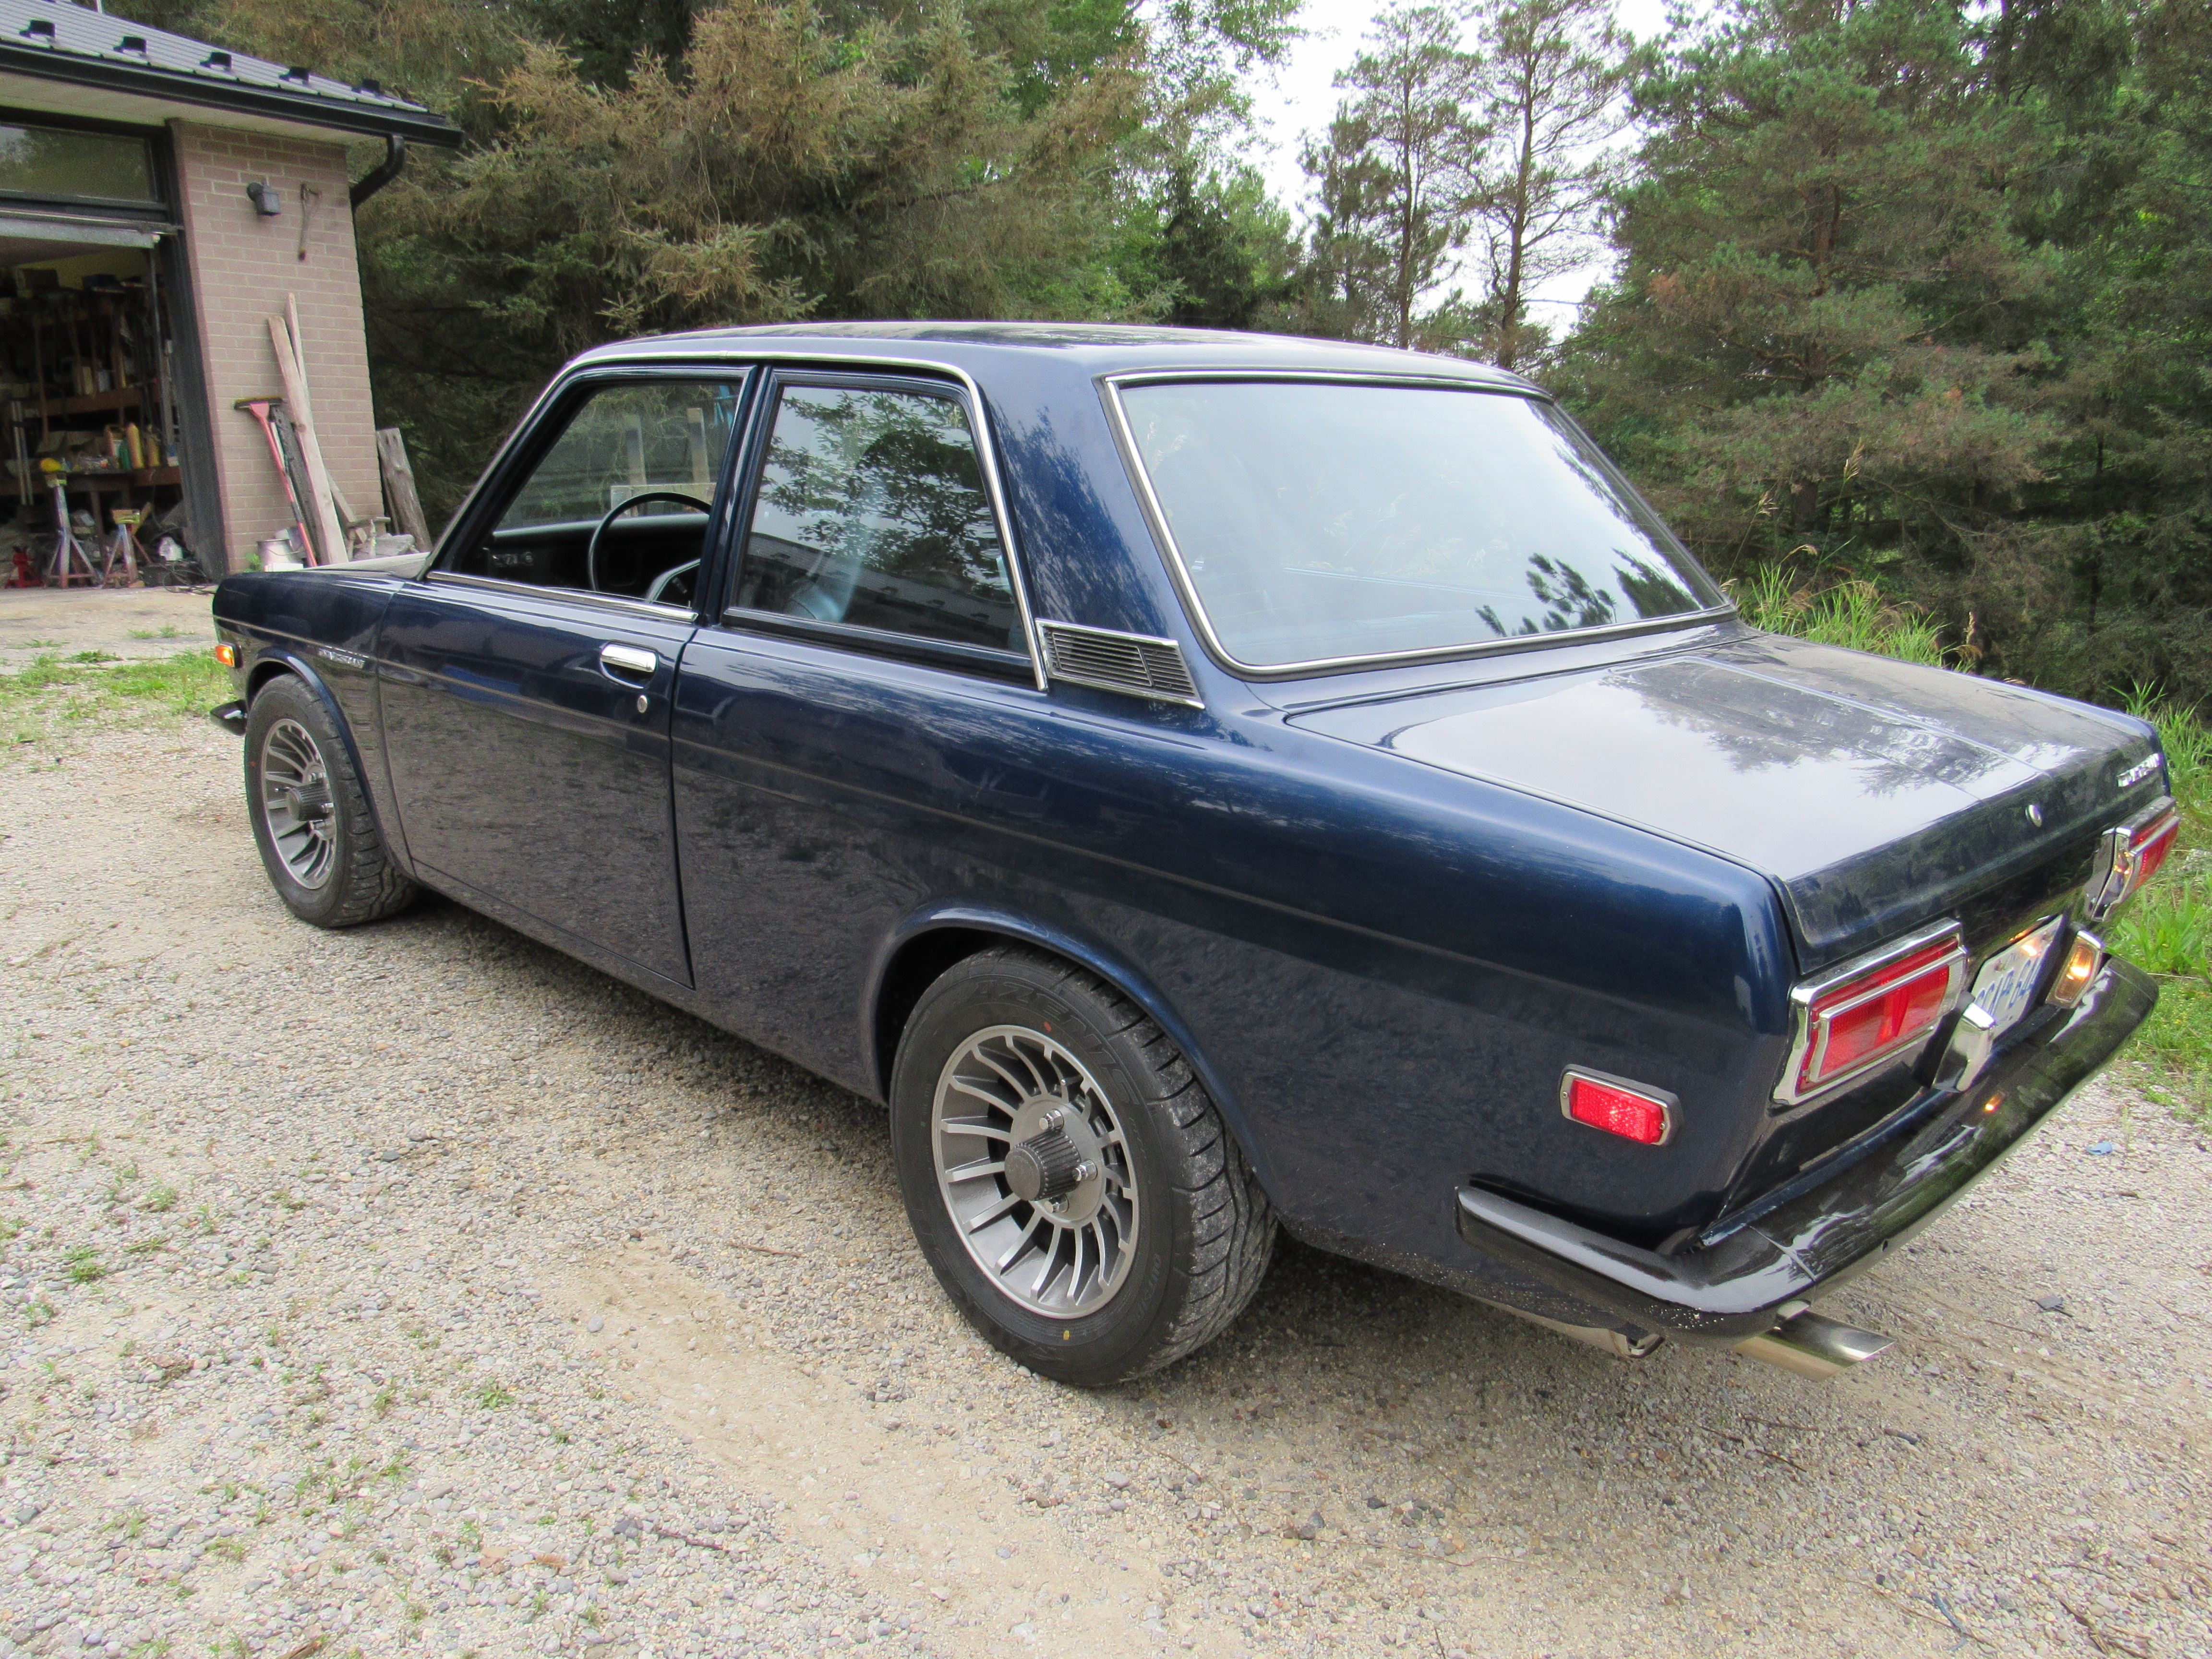
 1 point1 pointOn mine, the serrated washers were missing their teeth completely as they had been washed off with British weather over 40+ years. The moustache bar used to clonk going over bumps or undulations in the road when accelerating. As they are NLA, I used some 9mm and 3mm washers (60mm OD, 24mm ID -22mm if you want a very tight self centring fit) to make my own version. NEVER a clunk since and I’ve been pushing very hard. https://www.ebay.co.uk/itm/5-x-pick-own-size-Solid-Neoprene-Rubber-Washer-Washers-3mm-thk-upto-60mm-dia-/262163888110 I think the engineers put them there for a very good reason. Ps. Great work - looks incredible under there - now you will fear puddles!!! [emoji1787]1 point1 pointI got her running well enough to take it for its first drive, fun little car, went for a blast up my back road. A few rattles and vibrations I have to hunt down and need a new filler hose so ordered that today. The car is filthy from sitting in the shop since the paint job but you can get the idea of what it will look like when she's all shiny again, very pleased with the height, just where I like it. Don't want to look like a boy racer.


 1 pointIn regard to the wiring the IPO put in, the blue wire is the power for the fuel pump relay coil. It's connected to the yellow wire that is shown in the wiring diagram between the voltage regulator and alternator. The blue wire runs from the yellow wire to the 85 or 86 pin of the relay. The curly wire runs between the 86 or 85 pin (whichever the blue wire is not on) to ground. The black/red wire is the power for the fuel pump. It is going to pin 30 or 87. The white wire is going from the 87 or 30 pin and on back to the fuel pump. With the way it is wired, if the black/red wire came off the relay while the car is running, it could cause an electrical fire since there is not a fuse between the alternator and the relay. As you seem to have figured out, the blue wire will go away after modifying the electrical system for an internally regulated alternator.1 point


Important Information
By using this site, you agree to our Privacy Policy and Guidelines. We have placed cookies on your device to help make this website better. You can adjust your cookie settings, otherwise we'll assume you're okay to continue.