Leaderboard
-

siteunseen
Free Member7Points15,115Posts -
jfa.series1
 Subscriber
 6Points2,734Posts
 -
Barefootdan
Free Member5Points275Posts -
conedodger
Free Member3Points12,516Posts


Popular Content
Showing content with the highest reputation on 04/08/2021 in Posts
-
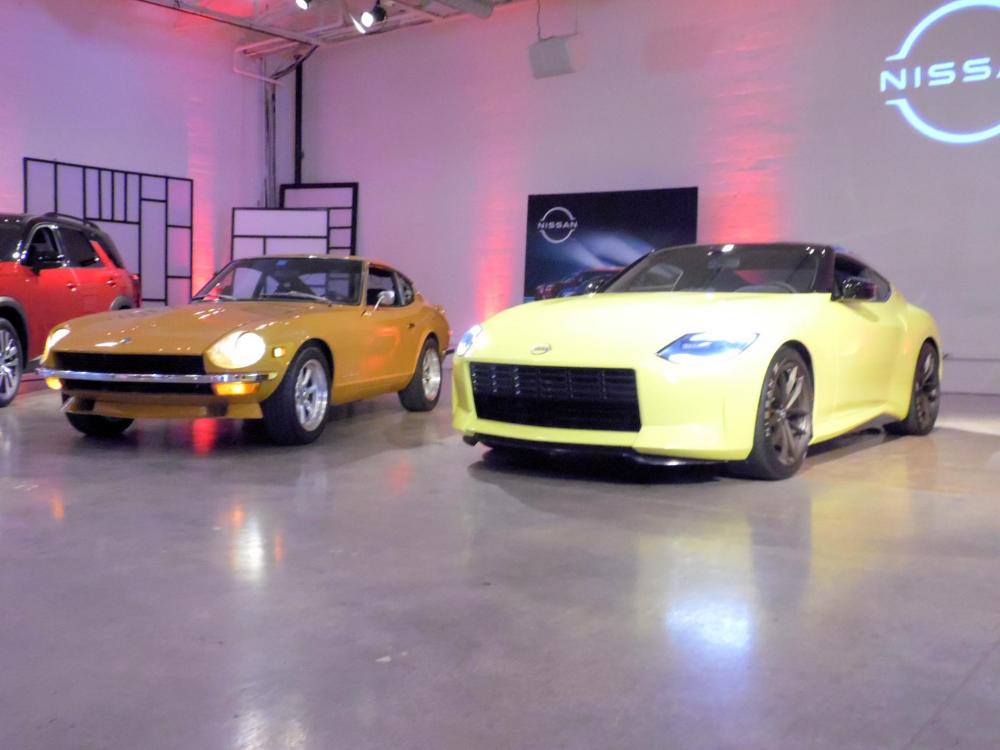
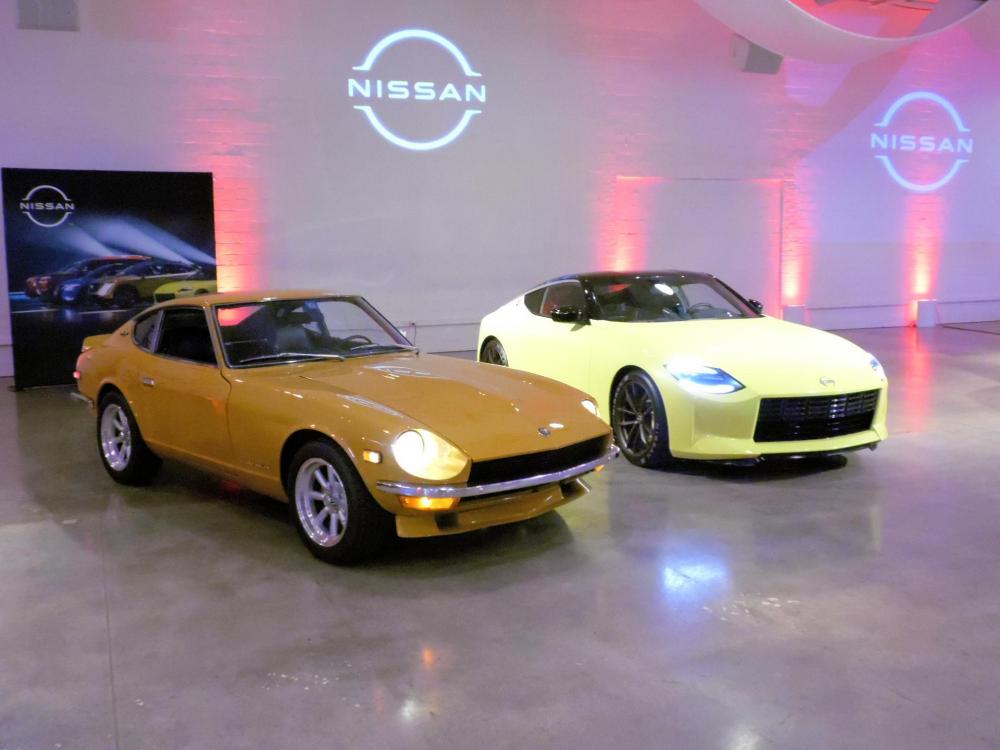
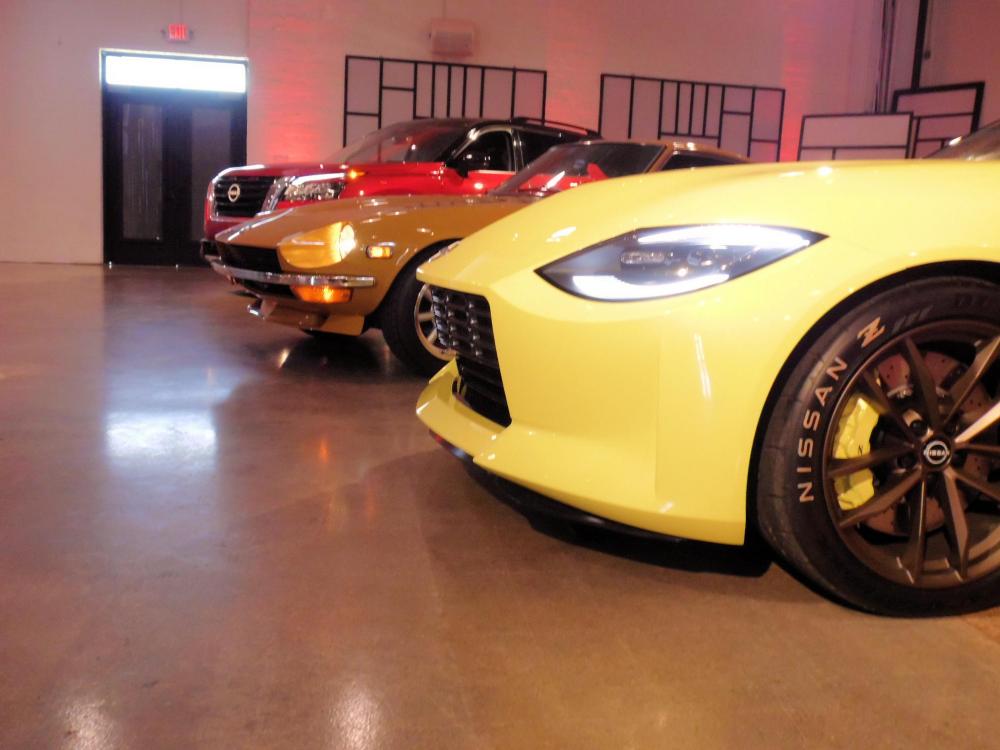
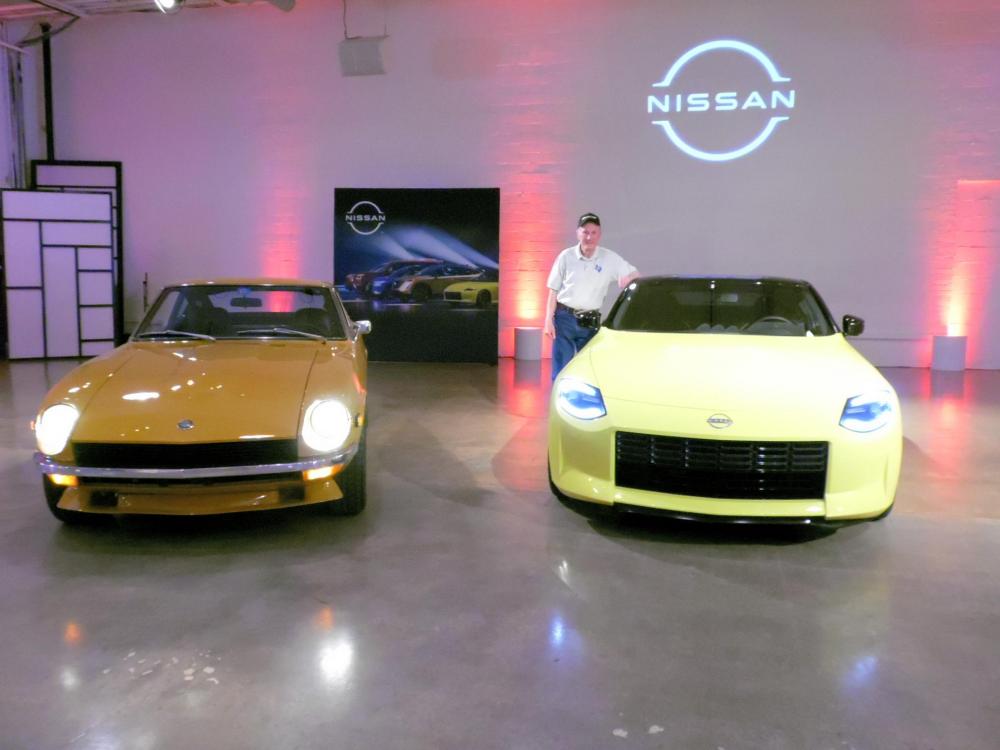
5 pointsThe Z Proto wrapped up a three-day visit in Dallas today. I had recently posted on the Nissan USA Facebook page about our 50th anniversary and they reached out to me with an invite to see the Z Proto. What followed was an unexpected photo and interview session where they posed my car next to the new Z. The new Z is a sleek and stylish car with none of the faux vents, overwrought bulges and creases, or chrome embellishments; the interior is exceptionally comfortable and well done. The Nissan team was very welcoming and showed a genuine interest in my car. I expect to get copies of the photos taken by the pros in the coming weeks.
 5 points
 -
4 pointsI found something similar to what my uncle used off his rear truck hub. Cannot believe I found this. This is 70s/80s redneck engineering. His name was "Uncle Luther". Miss him too.4 points
-
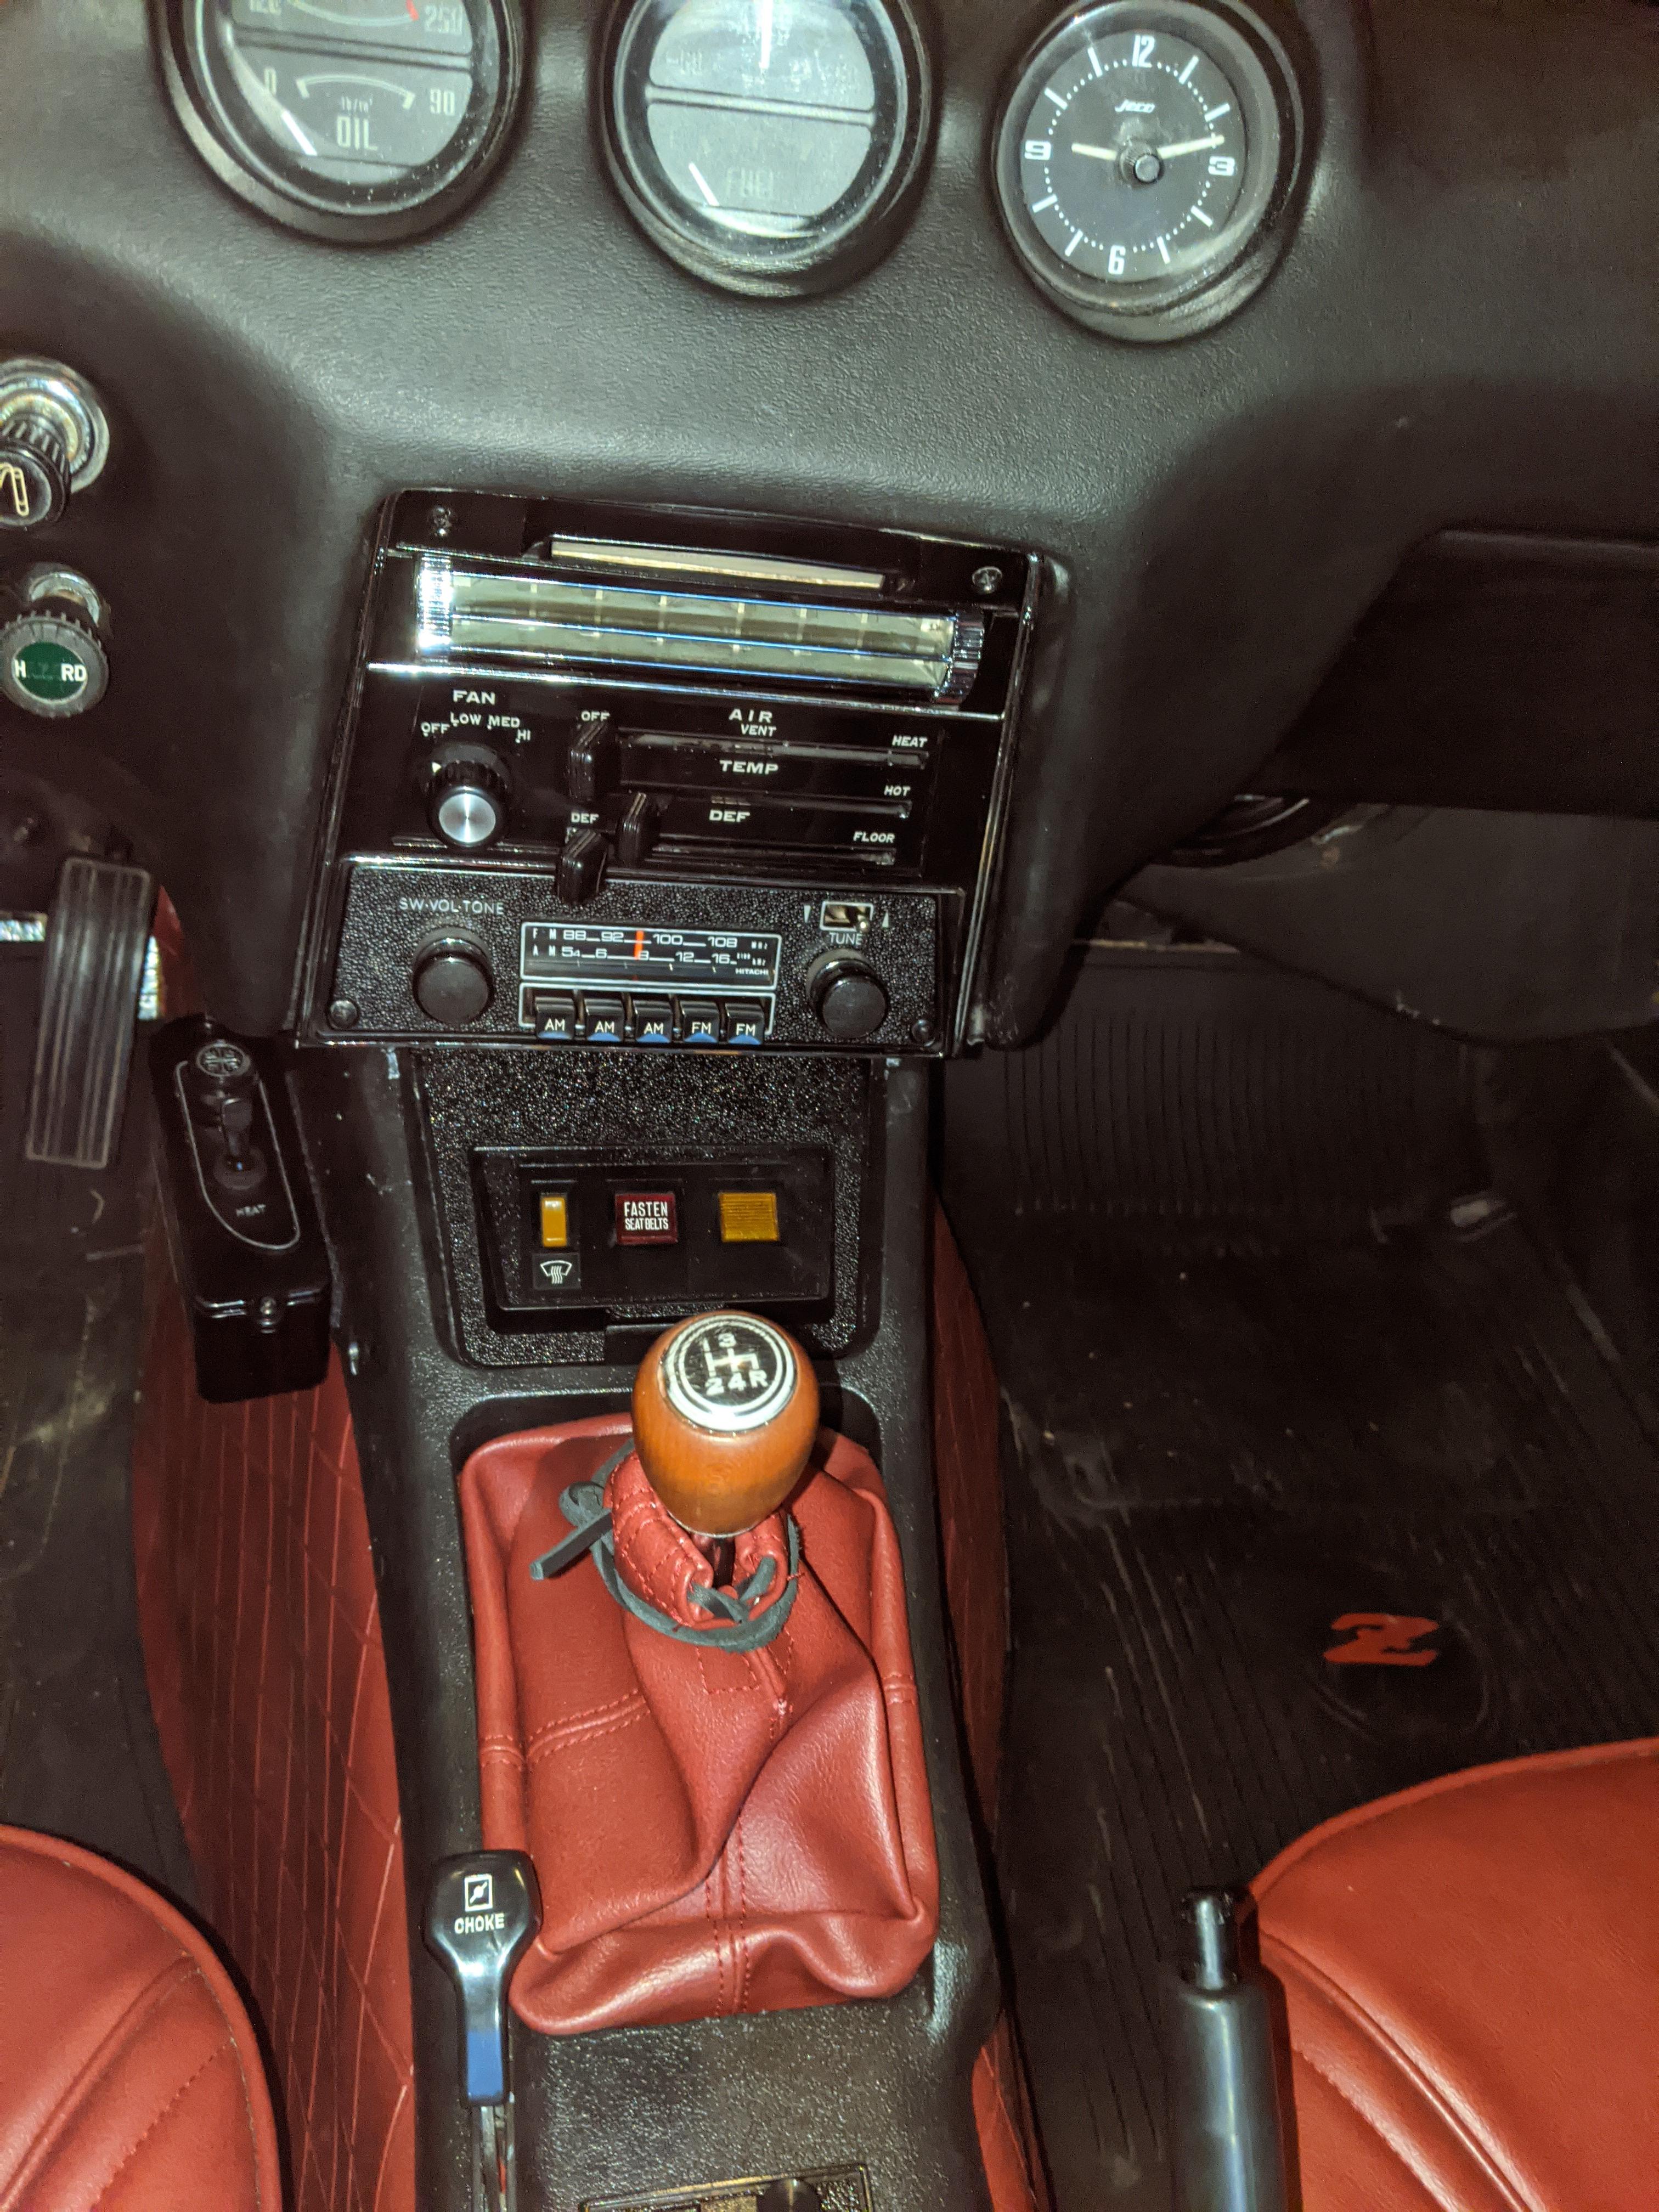
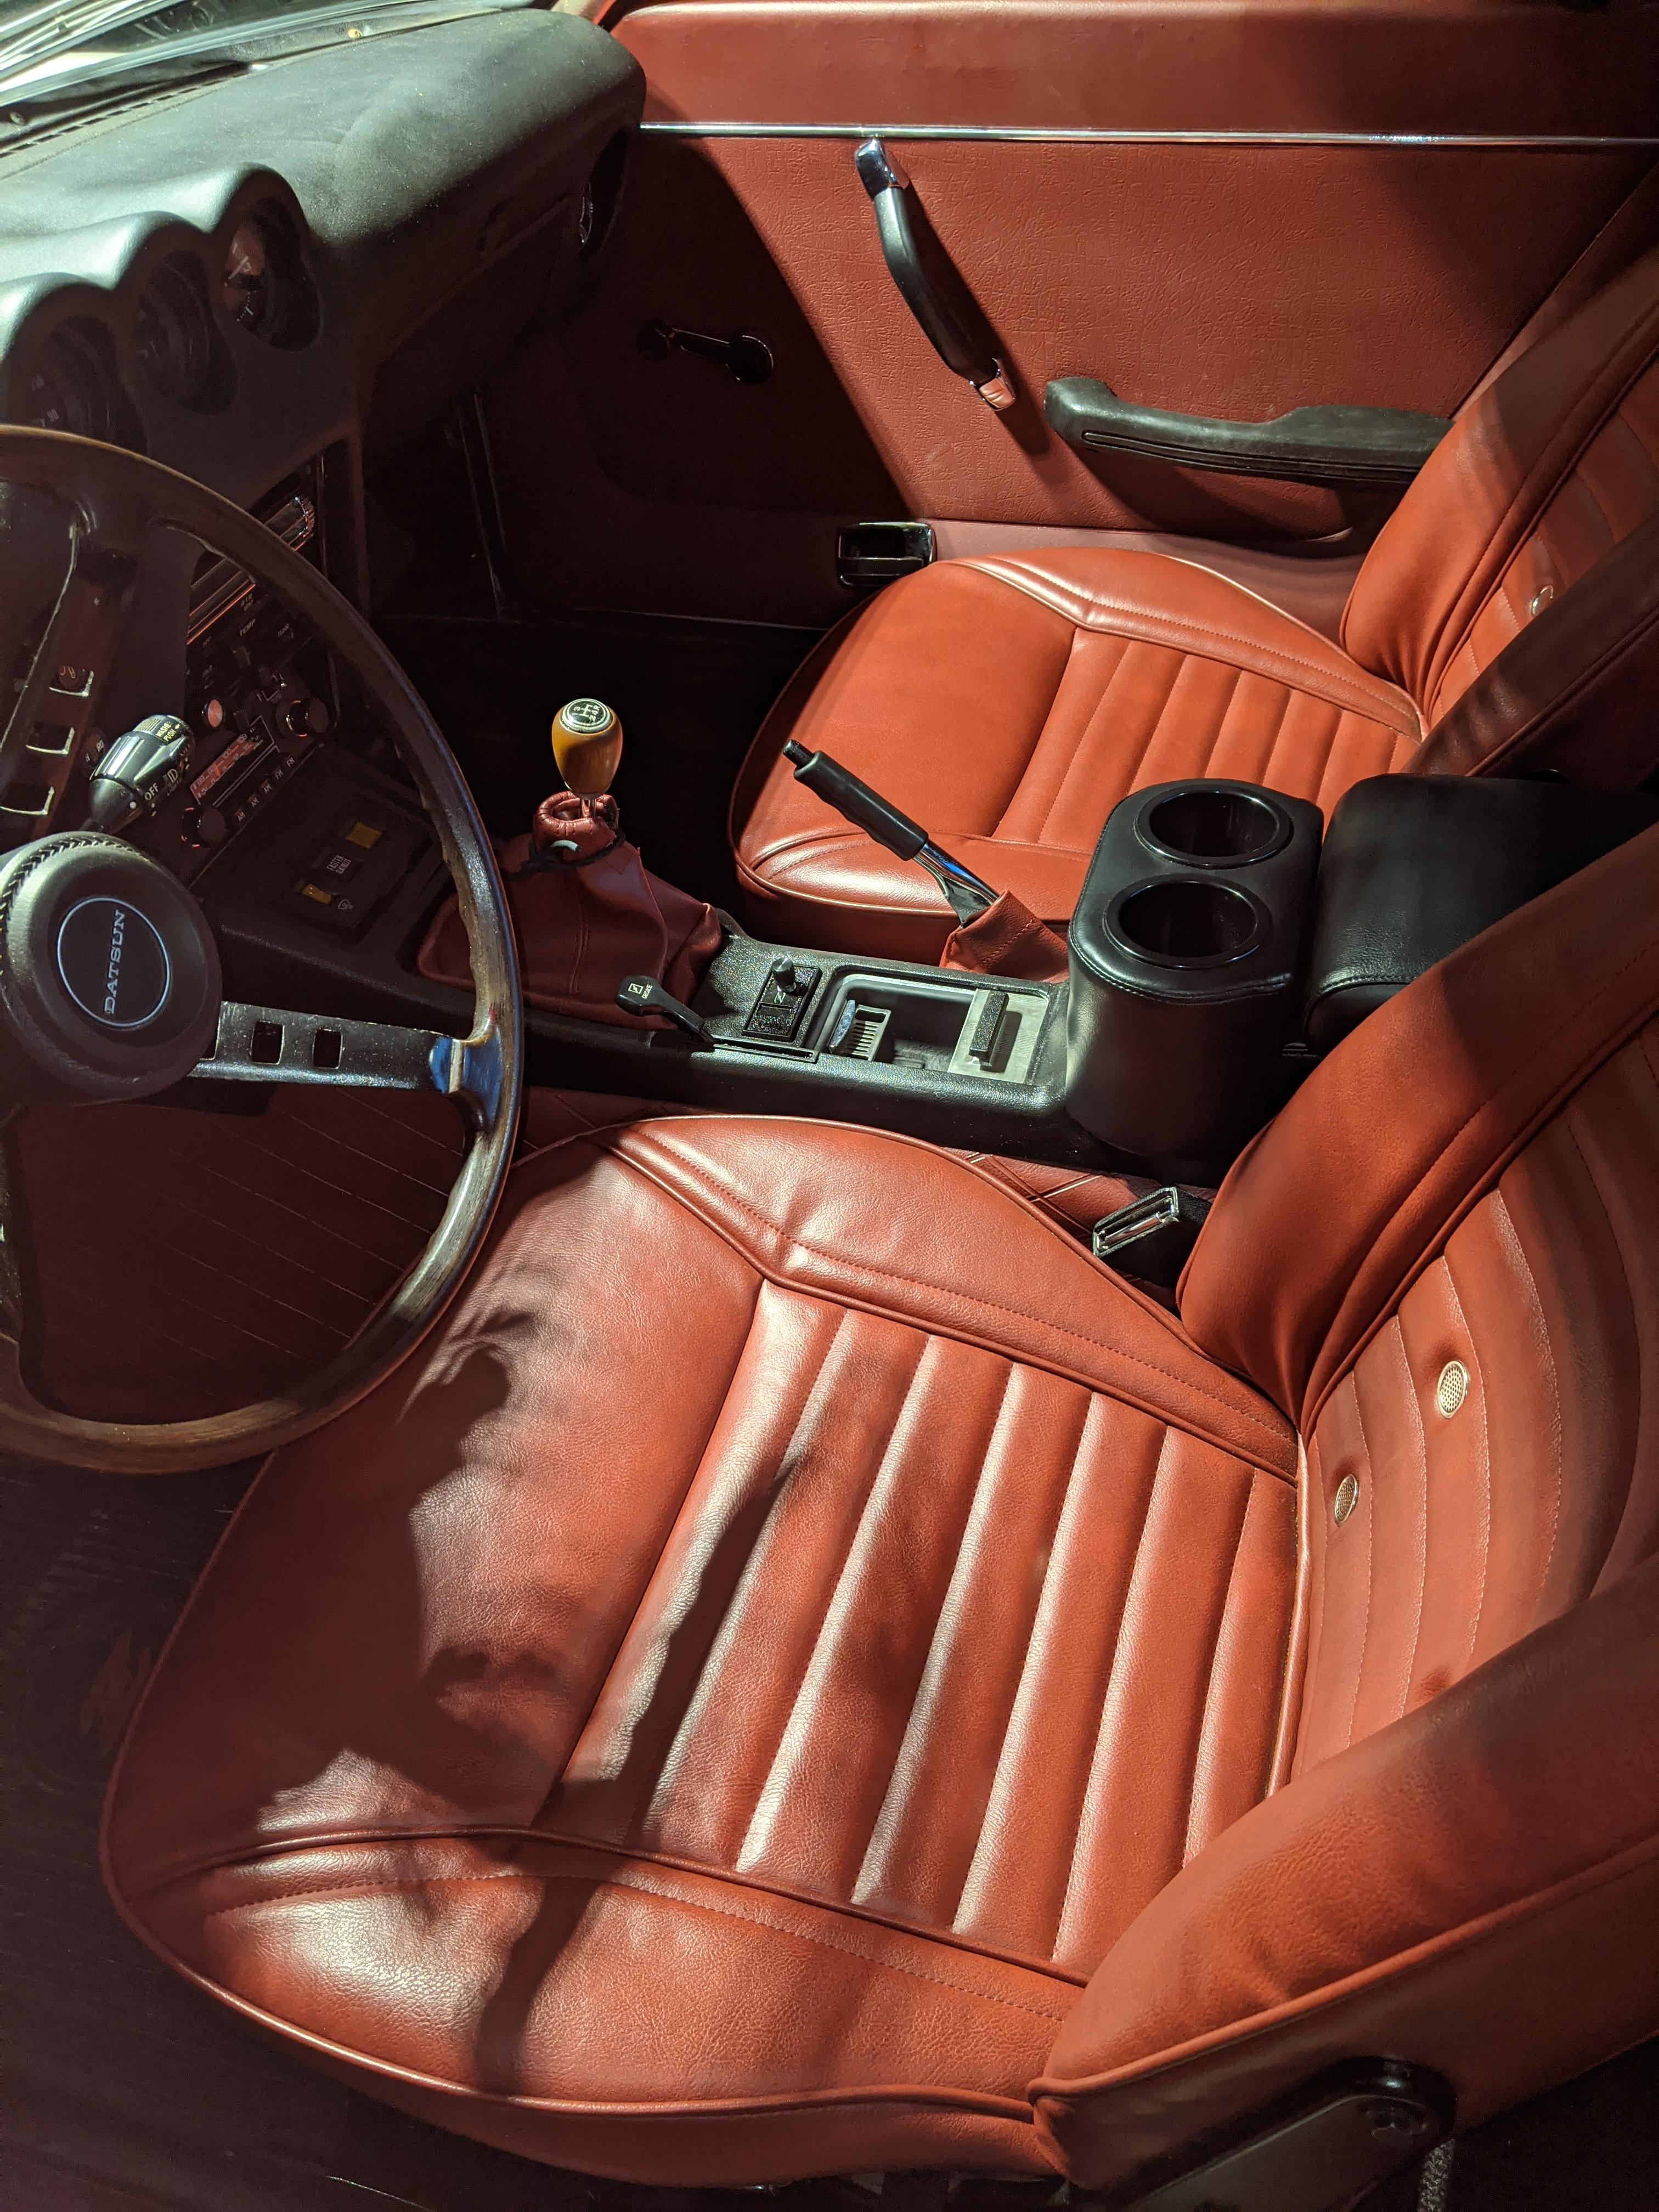
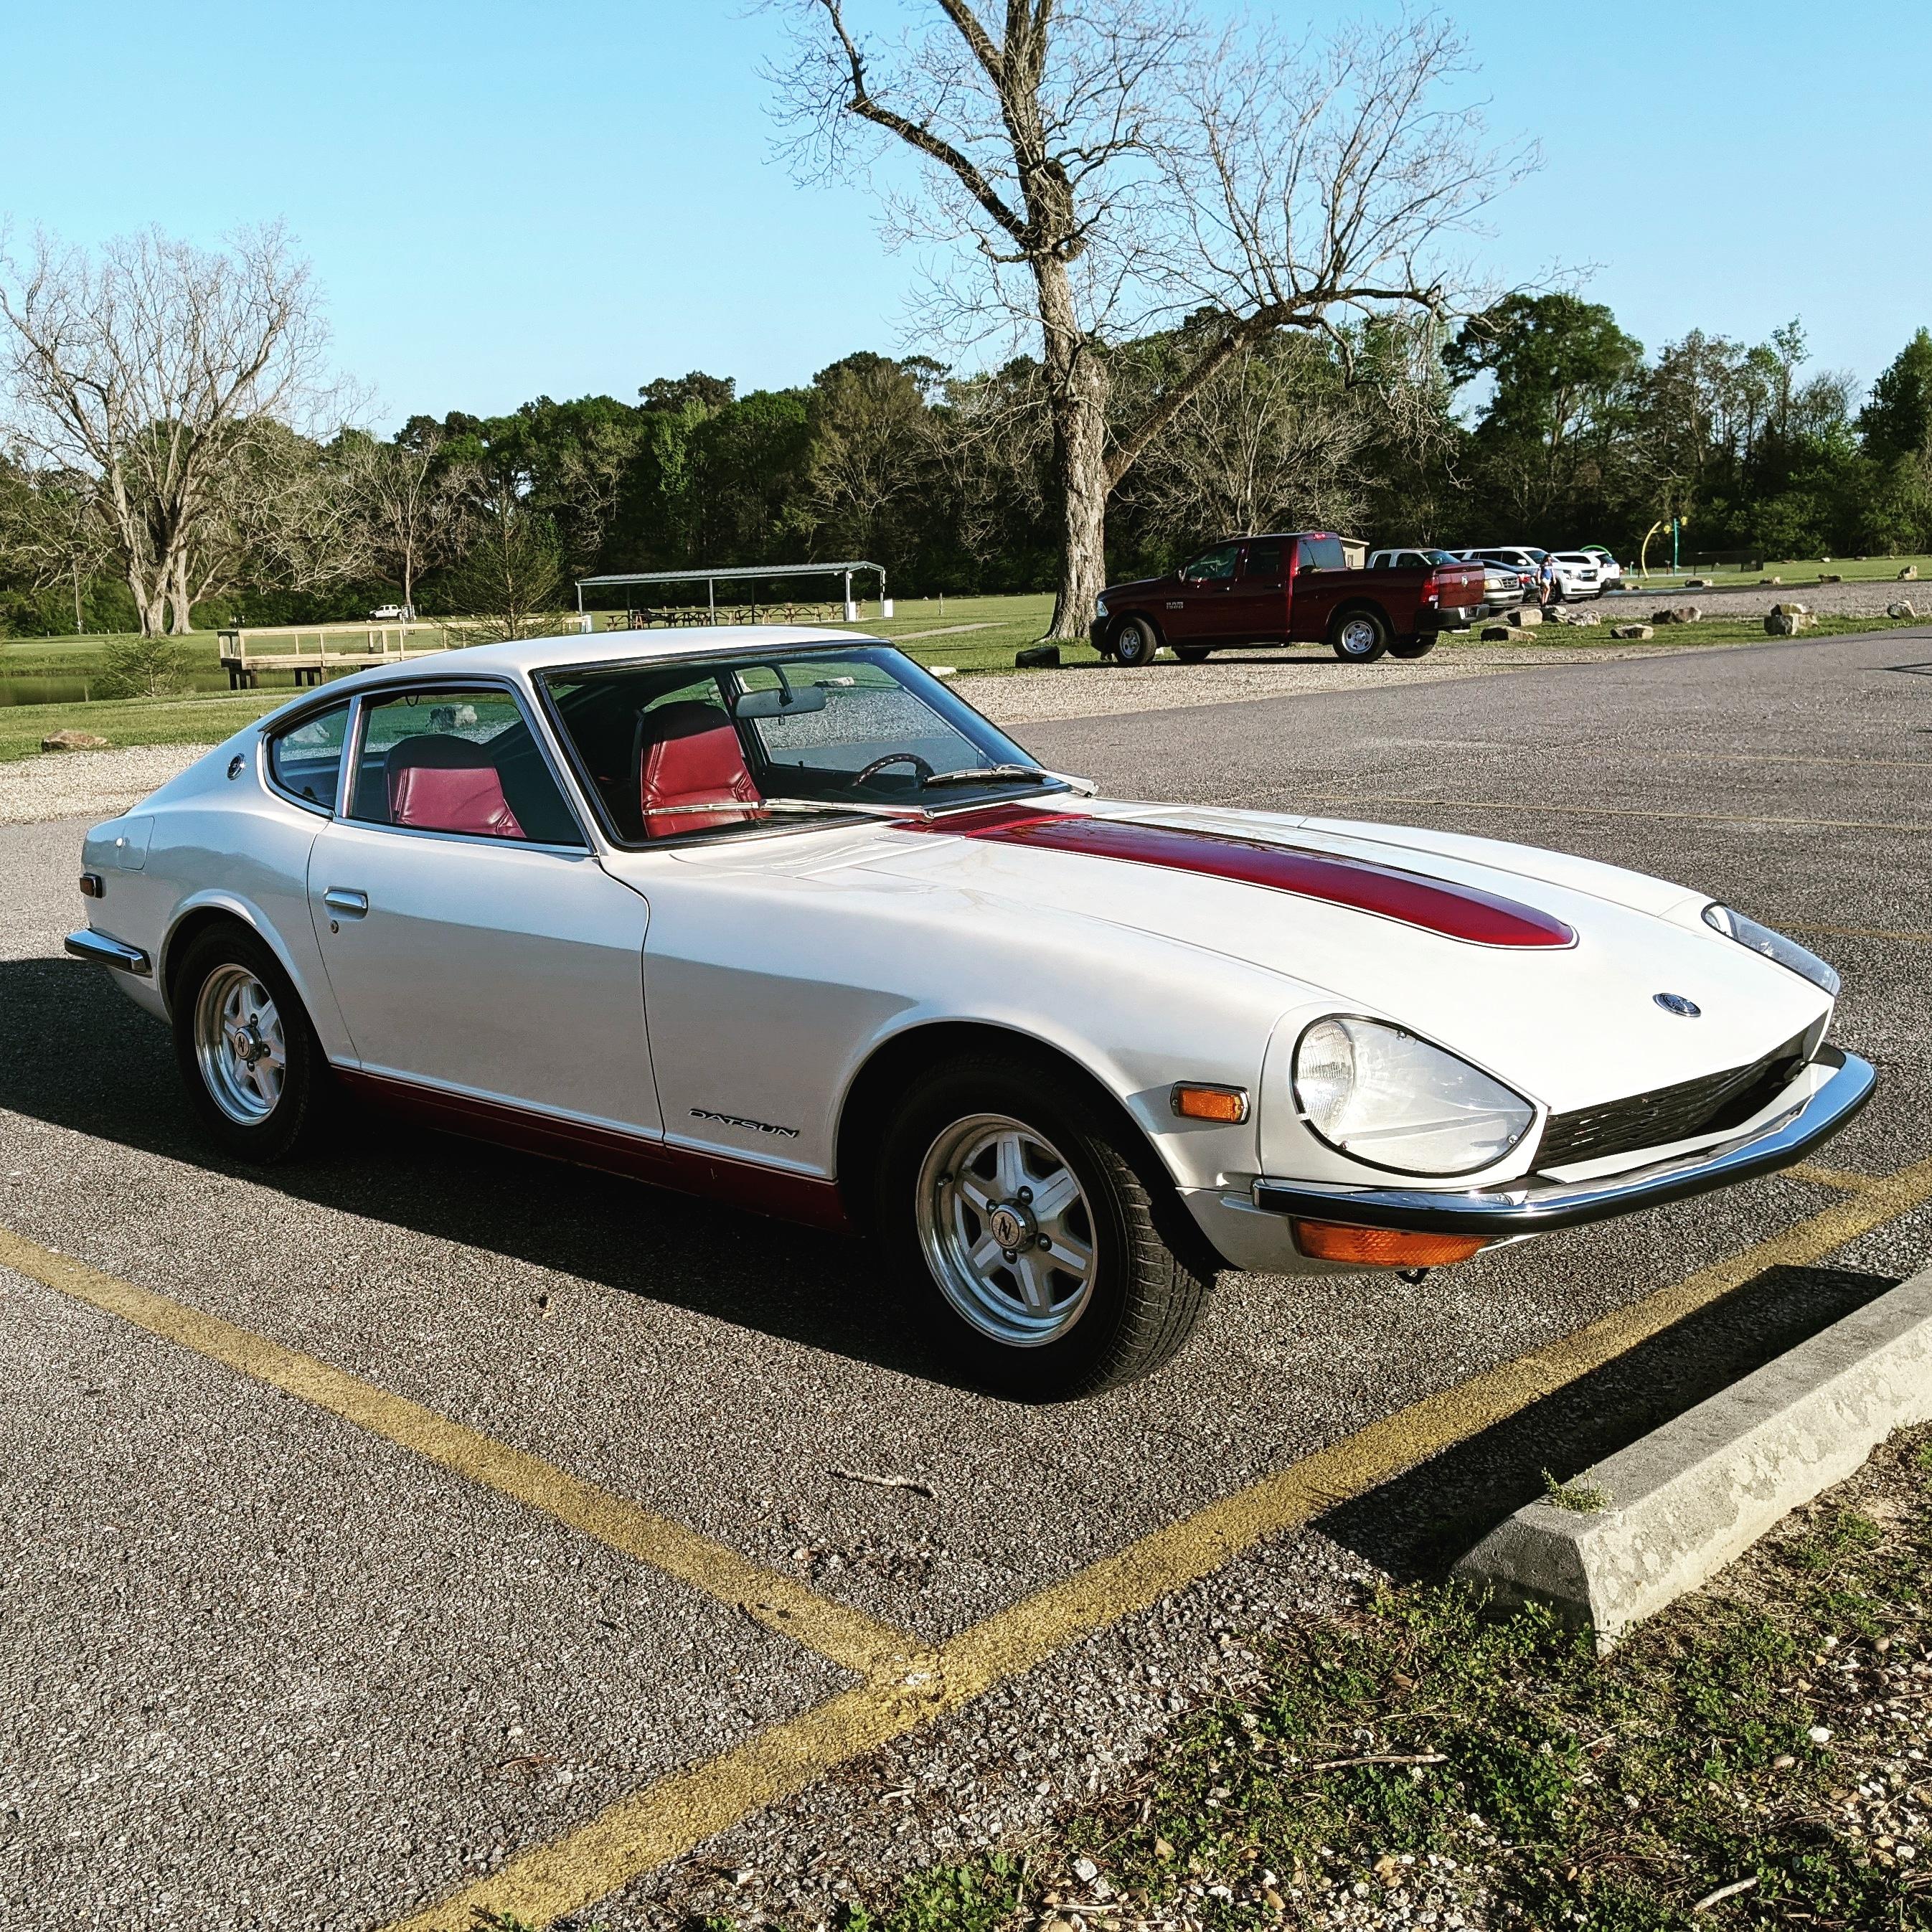
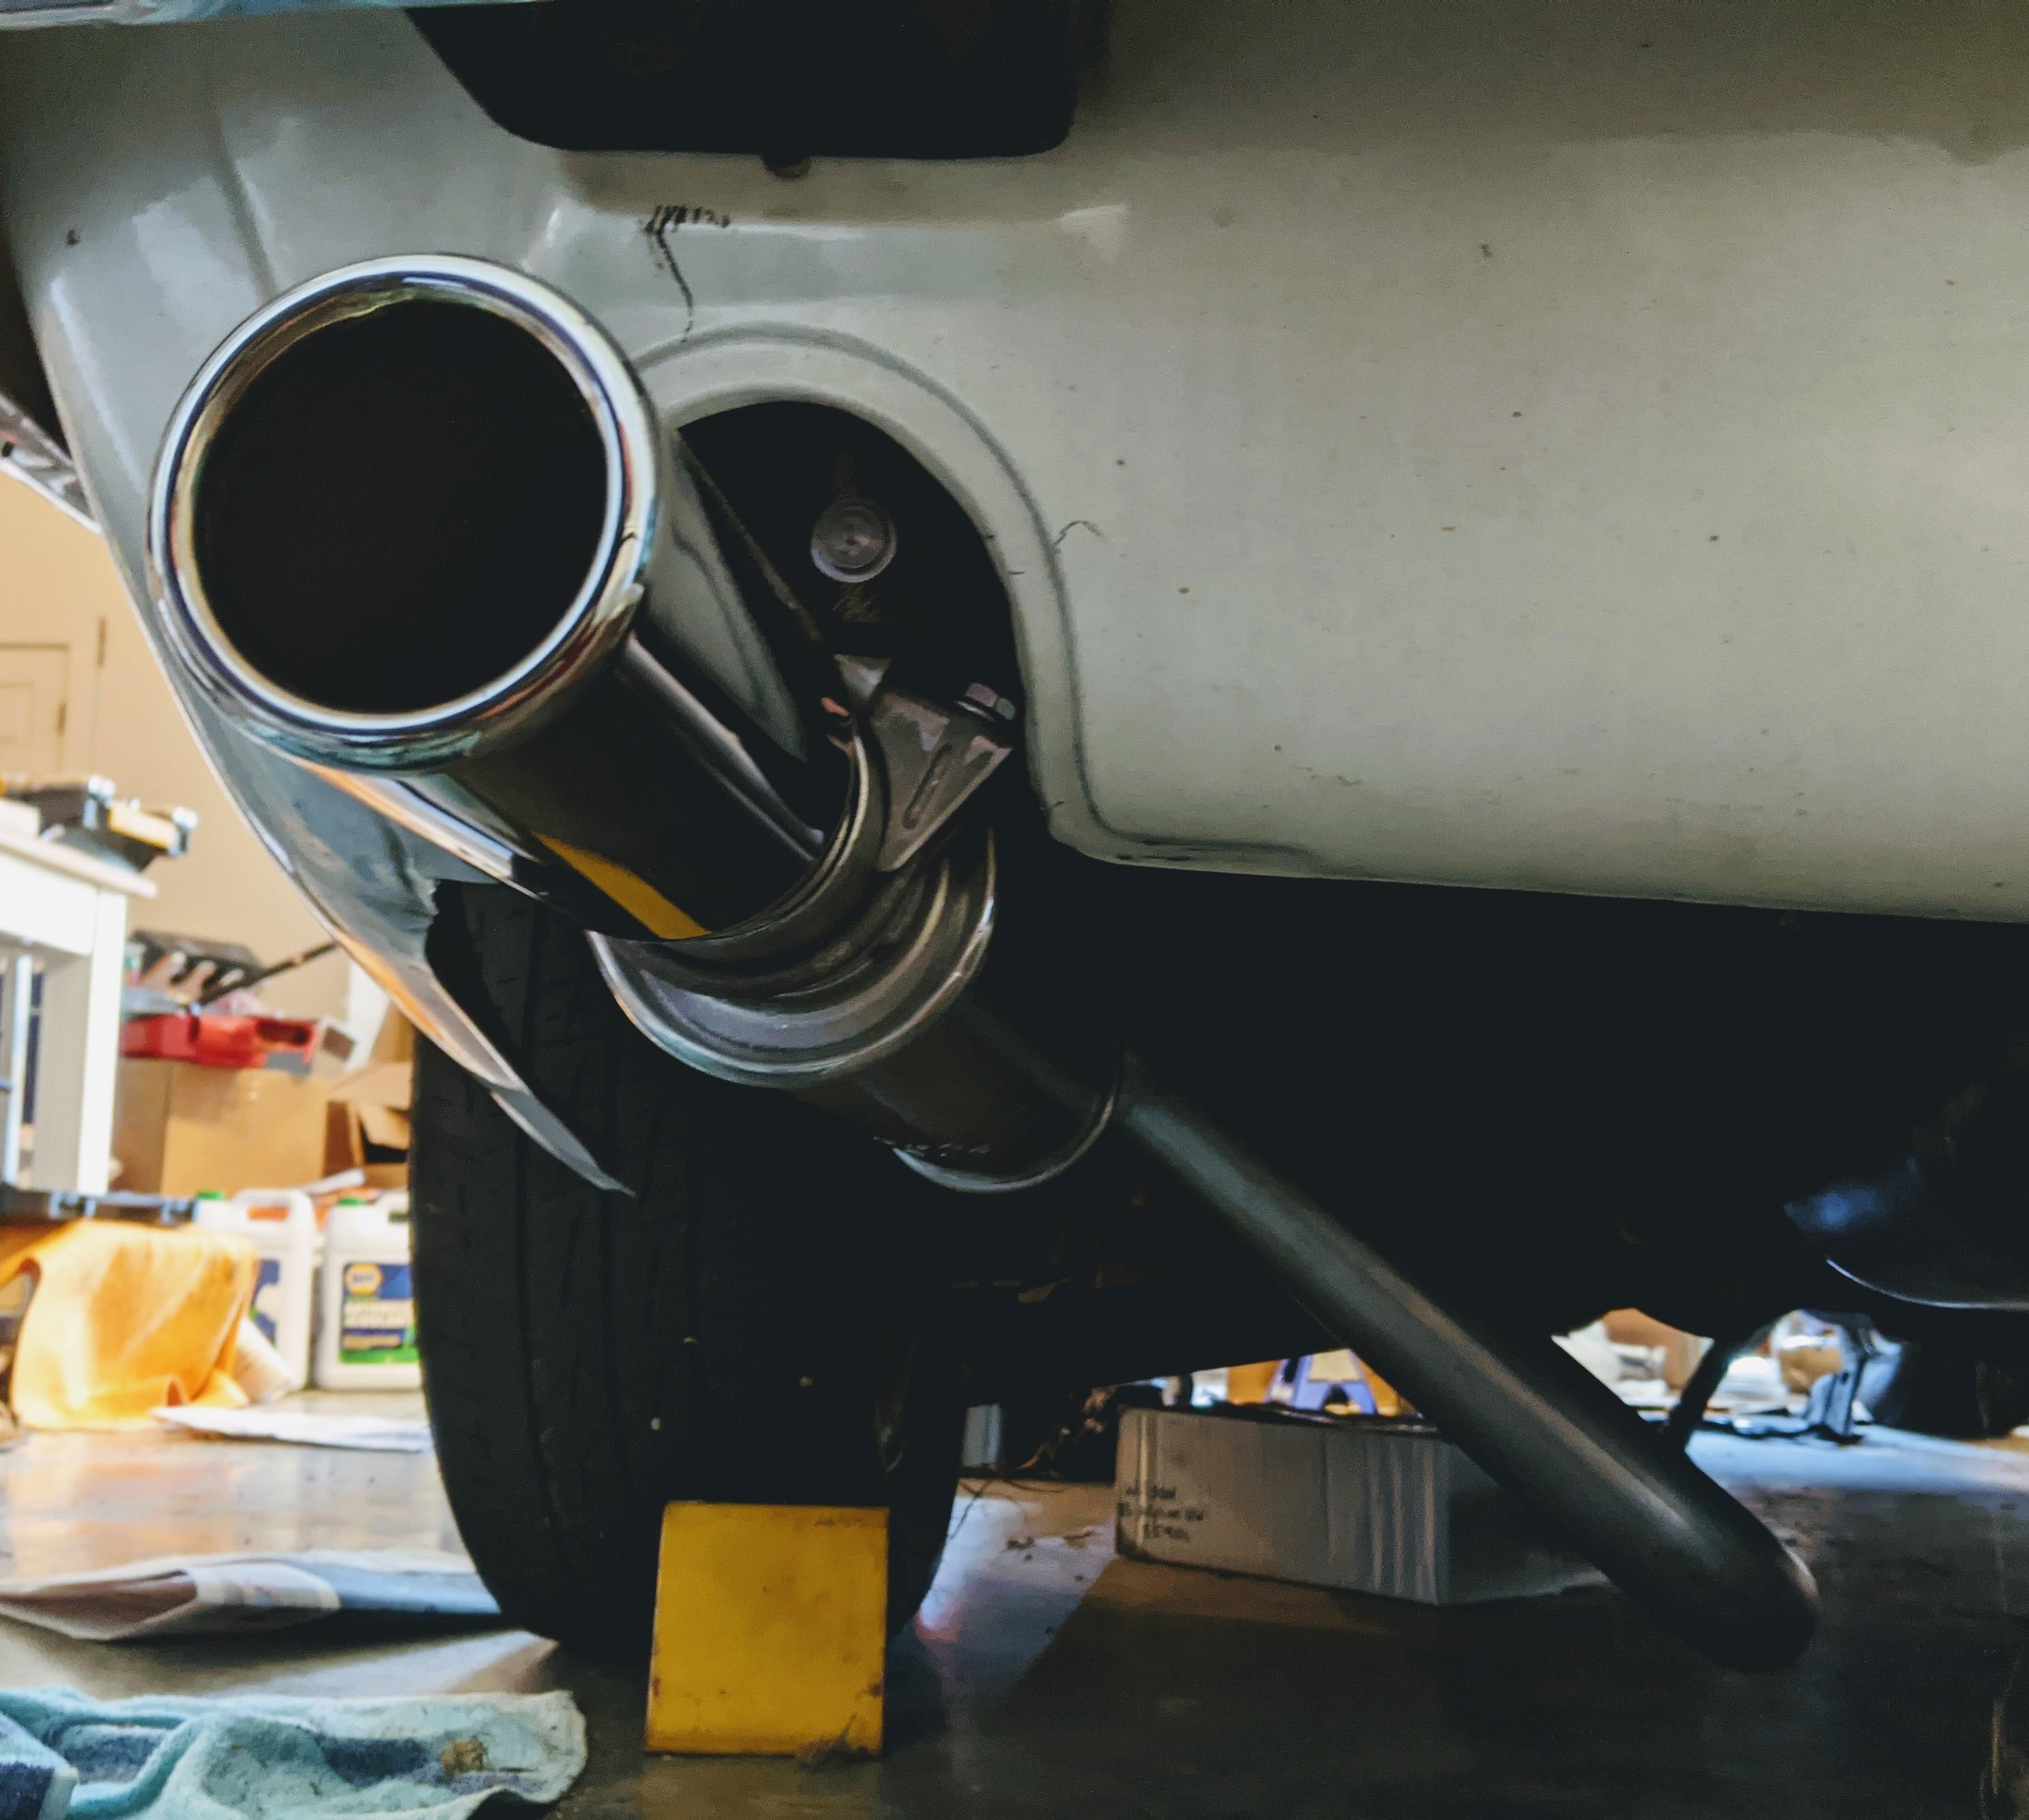
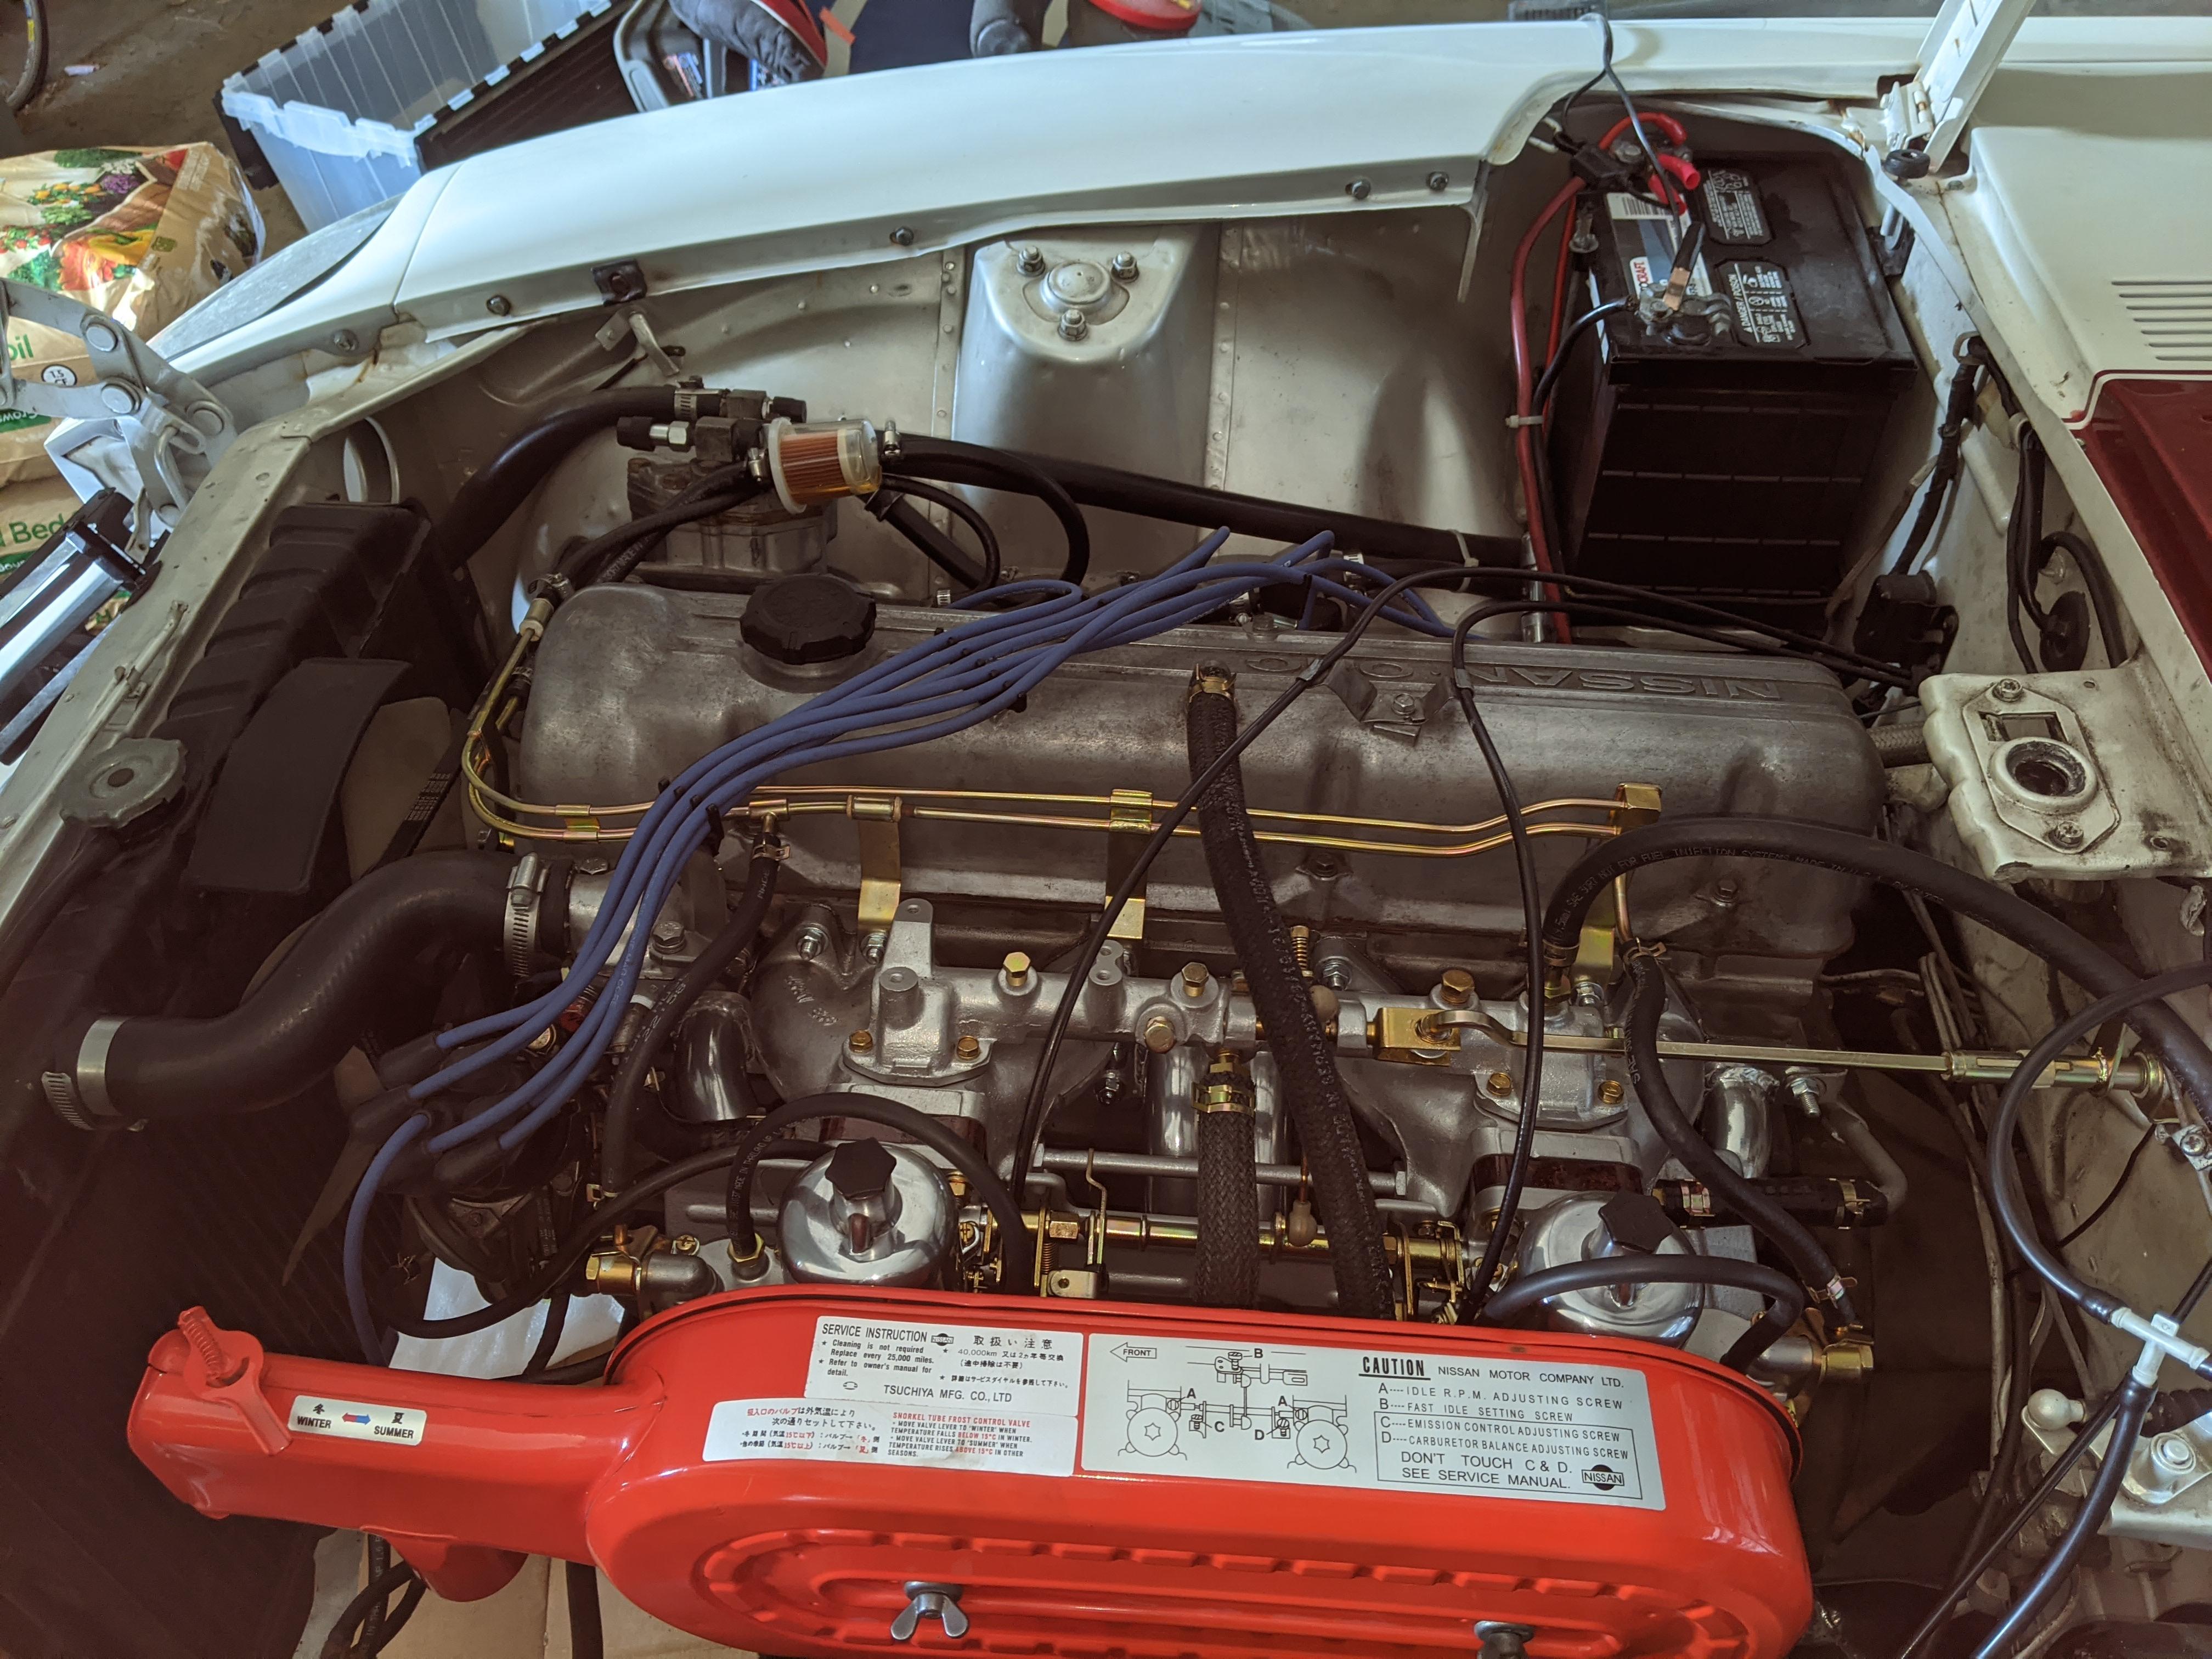
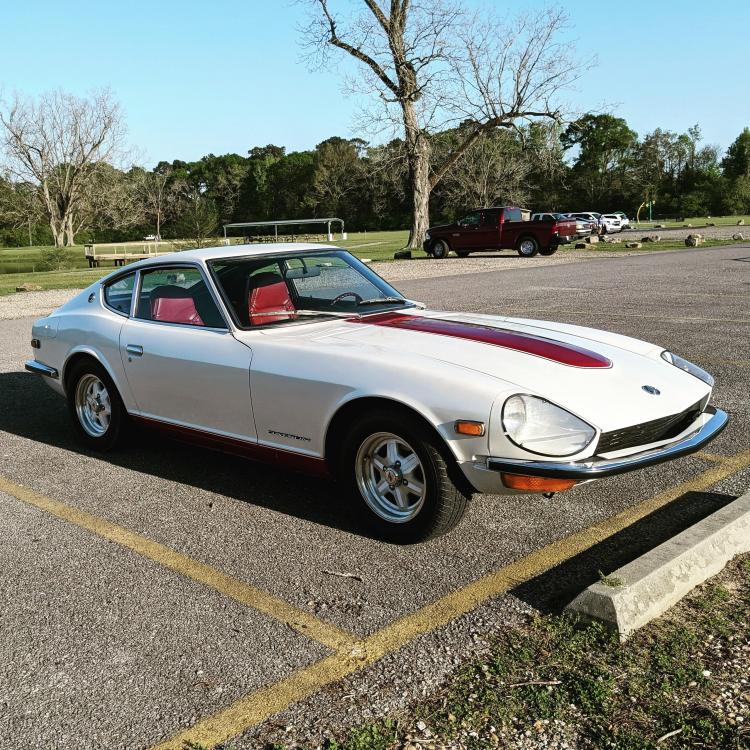
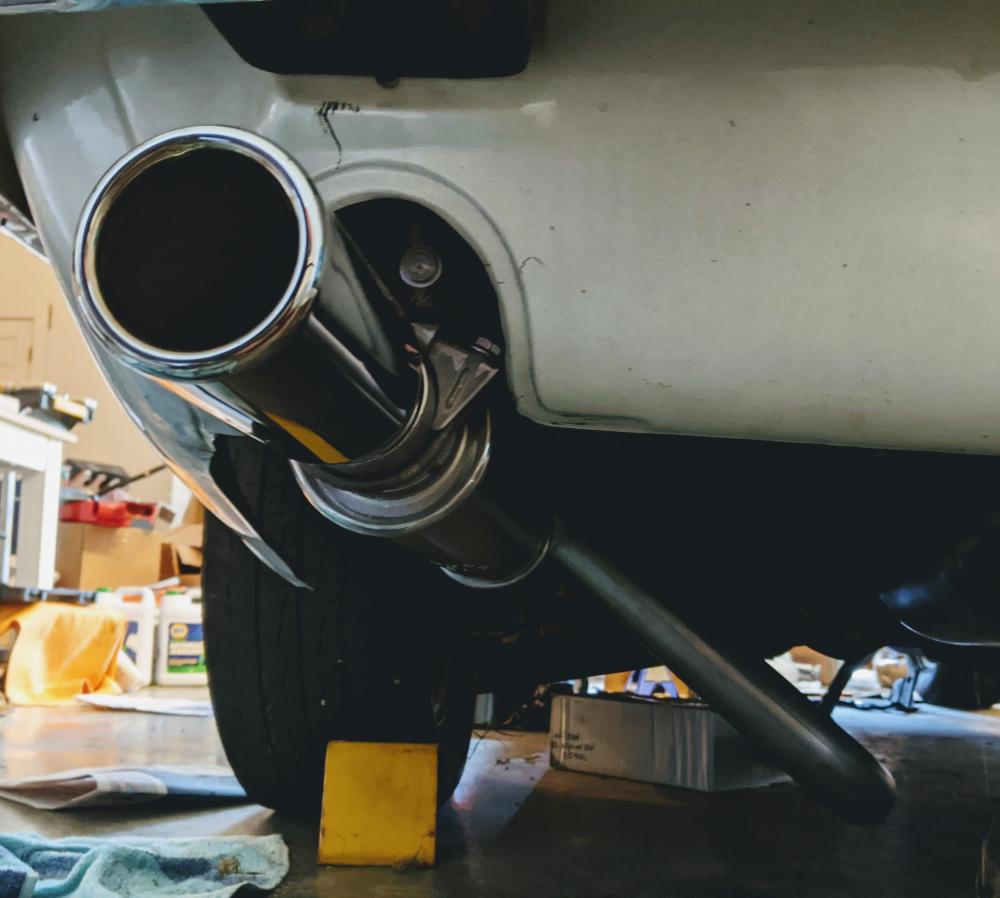
I've been on the notifications for BAT for a while. Finally scratched the itch with my first 240z about a year ago. I bought it via Facebook marketplace from the original owner in Lafayette, Louisiana, about 1.5 hours from me. Still have the original title and receipts. It's a 1973 with build date of 10/72. So it apparently had the worst of the flat top carb iterations. 79K miles. He drove it maybe 3-4K the last 20 years. It is white with red interior, although the white is no longer stock Kilimanjaro white. It's a pearl white with a red hood stripe. I am finally driving it now that I've swapped out for rebuilt round tops, MSA performance exhaust system, coated header, new radiator lines, reupholstered seats and vinyl throughout, all new plastic interior panels, restored door panels, restored gas tank and cleaned fuel lines, new struts and progressive springs, etc. Also put the original radio back in it and hooked into power antenna. What's left is to restore back end tail light trim and paint Datsun grey (instead of current black), put in electronic ignition, and put original rims and hubcaps on. At that point I'll be tempted to see what it's go for on BAT. It'd just be lacking the stock paint color Some pics.


 3 points
 -
Thanks everyone for the input. By the way, my car is an automatic. Curiosity is a good thing.2 points
-
2 points
-
2 pointsExactly. I have a very long history of missing badly when estimating how long something will take, so I'm keeping my mouth shut on that one. I used to believe I'd get it done in a couple of years. Then I read Mark's thread! 😉2 points
-
2 points
-
2 pointsThat's great redneck engineering! Makes me wonder if Uncle Luther offered to hone Cliff's cylinder bores when he did his rebuild ....2 points
-
2 pointsI wouldn't have expected that. That would have been quite the surprise!2 points
-
2 points
-
I have not used that product, but I will say if you are trying to get close original, I would say test spray something first to see the amount of "metallic". The original is a matte finish that had virtually no metallic except a very minimal amount at certain angles. Five years later I am still very happy with the choice I made, as in the link above that @siteunseenposted. HTH, Mike1 point
-
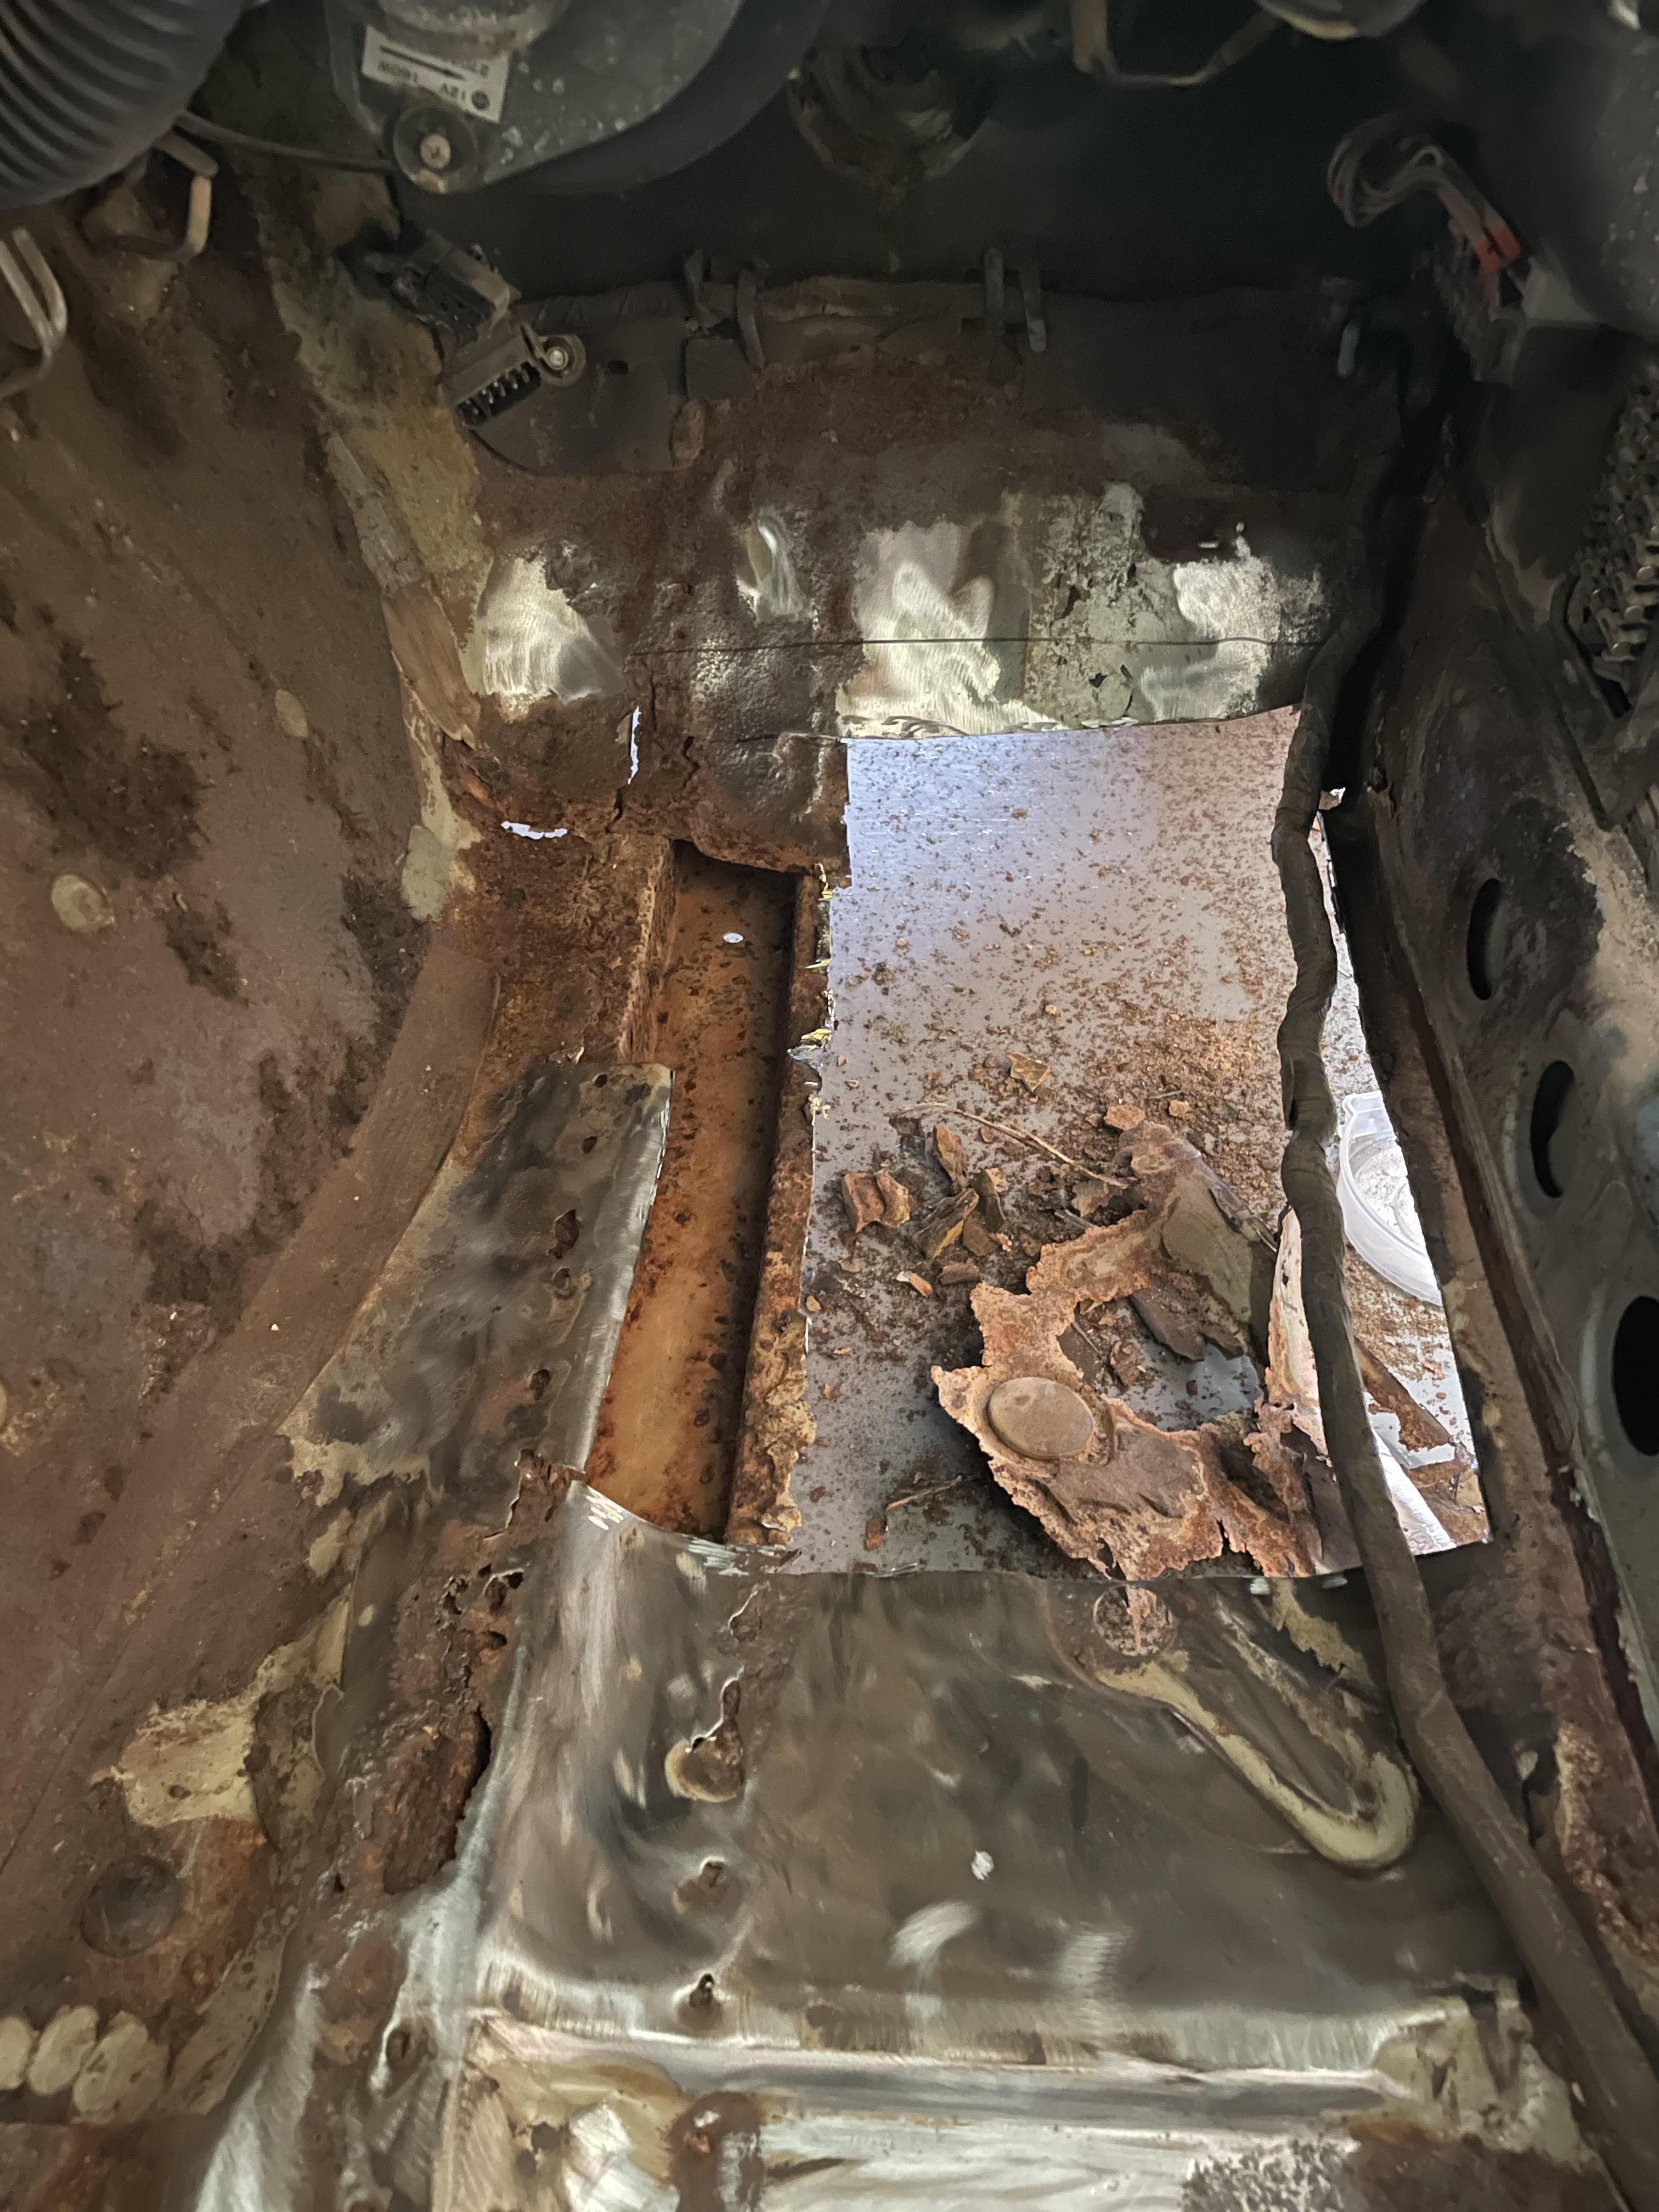
1 pointTotally agreed with both comments above. But at this time (and with my current budget), my main focus is getting the car driving. I fully understand it is not the cure, but it should last me a couple years before I do a full strip down. Theres a couple other spots of rust (hatch lid corner, lower fender, for example) that I would want to tackle at the same time. Luckily Arizona is DRY, so fingers crossed no new spots come up1 point
-
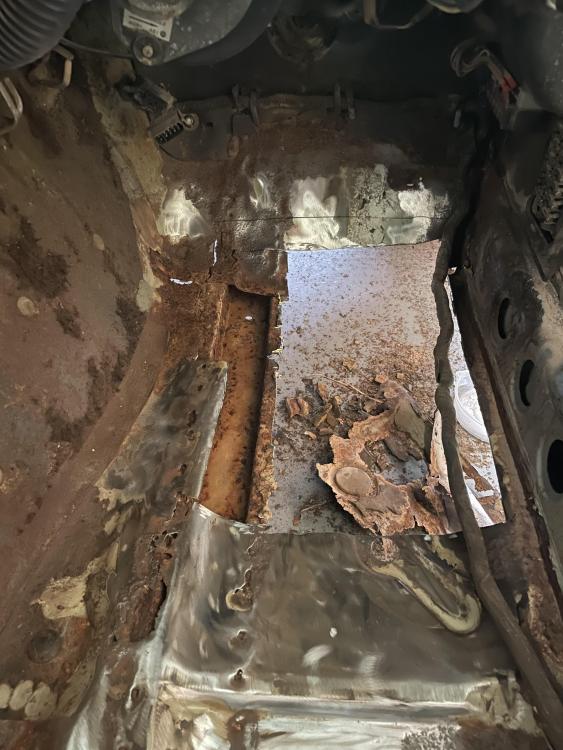
1 pointYou would be much better off replacing those entire pans, there really isn't much left. A complete set of pans and rails are reasonably priced at around $300 I think.1 point
-
Nice car! Can TechZ has the best color match with matte clear coat on top. I redid mine after seeing his.1 point
-
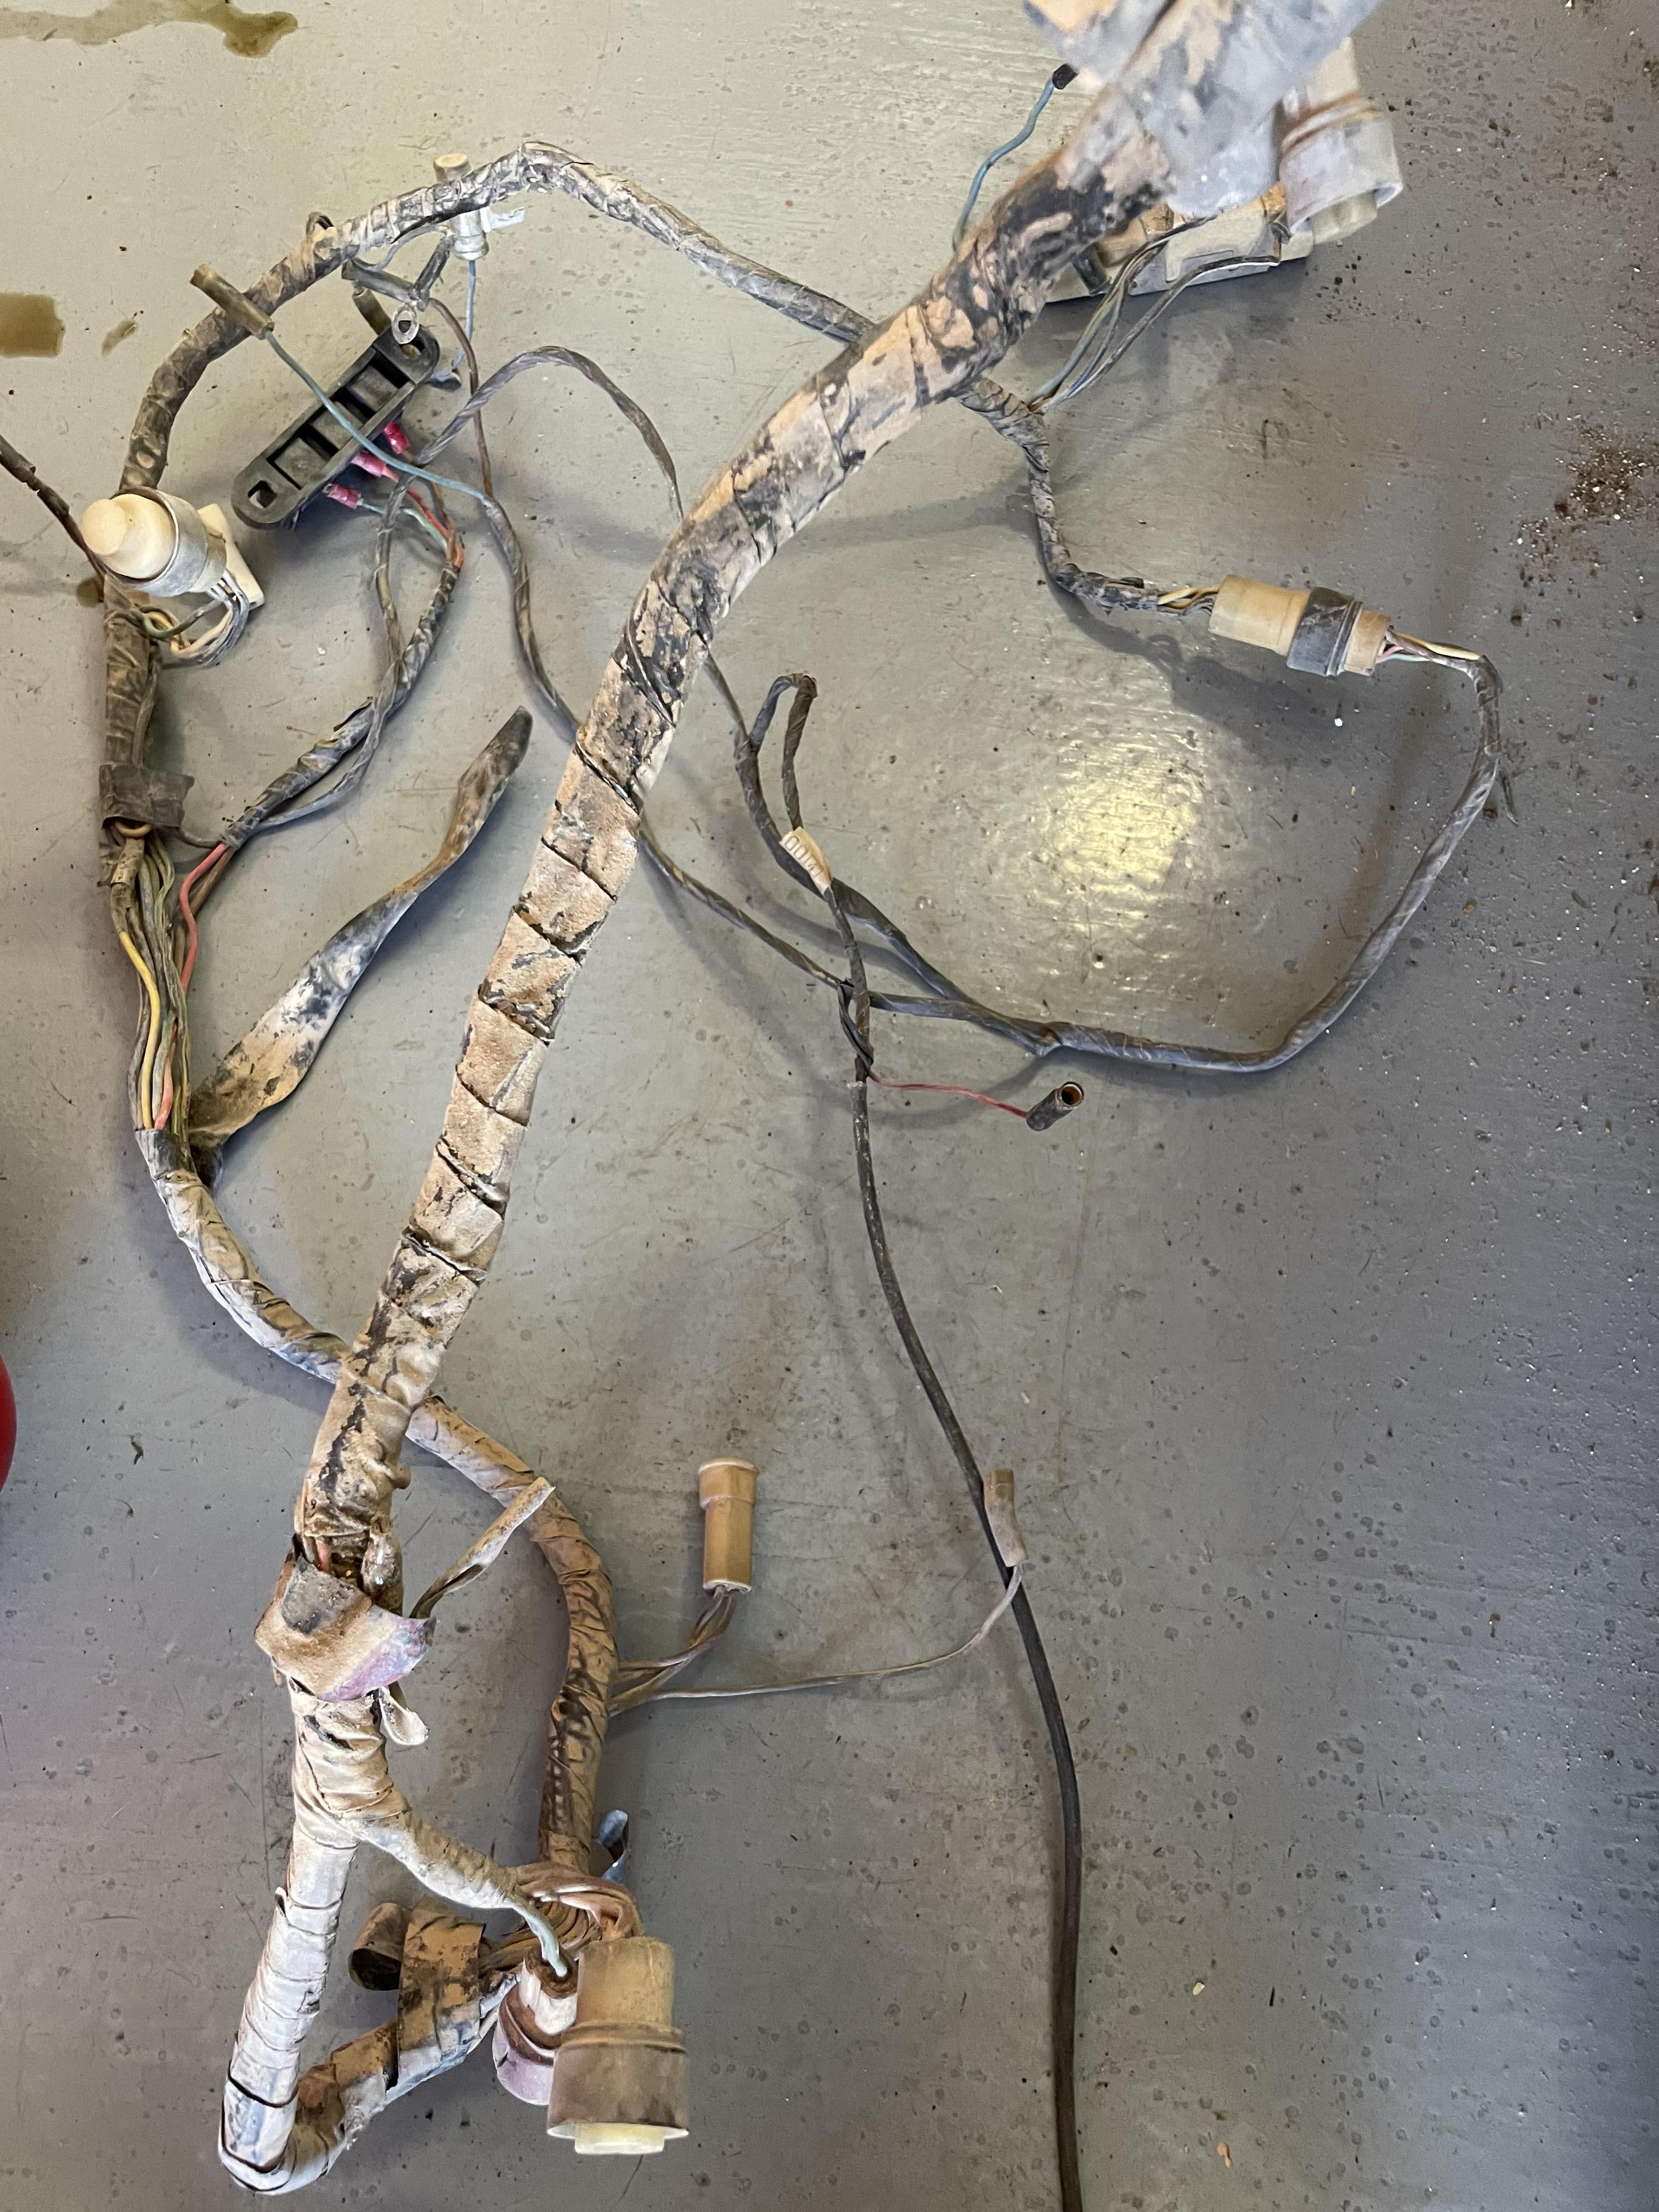
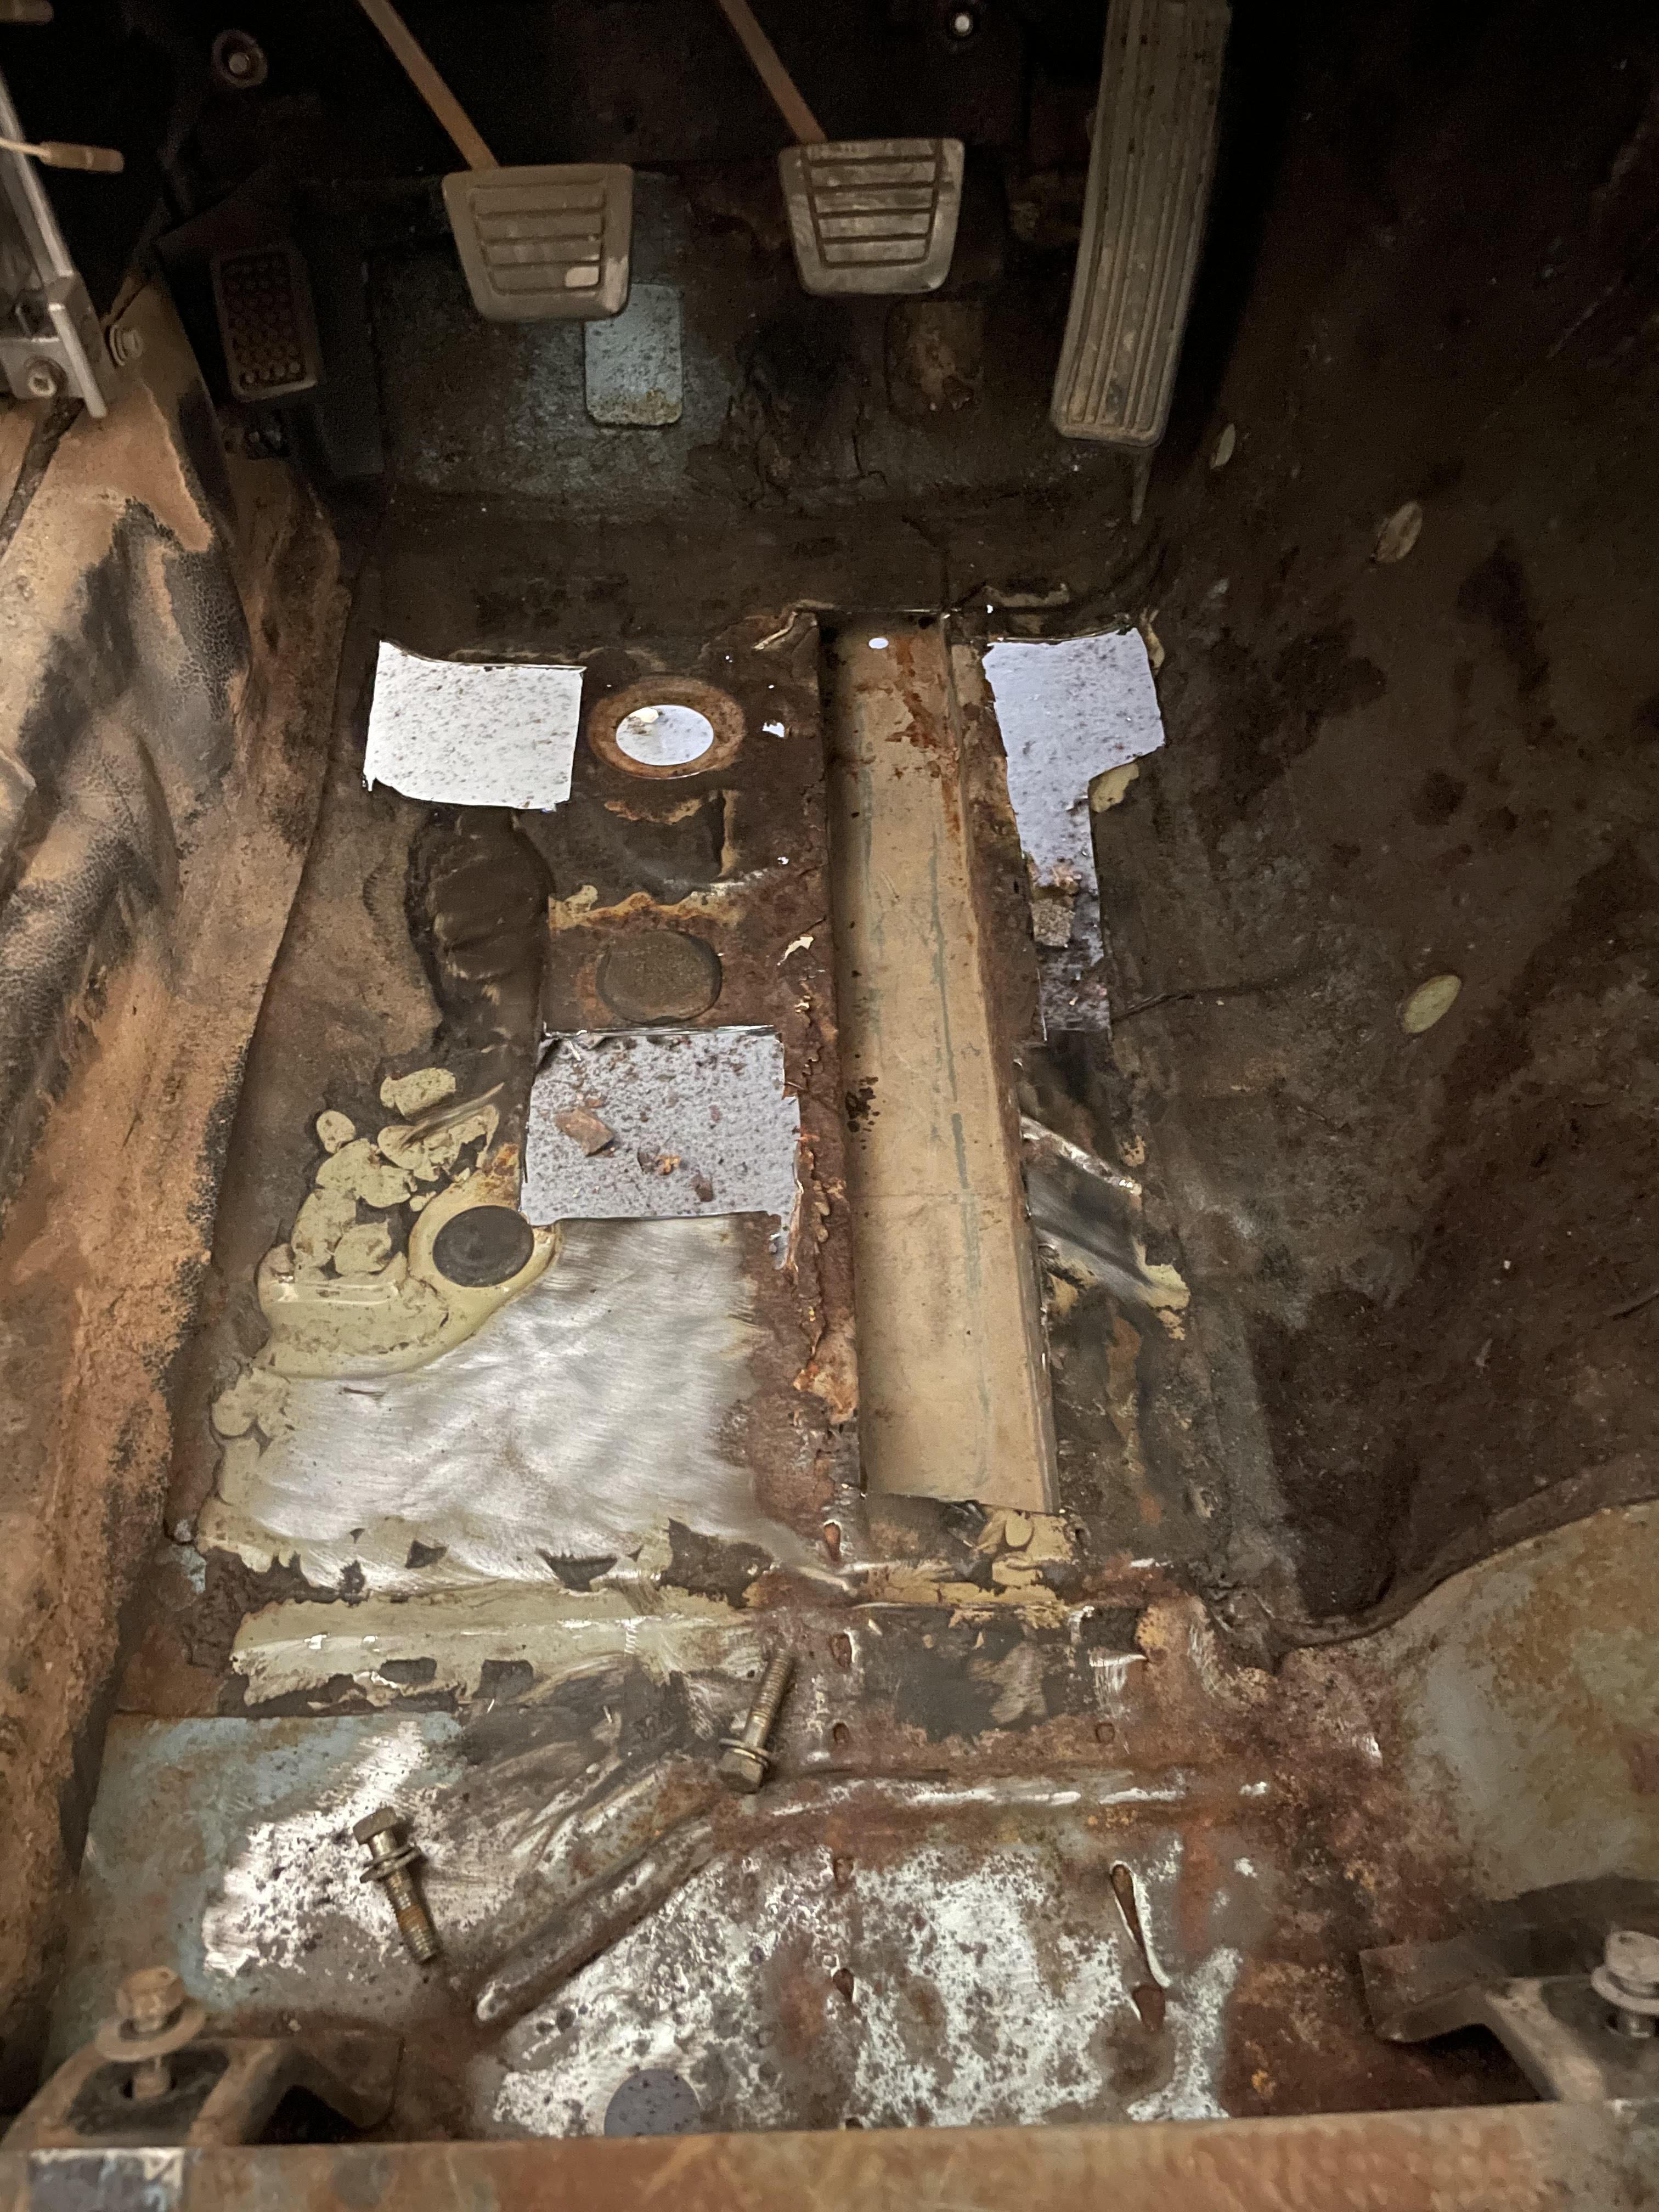
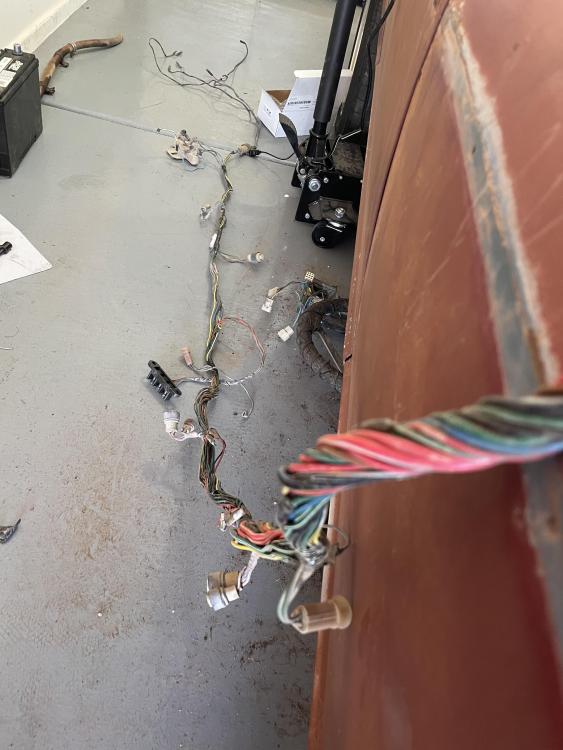
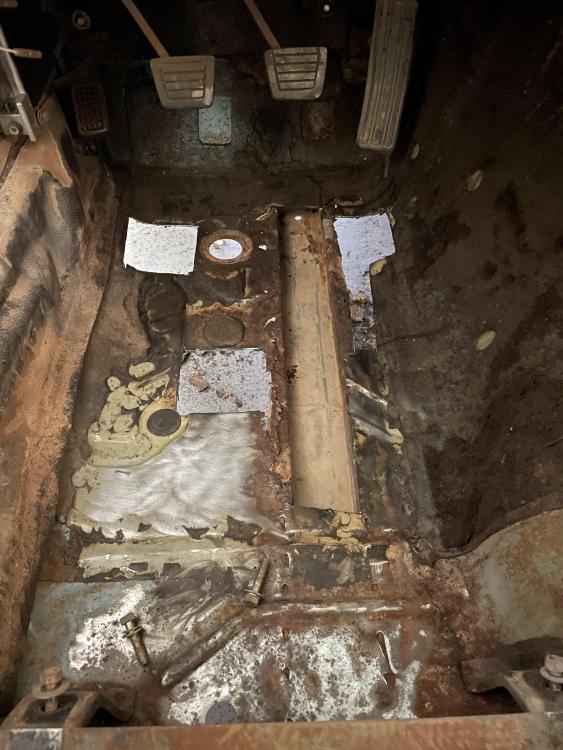
1 pointSome recent photos from the work I did over the week. As I mentioned before, I stripped that grimy wiring harness. Just did a quick electrical tape to get it back together. I forgot to take and after photo...oops! And then I got around to some more floor pan cutting. Its ugly and theres still some pinhole rust, but I think the major cancer is out. I'll use the POR15 fiberfill for the small stuff and patch in a new sheet for the big cuts. The passenger pan near the firewall has another spot I may take out. But it is a bit more complex shape and curve. I dont want to go out of my abilities. And no, the floors arent fully surface rusted...I just didnt vacuum before I took the photo, hah!


 1 point
 -
1 pointI figured out a general timeline estimate years ago, and it has proved more accurate than I want to admit. Figure out the longest time the job could possibly take, then double it and add half.1 point
-
1 pointReplaced the leaking seals and mated the tail housing back to the gearbox. (Used permatex ultra grey, ran outta Hondabond 😞 ) Does the 240mm pressure plate use 9 bolts to bolt to the flywheel? I was inspecting the parts today realized that i might be mising some hardware. I took 6 bolts off the 225mm pressure plate..... the OEM part number is 30223-E4100 but it looks like a regular bolt, not like the flywheel bolts..... Courtesy has the... $6 BUCKS! 😞 Might be better to go to fastinal in this case... http://www.carpartsmanual.com/datsun/Z-1969-1978/power-train/clutch -- Edit: Bench fit the fidanza flywheel to the clutch, looks like everything will fit. Only 6 bolts will align from the pressure plate to the flywheel, the 3 included dowels line up accordingly.1 point
-
1 pointI'm impressed but I'll stick with a chainsaw for something that tough.1 point
-
1 point
-
1 point
-
1 pointYou have that good "figuring out sense" that's so prevalent on classiczcars.com. I've been blessed with it also but once I got involved with this forum I realized I'm barely touched with it.1 point
-
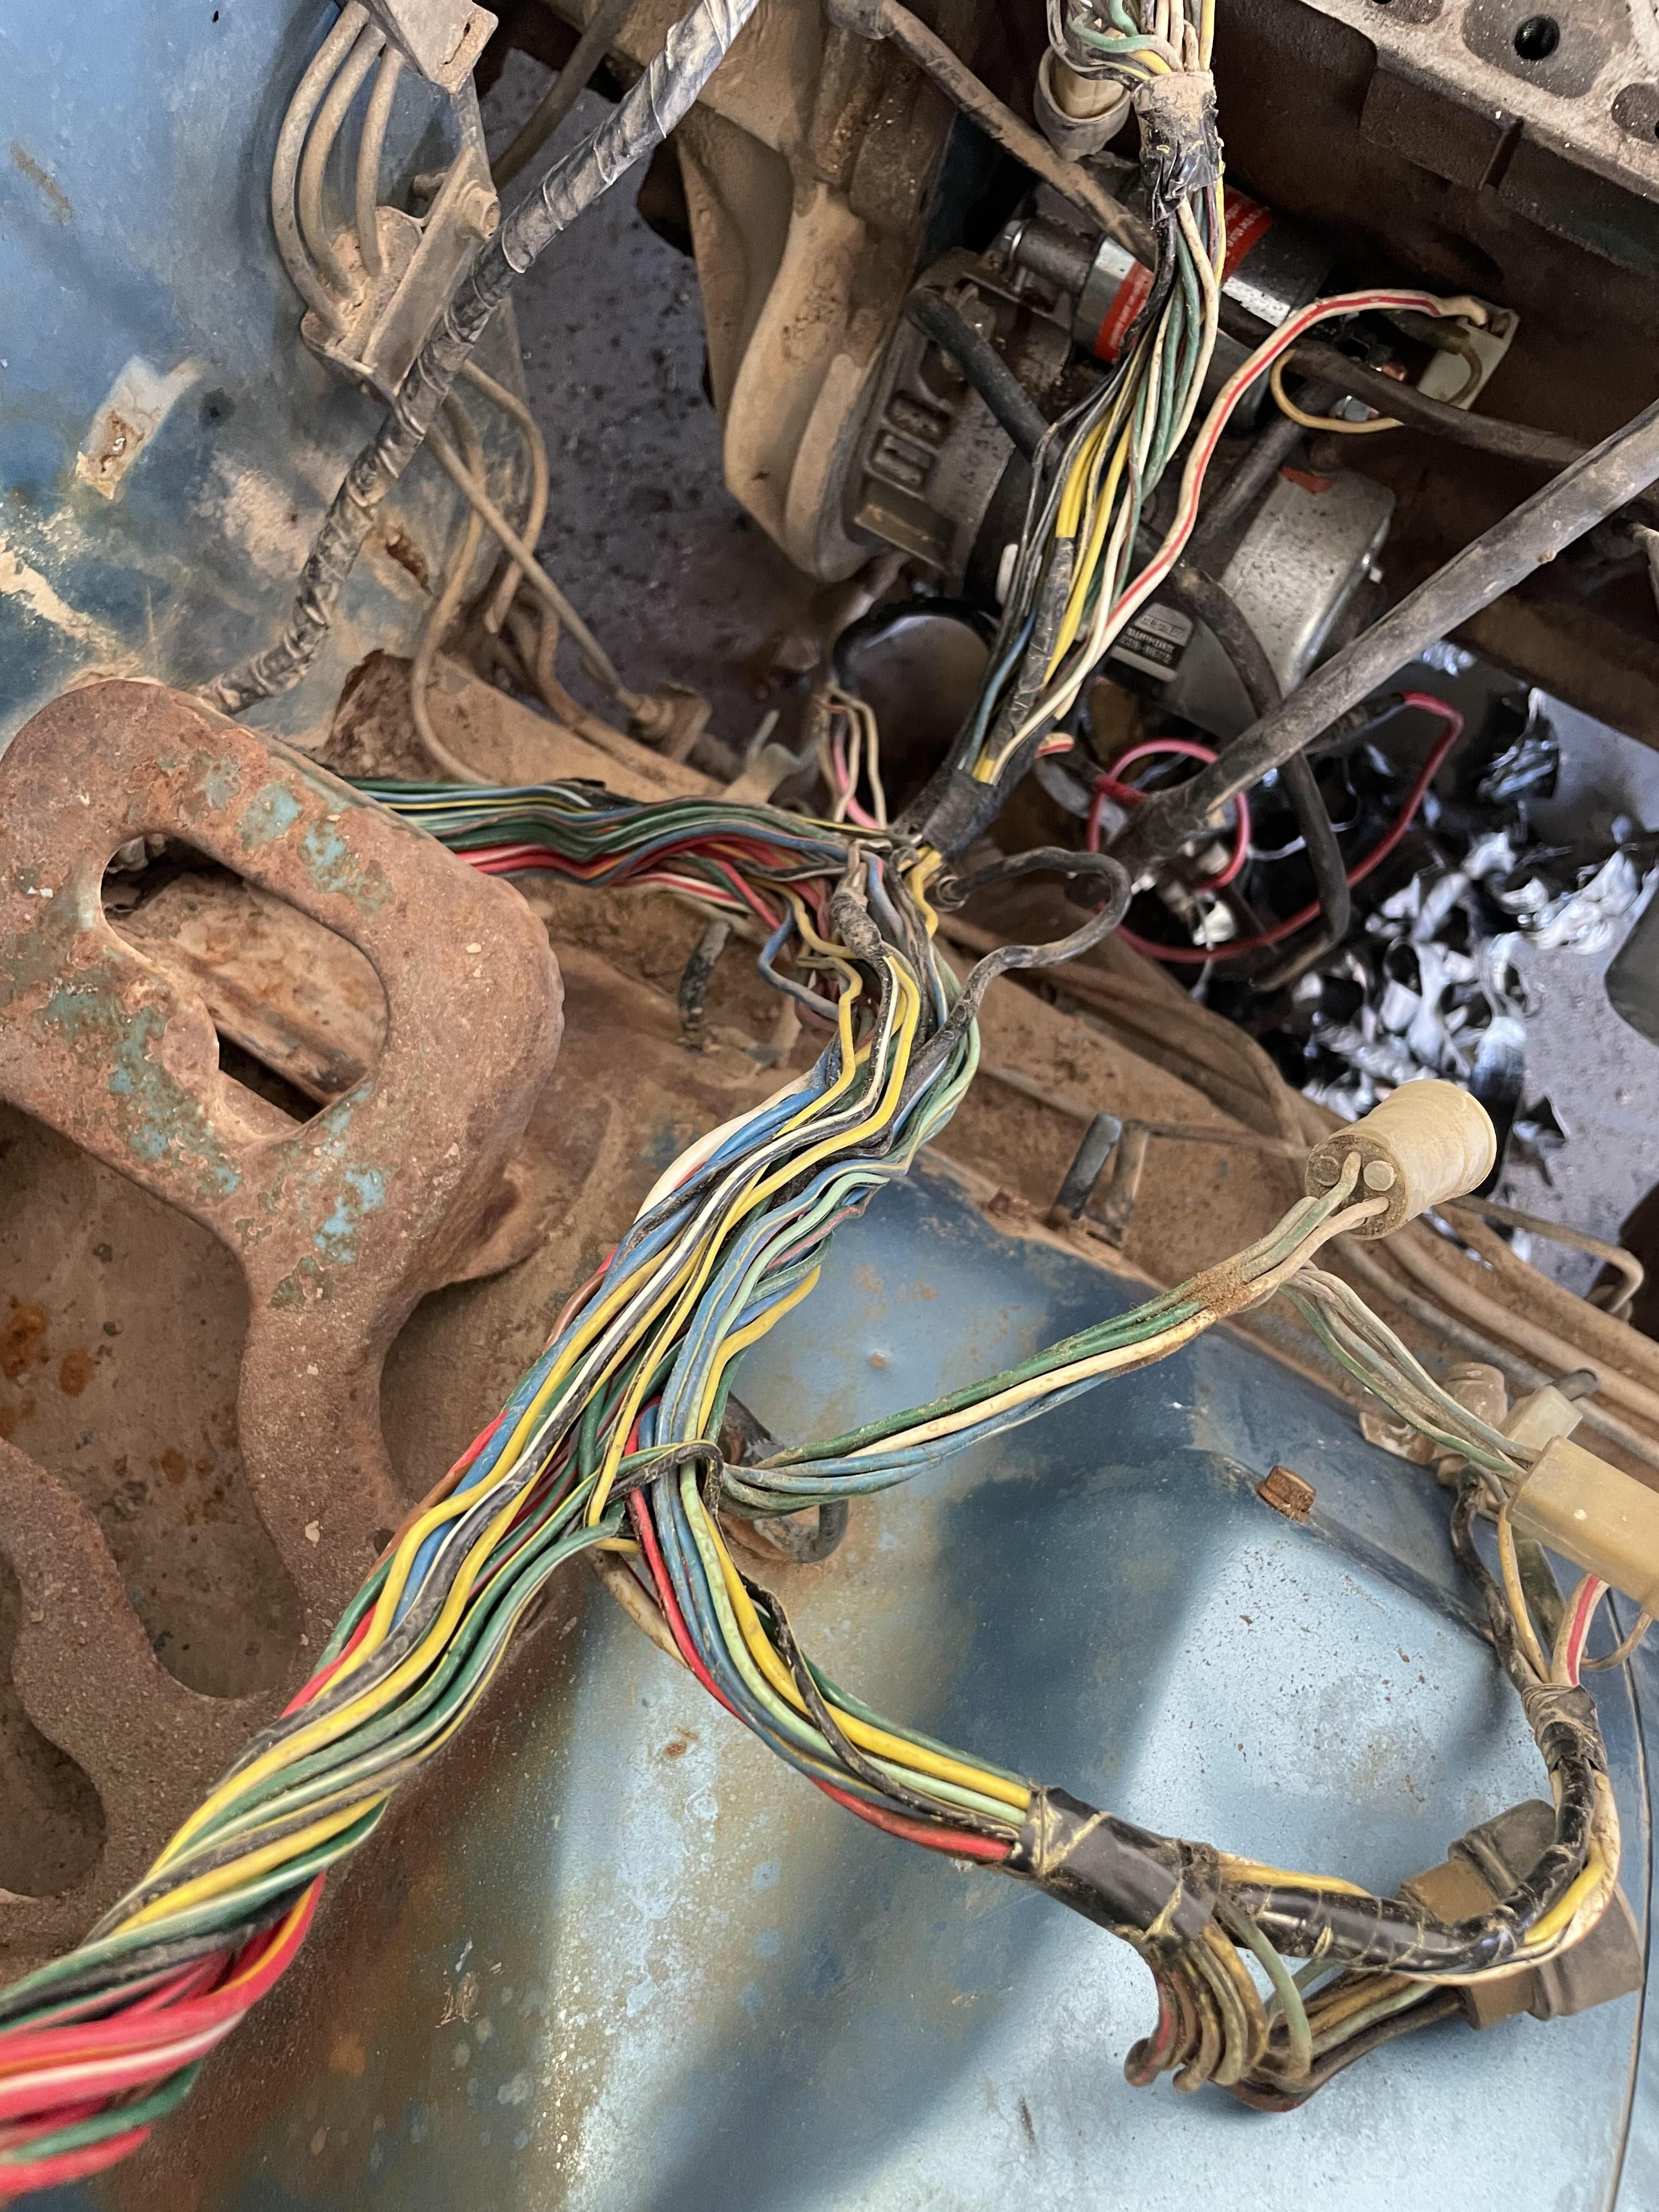
1 pointSmall project update. I was able to finally decide the direction of the build. I'll be rebuilding the current head (if the machine shop approves) and use the stock cam for now. I figure it is not worth the money for a stage 1 cam and the original EFI. Later on I can decide on megasquirt or carbs and worry about power then. I'll slap on some 6-2 headers and some twice pipes out the rear. I was debating in my post above to not worry about the rings, but I did a quick test by pouring some gas into the cylinders to see how bad they are. Welp, good thing I checked. Within 15 minutes there was a noticeable drop in 4 of the 6. Maybe 30 minutes later they were empty except for Cylinder #6 which held great. SO out they will come. Next debate is pulling the pistons with the block in the car or finding a hoist and stand. Not so much a money issue, rather the space of the two is annoying. Has anyone had experience pulling pistons without pulling the block? Lastly, I made some progress in the engine bay while everything was out. I pulled the wiring harnesses back to the firewall and re-wrapped them. Cleaned it up the best I could and was planning to do a quick paint. But I am just not happy with how unclean I got it. I'll need to push it out front for a pressure wash before I go painting. I wish I took photos of this...there was dirt thick enough to match the brake lines on the frame rails!1 point
-
That's a very nice job of straightening a rail - far better than many I've seen. Here's a pic of a similar one I restored for comparison, our OP is right on target.
 1 point
 -
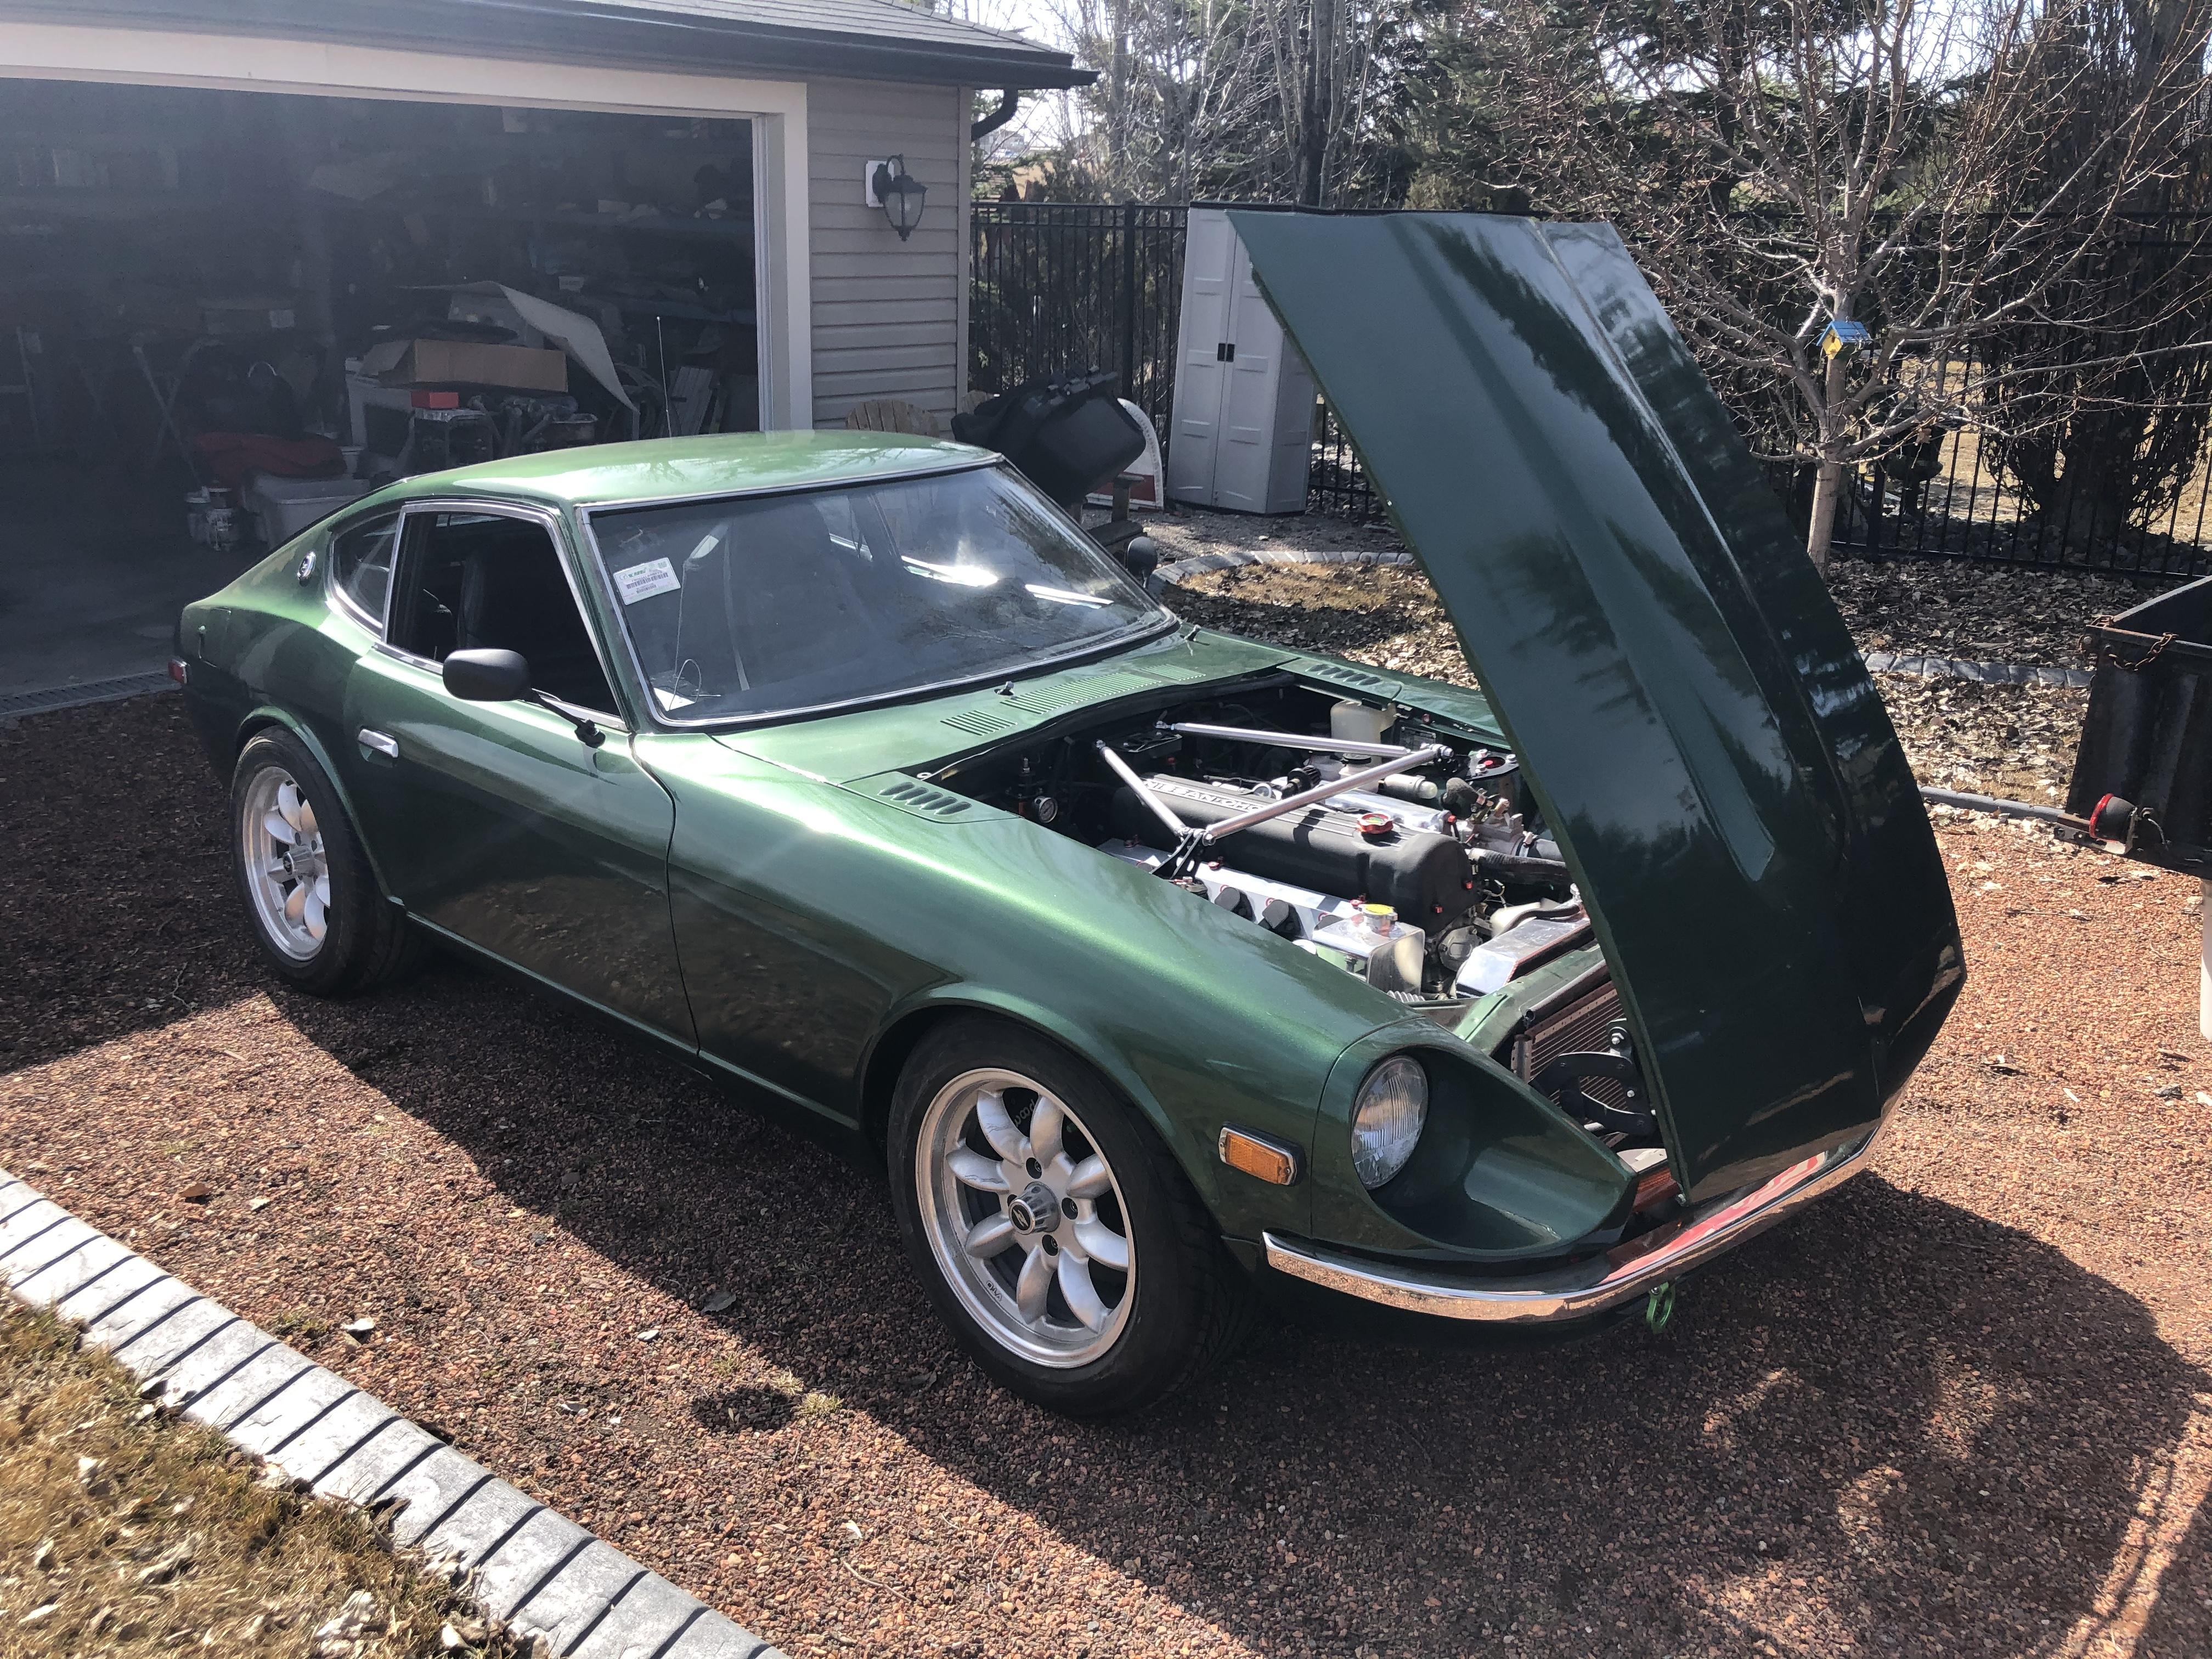
Cool build! I considered that swap, but in the end kept the original motor and put ITB's on it. Health issues caused me to sell the car but to a friend, so I still get to visit! Will watch this thread with interest!1 point
-
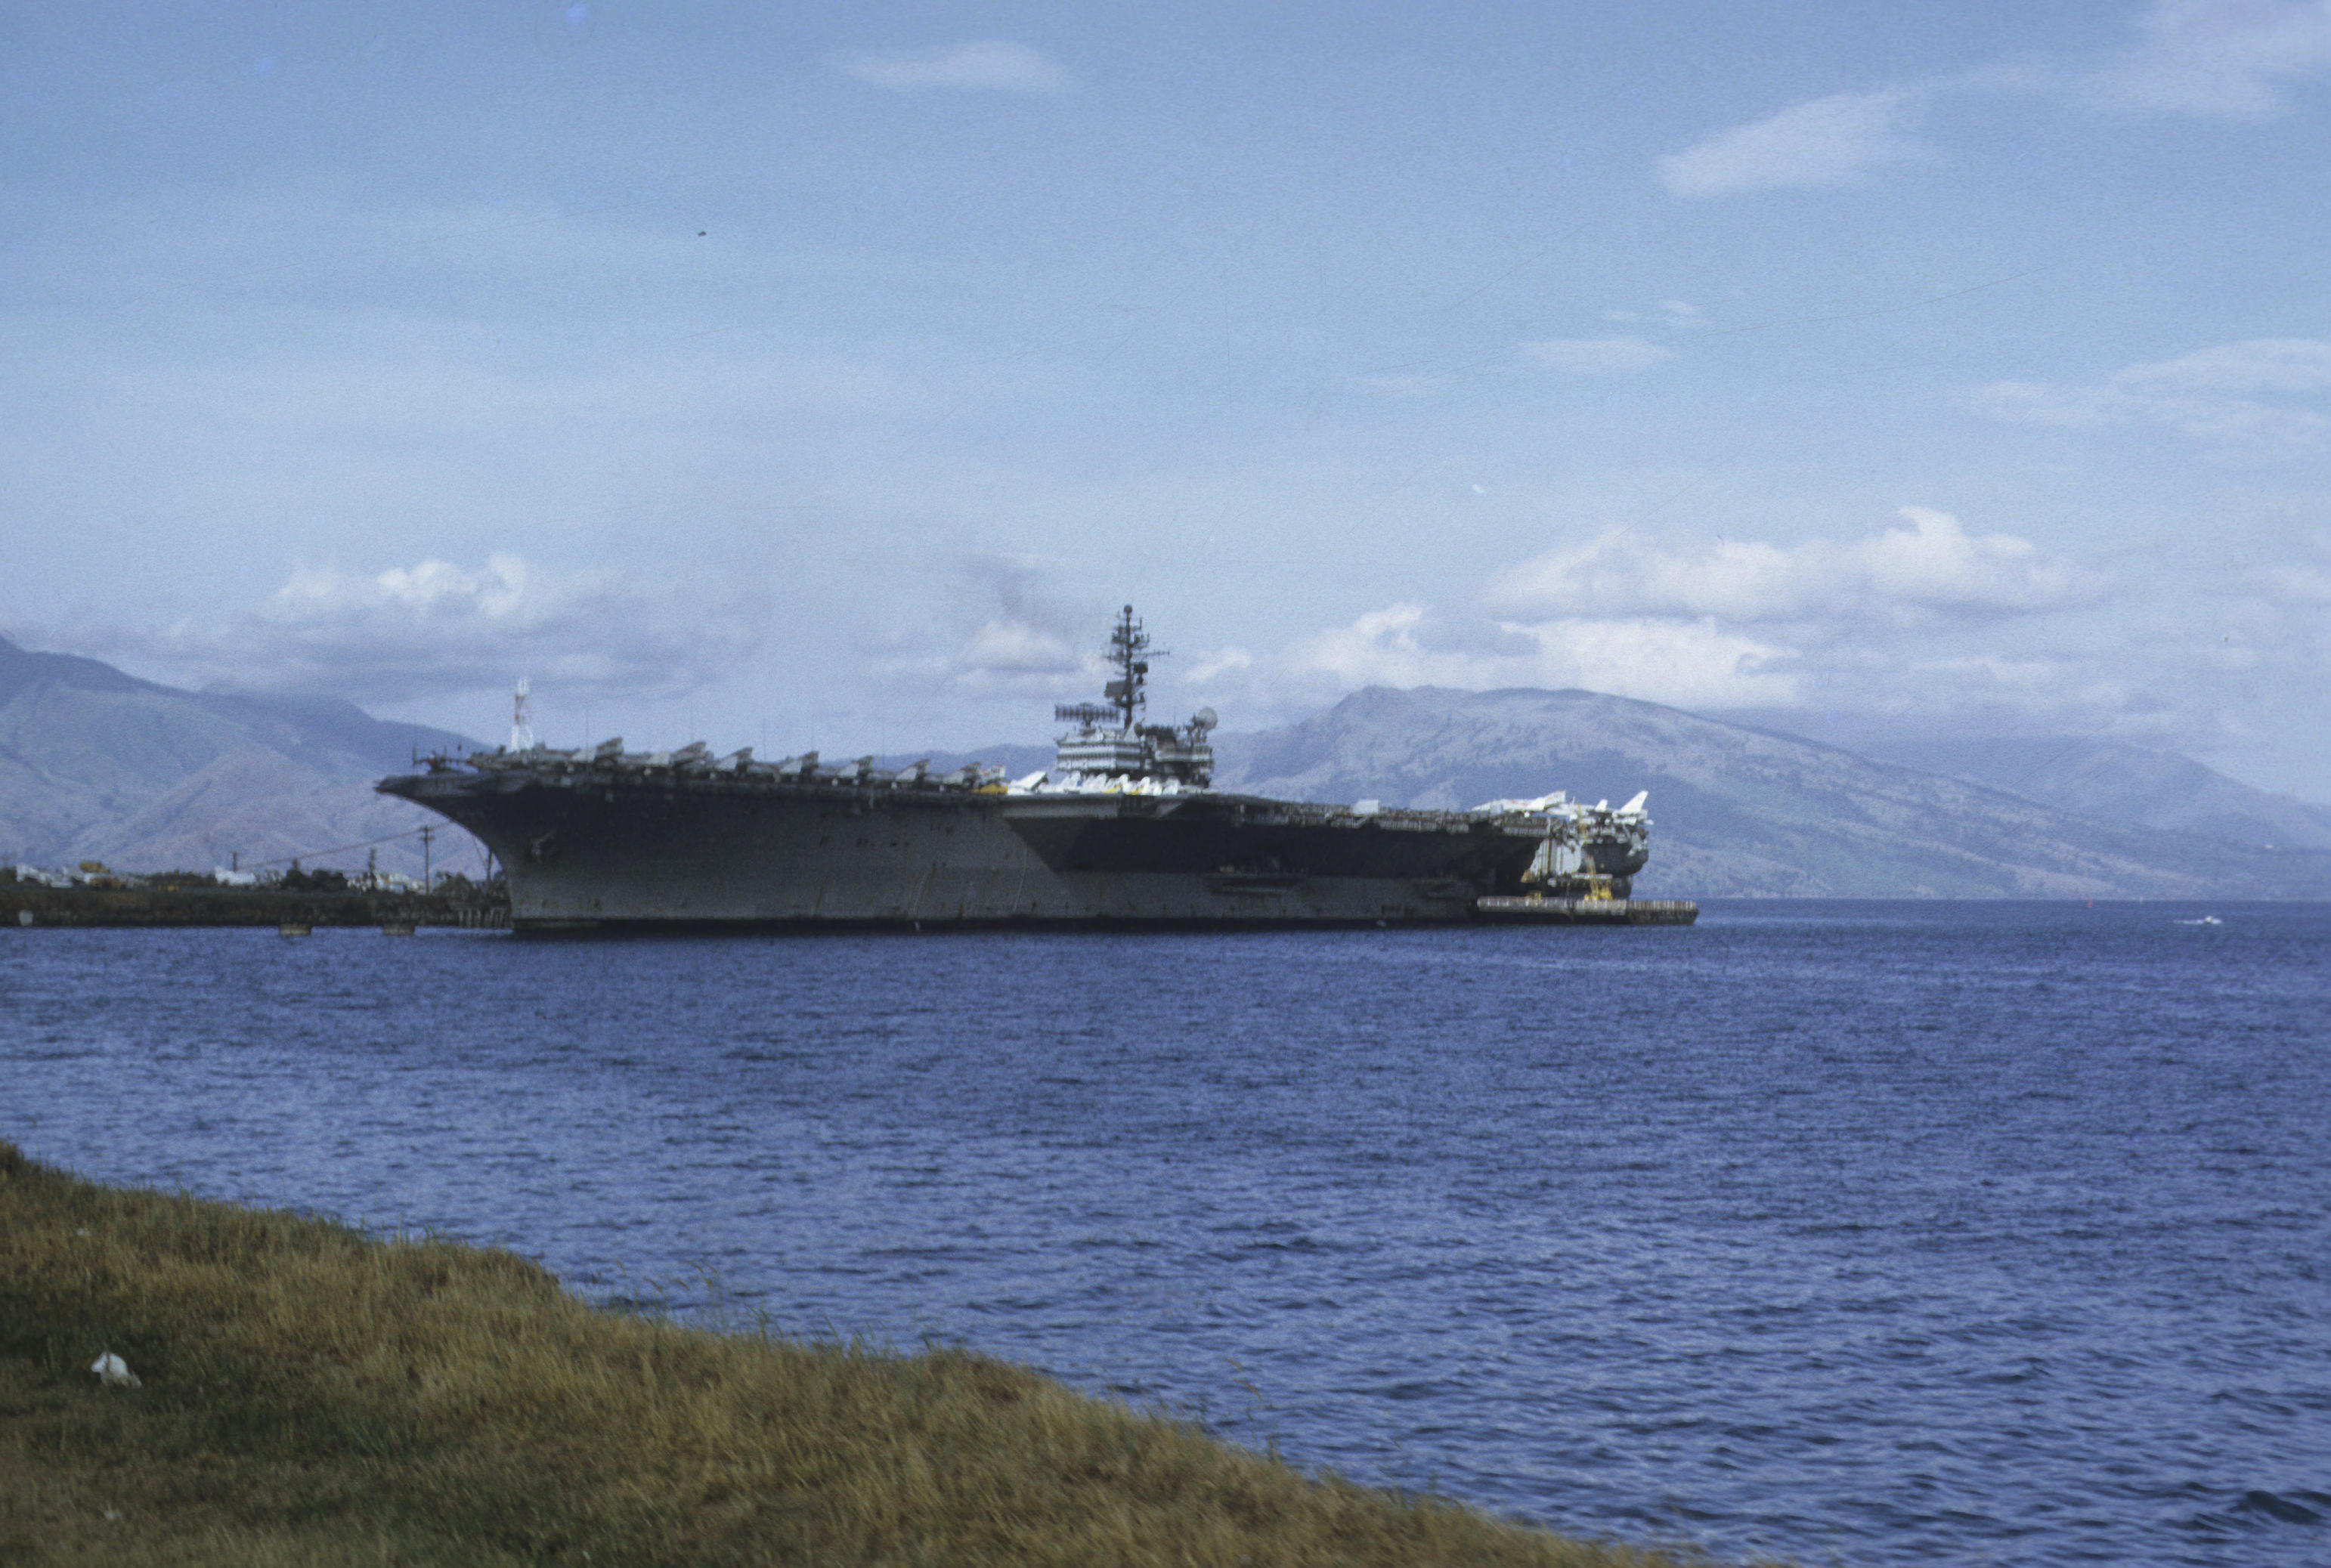
You reminded me that it was 11 months on THIS vintage flat top IN 1972 that allowed me to save enough to buy the Z in 1973: USS Kitty Hawk, CVA63, Cubi Point Naval Air Station, Philipines, 1972
 1 point
 -
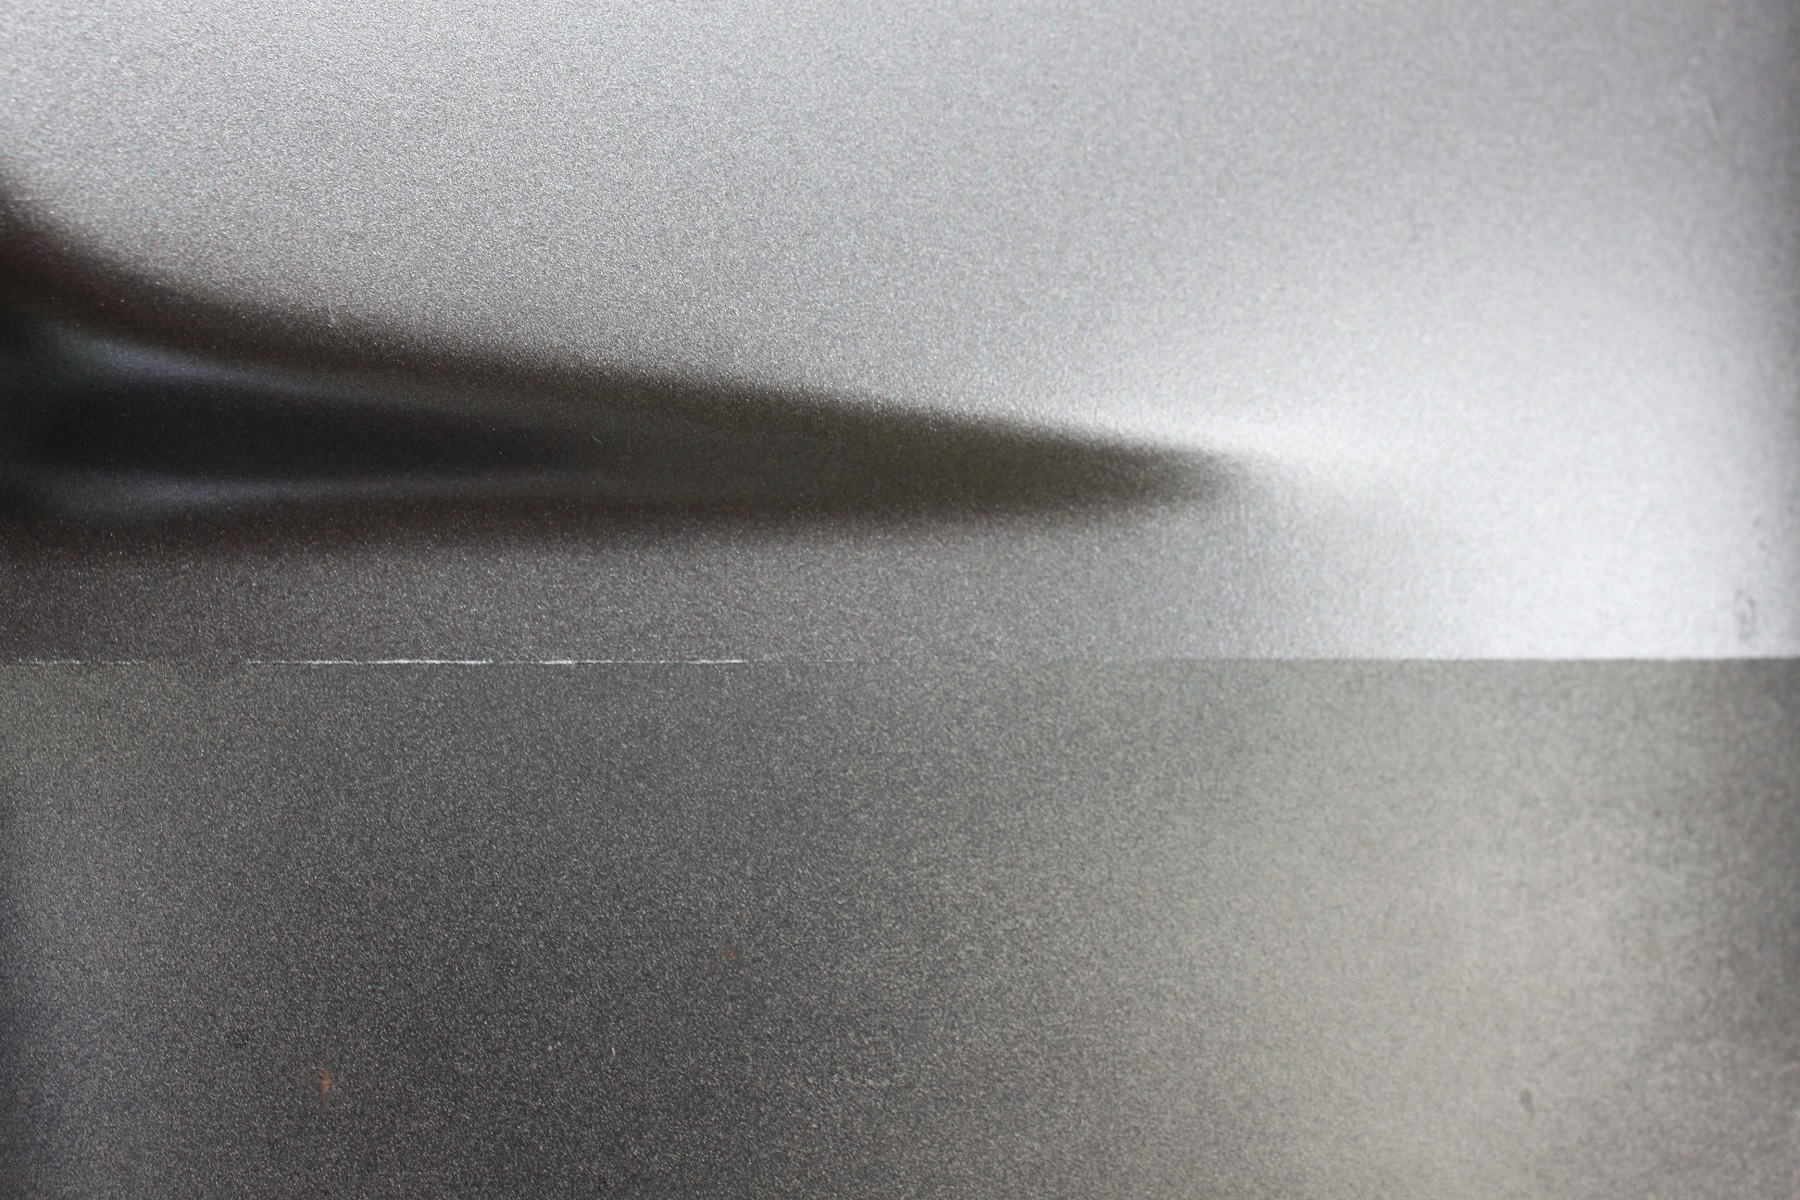
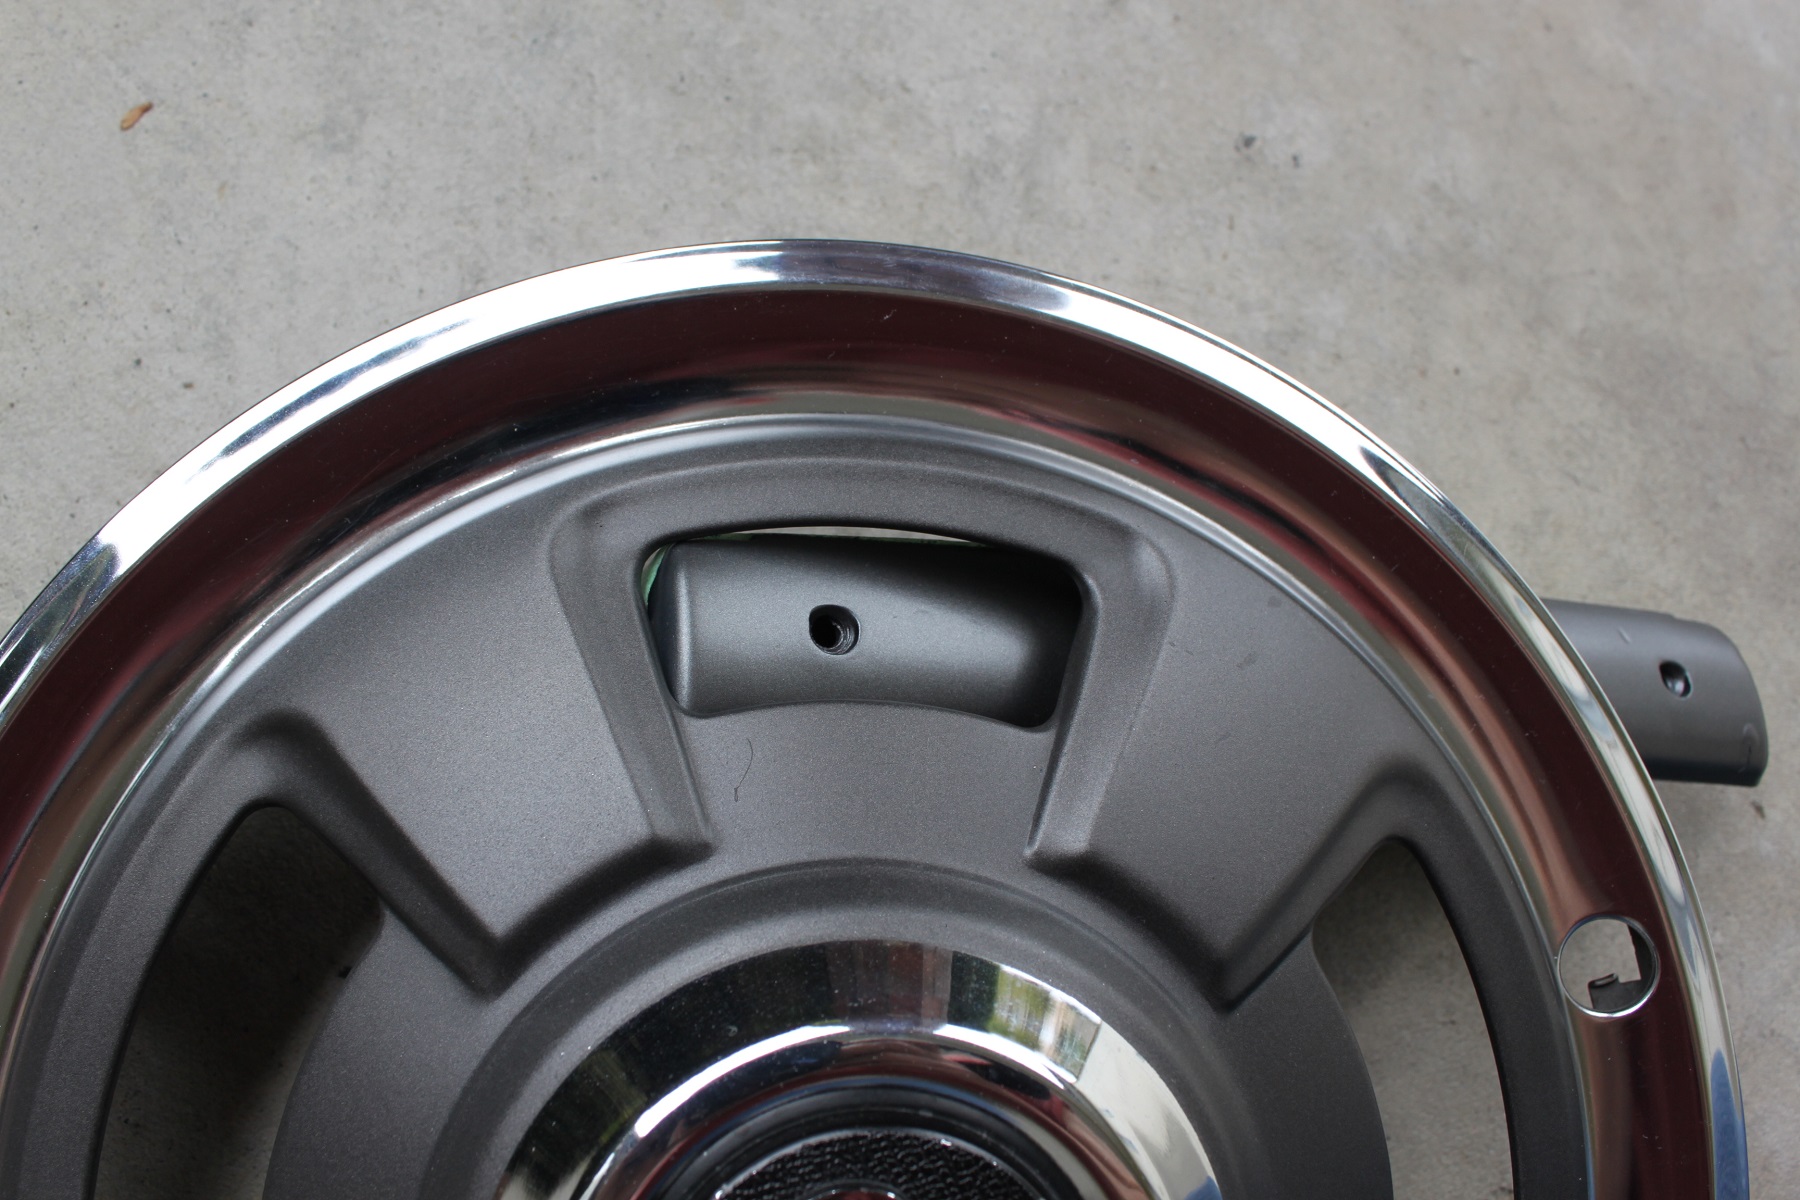
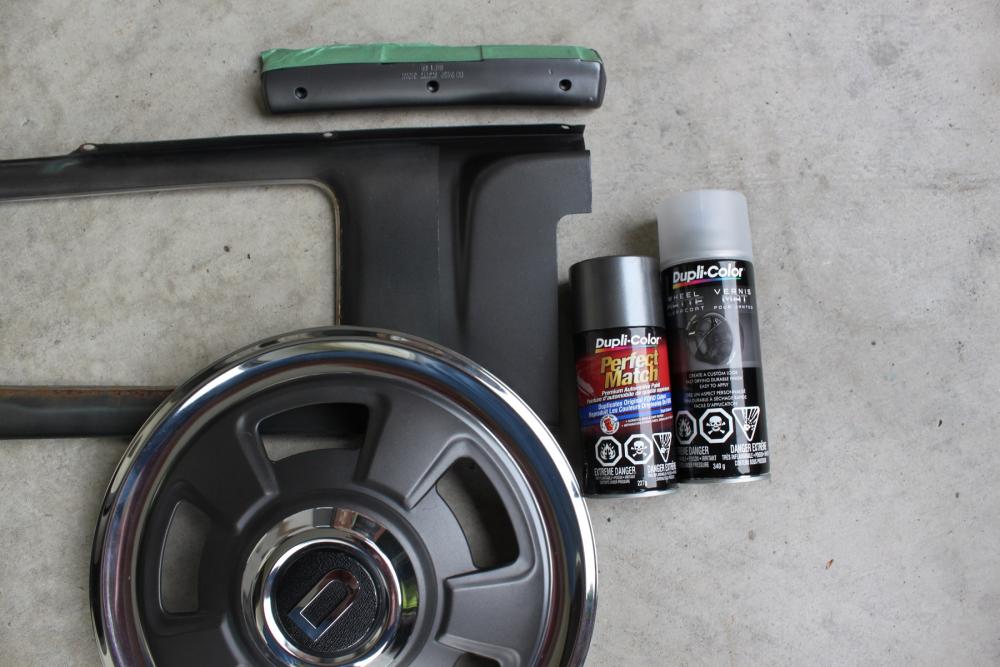
Just getting ready to re-paint the tail light finisher on my 7'70 that is currently satin black and I found a very close matching Dupli-Color paint that is not a metallic finish, It is a Ford color called Dark Shadow Gray. In Canada it is Dupli-Clor number CBFM0360. For a test I did a partial paint to the inside of a tail light finisher half from my 12/70 parts car that was the original grey. I also did a test on a old license plate light body. I used two coats of paint and two coats of the Dupli-Color matte clear. Here are the results comparing to one of my un-restored original hubcaps that are only brought out for shows. Here is a close up showing the new paint at the top and the original paint at the bottom, I'm quite happy with the results. The paint not being metallic makes the job much more forgiving. And here is the license plate light body with new paint compared to the un-restored hub cap:

 1 point