Leaderboard

 Subscriber


Popular Content
Showing content with the highest reputation on 02/21/2020 in all areas
-
3 pointsA Three on the tree, Stick Shift was Poplar back then. It was a Beech to shift though.
 3 points
 -
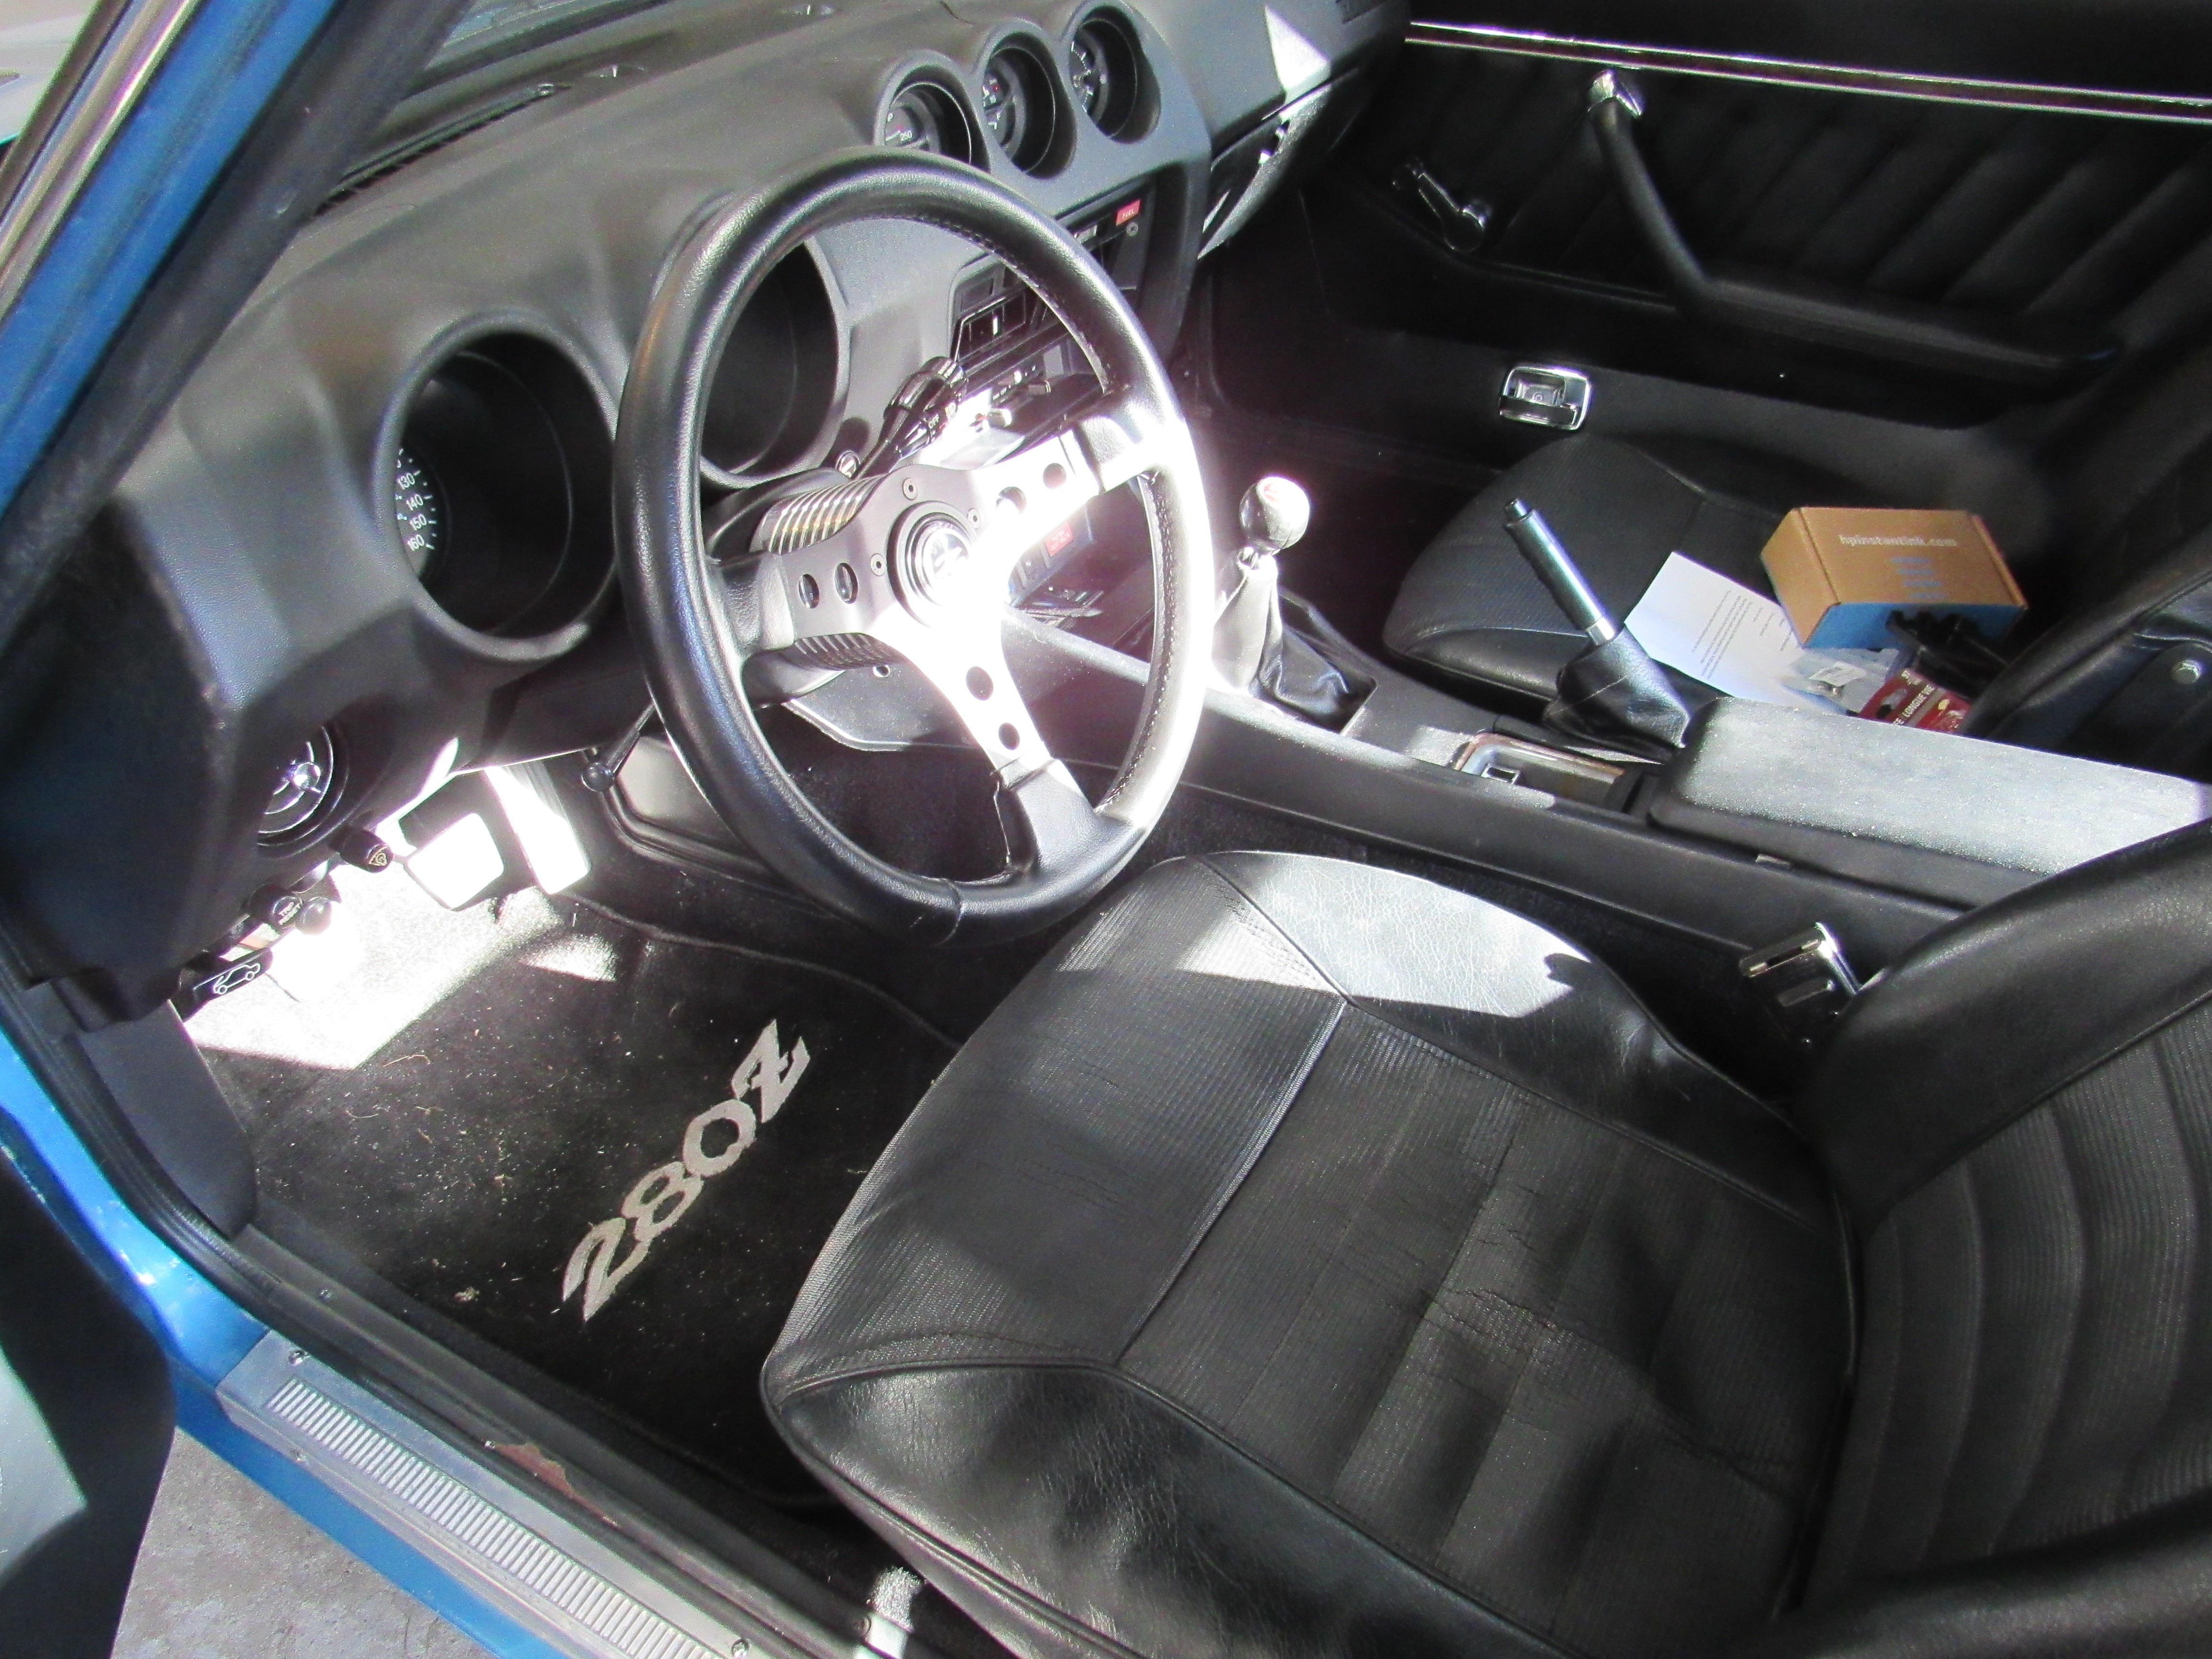
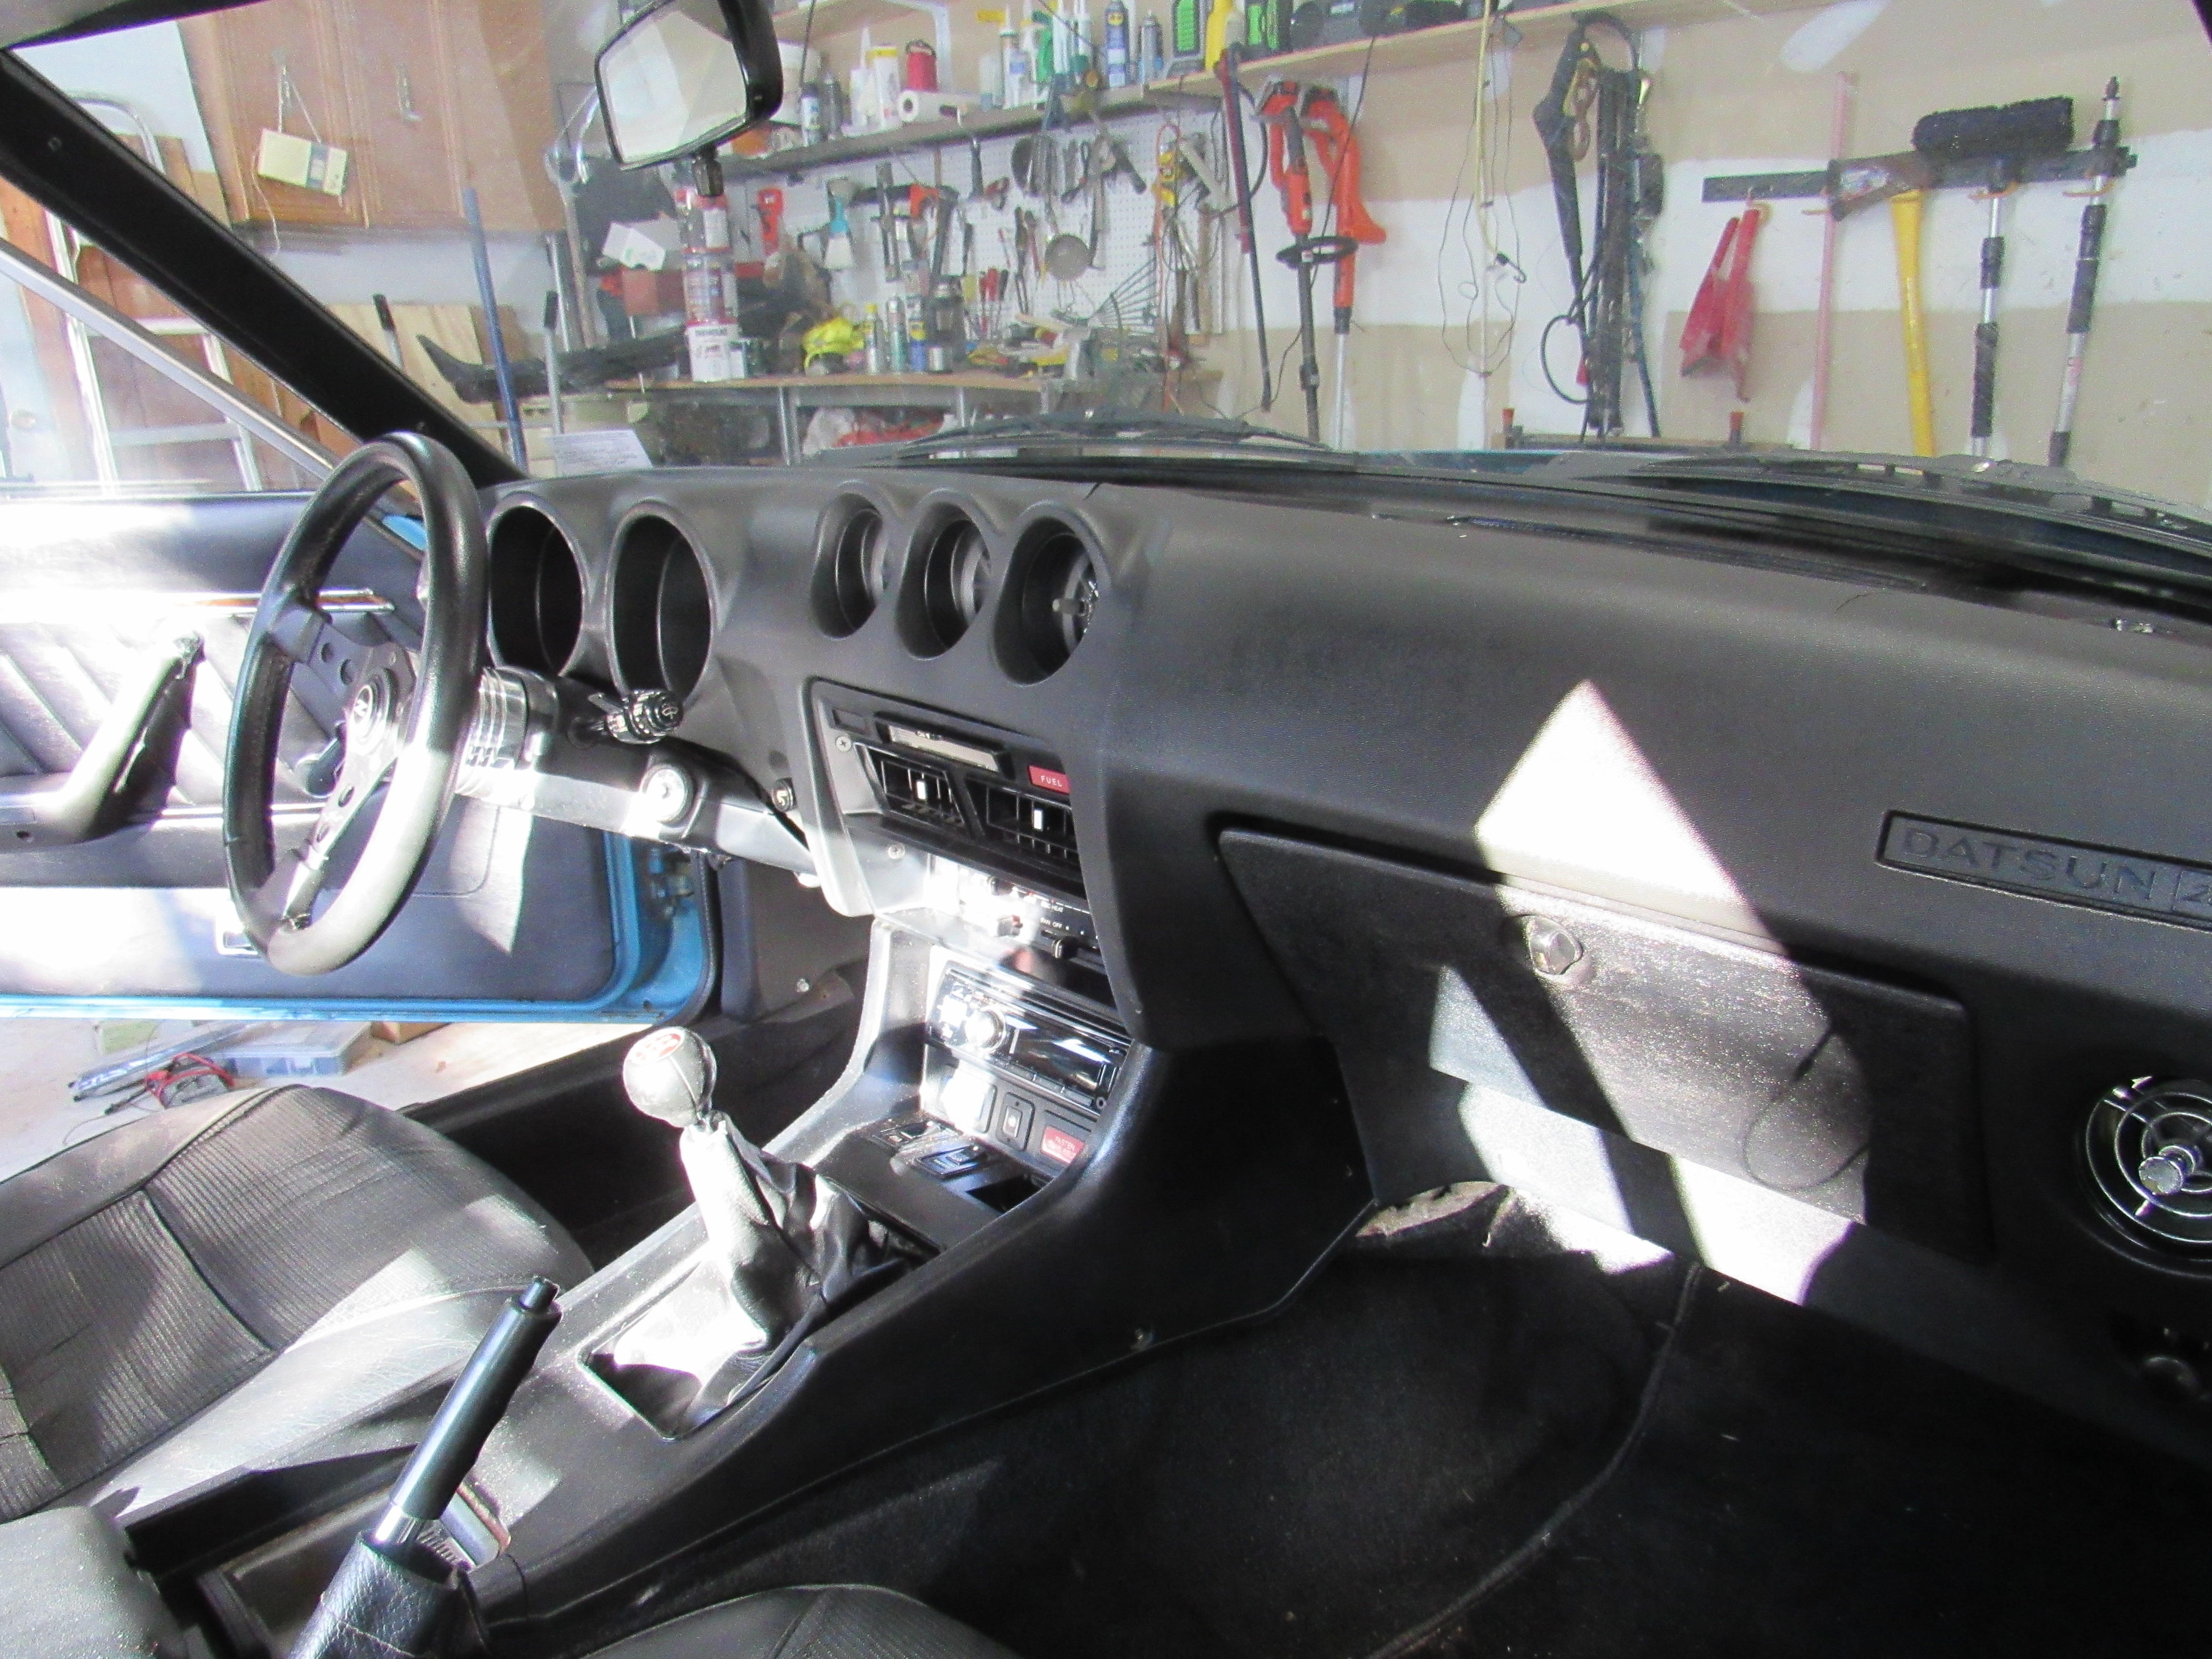
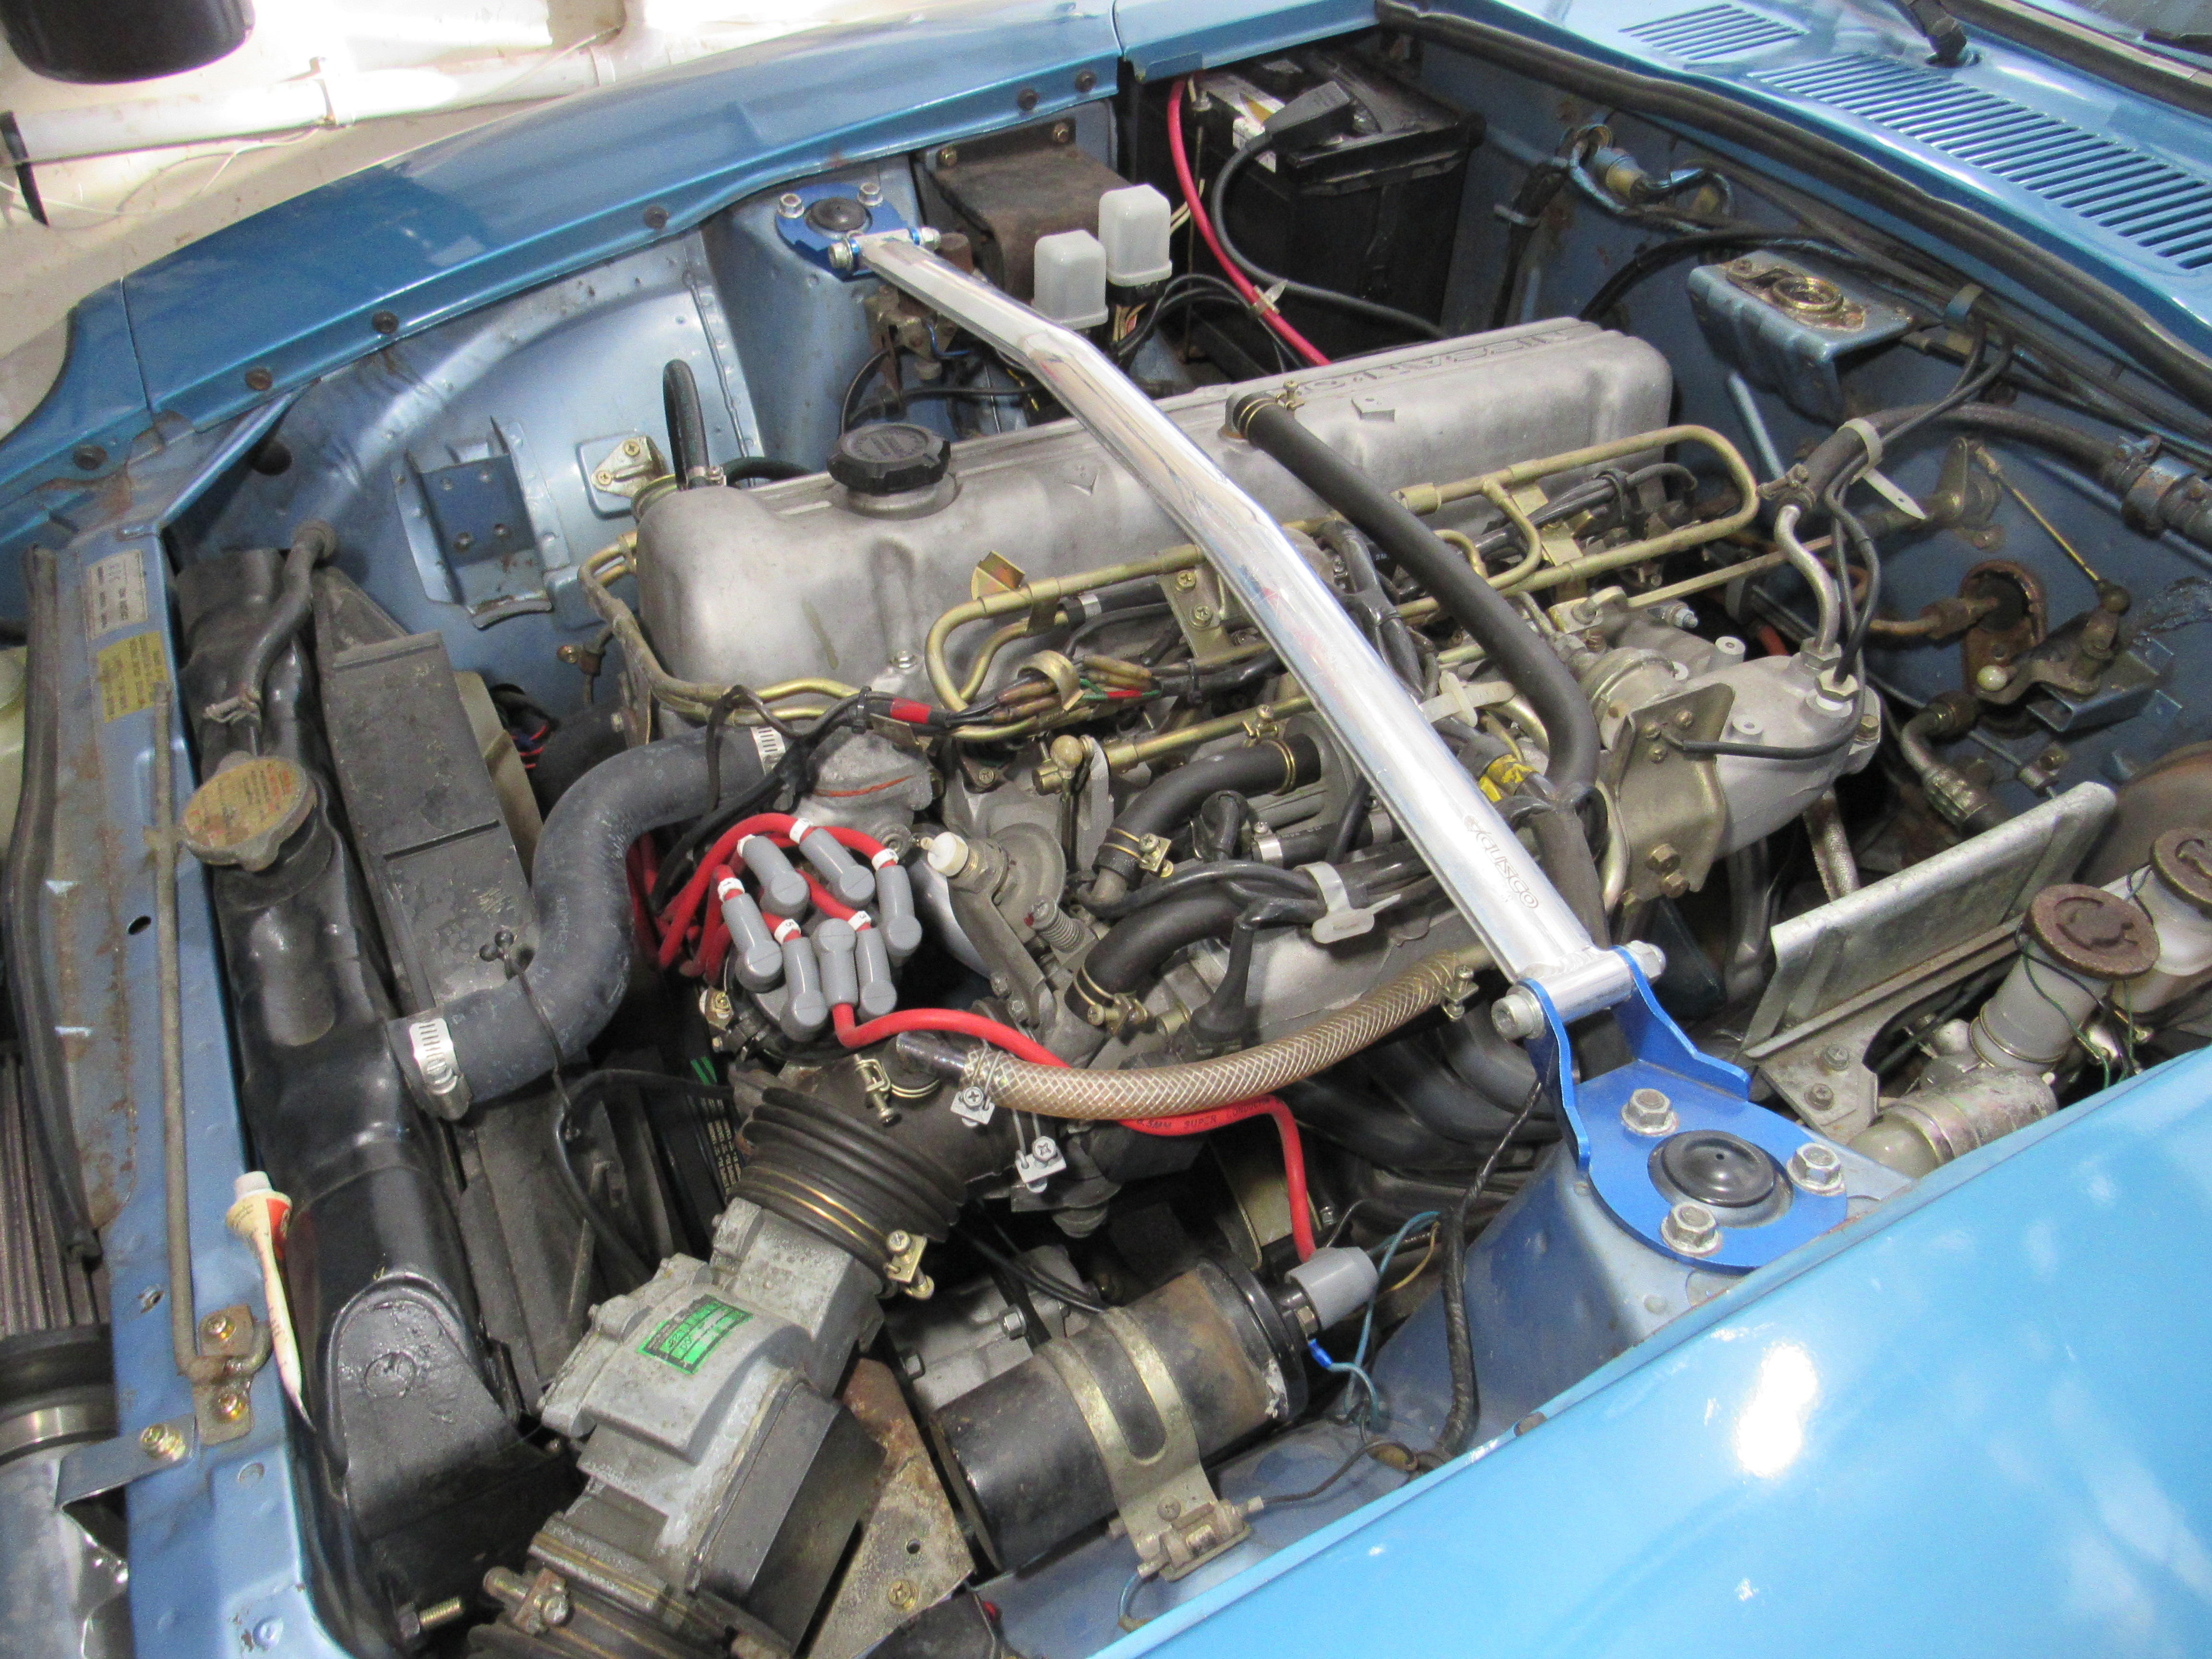
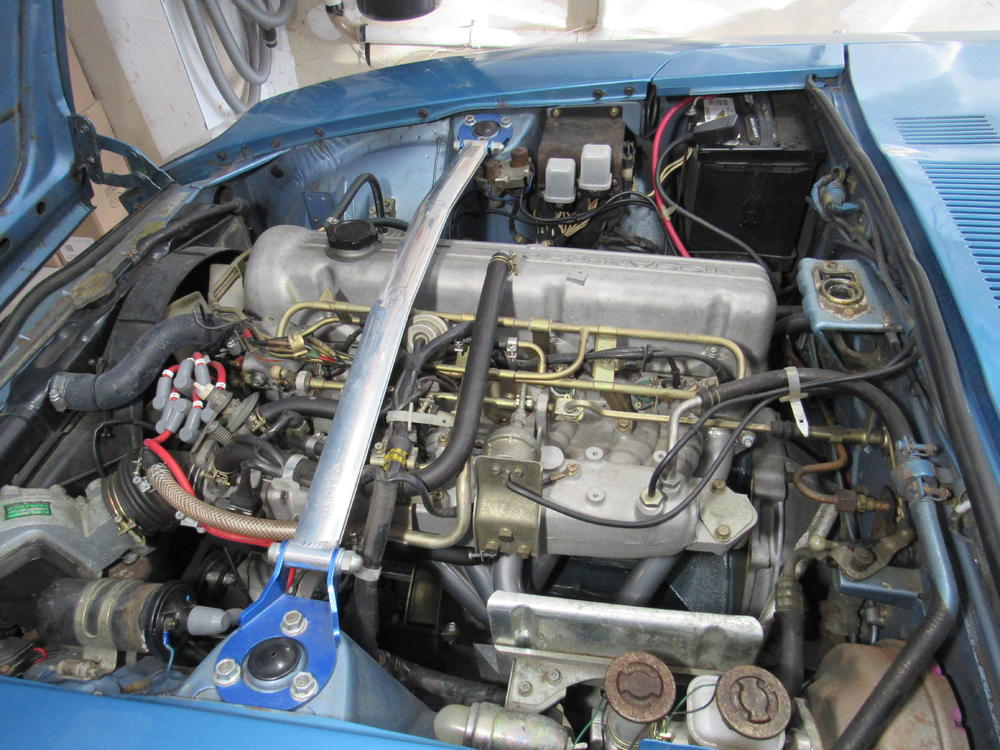
3 pointsWell, I didn't want to do this but it worked.... Spent the afternoon test fitting the hood and fenders...I think everything will be OK ...

 3 points
 -
2 pointsgreat! ill keep an eye out for that. Headed over to the garage tonight2 points
-
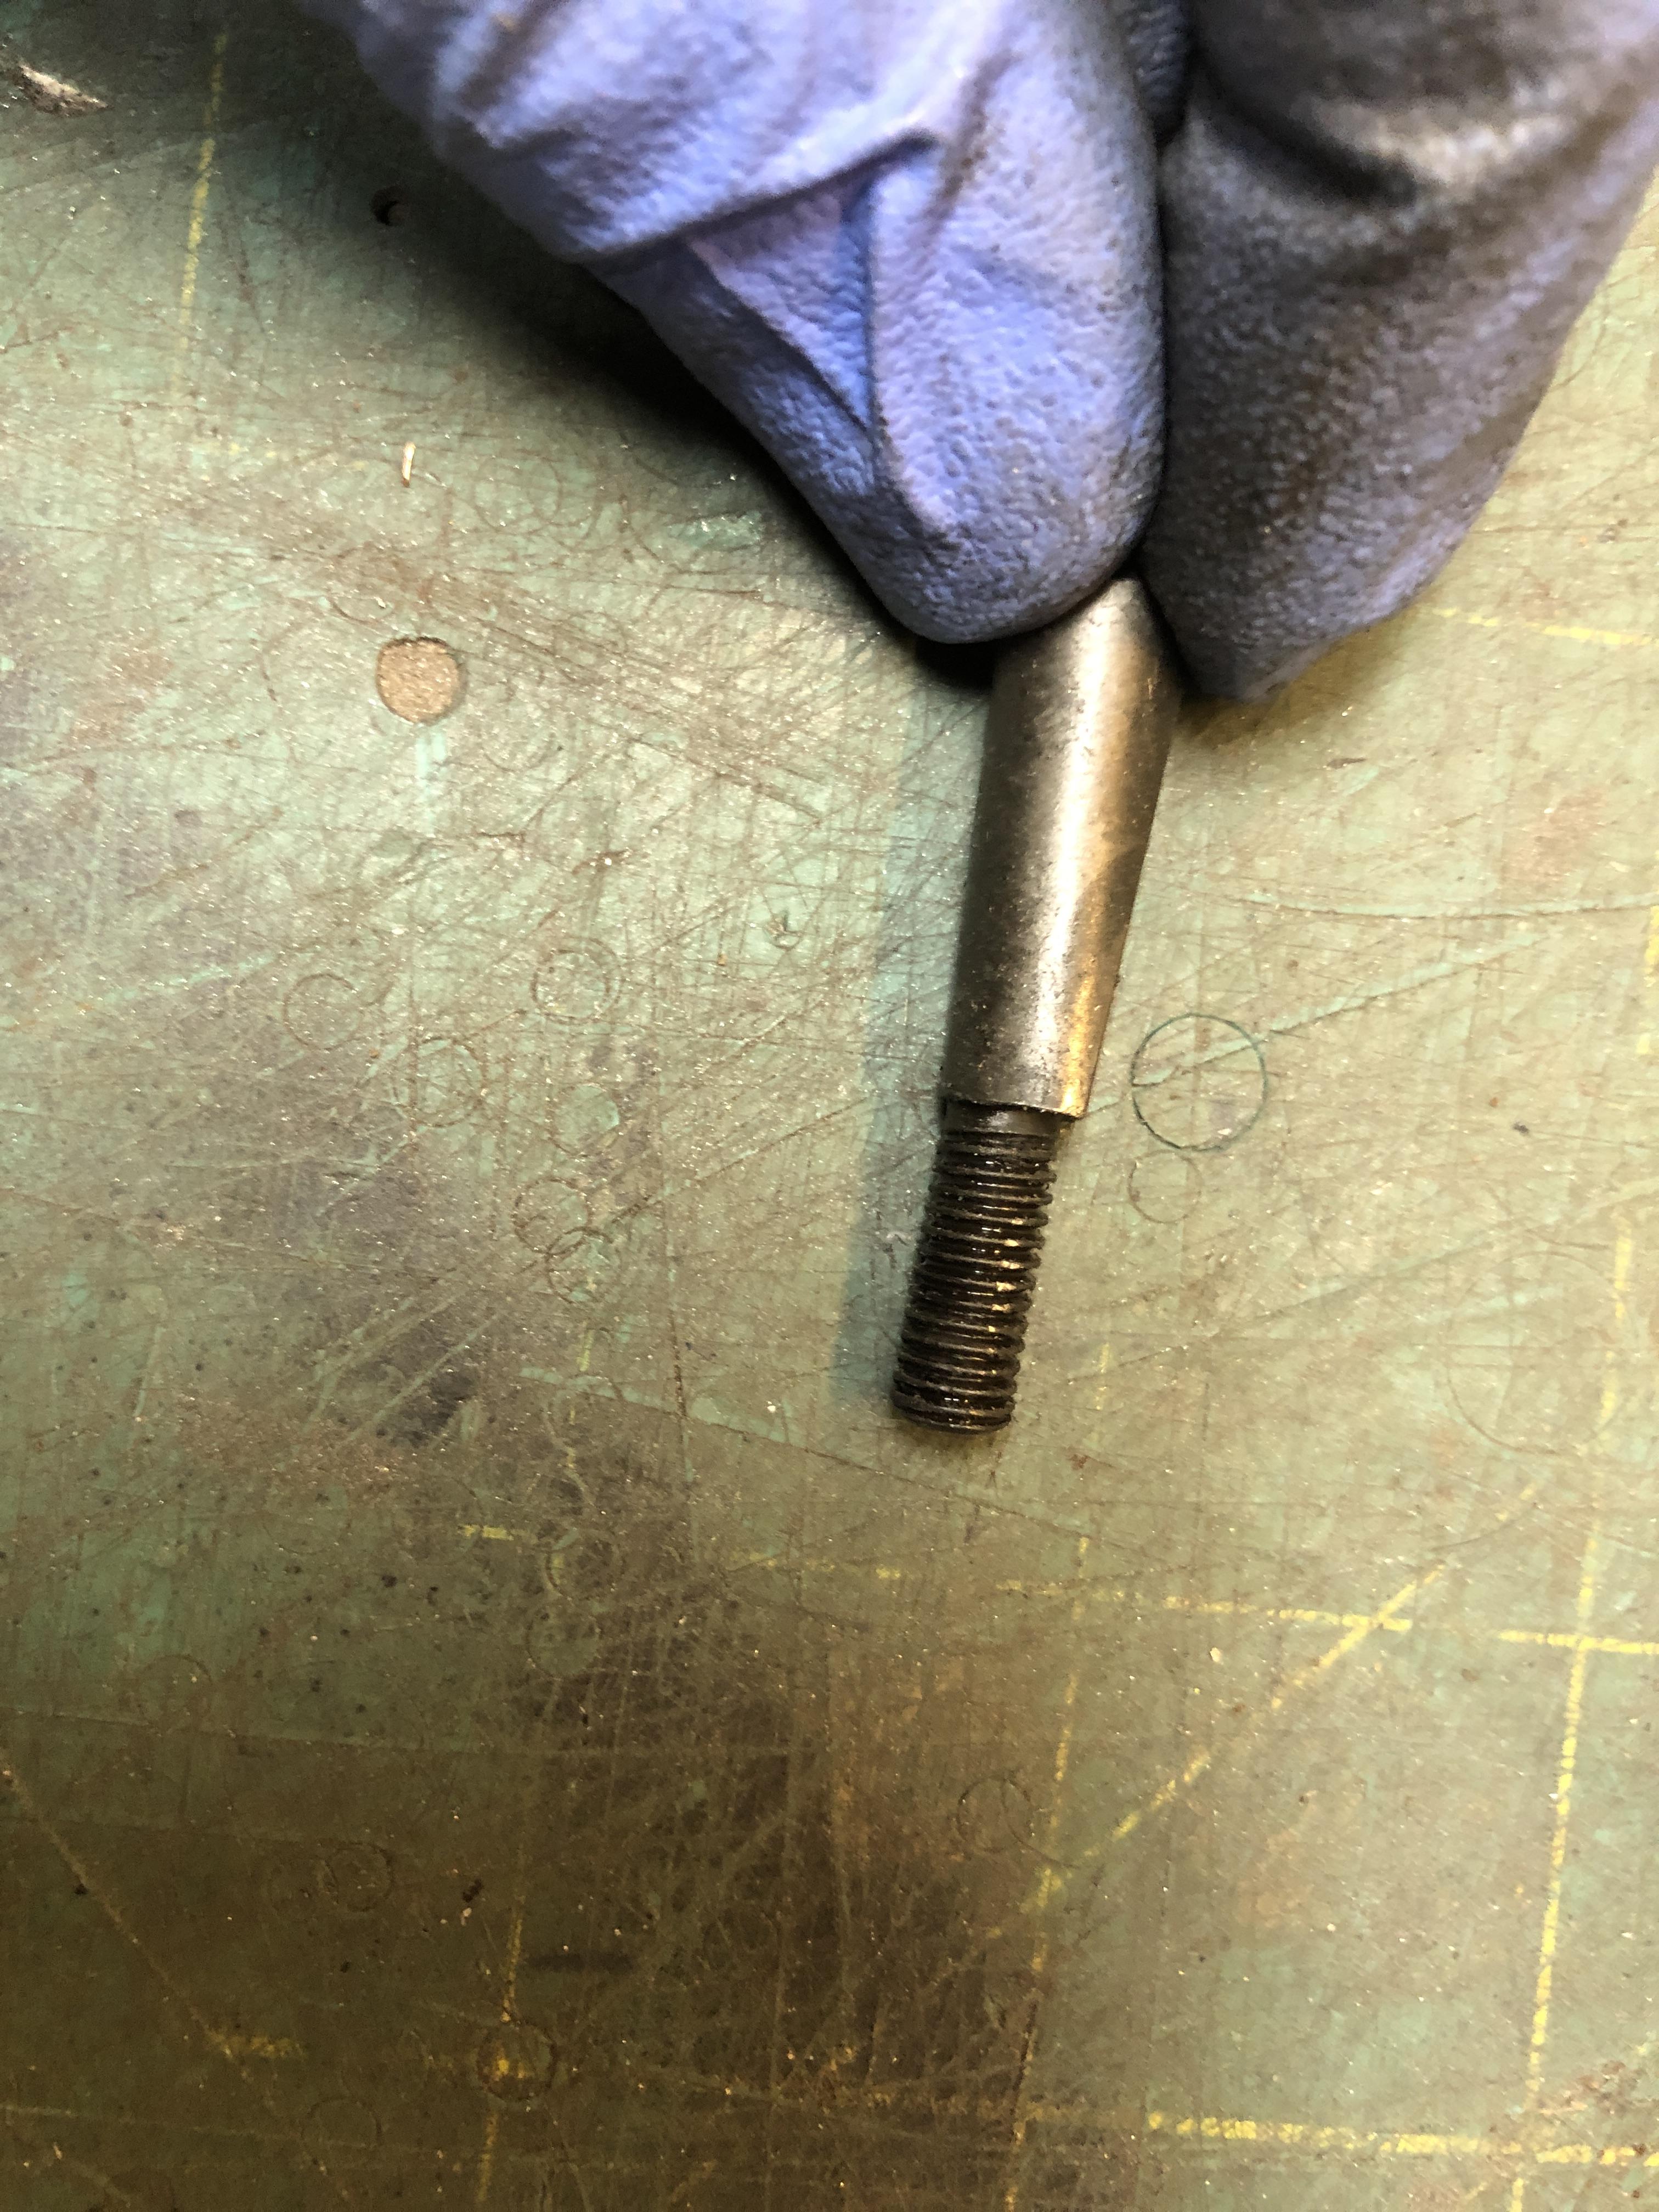
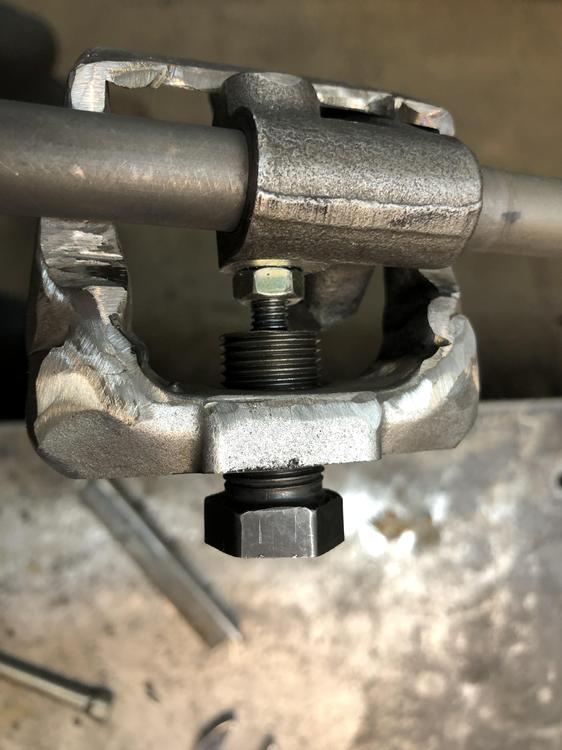
Well I tried my fancy azz press tool on a “fresh” tail housing pin. Not quite perfected. It was not pushing dead straight and the threaded portion began to bend. Quite happy it didn’t snap. resorted to more heat and a punch with the fancy azz new support tube/angle iron. Still no joy. Still too much bounce in the system. Decided to try the air hammer. Machined one of the tips with a flat and 1/4 hole to catch the end of the bolt. Well I have to tell you, it popped free in about 2 milliseconds of pounding. I suppose I had loosened it up a bit with previous attempts. Let’s just say that’s true... For me, the right thing to do is to just use the dang air hammer, making that hole in the side of the case first if you have to, and plugging later. Having decent backup, even a chunk of wood wedged in there, would be plenty.

 2 points
 -
2 pointsMy painter has cut, aligned and welded the sculpture. He’s almost ready to paint. I’ll bring him the emblem, mirror and chrome trim and then it should be impressive. Gonna be awesome!


 2 points
 -
2 pointsI was actually there the day before doing some electrical work for Max. I also got to meet Jim Downing at the track he bought across the street from Road Atlanta. Jim took me for a ride in his car on the track.2 points
-
2 points
-
1 point
-
1 point
-
It's pretty clear the carpets don't fit Mart. I hope they solve it and send the good ones back to you without charge. ( only you pay NL tax ) Welcome to my world… i've ordered ALOT from, the states, and many mistakes to, cost me alot of money sadly. I find it sad these days ( also here in NL ) most companies only want to MAKE money, but when there is a problem, it takes AGES to solve, or worse it will not be solved AT ALL. Where is customer service gone to ? With my company I still stand with these old values, but it seems almost none are to be found anymore these days that really care about their customers. Just want to get rich quickly.1 point
-
1 pointNice. Never let your mistakes drag you down. Learn and move on!1 point
-
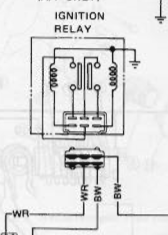
I would go to the diagram. Identify the pins that power the solenoid coils and the pins that are the circuit being made and broken. Go from there. The Ignition Relay doesn't have that many pins to figure out. I found one on EE-5. You might have to go through a few pages to ID the power sources and circuits, but the relay itself can be tested alone with a diagram. Notice that it grounds through the mounting bolts so if you have it just hanging from the wires it might not work. Nissan added a dedicated ground wire terminal in the ZX's.
 1 point
 -
1 pointAha! PM=Personal message. Click on my screen name, zKars, then when the new window opens, find the message button. Click it and type your message. That way we can discuss details without polluting the thread.1 point
-
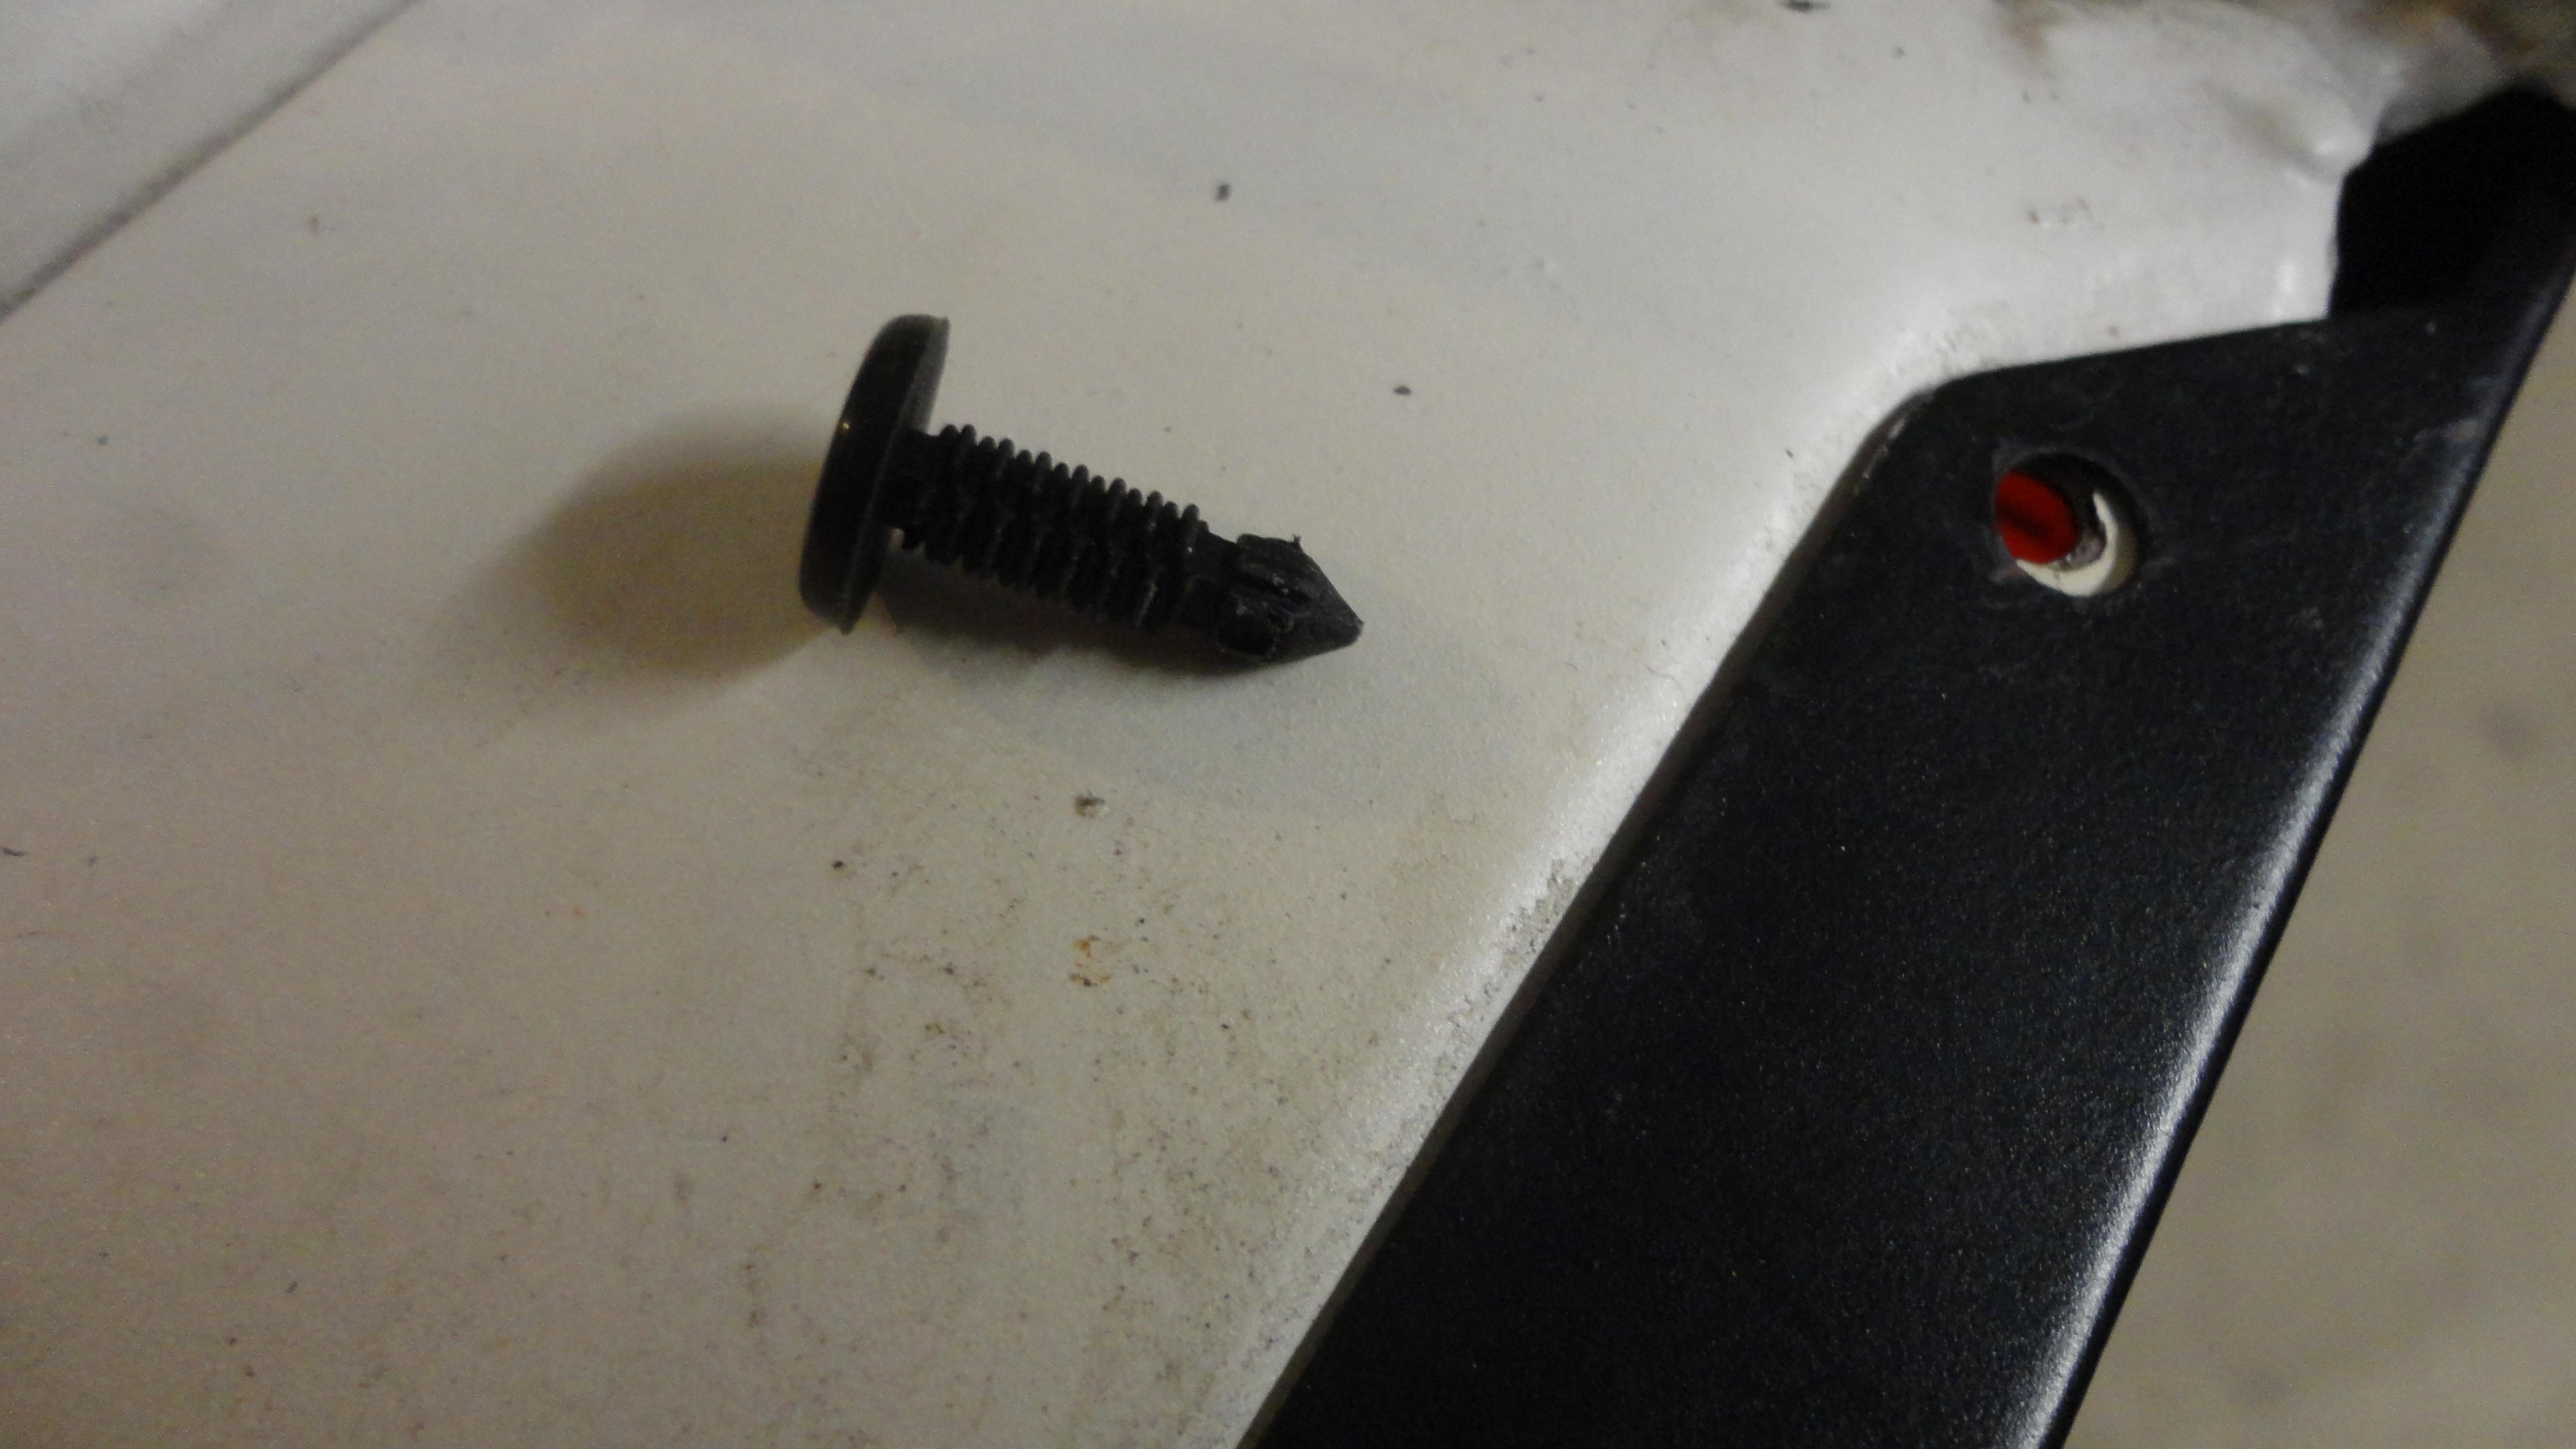
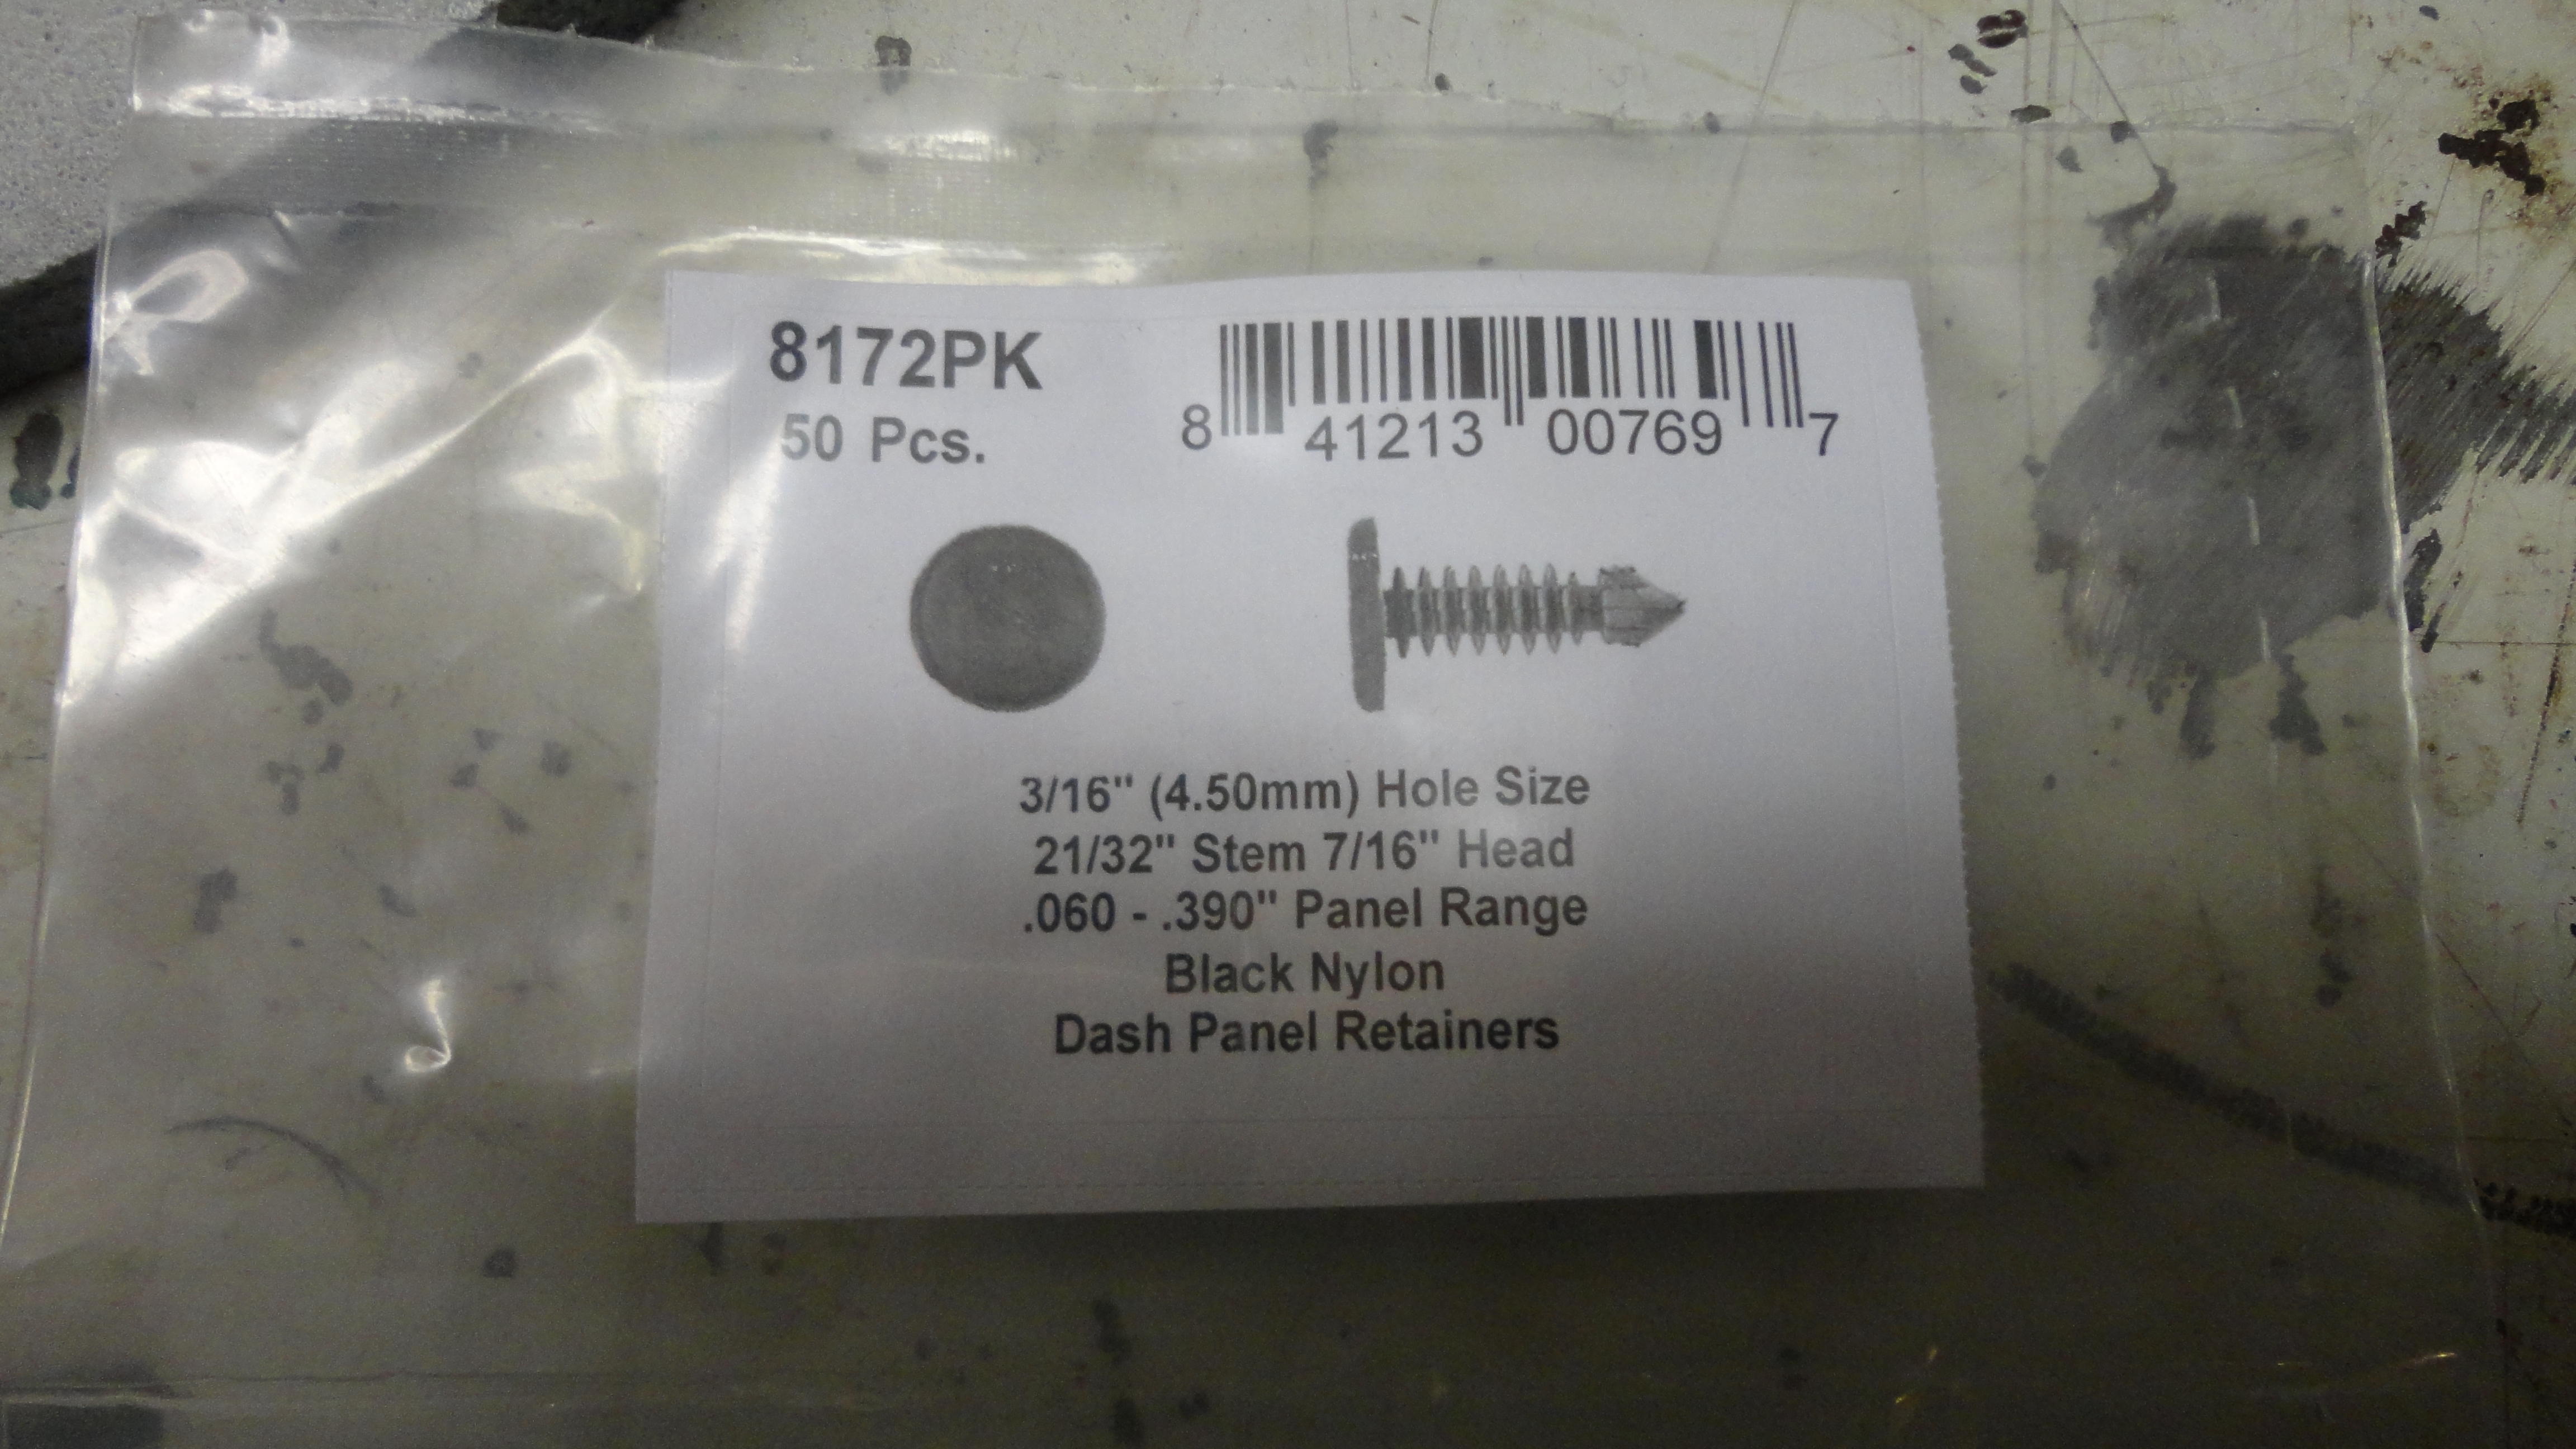
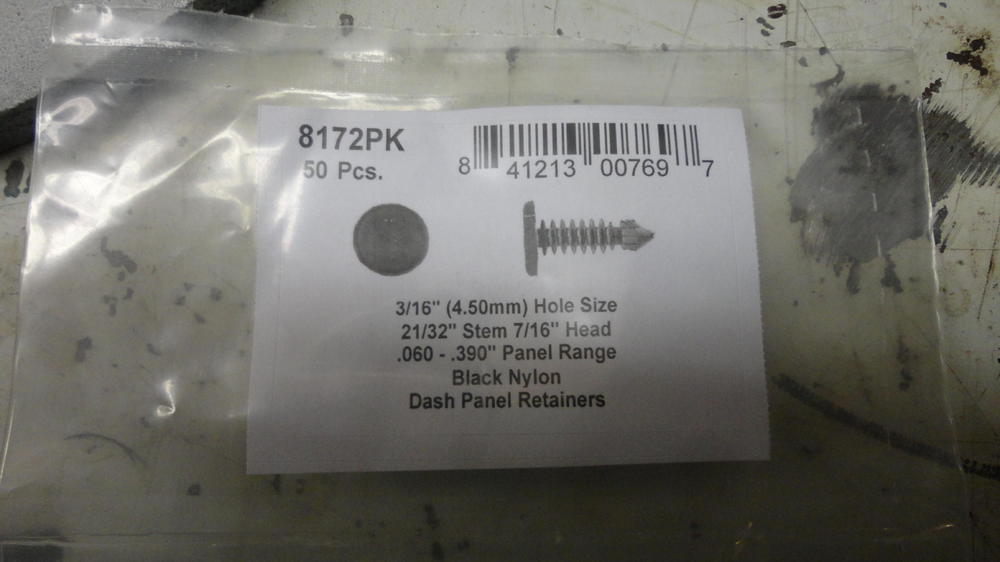
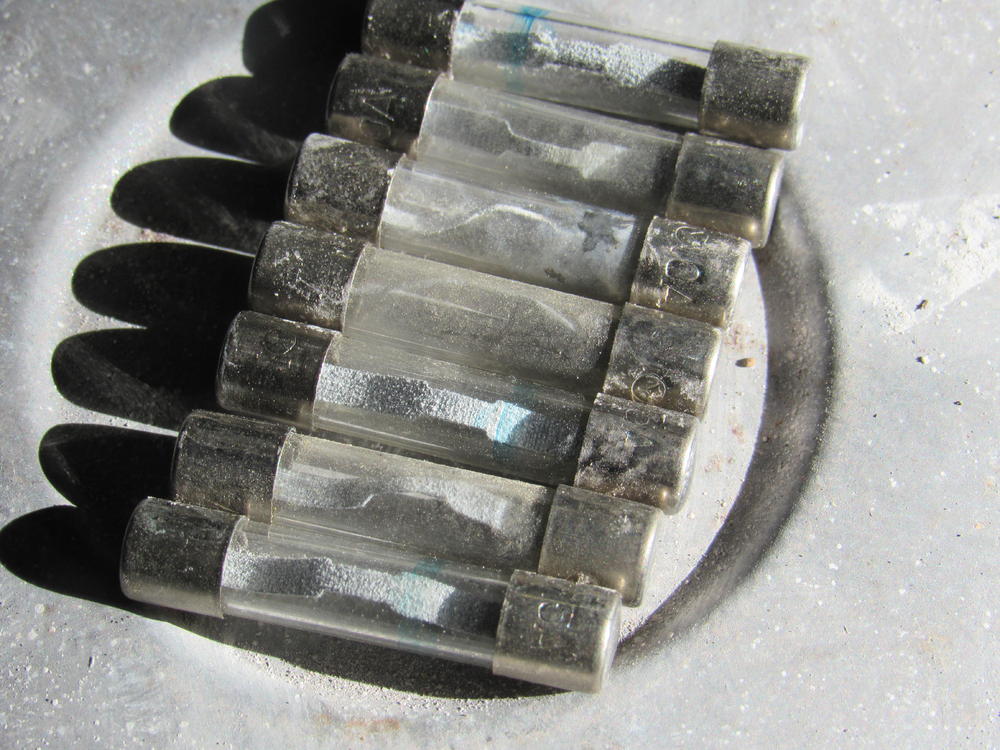
I know that this is a really old thread, but I found a substitute for the rivets. (Those of you looking for originality need not apply.) Anyway, I got them thru Zoro. (Part #G5101564) for $8.83 + shipping. I haven't seen fasteners this small anywhere else.

 1 point
 -
From the movie "Cars", my birth year car was the Hudson Hornet. Very successfully campaigned in NASCAR in the early 50's!1 point
-
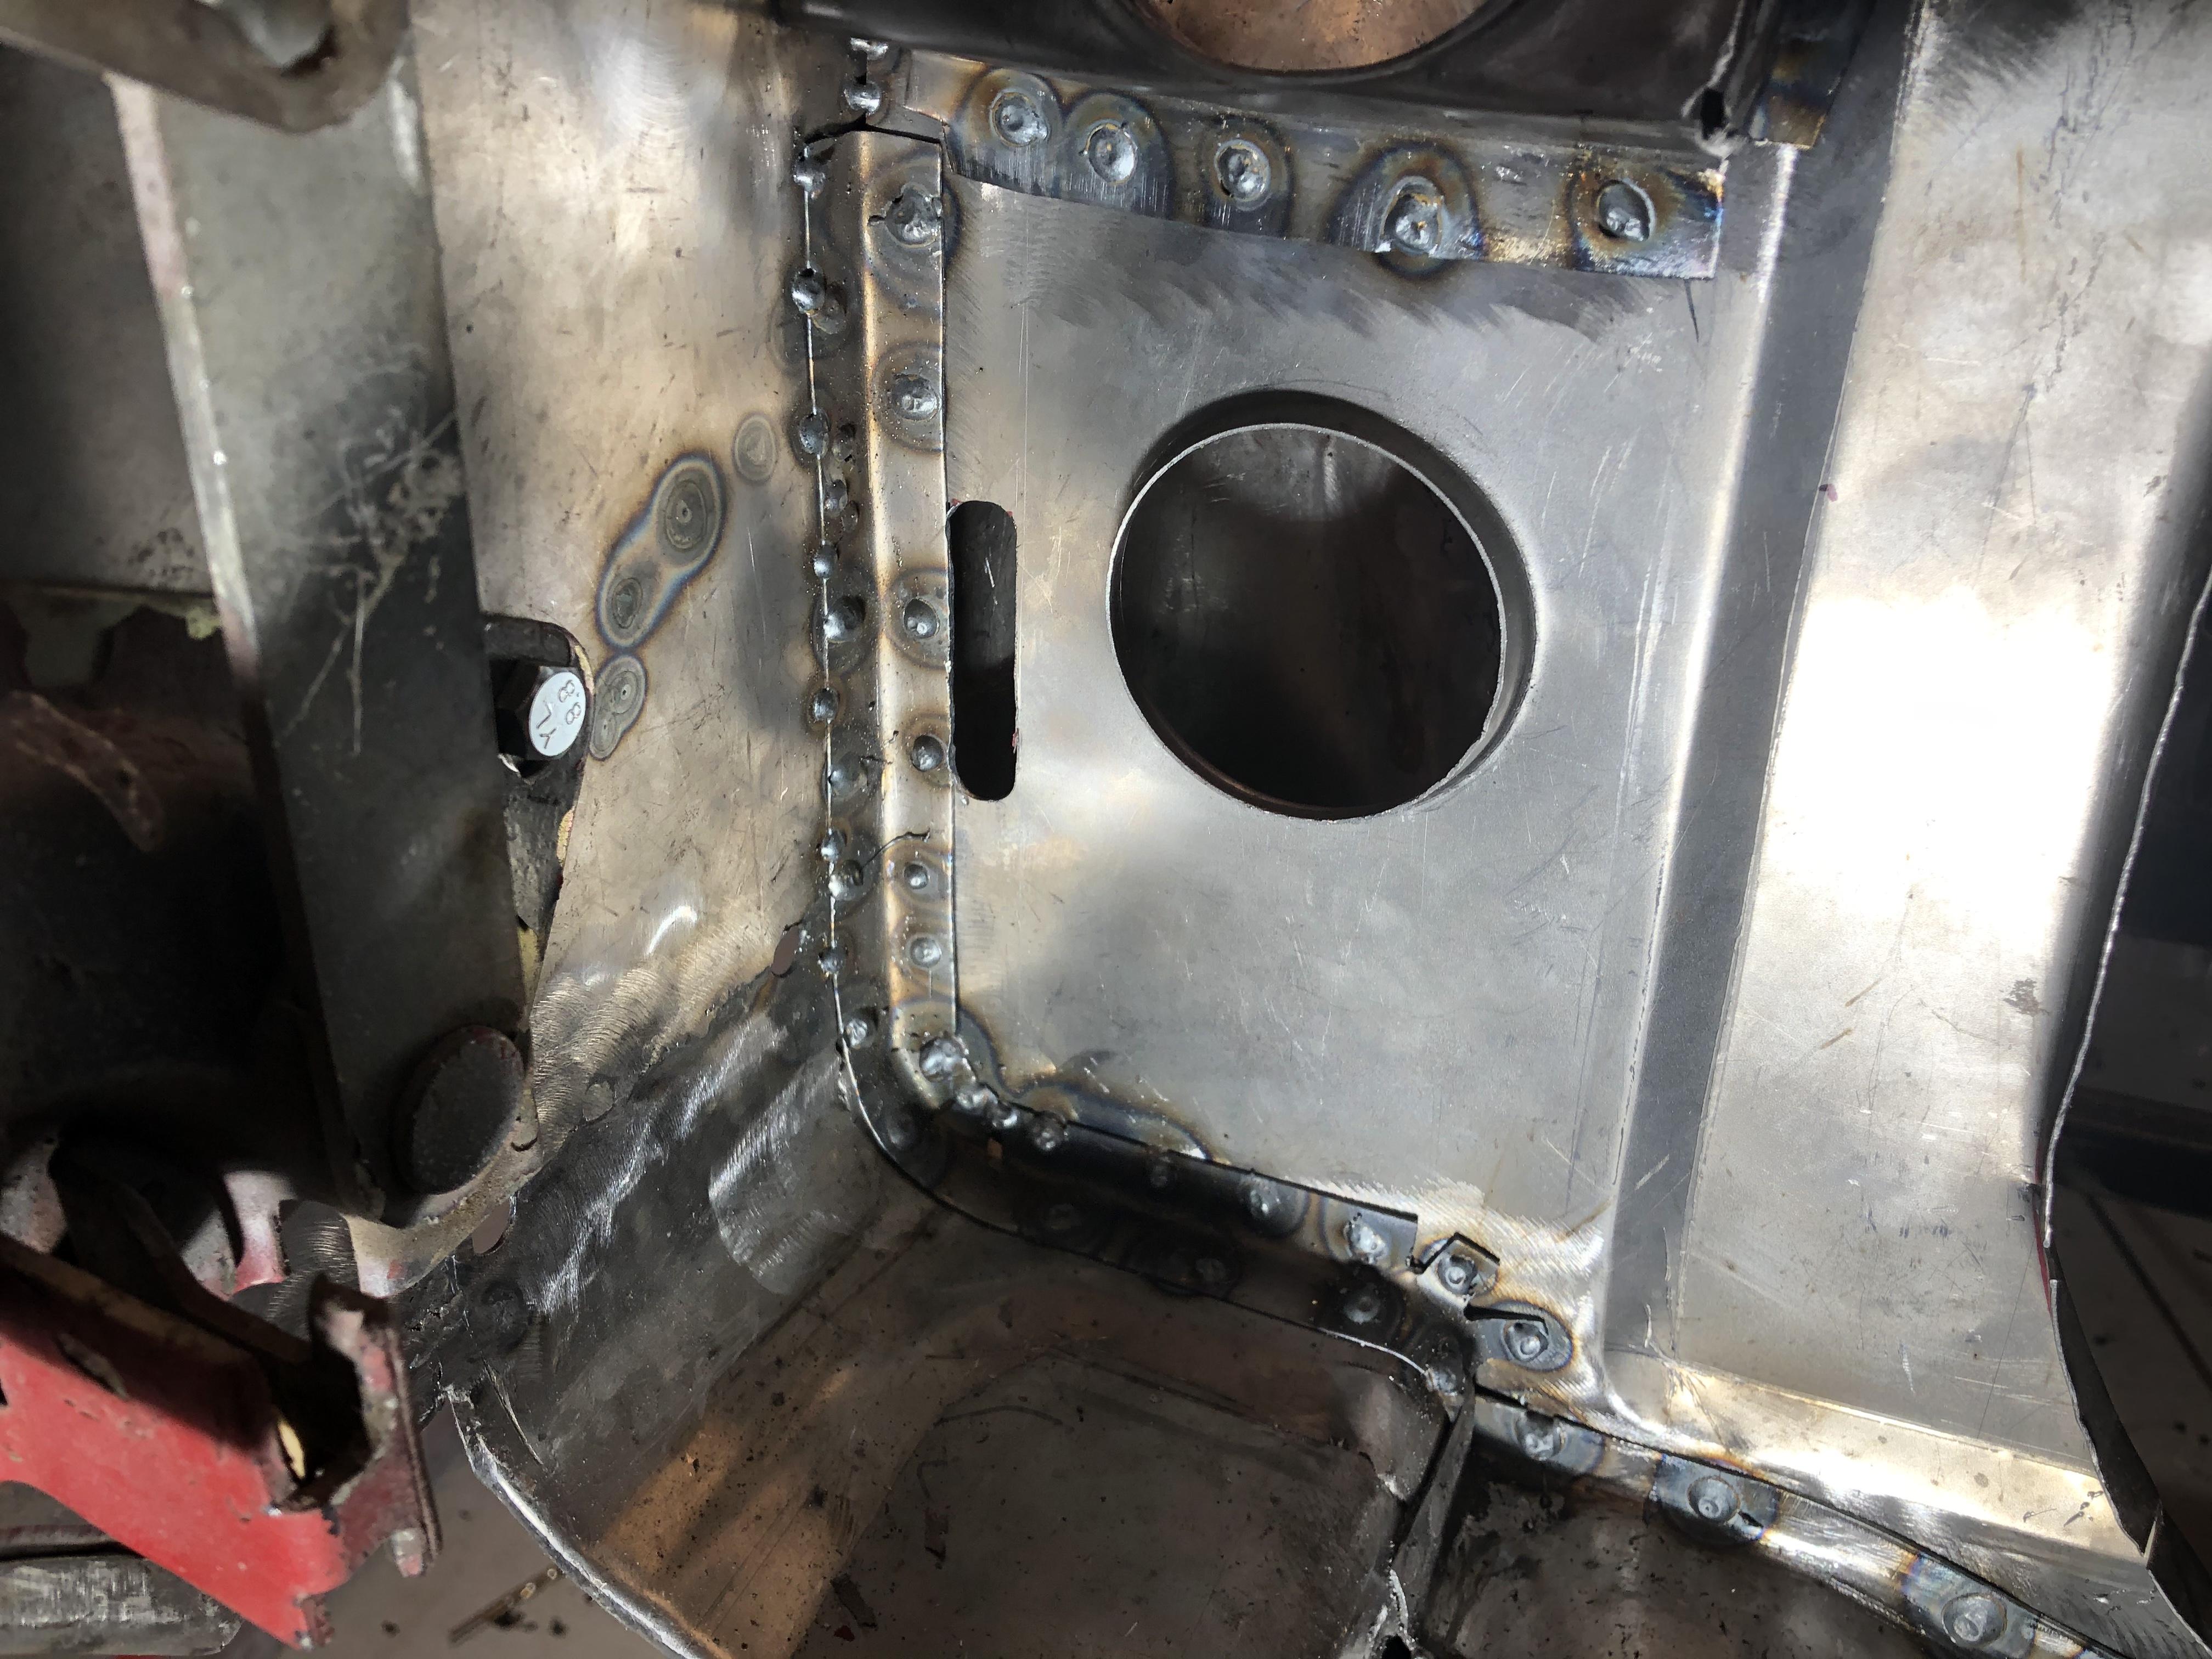
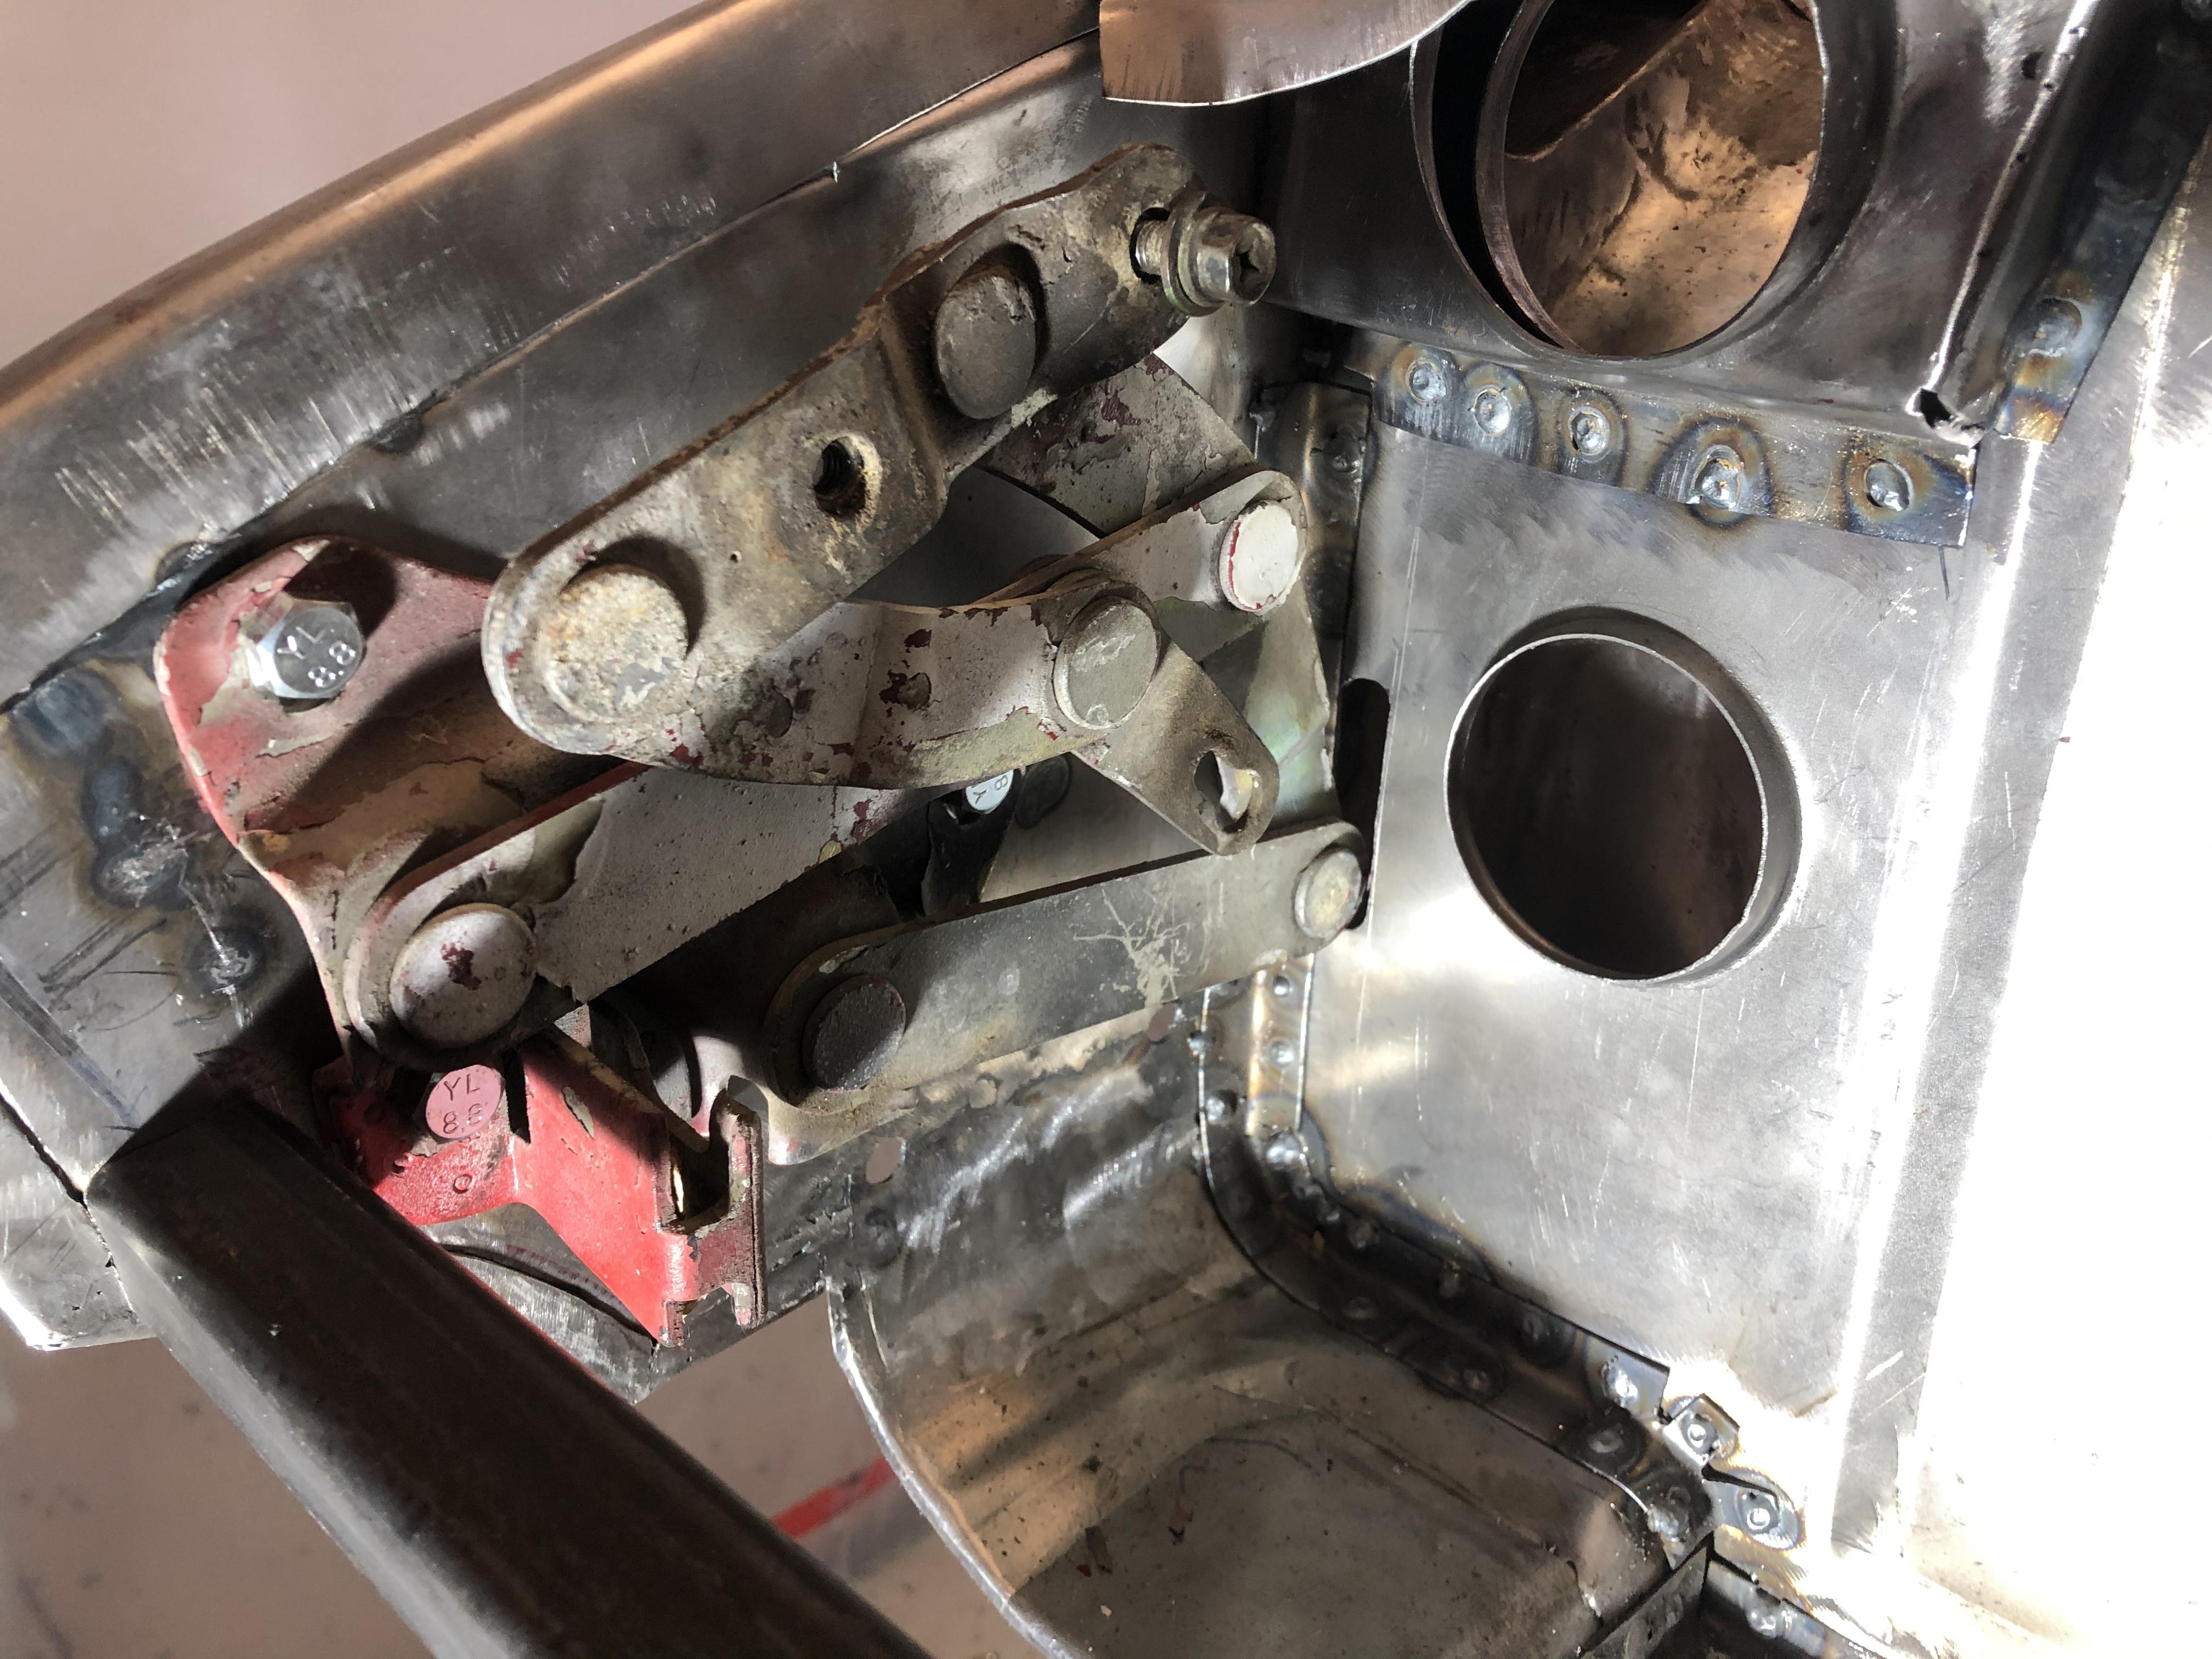
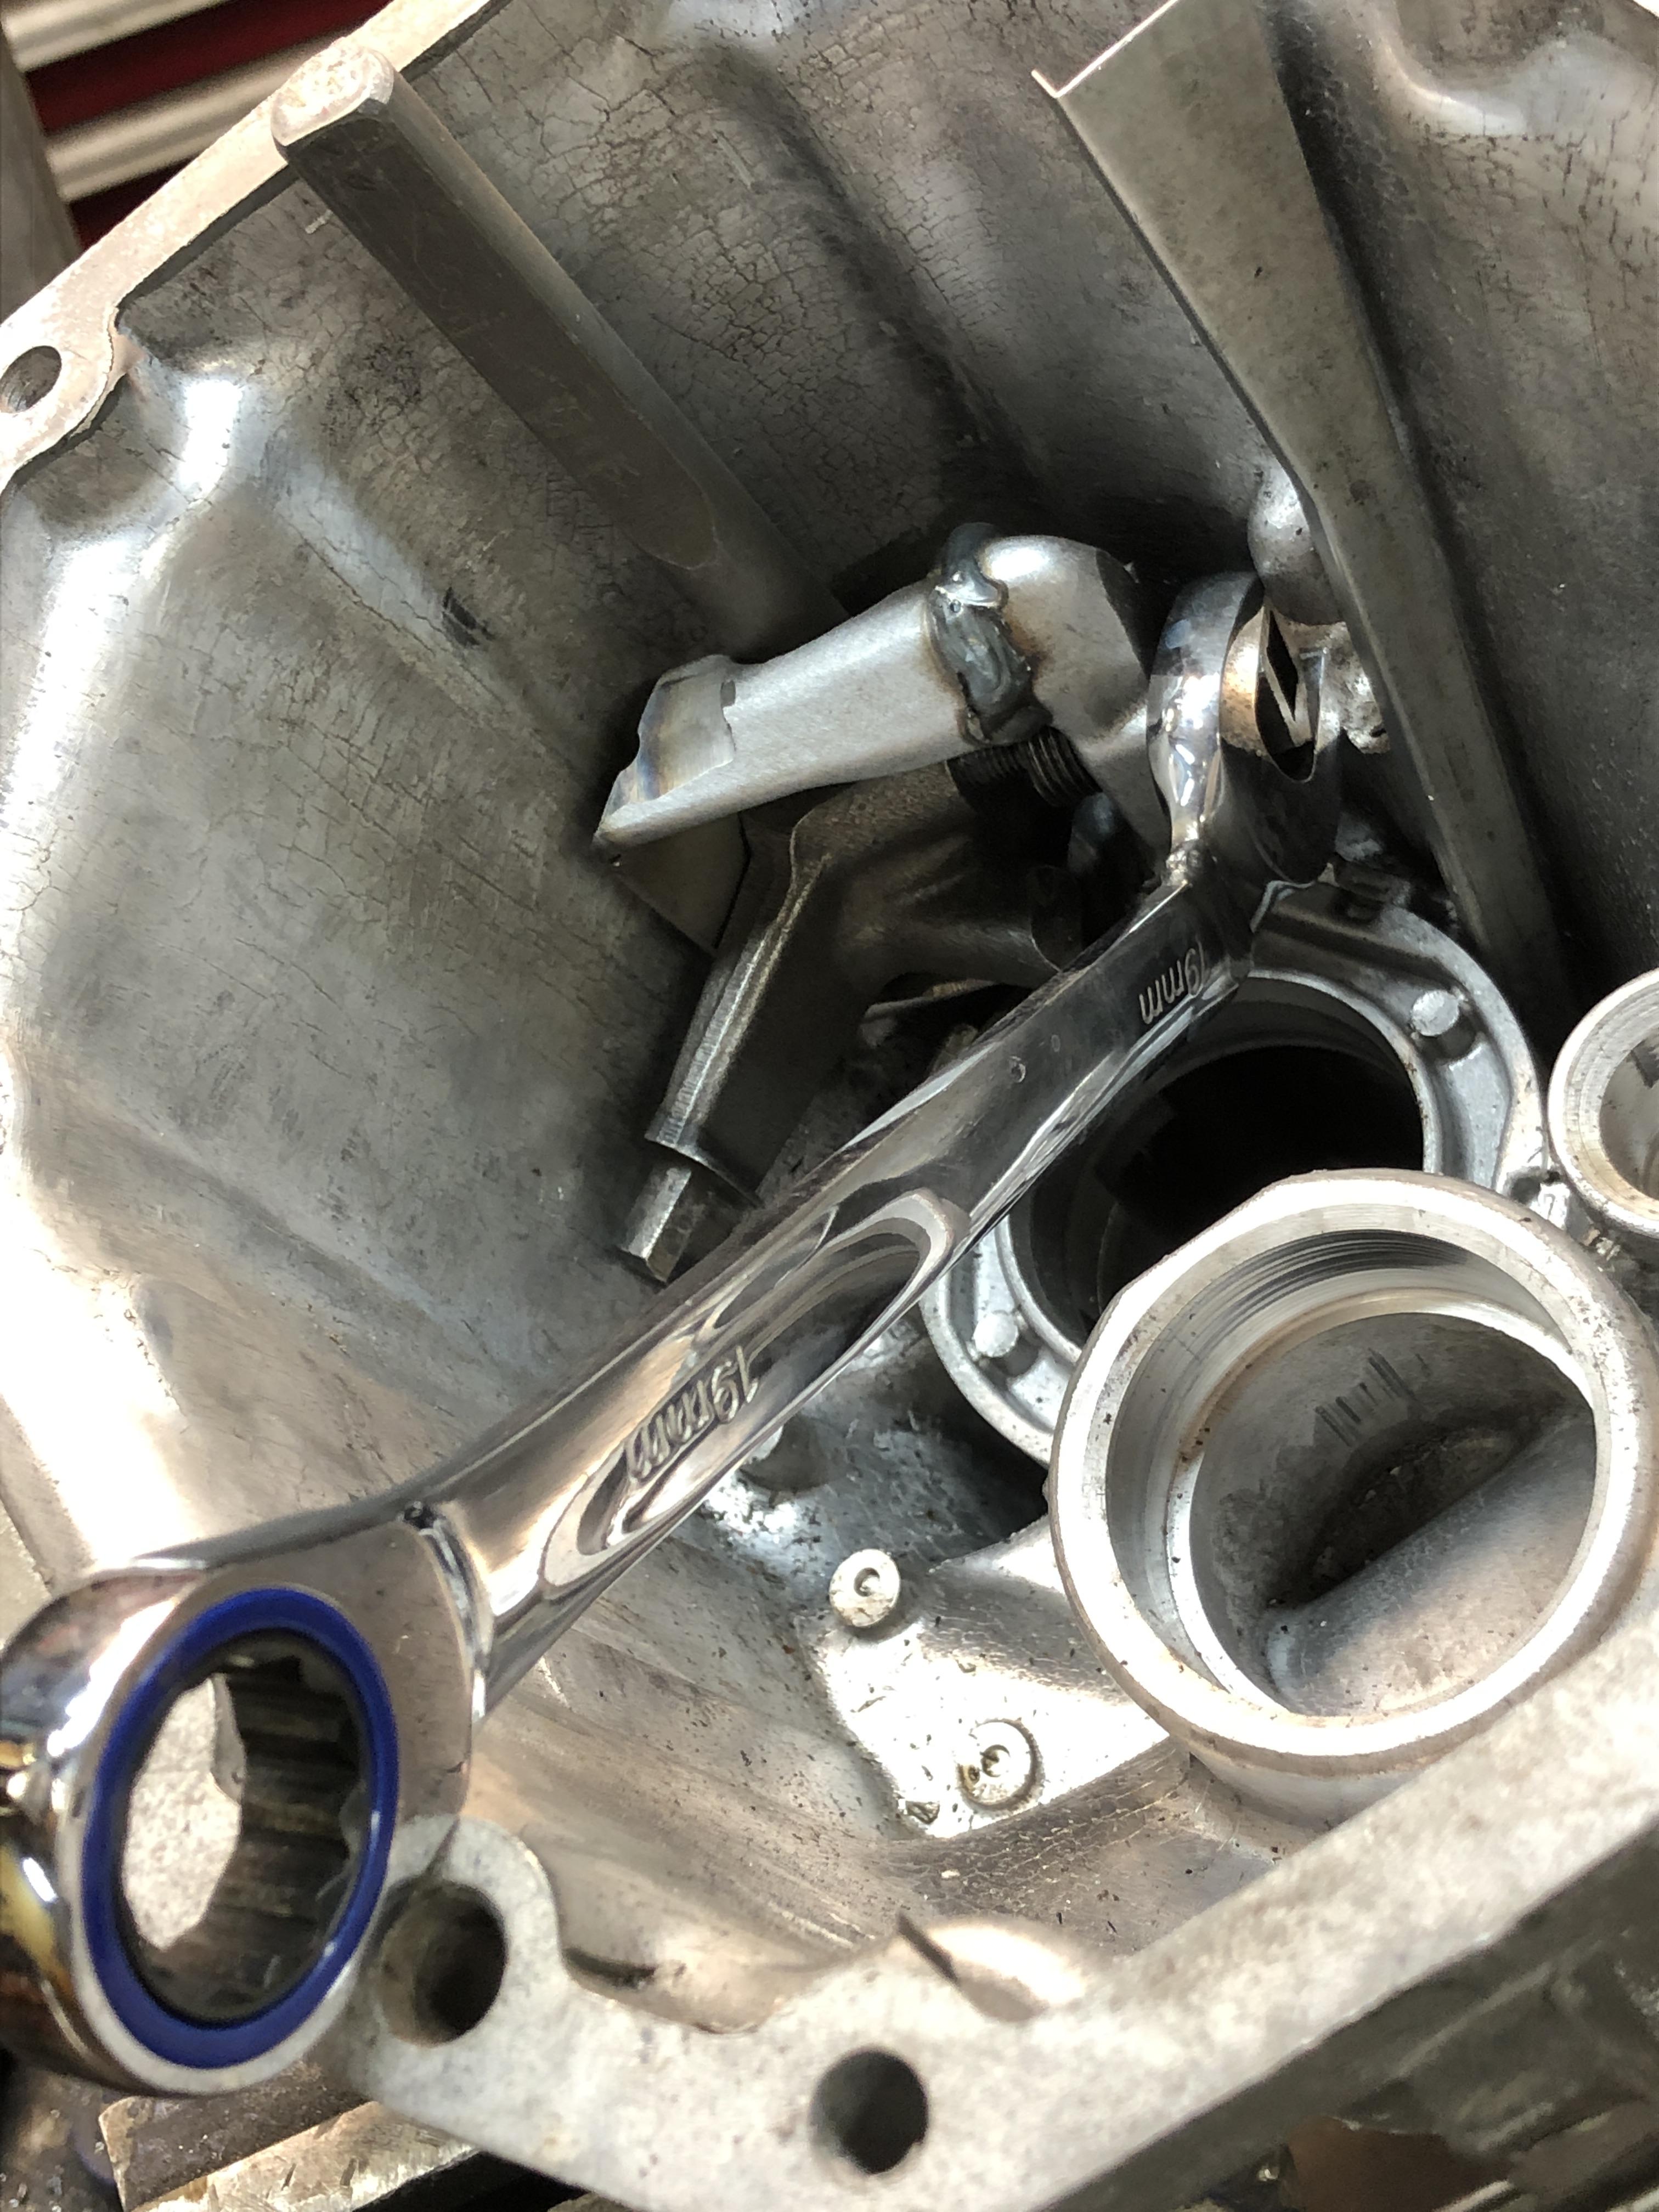
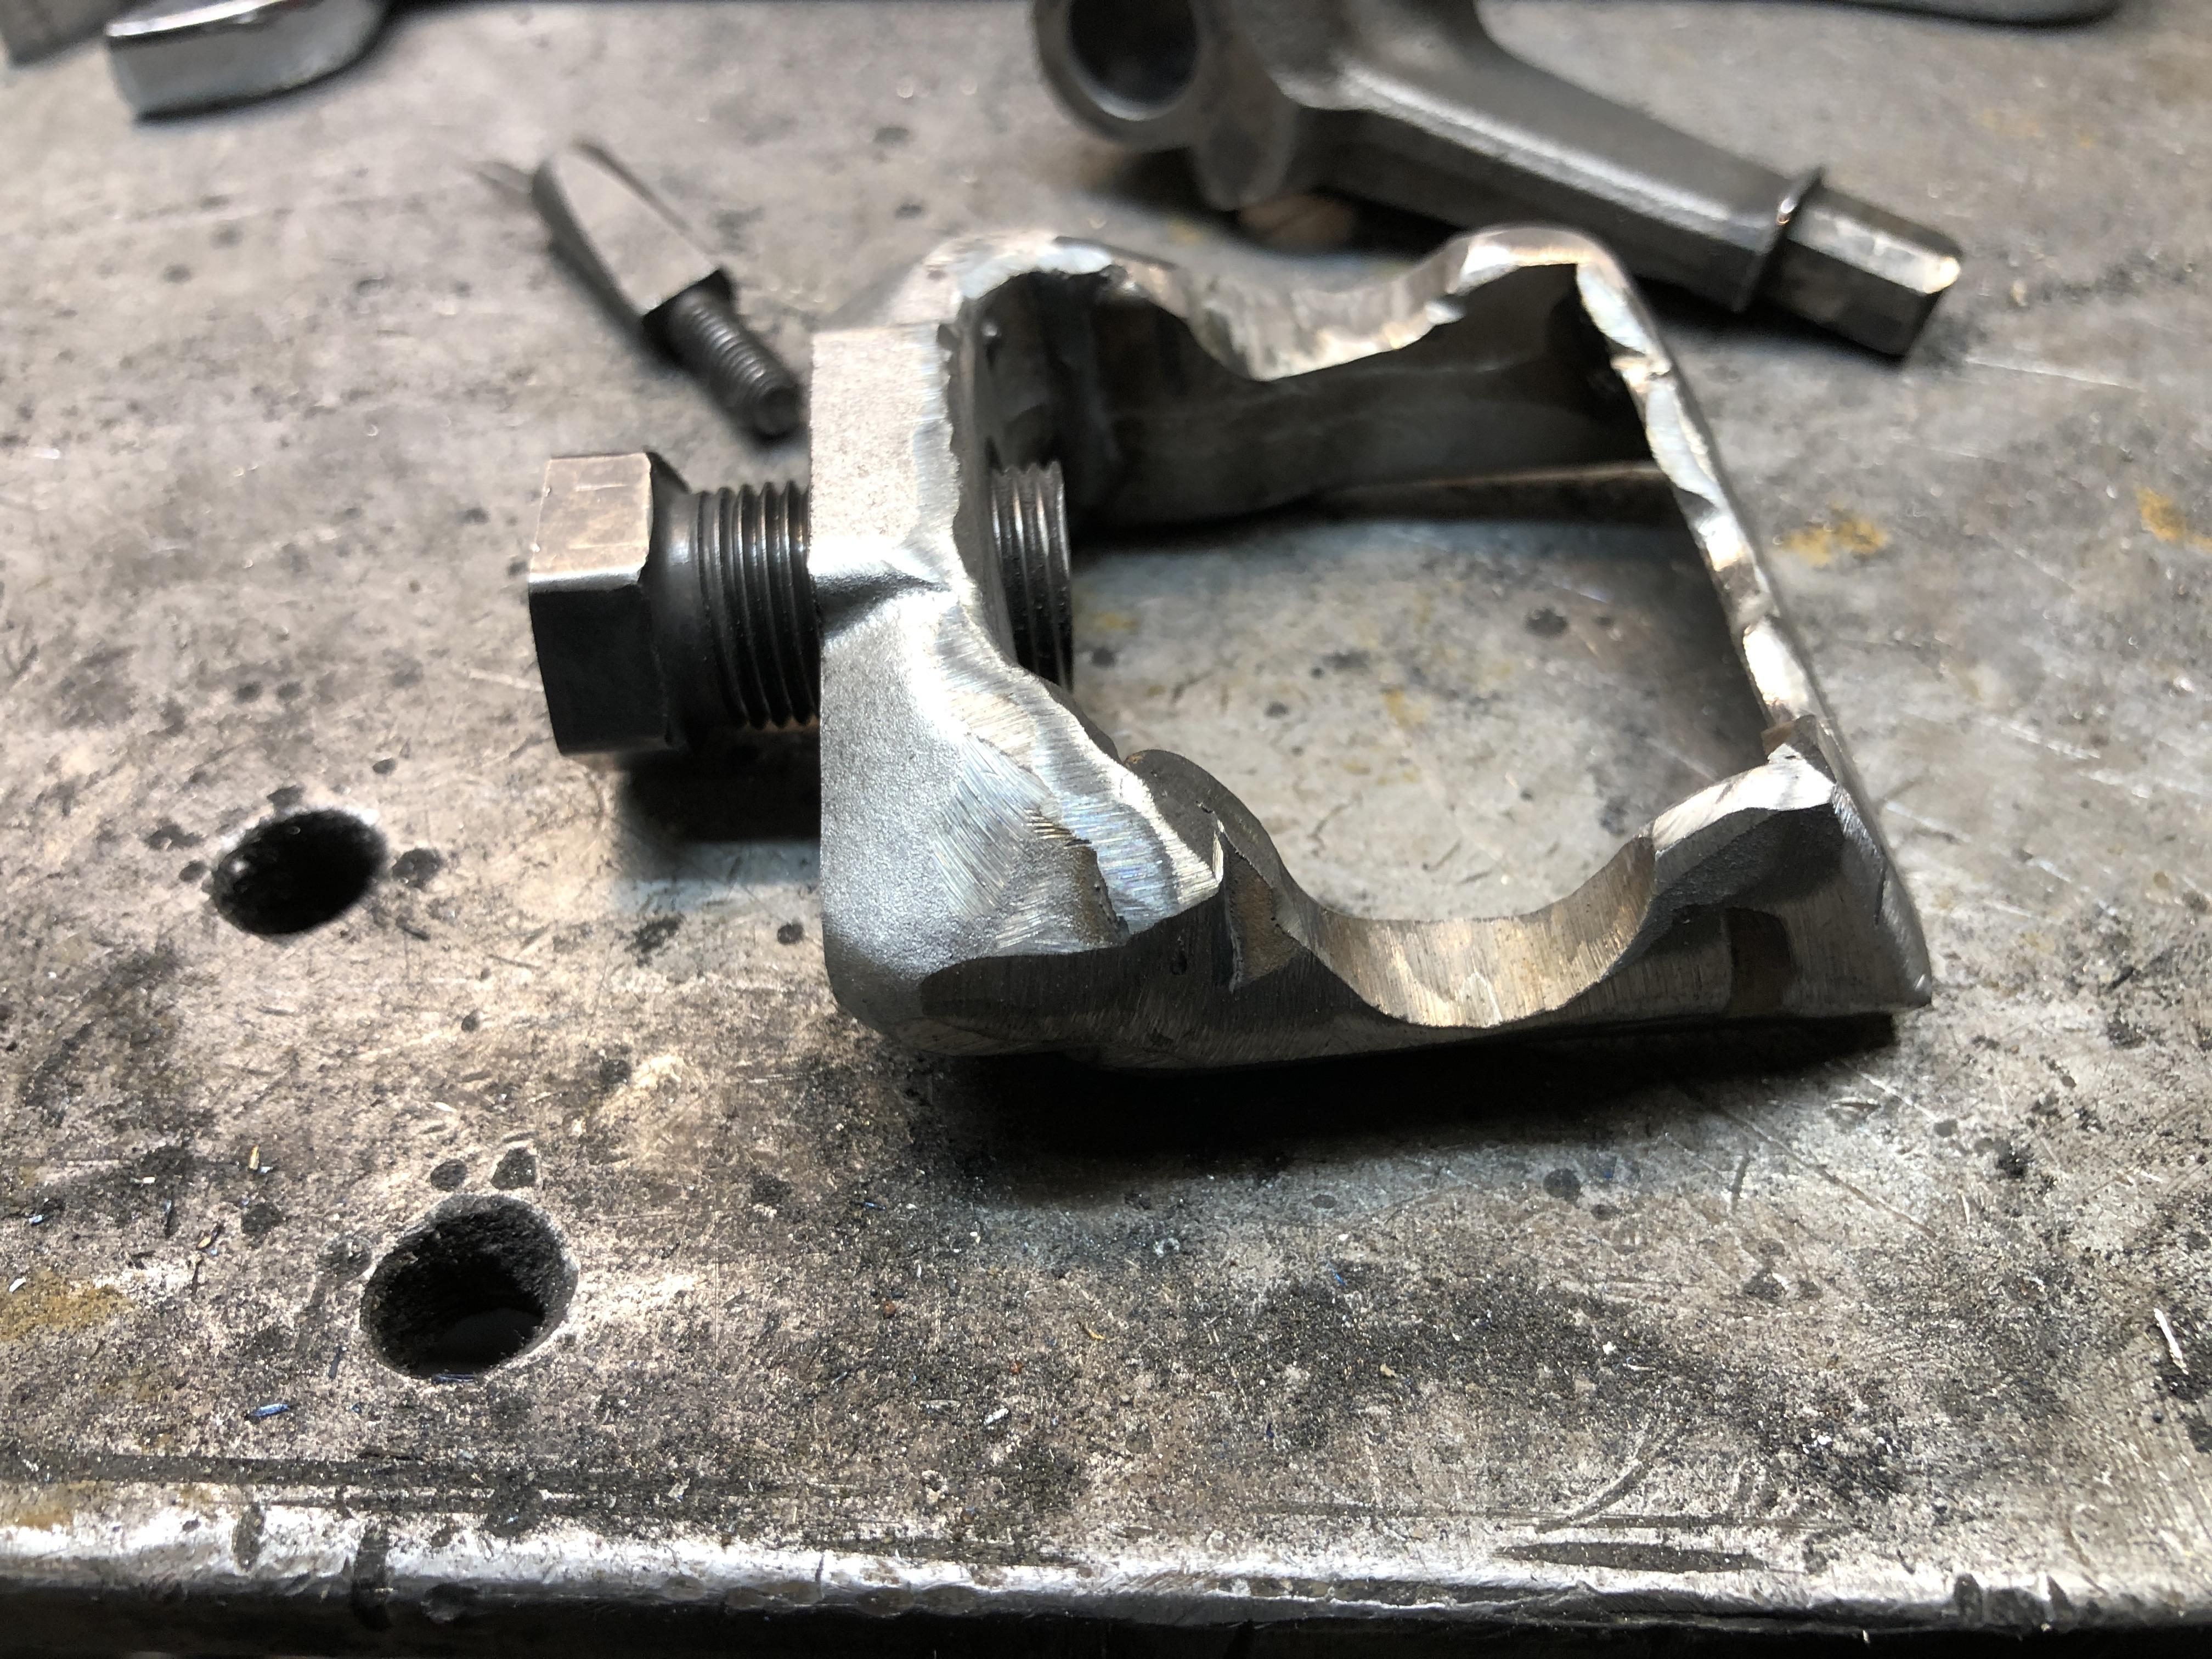
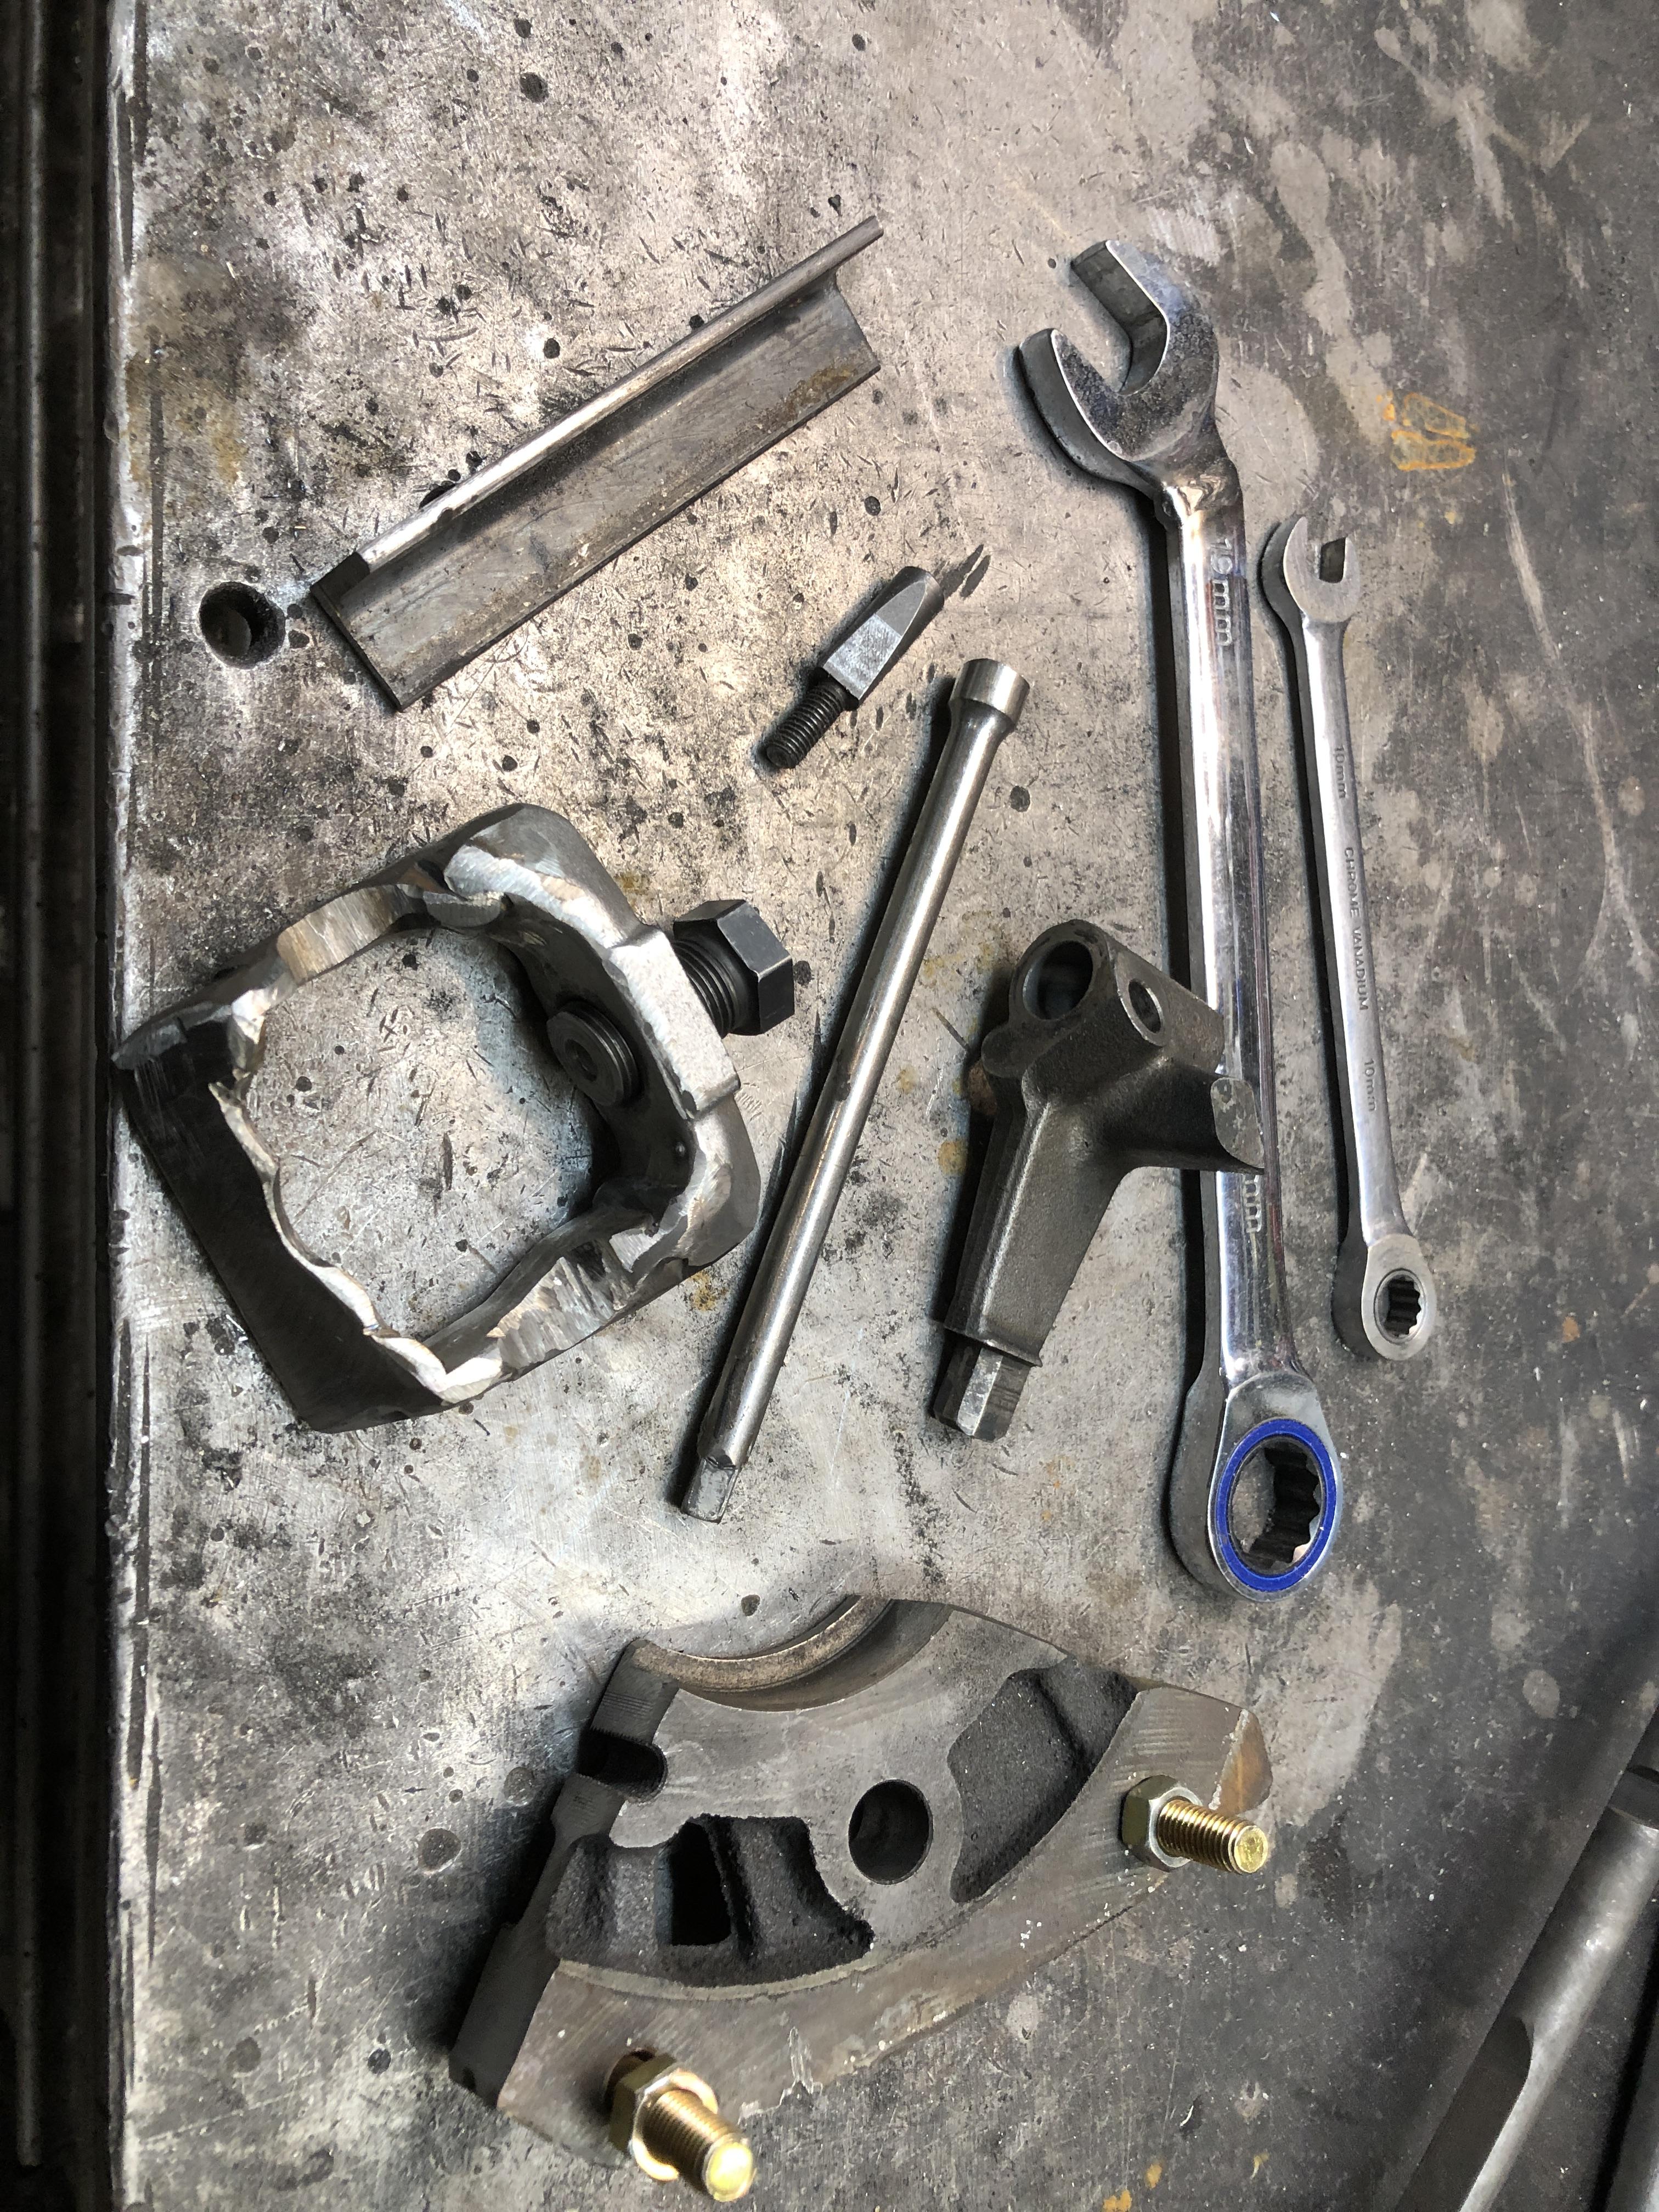
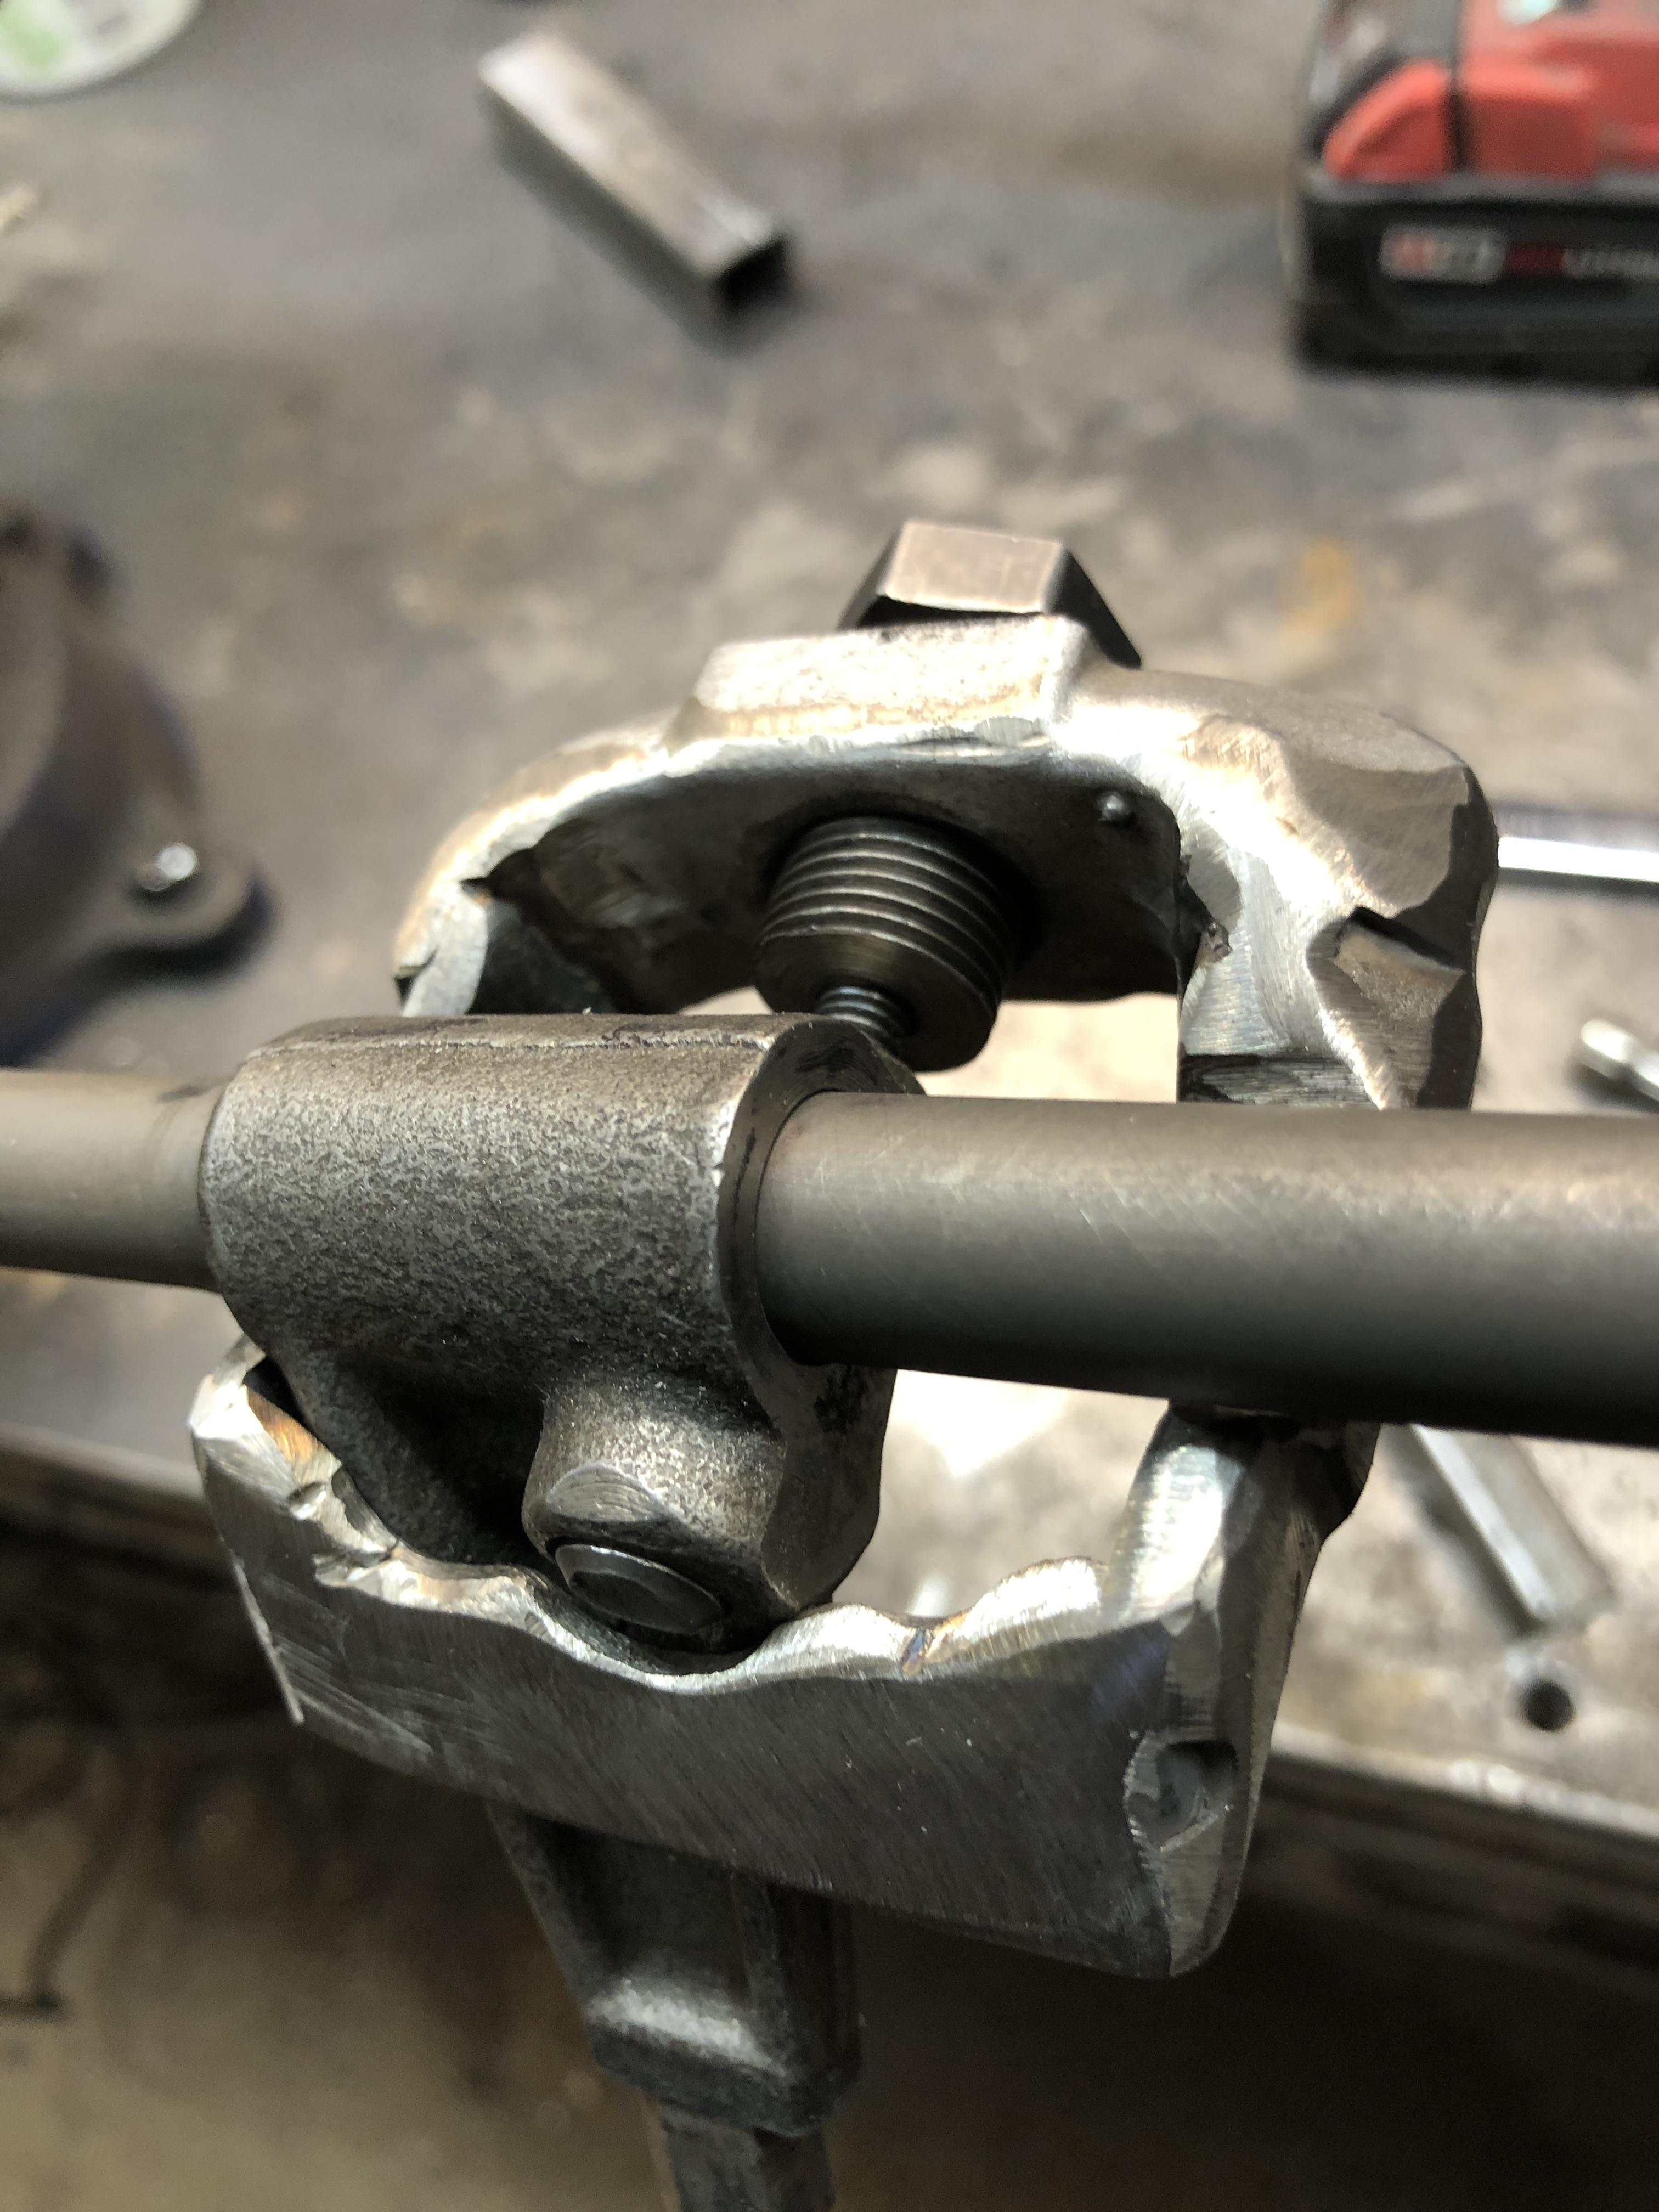
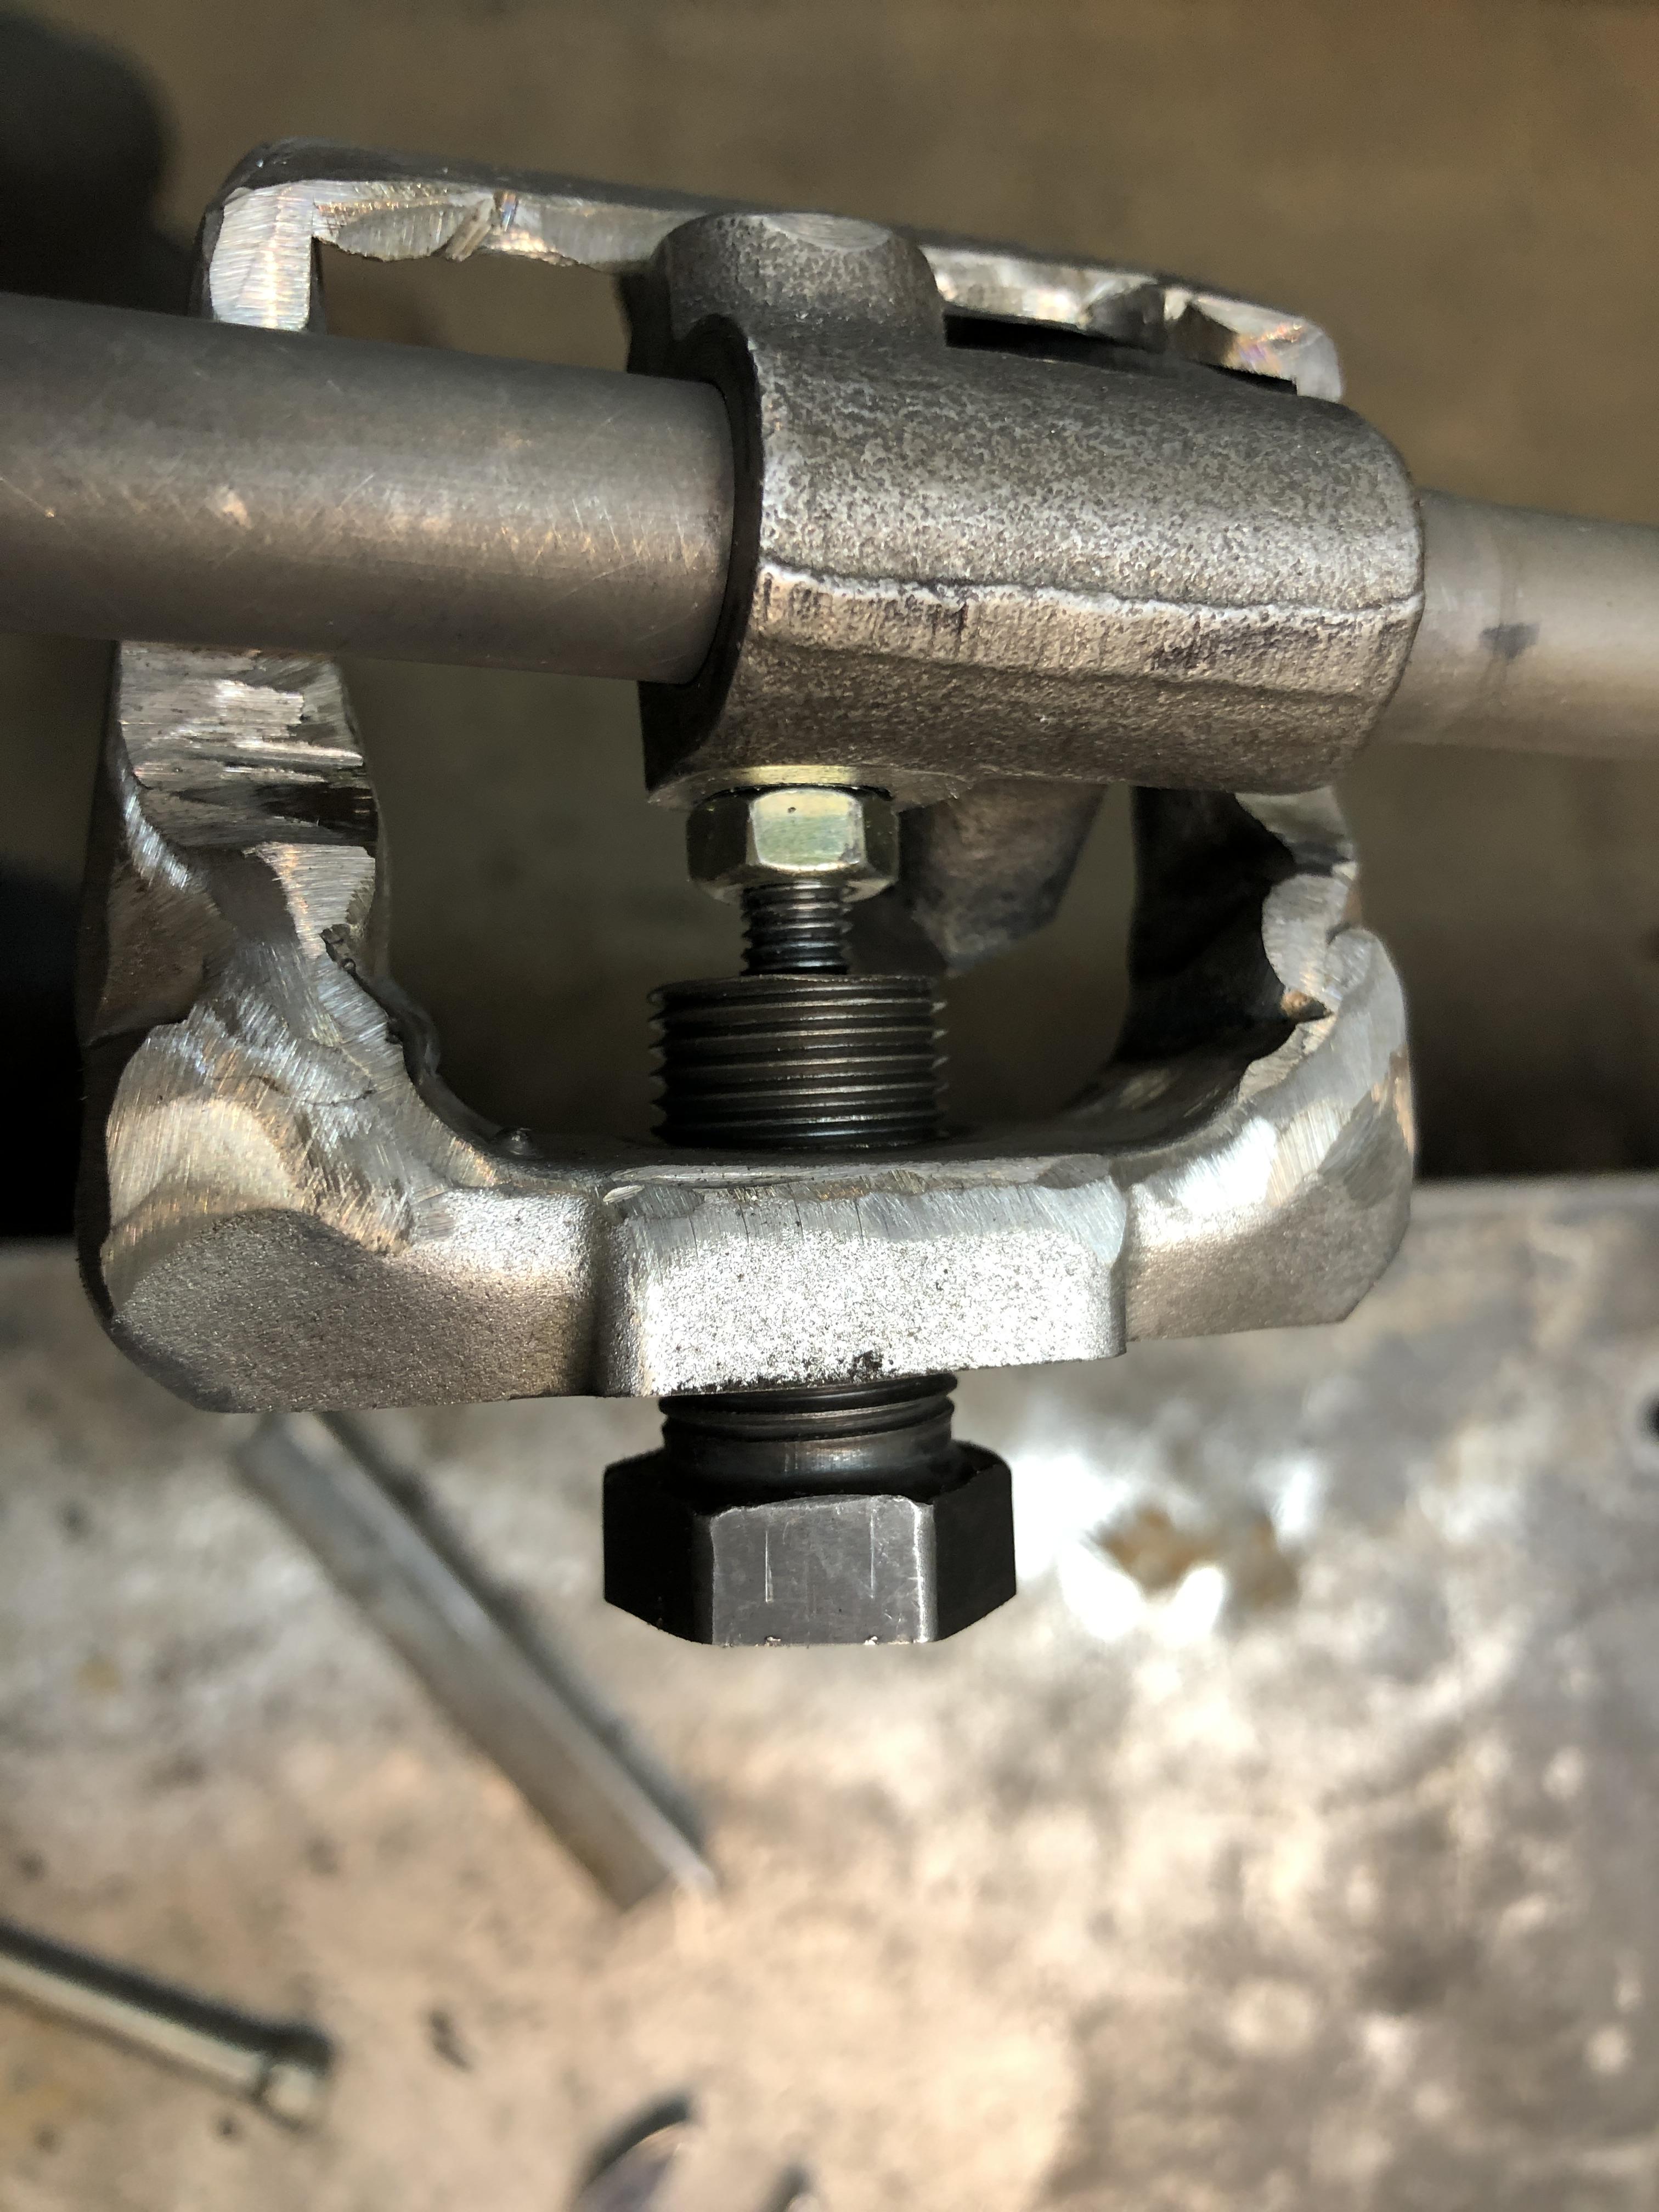
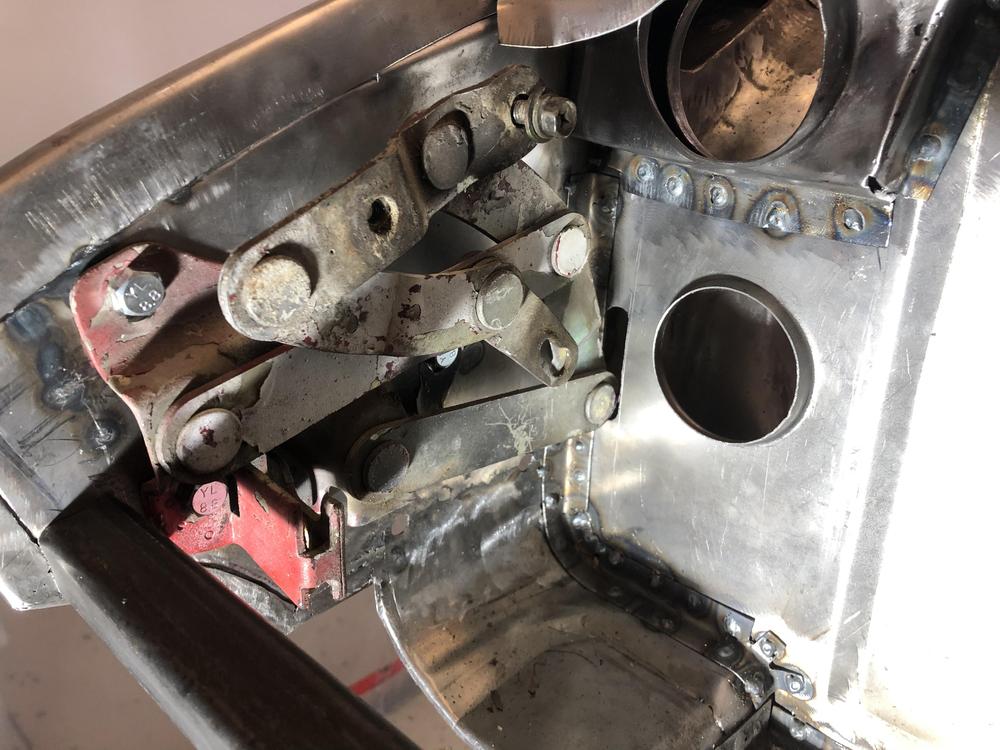
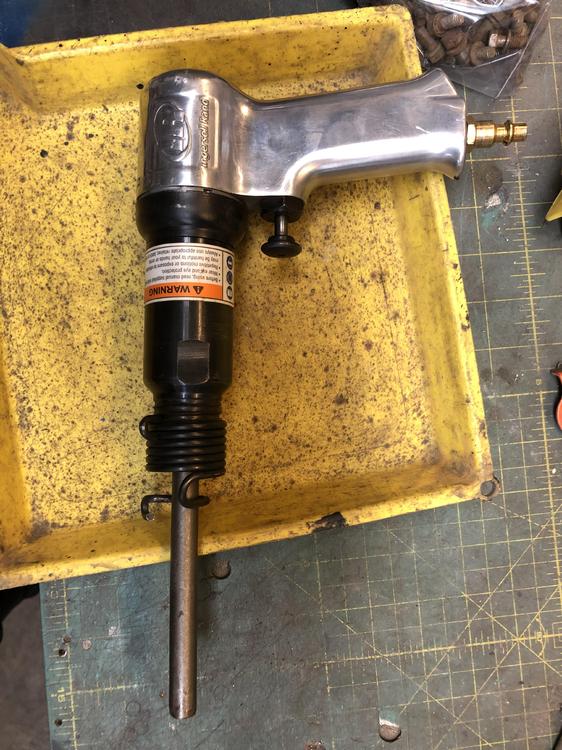
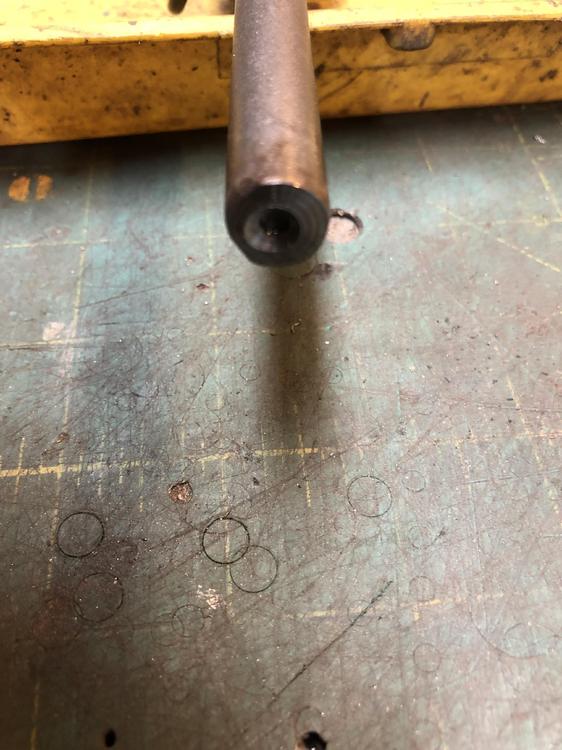
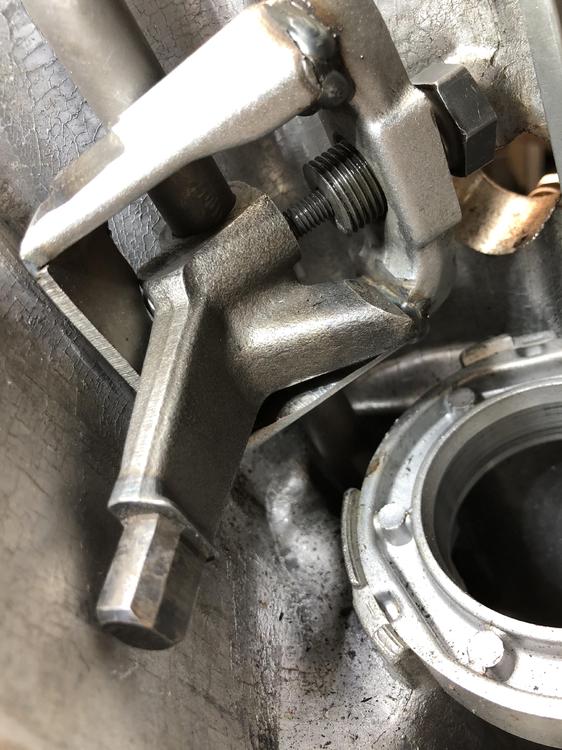
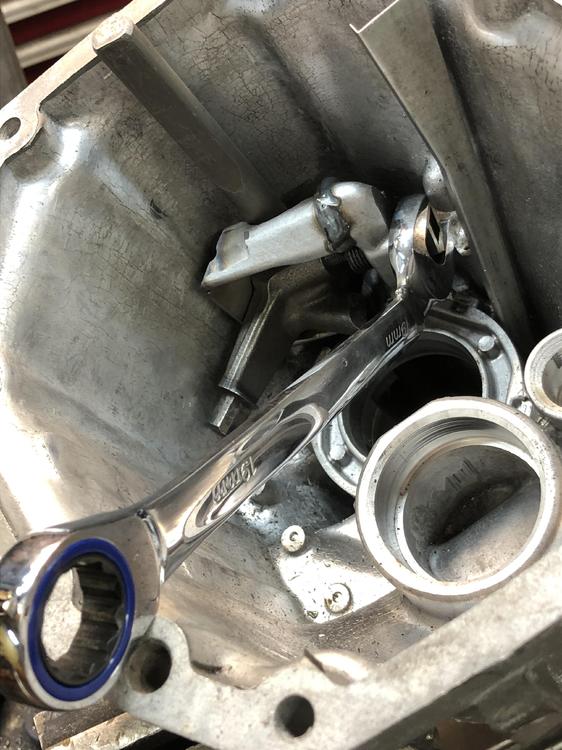
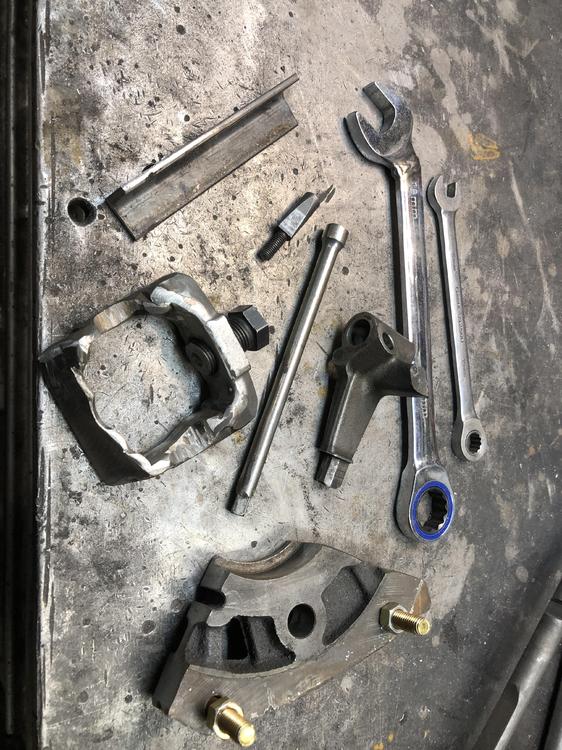
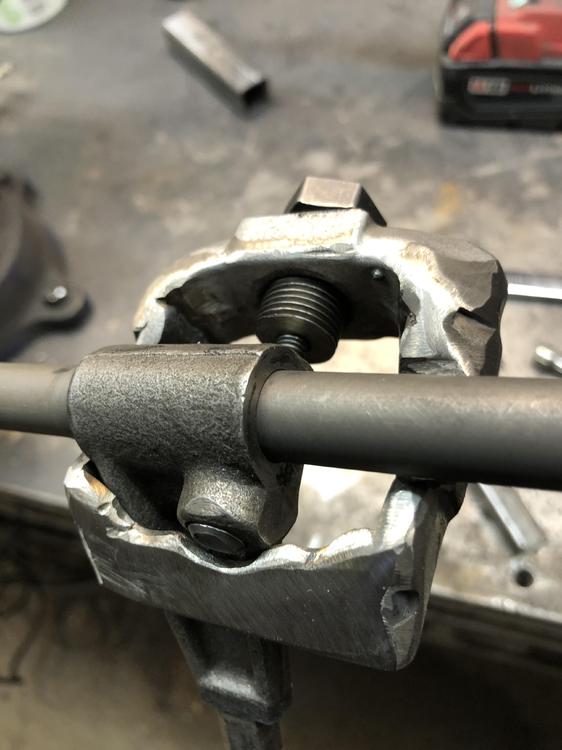
Ok, here is the beast. Bit rough, it has been through many changes on the way to a working model. Here is how it fits and sits on and around the rod and lever arm. And here is it in action inside the tail housing/ The nut on the threaded pusher is 19mm, so had to make a custom bend on this 19mm open end wrench to allow access and at least 1/6 turn. The nut is very close to the raised casting area around the reverse lockout assembly hole in the case. Had to get the length of this pusher bolt just right to allow you to put it on the wedge bolt tip and still get you enough room to push it off. The tail housing without this reverse lockout thingy would have much more room. You might even get a box end wrench on it. Here is the SFT’s for the project The bottom chunk is the part of an intermediate plate from a junked 4 speed. It has the hole for the end of the shift rod. Helps to keep the shift rod supported if you using the 1/4 socket extension whacking method to remove the wedge pin. I still needed a firm support behind the wedge pin area to the case to prevent the rod from just flexing when you hit with the sledge. That is what the 3/4” wide 1/8 thick angle iron piece does. Sits in there real nice. Design wise, the biggest change I had to make to the original tie rod end puller was to cut the legs off close to the threaded end and shift the whole body down about 3/16” then re-weld. This is due to the fact that the wedge pin sit below the centerline of the shift rod by about that much. Your threaded pusher bolt has to be in-line with wedge bolt or you risk bending, well actually, snapping it off. You will be applying considerable compression on that little M6 threaded pin.The 1/4 hole in the end of the pusher bolt makes sure the pin end stays straight and engaged. Now the real test is to try it on fresh untouched pin in another housing. This test pin was never re-inserted with the same pressure as it had from the factory. At least there was zero, and I mean zero signs of rust or pitting, or roughness on the pin. Being bathed in oil its whole lift kept this one clean. If you have a wet rusty one, you’re in for a fight. Heat, penetrating oil, time, the usual.... I still think the “best” approach is to use the pin punch (1/4” socket extension) from outside the case through a hole. Easy on a trans with the reverse lockout, but you’d have to make a hole in the same spot for the earlier ones. I don’t think this such a big deal. We have the exact location from any trans with the reverse lockout, and making NPT threads and plugging it is pretty benign. 1/4 or 3/8 NPT is a plenty big hole. Or you spend a day or two making a custom puller. Your choice.

 1 point
 -
I'm not far from their headquarters in Anniston Alabama, 30 minute drive. You need me to go rough them up a little? I'll take a 2x4 upside somebody's head. I've been able to buy from their ebay store really cheap prices too. They supply just about all the carpet kits in the States. I hope they get your order right and make you a happy customer. Cliff1 point
-
1 pointI spent the day cleaning grounds and power connectors and worked my way around to the dim P/S headlight, I cleaned every connector and couldn't figure out why it was still dim. There was nothing left to check so I had a look at the fuses, Bingo, all of them were original and so oxidized that there wasn't much current passing through. Replaced all of the fuses and it fixed the headlights but blew the ignition relay, water had leaked into it at some time in the past and it was ready to pop, I guess it wasn't use to full power. Whiteheads had one to sell so I'll give that a go tomorrow and hope the next weakest link doesn't show up. So the car has a Stage 2 DatsunSpirt engine with only 5,000 miles on it, the car itself has 95,000 mi. New 16" Panasport wheels with Toyo Proxies , new complete exhaust system but WAY too loud so I'll install a resonator and see if that will bring it down. The 3.54 diff has been overhauled and a full poly bushing kit was installed. I think we'll be removing most of the poly and replacing with rubber. Tim has lots of plans and ideas for the car but they are evolving and changing from day to day, I have encouraged him to just drive the car as it is for the spring, summer, fall season, then in Oct. we'll sit down and draw up a plan, I have a feeling his list of wants are going to be very different in the fall. He has wanted a Z since he was a kid but has never driven one so this is going to be lots fun.


 1 point
 -
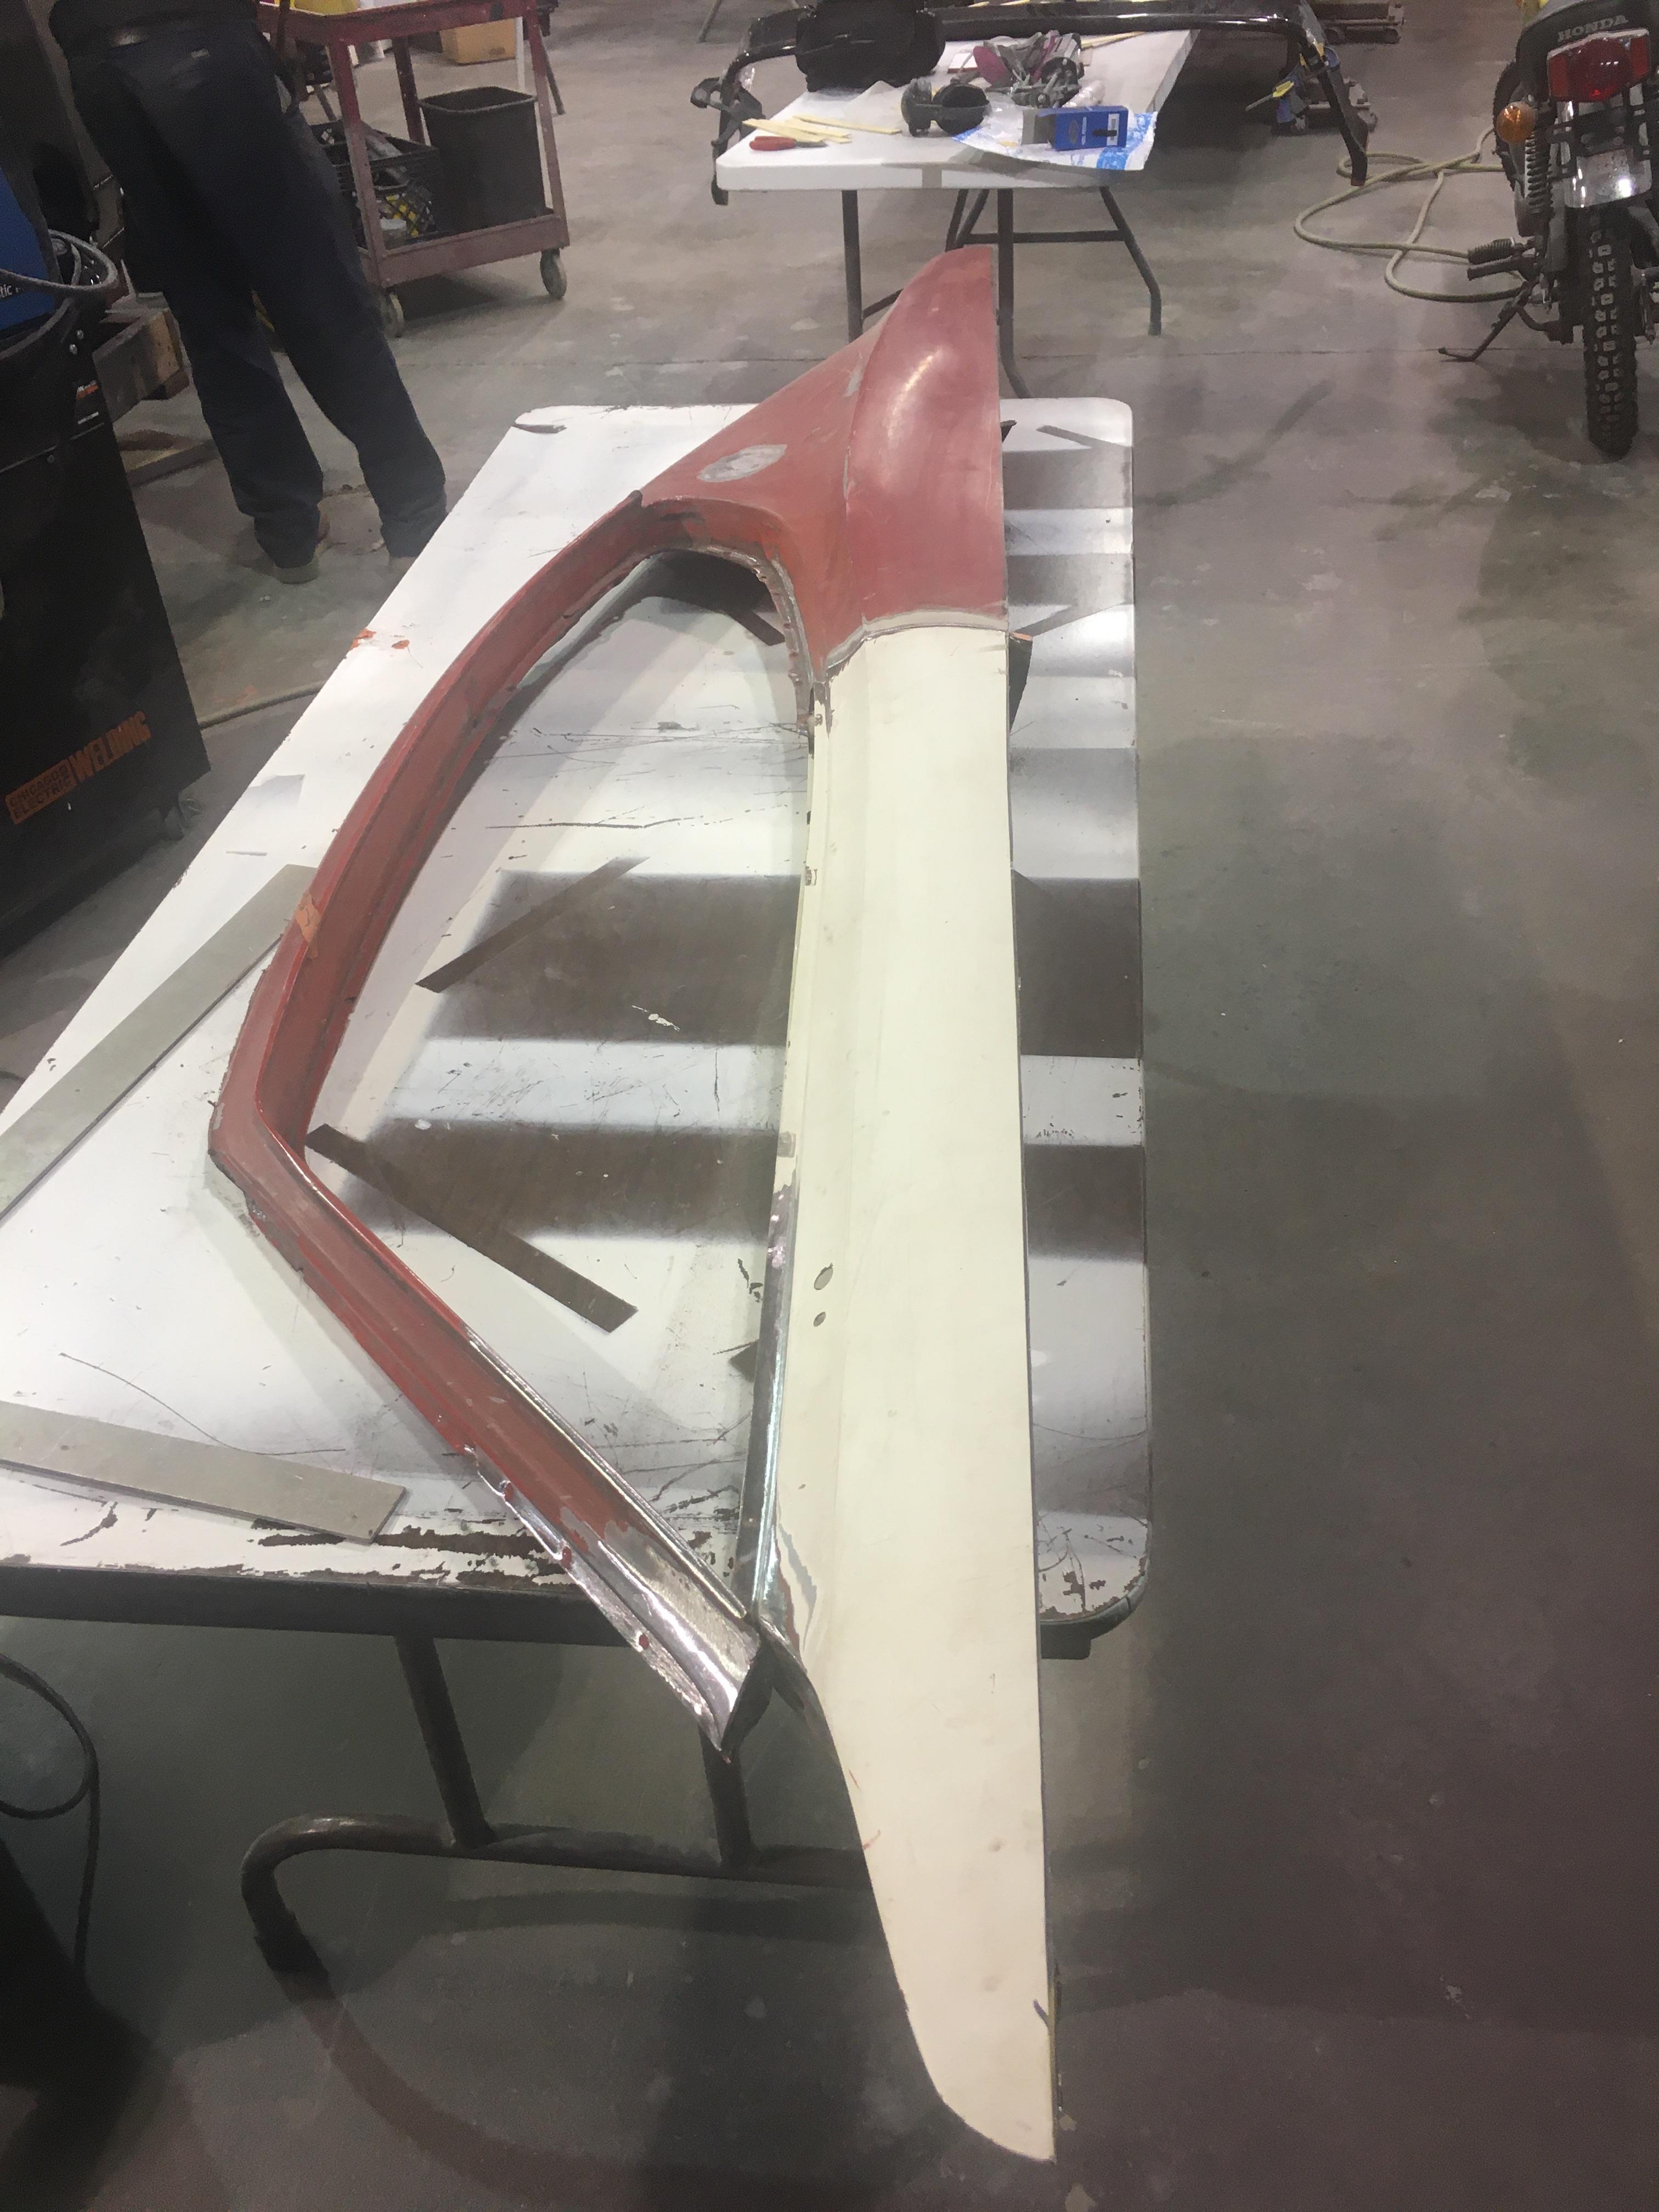
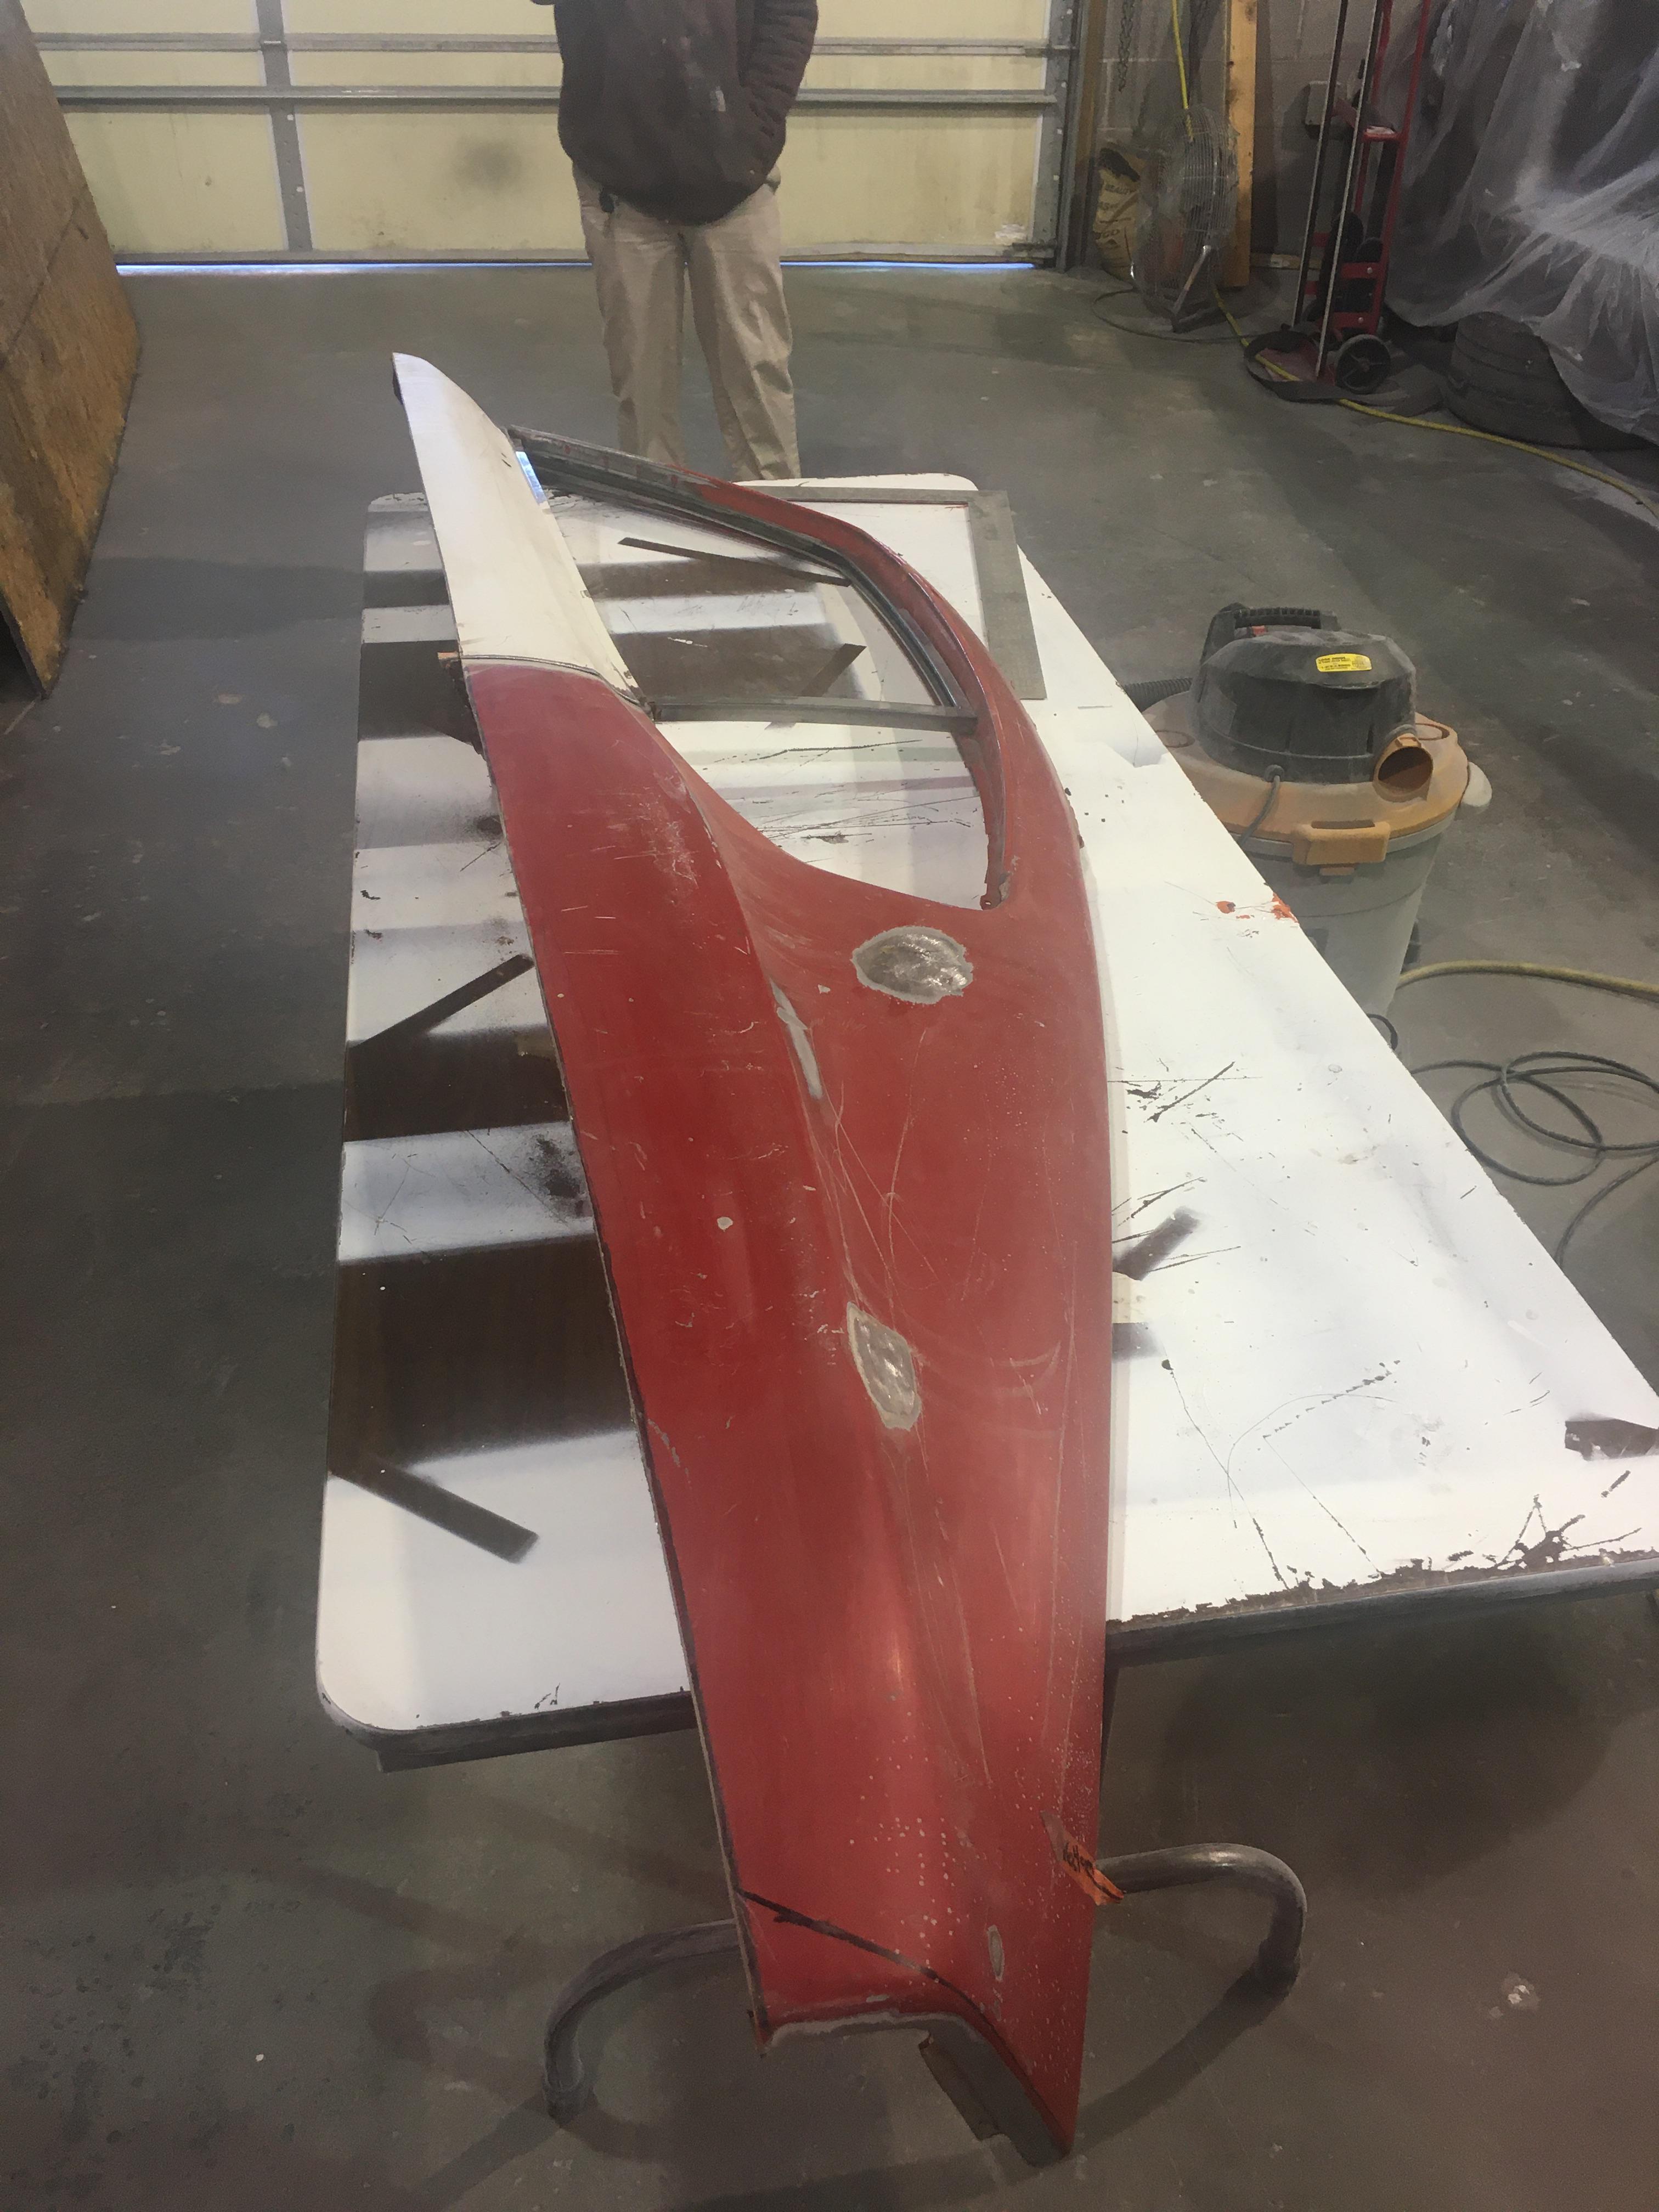
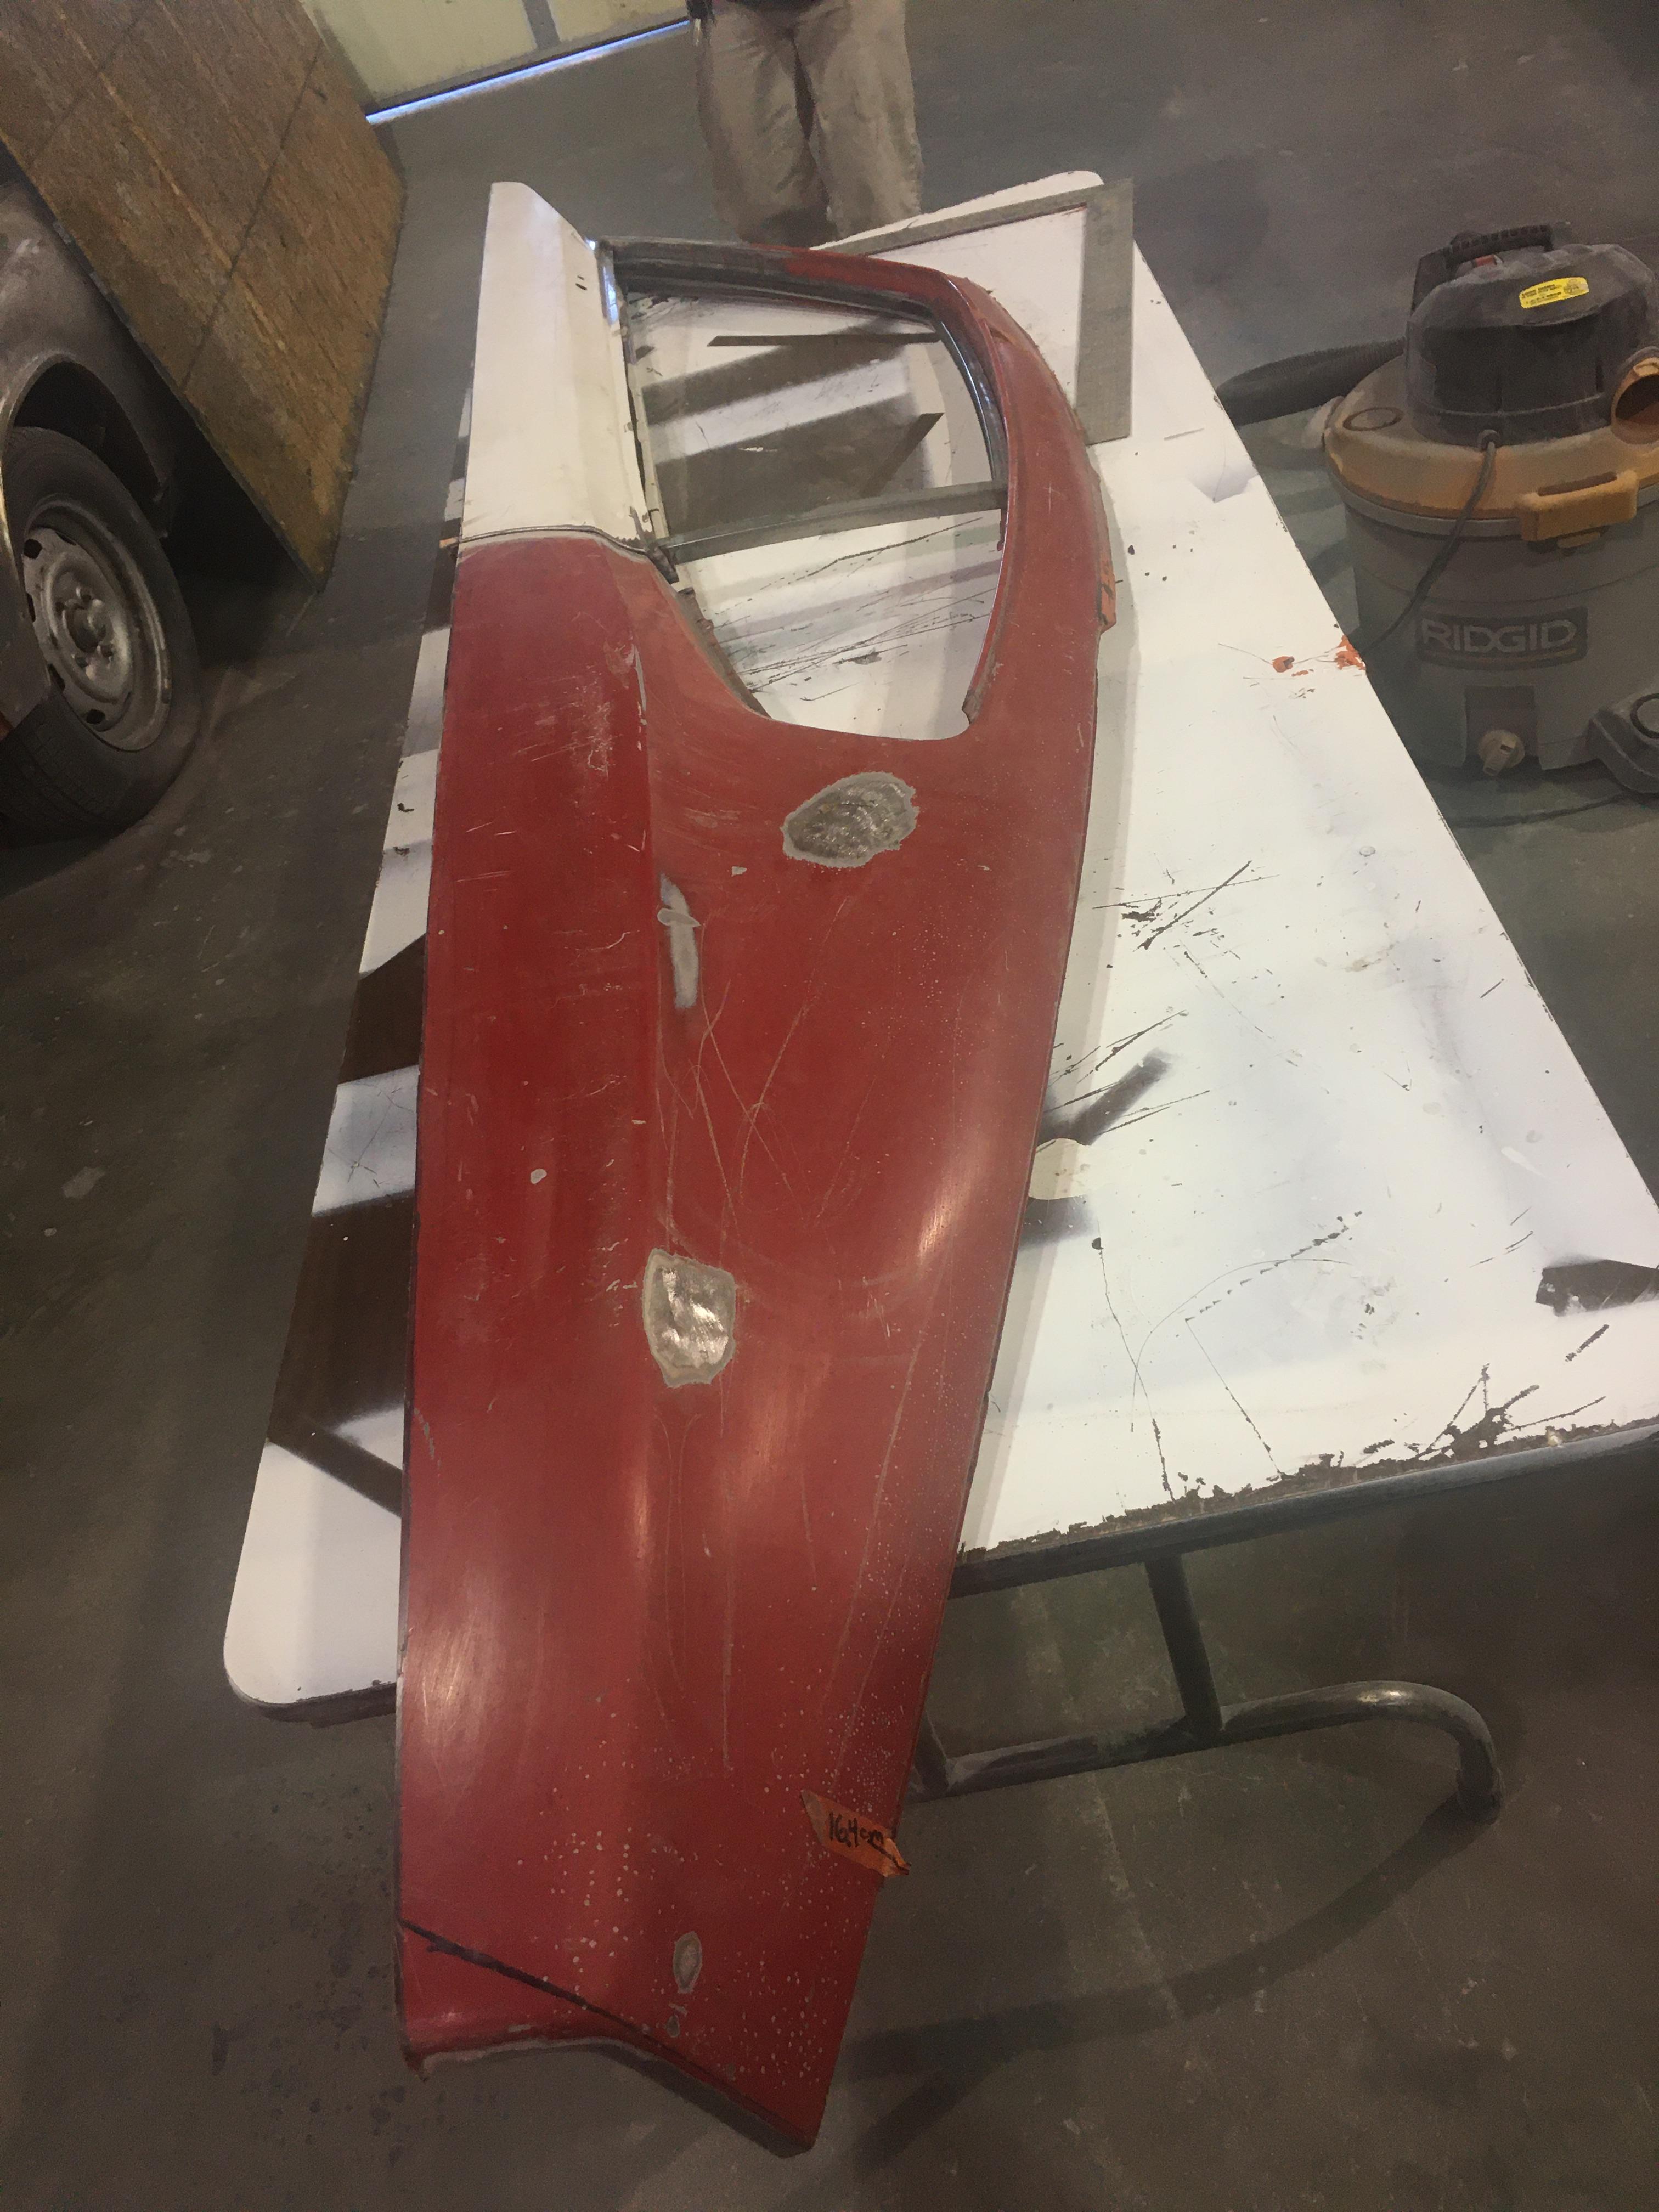
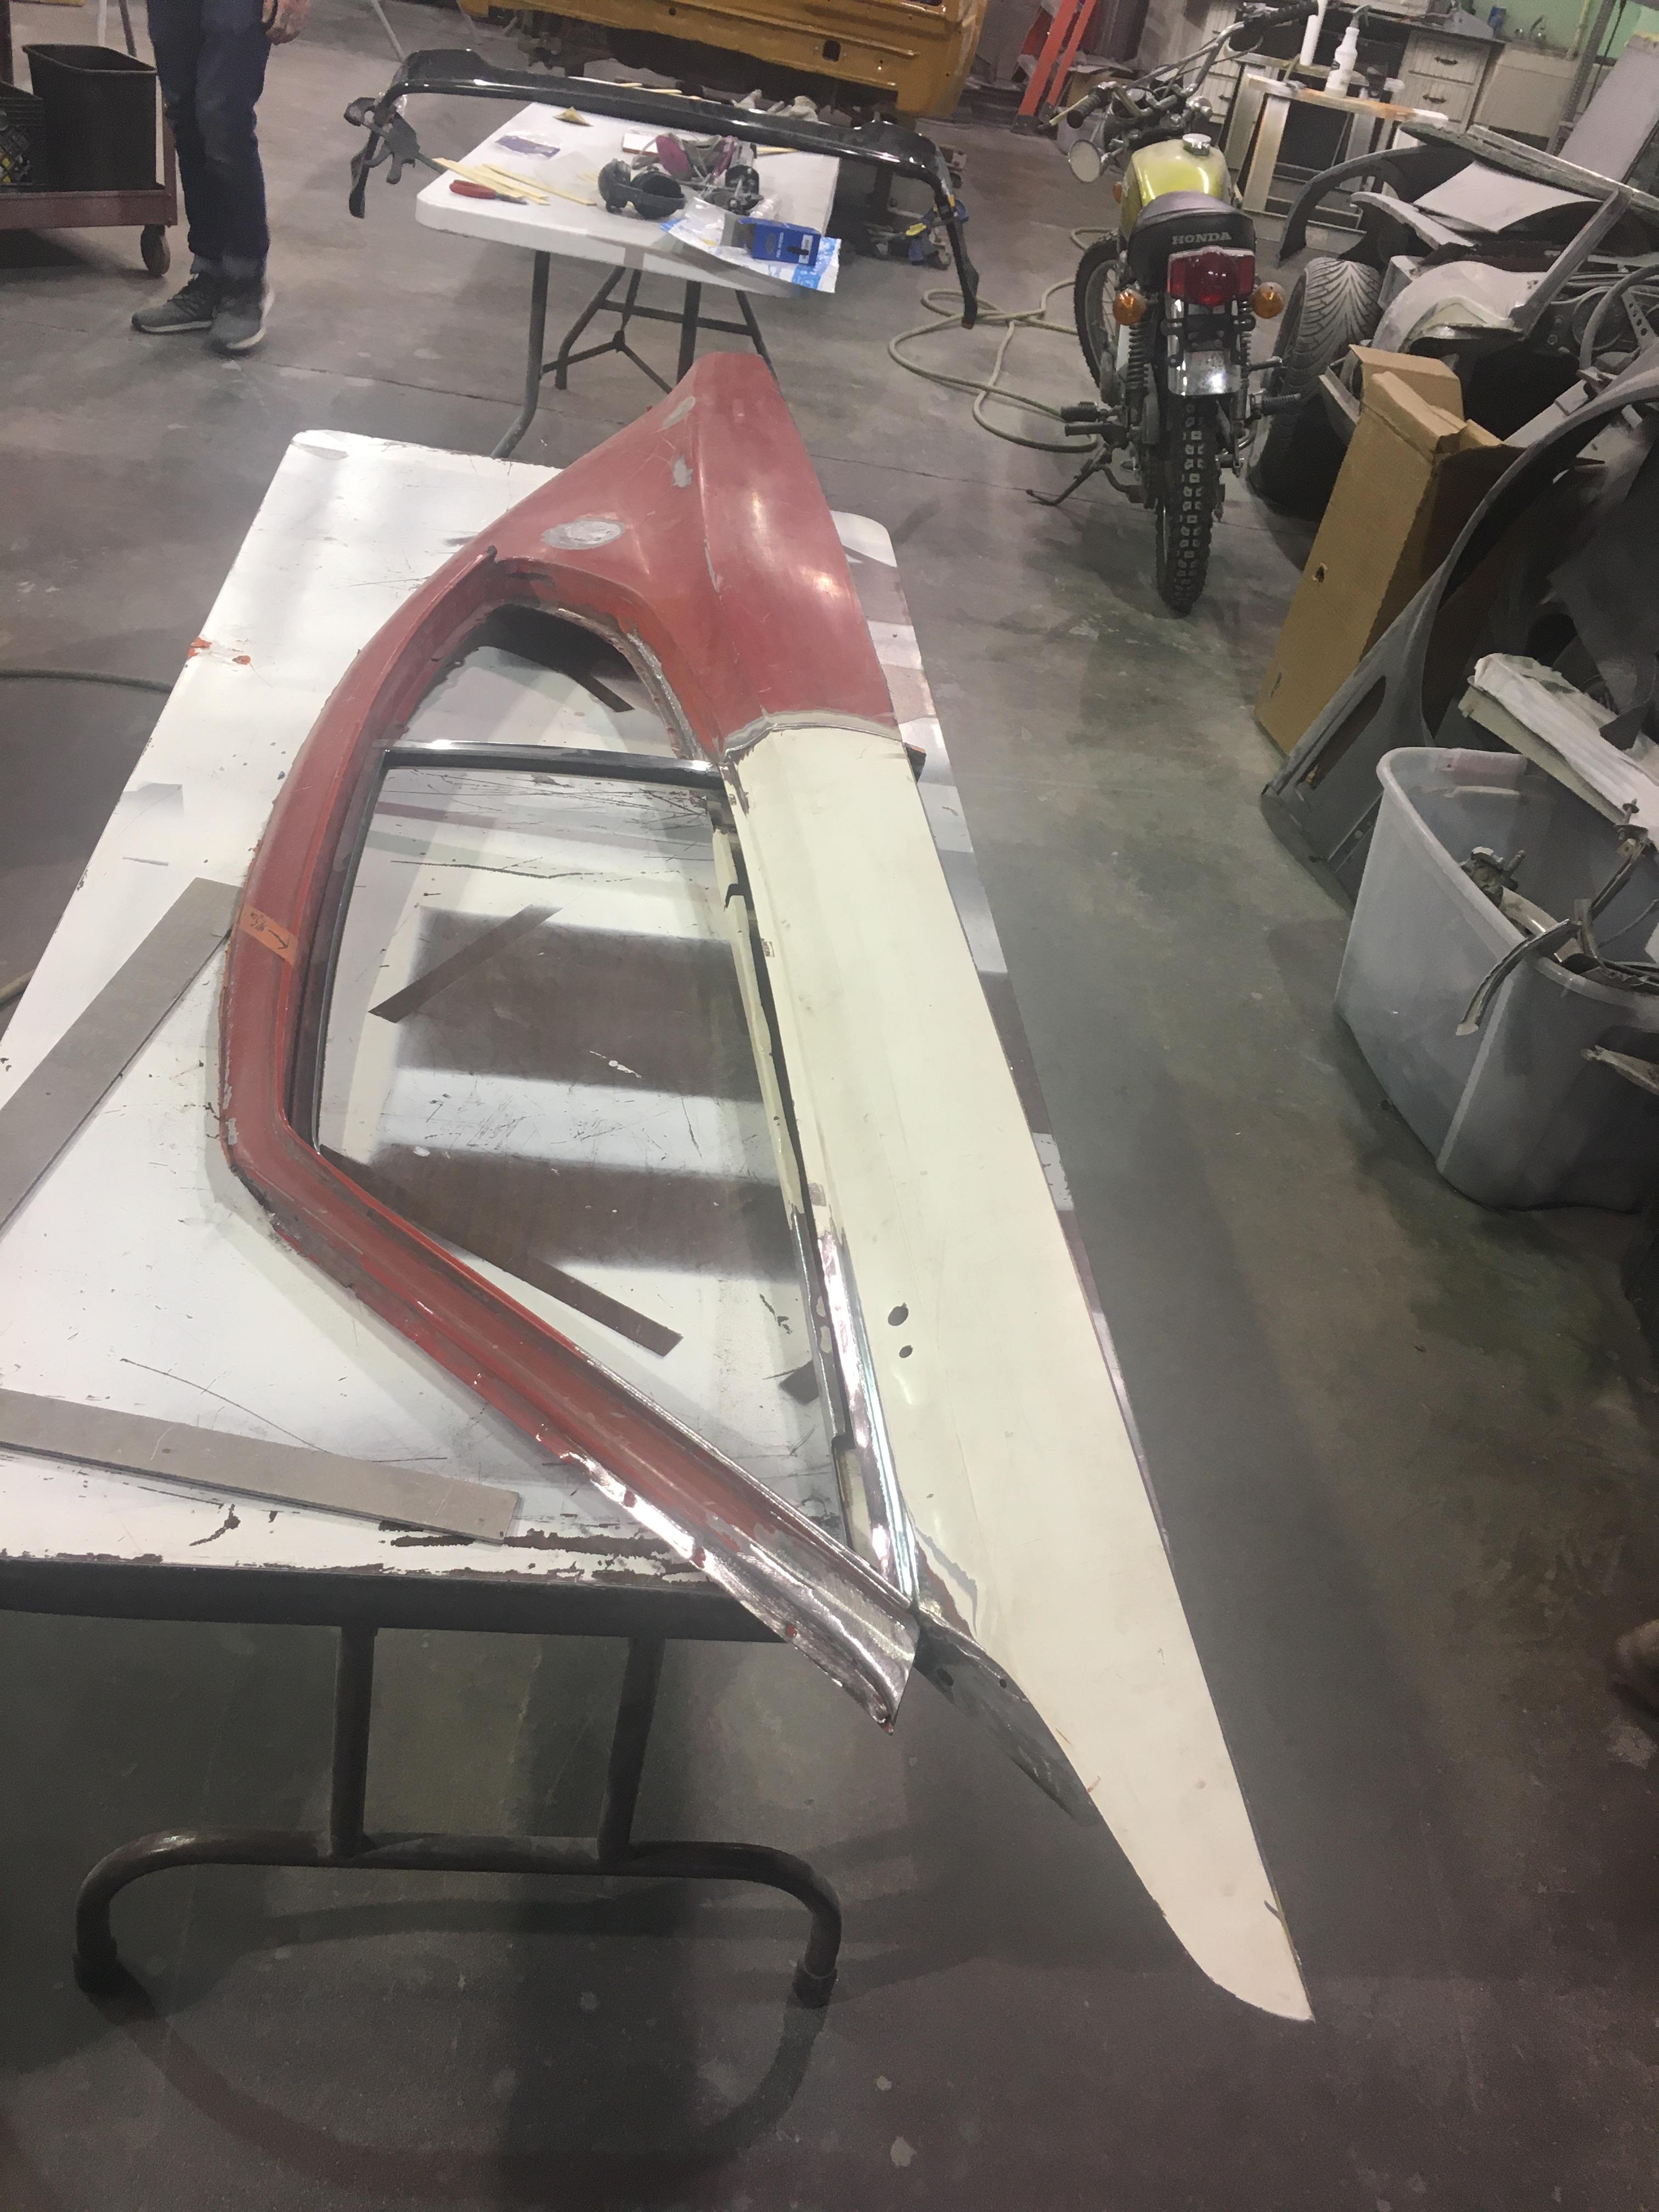
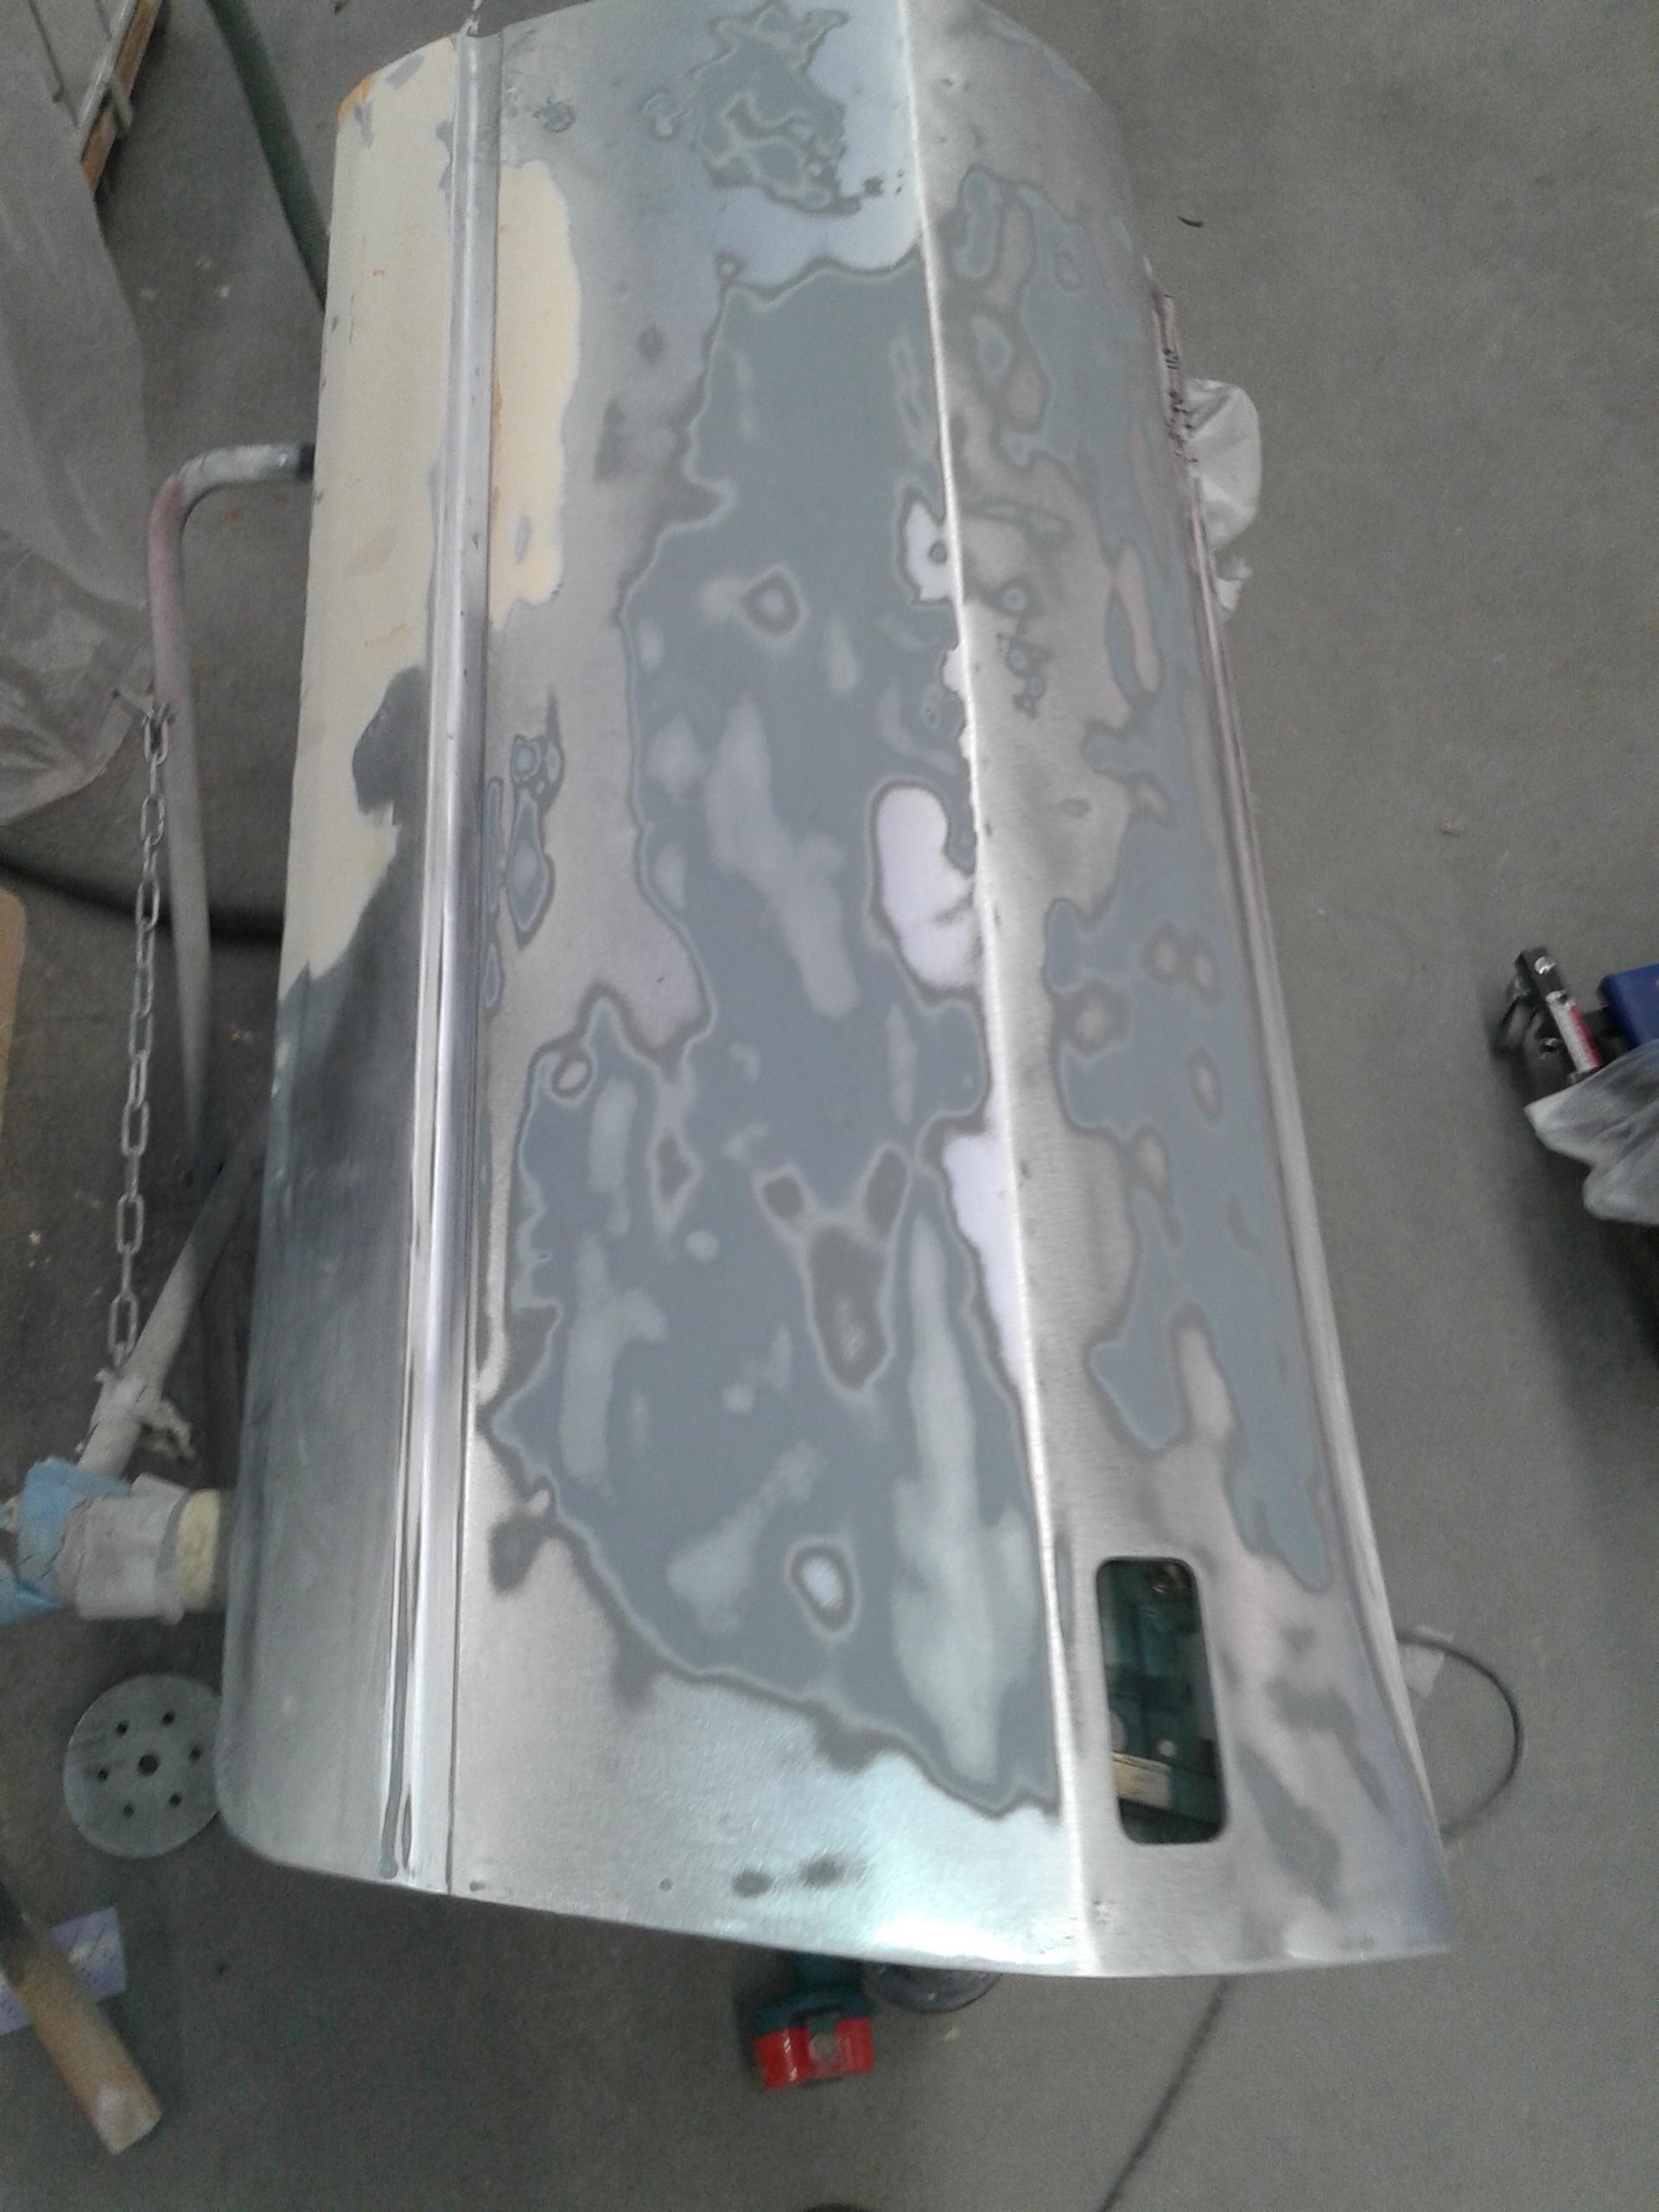
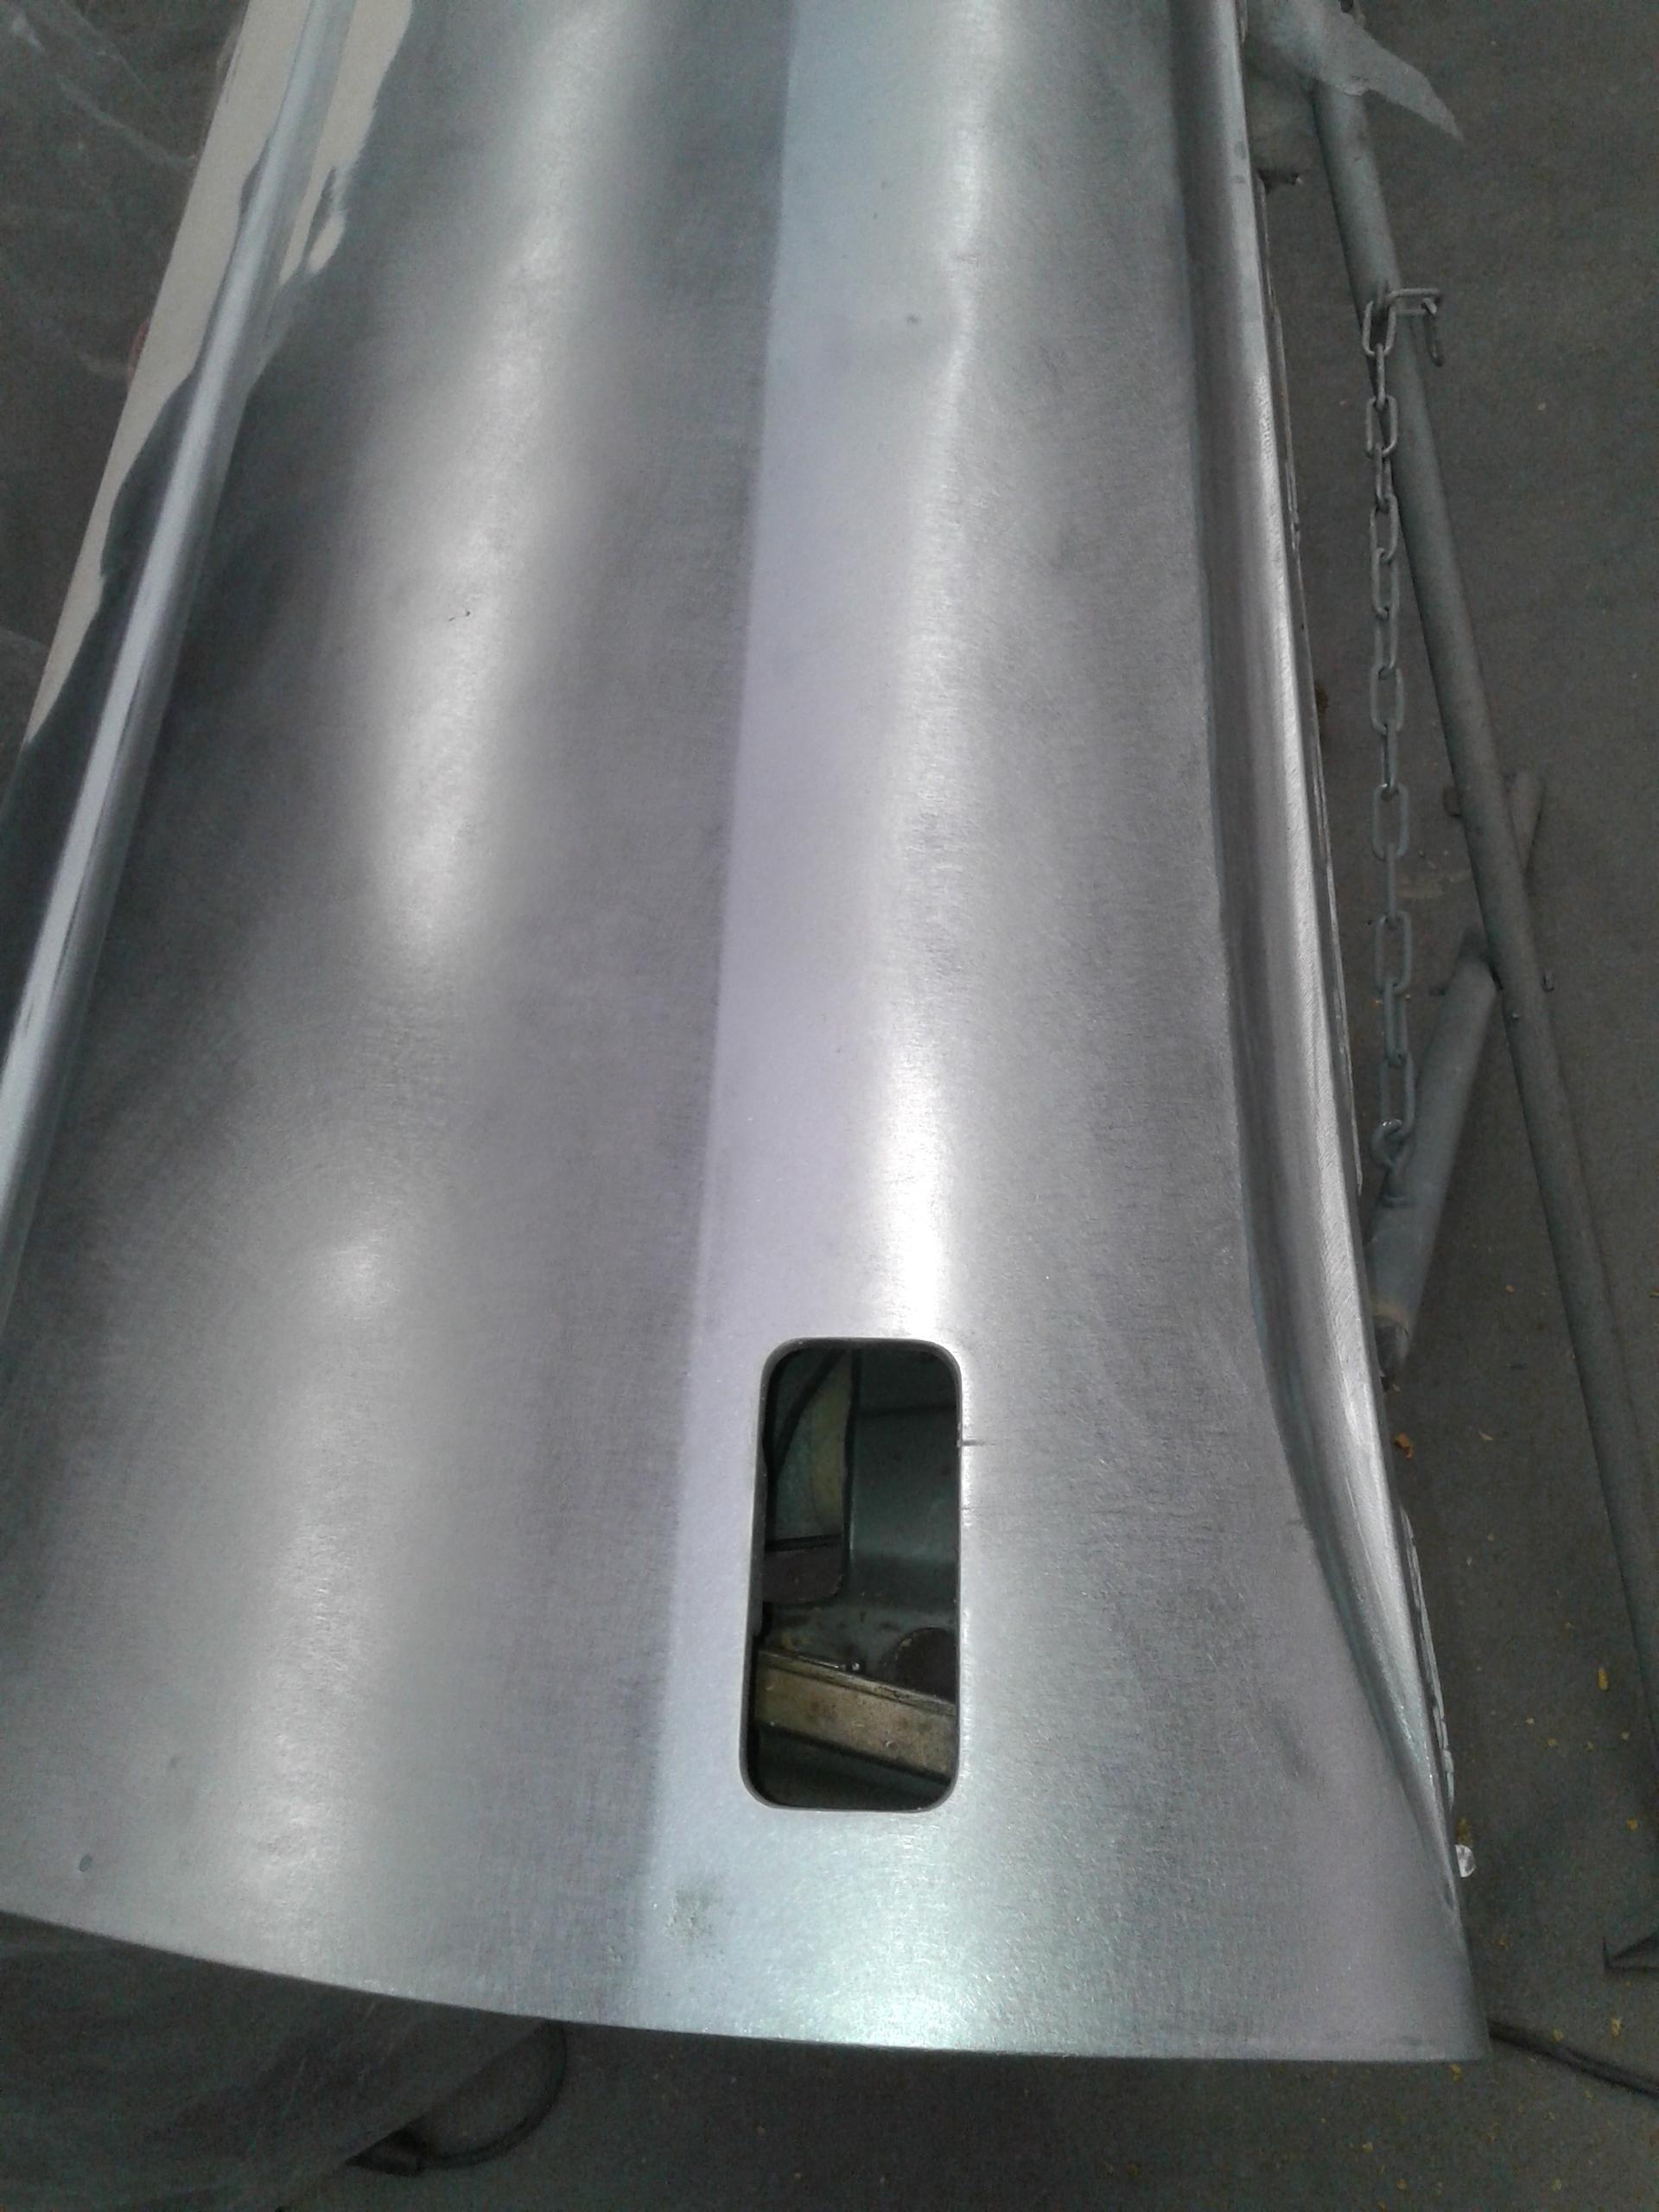
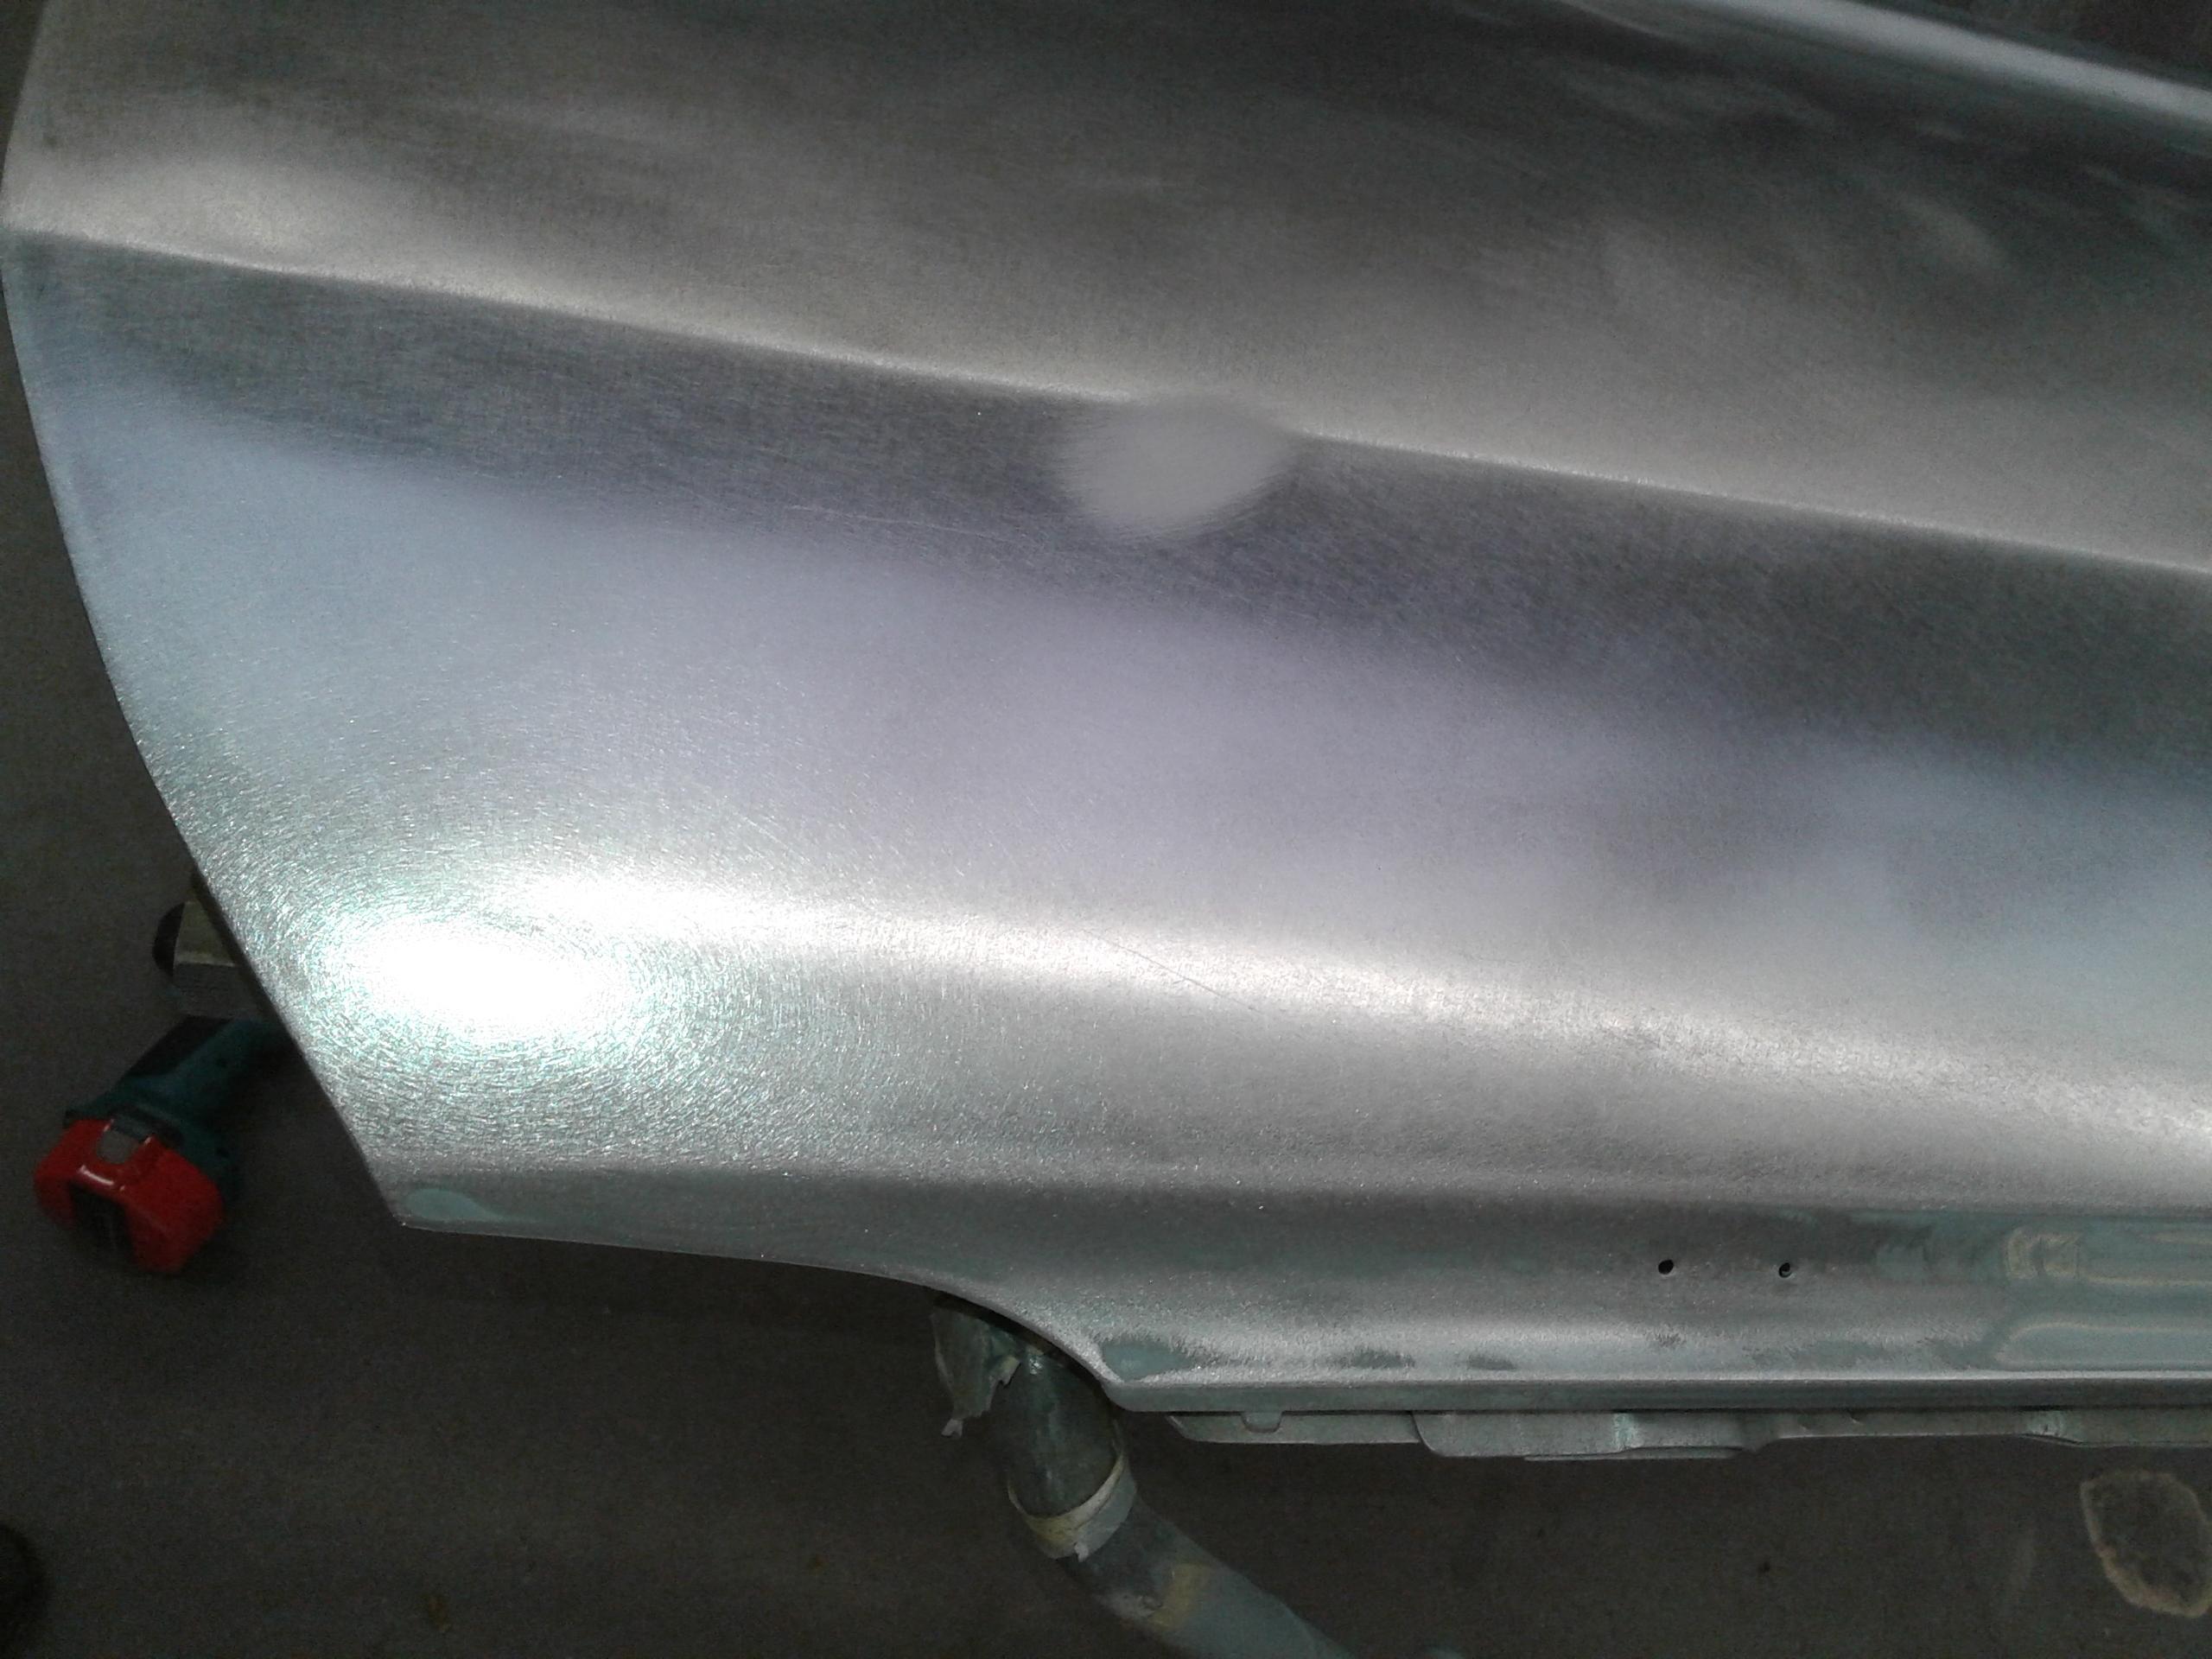
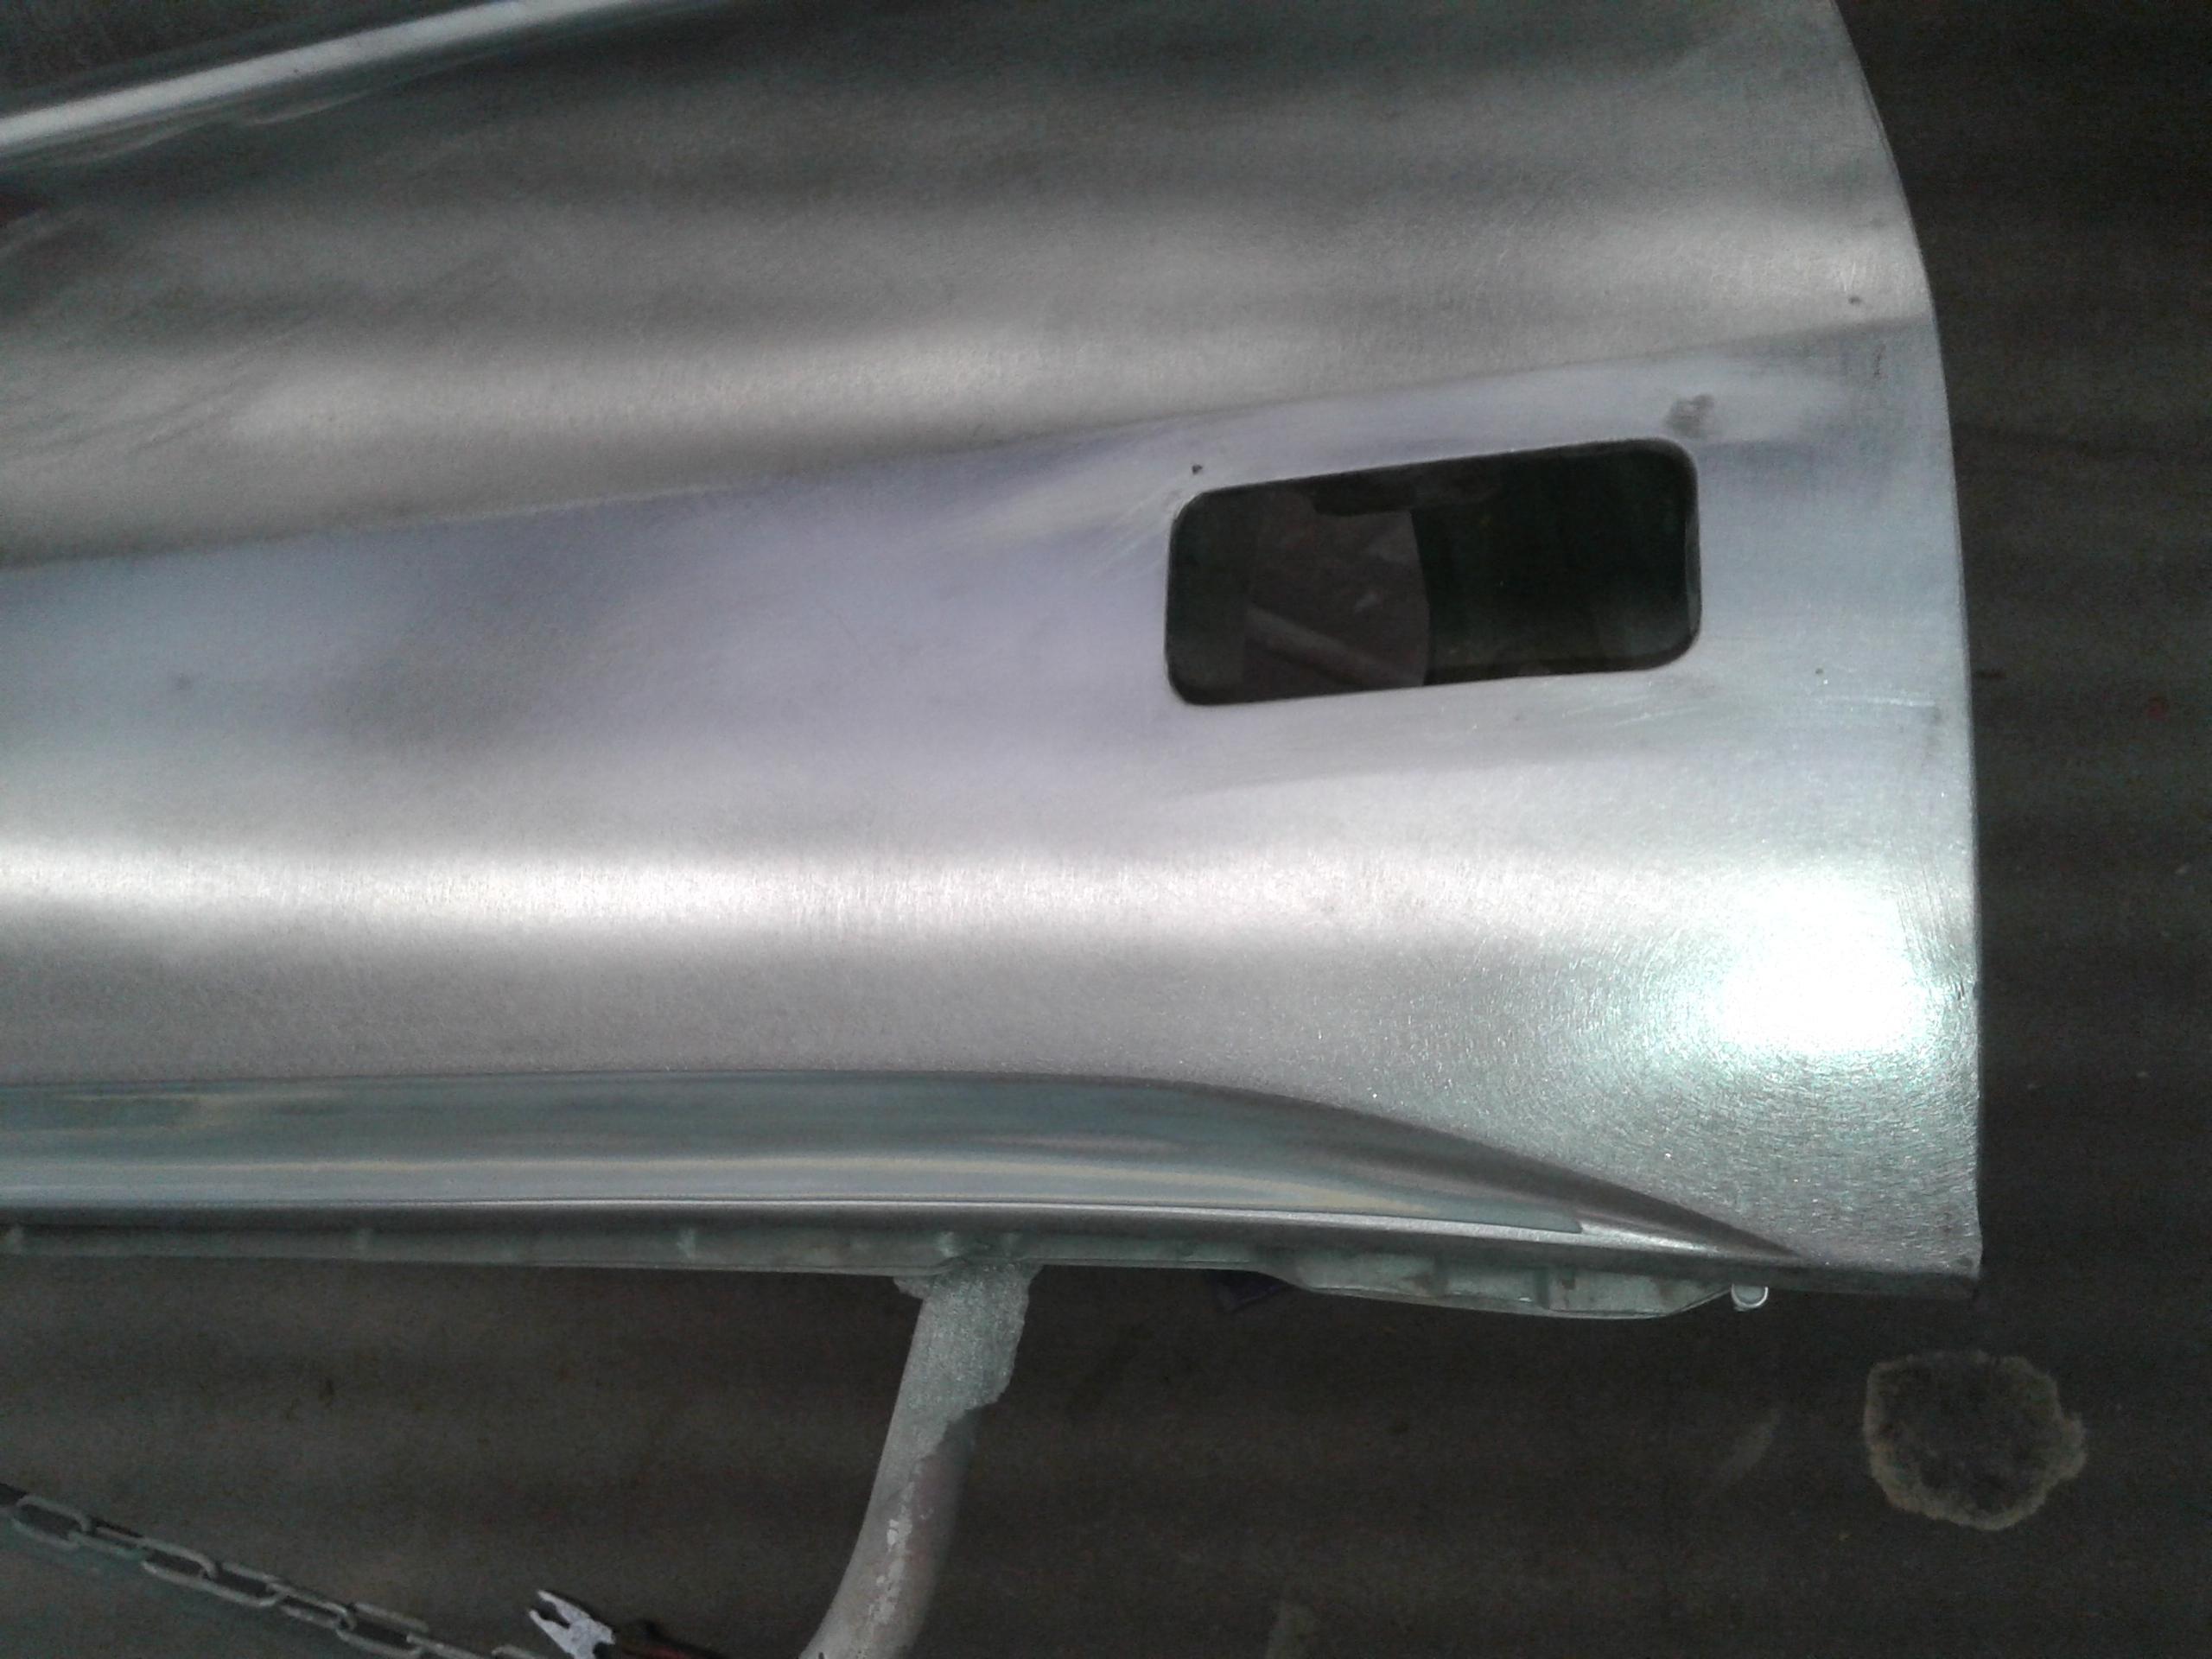
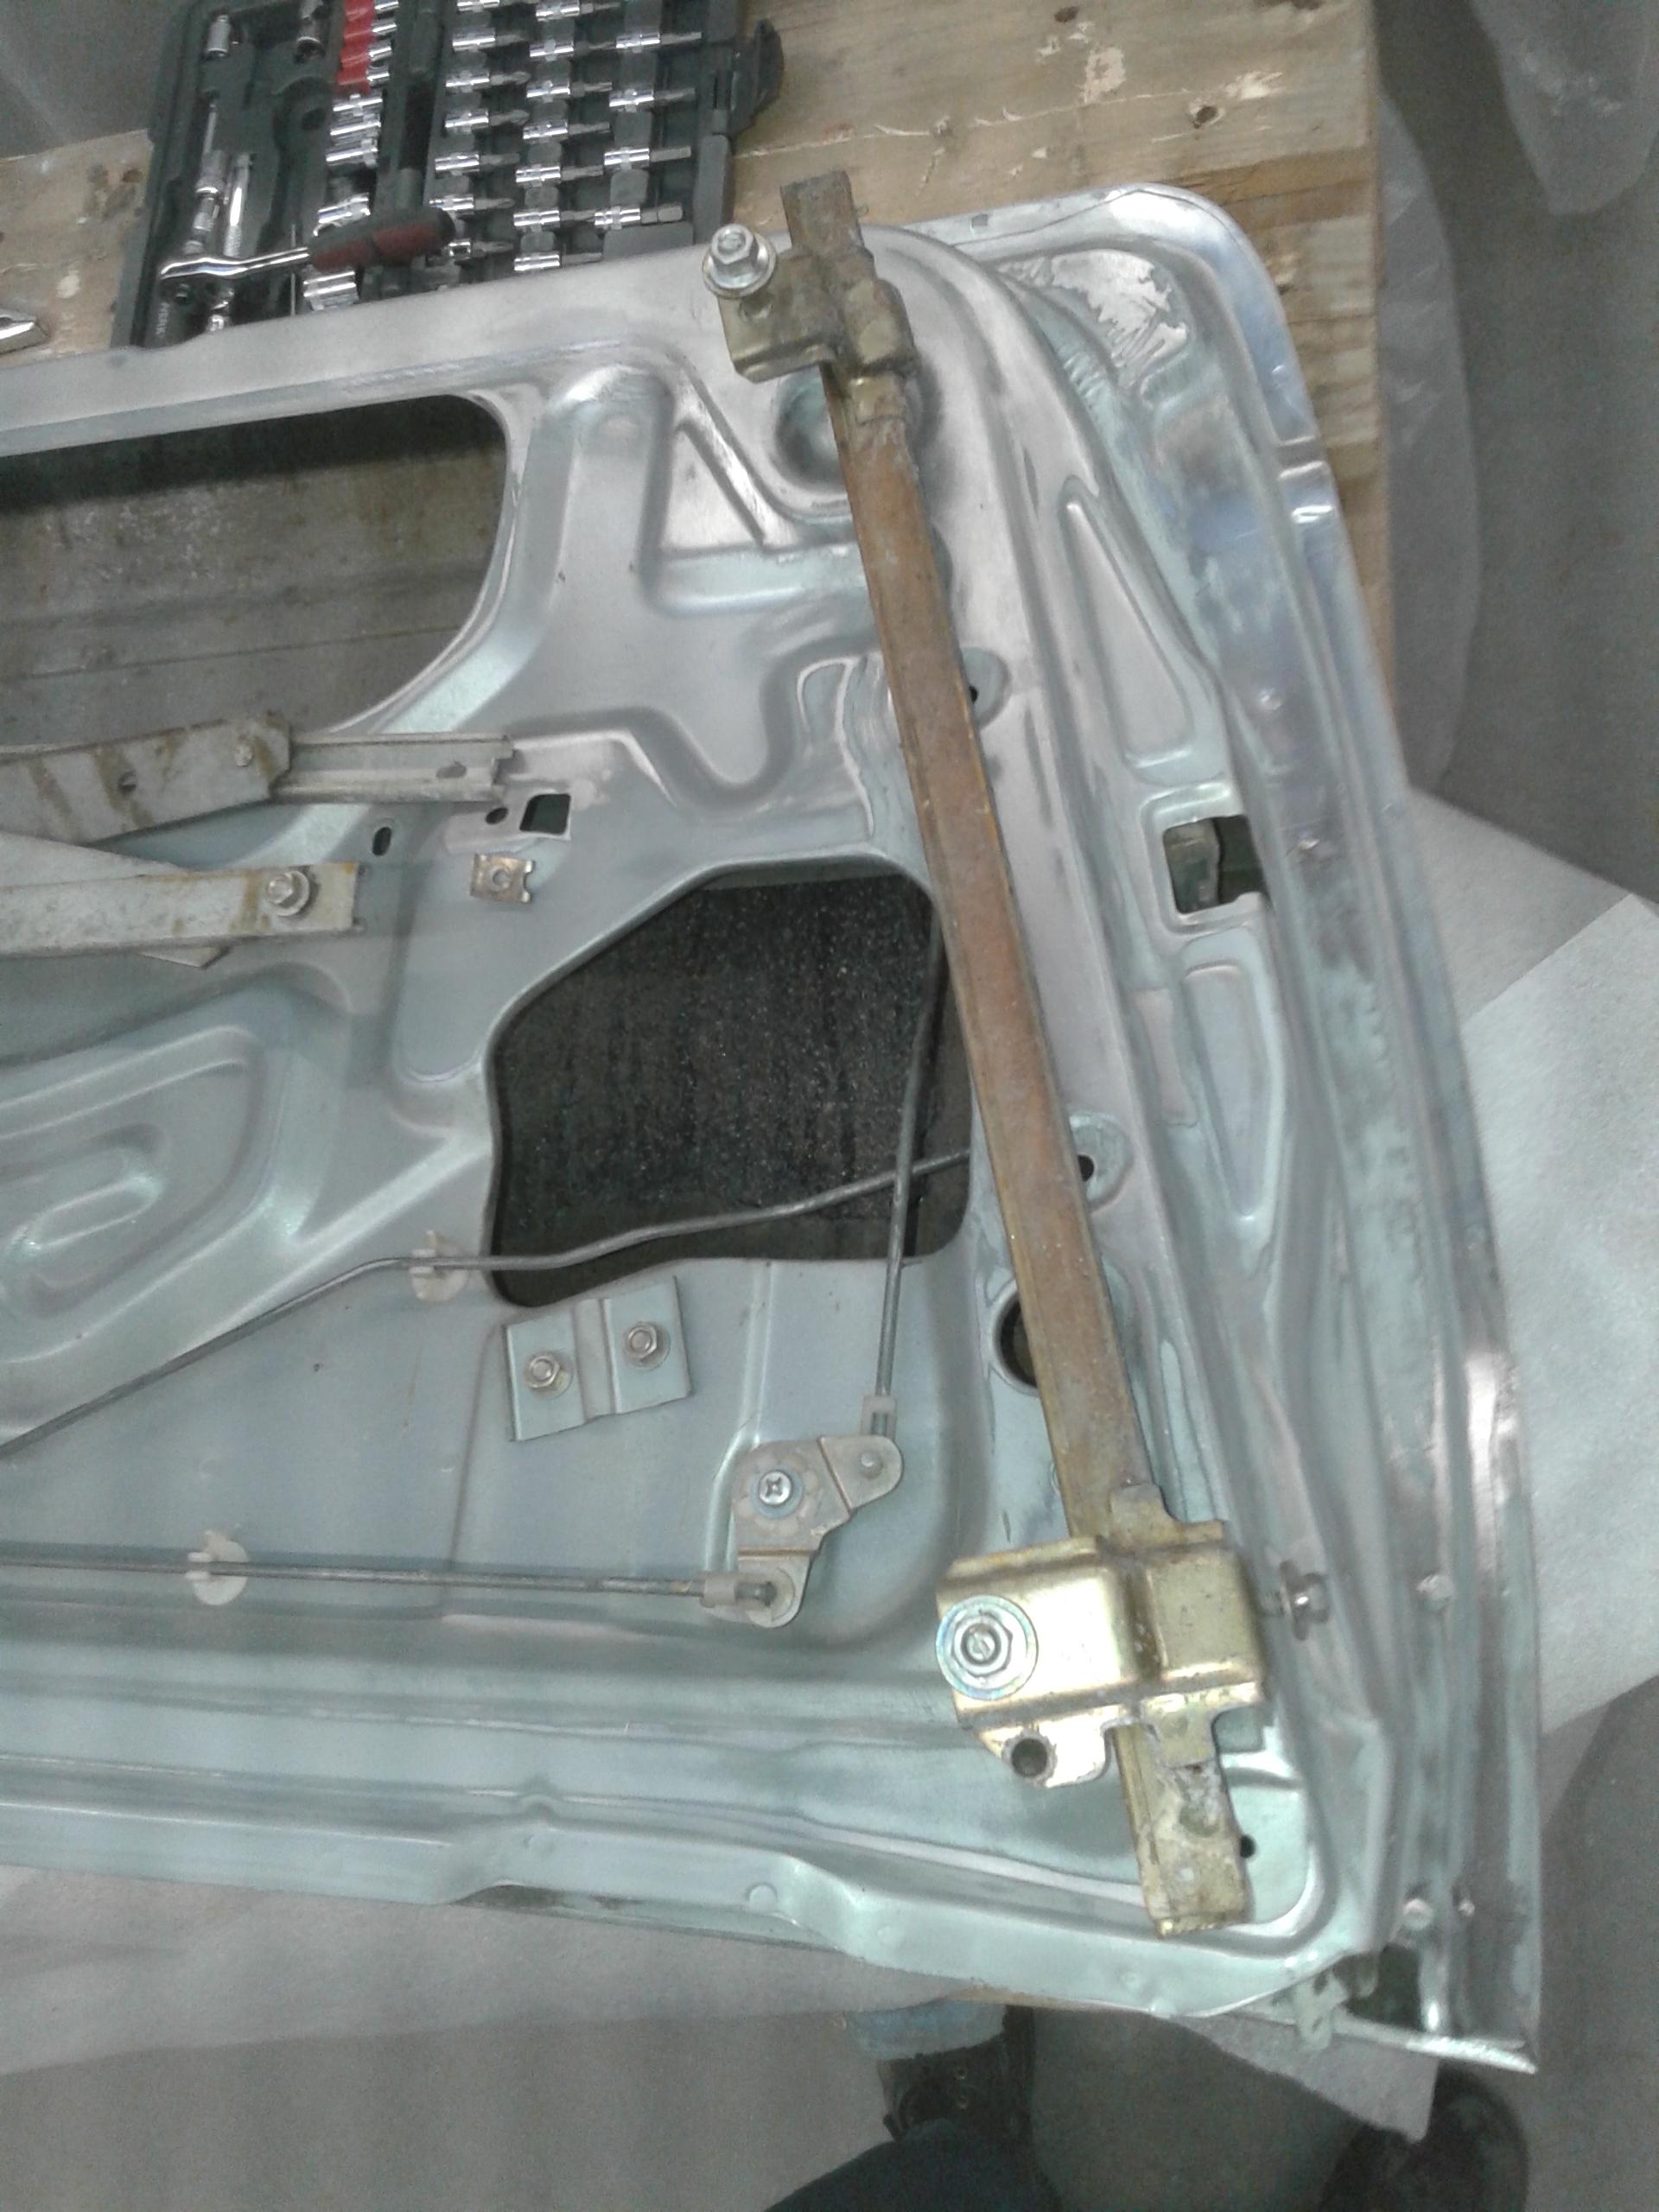
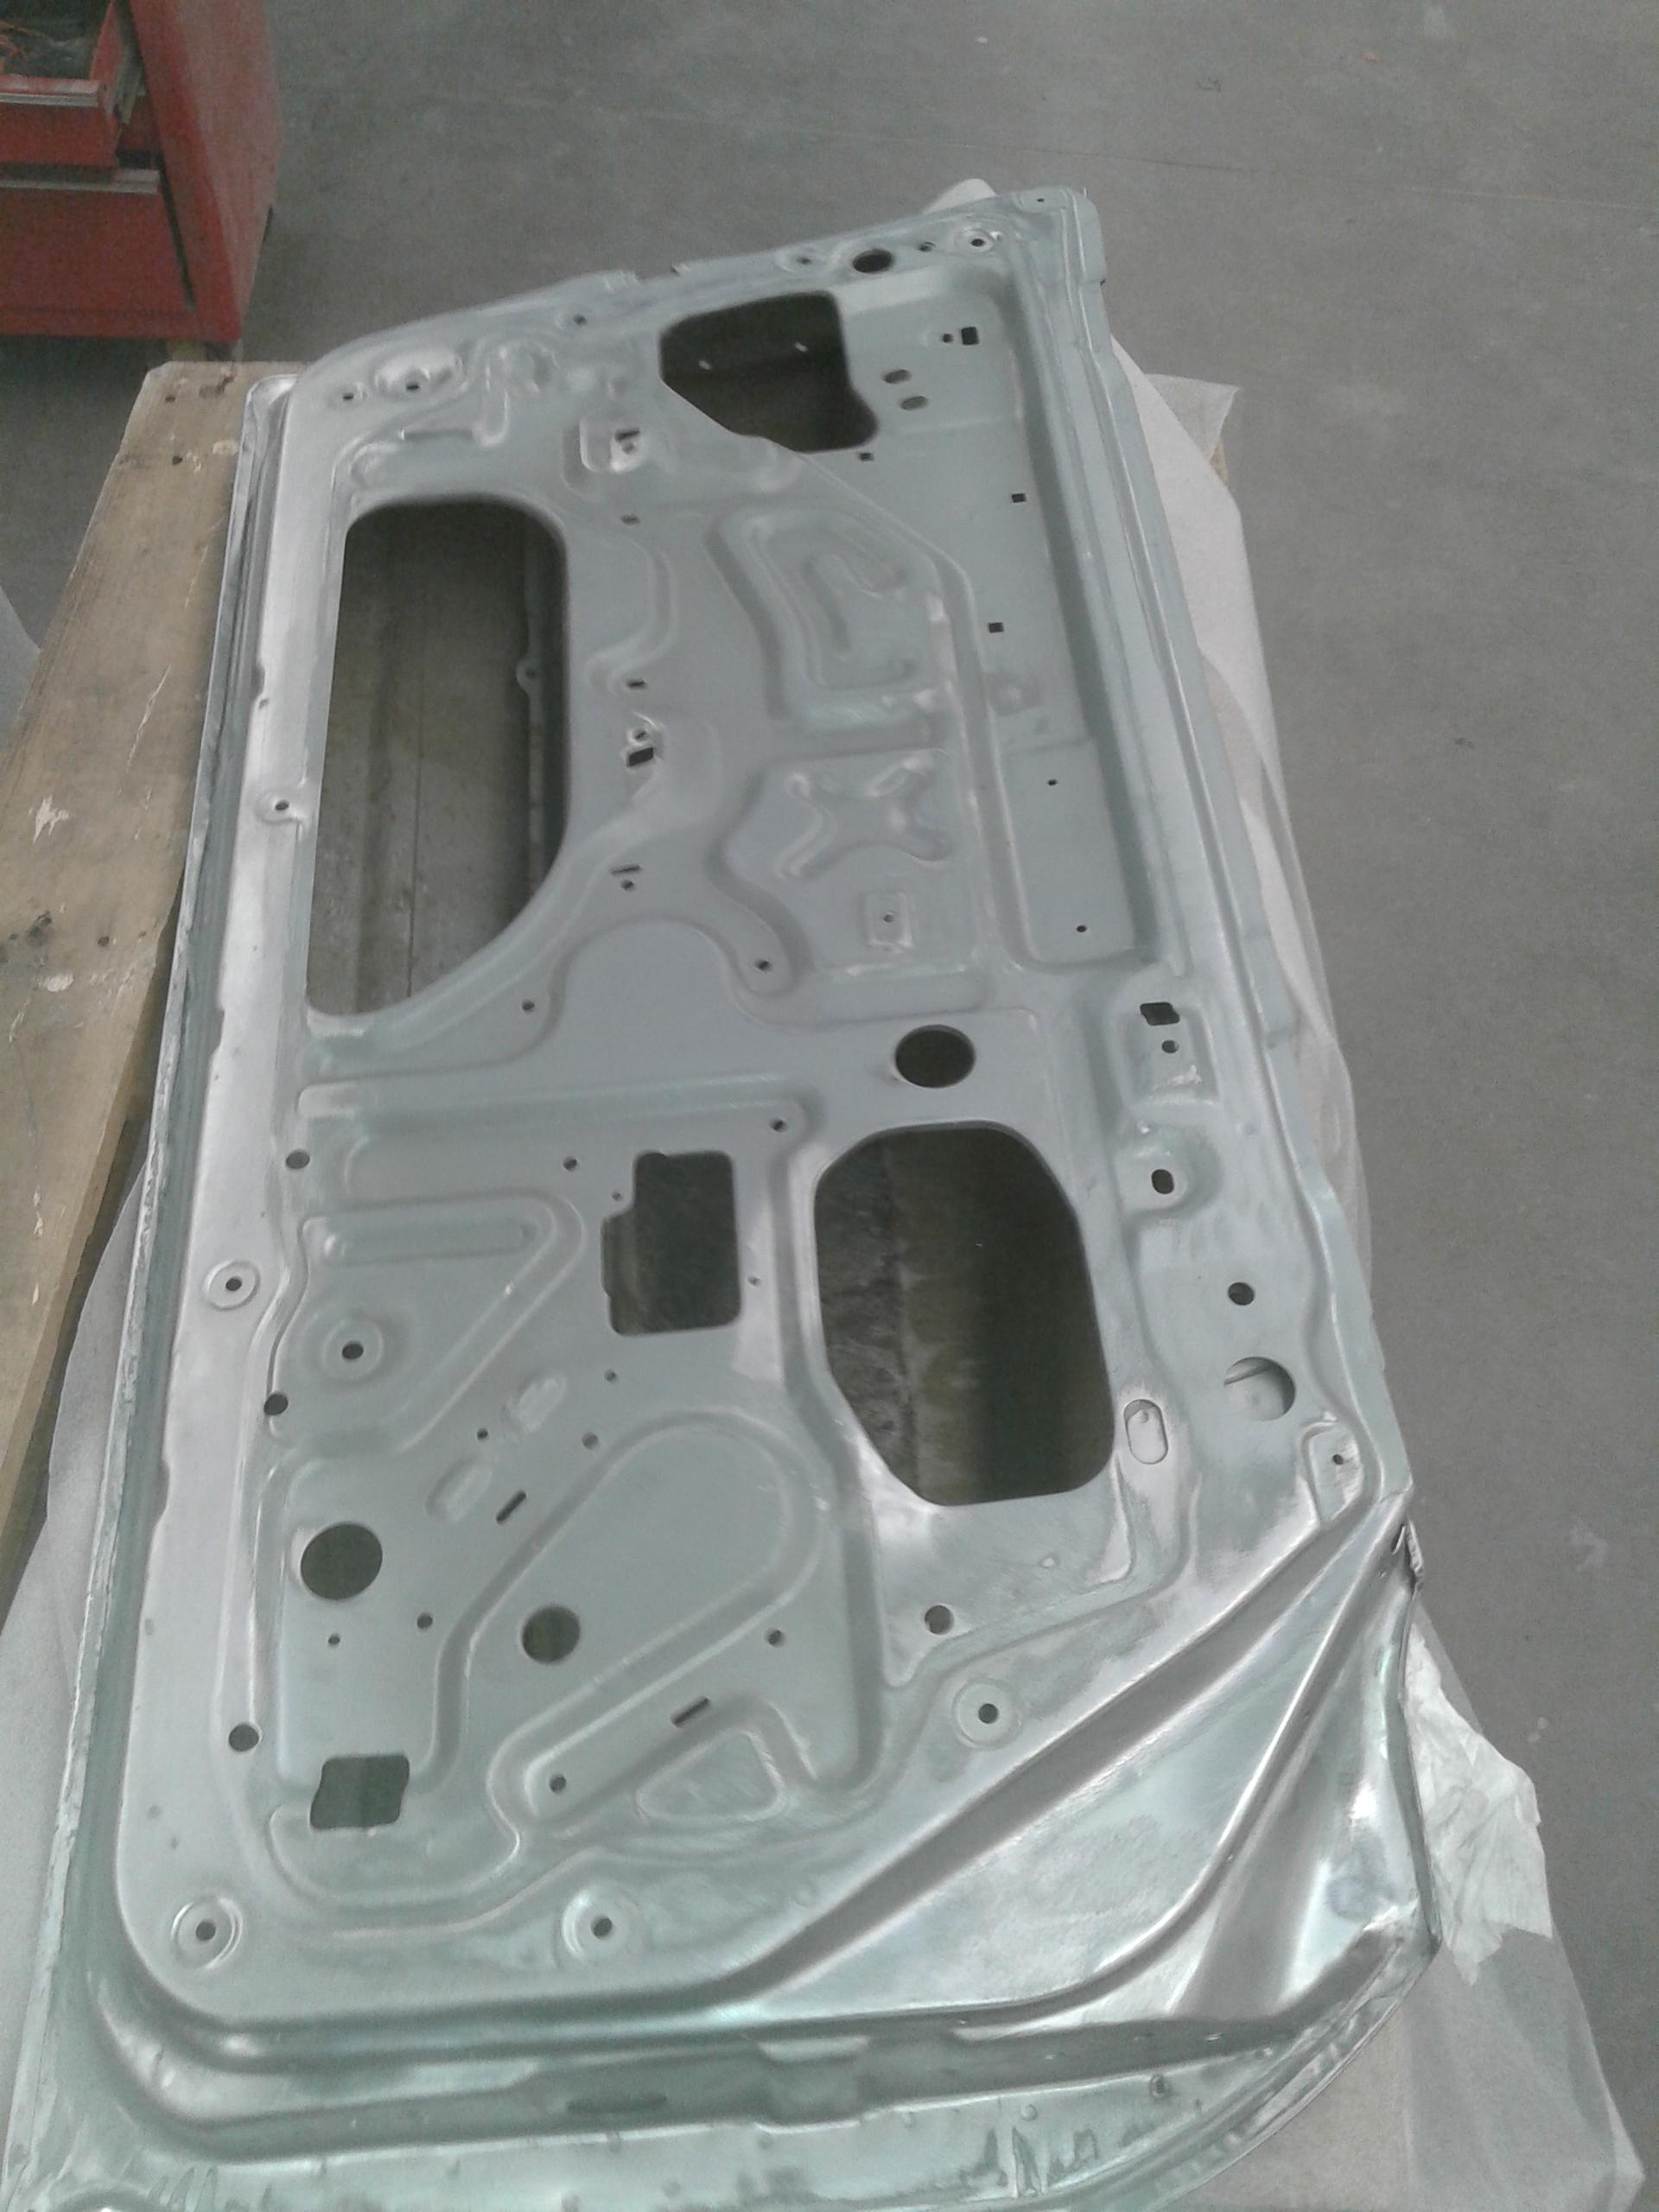
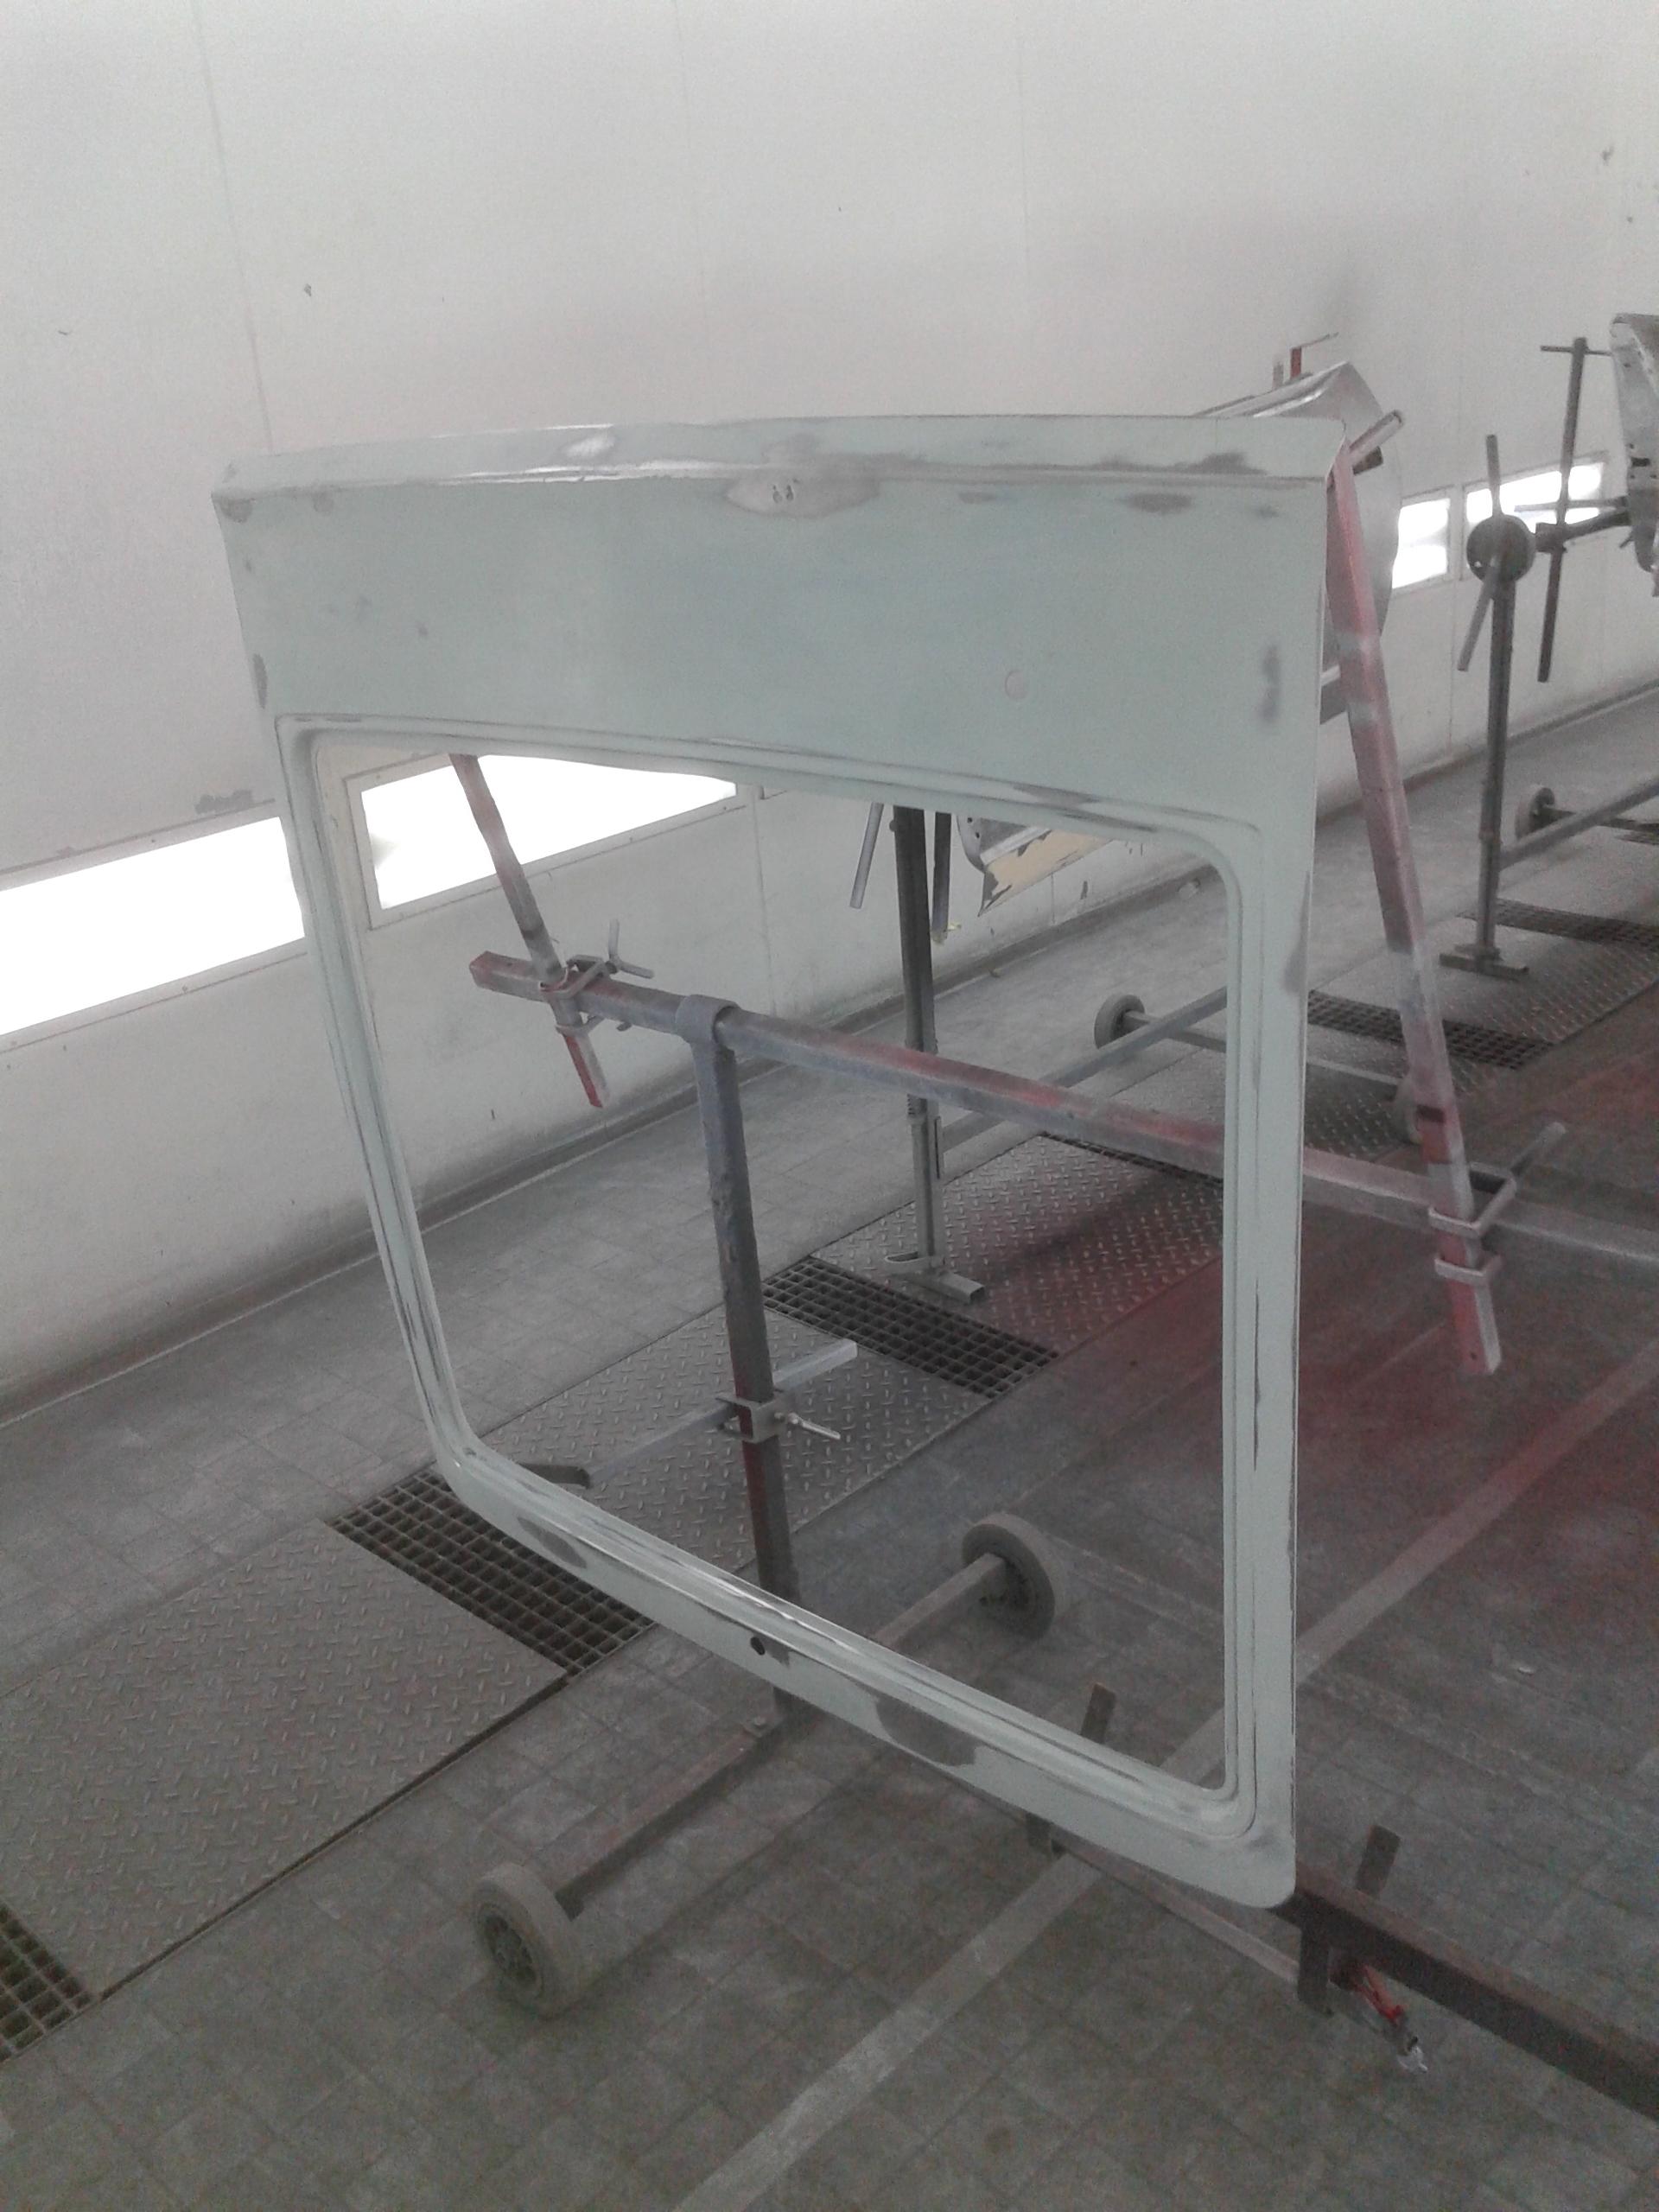
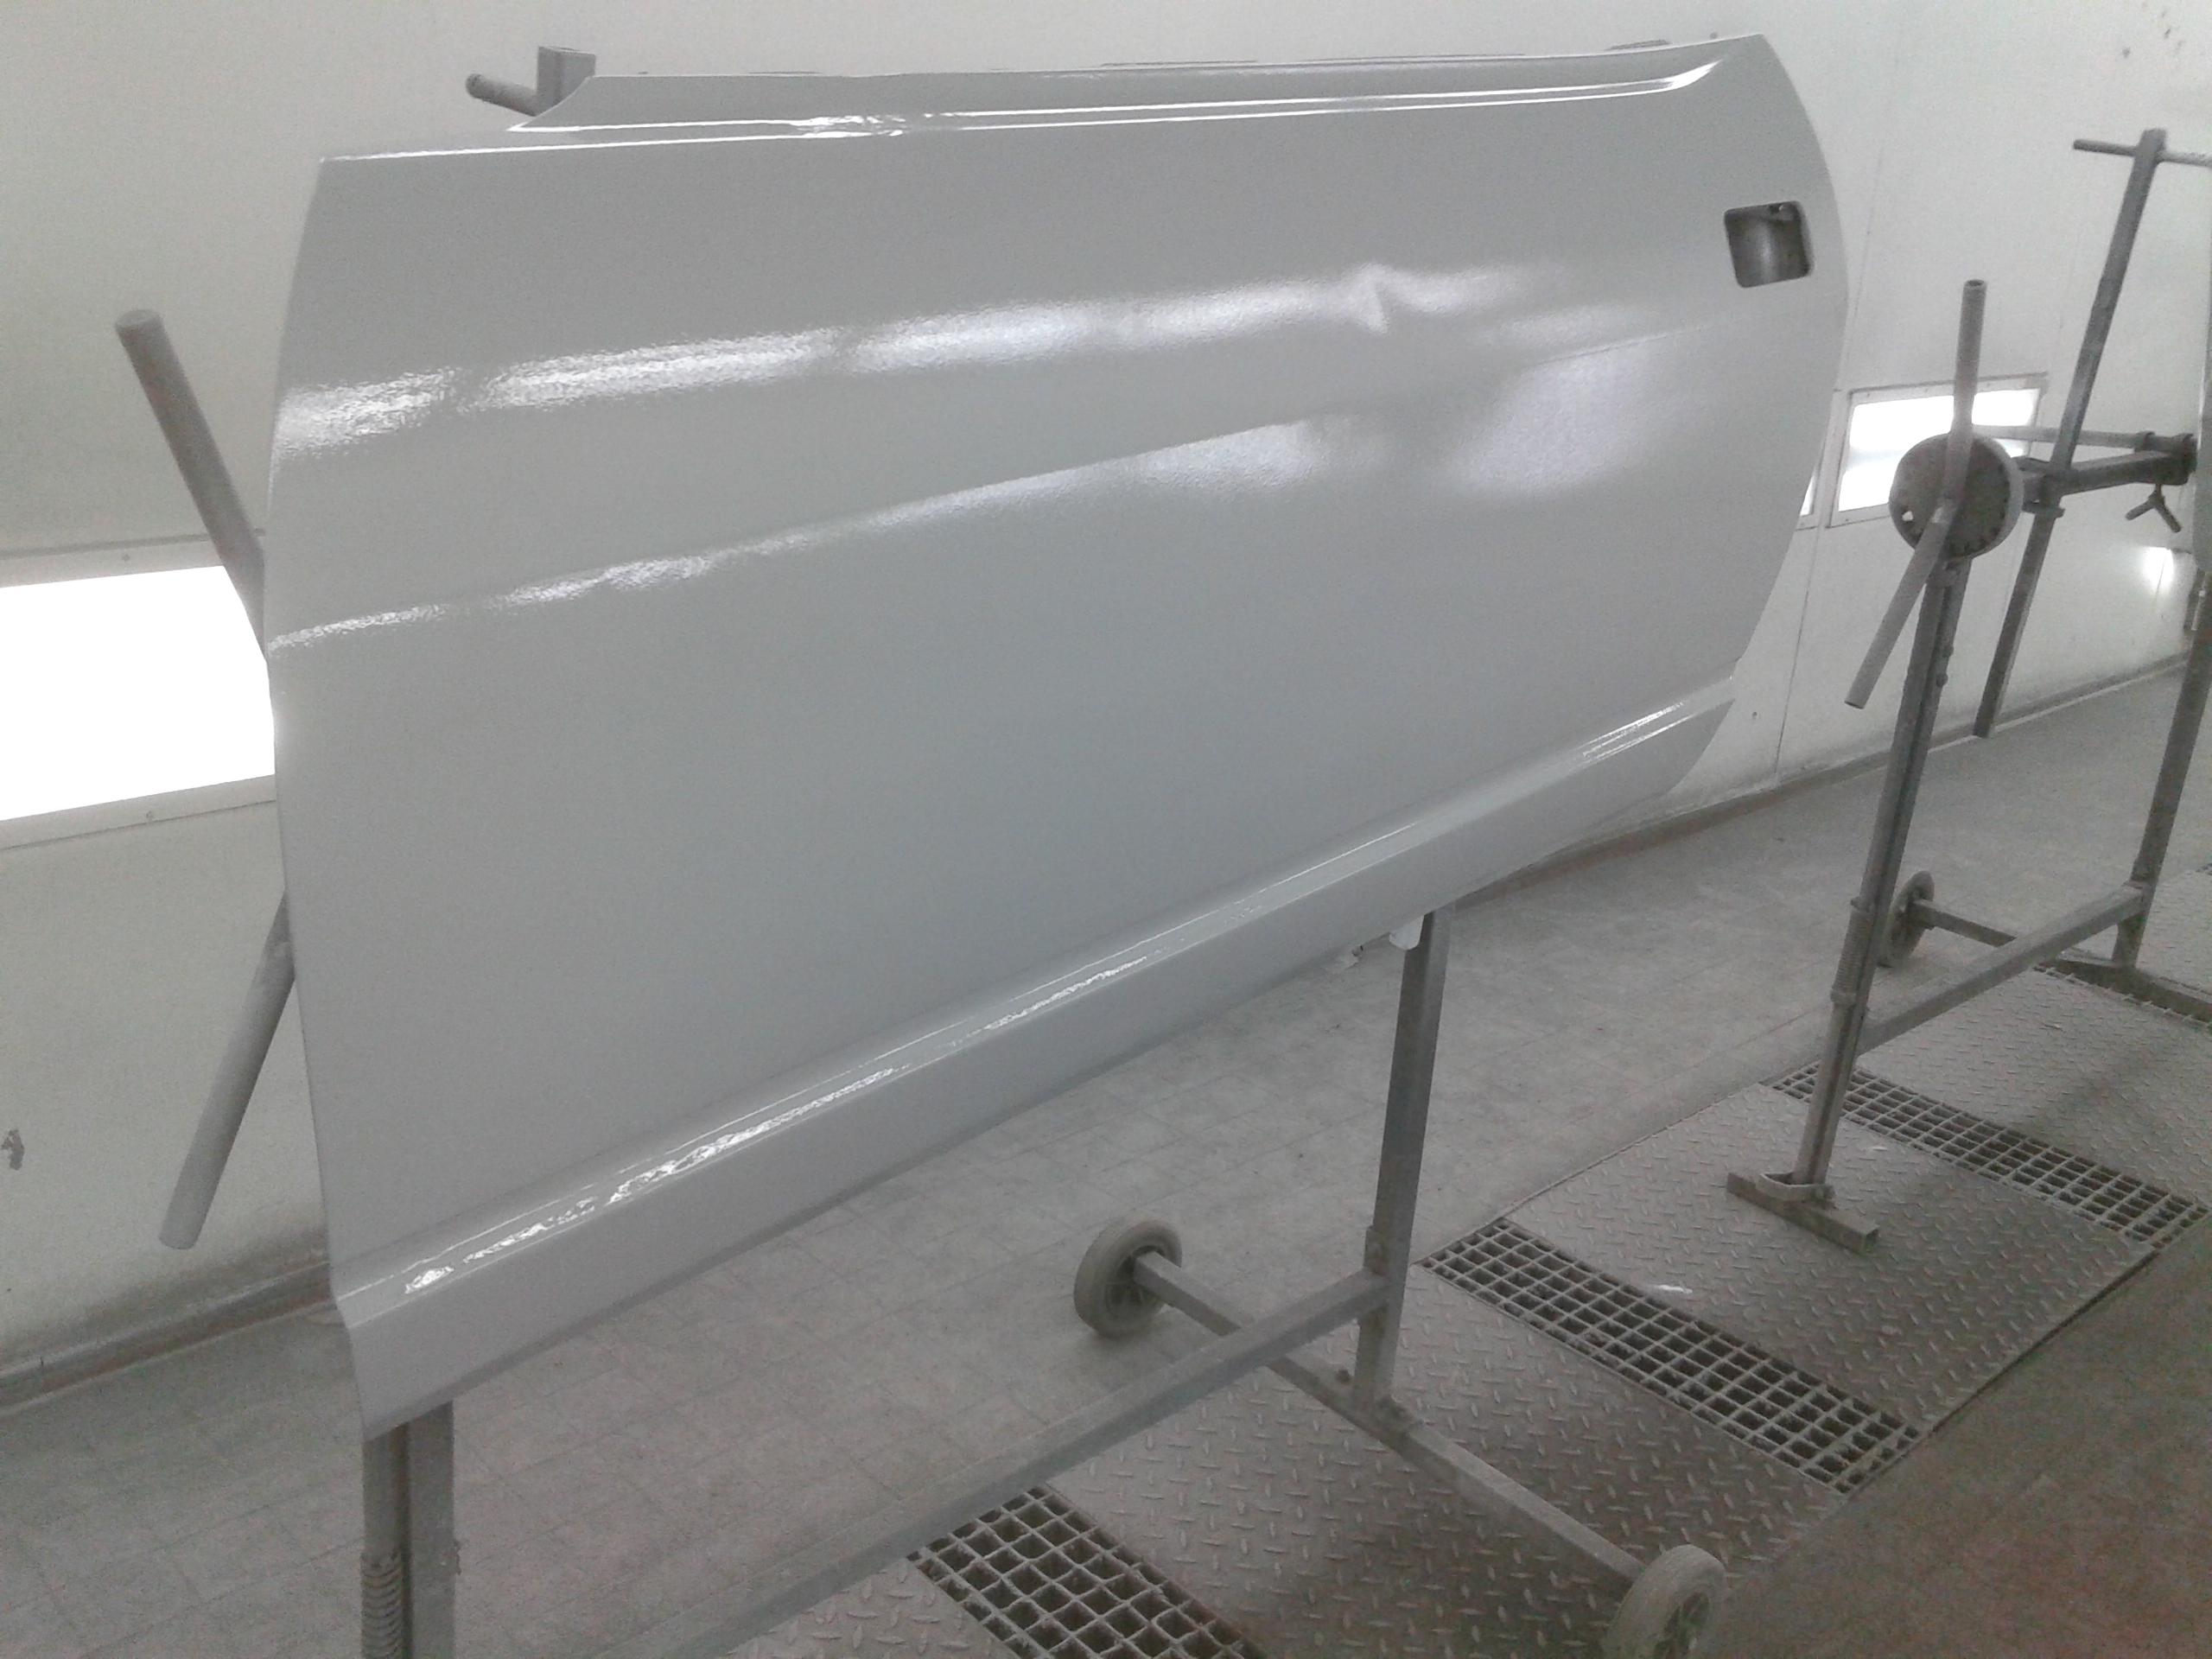
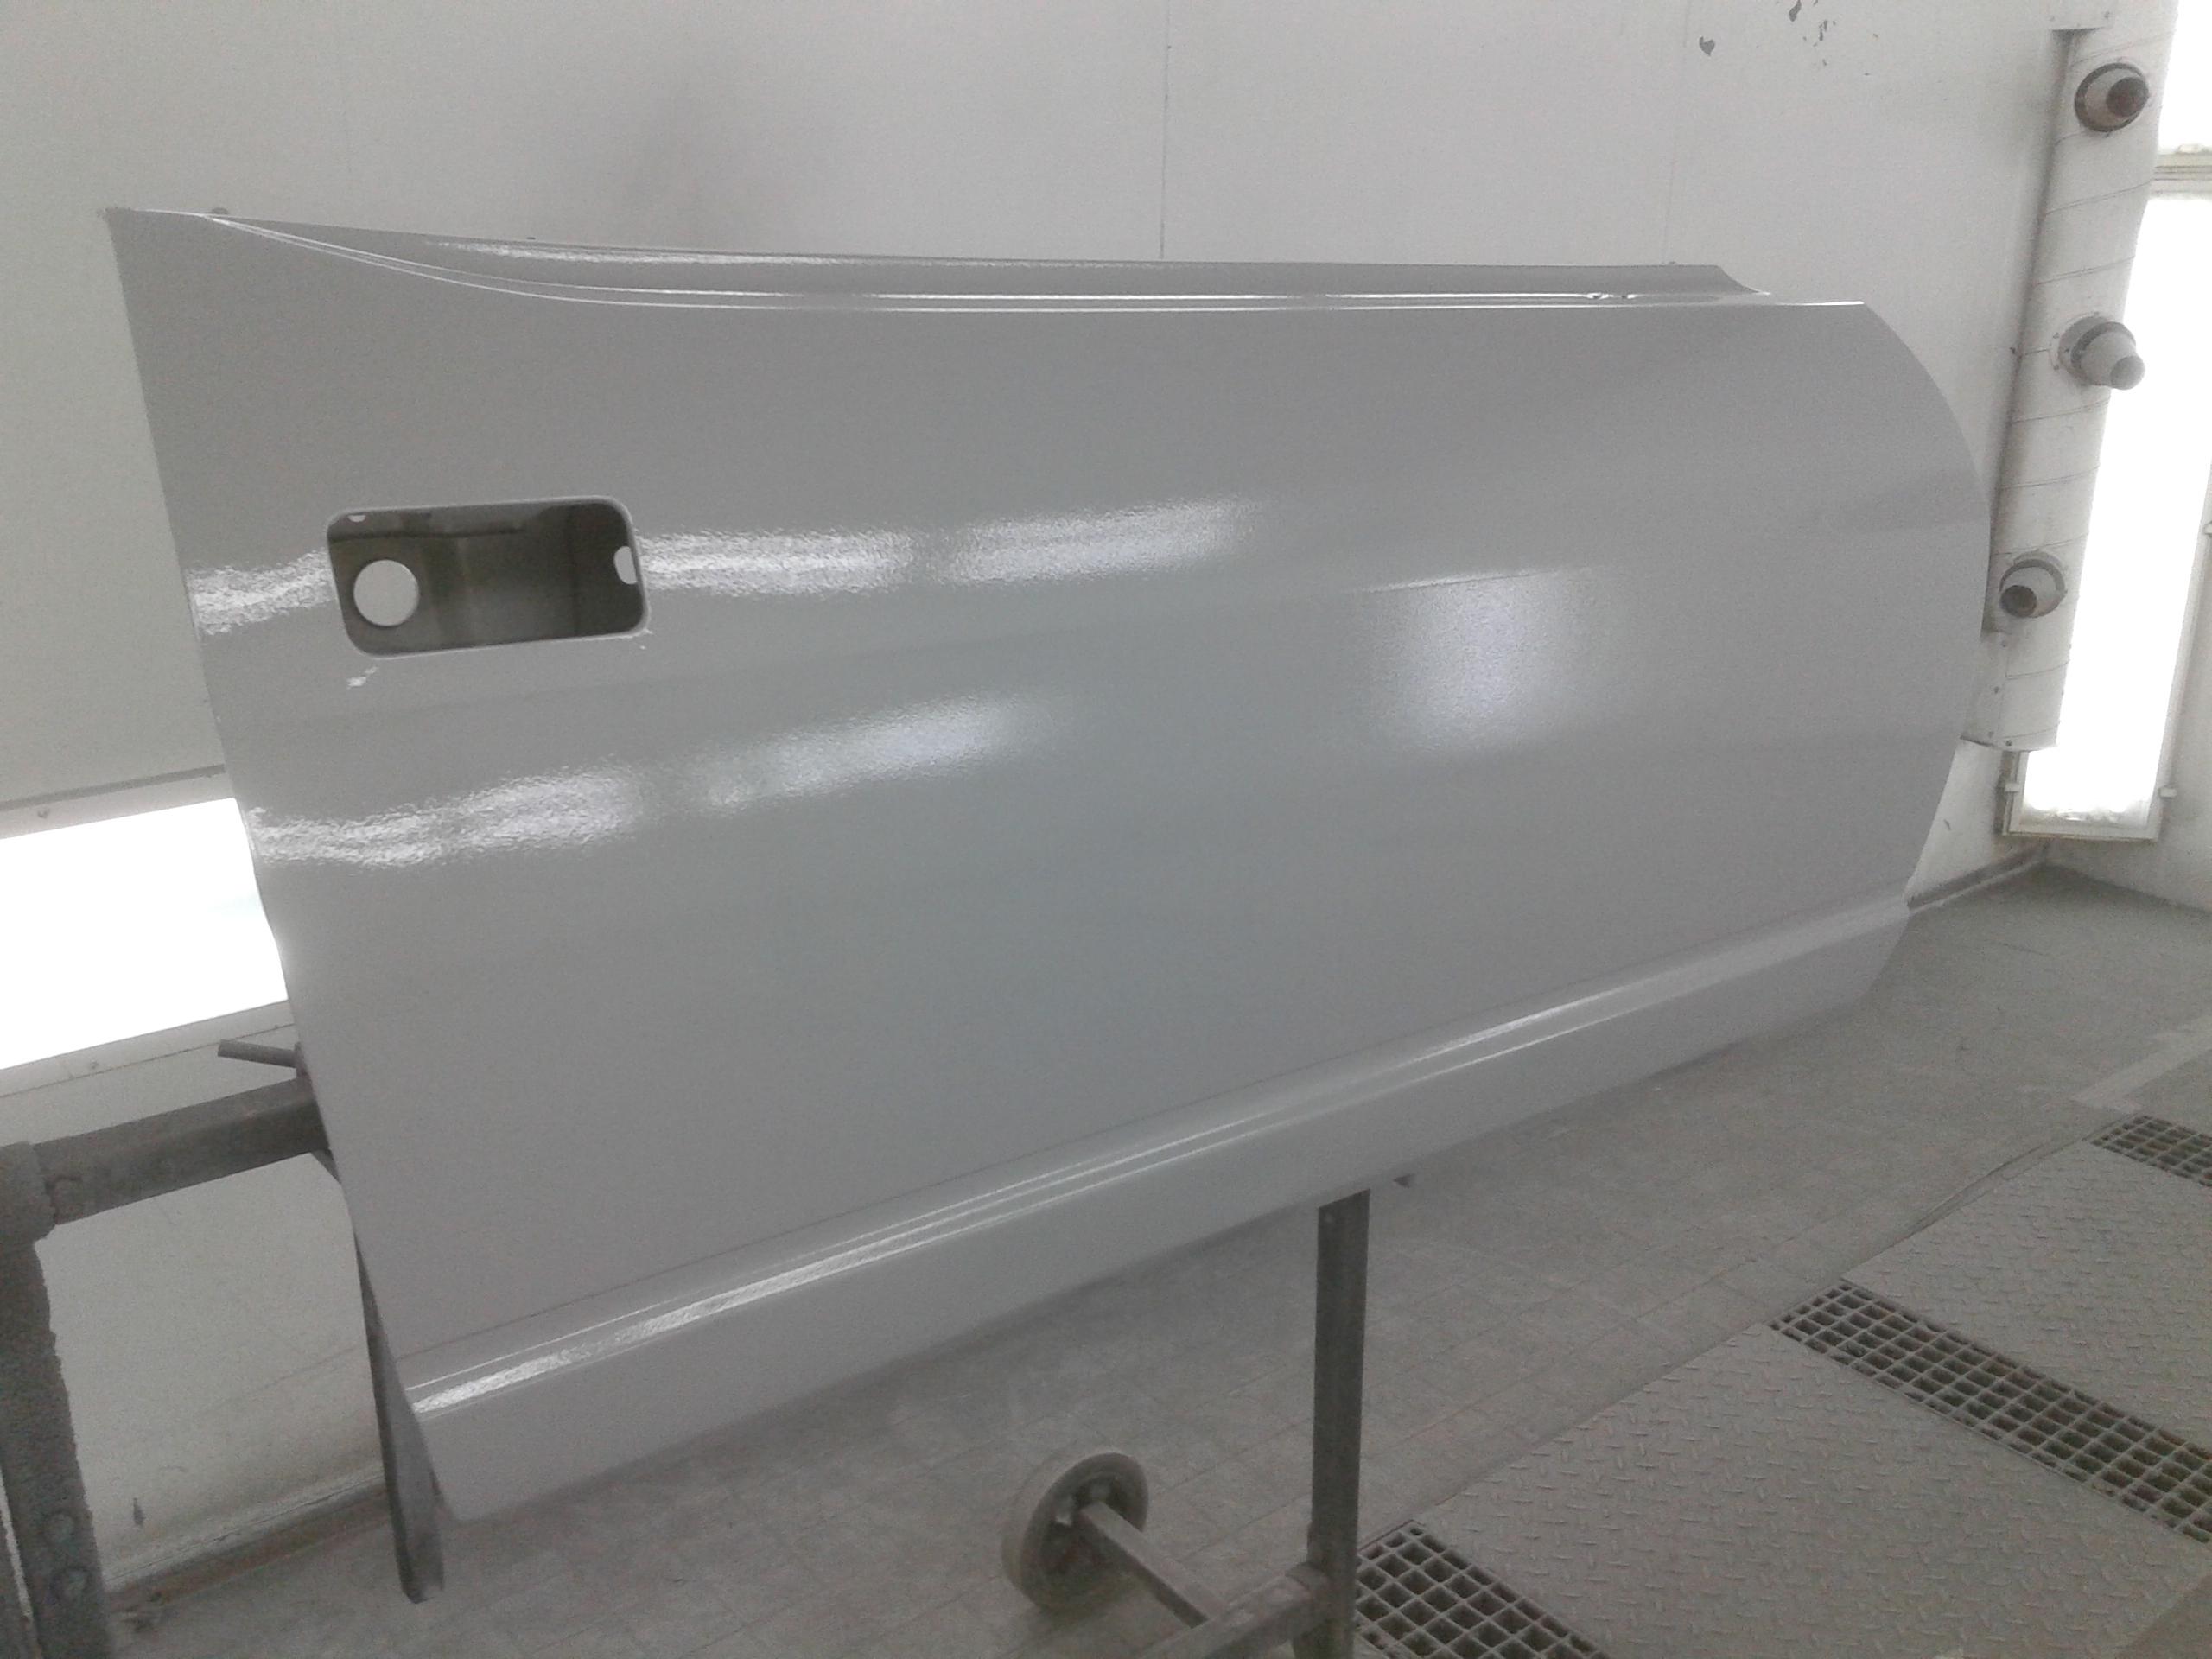
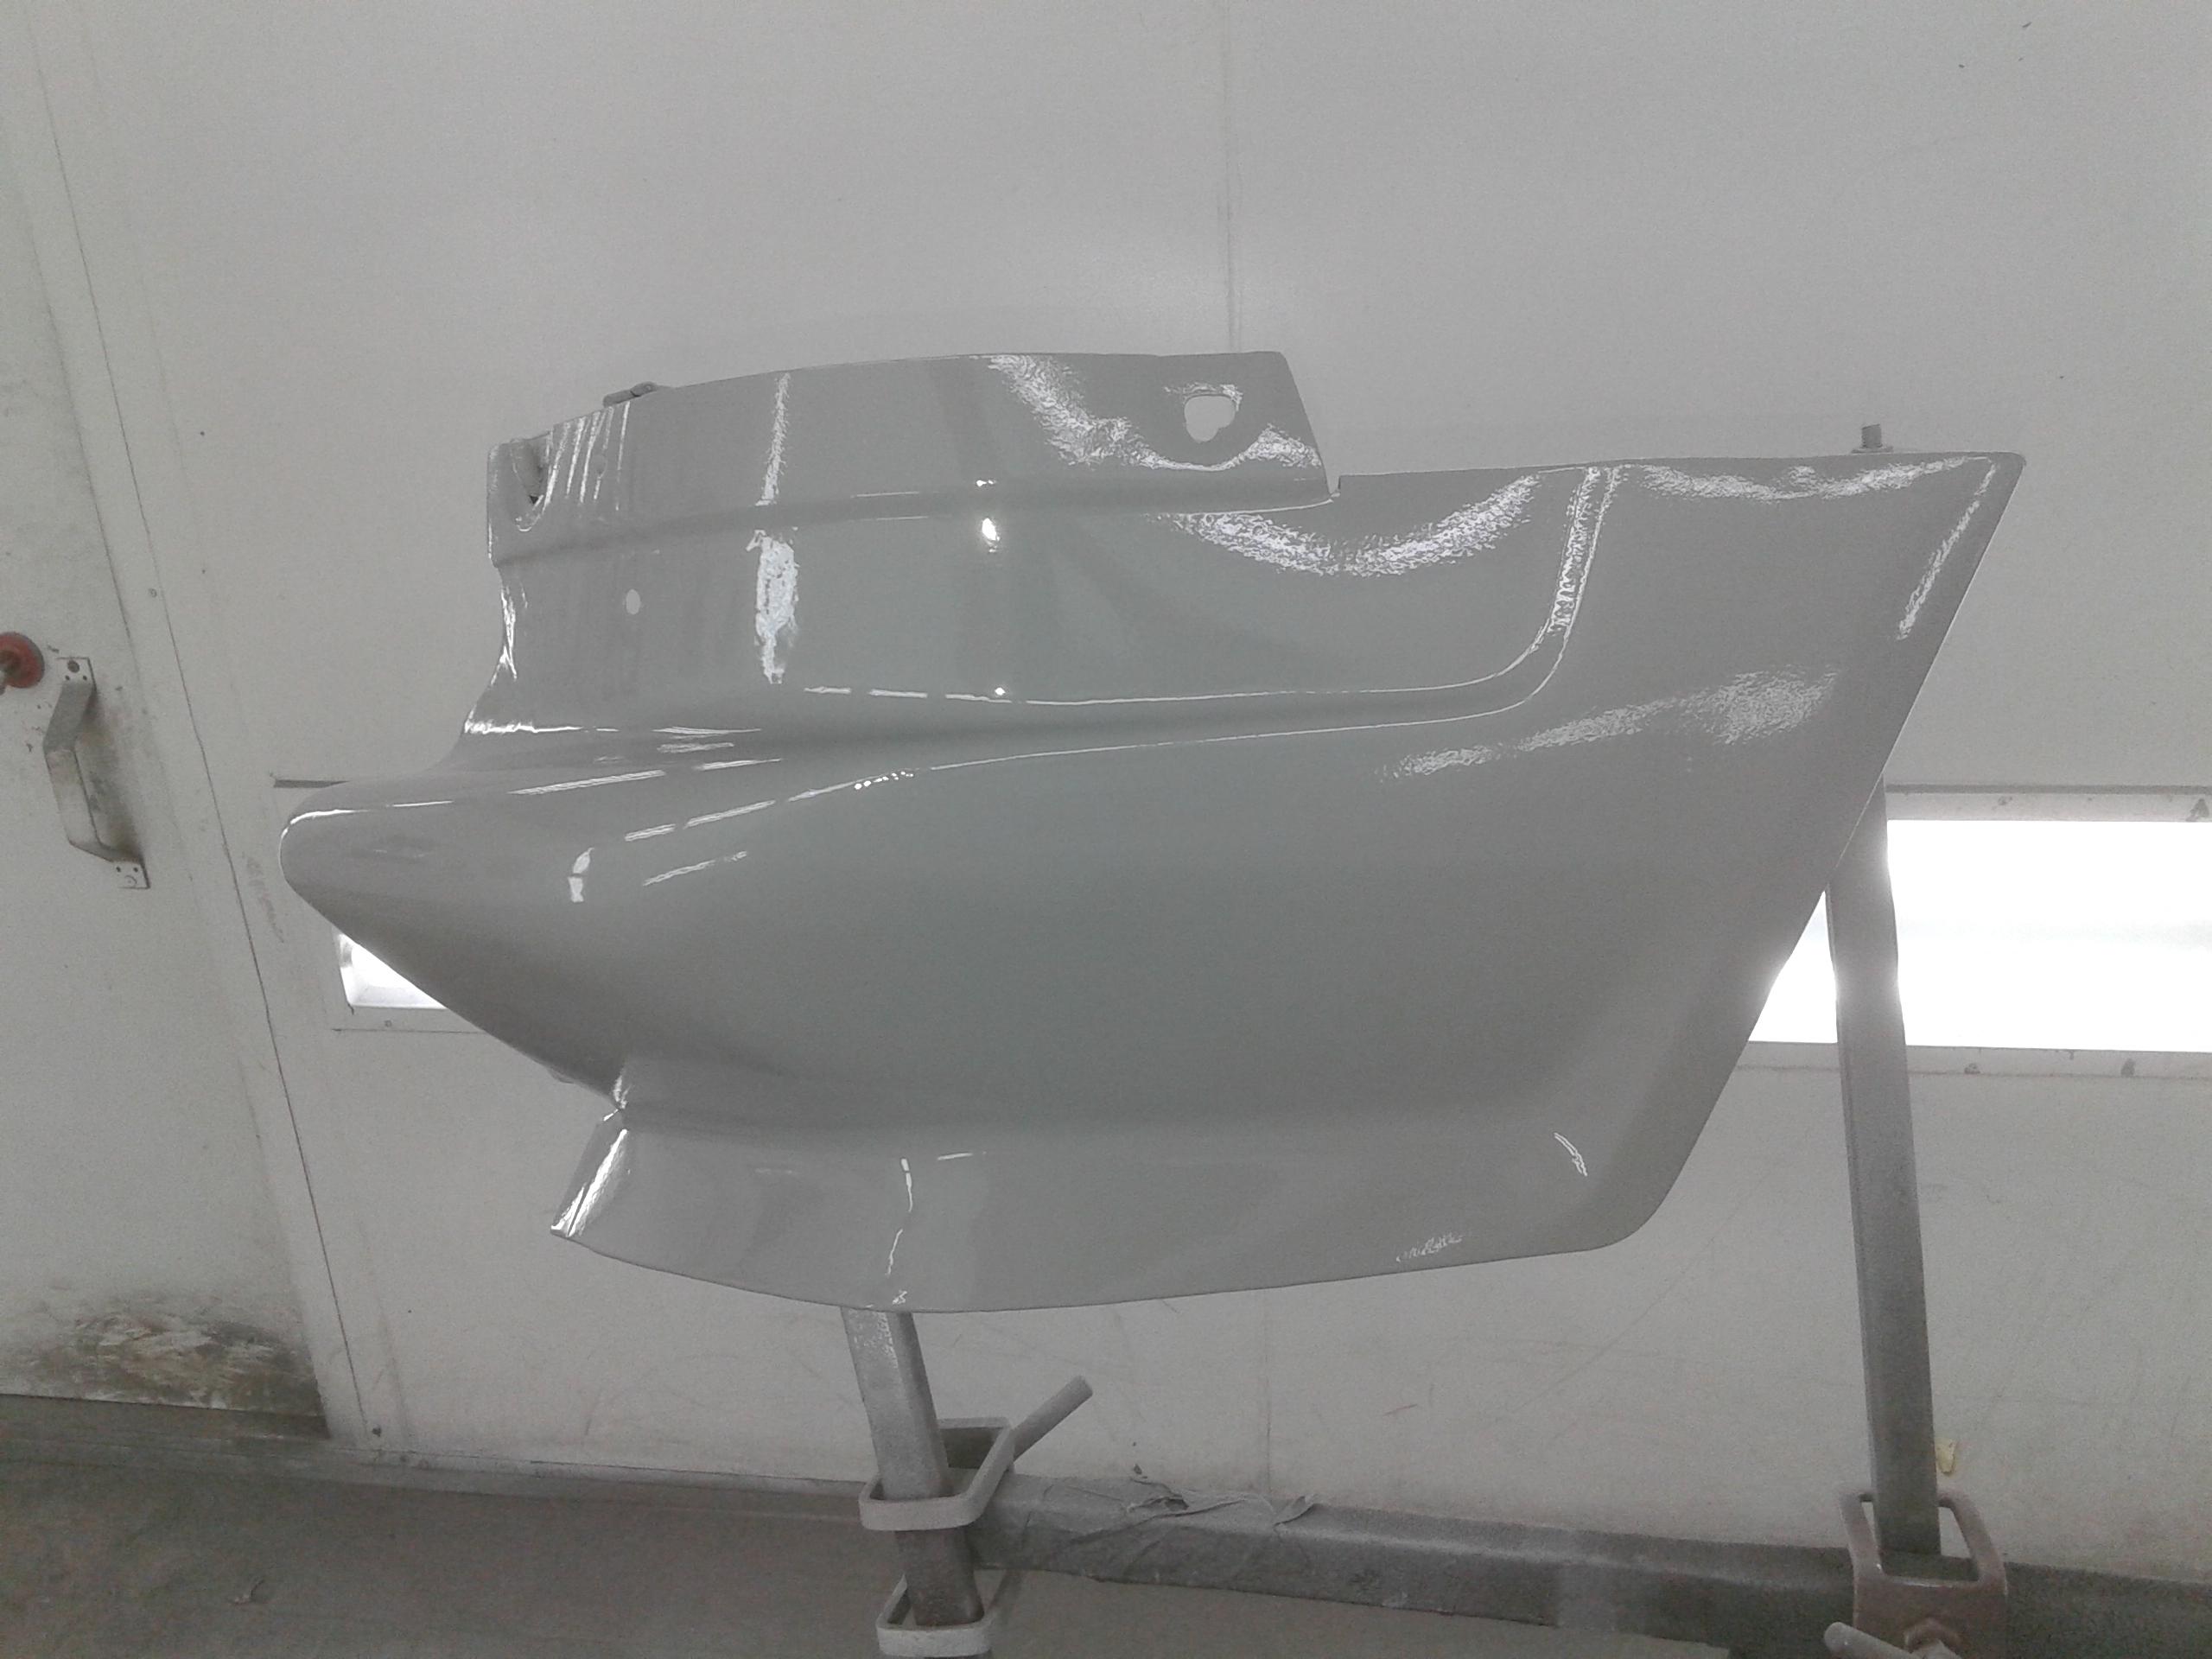
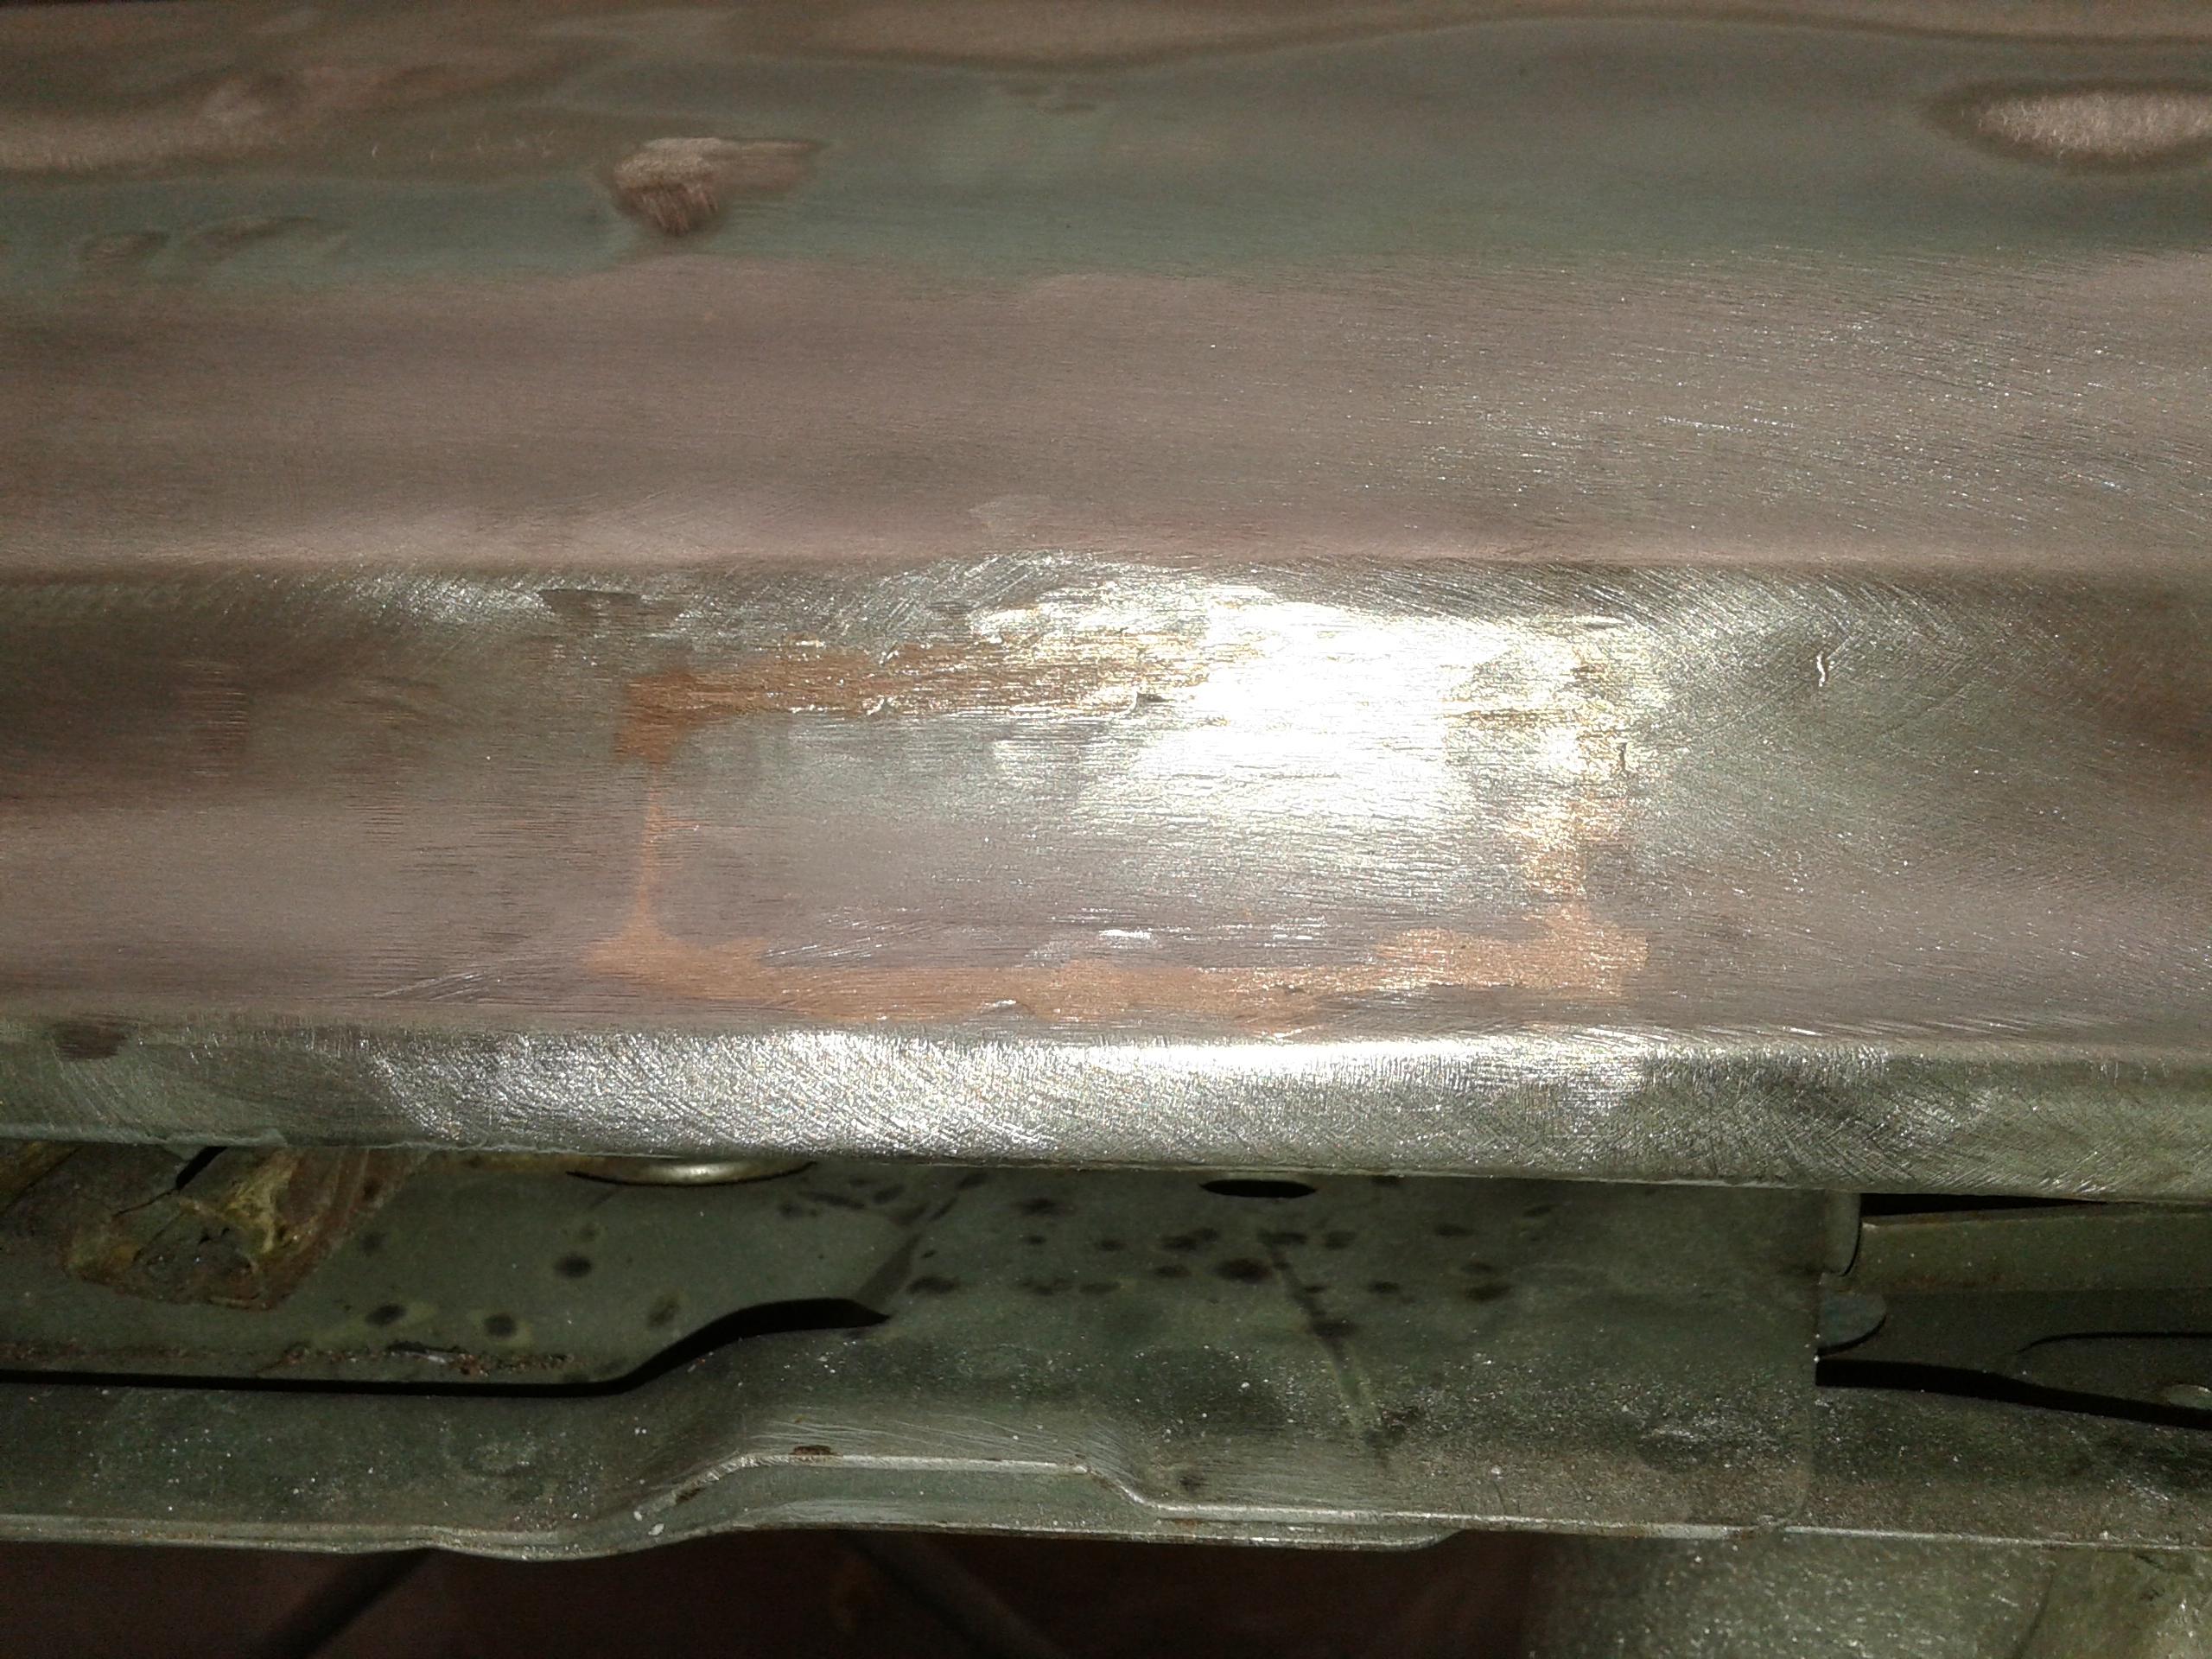
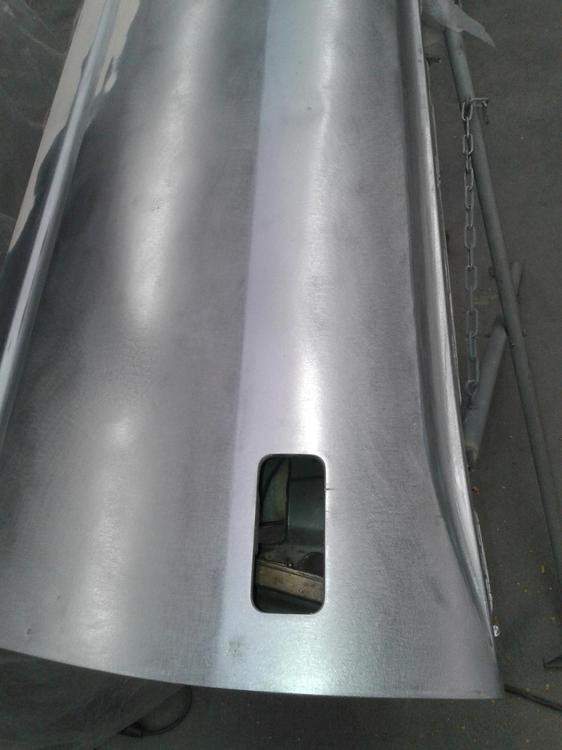
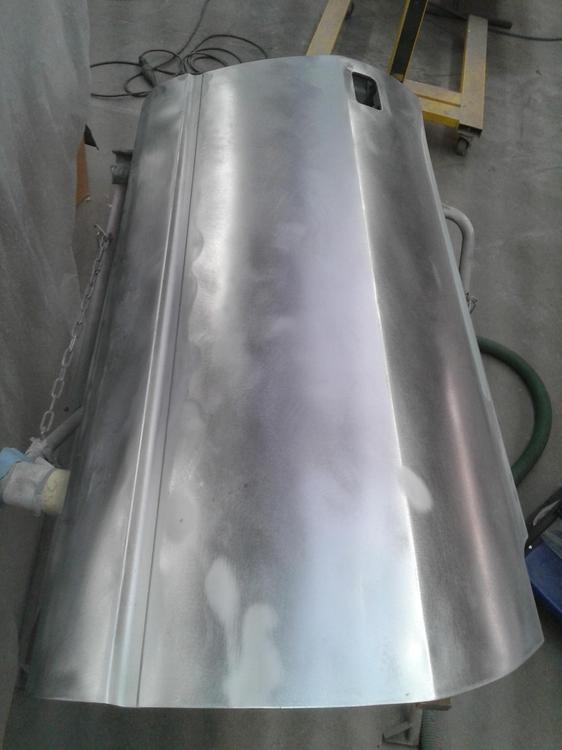
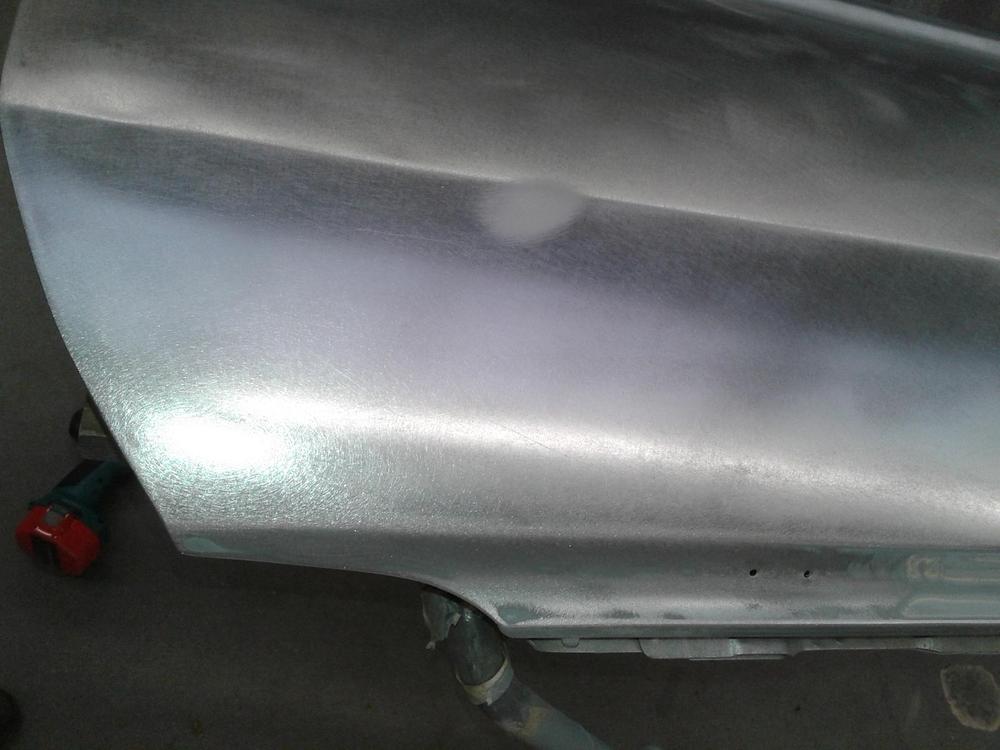
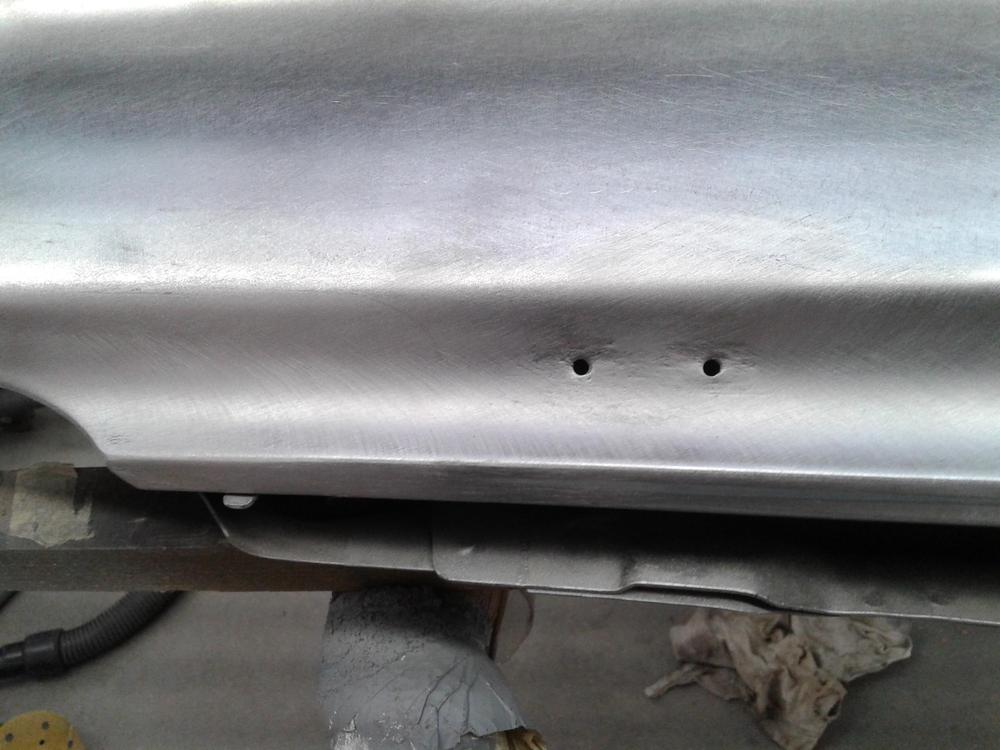
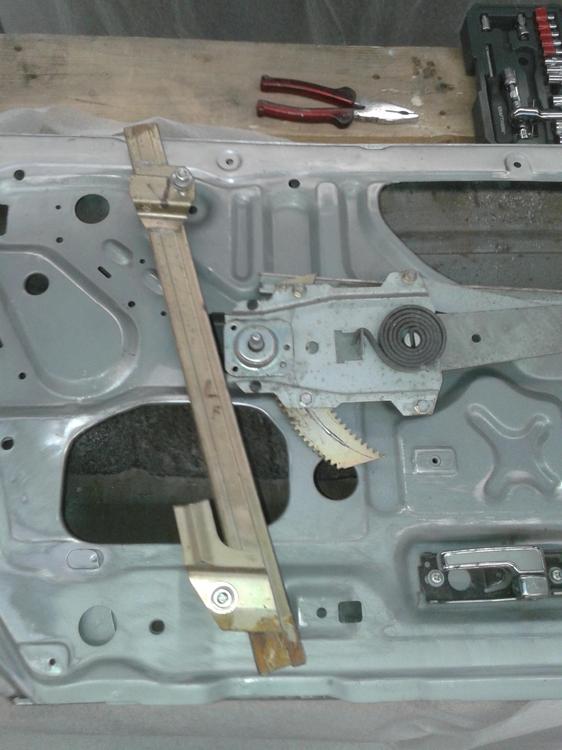
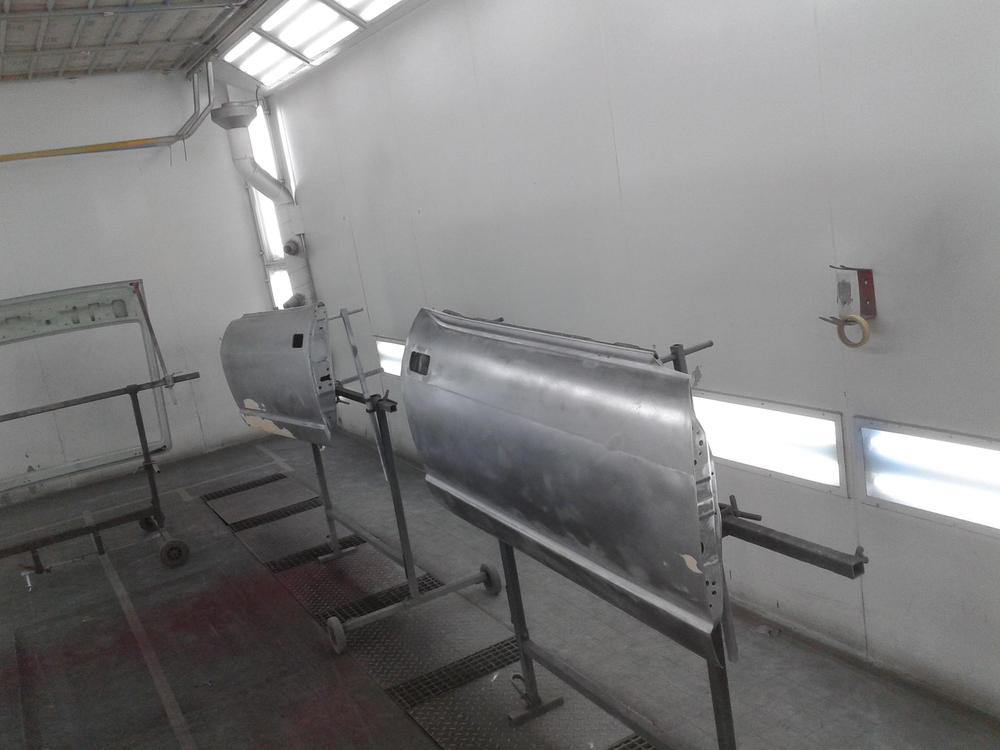
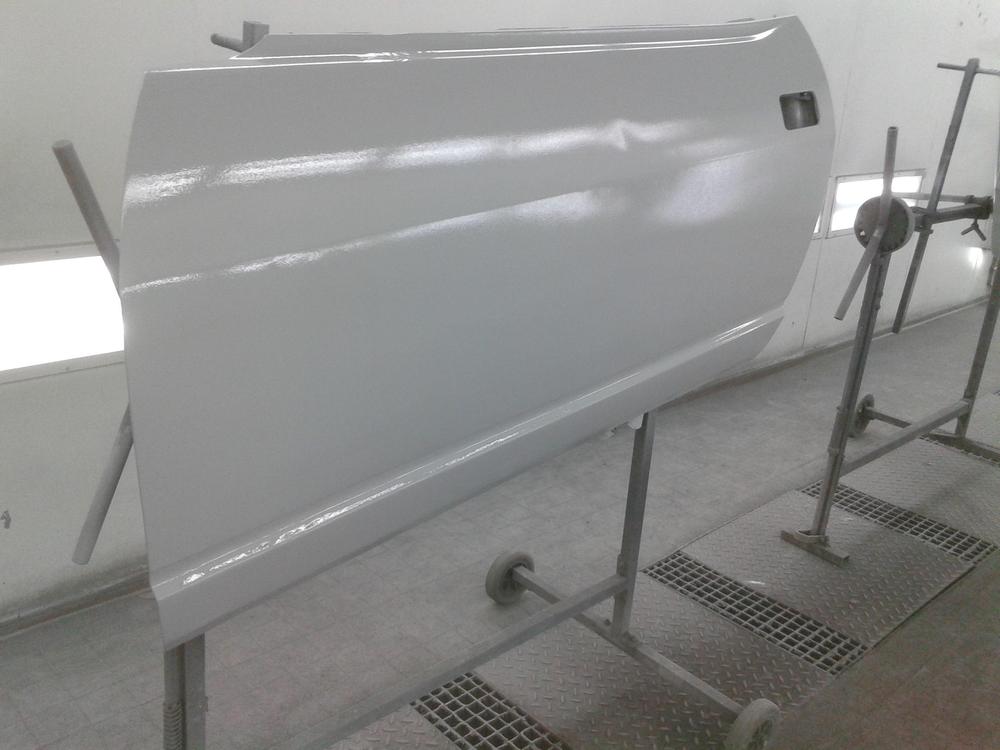
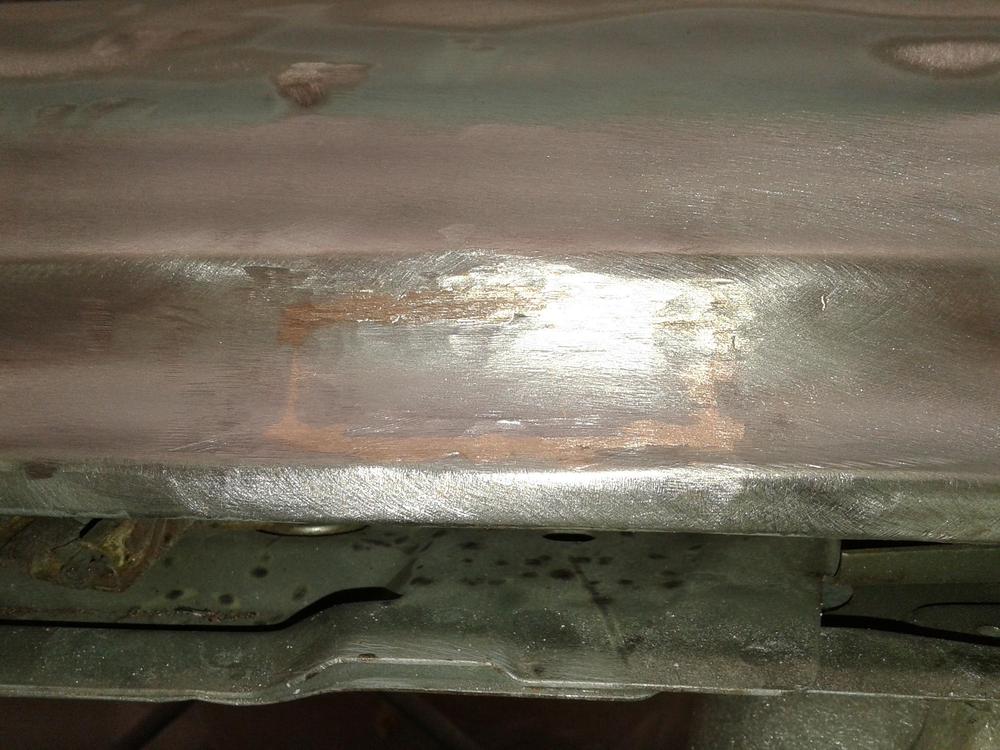
Another week at the painter/bodyshop.. Most time sanding and eh.. sanding and then…. some sanding! ? Also used some new to me tools.. to get out some dents that were to severe to lieve alone.. Did i say earlyer that sanding is my favorite hobby? NOT !!! First here the pic of the welded in new part were the left mirror sits. I know now the pro's and cons of copper/selicium welding… one con is the weld tore easely when you want to lower it by hitting it with a hammer! So a second weld was neccessary. Today (saterday) was a important day.. The first parts became a layer of epoxy in the spraybooth…. BY ME! I've used a spraygun many years ago but not much experience with them.. i think this went well.. Some small dents are still in there but... not bad for 40+ year old doors! After this they get smoothed out with some bondo and become a new set off paint. (Car will be painted in Nissan TK3, an Original nissan zx color.) Some other pic's of prep.. and sanding.. bare metall pic's.. Rightdoor mirror, bare metall. A "college"had some left over bondo.. i let him leave it on a little dent.. Next i'll probably do the hood and frontfenders prep and epoxy...


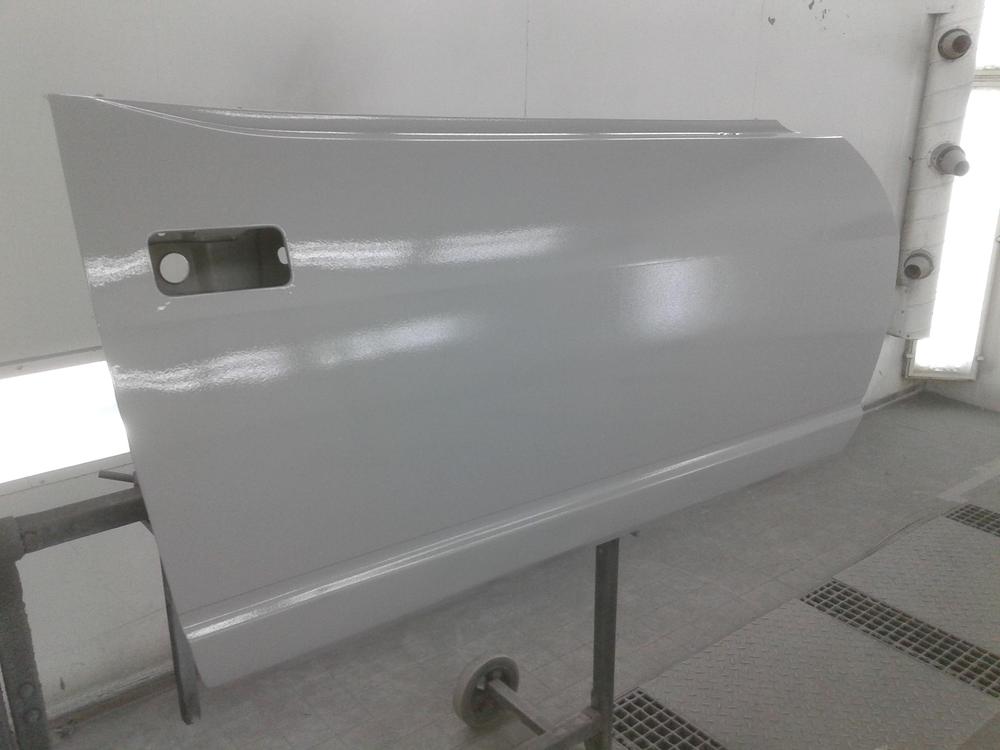
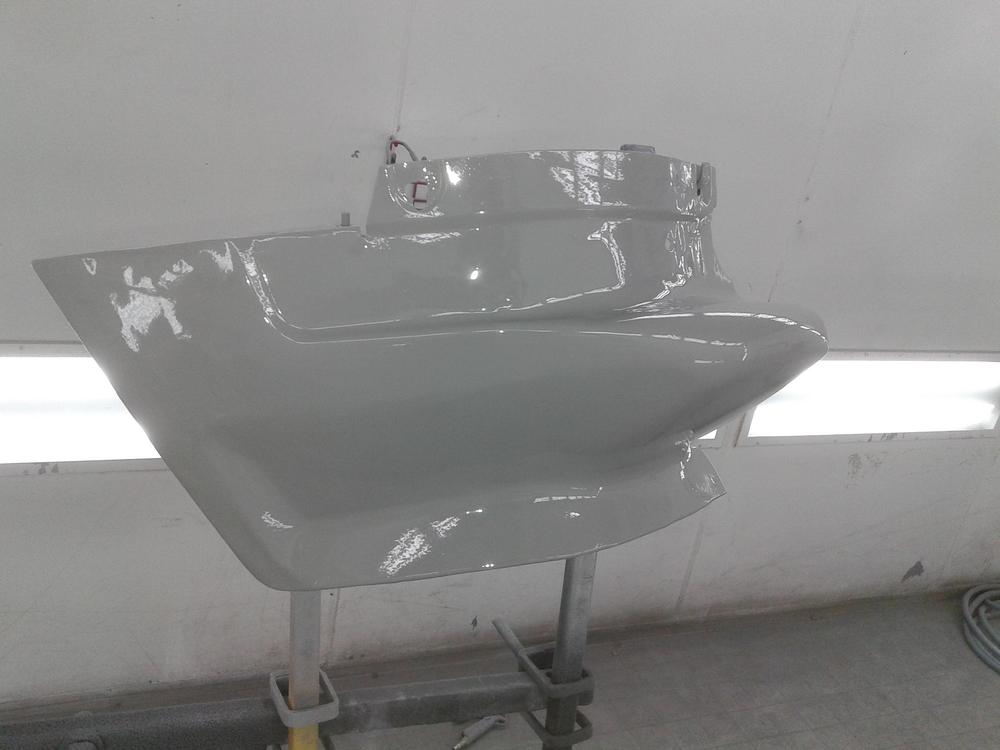

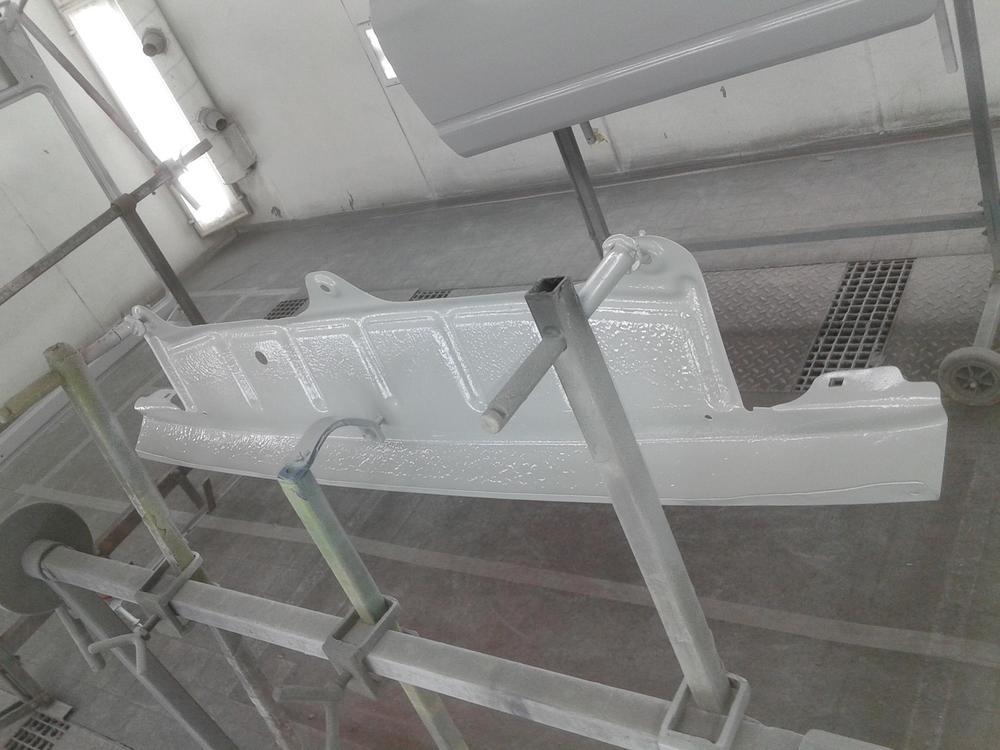
 1 point